Last year, I made a yellow cotton print 1834 dress (there are tons of details about it in this past post). The yardage leftover after that project wasn’t enough for another full dress, but it was enough for another bodice, and I’d been caught up in 1830s fever!
There are so many ridiculous sleeves to explore! Accordingly, I decided to make a second 1830s bodice with different sleeves. I finished the new 1838 bodice earlier this year and over the summer I was able to wear it with my recently finished chemisette.
The 1834 dress was made in two parts, a skirt and separate bodice, so that it was easy to make a second bodice and save yardage on the skirt.
Construction Overview
First, the construction details of the new 1838 bodice, starting with the HSM facts, because this bodice fits Challenge #4:
The Costumer’s New Look: Give an old costume a new look, either by creating a new accessory or piece which expands or changes the aesthetic and use of an outfit, re-fashioning something into a costume item, or re-making an old costume.
Fabric/Materials:Approximately 2.5 yds reproduction print cotton and 1 yd of muslin.
Pattern: The pattern for this bodice is based on patterns contained in Janet Arnold’s Patterns of Fashion 1 and Norah Waugh’s The Cut of Women’s Clothes, as well as sleeve information fromThe Workwoman’s Guide.
Year: 1838.
Notions: 2 ½ yds narrow cotton yarn for cording, about 10 hooks and loops, and thread..
How historically accurate is it?: 90%. The pattern, construction methods, and fabric are all quite good. Inside seams are sewn by machine.
Hours to complete: 22.
First worn: August 2021.
Total cost: Approximately $15.
Construction Details
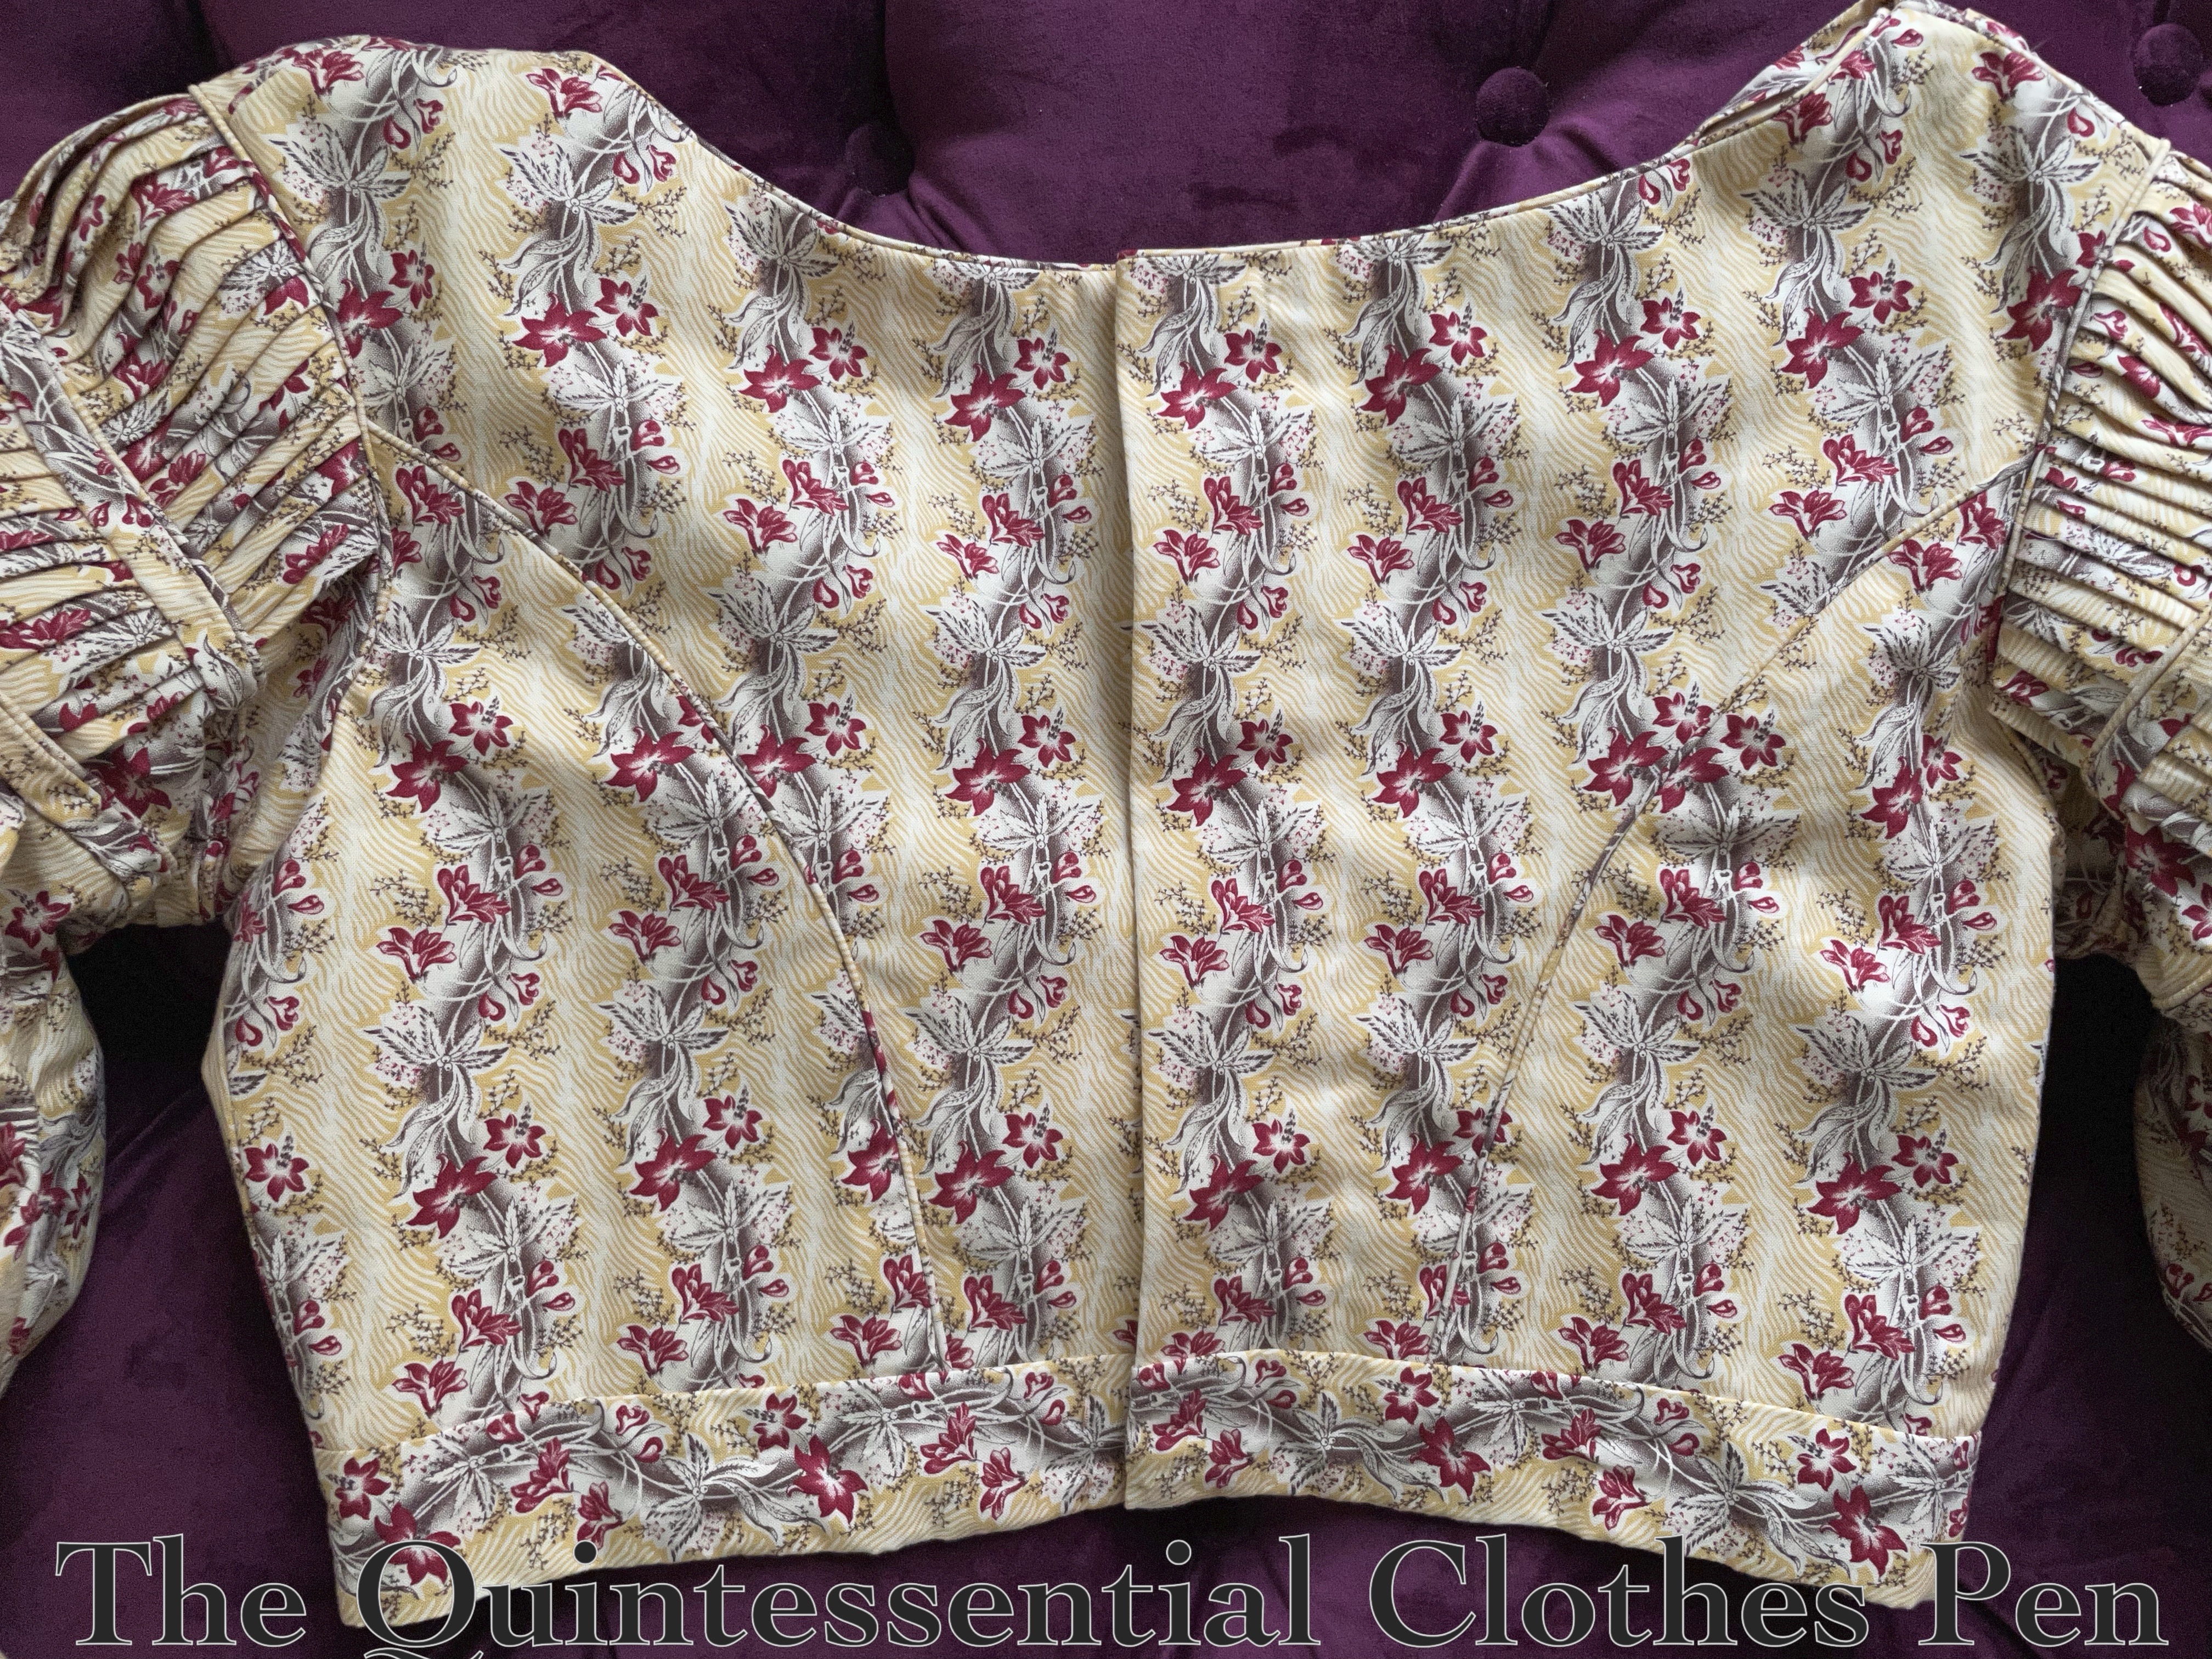
The back of this bodice is made just like the 1834 bodice, with piping in the side back seams. The armsceyes and neck are also finished with piping.
The main difference in the bodice (aside from the sleeves, which we’ll get to shortly) is the front, which has a deep V shape.
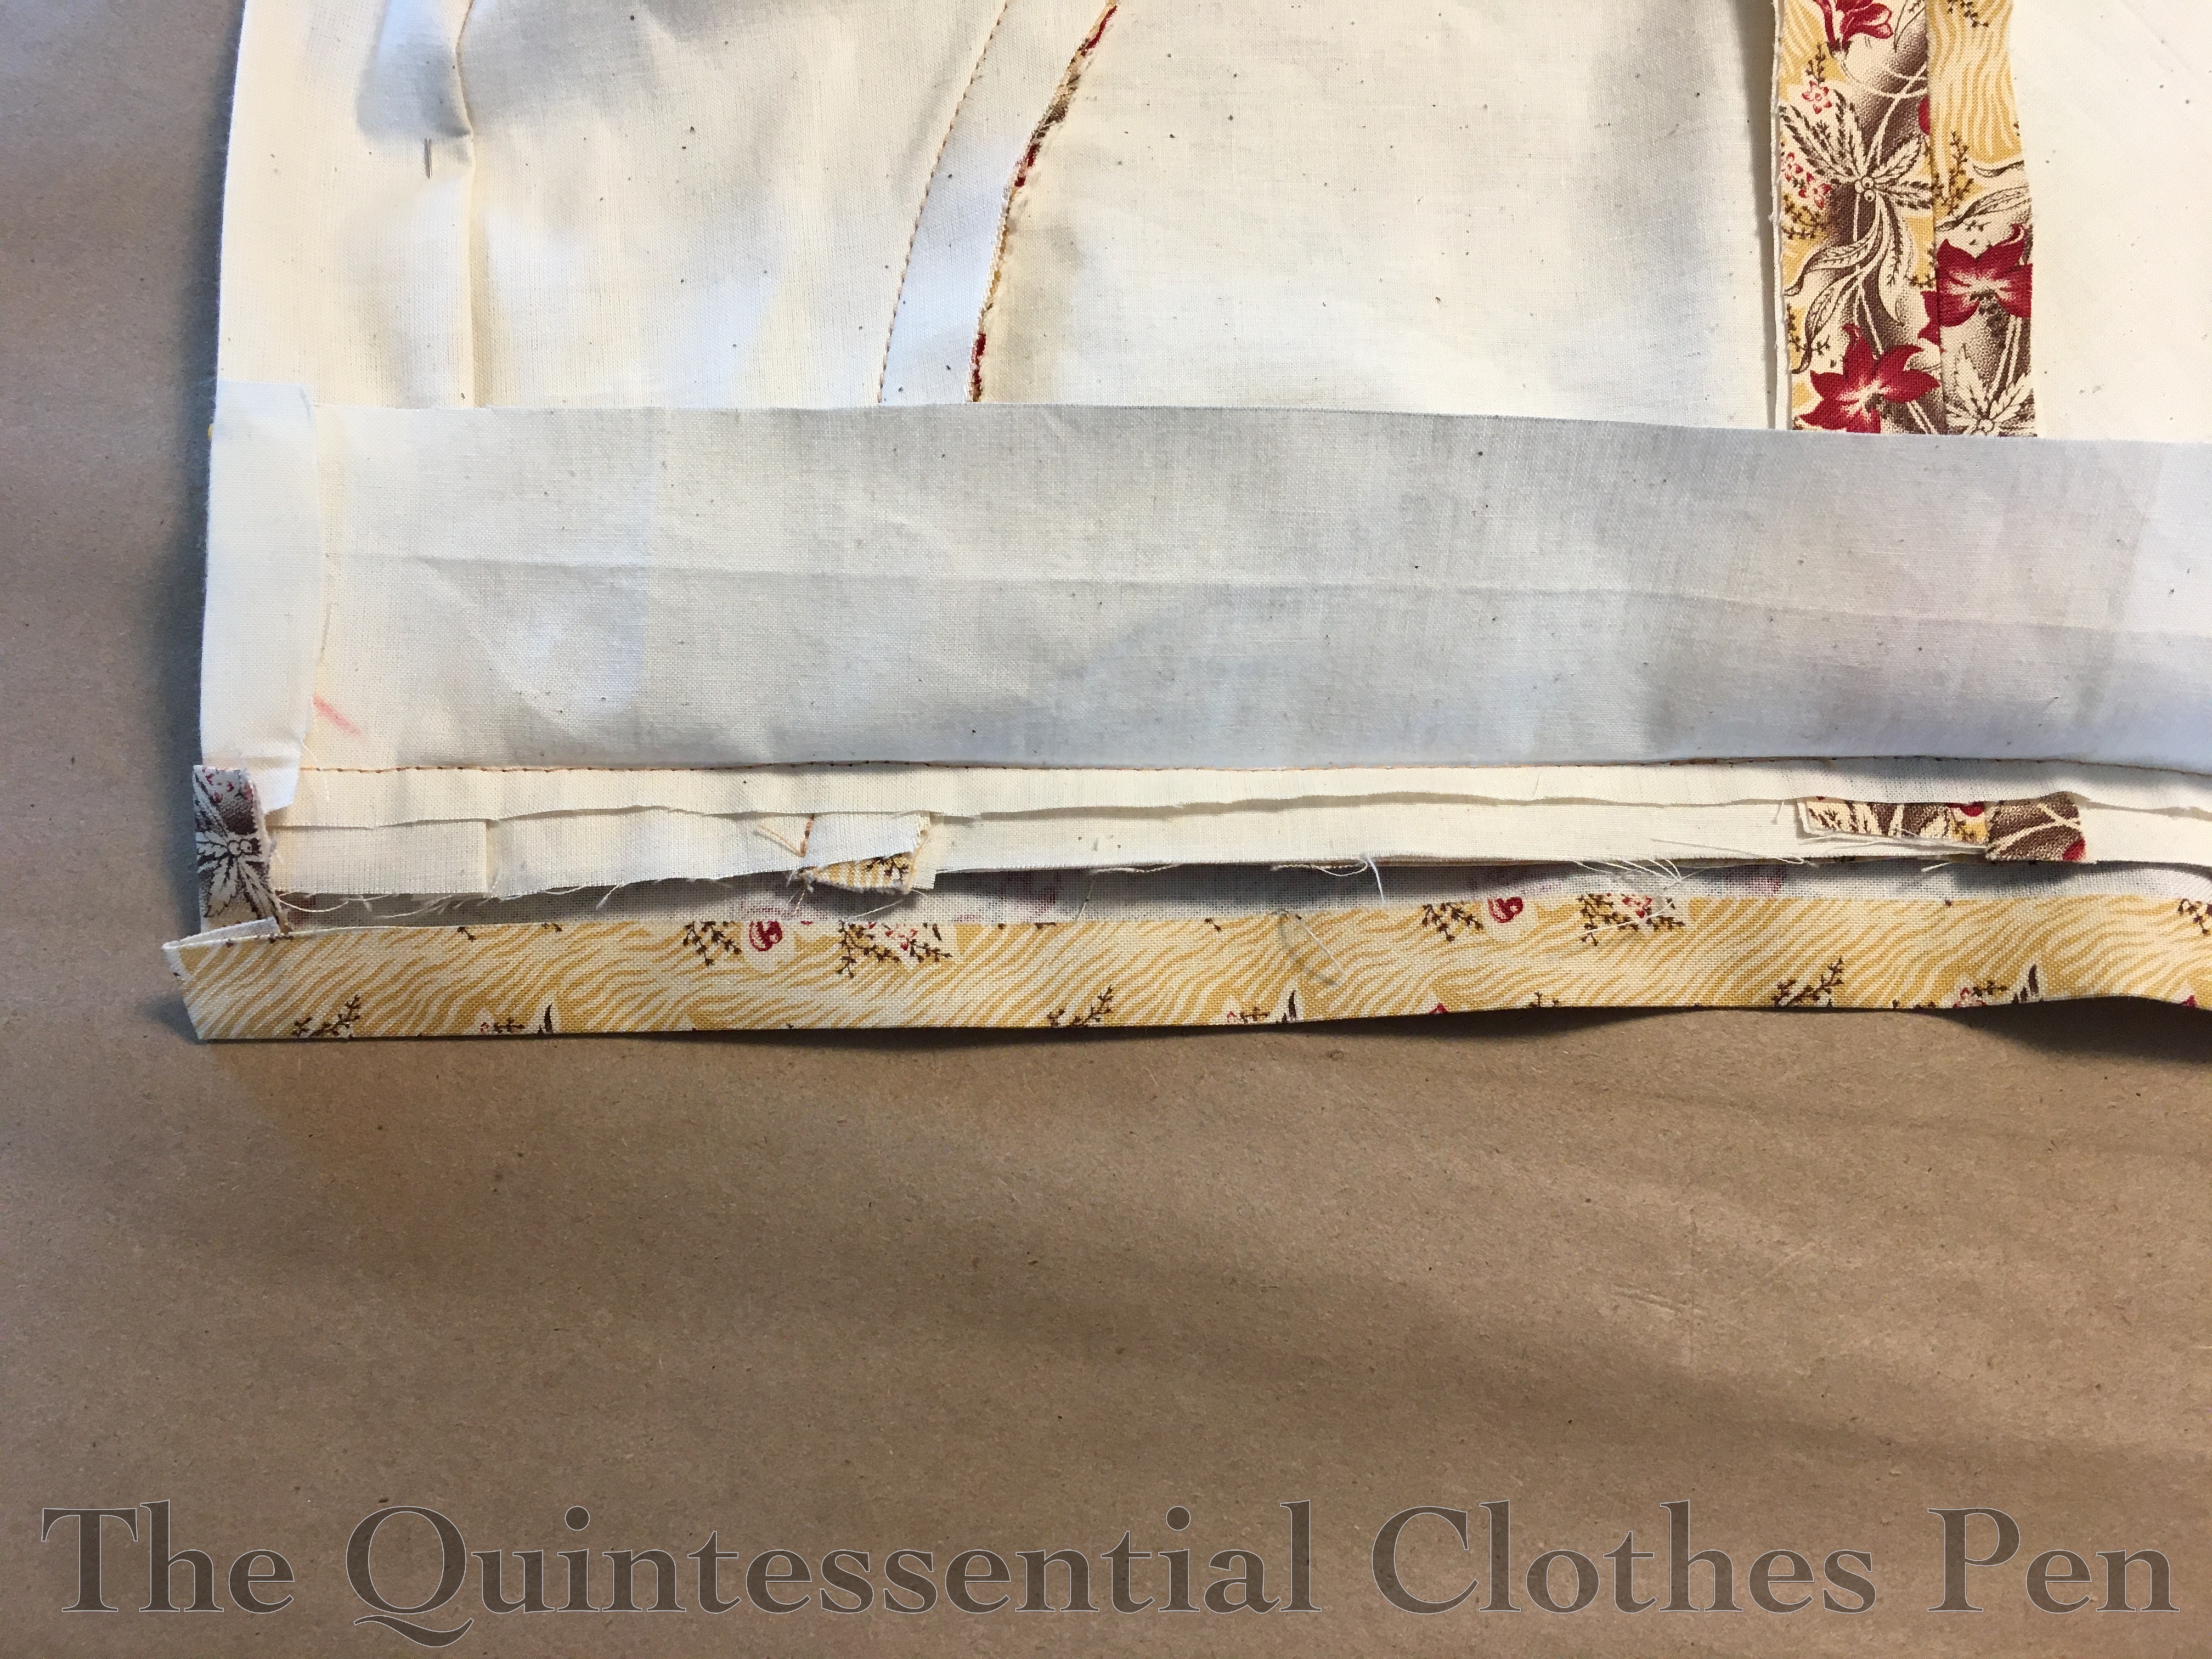
What I saw is that instead of being flatlined (as with the yellow and muslin layers of the back pieces), the lining was stitched separately from the gathered front panels. The muslin provides a fitted shape for the yellow exterior layer. There is a photo of the inside of the bodice of the extant bodice that shows this very clearly.
For my dress, the piping that finishes the back neck continues around the muslin to finish the edge. The yellow exterior pieces of the V edges (which are cut on the straight of grain) are simply pressed under twice.
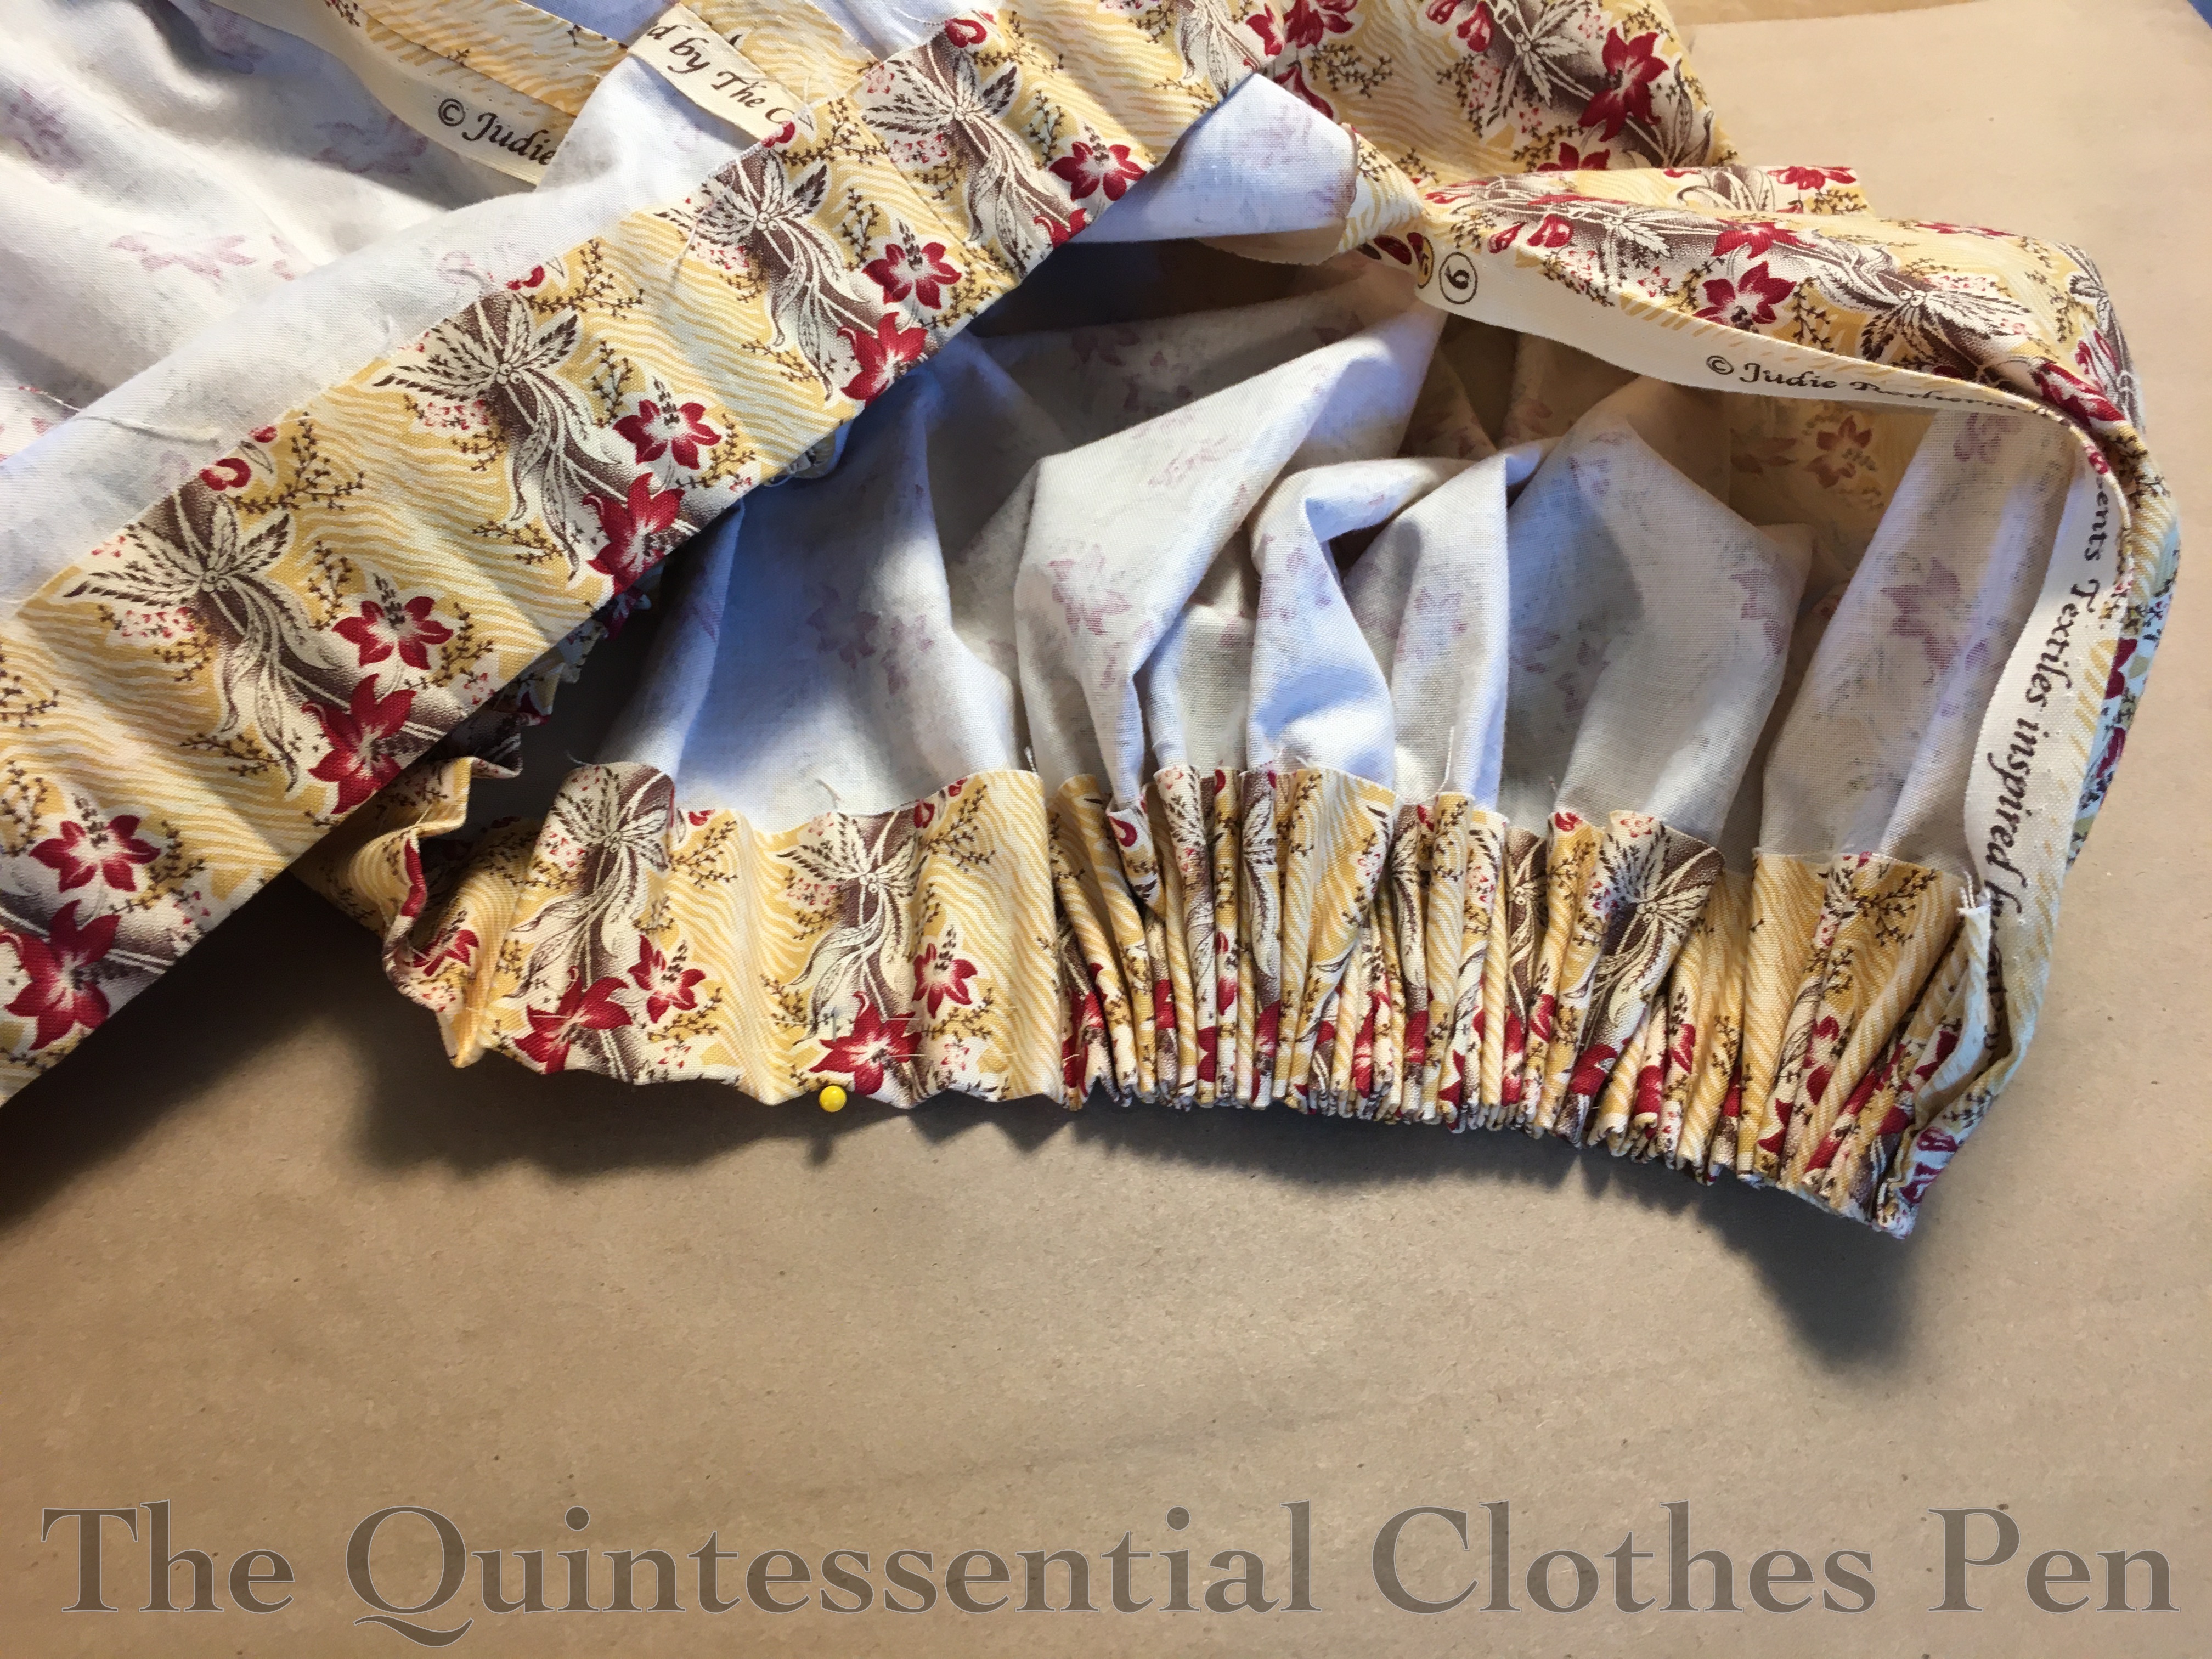
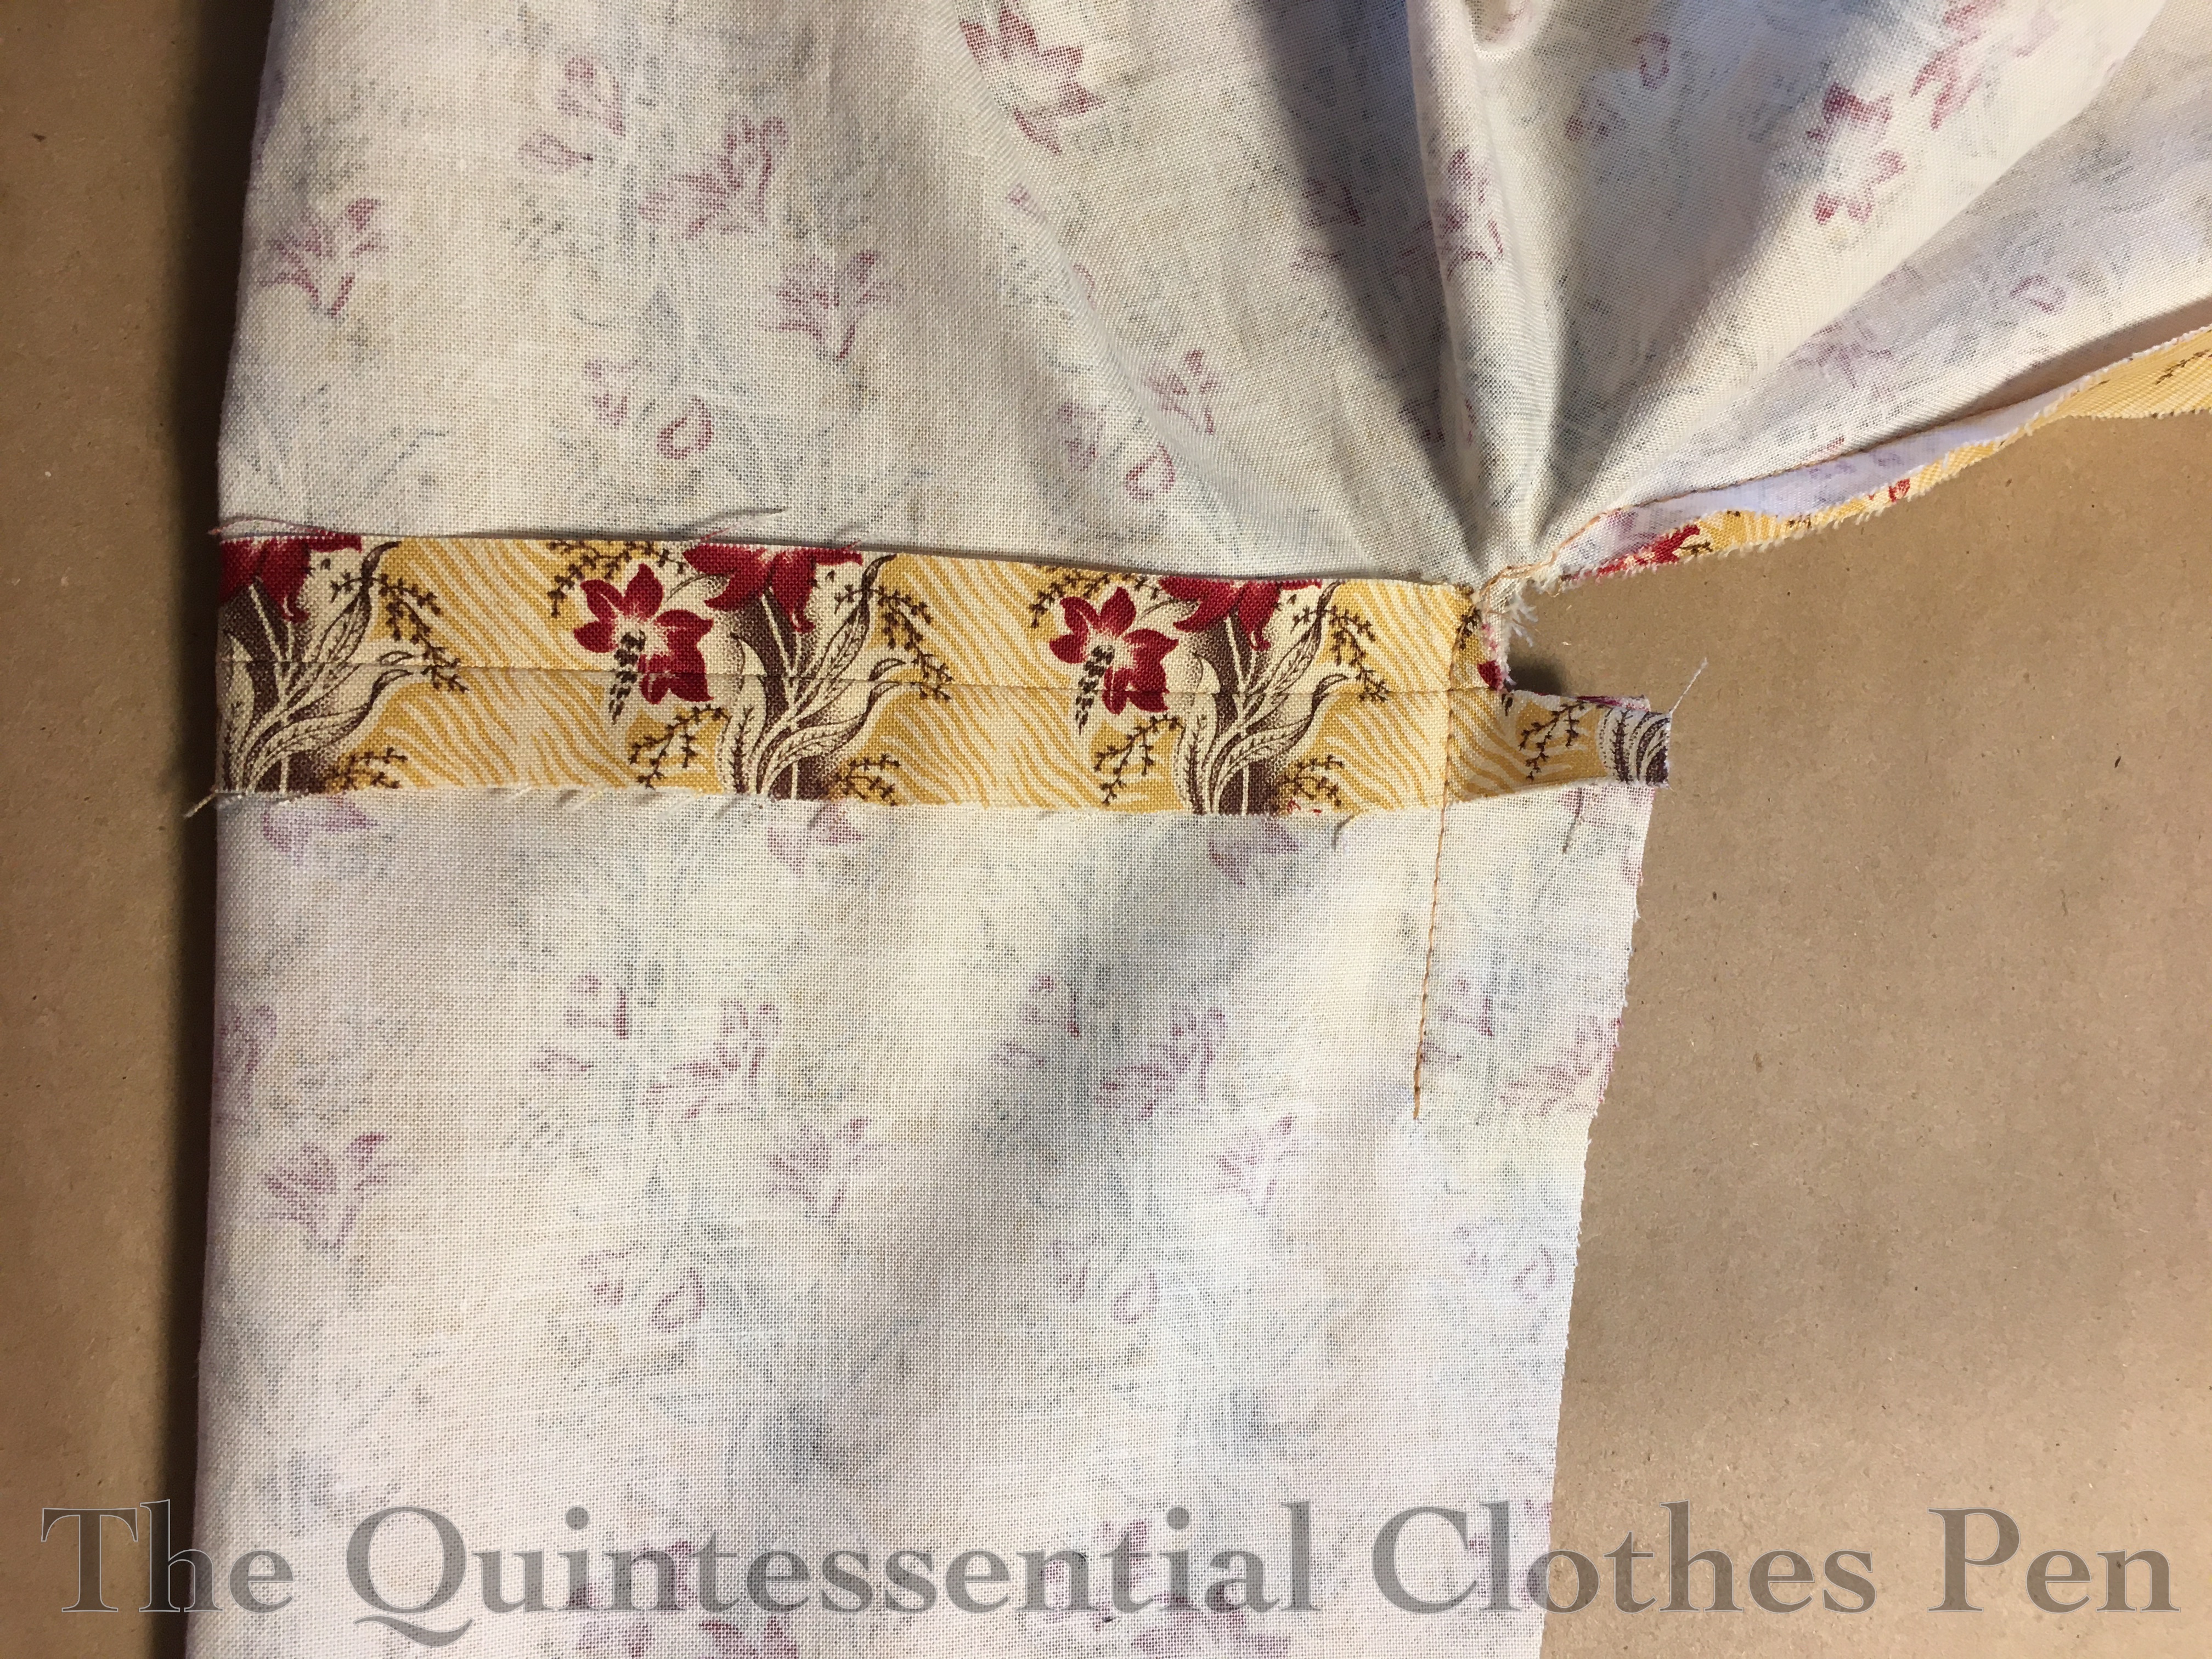
Here is a closeup of the armhole of my bodice from the inside. The muslin front edge and exterior yellow layer are on the right of the photo. You can also see the ties that hold the sleeve puffs in place.
In addition to those details, the photo below also shows the hooks that are used to attach this bodice to the skirt.
Ok, but the sleeves are the star of the show here, so let’s discuss them! Being from 1838, they still use a lot of fabric (a yard each), but the fullness is pleated to force the puff down to the elbow level.
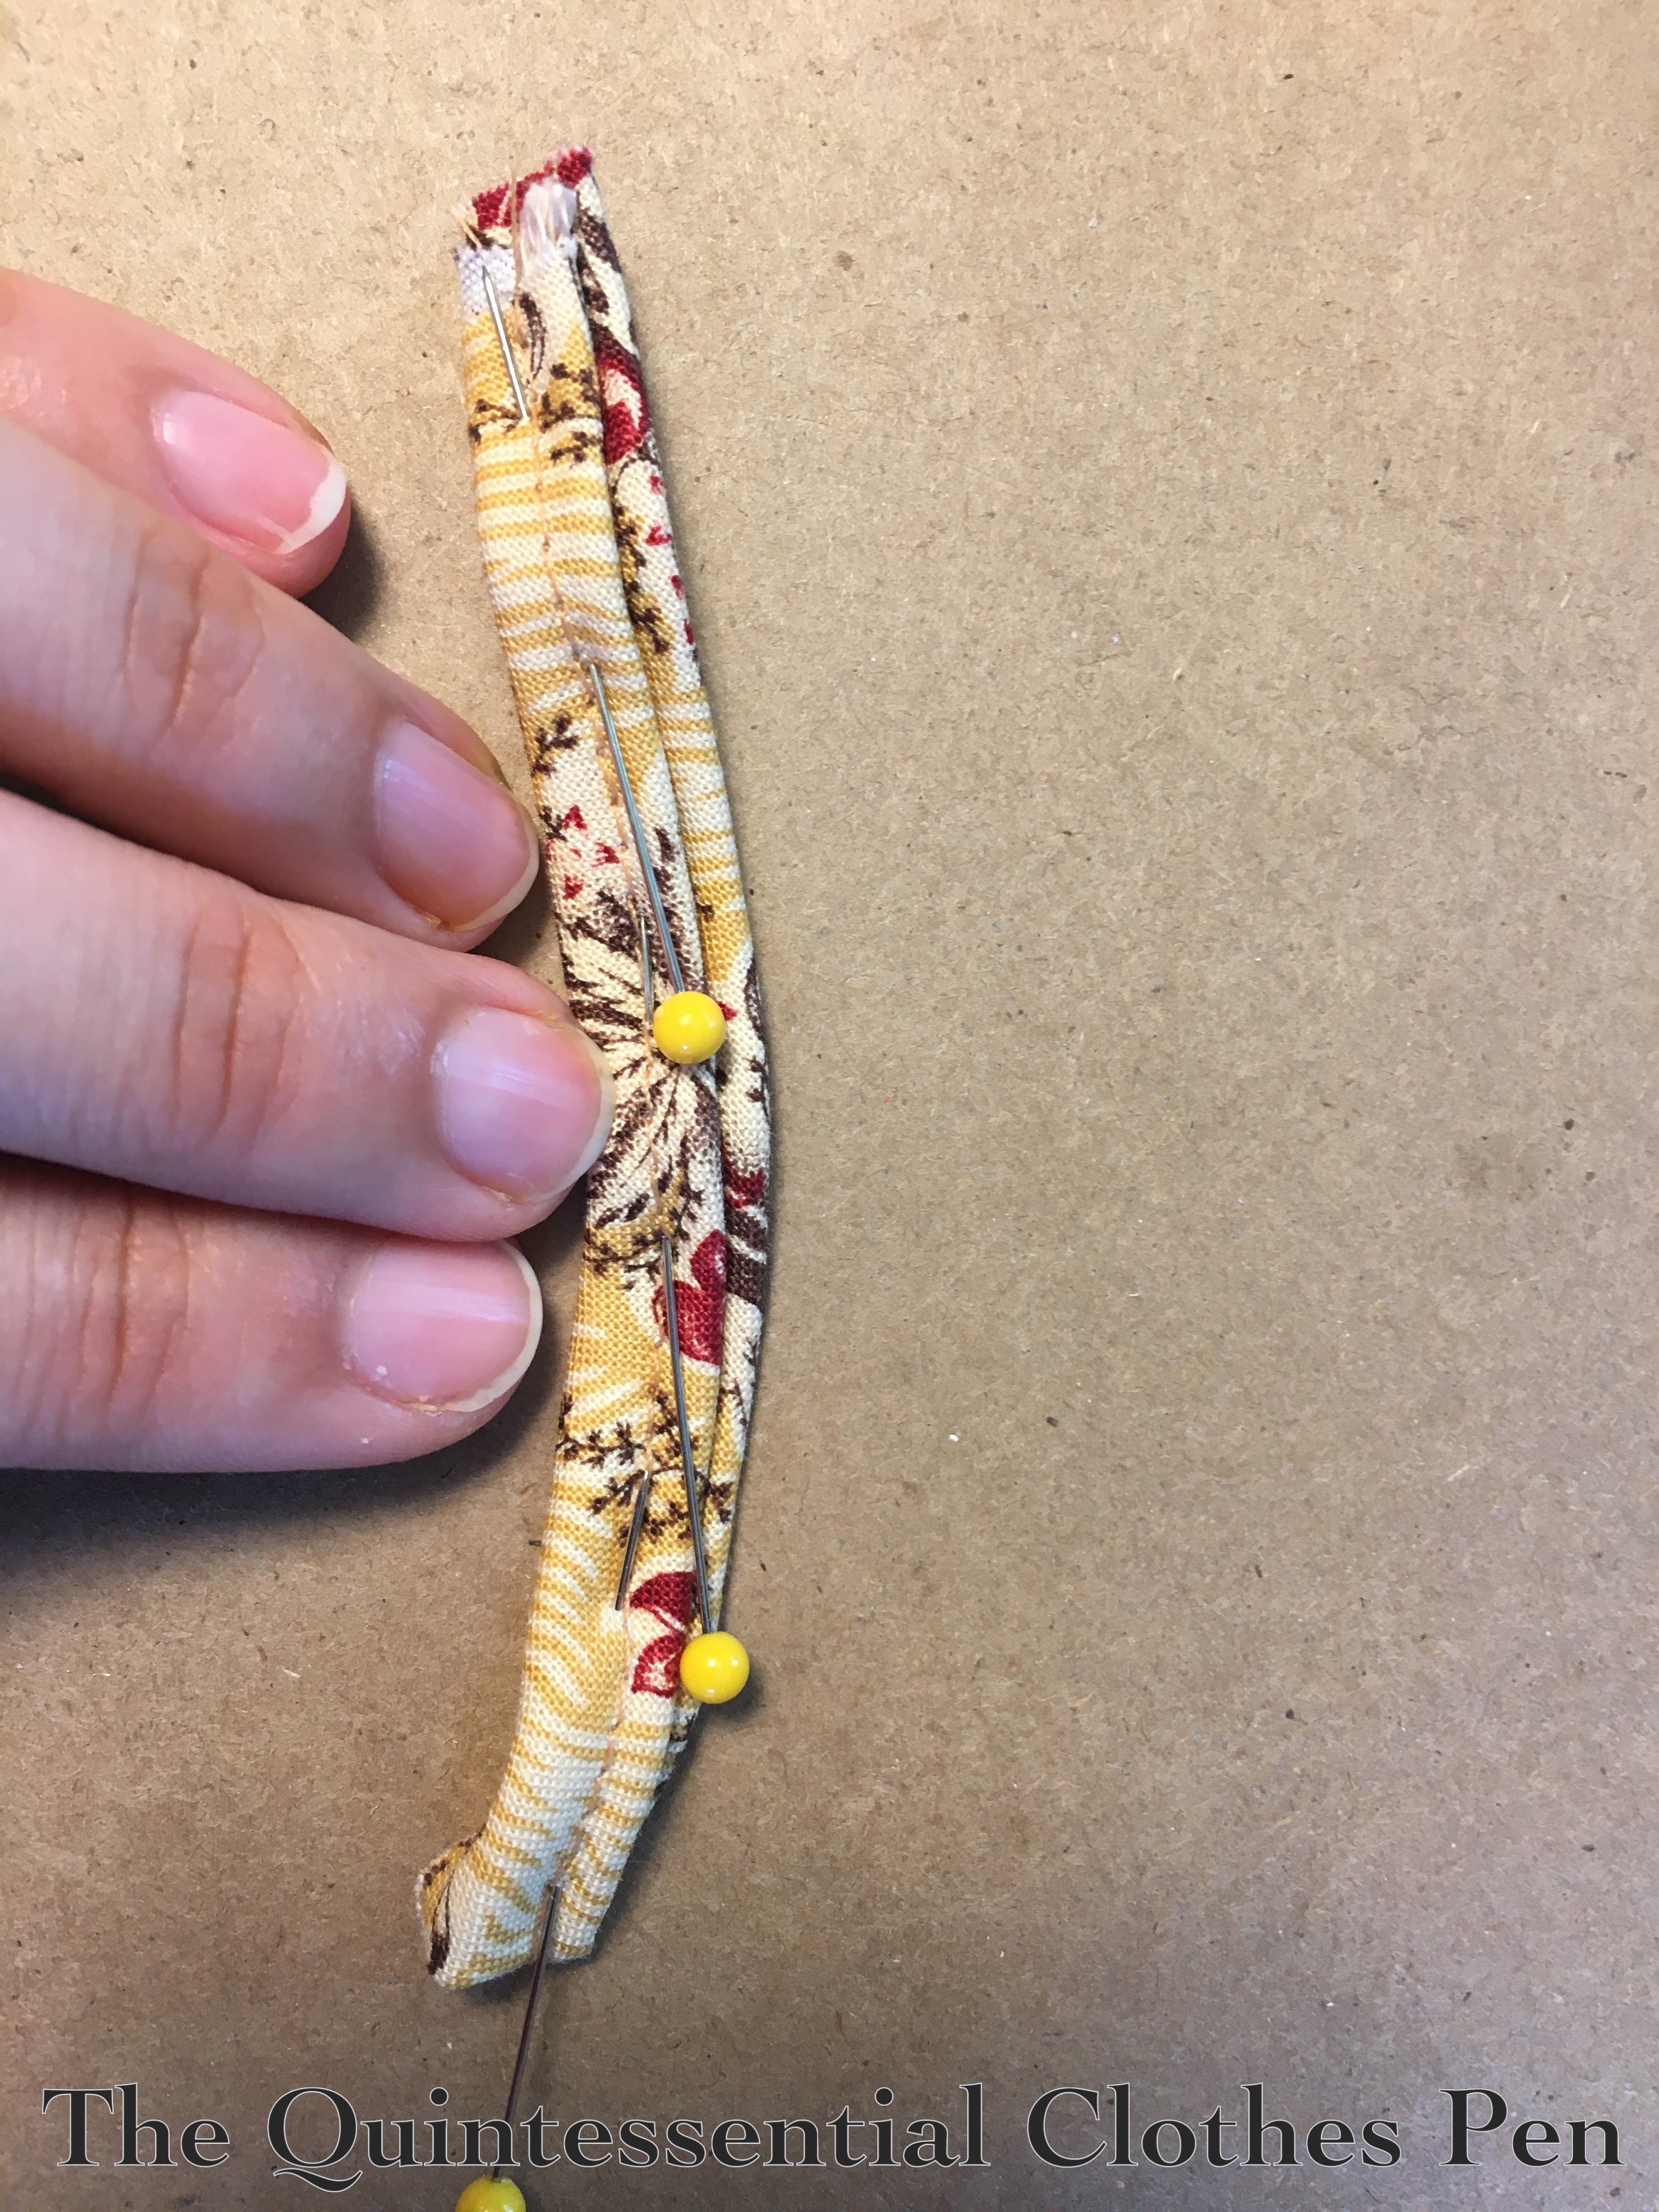
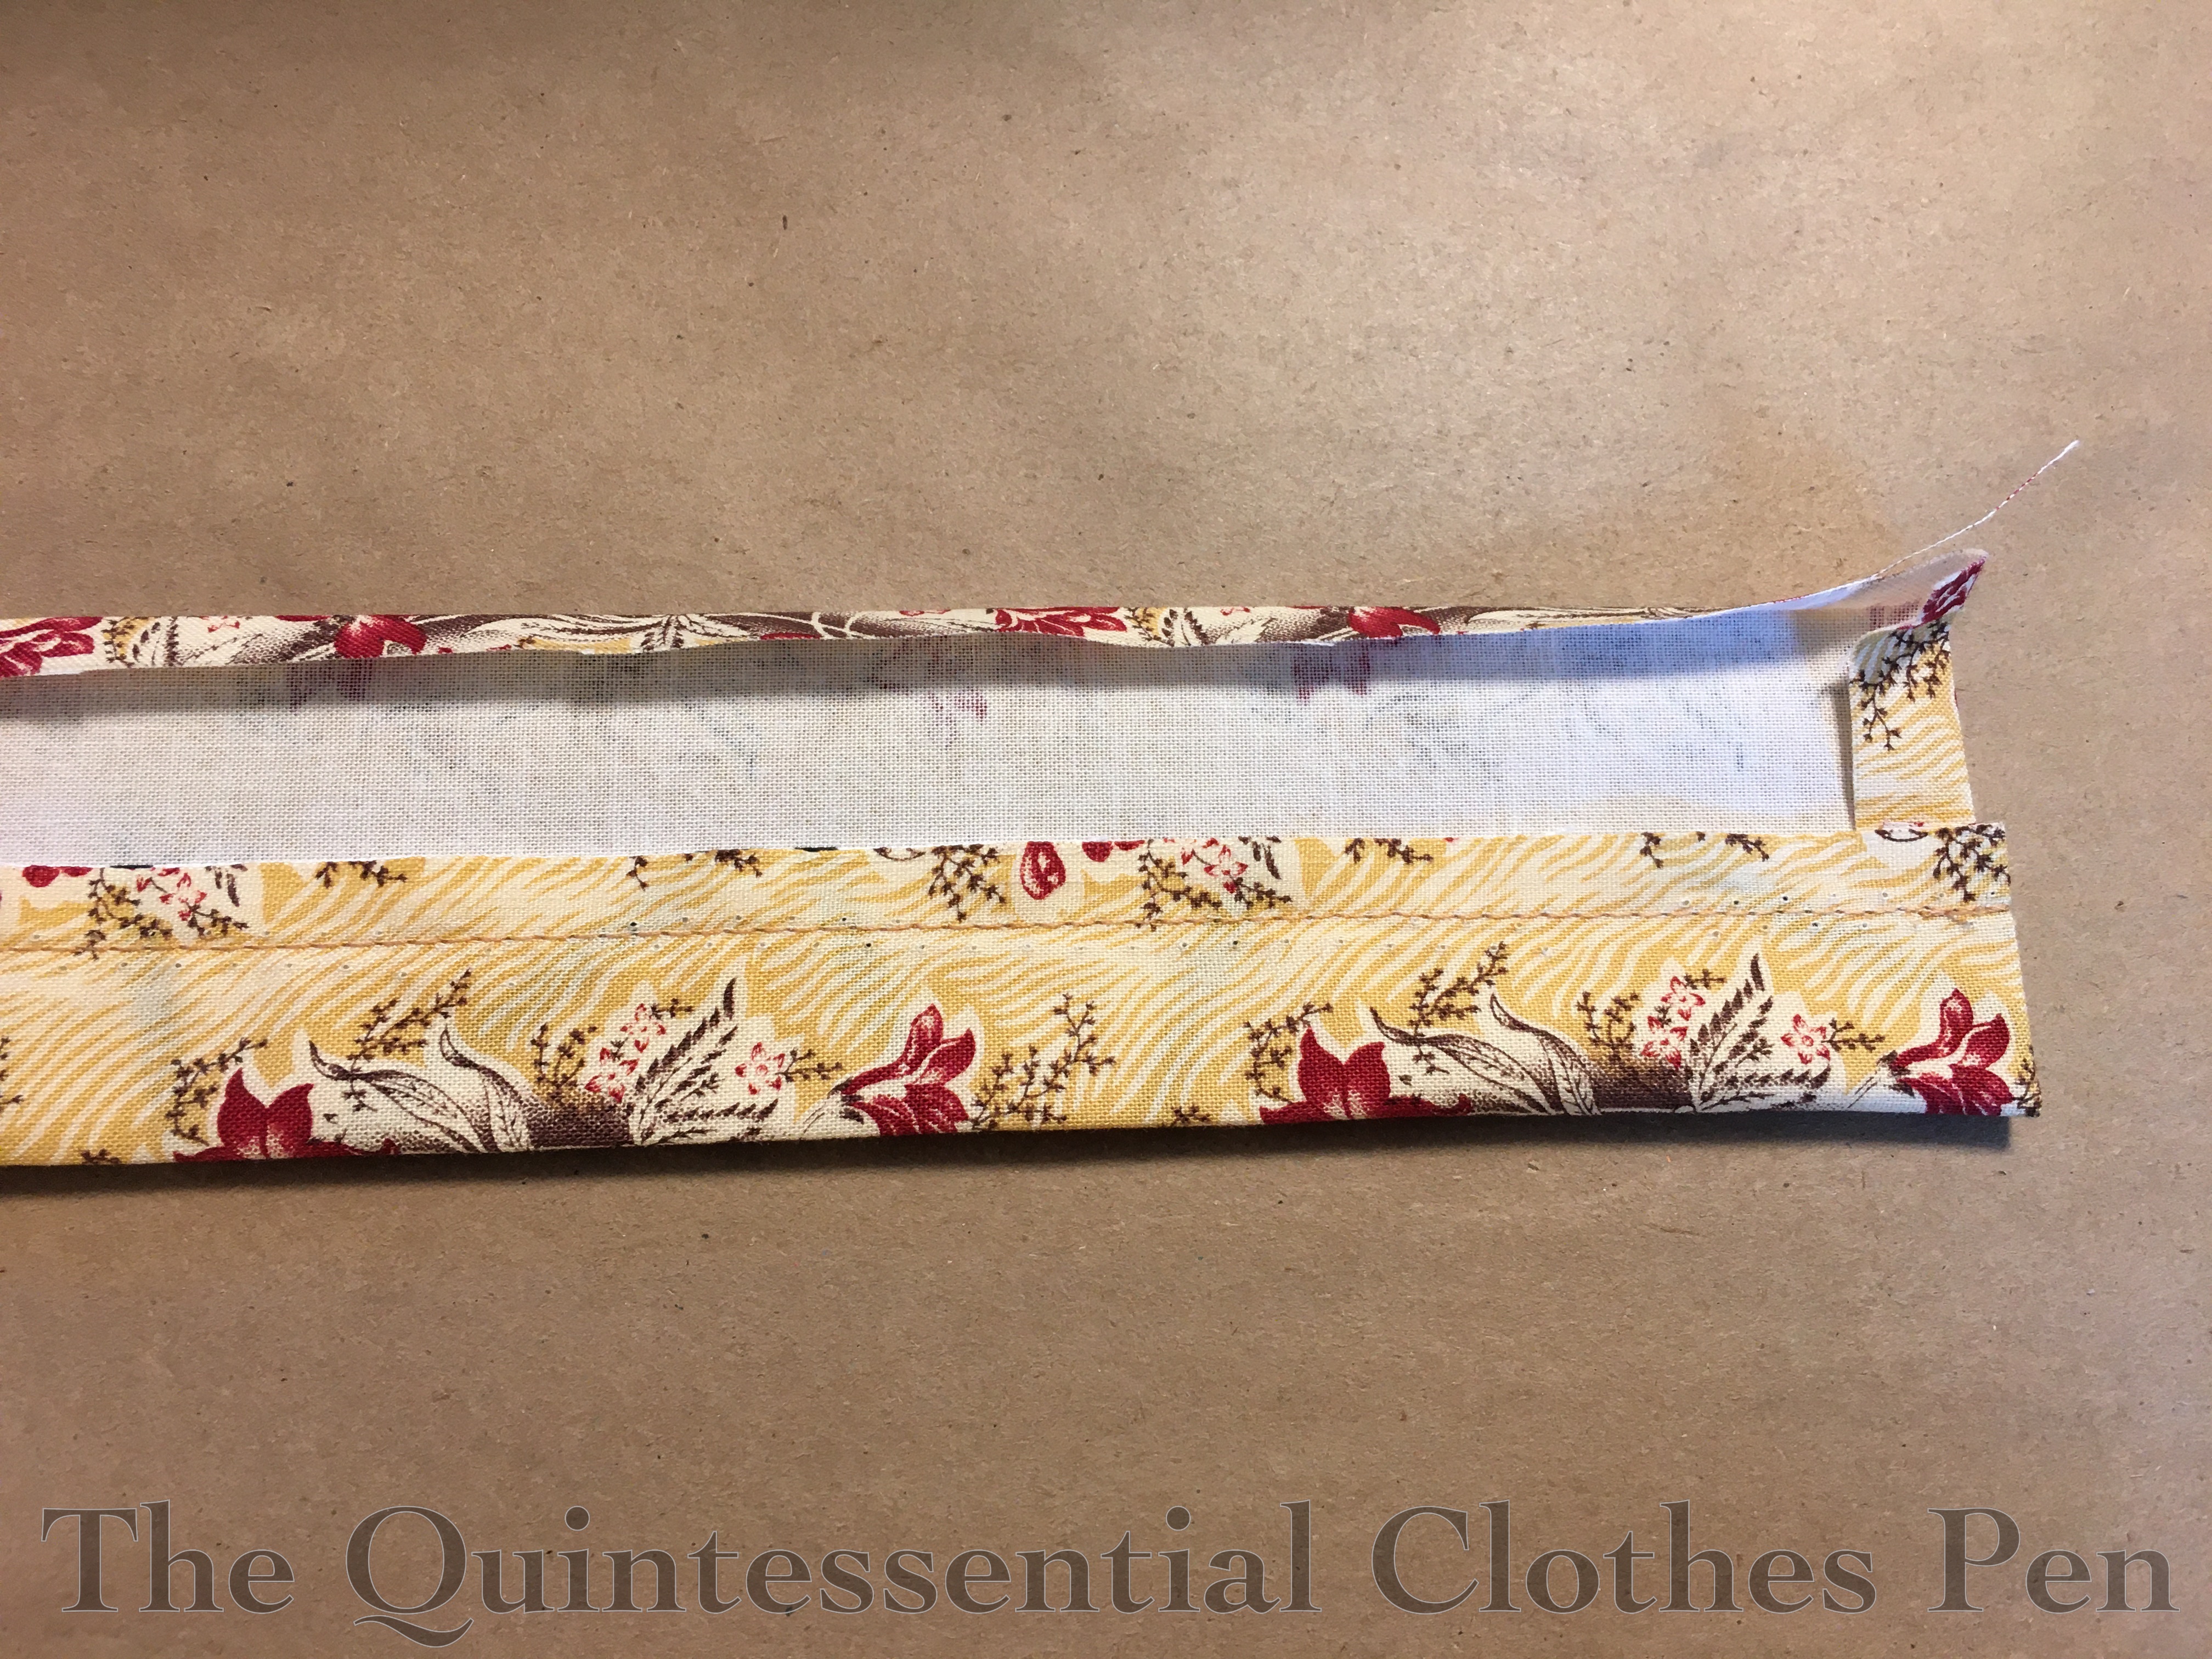
Here’s a closeup of the completed sleeve. The pleats are held in place by two bands of double piping that are hand sewn in place. To make the double piping I machine sewed the cord into one side of my bias and hand sewed it into the other, then pressed the bias in half and attached it through all the layers. In my sample below I didn’t bother to put the machine stitching on the under side, but on the dress the machine stitching is not visible.
Before the piping was added, the pleats were machine basted in place. My machine basting wasn’t exactly where the piping ended up, so I removed the basting anywhere it showed.
Backing up some more in the process, below is one of the sleeves with the pleats pinned in place. I did this while the sleeves were flat, before I sewed up the inseams.
There’s no pattern for the pleats… it was just a matter of knowing what dimensions I wanted to end up with for my top edge and bicep and then eyeballing it. The pleats vary in depth on the inside, even though the outside is pretty even at ¼”. Part of this is due to the fact that the pleats have to angle in order to create an armsceye that keeps a curve up in the middle. Figuring it out is a great mind puzzle!
Below is the sleve before being pleated, etc. Between being over a yard high and also being cut on the bias you can see why each sleeve takes a yard of fabric!
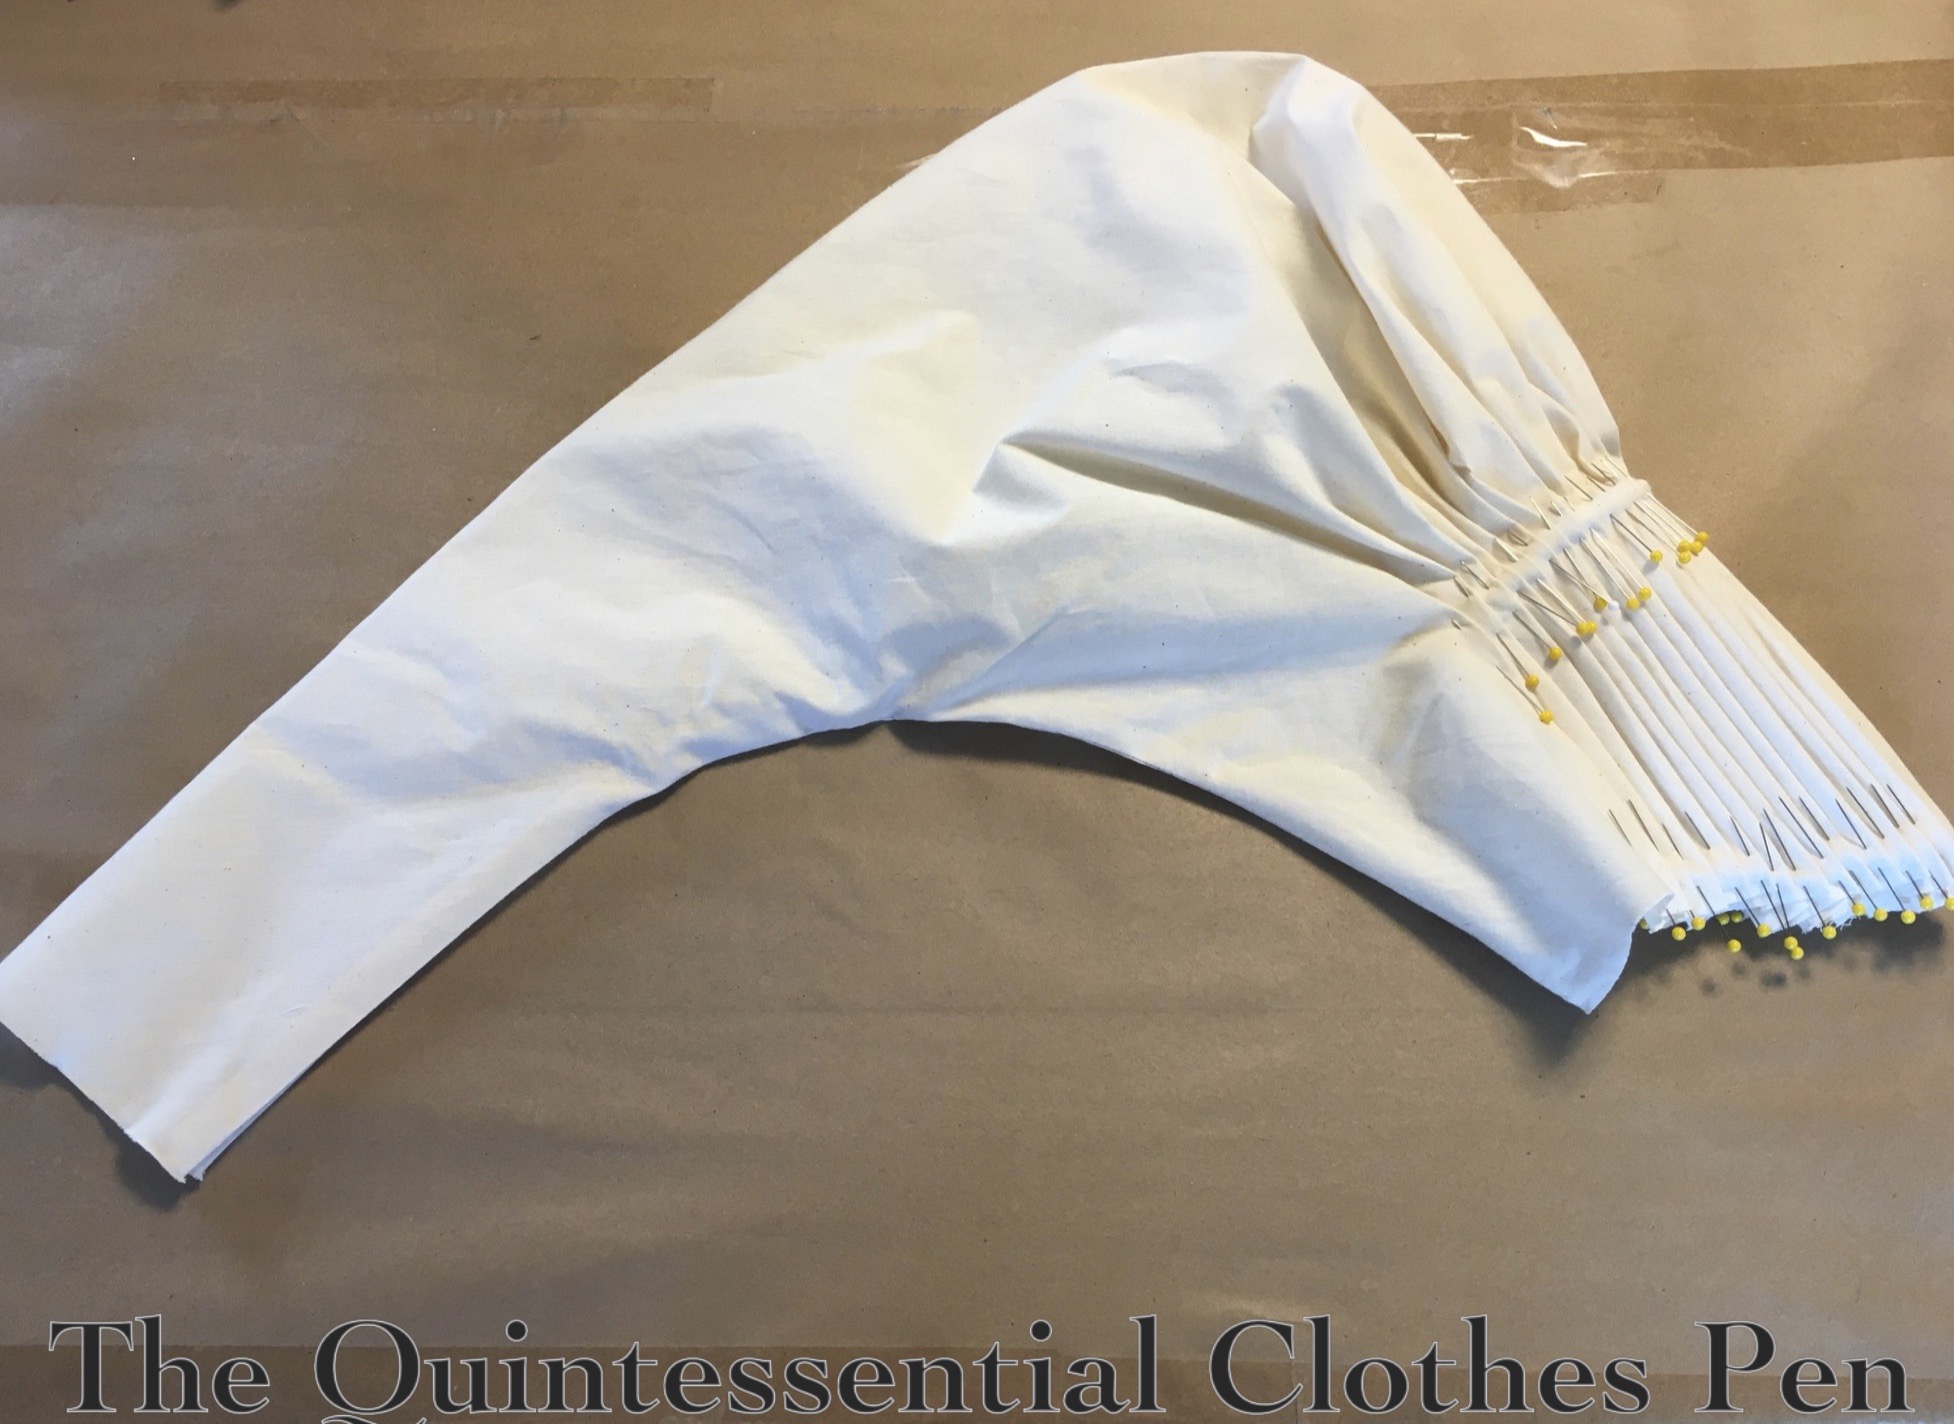
After pleating and sewing the inseam the sleeves had this shape (below is my mockup sleeve). I really wanted an exaggerated elbow puff, so this isn’t quite the shape I wanted to end up with. To get the shape I wanted, I took horizontal tucks about halfway down the sleeve. This keeps the forearm relatively unwrinkled while creating lots of elbow puff. The tucks are lost in the pattern of the finished dress.
Could I have altered my pattern to not have to take tucks? Sure! I’d probably change the curve of the sleeve inseam to do that. But… I’d already cut my pieces. And adapting sleeve shapes to adjust for changes in styles seemed very appropriate and in the spirit of what 1830s ladies might have done.
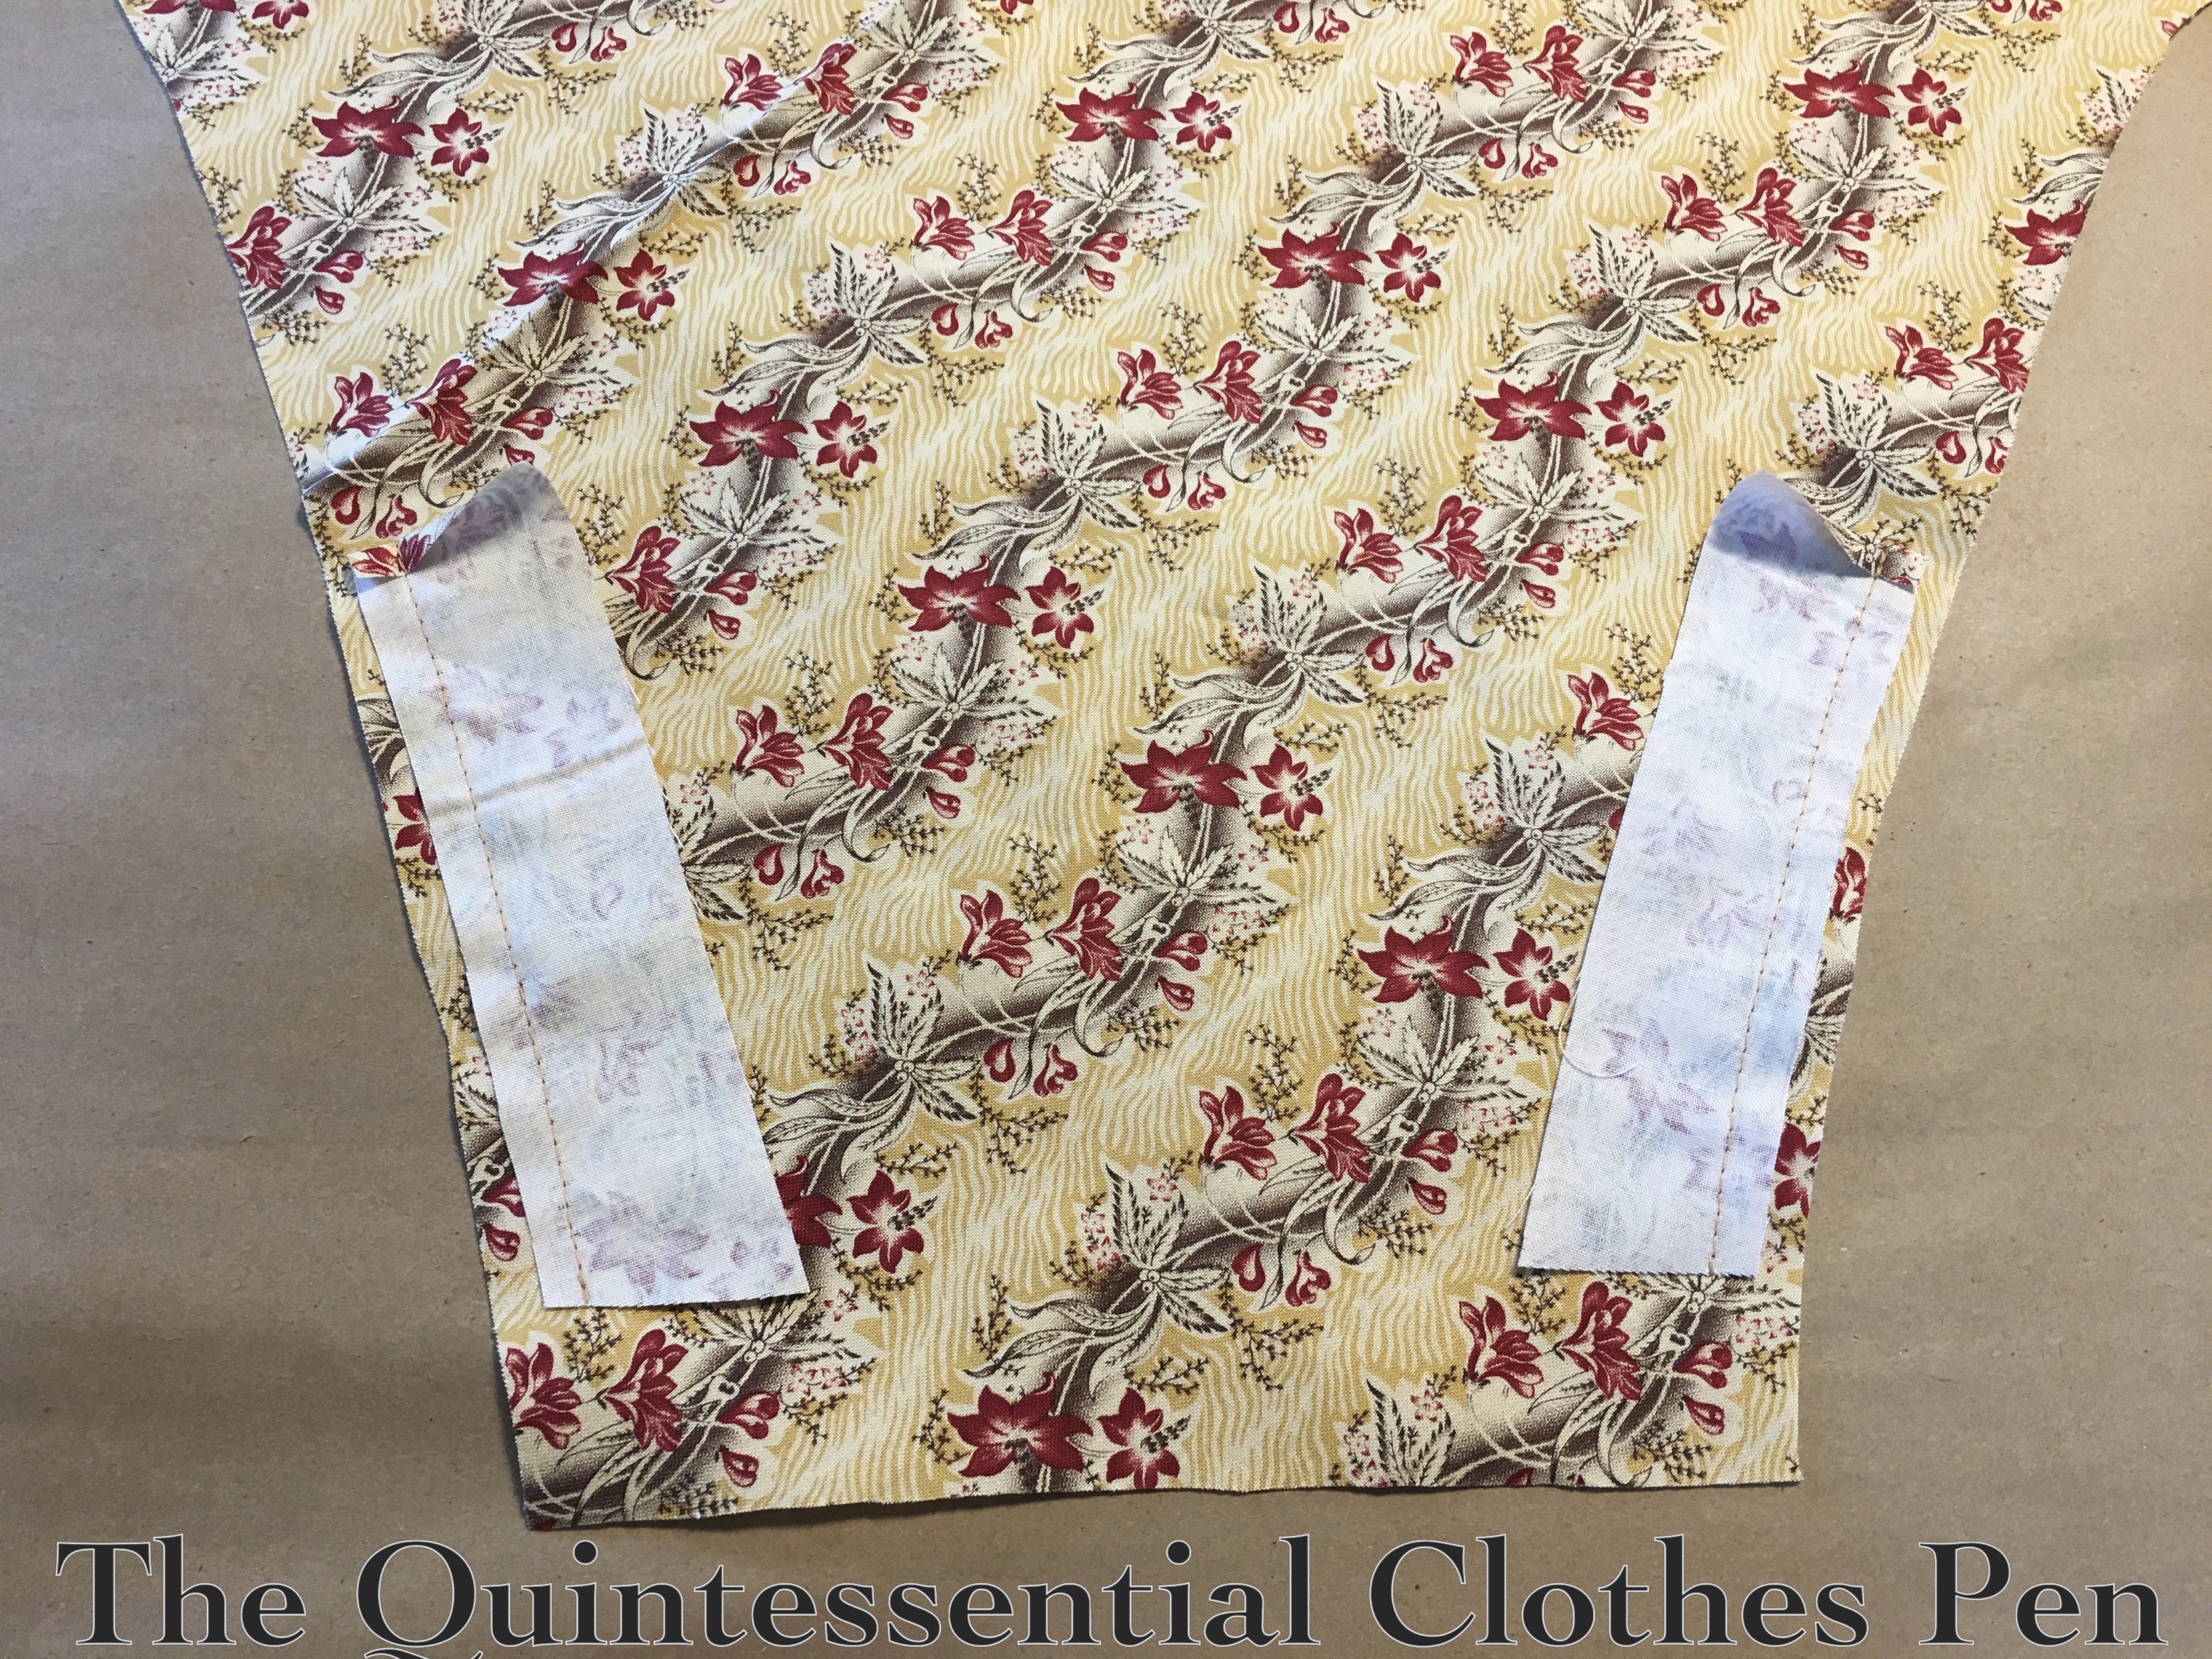
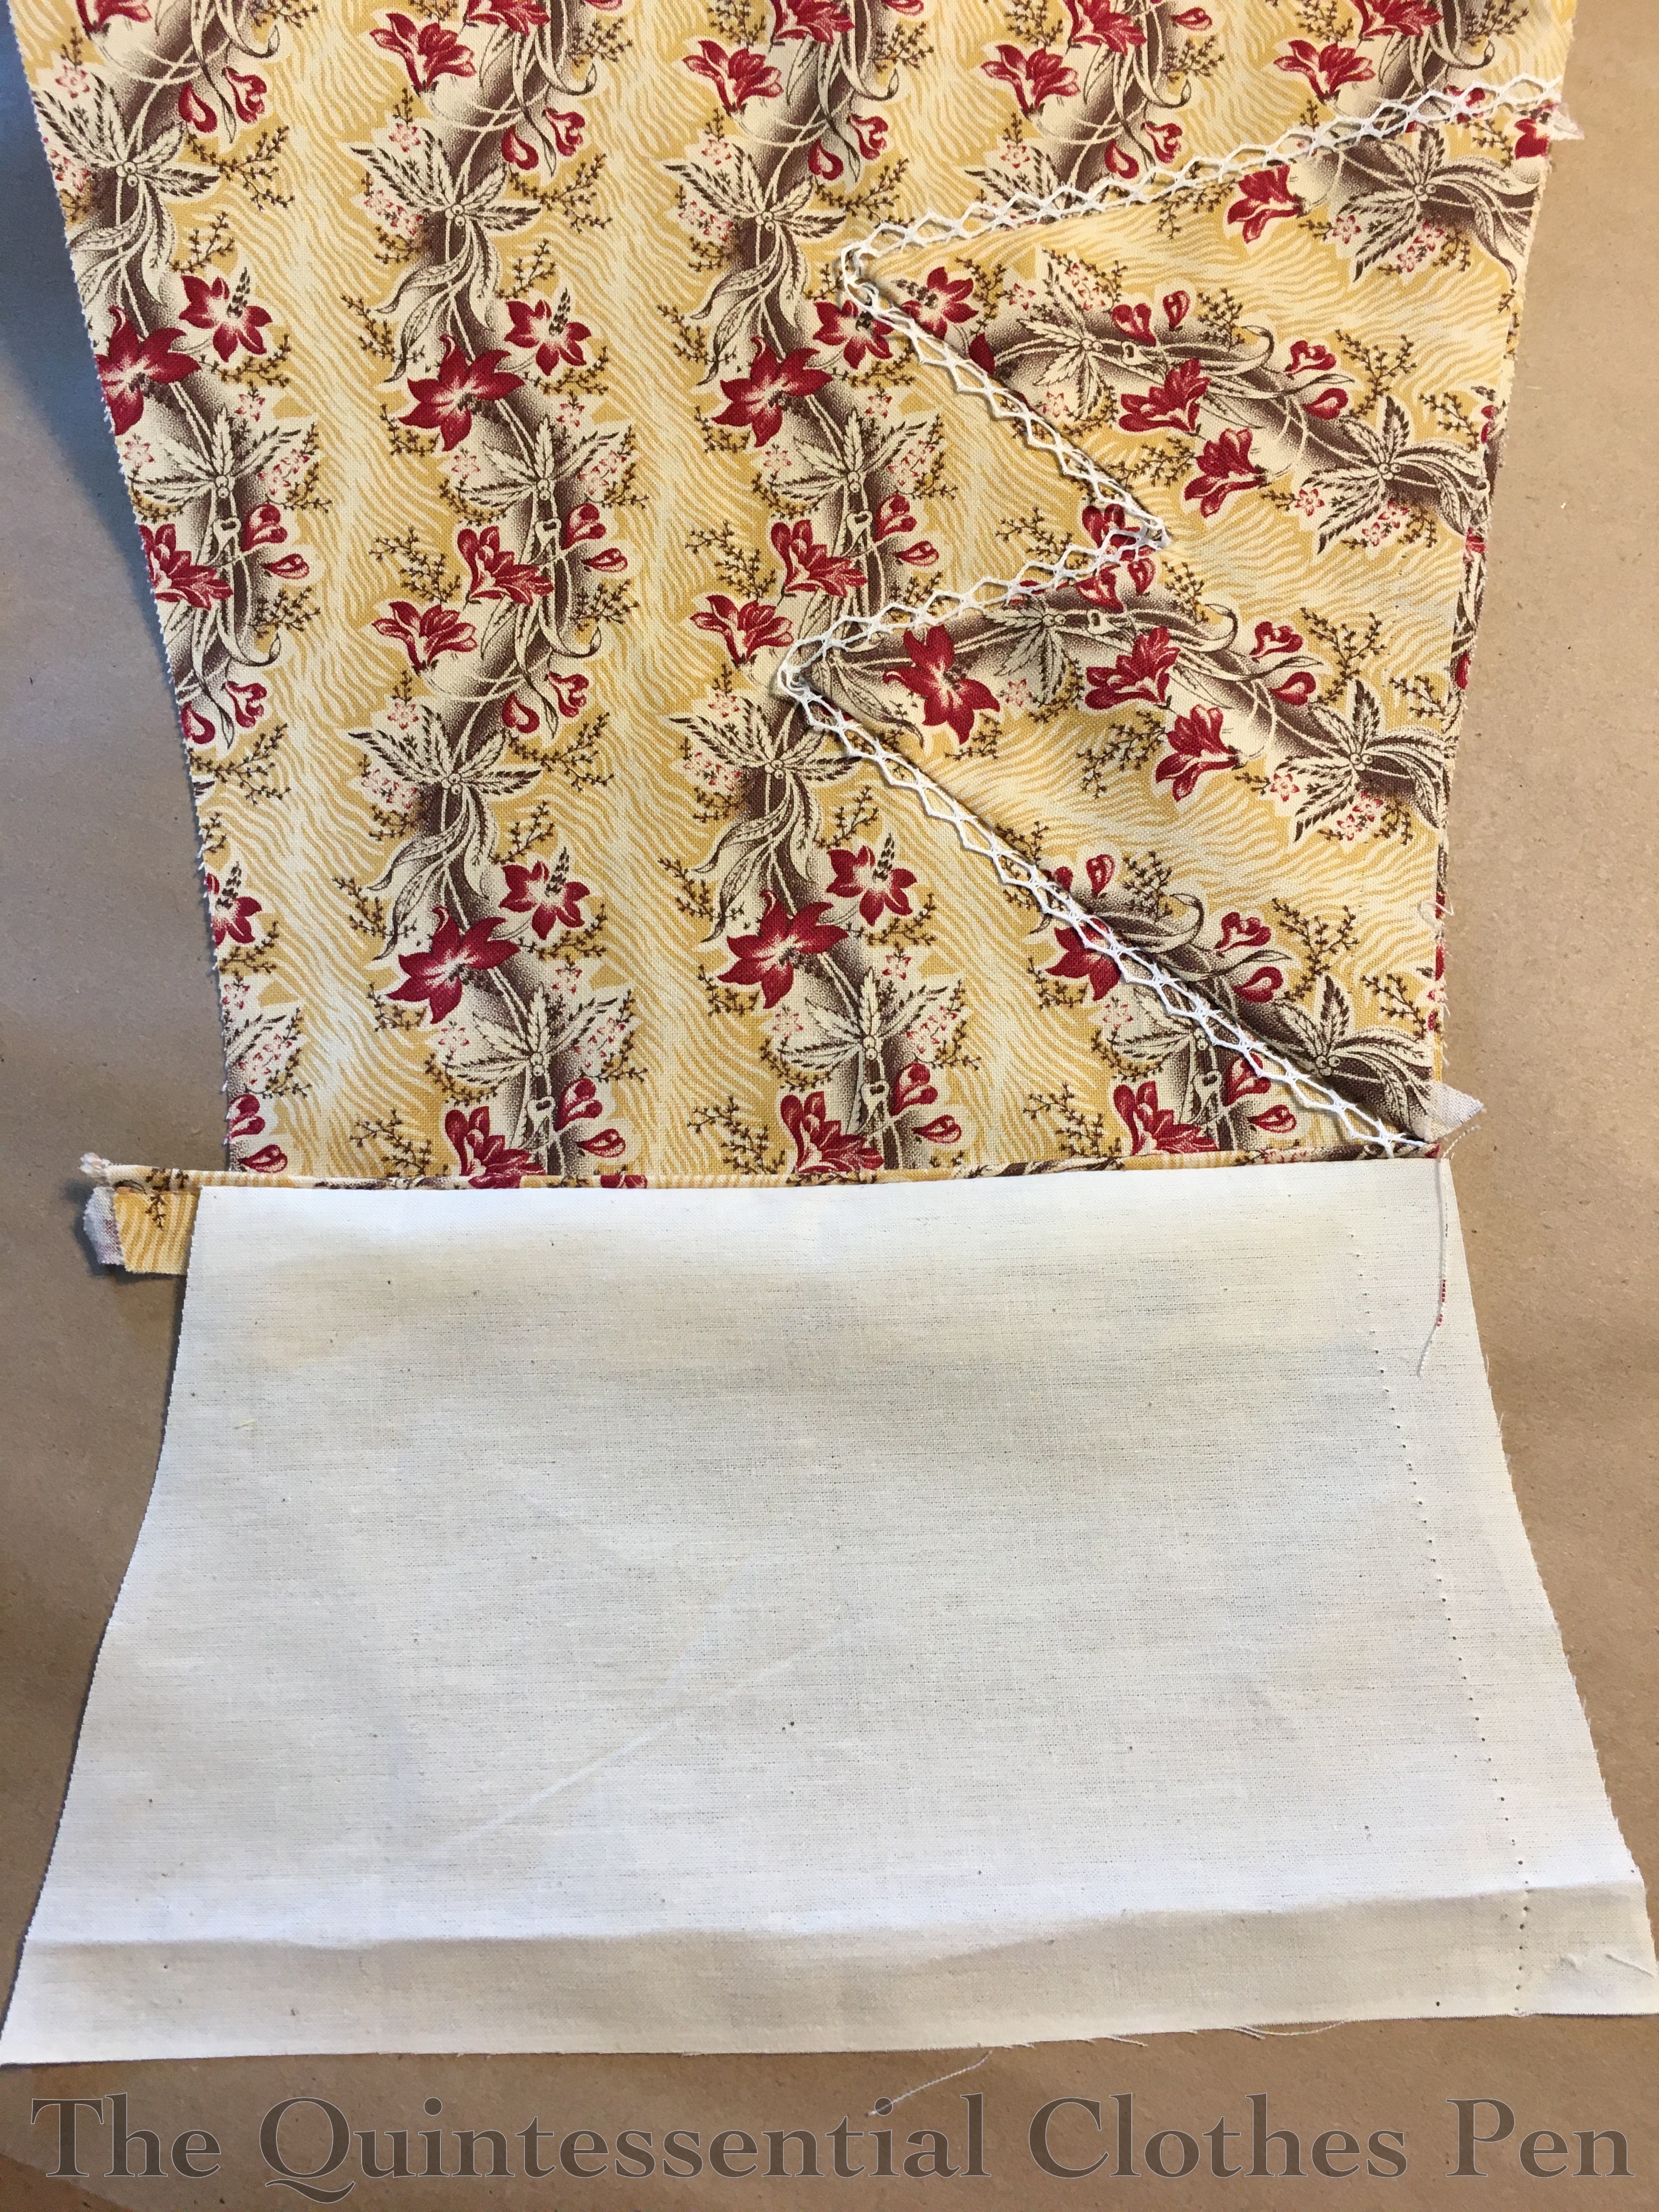
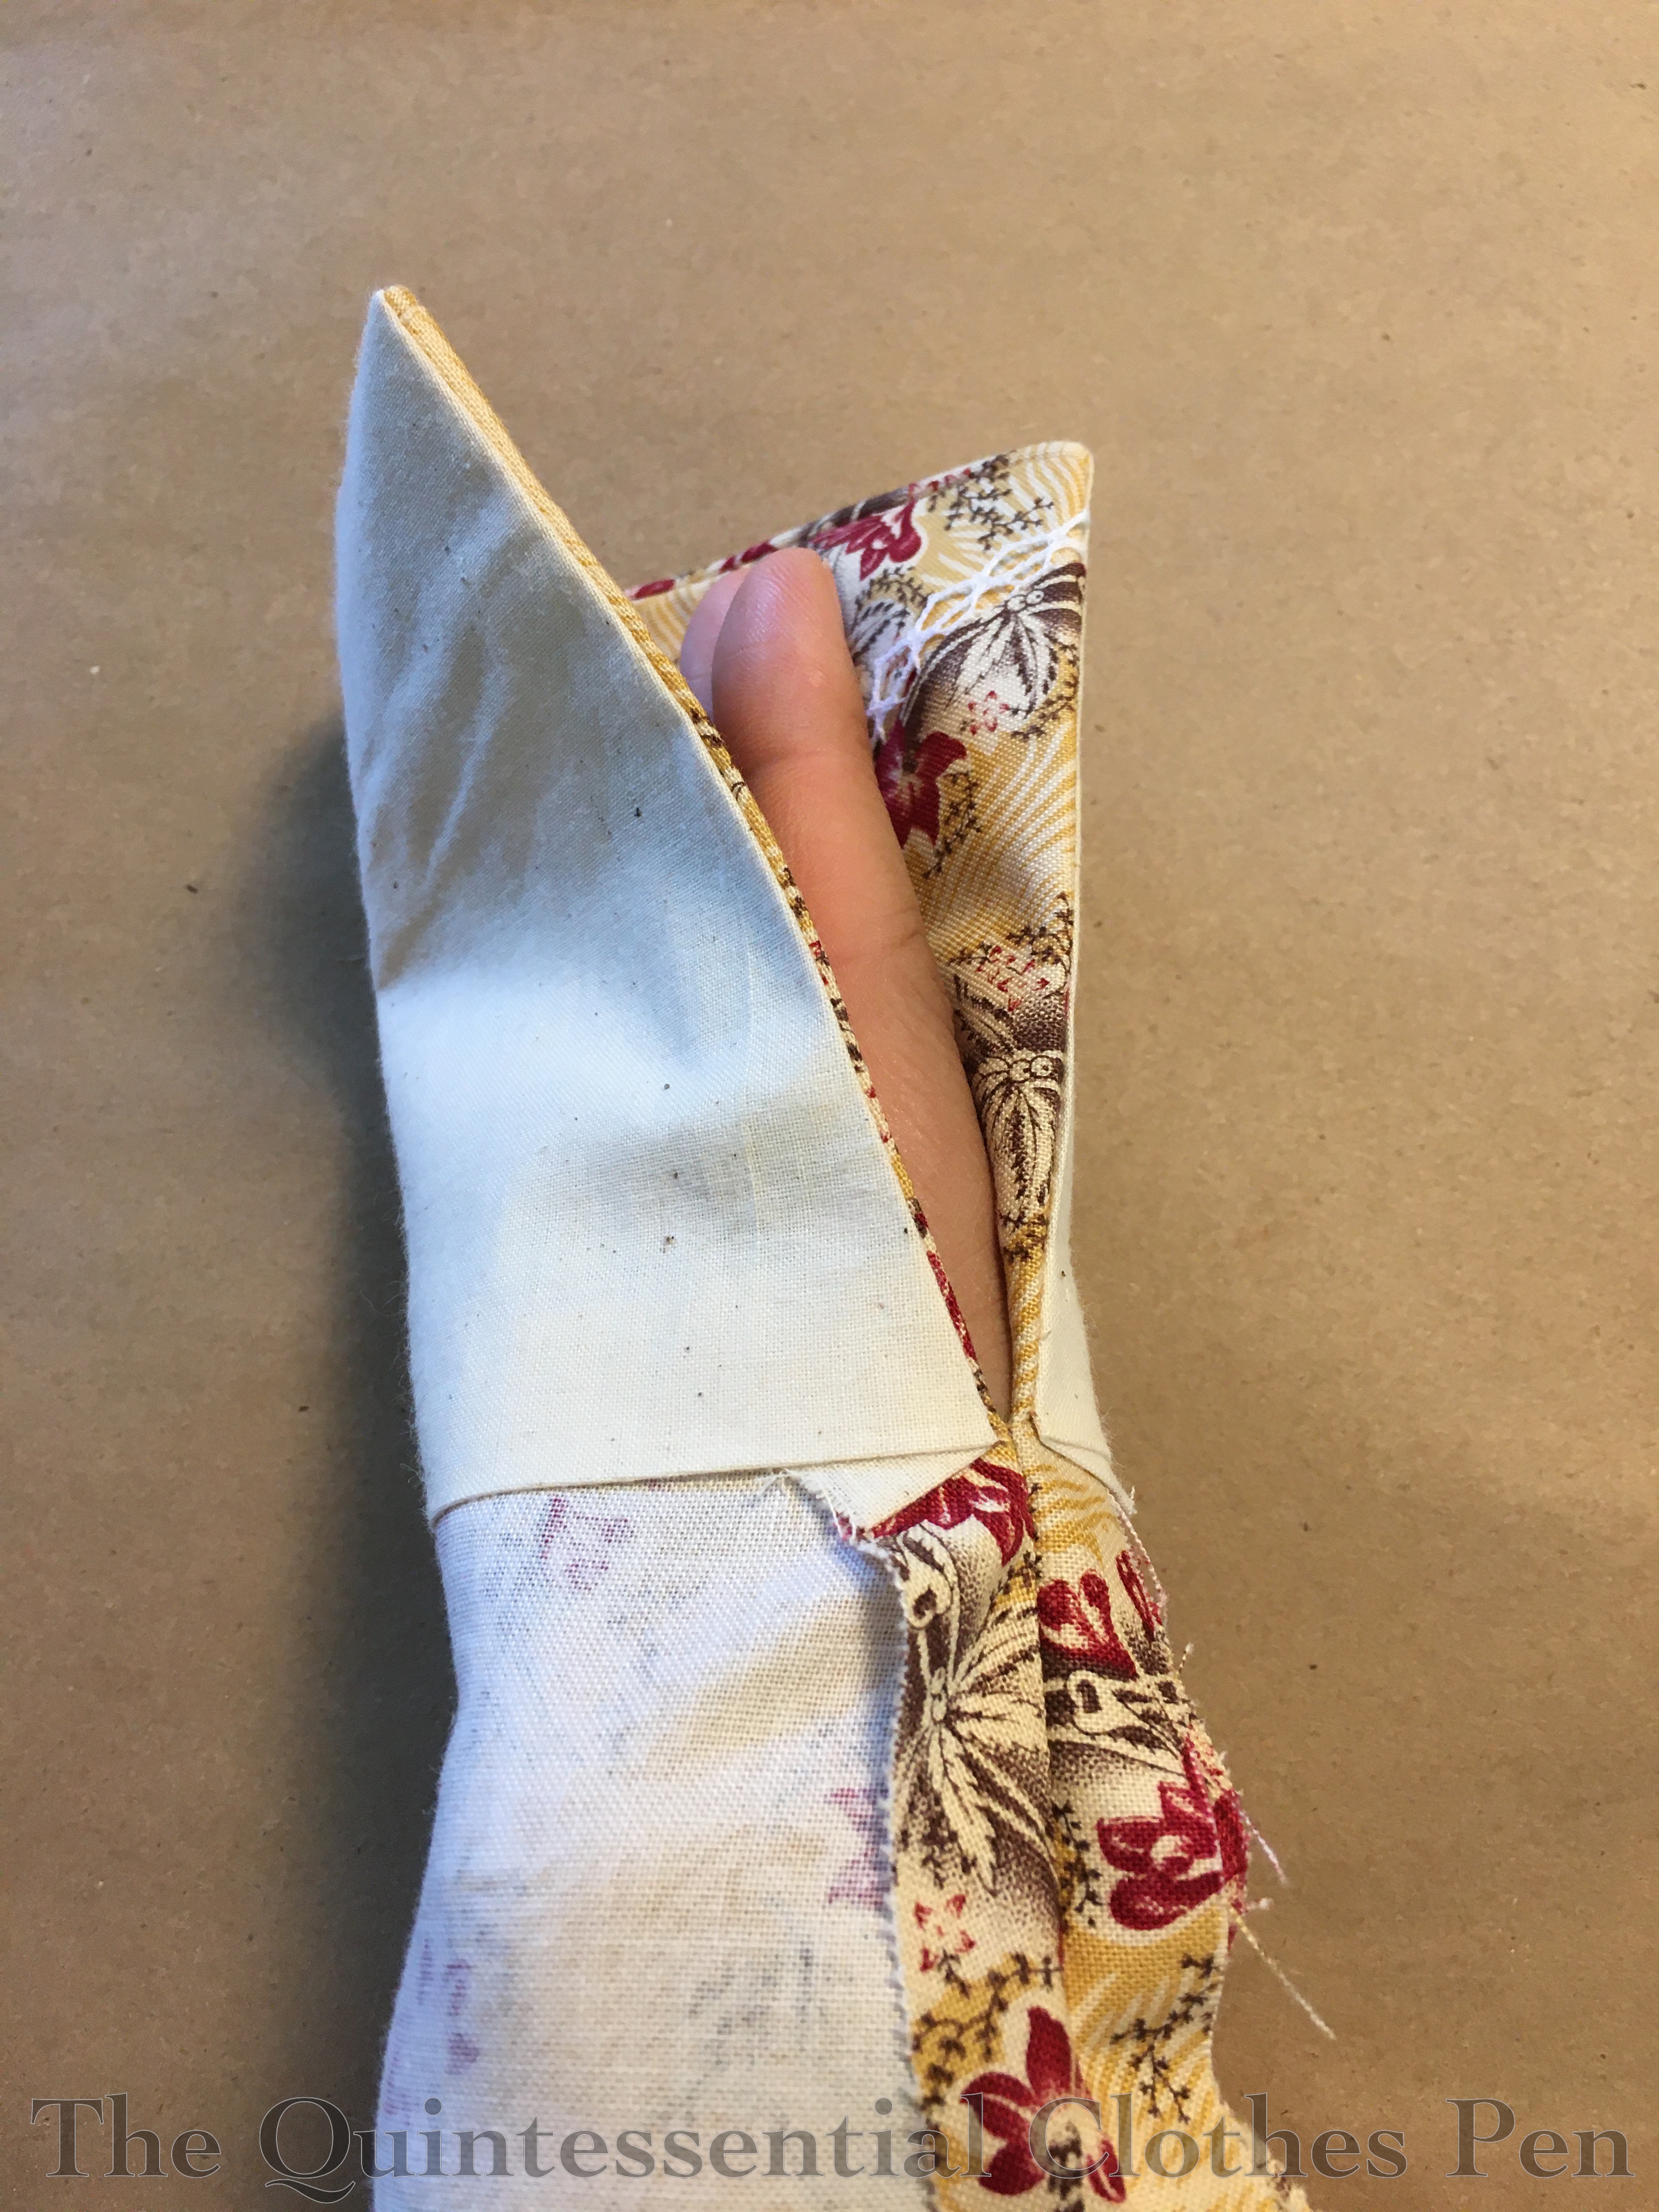
So for a bit more sleeve information… These sleeves have an opening at the cuff to allow for the tight fit of the forearm. The openings are finished with self fabric facings and then the hem is turned up.
Here’s what that looks like on the inside.
And that’s it for construction!
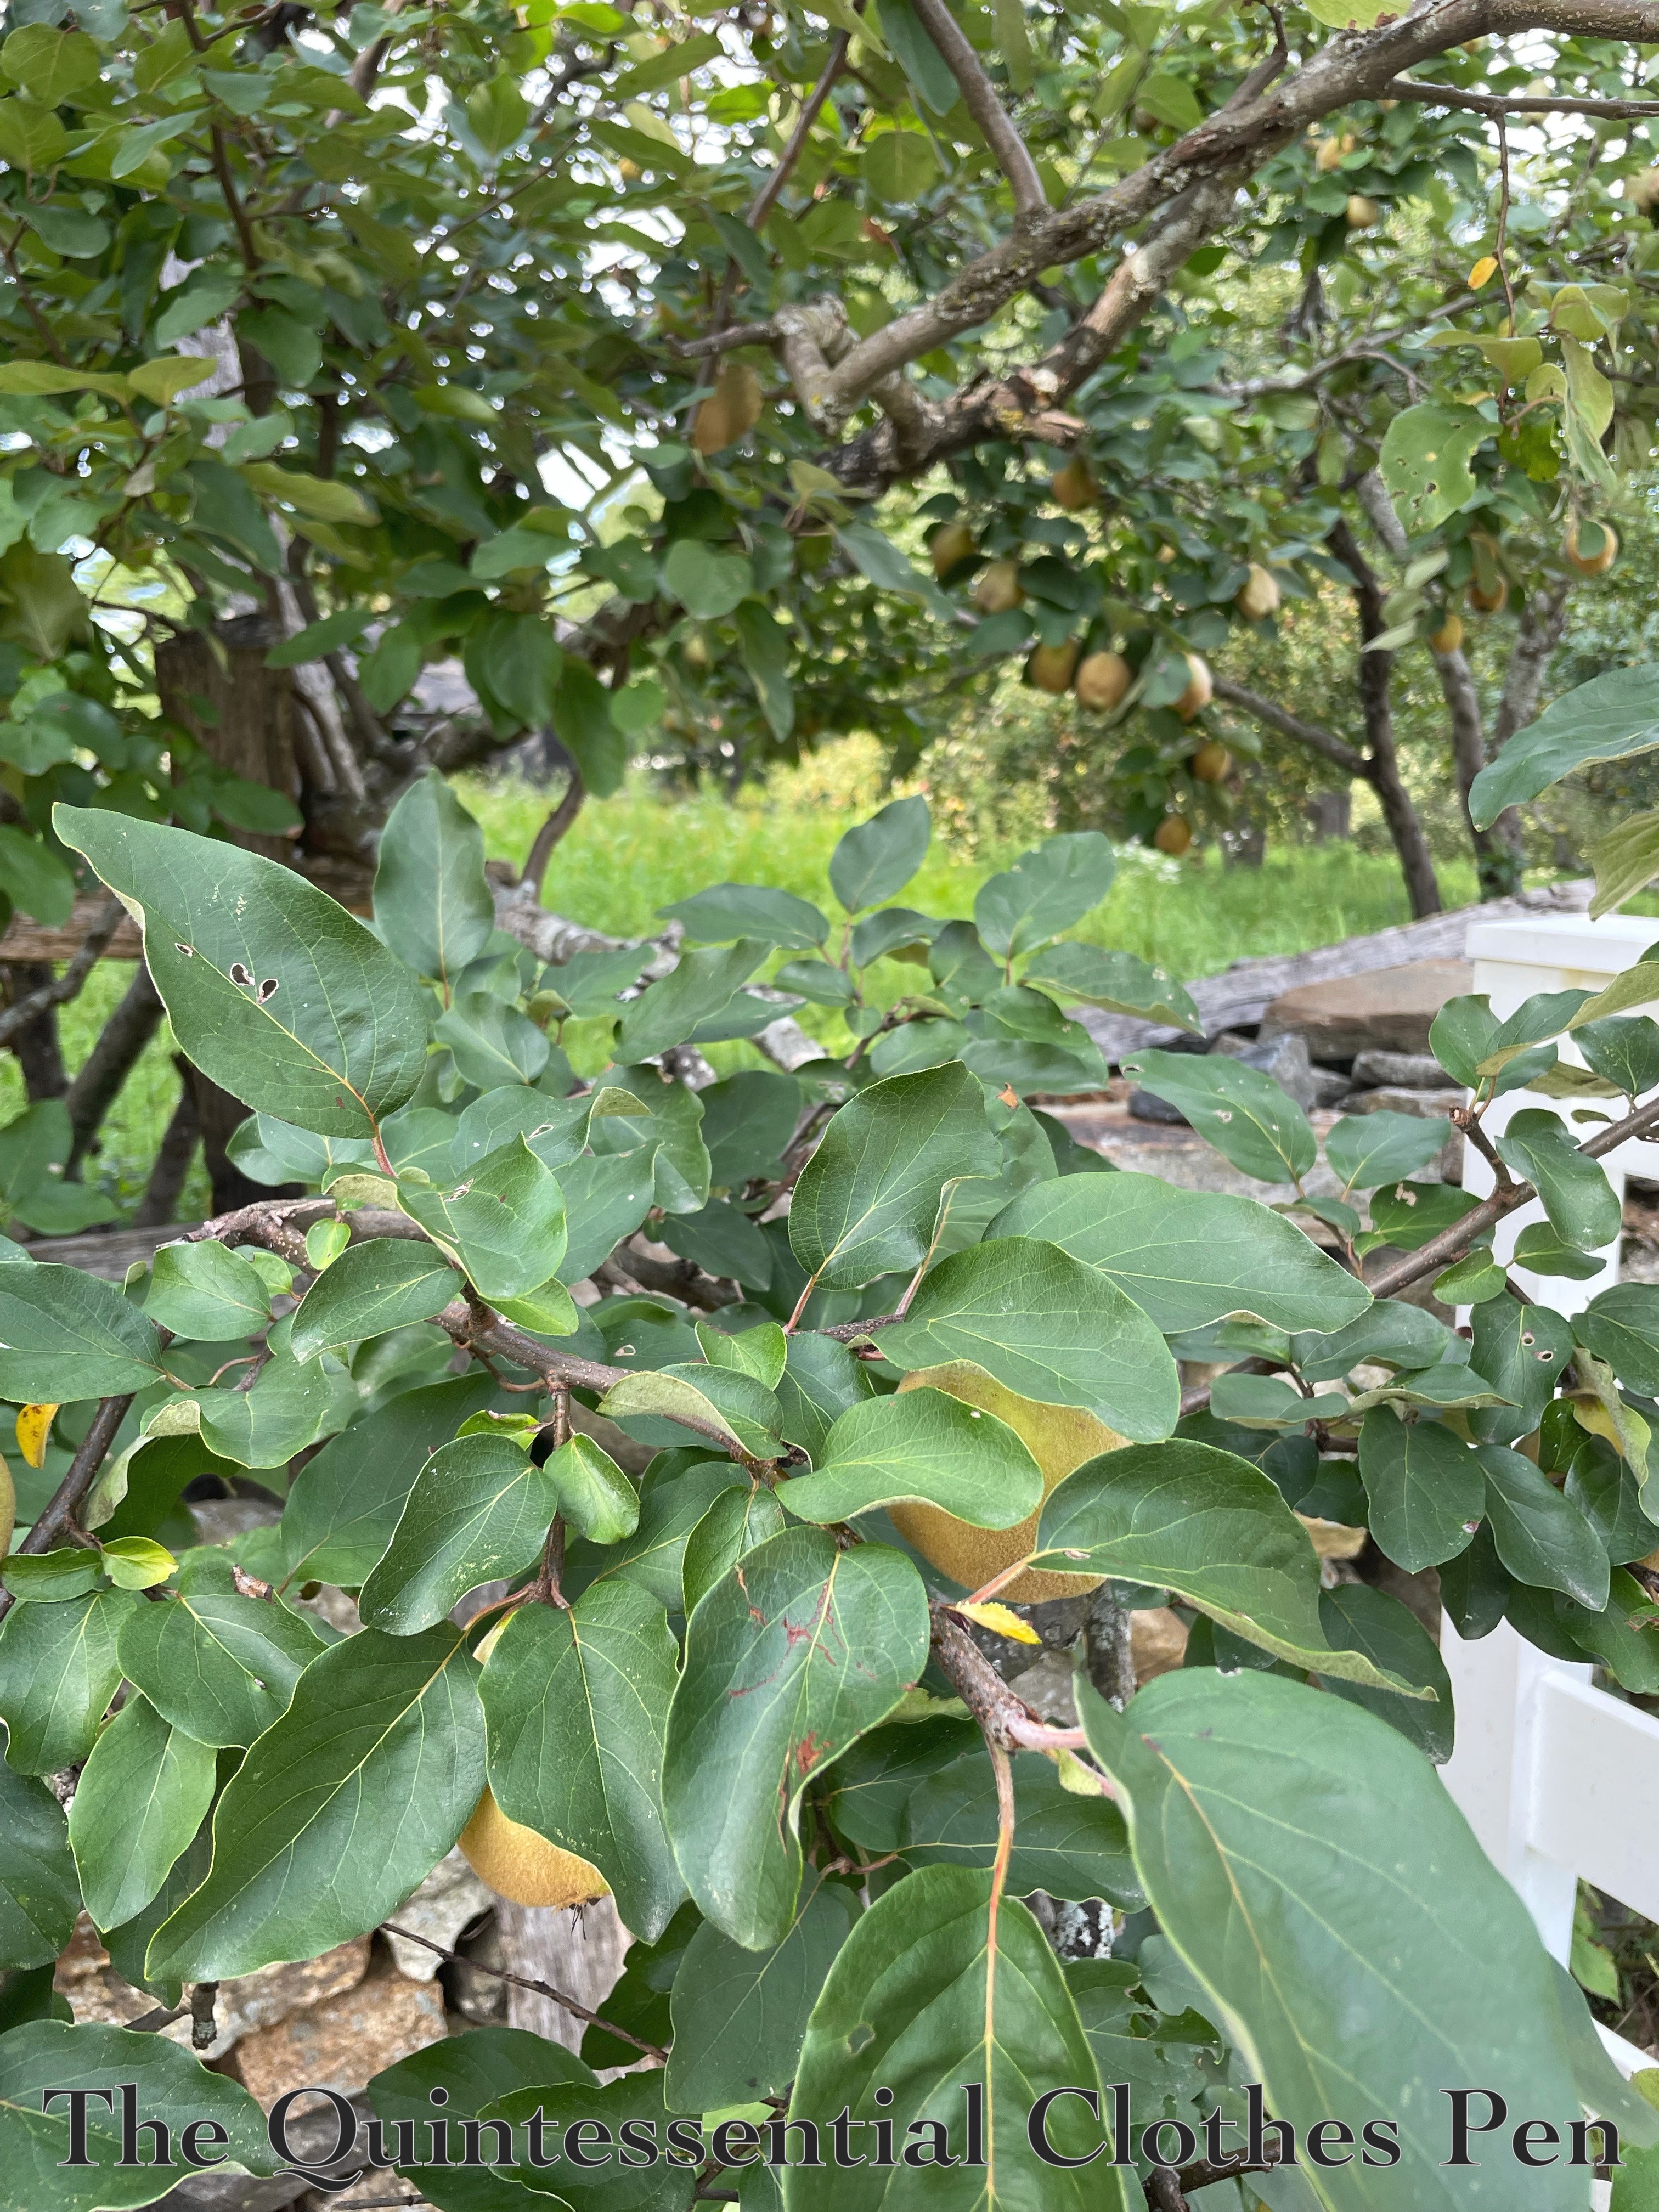
Here’s a bonus photo of the dress with a quince tree. I’ve heard of quinces but never encountered them before.
They sort of look like pears!
I’m very pleased with this cross front bodice and the sleeves that go with them. I appreciate their minute detail even though they were definitely the most time consuming part of this bodice!
The third challenge for the Historical Sew Monthly 2021 is ‘small is beautiful’. Little things can make a big difference to the finished look.Make something small but perfect. My entry for this challenge is an 1830s chemisette to fill in the neckline of my 1838 bodice (the sister of the 1834 dress I posted details about last year).
Pattern: Adapted from Janet Arnold’s Patterns of Fashion 1, with adjustments for fit and style.
Year: 1836.
Notions: 1 ½ yds ¼” white cotton twill tape, 1 metal hook, 1 cameo button and thread.
How historically accurate is it?: 90%. The pattern, construction methods, and fabric are all quite good. It is entirely hand sewn. The most modern element is the plastic cameo button.
Hours to complete: 19 ¾.
First worn: August 2021.
Total cost: Approximately $5 for the fabric/shipping (though it is leftover from another project), $1 for the twill tape, and $1 for the button = approximately $7.
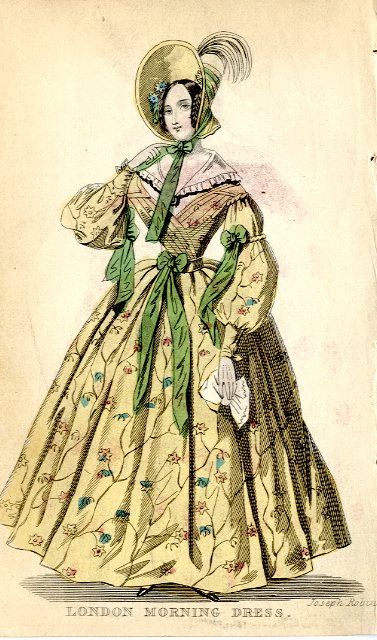
The chemisette pattern shape was based on this fashion plate from 1836.
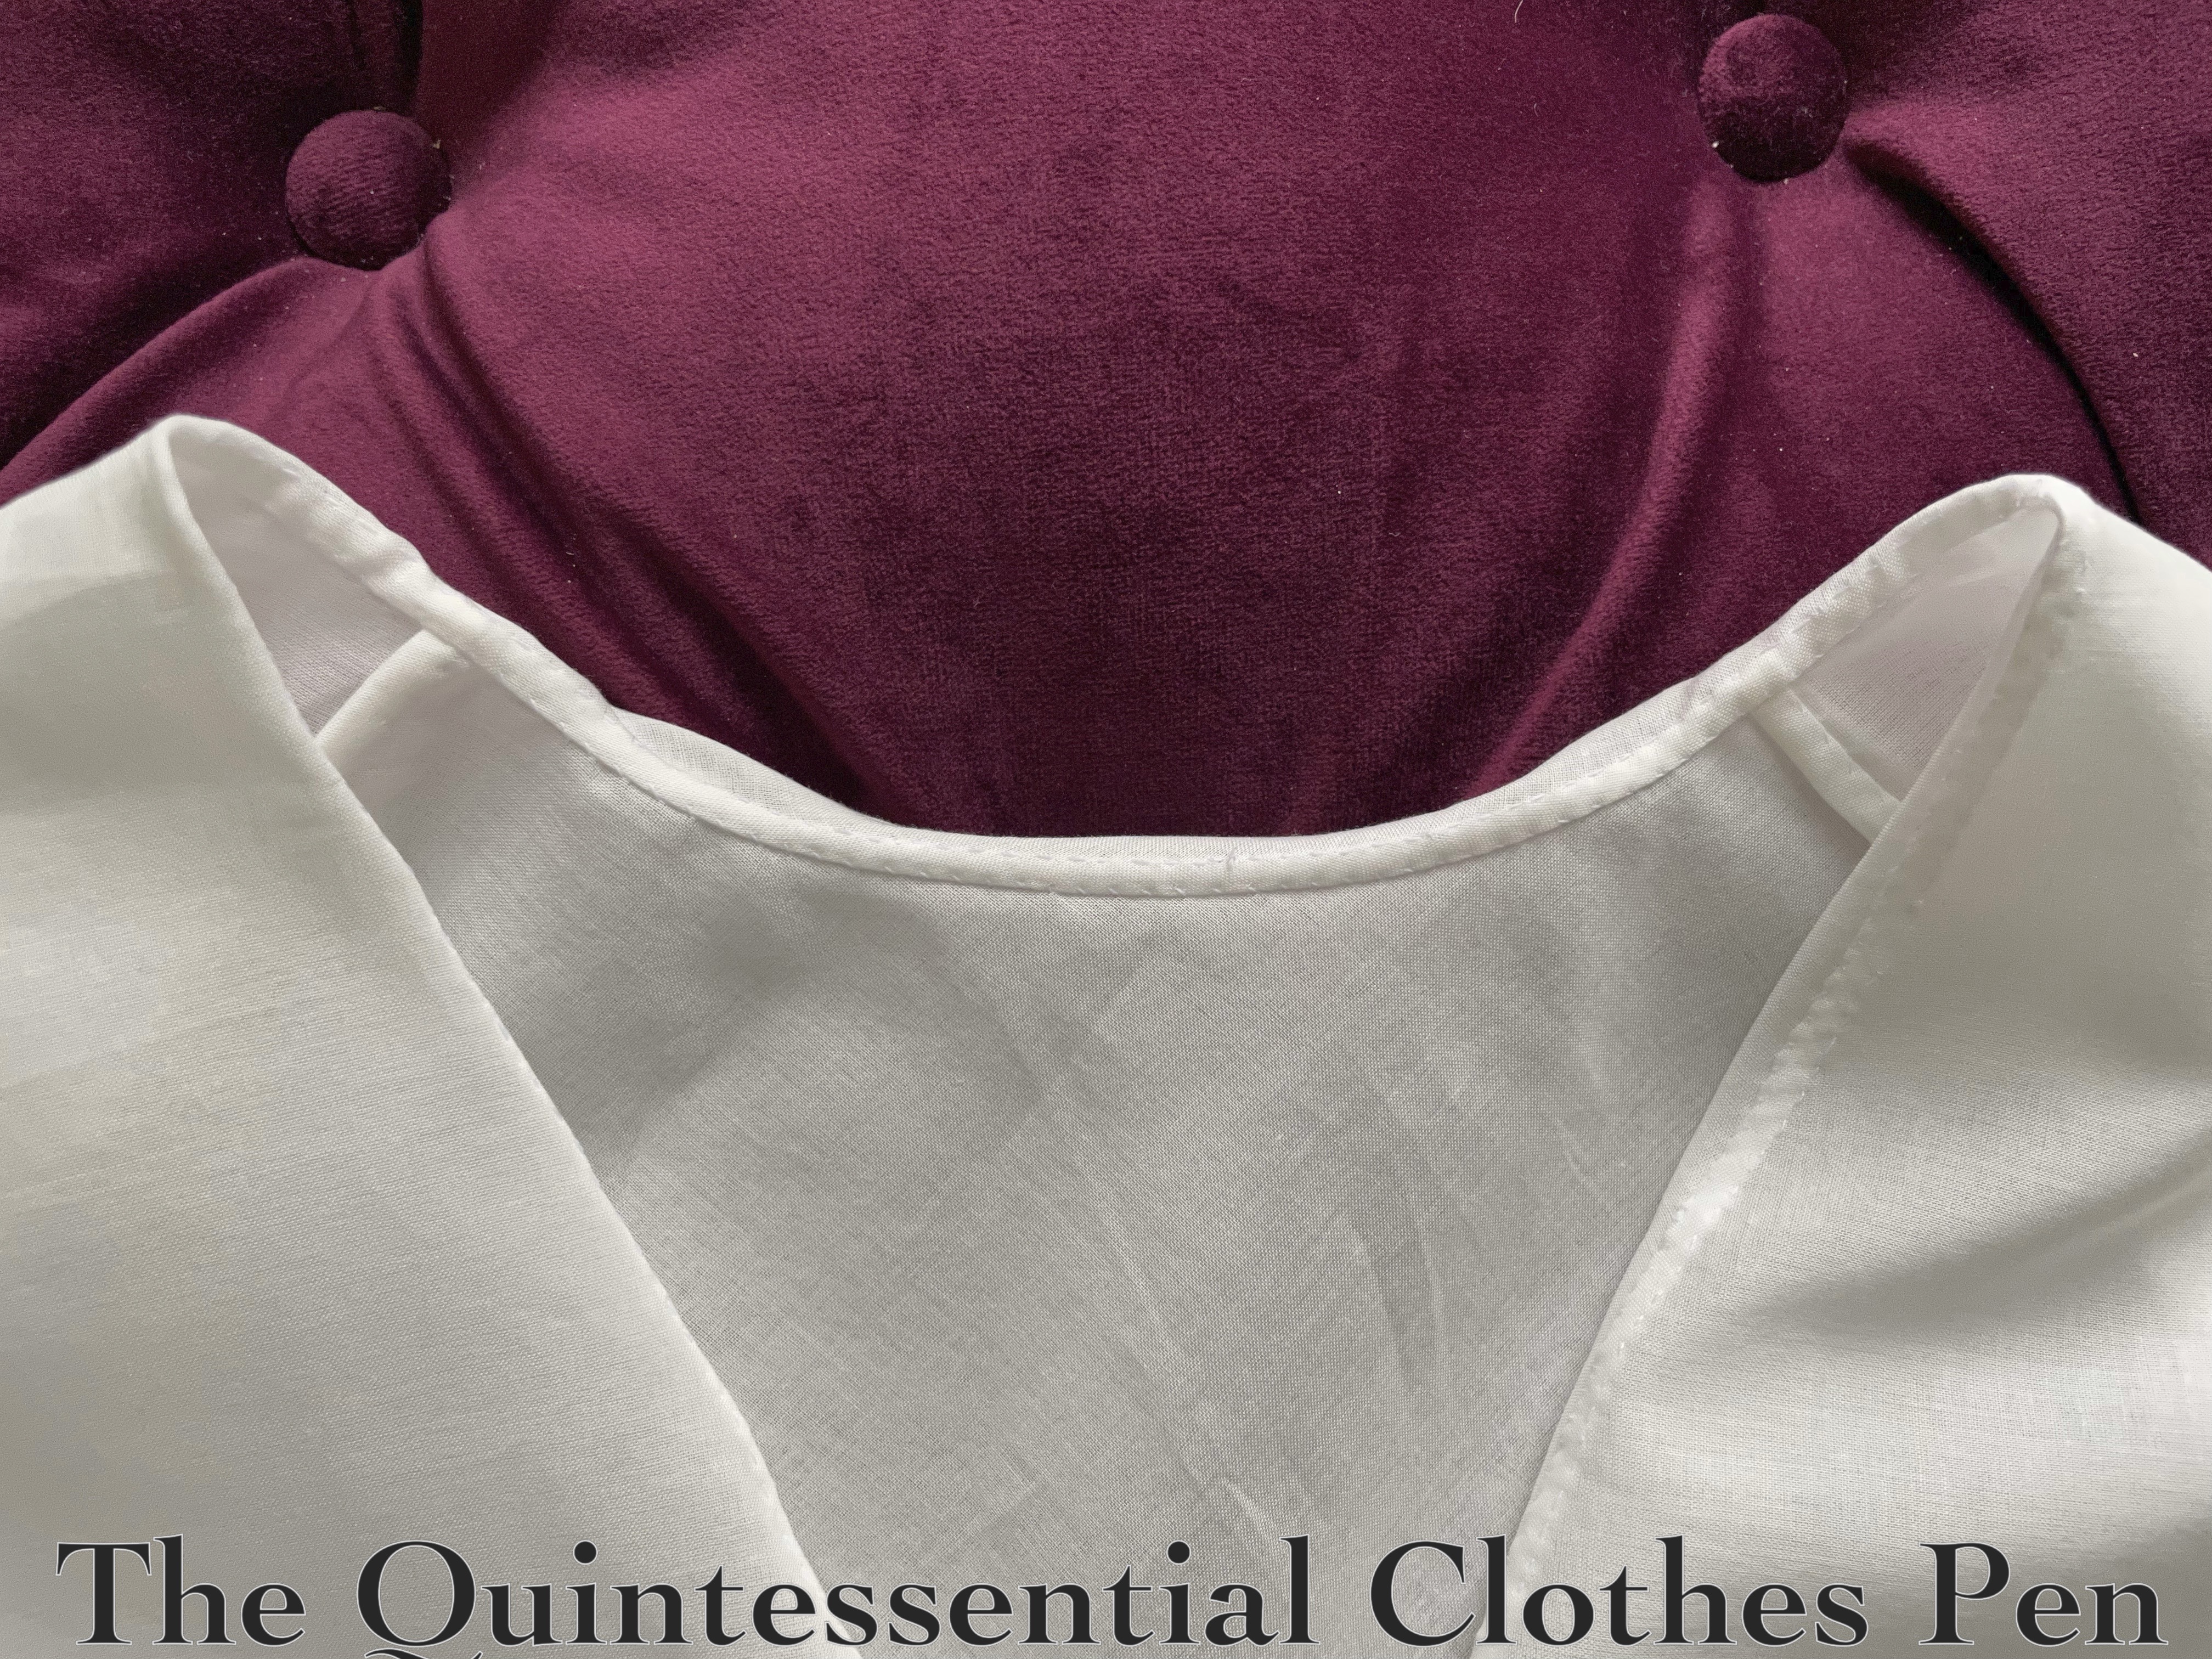
Without a body in it, the chemisette looks like this. It is entirely hand sewn, with small rolled hems and drawstring channels on the bottom edges.
The shoulder seams are sewn with French seams to encase the raw edges. The collar is attached with a flat felled seam for the same reason.
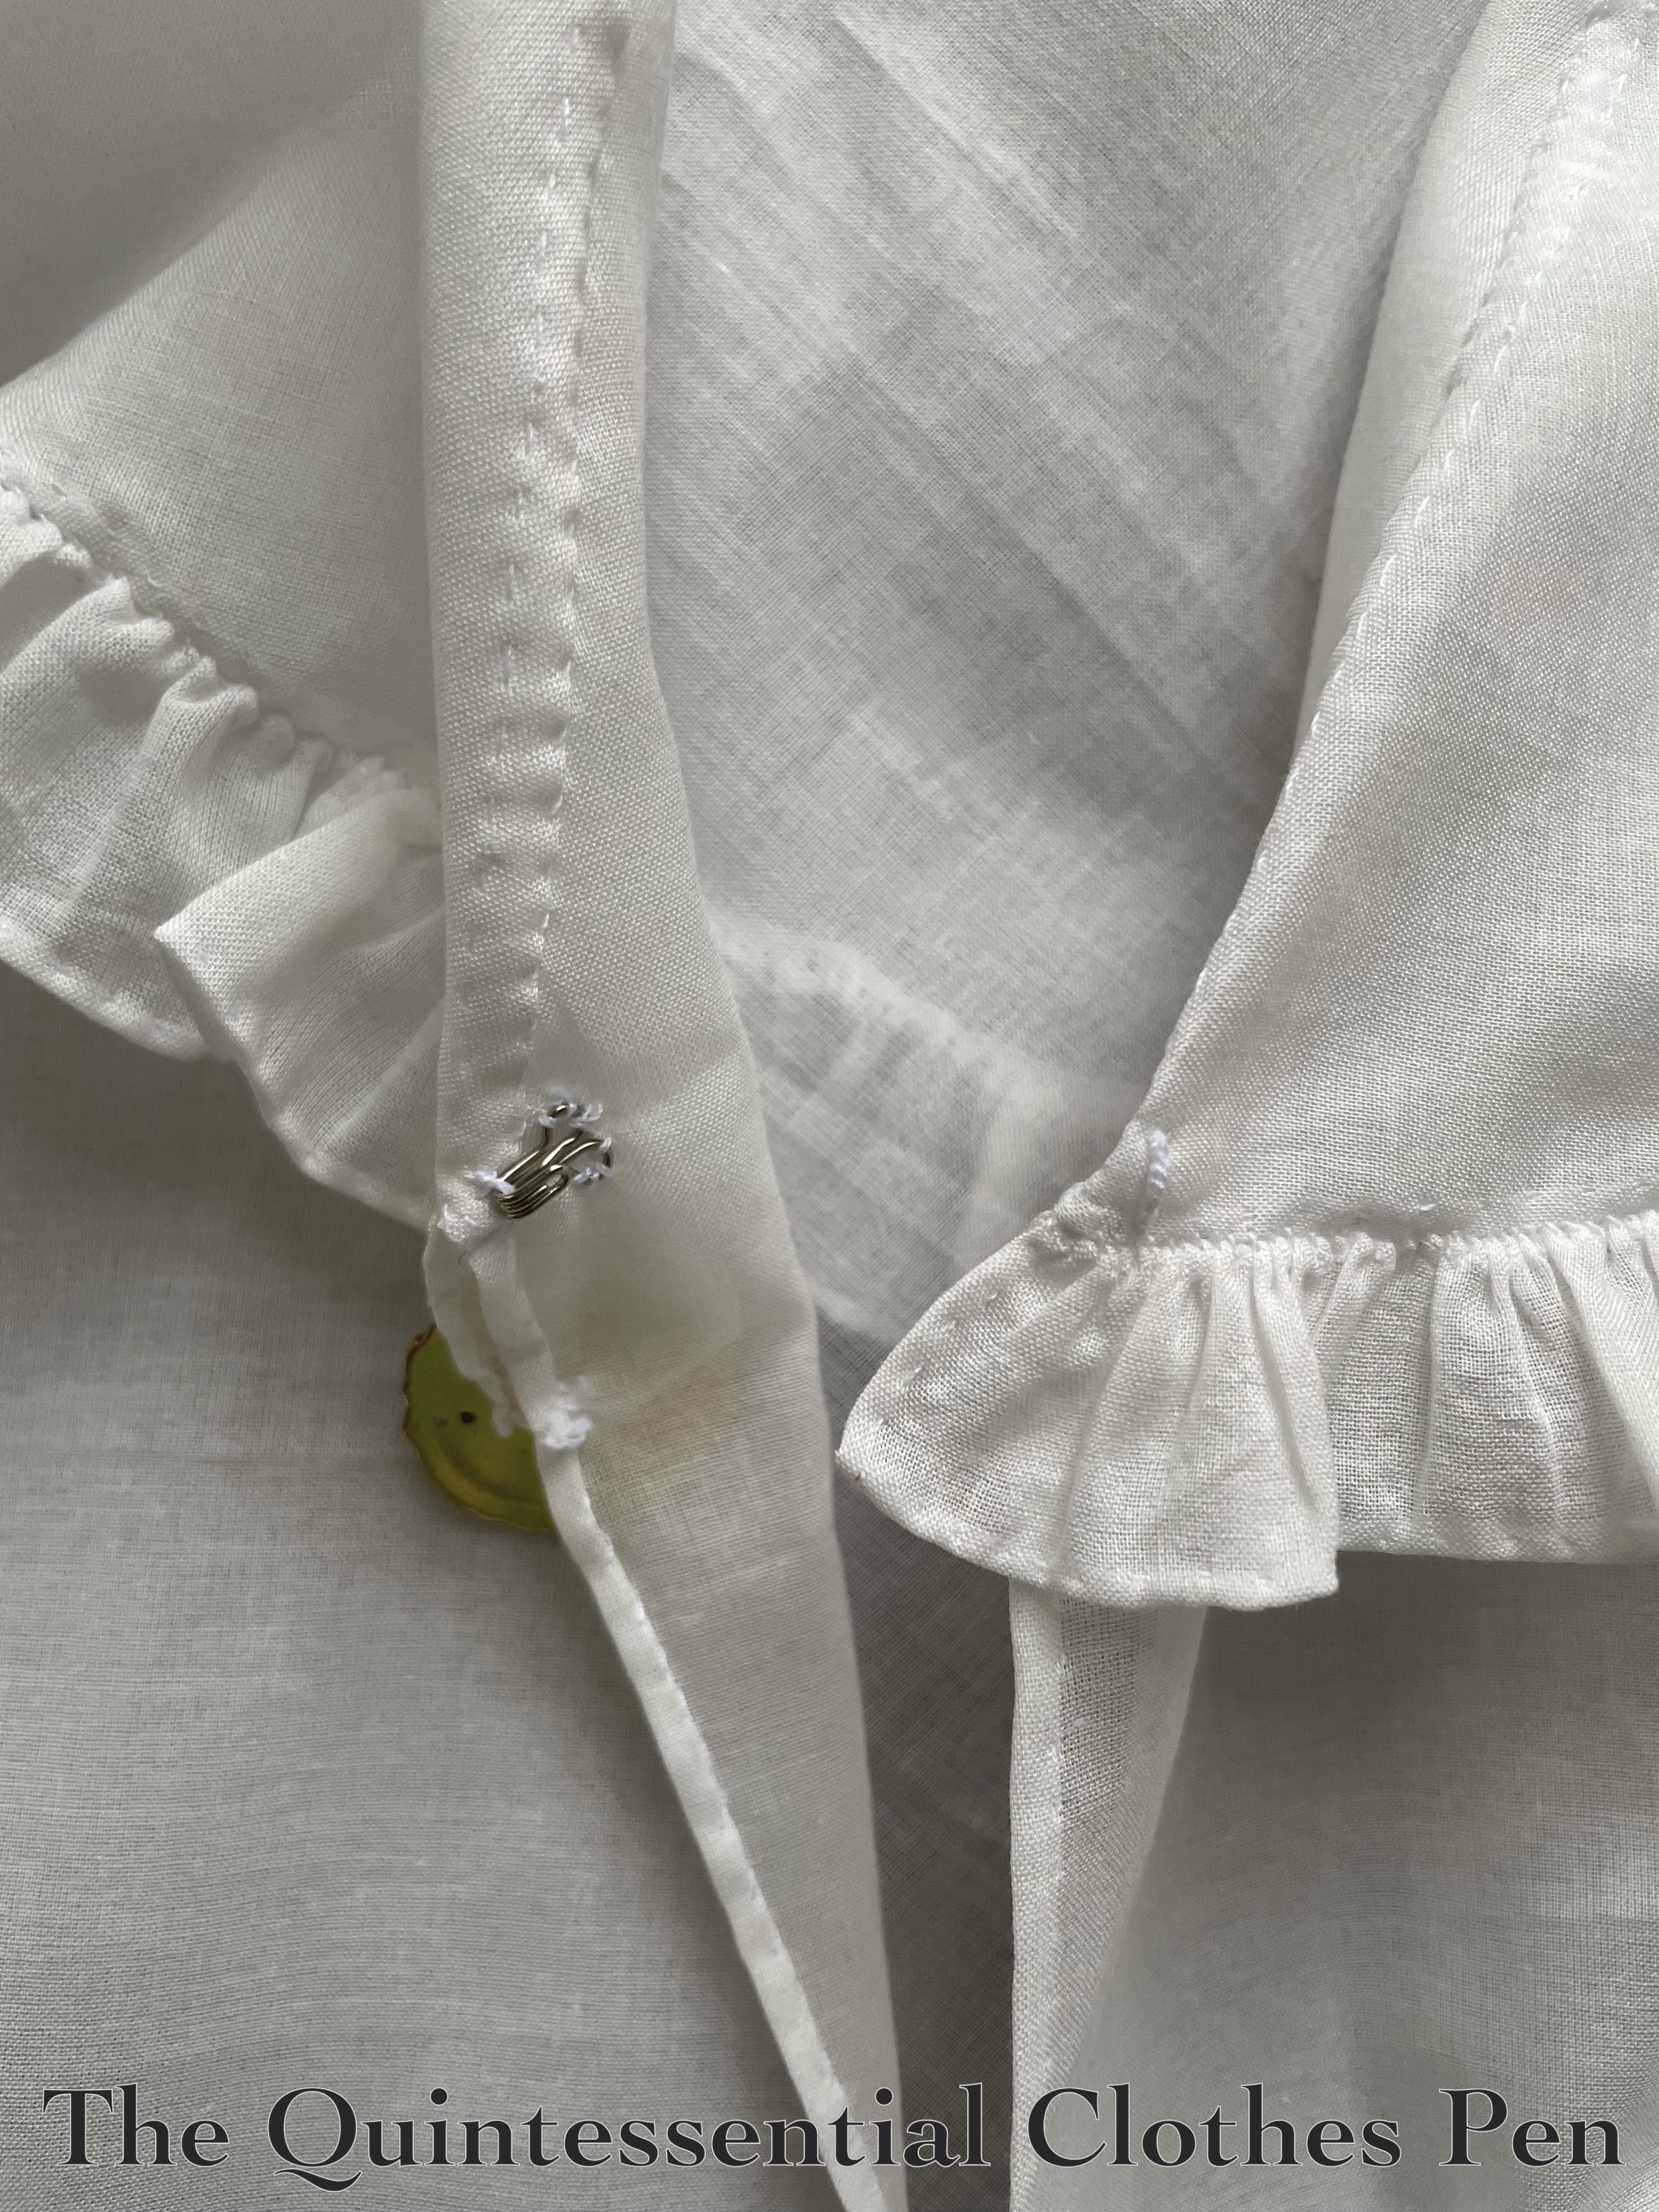
The gathered ruffle on the edge is hemmed on all sides with a tiny rolled hem and then whip gathered to the hemmed collar edge. I haven’t tried whip gathers before and this seemed like it would be a fun project to try them out.
On the underside of the ruffle the whip stitches are more visible.
The inspiration fashion plate doesn’t show the back of the chemisette, so I had to decide on what I wanted. After looking at extant collars and chemisettes, I settled on a rounded point that extends just under halfway down the back.
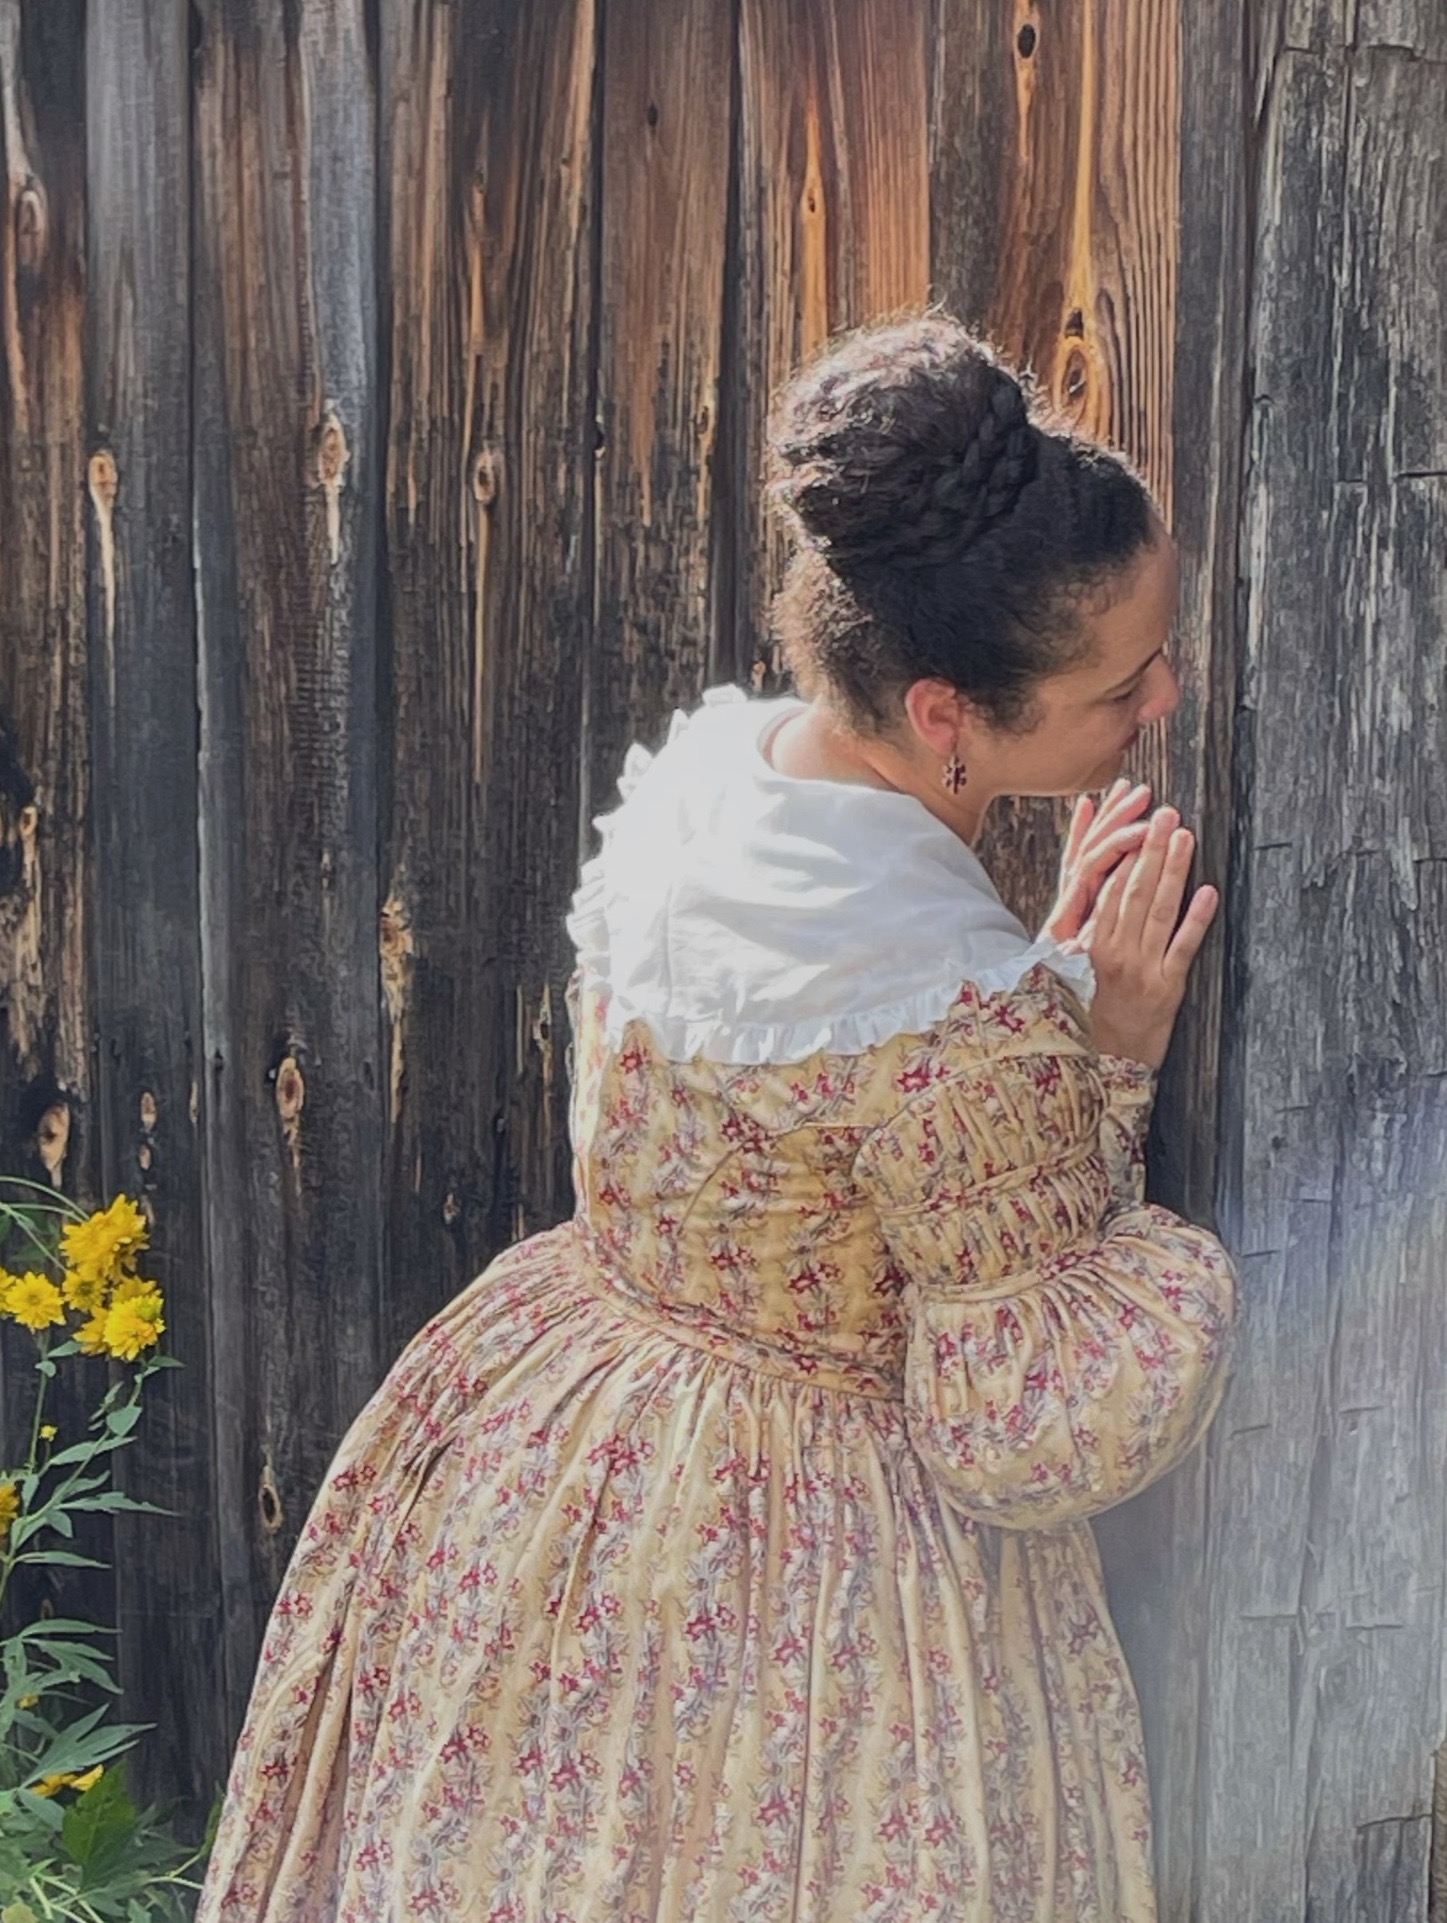
On a body, it looks like this.
The final touch is a hook and thread loop to close the collar, with the decorative cameo button on top. The plastic is obviously not correct for the 1830s, but it does have the benefit of being lightweight! I was worried that if I used a metal brooch (not that I have one, but if I did…) it would pull the collar down or out.
And that’s it! There was no rushing with this project. I took my time and enjoyed the hours of tiny hems and whip stitching.
My 1830s apple picking adventure last fall was followed by a ramble through the woods for exercise and to get more photos. I shared a bunch of the photos in the construction posts for my 1834 dress (here and here), but even after that there were still a bunch of lovely photos I wanted to share. At that point, I decided to take a break and post about other topics since I’d posted a few blog posts in a row about 1830s things and so the photos from the woods have been patiently waiting to have their moment to shine. Today is the day! I bring you an 1830s armchair ramble through the woods!
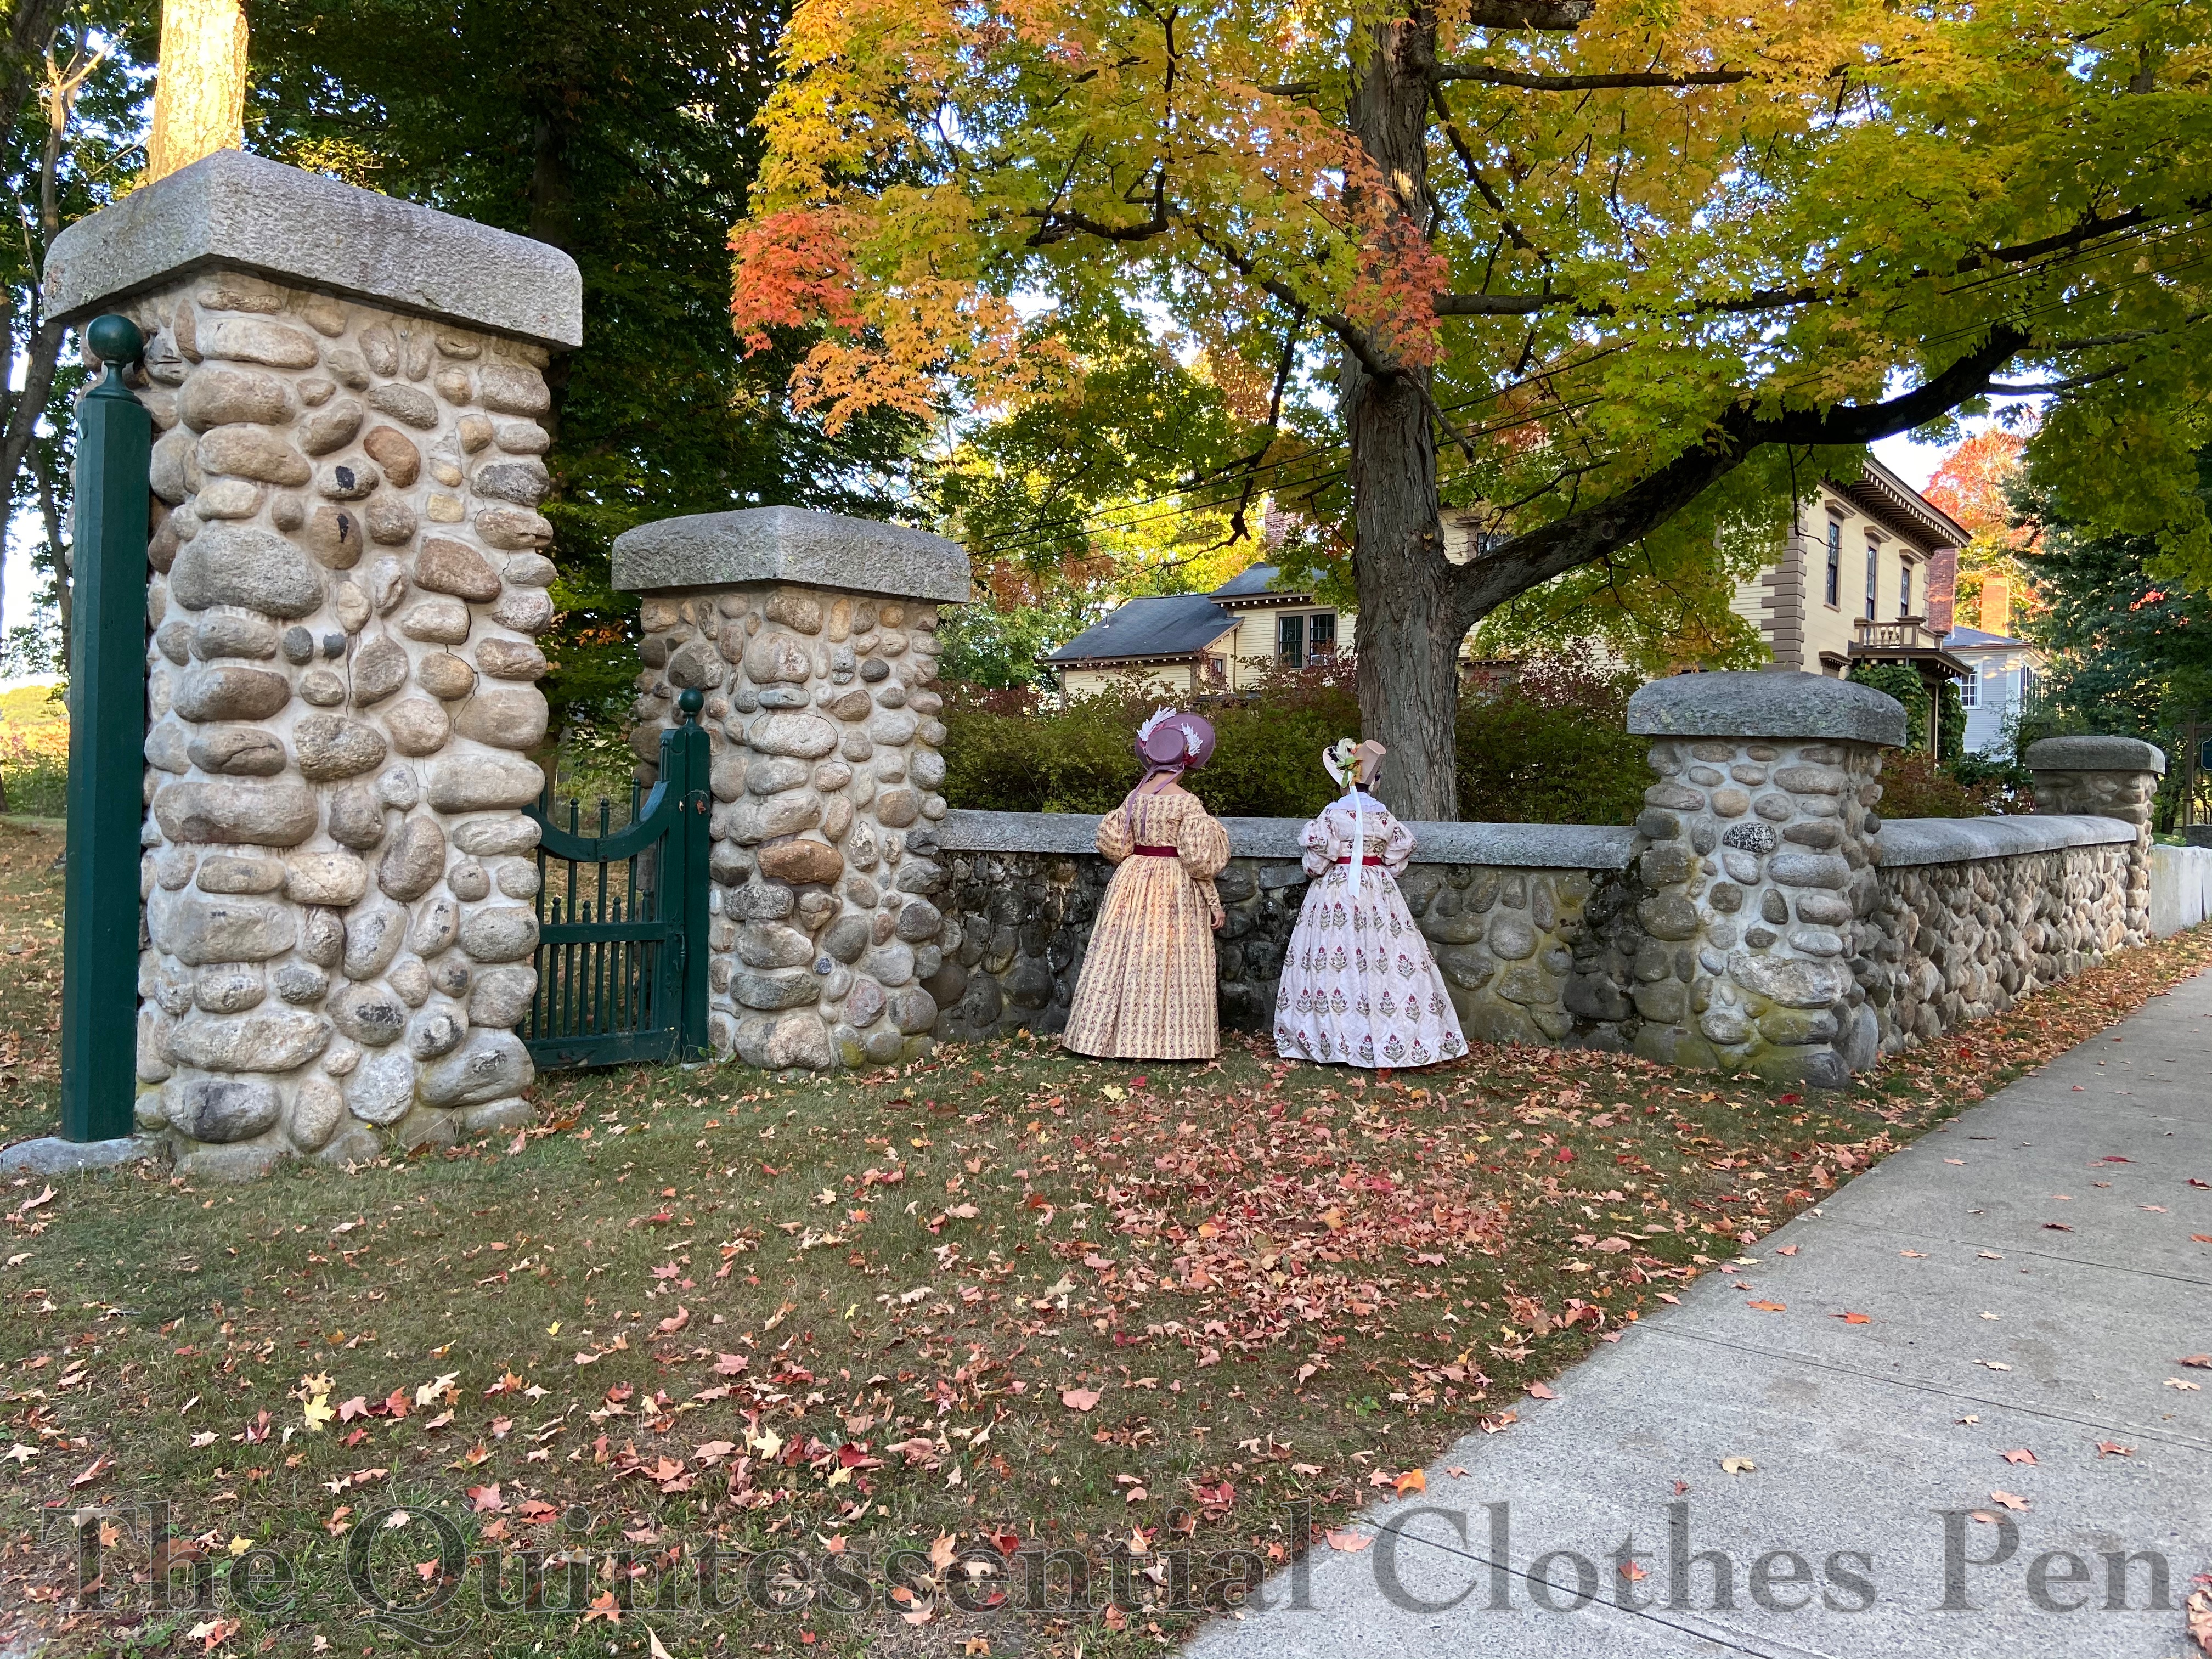
On our way to the wooded area, we stopped to take advantage of this stone wall and gate.
The main gate to the wooded area is similar, though with bricks instead of stones and with animal sculptures to delight visitors. My usual photographer friend (who blogs at Plaid Petticoats) enjoyed taking a few photos with her Petzval camera lens, which creates the swirled background in the next two photos (you can read more about the Petzval lens in this Plaid Petticoats blog post).
Just past the main entrance to the wooded area is a little bridge spanning a lovely bit of water. It looks like a pond, but I think it might actually be connected to the nearby river.
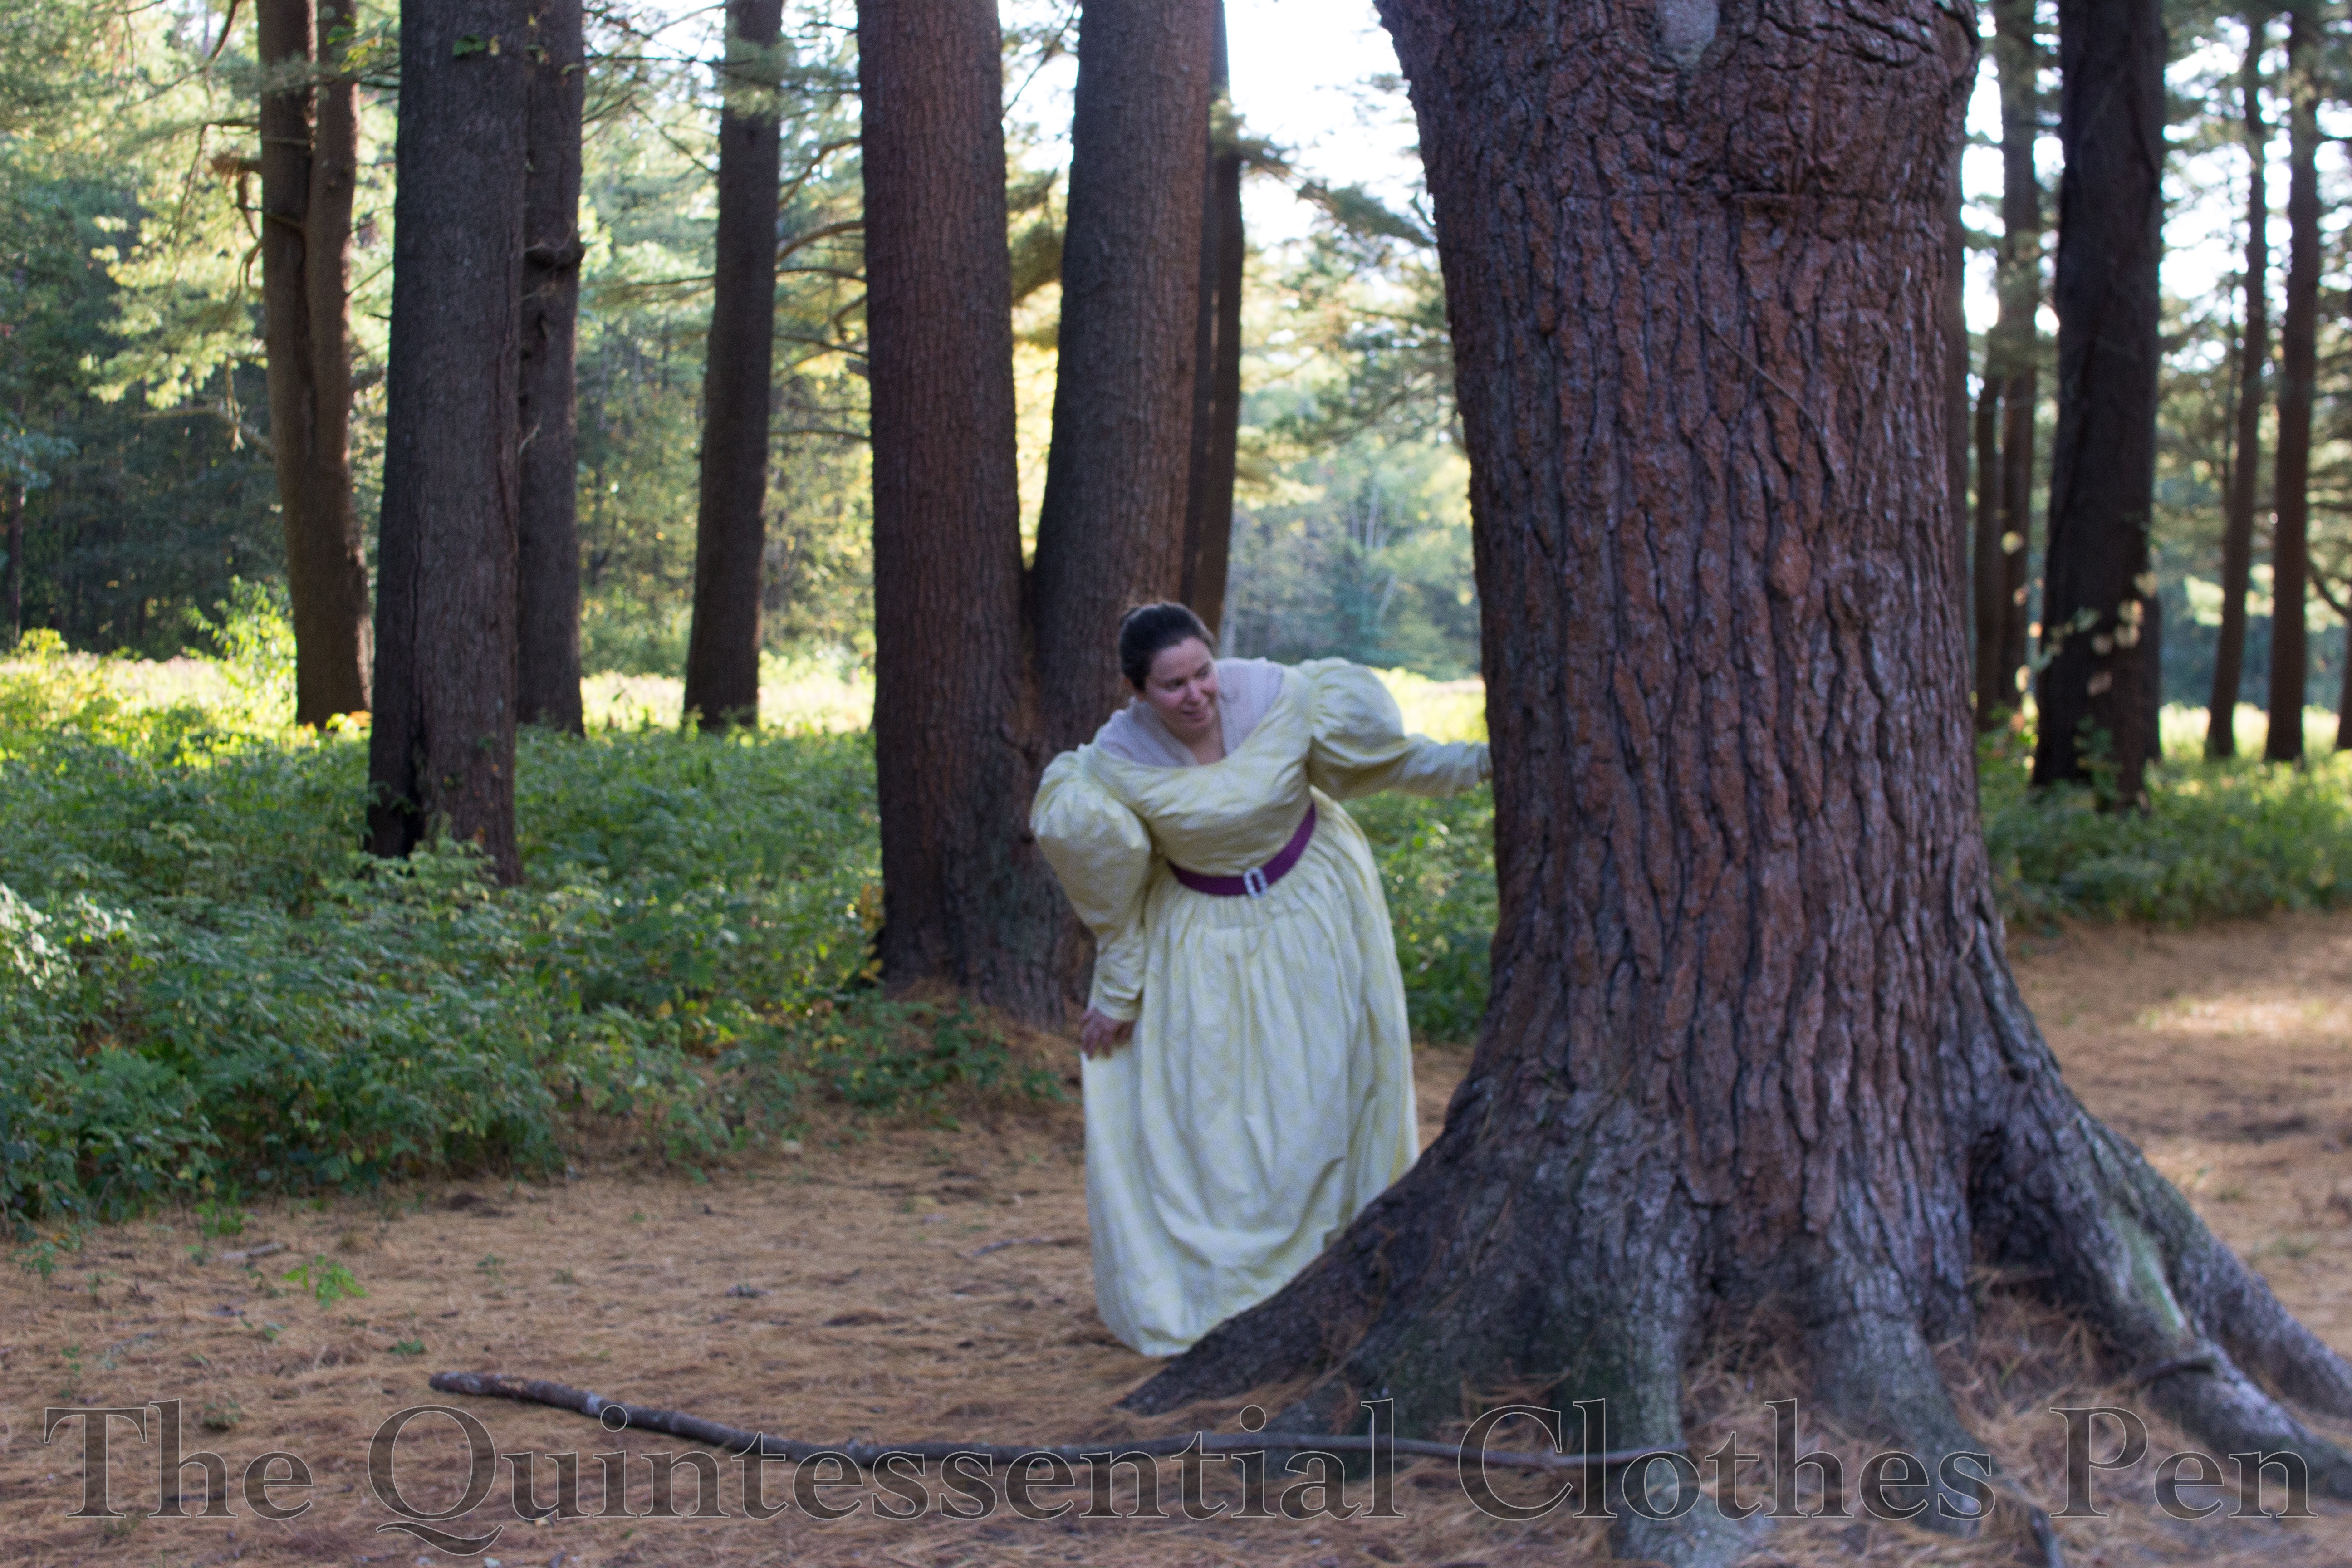
Around the bend is one of my favorite vistas, a grand line of pine trees bordered on one side by a small meadow. It’s a magnificent and playful place to stop for photos.
Continuing towards the river is a path along one side of the meadow. Thankfully, the grass on the path is maintained and easy to walk through.
This group photo uses the Petzval lens to make a glorious twinkling arch of greenery out of the dwindling afternoon sunlight.
Along the way to the river are small bits of interest. Enterprising greenery in unique shapes and more watchful animal statues.
Near the river we stopped for more photos. The drooping trees made dramatic backgrounds for us.
I love the next photo. It captures the reflection of the golden leaves in a way that almost looks like a painting, in juxtaposition with the oak leaves and branches on the far side.
Thanks for joining me on this autumnal walk through the woods. I find outings like this are wonderful moments for reflection and appreciating the natural beauty of the seasons.
I find great joy in the pursuit of researching and making historical clothing. Here on the blog, I post most often about the garments I make for myself, but I rarely post about commissions to make custom historical garments for private individuals, museums, historical institutions, etc. Today’s post is different from the usual in that I’m going to share a commission project with you!
This commission came about through the kindness of Myrthe, who blogs at Atelier Nostalgia. (And how fitting, that we were just communicating about how wonderful it is to connect with people who love historical clothes from around the world!) The commission was from the Massachusetts Chapter of the National Society of the Colonial Dames of America (NSCDA-MA).
The NSCDA-MA owns the beautiful William Hickling Prescott House in Boston, which was built in 1808 and upgraded throughout the 19th century. The NSCDA-MA website (linked above) shares many more details about the various owners of the house and its architecture. In addition to the house itself, the NSCDA-MA also holds a wonderful collection of historical clothing, some items of which have been used for display purposes throughout the house (though most of the garments are in storage and only available for research visits by appointment). Unfortunately, historical garments are often not suited to permanent display as they can be made of delicate fabrics that can be damaged by light, dust, and gravity, just to name a few possible problems. The NSCDA-MA was looking for custom made historical dresses to display instead of the extant historic garments and I was very excited to work with them to make that goal a reality!
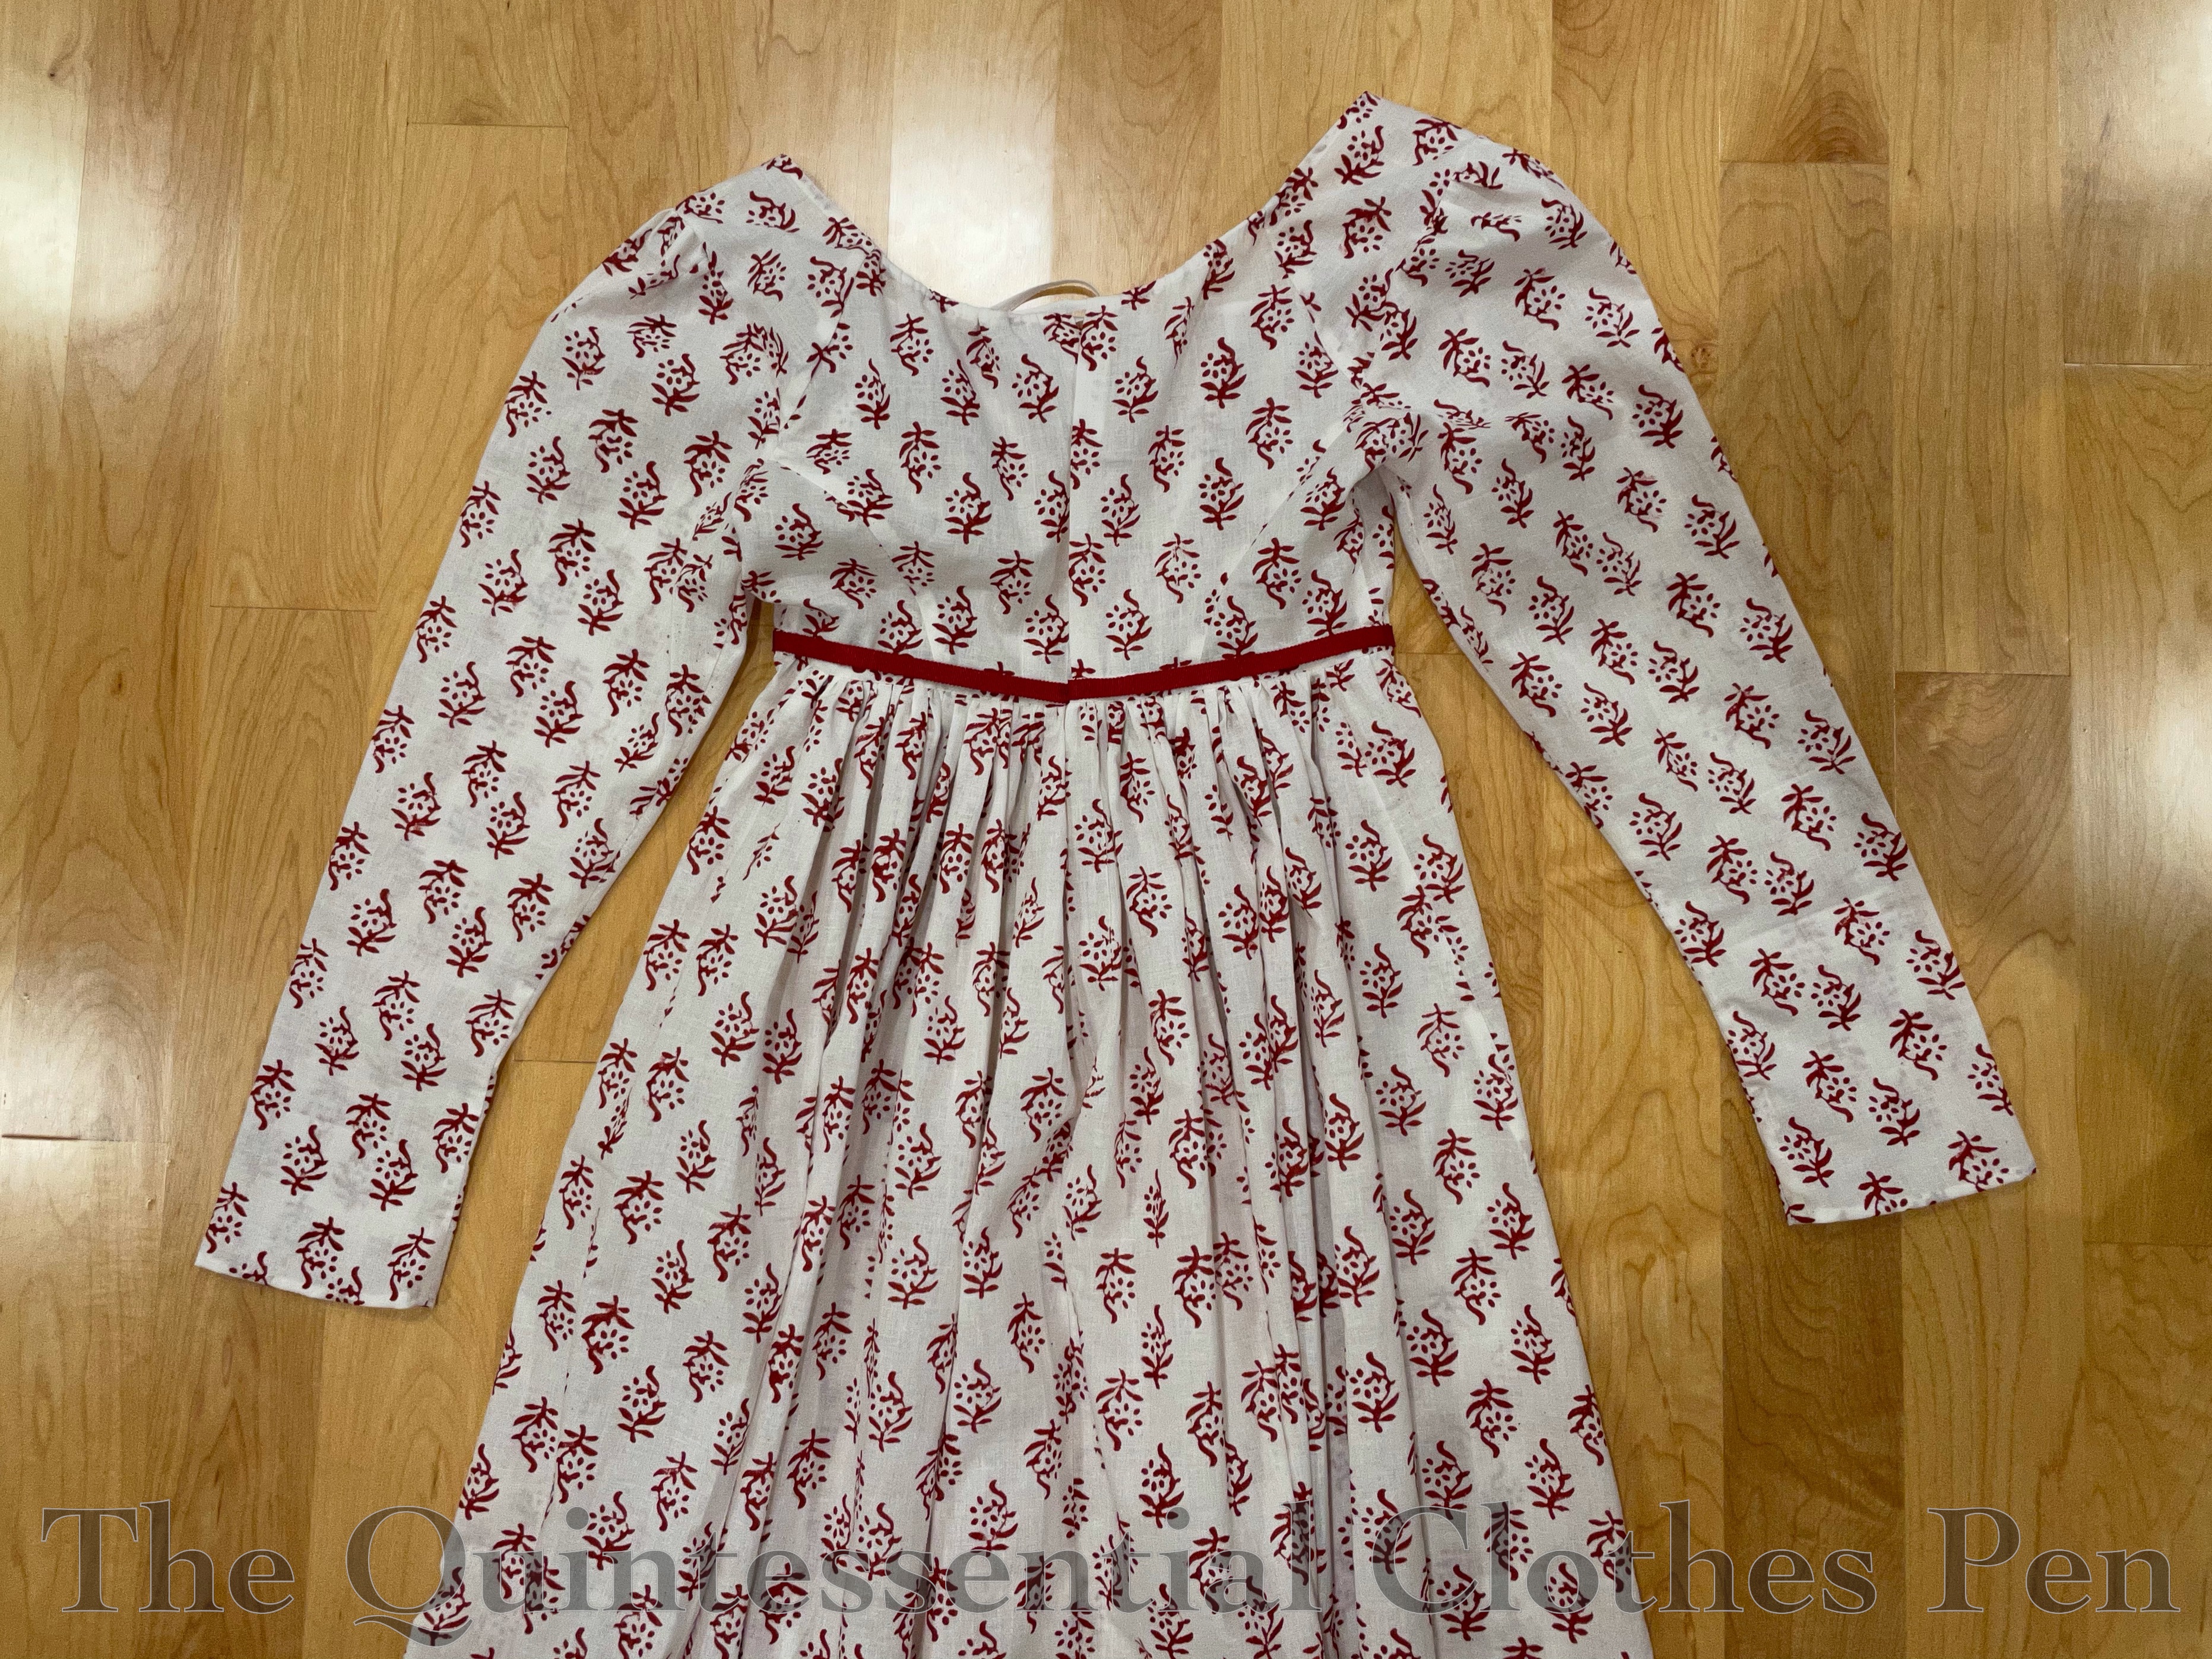
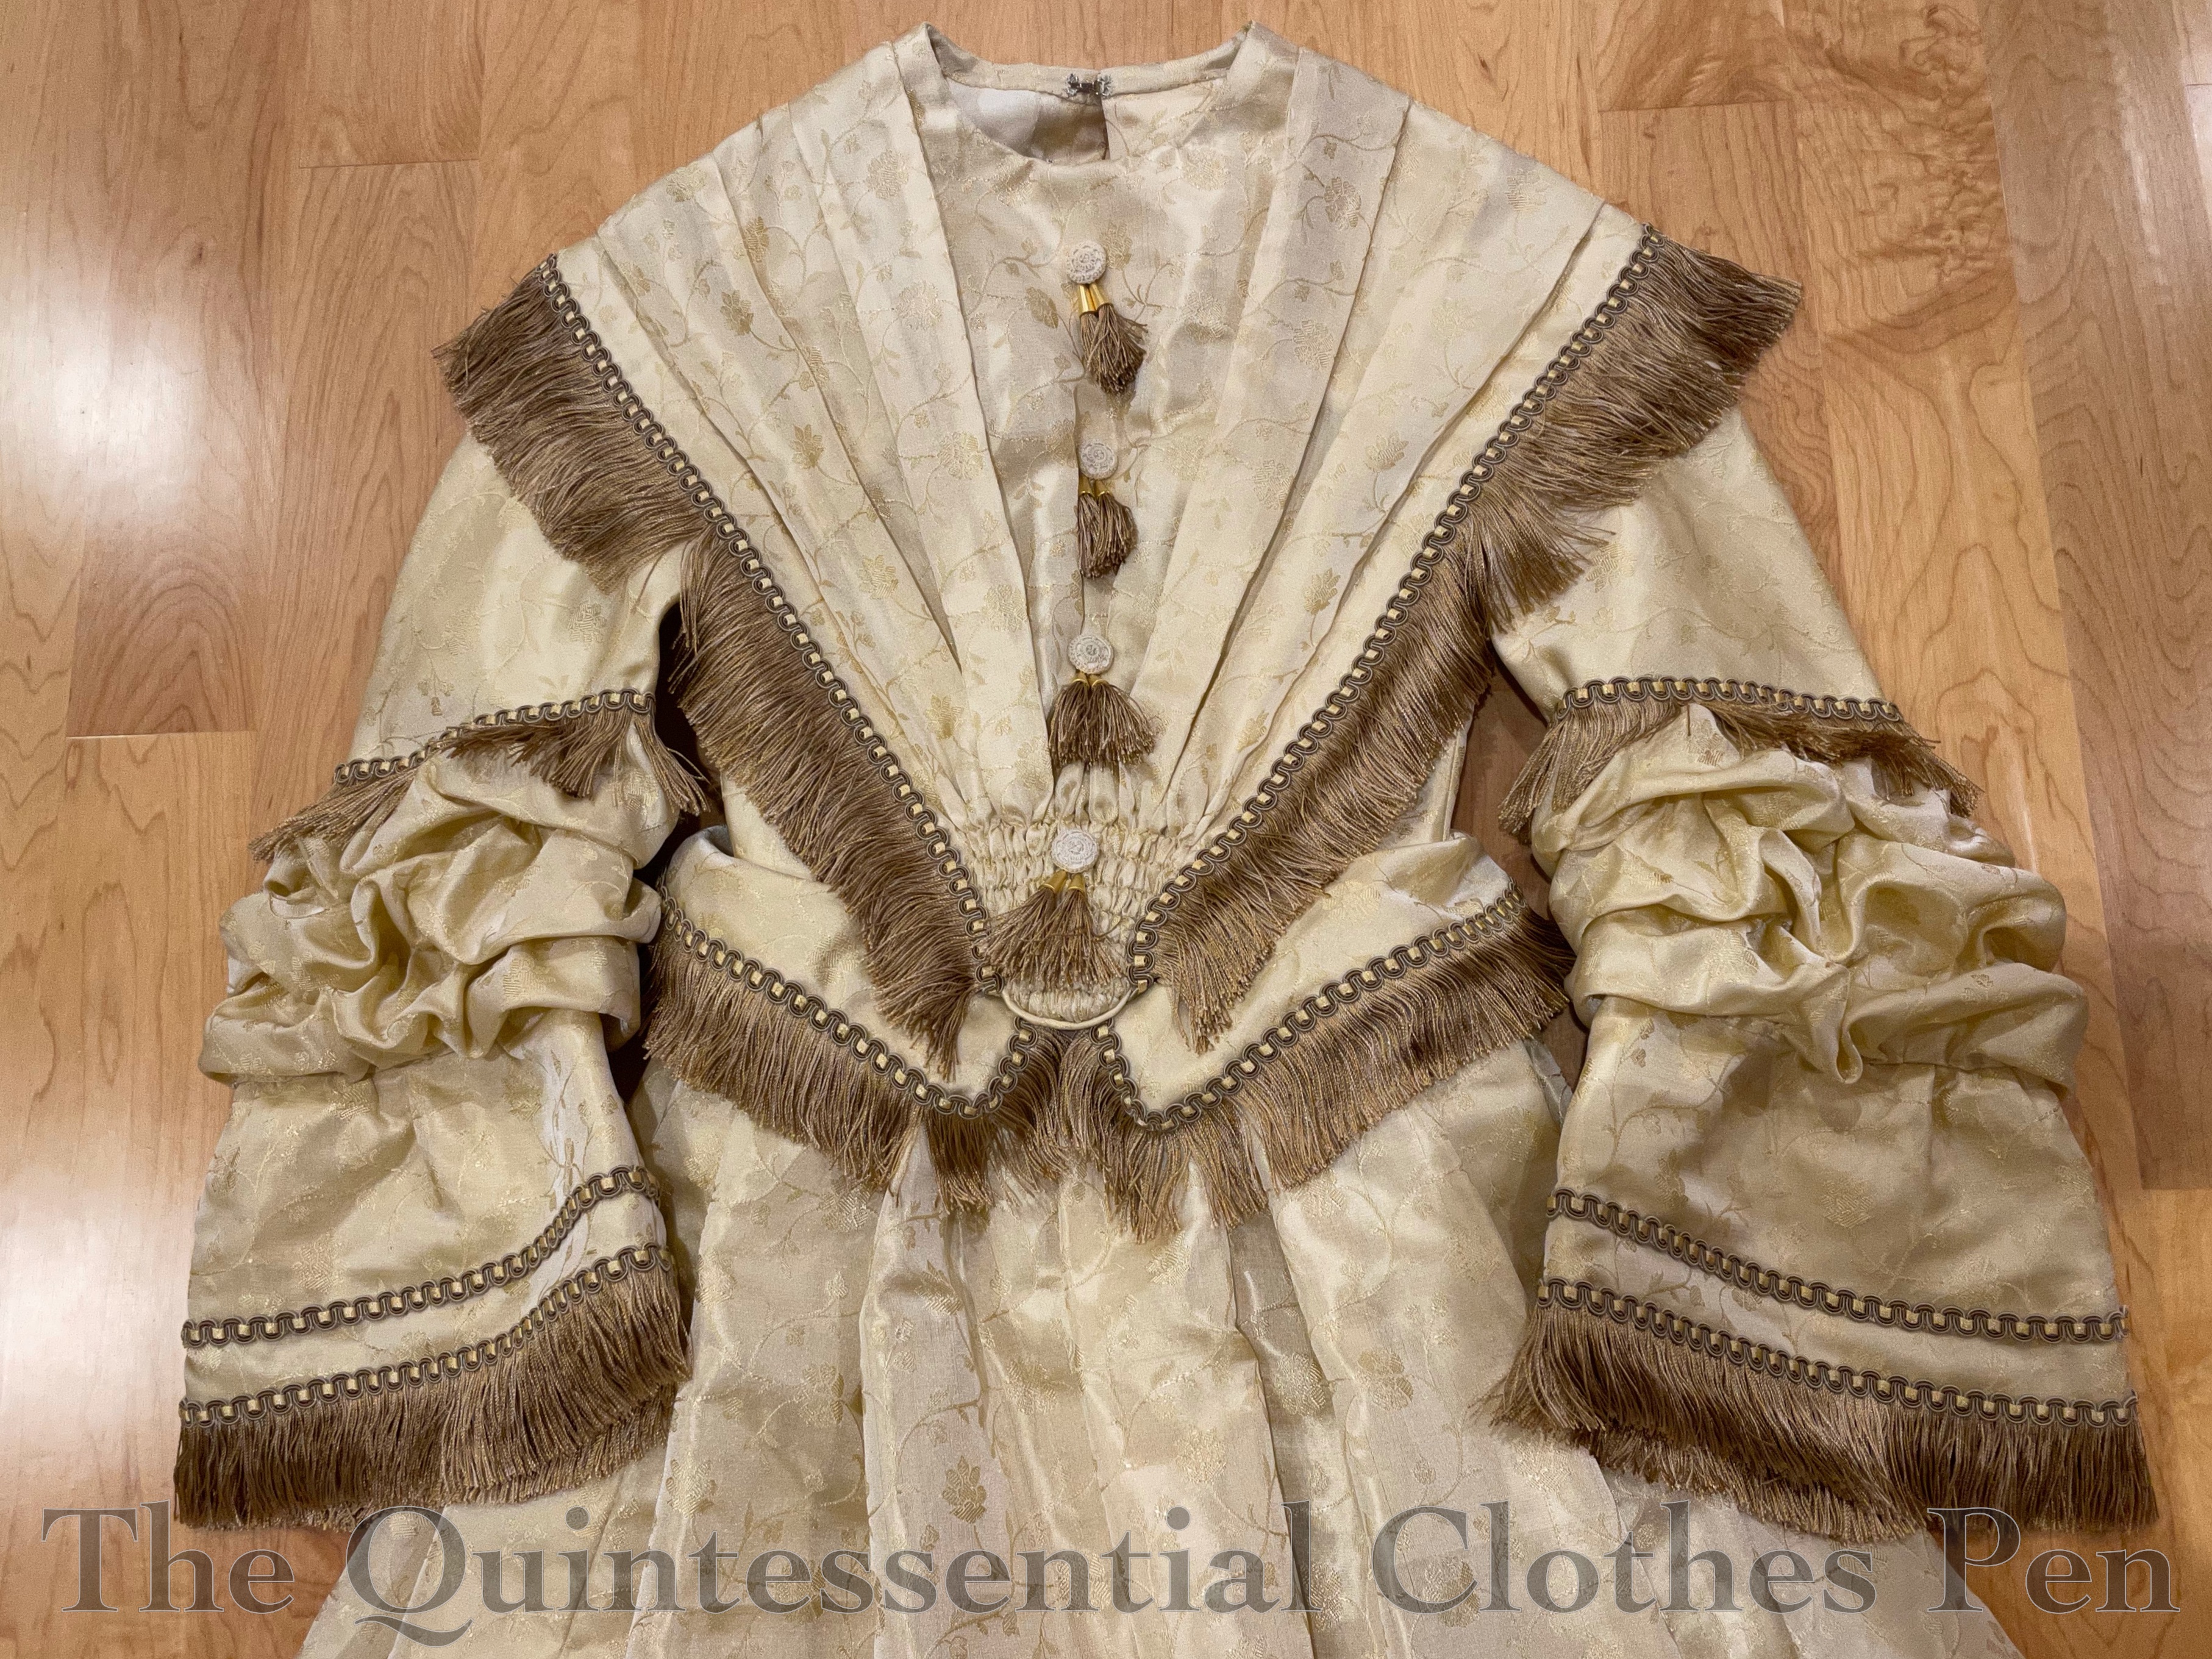
The commission involved two dresses: one from about 1810 and one from about 1845. The two dresses haven’t been mounted yet and aren’t available to visit due to ongoing closures, but I hope to eventually go see them in one of the glorious rooms of the house. For now we’ll have to make do with flat photos that were taken for my own archival purposes.
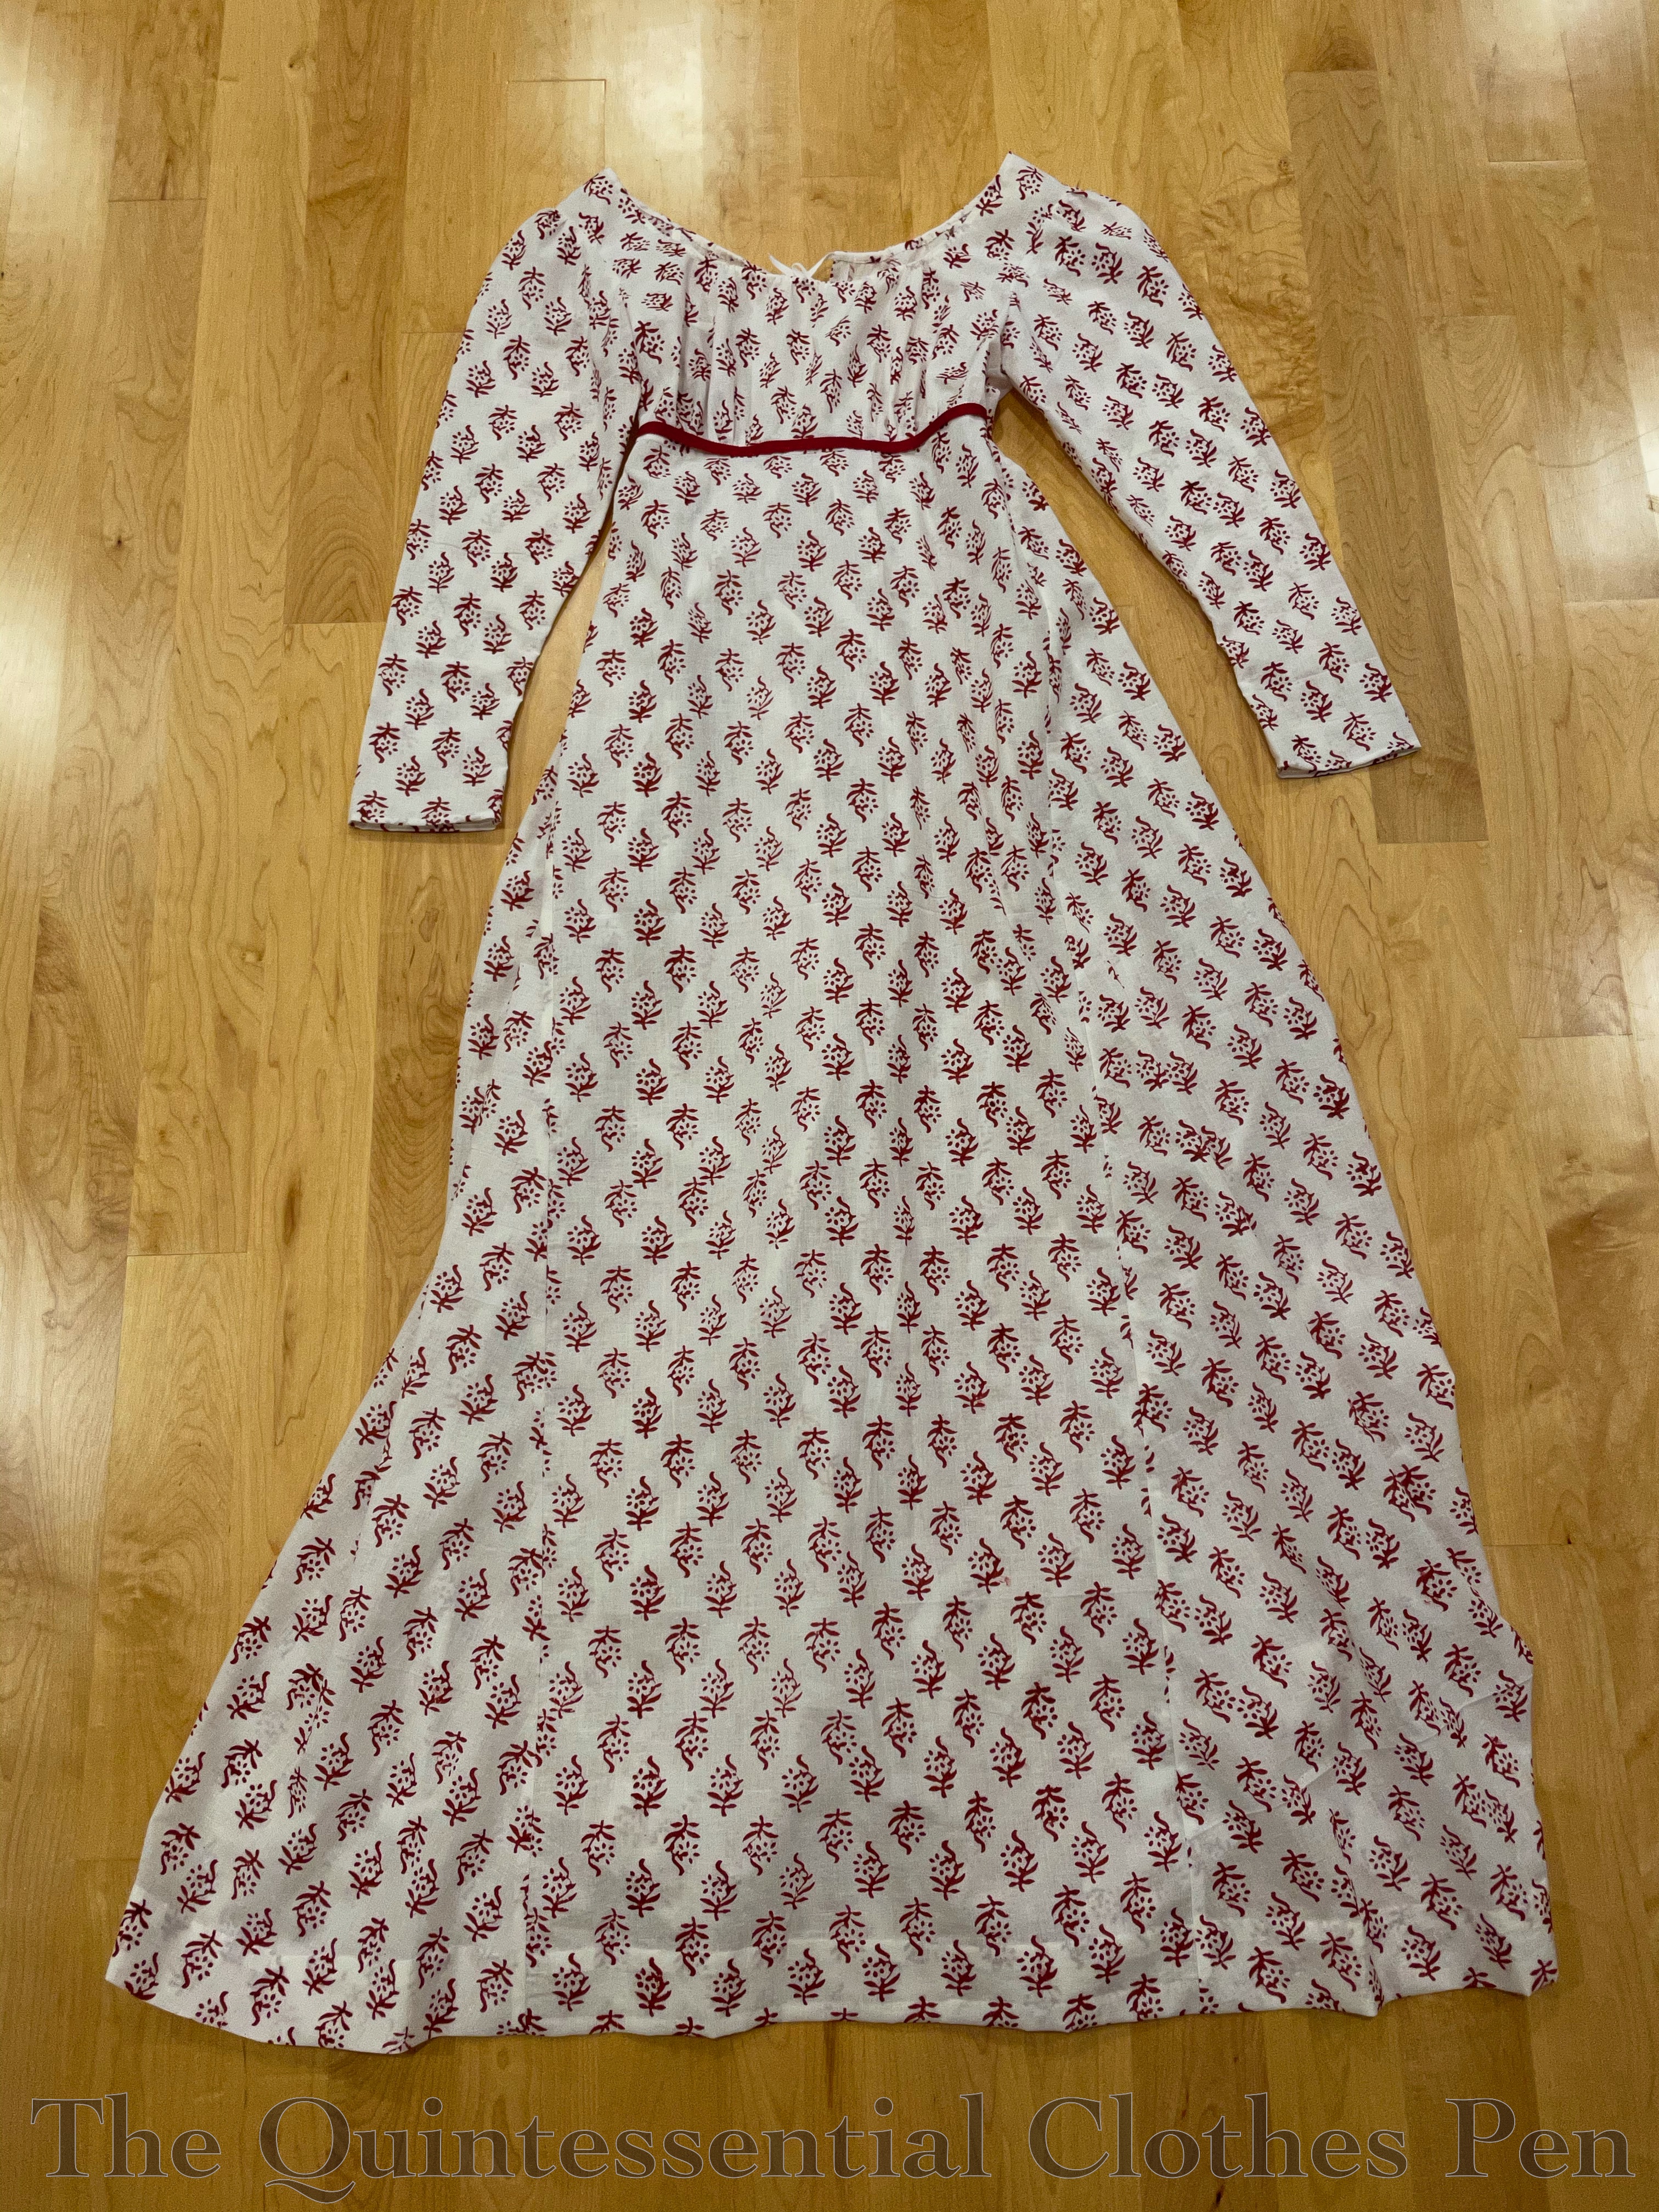
The c. 1810 dress was inspired by a few different dresses, including this c. 1810 cotton dress held by The Metropolitan Museum of Art. The goal was to merge the inspiration dresses into one dress with a repeated pattern on cotton, an adjustable drawstring neck, and long sleeves. In order to support the silhouette and provide opacity I also made a bodiced petticoat to go with the dress. Below are front and back views.
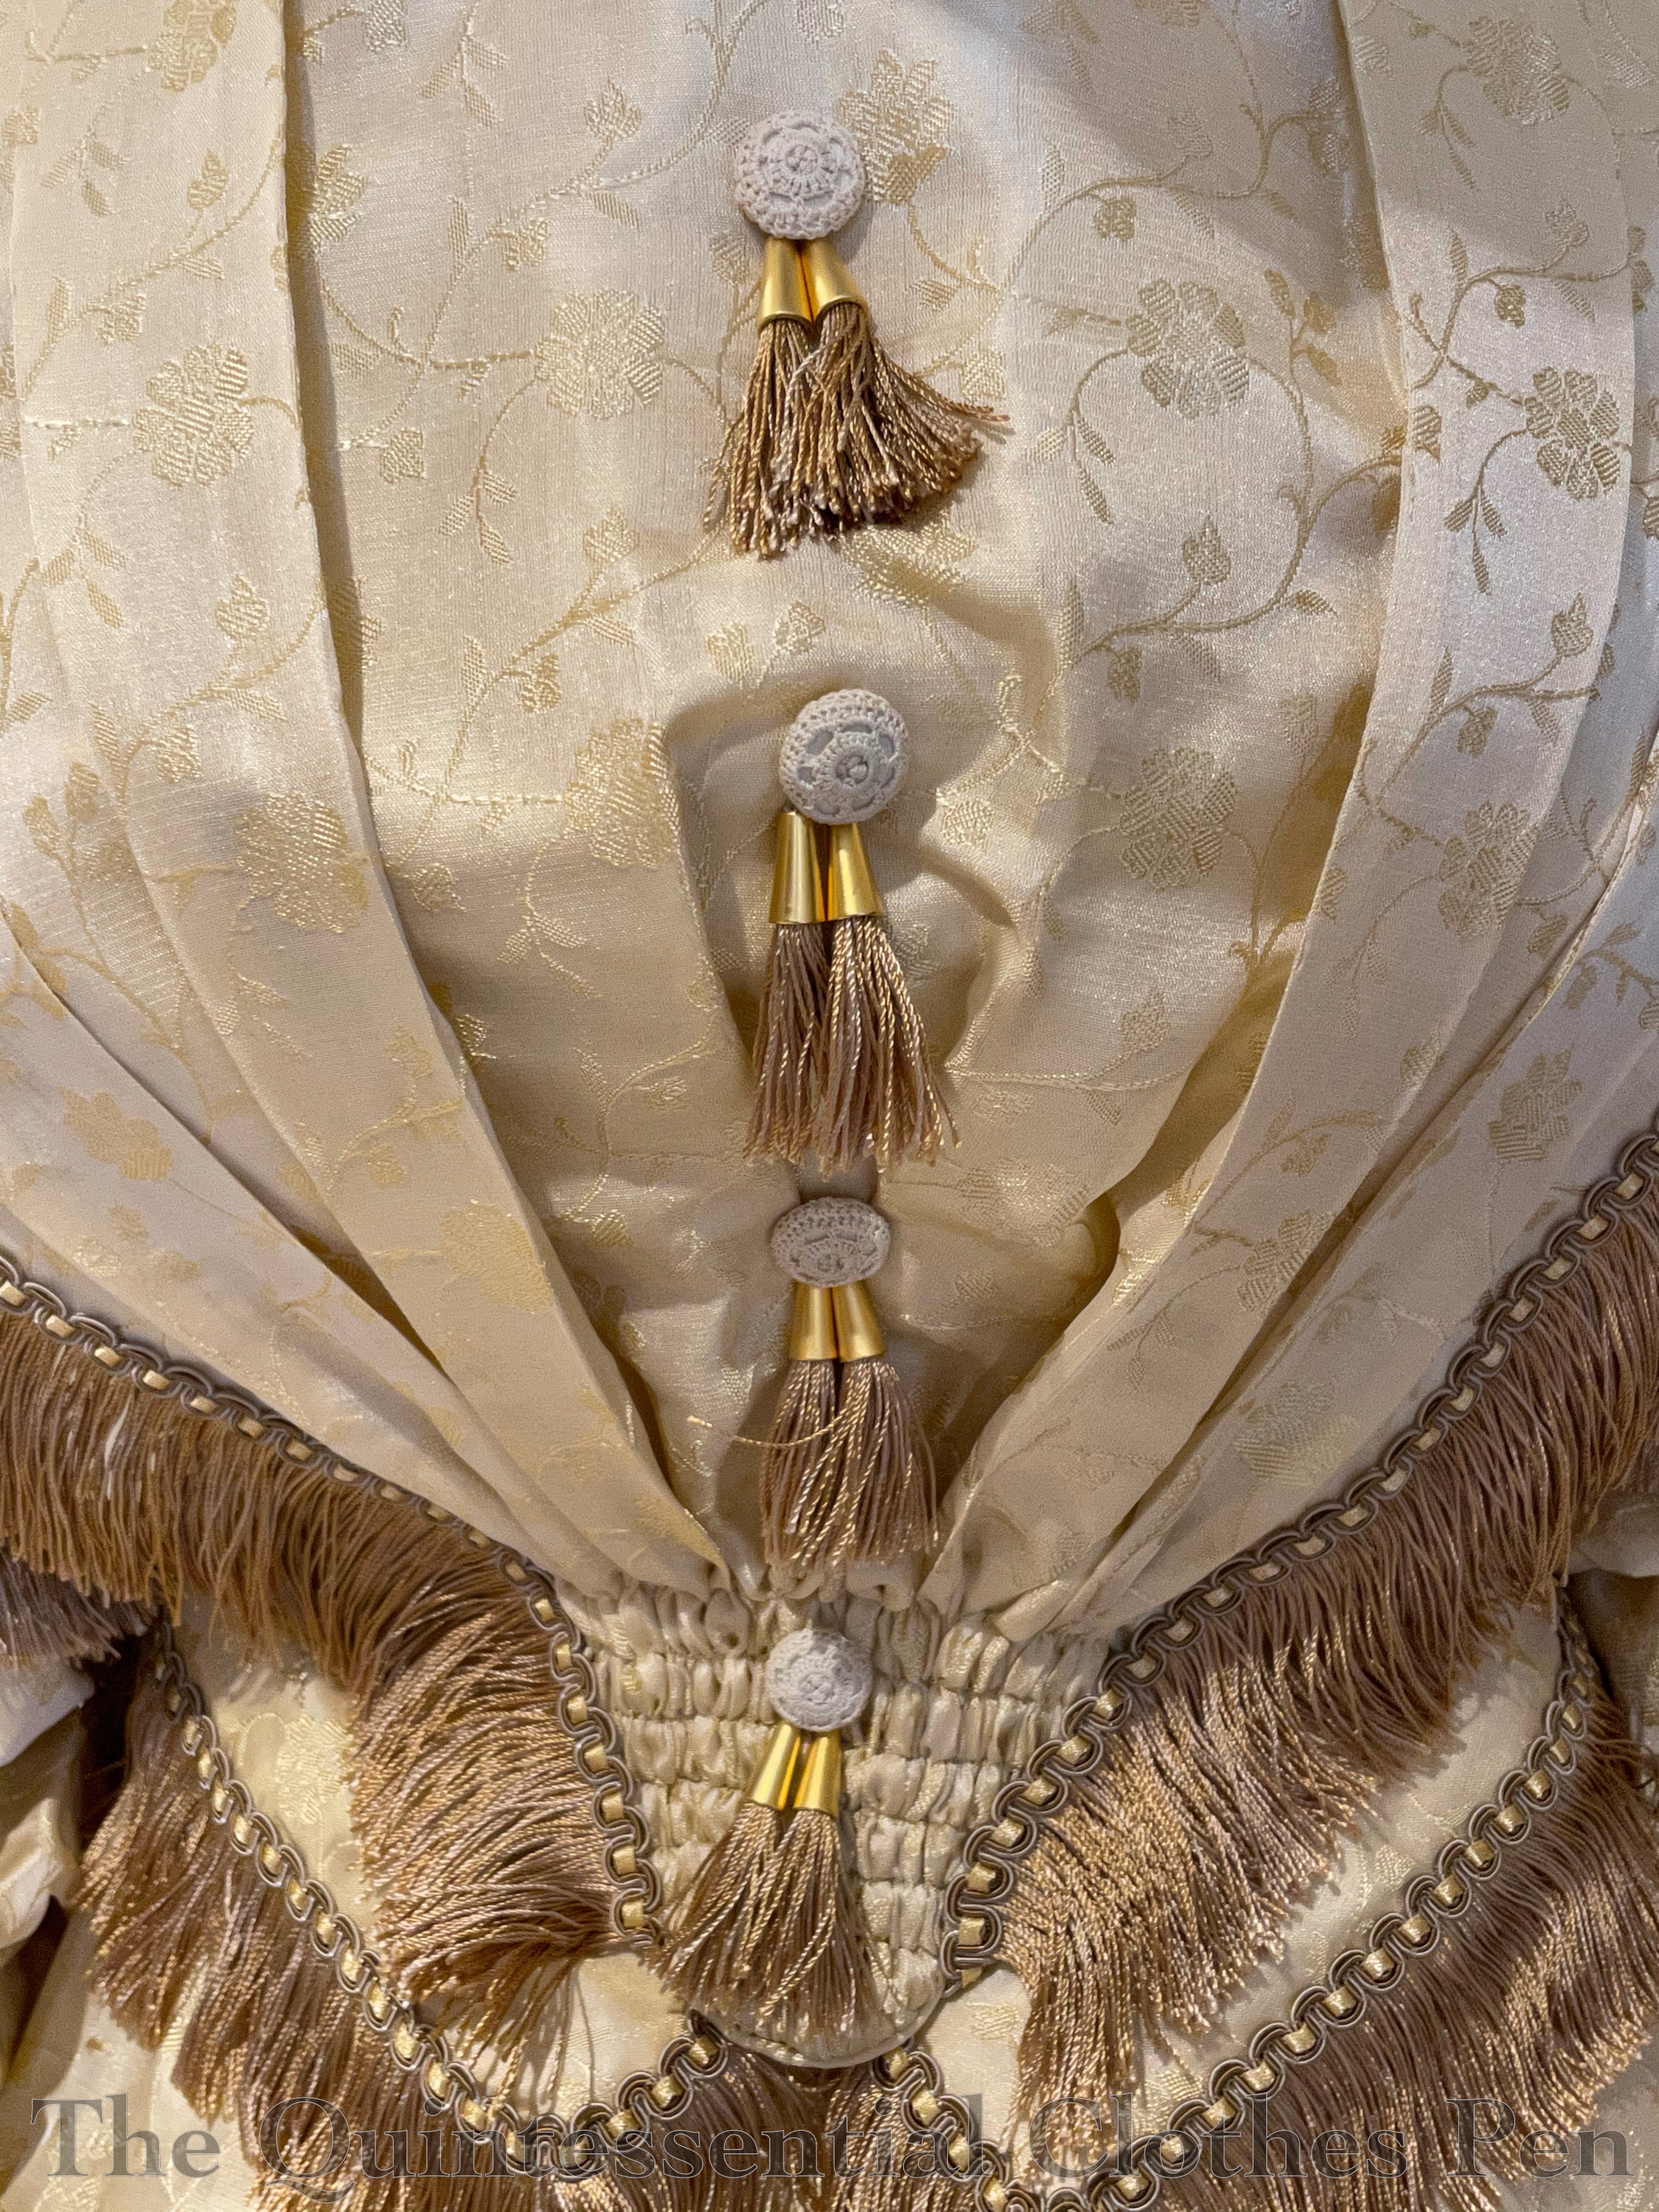
Unlike the first dress, the c. 1845 dress was inspired by this specific c. 1848 silk dress held by The Met. The goal was to keep the details of The Met inspiration dress but make the new dress proportional to the measurements of the form that would be wearing it. The dress includes extra structure to help the bodice keep its shape even without a corset underneath. Below are a full length front view and a close up of the bodice.
I had lots of fun finding trimmings for this dress that recalled the original. In the case of the tassels, I combined sections of the fringe with tassel tops and vintage passementerie buttons in order to get the right look and create tassels. Below, a closeup of tassel parts and the final result.
The designs of each dress were settled on with much collaboration to determine fabrics, trimmings, style details, and more. Both patterns were individually created to fit the requirements and specifications for each dress. Both dresses use a mixture of machine sewing/modern methods on the interiors and hand finishing on the exteriors. This speeds up construction and provides the necessary foundation for the dresses even without a full set of supportive undergarments.
I love projects like this! It’s so wonderful to collaborate with others who appreciate the minute details of historical clothing while also making garments that can be used to help interpret history to the public. These sorts of projects are often initiated through word of mouth suggestions, so please reach out if you know of museums, historic sites, historical societies, etc. who are looking for this type of collaboration!
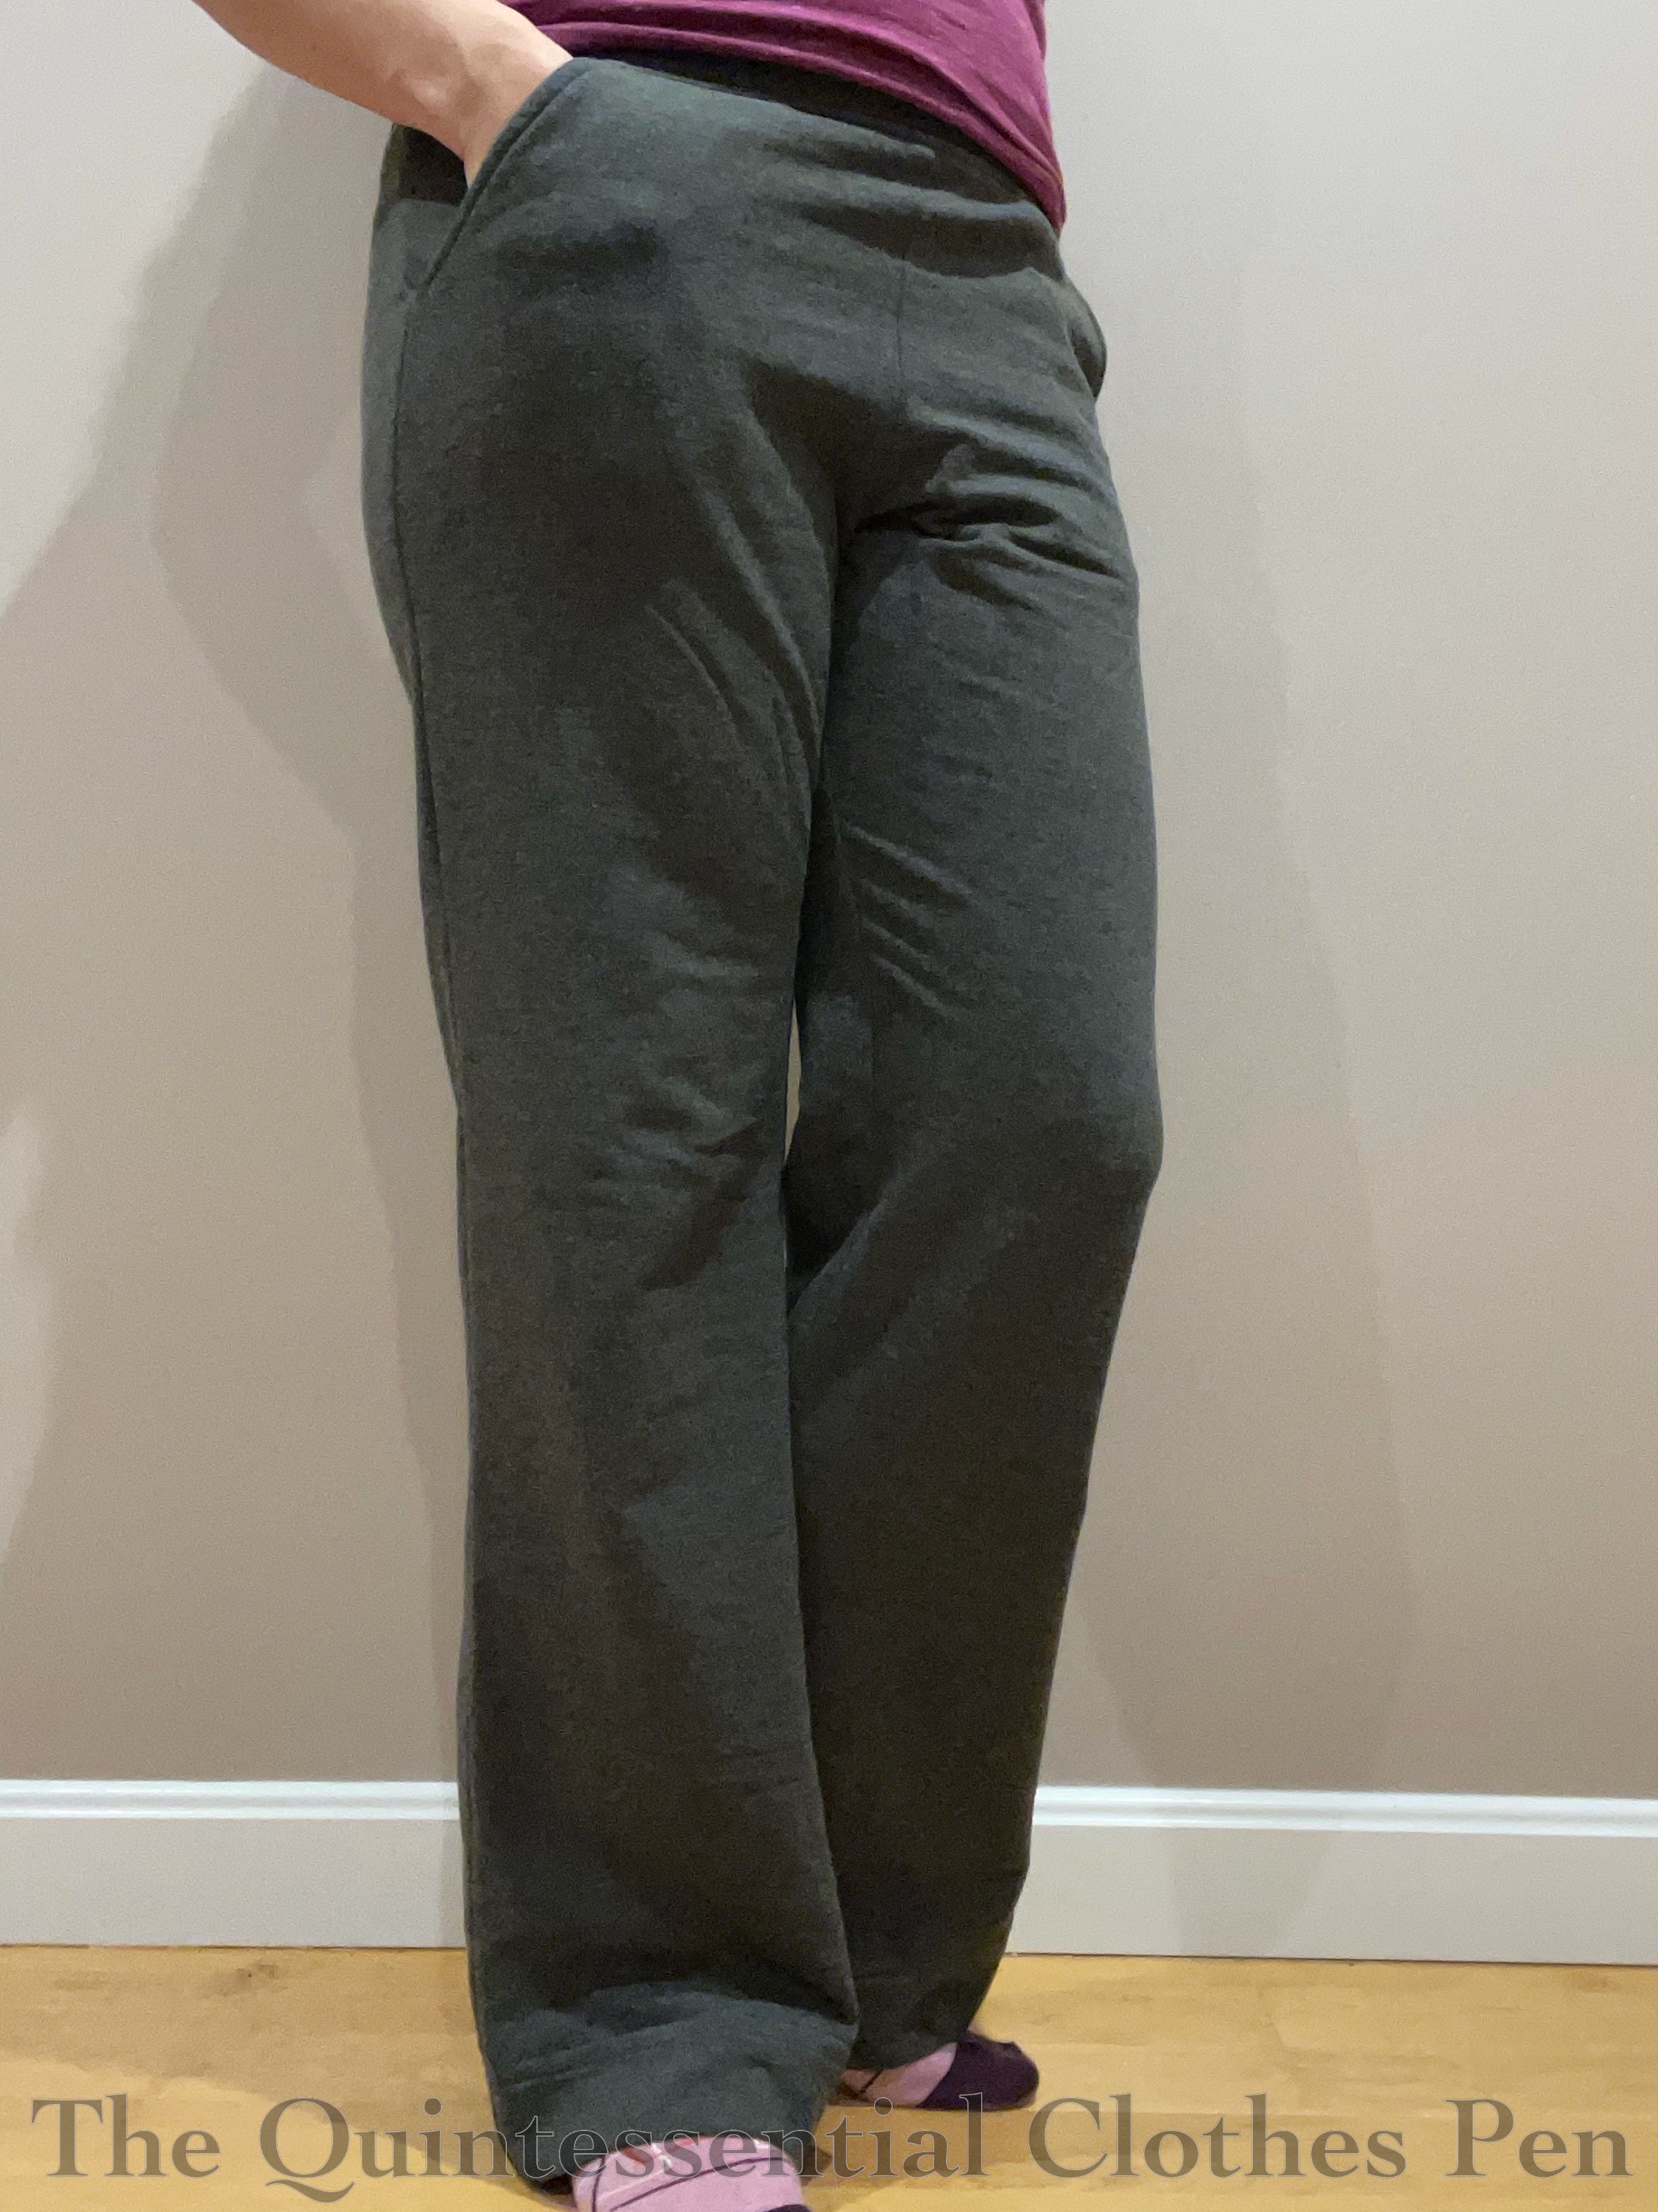
I made a pair of sweatpants! It isn’t the most fancy project, but I’m quite pleased with them because they are a re-creation of a very loved pair that I’ve had for about 20 years.
After looking for replacement pants with a similar cut for years (and coming up with nothing), I decided to take advantage of Blackbird Fabrics restocking their Bamboo/Cotton Stretch Fleece and try making my own! I’d already taken a pattern from the old pair, so there wasn’t much to do except cut out and sew the wonderfully soft fabric I’d purchased.
I didn’t track how long taking the pattern took, but I did track the construction: these new pants took just 2.5 hours–a short project by my usual historical dress standards! I used 1 ¼ yards of the Bamboo/Cotton Stretch Fleece and ½ yard of Bamboo/Cotton 2 x 2 Ribbing in matching grey, also from Blackbird Fabrics.
I reproduced all of the details from the original, including the pockets, wide hems, and wide elastic encased in the waistband.
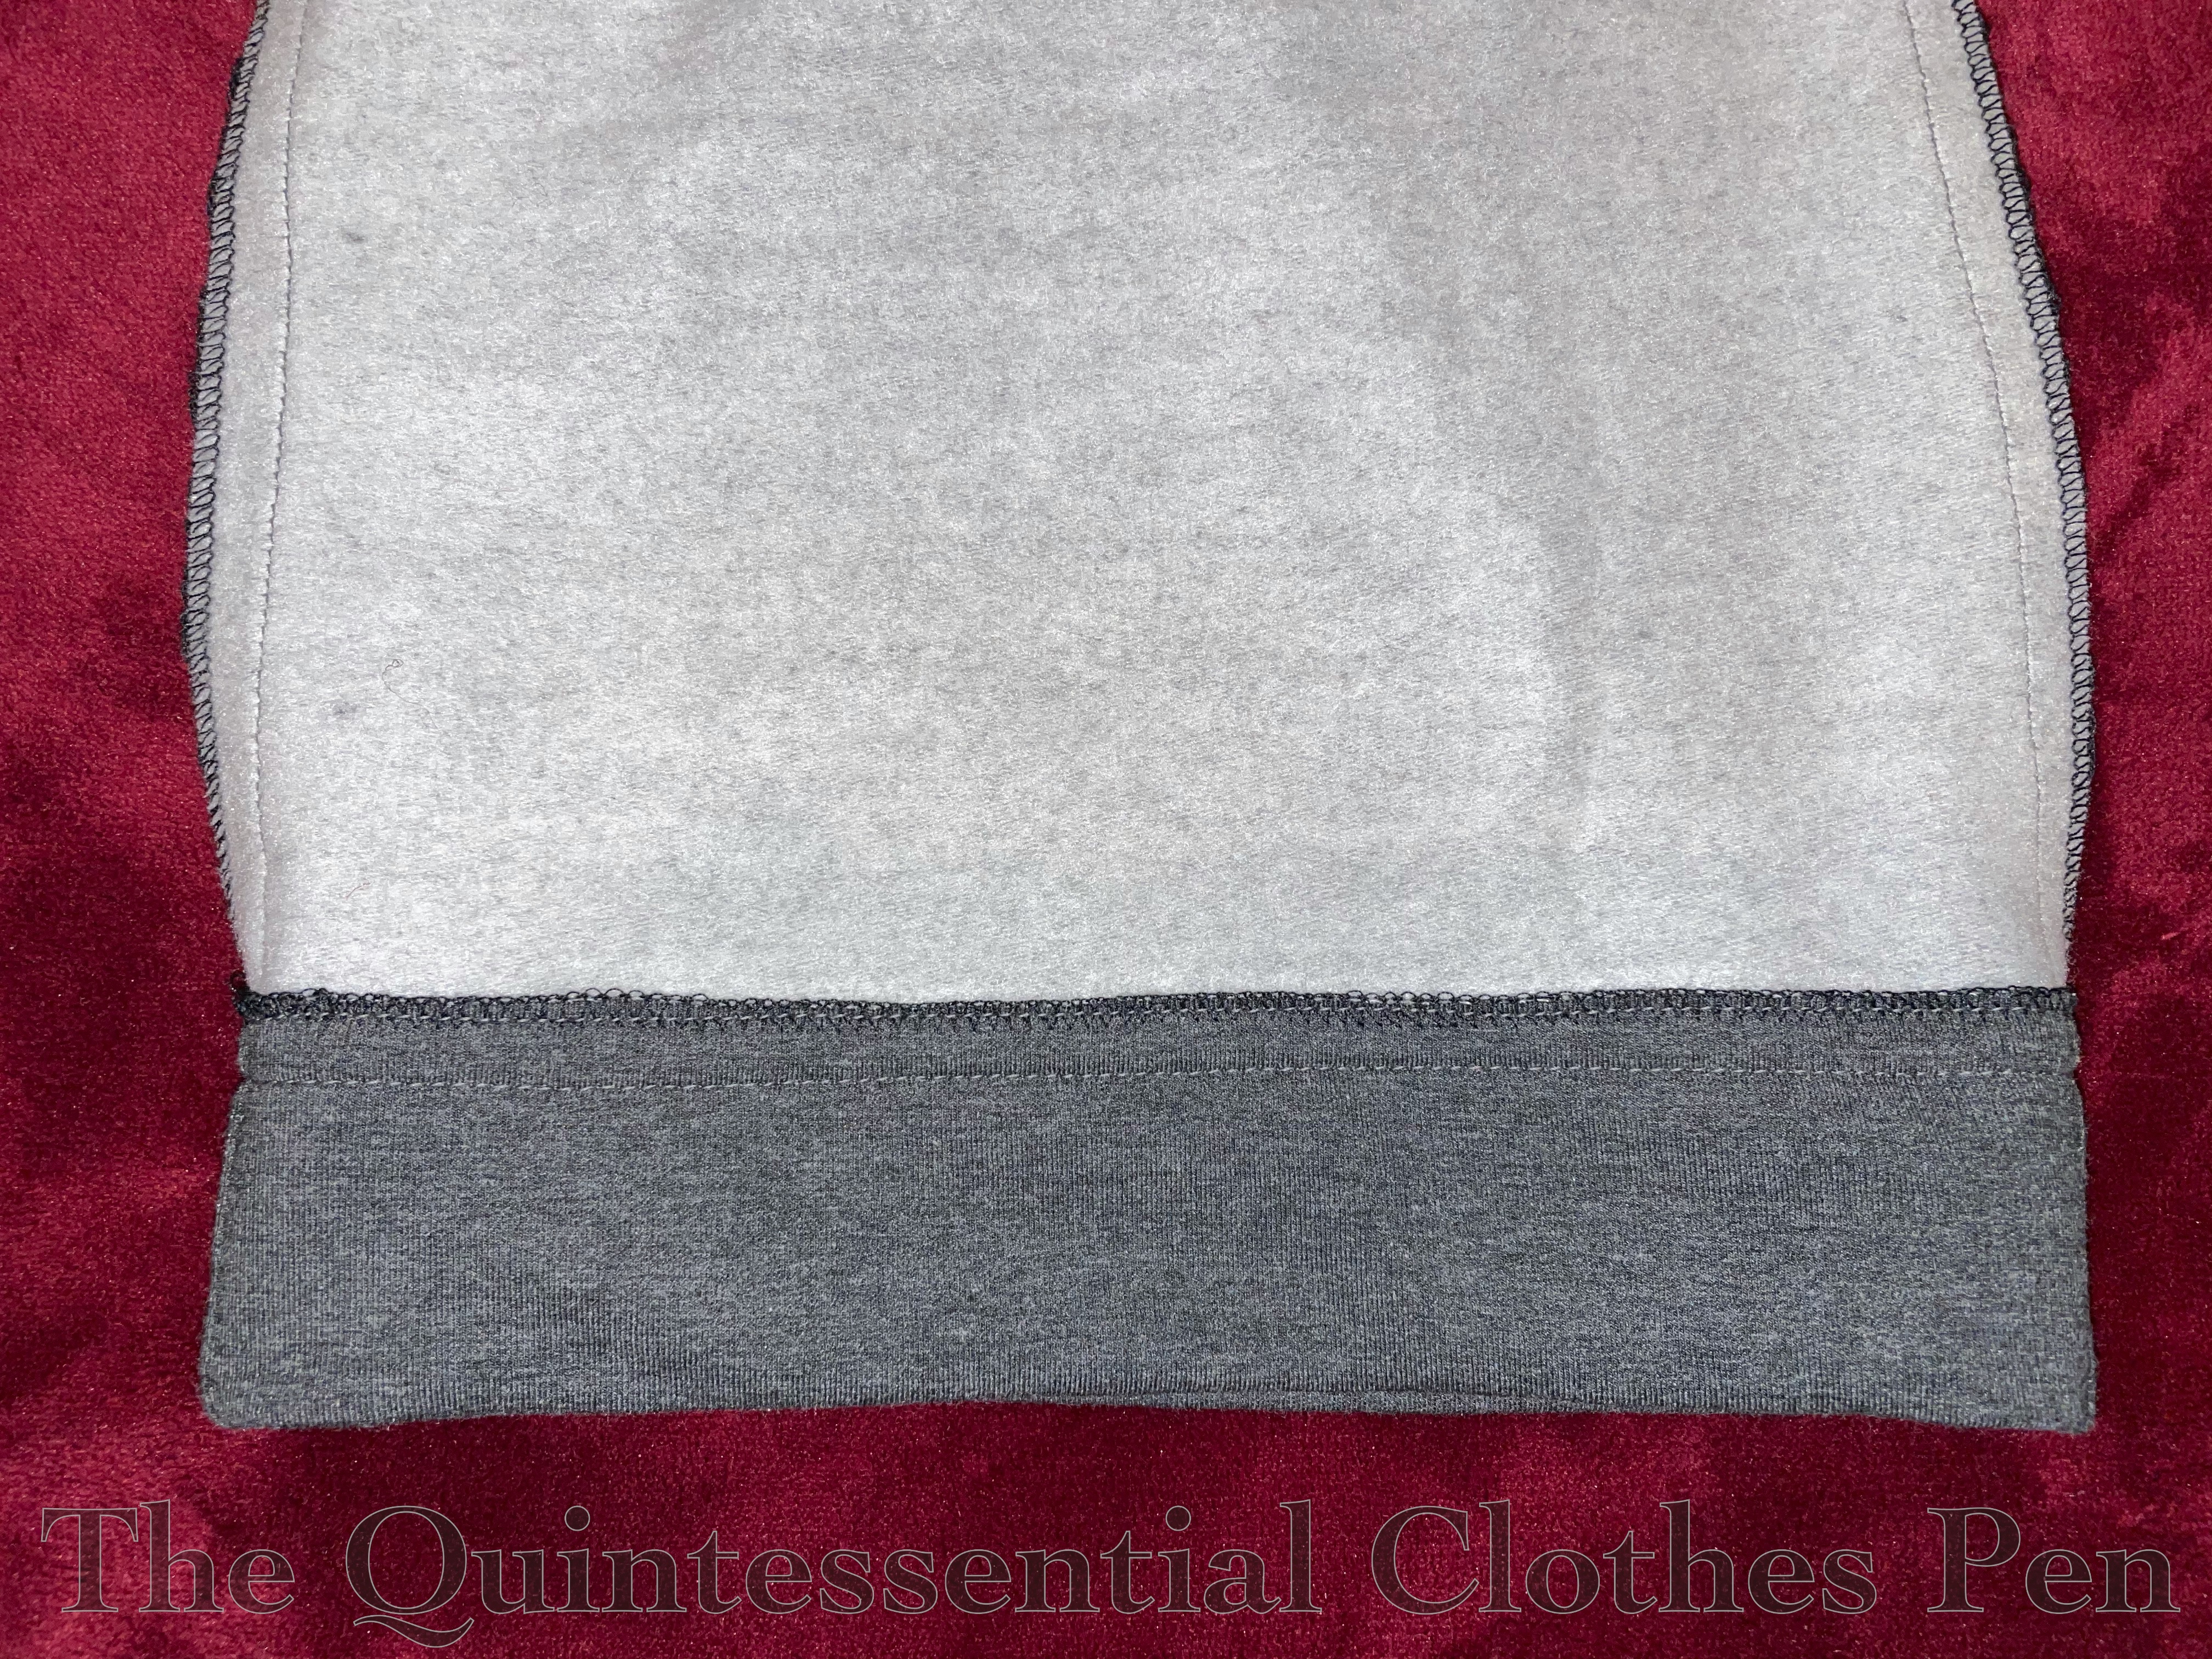
First, a look at the wide hem from the exterior and interior. I stitched twice, to replicate the look of a twin needle stitched hem.
Next, a look at the wide waistband and the western style pocket. You can also see some of the topstitching that I replicated from the original pants.
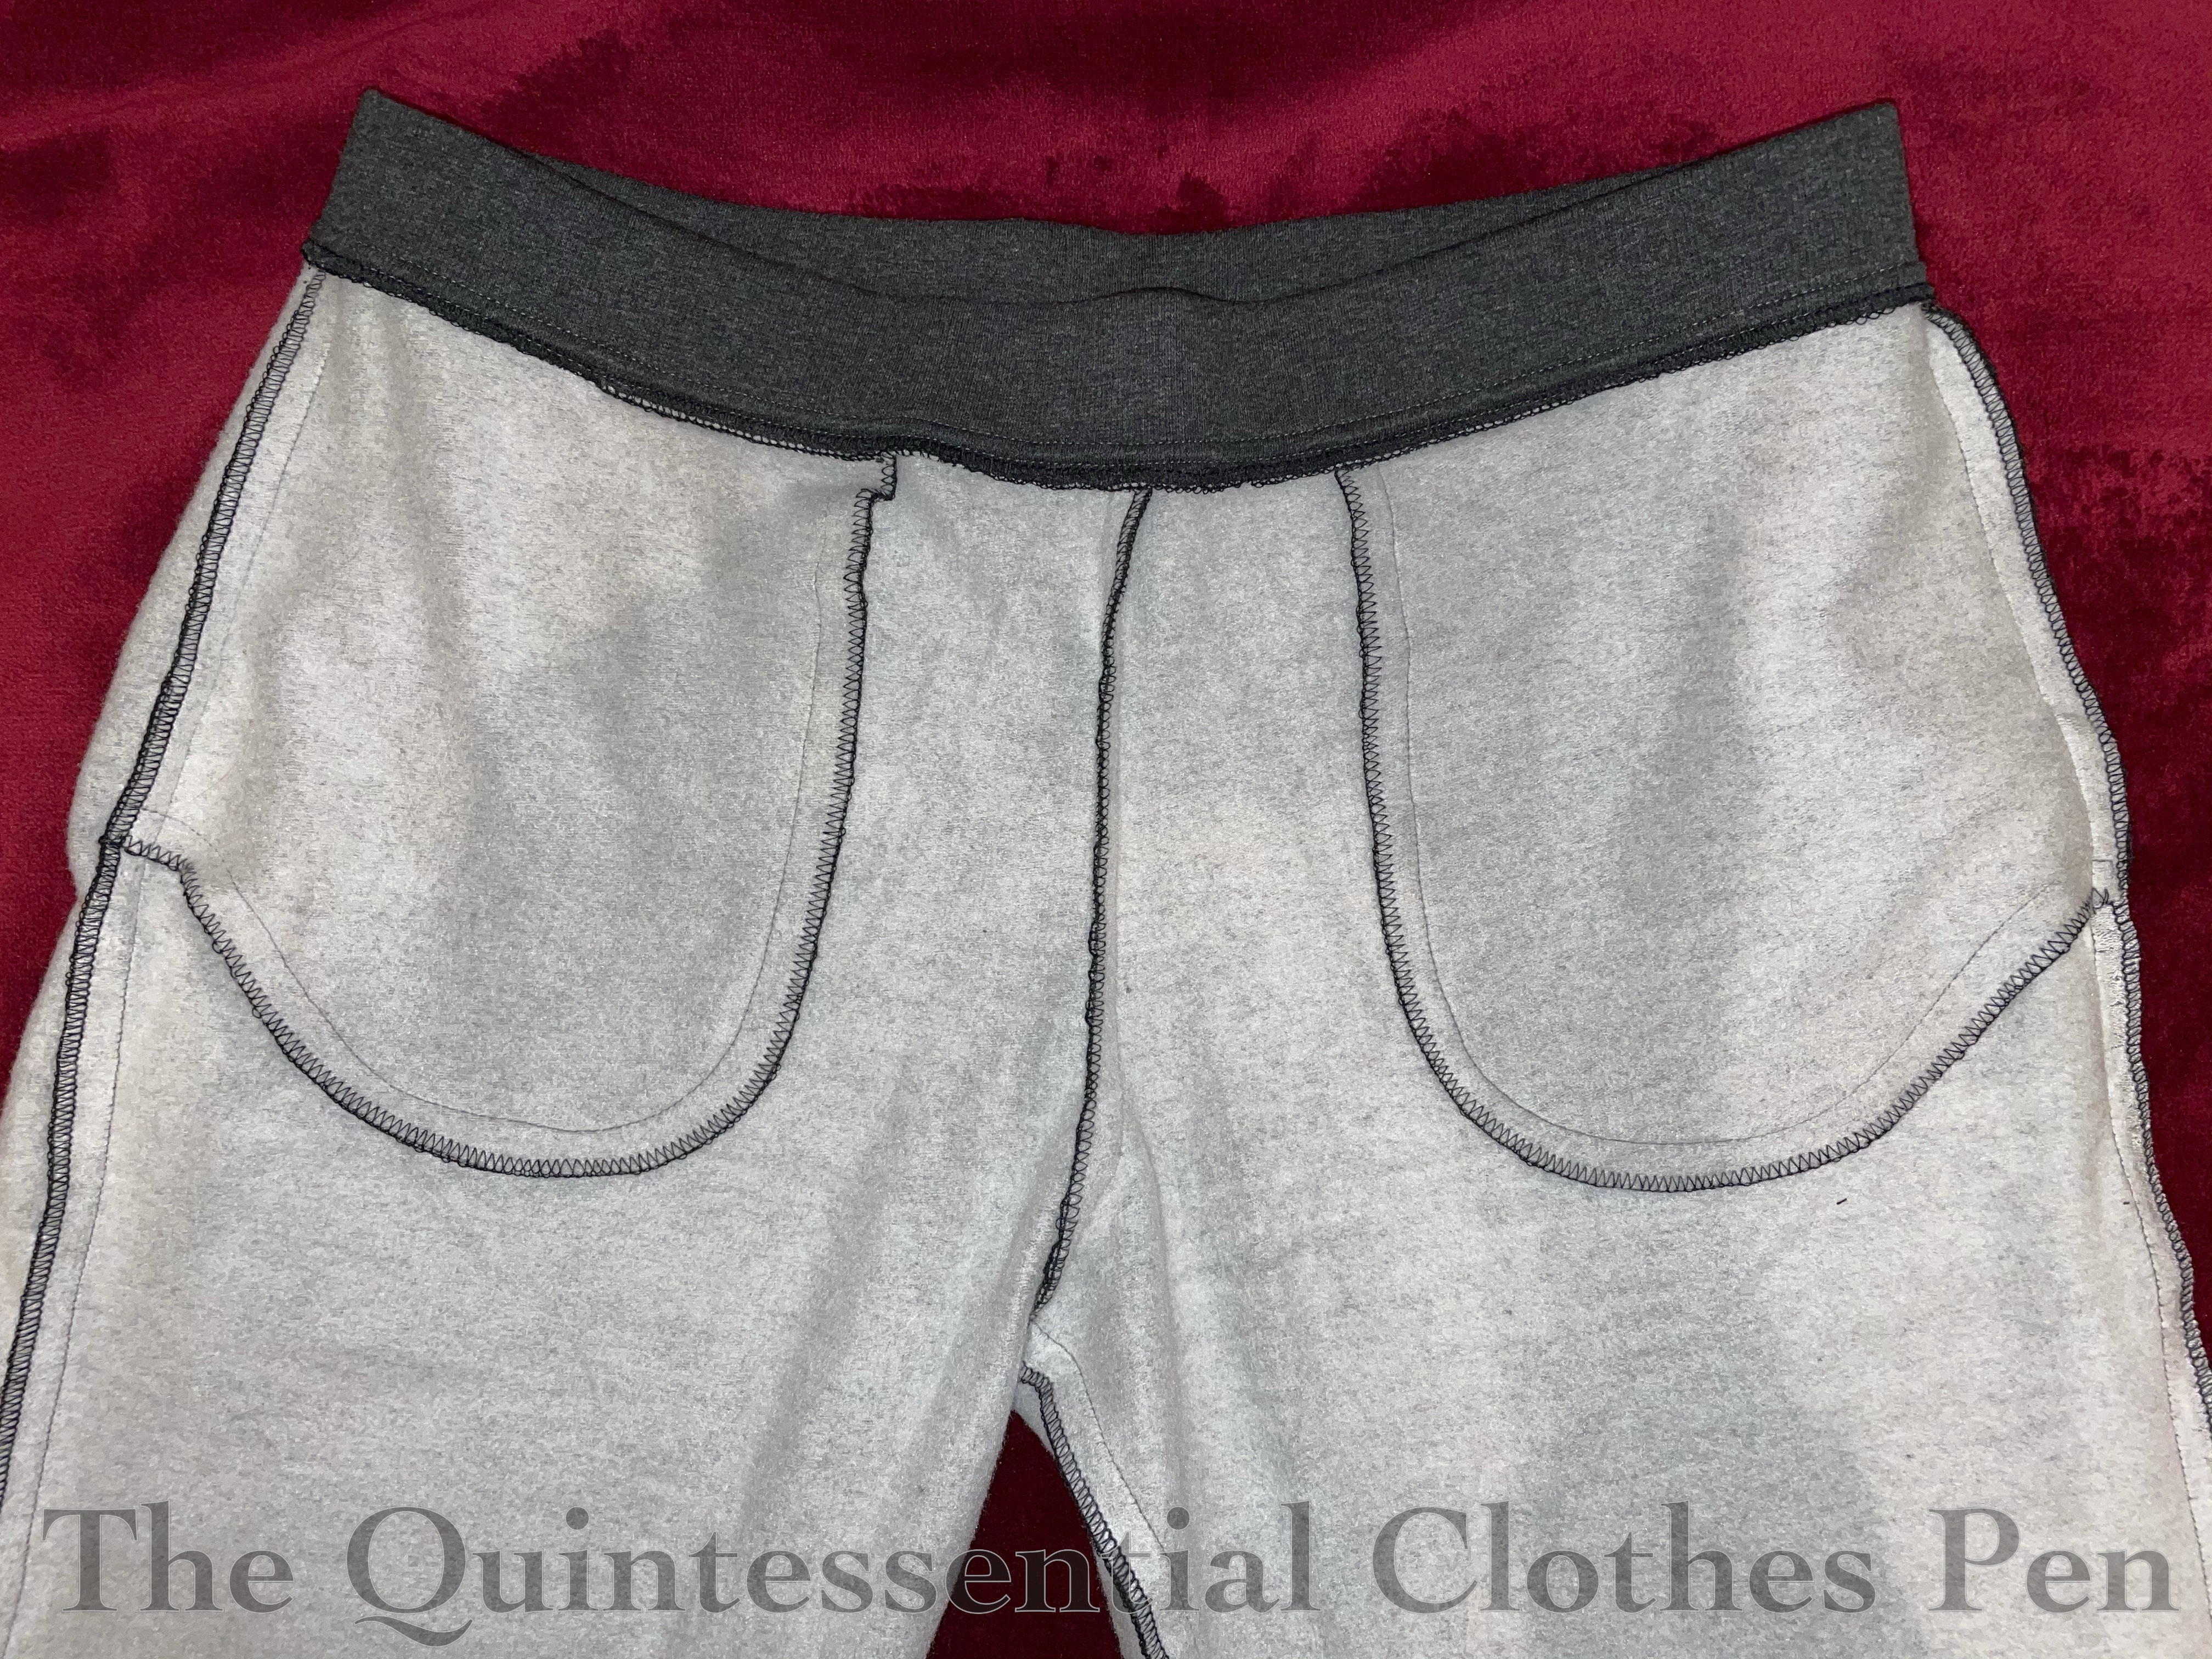
Here is the inside of the pants, showing the yummy new fleece interior (so soft!) and the nicely serged edges.
The only thing I left out was a drawstring, because I didn’t have an easy way to make small metal eyelets in my new pants and I didn’t have a matching drawstring, either. This means the waist can’t be cinched in quite like the old pair needed to be (earlier in their life when I was skinnier and later in their life when they were super stretched out and old), but they stay up pretty well. The next pair might get a smaller elastic…
And yes, there will be another pair! After these were so successful I decided to buy fabrics for a second pair (again from Blackbird Fabrics), this time in dusty pink.
I’ve picked up a few patterned cotton fabrics over the last few months at my local discount fabric store. (Everything in the store is $3 per yard. Crazy!) I enjoy all of them and want to document their new status here. Hopefully, I can link back to this post when I eventually make garments out of them… This is encouragement to not let them languish in the stash for too long!
First, there is this light blue-ish grey cotton print. The mixture of colors and style of the printing reminds me of fabrics from the 1830s and 1840s. In fact, I used this very fabric to make an 1830s dress for a friend (you saw it in my posts last fall about apple picking). After seeing how wonderfully that dress turned out I decided I needed one of my own. And so… my stash has gained 7 yards of this.
I justify it by the price and the fact that I have very specific plans already. In the spirit of trying out different 1830s sleeve shapes, I want to make a dress from 1836 that has sleeves that are fitted around the upper arms but full around the elbow and down to the wrists.
Second, there is this purple mosaic looking fabric that has an Art Deco vibe. This one doesn’t have a specific plan, but I couldn’t pass up the colors, so I got 1 yard.
The mosaic Art Deco fabric came in four colorways: the purple above, as well as pink, orange, and… lime green! The lime green reminds me of palm fronds and Egyptomania styles.
On its own it’s a bit bright, but I also came across a teal fabric with gold metallic squares on it that I liked but couldn’t think of a use for… until I put it next to the lime green fabric. It helps bring out the blues in the pattern which tones down the lime green a bit. I’m thinking of a short sleeved 1920s summer dress like this using the teal as trim on the lime green.
I’m hoping to get around to the 1830s dress sooner rather than later, but the 1920s dress is lower on the priority list. Unless (maybe) this year brings the ability to reconvene and have 1920s summer events… and then maybe this dress will shoot up the to do list ladder! Ahhh, dreaming!
Today’s post is going to share more details about and photos of my new 1834 yellow dress. If you missed my last post about this dress, it was a lengthy one sharing oodles of construction details and photos. You can read that past post here.
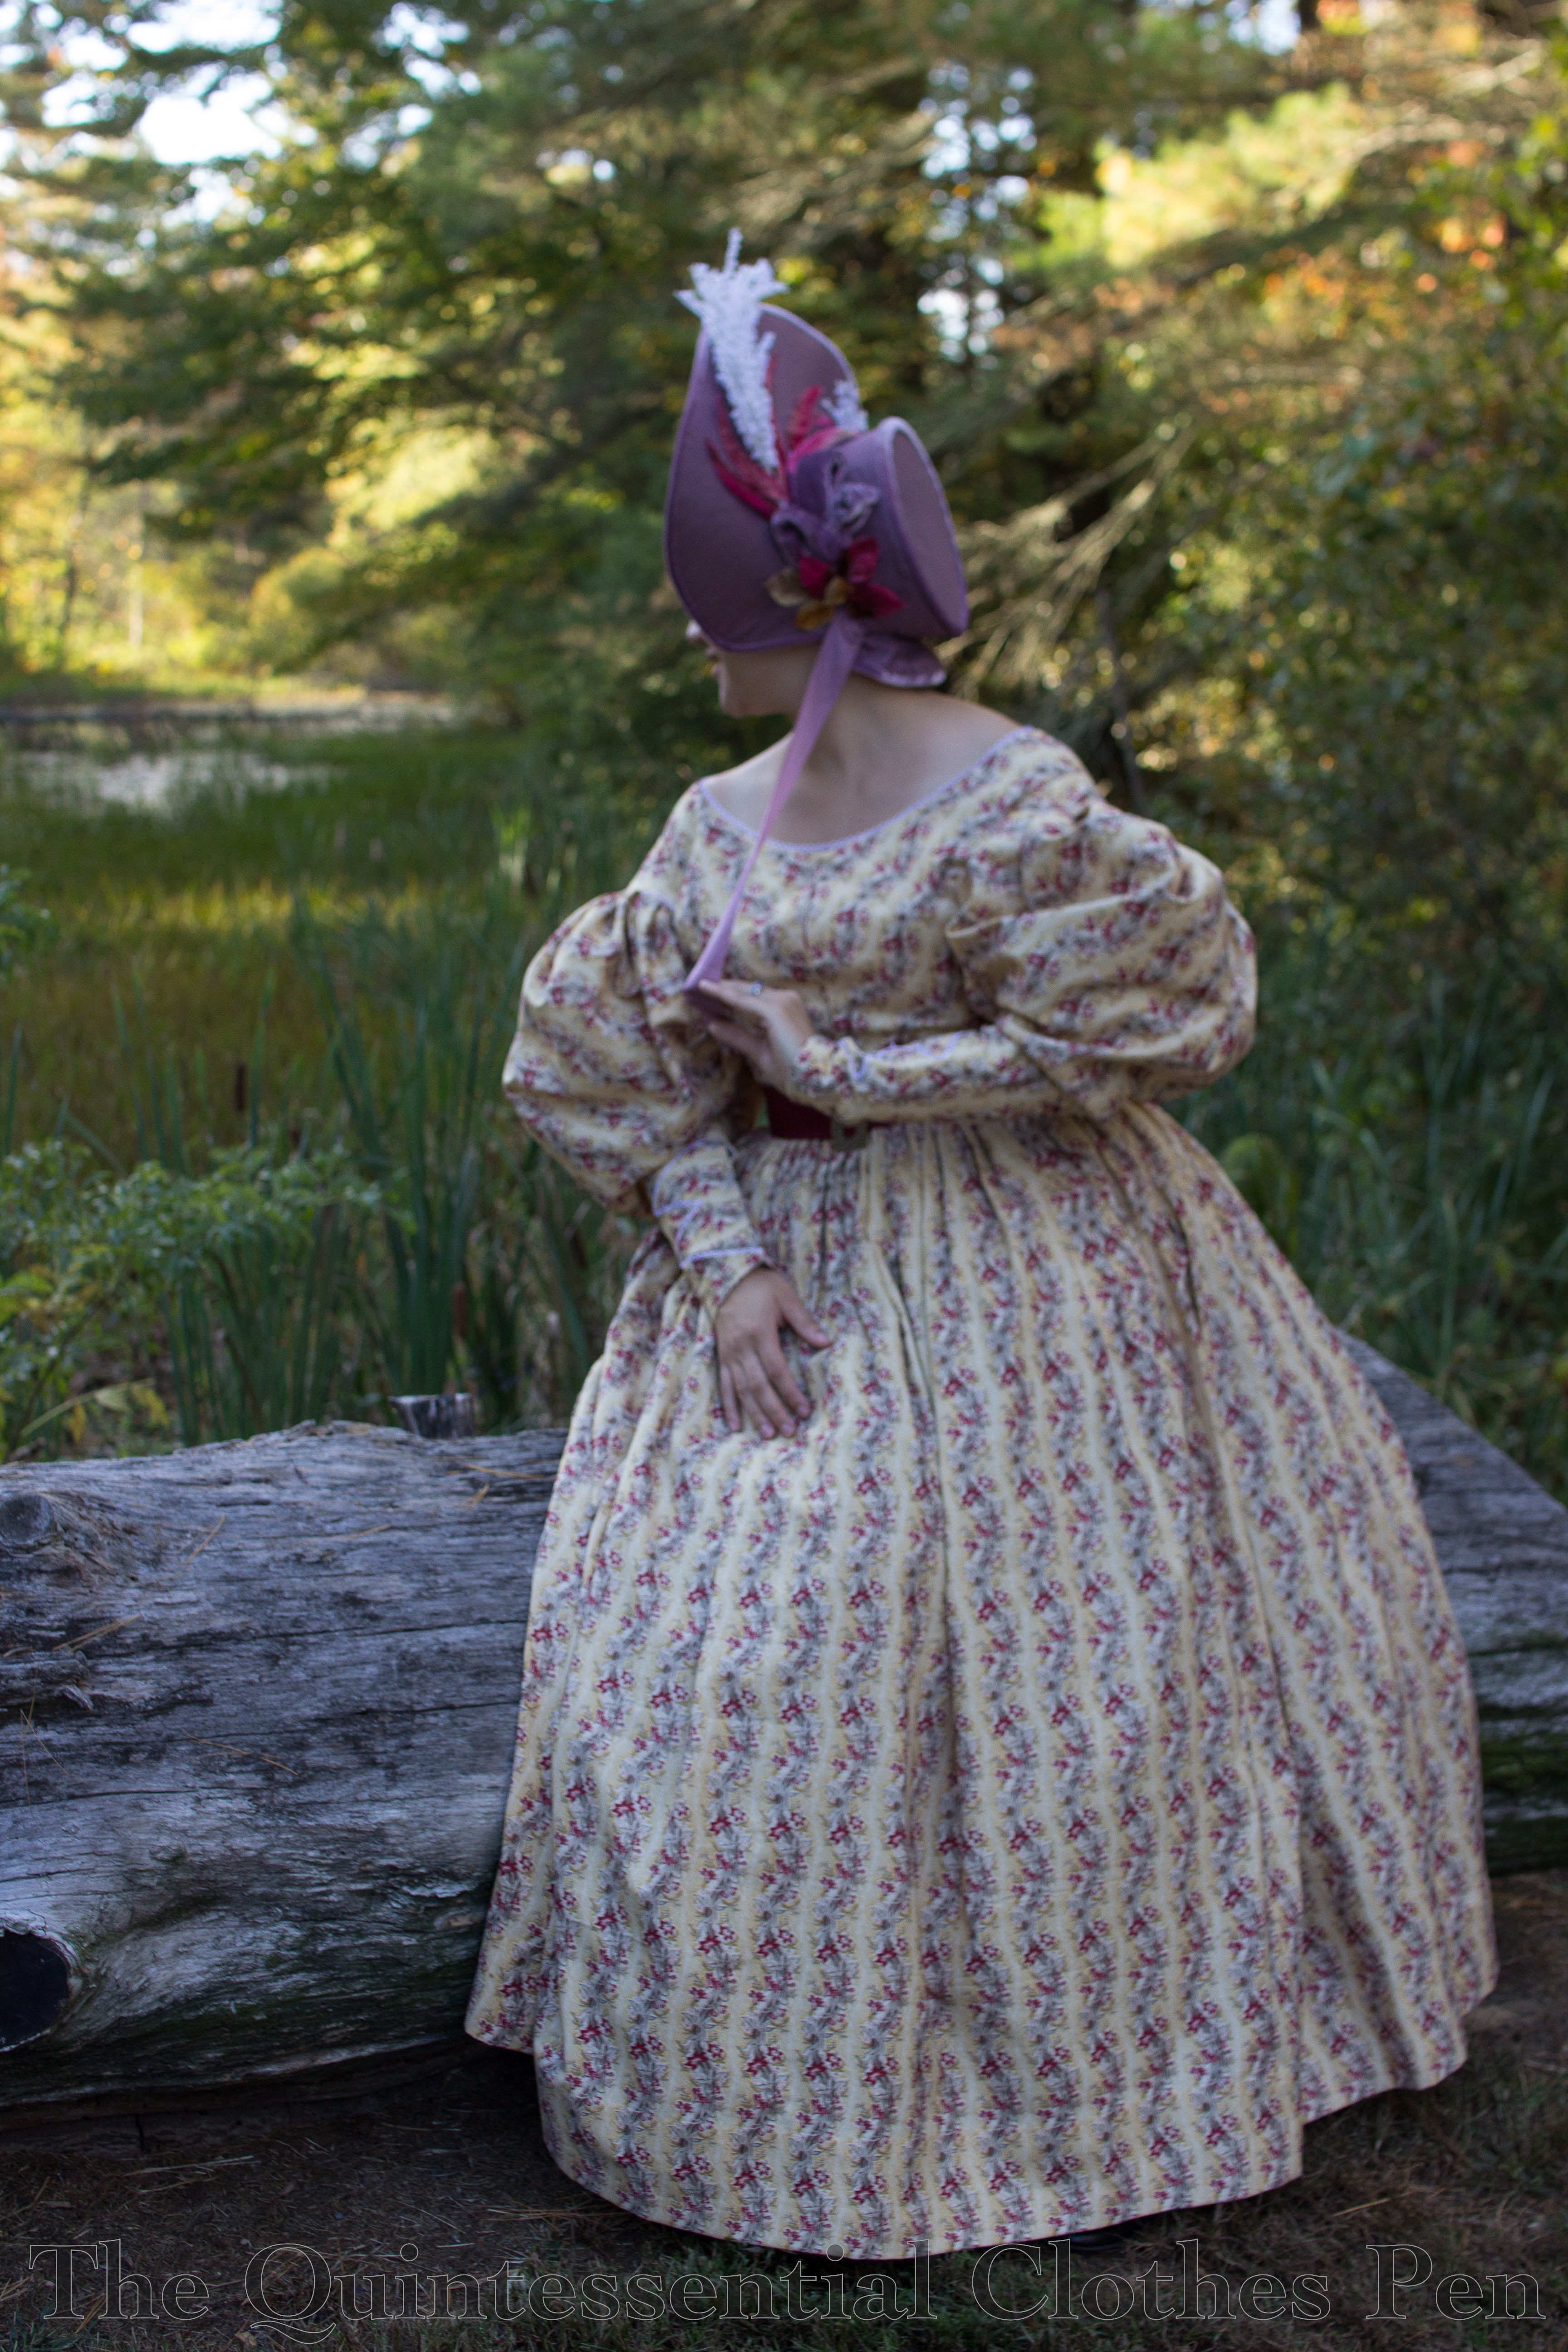
Here is a reminder image of the fully accessorized dress!
The biggest accessory is my newly completed 1831 bonnet. There is a recent (lengthy) post about the construction of that here, if you want to learn more about it.
I also added smaller accessories, in the form of a petersham belt and brand new reproduction buckle. The wide petersham is a length of ribbon I purchased from The Sewing Place–I highly recommend their many colors and widths! The buckle is a fabulous reproduction buckle from Ensembles of the Past. It’s a bit hard to see the wonderful detail in this photo, but there’s a photo later in the post that shows the detail much better! The Ensembles of the Past blog also has a post sharing how to easily use ribbon to make an endlessly (and easily) adjustable belt out of ribbon! I highly recommend both the buckles and a read through the blog post!
Back to the dress itself. Let’s start off with the Historical Sew Monthly details. Challenge #9 is Sewing Secrets:
Hide something in your sewing, whether it is an almost invisible mend, a make-do or unexpected material, a secret pocket, a false fastening or front, or a concealed message (such as a political or moral allegiance).
In this dress, I have two secrets, both of which I mentioned in the dress construction details post. One is pockets in the skirt and the other is that the bodice of this dress is detachable.
First, the pockets. Yay! My pockets are made from the dress fabric. They are French seamed and set into the side front seams of the skirt. On the inside, they look like this.
On the outside, they look like this. They’re a secret because they camouflage so well that you really can’t see them at all unless I pull them open or my hand is disappearing inside!
Second, the bodice detaches. This is very unusual (and possibly unheard of) for the 1830s, though it becomes common practice by the 1850s and 1860s. This system allows me to attach the current bodice, which I’ve dated 1834, or a second bodice that I have in the works which is dated 1838. That opens a whole world of possibilities in terms of showing changing bodice and sleeve styles without needing to create an entire second dress!
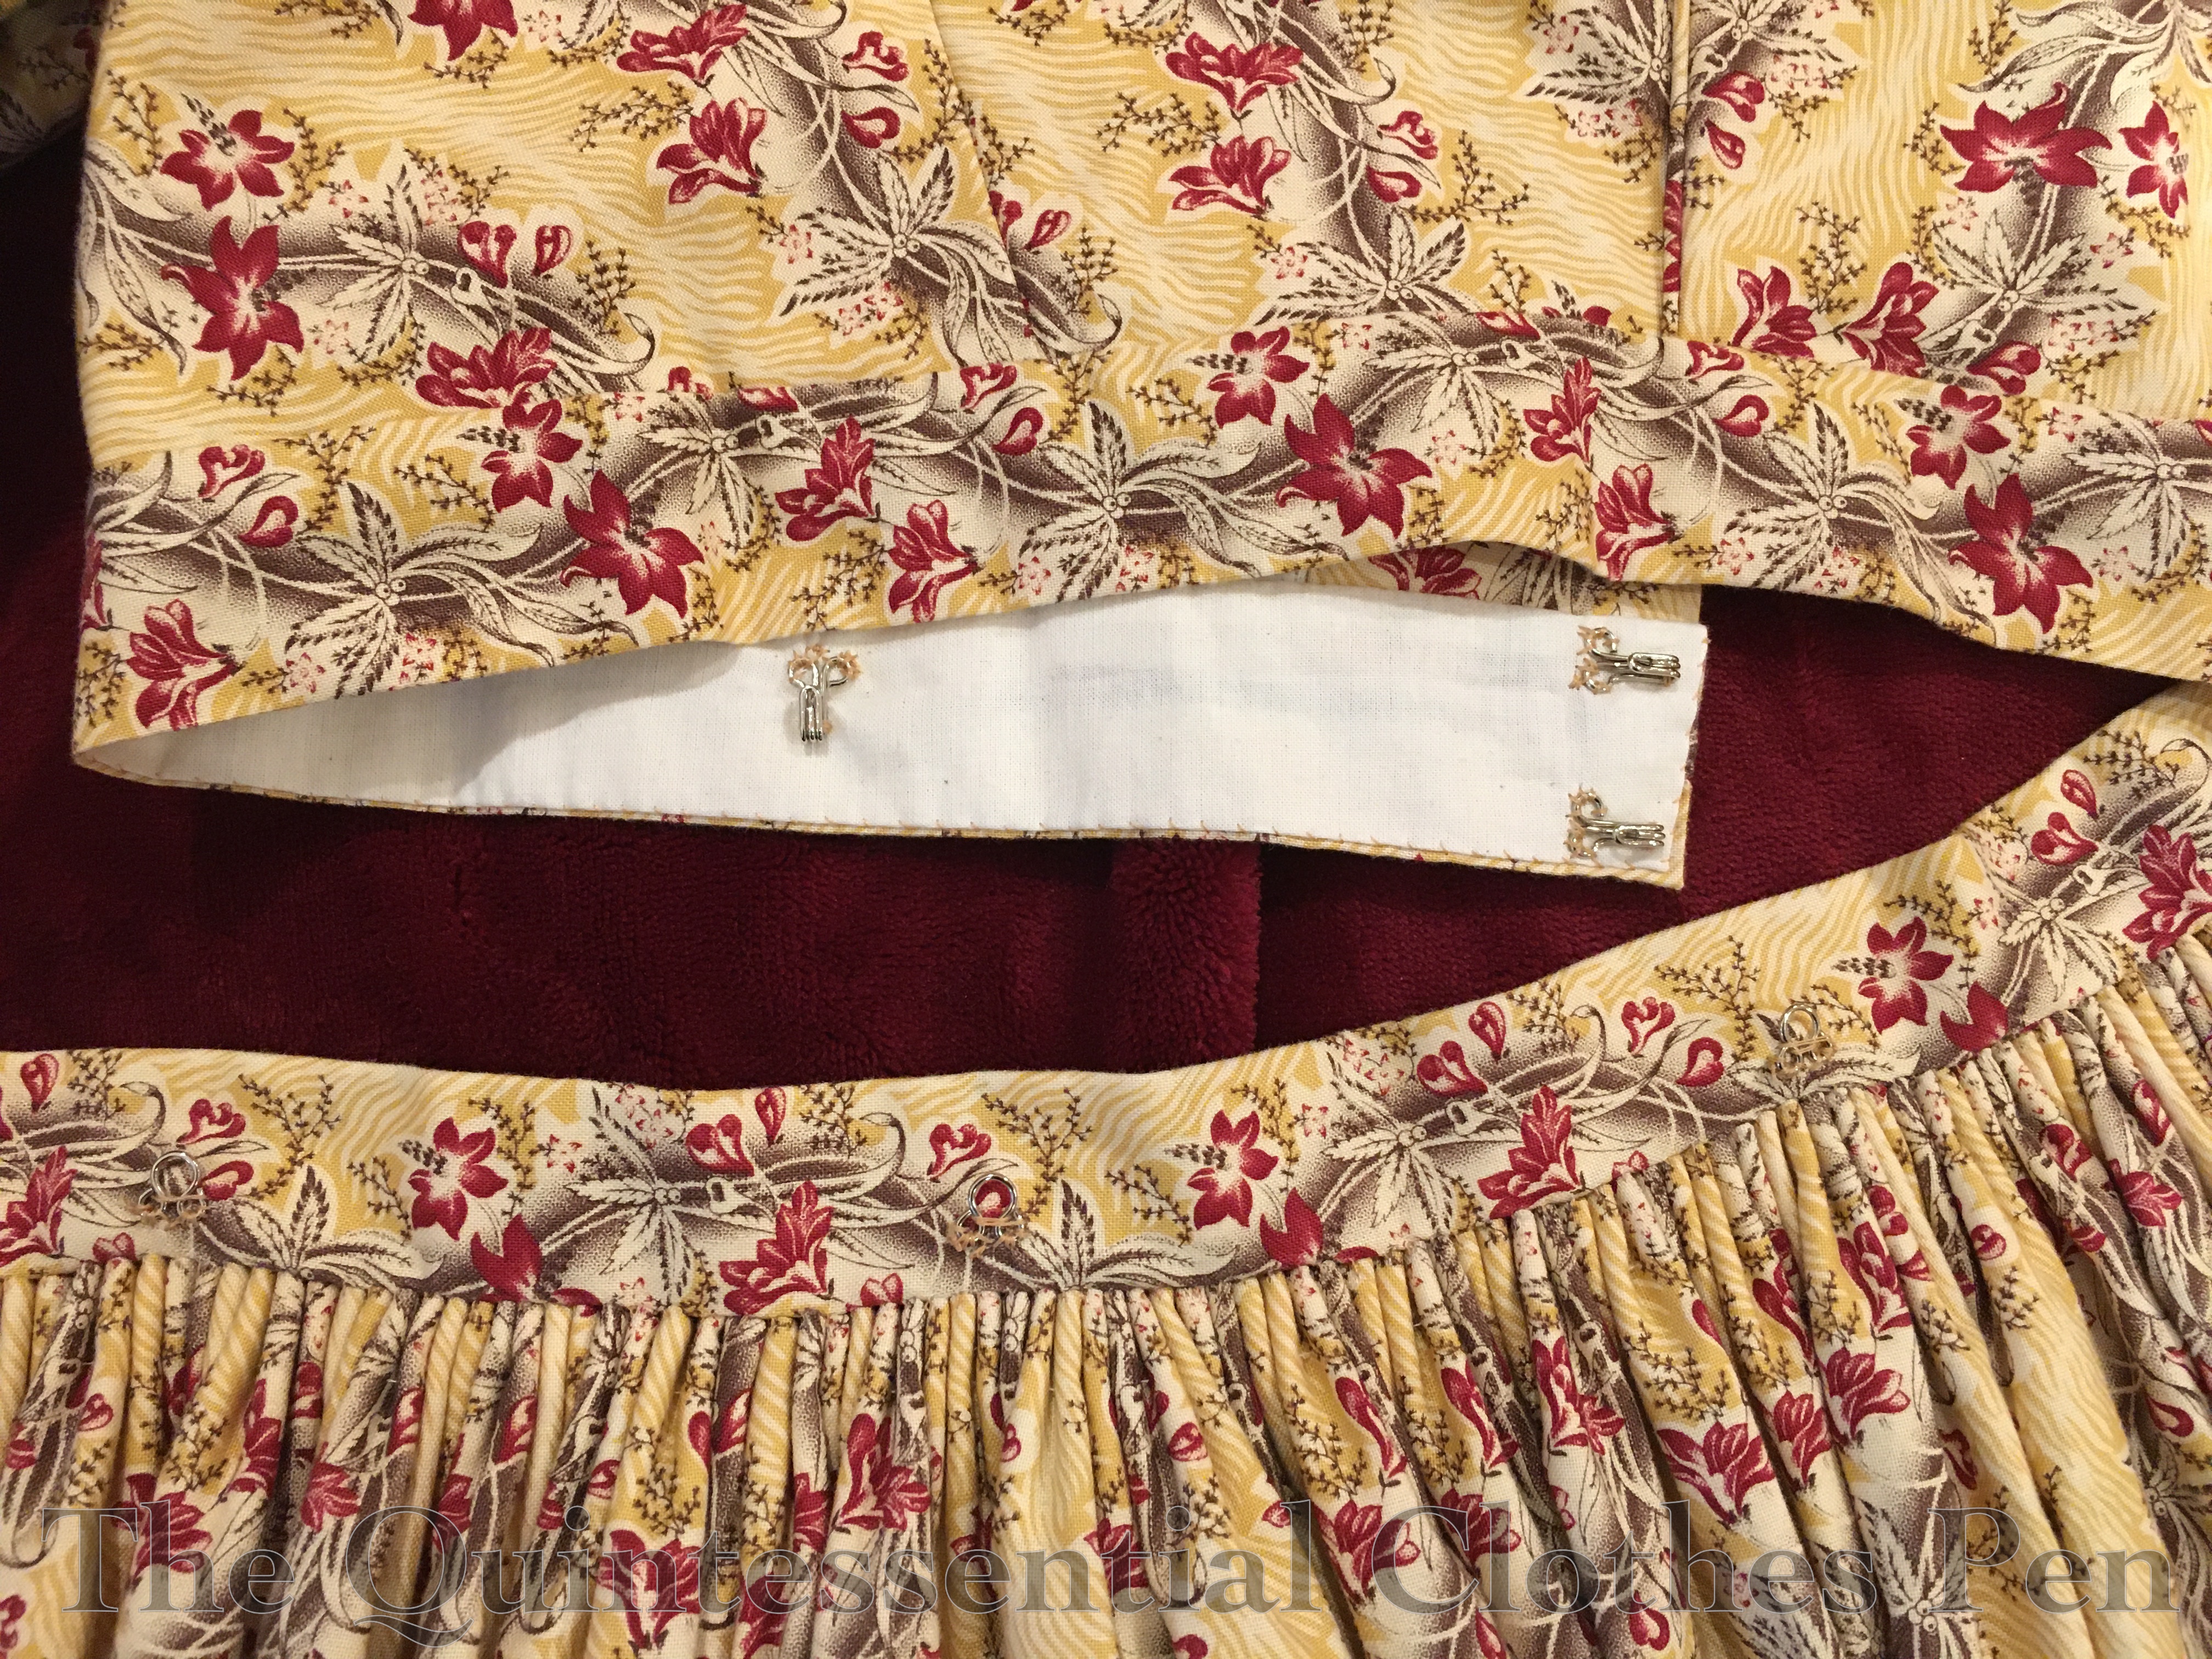
A bit closer up, you can just barely make out a loop on the skirt waistband that connects to a hook at center front. There are hooks and loops all around the skirt and bodice waistbands to connect them together.
Now that we’ve seen the relevant dress features, let’s look at the other HSM facts:
Fabric/Materials: 7 ¼ yds of reproduction print cotton, 1 yd muslin, a scrap of canvas for the waistband of the bodice, and a scrap of flannel for the cartridge pleats.
Pattern: Adapted from Janet Arnold’s Patterns of Fashion 1, with adjustments for fit and style, as well as The Workwoman’s Guide.
Year: 1834.
Notions: 2 ½ yds narrow cotton yarn for cording, 2 ½ yds of narrow white lace, and about 23 hooks and loops.
How historically accurate is it?: 95%. The pattern, silhouette, construction methods, and fabric are all quite good, but there is machine sewing on the interior seams.
Hours to complete: 25.75 hours.
First worn: In early October, for an apple picking outing, picnic, and photos!
Total cost: Approximately $60.
In addition to the HSM details, I want to share some more photos as well. These photos were taken during an all day outing in October. There’s still a post coming that will share apple picking photos from the outing, but there were many good ones from our later in the day photo shoot as well.
These next photos were taken in a neat conservation area that has beautiful, varied scenery that includes a pond area, open fields, wooded paths, huge rhododendrons, a meandering river, and this lovely row of pine trees.
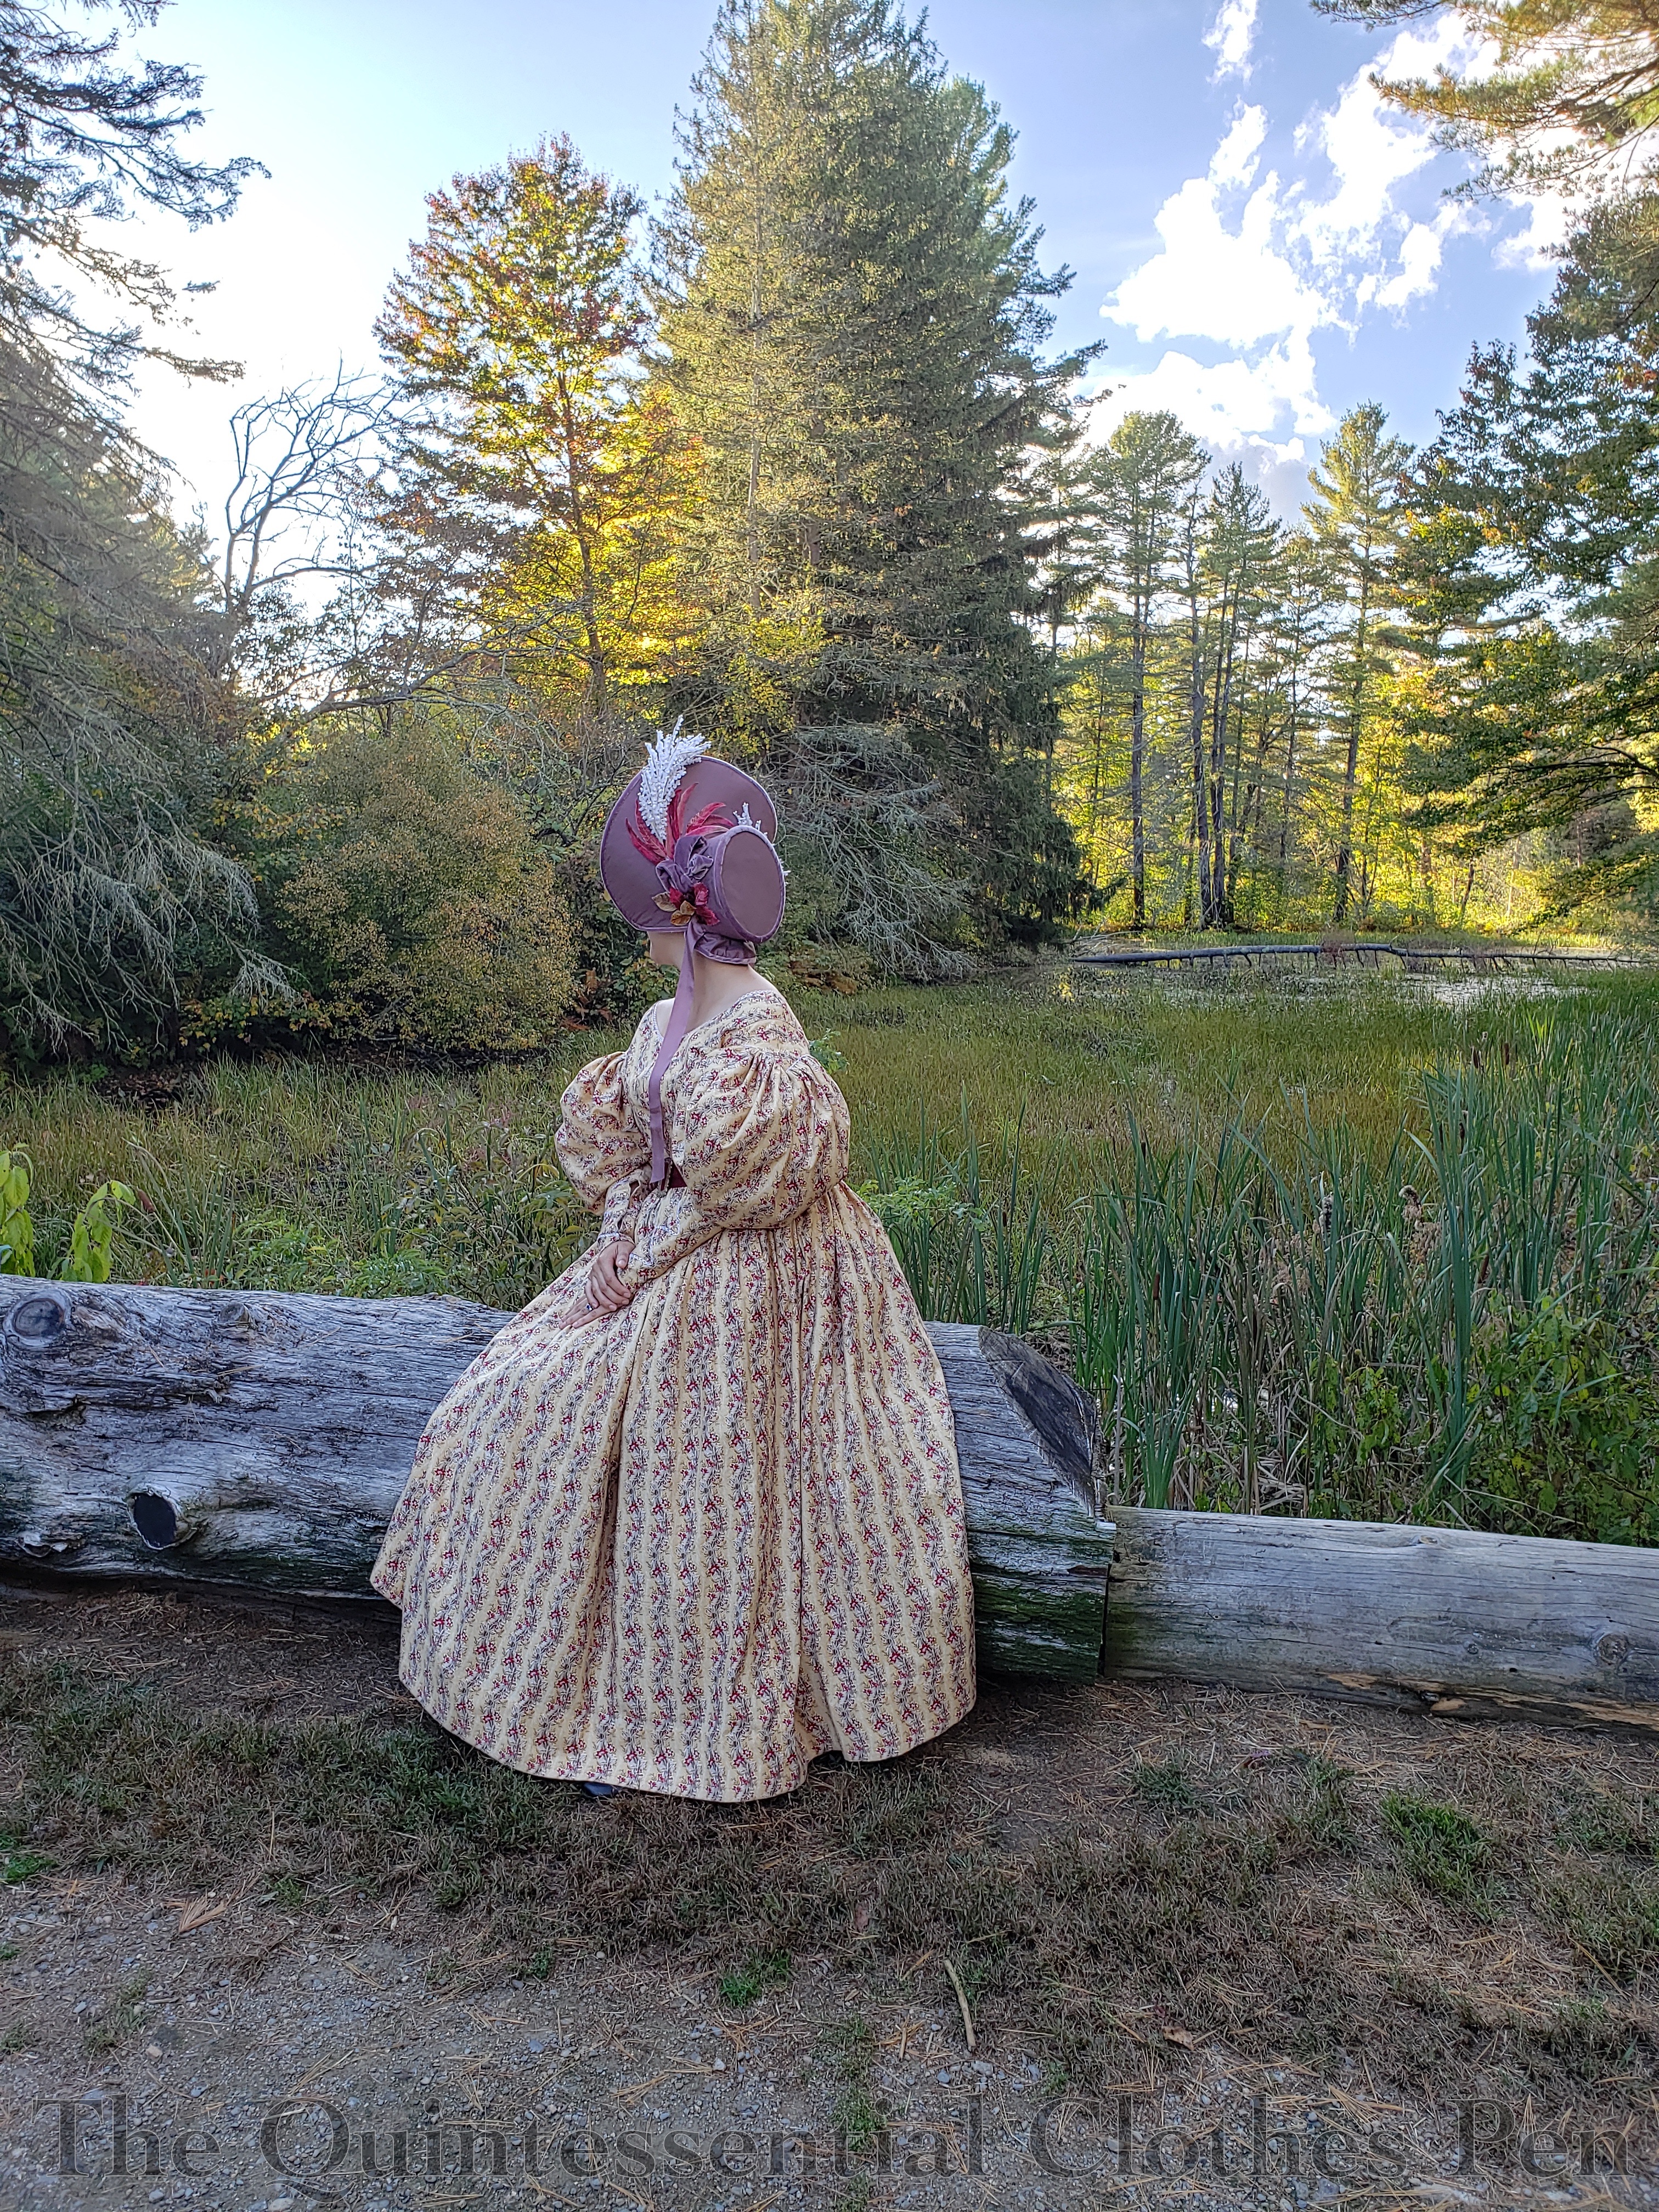
I enjoy the line of trees and the interesting perspective they provide. So here you go, a front and back view of this ensemble.
Farther along our walk through this beautiful area we stopped to take some artistic detail shots of the sleeves of this dress. First up, the mancheron on the shoulder of the dress. There’s some pretty good pattern matching to admire and it’s fun to see the gathers up close, too.
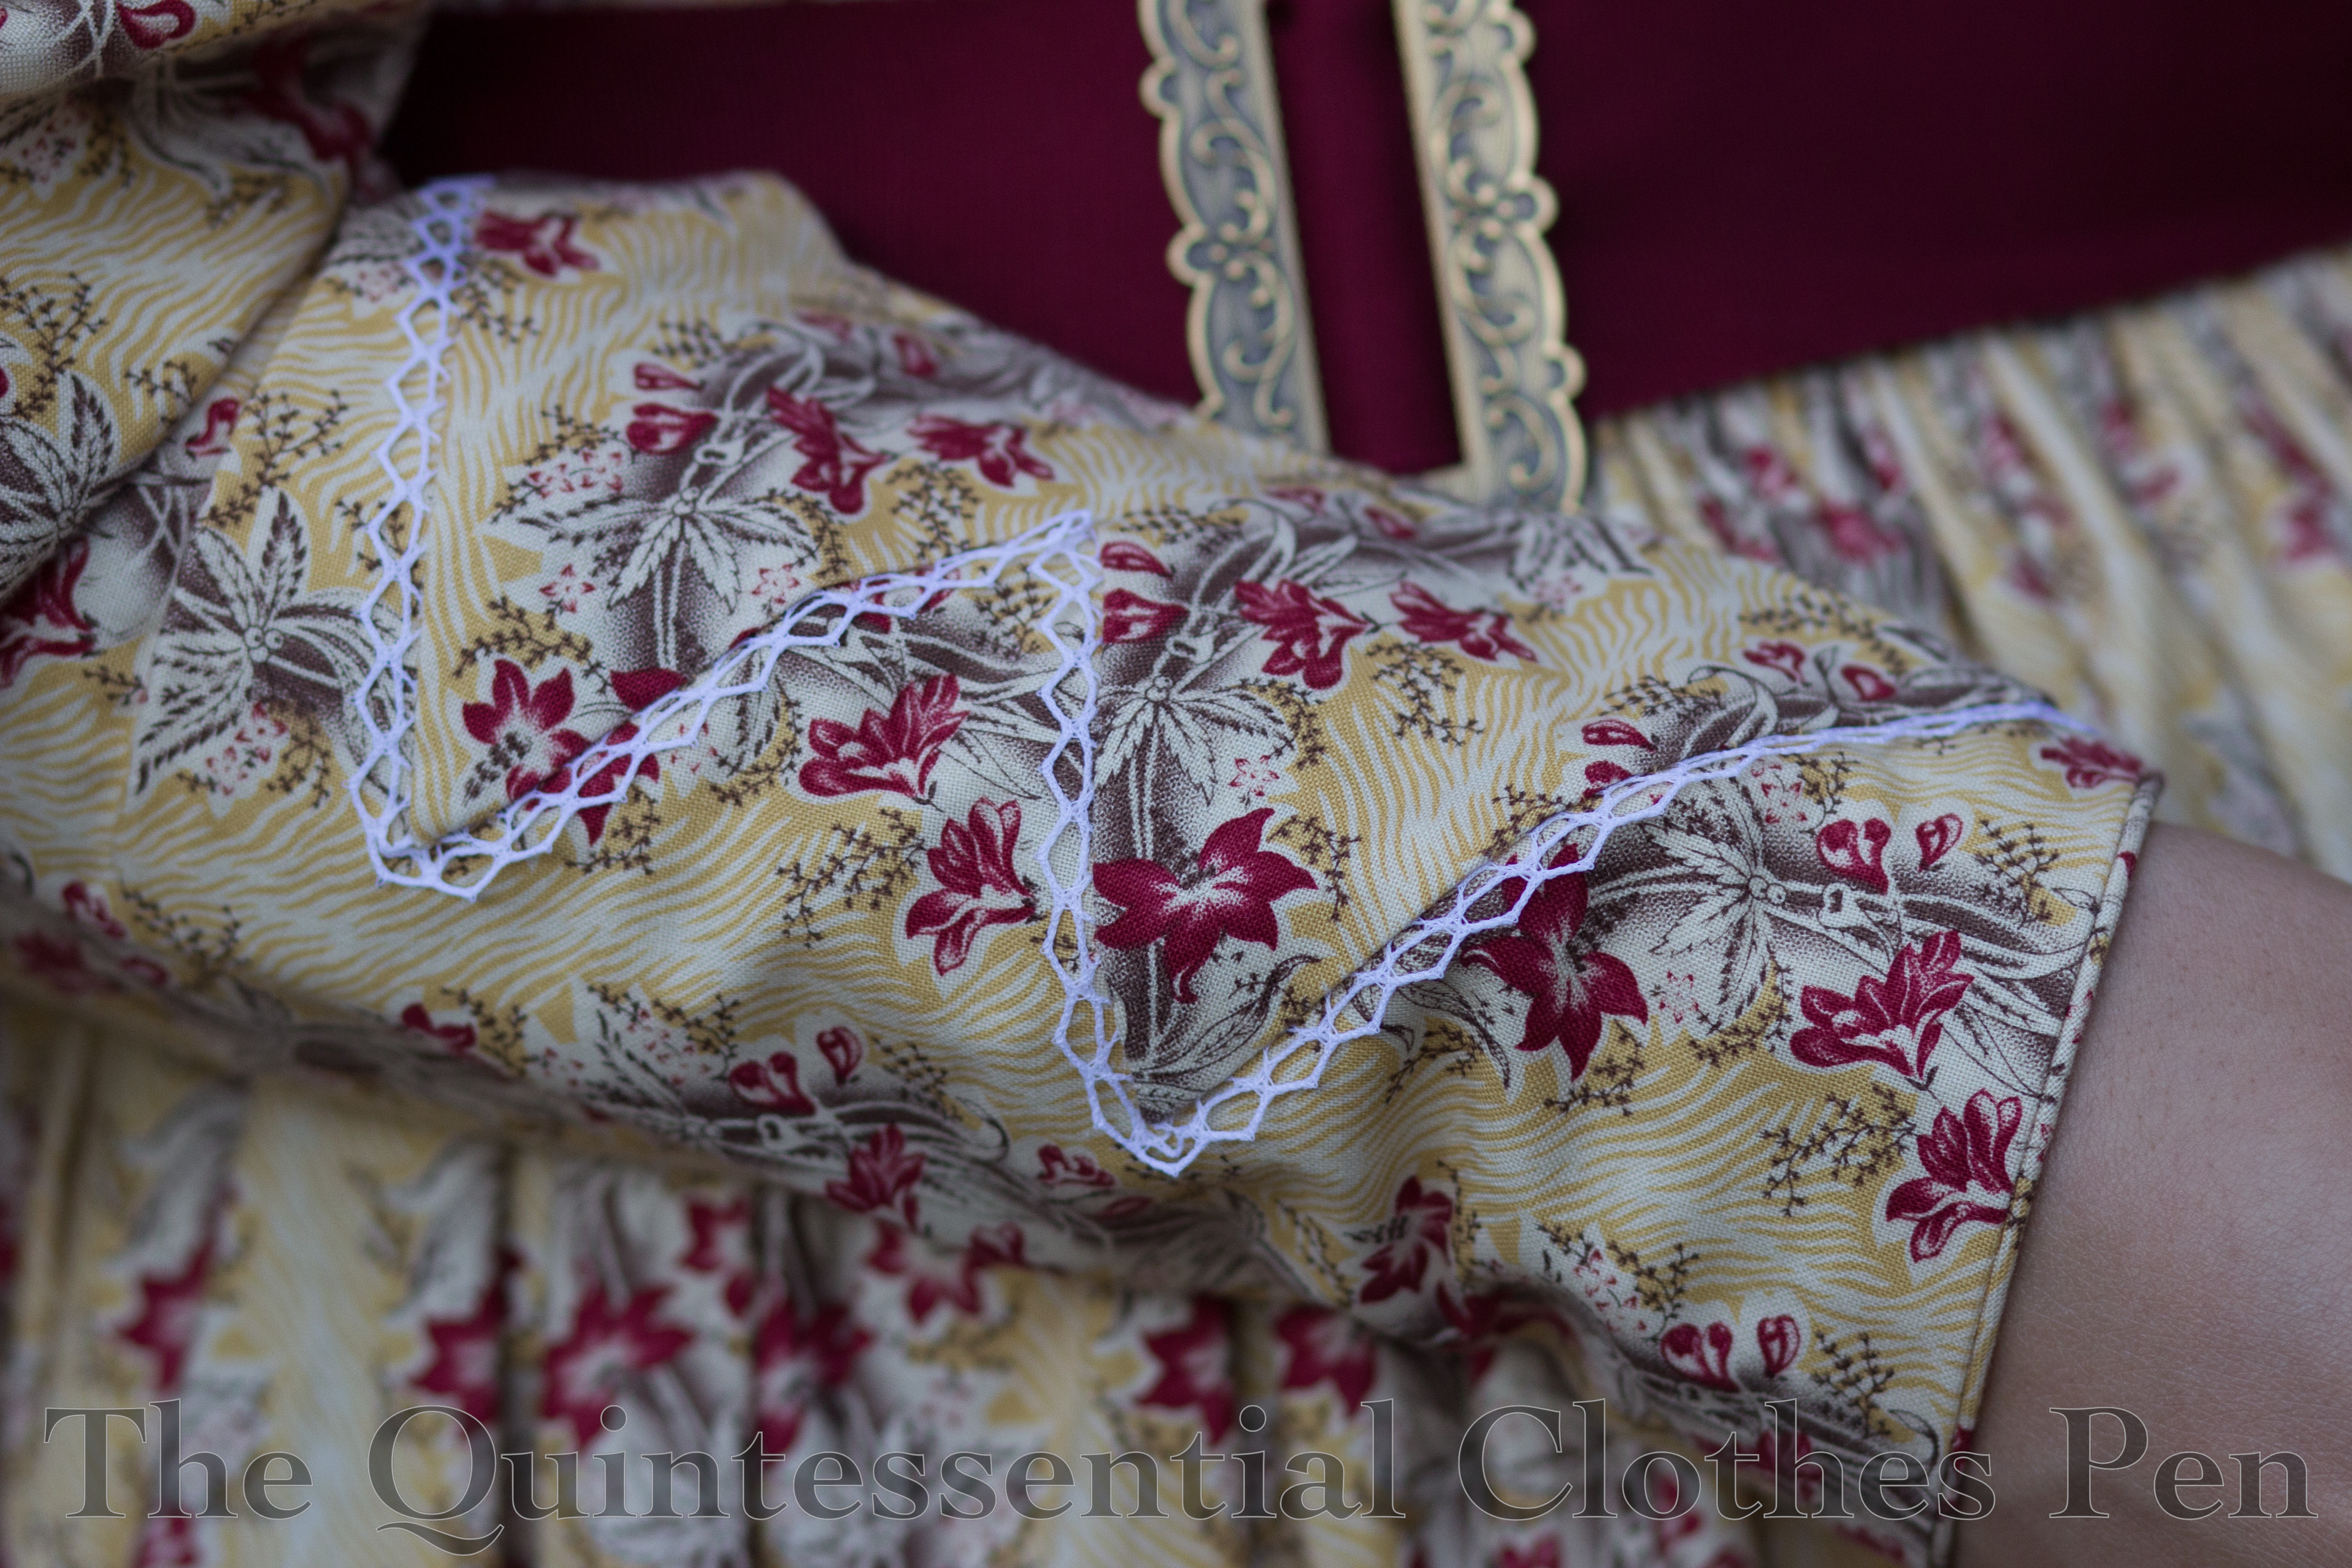
Here’s another view of the mancheron and sleeve puff, with the zig zag cuff trim in the background.
I can’t decide if I like that photo or this next one best! The next one is similar, but the focus of the photo is on the zig zag cuff trim instead of the mancheron.
The last detail photo shows the cuff trim in even greater detail, as well as my new belt buckle from Ensembles of the Past!
I purchased the ‘antique gold’ color. I love it! It’s substantial in weight, has precise and delicate details, and will probably outlast me in terms of durability. (This is just my opinion–I’m not paid to say these nice things!)
The last photos I have to show you are a bit of a teaser for the apple picking photos that are still to come. We had the most gorgeous autumn New England day!
The sky was a brilliant blue. The temperature was wonderfully comfortable–neither hot nor cold. The leaves were changing and were starting to crown the trees in vibrant red, yellow, and orange.
And a fresh breeze lifted our spirits and our bonnet ribbons! I’ve so missed events and outings. This was much needed (socially distanced) relief for weary souls. I hope that you have also found relief and joy in these trying times!
Some of my recent posts have mentioned my excursion into sewing clothing from the 1830s. Most recently, in September, I posted about making a corded petticoat to help support a fashionable 1830s silhouette. I also shared a reminder about the fabric I’ve had in mind for an 1830s dress since I bought it seven years ago. It’s finally time to share the finished ensemble created with that fabric!
Today’s post is going to focus on the construction of this dress, but, never fear, upcoming posts will share more finished garment photos as well as construction details about the bonnet.
There is a lot of information about this dress to share and many photos of the process, so I hope you’re ready for a lengthy post!
Inspiration
As you probably guessed from the title of this post, this dress is from the year 1834. The trimming details and shape are directly inspired by the dress pictured below, which is in the collection of the Victoria and Albert Museum.
The V & A Dress is dated to 1830-1834. From a style perspective, this makes sense as these are the years from this decade with the largest sleeves, but it is also around this point in the decade that sleeve fullness starts to slide down the arm. This look that is just beginning to show in the V & A dress, which achieves the falling look with the addition of the mancherons at the top. The mancherons both practically and visually push the fullness of the sleeve off the shoulder.
What is a mancheron? The Oxford English Dictionary has the following entry):
mancheron, n. 1.French Heraldry. A sleeve used as a charge. Obsolete. 2. A piece of trimming on the upper part of a sleeve on a woman’s dress. Now historical.
Patterning
The pattern for this bodice is based on patterns contained in Janet Arnold’s Patterns of Fashion 1 and Norah Waugh’s The Cut of Women’s Clothes. I was able to start with my basic darted 1860s bodice and adapt it for the 1830s using information about grain line, dart placement, etc. from the books. This worked well because I know the basic darted bodice fits in areas that can be fussy to fit such as neckline, armhole, etc. and those things (in the 1860s) are still very similar to the shapes from the 1830s.
The sleeve pattern is from Plate 12 (page 84) in The Workwoman’s Guide (published in 1838), which can be viewed on Google Books here. I used the big circle sleeve (Figure 8–shown made up in Figure 7) and varied the top shape so that it forms a downward V shape to allow for my mancherons, which are patterned based on the V & A inspiration dress.
The ladies at American Duchess created a very helpful video discussing sleeve shapes from the 1830s, including showing mockups of a few different sleeve patterns from The Workwoman’s Guide. It is wonderful for seeing how the flat patterns turn into 3D shapes, which I found to be very helpful as I dithered about sleeve patterns.. You can view the video here. Lauren also has a blog post talking about 1830s sleeves, which shows the pattern I chose to use in various stages of its construction, from being flat to being made-up.
The skirt is based on information from the same books as the bodice pattern. It is made of 3 panels of my 45″ wide cotton fabric.
Construction Method Disclaimer
I chose to construct this dress in the mid-19th century way of separate bodice and skirt. This is odd for the 1830s (in fact, I can’t think of any examples that are done this way) as they are usually sewn together to make a one piece dress. However, as I was pondering sleeve options and considering my yardage I was faced with an exciting prospect.
There are so many sleeve variations in the 1830s–super poof, takes-a-while-to-get-used-to-looking-at elbow poof, meticulous pleated details as the poofs are reduced and contained… I wanted to make more than one! Also, I had 10 yards of my beautiful reproduction cotton and I expected my 1834 dress to only use about 7. What would I do with the last 3 yards? That’s not enough to make another dress. But… it is enough to make another bodice, even with giant 1830s sleeves that use a full yard for each arm!
I decided to make one skirt with two bodices, so in addition to this 1834 dress I also have an 1838 bodice halfway completed. It is a variation on a theme, using mostly the same bodice pieces, but with a different front style and different sleeves. More on that in the future, but for the purposes of this post it is an explanation for the fact that the skirt of my 1830s dress hooks to the bodice in a way that is common in the mid-19th century, as you can see below. (The loops on the skirt waistband blend really well with the pattern on the fabric, but you can see them if you look really carefully.)
Skirt Construction
As I mentioned earlier, my skirt is made up of 3 panels of my 45″ wide cotton. They are carefully pattern matched to keep the scrolling consistent across the panels and to help hide the seam lines. They’re not perfect, but they are pretty darn close.
Two seams are on each side of center front and one is at center back. The two front seams have french seamed pockets set into them below the cartridge pleats. This is wonderfully helpful while wearing the dress! I made sure to make the pockets big enough to hold a phone, keys, etc.
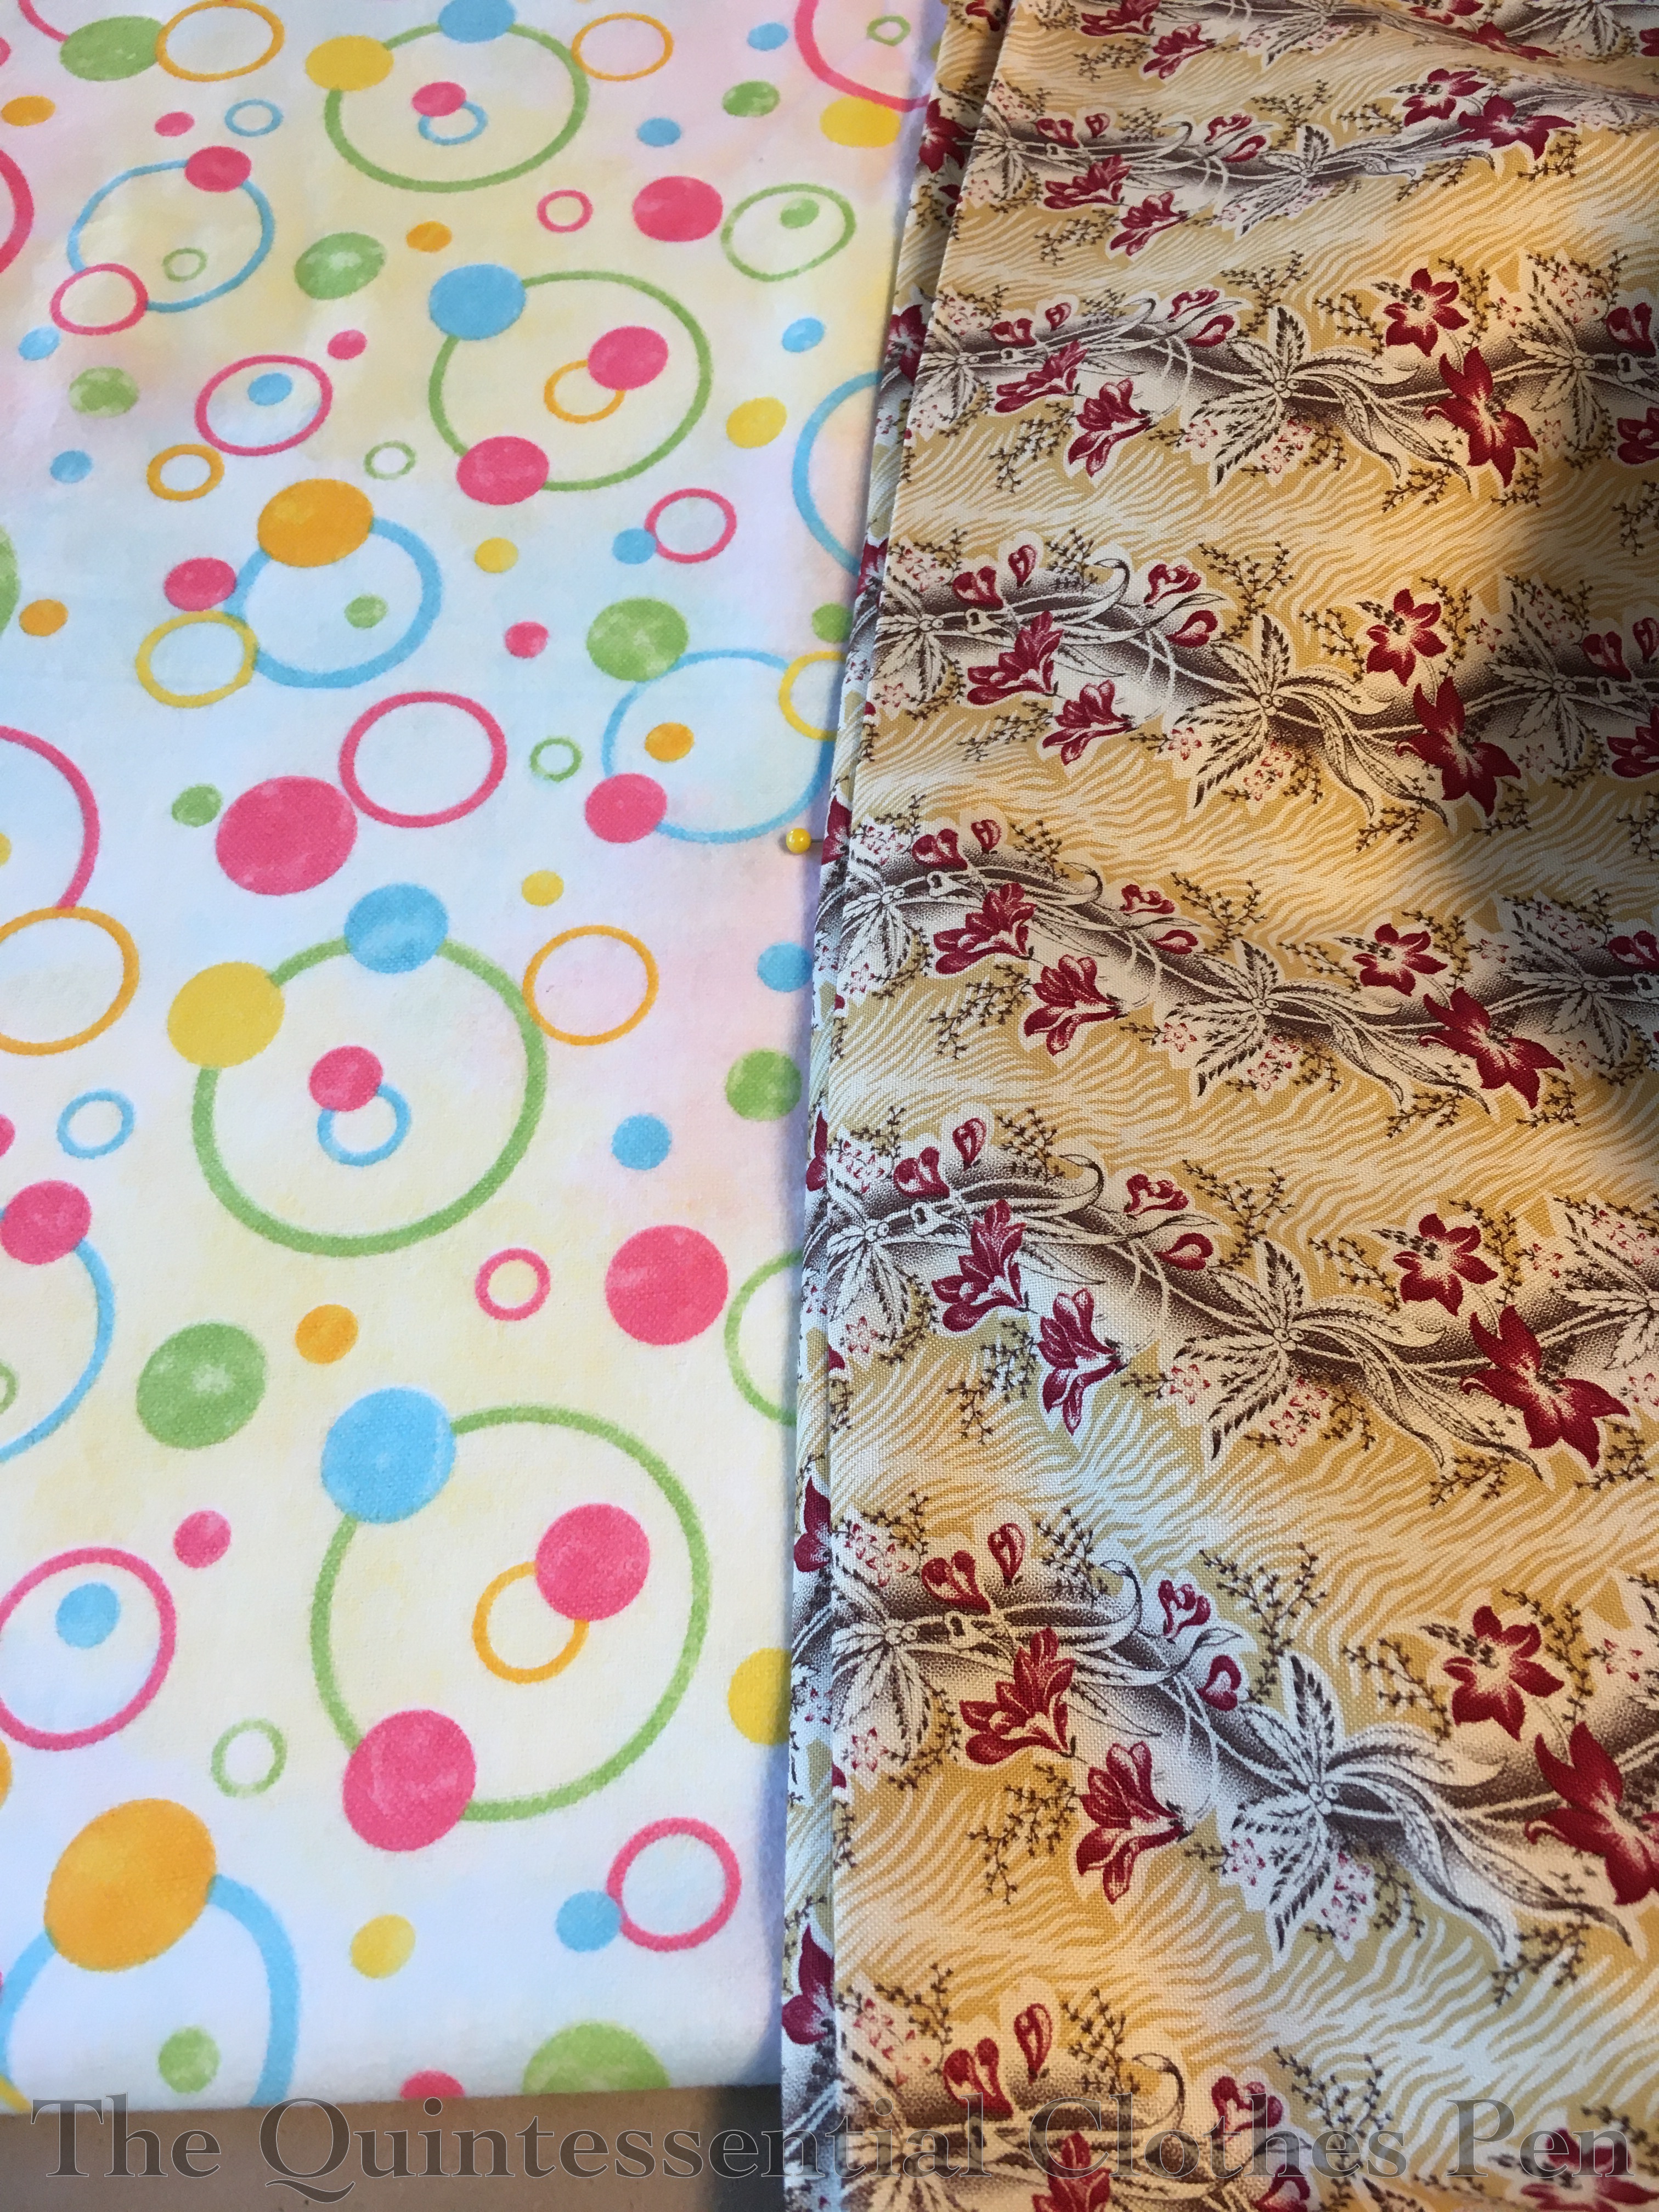
The fullness of the skirt is cartridge pleated to the waistband. I find that this quantity of cotton is weeny looking when cartridge pleated to a waistband without a little help to create loft, so I sandwiched a single layer of cotton flannel into the pleats to help them have a little bit of puff. I just used scrap flannel from my stash for this–the fun dot print pictured below. This is the top of my skirt pressed and ready for pleating!
Here is the skirt in the process of being pleated. The top edge is left raw and folded over the flannel before I ran two rows of parallel stitches to form the pleats.
I absolutely eyeball my cartridge pleats! My stitches are vaguely even but I really don’t worry too much about that. I mark the quarter points of the skirt and waistband and then adjust the pleats to fit. No math for this process!
The waistband has a single layer of canvas inside (a scrap from a decorating project) to help stiffen it and provide stability for the cartridge pleats and closures. This is machine stitched to the cotton where it will not show.
The cotton is then wrapped around the canvas and whip stitched in place. I finished the waistband entirely before whip stitching the cartridge pleats in place.
Bodice Construction
The construction of this bodice is pretty straightforward as 19th century bodices go, though I spent a bit of time searching out photos of extant dress interiors from this decade so I could see how they were finished (or left with unfinished edges!). I found these dresses featured on All The Pretty Dresses very helpful, especially as they have interior views: late 1830s green/blue/red cotton print dress and early 1830s brown dress.
There are other inspirational dresses on my Pinterest board for this project, as well. Many of them are held by the Metropolitan Museum of Art. Those are excellent because you can really zoom in on the photos to look at details, but unfortunately they don’t often show interior views of the dresses.
The hardest part about this bodice was the pattern matching! It was mind boggling to keep the flowers growing upwards, match the wave, keep the dark pink flowers at corresponding places, and keep some parts on the bias and some on the straight.
For example, here is my first attempt at the front bodice, which is cut on the bias. It’s not awful… but it’s just not quite right, and that bothers my eyes.
I very carefully tried again…
And was able to get this, which I was much happier with!
And I was able to use the reject front piece to cut out a pocket piece (and later a bit of bias as well)… no waste here!
Here is the front piece after flatlining (the fronts, side backs, and backs of the bodice are all flat lined with muslin), stitching the darts, and putting cording down the center front seam.
Ah yes, the cording! There is 1/16″ cotton cording in most of the bodice seams (front, side back, shoulders, armholes, neckline, and to finish the cuffs). This detail is taken directly from extant 1830s dresses.
My cording is made up of bias scraps, some as small as about 4″ long, that are pieced together. The cording is machine stitched. I made it with even seam allowances for most of the seams, but thought ahead and offset the seam allowance for the neckline cording, to make it easier to turn it under and whip stitch later. The photo below shows the neckline cording (on the top) and regular seam cording (on the bottom).
Here are the side back pieces with the cording attached, before being sewn to the back pieces. As you can see, I carefully matched my pattern across these two pieces as well.
And here is one side back sewn to its corresponding back, with the cording in the seam. Even across these pieces my pattern matching is pretty good, especially at the bottom!
And the back! It also makes me very happy, but was a super mind boggle to figure out! I have a flap that overlaps past center back, covering a pleat on the other side that will anchor my loops. I found this detail on a number of 1830s dresses, including this 1835-1836 dress at The Met and this c. 1837 dress at The Met.
It doesn’t look like much until it’s lined up to be closed… and then it’s perfect!
The final step was to finish the bottom. I wanted to have a self fabric waistband on this bodice, as with the bodice at the V & A, so that I would have the option of wearing my dress with or without a belt, while still having the visual change of pattern in the fabric.
The outer waistband and inner muslin facing encase the bottom seam allowance of the bodice. They are machine stitched at the top, have graded seam allowances, and then the muslin is whip stitched along the bottom.
Sleeve Construction
With the bodice mostly assembled, I moved on to the sleeves. These are not flat lined.
I upgraded my sleeve puffs for this ensemble by giving them ties to attach to the armsceye of the dress so I can control the height that they sit at. This is essential for getting the right shape poof with this sleeve style. Looking into a sleeve, here is one sleeve puff tied in place.
I edged my decorative mancheron and cuff zig zag with narrow lace before attaching them to my sleeve. The cuff zig zags are sewn on by hand, while the full tops of the sleeves are gathered and machine sewn to the mancherons (you can see a the seam allowance from this seam in the photo above).
After the trim was added to the cuffs, I sewed cording to the bottom edge and then a muslin facing to finish everything off. This allows me to have nicely finished edges for the sleeve openings, which extend up about 8″ and allow for the tight fit of the forearms.
Here’s what that looks like flipped up and ready to be slip stitched along the top edge. You can see my hand sewing from attaching the cuff zig zag.
So… I got this far and realized that my sleeve was too narrow (even though I’d had no trouble in my mockup!) and my hand wouldn’t fit through the opening! Even if I made the opening higher, the sleeve edges wouldn’t butt, but would have a gap!
It’s good to have extra fabric… Having extra allowed me to make the decision to cut off the old forearm pieces and piece on new ones (with careful pattern matching, of course!). This meant redoing the cuff trim and finishing, but I couldn’t find a better solution. The seam hides under the crazy big sleeves, so it’s really not noticeable at all (even if I hadn’t pattern matched the seam!).
Finishing
Finally, after these various successes and challenges… the dress was done! Here are some more photos of it in its finished state.
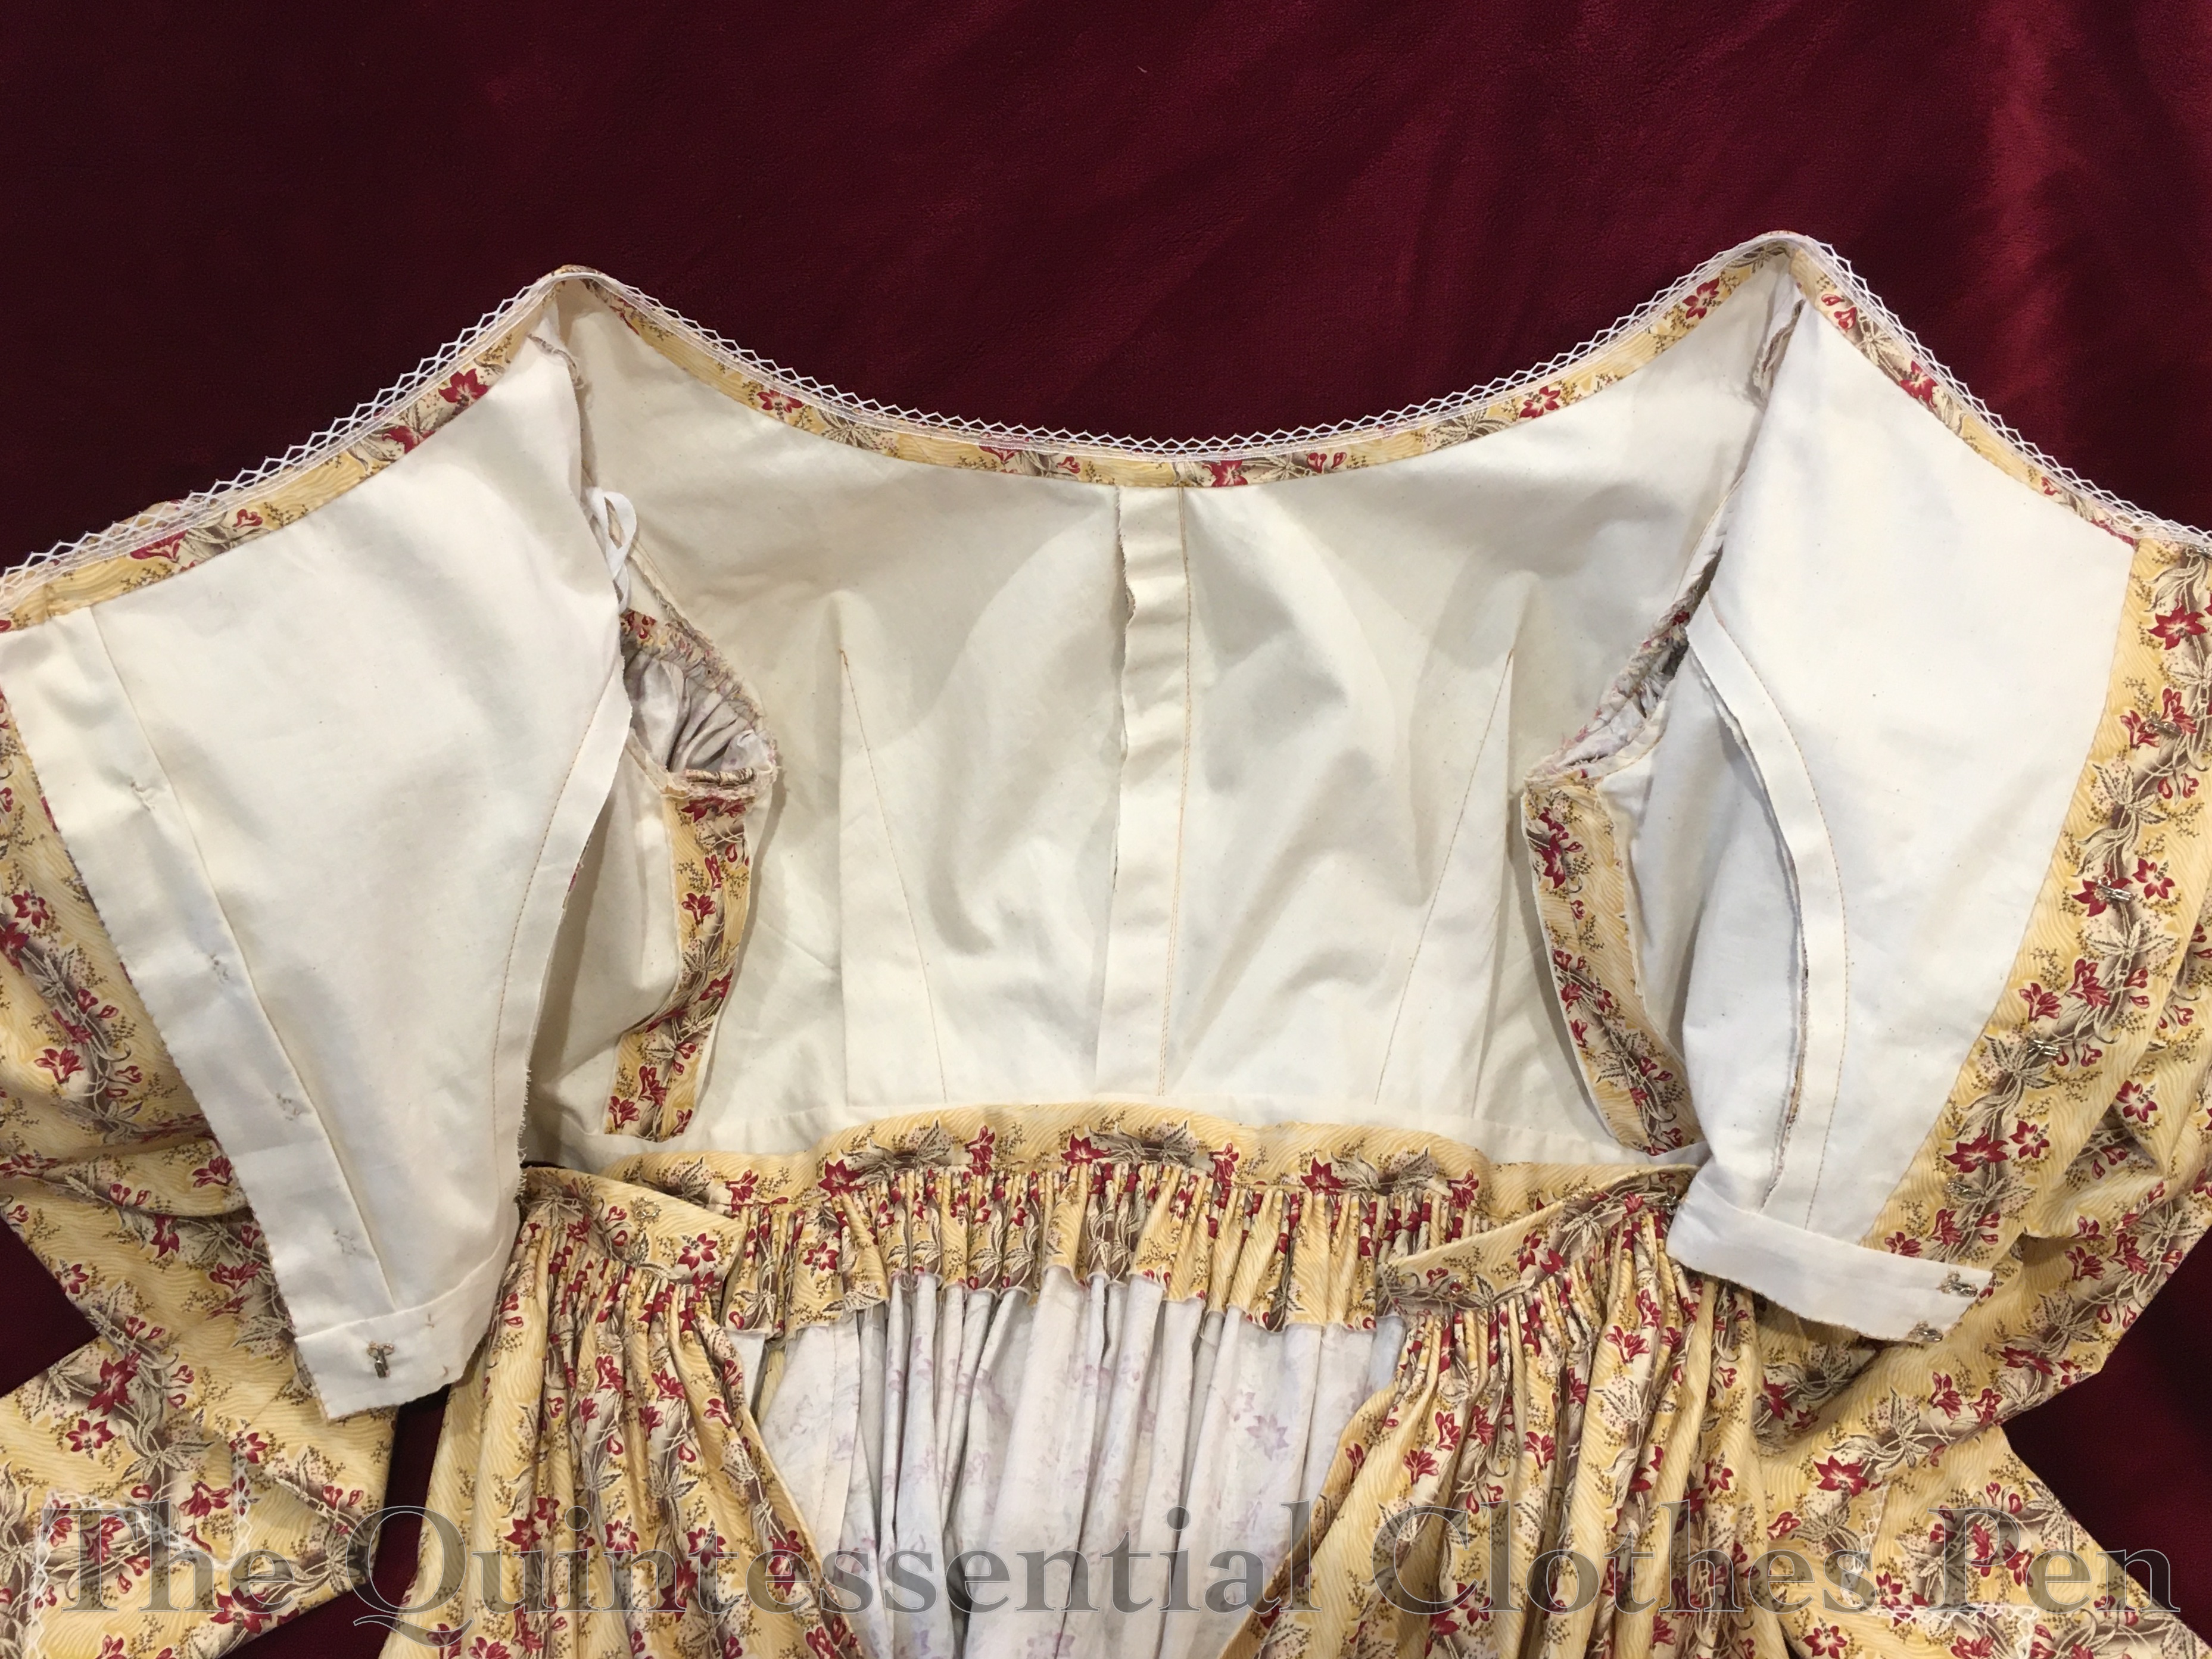
This is the inside of the bodice with the skirt attached. You can see machine stitching, seam allowances mostly left unfinished (they really don’t fray at all), neck binding, closures, etc.
This closeup shows a shoulder seam, as well as the neckline and armhole finishing. The bias on the neck is turned under and whip stitched. The lace is sewn on top of that. The armhole seam allowances were trimmed and then roughly whip stitched to hold the layers together. You can also see a little square of the twill tape tie for the sleeve puff (it is sewn to the armsceye seam allowance below the shoulder seam).
Here is the finished cuff opening. Hidden under the zig zag are the hooks that correspond to the loops on the muslin facing.
This is the center back opening with all of the closures in place. Those hooks really do camouflage well on the brown scroll, don’t they? Doing the closures this way leaves lots of seam allowance at center back for me to make alterations in the future if I need to.
This photo shows the inside of the skirt and bodice. Specifically, you can see the raw edge of the top edge skirt seam allowance folded to the inside (the skirt is intentionally shorter in the front than in the back, which you can see in the varied top edge seam allowanced length), the french seam of the pocket, and the skirt opening, which is simply an opening in the back seam (no placket on this skirt, the fullness of the cartridge pleats easily hides the opening).
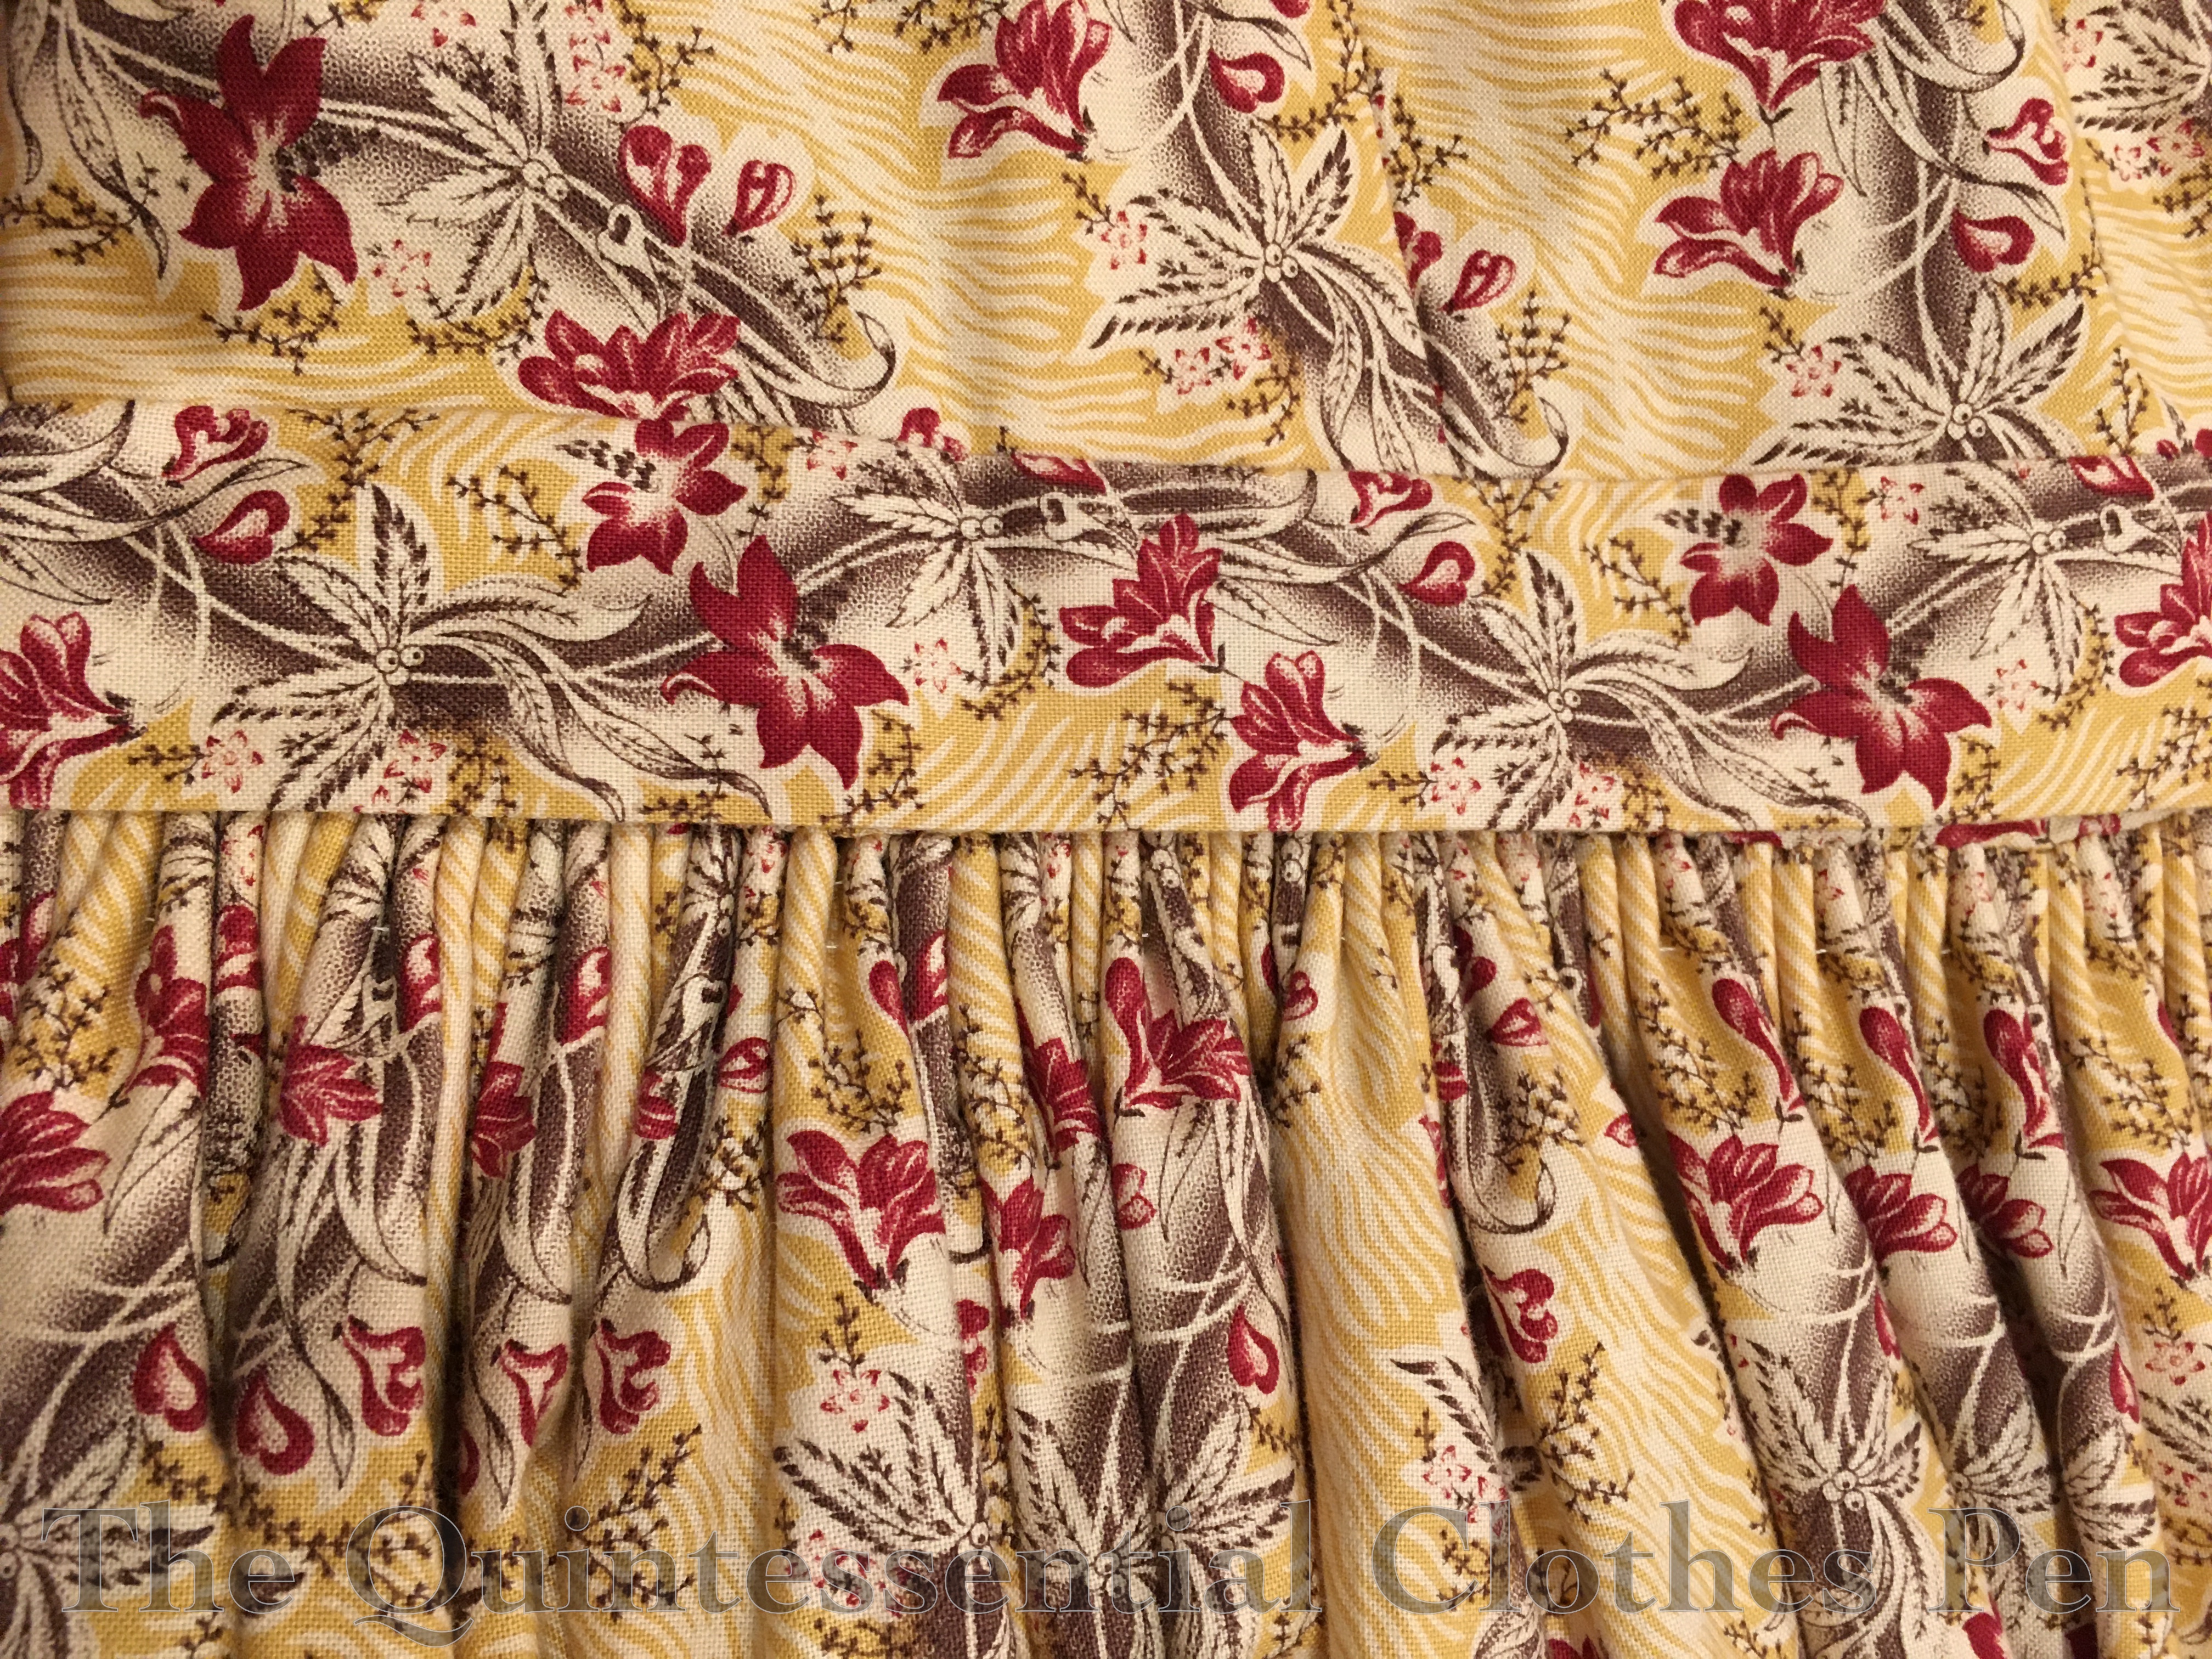
One last photo! This is the cartridge pleats and bodice waistband from the exterior. Cartridge pleats are always visually intriguing to me and I also love how the waistband of the bodice is perfectly cut to show off the scroll and flower pattern.
After so many construction photos, here is a reminder of what the completed dress looks like from the exterior. I’m looking forward to sharing more photos in future posts!
Thanks for sticking with me through this very long post!
I’ve accumulated a few new fabrics over the last few months and I thought it would be fun to share them in a stash addition post!
Fabric for new sweatpants
I have a favorite pair of sweatpants that I’ve had for almost 20 years. They’ve seen a lot of wear. After 20 years, the hems are pretty worn out and they’re starting to develop holes in the fabrics near the seams. I’ve been on the lookout for similar ones to replace them for years, but the fit is hard to find: wide-ish legs with a bit of a flare, diagonal pockets, and wide hems. I’ve never come across another pair with quite the same styling. (And they’re not currently in style, being 20 years old, so that’s part of the challenge.)
While wearing them quite a bit in March and April I had the thought that “I could make myself a new pair of these pants!”
This idea was spurred in part by the lovely fleece fabrics that Blackbird Fabrics has stocked over the last eight months or so. Every time they popped up in an email I considered purchasing some, but couldn’t make up my mind about color and dragged my feet. Blackbird’s fabrics sell out quickly and I kept missing the boat with my indecision, but then they restocked the bamboo/cotton stretch fleece and matching ribbing and I decided to make a decision, go for it, and order some!
Doesn’t the fleece side of this fabric look soft? I love that new fleece feeling!
I ordered 1.5 meters of the fleece and .5 meters of the ribbing. I’m sure I’ll have leftover ribbing, as it’s only used for the band at the top of the pants, but I’ll find a use for it again someday, I hope.
Of course, right around the time I purchased my new sweatpant fabrics the weather warmed and I lost my motivation to make the pants. But the fabric isn’t going anywhere and in theory the weather is getting cooler soon, so maybe these will make it onto my sewing table sometime in the next few months.
I do congratulate myself on taking the time to take a pattern from the old pants before I lost motivation so that when I decide to move forward I’m ready to go!
Two block printed fabrics
I keep a running list of sewing projects, in order to remind myself what steps projects are at, what fabrics are marked for certain projects, and what projects I have in mind. Occasionally, while looking at this list, I get swept away with ideas for new projects.
Earlier this summer, this feeling of wanting new projects was compounded by a friend updating me on the status of her current 1830s day dress project using a lovely block print cotton. It’s been a few years since I’ve seriously looked at what’s on offer for block print cottons on places like Etsy and eBay, so I decided to check things out.
Oops! Because, of course, I found pretty things! And then my brain went into overdrive, thinking of all the amazing projects I could make with the beautiful things!
I confess that I gave in to temptation and purchased two block printed fabrics.
I feel somewhat justified in that I have very clear ideas in mind for them!
I intend for the green and red print to become a gown like this one, from about c. 1785. I have 10 yards, enough to make the dress and a matching petticoat, but I thought that someday I might also be interested in having a contrast petticoat as well.
In terms of timeline, I have no clear plans for when I might make this. I am working on stays from this period, so that will be a great help, but that’s not really a solid plan. And the stays are going slowly, as I’ve been distracted from them by other projects. So, no deadline or timeline in mind.
I also bought 9 yards of the pink print in order to make a day dress from 1843/44. But then I remembered a fabric already in my stash that would also make a lovely dress from these years (I actually posted about it in this past stash addition post in 2018–it’s the cream woven plaid). So… I’m not exactly sure which fabric I would pick for this project, though I’m leaning towards the new pink block print (whichever one I don’t pick doesn’t have a clear plan).
I have a new corded petticoat that would help with the 1840s silhouette and I already have the rest of the undergarments, so it’s not out of the realm of possibility that I could tackle this project in the not-too-distant future. (What does that actually mean? Next year, maybe?)
Discount duchess satin
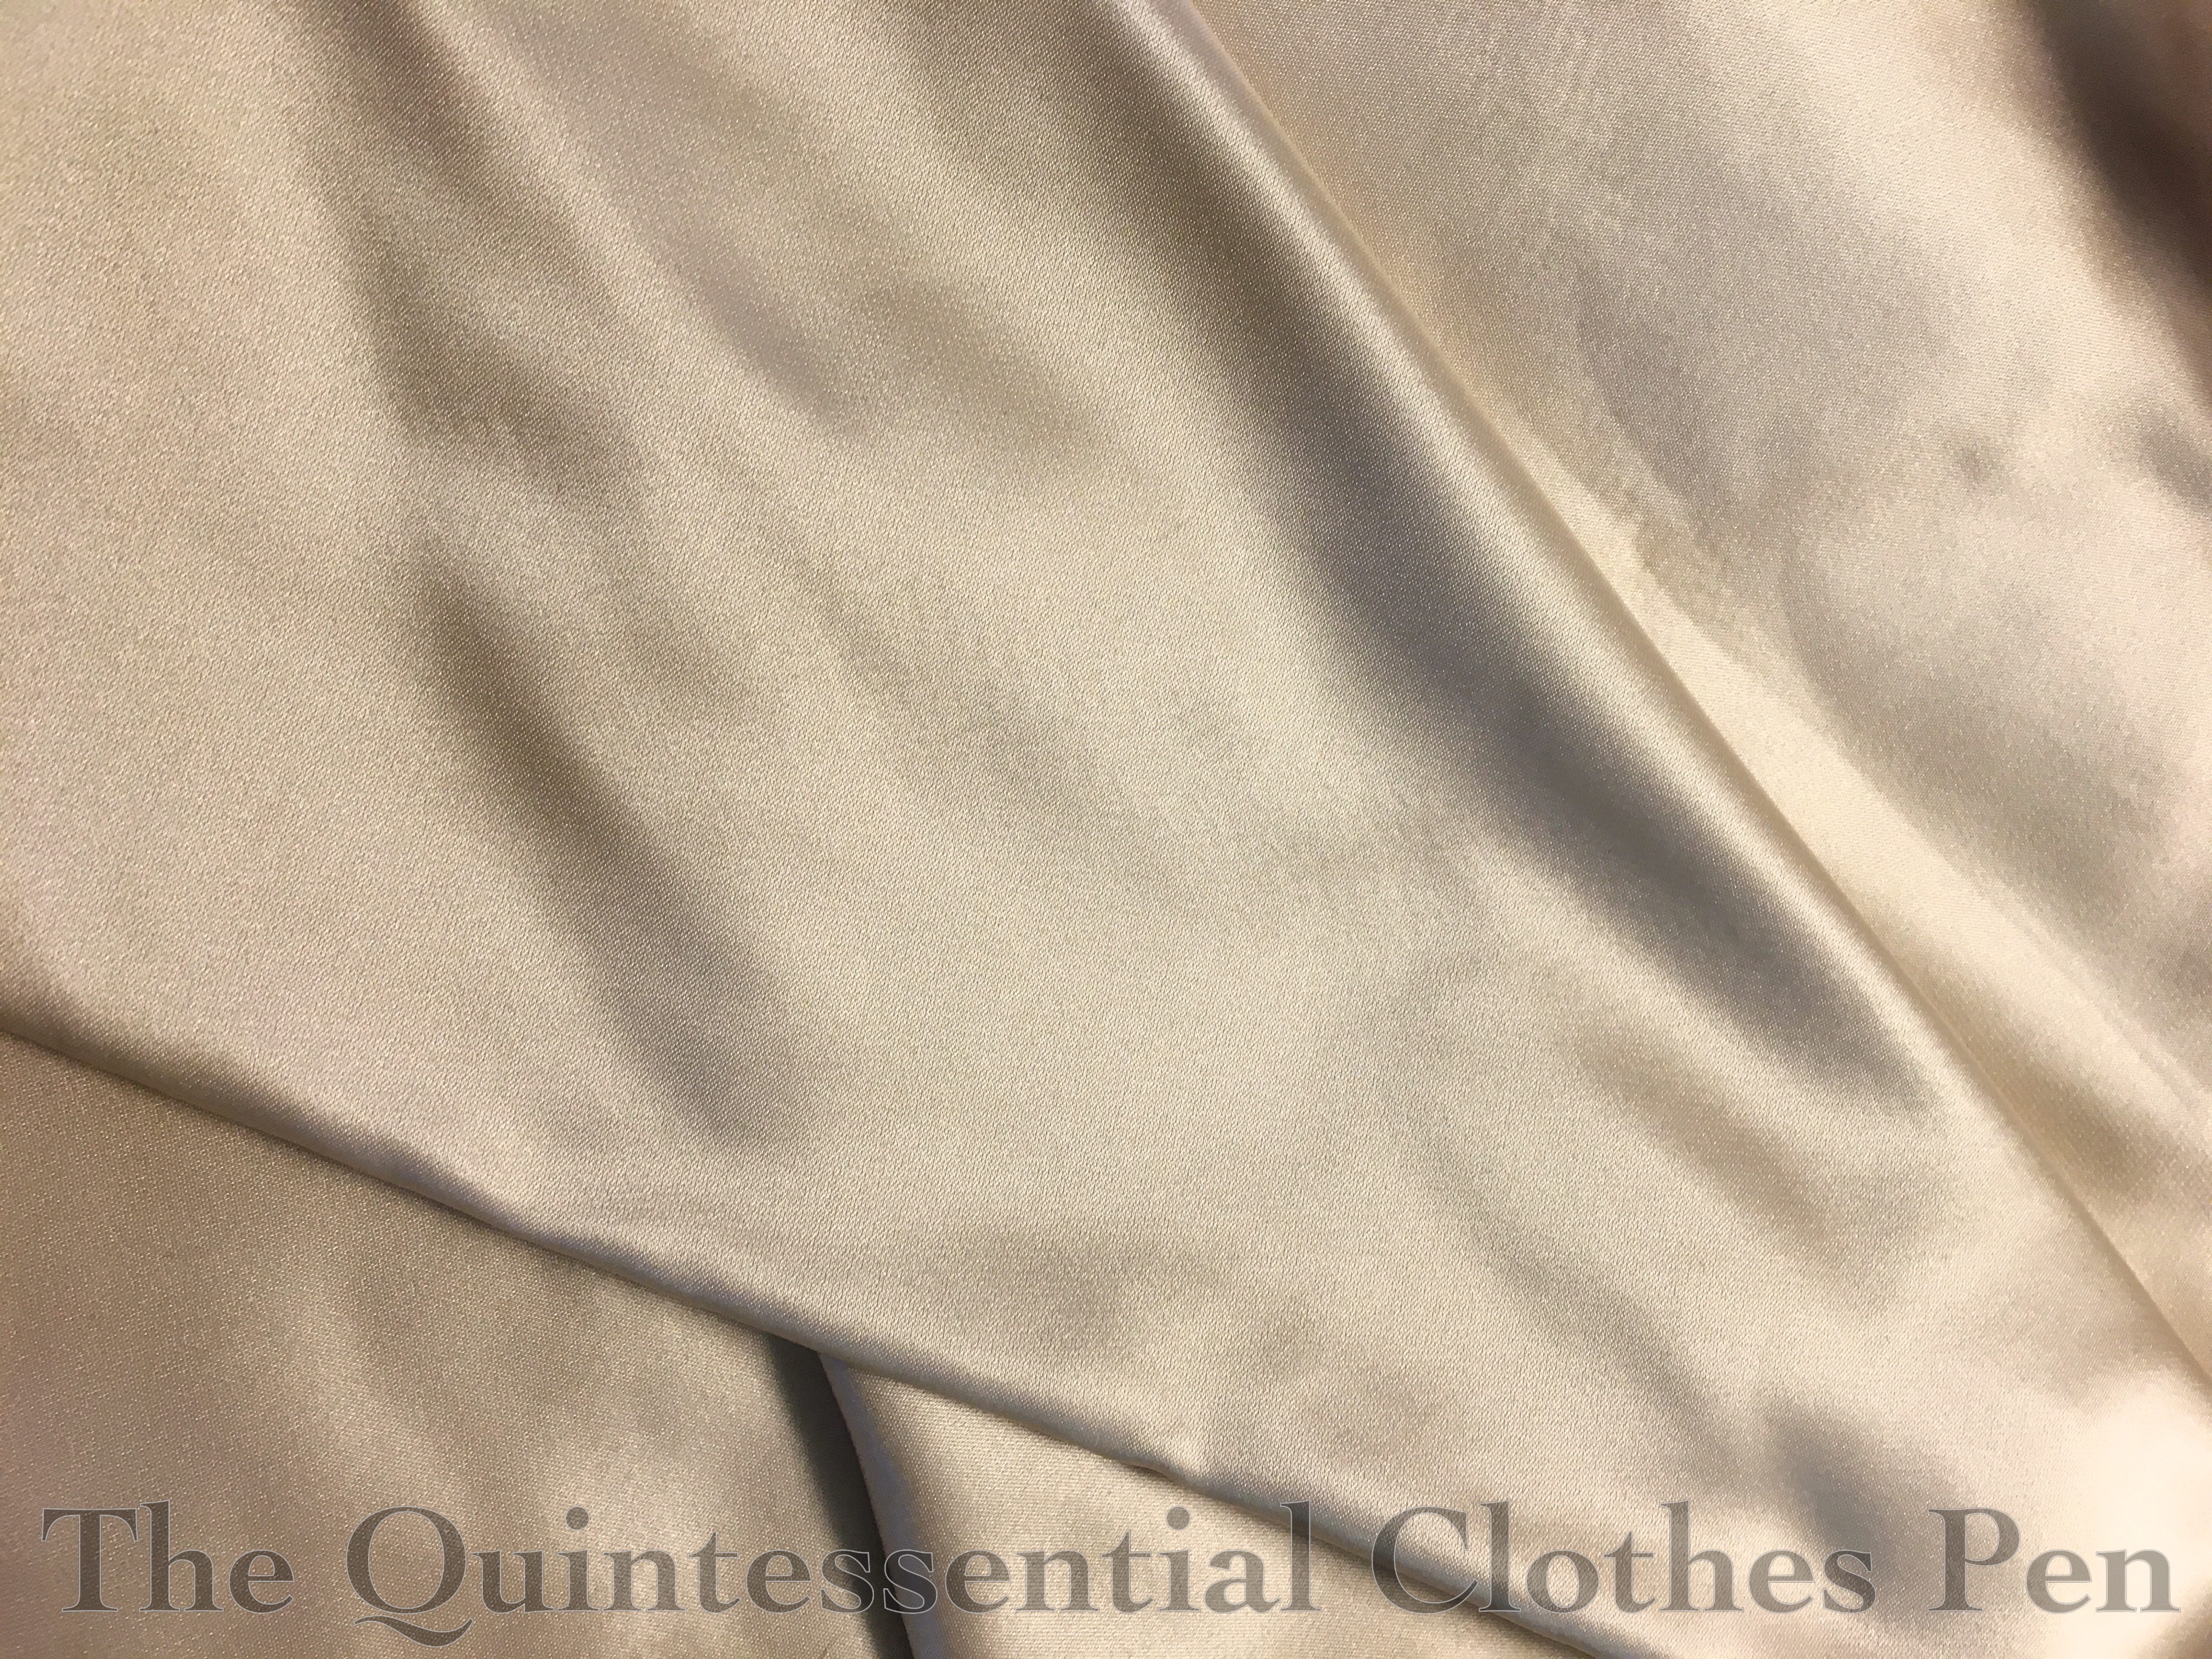
This is the standard ‘I happened upon it’ story. This blush duchess silk satin was in the discount bin at a local store.
Of all of the fabrics I’ve acquired recently, this is the one that is the most ‘stash addition’. I don’t need the 1.5 yards that I bought for anything in particular, but I thought that for the low price it was worth picking some up.
I think it would make a gorgeous 19th century corset (like my 1880s steam molded corset, which is also made from duchess silk satin). I also have vague plans to someday make a 1920s corset/girdle and I think it might be useful for that as well.
In conclusion…
I’ve been doing well at using stash fabrics to make things recently, which is great, but I’m not sure if I’ve offset that by buying new things… Oh well! Sometimes you have to buy things when you see them!
My sewing has taken a sharp turn into the 1830s in the last two months or so. It’s an exciting detour that has been on the horizon for a long time–ever since I purchased this yellow block print cotton back in 2013, in fact.
I wanted to up my silhouette game for the 1830s and achieve a fuller looking skirt than I’ve been able to do with my 1832 velvet gown in the past. To that end, I decided to make a corded petticoat.
I followed the directions from American Duchess in this video and only changed the cording pattern to suit my materials. If you’re interested in making a corded petticoat yourself I definitely recommend the American Duchess video. I found it easy to follow along with the steps and appreciated the mentions of pitfalls and tips along the way.
I was super excited to get started and maintained my enthusiasm for the first 4 sections of cording, but by the top 2 sections I was definitely feeling ready to be done! By that point the petticoat was unruly and difficult to turn as I sewed around each channel. Despite being less fun than when I started, I pushed on, and I was quite grateful when I finished the last section of cording!
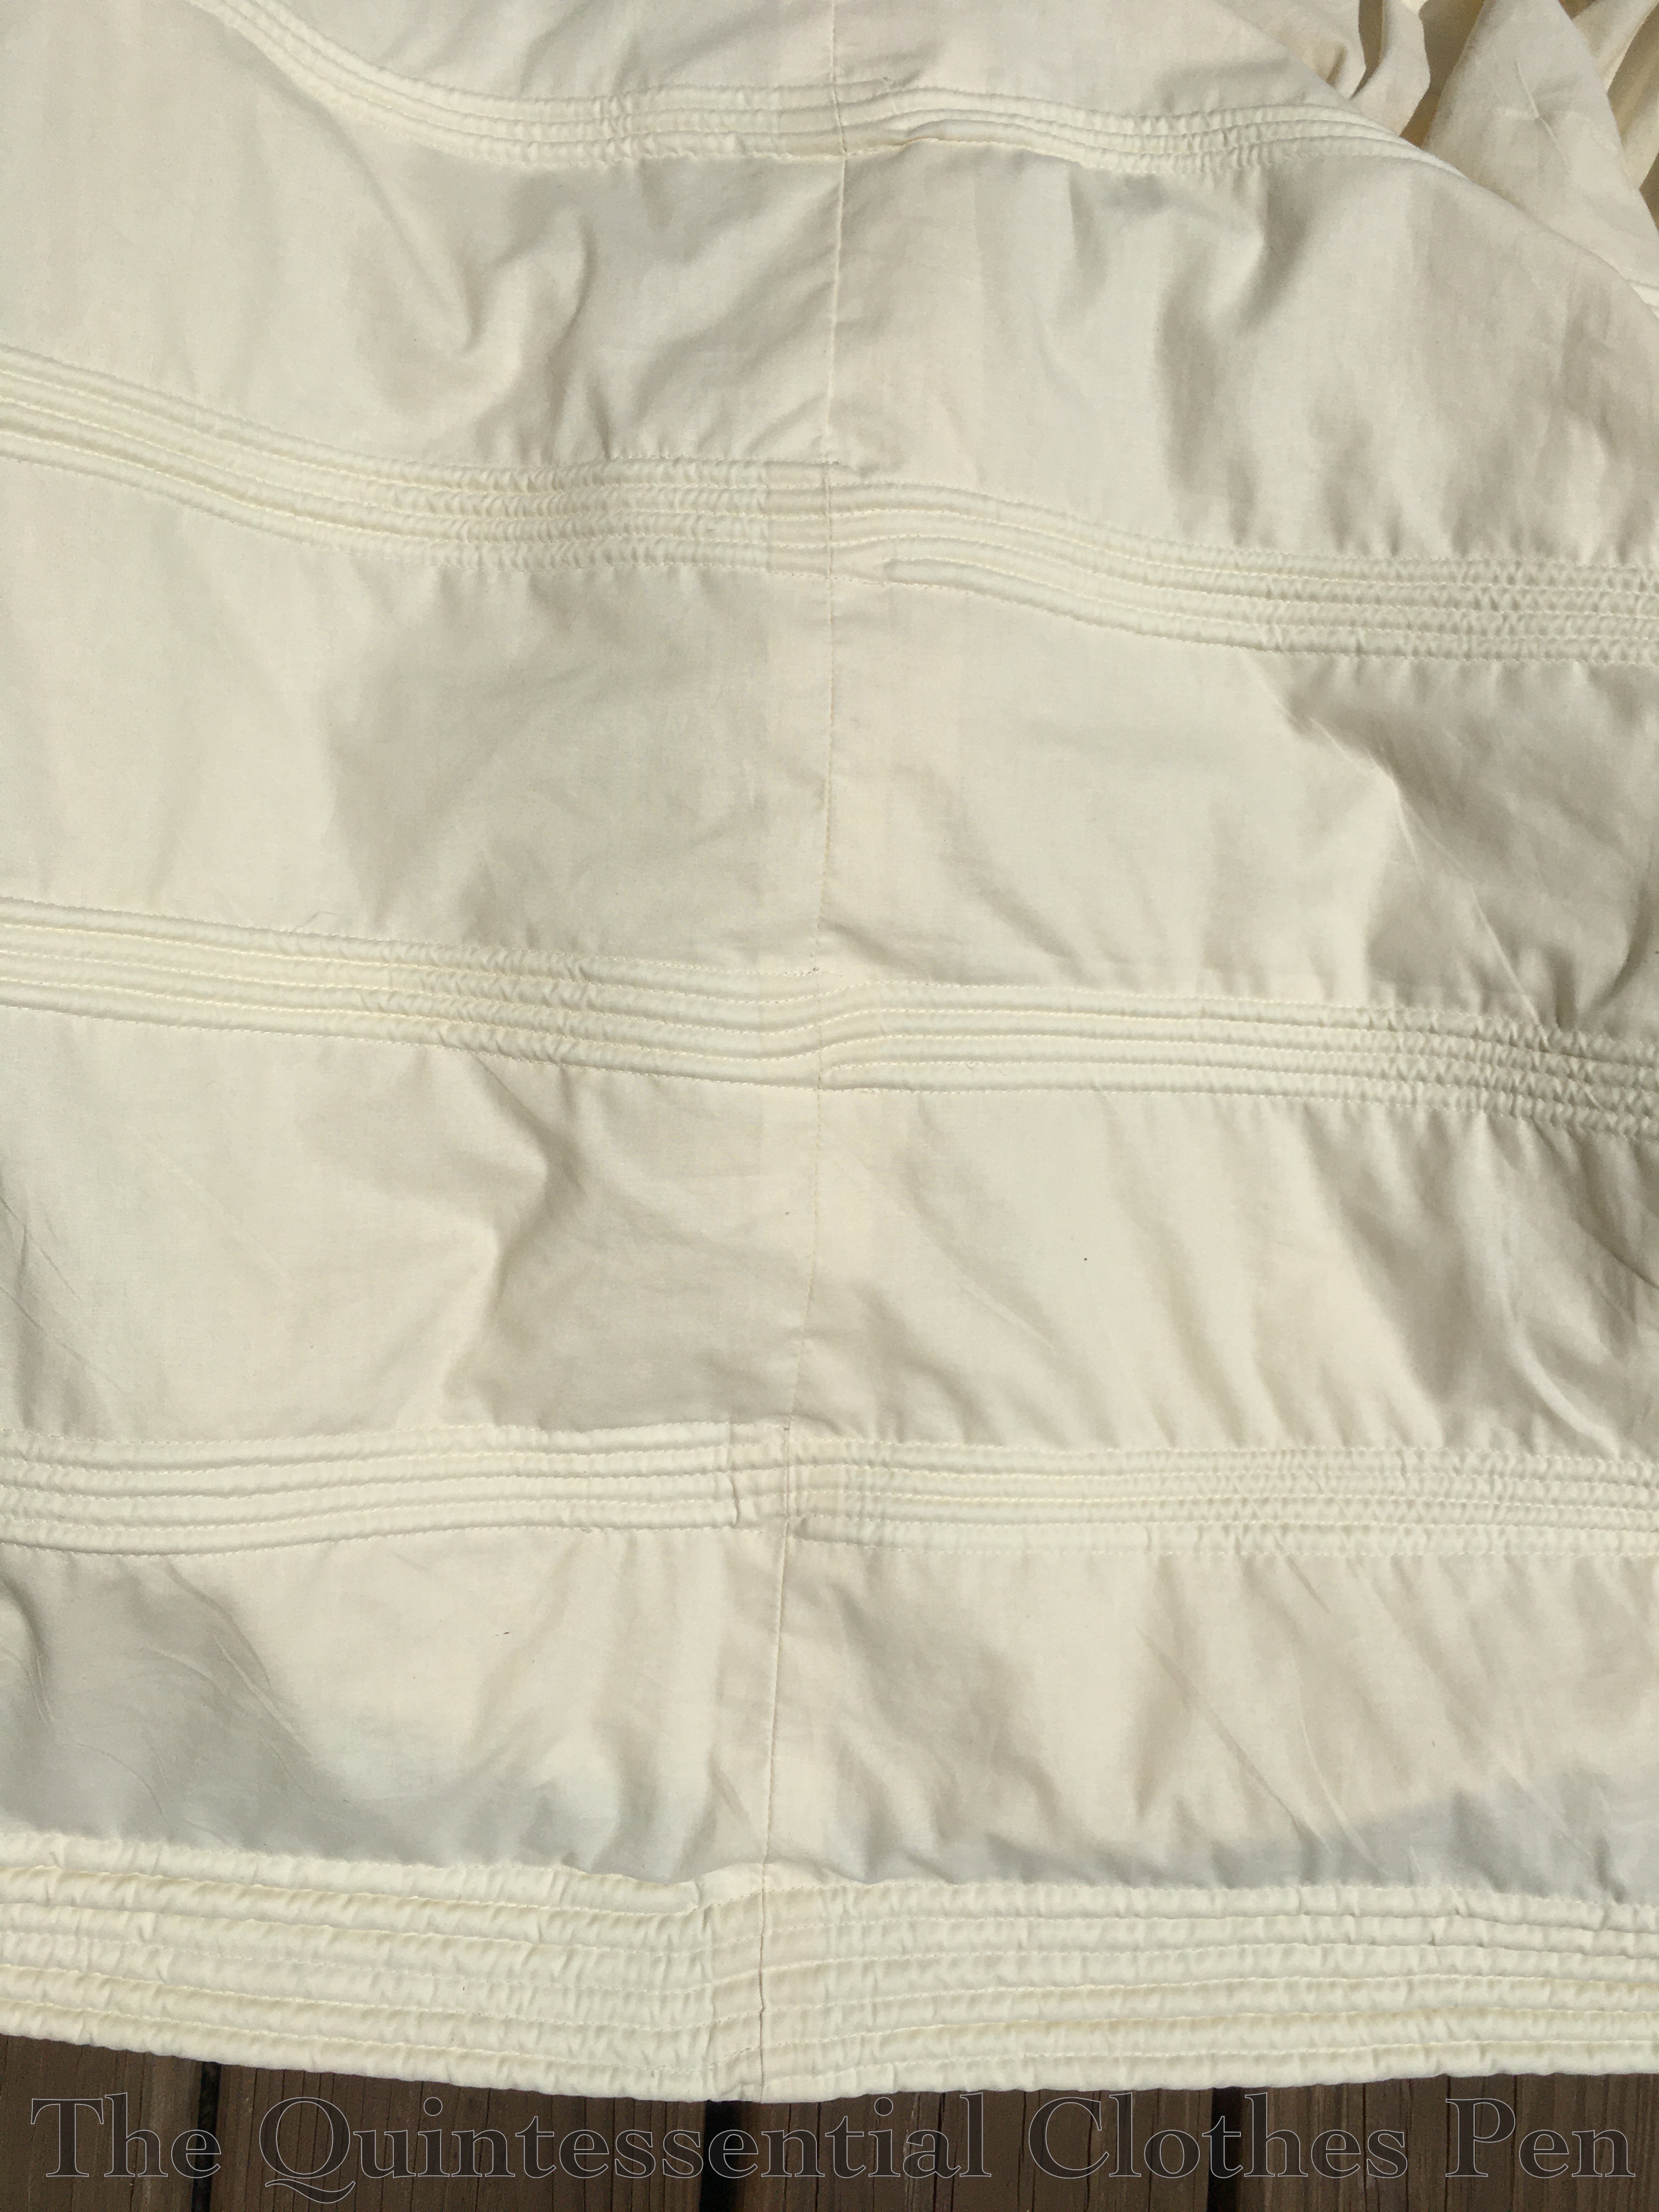
Here’s a closeup photo of the cording sections. I used a continuous piece of cord for each section, as suggested in the American Duchess video.
My opening is just a portion of one seam left open just above the top section of cording. This is what it looks like from the outside. I made the waistband extra long to allow for future adjustment (just in case!), which is why the button is set over so far from the edge of the waistband.
On the inside, that opening looks like this. The second layer of fabric is just turned back from the edge and top stitched in place. The other seam allowance edges are selvedges, so they didn’t require finishing. Easy and tidy!
The ivory cotton waistband is whip stitched on the inside finish it all off nicely. Hidden underneath is a layer of cotton canvas that helps to stiffen the waistband a bit.
This petticoat is almost entirely machine sewn and took 8.5 hours to make. I used 4 ¼ yards of ivory cotton, 13 ¼ yards of 5/16″ cording from Wawak, 39 ¼ yards of 7/32″ cording also from Wawak, the canvas scrap for the waistband, and a lone ivory button from the stash. The materials cost about $33.
When I started this petticoat, I thought that it would only be worn with the 1832 velvet gown I mentioned earlier, but since then 1830s daywear using the yellow print cotton has made it onto my sewing table… and this will definitely get worn with the new dress. I also hope to be able to wear it with 1840s dresses that will someday make it onto my sewing table. It’s a great step towards improving my silhouette!




 To make the double piping I machine sewed the cord into one side of my bias and hand sewed it into the other, then pressed the bias in half and attached it through all the layers. In my sample below I didn’t bother to put the machine stitching on the under side, but on the dress the machine stitching is not visible.