

Have you ever encountered closet shrinkage?
I’ve mentioned it here on the blog before, most recently in my modern wardrobe inventory post, but it is not only confined to my modern closet. Oh no, the things in my historical closet shrink, too!
In the past, I’ve shared how I updated two mid-19th century dresses to fit again, after finding that they no longer fit the way they did when they were first made, as well as how I updated two early 19th century dresses for the same reason.
I was recently inspired to finish off not just one, but two UFO ‘this doesn’t fit anymore’ projects that fall into the closet shrinkage category. I’ve decided to post about them separately, since I have a number of photos for each, so today we’ll look at my 1953 Dot Dress and next time we’ll look at my 1940s Inspired Anne Adams Dress.
I made this dress in 2013, for an adventurous day that included brunch, fall leaves, and roller skating (all followed by a Regency ball)!

I loved (and still do) the lightweight fabric, the fun dot print, and the pink, purple, and and rust colors of the dots. I wore this dress for the next few years–to a few historical/vintage events as well as in my everyday life.
This next photo is from 2016–the last time I could squeeze into the dress and actually close the zipper.

After that, I had to accept that the dress no longer fit. My shape had changed and it just wasn’t feasible. I was sad!
Fast forward to 2019, and I had the courage to decide to remake the dress, somehow, to make it fit. I got started by cutting straight down the front, stopping just short of the waistband, to see how much I needed to adapt the bodice…
It was rather a lot! I ran out of inspiration… and let the dress hang in my closet until recently.
I had thought I would just be able to add a piece to the front, somehow, and that would be enough. But when I started really looking at things again, I realized that the dress needed more than that to really do it justice. The side darts needed to be let out, the underarms need to be raised and filled in, the waist was still very tight, and there was the bust issue.
Oh, and I had minimal scraps for these alterations, partly because I’d used some of the larger ones to make ice skate soakers in 2015. (I’m not saying I shouldn’t have used my scraps to make a second project that brings me joy, but… the alterations would have been easier if I’d had wider scraps to work with!)
The front needed to have more more space created, about 3″ worth, but I had no scraps both wide enough and long enough to make a straight panel without seams. So I decided to get creative with a straight panel, adding tucks to it so I could hide seams within the tucks. I was inspired by the dotted dress Miss Hero Holliday wears in this wardrobe roundup post.
Here’s what my pieced piece looked like before pleating (lots of P’s!).

After a fair bit of complicated math (I’m pretty sure I made it more complicated than it needed to be), I was able to achieve a dress front that looks like this.

Essentially, I added princess seams. It was complicated to figure out, because I had cut straight down to figure out what was needed and I needed to add as much as 3″ at the bust while adding nothing at the waist, while actually adding in the panel that was 3″ wide from top to bottom. That means that I basically created a curve on the old center front line that was filled in with the straight pleated panel.
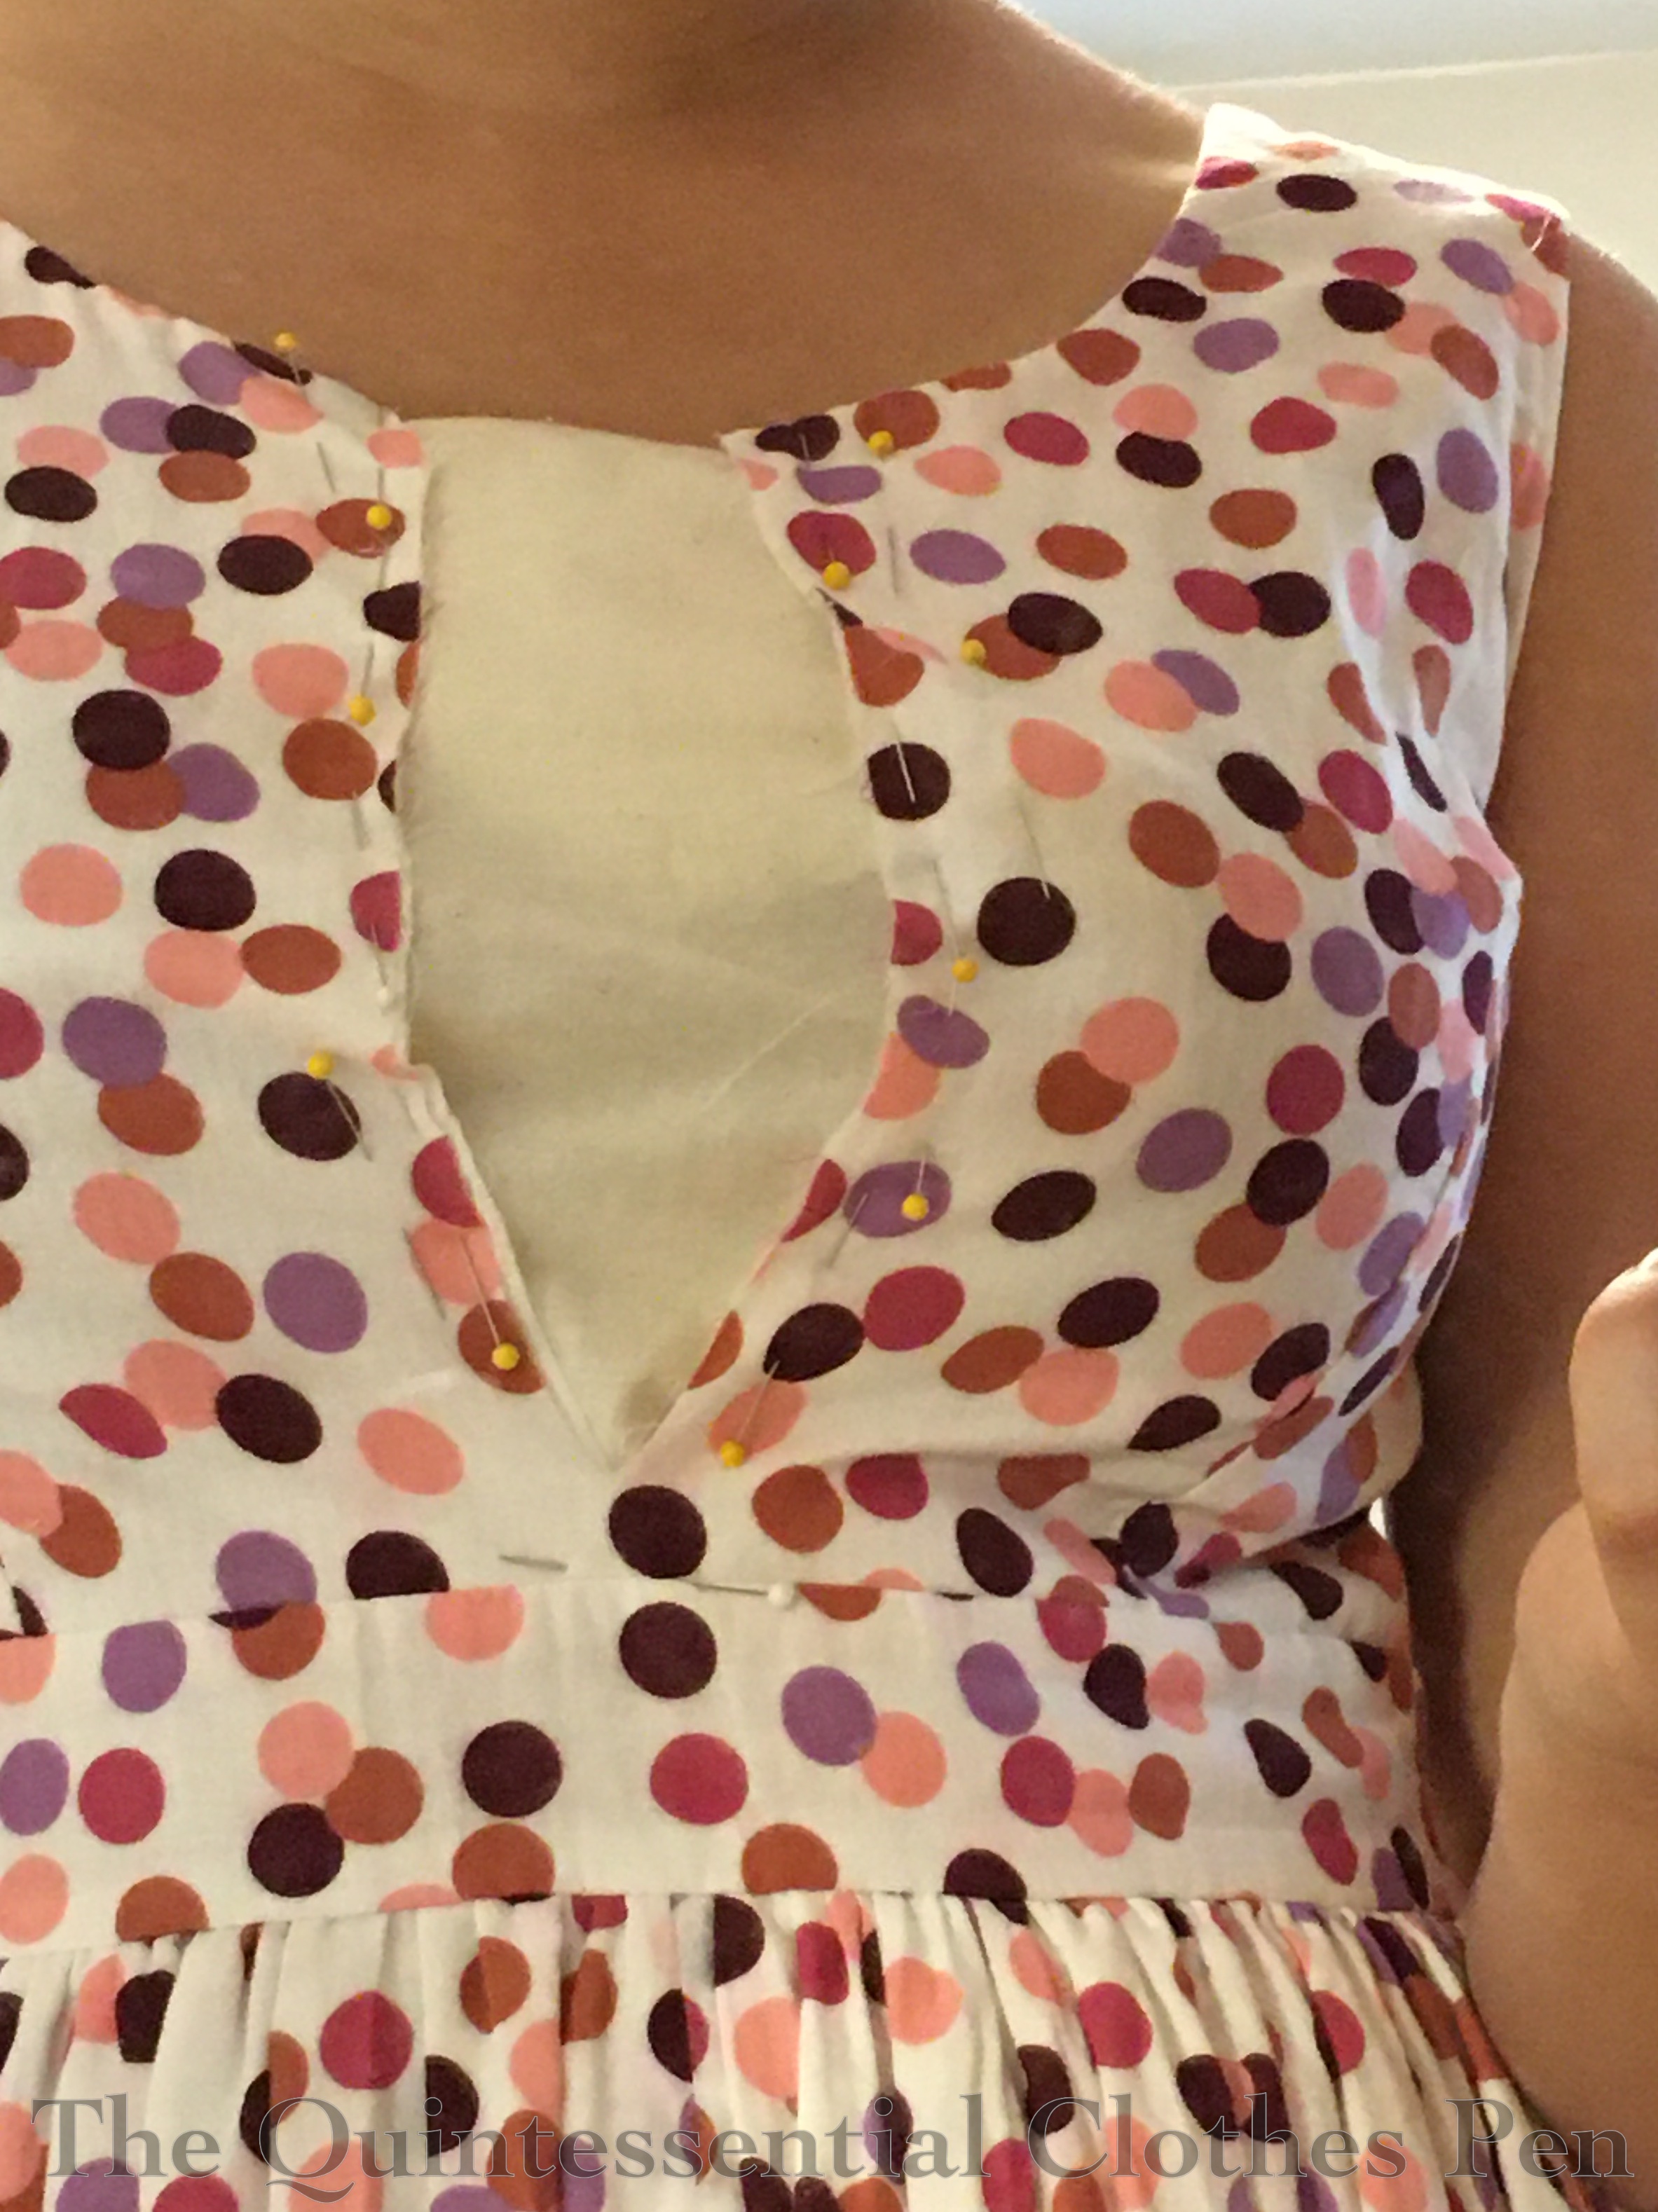
While being worn, it looks like this.

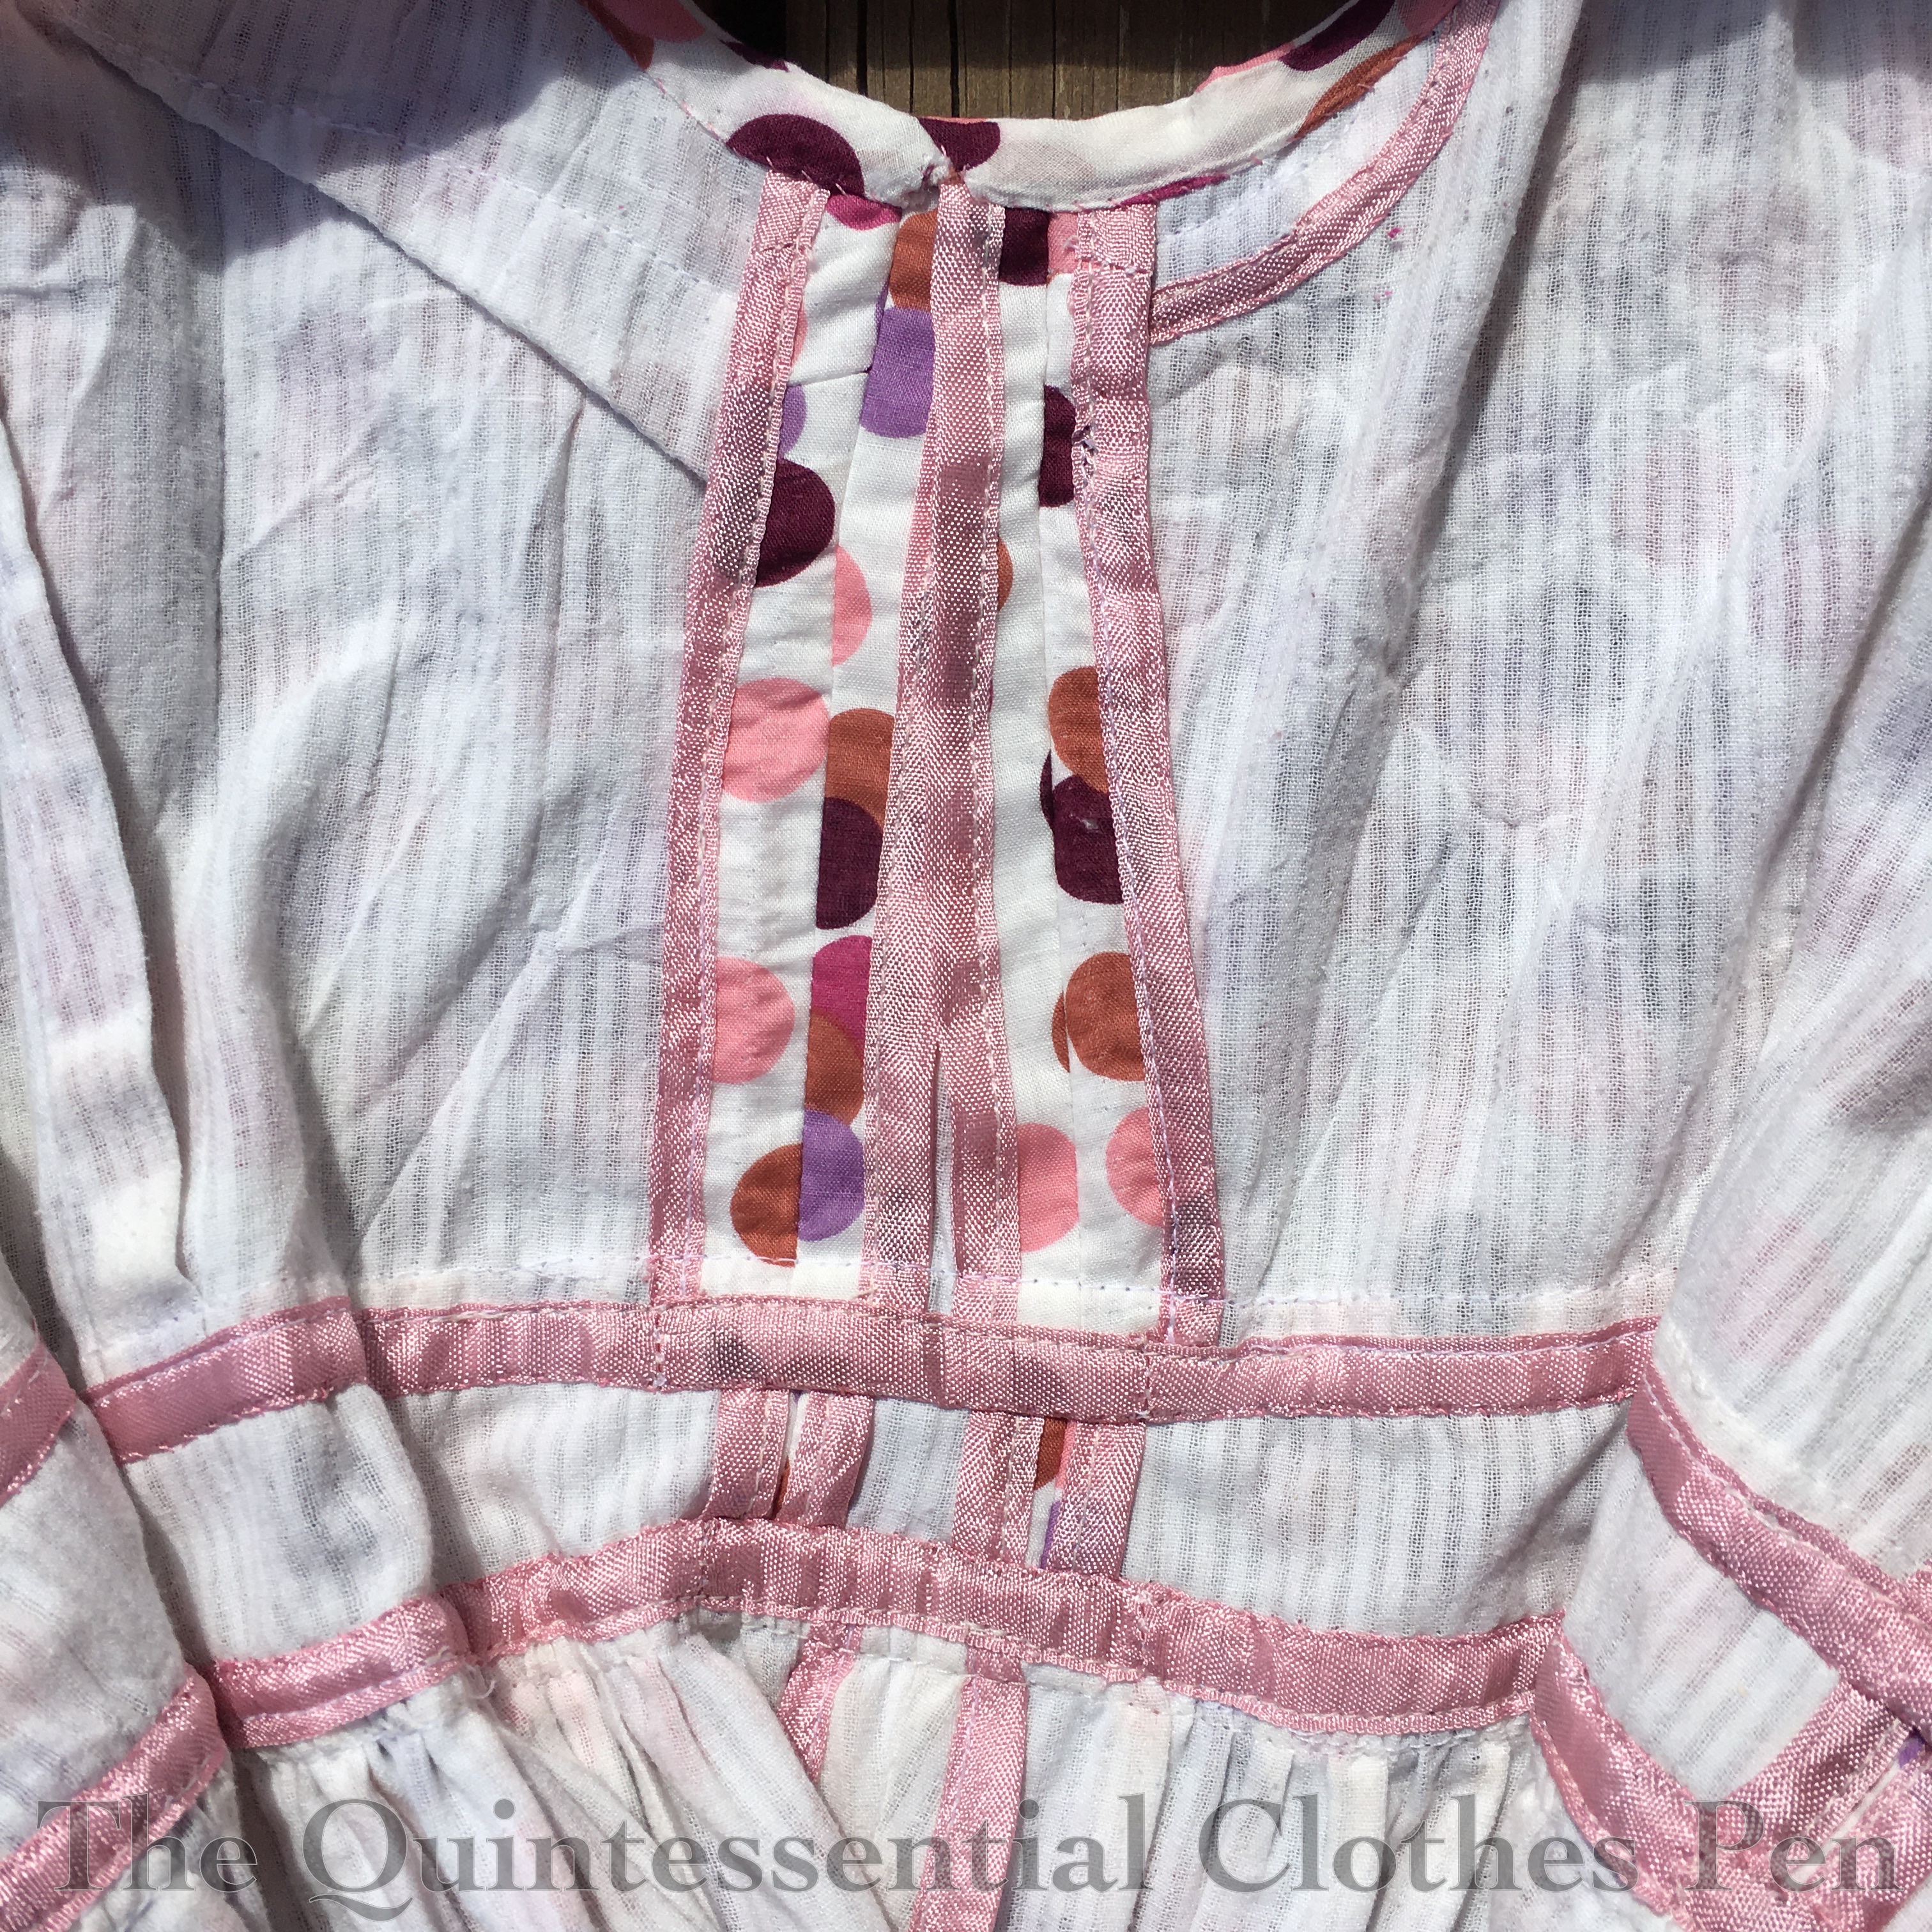
On the inside, I carefully bound all the raw edges in pink hug snug, just as I had when I first made the dress. However, I realized when trying on the altered dress that the pleats just opened up instead of staying put.
Oops.
This seems like it should have been an obvious problem from the beginning, but my brain missed it until I tried on the dress with the pleats in place.
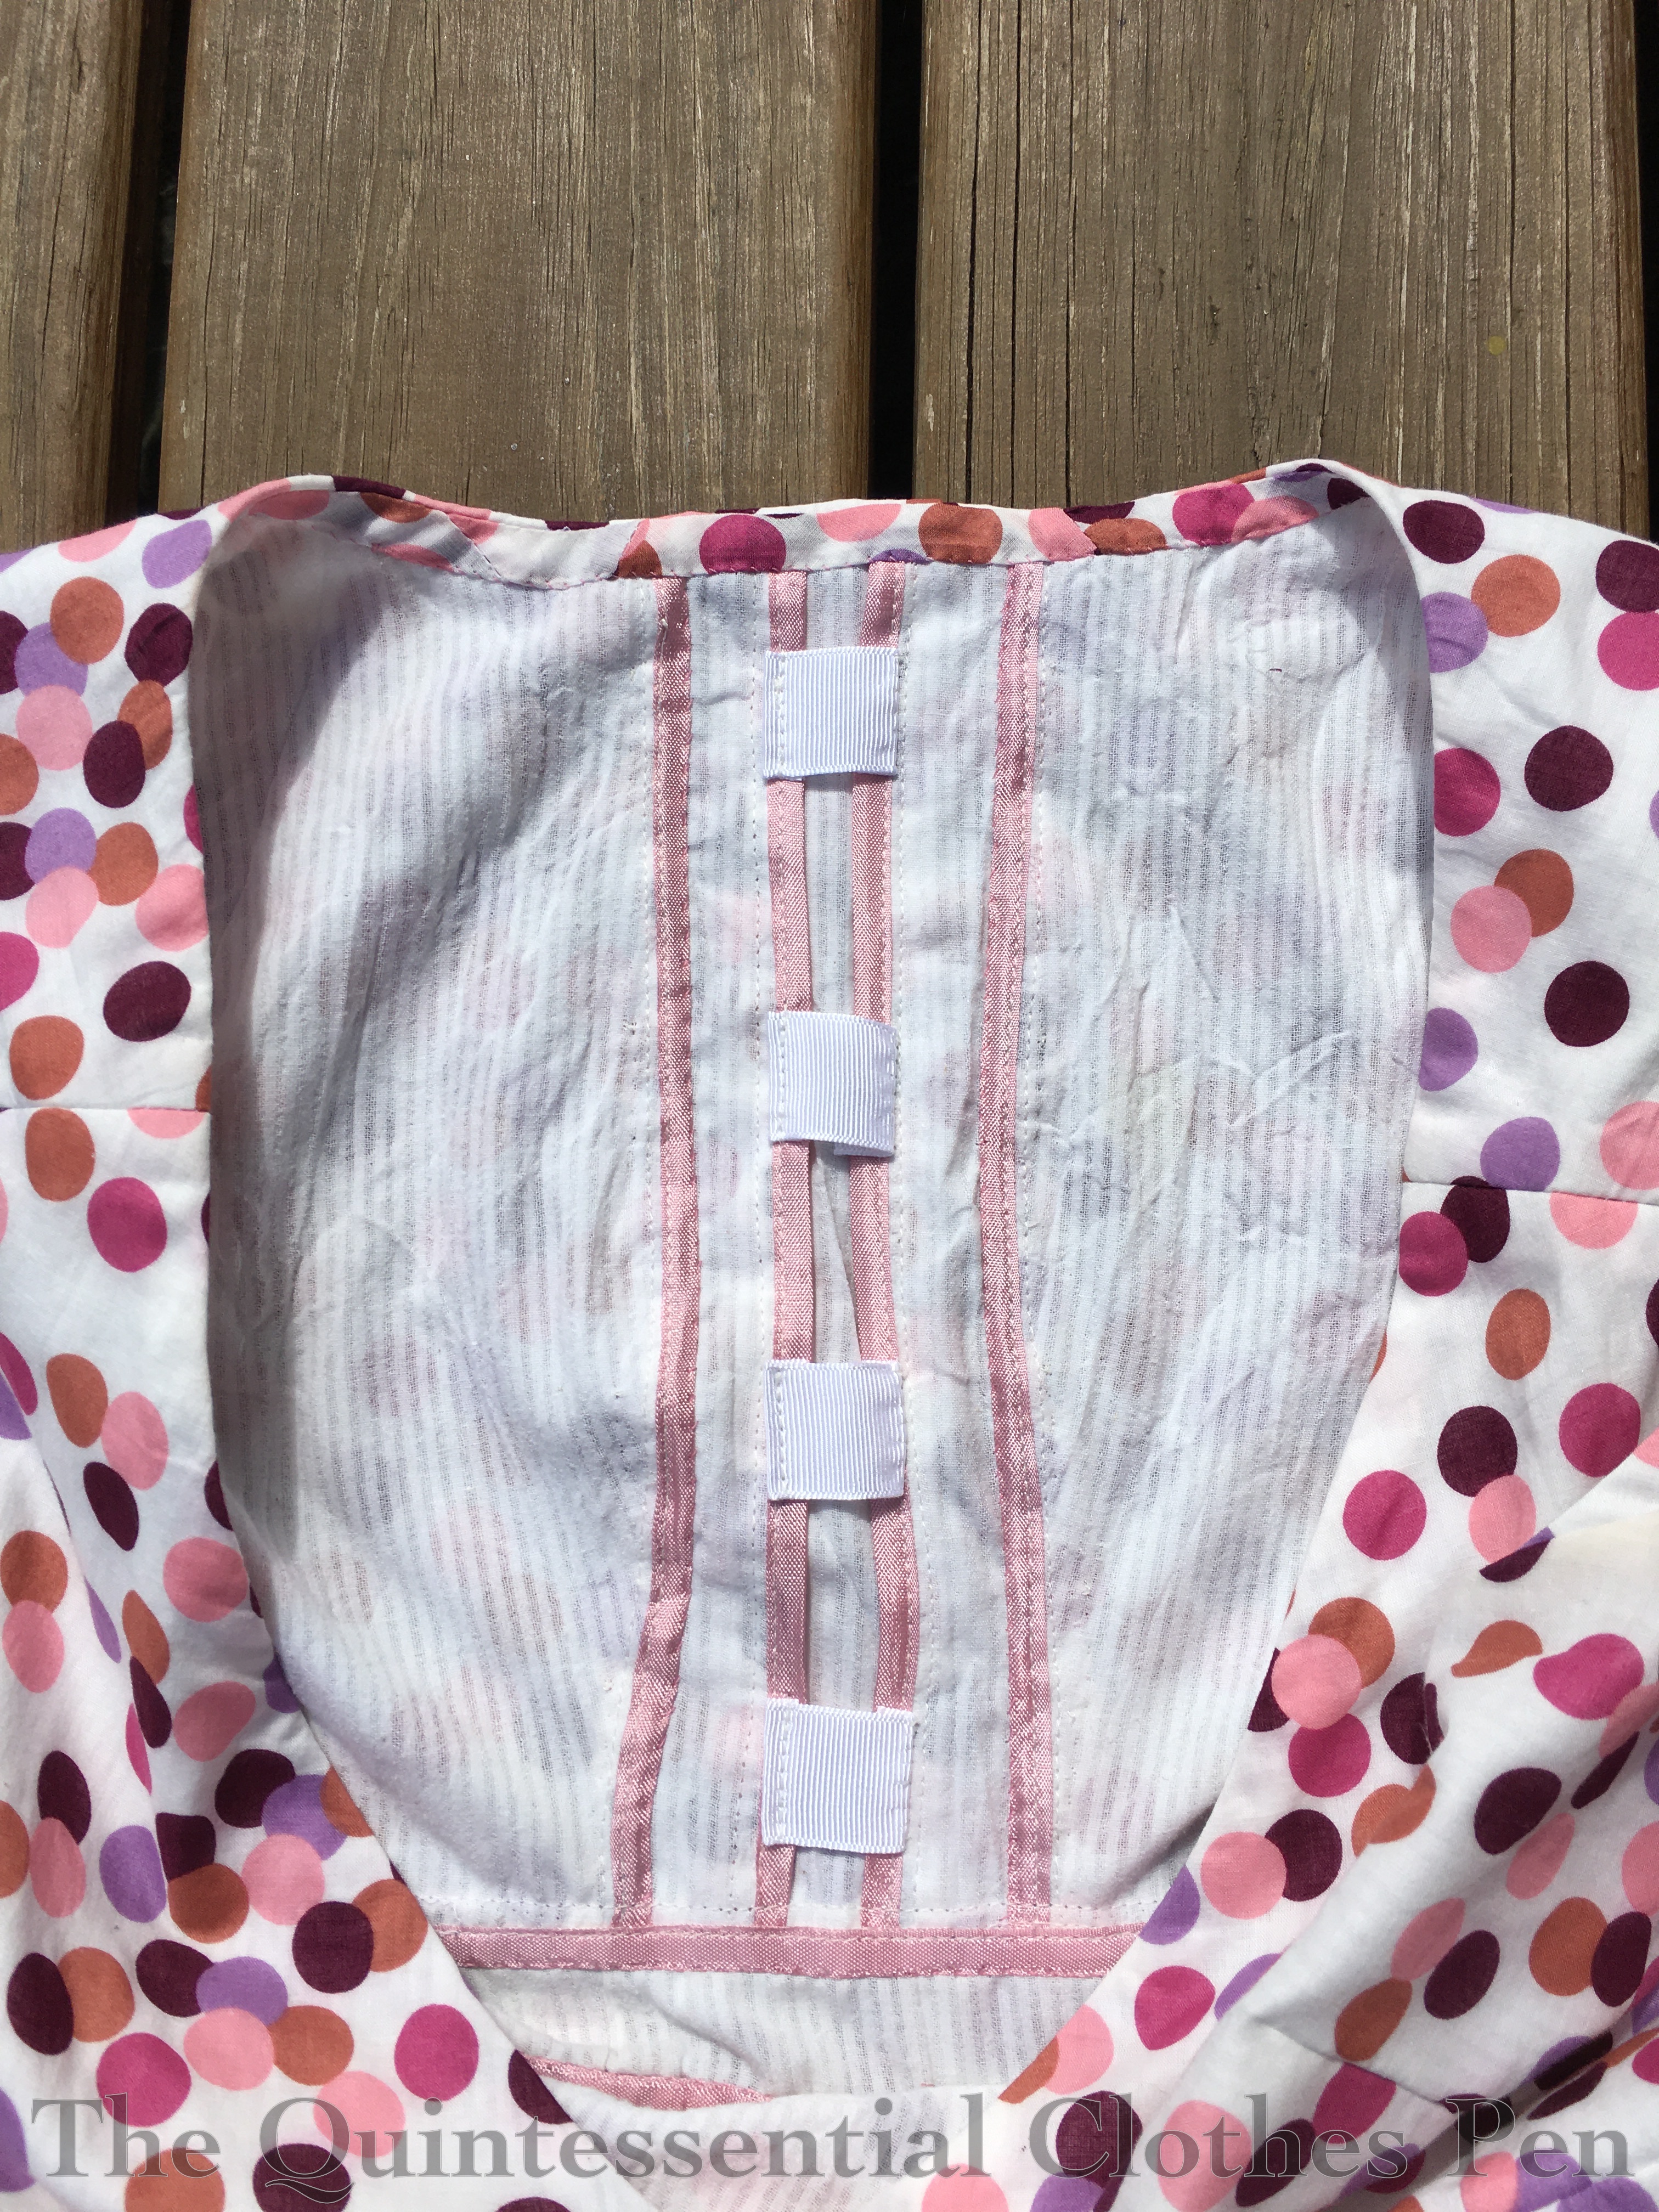
So I had to figure out how to hold the pleats in place. The middle ones are held by the bits of grosgrain ribbon, while the side ones are invisibly tacked in place under the fold.
In addition to the front pleated panel, I also let out the side darts, which helped to create bust space and also raised the armhole a little bit as well. When I put the bias binding back on after doing all the other alterations I maxed out my meager seam allowance, which also raised the armhole up a bit.
You can just barely see my old stitch line on the side dart (on the top left side of the photo below). (You can compare this updated inside view to the original inside view in this post showing the original construction.)
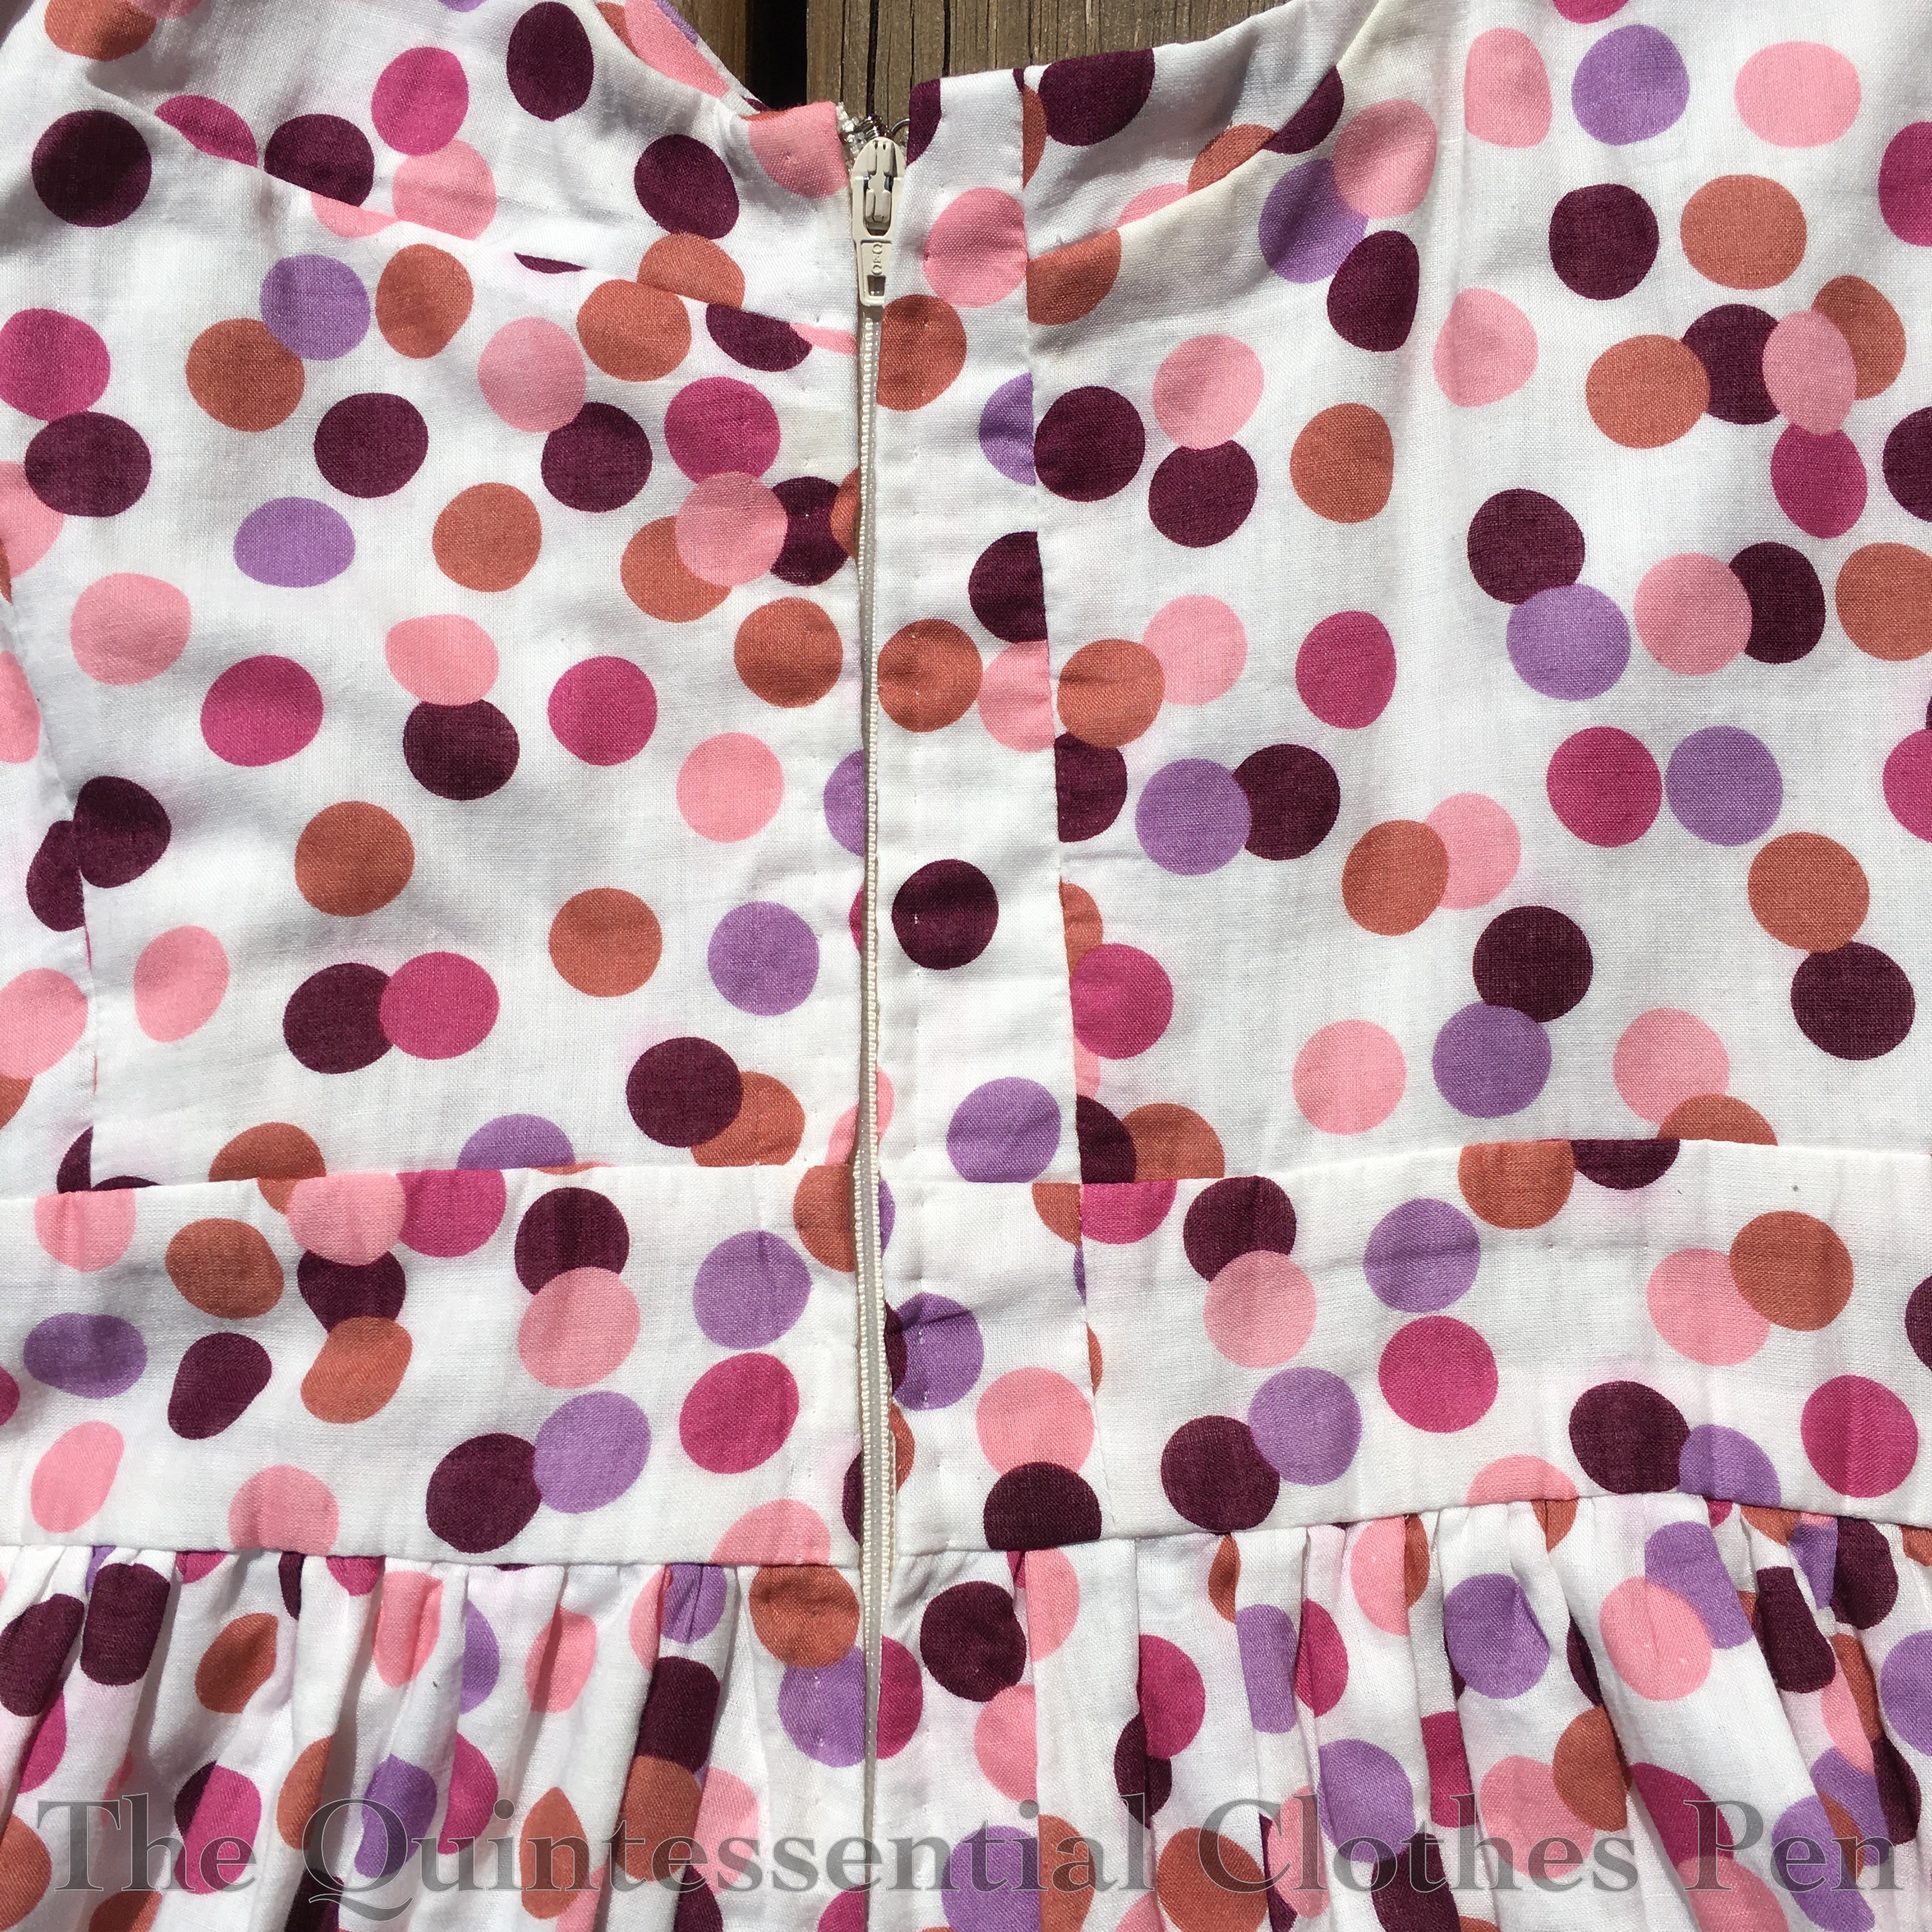
And as you can see in both the photo above and the one below, I added a piece at the side seam, both above the waistband and in the waistband. There’s also a little crescent of added fabric on the back armhole (on the right sides of these photos), that fills in the raised underarm area.
I was very careful to re-finish the insides of the dress as nicely as I had the first time. That includes binding all the raw edges in hug snug (sometimes piecing in little pieces to do so) as well as adding pieces of bias to finish the new, wider neckline.
I decided to put in the zipper by hand this time around, as my first attempt on this dress with a machine sewn lapped zipper was a bit clunky where it went over the waistband.
All of these steps definitely added a bit of time to the alterations, but it makes me happy to still have lovely finished insides even after altering the dress.

The underarm area looks like this on the outside now. The busy print really helps to hide all my piecing seams! You can just make out some old stitch lines (like the one to the left of the zipper), but they’re not noticeable when the dress is being worn, thankfully.
I’m so pleased that I can wear this dress again! It actually fits better now than it did the first time, imagine that!

I wouldn’t have been able to make these alterations happen if I hadn’t kept my scraps!
I’m so grateful to all those seamstresses from the past few hundred years who have shown me that piecing is ok and making do/repairing/altering to keep getting wear out of clothes is ok, too! It’s a wonderful benefit of making my own clothes and knowing how to sew.
Welcome back, dotty dress!


A lovely dress! Definitely worth the effort to change it! I always followed my Mom’s advice to keep all the scraps!
Thanks! 🙂 That is sage advice–your mom sounds like a clever lady.
Great job! The look of the finished dress makes it well worth the effort you put into it. I love your fix to keep the pleats in place, too.
Thank you! 🙂
Applause! Applause! You certainly nailed the alterations while keeping the spirit of the the dress! I can surely see why it would be hard to part with this dress…it’s fun and vibrant…and I am sure, always invokes a smile! Brava! –Erik in NW Ohio
Yes, it is the sort of dress that brings smiles. I love the dots! 🙂 Thanks!
Hey, that was a great save! I just got rid of a lot of ‘loves’ because they just did not fit. Unfortunately most were store bought so I had no other fabric to fix them. And I was uninspired to use other fabric with them. I did pass on to niece who can wear them and will get a good use out of them. I applaud your ingenuity!
Hello Anglea! Thank you!
It’s hard for me to pass along store bought items I love but that no longer fit. Sometimes I hang on to them for longer than I probably should–even if I can’t wear them. Giving them to someone else you know will use them is a great way to pass them along, though. I’ve done similar things with some of the dresses I’ve loved–in my case passing them along to a younger cousin who is still the size I used to be. 😉
What a fantastic alteration job, Quinn! It looks even better than before (if that’s possible)!! I love how you explained it all step by step. You amaze me at your attention to details…especially the beautiful seam finishing. You’re a girl after my own heart… ❤
Thank you for the kind thoughts, Kelly! It’s especially wonderful because I know you do a lot of refashioning yourself and have figured out your own creative solutions to sewing/fitting/wearing problems. It does seem we are similar in our desire for nicely finished interiors and attention to detail. 🙂 Yay!
Oh Quinn, what a happy, happy dress. The alterations worked beautifully, and thank you for showing us how to manage width issues in the bust. The solution is not only effective, but the result is more elegant than the original design.
Back in 1982 when I studied in London in college, I thrifted a vintage dress of similar cut and very similar pattern, except that it was synthetic multicolor dotted brocade on a shot pink ground. It’d been used in theater or something and had paint spots, but I didn’t care. Only said goodbye to it last year…it traveled with me for decades even though it was *long* since fitting. Smiled widely when I saw yours and hope it makes you happy for years and years to come.
Very best,
Natalie
Thank you so much, Natalie! I so much appreciate that assessment of this alteration! And I’m so glad that you (and others) have appreciated my detailed walk through my decision making and sewing process.
Thanks for sharing your London dot dress memory! I love it! I love that you kept it because it brought you joy and that it traveled with you. Thank you for sharing that inspiration with me and for the encouragement to keep this happy dress going for a long time!
This dress is just darling. Love the print, the colors, and the new pizazzy pleated bodice. If you made them for sale I would buy one!
Thanks, Margaret! It’s high praise to know that someone else would want to wear this dress, too. I enjoyed your alliterative description of the bodice! 🙂
This is amazing!! I love the dress, and from the front you’d never think it had been altered. Yay for getting as much wear out of clothes as possible!!!
Thank you, Alyssa! That’s a lovely comment, coming from someone who does a fair bit of refashioning. I agree, yay!!!