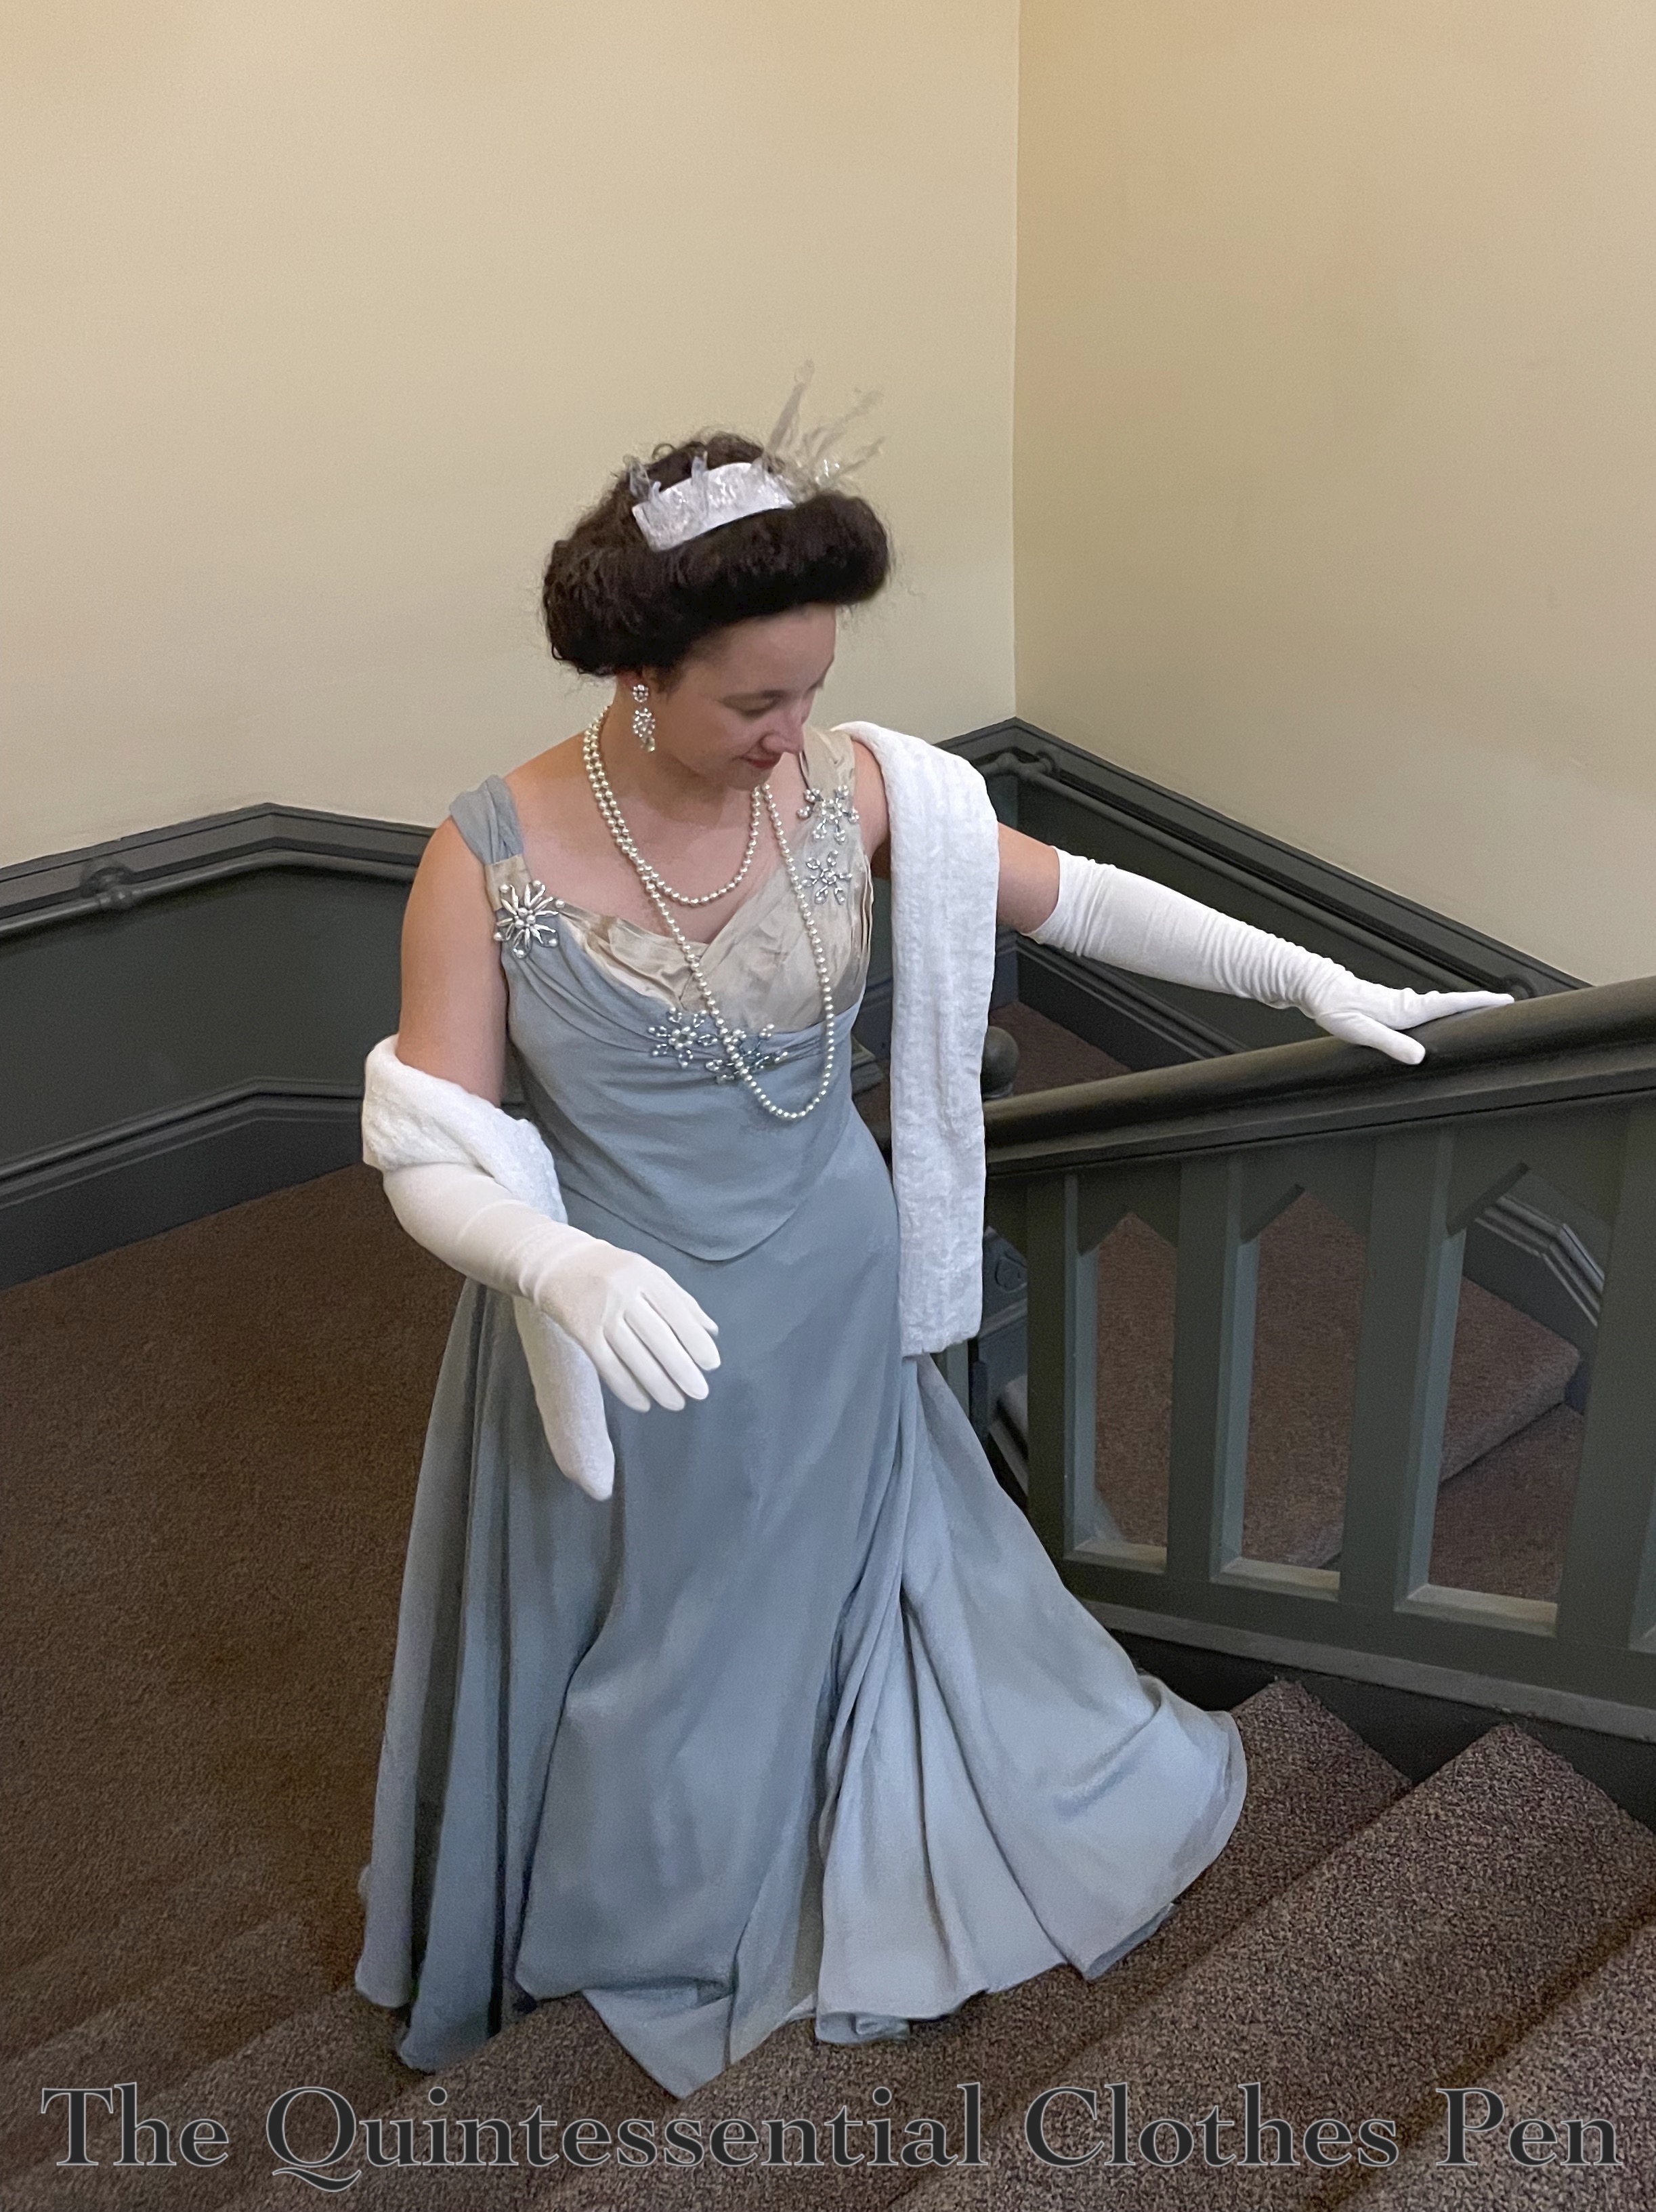
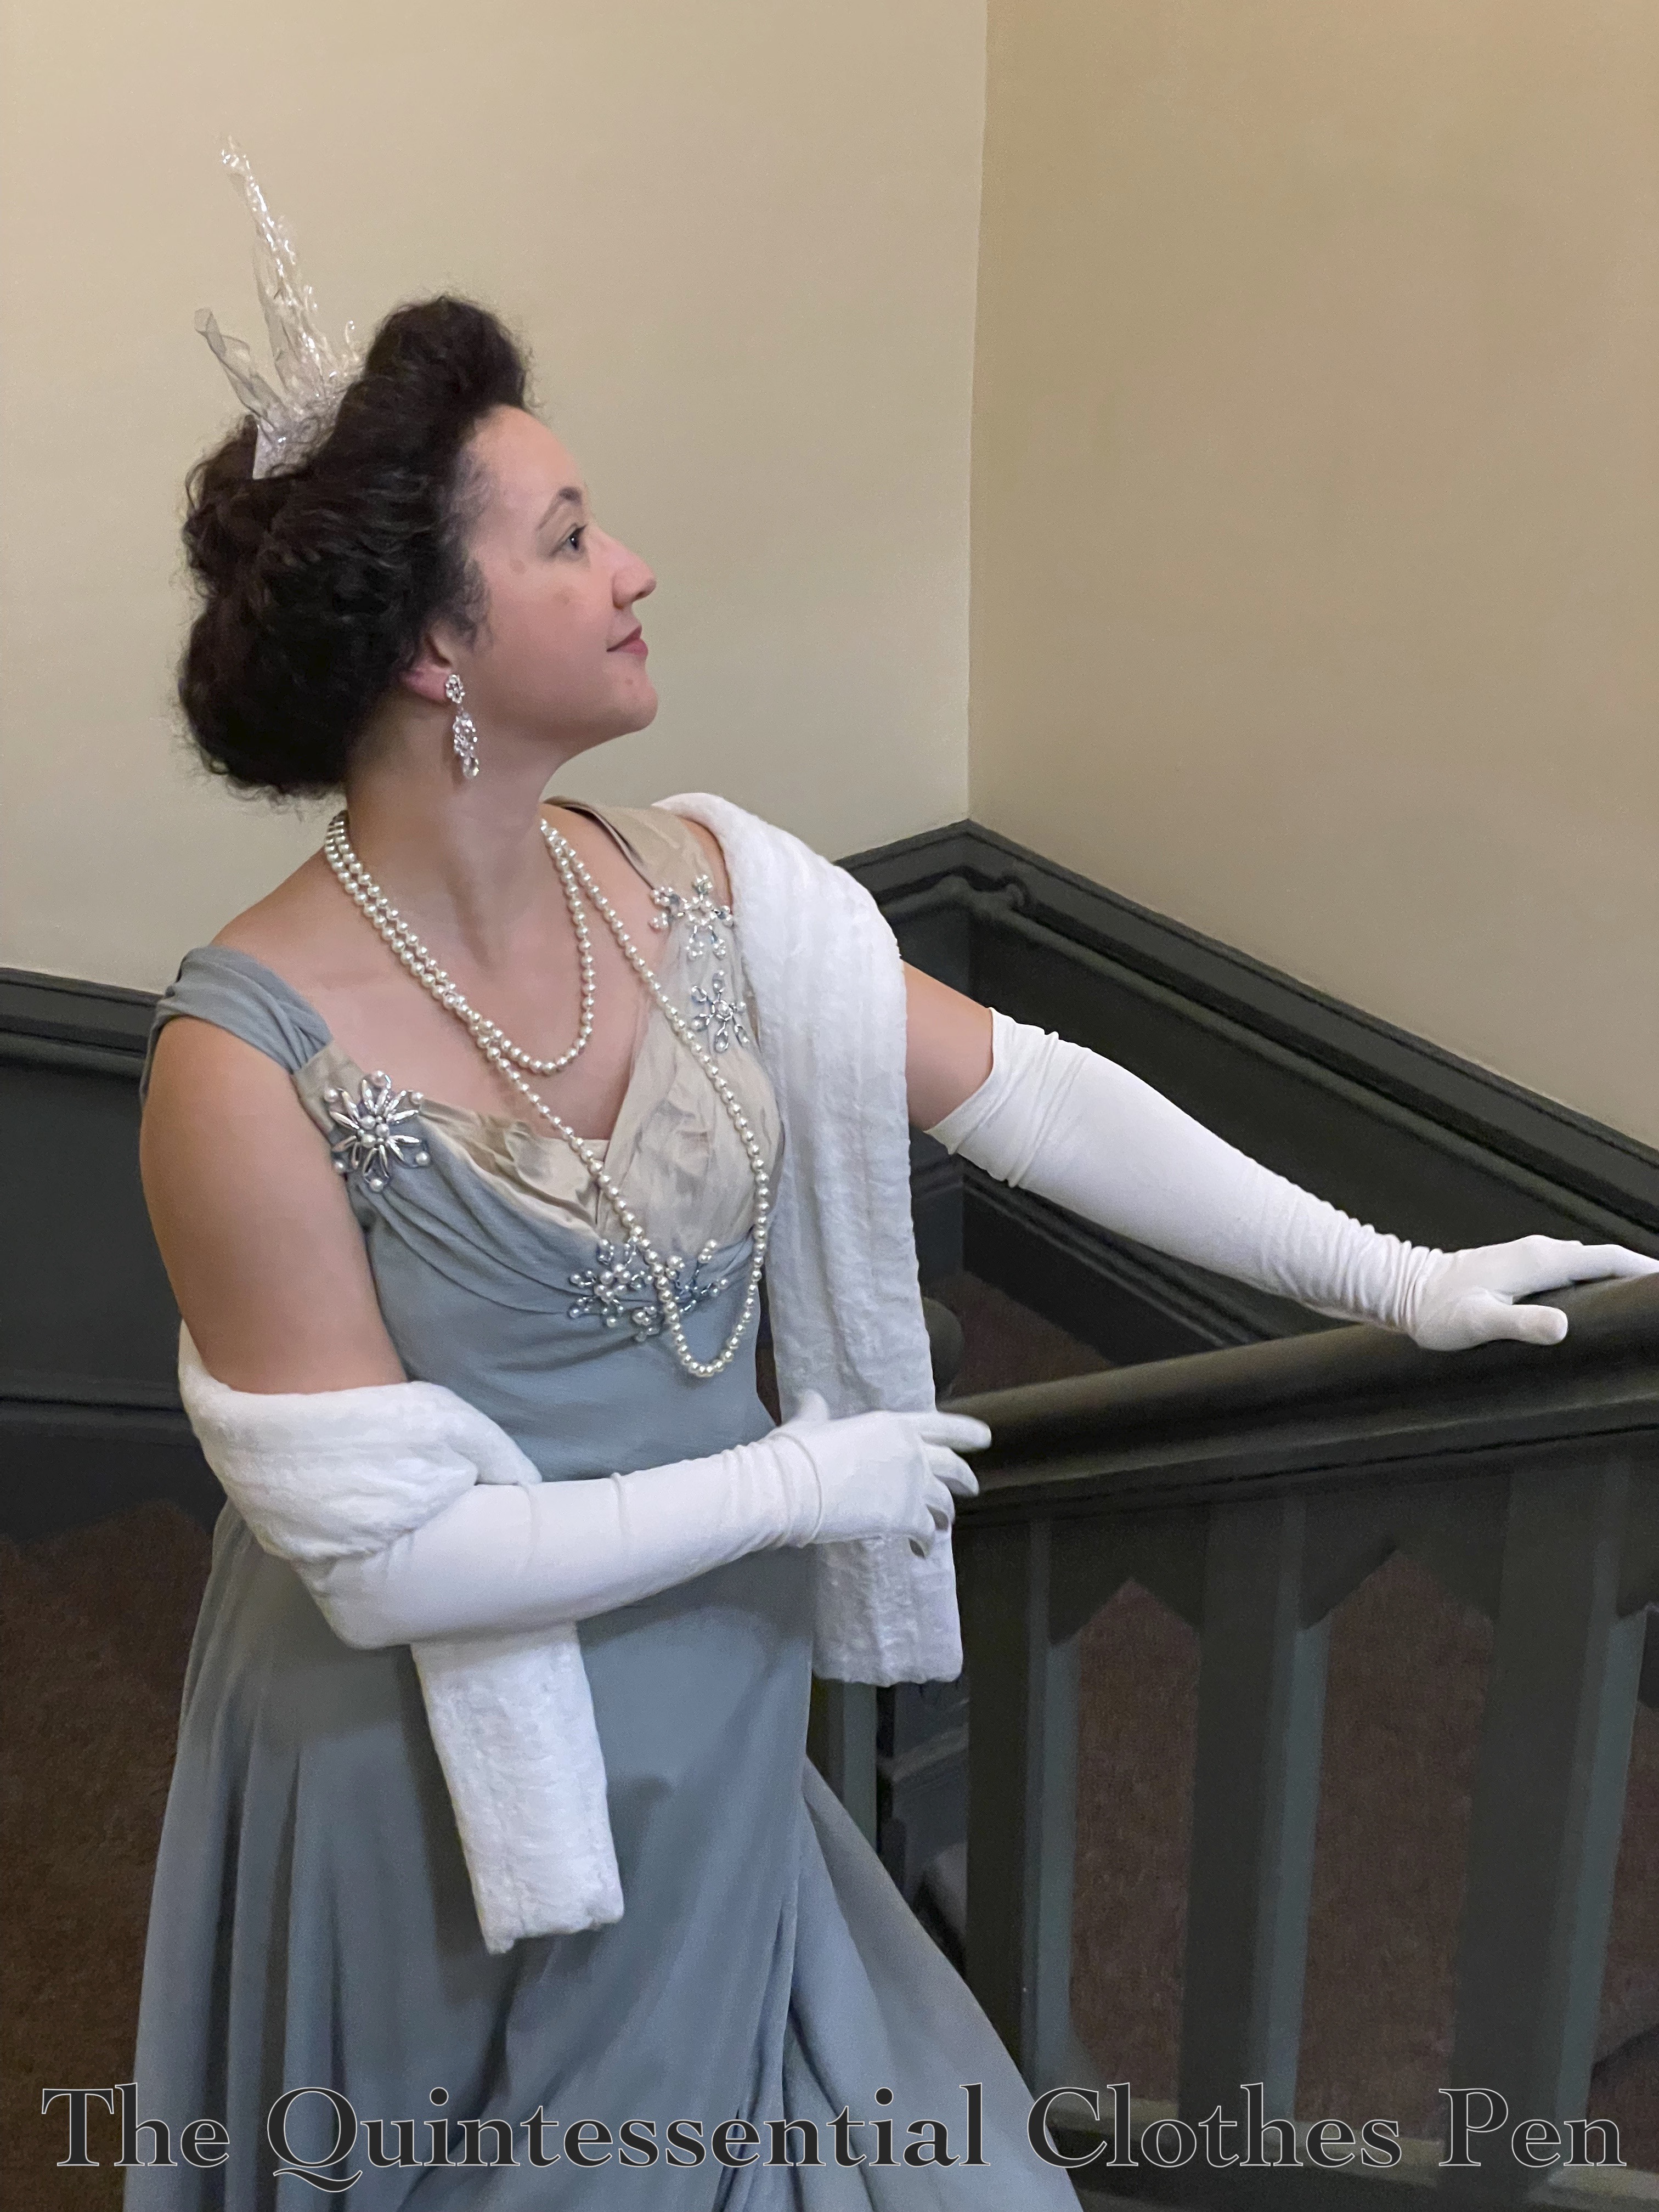
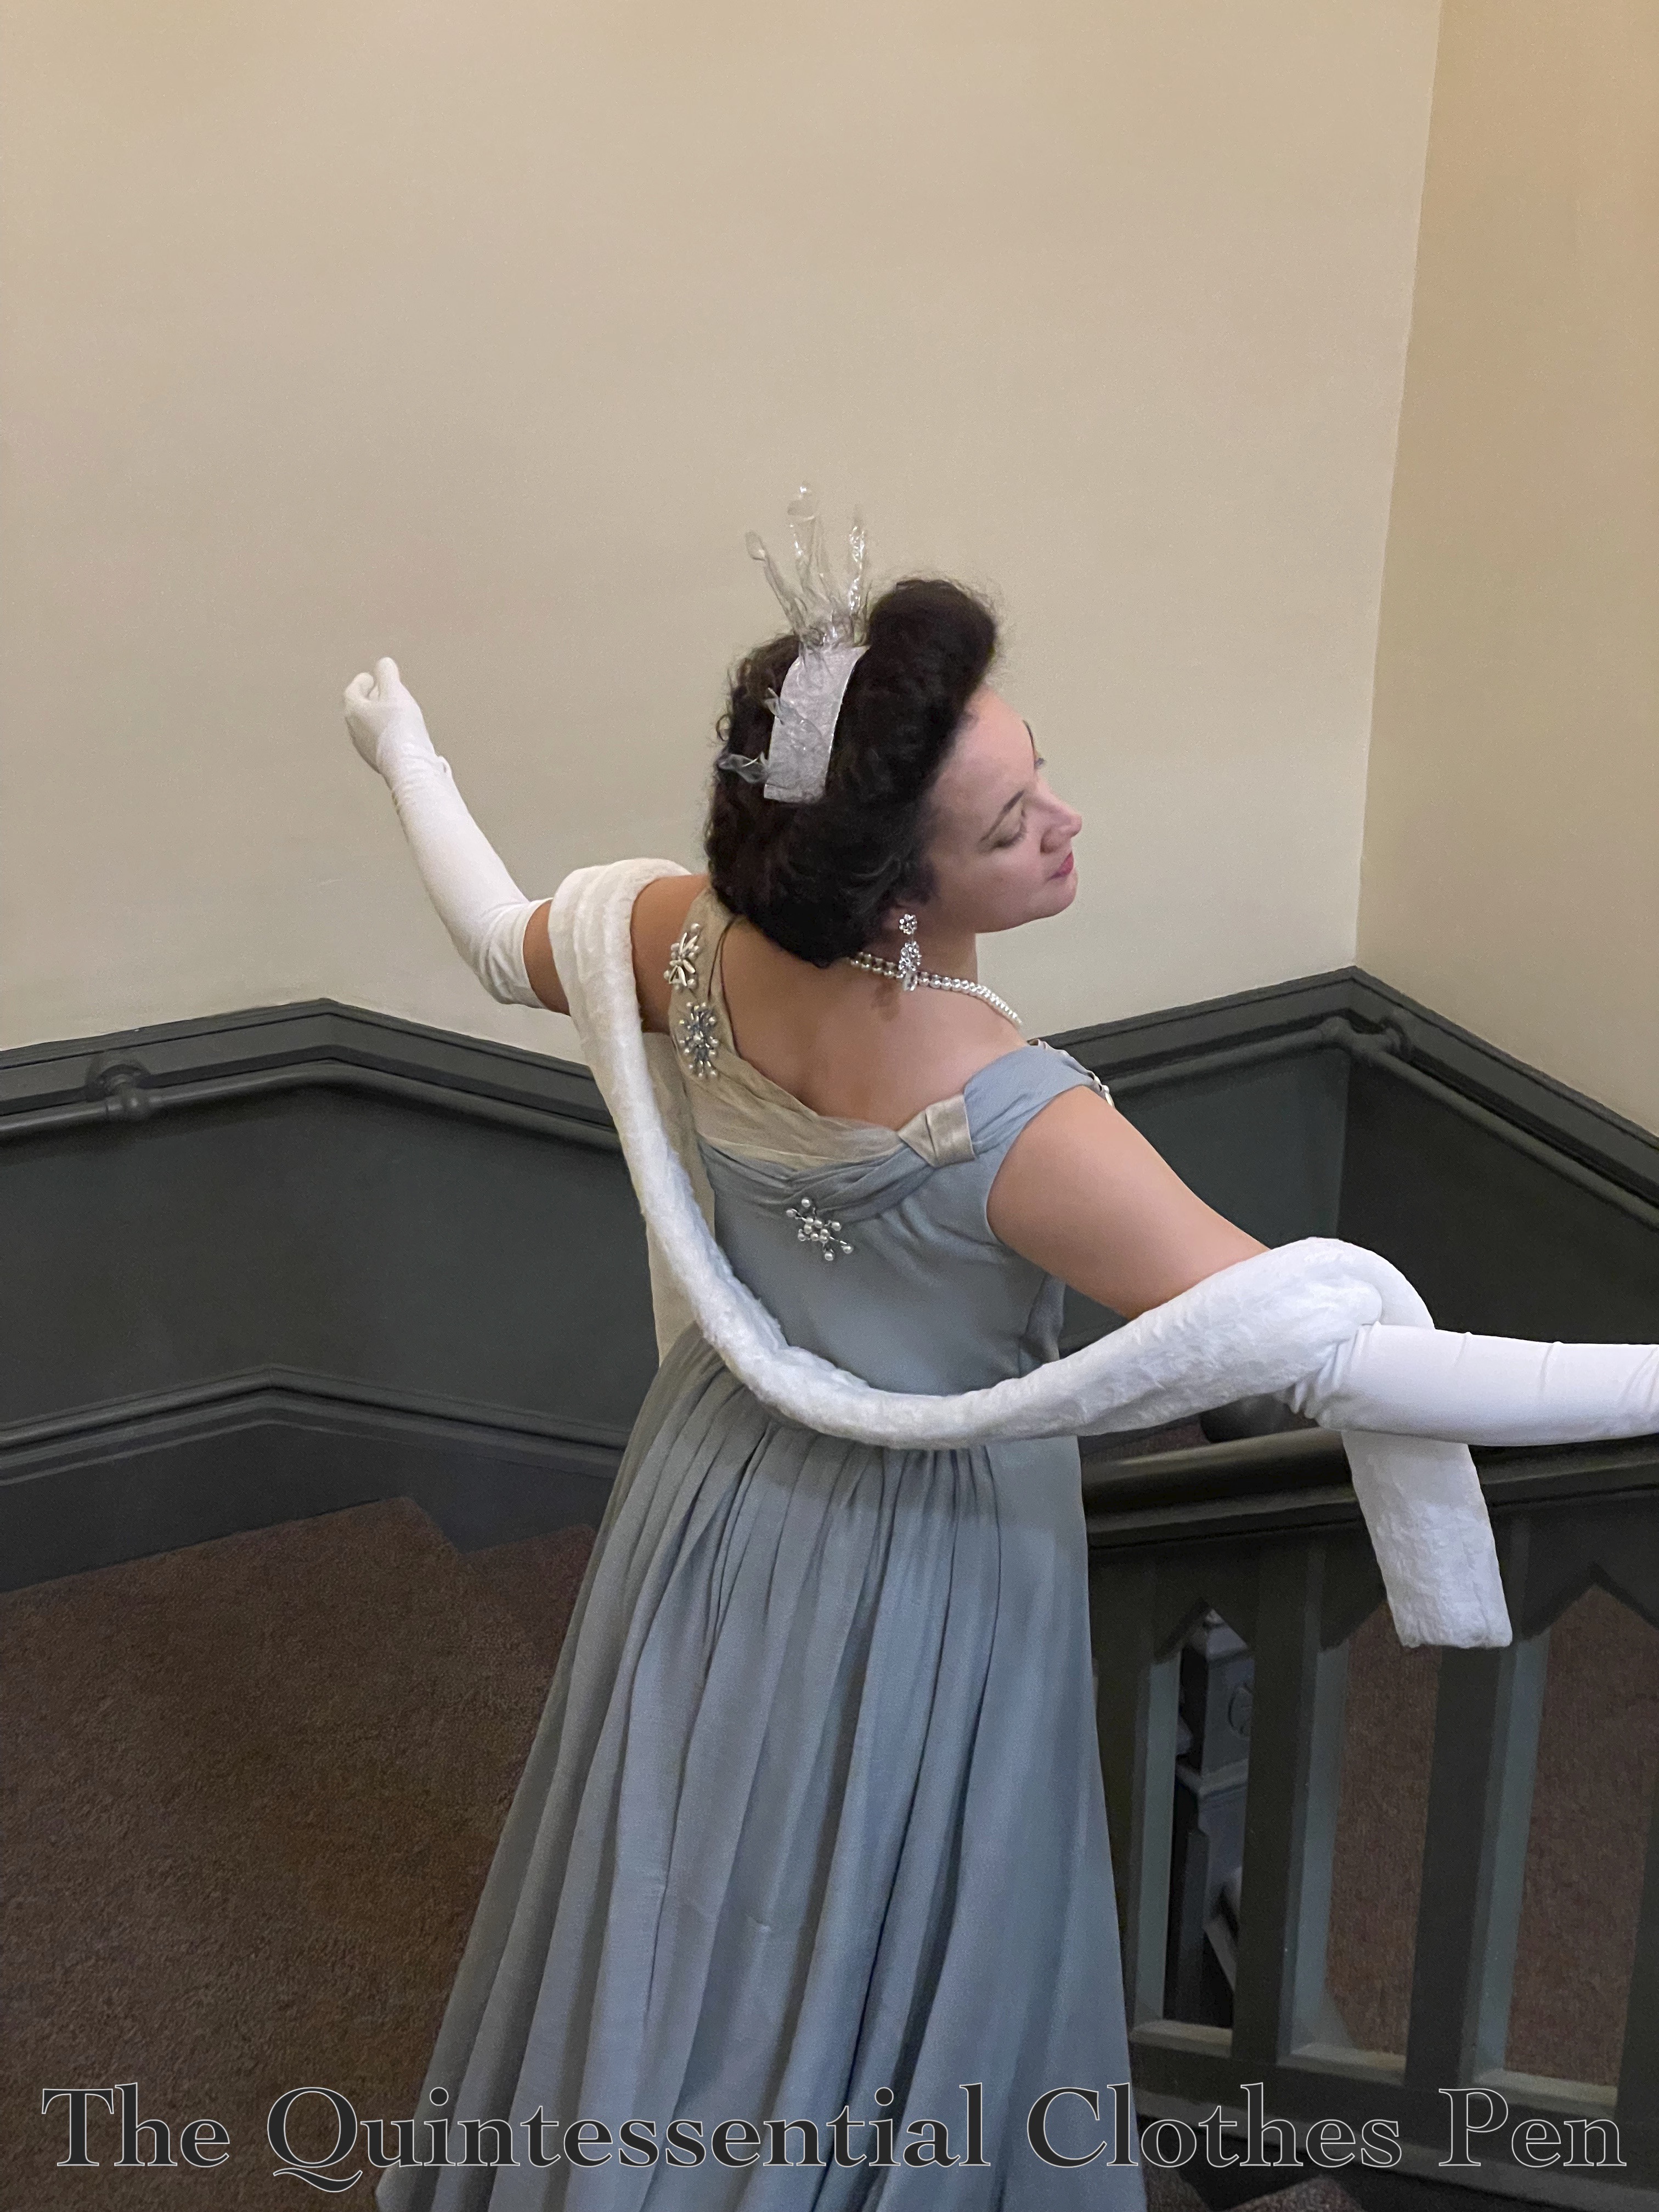
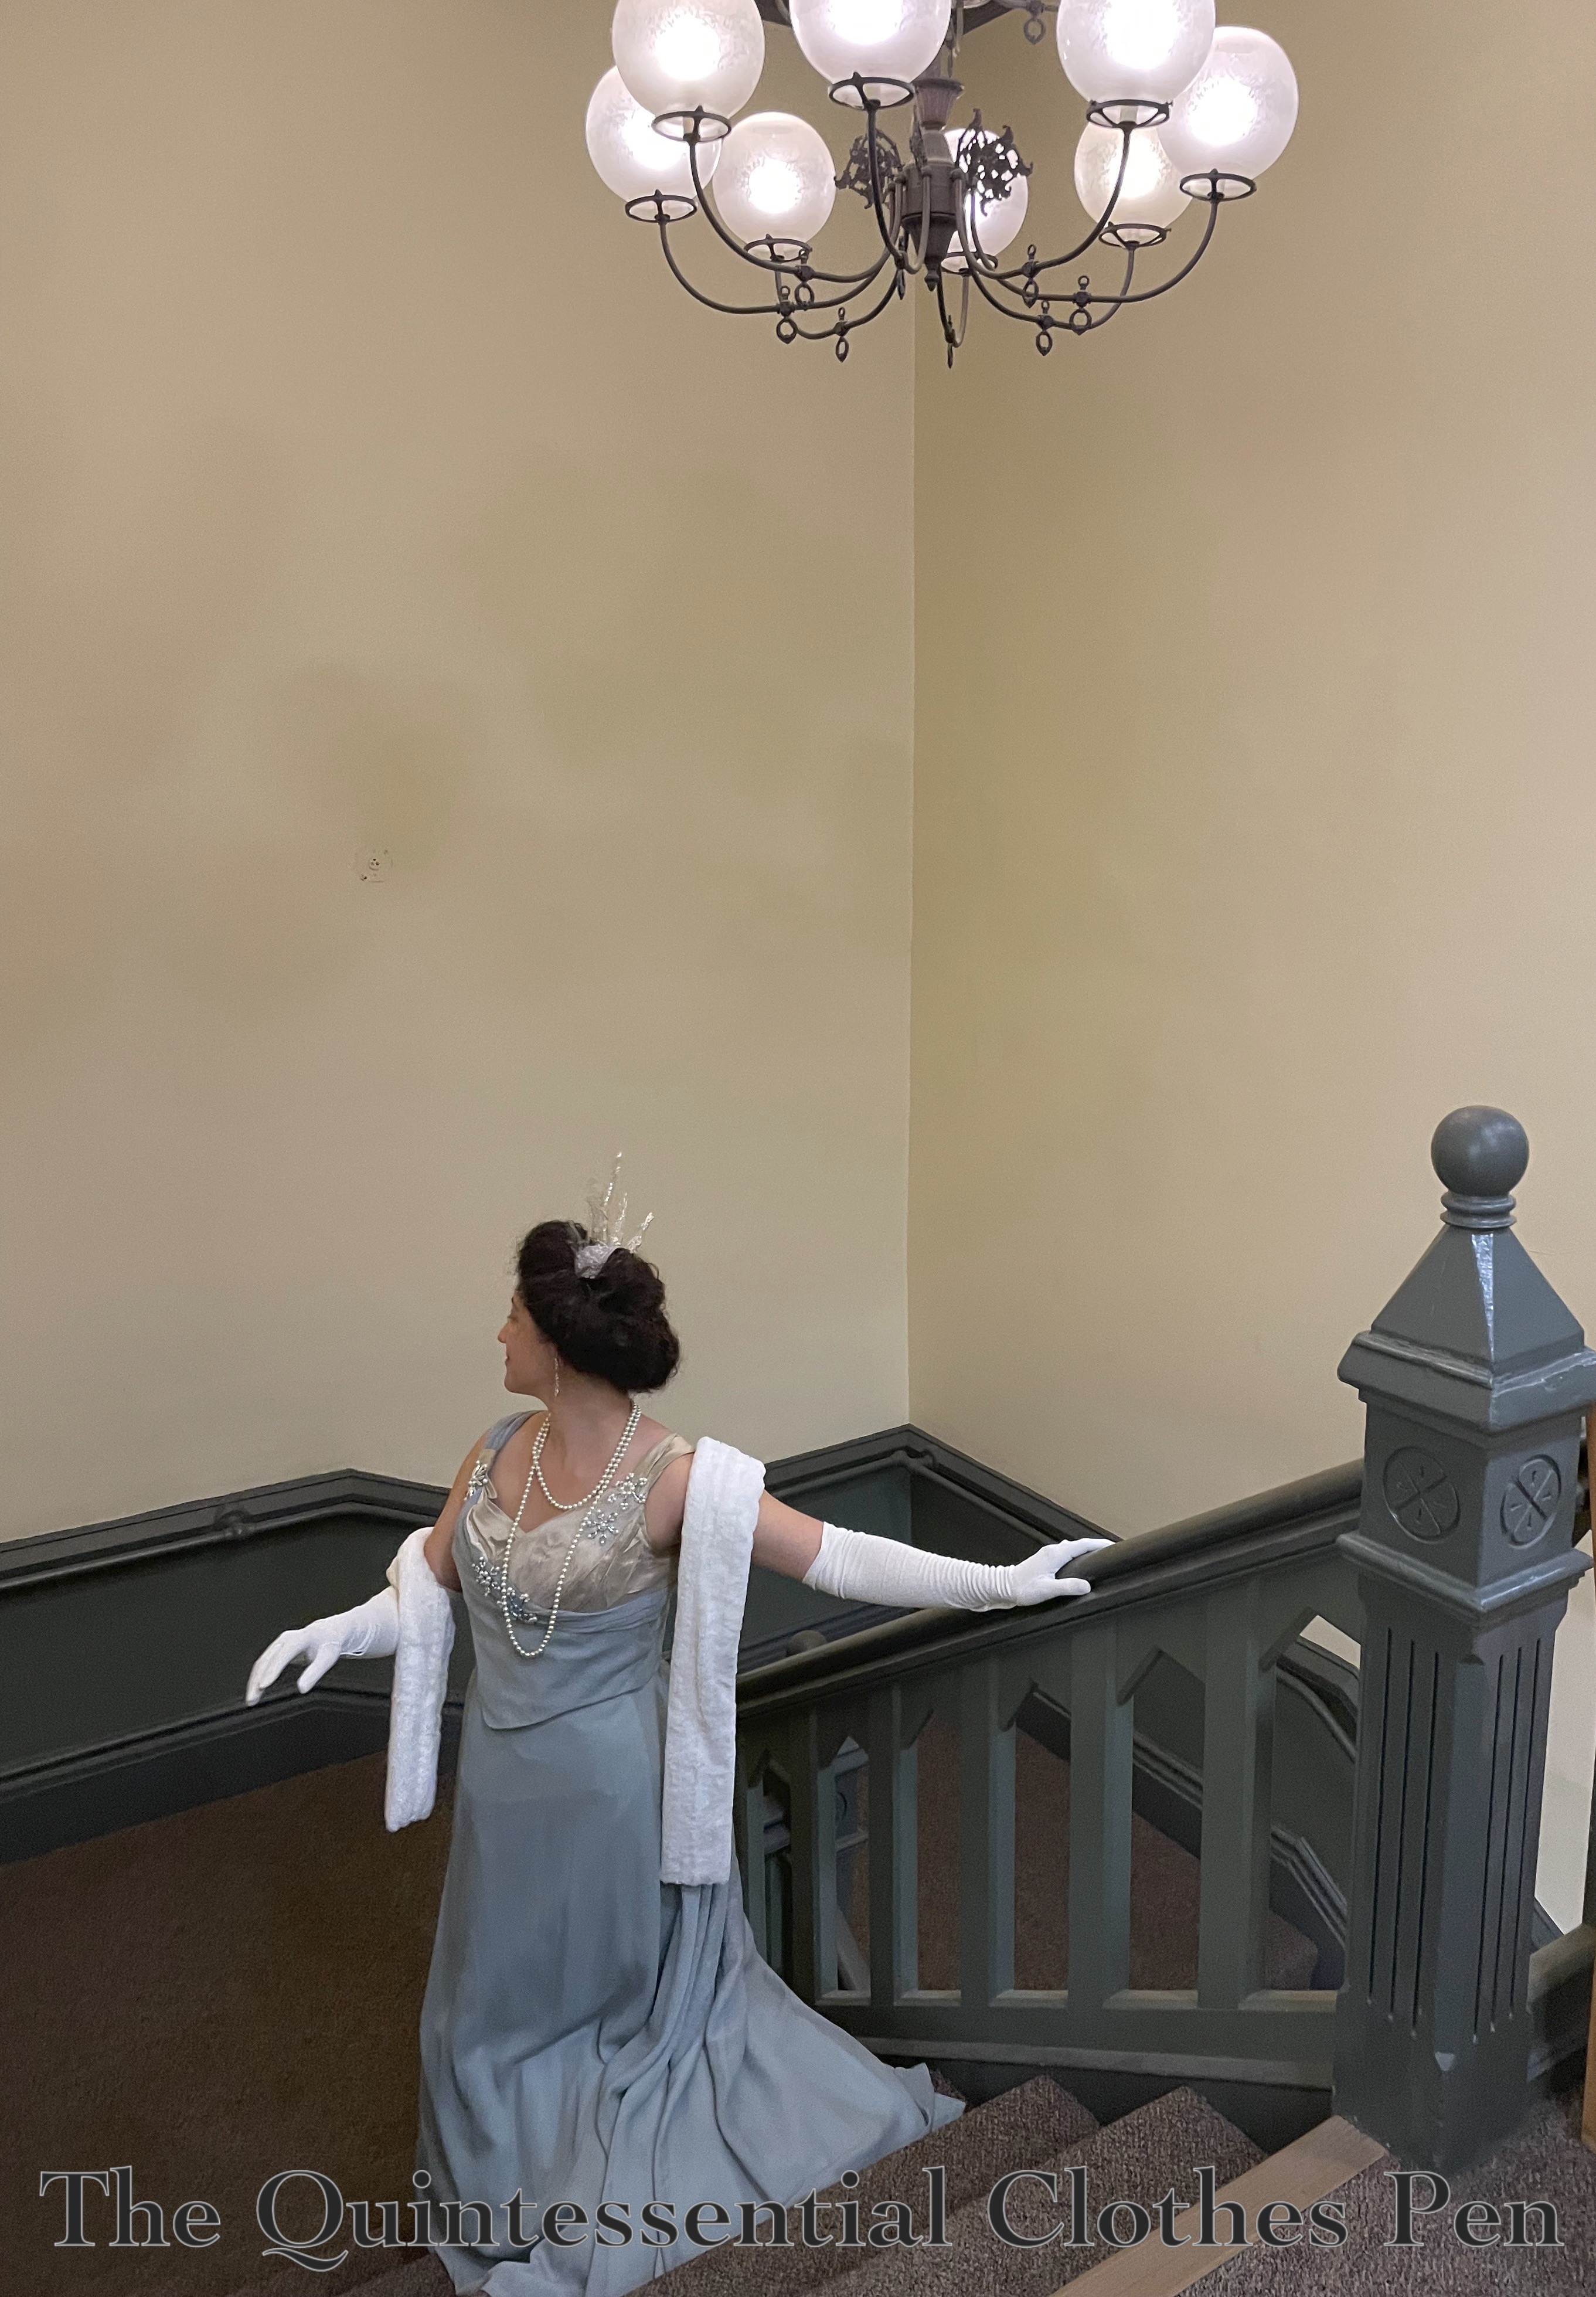
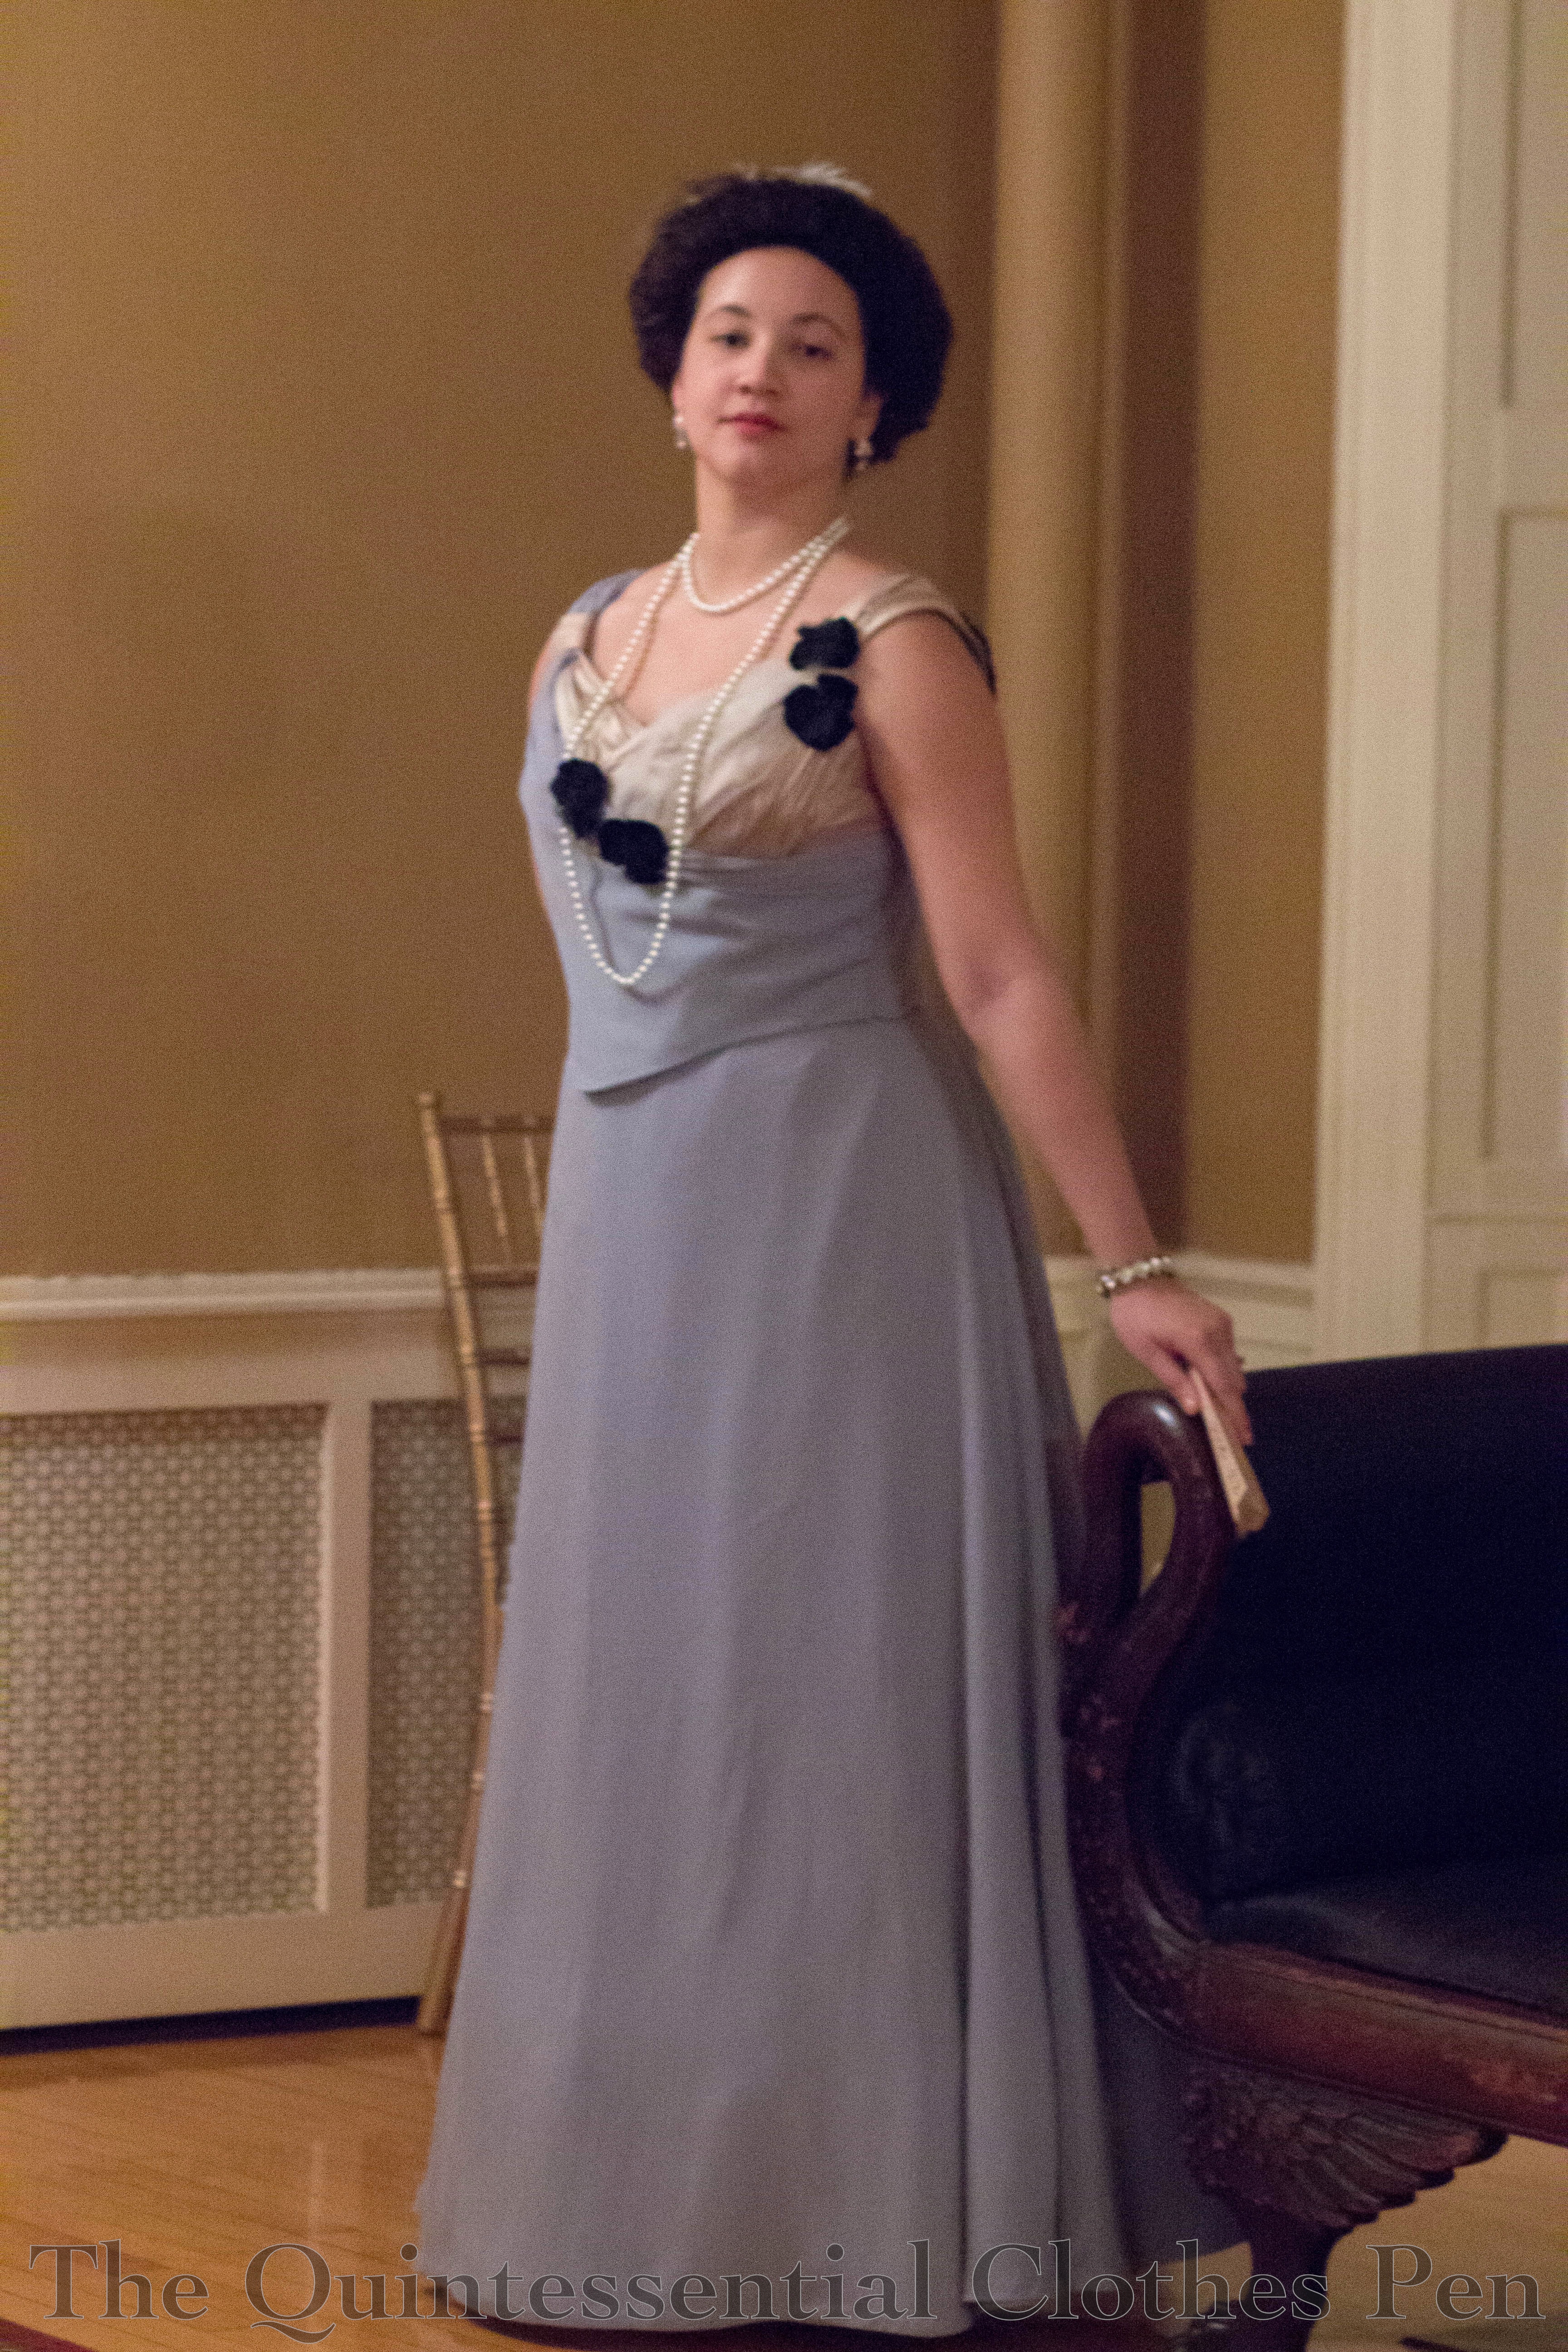
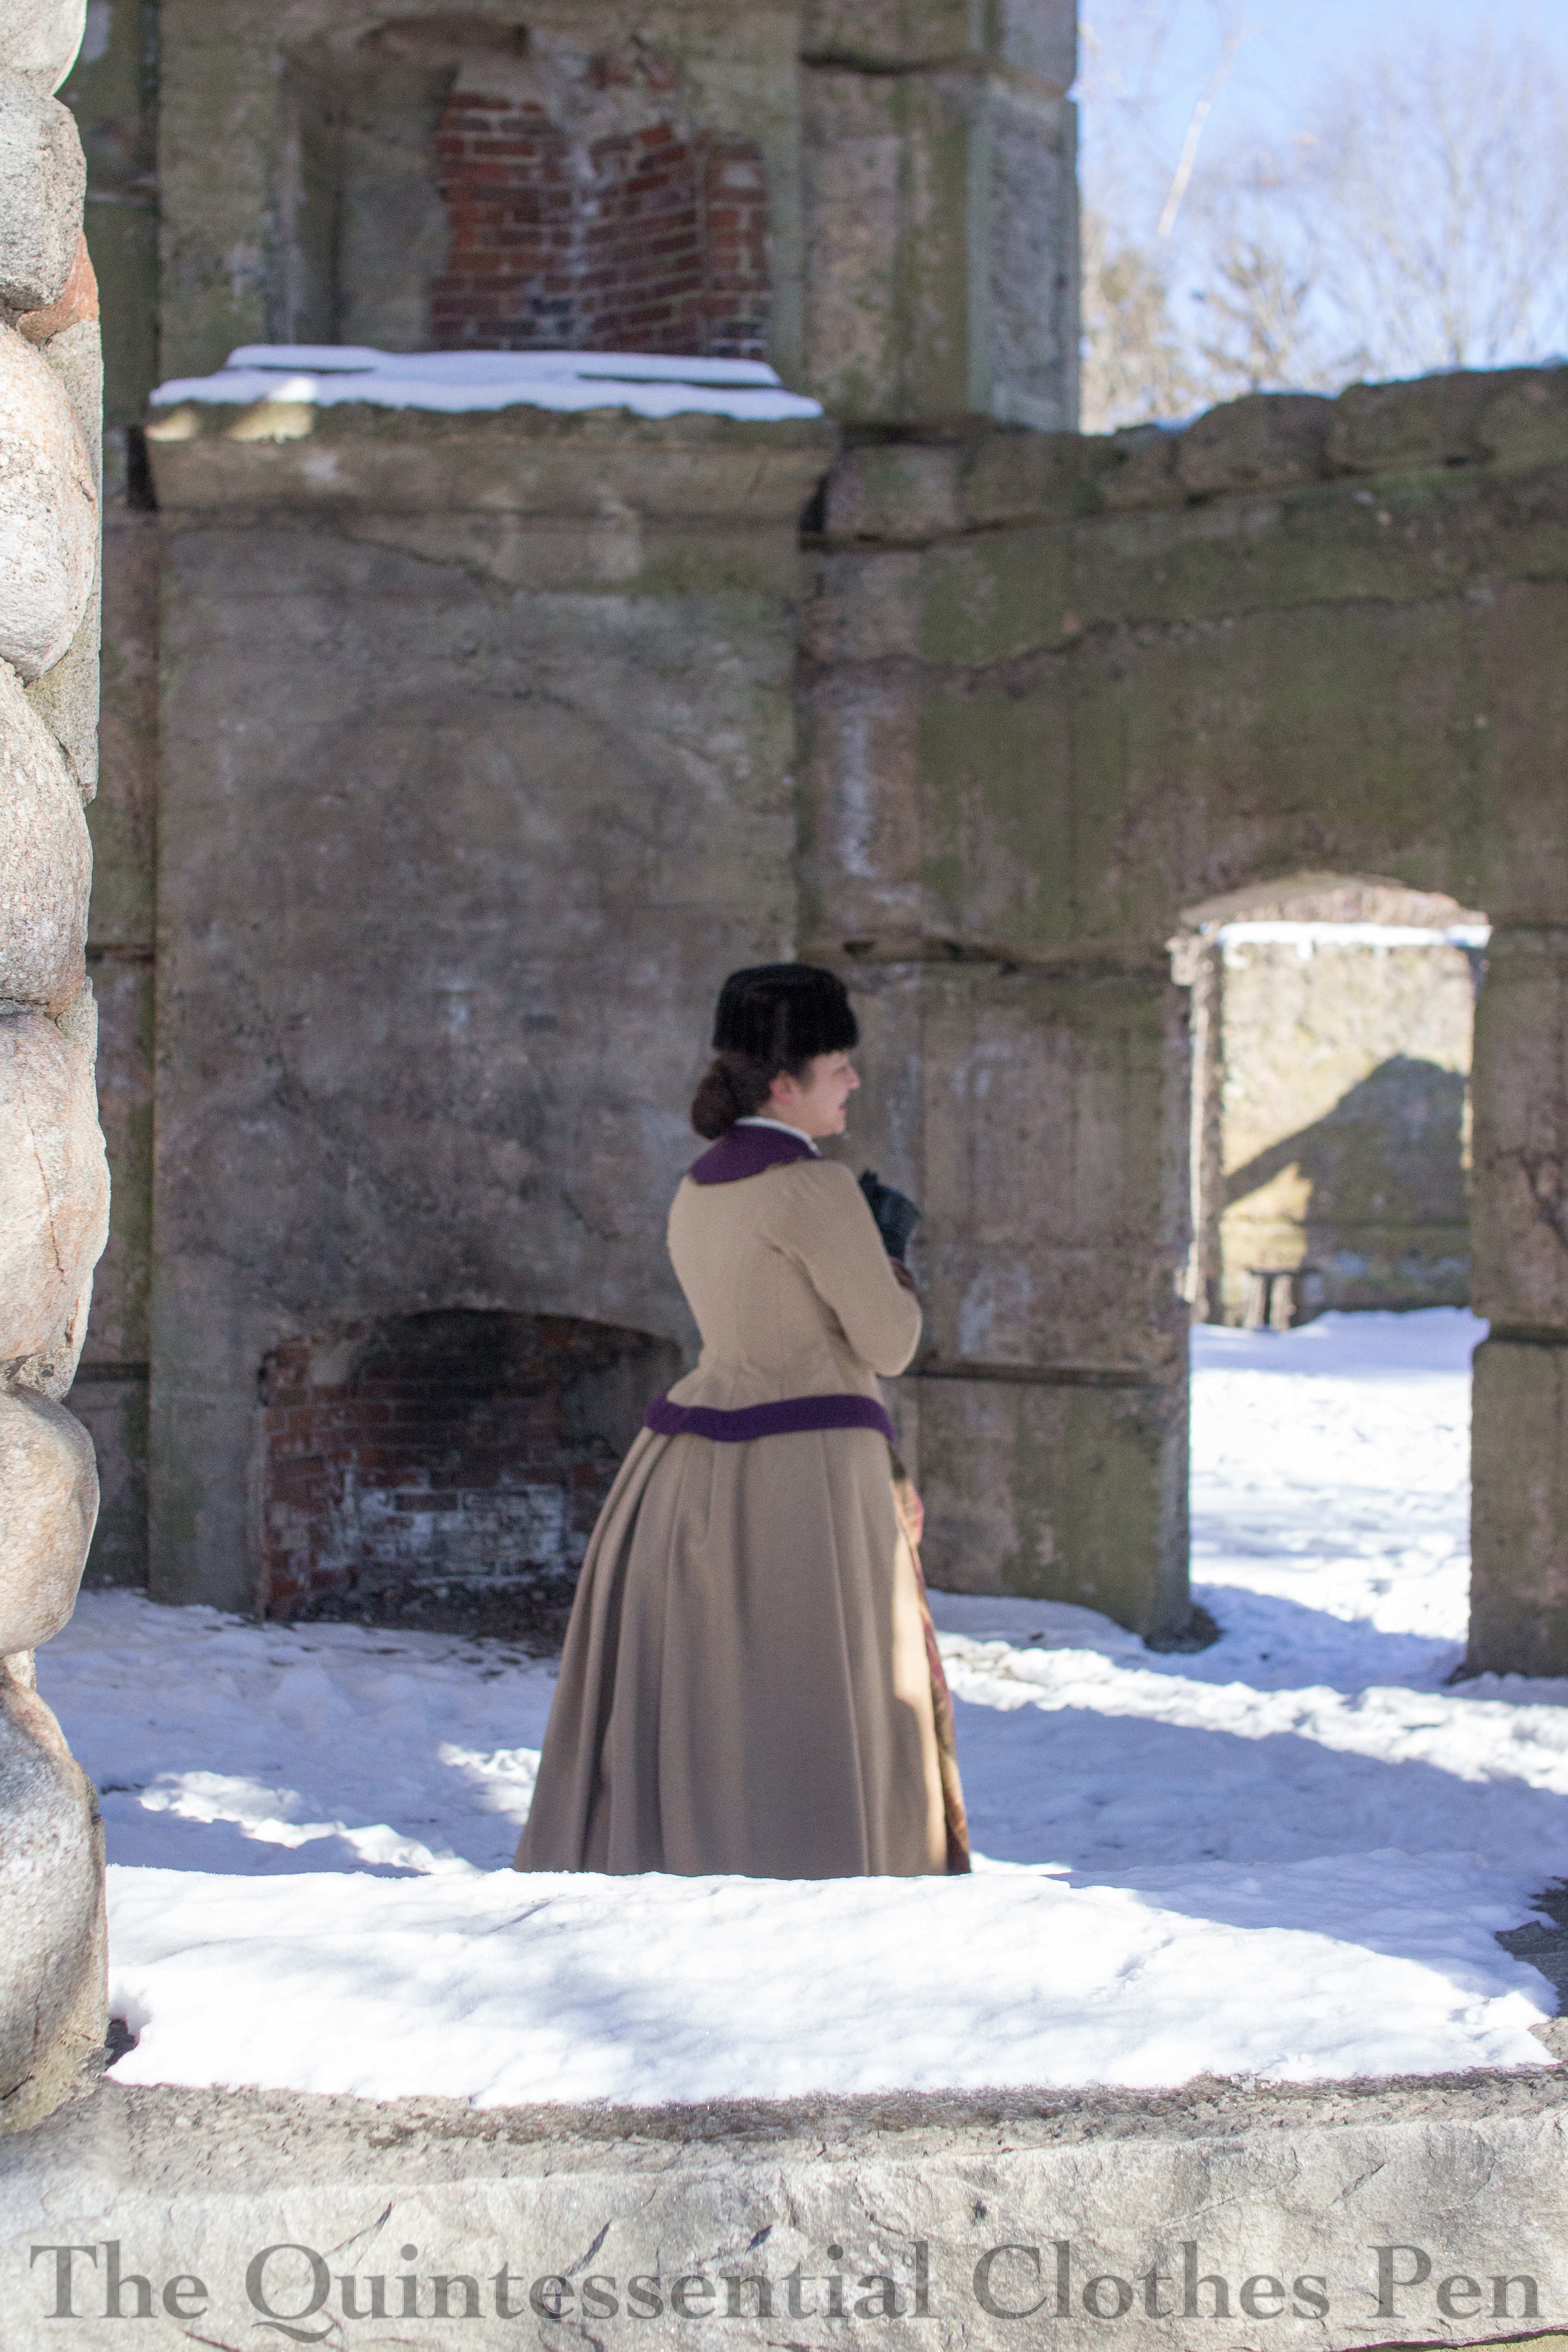
It’s time to share photos of my completed Snow Queen fancy dress outfit! This outfit, which is a re-trimming of my 1899 Elusive Blue dress, made use of new beaded snowflakes (posted about in detail here) and a recycled plastic clamshell icicle crown (posted about in detail here). Below is the finished outfit with all of the trimmings!
The trimmings included big sparkly earrings and a long strand of faux pearls worn in an 1890s style, long white gloves (an essential for an 1890s ball!), the afore-mentioned snowflakes and crown, and a bit of white fur to capture the idea of snow.
The fur tippet amuses me because it is super soft and comes in handy as a historical accessory, but also because, looking back, I made it in 2012! Here is the original blog post about it, including a definition of what a tippet is and research showing examples of tippets. How fun that it is still in my wardrobe and still coming in handy!
Here is the icicle crown in action, to give some context to the description of how it sits on my head.
To finish off, here is one more full length view of the ensemble, zoomed out far enough to see the fun bubble-shaped light fixture!
Happy new year! Thanks for enjoying this ensemble with me!
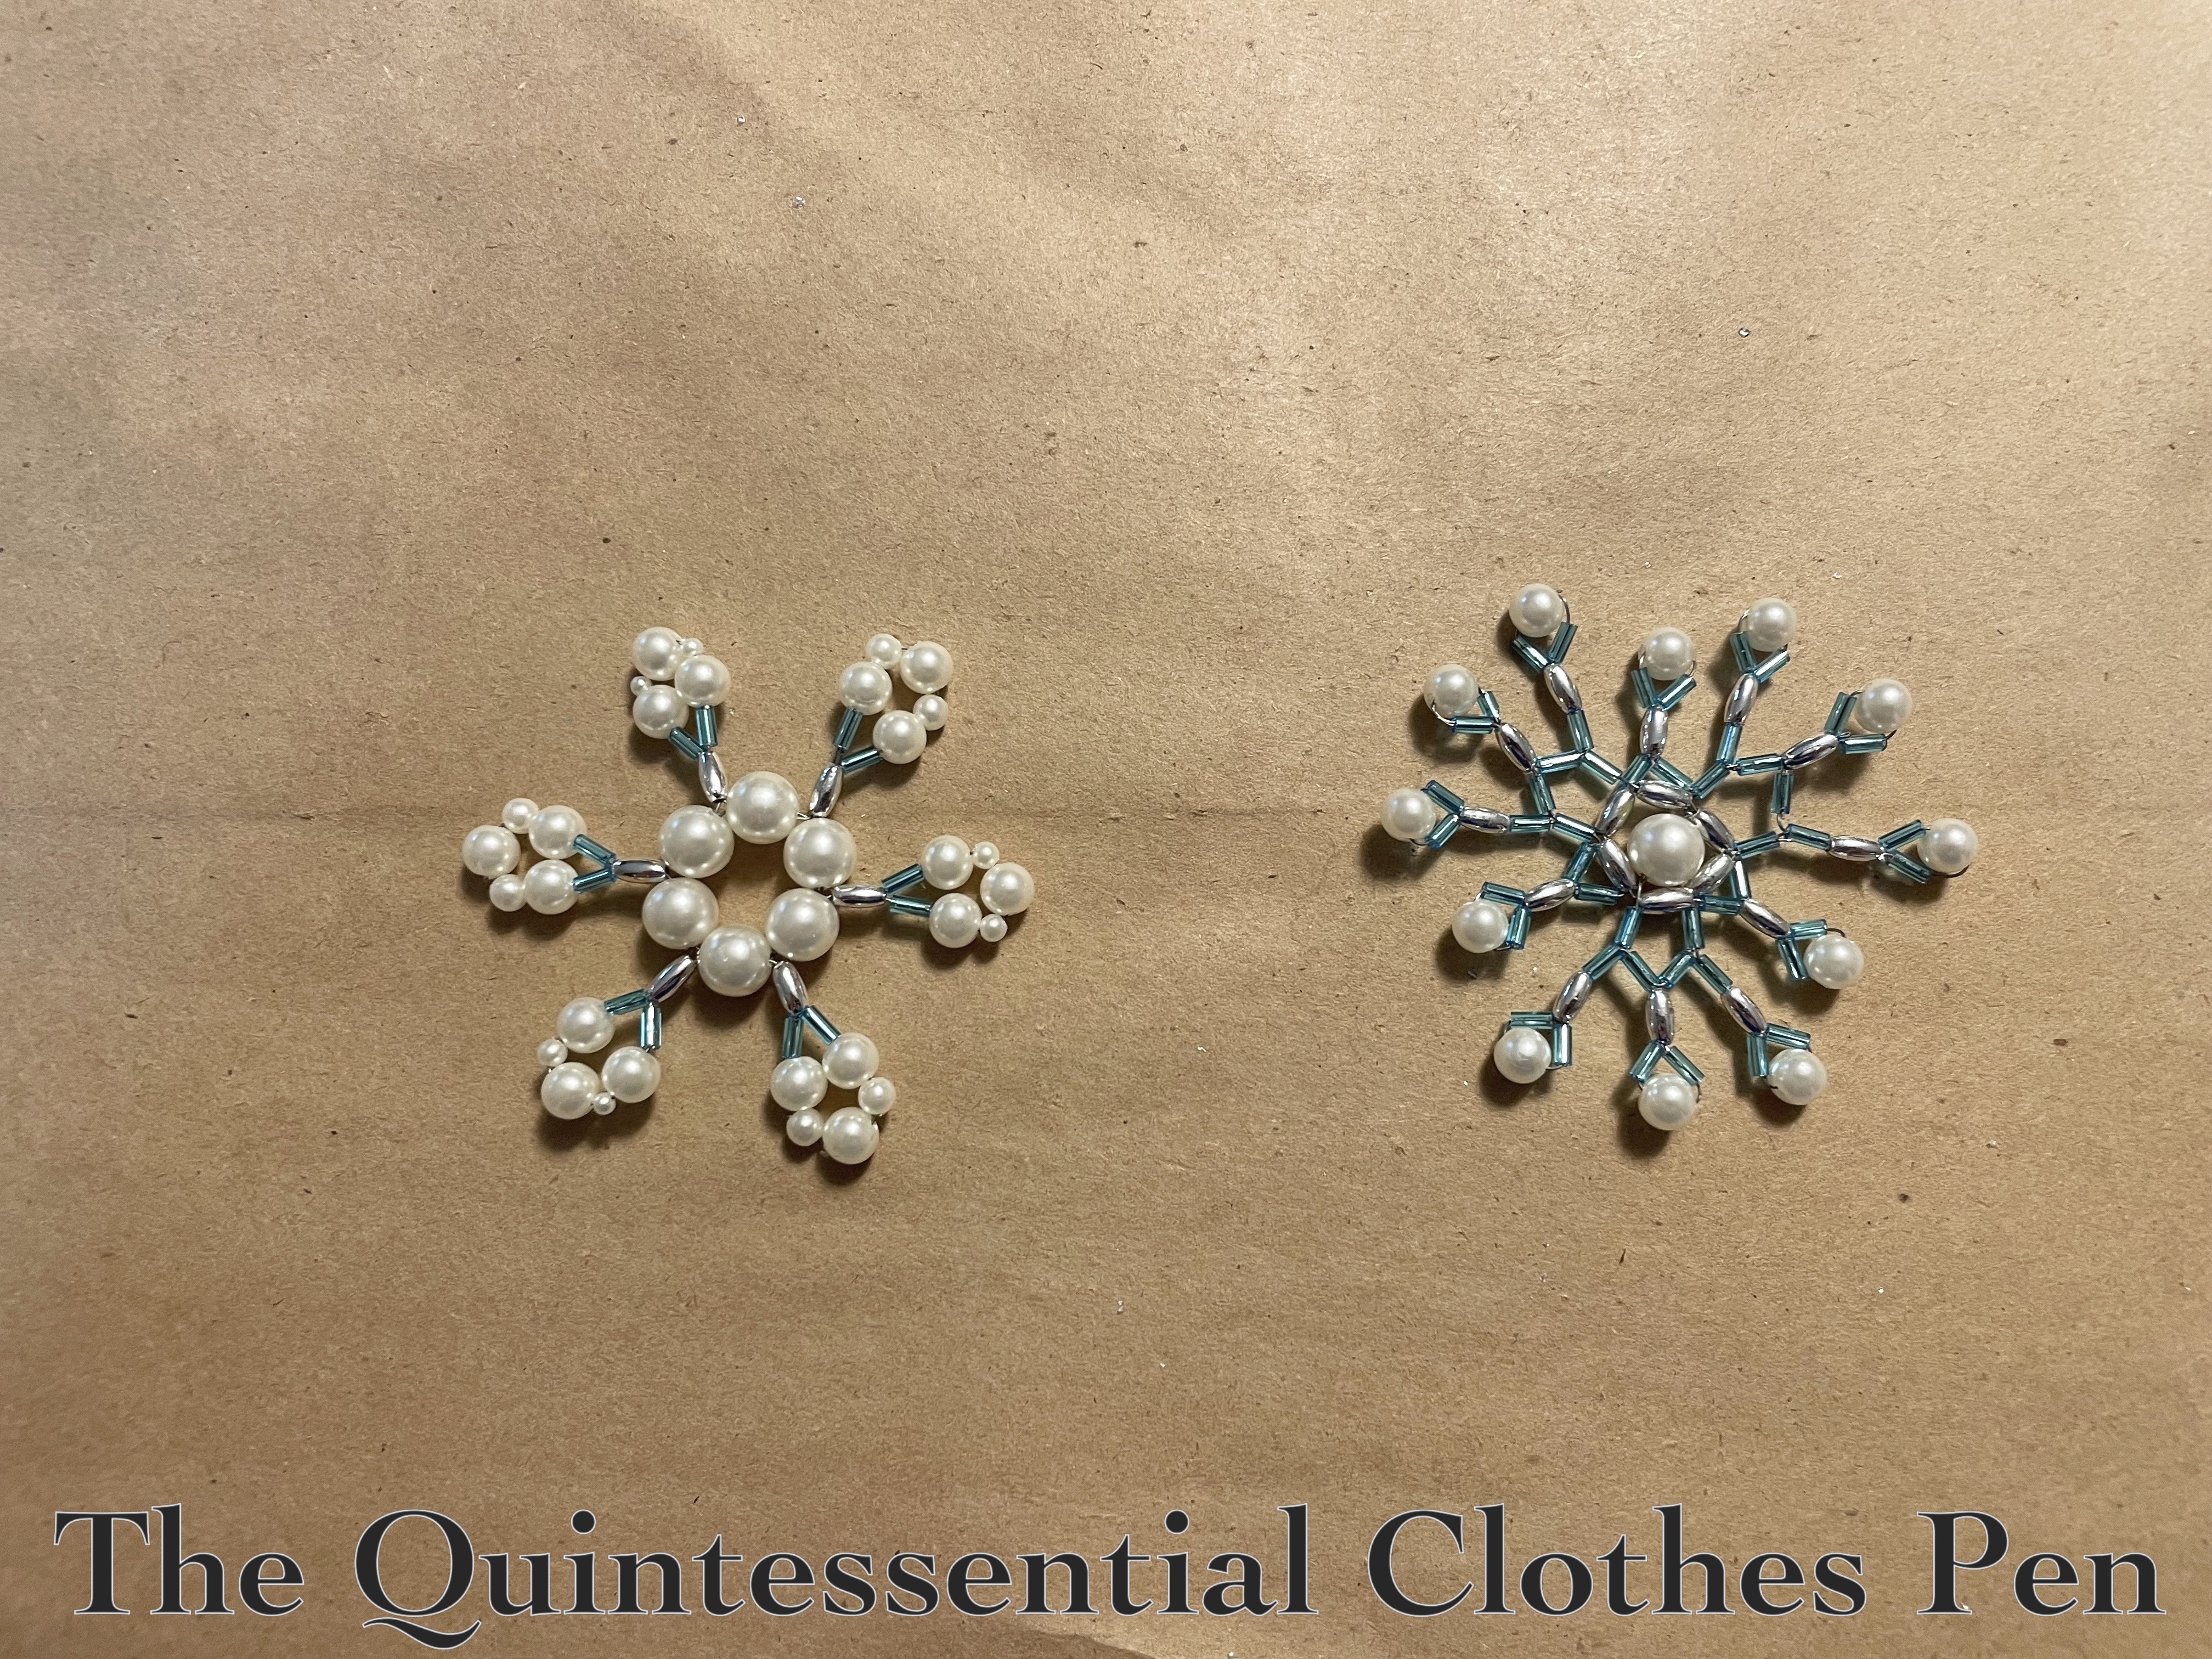
As part of my Snow Queen idea for The Footwork & Frolick Fairytale Ball I wanted to incorporate some snowflakes! In my brainstorming of materials I remembered that many years ago (twenty-ish, I think!) I had been gifted a whole bunch of beads and little trimming bits and bobs. I stored them for years and didn’t really find uses… but all of those pearls, silver, and blue beads would be perfect for making snowflakes!!
I actually started these in the middle of making my icicles. I was completely distracted! My thought was to put one snowflake on top of each of the black flower accents on the Elusive Blue 1899 Dress I made back in 2016 (visible in it’s original form below). There are 8 flowers total, so I would need 8 snowflakes.
I did a quick internet search for ‘beaded snowflake tutorial’. There are many! But this one, on Instructables, use beads similar to the types I had available, so that was my main inspiration. I laid out my beads in a few ways to see what would best approximate the pattern in the tutorial, as you can see below.
Then I dug out a spool of wire I had accumulated doing other craft projects. Honestly, I’ve probably had this wire for 20 years, too, and I have no idea what project I purchased it for… but it came in handy to have it on hand! Mr. Q contributed wire cutters that lowered my frustration by cutting the wire more effectively than my sewing pliers, and I was off!
I easily created the first snowflake, on the left in the image below!
No two snowflakes are the same, right? So I wanted variation and decided to make up my own design, which you can see on the right in the image above. Turns out I made it pretty complicated… and a triangle! I had a bit of a meltdown… Would a triangle snowflake make sense?? Are snowflakes always symmetrical?
I went back to icicles for awhile and then over the next few weeks made more snowflakes. Some are similar, but no two snowflakes are the same.
It was fun! For me, it was also a perfectionist rabbit hole! I wanted to find eye catching designs for the beads I had, make sure the beads were tightly pulled on the wire, make sure each area of each snowflake matched the other areas… There were many conditions to be met!
It all turned out well, though. I decided to replace the black flowers with snowflakes, but saved the black flowers and took note of the placement so they could easily be switched out in the future. Next post I’ll share the finished effect of the icicle crown and snowflakes for my Snow Queen fancy dress outfit!
This story begins in my previous post (which you can read here) in which I share the backstory and inspiration for this garment. I’ll be carrying on from where I left off. But first, a quick side story!
Mr. Q saw the title of this post and asked “What is a watermelon sleeve?” An excellent question, I think! I explained that watermelon is my description fpr the colors of the garment I’m discussing. But… I do rather wonder what a “watermelon” sleeve might look like…! After all, there are many historical sleeves with fun names (bishop, bell, pagoda, beret, gigot, and mameluke all come to mind quickly, though I can’t think of any that are named after fruit. If you can, let me know!).
Leaving that tangent behind… back to the story!
Patterning
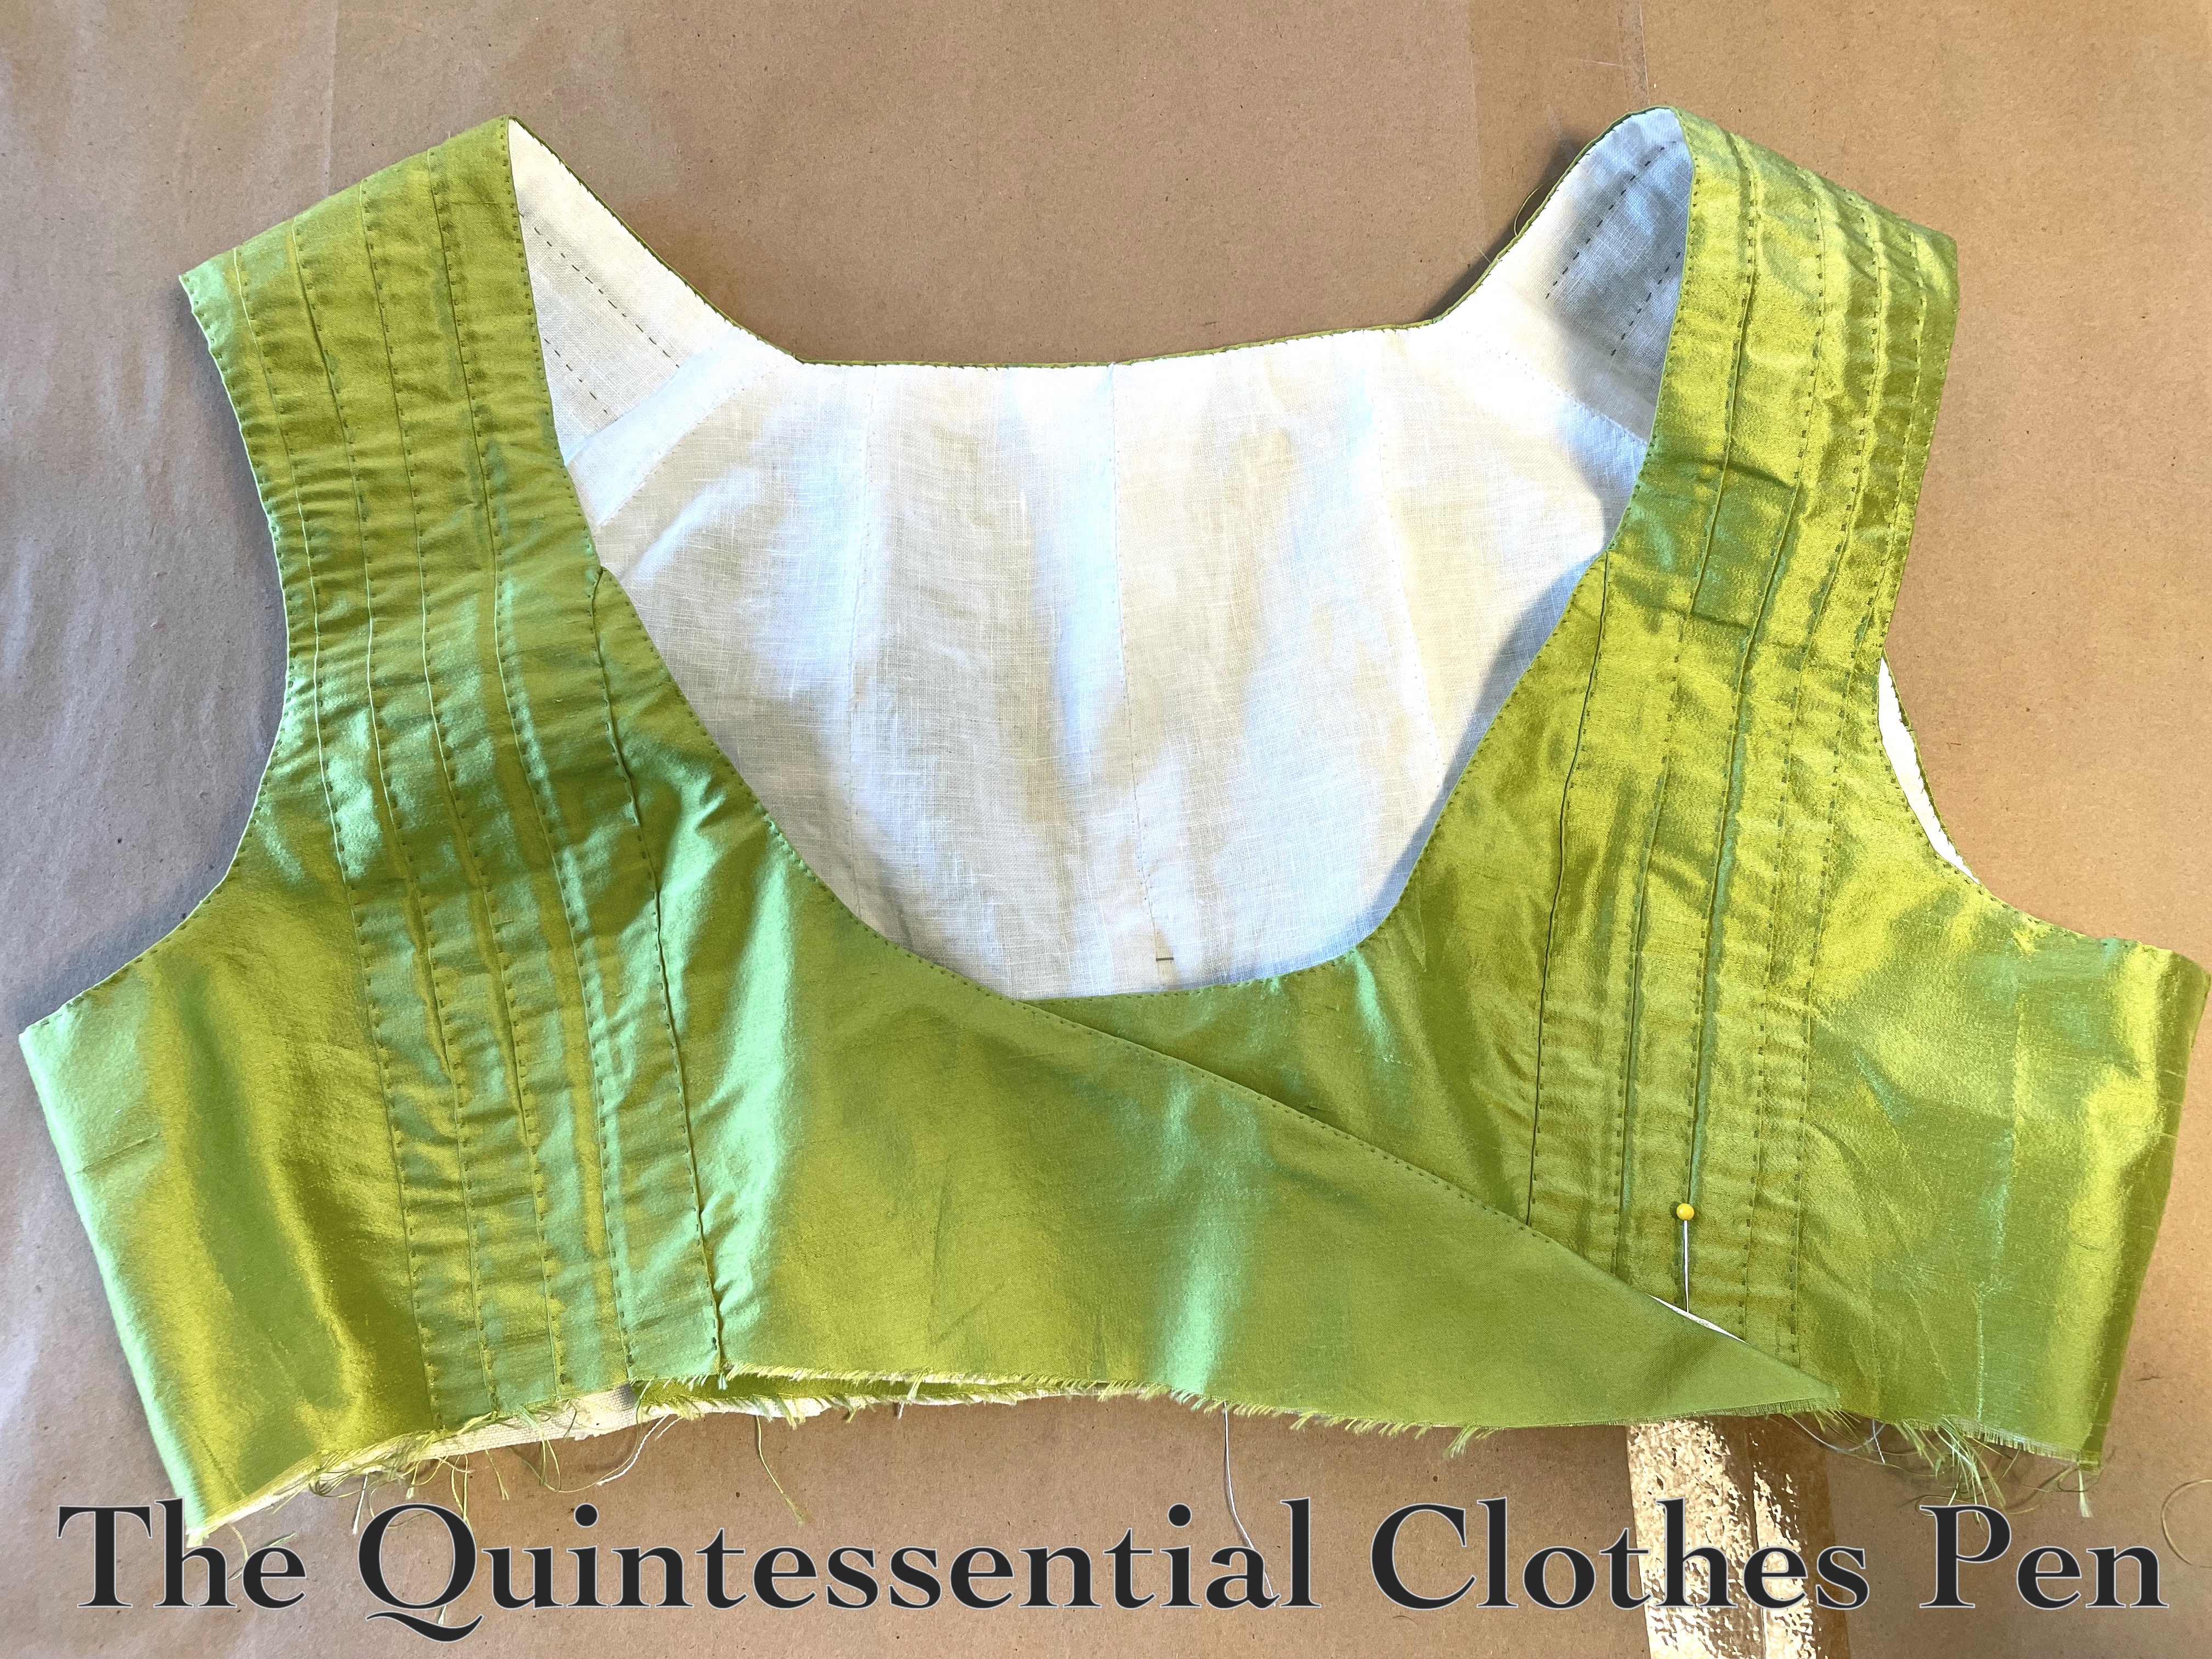
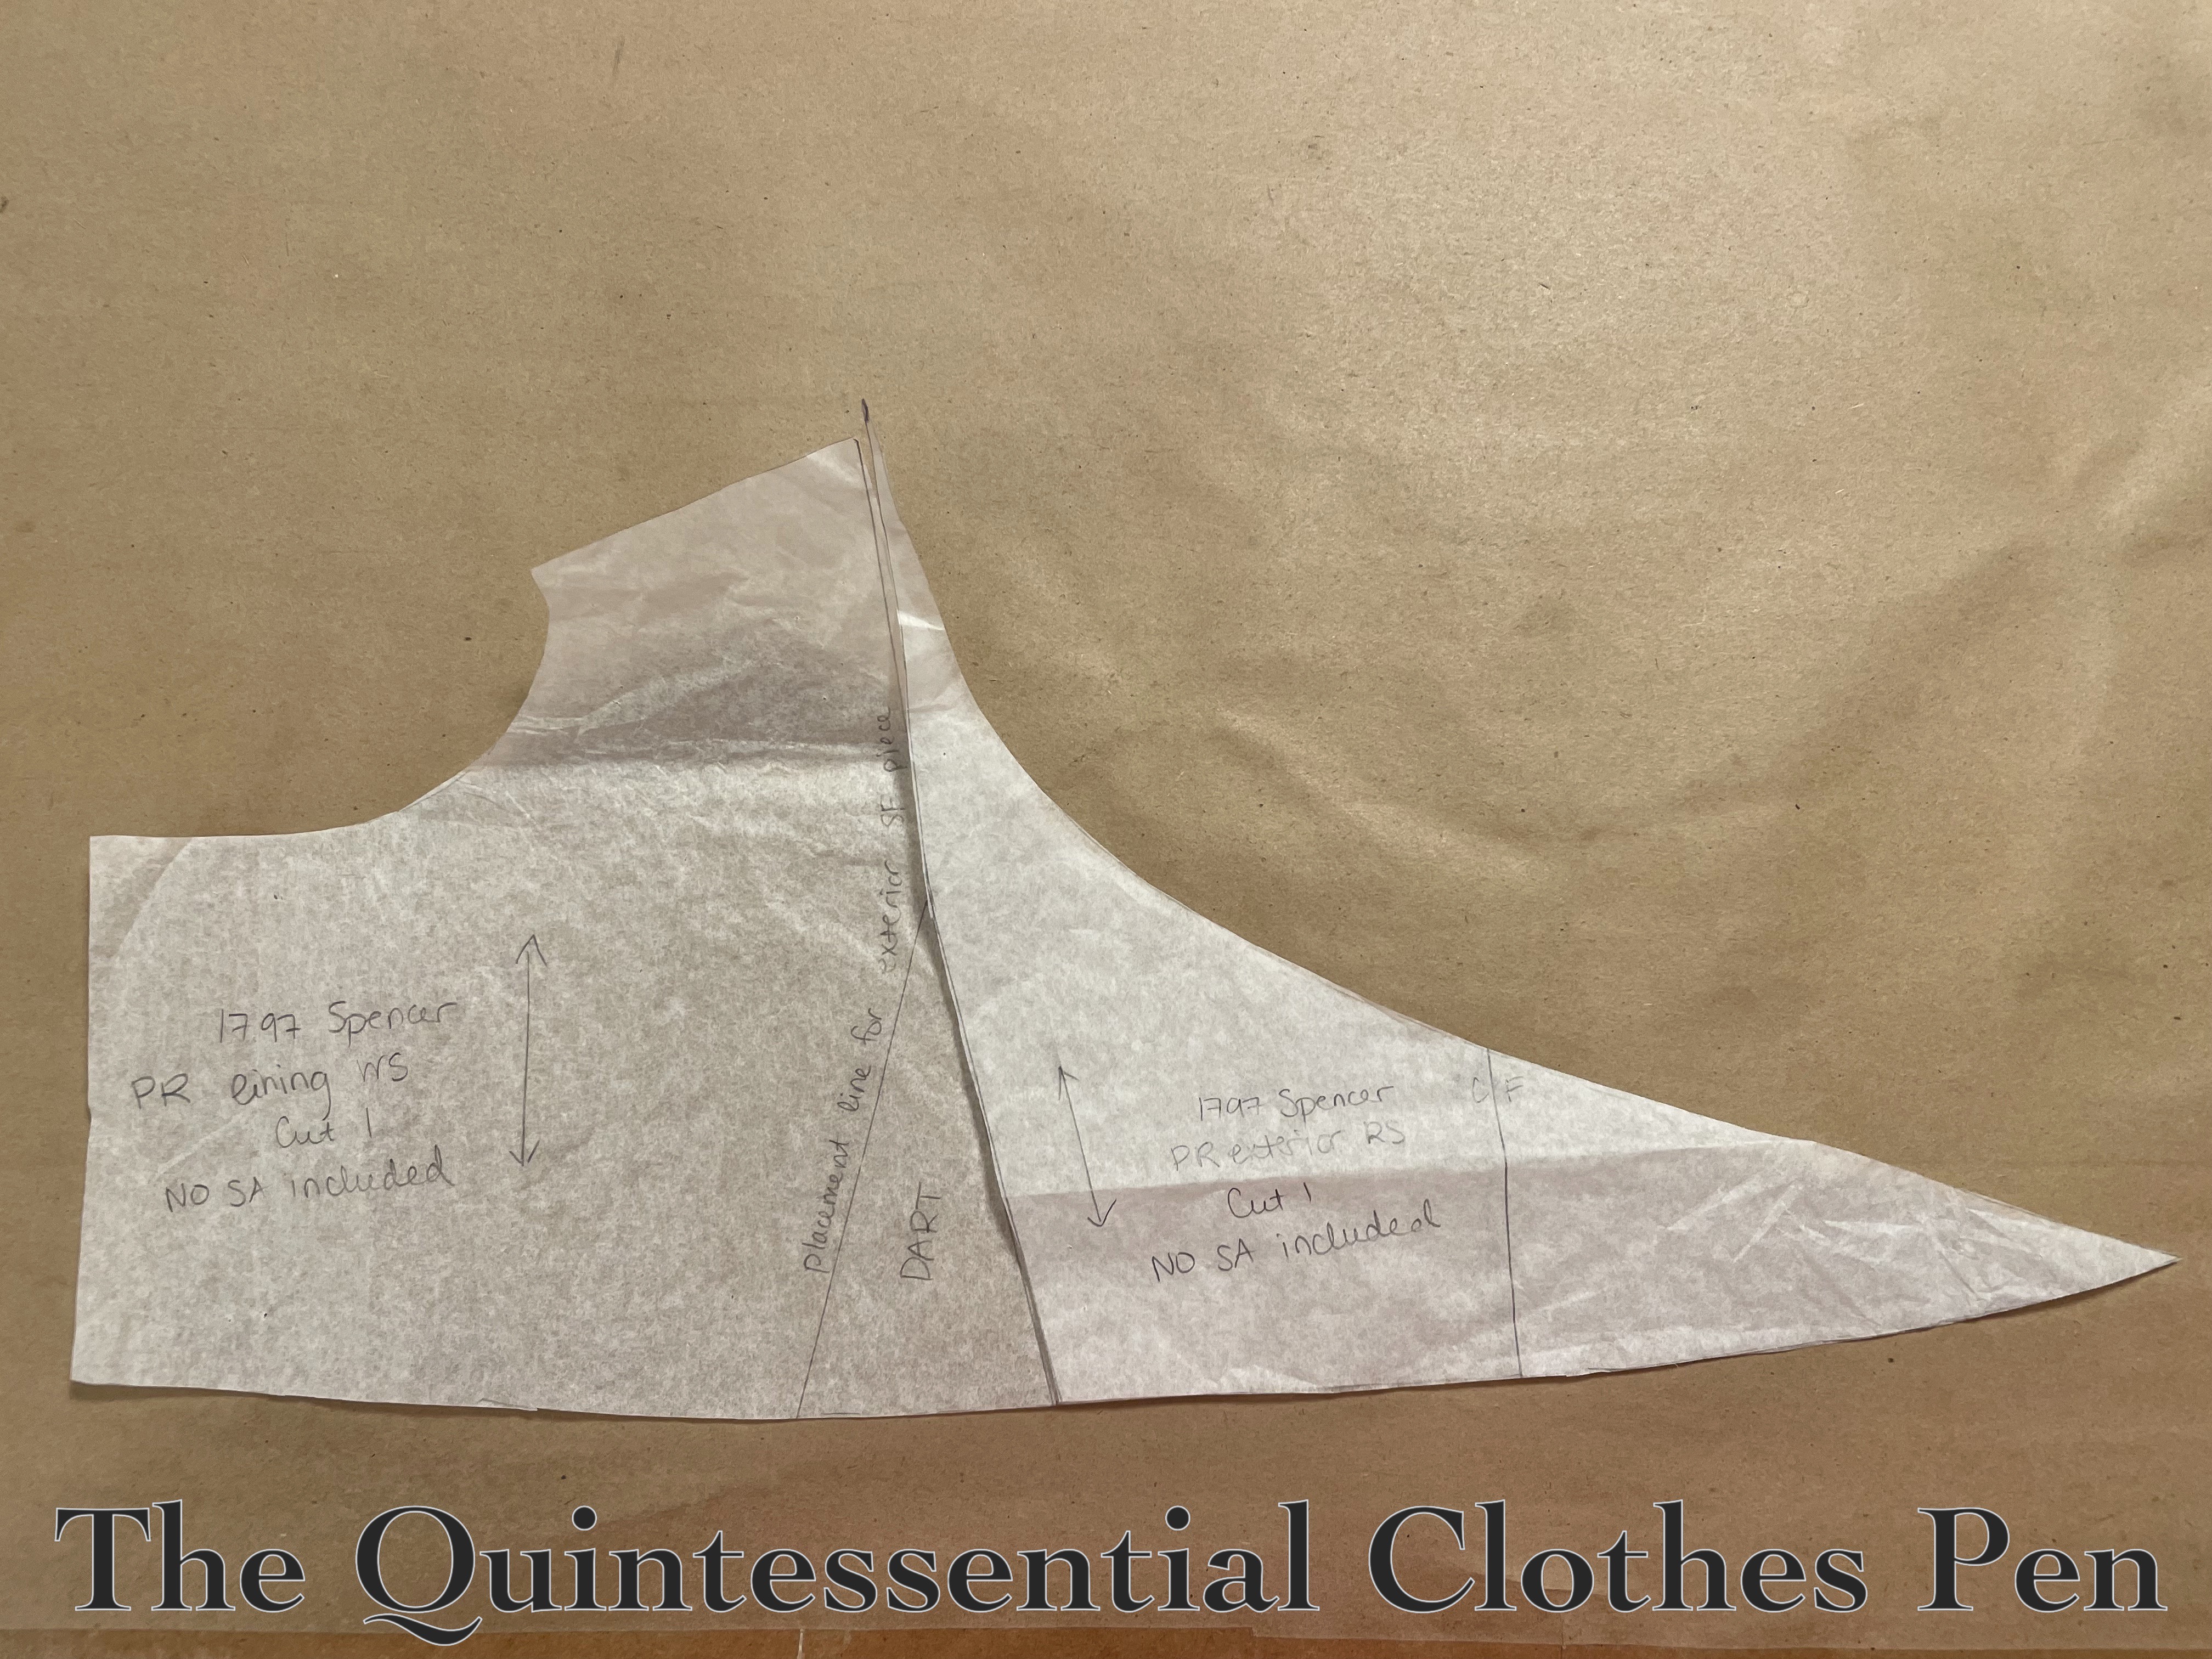
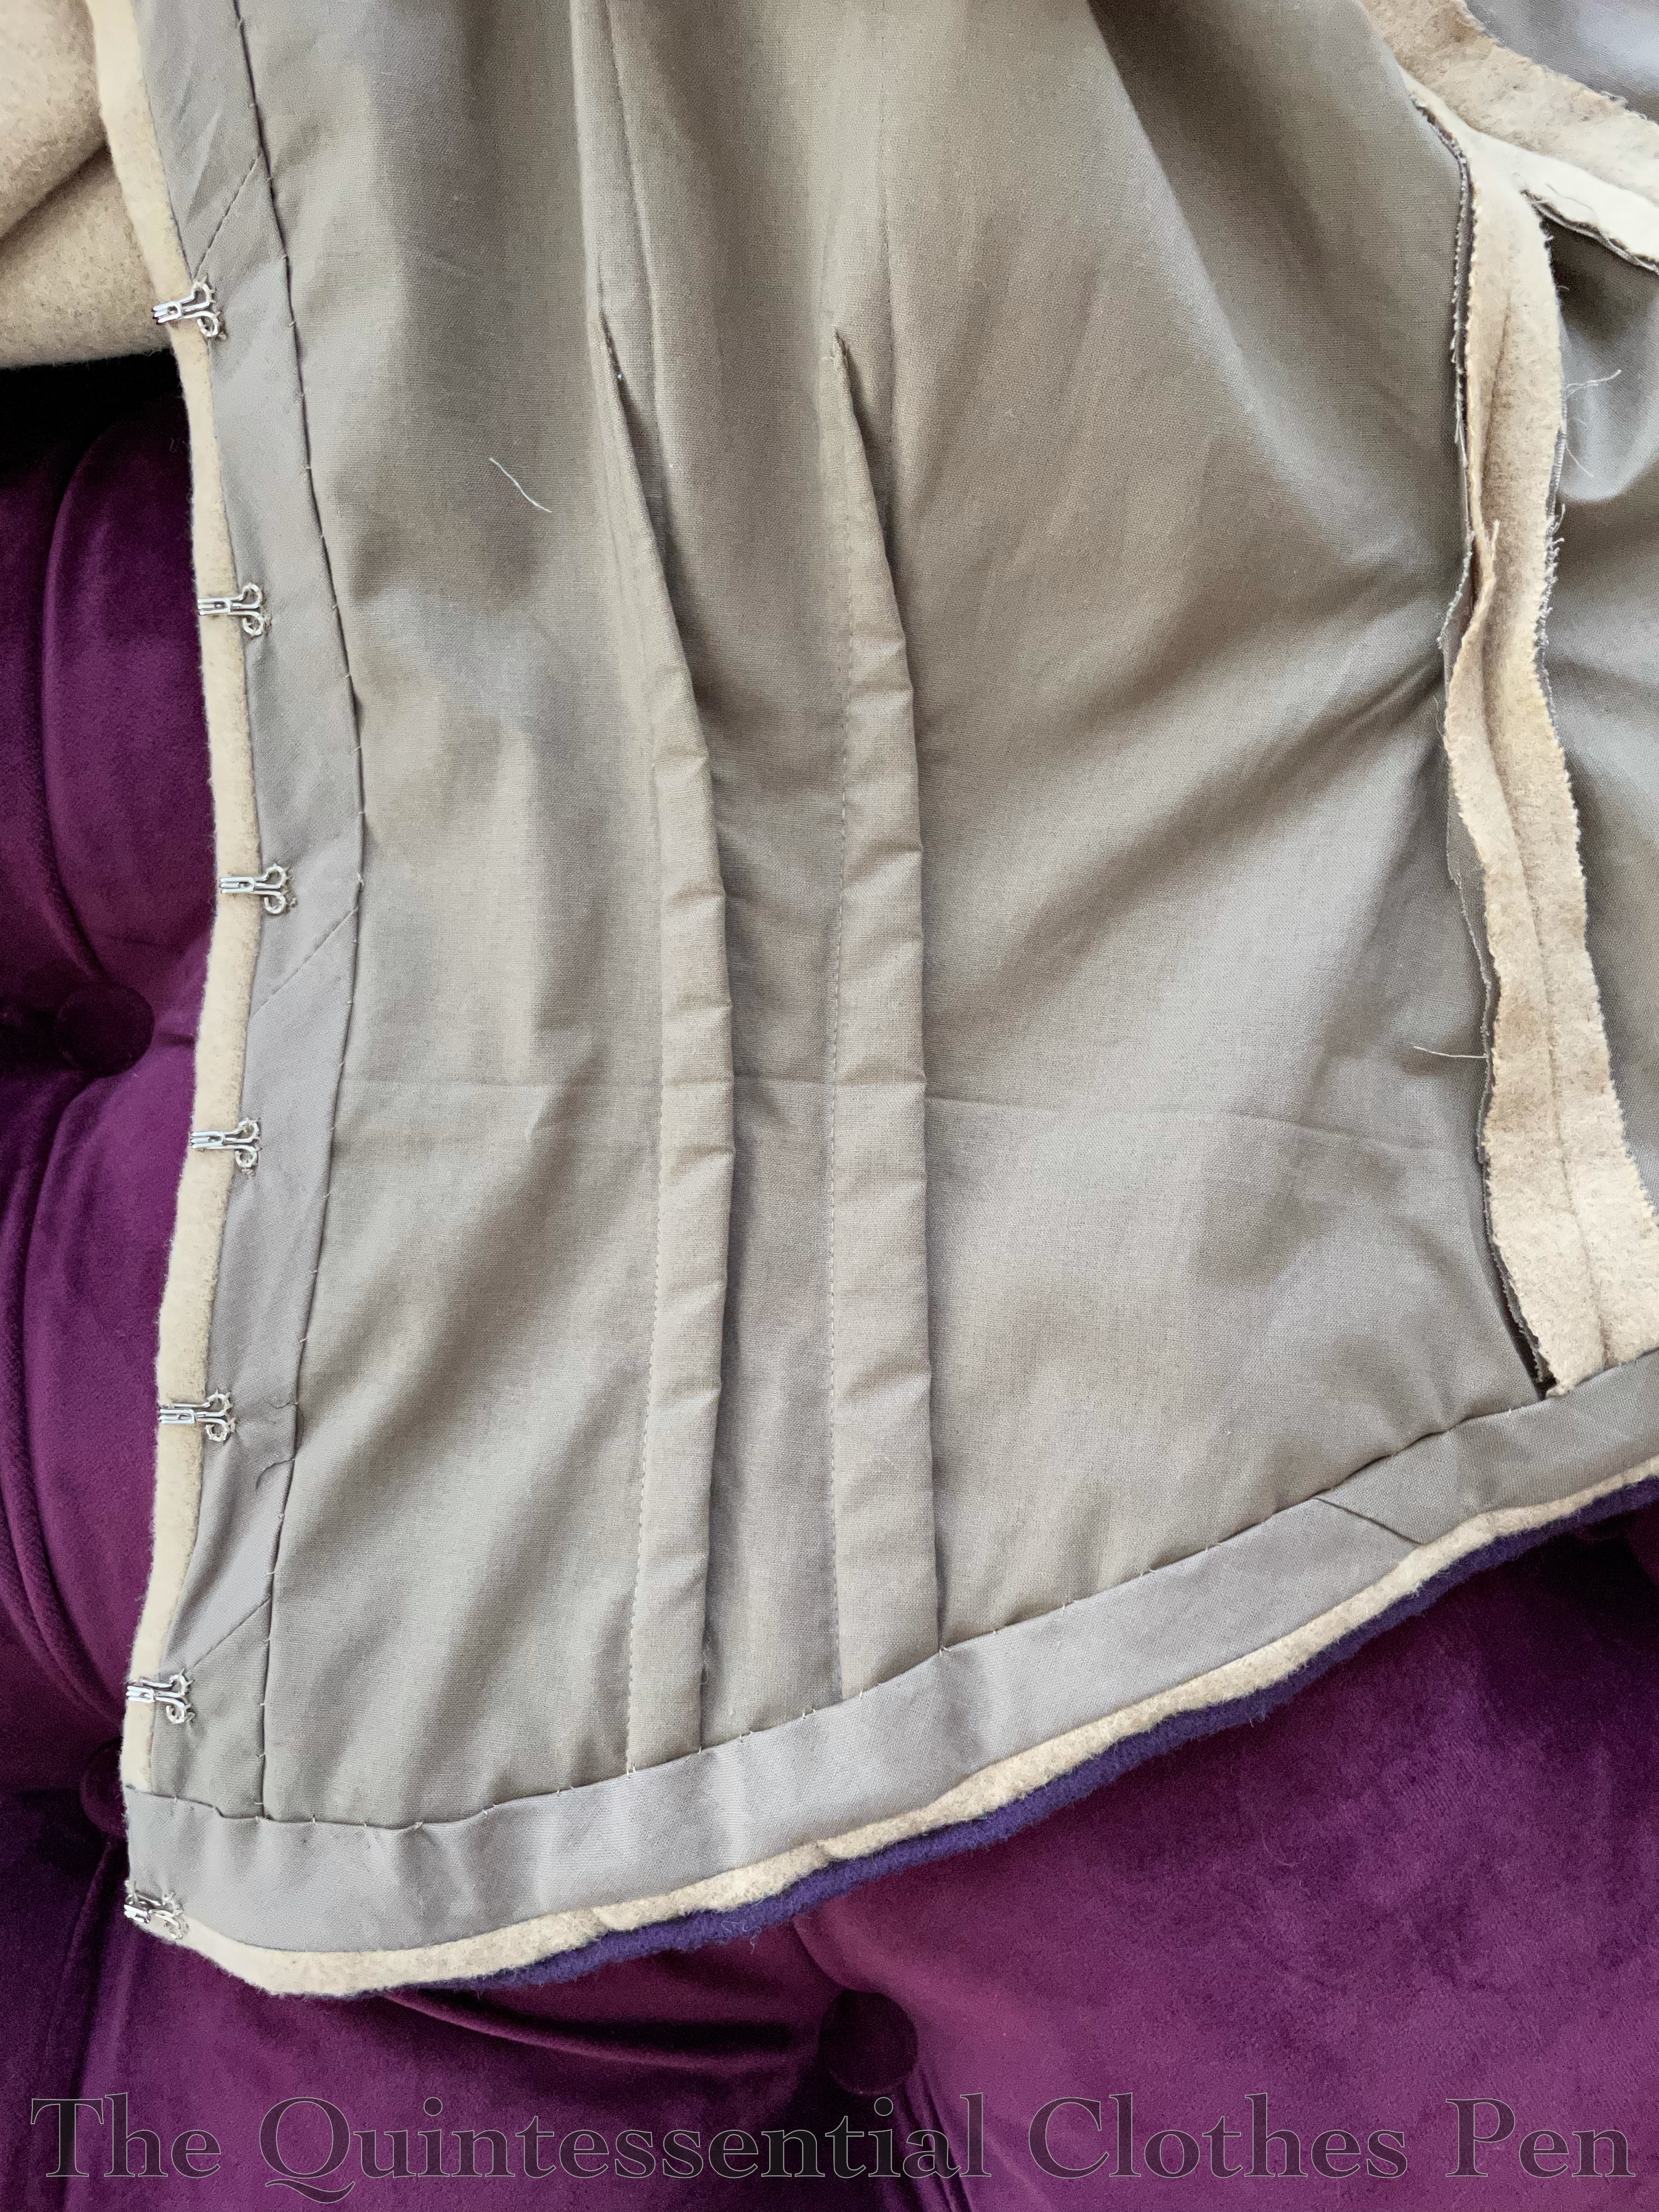
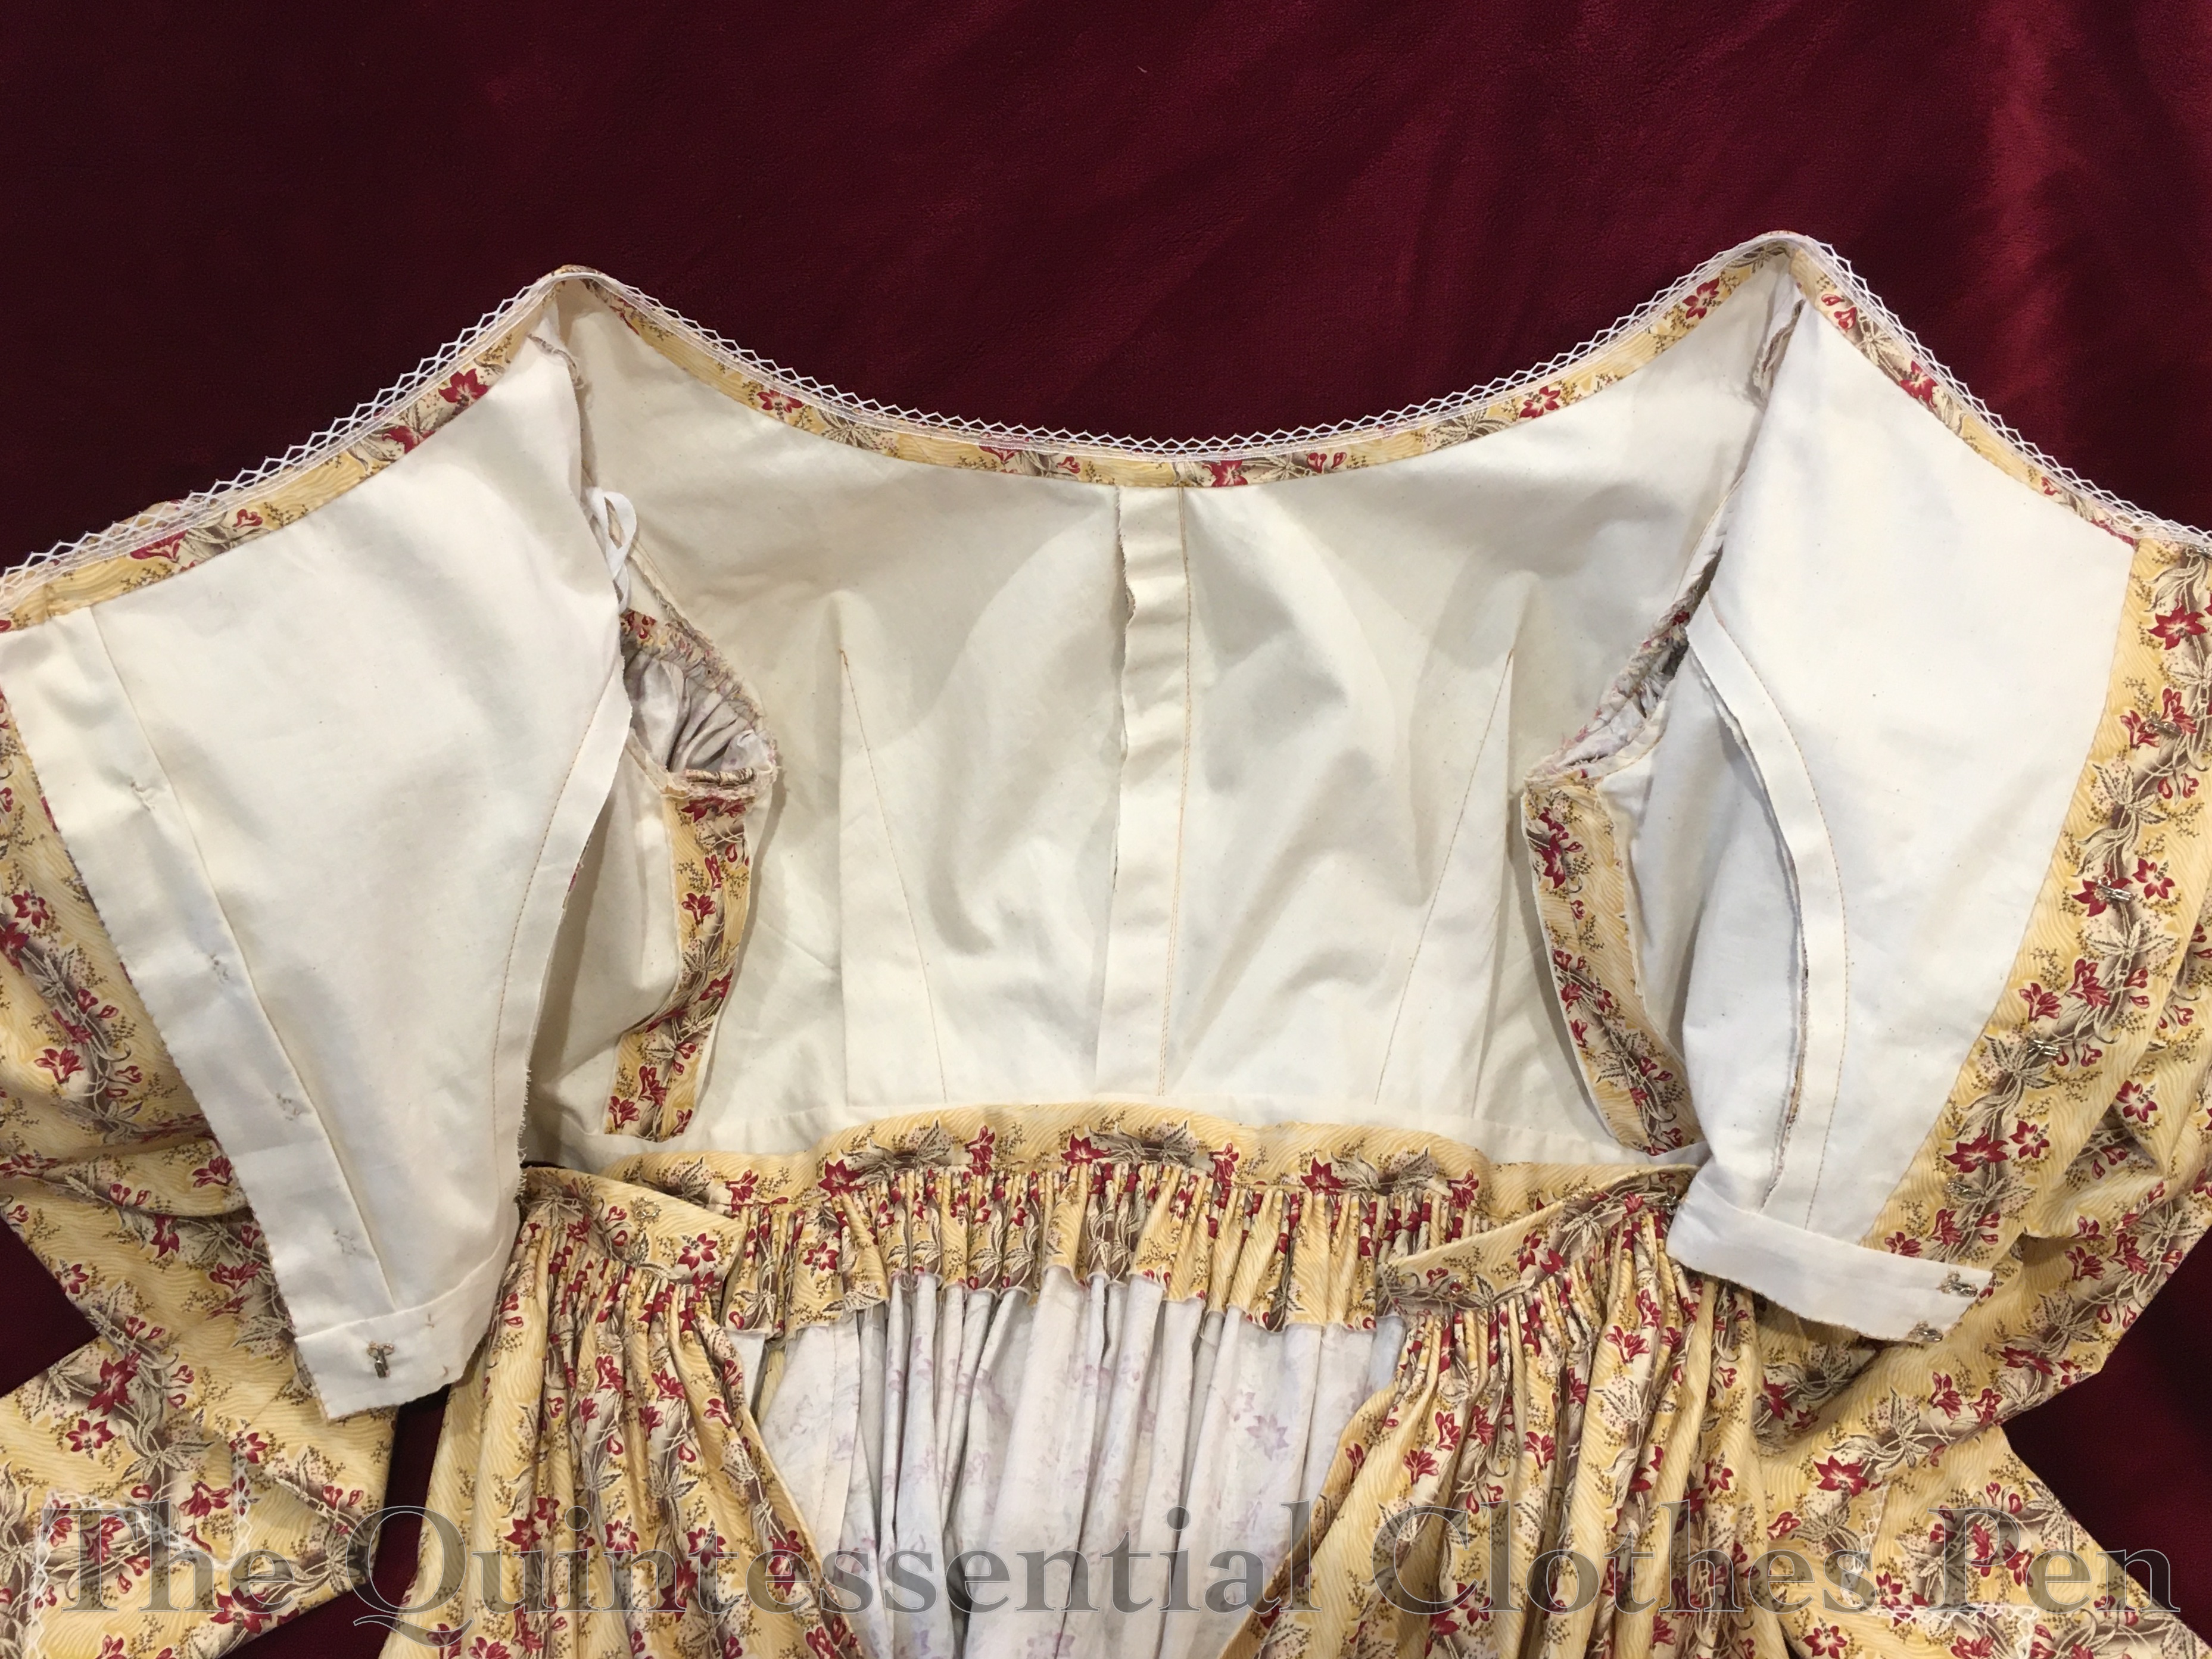
The pattern started with the lining pattern for the dress that I knew fit and would be worn under the sleeveless bodice as well as the bodice of “A Robe c. 1795 – 1803” on pages 44 and 45 of the original printing of Janet Arnold’s Patterns of Fashion 2. I liked the idea of the pleats on the exterior to provide interest on my otherwise solid fabric. It didn’t occur to me until very late in the process of making this garment that most of the pleats would be covered by the neck trim. Oops! Oh well! Below, a photo of the front of the bodice. The pleats are the topstitched lines running downwards from the shoulders.
I ended up with separate patterns for the exterior and lining front pieces, but the side back and back pieces were cut from the same pattern. I’ll explain how I made them.
For the front lining piece, I started with the dress lining, as pictured below. By starting with this, I knew that the sleeveless bodice would easily fit over the dress and have similar seam lines.
I adjusted this pattern to have a little bit of wearing ease by adding ¼” to the bottom edge, ¼” to the neck edge, ½” across the center back piece, and ¼” across the side back pieces.
To that, I superimposed the PoF robe because it had a very low front bodice (clearly intended to be worn with a dress underneath) and it had a front pattern piece that curved downward towards the front, with a separate side front piece. Ah ha! I could create a dart going towards the waist in the area between these two pieces and have a one piece lining while also easily having a two piece exterior to make the pleats easier! This would reduce bulk in the finished garment and allow for the necklines of the exterior and lining to be exactly the same.
The photo below shows the front pieces I ended up with. On the left is the lower part of the front lining (the shoulder area is extended with a separate shoulder piece in the lining) and the center front part of the lining. For the lining, these were cut as one piece (with the dart marked).
If you look carefully, you might notice that the grainline on the center front piece is off relative to the side piece. Why is that, you might wonder?
Well, for the front exterior I started with the lining piece but changed the single dart to be the pleats I’ve previously mentioned. I didn’t see bust darts in my inspiration fashion plate or observations of 1790s overdresses, but in 18th century dresses pleats are used used in varying depths to adjust a flat piece of fabric to fit the curves of a body, so I used that method.
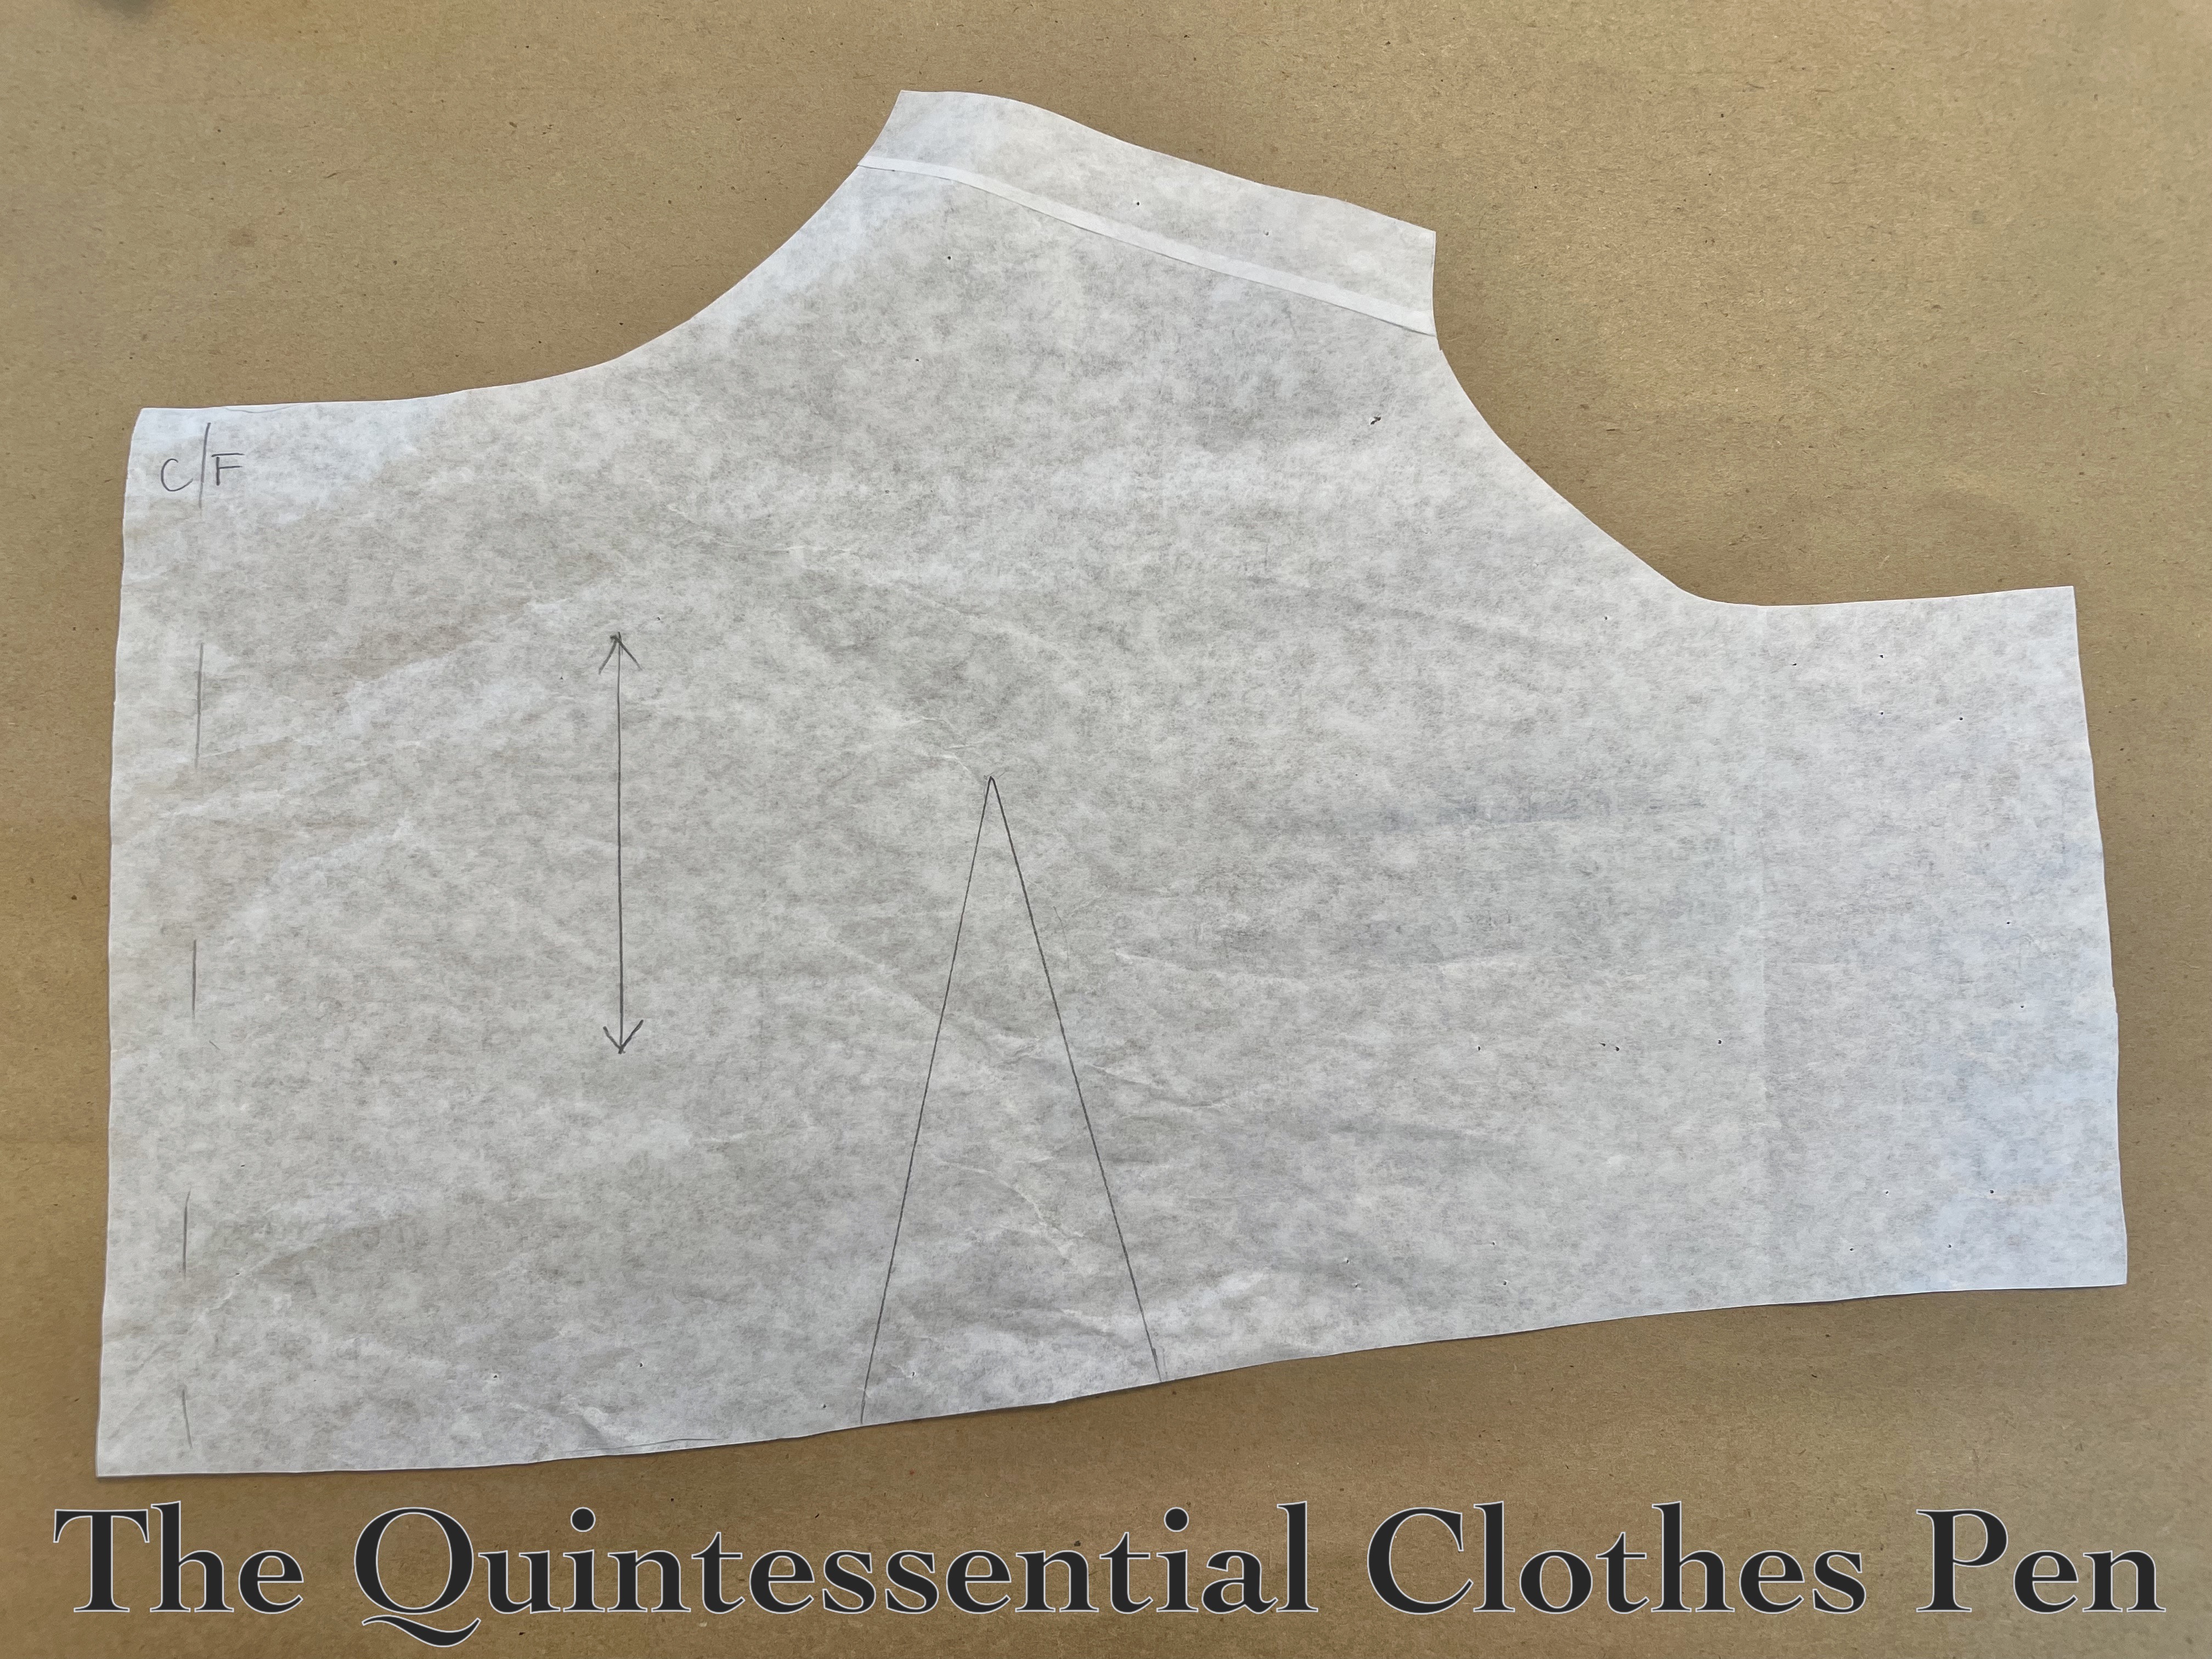
First, I traced the lining pattern onto a new piece of paper, including the dart. Then, as you can see in the photo below, I cut along the dart edge closer to Center Front, then up a line that continued to the neck edge I wanted. (I also cut down to the bust point from two other points along the neckline, but later realized I didn’t need those cuts.)
Next, as you can see in the photo below, I rotated the center front piece down towards the dart, making that area a little narrower and creating space (essentially another dart) going up towards the shoulder. Then I drew my new grainline on the front piece for the exterior, heading up towards the shoulder. This is why it looks off relative to center front. When worn, those ‘darts’ are closed when the exterior is fitted over the lining and center front is pulled into its proper place on the body.
These exterior darts — hidden in the seam line — are what creates that downward curve to the pattern pieces that I observed in PoF.
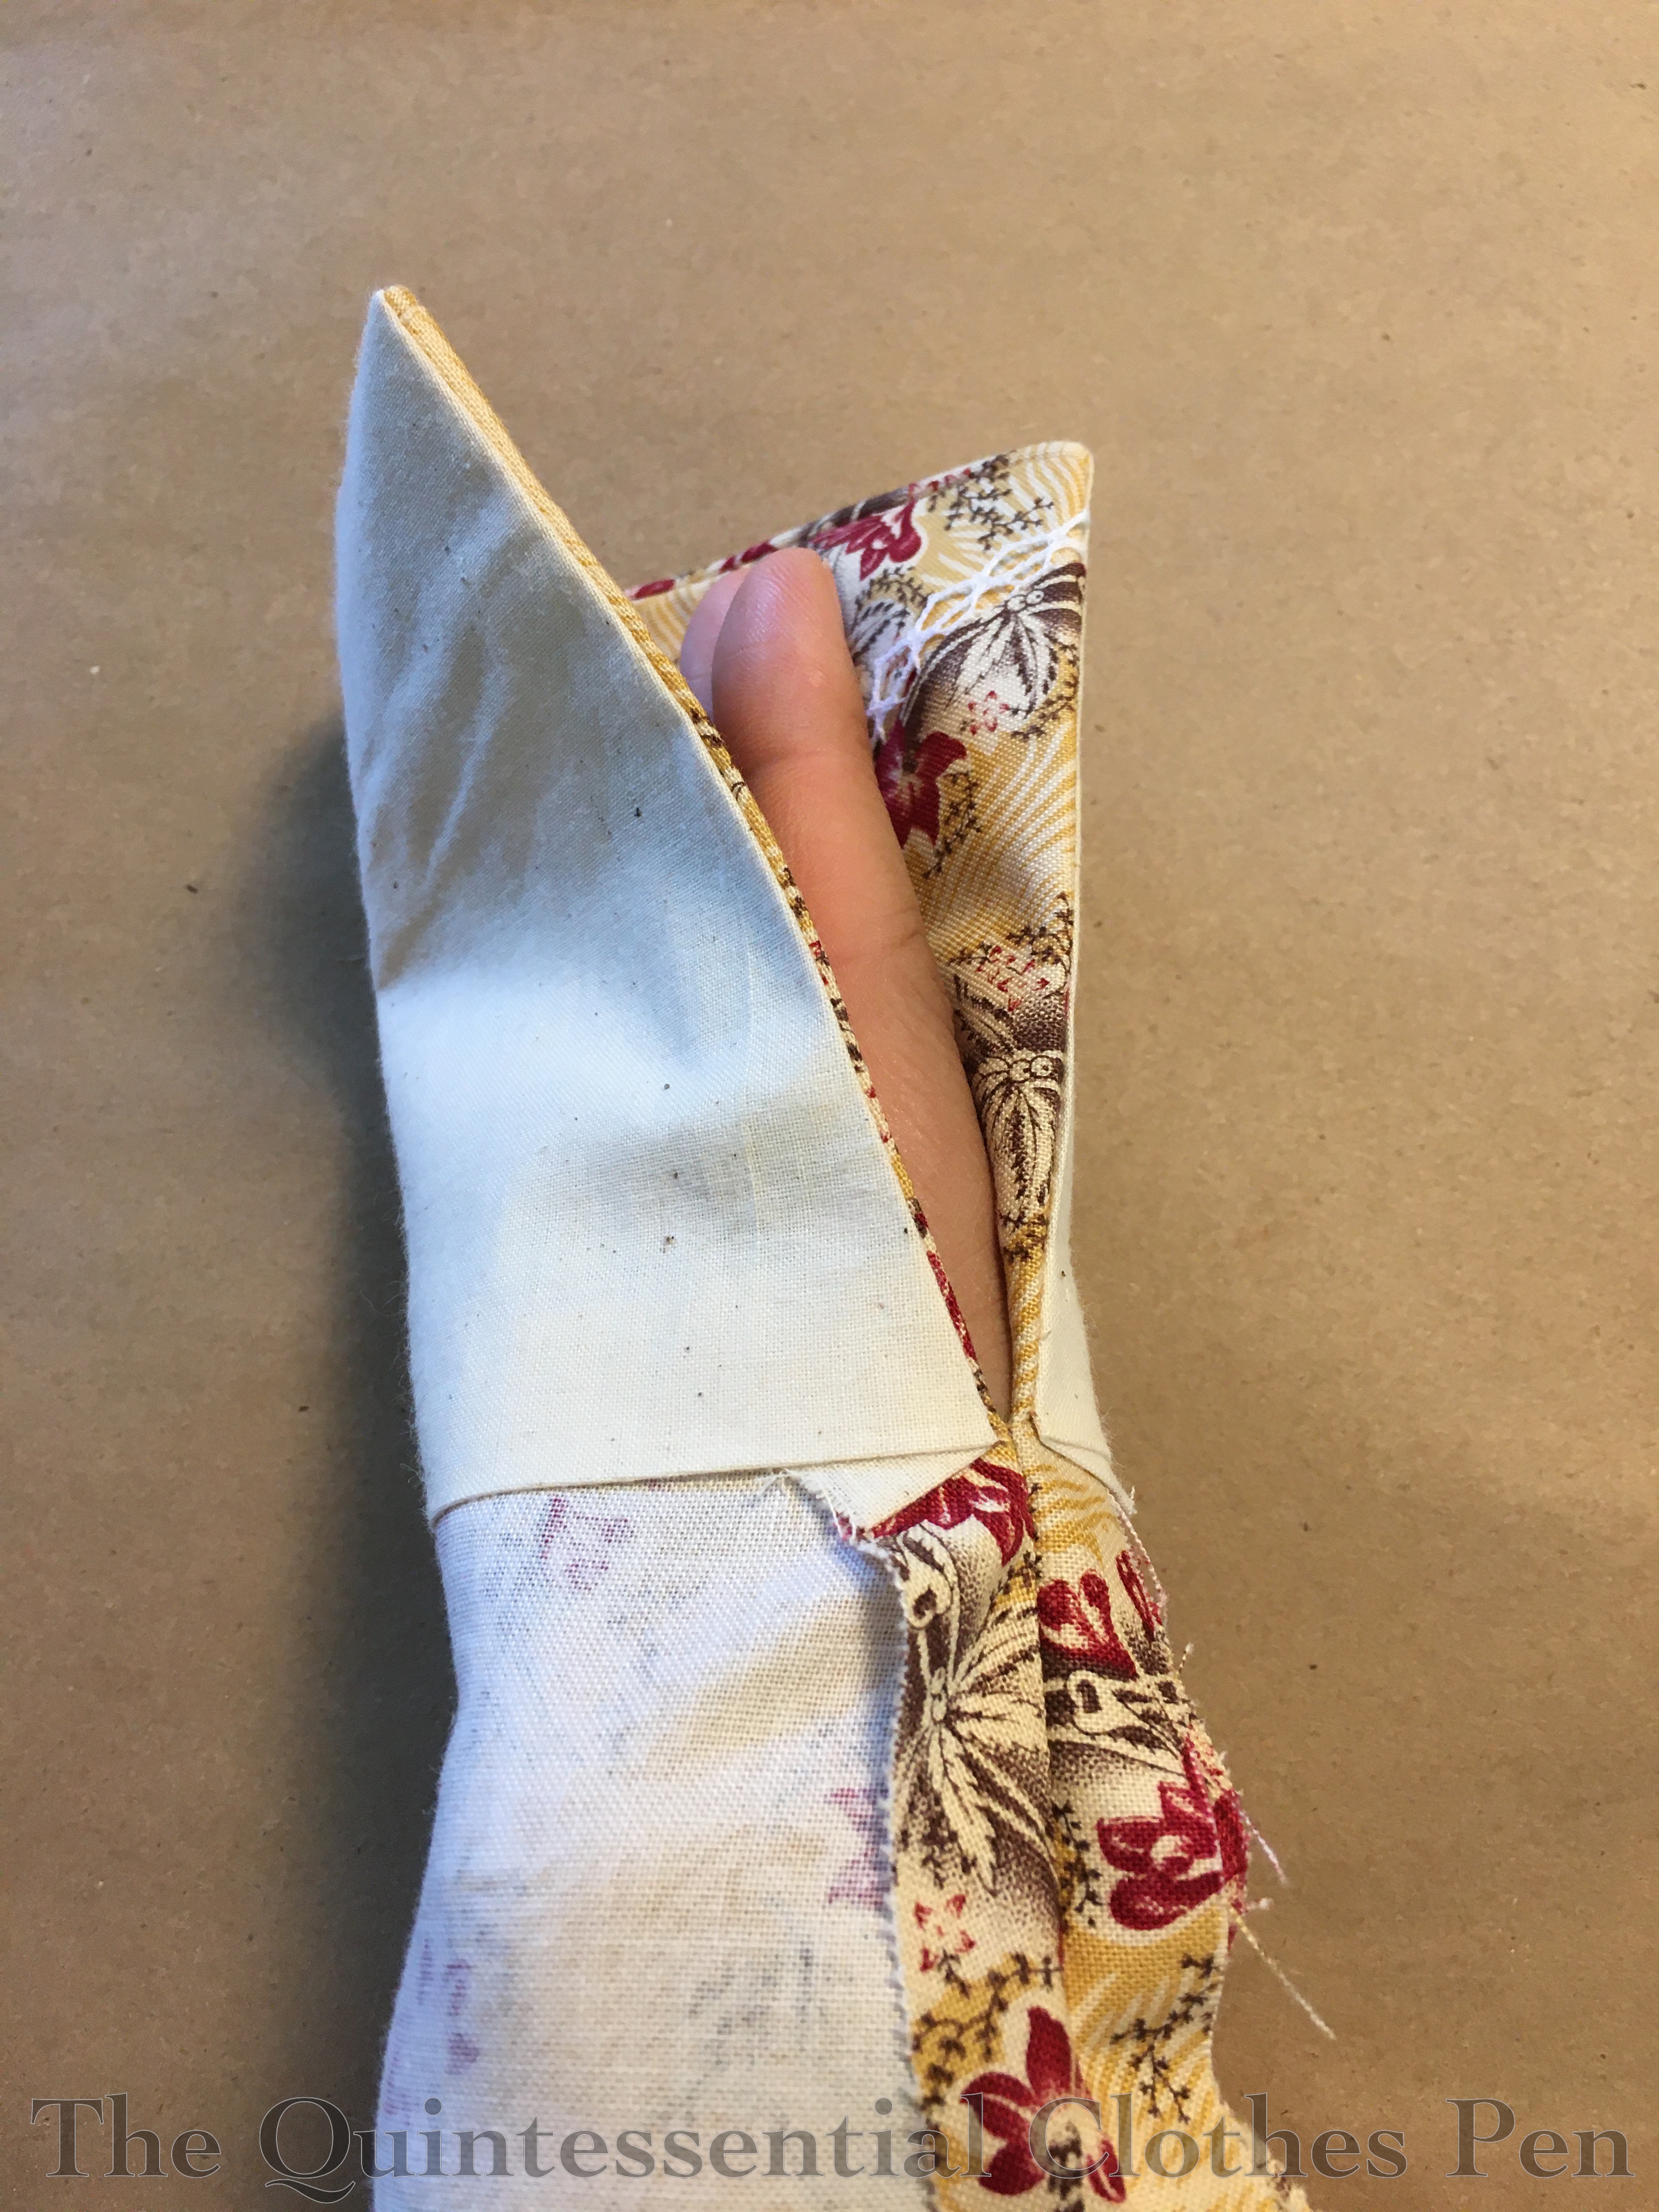
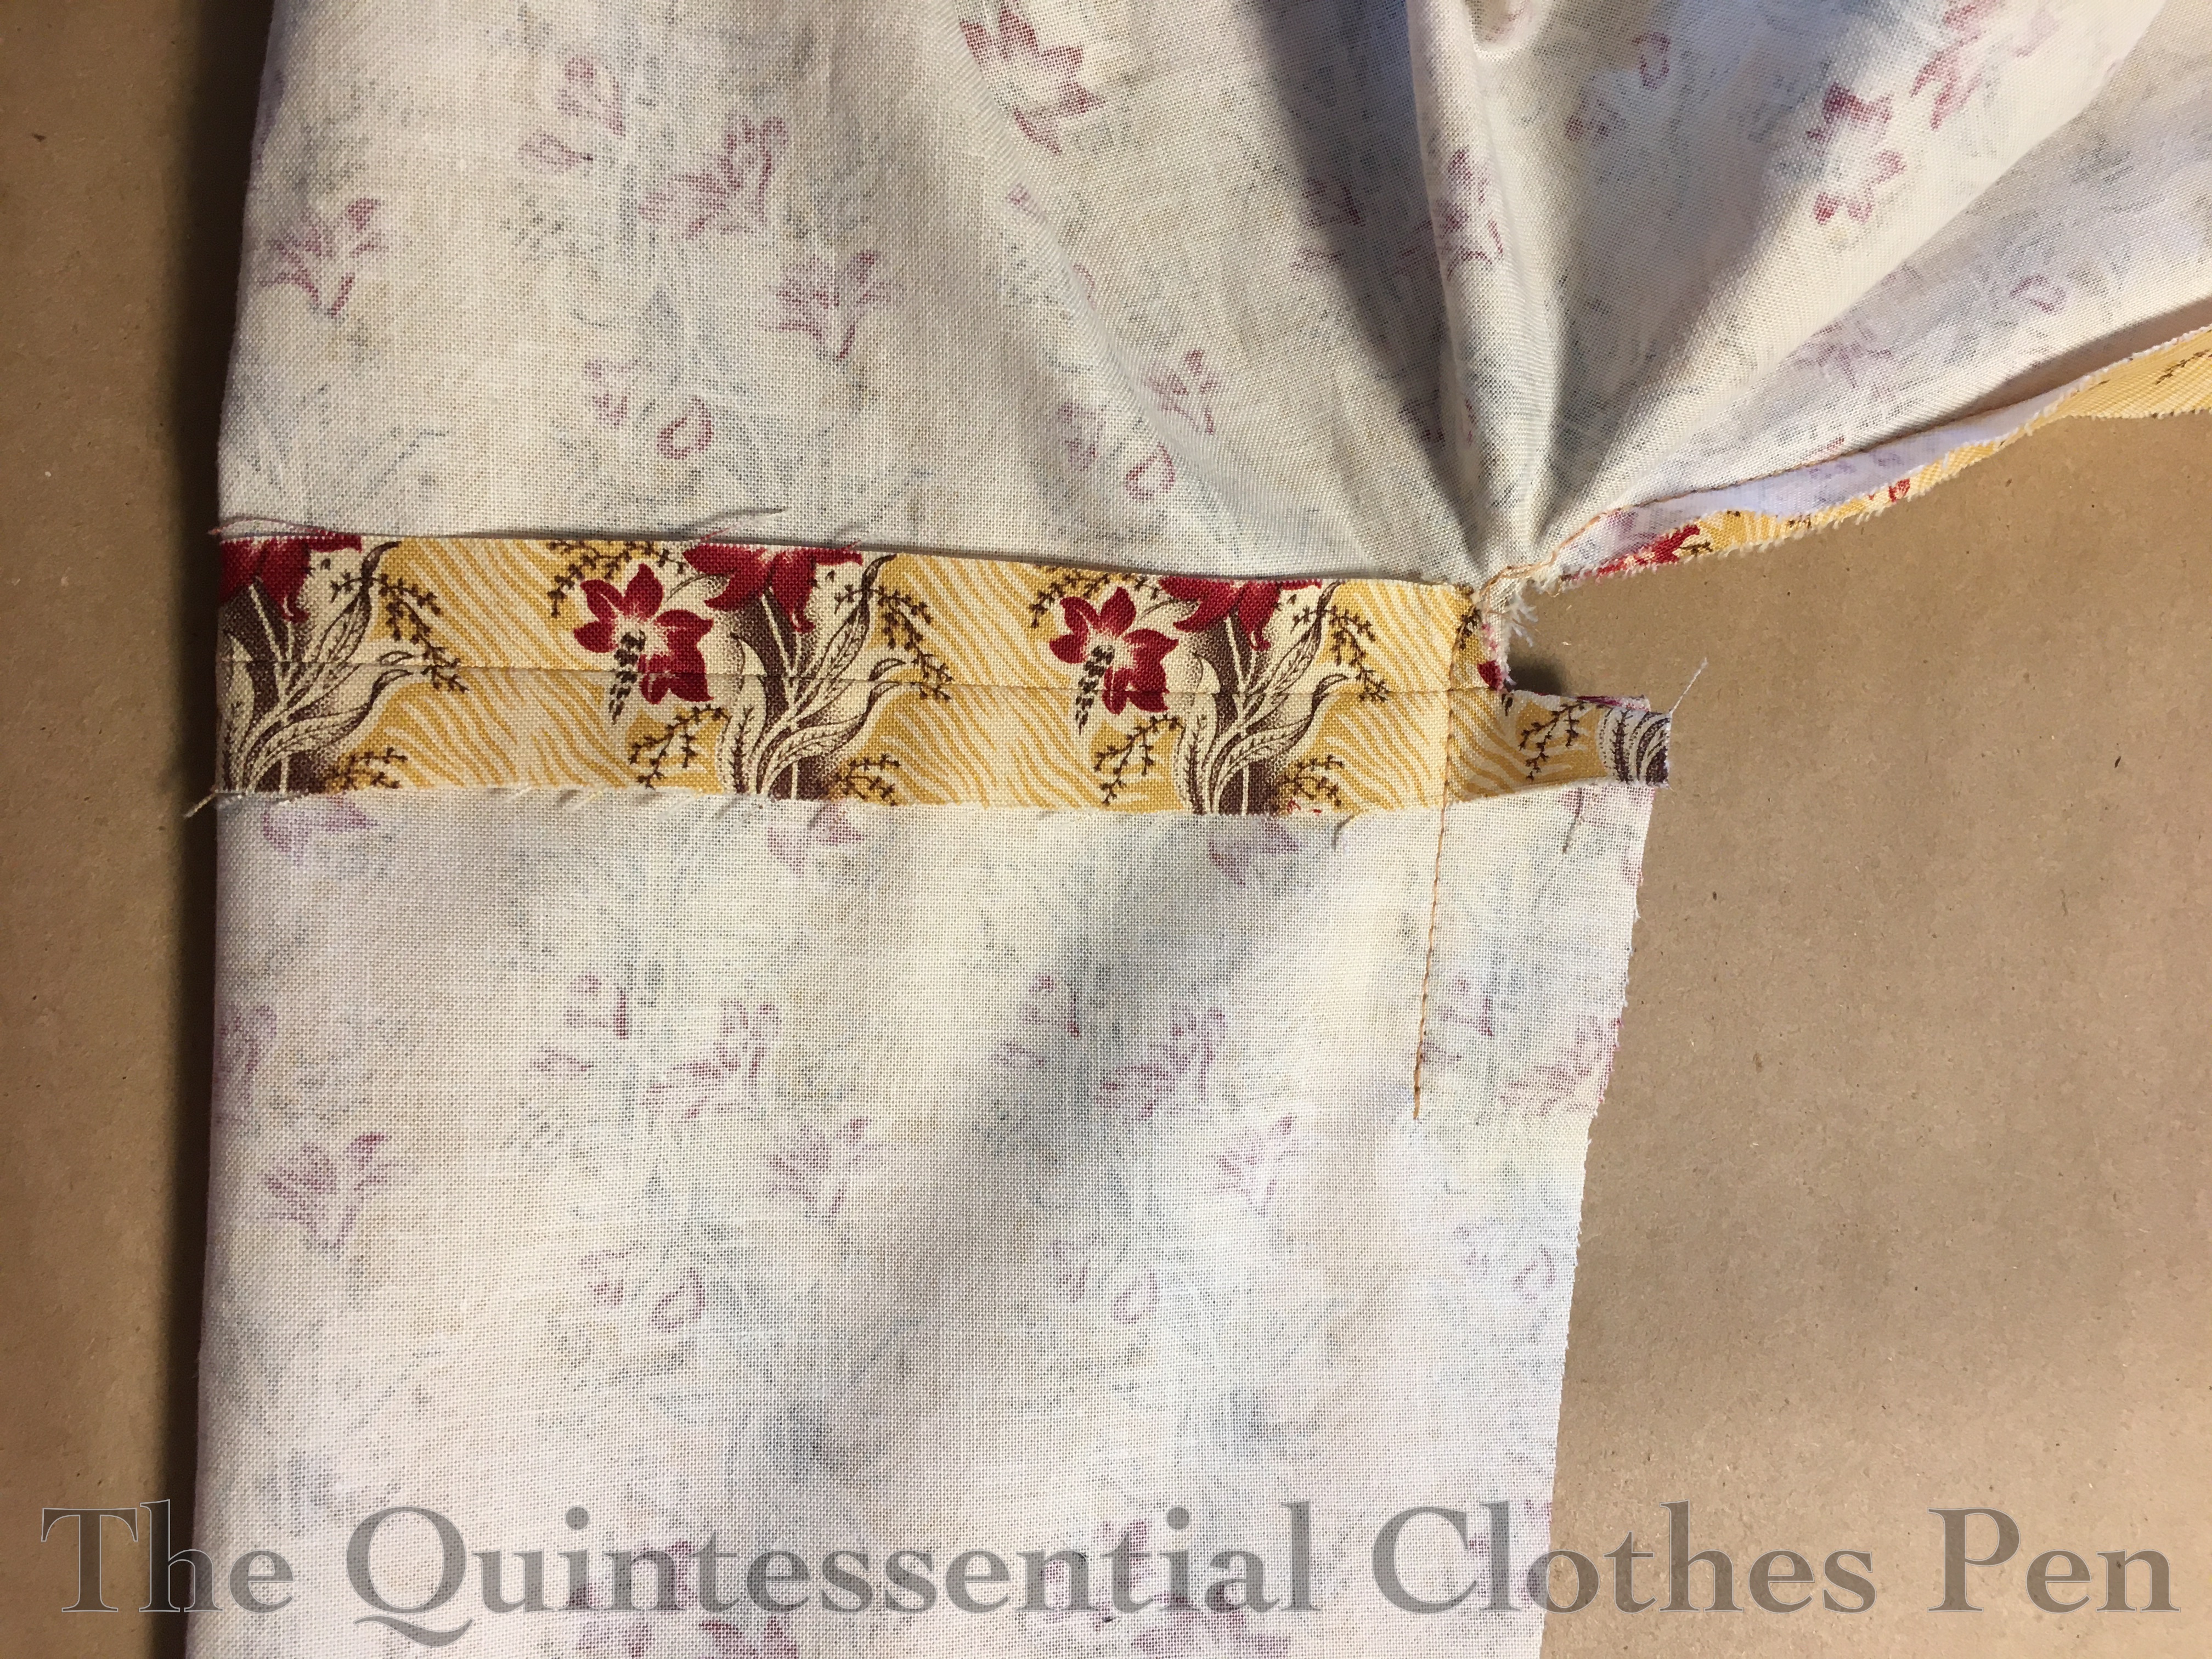
The two ‘darts’ are taken up in the pleated side front piece of the exterior, which is fitted over the center front piece and the darted bodice lining. In the photo below, the dart in the lining is visible on the left and the silk is pleated to fit and visible on the right.
After creating the paper pattern, I made a mockup and did a fitting to see how well my adjustments worked. They were pretty good, but I did have a few notes — I extended the bottom edge by a little more across the front, set the overlap shape I wanted (based on the fashion plate), set my armhole seam allowance, decided on the height of the peplum, and adjusted the front neckline to sit nicely over the dress.
I made these adjustments to my paper pattern and then moved on to cutting out my pieces in real fabric:
A proper left front lining
A proper right front lining
Proper left side front and center front exteriors
Proper right side front and center front exteriors
Straps in lining fabric
Side back pieces for lining and exterior
Center back pieces for lining and exterior
The Backstory: Construction
With a pattern established, I went down the rabbit hole of figuring out construction methods.
I had been reading Patterns of Fashion 6: The Content, Cut, Construction & Content of European Women’s Dress c. 1695-1795 and my mind was full of details and excitement about 18th century construction methods, so I happily went down a path of sewing in an 18th century manner! But… at some point in the middle of things I realized that I would need to combine some early 19th century construction methods into what I was doing, too, since my sleeveless bodice idea does span two different eras of construction styles.
For example, from an 18th century perspective turning seam allowances of the lining and exterior towards each other and whipping the pieces together made perfect sense. From a 19th century perspective, however, finishing the armholes with this method seemed odd (usually in the 18th century the seam allowance would have been left raw on the inside when the sleeve was attached, but I wasn’t adding sleeves!) and inserting a peplum into the bottom edge seemed odd, too (often a ruffle was applied on top of an edge, rather than being sandwiched between the exterior and lining, but that wasn’t the look I wanted). After many brain somersaults, I wound up mashing these two methods of construction together to create a transitional garment (which does actually make sense, since this was a transitional period for construction methods!).
Actually Making The Spencer
I thought it would be fun to use up linen scraps for the lining, rather than cutting into yardage from my stash. The lining pieces weren’t that big, right? Well, it turns out they were bigger than I thought. I ended up using 3 or 4 different types of white linen and adding in a fair number of piecing seams to get the shapes I needed for these lining pieces (you can see some extra seams in the lining in the previous photos). It definitely added time, but I had time while making this garment, so it was fine.
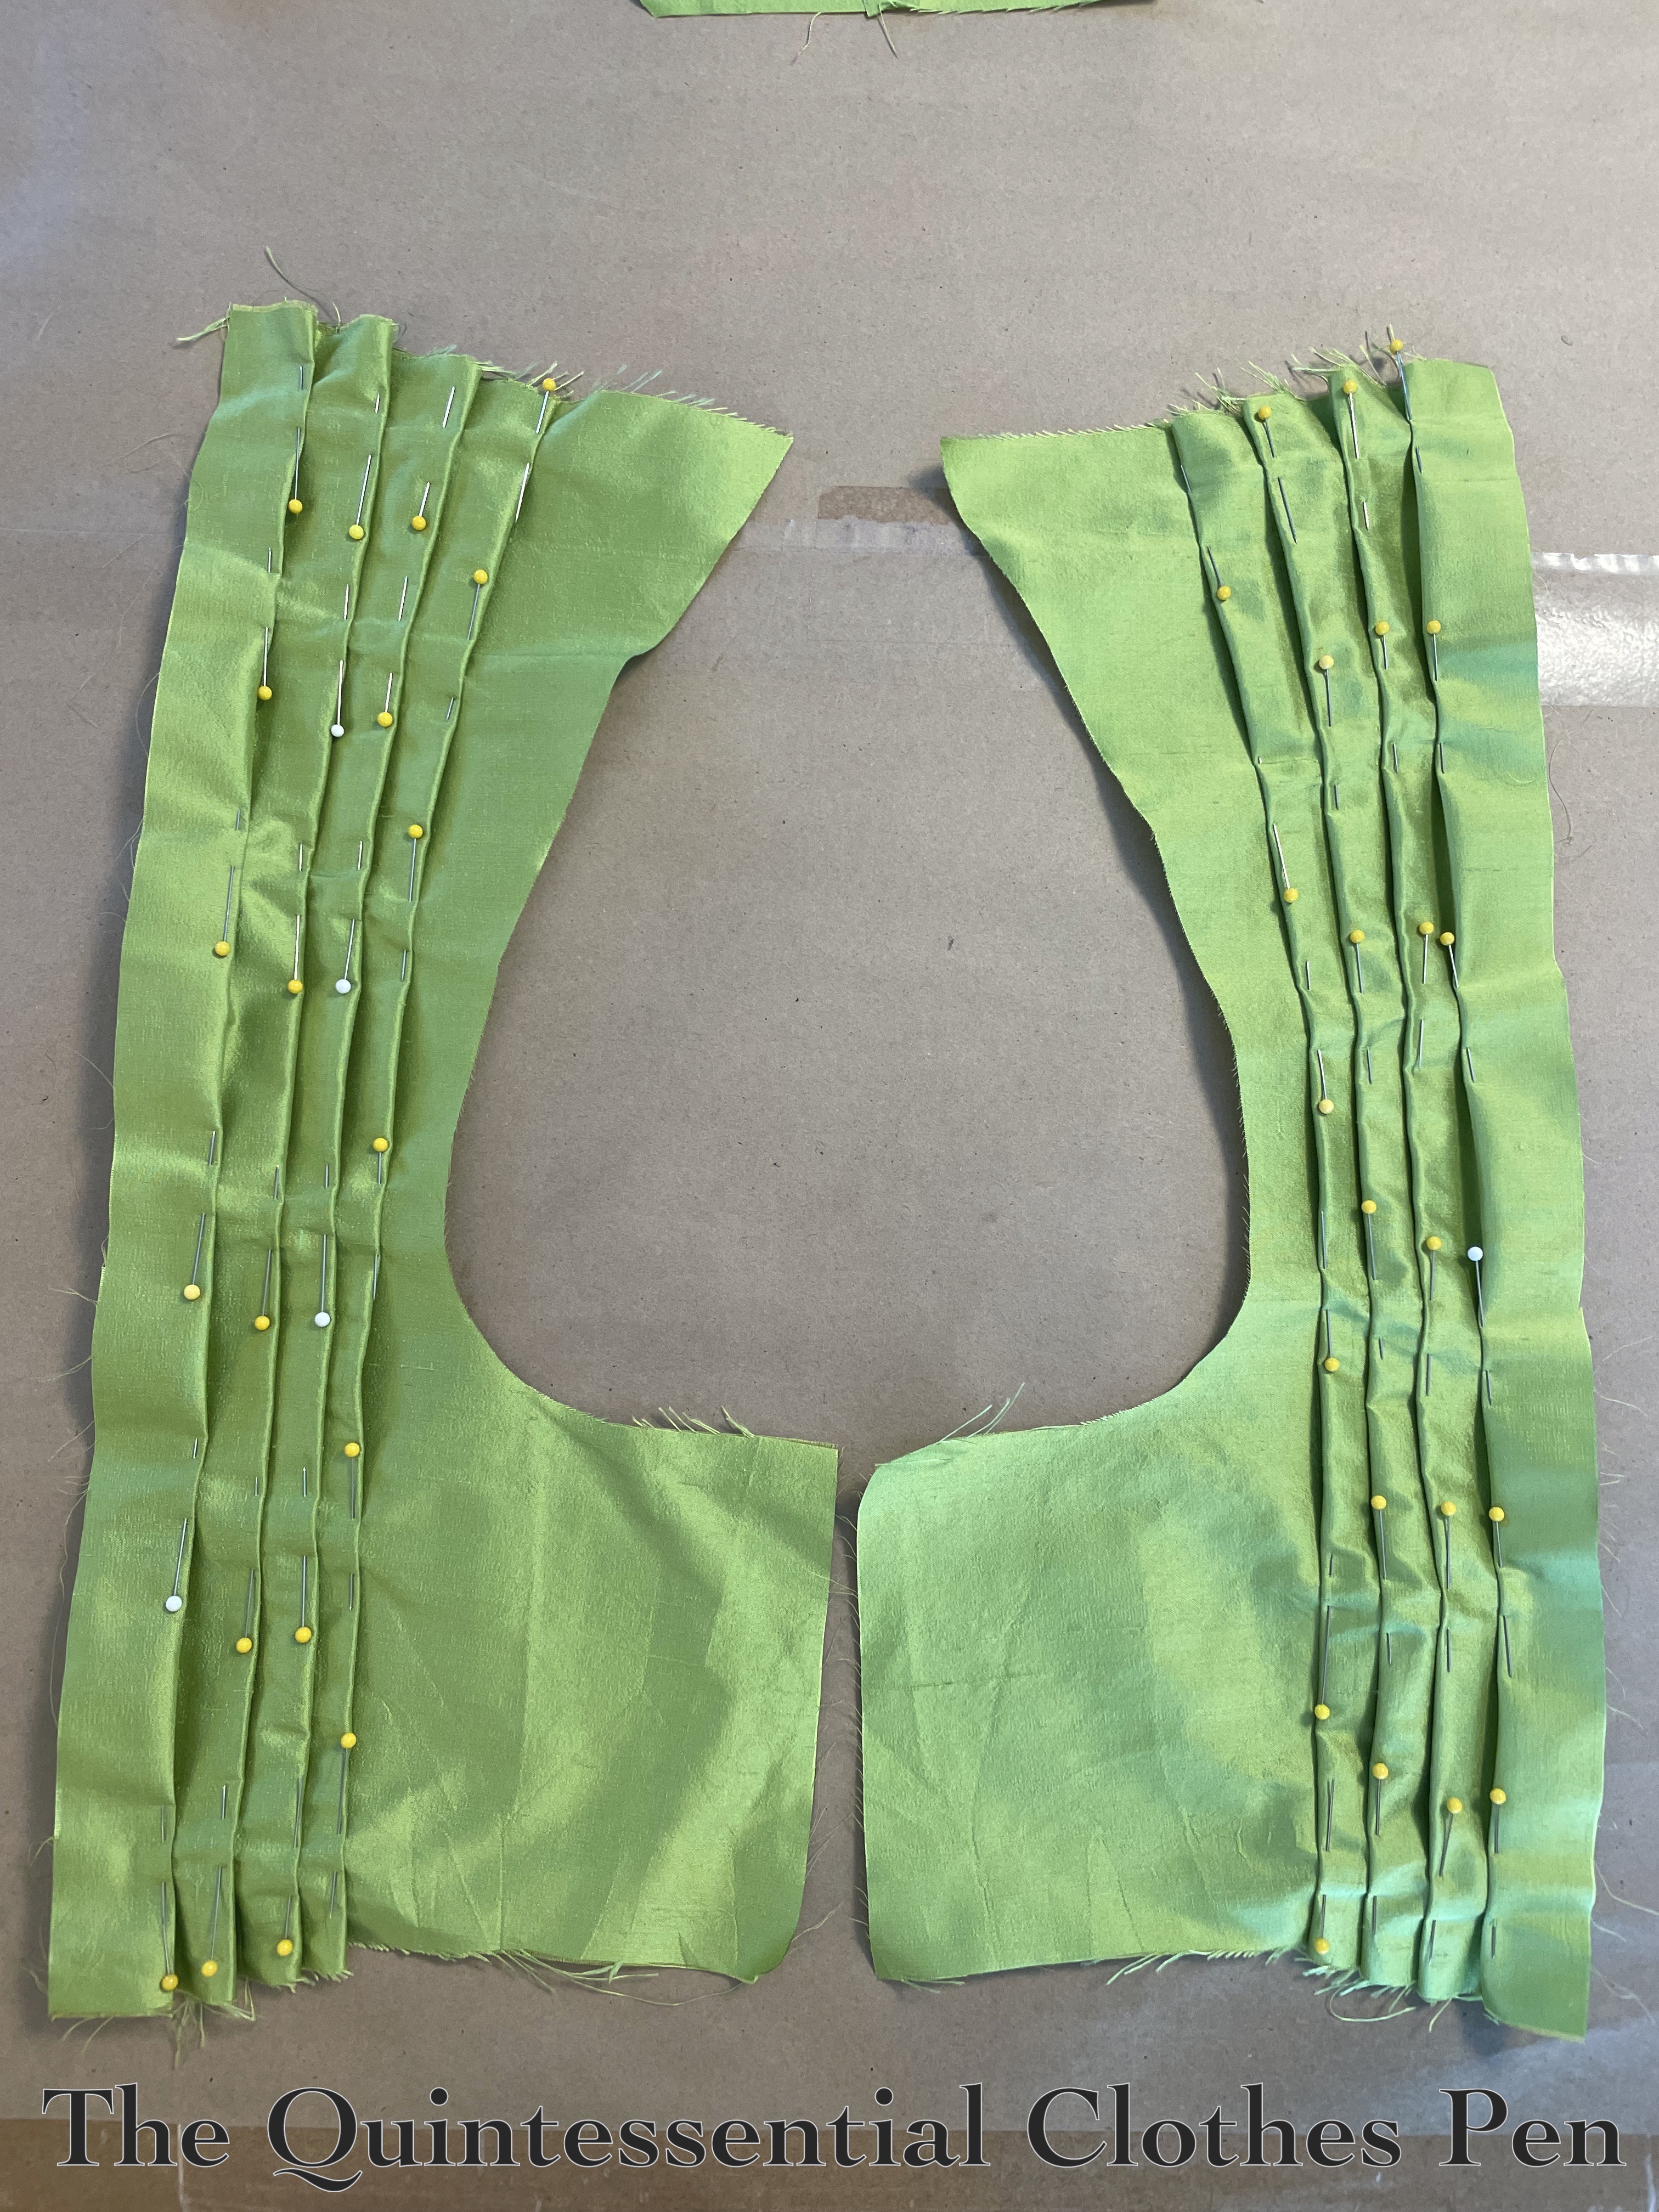
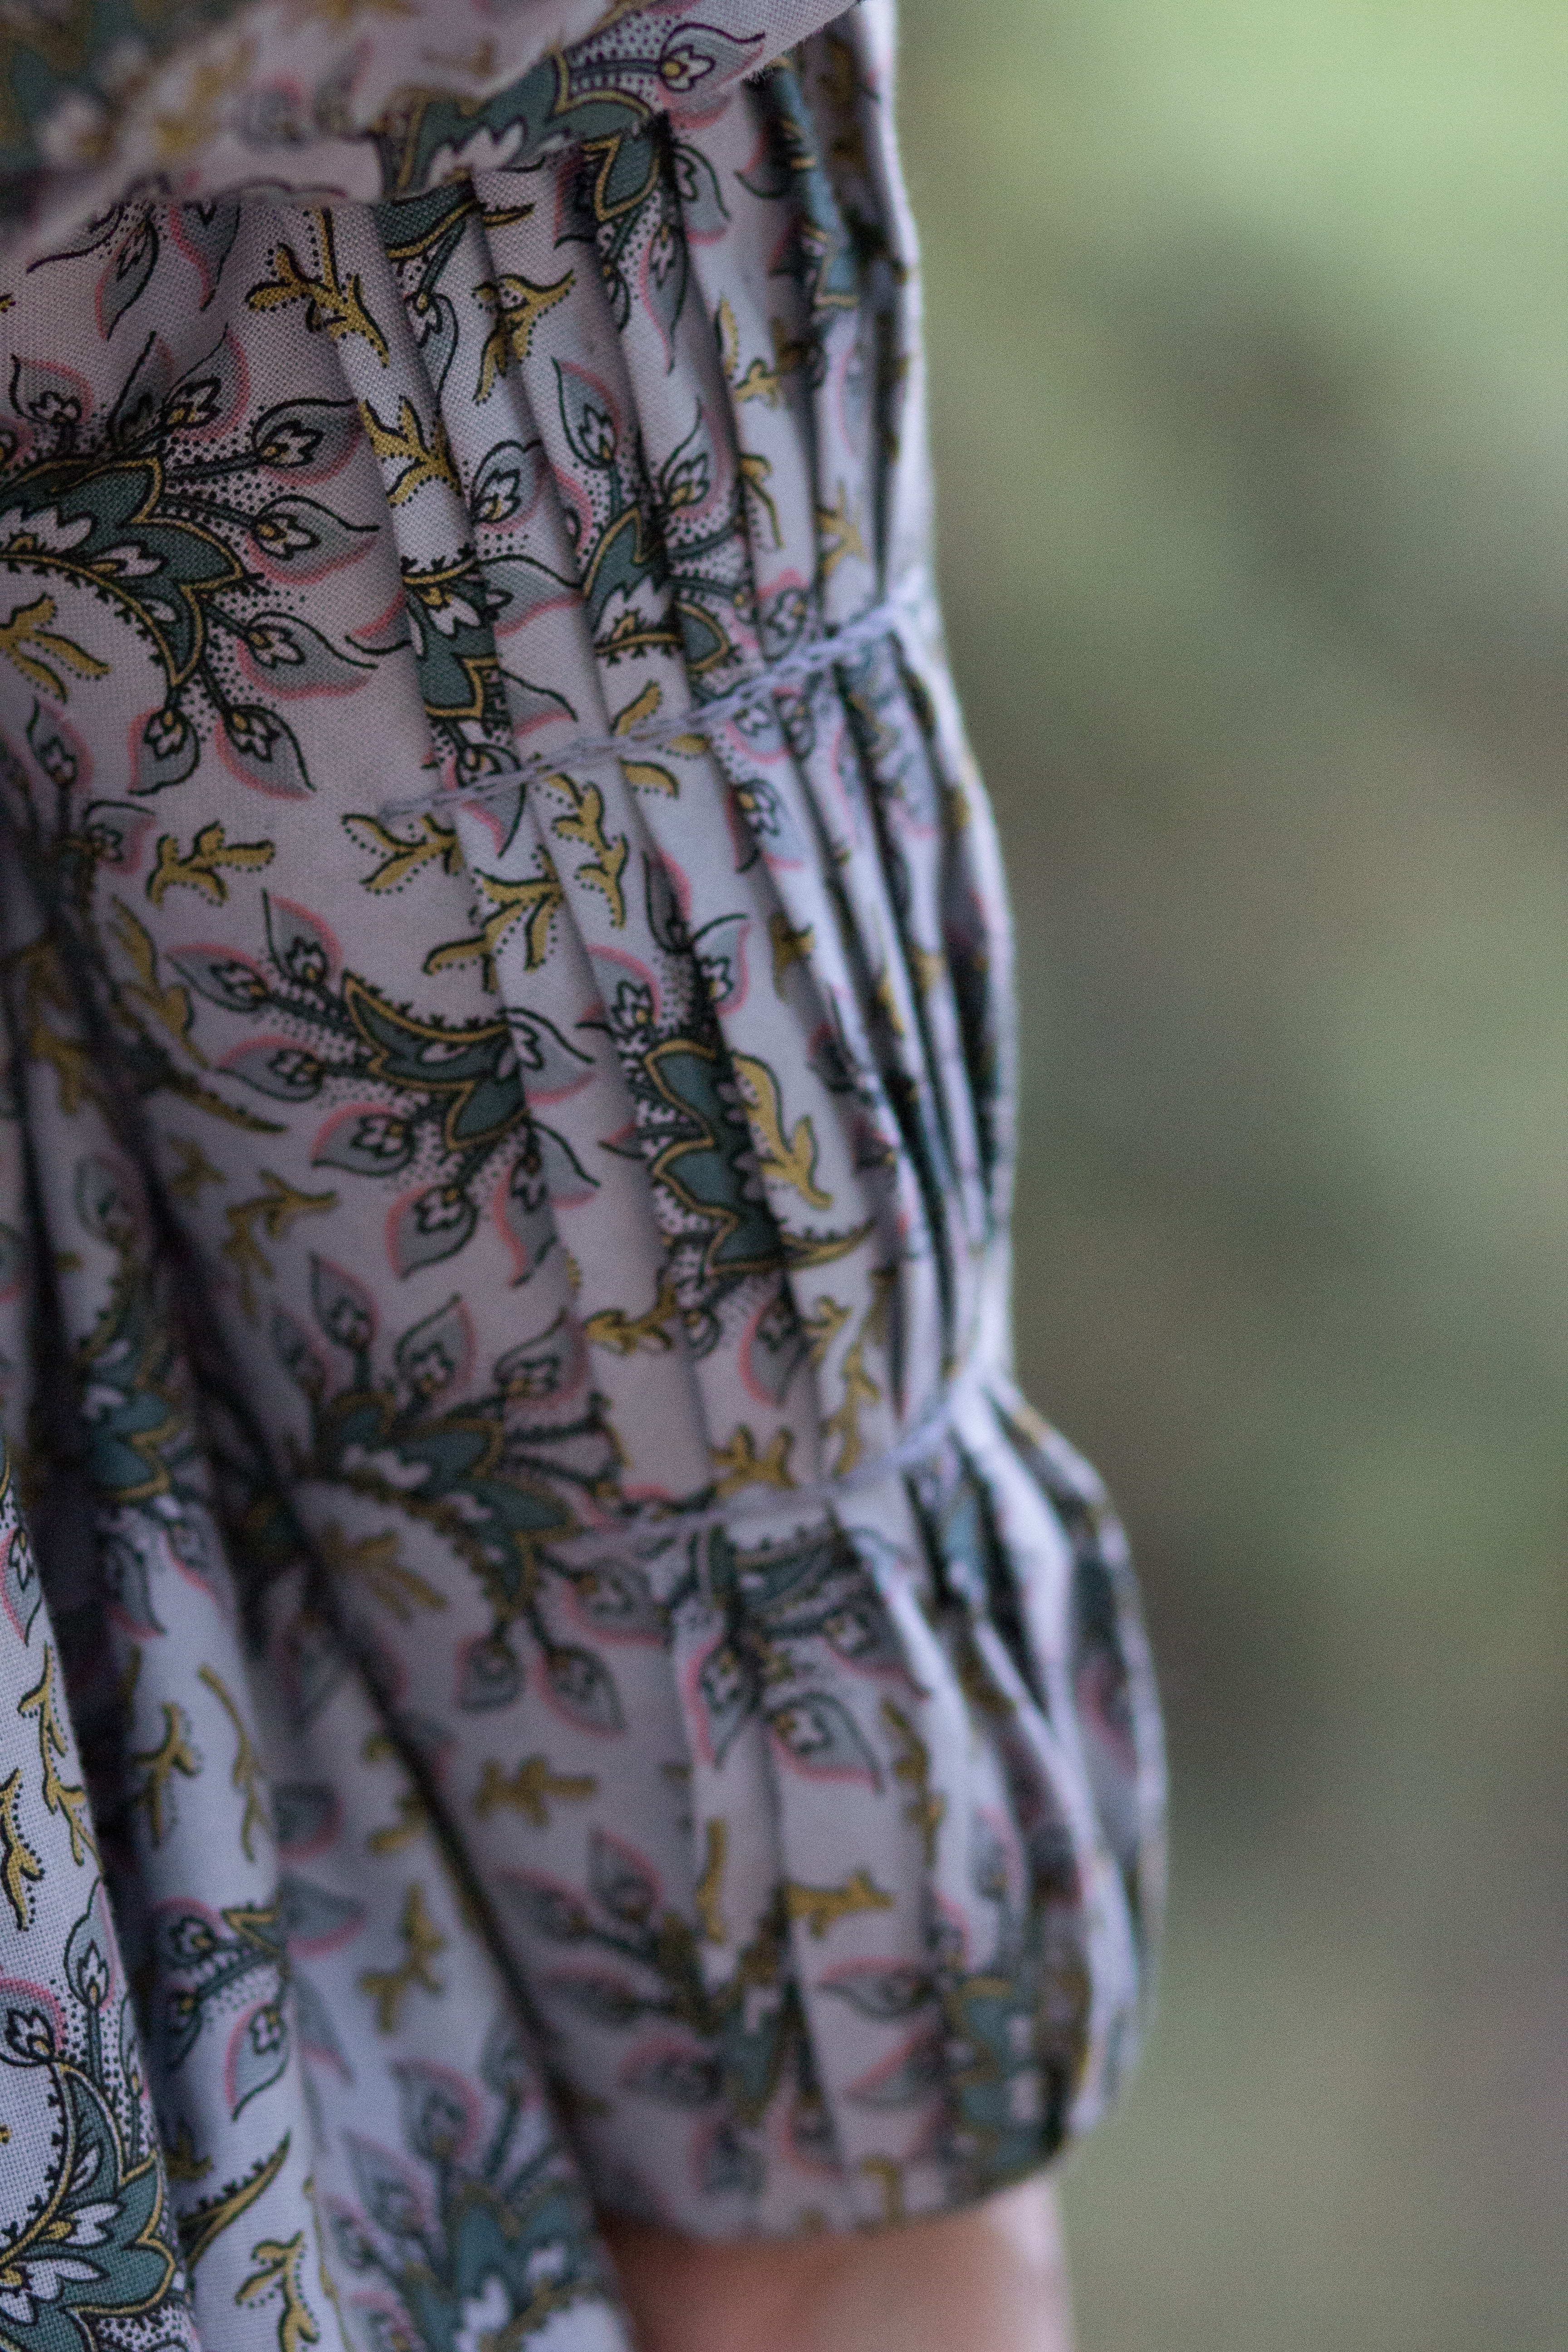
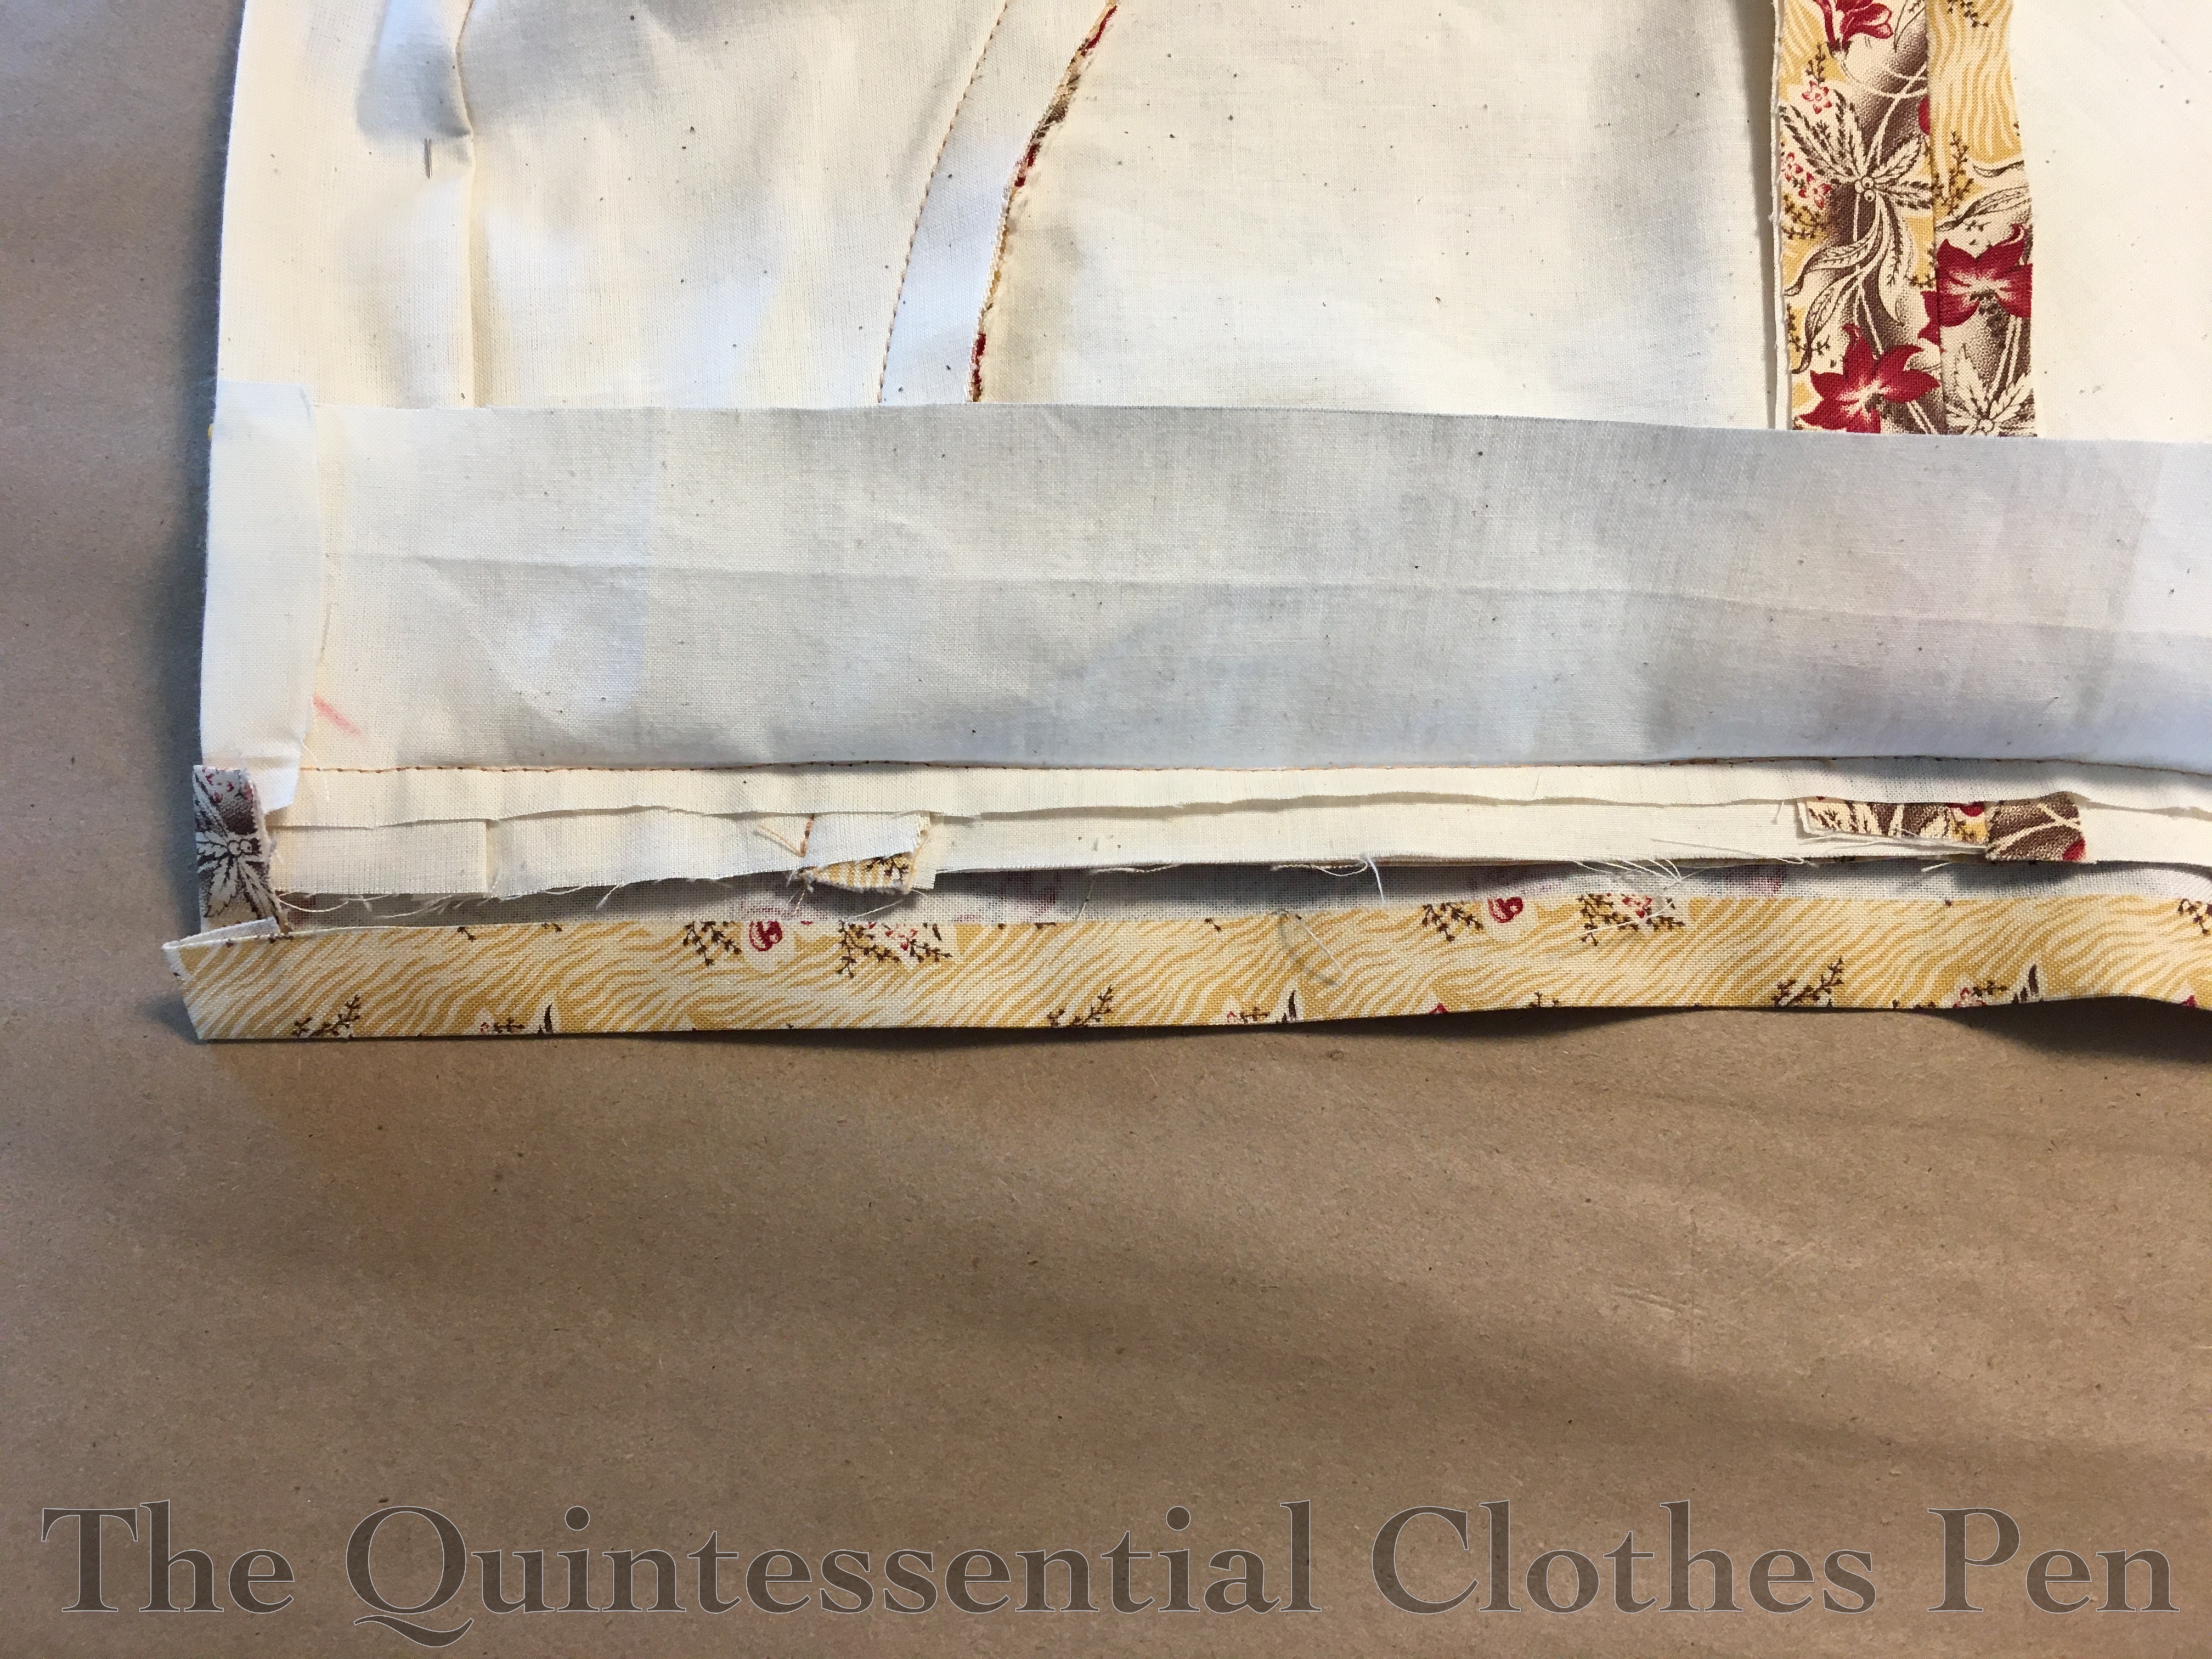
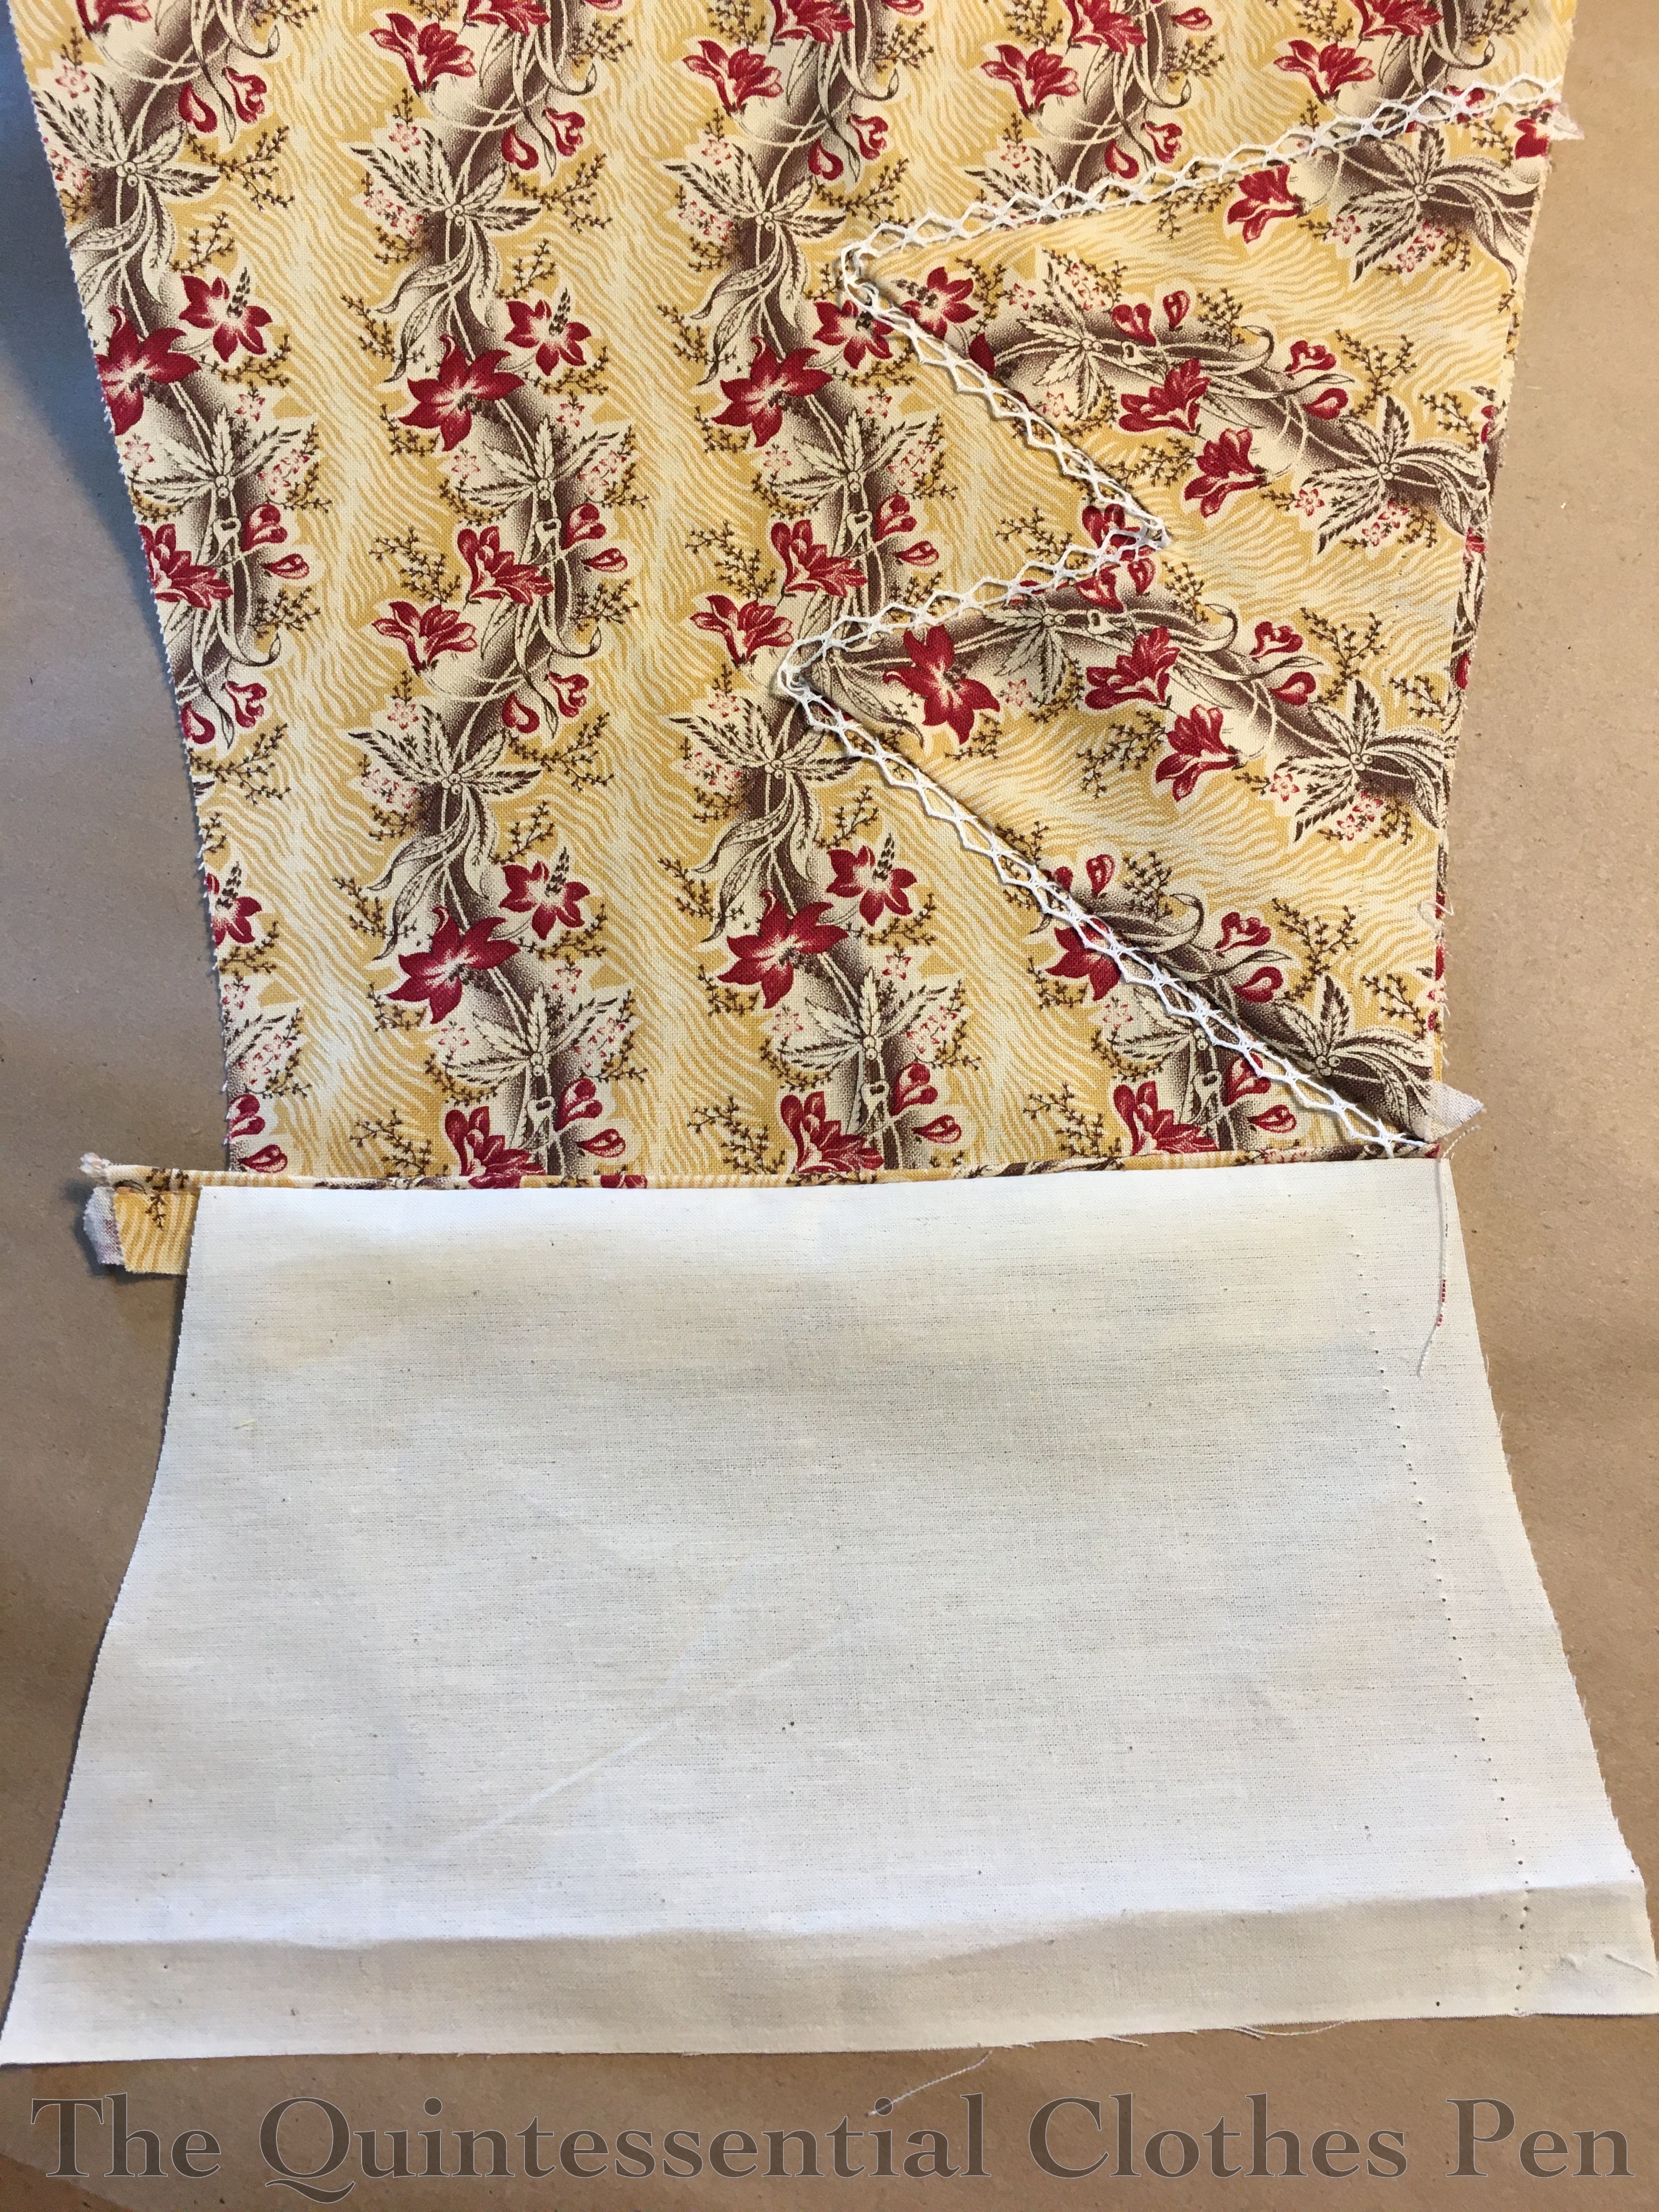
Once the lining pieces were ready to go I could cut the silk layers. The side front of the silk exterior had the shoulder straps included and was extra wide in order to create those all-important pleats. Below is a photo of what the pleats looked like before they were topstitched flat. They are not quite all the same depth and slowly spread out as they move towards the shoulder seam in the back (at the top of the photo).
Here is a summary of the 18th century elements I used in the construction of this garment: much piecing of the lining fabrics, whipping the lining pieces together along the seams, whipping the lining into the exterior around the edges, topstitched pleats in the front exterior for shaping over the bust, a shoulder seam that is topstitched onto the back piece, many edges bound in narrow strips of silk, and the neckline trim being tucked to shape around the neckline curve.
Here is a summary of the 19th century elements I used in the construction of this garment: gathering the peplum and sewing it to the bodice with right sides together then whipping the lining seam allowance on top and turning in the seam allowance of the armholes and whipping the lining into place.
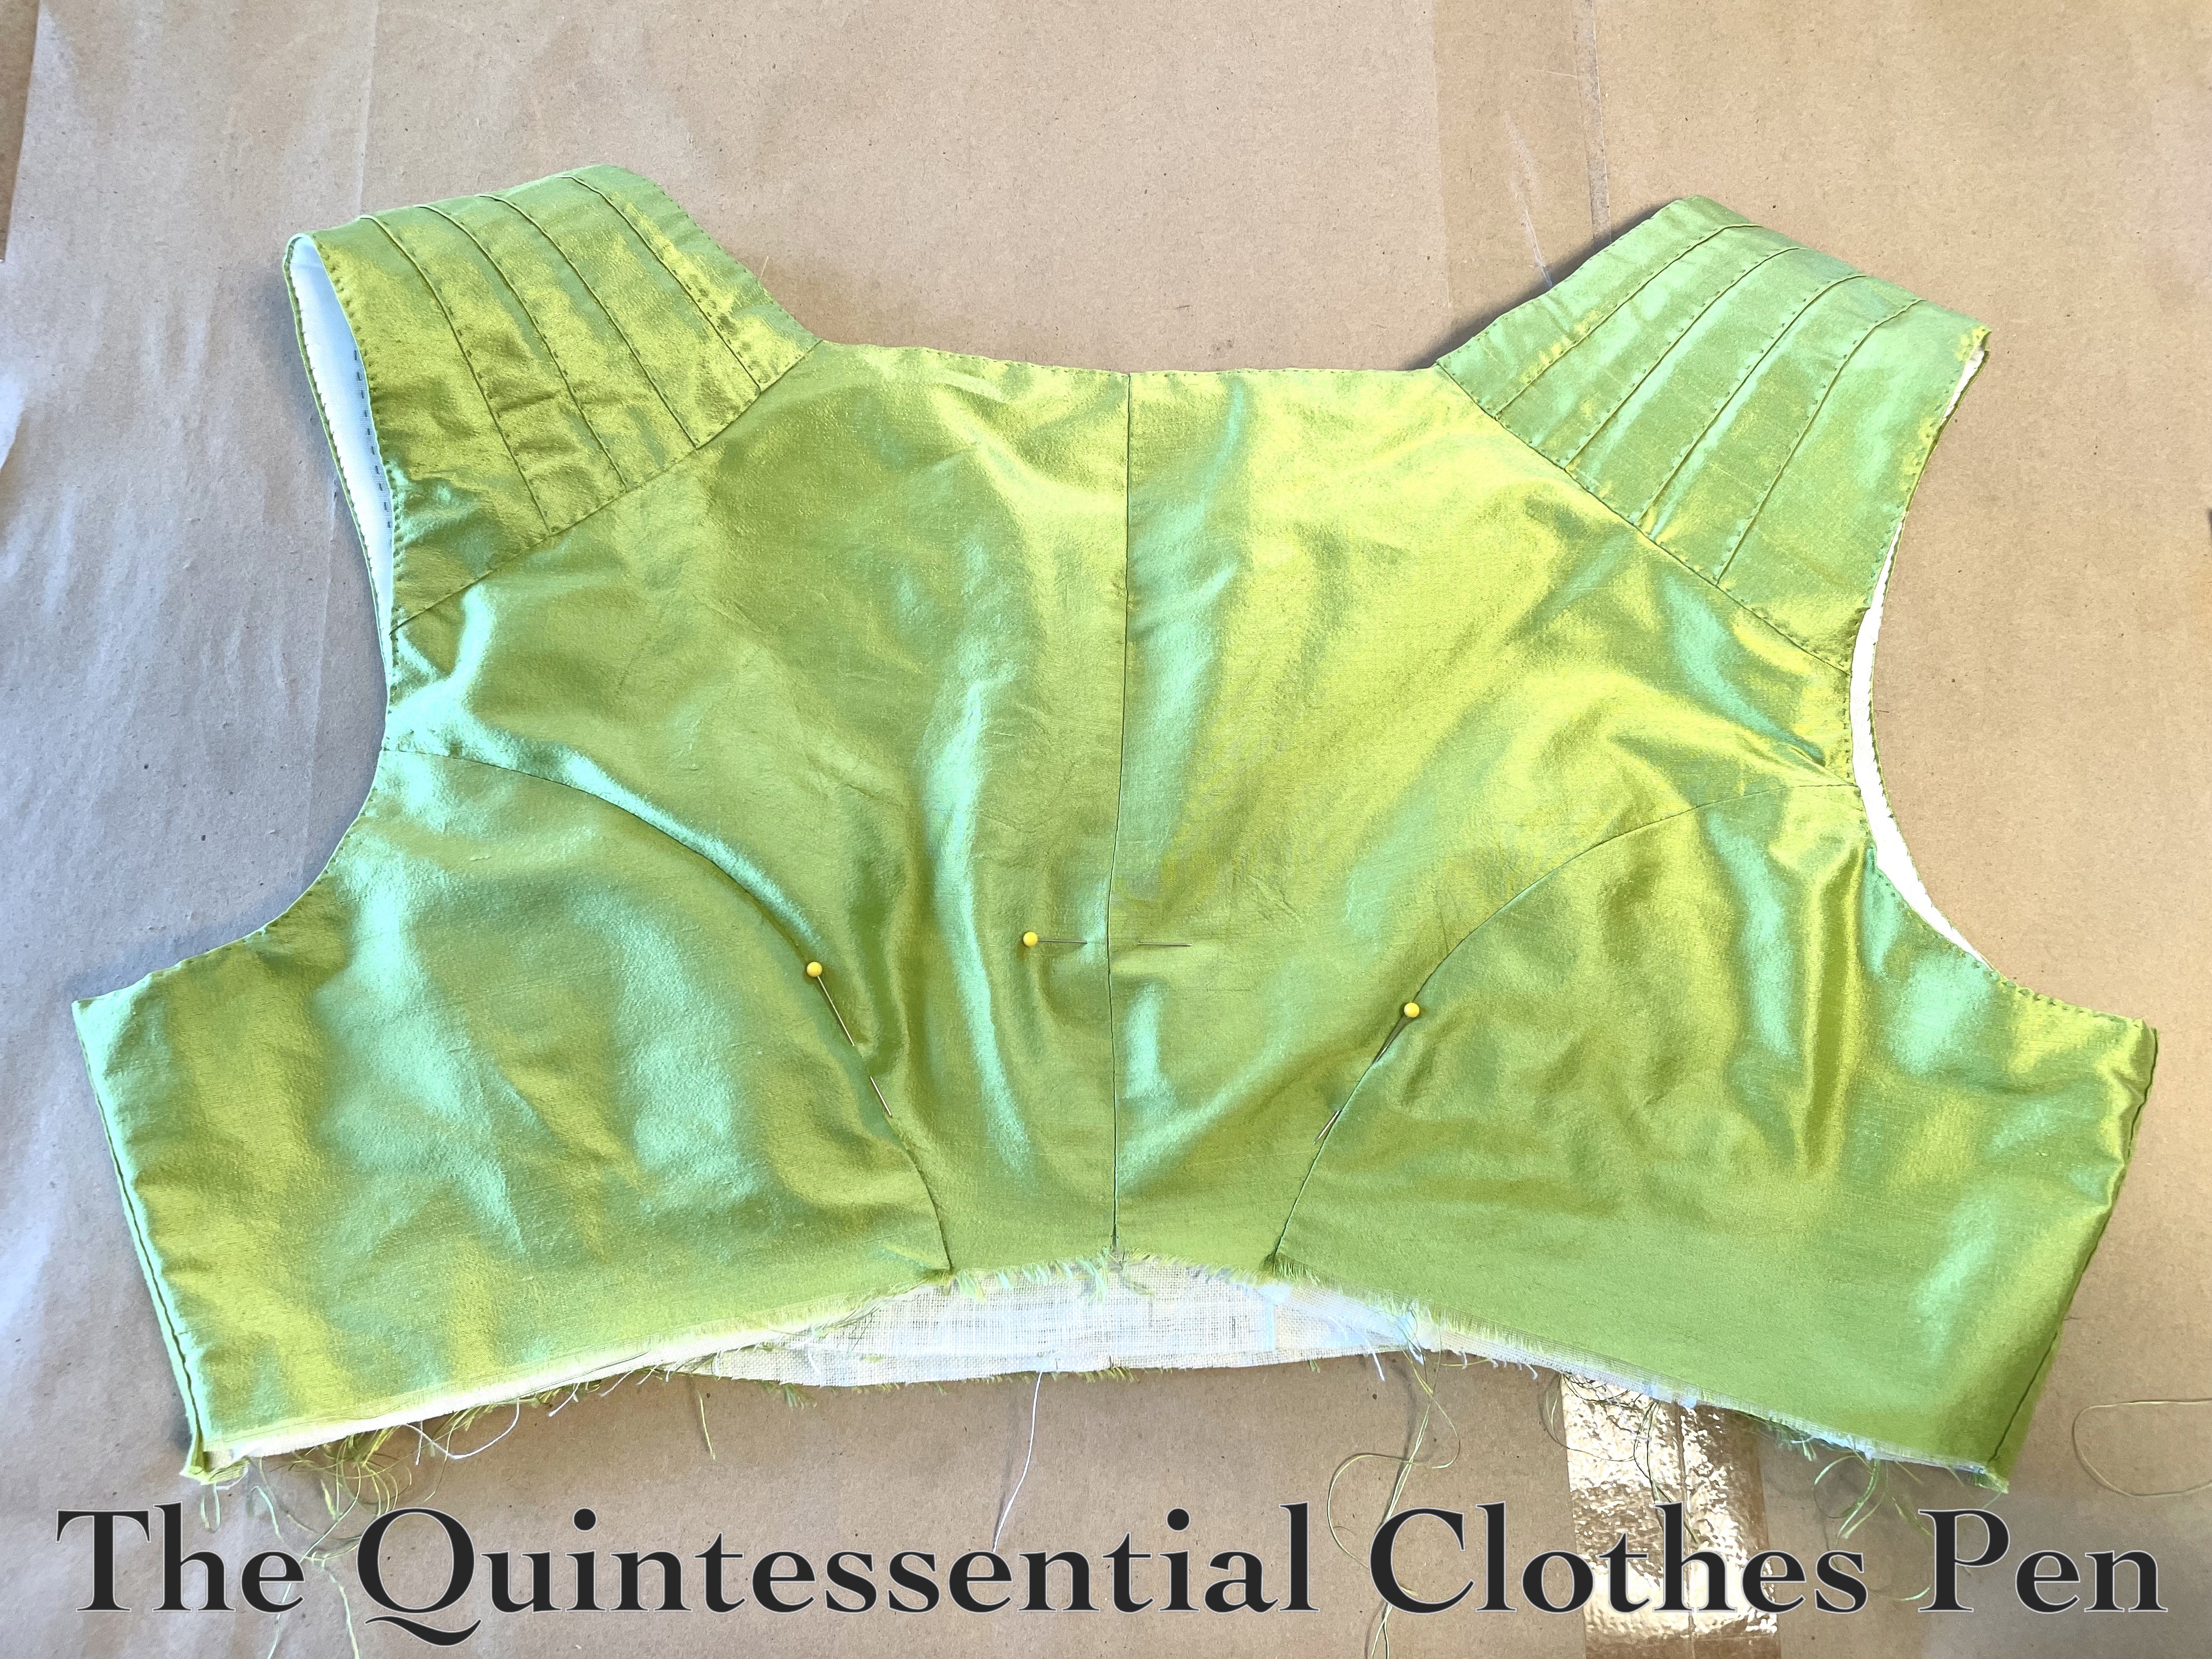
In the photo below, most of those methods have been employed to get the bodice to this state, which is basically finished aside from the peplum, neck trim, and closures.
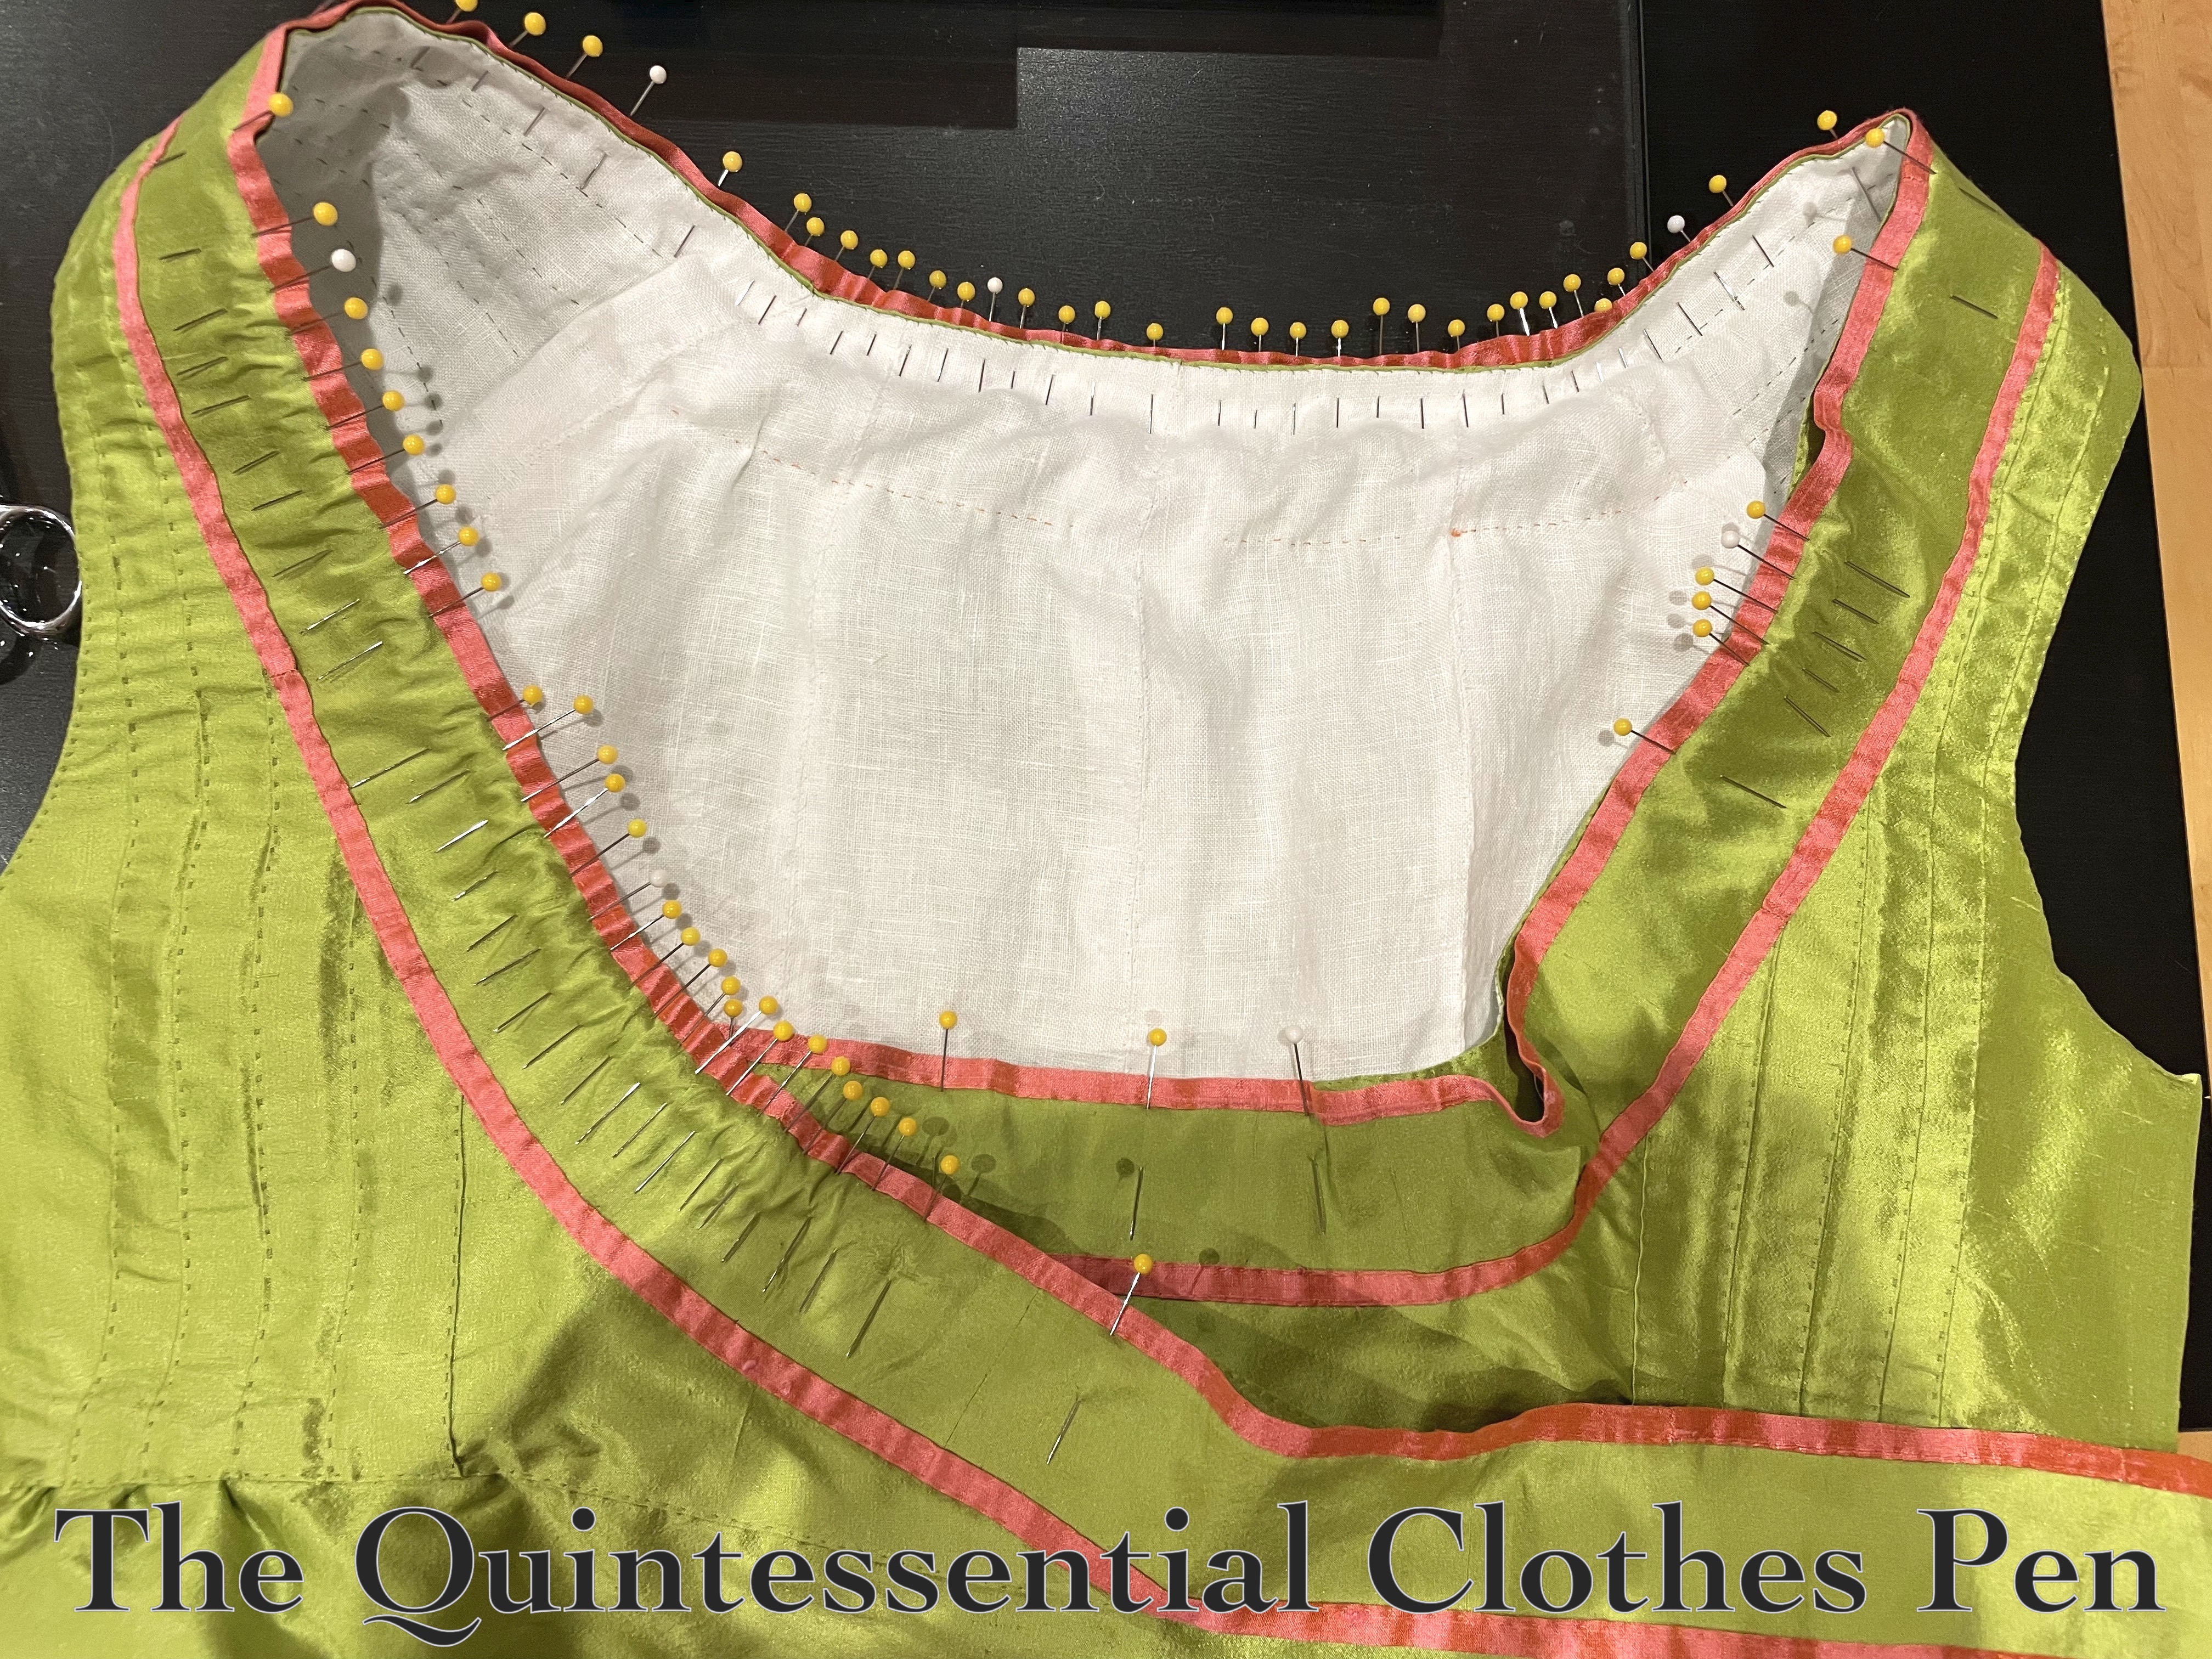
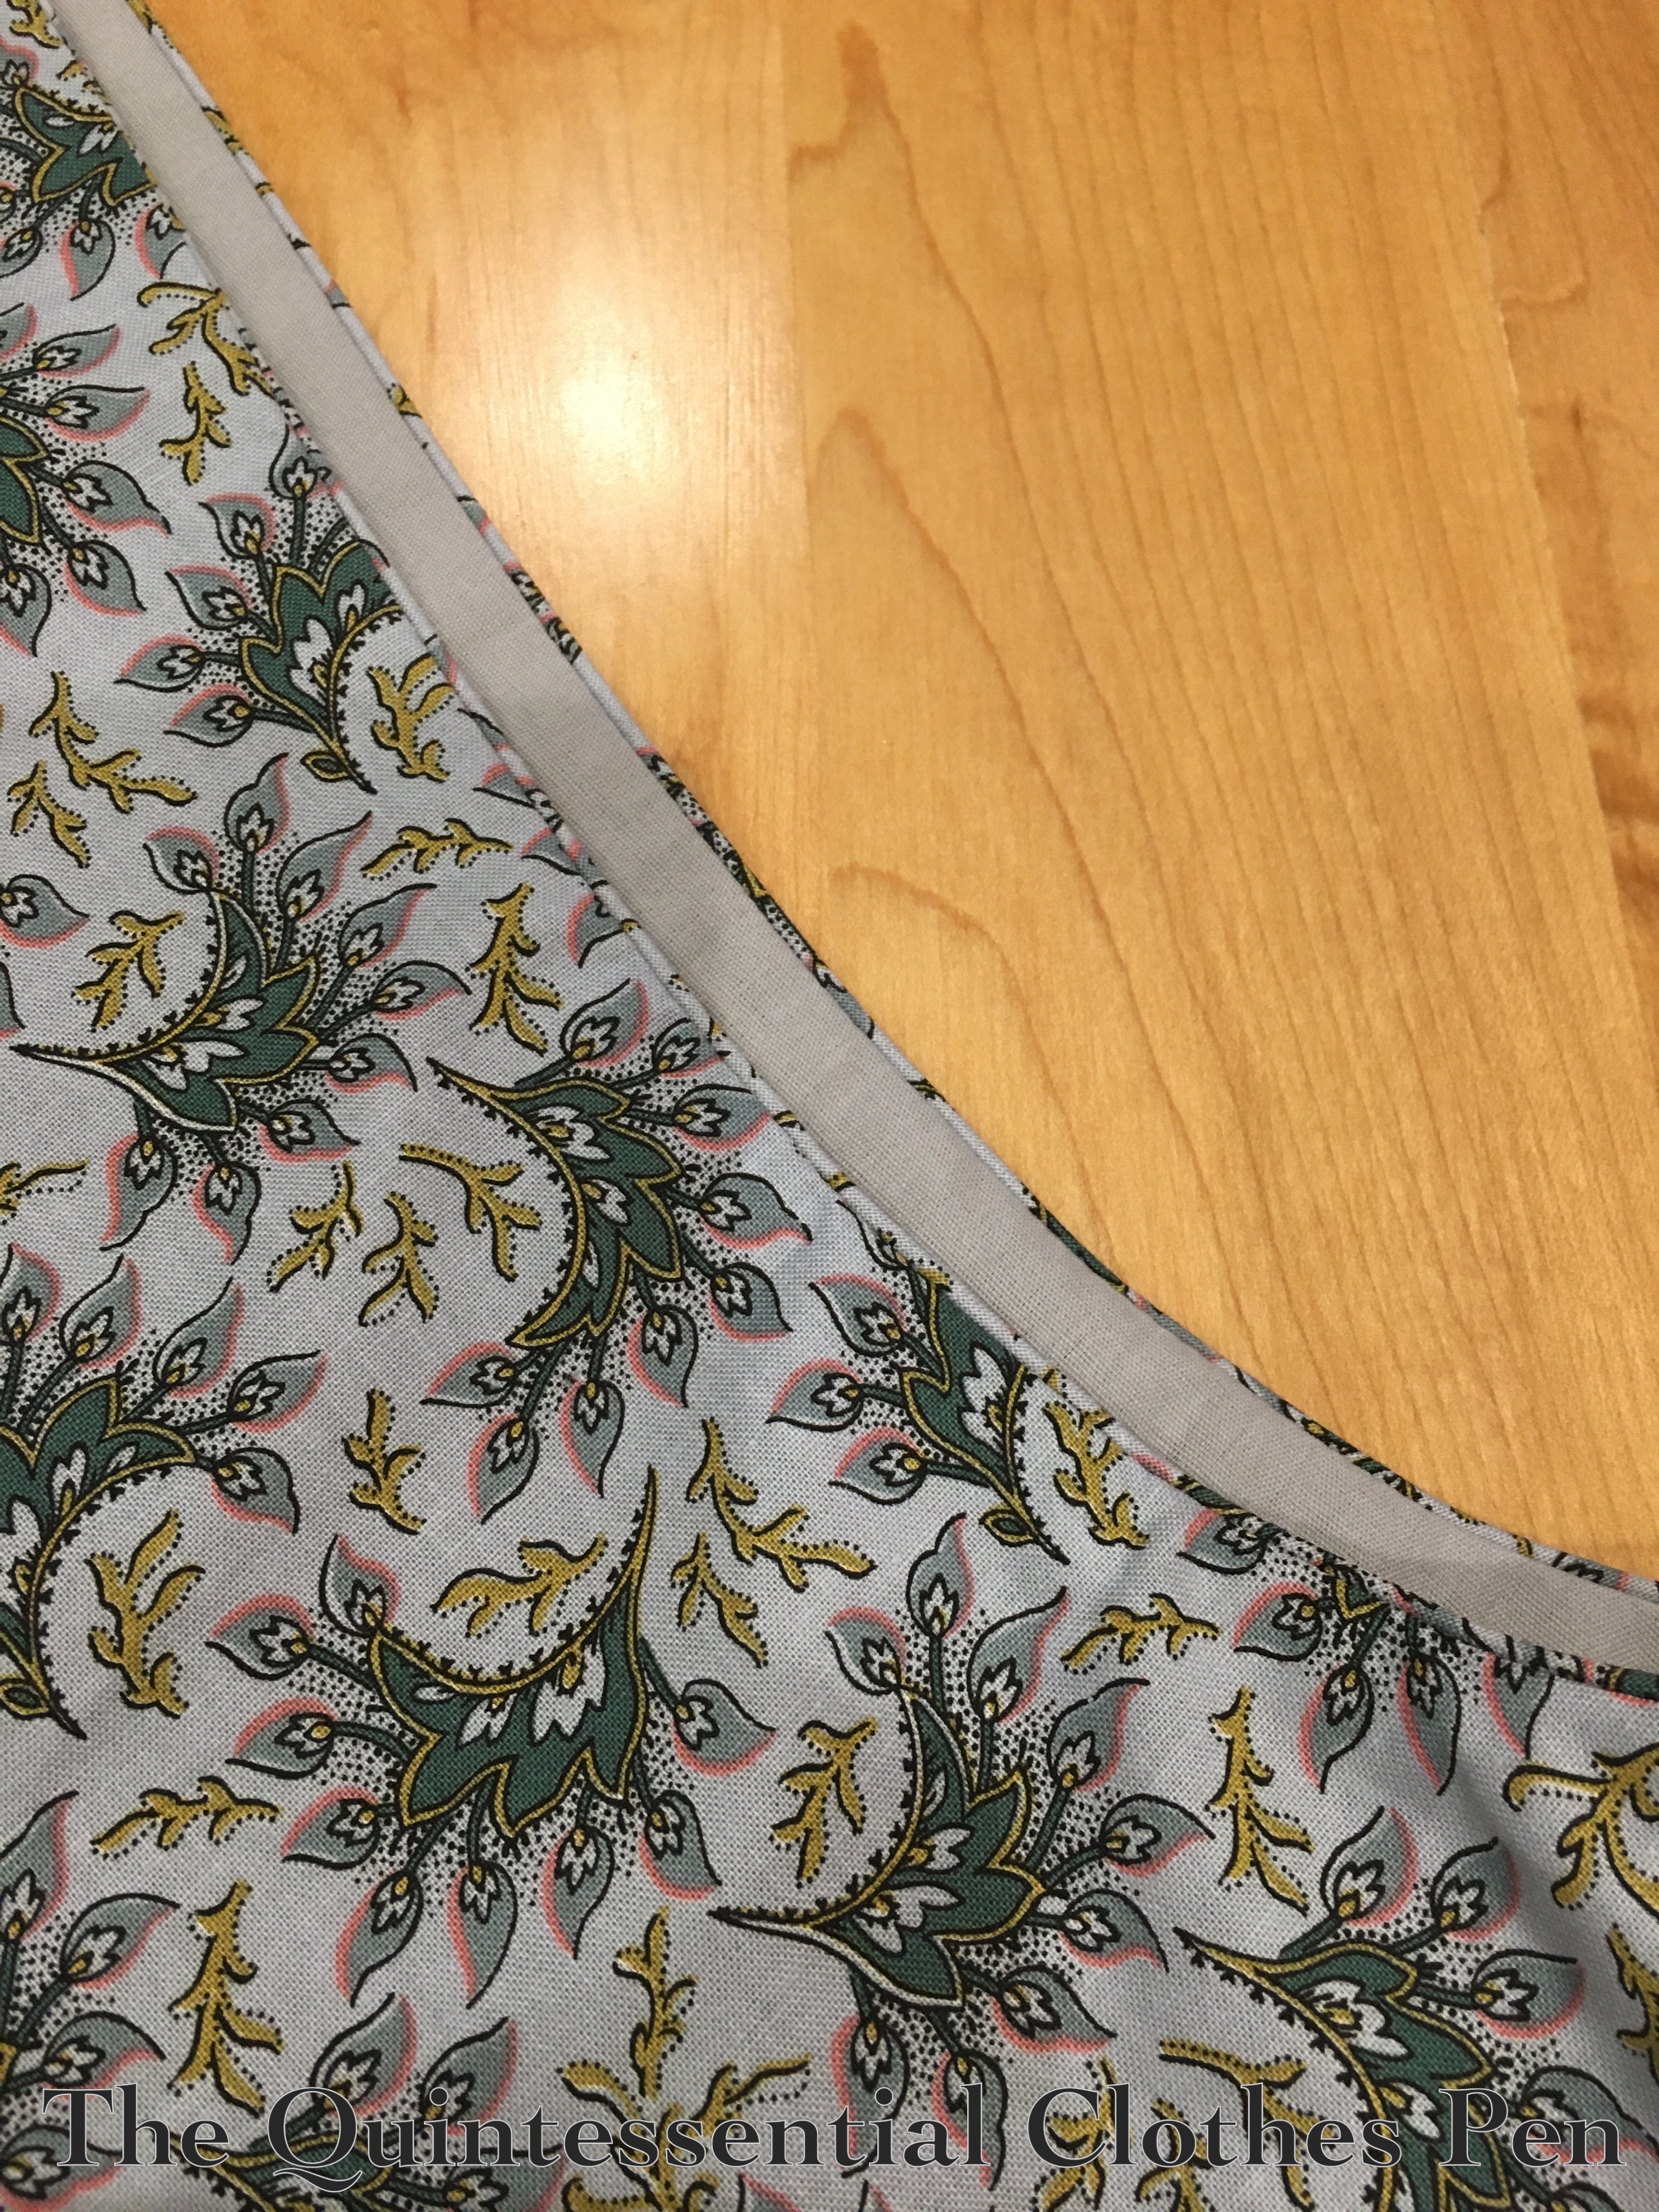
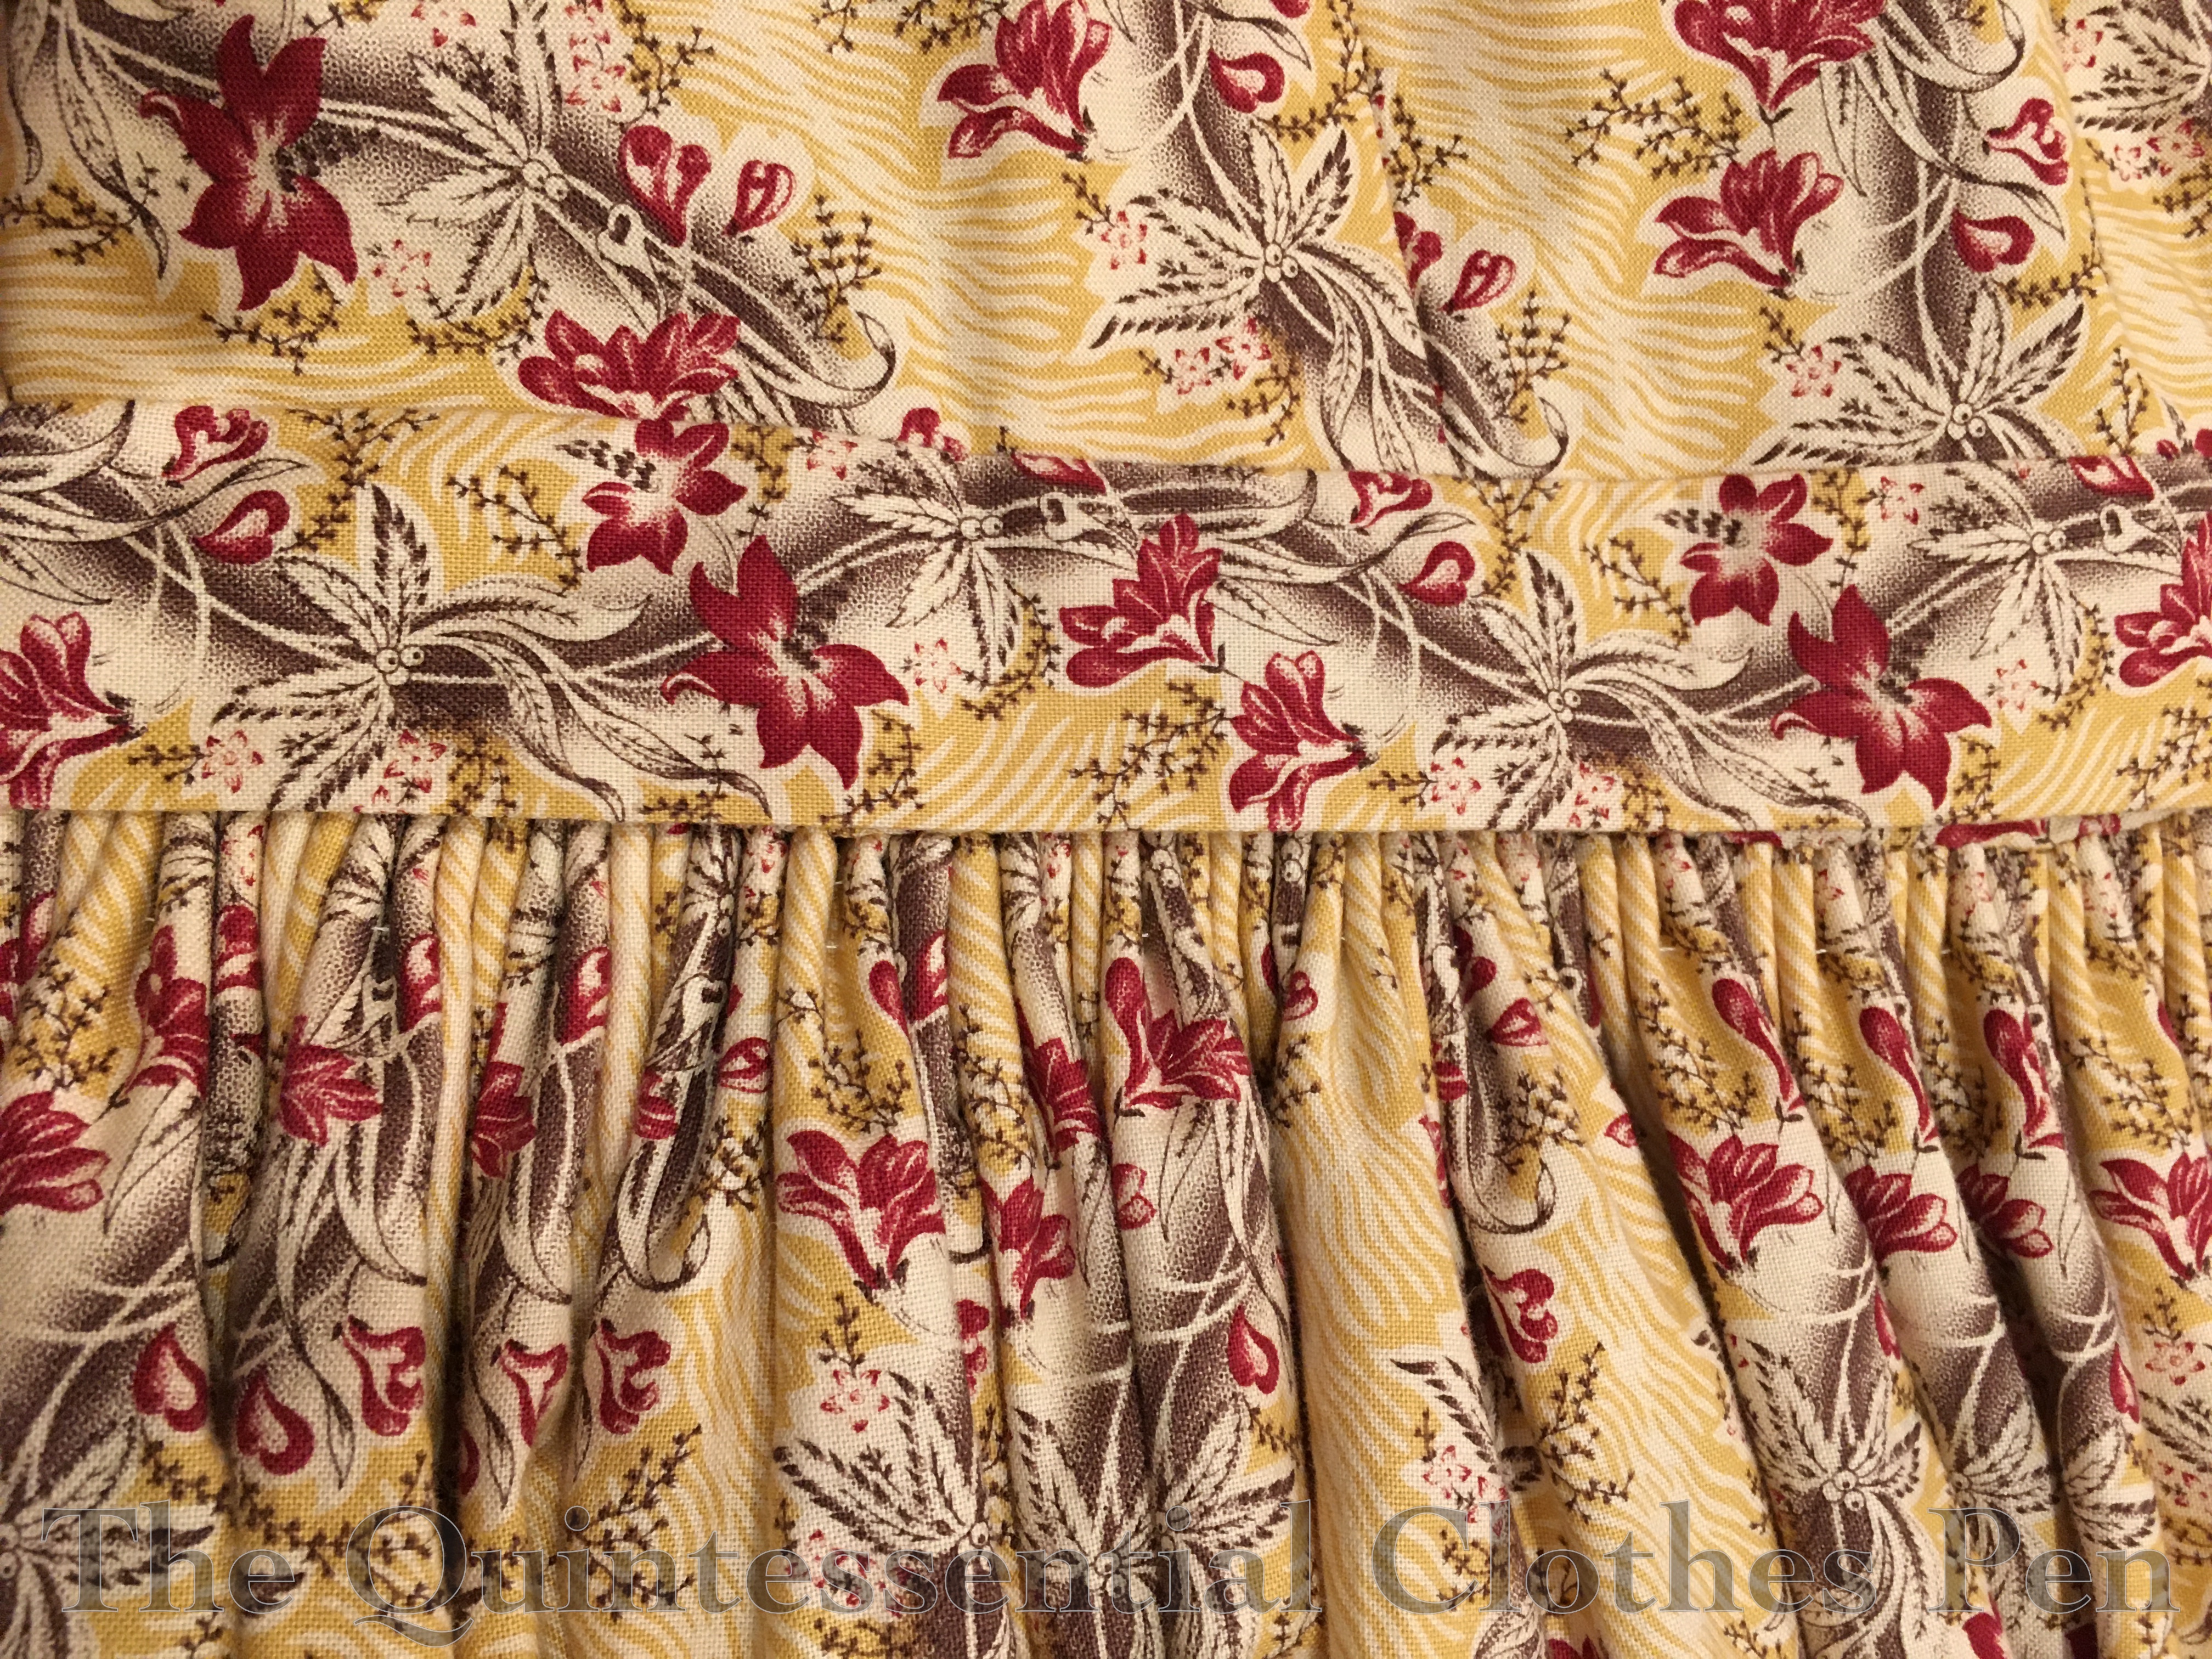
The neck trim is a pieced strip of the green silk bound in running stitched ¼” wide strips of pink silk (hence the watermelon name!). The assembled band was running stitched along the outer edge and then eased into place around the neck edge. Below is the easing in progress. It took many pins!
And here is a closeup. You can see some of the whip stitched piecing seams in the lining and the minute easing of the neckline edge of the trim.
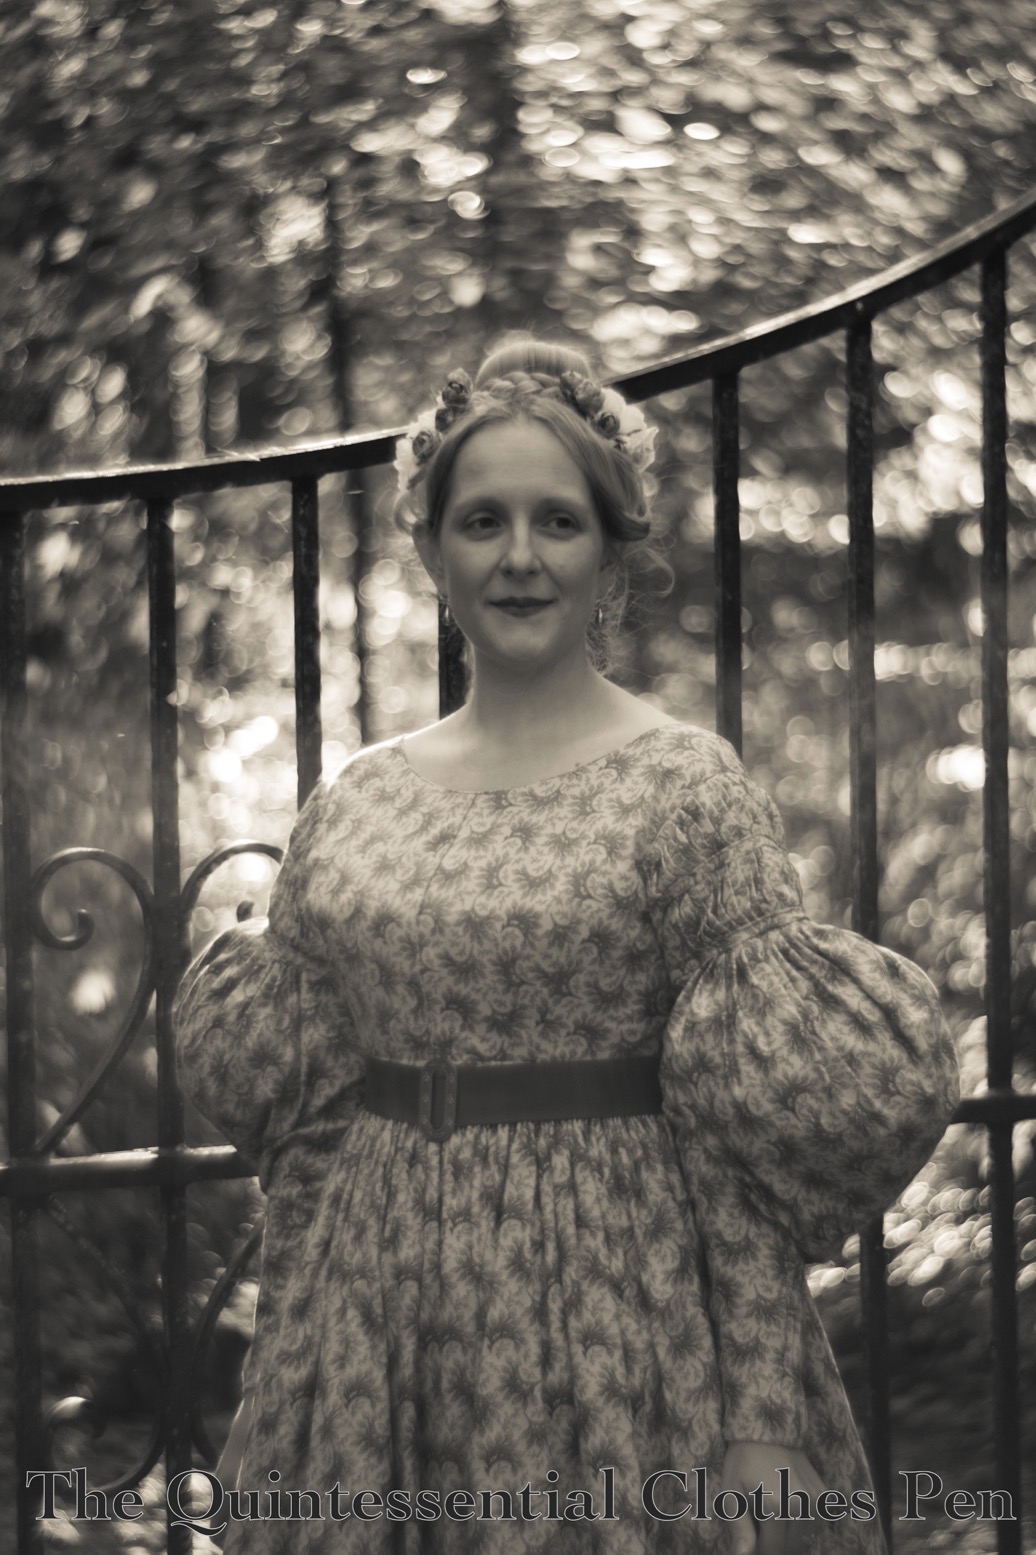
And that was it…! Entirely hand sewn, with many small details, lots of justifying and research, and, in the end, a relatively small garment! Next time, photos of the finished garment being worn!
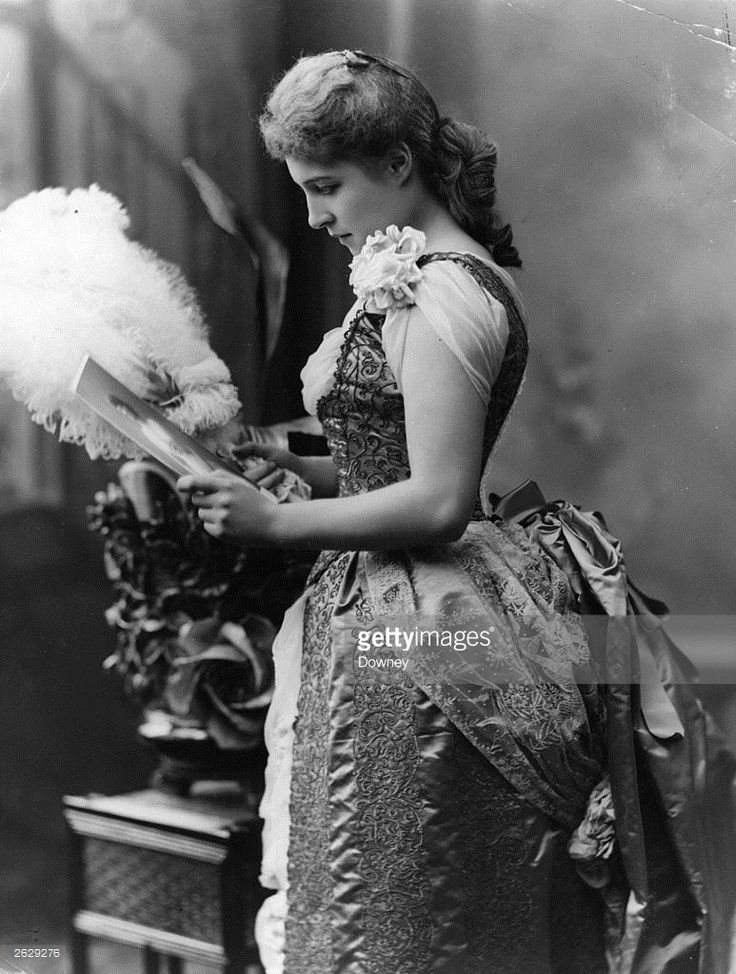
In 2016, I made a dress for a Fancy Dress Ball inspired by a dress worn by Alice Gwynn Vanderbilt in 1883. Alice’s now-famous dress, made by The House Of Worth, celebrated Electric Light as its theme. The dress uses beading and metallic elements (as well as an electric torch, for the original wearing!) to visually reflect light as well as communicate the electric light theme via decorative motifs. I posted an image of the inspiration gown and a link to more information about it in my original post about my dress in 2016, which you can view here.
I was inspired by the trimmings on the gown, but needed to create a dress with little expenditure (much different than the budget for a Worth dress!). To achieve this, the goal when I made my dress in 2016 was to use as many materials as I could that I already owned. The main dress fabrics were already in the stash from old projects and the silver net was leftover from trimming the Versailles sacque I posted about wearing recently.
Below, a photo of the dress in 2016, with a lantern standing in for “electric light.”
There were a few small changes I wanted to make after the first wearing of the dress, but I didn’t have a need to wear it again for years. Fancy Dress events are not all that common even within the already limited realm of historically clothed events! And with the original trimmings I didn’t like the dress for regular wear. Plus, for a number of years after making the dress the events I was attending did not encompass the 1880s.
More recently, however, I have had more opportunities to wear clothing from this period, as The Footwork and Frolick Society has hosted a few events with themes that can include the 1880s. Therefore, I decided to re-trim the Fancy Dress dress into a more regular, less Fancy Dress, ballgown style for the Yuletide Ball in 2024.
Inspiration
This time, my inspiration was a mashup of ideas from a variety of images.
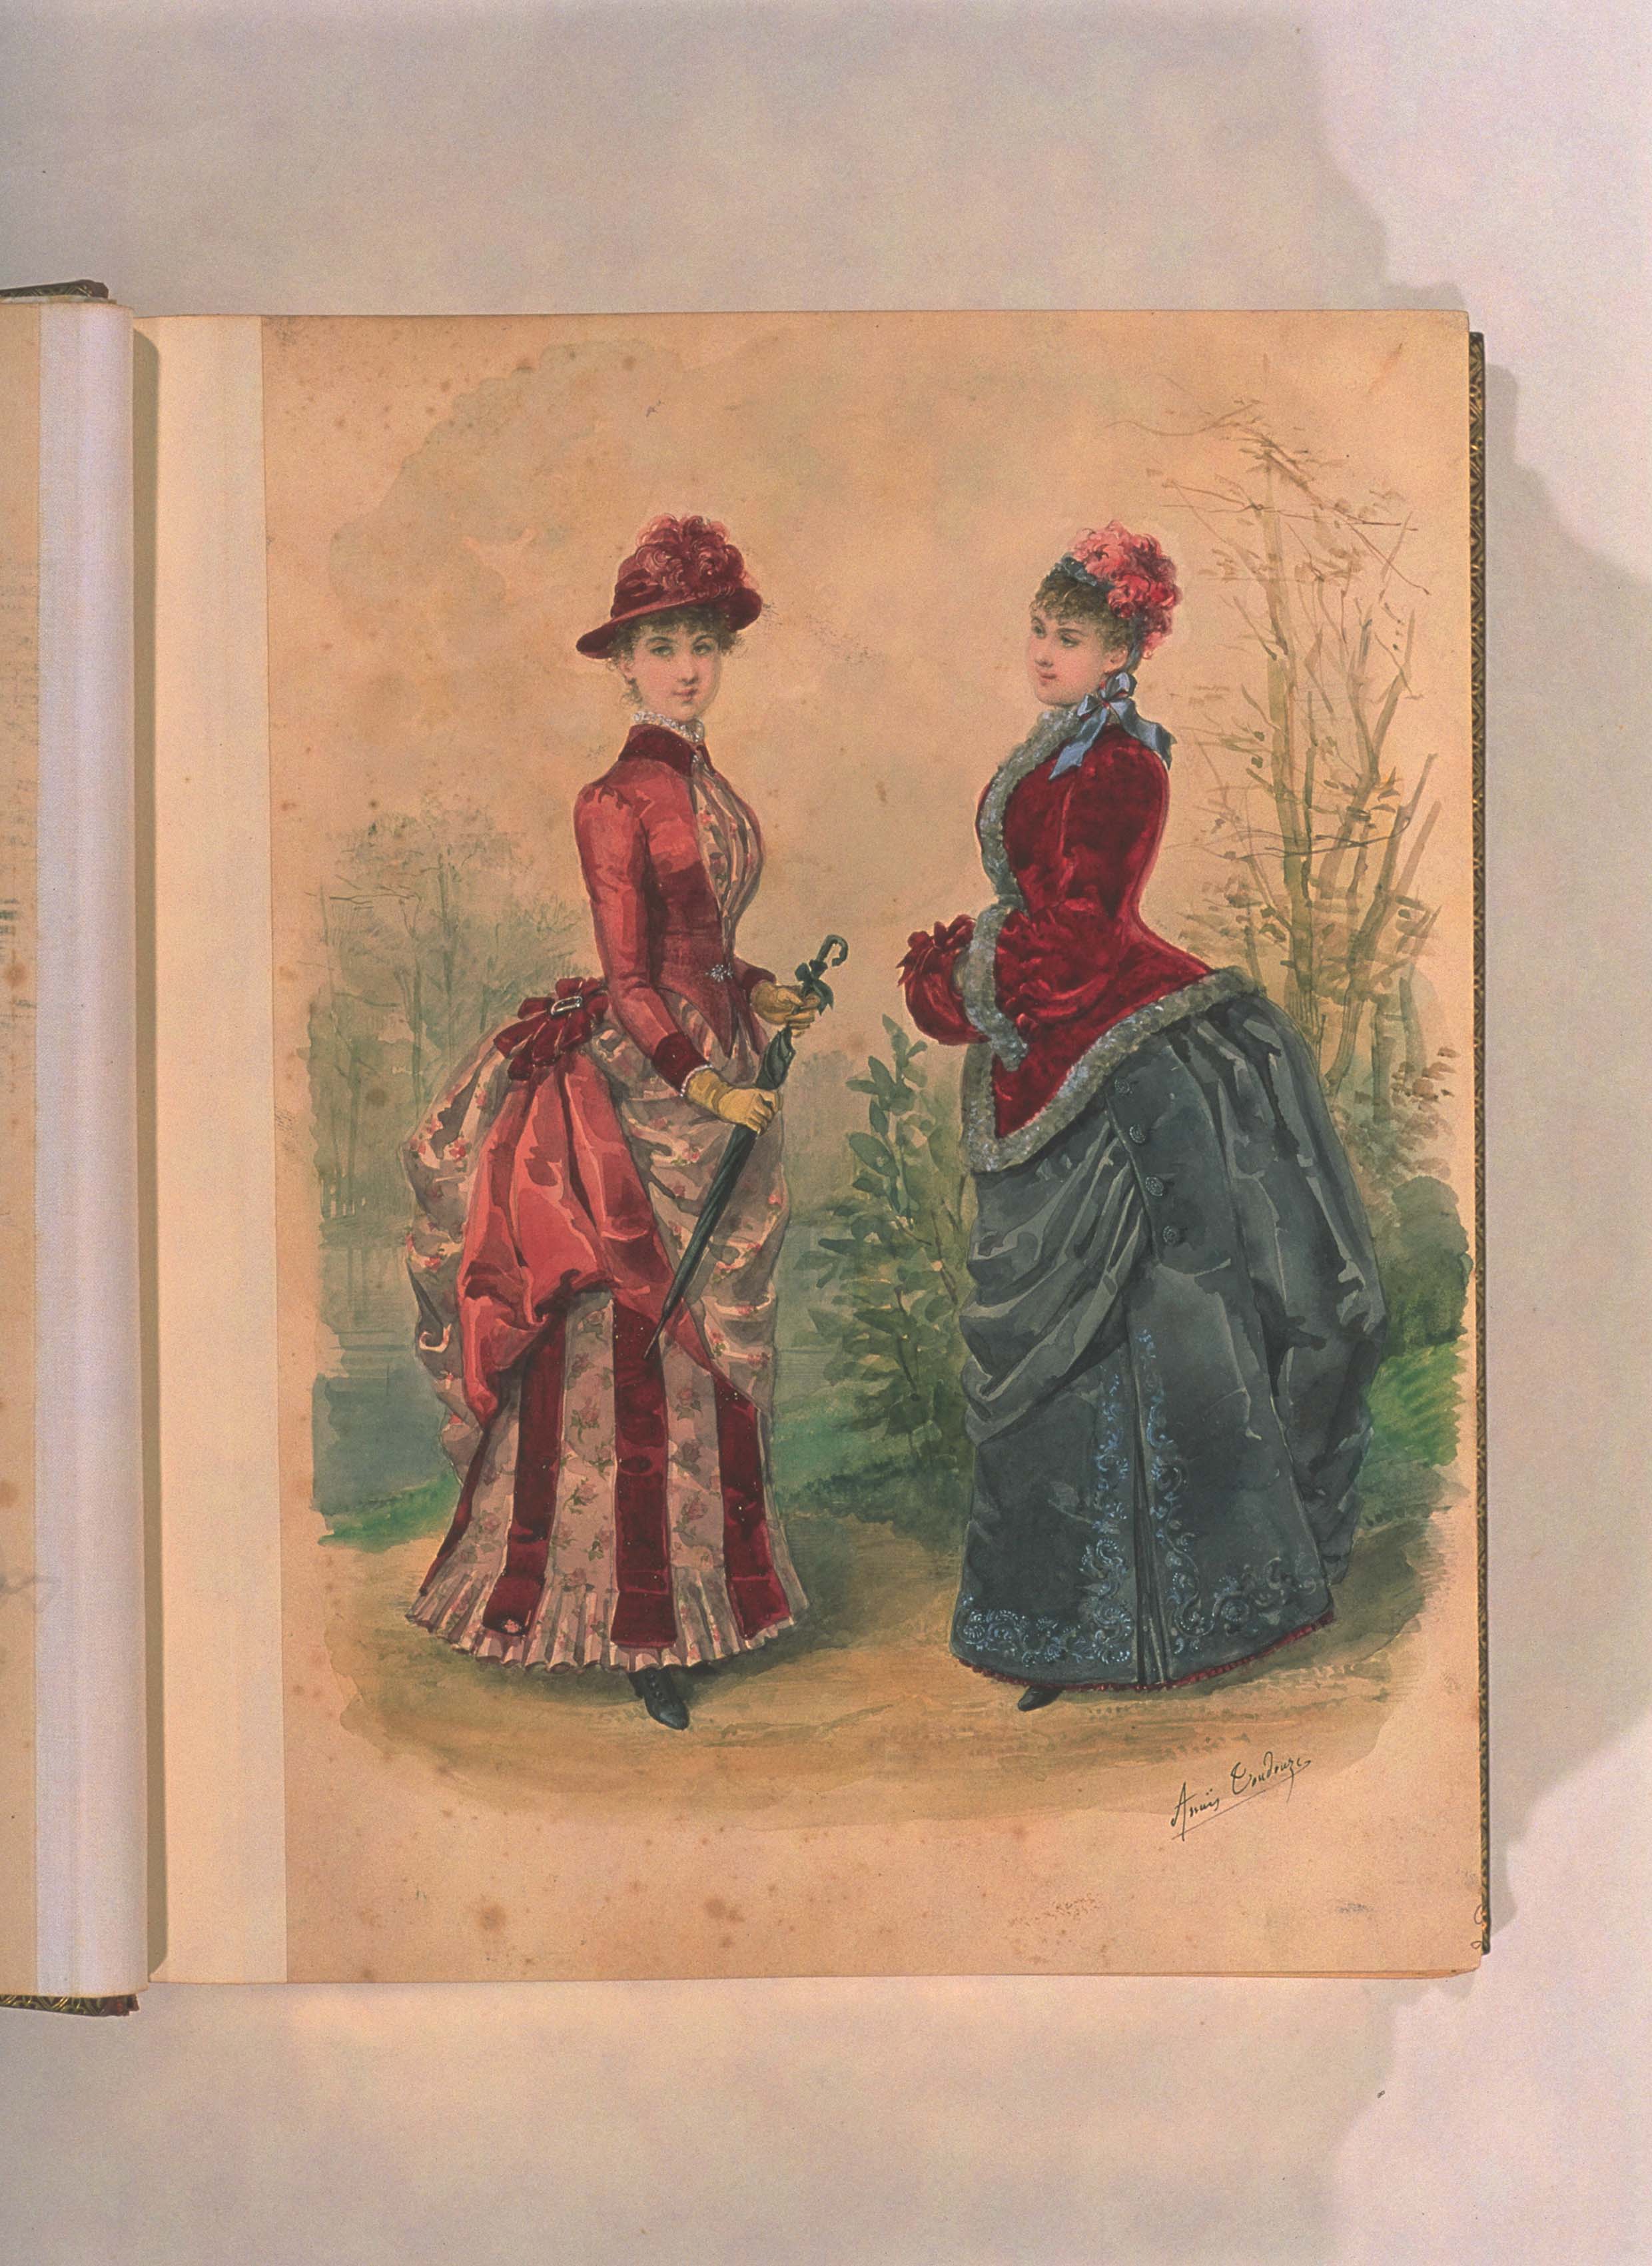
From the fashion plate below, published in the Revue de la Mode in February 1886, I pulled information from the gown on the right, with the pleated fabric along the v-shaped neckline and asymmetrical decorations (which I guess are feathers) on the shoulder and skirt.
From the photo below of British actress Lillie Langtry (Original Publication: People Disc – HU0206. Photo by Downey/Getty Images), I pulled inspiration for the “sleeve” idea I wanted to incorporate. The pattern of the fabric used for the bodice in this photo was also reminiscent of one of the fabrics I used to update my dress.
And finally, I was also inspired by the beaded swags (and chiffon “sleeves”) on the c. 1887 dress in the collection of the Kent State University Museum in the photo below.
Dress Update Overview
For the re-make of the dress, I wanted to maintain my goal of using materials already on hand. I still had small scraps of the navy blue satin in my stash as well as the silver net. I also went through my fabric stash binder to see what other fabrics and trimmings might work and found that the best bets were a piece of polyester velvet flocked with silver swirls that I’d purchased at Joann Fabrics probably twenty years ago when I had just started sewing and loads of silver ribbon that I had been gifted to me. The blue and silver colors fit the colors of the existing dress perfectly and I thought there was a sort of New Year’s aspect to the color scheme, as well. (I also purchased the Joann fabric in burgundy and green (both with gold swirls) and had made Christmas decorations out those, but I don’t think I ever used the piece of blue, so this was a great opportunity!)
With my materials decided, I moved on to the sewing part of the project, starting with unpicking the original trim from the dress. I had made it knowing I might someday want to change the trimmings, so they were not sewn into seams and were pretty easy to remove. That left me with an almost entirely navy blue dress, relieved only by the silver pleats at the bottom of the skirt.
Then I went back and considered my original list of changes, which included:
Boning the center back edges so they would lie flat when laced closed
Adding a matching piece of satin behind the lacing holes to hide any white fabric of undergarments
Making sure that my chemise wouldn’t poke out of the armholes
Quoting myself, from 2016… “these are minor changes and I’m not sure when I’ll have the opportunity to wear this again so it might be awhile before they happen.” I’ll say! It only took 9 years!
Historical Sew Monthly
My goal of using stash-only materials for this dress re-do makes it fit into the Historical Sew Monthly 2025 Challenge #9 Blue:
Make an item that features blue, in any shade from azure to zaffre.
Just the facts:
Fabric/Materials: Approximately ¾ yard silver net, just over 1 yard of navy velvet with silver motifs, and scraps of navy polyester satin.
Pattern: My own.
Year: c. 1885.
Notions: Approximately 23.5 yards of ¼” silver ribbon.
How historically accurate is it?: 90%. Polyester and modern synthetic ribbon do not have accurate fiber content. And my patterning is conjecture. But the overall idea is pretty good.
Hours to complete: I didn’t keep track.
First worn: December 7, 2024.
Total cost: Free, since everything came from the stash and was either gifted to me or purchased ages ago!
Dress Update: Back Closure
Following the original list of changes, I added a placket behind the lacing holes and added plastic bones along the very back edges, to help hide undergarments (the white color really does pop against the navy blue of the dress!) and keep the back laying flat when laced closed.
Dress Update: Sleeves
When re-examining the dress in 2024 with fresh eyes, one of my biggest desires for change was to better fill in the armholes of the dress and provide a decorative element. Yes, evening dresses in the 1880s were often sleeveless, but when really looking closely at them again, I found that while not having sleeves, they do almost always have something that obscures the armhole and even the upper arm. I am more likely to call these styles swags or drapes of fabric, as they aren’t really proper sleeves, but they are certainly set into the armhole in some way. I wanted something like that for the re-do of this dress.
I haven’t had a need to pattern something like this for this period before, so I looked through my historical pattern books for places to start. Interestingly, I didn’t find much. There was one sleeve that seemed like a possible starting place, but when I mocked it up it didn’t really do what I was hoping for at all!
So that left me with the decision to create a pattern from scratch. Thinking about what didn’t work in the mockup and my inspiration image, I proceeded to drape a mockup that achieved what I was hoping for. I didn’t have my dress form handy, so it required a fair bit of going back and forth between pinning and trying on the bodice to get the right shape. But I did! It’s a strange shape, for any sort of sleeve pattern. But that makes sense, since the sleeve drape is a not-really-sleeve!
Dress Update: Apron, Sleeve Swags, and Ribbon Flowers
I pondered creating some sort of beaded fringe for the armhole (and maybe even the waist, as can be seen in the third inspiration photo, above), but decided against it for time and material reasons. I really did want to stick to the stash!
Even if the beaded fringe wasn’t going to happen, I liked the idea of something to set off the wonderfully pointed bodice so that it would show up and not blend into the skirt. So in the end I decided to use some of the velvet from the stash to make an apron layer for the skirt, as was very common on dresses from the 1880s.
I started with making the pleated neck swag, so I wouldn’t run out of fabric, and then used all of the leftover fabric to make the apron. Due to this fabric restriction, I patterned the apron based on what was possible with my fabric, using a general understanding of the how these skirt elements were patterned in this period. The front of the apron is a curved piece that is pleated into the back on each side. The back piece is a bit scant, but has a few pleats along the top to give volume and descends to a point at the center back, since that was the shape of the fabric that was available! I used up pretty much all of the blue velvet!
For the sleeves, I made flower shaped sprays from lengths of ribbon that were tied into loose knots close to each end and then folded into quarters to make one loop and two ends. These individual elements were then combined and sewn together to make the flower-like formations, with larger scale ones on the skirt and smaller ones on the bodice.
The sleeve dangles were made from the same ribbon, knotted in the same way, that was folded to make a longer and shorter side and then tucked under the sprays on the shoulders.
Below, you can see the individual spray elements and a length of ribbon ready to be added as a sleeve dangle.
Finished Updates
Here is the updated dress! The blue velvet pleated v-shaped neck swag completely ignores the neck shape of the bodice underneath, which is more of a square shape. The same fabric is used again to create an apron, stitched to the outside of the waistband of the skirt to reduce bulk.
The silver net is used over the blue satin scraps to create “sleeves” that are pleated into the armhole and decorated with sprays and dangles of silver ribbon.
The “sleeves” wound up looking a little odd where the meet the back of the bodice, but that’s more due to my original patterning of a very inset armhole in the back than it is the sleeve pattern. It’s a lesson/change for the next bustle period evening gown I make, whenever that is!
I didn’t know what to do with the back of the velvet swag, because I wanted it to be easily adjustable depending on how tightly the back was laced. I ended up with this pointed arrangement that accomplished the goal of flexibility.
The armholes, left side front of the bodice, and right side front of the skirt are decorated with the sprays of looped silver ribbon. I used x4 — 4 yard spools of ribbon and half each of x3 more spools that were 5 yards each.
I calculated how many sprays and dangles I wanted for each section, but in the end I was running out of ribbon and started to just combine and move things around until they looked reasonable. Sadly, that means I don’t have a good record of how much ribbon went into each element or how long each piece of ribbon ended up being. I think that the smaller sprays were made of piece of ribbon that were 10″, the larger sprays on the skirt were made of pieces of ribbon that were 16″, and the arm dangles were 11″ before being folded.
Wearing
I wanted to find a simple but still 1880s hair style for this wearing, so I was pleased when I came across a photo of women in 1880s evening dresses with their hair drawn back and pulled up into simple large chignons on the backs of their heads. I wore that style with the addition of a few silver hair pins to tie everything together.
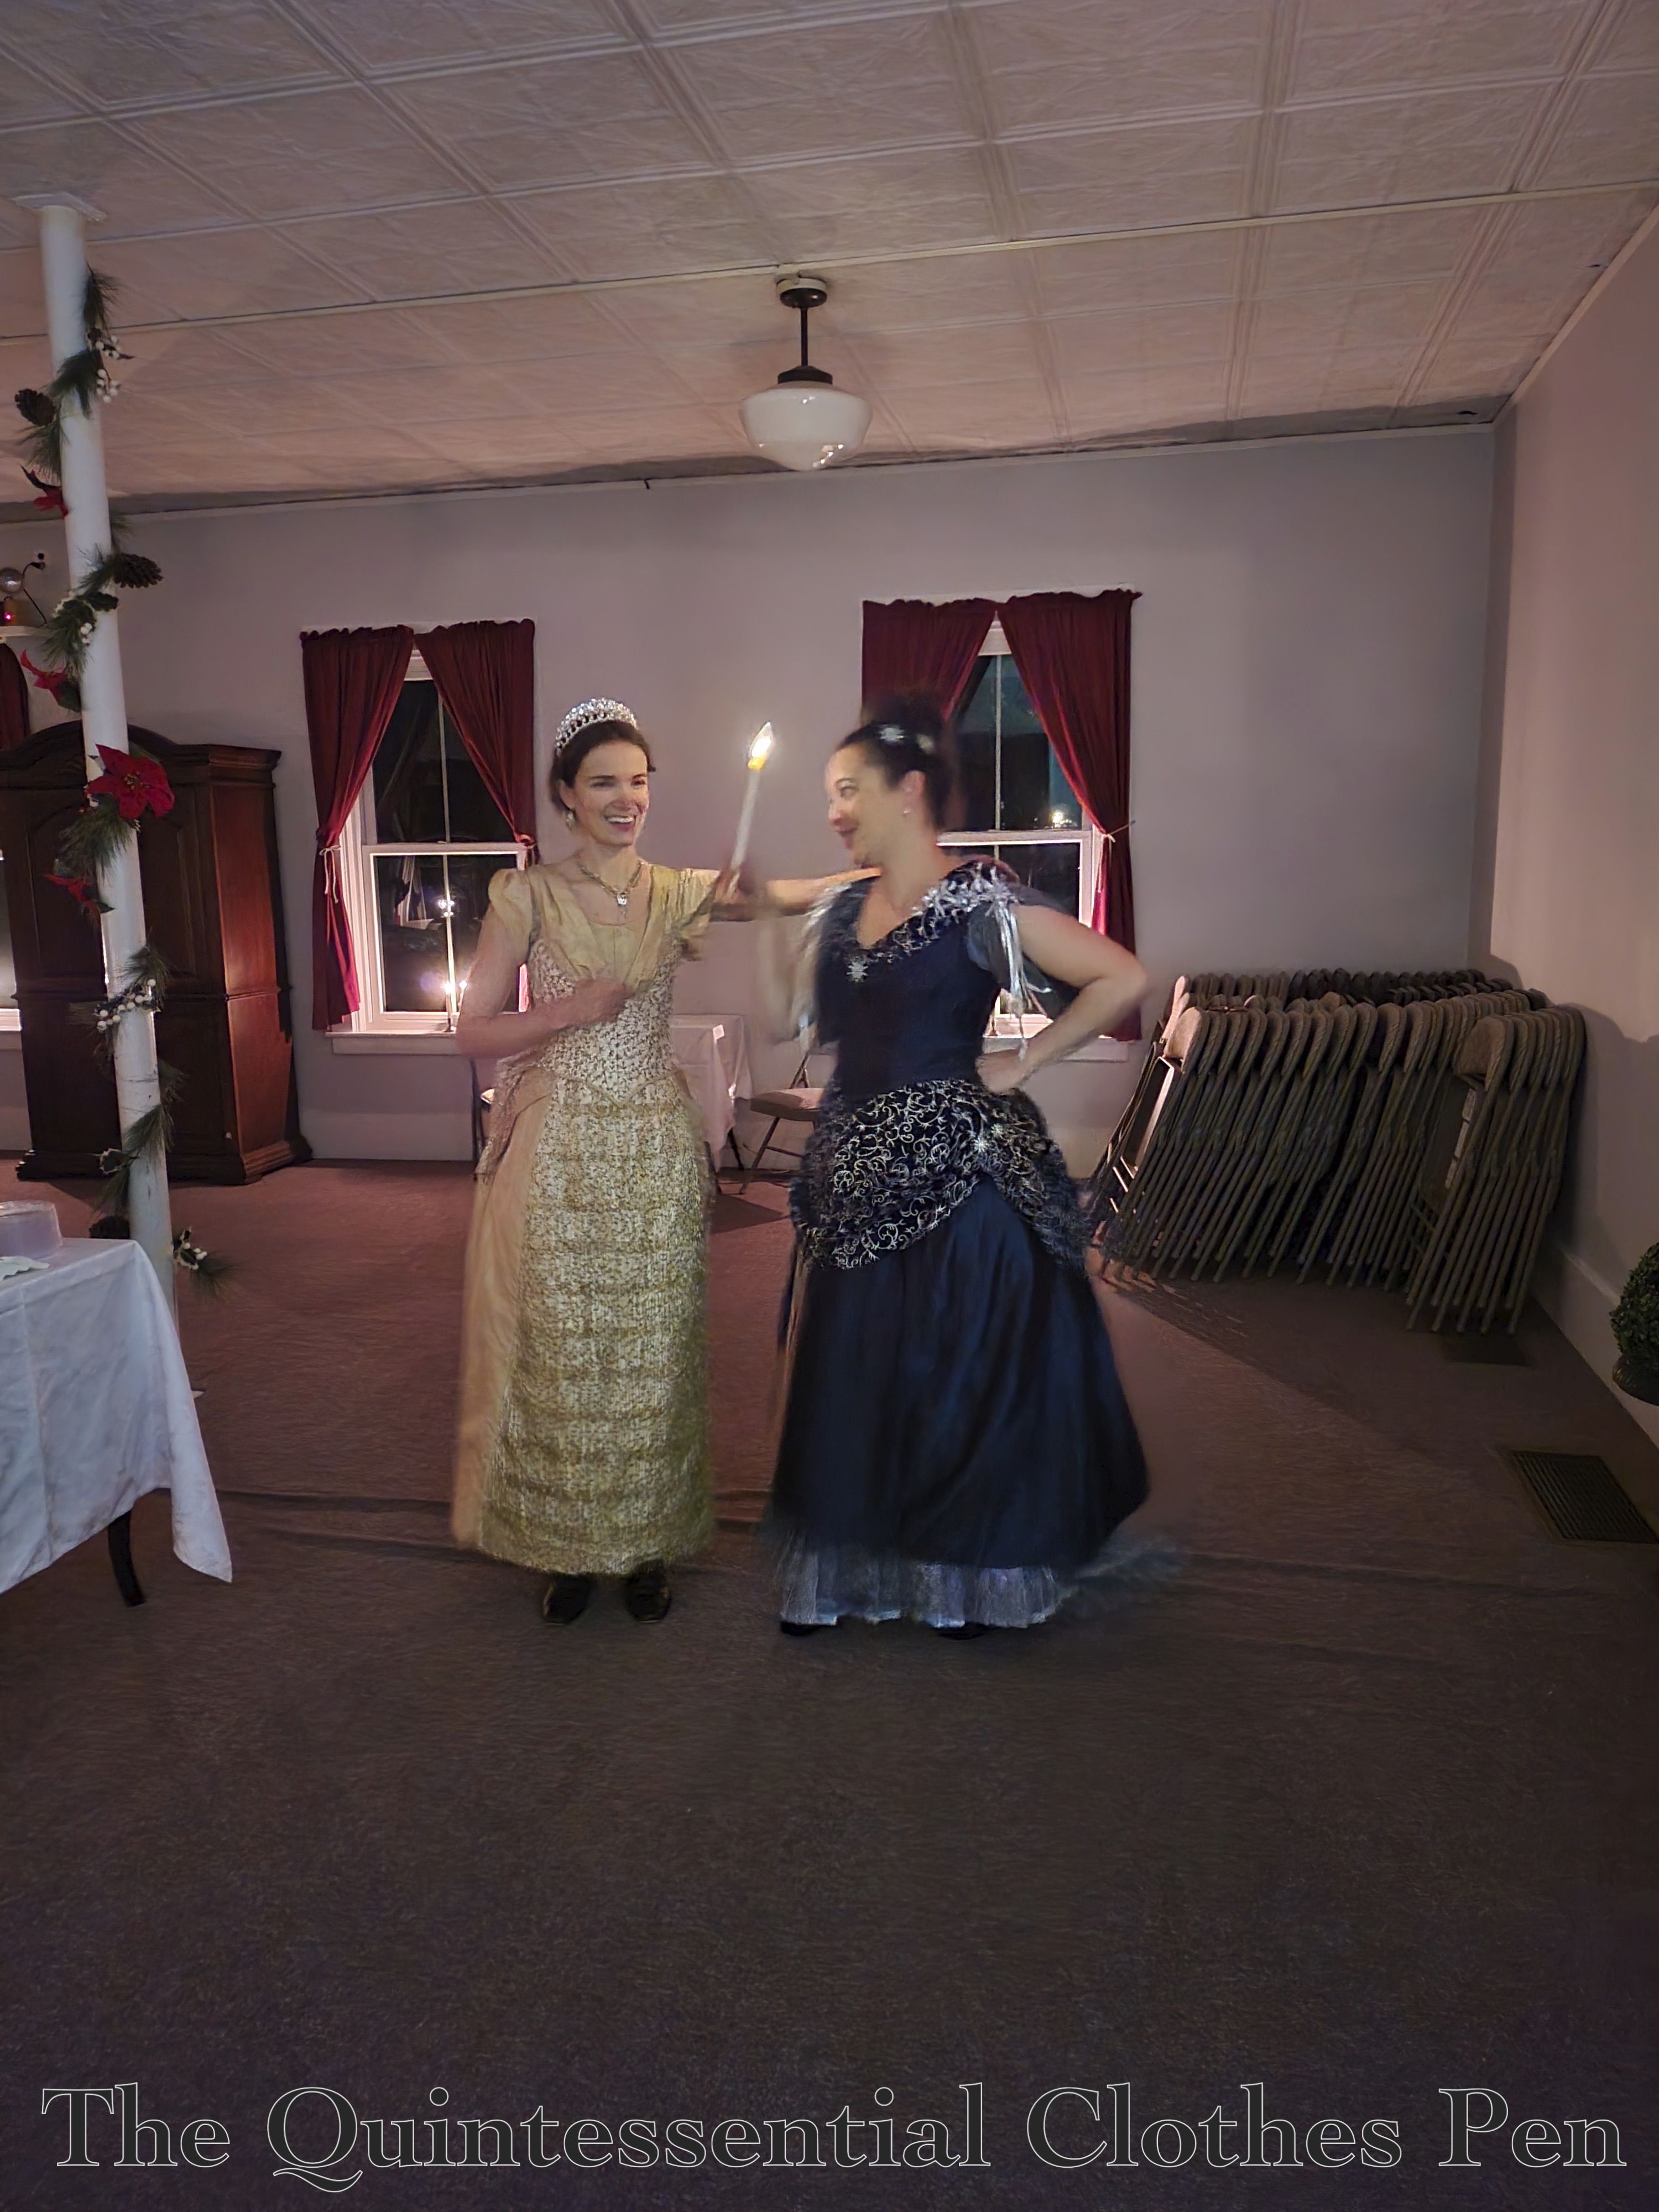
I also reused some of the star brooches from the first iteration of this dress, adding one at the center from of the bodice, two on the left side of the skirt, and some on the left side of my hair. They stand out well in the photo below, in which the two of us are bobbling about, making the ribbons on my dress and beaded trim on the dress on the left shimmer, sparkle, and sway.
Other Photos From The Event
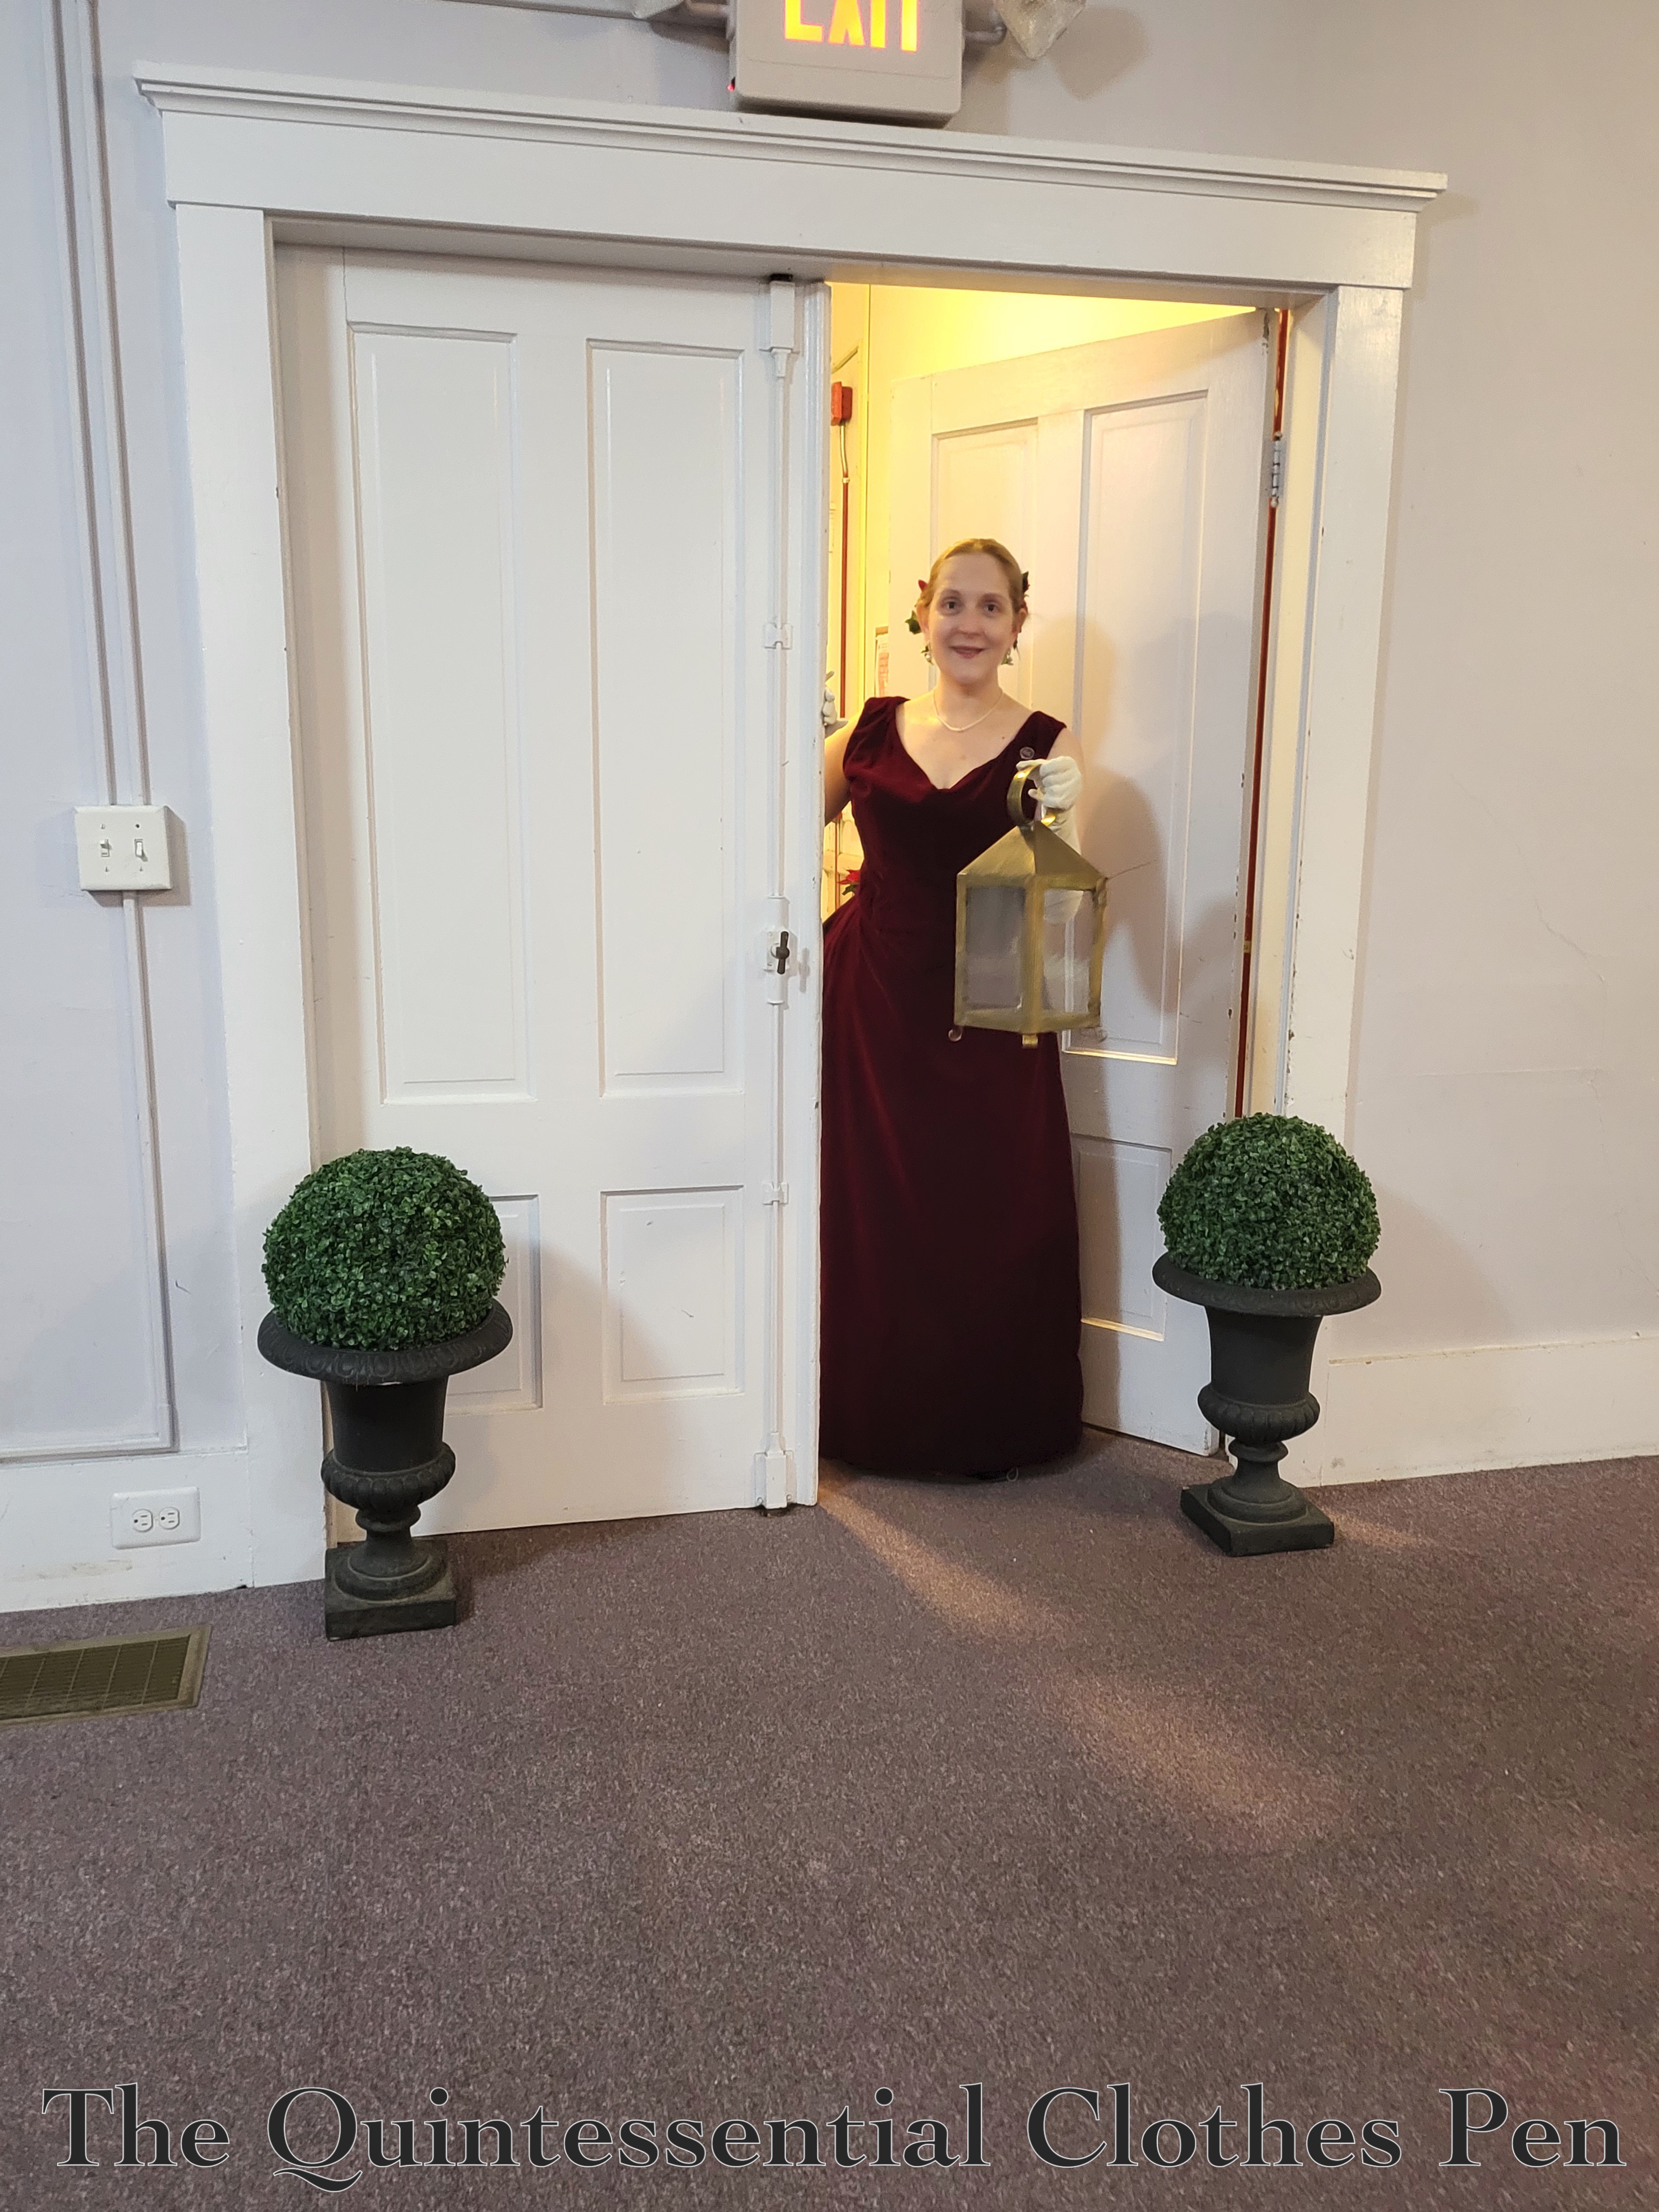
This was a ball for bustles! There were multiple people wearing dresses with this feature, including the dress above, as well as the burgundy velvet dress below.
Finally, a cheerful holiday view into the ballroom. I wasn’t feeling my best at this event and therefore didn’t dance, but everyone else had a grand time! I look forward to the next event in which I can participate in dancing with the bustle! It’s really quite fun to experience the movement of dancing with all of your dress behind you!
I was on a bit of a 1830s tear back in 2020, when I made my 1834 yellow print dress followed up with a coordinating 1838 yellow print bodice and 1836 chemisette. But in fact there was even more than that, because I also made an 1835-1840 (let’s just call is 1837) blue cotton print dress for friend at the same time!
You can spot this dress in the photos from my 1830s Woods Walk blog post from 2021. The fabric for was a bargain at the the local discount fabric shop–only $3 per yard! It’s not technically a reproduction historical print, but the colors, motifs, and details (such as little dots for texture in the design) have the right look to me.
In terms of a pattern, I used my 1834 yellow print bodice as a starting point for this new blue dress, so the two bodices are very similar aside from size. The skirt of the blue dress is made in exactly the same way as the yellow dress (I blogged about that construction process in detail here).
The big different is the sleeves!
After trying a few silly sleeve shapes, we settled on giant elbow height puffs that are set off at the top and bottom with pleats and feature a bit of embroidery and corded bands to hold the pleats in place.
Here’s a view of the pleats and corded bands at the top of the sleeve. This dress has similar pleats.
The sleeve puffs are supported by separate interior puffs that tie in. I used the method outlined in my 1830s Sleeve Puff Tutorial to make them.
In addition to the base dress, we decided to go all in on the 1830s aesthetic and create a matching fabric pelerine for this ensemble.
I looked at images of pelerines to determine what the shape and edges should be. We decided on a simple but flattering shape (as much as a matching fabric piece can be!) without extra difficulty in the form of scalloped or dagged edges, ruffles, etc. This is the finished shape we decided on.
Cording helps to define the edge and a similarly colored grey/blue cotton lining finishes off all of the raw edges. This was great, as the pelerine could be almost entirely made by machine!
On our woods walk, my usual photographer friend (who blogs at Plaid Petticoats) enjoyed taking a few photos with her Petzval camera lens, which creates the swirled background in the next two photos (you can read more about the Petzval lens in this Plaid Petticoats blog post). I can’t decide whether I like the color or black and white version better, so I’m including both!
So why is the title of this post include the #1? Well… because I enjoyed the effect of the fabric so much that I purchased additional yardage for myself and started making an additional dress for myself, too! What an excellent excuse to try out further 1830s sleeve variations!
Blue dress #2 has been cut out for quite awhile (a year, I think?). However, I’ve been busy and other things have been a priority, so the dress is 0% done in terms of being assembled. Someday…!
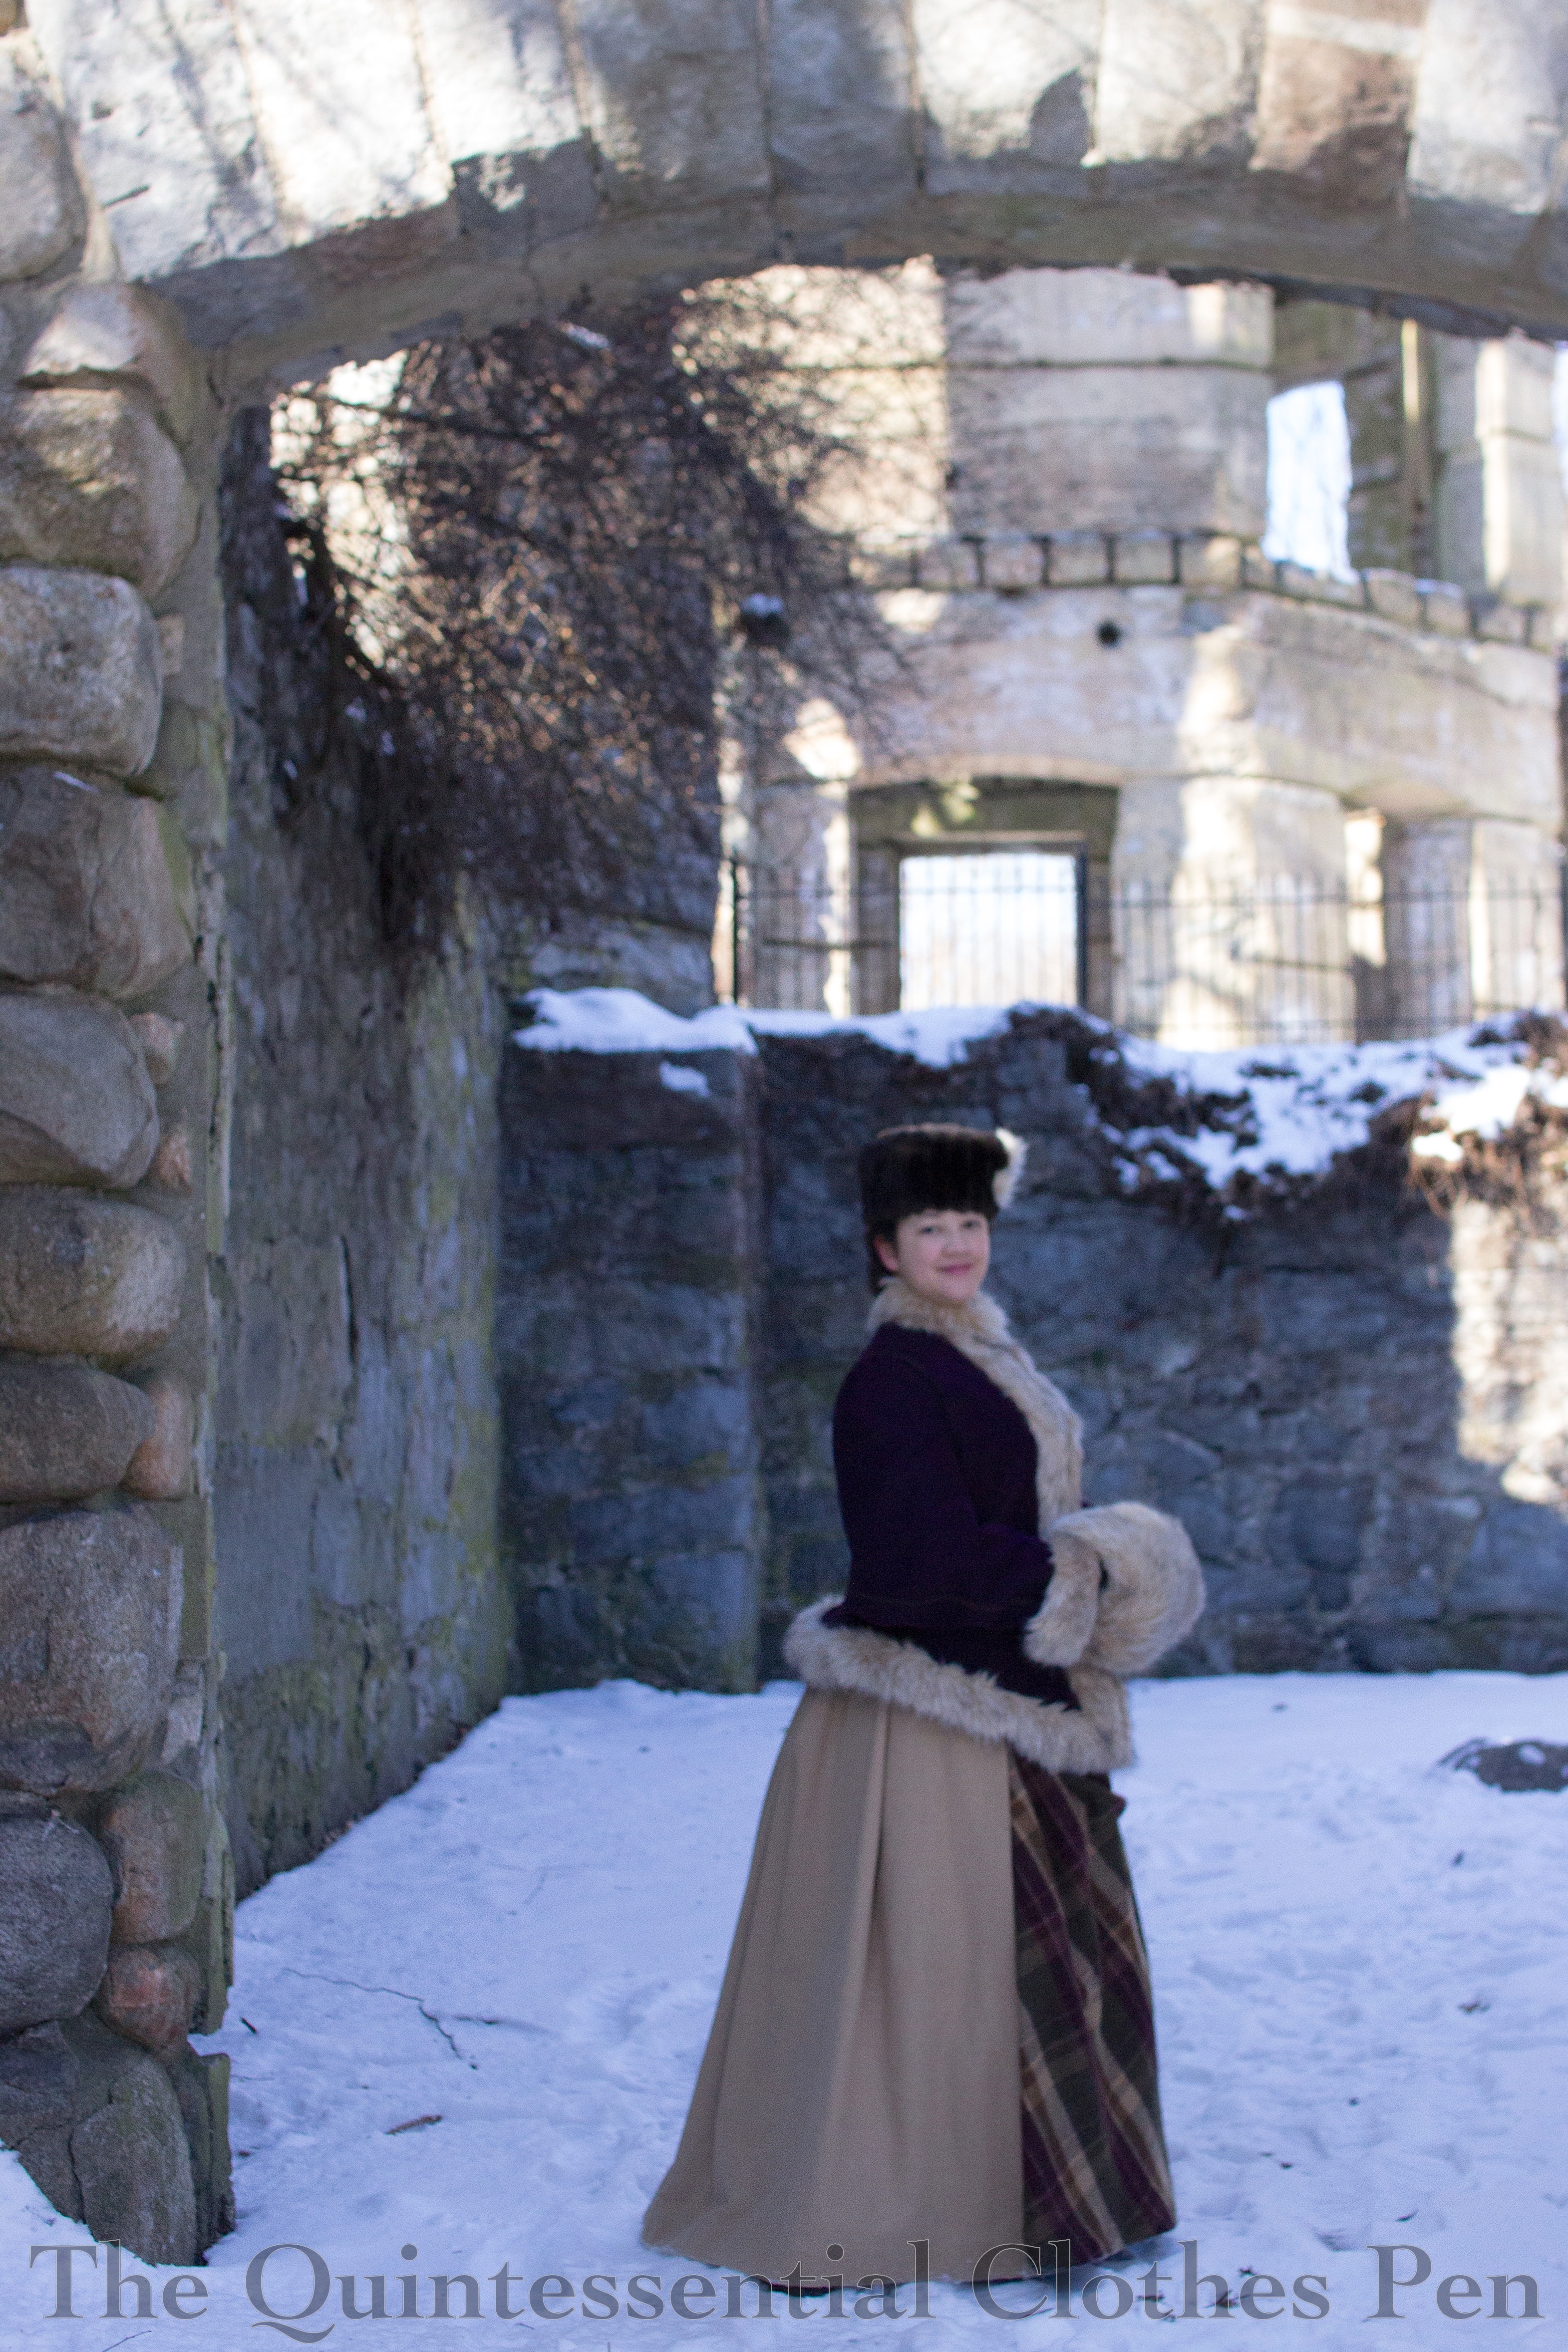
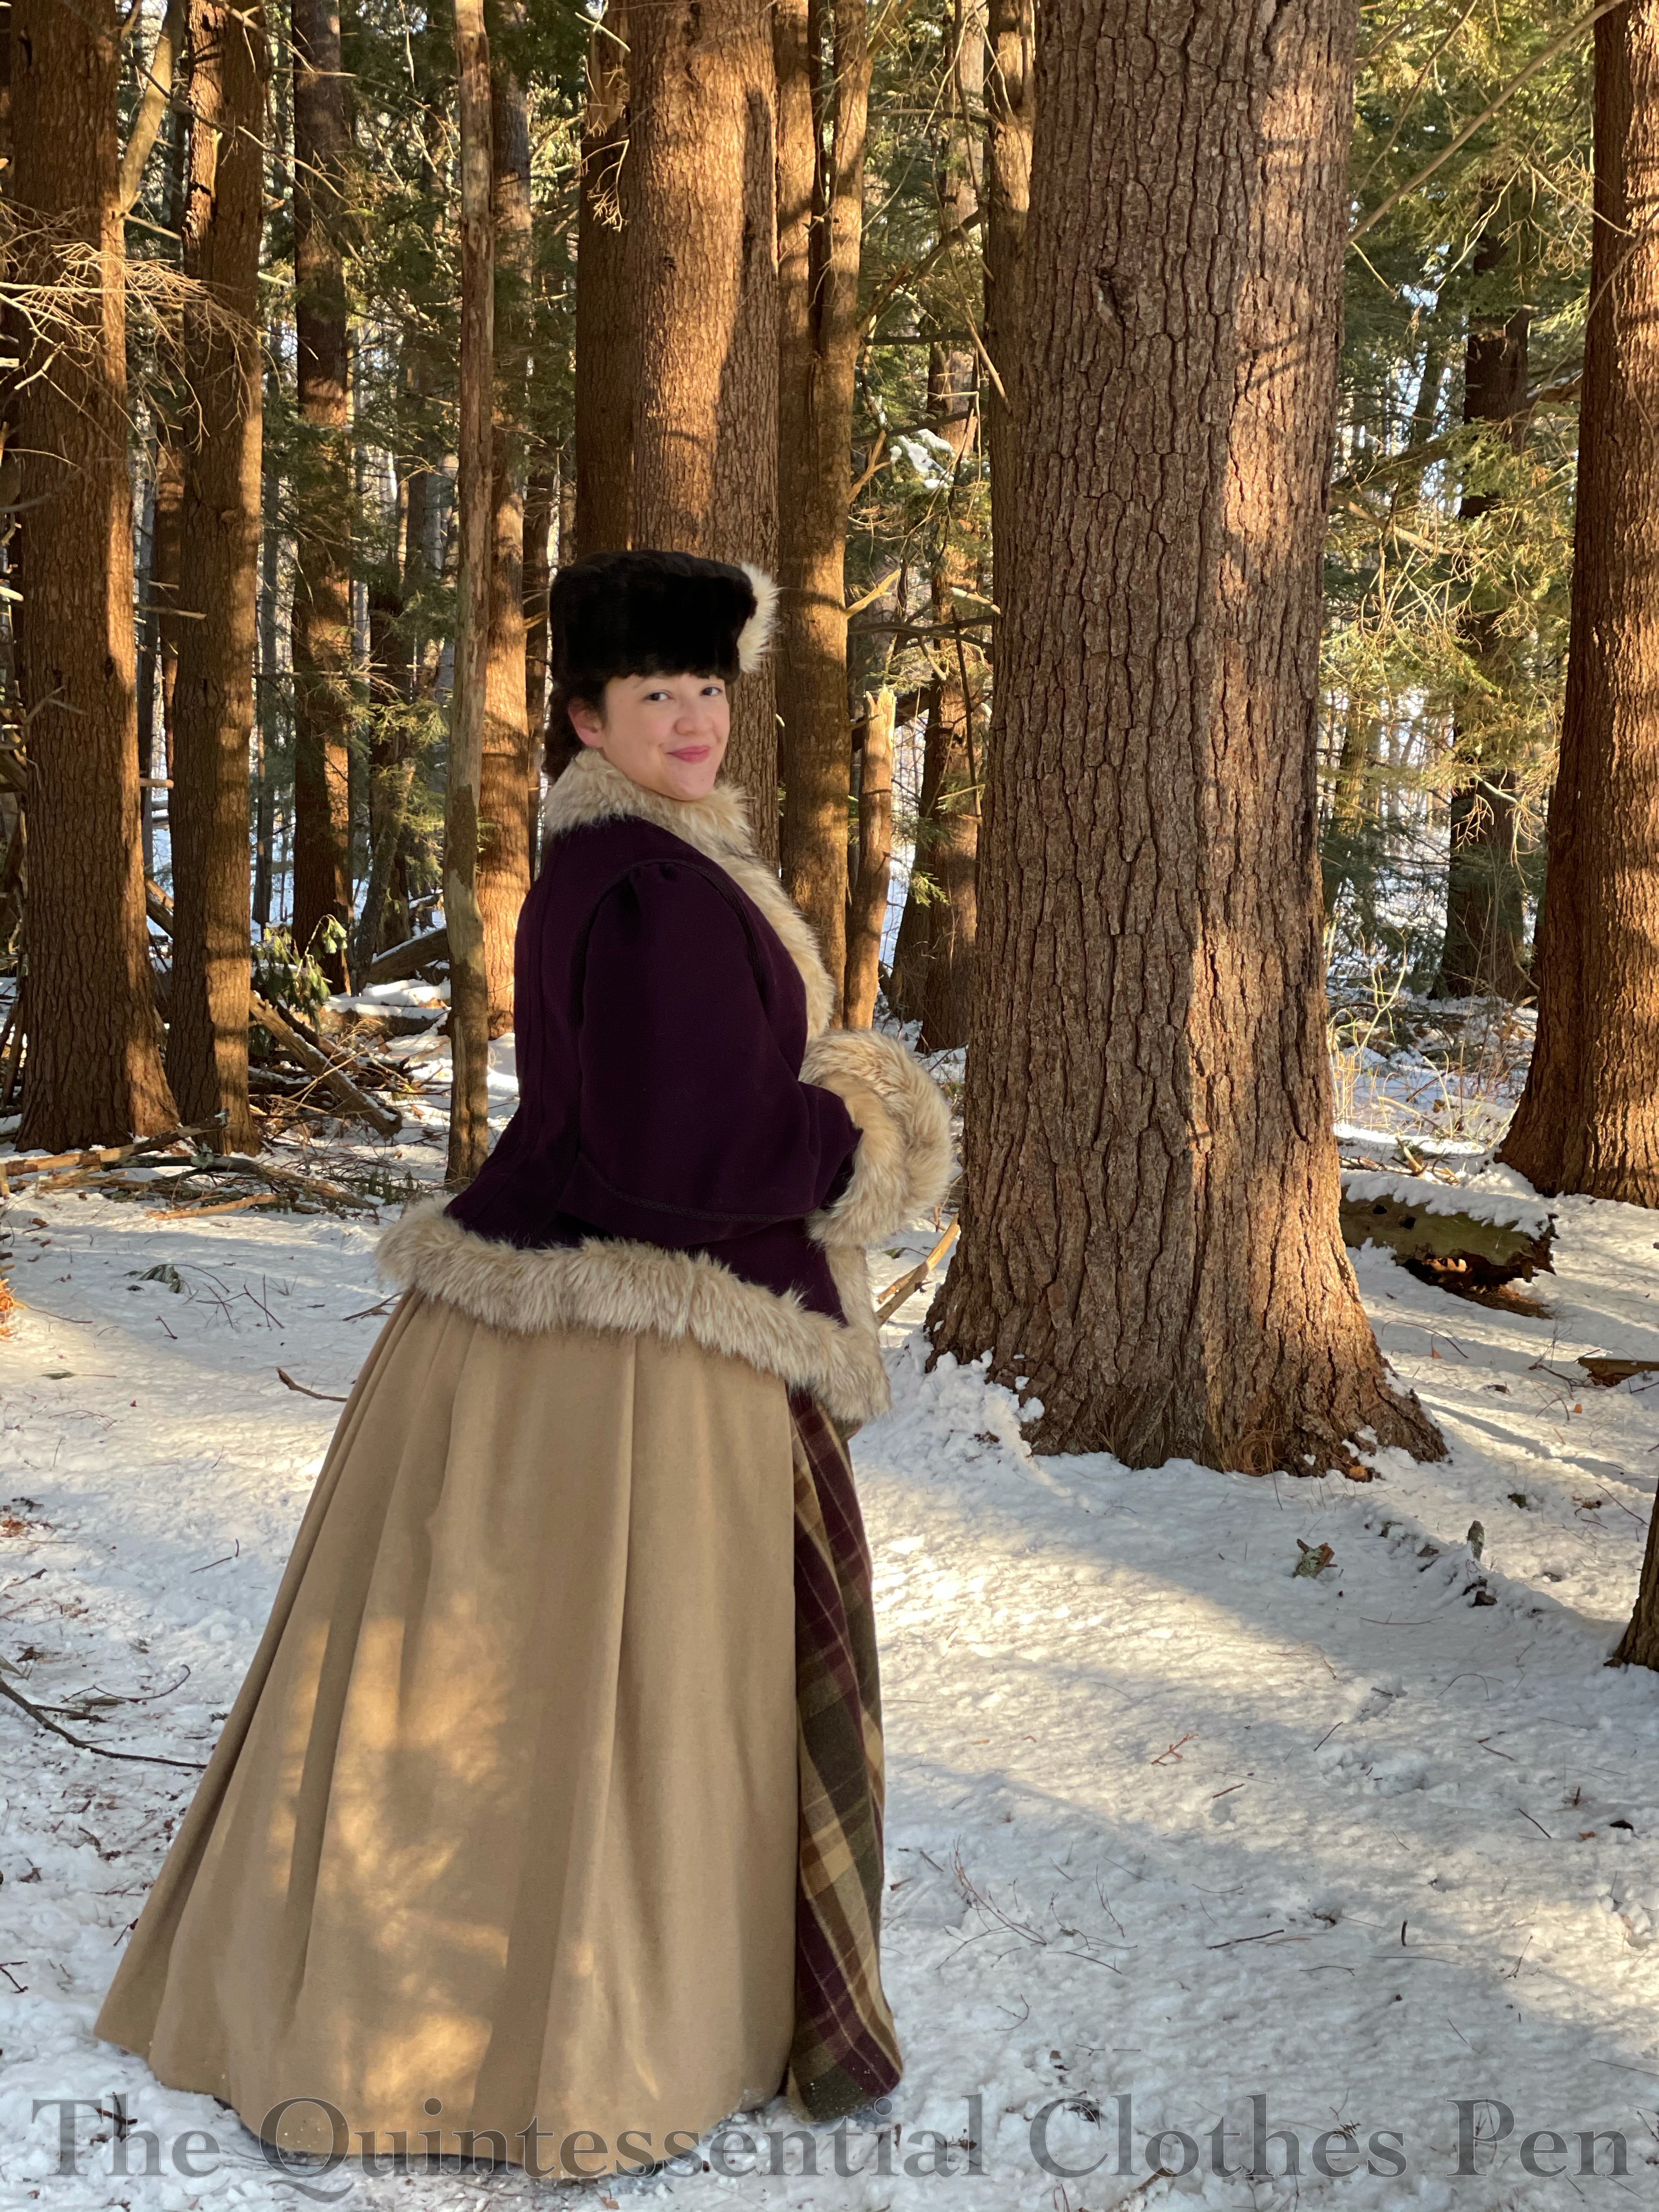
Last post was a detailed look at the 1884 Plaid Wool Bustle Dress that I completed last year. This post is going to look at the details of the accessories I made and wore to stay warm while taking photos of the 1884 dress: a mantle, a new muff cover, and a quick mention of the hat.
First, the mantle, which qualifies for the Historical Sew Monthly 2021 Challenge #5:
Purple: Make an item in any shade of purple.
Easier to see the color in the next photo! Purple!
Just the facts:
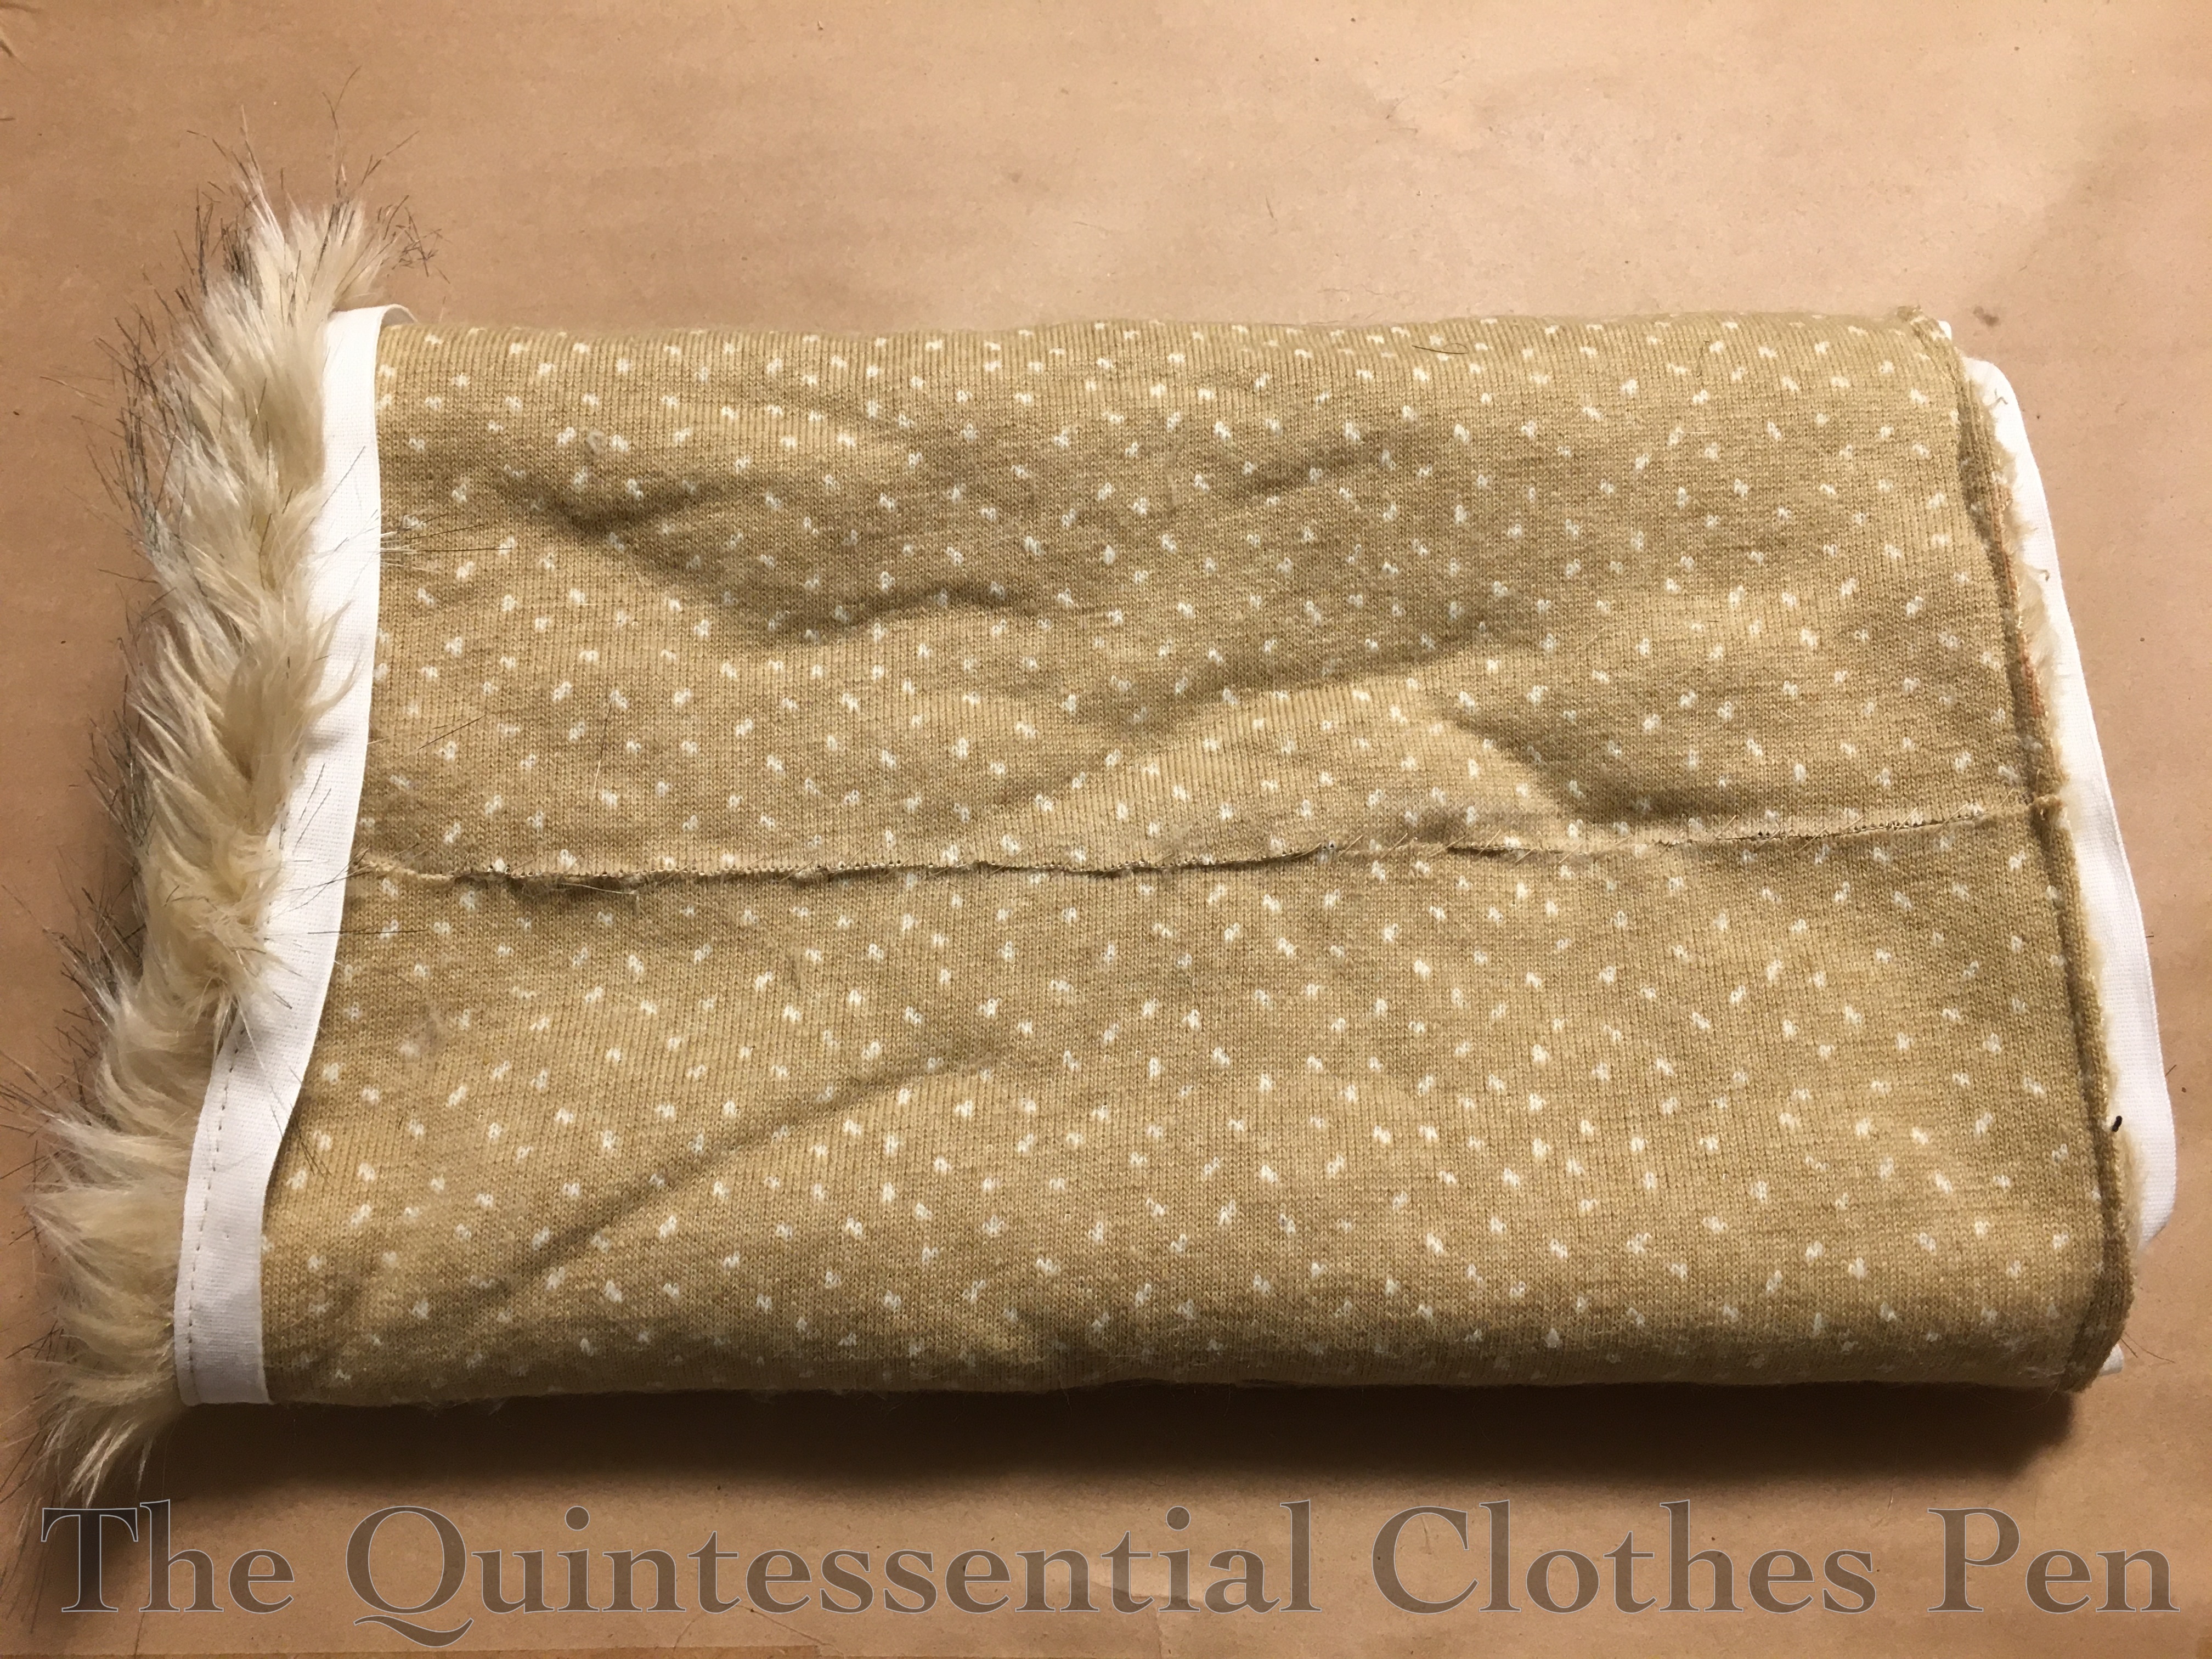
Fabric/Materials: 1 ½ yards purple wool, 2 ¾ yards drab polyester lining, and about 1 yard of faux fur.
Notions: 4 ¼ yards brown braid trim and 4 coat size hook and loops.
How historically accurate is it?: 85%. The pattern and silhouette are good, but the polyester lining and faux fur are not accurate. I’ve also never examined an extant 1880s mantle up close, so the construction methods are guesses that made sense to me.
Hours to complete: 18.5 hours.
First worn: In January, for a ramble and photos!
Total cost: Approximately $40.
Mantle: Beginnings
This accessory adventure started with a passionate desire to make a specifically 1880s shaped mantle to go with my new dress. I don’t remember the details exactly, but it’s possible that I fell in love with the red mantle on the right in the fashion plate below even before I fell in love with the shape of the bustle dress that I’m wearing underneath my mantle.
The shape! The fur! The matching muff! So cute! It seemed like it would go very well with my dress.
Mantle: Patterning
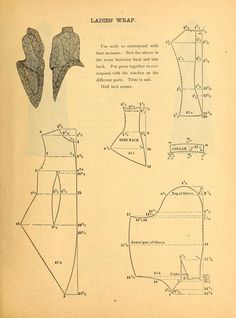
I started the mantle soon after finishing the 1884 dress last year, beginning with the pattern. The pattern is from The National Garment Cutter Book Of Diagrams published in 1888 (the entire book is digitized and available here).
The pattern I started with is on page 33: Ladies’ Wrap. It has the same general shape as my inspiration plate, including the very specific-to-the-1880s outerwear sleeve set into the side back seam. Figuring those out was an eagerly anticipated part of the challenge.
The brief instructions are to use the scale corresponding to the bust measure to enlarge the pattern. I didn’t feel like finding the right scale in the book, so instead I guessed at a scale that generated proportions that made sense for my size. I think it was somewhere in the realm of ⅛” to 1″.
After the pattern was enlarged, life became busy and I put this project on hold. Fast forward to the first days of 2021 and I decided to knock this project off the to-do list so it would be ready at the first sign of snow for photos!
I made a mockup from my pattern, adjusted a few things including the length of the front piece (it was much longer than my inspiration!), then altered the mockup to check the changes. At that point, I was satisfied and ready to move on to real fabric!
Mantle: Sleeve Puzzling
Along the way in this process I had to figure out the sleeves. Below is what the sleeve pattern piece looks like when cut out. It’s not your usual sleeve shape. The top looks mostly reasonable, but what’s with a dart on the bottom edge? And the point at the bottom? Odd! Folding this in half (as you would normally do for a sleeve) would produce a strange sleeve, indeed.
I pondered this… looked up extant garments (there are a number of mantles with sleeves like this on my general 1880s outerwear Pinterest board) and did some searching for other people who had made this type of garment before.
The thing that suddenly made the sleeve click for me was a series of posts from Caroline (who blogs at The Modern Mantua Maker) showing the construction of an 1880s dolman that she made. This post, in particular, contains a photo showing the sleeve before it was set into the body of the garment. Ah ha! I realized that the bottom of my sleeve folds up and the dart goes against the body. That creates the right shape!
This post from Caroline shows her finished dolman. It was also very helpful as I tried to wrap my brain around these unusual sleeves. And, Caroline has another dolman she made as well, which I also looked at as I was figuring out my pattern.
Mantle: Materials
I had the fashion plate to reference for the overall design of the mantle, but I needed a bit more detail to confirm my material choices. Many 1880s mantles are made from fancier fabrics: silks, velvets, brocades… I only had a heavy purple wool in my stash in a quantity I thought would be just the right amount for the mantle and I didn’t want to buy something new (especially something likely to be expensive, as many of those fancier fabrics would be).
After some searching, I found this c. 1880 opera cloak at the Metropolitan Museum of Art that seems to be made of a plain wool. I decided to use some of the details from it, like the braid trim, to upgrade my mantle from plain to more interesting.
I had the braid trim in my stash already, purchased a few years ago from Deb’s Lace and Trims because I liked the look of it and thought it would be useful someday (I love Deb’s Lace and Trims–you absolutely can’t beat the prices and the products are lovely–I’ve been using them for historical projects for the last ten years!). It was great to find a use for this braid. With just five yards on hand I had to reduce the amount used relative to the Met inspiration mantle, but I think the end result is in keeping with the simple style of the dress. The braid highlights the shape of the mantle but doesn’t distract or seem too gaudy for the plain wool base.
After creating my first mockup I did have a very justified fear that my purple wool would not be enough for the mantle. Thankfully, after altering the pattern to suit my taste and size I was just able to eke out all of the pieces. Whew!
I love the quilted lining of the Met opera cloak and I considered quilting silk myself to do it. My stash didn’t have any appropriately colored silk, though, so that idea was out if I was to stay on the stash busting course. I thought of buying pre-quilted silk (completely abandoning my stash busting idea), but the colors I could find were bland and the dark brown I eventually decided on after months of indecision was sold out.
In the end, I decided I just wanted the project to be finished, so I would go the low-cost route of purchasing a polyester lining from the $3 per yard store. It helped me use other stash materials, so it seemed a reasonable trade off.
Mantle: Construction
Here’s that polyester lining. It’s unintentionally the same greyish-brown drab color as the cotton lining of the 1884 bustle dress. The mantle is fully lined, as you can see.
In order to make the lining of my mantle tidy, the sleeves were fully lined before being set into the side back seams. Here is one sleeve assembled and ready to be set in.
The assembled/lined sleeves were set into the exterior wool side back seams while the lining side back seams were sewn plain. After attaching the sleeves around the armsceyes in the exterior wool, the lining was turned under and whip stitched to finish the edges.
All of the braid trim is machine sewn on using a zipper foot. I was able to sew it in place on the wool before setting in the lining, so none of the attaching sew lines are visible.
The lining was machine sewn around the edges with the neck left open to turn right sides out. After that was completed, I machine sewed the collar lining (interfaced with cotton) to the neck edge by machine. Then I sewed the exterior fur collar on the neck edge by hand (shown in the next photo).
After that I flipped the lining up, turned all of the seam allowances in, and whip stitched the lining to the fur edge. It seemed easier to do it this way rather than machine sewing the fur.
The faux fur trim around the bottom edge is pieced where there are seams in the wool. This allows the fur to have the exact same shape as the wool underneath. These edges have no seam allowance. The edges are just butted together and then (roughly) whip stitched, as in the photo below. From the right side of the fur the seams are completely invisible.
The top and bottom edges of the fur trim have seam allowances that are turned in and hand sewn along both edges. The outer (bottom) edges are sewn right sides together with the bottom of the purple wool. Then, the inner (top) edges are turned under and stitched. Here is that process in progress.
The mantle closes with 4 coat weight hook and loops spaced down the front edges. They kept popping open while being worn, so when I got home I pinched them with a pair of pliers to make the hooks grab onto the loops better. I haven’t been out wearing this again since then, but I’m confident this solves the problem, as I’ve used this trick in the past.
New Muff (Cover)
Next, I want to share a bit about the muff I have in these photos.
But I didn’t want to make an entirely new muff. Instead, I decided to make a new cover for a muff I’ve had since 2012 (you can see it in this post from 2019, when I used it with an early 19th century outfit). The muff is from a workshop I took with LadyDetalle. (She has an Etsy shop that often stocks muffs like this as well as many other beautiful and historically inclined goodies.)
The base is essentially a pillow (stuffed with real down–quite luxurious!) that can be rolled into a tube and have a cover put on. The idea is that the muff cover can be changed out so that you can have all sorts of beautiful muffs and only need to store the one base. The muff is sized for the 18th century, but I thought it just might work for my 1880s look, too.
Accordingly, I measured my existing muff cover and cut a rectangle of faux fur that size. I butted my edge to make a tube and whip stitched it, in the same way as I whip stitched the mantle trim. Next, I machine sewed twill tape on the tube ends. (I had no worries about the fur getting caught in the machine sewing because that whole edge turns into the muff in the end anyway, so none of that will show.)
Once whip stitched in place the twill tape covers the raw edge of the fur and also provides a casing for the ribbons at each end. I used tobacco brown polyester ribbon that was gifted to me. By way of justification for the polyester ribbon, I’d already used polyester for the mantle lining and this seemed like a good use for this particular ribbon.
Below is the muff cover after those steps were completed.
And here is a closeup of the twill tape with machine stitching on one side and whip stitching on the other. The ends of the twill tape are just turned under and butted together, leaving an opening for the ribbon ends to come through.
And ta da! A muff that is the right size and perfectly matched to the mantle! The additional muff cover takes up hardly any storage space and now I have more versatility in my wardrobe.
Hat Baubles
While making my mantle and debating how to stay warm, I figured I would need something to keep my head warm. I’d already made the dress and the mantle and I didn’t feel like creating something all new for my head, as well. And I loved this image from the McCord Museum of 1880s ladies curling in the cold with their hats.
I thought I could repurpose my 1917 faux fur hat to suit the purpose, as it has a generally similar tall, straight shape. That hat is nice and warm, being lined in flannel and interlined with layers of batting to insulate the head.
The look of it was a little bland with this outfit, though, and not really coordinated with everything else. I liked the idea of bringing in some of the mantle fur to make the hat look like it belonged. After fussing with various ideas I decided on fur poms, or baubles.
The baubles are sort of like large-scale cloth stuffed buttons. They are a circle that is gathered, the edges turned into provide stuffing, and the backs sewn together to close up the opening. (This tutorial shows how to make these types of buttons, though I started with a circle of fabric rather than a square.)
I like that the finished baubles pull in the look of the tan fur, that they are silly and amusing, and that they are easily removable. In fact, they are attached with safety pins on the inside of the hat! You can’t get much more easily removable than that!
I’m very pleased with my stash-busting-and-using-things-I-have-on-hand winter bustle ensemble. It’s warm. It was a great patterning challenge. It’s really fun to wear (it feels super elegant!). And it (mostly) reduced my fabric stash.
Thanks for sticking with me through this second detailed (and rather long) post! Next post will be further photos of the bustle dress in action on a woodland adventure.
I’m very excited to share the details of my (somewhat) new 1884 Plaid Wool Dress! It’s ‘somewhat new’ because I actually finished it 8 months ago, but at that point it was July and the temperature was absolutely not acceptable for wearing a wool dress for photos! Instead of putting the dress away, I kept it out, waiting for colder weather and the opportunity for a photo shoot. I was hoping for snow… and this winter, I got it!
This dress is entirely inspired by the dress on the right in the fashion plate below from La Mode Illustree. I love the relative simplicity of the overall design and the waterfall of folded fabric on the skirt. Unfortunately, I don’t have an official source of the fashion plate or the year it is from, though my best guess is 1884.
I thought the design would be a great use of the tan and plaid wools that have been in my stash since 2012 (wow… that’s longer than I remembered!). In addition to those, a small piece of plain purple wool had made its way into my stash over the last eight or nine years and when I started this dress in November 2017 I decided it would be a nice addition to the tan and plaid wools in the form of trim. While not an exact match to the purple in the plaid, I think it helps to perk up the plaid and bring out the non-tan tones (the green and purple).
Skirt Construction
I started the process of this dress with the skirt. I wanted the fabric to hang just like the fashion plate, so I decided to drape a custom pattern as opposed to starting with anything that already existed. The only exception to that (in the skirt) is a base of drab greyish-brown cotton. The base pieces were adapted from a Janet Arnold pattern.
I used the skirt base for the front and side areas, in order to have something for the wool layers to be attached to. In the back of the skirt there is nothing but the tan wool.
Here is a look at the inside of the finished skirt. You can see the tan waistband along the top and the drab cotton base with tacking stitches all over it. The tacking stitches are holding the plaid fabric in place–you can just see the plaid selvedge poking out on the right side.
The pleats in the plaid aren’t part of the original fashion plate, which instead has a draped apron-type front. I tried that, putting my plaid with a vertical grain and a tan apron over top, but I really hated how it looked in wool–too heavy and rather unattractive. I played with the fabrics until I settled on the bias plaid. I hinted at the draping in the fashion plate by adding tucks to the plaid to help it drape just slightly rather than just being flat. You can see the resulting folds pretty clearly in the next photo.
The various overlapping pleats of the plaid front, waterfall side, and back were complicated. I was trying to achieve a back that looked like this dress held by the Met, in addition to the various lovely folds shown in the fashion plate.
It’s easy to draw things, but sometimes they don’t really work in actual fabric… I found that with the waterfall, especially. There’s actually an added loop of fabric tucked between the folds that isn’t part of the side piece at all! It’s just a little fake bit to help create the look of the fashion plate. I couldn’t figure out any other way to do it!
Given these various challenges and lots of other things to keep me busy in life, this poor skirt sat in a half finished state on the dress form in my sewing room for at least a year. I couldn’t remove it without marking everything… and I couldn’t make up my mind about what I wanted! (I say poor skirt, but it was sort of poor me, as I definitely reached a point of wanting the dress to get put away!)
Eventually, I did make up my mind and remove the skirt, but the partially finished skirt still sat around for ages before I finished it. Part of marking the skirt also meant figuring out the facings of the waterfall bits, because the fully finished edges had to be set into the waistband. Mr. Q actually asked at one point after the skirt was off the dress form whether I had intended it as decoration in my sewing room because it was there for so long… Nope!
All the various pleats on the skirt wound up making for a rather thick layer of things to sew through for the waistband. Here’s what the side with the waterfall trim looks like on the inside. I count at least 9 layers of wool in one spot! Given that, I decided to cut the inner side of my waistband on the selvedge of the fabric and leave it hanging down into the skirt instead of turning the seam allowances up as you would normally do for a waistband.
Setting the hems on the skirt was another challenge, though this was due to the fact that I did it by myself. It involved dressing in my corset, bustle, petticoat, and skirt, twisting and contorting while putting pins in the hem to mark the floor, then standing to look in the mirror to see if they were even, then adjusting… many times!
I eventually had everything marked to my satisfaction and could move on with the sewing. All sections of the hem are finished with wide bias strips of the drab cotton, the goal being to make the hems durable and less likely to catch on twigs, etc. than if they had more textured wool exposed (and I can say, after romping about the woods in this dress, that the hems did an admirable job!).
After using the drab cotton for both my 1896 Bicycling Ensemble and to line my 1863 Apricot Evening Gown I was starting to run low for this project. I cut the skirt base pieces, cut the bodice lining pieces, and then used pieced scraps to make the wide bias to hem the skirt. As you can see in the above photo, some of my bias pieces were only 6″ or so in length. And in the photo below, you can see the only bit of wide bias that was leftover when I was finished!
The final skirt detail to share is a hidden patch pocket! The skirt opens on the side front, along one side of the plaid, and underneath that opening is a pocket, perfectly sized to fit a cell phone and keys. The pocket is oddly low, near the knees, but that is because I wanted to make sure that any bulk from items in the pocket would press in towards my legs and not make an unsightly bulge on the exterior of the dress.
The photo below shows the pocket, as well as some of the hooks and thread loops that allow the tan fabric to attach to the plaid wool.
Bodice Construction
In addition to this rather complicated skirt, there was also a bodice to be made! The bodice is actually pretty straightforward. The pattern is adapted from the one I used for my 1885 Frills and Furbelows summer dress which in turn was adapted from a Janet Arnold pattern.
The bodice is completely flat lined in the drab cotton. There is a ribbon waist tape to help keep the back of the bodice tight against the body and to keep the bodice from riding up while being worn.
The bottom and front/neck edges are finished with bias strips of the drab cotton. The seam allowances are unfinished. The bodice closes in front with hooks and loops.
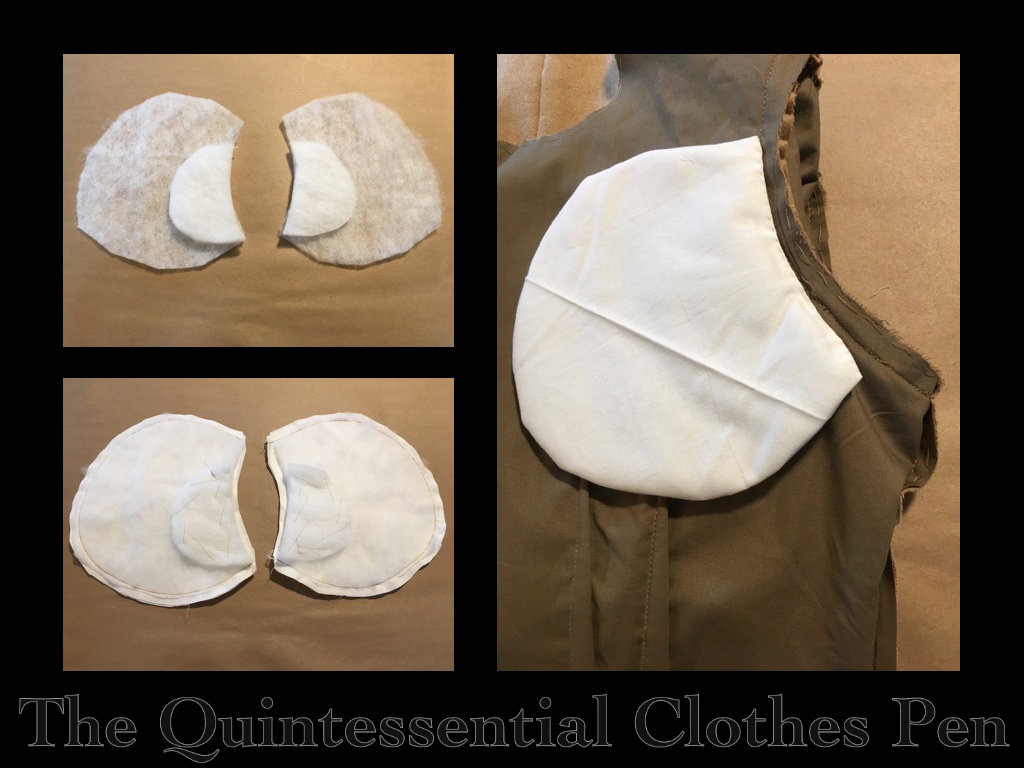
There are two other details I want to discuss, as well. First, there are the bust pads! I came across these in this c. 1885 extant dress and decided I wanted to give them a try to see if I could get that really exaggerated bust to waist ratio in my inspiration fashion plate (here’s the link to it again).
Turns out… no. I did not achieve that bust to waist ratio… but I think that’s more a factor of my waist size than anything. (It’s not as small as it was 10 years ago…) To keep the proportions of the fashion plate I would drastically need to increase the bust size. Perhaps in another dress.
In the meantime, this dress tried out the bust pads. They are made from cotton scraps with shaped batting layers inside. Below you can see the steps to creating the pads. Once sewn, these were tacked inside the bodice to keep them in place.
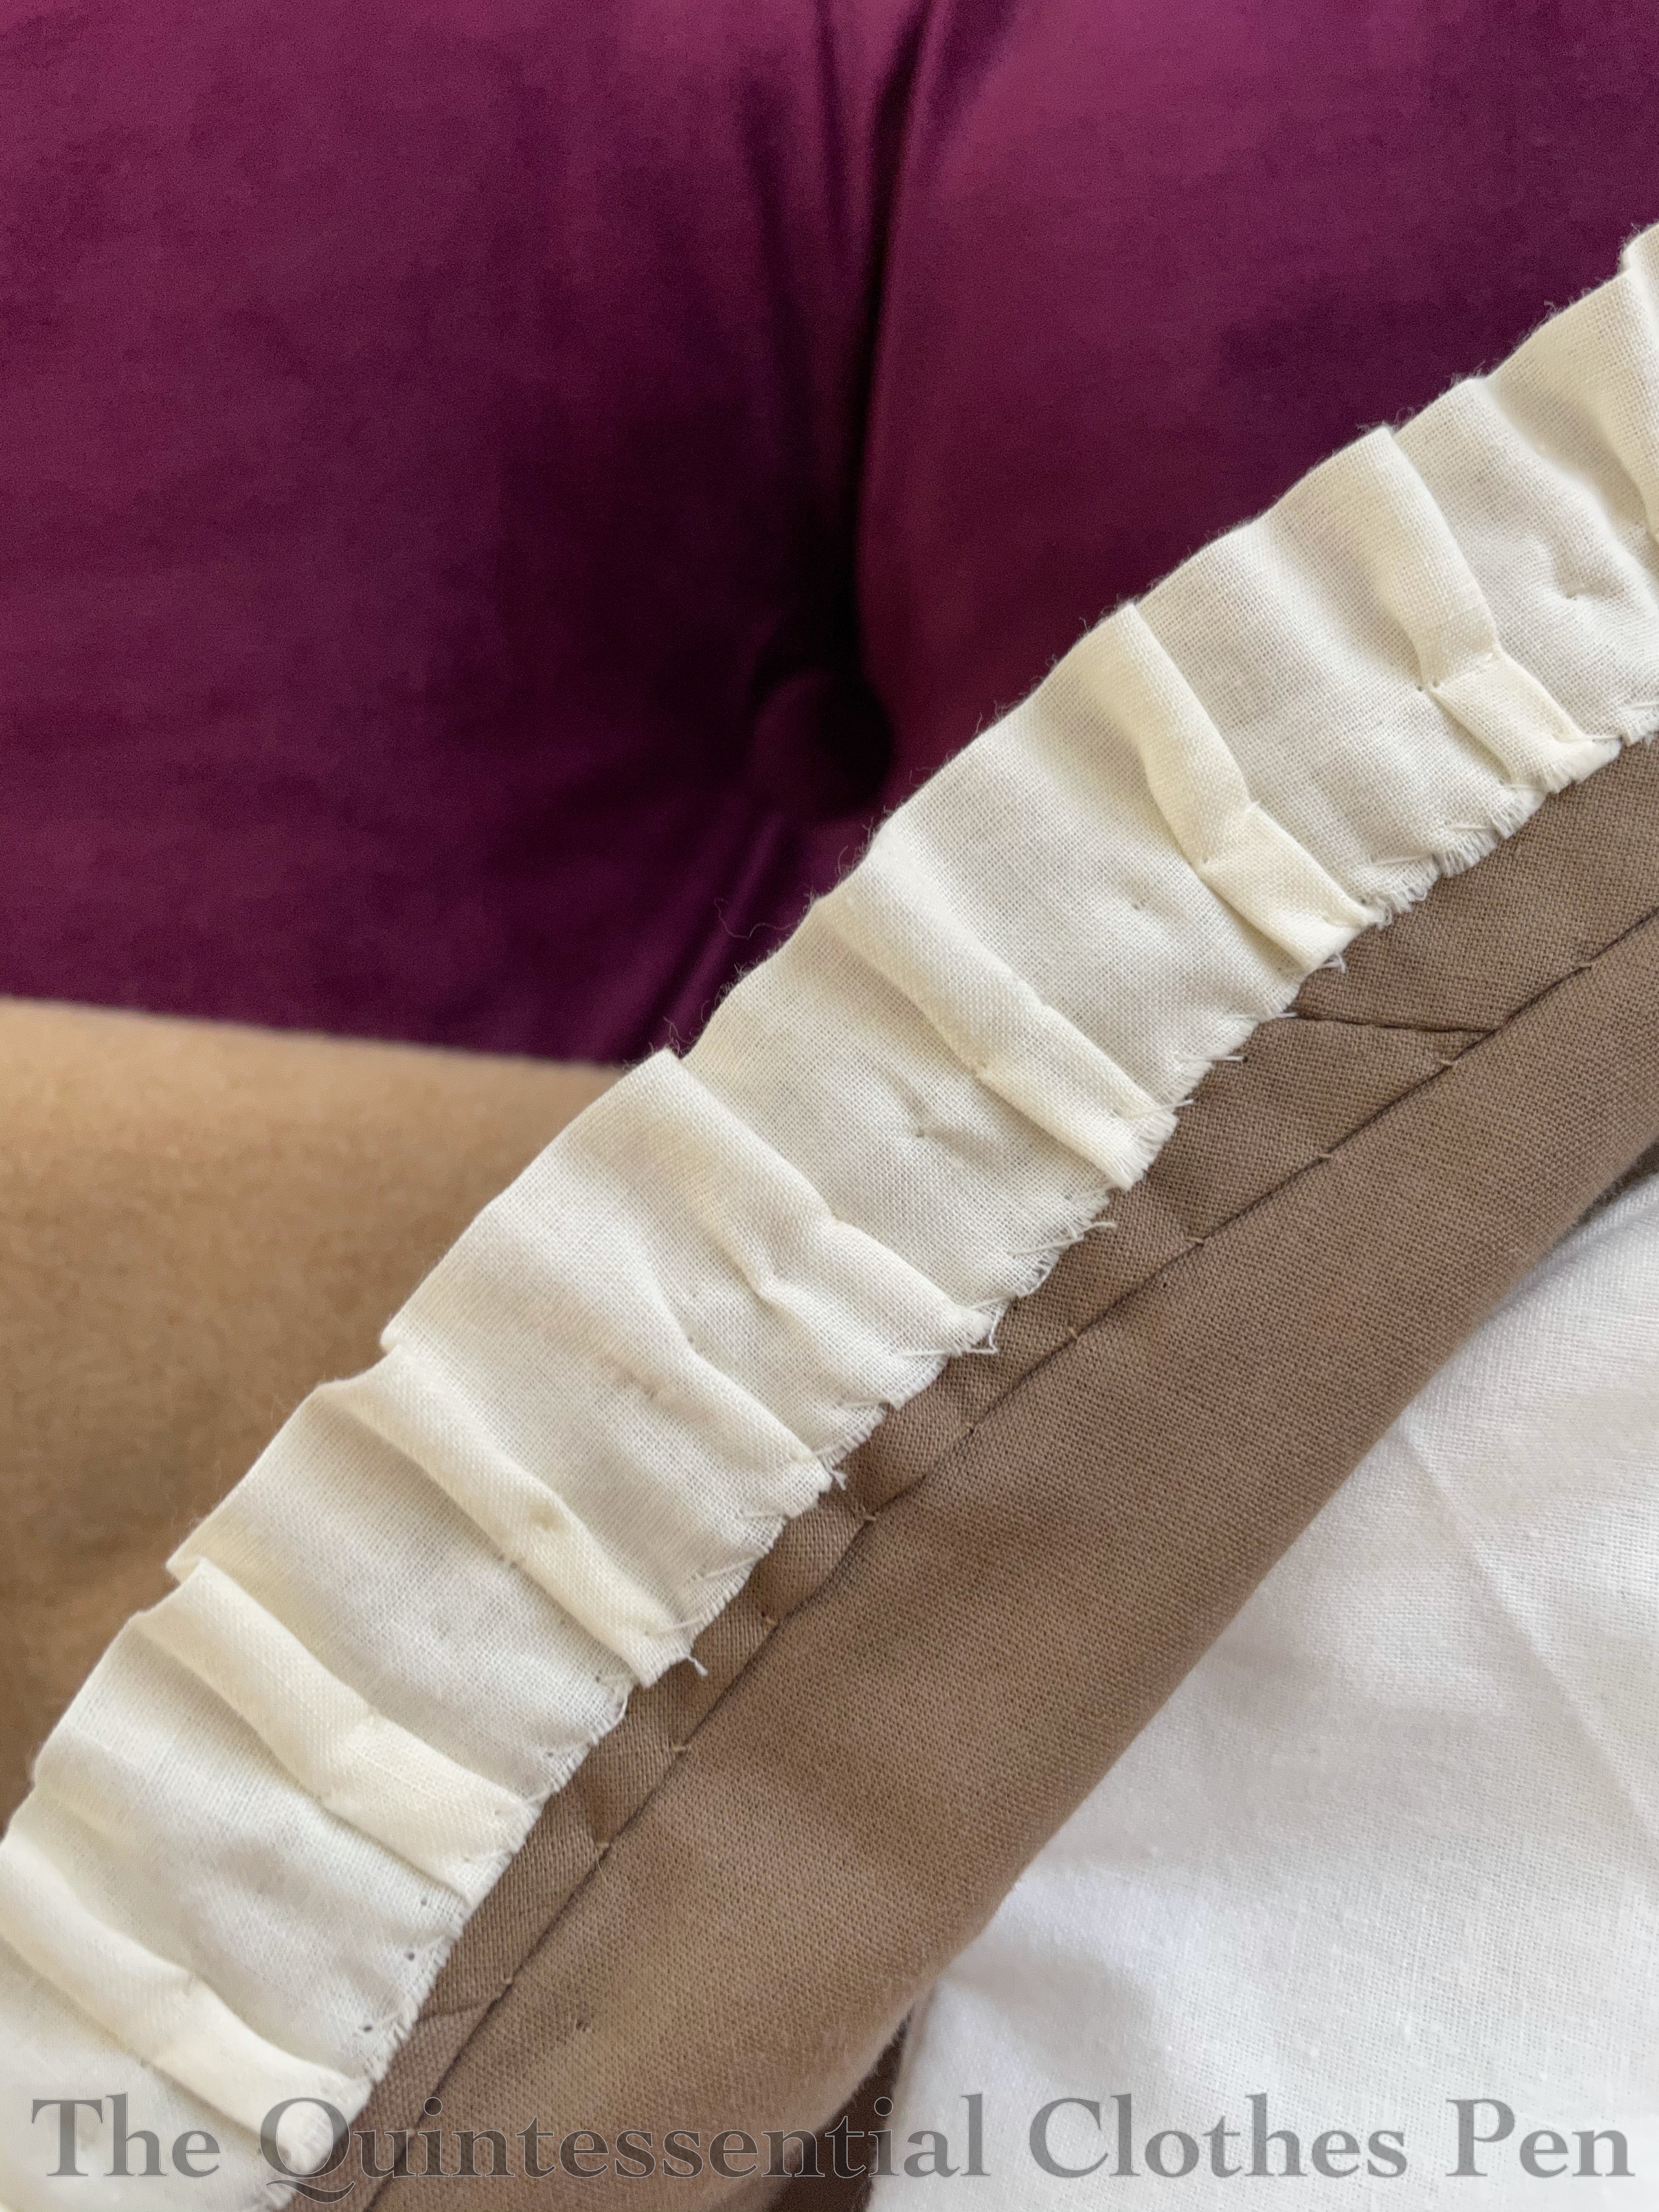
The second detail still to discuss is the neck ruffle. I finished this dress shortly after completing my 1875 Reception Dress last summer and I had my antique fluting iron on the brain. After pondering the fashion plate neck and sleeve ruffles for awhile I decided to use my fluting iron to ruffle some cotton to use for my dress’s neckline and cuffs.
I was well practiced by this point, having fluted lots of silk for the 1875 dress, so away I went! The cotton strips are cut on the grain and folded along the long edge–no hemming required!
Attached to the neckline the trim looks like this. The waves are a little crushed where they are tacked down, but the folded edge maintains a nice wavy shape. I found that my cotton frayed more than I wanted it to, so I went back and whip stitched over the raw edge to keep it tidy.
I used the same cotton for small ruffles on each cuff, as well. Like the neck ruffle, these are hand sewn inside the finished sleeve openings.
You can see the finished effect of the ruffles in the next photo! Subtle, but adding a nice edge finish.
While the ruffles are sewn to the inside of the finished bodice, the purple bodice trim and plaid cuffs are sewn similarly but on the outside of the finished bodice. I didn’t want them to add bulk by turning all the way under into the bias edging, so they have the raw edges turned under and then they are hand sewn to the outside of the bodice.
I decided the purple trim around the neck wasn’t quite interesting enough and so I added a narrow fold of bias cut plaid to help transition between the two solid colors. This also helps the bodice to feel that it belongs with the skirt, so that the only plaid isn’t just on the skirt front and cuffs.
Final details
Both skirt and bodice are mostly assembled by machine with hand finishing, including trimming, hemming/facing, closures, etc.
I used about 8 yds of the different wools and drab cotton for the ensemble. These materials, plus notions etc., cost just under $30. This was definitely helped by the fact that most of the fabrics were purchased for just $3 per yard at the local discount fabric store!
The skirt is a bit heavy, being made of about six yards of wool and cotton, but it’s not unreasonable. And, it’s quite warm! I was perfectly warm in the approximately 20 degree Fahrenheit cold for all of these photos except for my nose, chest, and hands. Never fear, though, I was wearing the additional layers of my newly completed mantle and muff except for during these photos! (And there will be posts coming up about them as well, with lots more photos!) With all my layers the only part of me that was cold was my nose!
In the end, I’m more pleased with the overall dress than I expected to be! I was always excited about the skirt and the purple swoop of the upper bodice trim, but once I started making the dress in wool I was worried the bodice might be too plain and maybe even boring… but I like the fit and shaping very much (especially in the back!) and I think that helps balance out the relatively simple style. It makes sense for a wool dress to be well tailored but more simple in decoration and style than its silk counterparts.
Also, I’m very pleased that my idea from 2012, to use these fabrics for a bustle dress, has finally been achieved! I think there’s still a yard or so of tan wool in my stash, but I’ve sewn my way through a good 8 yards of it. That’s great stash busting!
A few years ago, I decided I wanted a 1920s coat. The goal was to make it for an event, but I ran into some construction problems along the way that caused me to give up work for awhile. In January, after letting it sit for about two years, I was tired of looking at the half finished project and worked up the determination to actually finish it.
Though I’ve only worn it once so far, I’m very pleased that I finally finished this coat! It is quite decadent and elegant to wear (and it’s nice to have completed the project so I can put it away)!
My inspiration started with the pattern below. I was intrigued by the flared side pieces and overlapped closure. I enlarged this pattern and did a little adjusting for my proportions.
With the pattern ready to go, I purchased the exterior fabric of the coat and got to work. The exterior is made out of fleece backed velvet upholstery fabric from Fabric.com. Thankfully it isn’t super stiff, like some upholstery fabrics are. The fleece backing is actually quite soft and the exterior has a low pile and lovely sheen. It shows every little brush against the nap though, so I was super careful while making it, transporting it, and wearing it to keep the pile brushed the right way.
The inside body of the coat is lined in tan silk shantung. This was a remnant I purchased years ago from a local discount fabric store. I’ve never found a good use for it until now, when I managed to just squeeze out the pieces I needed for the coat.
Unfortunately, that’s also where the problems started. I cut the sleeve linings on the cross grain of the silk (because I was running low on fabric). I know that grain and cross grain can behave differently, but these were drastically different! The sleeves were so constricting!
Also, I hadn’t widened the sleeves enough to actually move in even without the silk lining! I could get my arms in the sleeves but there was no way I was going to bend them or use them for any useful purpose. Oops!
What to do???
Well, with the event I had intended this for fast approaching… I gave up. I put the project on the back of a chair (so it wouldn’t get marks in the pile!) and moved on.
Two years later, I decided it was time to finish the coat. In the spirit of forging ahead and in order to make things work, I changed a few things from my original vision.
For the sleeves, I scrapped the silk linings, opting to just leave the arms of the coat unlined. This worked because of the softness of the fleece backing. In addition, I was able to cut cuff facings and binding for the armhole seam allowances out of my failed sleeve linings.
I thought I could let out the under sleeve seam and it would be enough extra fabric to make the sleeves comfortable. The needle holes had left scars on the fabric, but I figured no one would see it. Unfortunately, that wasn’t enough!
So, I ripped out the let out seam, dug out my fabric scraps, and pieced a section down the entire length of the arm. The piece is about 1″ wide at the wrist and 2″ at the armsceye. What was I thinking with my original pattern??? Thankfully the added piece is not obvious, since it’s on the underside of the arm. And I suppose that if you didn’t know where sleeve seams should be it wouldn’t look out of place!
As well as actually fitting my arm (and allowing for movement!), the bigger armsceye on the sleeve allowed me to move the sleeve up on the shoulder a bit, too, which helped the coat not look oversized.
In addition to the sleeve changes, I also changed the front edges of the coat from that nice jag with buttons to straight from collar to hem. I realized there was no way to do buttonholes I would be happy with in my very thick velour and that the angle I had very carefully sewn just would not lie flat. A slight tug line at the inside corner really bothered me.
I looked at these two pages from a 1925 Sears catalog to help with the design choices at this point.
These helped me decide on the button closure. There is one button and corresponding thread loop on the hip and another below the collar.
The Sears images also helped me decide on the location of the fur trim. The bands and collar are made faux fur leftover from my 1814 Wizchoura Ensemble, also from Fabric.com. The collar is especially warm and comfy when buttoned shut, though it’s also a lot around the face… so I think wearing it open is more likely! This combination of red pile exterior and tan fur shows up multiple times on my 1920s Outwear Pinterest board and it was nice to use fur I already owned instead of buying more.
I decided against fur trim on the cuffs and instead kept the French cuff look, set off with two buttons. This was a feature from the original pattern that was supposed to mirror the jag on the front edges that I eliminated.
I didn’t change the flared side pieces of the pattern and I’m very pleased with the end result. They give a 1920s flip to the otherwise very straight shape of this coat.
The six buttons on the coat are from Farmhouse Fabrics. They’re big, about 1 ¼” across, and they have a wavy pattern on them that helps make them interesting looking without being distracting. They match the velour so well!
All together, the materials used on this coat are: 2 ½ yards of the fleece backed velvet, approximately 2 yards of silk shantung for the lining, scraps of faux fur used on my 1814 Wiztchoura, 6 large buttons, and thread. The total cost of these materials is about $70, including shipping.
I didn’t keep track of the number of hours spent making, altering, and finishing this coat, but I would guess that it is around 30-40. There was some serious frustration in there (or despair, as Anne of Green Gables might say!).
As you can see in all the photos, when I finally wore this coat in January 2020 at the Fairmont Copley Plaza Hotel, the Christmas decorations were still up. I loved (and still do!) how festive the coat looks with the decorations, but by the time this post was written it seemed a bit late for the holiday look here on the blog, so I decided to save this post for this 2020 holiday season. Now, after many months of missing fabulous indoor spaces and events, I’m particularly pleased that I have these photos to share!
Many years ago (well, in 2012), I started a bonnet that was intended to match my 1822 Walking Dress. I was making a whole ensemble, with the dress, a muff and tippet, and also a bonnet and chemisette. It was more than I had time to complete for the deadline at the time. The chemisette was not even started, but the bonnet was patterned, cut out, started, and then abandoned.
In the intervening years, the bonnet pieces have sat in my UFO box, patiently waiting for me to come back to them. This year, as I was making my 1834 yellow dress and thinking about how to accessorize it, I remembered the bonnet and wondered if the shape and color might work for the 1830s. It seemed more useful to use something that already existed, and was already partly finished, as opposed to starting something new, so I decided to go for it!
This is the state of the bonnet when I picked this project up again this fall. It’s not bad progress, actually. All the pieces were cut out of buckram, flannel, and slightly slubby silk; the buckram assembly was started; the flannel was basted on; and the edges of the pieces were wired.
All of that turned into this!
In this post, we’ll follow along with my construction process. Future posts will have more finished ensemble photos as well.
Inspiration
First, let’s go back to the inspiration for this bonnet.
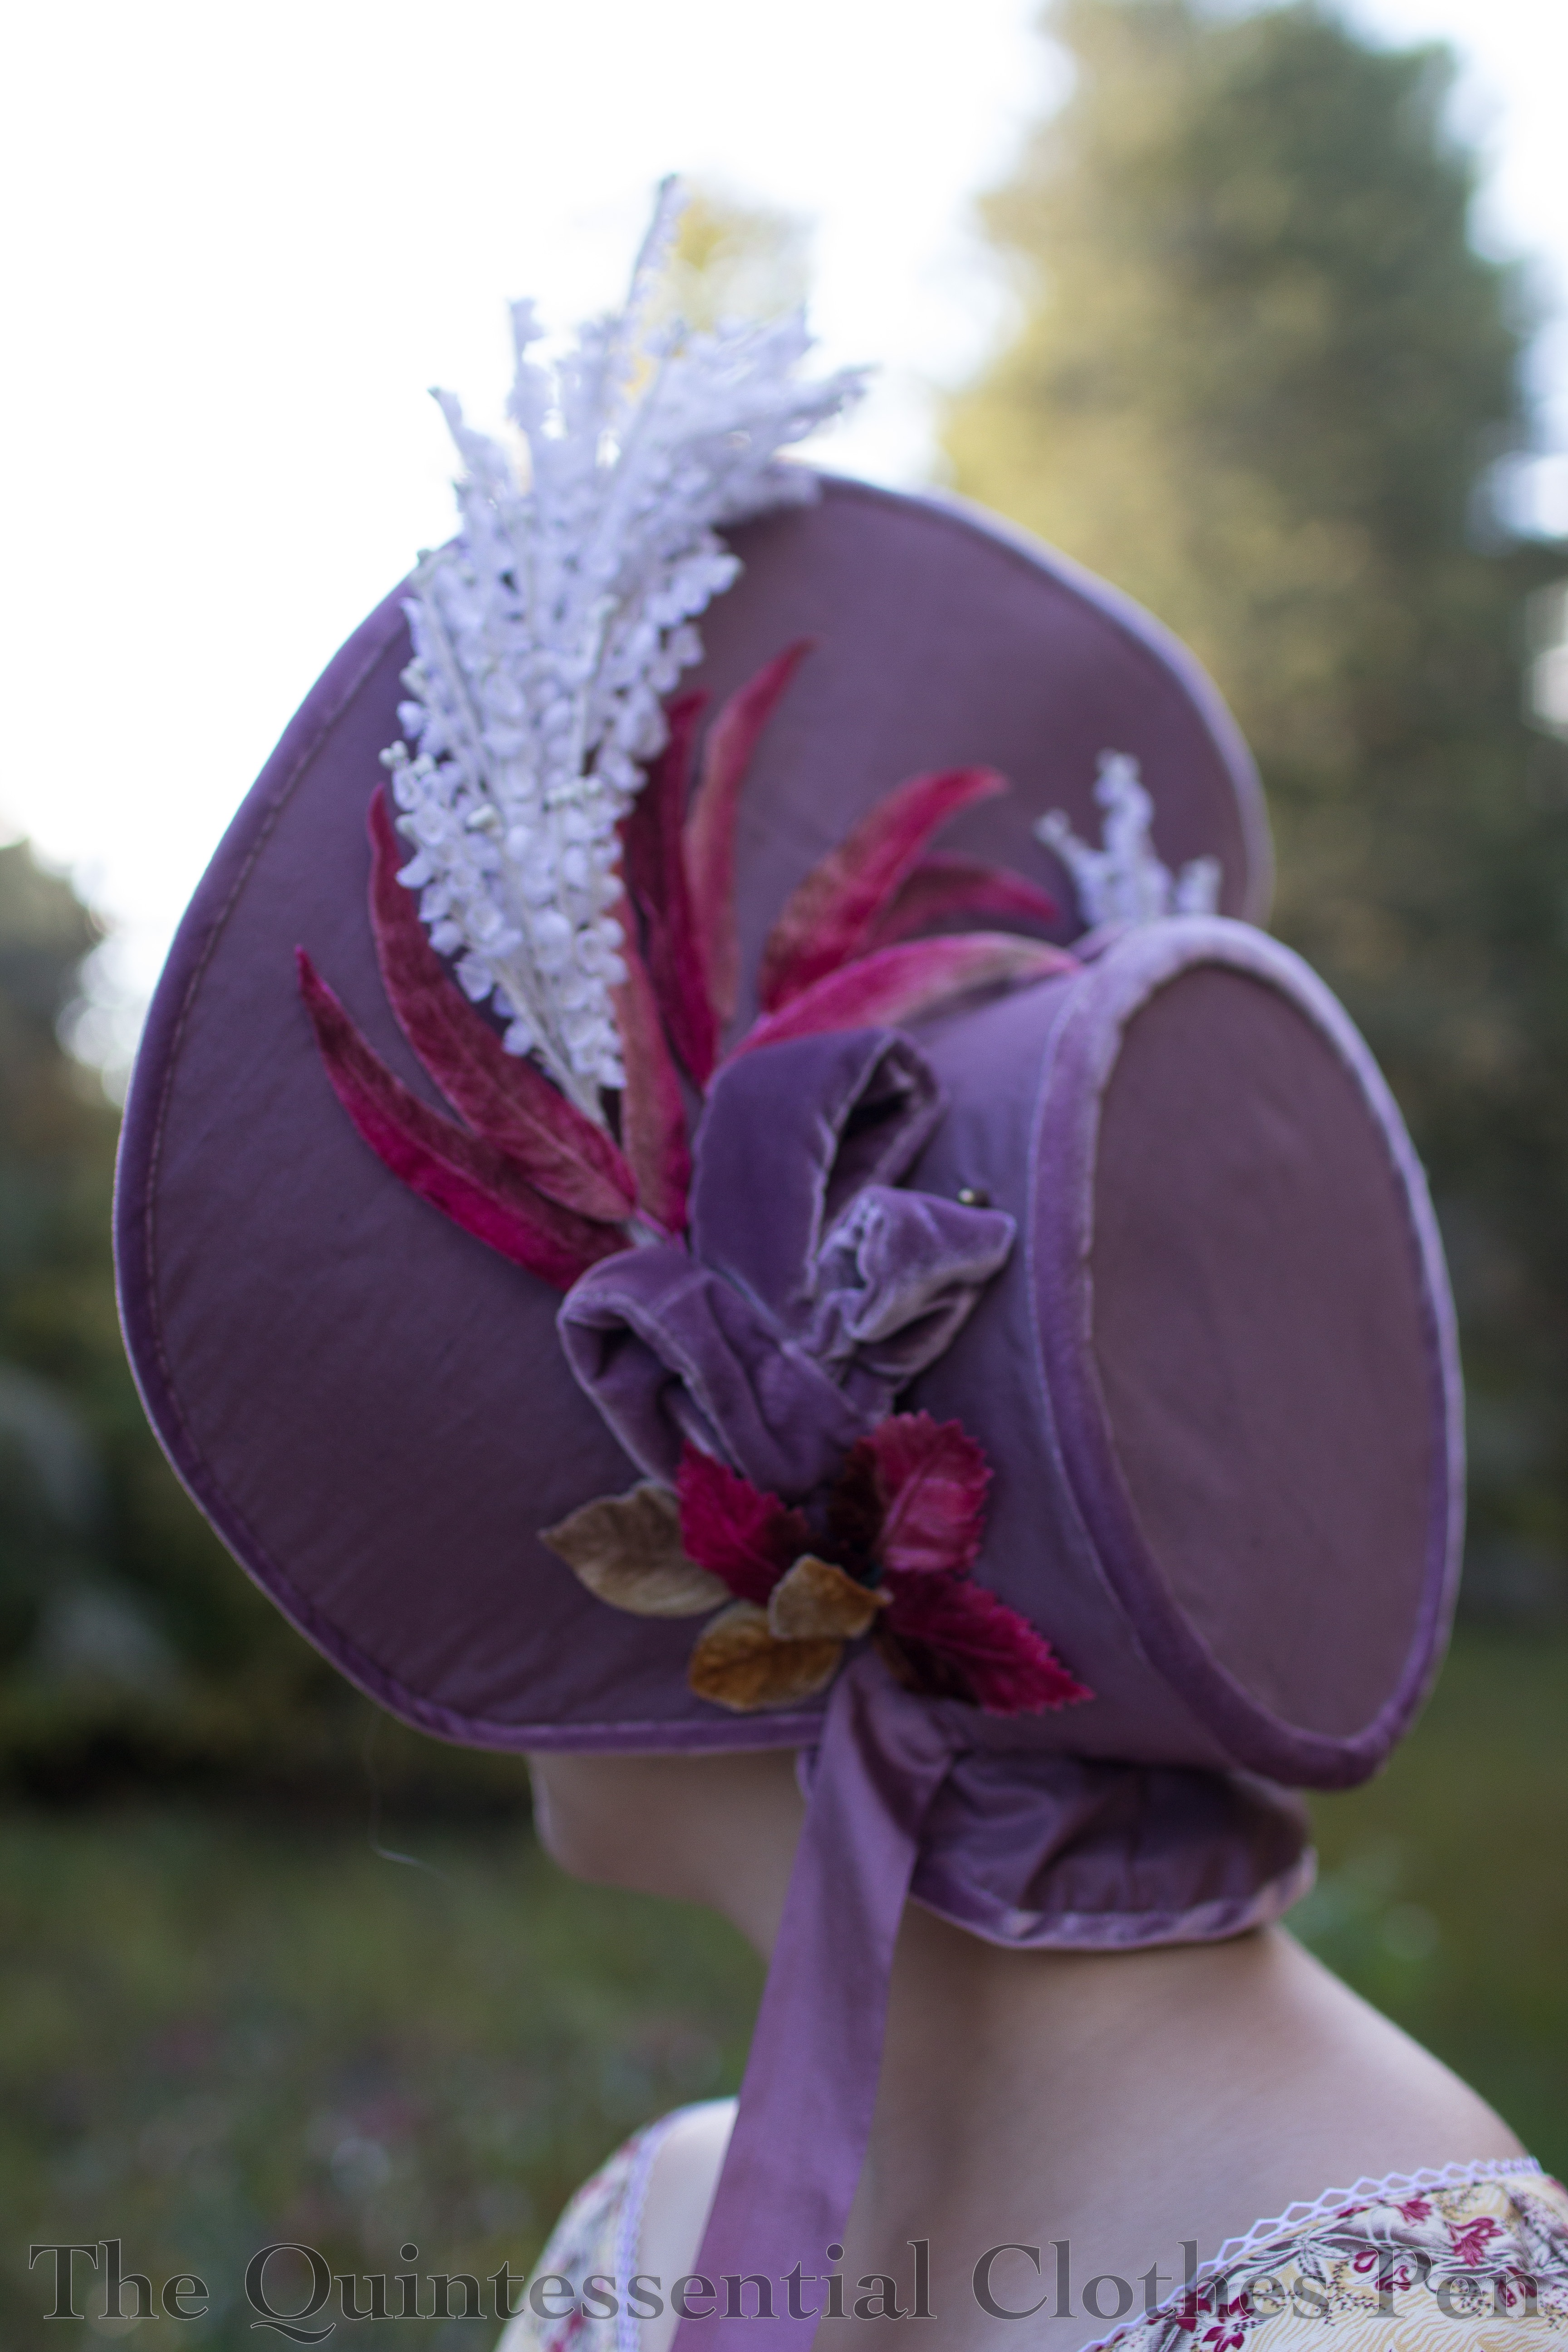
The Metropolitan Museum of Art has a bonnet that is dated c. 1820, pictured below. It is silk and appears to be satin edged in velvet. It looks brown to me, but it’s also possible that it is black and that lighting and fading from age cause it to appear brown.
This is what I was aiming for when I started patterning in 2012. However, after finishing my bonnet, I realized that my brim shape is more open and high, and less forward, than the shape of this bonnet. This surprised me! And actually, it worked out in my favor, as the shape I patterned is more 1830s than 1820s.
Despite the shape not being quite like The Met bonnet (maybe someday I’ll alter the pattern and try again for the 1820s shape), I still took much color and material inspiration from it. I liked the tone on tone silk with velvet trim, the edges trimmed in velvet, and liked the lightweight silk ties (plus, I had all of these materials in the stash in perfectly coordinating purples!).
The trim needed to be different for the 1830s, though. I liked this 1830 bonnet, particularly for the inside of the brim trim, and this 1826-1830 bonnet for the fabric loop trim. There are other inspirational fashion plates showing floral trim inside and outside the brim on my Pinterest board for this project, as well. My bonnet is a melding of all of these sources of inspiration.
Construction
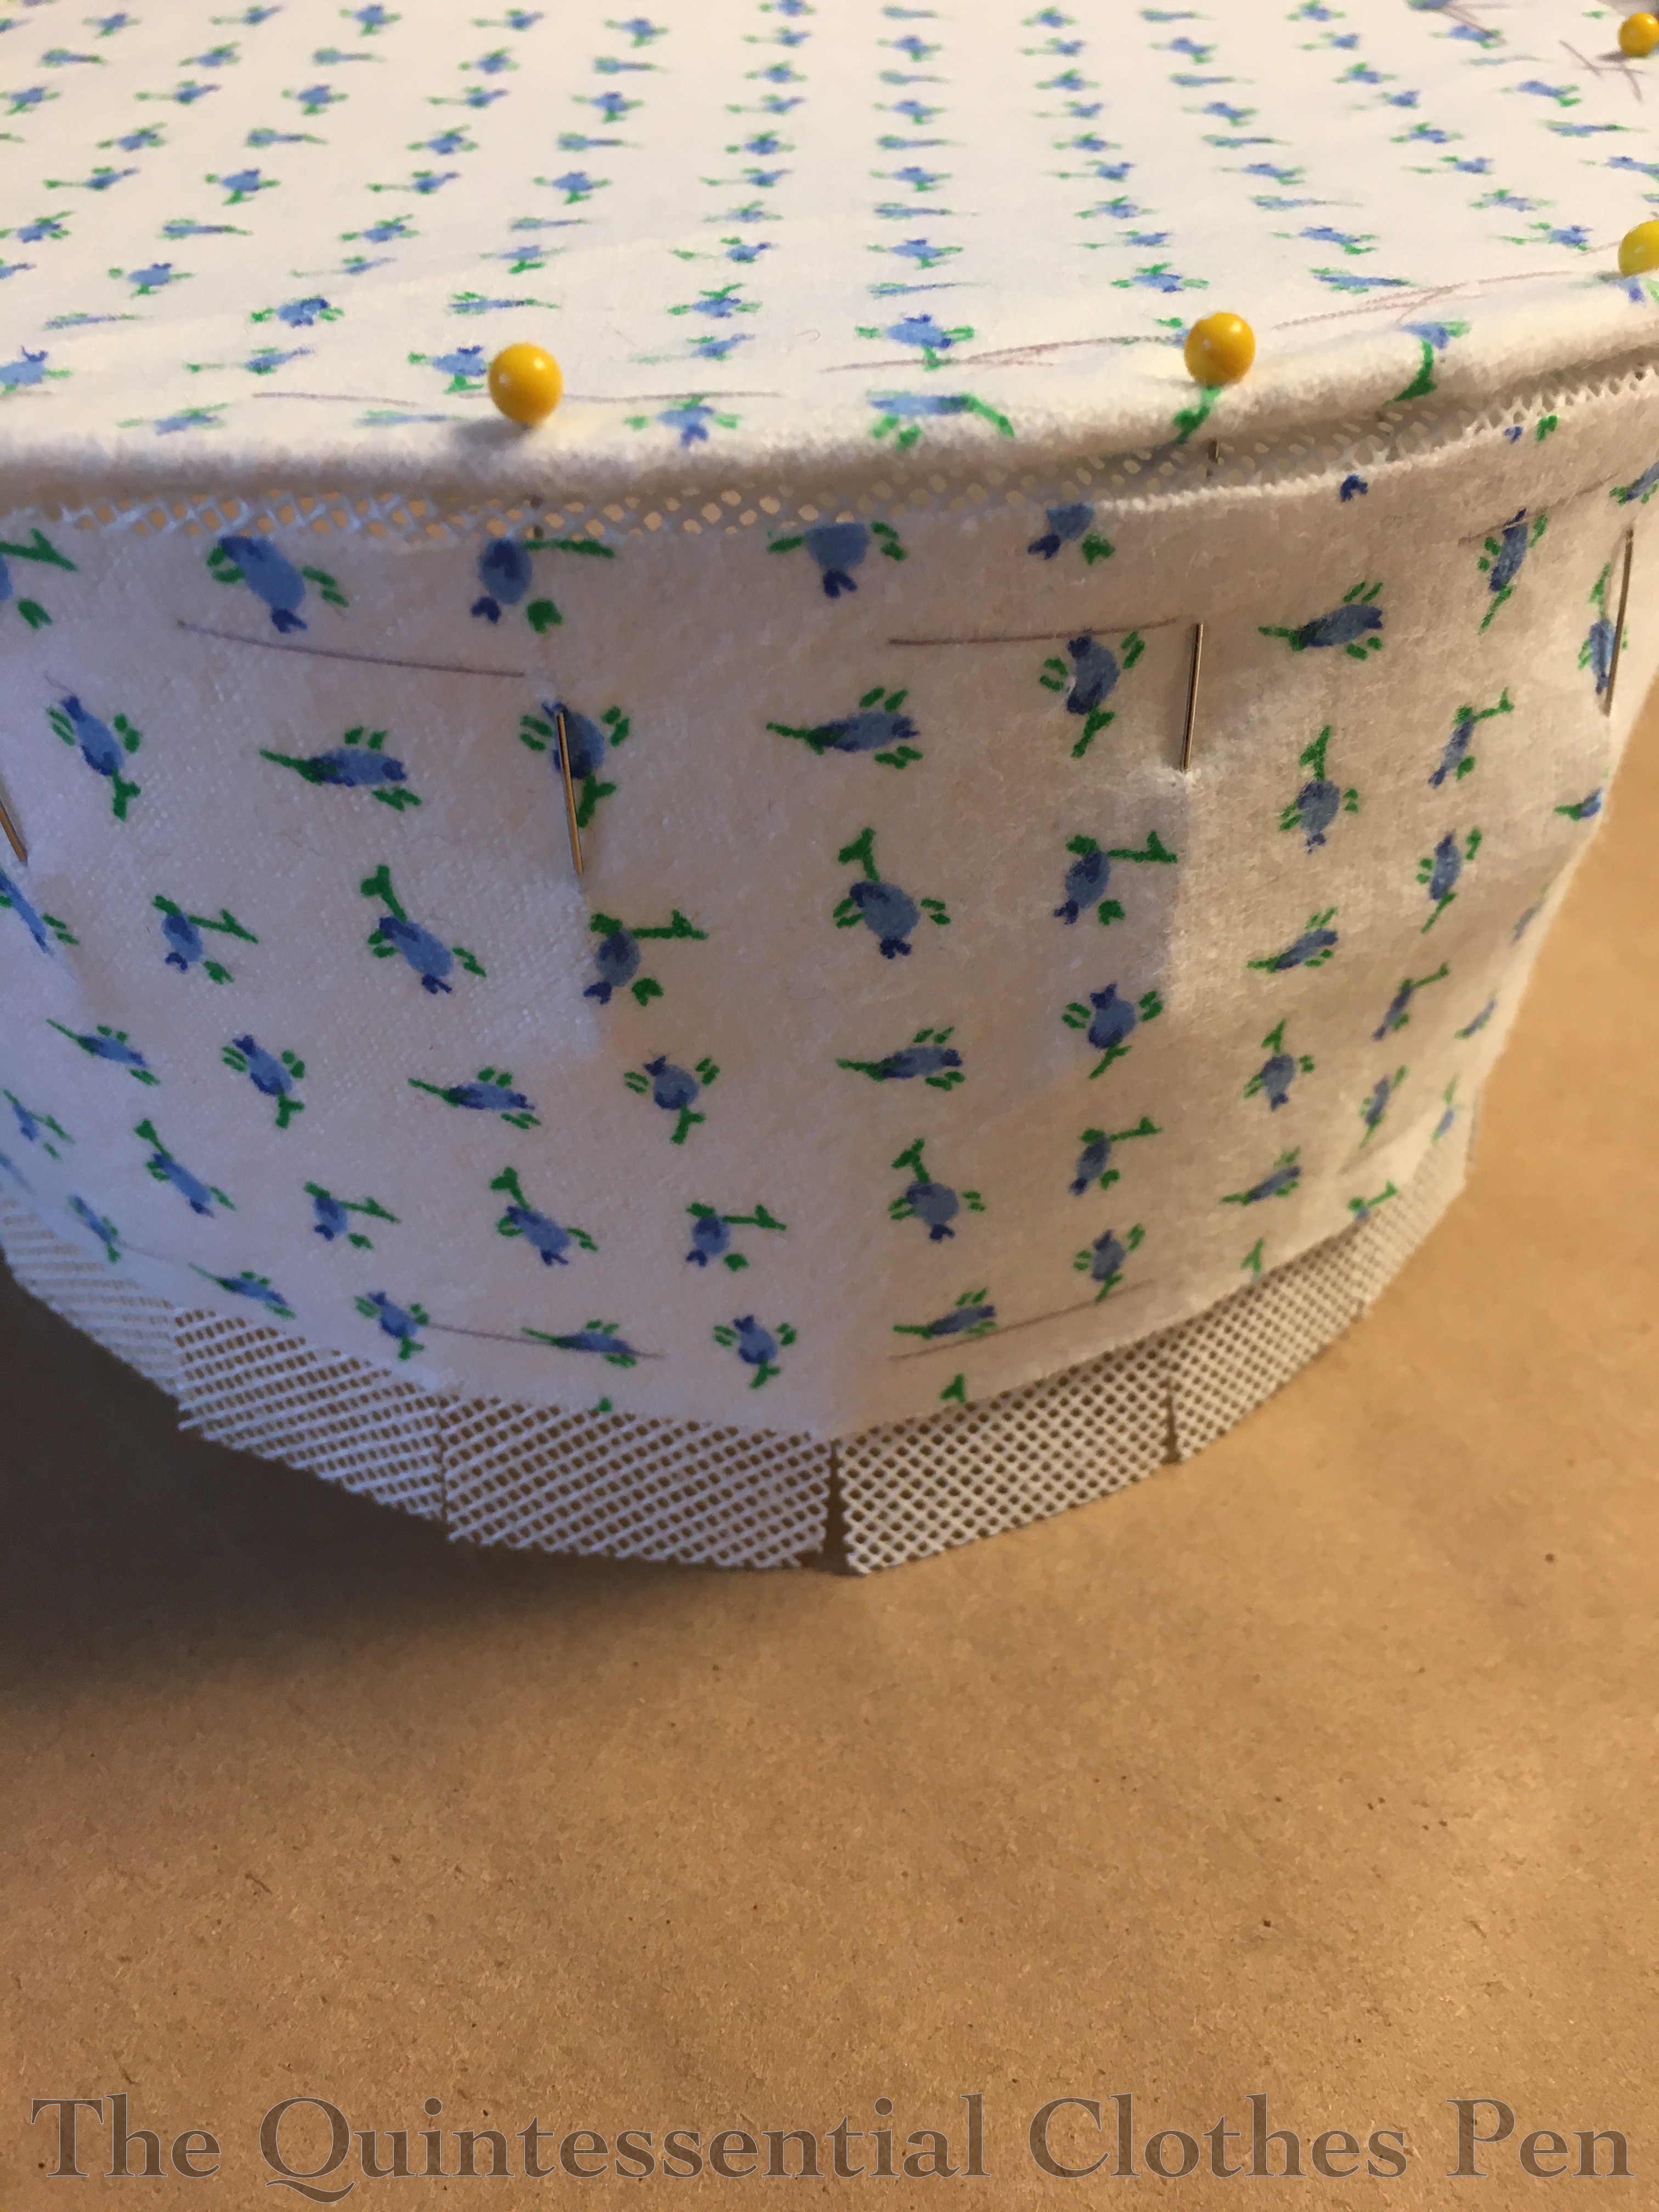
With my half finished pieces in hand, I decided to attach the tip of the bonnet to the side. Here is that step, pinned in place. These pieces were hand sewn together.
I’d decided to baste my flannel in place in order to help it follow the contours of the shapes instead of pulling away. On some bonnets (such as one covered in transparent fabric) these stitches might be seen, but I was confident that my silk would hide these quite well. The alternative would be to use spray adhesive to hold the flannel in place, but I didn’t have that at my fingertips 8 years ago.
In addition to the basting stitches in the middle, I also roughly whip stitched over the outside edge of the brim to hold the flannel in place.
I took this brim piece and basted it to my assembled crown, then stitched those two layers together using a Z stitch. Pinning this was fiddly, as I had to get the buckram seam allowance of the side to slip under the flannel of the brim smoothly.
The next thing to do was cover the brim with my silk, but I still had the problem of getting the fabric to follow the contours of the curves without pulling away. When I started on this step I only had rubber cement on hand. I (smartly!) tried a sample to see if it would show through the silk. It definitely did! The rubber cement sample is on the bottom of the photo below. Not what I wanted! So, I ordered Krylon spray adhesive, which I knew would do the job. When it arrived, I tried another sample. The spray adhesive sample is on the top of the photo below. Success!
I used the spray adhesive for the inner and outer layers of the brim covering. It worked wonderfully, just as I had expected it to. The only exception is that I accidentally left a mark on one of my brim pieces where I’d let too much spray build up and had to recut that piece. So if you try this, make sure to do very light coats with the spray adhesive if your fabric is thin enough for it to show through!
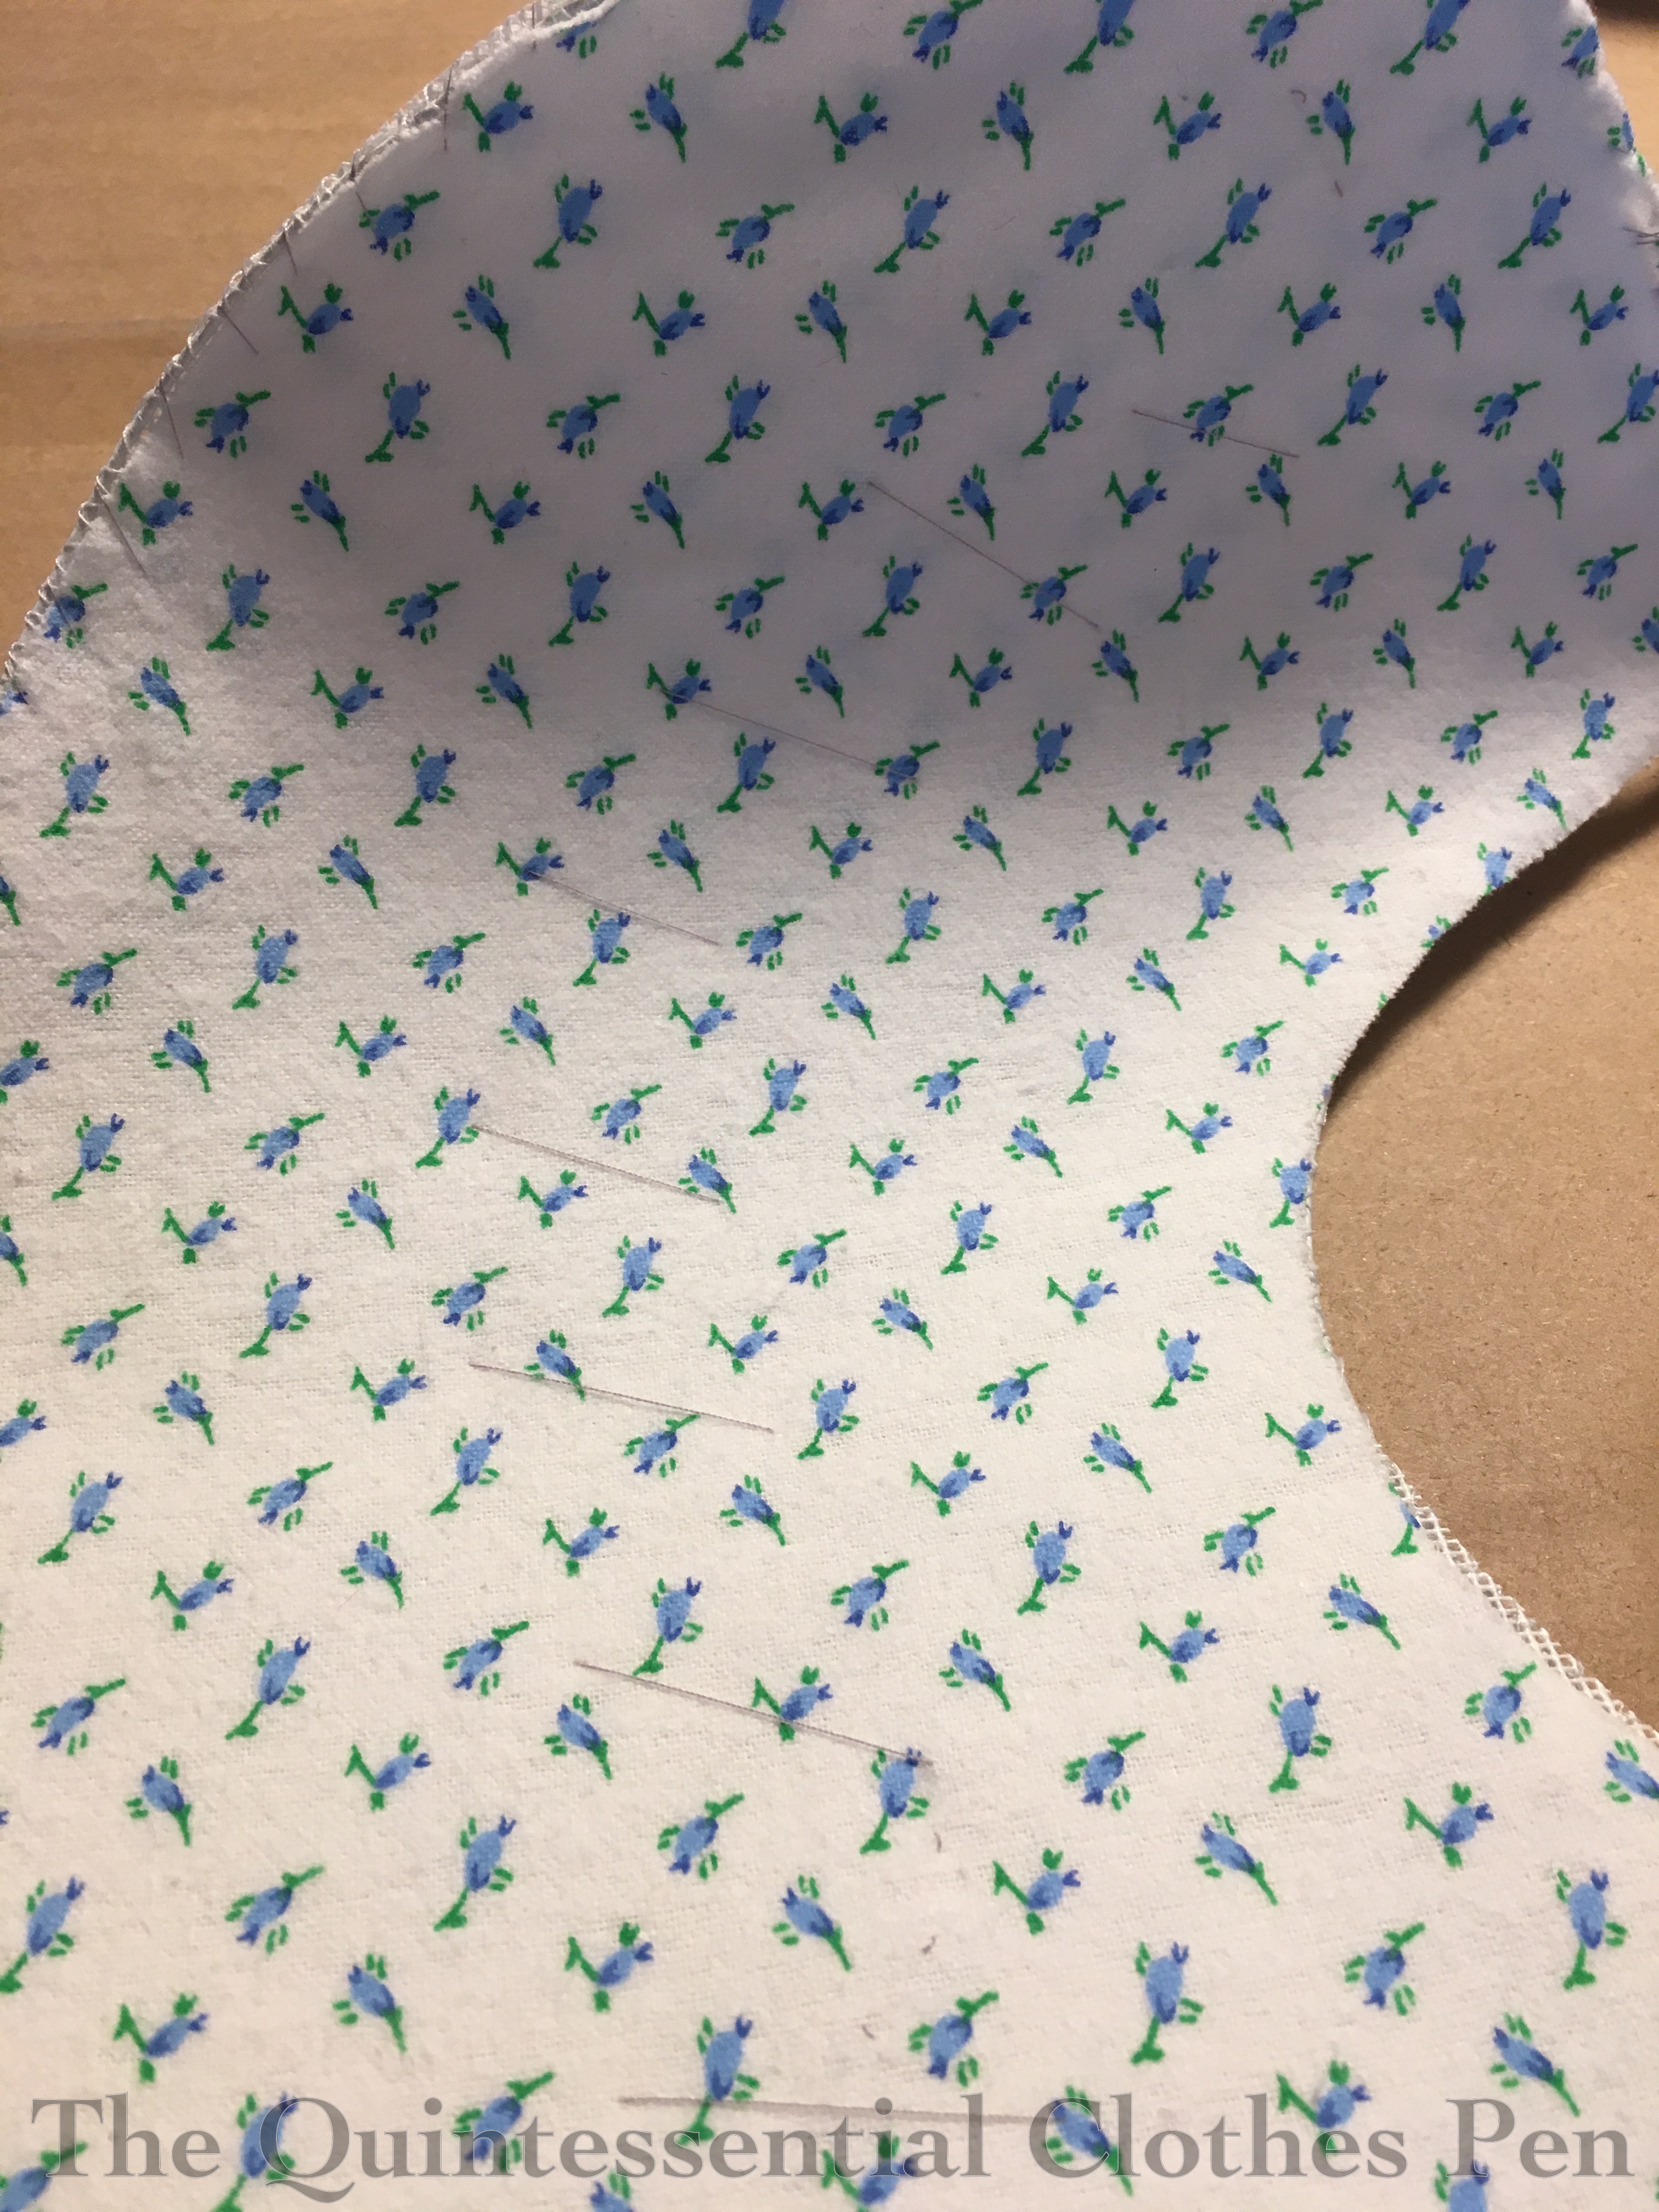
Here is the inside of the brim, with the seam allowance clipped where it meets the crown.
And here is the outside of the brim, with the seam allowance clipped so it can lay along the outside of the side band. You can see the interior of the brim showing on the extreme left of the photo, on the other side of the wired edge of the buckram. You can also see that by this point I’d put the silk covering on the tip of the bonnet. The seam allowances of that piece are clipped and then stitched over onto the side band through all the layers.
This photo shows the Z stitches holding the silk tip piece in place a little better than the last photo. It also shows the side band. For this piece, I pressed under the brim side seam allowance ahead of time, pinned it in place, and then turned the top edge under as I went along, so it would be just the right width. Stitching this piece on covered all of the seam allowances you can see in this photo.
In the next photo ,a few more steps have been completed. The side band was sewn on, the silk edges were trimmed and bound with bias velvet, I cut bavolet pieces (out of my glue stained brim piece!), edged the bavolet with bias velvet, and attached the bavolet. The great thing about the spray adhesive is that it’s not so glue-y that it gums up a needle or makes things hard to sew through, so I had no problem with any of these sewing steps.
As a side note, what is a bavolet? Interestingly, my go-to source for definitions, the Oxford English Dictionary, does not have an entry for this word! I believe that is because it is actually French, not English. I would define bavolet as ‘the curtain piece at the back of the bonnet’. There is more information about this word, including examples of the word in use from the 19th century, in this French Vocabulary Illustrated blog post. If you know of other good places to find a definition or etymology of the word bavolet I would love for you to share!
Back to the photos! All the long purple stitches around the side band are from attaching trim. I find that double thread makes it much easier to attach trimmings such as feathers and flowers, as you can double back through your looped thread to hold things in place and it makes it a little extra sturdy. The nice thing about doing all of that before lining the hat is that it makes for a really elegant interior when all is finished!
Below, you can see what that trim looks like from the exterior. I used some scraps of velvet to make loops and a variety of vintage paper and velvet millinery flowers and leaves in white, pink, and gold.
I’m super pleased with how it turned out, but it took hours to decide on the placement and then sew everything in place. It was finicky… The trim kept causing the bonnet to fall over as I was trying to place it and when sewing it the thread kept getting wrapped around the different elements and getting stuck. Plus, to make the stitches on the brim invisible they had to catch just one layer of the silk (as opposed to being stitched all the way through all of the layers) without pulling the silk away from the flannel.
Finally, it was time to make a lining! This used the same pattern pieces as the tip and side band and was cut from scraps of ivory shantung. The seams for the lining were machine sewn.
After I put the lining inside the crown of the bonnet, I covered most of the raw edges of the purple and ivory silk with a band of brown cotton velvet. This blends with my hair and provides a bit of a velcro effect to help keep the bonnet in place, in addition to providing nice finishing! This is the same process that I used when making my 1875 hat earlier this year.
At the bavolet edge, where there is no brown velvet, the ivory silk was turned under and sewn in place. I also added lightweight silk ribbon ties as a finishing step.
Finished!
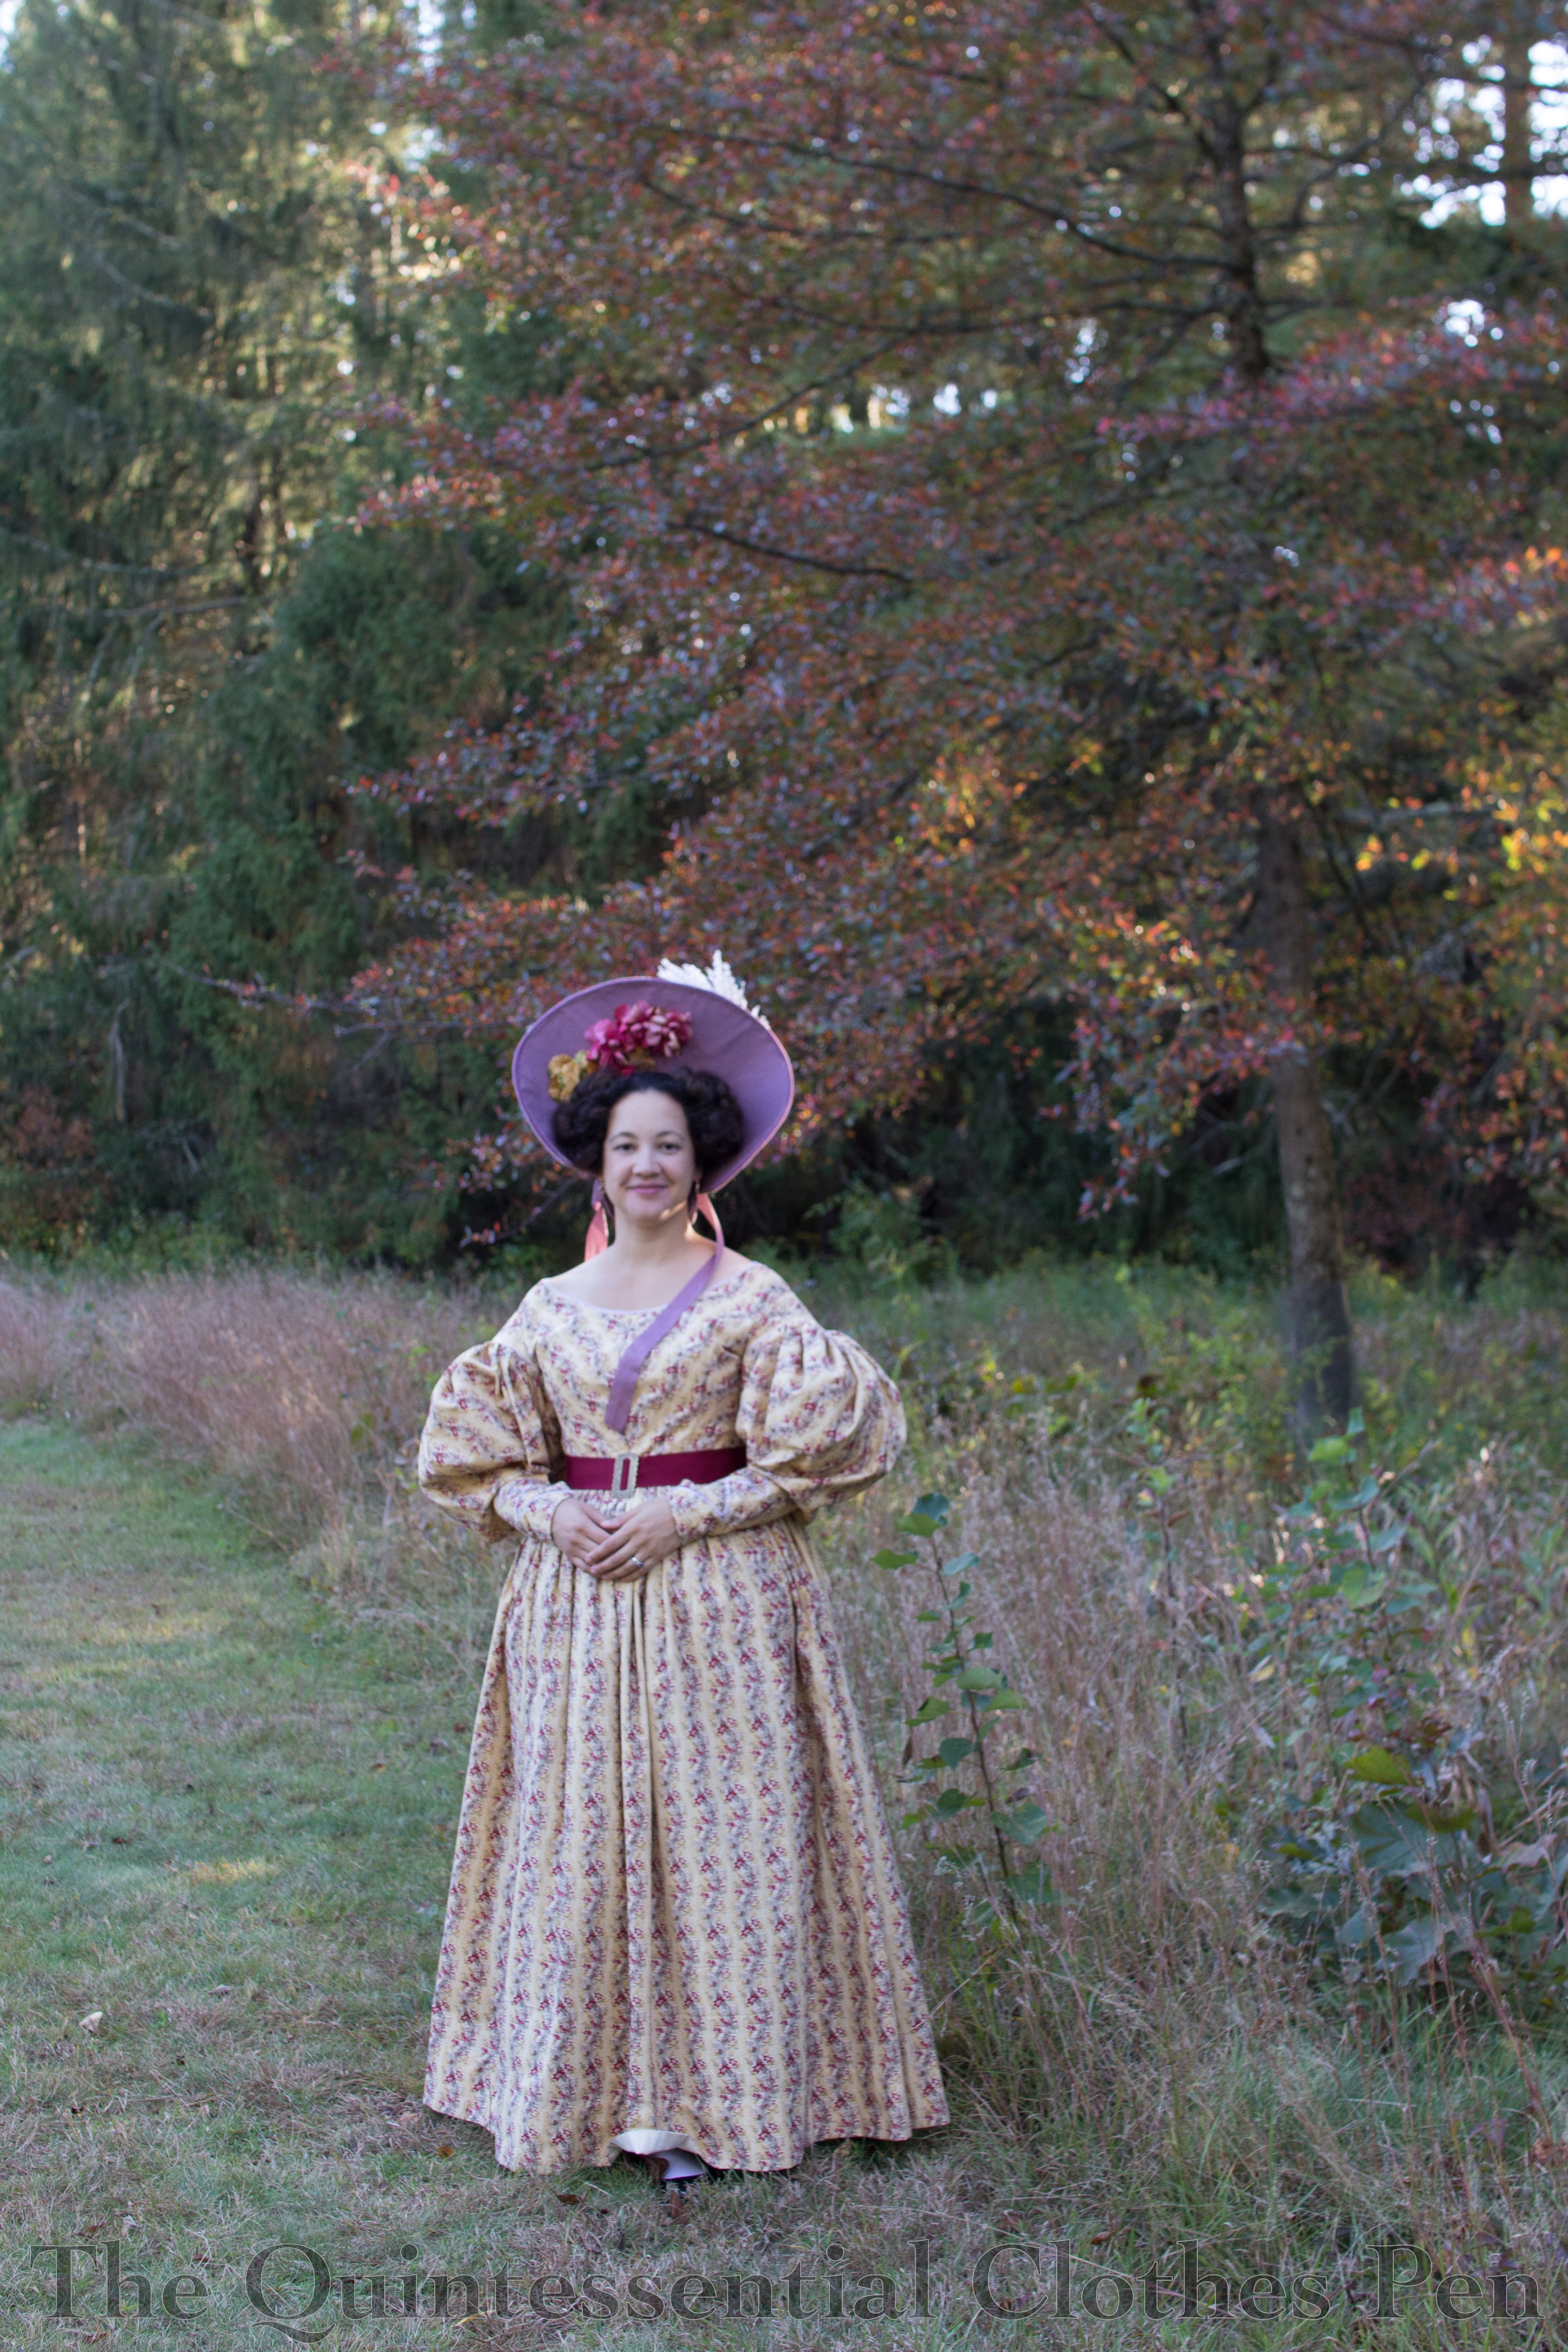
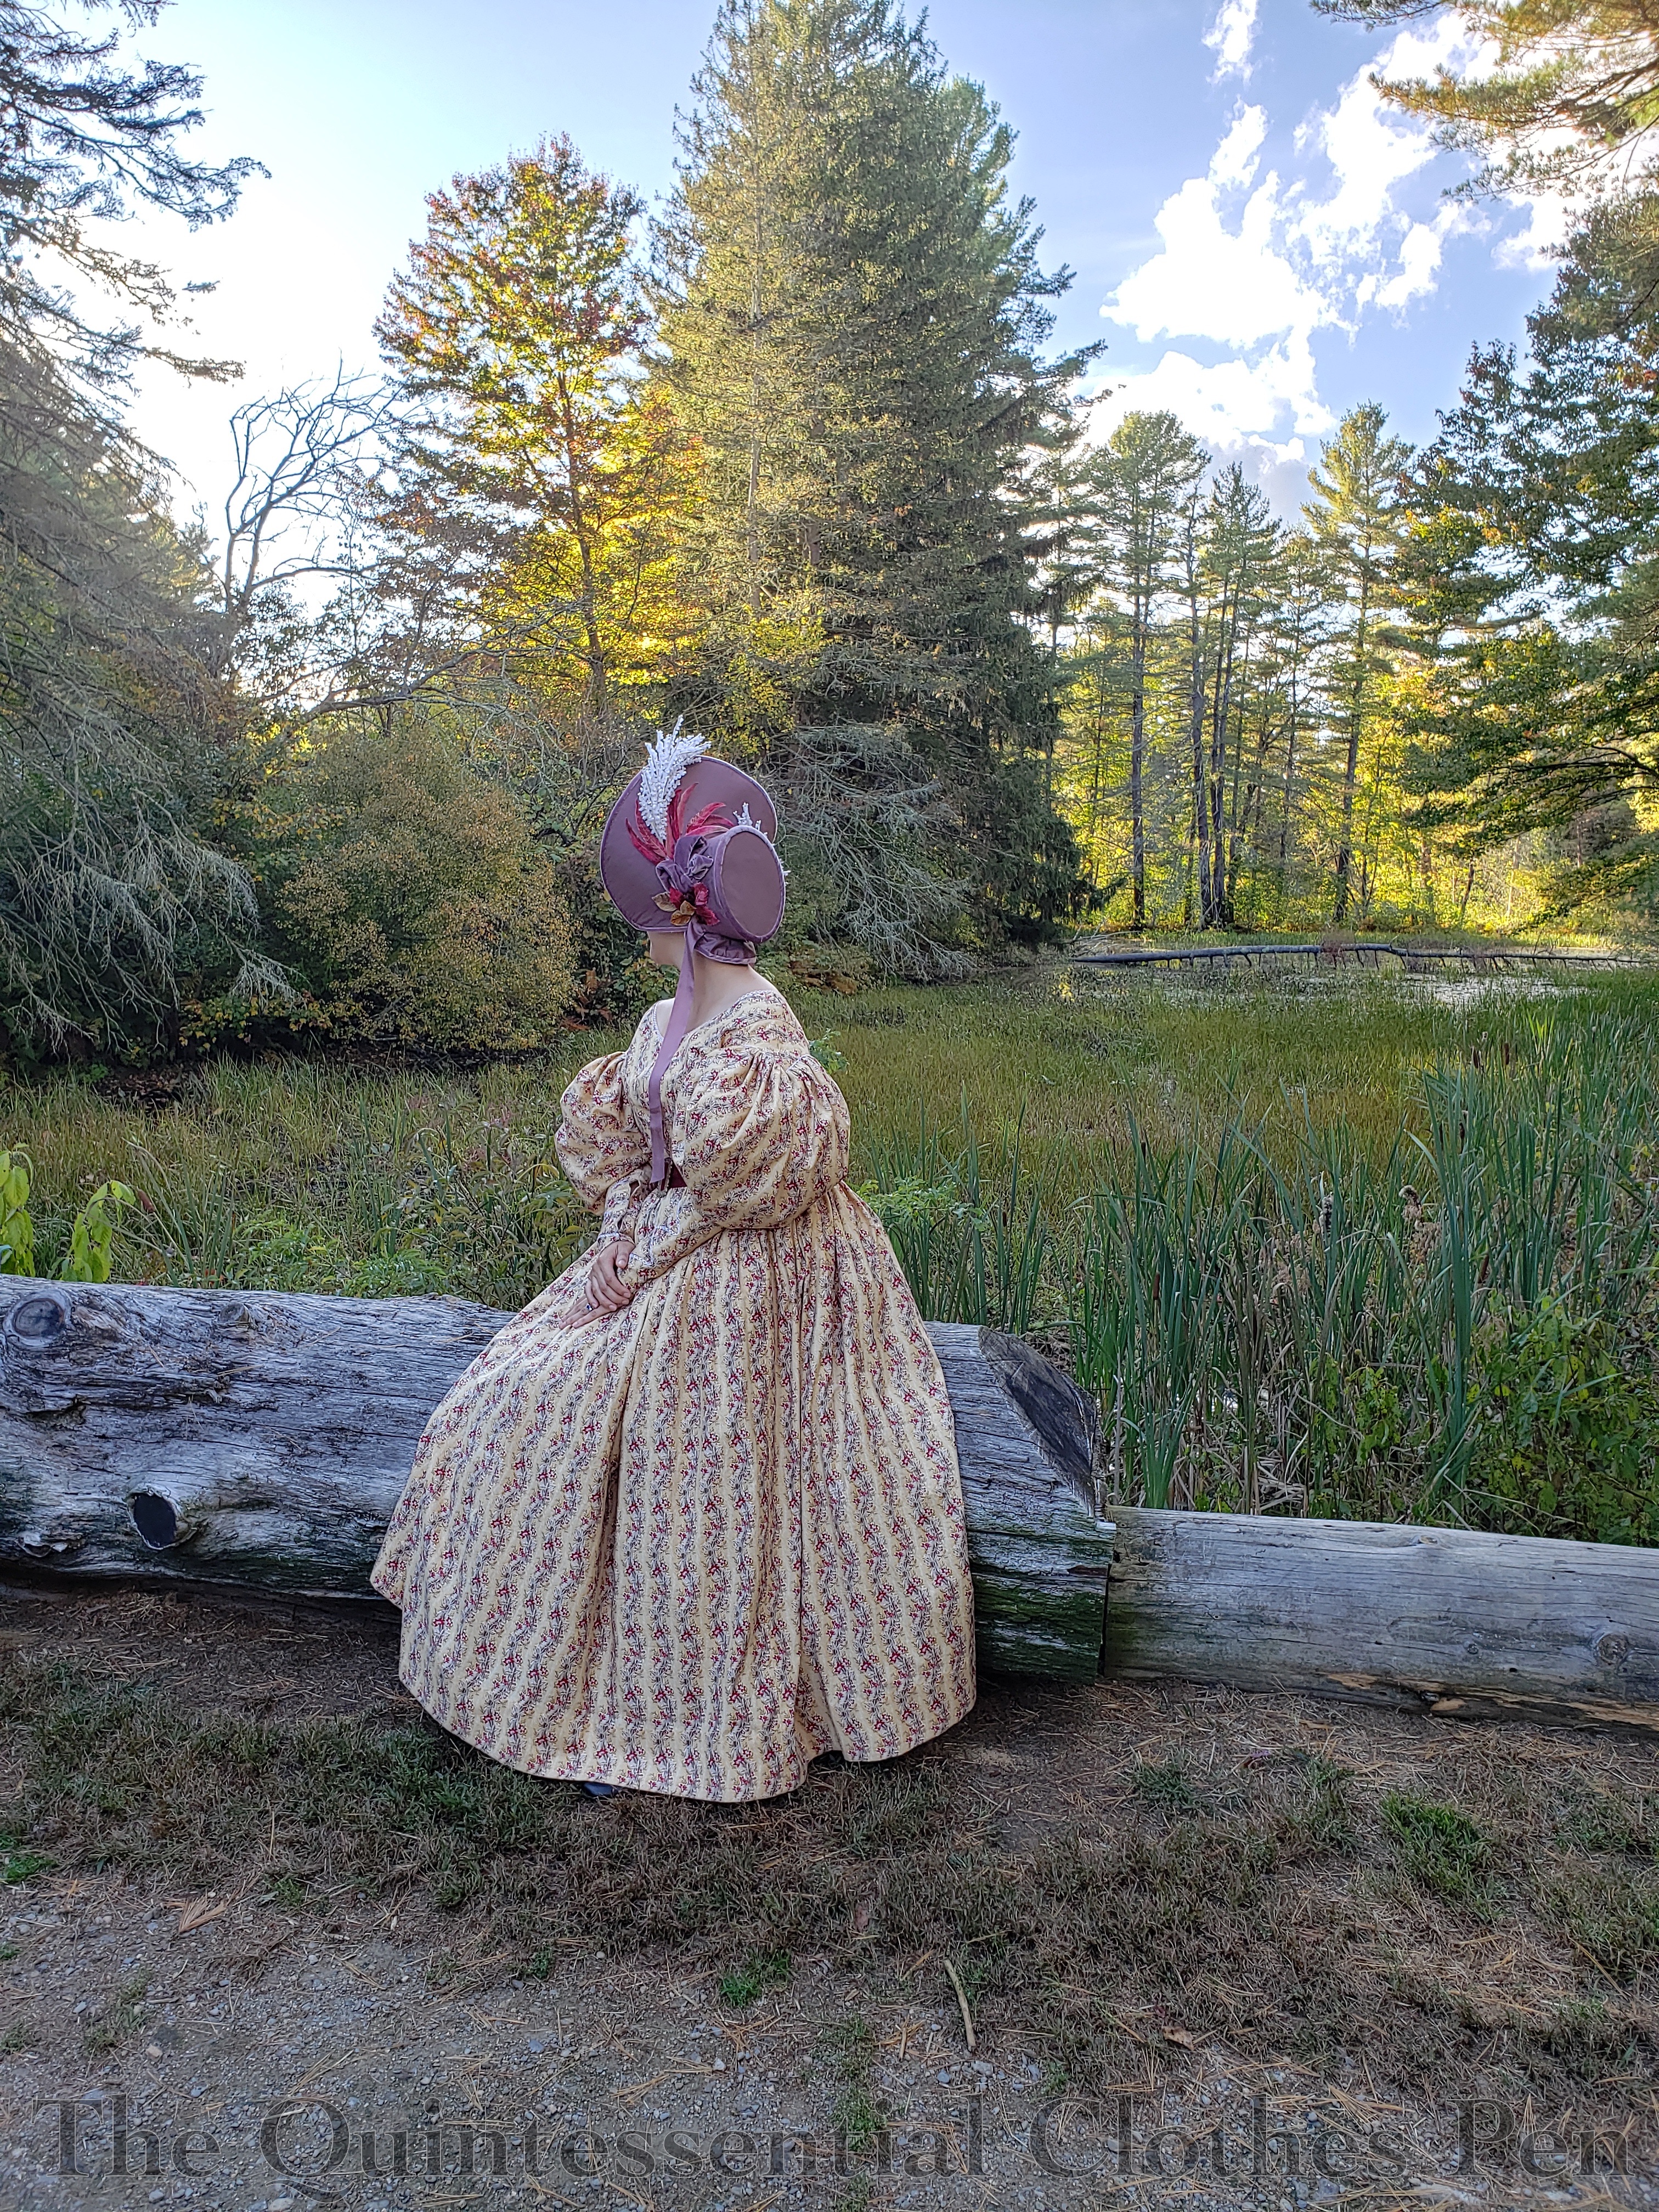
Here is the finished bonnet, being worn with my 1834 yellow dress! I love that the purple coordinates with my yellow print dress fabric without directly matching any of the colors in the print. It was also fun to choose white, pink, and gold floral trimmings for the bonnet to echo the colors in the print. I think the combination is anchored well while still being distinctive parts.
This photo clearly shows that the ties are purely decorative. I left them hanging free so that they could elegantly (usually!) move around. So what keeps this giant sail in place on my head? (Because I can say with certainty that a bonnet this big is basically just a wind catcher on the top of your head!) It will stay on its own… until moving around. I used the back section of my hair to make a bun, at just the right height so it would sit in the crown of the bonnet, and then used two hat pins at different angles to anchor the hat in place through the bun
I found that I placed the curl bunches too far back on the sides of my head when I tried to put on the bonnet and had to push them forward to get it to sit in the right place. It was unexpected how far forward the curls needed to be. As I’ve done in the past for 1830s side curls (explained here in 2016 and again in 2019), I used my own hair on top of mesh poufs to create the side curls. The combination of my hair getting very long and the curls needing to sit in front of the bonnet means that these curls are larger looking vertically than what I’ve had in the past. It seems to fill in the shape of the bonnet well, so I guess it’s good!
The other thing that the above photo does a good job of showing is the trim on the inside of the bonnet, which was also finicky to place. I had to get it in the right location so that it would organically grow out of my planned side curls hairstyle. The bonnet looks quite silly without the 1830s hair to go with it (and one might argue that it looks silly, in scale at least, even with 1830s hair!).
Speaking of scale, this bonnet is quite large. With the trim, it stands more than 8″ high on top of my head. I had to hold the brim when wind picked up while wearing it–the hat pins kept it in place but it would pull at my hair which wasn’t comfortable. Also, it required a pretty severe slouch in the car in order to not hit the roof! Thankfully, I was able to be a passenger while wearing the bonnet, so that I could arrange it, with the hat pins, in front of a mirror and then not need to sit up or look around while driving. Pretty silly! A carriage would have made so much more sense!
Just The Facts
While this bonnet does not qualify for any of the remaining challenges of the Historical Sew Monthly this year, I would still like to share the facts about this bonnet in the format I would use for an HSM garment. So, without further ado, the facts!
Fabric/Materials: ½ to ¾ yard each of floral cotton flannel and purple silk shantung, scraps of purple polyester velvet and ivory silk shantung, about ½ yard of buckram, about 3 yards of millinery wire, and a small piece of brown cotton velvet.
Pattern: My own.
Year: 1831.
Notions: Vintage millinery flowers, thread, and about 1 ½ yards lightweight silk ribbon.
How historically accurate is it?: 90%. Pretty good in terms of silhouette, construction methods, and materials; however, there are a few modern materials mixed in (such as spray adhesive).
Hours to complete: 15.75 hours to finish, plus maybe 6-8 from years ago.
First worn: In early October, 2020.
Total cost: Approximately $35.
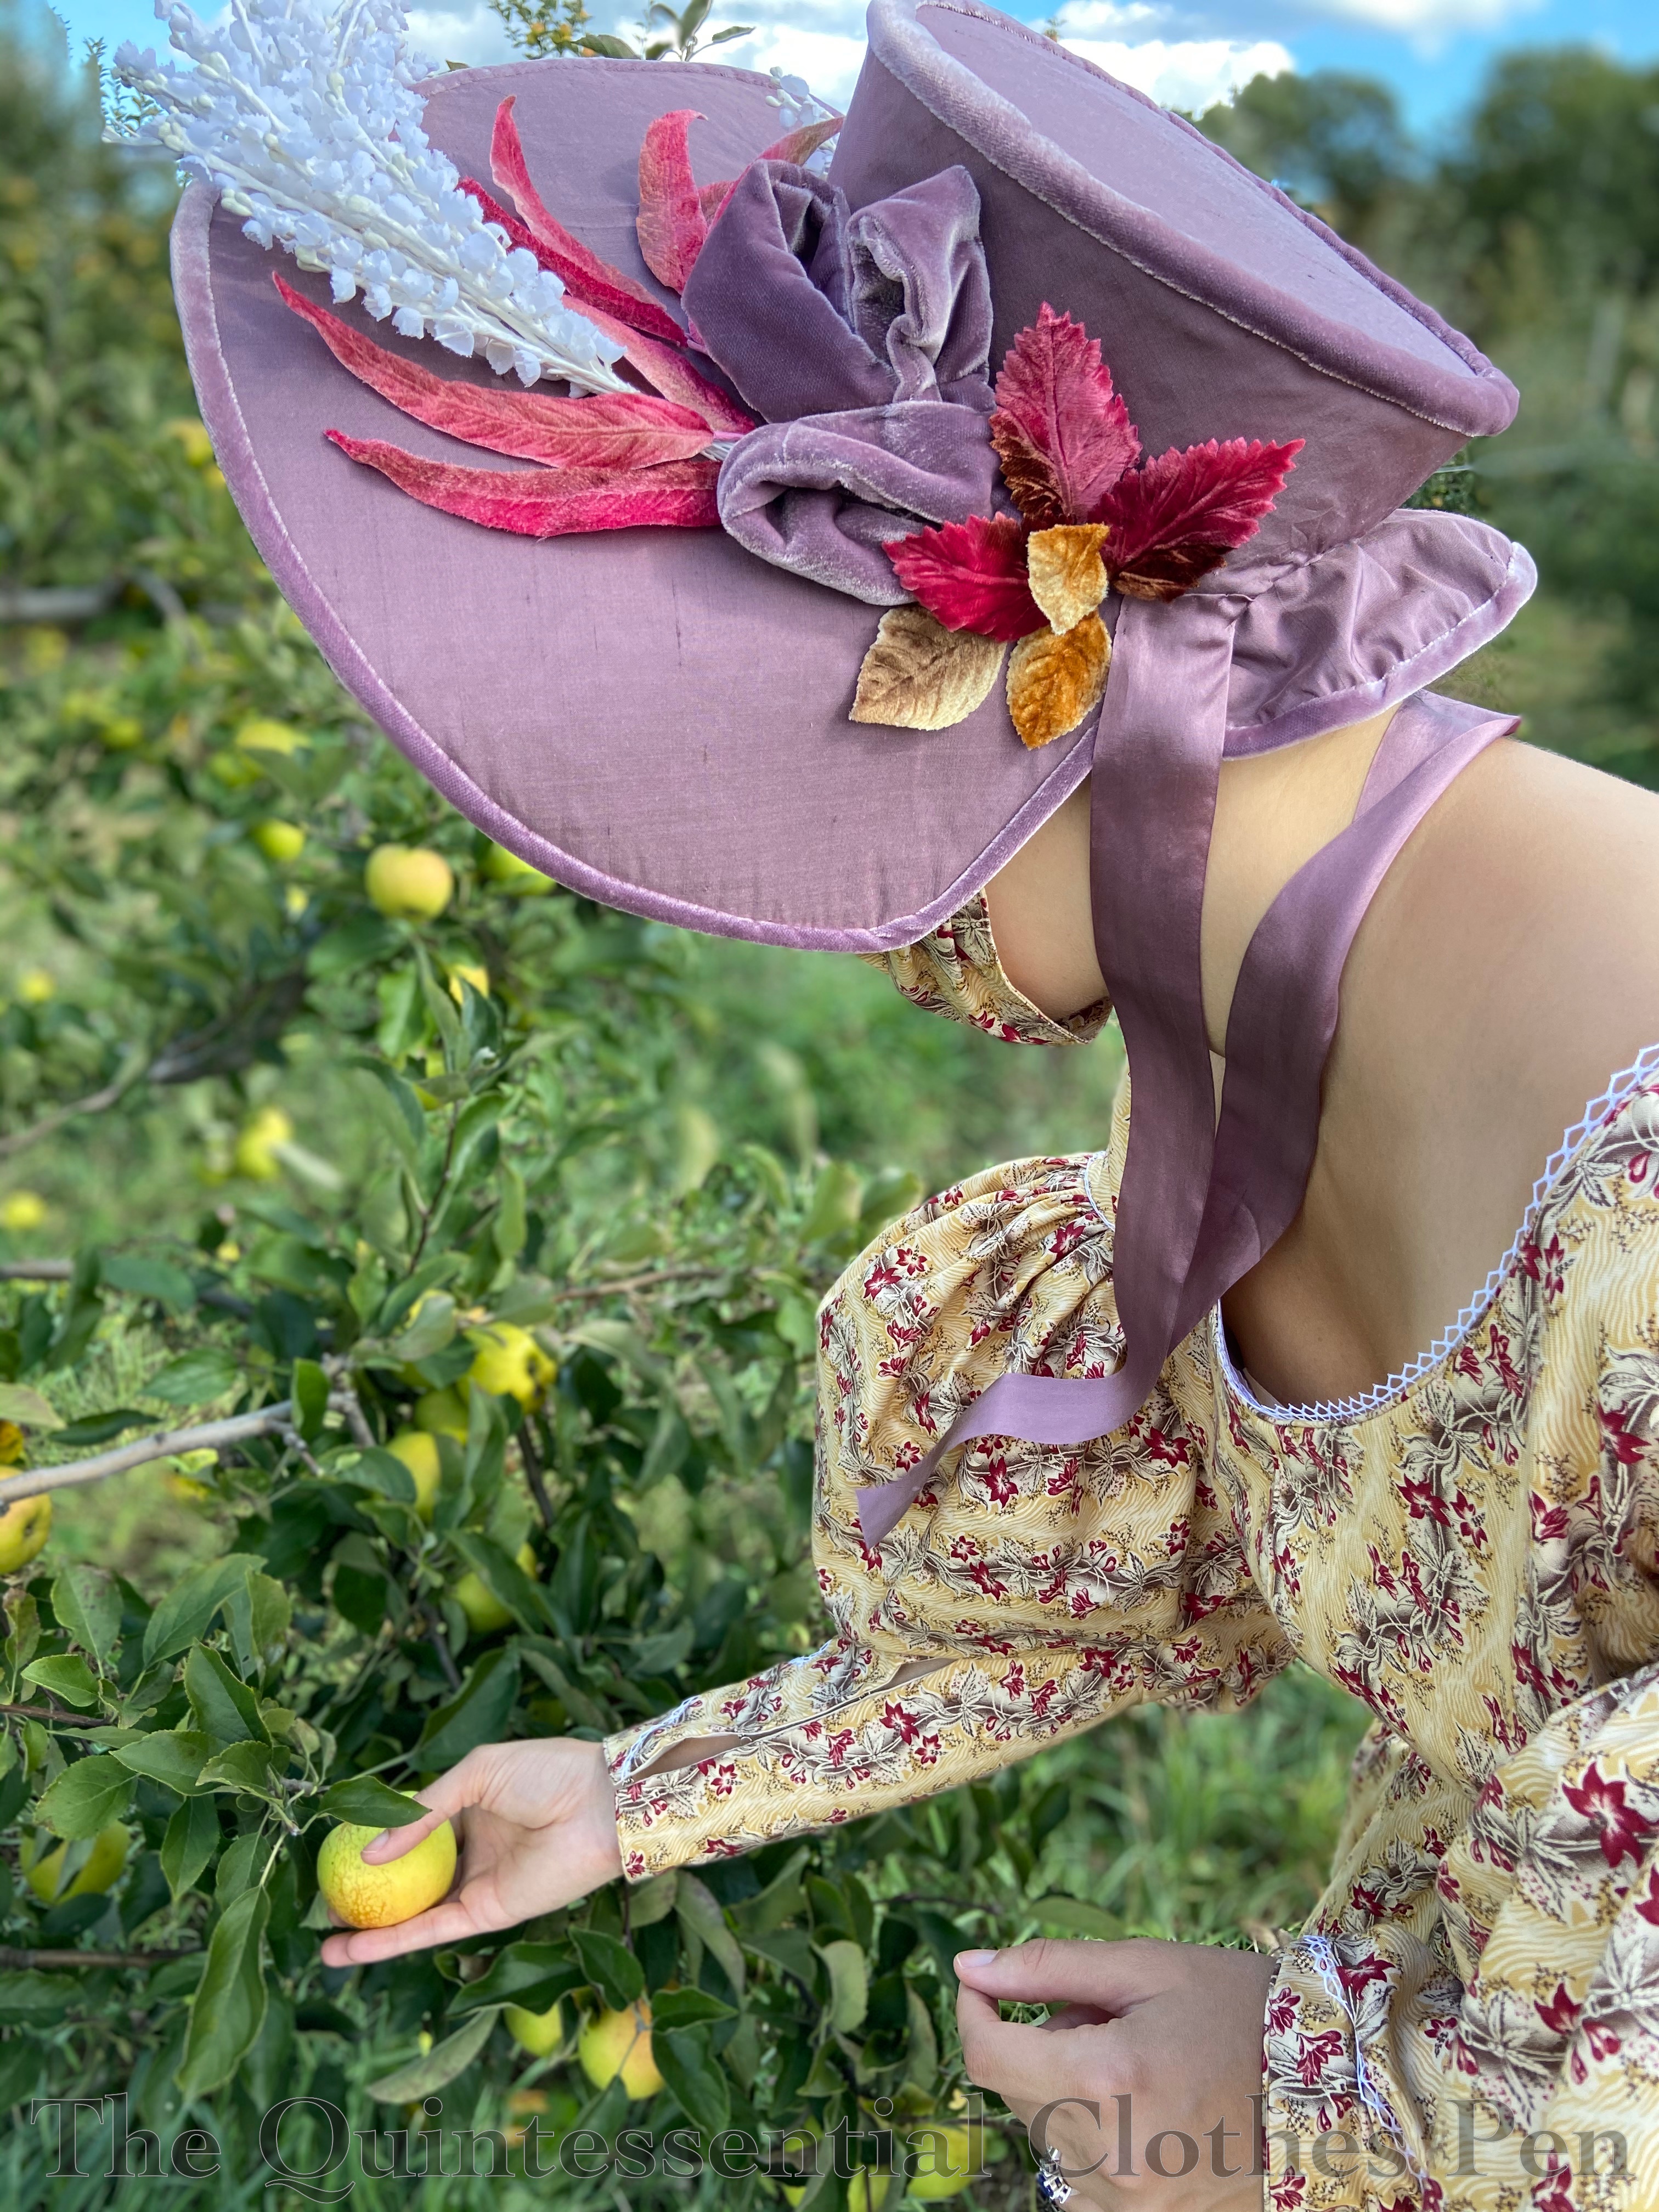
Thanks for sticking with me through another long construction post! I have one final photo that also hints at an upcoming post… 1830s apple picking adventure photos! Happy autumn!
Some of my recent posts have mentioned my excursion into sewing clothing from the 1830s. Most recently, in September, I posted about making a corded petticoat to help support a fashionable 1830s silhouette. I also shared a reminder about the fabric I’ve had in mind for an 1830s dress since I bought it seven years ago. It’s finally time to share the finished ensemble created with that fabric!
Today’s post is going to focus on the construction of this dress, but, never fear, upcoming posts will share more finished garment photos as well as construction details about the bonnet.
There is a lot of information about this dress to share and many photos of the process, so I hope you’re ready for a lengthy post!
Inspiration
As you probably guessed from the title of this post, this dress is from the year 1834. The trimming details and shape are directly inspired by the dress pictured below, which is in the collection of the Victoria and Albert Museum.
The V & A Dress is dated to 1830-1834. From a style perspective, this makes sense as these are the years from this decade with the largest sleeves, but it is also around this point in the decade that sleeve fullness starts to slide down the arm. This look that is just beginning to show in the V & A dress, which achieves the falling look with the addition of the mancherons at the top. The mancherons both practically and visually push the fullness of the sleeve off the shoulder.
What is a mancheron? The Oxford English Dictionary has the following entry):
mancheron, n. 1.French Heraldry. A sleeve used as a charge. Obsolete. 2. A piece of trimming on the upper part of a sleeve on a woman’s dress. Now historical.
Patterning
The pattern for this bodice is based on patterns contained in Janet Arnold’s Patterns of Fashion 1 and Norah Waugh’s The Cut of Women’s Clothes. I was able to start with my basic darted 1860s bodice and adapt it for the 1830s using information about grain line, dart placement, etc. from the books. This worked well because I know the basic darted bodice fits in areas that can be fussy to fit such as neckline, armhole, etc. and those things (in the 1860s) are still very similar to the shapes from the 1830s.
The sleeve pattern is from Plate 12 (page 84) in The Workwoman’s Guide (published in 1838), which can be viewed on Google Books here. I used the big circle sleeve (Figure 8–shown made up in Figure 7) and varied the top shape so that it forms a downward V shape to allow for my mancherons, which are patterned based on the V & A inspiration dress.
The ladies at American Duchess created a very helpful video discussing sleeve shapes from the 1830s, including showing mockups of a few different sleeve patterns from The Workwoman’s Guide. It is wonderful for seeing how the flat patterns turn into 3D shapes, which I found to be very helpful as I dithered about sleeve patterns.. You can view the video here. Lauren also has a blog post talking about 1830s sleeves, which shows the pattern I chose to use in various stages of its construction, from being flat to being made-up.
The skirt is based on information from the same books as the bodice pattern. It is made of 3 panels of my 45″ wide cotton fabric.
Construction Method Disclaimer
I chose to construct this dress in the mid-19th century way of separate bodice and skirt. This is odd for the 1830s (in fact, I can’t think of any examples that are done this way) as they are usually sewn together to make a one piece dress. However, as I was pondering sleeve options and considering my yardage I was faced with an exciting prospect.
There are so many sleeve variations in the 1830s–super poof, takes-a-while-to-get-used-to-looking-at elbow poof, meticulous pleated details as the poofs are reduced and contained… I wanted to make more than one! Also, I had 10 yards of my beautiful reproduction cotton and I expected my 1834 dress to only use about 7. What would I do with the last 3 yards? That’s not enough to make another dress. But… it is enough to make another bodice, even with giant 1830s sleeves that use a full yard for each arm!
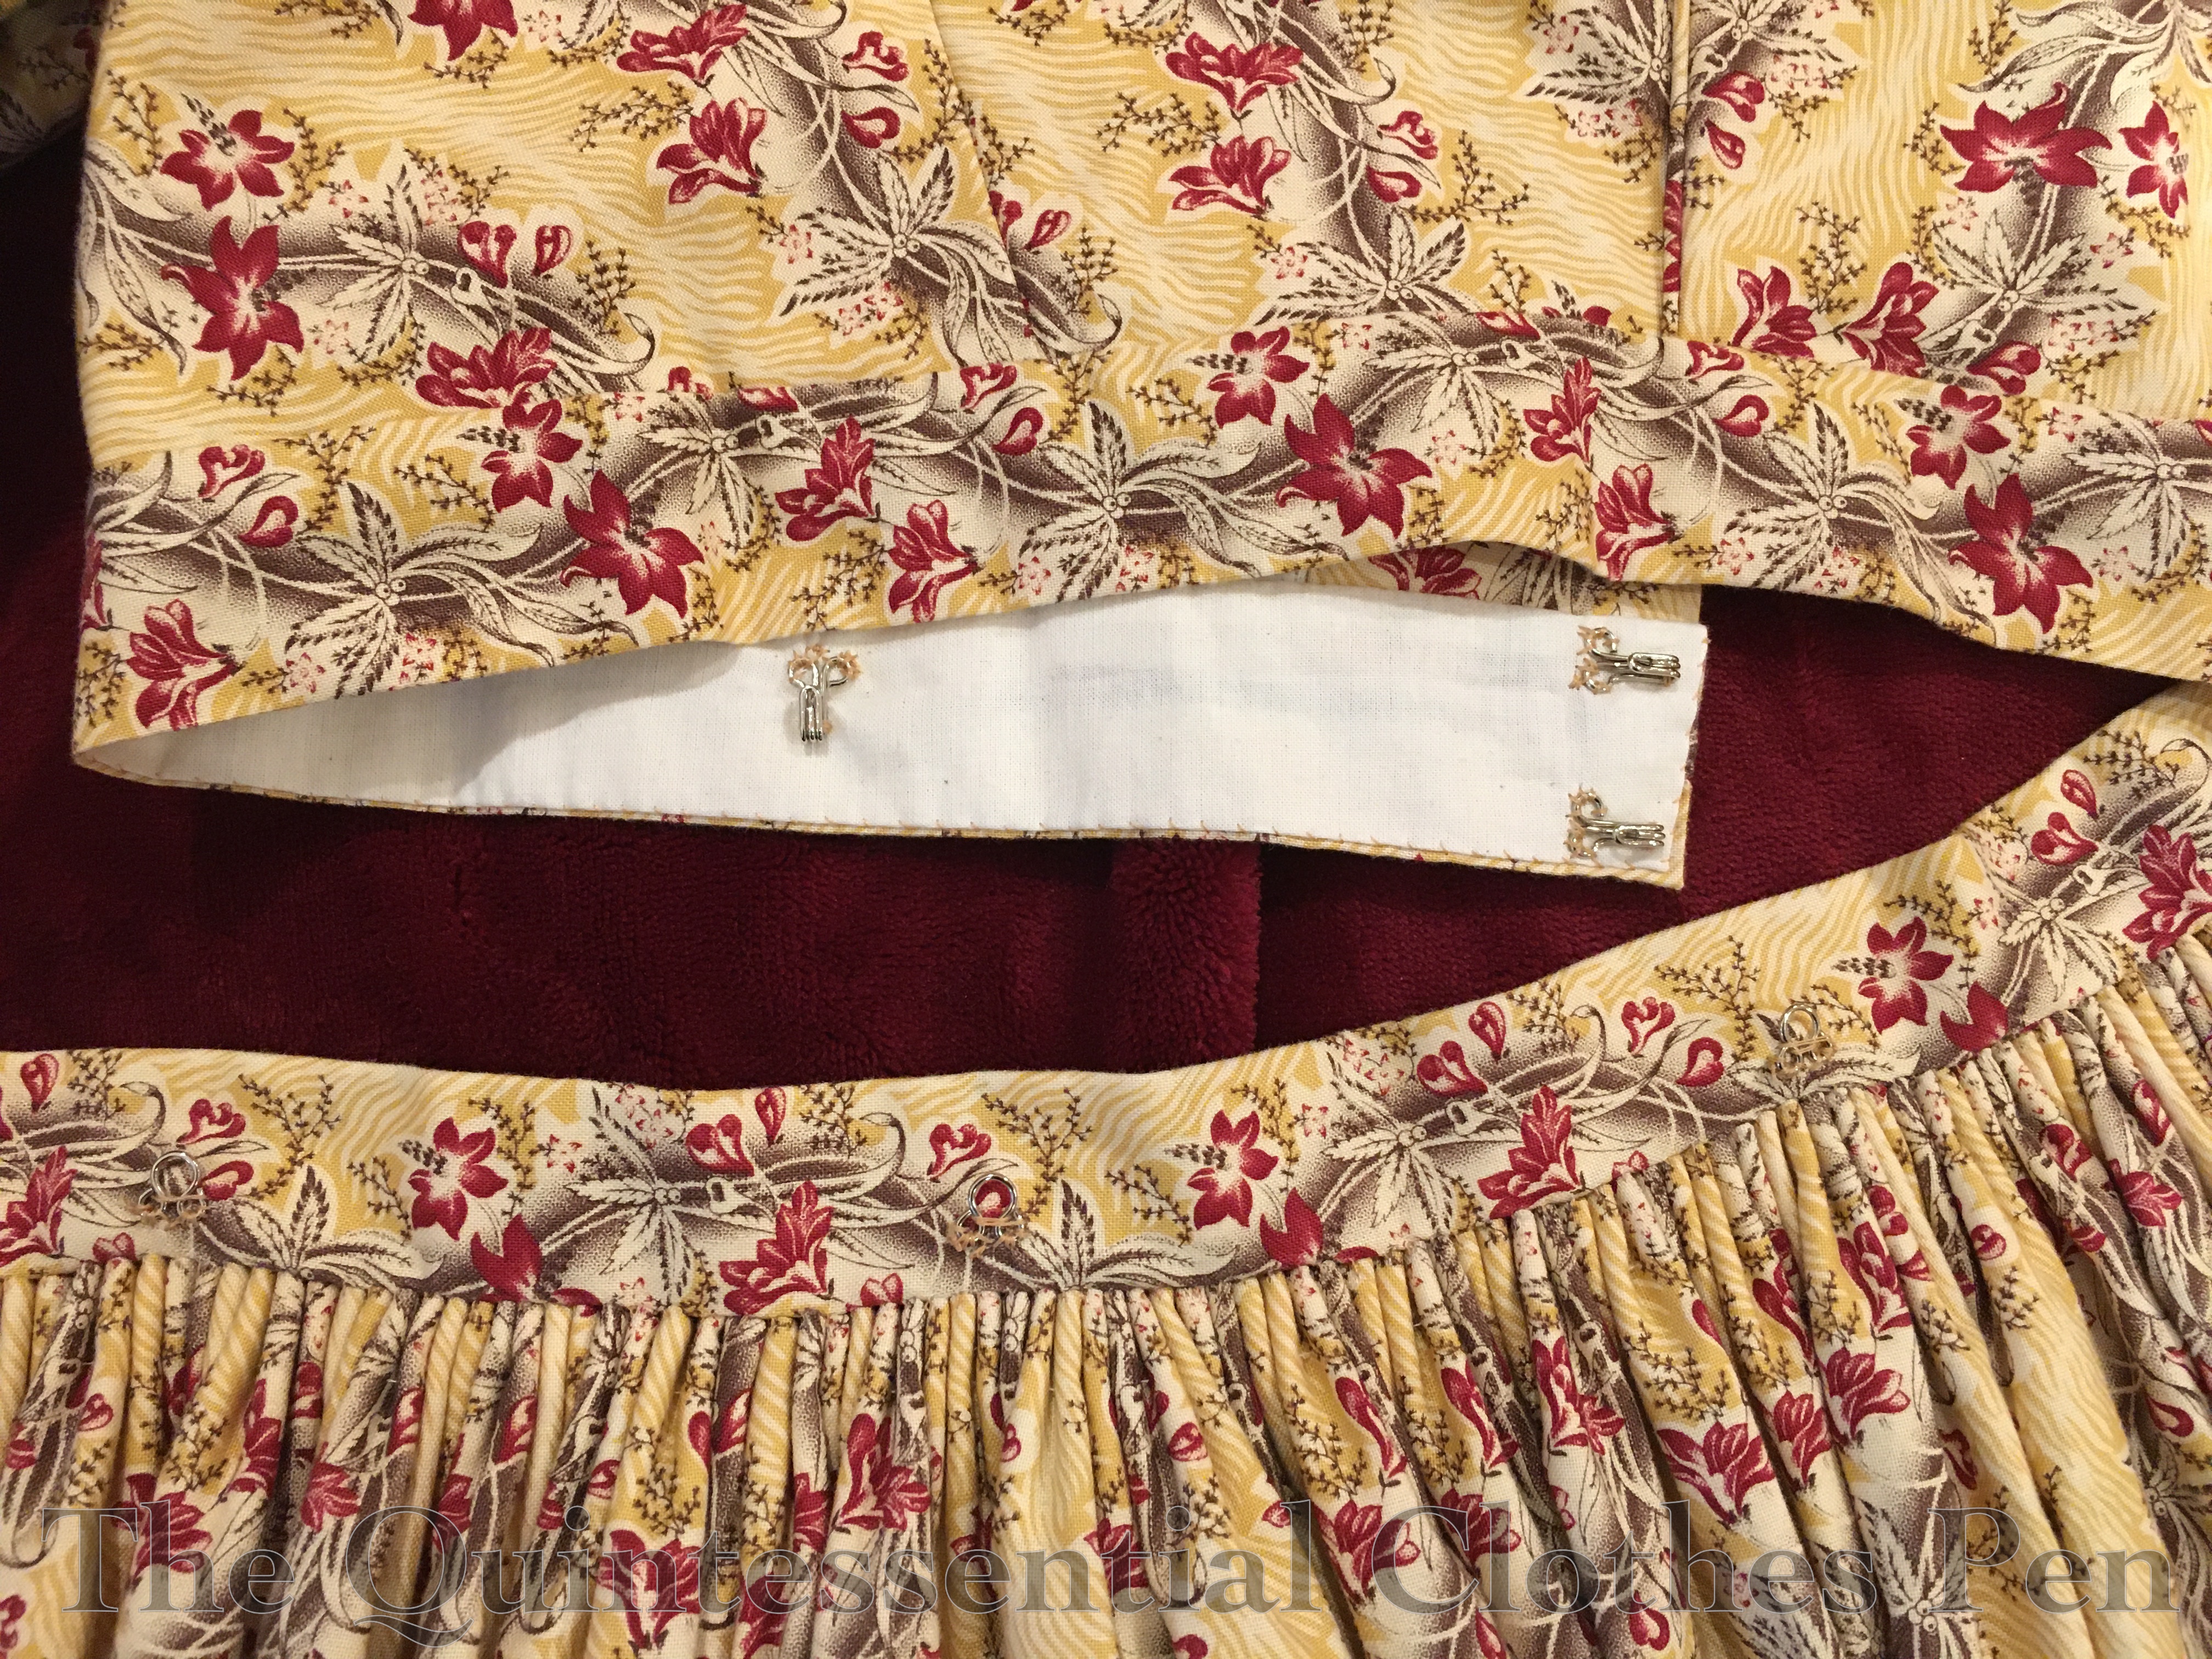
I decided to make one skirt with two bodices, so in addition to this 1834 dress I also have an 1838 bodice halfway completed. It is a variation on a theme, using mostly the same bodice pieces, but with a different front style and different sleeves. More on that in the future, but for the purposes of this post it is an explanation for the fact that the skirt of my 1830s dress hooks to the bodice in a way that is common in the mid-19th century, as you can see below. (The loops on the skirt waistband blend really well with the pattern on the fabric, but you can see them if you look really carefully.)
Skirt Construction
As I mentioned earlier, my skirt is made up of 3 panels of my 45″ wide cotton. They are carefully pattern matched to keep the scrolling consistent across the panels and to help hide the seam lines. They’re not perfect, but they are pretty darn close.
Two seams are on each side of center front and one is at center back. The two front seams have french seamed pockets set into them below the cartridge pleats. This is wonderfully helpful while wearing the dress! I made sure to make the pockets big enough to hold a phone, keys, etc.
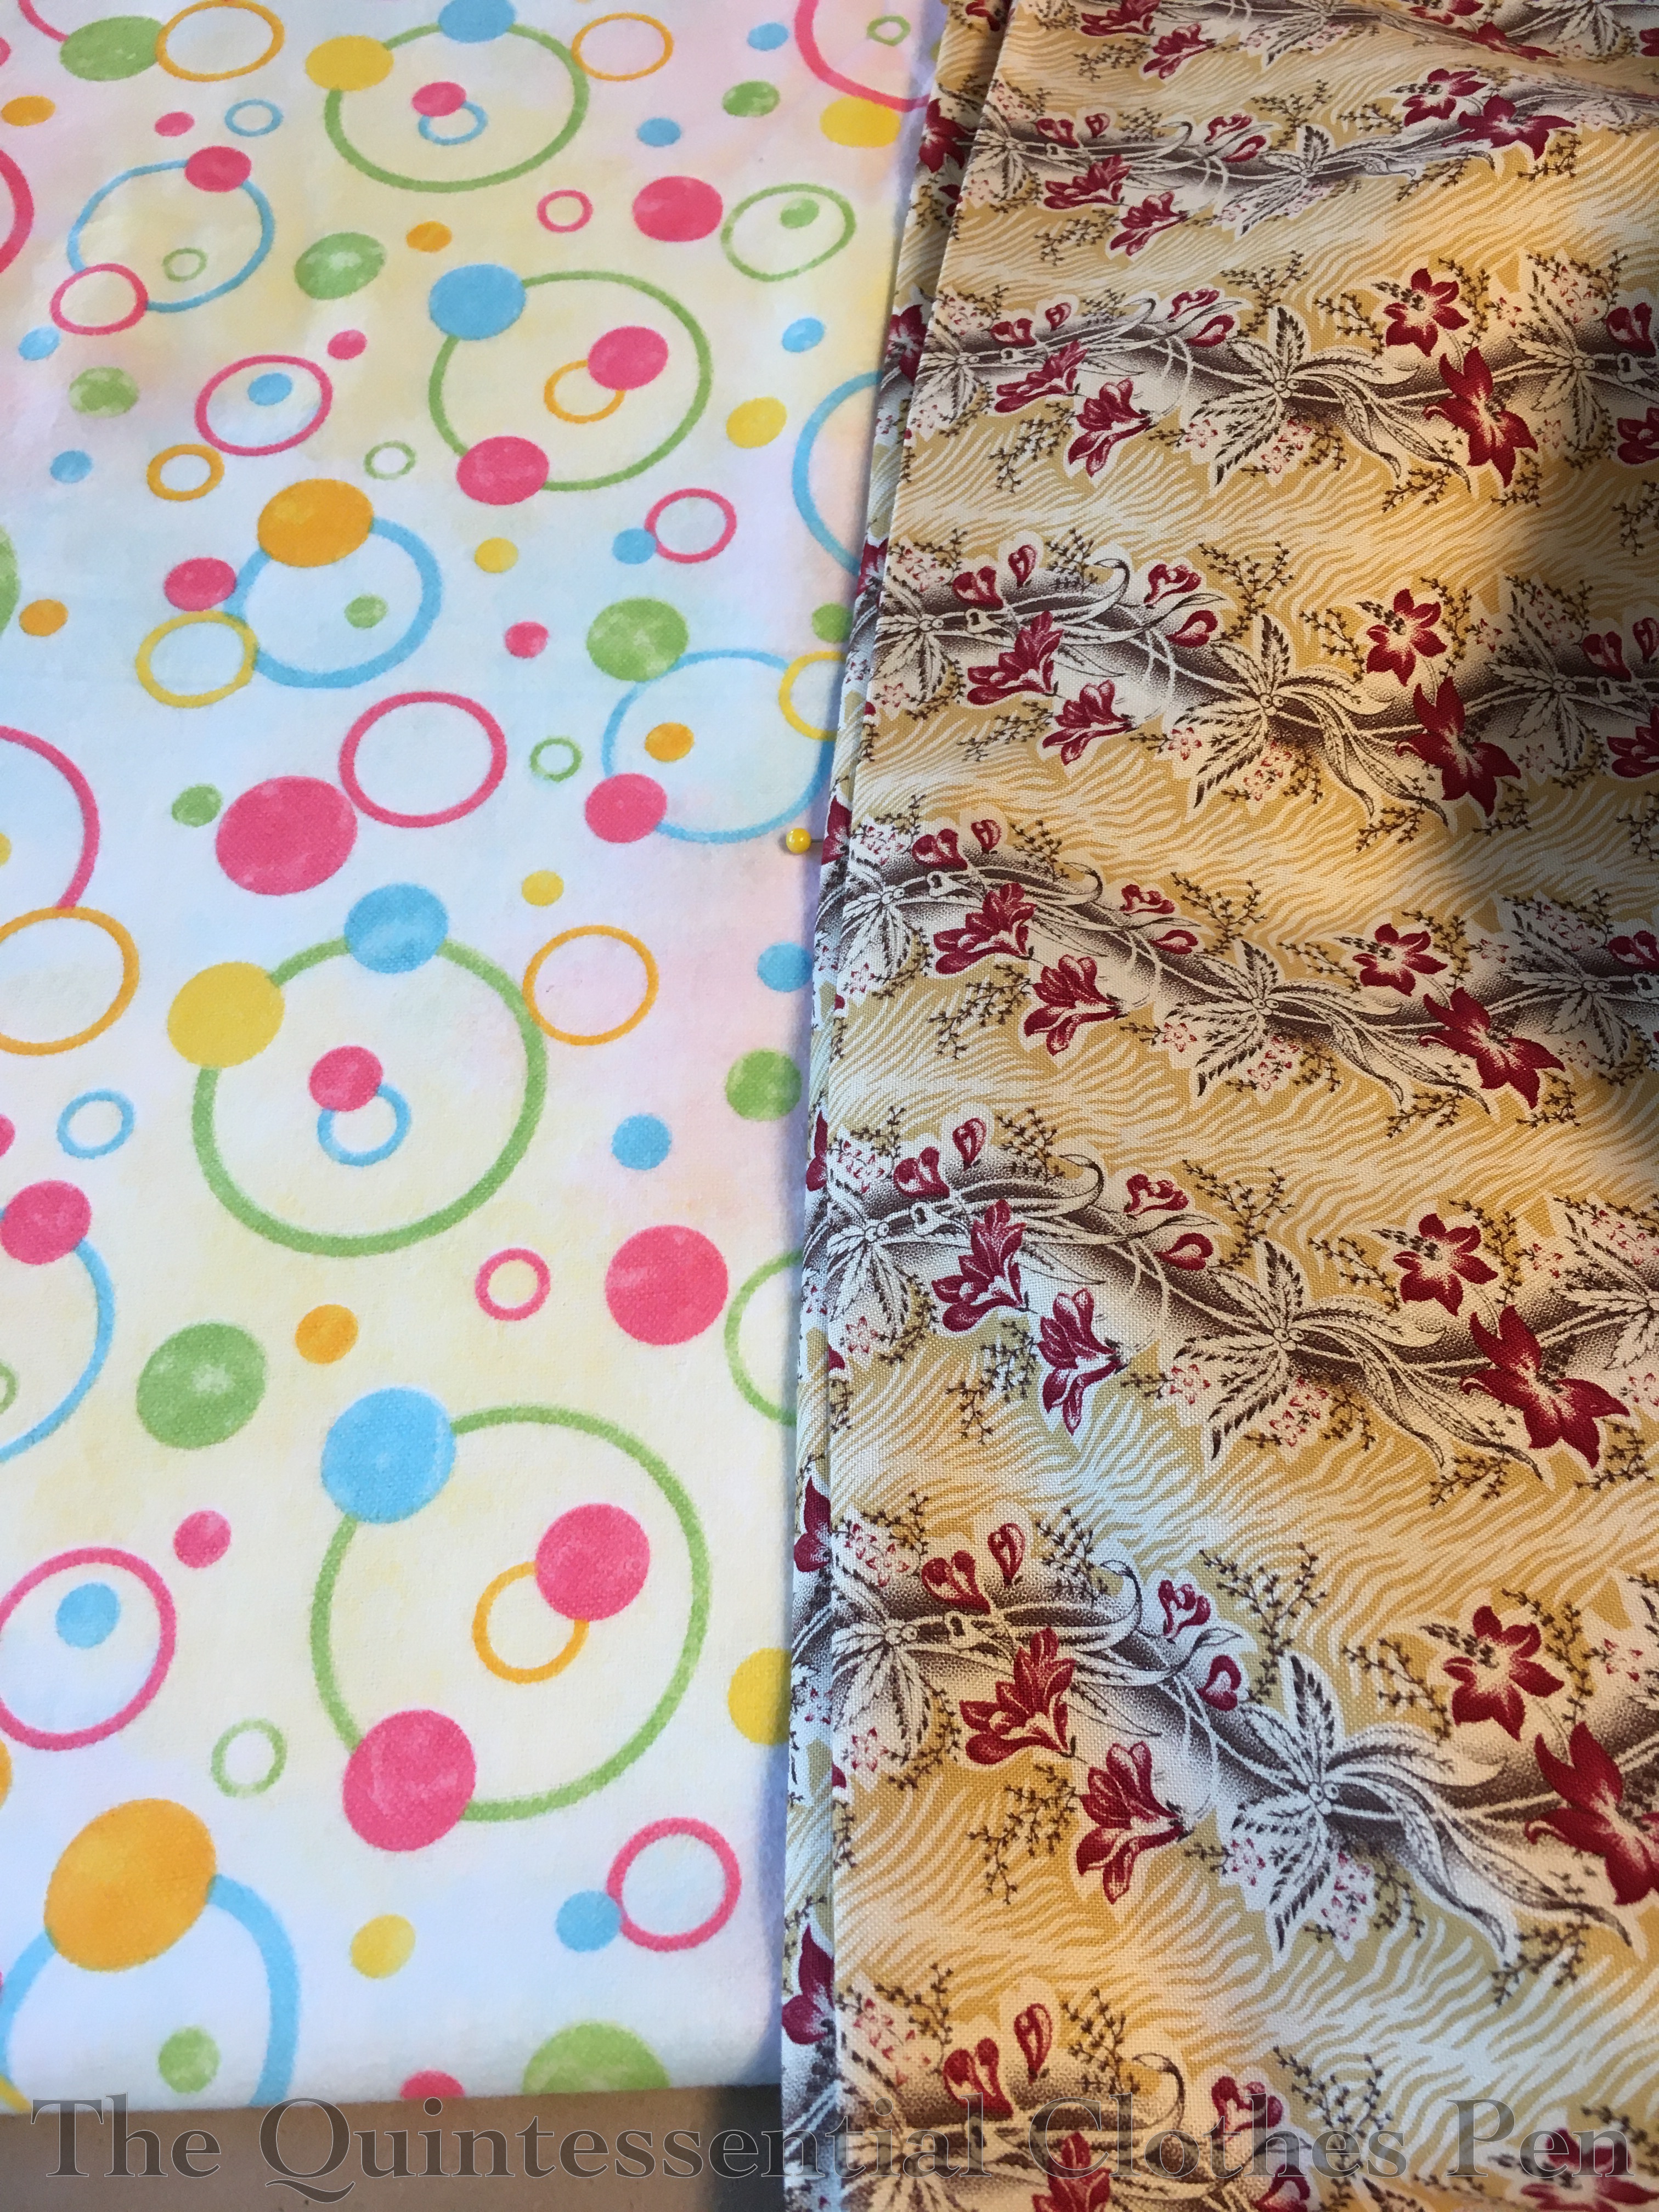
The fullness of the skirt is cartridge pleated to the waistband. I find that this quantity of cotton is weeny looking when cartridge pleated to a waistband without a little help to create loft, so I sandwiched a single layer of cotton flannel into the pleats to help them have a little bit of puff. I just used scrap flannel from my stash for this–the fun dot print pictured below. This is the top of my skirt pressed and ready for pleating!
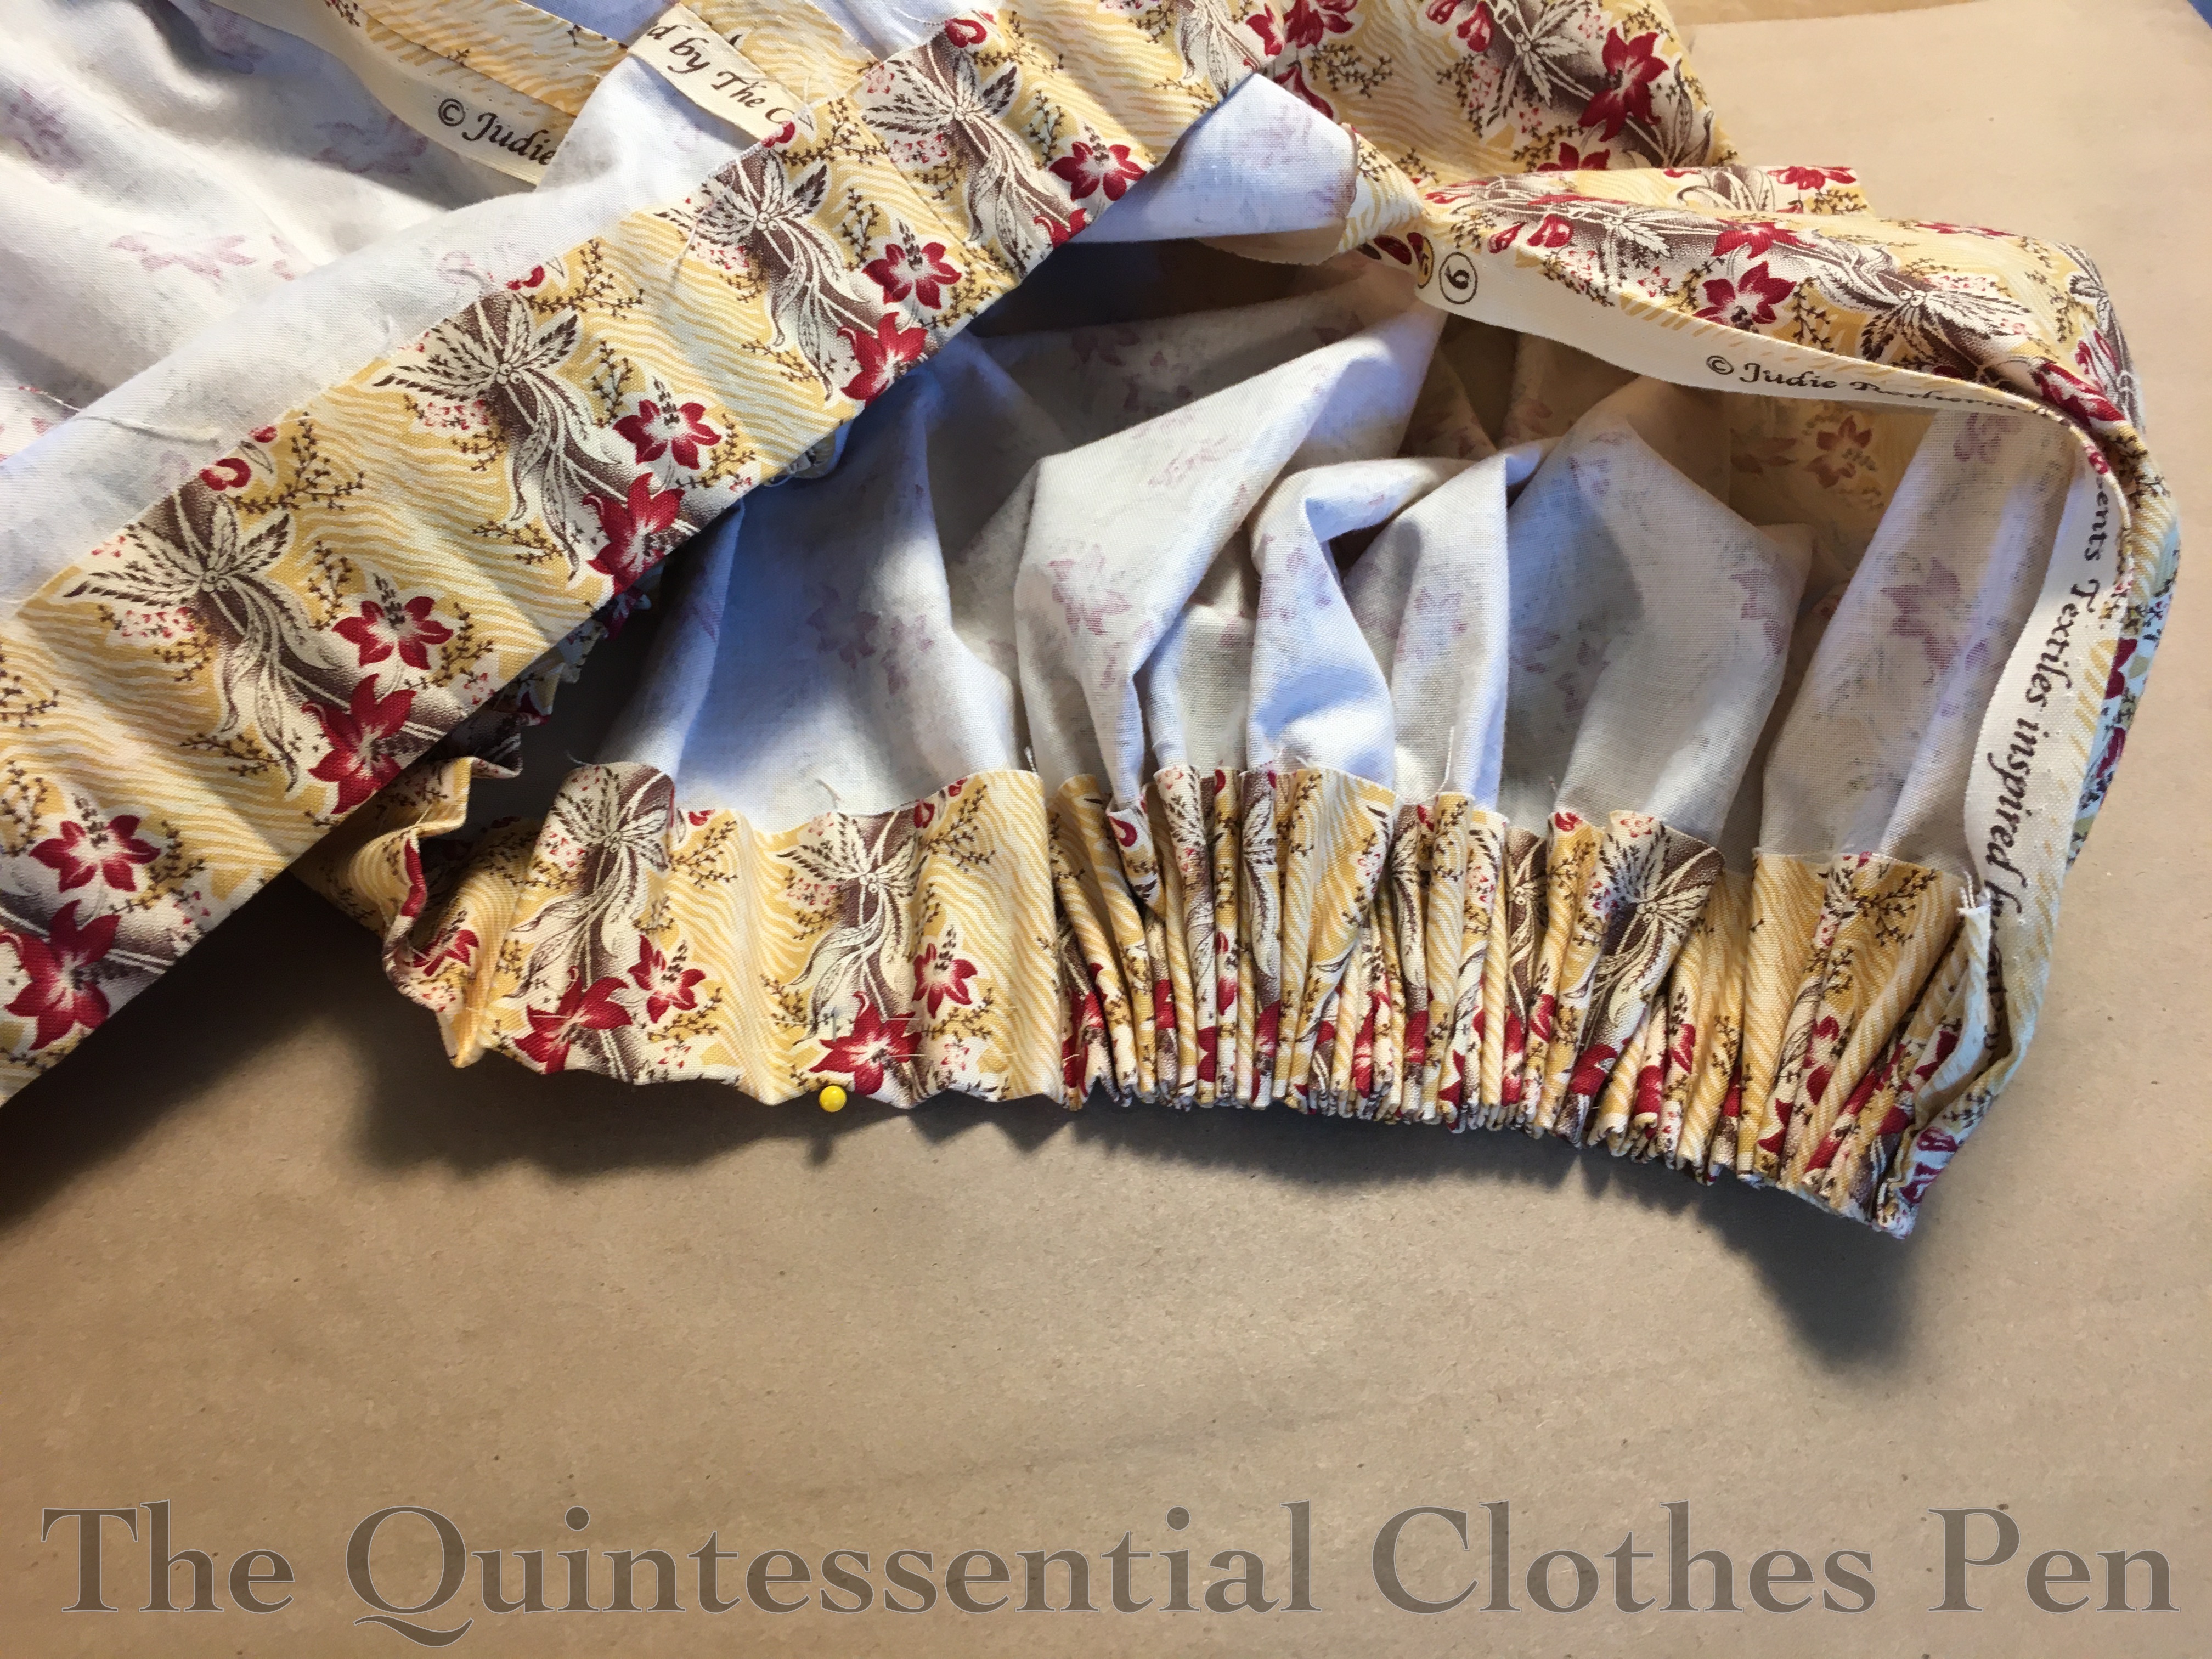
Here is the skirt in the process of being pleated. The top edge is left raw and folded over the flannel before I ran two rows of parallel stitches to form the pleats.
I absolutely eyeball my cartridge pleats! My stitches are vaguely even but I really don’t worry too much about that. I mark the quarter points of the skirt and waistband and then adjust the pleats to fit. No math for this process!
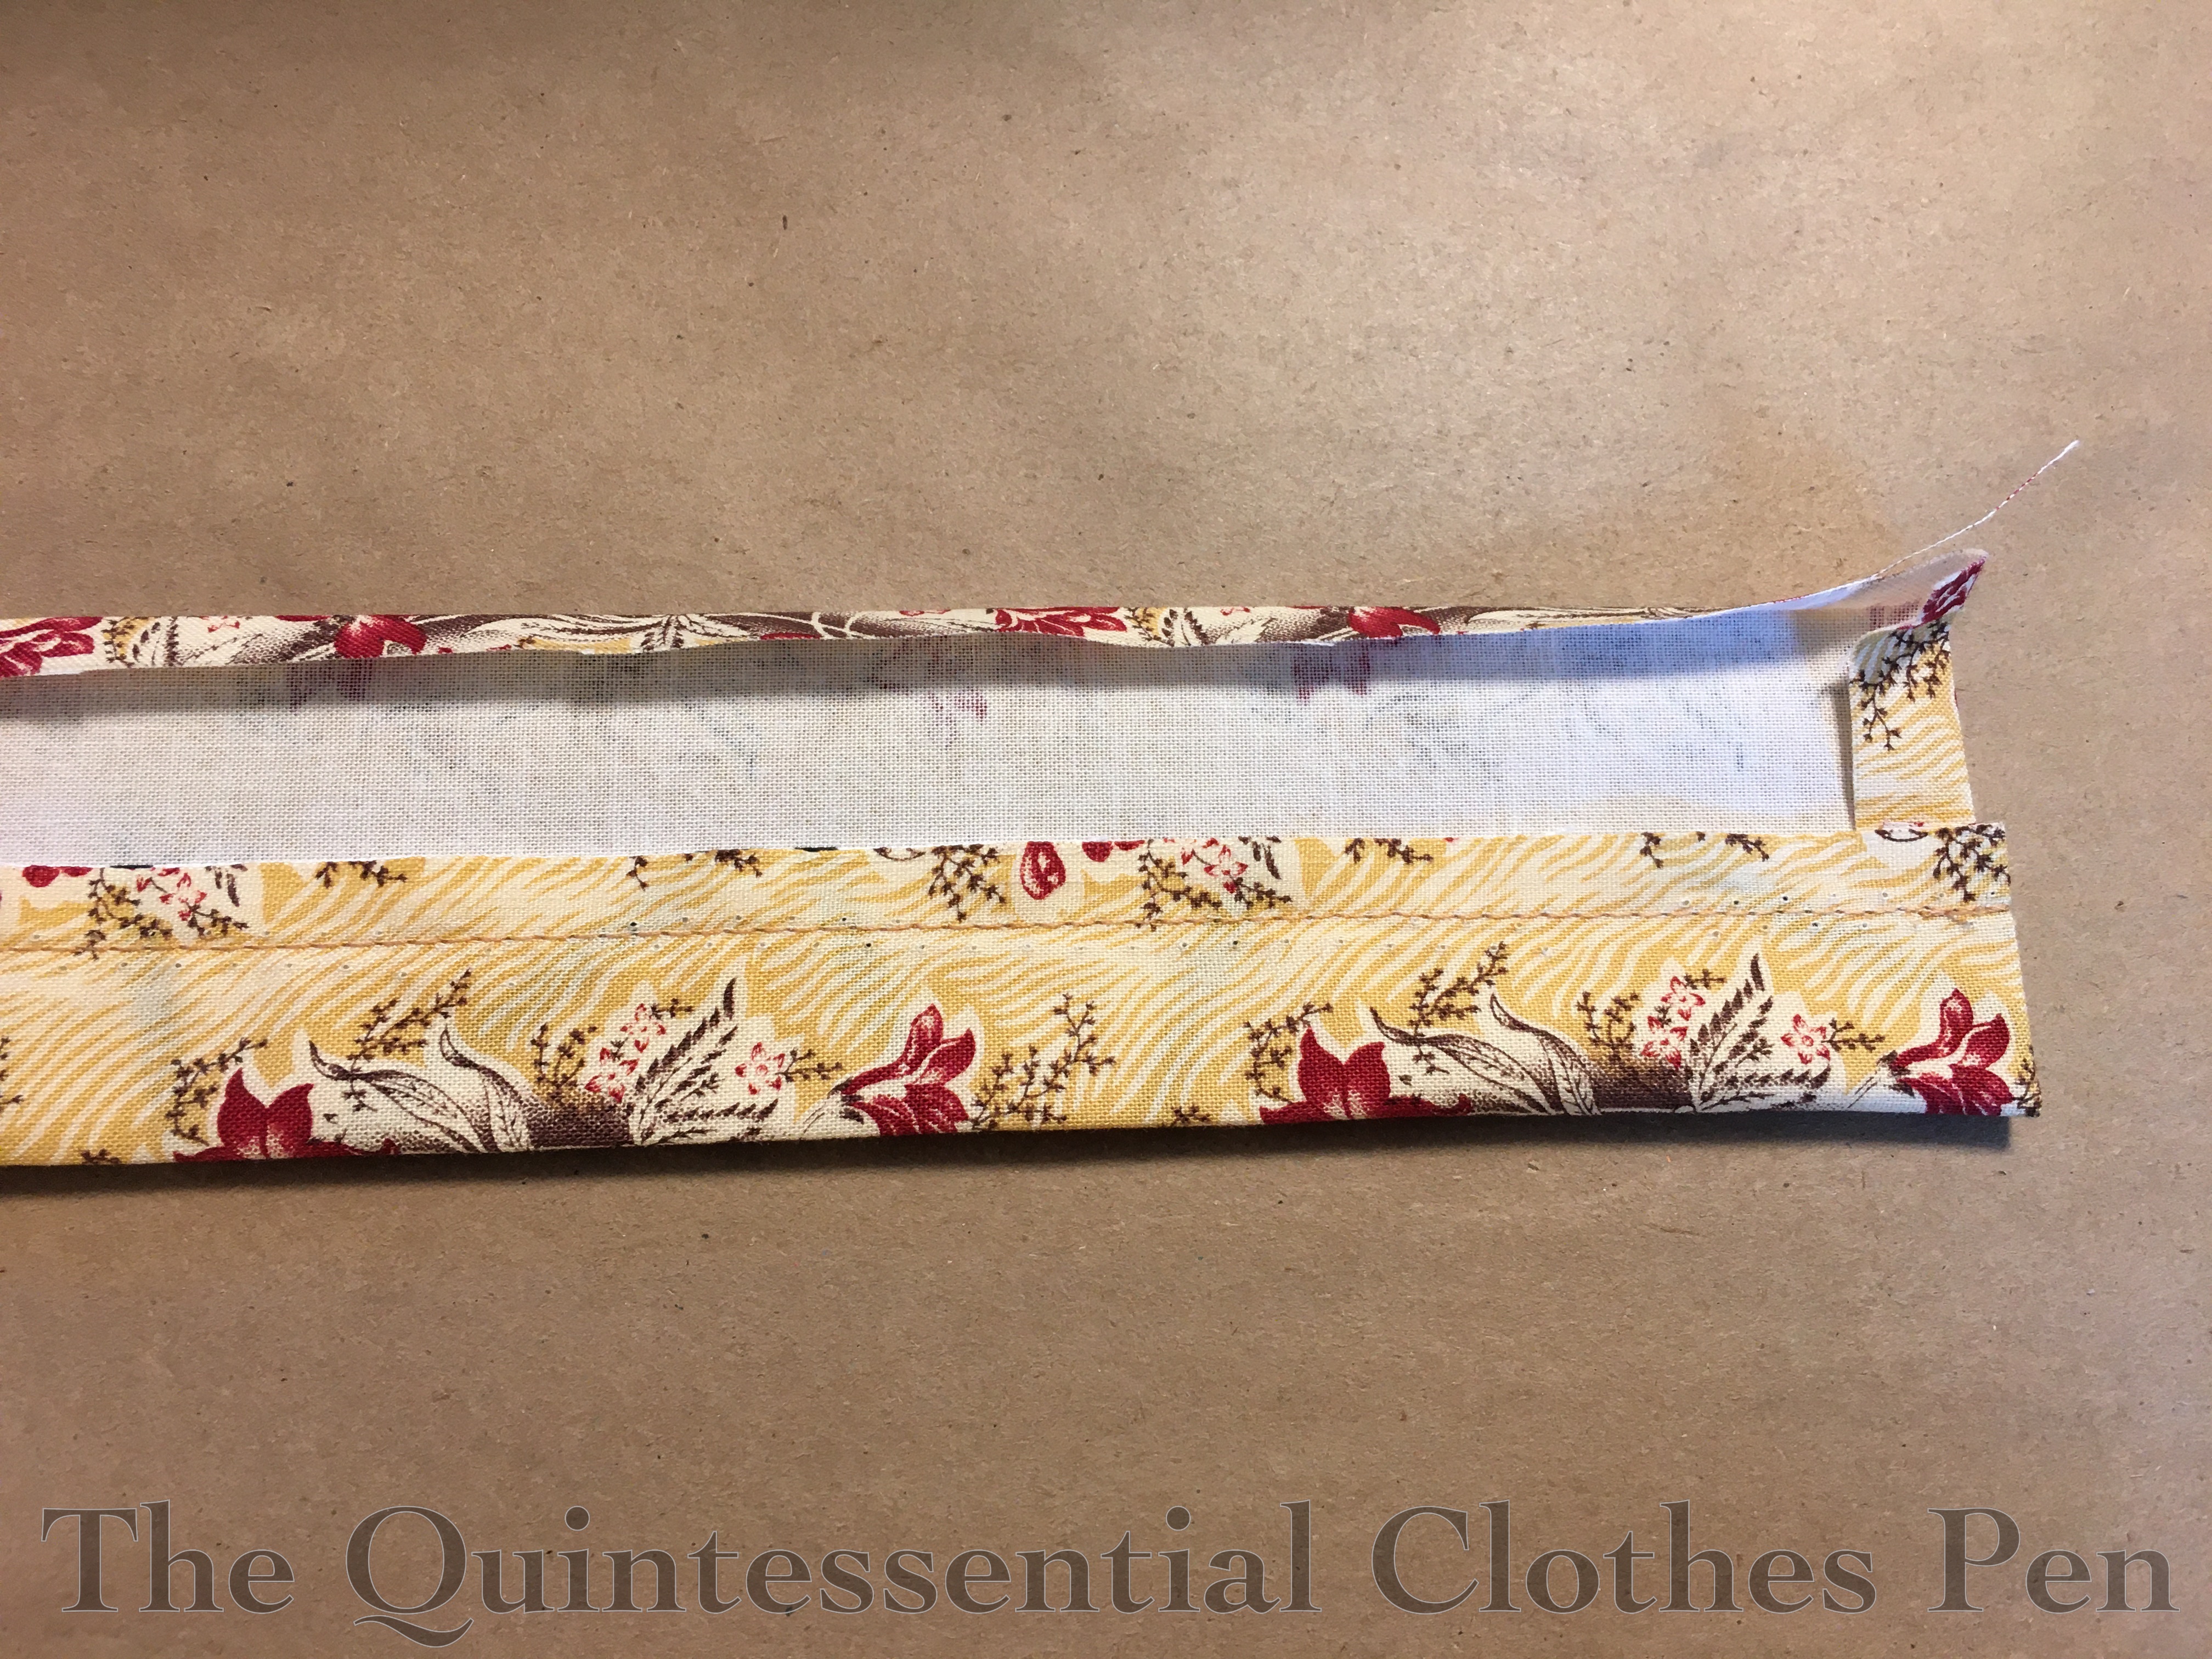
The waistband has a single layer of canvas inside (a scrap from a decorating project) to help stiffen it and provide stability for the cartridge pleats and closures. This is machine stitched to the cotton where it will not show.
The cotton is then wrapped around the canvas and whip stitched in place. I finished the waistband entirely before whip stitching the cartridge pleats in place.
Bodice Construction
The construction of this bodice is pretty straightforward as 19th century bodices go, though I spent a bit of time searching out photos of extant dress interiors from this decade so I could see how they were finished (or left with unfinished edges!). I found these dresses featured on All The Pretty Dresses very helpful, especially as they have interior views: late 1830s green/blue/red cotton print dress and early 1830s brown dress.
There are other inspirational dresses on my Pinterest board for this project, as well. Many of them are held by the Metropolitan Museum of Art. Those are excellent because you can really zoom in on the photos to look at details, but unfortunately they don’t often show interior views of the dresses.
The hardest part about this bodice was the pattern matching! It was mind boggling to keep the flowers growing upwards, match the wave, keep the dark pink flowers at corresponding places, and keep some parts on the bias and some on the straight.
For example, here is my first attempt at the front bodice, which is cut on the bias. It’s not awful… but it’s just not quite right, and that bothers my eyes.
I very carefully tried again…
And was able to get this, which I was much happier with!
And I was able to use the reject front piece to cut out a pocket piece (and later a bit of bias as well)… no waste here!
Here is the front piece after flatlining (the fronts, side backs, and backs of the bodice are all flat lined with muslin), stitching the darts, and putting cording down the center front seam.
Ah yes, the cording! There is 1/16″ cotton cording in most of the bodice seams (front, side back, shoulders, armholes, neckline, and to finish the cuffs). This detail is taken directly from extant 1830s dresses.
My cording is made up of bias scraps, some as small as about 4″ long, that are pieced together. The cording is machine stitched. I made it with even seam allowances for most of the seams, but thought ahead and offset the seam allowance for the neckline cording, to make it easier to turn it under and whip stitch later. The photo below shows the neckline cording (on the top) and regular seam cording (on the bottom).
Here are the side back pieces with the cording attached, before being sewn to the back pieces. As you can see, I carefully matched my pattern across these two pieces as well.
And here is one side back sewn to its corresponding back, with the cording in the seam. Even across these pieces my pattern matching is pretty good, especially at the bottom!
And the back! It also makes me very happy, but was a super mind boggle to figure out! I have a flap that overlaps past center back, covering a pleat on the other side that will anchor my loops. I found this detail on a number of 1830s dresses, including this 1835-1836 dress at The Met and this c. 1837 dress at The Met.
It doesn’t look like much until it’s lined up to be closed… and then it’s perfect!
The final step was to finish the bottom. I wanted to have a self fabric waistband on this bodice, as with the bodice at the V & A, so that I would have the option of wearing my dress with or without a belt, while still having the visual change of pattern in the fabric.
The outer waistband and inner muslin facing encase the bottom seam allowance of the bodice. They are machine stitched at the top, have graded seam allowances, and then the muslin is whip stitched along the bottom.
Sleeve Construction
With the bodice mostly assembled, I moved on to the sleeves. These are not flat lined.
I upgraded my sleeve puffs for this ensemble by giving them ties to attach to the armsceye of the dress so I can control the height that they sit at. This is essential for getting the right shape poof with this sleeve style. Looking into a sleeve, here is one sleeve puff tied in place.
I edged my decorative mancheron and cuff zig zag with narrow lace before attaching them to my sleeve. The cuff zig zags are sewn on by hand, while the full tops of the sleeves are gathered and machine sewn to the mancherons (you can see a the seam allowance from this seam in the photo above).
After the trim was added to the cuffs, I sewed cording to the bottom edge and then a muslin facing to finish everything off. This allows me to have nicely finished edges for the sleeve openings, which extend up about 8″ and allow for the tight fit of the forearms.
Here’s what that looks like flipped up and ready to be slip stitched along the top edge. You can see my hand sewing from attaching the cuff zig zag.
So… I got this far and realized that my sleeve was too narrow (even though I’d had no trouble in my mockup!) and my hand wouldn’t fit through the opening! Even if I made the opening higher, the sleeve edges wouldn’t butt, but would have a gap!
It’s good to have extra fabric… Having extra allowed me to make the decision to cut off the old forearm pieces and piece on new ones (with careful pattern matching, of course!). This meant redoing the cuff trim and finishing, but I couldn’t find a better solution. The seam hides under the crazy big sleeves, so it’s really not noticeable at all (even if I hadn’t pattern matched the seam!).
Finishing
Finally, after these various successes and challenges… the dress was done! Here are some more photos of it in its finished state.
This is the inside of the bodice with the skirt attached. You can see machine stitching, seam allowances mostly left unfinished (they really don’t fray at all), neck binding, closures, etc.
This closeup shows a shoulder seam, as well as the neckline and armhole finishing. The bias on the neck is turned under and whip stitched. The lace is sewn on top of that. The armhole seam allowances were trimmed and then roughly whip stitched to hold the layers together. You can also see a little square of the twill tape tie for the sleeve puff (it is sewn to the armsceye seam allowance below the shoulder seam).
Here is the finished cuff opening. Hidden under the zig zag are the hooks that correspond to the loops on the muslin facing.
This is the center back opening with all of the closures in place. Those hooks really do camouflage well on the brown scroll, don’t they? Doing the closures this way leaves lots of seam allowance at center back for me to make alterations in the future if I need to.
This photo shows the inside of the skirt and bodice. Specifically, you can see the raw edge of the top edge skirt seam allowance folded to the inside (the skirt is intentionally shorter in the front than in the back, which you can see in the varied top edge seam allowanced length), the french seam of the pocket, and the skirt opening, which is simply an opening in the back seam (no placket on this skirt, the fullness of the cartridge pleats easily hides the opening).
One last photo! This is the cartridge pleats and bodice waistband from the exterior. Cartridge pleats are always visually intriguing to me and I also love how the waistband of the bodice is perfectly cut to show off the scroll and flower pattern.
After so many construction photos, here is a reminder of what the completed dress looks like from the exterior. I’m looking forward to sharing more photos in future posts!
Thanks for sticking with me through this very long post!