Vernet Project: Witzchoura Construction

This is the last post about the construction of my amazing 1814 Vernet Project. I really enjoyed doing the research and making the parts of this project. It was great fun and such a lovely learning experience to be part of the group of people making Vernet ensembles. And I was able to wear most of the ensemble for more than just pictures! I hope to find future reasons to wear these again!

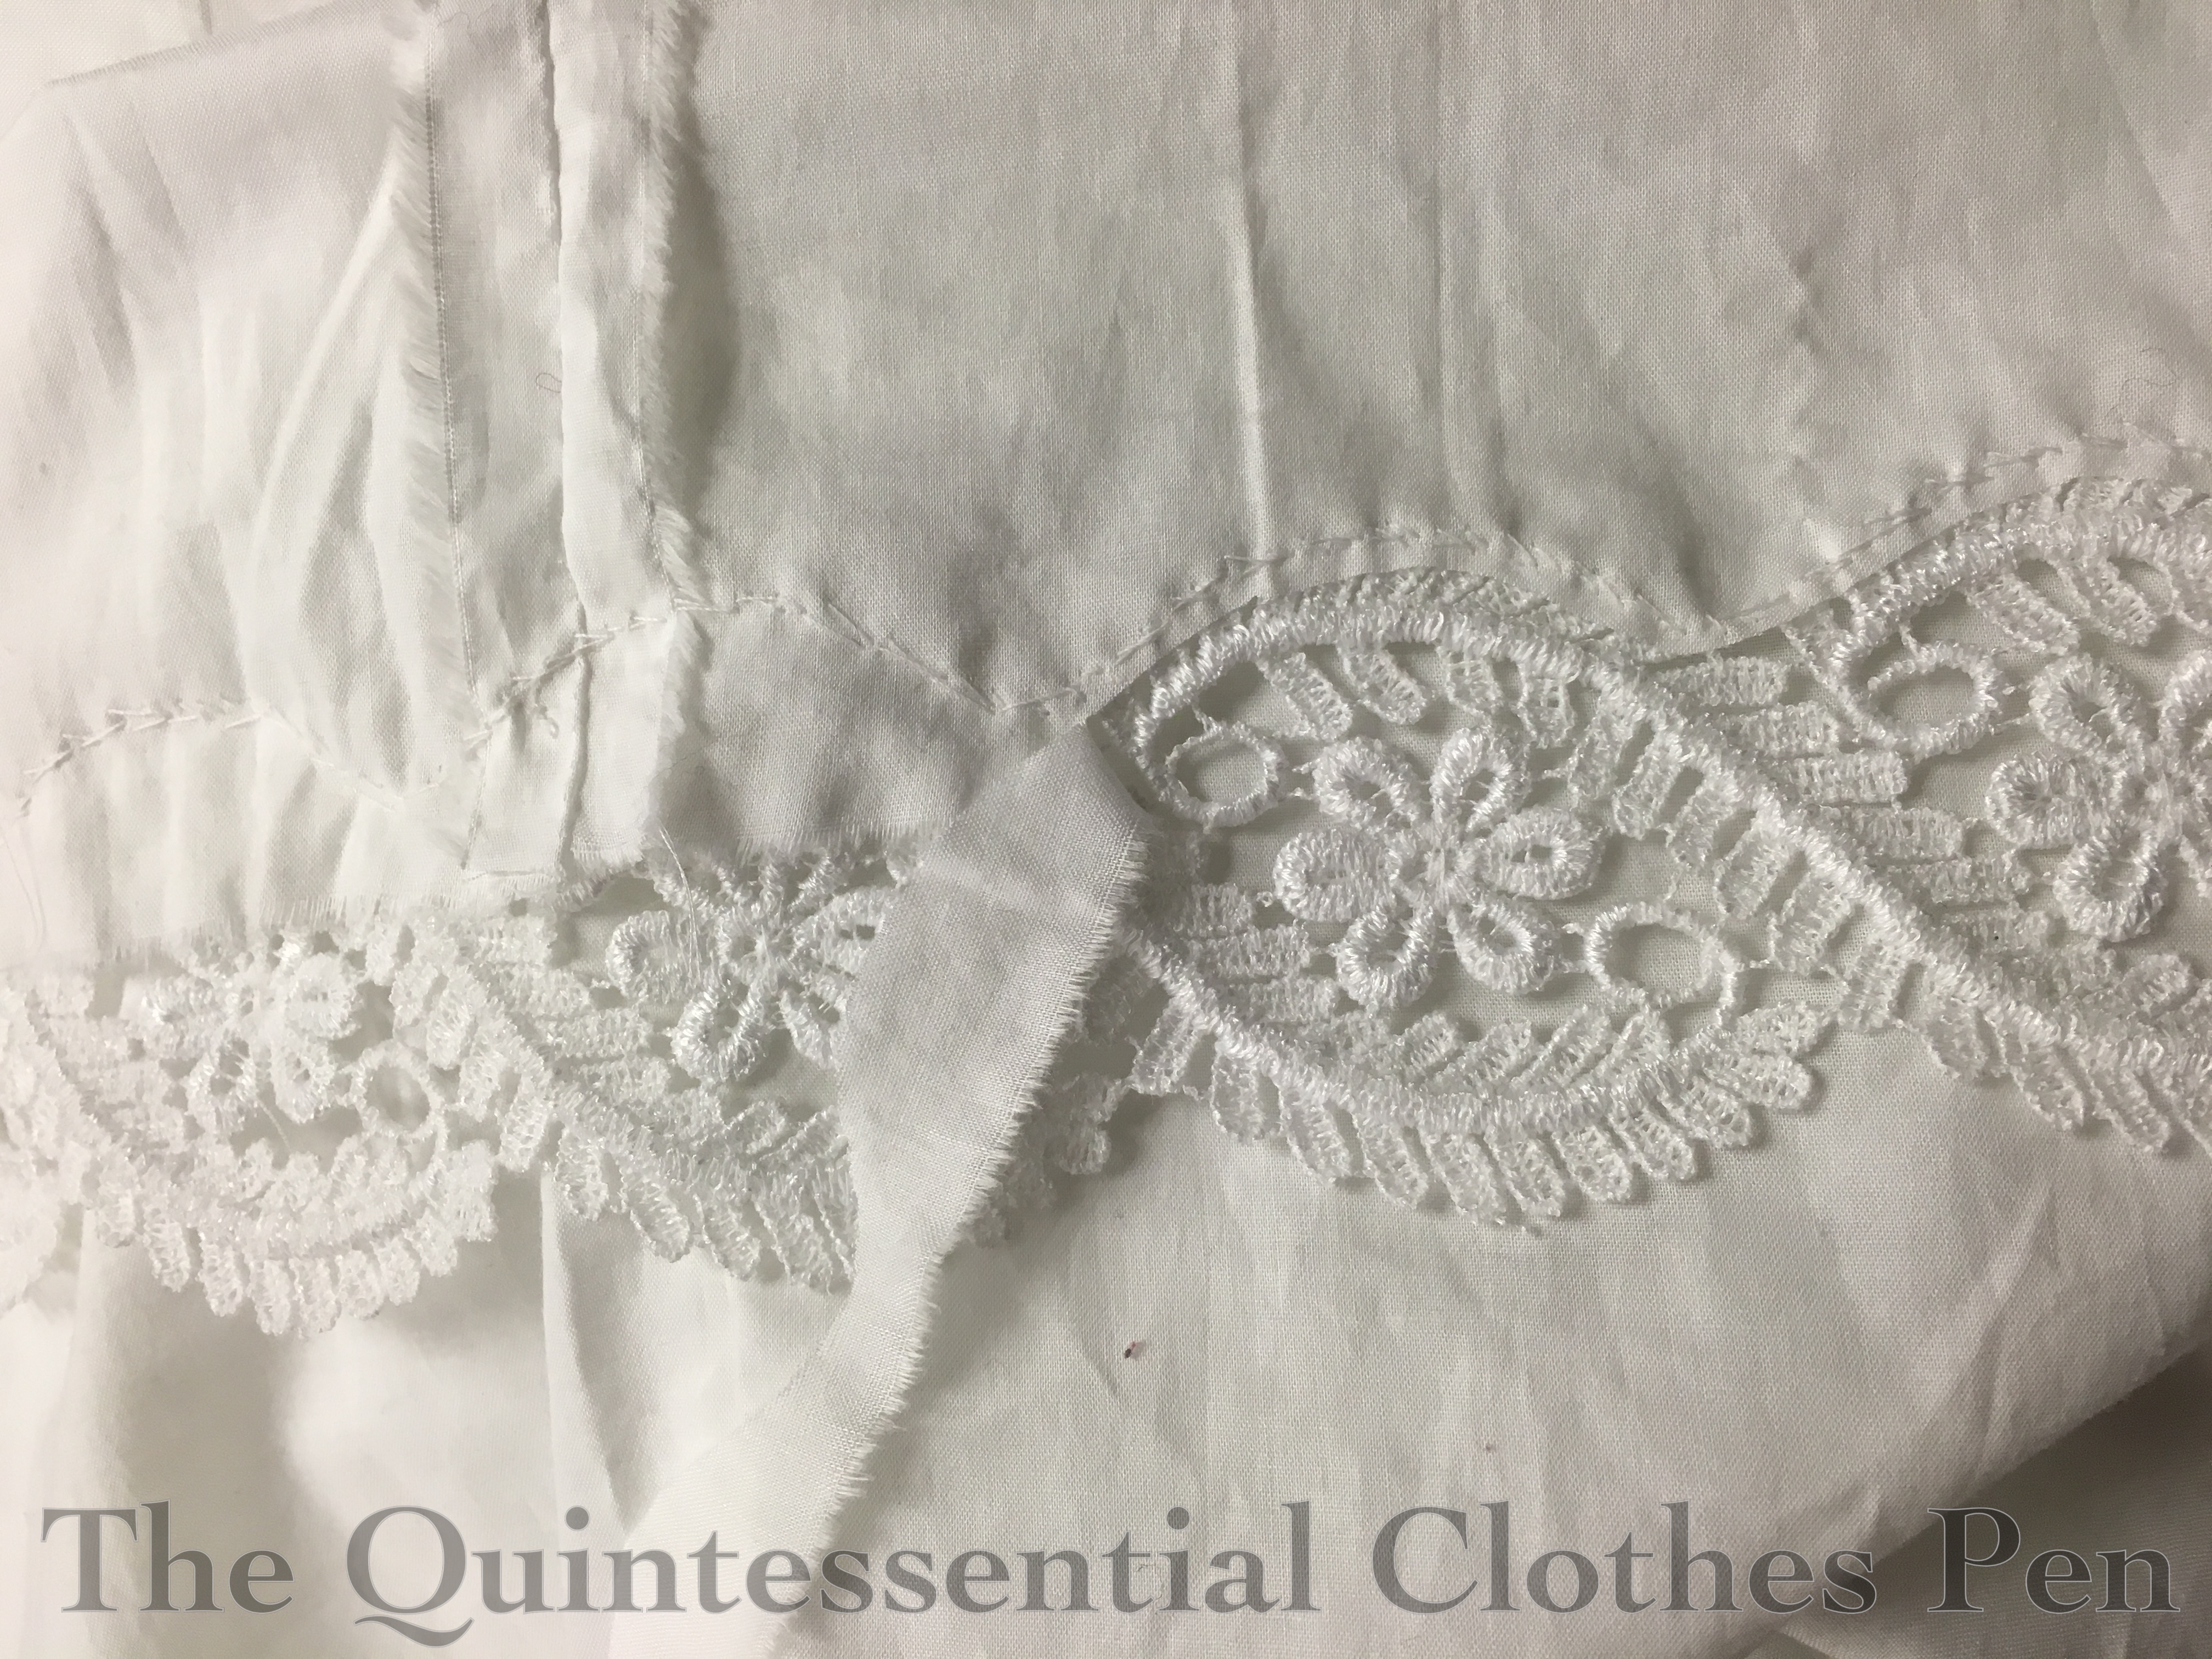
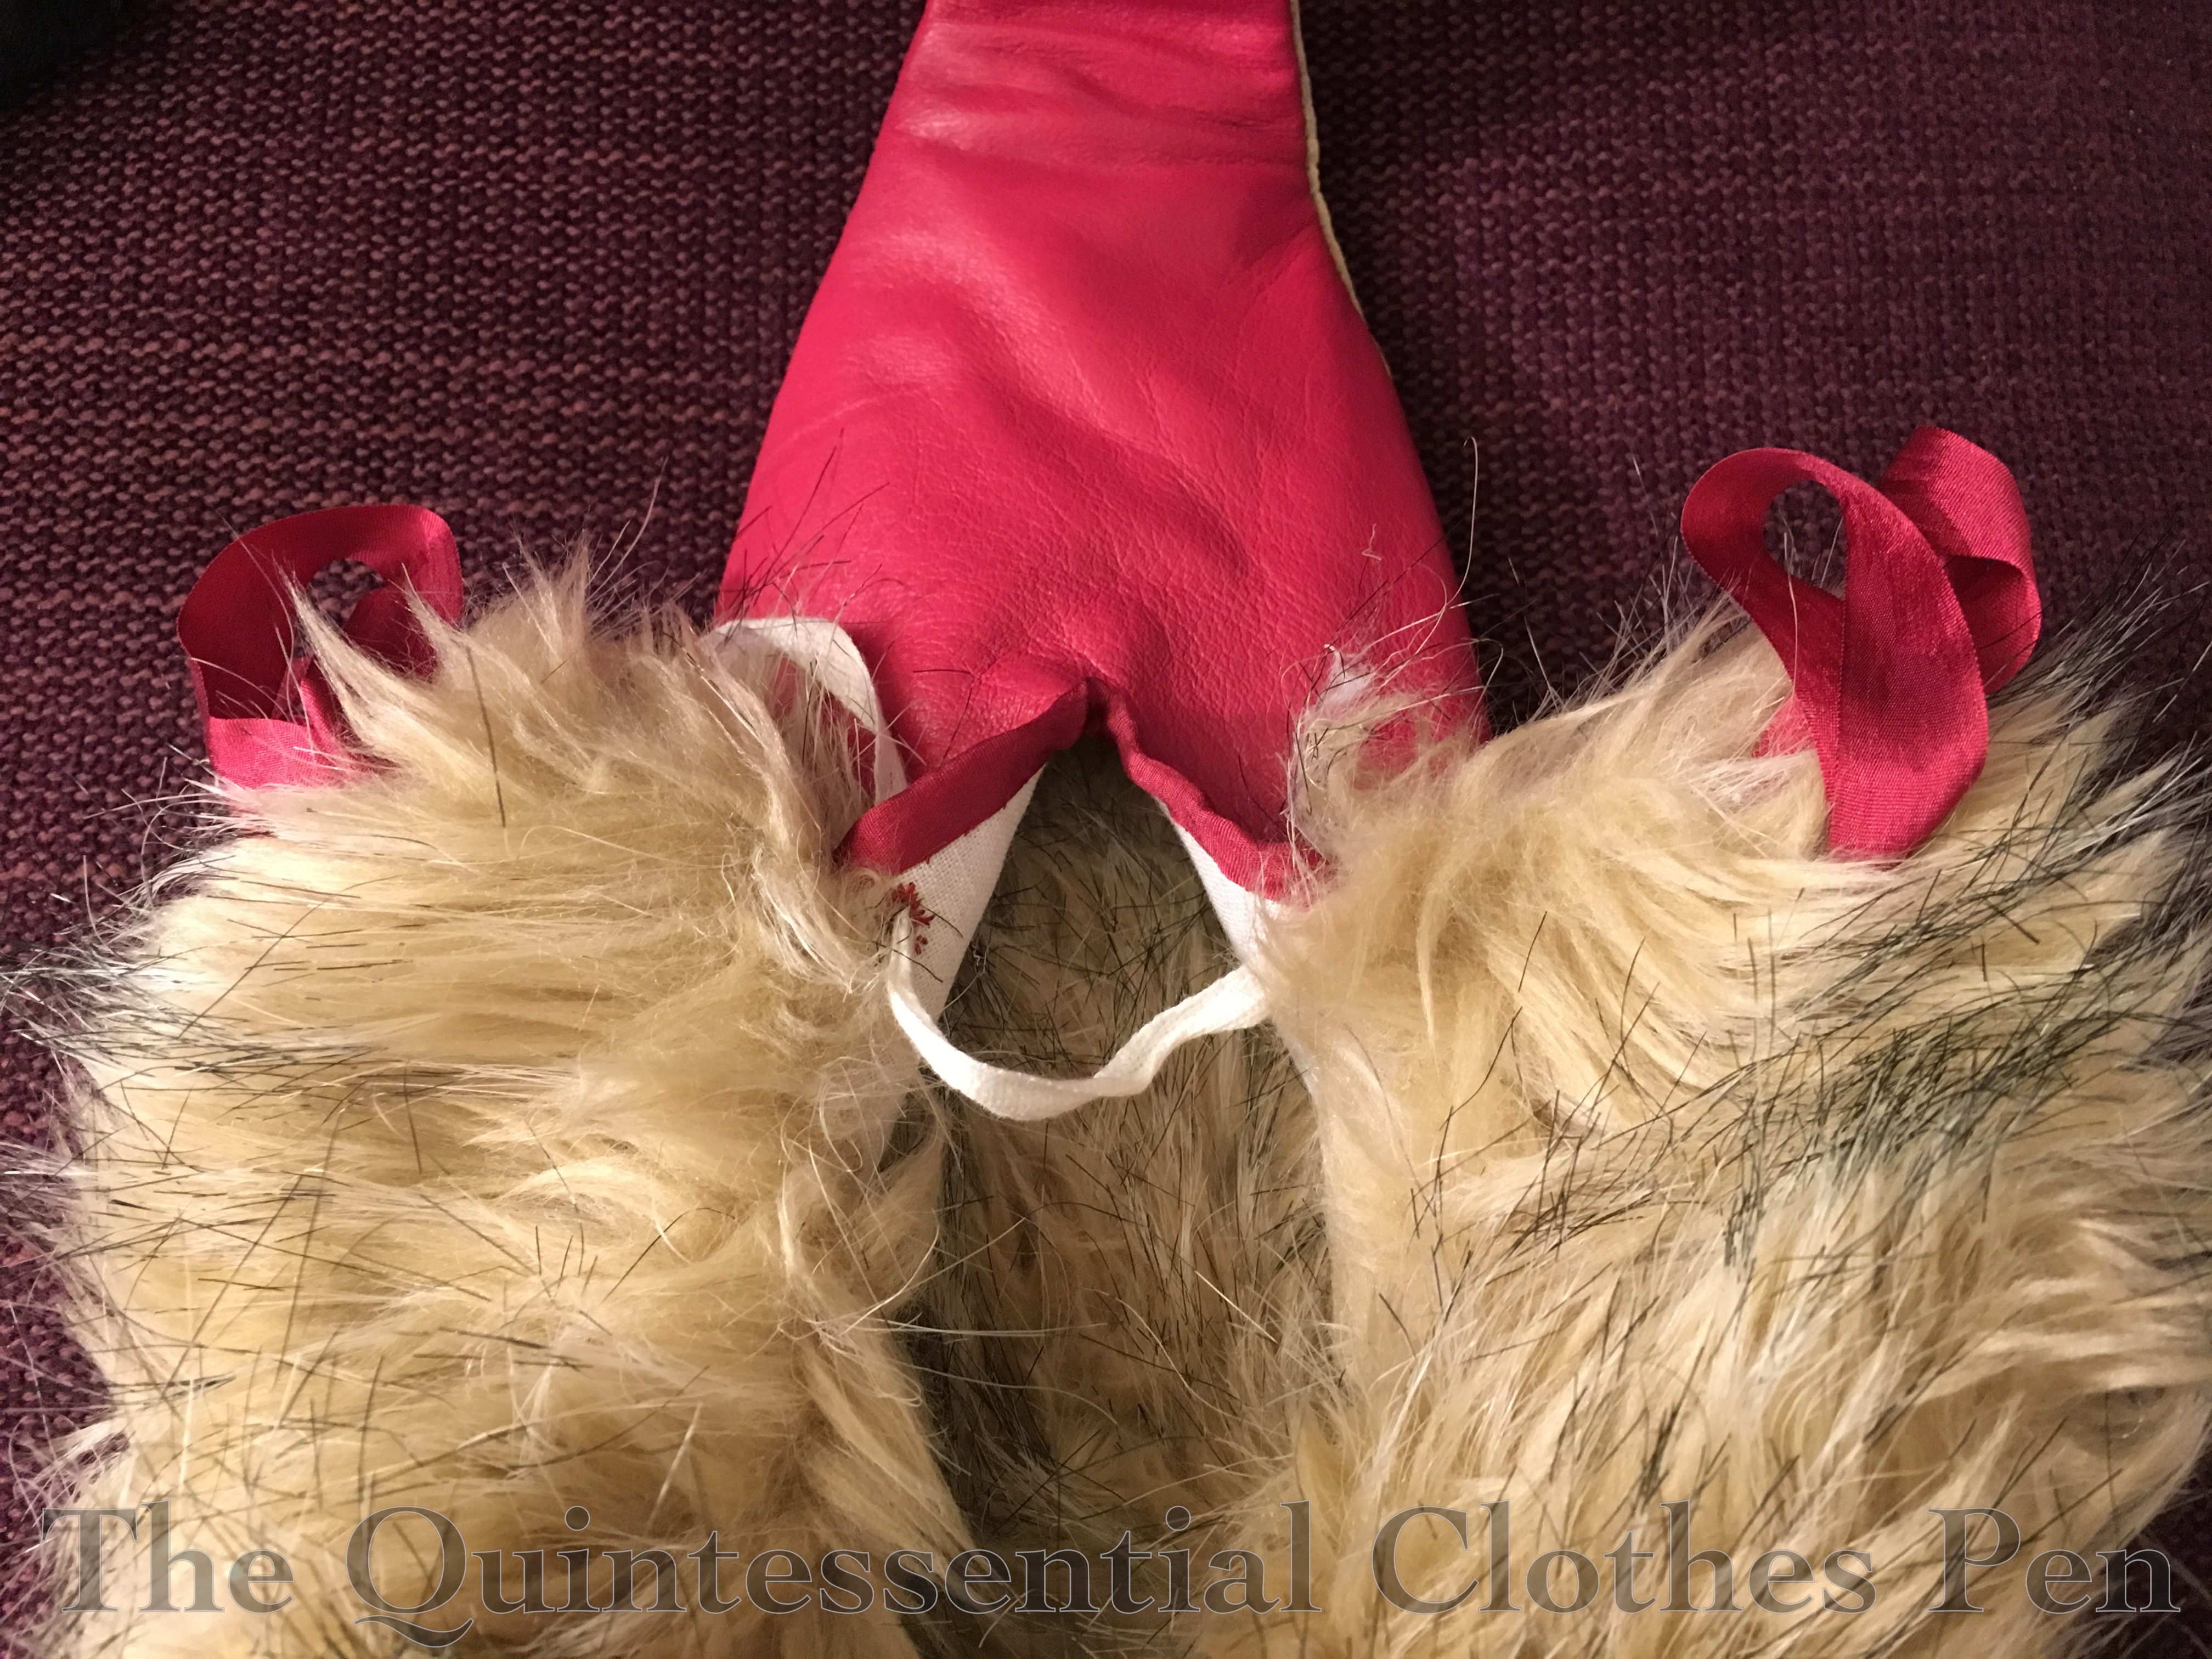
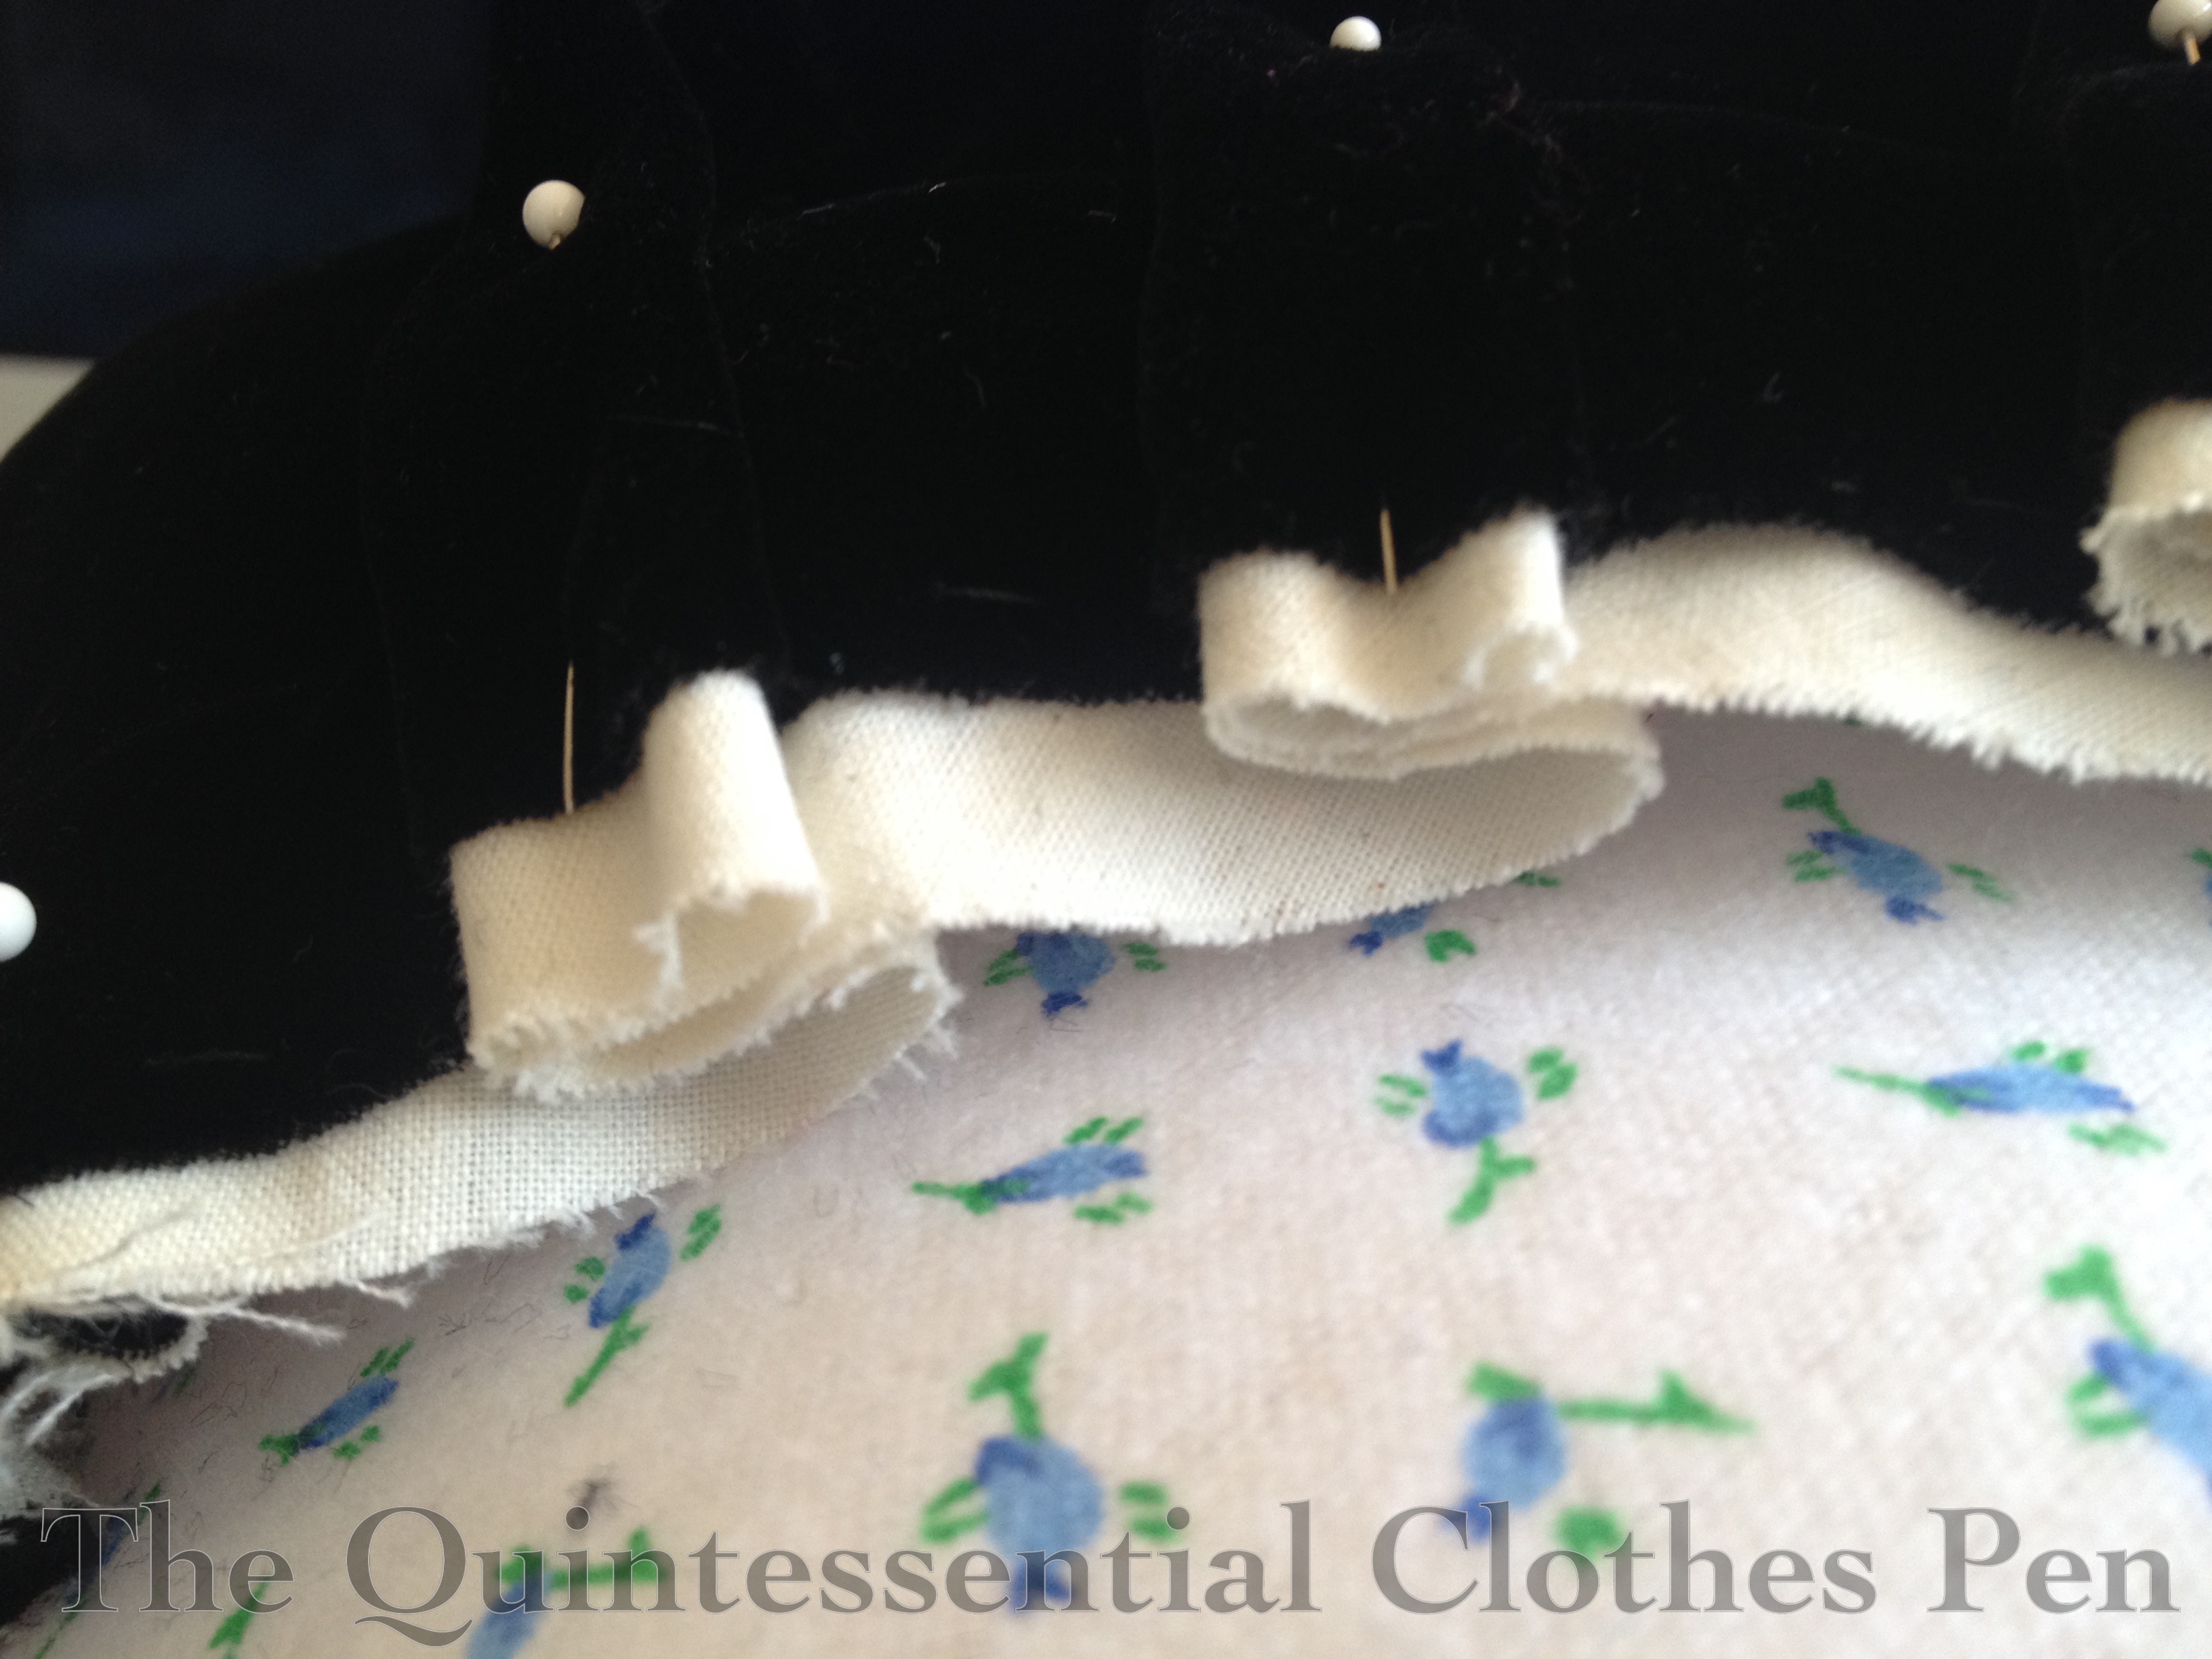
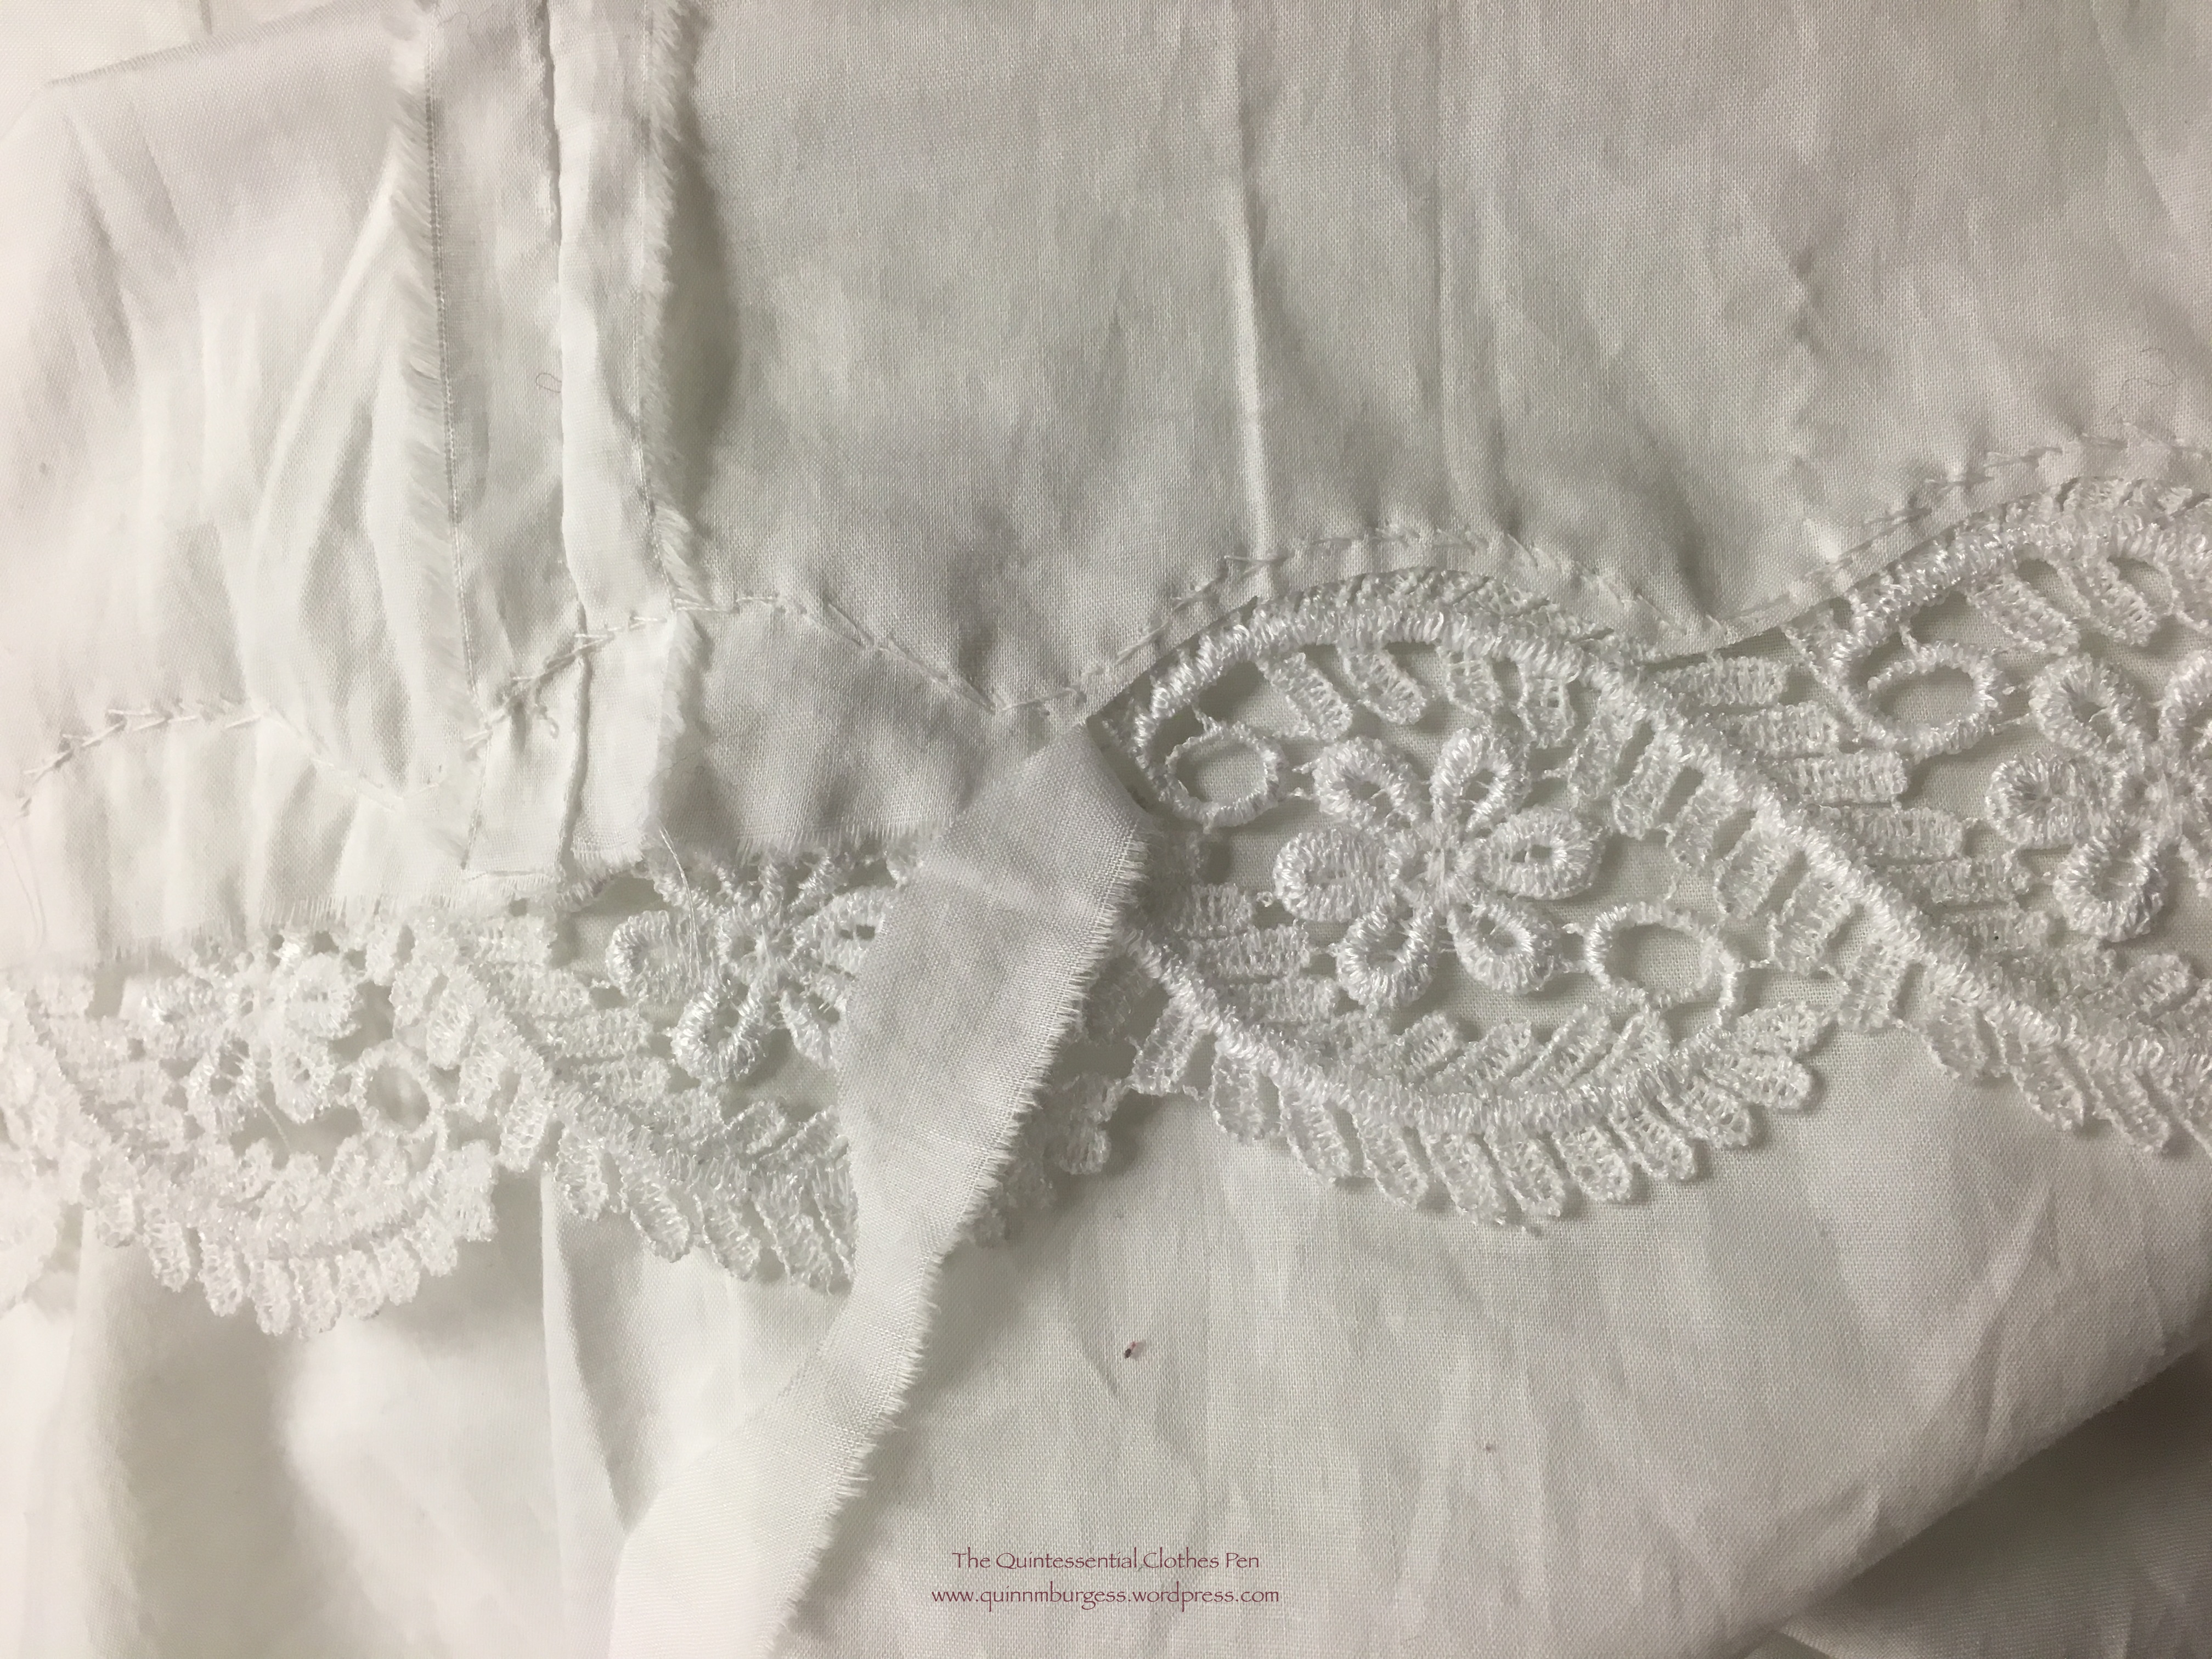
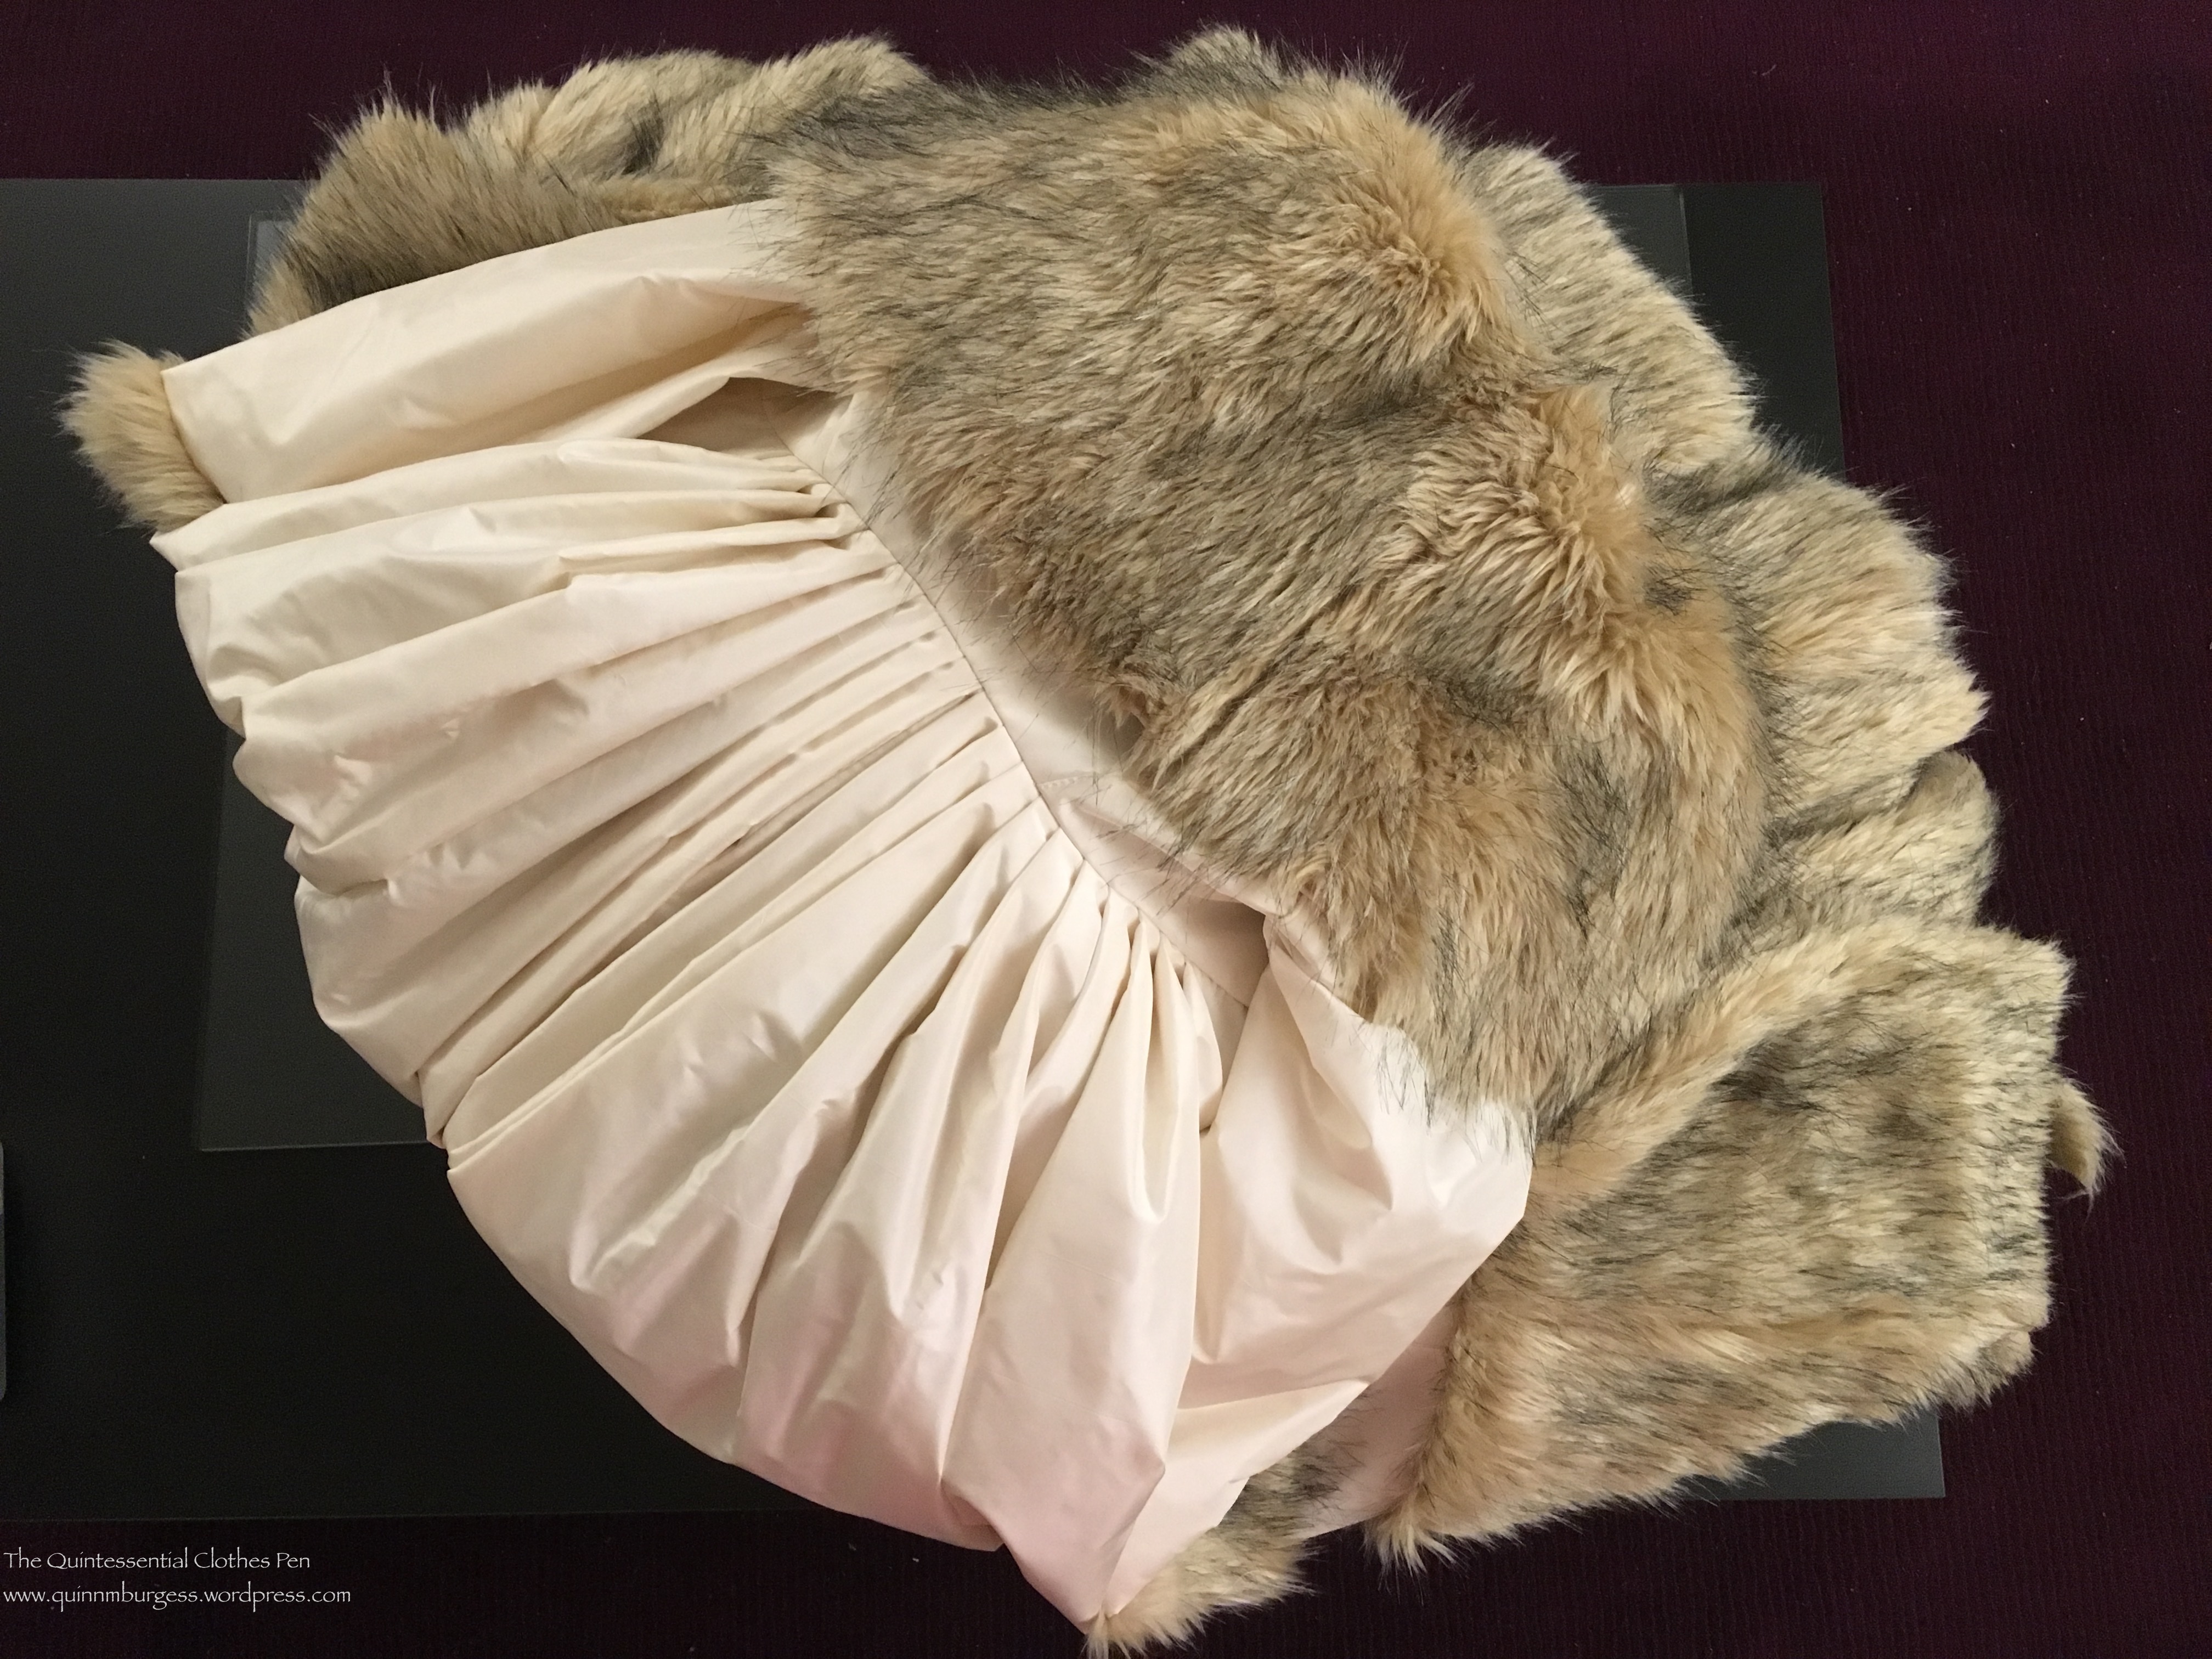
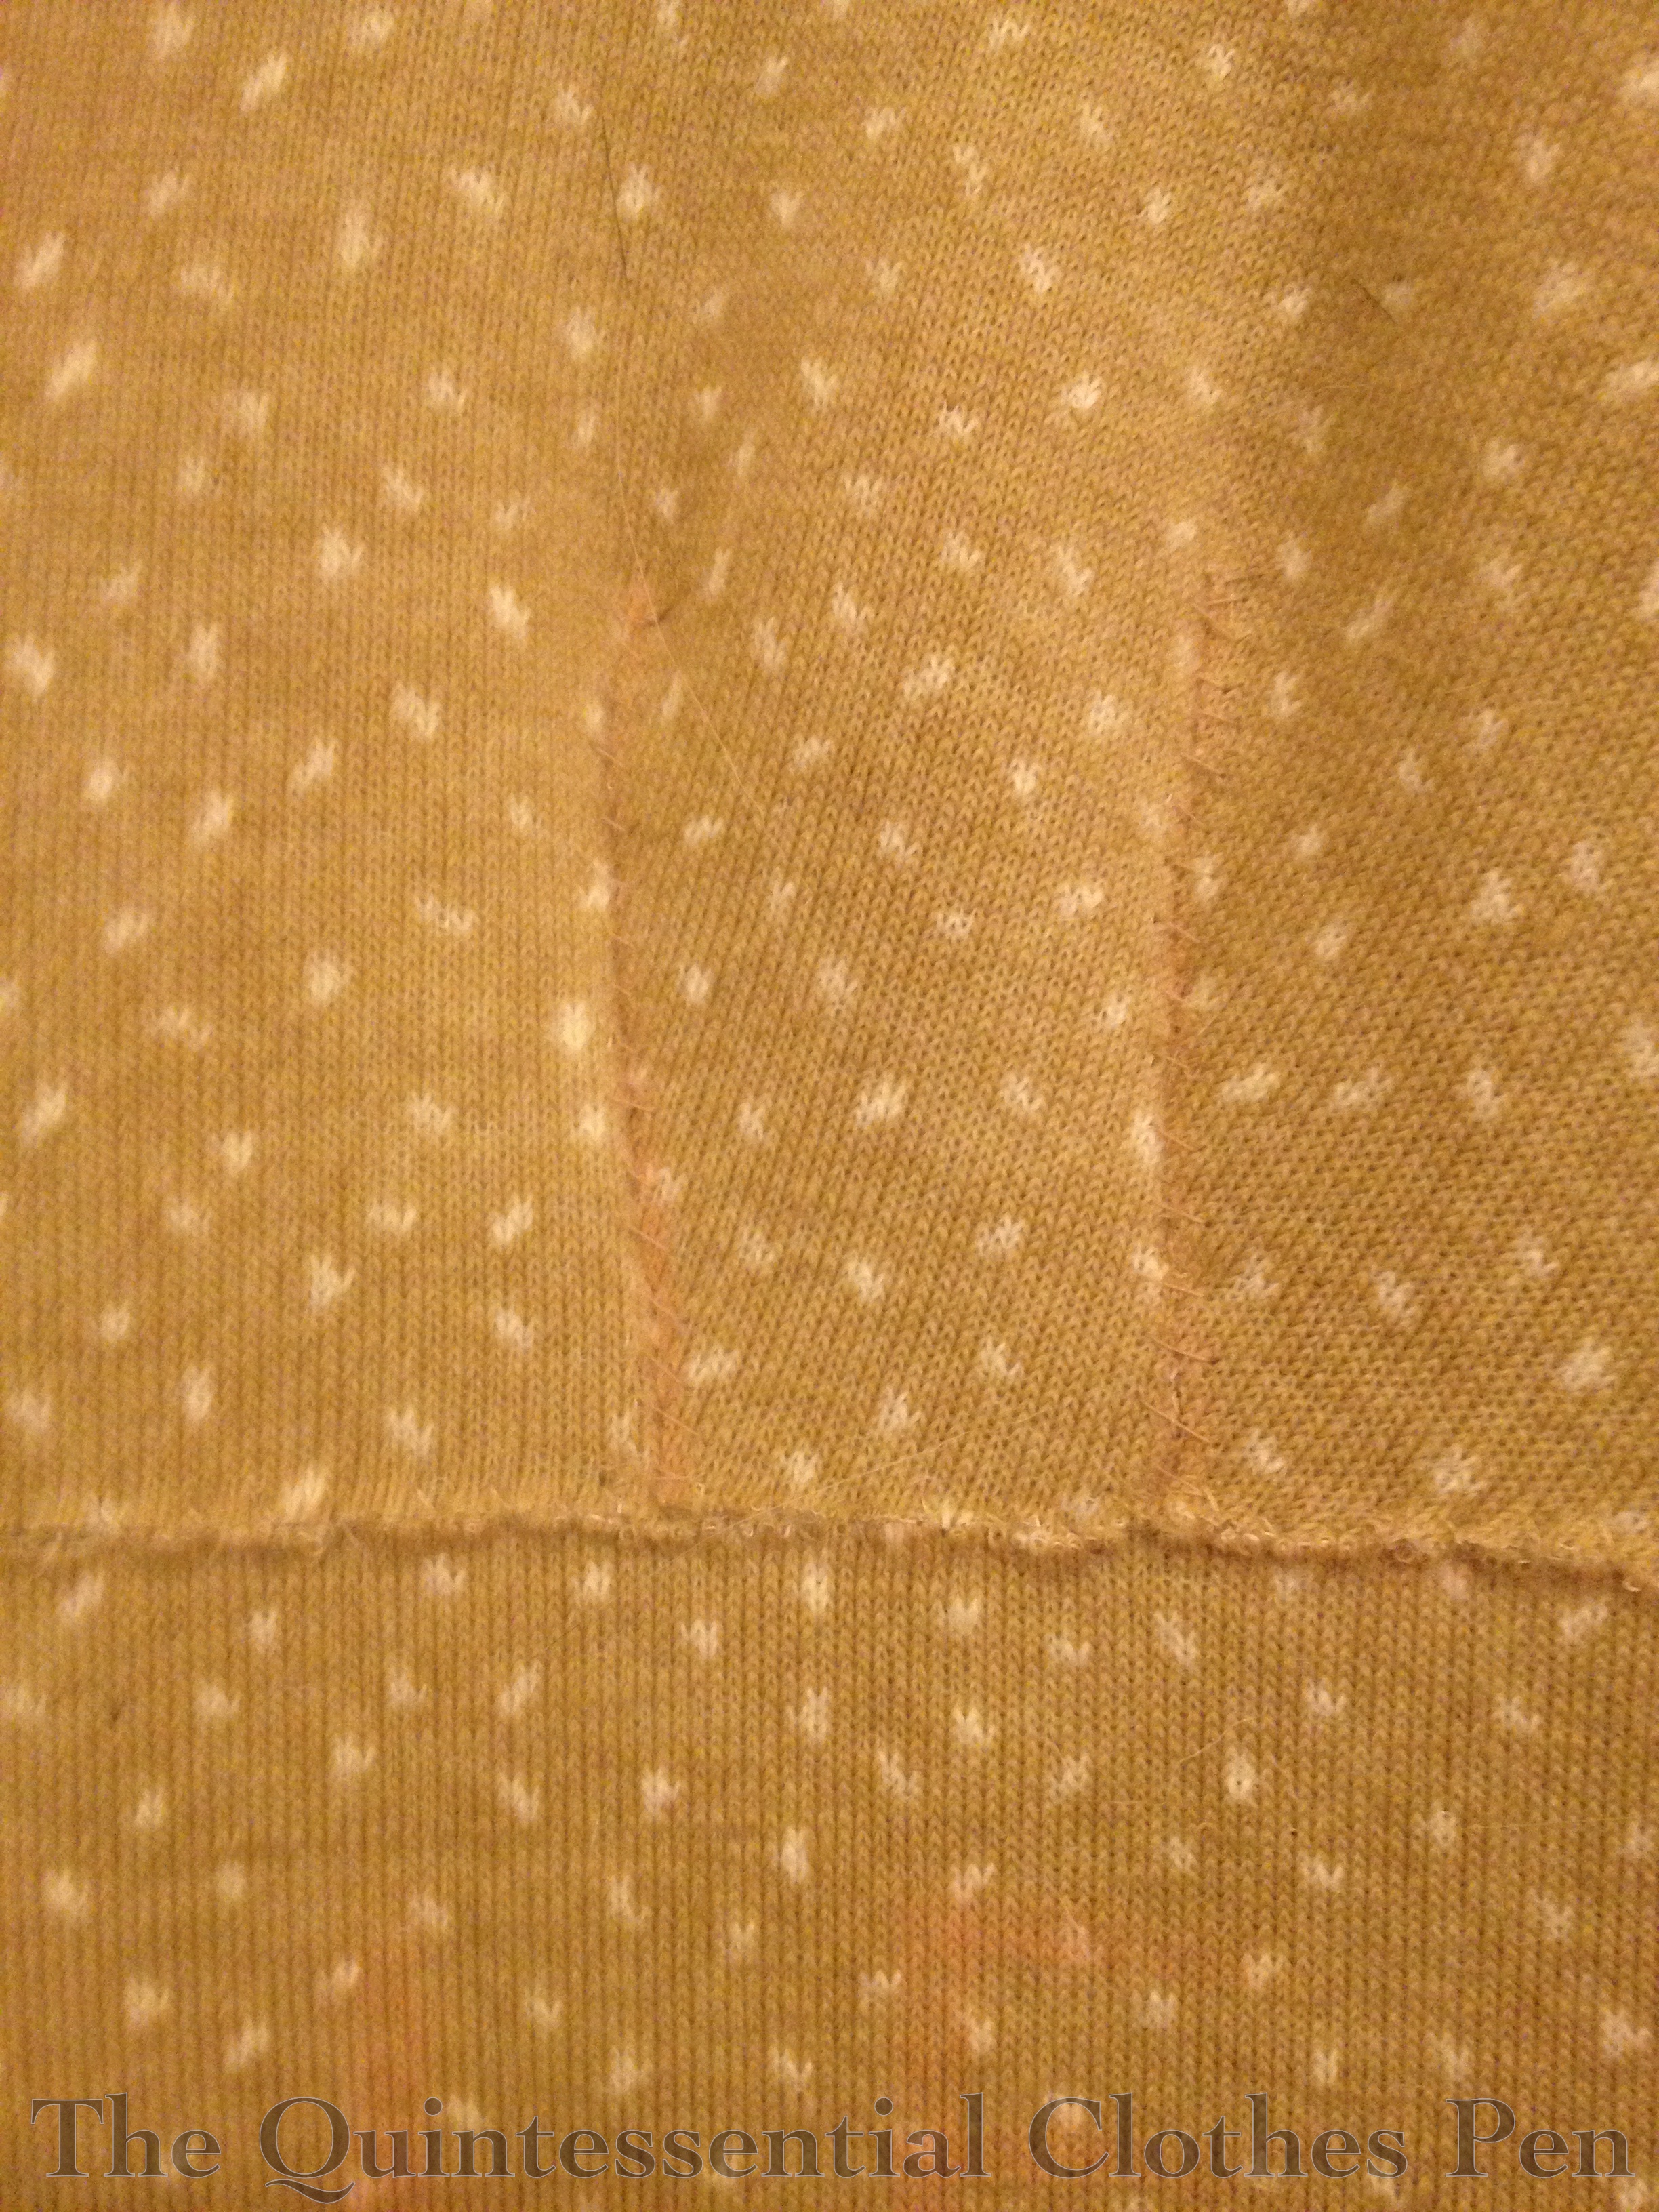
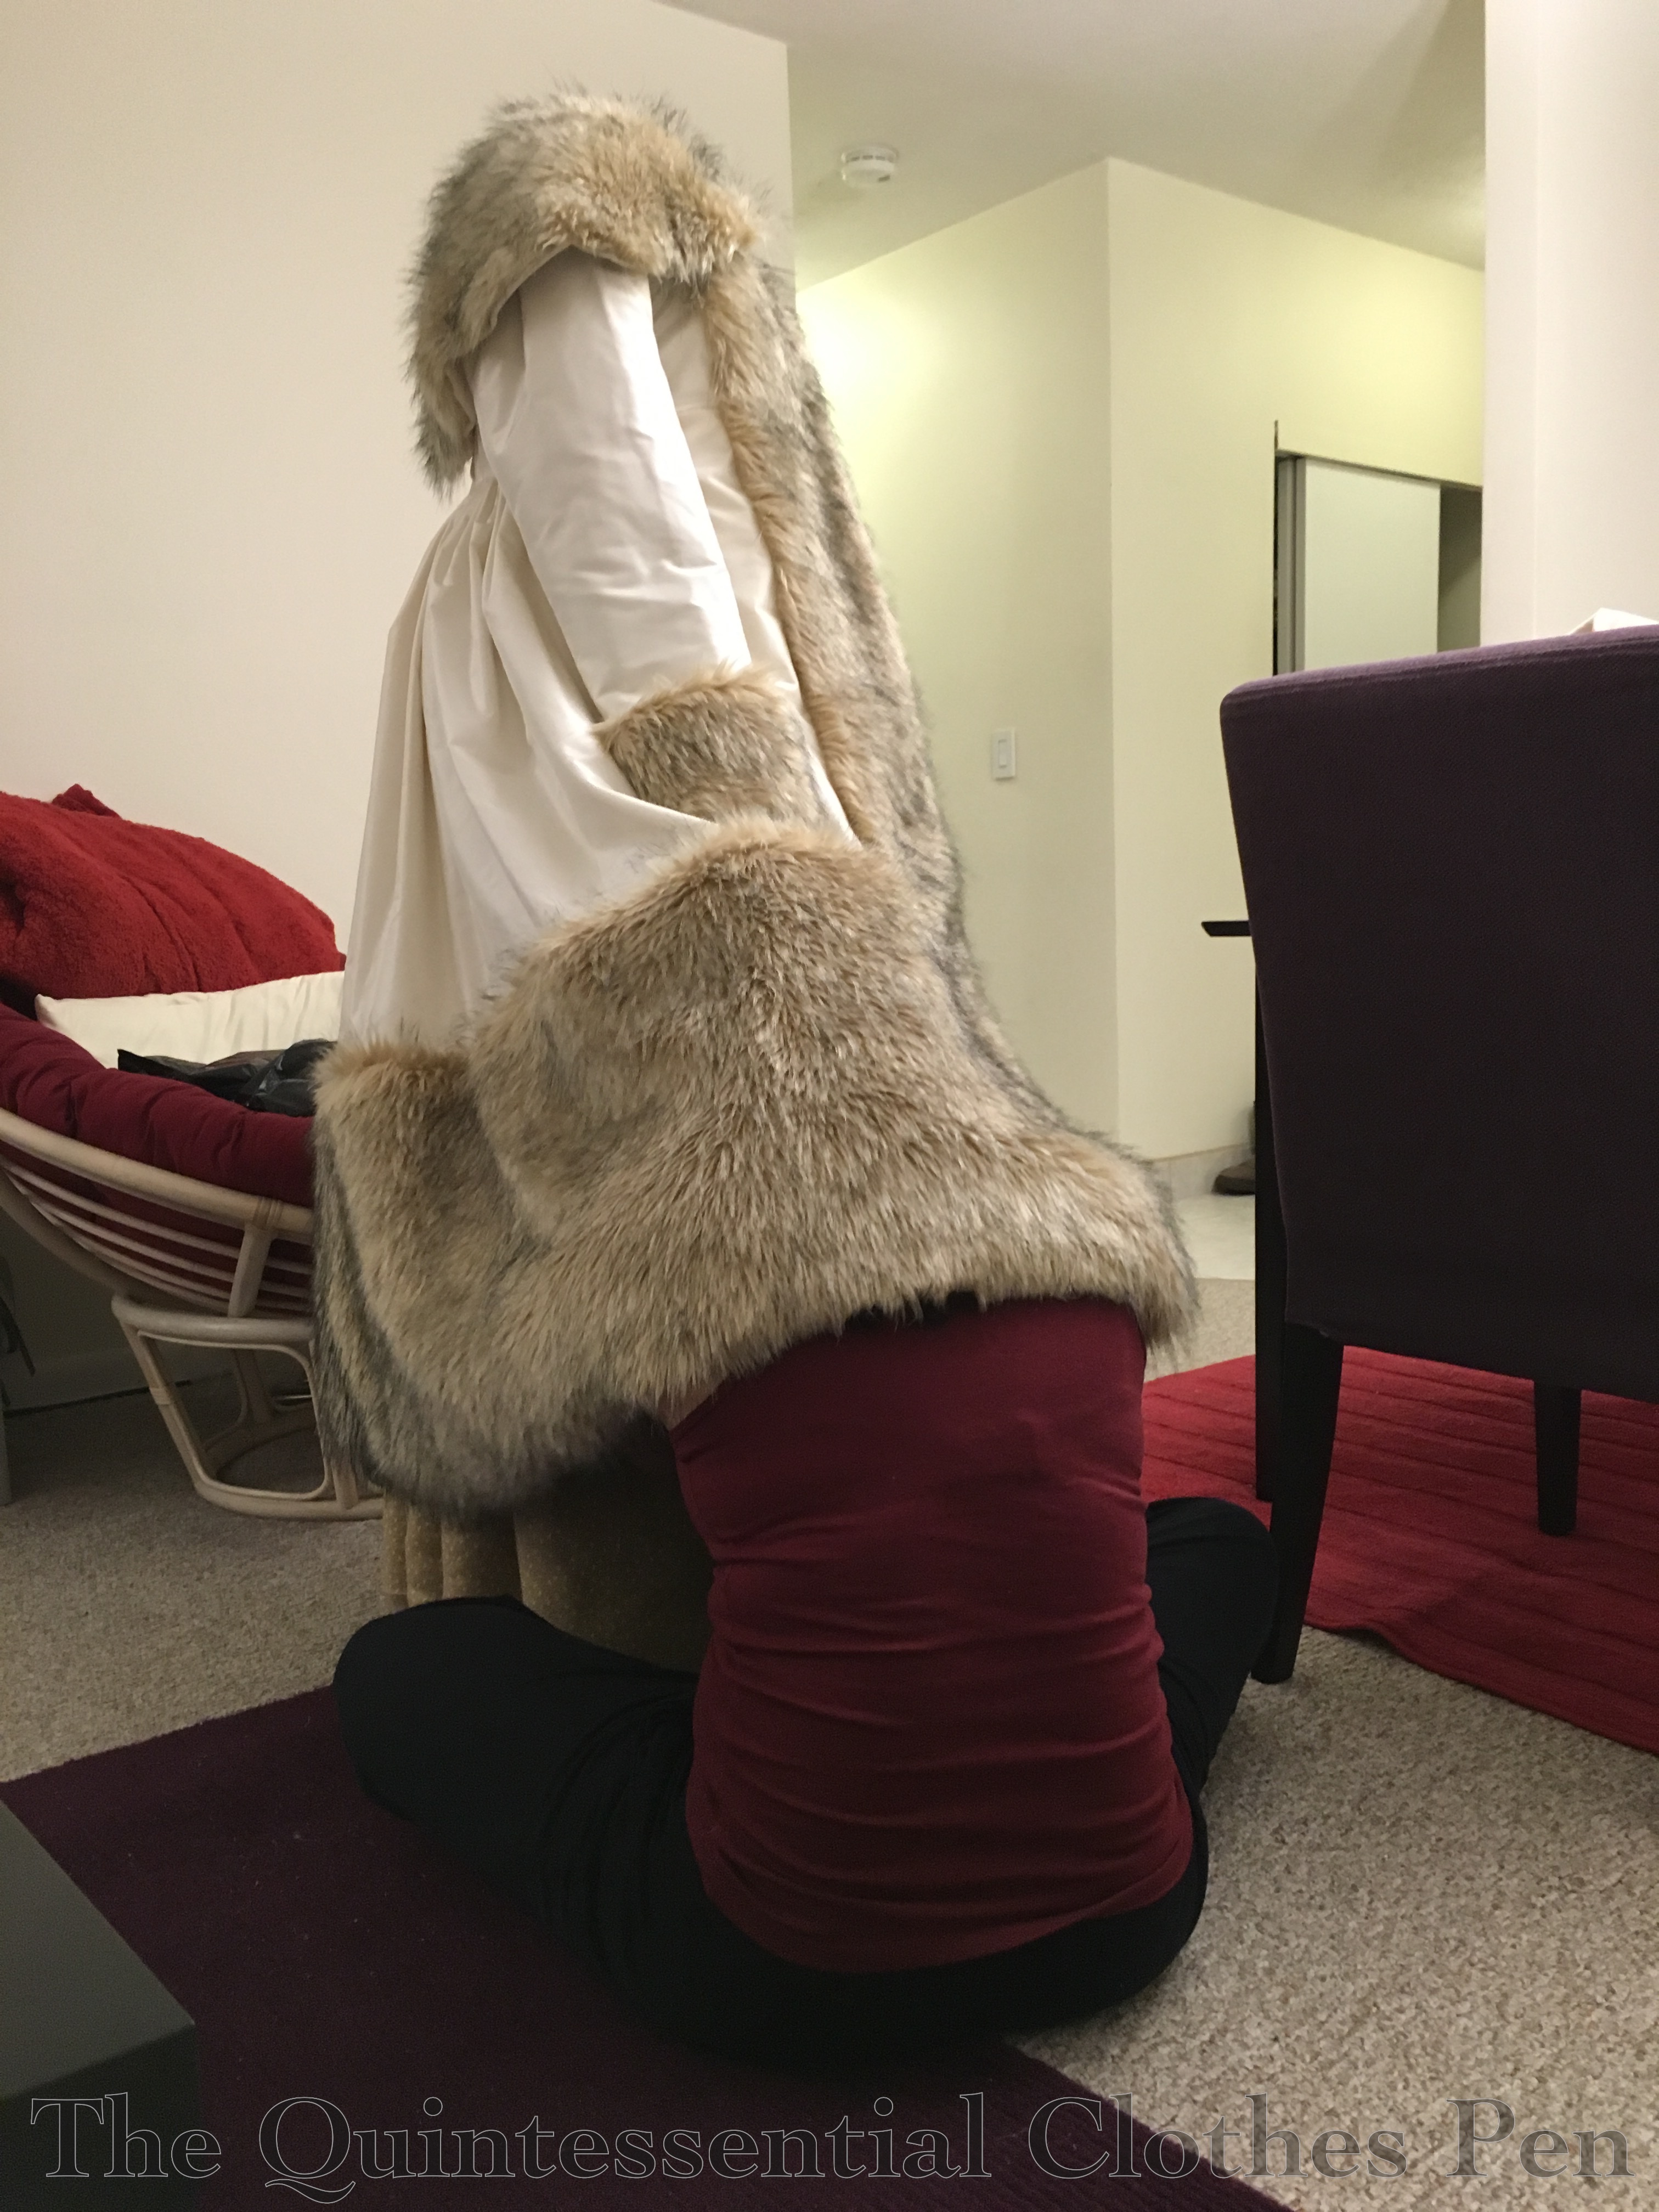
I’ve been saving the best for last–the construction of the main piece, the witzchoura itself. As with all the other pieces in this ensemble, the witzchoura is entirely hand sewn. It is made up of a faux fur lining and an exterior of silk taffeta flat lined with cotton flannel and trimmed with more faux fur. Here are some in progress photos.

img_2202-1
Faux fur lining made up but not set in.
img_2205-1
A seam and bust darts in the faux fur lining. The edges were cut without seam allowance, butted together, and whip stitched.
img_0264-1
An interior view of the in progress witzchoura, showing the back pleats and cotton flannel interlining. I believe at this point I had attached the hood/collar as well as the faux fur lining at the neck but had not yet sewn the center front edges together.
img_0278-1
The exterior silk/flannel layer was pleated, but the fur was gathered (it wound up resembling cartridge pleats) to the bodice.
img_0274-1
After attaching the front edges of the exterior and lining I put the witzchoura on squishy to look at the hem lengths. In doing so, I found a few places where the exterior needed to be invisibly tacked to the lining, which is why I’ve got my head between the layers!

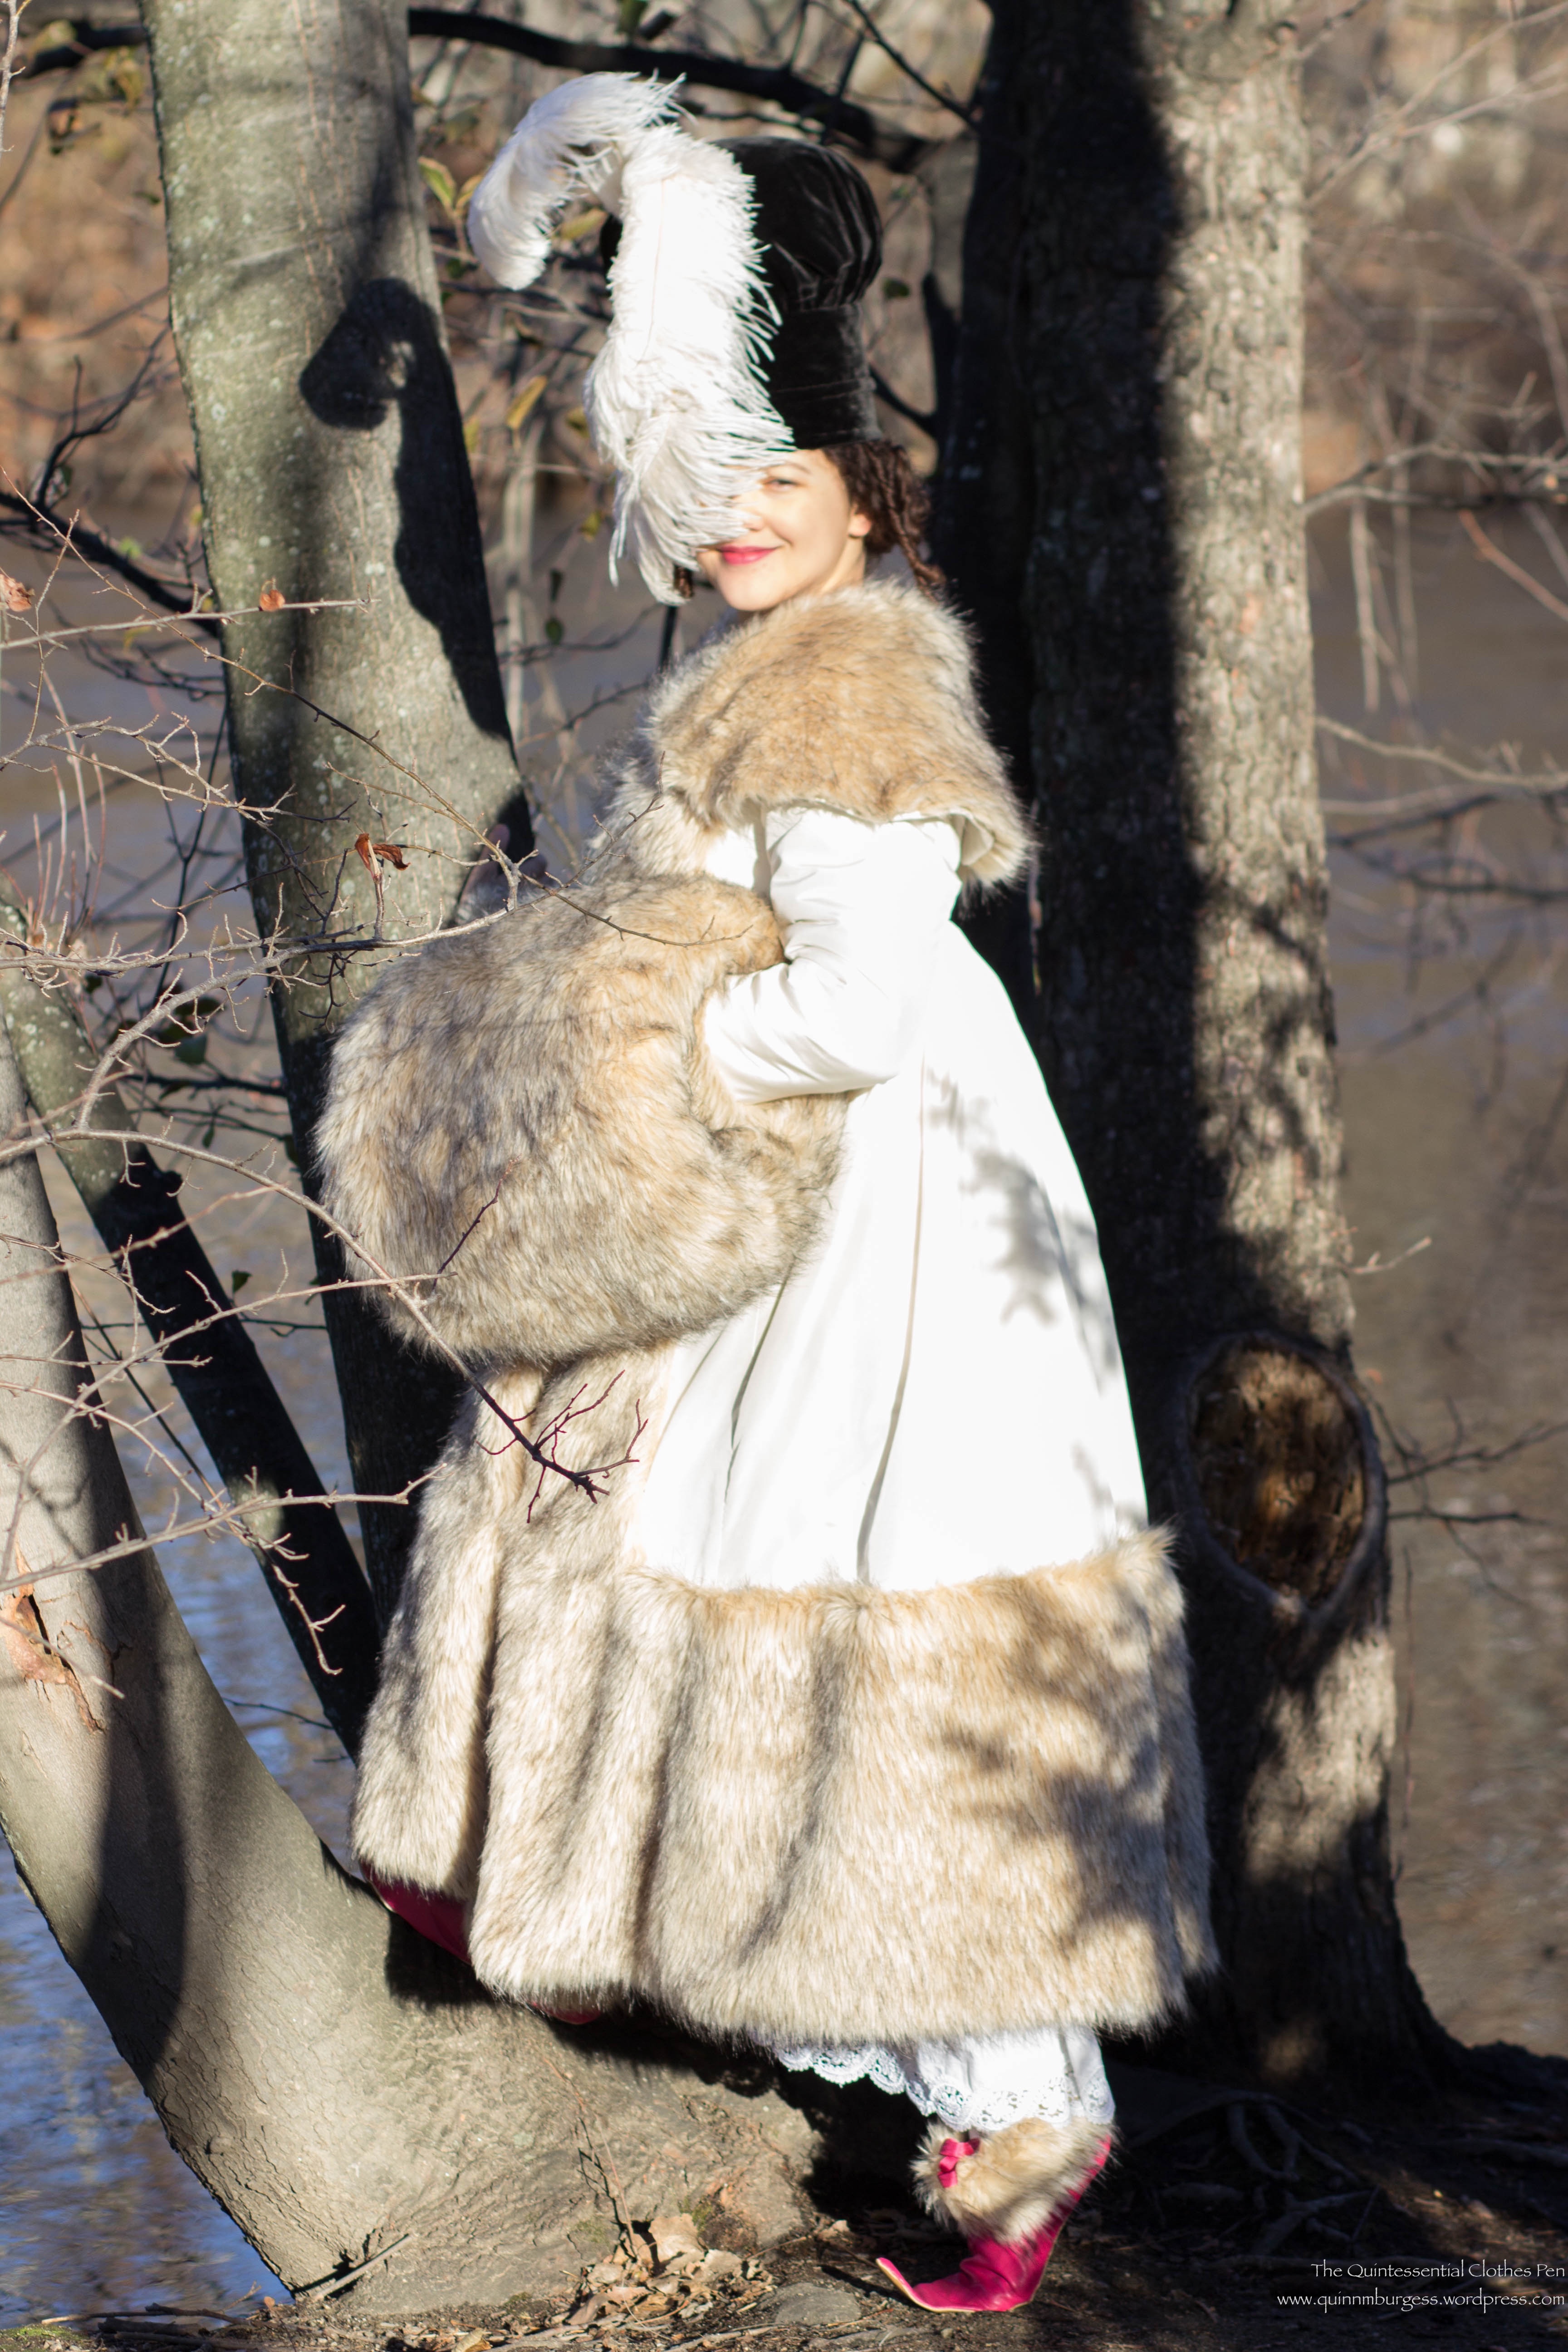
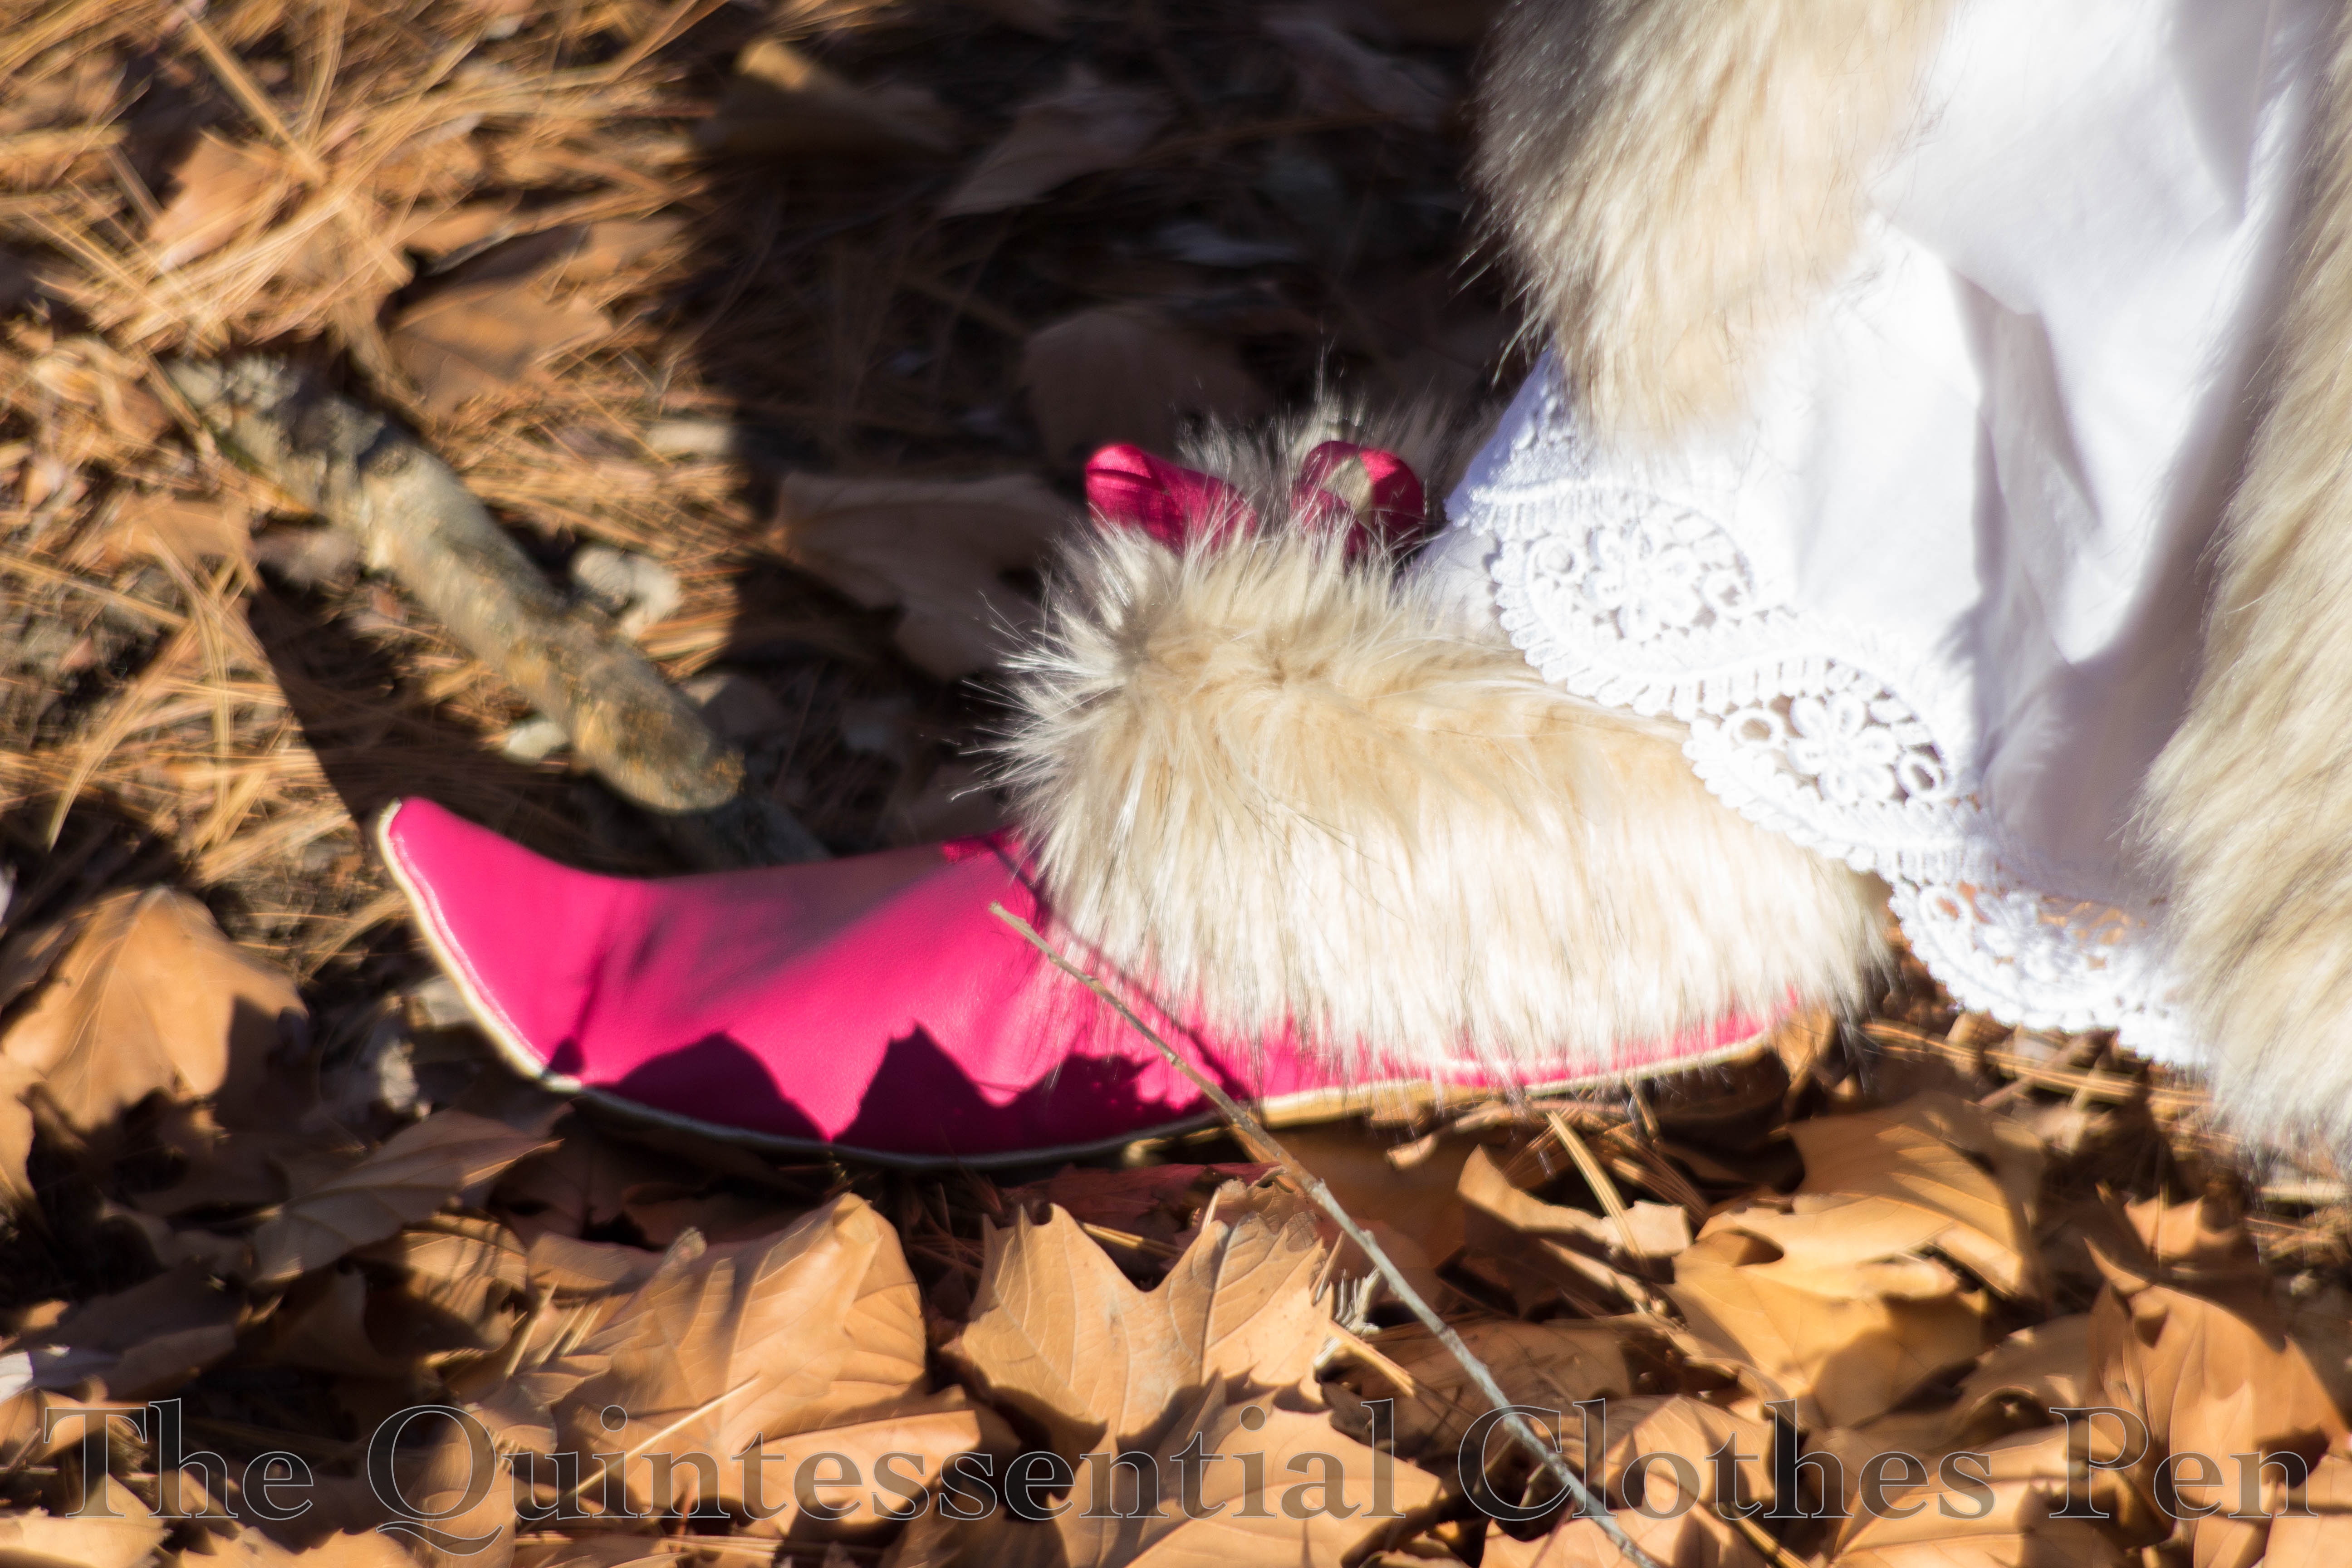
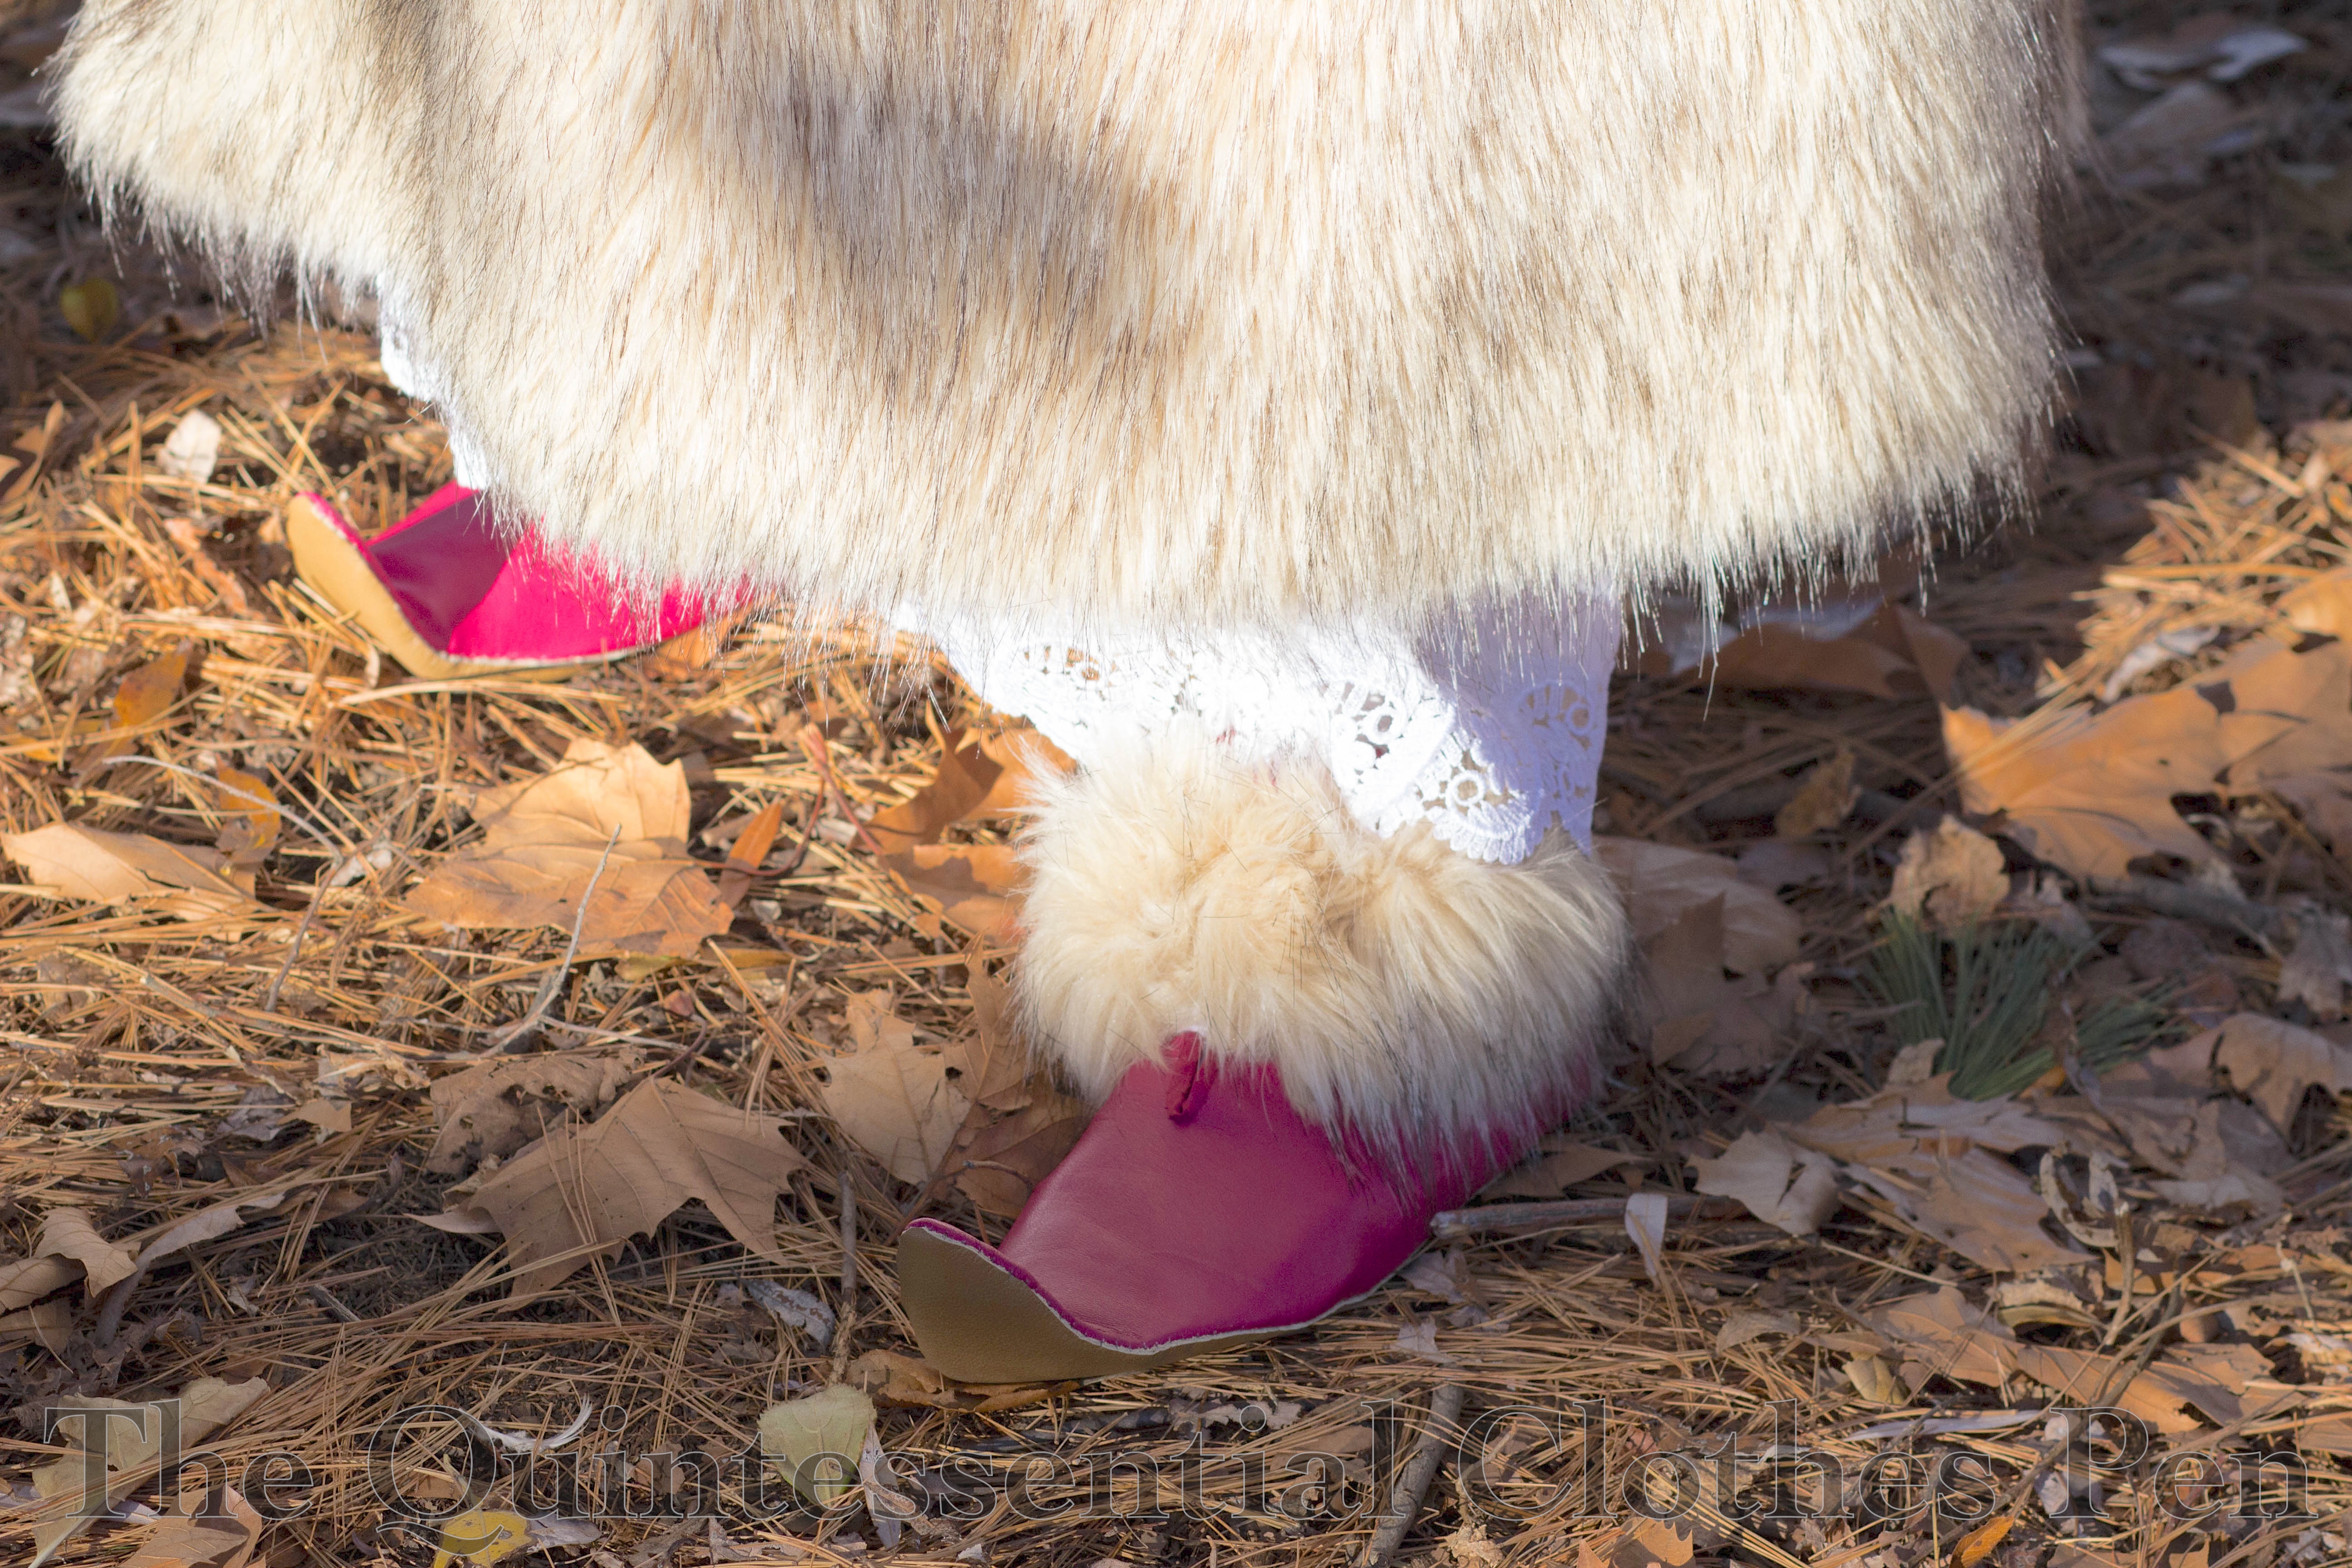
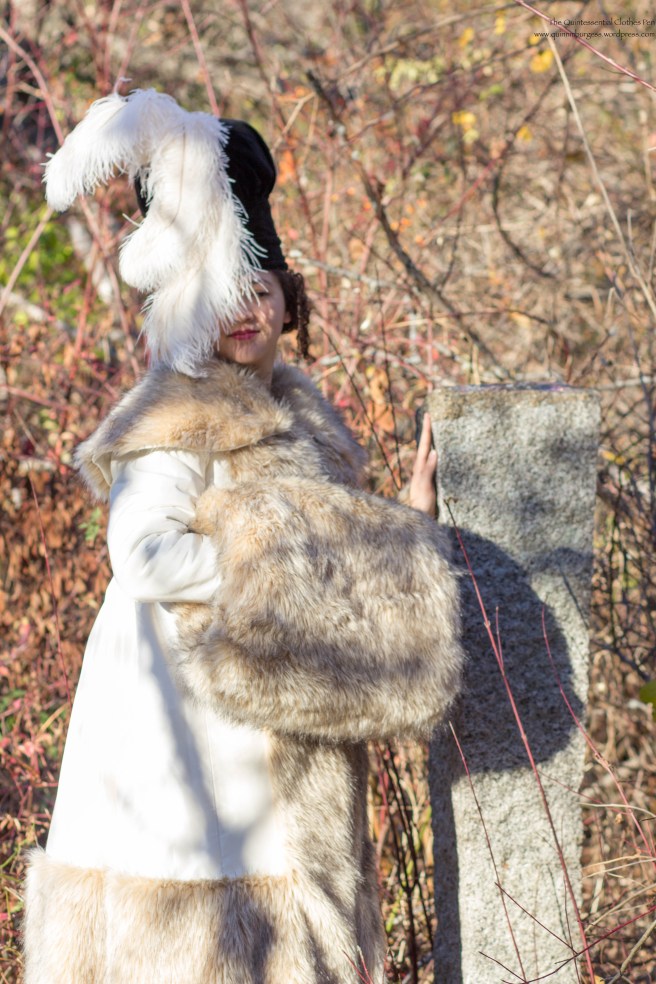
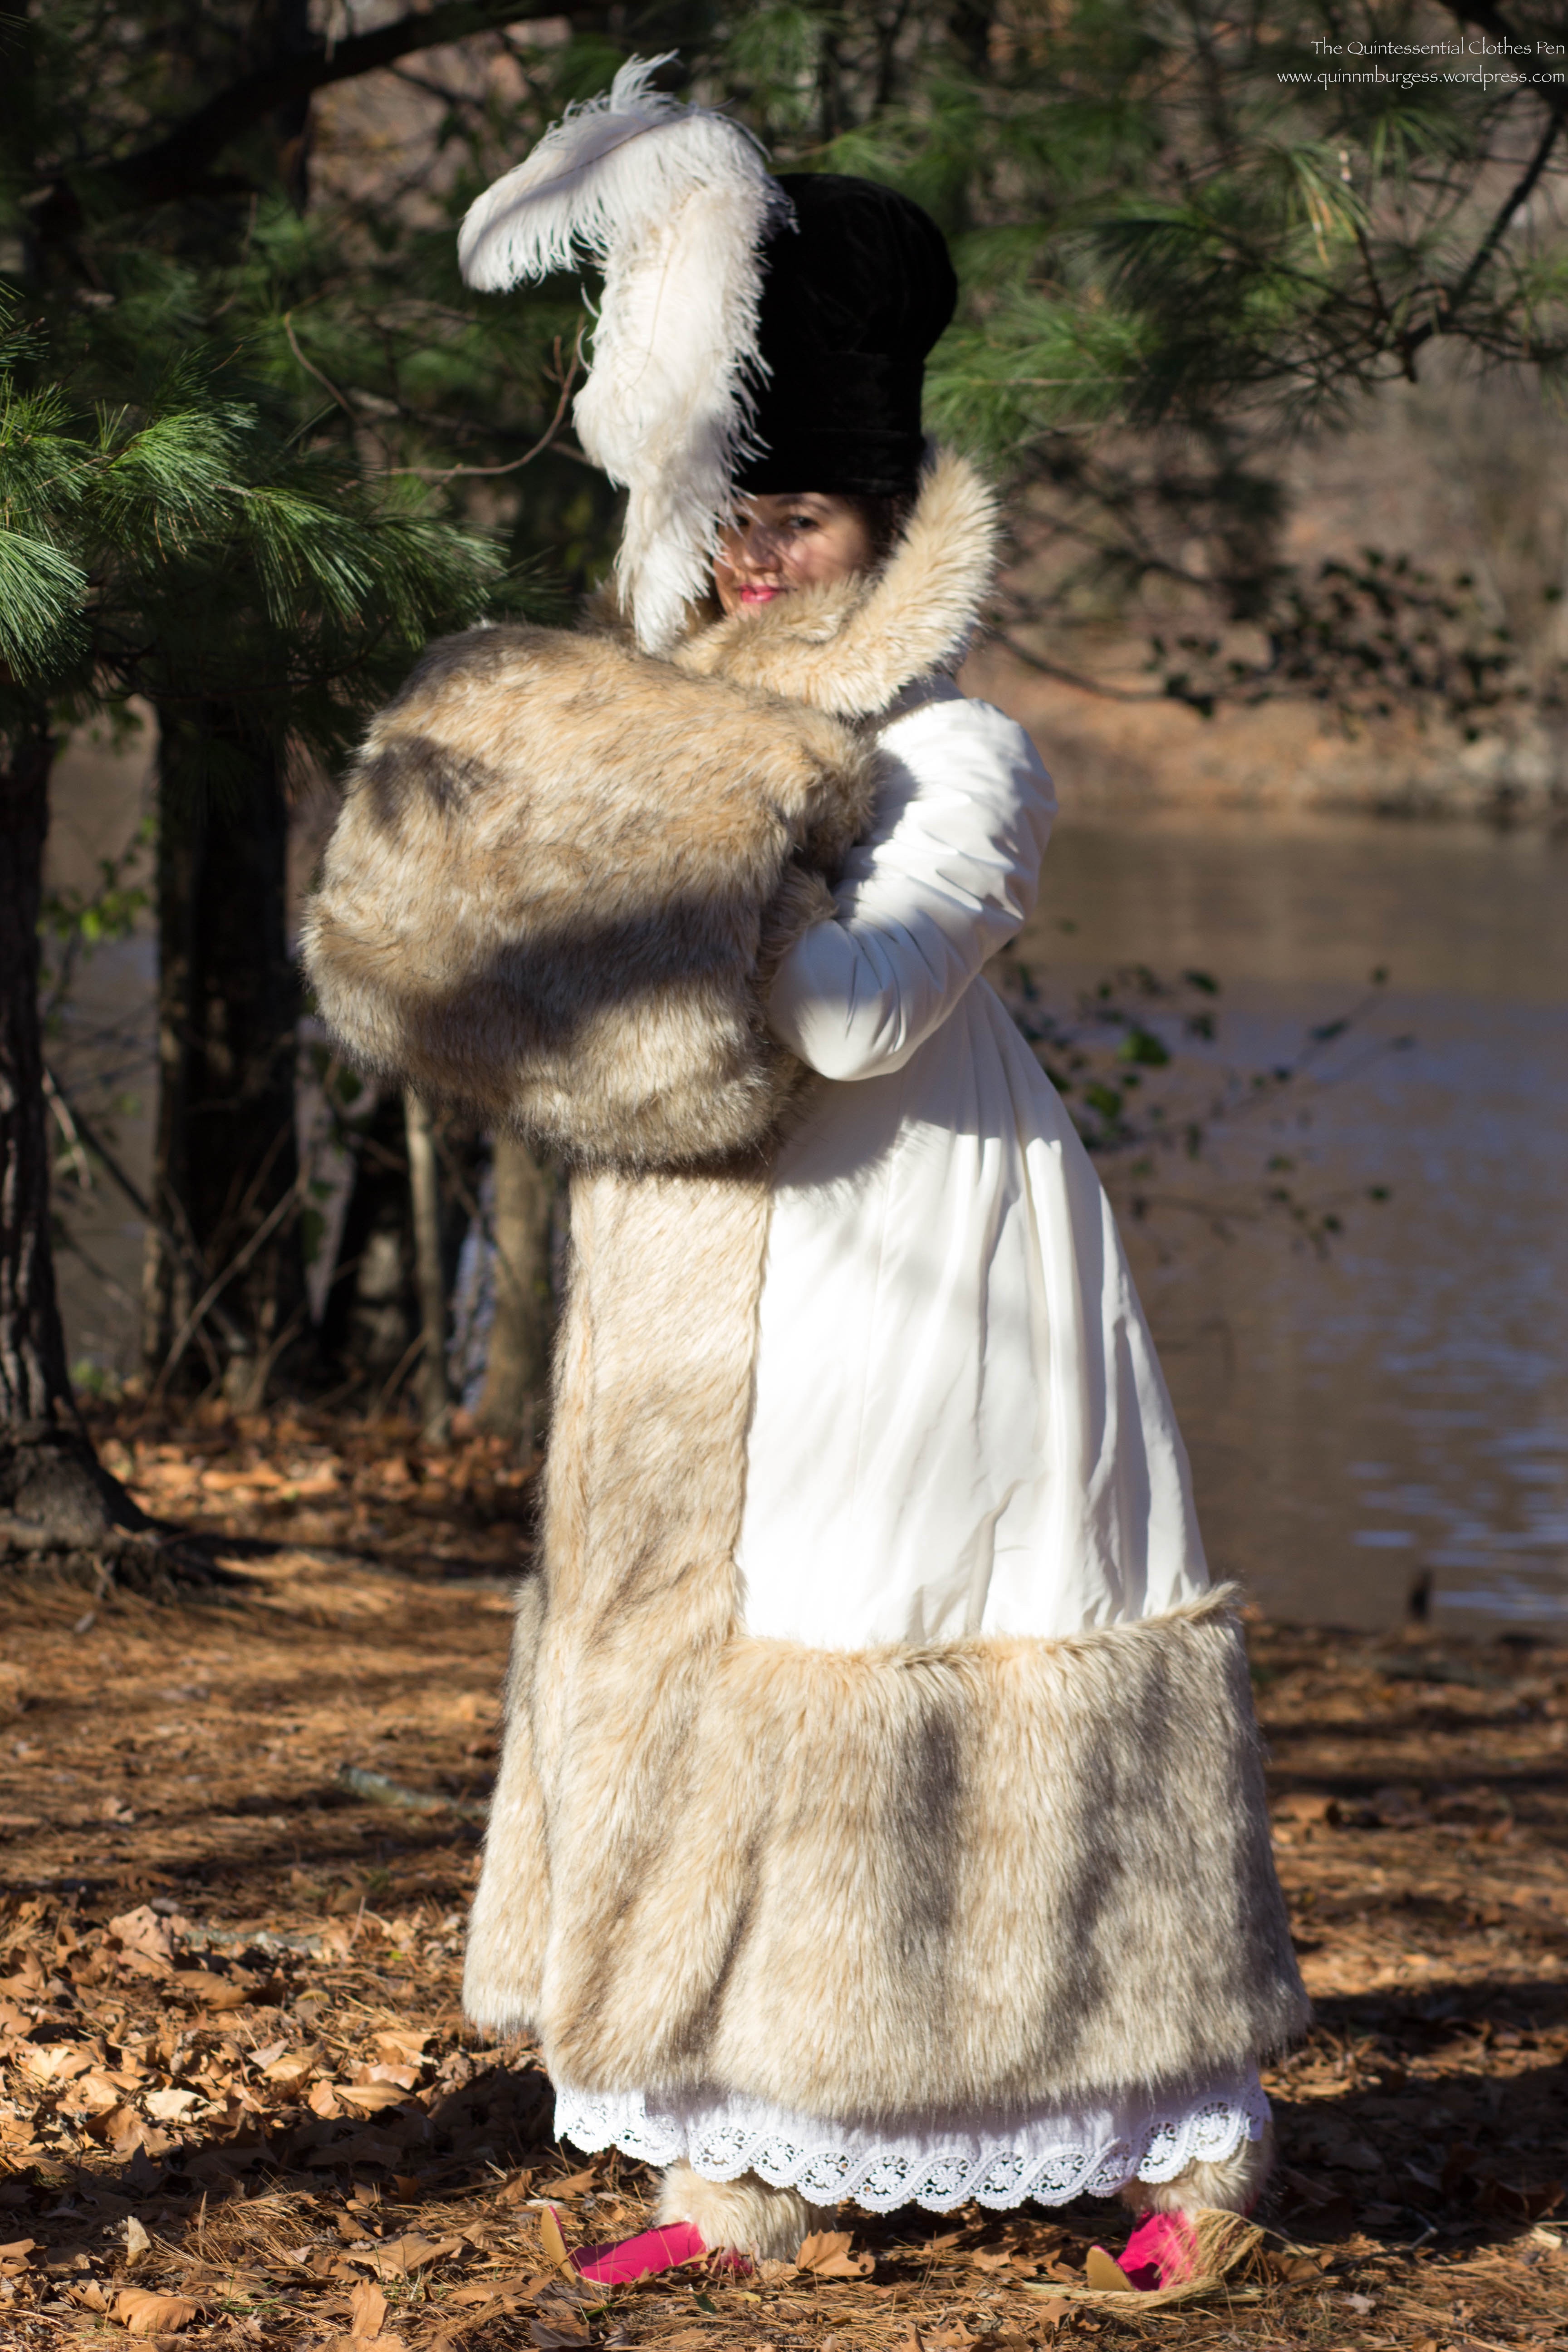
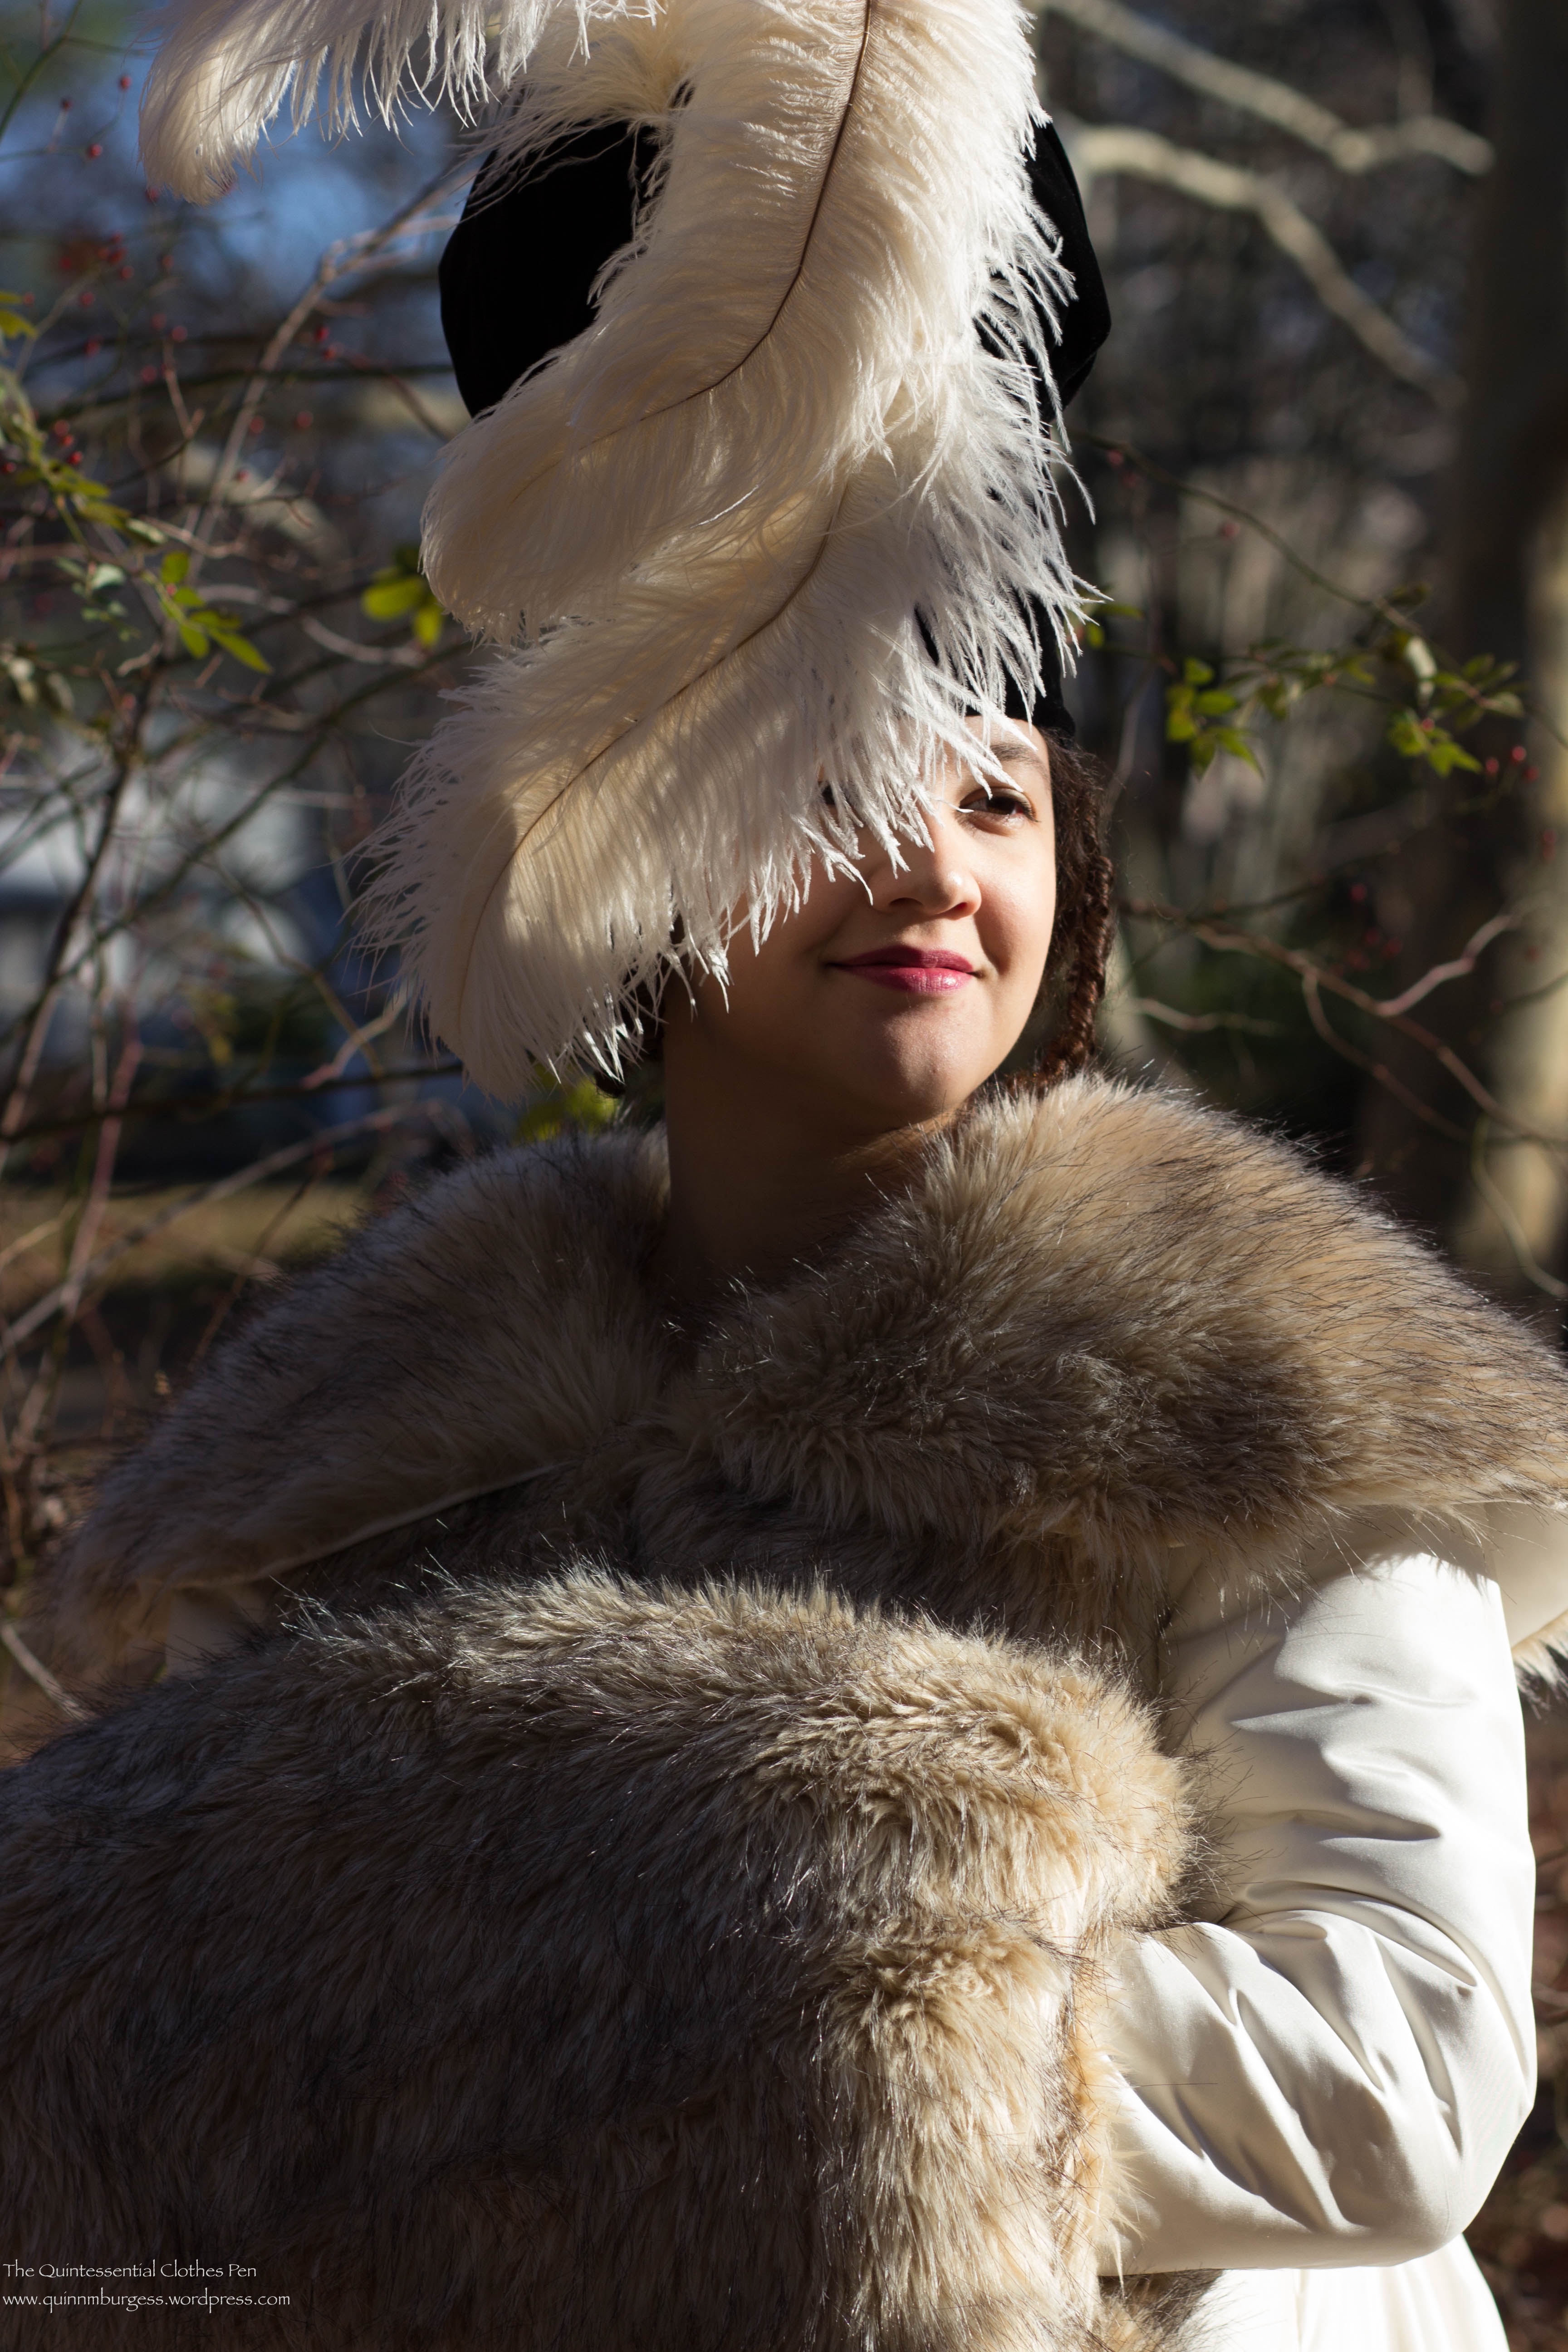
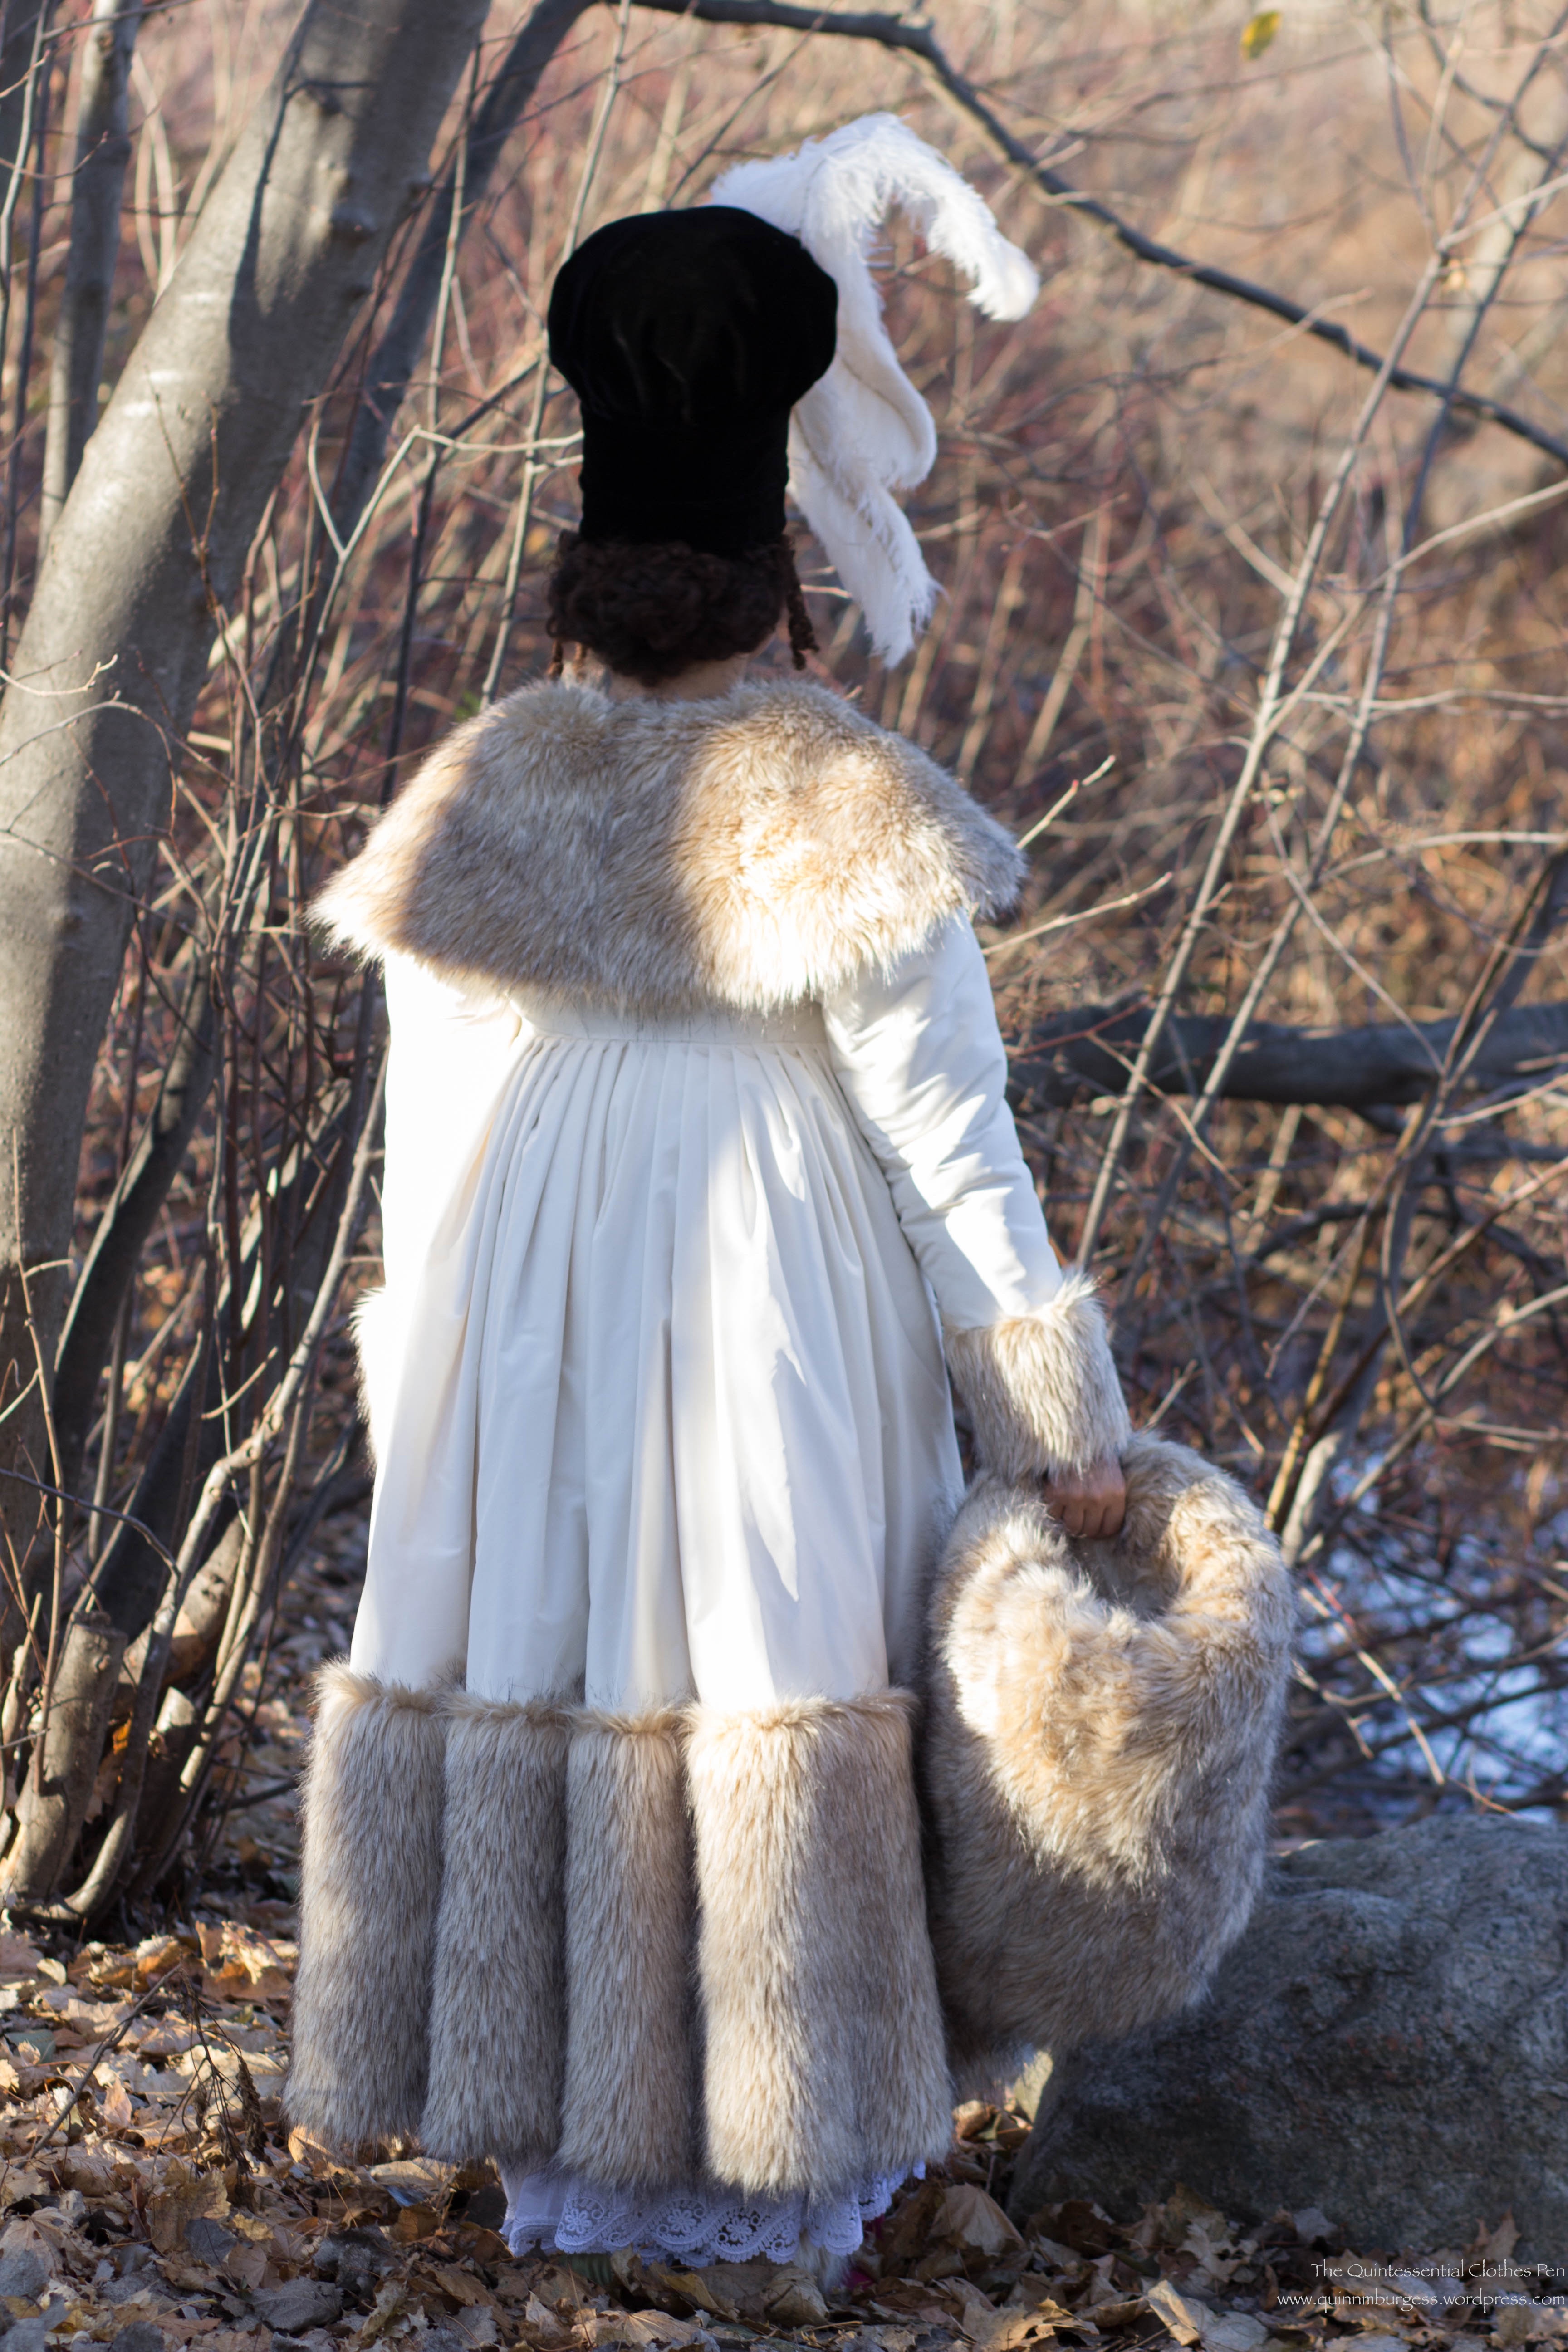
Ta da! The finished witzchoura with all of the lovely accessories. It certainly is a luxurious looking and feeling ensemble!

img_1860-1

I thought I would address a few other points as well. Some people have been waiting for answers to these questions for a long time! Thank you for your patience as I waited to answer your questions until now in order to keep everything together in terms of information.

Is it heavy to wear?

No, once dressed, the ensemble does not feel heavy. But, when holding it, or hanging it, or putting it on, YES, it feels quite heavy! It’s a fair bit of fabric, with three layers, and the faux fur gets heavy quickly with such yardage.

What is the weight? How does it compare to a heavy wool winter coat, for example?

Oh dear. I’m very bad at estimating this. I like the comparison question better! If you’ve ever held a very heavy, thick, full length winter coat, I think this is probably similar in weight. But compared to anything less, it would feel heavier.

Is it easy to walk and move with such an enveloping set of objects?

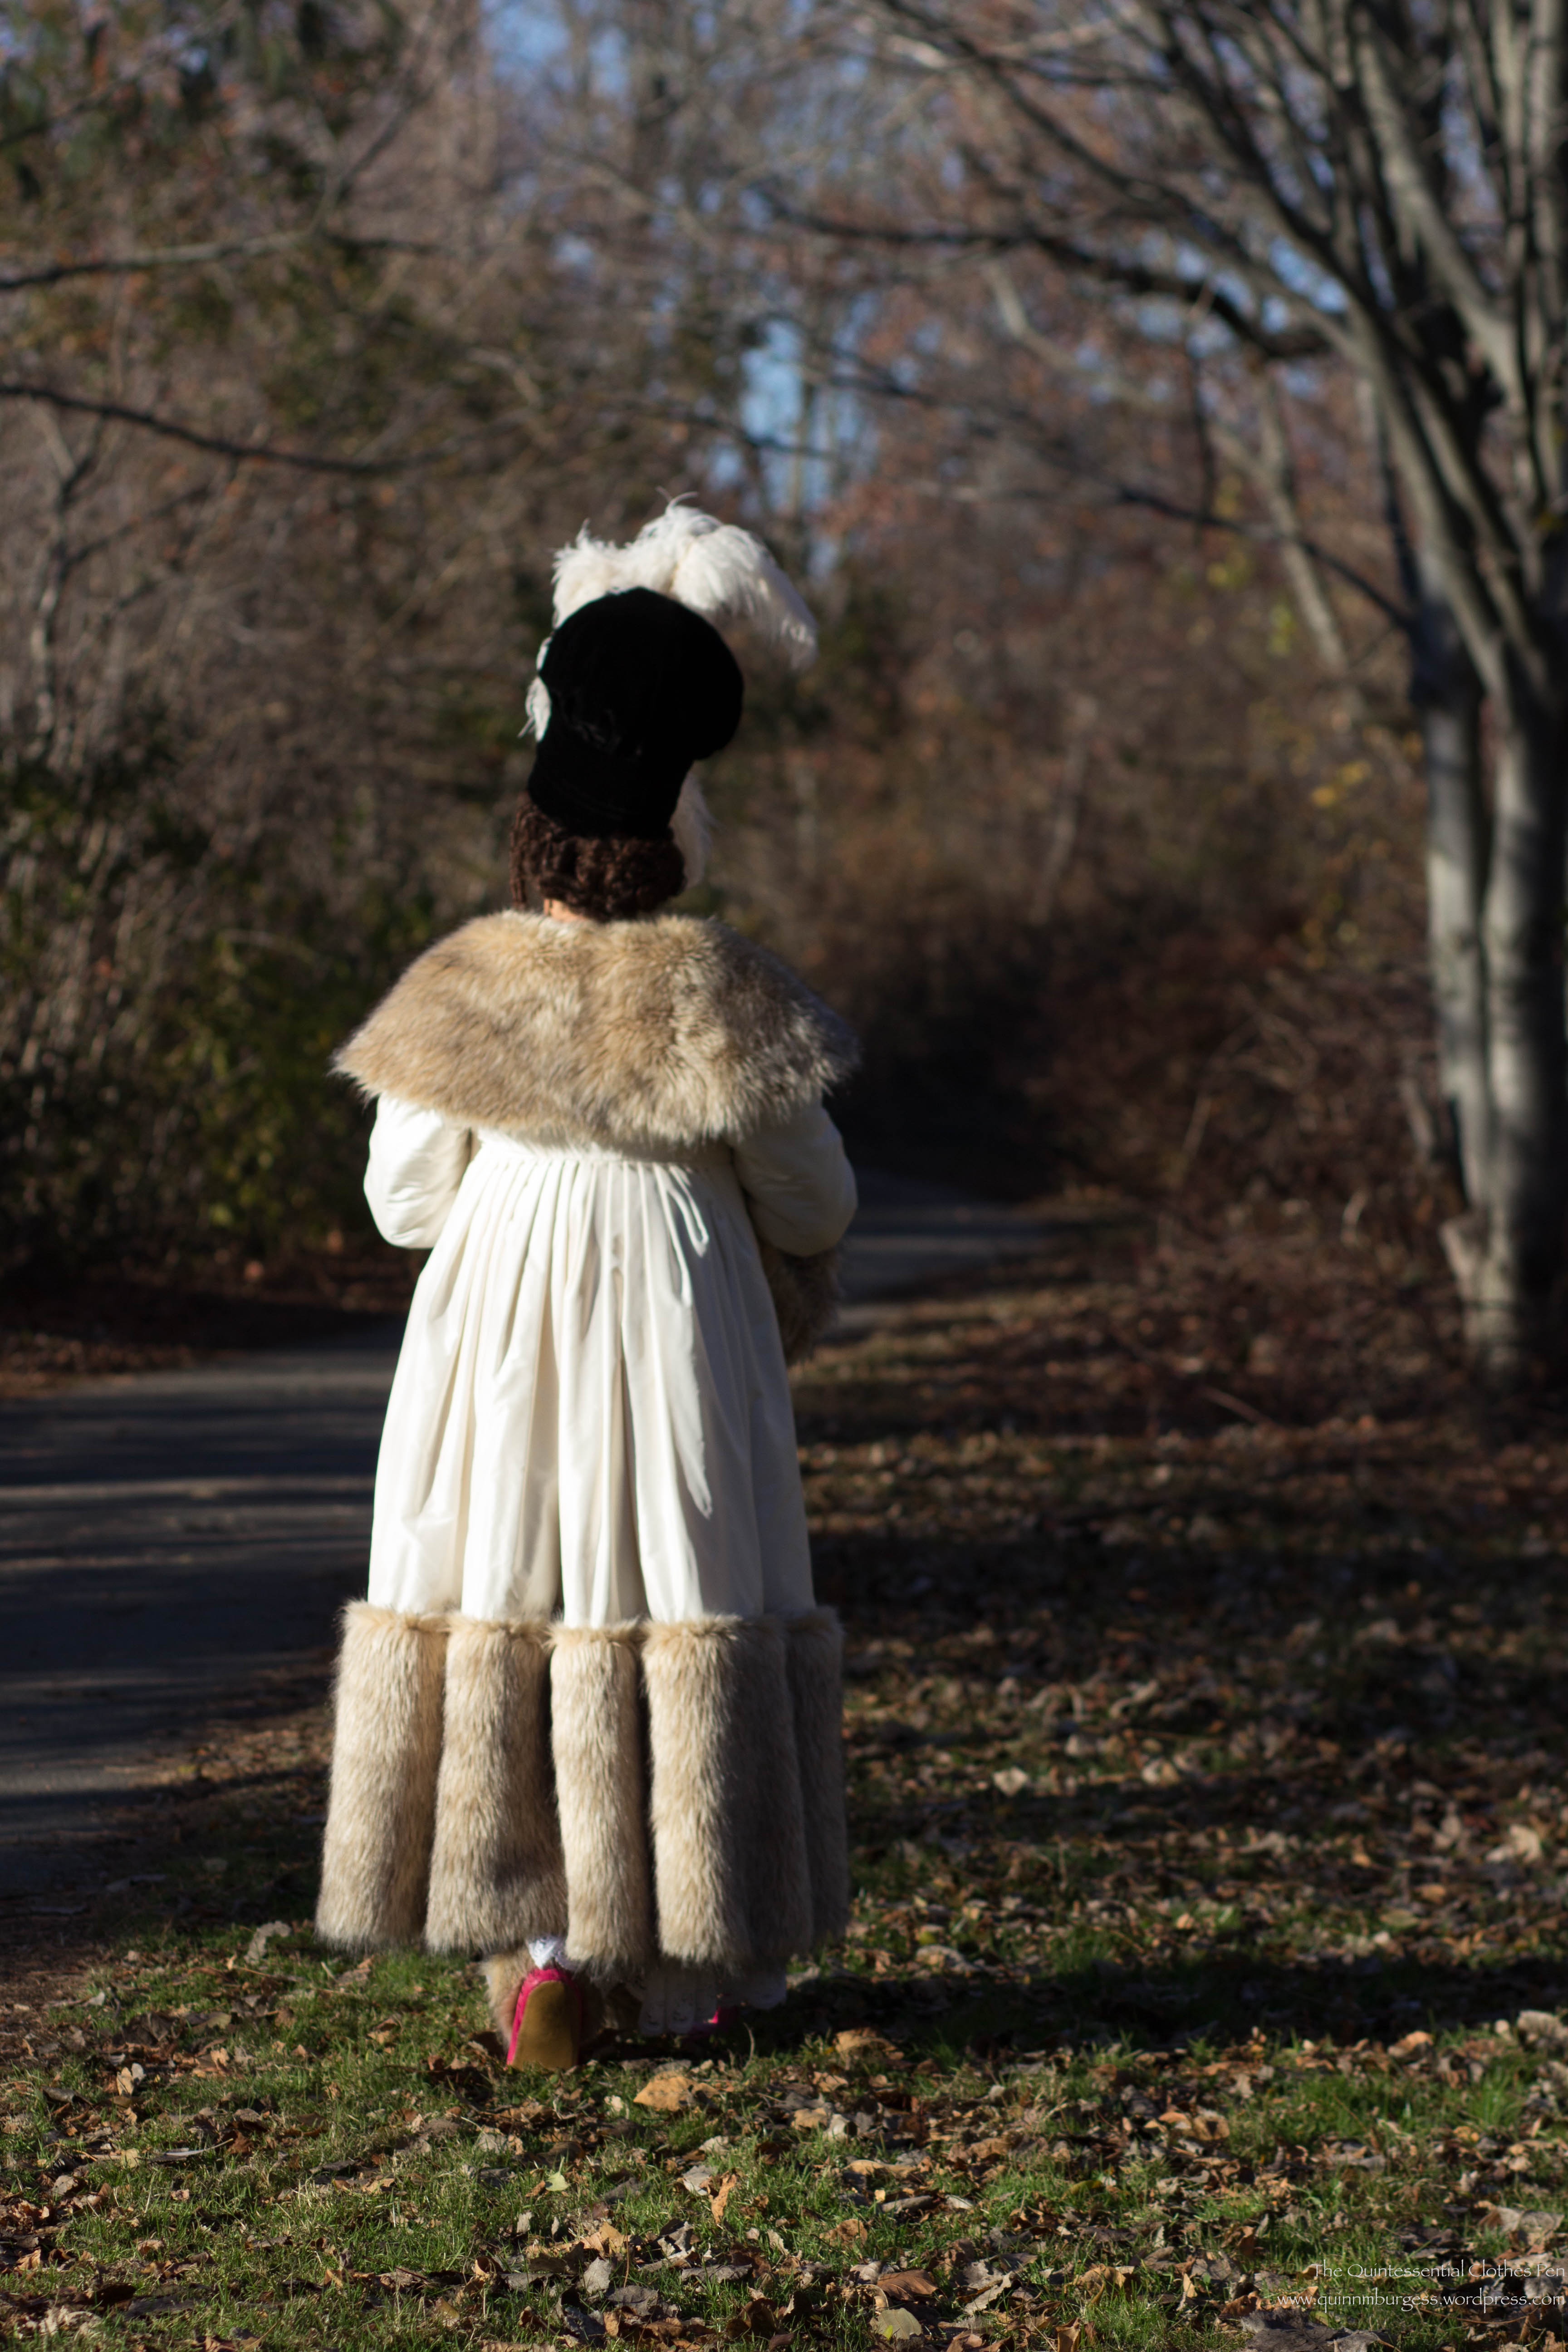
This is the sort of question I would want to know the answer to! Yes, it’s easy to walk. The ensemble does not restrict leg movement. I can also move my head with ease, because the hat sits low enough that it is well anchored and not going anywhere. However, the witzchoura does restrict arm movement some. For example, putting it on without just the right movement (which is lifting it up and behind and then sliding both arms in at the same time) doesn’t really work. And once it’s on, there’s only so much forward and backward arm movements that are possible. Lifting arms is better, but still not full range of movement. Each layer by itself has more possibilities, but the faux fur fills a lot of space inside the silk exterior. This makes it quite warm, but feels a little bit like wearing a marshmallow.

I hope you’ve enjoyed my Vernet journey! If you have any other questions about the ensemble please let me know. I would be happy to answer them!

Vernet Project: A Witzchoura Tangent

I started this post soon after joining the Vernet Project, so I think it must have been in my drafts for close to two years at this point. I didn’t want to leave it in the drafts folder forever, though, so I thought I’d include it as I’m wrapping up my Vernet posts.

Throughout my research, I’ve looked through many hundreds of pins on my Pinterest boards from the 1810s, 1820s, and 1830s and have found only a handful of plates that show outerwear specifically labeled as witzchouras (these can be seen in this past post showing examples). There are a much larger number of other, similar, types of outerwear.

(If you’ve missed out, this post explores the origins and qualities of a witzchoura, while this past post explores witzchouras in even more depth, with multiple excepts from the first part of the 19th century mentioning them.)

Examples of garments similar to witzchouras

Common garments in this category are labeled using words such as pelisse and pardessus. Then there are also carriage dresses (example), promenade dresses (example), and redingotes (example) trimmed in fur, but it seems clear in the fashion plate descriptions that these garments were not considered witzchouras.

ac27bb830f63f1673e45316d0e18f87d
Fashion plate showing a Pardessus from 1811.

Here is another similar garment, a Russian mantle, described in The Ladies Pocket Magazine in 1838 under the chapter English Fashions and Novelties: Remarks On The Prevailing London Fashions.

content

Descriptions of garments similar to witzchouras

In 1849, La Belle Assembleé addresses this for us (while also mentioning yet another type of outer wear, a burnous. The Dreamstress defines and explores this garment specifically as it relates to historical fashion, which is excellent and full of images!). The author of this reflection of fashion specifically mentions the weight of a witzchoura and how that compares to the weight of a pardessus, as well as the types of outings that these garments would have been worn for. Interesting that they would be worn for carriage dress, when, alternatively, one could also wear a ‘carriage dress’.

content

This next excerpt, from La Belle Assembleé in 1825, tells us one distinctive quality of a pelisse which is that the arms were not encased in the garment and could be freely moved about.

content-1

a94e6fc37e3582c81ab22797c3c06b78
Example of a Pelisse from 1815, showing the armholes that would allow movement.
004c2dc3370c00425fcfd044369a9d53
A slightly later example of a Pelisse in a similar style. This is from 1821.

Examples of out of the ordinary witzchouras

Then there are garments labeled as witzchouras, but which are odd in a variety of ways. For example, take a look at the interesting witzchoura mentioned in The Lady’s Monthly Museum in 1817, seen below.

content

I’m not really sure what qualities allow a witzchorua to keep one’s dress from being rumpled, but what strikes me as odd is that the witzchoura mention is lined with silk and that is has a chapeau bras attached! Also in 1817, La Belle Assembleé mentions this exact garment twice! The first is a description of the garment. The second is about the inventor, Mrs. Bell, who, if you care to read more, has a long list of other interesting things that she supplies.

content

content-1

In this next case, the witzchoura is described as being lined with sarsnet (a fine plain or sometimes twill weave usually silk fabric) and only trimmed with fur rather than being lined entirely with fur. Haven’t we seen conclusively that a witzchoura should be lined and trimmed in fur? This witzchoura is also interesting because of its colors. It is quite likely a garment made for the general mourning of the death of Queen Charlotte, who passed away in November 1818.

“For out-door costume nothing can be reckoned more completely elegant than the Witchoura pelisse of black velvet lined with white sarsnet, and trimmed with real ermine.”

La Belle Assembleé  in January 1818

Finally, there is this fashion plate at the LACMA which is labeled as being a witzchoura but with nothing witzchoura-like about it! A mistake perhaps? This looks like a summer garment, not a heavy winter garment.

What a rabbit hole of obscure information the witzchoura is. I’m rather glad to say that I’ve now exhausted my currnet list of historical references to the witzchoura!

Vernet Project: Petticoat and Muff Details

As the end of this year draws nearer, I feel the urge to complete my plan to share all the details of my 1814 Vernet Ensemble before the end of 2016. In order to do that, I have the smaller garments to discuss (petticoat and muff) and the witzchoura itself, which I know some people have had questions about for probably about a year. Sorry to keep you waiting!

As I’m saving the witzchoura to be the grand finale, today I want to share some details about the petticoat and muff. First, here are some repeat pictures of the full ensemble in case you’ve started reading since this project was unveiled. Both of these pictures are from my Vernet Project photo shoot in 2015. They give you a good glimpse at the petticoat and the muff.

IMG_1985

The muff exterior is the same faux fur as the trim on the witzchoura. The lining is an ivory cotton flannel, which feels warmer on the hands than a silk lining and which I don’t think is out of the realm of possibility in terms of historical reasonability (a theory I have tested out with multiple muffs over the last few years).

In order to get the distinctly Regency style of a beehive style muff, the inner flannel lining is substantially smaller in dimension than the exterior fur. Layers of high loft polyester batting fill in the shape and the fur actually wraps to the inside of the lining for a few inches on each side and is gathered to fit the smaller circumference of the lining. The result is a very large and very cozy muff. (This method is different than making the interior and exterior the same or similar in dimensions, resulting a muff that looks like my 1822 one. The blog post sharing details about that muff has lots of great images of both types of muffs from this period, if you want to see more. Also, it’s worth noting that polyester batting would not have been used to keep one’s hands warm in the early 19th century, but that I chose that materials because I had it on hand and it is not visible.)

IMG_2004

The petticoat is the only piece of my Vernet project that existed before I agreed to participate. It started life as part of a dress, but was removed and languished for years. Turns out I had made it too narrow to dance in, which isn’t very useful in my life. On the bright side, I had just enough of the cotton fabric left to add another panel, thus making the hem circumference much more wearable.

The petticoat had an attached sleeveless bodice before the addition of extra fabric in the skirt, so after adding fullness I was able to simply reattach the bodice. The edges of the bodice are narrow hemmed and it closes at center front with a tie at the waist and a button and loop at the bust. This past blog post discusses extant sleeveless underdresses or petticoats such as this. As with everything else in this project, both this petticoat and the muff are entirely hand sewn.

img_1632-1

The only other changes I needed to make to the petticoat to use it for the Vernet Project were at the hem. I started by adding lace that mimicked the shape of the embroidery seen in my Vernet fashion plate. I whip stitched the lace on with small stitches and then cut away the fabric behind the lace, creating a lovely scalloped hem.

img_0284-1

After trying on the petticoat with the finished hem, I decided it was too long and took a tuck above the hem to shorten it. You can see the tuck in one of the photo shoot pictures early in this post.

This final picture is from when I was hemming the witzchoura. While I had that garment on the dress form I also put the petticoat on to determine the placement  of the lace on the previously hemmed petticoat.

img_0279-1

And that’s it! Those two garments were minor in scale compared to the toque de velours, silly shoes, and the witzchoura itself, both in terms of materials and sheer volume of work involved.

Vernet Project: Silly Shoes

One of the five pieces of my Vernet Project was creating the silly up-turned-toe elf shoes in the fashion plate. Clearly, these are not shoes that could be purchased, as they are so specific in style, so I set out to make my own!

IMG_1920 (1)

In the beginning, I was thankful to have another Vernet project maker’s experience making her boots before mine to work from. Jenni posted a two part tutorial showing how she made her boots as well as sharing information behind-the-scenes with project participants earlier in the process (Part 1 and Part 2). She closely referenced Every Lady Her Own Shoemaker, published in 1855 (a little late relative to the date of the project, but still useful for construction advice), for construction methods and carefully documented her process. In fact, she did a much better job at documenting the actual sewing than I did… I also read Anna’s information about making mid-19th century shoes multiple times to help get my mind acquainted with the project (again, a little later than the period of the project, but still helpful). She also has lots of great construction pictures.

I started by creating a pattern for my shoe using patterns in Every Lady Her Own Shoemaker. Given that my shoe has the unusual turned-up-toe, I necessarily needed to make adjustments to the general slipper pattern. Here is my shoe at the mockup stage. The upper pieces fit pretty well! I adjusted the width of the sole as well as the shape of the turned-up section before moving on to cut out the final pieces.

Mockups.001

Here are all of the final pieces cut out and ready to assemble. The soles have three layers: heavier tan leather for the outer sole, cardboard for the inner sole structure, and white linen to cover the cardboard insole. The uppers have two layers: lightweight raspberry leather for the exterior and white linen for the interior. Later in the process I also added a faux fur cuff.

IMG_0239 (1)

To help the shoes keep their turned-up-toe shape I soaked the leather soles in water, taped them to a lysol wipe container, and let them dry. You can see the results below. Not perfectly curved up, but still helpful. I also tried boiling leather soles to thicken them before shaping, but found that the leather shrank unevenly which created soles that wouldn’t work for this project. I did save them, though, and hopefully will get to use them for a future shoe making endeavor. I repeated the soaking and shaping for the cardboard insoles before gluing the linen to them. There’s a picture of the insoles at this stage in this past post.

Soles in progress.001

After shaping the soles it was time to construct the uppers. I did the interior and exterior separately, then basted them together around the top opening and around the bottoms. Then I sewed the bottom edges of the uppers to the soles, using the slanting stitch through the side of the sole that Jenni shows in Part 2 of her tutorial. She used all sorts of nifty leather tools as well as a wooden last during construction. I purchased the nifty leather tools but found that they didn’t work for me and a simple non-leather needle worked just fine. (I think my leather was too thin and soft for these to be needed). As for the last, I looked online for a wooden one, never found one in my size foot, and eventually decided to give it a go without one, especially since I had to do the turned-up toe. In the end, I don’t think it was a problem not to have a last.

IMG_2253 (1)

Once the soles were attached, I bound the front slit with matching silk ribbon. Then I cut a piece of faux fur for each shoe that went around just the top of the foot opening and could double over on itself. There are non-functional silk ribbon loops that are sewn to the front of the fur that encases the top edge of the shoe. The shoes actually close with a twill tape threaded through hand sewn eyelets on each side of the opening.

IMG_1684

They’re actually quite comfortable for walking around in. I have very flat feet, so don’t really need arch support to be comfortable. The only thing is that my feet did get cold during our photoshoot due to the freezing ground only separated from my feet by a few thin layers of fabric. So, for the second wearing, while caroling at Christmastime, I added a faux fur insole. Problem solved! They were toasty and even more comfortable!

IMG_1884 - Version 2

Interestingly, witzchouras are mentioned as being popular in Paris during the year 1827 by La Belle Assembleé, after a mention of other popular pelisses and mantles (well worth checking out!), and are are described as being worn with boots laced in front and with fur around the leg.

335d382370bd68a719024c208ffeff0c

Doesn’t that description sound oddly familiar? It reminds me so very much of the Vernet fashion plate and my silly shoes!

Vernet Project: A Bit More Toque de Velours

In January, when I posted about my Vernet Project hat (the Toque de Velours), I missed including a few in-progress construction pictures I later discovered floating around my photo library. Now is as good a time as any to share them.

To remind you, this is my toque de velours.

IMG_1903

Here is the toque in the mockup stage, early in the process. I was trying to determine scale and proportions more than anything. For ease, I combined the bottom two vertical sections into one piece of paper for the mockup.

IMG_1394

Here is the actual toque in progress. You can see the floral cotton flannel mulling layer that is between the buckram base the the velvet exterior. You can also see that I used my mockup poof to flat line my velvet poof in order to help the light silk velvet hold its shape. This picture also shows the double, or stacked, pleating around the poof.

IMG_2924 (1)

This is the beginning of a renewed effort to post details about all the pieces of my Vernet Ensemble, so keep an eye out for posts about the petticoat, muff, shoes, and the witzchoura itself this fall.

Vernet Project: Toque de Velours

Today, I’m going to share more information about the unusual hat in my Vernet fashion plate.

IMG_1903

The caption reads “Toque de Velours.” I already had a rough translation in my head, basically “Hat of Velvet,” but thought I should double check the definitions before deciding on materials.

Toque:

1:  a woman’s small hat without a brim made in any of various soft close-fitting shapes

2:  tuque (a warm knitted usually pointed stocking cap)

3: a tall brimless hat worn by a chef —called also toque blanche

Velours:

1:  any of various fabrics with a pile or napped surface resembling velvet used in heavy weights for upholstery and curtains and in lighter weights for clothing; also  :  the article of clothing itself

2:  a fur felt (as of rabbit or nutria) finished with a long velvety nap and used especially for hats

Well, the hat does rather resemble a chef hat, doesn’t it? My rough translation was confirmed! Luckily, I had black silk velvet in my stash, which perfectly suited the project.

The hat base is buckram in the simple shape of an oval to fit my head with a flat tip on top. I don’t have pictures, but imagine the shape of a straight sided Lincoln-like top hat without the brim and you’ll have the right idea. The buckram is mulled with cotton flannel and wired around the head opening, tip, and partway up the side. The buckram support is about 8″ tall.

In addition, there is padding to support the poof on top. I chose to use polyester batting–it’s not at all accurate, but I had it on hand and it isn’t seen. There are concentric ovals on top that diminish in size with each layer as well as a few layers around the top of the buckram on the side to provide support for the tucks/pleats.

rolledpleats
The “stacked” pleat is on the right.

The poof is a large circle that is flat lined with a piece of muslin to help provide the support for the pleats. The pleats are about 1″ wide knife pleats that are then folded back on themselves to create a double pleat (this website calls this type of pleat a stacked pleat and is the source for the image). To determine the type of pleat, I played around with my fabric until I found a method that created an effect like the fashion plate, which is like fans or slices (you can see it in this post). Then I eyeballed how many to do, pinning and re-pinning until the pleats were evenly spaced and the poof fit into the side of my hat (no math here, I avoid it as much as possible most of the time).

The definition on the sides (at the head opening and about 1.5″ up from the head opening) was created by inserting “cording” under the velvet. My “cording” is actually modern acrylic yarn in sunshine yellow (like the batting, I made this choice because I had the materials on hand, it worked, and it will not be seen–but it is not accurate). I believe there are two or three lengths of yarn in each single section of “cording” to get the right thickness to show under the velvet.

IMG_1887
We took this photo specifically to capture the detail of the hat construction (usually the black all washes together, eliminating evidence of all the detail).

The rest is just sewing! The hat is entirely hand sewn, with the layers of velvet either tacked to the mulling or stitched through to the interior of the buckram base. Once I had finished the exterior sewing, I whipped up a lining of black silk  to tidy up the inside.

The last step was to trim the hat with the immense ostrich feathers depicted in the fashion plate. I ordered my feathers from Lamplight Feather, which I highly recommend (quick shipping, good quality, and great selection). The hat has 6 total feathers, each 17″-21″in length. Each plume is two feathers sewn together along the central stem before being shaped and sewn to the hat. The trickiest part was shaping the feathers to achieve the shape in the plate. Each plume is shaped so that it does an 180 degree turn (the plumes are attached to the hat standing up, but then are turned downward) in addition to the side sweep shape. As you can see, the wind occasionally blew lots of feather fluff into my face during the photo shoot, but it was totally worth it, to wear such lovely feathers.

IMG_1957
Feathers!

I constructed the hat such that it would sit almost horizontal across my head. It’s pretty light in terms of weight and is not uncomfortable to wear, being sized perfectly to fit my head. It also comes down far enough to be quite stable: even with the breeze and moving my head around there was no fear of it falling off.

As fun and silly as it is, I don’t really see a use for it in regular Regency wear. I will likely remove the feathers to use for another project someday (also partly because it would be hard to store the hat nicely with the feathers still attached). I’ve toyed with the idea of removing the poof (and maybe making a tam or turban or something out of it, or just sticking it back in my stash with the rest of the velvet) and using the buckram base with the velvet sides to make a shako style Regency hat. I have no immediate plans to put these ideas into action, except for removing the feathers, which I really should do soon, so I can put the hat away!

Vernet Project: Photo Shoot!

I thought I’d start the new year off with photos from my Vernet Ensemble photo shoot. (I’ll be doing separate posts with details about the construction of the ensemble as the year progresses.) I’m so incredibly pleased with my ensemble and with the quality of the pictures. I often have lovely pictures after events and when documenting sewing projects, but these are extra special in terms of the sharpness of the images, the clear colors, and the fun use of a historical lens.

Hopefully, you were following along with the release of finished ensembles in December, but in case you missed mine or haven’t figured out yet which fashion plate I was recreating, here it is.

Plate No. 20 “Toque de Velours. Witz-choura de Satin.”

164-0000-021 - Version 2

Below is the “official release” picture. I did my best to mimic the pose of the fashion plate, but it was really hard to wrap my brain around the left and right of things in my own pose relative to the fashion plate. Left was right and right was left, and in the end we did the best we could and called it done. I think we actually did it right, it’s just that I’m facing the camera at a different angle. It still boggles my brain to try and figure it out!

IMG_1915 blog

Unfortunately, there was no snow in November when we took these pictures and so I didn’t get ice skaters falling over behind me (also, I would have had to find ice skaters)… but I did get unfrozen water, and you’ll just have to imagine the ice and the skaters!

IMG_1903

IMG_1902

IMG_1936

IMG_1978

IMG_1963

IMG_1972

IMG_1985

IMG_2004

IMG_2020

These last few pictures with the blurred background were taken using a reproduction 19th century Petzval lens. You can read more about the lens and how it causes this effect here, at my photographer’s blog. 

IMG_1928

IMG_1922

IMG_1917

I am so incredibly blessed that to have a friend that joyfully enjoys practicing her photography skills with her nice digital camera (with fancy and historical lenses, to boot!) by taking pictures of my endeavors, amongst other things. She happily came over one afternoon in November just to accompany me for the photo shoot and take these absolutely gorgeous pictures. Thank you!!!

Vernet Project: Check Out The Finished Ensembles!

Photos of each recreation of one of Vernet’s Merveilleuses and Incroyables fashion plates start to be released tomorrow (December 8) on the group Facebook page! One fashion plate per day will be shared right next to a photo of the recreation, right up through the 31st of December (my plate will be on the 21st). Check it out! It will be a fun way to end 2015!

10394822_835881046430902_3846149313268917321_n

I’ve seen some of the finished ensembles ahead of time, and let me just reiterate how wonderful, weird, and wacky they are! Further posts with more images and specifics about construction, etc. will be released by participants in 2016, so don’t forget to check back to see updates on the ensembles that most capture your fancy.

(You can see all my posts from this past year relating to this project here, and I’ll be sharing more in 2016!)

Vernet Project: Making Progress

Our group’s early December deadline to finish sewing our Vernet Projects is fast approaching! Thank goodness we’ve had all year to work on these–mine has been quite a project with all the hand sewing and patterning and learning new skills. Of my five pieces, one is totally done, two have less than three tasks left to be finished, and 2 are still about halfway completed. It won’t quite be furious sewing, but I do have to keep at it to get it done in time. For now, here is proof that I’ve been making progress!

IMG_0288

IMG_0284

IMG_0124

IMG_0272

Starting December 7th, you should check in often with the group on Facebook to see each recreation released side by side with the original Vernet fashion plate. It’s going to be really, really amazing to see these crazy and beautiful fashion plates in 3D form!

Vernet Project: Witzchoura Images

As a quick recap, I started my witzchoura research journey here, being confused about how the word was spelled. After sharing that with you, I moved on to look at basic witzchoura definitions and then further witzchoura references, but I haven’t really shared images of witzchouras with you yet, so that’s what this post is going to focus on.

Out of the thousands of pins on my historic clothing Pinterest boards, the images below are the only ones I could find that specifically mention that they show a witzchoura. (Never fear, I’ll be looking at not-quite-witzchouras in a future post.)  If you know of any other images that specifically name the garment shown as being a witzchoura please let me know!

I find it interesting that two are yellow and two are blue. Also interesting that all the furs that are depicted are textured or downright weird (like the first one with the flower-fur… what is that?). However, in terms of materials there is variation: one of merino (wool), one of reps (could be wool, silk, or cotton, according to the OED), and two of velvet (fabric content unknown, though wool, silk, or cotton would seem to be likely).

b2e293cd8d6787e52979911acc6c3539
Costume Parisien, 1812
pictura2009%5Cs_a_55466_000
Costume Parisien, 1813
49a82ad6569f70e121aebe638e857efd
Costume Parisien, 1818
1ec484b324c9135cf9d6934f28eb8dfd
Costume Parisien, 1820