

Today, I’m going to share more information about the unusual hat in my Vernet fashion plate.

The caption reads “Toque de Velours.” I already had a rough translation in my head, basically “Hat of Velvet,” but thought I should double check the definitions before deciding on materials.
1: a woman’s small hat without a brim made in any of various soft close-fitting shapes
2: tuque (a warm knitted usually pointed stocking cap)
3: a tall brimless hat worn by a chef —called also toque blanche
1: any of various fabrics with a pile or napped surface resembling velvet used in heavy weights for upholstery and curtains and in lighter weights for clothing; also : the article of clothing itself
2: a fur felt (as of rabbit or nutria) finished with a long velvety nap and used especially for hats
Well, the hat does rather resemble a chef hat, doesn’t it? My rough translation was confirmed! Luckily, I had black silk velvet in my stash, which perfectly suited the project.
The hat base is buckram in the simple shape of an oval to fit my head with a flat tip on top. I don’t have pictures, but imagine the shape of a straight sided Lincoln-like top hat without the brim and you’ll have the right idea. The buckram is mulled with cotton flannel and wired around the head opening, tip, and partway up the side. The buckram support is about 8″ tall.
In addition, there is padding to support the poof on top. I chose to use polyester batting–it’s not at all accurate, but I had it on hand and it isn’t seen. There are concentric ovals on top that diminish in size with each layer as well as a few layers around the top of the buckram on the side to provide support for the tucks/pleats.
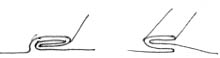
The poof is a large circle that is flat lined with a piece of muslin to help provide the support for the pleats. The pleats are about 1″ wide knife pleats that are then folded back on themselves to create a double pleat (this website calls this type of pleat a stacked pleat and is the source for the image). To determine the type of pleat, I played around with my fabric until I found a method that created an effect like the fashion plate, which is like fans or slices (you can see it in this post). Then I eyeballed how many to do, pinning and re-pinning until the pleats were evenly spaced and the poof fit into the side of my hat (no math here, I avoid it as much as possible most of the time).
The definition on the sides (at the head opening and about 1.5″ up from the head opening) was created by inserting “cording” under the velvet. My “cording” is actually modern acrylic yarn in sunshine yellow (like the batting, I made this choice because I had the materials on hand, it worked, and it will not be seen–but it is not accurate). I believe there are two or three lengths of yarn in each single section of “cording” to get the right thickness to show under the velvet.

The rest is just sewing! The hat is entirely hand sewn, with the layers of velvet either tacked to the mulling or stitched through to the interior of the buckram base. Once I had finished the exterior sewing, I whipped up a lining of black silk to tidy up the inside.
The last step was to trim the hat with the immense ostrich feathers depicted in the fashion plate. I ordered my feathers from Lamplight Feather, which I highly recommend (quick shipping, good quality, and great selection). The hat has 6 total feathers, each 17″-21″in length. Each plume is two feathers sewn together along the central stem before being shaped and sewn to the hat. The trickiest part was shaping the feathers to achieve the shape in the plate. Each plume is shaped so that it does an 180 degree turn (the plumes are attached to the hat standing up, but then are turned downward) in addition to the side sweep shape. As you can see, the wind occasionally blew lots of feather fluff into my face during the photo shoot, but it was totally worth it, to wear such lovely feathers.
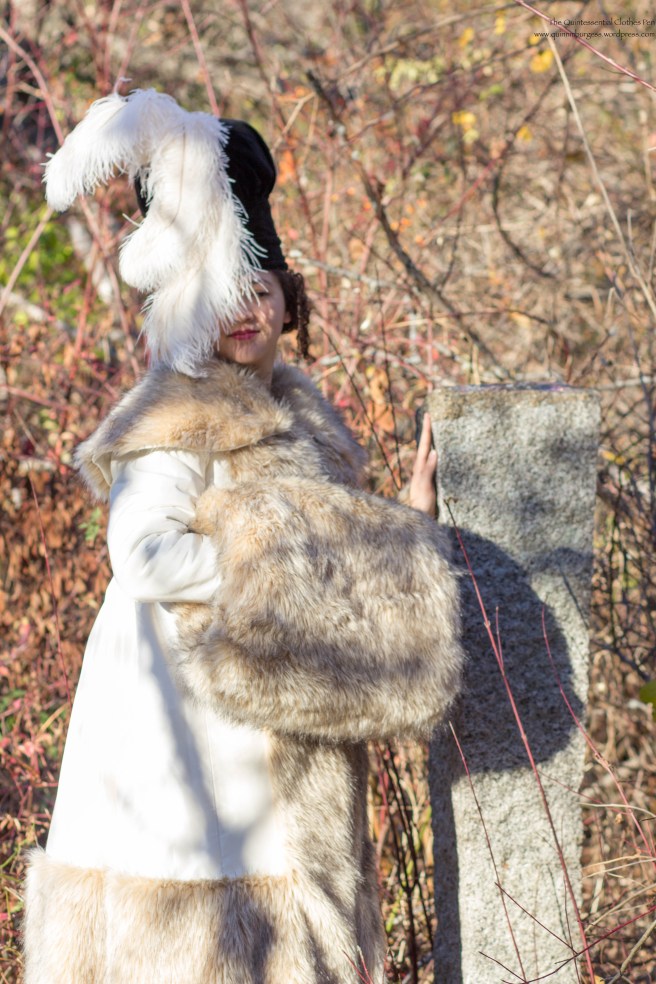
I constructed the hat such that it would sit almost horizontal across my head. It’s pretty light in terms of weight and is not uncomfortable to wear, being sized perfectly to fit my head. It also comes down far enough to be quite stable: even with the breeze and moving my head around there was no fear of it falling off.
As fun and silly as it is, I don’t really see a use for it in regular Regency wear. I will likely remove the feathers to use for another project someday (also partly because it would be hard to store the hat nicely with the feathers still attached). I’ve toyed with the idea of removing the poof (and maybe making a tam or turban or something out of it, or just sticking it back in my stash with the rest of the velvet) and using the buckram base with the velvet sides to make a shako style Regency hat. I have no immediate plans to put these ideas into action, except for removing the feathers, which I really should do soon, so I can put the hat away!

As always, Quinn, your research, explainations, photos and projects are fantastic. I have a degree in clothing, but I learn from you all the time. I am SO glad I found your blog. Keep it up. We need your inspiration.
Thank you for the ready encouragement, Helen!
Beautiful, Quinn!
What a fun project!
Laurie
I love all the detail that went into this simple hat. The pleats and cording really make it. Not to mention the gorgeous feathers!
Caroline
Thank you very much!
That hats are all kinds of awesome. You whole ensemble, really, but I Think the hat really Nails it. 🙂
Thank you very much!
WOW! This ensemble is so luxurious and so merveilleuse! What ridiculously fabulous hat–it’s adorable. And it is exactly like a velvet chef’s hat. Those feathers are delish, too. Erg! now I’m all inspired to get cracking on a piece of Empire outerwear.
Thank you!
It’s so hard to balance sewing options! There are so many fabulous things to make and so little time…