

Way back in 2012, I posted with great excitement about a new to me sewing tool that Mr. Q called the Cast Iron Crinkle Cutter. These antique specialty irons are actually called fluting irons.
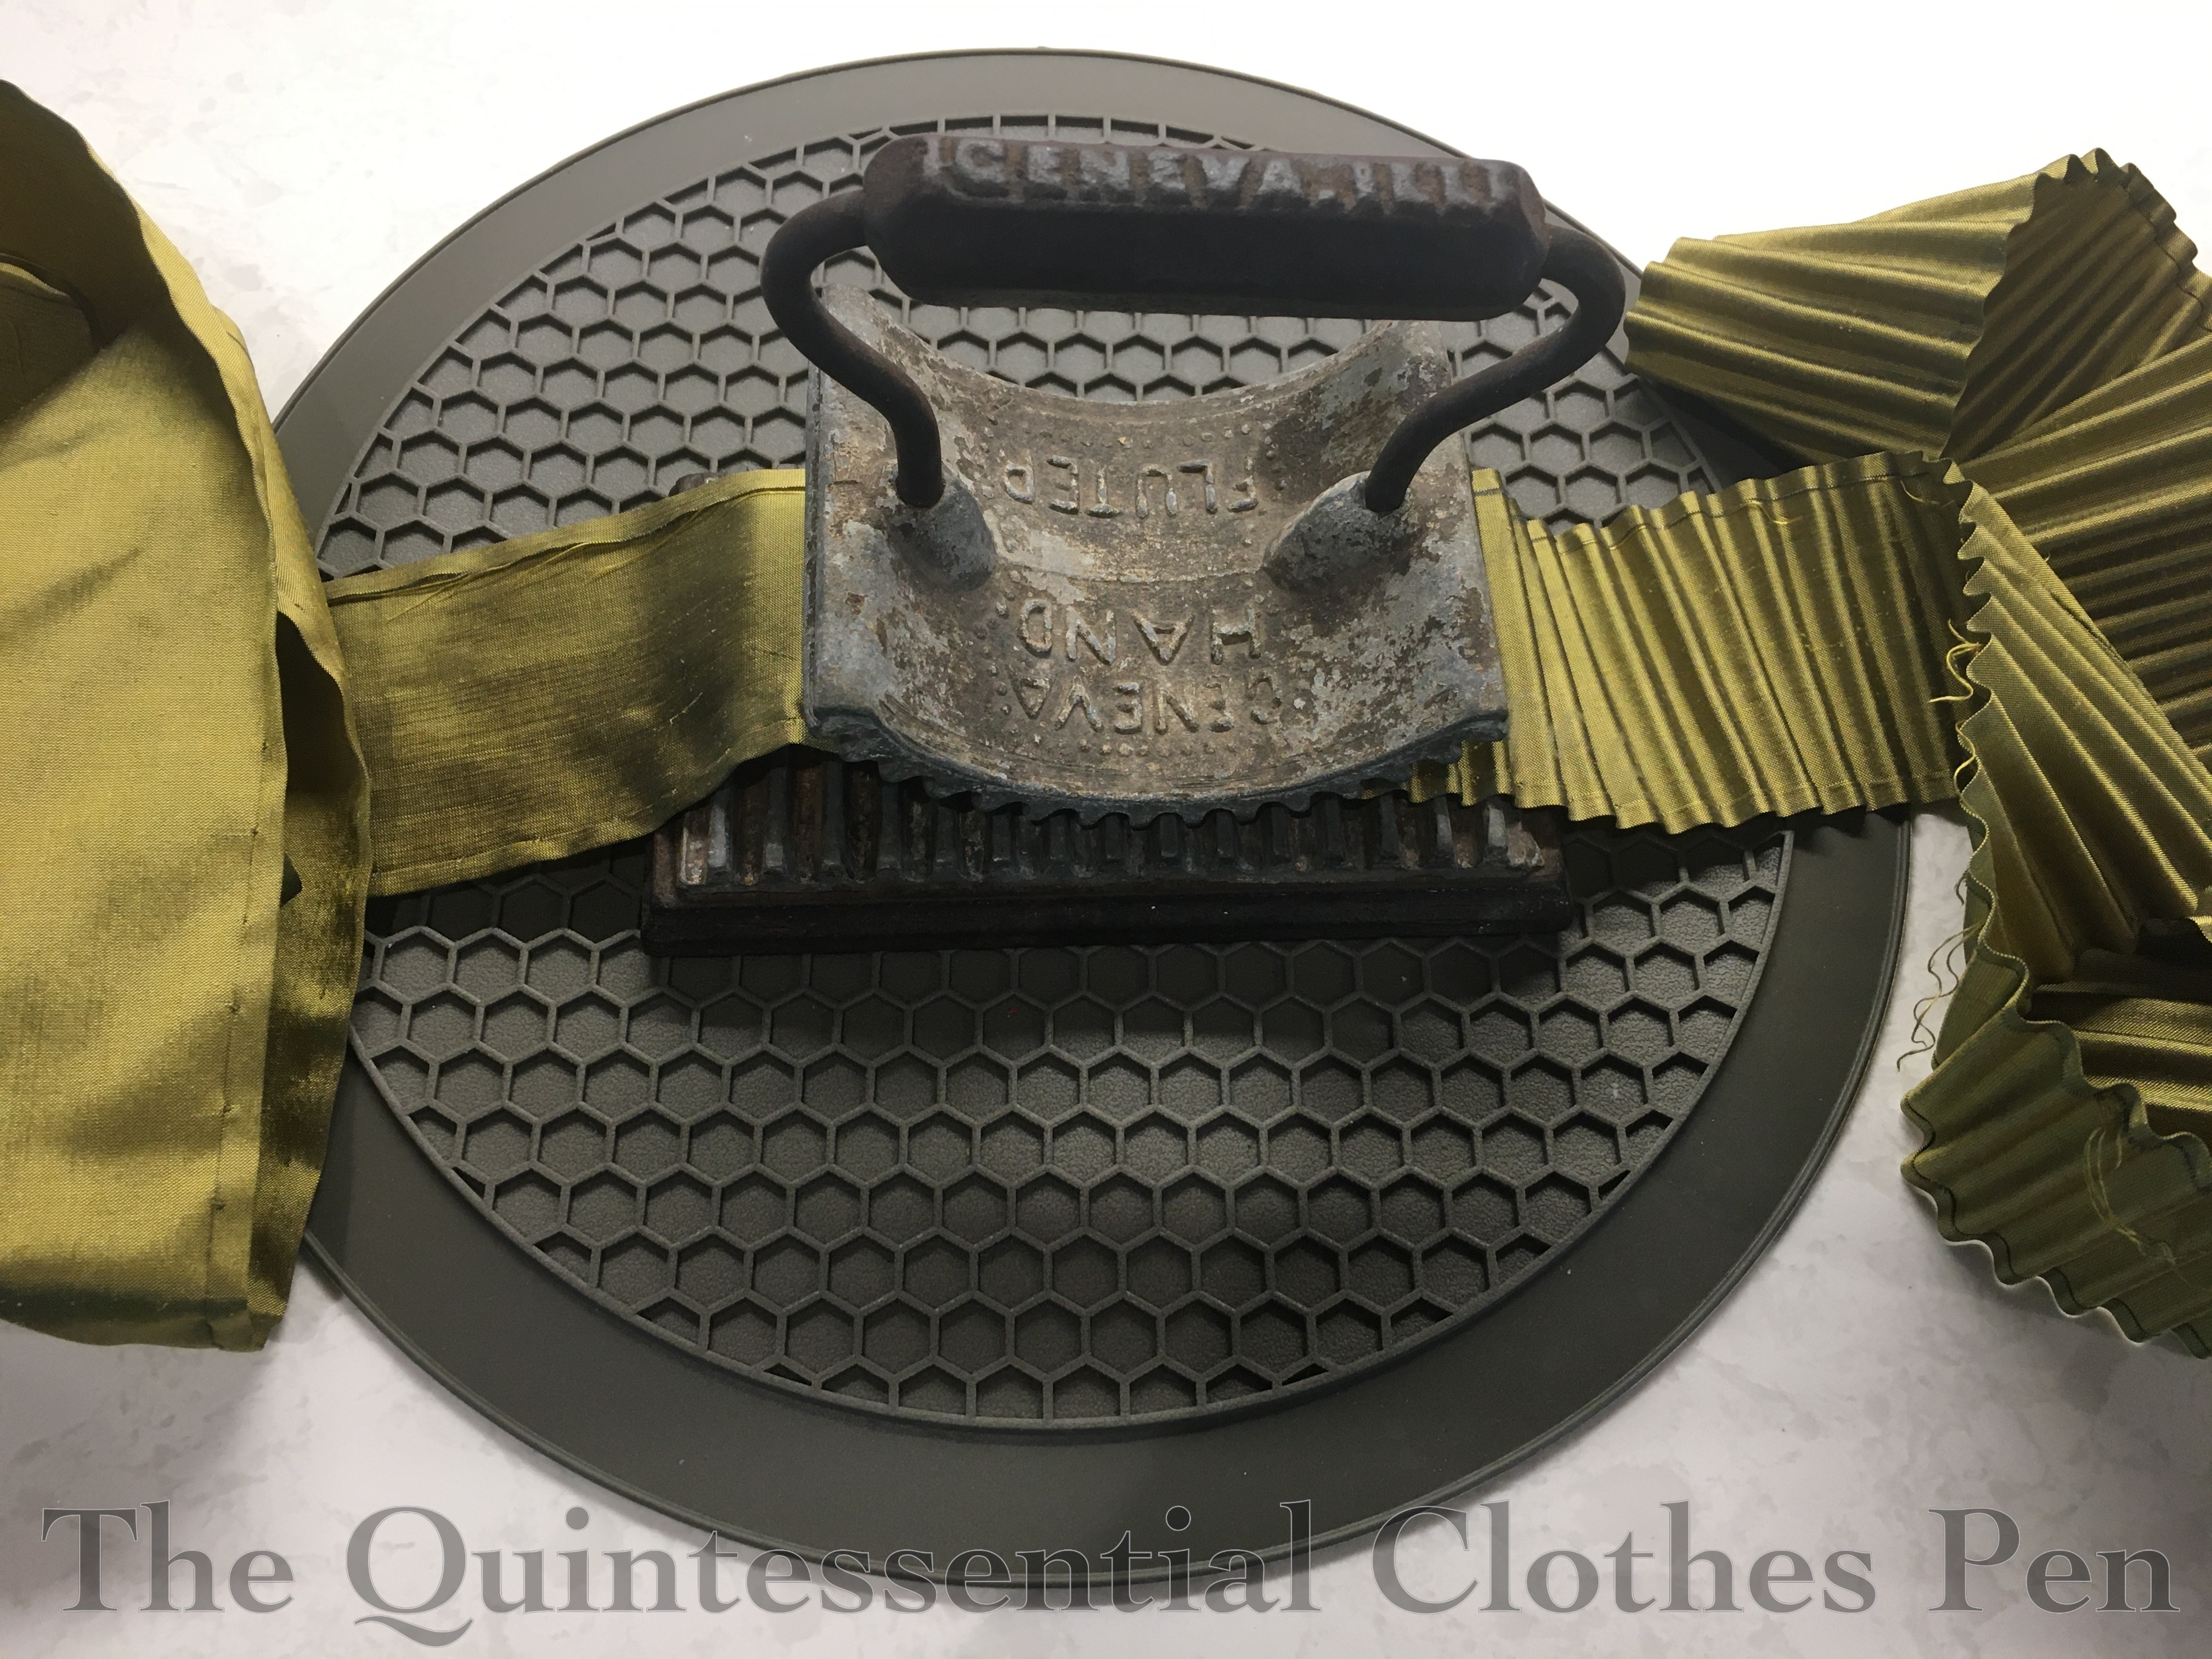
Here is mine, in action!
Despite my best intentions of actually creating trim with my fluting iron, instead it has been used as a door stop and decorative item (near my modern iron in my sewing room!) since I’ve owned it. I’m currently working on a project from 1875 that has pleated trim around the skirt and I thought that perhaps instead of knife pleating I would try a sample with my fluting iron! I figured that if I liked it (and I could get it to work) I’d use it for the trim on the dress.
Brief History
Specialty irons have been used for hundreds of years to create different types of ruffles and trims. I came across two sites that had really interesting information about the fluting iron I have as well as many other types of irons from around the world and for the last few thousand years. This one is summary of ironing throughout history. This one is more about types of historical irons. Also, this video from the Oshawa Community Museum looks specifically at some ironing tools that were used to create late Victorian ruffles, including various types of fluting irons.
Along the way to learning more about fluting irons, I also learned that flat cast iron irons are called sad irons. (I might have read that before but didn’t remember the term, so it feels like new information!) They’re called that not because they’re melancholy, but because in the past ‘sad iron’ meant the iron was solid as opposed to hollow (to be filled with heating devices, such as charcoal). The word ‘sad’ also meant heavy and a sad iron could weigh up to 15 pounds. That only further reinforces the fact that laundering in the 19th century was strenuous work (hand scrubbing, hauling buckets of water to heat, maintaining the stove or fire, harsh soaps, refreshing the rinsing water… hard work!). *This is edited from my original description of sad iron. To read all about the etymology of the terms ‘sad’, ‘sad iron’, and ‘box iron’ (the term for a hollow iron), check out this post, published after the one you are currently reading.
Practical thoughts about getting started
In terms of my fabric, I had the strips I wanted to flute prepared and ready to go before ironing them. I had hemmed one long side and just pressed the other edge under (that would become the top edge). With the crisp silk I’m using I probably could have gotten away with just pressing under both the hem and the top edge, but oh well. I prepared and hemmed these long before I officially decided to flute them.
In terms of the fluting iron, I followed these steps (or considered them, anyway):
Cleaning: I used dish soap and a toothbrush, to really get into all the grooves on both pieces of my fluting iron and remove the accumulated dust and grime (I don’t want those on my silk fabric!).
Drying: To prevent rust from forming, I carefully dried the iron and then also let it air dry overnight (though I realized that if I were to immediately use it the heat would cause all of the water to evaporate anyway…).
Seasoning: This is done on non-coated cast iron pans to keep them from rusting. I chose not do this with my iron at this time. I might do it later (I read that well-seasoned cast iron will not release oil onto your fabrics), but right now I just wanted to get started on my experiment.
Supplies
It’s worth noting that the cast iron gets much too hot to hold with bare hands or put directly on the counter to use, so in addition to the two parts of the iron, I also used a variety of other kitchen tools in this experiment.
I used the baking sheet, cookie drying rack, and cast iron frying pan you’ll see in photos at various points, as well as the silicone baking supplies pictured below: a hefty mitt, a small trivet, and a large trivet.
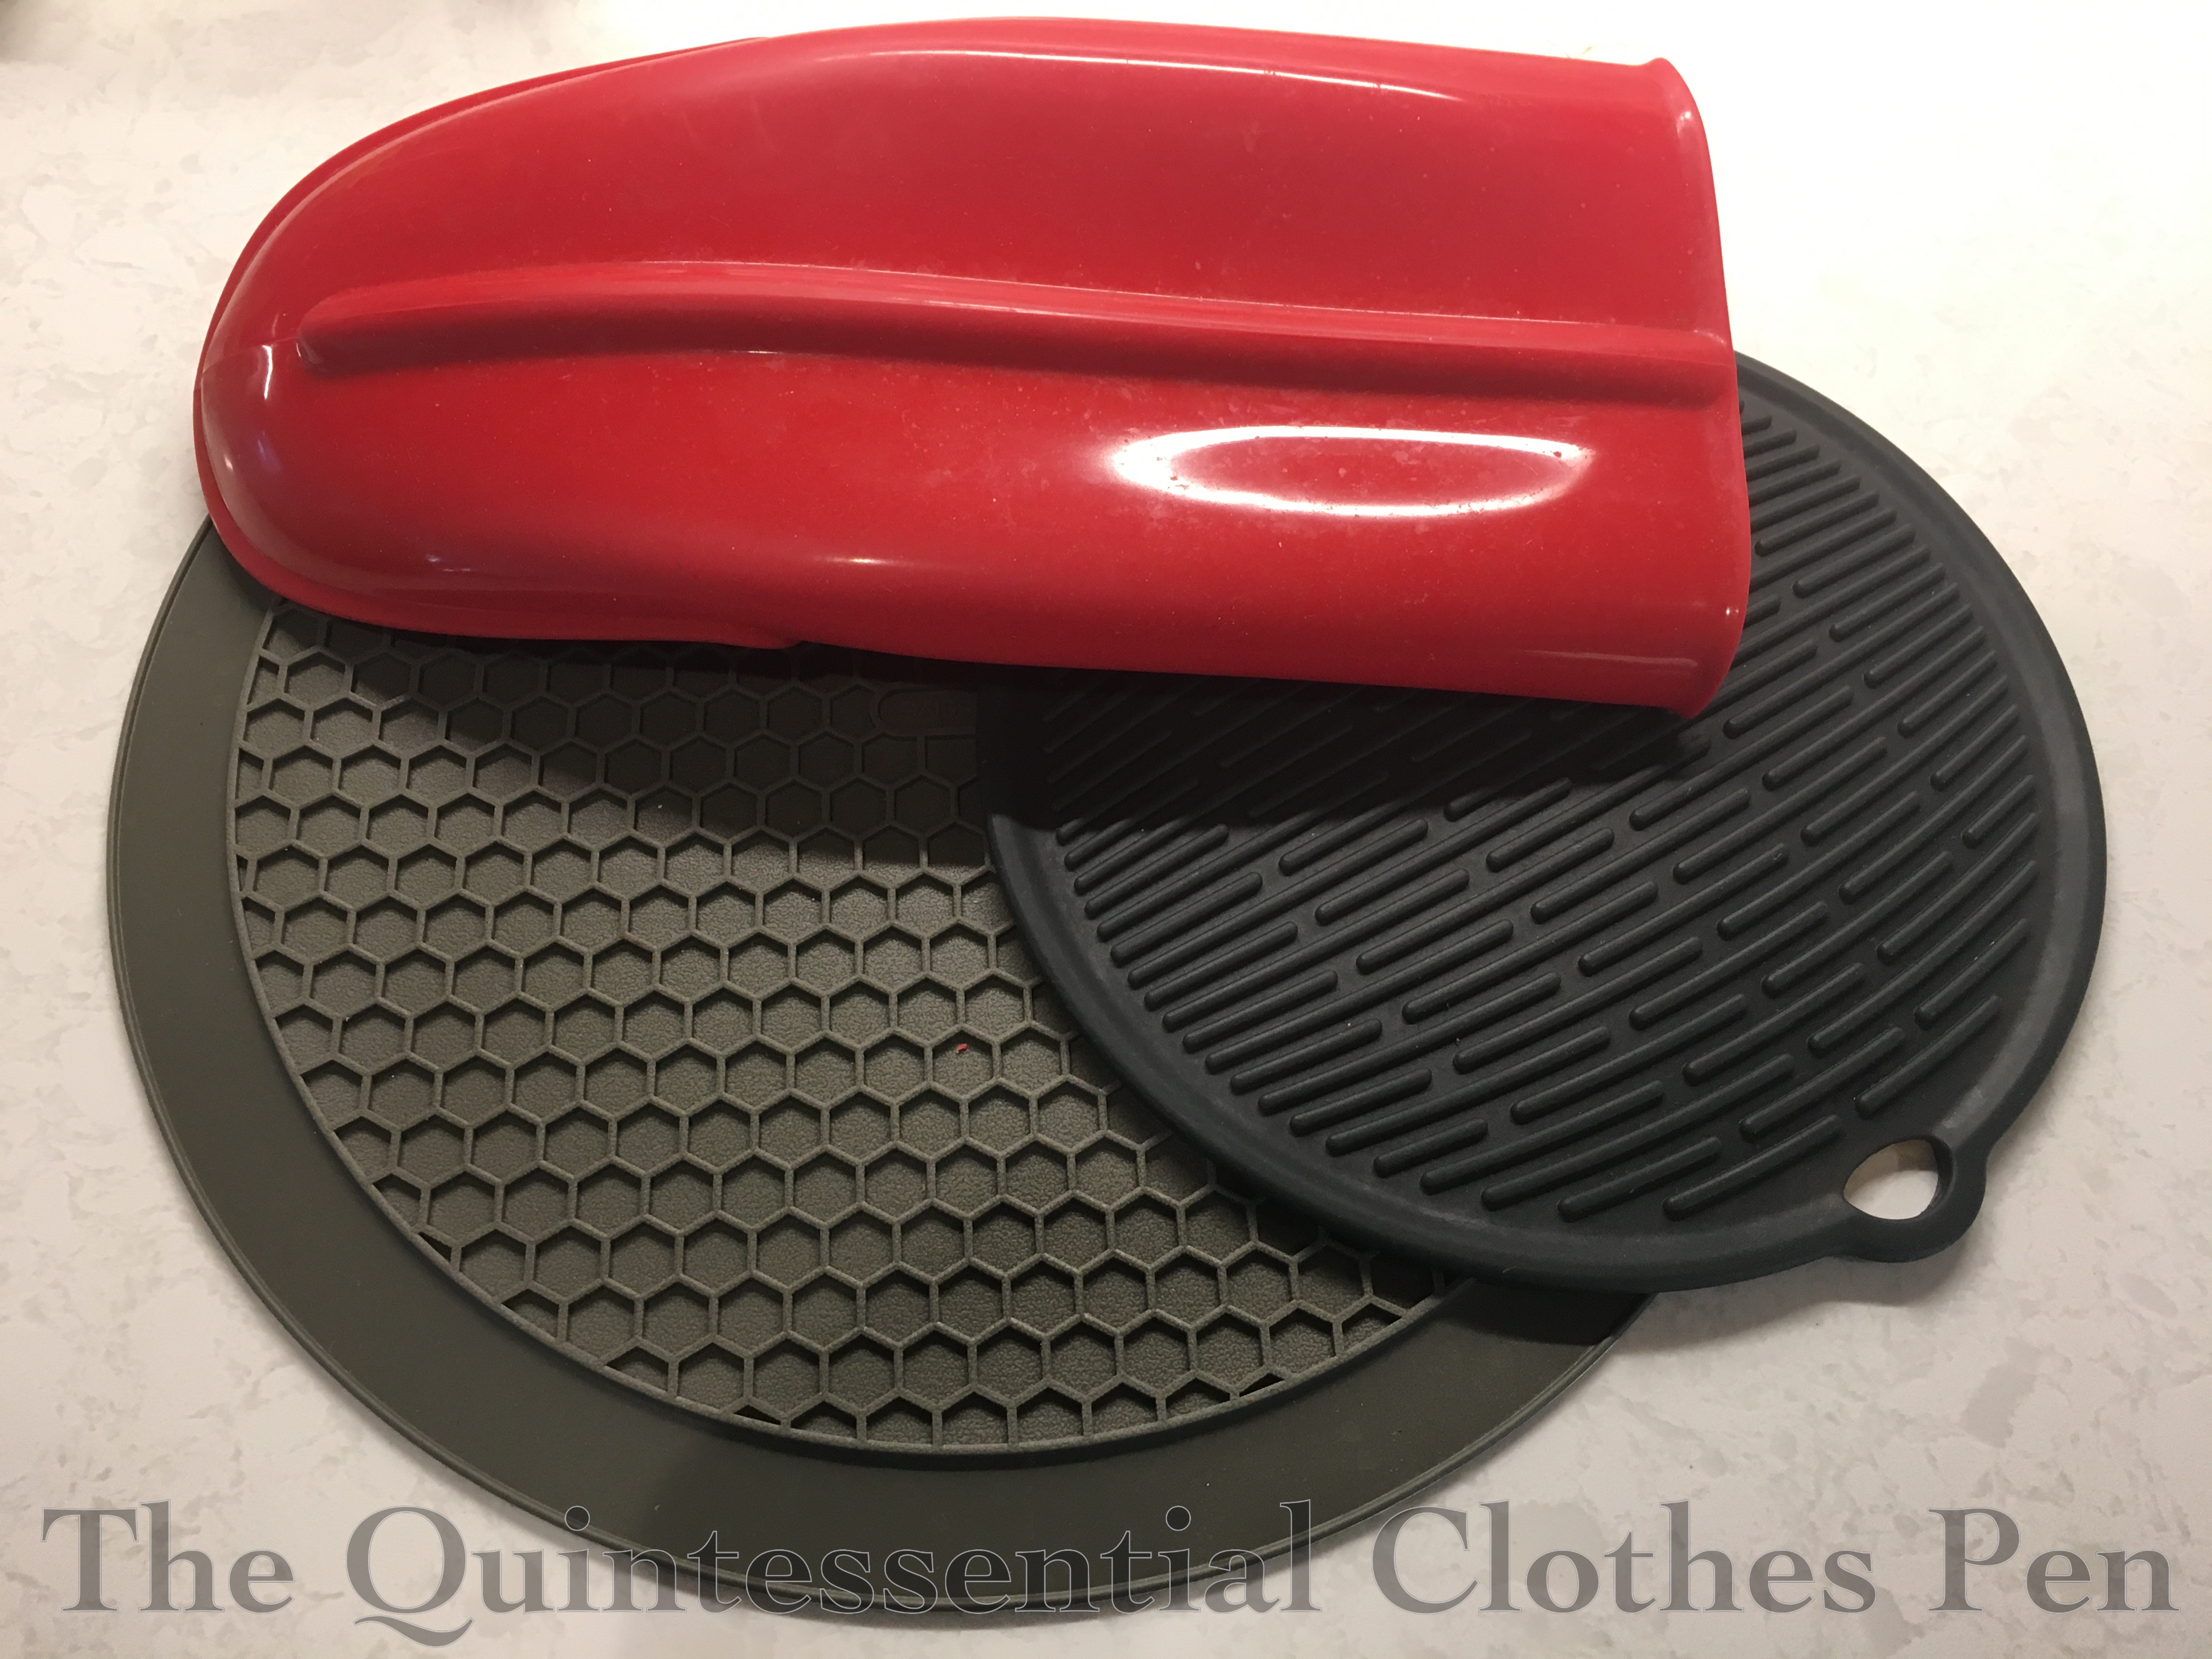
I also used a spatula to help get a grip on the base of the iron while lifting it out the frying pan, a small spray bottle, white vinegar from my pantry, and tap water.
Method #1 (the slow and steady way to heat the fluting iron)
Heating/Using: I used my conventional oven to heat both parts of my fluting iron on a baking sheet. I could not find specific directions for temperature or length of time, so I started conservatively with 175 F for 15 minutes. (Partly due to the basic information on Wikipedia about specific temperatures for different types of fabrics, but also check out the image of the tailor’s stove on the right side of the page: a multi-sided stove to heat sad irons simultaneously makes so much sense if you’re ironing a lot, as tailors would be!).

When tested on my silk this hardly made an impact. So I put the iron pieces back in the 175 F oven for another 10 minutes. This was better, but not as effective at getting tight flutes as I wanted. On the left are the barely visible results from the first 10 minutes of heating and on the right after the second 10 minutes of heating.
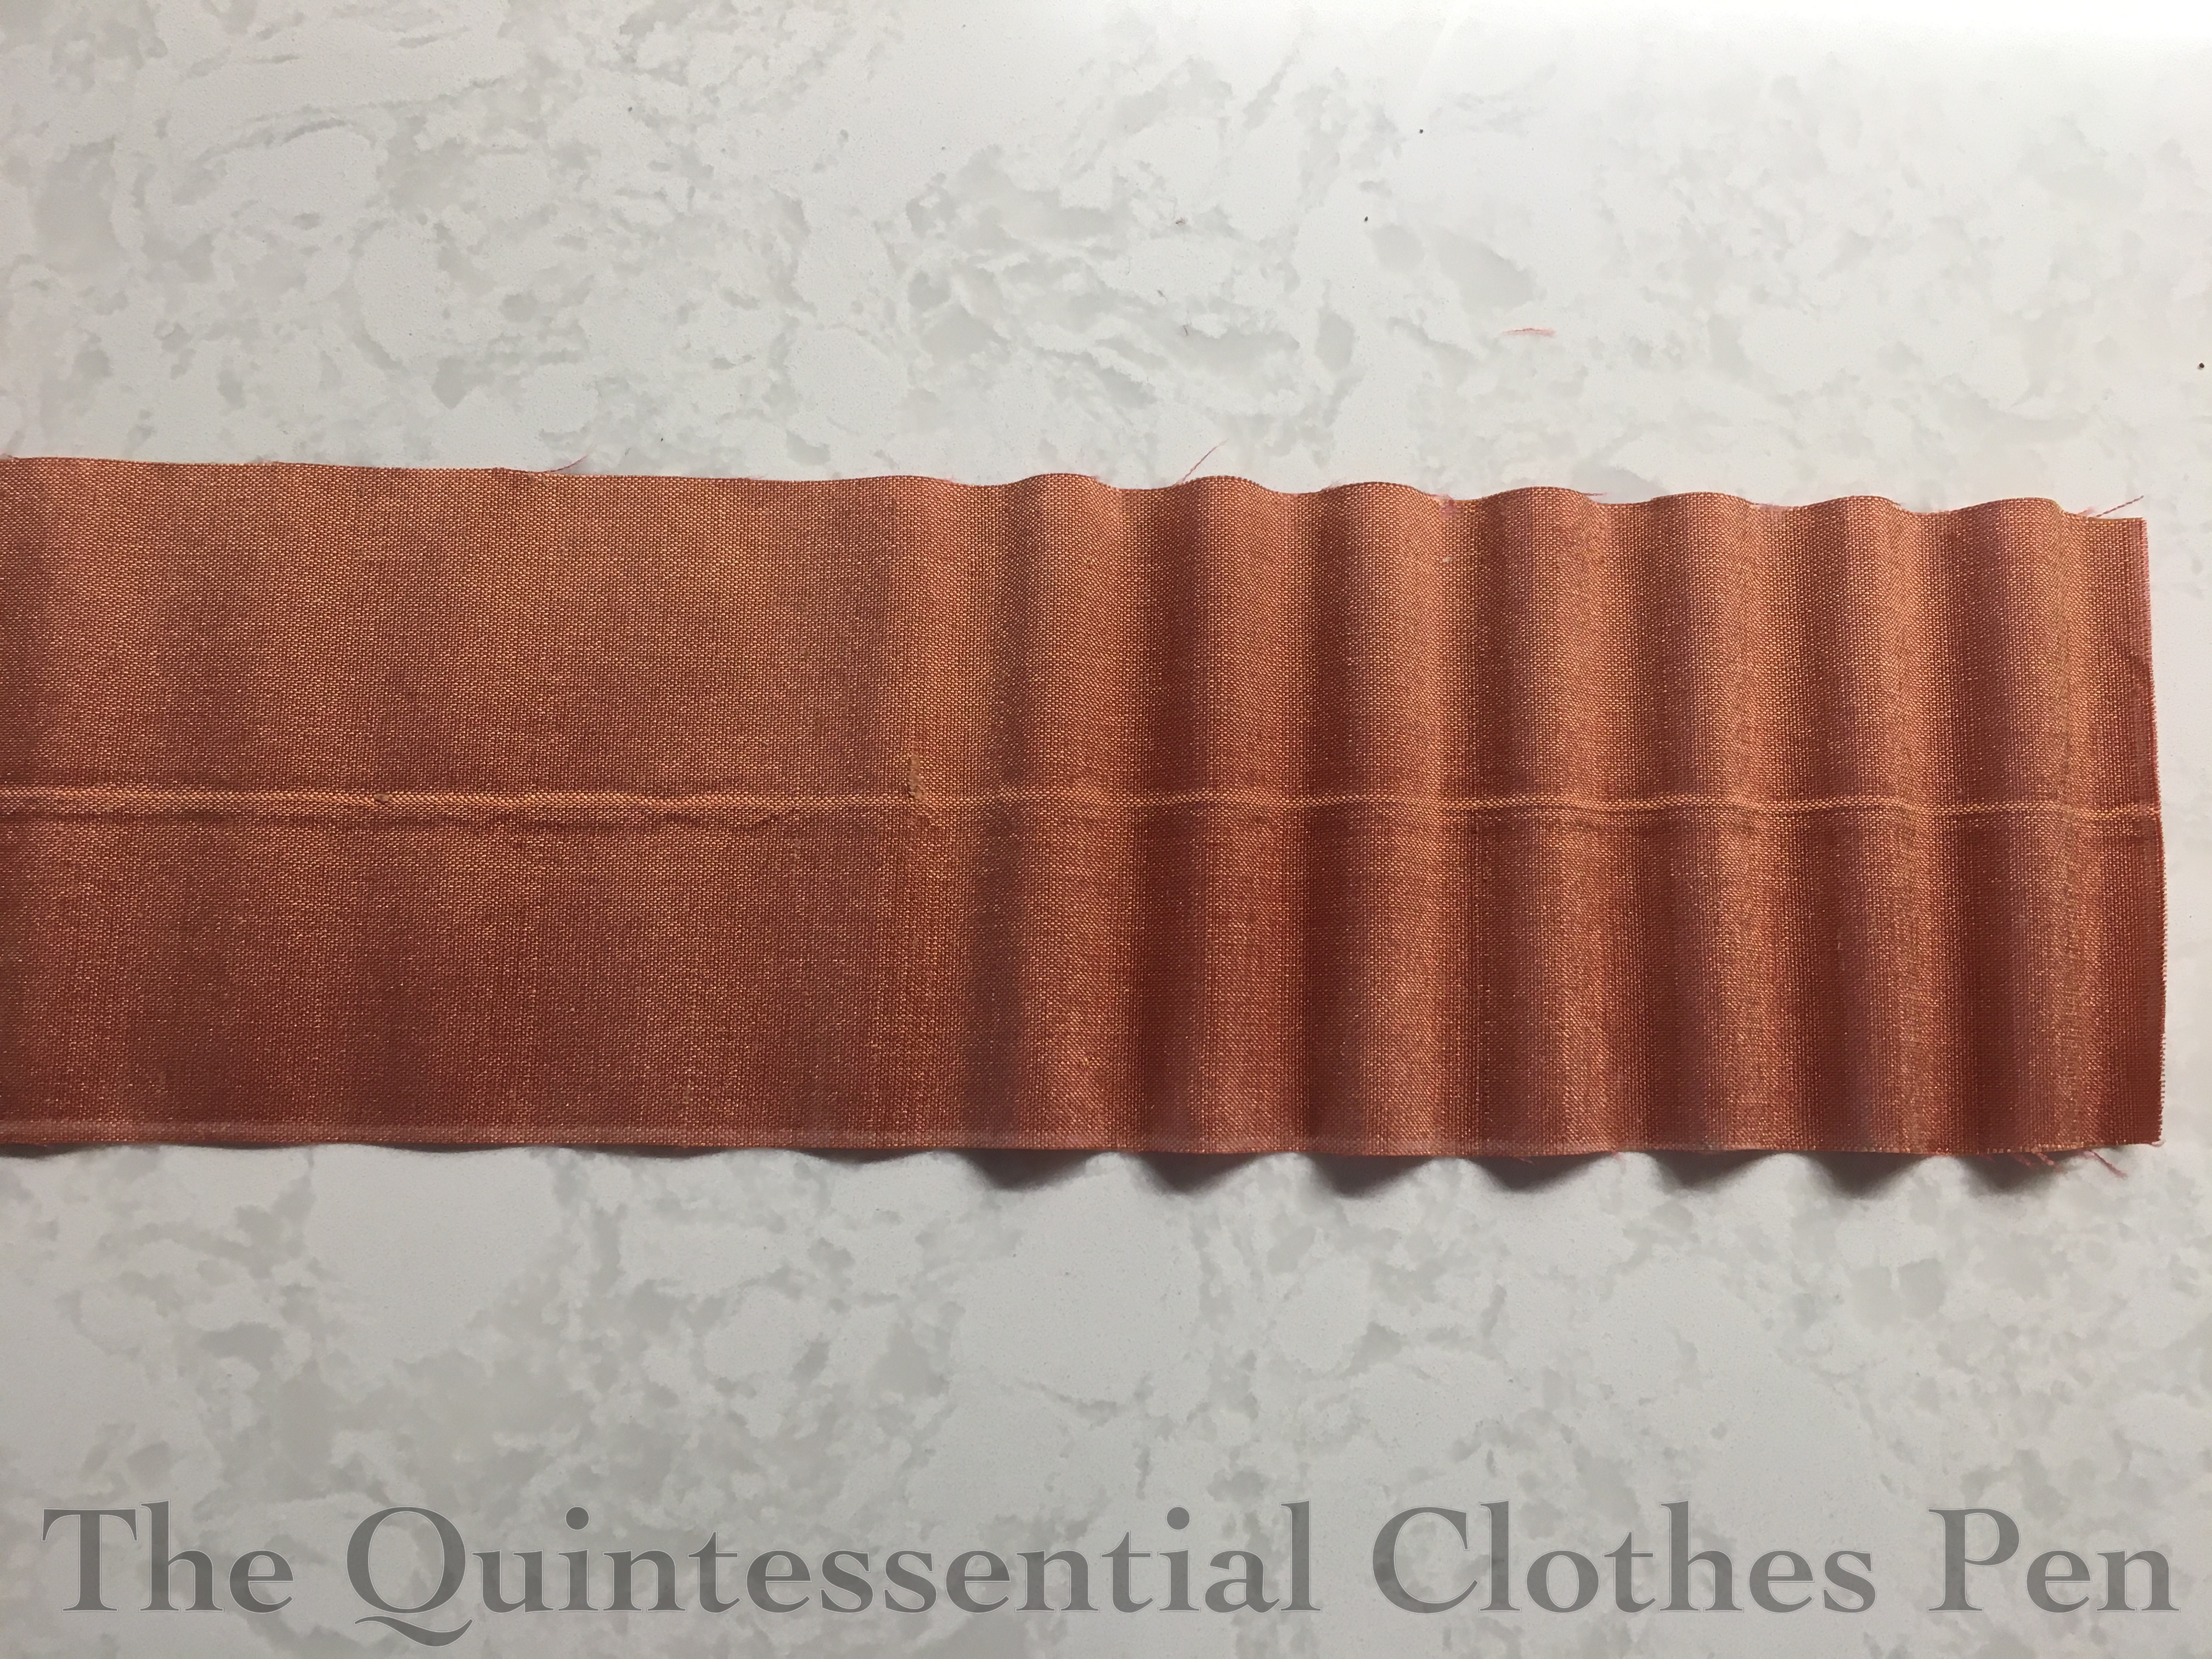
I increased the temperature to 225 F and put the iron pieces back in the oven for 10 more minutes. This time I also decided to use vinegar to help set the flutes. I mixed ½ white vinegar and ½ water in a spray bottle and then sprayed the section of silk I intended to iron. Here you can see the sprayed silk ready to feed into the iron on the left and the results coming out on the right.

This worked much better, but still feeling like I needed more heat to get a good sizzle and press, I increased the oven to 275 F and put the pieces in for another 10 minutes. This seemed like the right temperature! A bit of sizzle from the evaporating liquid on the silk and tight flutes as a final result.
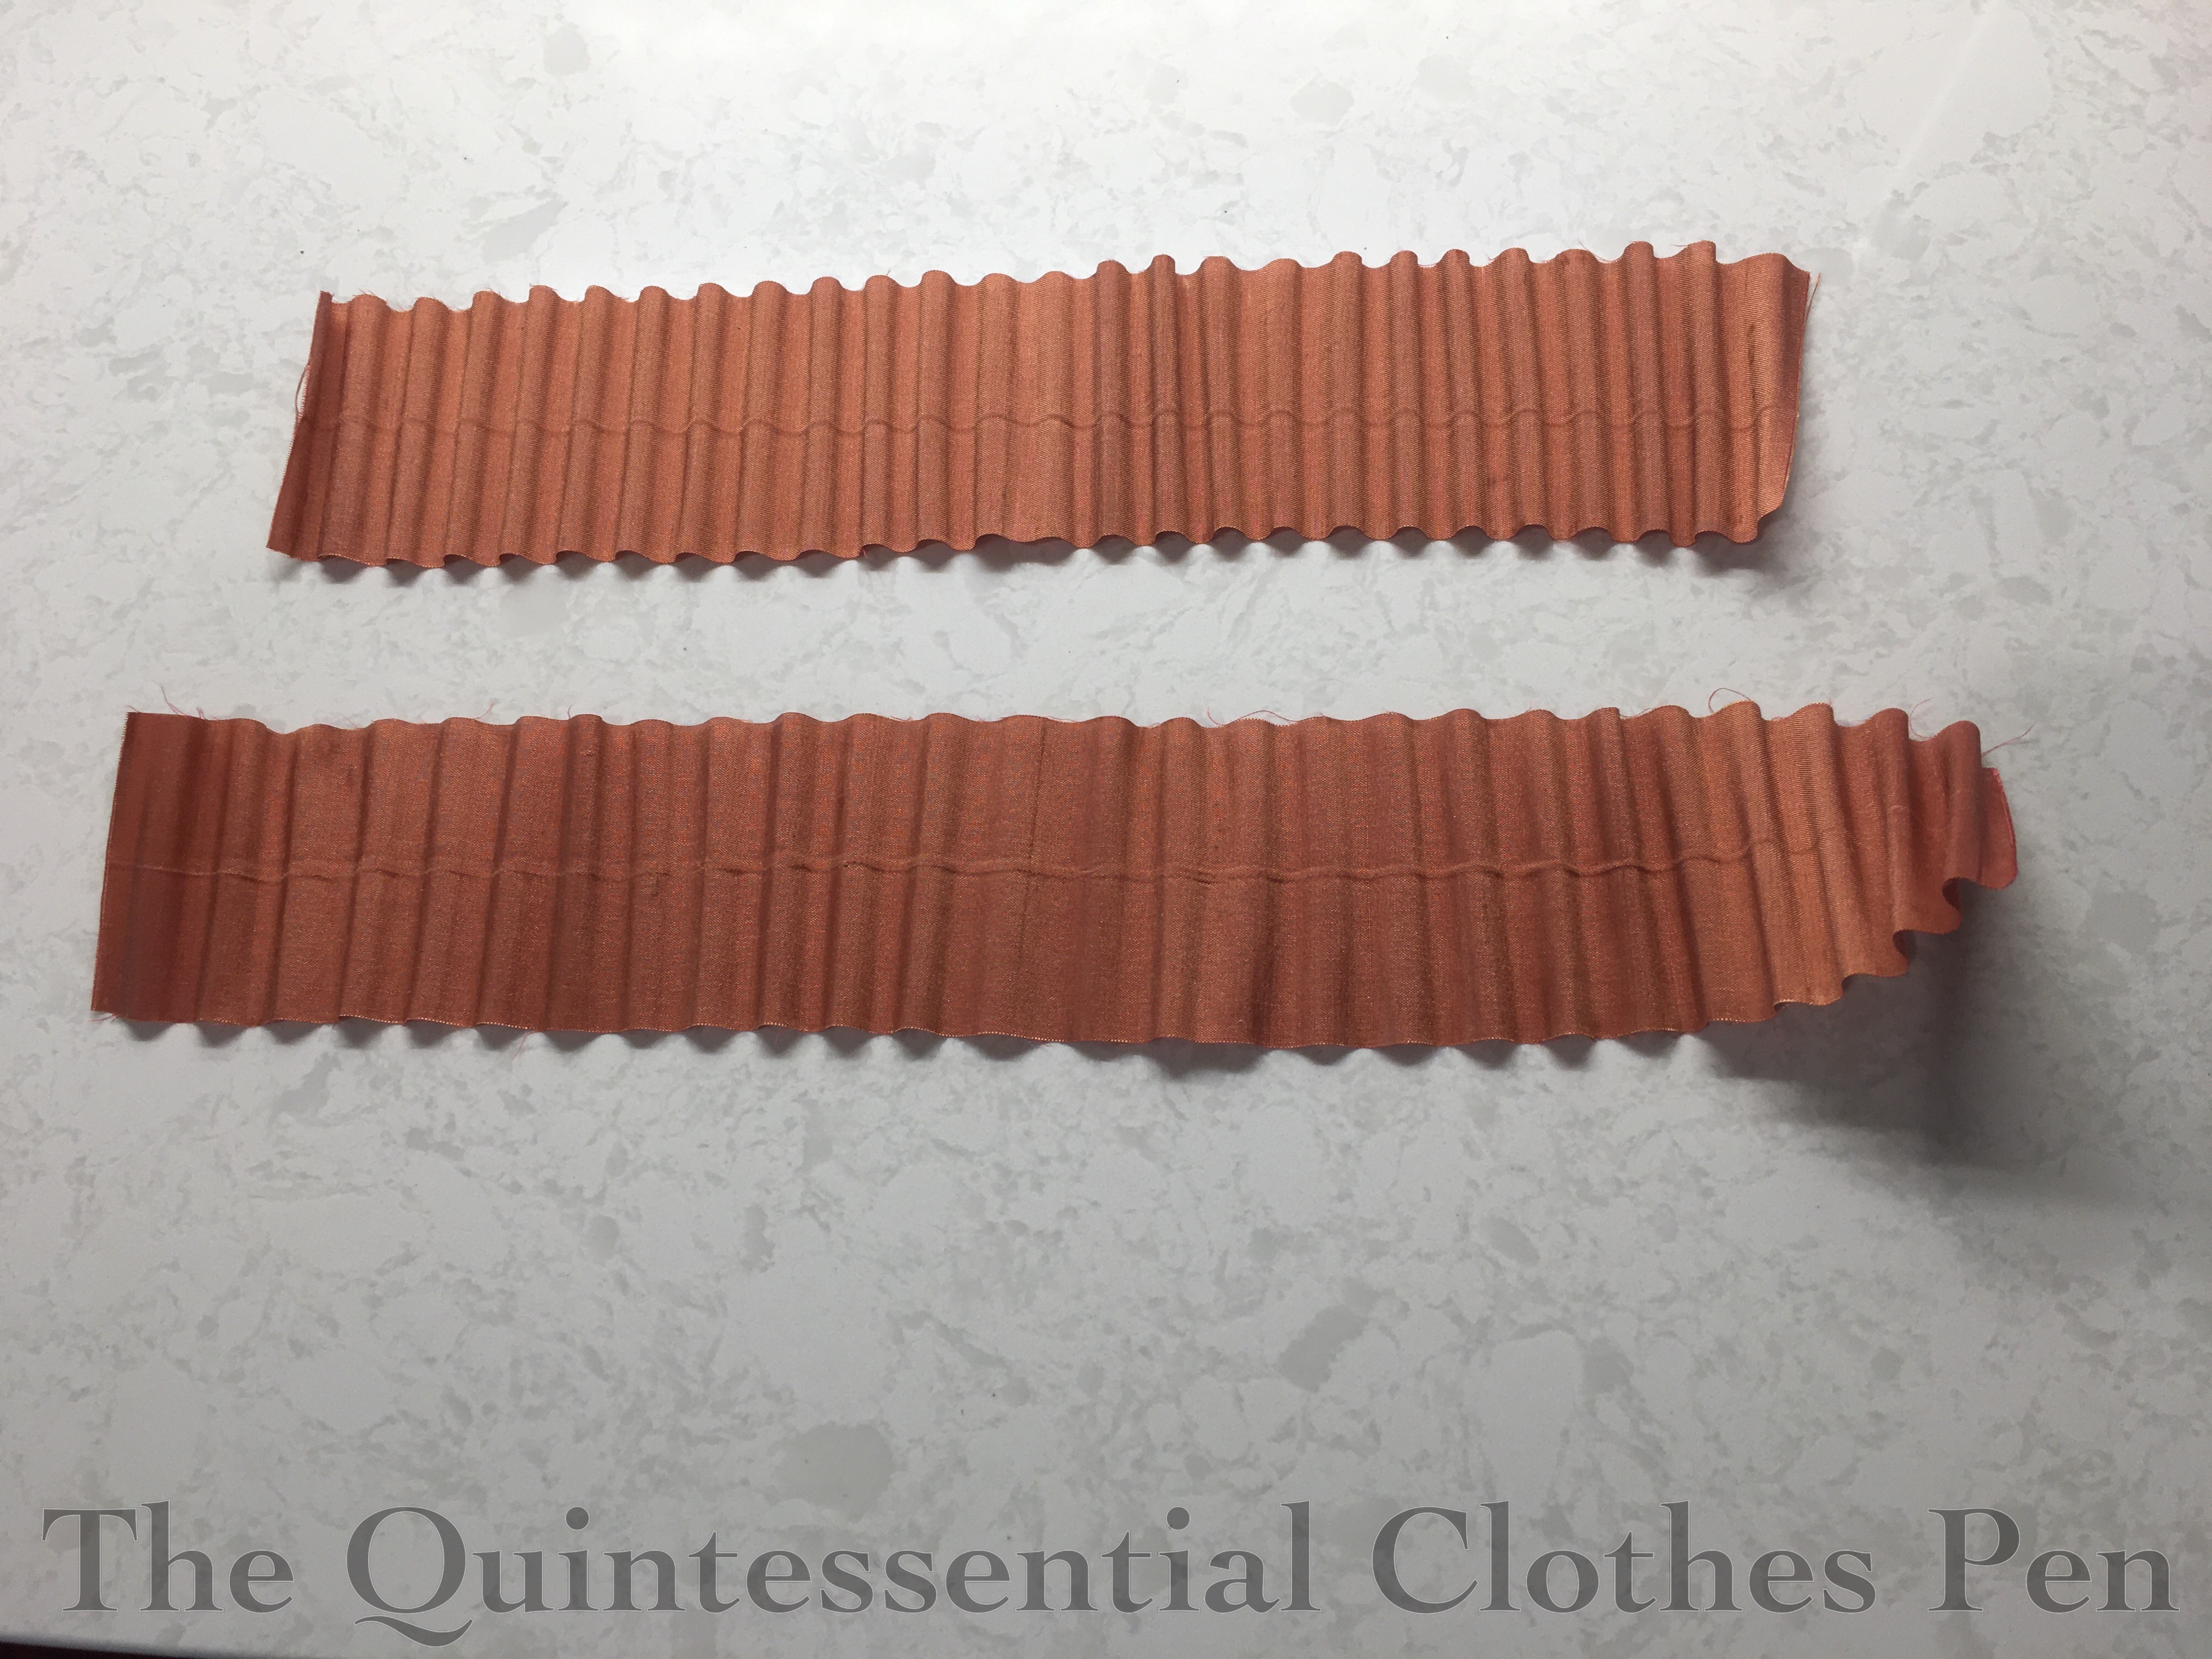
Here is a comparison of two silk samples. The one on the bottom used vinegar and lower heat: 175 F and 225F. The one on the top is the sample that used vinegar and 275 F for heating.
Reheating: I found that the iron lost heat pretty quickly. I reheated it for 10 minutes after every 5 minutes of use. It wasn’t the most efficient process (I can really understand why you would have a set with multiple irons to keep them heating while not in use), but it got the job done on a Saturday afternoon. Experimenting with temperature and fluting 106″ of fabric took about 4 hours.
Setting: In addition to using vinegar (which made huge difference in terms of getting crisp flutes!), I also found it quite important to move the iron very slowly over the base to create the flutes. A quick pass did not do the job and getting each and every flute to line up perfectly to go over it multiple times is much easier to say than to do! I rocked the iron from one side to the other, trying to hold each little section in place for at least a few seconds before moving to the next. I got through about two full rocks with the iron before needing to reheat it.
Method #2 (the much more efficient way)
Heating: After I completed the first of three 106″ sections of trim, a science-minded friend suggested that I would have much more efficient transfer of heat to the iron pieces if I were to heat them directly on my stove in a cast iron pan. This was genius!

I started with my pan on pretty low, as it’s much easier to heat cast iron up than cool it down. This particular burner on my stove gets super hot, so I kept the pan around 2 out of 10 in terms of heat. Harder to translate for other people, but I let the iron heat up for about 10 minutes, until I could feel radiant heat coming from the base when it was out of the pan and I held my hand 1″-2″ away. Another way I tested the head was with a drop of water. At this temperature it quickly evaporated when dripped onto the cast iron.
Reheating: Using the cast iron pan was much more efficient than the oven! I still reheated the iron after about 5 minutes of use, but now I only had to let it reheat for 5 minutes. And because I wasn’t lifting a pan in and out of the oven it was much easier to let the top part of the iron sit on the pan while I moved the fabric along the base piece of the iron. Because the iron was warmer than with the oven, and I’d had more practice at using it, I was able to do three or four full rocks of the iron before needing to reheat it. That meant that my second and third 106″ lengths of fabric only took about 1 hour each. So much faster than with the oven!
You can see the crisp flutes that this method acheieved.
Setting: I used the vinegar/water spray to help set all of these flutes. It should help the fabric to keep this shape permanently (short of me completely soaking the fabric). I experimented with a light spritzing, but the heat quickly evaporated the liquid so I started just making it pretty soaked. Sometimes I even sprayed a bit on the fabric right under the iron if it evaporated before I reached that section of the rocking motion.
Here’s another view of the half finished strip of fabric.
Post Experiment Thoughts
This was fun! I would definitely like to use my fluting iron for more projects–and it should be easier now that I’ve figured out how.
I will say that practice makes a huge difference in terms of being able to flute quickly, so that the iron doesn’t cool down. You don’t have too long to think once you take the iron off the heat source!
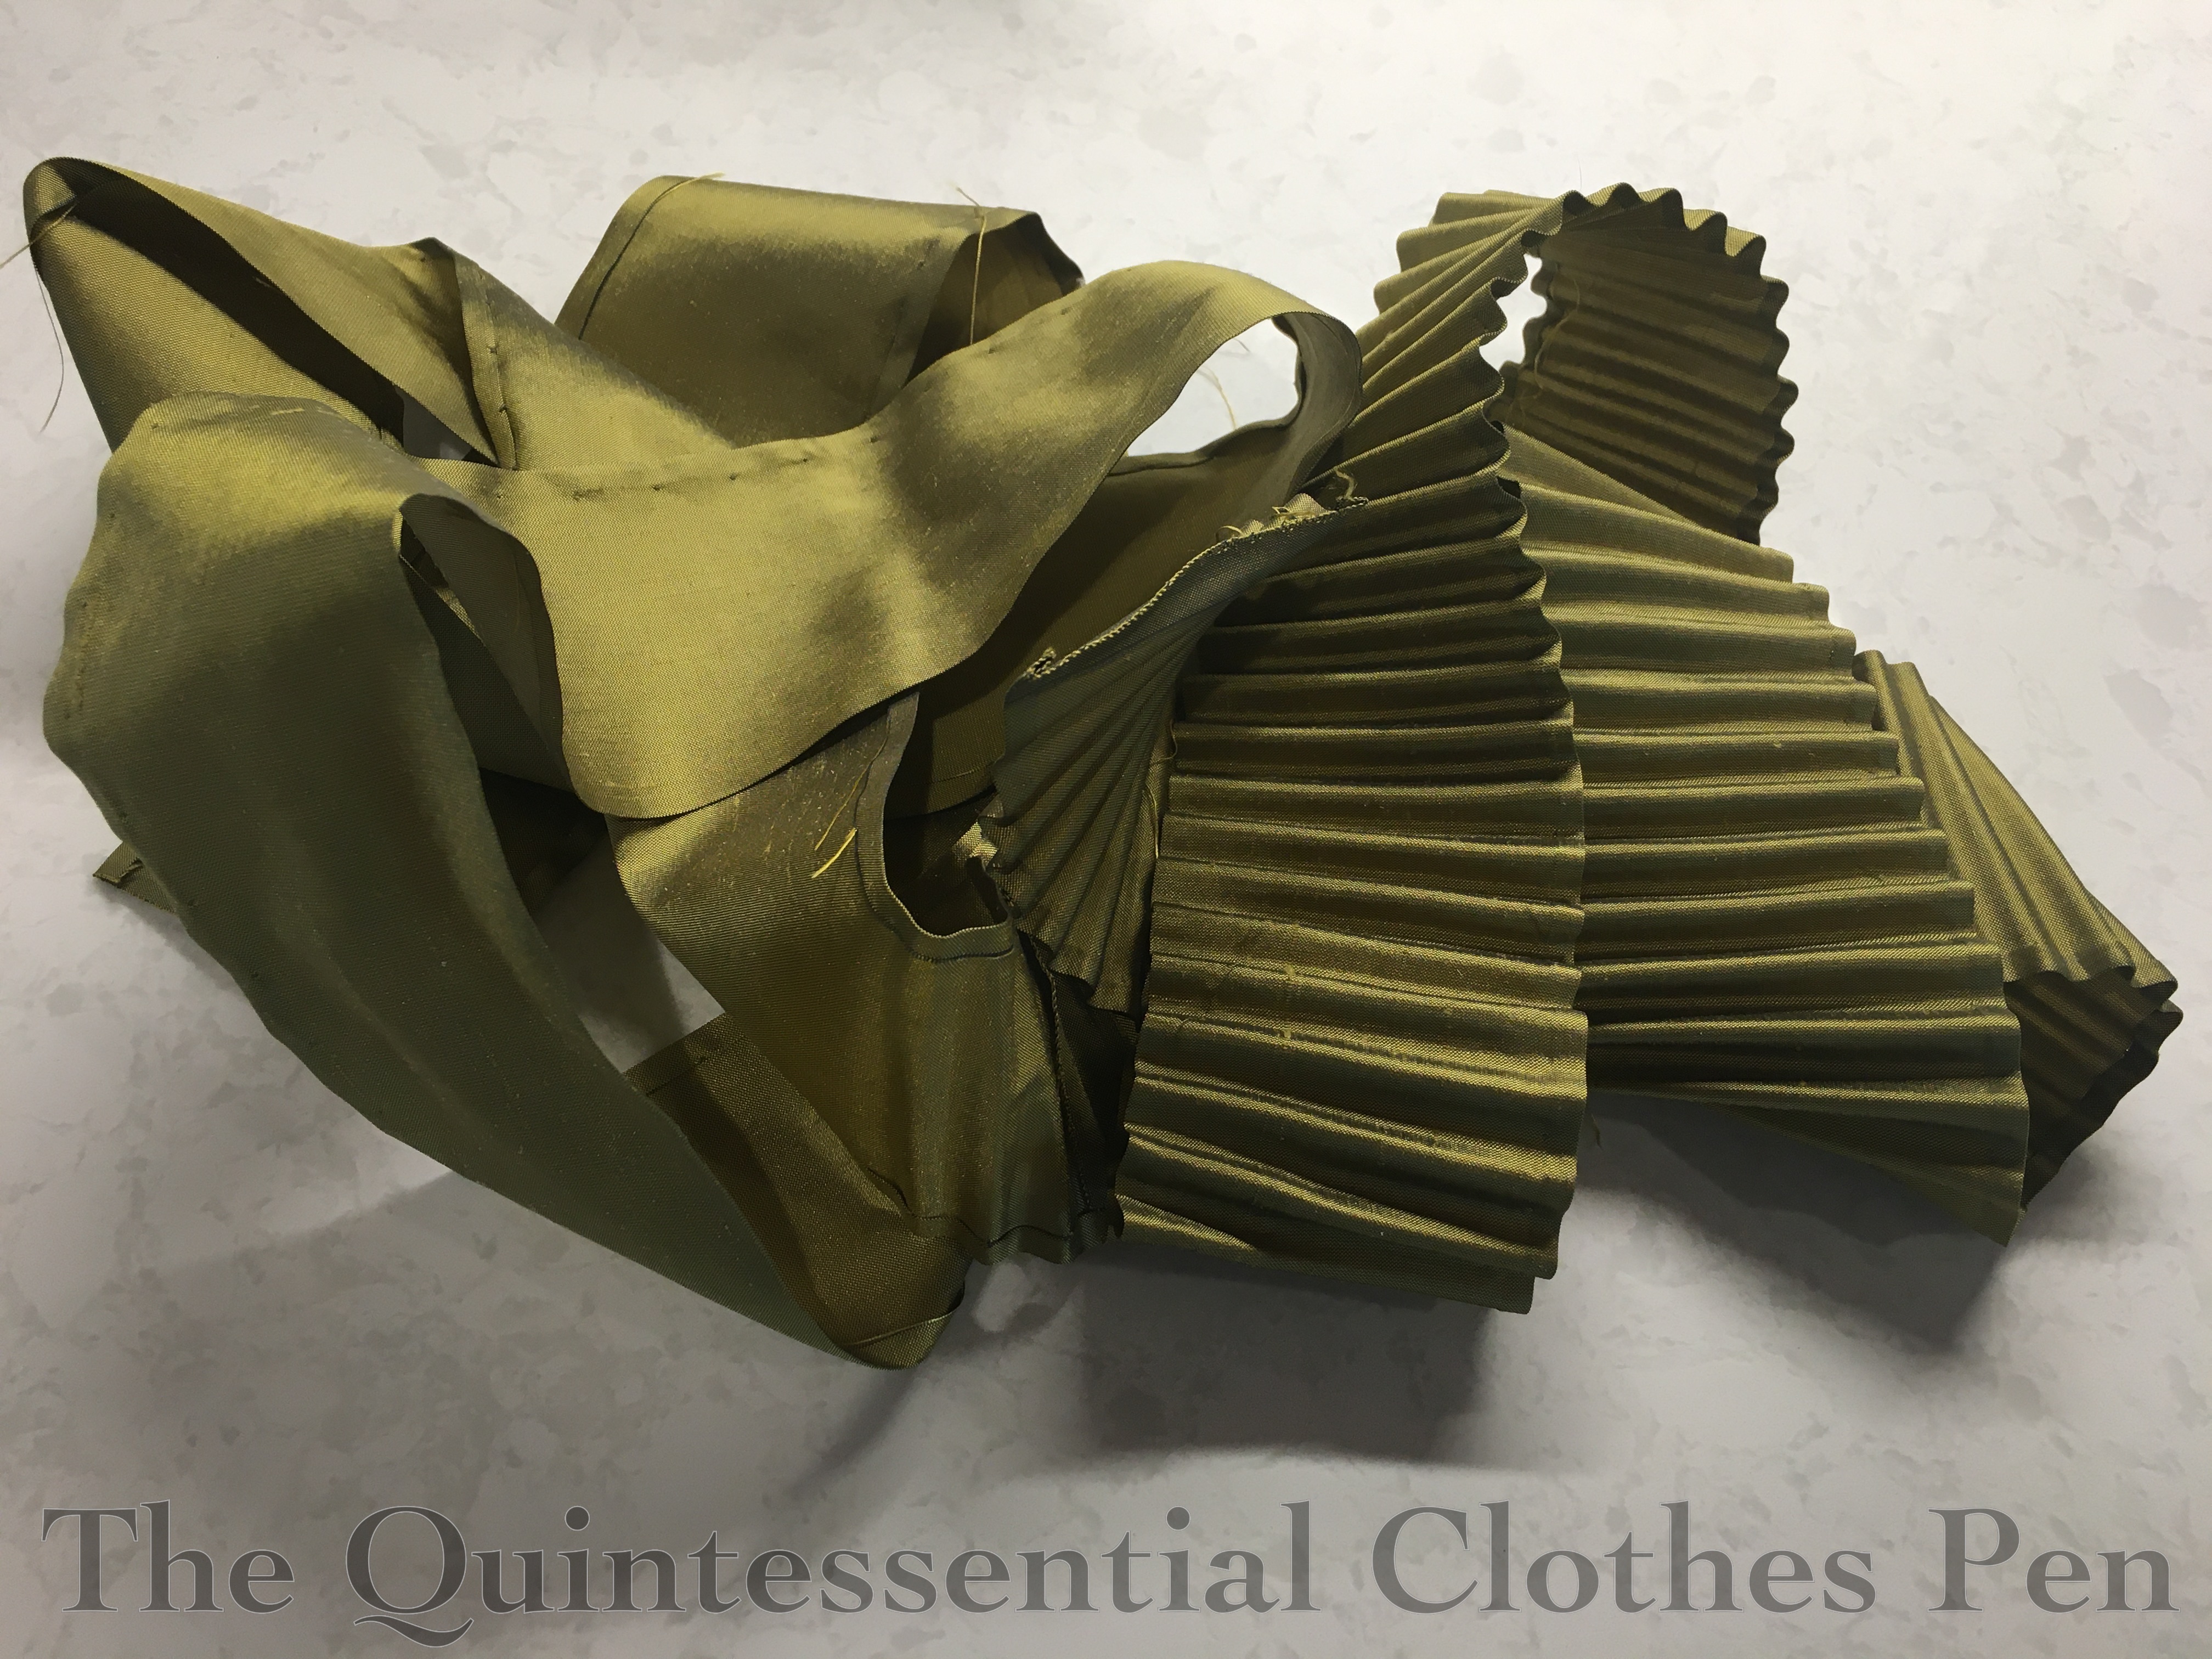
A finished pile of about 318″ of fluted trim! I’m curious about how I will sew this on. I think that a sewing machine would crush the flutes (and I don’t think I want a line of machine stitches anyway), so I will likely sew it on by hand, catching only the valleys and not the hills in the fabric. Good thing I like hand sewing!

I came across few people trying out antique fluting irons while looking for information to get started on this experiment. For the sake of anyone else who might be looking, here are a few other practical experiments to check out:
Katherine of The Fashionable Past tried out a fluting iron in 2011 and posted about it on her blog here, including a video.
@isabel.northwode tried out a fluting iron in 2018 and posted about it on Instagram here.

So ambitious! You are always full of great information. Looking forward to seeing your fluted trim on its’ dress.
Thanks! Ambitious is a good word for this project! 🙂
My mother (who was born in 1914) went through the Depression in a rural situation with no electricity. She heated the sad irons (just plain, flat ones) directly on the top of the wood stove.
Neat! Thanks for sharing that memory!
This was so cool to see, thanks for sharing your experiences! I’ve really wanted one of these for a while now, but haven’t had any luck yet. I’ll be keeping this post in mind for when I do find one! Your strips of silk look really beautiful, and I’m looking forward to seeing how you’ll use them!
Yay! Thanks! I’m so glad other people are enjoying this experiment too (and that it might be helpful when you find an iron yourself)!
Incredible!!! I loved reading your technique.
Aunt Doris
Thanks! It was an enjoyable experiment. 🙂
Hooray for another fitting iron experiment. Yours was flat-out successful (what a sad pun, eh?). Appreciated the systematic way in which you undertook the project.
I have a Crown crank-style fluting iron, with a spring and knob on top governing how tightly the brass rollers interlock together. Alas that it’s missing its heating rods. I’ve thought on and off of hunting for some steel rods that might work, or creating some ceramic ones and experimenting with them; iron ones haven’t turned up locally.
However, never having made fluted trim before (although I have some pretty antique fluted cuffs), haven’t had a fire lit to really do anything. Maybe it’s time, what with the 1890s outfit still on the burner.
Would you like me to roust out the cuffs to see how they are attached to the cuff bands?
Very best,
Natalie in KY
Hi Natalie!
Thanks! It was amusing to me to try to be systematic, as that is not often my way of communicating on the blog and it reminded me of science labs in school (which I was terrible at, as that is not my usual method of communication!).
It sounds like many of the heating rods are missing from crank style fluting irons. A pity! I would love to see the results of your attempts to use yours! I haven’t heard of anyone mentioning a knob that controls the tightness of the rollers. That’s neat! It would be an interesting side experiment to test it looser and tighter to see what the results are on fabric. 😉
I would love to know more about the fluted cuffs you have. No rush, of course!
Love the puns! 🙂
I hope you and your family and friends are happy and well!
Best,
Quinn
Do you do fluting? I have a nurses cap that is fluted and would like to have it fluted. It is 50 years old.
Hi Patricia,
Thanks for reading the blog and for your question. The cap sounds very interesting. While I’ve played around with my fluting iron on modern fabrics, I don’t think I have the expertise to use the tool on vintage fabrics. Perhaps a textile conservator would be better suited to work with the cap.
I guess this is the origin fir the expression “having a lot of irons in the fire.”
I think these strips might be wonderful for millinery projects. The decorative hoo-hahs could sit atop a hat, and not get damaged by more rigorous wear.
I hadn’t thought of that term in particular, but indeed, that makes lots of sense!
Yes, I was thinking of using some of the leftover green fluted strips to decorate a bonnet to go with the dress I am making. They do seem quite appropriate for the folly of millinery. 🙂
Hmm… I have an electric stove with cast iron plates… I would probably have kept the bottom on a turned on plate all the time, and had another plate on with the top piece kept when I didn’t use it… that way it would have been warm all the time, and I could have just focused on not burning my fingers or the sash while setting it on the bottom piece… I wonder if that had worked.
That seems like a reasonable plan for keeping both parts of an iron like this hot! Not burning yourself is definitely a plus. 😉
Hello, Natalie!
Thank you so much for the detailed description of your fluting iron experiment! I learned so much. We had a fluting iron with 2 rollers and a crank in my childhood house that came from our 127 year old hardware store. As kids we liked to flute paper or aluminum foil. I don’t remember if it had the heating rods.
I also have some very old wood and metal printing blocks which are extremely grimy, so I appreciated learning your way of cleaning and drying your iron parts.
You did a beautiful job fluting your green fabric!
Hi Claritza! Thanks for reading and commenting. I’m glad you enjoyed this blog post for multiple reasons. It’s so neat that you remember having a fluting iron. I imagine foil would be fun to pleat!
Seeing your irons pieces sitting in your cast iron pan made me think of my grandmothers cast iron stove. I wonder if the base of the iron sat on top of a heated cast iron stove as the seamstress worked on the fabric without having to go back and forth to reheat? If you have one of those long flat 2 burner cast iron grills you could try it out and report back to us. 🙂
That’s a great thought! It would be an excellent way to keep the base warm. I don’t have one of those grills (though I remember my parents having one that we made pancakes on when I was young–good memories!), but perhaps I’ll ask around and see if anyone I know has one the next time I decide to use the fluting iron. Thanks for the idea!
Hi- just found this page, as I recently bought a fluting iron.
Mine has an extra metal chunk that goes inside the bottom fluting structure, probably like the old irons that have an extra metal part that you insert in the frame and handle. It might mean a longer working time due to increased thermal mass.
When I get around to trying it, if I come to any conclusions I’ll drop a note here.
Hello! Thanks for reading! That is quite interesting. Yes, please share if you try it out and have any observations.
Hello!
Just bought The Globe fluting iron today. Thrilled at finally finding one with both parts. I appreciate your experiments and instructions. I look forward to trying mine. Thanks!
Exciting! Thanks for sharing your interest in my experiments. I hope your exploration is fruitful and enjoyable!