

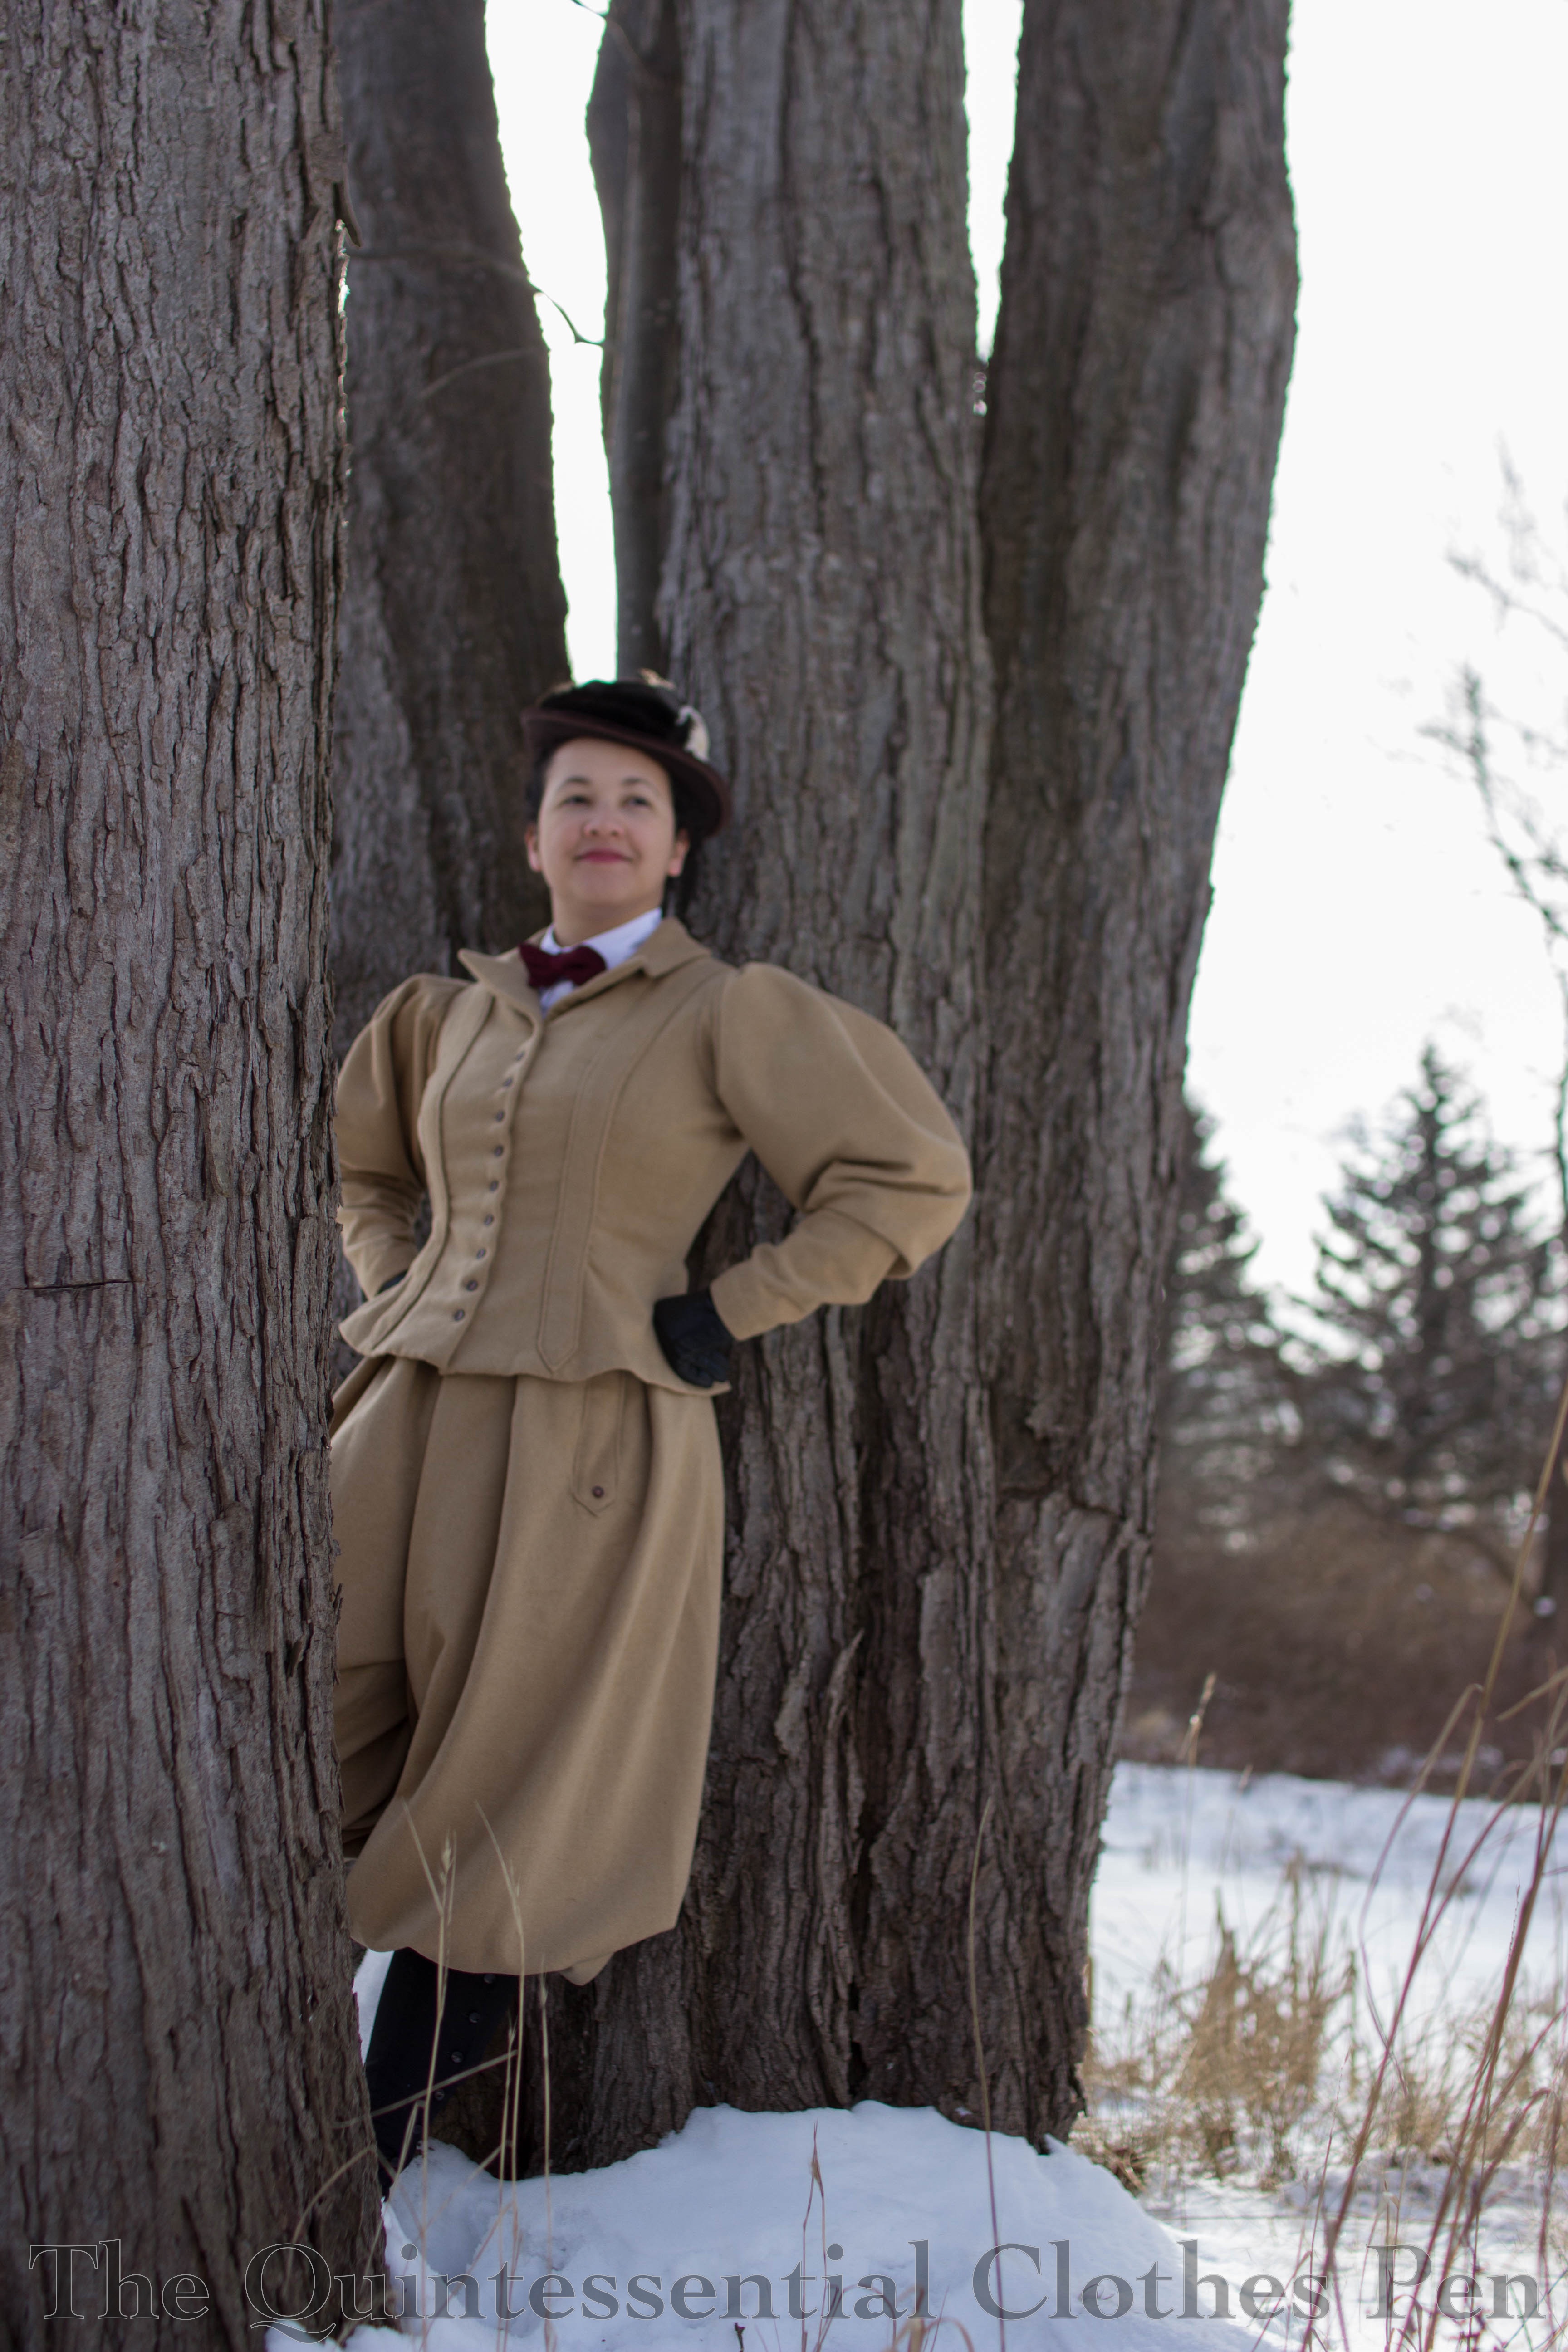
As promised, I have quite a few words and photos to share with you about the construction of my 1896 Bicycling Ensemble, so prepare yourself for a long post! This post is a great reference for me to have all the details in one place, but I also hope that some of my details might be helpful for other people who want to build 1890s cycling outfits as well.
If you want to read a bit more about the social history of the bicycle ensemble, see more finished ensemble photos than the few in this post, or read more about the accessories I’m wearing with this ensemble, check out my first post about it (this is the same as the first link). I also have a post looking specifically at patents and advertisements for women’s bicycling clothing from this time. It’s a great supplement to some of the information I mention in that first post.
This post is going to focus on the main garments that make up this ensemble: the jacket and bloomers. We’ll start with the two main similarities between these garments.
#1 Both garments are mostly machine sewn, with hand sewing for the tailoring steps of the jacket as well as much of the finishing of each garment.
#2 Both jacket and bloomers are made from a drab colored wool that has been in my stash since 2012. I purchased it from the remnant table at the local discount fabric store for the amazing price of $3/yard! I bought every piece they had, so I have about 10 yards broken up in about 6 different pieces. I used less than half of what I purchased for this project, leaving me plenty to use this for an 1880s dress as well. (That one has been in progress for the last 18 months… I hope to finish it this year!)
The drab colored wool is perfect for this cycling outfit, not only because I already owned it and it has been taking up space for years, but also because drab was a popular color for cycling outfits because it successfully hid dirt and dust. Other recommended colors were brown, black, and navy.
The Bloomers
Now that we’ve looked at the similarities let’s look at the differences, starting with the bloomers.
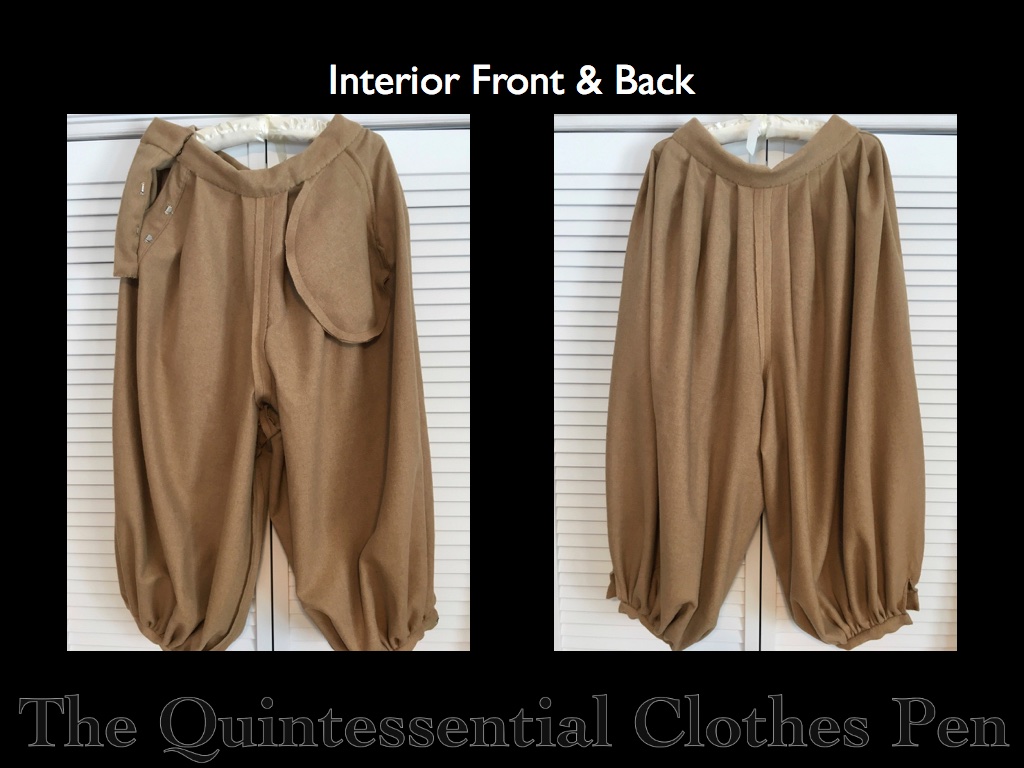
These are entirely self drafted. While that might sound intimidating, these are actually quite simple! Each leg is the full width of the fabric, 60″ wide, and 33″ in length. On my 5’6″ frame that provides plenty of pouf in the legs when they are held in place around the tops of my calves. The only shaping is in the crotch seam, which is a curve ~5.5″ wide and ~12″ deep. The crotch curve is deep enough and the bloomers are full enough that I made the crotch curve the same for the front and back. Here’s a photo of the crotch curve drawn out before I cut it.

The fullness of the 60″ wide legs is pleated into the waistband with knife pleats folded towards center front and center back. Knife pleats are documented in sporting bloomers from the 1890s and are specially mentioned as being folded this way in order to help the bloomers maintain the full look of a skirt, in keeping with the social convention that skirts were acceptable wear for women but bifurcated bloomers were not. I experimented and decided I liked just a few deep knife pleats as they helped the bloomers fall nicely on my body.

I debated about how to gather in the fullness at the bottom of the legs, especially since I couldn’t find specific instructions on how this was accomplished or see this particular detail given the way extant bloomers are displayed. I decided on gathering each leg into a band that hooks so that it stays in place at the top of my calf. There is a 3″ slit in the leg as well. The raw edges of this are turned under ¼” and whip stitched by hand. There is also a small reinforcing bar sewn across the top of the slit to keep it from ripping. Here’s a closeup of the leg opening.

The inside of the bloomers looks like this. There are two decorative strapping details on the front of the bloomers (more on that when I get to the jacket). These conceal a placket opening on one hip (visible on the far left) and a pocket on the other! The crotch seam and inseams are left unfinished. This wool did a pretty good job of not fraying at the edges so there was no need to finish these seam allowances.
Here is a closeup of the placket opening that is hidden behind one of the strapping details. You can also see the interior of the waistband, which is whip stitched to hold it in place. To be entirely fair, I could have made bloomers on a waistband without the strapping and pocket and saved a fair bit of time. Stitching the strapping bits on and hiding the placket and pocket behind them required some extra brain somersaults and time to figure out and execute. But I really like the strapping detail on this extant bicycling ensemble from 1896 at The Met and really wanted to include that detail in my own garments, so here we are.

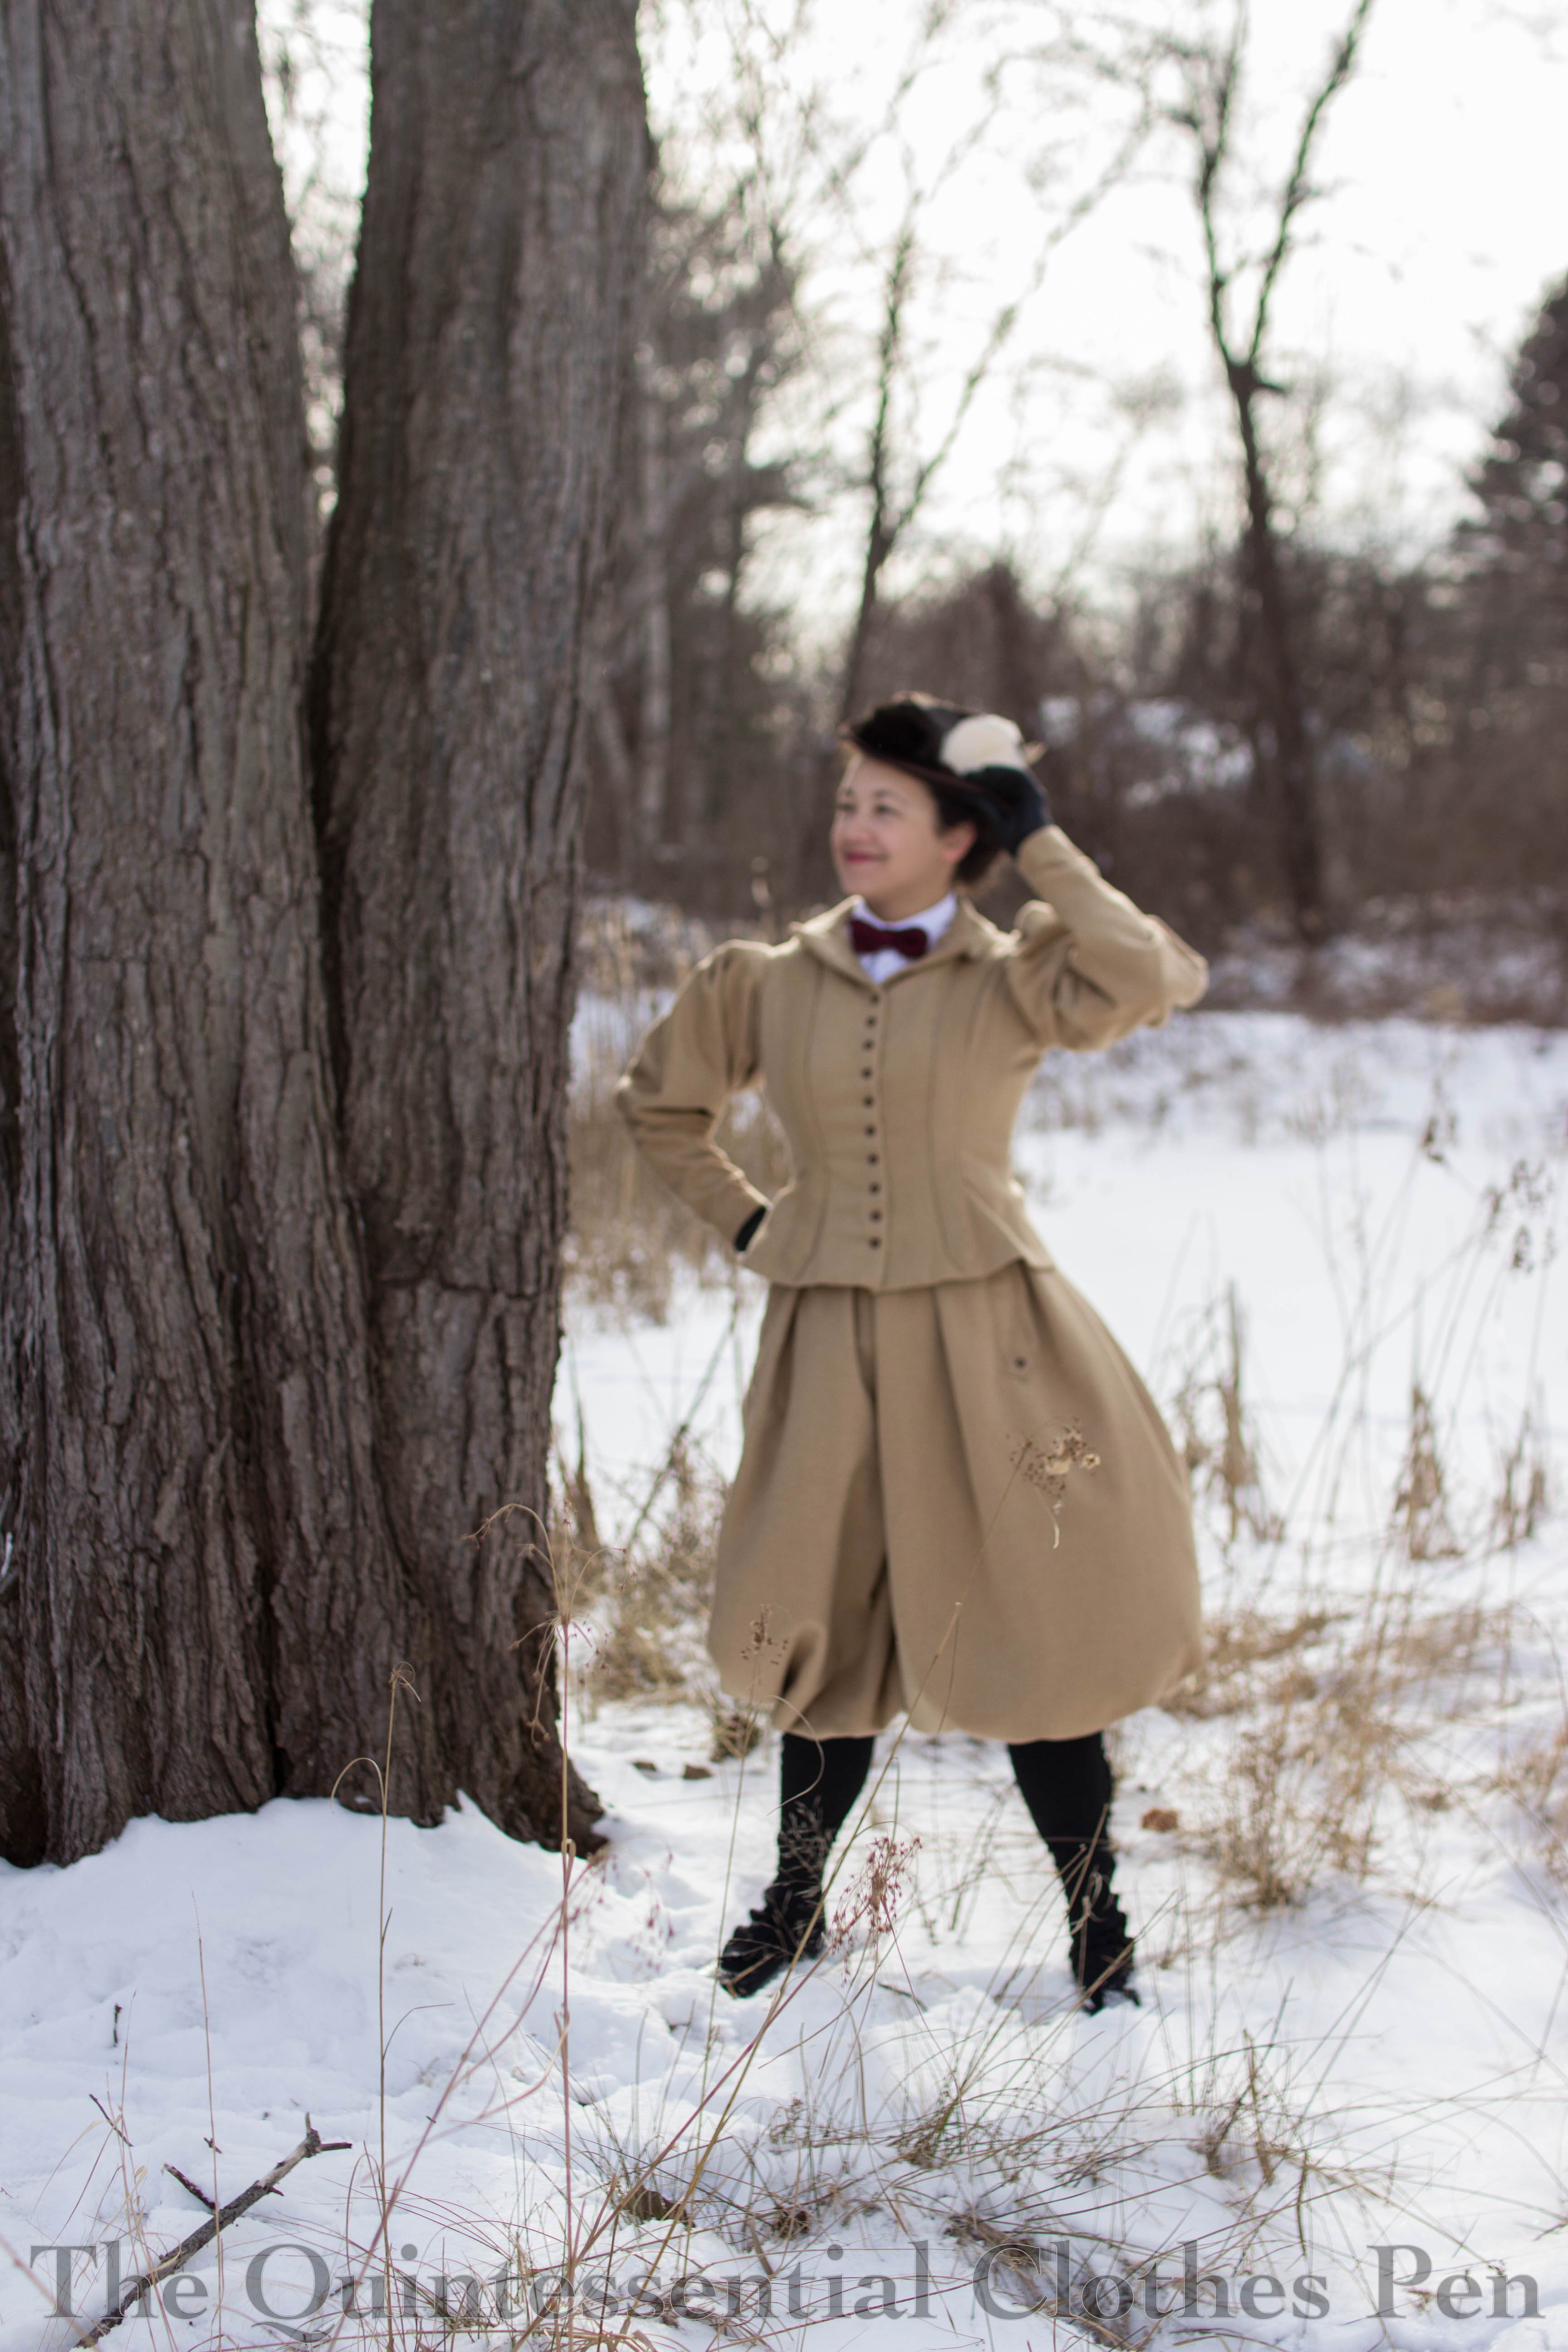
Here’s what the bloomers look like when the wind filled them out during our photoshoot. This gives a better idea of how much fabric is in each leg of the bloomers.
The Jacket
I wanted to have a tailor-made style with a lapel and collar that would follow the general style of men’s jackets in the 19th century. Most bicycling ensembles are of this style, due in part to the fact that this type of activity was traditionally a male pastime. The specialty clothing produced for men’s active pursuits was made by a tailor, so it follows that women’s clothing began to be tailor-made as well as they joined in these male activities in the later part of the 19th century.
I started with the pattern for my 1895 Skating Ensemble because I knew it had the general shape of the mid-1890s and that it already fit. That pattern was made by me, based on my inspiration jacket for that ensemble as well as patterns published in Authentic Victorian Fashion Patterns. I had already modified it to get the shape of the skating jacket, but I modified it even more to create this new jacket. I made these further changes:
- Created princess seams on the front and back that run down from the shoulders instead of the armsceye
- Joined the side back pieces to make a single wider piece instead of two narrower pieces
- Moved the new side back seam towards the side seam
- Added back pleats, front darts, and a lapel and collar
- Shortened the length
At this point it’s really not close to the original pattern at all!
The sleeves are my standard 1890s gigot sleeve that originally came from Period Costumes For Stage and Screen. I wound up making a number of changes to the pattern to get a slightly different shape. Below you can see my progress.
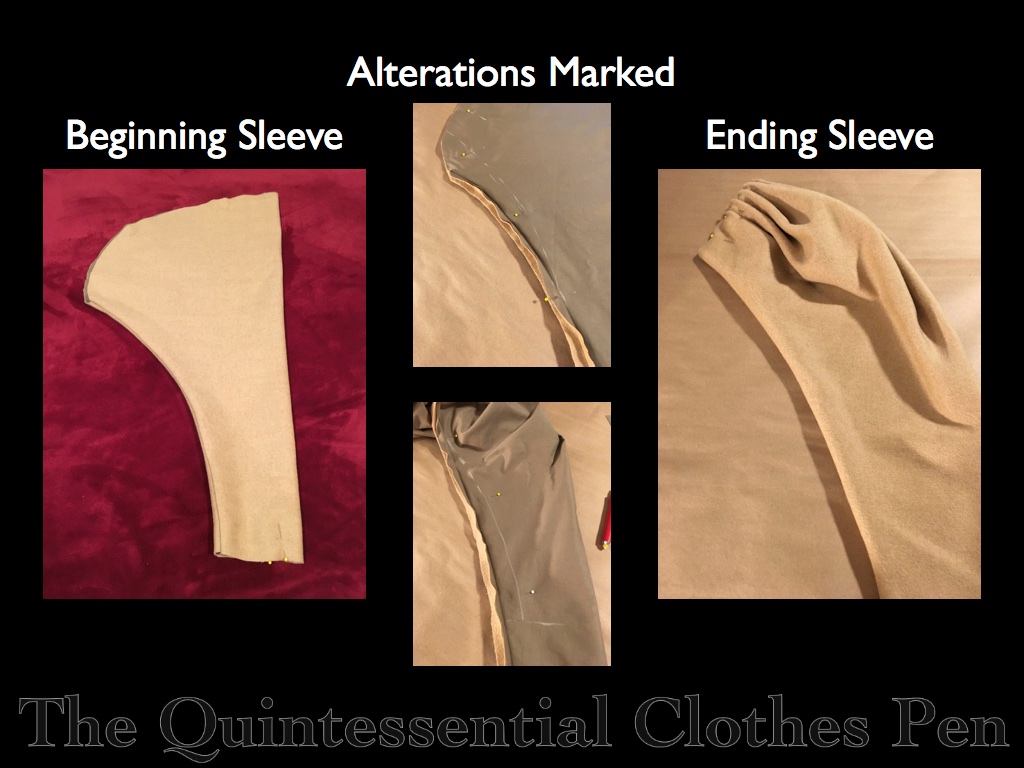
After trying out the original sleeve I made two major changes to the shape, angling the underarm seam at the top/making the top less full and angling the underarm seam at the bottom towards the wrist/shortening the length. After pleating each side of the new sleeve towards center I ended up with the sleeve shape on the right.
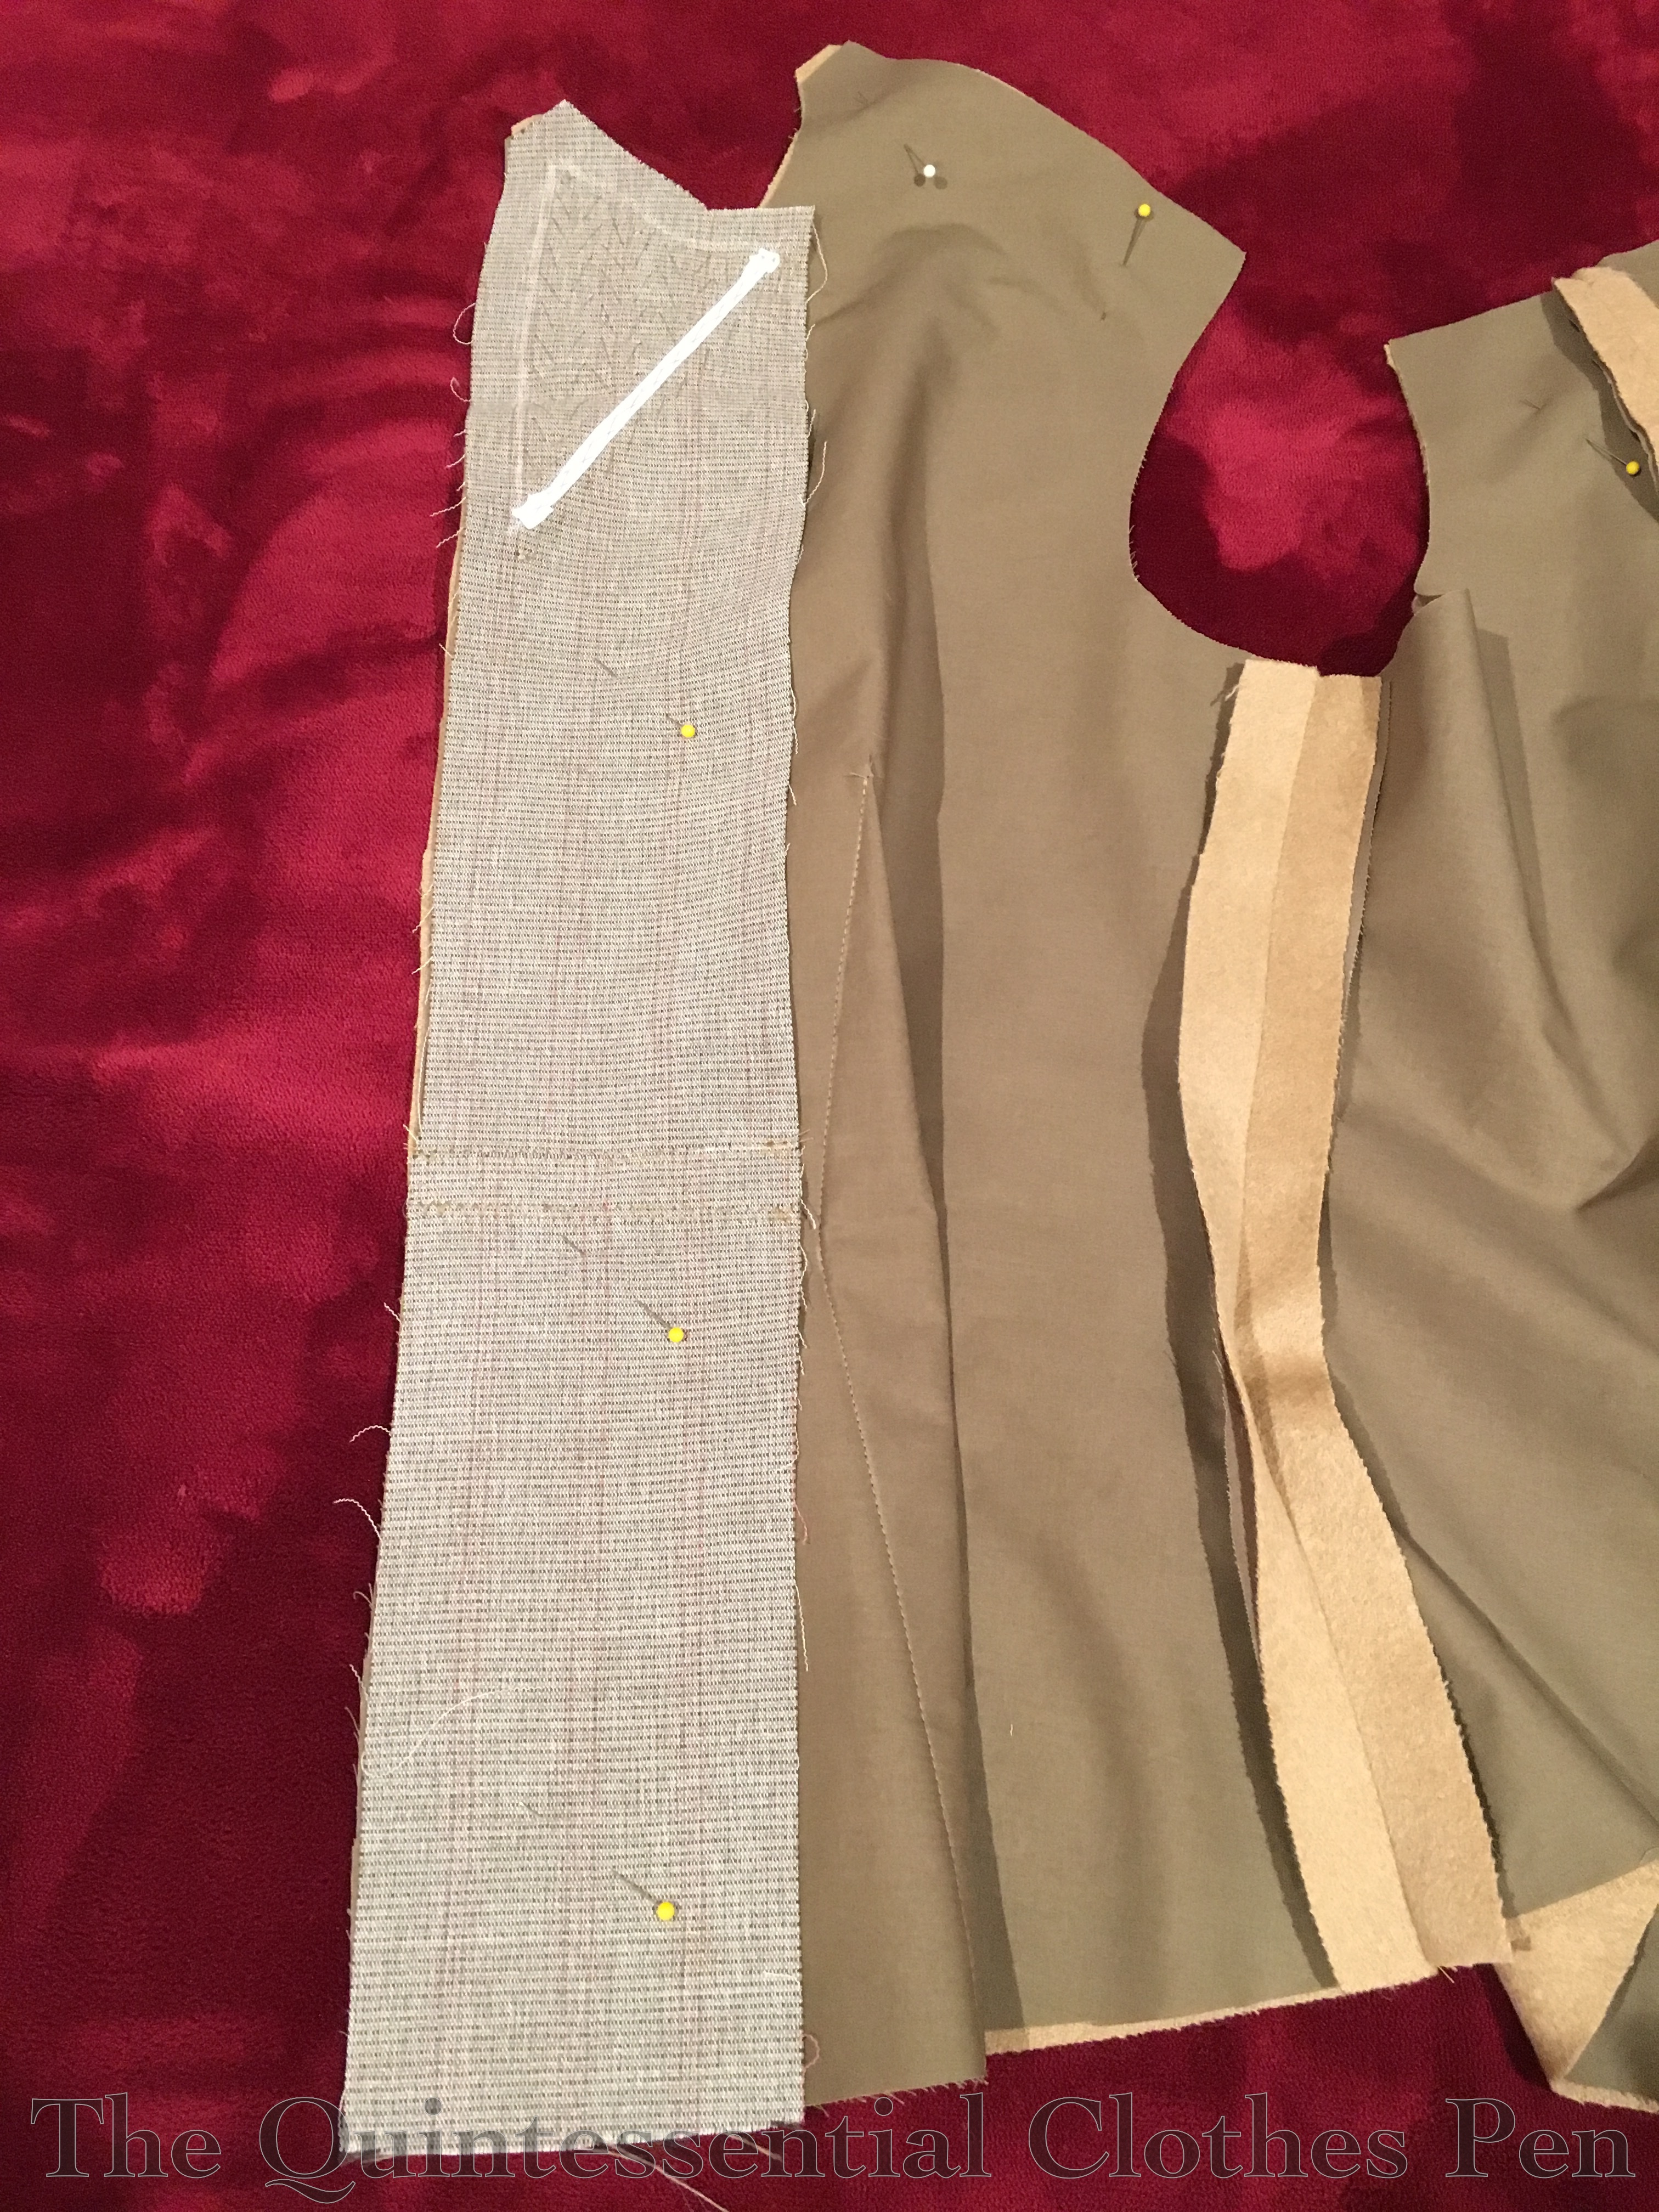
After I had a pattern I was confident with I started cutting my pieces. Each exterior piece was cut in wool and cotton in order to be flatlined. The front and collar facings are single layers of wool. There are also canvas interlining pieces for the front and collar.
The proper way to flatline is to pin your layers together and then (preferably) hand baste around each piece to hold the layers together while working with them. I opted to eliminate the basting step, using pins to hold the layers together until they were sewn. My fabrics were pretty sticky so this time-saving shortcut worked pretty well. You can see the pins holding the non-sewn edges together in this photo of the exterior after assembling the front and back pieces.
This is also one of the only steps that show the front darts, as those were hidden under the decorative strapping I added to the jacket later on. The other amusing thing here is that because I was cutting my garment pieces from multiple pieces of wool you can see a color difference here between the center back pieces and the other pieces. But it’s not noticeable in the finished jacket, so that’s good!

And here’s the jacket at the same point in the process, turned over to see the inside. Now the flat lining is clearly visible, as are the box pleats along the back seams. You can also see the canvas that runs down the fronts.

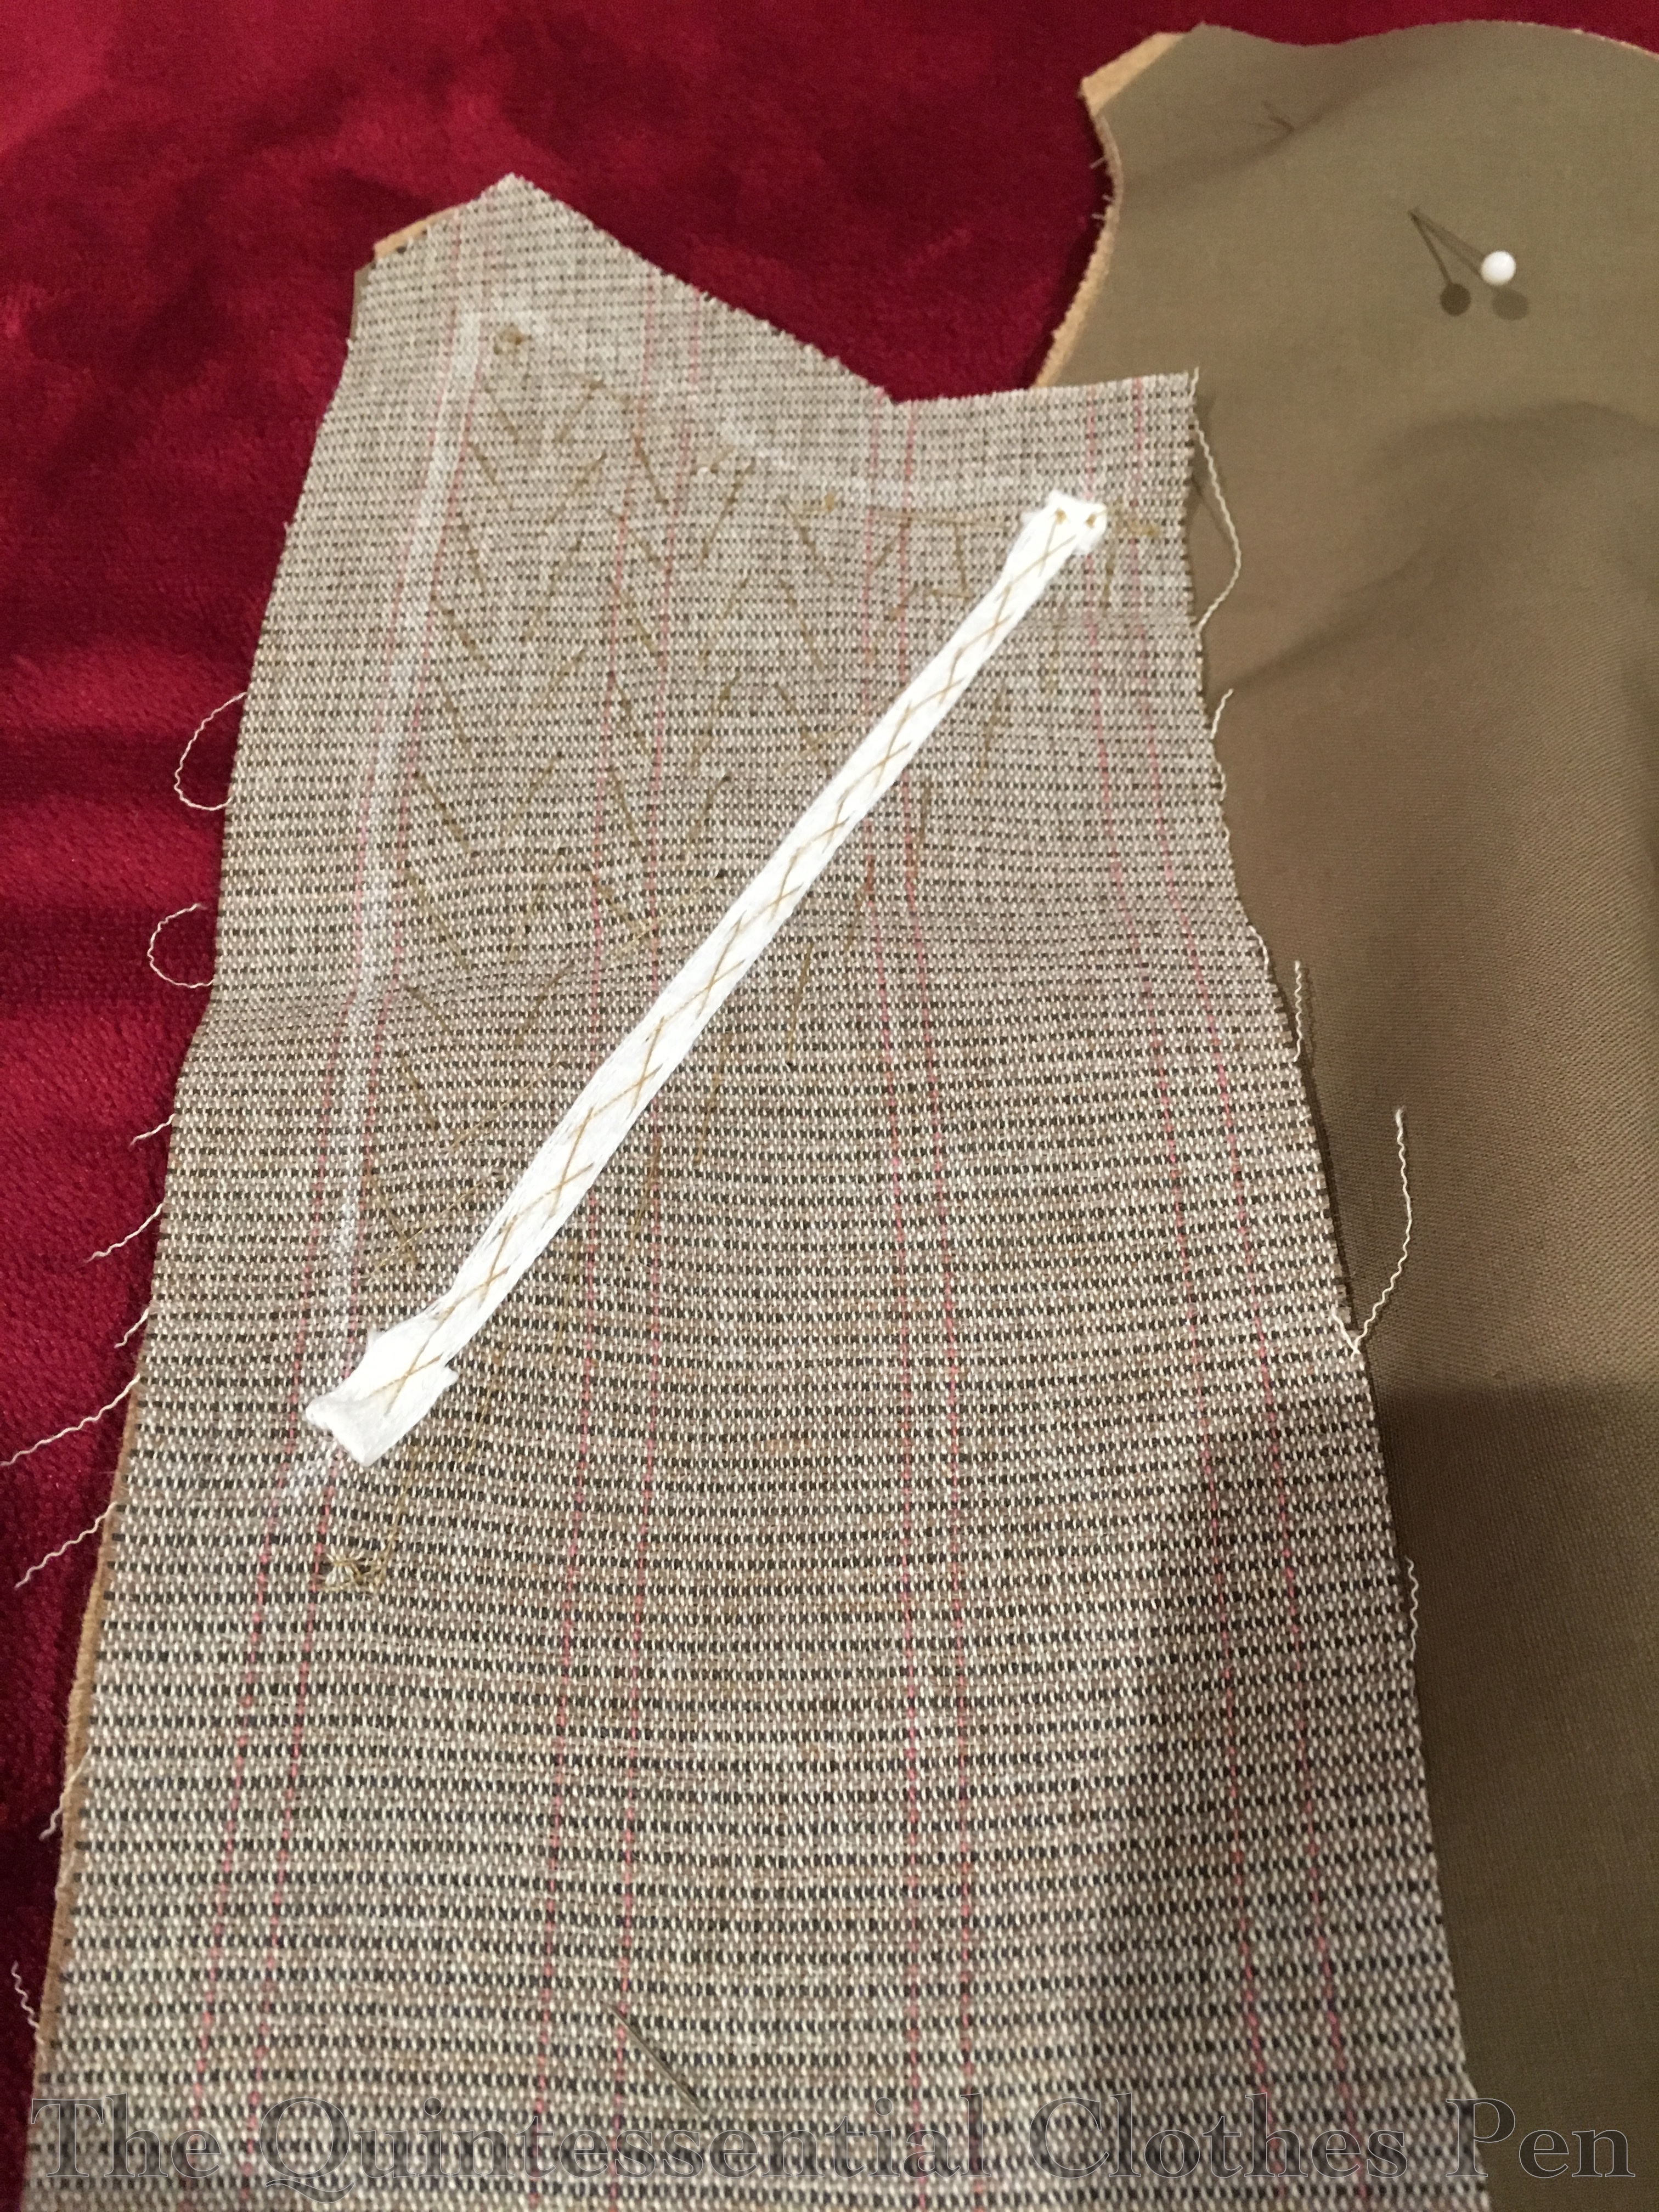
Here is just one side of the front. It gives a clearer view of the front dart and the canvas that supports the lapel and front edge.
I pad stitched the lapel and taped the roll line in men’s tailoring fashion. These stitches help to support the roll of the collar. The tape running across the roll line snugs that distance in just a bit which helps the collar roll in exactly that spot.
I decided not to try to pattern the strapping with the main body pieces. It just seemed too complicated to wrap my head around. I knew they wouldn’t be straight, as my body is curved, and I knew that making them on the bias would be a disaster to try and manage the edges of… I decided to deal with this step when I got there in the construction process.
Accordingly, when the jacket had all of the vertical seams assembled it was time to consider the strapping. I did this at this step, before sewing the shoulder seams, as I wanted the strapping front and back pieces to perfectly match along that seam. Easier to pattern flat than if I’d already sewn the shoulder seams!
I laid the jacket out on the table with a scrap piece of wool on top of it, put pins along the seam line to mark the location (so my strapping would hide the seam), and then drew a strapping shape I liked around that. As you can see, I didn’t follow the curve of the seam perfectly. That was an intentional choice, as I wanted the strapping to have a similar curve as the curve on the strapping of my inspiration jacket (here is the link to that again, in case you want to take a look and not scroll all the way up to the first link).

I repeated this process for the front (which was trickier with the shaping that dart creates!) then cut out four of each piece. I decided to finish the edges by making a tube that was topstitched by machine before being hand sewn to the jacket
I can’t imagine how horrible it would have been to try to topstitch the straps onto the jacket! Bad… very, very bad! And trying to turn the edges under and then topstitch would not have provided enough stability for crisp edges and would also have been a frustrating experience. Thank goodness I avoided those potential problems!
Here are two of the four straps, pinned and ready to be stitched together. The only edge I left open is the straight edge (at the right) that would go into the shoulder seam. After being sewn and trimmed these were turned right side out, pressed, topstitched, and carefully placed at the shoulder seam so that they would match up perfectly when the seam was stitched. The edges of the straps were then invisibly hand sewn to the jacket.

Here’s the end result. The straps look topstitched onto the jacket, but they are actually finished pieces that are fully sewn down in front but only attached above the pleats in the back, allowing the bottoms to flap amusingly! This detail is again taken from my inspiration jacket (and here is the link to that again).

As I mentioned earlier, the bloomers also have a strapping detail taken directly from my inspiration bicycle outfit at The Met. Those were carefully patterned–they look straight at first glance but are actually slightly angled and tapered. They are made in the same way as the jacket strapping pieces, though as I mentioned earlier, they were more complicated to put onto the bloomers as they conceal a placket on one side and a pocket on the other. That was a figure it out as I go experiment that required precision and quite a bit of puzzle-solving!
The collar was interlined with canvas and pad-stitched to provided stability for the shape. Then it was sewn around the edge by the machine and the seam allowances were graded before I turned it right side out.

The sleeves are pleated to take in the fullness to fit the armsceye. There are 10 pleats total, each about ½” (1″ total) in depth. Here’s a photo looking down into the sleeve with all the pleats pinned in place. The box pleat (that is slightly off center in the photo) is the top of the sleeve when it’s set into the armhole of the jacket.

In this next photo we’ve progressed quite a few steps! The sleeves are set, the collar is on, the front wool facings are on, the collar edge and facing edges are turned under and hand sewn in place. I’ve finished the bottom edge of the jacket with a bias strip of cotton that was machine sewn then pressed to the inside and hand sewn into place (this is also how I finished the sleeve cuffs). The buttons are on and the buttonholes sewn by machine. I’ve whip stitched all of the seam allowances to keep them from fraying and added some extra support for the sleeve caps. I’ve also added a waist stay. Quite a few hours of work to condense into one paragraph!

The waist stay is a grosgrain ribbon sewn to the seam allowances that hooks in the front. Its purpose is to keep the jacket tight against my lower back and to keep the jacket from riding up as I use my arms. The photo below shows a close up of this as well as a number of other details–the bias binding at the bottom, the whip stitched seam allowances, and the pleats tacked to the lining along the top edges.

The sleeve pleats wouldn’t stand up on their own which made me a bit sad. My solution was to give them a bit of support… in this case I reused stiff net sleeve headers removed from 1980s dresses that I have a whole bag of in my stash. Each jacket sleeve has two of these sewn into the armsceye such that they stand up off my shoulder and help to support the pleats. In this photo I’ve just flipped them out to make them easier to see, but normally they’re tucked up inside the sleeve.

I also tacked the pleats together by hand about 1.5″ away from the seam. This helps keep the pleats nicely arranged and pointing up, which helps keep the fullness of the sleeves in check. In the end, this sleeve isn’t quite the same shape as my Met inspiration (here’s the link one more time), but that’s because it would have taken a lot more patterning time to determine exactly how the Met sleeve is shaped. I wanted to use my existing sleeve pattern and so I’ve decided to be happy with the sleeves I have.
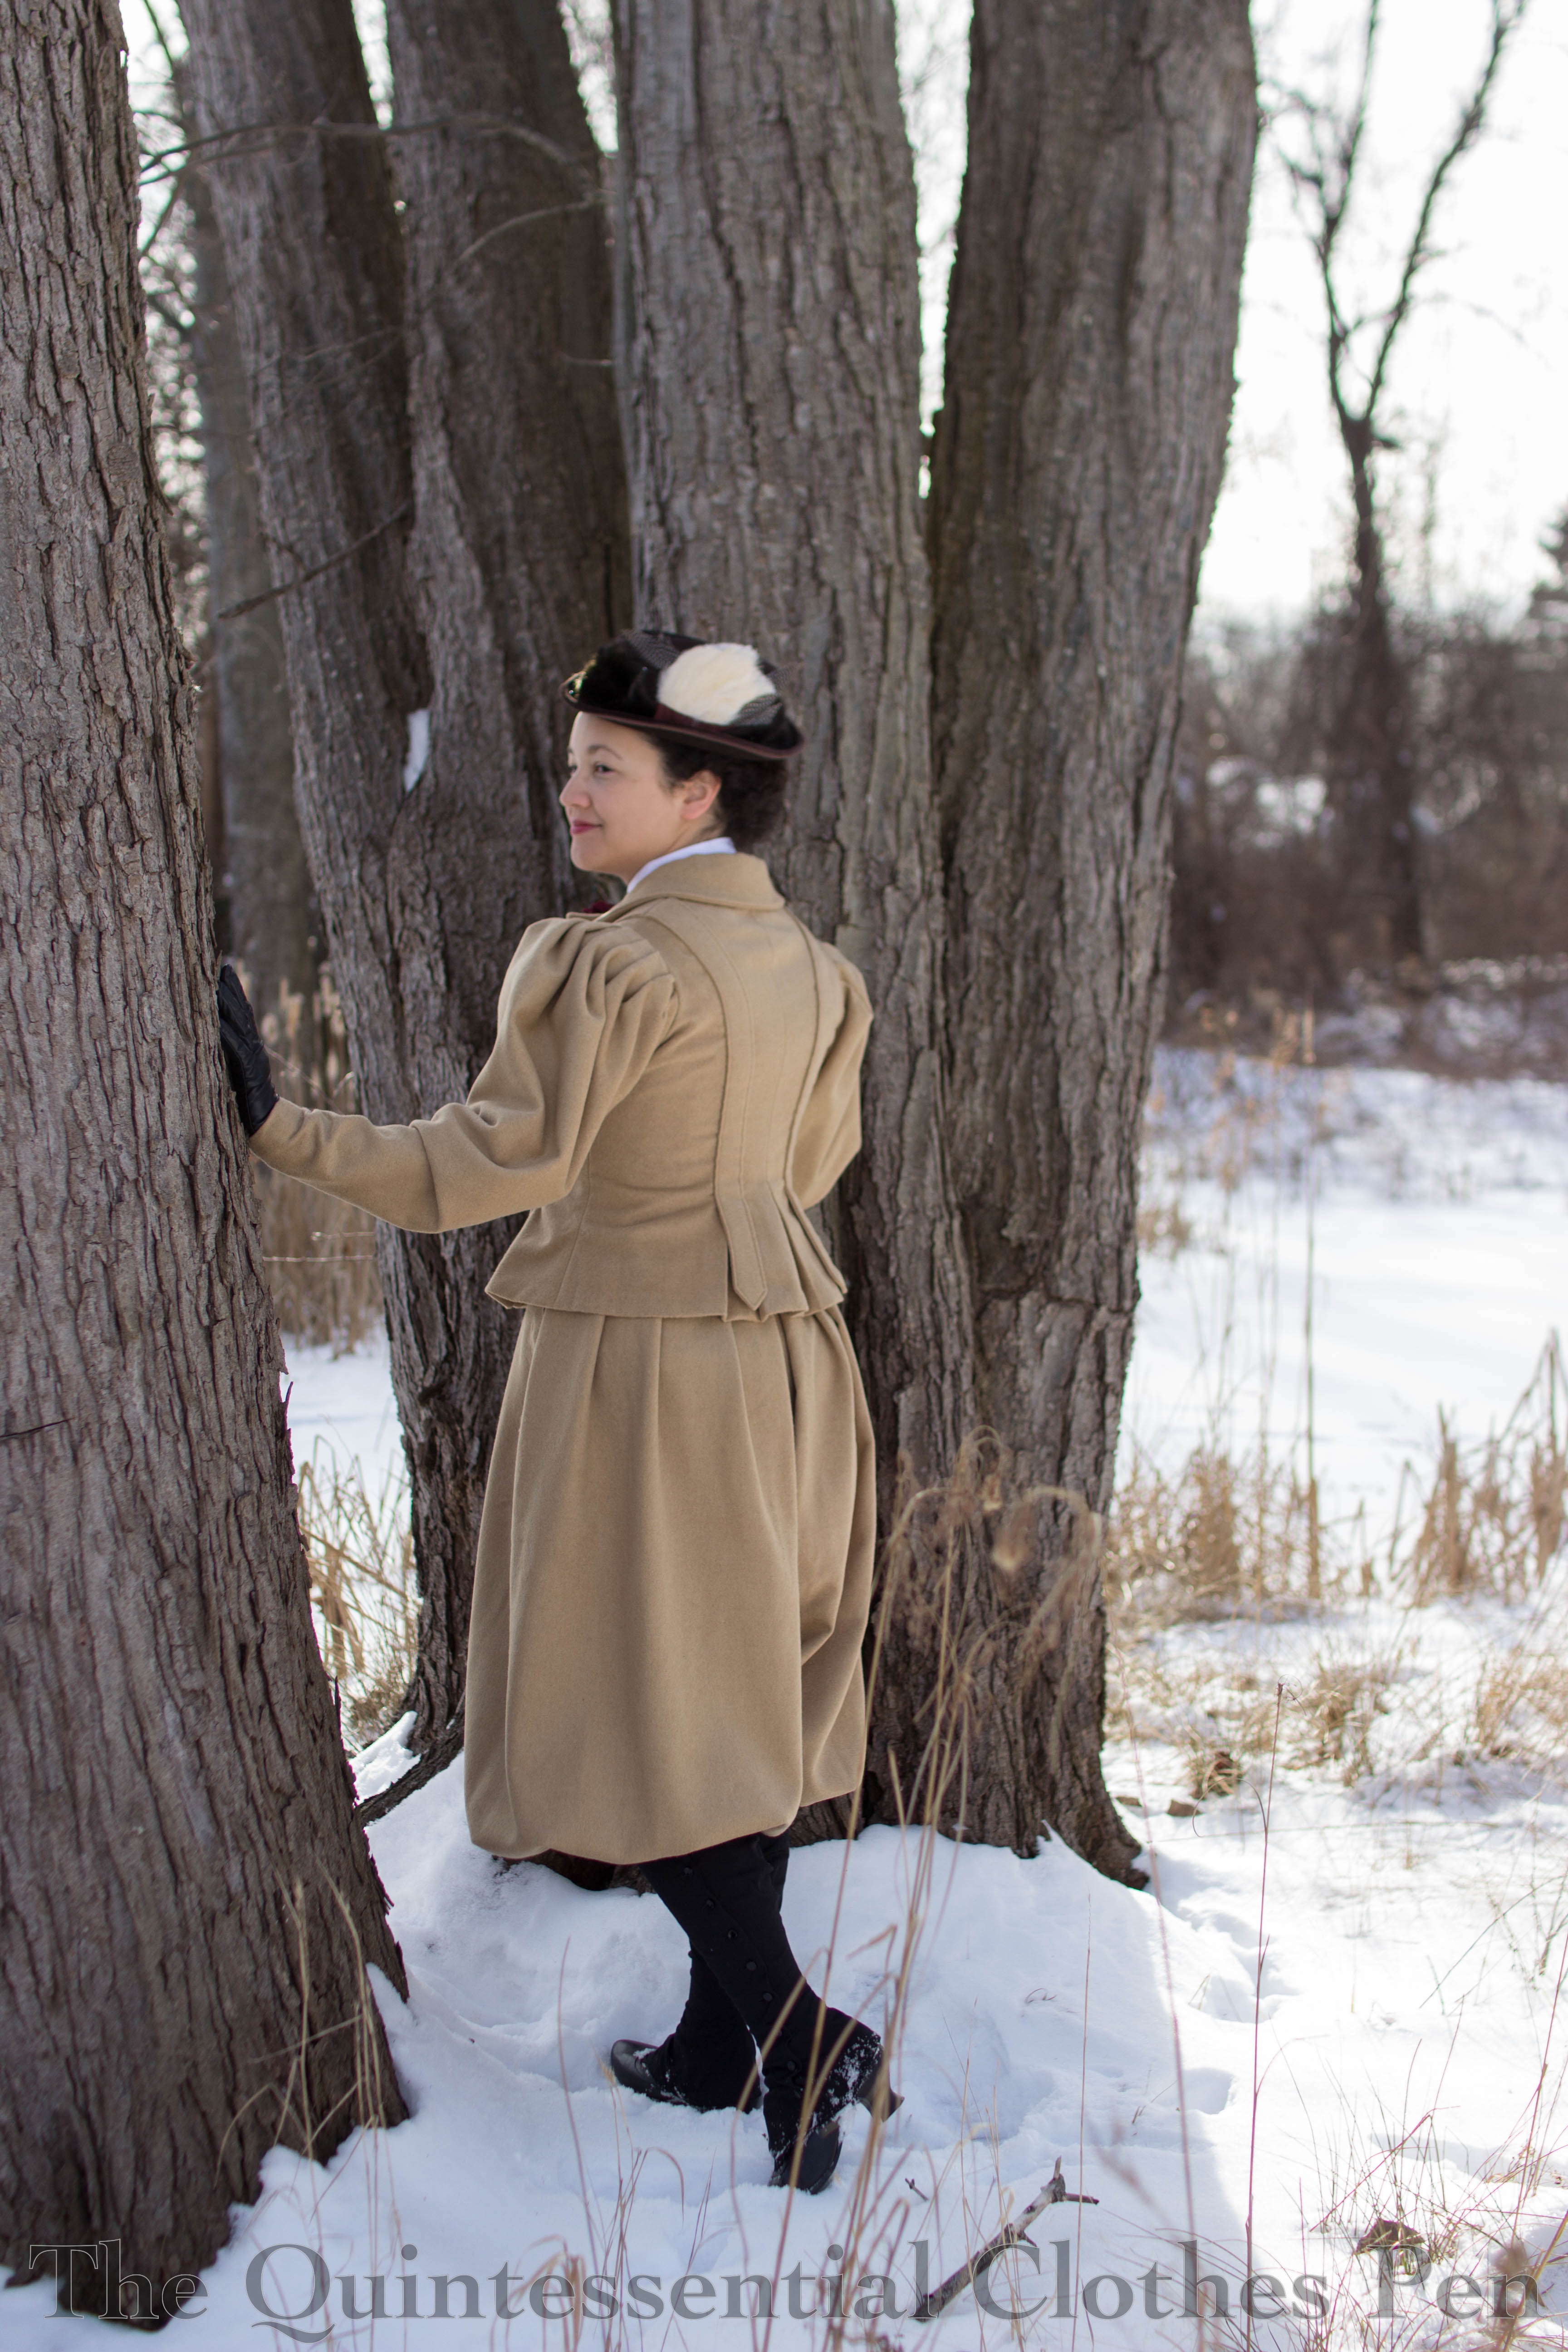
To recap, all these details and construction steps produce this! Slightly subdued 1890s puff sleeves, tailored jacket details, interesting strapping patterns, and bloomers!
People sometimes ask me how long it takes to make my garments and often I don’t have a good answer as I don’t actually pay attention. I’m in it for the enjoyment of sewing and unless something is going wrong and I’m frustrated I generally enjoy the process. For this ensemble I kept track, though, and I can report that it took me 22 hours to pattern, fit, cut, tailor, sew, and finish this jacket and bloomer ensemble.
I’ve collected some (but by no means all!) images of bicycling ensembles on my 1890s Sportswear Pinterest board if you want to see more of my visual research and inspiration. Thanks for sticking with me for a lengthy post!

Hard work, pererverence, best practices, and talent sure make for wonderful results. That you so much, Quinn, for being so generous with your knowledge and creativity…as a former costumer/designer, you are a delight to read! –Erik in NW Ohio
Thank you so much for the kind words, Erik! I’m so pleased to know that you enjoy reading my many details!
I love this whole outfit so much and really enjoyed reading about and seeing all the incredible details!! I think I must have smiled the whole way through because this is just such a fantastic ensemble and it makes me so happy every time I see it!
Congratulations on some truly beautiful work!
Thank you very much! I’m glad you stuck with me for it all. Yay!
WOW! You certainly are a master seamstress. I remember some of these strategies and materials from a tailoring class I took in college. I just love the wool material, and can’t wait to see the dress you are making out of the rest of it. How resourceful to reuse the net from the 1980s dresses. I enjoyed reading this very much!
Thank you very much, Margaret! It’s fun to put my tailoring skills to use. And I’m so glad you had fun reading this post.
I can’t wait to see the dress, too! 😉 It lived on a dress form for the last 18th months but I recently took it off. I need to find the time to work on it again.