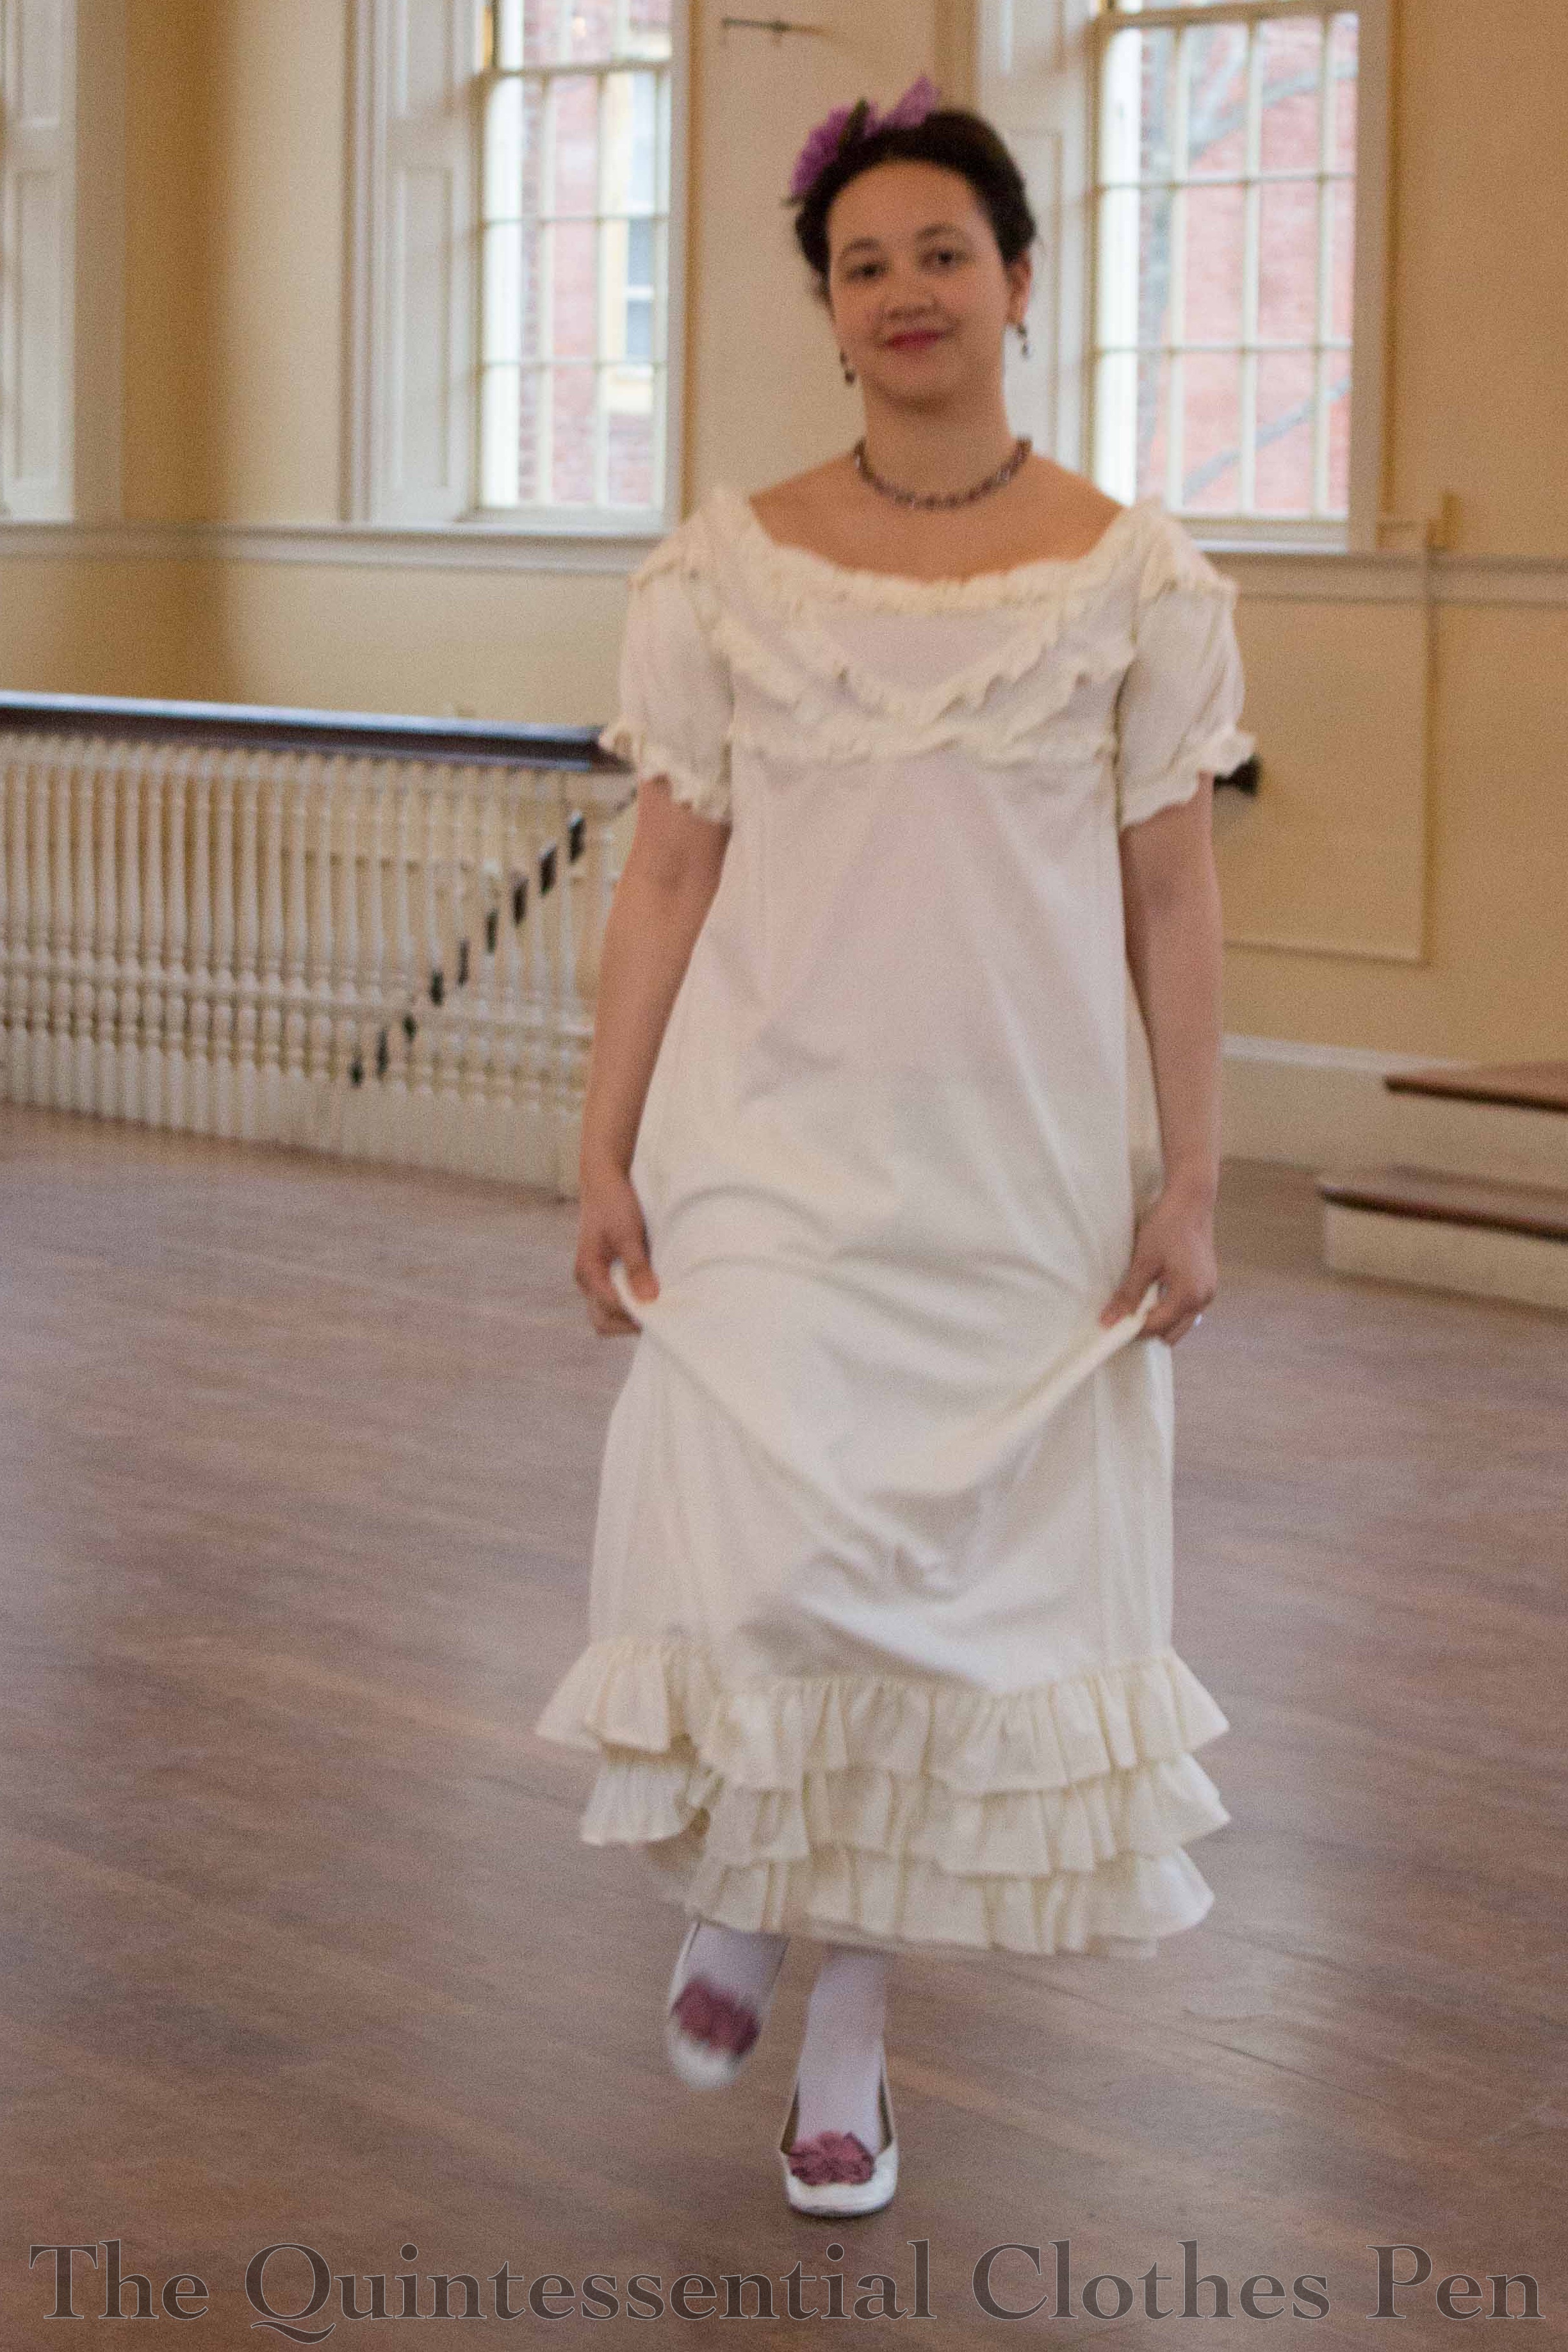
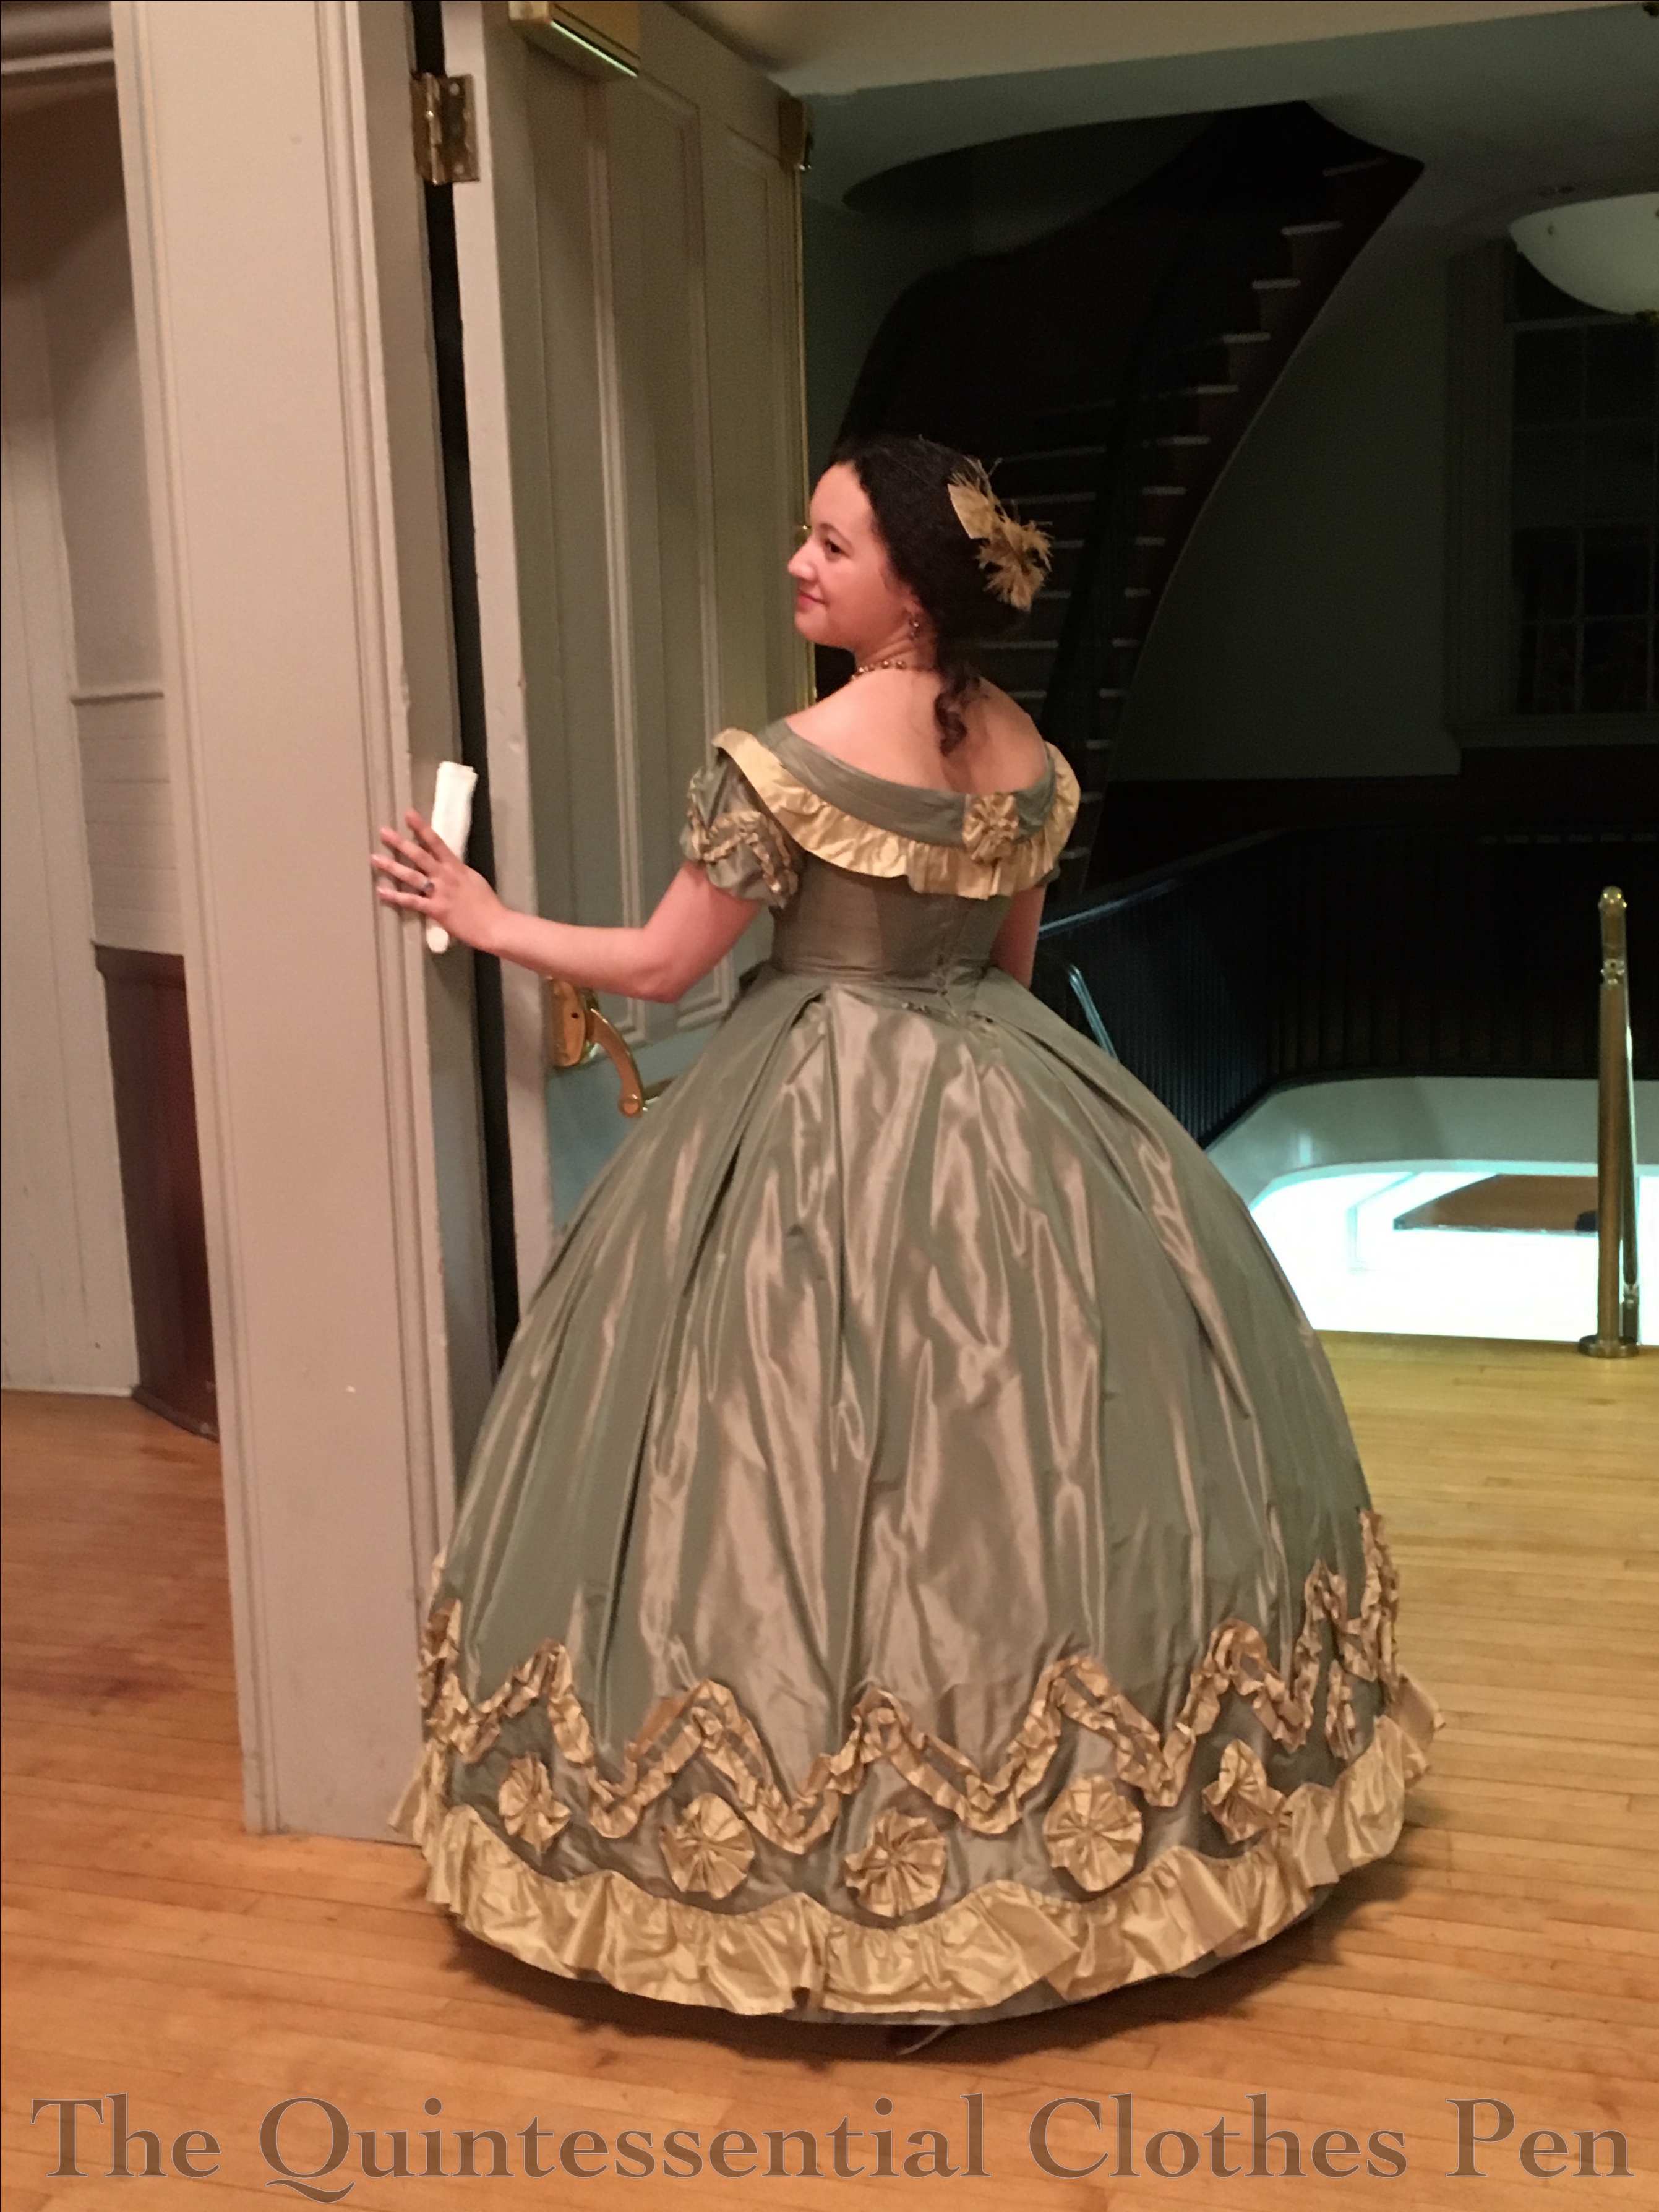
In March, I again had the pleasure of attending The Commonwealth Vintage Dancers‘ annual Returning Heroes Ball (you can read about other years I’ve attended here). I decided to wear Evie, my 1864 ballgown, simply because it had been a year or so since the last time I wore that particular gown.
In order to change things up I did two things differently with this wearing: I wore different earrings and did my hair differently. Small changes, but it makes wearing an old dress feel new and exciting!
I don’t think I’ve ever worn these earrings for mid-19th century events before (only for things later and earlier than this period), though now that I’ve tried it I think they work quite well. I made them from triple drop earrings that I bought from a modern store (I forget now, but I think it was New York and Company). I just took off the bottom drop and attached them to clip hardware. They catch the light and sparkle nicely.
1860s and earrings together reminds me of the scene in Gone With The Wind in which a straggling soldier try to steal ‘ear bobs’ from the house. Not that these look at all similar (and luckily my story ends on a happier note than that scene), but a GWTW reference generally makes me smile.
I was going to do a simple hairstyle (my usual go-to c.1860 style with a center part and the hair in a low mass at the back of my head), but as I was getting ready I chanced a look at Pinterest and got excited about trying a more complicated style than I usually do. In particular, I liked the puffed fronts on some of these styles from 1864 and the curls on the sides like some of these from 1861.
I sort of mashed these two looks together, using small rats to puff the front sections of hair and a curling iron to get smooth curls for the sides. My hair is getting to be so long that I had to pin the hanging curls up to shorten them! The rest of my hair was just twisted and pinned on my neck without too much attention paid to it. I was running out of time and knew I’d be adding my hair piece on top, which would cover most of the back of my hair anyway.
I really like the end result for this particular dress of mine. I feel it compliments the hair piece and the silk dress nicely. Isn’t it lovely when all these little details come together to create one cohesive end result? Yay!
While it’s still holiday season I want to share a few pictures from The Commonwealth Vintage Dancers’ 2017 Fezziwig’s Ball. This year we had snow on the day of the event. It made for some slippery driving, which unfortunately caused a number of people to not be able to make it, but the bright side was that Salem was enchantingly draped in snow.
It was a bit colder than it has been in some previous years, so it was necessary to wrap up warmly for outdoor caroling. The easiest (and warmest) option that would fit over my gigantic 1830s sleeves was my 1860s wool cape (it is lined in flannel and has thick batting so it is quite soft and warm!). It was great to make use of its amazing warmth since I hadn’t worn it in years, though I have yet to get actual documenting photos of it. I always seem to be wearing it when it’s dark outside! We did get this nice picture though. The stars of light are made using a special Petzval lens (you can read more about this special lens in this past post). The cape plus a muff did a good job of keeping everything but my head warm. There’s no easy way I know of to cover a big hairstyle without mussing it while also keeping your head warm…
Super puffed sleeves, a little more skirt volume, and ribbons on my shoes are the notable changes from last year’s wearing.
I basically styled my hair the same way as last year. I really liked what I came up with and there seemed to be no need to reinvent the wheel!
After vigorous dancing to lovely holiday music it is always a treat to partake of the lavish refreshments, which provided a perfect outing for my refreshing apron. It does a wonderful job of keeping my dresses clean!
Happy holidays!
I hope you’ve had a joyous December so far, full of laughter and blessings!
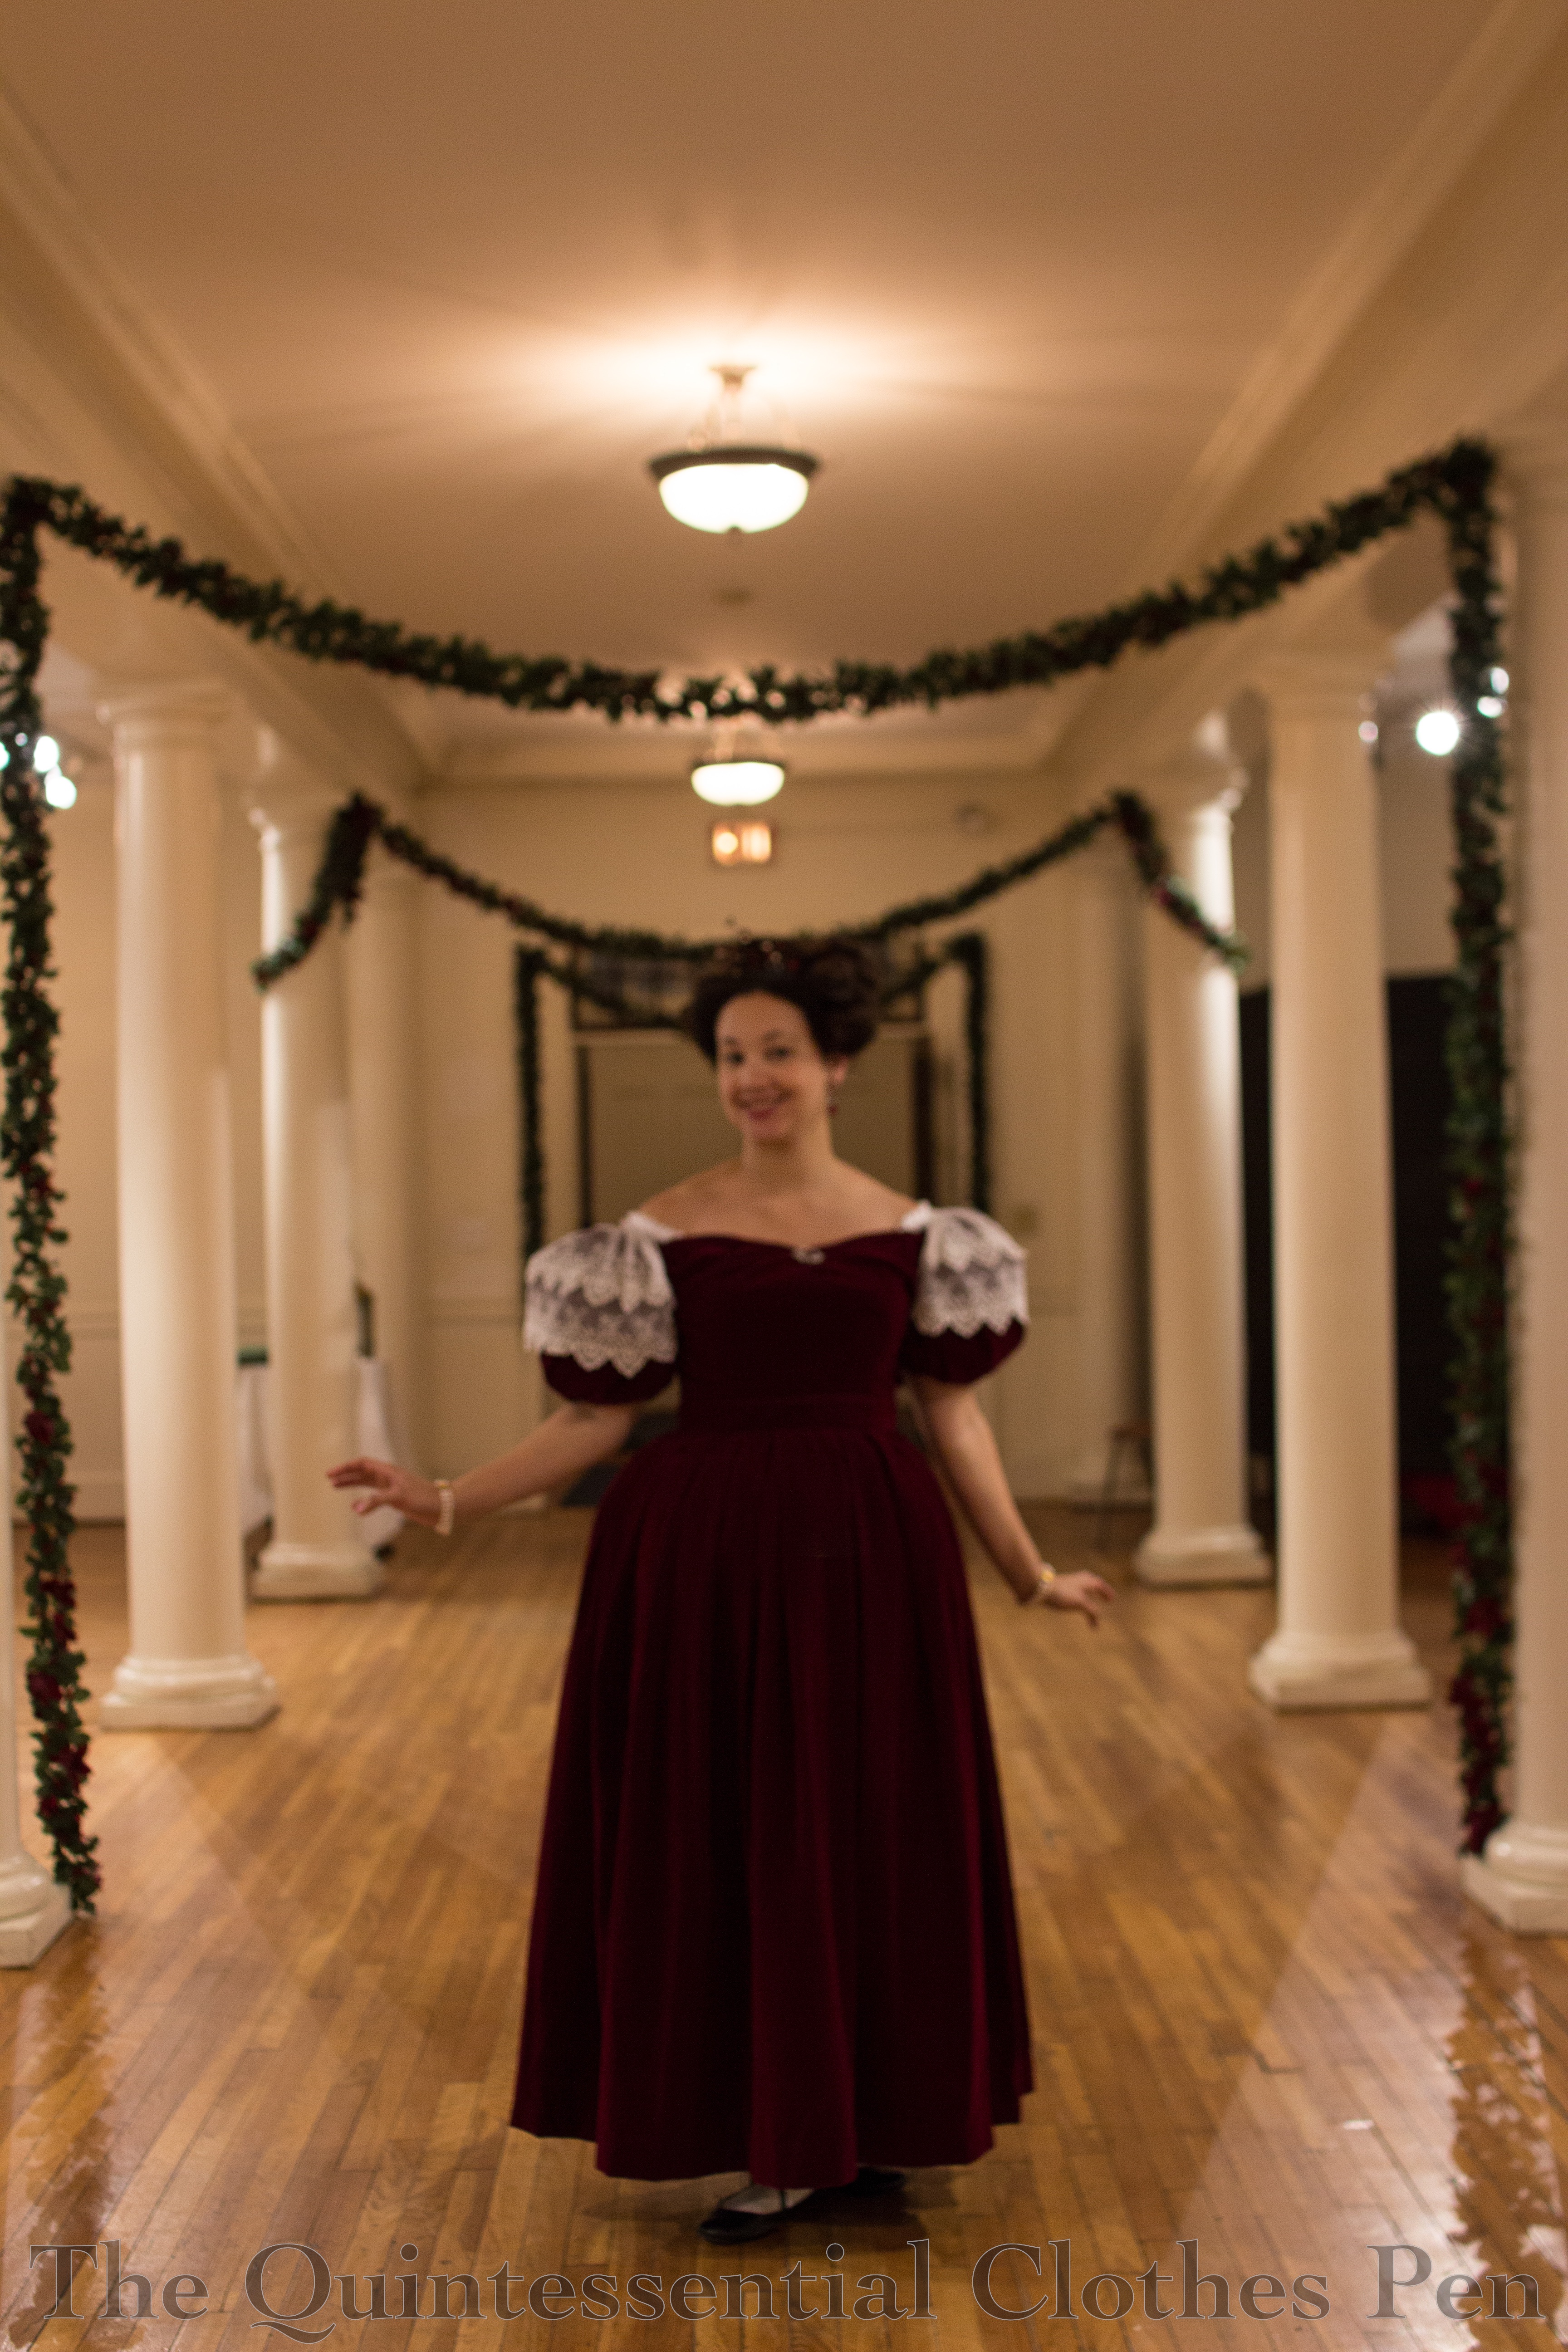
It’s been almost exactly a year since the inspiration for a new mid-19th century headdress stuck in my mind. I was attending a workshop at the Civil War Weekend last October and watching others make lovely floral headdresses with low hanging flowers, like this. Another inspiration headdress was similar in having two sections of decoration on each side of a headband, but made of loops of silk chenille rather than flowers. I decided then and there that I wanted to try out this more unusual style. The image below was my main inspiration, followed by a similar style made of silk ribbon.
It’s charming, right? I thought it would be silly, fun, and different, so I went on a hunt for chenille yarn to complement one of my mid-19th century dresses, Annabelle. It was rather harder than I thought it would be to find just the shade of purple that I was looking for as well as an off white, but I persevered and found them on Esty.
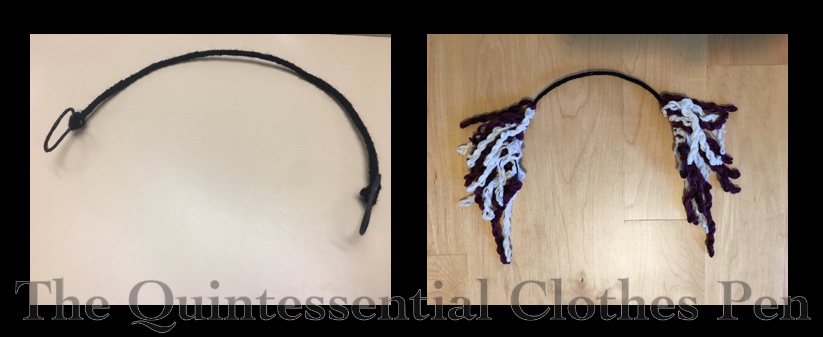
The base of my headdress is millinery wire. I formed loops at the ends in order to have a section to easily bobby pin to my hair. The over-the-head millinery wire is covered in black acrylic yarn from the stash to blend in with my hair, while the ends are black because I colored them with a sharpie–easy and quick. No yarn to get stuck in the bobby pins on the ends.
The loops of chenille vary in length. Each piece was folded in half, twisted, and then tied to the base. The chenille I found is not as plush as my inspiration, but with overlapping twists I was able to achieve a similar overall shape.
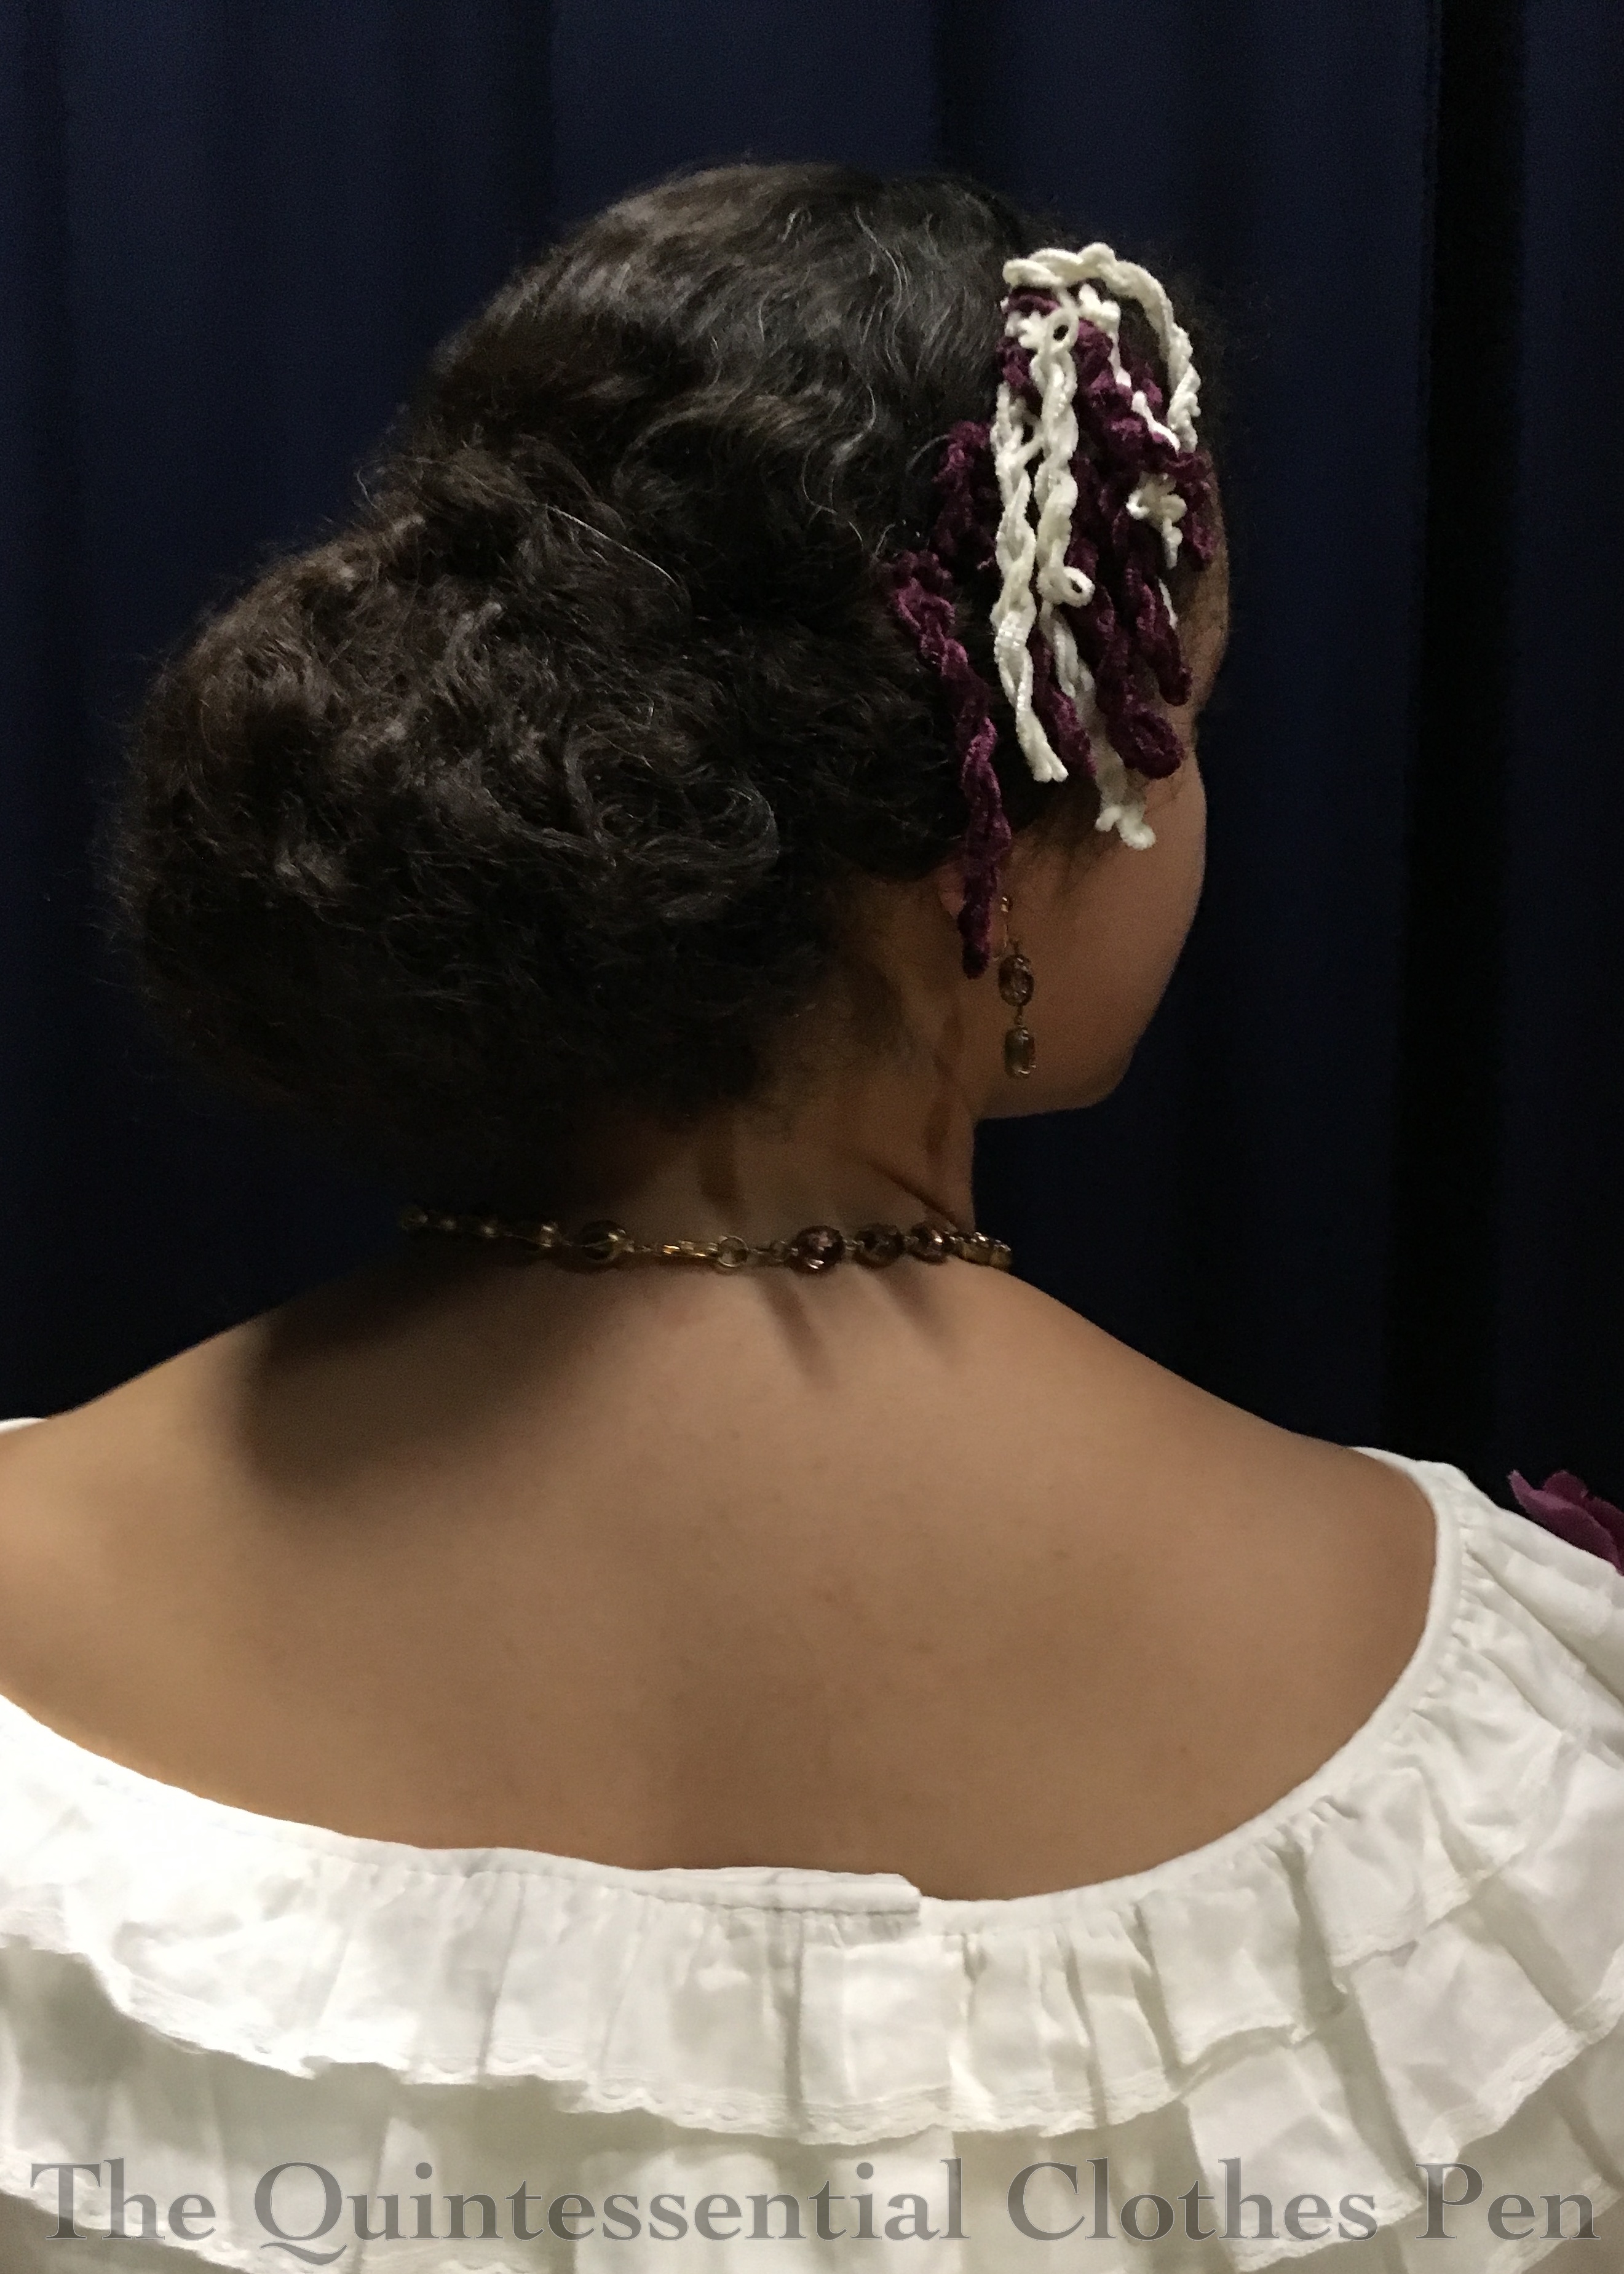
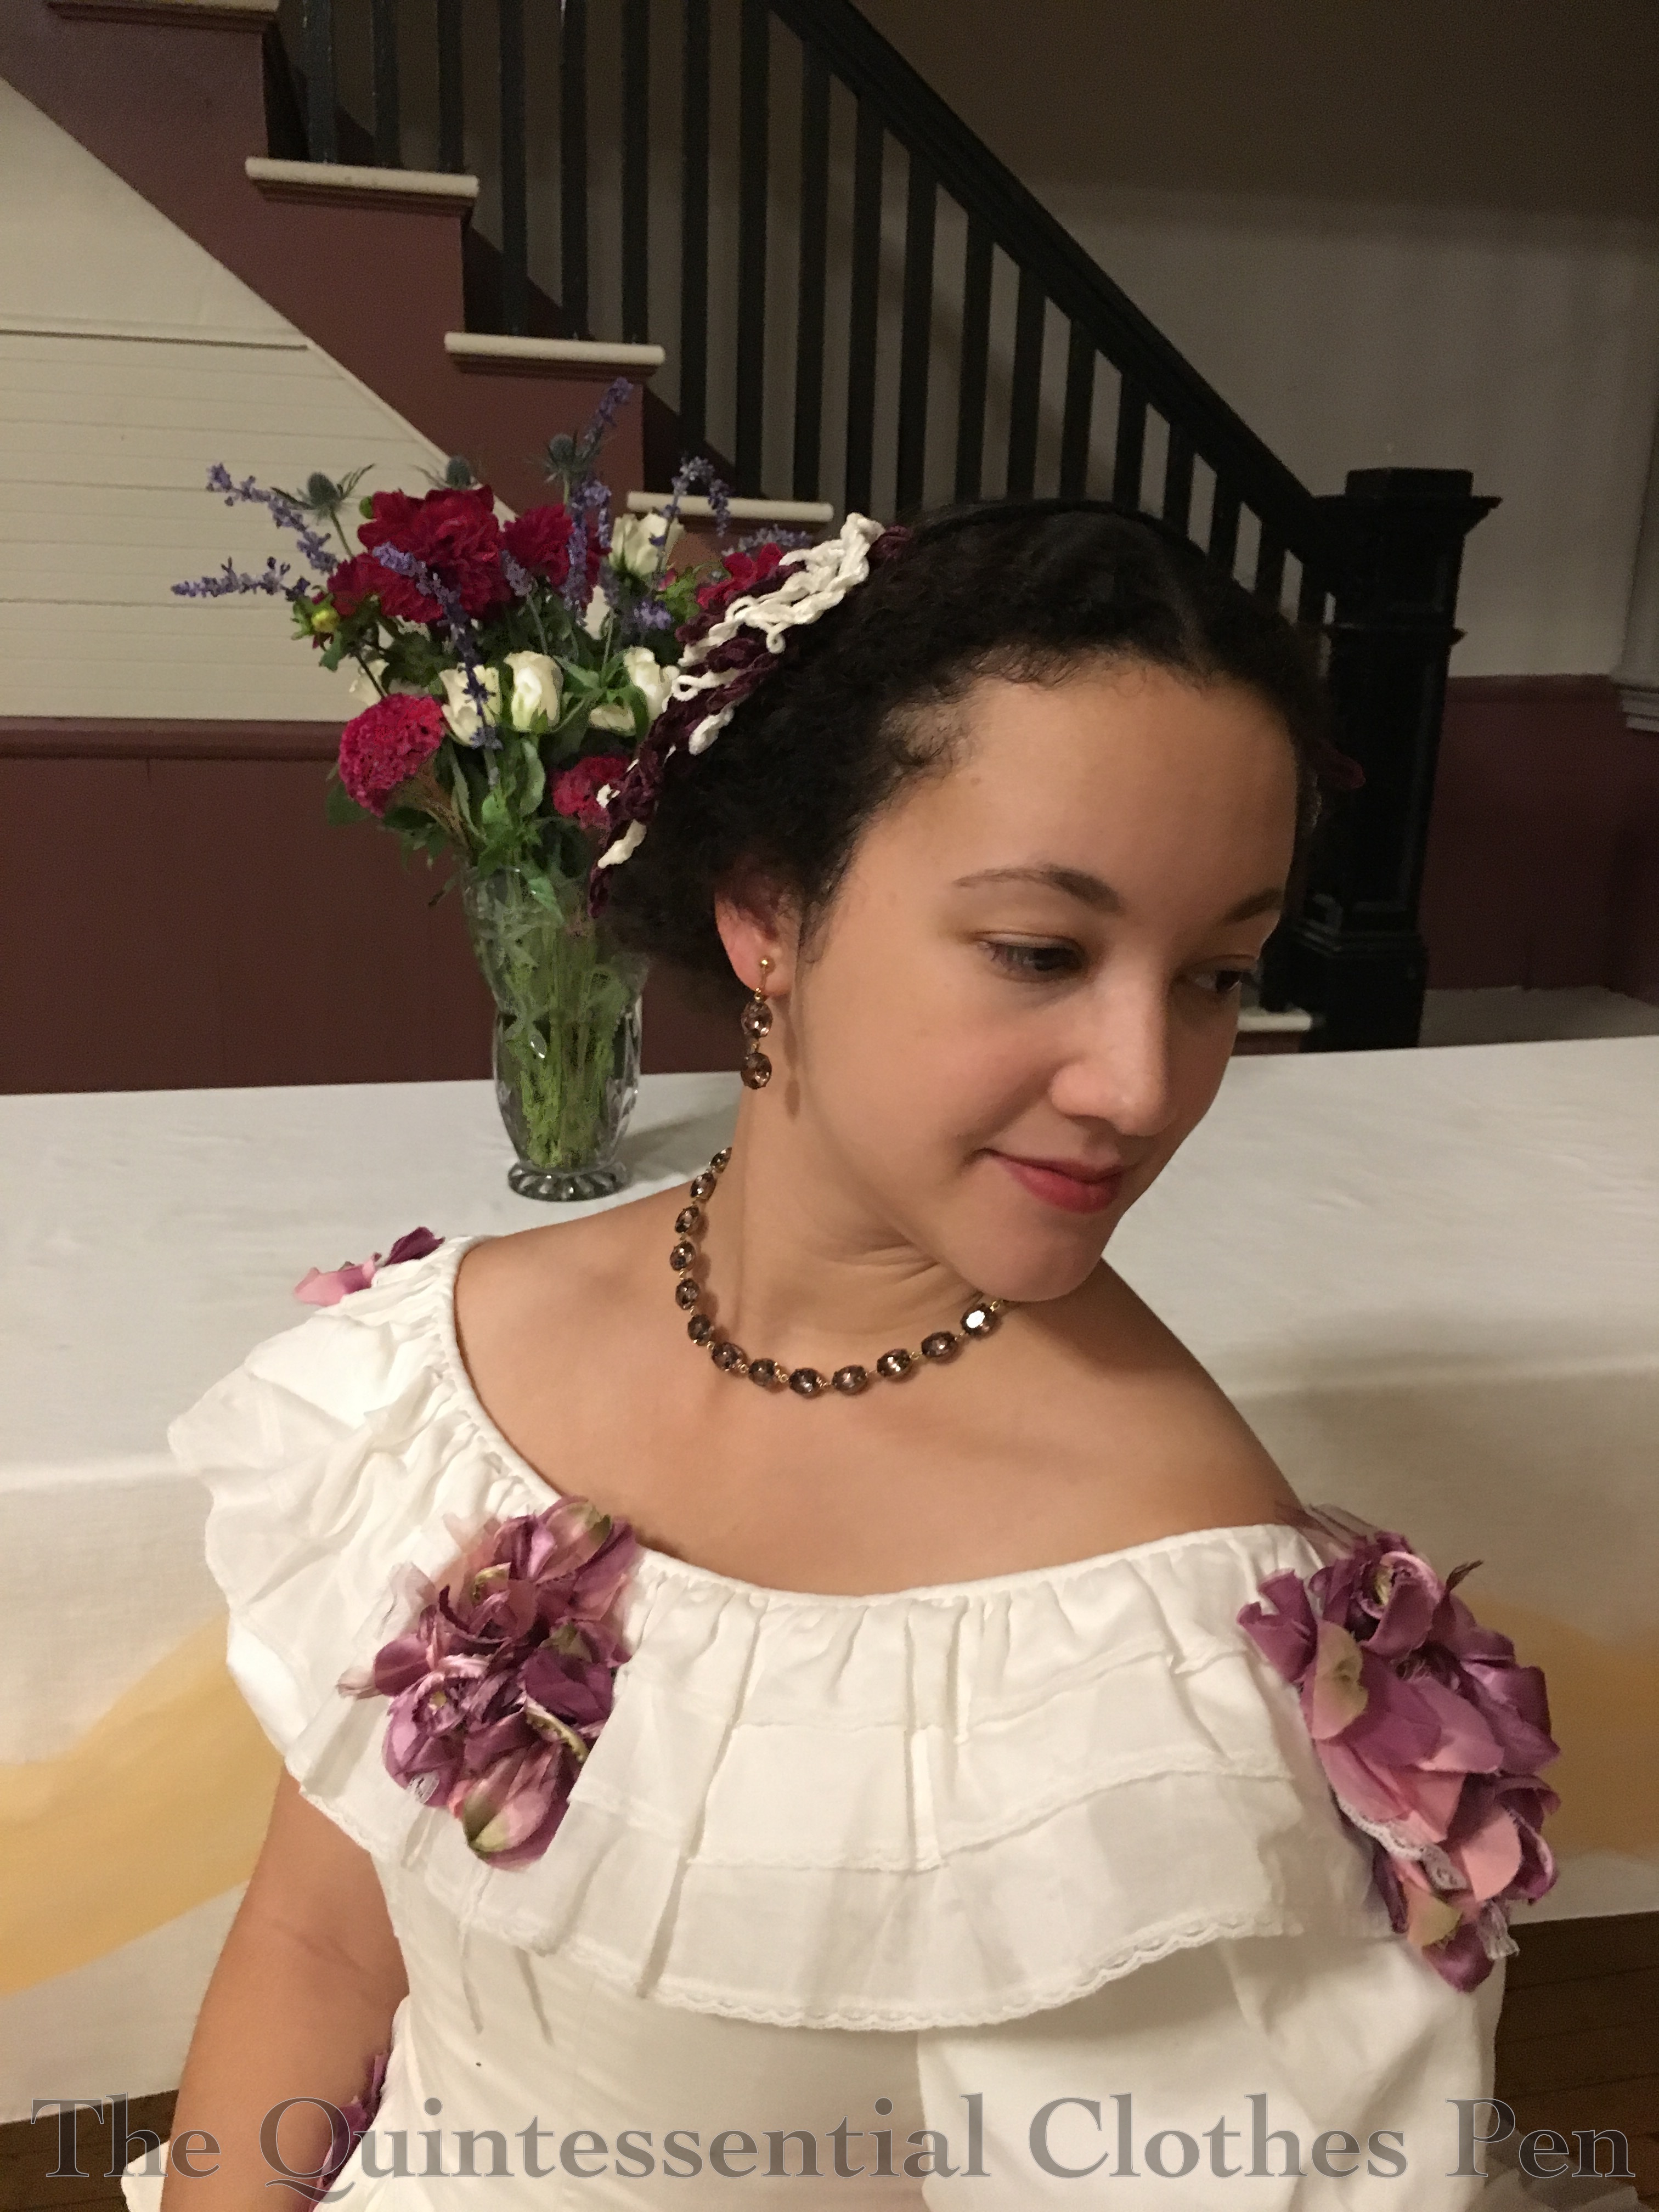
Here are two pictures of the headdress, one from the back, which better shows off the chenille headdress, and one from the front, which also shows one of our lovely bouquets from the ball.
As the title mentions, I was able to wear this ensemble to a mid-19th century Victoria and Albert themed ball. In addition to the usual loveliness of balls (live music, refreshments, etc.), we had added decorations, special fan shaped dance cards, a quadrille performance, and sashes. Here are the dance cards laid out on a silver tray in the entryway.
And here’s the whole ensemble worn with my sash. The chenille frames the sides of my face and puffs out a bit farther than my hair. Fun and different! I really like this somewhat quirky and unusual headdress!
My last few posts have been about the new Regency clothes I made earlier this year: Orange Boven Pelisse and Hat from 1814 as well as a look at the history behind the description Orange Boven and 1817 Gold Stripe Duchess Evening Gown. Now that I’ve got all the details about the construction and history of these garments recorded, it’s time for a look at the Regency Dance Weekend that provided an opportunity to wear these clothes in the company of other fabulously dressed people and in historical halls built in the early 19th century.
This annual Regency Dance Weekend is organized and run by the Commonwealth Vintage Dancers. If you want to see more pictures and read more about the amazing Regency moments I’ve had in past years, I have posts about them here: 2013, 2014, and 2016.
Saturday always begins with dance classes in modern clothes. The hard work we all put in during the day pays off at the evening ball, when we are able to dance with quick reminders of the figures but without full teaching. It’s a very special experience every year!
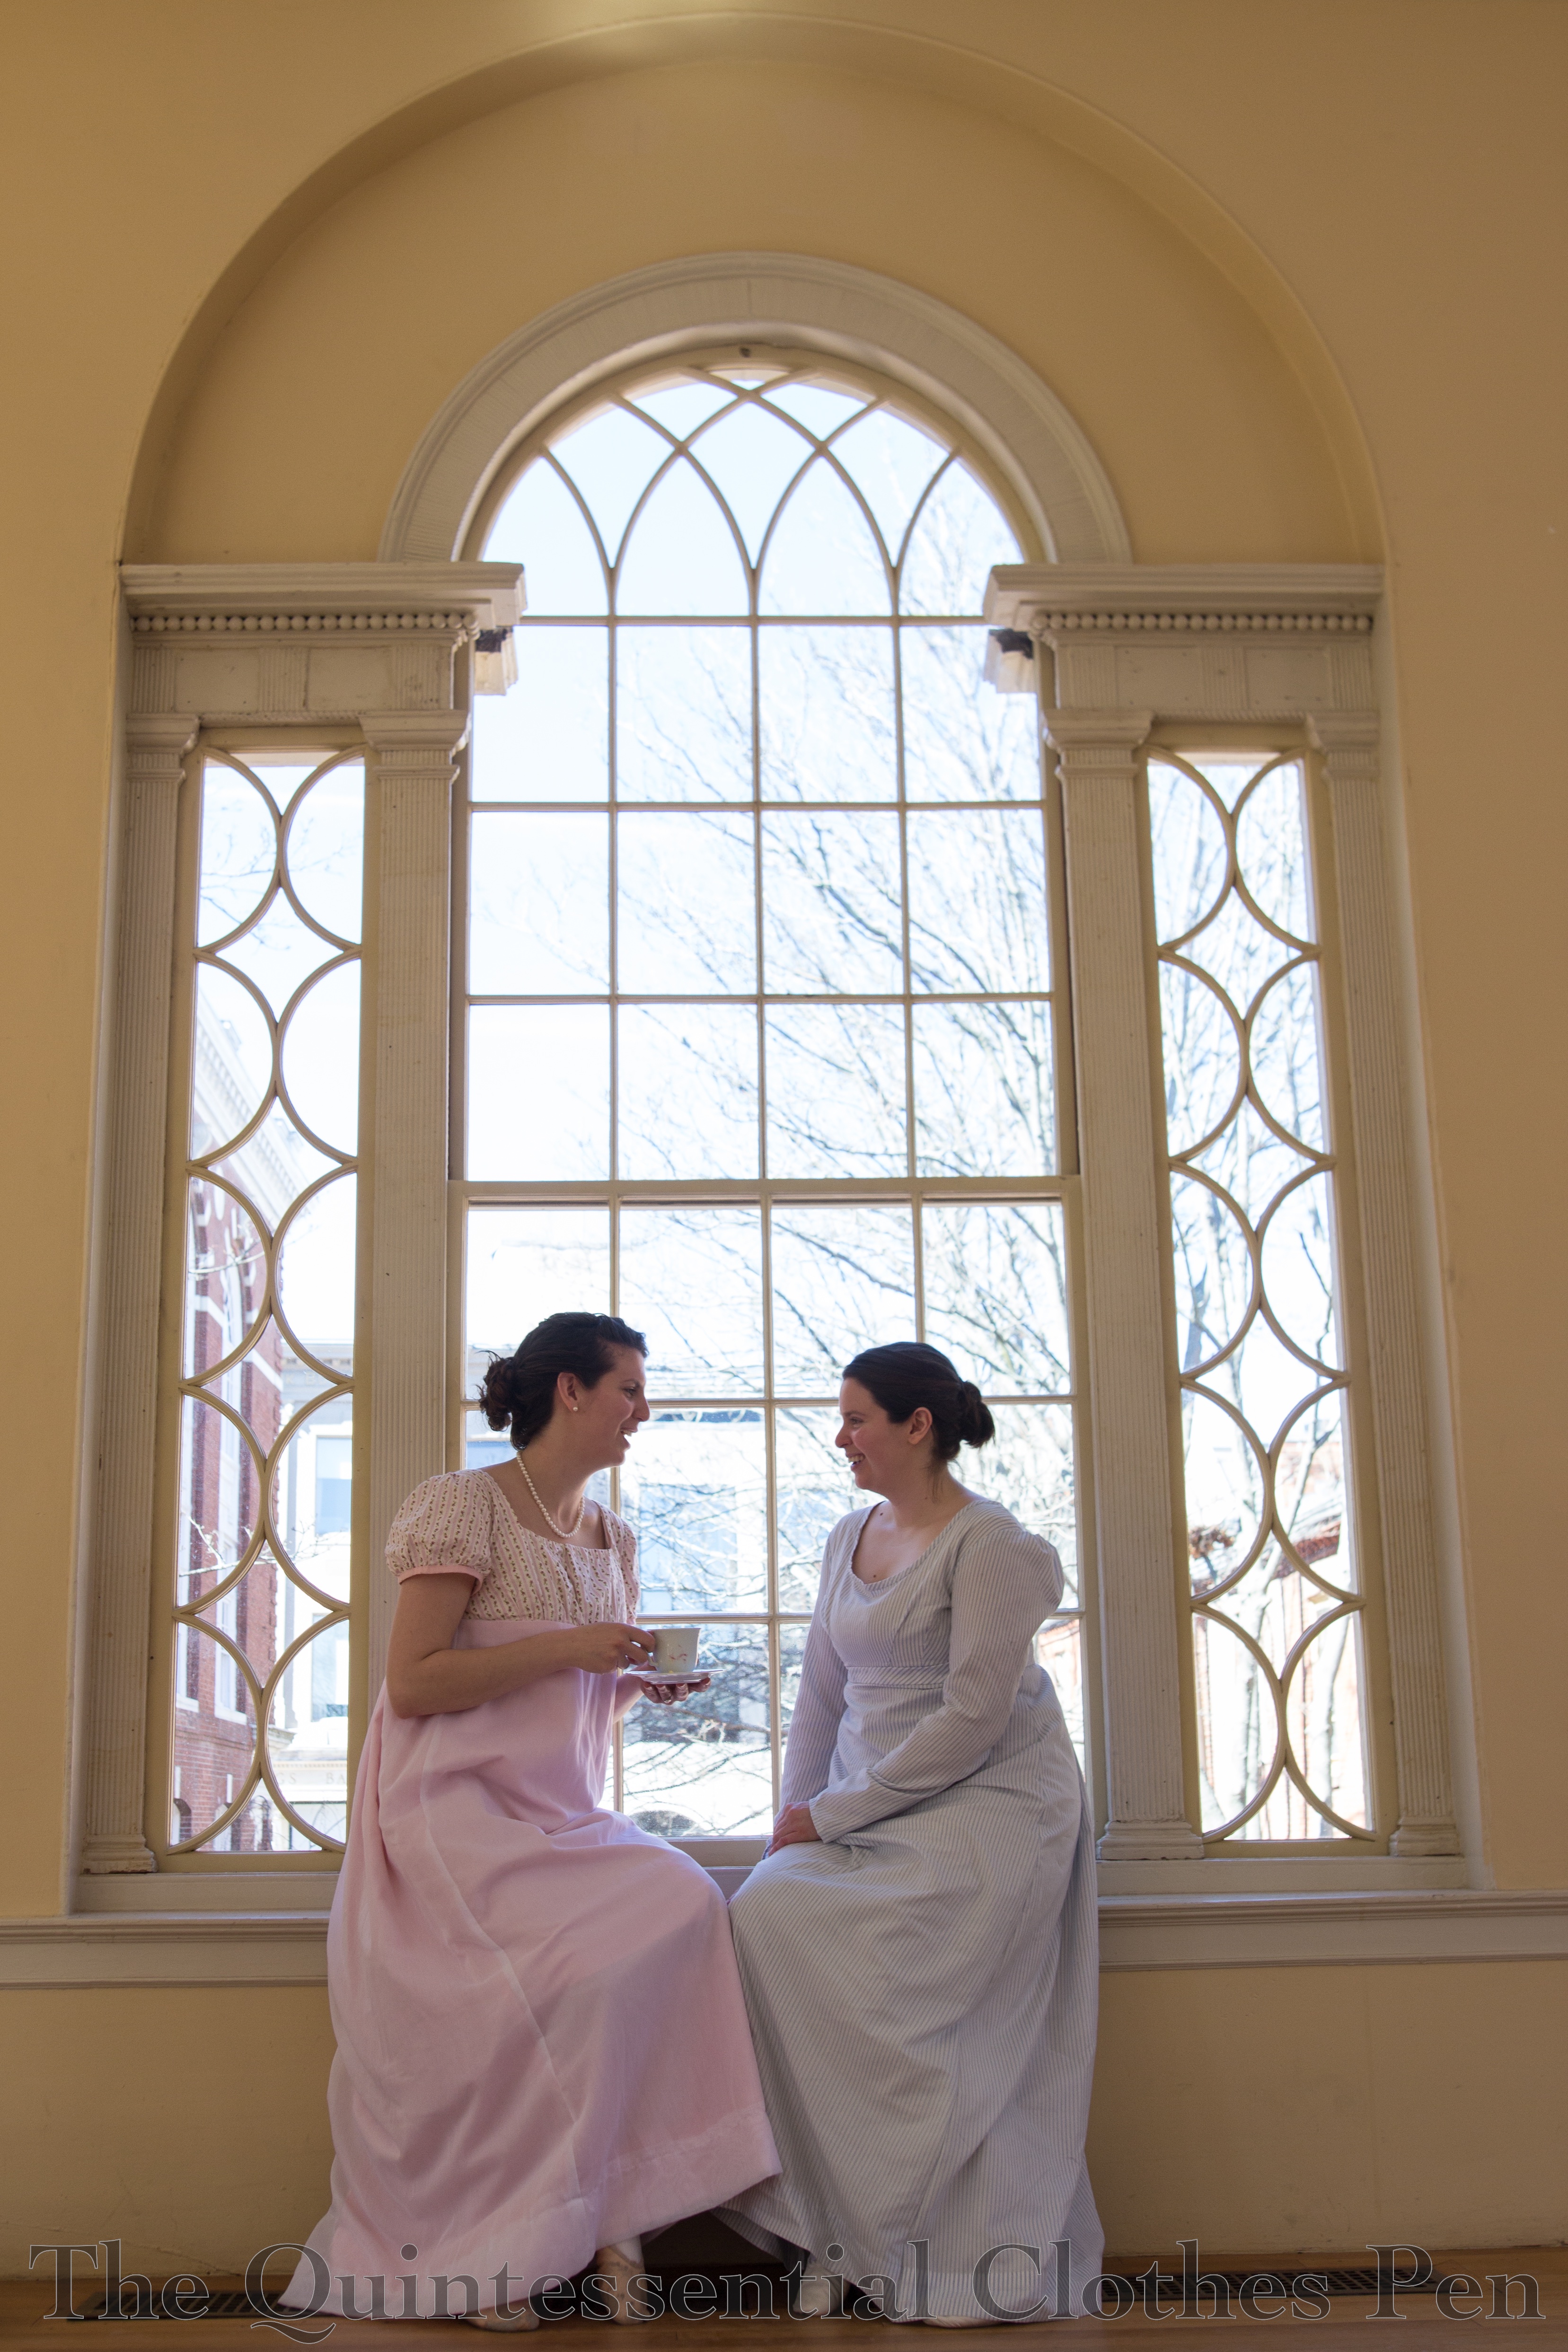
After a final class on Sunday morning, we take the afternoon off from dancing for a bit of leisure. Often it has been tea, though in some years we’ve had promenades, or even archery! This year we focused on tea, games, and chatting.
This venue, Old Town Hall, has lovely windows that make perfect frames for picture taking!
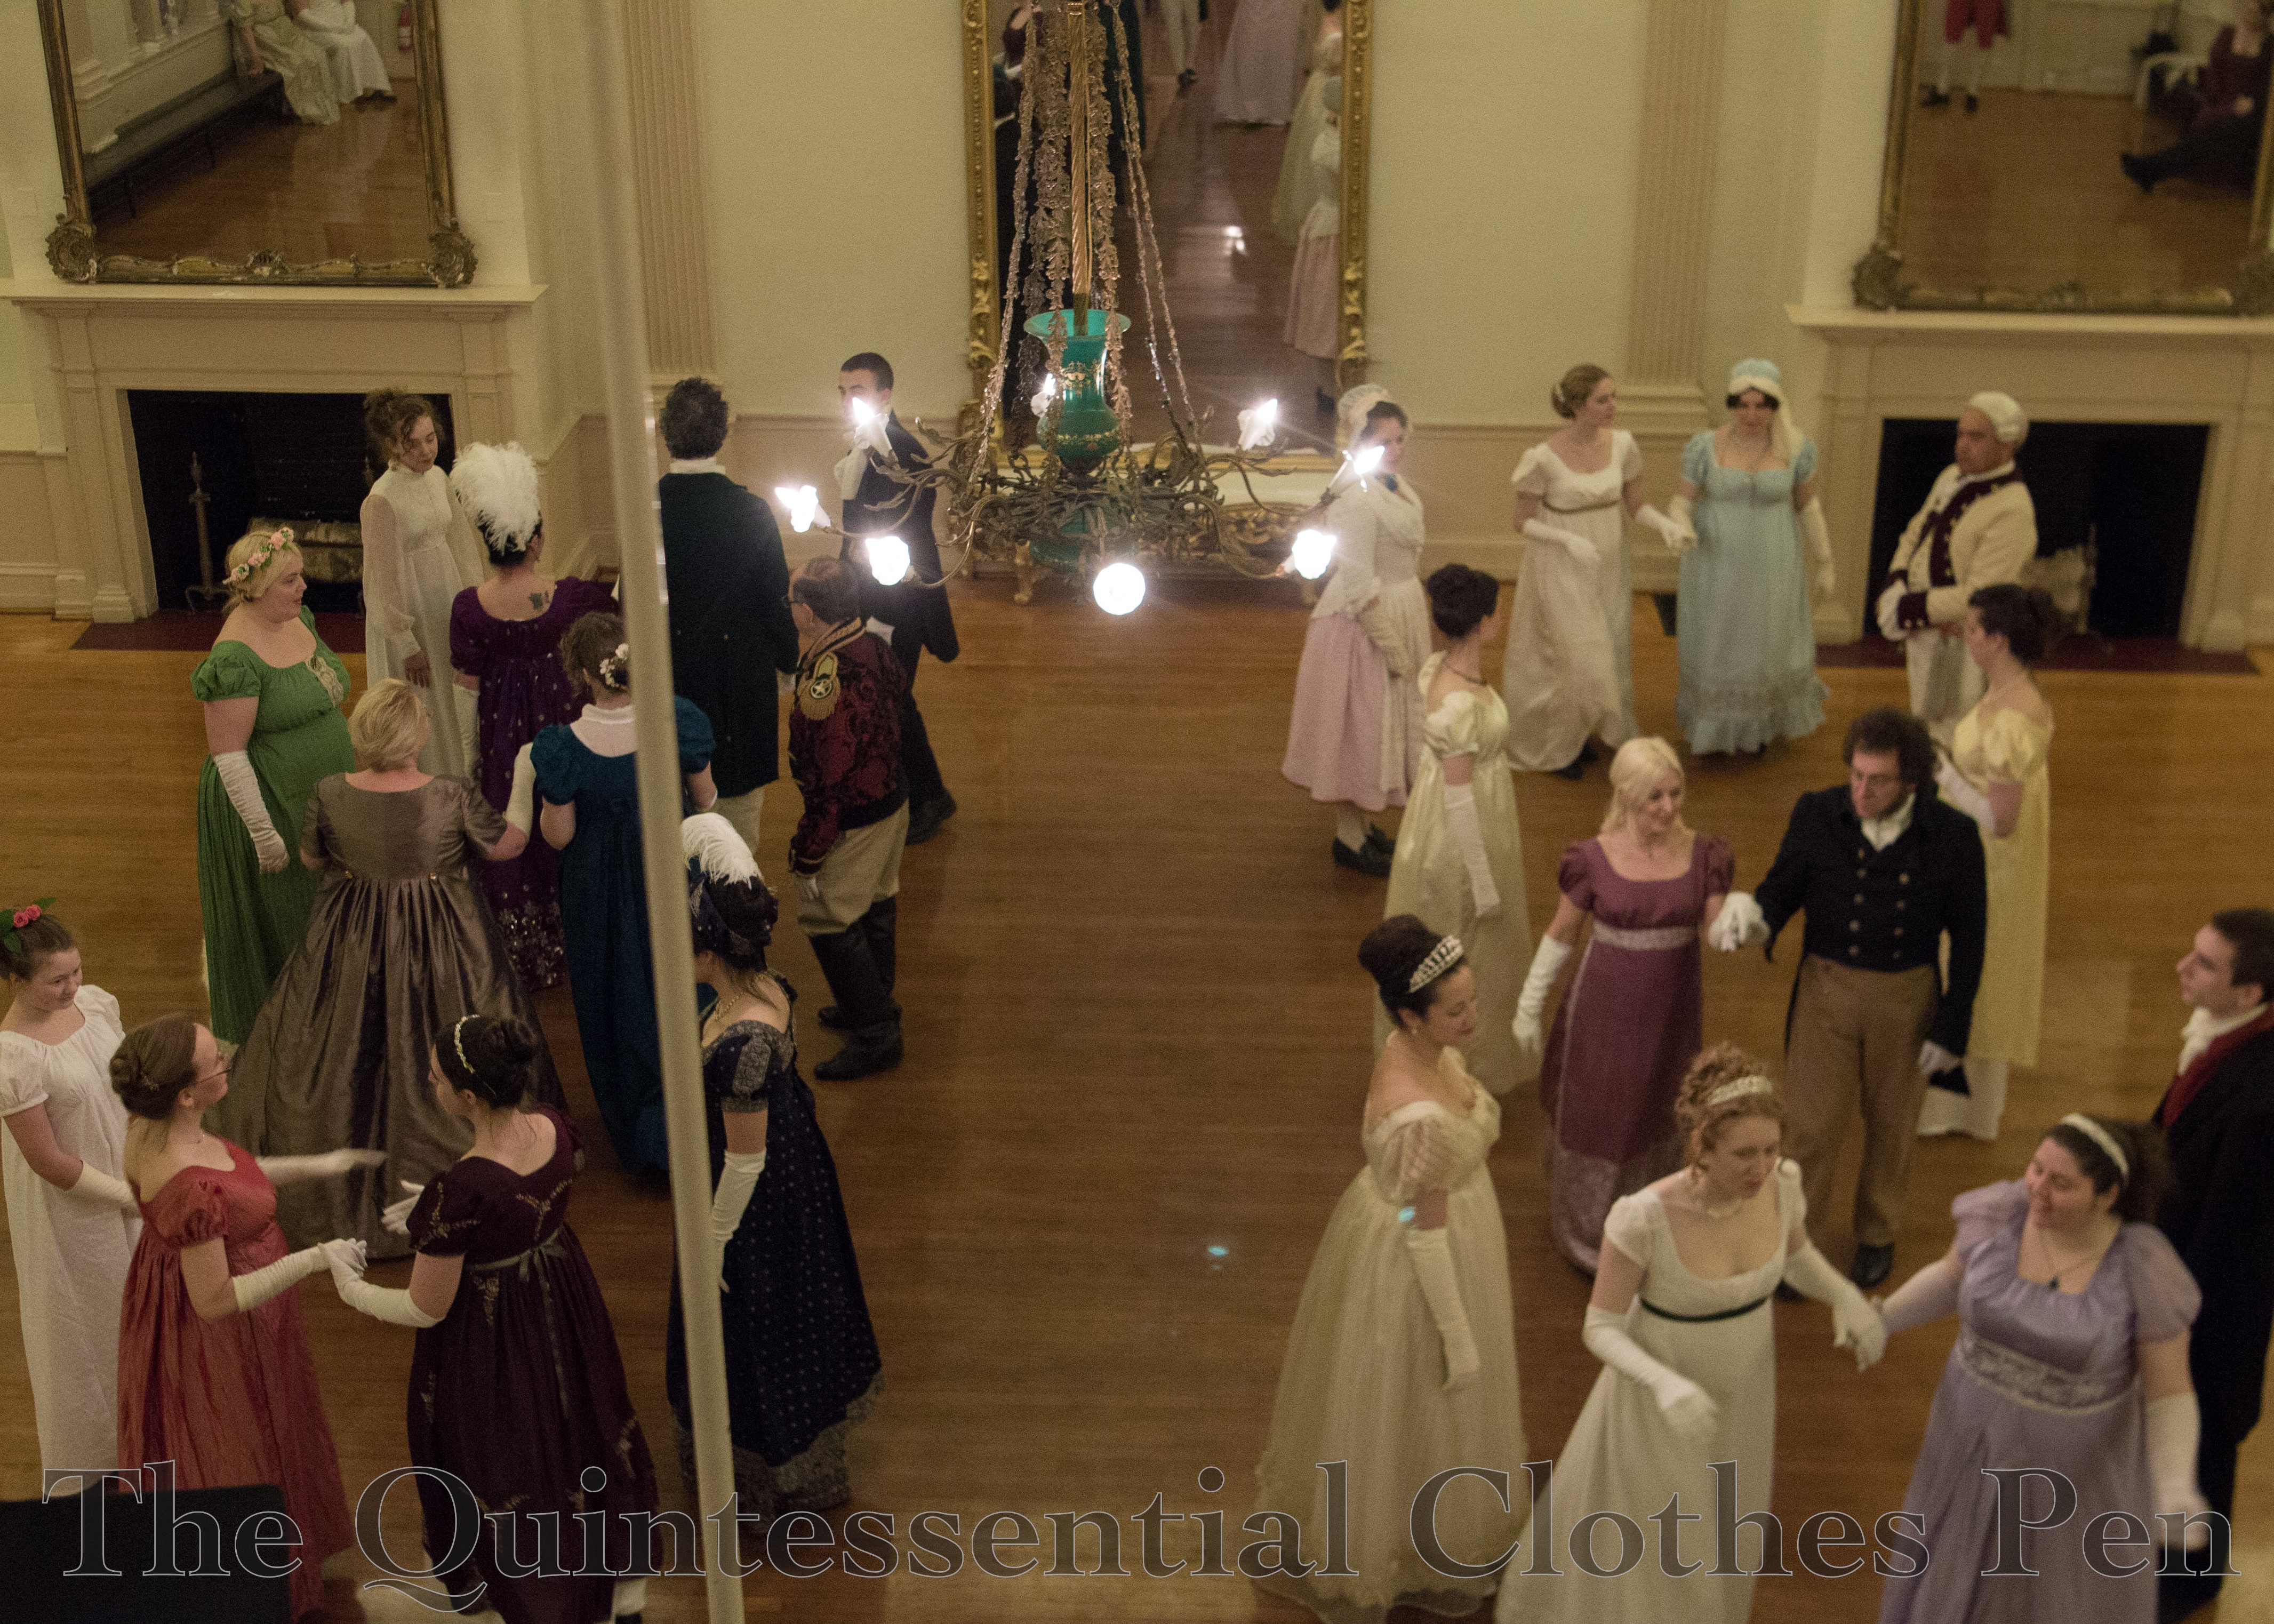
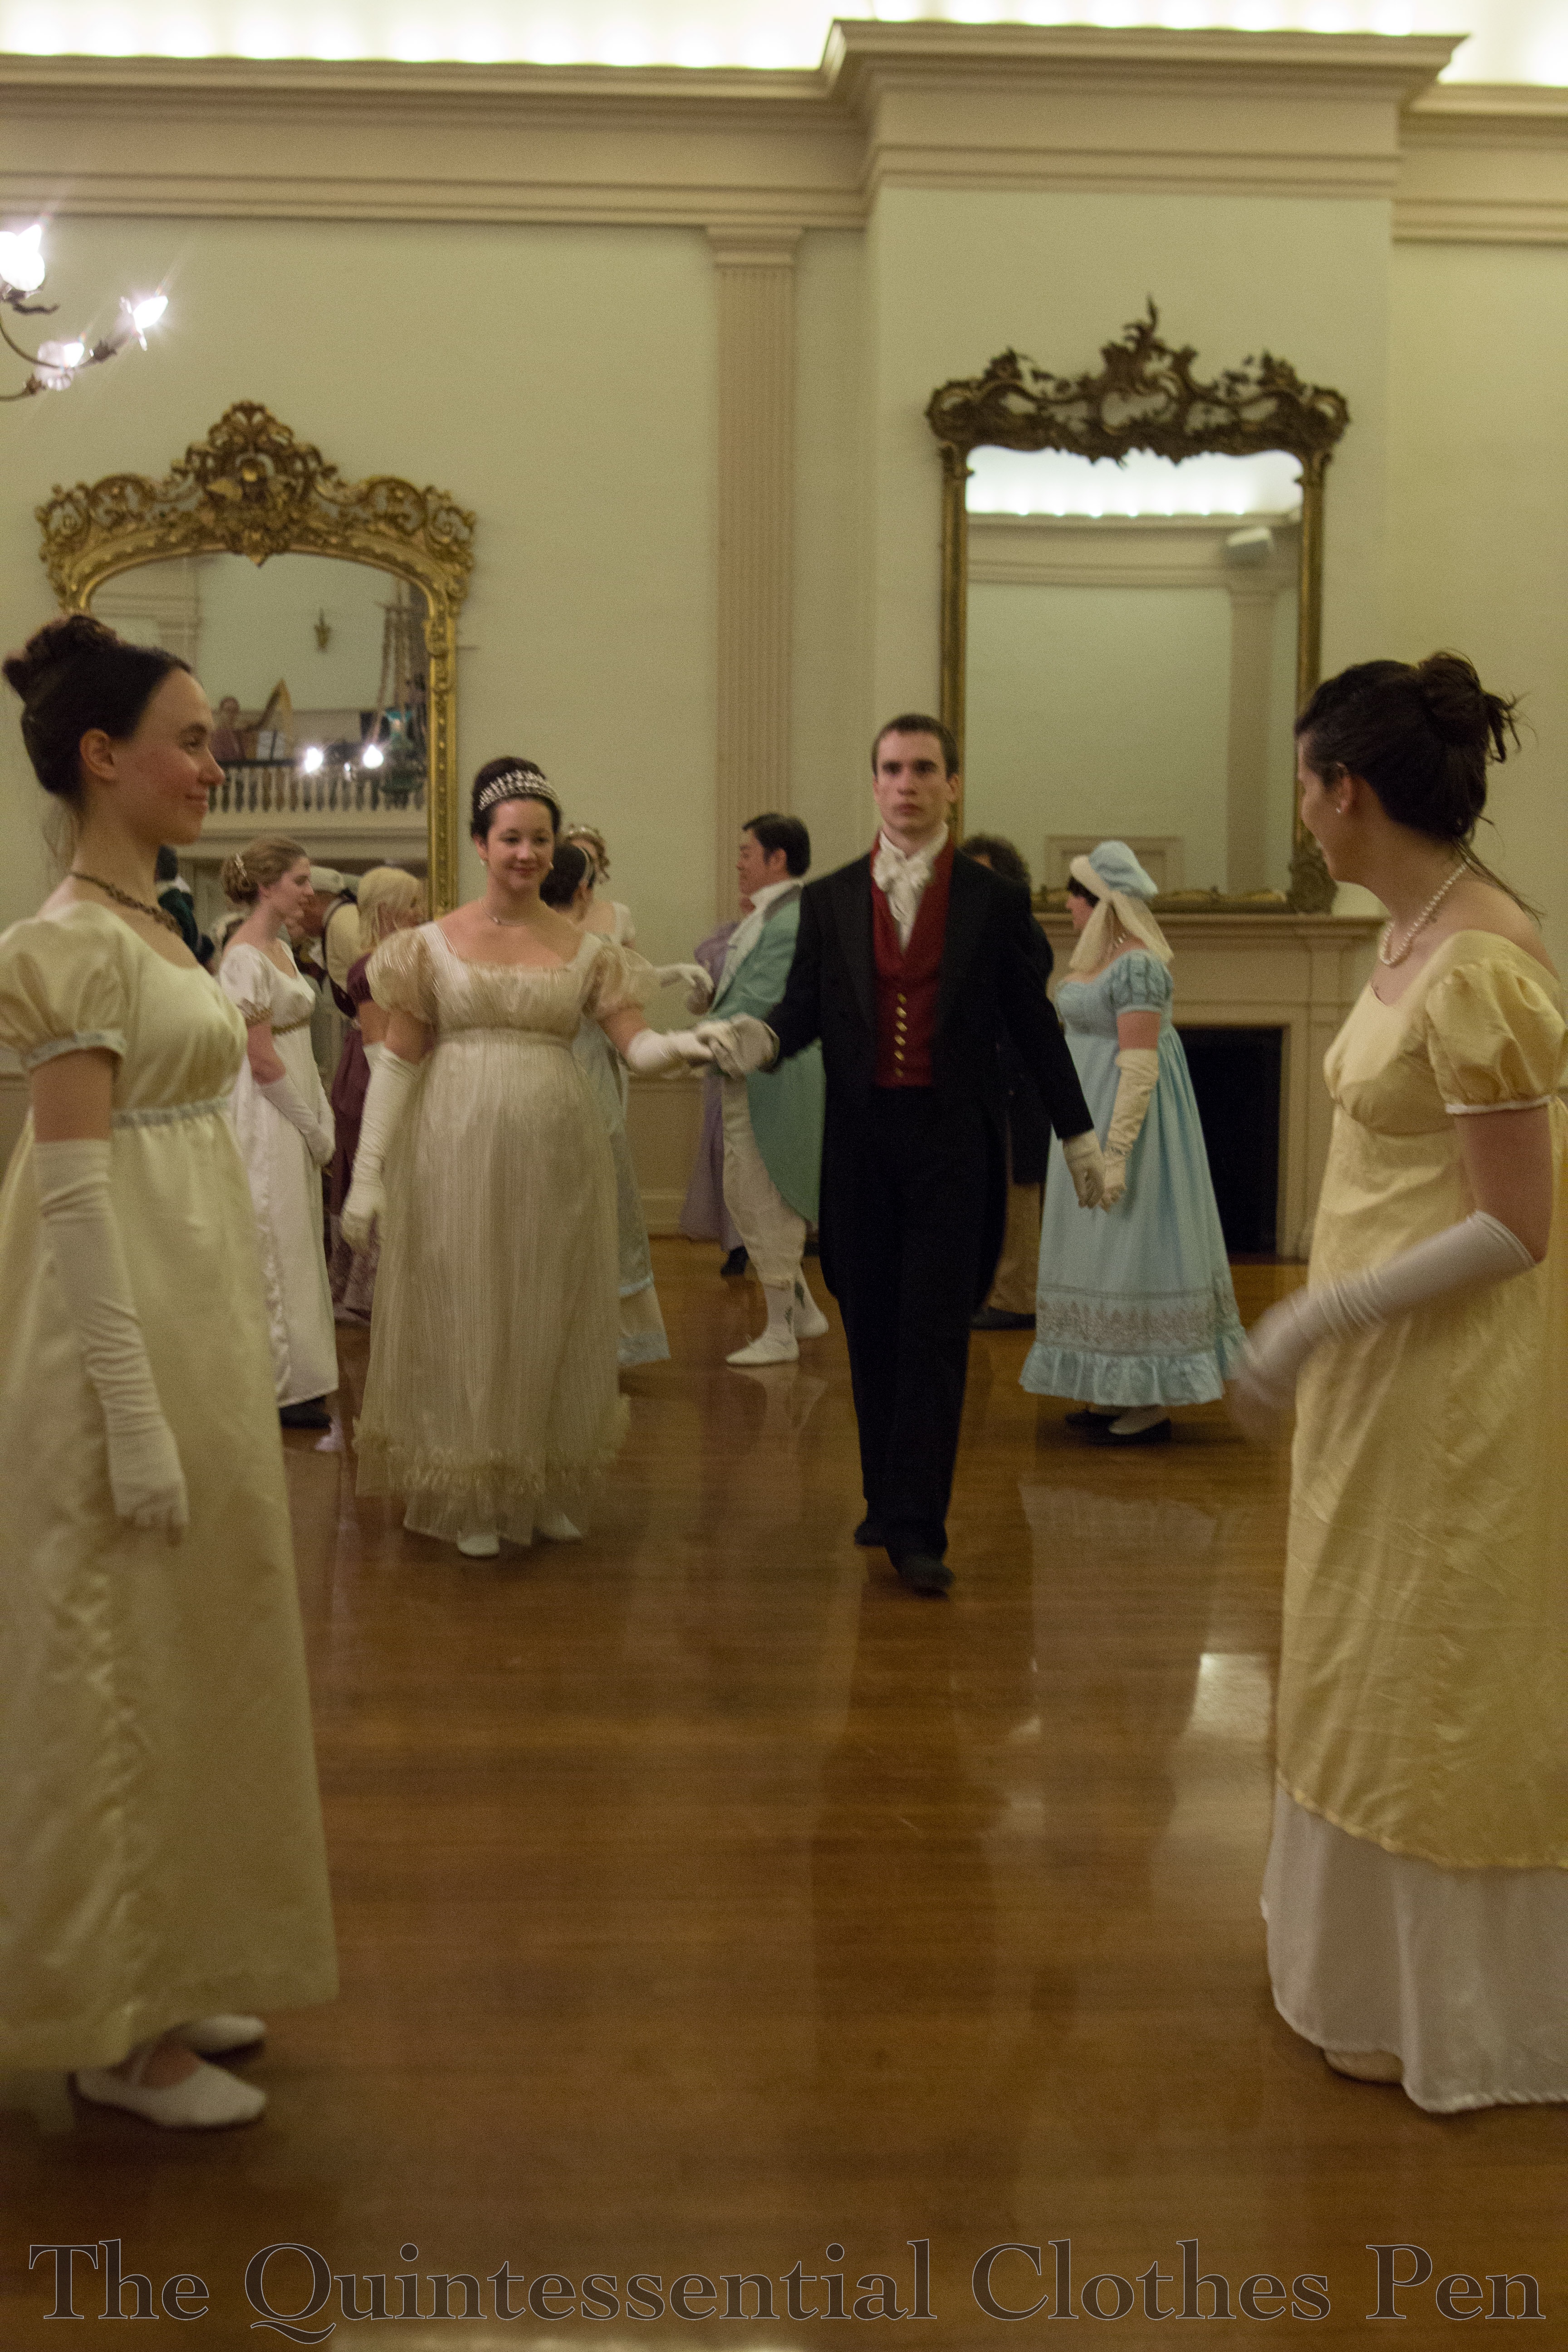
After tea, those of us running the weekend calmly (well, probably with a lot of scurrying) switch venues to the more elegant Hamilton Hall, where we have a formal ball with a lavish reception. Hamilton Hall is special, with a gleaming sprung floor, musicians balcony, and gorgeous gilt framed mirrors.
Sometimes, though, silliness ensues! I couldn’t resist making a face in the picture below… After that is a face that often happens after I run out of pose ideas…
There is lovely dancing on that evening. The things we’ve all learned have had time to sink in and people dance marvelously, again without teaching.
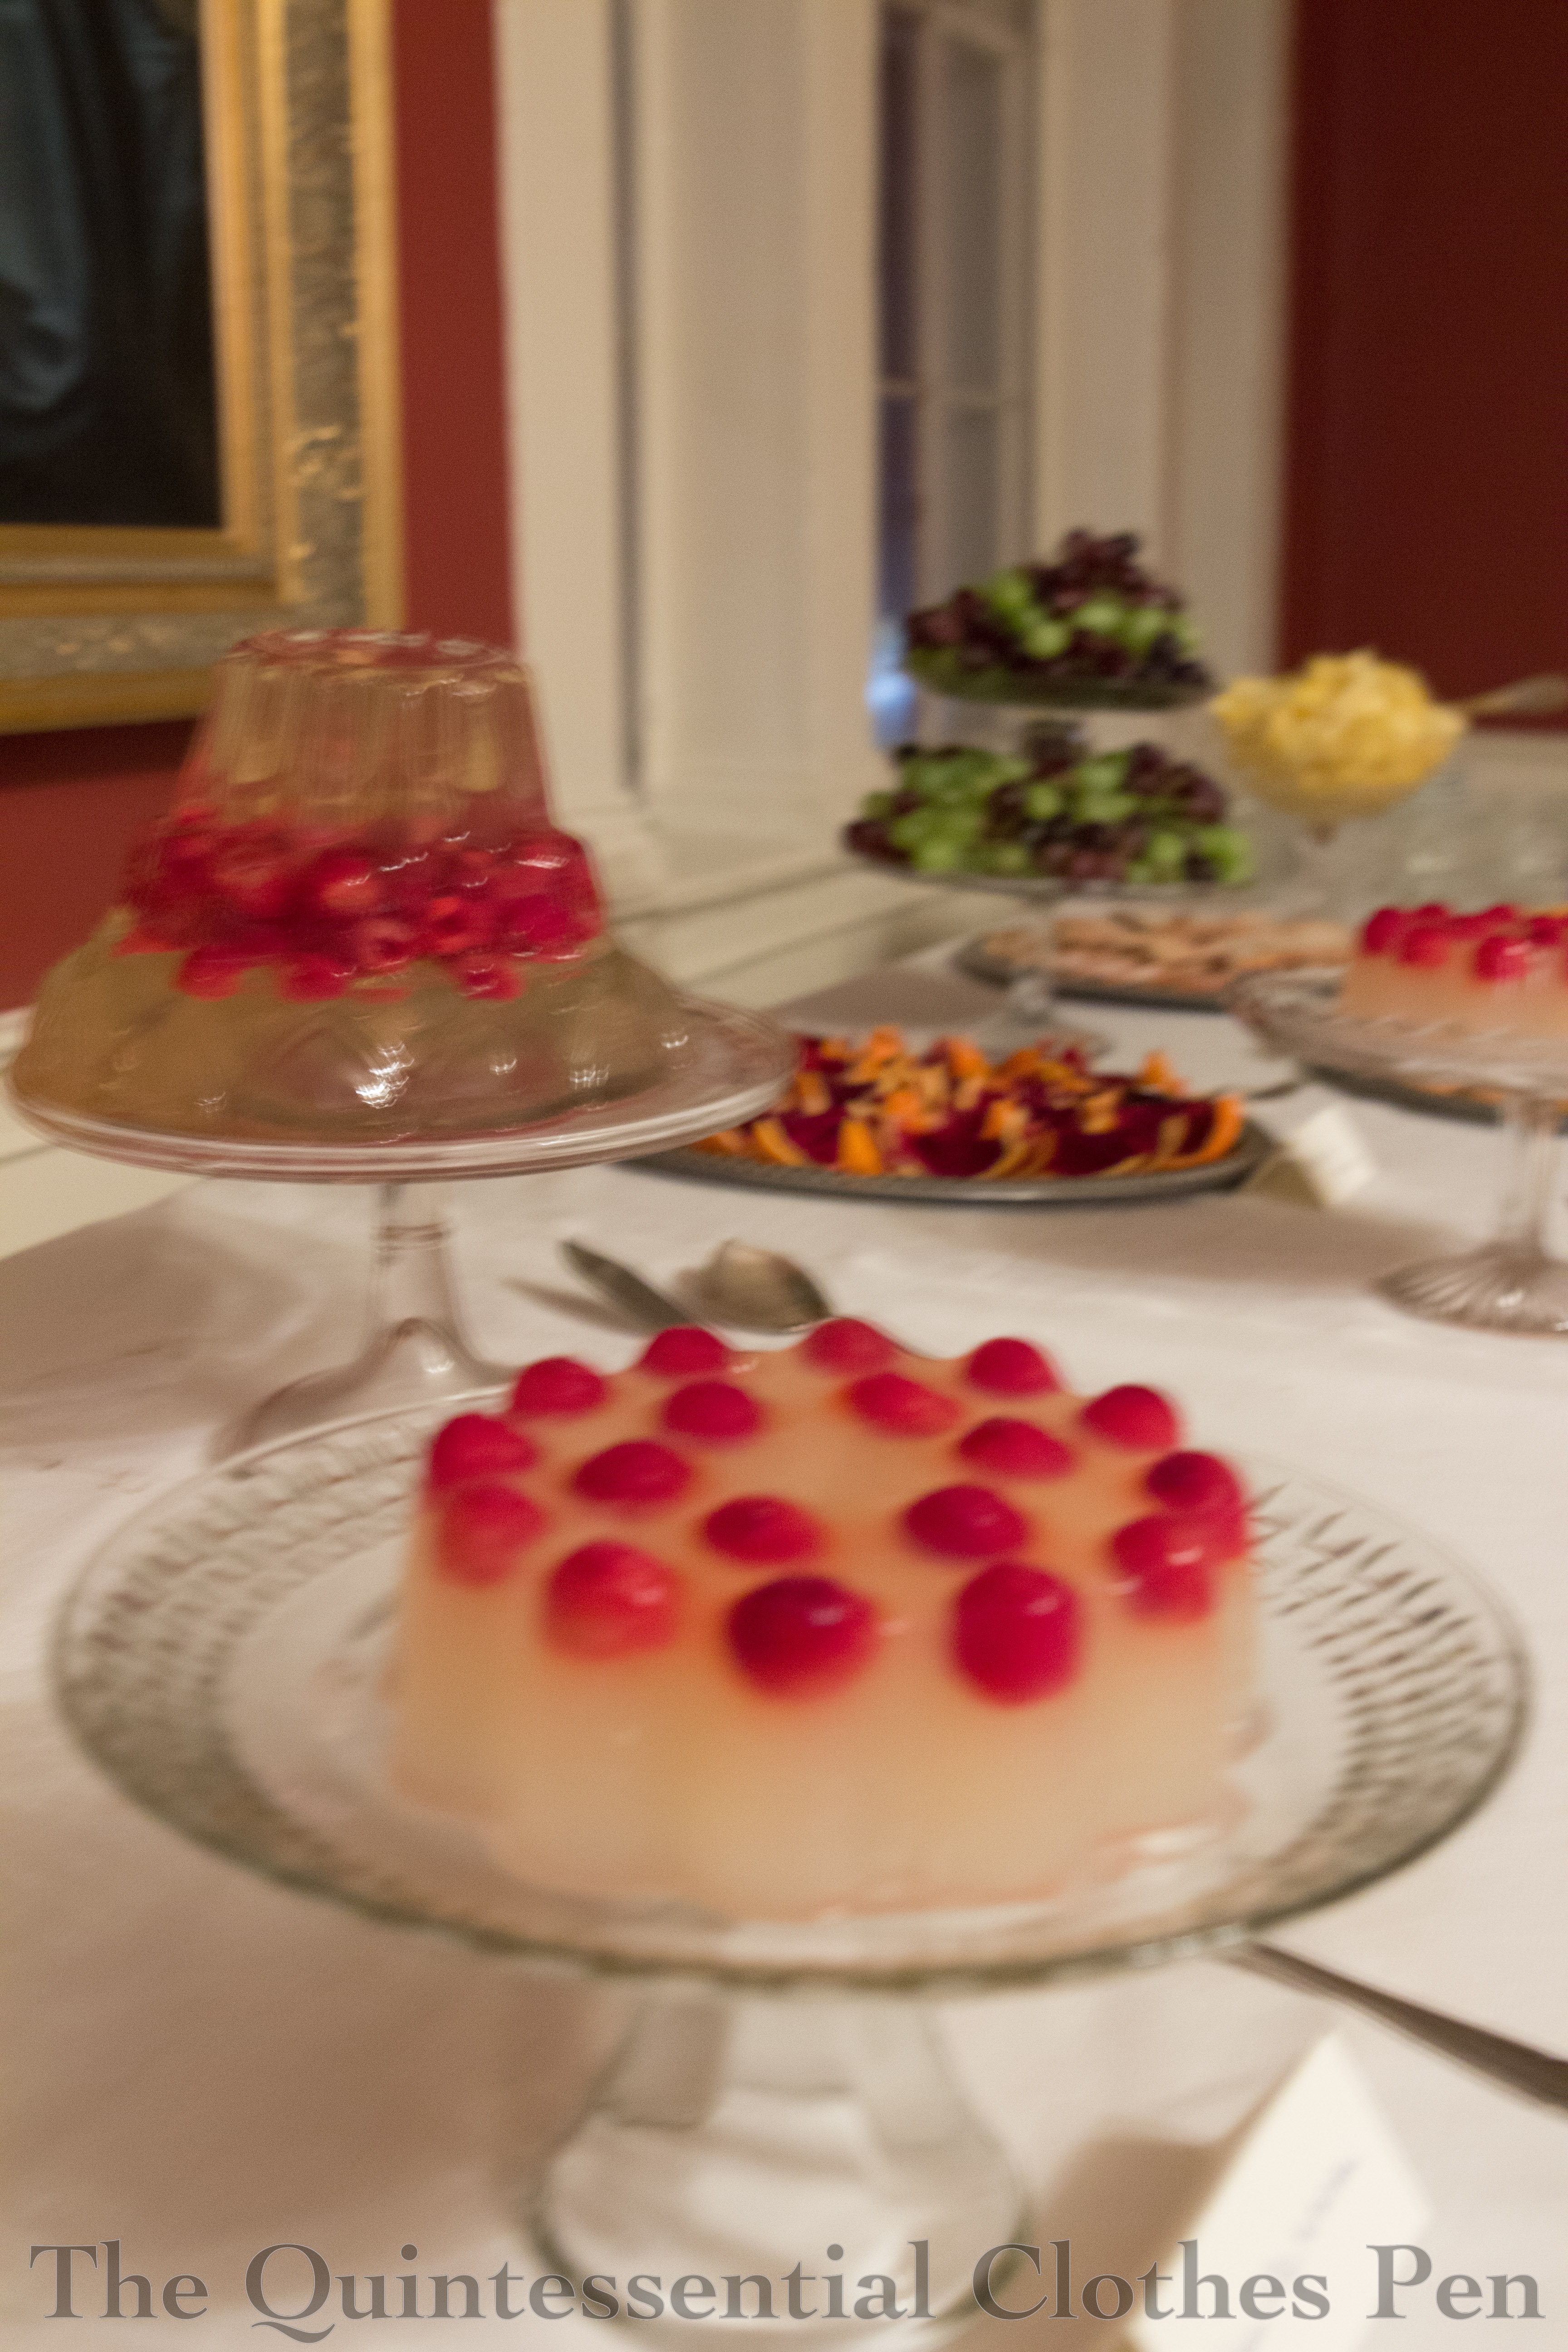
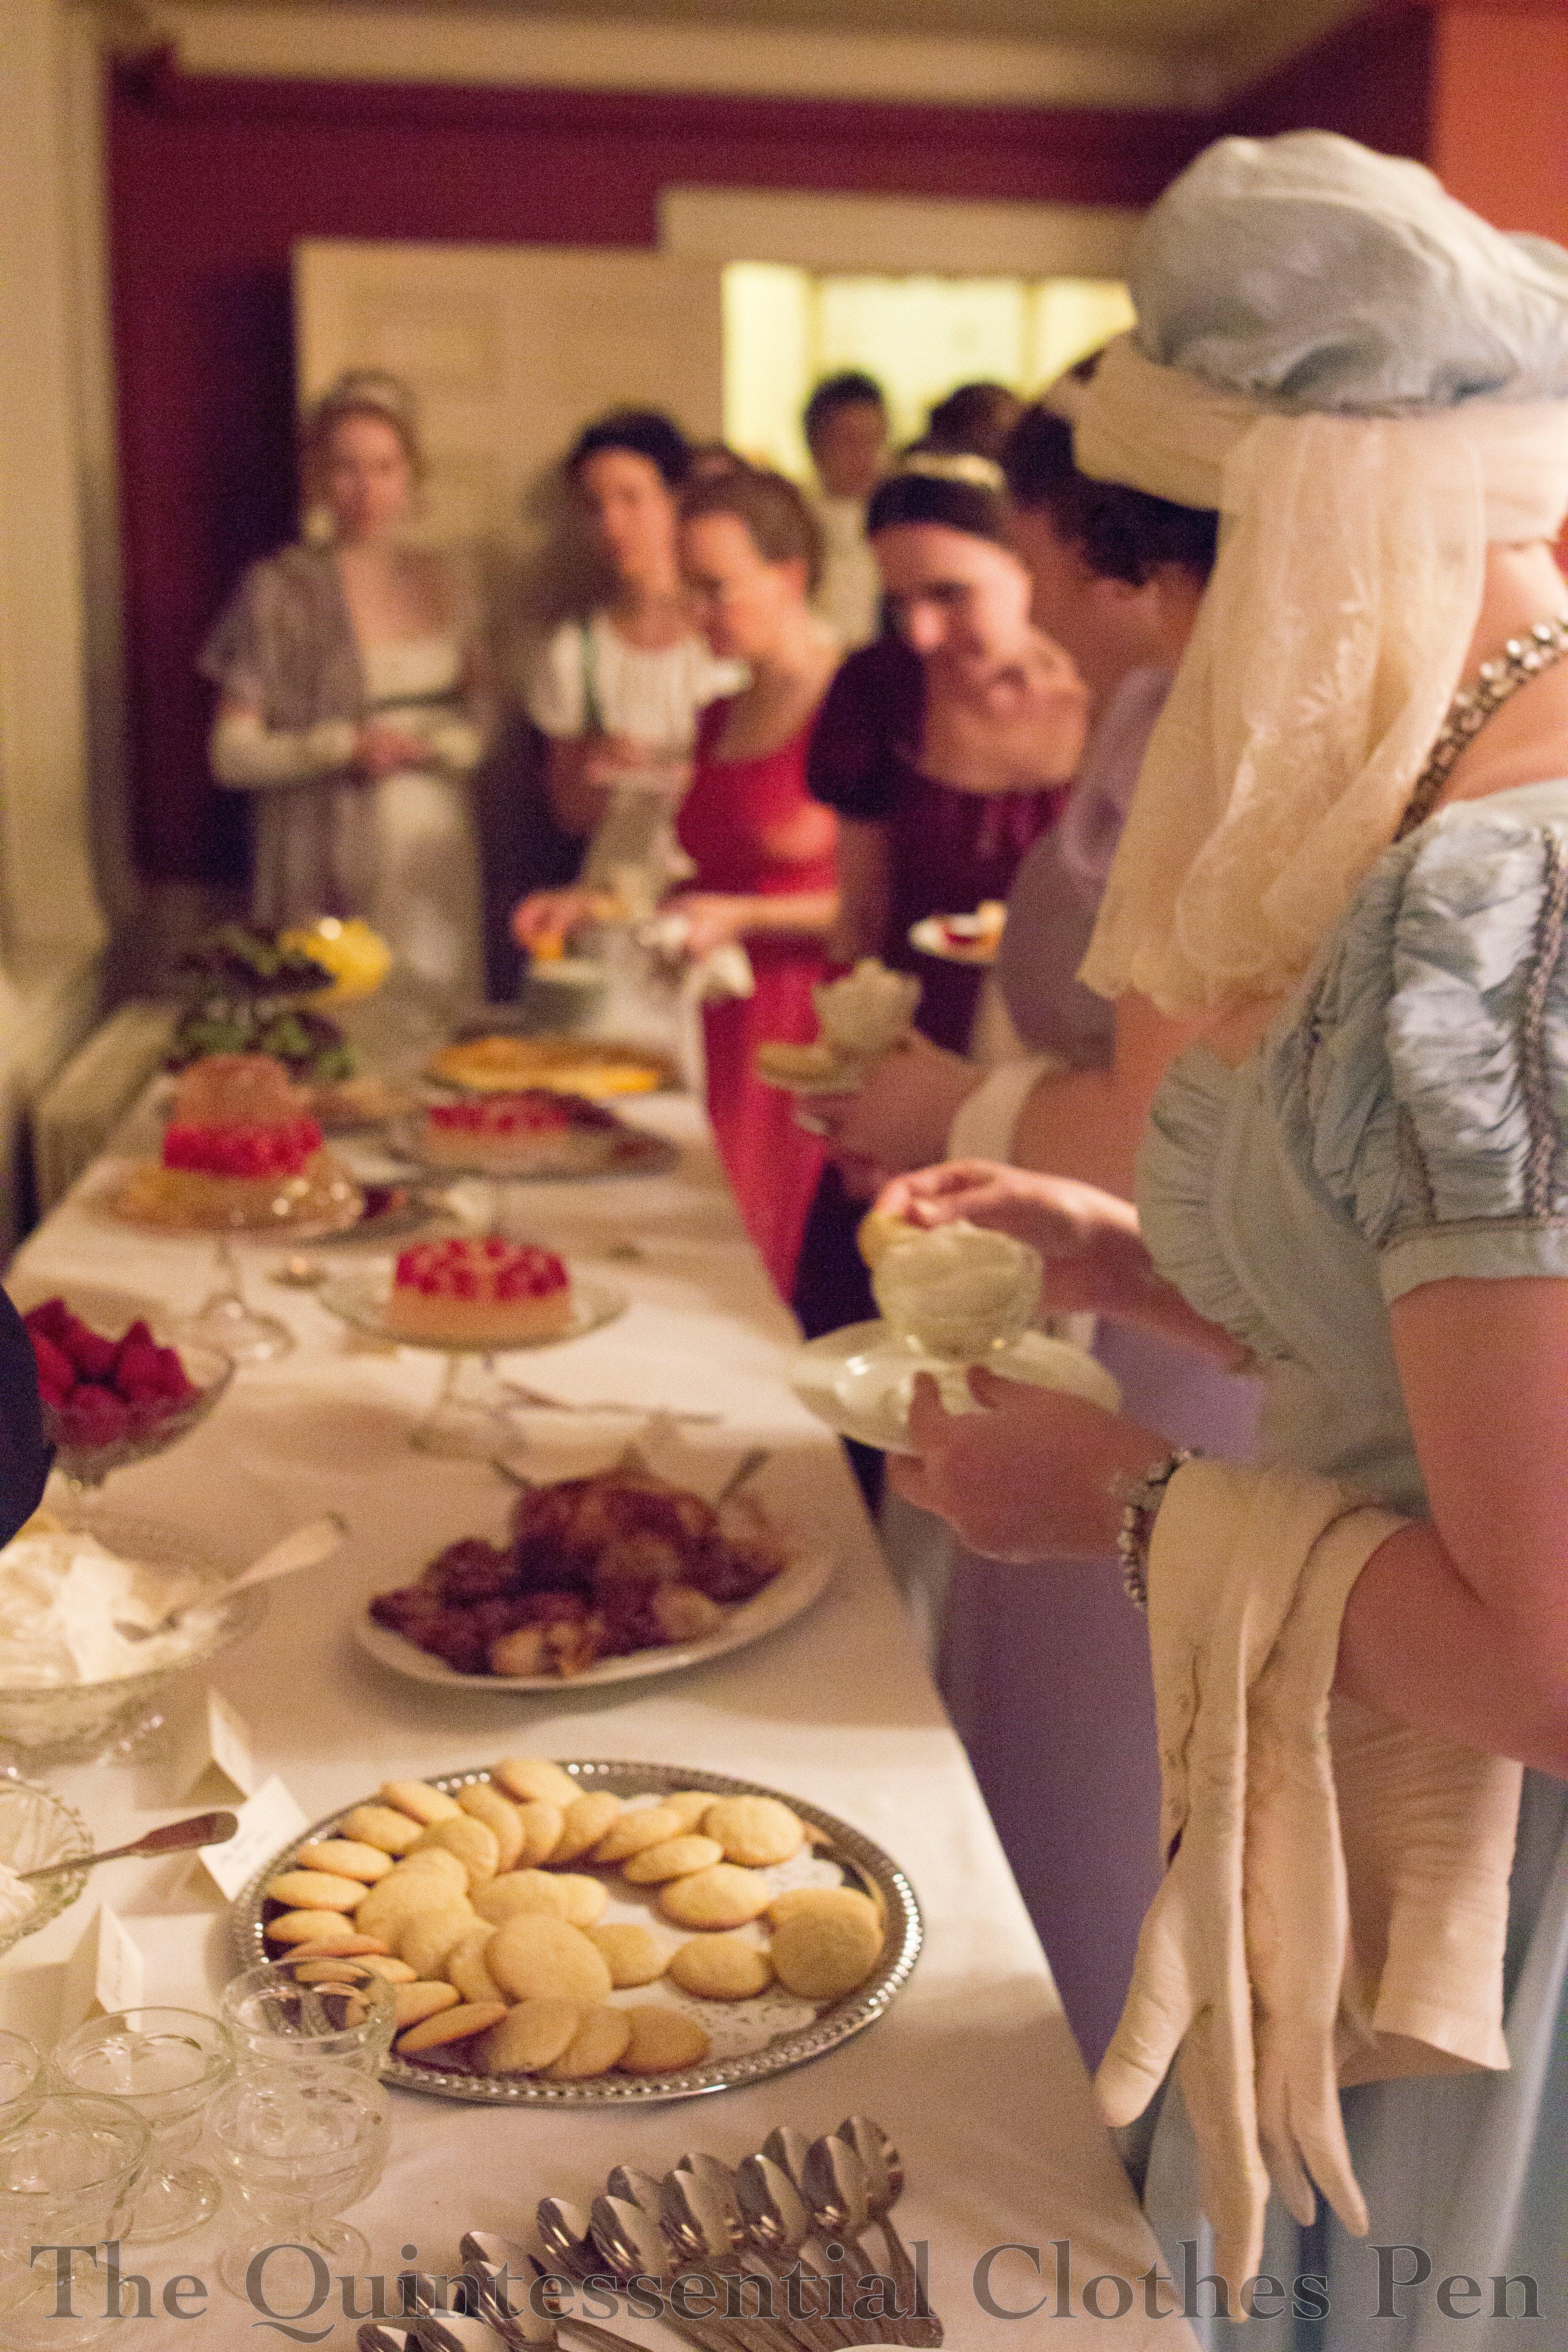
There are lots of yummy and beautiful foods to tempt everyone away from the ballroom, as well. This year we had some successful fruit filled jellies, a popular dessert in the 19th century.
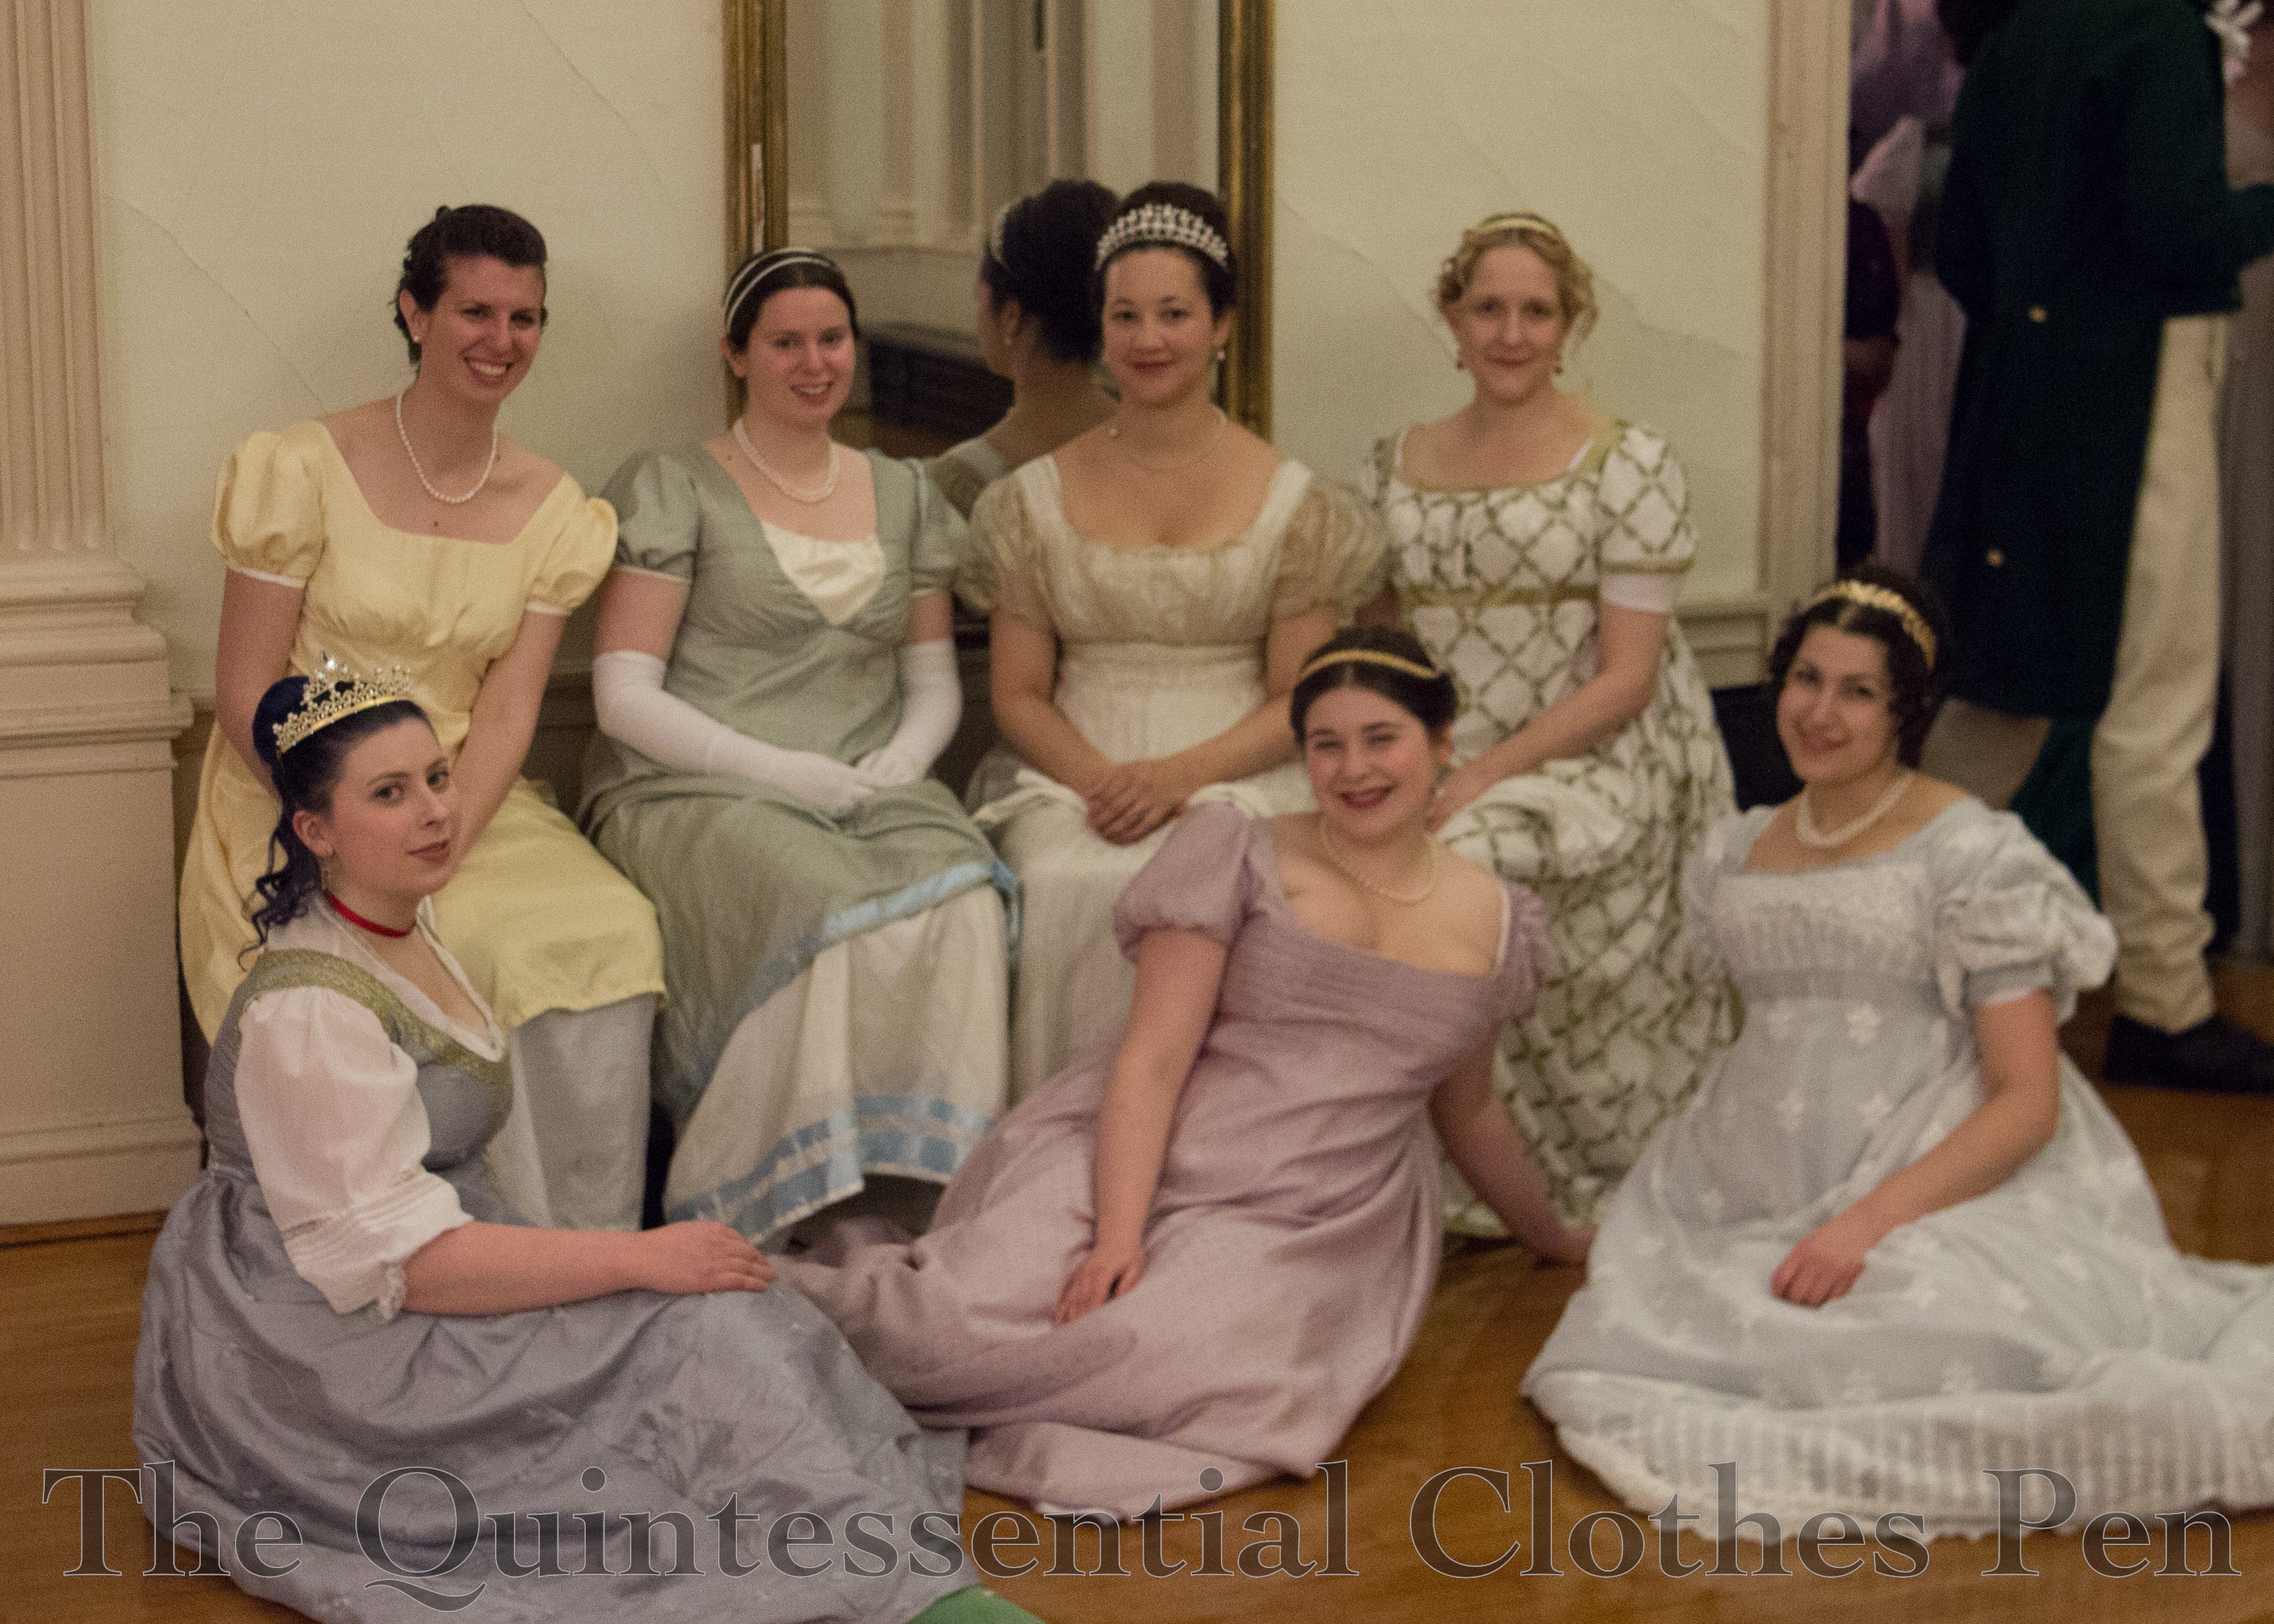
After lots of dancing (and dish washing–lovely spreads like this with real dishes don’t appear without a fair bit of work behind the scenes) a much needed sitting break provided a nice opportunity for a group photo.
As usual, it was a lovely weekend full of great dancing and meeting lots of lovely new people from around the country, the more local New England area, and even Canada! Maybe some year I’ll get to meet you, too!
A few months ago, I had the privilege of being present once again at the Commonwealth Vintage Dancers’ annual Returning Heroes Ball. It was a lovely evening full of dancing, admiring the well turned out ladies and gentleman, chatting…and lots of dish washing (that’s what happens behind the scenes at these things–someone has to do all of the dishes.)
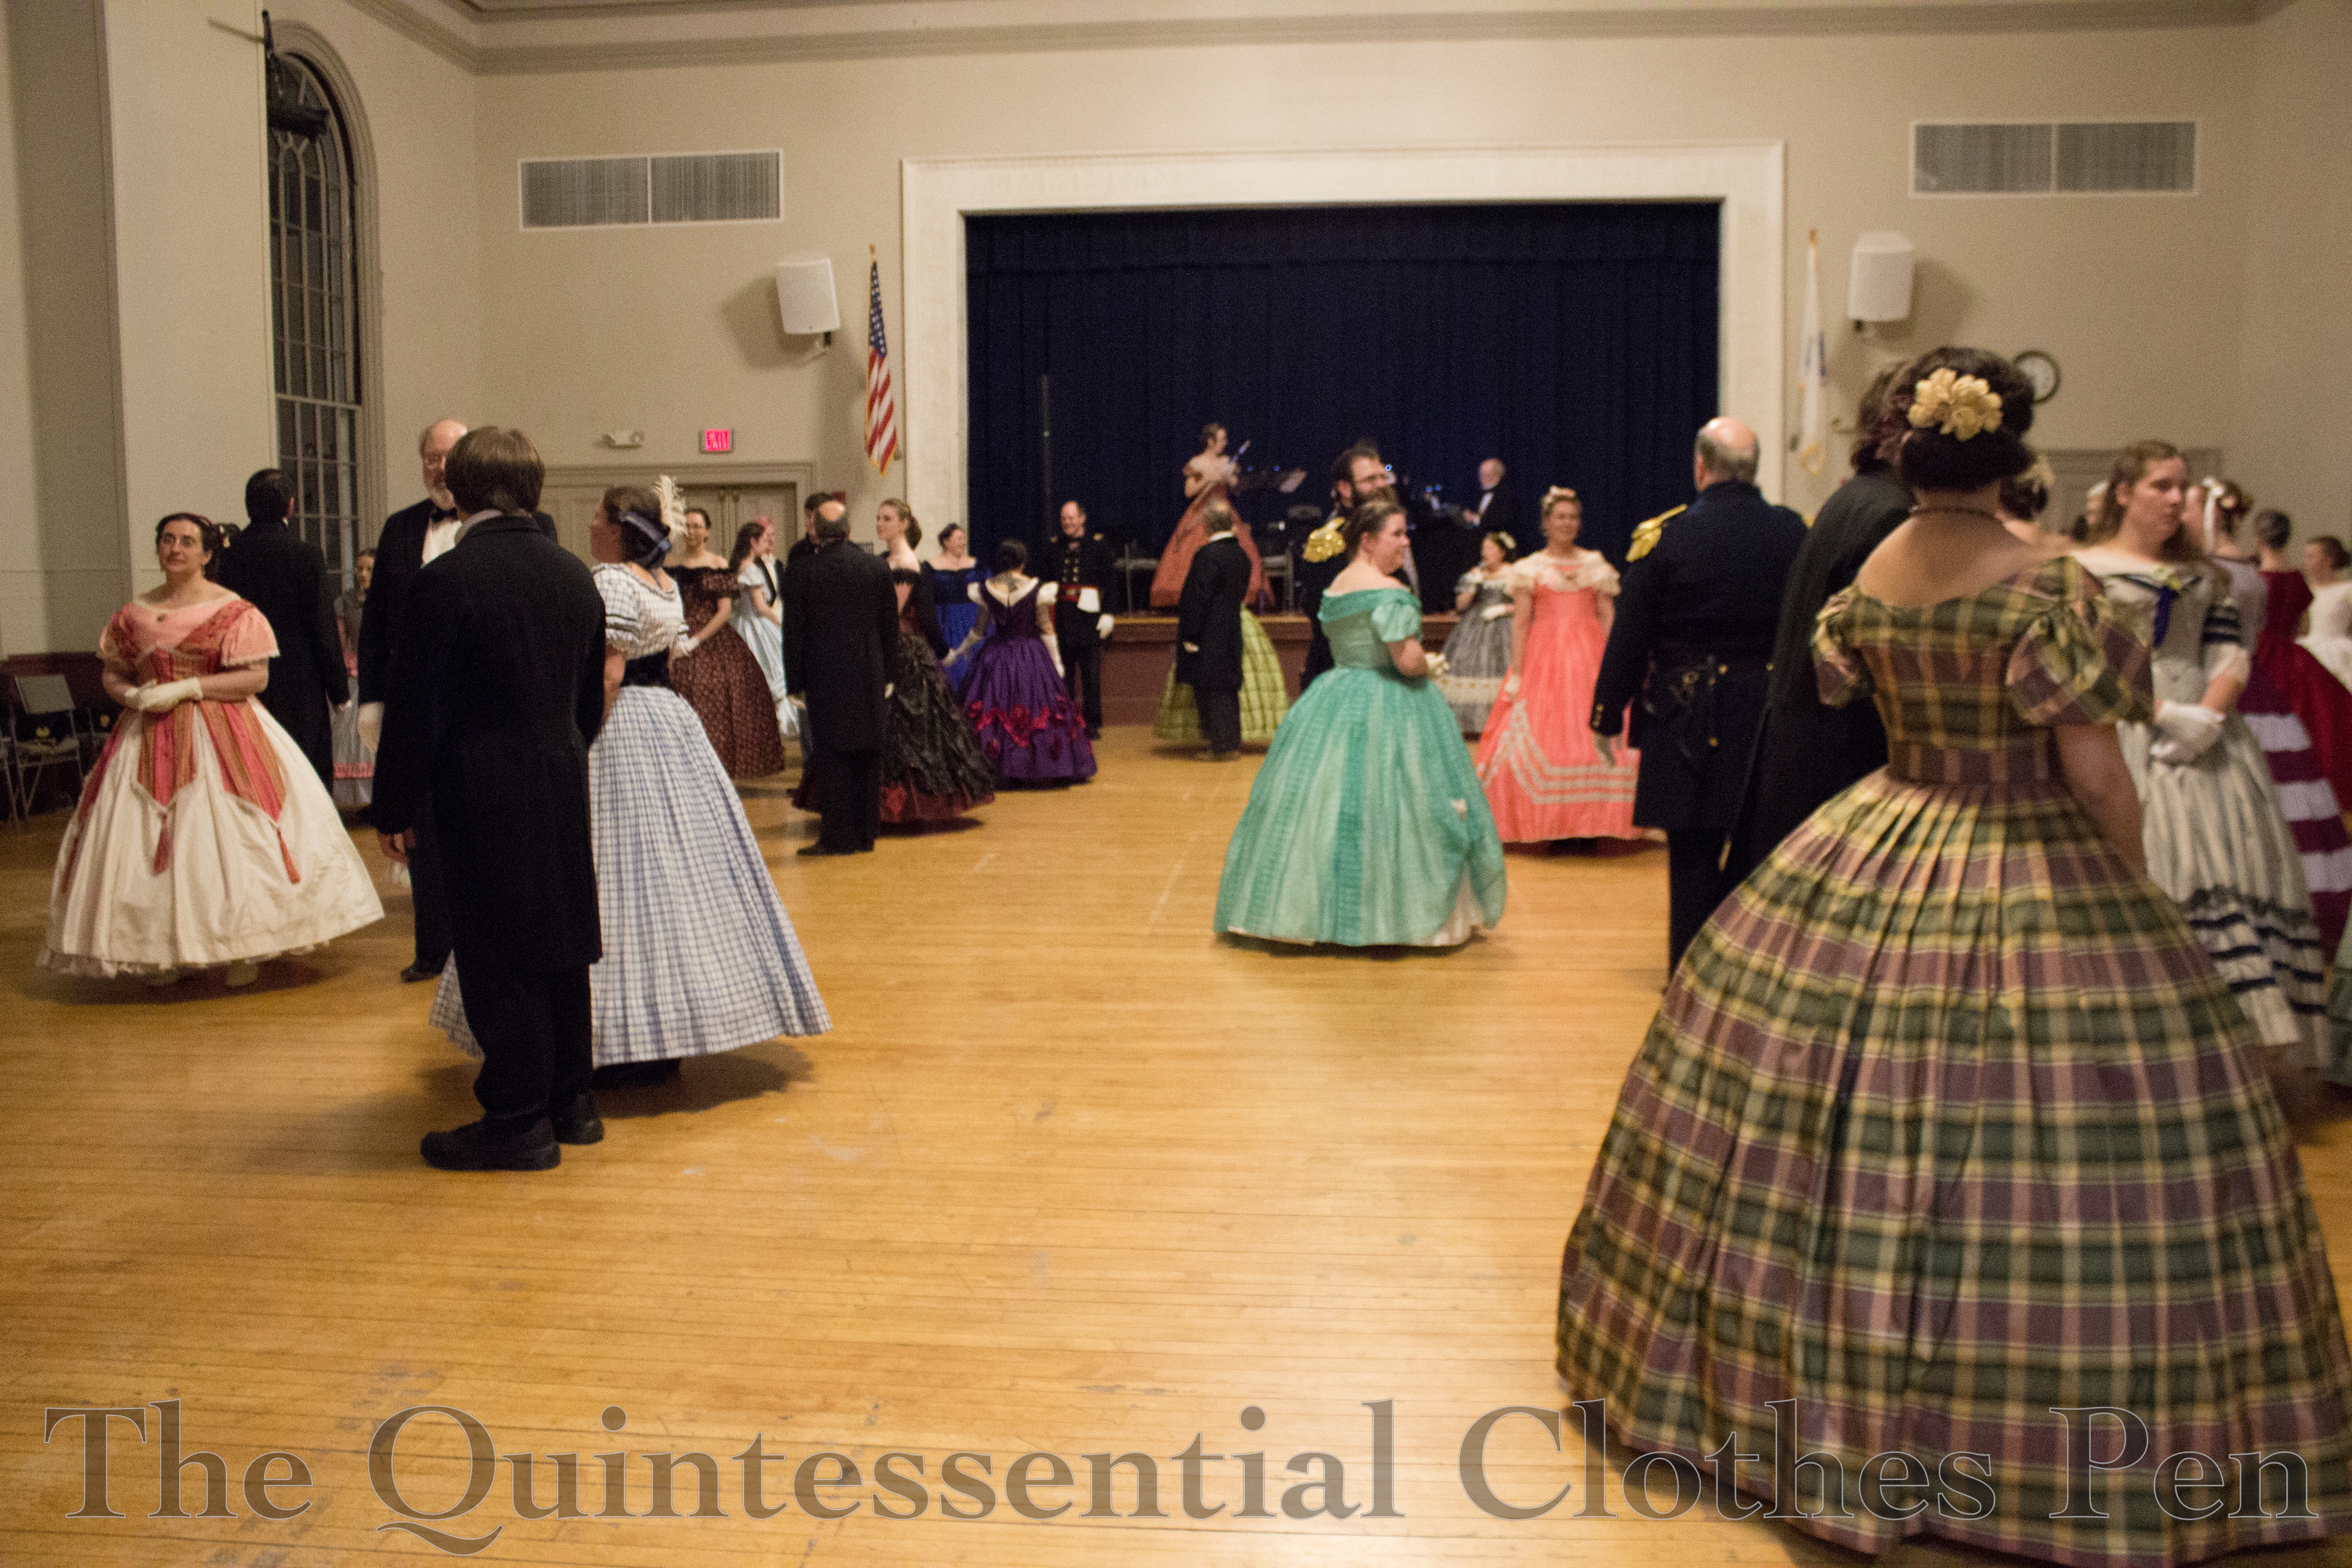
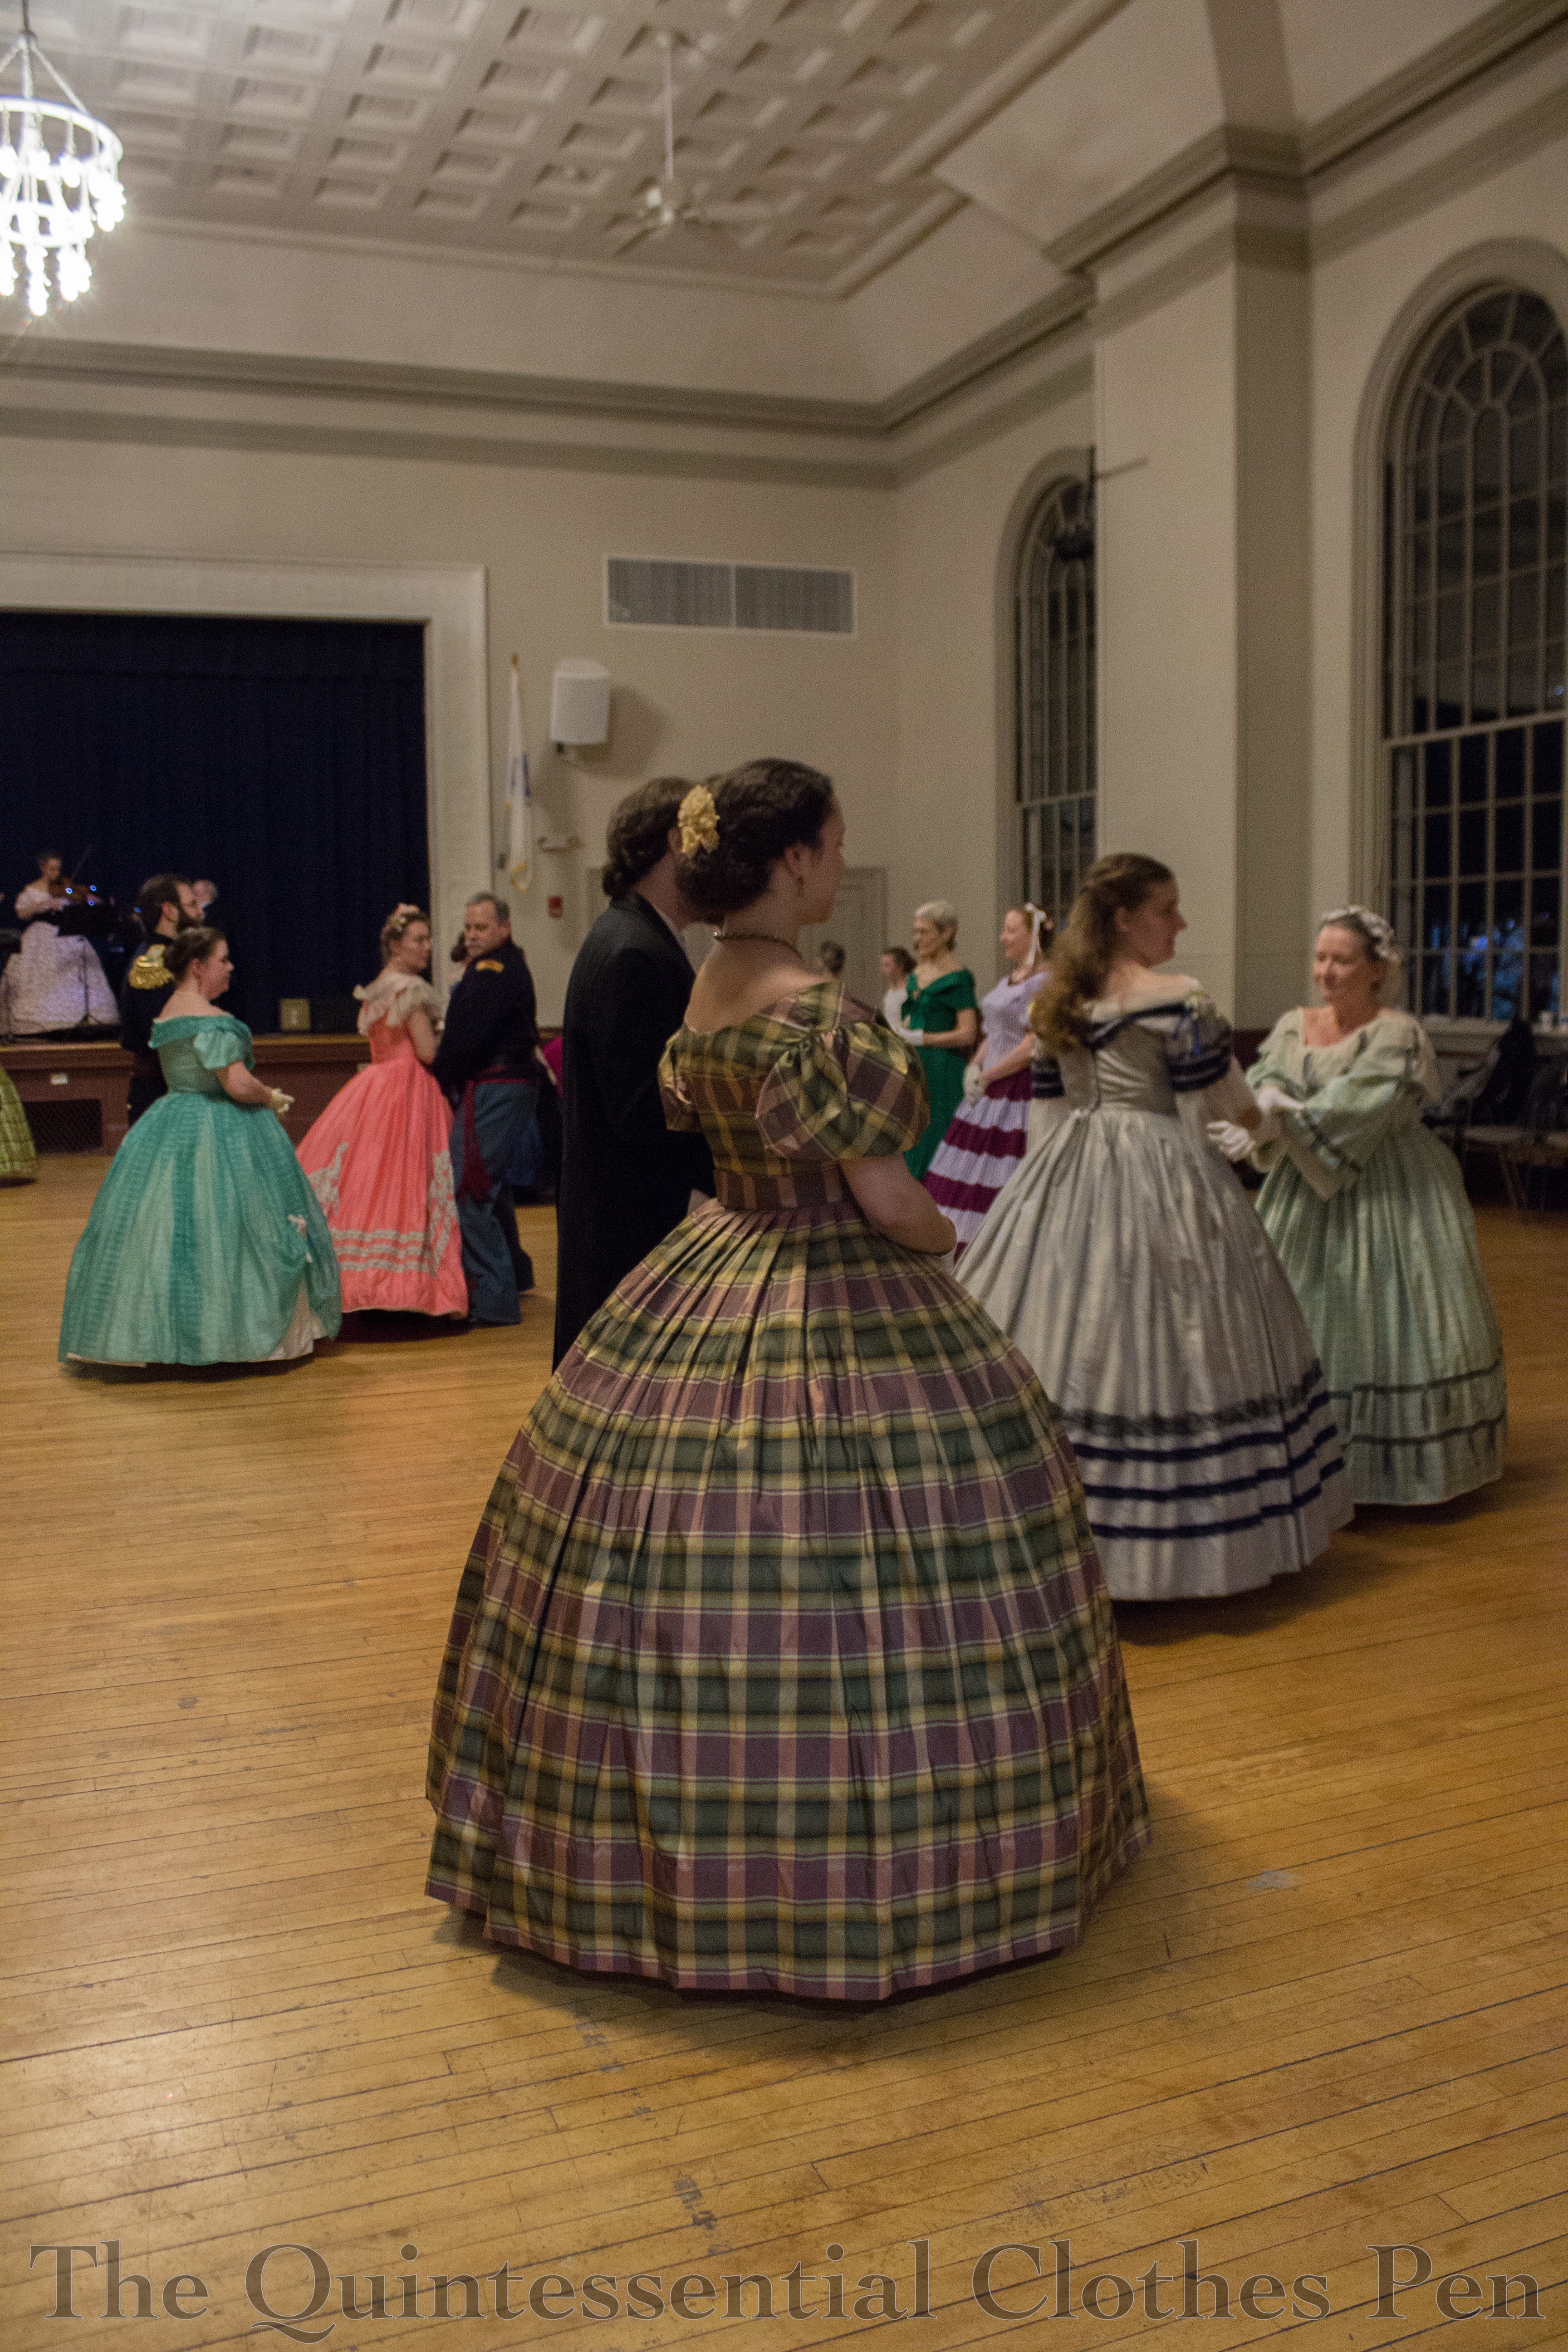
Here are two very similar views of the ballroom. I thought I’d include both because you see different dresses in each one and that’s one of the things that I greatly enjoy about attending historical events!
I didn’t spend all my time watching, however. Here I am participating in a quadrille. I wore my most recently constructed mid-19th century dress, Eleanor. I was grateful that the only change I needed to make after the first wearing was shortening the hem one turn so I didn’t step on it while dancing.
I made my refreshing apron a few years ago, but since then others have joined me in my apron endeavors (they really are quite practical when doing dishes, filling punch bowls, and setting out refreshments!). Aprons in a row!
I’ve had my eye on this fashion plate for years. Then earlier this year, I came across a reasonably priced, lightweight polyester velvet and thought it would be just the thing to recreate this gown. I don’t get too many opportunities to wear clothing from this period, but the annual CVD Fezziwig’s Ball, with a general ‘life of Charles Dickens’ timeframe, was the perfect opportunity to try it out. Plus, I’ve worn my green appliqué 1823 ball gown for the last few years, which has been lovely, but I was ready for a change. And, this fashion plate is from the month of December, which makes it even more perfect for wearing to a December event!
Royal Ladies’ Magazine, December 1832
Also, this dress fits the last HSM challenge of 2016 (Special Occasion: make something for a special event or a specific occasion, or that would have been worn to special event or specific occasion historically)! A ball gown is certainly a garment that would have been worn to a special event in the 19th century.
Just the facts:
Fabric: About 5 yards polyester velvet.
Pattern: Adapted from Past Patterns #702, 1850s-1863 Dart Fitted Bodices (this is the same pattern I recently used to create Eleanor). The sleeve is a beret sleeve from Janet Arnold and the skirt size is based on information from Janet Arnold as well.
Year: 1832.
Notions: Thread, hooks and bars, two tier lace, pleated ribbon, muslin, narrow yarn for cording, and a brooch.
How historically accurate is it?: I’m going to go with 80% on this one. The materials leave something to be desired, though they have the right look.
Hours to complete: Too many, this dress was finicky!
First worn: December 10 for a ball.
Total cost: About $50.
I put a fair bit of work into this dress, but I don’t feel in love with it, as I often do with my creations. It’s finished (thankfully!) and it was fun to wear, but it was annoying and finicky to sew which made for a not fun process. Actually, the velvet fabric itself wasn’t the problem, even though I started out thinking it might be. I was able to do most of the seams on the machine without an issue despite having a fine layer of burgundy fuzz on everything. So the construction went together pretty quickly. I flat lined the bodice with muslin, sewed up the seams, and made cording on the machine. I did have to sew the piping on by hand at the neck, back, sleeves, and on the belt to get it to behave, as well as setting the sleeves by hand.
Then I knife pleated the skirt, which was more annoying than that process generally is, and hand sewed it to the bottom of the bodice. I also whip stitched the bottom edge and the bodice seam allowance edges to keep them contained.
Next came the fiddly trim bits, which I usually enjoy. But… the belt wound up being too short, the placement of the fabric scrunched bit on the front was absolutely one of the most annoying dress construction processes I’ve had in years, and I couldn’t put the ribbon around the neck until the bust fabric bit was done. I wrangled the bust fabric into submission eventually, but with a lot of frustration. I solved the belt problem (because I was NOT going to be making another one) by adding a butt bow to fill in the gap, after looking at other 1830s dresses and their trims and being inspired. Actually, I really like the bow as I think it makes the plain back of the dress rather more interesting!
I was so grateful to be done sewing the thing that I didn’t bother doing anything to keep the sleeves poofed. Looking at pictures, I think some sleeve poofing would help for a next wearing. I’m also a bit disappointed by the skirt silhouette. I made a new silk petticoat to help fill out the skirt (more on that later), and a super quick stiff net ruffle for my waist, but I don’t think they did the job well enough. This picture, with the skirt in motion, is a better than when I’m standing still. Also, I had high hopes to make handmade slippers to wear with this dress, but abandoned that idea after making one, realizing that they were not looking the way I wanted, and that I really didn’t have time.
However, I really wanted the laces across my feet, so I tried used masking tape to attach black ribbons to my modern flats that tied around my ankles. It would have worked for pictures, but I danced before pictures and they fell off mid-dance… That was exciting. I was peering through all the dancers to keep an eye on the ribbons on the floor so I could recover them while hoping that no one would trip… Luckily, no one did! And I recovered the ribbons. I’ll have to try again next time.
Then there was my hair. 1830s hair is ridiculous, but I was inspired and had a plan. I wanted those silly smooth loops of hair that are often seen in fashion plates. I tried them in fake hair and achieved something–but not what I wanted. And then I ordered false hair bangs to make the side curls, but in a comedy of errors they didn’t arrive until the day of the ball and I didn’t have time to curl and arrange them. All in all, I have concluded that these hair styles are harder than they look and frustrating to achieve! In the end, I resorted to using my own hair, with only a rat on each side to plump up the curls.
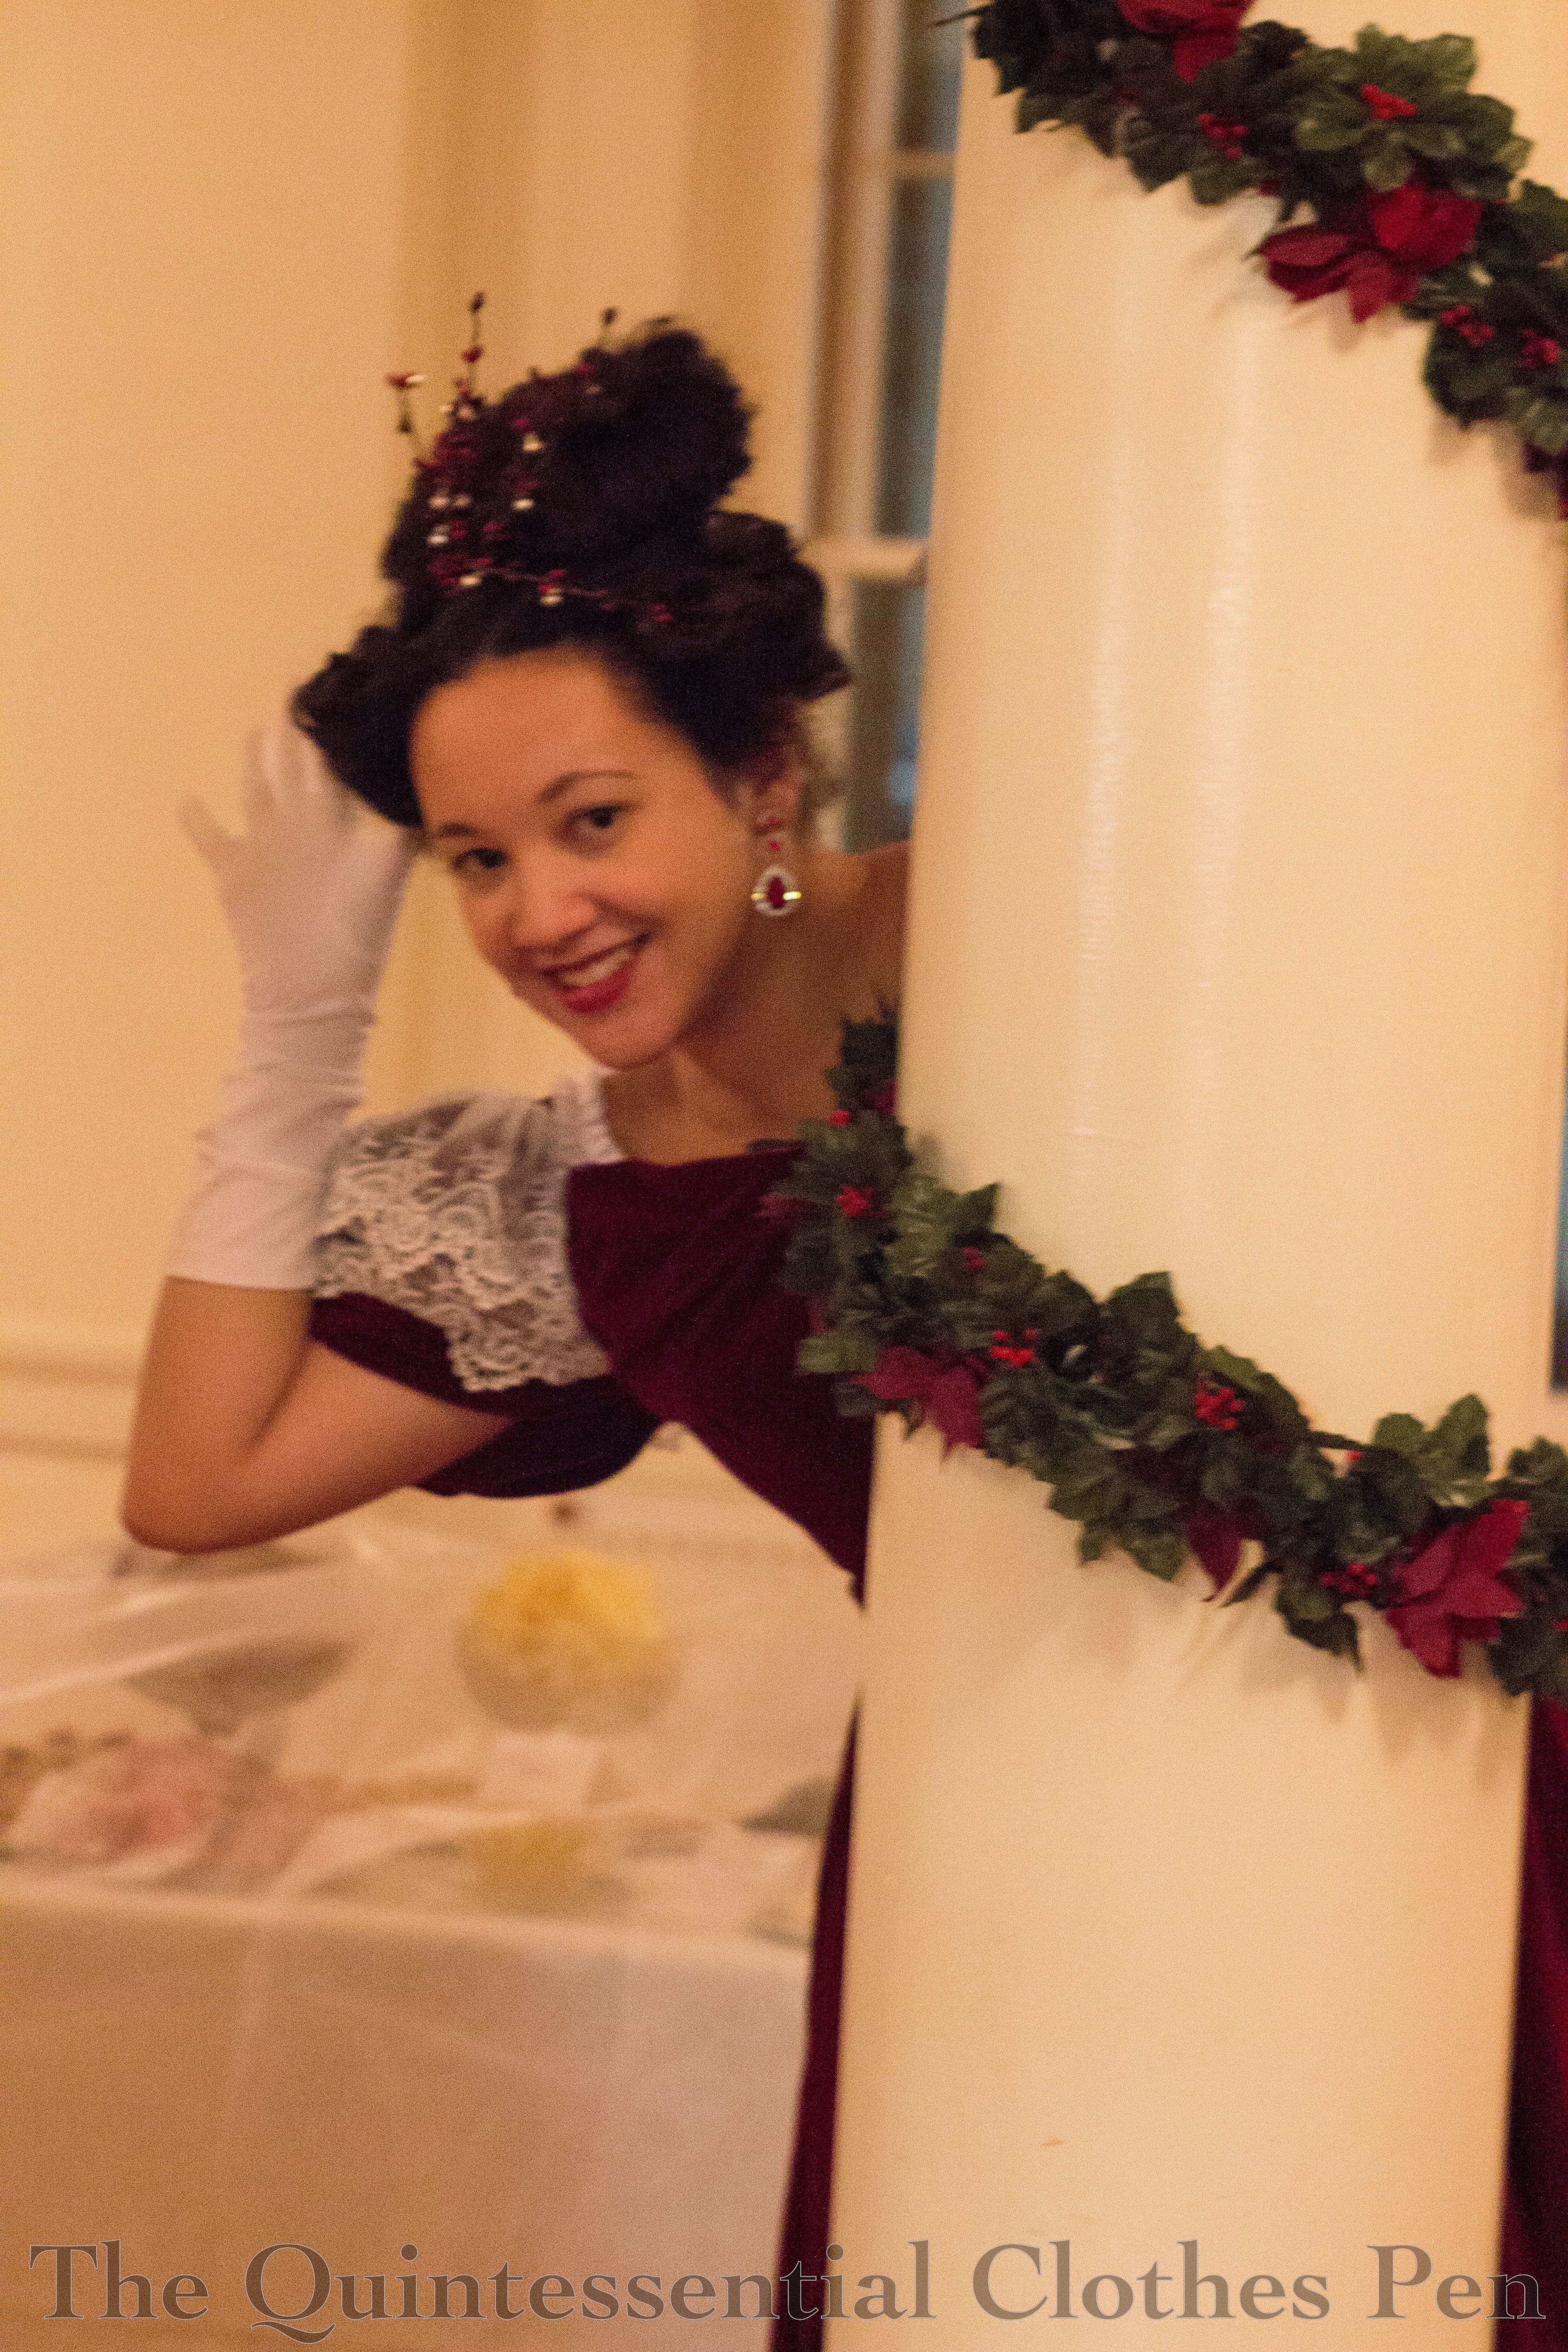
Once I decided to go with the looser floppy loops of hair on my head, as in my fashion plate inspiration, I knew my own hair would do the trick. I wish I’d been able to get them to stand up just a bit more, but overall I like how the hair turned out. I certainly have enough hair to achieve all the different parts of this style. I think my favorite part is the unusual backwards V part in the front, which I saw on multiple images from the 1830s. It’s so unusual, but makes so much sense given the sections of hair needed for this style.
My hair decoration is wired springs of berries bearing tiny jingle bells! I decided on this because of a mention of putting something from the 12 Days of Christmas in 1830s hair. There are no berries or bells in the modern version of the song, but Wikipedia suggests that in the 1840s the lyrics were ‘twelve bells ringing.’ I was intrigued and decided it would be a fun, silly thing to do. I was also worried that the bells were going to be very noisy! They provided a lovely tinkling sound when I moved, but couldn’t be heard from more than a few feet away and so therefore were not a distraction as I feared they might be.
I wore the gown with my 1860s chemise and corset, as well as the other skirt supports previously mentioned. I added white gloves for dancing and wore red and crystal earrings. Unfortunately, I couldn’t find a necklace that I liked, so I decided to go without instead.
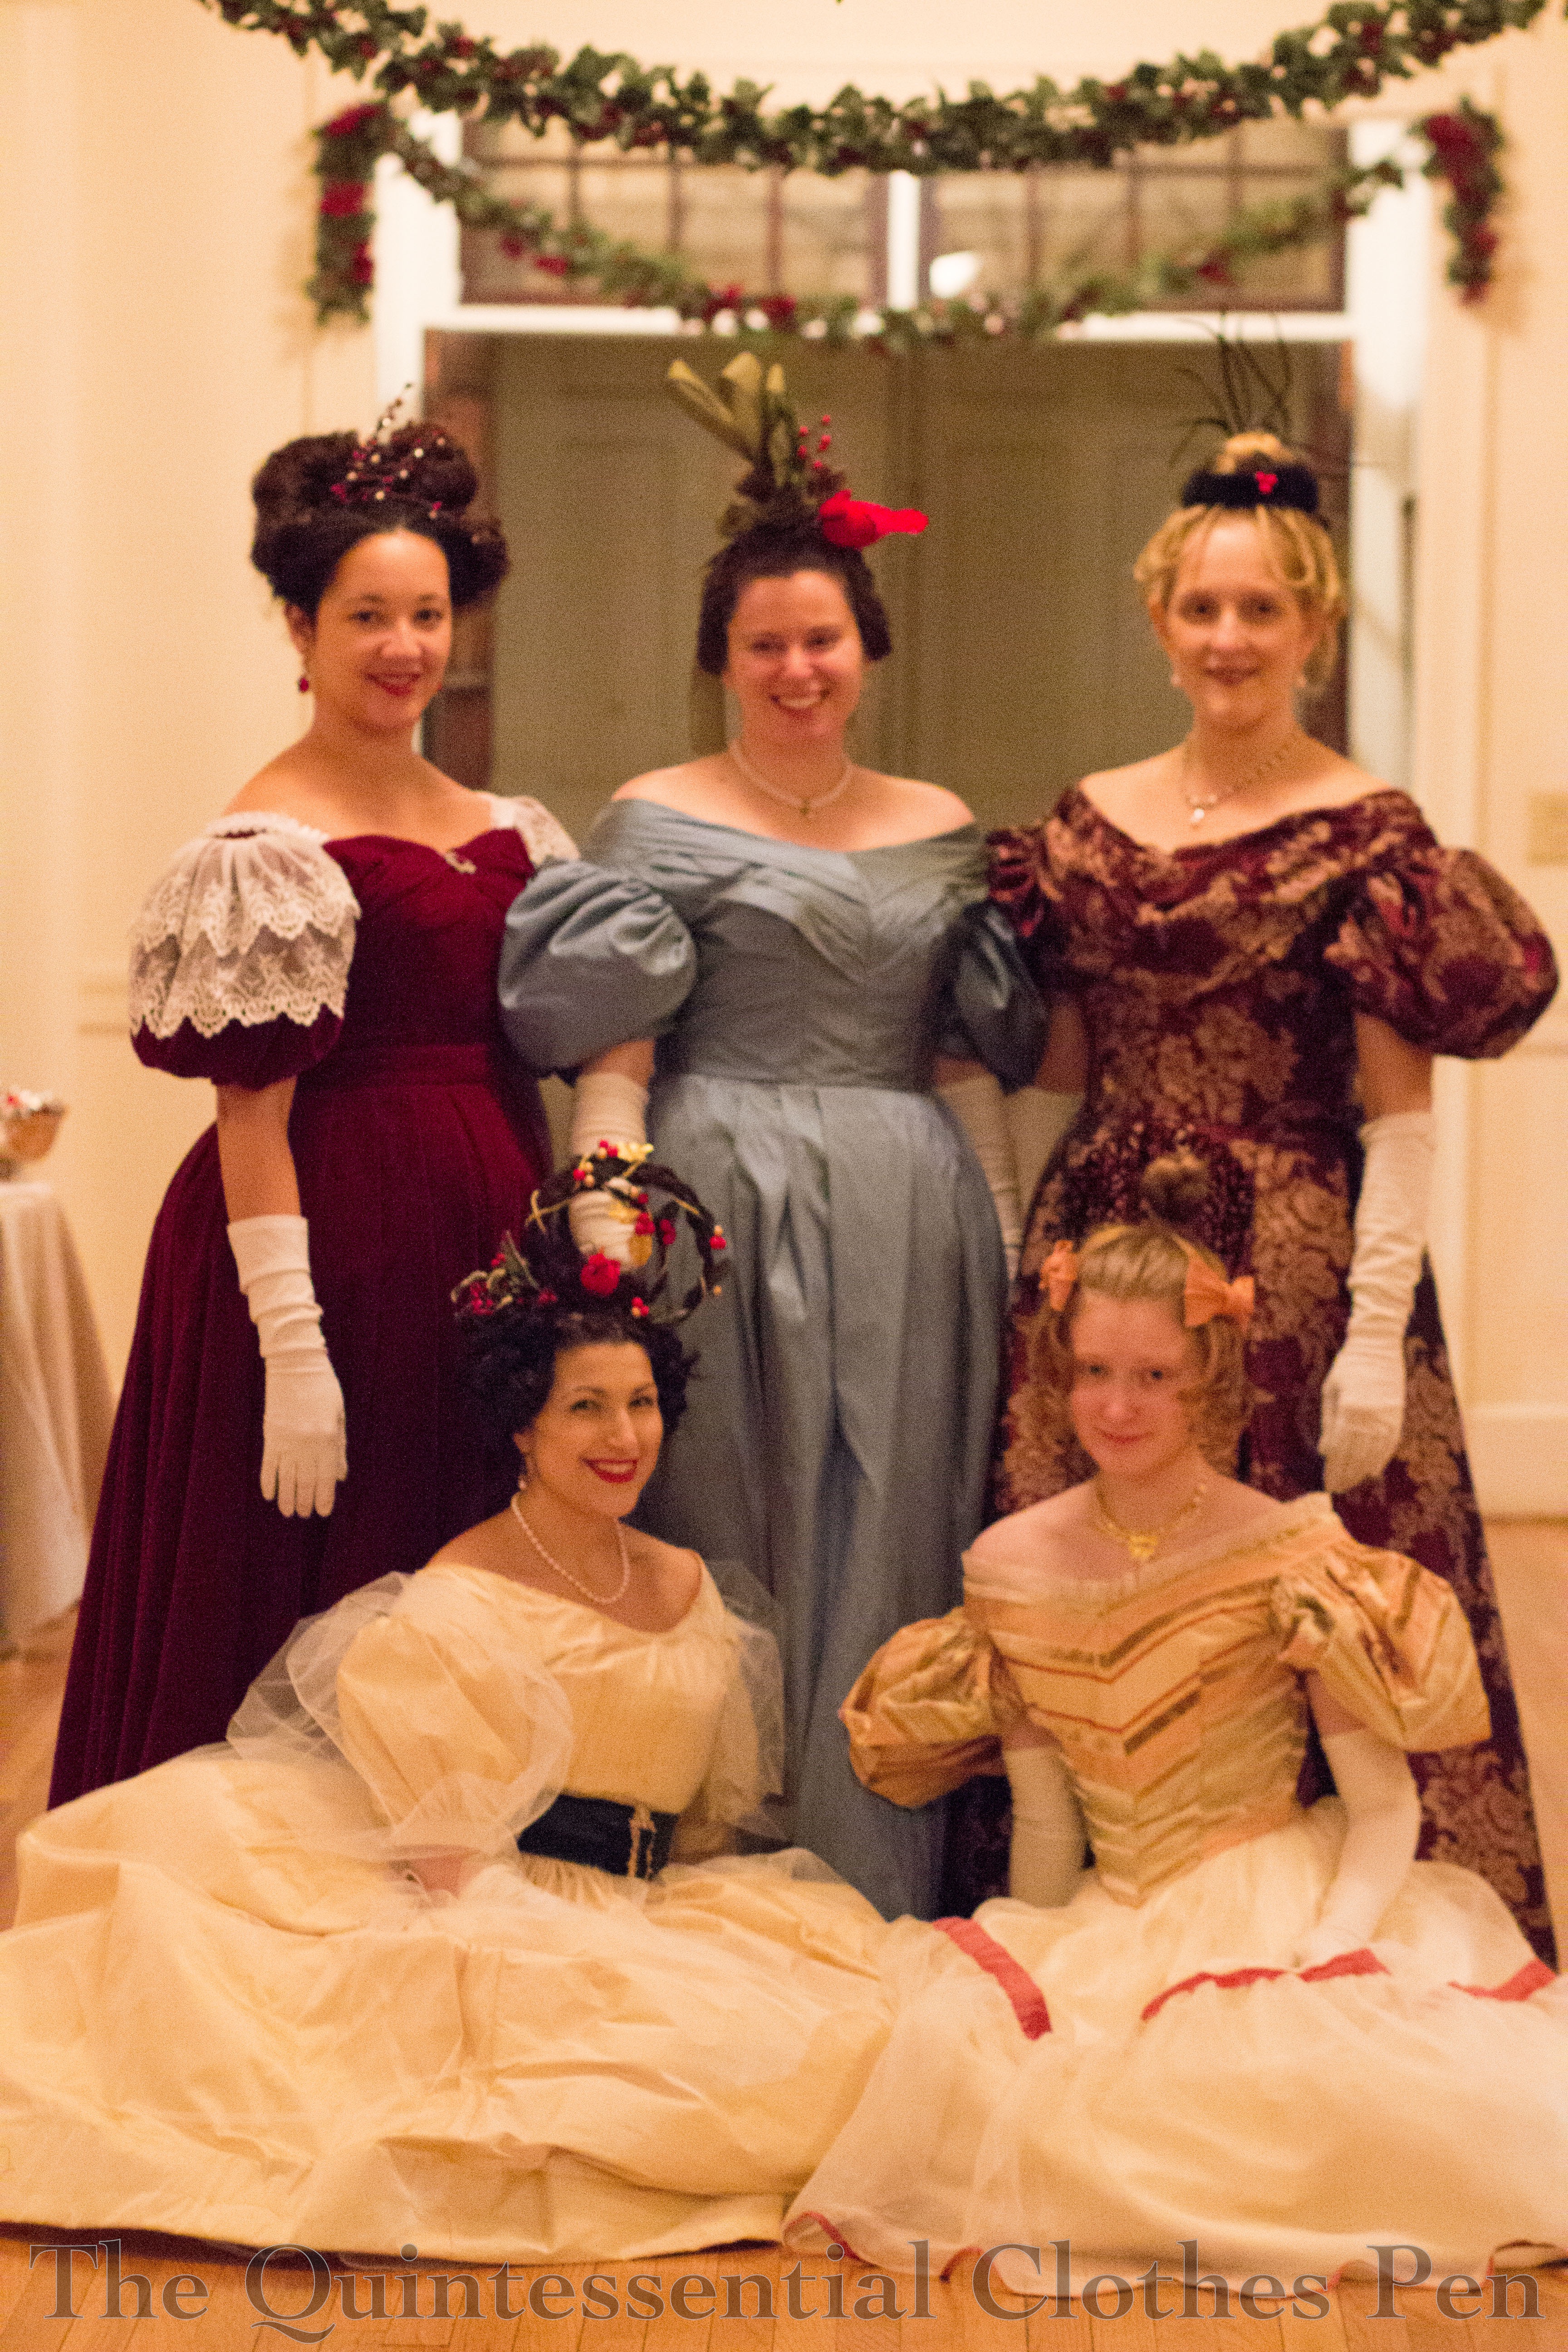
Moose hands! It was fun to be part of a rather large clump of women wearing 1830s to the ball this year. It’s such an odd period and one looks less out of place if others are wearing equally as ridiculous garments and hair as well!
The Historical Sew Monthly challenge for October is Heroes – Make a garment inspired by your historical hero, or your historical costuming hero.
You may or may not know that one of my favorite movies is Gone With The Wind. (I posted about this topic years ago when the blog was in its infancy–most of what I claimed then is still true and the 1860s will always have a special place in my heart, but I can now say that other periods give me excited wiggles too!) You can read the old blog post to get more specifics, but the essential point is that despite her personal shortcomings and the turbulent and controversial history of the period, Scarlett reminds me of the clothing that I love and therefore is an historical costuming hero to me.
And this gown has an added historical hero, Eleanor ‘Felcie’ Bull, who came to my rescue when I was contemplating what sleeve style to give my dress.
Eleanor “Felicie” Bull. 1863.
Prior to finding her image, I had been planning to name this dress Johanna, in honor of the friend who convinced me that I needed the fabric a few years ago. But I had sort of decided this was weird, since all my other dresses from this period have names that I like, but that are not from a specific living person. Once I found this image I was completely overtaken with excitement–I love the name Eleanor and there she was, helping me out! The choice was obvious.
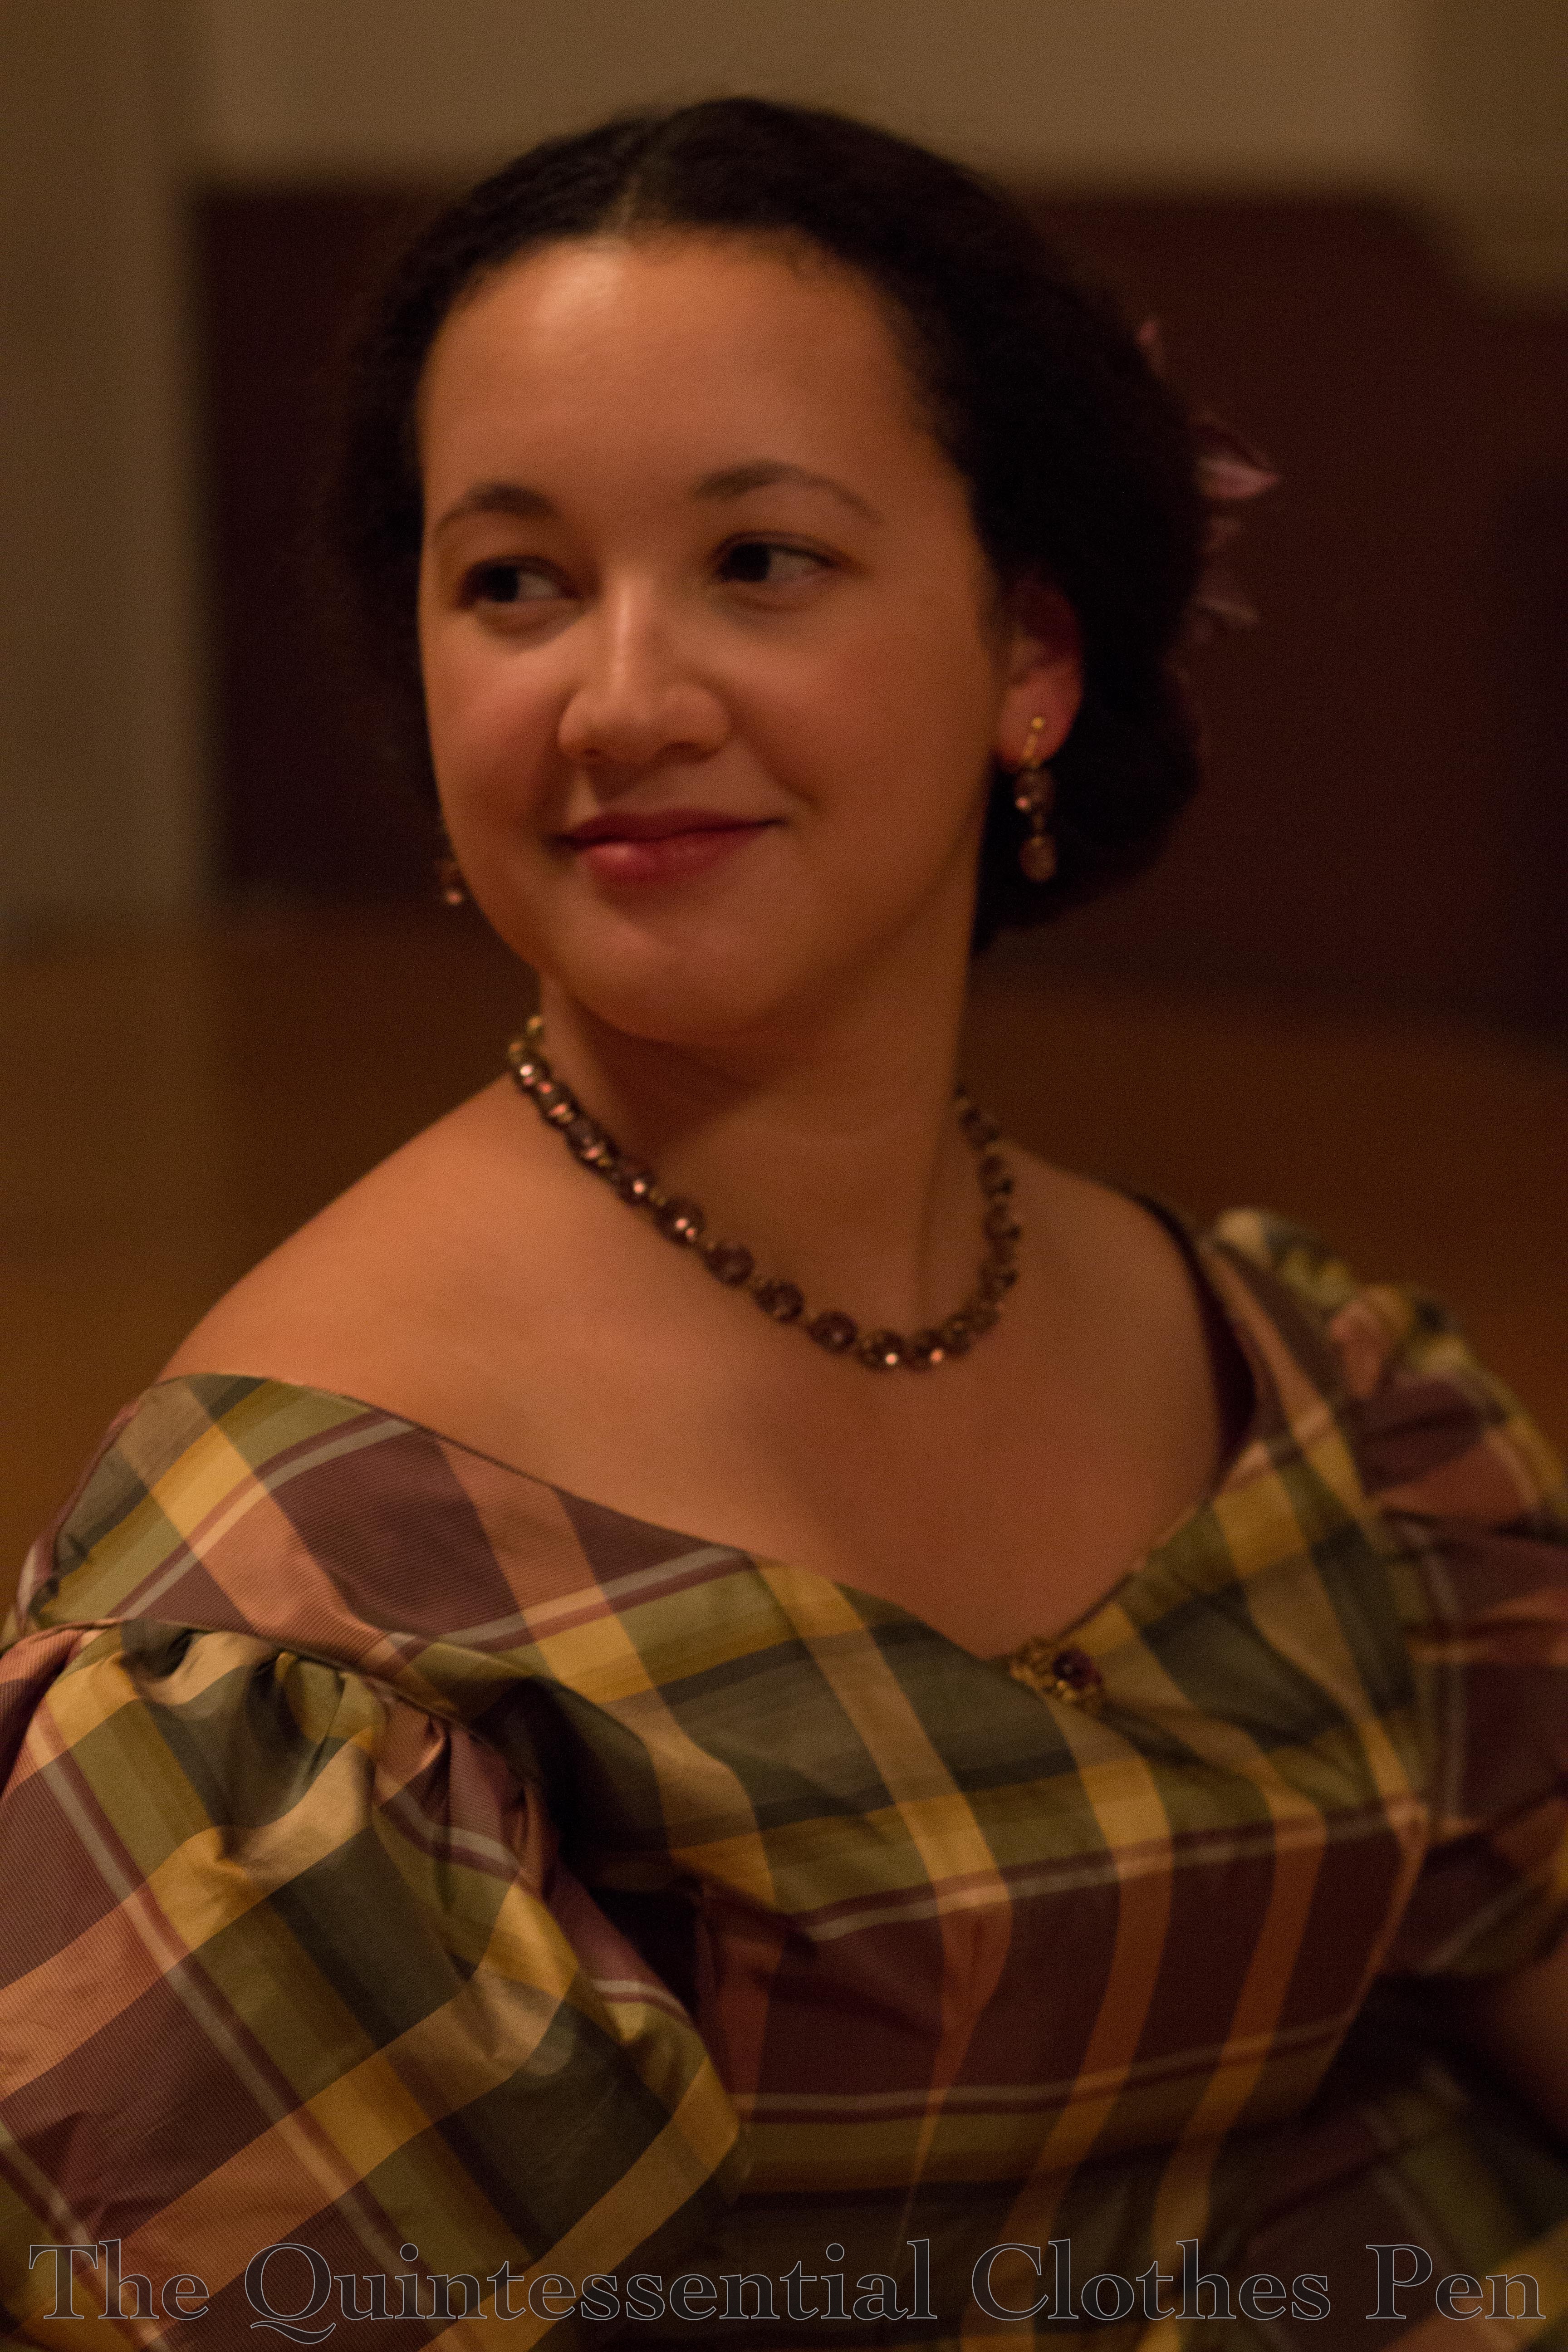
I made a new hair decoration to go with Eleanor. I had the perfect stem of purple velvet leaves, but no flowers to match the dress. So I dyed some white millinery flowers to a golden yellow. They have a fluffier texture than before being dyed, but the color is perfect. Using millinery flowers brings me so much joy, because it’s easy to shape any section since each stem is fully wired. And I couldn’t pass up the opportunity to wear my Dames a la Mode purple earrings and necklace.
Regarding dress construction, we must start with a bit of a personal habit, or perhaps a theory, though I’m not sure it’s as thought out as that. When the opportunities arise for me to make multiple garments from the same period that could be carbon copies of each other in different fabrics (so much speedier on the patterning and planning front!), I hardly ever take that easy road. I am drawn to exploring the small variations.
So it is with Eleanor. I decided to: knife pleat her skirt instead of box pleating, cartridge pleating, or gathering; to make a plain darted bodice instead of using seams or gathers; to make the bodice straight across all around, which is more unusual for evening gowns made of silk than having points in front and back; to overlap and topstitch her side back seams; to omit the oft-seen bertha around the neckline; and to have single puff bias cut sleeves. These things all make this dress just slightly different than my others from this period, adding a bit of thought and time to the process. And if we’re talking about time, let’s just mention how mind-boggling cutting plaid pieces with curved seams and darts is when the pattern matching is important to you!
I collected images of plaid gowns with a focus on evening bodices and noticed these features, which is why I decided on them. The most useful images are in one place here, on my Pinterest board for the project. I was contemplating the sleeve type when I came across Eleanor ‘Felcie’ Bull. Interestingly, she shows all of those traits I’d decided on. I loved her simple sleeves and restrained bodice trimming, which then set me on an extensive Ebay and Etsy hunt to find just the right brooches to replicate her style. Yes, I did look through about 150 pages of bow brooches to find just the right one for less than $15. Plus many pages of gold oval brooches. I couldn’t have wished for better results! Remember the look I gave you a look a few posts ago? The only thing I did was to brush the oval brooch (which is new, not vintage) with a bit of brown acrylic paint to bring it down to the old gold color of the bow brooch.
Other construction details include flatlining the bodice and facing the skirt in a remnant of dusty mauve cotton from my stash (used it up, yay!), creating boning channels in the darts to keep the front nicely shaped, and finishing the neck and bottom edge of the bodice as well as the armholes with very narrow cording.
Just the facts:
Fabric: About 6 yards of silk taffeta and 1 yard of cotton.
Pattern: Adapted from Past Patterns #702, 1850s-1863 Dart Fitted Bodices and Period Costumes for Stage and Screen as a reference for the sleeves.
Year: 1862, given the details that I decided on.
Notions: Thread, hooks and bars, canvas to interline the belt, narrow yarn for cording, and plastic wire ties for boning the bodice.
How historically accurate is it?: I’m going to go with 99% on this one. Materials and methods are well researched and executed. This would be entirely recognizable in its time.
Hours to complete: I really didn’t keep track. But I can safely say many!
First worn: October 22 for a ball.
Total cost: $98 total: $68 for the silk, $10 for bow brooch, and $18 for the oval brooch.
I’ll end this with my photographic homage to Eleanor ‘Felcie’ Bull.
I was very excited when Gina posted a tutorial for making shoe pom poms in September 2014. I decided then and there, while reading the post, that I needed some of my own. It only took me about 18 months to get around to it… but I am happy to report that in April 2016, I finally used Gina’s tutorial to finish making my very own!
What prompted me to really go ahead with making the poms is that I wanted to have something to spruce up an older outfit I wore to the 4th Annual CVD Regency Dance Weekend, but didn’t have the time to create a new dress, as the Versailles sacque and 1885 Fancy Dress were all consuming. I suppose what I should really say is that what prompted me to finish the poms is the opportunity to wear them. I think I actually started them in late 2015.
Let me start by saying that Gina’s tutorial is clear and easy to follow. I highly recommend it!
My issues were all self inflicted… I carefully followed Gina’s instructions, got partway through the process and realized that the scale was much bigger than I remembered and that I didn’t like it at all on top of my foot. Oh no! (But in going back to link to Gina’s tutorial for this post I have realized that of course her poms are not the scale I wanted, because her poms are bigger than I ever intended! Oops! Totally my fault!)
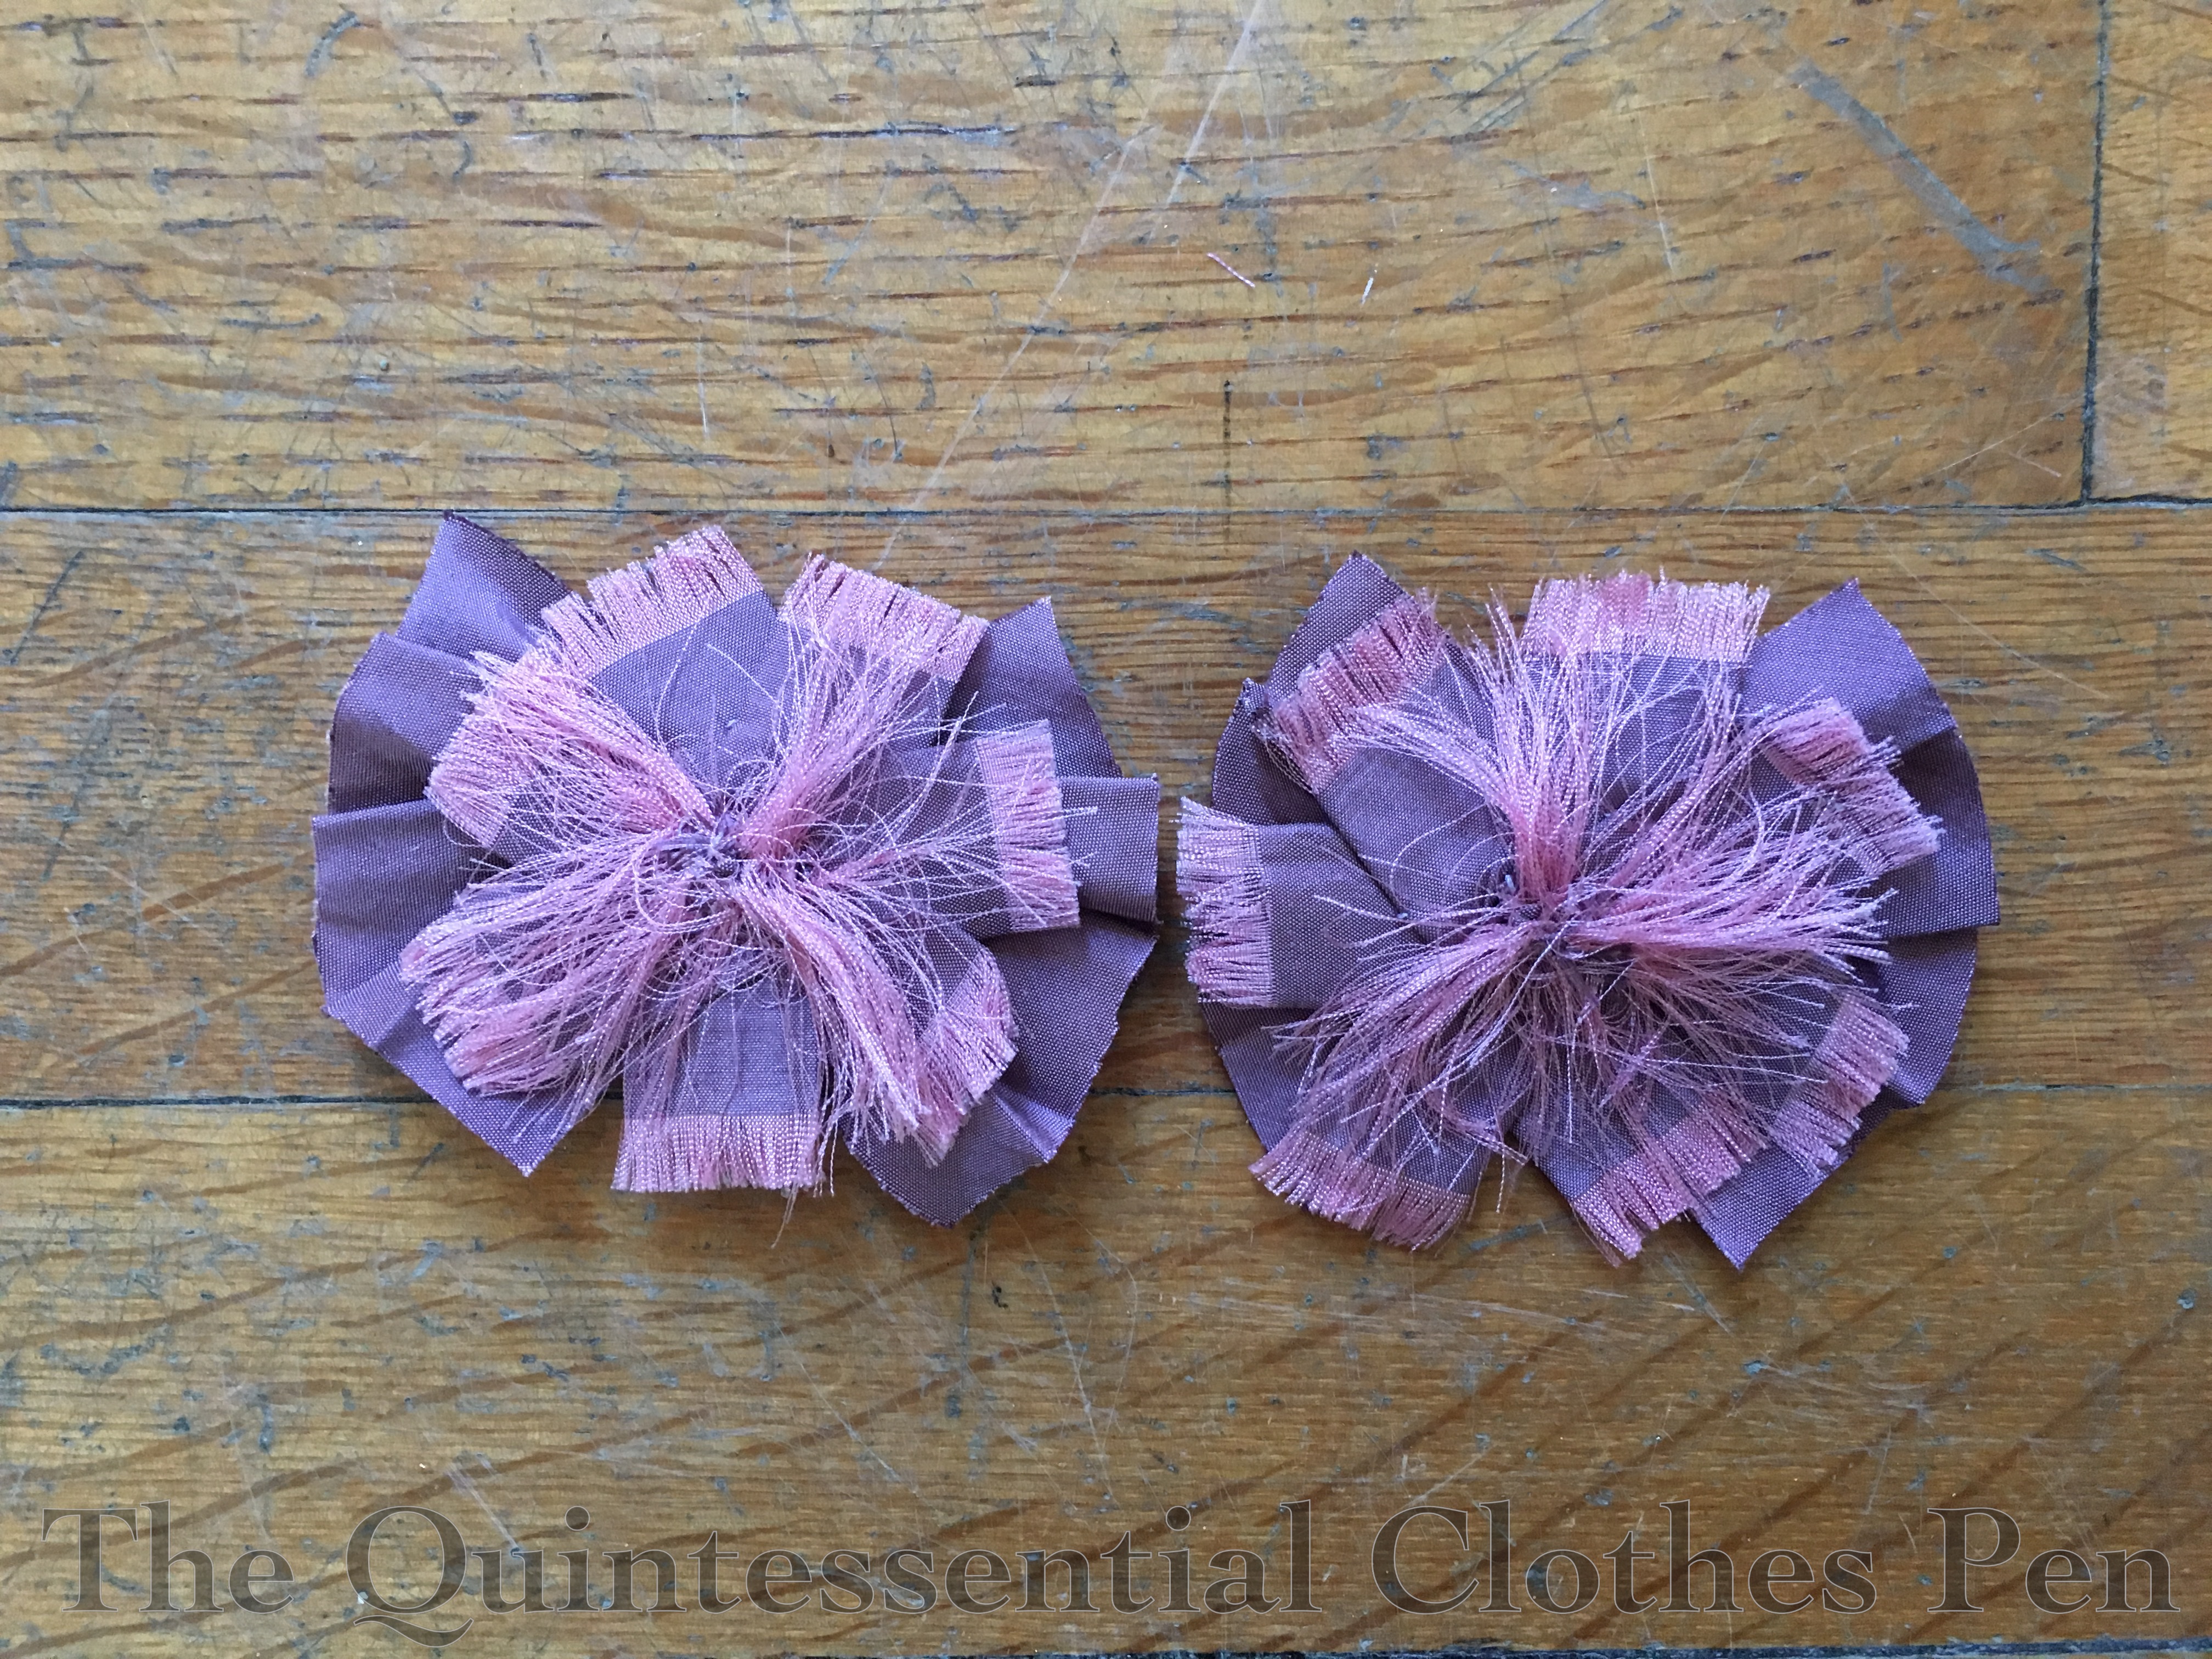
The only solution I could see at the time was to cut off the ends of each pieces and re-fray the silk ends! UGH! It was not a fun process to fray the ends and I could not face the idea of doing it again. So I refused to work on the poms for months because I was so frustrated. Then, in March or April, I had the brainstorm to make the pieces shorter by cutting out the middle so I wouldn’t need to re-fray the ends. Duh! From there it was smooth sailing to finish up the poms.
Partially finished pom on top (using Gina’s original dimensions). My completed pom on the bottom (smaller in scale). The pin is for scale.
I used a purple silk shantung from my stash for this project so it would match my other purple accessories. The back of the poms have American Duchess shoe clips attached so that I can easily clip the poms to any shoes.
I was inspired by extant shoes with poms on the toes, such as these. You can also take a look through my Pinterest board to spot more pom-like shoe decorations.
Poms in action! I really like the look of the neutral dress with the purple accessories.
(I thought I was very clever when I came up with the name for the post… and then a few days later I couldn’t remember what I was thinking the content should be! I guess if I confuse myself that easily I should certainly explain my cleverness so you can appreciate it, too!)
“It is recommended that the lady, when waltzing, leave herself to the direction of her partner, trusting entirely to him, without in any case seeking to follow her own impulse. A lady who should endeavor to avoid an encounter with other dancers, would risk interfering with the intention of the gentleman, to whom alone should be trusted her security amid the crowd surrounding and crossing her in every direction.”
I thought, “Hm! Trusting myself entirely to my partner’s care is something I rarely do! I’m often giving non-verbal hints about my opinions on where we should go, how much we should rotate, etc… and depending on the ability of my partner, my hints sometimes come down to downright back-leading.” I’m sure this partly comes from eight or so years of competitive modern ballroom dancing, in which the leader is in charge, but the lady has the duty to do her part to see what’s going on around the floor and help ensure that crashes, etc. don’t occur, as well as my independent-modern-woman mindset. However, despite these reasons, I imagine Hillgrove would have taken exception to my dancing style!
I started thinking about whether it made sense for me to attempt Hillgrove’s method while dancing historical dances. I dance in three settings, at private rehearsals when the dance troupe I am part of is practicing for performances, during performances with said dance troupe, and at public balls when I am dancing with guests of varying abilities or with members of the dance troupe.
I think it boils down this way: when dancing in a performance there are goals of elegance, nice spacing between couples, etc. that we are aiming for, and my interpretation of our artistic directors’ instruction in addition to my own feeling is that every person dancing should contribute to these goals, so a bit of hinting makes sense for the context. I feel similarly about hinting while dancing at balls depending on the ability of my partner, and if the goal is to ensure the safety of myself, my partner, or other people who might cut us off, etc. I also feel justified in back-leading a partner who needs some assistance to stay with the music, avoid crashes, or know how much rotation to complete in a given step, etc… but it sounds like I don’t really ever follow with trust!
With these thoughts in mind at a recent ball, I attempted to follow partners (whose abilities I have faith in) with trust. It was surprisingly uneventful! I think it really comes down to the ability of a partner in order to determine if I’m comfortable with that level of trust. Do you entirely follow your partners with trust at historical dance events? Or are you like me, picking and choosing when you feel comfortable doing so?
Success! Time to go home.
(As another side note, it’s been just about a year since my last 19CBRE post. If you’re not sure what that’s all about, check out this introductory post. You can see all of the posts relating to 19CBRE here. Perhaps this year I’ll get around to posting more of the interesting tidbits I’ve been thinking of posting over the last year!)
I already had inspiration pinned to a board, I had fabric in the stash (the fabric is more of the same elusive blue I used to make my 1811 evening gown in 2014–it time travels!), and I had an opportunity to wear an 1890s gown this past month! With a vague plan in mind, I started the skirts* sometime in the fall with the sincere hope of getting a fair bit done on them, but only got as far as cutting them out, after which they languished in the closet while I worked on other projects. Languishing is a variation on procrastination, which is the HSF challenge for this January. And so, with the languishing having finished its course, here is the finished new gown.
Just the facts:
Fabric: 5 yards or so of(likely polyester) elusive blue chiffon, 3 yards or so of elusive blue polyester for skirt lining, 3/4 yard or so robin’s egg blue cotton, 1 yard or so of pink glazed cotton, 1/8 yard or so of taupe silk shantung, some small bits of ivory polyester tulle and ivory silk gauze.
Pattern: Created by me, with reference to Janet Arnold dresses from the 1890s.
Year: 1899.
Notions: Wide grosgrain ribbon, bone casing, 1/4″ plastic wire tires, narrow grosgrain ribbon, black velvet and organza millinery flowers, hooks and eyes, and thread.
How historically accurate is it?: Definitely recognizable in its own time. The silhouette is spot on. The colors are inspired by extant clothing. The construction is mostly accurate. The materials are a mix of accurate and inaccurate. I’ll give it 80%.
Hours to complete: Many. I worked on this over a few months.
First worn: January 9, 2016.
Total cost: About $15-$20.
(The low cost is due to the fact that the chiffon and lining fabrics were purchased for the amazing price of $1/yard and that many of the notions and small bits were in my fabric stash.)
For the bodice, I started with the pattern for my 1893 gown (which was adapted from Janet Arnold originally). The back needed very slight alteration, but the front had quite a few changes, due to being worn over my new 1880s corset and because I wanted different dart placements, neckline, a front/side hidden closure, etc. I did multiple mock-up fittings (no pictures, sorry) before feeling ready to cut real fabric.
Here is the bodice in the middle stages on construction. You’d never guess from the exterior, but the bodice is flat lined with pink! This is not a standard lining color, but I had it on hand, it is the right weight (with a glazed finish, which is standard), and it amused me. By this point, I’d finished my edges, adding boning, nicely finished my interior seam allowances, and covered the back with elusive blue lining and chiffon cut on the bias.
Next was creating the front bodice main piece, which is also on the bias. I draped it and then bagged the lining/chiffon with the robin’s egg cotton to create nice finished edges. The flapping bit on the left of the picture was turned under and hand sewn later in the process.
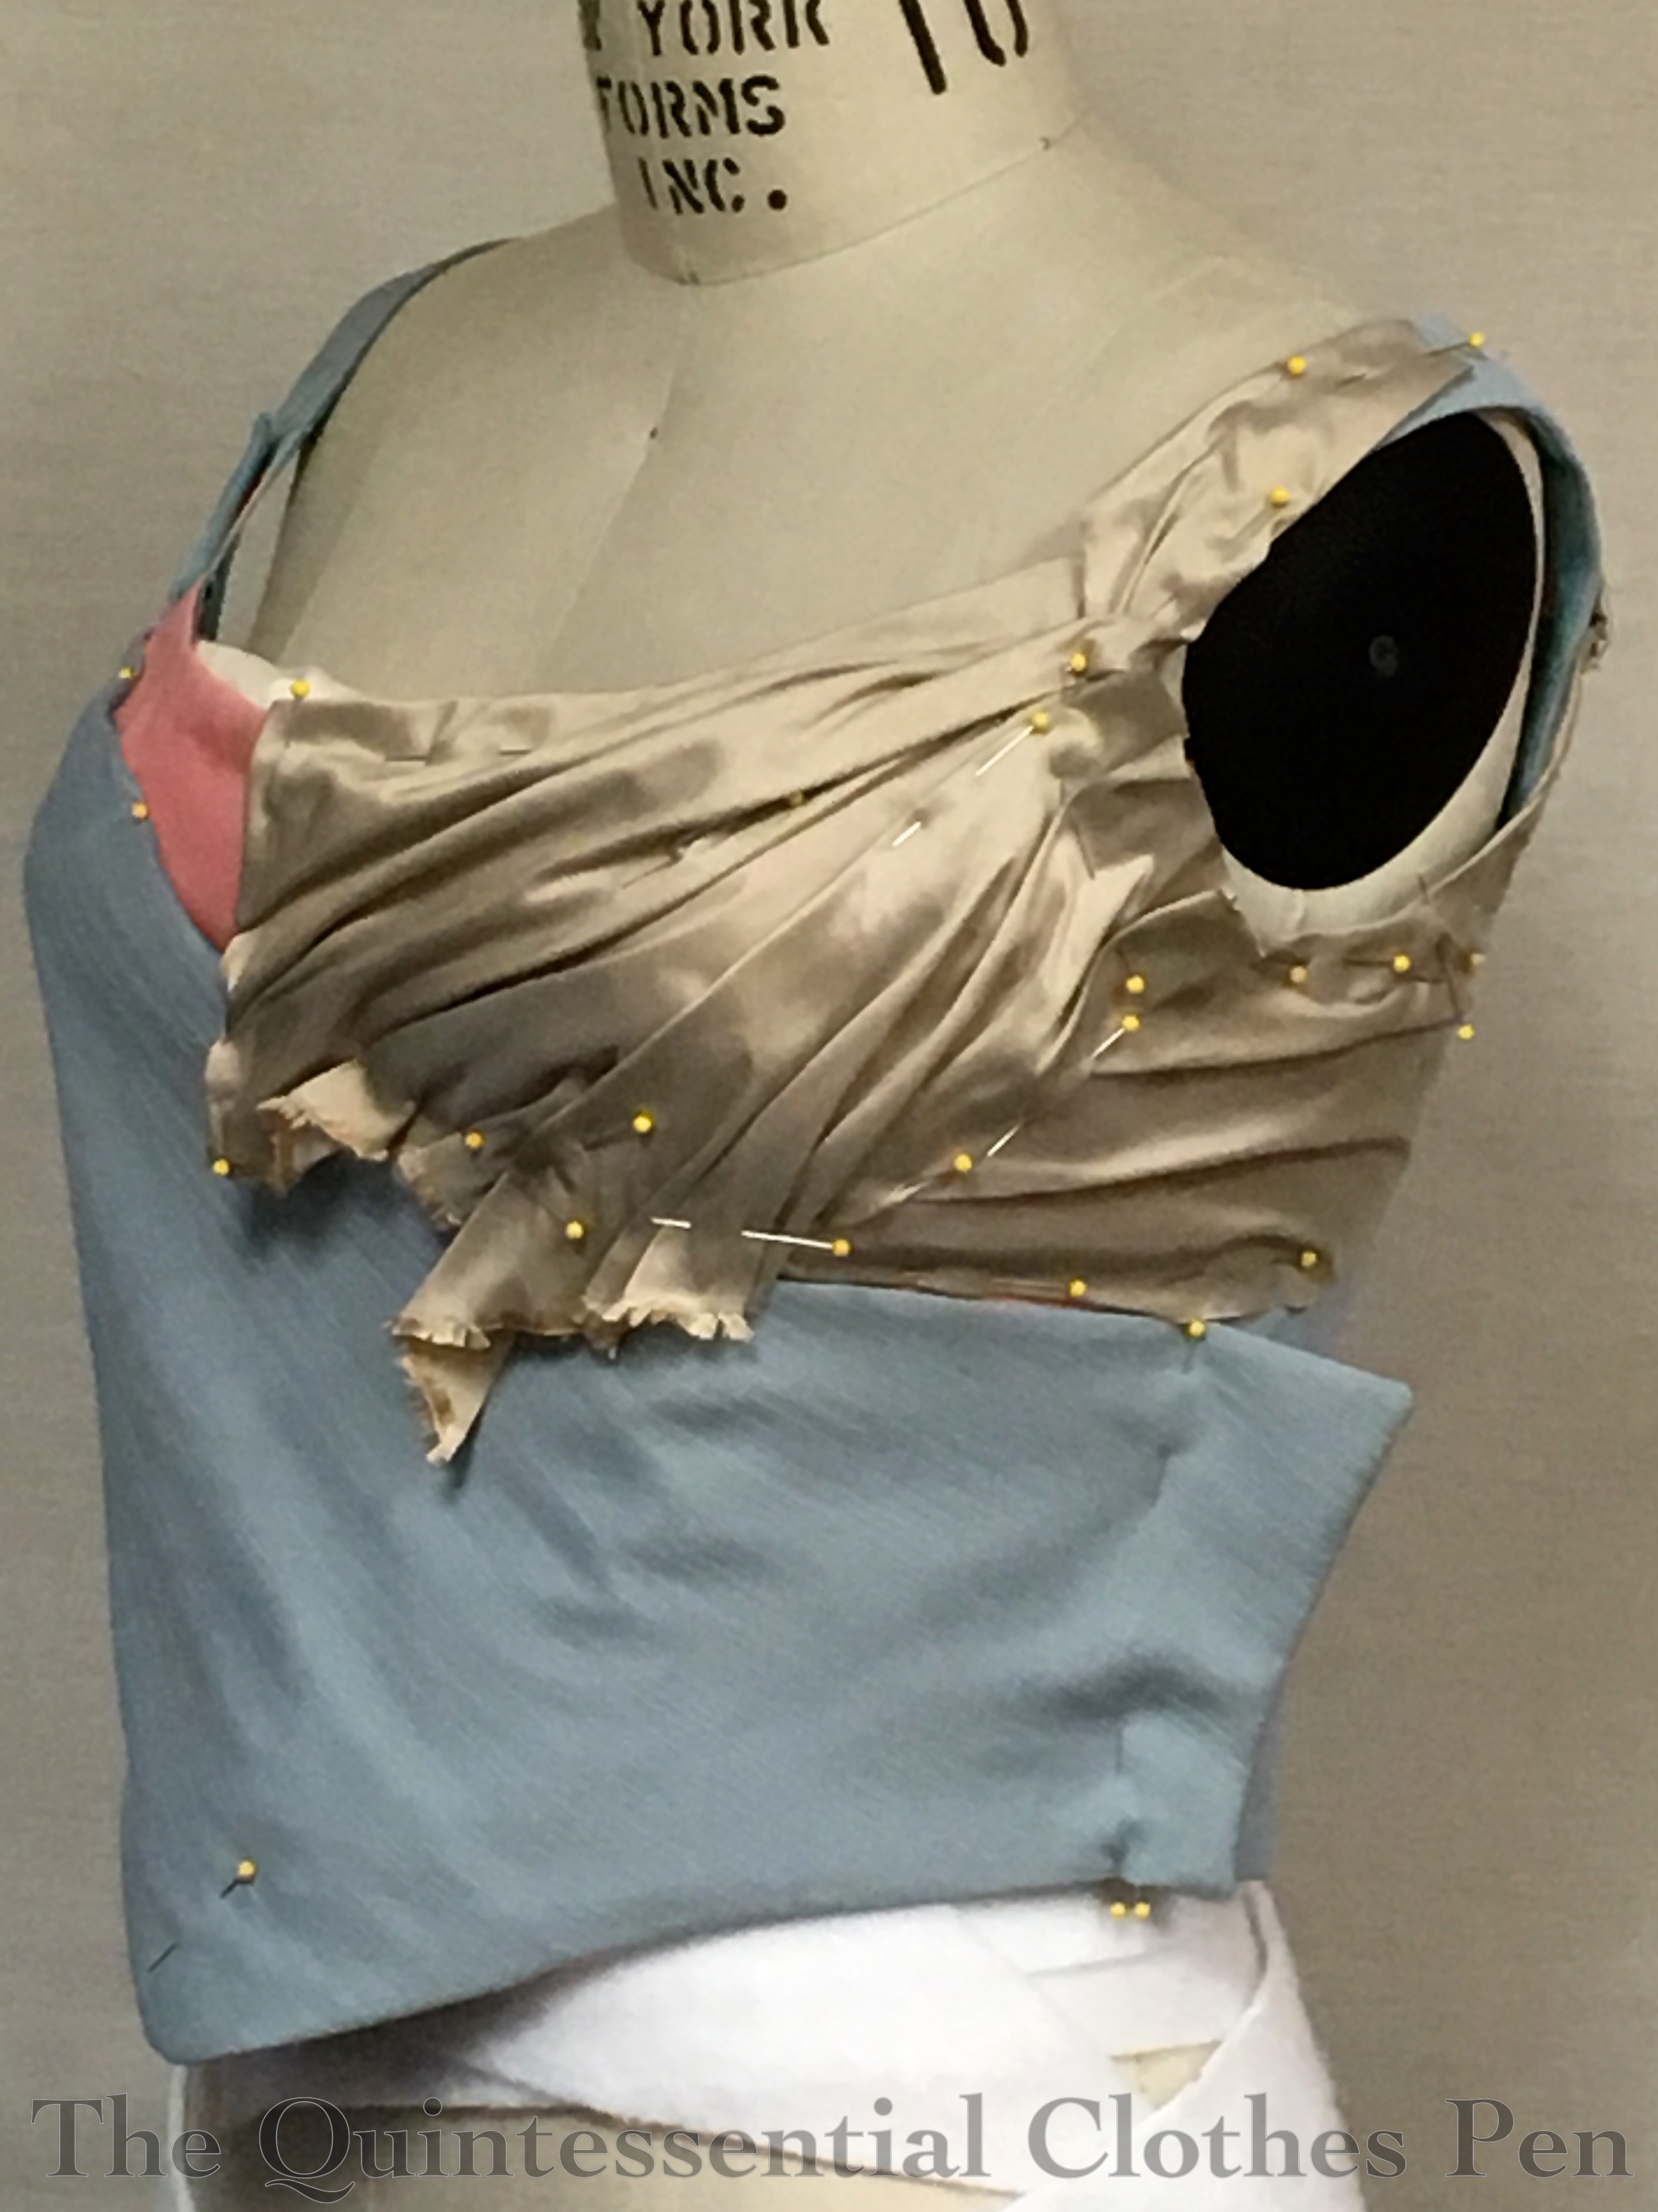
Draping the silk was next. There are actually a number of small pieces carefully pleated before being hand sewn in place.
My original main inspiration was this gown at the Met (and the alternate skirt follows this idea quite closely), but when I looked at my material options, I really loved this variation, also from the Met. Other dresses with a similar cut were also influential, including this, this, and this. Here’s a similar example that clearly shows the shadow of a side closure.
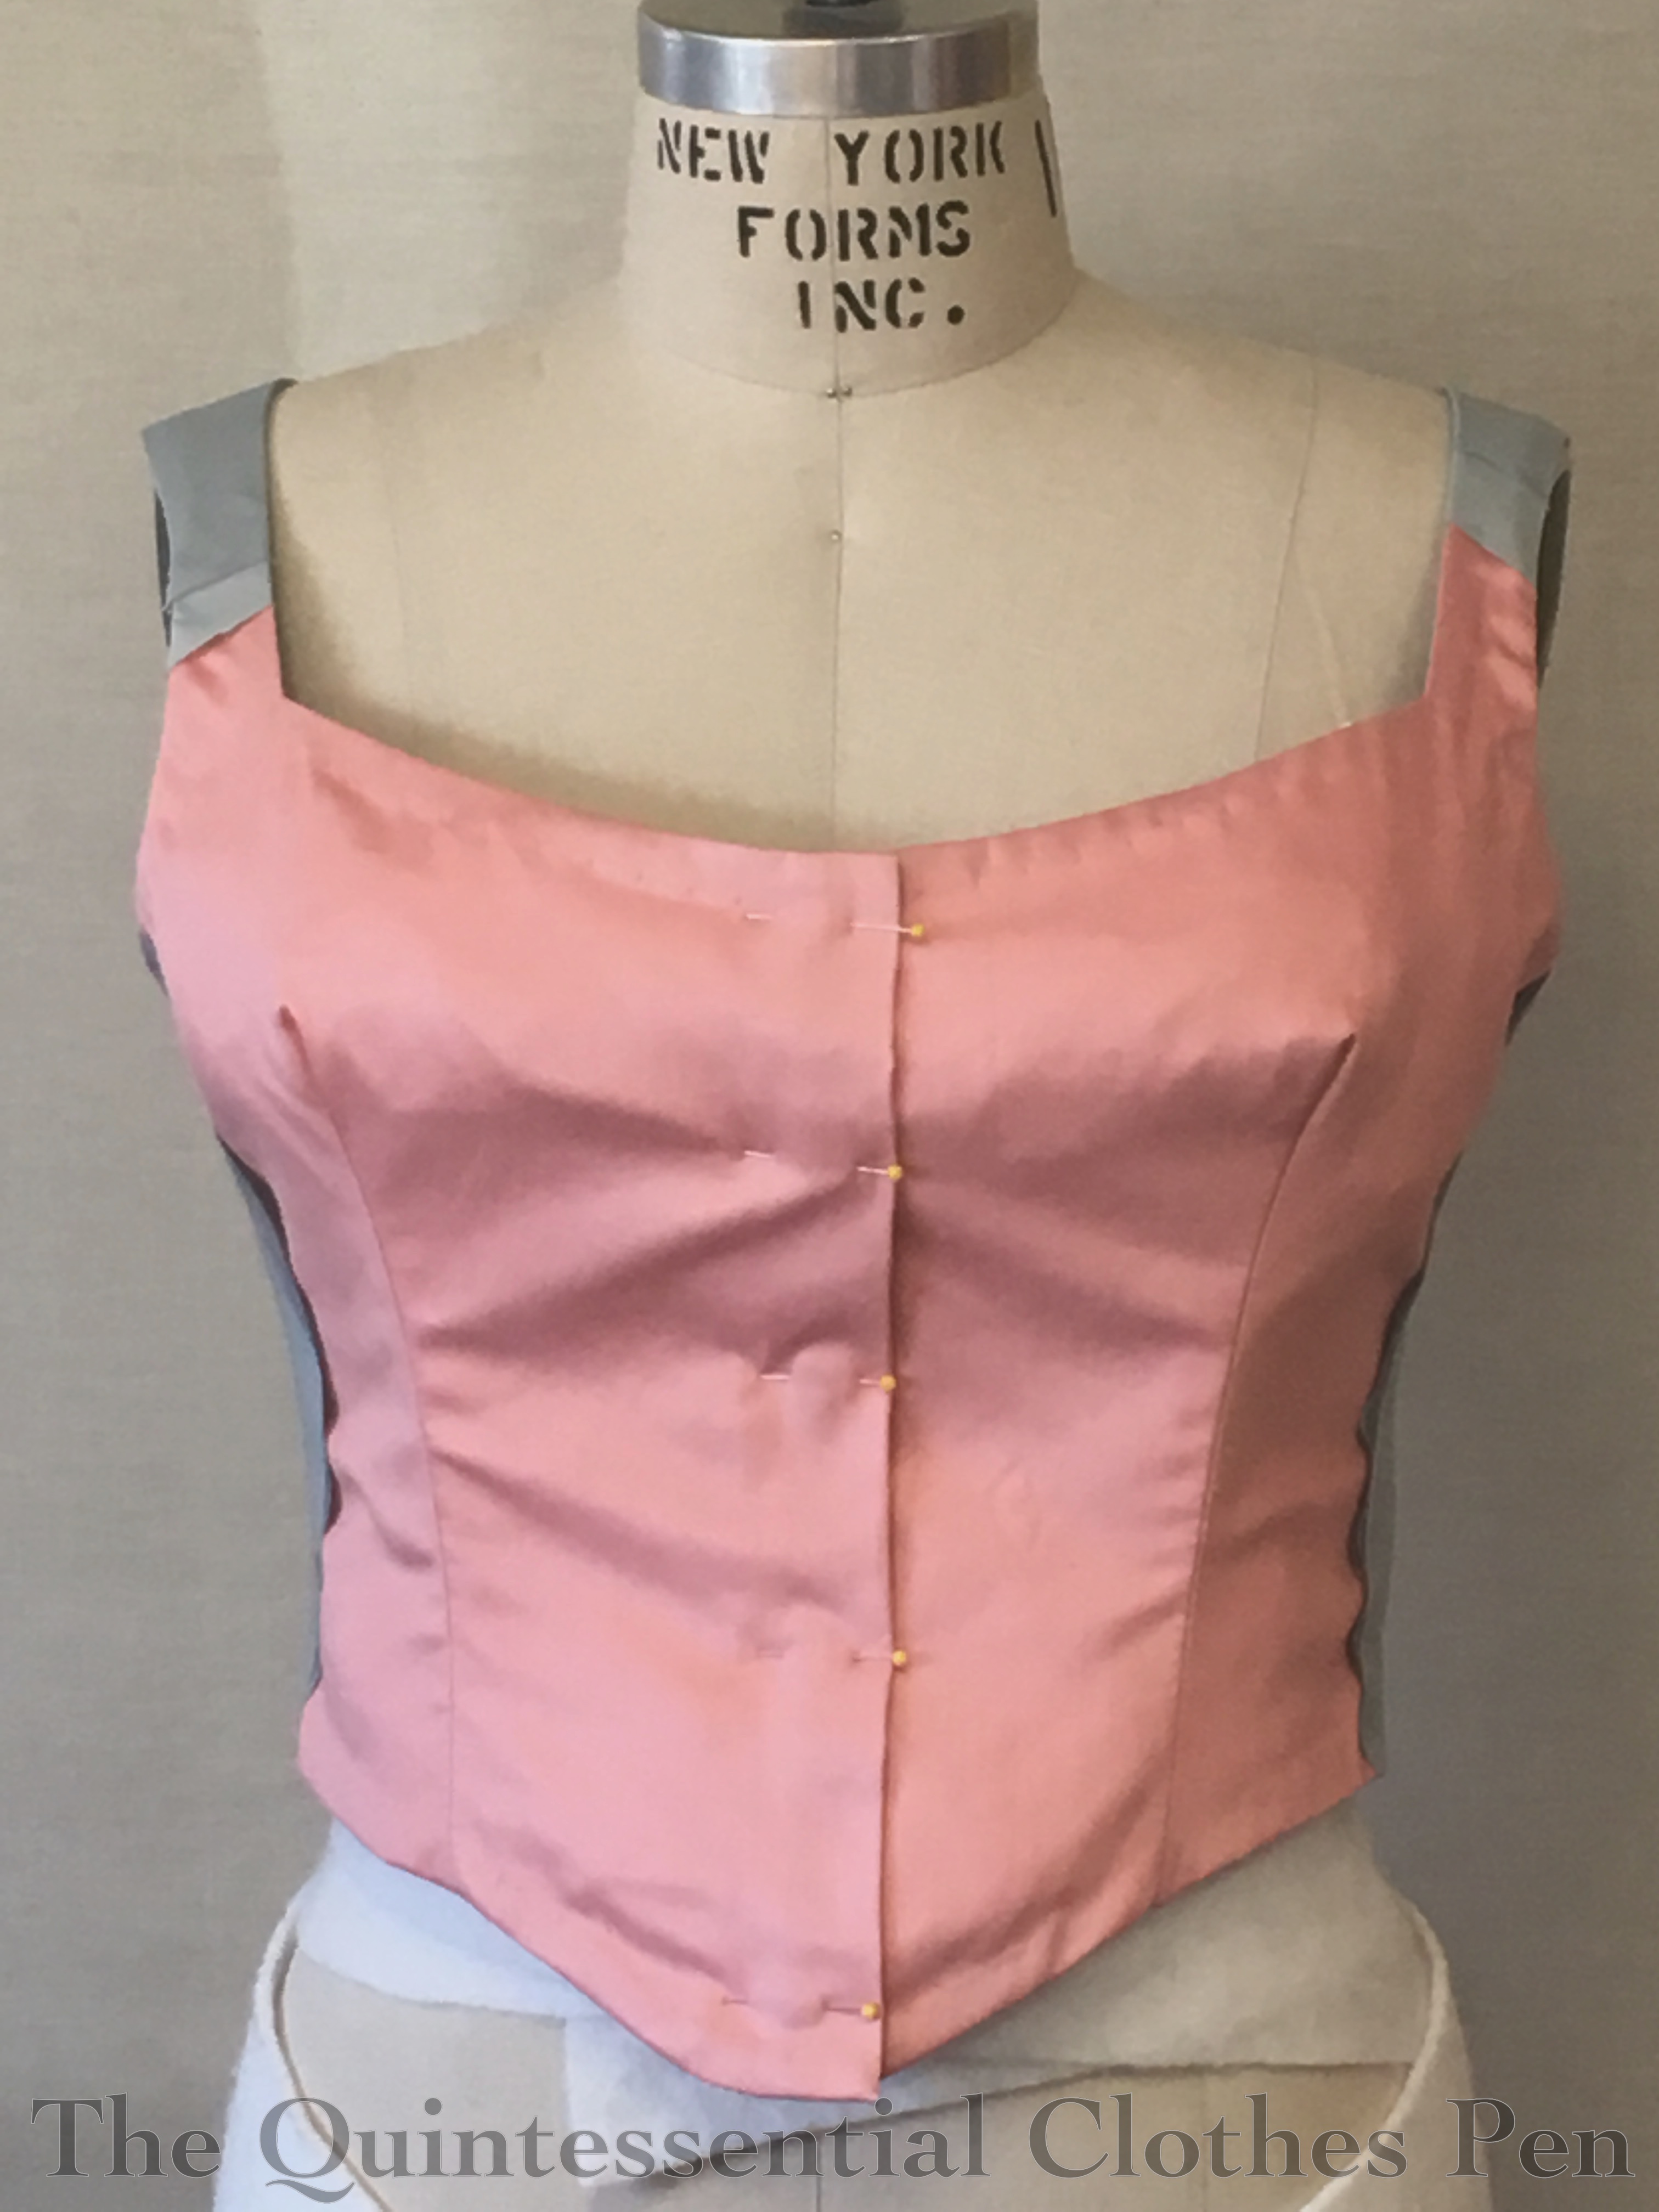
In the next picture, both the left and right sides have been covered in silk. Each side of the bust layers and attaches separately. I also started playing with flower placement at this point. I was inspired to add black accents to the otherwise subdued colors by this dress. I really like how the black pops!
Here’s the back around the same stage.
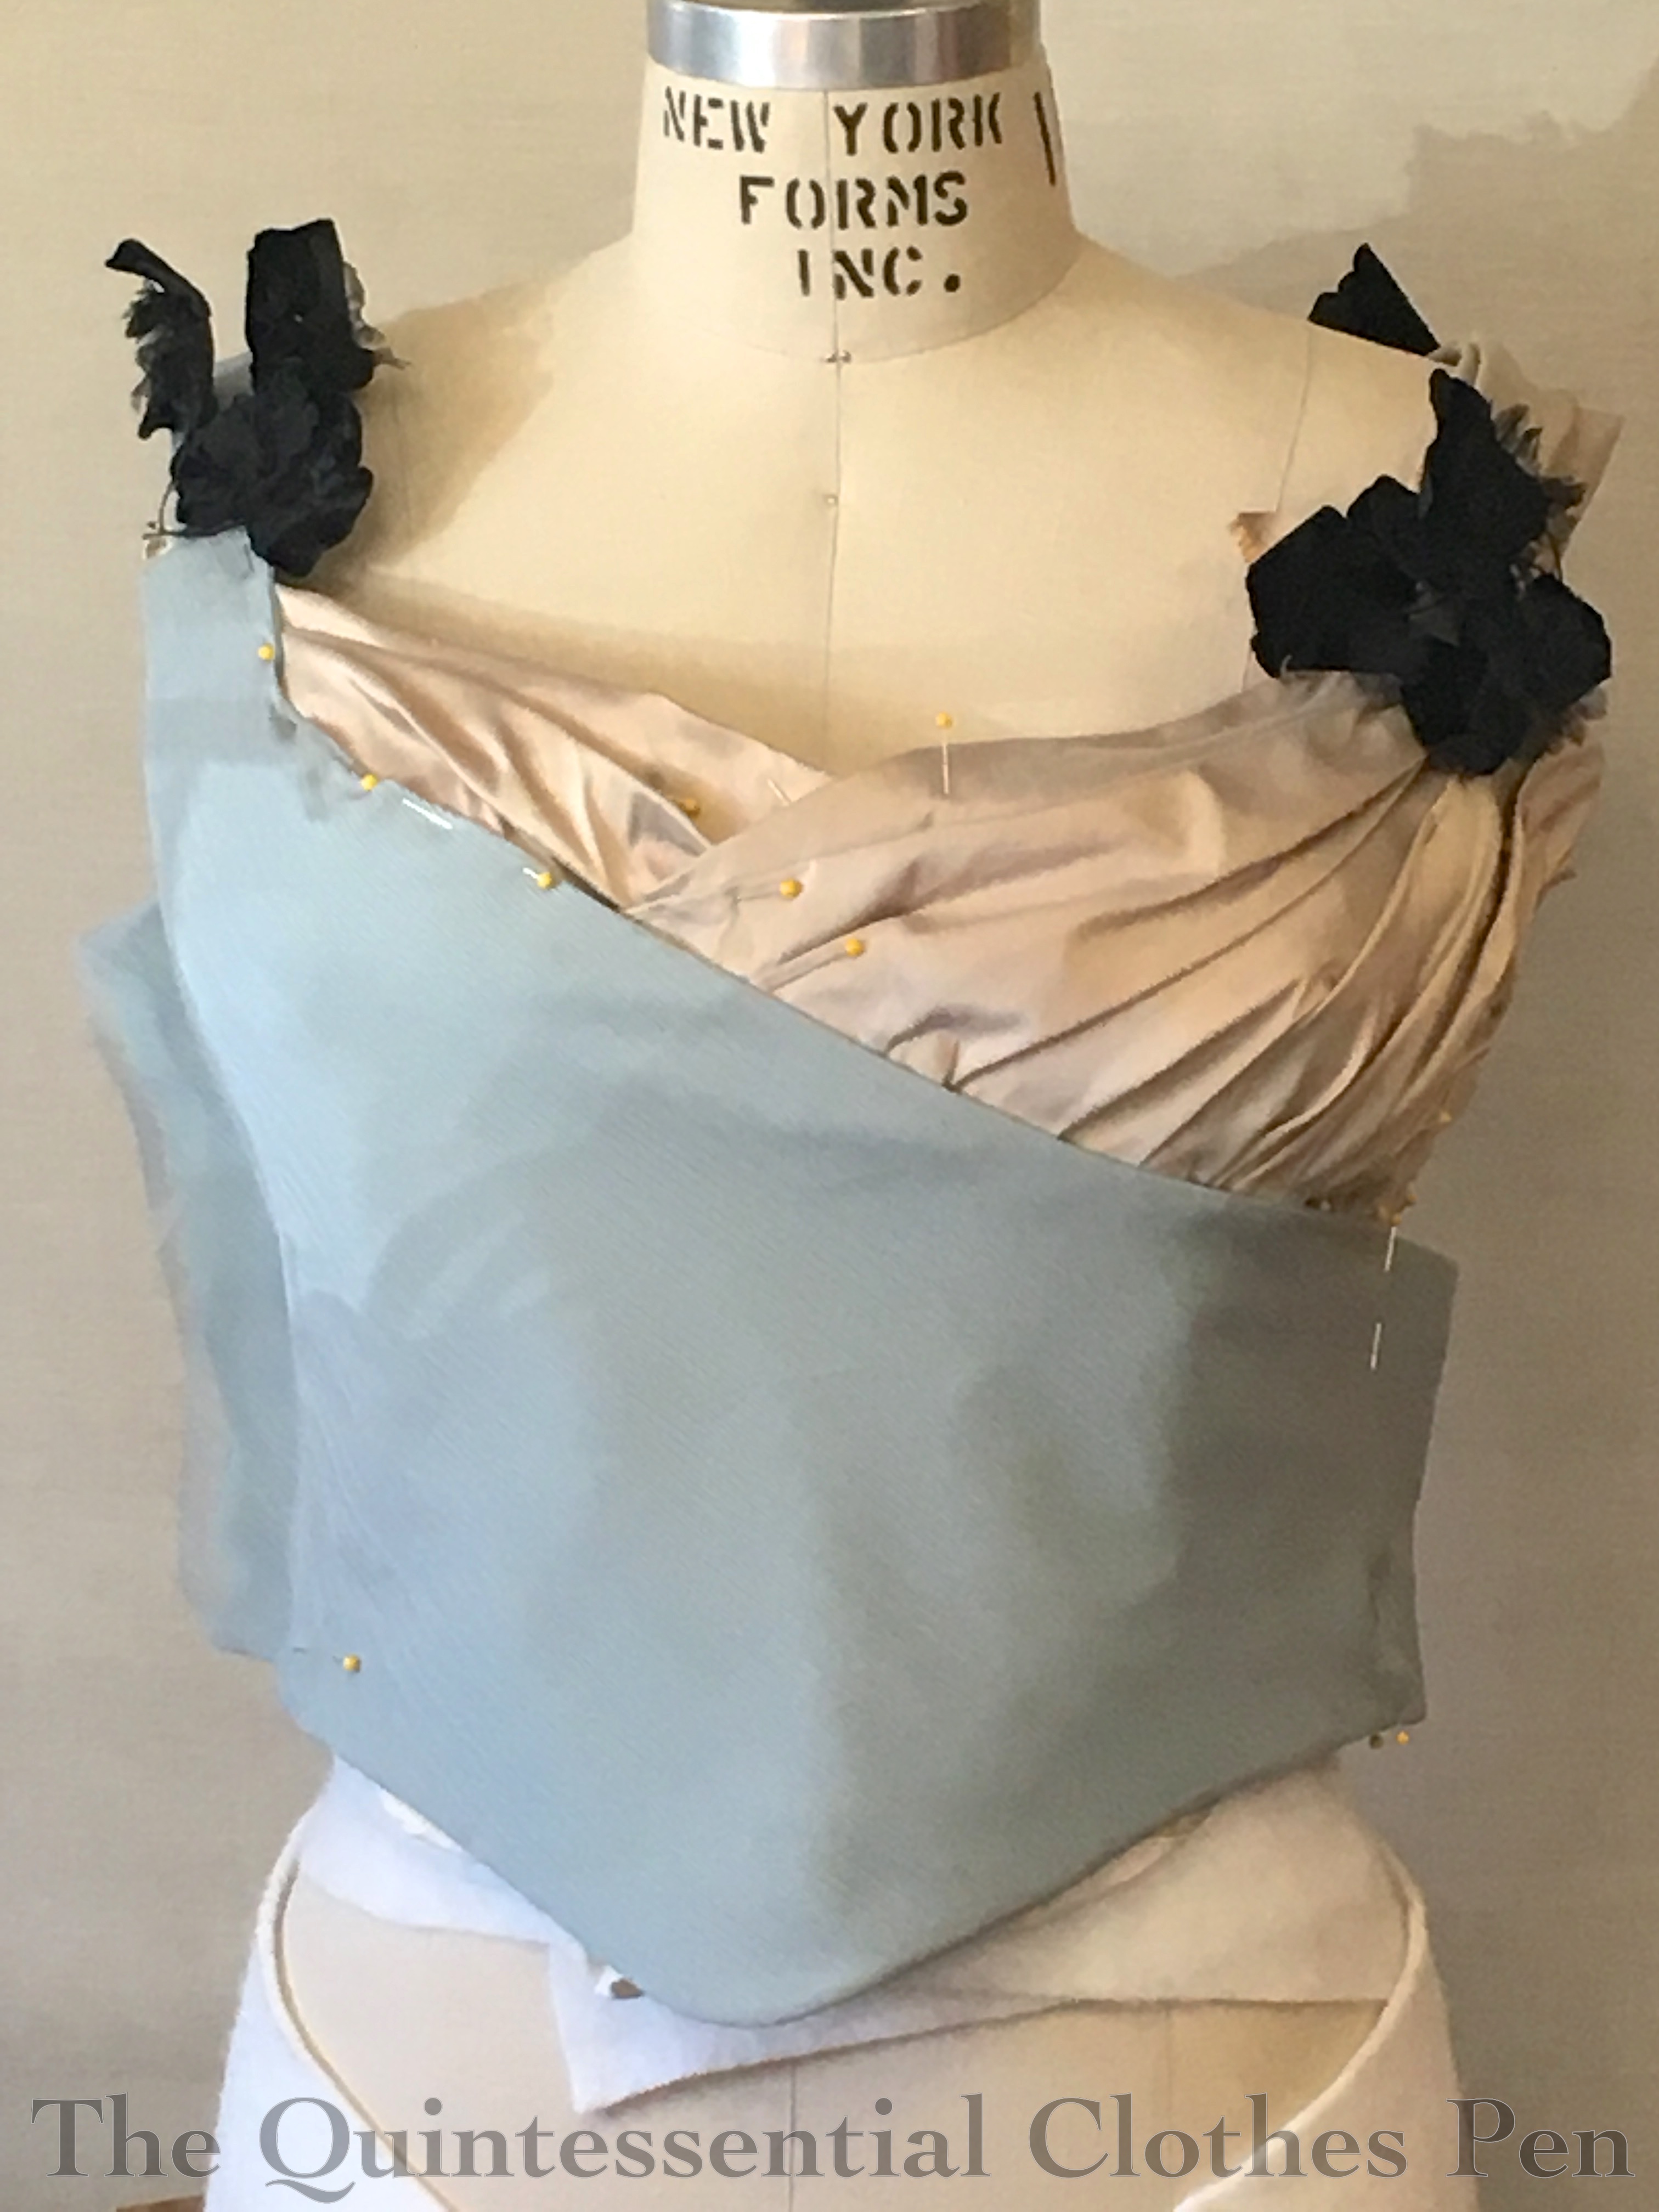
At this stage, I’ve added gauze and tulle to the front and am playing with the chiffon edging. The flowers are tucked into place to see the effect. I’ve also sewn down the proper right (left in the picture) side. The proper left (right in the picture) side is pinned and tucked, waiting for a final fitting before finishing and adding closures.
The back also received a treatment of gauze and tulle in addition to a chiffon edging. You can see that the flowers came in stems of three (these are another part of one of two huge hauls of millinery flowers for super cheap that I’ve had in the last few years, yay!).
Sewing down all the pleats just so, in order to look natural and not constrained, took rather a long time, as did nicely tucking all the silk around the armhole. But it was worth it!
Here is the inside of the bodice, finished. I decided to bind the seam allowances in the same robin’s egg blue cotton that I used for bias binding for the edges and armholes. A hong kong finish is not accurate, but I didn’t feel like hand whip stitching all the seam allowances (although, in the end, it probably would have taken just as much time, or less), plus, I enjoy the effect. There are also closures (yay!) and a waist tape.
And here’s what the bodice looks like with center fronts together. The bit with the tulle actually hooks over the other side (but pictured this way, you can see the closures). After that, the front panel hooks across the front and is securely hooked at the side seam, effectively covering my pink lining.
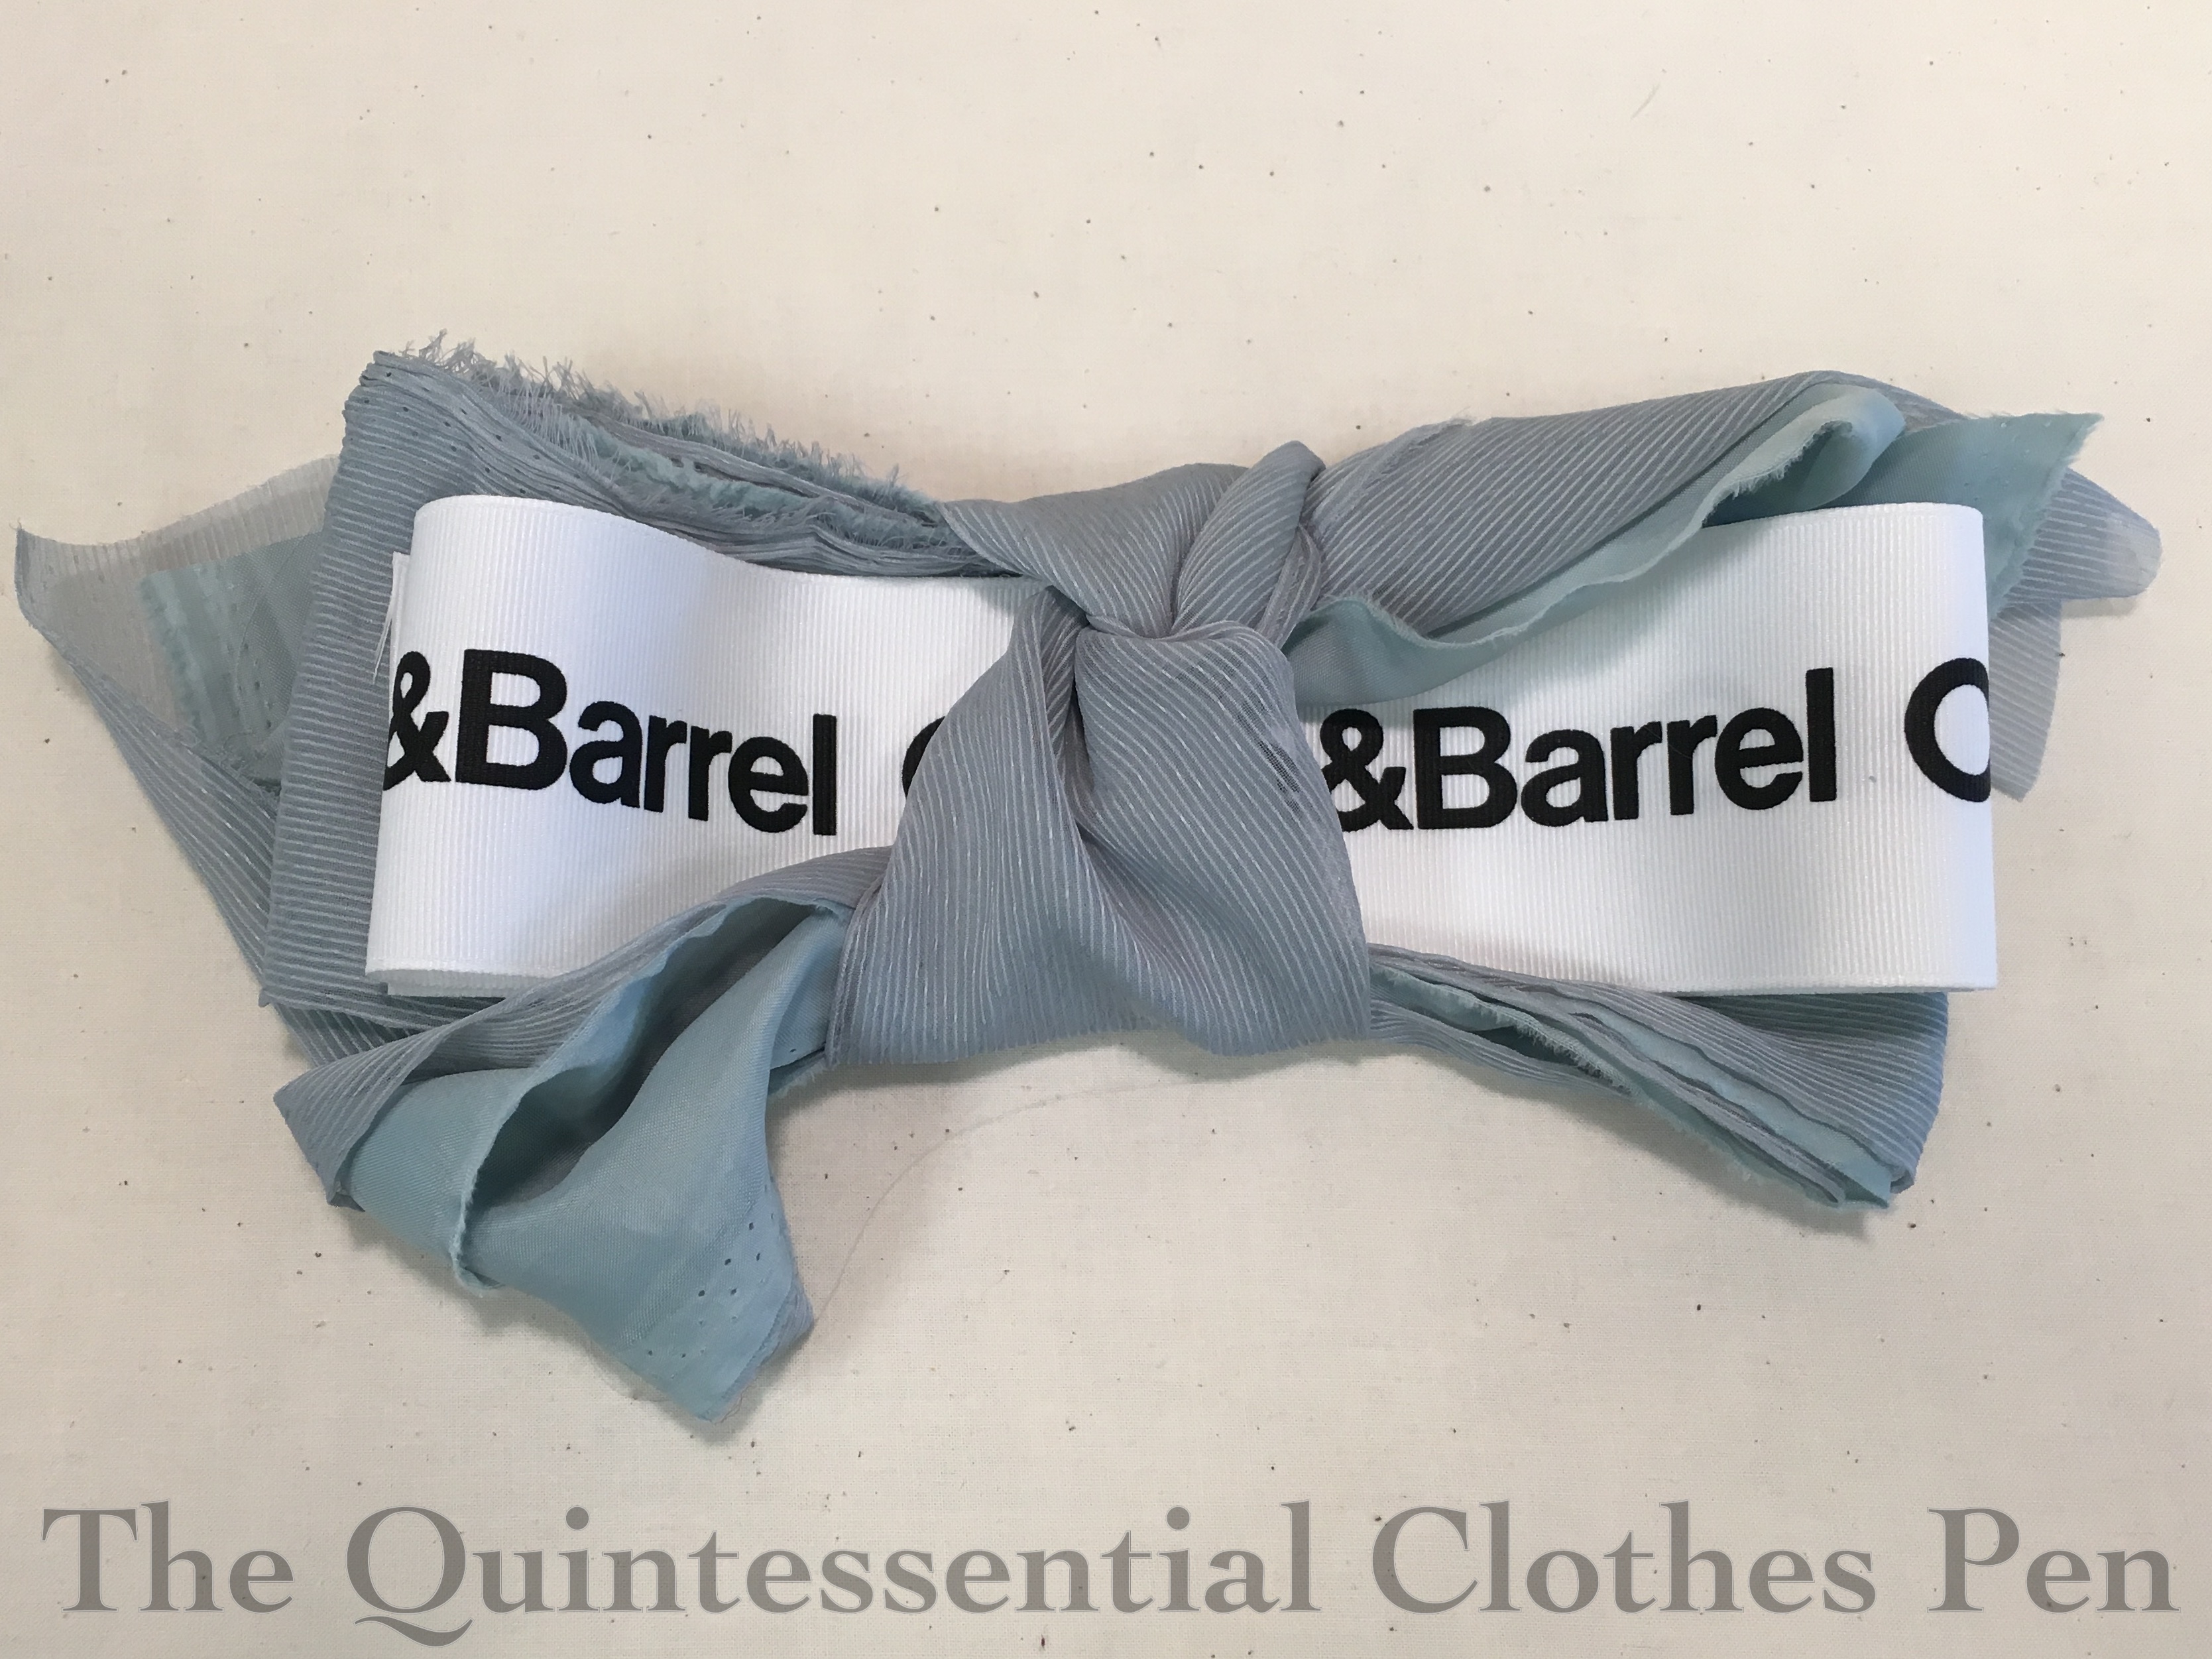
The untrained skirt is flat in front and gathered at the back. It is cut in an umbrella shape (like my 1895 skating ensemble skirt), so that the only seams needed are center back, and a diagonal seam across the back to add width to the panel. The waistband and placket are standard 19th century style, with the exception of the fact that the ribbon I used to stabilize the thin fabrics is leftover gift wrapping ribbon from wedding gifts we received from Crate and Barrel. Yay! It’s hidden on the inside and folded in half, but it amuses me, because recycling is great and it’s nice to have a bit of Mr. Q-related-something in a dress.
A nice package of placket and waistband pieces. I made one for each skirt.
The most annoying thing about fitting this gown was marking the hem on the skirt. (Fitting the bodice on myself with all the layered closures was also a feat, but more uncomfortable twisting than annoying.) Chiffon is annoying to hem most of the time and it only gets more complicated when you’re marking the hem on yourself. It meant looking in the mirror, bending over to place a marking pin while everything shifted, standing up to check things, and then repeating that over and over again to shift pins by tiny amounts until they all looked good (while wearing a corset and fluffy petticoat of course, so the whole thing would hang properly on my body). Once that was all over, I hemmed each layer with self fabric bias that is turned to the inside and invisibly hand stitched in place.
I was quite successful, but it took a whole afternoon to mark and cut and sew the hem of the chiffon and of the lining (because of course the lining couldn’t stick out or be too short!). The whole thing would have been much speedier if I’d had someone else to mark the hem for me. (I thought of using my hem puffer, but the floor is too close for the puffer to reach and I didn’t have anything to stand on.)
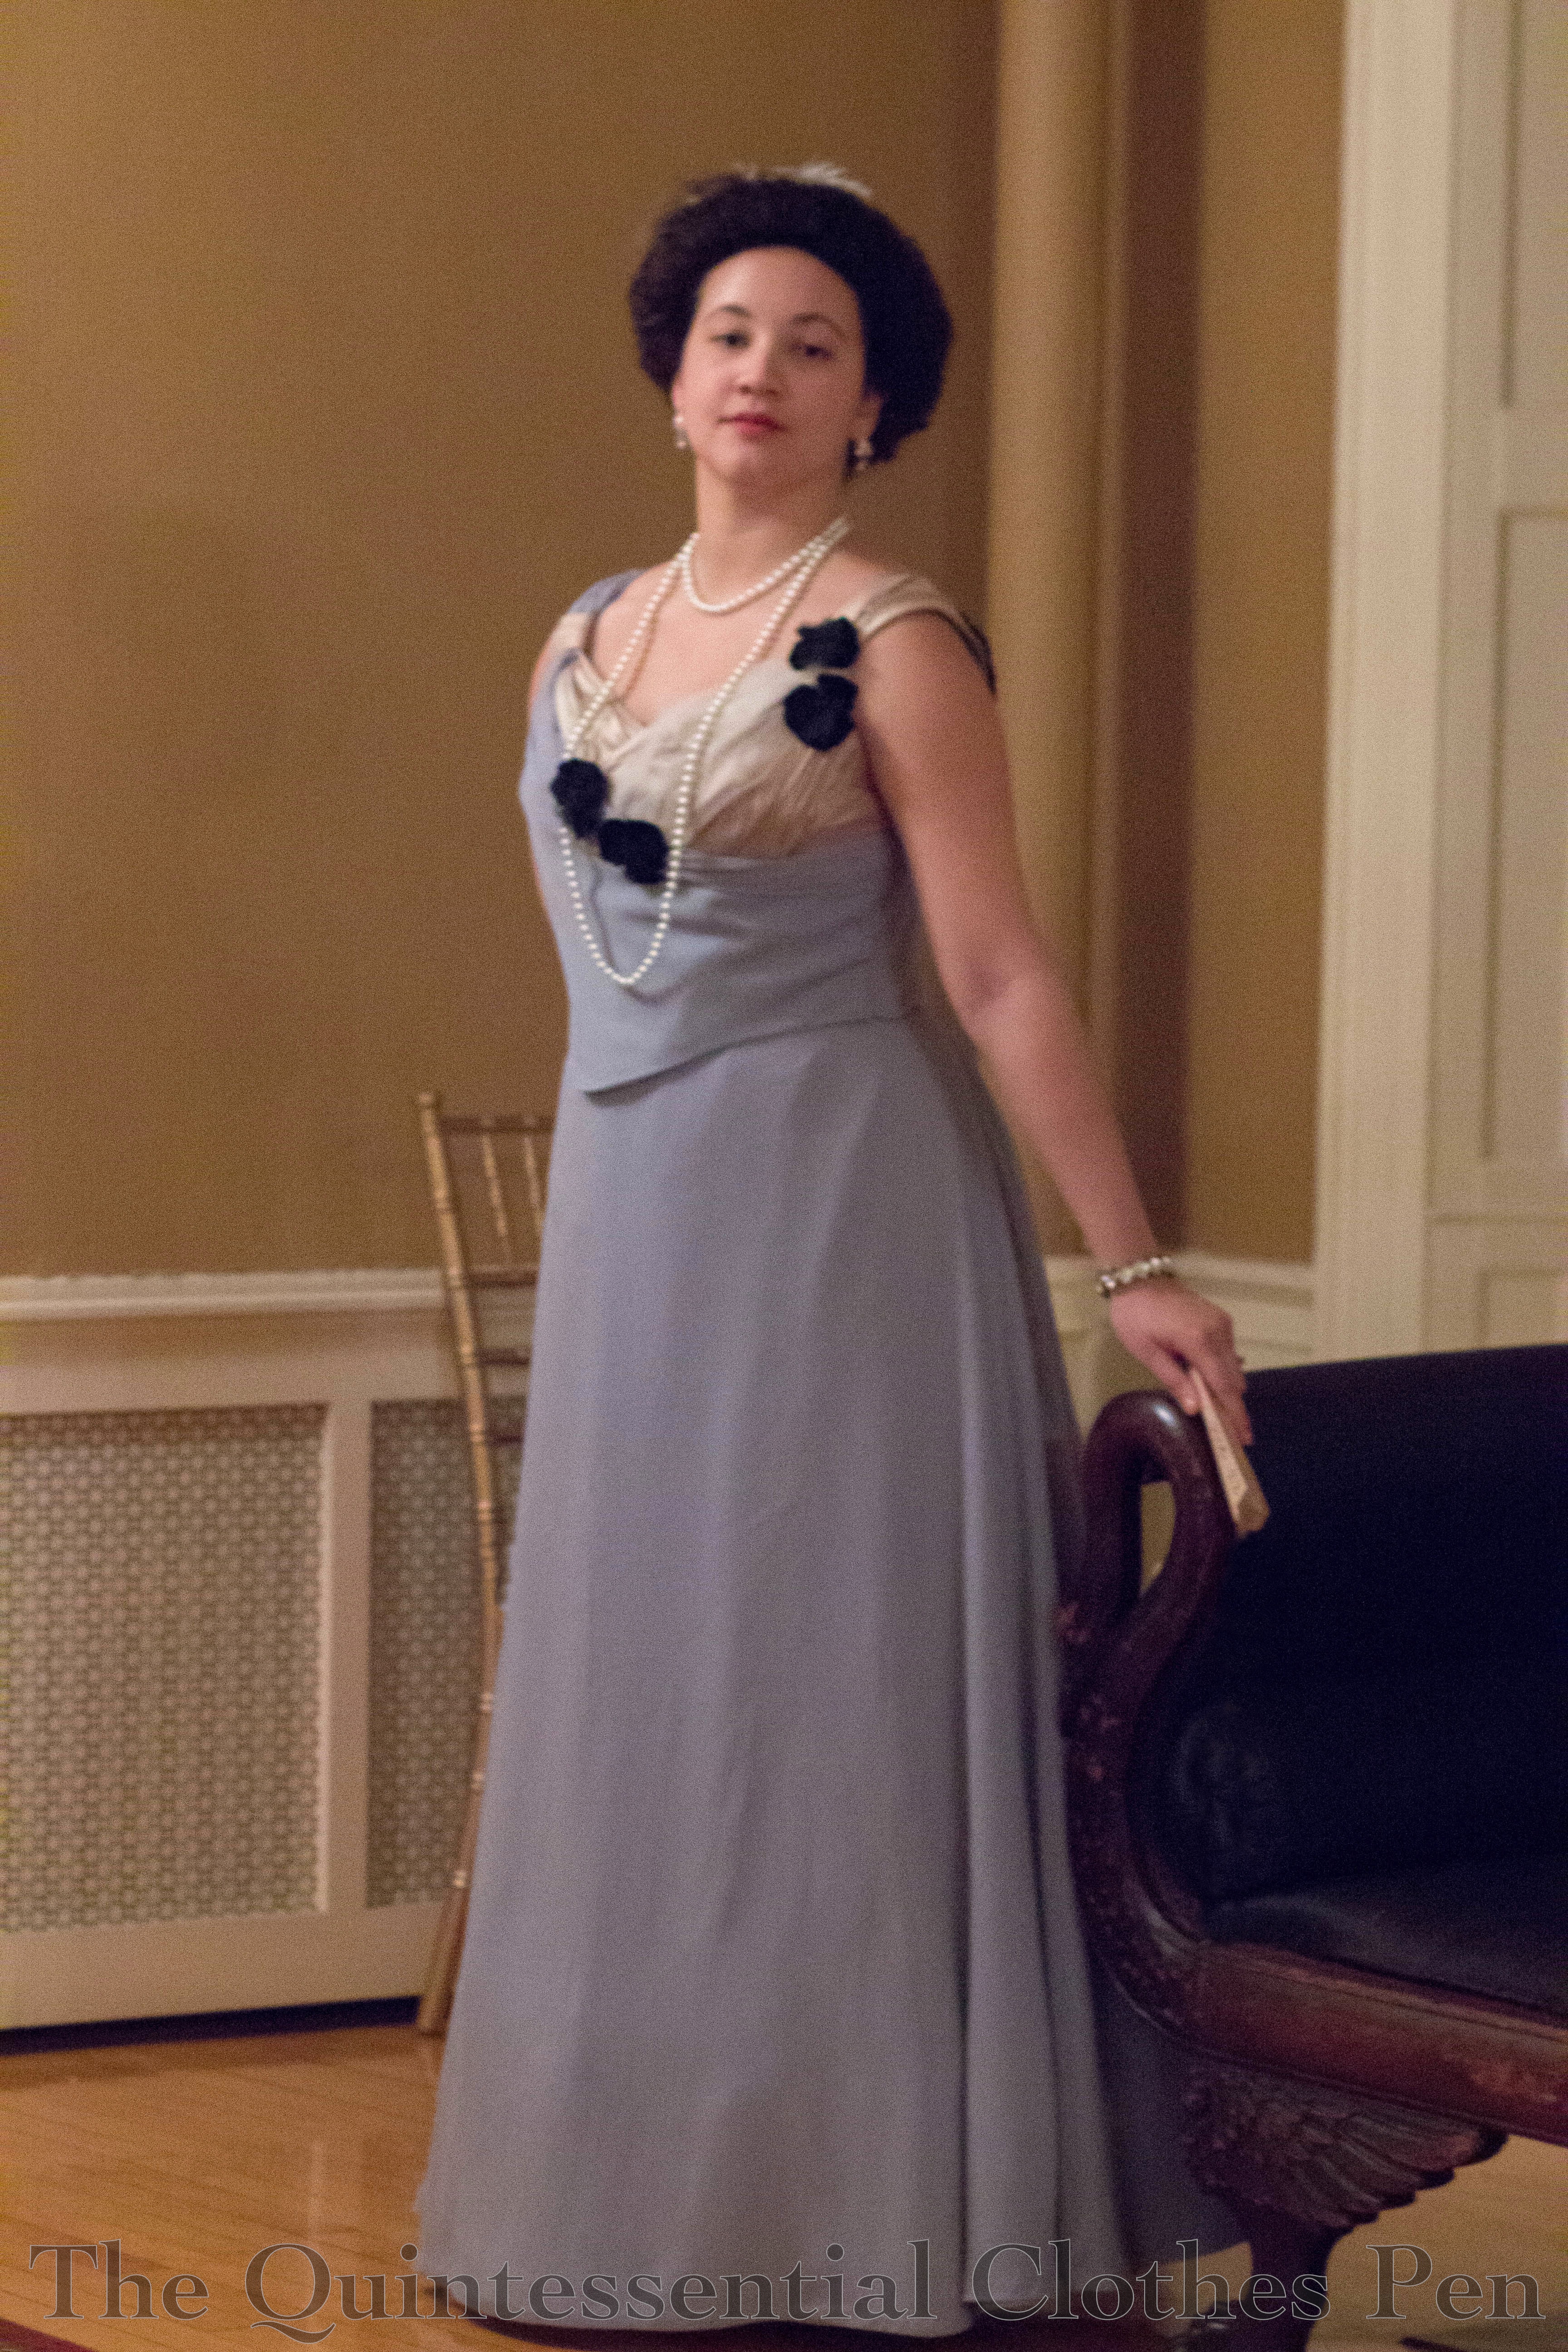
Anyway, the end effect was fabulous. The chiffon and lining swooshed so beautifully that it was necessary to get “swooshy skirt” pictures at the ball just to highlight their movement.
The ball also gave me an opportunity to have fabulous hair and a new hair ornament instead of a tiara as well as an opportunity to photograph my new 1880s corset completely finished and the fabulous petticoat I have for 1890s/1900s styles. It gets worn often, but hardly ever seen (which I suppose is rather the point of a petticoat, but when you have one as lovely as this, it really should be seen!). There will be future posts for the hair and undergarments, as this post is getting pretty long.
Overall, 1890s ball was lovely, with beautiful dresses and beautiful dancers. There were fun new people as well as quiet moments to sit and have engaging exchanges with friends.
And the new gown was very comfortable and fun to wear. I’m looking forward to completing the trained skirt (hopefully without too much procrastination) and wearing it this summer!
*My plan is to have two skirts for this gown, one without a train, for dancing, and one with a train, because trains are fun! I only finished the non-trained skirt for the ball, though the trained skirt is assembled and mostly finished with the exception of a closure and hems.