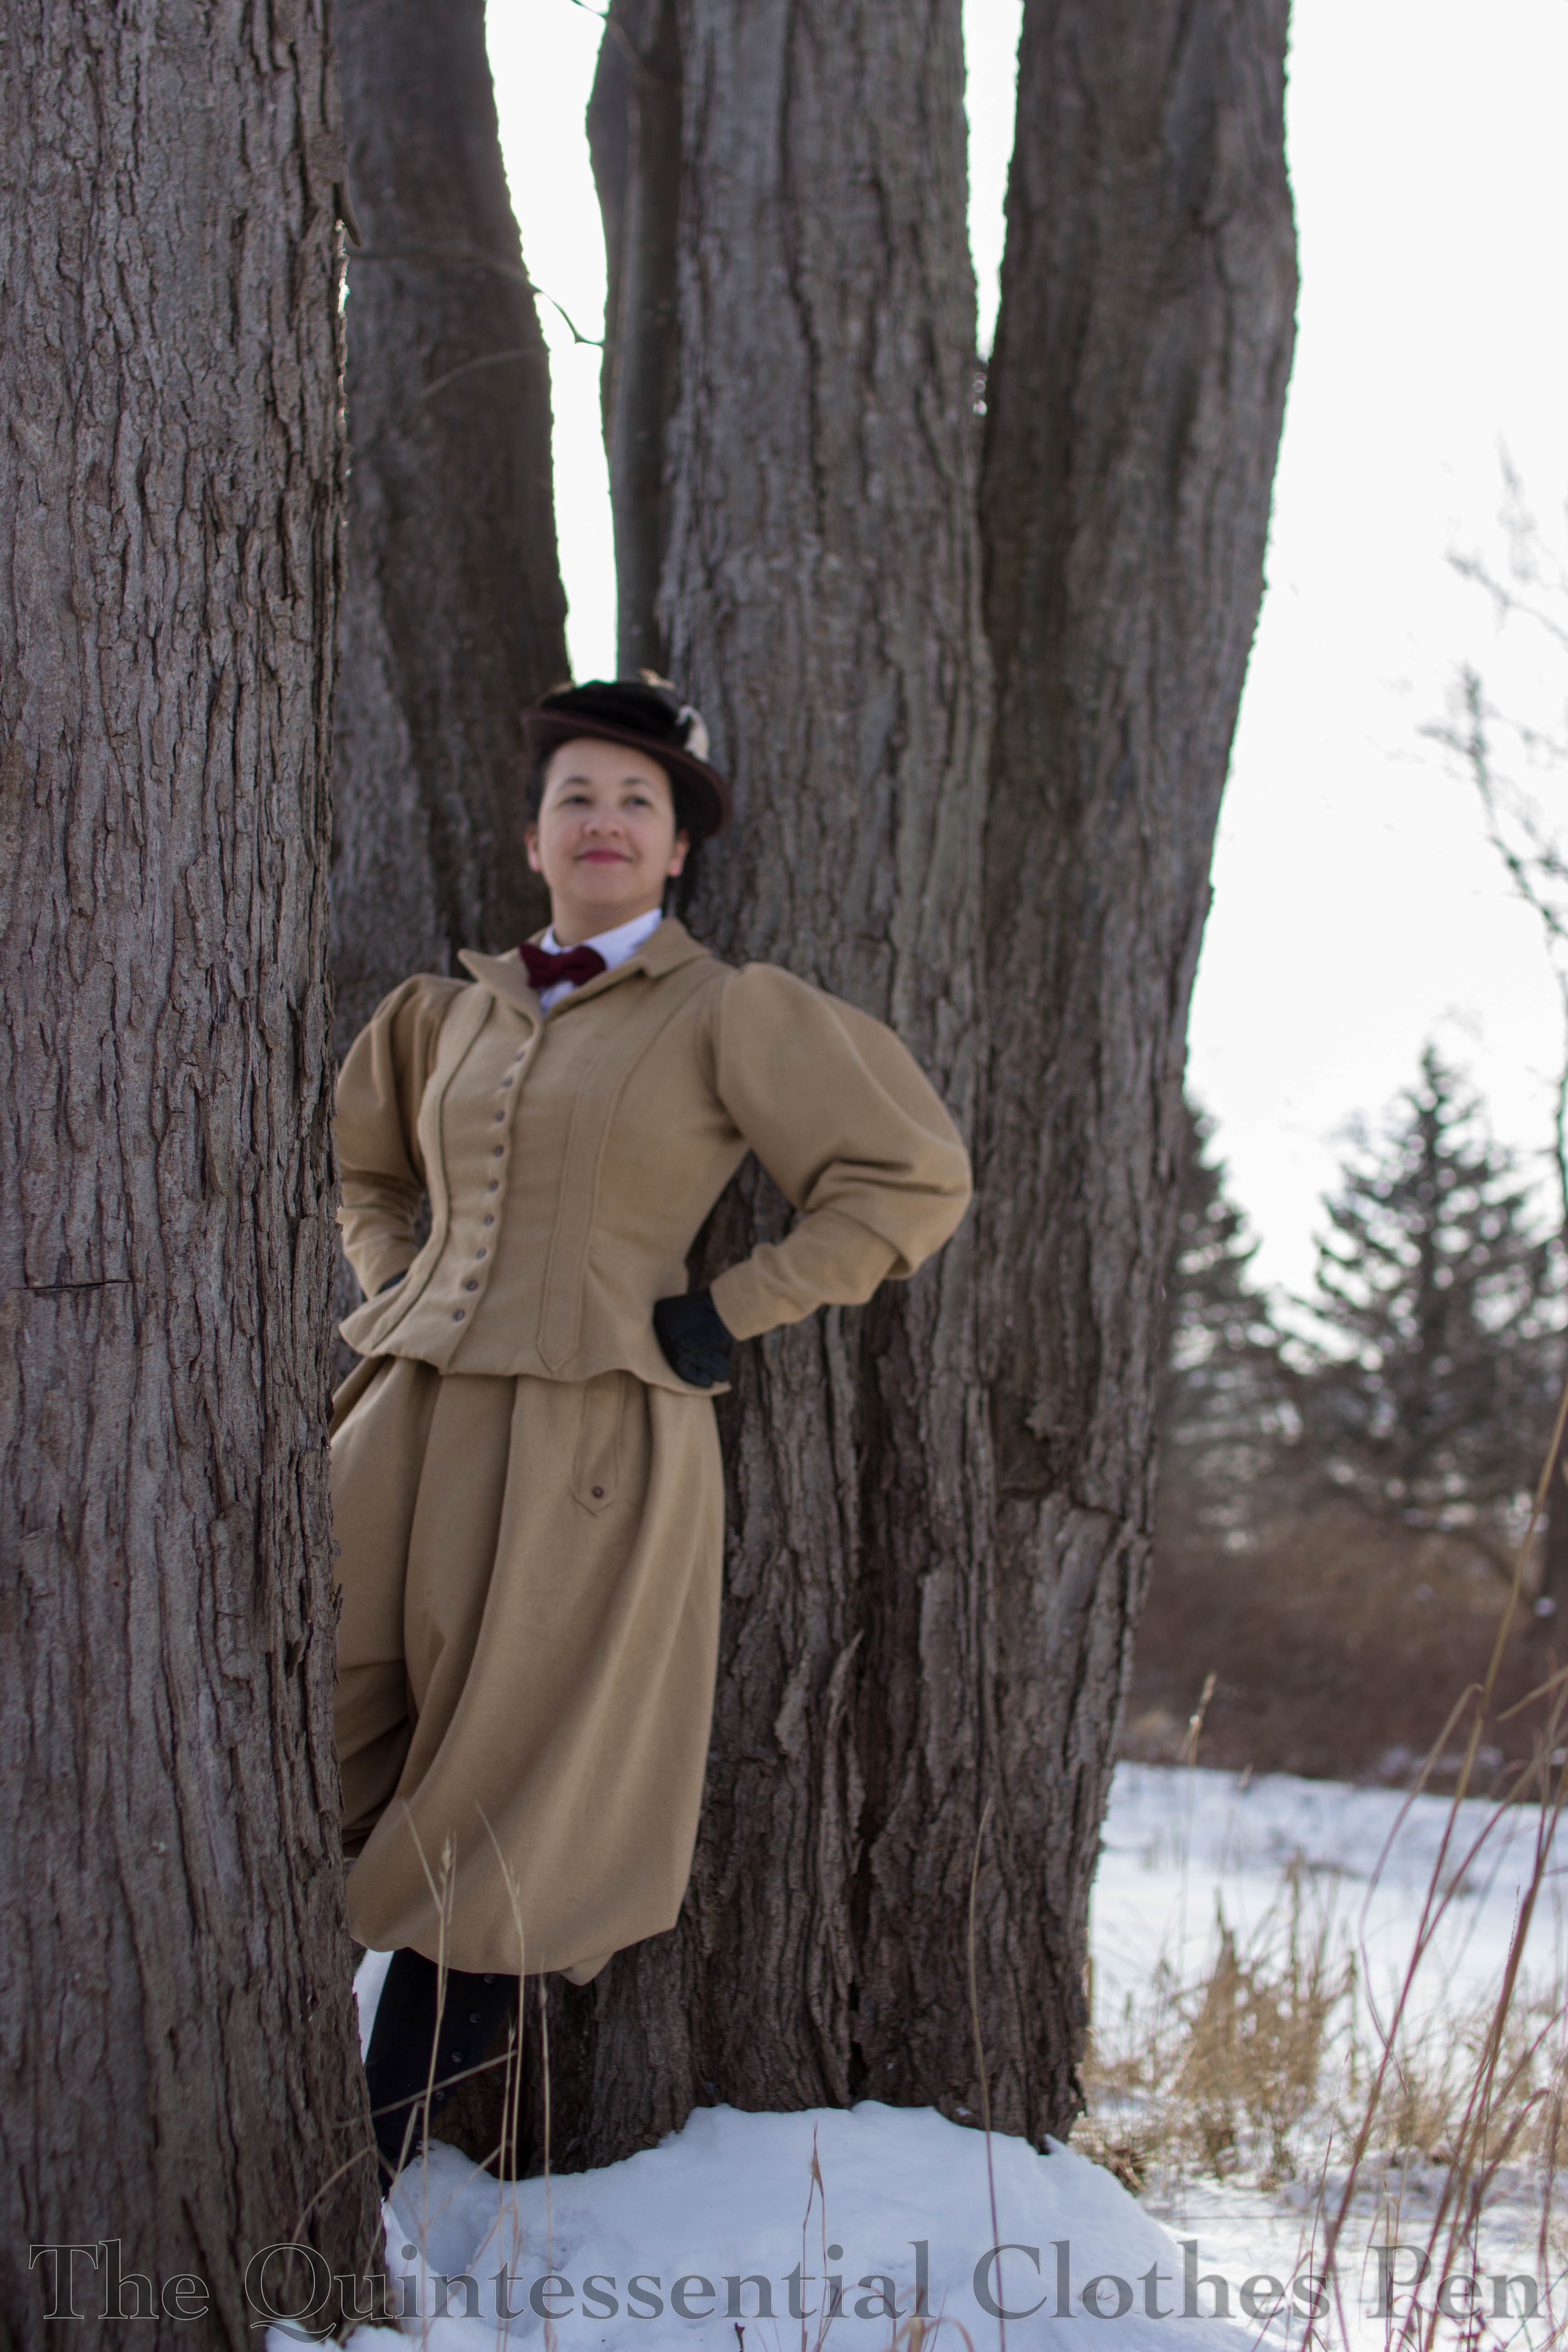
1896 Bicycling Ensemble: Construction Details

As promised, I have quite a few words and photos to share with you about the construction of my 1896 Bicycling Ensemble, so prepare yourself for a long post! This post is a great reference for me to have all the details in one place, but I also hope that some of my details might be helpful for other people who want to build 1890s cycling outfits as well.

If you want to read a bit more about the social history of the bicycle ensemble, see more finished ensemble photos than the few in this post, or read more about the accessories I’m wearing with this ensemble, check out my first post about it (this is the same as the first link). I also have a post looking specifically at patents and advertisements for women’s bicycling clothing from this time. It’s a great supplement to some of the information I mention in that first post.
This post is going to focus on the main garments that make up this ensemble: the jacket and bloomers. We’ll start with the two main similarities between these garments.

#1 Both garments are mostly machine sewn, with hand sewing for the tailoring steps of the jacket as well as much of the finishing of each garment.

#2 Both jacket and bloomers are made from a drab colored wool that has been in my stash since 2012. I purchased it from the remnant table at the local discount fabric store for the amazing price of $3/yard! I bought every piece they had, so I have about 10 yards broken up in about 6 different pieces. I used less than half of what I purchased for this project, leaving me plenty to use this for an 1880s dress as well. (That one has been in progress for the last 18 months… I hope to finish it this year!)

The drab colored wool is perfect for this cycling outfit, not only because I already owned it and it has been taking up space for years, but also because drab was a popular color for cycling outfits because it successfully hid dirt and dust. Other recommended colors were brown, black, and navy.

The Bloomers

Now that we’ve looked at the similarities let’s look at the differences, starting with the bloomers.

These are entirely self drafted. While that might sound intimidating, these are actually quite simple! Each leg is the full width of the fabric, 60″ wide, and 33″ in length. On my 5’6″ frame that provides plenty of pouf in the legs when they are held in place around the tops of my calves. The only shaping is in the crotch seam, which is a curve ~5.5″ wide and ~12″ deep. The crotch curve is deep enough and the bloomers are full enough that I made the crotch curve the same for the front and back. Here’s a photo of the crotch curve drawn out before I cut it.

The fullness of the 60″ wide legs is pleated into the waistband with knife pleats folded towards center front and center back. Knife pleats are documented in sporting bloomers from the 1890s and are specially mentioned as being folded this way in order to help the bloomers maintain the full look of a skirt, in keeping with the social convention that skirts were acceptable wear for women but bifurcated bloomers were not. I experimented and decided I liked just a few deep knife pleats as they helped the bloomers fall nicely on my body.

I debated about how to gather in the fullness at the bottom of the legs, especially since I couldn’t find specific instructions on how this was accomplished or see this particular detail given the way extant bloomers are displayed. I decided on gathering each leg into a band that hooks so that it stays in place at the top of my calf. There is a 3″ slit in the leg as well. The raw edges of this are turned under ¼” and whip stitched by hand. There is also a small reinforcing bar sewn across the top of the slit to keep it from ripping. Here’s a closeup of the leg opening.

The inside of the bloomers looks like this. There are two decorative strapping details on the front of the bloomers (more on that when I get to the jacket). These conceal a placket opening on one hip (visible on the far left) and a pocket on the other! The crotch seam and inseams are left unfinished. This wool did a pretty good job of not fraying at the edges so there was no need to finish these seam allowances.
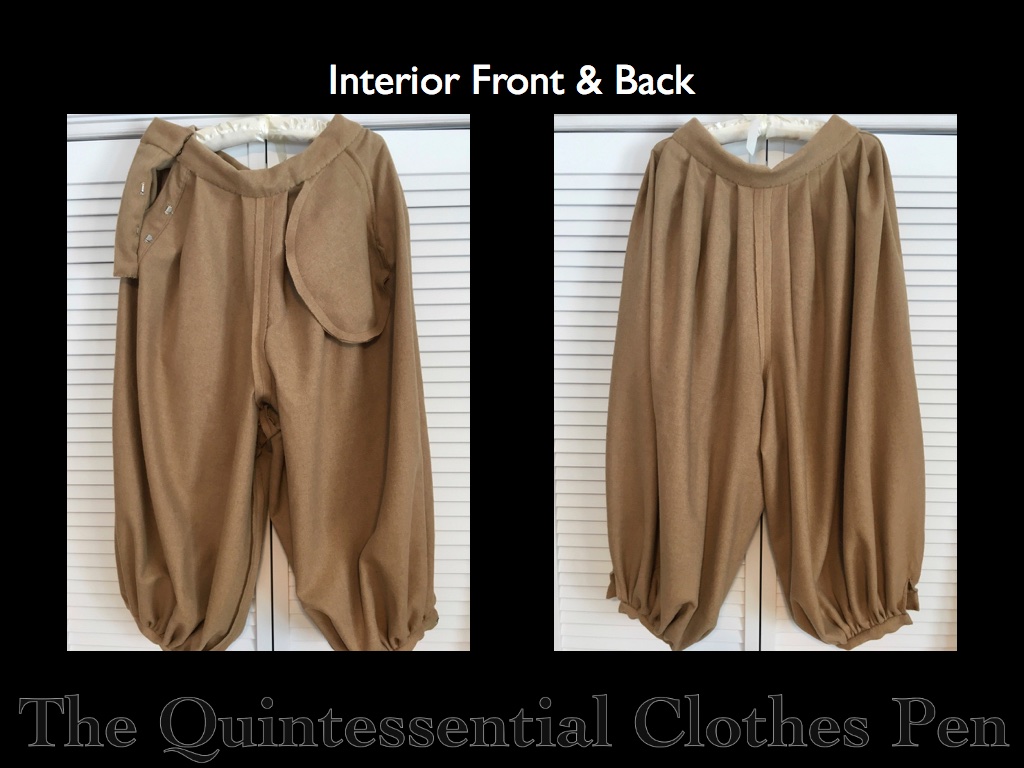
Here is a closeup of the placket opening that is hidden behind one of the strapping details. You can also see the interior of the waistband, which is whip stitched to hold it in place. To be entirely fair, I could have made bloomers on a waistband without the strapping and pocket and saved a fair bit of time. Stitching the strapping bits on and hiding the placket and pocket behind them required some extra brain somersaults and time to figure out and execute. But I really like the strapping detail on this extant bicycling ensemble from 1896 at The Met and really wanted to include that detail in my own garments, so here we are.

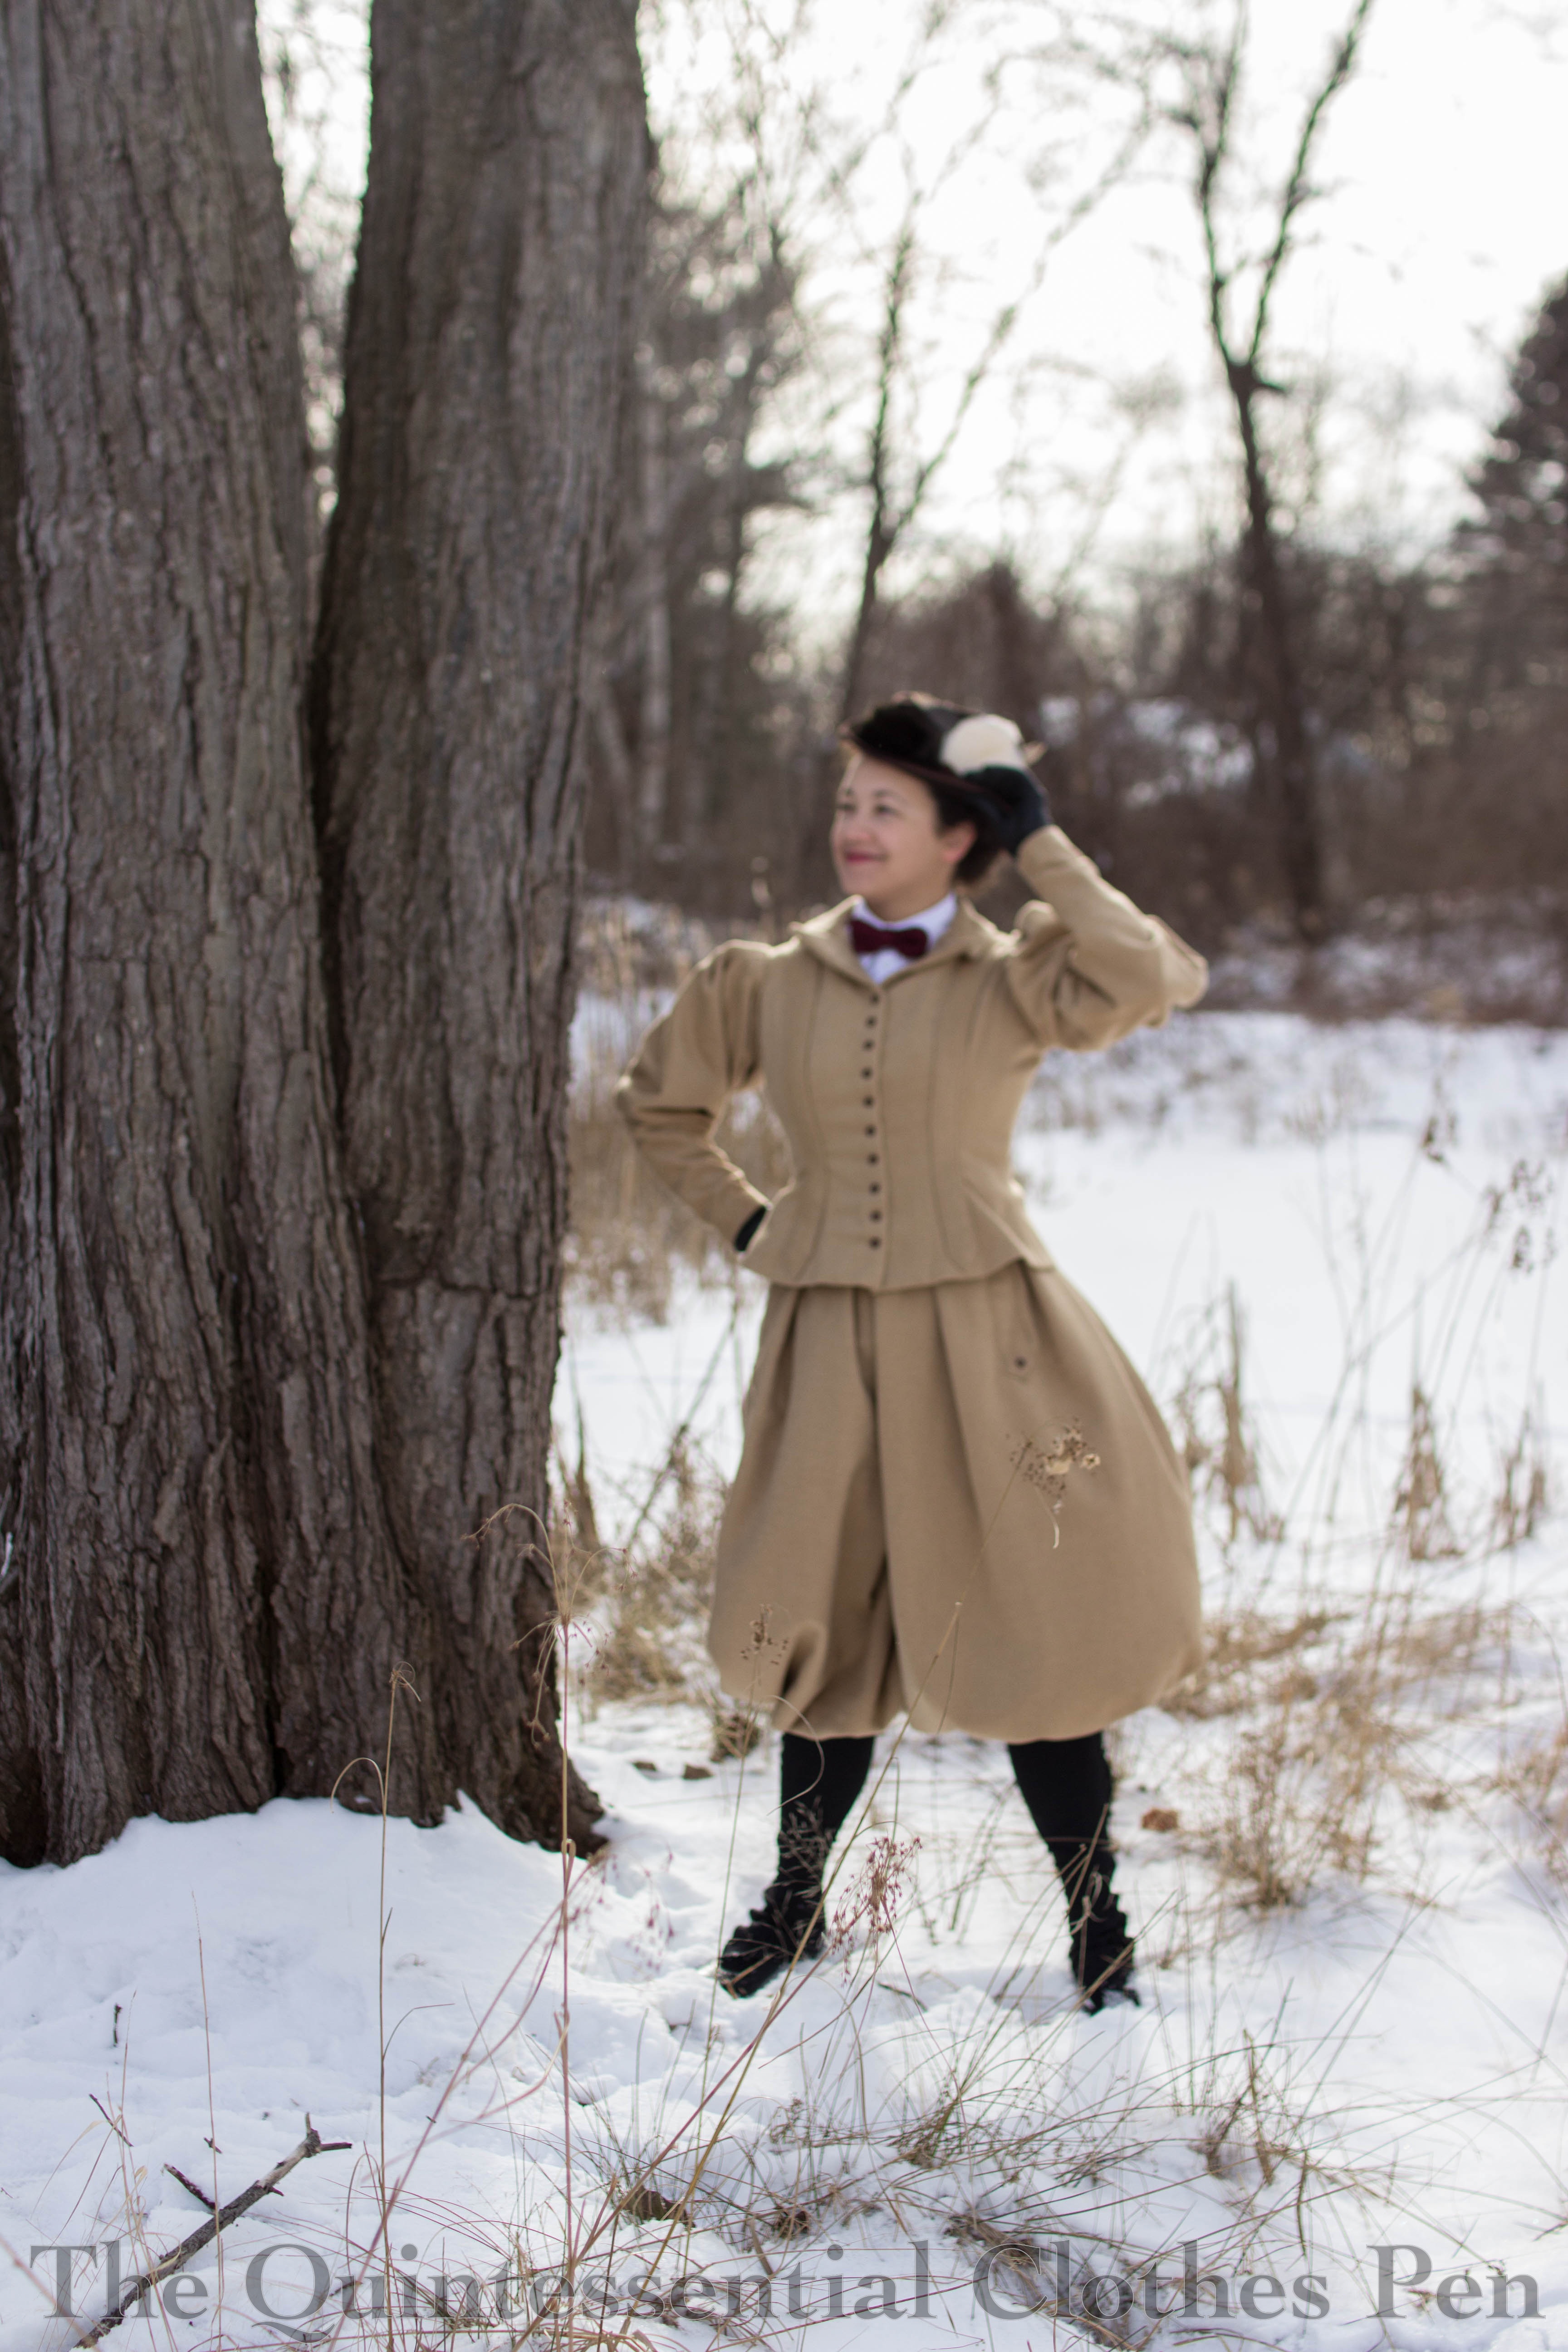
Here’s what the bloomers look like when the wind filled them out during our photoshoot. This gives a better idea of how much fabric is in each leg of the bloomers.
The Jacket

I wanted to have a tailor-made style with a lapel and collar that would follow the general style of men’s jackets in the 19th century. Most bicycling ensembles are of this style, due in part to the fact that this type of activity was traditionally a male pastime. The specialty clothing produced for men’s active pursuits was made by a tailor, so it follows that women’s clothing began to be tailor-made as well as they joined in these male activities in the later part of the 19th century.

I started with the pattern for my 1895 Skating Ensemble because I knew it had the general shape of the mid-1890s and that it already fit. That pattern was made by me, based on my inspiration jacket for that ensemble as well as patterns published in Authentic Victorian Fashion Patterns. I had already modified it to get the shape of the skating jacket, but I modified it even more to create this new jacket. I made these further changes:

  • Created princess seams on the front and back that run down from the shoulders instead of the armsceye
  • Joined the side back pieces to make a single wider piece instead of two narrower pieces
  • Moved the new side back seam towards the side seam
  • Added back pleats, front darts, and a lapel and collar
  • Shortened the length

At this point it’s really not close to the original pattern at all!

The sleeves are my standard 1890s gigot sleeve that originally came from Period Costumes For Stage and Screen. I wound up making a number of changes to the pattern to get a slightly different shape. Below you can see my progress.
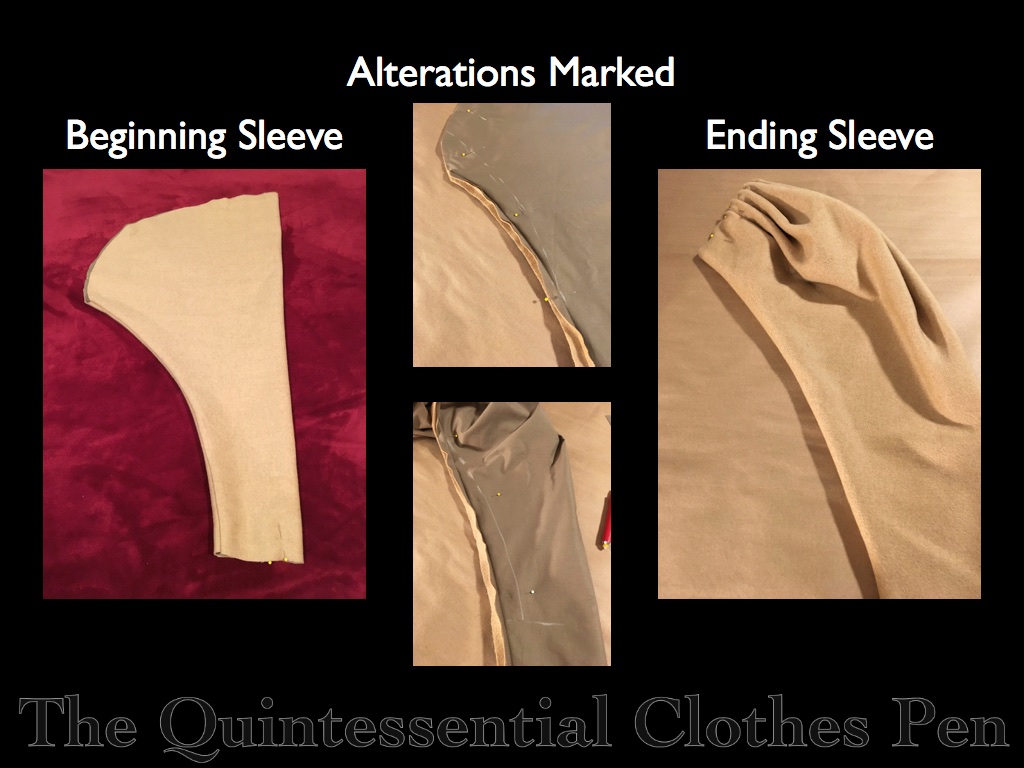
After trying out the original sleeve I made two major changes to the shape, angling the underarm seam at the top/making the top less full and angling the underarm seam at the bottom towards the wrist/shortening the length. After pleating each side of the new sleeve towards center I ended up with the sleeve shape on the right.

After I had a pattern I was confident with I started cutting my pieces. Each exterior piece was cut in wool and cotton in order to be flatlined. The front and collar facings are single layers of wool. There are also canvas interlining pieces for the front and collar.

The proper way to flatline is to pin your layers together and then (preferably) hand baste around each piece to hold the layers together while working with them. I opted to eliminate the basting step, using pins to hold the layers together until they were sewn. My fabrics were pretty sticky so this time-saving shortcut worked pretty well. You can see the pins holding the non-sewn edges together in this photo of the exterior after assembling the front and back pieces.

This is also one of the only steps that show the front darts, as those were hidden under the decorative strapping I added to the jacket later on. The other amusing thing here is that because I was cutting my garment pieces from multiple pieces of wool you can see a color difference here between the center back pieces and the other pieces. But it’s not noticeable in the finished jacket, so that’s good!

And here’s the jacket at the same point in the process, turned over to see the inside. Now the flat lining is clearly visible, as are the box pleats along the back seams. You can also see the canvas that runs down the fronts.

Here is just one side of the front. It gives a clearer view of the front dart and the canvas that supports the lapel and front edge.
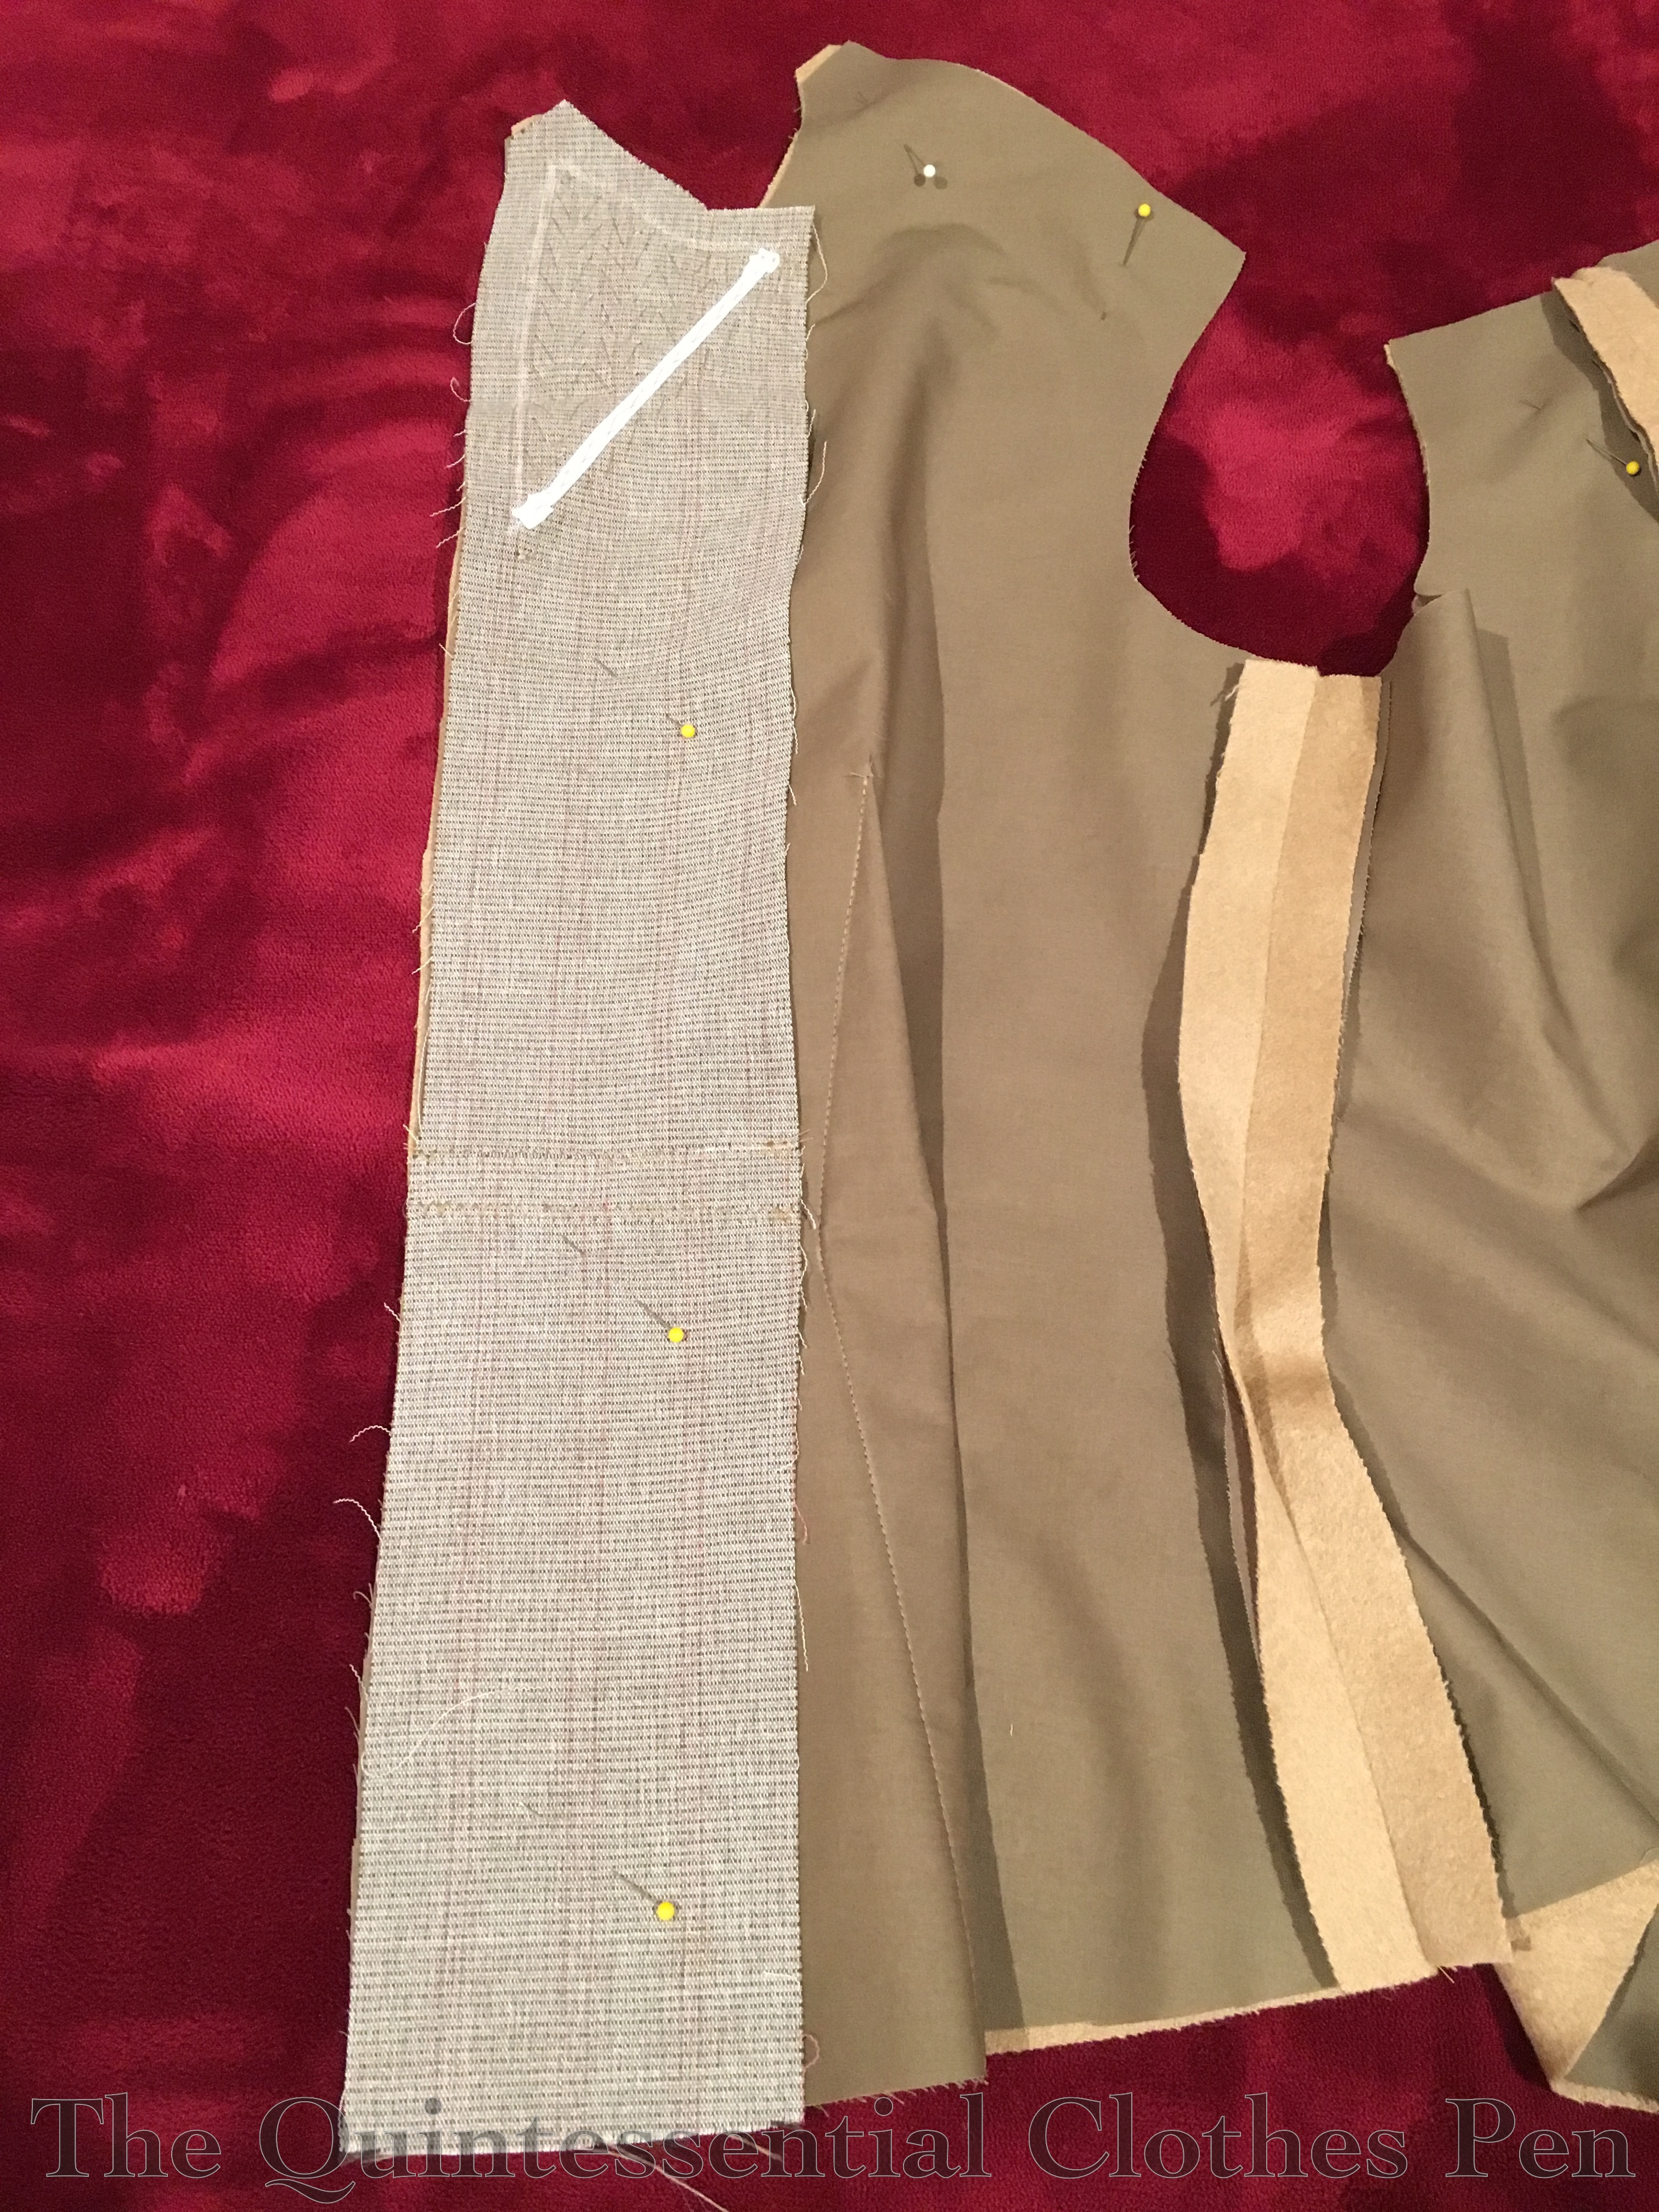
I pad stitched the lapel and taped the roll line in men’s tailoring fashion. These stitches help to support the roll of the collar. The tape running across the roll line snugs that distance in just a bit which helps the collar roll in exactly that spot.
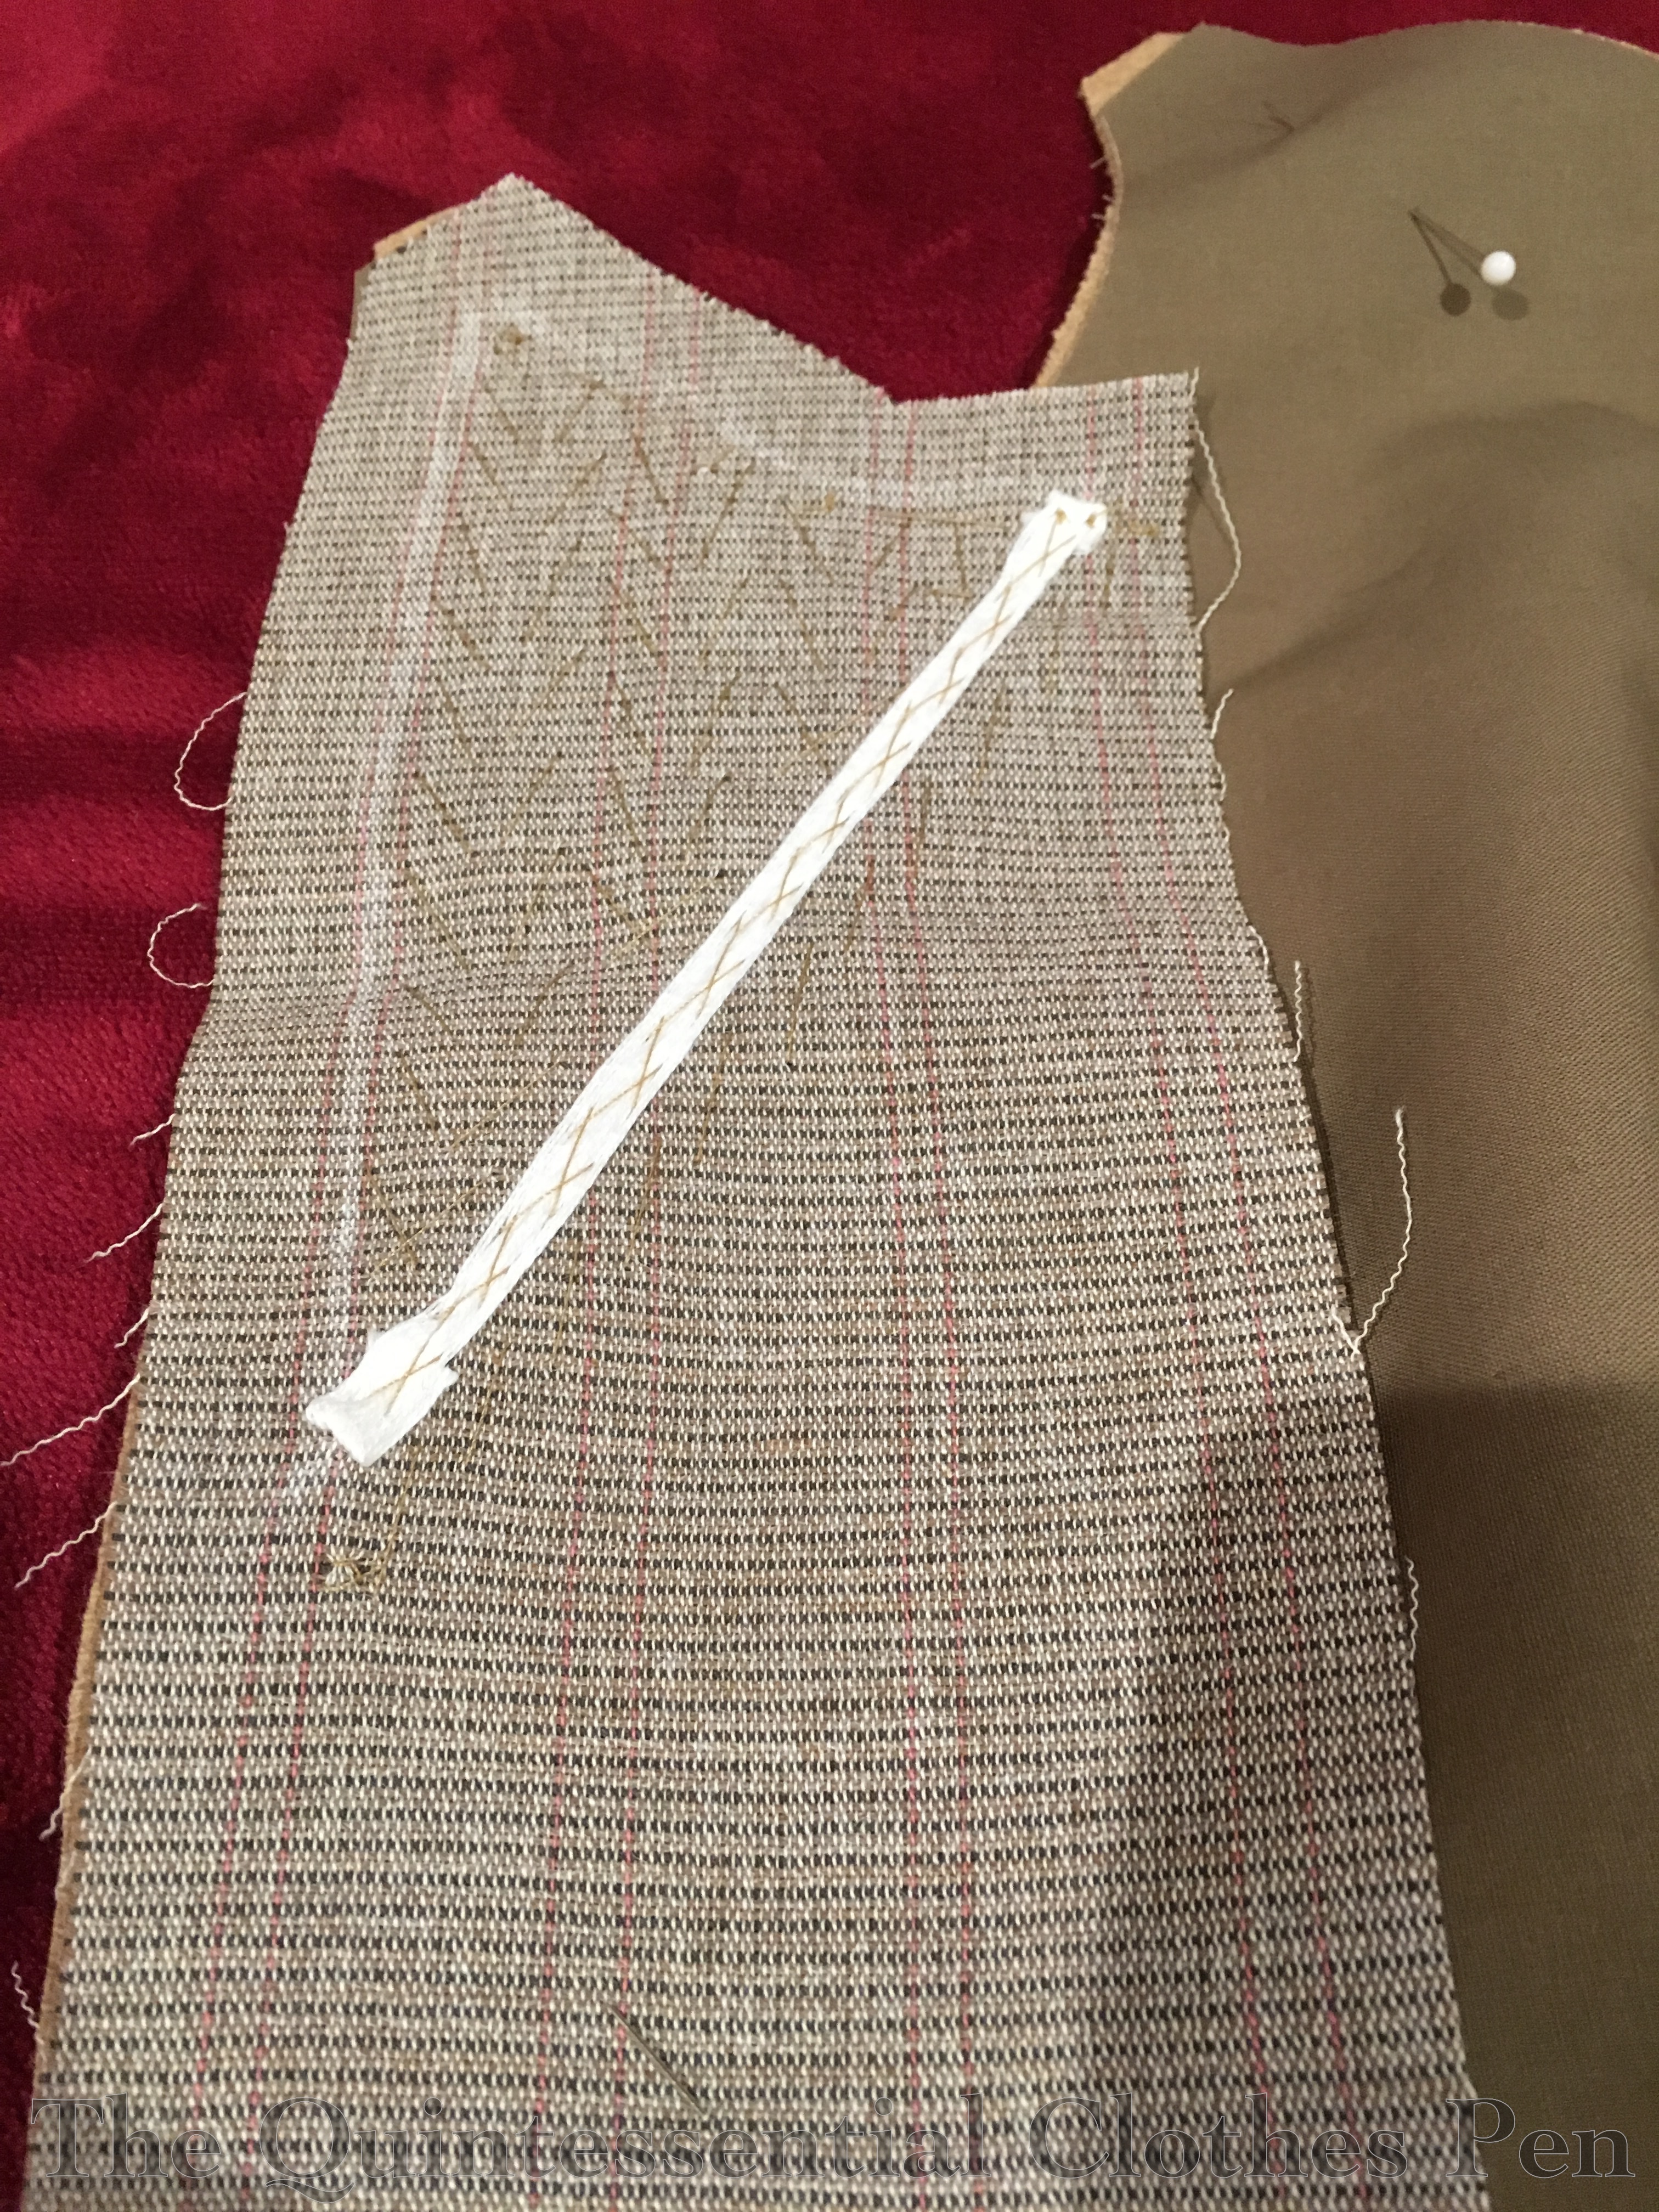
I decided not to try to pattern the strapping with the main body pieces. It just seemed too complicated to wrap my head around. I knew they wouldn’t be straight, as my body is curved, and I knew that making them on the bias would be a disaster to try and manage the edges of… I decided to deal with this step when I got there in the construction process.

Accordingly, when the jacket had all of the vertical seams assembled it was time to consider the strapping. I did this at this step, before sewing the shoulder seams, as I wanted the strapping front and back pieces to perfectly match along that seam. Easier to pattern flat than if I’d already sewn the shoulder seams!

I laid the jacket out on the table with a scrap piece of wool on top of it, put pins along the seam line to mark the location (so my strapping would hide the seam), and then drew a strapping shape I liked around that. As you can see, I didn’t follow the curve of the seam perfectly. That was an intentional choice, as I wanted the strapping to have a similar curve as the curve on the strapping of my inspiration jacket (here is the link to that again, in case you want to take a look and not scroll all the way up to the first link).

I repeated this process for the front (which was trickier with the shaping that dart creates!) then cut out four of each piece. I decided to finish the edges by making a tube that was topstitched by machine before being hand sewn to the jacket

I can’t imagine how horrible it would have been to try to topstitch the straps onto the jacket! Bad… very, very bad! And trying to turn the edges under and then topstitch would not have provided enough stability for crisp edges and would also have been a frustrating experience. Thank goodness I avoided those potential problems!

Here are two of the four straps, pinned and ready to be stitched together. The only edge I left open is the straight edge (at the right) that would go into the shoulder seam. After being sewn and trimmed these were turned right side out, pressed, topstitched, and carefully placed at the shoulder seam so that they would match up perfectly when the seam was stitched. The edges of the straps were then invisibly hand sewn to the jacket.

Here’s the end result. The straps look topstitched onto the jacket, but they are actually finished pieces that are fully sewn down in front but only attached above the pleats in the back, allowing the bottoms to flap amusingly! This detail is again taken from my inspiration jacket (and here is the link to that again).

As I mentioned earlier, the bloomers also have a strapping detail taken directly from my inspiration bicycle outfit at The Met. Those were carefully patterned–they look straight at first glance but are actually slightly angled and tapered. They are made in the same way as the jacket strapping pieces, though as I mentioned earlier, they were more complicated to put onto the bloomers as they conceal a placket on one side and a pocket on the other. That was a figure it out as I go experiment that required precision and quite a bit of puzzle-solving!

The collar was interlined with canvas and pad-stitched to provided stability for the shape. Then it was sewn around the edge by the machine and the seam allowances were graded before I turned it right side out.

The sleeves are pleated to take in the fullness to fit the armsceye. There are 10 pleats total, each about ½” (1″ total) in depth. Here’s a photo looking down into the sleeve with all the pleats pinned in place. The box pleat (that is slightly off center in the photo) is the top of the sleeve when it’s set into the armhole of the jacket.

In this next photo we’ve progressed quite a few steps! The sleeves are set, the collar is on, the front wool facings are on, the collar edge and facing edges are turned under and hand sewn in place. I’ve finished the bottom edge of the jacket with a bias strip of cotton that was machine sewn then pressed to the inside and hand sewn into place (this is also how I finished the sleeve cuffs). The buttons are on and the buttonholes sewn by machine. I’ve whip stitched all of the seam allowances to keep them from fraying and added some extra support for the sleeve caps. I’ve also added a waist stay. Quite a few hours of work to condense into one paragraph!

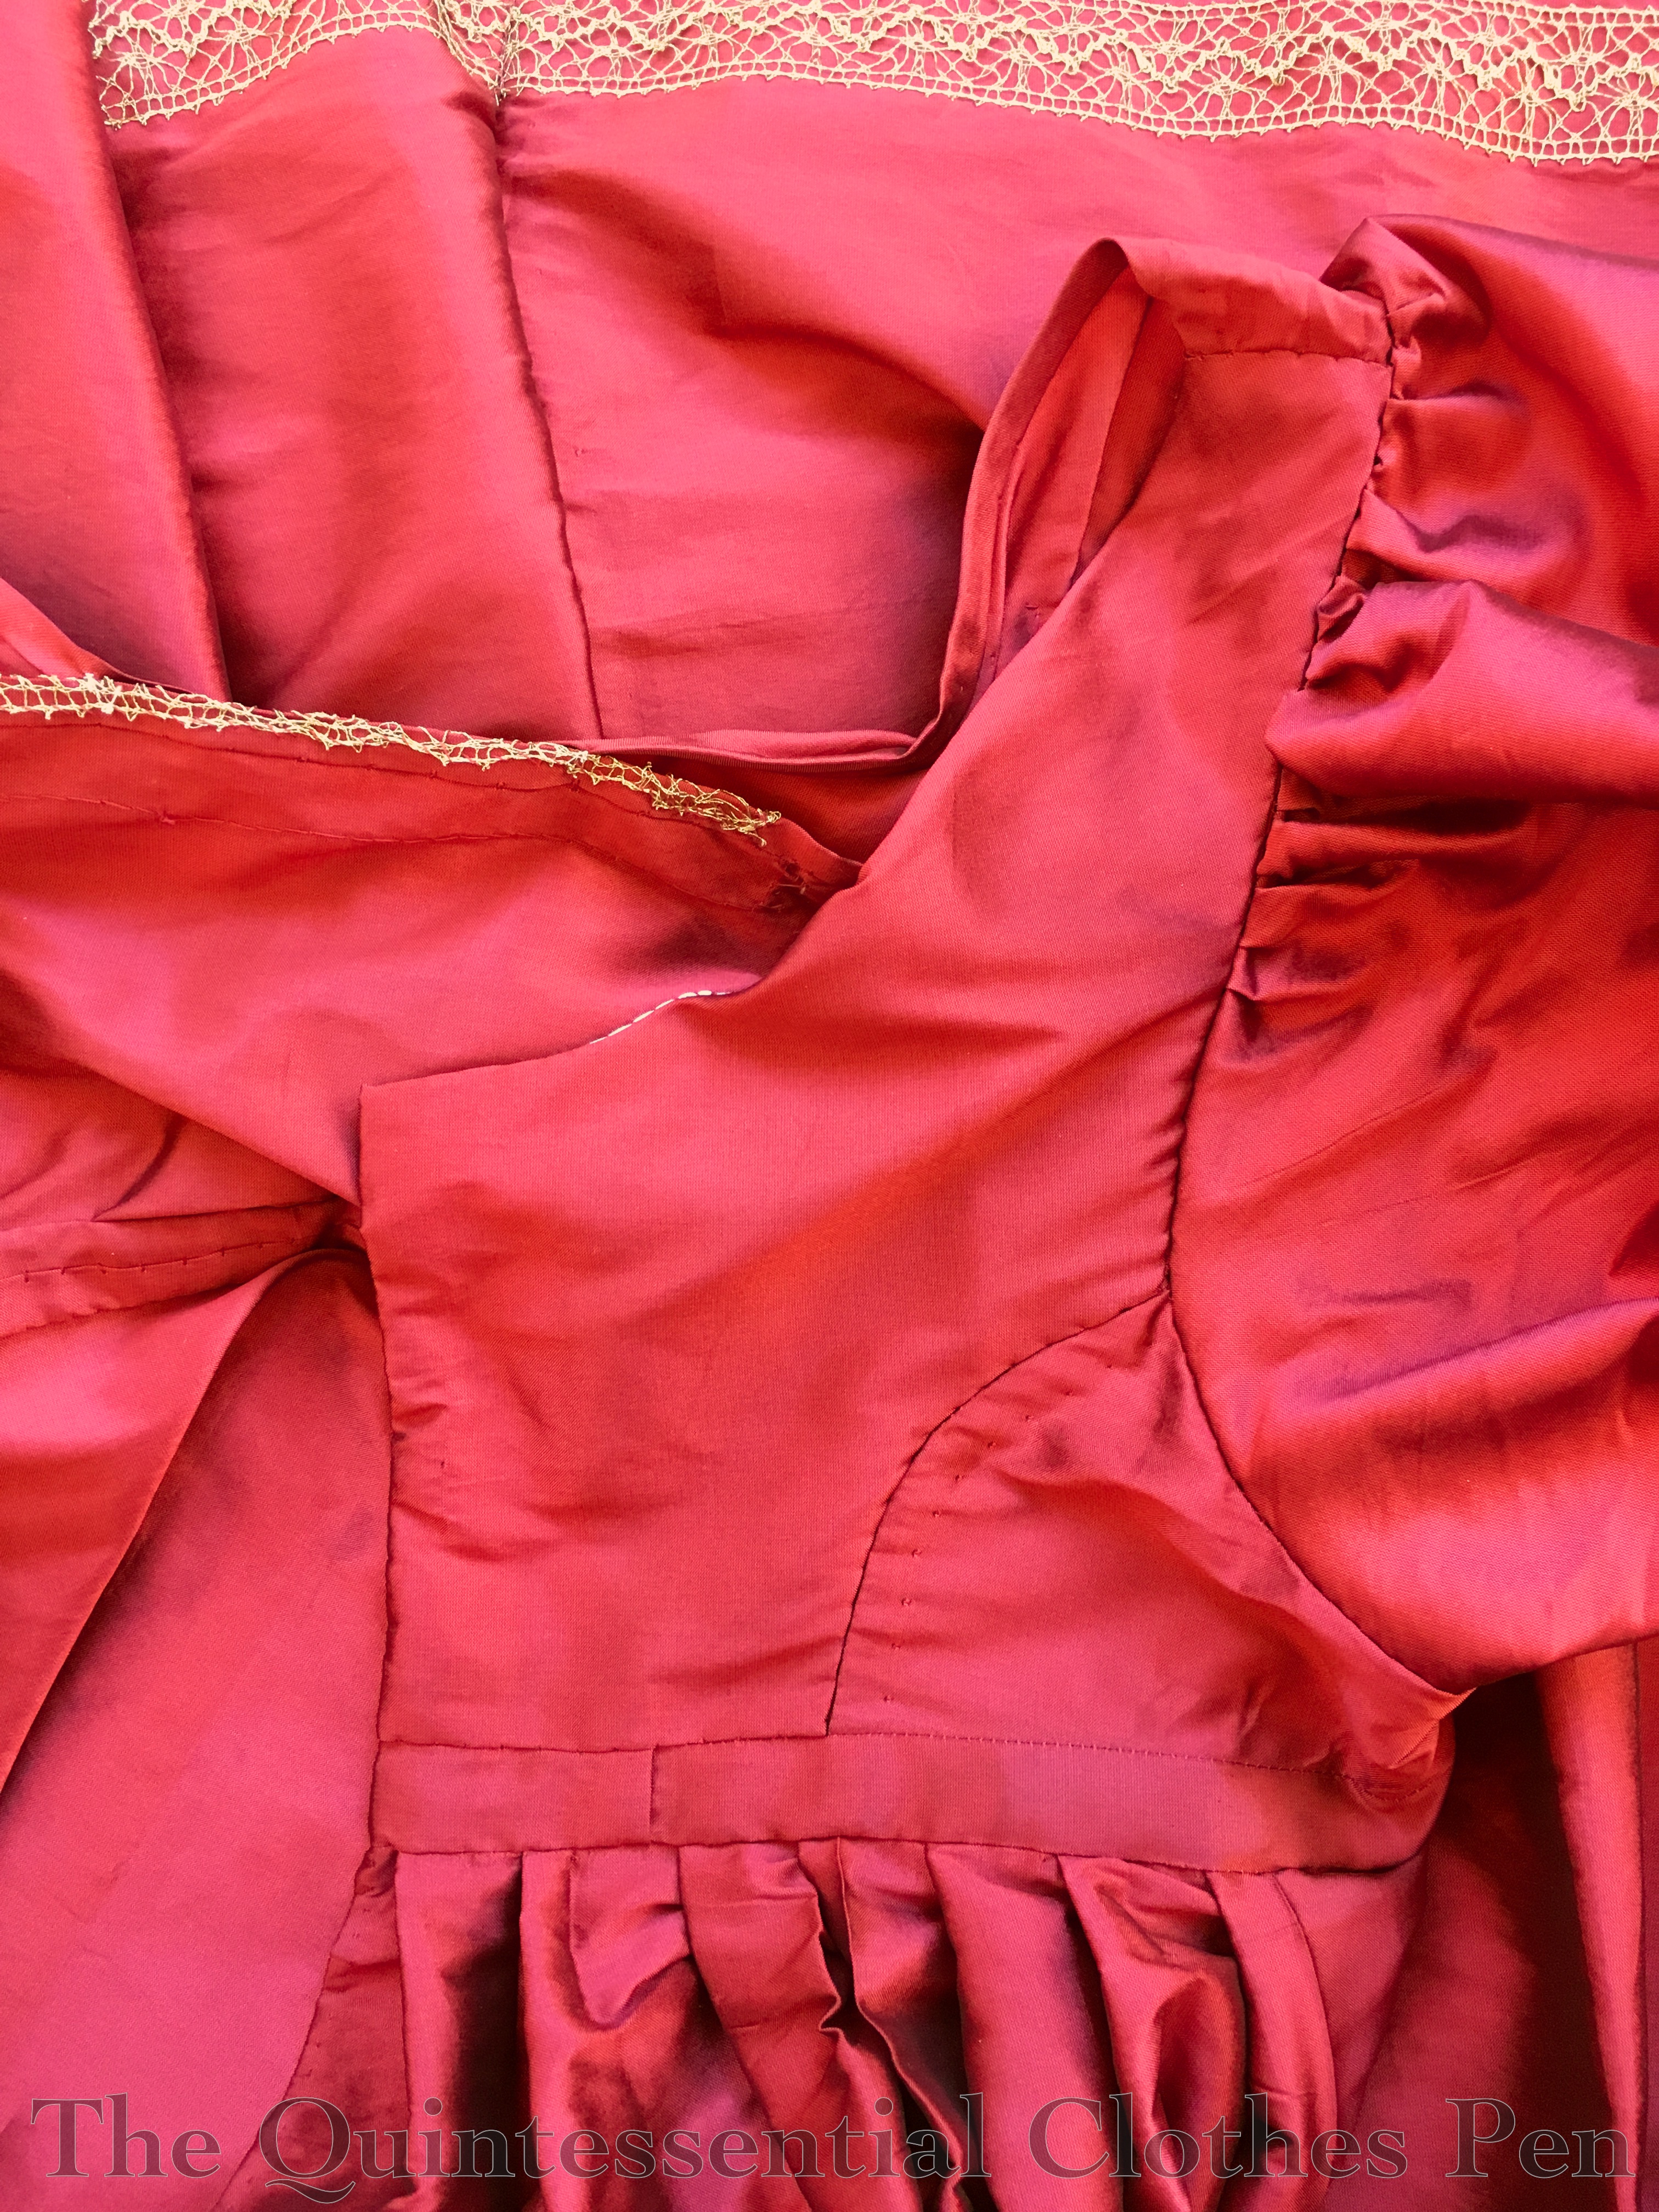
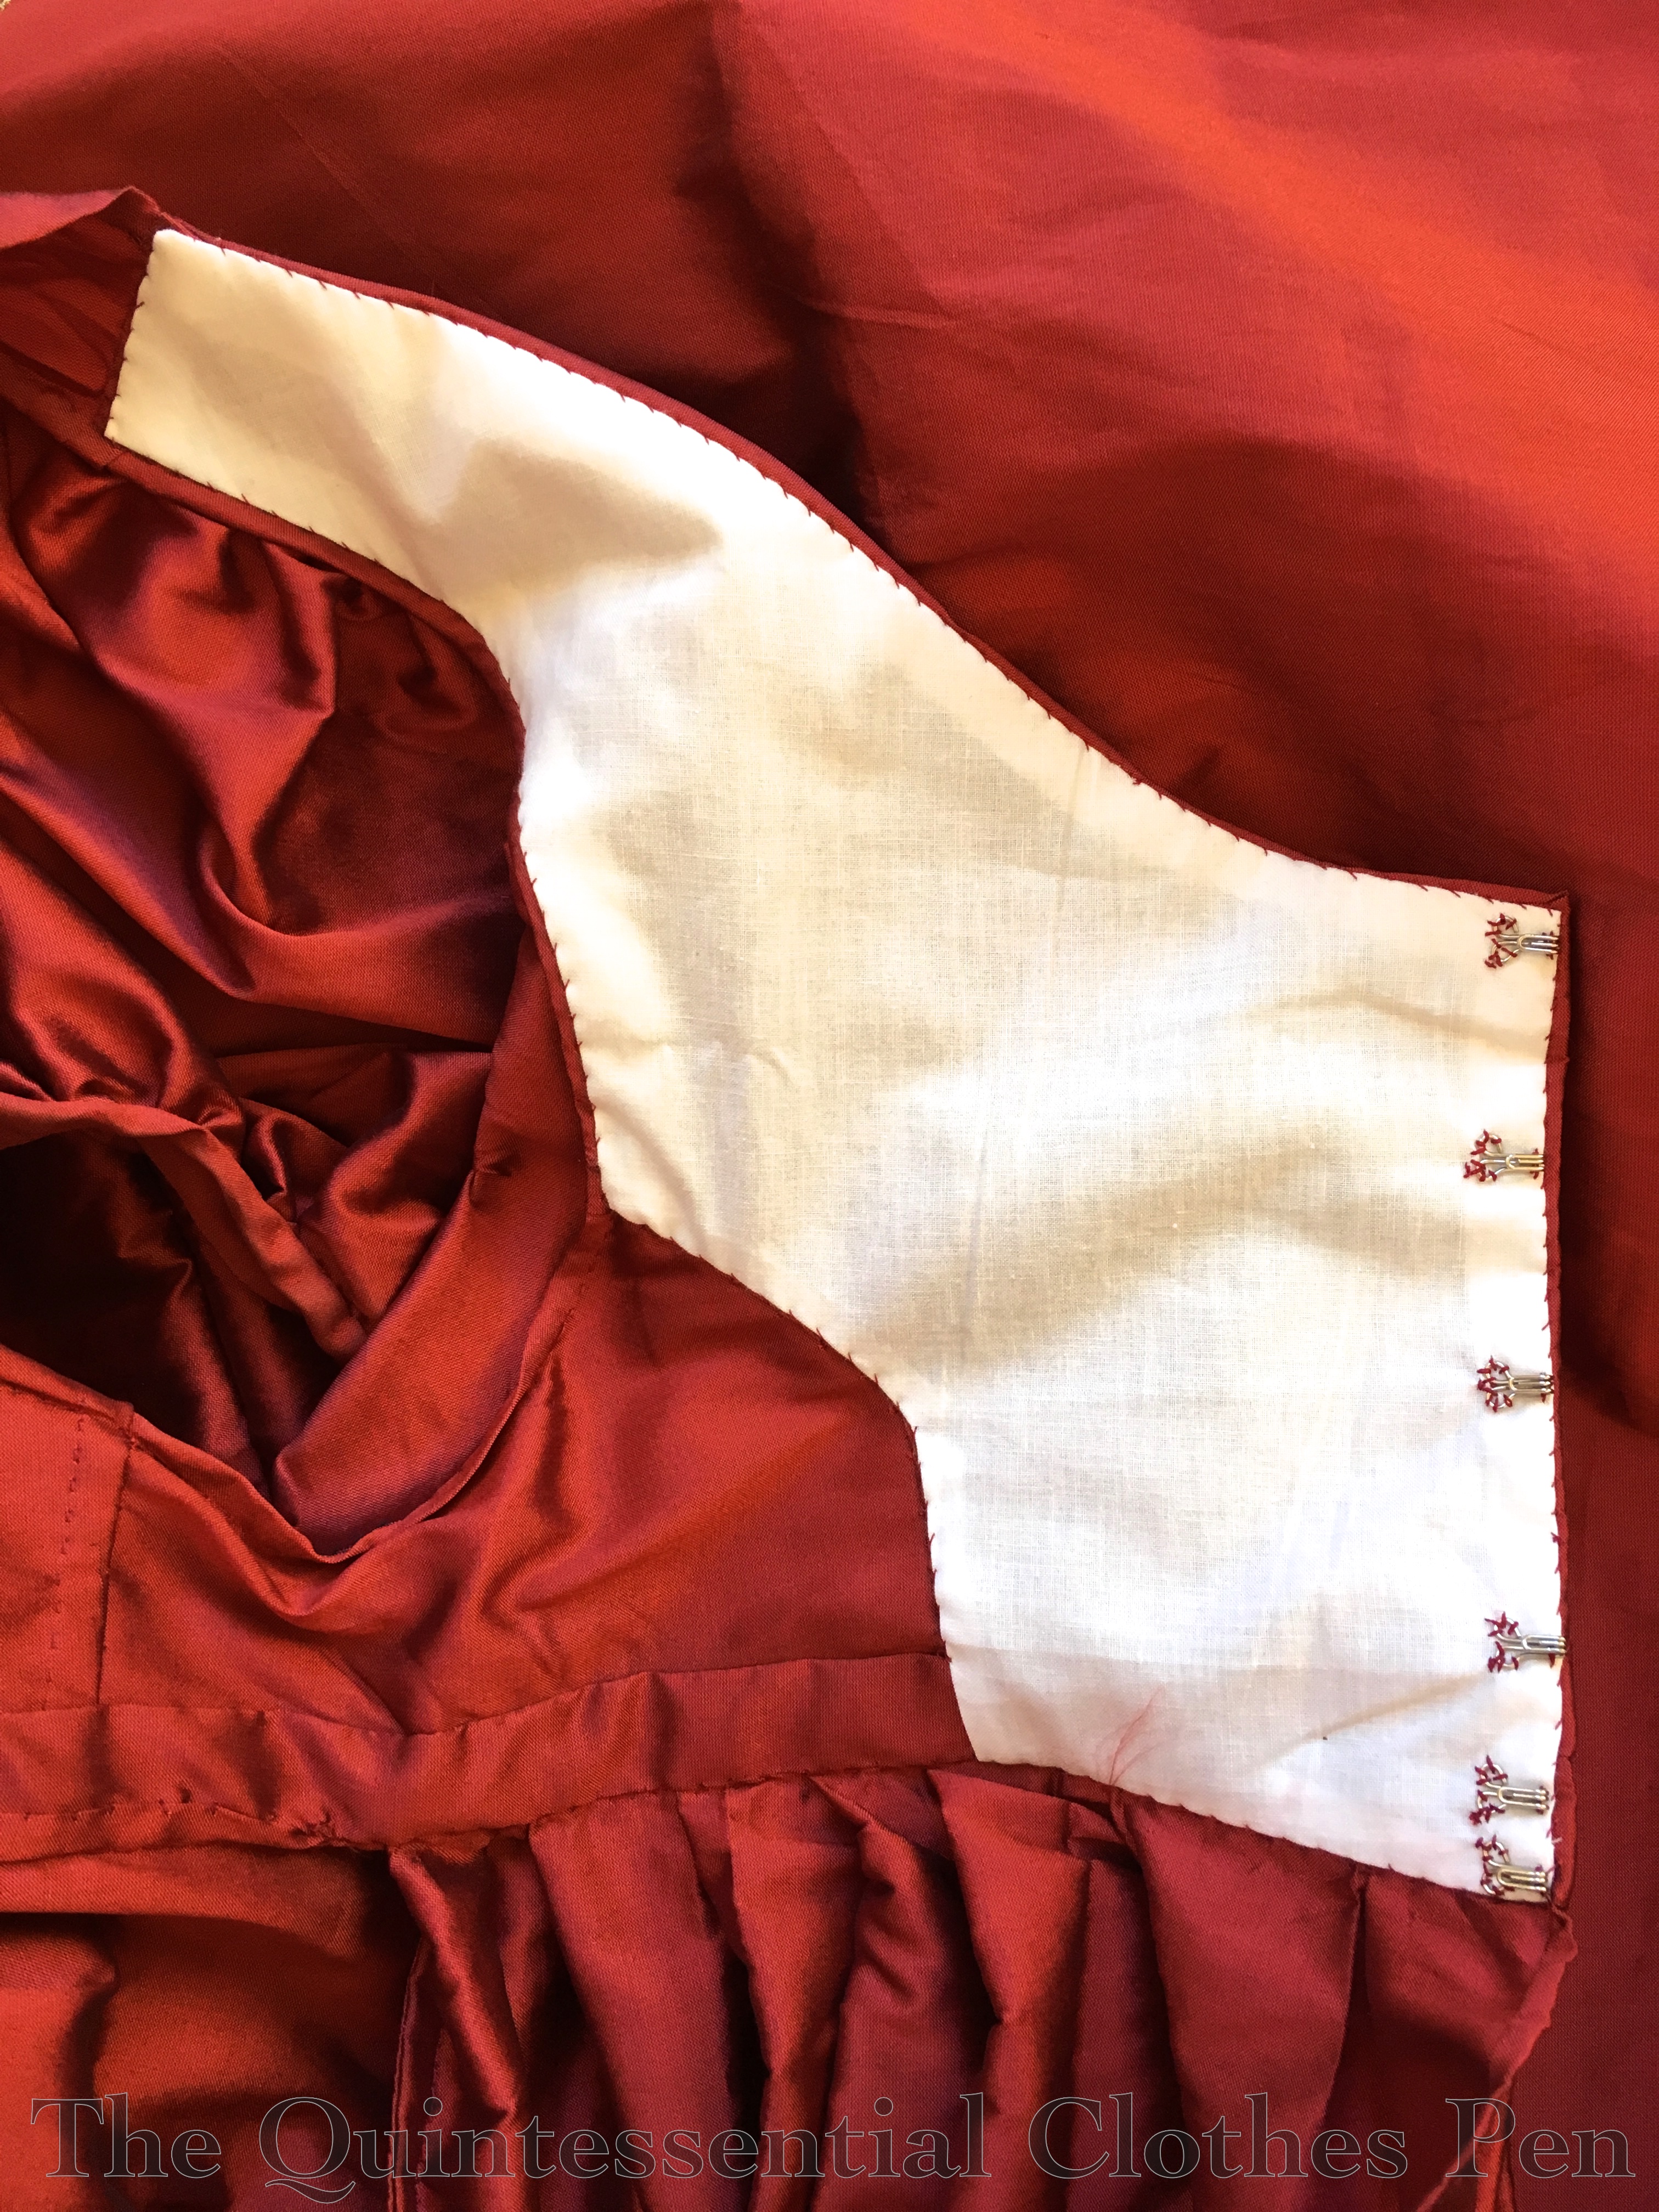
The waist stay is a grosgrain ribbon sewn to the seam allowances that hooks in the front. Its purpose is to keep the jacket tight against my lower back and to keep the jacket from riding up as I use my arms. The photo below shows a close up of this as well as a number of other details–the bias binding at the bottom, the whip stitched seam allowances, and the pleats tacked to the lining along the top edges.

The sleeve pleats wouldn’t stand up on their own which made me a bit sad. My solution was to give them a bit of support… in this case I reused stiff net sleeve headers removed from 1980s dresses that I have a whole bag of in my stash. Each jacket sleeve has two of these sewn into the armsceye such that they stand up off my shoulder and help to support the pleats. In this photo I’ve just flipped them out to make them easier to see, but normally they’re tucked up inside the sleeve.

I also tacked the pleats together by hand about 1.5″ away from the seam. This helps keep the pleats nicely arranged and pointing up, which helps keep the fullness of the sleeves in check. In the end, this sleeve isn’t quite the same shape as my Met inspiration (here’s the link one more time), but that’s because it would have taken a lot more patterning time to determine exactly how the Met sleeve is shaped. I wanted to use my existing sleeve pattern and so I’ve decided to be happy with the sleeves I have.

To recap, all these details and construction steps produce this! Slightly subdued 1890s puff sleeves, tailored jacket details, interesting strapping patterns, and bloomers!
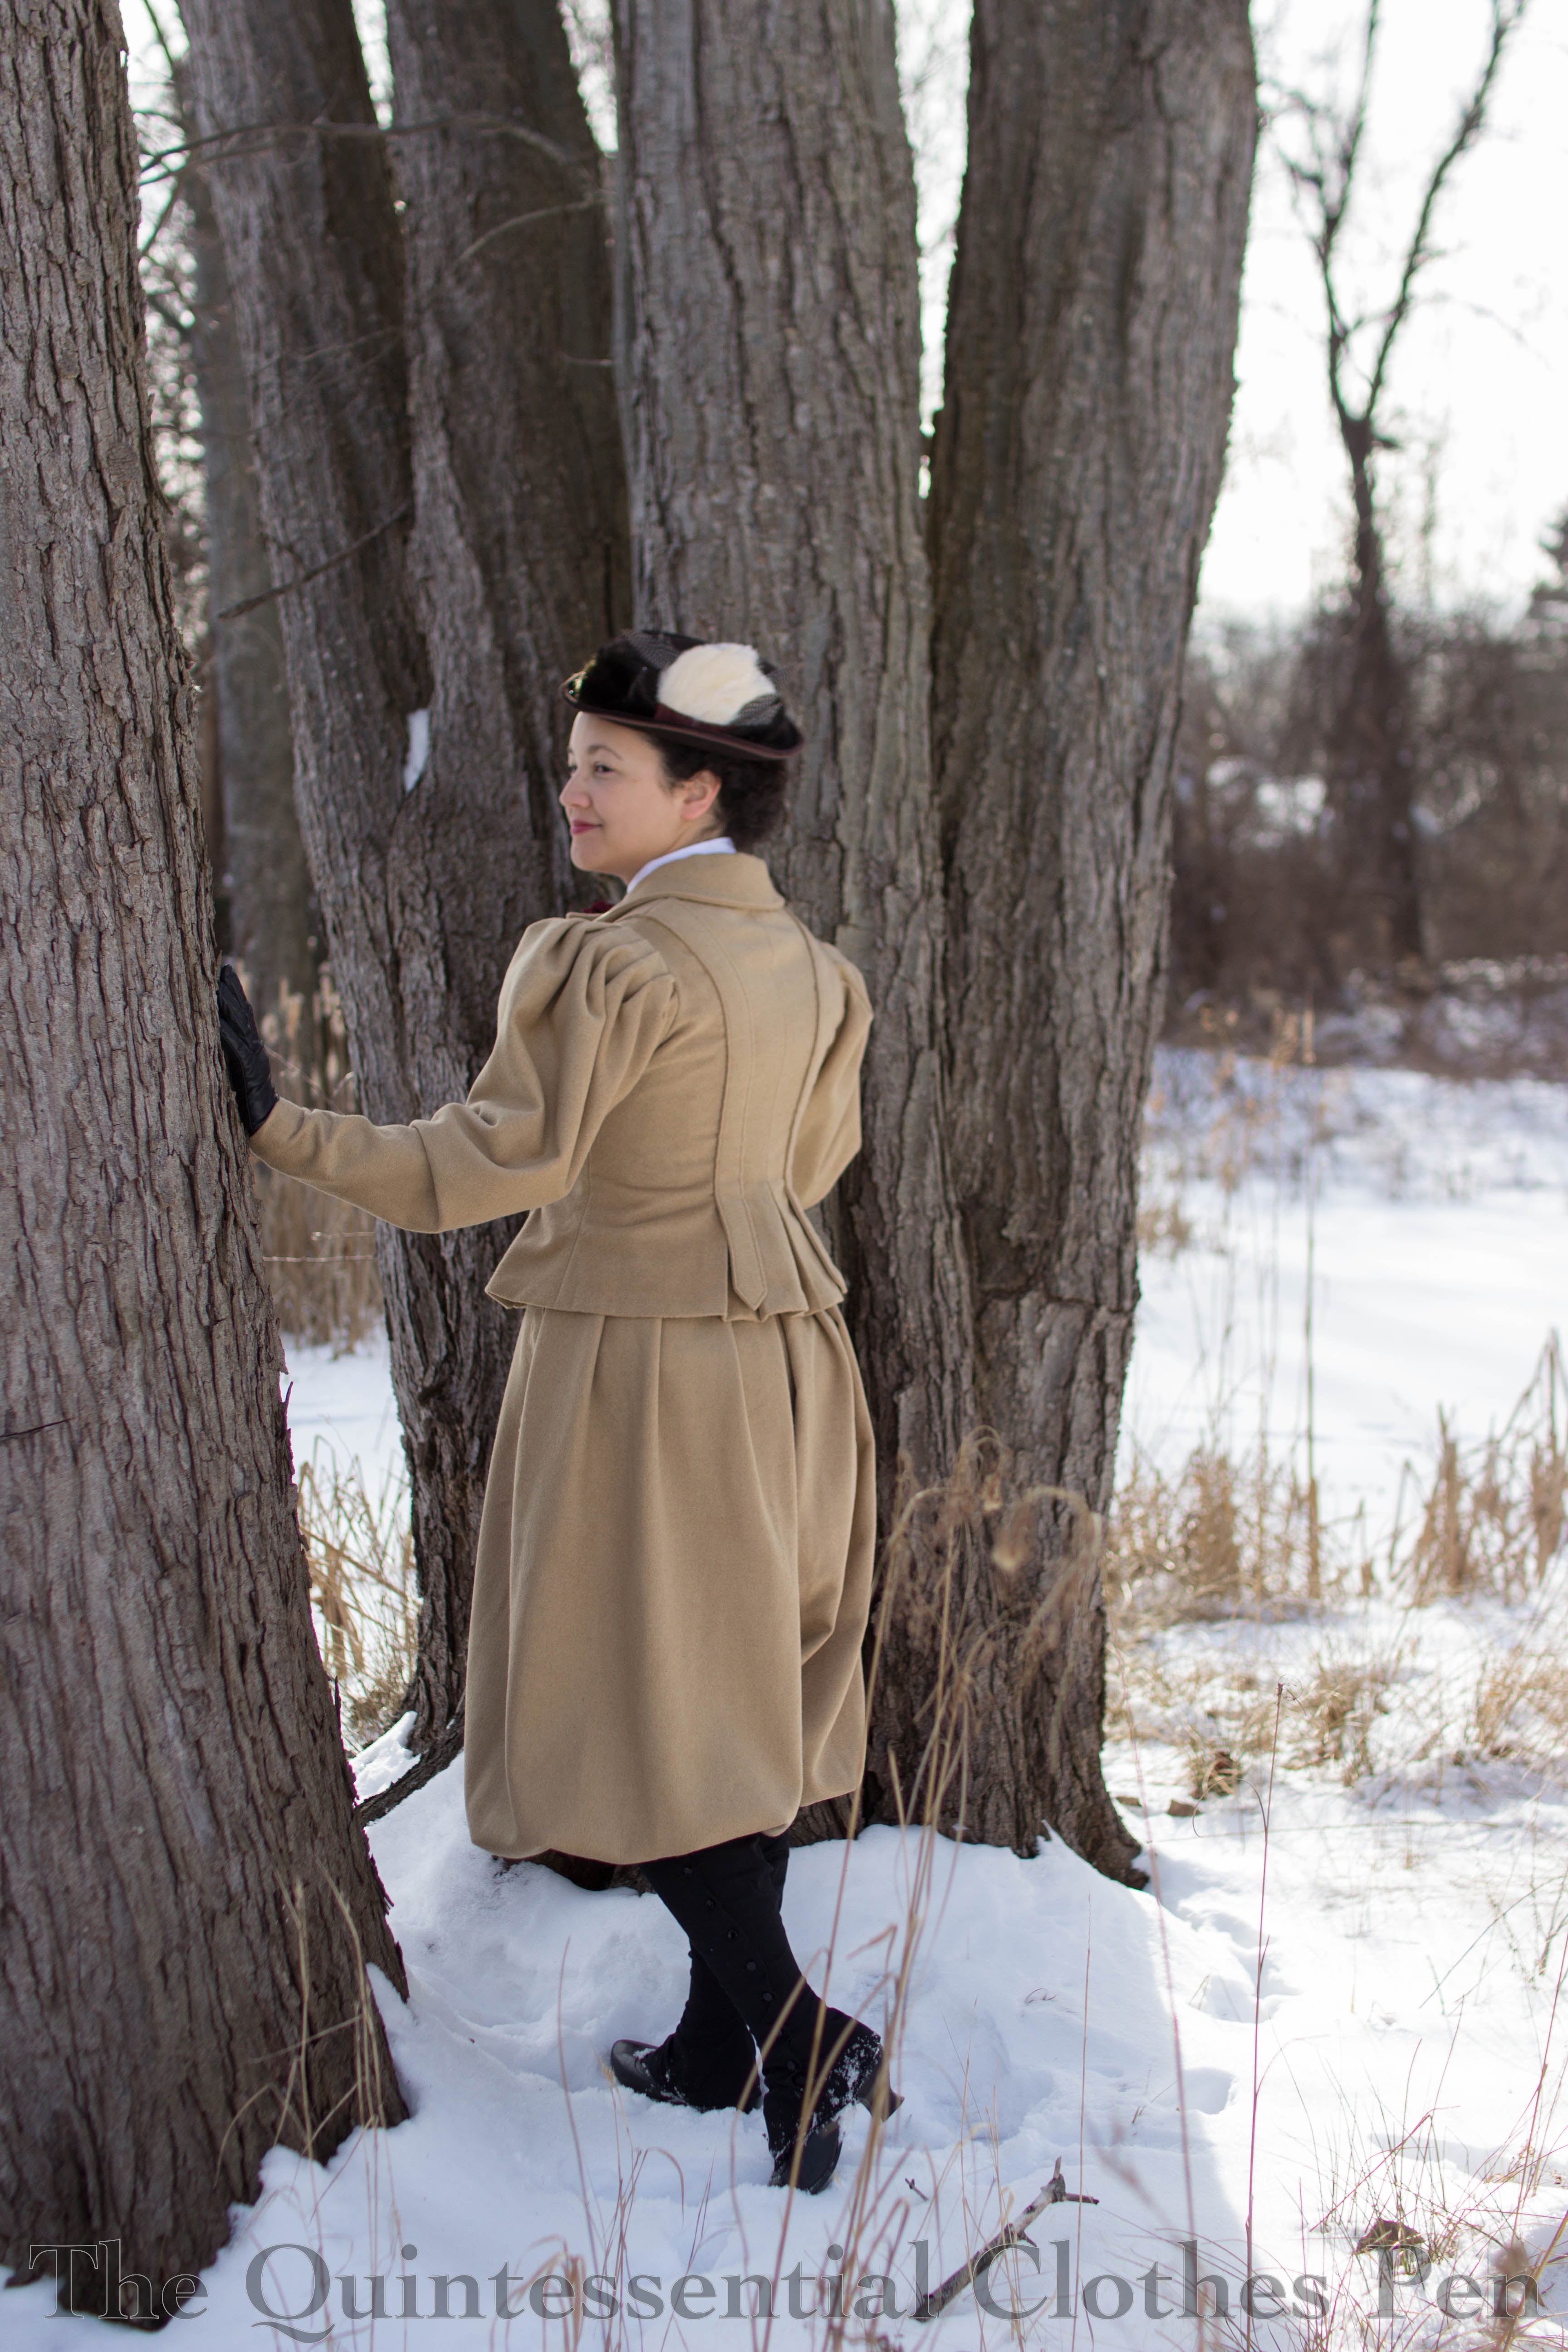
People sometimes ask me how long it takes to make my garments and often I don’t have a good answer as I don’t actually pay attention. I’m in it for the enjoyment of sewing and unless something is going wrong and I’m frustrated I generally enjoy the process. For this ensemble I kept track, though, and I can report that it took me 22 hours to pattern, fit, cut, tailor, sew, and finish this jacket and bloomer ensemble.

I’ve collected some (but by no means all!) images of bicycling ensembles on my 1890s Sportswear Pinterest board if you want to see more of my visual research and inspiration. Thanks for sticking with me for a lengthy post!

Giving Old Hoops New Spots

Spots are this nifty piece of hardware that can be used to secure interlocking pieces together. They’re similar to a brad in that they have two prongs on the back of a circular top. The difference I see is that they have a domed top and the prongs come out from other side rather than the center.

Back in April, I posted about the dimensions of my large hoops and how I made my new smaller hoops and stated the goal of adding spots to my old hoops just like I had done for the new hoops. Over the last six months I’ve been slowly adding the spots to my old hoops and I’m pleased to report that the process is complete! My ten year old hoops have reinvigorated life!

For the new smaller hoops I used brass colored spots, but I decided to change it up for my older hoops and used gold colored spots instead. (Both of the spots were purchased from this seller on eBay, who I would certainly recommend.) I’d originally intended the vertical tapes on these old hoops to be able to slide around when needed so that I could force the hoops into an elliptical shape, but since I haven’t done that even once in the last ten years I figured that if/when I want elliptical hoops I’ll make a new support structure and will reinforce these hoops in their current cupcake shape instead of contingent to allow them to be adjustable.

My spots are positioned so that the prongs are at the top and bottom of each horizontal wire. I poked the prongs through the twill tape then used pliers to bend the prongs towards each other to secure them in place. The nice thing about the spots is that as they are folded back you have control over how tightly they are attached. So technically they are still loose enough that I can scoot the vertical tapes around if I really want to. But will I? Probably not.

c. 1860 Crinoline Size Comparison & Tutorial

Back in October of 2016, I made a new, smaller crinoline (also called a hoop skirt) than the one I’d had for about the last 10 years. I thought it would be great, and it was… in terms of shape. Unfortunately, the new crinoline had a fatal flaw: the channels for the hoops were too wide for the slippery-ness of the hoops and therefore all the tapes would slide to one side while being worn, causing the hoops to drop down and create a trip hazard for the wearer. I had loaned these to a friend at a ball and was horrorstruck as I realized the problem and she attempted to dance without realizing the problem. It was such an awful feeling! We solved the problem for the night, but I resolved to fix the hoops before wearing them again and I learned a good lesson about trying out new garments myself before loaning them! I’ll get to my solution for the sliding hoops in a bit, but first I’ll start at the beginning.

The new crinoline was an experiment to see if I could use the hooping from a cheap Amazon hoop skirt like this to create a cage crinoline with smaller dimensions than my usual crinoline, the super-cupcake, which has a decidedly high fashion silhouette. The answer to that question is ‘yes’ it was easy to reuse the hoop steel from the Amazon crinoline to make a cage crinoline.

You see, the super-cupcake looks great with the right circumference of skirt and the right environment (high fashion daywear or a ballroom); however, under a cotton day dress I wanted a more subtle, practical, reasonable shape. I have to admit to liking a big skirt though, so a reasonable crinoline for me still has a larger circumference than what it might be for others. Also, at 5’6″ I am taller than the average woman, which allows me to carry off a larger circumference while staying within reasonable looking proportions. (For more thoughts on practical sized crinolines, Maggie May has shared useful research and an equation to help determine crinoline circumferences.)

Here’s a comparison of my two crinolines worn with cotton dresses: the super-cupcake is on the left and the newer reasonable crinoline is on the right.

Interestingly, the dimensions of these two crinolines aren’t terribly different. The lowest hoop is only about 8″ smaller  on the new crinoline. The biggest difference (and what alters the silhouette most) is that the new crinoline has a more tapered shape in the upper hoops.

I’ve provided the following size chart in an effort to help those who might be making or adjusting their own crinolines. Even if you don’t want to deal with all the vertical tapes, you can use these dimensions to adjust the hoop sizes in a ready-made modern crinoline to achieve the same effect.

Interestingly, both of these crinolines have the same vertical tape length that is short enough to keep the bottom hoop decidedly above the floor. The lowest hoop on these is about at my mid-calf height. This keeps my feet from getting tangled–especially useful while dancing! In order to keep my dresses from folding under the bottom hoop as I move, I have a cotton petticoat with a substantial ruffle around the hem which provides stability for the dress worn on top. You can see the length of the super-cupcake on me as well as the ruffled petticoat that I wear over both crinolines in this post.

Here are my two crinolines next to each other while the new one was still in progress. They have an overall similar construction (although I did simplify the new ones, using fewer hoops and fewer vertical tapes).

My old crinoline used ivory twill tape for the vertical supports. There are actually two layers of it that are hand sewn together to make channels for the hoops, creating channels along the lines of those seen in this 1859 hoop skirt patent filed by James Draper of New York (while the hoop circumferences are not provided in the patent, the silhouette of Draper’s hoop skirt is similar to that of my super-cupcake). This method used a ridiculous amount of twill tape, so I came up with a way to make the new channels that would use only one layer of twill tape for each vertical support. More on that in a moment.

The old crinoline’s hoops are made from cotton covered steel that was in a ribbon form originally. I had cut each ribbon in half (and over time, the fabric covering started to fall off, which caused me to painstakingly wrap each hoop all the way around with thread to make it more durable–a caution to anyone else using this to make a crinoline, although I’m not sure where you’d source this type of material these days as I believe this type of ribbon wire is no longer being produced). The fabric covering combined with the narrow channels in the twill tape means that the vertical ribbons only slide when I want them to, but that they otherwise stay in place nicely.

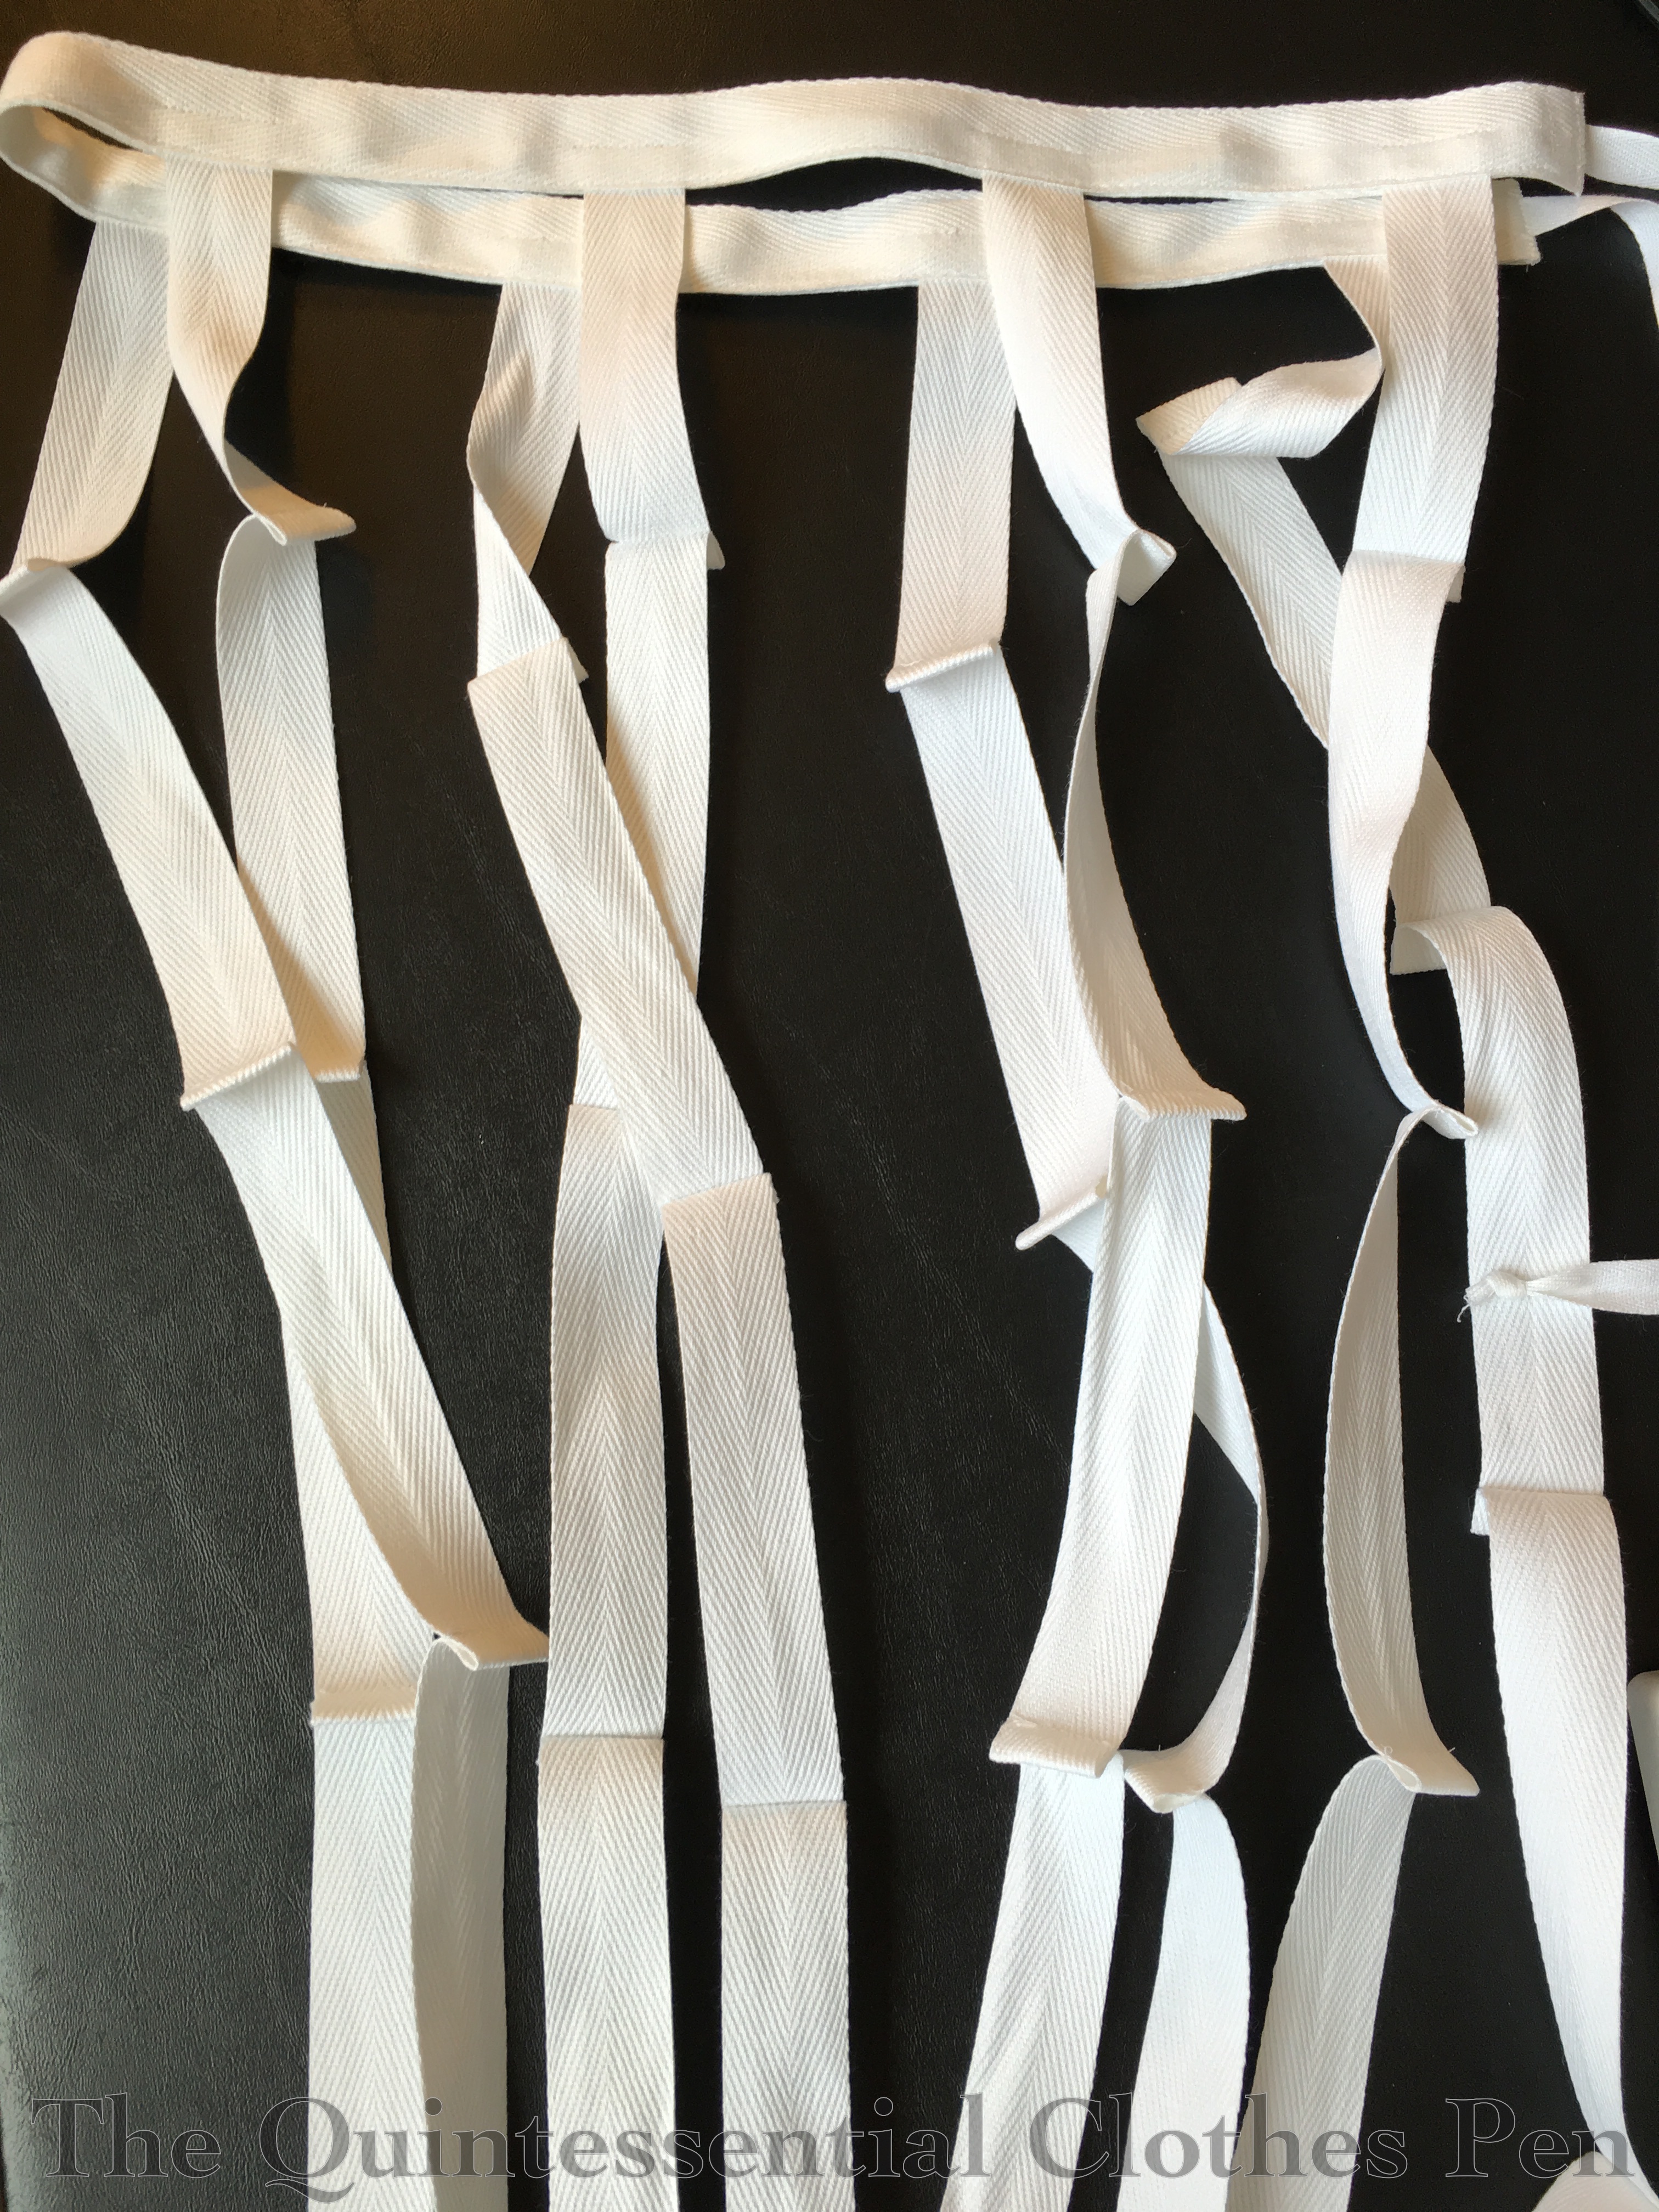
For the new crinoline, I machine sewed tucks into a single layer of twill tape to create channels for the hoops. You can see those tucks in the photo below.

I also machine sewed the vertical tapes to the twill tape waistband, because why not–I was machine sewing anyway. The waistband is two layers of twill tape sandwiched together.

That’s basically it for the construction before the awful incident of loaning them out. I cut the hoops to be the dimensions I wanted, slid them through the channels, and used the plastic joiners that had come with crinoline to secure the ends. Done! Or so I thought…

After realizing that these hoops were going to slide horribly, I went back to research to figure out how this problem was solved in the past. What I noticed are little metal dots on each join of hoop to vertical support. That makes so much sense! I wanted to add these to my hoops but I didn’t know what to call them while searching for materials.

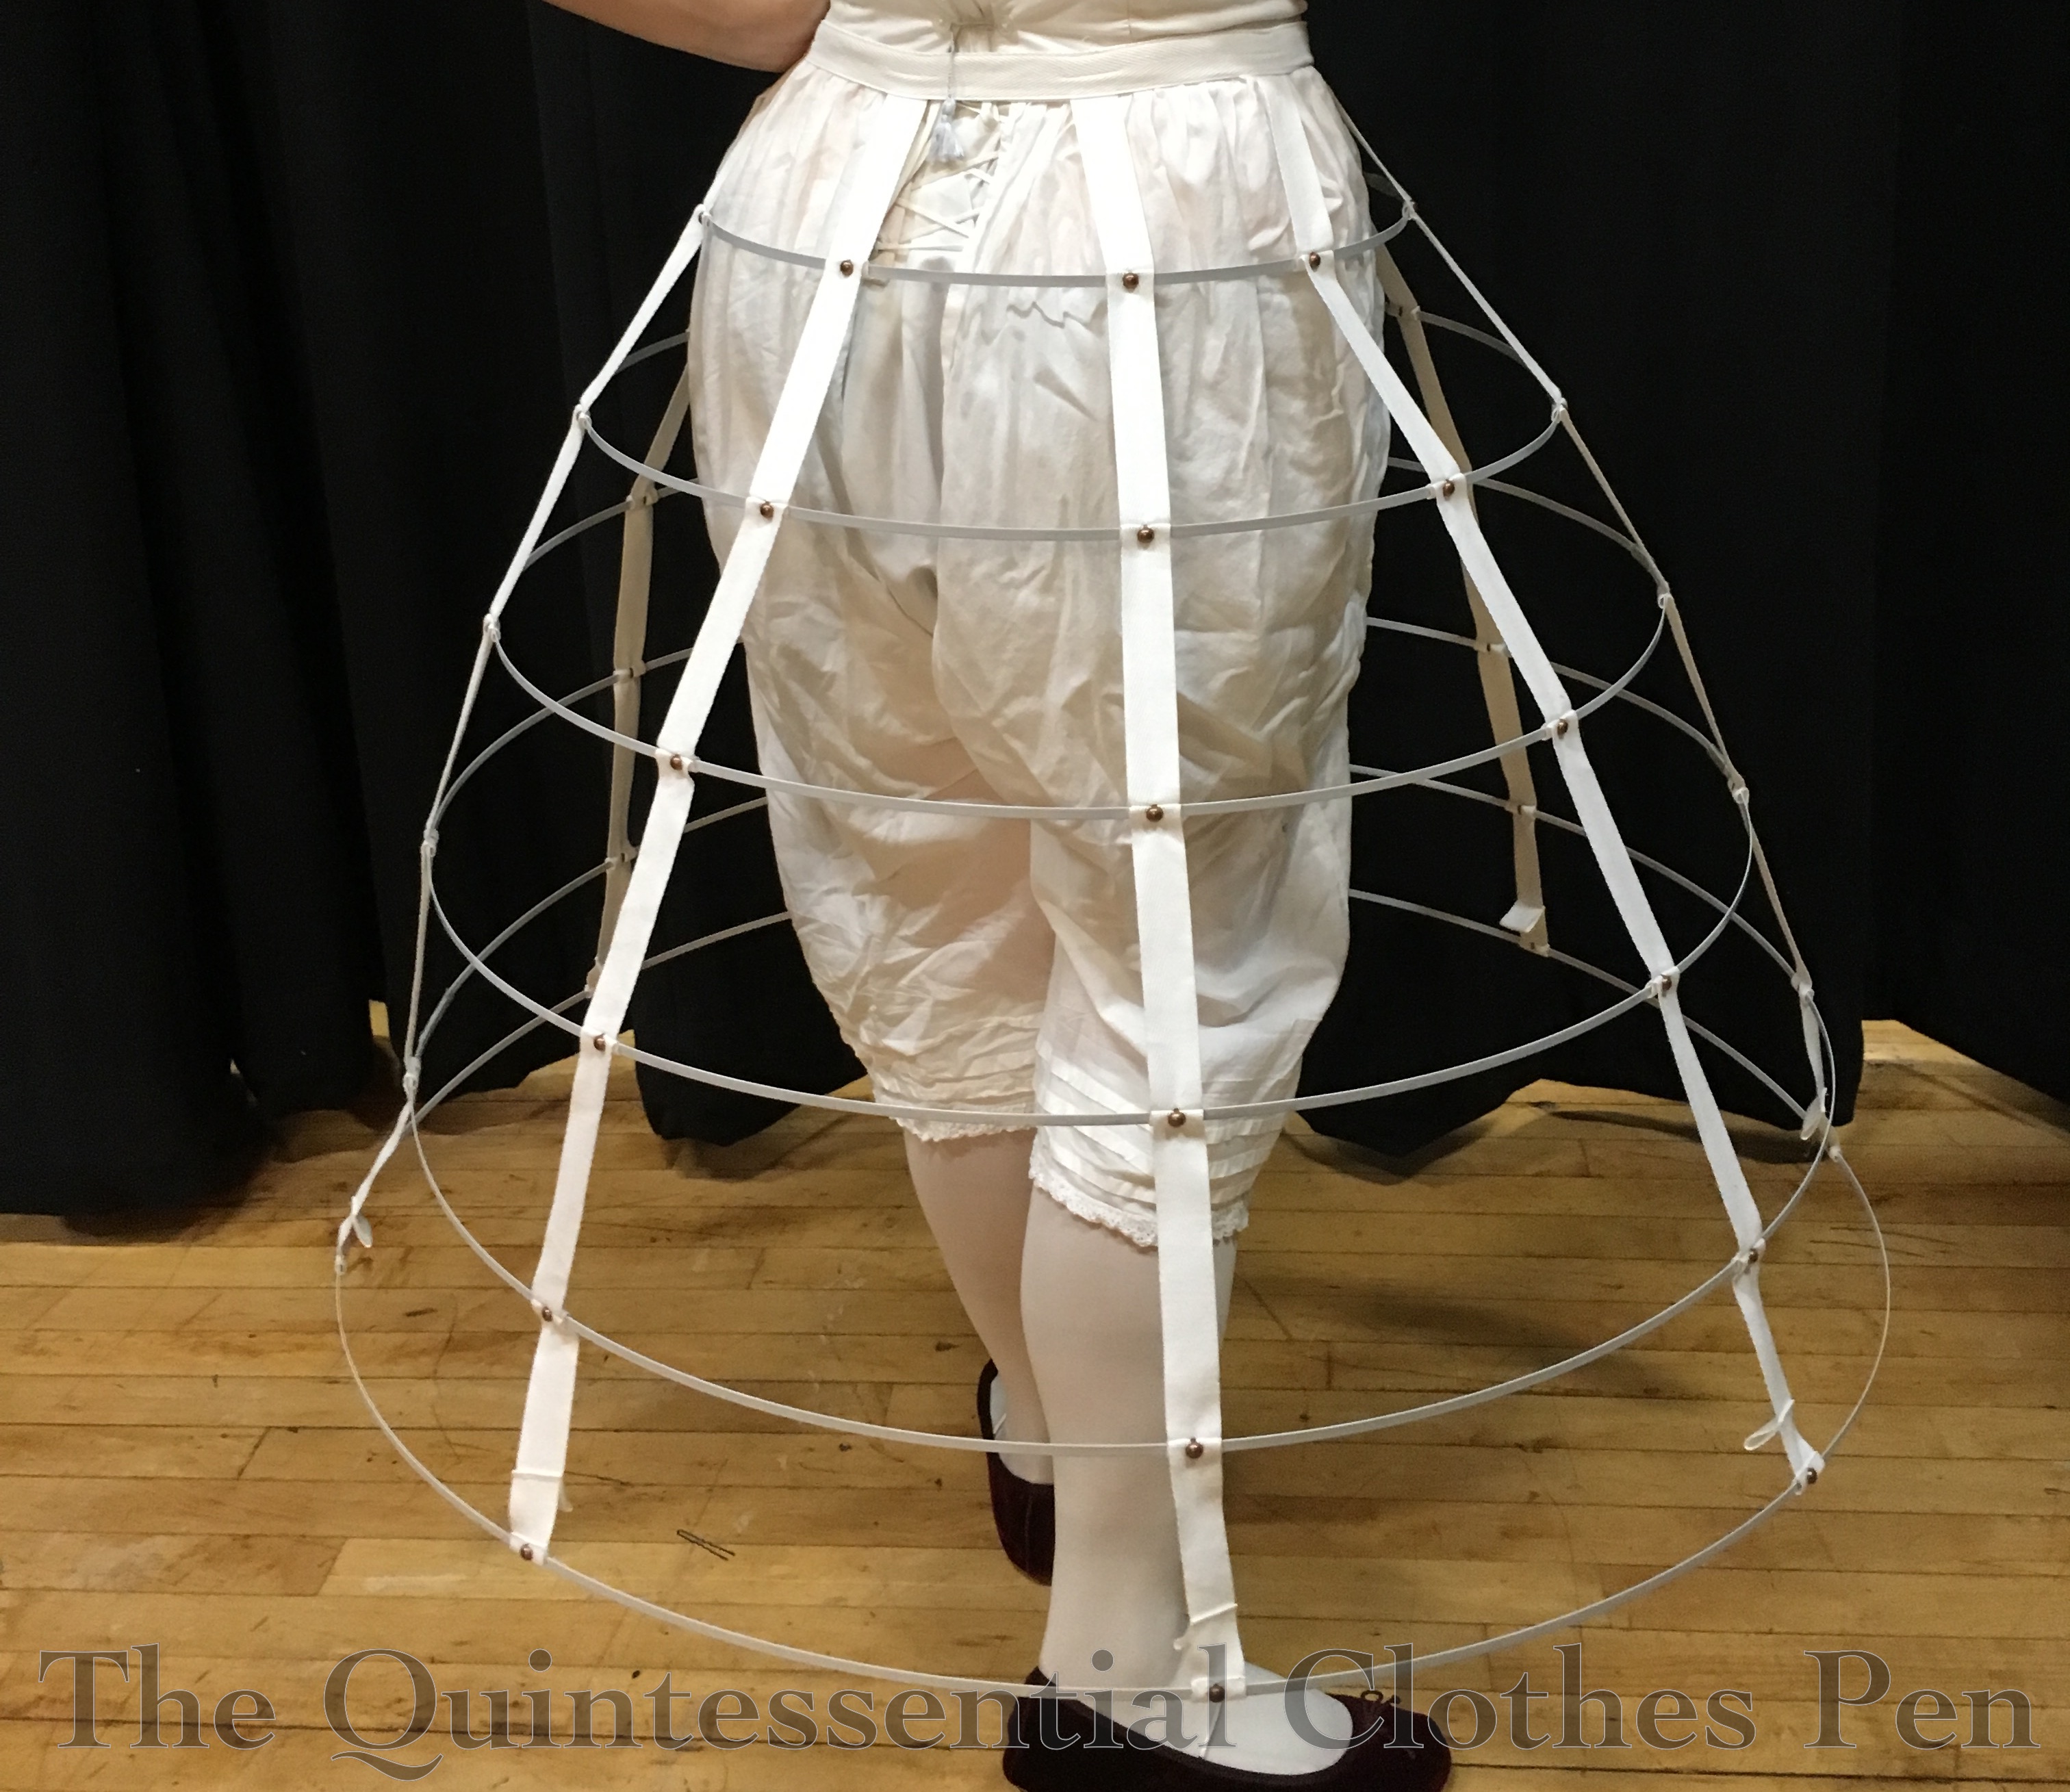
It took me a little research to figure it out, but I did and now I’ll share that with you. They are called spots! Once you realize that then a whole world of spots becomes available to you. Decorative ones, bronze, copper, nickel, black… so many options! I got plain domed copper from this seller on eBay and am very happy with them. They’re easy to apply with a pair of pliers and seem quite durable. Now my hoops and tapes stay in place–no more sliding around!

And here is the finished result of the spots on the reasonable crinoline. I like the look as well as the practicality. I’m planning to add gold ones to the super-cupcake as well, for looks more than anything else.

SaveSave

SaveSave

SaveSave

SaveSave

SaveSave

SaveSave

SaveSave

SaveSave

SaveSave

SaveSave

If At First You Don’t Succeed… (HSM #1)

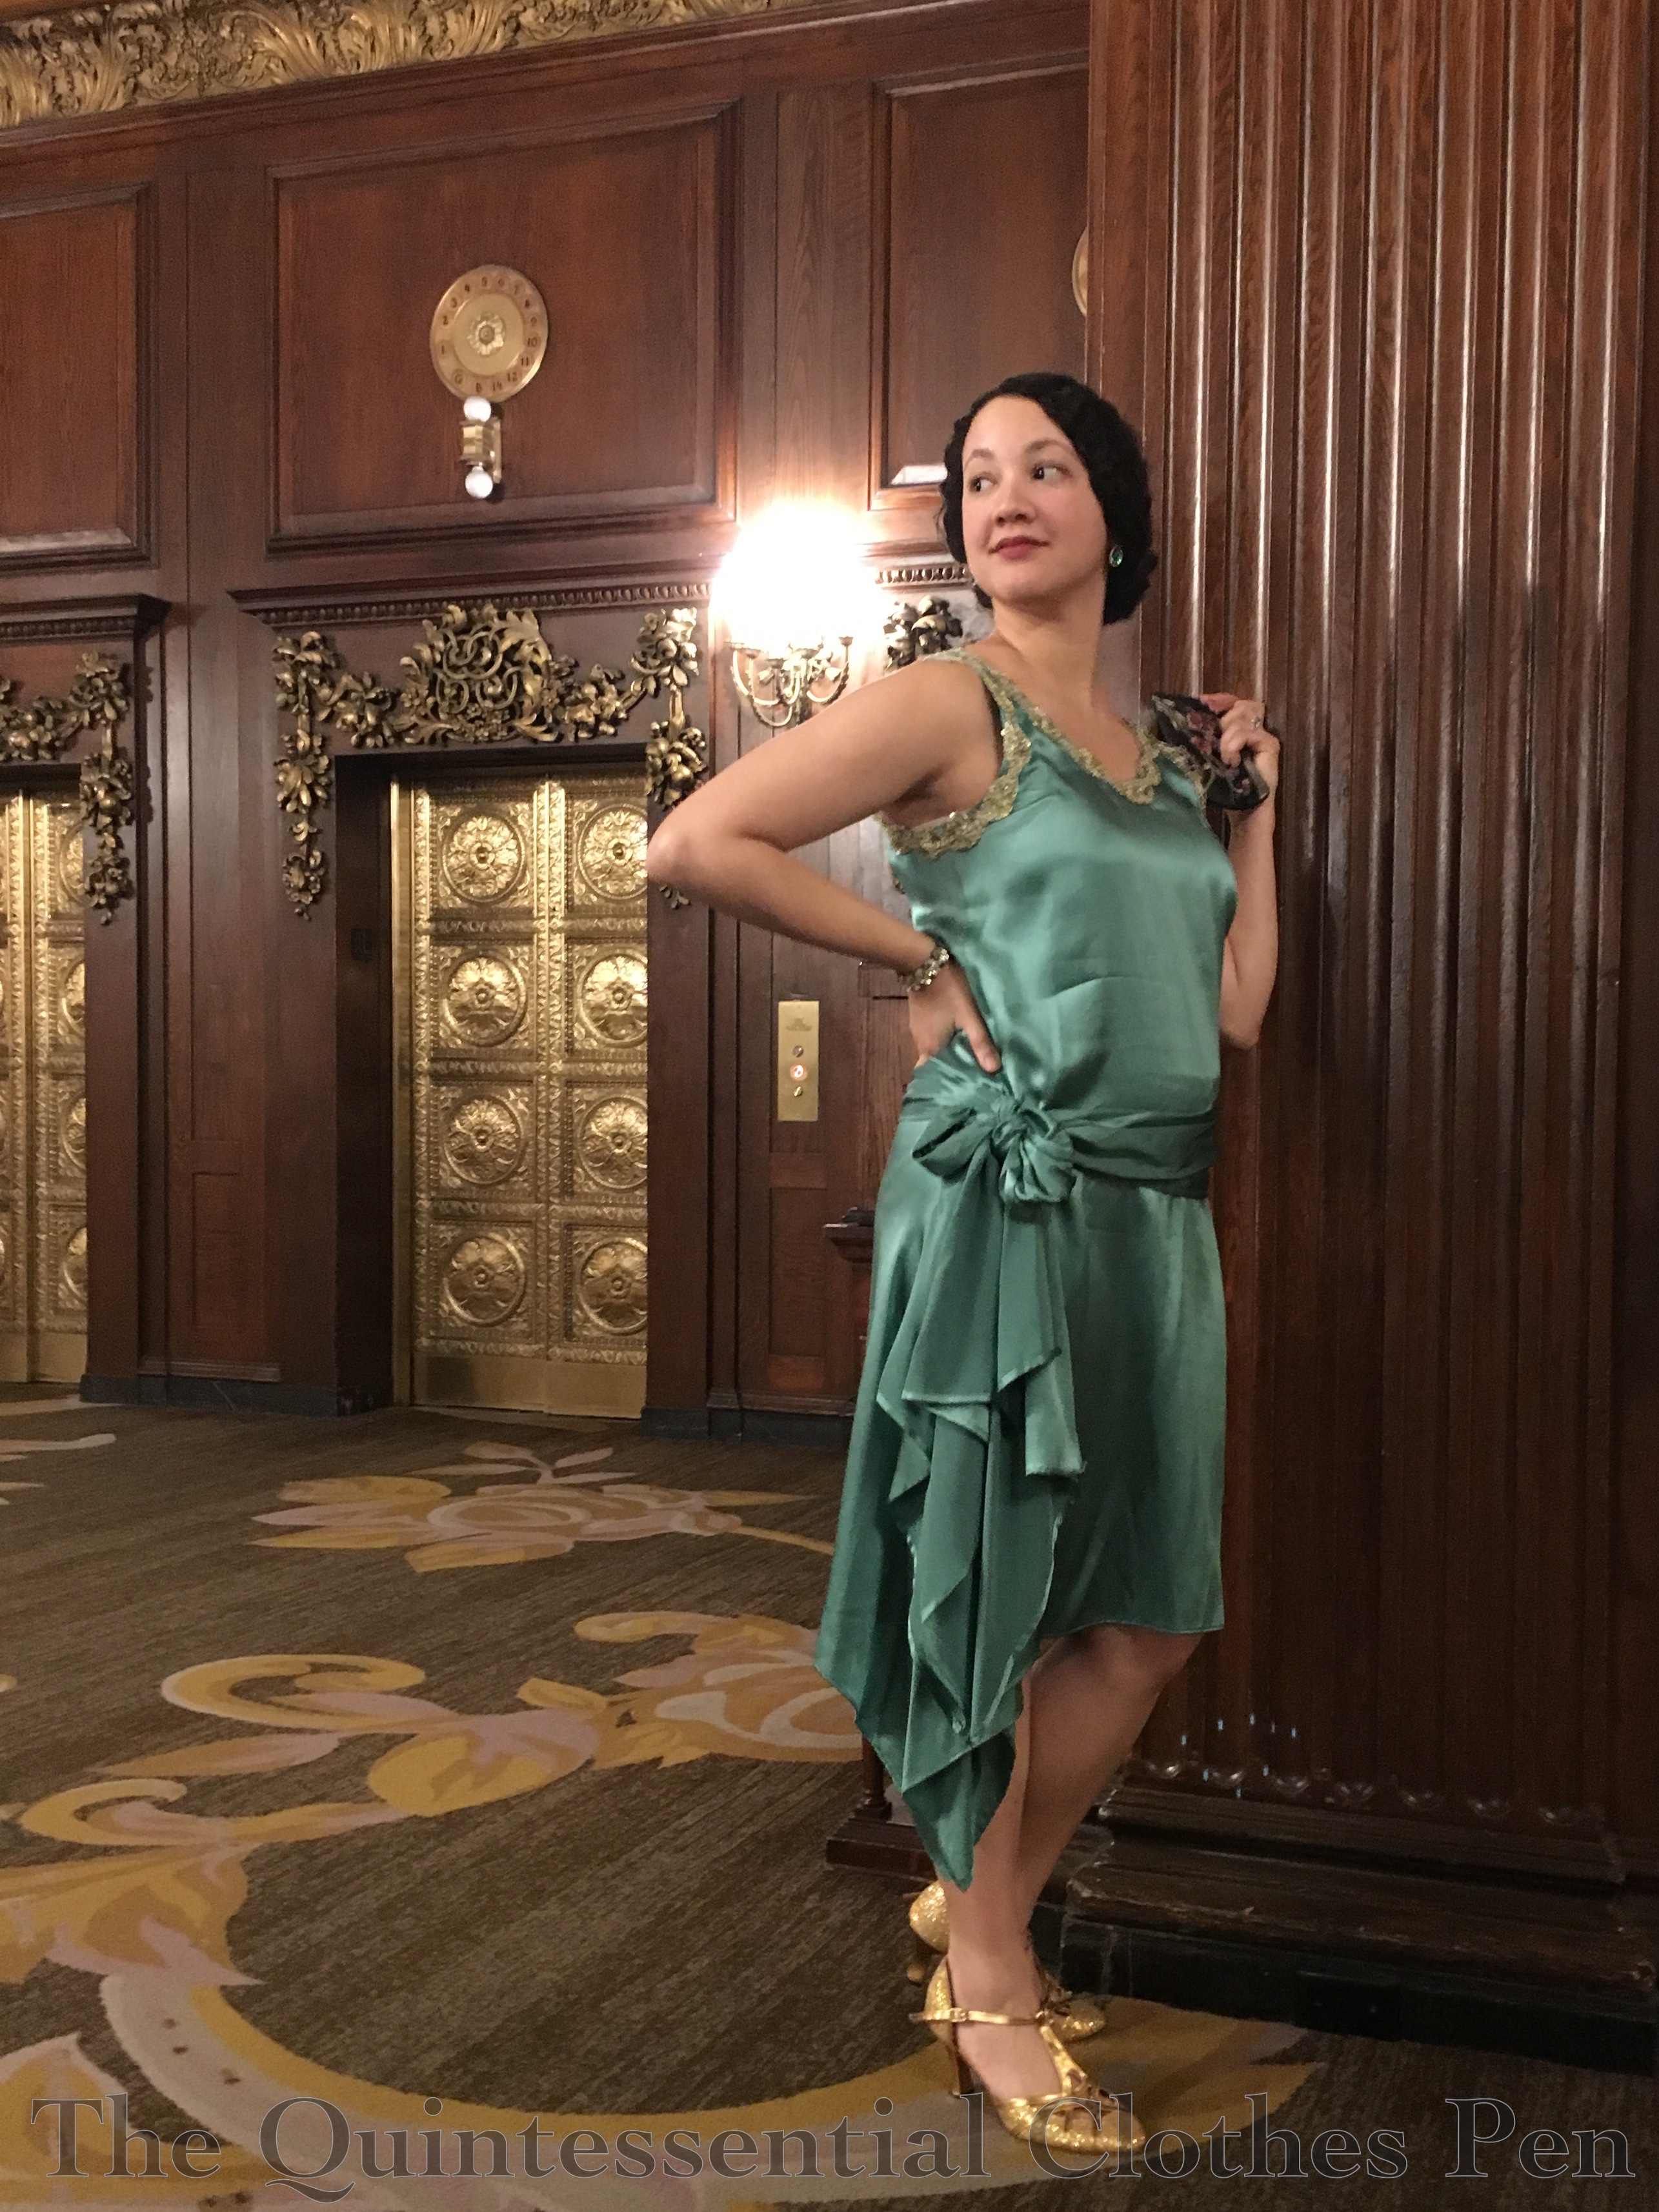
I made this 1928 evening dress and first wore it in 2012. Back then it was simple, with just a small cascade of fabric and no sash or bow (I show the construction in detail in this past post). Three years later, I decided to add the sash, bow, and extra cascade of fabric (and wrote a post about it). I liked the effect but wasn’t pleased with the slippery silk moving all over and sliding around. The armholes were also a bit high under the arms from the beginning, causing the trim to dig in a bit which wasn’t very comfortable.

Due to these issues and the addition of other 1920s evening dresses to my wardrobe I hadn’t worn this dress in a few years. But for an event this January, I decided to give it another go. Luckily, the dress still fit and didn’t cling in unwanted places! The first HSM challenge of 2018, Mend, Reshape, Refashion, was the perfect complement for the updates I wanted to complete.

To be specific about the updates, this time I lowered the armholes about 1″ and then pieced in extra trim to fill in the gap, sewed the sash/bow in place, and added an interior waistband that supports the weight of the bow and keeps the dress from pulling down on one side.

Our hotel room had a bonus vanity table and stool that was a perfect prop for photos…

I did my hair like I did last year but added a gold hair comb I recently discovered at my parent’s house. I’m pretty sure my mom gave it to me when I was a child or maybe a teenager… It’s just been sitting there waiting for me to put it to use again!

Just the facts:

Fabric: The only new fabric was a scrap of tightly woven polyester for an inner waistband.

Pattern: My own, based on measurements.

Year: 1928.

Notions: Extra trim to piece under the arms, thread.

How historically accurate is it?: Let’s say 95%, with points lost for the polyester.

Hours to complete: The updates took about 4 hours. I felt like hand sewing most of it so I could watch Netflix!

First worn: With the updates in January, 2018.

Total cost: Free!

I love how this dress looks and fits now! Yay! It only took three tries… It’s a good lesson: if you don’t succeed the first time, try again! And keep trying…! Third time is the charm on this one!


SaveSave

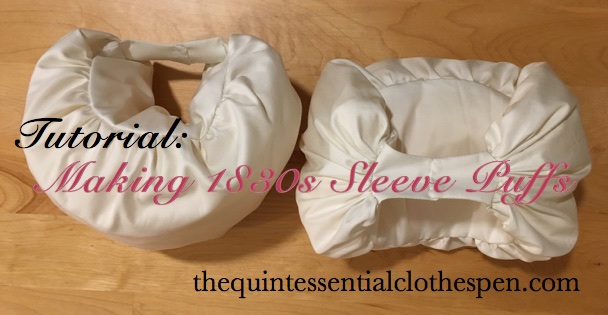
1830s Sleeve Puff Tutorial

Why make sleeve puffs, you ask? In order to keep the large sleeves of 1830s dresses from deflating, of course! Here’s an example of my 1832 dress without puffs (on the left) and with puffs (on the right). They make such a difference!

I chose to use a sewing machine for much of the assembly of my puffs, but you could easily hand sew all of these steps instead.

To make these sleeve puffs you will need the following materials:

  • Fabric: ¾ yard of 44″ wide or ⅜ yard of 60″ wide (cotton, linen, and silk are the most historical options, but you can use whatever is comfortable on your skin, just make sure it’s not too loosely woven or too heavy in weight)
  • Stuffing: I used scraps of stiff net and organza, but you could also use batting, tulle, down, etc.
  • Thread

To begin, you’ll need to cut out your pieces:

  • Two rectangles: 25″ wide x 13″tall
  • Two shaped bases: 18.5″ wide x 7.5″ tall at the center and curved down to 2.5″ tall at the sides
  • Four end caps (two for each end of your shaped base): use the shaped base as a pattern and cut the end caps so they are 2.5″ wide

Next, you’ll assemble your puffs:

Step 1: Lay your end caps on each end of the shaped base. Sew around the three exterior sides, leaving the side towards the center unstitched.

Step 2: Trim your seam allowances, corners, and clip through seam allowance close to the end of your stitch line on the shaped base.

Step 3: Turn each end cap so the right sides face out–the clip through the seam allowance allows the end caps to sit nice and flat on the shaped base.


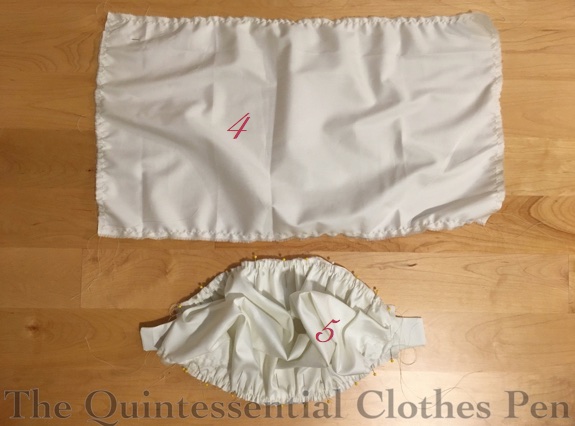
Step 4: Run gathering stitches along each individual side of the four sides of each rectangle (not one long gathering line that turns the corners).

Step 5: Pull up your gathering stitches on the long sides and pin to the curved edges of the shaped base. You want to pin the rectangle to the side of the shaped based that does not have the end caps on it.


Step 6: Sew the gathered rectangle to the shaped base and turn it right side out.

Step 7: Now pull up the gathering threads on one short side of each rectangle. Turn the raw edge under and pin the gathers in place. Hand sew these gathers through all the layers, making sure to take small stitches and catch the gathers in many places. Leave the other side open for now.

Step 8: Stuff those puffs!

Step 9: Now pull up the gathering threads on the remaining short side of each rectangle. Turn the raw edge under and pin the gathers in place. Hand sew these gathers through all the layers as well, making sure to take small stitches and catch the gathers in many places. (This is the same as step 7.)

Step 10: Overlap the end caps about ¼” and sew them together.

Ta da! Now you have some sleeve puffs of your very own!

Extra tips:

I strongly suggest taking a look at extant puffs. As a starting point, I suggest this pair at the MFA and this pair at the V and A.

If you’re worried about keeping your puffs in place, ties can be added to the puffs which would be secured to additional ties in the armholes of dresses. Take another look at the those two pairs of extant puffs and you’ll see ties.

I also suggest looking at the puffs other people have made. It never hurts to see more methods of construction. I referenced Fresh Frippery and Stepping Into History when creating my puffs. Have you come across other 1830s puff making resources? If so, please share!

SaveSave

SaveSave

SaveSave

SaveSave

SaveSave

SaveSave

SaveSave

SaveSave

SaveSave

SaveSave

When The Dress No Longer Fits (Mid-19th Century Edition)

A few months ago, I had a post with the same name that focused on two Regency dresses that had experienced closet shrinkage. The post was centered around what I did to make them wearable again. Around the same time I was battling the Regency closet shrinkage, I encountered the same problem with two of my older mid-19th century dresses as well. Boo!

It took me awhile to do anything about the problem and even longer to post about it, but here we are.

There was a time when the back edges of Evie’s bodice met from top to bottom. In fact, if you look at the pictures in this post from 2013 you’ll see that there was even excess fabric around the waist (yikes, but that does mean my waist has expanded a fair bit!); however, by February 2016, the bodice looked like this:

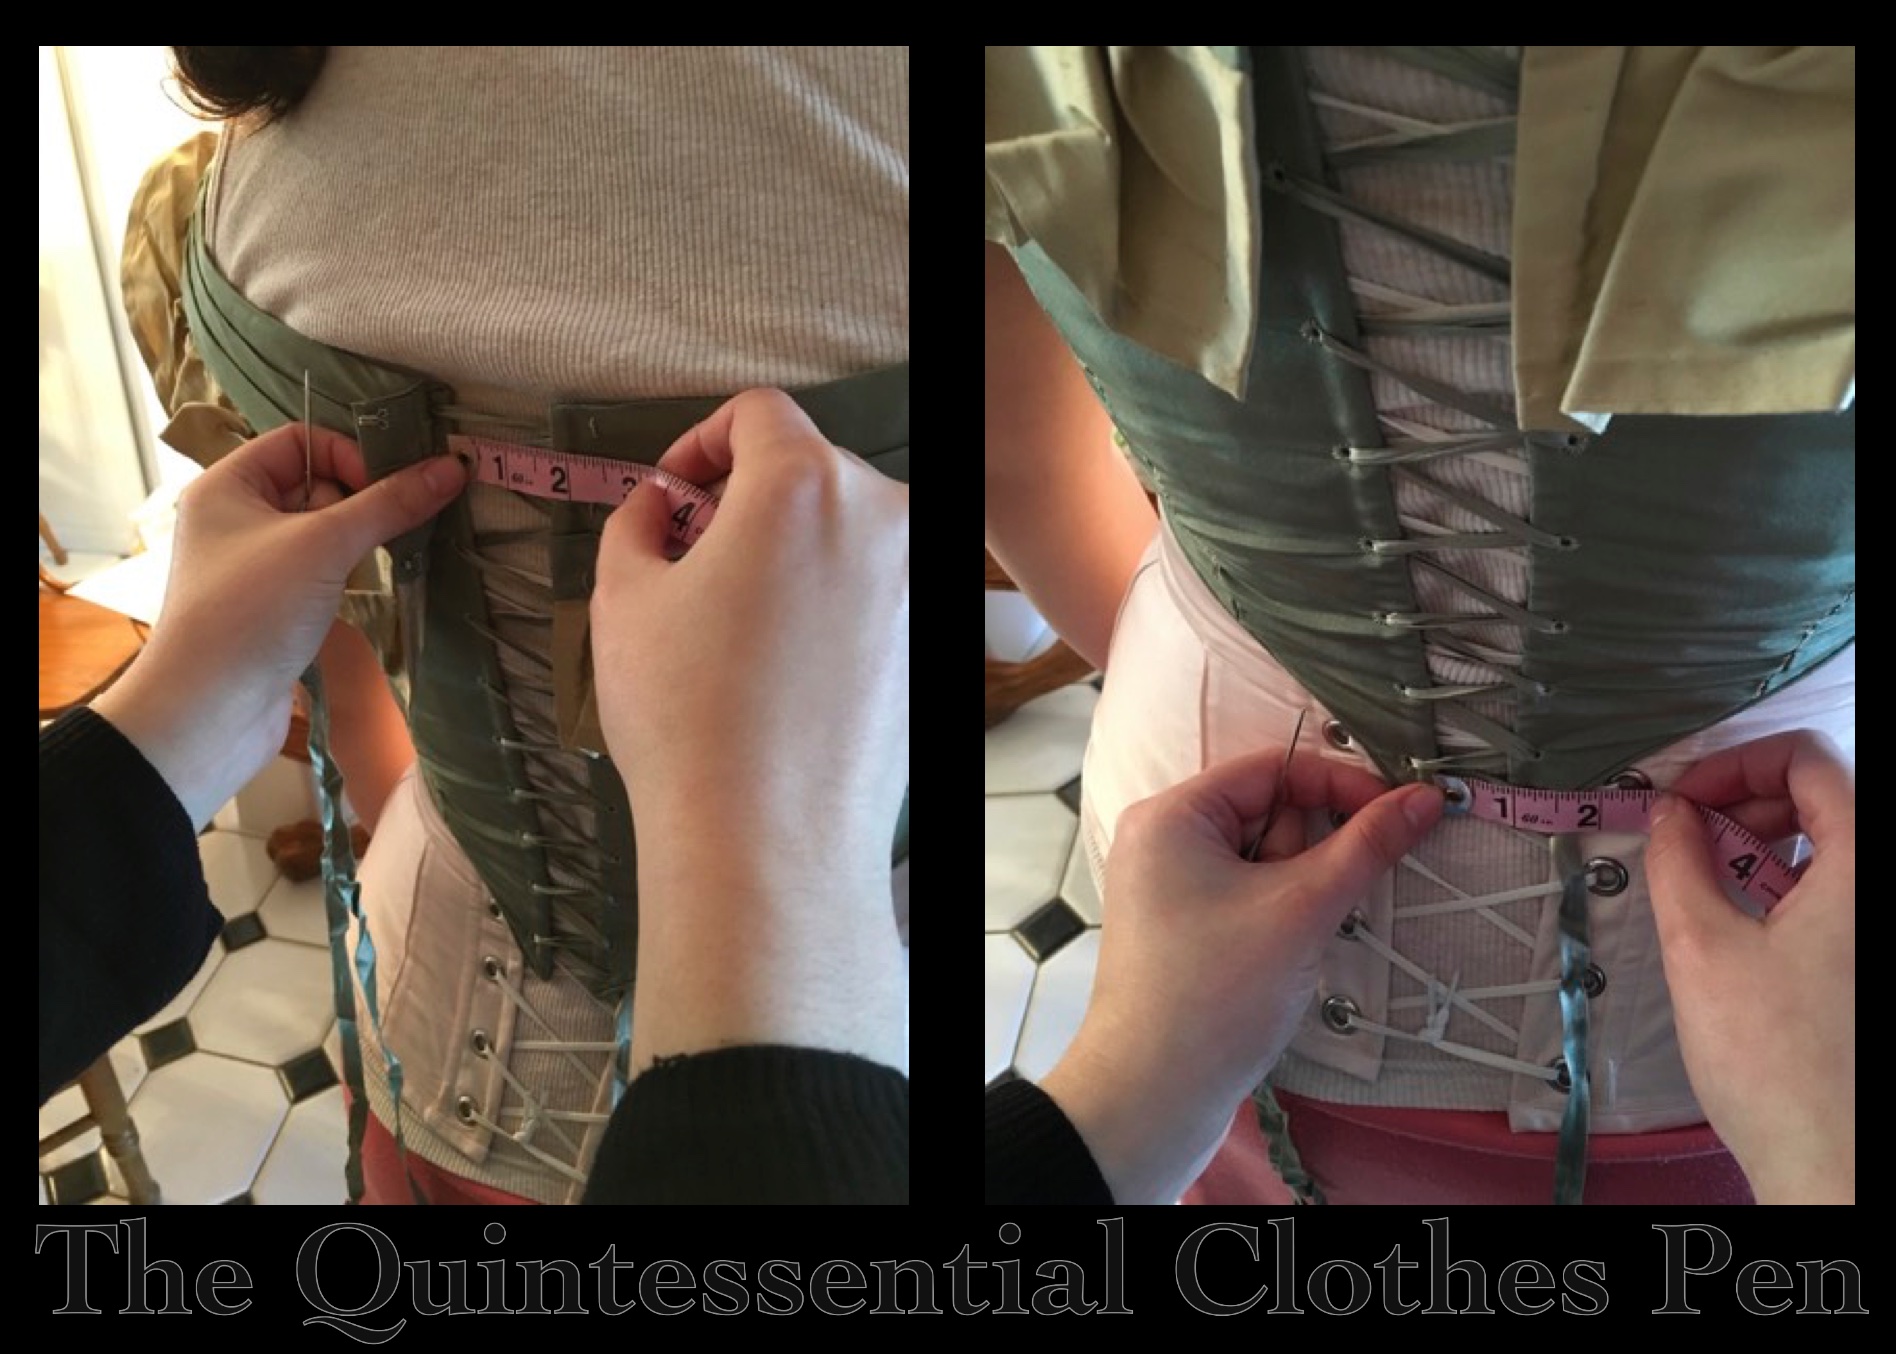
Uh oh! That wasn’t going to do for wearing at a ball! So I brought my corset and bodice (plus the other bodice I’ll mention shortly), got all laced up, and had a friend measure the gap between the back bodice edges and take pictures for documentation (so I wouldn’t forget the measurement, because let’s face it, my memory is pretty terrible sometimes).

Then I pondered my options. There was no way to let out the seams on this bodice, as the fabric has scarred at every point the needle and thread passed through. Plus, I didn’t leave much seam allowance anyway. Given my limited options, I decided that a placket was the best way to go. Many extant dresses using lacing as the method of closure on bodices and I’m sure that ladies in the 19th century changed sizes, too. I went on a hunt and couldn’t find an example of a bodice with a placket showing between the lacing, but museums have the benefit of being able to put their collections on forms rather than real people, which allows for easier adjustability to have the lacing edges touching. (If you know of any examples of a bodice laced with a placket under the gap, please let me know!) Anyway, I don’t think it’s unrealistic to assume that some ladies in the 19th century used the same method I did to allow adjustability in their bodices.

In addition to the placket, I also had to extend the bertha to bridge the gap. For that I was able to unfold my seam allowance, respace my gold ruffle, and cover the remaining gap with a rosette of gold like the one on the front of the bodice (another instance of the benefit of saving all the scraps from a project–this finished off the gold bits I had leftover from the original construction). Thankfully, these changes worked. I wore Evie to a ball in March 2016 and was happy as a clam. The placket was hardly noticeable and now the dress is much more adjustable!

The second bodice was for the dress named Annabelle, which was made in 2011 (and worn again later in 2011). This bodice also closed all the way down the back when it was made. Well, that’s not the case any more. Actually, a few years ago I’d already converted the closure from being hooks and eyes with folded over seam allowance to lacing with less seam allowance folded over in order to eek out a little more space, but that just wasn’t enough. By 2016, here’s how we were looking. It was time for a more drastic update.

I did the same thing I did for Evie, adding a placket and regathering the bertha to make it span the lacing gap. It took me about two years to get to it, but the result is that I was able to wear Annabelle to a recent ball in October, with a back that looked like this.

Not bad! The only thing I want to change is making that top edge actually stay matched rather than the one side riding up. But that’s a minor change. Overall, I’m pleased to be able to continue to wear this dress!

There we are–two more examples of how to fix the-dress-no-longer-fits problem! It was incredibly lovely to receive comments on the Regency post that other people also experience closet shrinkage and have already adapted their clothing to deal with it or are now inspired to do so. It is my hope that continuing to post about this topic will encourage others come to terms with their own changing size as well as ideas for how we can all deal and move forward while still being able to wear our finery.

SaveSave

When The Dress No Longer Fits (Regency Edition)

Whether you sew historical clothing or not, I think it’s likely you’ve experienced the following phenomenon: You buy or make a lovely dress or other garment and wear it once (or maybe you wear it a lot). The season changes and you put said lovely garment away in the closet to await the next year’s season. When you next go to wear it, you realize that the garment no longer fits. It has obviously shrunk in the closet! I find that circumferences are the worst culprits for closet shrinking: waists, ribcage, arms… How dare they?!?

This has happened to me with both modern ready-made clothes and historical ones. Unlike modern ones, which usually hang around for a few years until I feel emotionally ready to donate them to someone else who might actually fit into them, my historical clothing has the benefit of being able to be resized with relatively little effort (certainly much less than making a new garment!). Depending on how I’ve constructed the garment, seams might be able to be let out or, being the pack rat that I am, I have more of the fabric hanging around and I can cut new pieces or add to what is there to expand at the necessary areas.

The more often I come across this problem in my wardrobe, the more I realize the benefit of making my clothing more adjustable from the start, with things like drawstrings and lots of overlap on opaque garments. (Did you notice that most of the closures on my recent 1817 Duchess Regency Gown were drawstrings? There might be an intentional rationale there… My 1811 Elusive Blue Gown also closes with ties and drawstrings, another intentional decision.)

1817 gown with mostly drawstring closures.

In the past year or two, I realized that two of my older and oft-worn Regency dresses had experienced closet shrinkage. I wanted to continue to be able to wear them and so I started thinking of the best ways to alter the size to make them wearable again. Luckily, both of these dresses fall into the category of ‘I kept the extra fabric and have plenty to play with to resize them.’

I used a different method on each dress. The first is my 1813 Red Dress, which I made in 2013. It’s seen lots of wear since I made it (yay for actually making good use of something I’ve made!) as well as a pretty major revamp when I accidentally tore a hole in the skirt.

It’s always closed with hooks and eyes, but when I went to wear it last year it wouldn’t close! With some safety pins, we got it to this point, but I was afraid for the integrity of the fabric because it was stretched so tightly.

I was able to use someone’s small scissors to take out the stitches along the back edge with the loops on it to get a bit more fabric across and we used the safety pins for bars with a piece of ribbon folded behind to stabilize the now-only-one-layer of fabric. But I wasn’t willing to let people see it looking like this!

Thankfully, I had a shawl with me and I wore it the entire evening to cover the back. I was apparently nonchalant enough that no one realized I was wearing a shawl to cover the fact that my dress wouldn’t close, but I was awfully warm while dancing! Something had to be done before I would wear the dress again.

I pondered multiple ideas, but the one I settled on was to cut new center back pieces with more width to them and sew them over the current, too-small pieces. I also had to piece the waistband to extend it as well as re-pleating the skirt to fit the larger size waistband, but it looks pretty good, I’d say.

The inside of the dress now looks like this. Previously, it was unlined (I did a post about the original inside finishing of this dress, which you can see here). Now, the center back panel has a lining to help stabilize it and encase the original back panels and waistband extension. Still tidy, yay!

In addition, the armhole openings had become quite tight. I wanted a little more space to be comfortable, so I also added underarm gussets (the upside down triangle). I simply opened up the seam and added a diamond shaped piece. It’s diamond shaped and folded in the center to hide the raw edges inside and out. I didn’t bother to add a band at the bottom, as I figured this gusset was in a place no one was likely to see such detail.

The other dress is my 1812 white square neck Ikea gown. I made this in 2012and have also worn it many times. Before the recent changes, I had made no other alterations to the dress since I first made it.

This dress also had a panel added to center back, but I had to more carefully follow the details of the dress, including the small seams (because of the sheer fabric) and the tucked waistband. This dress has spent a lot of time in the sun, and between that and being gently washed a few times, the fabric has become a much brighter white than it started out. It’s not noticeable, until I add a piece of the same fabric that has been sitting in my stash and the light hits it just right. (It’s convenient for pointing out the new fabric though, because it’s pretty obvious in the picture below!)

Sometimes, this would bother me. But it’s only noticeable in some light and I hope that eventually the pieces will also brighten. Plus, it’s entirely historically reasonable to piece a gown using more of the fabric that hasn’t faded in the same way as the rest of the garment to adjust the size. It’s much more practical than making an all new garment!

I had to regather the skirt on this dress (like I had to repleat the red one) to accommodate the new waistband size. I also added an underarm gusset on this dress to help the arm openings be more comfortable.

While the red dress fit pretty perfectly after the alterations, the white dress alterations proved to be too much (it’s hard to fit these things on yourself when the closures are in the back!) and I now need to move my eyes over and add a drawstring to the top of the back neckline to keep my undergarments from showing. Sometimes it seems like some garments will never leave the to-do list. Oh well! Does that happen to you? You think a garment is done until you wear it and realize it needs something changed or added? (I’m proud to report that between the time I started writing this post and the time I finished writing this post I completed those final two notes–drawstring and bars–and now the dress is done and ready to get put away! Hooray for getting rid of UFOs!)

Do you ever resize your modern or historical clothing after closet shrinkage? What methods have you used?

SaveSave

SaveSave

SaveSave

SaveSave

SaveSave

SaveSave

SaveSave

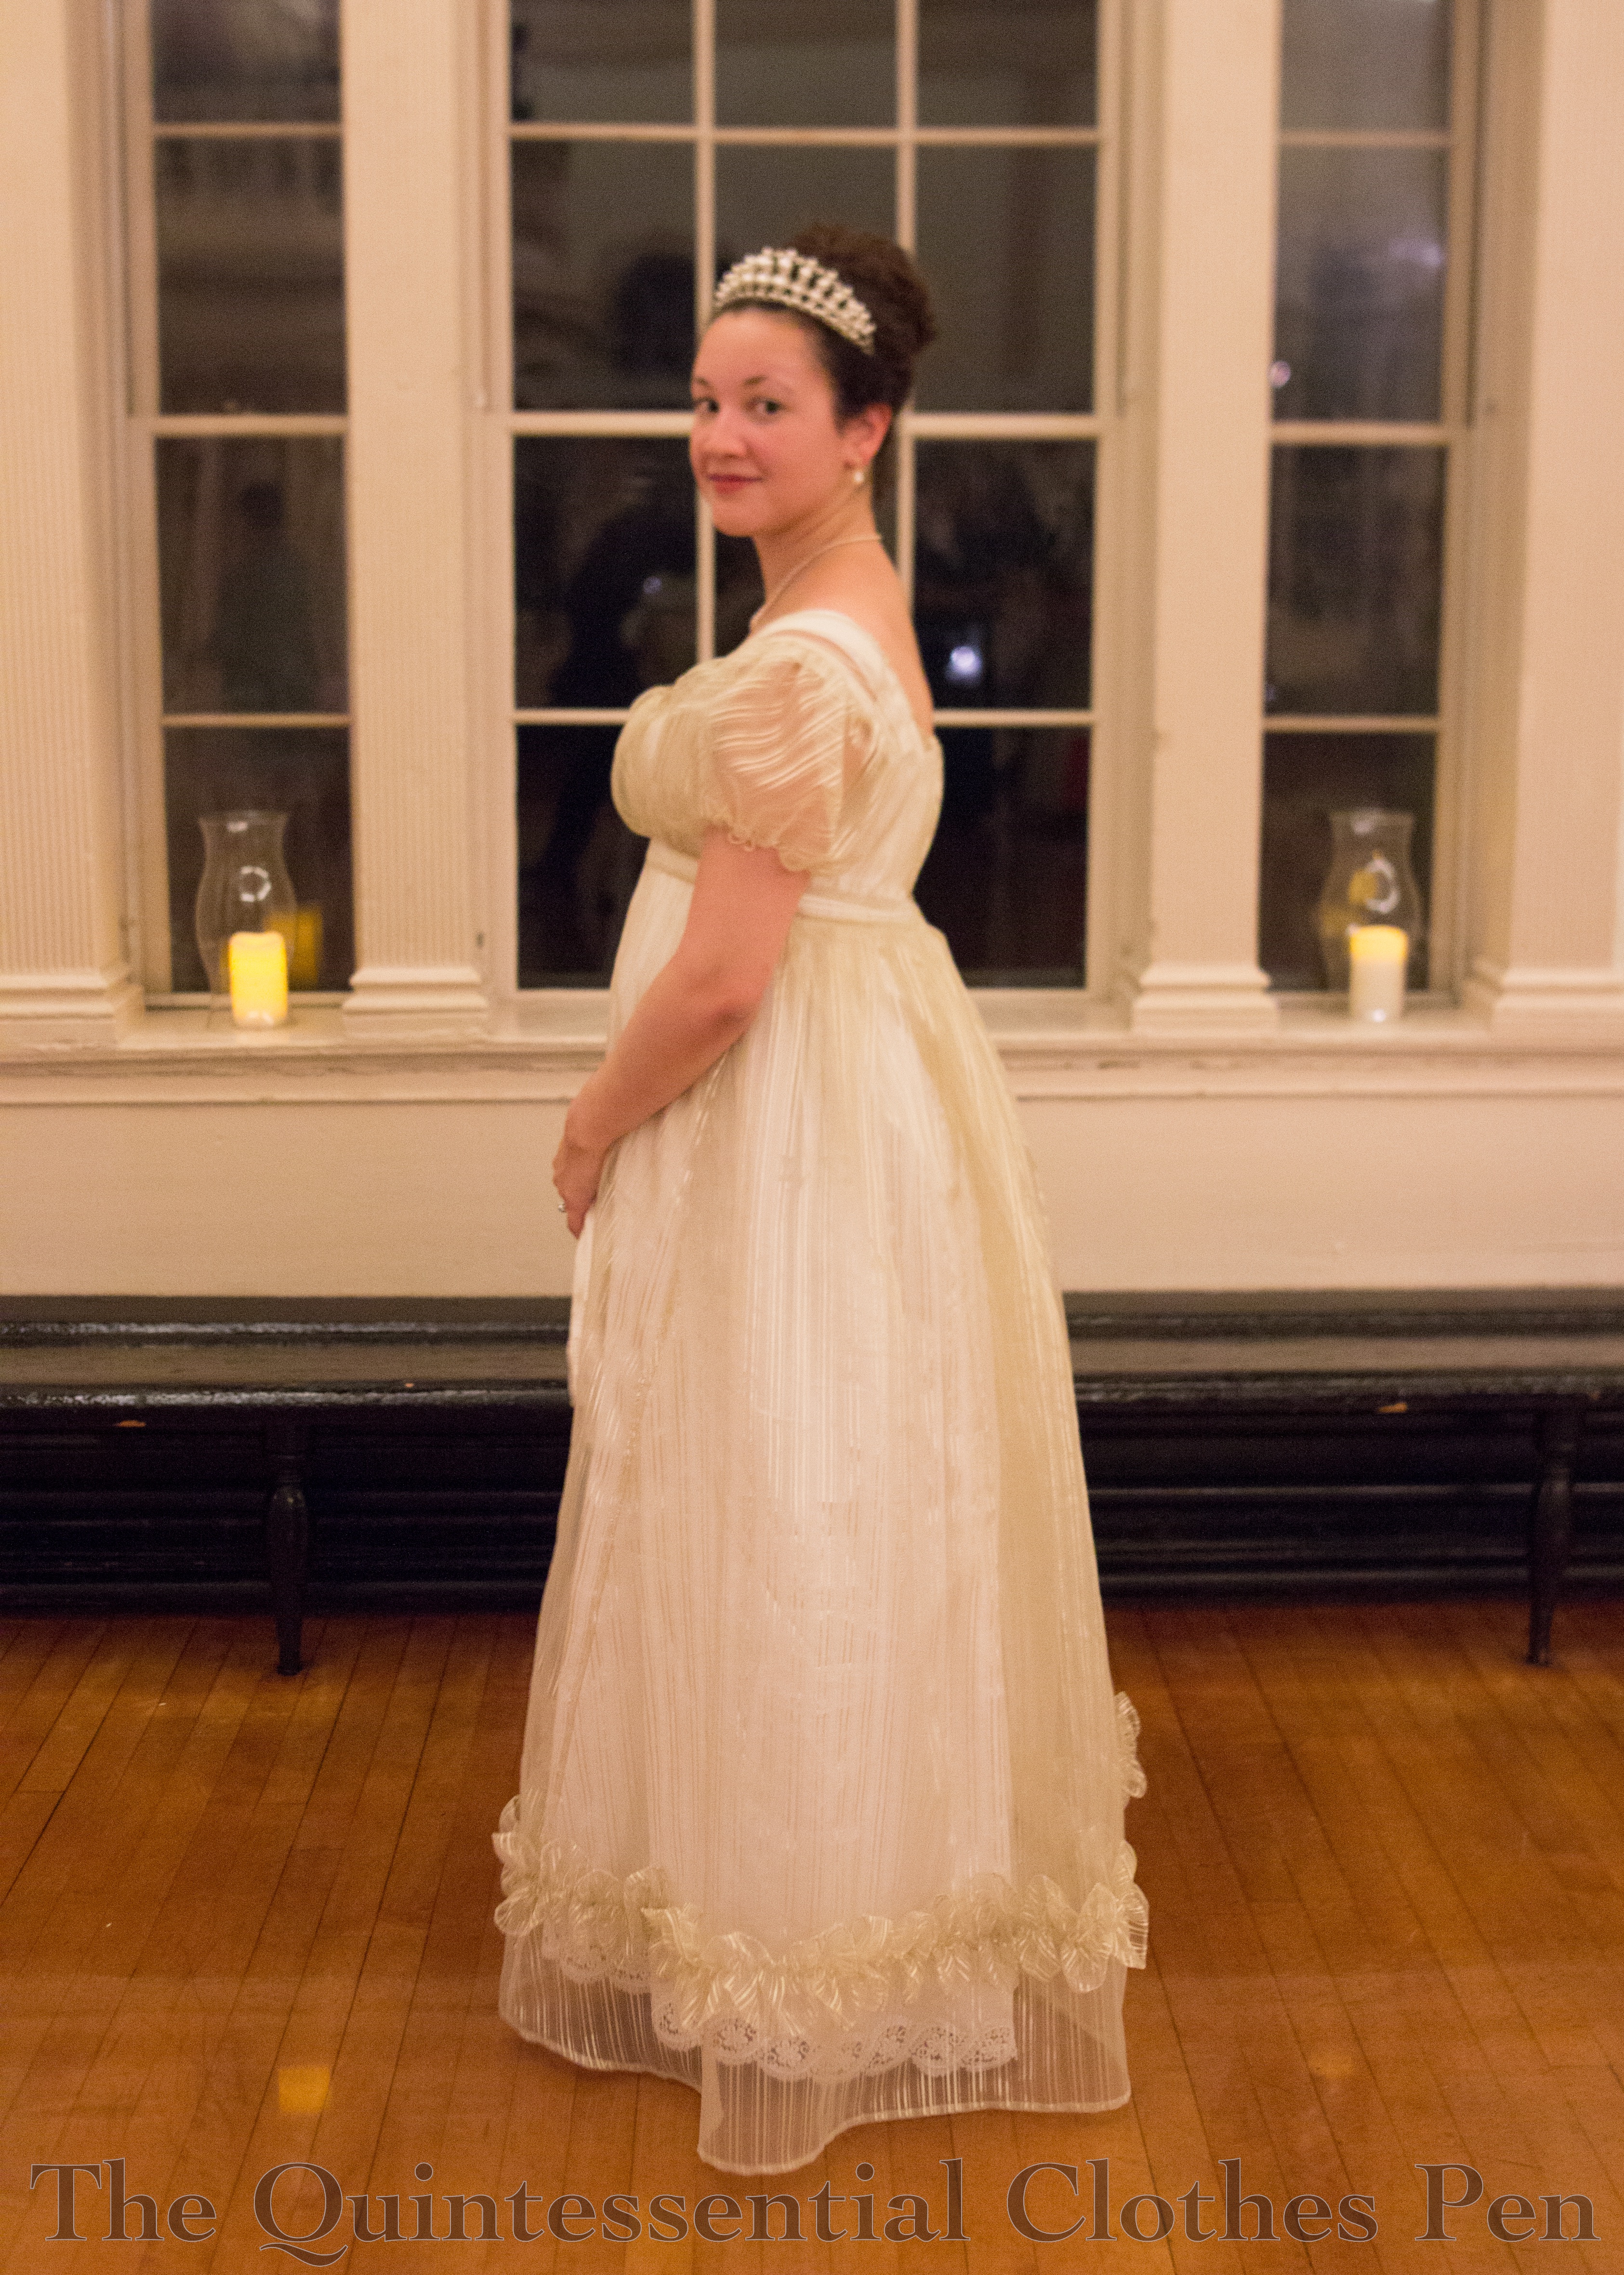
A Gown Worthy Of A Duchess

On the same January shopping trip that I unexpectedly found the blush sparkle fabric I made a 1920s dress out of I also unexpectedly found an excellent fabric for a new Regency evening dress. I hadn’t made one in awhile, but I had a Regency weekend coming up and I was wanting something new for the fancier ball (and of course nothing in my stash was inspiring me). In my wanderings around the store, I discovered an organza curtain sheer that brought to mind this particular fashion plate that has been on my ‘to-sew’ list for years.

1819 – Ackermann’s Repository Series 2 Vol 7 – March Issue

I’d been on the look-out for a sheer with black stripes but hadn’t found anything suitable. Once I found the curtain fabric, I debated whether to use it for a dress in this style or to hold out for the black stripe. As you’ll see, I decided to call this inspiration fulfilled by the gold striped fabric that I found. It’s polyester, but that means it was a good price. Occasionally, a polyester can be just the thing.

In addition to the Ackerman’s fashion plate, I also borrowed design ideas from two other striped evening gowns: this earlier Costume Parisien fashion plate from 1809 and this image of the Duchess d’Angoulême c. 1815. My dress is a conglomeration of these and the 1819 fashion plate. I borrowed the sheer overdress idea from 1819, the single row of scalloped trim from 1809, and the bias cut sleeves from 1815. I date my dress to 1817, as the fluffy nature of the organza pushes the silhouette towards 1820, but the single row of trim pulls it back from 1819 just a bit.

I have a full compliment of nicely finished underthings that are perfect for making the sheer dress opaque. It was never my intention to be a scandalous Regency lady with minimal underthings! In fact, to make the ensemble sufficiently opaque, I wore my chemise plus two petticoats under the sheer dress. Without the second petticoat it was clear where my chemise ended (at my knees, in case you’re curious), but I didn’t want to have the illusion of scandal with this, I really wanted opacity all the way down.

Like the new pelisse, the sheer dress provided another perfect opportunity to make further use of my Vernet petticoat, which has a lovely eyelet border at the hem. Here’s another view that shows off the lace on the petticoat.

It’s usual for me to meticulously finish the insides of my garments, but in the case of a sheer dress, that desire became a necessity. Accordingly, all of the inside seams are nicely finished with a mix of French, flat felled, and folding seam allowances to hide raw edges and whipping them together. I kept the finished seam allowances small, so that they wouldn’t detract from the stripes.

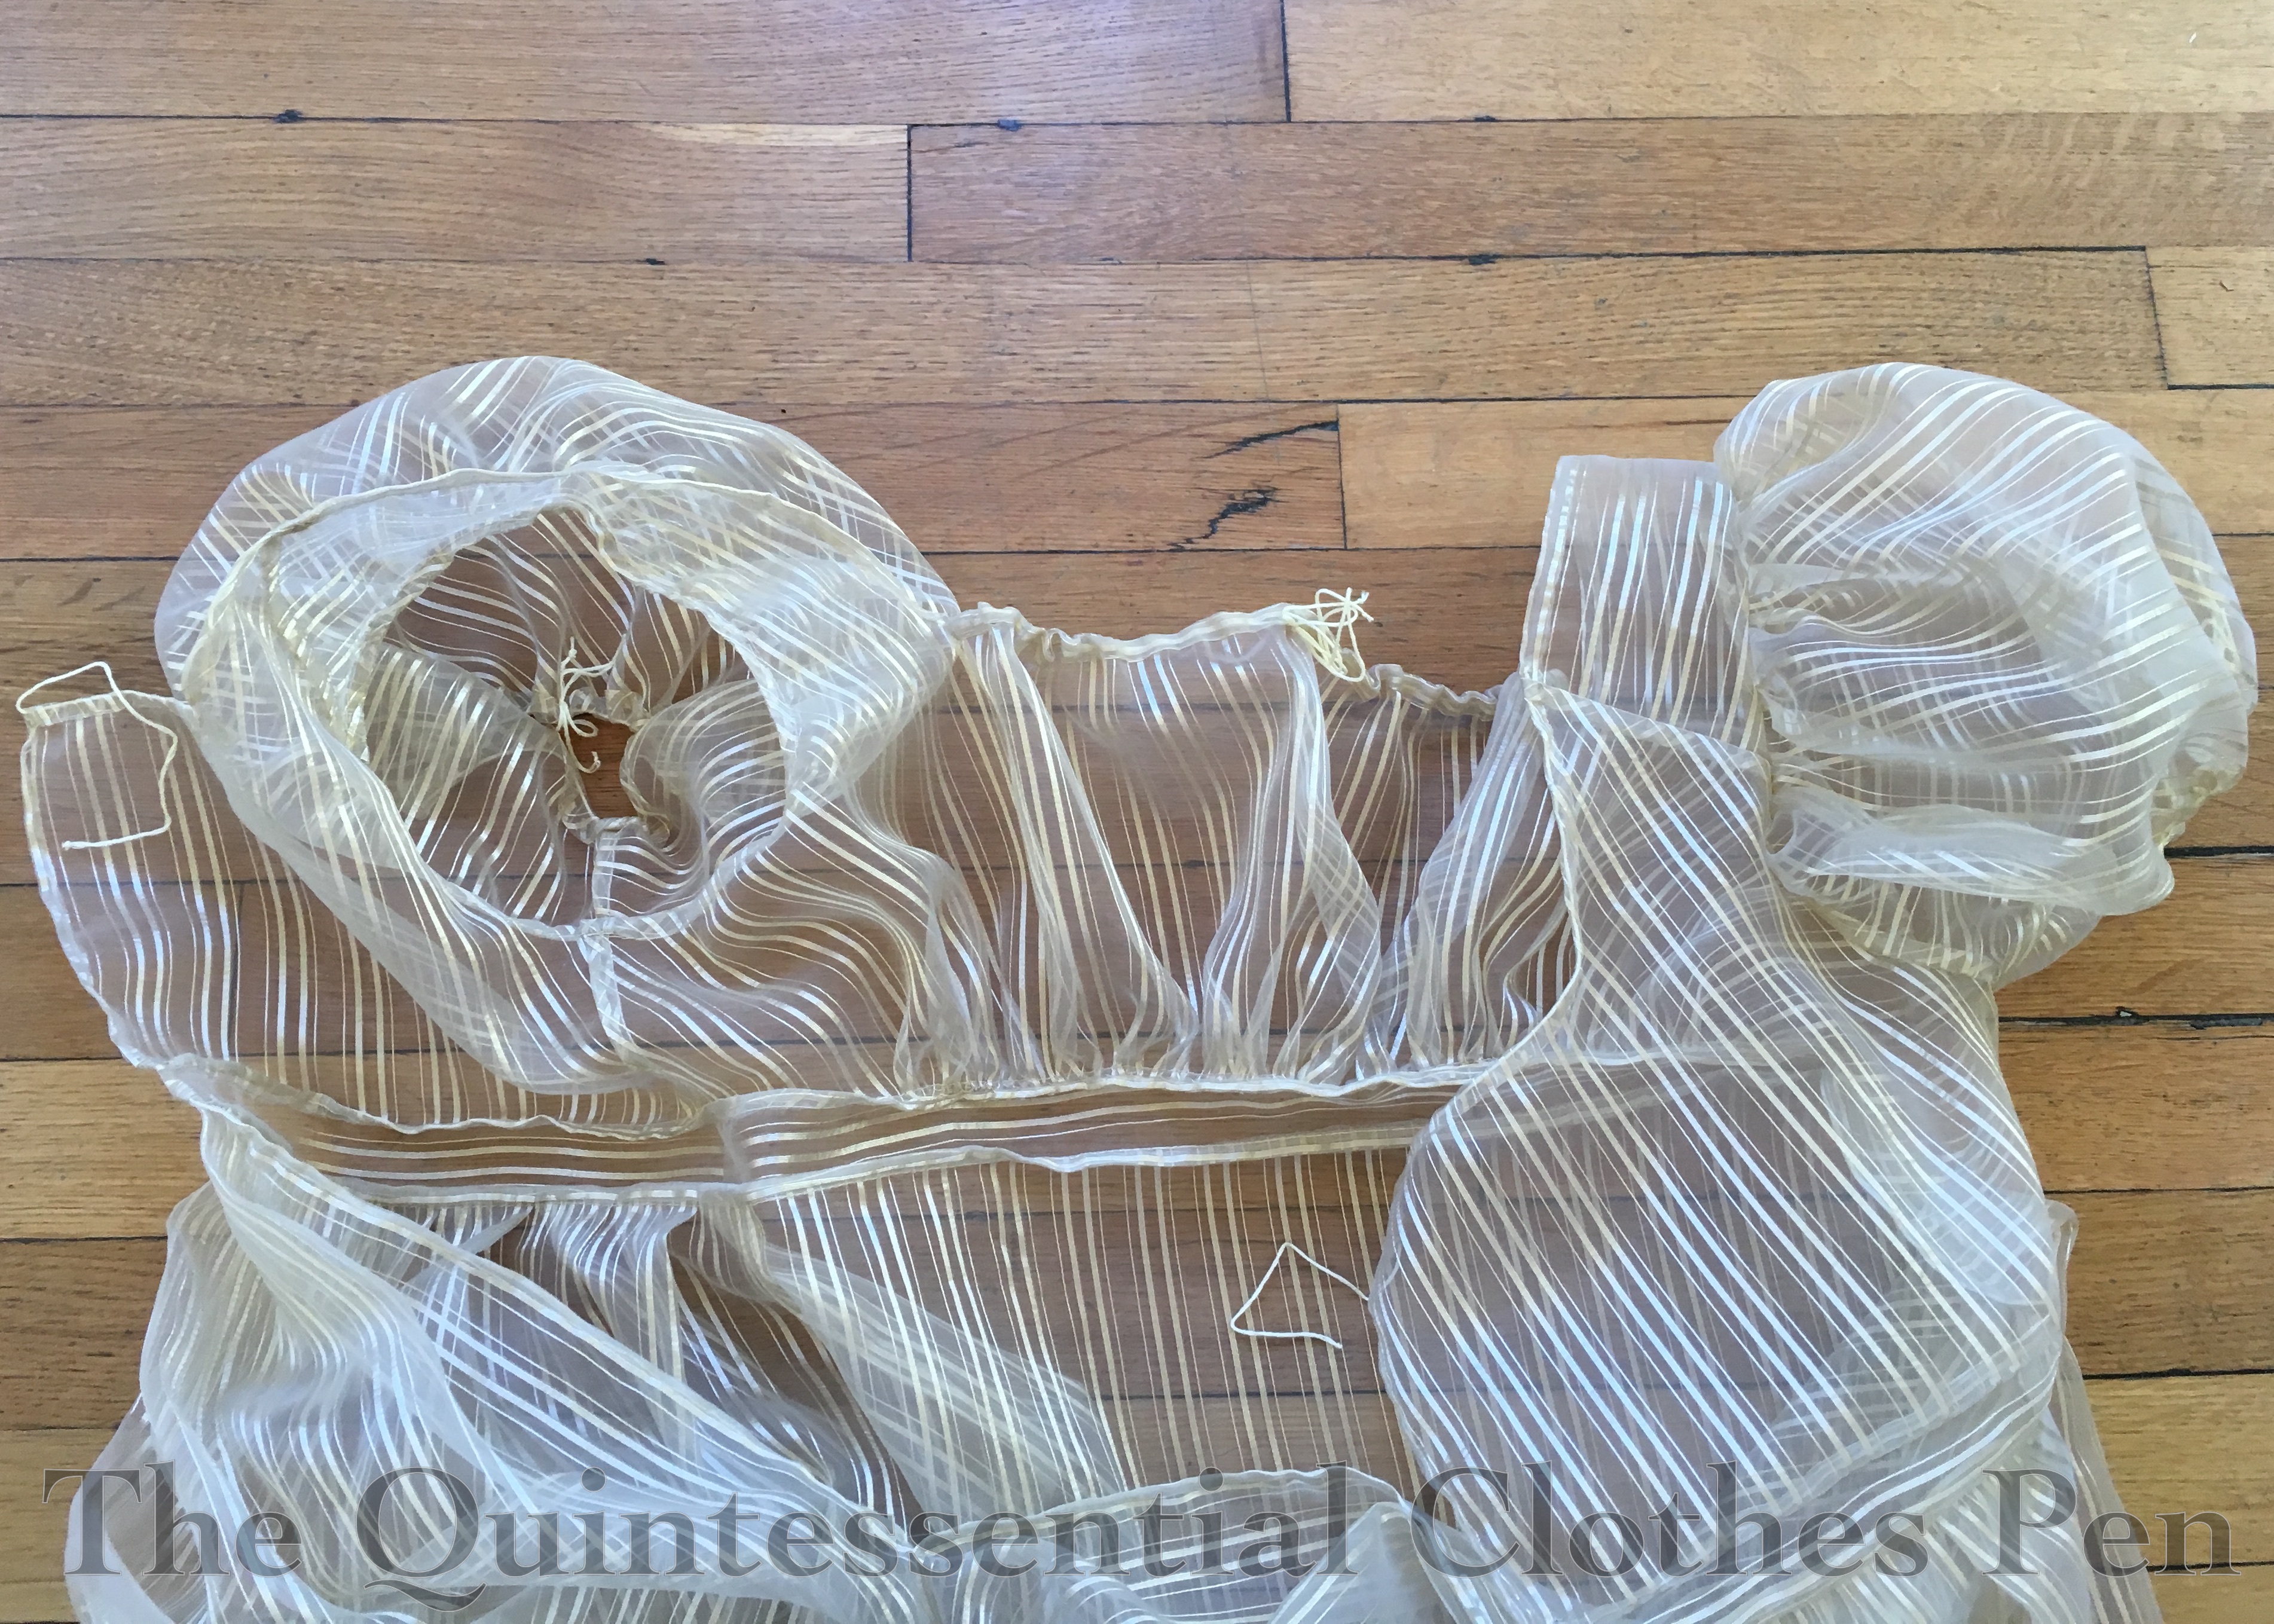
The bottoms of the sleeves and the front and back necklines are all adjustable with tiny drawstrings made from champagne colored embroidery floss. The goal was to have ties that would blend and not be noticeable through the sheer fabric.

The pattern for this dress was adapted from other Regency dresses I have made. I think I most closely referenced the patterns for my tree gown and square neck gown, but adjusted the fullness to give this dress a little more oomph.

This dress is machine sewn and hand finished. All of the French seaming was done on machine, as was the assembly of the bodice, waistband, and skirt to make a dress, but all of the other stitching (casings, hems, trim, finishing seam allowances in non-French ways, etc.) was done by hand.

The dress has a scalloped trim band around the bottom, set up high enough to show off the lace on the Vernet petticoat. It’s hand hemmed and it seems like miles… though I think it was only about 9 yards. Hemming, gathering, and attaching this was one of the last tasks and it was going right up until about 2am on the morning of the ball. By the time it was being sewn on there was no measuring or sectioning, just eyeballing, so it’s a little wavier than I would normally allow, but one has to make accommodations (sometimes). I was envisioning the scallops would be spaced out more and therefore be more defined, but as I was furiously sewing the trim on I was not about to cut it up and resew it, so all 9 yards made it onto the dress. It’s fine. I’m happy. I do not plan to re-do the fullness of the trim or the placement!

I decided that such a dress needed grand hair and hair ornamentation, and so I justified my desire to wear a tiara by scouring my Pinterest boards for documentation. The Duchess d’Angouleme sports a pretty grand tiara in 1818. And here she is in 1817 wearing what I think is the same tiara.This is Victoria, Duchess of Kent, sporting a fabulous tiara and giant hair poof/bun. Empress Josephine and Caroline Murat (Queen of Naples) have some pretty fabulous tiaras, too. To match the tiara, I accessorized with a pearl necklace and pearl earrings. Worthy of a duchess? I think so!

SaveSave

SaveSave

1814 Orange Boven Pelisse

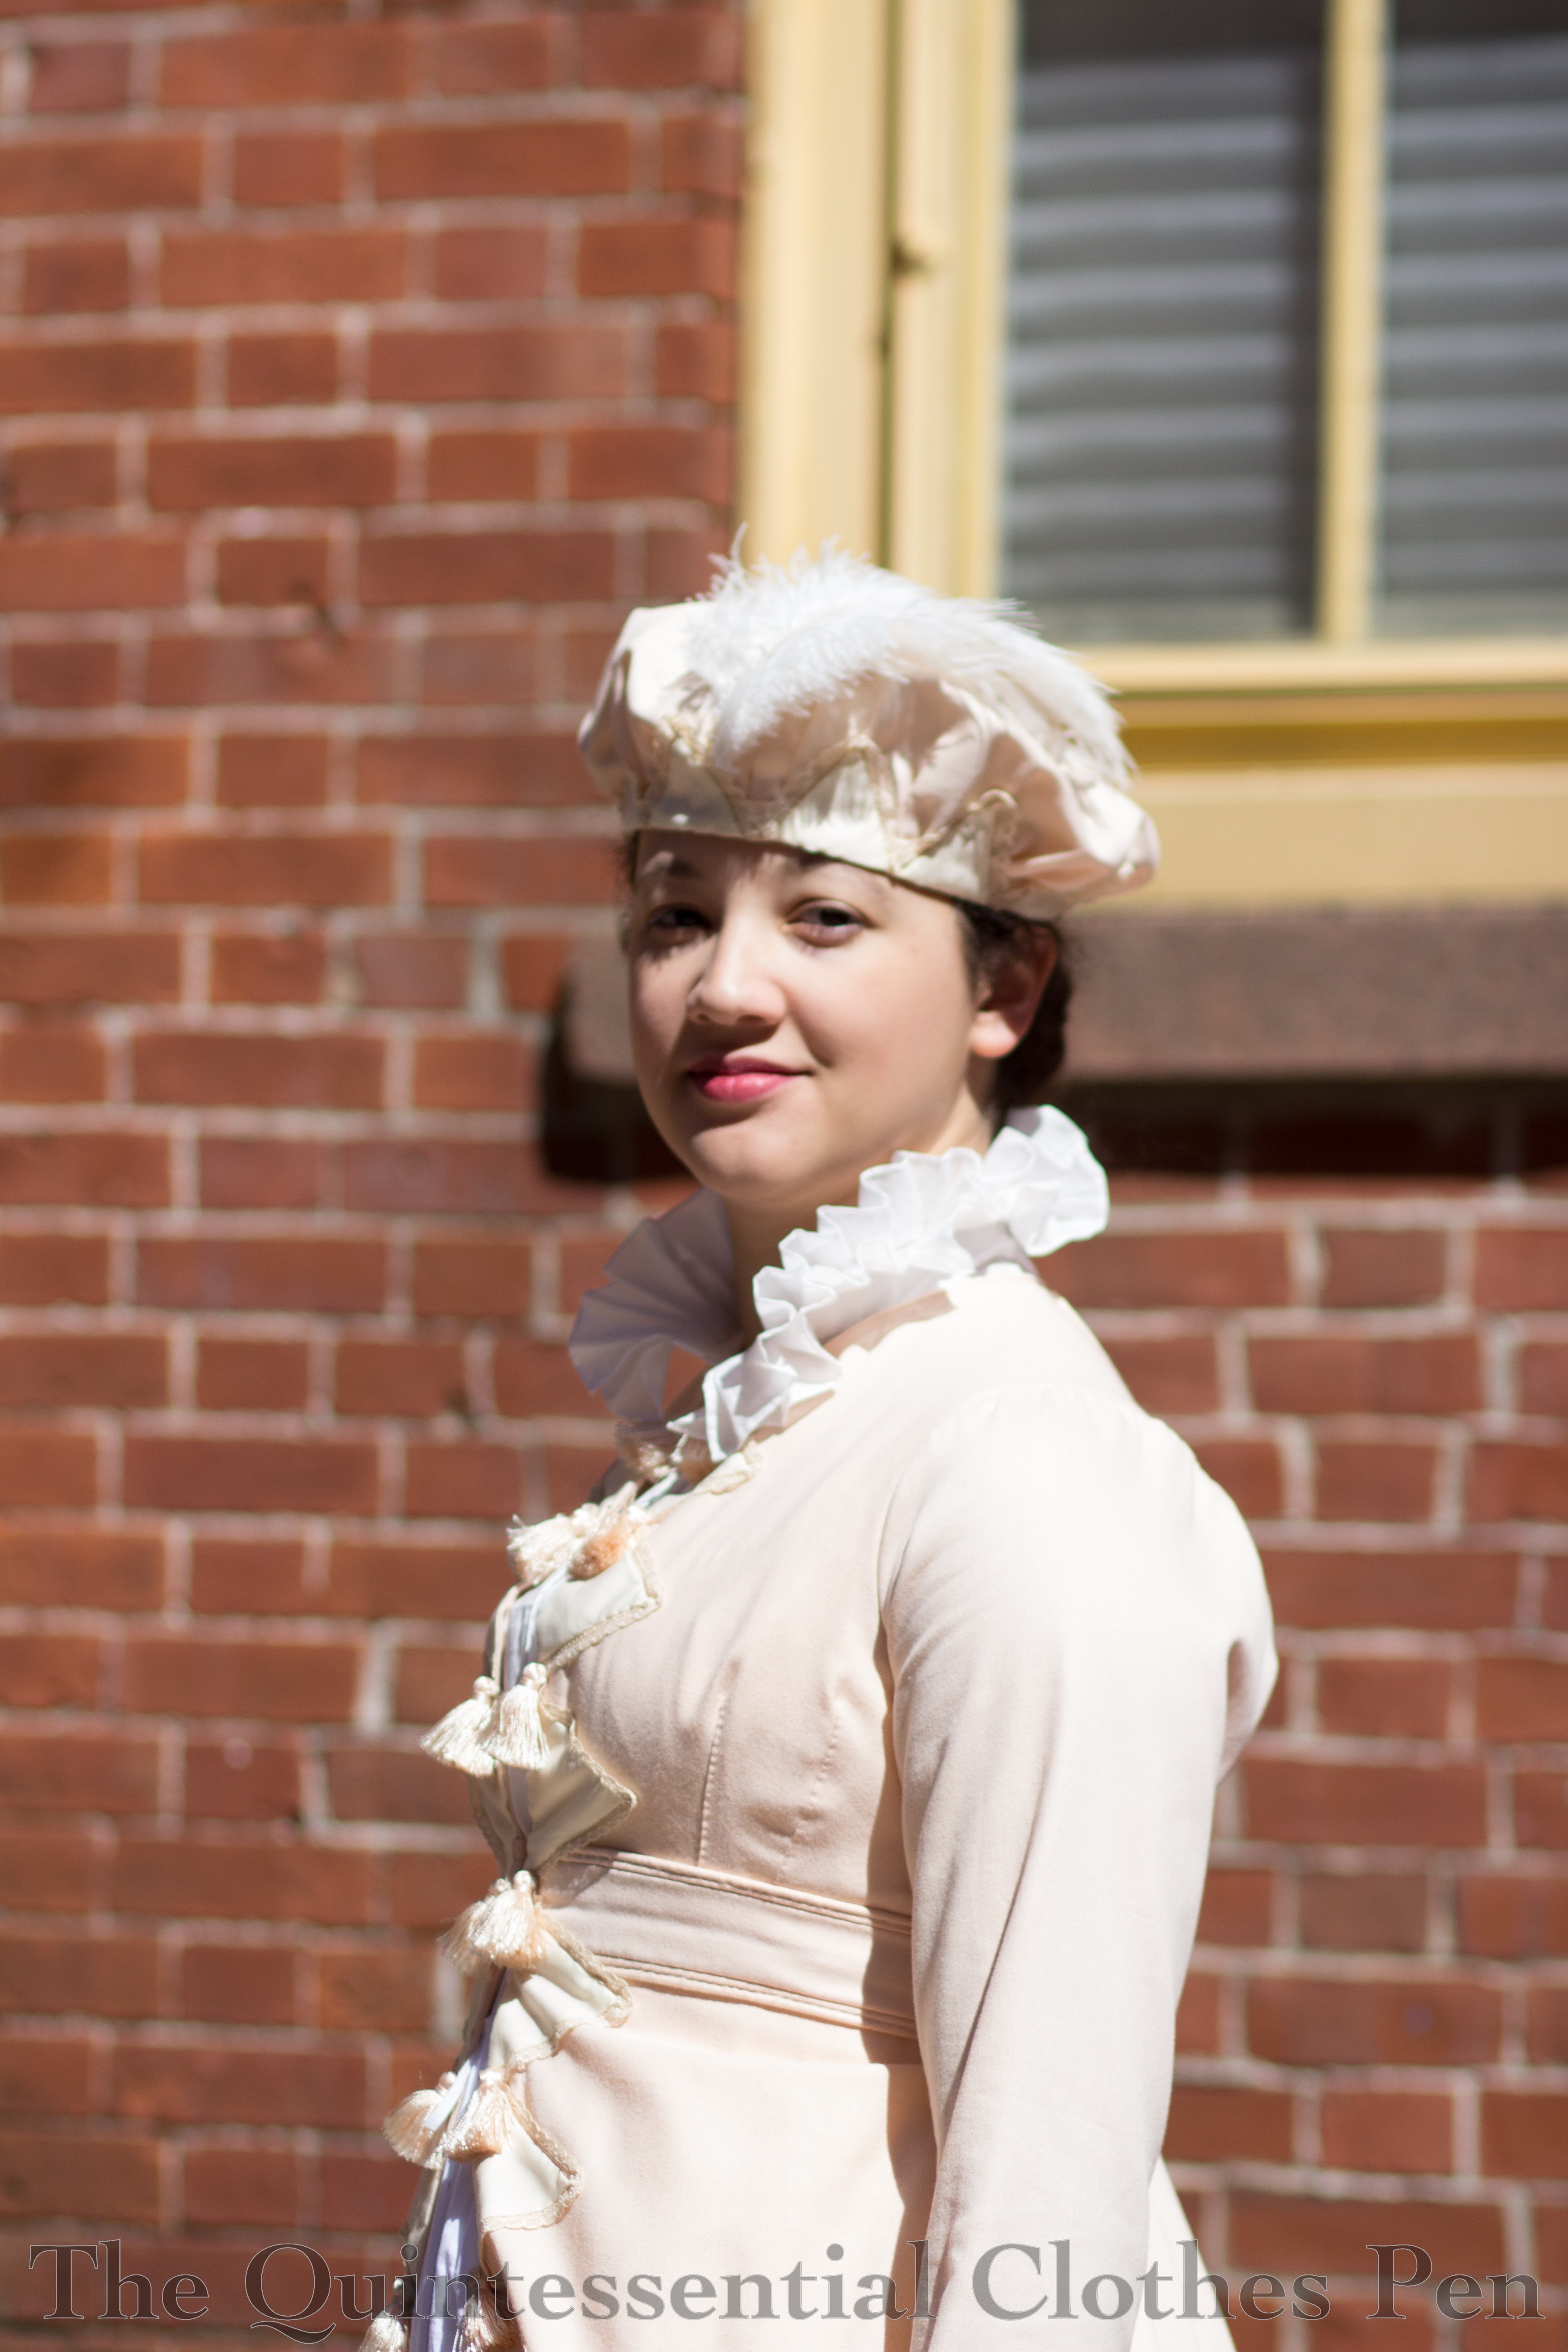
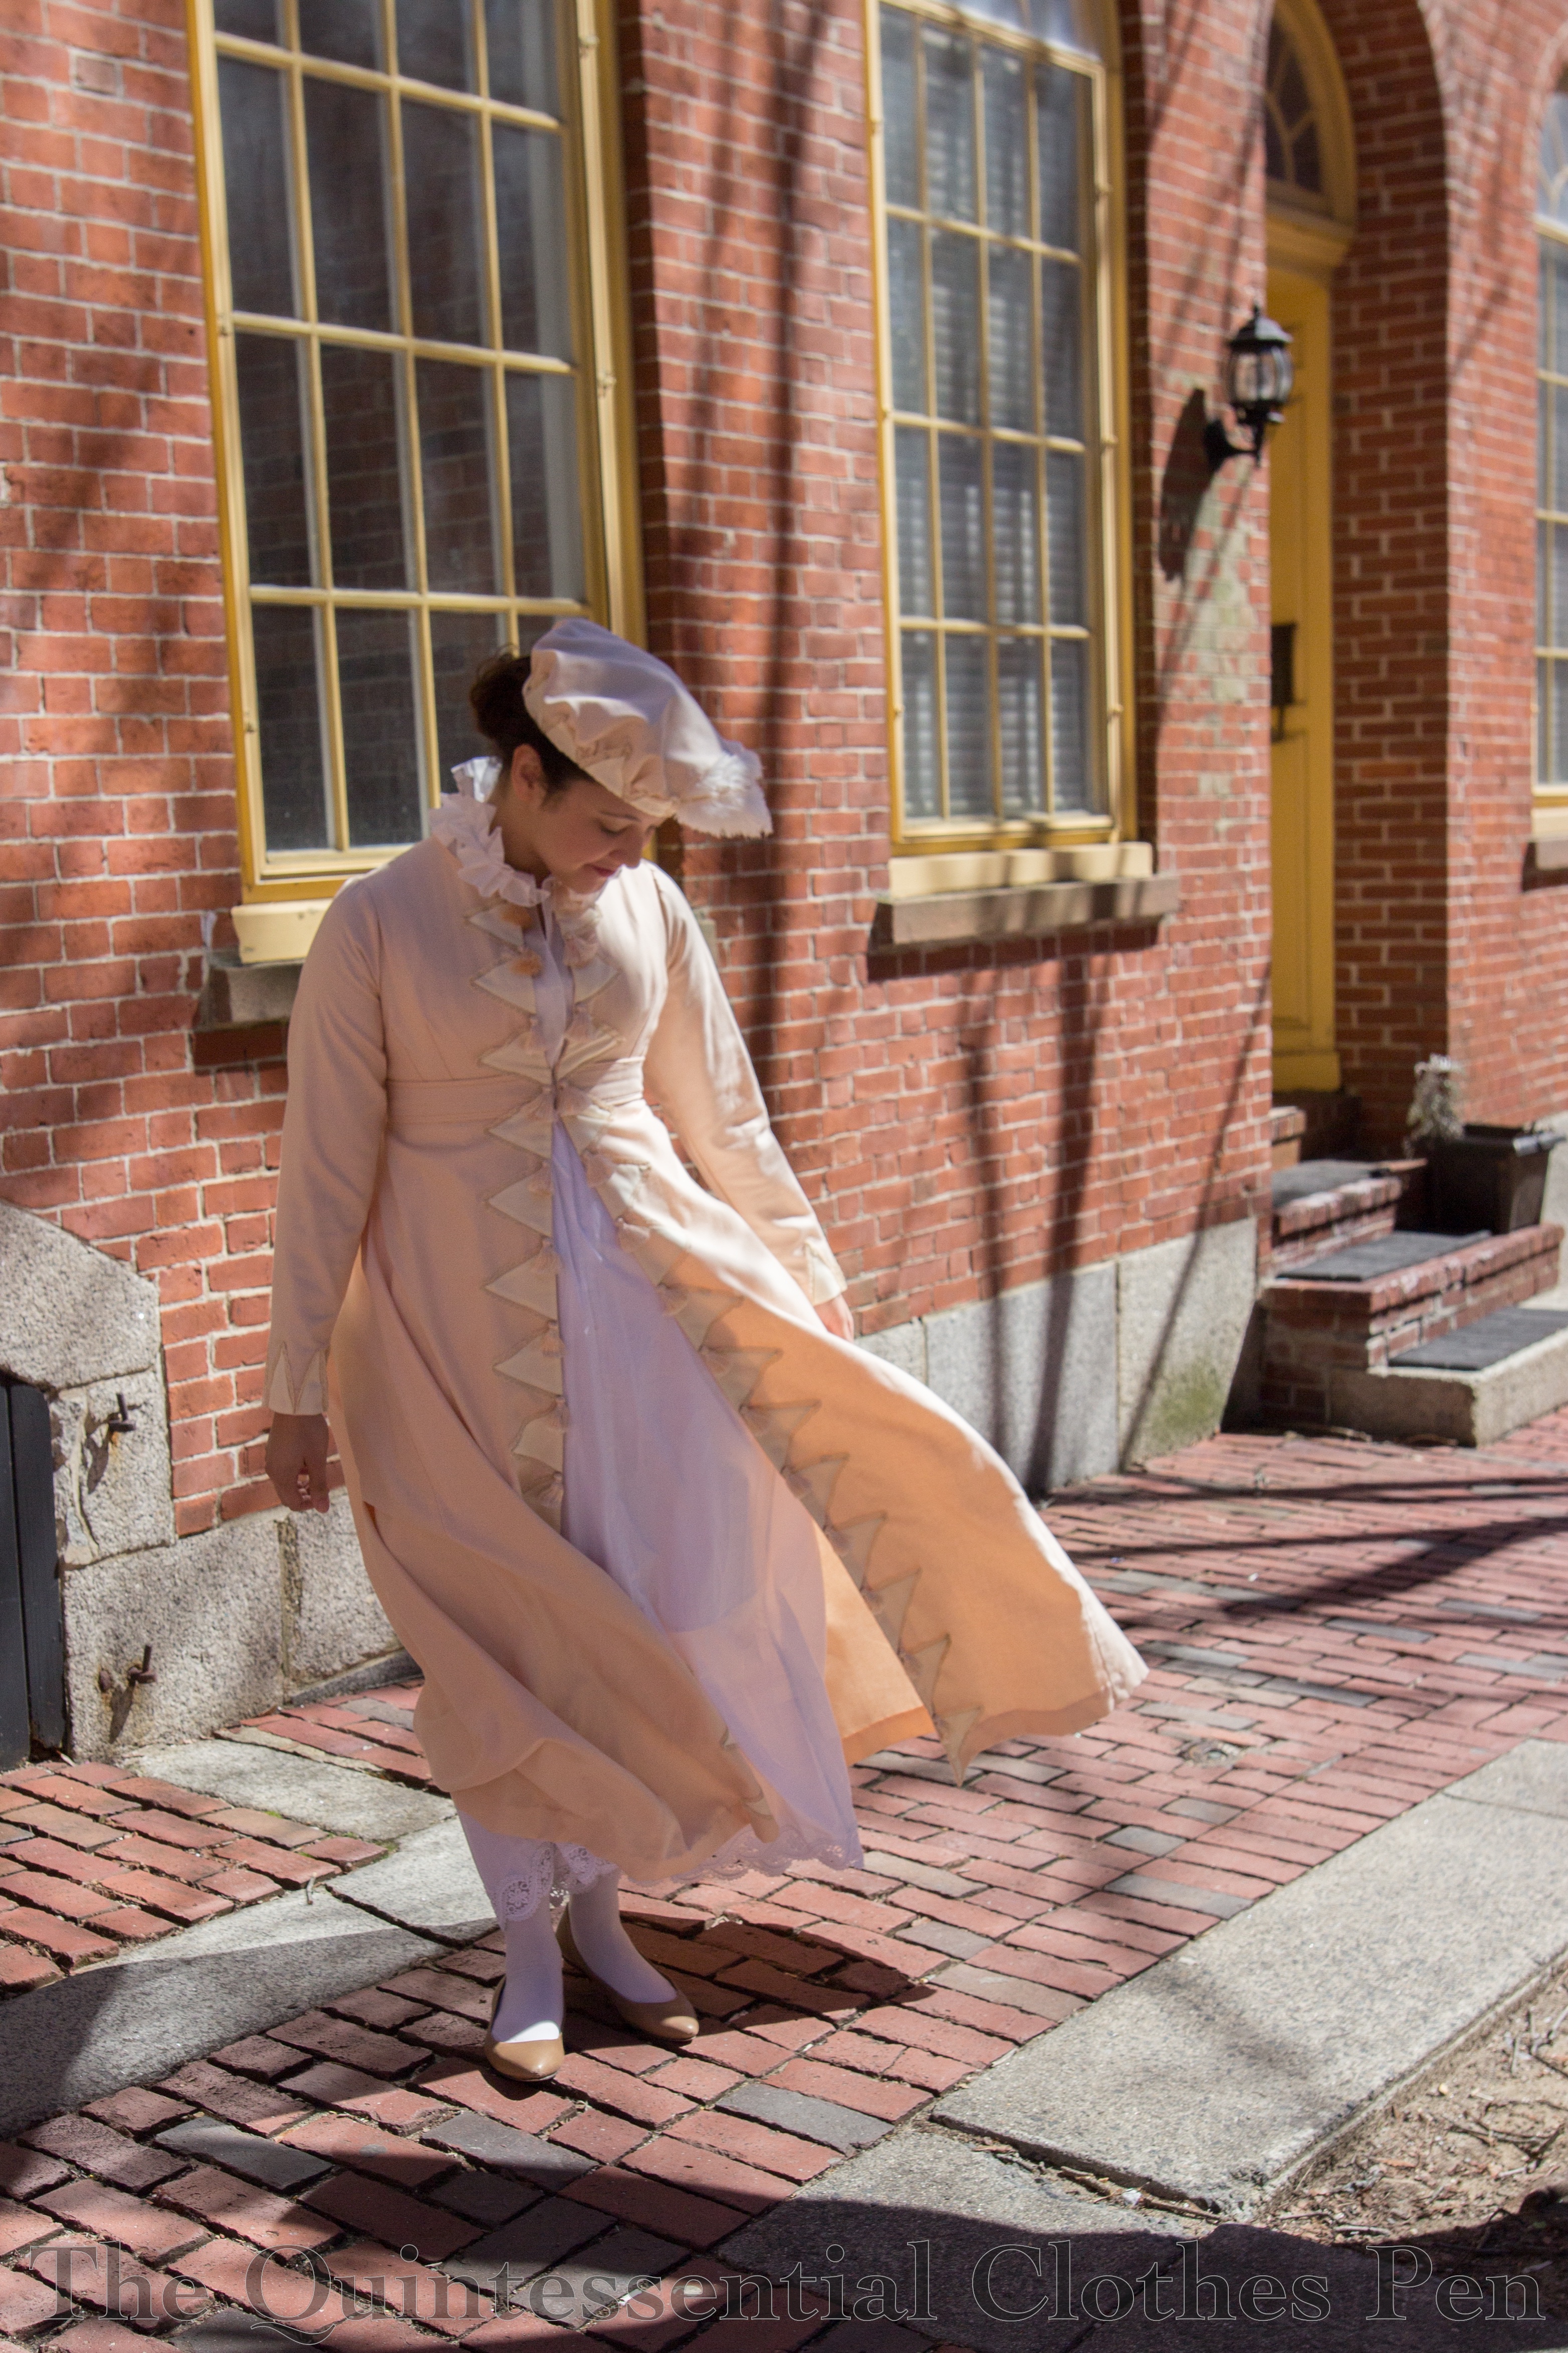
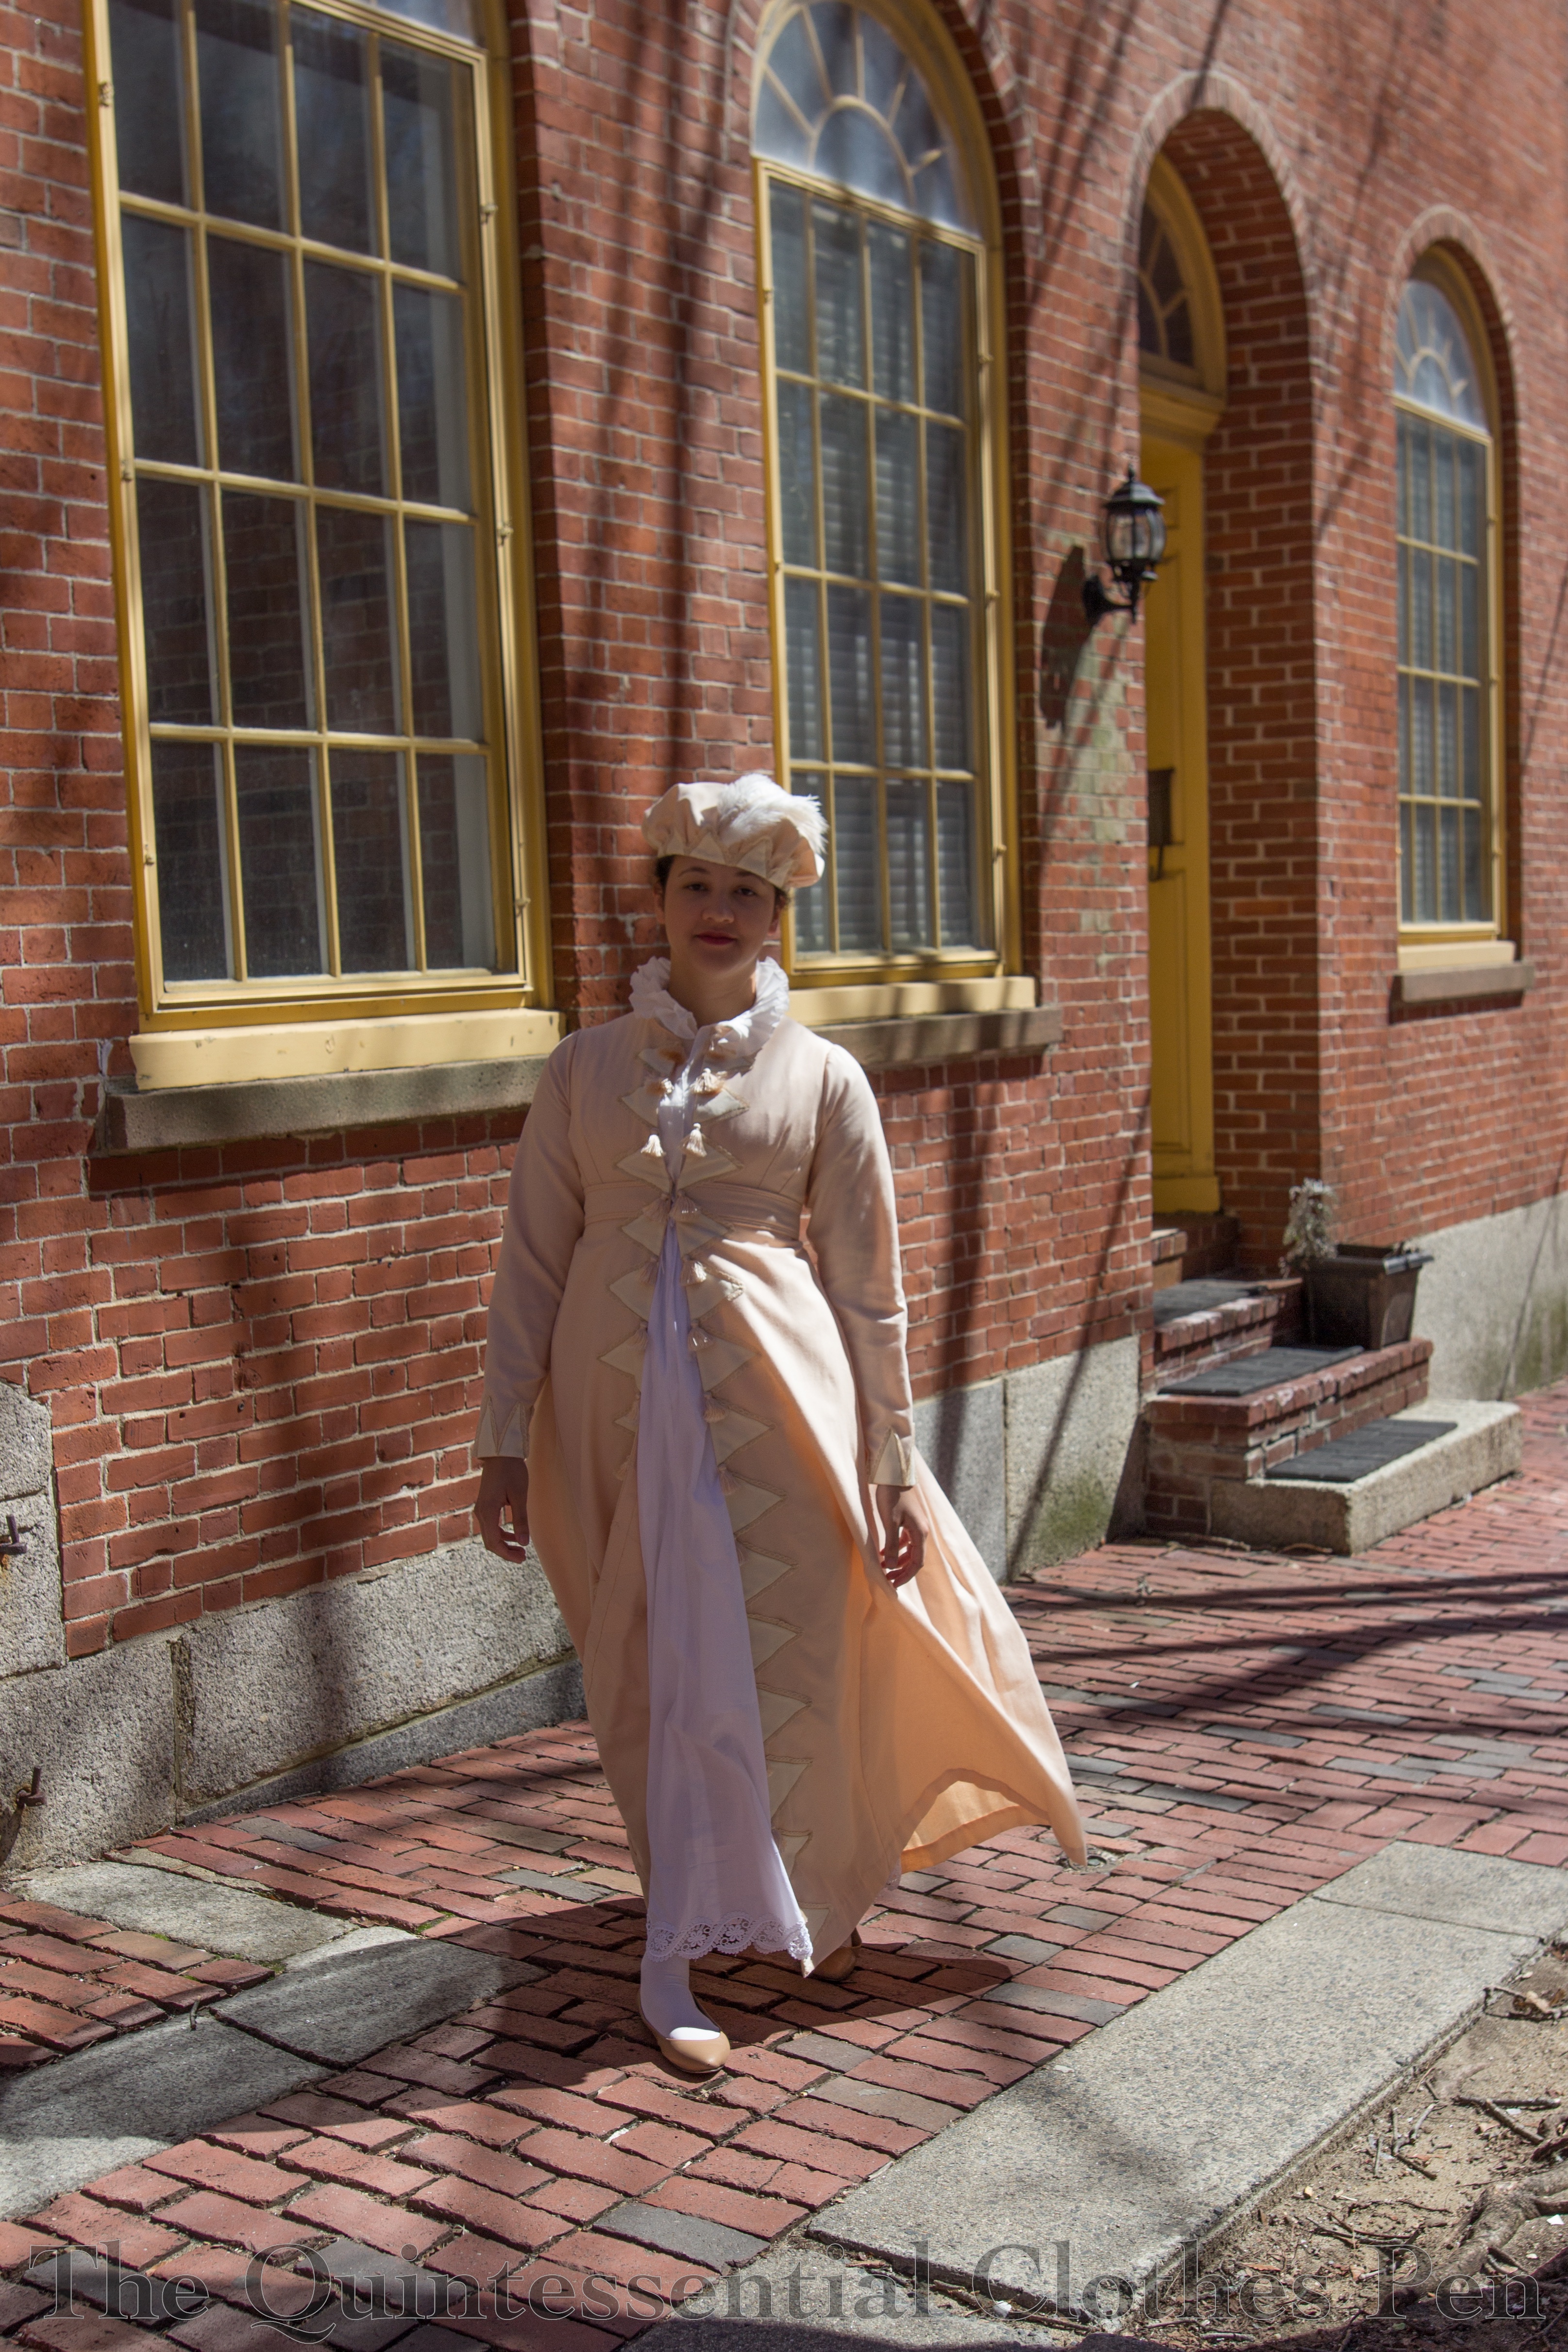
At least three years ago I was inspired by a fashion plate, as one often is, and started working on a Regency pelisse following the design in the image. I got really far along, finishing the construction and even part of the trimming, but then stalled and let the ensemble languish for years before determining to pick it up and finish it off this year or else! I’m excited to have finally reached a ‘done’ point in this project so I can remove it from the UFO list!

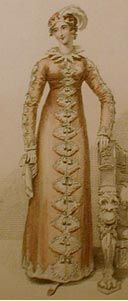
The pelisse (and hat) are directly inspired by the following fashion plate, which can be seen here with slightly different coloring and here in black and white. In the first of those two links, the garment is labeled as a dinner dress, but I thought the design would make excellent pelisse trimming and so I adapted it.

You’ll notice, perhaps, that the finished pelisse does not have as much trim on it as the inspiration image. Early in this project, before it languished, I cut out all of the appliqués for the neck, sleeves, and hem as well as the front edges. I pressed under a 1/4″ on each side of each piece, too. And then, as I was finishing all that triangle trim on the front earlier this year, two things happened:

#1- I lost steam and really just needed to be done with this project.

#2- I decided I liked the simplicity of the pelisse without the extra trim. It’s so easy to draw lots of details, but then in a real garment the details don’t always translate. For example, the triangles around the neck just looked bad and awkward (plus, I wonder if that is a chemisette collar and not trim on the dress itself?) and the sleeves just looked too crowded. I was also afraid that putting all that work into triangles around the hem would just get dirty and not be a good use of many more yards of the vintage lace I used to edge the triangles.

In fact, despite the somewhat-simplified trim, there are actually a lot of details in the construction of the pelisse. Each back seam is piped and the belt has double piping above and below it. The neck is bound with piping, which is sewn with small, invisible stitches around the neck to hold the seam allowance to the inside. Also, the skirt is knife pleated into the back, allowing for a nice silhouette from all sides.

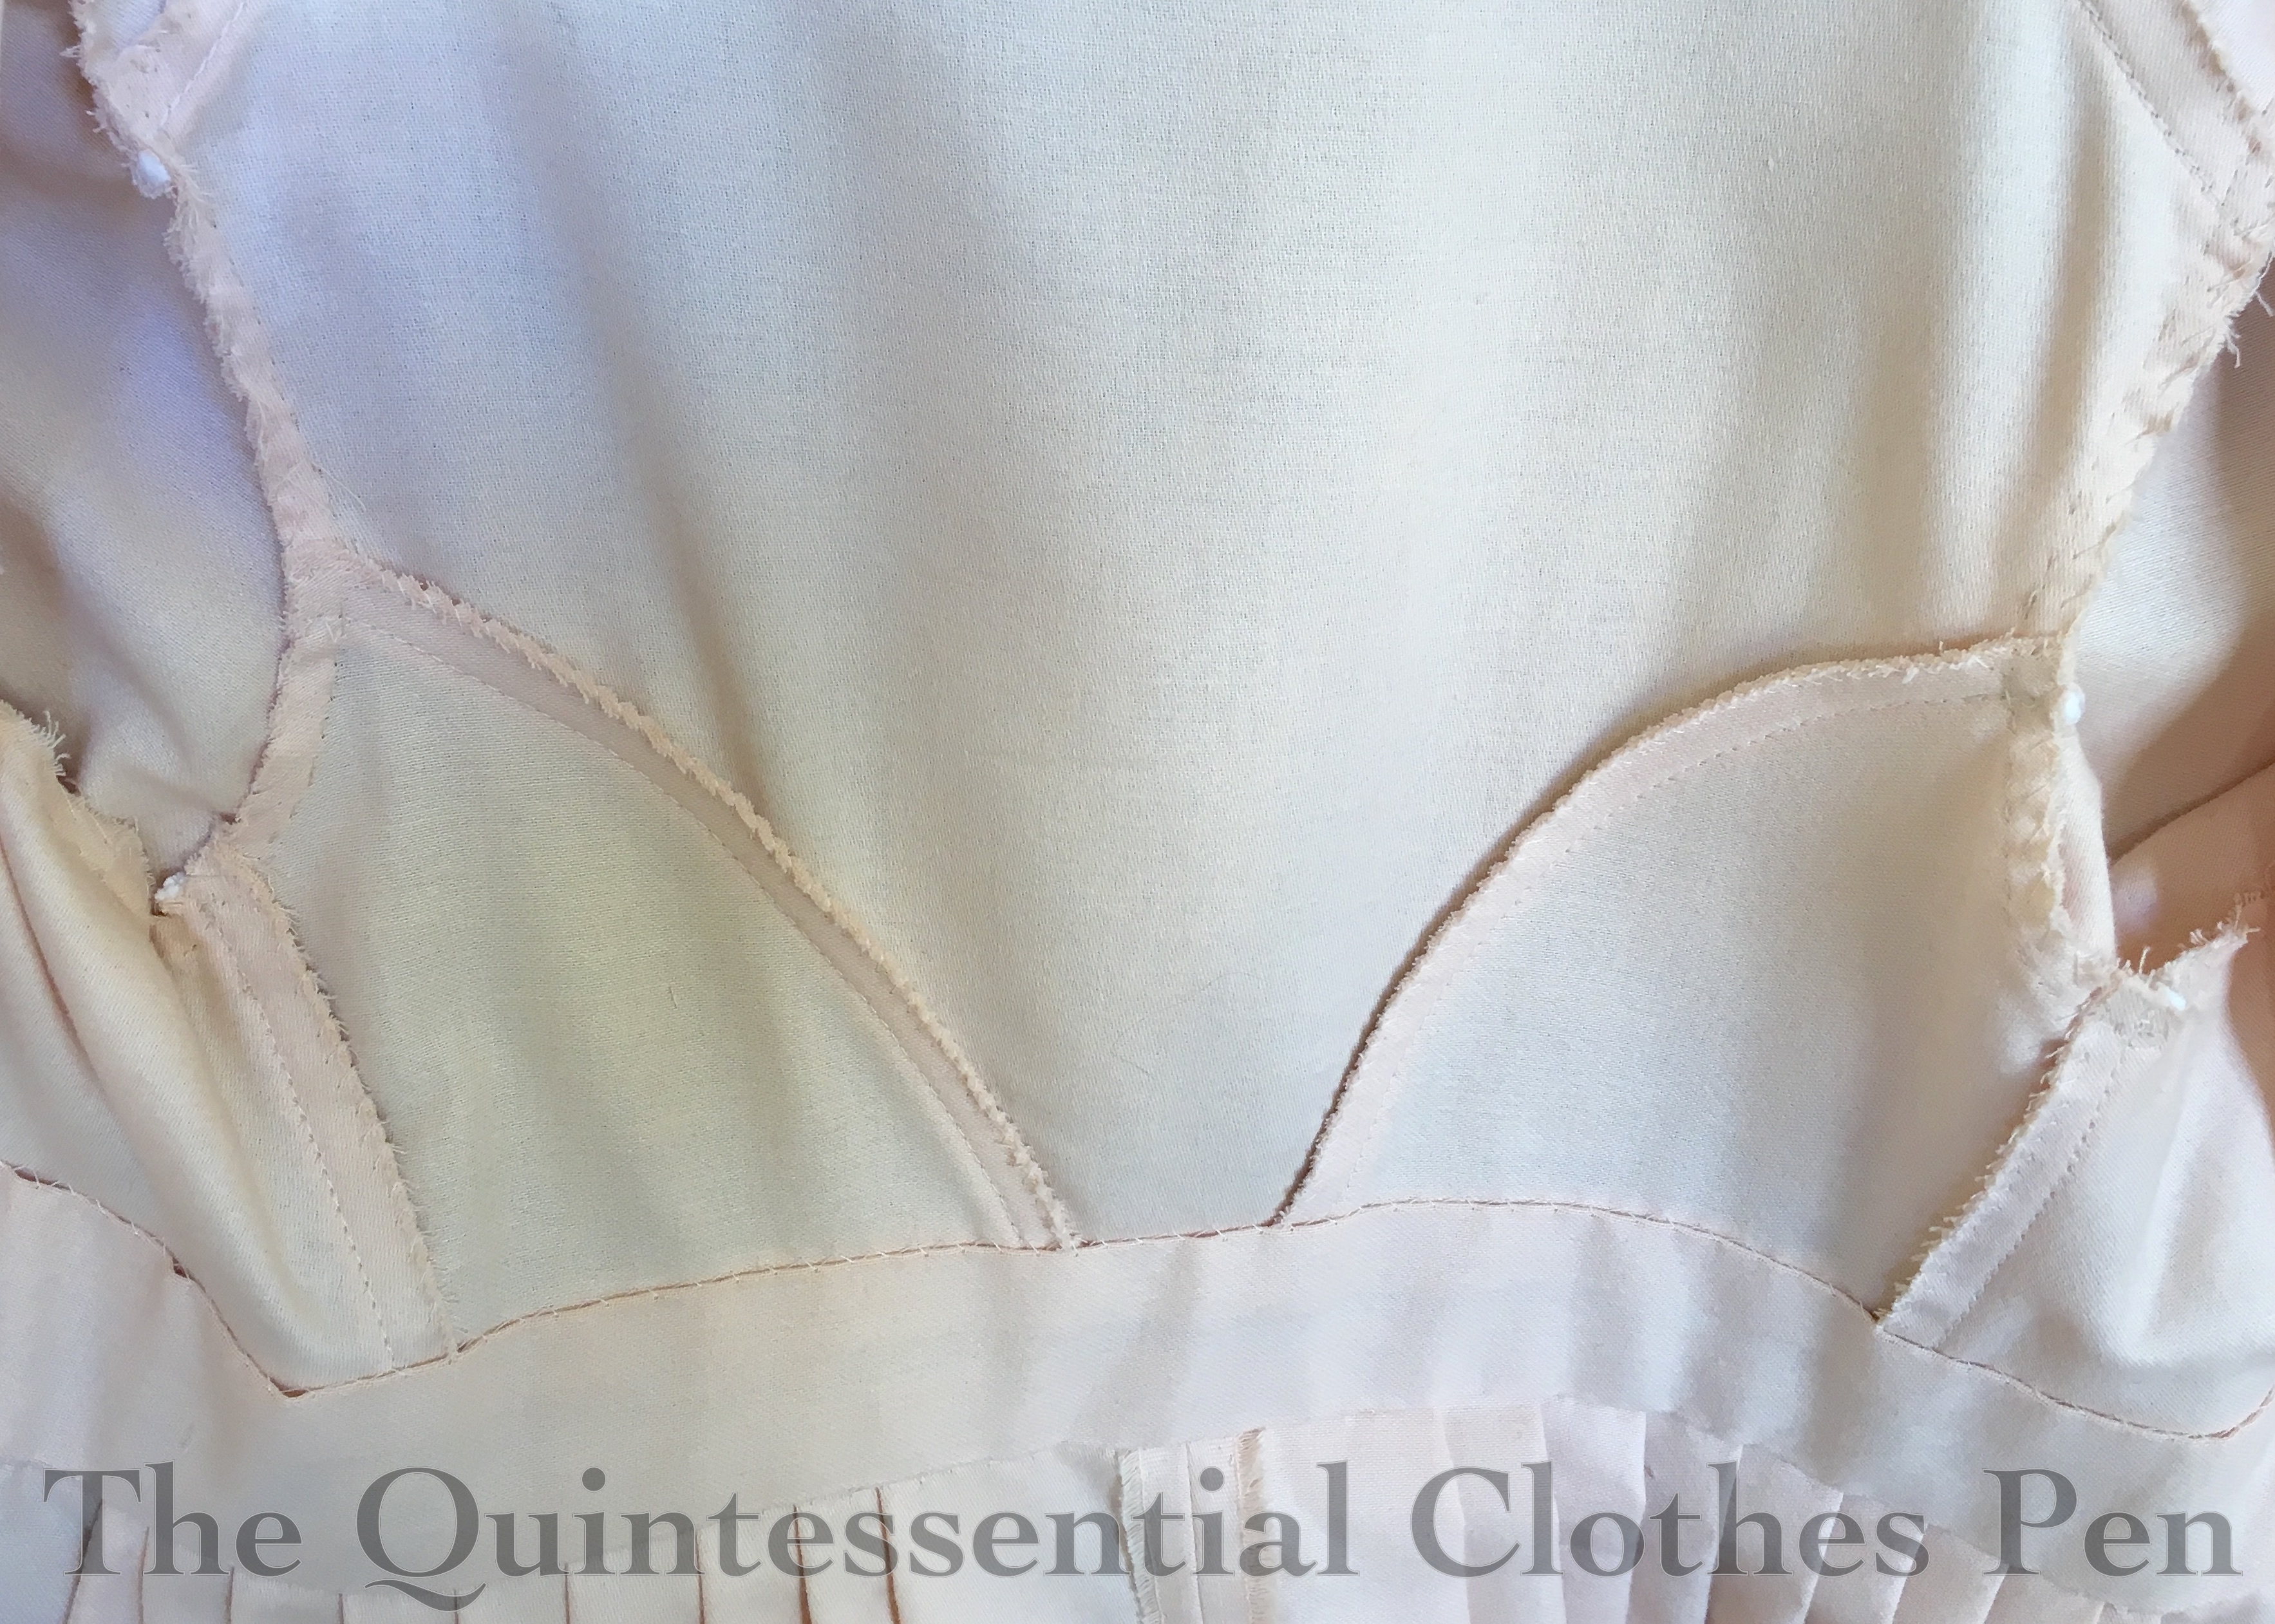
The pelisse is made entirely from peach colored cotton. It is unlined, except on the belt, where it is lined in order to hide the raw edges. The other seam allowances are whip stitched to keep them tidy. Here is an inside view of the bodice section. I do like my insides to be tidy!

The trim fabric is a cream colored poly/cotton blend. Each triangle is edged in very light tan vintage lace. Then, to top it all off, there are peach tassels on each triangle down the front as well. The peach tassels were removed from a length of upholstery trim that happened to be a perfect color match!

The pelisse is machine sewn on the interior seams and hand finished, including the hem, neckline, seam allowances, and all that trim. The darts are also sewn by hand with a small running stitch, a detail I picked up from looking at extant pelisses, though of course it’s been so many years now that I can’t find a specific example. I like how the top stitched darts at a little extra interest.

The pattern for this pelisse is of my own design. I’m pretty sure it was based on my 1819 spencer, but adapted slightly for a different fit. It’s hard to remember since it’s been so many years since I made the pattern! The skirt is a large rectangle–two panels of fabric seamed at center back.

I’m wearing the pelisse with the following garments: a chemise and my short stays, my Vernet petticoat , my recently finished chemisette, and the hat that matches the whole ensemble. I’m excited to have found a use for the Vernet petticoat that shows off the trim at the hem! I did take out the tucks that made it the right length for my Witzchoura so that it would be the right length for the pelisse, but that’s what tucks are for, right? On picture day there was a nice breeze blowing everything around and showing off all the layers nicely.

I was lucky to take these photos in and around some of the Regency period buildings in Salem, MA. You can’t beat buildings from the right period for a suitable backdrop for a garment like this!

Now I have my first pelisse. More outings will hopefully arise in the future so I can wear it again. I’m so glad I’ve decided it’s finished and that it was a comfortable garment to wear, though I maintain that the hat is a bit silly.


Orange Boven Hat, 1814 (HSM#4)

I am pleased to report that I made a garment which qualifies for the HSM challenge #4: Circles, Squares, and Rectangles! I wasn’t sure I had anything on the sewing list that would do, but then I remembered years ago when I started this hat and it was only two pieces, a circle for the crown and a rectangle for the binding. Perfect! (I’m not counting the triangular trim. That’s just the trimming!)

As you might guess from the photo, this hat is part of a matching ensemble: a pelisse and hat from 1814. I’ve got lots of details planned regarding the inspiration for this ensemble as well as more pictures of the finished outfit, but for now this teaser will have to suffice. It gives context to the rather silly hat.

Just the facts:

Fabric: Pale peach cotton and cream (likely) poly/cotton blend.

Pattern: My own based on my head measurements.

Year: 1814.

Notions: Thread, two ostrich feathers, and about 1 yard of vintage lace.

How historically accurate is it?: I’m going to go with 95% on this one. It’s entirely recognizable in its own time and made in a way that is straightforward and consistent with historic garments. The materials are not 100% accurate.

Hours to complete: If I’m only counting the hat, about 3 or 4, since it is entirely hand sewn.

First worn: April 9 for a Regency tea.

Total cost: About $8 for the hat without the pelisse.