Masquerade! Hide your face so the world will never find you! Masquerade! Every face a different shade… Masquerade! Look around there’s another mask behind you!
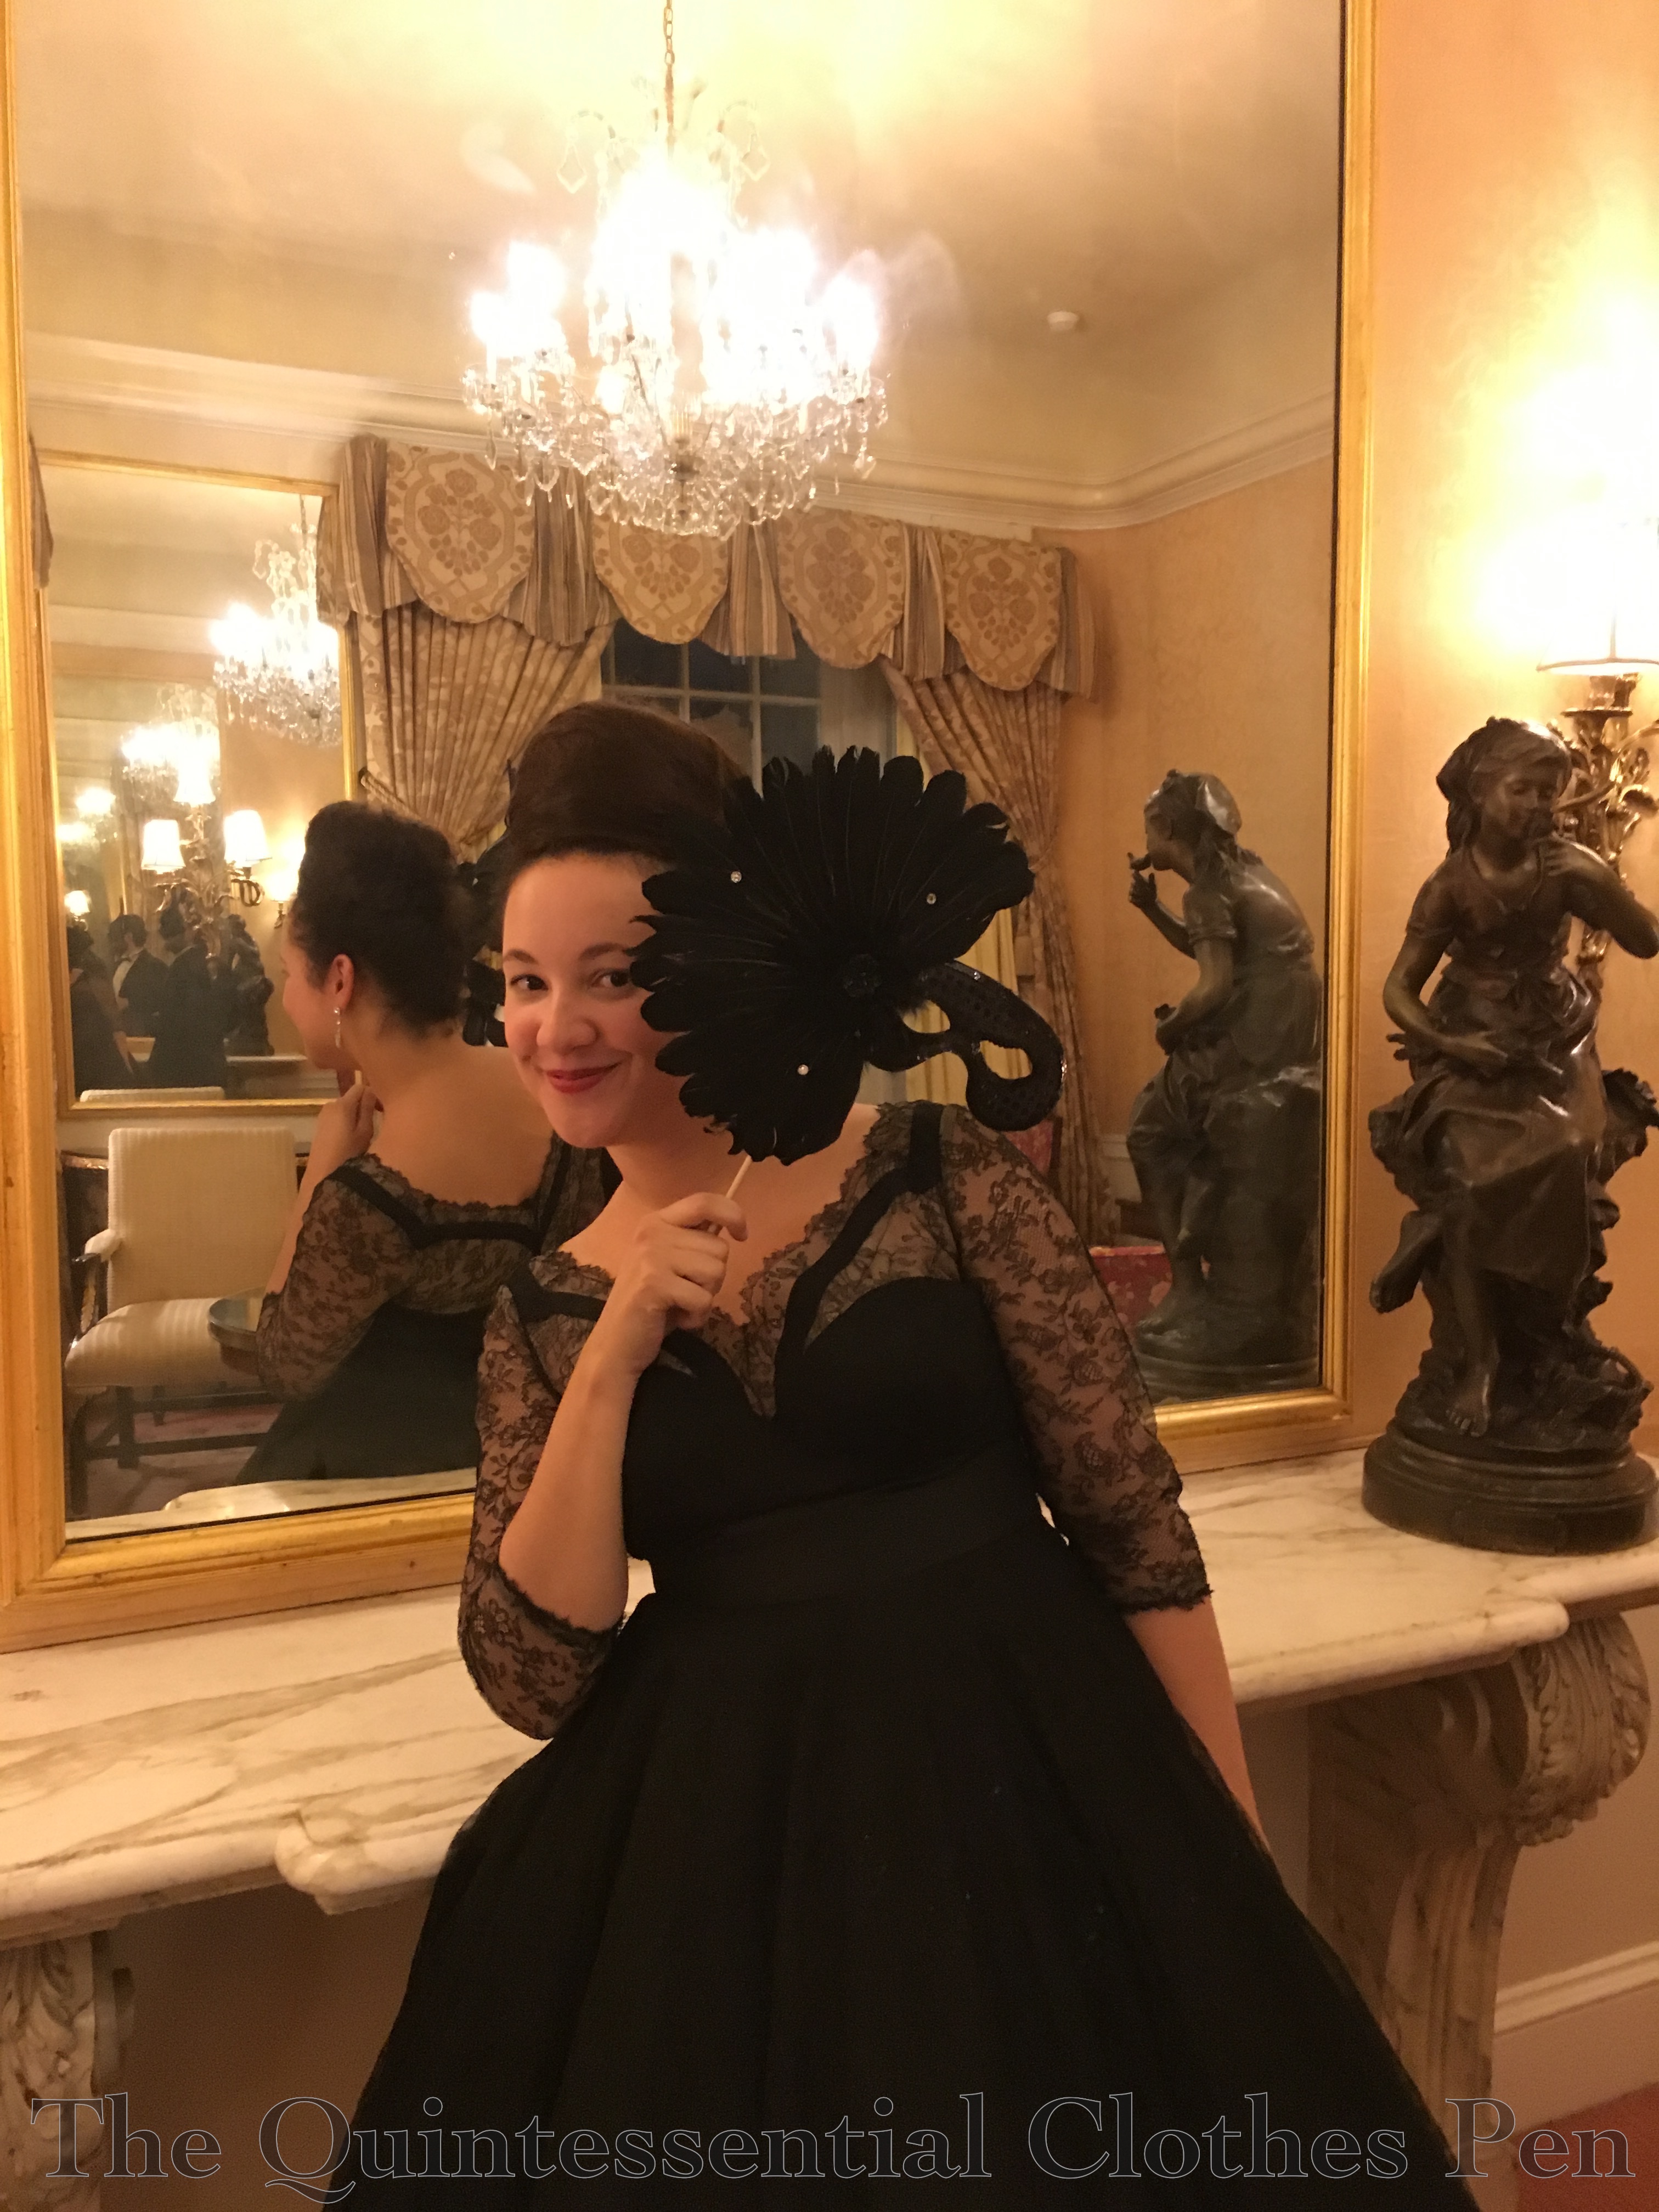
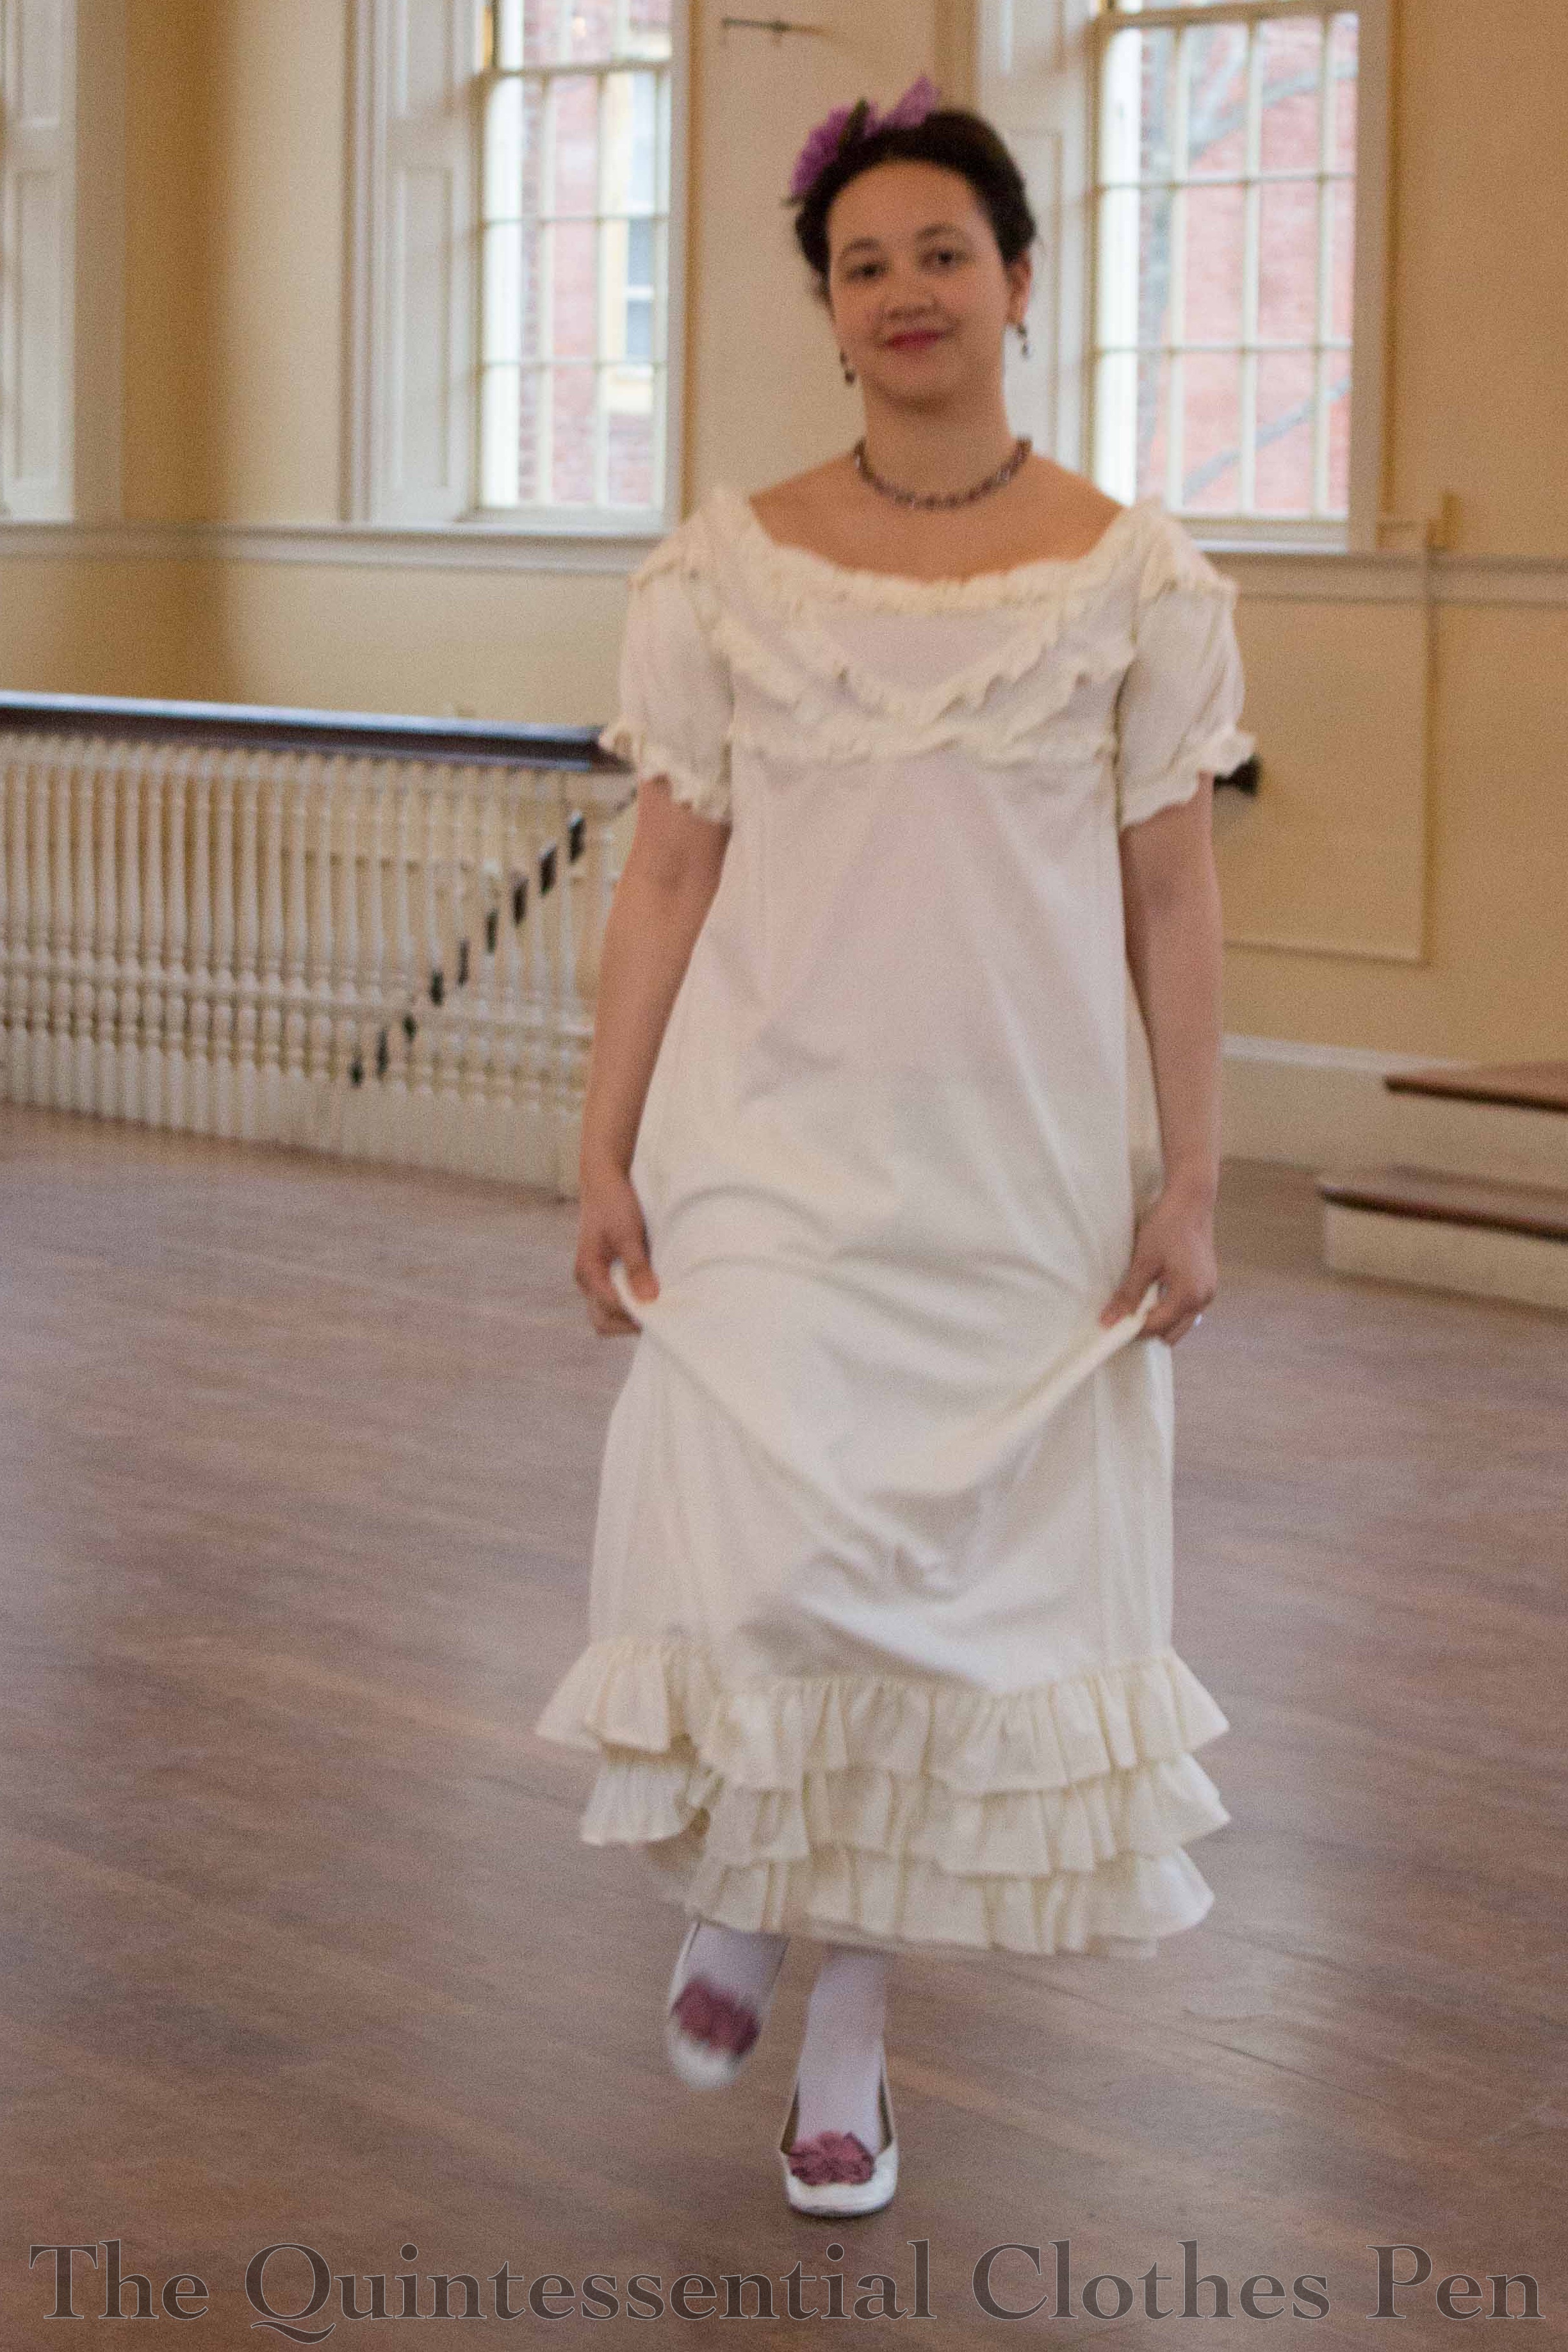
I’ve always wanted to attend a masquerade. This wasn’t quite the masquerade of The Phantom Of The Opera, not having sweeping orchestral music and head-to-toe colorful costumes, but it was nonetheless fun and a bit surreal in the masks-plus-fabulous-location-ness (I think a bit of a surreal experience is what makes a masquerade a unique experience, so this is entirely a positive description here).
Digressions about masquerades aside, back in November of last year I had the good fortune to attend such an event myself. The theme was 1960s, but I had recently acquired a 1950s dress that fit me so perfectly that it just HAD to be worn, so I opted to be a bit old fashioned for the theme of the party.
The event was held in a very nice downtown hotel. We had a series of rooms including the ballroom, its foyer, and a parlor-type space far enough away from the music to easily chat and lounge. It was quite elegant feeling!
Usually I don’t wear vintage or historical garments. I’d prefer to use them for study and don’t want to damage them. But I made an exception in this case and did my best to be gentle with the dress. I carefully mended it before wearing and then again after, as the delicate lace was pulling apart at the seams under the arms when I received the dress as well as after wearing it. My second version of the mend was to put gussets under the arms, using a tiny bit of leftover fabric I had from shortening the sleeves (I wanted to do this during the pre-wearing mend, but ran out of time). I think the sleeves were full length on the original owner, but they came down to an awkward mid-forearm length on me, so I shortened them to be a nice 3/4 length. I know! It was a hard decision to make, changing the dress, but I think it is in keeping with the period the dress is from and it allowed me to better fix the underarm problem, so I’ve come to terms with the choice.
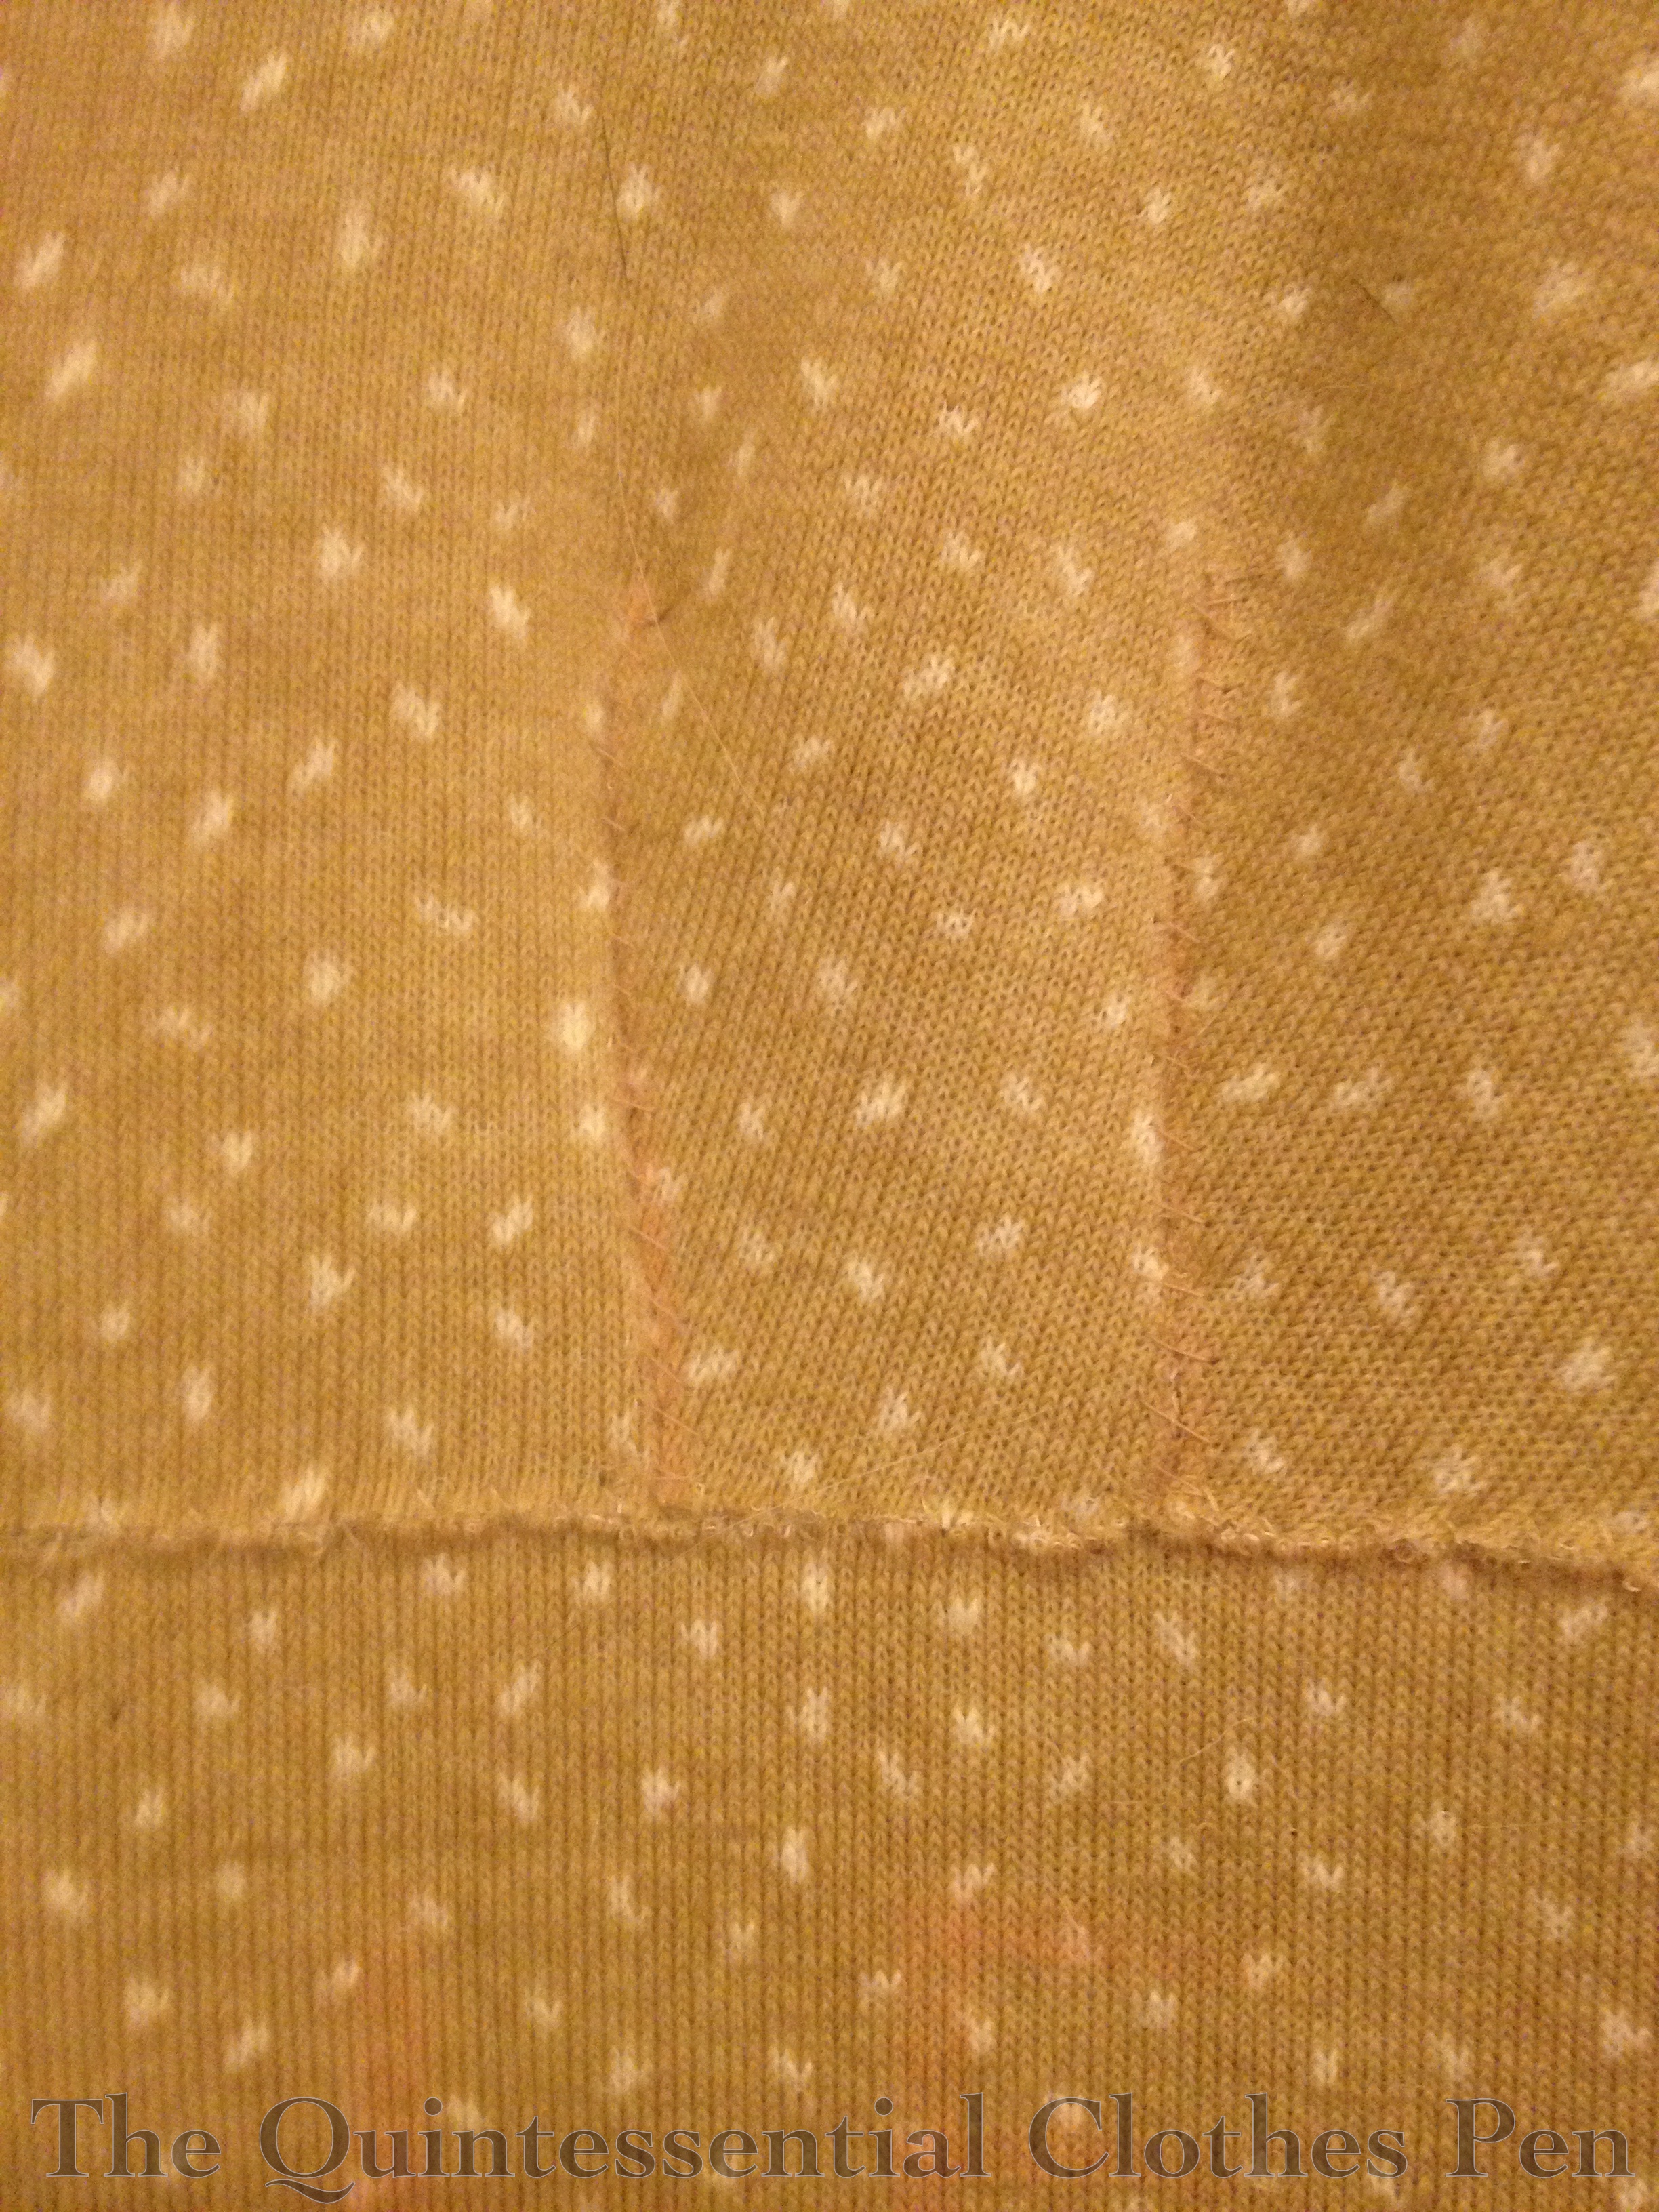
Here’s a slightly clearer view of the bodice. The lace is backed by nude net and there is a silk faille band around the waist. The entire skirt is faille with an overlay of the same lace and horsehair around the hem for stiffening.
For my hair, I decided it was go big or go home, so I used my largest bun form (part of the base of my Versailles hairstyle) to create a giant poof-bun-thing on top of my head that’s a nod to the 1960s beehive. I think it was balanced out well by the feathers on my mask. Plus, in general I’m pretty good at making big hair work.
I put the mask on a stick so that it wouldn’t irritate my face and so that something like an elastic wouldn’t squash my huge hair. A bonus is that I could peek out from behind it, as in this picture.
With this ensemble, I wore the same sparkly earrings I wore to Versailles and my silver American Duchess Seaburys with silver rhinestone shoe clips to make the ensemble even more bling-y!
The event included food and dancing and chatting. I had a great time that was even better than I was expecting, though I think that was due to being tired after a long week of work and not really sure if the event would be a hit or not.
My friends and I did lots of silly 1960s dances–the monkey, the swim, etc. (Are these really 1960s? I don’t know for sure, but in my mind they are…) These pictures of my dancing in the lobby are some of my favorite, partly because swishing around in my 1950s dress was so much fun!
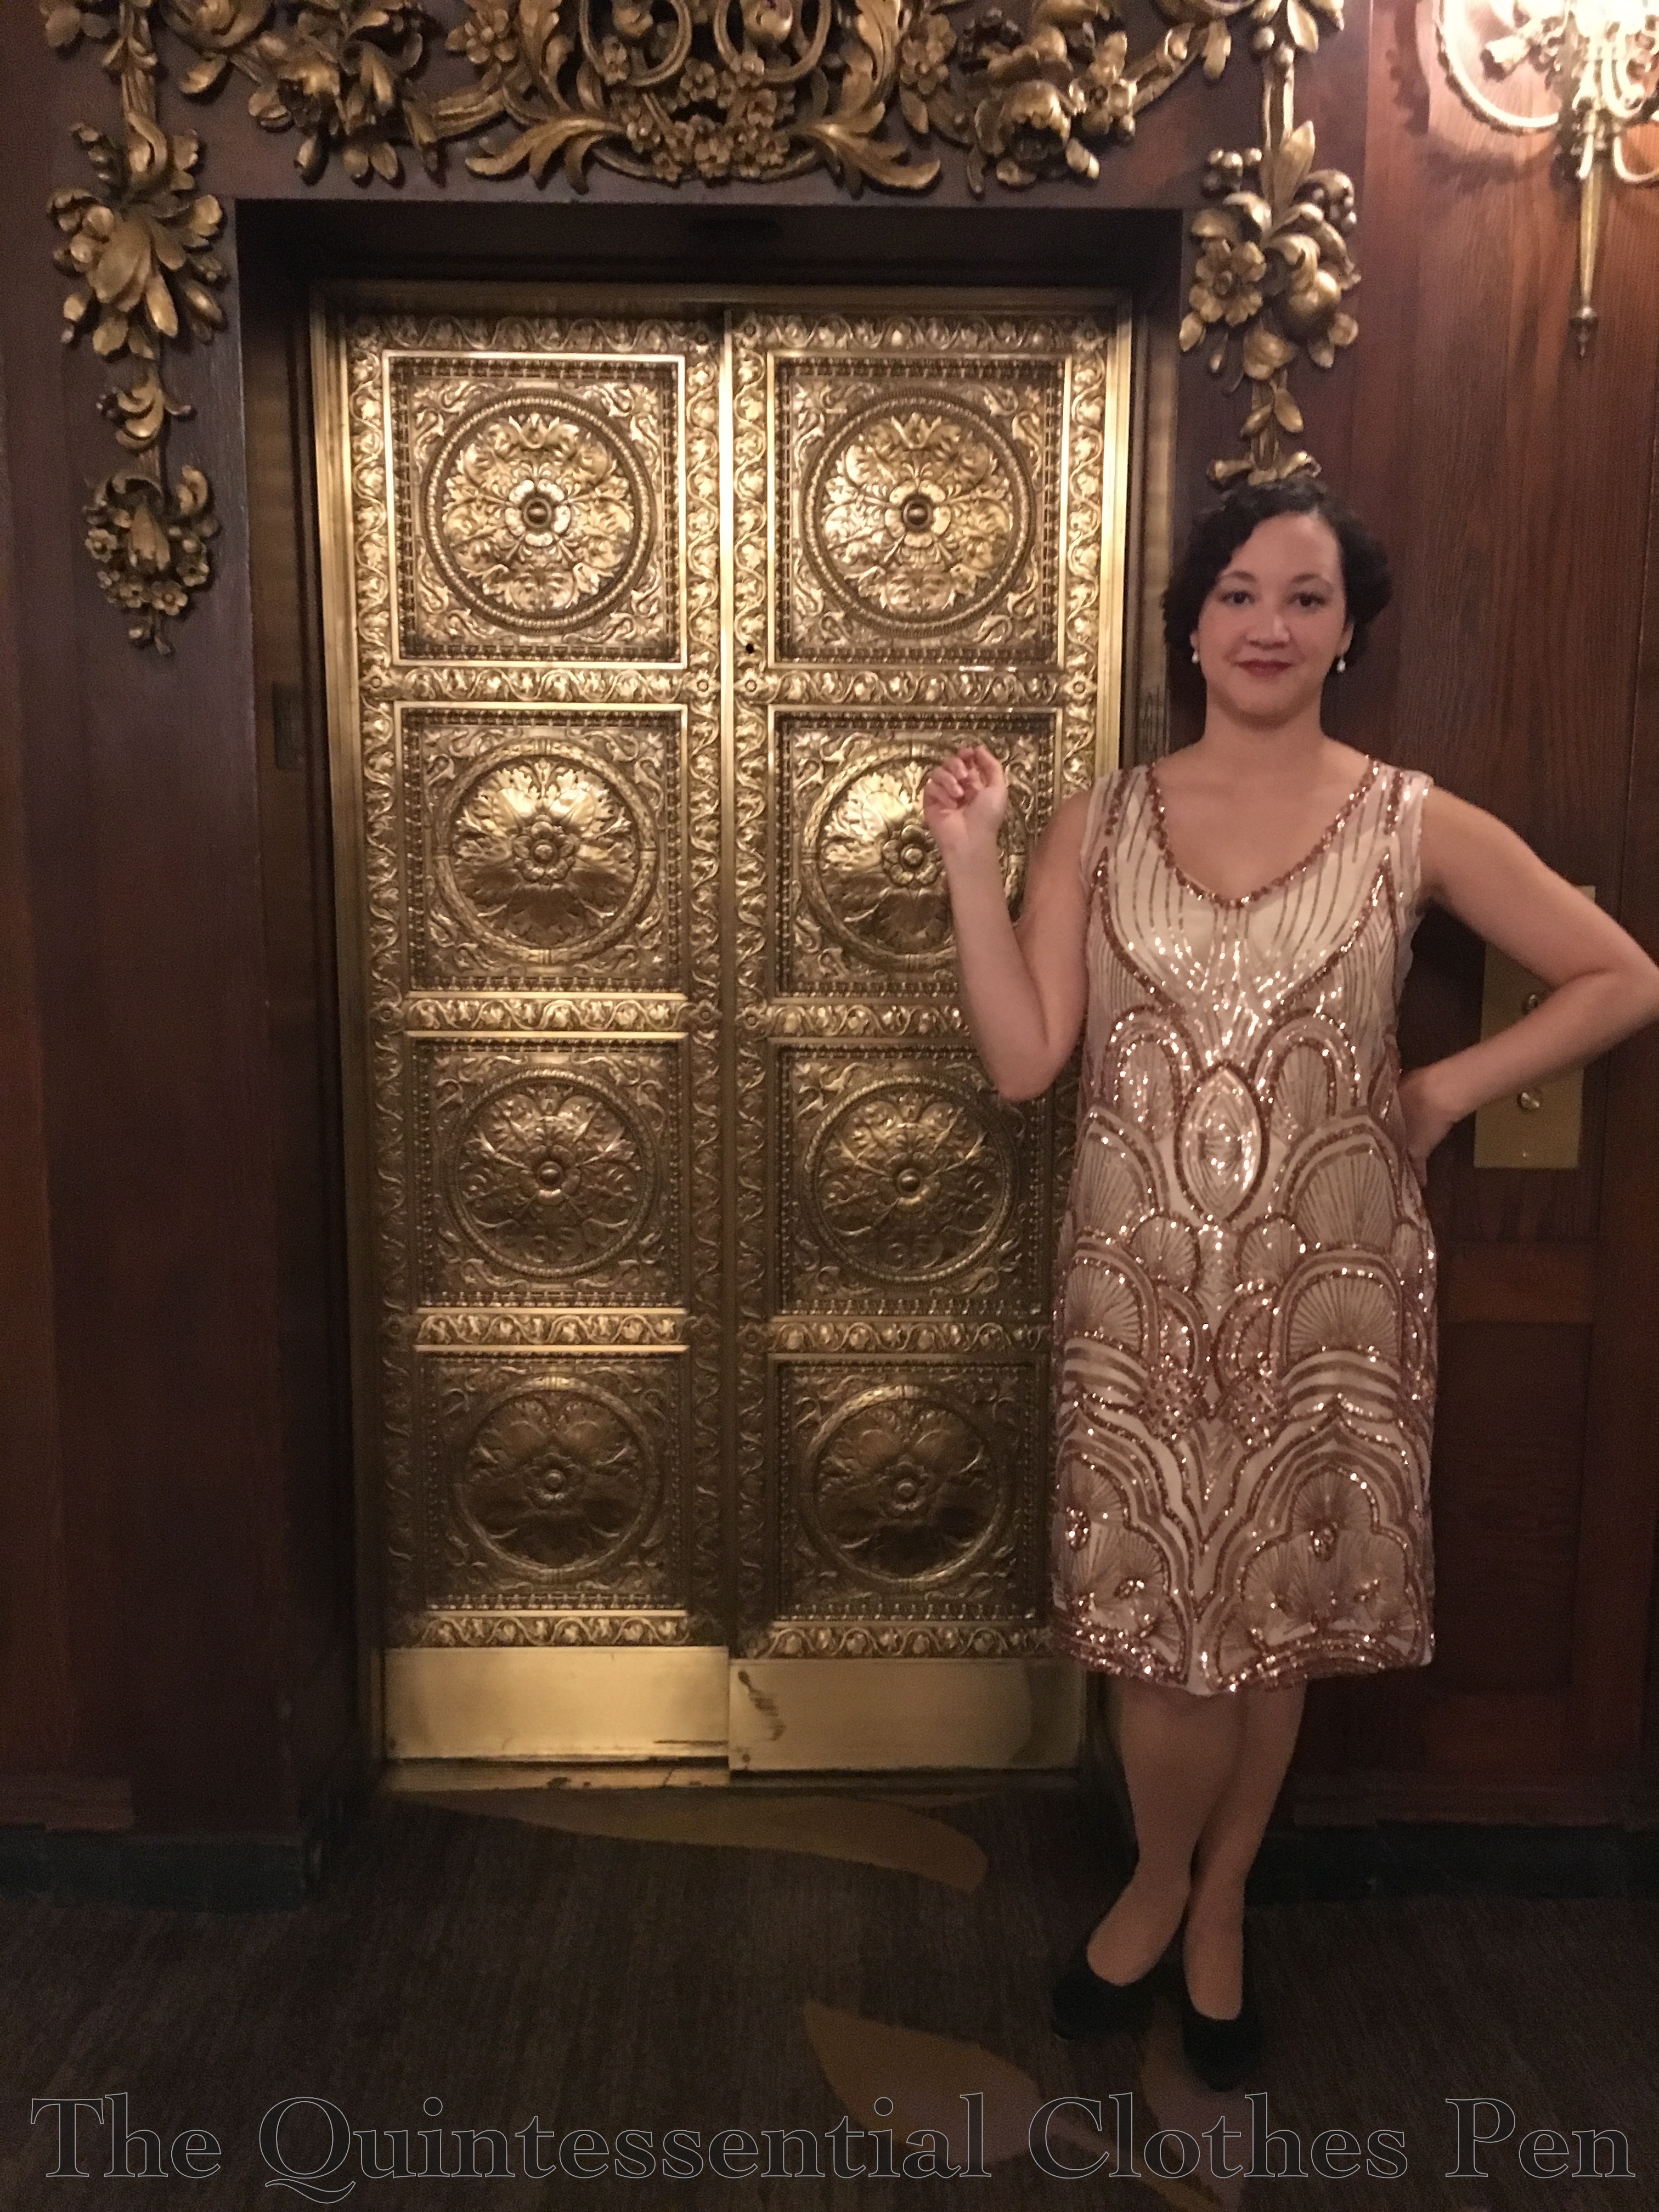
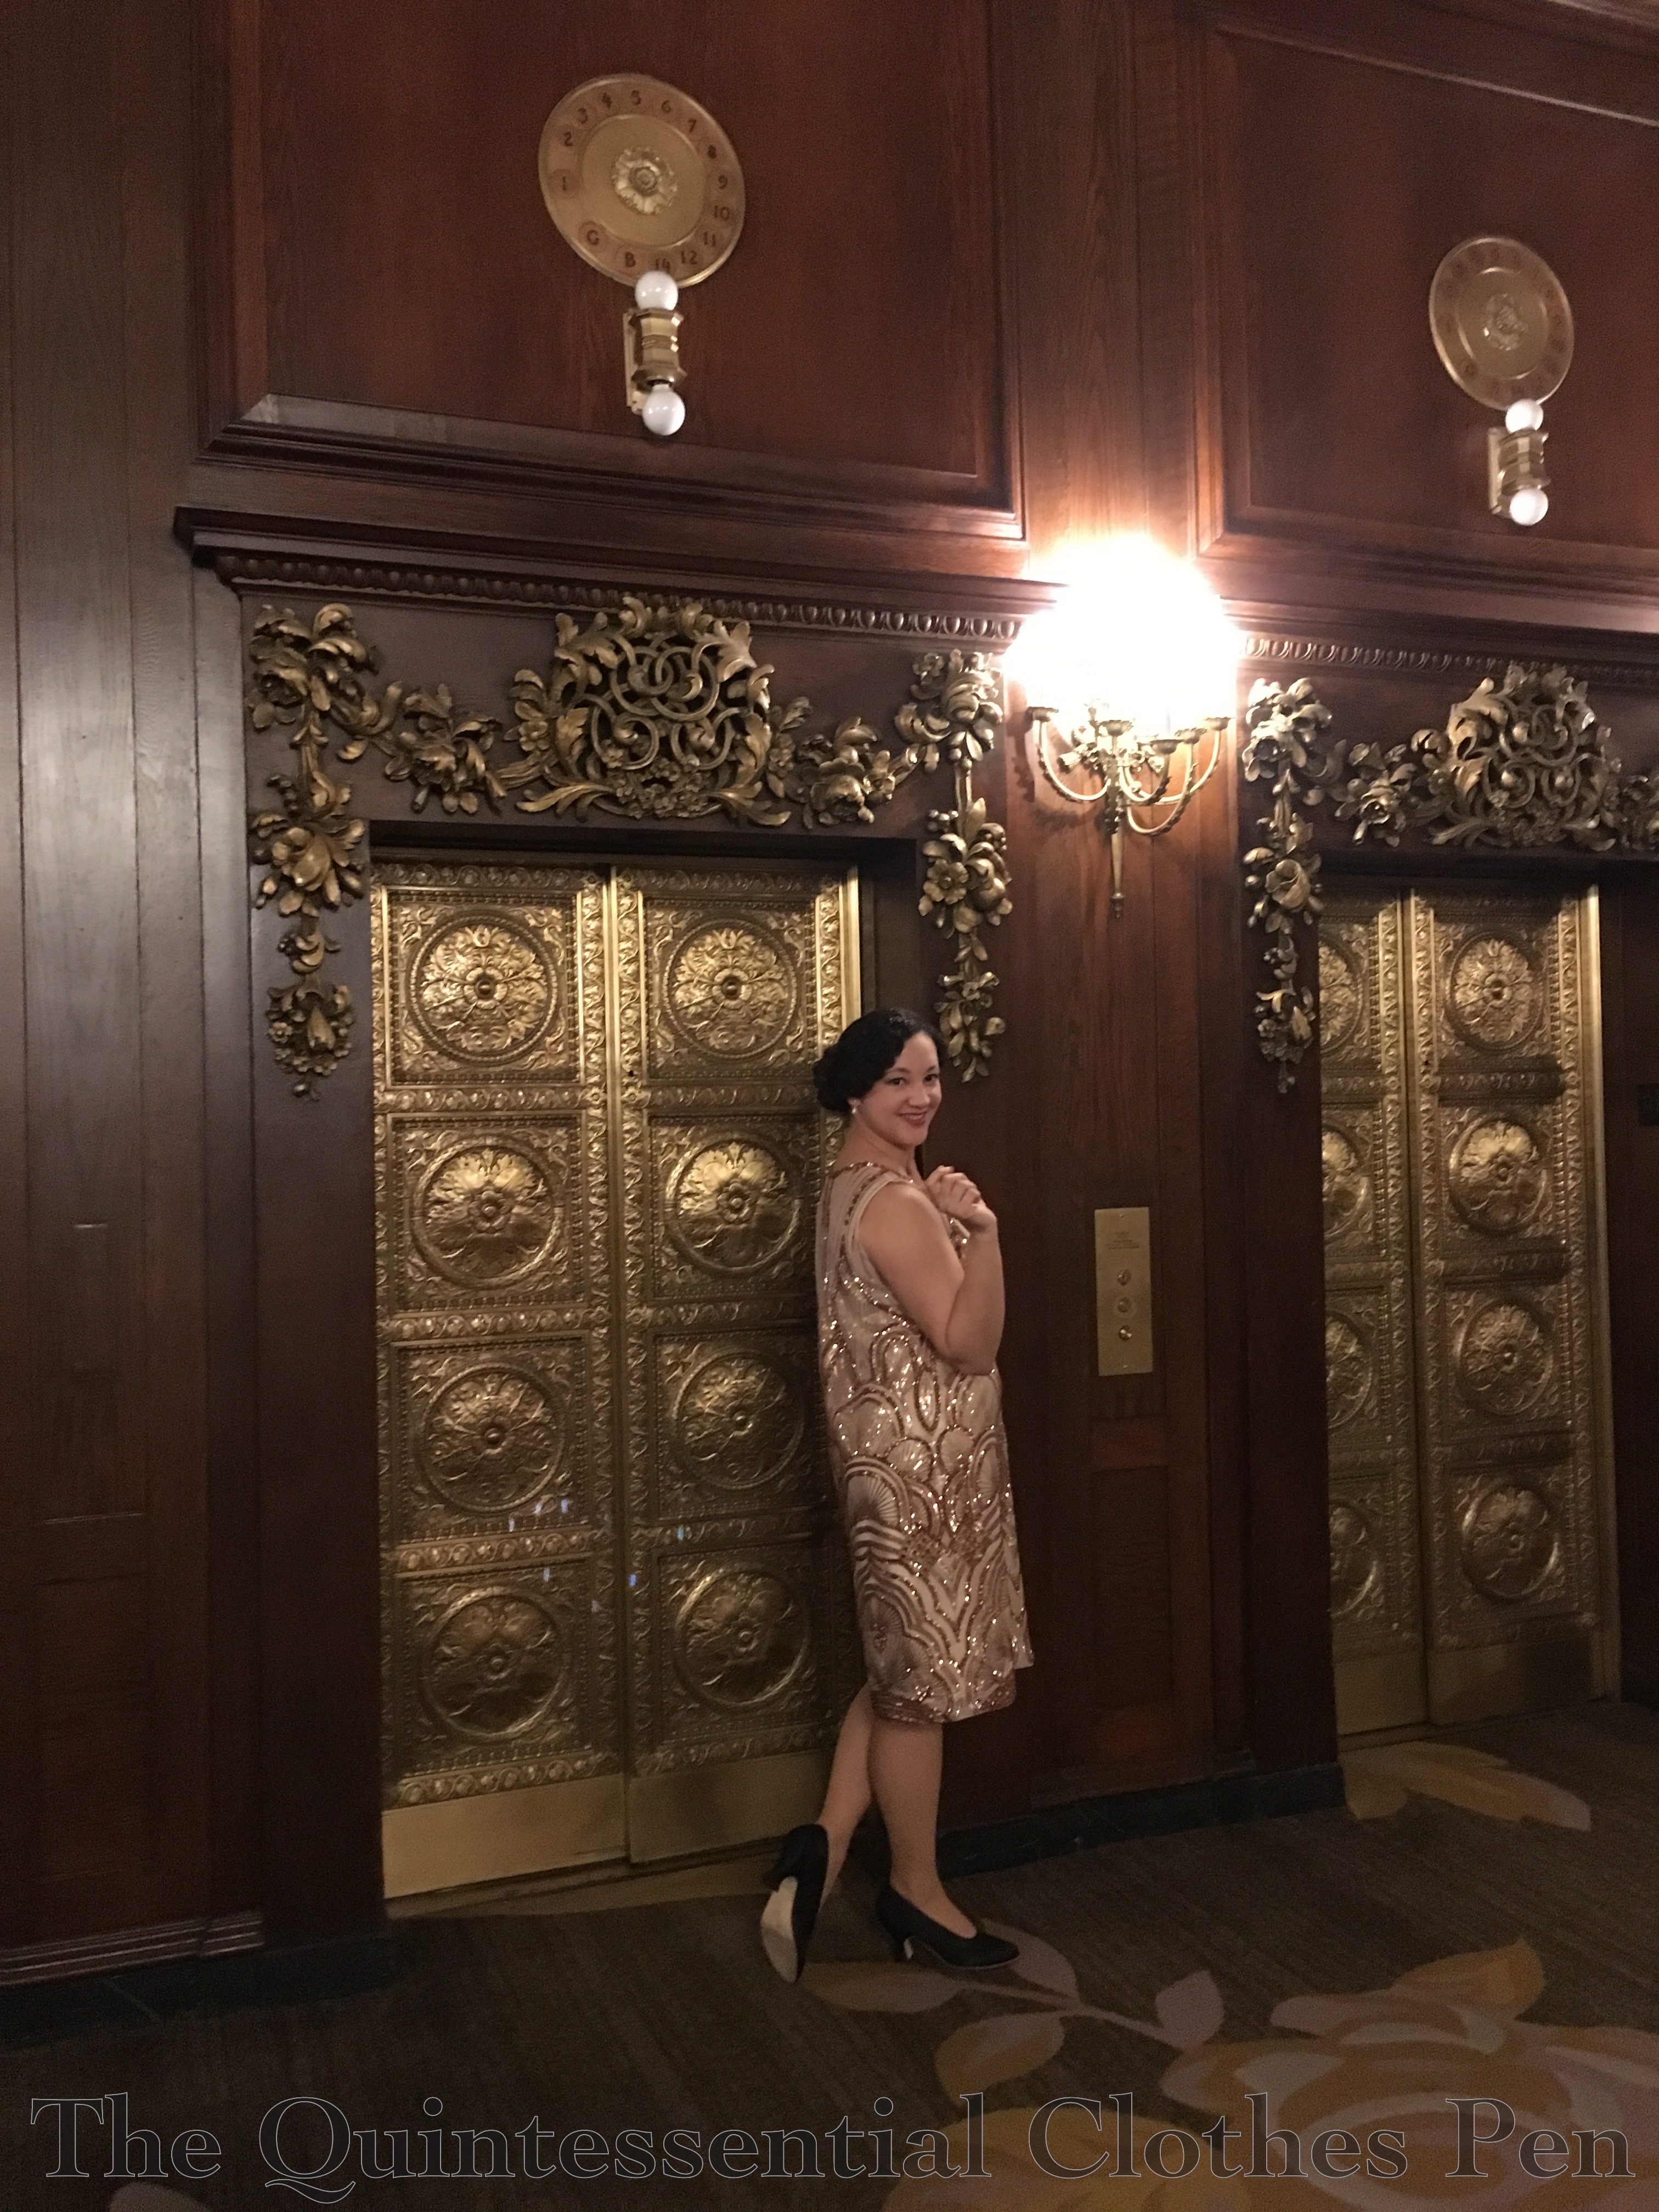
I was at the fabric store looking for other things… (the beginning of a lot of my fabric buying adventures) when two super sparkly fabrics caught my eye. They were screaming “1920s!” But the colors were somewhat costume-y 1920s and not often seen in my research of actual historical dresses from this period–red on nude net and black on nude net. A bit disappointed, I looked at the sparkly lace section some more and found the same fabric in blush on nude net! It was so sparkly and the pattern on it was so perfectly deco that I had to take some home with me. Luckily it wasn’t expensive and only cost $14 for 1.25 yards. Not bad!
The timing was perfect, because I had a 1920s event in January and just enough time to make the dress. I didn’t have a slip to go under it that was the right shape or color, so I also squeezed in making a bias cut slip.
For the pictures, I wore my American Duchess black Seaburys. They provided just the right 1920s shoe shape, encasing the front of my foot in a uniquely historical way that modern style shoes do not. You can see the shape more clearly in this post when I wore the shoes with my 1920s bathing suit in a beauty pageant look.
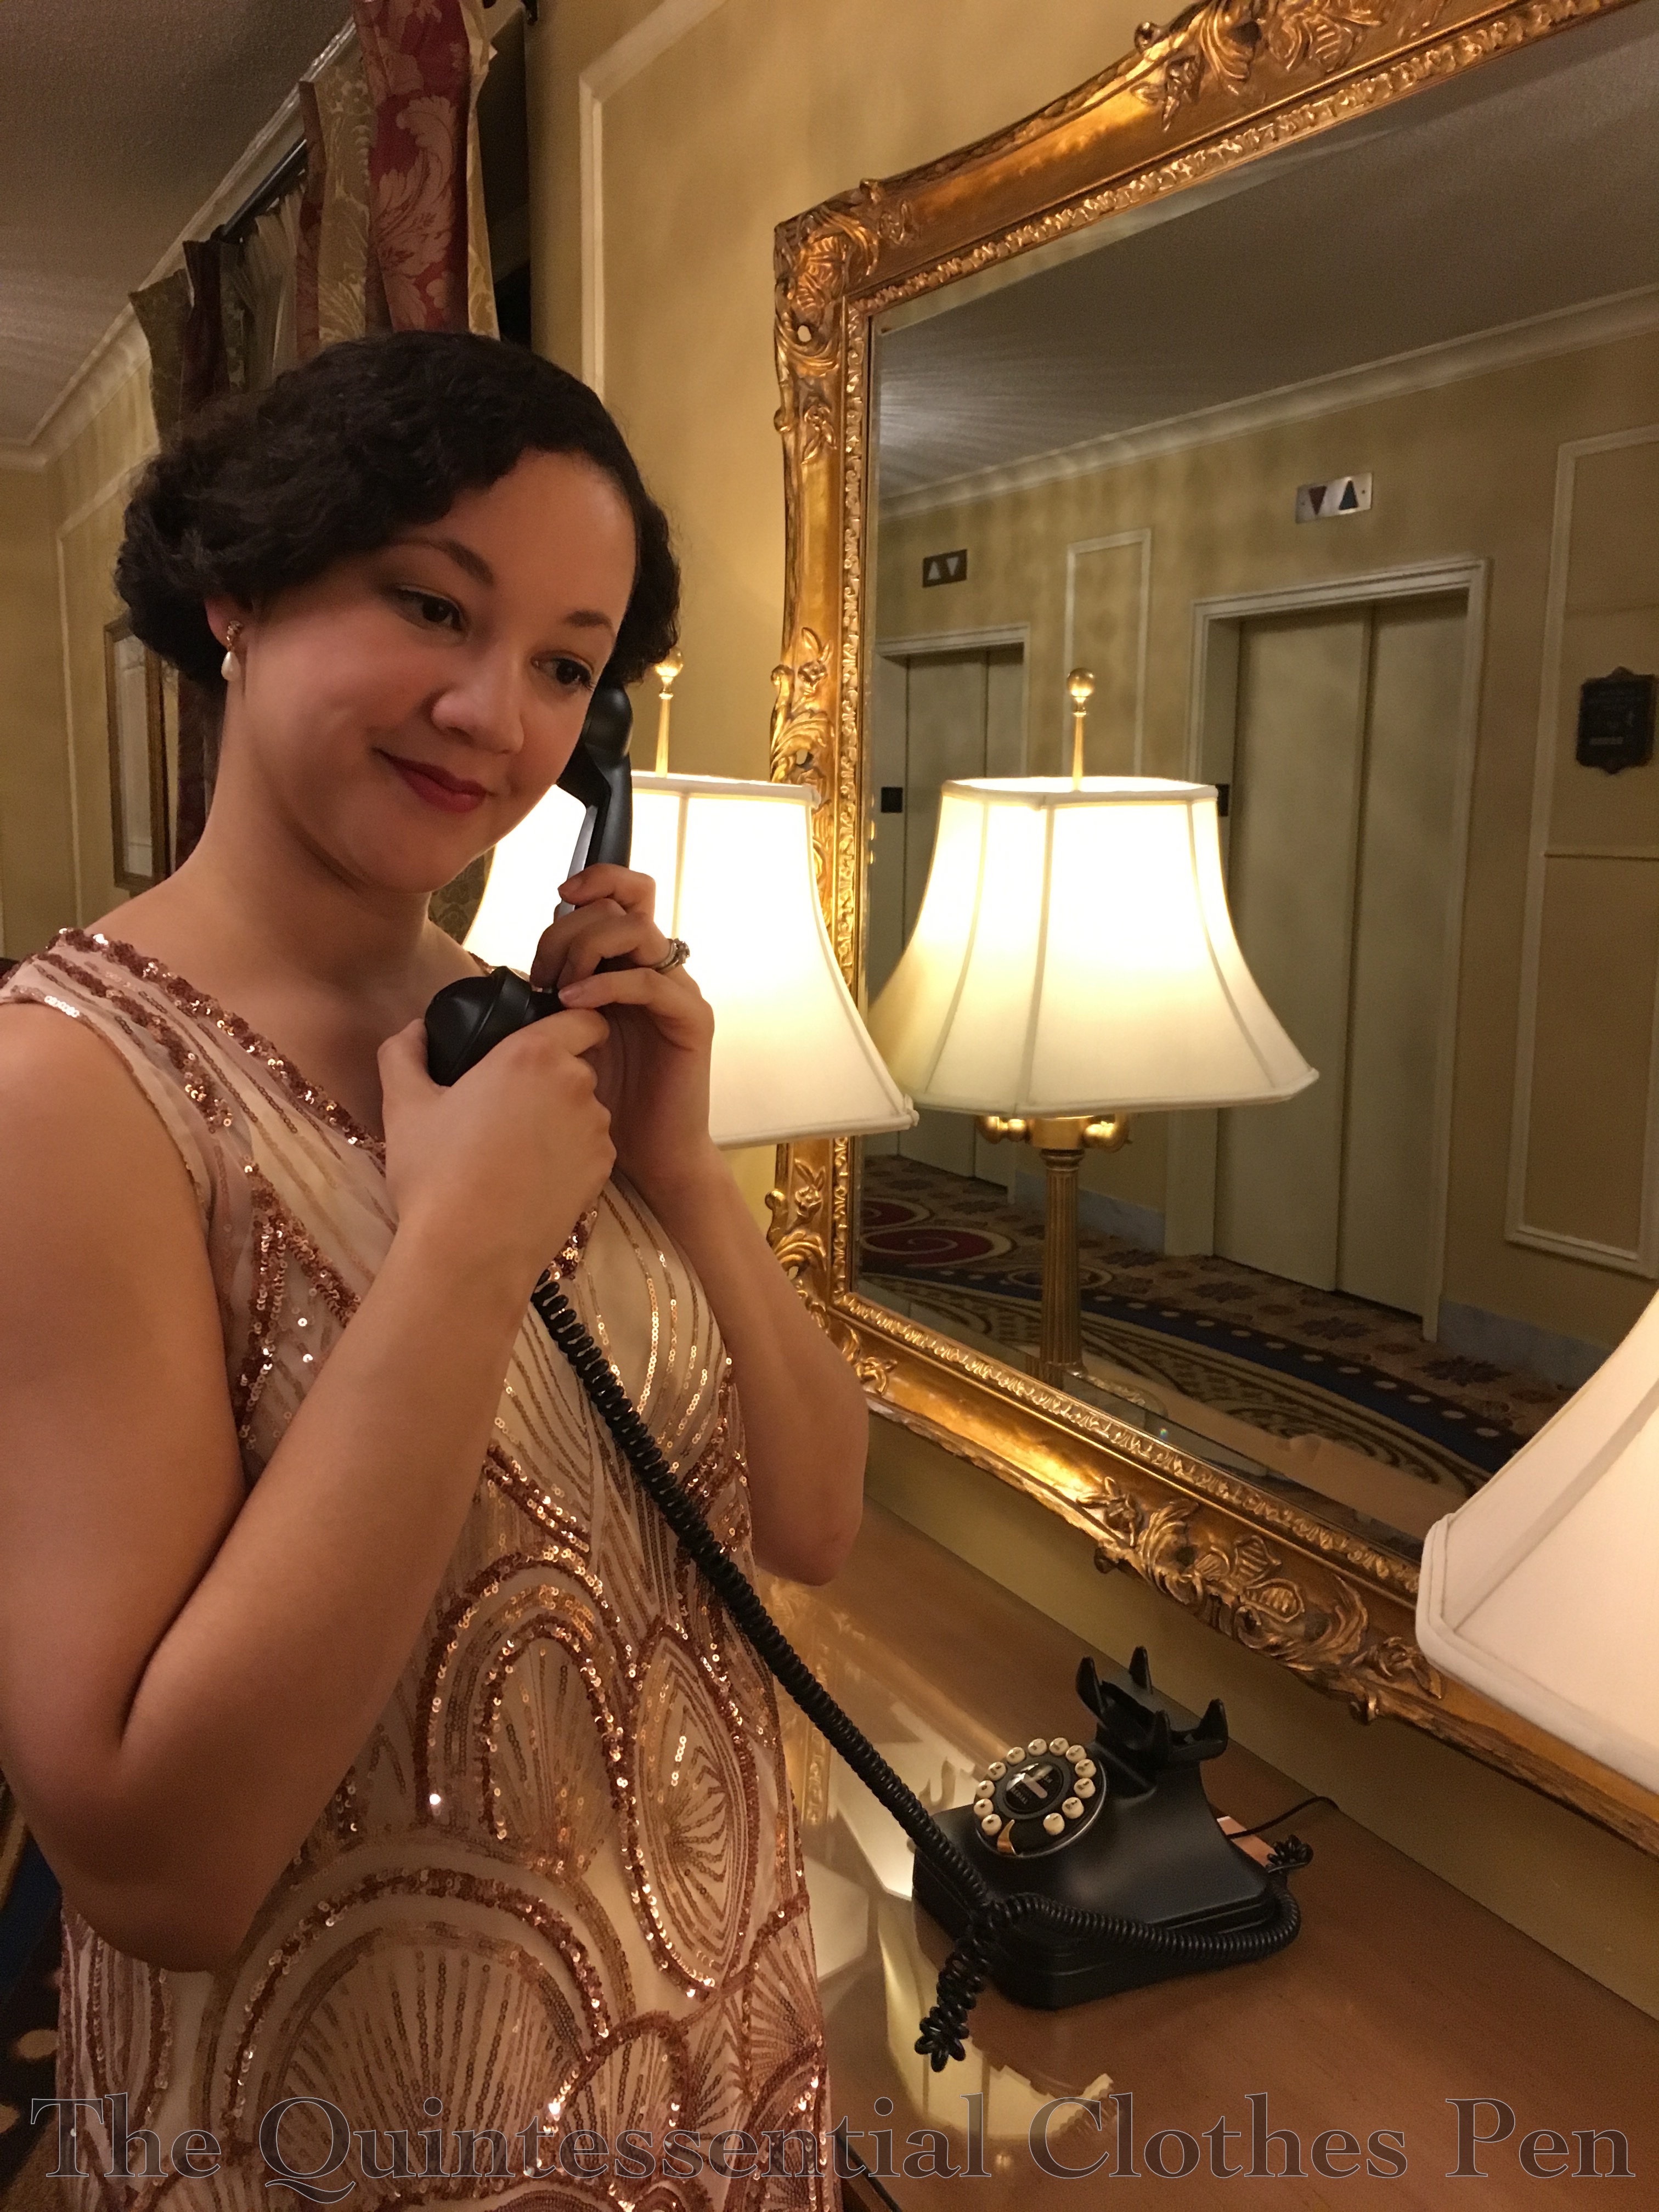
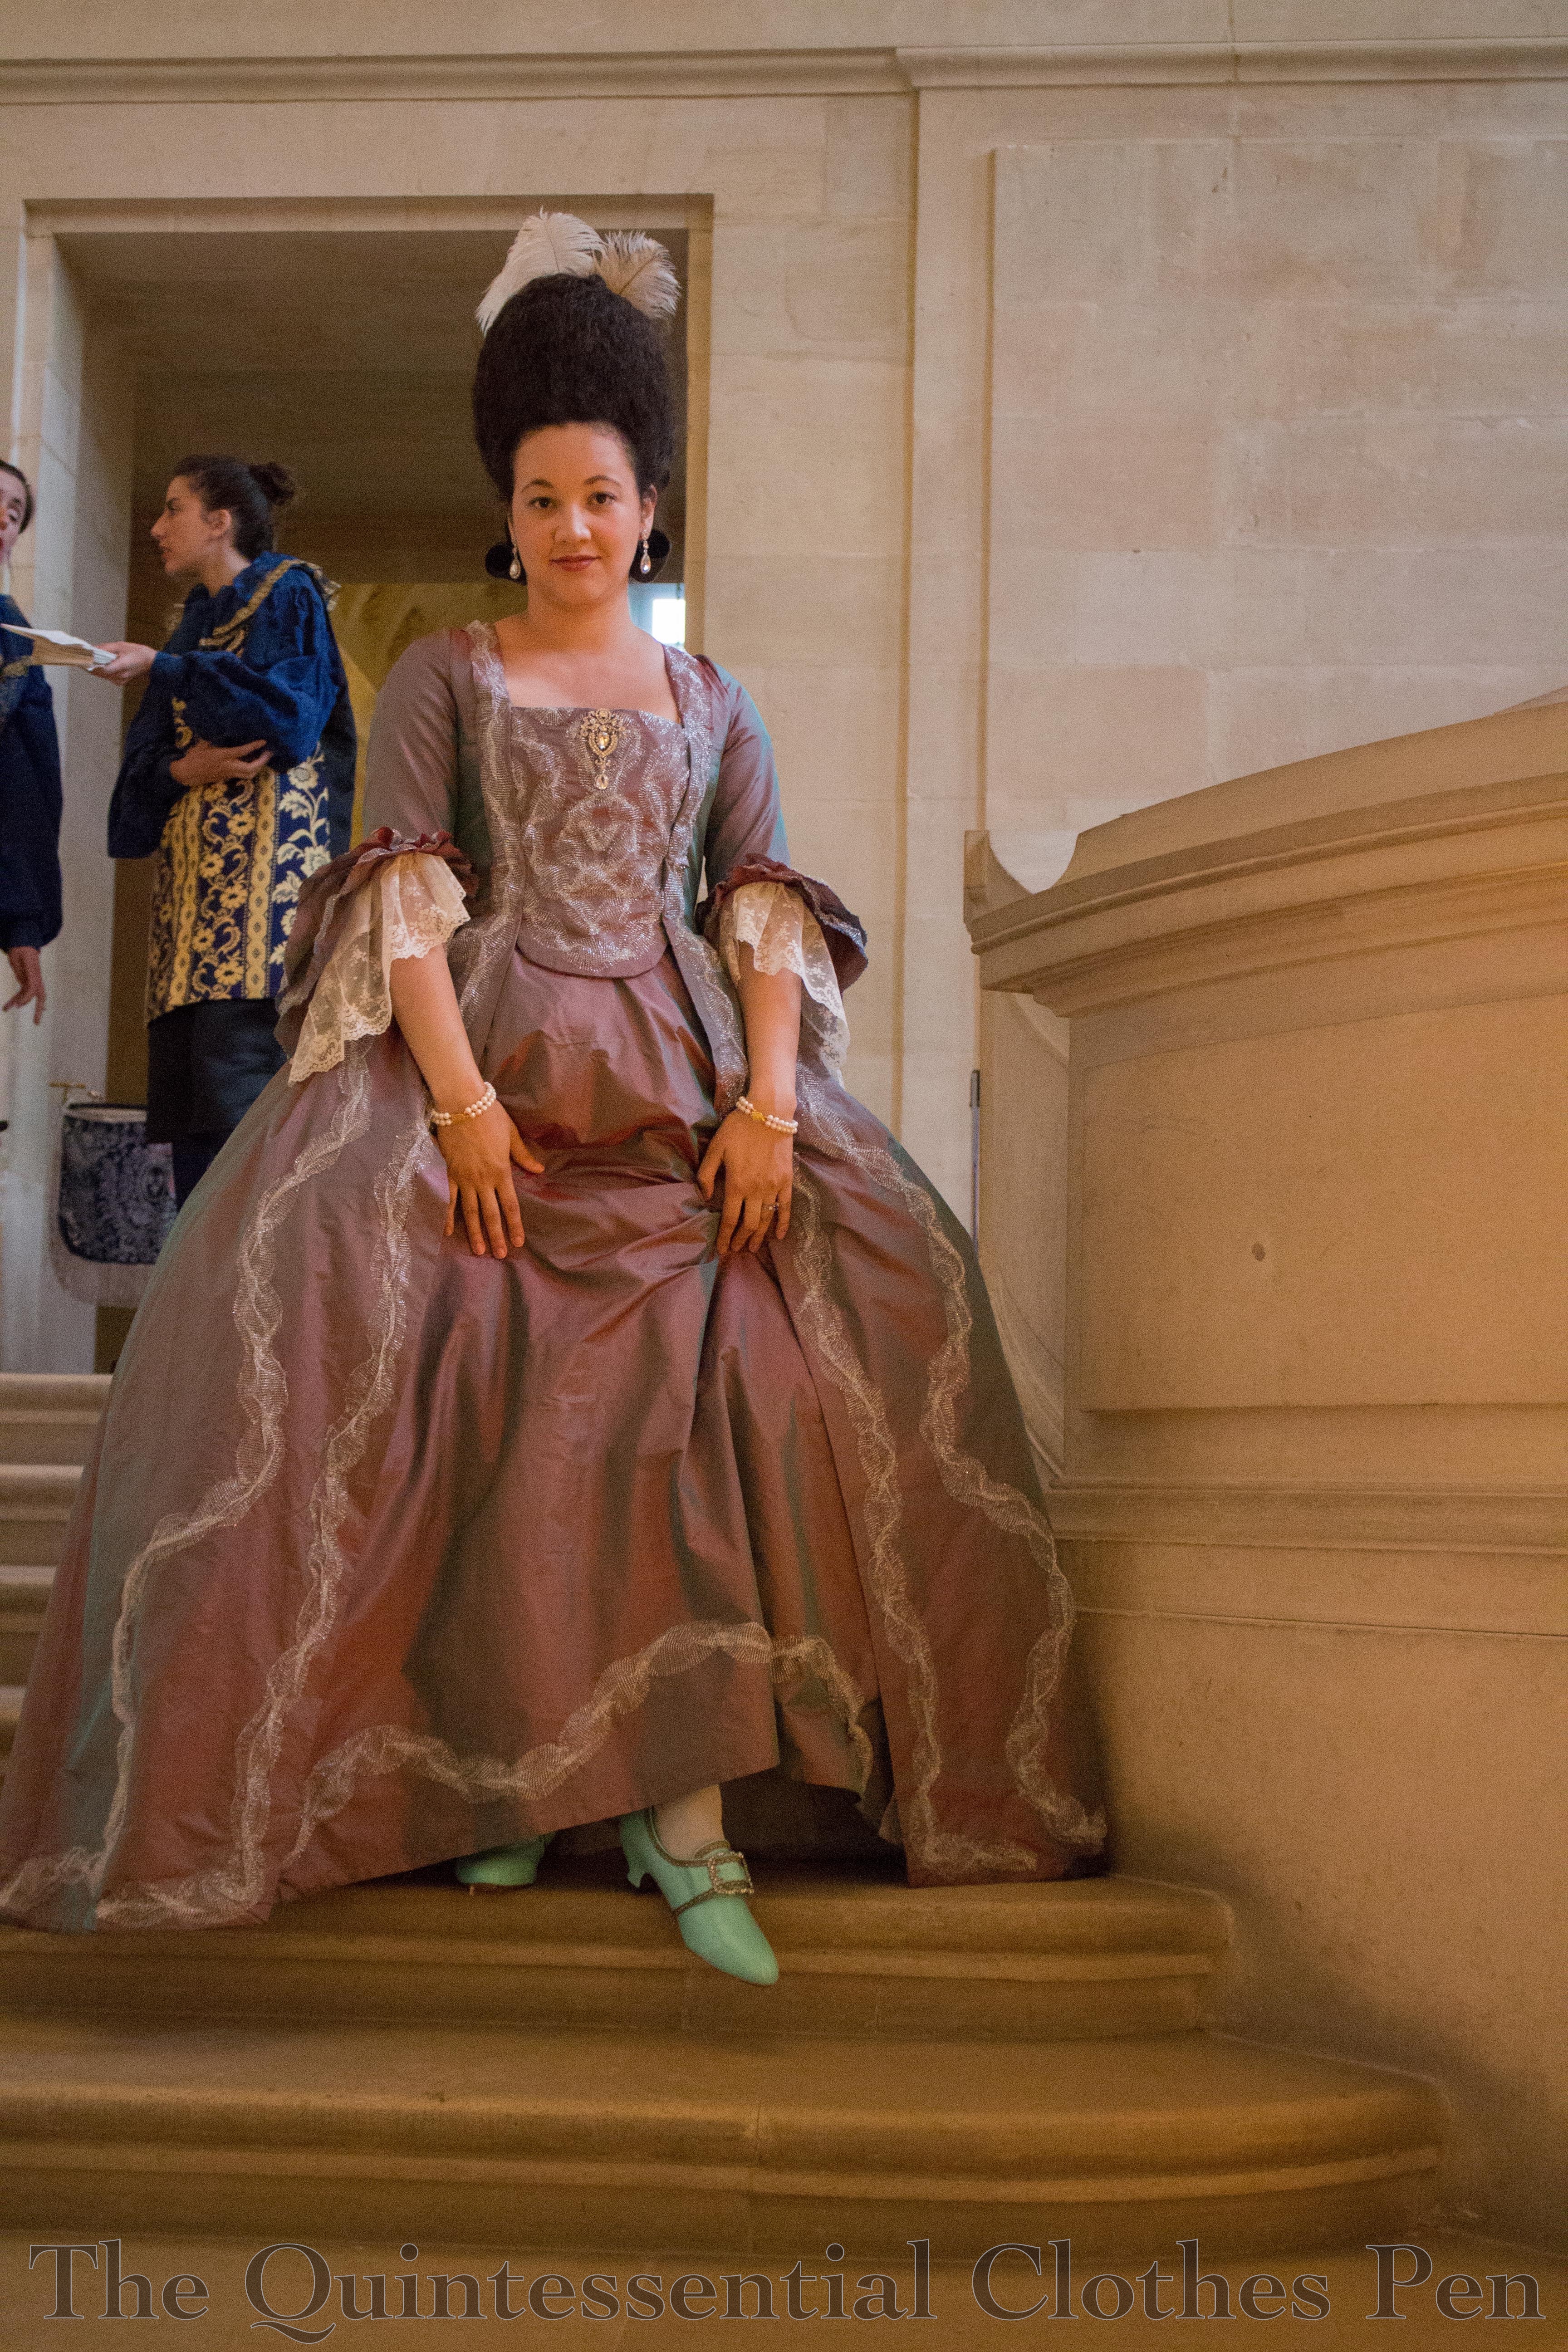
I was also incredibly lucky that the event was held in a historical hotel that provided fun backdrops for pictures! Those elevator doors are lovely! And look at this awesome phone–it had to be included in pictures!
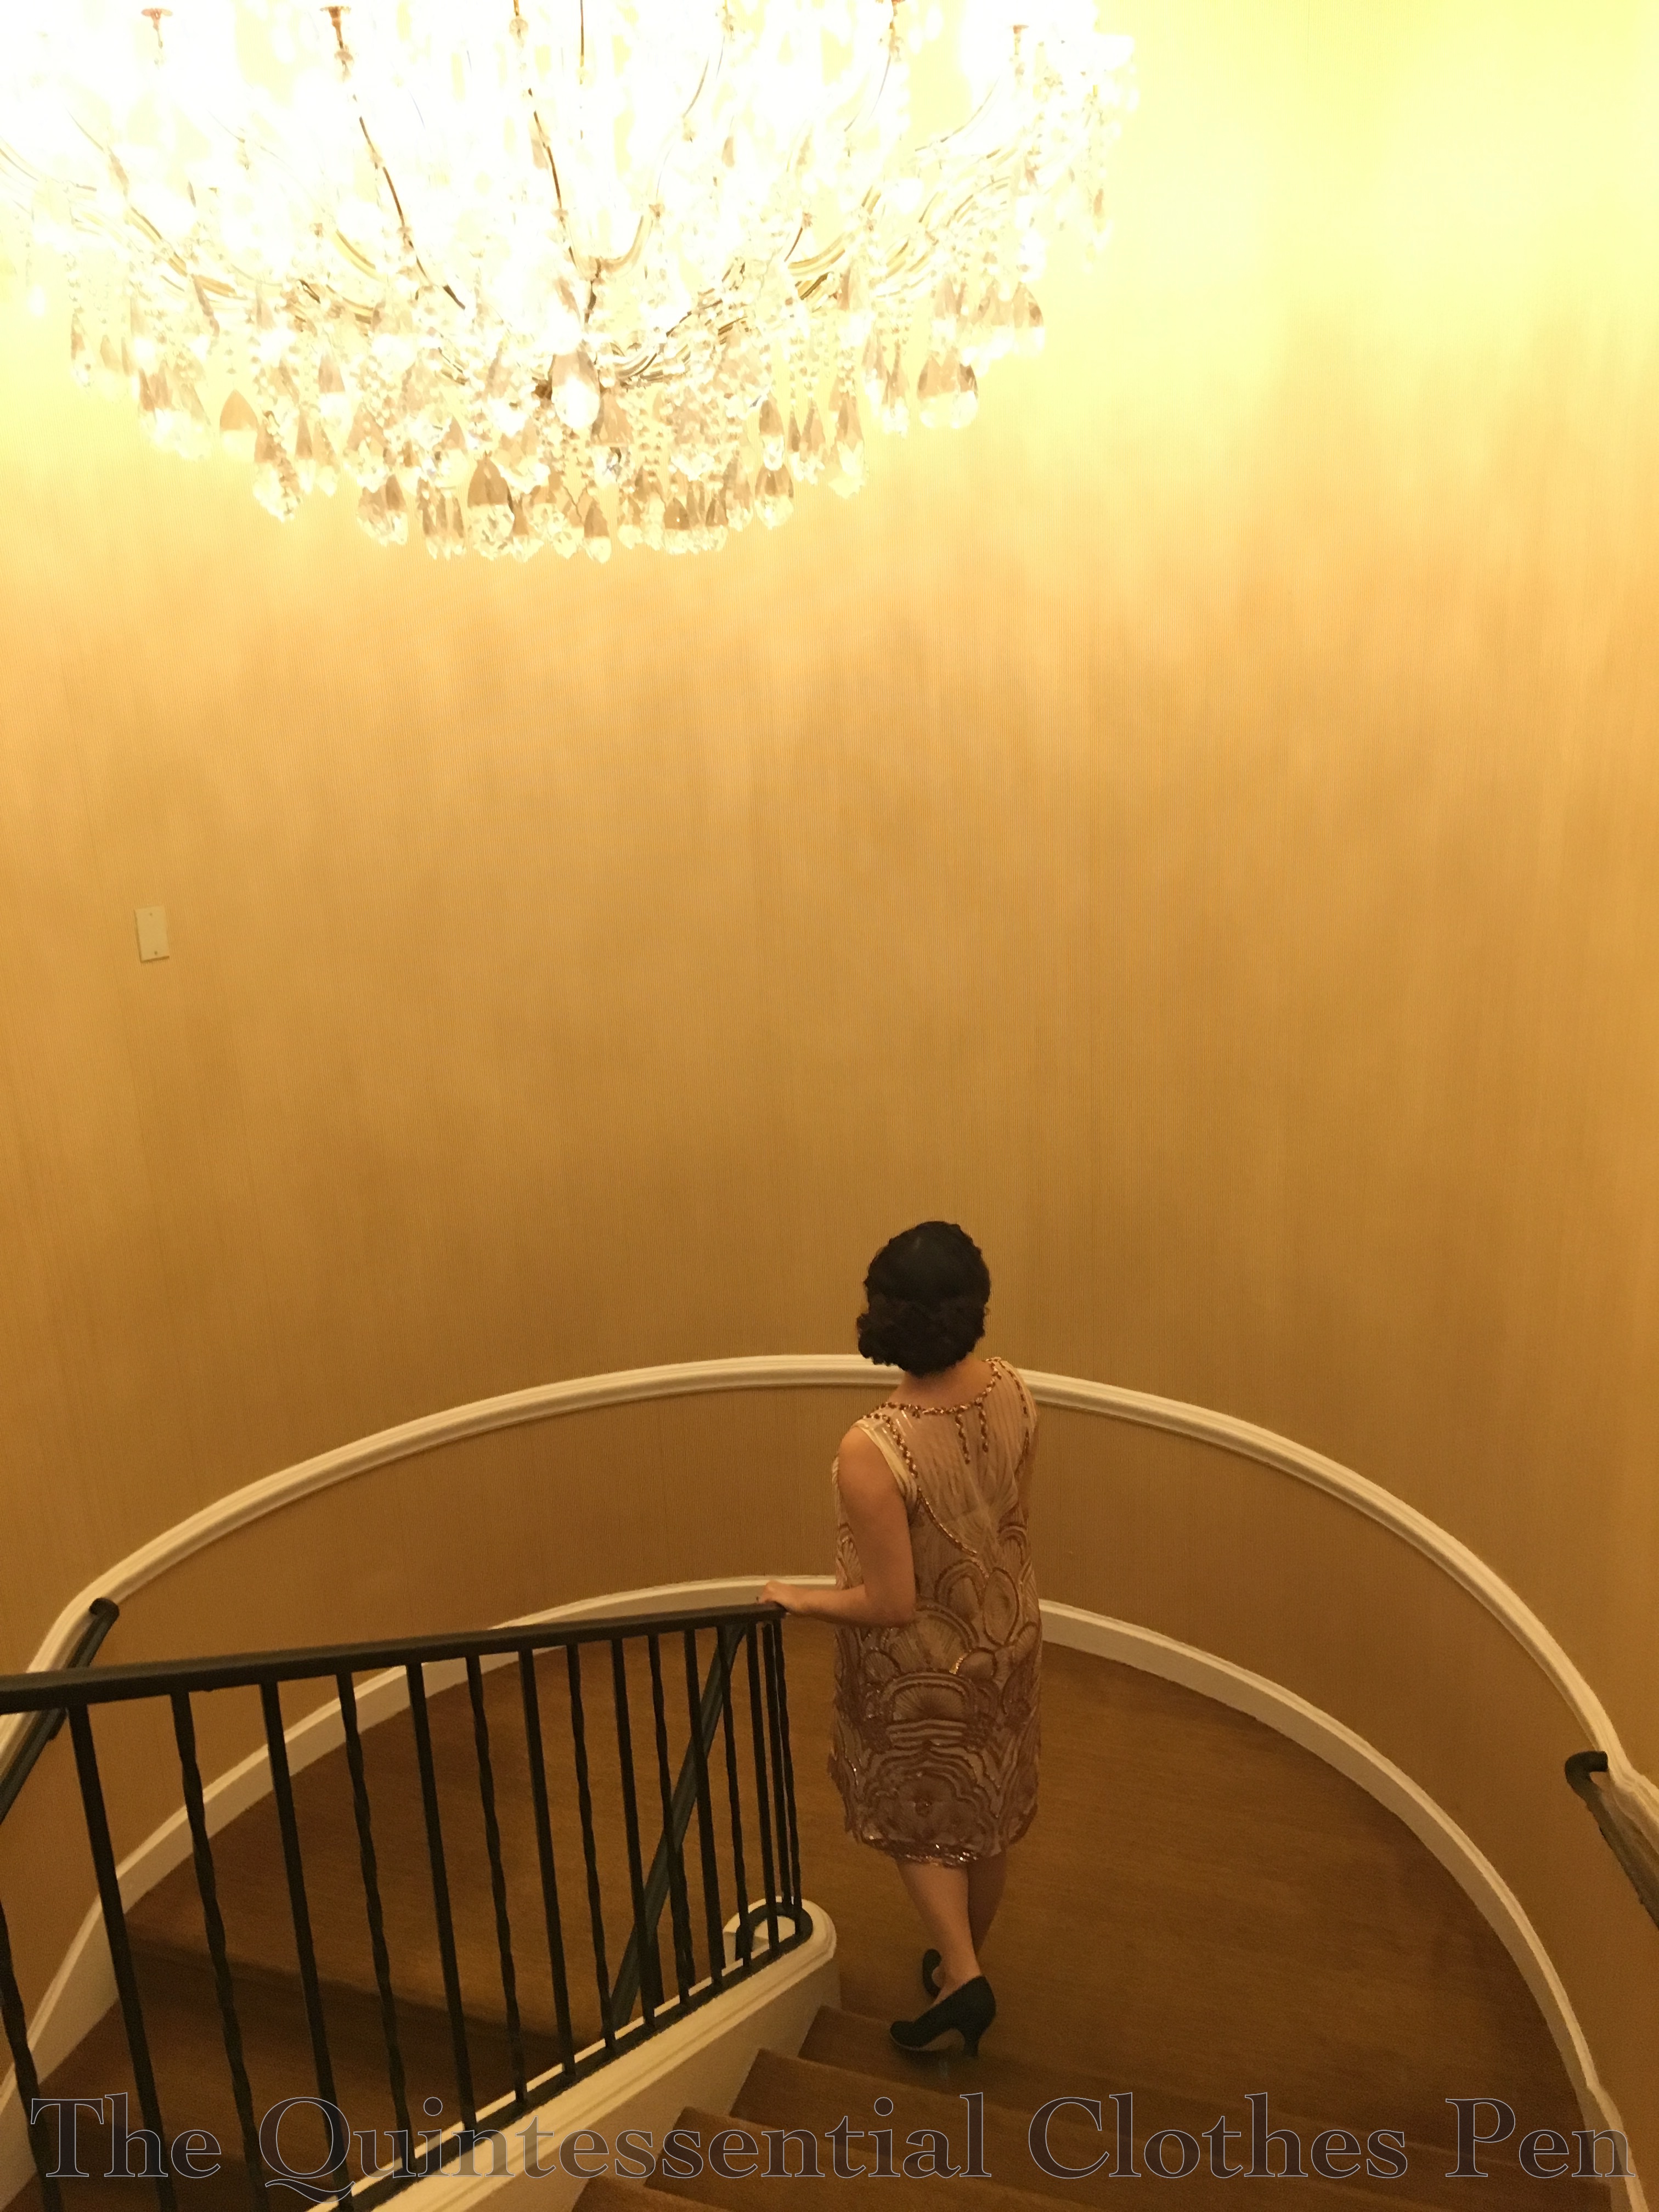
Another neat place we took pictures was this stairwell. I love how different these two pictures are, despite being so similar. One is much more about the dress while the other shows off the chandelier and is a bit more artsy and mysterious.
I was so pleased with how my hair turned out! I tried a style similar to one I did last summer for a different 1920s event that I have yet to post about… oops! But here’s a teaser of just my hair. Soon I’ll post the details and it will bring some warm summer memories to my New England winter.
For the summer event I did my hair when it was wet, resulting in a similar style, but much smaller and closer to my head. For that version, I did all the back curls while my hair was still distinctly damp, making the curls much tighter and closer to my head.
For this event, I braided my hair in the morning while it was still damp (to help create waves on the top but curls on the bottom) and left it all day, meaning it was mostly dry when I took out the braid. Then, when doing my hair for the evening, I added small rats under the puffed bottom portion to add a bit more volume than just my own curls. I covered the rats with the length of my hair then carefully placed and pinned the curly ends to imitate having a sort of 1930s smooth-on-top-curly at the bottom style, like this. This style is a few years later than my new dress, but I think it works as a 20s style for someone with longer hair, like me. I have a lot of hair to hide in a 1920s style!
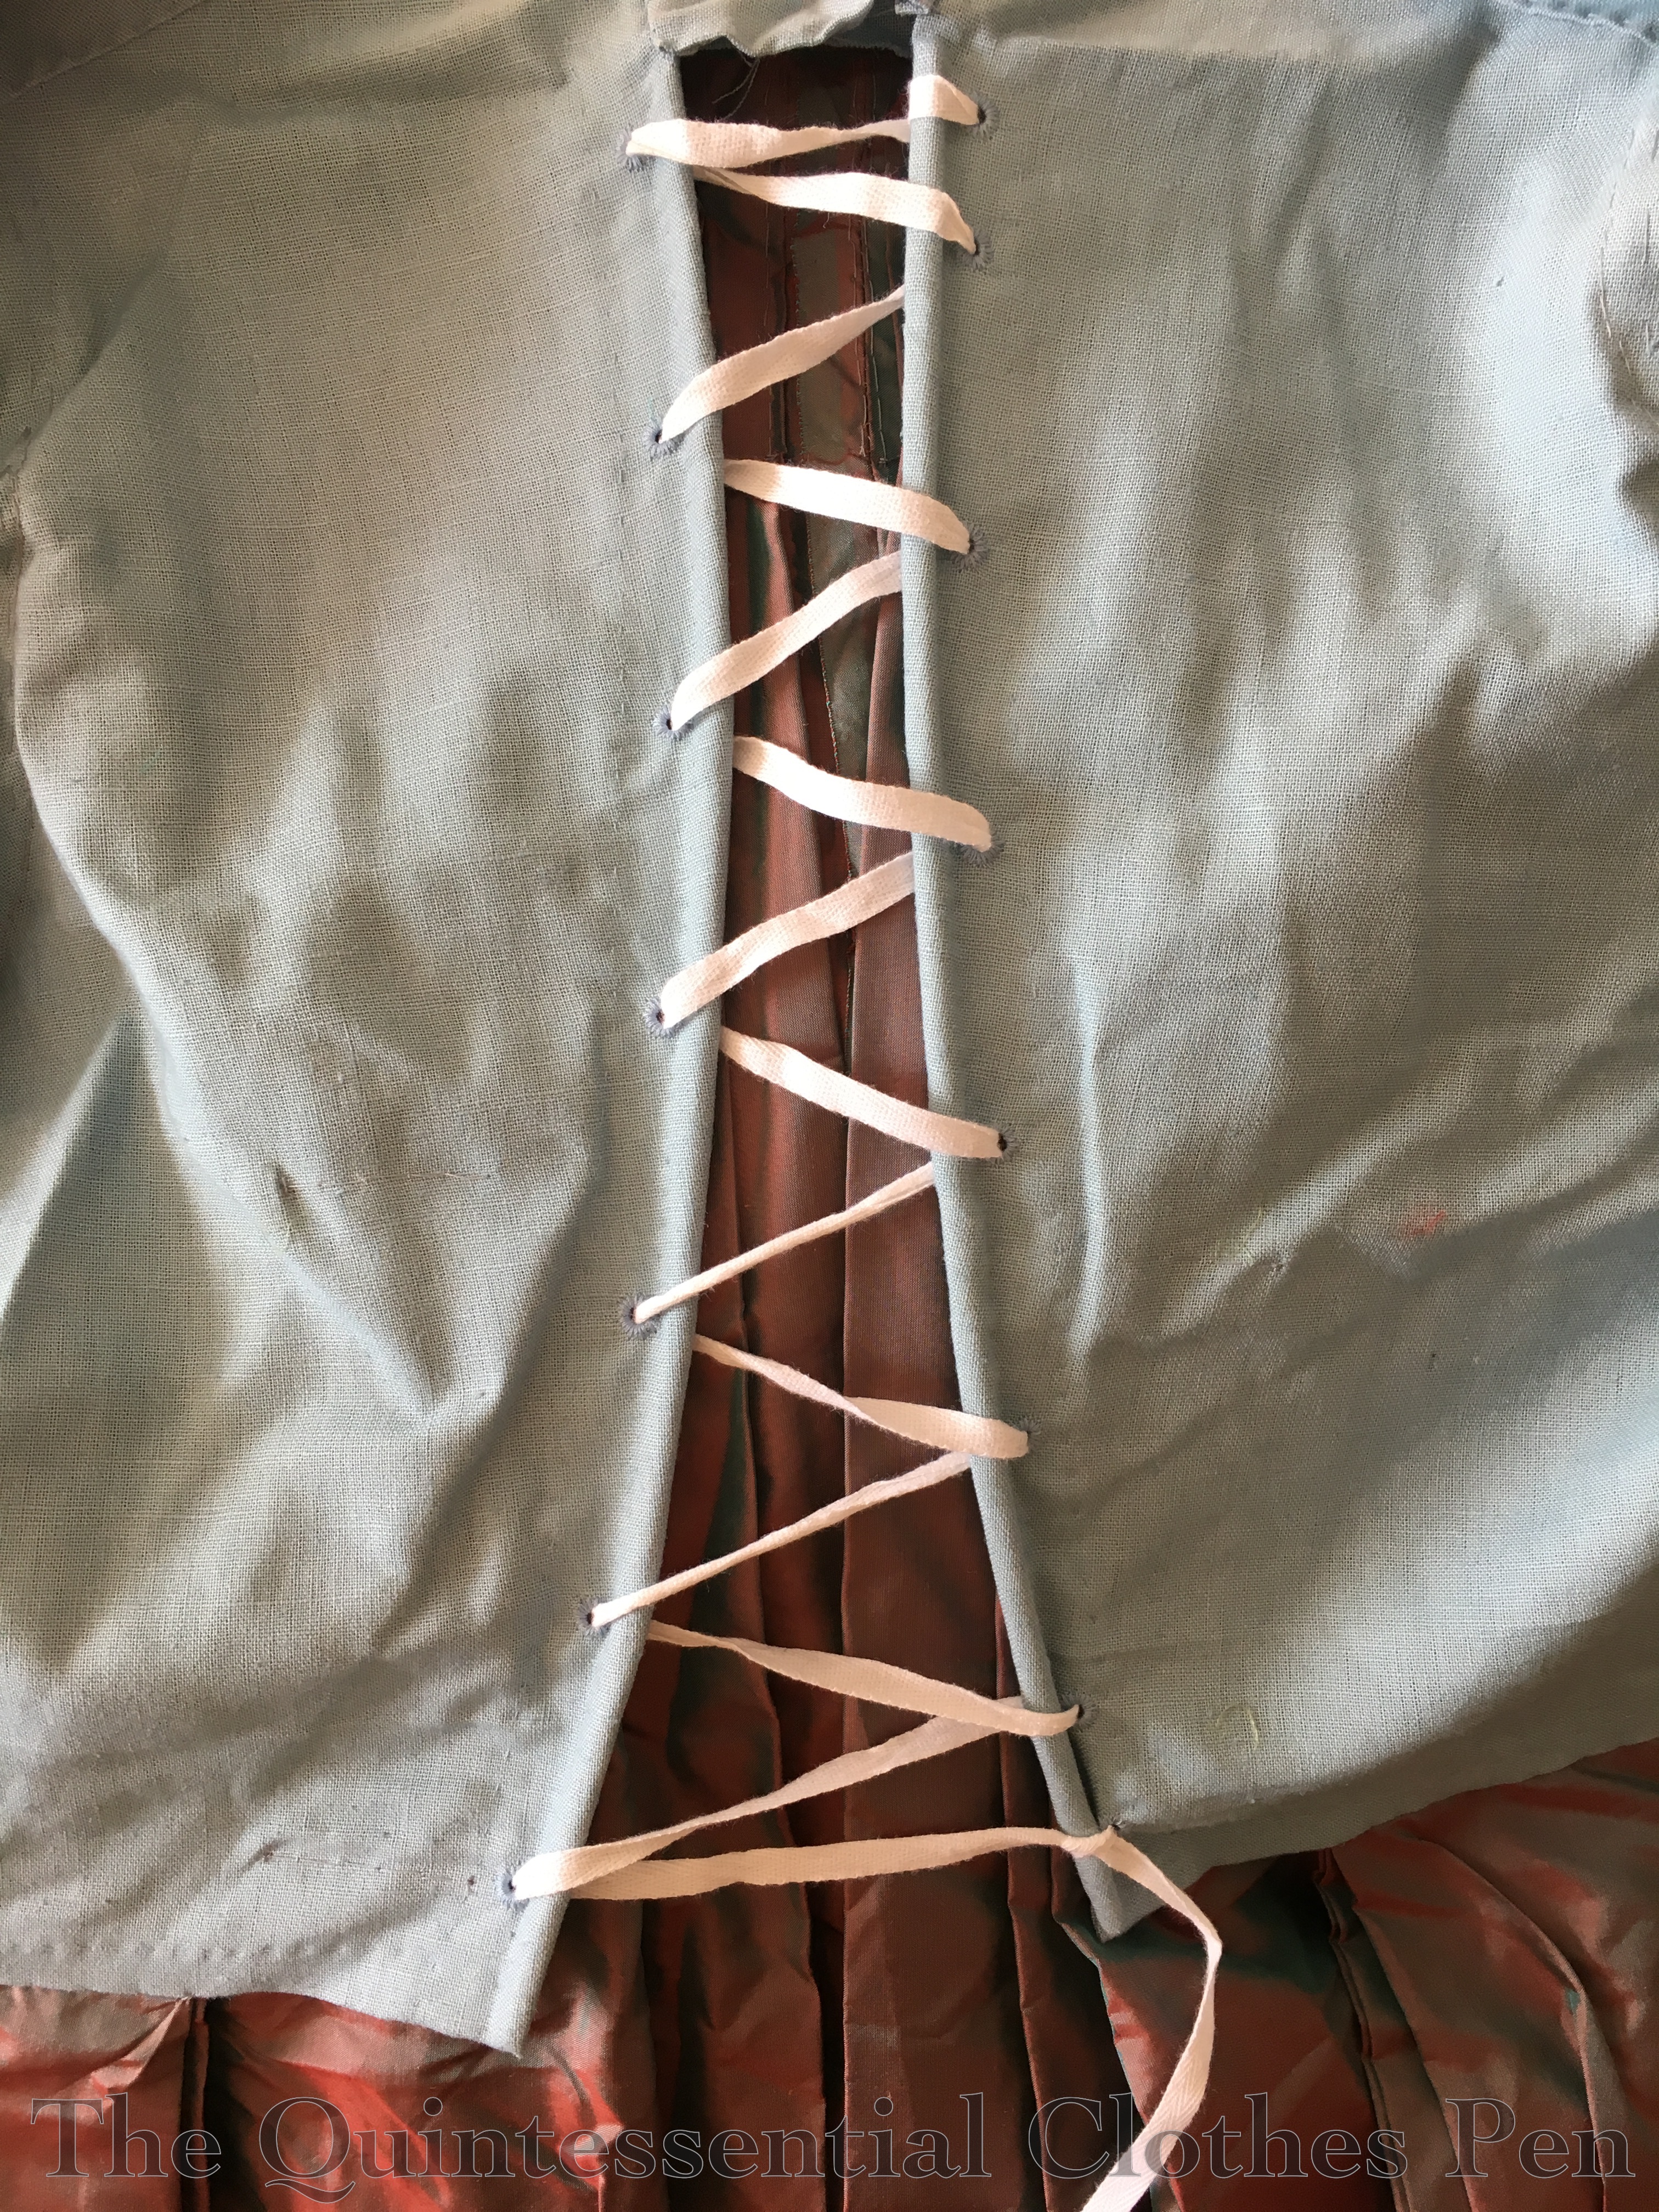
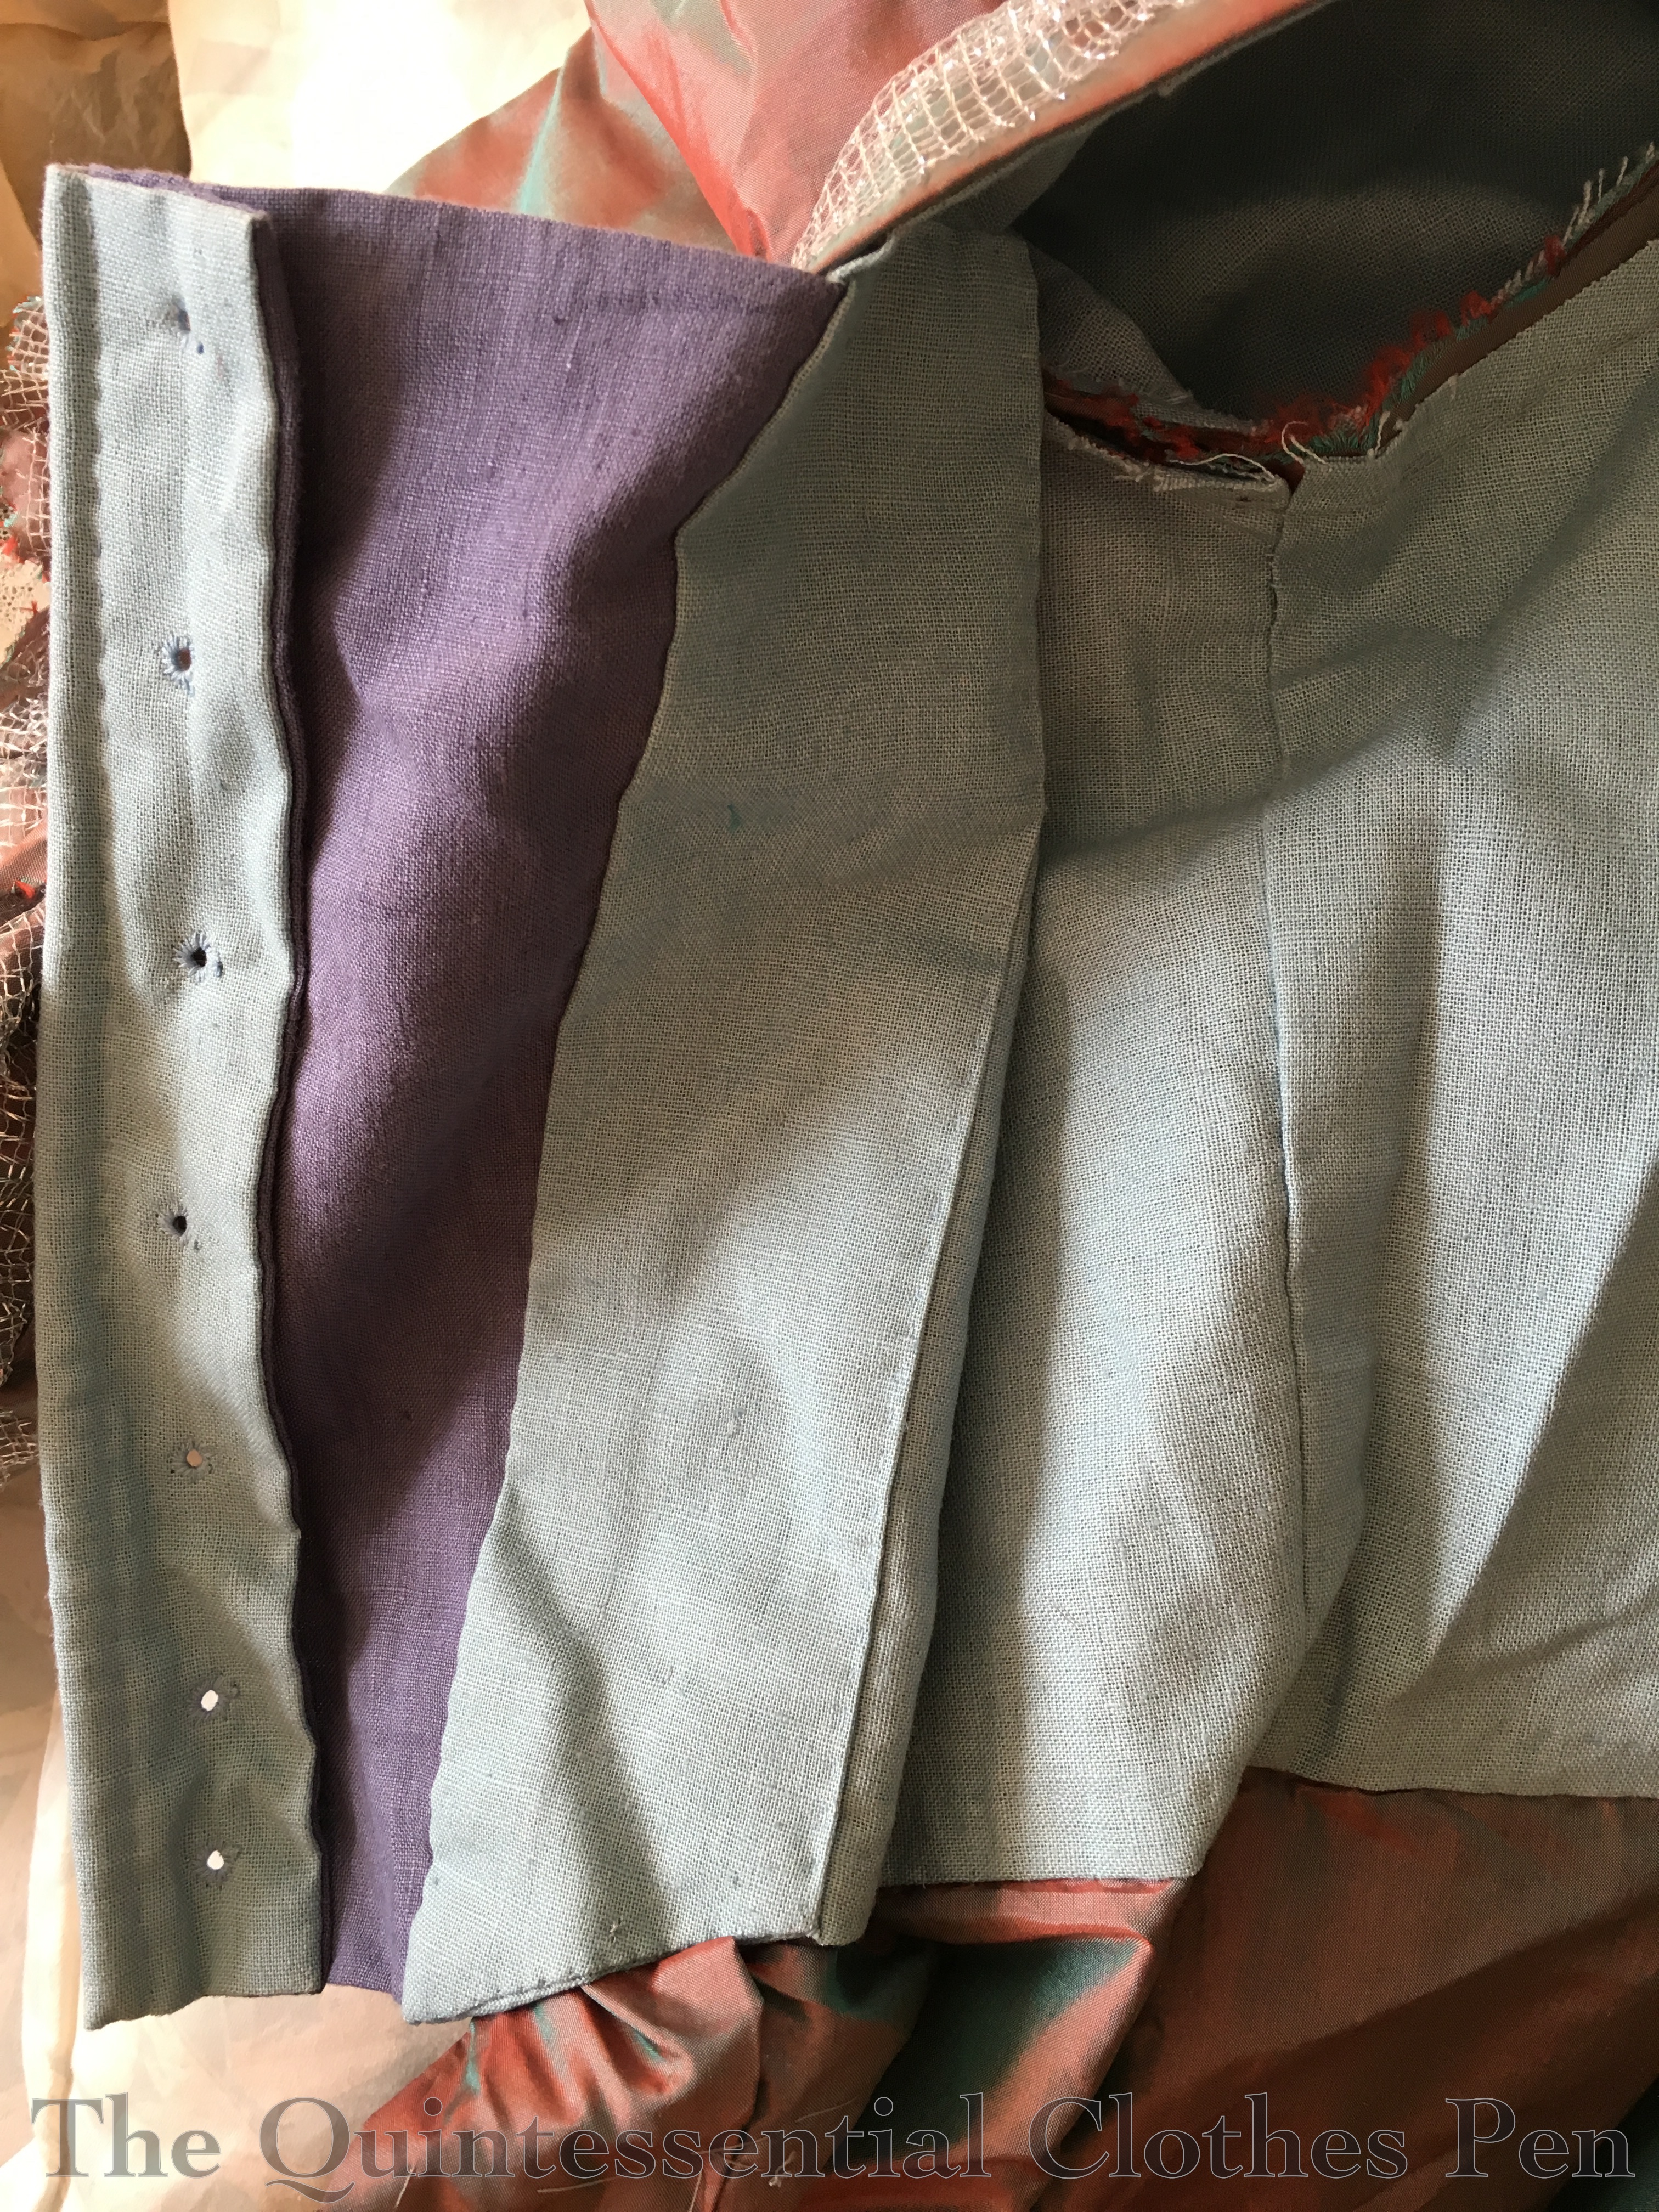
Both the dress and slip are entirely hand sewn, due to working on it away from home (I would have hand sewed the dress anyway because of all the sequins, but probably not the slip). The dress started out as a tube, but was more unflattering than I was willing to allow. It was fine from the hips down, but needed to be taken in above the hips. What I ended up with is a curved seam (or a long dart, depending on how you look at it–one side didn’t have a seam to begin with) allowing slight shaping from the torso to the skirt portion of the dress. 1920s dresses can be such bags, but after the extra shaping I am very happy with the still somewhat bag-like, skimming shape of the dress without feeling like it’s an absolute sack.
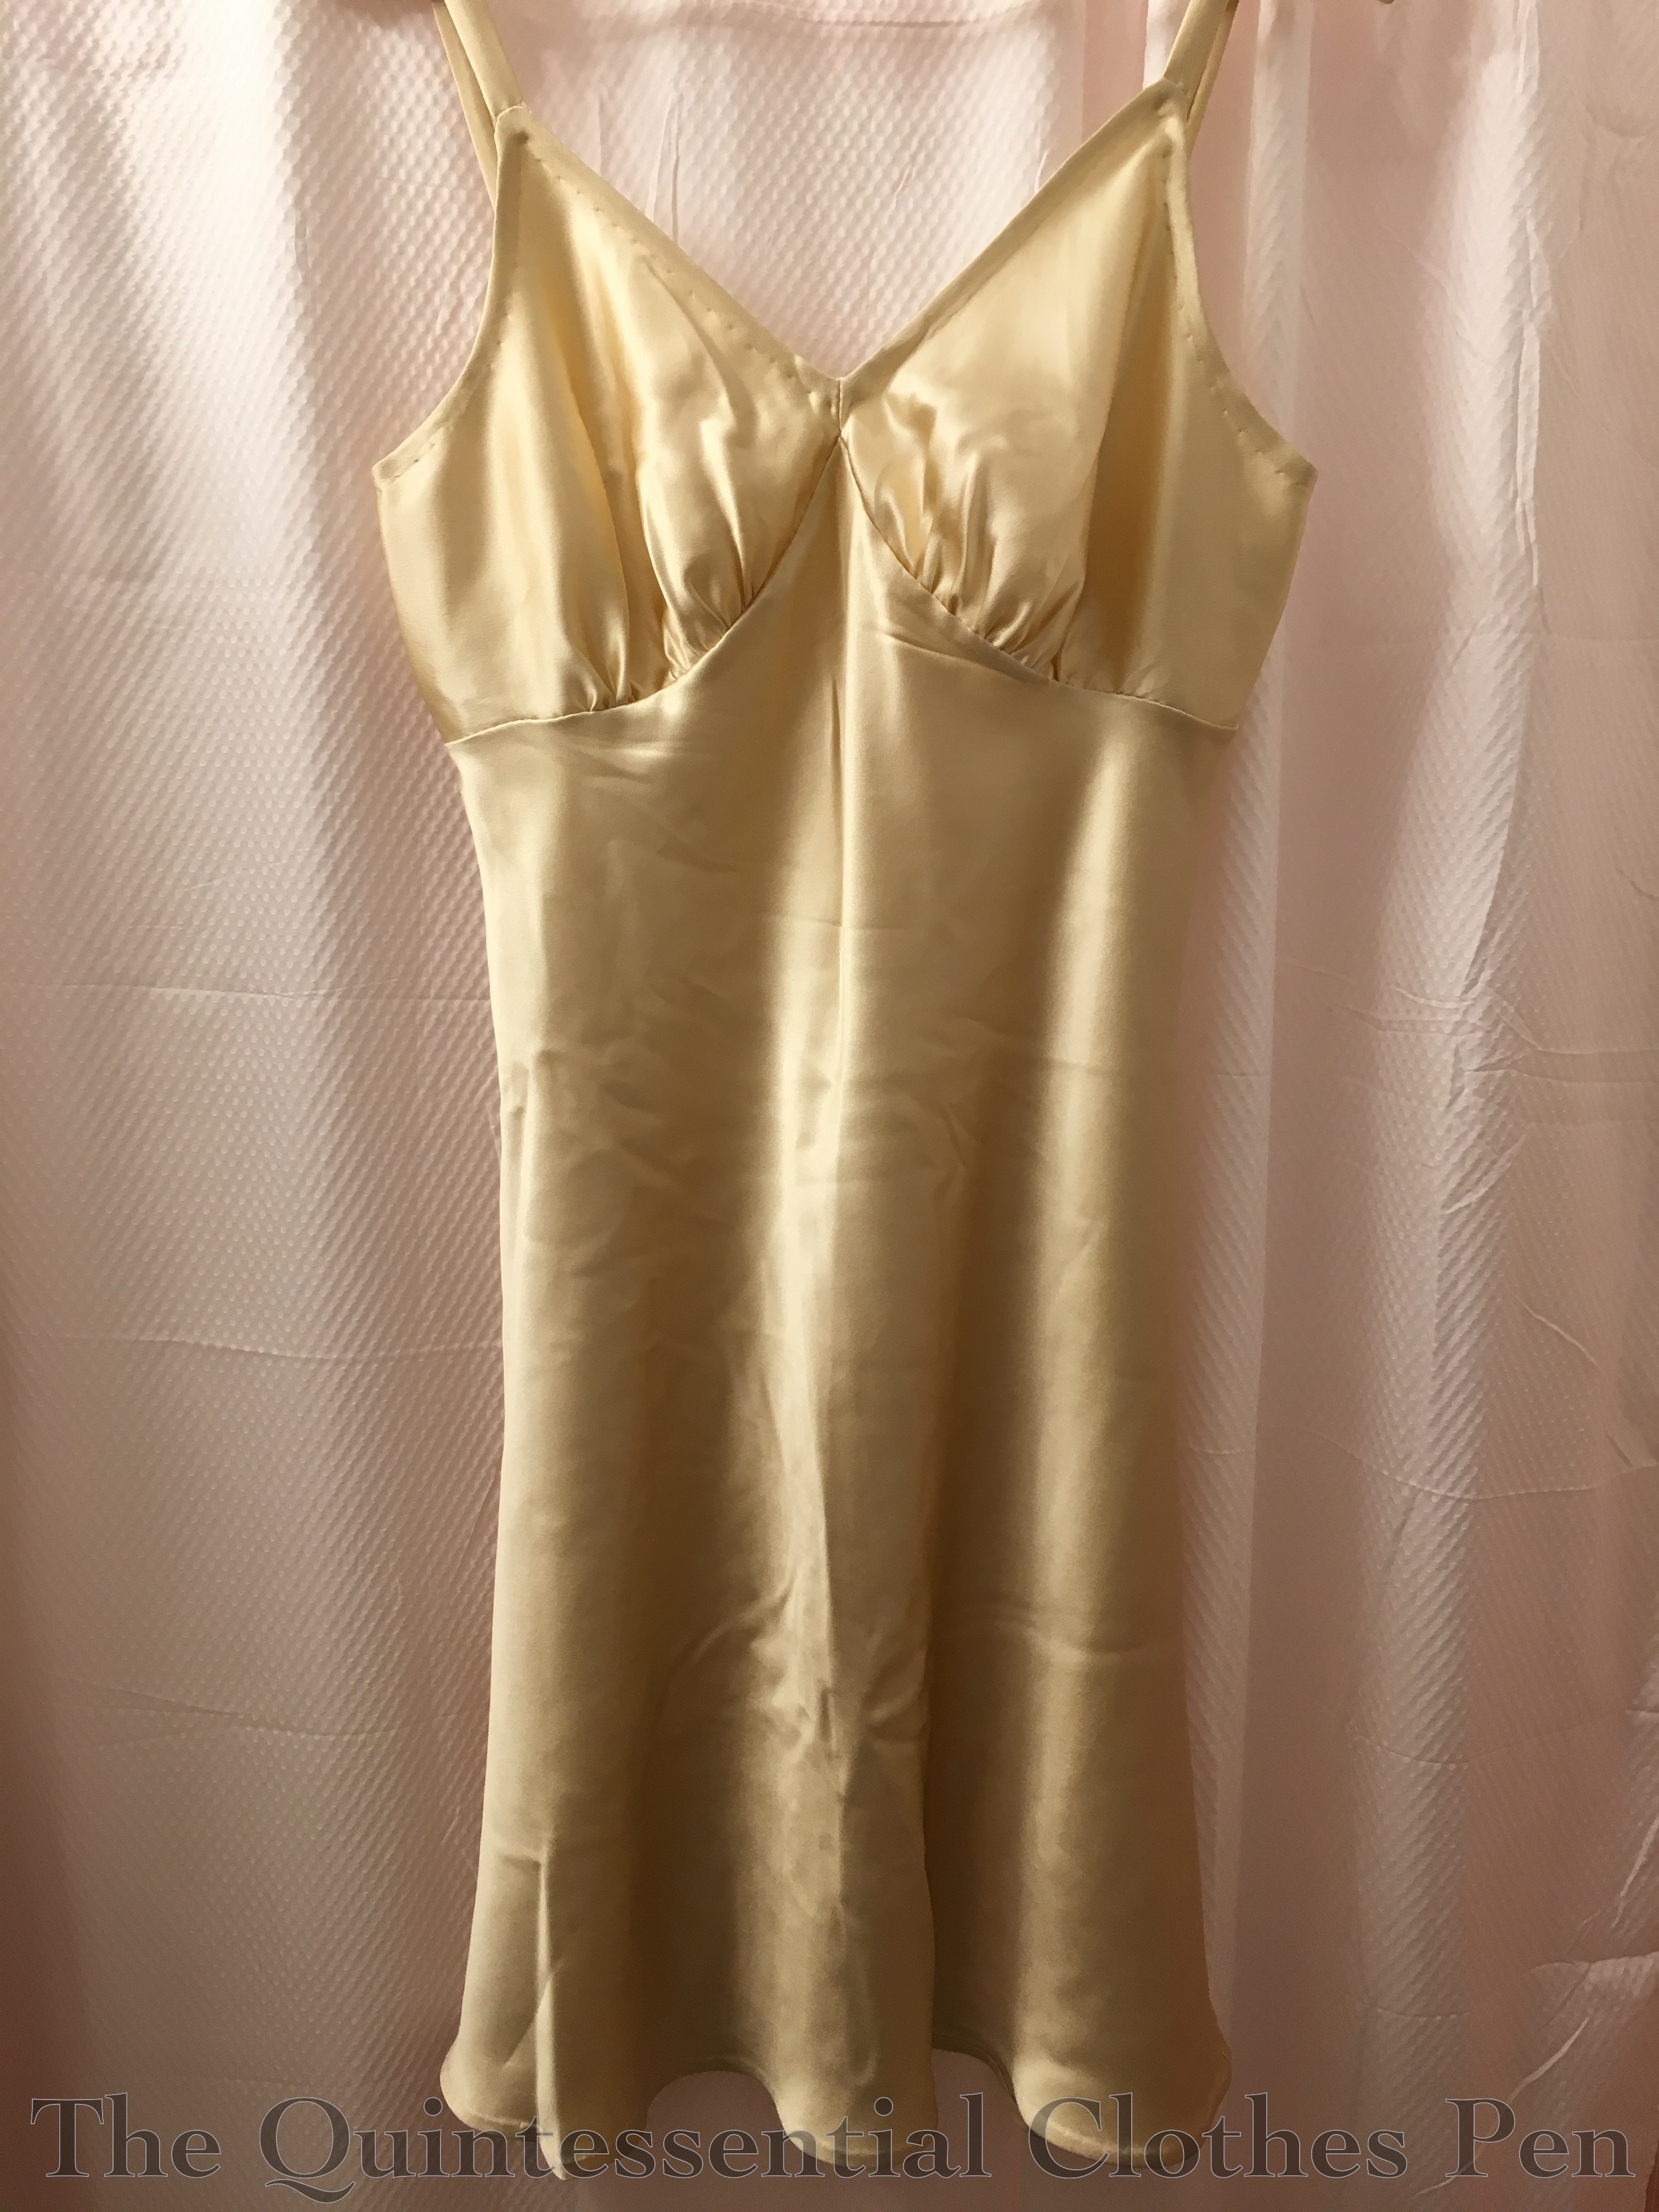
The slip was cut from a pattern I made a few years ago–perfect, since I didn’t have time to pattern something from scratch! I intentionally picked a 1930s pattern in order to have the addition of a perfectly fitting 1930s silk slip to my wardrobe, but also because the shape of the neckline was perfectly suited to the v-neckline I decided on for the sparkly overdress.
The slip has french seams on the sides. The under-bust seam allowance was trimmed away on the gathered piece and then the body piece seam allowance was turned over it and hand sewn to hide the raw edges. The top edge is mostly bound of with vintage cotton bias (which I removed from the top of the net petticoat I show in this post before shortening it. The piece wasn’t quite long enough to go all around the top edge of the slip, so the center back section is just turned twice and slip stitched, in the same way as the hem.
The slip fabric is left over from a project that I did about 7 years ago. It’s lovely silk crepe back satin with the perfect weight for making bias cut 1930s clothing. I thought I would have just enough to eke out the slip, but I came up a little short on the back piece and decided to piece it to make it work, as the fabric is so nice to wear and it was the perfect color. As a result, there are two random diagonal seams on the top of the back piece of the slip. Oh well! They add character!
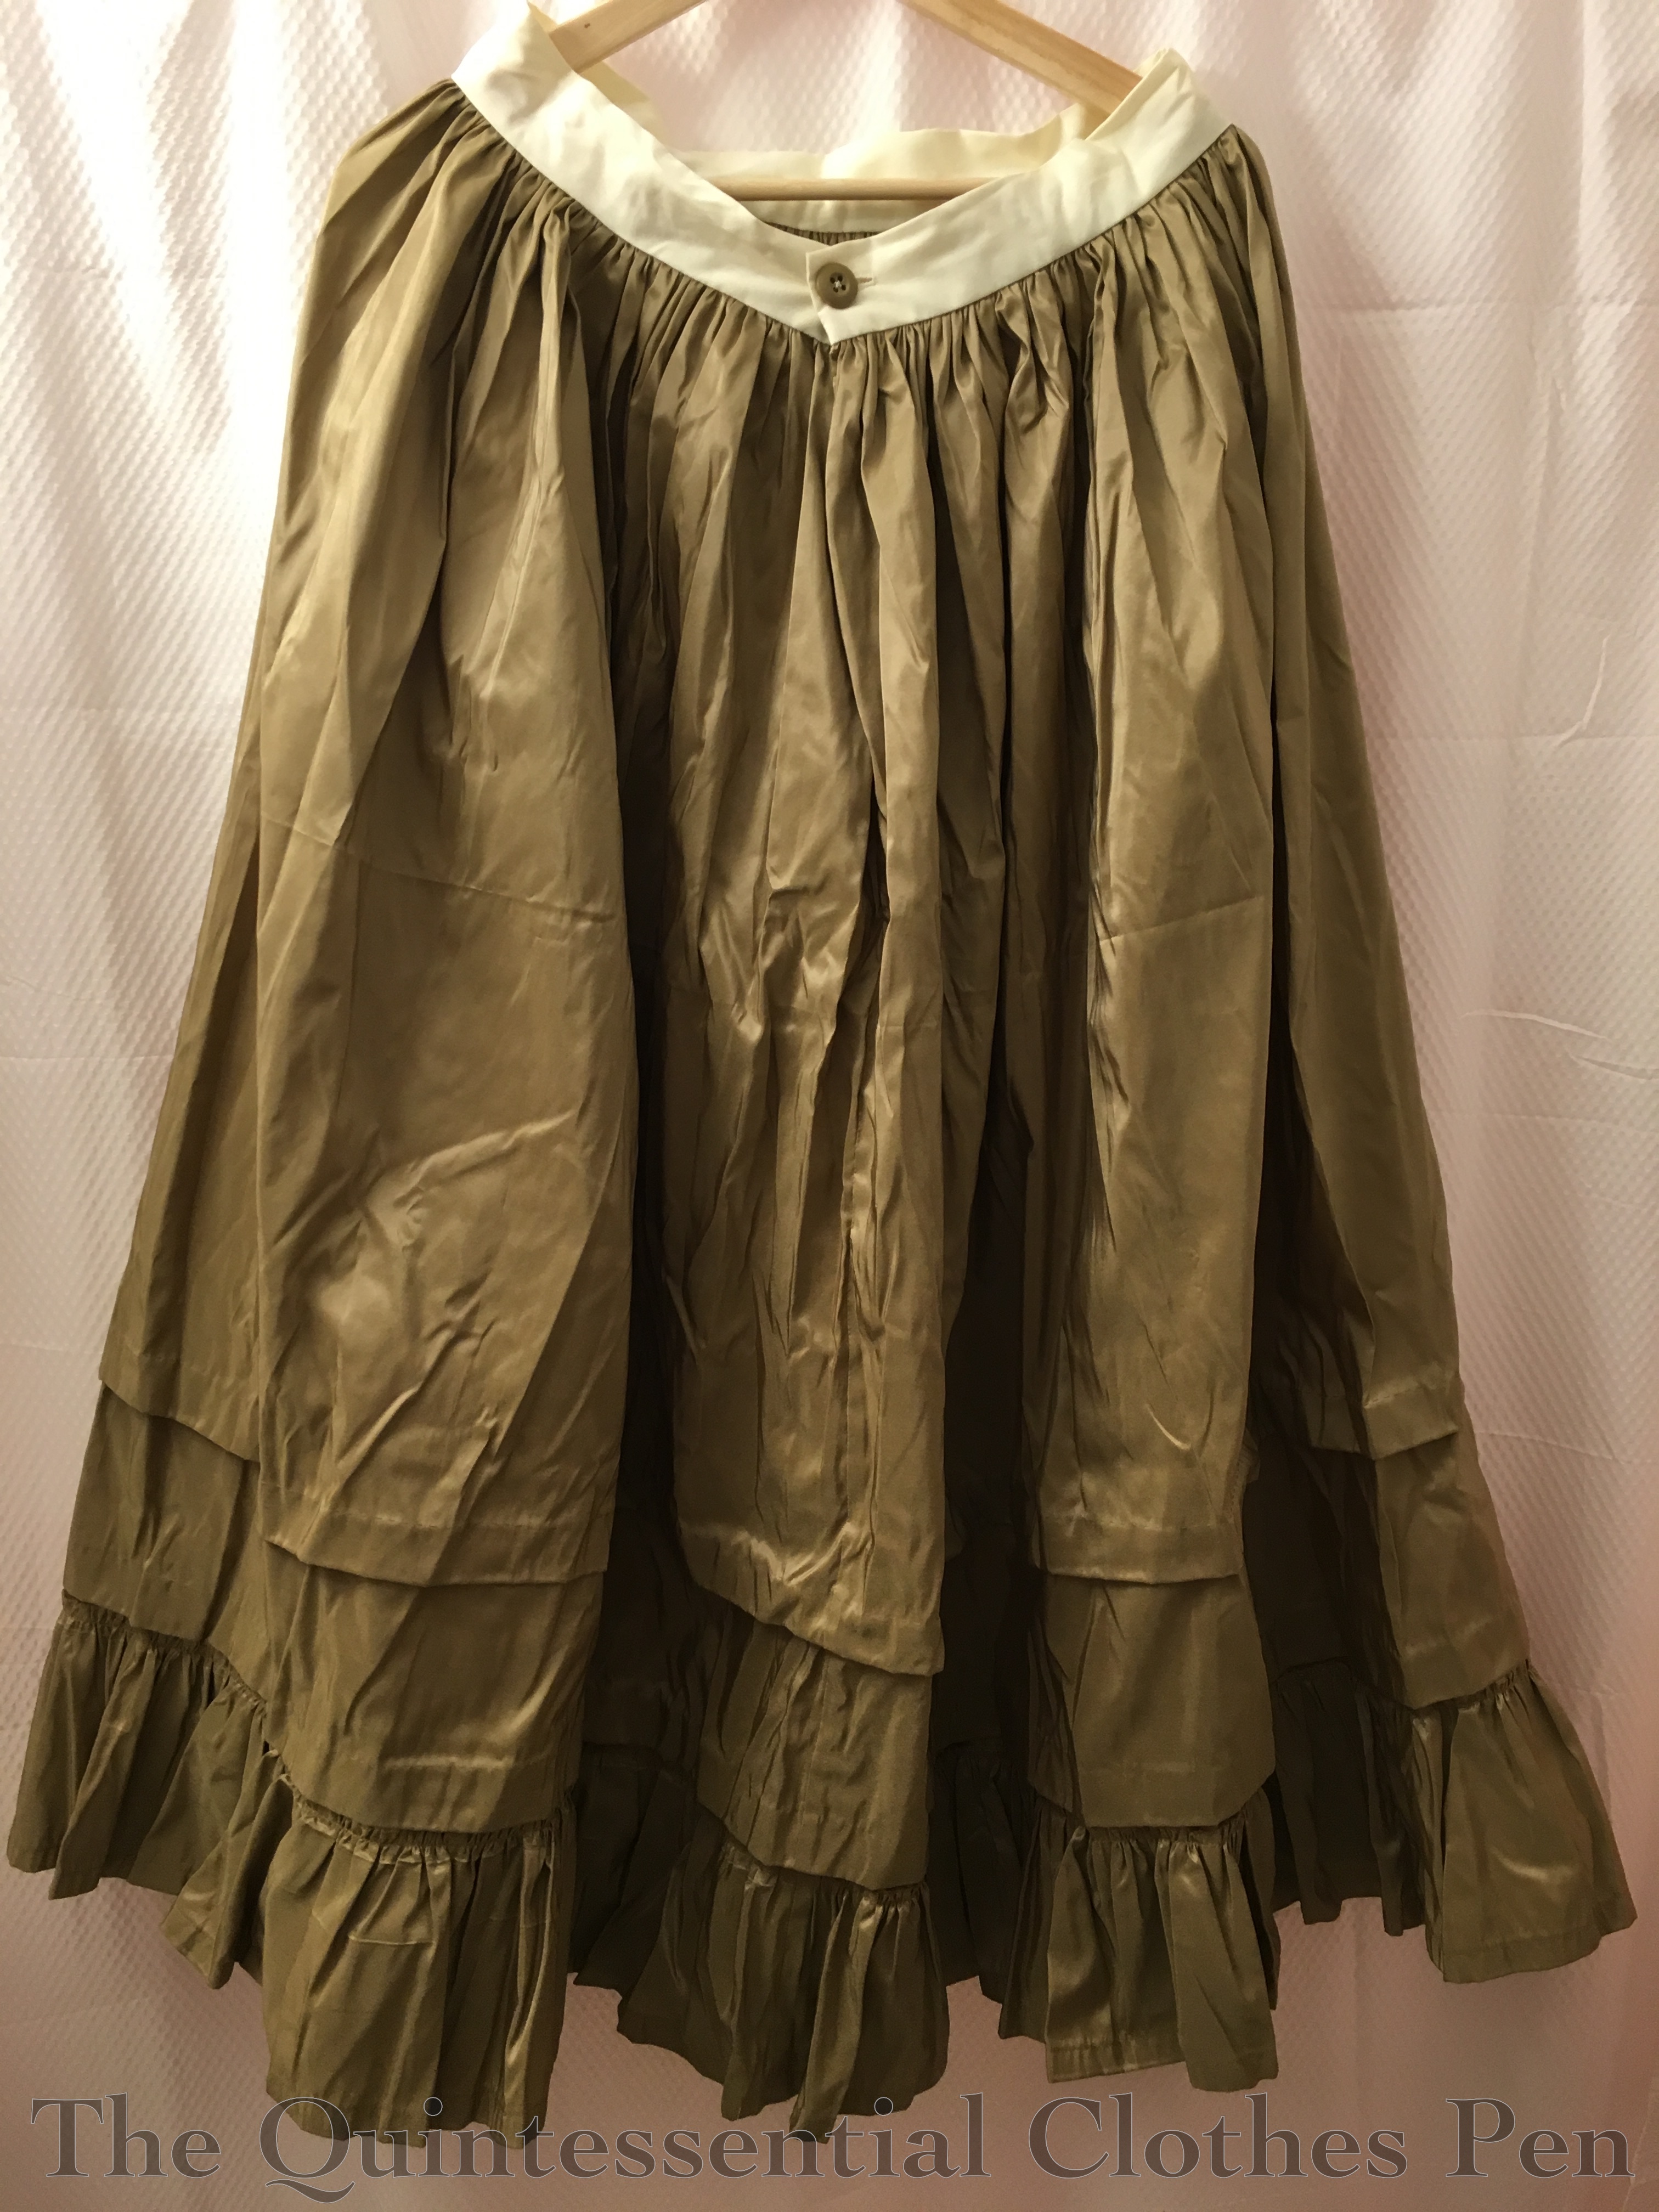
While making my 1832 velvet gown at the end of last year, I decided that a generic 1830s/40s petticoat might add to the silhouette, besides being elegant and fun to own. Silk petticoats remind me of Mammy, in Gone With The Wind, who is very excited (and a bit scandalized) about a red silk petticoat gifted to her by Rhett.
I had purchased this silk taffeta a number of years ago on clearance, but it was languishing in the stash due to its unflattering shade of brown. I had 3 yards, which was just right for a petticoat. And since the garment is never seen nor worn near the face, the color was perfectly suited to the project.
I made a tube of the yardage, then cut off the excess length and used that to make the ruffle. I had thought of making the ruffle twice as high, but realized that I needed to have more than a 1:1 ratio to gather… duh! I was sick while making this and clearly my head wasn’t working terribly well. Anyway, I cut my tall ruffle in half to make a 2:1 ratio and that was that.
The waistband is made of small bits of leftover cotton from some other project. There is evidence of quilted petticoats from the 1830s and 1840s having waistbands made of other fabrics, which was my inspiration (examples can be found here, here, and here). It was a perfect idea, as I was trying to make the best use of my fabric and I did not want to cut a waistband piece out of it.
Petticoats of this type also sometimes close with buttons (like this one), so I chose to close this petticoat in that way as well. It used up a single, random, khaki colored button from the stash and matches the fabric perfectly!
I added tucks to the petticoat after trying it on with the 1832 dress and realizing it needed to be shorter. Those are hand sewn, but the rest of the construction was done on a machine except for the buttonhole and sewing down the inside of the waistband.
This garment fits the first HSM challenge of the year, Firsts and Lasts (create either the first item in a new ensemble, or one last piece to put the final fillip on an outfit), as it was the start of the 1830s ensemble.
Just the facts:
Fabric: 3 yards brown silk taffeta.
Pattern: None. Just rectangles and math, sort of.
Year: 1830s/40s.
Notions: Thread, a button, and a cotton scrap.
How historically accurate is it?: I’m going to go with 95% on this one. The materials are good and so is the method. The only thing off is the machine sewing and the plastic button.
Hours to complete: Not many, for me. Maybe 10? It didn’t help that I was sick and not thinking straight.
This is the last post about the construction of my amazing 1814 Vernet Project. I really enjoyed doing the research and making the parts of this project. It was great fun and such a lovely learning experience to be part of the group of people making Vernet ensembles. And I was able to wear most of the ensemble for more than just pictures! I hope to find future reasons to wear these again!
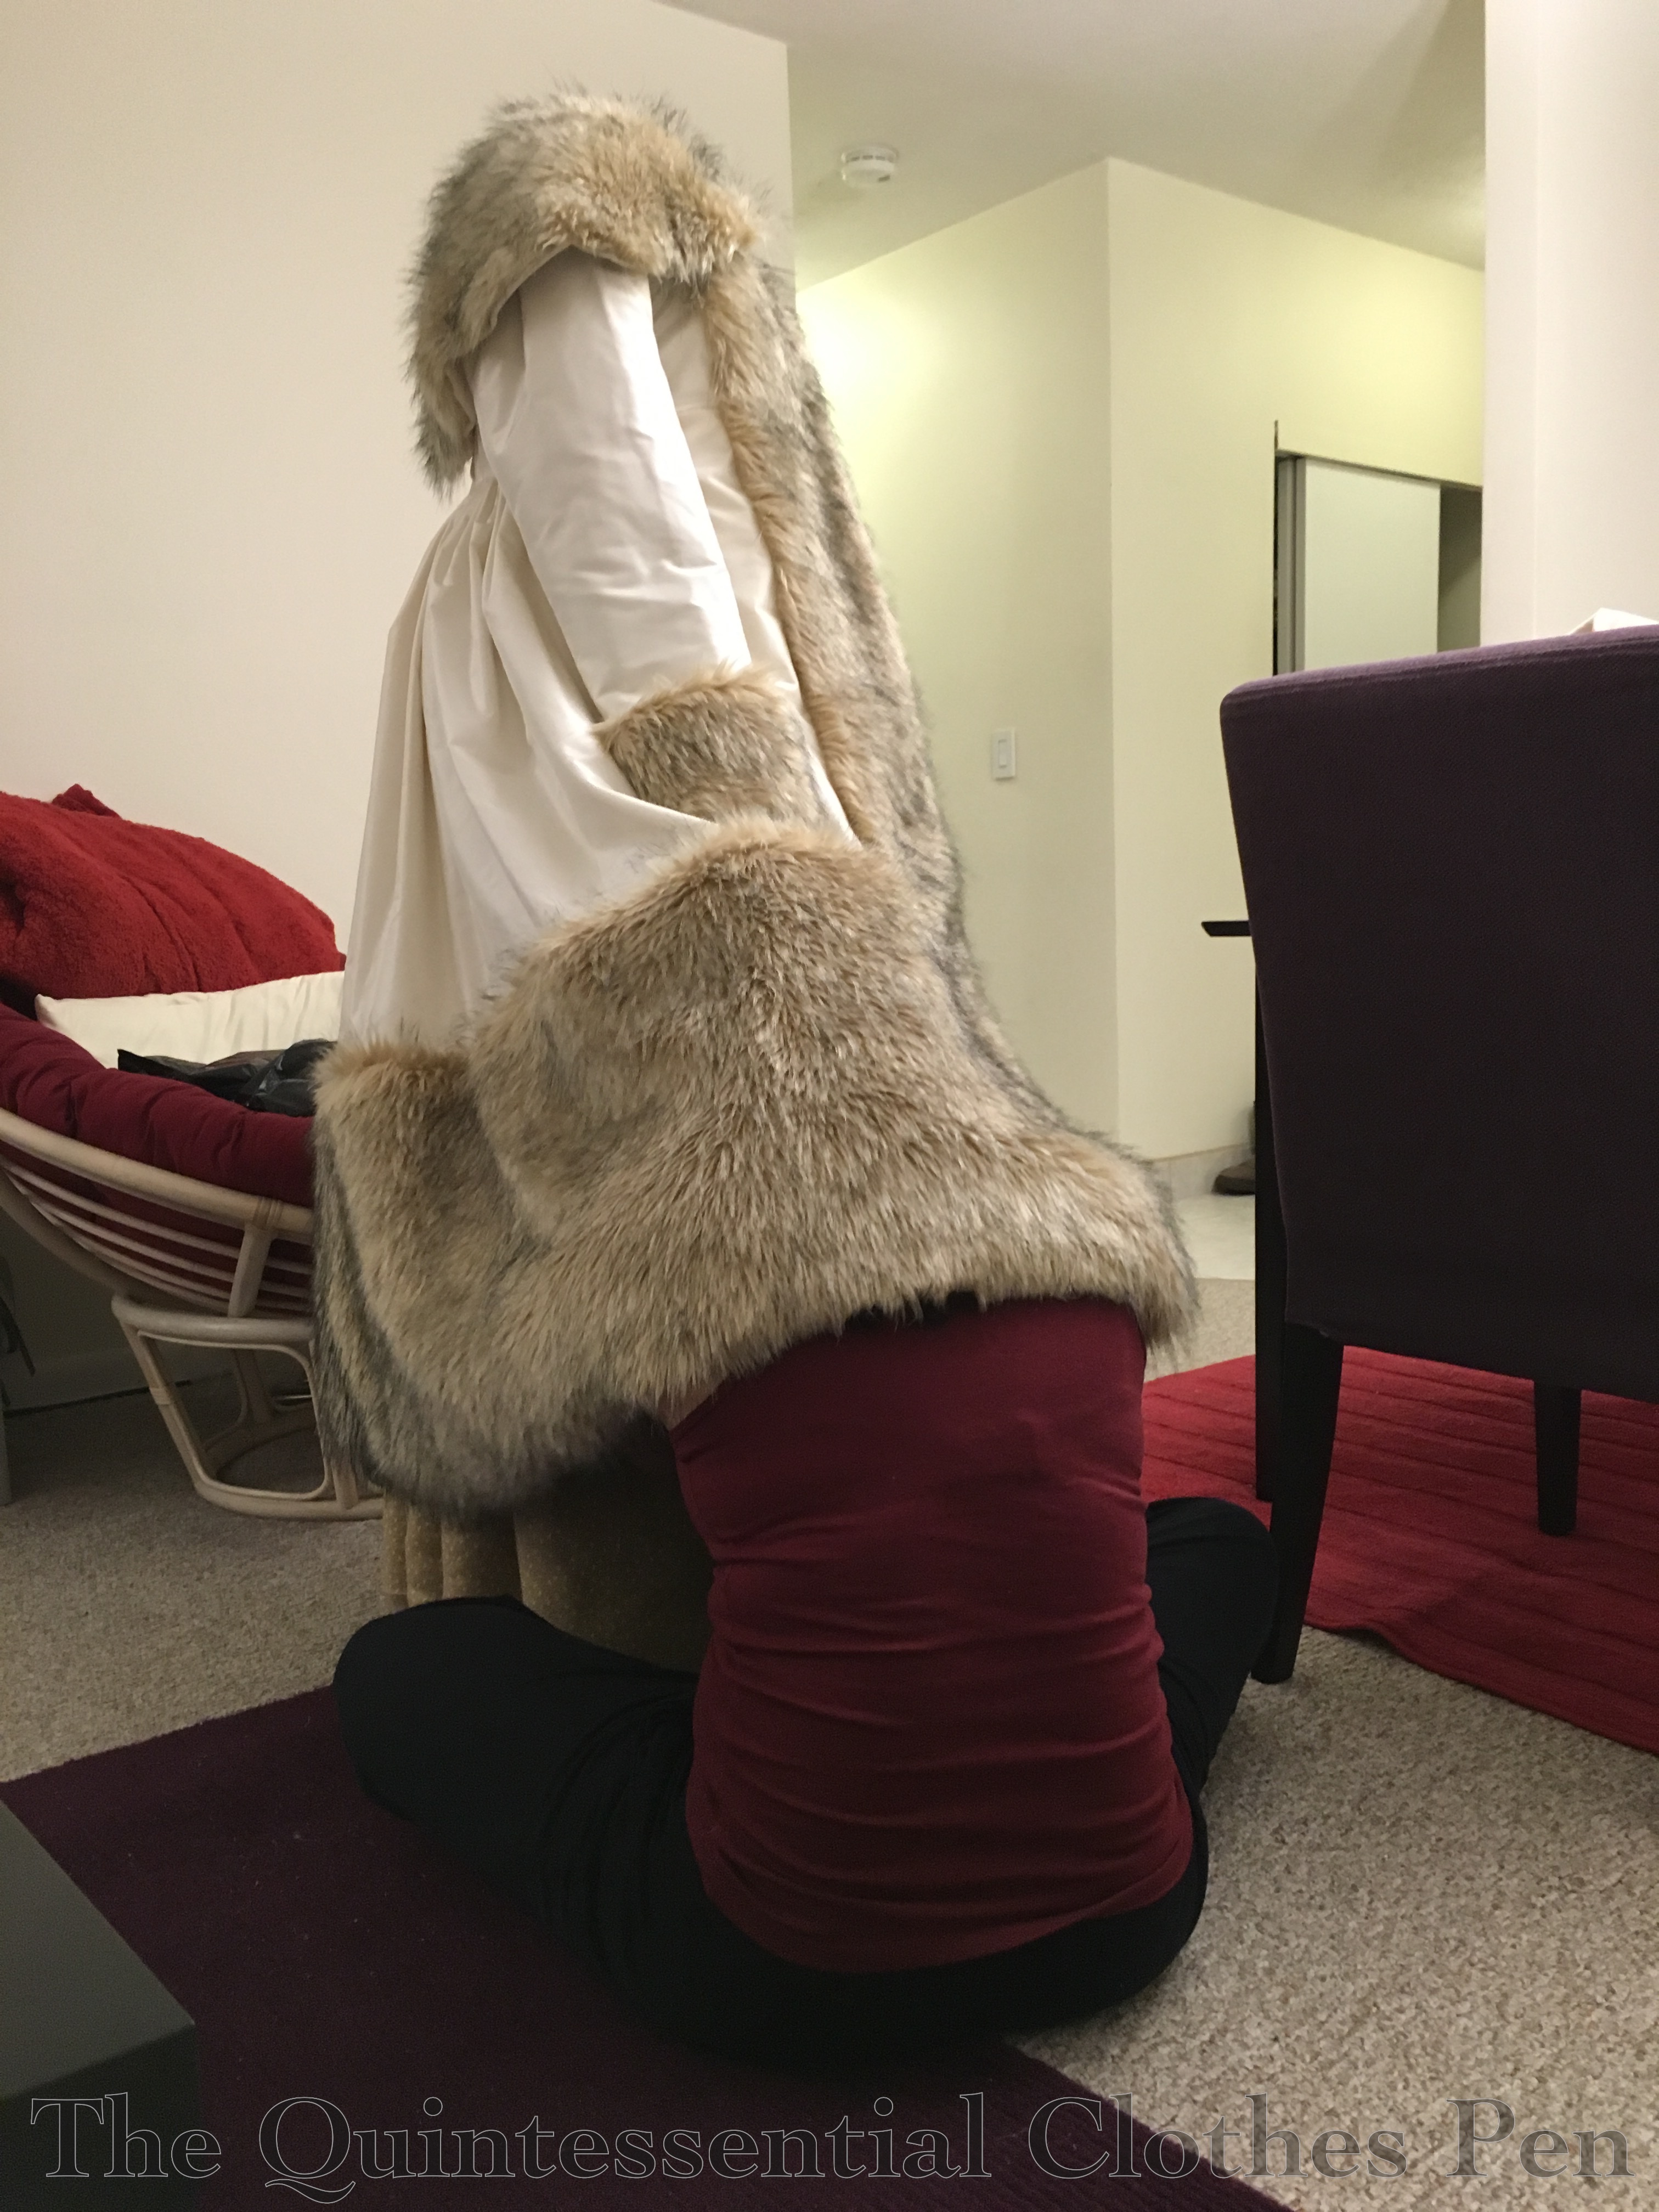
I’ve been saving the best for last–the construction of the main piece, the witzchoura itself. As with all the other pieces in this ensemble, the witzchoura is entirely hand sewn. It is made up of a faux fur lining and an exterior of silk taffeta flat lined with cotton flannel and trimmed with more faux fur. Here are some in progress photos.
Faux fur lining made up but not set in.A seam and bust darts in the faux fur lining. The edges were cut without seam allowance, butted together, and whip stitched.An interior view of the in progress witzchoura, showing the back pleats and cotton flannel interlining. I believe at this point I had attached the hood/collar as well as the faux fur lining at the neck but had not yet sewn the center front edges together.The exterior silk/flannel layer was pleated, but the fur was gathered (it wound up resembling cartridge pleats) to the bodice.After attaching the front edges of the exterior and lining I put the witzchoura on squishy to look at the hem lengths. In doing so, I found a few places where the exterior needed to be invisibly tacked to the lining, which is why I’ve got my head between the layers!
Ta da! The finished witzchoura with all of the lovely accessories. It certainly is a luxurious looking and feeling ensemble!
I thought I would address a few other points as well. Some people have been waiting for answers to these questions for a long time! Thank you for your patience as I waited to answer your questions until now in order to keep everything together in terms of information.
Is it heavy to wear?
No, once dressed, the ensemble does not feel heavy. But, when holding it, or hanging it, or putting it on, YES, it feels quite heavy! It’s a fair bit of fabric, with three layers, and the faux fur gets heavy quickly with such yardage.
What is the weight? How does it compare to a heavy wool winter coat, for example?
Oh dear. I’m very bad at estimating this. I like the comparison question better! If you’ve ever held a very heavy, thick, full length winter coat, I think this is probably similar in weight. But compared to anything less, it would feel heavier.
Is it easy to walk and move with such an enveloping set of objects?
This is the sort of question I would want to know the answer to! Yes, it’s easy to walk. The ensemble does not restrict leg movement. I can also move my head with ease, because the hat sits low enough that it is well anchored and not going anywhere. However, the witzchoura does restrict arm movement some. For example, putting it on without just the right movement (which is lifting it up and behind and then sliding both arms in at the same time) doesn’t really work. And once it’s on, there’s only so much forward and backward arm movements that are possible. Lifting arms is better, but still not full range of movement. Each layer by itself has more possibilities, but the faux fur fills a lot of space inside the silk exterior. This makes it quite warm, but feels a little bit like wearing a marshmallow.
I hope you’ve enjoyed my Vernet journey! If you have any other questions about the ensemble please let me know. I would be happy to answer them!
The Historical Sew Monthly challenge for October is Heroes – Make a garment inspired by your historical hero, or your historical costuming hero.
You may or may not know that one of my favorite movies is Gone With The Wind. (I posted about this topic years ago when the blog was in its infancy–most of what I claimed then is still true and the 1860s will always have a special place in my heart, but I can now say that other periods give me excited wiggles too!) You can read the old blog post to get more specifics, but the essential point is that despite her personal shortcomings and the turbulent and controversial history of the period, Scarlett reminds me of the clothing that I love and therefore is an historical costuming hero to me.
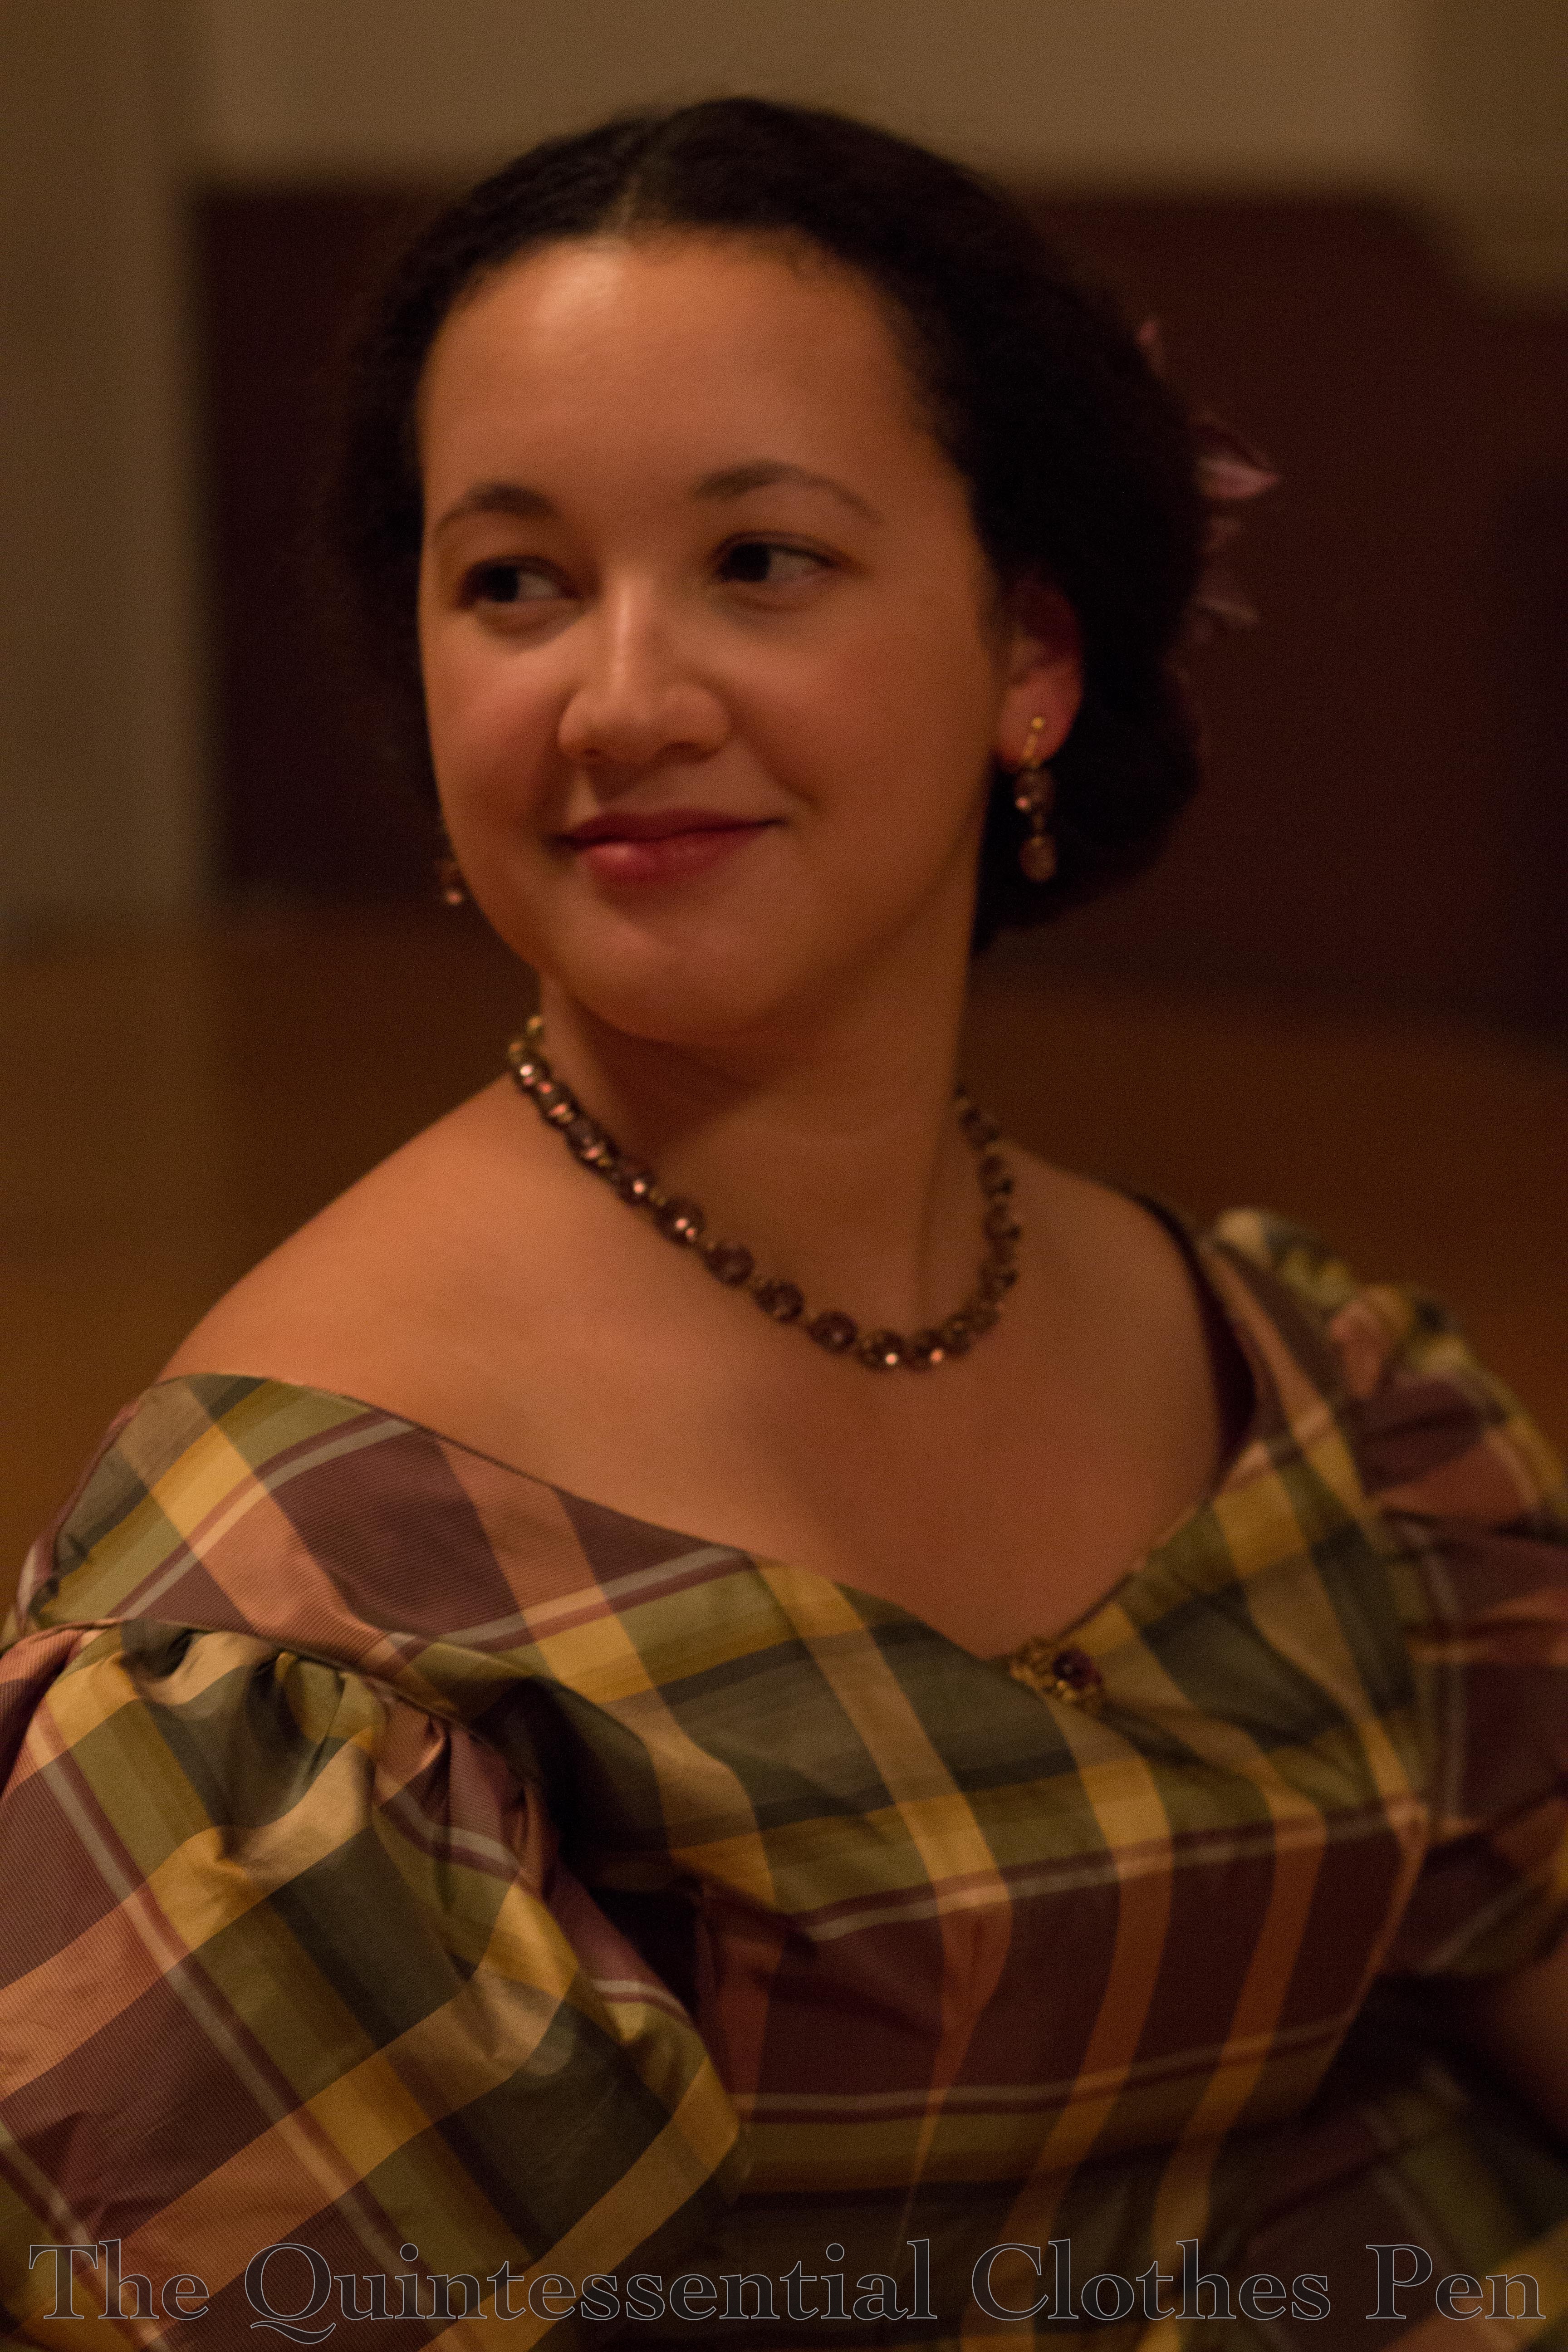
And this gown has an added historical hero, Eleanor ‘Felcie’ Bull, who came to my rescue when I was contemplating what sleeve style to give my dress.
Eleanor “Felicie” Bull. 1863.
Prior to finding her image, I had been planning to name this dress Johanna, in honor of the friend who convinced me that I needed the fabric a few years ago. But I had sort of decided this was weird, since all my other dresses from this period have names that I like, but that are not from a specific living person. Once I found this image I was completely overtaken with excitement–I love the name Eleanor and there she was, helping me out! The choice was obvious.
I made a new hair decoration to go with Eleanor. I had the perfect stem of purple velvet leaves, but no flowers to match the dress. So I dyed some white millinery flowers to a golden yellow. They have a fluffier texture than before being dyed, but the color is perfect. Using millinery flowers brings me so much joy, because it’s easy to shape any section since each stem is fully wired. And I couldn’t pass up the opportunity to wear my Dames a la Mode purple earrings and necklace.
Regarding dress construction, we must start with a bit of a personal habit, or perhaps a theory, though I’m not sure it’s as thought out as that. When the opportunities arise for me to make multiple garments from the same period that could be carbon copies of each other in different fabrics (so much speedier on the patterning and planning front!), I hardly ever take that easy road. I am drawn to exploring the small variations.
So it is with Eleanor. I decided to: knife pleat her skirt instead of box pleating, cartridge pleating, or gathering; to make a plain darted bodice instead of using seams or gathers; to make the bodice straight across all around, which is more unusual for evening gowns made of silk than having points in front and back; to overlap and topstitch her side back seams; to omit the oft-seen bertha around the neckline; and to have single puff bias cut sleeves. These things all make this dress just slightly different than my others from this period, adding a bit of thought and time to the process. And if we’re talking about time, let’s just mention how mind-boggling cutting plaid pieces with curved seams and darts is when the pattern matching is important to you!
I collected images of plaid gowns with a focus on evening bodices and noticed these features, which is why I decided on them. The most useful images are in one place here, on my Pinterest board for the project. I was contemplating the sleeve type when I came across Eleanor ‘Felcie’ Bull. Interestingly, she shows all of those traits I’d decided on. I loved her simple sleeves and restrained bodice trimming, which then set me on an extensive Ebay and Etsy hunt to find just the right brooches to replicate her style. Yes, I did look through about 150 pages of bow brooches to find just the right one for less than $15. Plus many pages of gold oval brooches. I couldn’t have wished for better results! Remember the look I gave you a look a few posts ago? The only thing I did was to brush the oval brooch (which is new, not vintage) with a bit of brown acrylic paint to bring it down to the old gold color of the bow brooch.
Other construction details include flatlining the bodice and facing the skirt in a remnant of dusty mauve cotton from my stash (used it up, yay!), creating boning channels in the darts to keep the front nicely shaped, and finishing the neck and bottom edge of the bodice as well as the armholes with very narrow cording.
Just the facts:
Fabric: About 6 yards of silk taffeta and 1 yard of cotton.
Pattern: Adapted from Past Patterns #702, 1850s-1863 Dart Fitted Bodices and Period Costumes for Stage and Screen as a reference for the sleeves.
Year: 1862, given the details that I decided on.
Notions: Thread, hooks and bars, canvas to interline the belt, narrow yarn for cording, and plastic wire ties for boning the bodice.
How historically accurate is it?: I’m going to go with 99% on this one. Materials and methods are well researched and executed. This would be entirely recognizable in its time.
Hours to complete: I really didn’t keep track. But I can safely say many!
First worn: October 22 for a ball.
Total cost: $98 total: $68 for the silk, $10 for bow brooch, and $18 for the oval brooch.
I’ll end this with my photographic homage to Eleanor ‘Felcie’ Bull.
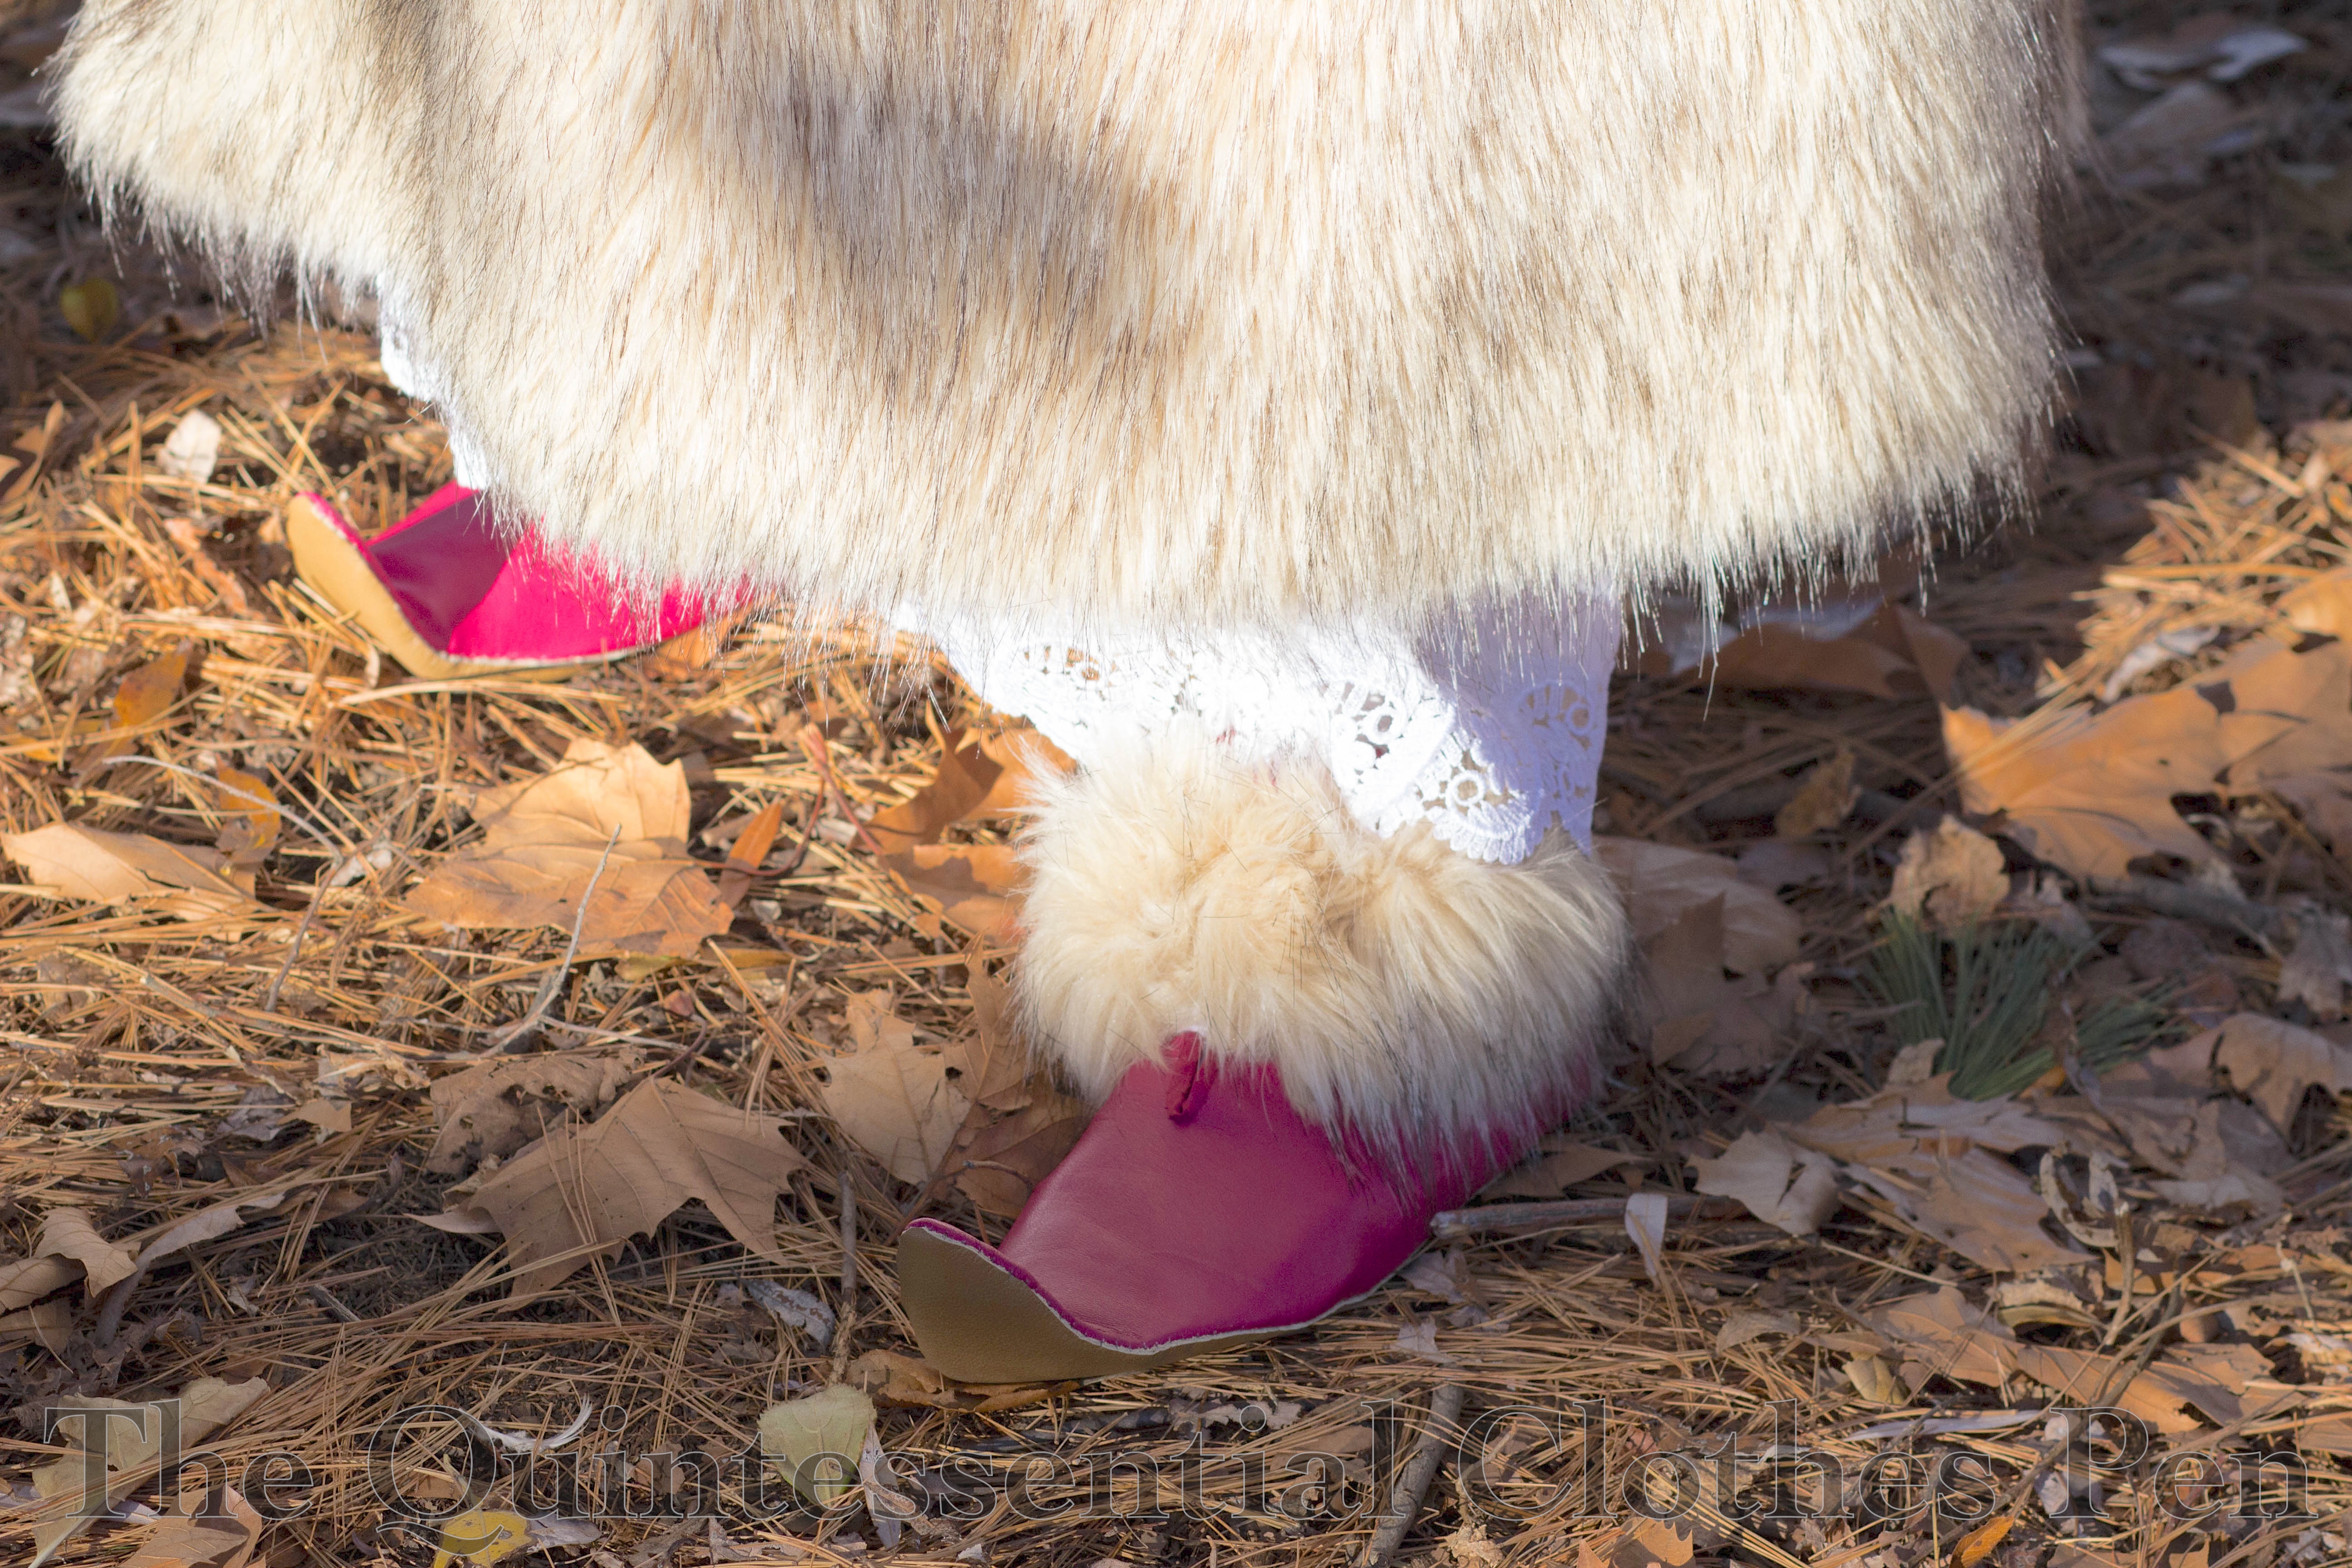
One of the five pieces of my Vernet Project was creating the silly up-turned-toe elf shoes in the fashion plate. Clearly, these are not shoes that could be purchased, as they are so specific in style, so I set out to make my own!
In the beginning, I was thankful to have another Vernet project maker’s experience making her boots before mine to work from. Jenni posted a two part tutorial showing how she made her boots as well as sharing information behind-the-scenes with project participants earlier in the process (Part 1 and Part 2). She closely referenced Every Lady Her Own Shoemaker, published in 1855 (a little late relative to the date of the project, but still useful for construction advice), for construction methods and carefully documented her process. In fact, she did a much better job at documenting the actual sewing than I did… I also read Anna’s information about making mid-19th century shoes multiple times to help get my mind acquainted with the project (again, a little later than the period of the project, but still helpful). She also has lots of great construction pictures.
I started by creating a pattern for my shoe using patterns in Every Lady Her Own Shoemaker. Given that my shoe has the unusual turned-up-toe, I necessarily needed to make adjustments to the general slipper pattern. Here is my shoe at the mockup stage. The upper pieces fit pretty well! I adjusted the width of the sole as well as the shape of the turned-up section before moving on to cut out the final pieces.
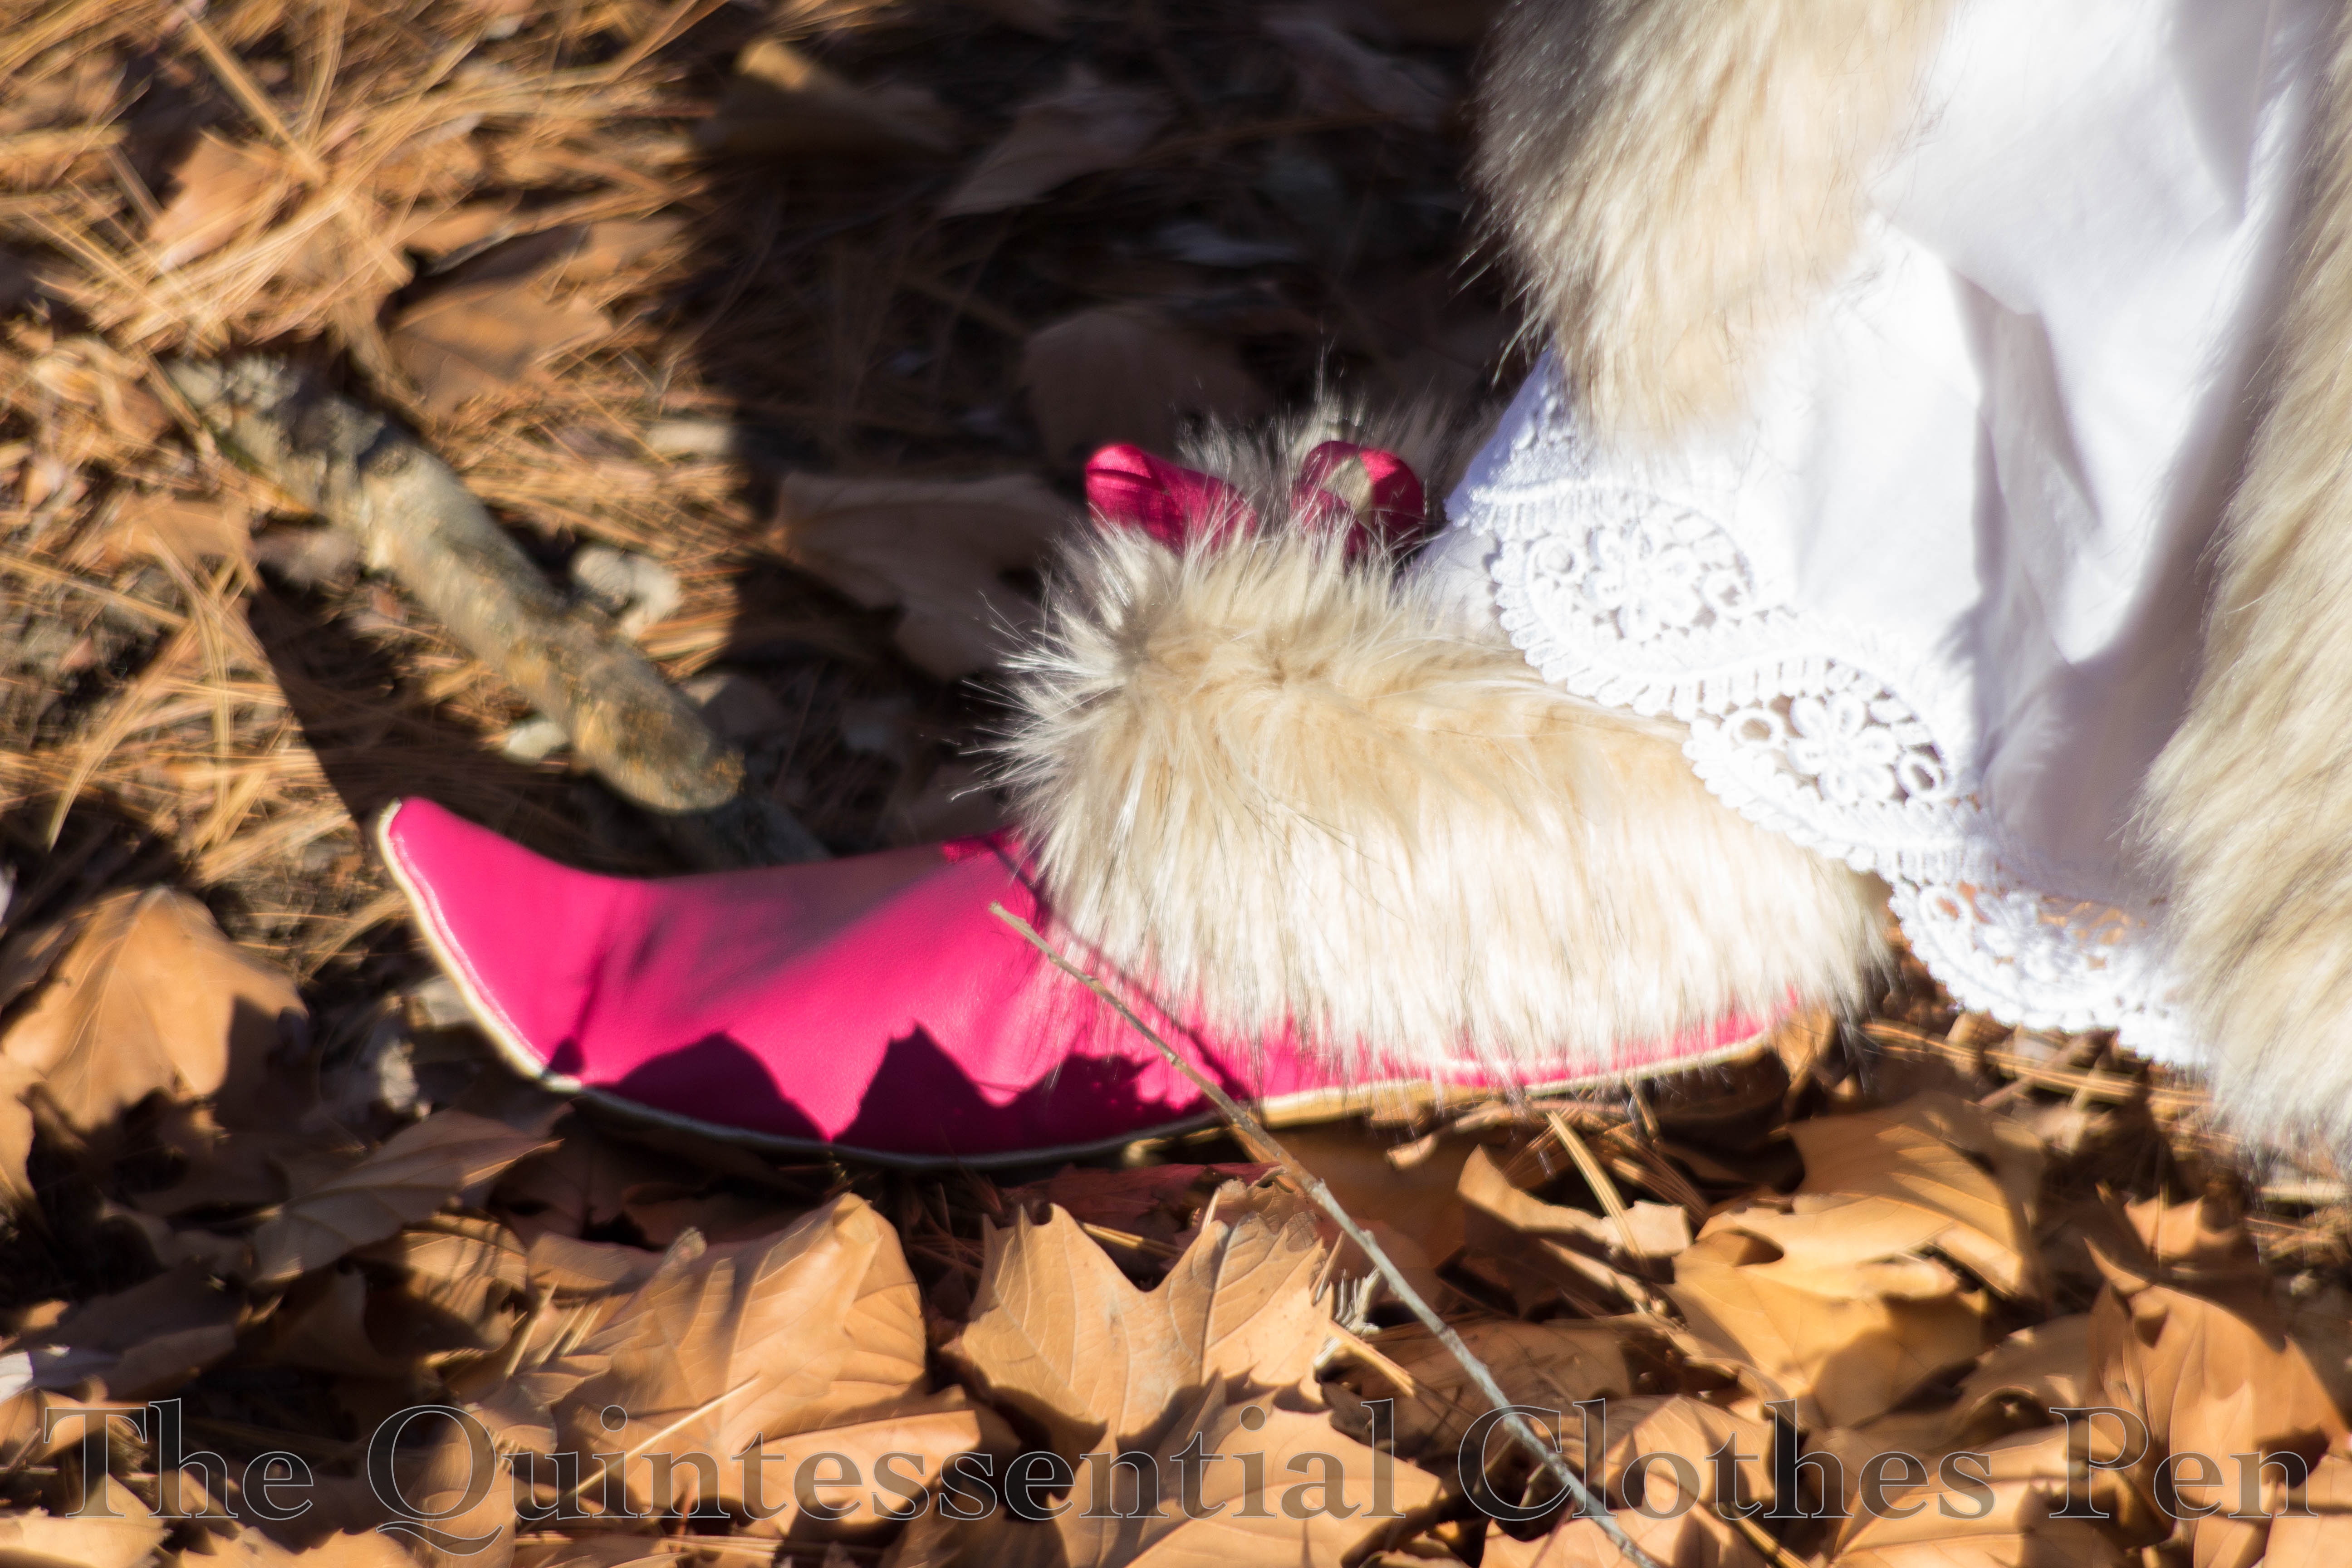
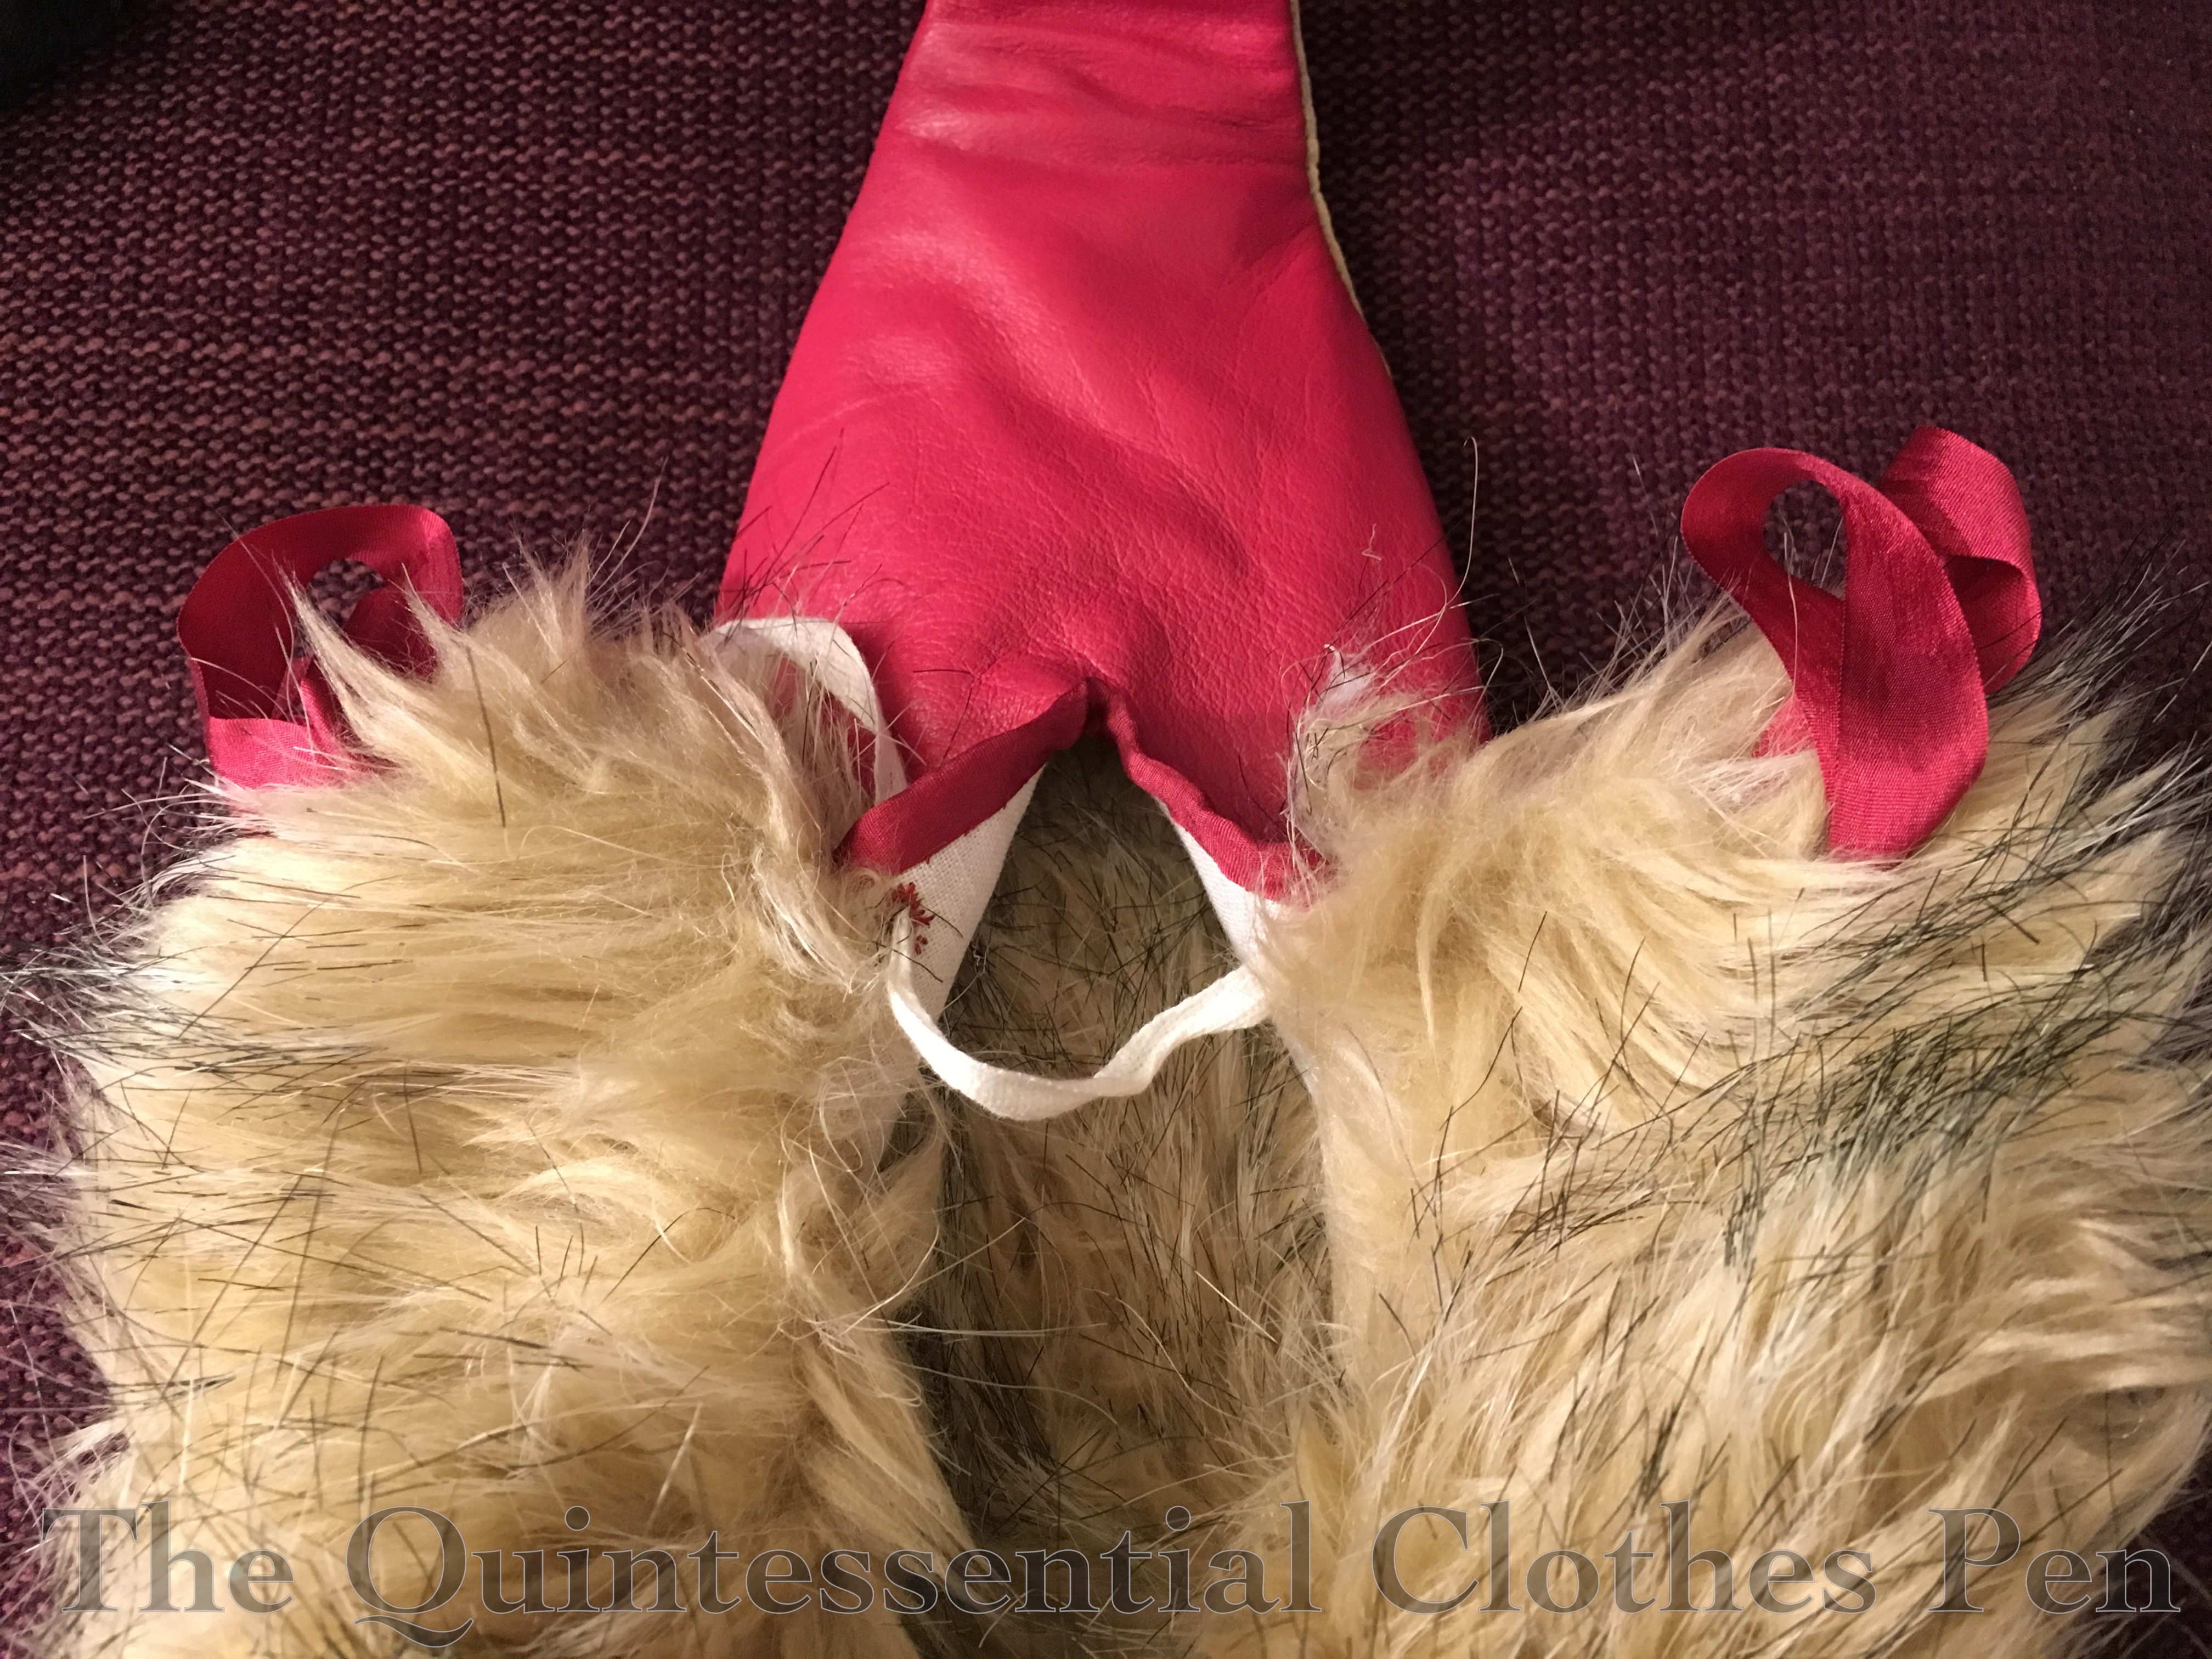
Here are all of the final pieces cut out and ready to assemble. The soles have three layers: heavier tan leather for the outer sole, cardboard for the inner sole structure, and white linen to cover the cardboard insole. The uppers have two layers: lightweight raspberry leather for the exterior and white linen for the interior. Later in the process I also added a faux fur cuff.
To help the shoes keep their turned-up-toe shape I soaked the leather soles in water, taped them to a lysol wipe container, and let them dry. You can see the results below. Not perfectly curved up, but still helpful. I also tried boiling leather soles to thicken them before shaping, but found that the leather shrank unevenly which created soles that wouldn’t work for this project. I did save them, though, and hopefully will get to use them for a future shoe making endeavor. I repeated the soaking and shaping for the cardboard insoles before gluing the linen to them. There’s a picture of the insoles at this stage in this past post.
After shaping the soles it was time to construct the uppers. I did the interior and exterior separately, then basted them together around the top opening and around the bottoms. Then I sewed the bottom edges of the uppers to the soles, using the slanting stitch through the side of the sole that Jenni shows in Part 2 of her tutorial. She used all sorts of nifty leather tools as well as a wooden last during construction. I purchased the nifty leather tools but found that they didn’t work for me and a simple non-leather needle worked just fine. (I think my leather was too thin and soft for these to be needed). As for the last, I looked online for a wooden one, never found one in my size foot, and eventually decided to give it a go without one, especially since I had to do the turned-up toe. In the end, I don’t think it was a problem not to have a last.
Once the soles were attached, I bound the front slit with matching silk ribbon. Then I cut a piece of faux fur for each shoe that went around just the top of the foot opening and could double over on itself. There are non-functional silk ribbon loops that are sewn to the front of the fur that encases the top edge of the shoe. The shoes actually close with a twill tape threaded through hand sewn eyelets on each side of the opening.
They’re actually quite comfortable for walking around in. I have very flat feet, so don’t really need arch support to be comfortable. The only thing is that my feet did get cold during our photoshoot due to the freezing ground only separated from my feet by a few thin layers of fabric. So, for the second wearing, while caroling at Christmastime, I added a faux fur insole. Problem solved! They were toasty and even more comfortable!
Interestingly, witzchouras are mentioned as being popular in Paris during the year 1827 by La Belle Assembleé, after a mention of other popular pelisses and mantles (well worth checking out!), and are are described as being worn with boots laced in front and with fur around the leg.
Doesn’t that description sound oddly familiar? It reminds me so very much of the Vernet fashion plate and my silly shoes!
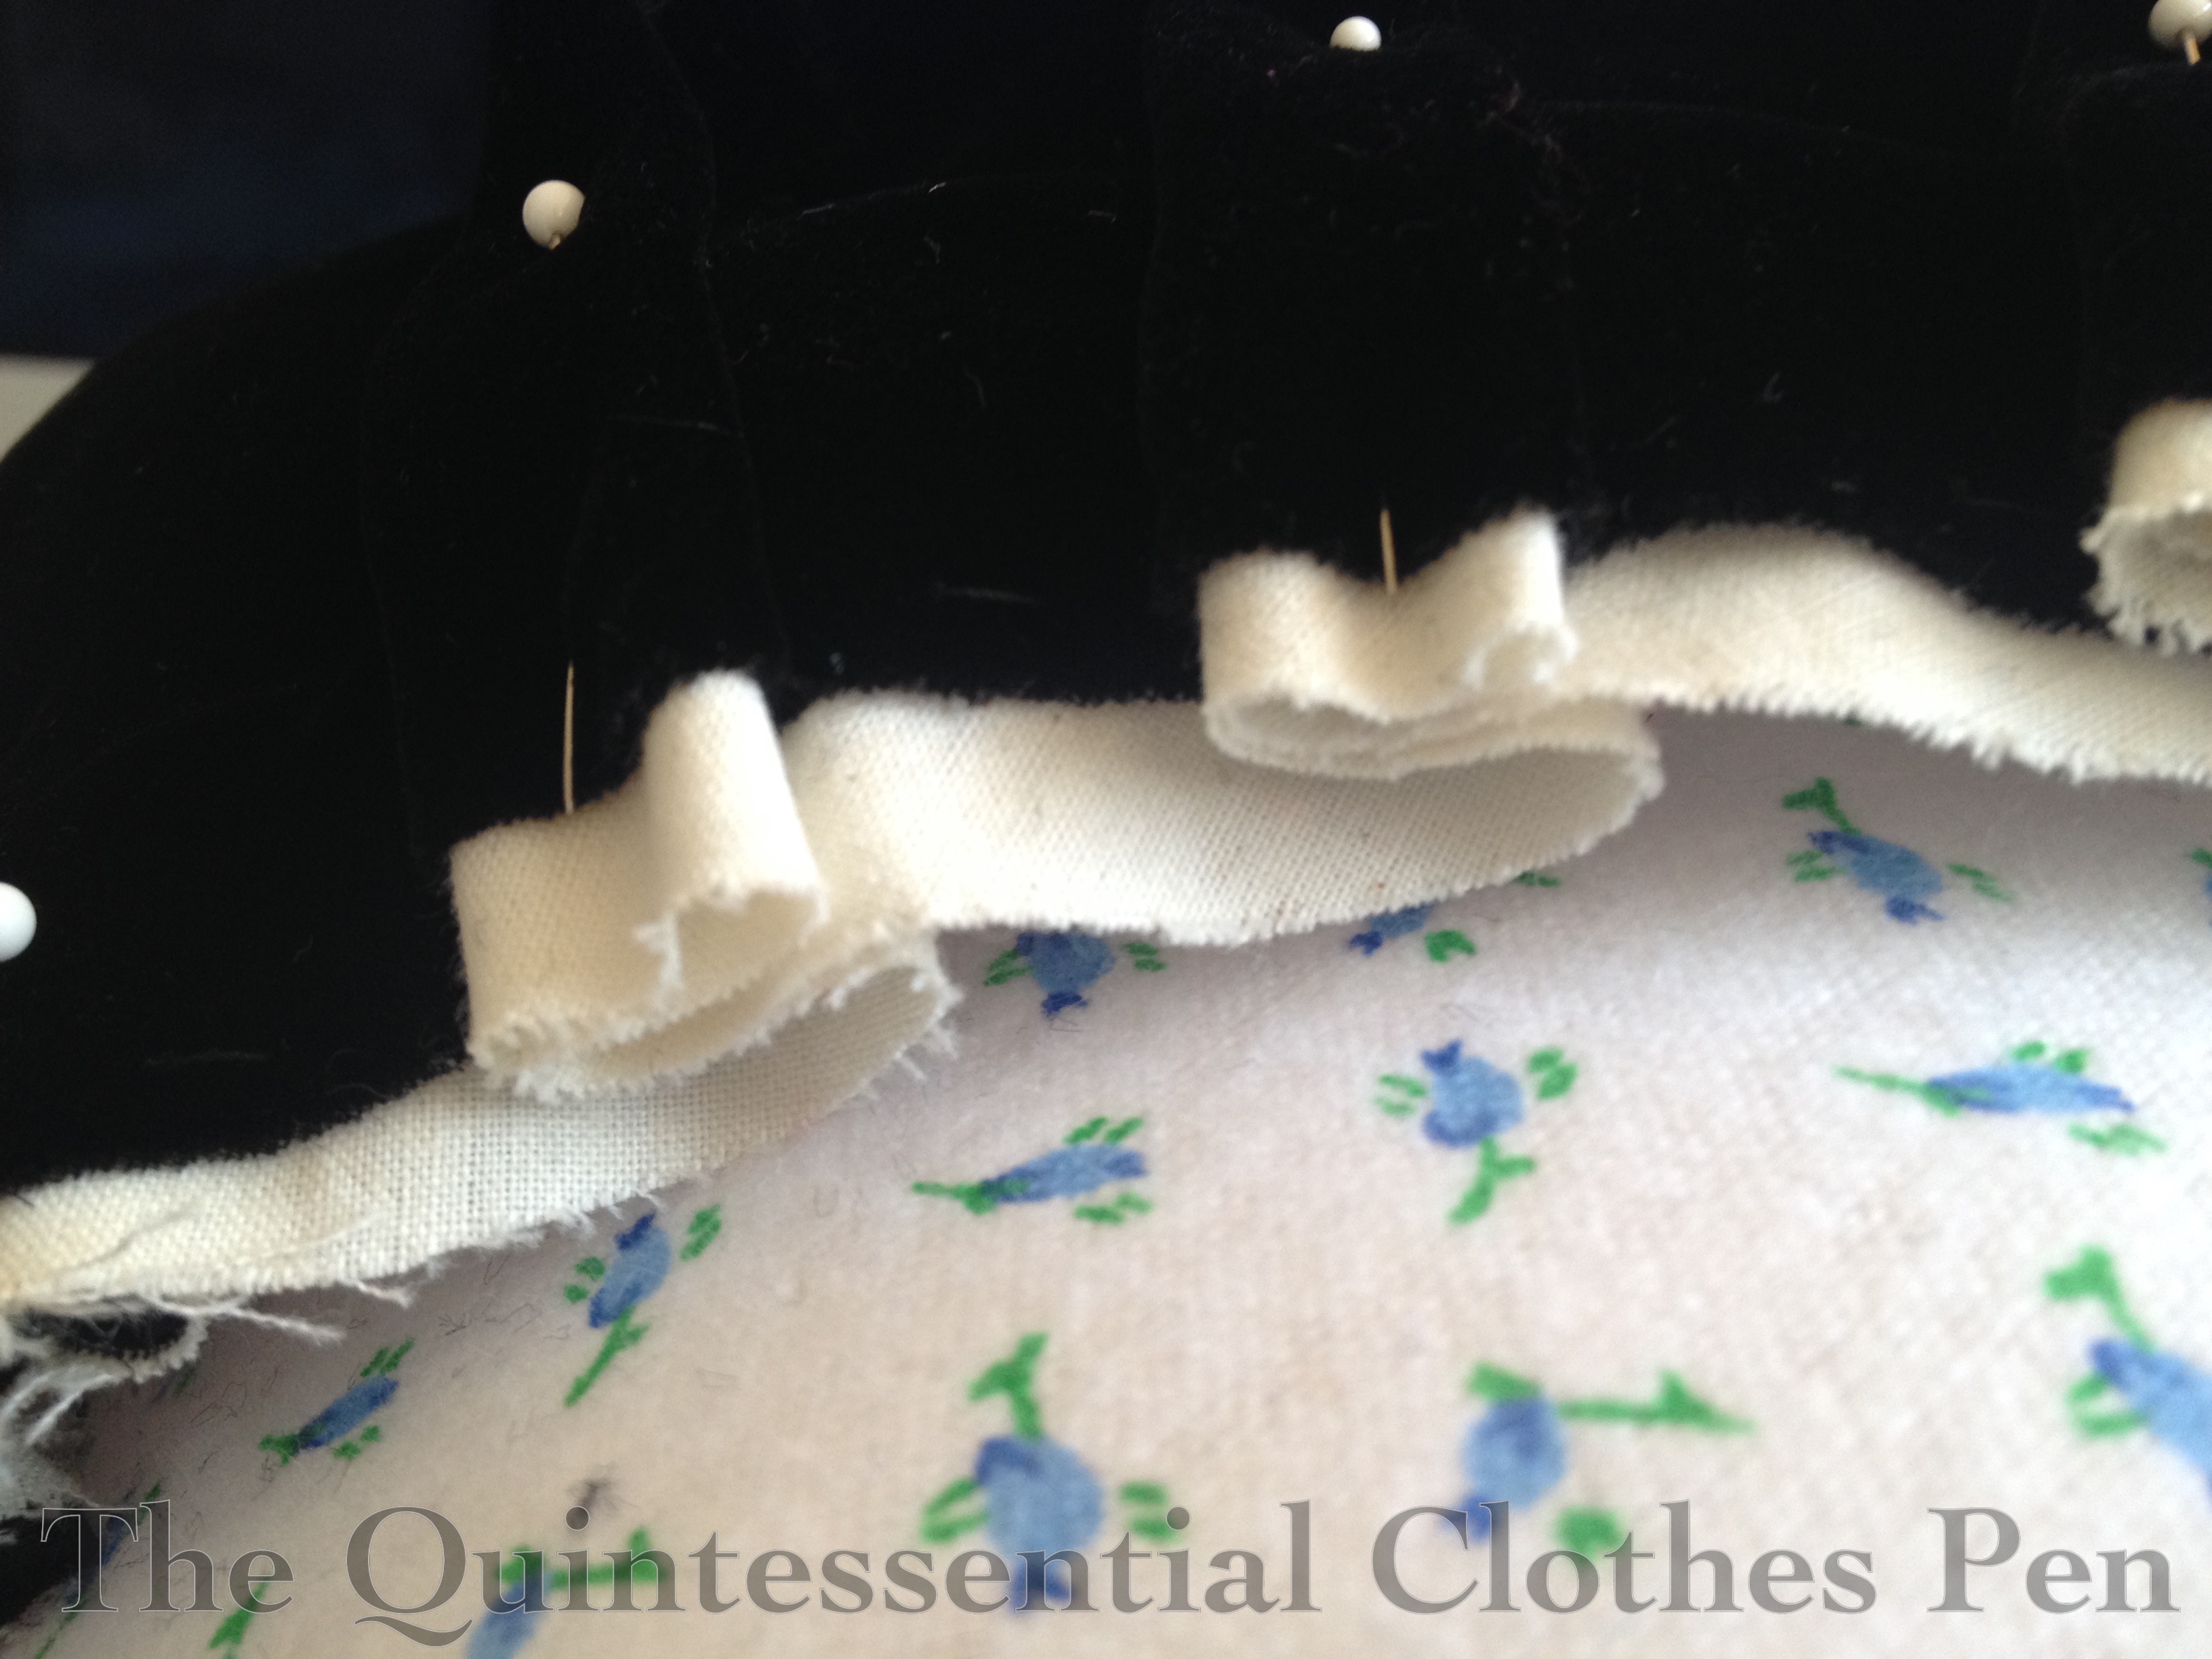
In January, when I posted about my Vernet Project hat (the Toque de Velours), I missed including a few in-progress construction pictures I later discovered floating around my photo library. Now is as good a time as any to share them.
To remind you, this is my toque de velours.
Here is the toque in the mockup stage, early in the process. I was trying to determine scale and proportions more than anything. For ease, I combined the bottom two vertical sections into one piece of paper for the mockup.
Here is the actual toque in progress. You can see the floral cotton flannel mulling layer that is between the buckram base the the velvet exterior. You can also see that I used my mockup poof to flat line my velvet poof in order to help the light silk velvet hold its shape. This picture also shows the double, or stacked, pleating around the poof.
This is the beginning of a renewed effort to post details about all the pieces of my Vernet Ensemble, so keep an eye out for posts about the petticoat, muff, shoes, and the witzchoura itself this fall.
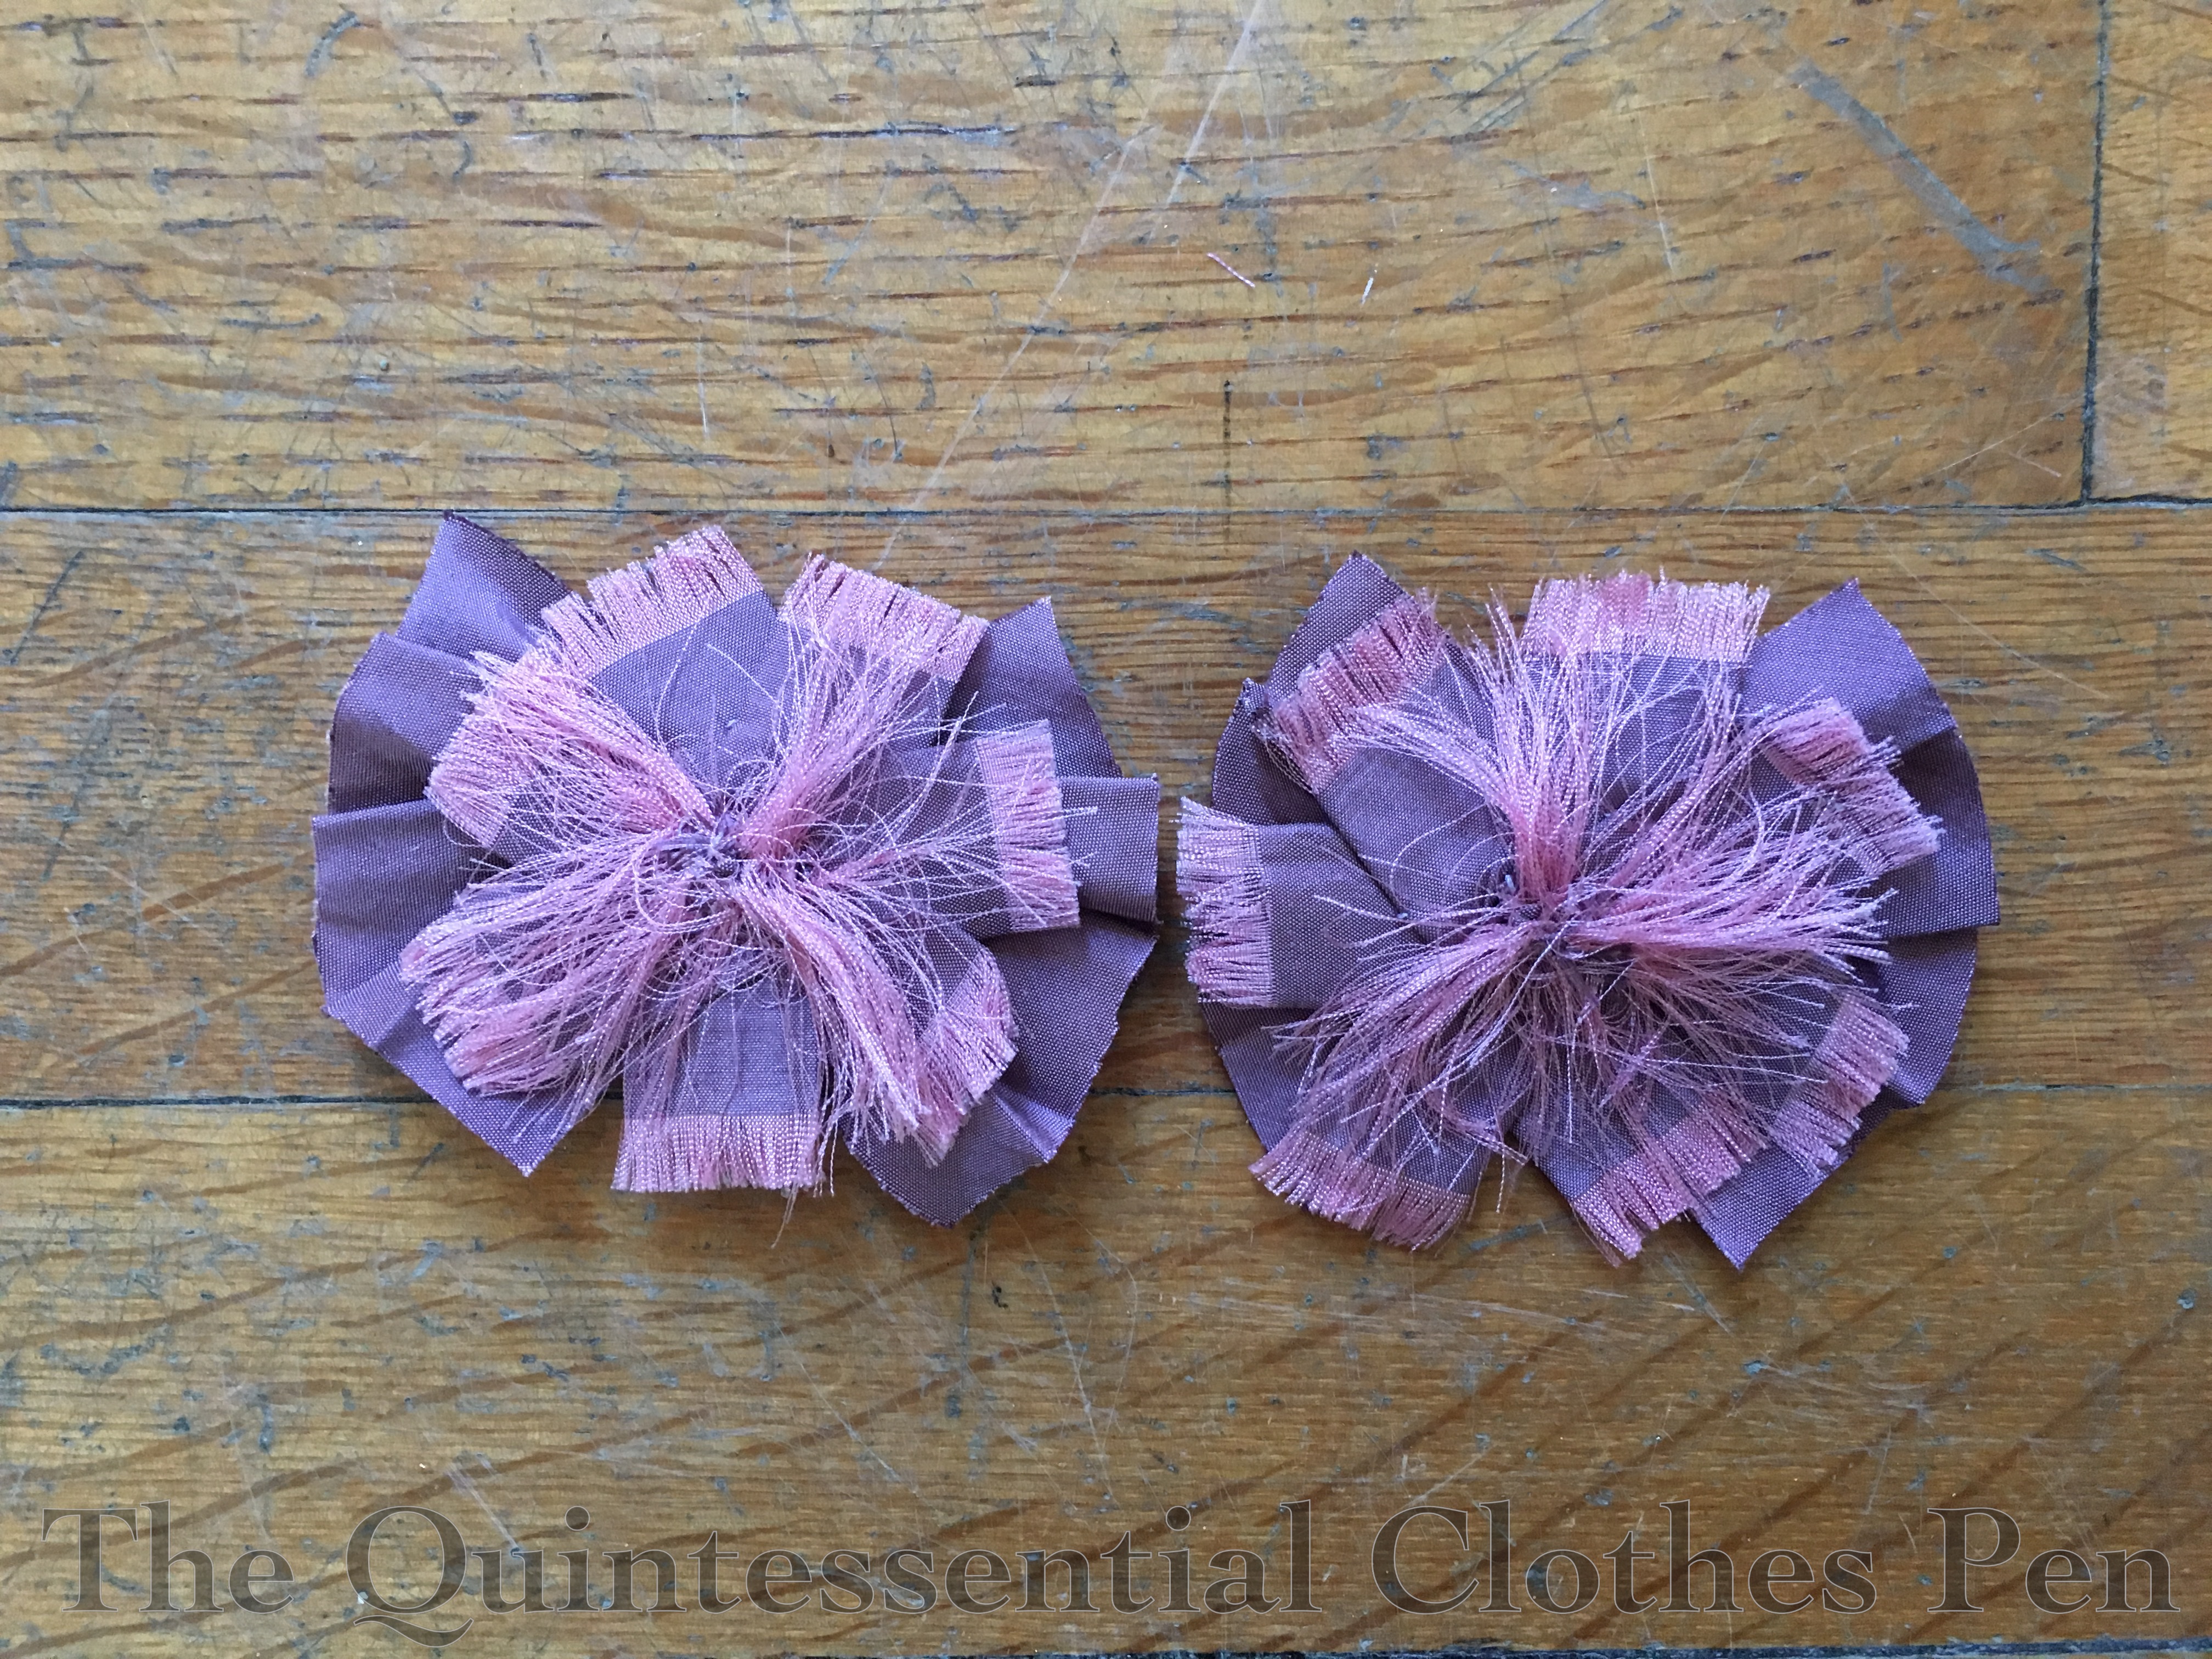
I was very excited when Gina posted a tutorial for making shoe pom poms in September 2014. I decided then and there, while reading the post, that I needed some of my own. It only took me about 18 months to get around to it… but I am happy to report that in April 2016, I finally used Gina’s tutorial to finish making my very own!
What prompted me to really go ahead with making the poms is that I wanted to have something to spruce up an older outfit I wore to the 4th Annual CVD Regency Dance Weekend, but didn’t have the time to create a new dress, as the Versailles sacque and 1885 Fancy Dress were all consuming. I suppose what I should really say is that what prompted me to finish the poms is the opportunity to wear them. I think I actually started them in late 2015.
Let me start by saying that Gina’s tutorial is clear and easy to follow. I highly recommend it!
My issues were all self inflicted… I carefully followed Gina’s instructions, got partway through the process and realized that the scale was much bigger than I remembered and that I didn’t like it at all on top of my foot. Oh no! (But in going back to link to Gina’s tutorial for this post I have realized that of course her poms are not the scale I wanted, because her poms are bigger than I ever intended! Oops! Totally my fault!)
The only solution I could see at the time was to cut off the ends of each pieces and re-fray the silk ends! UGH! It was not a fun process to fray the ends and I could not face the idea of doing it again. So I refused to work on the poms for months because I was so frustrated. Then, in March or April, I had the brainstorm to make the pieces shorter by cutting out the middle so I wouldn’t need to re-fray the ends. Duh! From there it was smooth sailing to finish up the poms.
Partially finished pom on top (using Gina’s original dimensions). My completed pom on the bottom (smaller in scale). The pin is for scale.
I used a purple silk shantung from my stash for this project so it would match my other purple accessories. The back of the poms have American Duchess shoe clips attached so that I can easily clip the poms to any shoes.
I was inspired by extant shoes with poms on the toes, such as these. You can also take a look through my Pinterest board to spot more pom-like shoe decorations.
Poms in action! I really like the look of the neutral dress with the purple accessories.
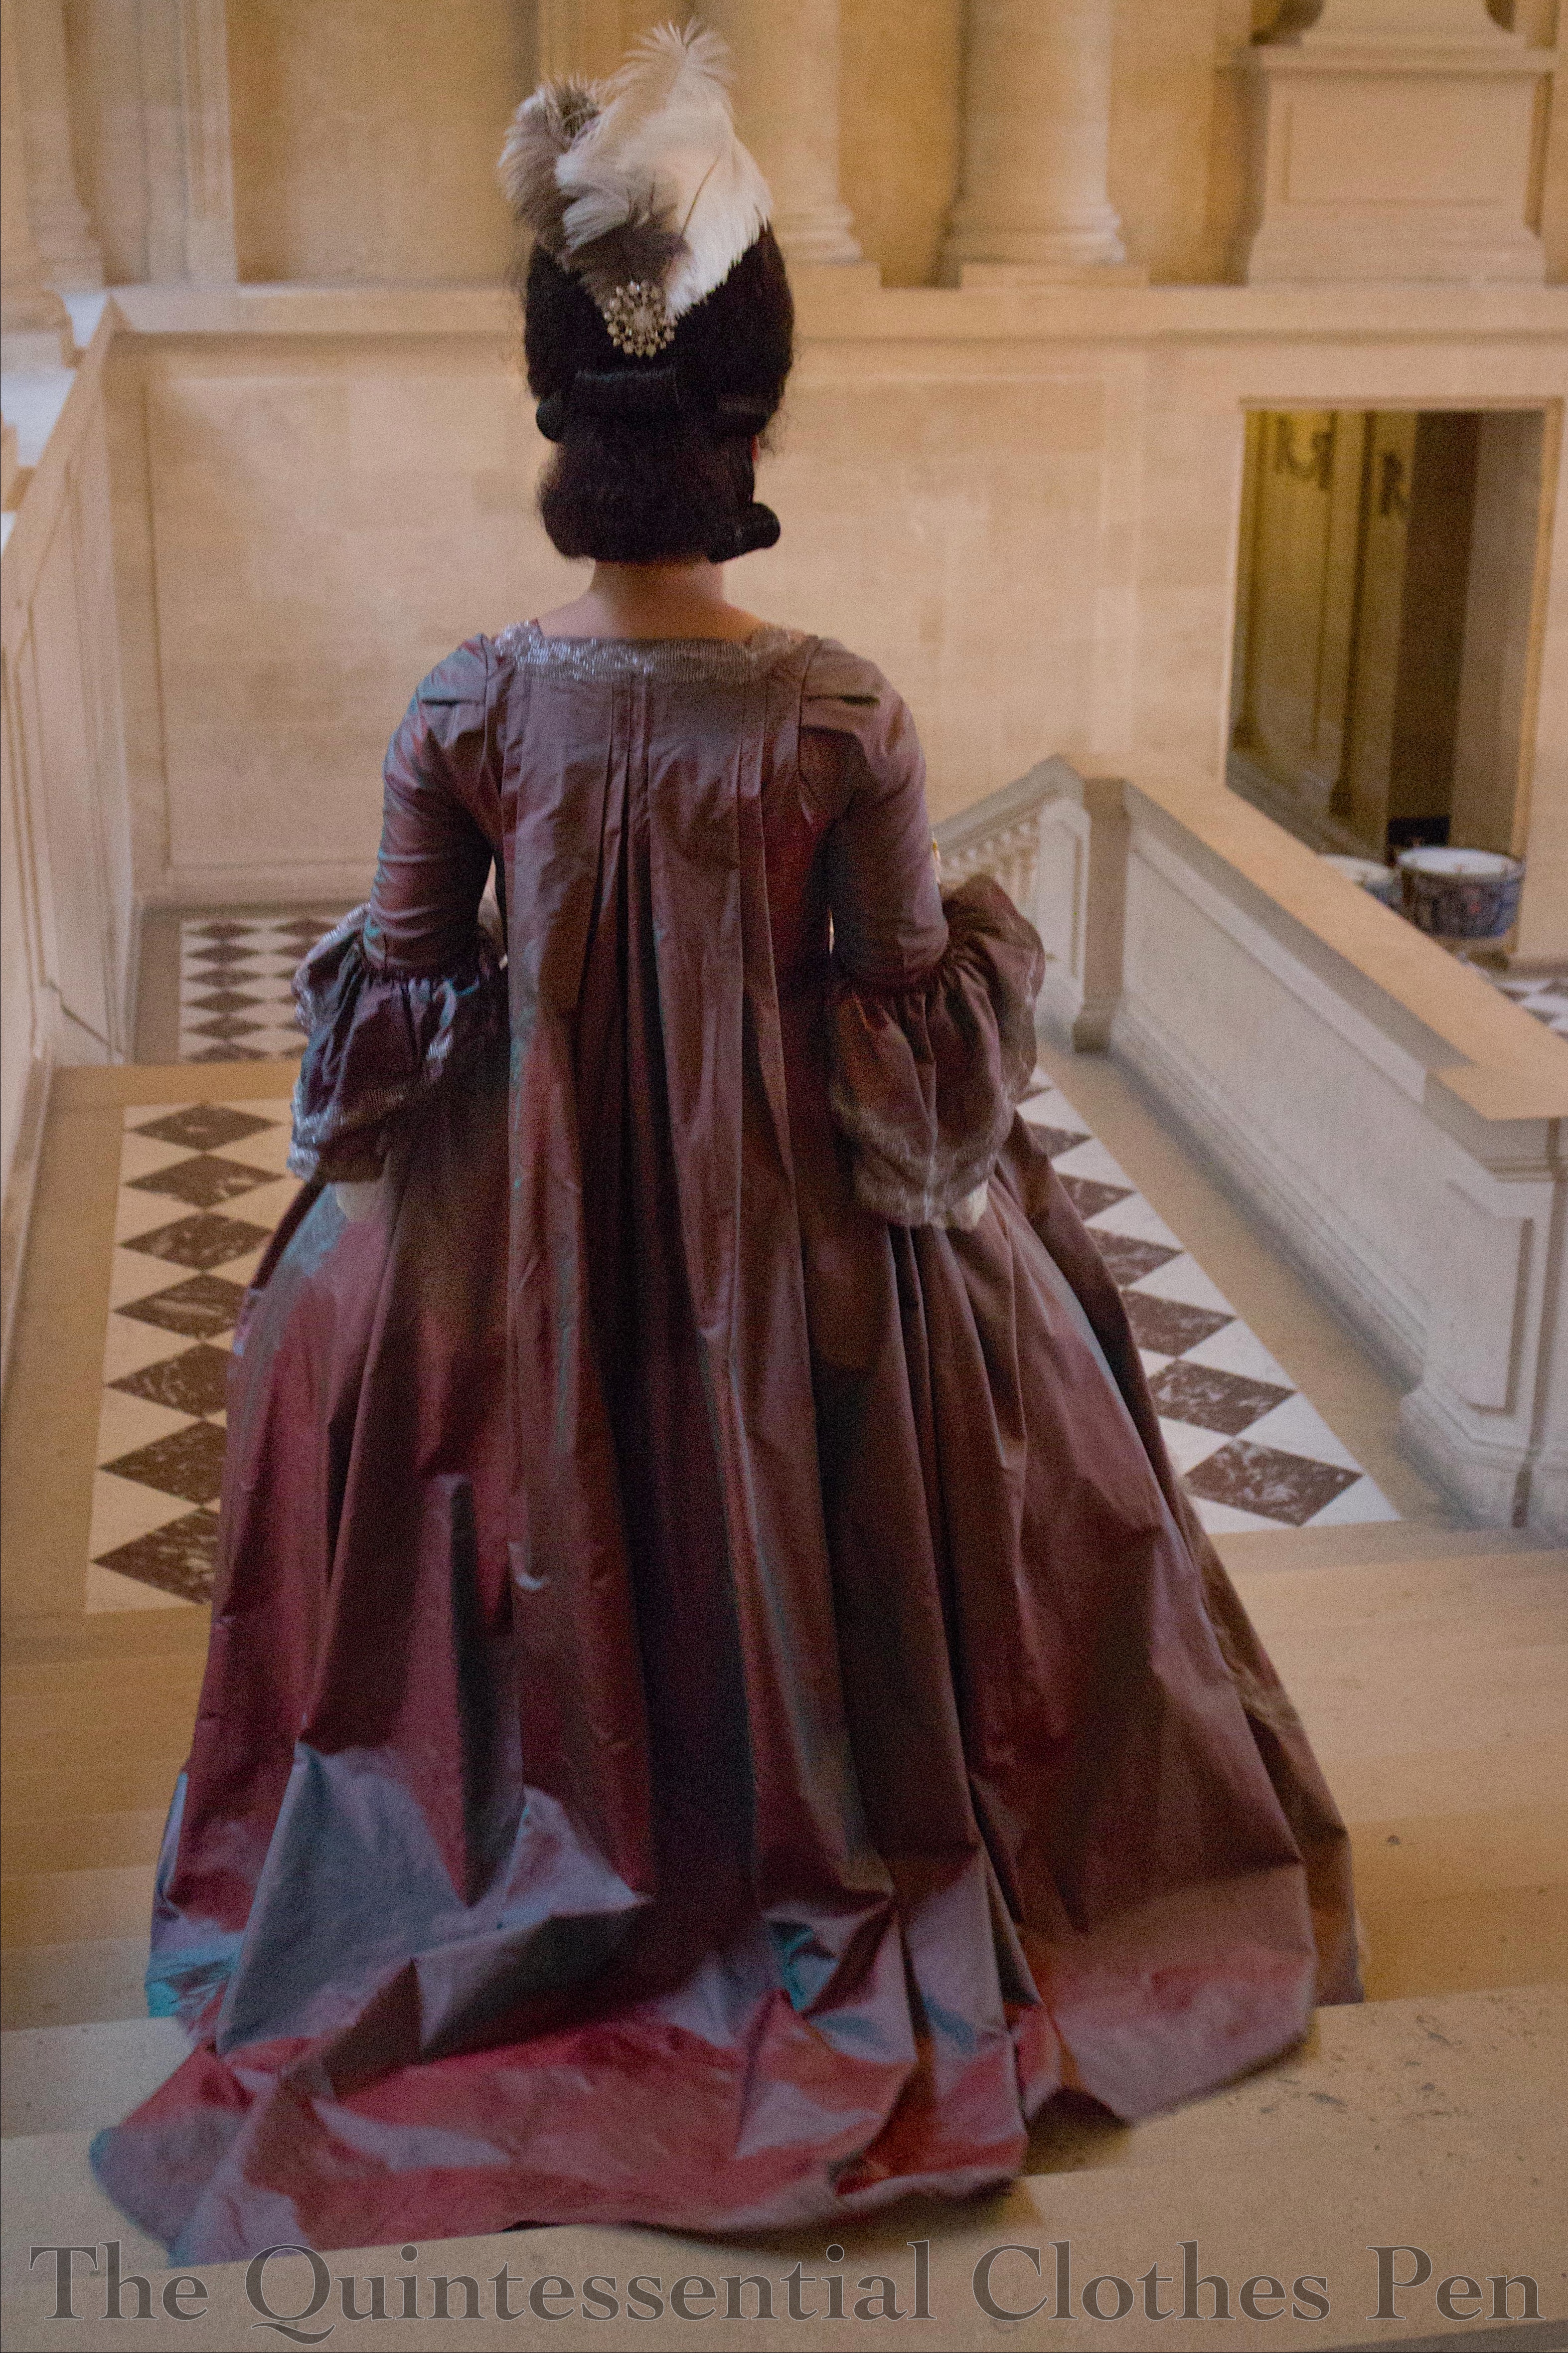
The change in plan resulted in new fabric and a new plan. I stuck with the decade of the 1770s, but decided to make a robe a la francaise, or sacque, instead of a robe de cour as it seemed like a garment I might be more likely to wear again in the future. Accordingly, I found and ordered new fabric: 11 yards of a very lightweight changeable silk ‘lutestring’ from Burnley and Trowbridge. Luckily, the new fabric still worked with the metallic silver net I’d purchased for trim. It’s the same metallic silver net that is on my 1885 Night Sky Fancy Dress, just cut into strips.
Regarding the pattern, I found some of the directions to be confusing. For example, making the petticoat seemed way overcomplicated. You can read more details about how I made my petticoat here. Also, I found the directions for pleating the front robings/facing and the back pleats quite confusing. There, I was saved by this post written by AJ who also used the JP Ryan pattern, got confused, and posted about the confusing bits. Very helpful! Aside from the confusing directions, the gown pieces went together perfectly with no trouble. I did have to alter the front strap area to make the front sit flat against my body. Two friends who used this same pattern did not have to make that adjustment, so I chalk it up to differing body shapes but do not think it negatively affects the pattern.
The lining of the gown is made from a one yard piece of cotton/linen blend from my stash. Also from my stash and used inside the gown were a scrap of medium blue linen and a scrap of medium blue cotton twill used to interface the stomacher. These were all the bits left of those three stash fabrics–yay! I was also amused that all of the random non-silk fabrics in this gown and petticoat wound up being blue. I used my lining as my mockup, meaning that I had to take a dart in the front strap area, but was able to adjust the pattern to eliminate the dart before cutting out the silk.
The back of the lining is adjustable using a tie threaded through eyelets. The edges are boned with reed. The pattern suggests ties, but you also see lacing in extant garments and this seemed easier to adjust and that it would use less length for the tie(s). There are examples of both ties and lacing on my Pinterest board for this project. The tie is a 1/4″ cotton twill tape. It’s not accurate, but did the job.
Underneath the decorative stomacher, the gown closes with lacing panels attached to the lining. Again, mine laces closed using twill tape.
This is the inside of the front lacing panels. You can see the medium blue linen backing. I think I had run out of the cotton/linen blend at that point. As is usual with 18th century garments, the armhole is left unfinished.
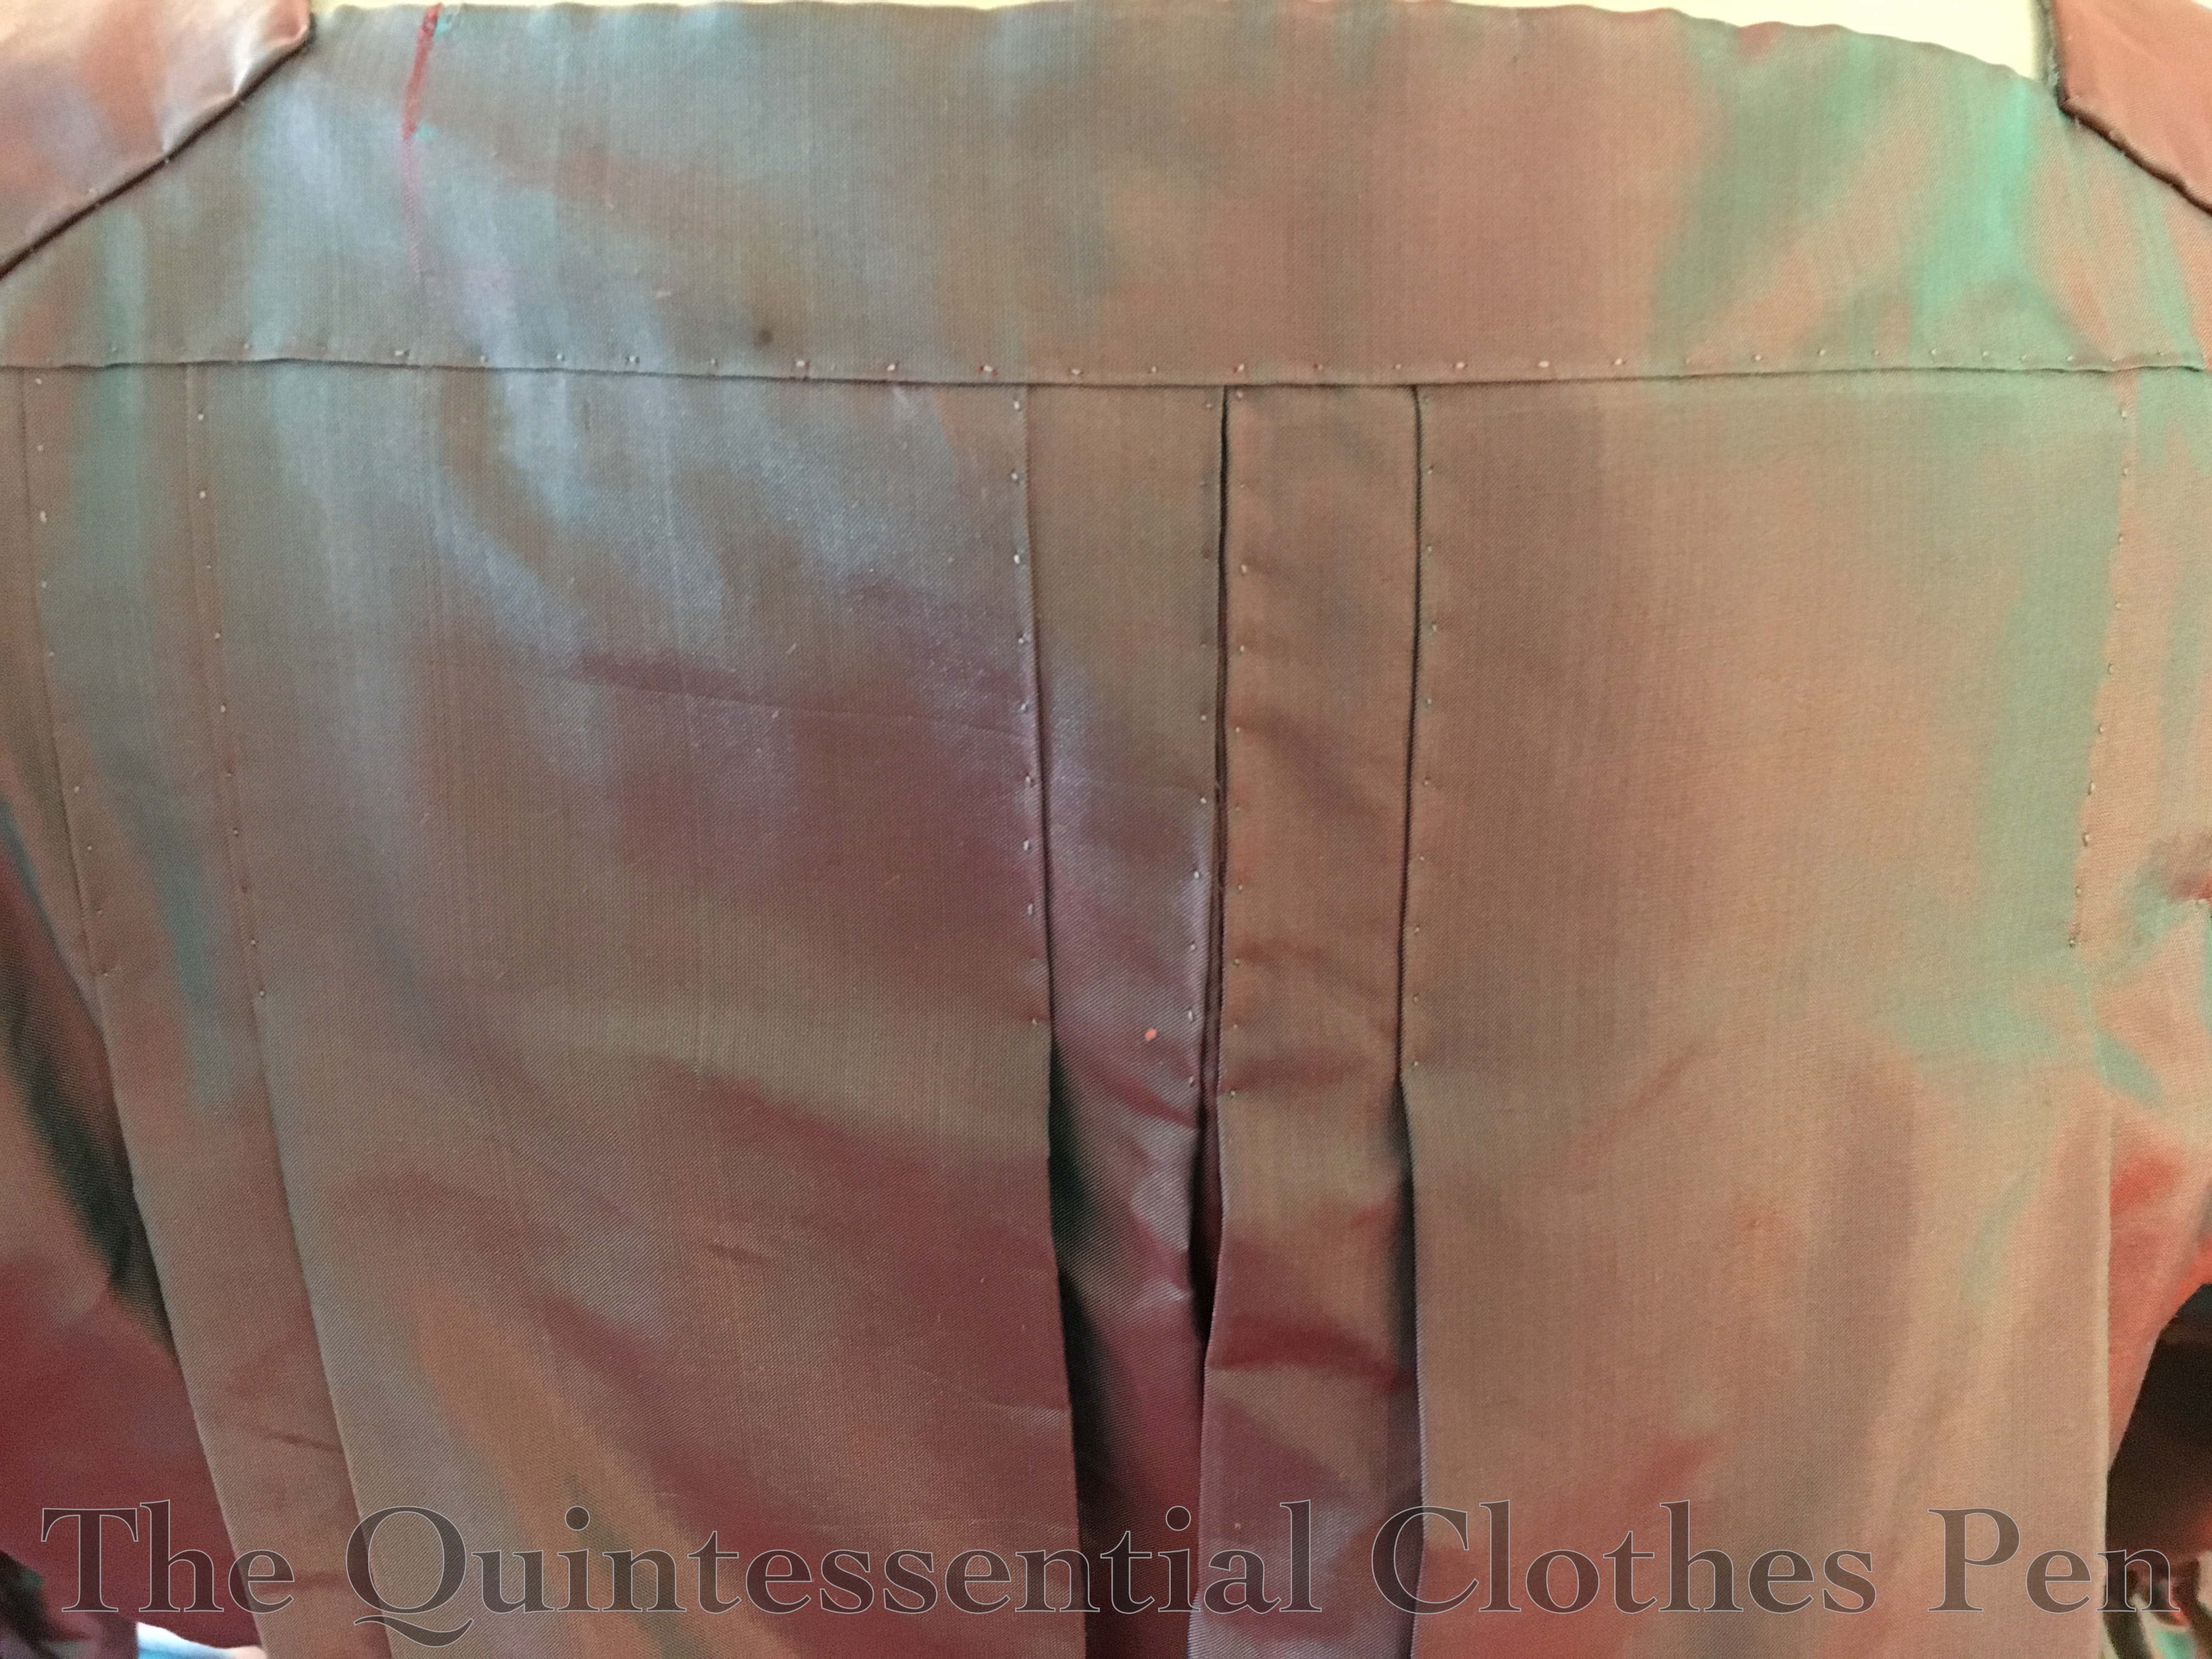
Here’s a close up of the back pleats. These are stitched all the way through to the lining. The directions for the pleats were slightly confusing, but made sense once I started fiddling with my fabric. It was important that I had transferred all the markings from the pattern to make the pleating easier to understand. The pattern uses another four pleats pleats, underneath these, that you can’t see to add volume to the back.
Due to the unexpected nature of the purchase of the silk fabric for this gown, I decided to do that fabric justice by hand sewing the entire garment. So in addition to the exterior stitching like that anchoring the pleats on the back, all of the interior seams are also hand sewn. I rather enjoy hand sewing and it makes a lot more sense given the way 18th century garments were constructed.
Here is the gown mostly sewn in its essential elements, but lacking trim. The sleeve flounces were individually gathered and sewn to the arm openings. They are pinked with scalloped shears on the top and bottom edges.
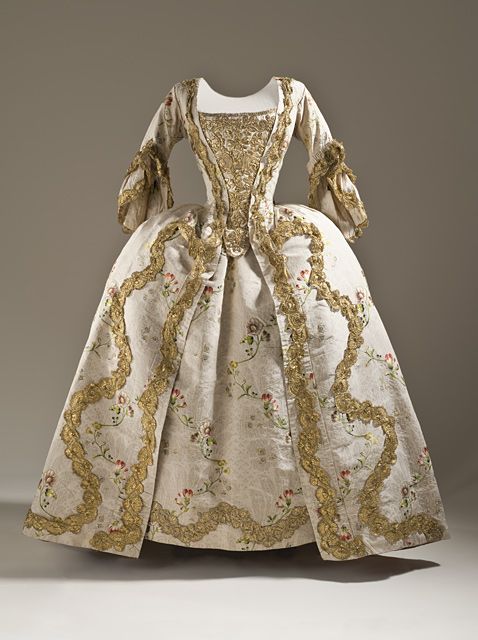
The following image is the gown that I followed in terms of trim placement. It took many more hours than I thought it would to pin the trim on. Those big waves are more complicated than they look, plus I had the challenge of creating the smaller scallops as I went along as well. All of the trim had to be sewn along both sides and tacked at each scrunch after it had been pinned.
Robe a la Francaise. 1765. LACMA.
You can see that I pressed my robings down all the way to the hem, though once the trim was applied on top it was really not very noticeable. I like the finished result, but I think it’s worth pointing out that this pattern is designed to have a wide stomacher. I was envisioning it coming out a little narrower at the waist. But I think adjusting the back opening enough to make a noticeable difference would only create awkward wrinkles under the arms.
The finished stomacher was covered in scalloped trim and finished off with a sparkly brooch. I went to France with an untrimmed stomacher and no clear idea about how I wanted to trim it except that I wanted it to be an all over metallic feast for the eyes. Luckily, early in the trip I was able to go see the 300 Centuries of Fashion exhibit at Les Arts Decoratifs. In addition to being amazing (I got to stand within 6 feet of Dior’s Bar Suit and see many garments I’ve only ever seen on Pinterest!), I also took a picture of a stomacher that was inspirational in terms of the overall wavy patterns and filler shapes. That picture is below.
Trimming the stomacher took place in the evenings in the few days before the special event. Here is the stomacher in progress. I took it specifically to show the amazing green color that the fabric can appear from some angles. I was hoping to get a picture of the finished gown looking this color, but had to be content with seeing shades of green in some of the pictures as we didn’t capture any where the whole gown was this color.
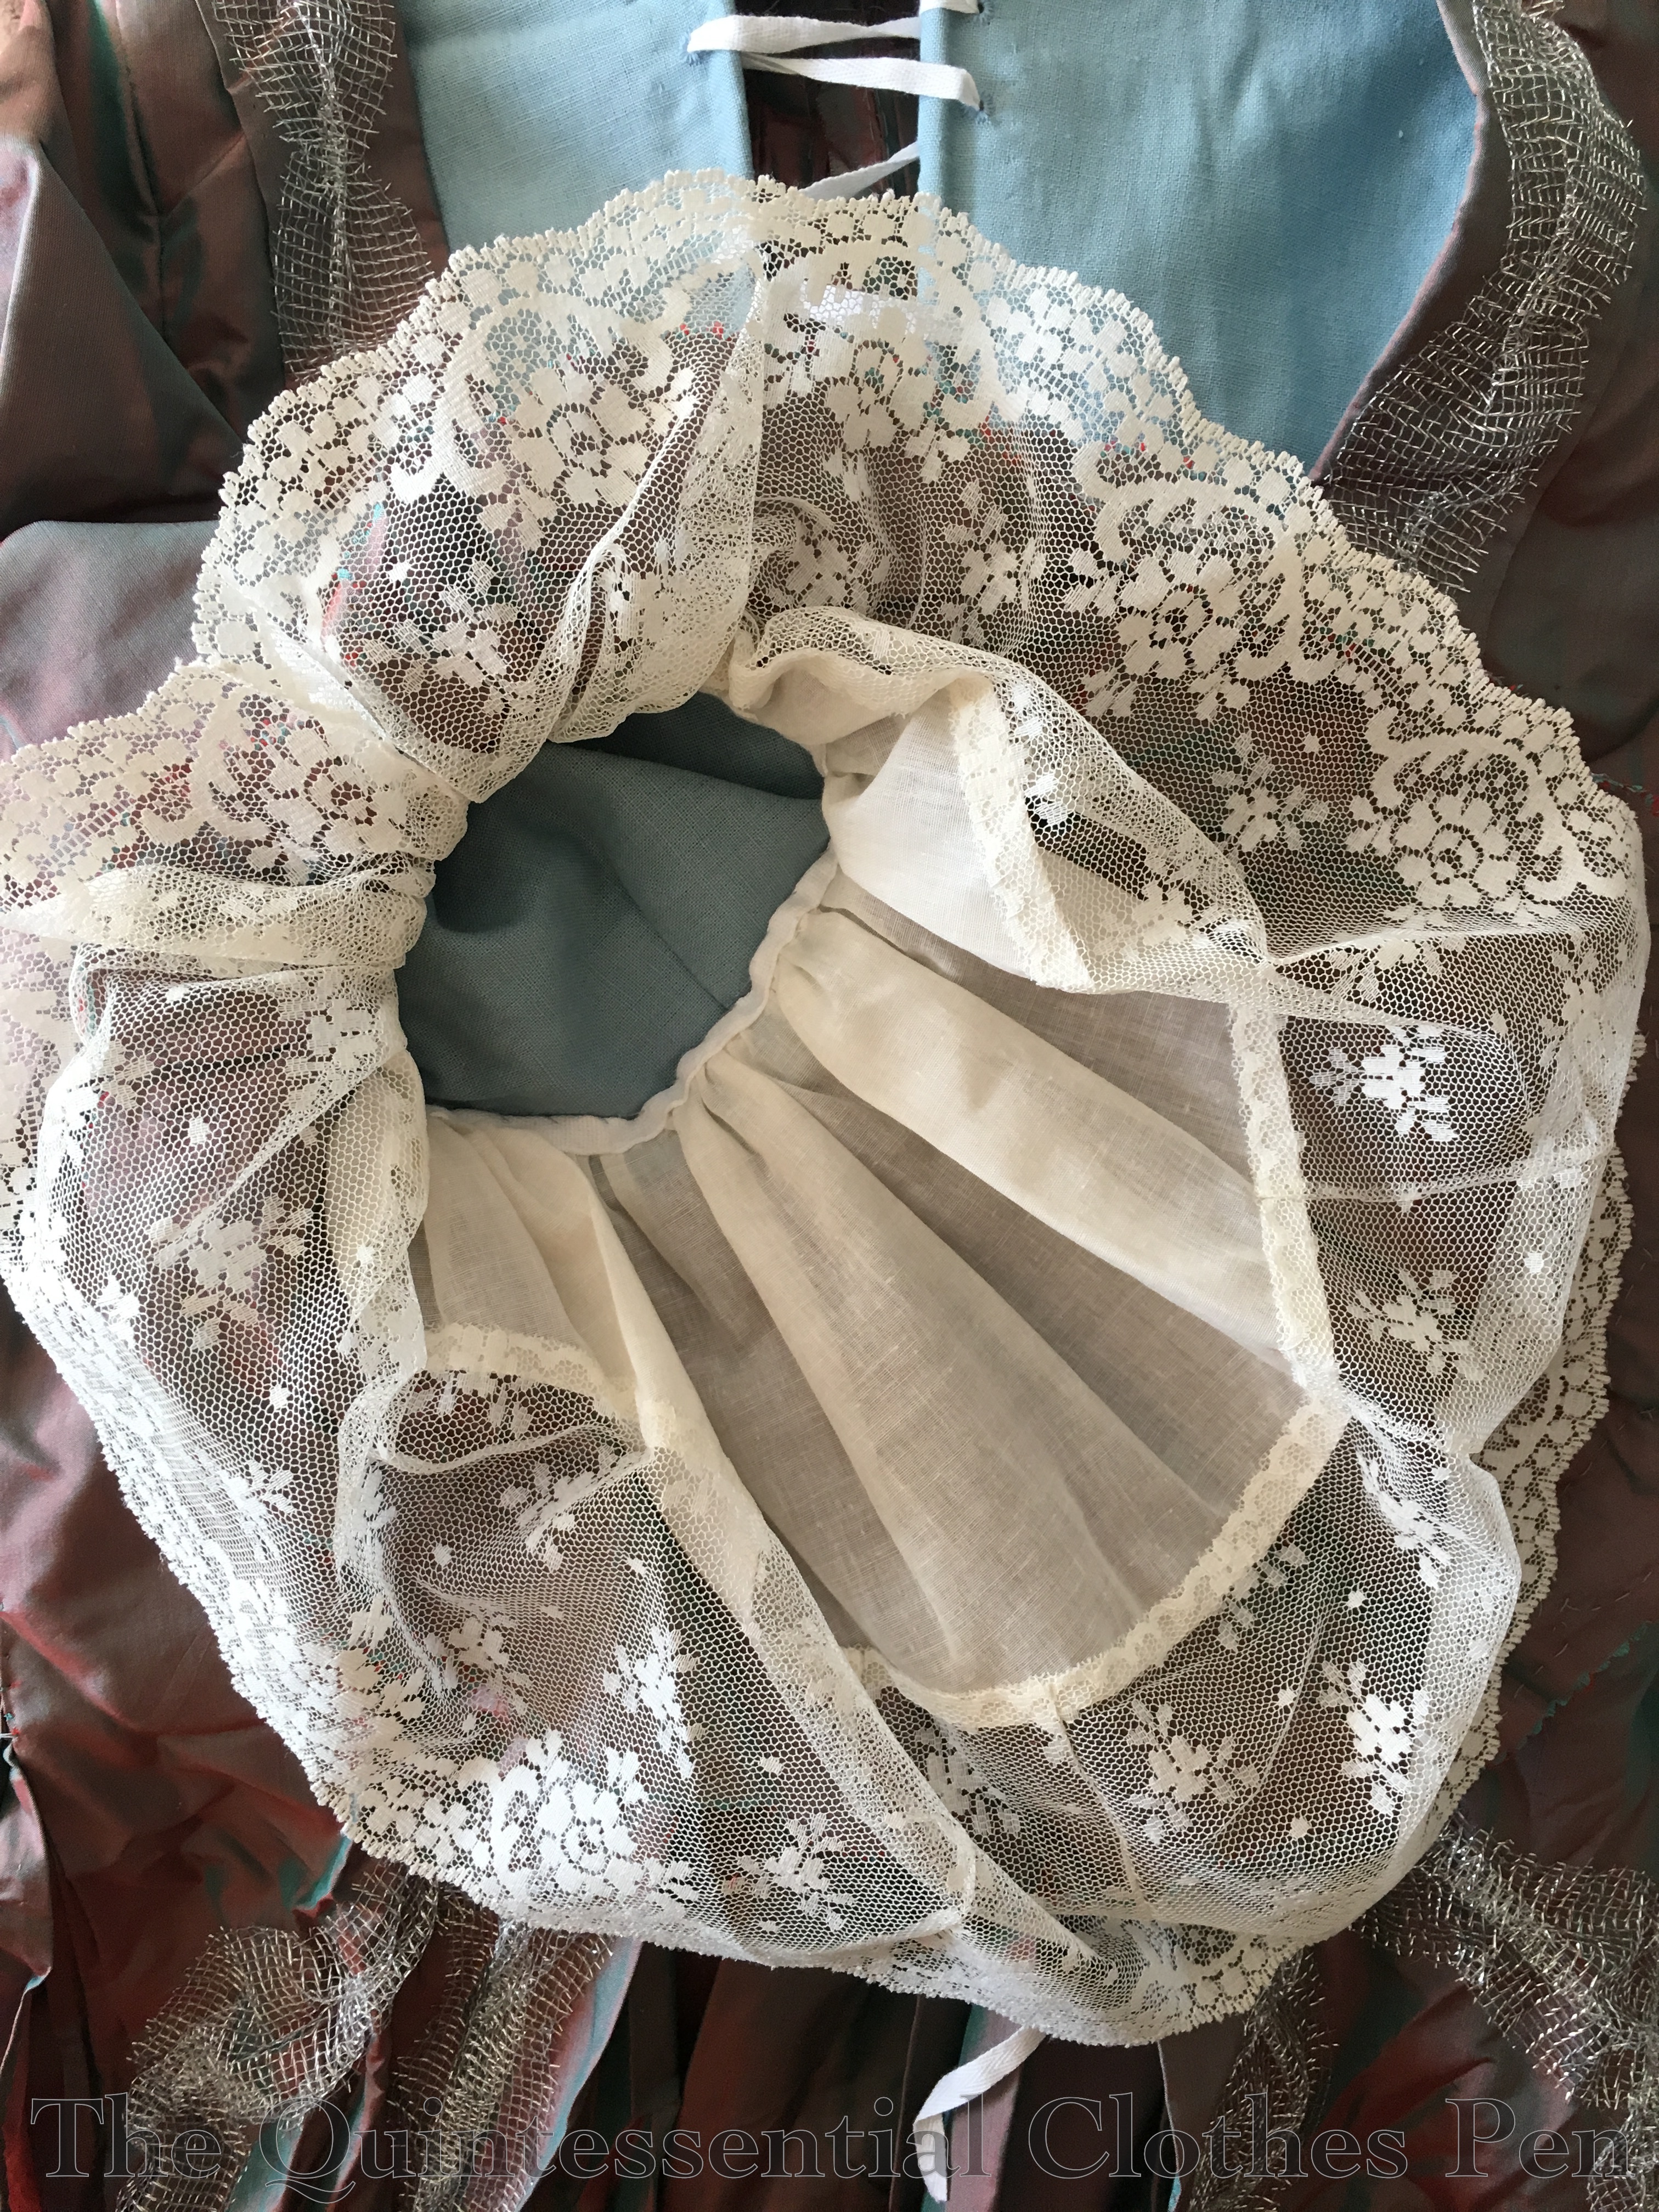
Another part of the dress that was finished in France were my engageants. The pattern includes flounces of two lengths to be made of silk and then one longer flounce for an under flounce or engageant. I sacrificed some lace I’ve been intending for another project, threw some darts in at the longest section to get the scalloped edge to be the right shape, and filled in the length with a bit of mystery ivory sheer. The resulting flounce was gathered and sewn to a cotton tape that was basted into the arm opening.
It sure sounds like a lot of work, recounting these bits of the process. It was! And it paid off. I’m very pleased with the gown. And very pleased that this picture captures some of the stunning green in the fabric!
Twice recently I’ve wound up at the local low-priced fabric store not needing fabric, but finding fabric that I knew wouldn’t be there if I went looking for it again in the future. Those trips resulted in three new dress lengths of fabrics for the stash.
The first two were from the first trip, when a friend and I stopped by the fabric store so she could get some supplies… I didn’t need anything…
Fabrics 1 and 2: rayon velvet and good imitation silk
But I bought the gorgeous burgundy rayon velvet specifically to make an 1830s evening gown I’ve been thinking of for the last year or so. It’s nice and lightweight and won’t weigh down the silhouette!
And the icy pink shot imitation silk I also purchased. I’ve used this fabric in other colors in the past multiple times, in my 1813 Regency dress and my 1811 Regency dress. It’s a little poofy, but looks like silk. I also have it in gold, which has been sitting in my stash for a few years. I have no current plans for this fabric, but I finished off the bolt so I have enough to make a dress from just about any decade in the 19th century I eventually decide on.
Fabrics 3 and 4: very slightly slubbed silk and figured purple lightweight silk
The lovely pumpkin silk is a color I’ve been dreaming of having a dress made out of, but it’s one of those colors you don’t often find. I carried it around the store for probably an hour before purchasing it. I’ve thought specifically of an 1820s dress, but really this color could be used for many decades in the 19th century. I also finished off the bolt on this one with hopefully enough yardage for any project I eventually decide on.
In addition, I found a lovely figured silk online at Blackbird Fabrics that I also knew was a fabric I wouldn’t find if I went looking for something similar in the future. That’s how fabric shopping often is, at least near me. You have to buy great things when you see them because if you go looking for specific and similar things you’ll likely not find them. Is it like that near where you live?
The purple color is so very 2nd-half-of-the-19th-century-chemically-dyed and it’s figured. It’s hard to find good silks these days for a reasonable price that aren’t just solid. I’m eventually planning a new 1890s gown, though who knows when. Maybe when another 1890s ball pops up on my calendar?
For now I need to get back to using up stash fabrics for my summer projects instead of adding to the stash!