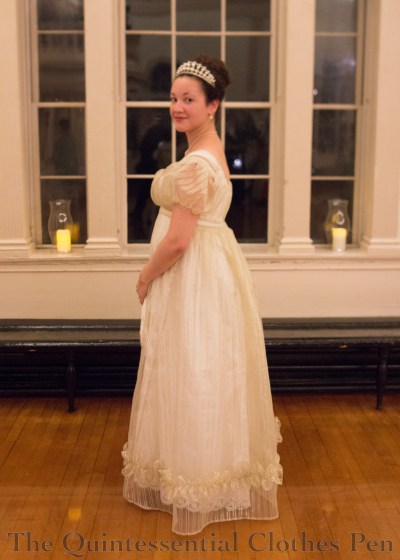
I had a chance to wear my 1899 Elusive Blue Dress at the end of last year plus the opportunity to take some wintery-feeling photos in it. This dress is so fun to wear–elegant and swooshy! Plus, the big hair of this period is just what my hair loves to do. So in the spirit of my post in 2016 sharing a more summery turn of the century ensemble, enjoy this Winter Gibson Girl Vignette!
It’s that time of year: to reflect on last year and think ahead about this year. It’s helpful to look back and see my accomplishments as a group. I seem to always make more things than I remember having worked on in that year!
In February I was honored to be awarded the Liebster Blog Award by Plaid Petticoats! In August, I was excited to be able to take a fantastic trip to Denmark focused on learning 19th century dancing and including multiple balls. I haven’t posted about that trip yet… but I hope to early in 2018!
I participated in my fifth year of the Historical Sew Monthly. This year I completed 5 challenges. It was a busy year in other ways, so I feel happy about my completion of those 5 challenges.
In terms of events this year, I attended 11 balls, 10 other events (teas, picnics, outings etc.), and 2 vintage dance performances, for a total of 23 events (plus all that dance practice I had in Denmark!). Not quite as busy as other years, but respectable when I consider all the other life things that happened this year as well!
Looking at last year’s ‘definitely do’ list, I’m pleased to report that I exceeded my goals by not only making all the things on the list but actually exceeding it by altering two Regency dresses instead of just one. There were 8 things on the ‘maybe’ list and I completed 4 of them, though not all of those have had pictures taken yet.
For 2018, my ‘definitely do’ list is unusually short:
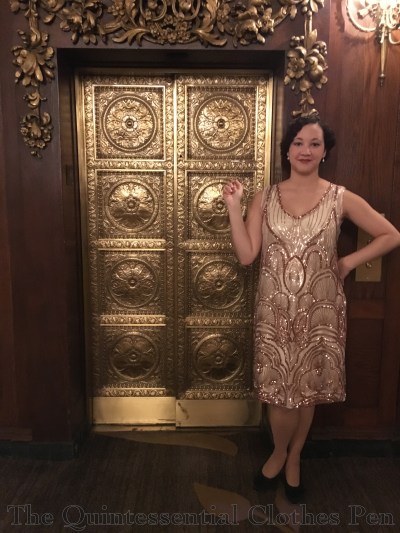
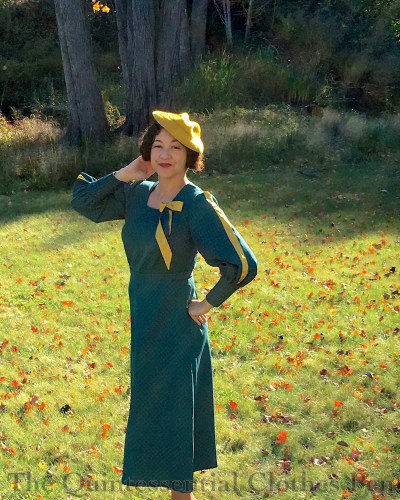
update my 1928 green evening dress to fit better with less hassle
make a 1950s-British-royal-inspired Queen of Hearts sash
On the other hand, the ‘maybe’ list feels extensive, probably due to the lack of projects on the ‘definitely do’ list:
1884 plaid wool day dress
1880s wool mantle
1790s stays
1790s petticoat
1790s dress
finishing a modern floral cotton summer dress
as many as four modern dresses
vintage inspired winter wool skirts
I’m looking forward to another year of research, sewing, spending time with old friends, and hopefully making some new friends, too! I hope for sunshine for all of us in 2018.
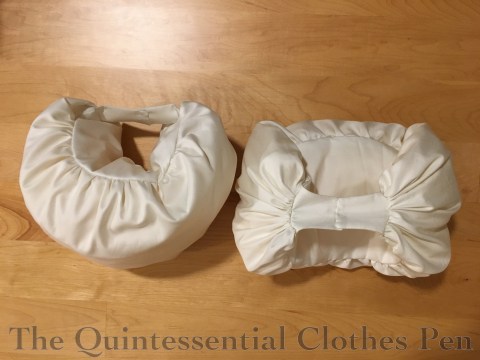
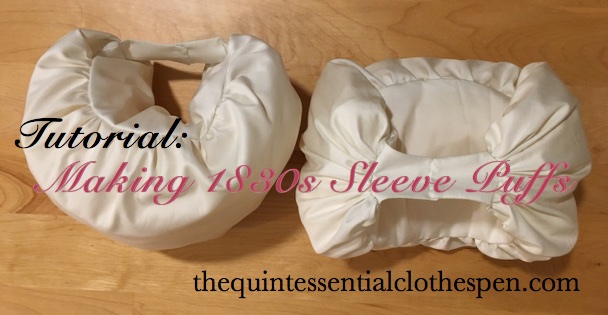
Why make sleeve puffs, you ask? In order to keep the large sleeves of 1830s dresses from deflating, of course! Here’s an example of my 1832 dress without puffs (on the left) and with puffs (on the right). They make such a difference!
I chose to use a sewing machine for much of the assembly of my puffs, but you could easily hand sew all of these steps instead.
To make these sleeve puffs you will need the following materials:
Fabric: ¾ yard of 44″ wide or ⅜ yard of 60″ wide (cotton, linen, and silk are the most historical options, but you can use whatever is comfortable on your skin, just make sure it’s not too loosely woven or too heavy in weight)
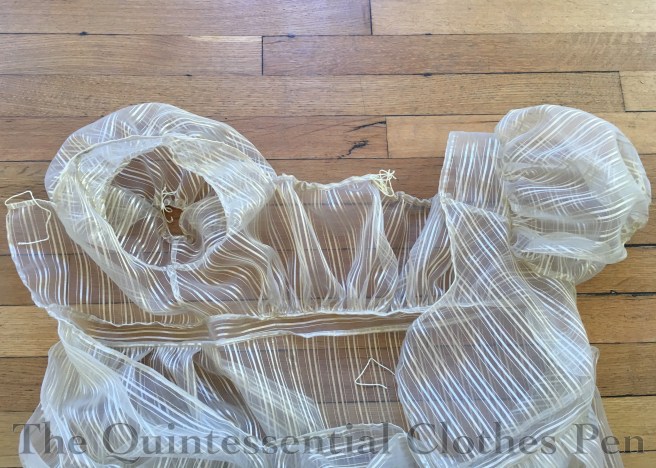
Stuffing: I used scraps of stiff net and organza, but you could also use batting, tulle, down, etc.
Thread
To begin, you’ll need to cut out your pieces:
Two rectangles: 25″ wide x 13″tall
Two shaped bases: 18.5″ wide x 7.5″ tall at the center and curved down to 2.5″ tall at the sides
Four end caps (two for each end of your shaped base): use the shaped base as a pattern and cut the end caps so they are 2.5″ wide
Next, you’ll assemble your puffs:
Step 1: Lay your end caps on each end of the shaped base. Sew around the three exterior sides, leaving the side towards the center unstitched.
Step 2: Trim your seam allowances, corners, and clip through seam allowance close to the end of your stitch line on the shaped base.
Step 3: Turn each end cap so the right sides face out–the clip through the seam allowance allows the end caps to sit nice and flat on the shaped base.
Step 4: Run gathering stitches along each individual side of the four sides of each rectangle (not one long gathering line that turns the corners).
Step 5: Pull up your gathering stitches on the long sides and pin to the curved edges of the shaped base. You want to pin the rectangle to the side of the shaped based that does not have the end caps on it.
Step 6: Sew the gathered rectangle to the shaped base and turn it right side out.
Step 7: Now pull up the gathering threads on one short side of each rectangle. Turn the raw edge under and pin the gathers in place. Hand sew these gathers through all the layers, making sure to take small stitches and catch the gathers in many places. Leave the other side open for now.
Step 8: Stuff those puffs!
Step 9: Now pull up the gathering threads on the remaining short side of each rectangle. Turn the raw edge under and pin the gathers in place. Hand sew these gathers through all the layers as well, making sure to take small stitches and catch the gathers in many places. (This is the same as step 7.)
Step 10: Overlap the end caps about ¼” and sew them together.
Ta da! Now you have some sleeve puffs of your very own!
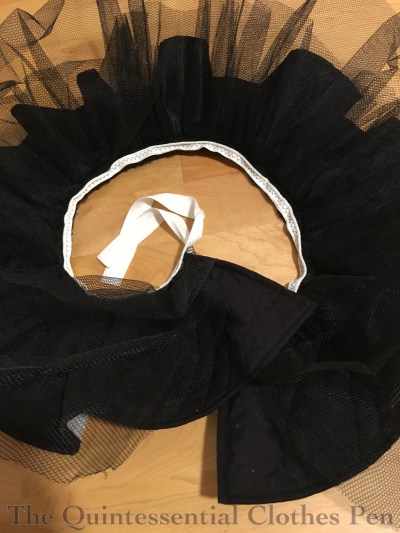
If you’re worried about keeping your puffs in place, ties can be added to the puffs which would be secured to additional ties in the armholes of dresses. Take another look at the those two pairs of extant puffs and you’ll see ties.
I also suggest looking at the puffs other people have made. It never hurts to see more methods of construction. I referenced Fresh Frippery and Stepping Into History when creating my puffs. Have you come across other 1830s puff making resources? If so, please share!
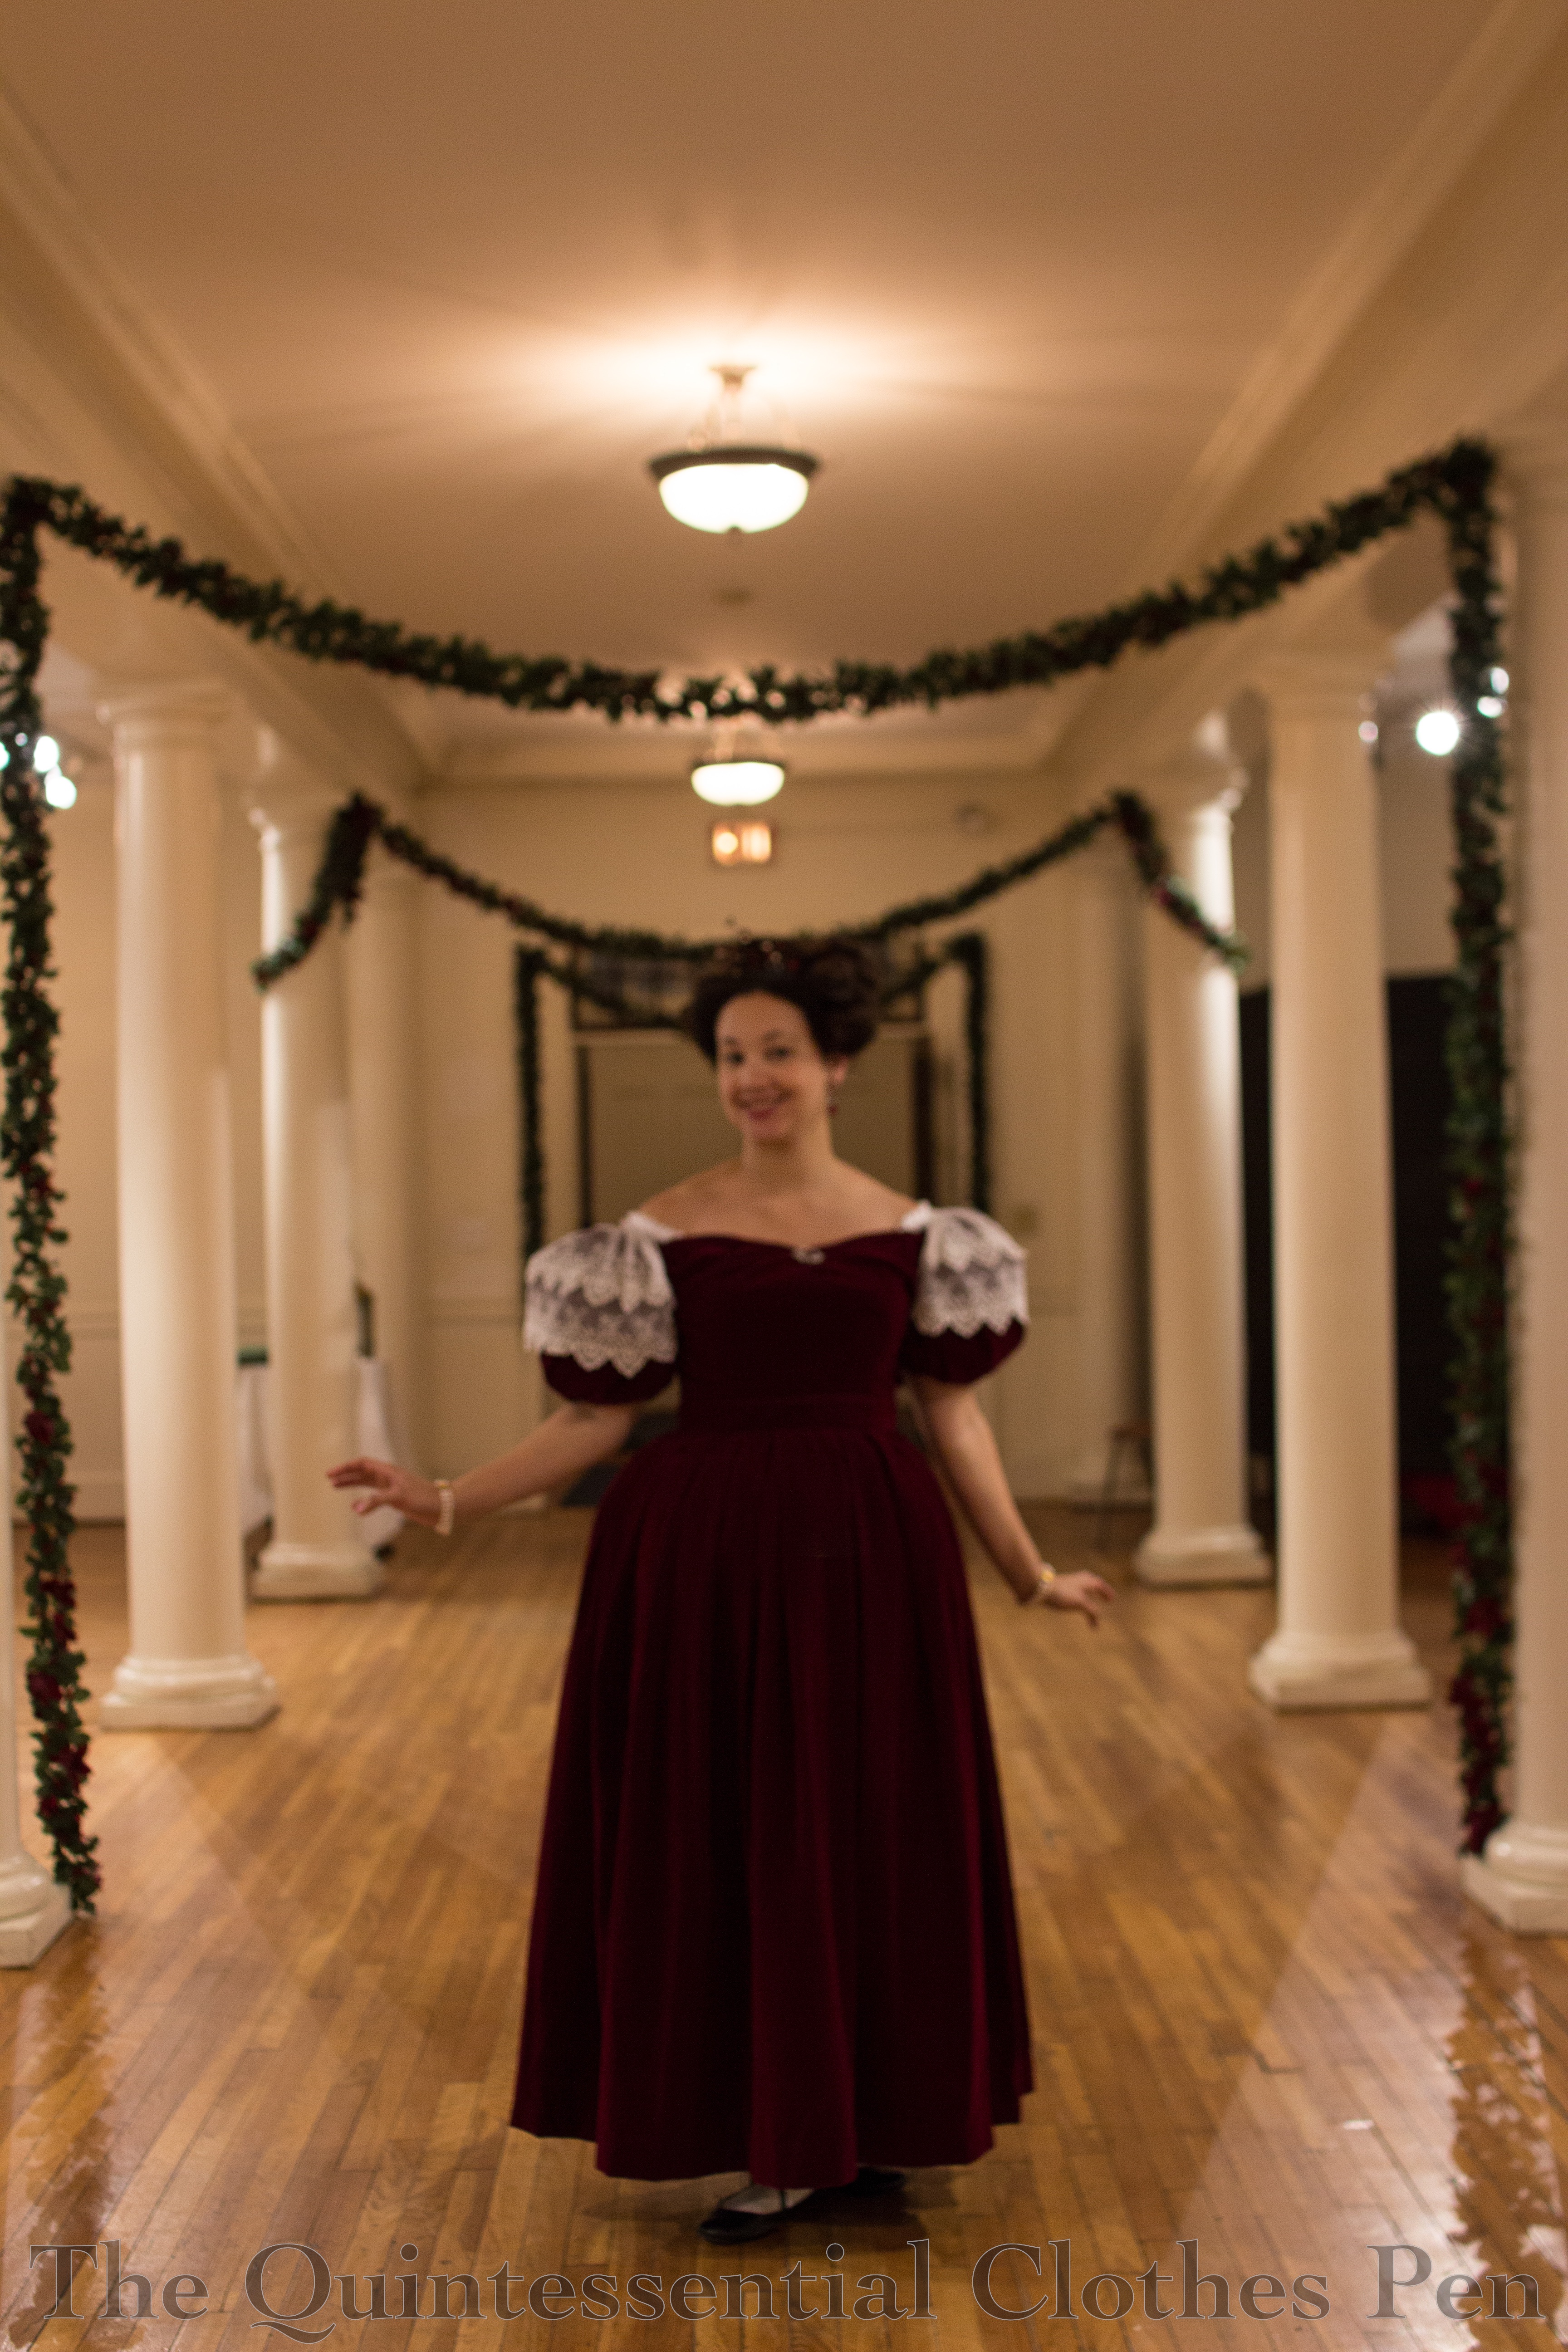
While it’s still holiday season I want to share a few pictures from The Commonwealth Vintage Dancers’ 2017 Fezziwig’s Ball. This year we had snow on the day of the event. It made for some slippery driving, which unfortunately caused a number of people to not be able to make it, but the bright side was that Salem was enchantingly draped in snow.
It was a bit colder than it has been in some previous years, so it was necessary to wrap up warmly for outdoor caroling. The easiest (and warmest) option that would fit over my gigantic 1830s sleeves was my 1860s wool cape (it is lined in flannel and has thick batting so it is quite soft and warm!). It was great to make use of its amazing warmth since I hadn’t worn it in years, though I have yet to get actual documenting photos of it. I always seem to be wearing it when it’s dark outside! We did get this nice picture though. The stars of light are made using a special Petzval lens (you can read more about this special lens in this past post). The cape plus a muff did a good job of keeping everything but my head warm. There’s no easy way I know of to cover a big hairstyle without mussing it while also keeping your head warm…
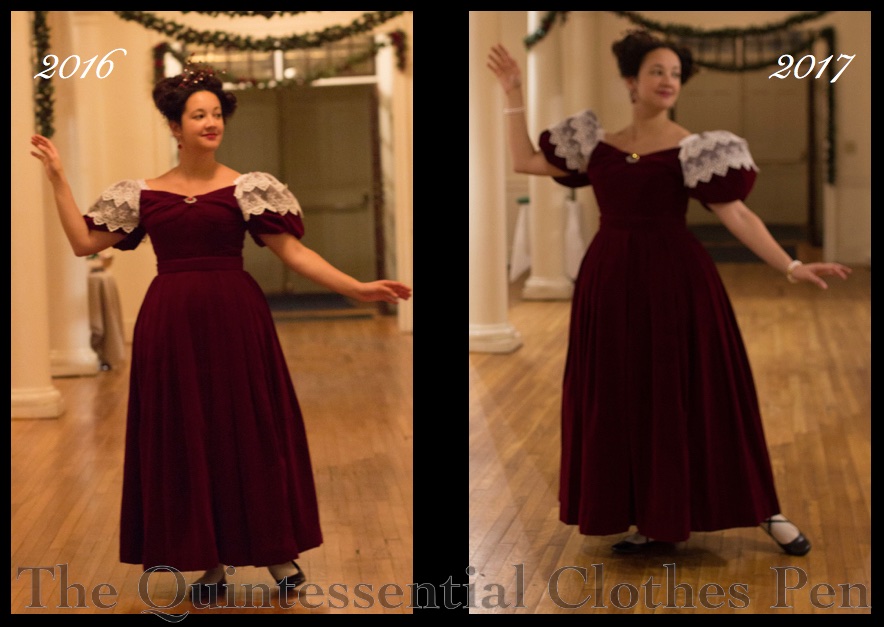
Super puffed sleeves, a little more skirt volume, and ribbons on my shoes are the notable changes from last year’s wearing.
I basically styled my hair the same way as last year. I really liked what I came up with and there seemed to be no need to reinvent the wheel!
After vigorous dancing to lovely holiday music it is always a treat to partake of the lavish refreshments, which provided a perfect outing for my refreshing apron. It does a wonderful job of keeping my dresses clean!
Happy holidays!
I hope you’ve had a joyous December so far, full of laughter and blessings!
A few months ago, I had a post with the same name that focused on two Regency dresses that had experienced closet shrinkage. The post was centered around what I did to make them wearable again. Around the same time I was battling the Regency closet shrinkage, I encountered the same problem with two of my older mid-19th century dresses as well. Boo!
It took me awhile to do anything about the problem and even longer to post about it, but here we are.
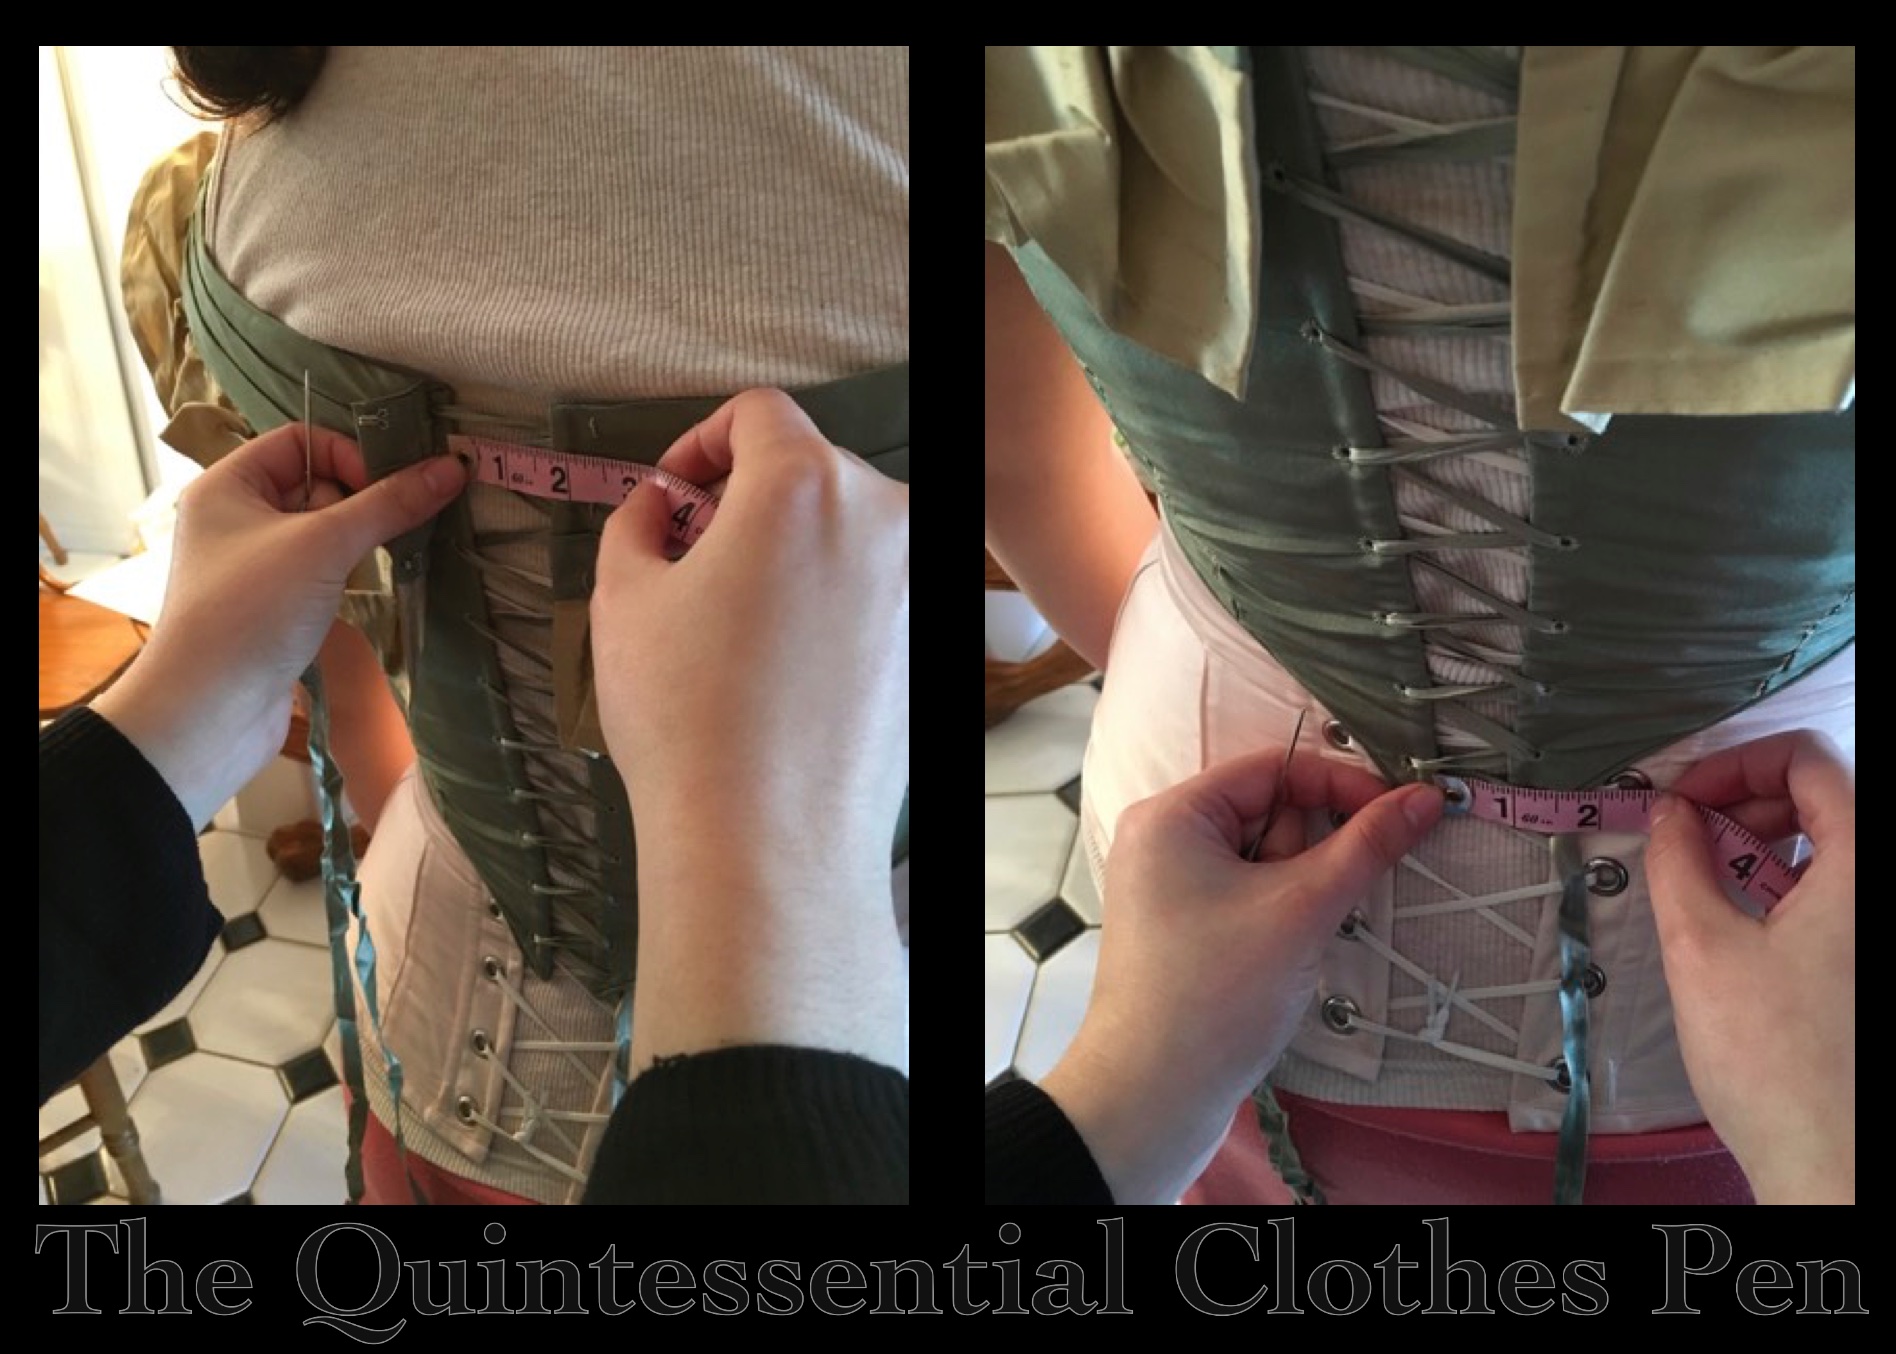
There was a time when the back edges of Evie’s bodice met from top to bottom. In fact, if you look at the pictures in this post from 2013 you’ll see that there was even excess fabric around the waist (yikes, but that does mean my waist has expanded a fair bit!); however, by February 2016, the bodice looked like this:
Uh oh! That wasn’t going to do for wearing at a ball! So I brought my corset and bodice (plus the other bodice I’ll mention shortly), got all laced up, and had a friend measure the gap between the back bodice edges and take pictures for documentation (so I wouldn’t forget the measurement, because let’s face it, my memory is pretty terrible sometimes).
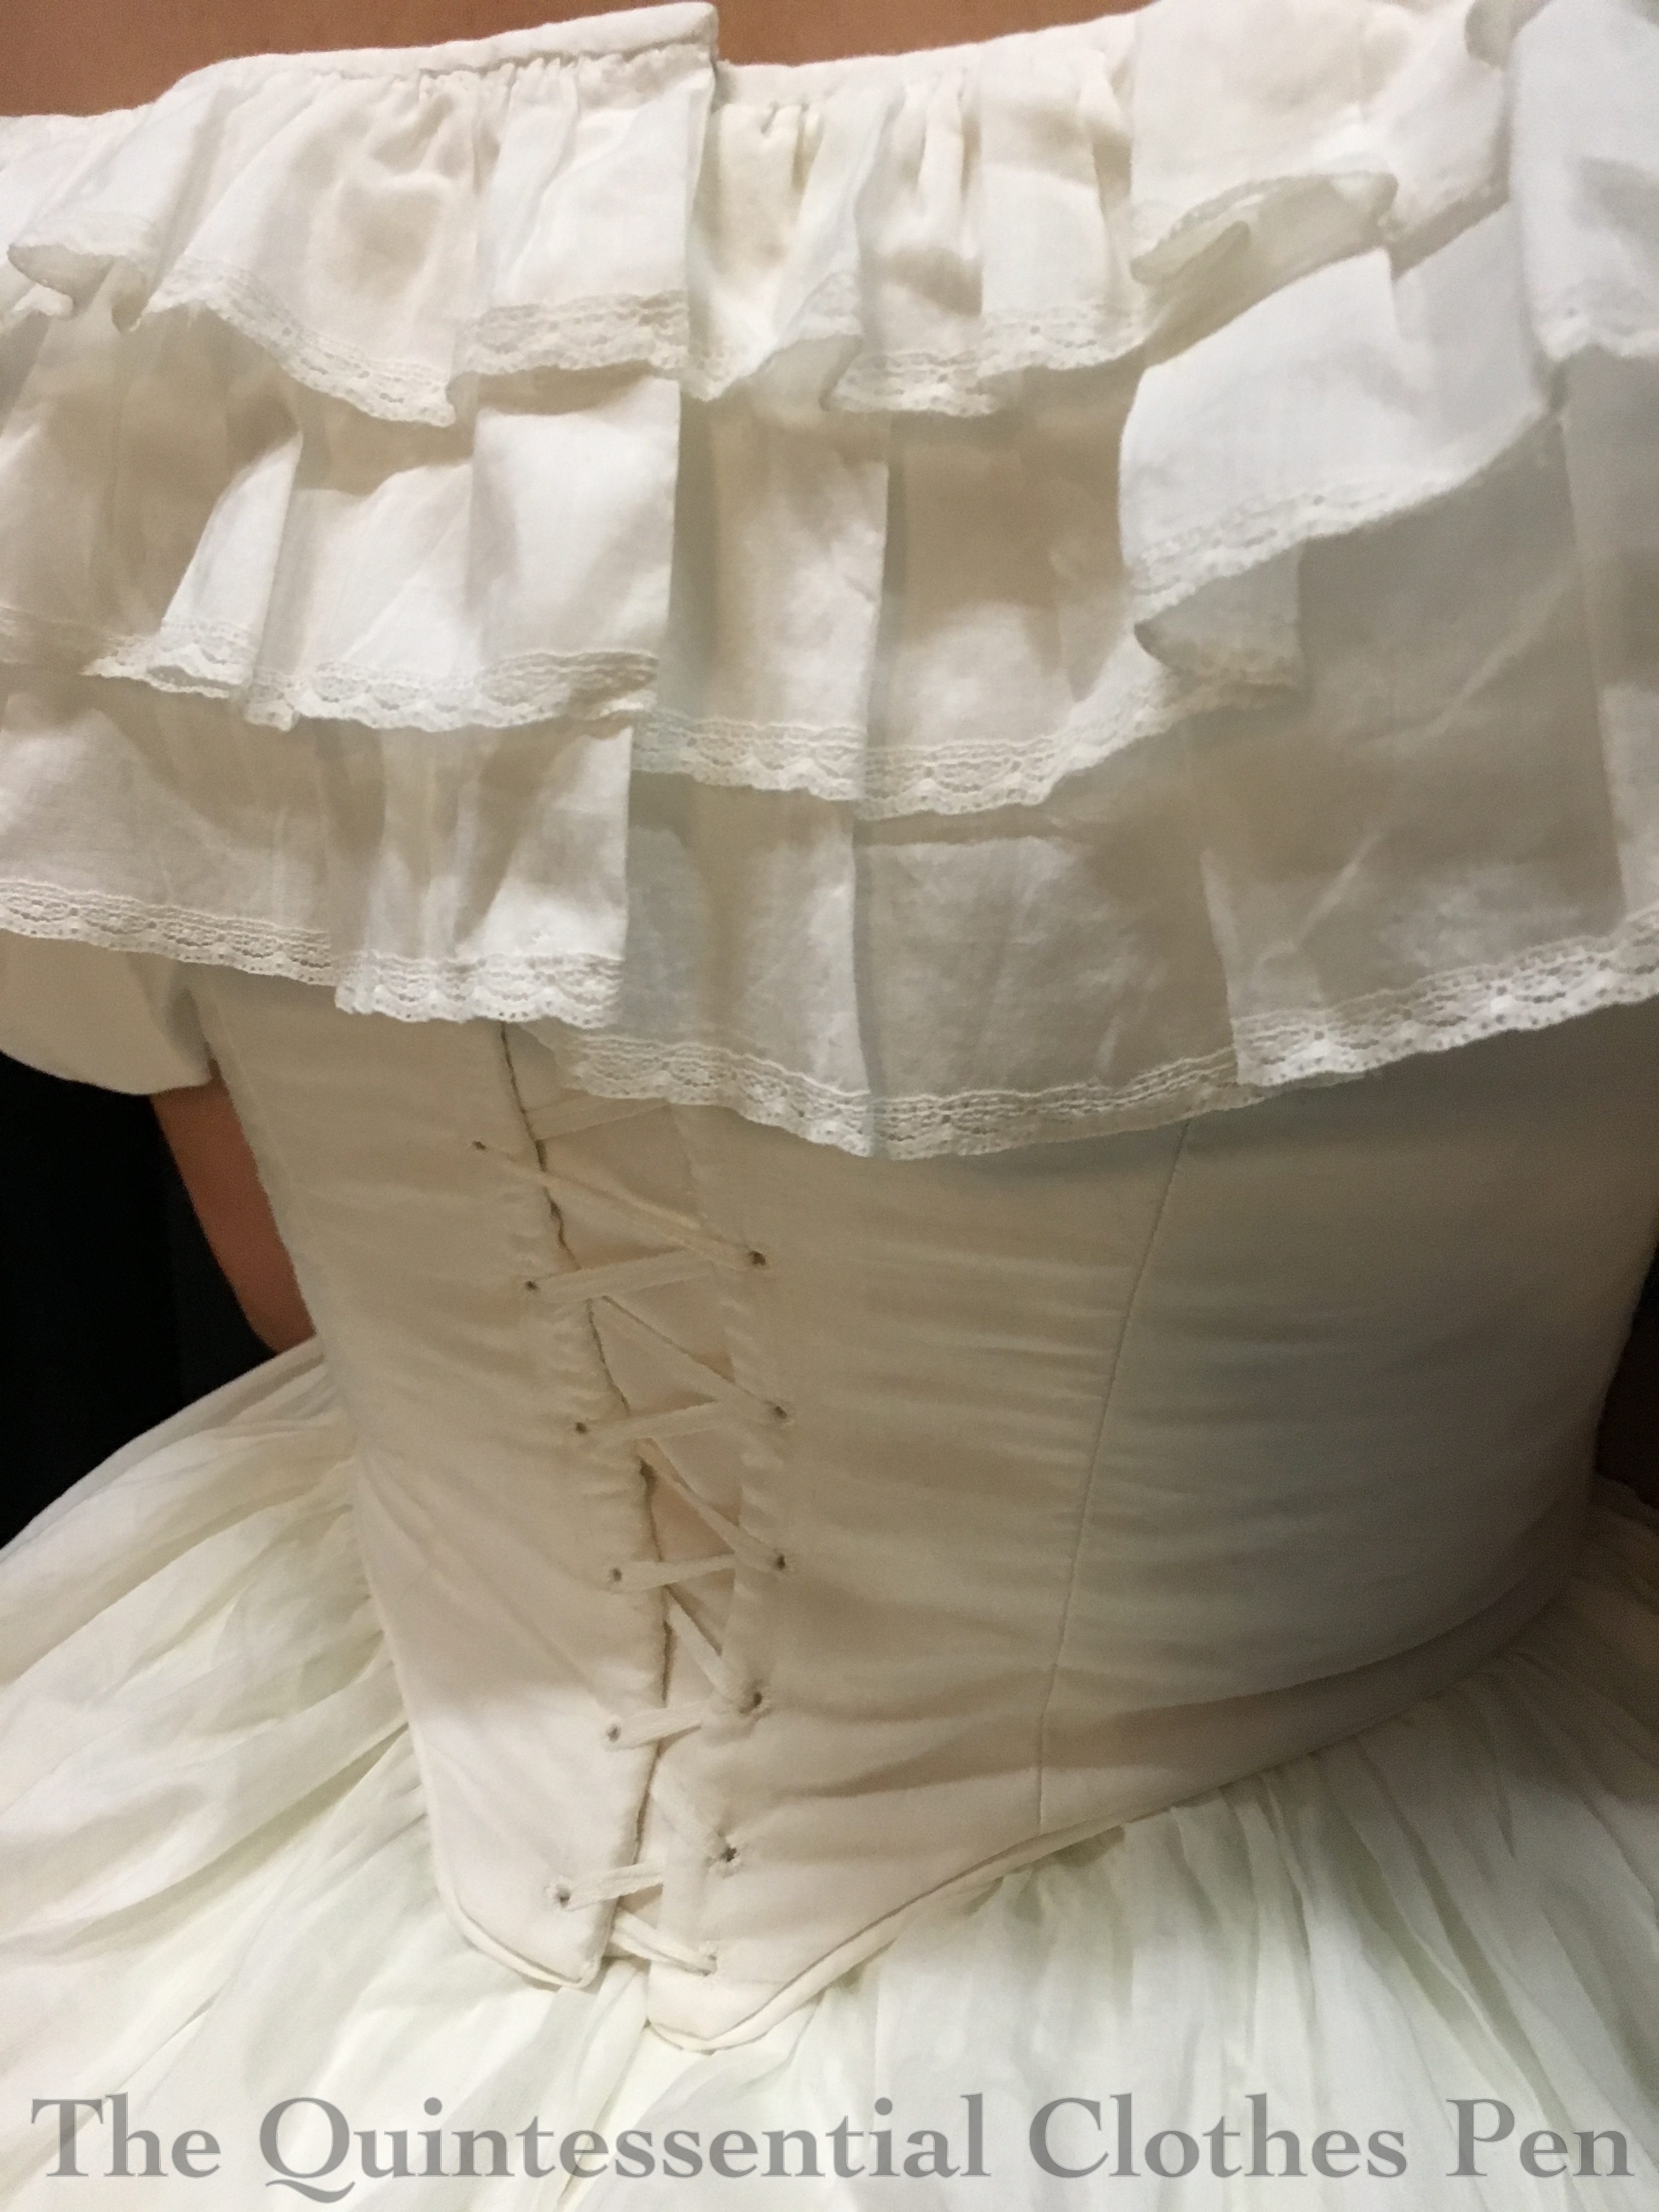
Then I pondered my options. There was no way to let out the seams on this bodice, as the fabric has scarred at every point the needle and thread passed through. Plus, I didn’t leave much seam allowance anyway. Given my limited options, I decided that a placket was the best way to go. Many extant dresses using lacing as the method of closure on bodices and I’m sure that ladies in the 19th century changed sizes, too. I went on a hunt and couldn’t find an example of a bodice with a placket showing between the lacing, but museums have the benefit of being able to put their collections on forms rather than real people, which allows for easier adjustability to have the lacing edges touching. (If you know of any examples of a bodice laced with a placket under the gap, please let me know!) Anyway, I don’t think it’s unrealistic to assume that some ladies in the 19th century used the same method I did to allow adjustability in their bodices.
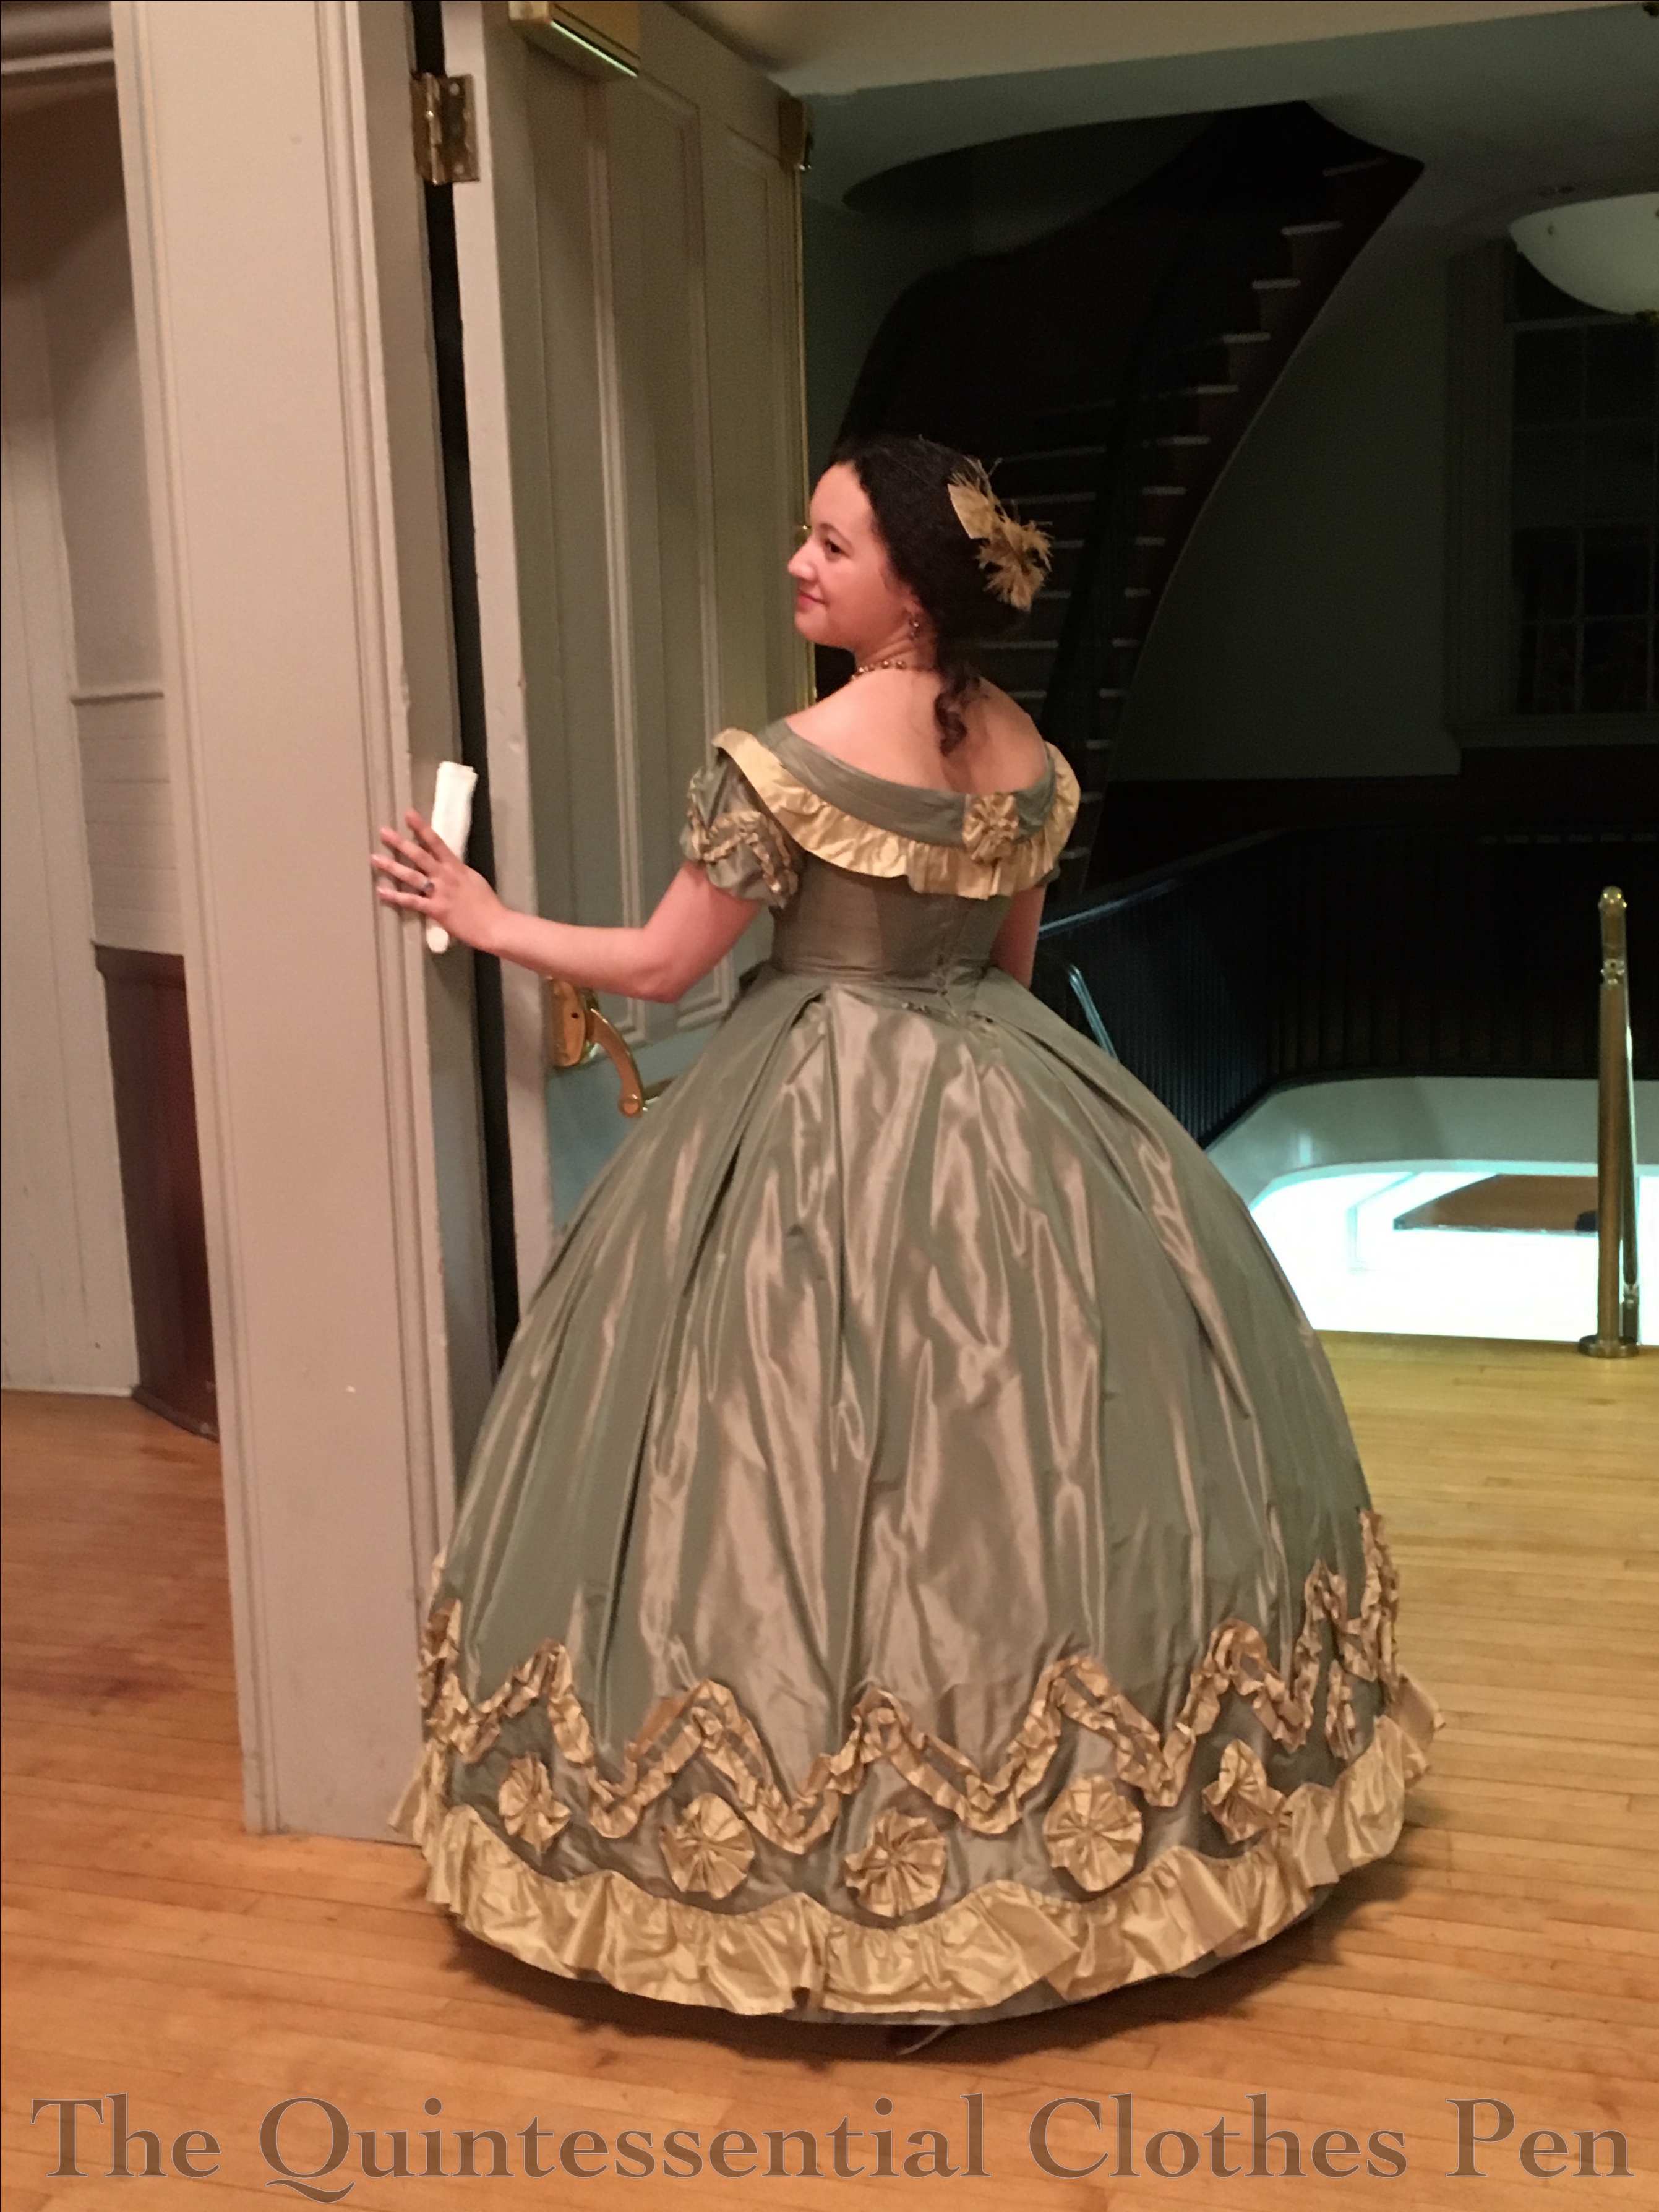
In addition to the placket, I also had to extend the bertha to bridge the gap. For that I was able to unfold my seam allowance, respace my gold ruffle, and cover the remaining gap with a rosette of gold like the one on the front of the bodice (another instance of the benefit of saving all the scraps from a project–this finished off the gold bits I had leftover from the original construction). Thankfully, these changes worked. I wore Evie to a ball in March 2016 and was happy as a clam. The placket was hardly noticeable and now the dress is much more adjustable!
The second bodice was for the dress named Annabelle, which was made in 2011 (and worn again later in 2011). This bodice also closed all the way down the back when it was made. Well, that’s not the case any more. Actually, a few years ago I’d already converted the closure from being hooks and eyes with folded over seam allowance to lacing with less seam allowance folded over in order to eek out a little more space, but that just wasn’t enough. By 2016, here’s how we were looking. It was time for a more drastic update.
I did the same thing I did for Evie, adding a placket and regathering the bertha to make it span the lacing gap. It took me about two years to get to it, but the result is that I was able to wear Annabelle to a recent ball in October, with a back that looked like this.
Not bad! The only thing I want to change is making that top edge actually stay matched rather than the one side riding up. But that’s a minor change. Overall, I’m pleased to be able to continue to wear this dress!
There we are–two more examples of how to fix the-dress-no-longer-fits problem! It was incredibly lovely to receive comments on the Regency post that other people also experience closet shrinkage and have already adapted their clothing to deal with it or are now inspired to do so. It is my hope that continuing to post about this topic will encourage others come to terms with their own changing size as well as ideas for how we can all deal and move forward while still being able to wear our finery.
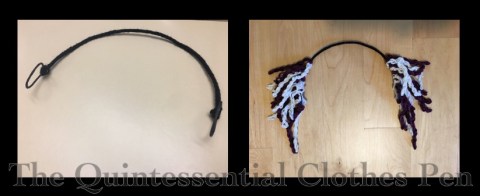
It’s been almost exactly a year since the inspiration for a new mid-19th century headdress stuck in my mind. I was attending a workshop at the Civil War Weekend last October and watching others make lovely floral headdresses with low hanging flowers, like this. Another inspiration headdress was similar in having two sections of decoration on each side of a headband, but made of loops of silk chenille rather than flowers. I decided then and there that I wanted to try out this more unusual style. The image below was my main inspiration, followed by a similar style made of silk ribbon.
It’s charming, right? I thought it would be silly, fun, and different, so I went on a hunt for chenille yarn to complement one of my mid-19th century dresses, Annabelle. It was rather harder than I thought it would be to find just the shade of purple that I was looking for as well as an off white, but I persevered and found them on Esty.
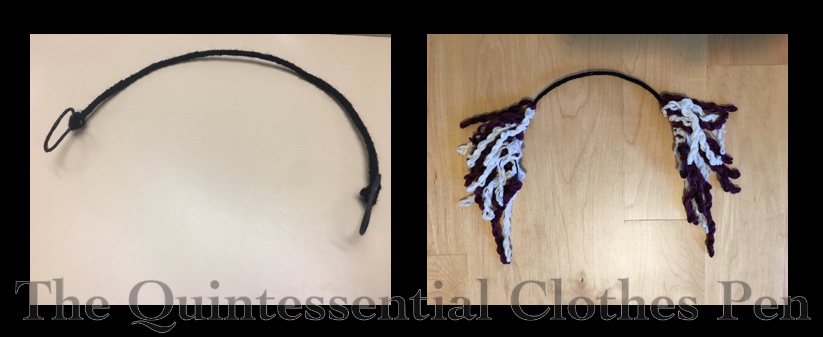
The base of my headdress is millinery wire. I formed loops at the ends in order to have a section to easily bobby pin to my hair. The over-the-head millinery wire is covered in black acrylic yarn from the stash to blend in with my hair, while the ends are black because I colored them with a sharpie–easy and quick. No yarn to get stuck in the bobby pins on the ends.
The loops of chenille vary in length. Each piece was folded in half, twisted, and then tied to the base. The chenille I found is not as plush as my inspiration, but with overlapping twists I was able to achieve a similar overall shape.
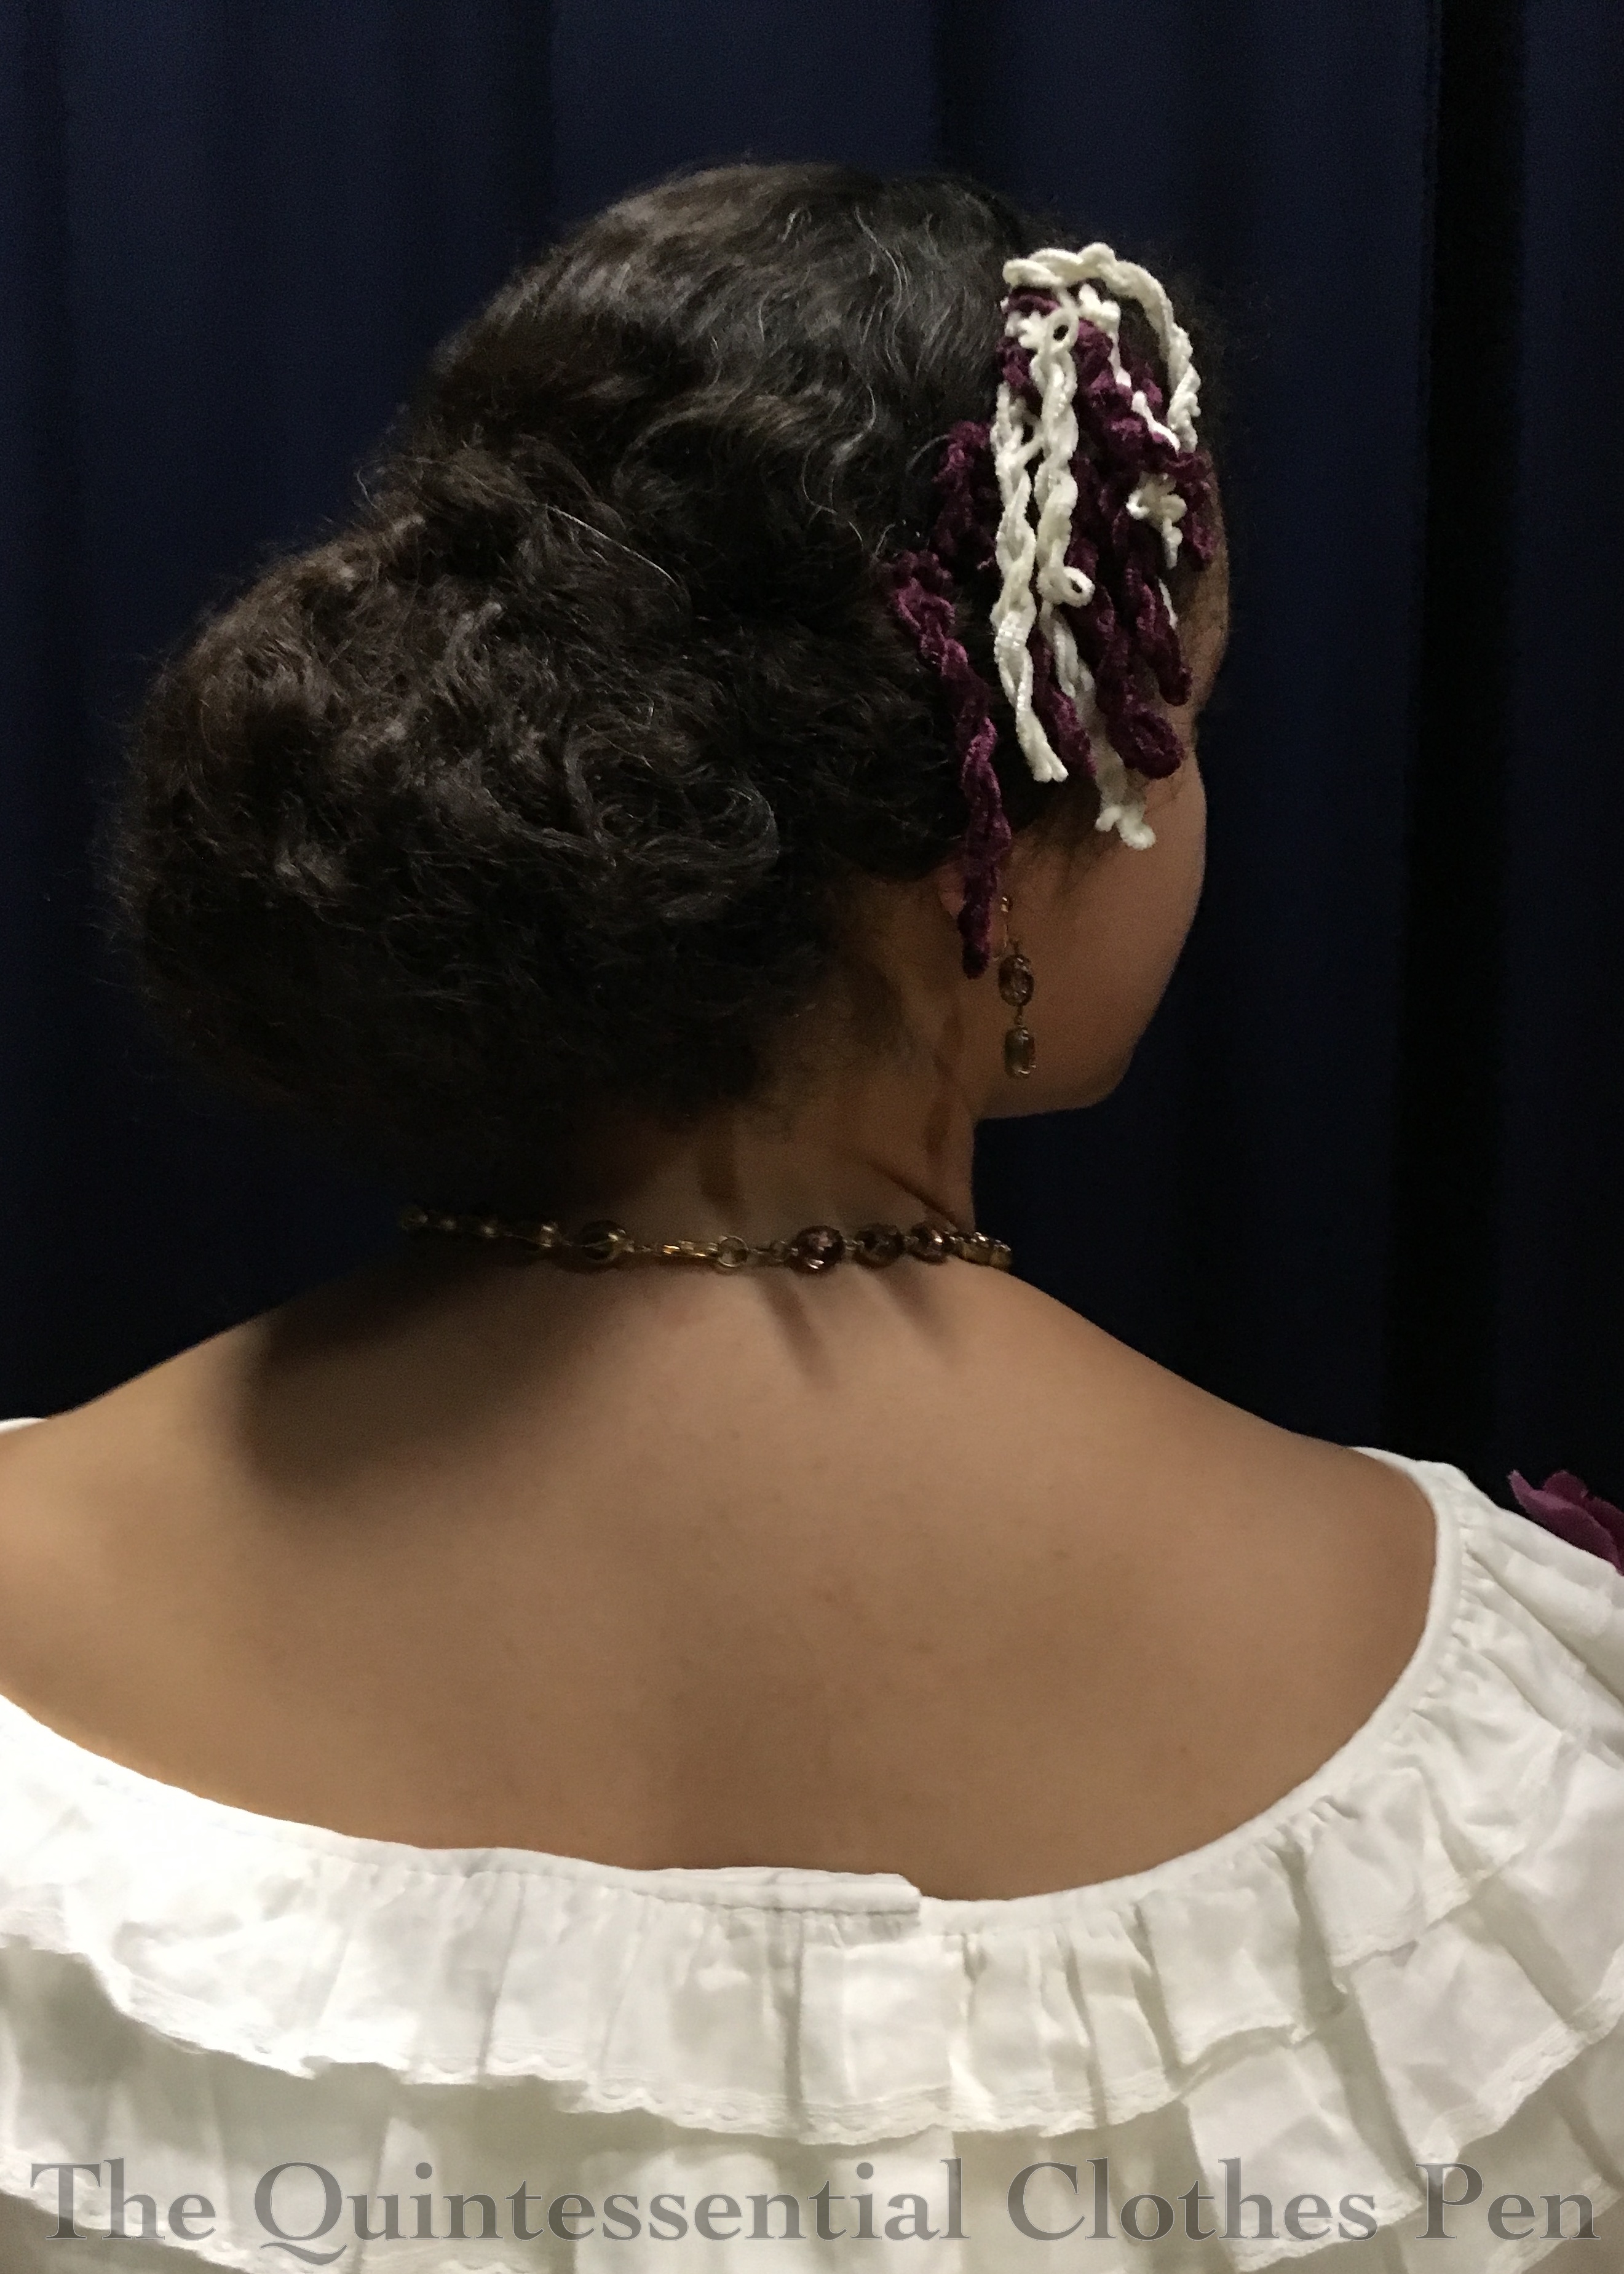
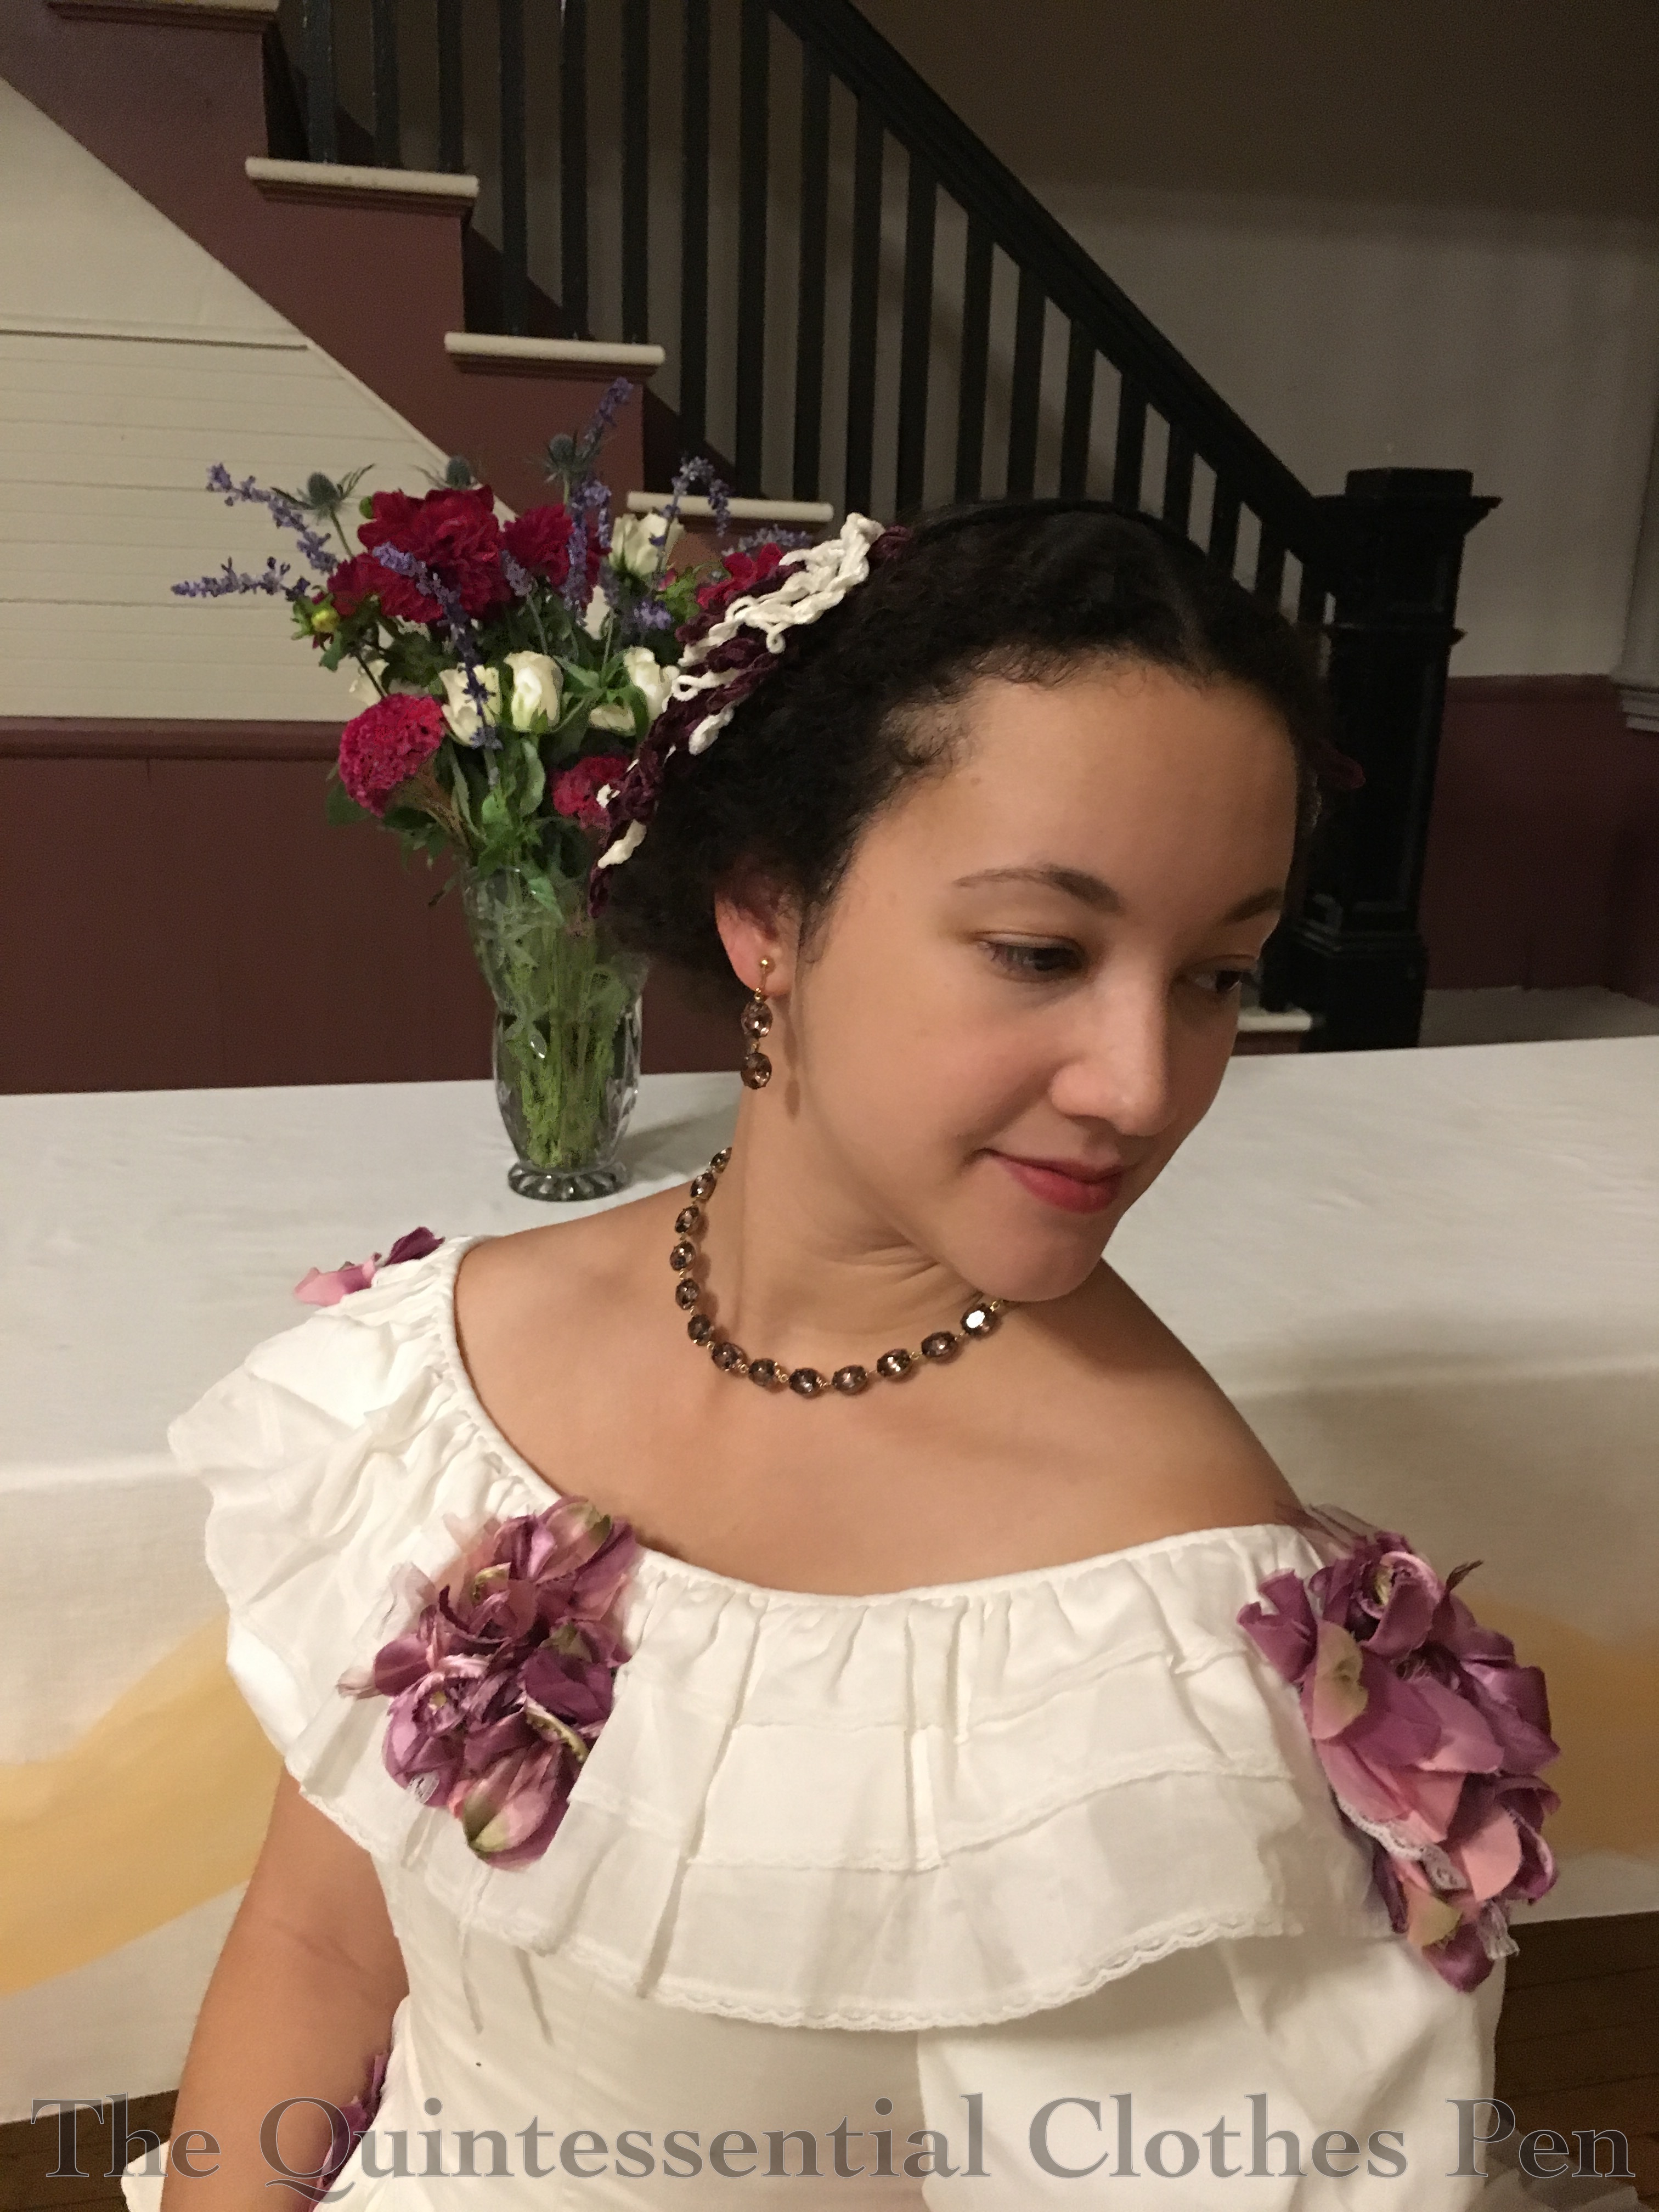
Here are two pictures of the headdress, one from the back, which better shows off the chenille headdress, and one from the front, which also shows one of our lovely bouquets from the ball.
As the title mentions, I was able to wear this ensemble to a mid-19th century Victoria and Albert themed ball. In addition to the usual loveliness of balls (live music, refreshments, etc.), we had added decorations, special fan shaped dance cards, a quadrille performance, and sashes. Here are the dance cards laid out on a silver tray in the entryway.
And here’s the whole ensemble worn with my sash. The chenille frames the sides of my face and puffs out a bit farther than my hair. Fun and different! I really like this somewhat quirky and unusual headdress!
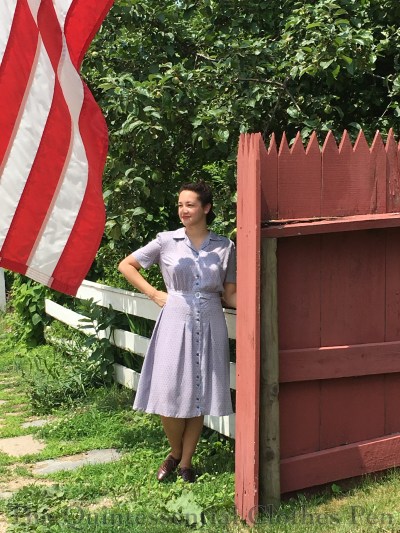
Summer temperatures lingered on here until just the other day, though they were not quite as hot and humid as they were on the 4th of July…
The day of the event started off a bit rocky, as I was confused about what time I was meeting my friends to carpool and so was just starting to get ready as they were getting in the car to leave the house I was supposed to meet them at, an hour from my house! I wound up driving to the event by myself and getting there a bit late. It wasn’t a great way to start the day, but at least it went up from there.
Being the beginning of July, it was hot, even in the morning. I was dripping sweat just standing still in the shade and I didn’t sit down until after pictures were taken because I knew how wrinkly my rayon dress would be as soon as I even looked at a chair! See, no wrinkles… yet!
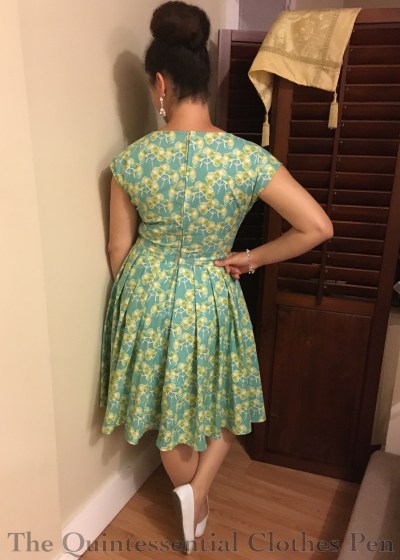
As you have probably deduced by now, I made a new dress! The goal was to have a war-time 1940s dress made from a fabric that had been sitting in the stash since 2013 waiting to be made into a 1930s or 1940s dress.
The dress is constructed from 3ish yards of rayon. (I don’t remember the exact yardage.) It’s a greyish/mauve color with little teal clovers all over. It’s machine sewn and hand finished. The seam allowances are left raw on the inside–a detail I have noticed in 1940s dresses I’ve had the chance to observe.
The dress closes with 12 buttons which run in groups of two down the front (and a hidden hook and eye at the waist). It’s a perfect detail for wartime, when I’ve read that zippers were being used less frequently so the metal could go to the war effort. The buttons-in-groups-of-two detail was directly inspired by this image. (The image came from this post by The Closet Historian. It has many lovely dresses from the Spring/Summer 1943 Montgomery Ward catalogue.)
I spent lots of time looking at buttons on Etsy in order to find some that matched the particular shade of teal I was looking for. I was so pleased when I found them! It was only after I ordered them that I realized they were shipping from Europe. I was very nervous they wouldn’t arrive in time for the event! Luckily, they arrived just a few days before, giving me just enough time to sew them on the dress. Whew!
I couldn’t find a buckle in the same teal color and I thought that might be too matchy anyway, so I went with a slightly grayish mother of pearl buckle instead, also from Etsy.
The pattern is a mix up of two different things: a 1970s shirt dress pattern for the bodice/sleeves and a self-drafted skirt pattern. I wanted to get the two pleats in the front of the skirt like the inspiration image has while also making the hem as full as was allowed during wartime rationing–a sweep of 74″. These two requirements made it easier to pattern something myself than try to start with anything I could easily find. I like the pleats in the front, but wish I had placed them a little farther towards the side seams. Oh well!
The back of the skirt is shaped with darts. Turns out they’re a little tipsy and listing towards the side seams… oops. The square-shoulder 1940s silhouette is achieved with the assistance of some super thick shoulder pads. Looks pretty silly on a hanger but slightly less silly on me, thankfully!
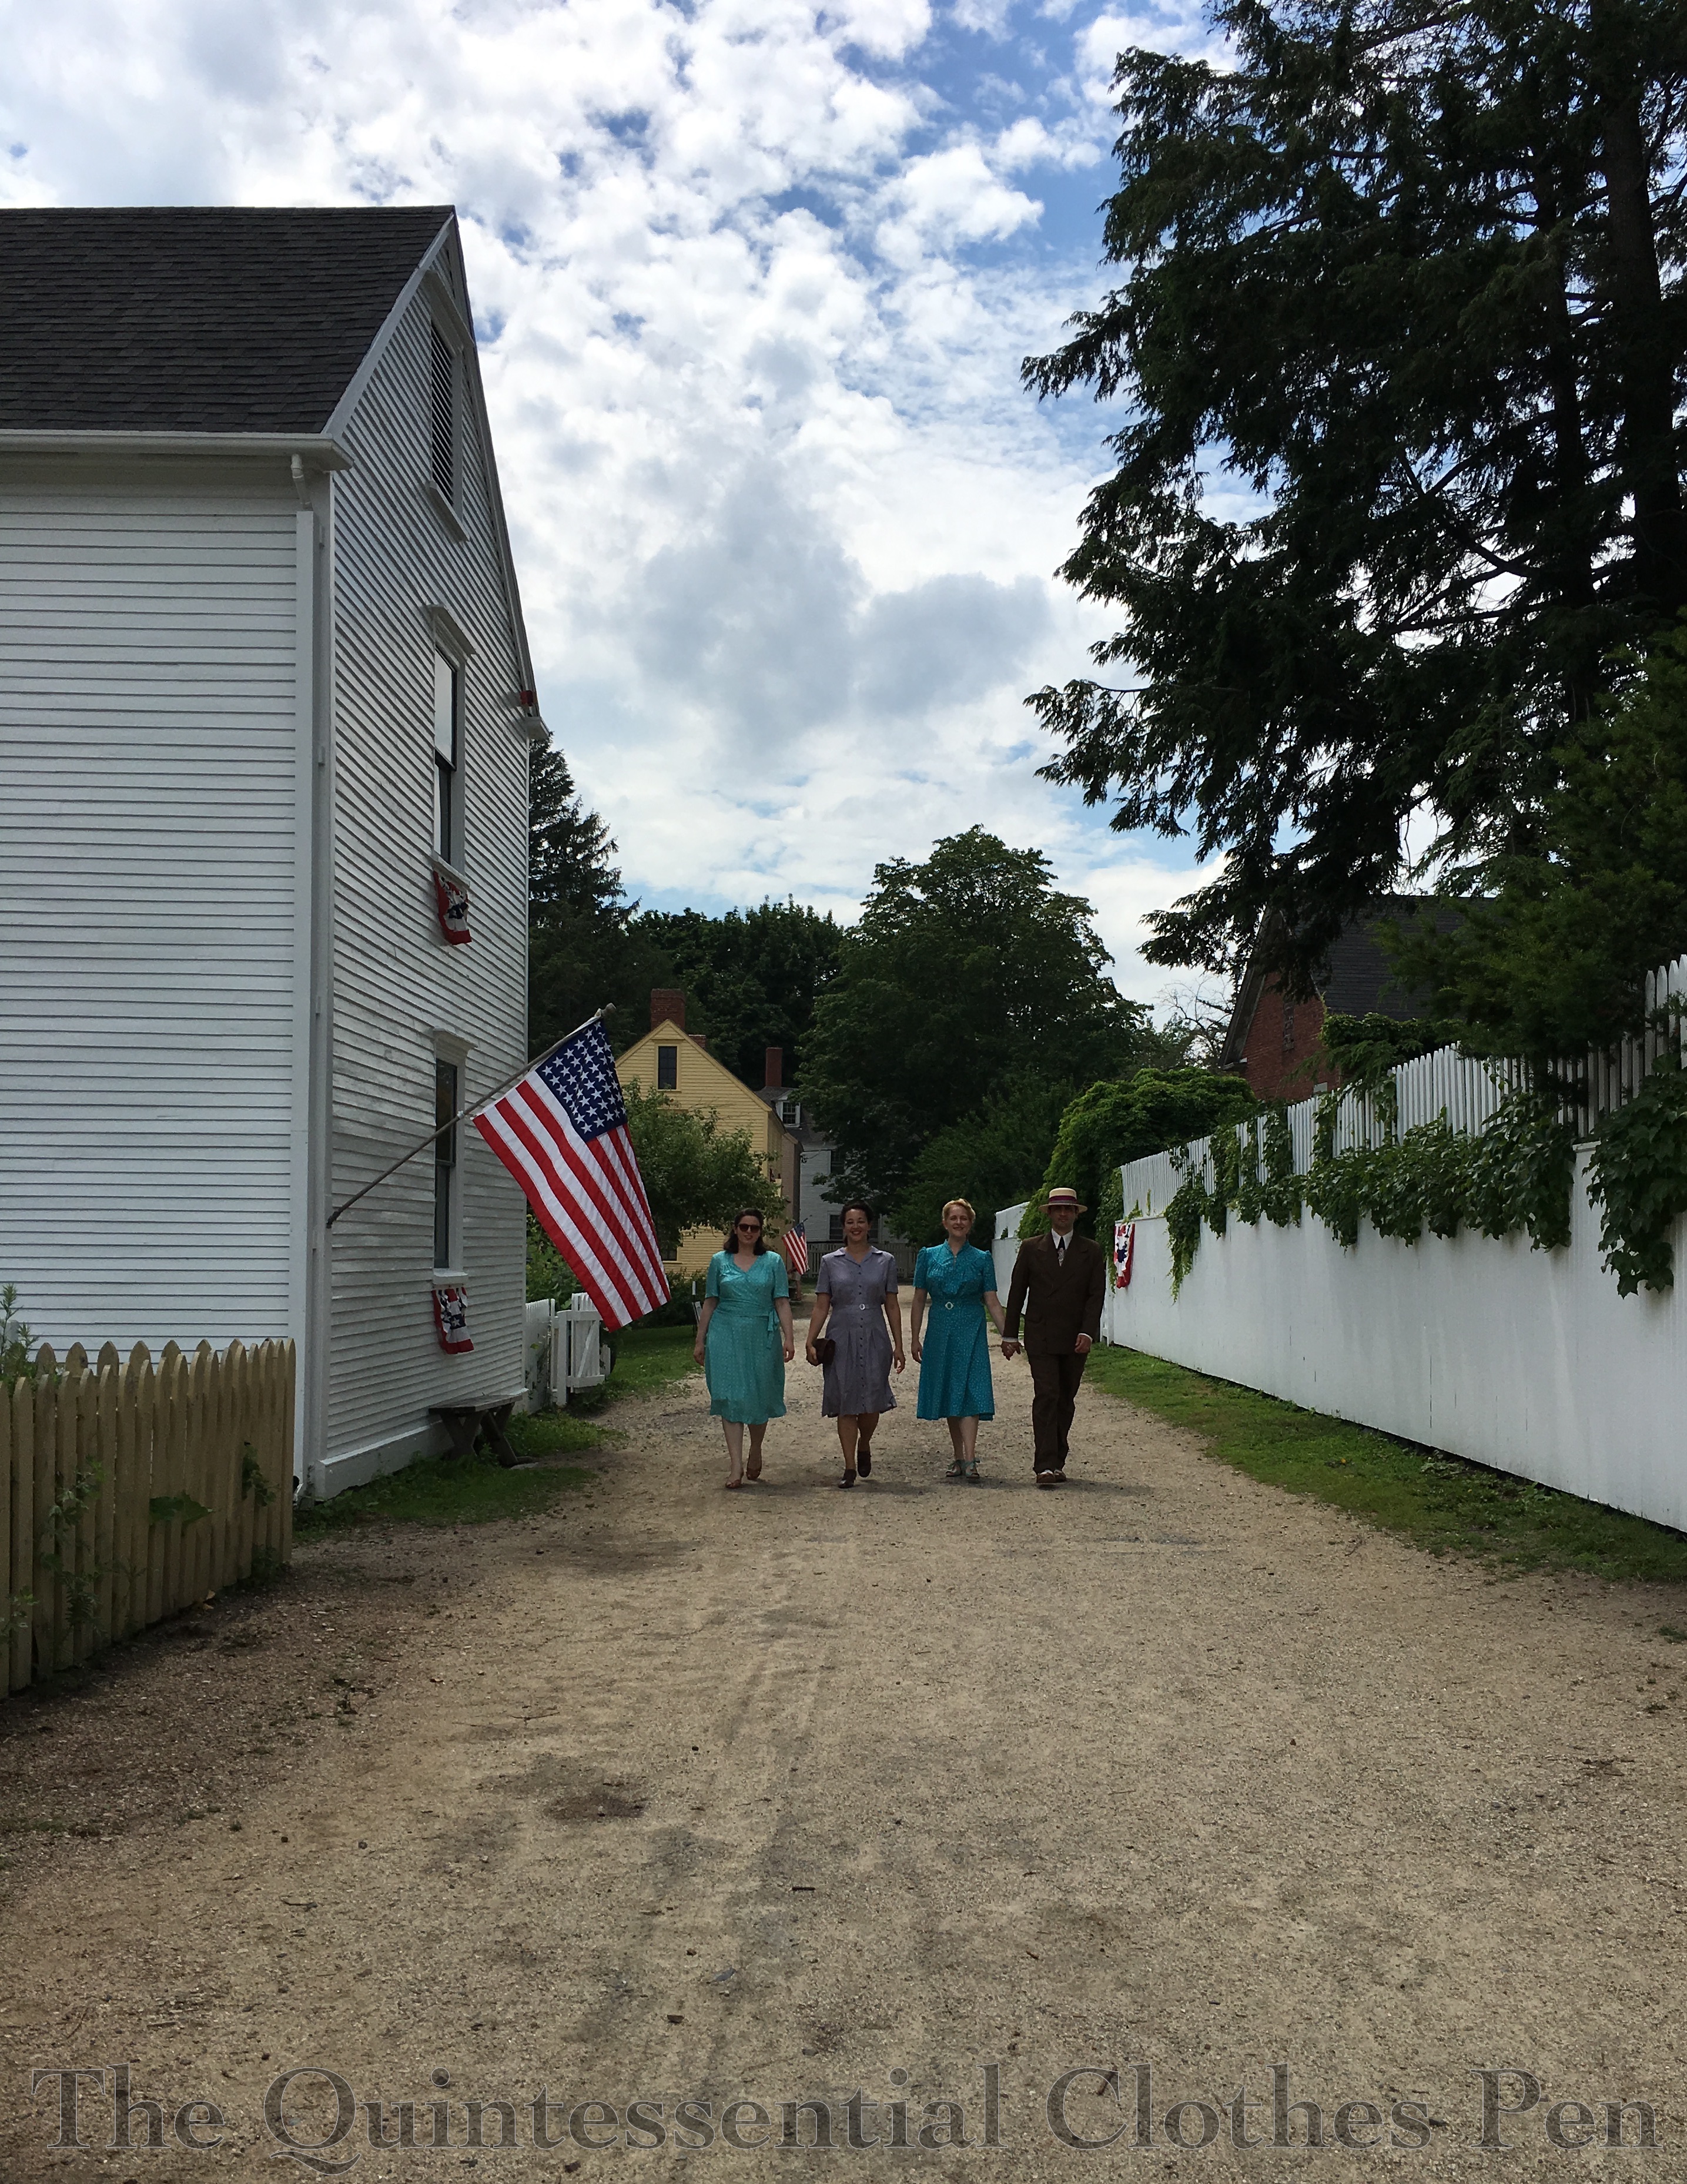
I like this photo of those of us from our group who were dressed in civilian clothes. In fact, there’s a whole series of us walking towards and away from the camera. It was hard to narrow it down to just one!
Before I made it, I wasn’t sure how I’d feel about an early 1940s day dress. I like shirt dresses when I see them but I don’t usually wear clothes with collars (nor many garments with buttons), so these were an unusual touch in my wardrobe. I’m pleased to report that with the proper accessories and hairstyle I felt perfectly comfortable and un-frumpy in this new decade. Win! Next up, a post with all the details of my successful victory rolls!
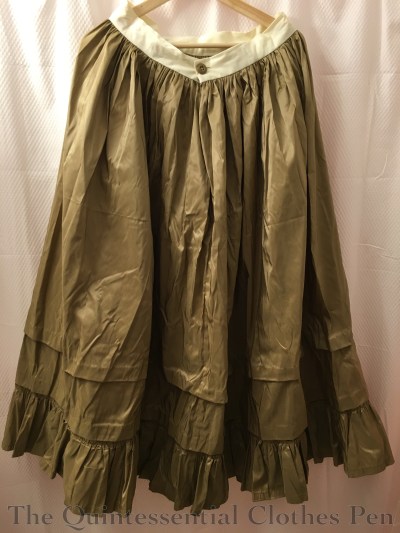
In 2012, I made and wore a c.1900 green skirt and straw hat at Newport Vintage Dance Week. I had plans to make a blouse as well with it but ran out of time and wore a 1913 blouse I already had instead. I wasn’t terribly pleased with the whole look, so I didn’t ever focus on it in a blog post, though I did include it in my overview of the dance week.
At Newport Vintage Dance Week in 2012.
Since then I’ve worn the skirt a few times, but haven’t been able to for the last few years because (and this shouldn’t be surprising given the subject of my last post) the waist was too small!
Thankfully, I had two things going for me that made changing the waist size quite simple. First, I had extra fabric. Second, when I’d originally made the skirt the waist circumference was a few inches too big for the waistband, so I took a tuck on each side of center back. Now all I had to do was let out the tucks and extend the waistband with my extra fabric!
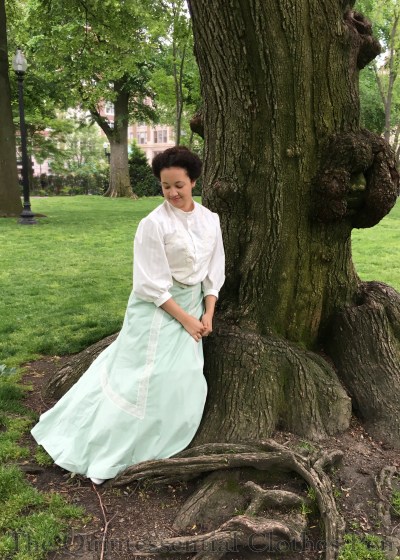
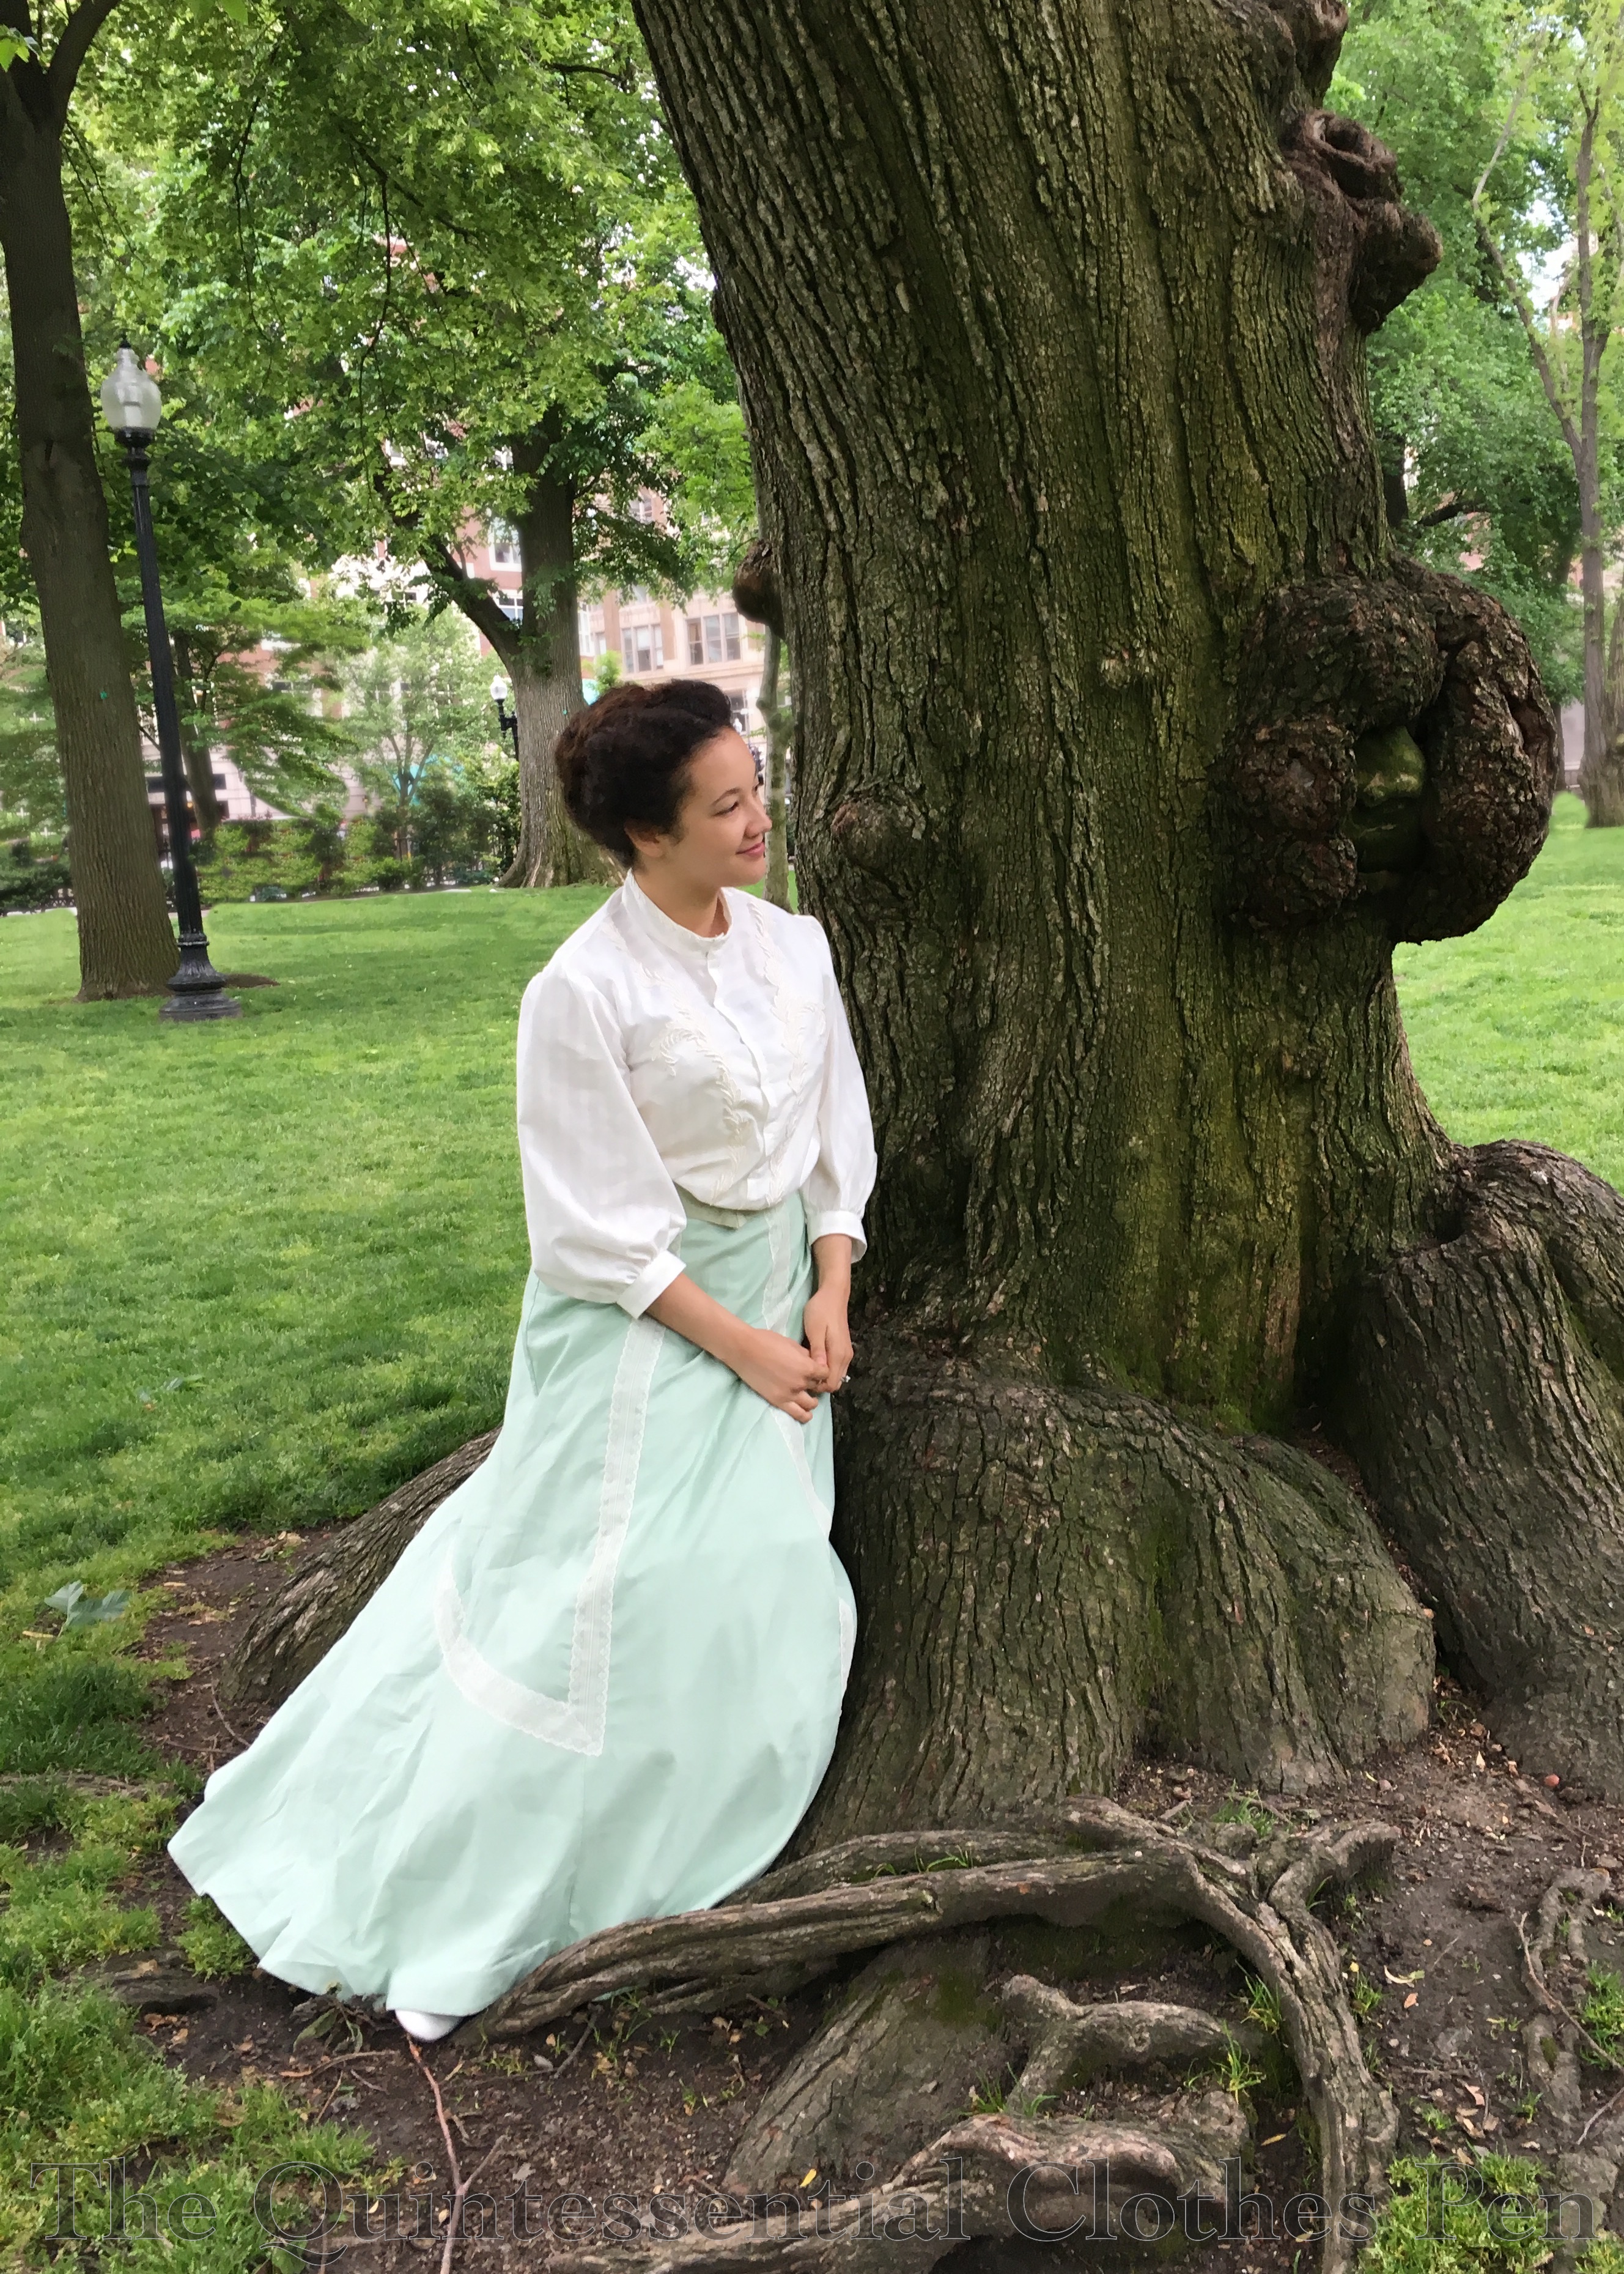
Updated ensemble in 2017.
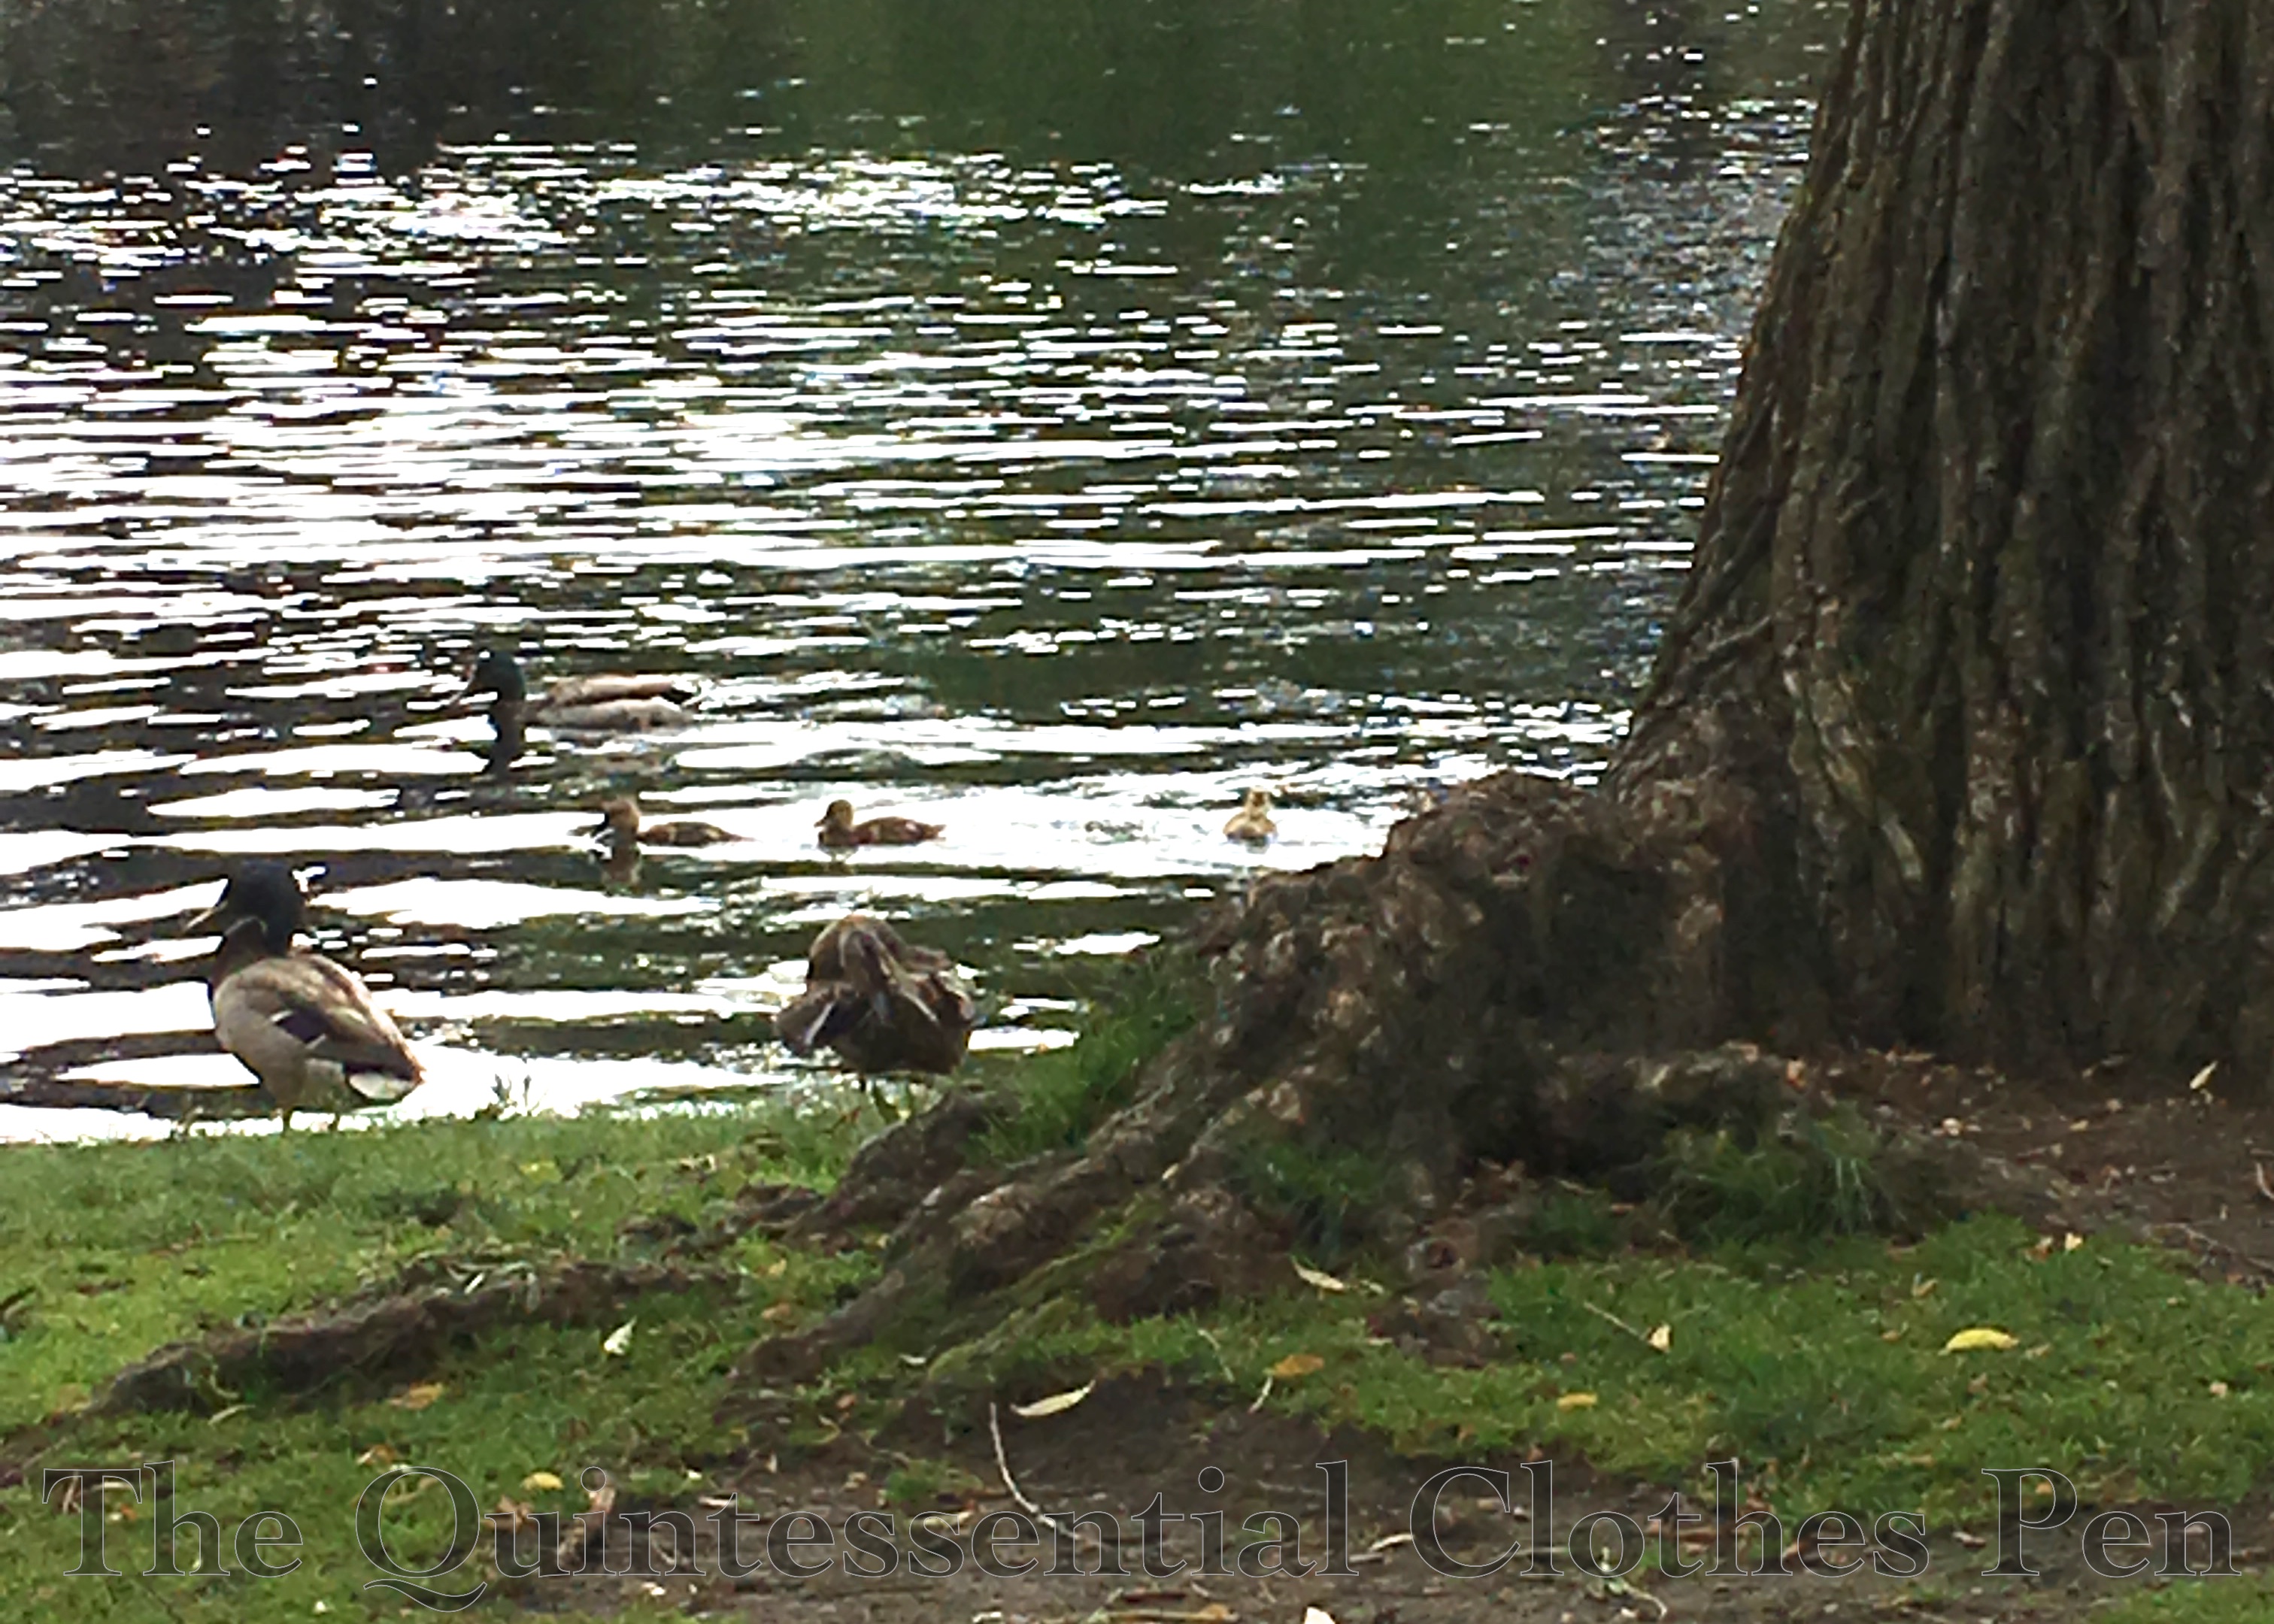
It took me years to finally get around to doing it, but I’m glad I did, because I really like this skirt and it’s fun to remember the lovely wading adventure we had back in 2012 while I was wearing it! What gave me the final push to do the change was the opportunity for an early summer picnic, for which I had clothes but really wanted to have something new. Who hasn’t experienced that desire?
More About The New/Updated Ensemble
Ducks (and baby ducks) at the picnic!
The picnic provided some lovely backgrounds to take documentation pictures of all the new and updated pieces that form my Anne-inspired ensemble! I ironed out all the wrinkles in the skirt ahead of time… and then sat on picnic blanket before taking pictures, so the back pictures have a rather wrinkly bum.
The Blouse Inspiration
In addition to wanting to update the skirt, I’ve also had that blouse to go with it on my to-do list for years. Instead of going back to the blouse plan from 2012, I started over with new inspiration. (Never fear, the unfinished blouse from 2012 is still in a box waiting for me to go back to it… someday.)
The new inspiration came directly from the scene in Anne of Green Gables when she’s walking down the lane with Gilbert and his horse (just before she gets mad and whacks him with her basket!). I’ve always love her silhouette and decided a blouse with a similar shape would suit the green skirt nicely.
Anne and Gilbert! (And the horse.)
I researched blouses from this period and decided on the year 1904 for my blouse. I was particularly inspired by this ivory c. 1905 blouse, this black c. 1905 blouse, and this blouse that The Met dates to 1899-1902. The idea to play with the direction of the stripes and to have curling lace trim (mimicking embroidery) was taken directly from this page from The Ladies’ Home Journal for April 1904 that Lauren of Wearing History kindly shared on her blog. Other views of some of these blouses as well as other inspiration are gathered on my Pinterest board for this project, here.
The Blouse Construction
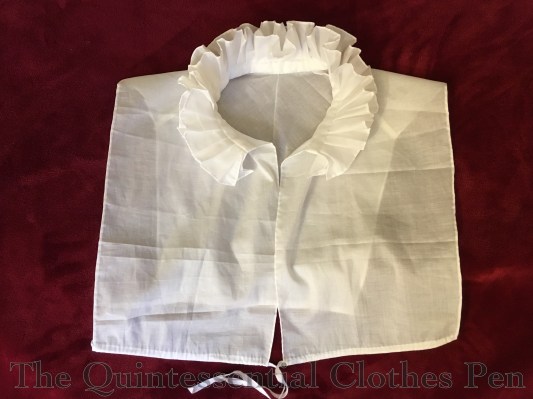
My blouse is made of an ivory cotton that is woven with narrow stripes. In the center front panel the stripes are horizontal, while on the rest of the blouse they are vertical. The blouse is trimmed with lace appliqués in the same pattern as the Ladies’ Home Journal blouse from 1904. Unfortunately, all of the subtle ivory on ivory details are hard to photograph.
The blouse is mostly machine sewn and uses French seams except at the armholes, which are left raw. It is finished by hand and closes up the front with concealed hooks and thread bars. There is a twill tape channel for a drawstring at the waist to help control the fullness and the pigeon front.
The silhouette was looking a little deflated for a 1904 pigeon breast look, so I tacked ruffles down the front seams to help fill out the blouse. It’s subtle-but-useful method and was easy since I already had the circular ruffles in my stash.
The Hat Inspiration
The most direct inspiration for my hat was this image from 1903. While I decided against feathers, the general trim placement as well as the poofs under the back of the brim are present in my hat.
There are more inspirational hats here, on my Pinterest board for this project.
The Hat Construction
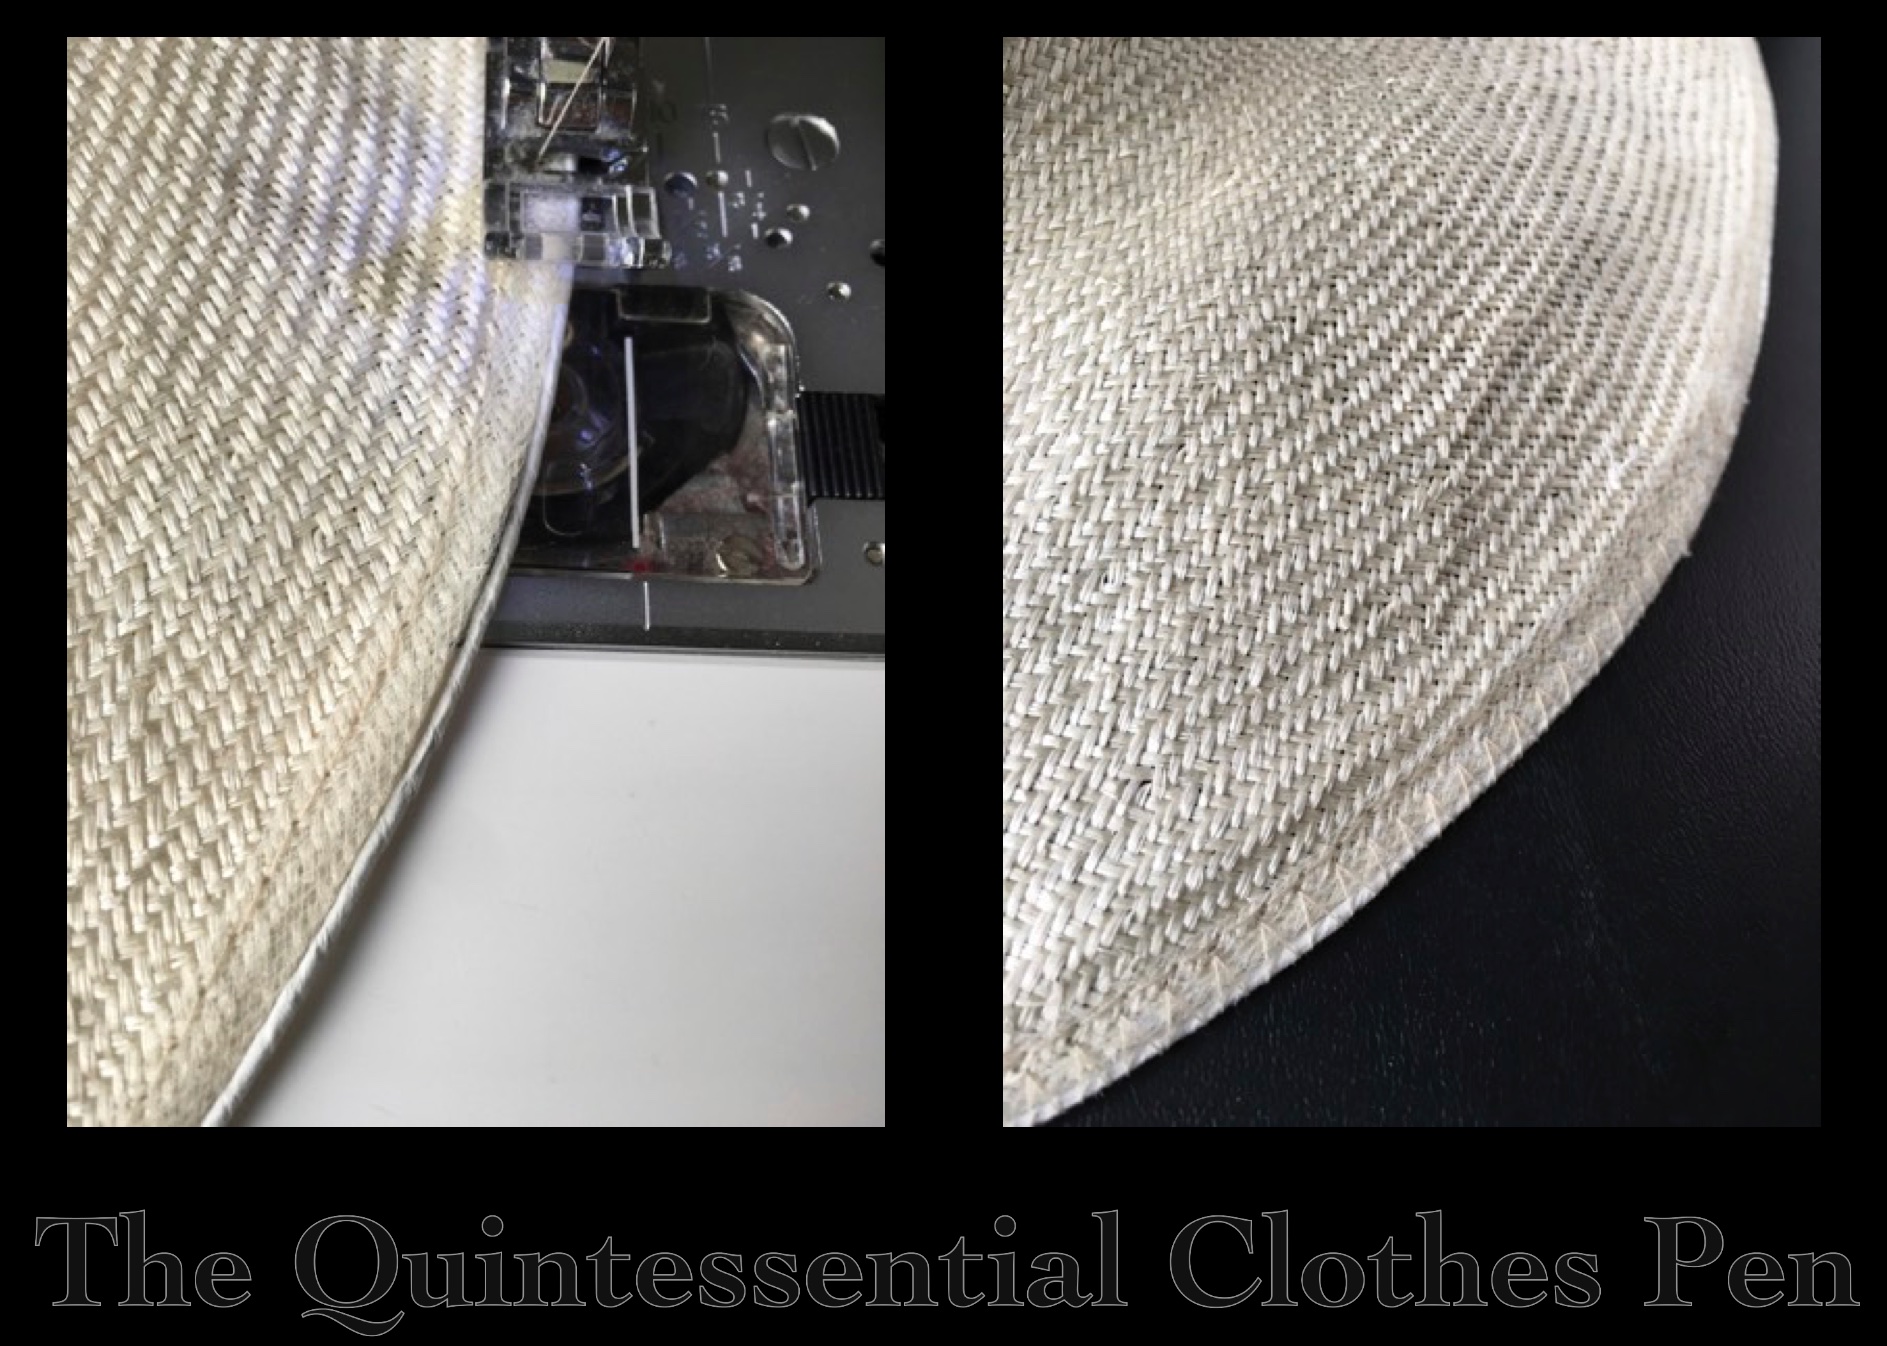
The hat in the 2012 version of this ensemble was an admirable idea in theory, but not execution. (I was displeased enough that it was remade into my 1885 Flower Pot Hat in 2015.) However, I had another of the same straw base that I decided to remake for the new Anne ensemble.
In 2012, I had used the second straw base to make a Regency bonnet, another project I wasn’t entirely happy with (this is not the right type of straw to get a good bonnet shape). All that needed to be done was removing the trimmings from the hat and taking out the stitching holding the wire around the edge… and I had a straw hat blank ready to be remade into a new hat!
For a hat block, I used a shallow glass bowl covered in tin foil and plastic wrap. I wet the straw base in the bathtub, then used a paintbrush to cover the straw with a layer of my sizing (a bit of elmer’s glue dissolved in water–no formula, I just winged it). I set the hat out in the hot sun to let it dry, holding the edges down with spice jars to keep it from blowing away. (Can you tell I just wandered into my kitchen to see what I had that would work to help me with this hat?)
Reshaped straw hat base next to my improvised hat block.
I tidied up the edges of the hat with scissors, bound the edge of the straw with narrow strips of tulle to keep the straw from fraying, and then reshaped my wire and resewed it around the edge of the hat. I covered these edge treatments with a binding of ivory silk satin, trimmed the hat, and I was done!
The tulle was sewn with a straight stitch. The wire was then stitched with a zig zag.
Sundries
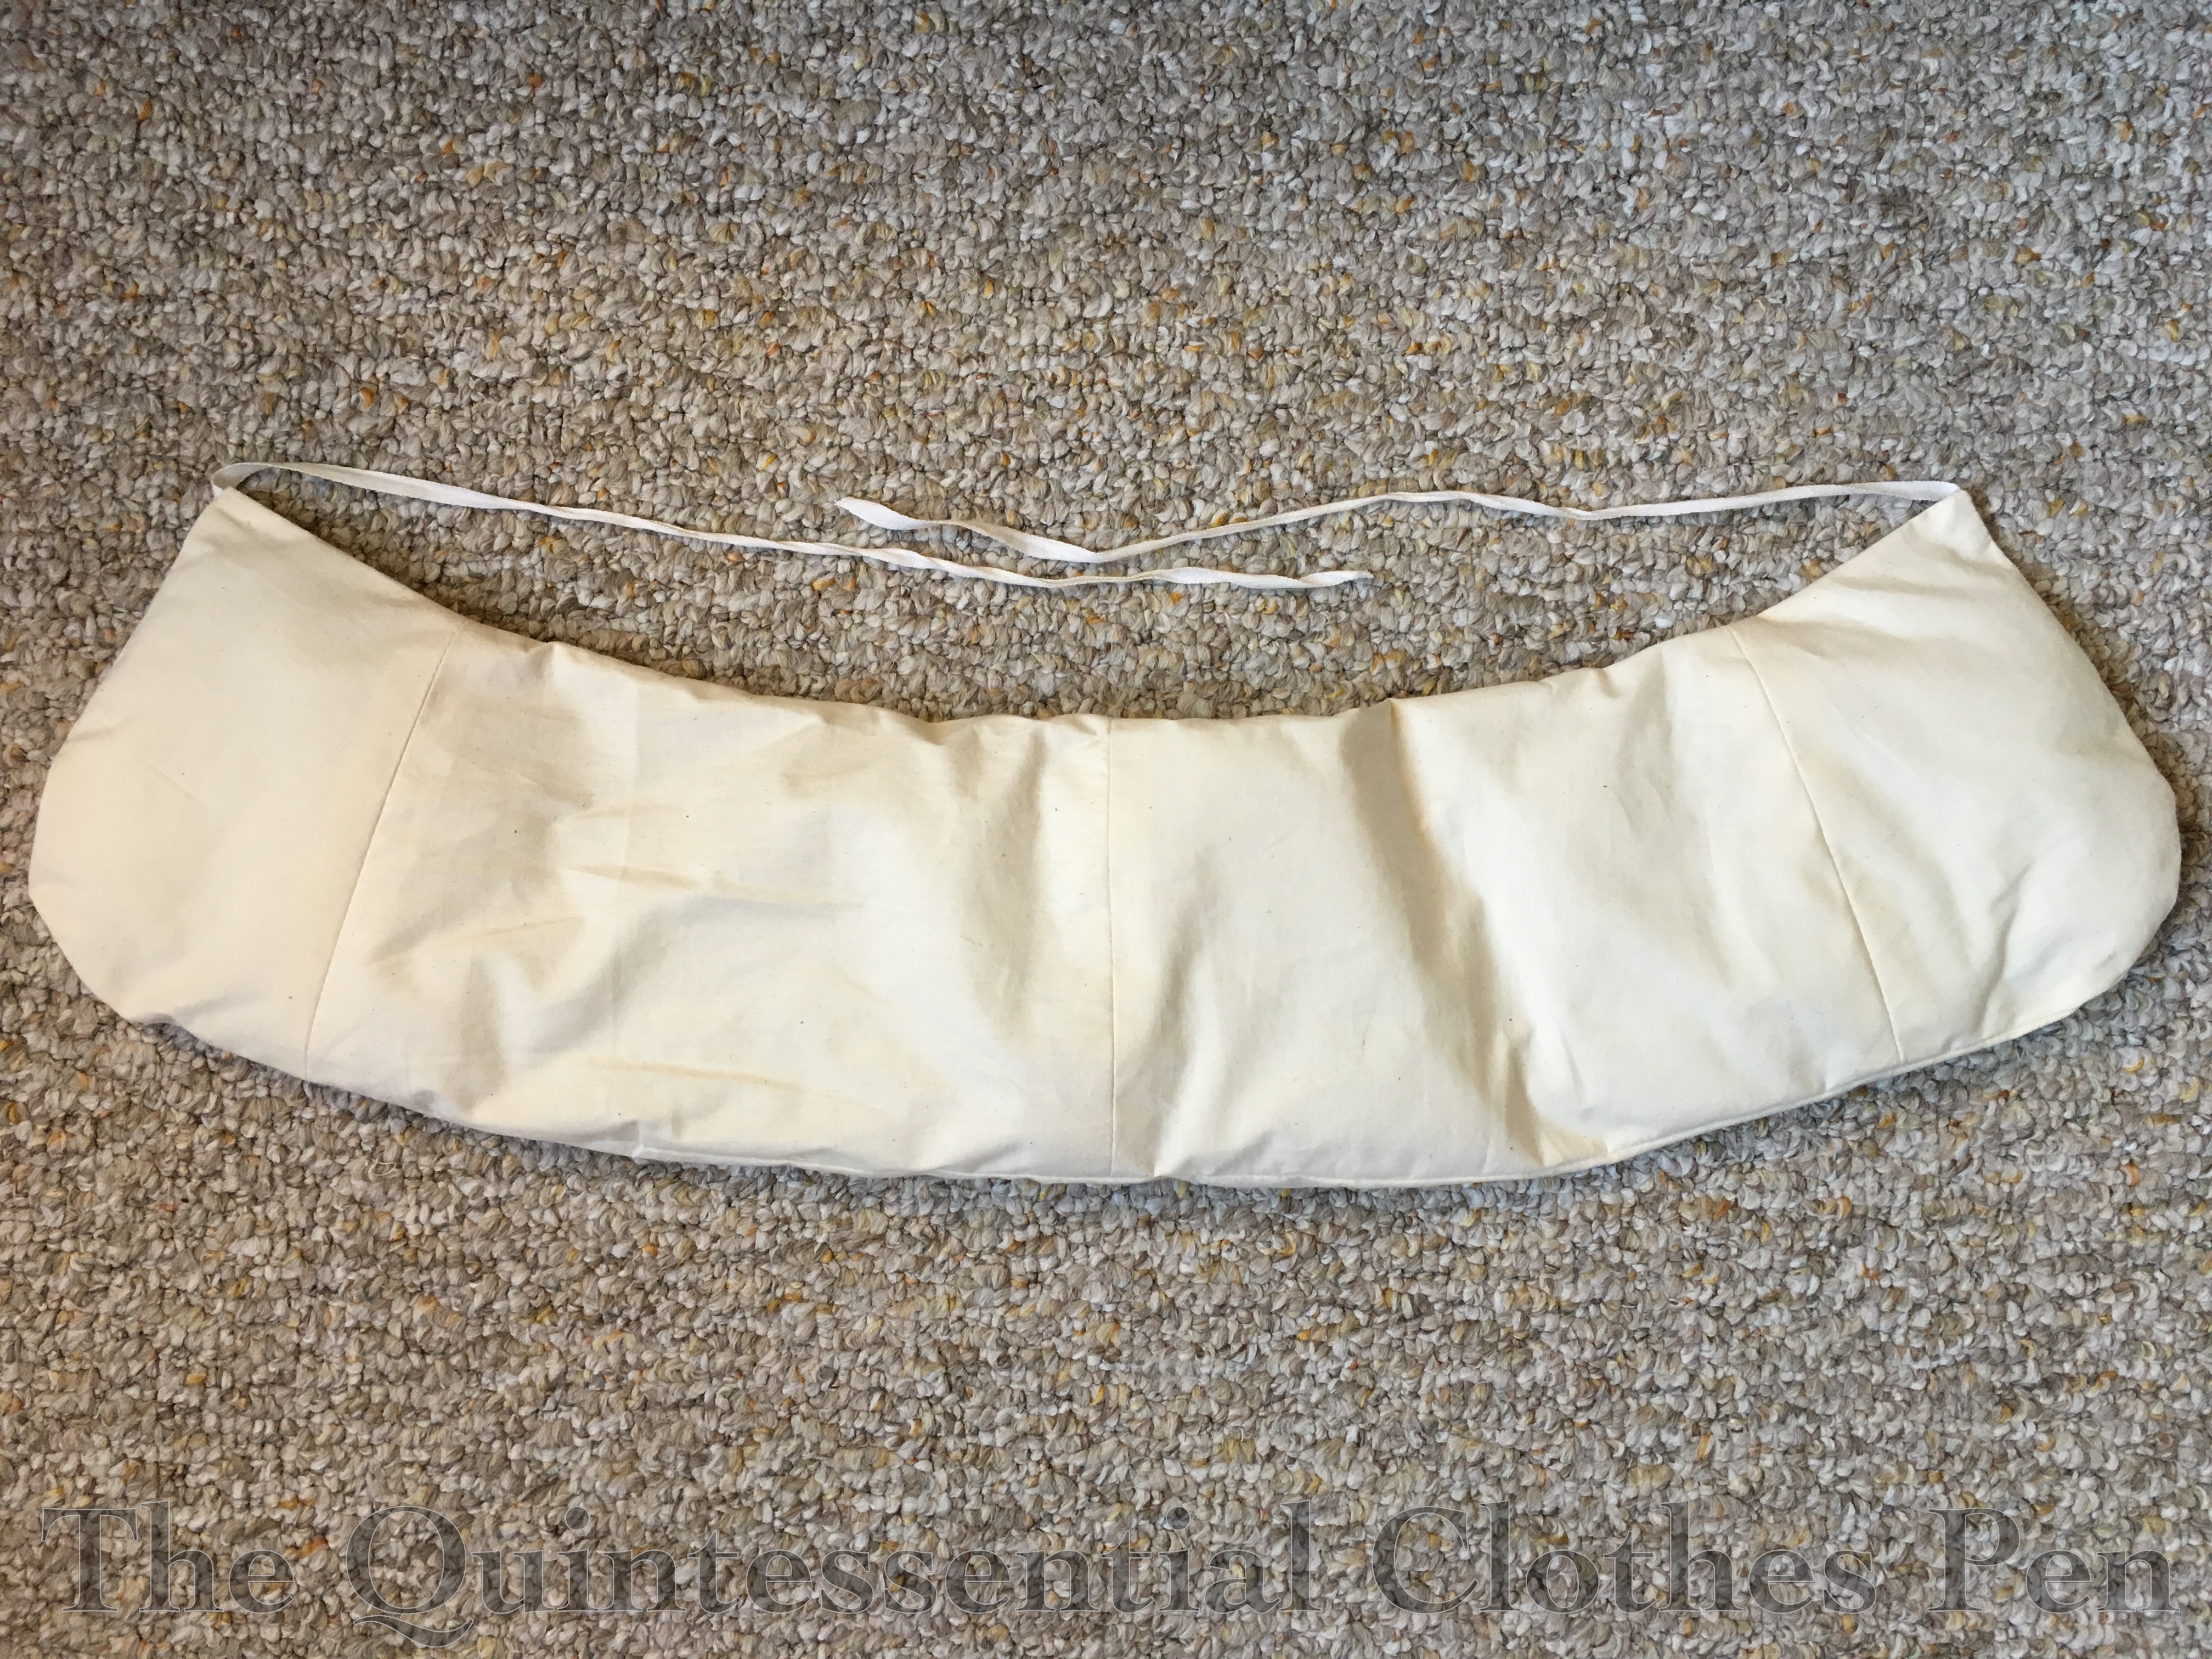
In order to achieve my desired pigeon breast silhouette of 1904, I needed some omph in the back in addition to the ruffles inside the blouse in the front. I tried wearing a small bum pad (about 10″ wide), but then my hips looked sunken by comparison. I determined I needed a new bum pad that would fill in both my hips and backside to help create the illusion I was aiming for.
I also made a new belt to go with this ensemble. I wanted something a little more V shaped in front and a little less dramatic in terms of color. I actually reused the lining from the previous iteration of my new hat to make a new belt. The two shades of green don’t quite match, but they also don’t offend, so I’m pleased.
Instead of a traditional Gibson Girl hair style, I tried a style more like this, with a center part and poofs on each side. It was a bit squashed by my hat, but I was quite pleased with it overall. Unfortunately, I didn’t get any perfect shots of just my hair style. I’ll have to try it again someday and get hair pictures.
Whether you sew historical clothing or not, I think it’s likely you’ve experienced the following phenomenon: You buy or make a lovely dress or other garment and wear it once (or maybe you wear it a lot). The season changes and you put said lovely garment away in the closet to await the next year’s season. When you next go to wear it, you realize that the garment no longer fits. It has obviously shrunk in the closet! I find that circumferences are the worst culprits for closet shrinking: waists, ribcage, arms… How dare they?!?
This has happened to me with both modern ready-made clothes and historical ones. Unlike modern ones, which usually hang around for a few years until I feel emotionally ready to donate them to someone else who might actually fit into them, my historical clothing has the benefit of being able to be resized with relatively little effort (certainly much less than making a new garment!). Depending on how I’ve constructed the garment, seams might be able to be let out or, being the pack rat that I am, I have more of the fabric hanging around and I can cut new pieces or add to what is there to expand at the necessary areas.
The more often I come across this problem in my wardrobe, the more I realize the benefit of making my clothing more adjustable from the start, with things like drawstrings and lots of overlap on opaque garments. (Did you notice that most of the closures on my recent 1817 Duchess Regency Gown were drawstrings? There might be an intentional rationale there… My 1811 Elusive Blue Gown also closes with ties and drawstrings, another intentional decision.)
1817 gown with mostly drawstring closures.
In the past year or two, I realized that two of my older and oft-worn Regency dresses had experienced closet shrinkage. I wanted to continue to be able to wear them and so I started thinking of the best ways to alter the size to make them wearable again. Luckily, both of these dresses fall into the category of ‘I kept the extra fabric and have plenty to play with to resize them.’
It’s always closed with hooks and eyes, but when I went to wear it last year it wouldn’t close! With some safety pins, we got it to this point, but I was afraid for the integrity of the fabric because it was stretched so tightly.
I was able to use someone’s small scissors to take out the stitches along the back edge with the loops on it to get a bit more fabric across and we used the safety pins for bars with a piece of ribbon folded behind to stabilize the now-only-one-layer of fabric. But I wasn’t willing to let people see it looking like this!
Thankfully, I had a shawl with me and I wore it the entire evening to cover the back. I was apparently nonchalant enough that no one realized I was wearing a shawl to cover the fact that my dress wouldn’t close, but I was awfully warm while dancing! Something had to be done before I would wear the dress again.
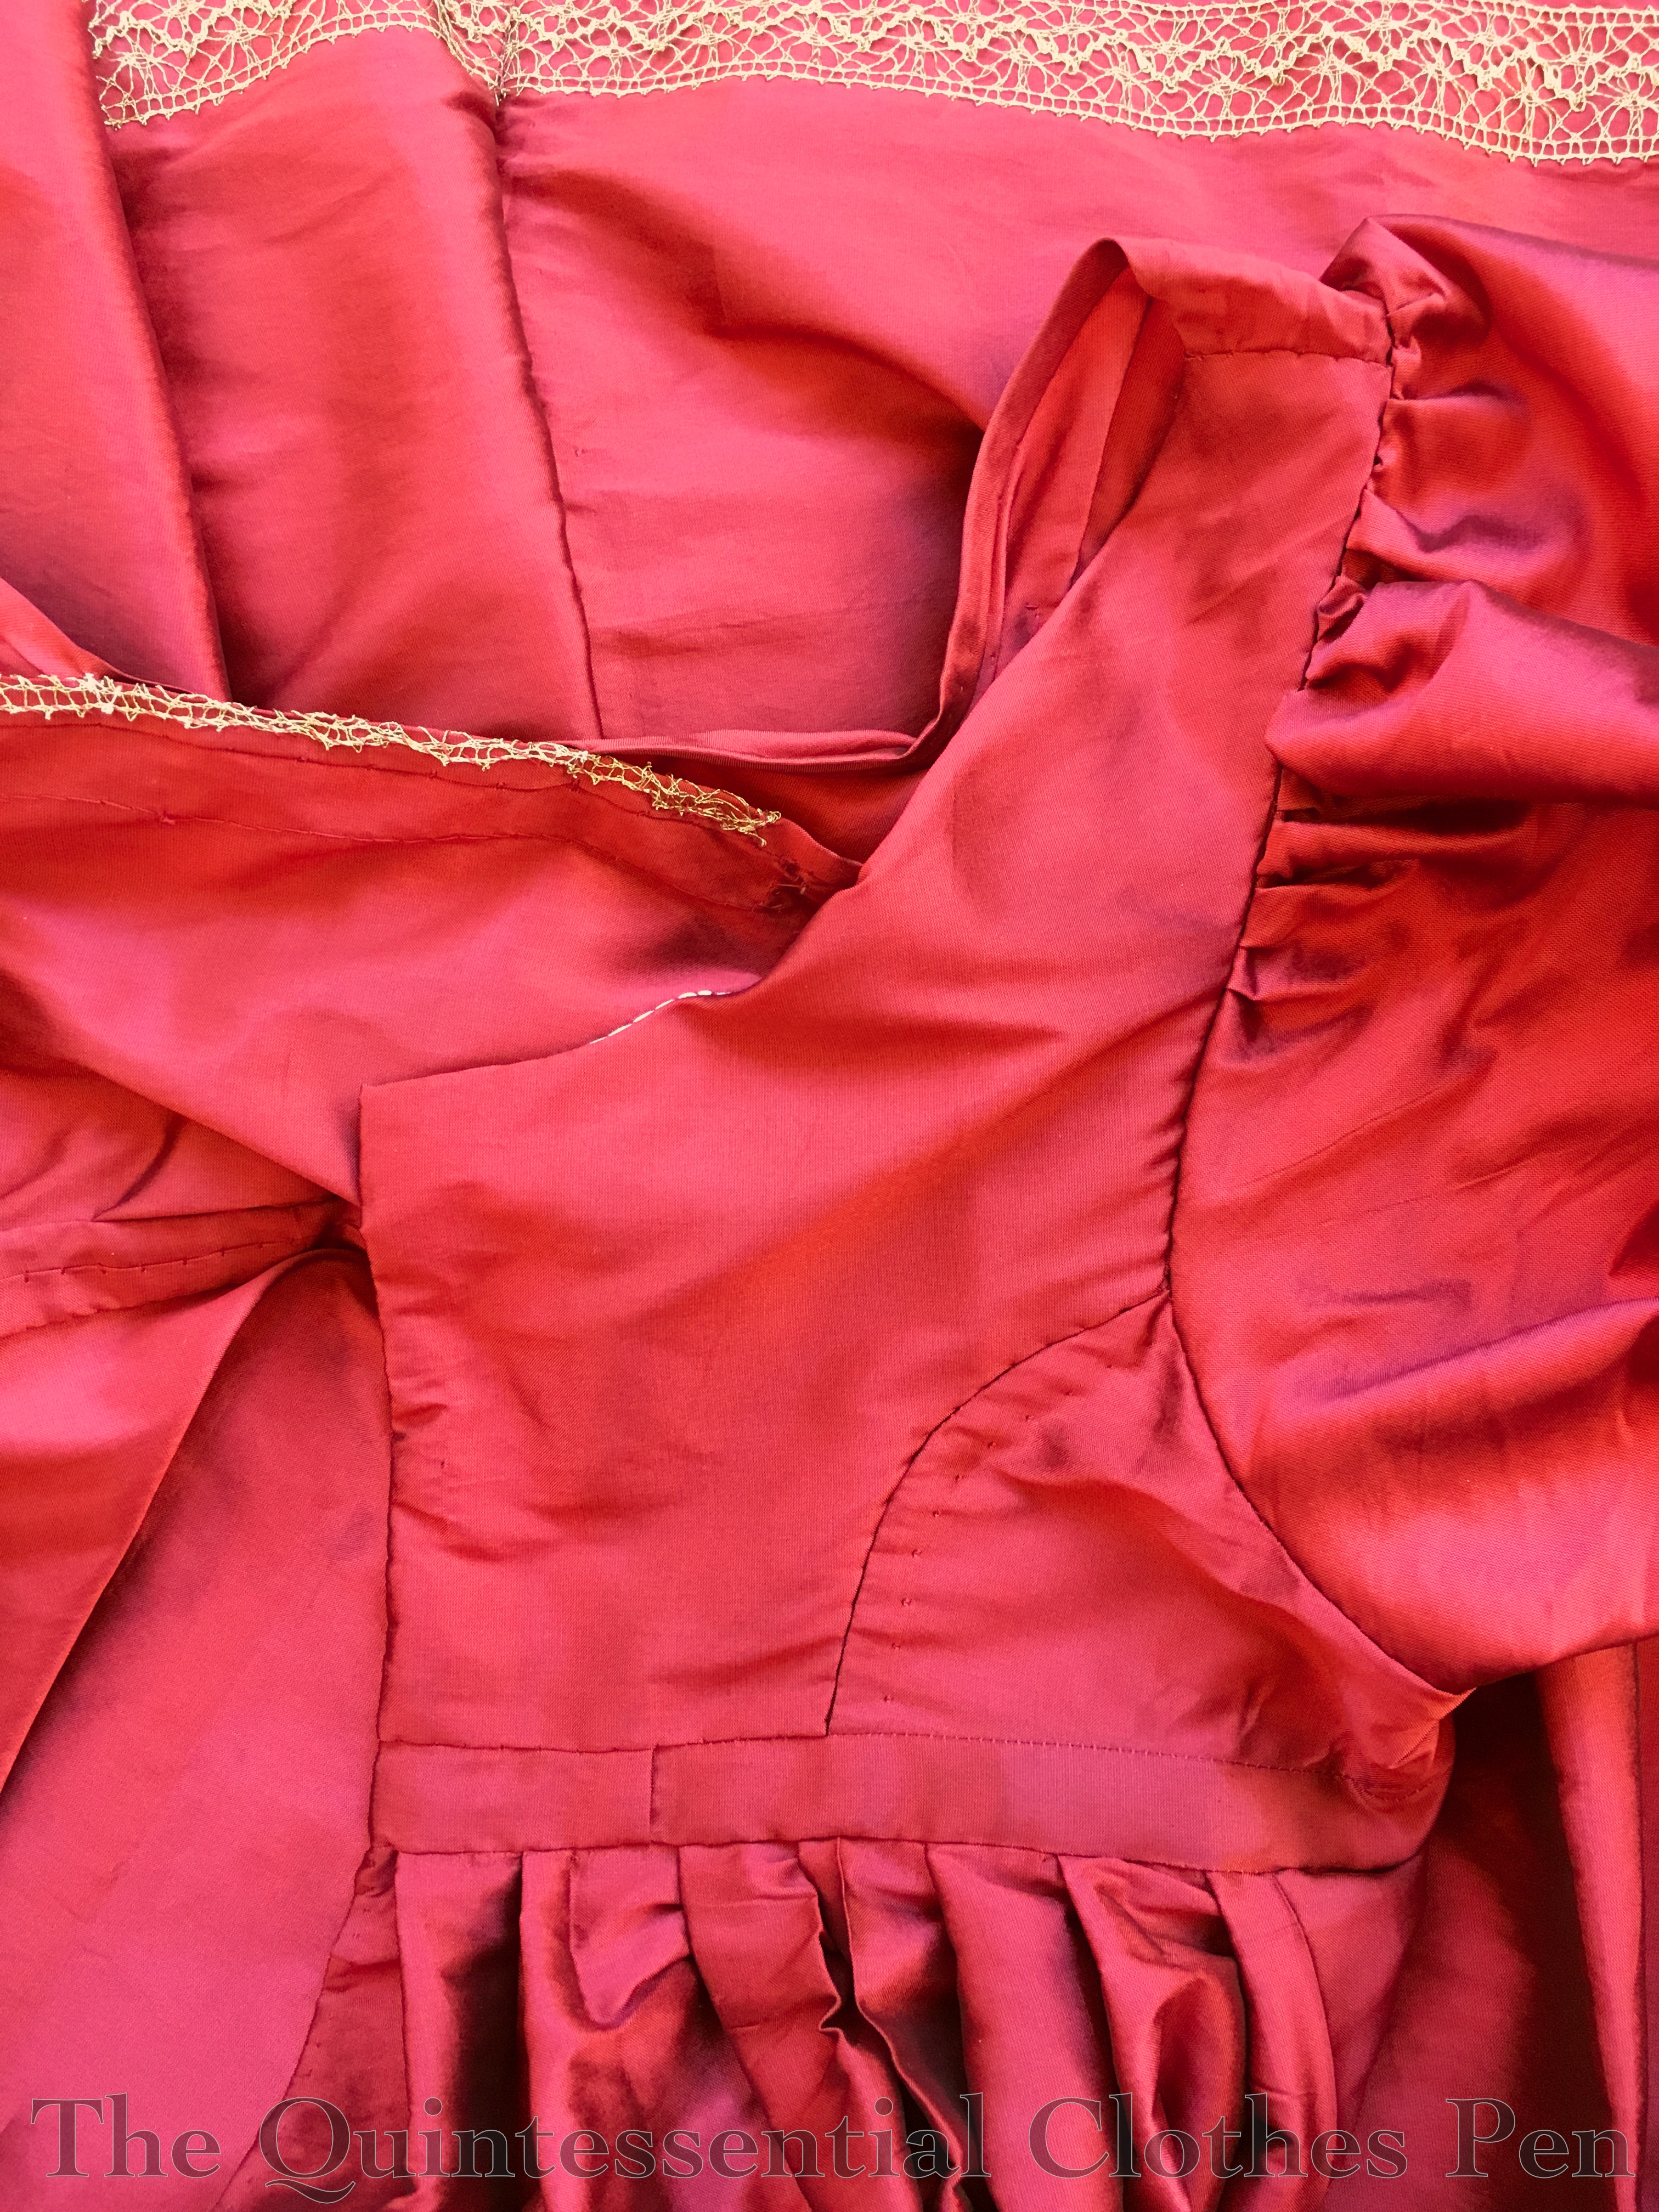
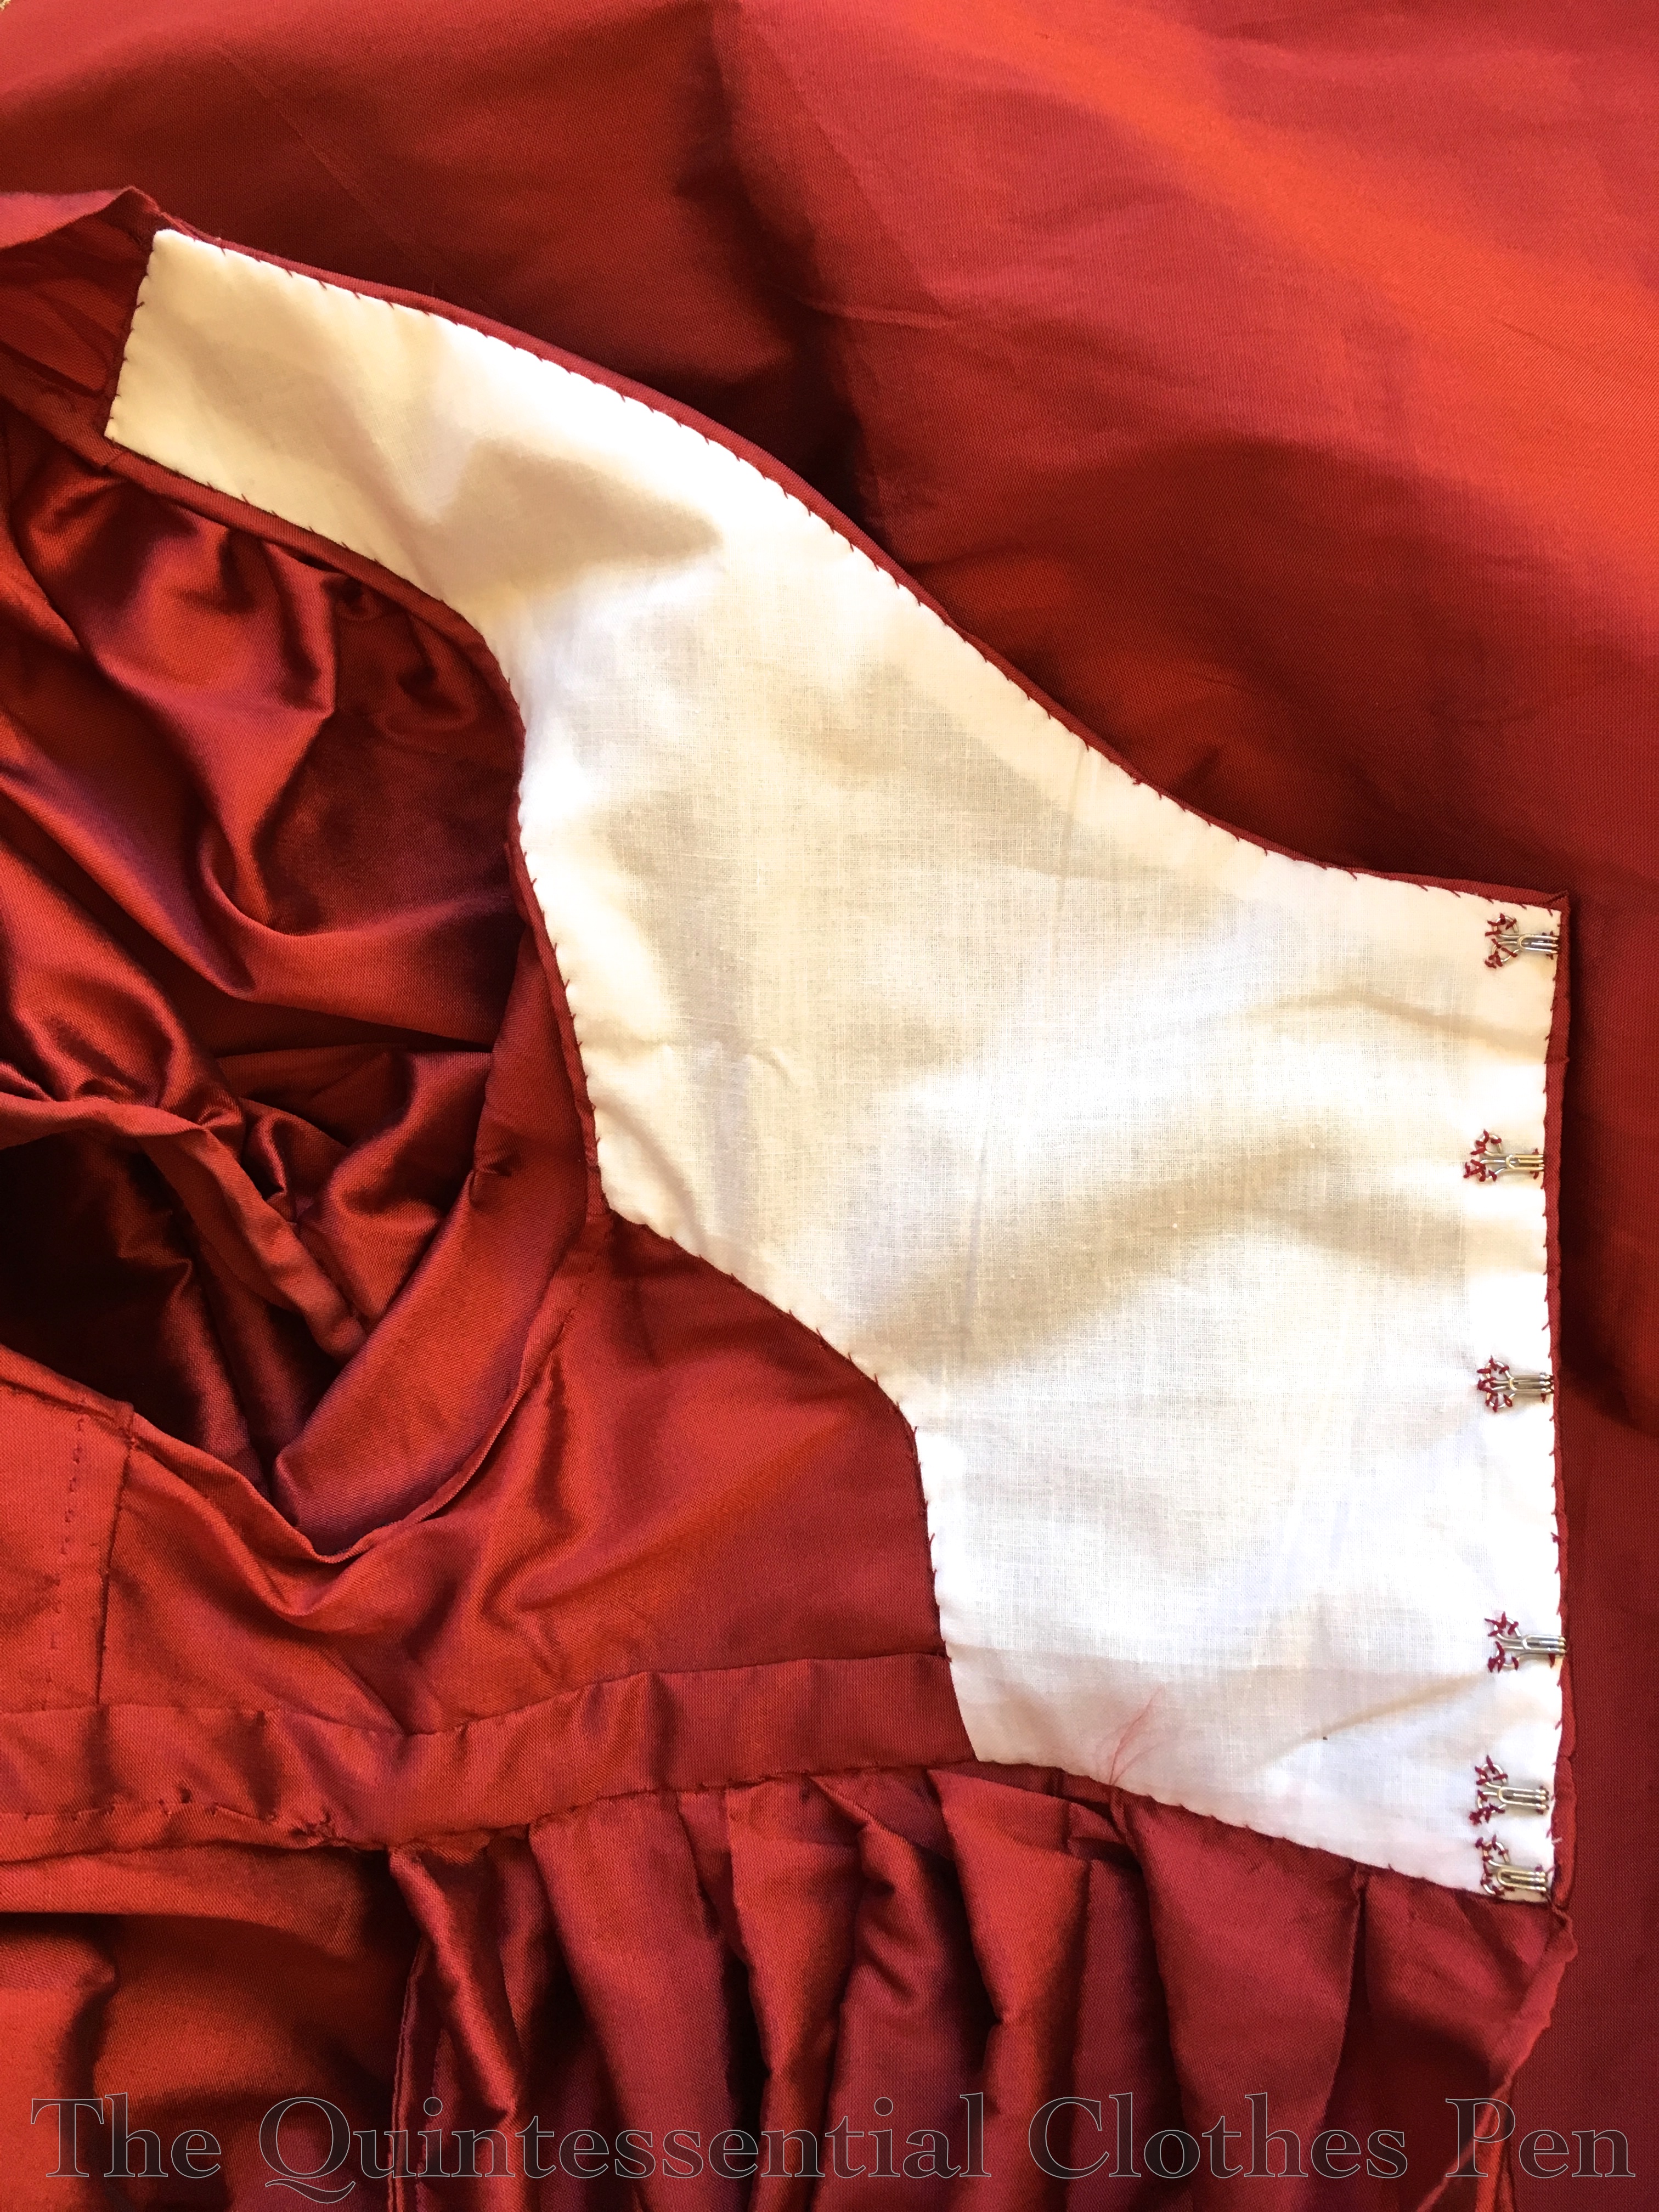
I pondered multiple ideas, but the one I settled on was to cut new center back pieces with more width to them and sew them over the current, too-small pieces. I also had to piece the waistband to extend it as well as re-pleating the skirt to fit the larger size waistband, but it looks pretty good, I’d say.
The inside of the dress now looks like this. Previously, it was unlined (I did a post about the original inside finishing of this dress, which you can see here). Now, the center back panel has a lining to help stabilize it and encase the original back panels and waistband extension. Still tidy, yay!
In addition, the armhole openings had become quite tight. I wanted a little more space to be comfortable, so I also added underarm gussets (the upside down triangle). I simply opened up the seam and added a diamond shaped piece. It’s diamond shaped and folded in the center to hide the raw edges inside and out. I didn’t bother to add a band at the bottom, as I figured this gusset was in a place no one was likely to see such detail.
The other dress is my 1812 white square neck Ikea gown. I made this in 2012and have also worn it many times. Before the recent changes, I had made no other alterations to the dress since I first made it.
This dress also had a panel added to center back, but I had to more carefully follow the details of the dress, including the small seams (because of the sheer fabric) and the tucked waistband. This dress has spent a lot of time in the sun, and between that and being gently washed a few times, the fabric has become a much brighter white than it started out. It’s not noticeable, until I add a piece of the same fabric that has been sitting in my stash and the light hits it just right. (It’s convenient for pointing out the new fabric though, because it’s pretty obvious in the picture below!)
Sometimes, this would bother me. But it’s only noticeable in some light and I hope that eventually the pieces will also brighten. Plus, it’s entirely historically reasonable to piece a gown using more of the fabric that hasn’t faded in the same way as the rest of the garment to adjust the size. It’s much more practical than making an all new garment!
I had to regather the skirt on this dress (like I had to repleat the red one) to accommodate the new waistband size. I also added an underarm gusset on this dress to help the arm openings be more comfortable.
While the red dress fit pretty perfectly after the alterations, the white dress alterations proved to be too much (it’s hard to fit these things on yourself when the closures are in the back!) and I now need to move my eyes over and add a drawstring to the top of the back neckline to keep my undergarments from showing. Sometimes it seems like some garments will never leave the to-do list. Oh well! Does that happen to you? You think a garment is done until you wear it and realize it needs something changed or added? (I’m proud to report that between the time I started writing this post and the time I finished writing this post I completed those final two notes–drawstring and bars–and now the dress is done and ready to get put away! Hooray for getting rid of UFOs!)
Do you ever resize your modern or historical clothing after closet shrinkage? What methods have you used?
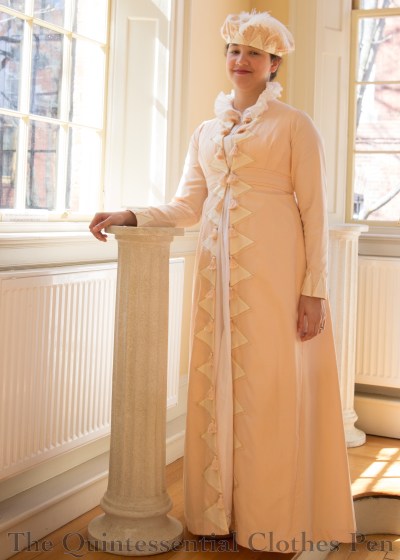
My last few posts have been about the new Regency clothes I made earlier this year: Orange Boven Pelisse and Hat from 1814 as well as a look at the history behind the description Orange Boven and 1817 Gold Stripe Duchess Evening Gown. Now that I’ve got all the details about the construction and history of these garments recorded, it’s time for a look at the Regency Dance Weekend that provided an opportunity to wear these clothes in the company of other fabulously dressed people and in historical halls built in the early 19th century.
This annual Regency Dance Weekend is organized and run by the Commonwealth Vintage Dancers. If you want to see more pictures and read more about the amazing Regency moments I’ve had in past years, I have posts about them here: 2013, 2014, and 2016.
Saturday always begins with dance classes in modern clothes. The hard work we all put in during the day pays off at the evening ball, when we are able to dance with quick reminders of the figures but without full teaching. It’s a very special experience every year!
After a final class on Sunday morning, we take the afternoon off from dancing for a bit of leisure. Often it has been tea, though in some years we’ve had promenades, or even archery! This year we focused on tea, games, and chatting.
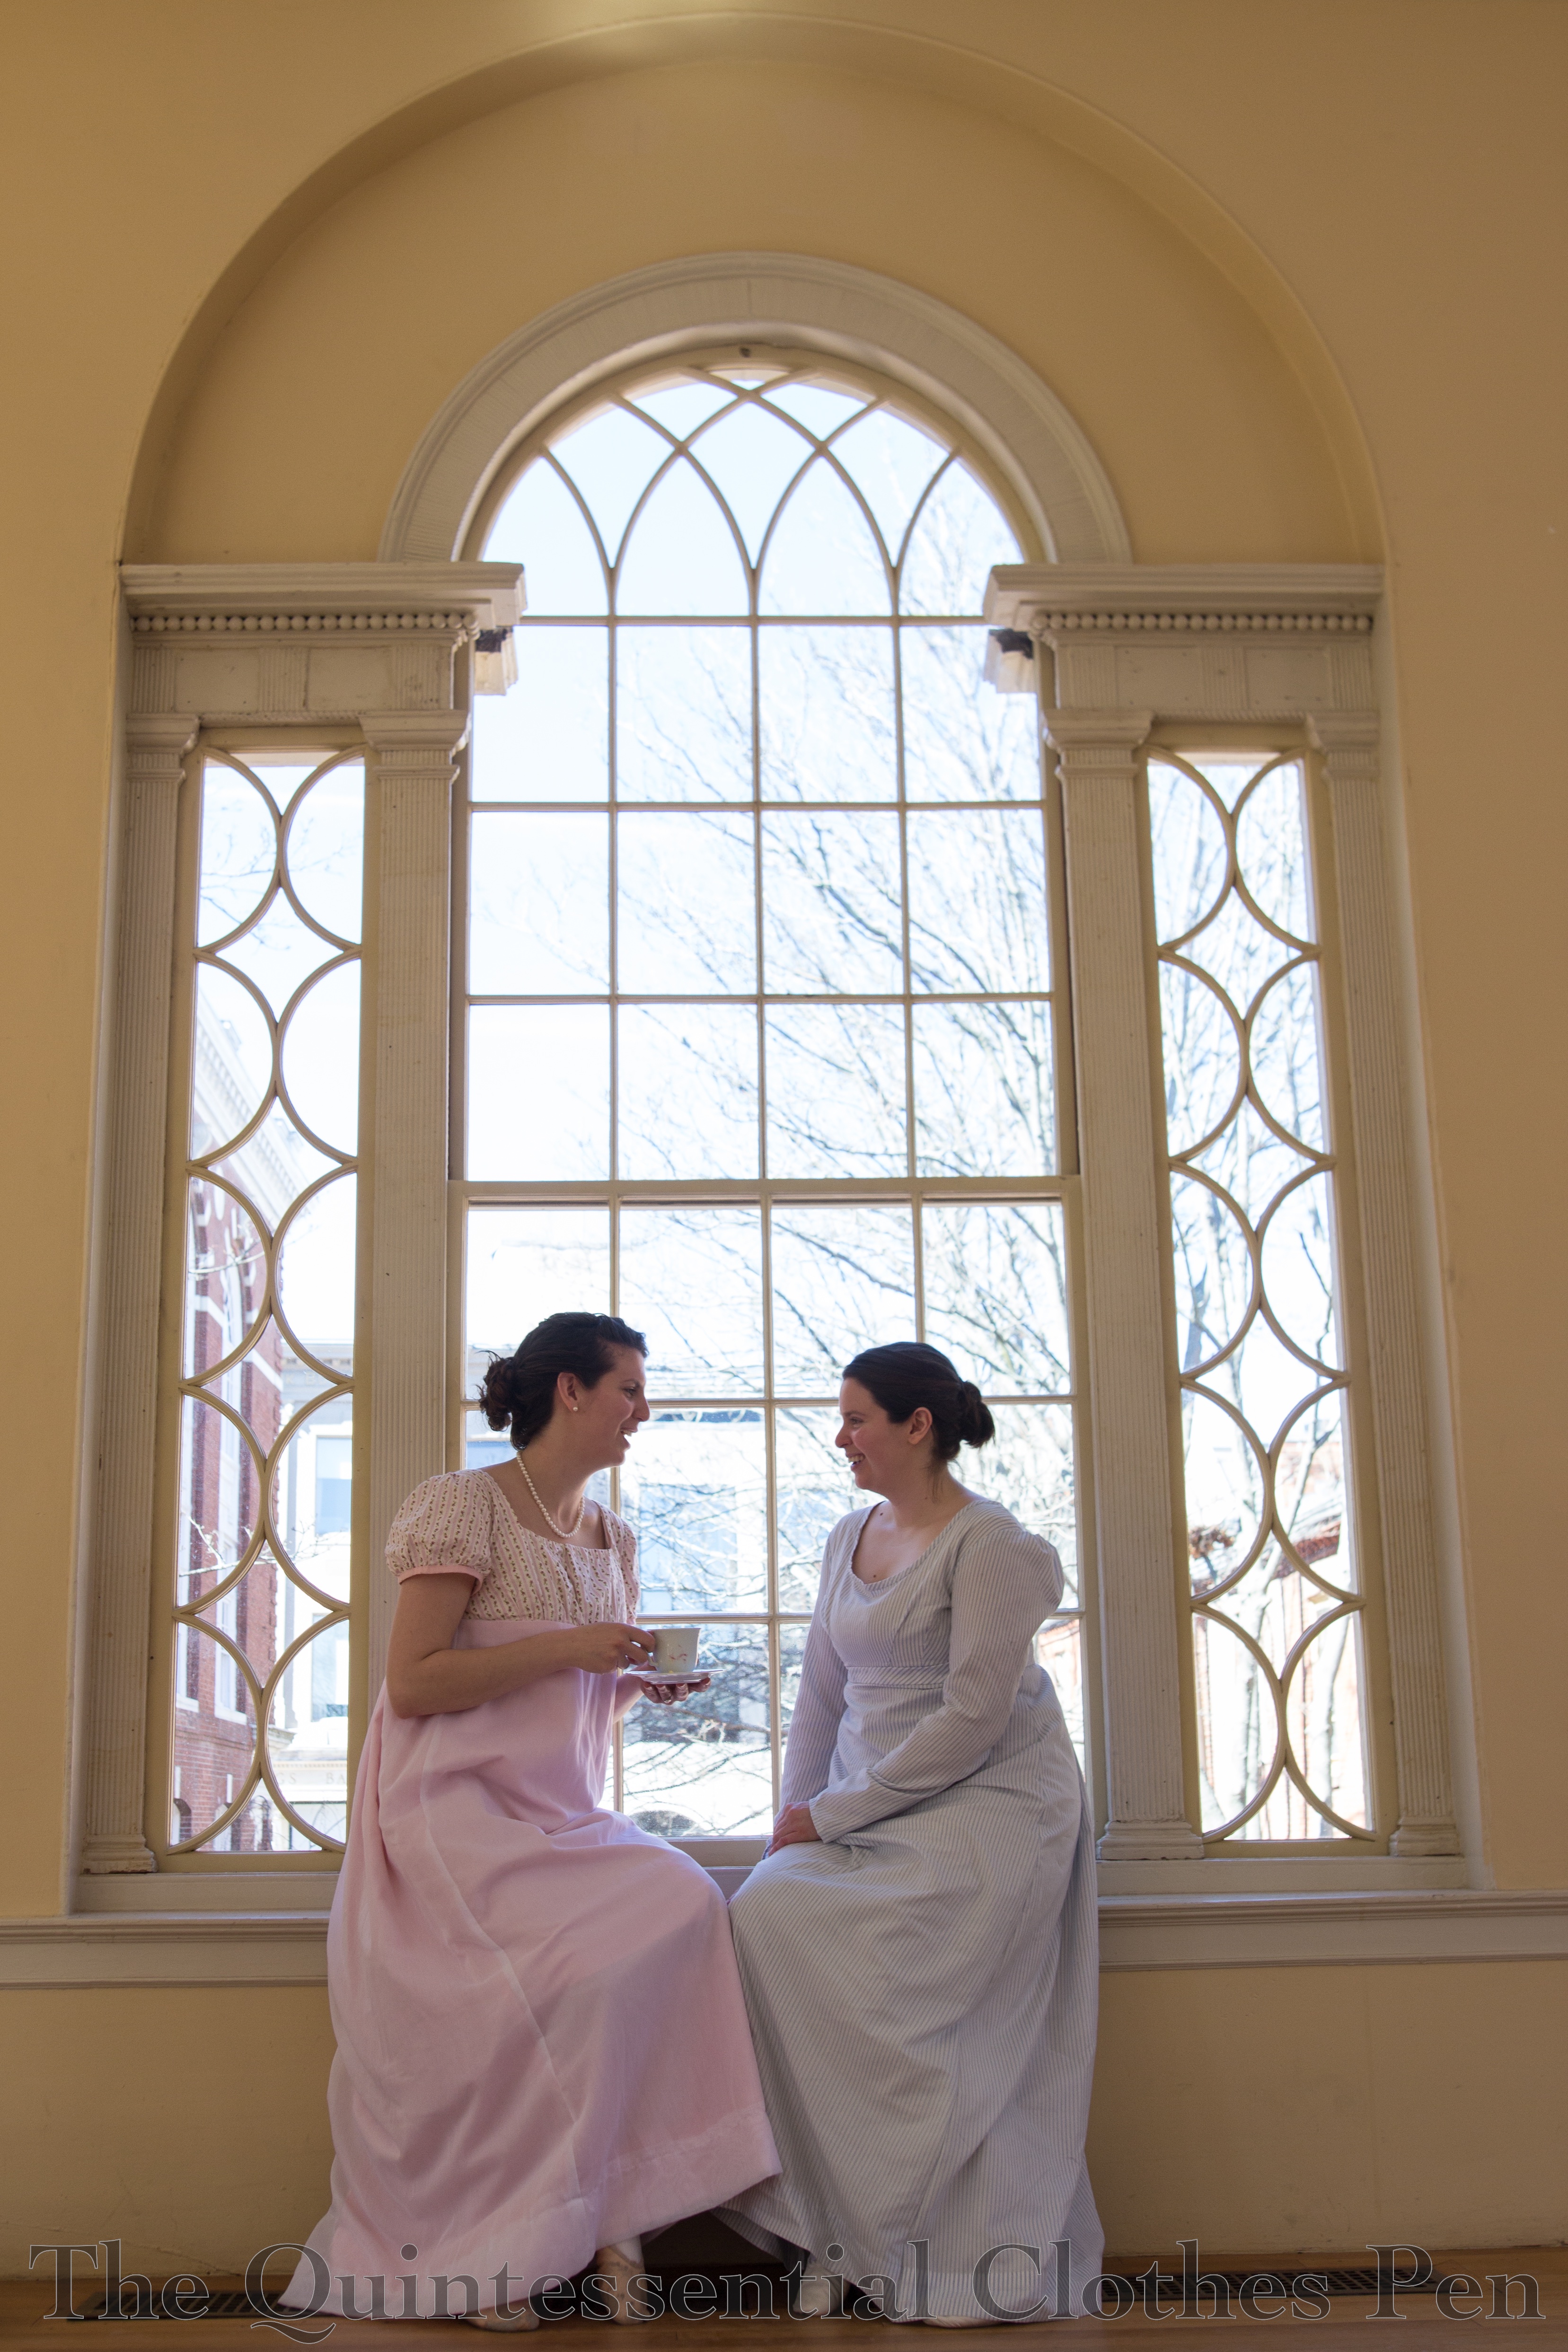
This venue, Old Town Hall, has lovely windows that make perfect frames for picture taking!
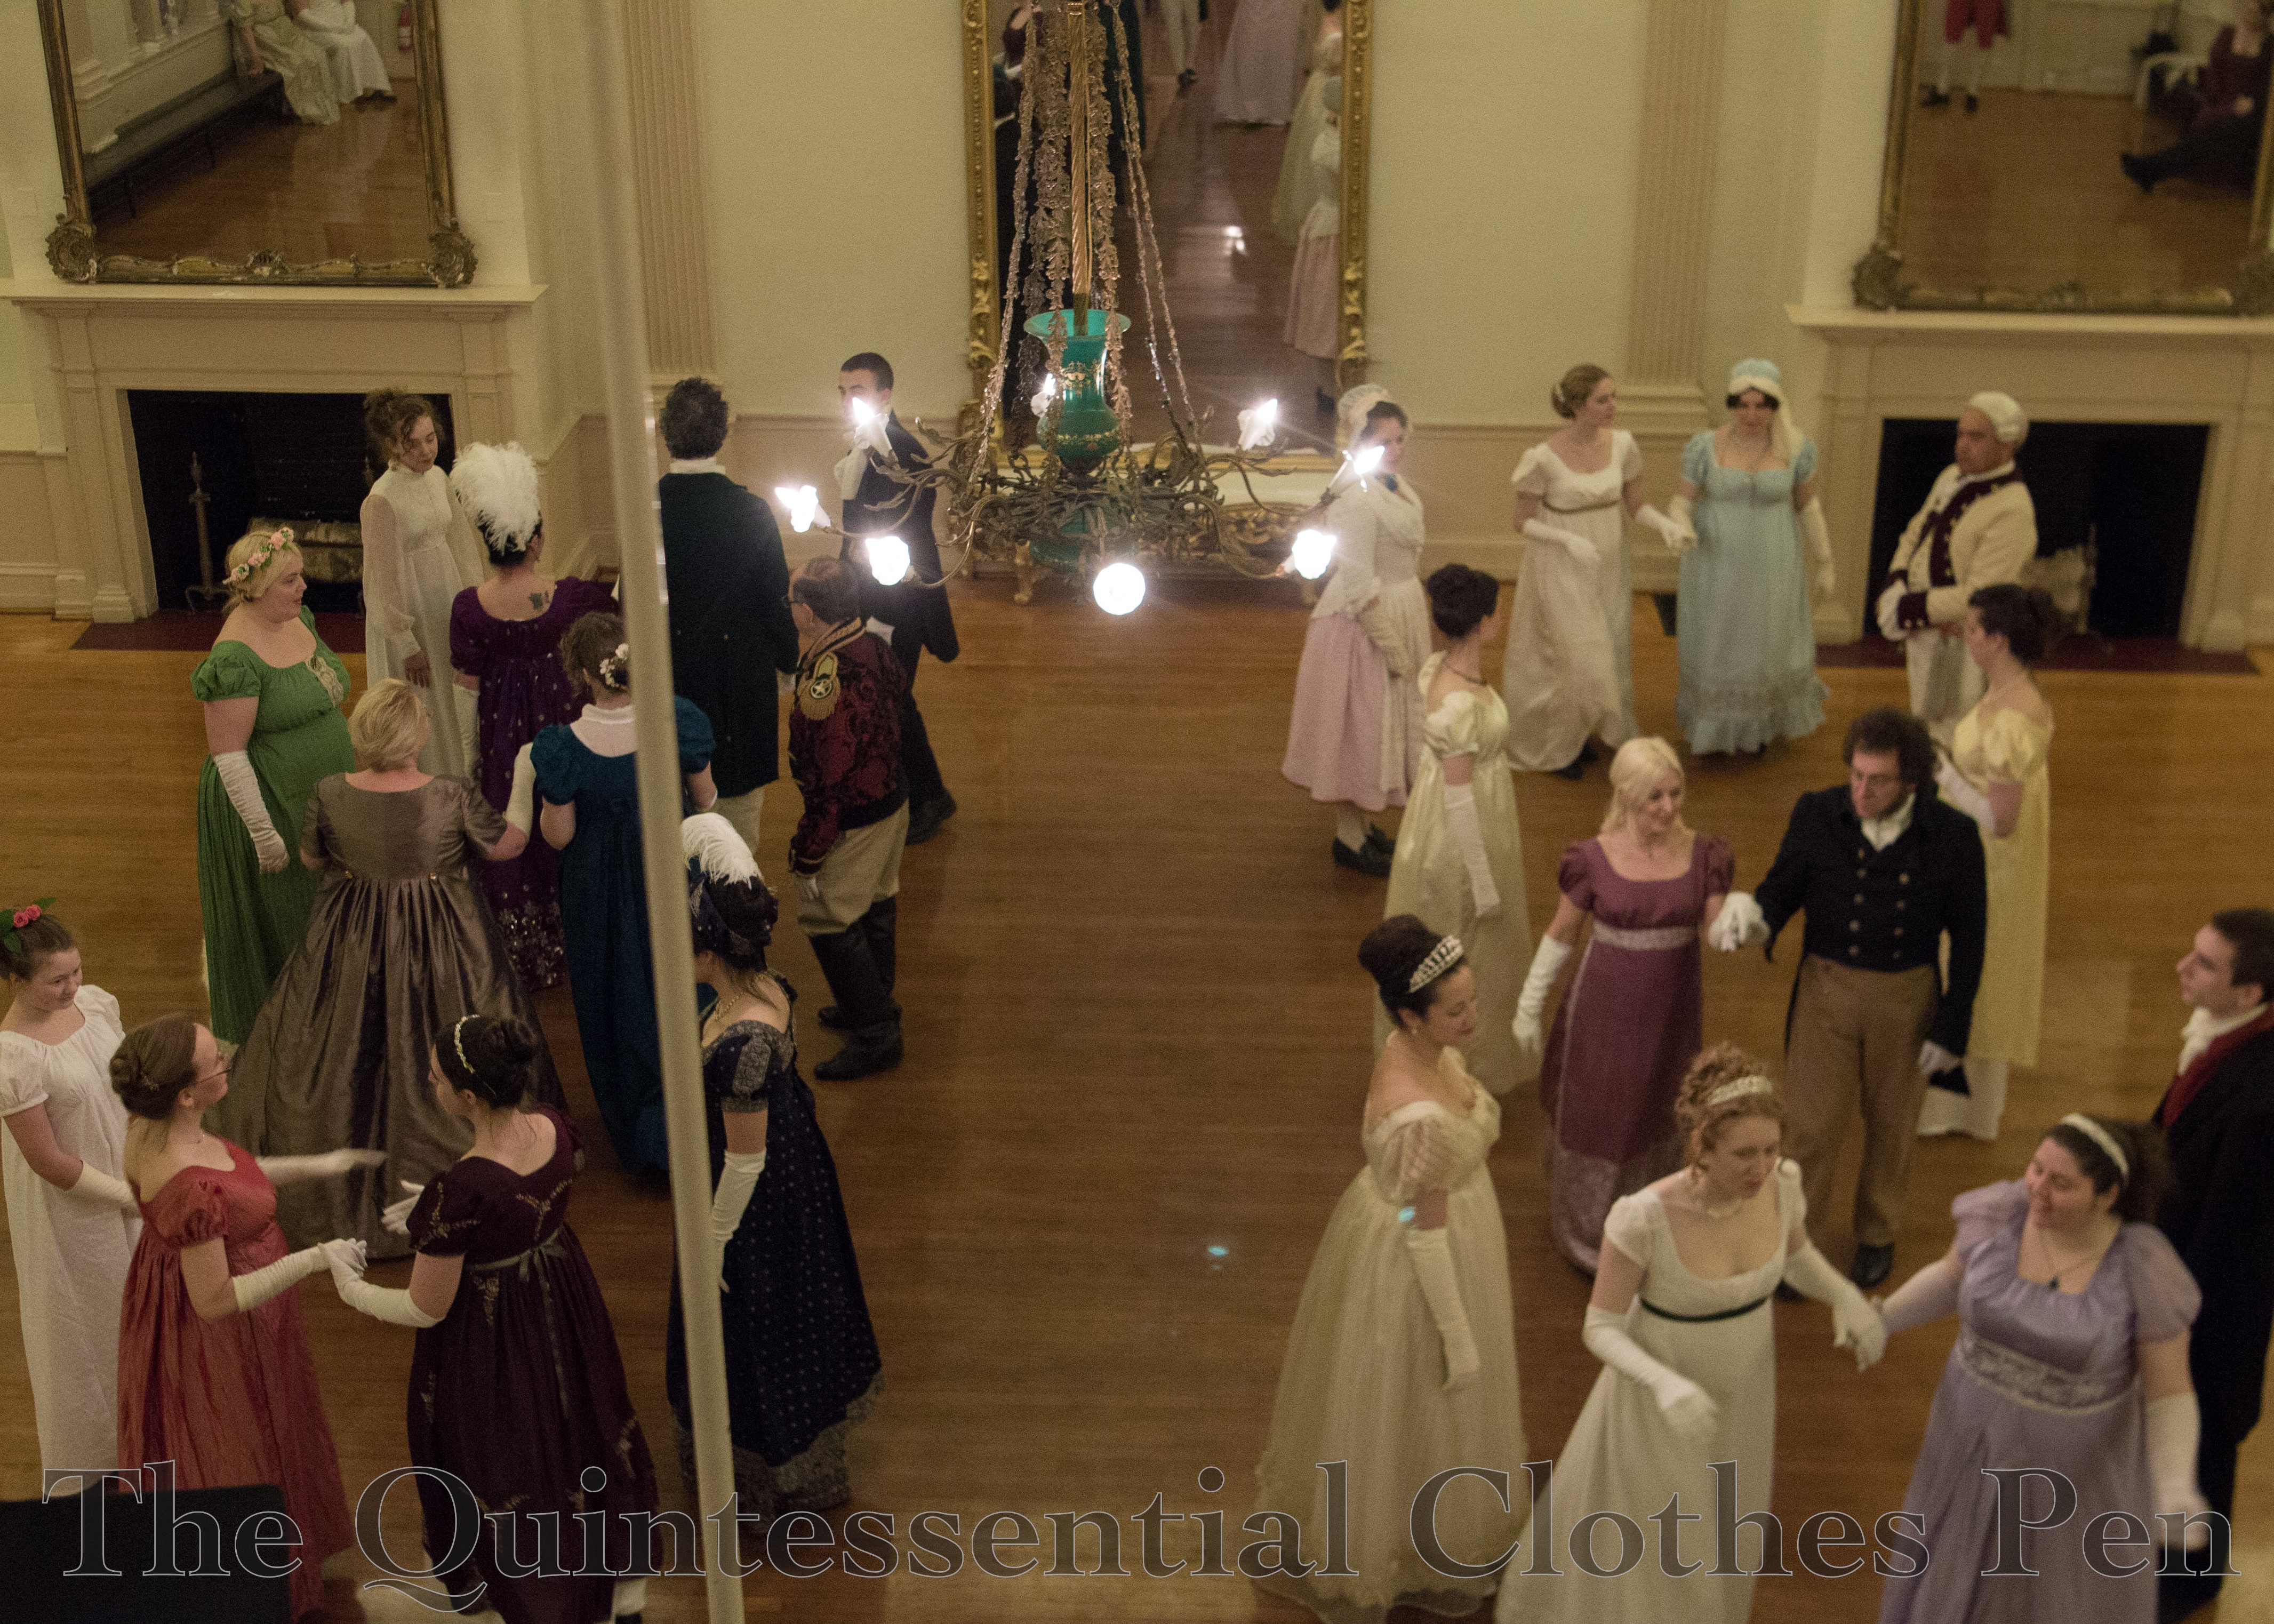
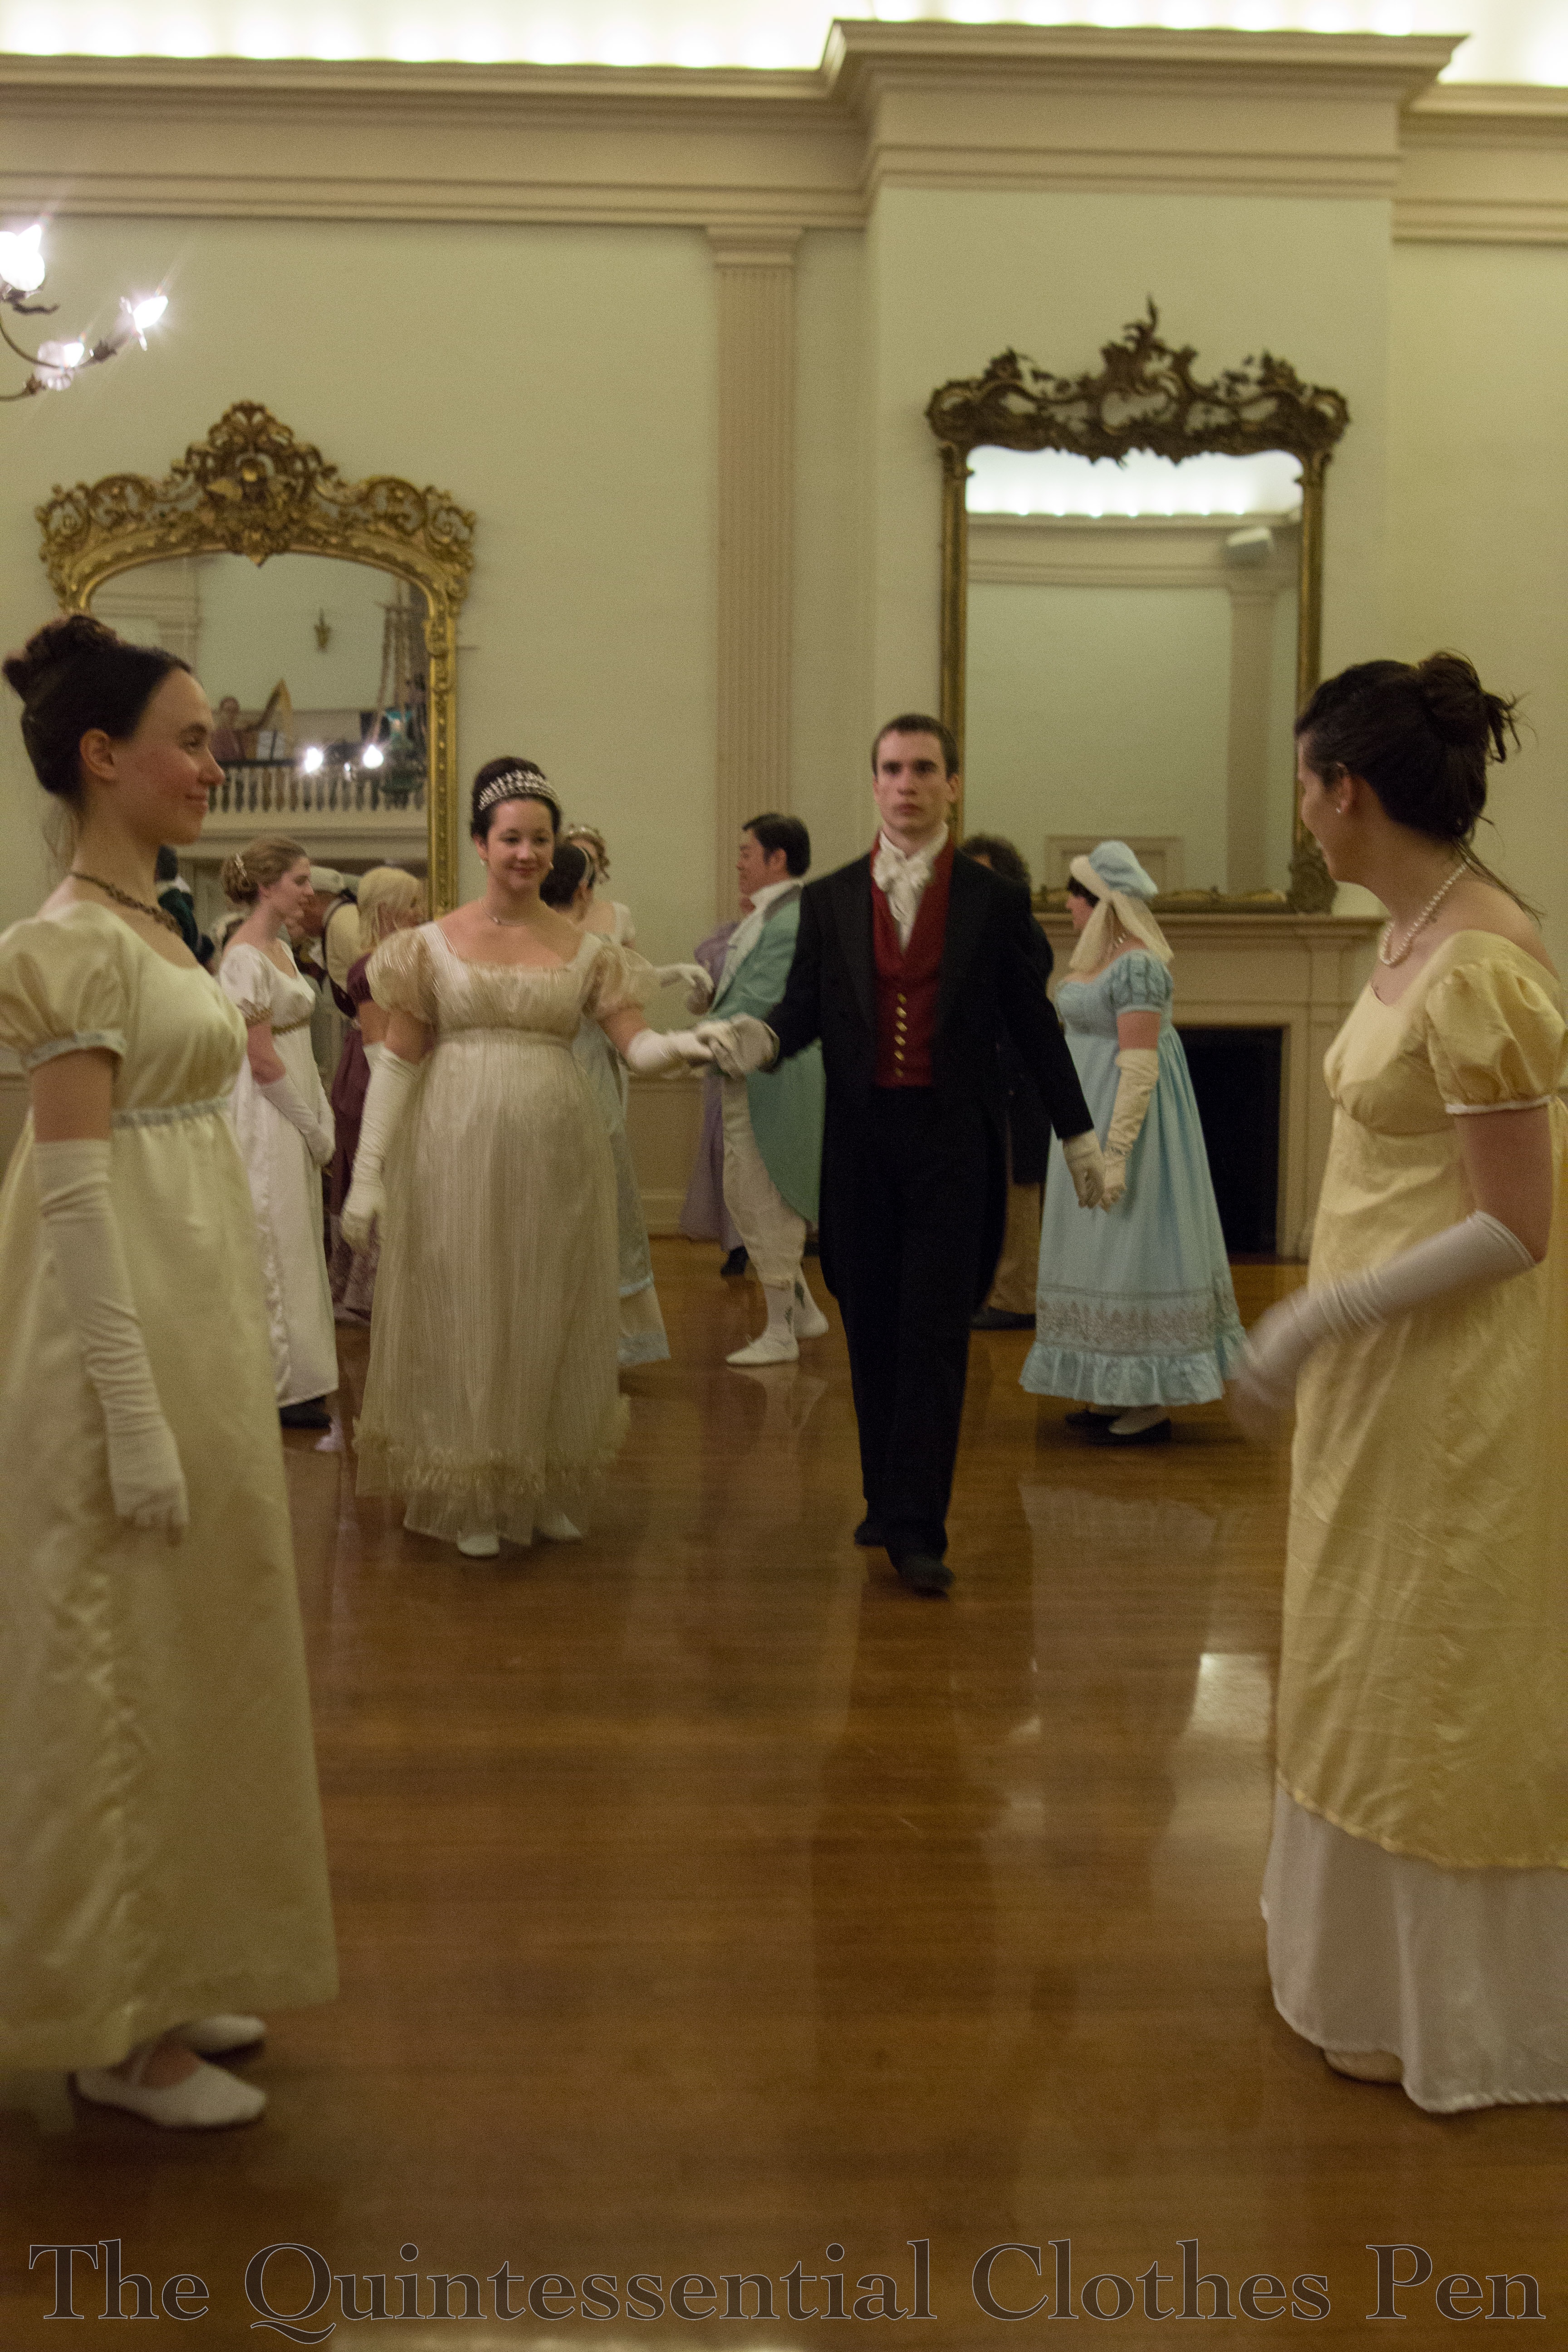
After tea, those of us running the weekend calmly (well, probably with a lot of scurrying) switch venues to the more elegant Hamilton Hall, where we have a formal ball with a lavish reception. Hamilton Hall is special, with a gleaming sprung floor, musicians balcony, and gorgeous gilt framed mirrors.
Sometimes, though, silliness ensues! I couldn’t resist making a face in the picture below… After that is a face that often happens after I run out of pose ideas…
There is lovely dancing on that evening. The things we’ve all learned have had time to sink in and people dance marvelously, again without teaching.
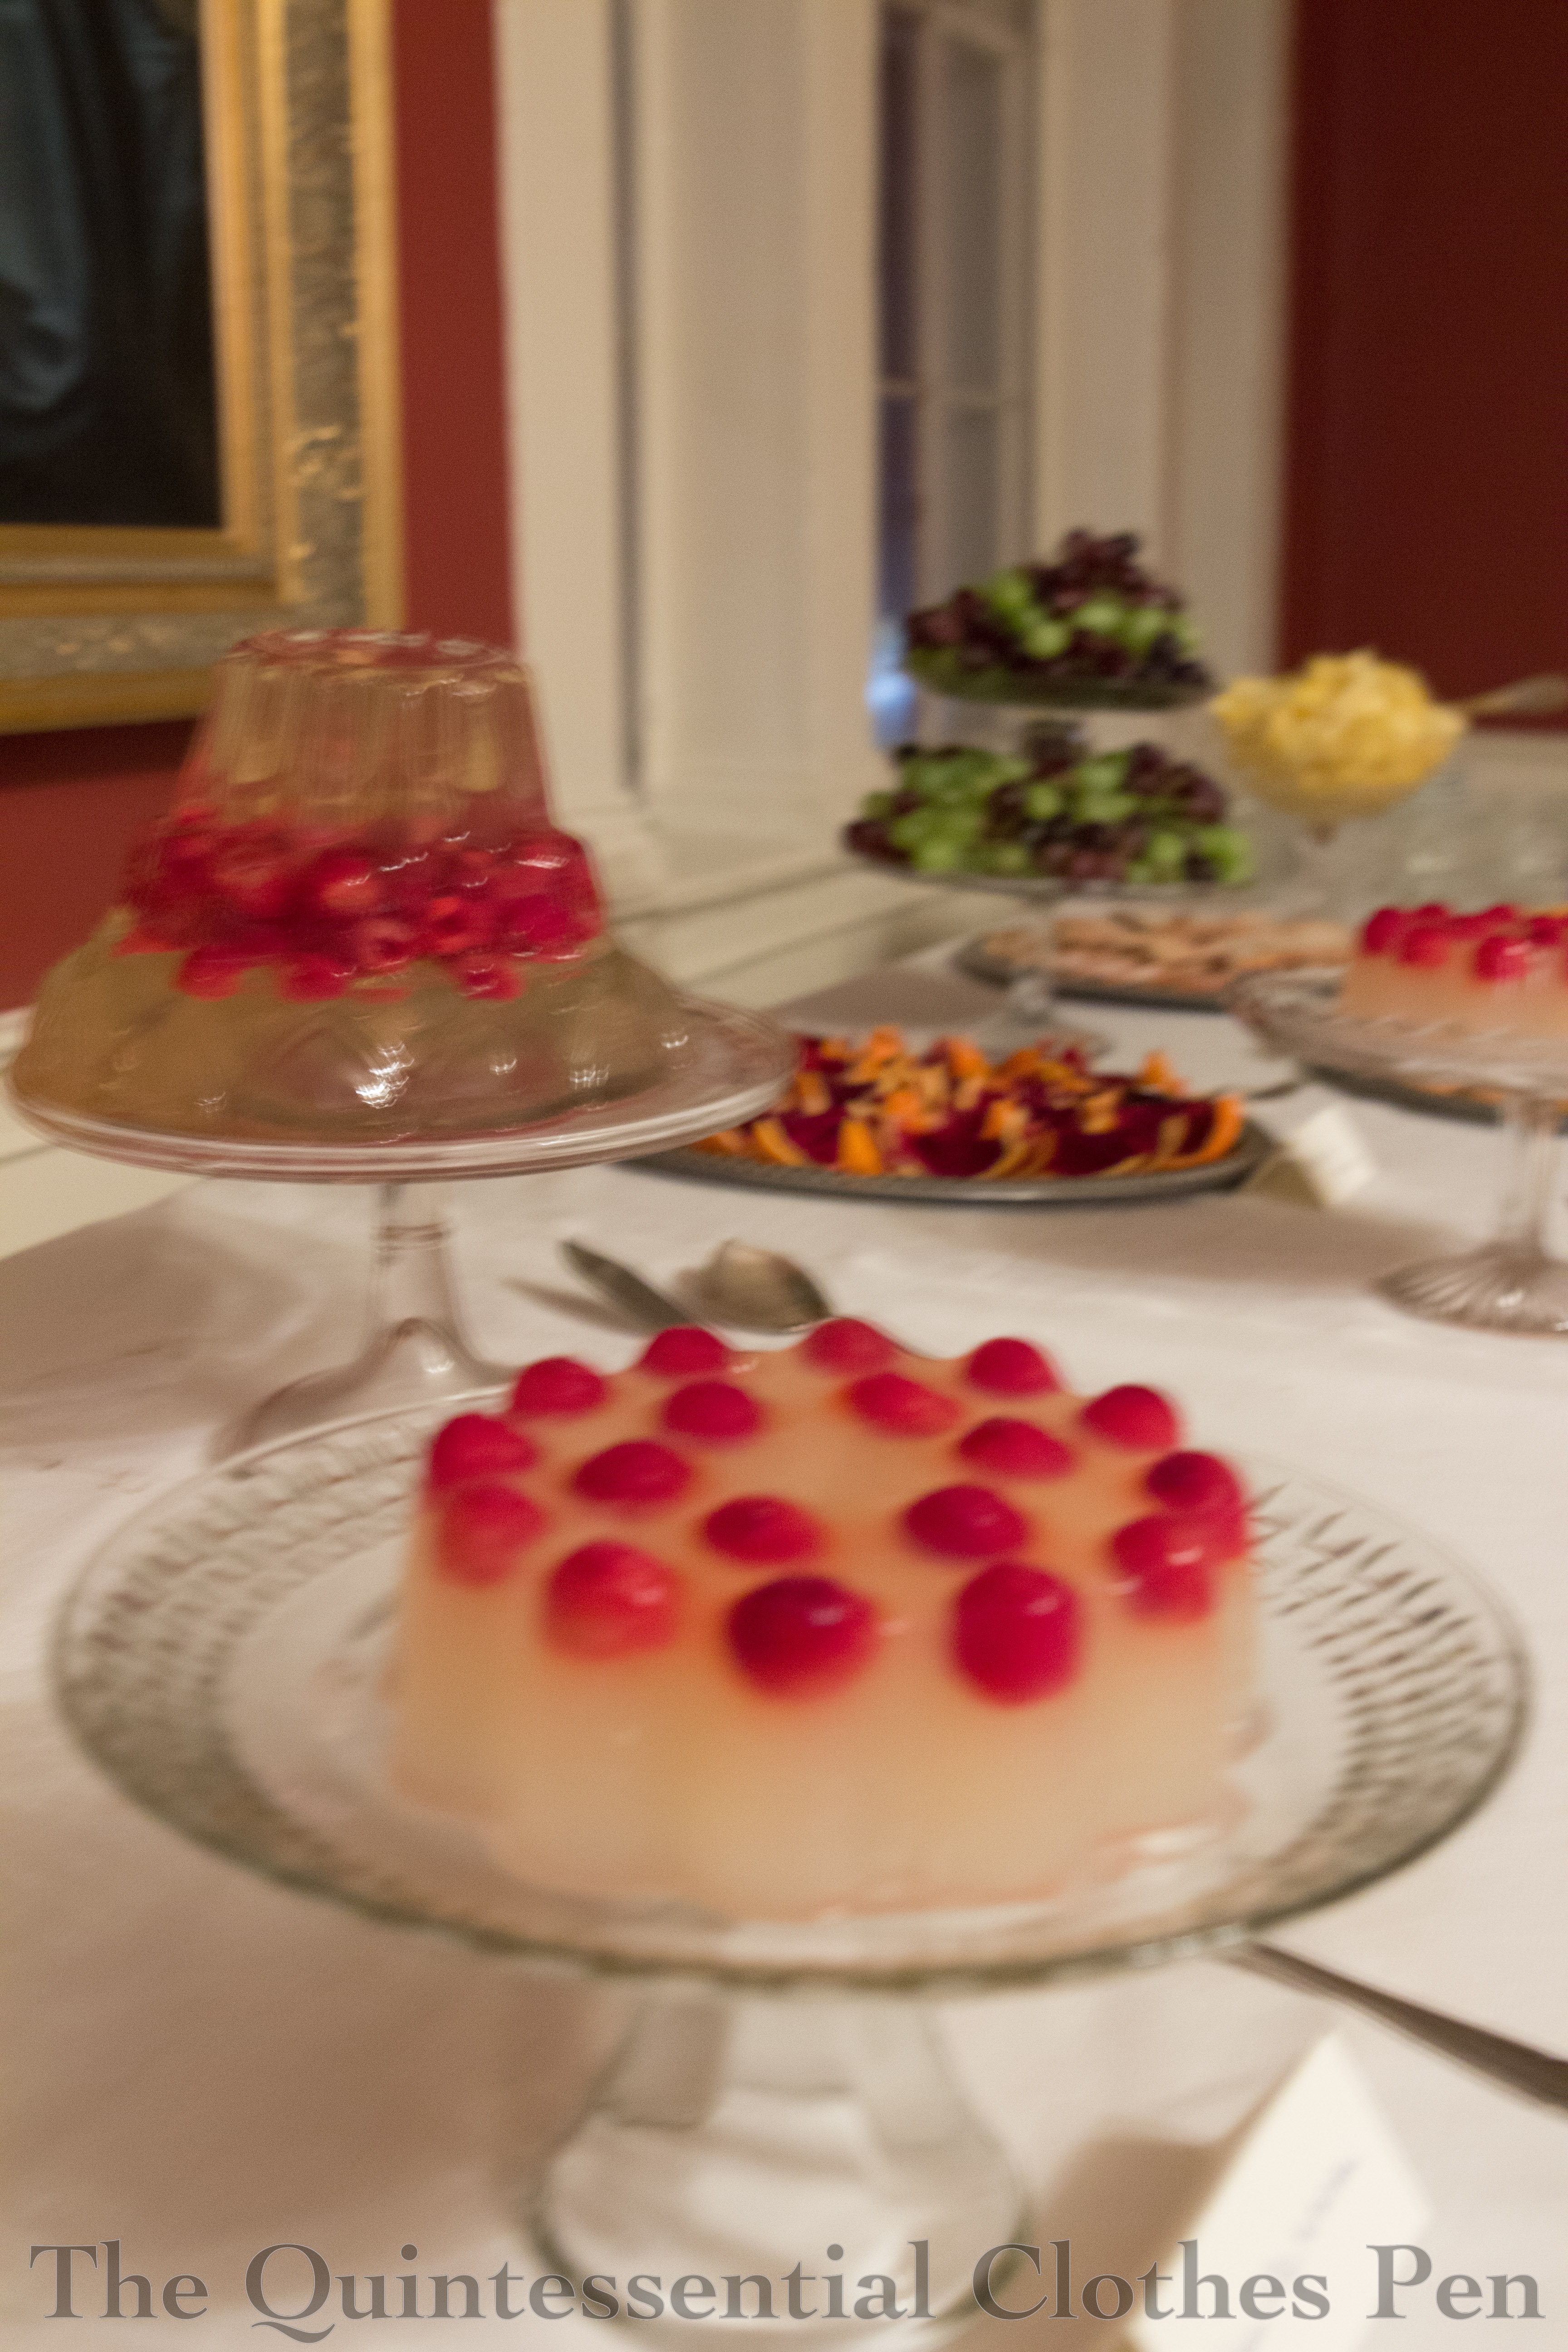
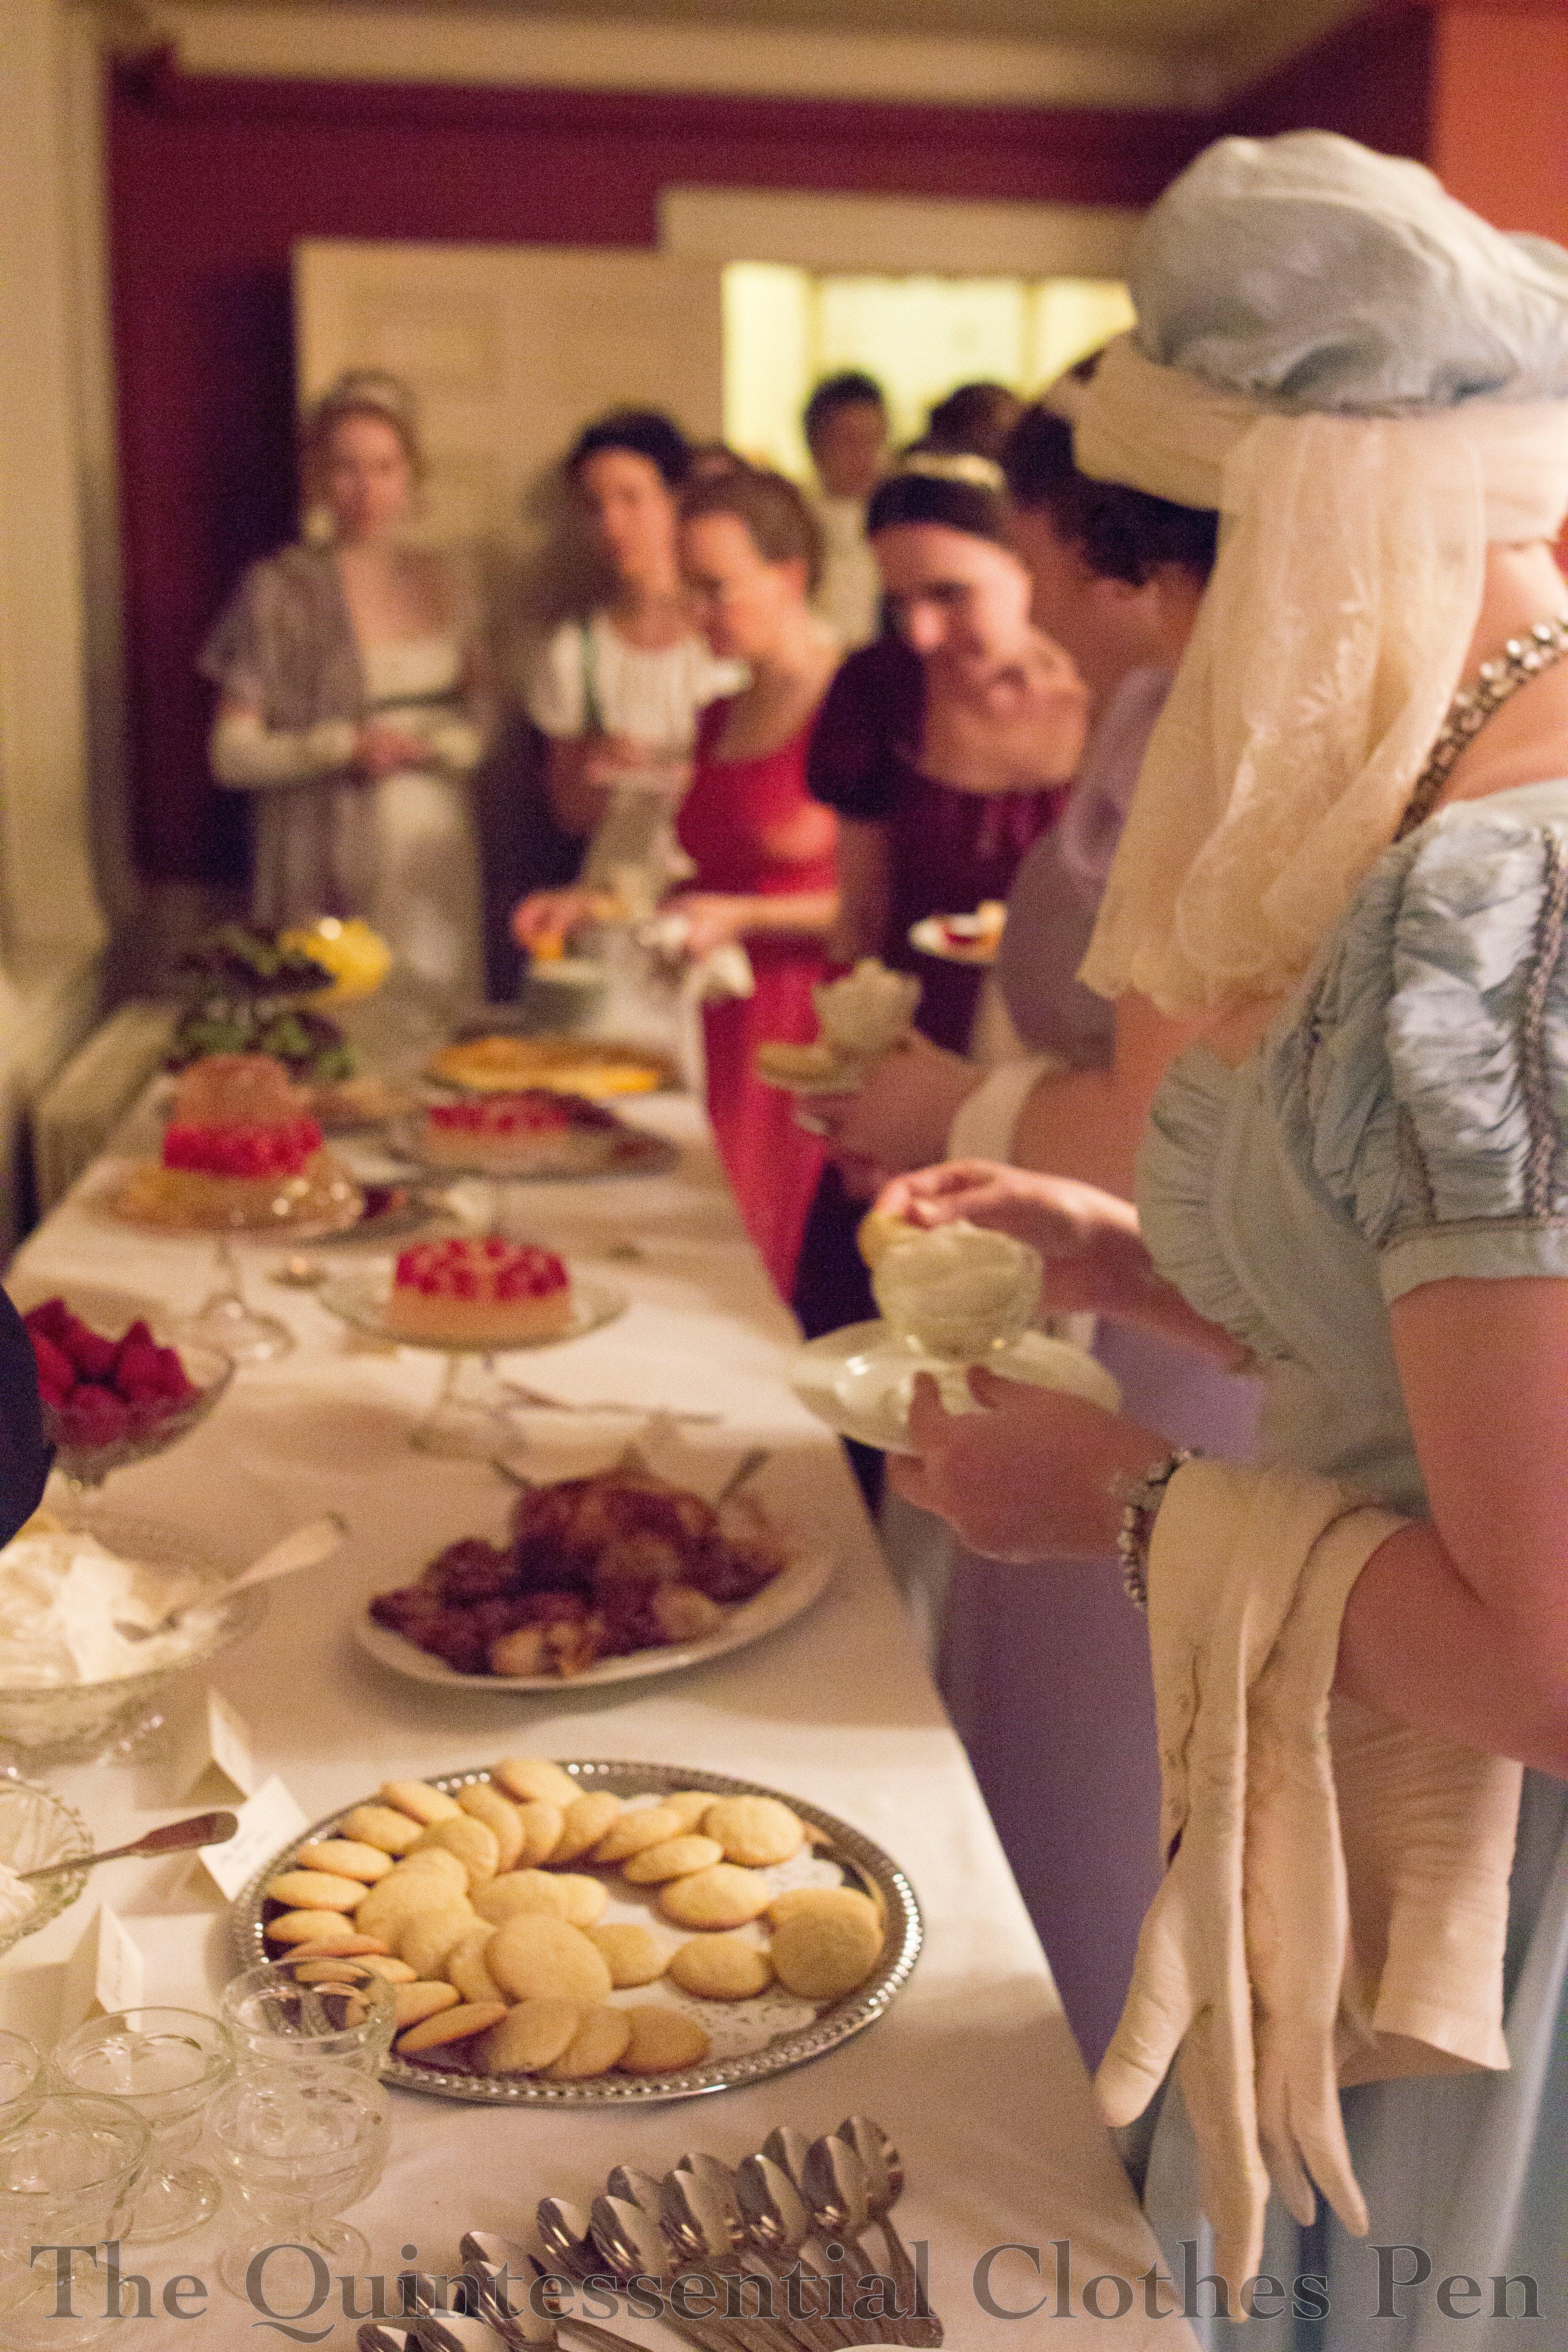
There are lots of yummy and beautiful foods to tempt everyone away from the ballroom, as well. This year we had some successful fruit filled jellies, a popular dessert in the 19th century.
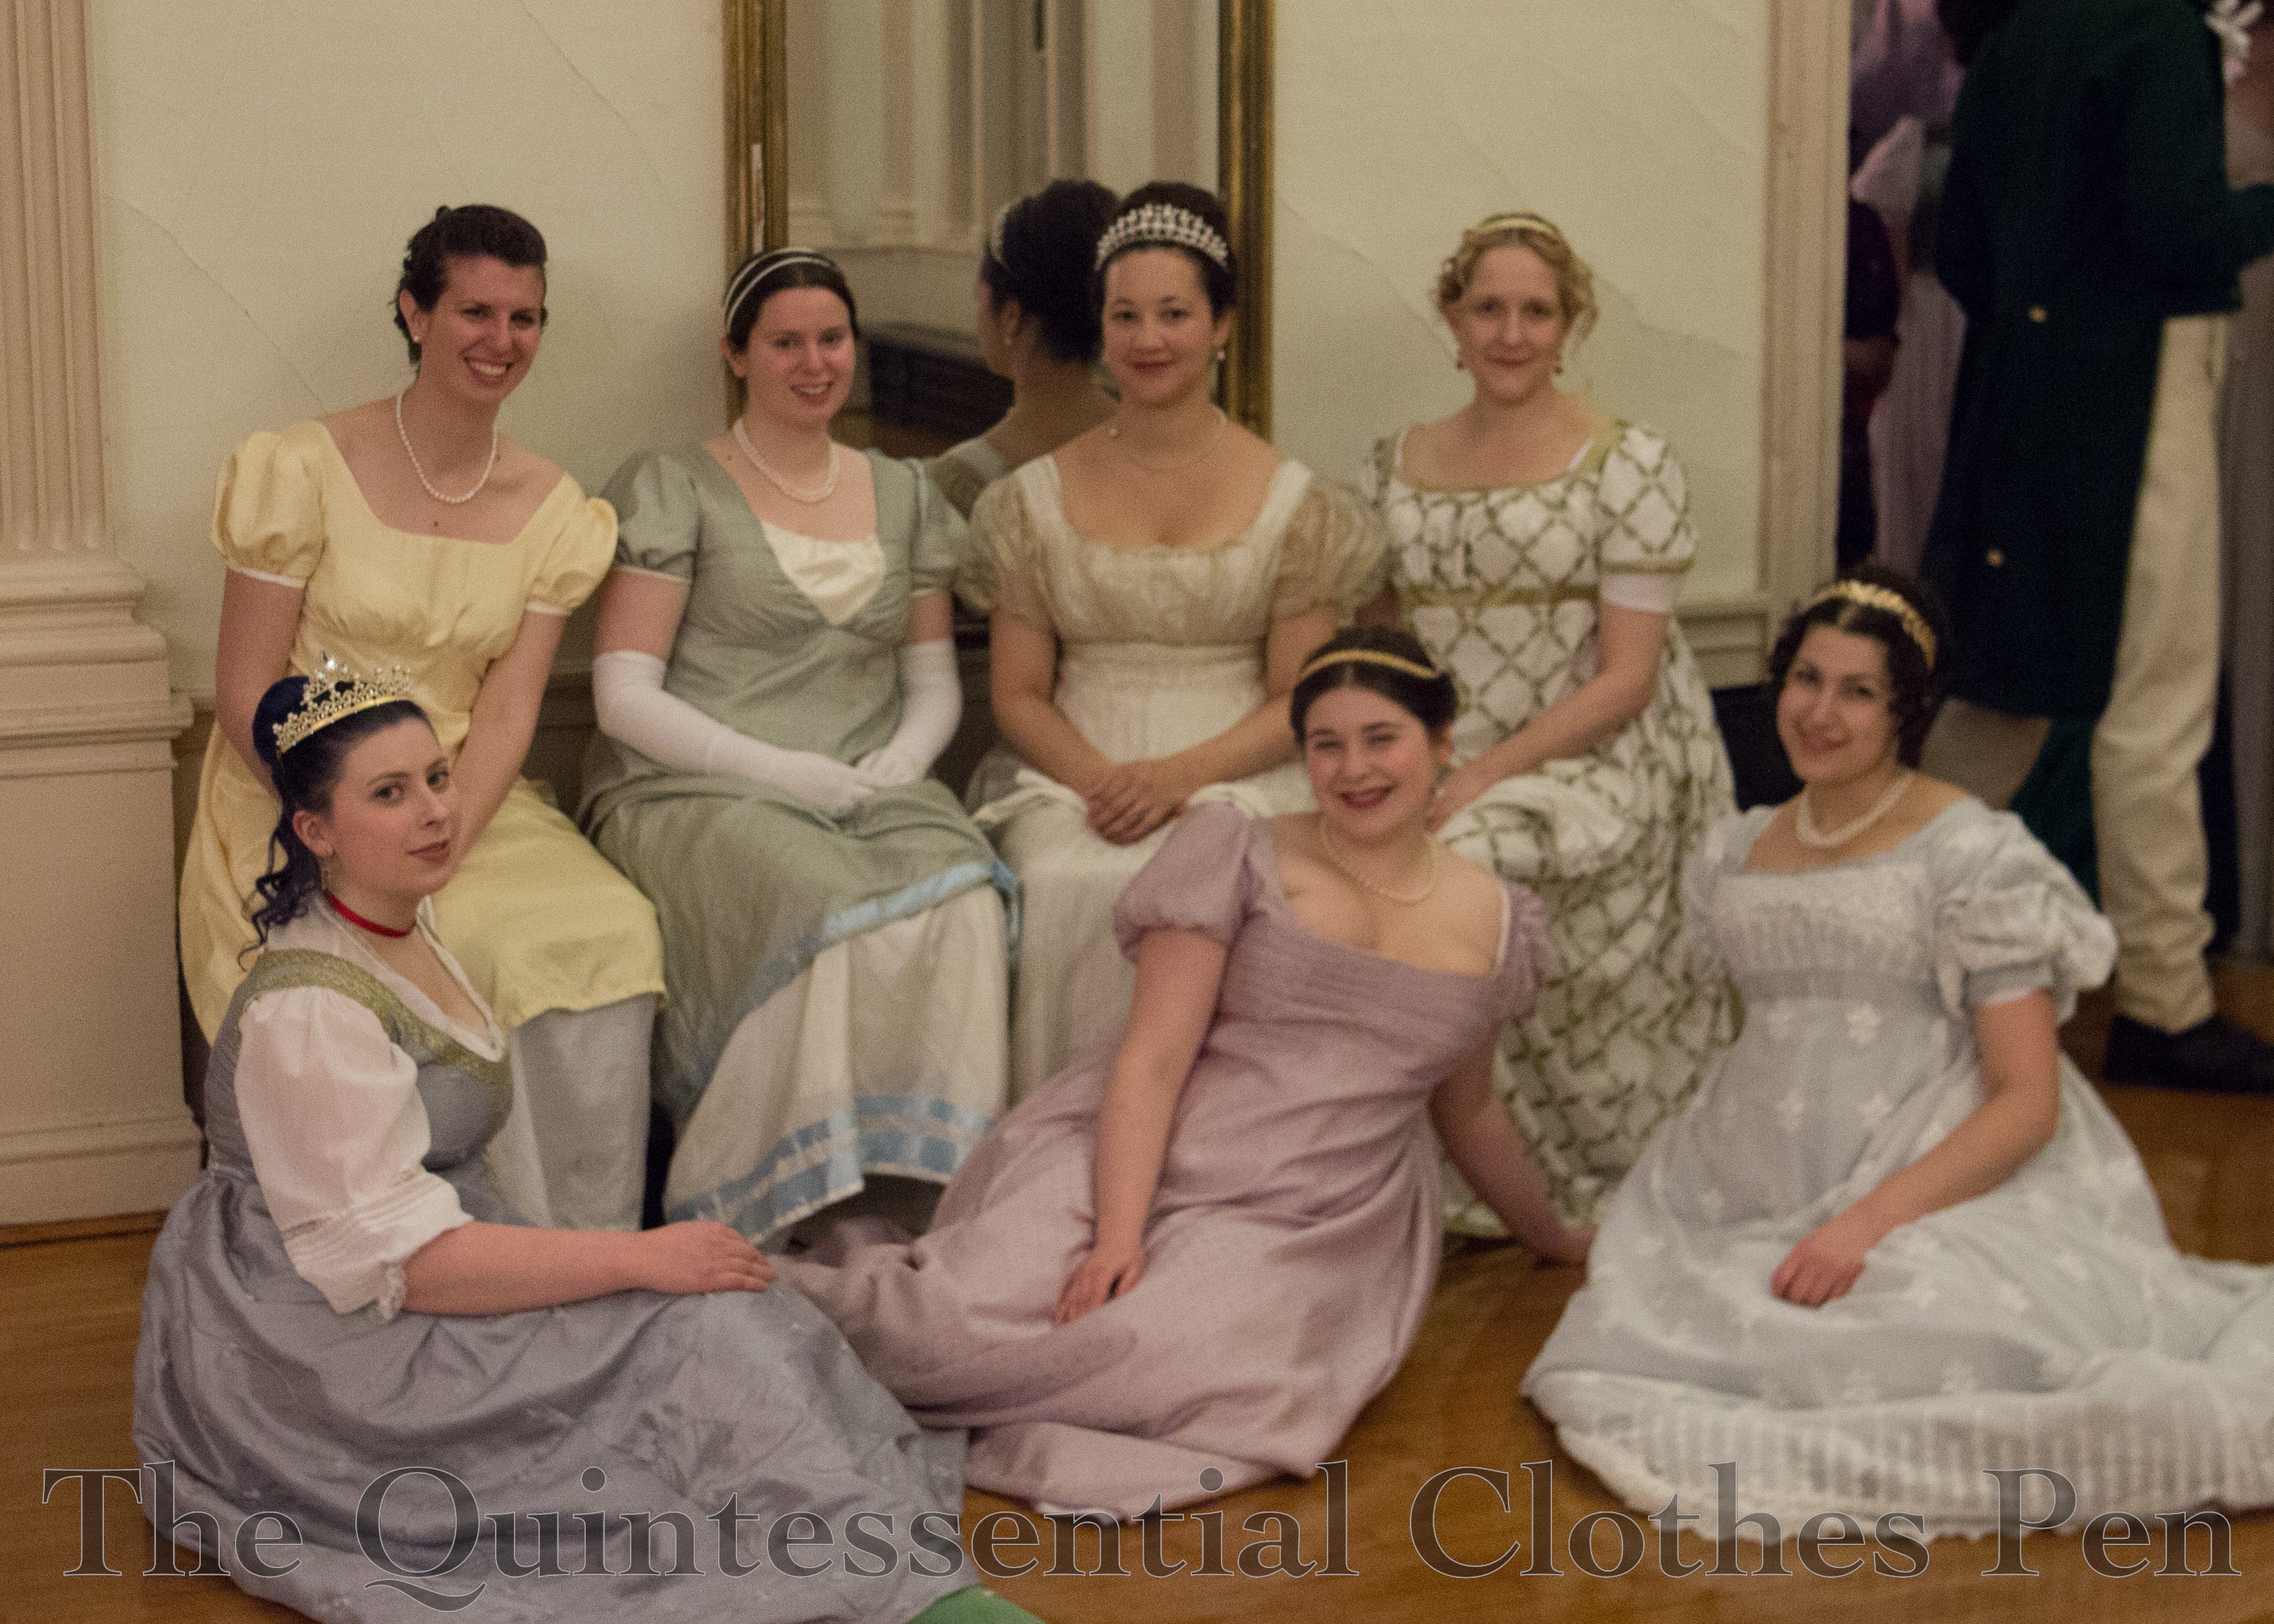
After lots of dancing (and dish washing–lovely spreads like this with real dishes don’t appear without a fair bit of work behind the scenes) a much needed sitting break provided a nice opportunity for a group photo.
As usual, it was a lovely weekend full of great dancing and meeting lots of lovely new people from around the country, the more local New England area, and even Canada! Maybe some year I’ll get to meet you, too!


