

I finished knitting another sweater!

This is actually my fourth sweater. The first was my 1917 Knitted Sweater of Angorina, the second hasn’t been posted to the blog, and the third was my 1920 Sweater of Determination. Each sweater has been a learning experience in some way, and this one was no different!
One thing I learned with this sweater was about multiple different ways to increase and decrease symmetrically on each side of a piece (a sleeve for example). This was a rabbit hole I went down that I think was sparked by my wondering why the stitch instructions were different for the left and right side raglan armholes.
The method of increasing or decreasing is an important one made by the pattern designer because every stitch has a different look and different types of stitches may or may not look symmetrical when knit up. Also, the increase and decrease stitches have a slant to them, so it’s important that the slants are going in the correct direction. This resource clearly outlines different increase and decrease methods.
You can see the decorative symmetry of the shaping on the armsceyes in this pattern in the photo below. I love how it looks!

I also learned how to K2Tog TBL (Knit 2 Together Through The Back Loop). I’d K2Tog before, but not through the back loop. I found this explanation of K2Tog TBL to be the most helpful.
And, I learned about picking up stitches along an already finished edge, which is something I hadn’t encountered in any of the things I’ve made so far. This technique is used for the cuffs on the new sweater. I found this information and this information super helpful in terms of figuring it out and making it look nice.

The pattern for this sweater is a PDF download from Subversive Femme on Etsy. It is the 1950s Fitted Raglan Cardigan pictured below. The pattern was easy to download and the quality was clear and easy to read.

My cardigan (the end result) generally follows the pattern image, so that’s great! There are a few differences:
1- My understanding of the instructions created a vertical pattern that doesn’t quite match the one pictured on the orange sweater. I’m not sure if I was doing something wrong or not, but I don’t mind how mine turned out.
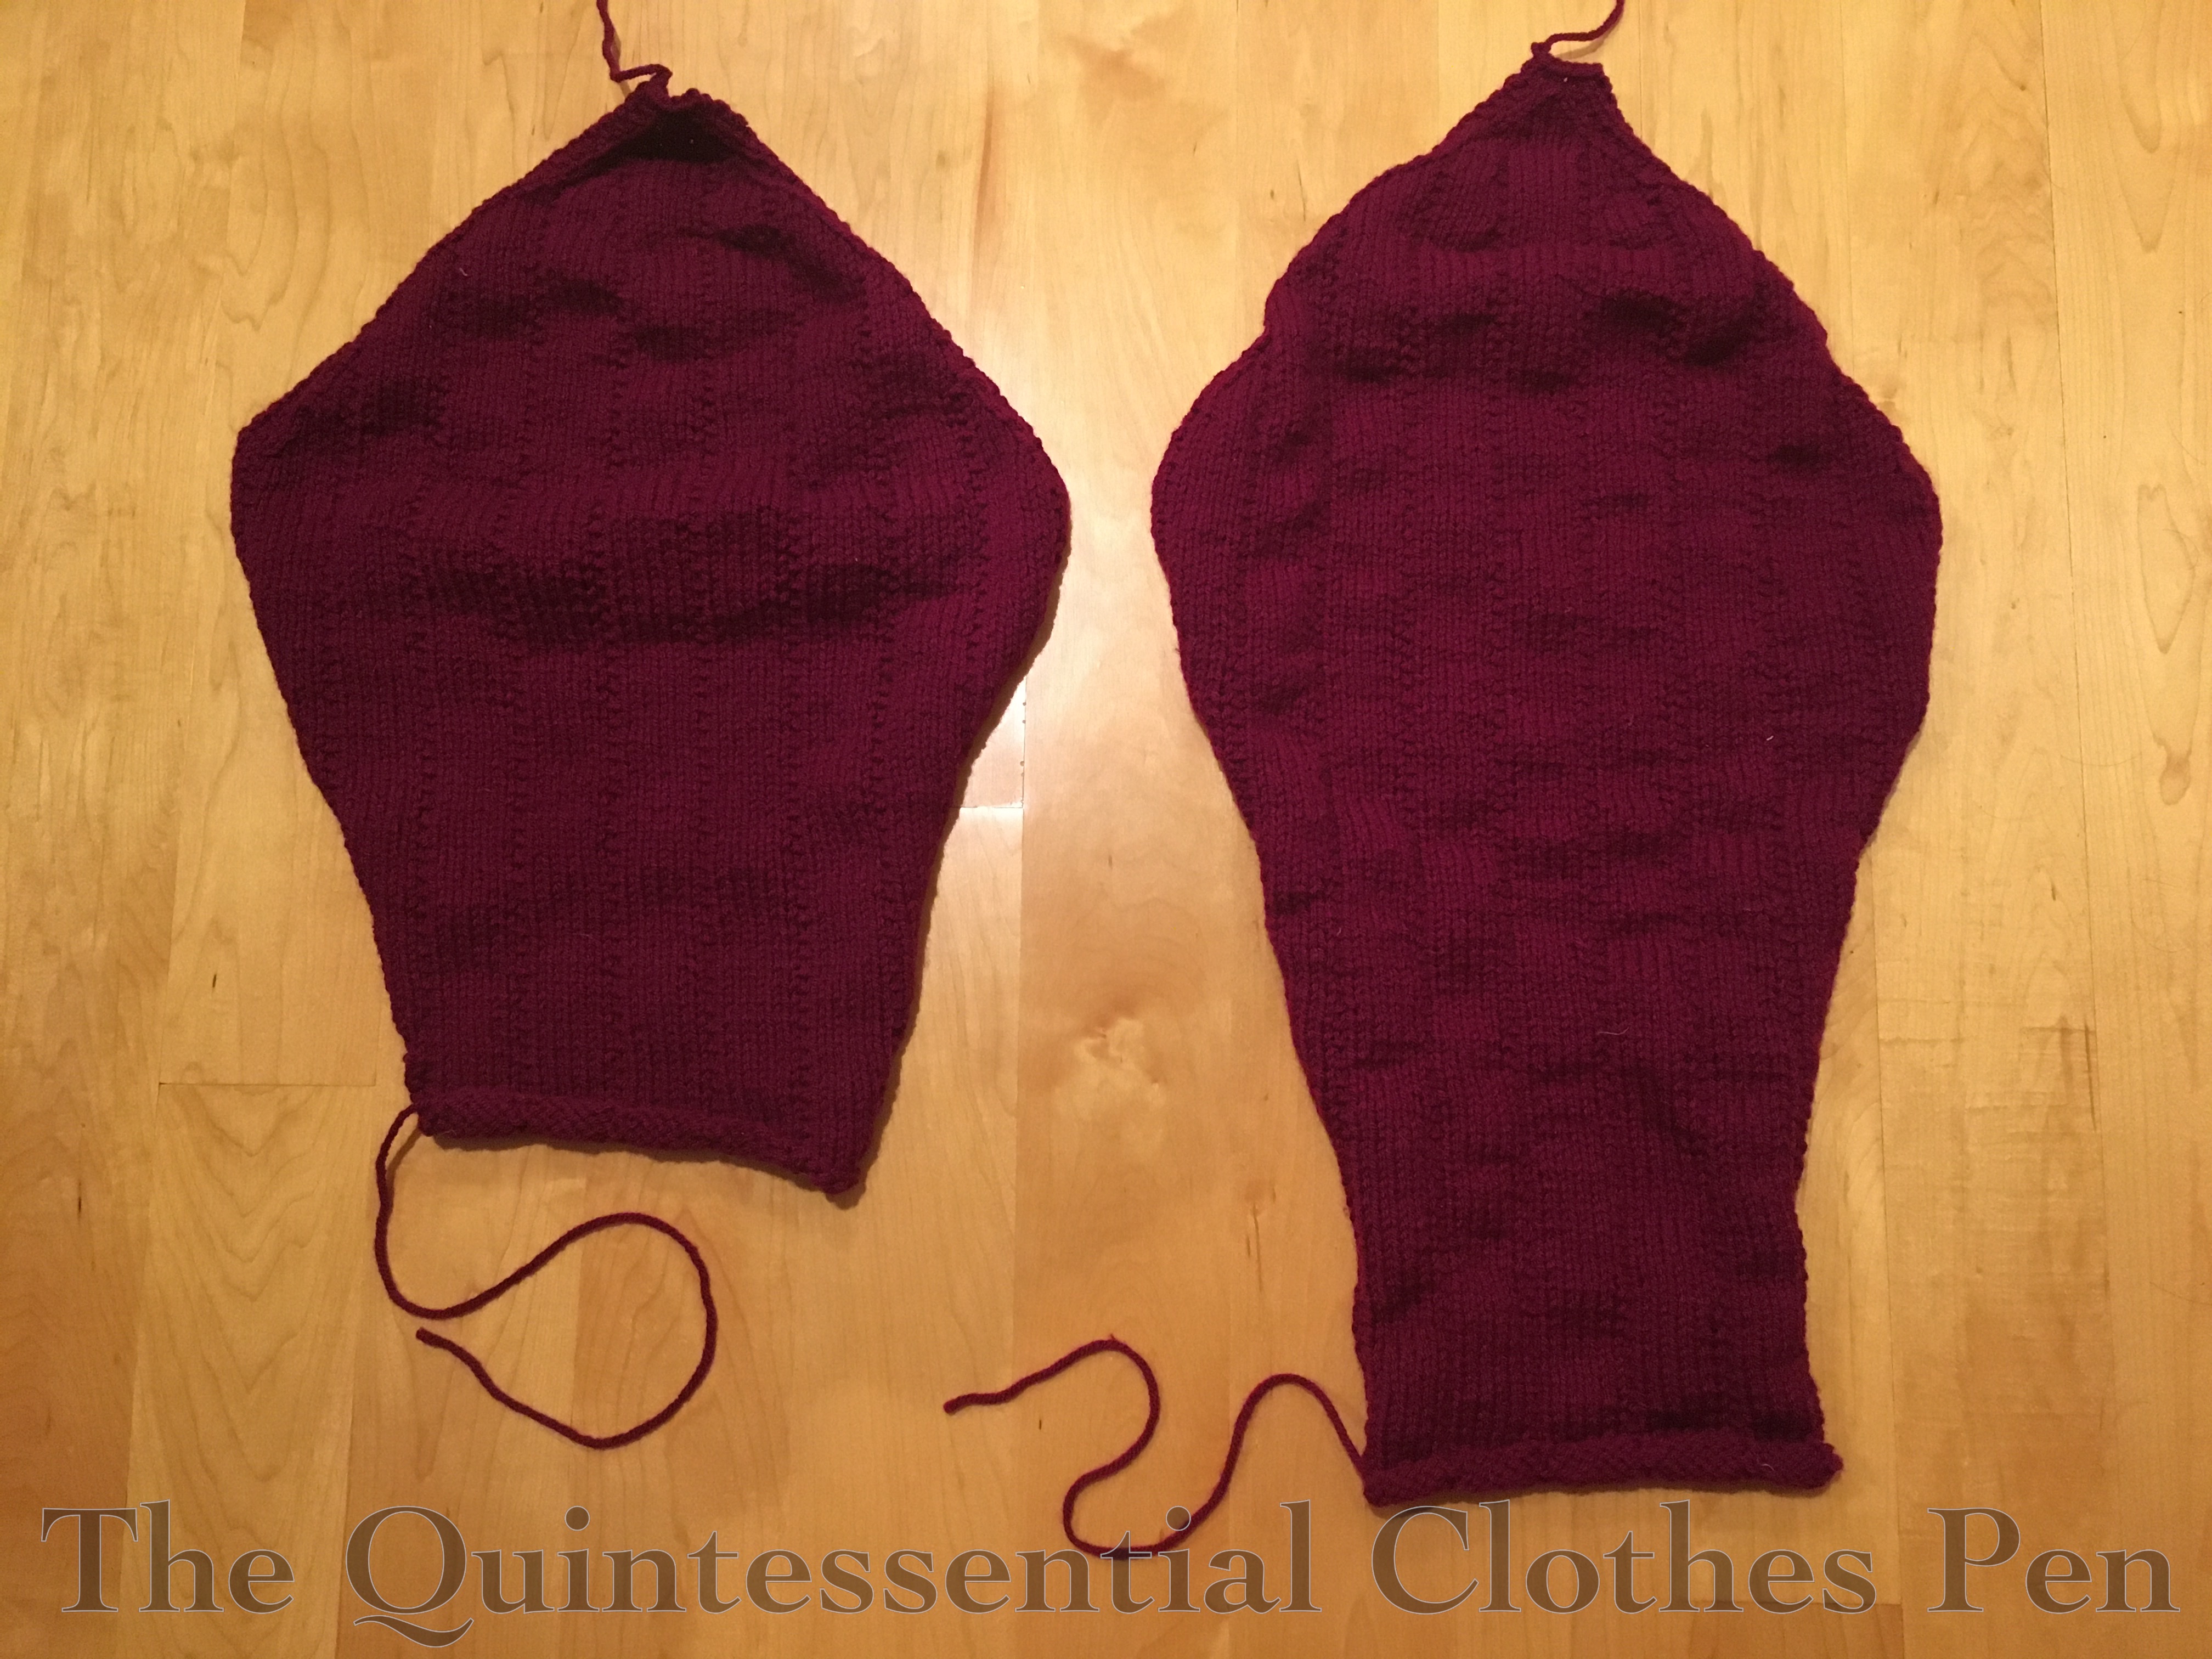
2- The pattern image clearly shows full length sleeves, but the instructions definitely produced ¾ sleeve sleeves with weird proportions in terms of circumferences around the arms. After making one, I puzzled for a bit, then decided to take it apart and knit a new sleeve with alterations to make it longer.
Below, you can see the comparison of the sleeves: the original sleeve that follows the directions is on the left and my altered version is on the right.
3- I made up the sweater in a bust size 38″ (the largest size included in the pattern). As much as I love my sweater, it is a bit small. I’d prefer it to be an inch or two longer in length, a bit bigger in terms of torso circumference (the buttons don’t really stay closed), and definitely bigger in the size of the armsceyes (it’s a bit tight under my arms). This makes sense, since my bust measures 40″. Someday I might make another version of this sweater and adjust the pattern to have more space in the areas where I need it.
The pattern seems to have been published by a yarn company and states quite clearly that “Correct results can only be obtained by using Lee Target in ‘Motoravia’ Double Knitting Wool.” Well, I didn’t use that… I used Red Heart With Love acrylic yarn in boysenberry, because I had a bunch of it in my stash (enough, I thought or at least hoped). It was leftover from my Deauville sweater, I liked the color, and it also seemed to be a similar weight to the Lee Target wool, which Ravelry has great information on and photos of.
I figured that if the sweater was a complete disaster I wouldn’t have spent tons of money on yarn for it. In the end, I didn’t have quite enough yarn and had to order another 6oz, but luckily I found the right yarn, in the right color, on Etsy and the skeins don’t have dye lots, so I had enough to finish the project!

Being acrylic, this cardigan is quite warm. It’s great for being outside in the cold, but I’ve found that wearing it inside can sometimes make me too warm. That’s true of most acrylic sweaters I own. I can’t count on them being part of an outfit all day, because I often take them off at some point.
This sweater took about 46 hours of knitting to make, plus another 4 ½ hours of unknitting (either to take apart the sleeve that was too short or because I’d mixed up a stitch somewhere along the way and had to go back and fix it). It was made over the course of about 10 months.
For materials, I used about 18 oz/925 yds of yarn and 7 plastic buttons that I found in a coordinating shade of deep pinky/purple, after a lengthy hunt on Etsy. The total cost of the materials was about $20, plus some shipping for the buttons and extra skein of yarn.

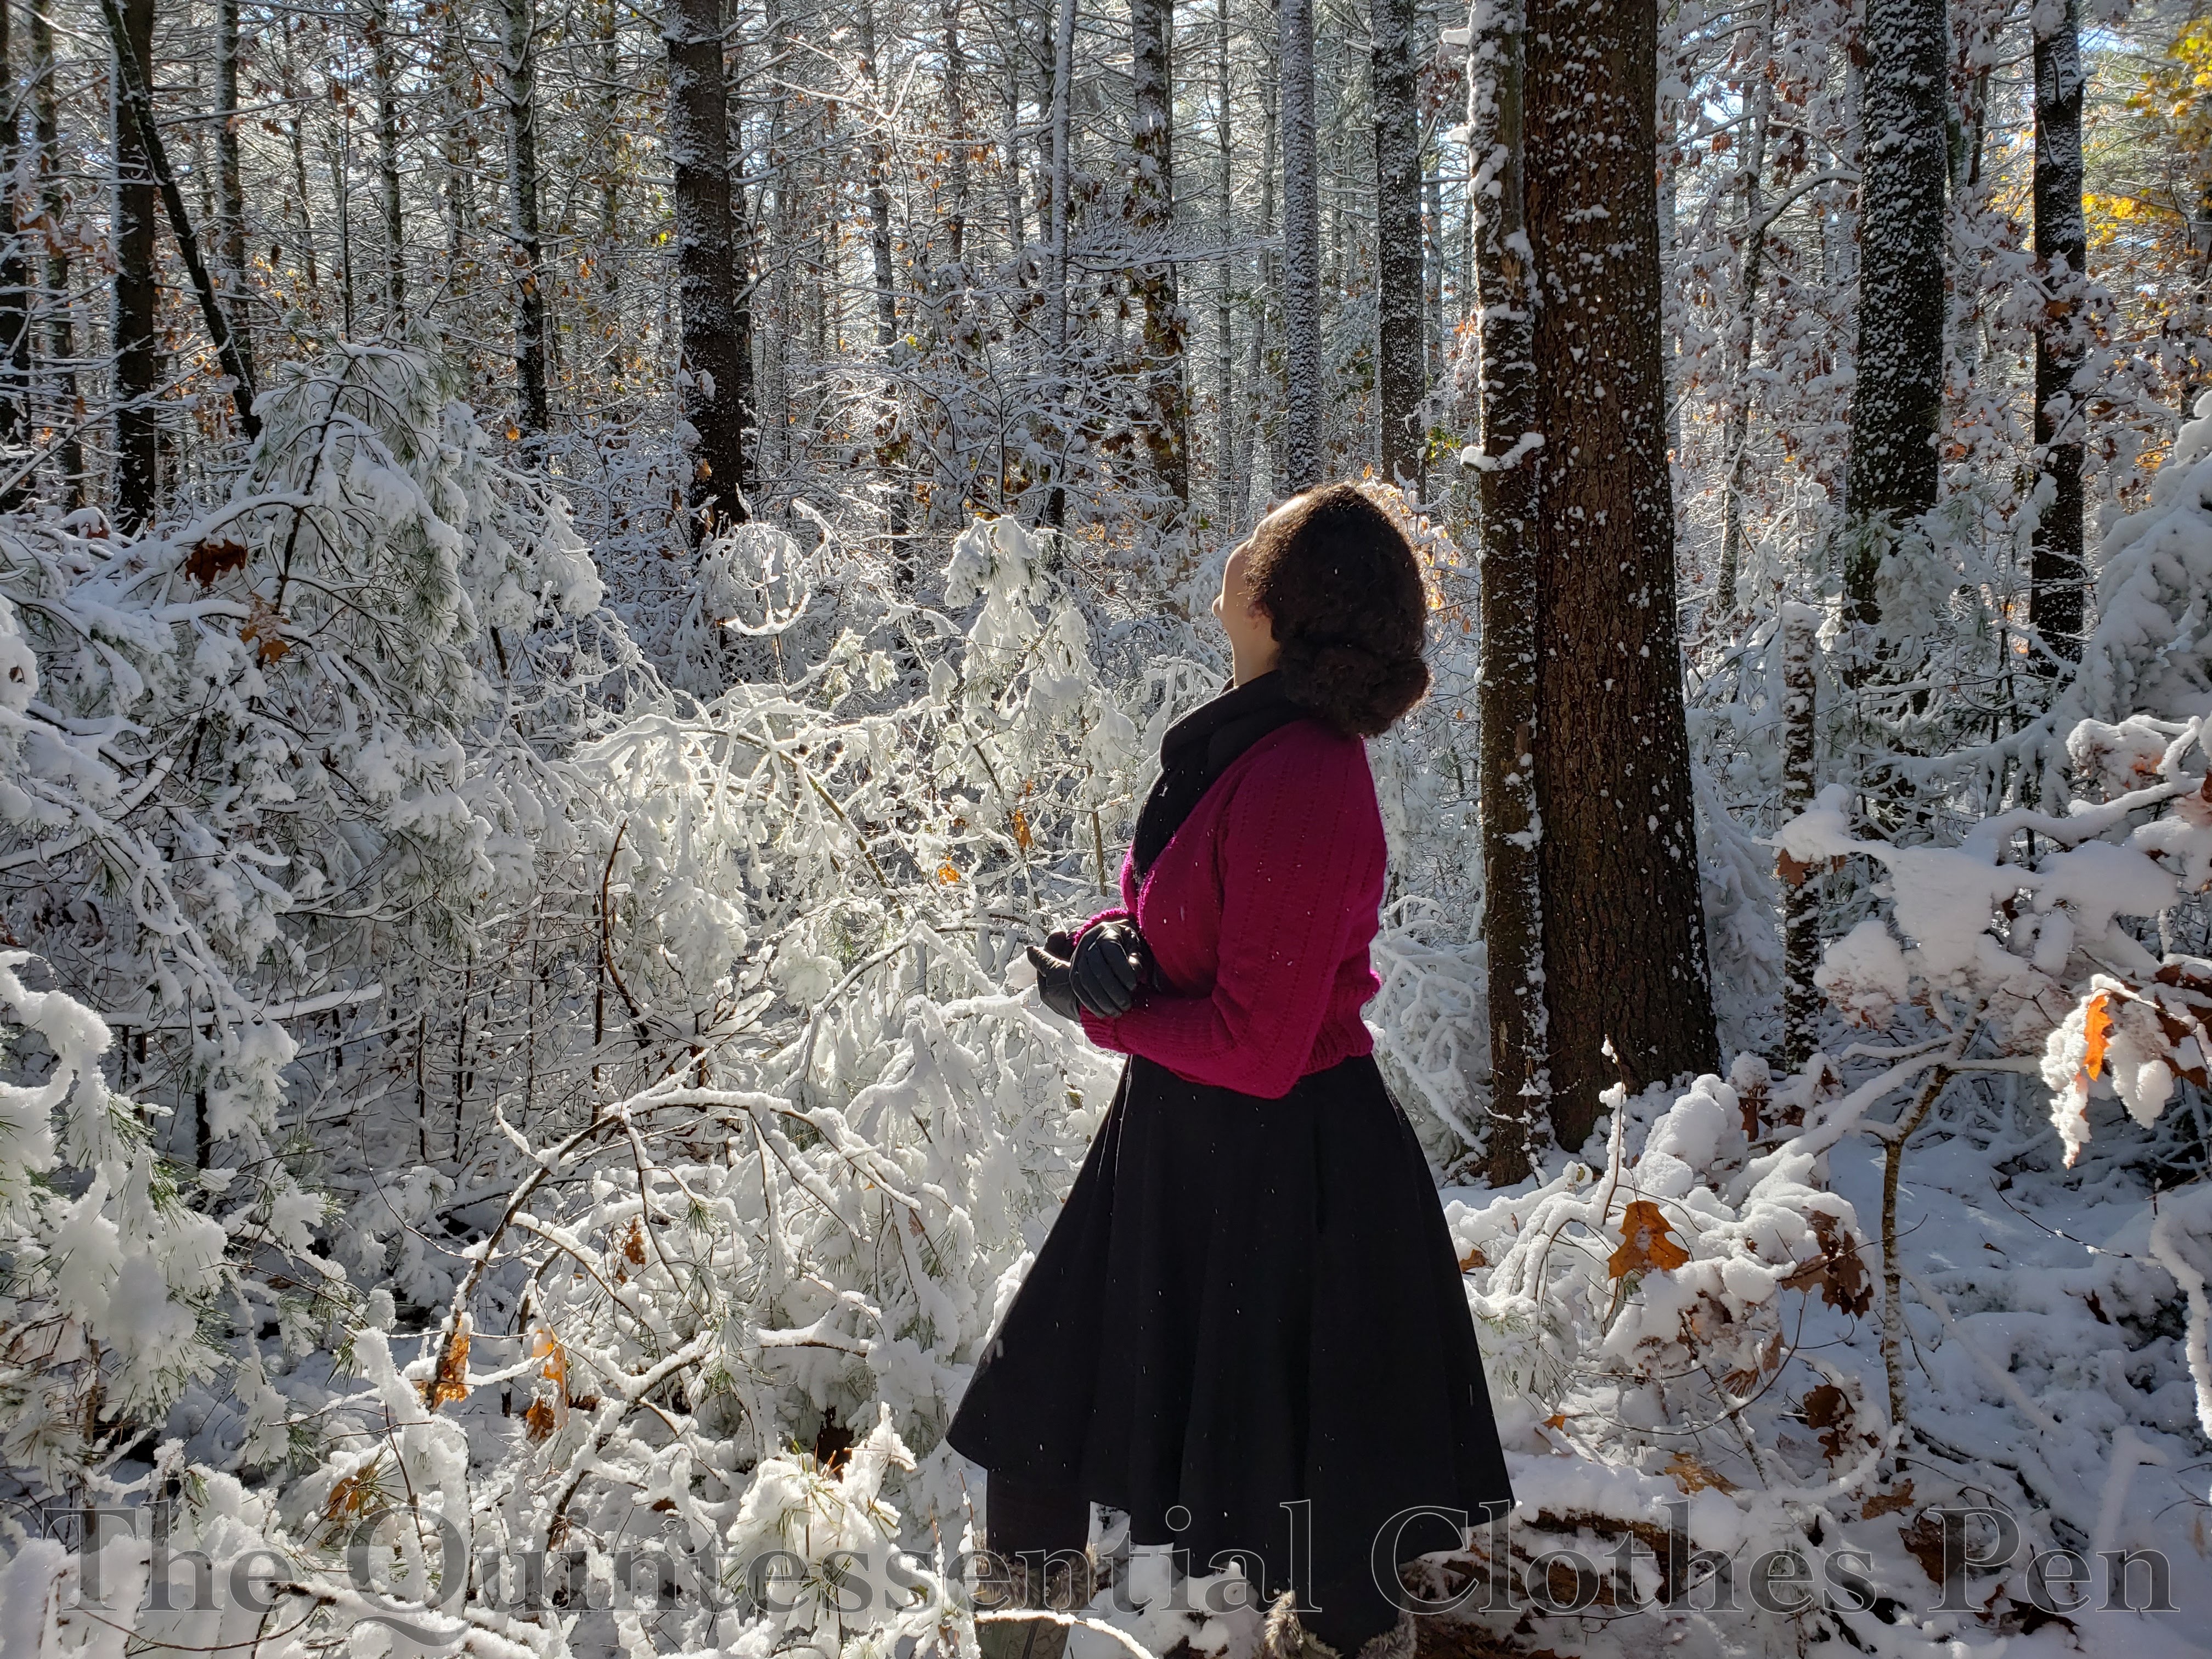
I had a wonderful time tromping through the woods after an early snow last October to document the new sweater and the black wool ¾ circle skirt I’m wearing with it. Despite the fit being a bit small, I’m very pleased with the cardigan and have added it into my regular wardrobe rotation even outside of a photo shoot walk.
While it’s fun to make historical things that only get worn on special outings, there’s also an added bonus when things can be worn more often for everyday life!

Beautiful sweater – it goes so well with your circle skirt!!
It is a beautiful sweater and you did a beautiful job making it! The color is delightful!
I always find it fascinating how canons of beauty, patterns, and the changing morphology of the human being can all collide…again, beautiful job!
–Erik in NW Ohio
Thank you!!
What a beautiful sweater! The color really suits you and is so cheerful.
Jennie from
theuglydame.blogspot.com
Thanks, Jennie! I do love jewel tones… and this fits right in. 🙂
I love that colour and it looks great on you! I have a couple of cardigans where the buttons gape. The best way I’ve found to fix them is: 1. sew small snaps in the gaps between buttons, which reduces the gaping, or 2. sew the entire buttonband closed from the inside and wear it as a sweater.
Thanks very much! Great suggestions for gaping buttons, too.
Dear Quinn,
Oh, oh! What a pretty, pretty sweater on you. It just pops in that snow. So impressed with how you handled the oddities of the pattern. I’d have been flummoxed when the sleeves came out so short. That must have been a moment when you discovered that the sleeve had ended…
Very best,
Natalie, where we’re expecting winter storm number 2 in 4 days. Hope you all don’t get it!
What a fashionable and cute look for autumn and snowy winter days! And what a winter wonderland!
The vibrant and very cheerful colour works very well in the contrasting snow, but I guess during the past week, when temperatures over here dropped really low and we’ve had tons and tons of snow, I would have needed three or four of those sweaters to keep me warm!
I’m not wild about all sweaters, but this one is gorgeous! I must learn to knit…amidst all my other projects!
You look so wonderful in this! Thank you for sharing!
How lovely! Thank you! I’m happy to encourage you to find a love for sweaters and to knit! Though I agree it can be hard to find time for additional hobbies and pursuits!