

I’m really excited to have finished this sweater and even more excited that I like the finished product! It’s been a bumpy road to completion… but more on that later in this post.
First, I’m excited that this sweater qualifies for the Historical Sew Monthly challenge #11: Above The Belt!
No hitting low! Let’s keep things on the up and up as the year closes, and make something worn above the belt.
Before I go into the story of this sweater, here are just the facts:
Fabric: 1 ¾ skeins of Red Heart with Love acrylic yarn in Boysenberry, ¾ skein of Red Heart with Love acrylic yarn in Eggshell, & ¼ skein of Lion Brand Vanna’s Choice acrylic yarn in Dusty Purple.
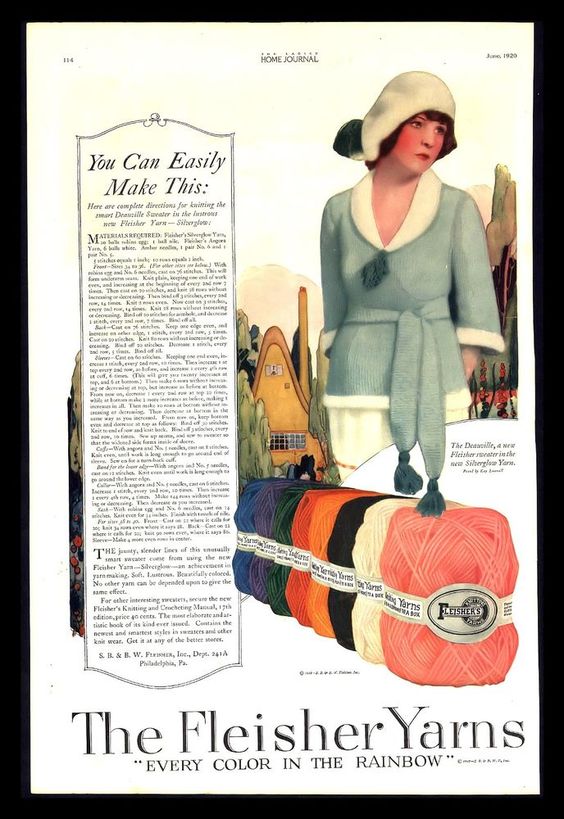
Pattern: An ad for Fleischer Yarn published in The Ladies Home Journal.
Year: June 1920.
Notions: None!
How historically accurate is it?: 90%. The weight of the yarn is a bit heavy, though the fiber content and color are plausible. My crazy alterations make sense but of course the goal would have been to avoid their necessity.
Hours to complete: So, so many. At least 100, I would think.
First worn: November 23, 2019.
Total cost: Approximately $39.
Inspiration
The story of this sweater starts with inspiration I found on Pinterest for 1920s sweaters. I think I came across these while making my last sweater in 2013, the 1917 Sweater of Angorina. Fast forward a few years to the summer of 2016 when I got all excited and ordered tons of yarn. Enough for three sweaters…
(Let’s get side tracked for a moment to tally my successes at using all that yarn. The 1st of those three sweaters is made but has never been photographed (it’s on the list of things to do!). The 2nd sweater is the Deauville this post is about. The 3rd sweater hasn’t been started… the yarn is still sitting in my stash. But after making two quite thick sweaters out of this weight of yarn, I’m pretty sure that the yarn I have for the 3rd sweater will not make what I want. Here’s the inspiration for the 3rd sweater–despite knitting rather often I’m not confident in my ability to pick the right weight of yarn and size knitting needles for a project like a sweater. I think that a sport weight yarn might be better for that 3rd inspiration, but I’m not sure. I’ll have to do more research!)
But back to this sweater: below is the inspiration for The Deauville sweater, including the instructions provided by Fleischer Yarns (this advertisement was listed on eBay). It is dated June 1920.
Making and Remaking
So I think I started on The Deauville in 2016. That means it’s been on my knitting needles for about three years… which is not to say that I’ve been working on it that whole time. Oh, no! This was definitely an on-and-off (mostly off) project–partly due to the fact that I just don’t pick up my knitting needles that often, but also because I encountered problems with this sweater that were demoralizing and time consuming.
I tried to follow the instructions as best I could. I think I did pretty well with the back and front. Then I started on the sleeves. But it became apparent as the first sleeve took shape that the sleeve I was knitting was not going to make a sleeve shape that made sense for the shape of the sweater. The top of the sleeves would have had three separate curves and the bottom of the sleeve would have curved down like a bishop sleeve. What???
Here’s the point in knitting that sleeve when I stopped. The top of the sleeve is the top of the photo. You can see that’s started to go downhill, but that was only about ⅓ of the way across rather than about ½, as you would expect for a sleeve. And the bottom curves down… why? I have no idea. It doesn’t make sense given the illustration of the finished sweater.

I could not see how the directions would produce usable sleeves, so I took apart what I had knitted and created my own instructions that made an expected sleeve shape. The sleeves took a really long time to knit… because it turns out that I had made them much wider and longer than they needed to be! I had lovely bell shaped sleeves, but that wasn’t the shape in the inspiration… ugh! (No photos, because I was frustrated at this point and just wanted to keep moving.)
I discovered the sleeve shape after having sewn up the sleeve inseams, the shoulder and side seams of the body, and attaching one sleeve. I was not inspired to re-knit two sleeves again, so I had to think of other solutions. In addition, I’d discovered other problems during my first fitting… I realized that the back of the sweater was 5″ smaller across than the front. What??? This pulled the side seams to the back and also made the sweater waaaay too tight around my body. That’s not the right style at all! It also explained why it was hard to set the sleeves in nicely–there was way more sleeve than armsceye!
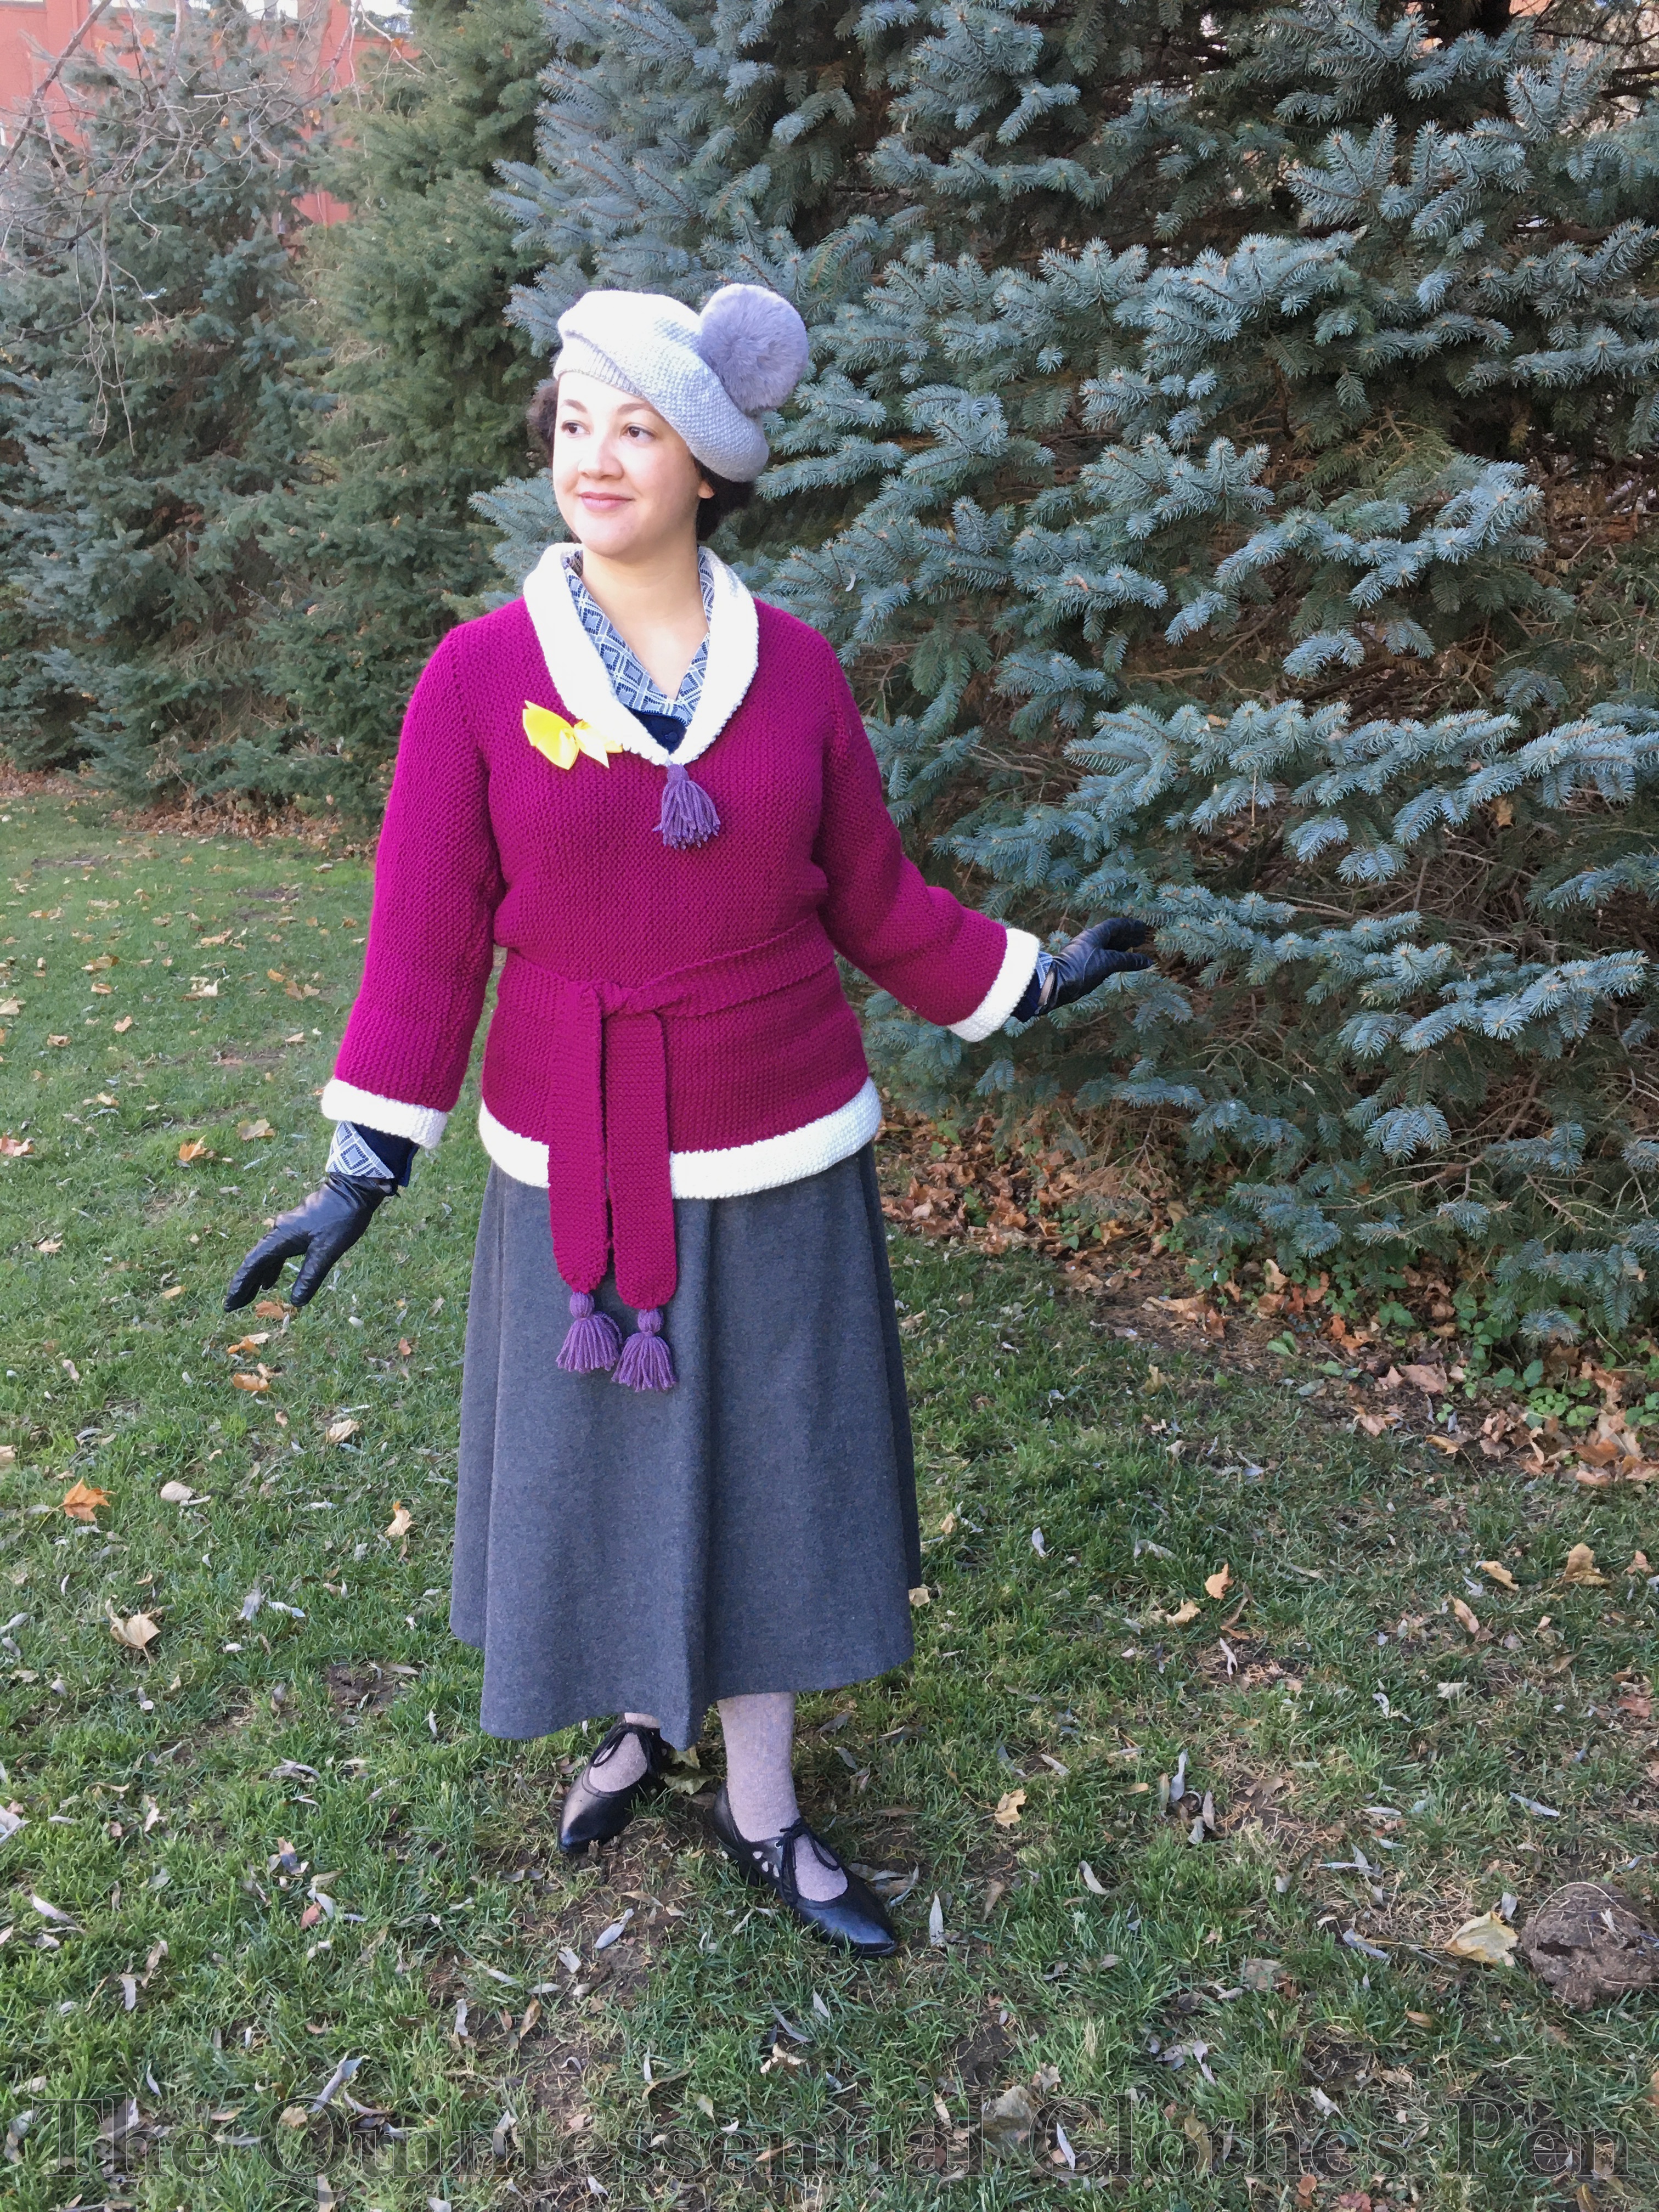
If you look carefully at my shoulders in this photo you can see that the armsceye seam sits pretty far back on my shoulders in the back, due to the narrow back panel. Luckily the sleeves have a shape that accommodates being pulled so far back.

It was my goal to wear this for an event in November and by now it was mid-October, so I had to come up with solutions that wouldn’t take too much time to execute (or add too much frustration). I’d put in so much time already–I was annoyed with the sweater but determined to carry on! I decided that I could take in the sleeves, hem them, add in two 2.5″ panels to the body, and hem the very long bottom of the sweater. That would solve most of the problems, but it required taking apart most of the seams I had just sewn. Ugh!
Oh, and one other problem from that first fitting? The v-neck was unreasonably deep! It went all the way down to the middle of my ribcage. And there was really nothing to do about that in terms of knitting something new. I decided to stitch it partway shut, hoping that the tassel in the front would hide my Frankenstein seam.
Happier Progress and Finishing
I unstitched my seams and knit my new panels, hoping that my side panel additions would look intentional or mostly not noticeable. (Luckily, from the outside they’re really not noticeable, are hidden under my arms, and symmetrical, so vaguely intentional looking. Yay!) After making the new panels, I sewed up all the seams again. I found that the sleeve to armsceye ratio was much better, so that was positive.
Here’s the inside of the sweater, showing one of the added-in side panels, as well as the hemmed bottom edge, and the white contrast band.

The next step was to take in the sleeves (more unstitching and restitching). Finally, I hemmed the sleeves and bottom edge, making for rather thick edges, especially at the sleeve hems, where the seam was taken in and then the sleeve was hemmed! Luckily it’s not too visible, just a little bulky when you can feel it–which I didn’t really notice while wearing the sweater, so that’s good.
Here’s the inside of one sleeve, showing the taken-in-seam (which was whipped down to keep the bulk in place), the hem of the sleeves (also whipped down), and the white contrast band.

At some point along the way I’d made the long rectangle for the belt, so that was done. It was an easy no-stress step to add in during the midst of all the frustrating sleeve/side/seam ripping business.
The final steps were to make and add the white bands of trim as well as the collar and tassels. At this point I threw the instructions out the window, using them for general guidelines but making it up as I went along. I decided that my rounded hemmed bottom edges wouldn’t look proportional with a single layer of white knit band, so I decided on the final widths I wanted, knit them double wide, sewed them into a tube, and then sewed the tube to the sleeves and bottom edge. I like the result!

I mostly followed the collar directions (I changed the length to match my neck opening and changed the curve slightly), but wanted a rounded, doubled collar look to match the bands. To do that, I made the collar a bit wider than I intended for it to be, turned under the outside edge, and whip stitched it down. The instructions gave no information on how to attach the collar, so I whip stitched that, too. (In addition to the collar, this photo also shows the inside of the v-neck that was stitched together. I finished those stitches off with a bow, to offset the frustration of the sweater.)

Done!
And that was it! It was a bit of a rush at the end, but I got it done in time to wear to the event–a Thanksgiving parade in which friends and I represented support for women’s suffrage. The 19th amendment granting women’s suffrage was ratified in 1920, but did you that it was approved by the House of Representatives and the Senate in 2019? Any year is a year worth celebrating suffrage, in my opinion, whether it’s a 100th anniversary year or not!

About Fleisher Yarns
I did a bit of research on Fleisher yarns, and Silverglow in particular (as that is the specific line of yarn that my inspiration advertisement is promoting). This blog has compiled an amazing resource, listing Fleisher Yarns from the 1890s through the 1970s, with photos. Here is the listing from that resource for Silverglow:
Silverglow
1904: “A soft and lofty two-fold yarn, a mixture of wool and art silk, having a rich, lustrous appearance. Adapted for light weight sweater’s, scarfs, sportswear, etc.”
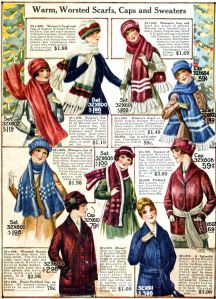
Back to my thoughts about the weight of my yarn, this description pushes me towards the thought that my yarn was a bit heavy for the original intentions. Although, I was thinking of this sweater as being on the sporty side of things (hence my accessories of the pom pom hat and wide scarf with tassels–inspired by ads such as those below), so I think it is still tangentially possible for this yarn weight to make sense–and it certainly did a great job of keeping me warm!


Interestingly, you can still find Fleischer Yarn. Here is one example, and though it’s not clear exactly when these skeins are from, I bet that a bit of looking at the labels on the first resource I linked might answer that question.
About The Color Of My Sweater
The color of my sweater color is one that I love. Berries of all kinds are yummy and pretty! But is it a reasonable choice for 1920? Well, I did a bit of researching that, too. Here is a color chart for Fleisher Yarns from 1929. My boysenberry color isn’t represented, but there are yarns with a similar depth of color and saturation, so I don’t think it’s out of the realm of possibility for a color like this to have existed at that time. For example, combine Wild Aster and Cardinal on the color chart and you might get a color similar to my yarn.
A Few More Photos
To finish off, here are a few more photos of my Deauville sweater, which was most definitely an exercise in determination!


Omg it’s fantastic!!!!! I love your overall outfit and color combination. Well done.
Aw, thank you! That’s wonderful feedback after the struggle-y process. 🙂
What a fun sweater–the tassels are the best! Re: the back being much smaller than the front, apparently that was par for the course in sweaters of the 1910s and early 20s. The book “Centenary Stiches” by Elizabeth Lovick has a super-helpful section at the front explaining why sweaters were designed that way (and how you’re supposed to set the sleeve in the armscye when the side seam of the bodice is really almost a back seam!)
Thanks, Ellen! I think the tassels are a fun touch, too! And how interesting about the size of the back! I will have to check out that book. Thanks for the information and reference!
I have often thought of knitting up one of these 20s sweaters – they are so functional in some ways, and so elegant in their own ways. Nicely done!
Thank you! I think they are rather elegant, too. I really should consider wearing this as a modern piece of clothing to get more use out of it, but once it’s in my head as part of my historical wardrobe it’s hard to change that mindset, somehow.
The fact for me is if I make something, I expect to wear it. That is what has kept me from sewing such lovelies as you do. A 1920s outfit could work for me….
Yes, it is completely understandable to want to wear things that you take the time to make. That’s part of what makes those things special. 1920s can be unobtrusive enough to not draw too much attention to itself. 🙂
That is exquisite! The finished sweater looks so pretty on you with the berry color and light trim. Thanks for your explanation on how it was done; even though I don’t knit I can appreciate all the steps and “unsteps” it took to get the project finished to your liking. Next Spring in Indianapolis I am organizing a 100th celebration of women’s right to vote at the Propylaeum downtown. It will be fun to choose an outfit to wear, but it will be readymade!
Thank you on all counts, Margaret! That sounds like an excellent celebration! Certainly worthy of any outfit you put together. 🙂
Gorgeous!!
Thank you!