This project is an old one that I’ve been meaning to get up on the blog for ages!
I finished this project a ‘few’ years ago, in approximately 2016. It has taken me that long to finally get photos and write about it!
I was inspired by the book Charmed Knits: Projects For Fans Of Harry Potter by Alison Hansel. I used the Quidditch Sweater pattern and chose Ravenclaw colors for my version. (I know, I know, Ravenclaw is only blue and silver in the movies, not the books. But these were the colors of yarn I had on hand, so therefore they are the colors that were used.)
The completed sweater is a bit bulky and very warm, as I used acrylic craft yarn because I had them on hand. The shoulders, especially, remind me a bit of football padding! But for the occasional wear in the middle of winter the shape isn’t too bad.
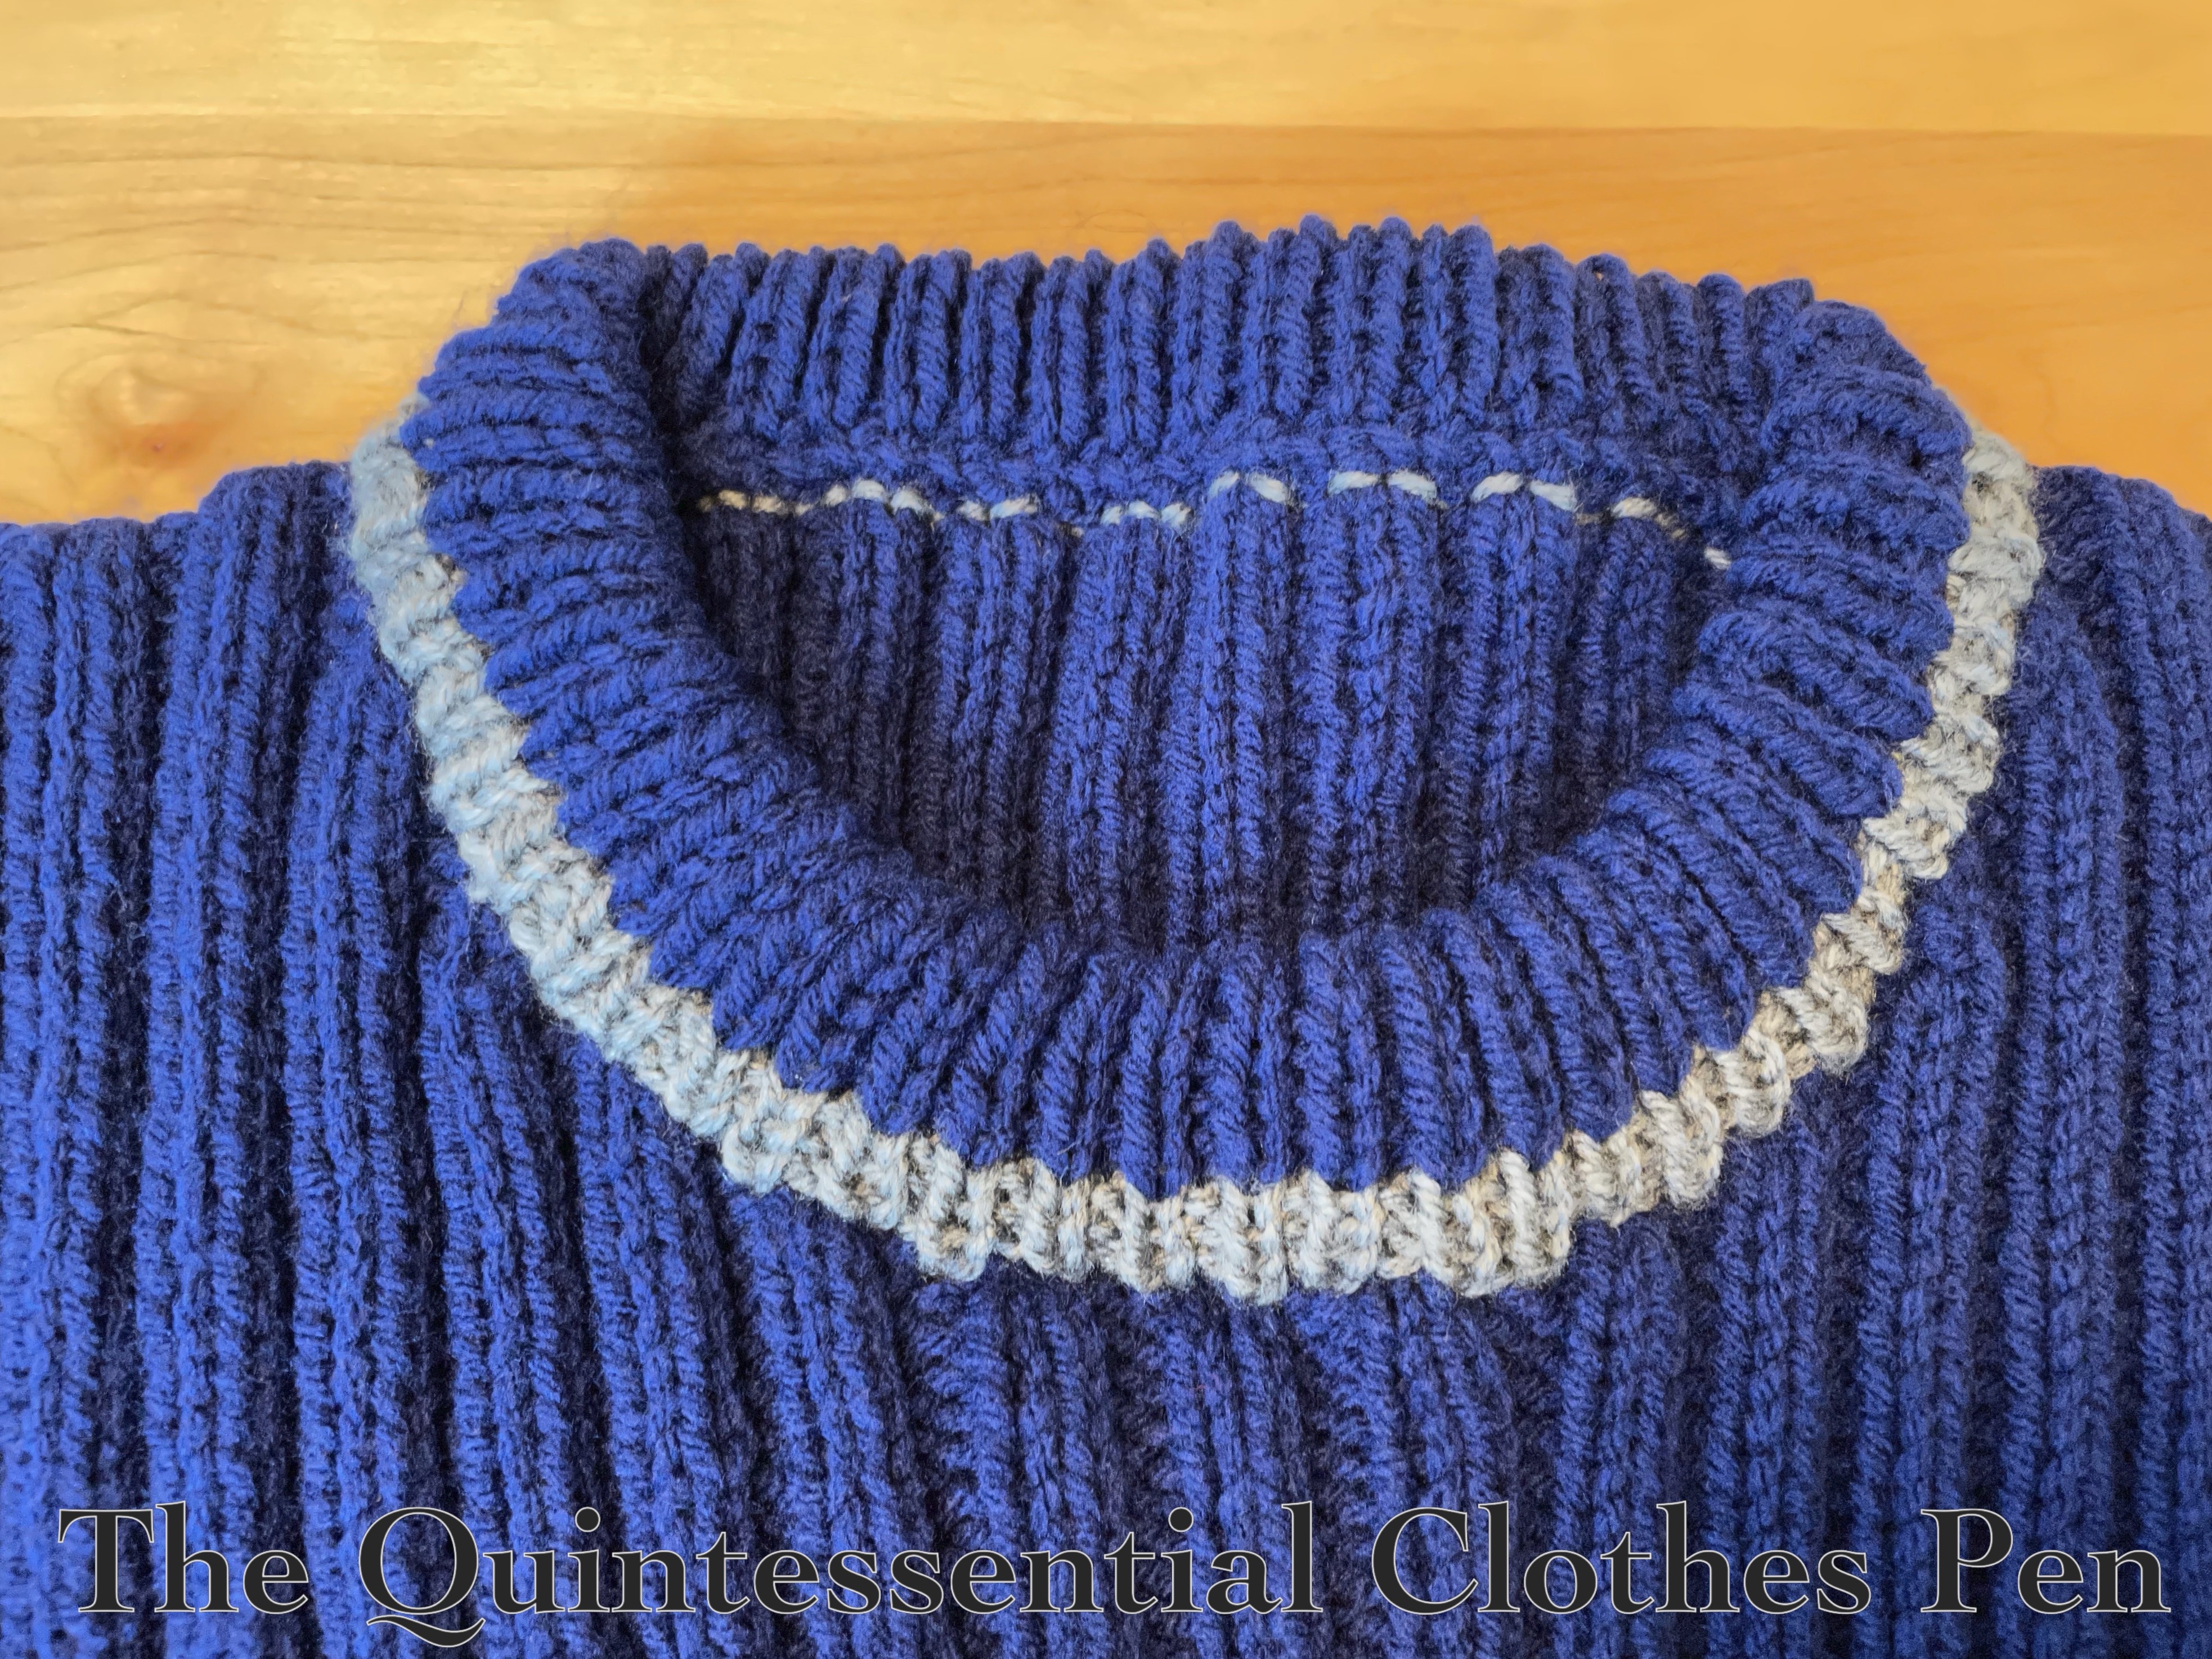
I had fun making the overall ribbed pattern, as well as the ribbed collar and cuffs. I’m very pleased with how nicely the colors transition.
Same with the collar!
I’m also pleased with how successfully the ribbing changes at the cuffs.
I spent 55 1/4 hours knitting this project over the course of about three months. The front and back each took about 14 hours and each sleeve about 13 hours.
This is actually my fourth sweater. The first was my 1917 Knitted Sweater of Angorina, the second hasn’t been posted to the blog, and the third was my 1920 Sweater of Determination. Each sweater has been a learning experience in some way, and this one was no different!
One thing I learned with this sweater was about multiple different ways to increase and decrease symmetrically on each side of a piece (a sleeve for example). This was a rabbit hole I went down that I think was sparked by my wondering why the stitch instructions were different for the left and right side raglan armholes.
The method of increasing or decreasing is an important one made by the pattern designer because every stitch has a different look and different types of stitches may or may not look symmetrical when knit up. Also, the increase and decrease stitches have a slant to them, so it’s important that the slants are going in the correct direction. This resource clearly outlines different increase and decrease methods.
You can see the decorative symmetry of the shaping on the armsceyes in this pattern in the photo below. I love how it looks!
I also learned how to K2Tog TBL (Knit 2 Together Through The Back Loop). I’d K2Tog before, but not through the back loop. I found this explanation of K2Tog TBL to be the most helpful.
And, I learned about picking up stitches along an already finished edge, which is something I hadn’t encountered in any of the things I’ve made so far. This technique is used for the cuffs on the new sweater. I found this information and this information super helpful in terms of figuring it out and making it look nice.
The pattern for this sweater is a PDF download from Subversive Femme on Etsy. It is the 1950s Fitted Raglan Cardigan pictured below. The pattern was easy to download and the quality was clear and easy to read.
My cardigan (the end result) generally follows the pattern image, so that’s great! There are a few differences:
1- My understanding of the instructions created a vertical pattern that doesn’t quite match the one pictured on the orange sweater. I’m not sure if I was doing something wrong or not, but I don’t mind how mine turned out.
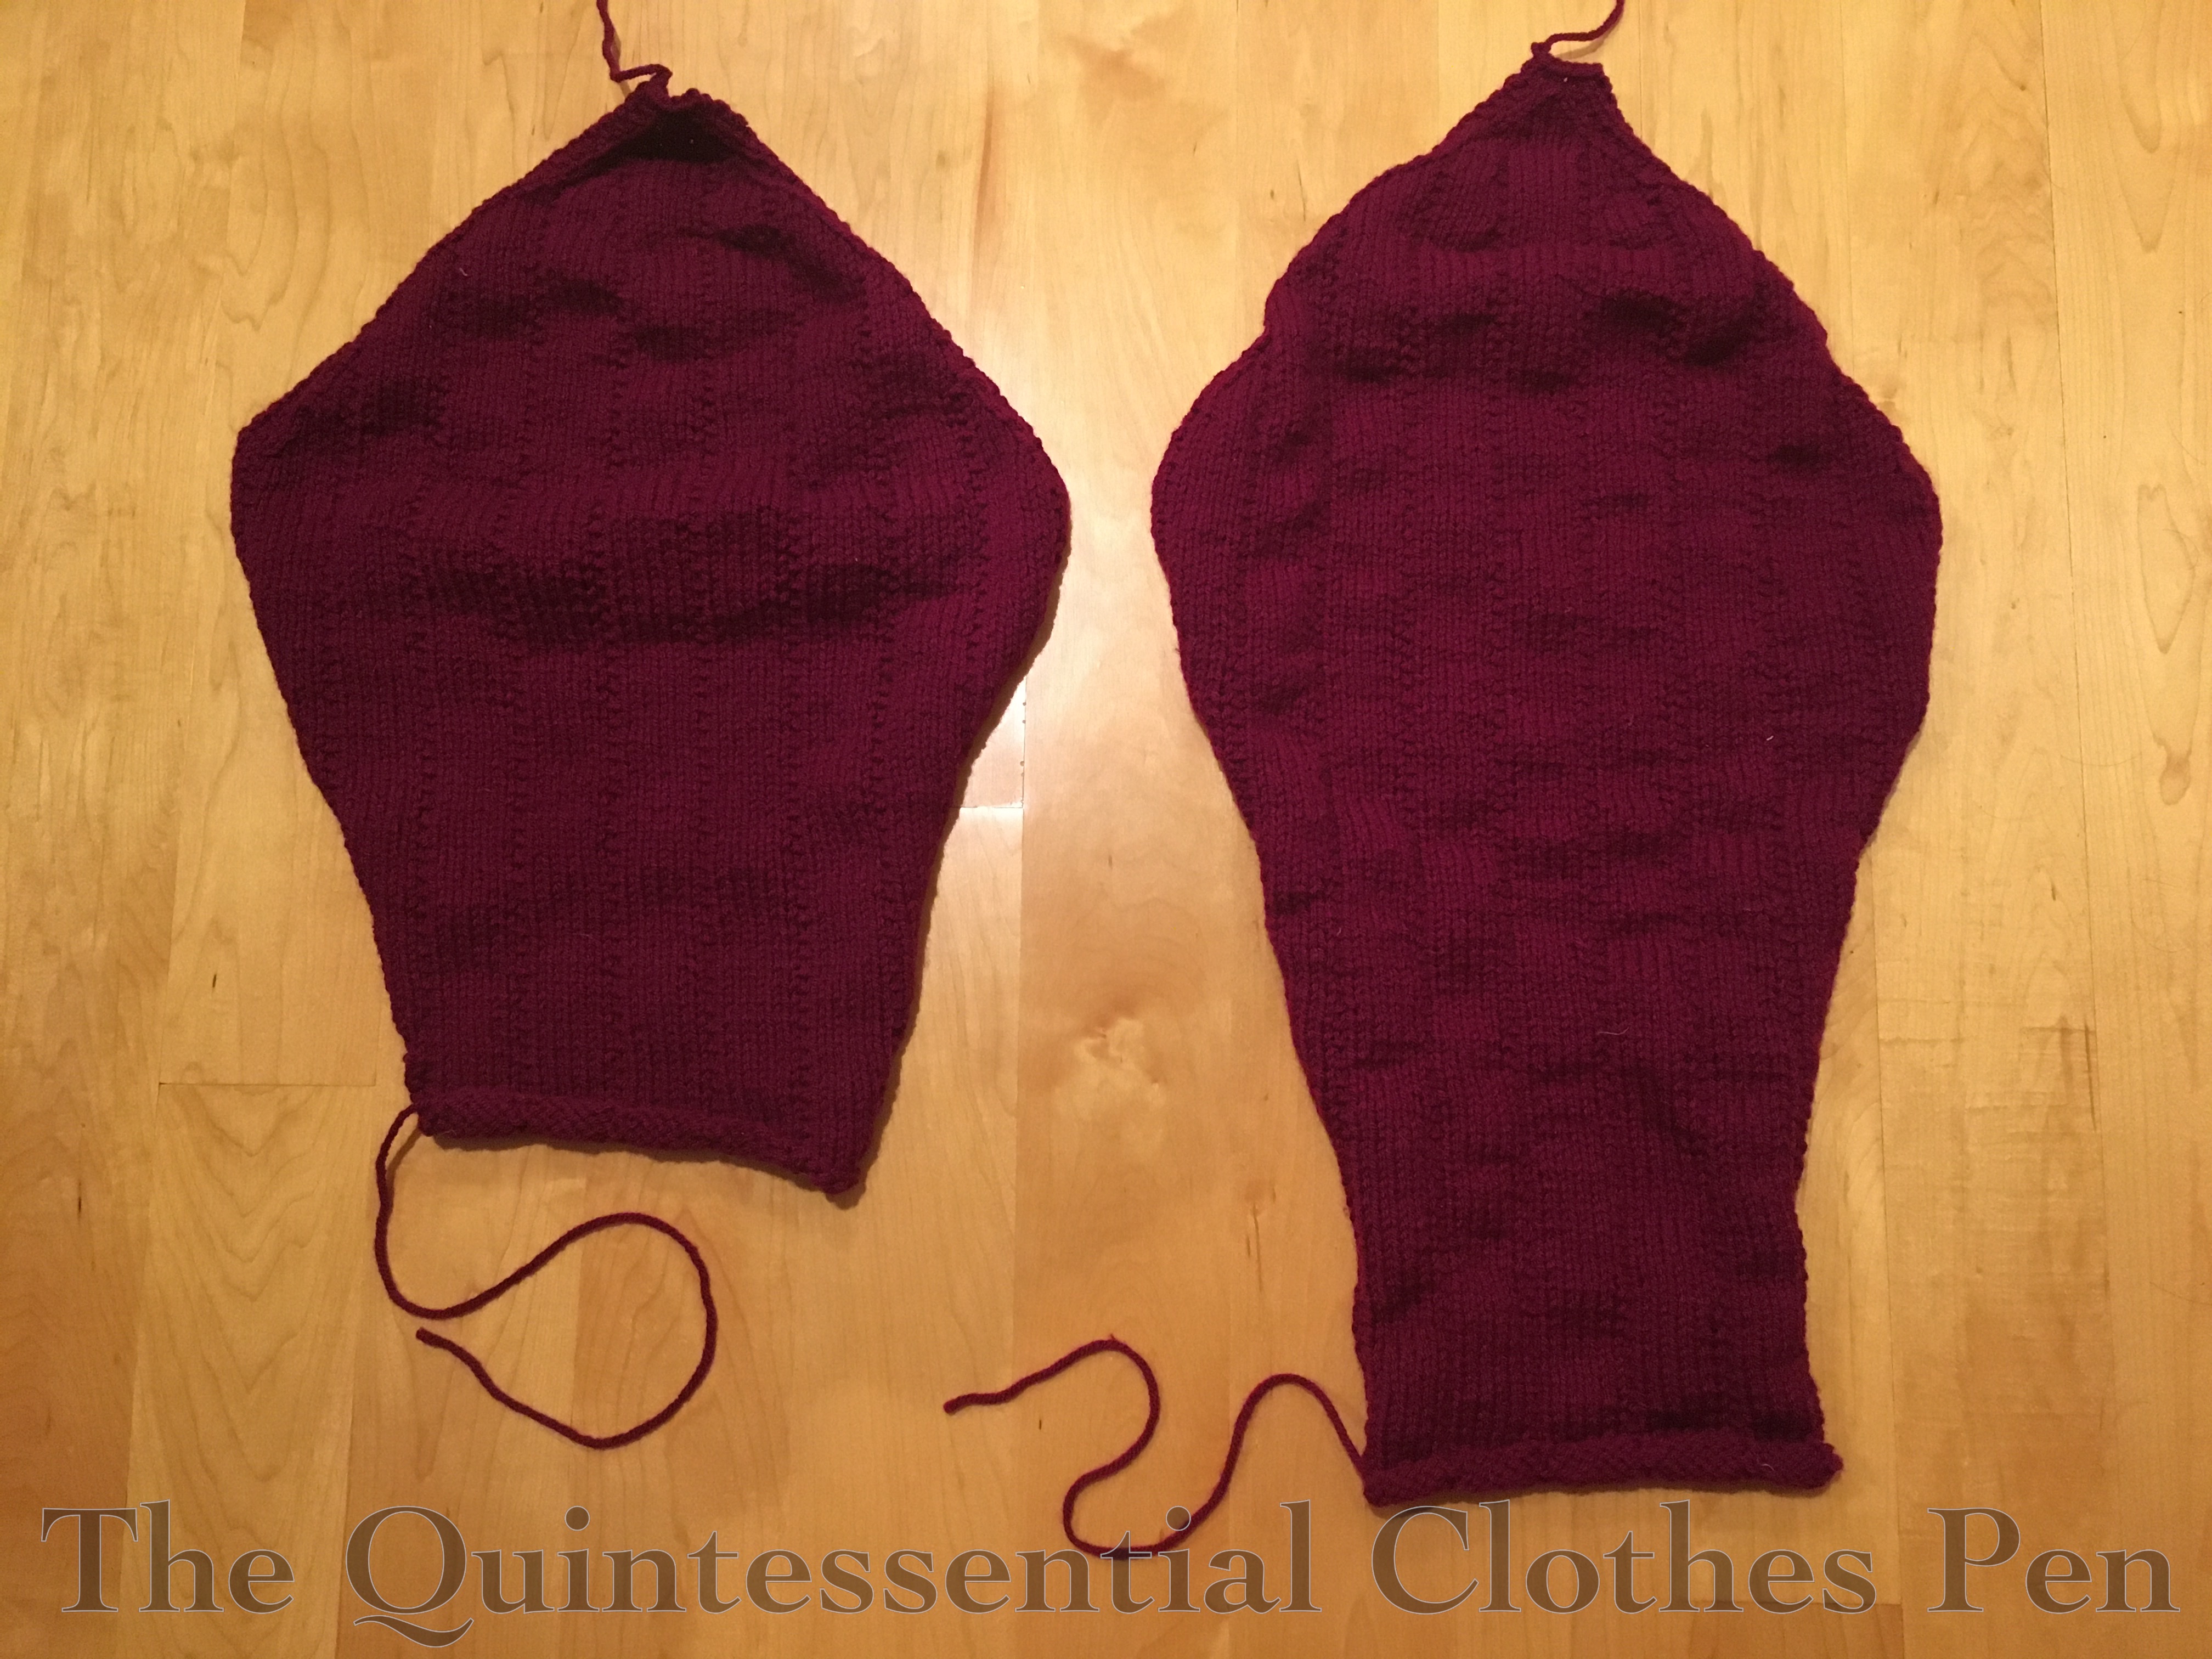
2- The pattern image clearly shows full length sleeves, but the instructions definitely produced ¾ sleeve sleeves with weird proportions in terms of circumferences around the arms. After making one, I puzzled for a bit, then decided to take it apart and knit a new sleeve with alterations to make it longer.
Below, you can see the comparison of the sleeves: the original sleeve that follows the directions is on the left and my altered version is on the right.
3- I made up the sweater in a bust size 38″ (the largest size included in the pattern). As much as I love my sweater, it is a bit small. I’d prefer it to be an inch or two longer in length, a bit bigger in terms of torso circumference (the buttons don’t really stay closed), and definitely bigger in the size of the armsceyes (it’s a bit tight under my arms). This makes sense, since my bust measures 40″. Someday I might make another version of this sweater and adjust the pattern to have more space in the areas where I need it.
The pattern seems to have been published by a yarn company and states quite clearly that “Correct results can only be obtained by using Lee Target in ‘Motoravia’ Double Knitting Wool.” Well, I didn’t use that… I used Red Heart With Love acrylic yarn in boysenberry, because I had a bunch of it in my stash (enough, I thought or at least hoped). It was leftover from my Deauville sweater, I liked the color, and it also seemed to be a similar weight to the Lee Target wool, which Ravelry has great information on and photos of.
I figured that if the sweater was a complete disaster I wouldn’t have spent tons of money on yarn for it. In the end, I didn’t have quite enough yarn and had to order another 6oz, but luckily I found the right yarn, in the right color, on Etsy and the skeins don’t have dye lots, so I had enough to finish the project!
Being acrylic, this cardigan is quite warm. It’s great for being outside in the cold, but I’ve found that wearing it inside can sometimes make me too warm. That’s true of most acrylic sweaters I own. I can’t count on them being part of an outfit all day, because I often take them off at some point.
This sweater took about 46 hours of knitting to make, plus another 4 ½ hours of unknitting (either to take apart the sleeve that was too short or because I’d mixed up a stitch somewhere along the way and had to go back and fix it). It was made over the course of about 10 months.
For materials, I used about 18 oz/925 yds of yarn and 7 plastic buttons that I found in a coordinating shade of deep pinky/purple, after a lengthy hunt on Etsy. The total cost of the materials was about $20, plus some shipping for the buttons and extra skein of yarn.
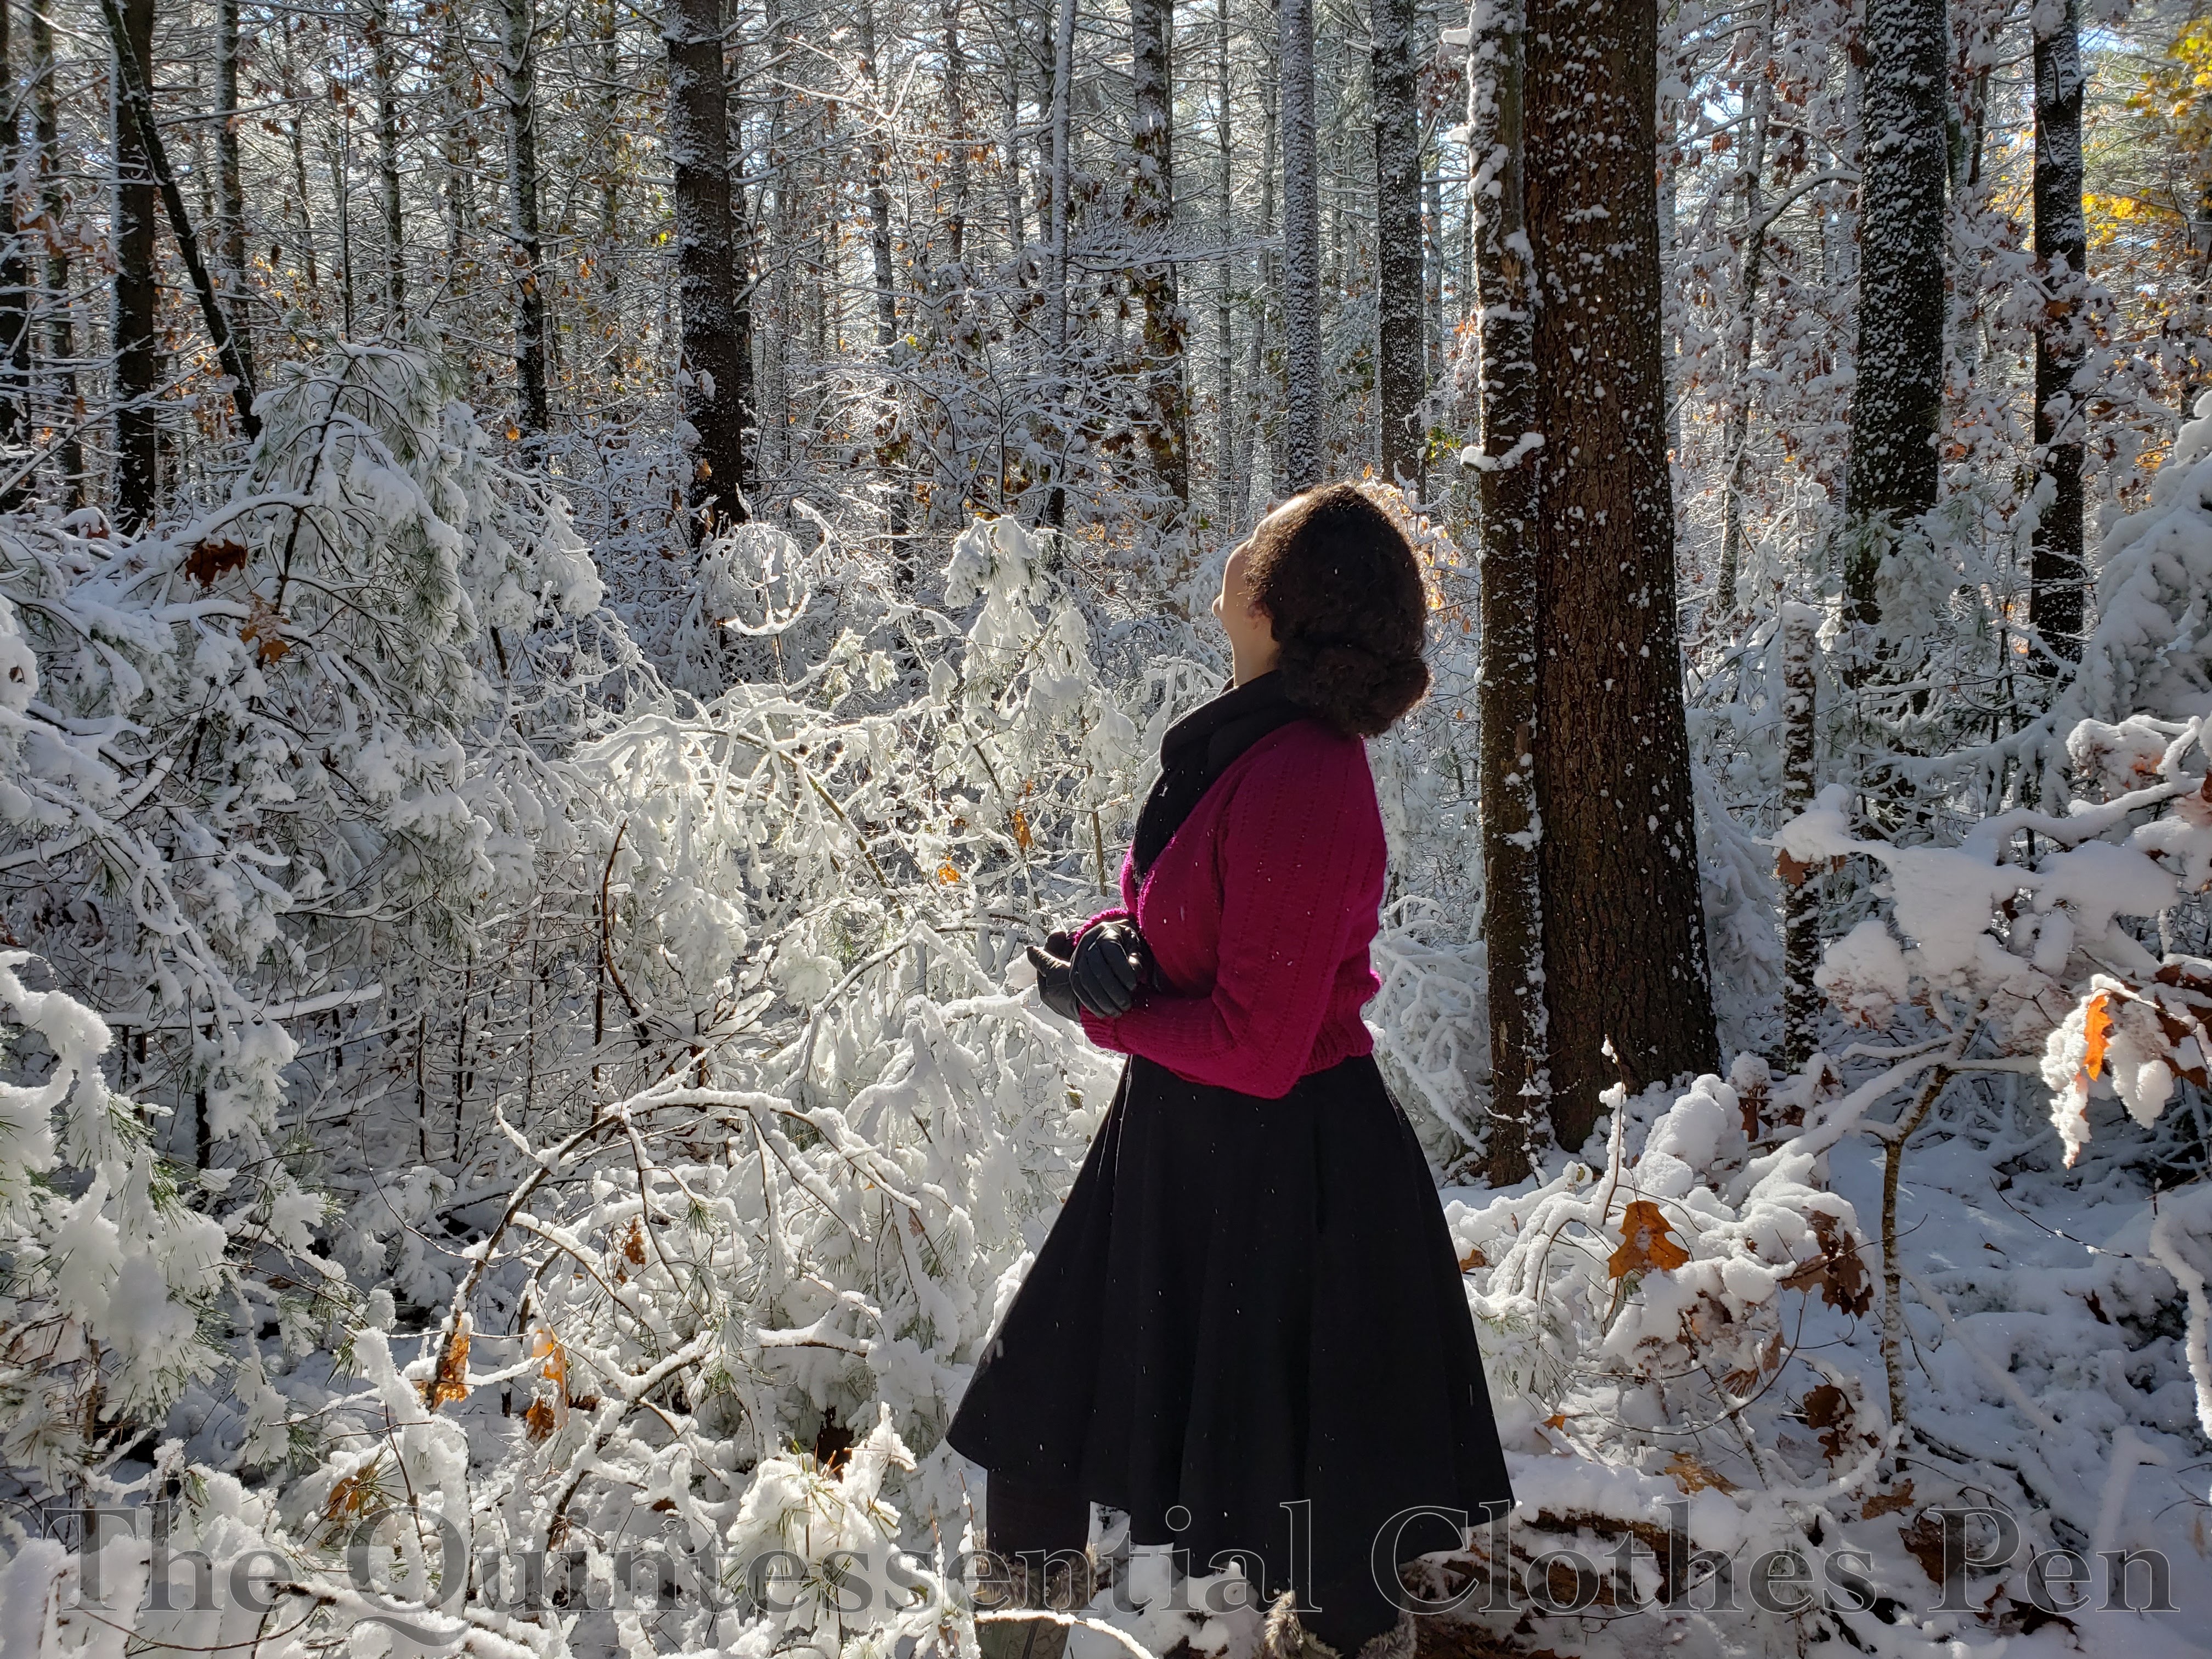
I had a wonderful time tromping through the woods after an early snow last October to document the new sweater and the black wool ¾ circle skirt I’m wearing with it. Despite the fit being a bit small, I’m very pleased with the cardigan and have added it into my regular wardrobe rotation even outside of a photo shoot walk.
While it’s fun to make historical things that only get worn on special outings, there’s also an added bonus when things can be worn more often for everyday life!
I’m really excited to have finished this sweater and even more excited that I like the finished product! It’s been a bumpy road to completion… but more on that later in this post.
First, I’m excited that this sweater qualifies for the Historical Sew Monthly challenge #11: Above The Belt!
No hitting low! Let’s keep things on the up and up as the year closes, and make something worn above the belt.
Before I go into the story of this sweater, here are just the facts:
Fabric: 1 ¾ skeins of Red Heart with Love acrylic yarn in Boysenberry, ¾ skein of Red Heart with Love acrylic yarn in Eggshell, & ¼ skein of Lion Brand Vanna’s Choice acrylic yarn in Dusty Purple.
How historically accurate is it?: 90%. The weight of the yarn is a bit heavy, though the fiber content and color are plausible. My crazy alterations make sense but of course the goal would have been to avoid their necessity.
Hours to complete: So, so many. At least 100, I would think.
First worn: November 23, 2019.
Total cost: Approximately $39.
Inspiration
The story of this sweater starts with inspiration I found on Pinterest for 1920s sweaters. I think I came across these while making my last sweater in 2013, the 1917 Sweater of Angorina. Fast forward a few years to the summer of 2016 when I got all excited and ordered tons of yarn. Enough for three sweaters…
(Let’s get side tracked for a moment to tally my successes at using all that yarn. The 1st of those three sweaters is made but has never been photographed (it’s on the list of things to do!). The 2nd sweater is the Deauville this post is about. The 3rd sweater hasn’t been started… the yarn is still sitting in my stash. But after making two quite thick sweaters out of this weight of yarn, I’m pretty sure that the yarn I have for the 3rd sweater will not make what I want. Here’s the inspiration for the 3rd sweater–despite knitting rather often I’m not confident in my ability to pick the right weight of yarn and size knitting needles for a project like a sweater. I think that a sport weight yarn might be better for that 3rd inspiration, but I’m not sure. I’ll have to do more research!)
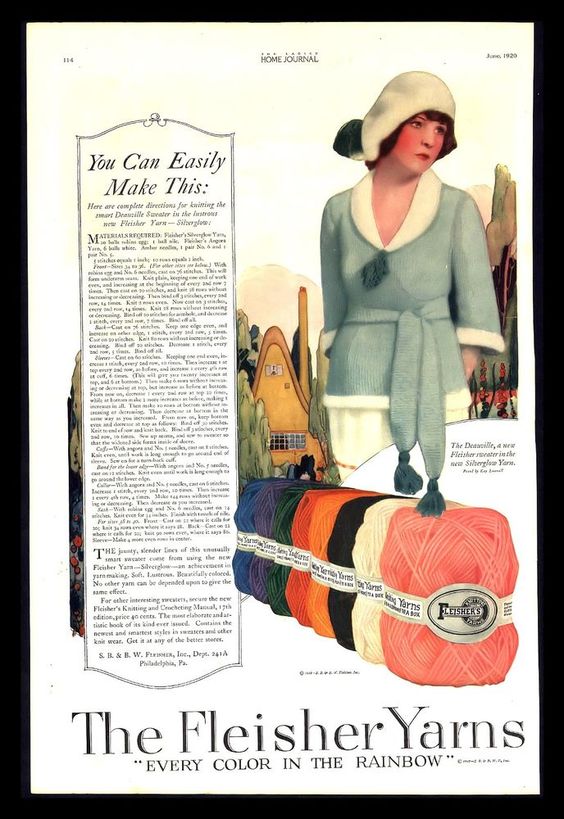
But back to this sweater: below is the inspiration for The Deauville sweater, including the instructions provided by Fleischer Yarns (this advertisement was listed on eBay). It is dated June 1920.
Making and Remaking
So I think I started on The Deauville in 2016. That means it’s been on my knitting needles for about three years… which is not to say that I’ve been working on it that whole time. Oh, no! This was definitely an on-and-off (mostly off) project–partly due to the fact that I just don’t pick up my knitting needles that often, but also because I encountered problems with this sweater that were demoralizing and time consuming.
I tried to follow the instructions as best I could. I think I did pretty well with the back and front. Then I started on the sleeves. But it became apparent as the first sleeve took shape that the sleeve I was knitting was not going to make a sleeve shape that made sense for the shape of the sweater. The top of the sleeves would have had three separate curves and the bottom of the sleeve would have curved down like a bishop sleeve. What???
Here’s the point in knitting that sleeve when I stopped. The top of the sleeve is the top of the photo. You can see that’s started to go downhill, but that was only about ⅓ of the way across rather than about ½, as you would expect for a sleeve. And the bottom curves down… why? I have no idea. It doesn’t make sense given the illustration of the finished sweater.
I could not see how the directions would produce usable sleeves, so I took apart what I had knitted and created my own instructions that made an expected sleeve shape. The sleeves took a really long time to knit… because it turns out that I had made them much wider and longer than they needed to be! I had lovely bell shaped sleeves, but that wasn’t the shape in the inspiration… ugh! (No photos, because I was frustrated at this point and just wanted to keep moving.)
I discovered the sleeve shape after having sewn up the sleeve inseams, the shoulder and side seams of the body, and attaching one sleeve. I was not inspired to re-knit two sleeves again, so I had to think of other solutions. In addition, I’d discovered other problems during my first fitting… I realized that the back of the sweater was 5″ smaller across than the front. What??? This pulled the side seams to the back and also made the sweater waaaay too tight around my body. That’s not the right style at all! It also explained why it was hard to set the sleeves in nicely–there was way more sleeve than armsceye!
If you look carefully at my shoulders in this photo you can see that the armsceye seam sits pretty far back on my shoulders in the back, due to the narrow back panel. Luckily the sleeves have a shape that accommodates being pulled so far back.
It was my goal to wear this for an event in November and by now it was mid-October, so I had to come up with solutions that wouldn’t take too much time to execute (or add too much frustration). I’d put in so much time already–I was annoyed with the sweater but determined to carry on! I decided that I could take in the sleeves, hem them, add in two 2.5″ panels to the body, and hem the very long bottom of the sweater. That would solve most of the problems, but it required taking apart most of the seams I had just sewn. Ugh!
Oh, and one other problem from that first fitting? The v-neck was unreasonably deep! It went all the way down to the middle of my ribcage. And there was really nothing to do about that in terms of knitting something new. I decided to stitch it partway shut, hoping that the tassel in the front would hide my Frankenstein seam.
Happier Progress and Finishing
I unstitched my seams and knit my new panels, hoping that my side panel additions would look intentional or mostly not noticeable. (Luckily, from the outside they’re really not noticeable, are hidden under my arms, and symmetrical, so vaguely intentional looking. Yay!) After making the new panels, I sewed up all the seams again. I found that the sleeve to armsceye ratio was much better, so that was positive.
Here’s the inside of the sweater, showing one of the added-in side panels, as well as the hemmed bottom edge, and the white contrast band.
The next step was to take in the sleeves (more unstitching and restitching). Finally, I hemmed the sleeves and bottom edge, making for rather thick edges, especially at the sleeve hems, where the seam was taken in and then the sleeve was hemmed! Luckily it’s not too visible, just a little bulky when you can feel it–which I didn’t really notice while wearing the sweater, so that’s good.
Here’s the inside of one sleeve, showing the taken-in-seam (which was whipped down to keep the bulk in place), the hem of the sleeves (also whipped down), and the white contrast band.
At some point along the way I’d made the long rectangle for the belt, so that was done. It was an easy no-stress step to add in during the midst of all the frustrating sleeve/side/seam ripping business.
The final steps were to make and add the white bands of trim as well as the collar and tassels. At this point I threw the instructions out the window, using them for general guidelines but making it up as I went along. I decided that my rounded hemmed bottom edges wouldn’t look proportional with a single layer of white knit band, so I decided on the final widths I wanted, knit them double wide, sewed them into a tube, and then sewed the tube to the sleeves and bottom edge. I like the result!
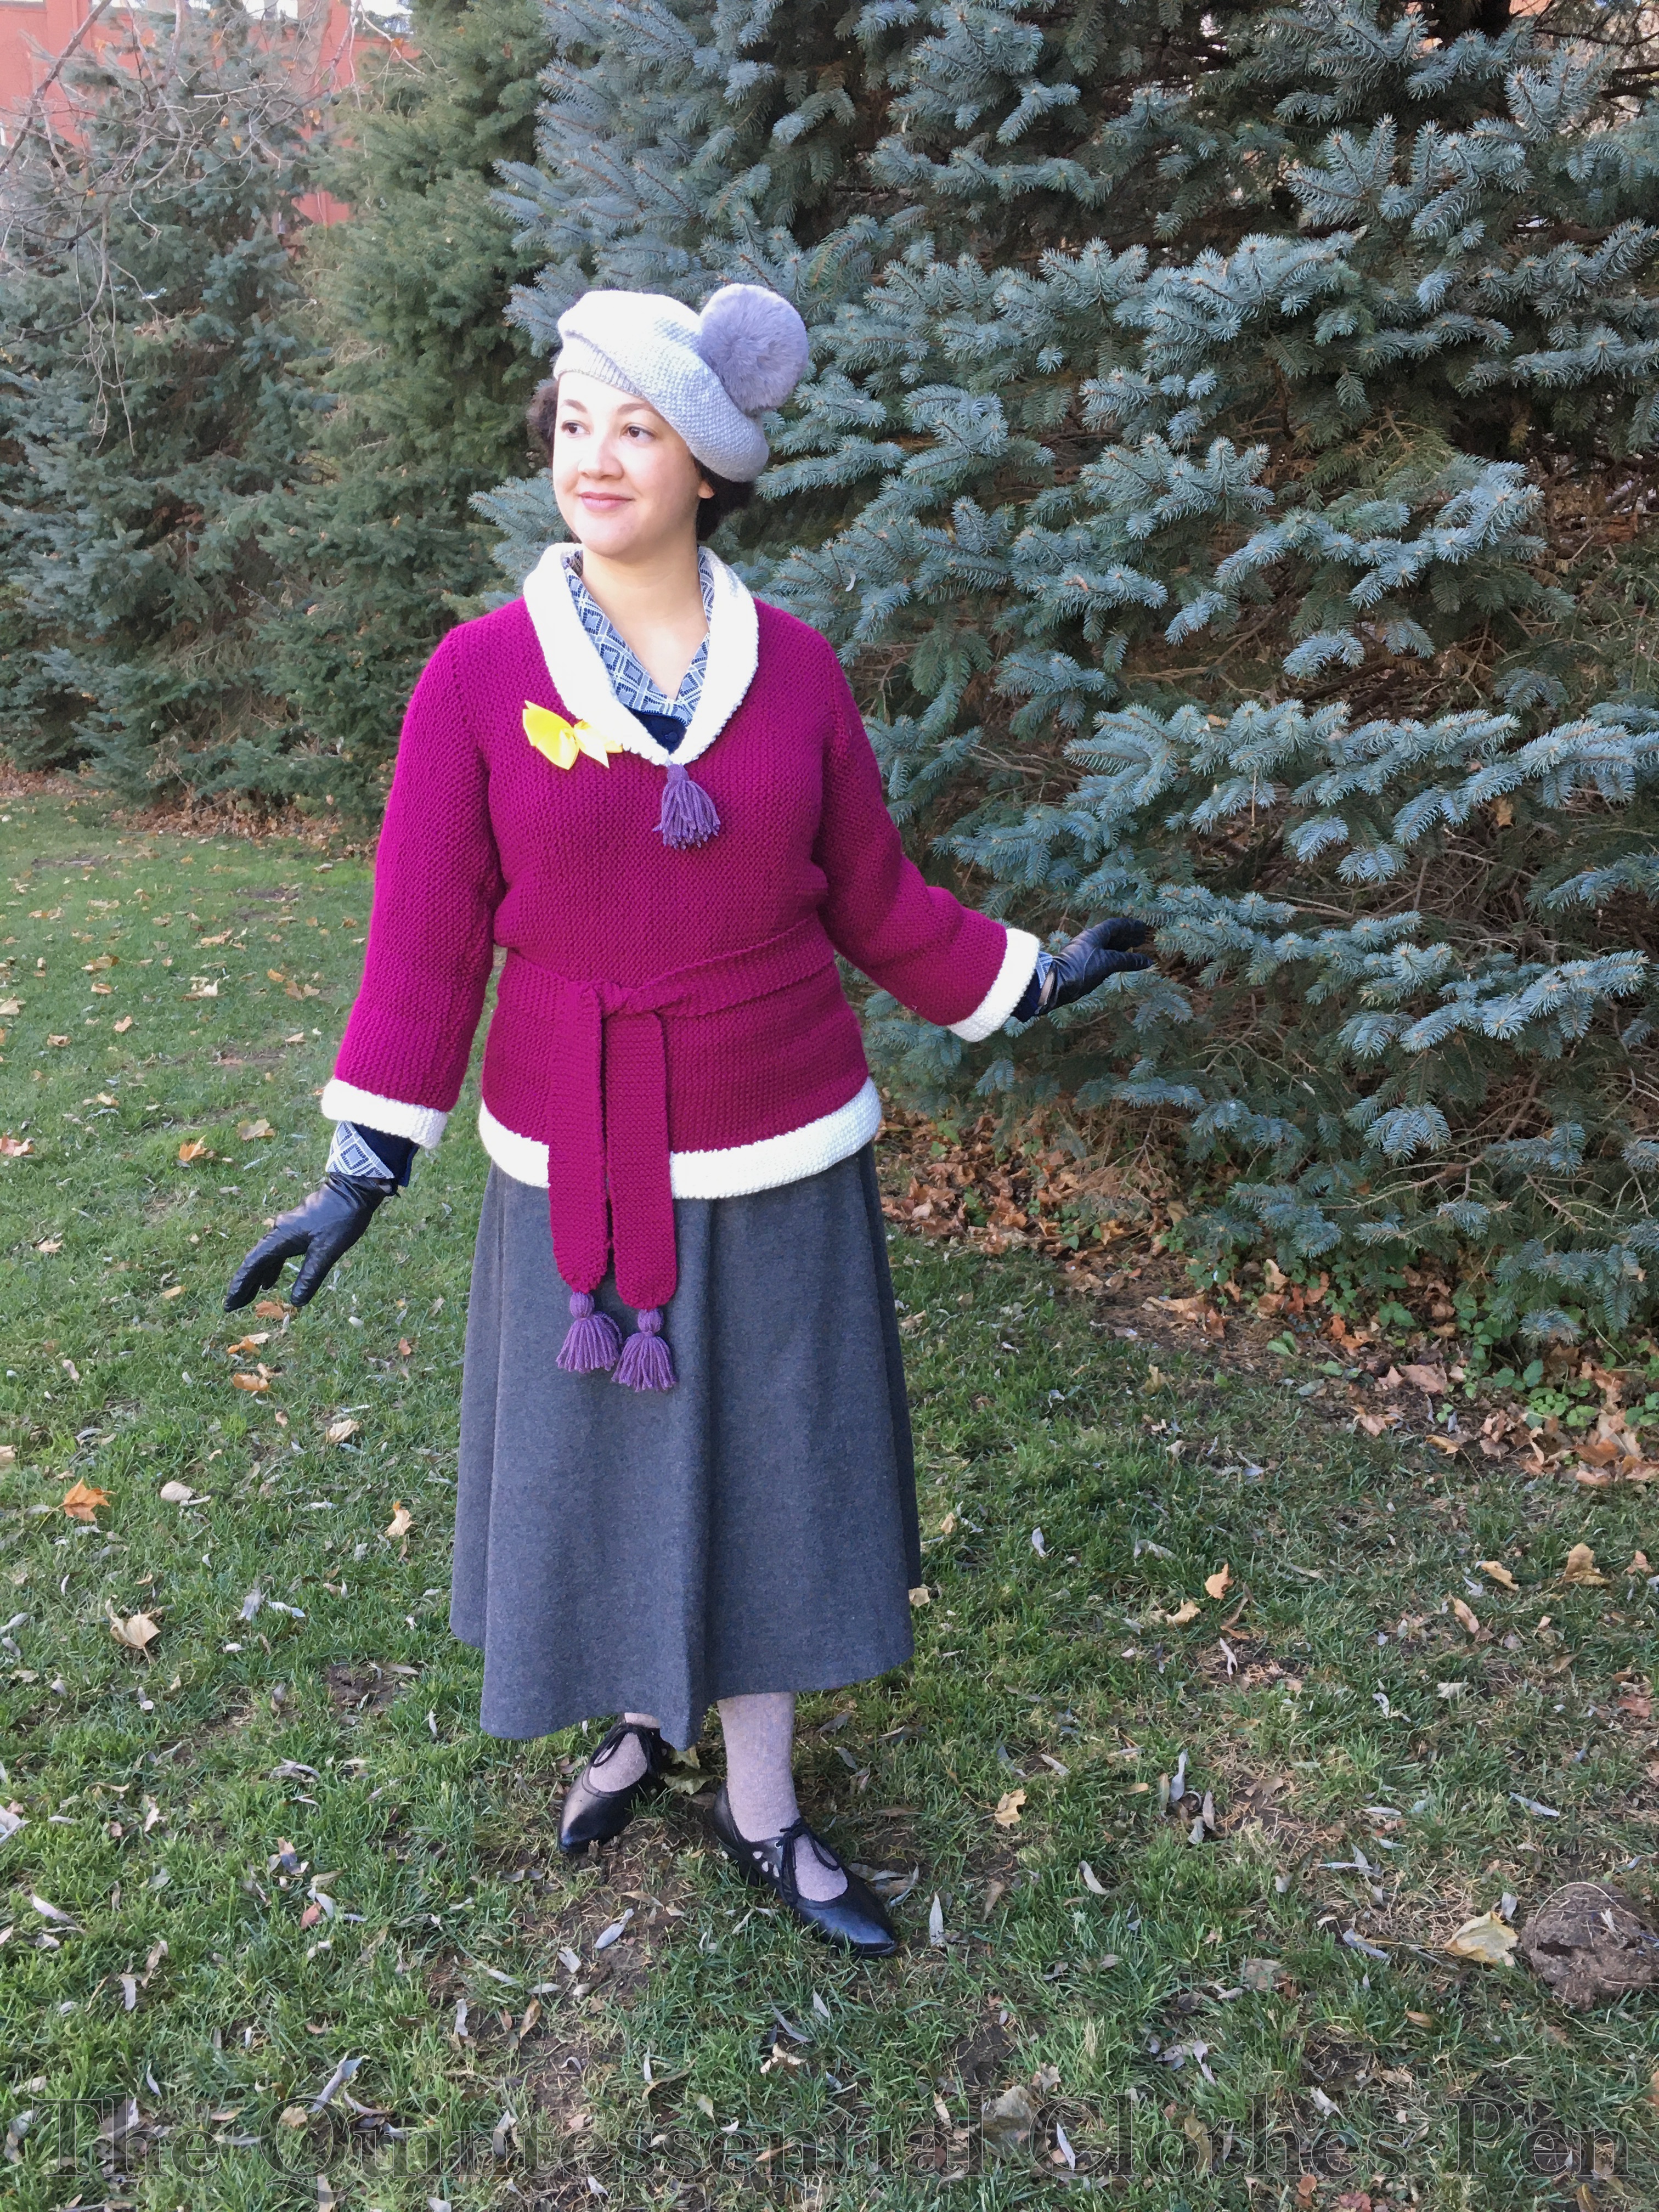
I mostly followed the collar directions (I changed the length to match my neck opening and changed the curve slightly), but wanted a rounded, doubled collar look to match the bands. To do that, I made the collar a bit wider than I intended for it to be, turned under the outside edge, and whip stitched it down. The instructions gave no information on how to attach the collar, so I whip stitched that, too. (In addition to the collar, this photo also shows the inside of the v-neck that was stitched together. I finished those stitches off with a bow, to offset the frustration of the sweater.)
Done!
And that was it! It was a bit of a rush at the end, but I got it done in time to wear to the event–a Thanksgiving parade in which friends and I represented support for women’s suffrage. The 19th amendment granting women’s suffrage was ratified in 1920, but did you that it was approved by the House of Representatives and the Senate in 2019? Any year is a year worth celebrating suffrage, in my opinion, whether it’s a 100th anniversary year or not!
1904: “A soft and lofty two-fold yarn, a mixture of wool and art silk, having a rich, lustrous appearance. Adapted for light weight sweater’s, scarfs, sportswear, etc.”
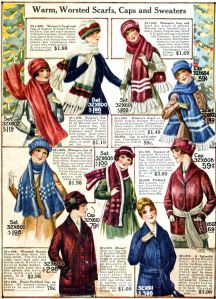
Back to my thoughts about the weight of my yarn, this description pushes me towards the thought that my yarn was a bit heavy for the original intentions. Although, I was thinking of this sweater as being on the sporty side of things (hence my accessories of the pom pom hat and wide scarf with tassels–inspired by ads such as those below), so I think it is still tangentially possible for this yarn weight to make sense–and it certainly did a great job of keeping me warm!
Interestingly, you can still find Fleischer Yarn. Here is one example, and though it’s not clear exactly when these skeins are from, I bet that a bit of looking at the labels on the first resource I linked might answer that question.
About The Color Of My Sweater
The color of my sweater color is one that I love. Berries of all kinds are yummy and pretty! But is it a reasonable choice for 1920? Well, I did a bit of researching that, too. Here is a color chart for Fleisher Yarns from 1929. My boysenberry color isn’t represented, but there are yarns with a similar depth of color and saturation, so I don’t think it’s out of the realm of possibility for a color like this to have existed at that time. For example, combine Wild Aster and Cardinal on the color chart and you might get a color similar to my yarn.
A Few More Photos
To finish off, here are a few more photos of my Deauville sweater, which was most definitely an exercise in determination!
In the spirit of the HSF #23: Generosity and Gratitude, I thought I’d share an annotated version of my altered 1917 Knitted Sweater Of Angorina pattern. Who knows, maybe you’re thinking of knitting this sweater or something similar right now, and this version of the pattern and these notes will come in super handy as you knit your own sweater?
“Knitted Sweater of Angorina” from the Star Needlework Journal 1917.
My version:
“Knitted Sweater of Angorina”
Here’s the pattern. I’ve put original directions in [brackets] if I’ve changed them, and included my version before the original version, so you can compare. My version of the pattern and any notes that I have added are in italics.
One of the major reasons I adjusted the pattern in places was in attempt to make it to my measurements (40″ hips, 30″ waist, and 36″ bust). On size 5 needles I was knitting 10 stitches in 2.5″, which was 2 squares of the pattern, and knitting 1″ vertically every 6 rows, which was 1 square of the pattern. If I had knit the sweater with this gauge and the original directions I would have had a sweater body that would be too big: about 12″ too big around and 3″-5″ too long in length.
ABBREVIATIONS: K – knit, P – purl.
MATERIALS: 6 skeins of probably acrylic yarn (of medium weight and unknown length, though on the smallish side, as modern skeins go (and I could have used 7!)); 5mm and 3mm knitting needles; 6 plastic buttons.
[17 balls of THE AMERICAN THREAD COMPANY’S Article 200 “Angorina” Fluffed Cotton, size 4; two long celluloid knitting needles No. 5 and two shorter celluloid knitting needles No. 3; 6 buttons.]
DIRECTIONS:
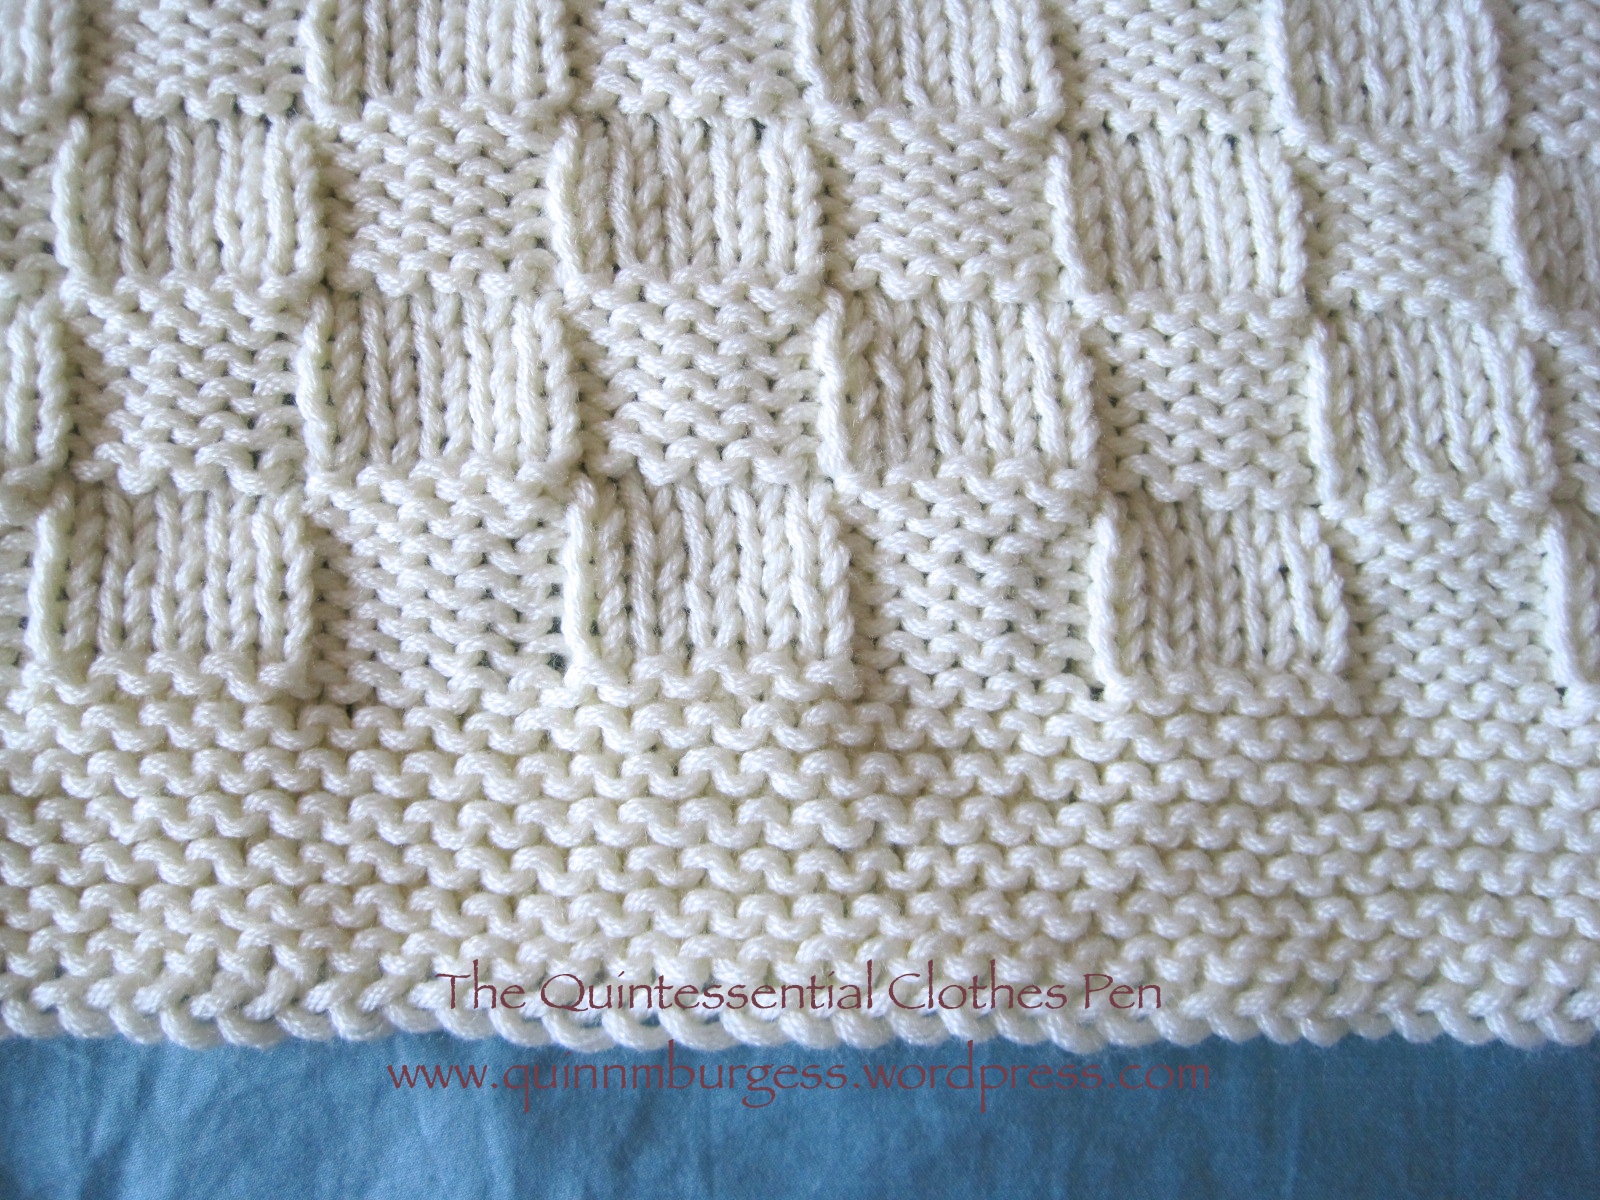
For the Basket Stitch pattern: Cast on a number of stitches divisible by 10 and 2 over for the edge stitches. (So the 10 is the repeat of two squares of the pattern, and the 2 extra are for the edges.)
lst Row: Slip the first stitch (this is the edge stitch) , * then knit 5, and purl 5, repeat from * to the end of row ending with P 6, turn (the last stitch is the edge stitch).
2nd, 3rd, 4th, 5th and 6th rows: Same as first Row.
7th Row: Slip the first stitch, * then P 5, and knit 5, repeat from * to the end of Row, ending with K 6, turn.
8th, 9th, 10th, 11th and 12th Rows: Same as 7th Row.
These twelve rows form the pattern, which is knit throughout the sweater.
Sweater
Cast on 82 [112] stitches on the long celluloid needles No. 5 and begin to K at the bottom of the sweater,
FOR THE BORDER: K plain back and forth for 14 rows or 7 ridges (2 rows of plain knitting back and forth form a ridge).
Now begin to knit the pattern as directed above.
K 12 [14] rows, then begin to decrease 1 St at the beginning and end of every third row until 10 stitches have been decreased at each end.
There are now 62 [92] stitches left in the row and 42 rows of pattern K.
Continue knitting the pattern for 120 [138] more rows or until 15 patterns or 180 patterns are K in all. (That last section of directions about 15 patters and 180 patterns confused me, so I just sort of ignored it…)
This completes the length of the back.
Next Row: Slip the first stitch, then knit 5, and P5 for 21 [31] stitches (this is for the right shoulder), bind off 20 [28] stitches for the back of the neck, the next 21 [32] stitches left on the needle are for the left shoulder.
Now put the first 21 [32] stitches on to a spare needle or thread (and I added one stitch to make it 22, so I would have a 20 stitches for the repeat of the pattern and one for each end), and continue knitting the left front as follows: K the pattern for 8 rows pattern (this is for the shoulder), then begin to increase 1 stitch at the beginning of every second row, this is at the neck – until 20 stitches have been increased.
There are now 42 [52] stitches in the row.
K the pattern without increasing for 84 [104] rows, then begin to increase 1 stitch every 3rd [7th] row at the outer edge (the outer edge was the end of each 2nd row for me) (the front edge must be straight) for 10 [5] times (that means I knitted in this fashion until I had increased 20 stitches), then K 12 more rows without increasing. (I chose not to knit the final 12 rows: I just ignored that direction.)
16 patterns of 192 pattern rows are now K for the length of, the front. (Again, I was confused by this direction and just ignored it.)
K 7 ridges plain back and forth for the border. (7 ridges equals 14 rows.)
Bind off loosely, break the thread. Now K the right front to correspond with the left front, then sew up the underarm seams (this is the length of 10 ½ patterns or 126 pattern rows from the bottom of the sweater up). (I waited to sew up my seams until I was entirely finished knitting the sweater. As before, I ignored the confusing direction about the number of patterns and pattern rows.)
Repeat the directions from right after “This completes the length of the back…” for the right front of the sweater. I’ve repeated them here, with the changes I made for knitting the right side instead of the left.
Next Row: Slip the first stitch, then knit 5, and P5 for 21 [31] stitches (this is for the right shoulder), bind off 20 [28] stitches for the back of the neck, the next 21 [32] stitches left on the needle are for the left shoulder.
Now put the first 21 [32] stitches on to a spare needle or thread (and I added one stitch to make it 22, so I would have a 20 stitches for the repeat of the pattern and one for each end), and continue knitting the left front as follows: K the pattern for 8 rows pattern (this is for the shoulder), then begin to increase 1 stitch at the beginning of every second row, this is at the neck – until 20 stitches have been increased.
There are now 42 [52] stitches in the row.
K the pattern without increasing for 84 [104] rows, then begin to increase 1 stitch every 3rd [7th] row at the outer edge (the outer edge was the beginning of each 2nd row for me) (the front edge must be straight) for 10 [5] times (that means I knitted in this fashion until I had increased 20 stitches), then K 12 more rows without increasing. (I chose not to knit the final 12 rows: I just ignored that direction.)
16 patterns of 192 pattern rows are now K for the length of, the front. (Again, I was confused by this direction and just ignored it.)
K 7 ridges plain back and forth for the border. (7 ridges equals 14 rows.)
Bind off loosely, break the thread.
FOR THE SLEEVES (The following directions are what I used for my first attempt at a sleeve for this sweater… I didn’t like the resulting sleeve and chose to take it apart and try again. I’ll include my revised sleeve pattern following these directions for the sleeve I didn’t like. You can read more about why I changed my sleeve pattern and see pictures of the before and after, in this previous post.):
Cast on 72 stitches, and K the pattern for 3 rows, then begin to decrease 1 stitch at the beginning and end of every second row until 5 stitches have been decreased at each end.
There are now 62 stitches left in the Row.
Knit 120 rows of pattern. [K 9½ patterns or 114 rows without decreasing.]
Now slip the stitches on to the No. 3 needles, and K plain back and forth for 18 ridges for the cuff, bind off, and sew up the seam.
Place the sleeve in the armhole, so that the sleeve seam and underarm seam meet. (I waited until all of my pieces were knit before sewing any seams.)
(So now, here is my revised sleeve pattern):
Cast on 72 stitches (I added a single plain knit row, as a transition), and K the pattern for 3 rows, then begin to decrease 1 stitch at the beginning and end of every second row until 5 stitches have been decreased at each end.
There are now 62 stitches left in the Row.
Knit 60 rows of pattern without decreasing. Knit 60 rows, decreasing 1 stitch at the beginning and end of every 4th row. [K 9½ patterns or 114 rows without decreasing.] (Again, I ignored the first part because it is confusing.)
Now slip the stitches on to the No. 3 needles, and K plain back and forth for 10 [18] ridges for the cuff, bind off, and sew up the seam.
Place the sleeve in the armhole, so that the sleeve seam and underarm seam meet. (I waited until all of my pieces were knit before sewing any seams.)
This second sleeve pattern worked much better for me, so I repeated it for my second sleeve.
FOR THE BANDS: Cast on 12 [16] stitches on the No. 3 needles. K plain back and forth for 2 1/2 [4] inches (25 rows), then make a buttonhole as follows: K 4 [7] stitches. bind off 4 [6] stitches, K 4 stitches (this leaves 4 [5] stitches at each side of the 4 [6] stitches bound off).
In the next Row cast on the 4 [6] stitches bound off, thus forming a buttonhole.
K back and forth for 3 1/2 [3] inches (35 rows), then make the next buttonhole.
Continue knitting plain back and forth making 4 more buttonholes so that there are 6 in all, always leaving an interval of 3 1/2 [3] inches (35 rows) between each buttonhole.
(I calculated these measurements and row lengths between buttonholes to fit into the length of the front of the sweater before the V neck starts… in my case, that length was 21″. If your gauge is different you might want to consider changing these directions to suit you.)
(At this point I became very worried about running out of yarn. I wish I would have had enough to make the bands as wide as the original pattern called for… but I had to make them narrower, so my revised pattern will reflect that. If you have enough yarn you should keep the band wide and only adjust for length.)
K 1/2 [1] inch (5 rows) after the sixth buttonhole then begin to decrease 1 stitch at the beginning of every second row until 8 stitches have been decreased.
There are now 8 stitches in the row. Knit for awhile… turns out I knit plain for 45 rows. Begin to increase 1 stitch at the end of every 2nd row until 8 stitches have been increased… in theory that was my plan, but since I was running out of yarn, I just slowly decreased until I ran out of yarn. [K plain for 18 inches or long enough to go around the neck, then increase 1 stitch at the beginning of every second Row until 16 stitches are on the needle again.]
K plain for 21 inches or as long as the wider part of the band with the buttonholes, bind off loosely.
Sew the buttonhole part of the band on to the right front, the narrow part around the neck and the plain wider part to the left front, this should be done very carefully, then sew on the buttons.
Whew! At this point I just need to sew up my seams and sew on the buttons. Yay!
My “knitted sweater of Angorina.” (Thanks to Mr. Q, who consented to take pictures of me with no hassle on my first ask!)
And here’s the image from the pattern, for comparison.
“Knitted sweater of Angorina” from the Star Needlework Journal 1917.
This is my entry for the HSF Challenge #23: Generosity and Gratitude. This challenge “is not about a particular item or aesthetic, it’s about celebrating the generosity of spirit and willingness to help others that makes the historical sewing community great, and giving credit and thanks to those who have contributed to our collective knowledge without expecting payment in return.”
My special thanks goes out to the person, or people, who took the time to put this knitting pattern out there on the internet, for free! I wouldn’t have been able to complete this project with the pattern, obviously. Thanks!
As it is, I’m really pleased to be done knitting and putting together this sweater. I’ve been using my sew time to knit, which has been a nice change and fun, but I do miss sewing! So now it will be back to sewing, which is good, because I have a lot of projects I’m working on!
Also, this sweater was a bit stressful… It started out on a relaxing note, but after completing the front, back, and one sleeve, I realized that it was taking way more yarn than I expected and I started to get worried I might run out before finishing the sweater! So as I was knitting my brain kept trying to think of ways to conserve yarn and wondering if there would be enough. I actually wound up completing unraveling one sleeve in order to knit it with less yarn… and thank goodness I did, because I barely had enough yarn to get as far as I did, and that was still with alterations to the original pattern to accommodate my dwindling yarn pile. You see, after knitting the front, back, and the two sleeves, there’s still the buttonhole/neck/button band to be knit, and you need enough yarn to stitch the seams! The sweater is quite long, so these things take more yarn than you might think. I used up literally almost all of the yarn I had…
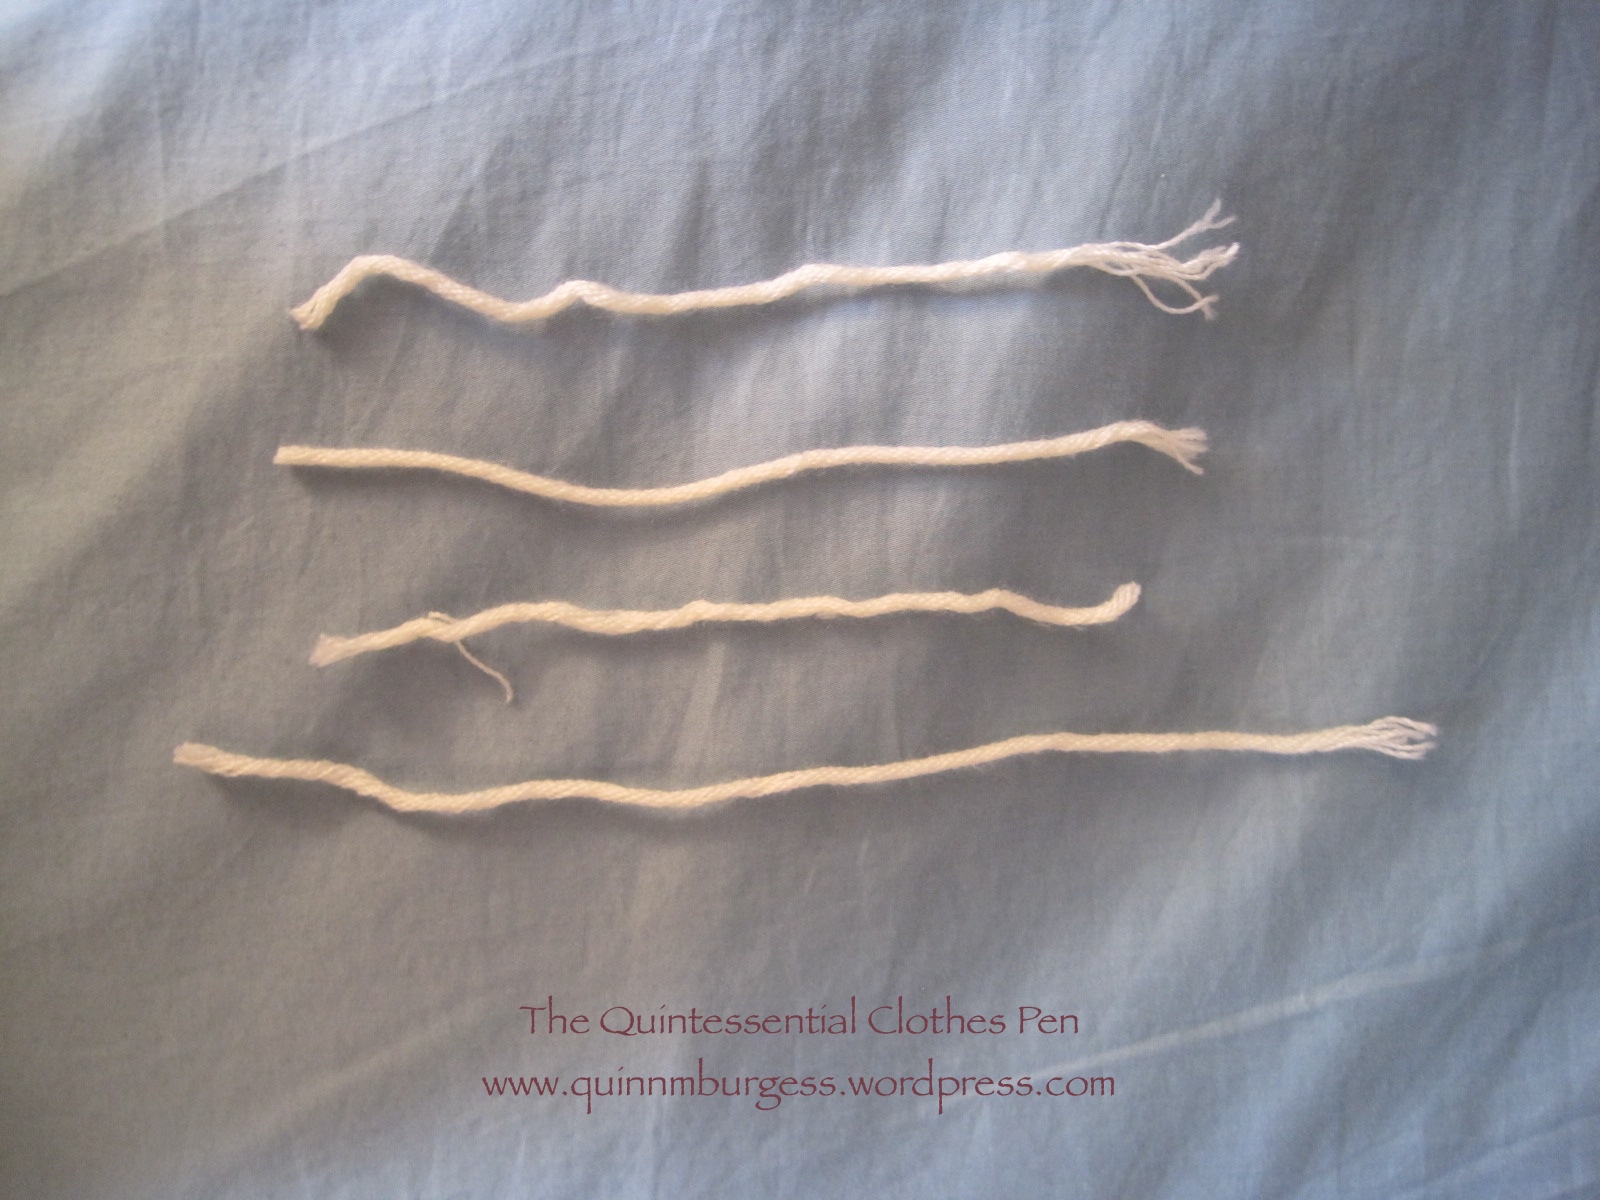
The first sleeve before it was unraveled and re-knit.The new sleeve shape with alterations to the pattern.Sewing up a side seam. The front, back, sleeves, and band are all knit separately, and flat, and then seamed together, creating side seams, armsceye seams, underarm seams, and a seam to join the band to the front/neck opening.These are literally the only pieces of yarn I have left… The longest is about 6″!
Here are the facts:
Fabric: 6 skeins, of unknown length, of probably acrylic yarn.
Notions: Heavy thread to sew on the buttons, and 6 plastic buttons.
How historically accurate?: Acrylic wasn’t invented until 1941 and as fas as I know plastic buttons of the sort I used weren’t in use in 1917, but as a historic costume I’d give myself 95% on looking right, even if the materials aren’t 100% historically accurate.
Hours to complete: Oh goodness… mounds. It took me the entire month of October, and that was working on the sweater for 2-4 hours almost every day.
First worn: For pictures! Hopefully I’ll get to wear it later this month for an event.
Total cost: $2.50 for the knitting needles, $3 for the yarn, $1.50 for the buttons… total = $7! Now that is a project total I’d love to have more often!
Things I’m proud of in this sweater? #1: It’s the first sweater I’ve ever knit! #2: I was really careful to keep the pattern perfectly knit, sometimes taking out 5-10 rows after noticing I had made a mistake, so I could go back and fix it (let me just say that un-knitting, like seam ripping, is not nearly as exciting as knitting or sewing!). The end result is that the pattern is perfect everywhere… yes, I’m a perfectionist. #3: I did a really good job sewing up the seams, especially on the front band. #4: I learned out to knit a button hole! It’s not that hard, really, just casting off one row and on the next, but it does take your brain a little bit to figure it out. As I went along my button holes became neater and neater, as you would expect. #5: The band fits nicely around the neck opening and is a lovely way to finish off the sweater edge.
Where front meets front band. See that seam? Nope, you don’t, because it looks like I knit it all at once! (ooo, and see my button holes?)
Things that make me call this sweater “wonky” or “original” or perhaps just simply “hand knit”? #1: That I had to cut corners because I was running out of yarn. The part of the band that goes around the neck is not as wide as the pattern calls for. And the part of the band that should have the buttons sewn to it is, well, non-existent. I literally ran out of yarn. #2: Because the button part of the band is non-existent, the neckline isn’t actually symmetrical… the side with the buttons doesn’t widen to be the same width at the button hole side. So the neck V doesn’t quite want to center, and the buttons/button holes wind up being slightly off center, too. (Honestly, though, I don’t think other people would notice those things if I didn’t point them out…) #3: Even with my sleeve alts, the sleeve is still rather large around (can you imagine if I hadn’t re-knitted them?!?) and they are a little long, even with a cuff. #4: Now that it’s finished, the sweater is rather heavy and prone to sagging some in places like the sleeves. Oh well!
See the side with the buttons? Yup, no band there!Looking at my slightly loose, and rather long, sleeve.
For a first try at knitting a sweater, and using a historic pattern, I’m calling this one a success!
My 1917 “Knit Sweater of Angorina” is finally complete! But, you’ll have to wait until my official HSF post to see it. In the meantime, I want to share a little bit of history that relates to knitting in WWI and, by extension, my new sweater.
World War I Red Cross poster encouraging knitting, ca. 1917
World War I started on July 28, 1914 and ended on November 11, 1918. The US entered the war on April 6, 1917. After the US joined the war, it didn’t take long before conditions in the trenches prompted the Red Cross to put out an urgent call for knitted goods for soldiers in the summer of 1917. Their immediate need was for one and a half million each of knitted wristlets, mufflers, sweaters, and pairs of socks. That’s a lot of knitting!
The need for the socks was paramount: The trench warfare conditions under which the war was fought meant that soldiers spent weeks or months entrenched in wet and in winter freezing conditions.
For American soldiers in the trenches or on the march in France, warm socks made all the difference. The boots these soldiers wore (the 1917 Trench Boot) were made of heavy retanned cowhide with thick soles. Although in theory water-repellant, the boots ripped out at the seams fairly quickly. They had iron heels and five rows of hobnails (to prevent slipping) hammered into the soles. These hobnails conducted the cold from the frozen ground directly to the soldiers’ feet.
An improved version (1918) called the Pershing Boot added an extra sole and thus extra warmth, but a soldier could not bend his foot in the rigid boot and his feet remained cold, sore, and often wet. These boots were not insulated in any way, and soldiers took to wearing two pairs of thick wool sock. This required them to wear boots two sizes larger than their regular size. Allowing for wear and tear and the prudent practice of changing socks often in order to avoid contracting trench foot (a fungus), the need for a continuous supply of warm wool socks was endless.
As you would expect, not everyone could knit very well, so the quality of knitted goods being sent overseas varied, but a sock is a sock, even with dropped stitches and other mistakes, and it will still keep a foot warm! In support of the war effort, people began knitting everywhere: work, school, while on public transportation, at church… People who couldn’t knit were encouraged to buy yarn for those who could, and children were encouraged to do whatever they could to help their family members have time to knit. Personal knitting was looked down upon for being selfish, because it didn’t support the war effort or the soldiers.
By mid-1918 the need for socks was so severe that the Red Cross begged knitters, “Don’t make sweaters … every pound of yarn that can be secured should be used for knitting socks” (quoted in MacDonald, 218). Some knitters conserved wool by using cotton yarn for the legs and wool for the feet. Wool was the best fiber for moisture absorption. Other knitters, stymied by the somewhat complicated mystique of turning the heel (i.e. knitting a heel flap and then picking up stitches along its sides to knit a gusset, forming the heel-shaped portion of the sock) began knitting heel-less tube socks. These drew praise from soldiers because they were more comfortable than socks with lumpy, poorly made heels.
The Seattle Red Cross operated a knitting machine that produced long knitted tubes. The tubes were cut into 27-inch lengths and the toes purled together by hand. “When the knitting machine is once ‘set up’ with gray yarn, it knits and knits and knits.” (The Seattle Times, December 2, 1917)
In September 1918, all American yarn retailers were ordered by the War Industries Board to turn over their stock of service yarn (any yarn in khaki, gray, heather, natural or white) to the Red Cross. For the next six weeks all yarn for war-effort knitting was available only through the Red Cross. This was done to ease the yarn shortage and to allow Red Cross knitting to continue uninterrupted.
…The so-called War To End All Wars ended on November 11, 1918, when Germany surrendered. In the war’s final months, the American Red Cross turned its attention to the devastating 1918 influenza pandemic… Many [knitters] foreswore gray and khaki yarn for good, or so they thought. These same knitters would be the first to pick up their needles in December 1941, to once more “knit for victory.”
Quite an interesting bit of history, I think. Given this information, I can confidently say that my sweater would have been knit early in 1917, before the US joined the war. I encourage you to click through to historylink.org to read the entire article I’ve quoted here. It focuses on knitters in the Seattle, Washington area, but I’m sure reflects what other areas would have been like as well.
I’ve brushed off my knitting needles and am attempting to knit my first sweater! Not just any sweater, though, this sweater pattern is from 1917.
“Knitted sweater of Angorina” from the Star Needlework Journal 1917.
This most recently started project has me going in a slightly different direction than in my previous knitting adventures. I taught myself how to knit in college (it was a popular thing lots of my friends and I did). I would often knit in class (and I had awesome professors who realized that I actually paid more attention while I was knitting because it kept my brain engaged during lectures and discussions). Mostly I knit scarves… so many, in fact, that I ran out of people to give them to. Then I started on afghans and pillows. I loved to figure out complicated patterns and cabling… But I never could figure out how to knit in the round (to make hats and such) and I never wanted to deal with sizing and non-rectangular patterns to create a sweater. I’ve since been taught how to knit in the round, though I haven’t tried it yet, but this is my first attempt at a sweater!
I decided to knit a sweater for an event I’m likely to attend in November for which we’ll be wearing WWI era clothes. That’s what sparked my interest in looking for knitting patterns from that period. I found the pattern I’m using through Ravelry, but in searching the internet for other patterns I came across other resources for period knitting that I’ve included at the end of this post. I also came across a pattern for a 1922 sweater that I’m hoping to try eventually (and assuming this one isn’t a complete failure!). It’s a more complicated pattern that uses two colors, so that will be new and exciting… some day.
I was further spurred on my knitting mission by coming across knitting needles and skeins of yarn for 50 cents in the bargain attic at our local fabric store. The yarn is a lovely cream color and super soft. I’m guessing it’s acrylic, but it had no label and I haven’t bothered burn testing it, so I’m not certain of the fiber content. I figured that for about $3 I could take a chance on knitting a sweater. If it works out I can always buy more expensive (or normally priced, haha) yarn later and make another sweater. Oh, and did I mention that the pattern I’m using is free??? Love that price!
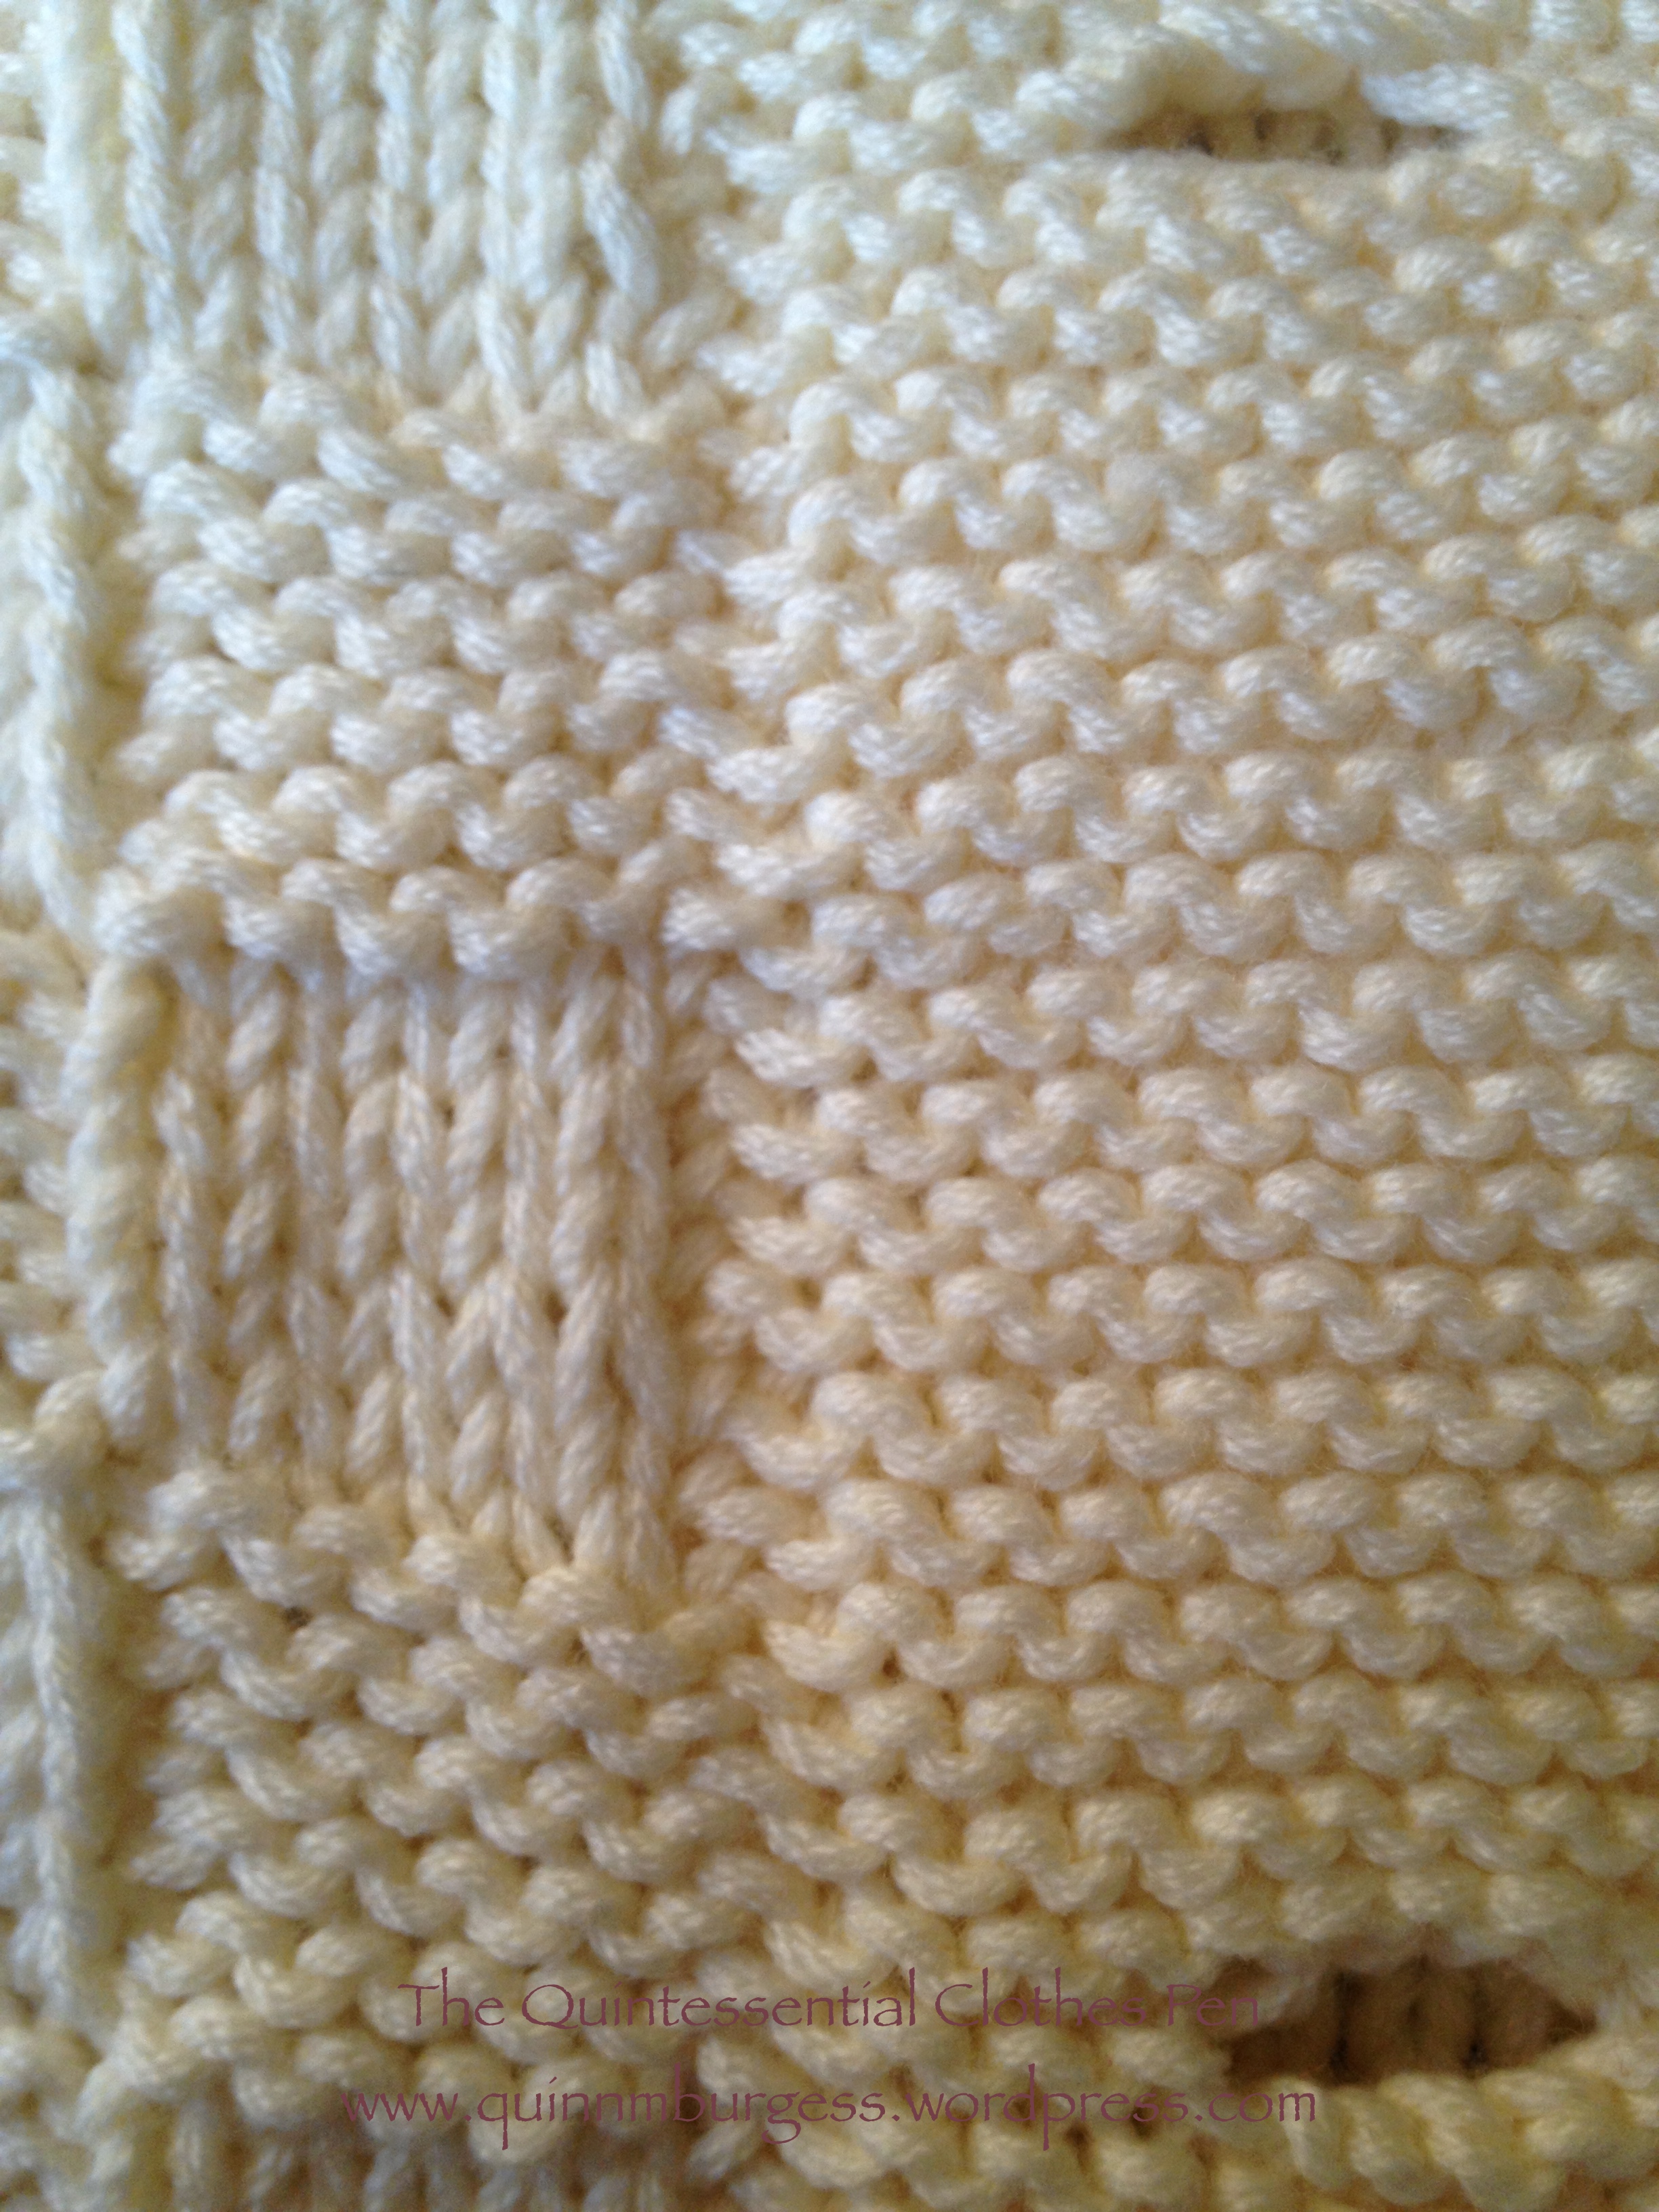
Here’s my progress so far:
The back of the sweater. I’ve still got about 6″ to go, but you can see that it’s starting to look like something!Here’s a close up of the basket weave pattern. It’s just knits and purls in sets of 5 stitches.
I’ve been knitting rather than sewing for the last week or so and it has been a nice change, plus it’s really neat to see the sweater starting to turn into something. As I get further I’ll post more about my progress.
Here are some other early 20th century knitting pattern sources I came across: