I completed a little project last week! It’s one I’ve been hoping to complete since the summer, when I realized how helpful it is at work that I have a safety pin pillow with open safety pins stuck into it near my fitting area, but that at home I keep my pins closed and in a plastic container. The solution was simply to make a safety pin pillow for home that can also travel with me when I do independent work outside of my normal costume shop!
The pillow is a simple square. It’s made from leftover bits of 1850s reproduction cotton (also known as Georgina) flatlined with muslin to help give the pins something to bite into and stuffed with polyester batting. I love that the colors are very me, the fabric has a story, and it won’t show hand oil dirt for a long time.
The pillow is about 6″ square and as you can see I have space to add lots more safety pins. (Plus, it’s squishy, and I like squishy things!) Really, safety pin pillows are genius ideas! It makes fittings so much more efficient to have pins easy to access and already open. Maybe you need to make one, too?
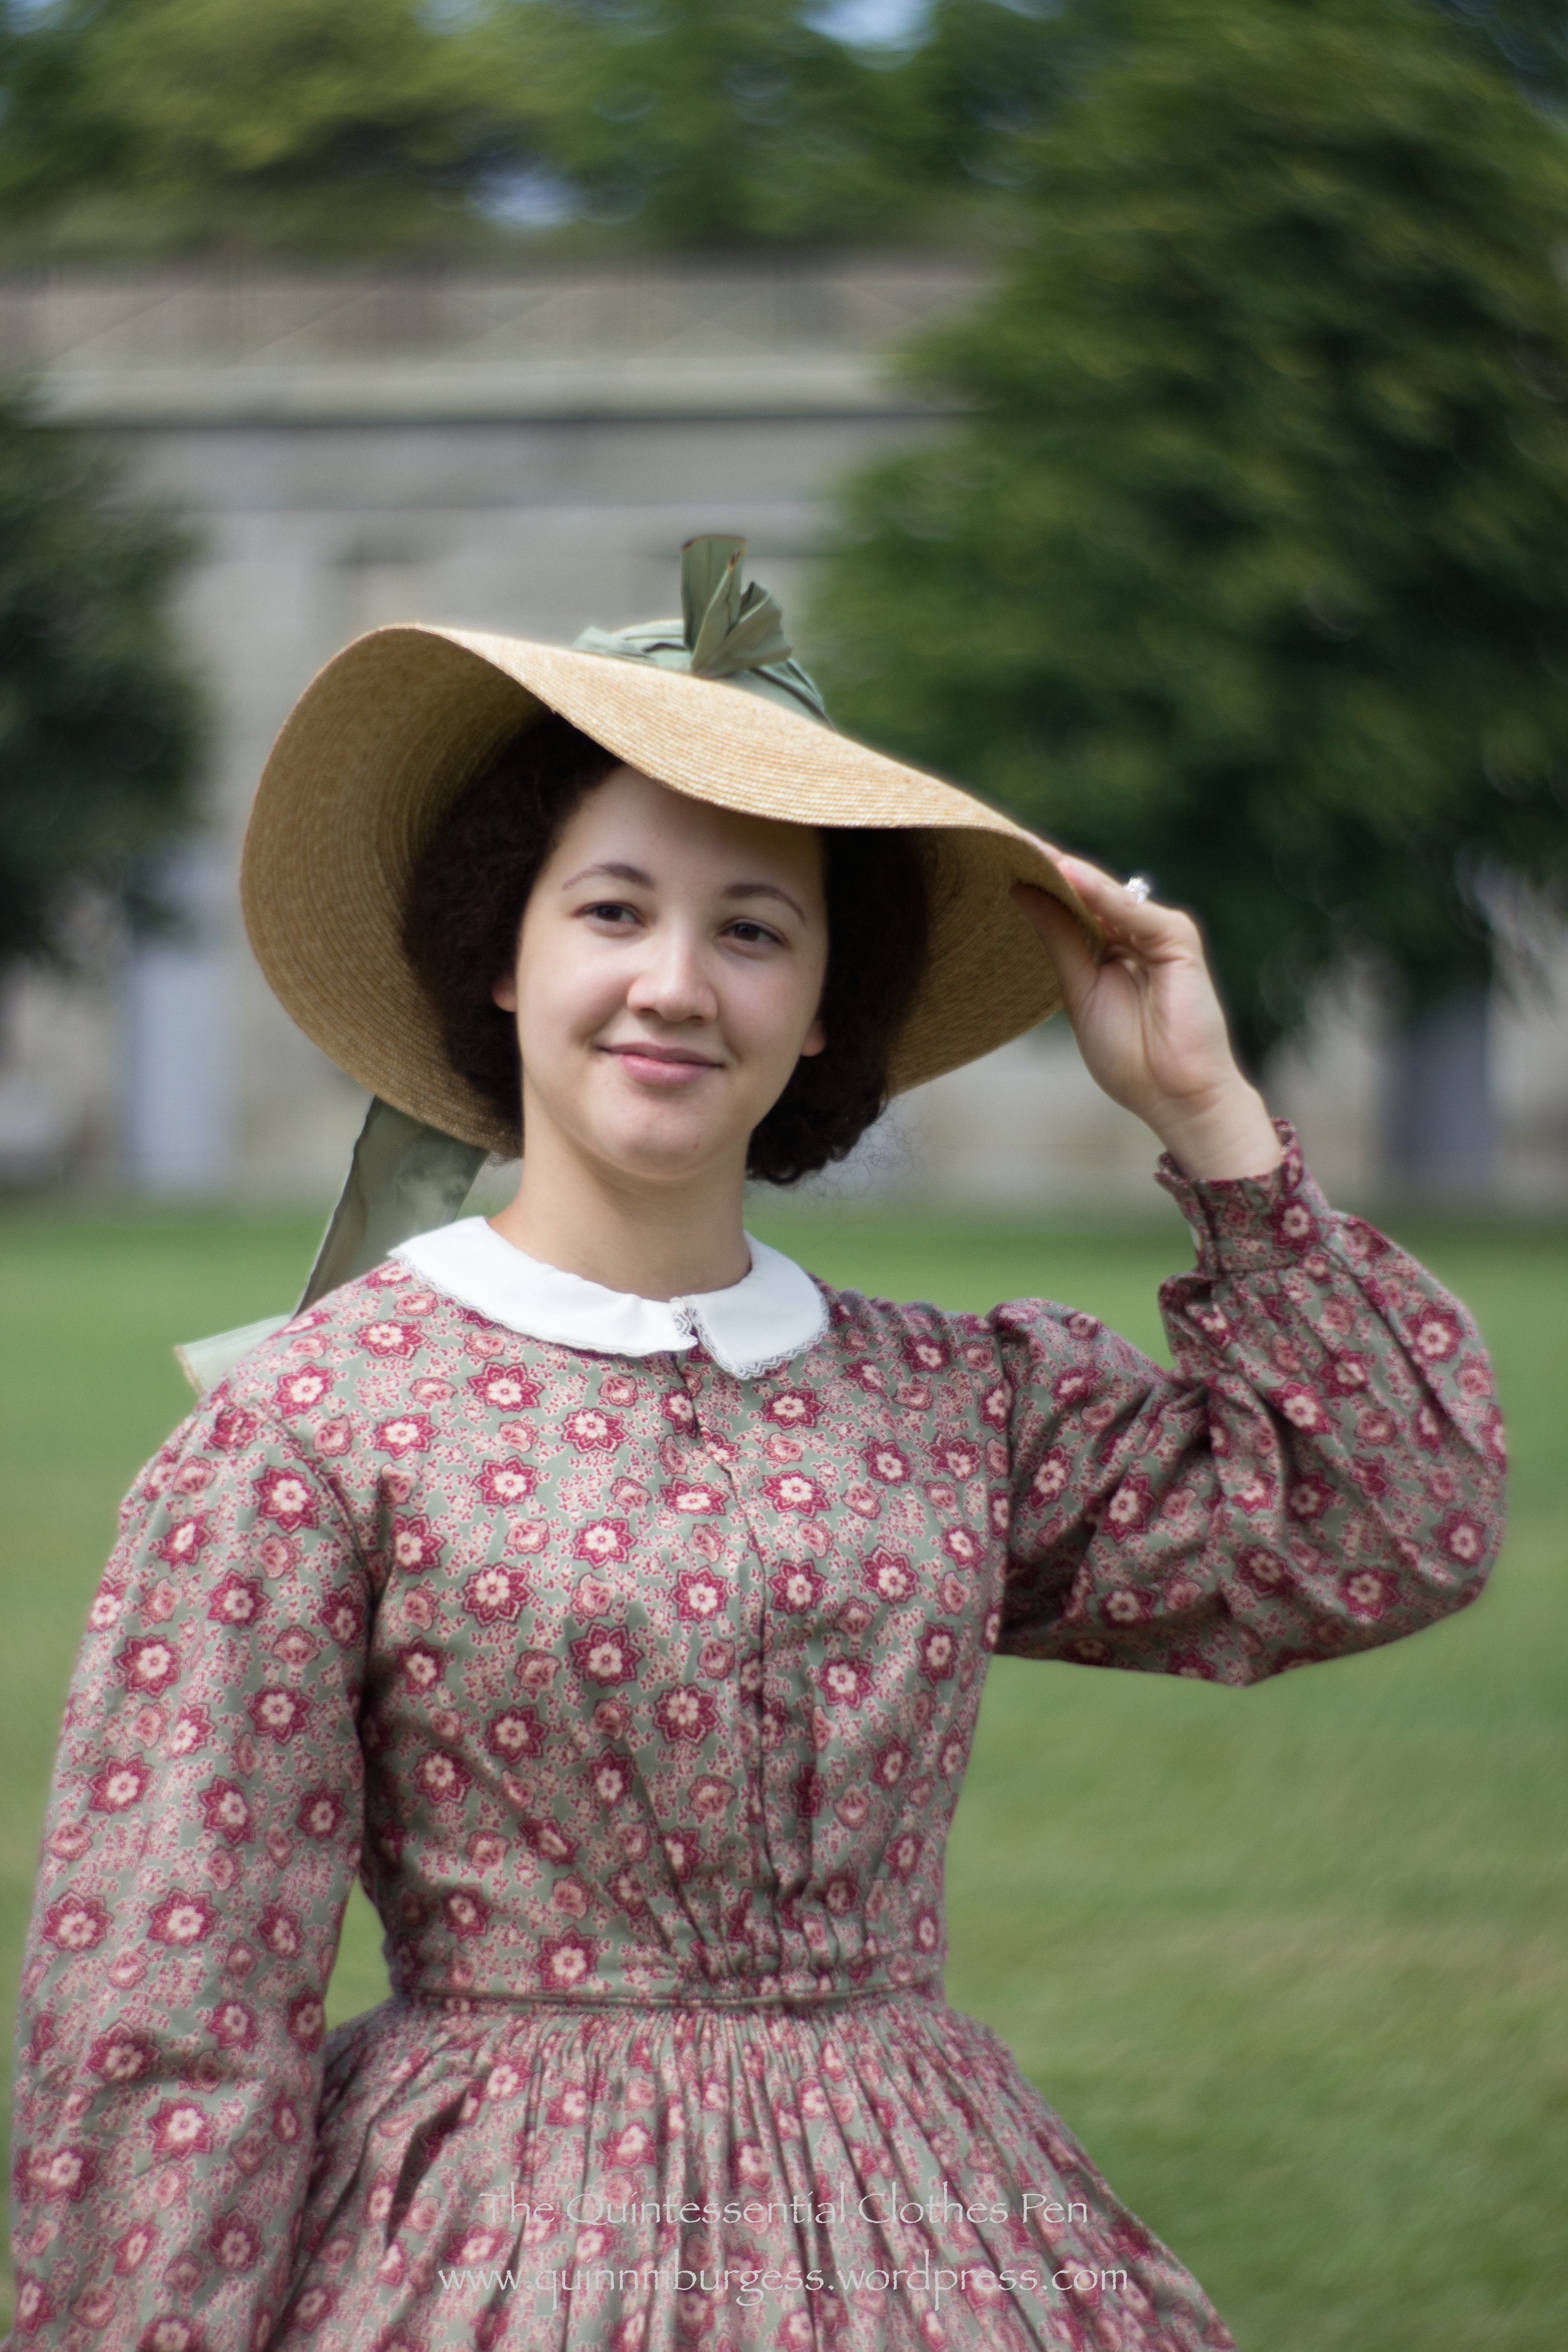
We performed on George’s Island again this year and were quite thankful that the weather was slightly cloudy and at least 15 degrees cooler than last year! It was a great opportunity for all of us to wear our cotton print day dresses again and it was neat to see the entire dance troupe all wearing cotton dresses with a pattern (no solids to be seen!).
I wore Georgina just as I did last year, the only difference being that I took a little bit of time to make a collar for this year. I had wanted to last year but ran out of time. It seemed more important to have the dress than to have a collar without the dress… But it was entirely feasible this year to add just the small item of the collar and I do think it really completes my outfit quite nicely.
New collar!
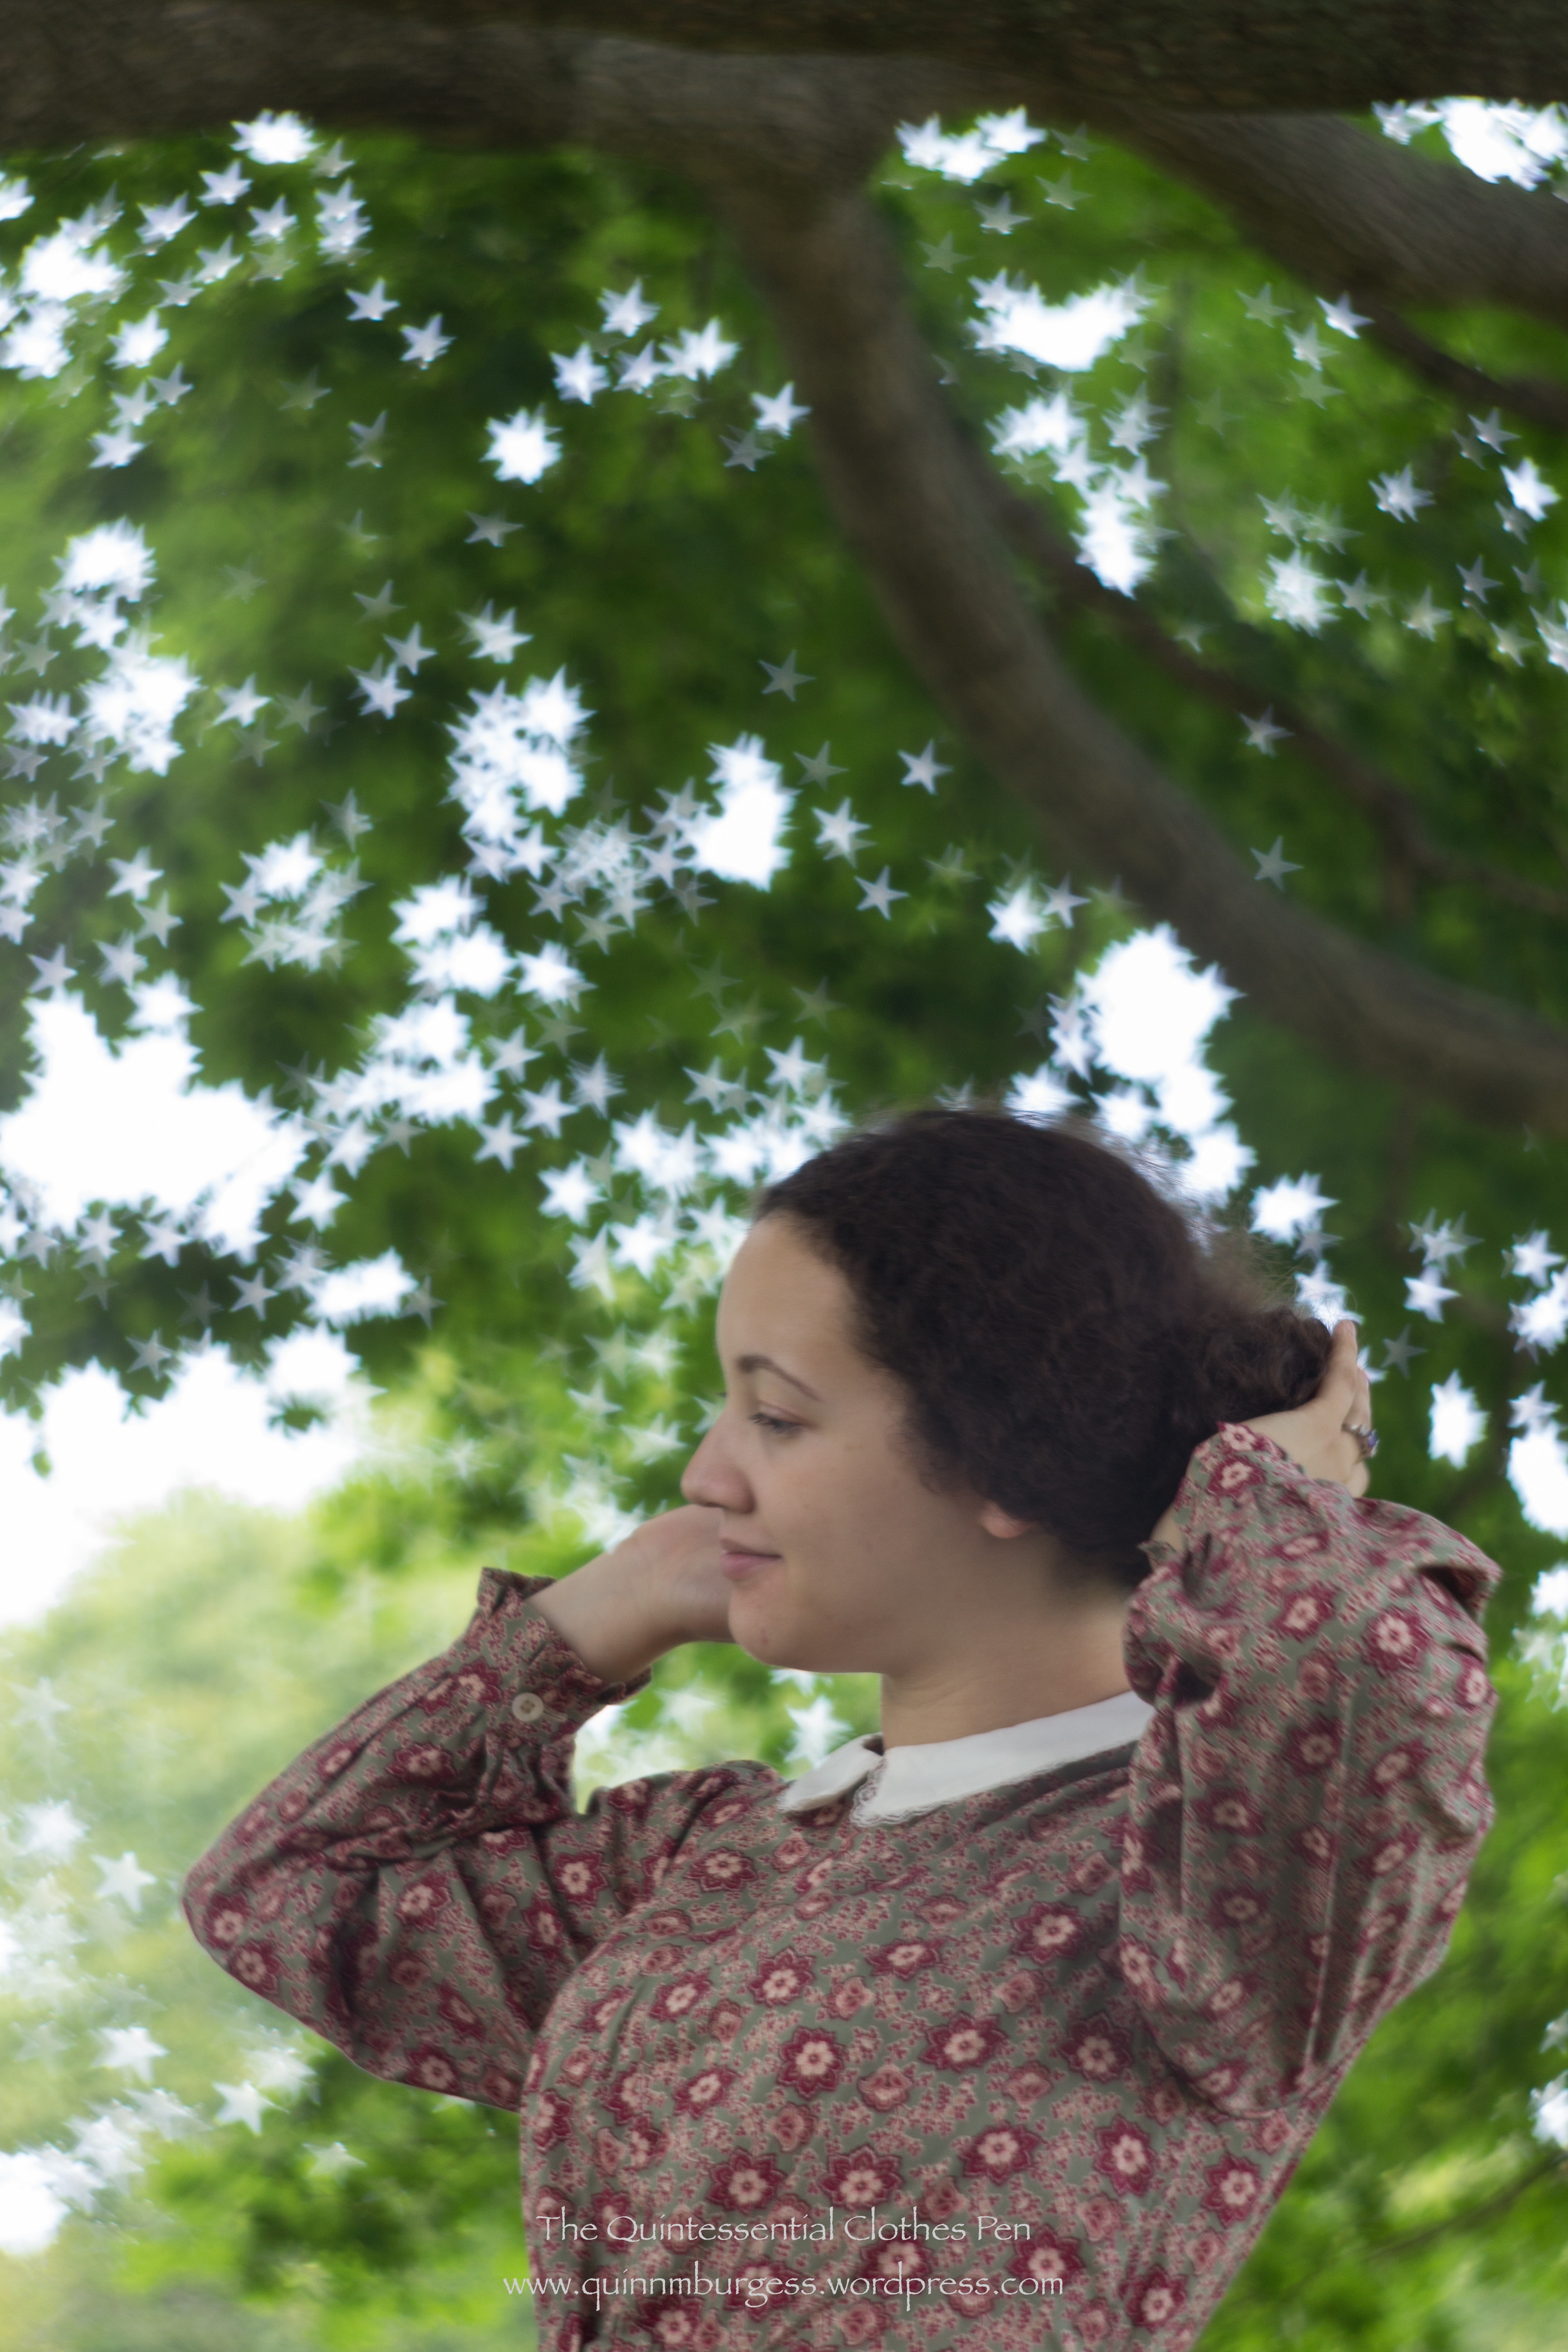
This year, our friend with the camera had purchased a new, special, Petzval lens (you can learn more about it and 19th century photography here at her blog). It’s a modern digital version of a historic lens. I love the pictures it produces! I’ve been told that the background is sort of swirled when the picture is captured, but to me it just looks nicely diffused and out of focus. It’s a lovely contrast to the foreground, which stays nicely in focus. All of these pictures were taken in color, but some of them are much more stunning in black and white.
This one captures the breeze and a bit of sun squint…This one a burst of joy and laughter…This one the tired desire for food during a picnic break…And this one just a simple stroll across the lawn.
This last one made use of a special part of the new lens. There is a piece which can be changed out and which creates the interesting background variations. All of the previous pictures were taken using the piece which blurs the background, but this last one was taken using the piece which causes the light in the background to be star shaped. Isn’t that neat?
Fixing my wind swept and straw hat frizzed hair… with stars in the leaves!
The collar is constructed from 2 layers of ivory cotton from my small bits stash (at least, it’s likely cotton… I don’t remember where it came from and there was the perfect amount, so I just went with it without knowing the details). It is edged with ivory lace. I made the pattern directly on Georgina’s day bodice so that it would fit the neck perfectly. It’s mostly machine sewn with hand finishing. It is lightly basted on to the piping at the neck edge of the bodice so that I can easily remove it if I want to in the future. I’m quite satisfied. I like the scale, the lace, and I think it adds a nice 1850s touch, completing the ensemble.
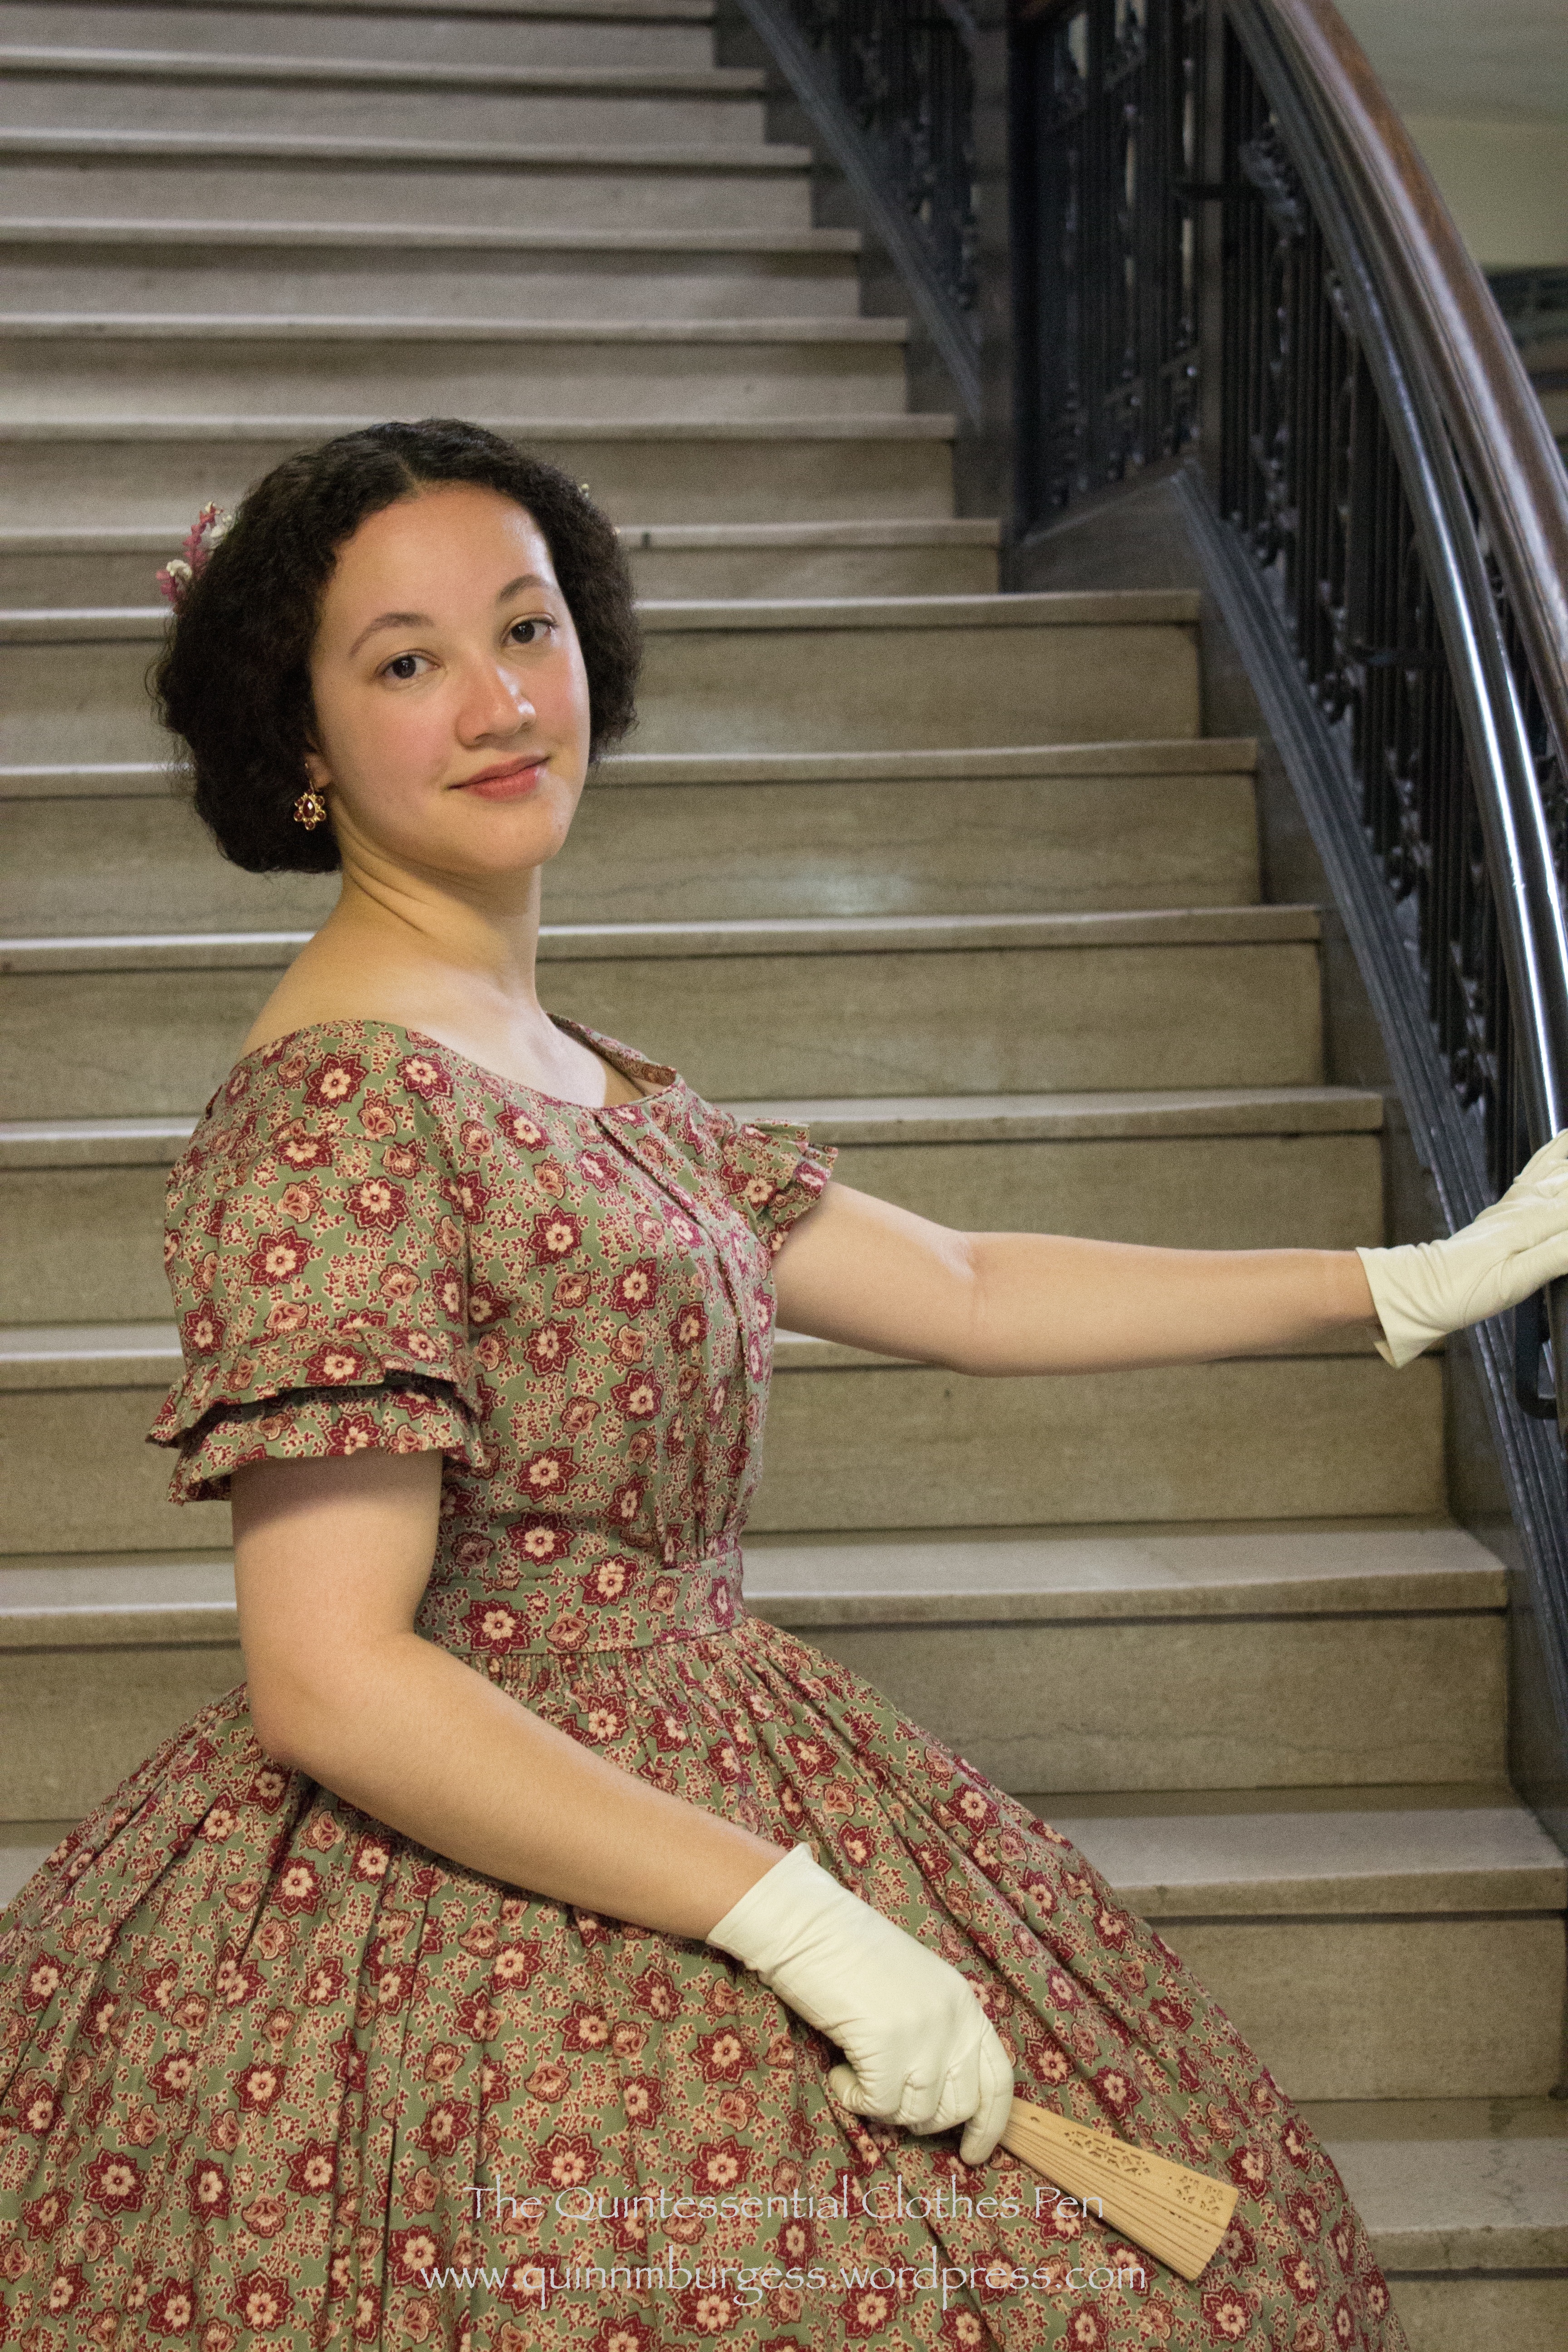
A few months ago, I had a master plan to use the leftover yardage from Georgina, my 1858 cotton print day dress, to make an evening bodice in addition to her current day bodice for versatility and washability. Luckily, I was able to complete the bodice and a new hair crescent before my life exploded in June and I was smothered under an immense amount of work. I am pleased to have work, don’t get me wrong, but I was so exhausted by the end of the month all I could do was sleep and be disoriented! I’ve just come back from a vacation and feel like I can peer out from under my rock and join the world again! So, to celebrate constructing historic clothing for myself rather than other people, here is a post about a really neat addition to my historic wardrobe! And it fits into the current HSF challenge #13: Under $10, a bonus since the HSF challenges haven’t lined up very well with a lot of my projects this year.
c. 1855 new evening bodice, with previously constructed skirt. Worn with all the usual underpinnings (chemise, my new corset, drawers, stockings, hoops, and petticoat) and accessorized with gloves, fan, earrings, and a new hair crescent. Oh, and I’m wearing burgundy velvet shoes! No picture of that, though.
Pattern: I began with Past Patterns #701 but altered it extensively to fit me, to have pleats and gathers on the exterior, and to have an evening neckline. The sleeve pattern was drafted by me.
Year: c. 1855
Notions: Thread, plastic wire ties for boning, hooks and eyes, and cotton cording.
How historically accurate?: Based off of historic examples, constructed with accurate details… I think the only compromise is the plastic boning, which I used because I didn’t have the right length in metal, and because plastic is easily washable (and I want this to be a garment that can be washed easily–that’s part of the goal in having a cotton evening bodice!).
Hours to complete: I have no idea… 32 hours maybe? I really didn’t keep track at all on this project.
First worn: To a mid-19th century ball in June (one of the few moments of respite in my crazy month).
Total cost: About $3 for approximately 1 yard of historic cotton print and a lot of stash materials, which count as free, since I have no idea what I paid for them at this point! Let’s call the total about $8.
Inside of the bodice.
As you know, I like things to be tidy. All of the seam allowances are either hidden between the layers of fabric or nicely finished. There are plastic bones in the darts and the side seams. The bodice is machine sewn and hand finished. (One amusing mistake is that I cut the lining with a center front opening for fitting purposes (and left lots of seam allowance, as you can see) but then forgot to leave seam allowance in the back… So the lining doesn’t extend all the way to the folded edge of the print, but it’s all covered up so no one will ever know and it fits just fine… it’s just one of those amusing things!)
From the back with the right side flipped open.
The bodice closes with hooks and bars. I wanted to use metal bars but make sure they wouldn’t been seen, so I let about ¼” of the print extend past the points of the hooks to create an overlap. I also left extra print extended past the bars, in addition to all the seam allowance, in case I want or need to adjust the size of the bodice in the future. The bars are especially hard to spot on the print, but if you look carefully on the left you can see them. The neck and armsceyes both have very narrow cording.
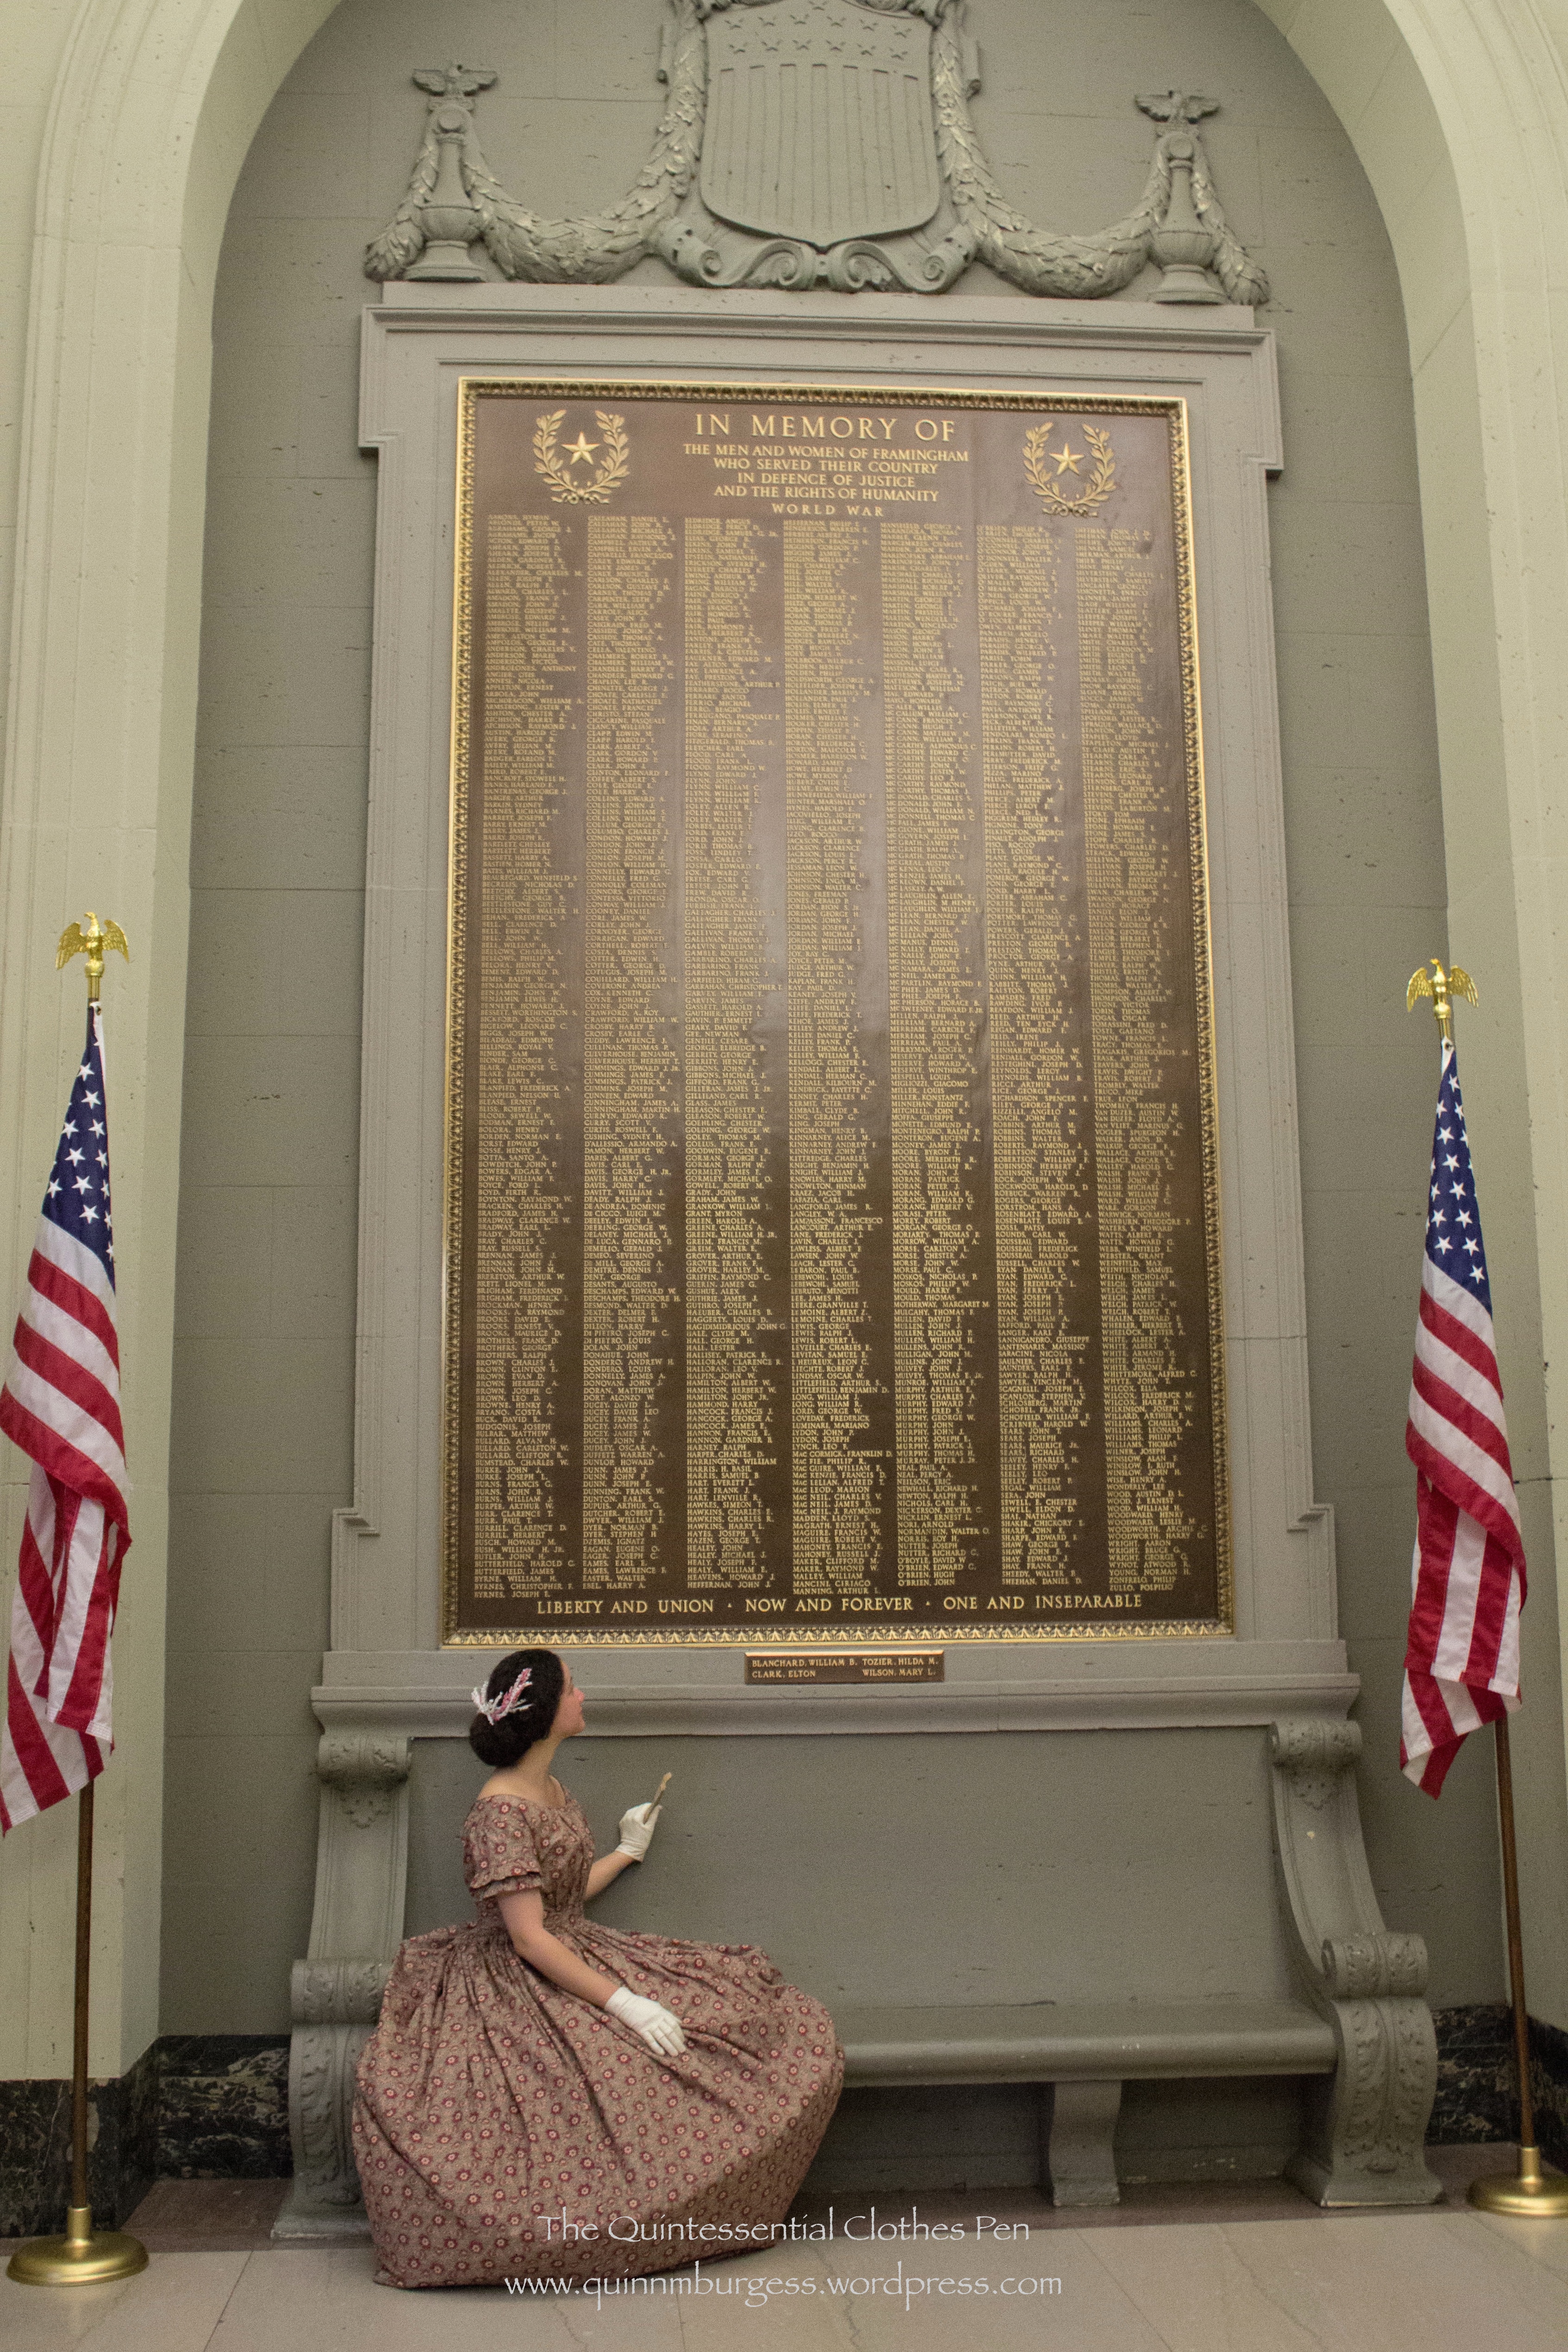
Appreciating those who have served our country. The ball was held in a local town hall which had lists for all the 20th century wars. I don’t think they have 19the century war plaques, but we thought it was a nice photo opportunity.
The defining design details were obviously the low neck and short sleeves, but there were other common details as well, such as double puffs or pleats to trim the sleeves, tubular sleeves without very much fullness at the top or bottom, 1.5″-2″ waistbands sitting on the outside of the skirt waistband, and gathered or pleated fullness on the fronts and backs (no darts on any of these cotton bodices). Some of the bodices have a yoke around the top so that only the bottom portion of the bodice is gathered, but this look says “young girl” not “grown woman” to me, so I opted for a bodice without a yoke.
In terms of construction, to have enough fabric in the print for the pleats and gathers on the print fabric, I first constructed and fit the lining. Then I separated one side of the lining to use as a pattern and added width to have space for the pleats I had planned. Once I had cut the print, I reassembled the lining and mounted the pleated print on top. From there on I treated the two layers as one.
Bodice closeup and a nice view of my successful 1850s round hair style!
As I’ve looked at 1850s images and fashion plates in comparison to early 1860s, especially, what I’ve noticed is that the 1850s really attempted to make a woman’s head look round or wide, whereas by the early 1860s the styles begin to grown upward and become vertically elongated. Here are some great examples of the round 1850s hair look: from 1851-53, c. 1855, from 1857, another 1857, yet another 1857, one more from 1857, and one from 1859. Here’s a super wide 1850s style and here is an example of the different shape of the early 1860s. The very round shape is what I was attempting to complement my 1850s bodice.
How? Well, I put gel right at the roots of my hair while it was still wet and then encouraged it to stand up from my head rather than being pulled back. I let it dry like that and it stayed all day. Later in the day, I styled it for my 1940s Anne Adams dress photos by brushing it out (and brushing my hair when it’s dry makes it big!!!). There was lots of added hair spray for that style, so when I went to restyle it there was plenty of fullness and air in my hair. I puffed the fronts and pinned them up and behind my ears then did a big roll with the rest.
The finishing touch was a new hair crescent that I made specifically to complement the colors in the cotton print. The crescent is made up of fully wired millinery flowers in ivory, some of which I dyed to be pinkish. Each extension is a singular stem and I just twisted them together until I liked the result. Lastly, I sewed a hair comb in the center to help attach it to my head and stabilize the wires. Each side also has a bobby pin to secure it to my head so the extended bits don’t flap around while I’m dancing.
Back view, and new hair crescent.
I’m super pleased with the end result: the bodice, the hair style, and the hair crescent! Oh, and the pictures (thanks!). And I had a marvelous time at the ball–it was one of the class of events which makes me feel radiant and at which I really enjoy myself (compared to those when I’m grumpy and grouchy at the world). And all the smiling and dancing gave me a lovely natural rosy glow in the pictures. The aloof face is my attempt at a 19th century portrait face (it took a long time to capture a picture then, which is my rationale for why everyone has a generally serious face!). You had to pick something you could keep still for a long time, and a big smile is hard to maintain without movement or looking staged.
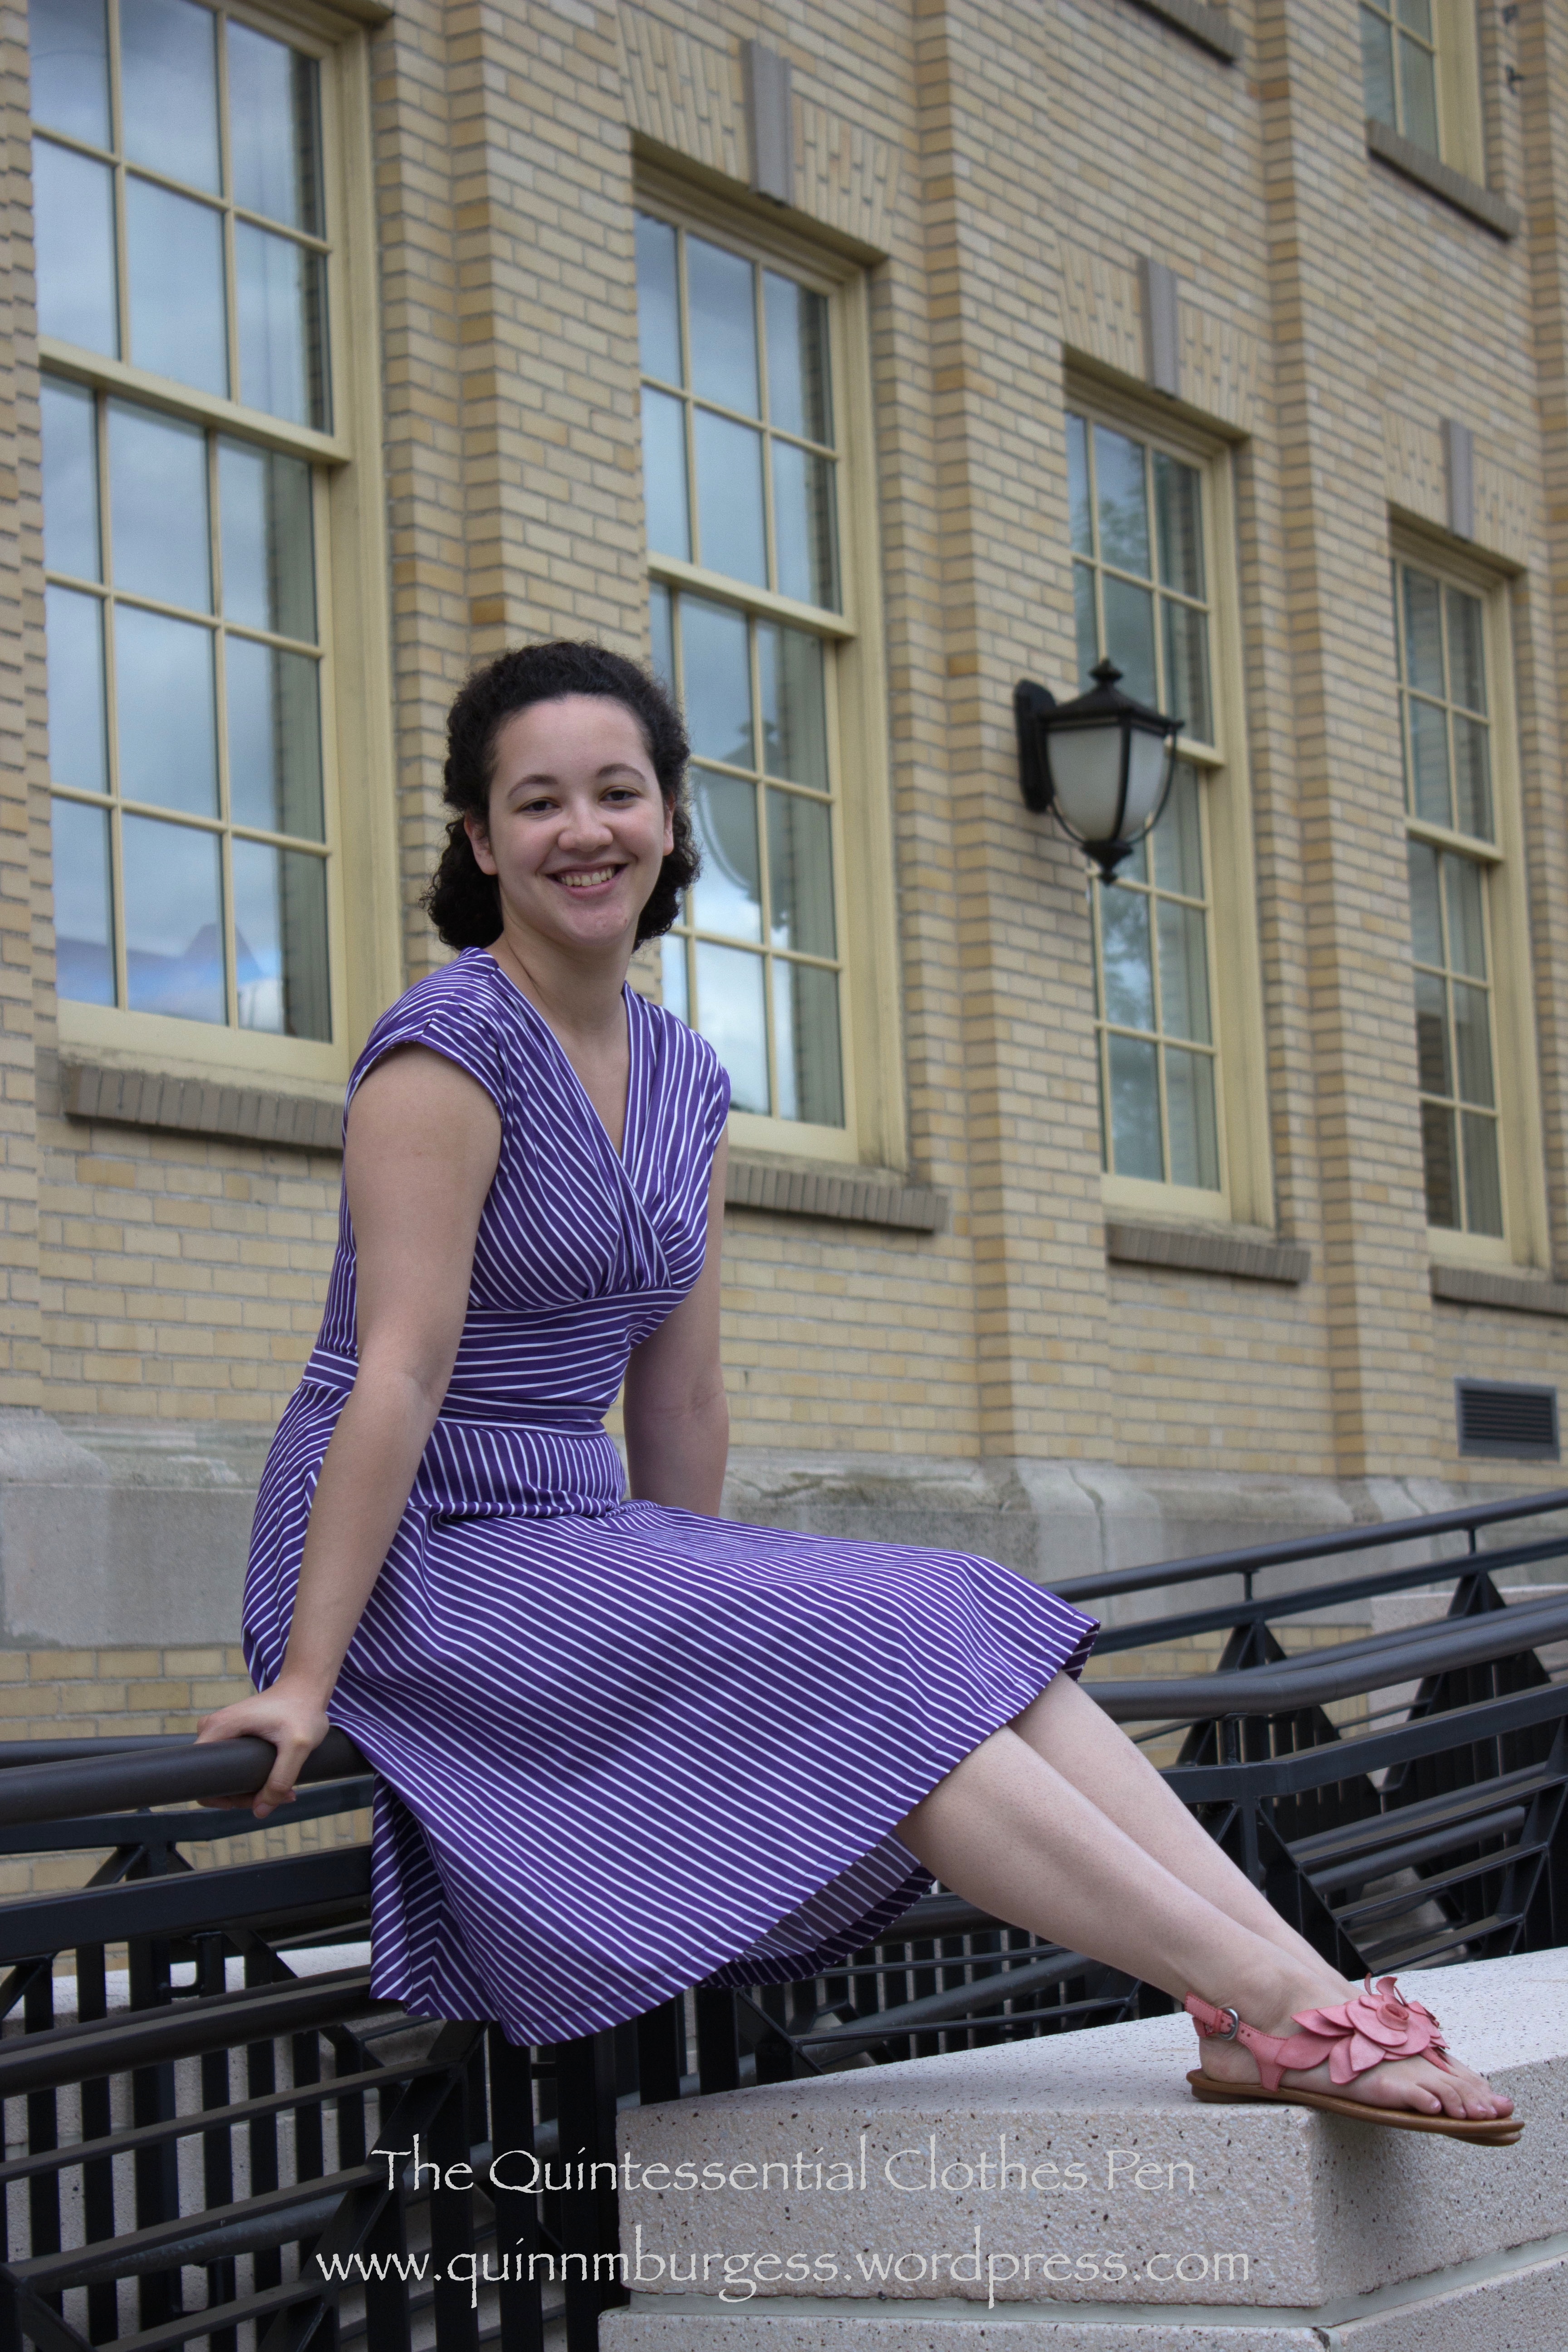
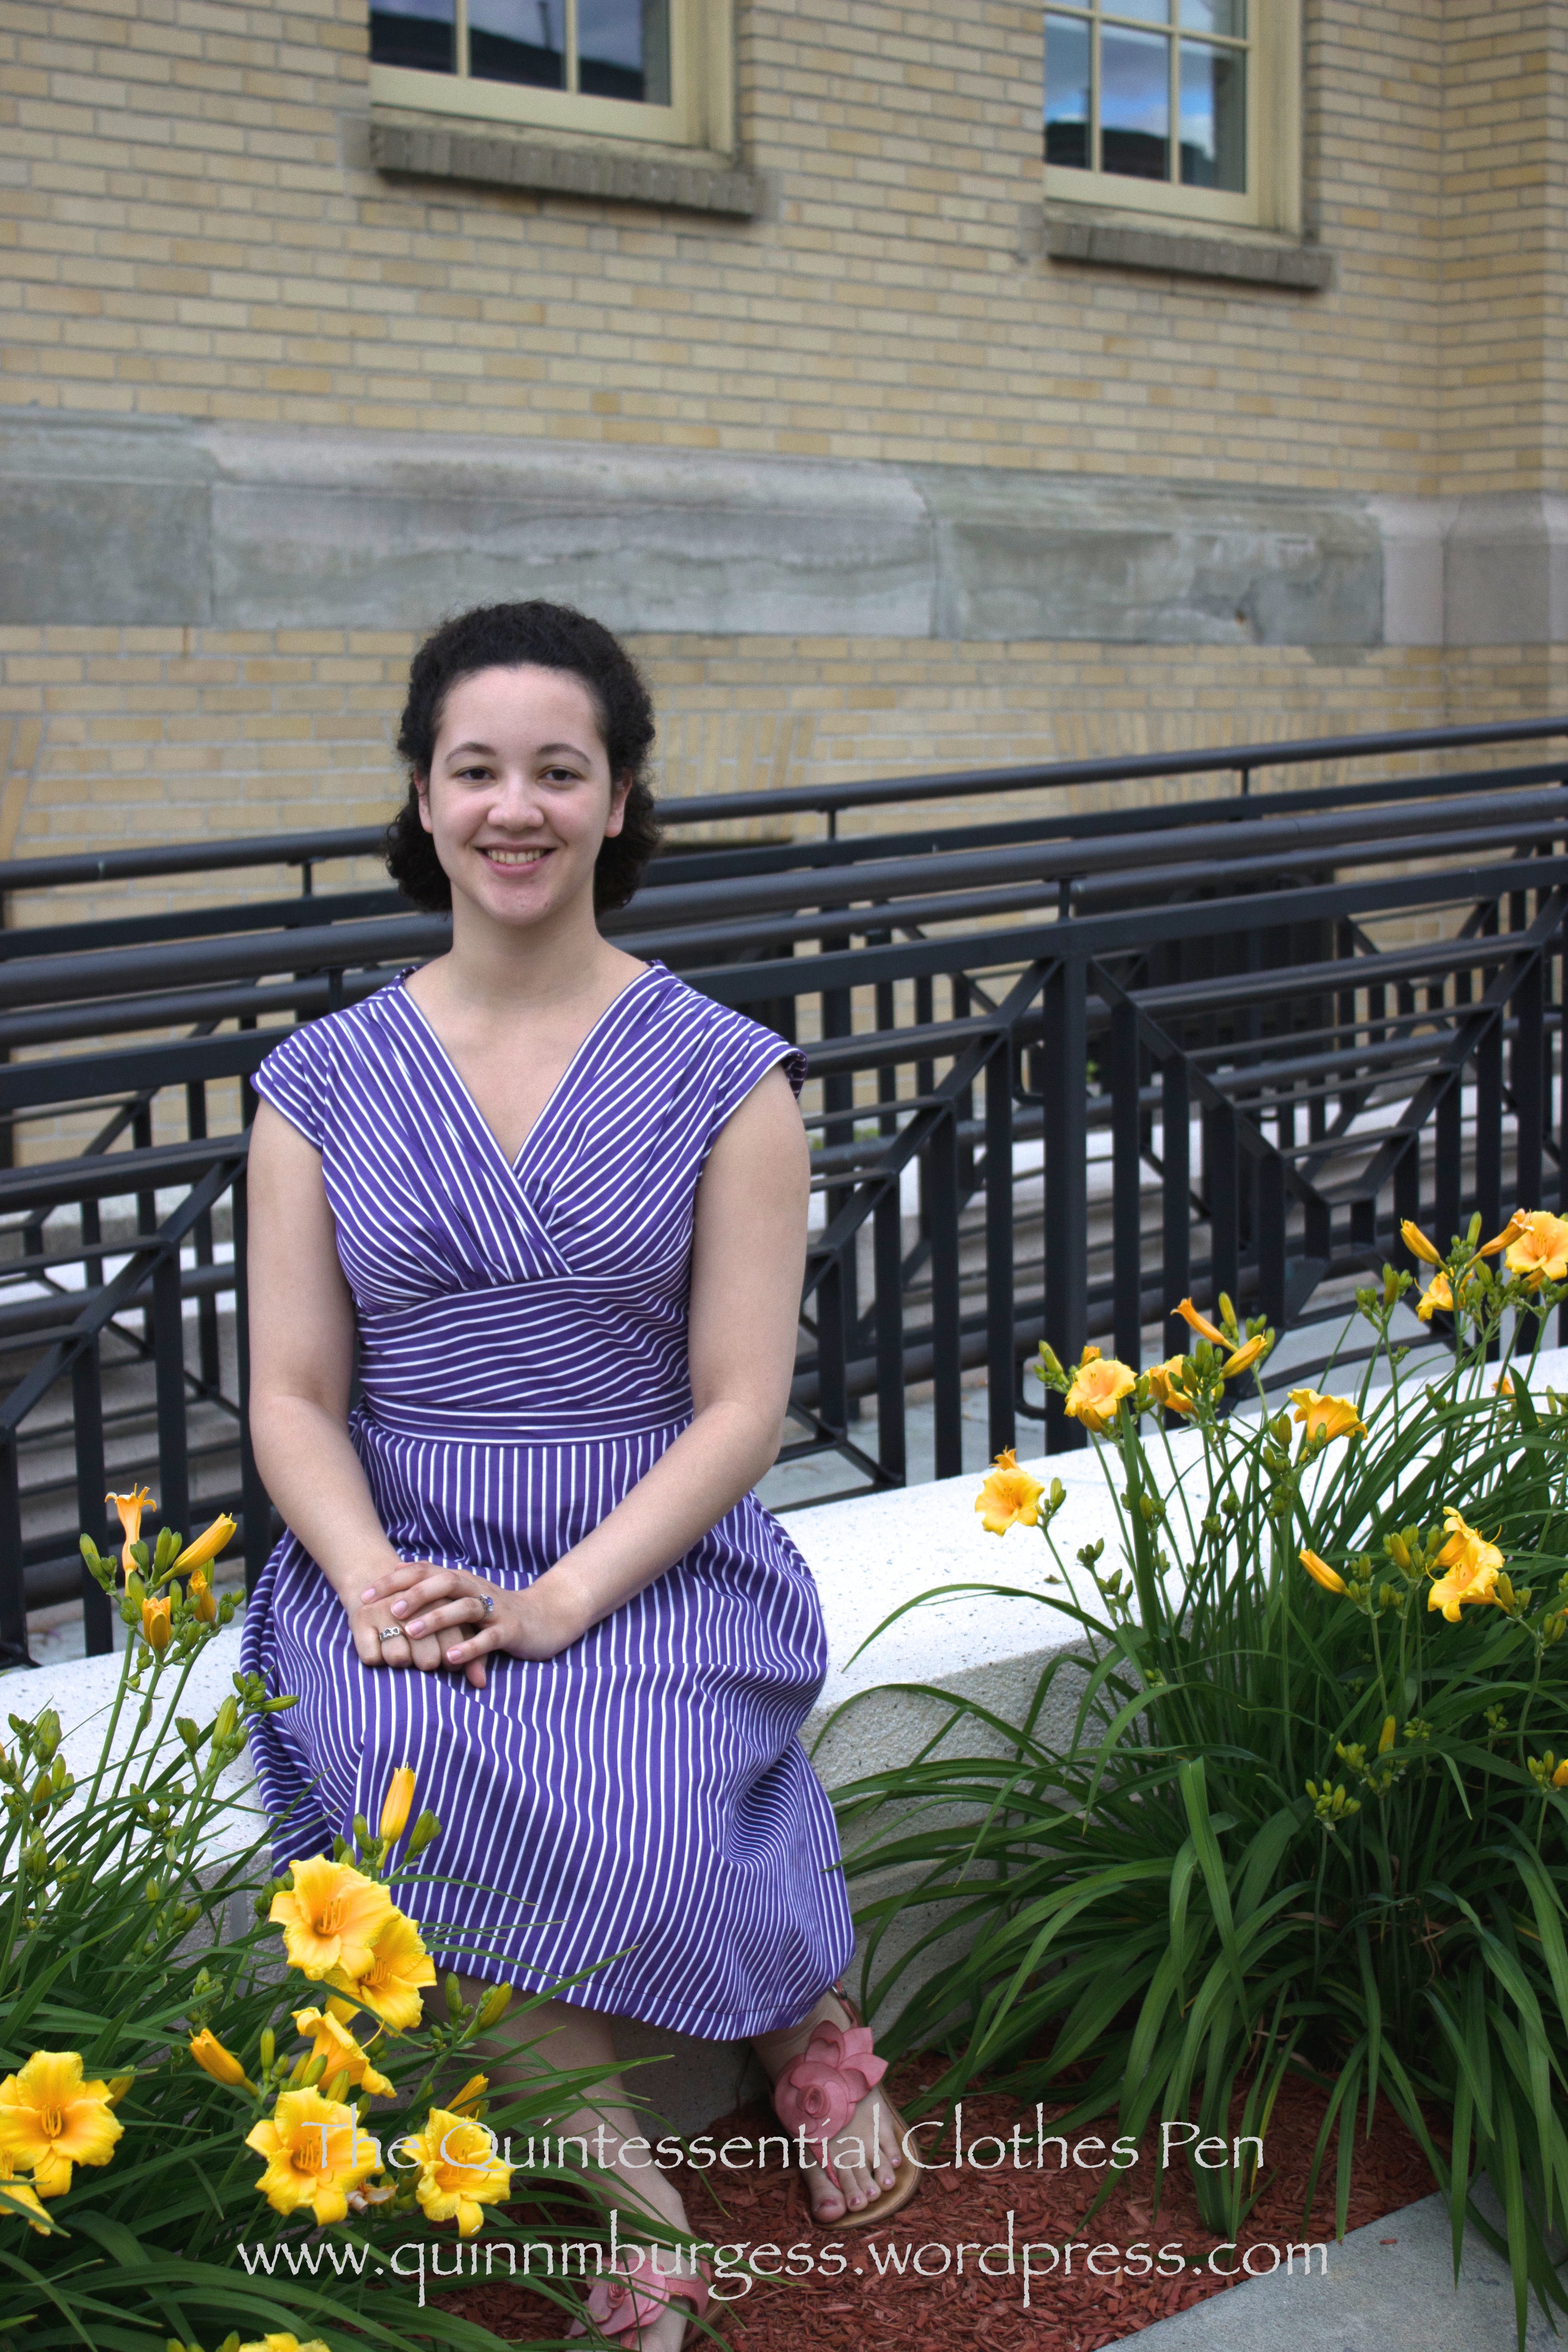
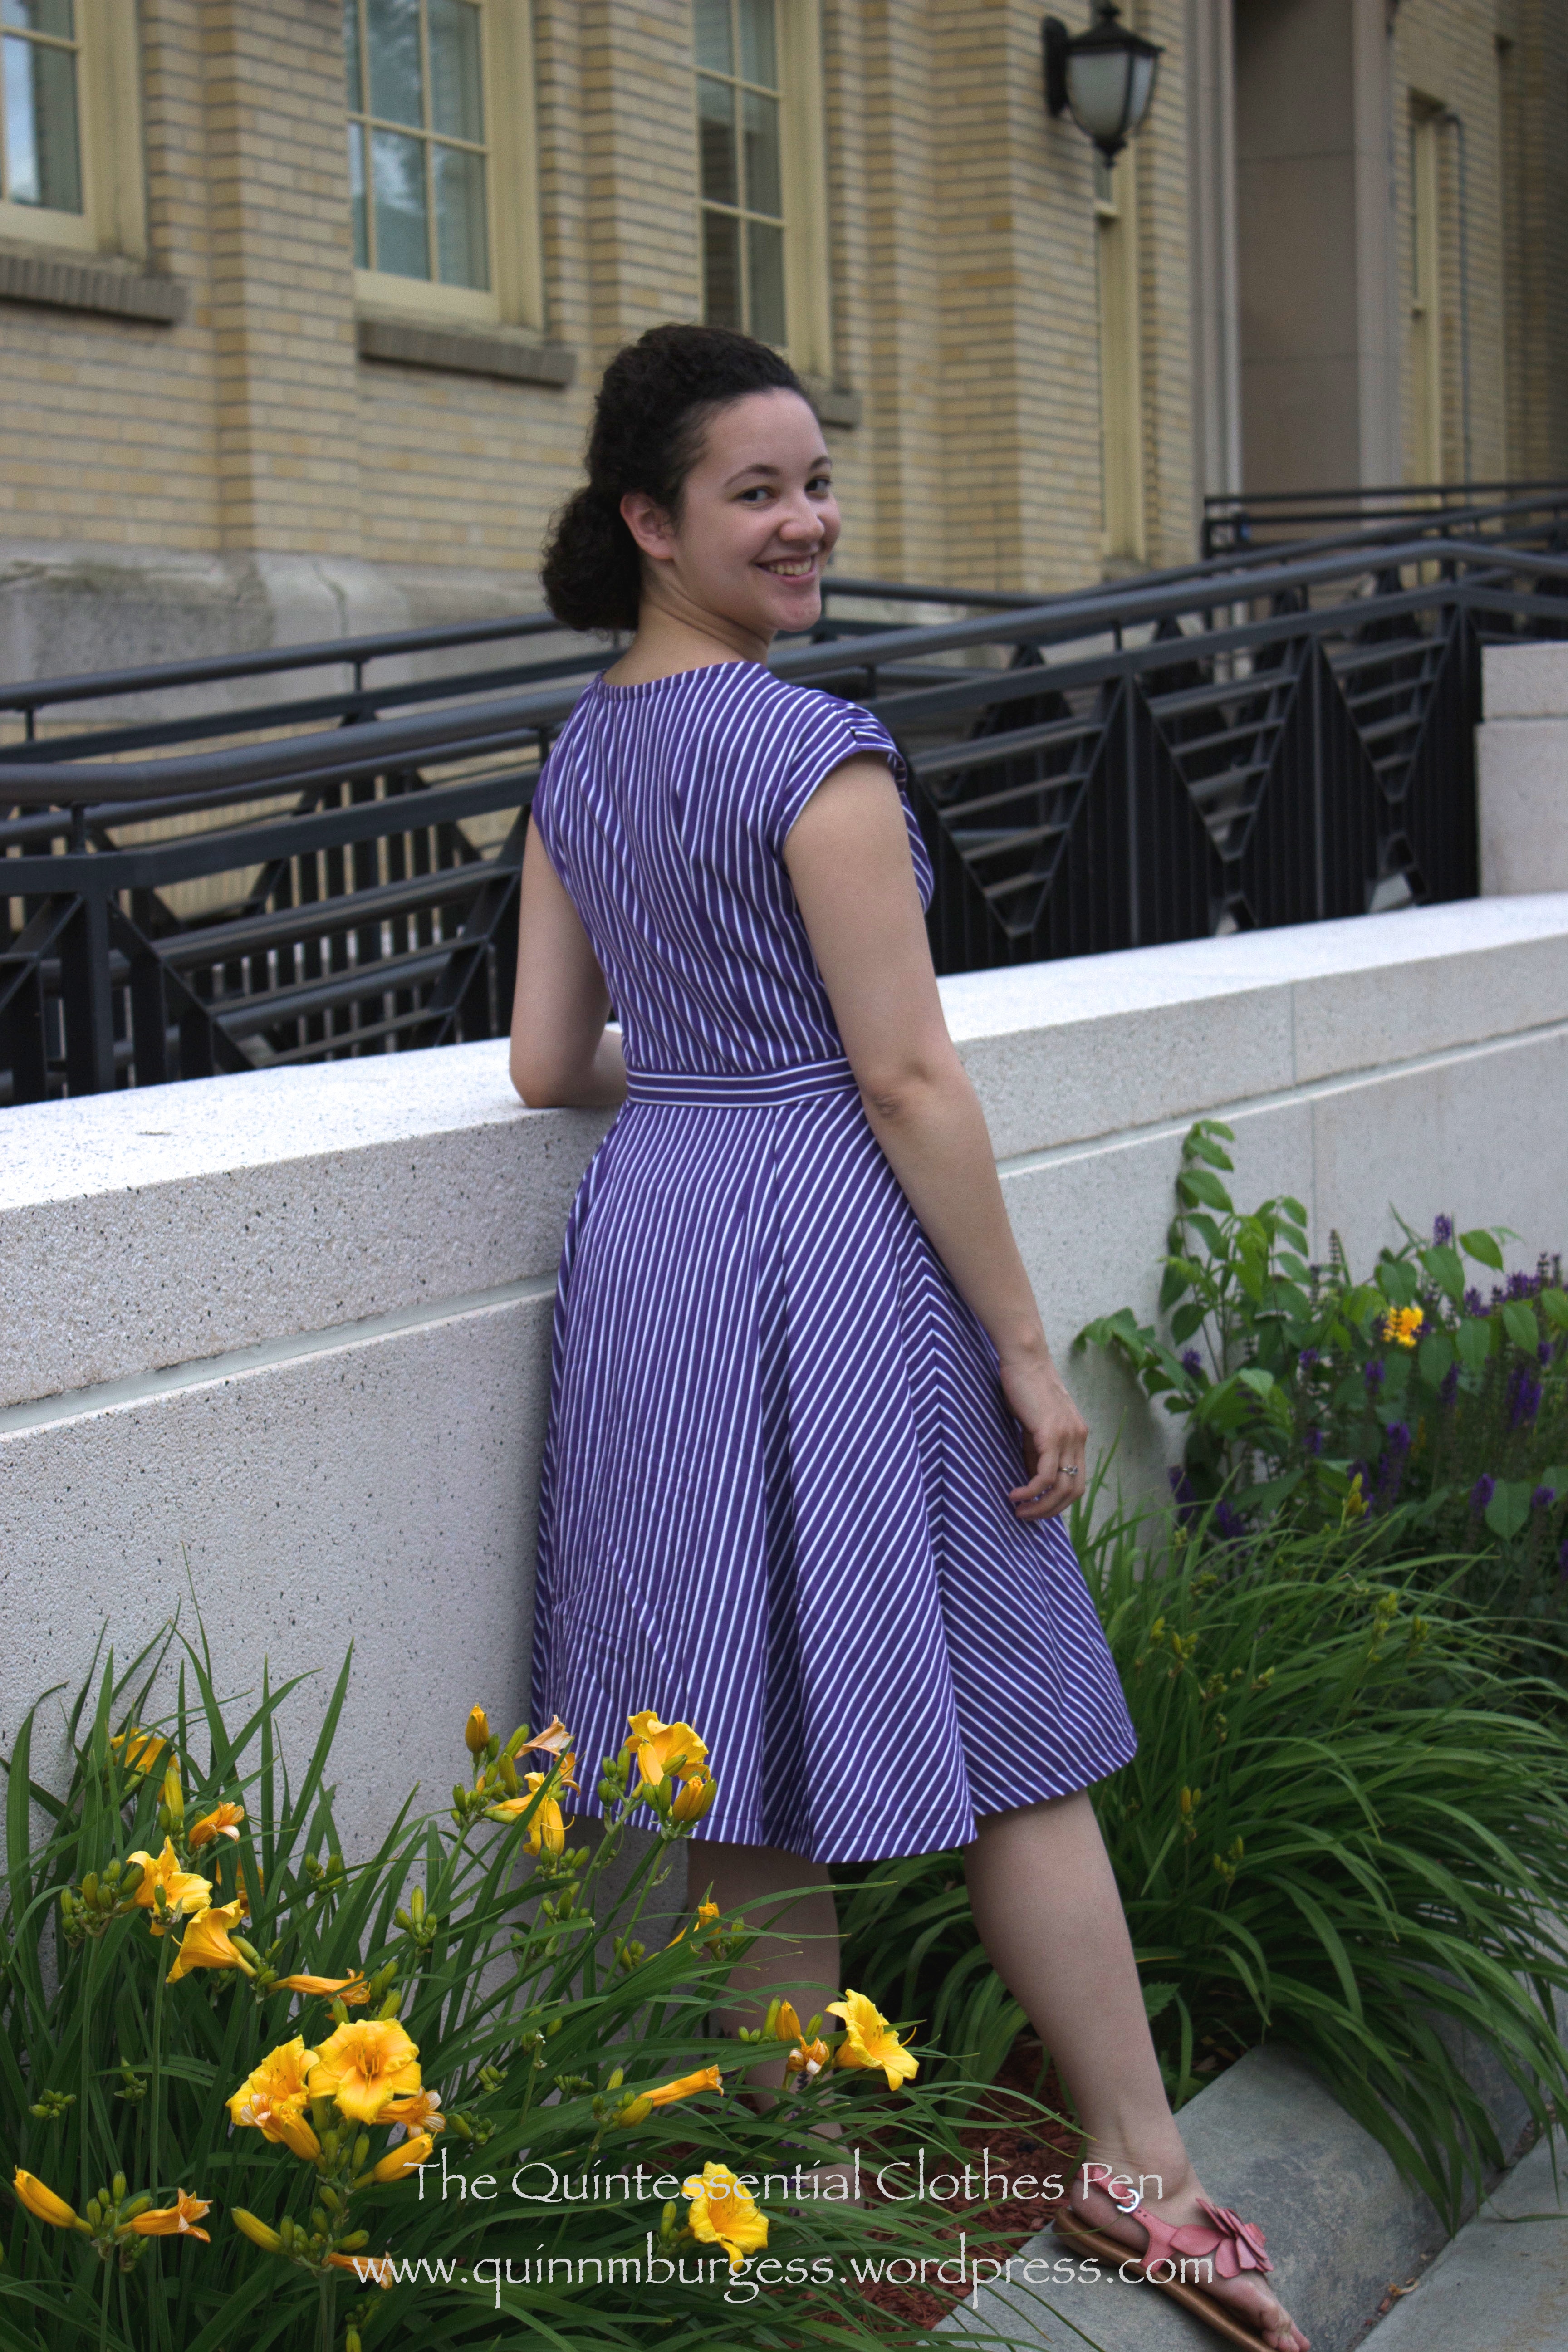
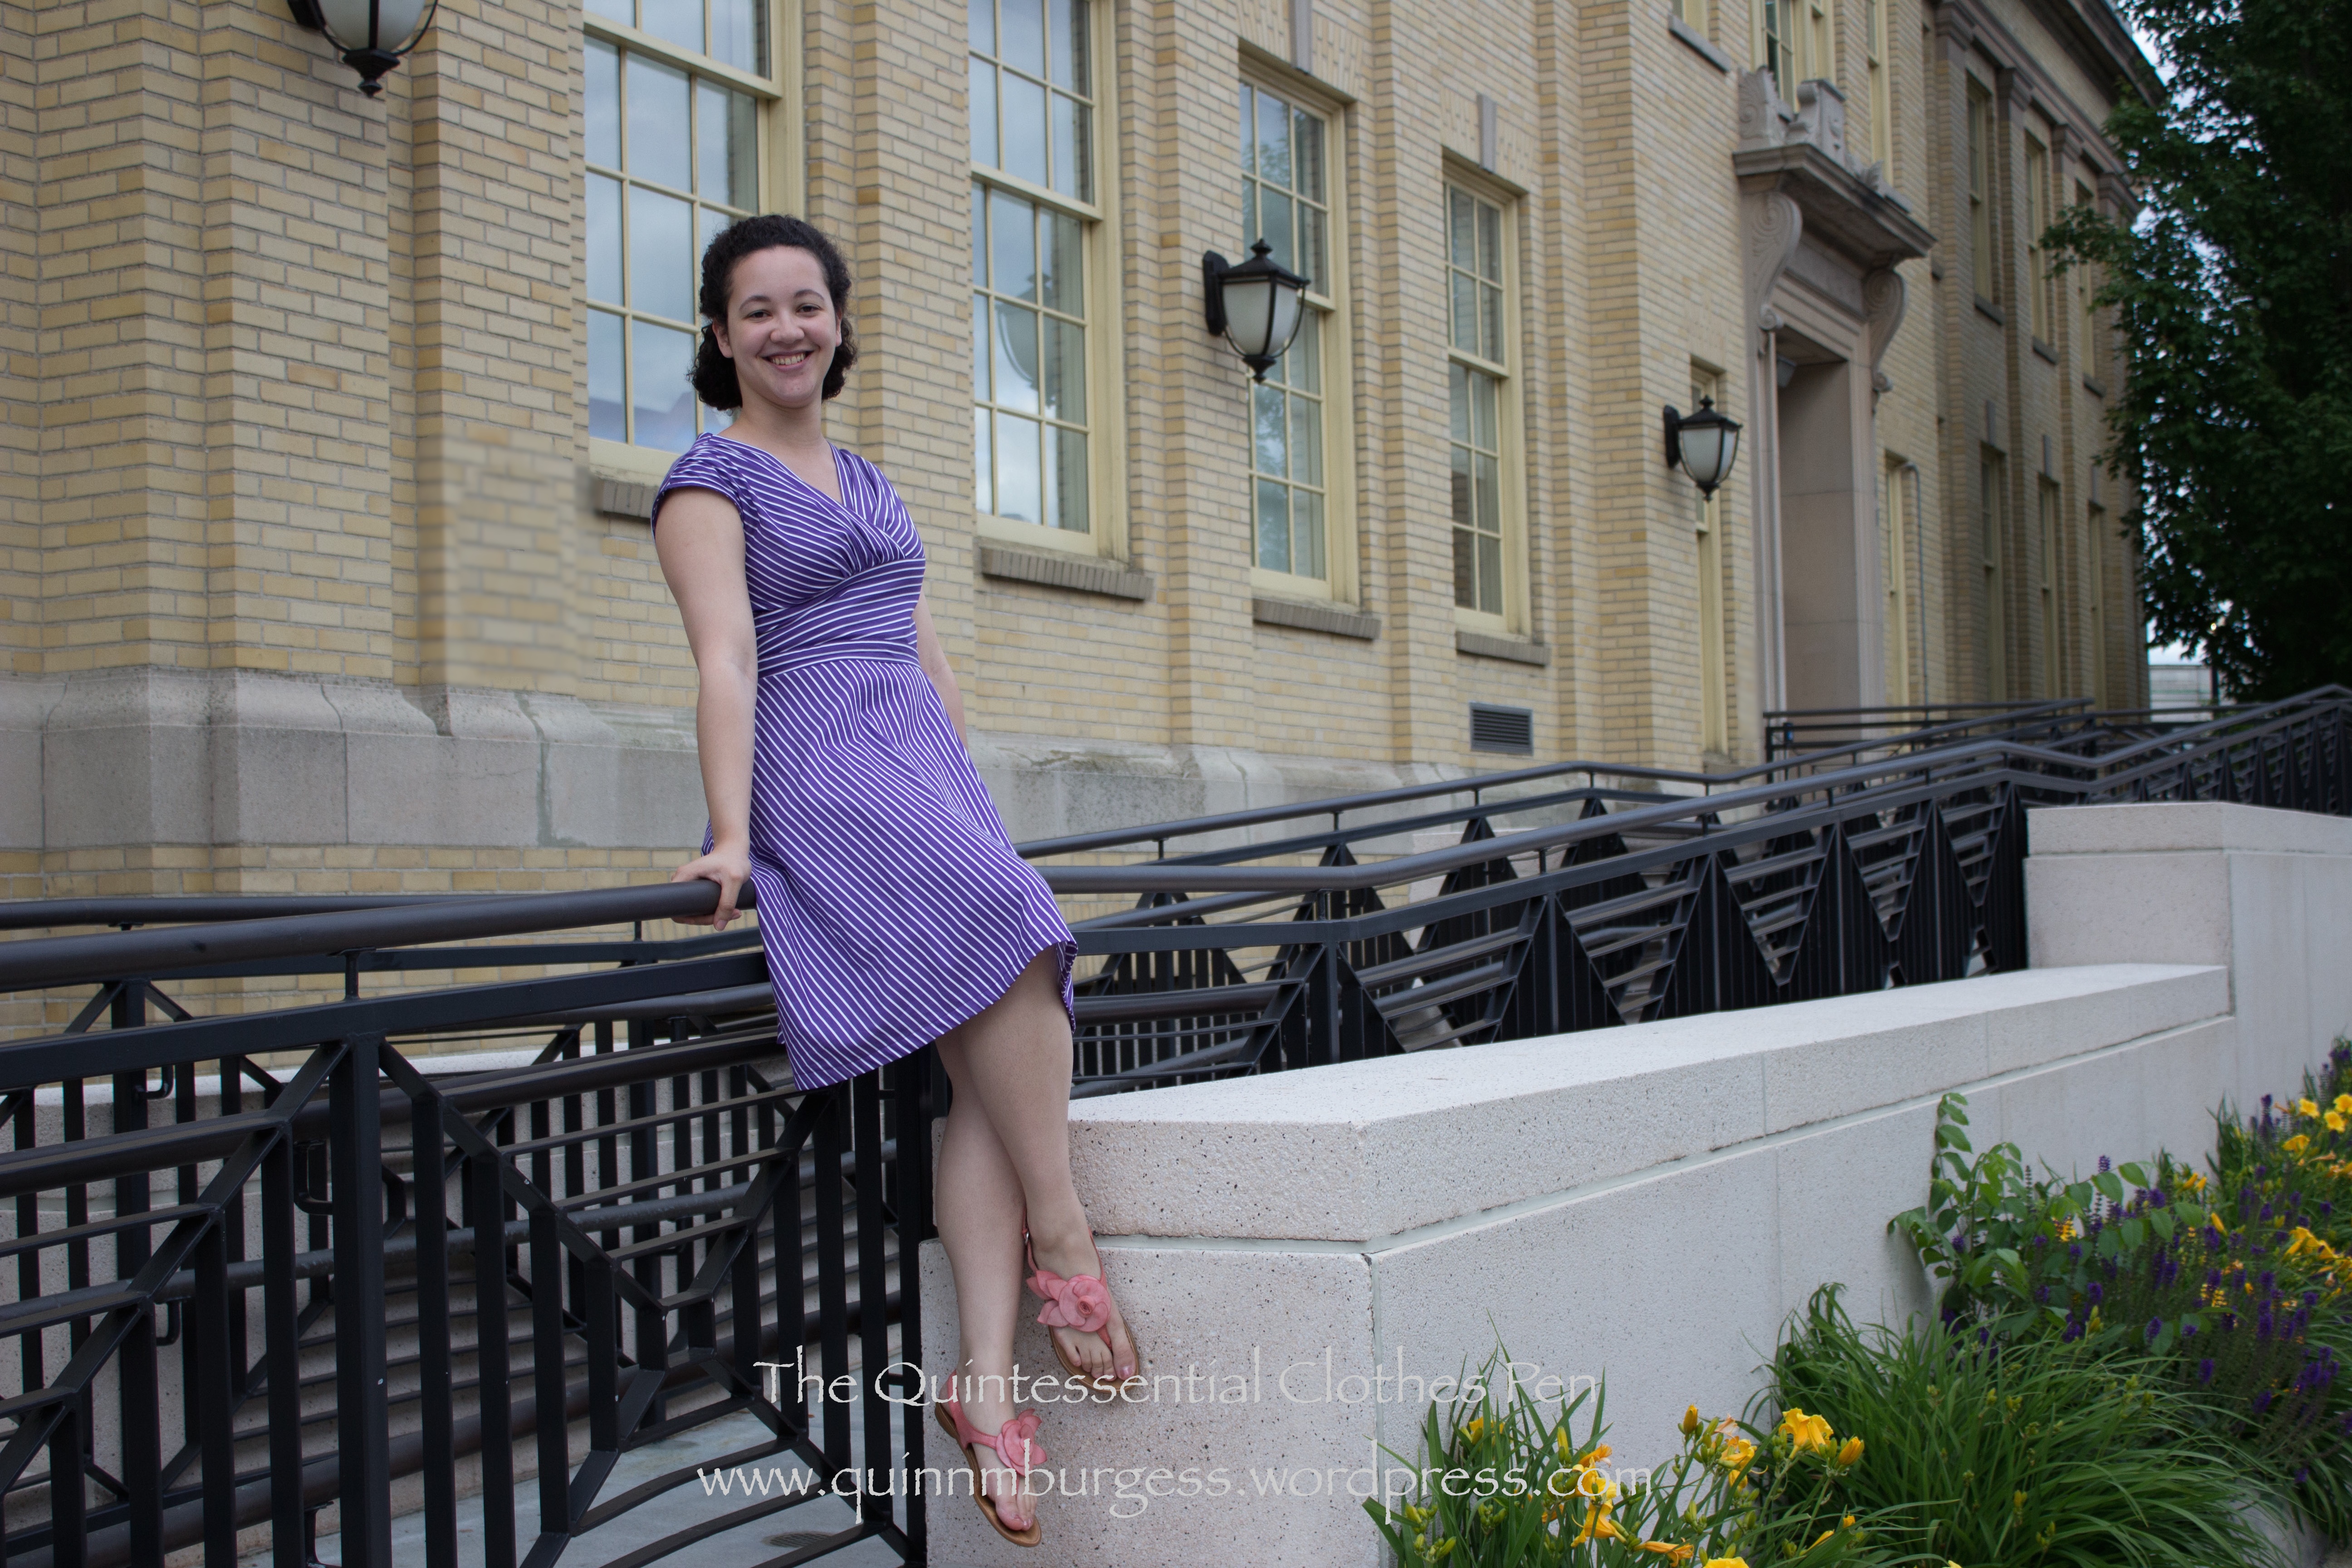
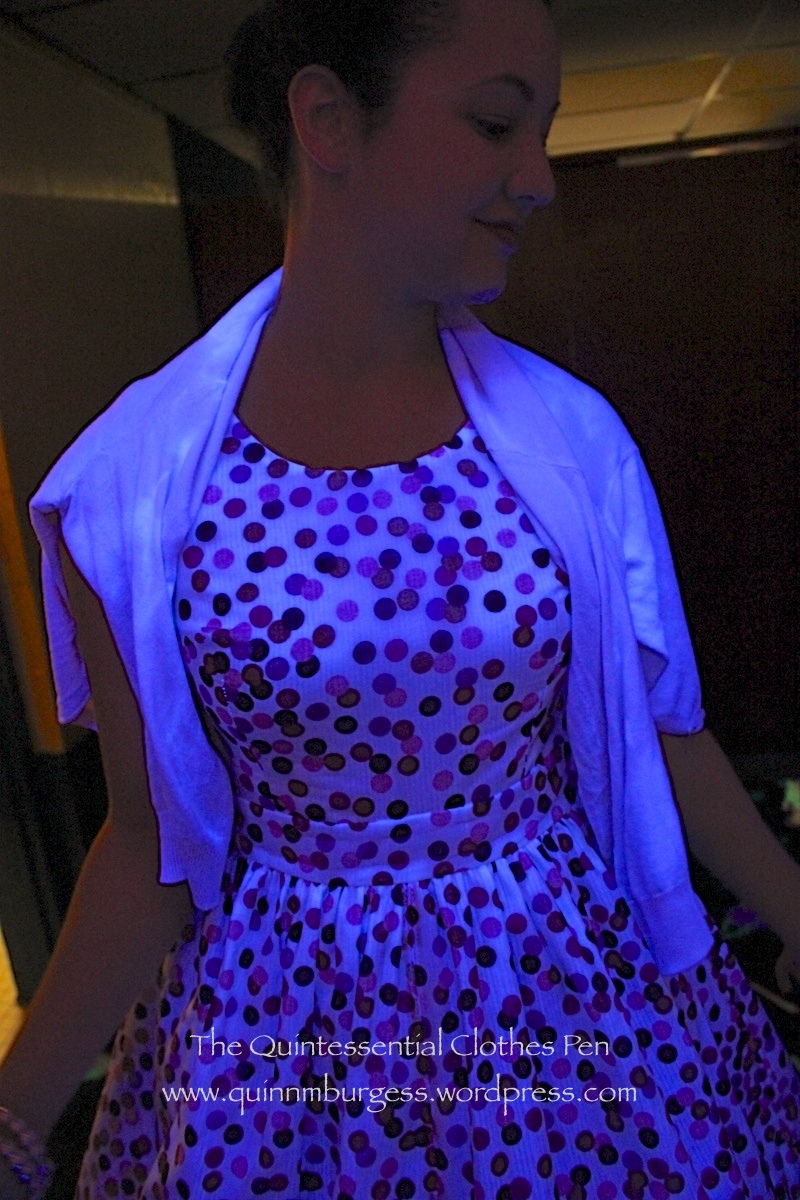
Summer is here, and I’ve been wearing dresses a lot lately. I’m trying to expand the number of dresses in my wardrobe and trying to incorporate more garments that make use of a pattern of some sort rather than just being a solid color. This new dress is… well, a dress, and it has a pattern! And, it’s purple with a wide skirt. What is not to like?
The inspiration is this Anne Adams dress pattern #4752 from the 1940s.
I love it, and really wanted to make a dress just like it. But then, I also wanted a nice full skirt just like another dress I bought from H & M years ago and wear often. Turns out that the full skirt made the angled stripes on the skirt totally impossible to pull off. I tried! It was sad looking, though, and in the end I decided I’d be much happier with the dress if I adjusted the design to accommodate my more-full-than-1940s skirt. Good decision, because I love the dress just as it is! I wouldn’t mind some day making the dress with a skirt that has less fullness and a more 1940s silhouette and trying the stripes as they are in the inspiration, but it wasn’t fated to be for this iteration.
See? Because the skirt is full it’s a curved piece, which meant that the striped panel had to have darts to fit, which wrecked the line of the stripes.
Once I decided to go for the Modern-Does-1940s look I also decided not to bother with the buttons on the bodice. My dress does have topstitching like the pattern image, though you can’t really see it with all the stripes going on.
The dress is constructed from a medium weight cotton I found on the remnant table at my local fabric store for $3ish/yard. Love that price! The armholes and hems are finished with self fabric bias. The dress closes up the left side with a purple lapped zipper. If you’re going to be purple, why not be PURPLE? (Maybe I should call this the Purple People Eater Dress?)
The bodice is a little different than the inspiration, because I wanted to make it fit my body. Thus, both sides of the bodice are gathered into the angled waist piece to create space for the bust (in the inspiration the dress is drawn with the proper left side being flat… but that would mean also being flat chested on that side…). The other thing is that I have a shoulder seam in my dress, and I wound up gathering the front pieces at the shoulders to make the whole thing sit correctly on my body. You can see in the picture with the dress on the mannequin that it started out with no gathers on the shoulders, but it wasn’t fitting me in a flattering way, so I gave up and altered it to be comfortable.
The back bodice has darts and corresponding tucks in the skirt. The tucks were unintentional, added only because the skirt had stretched out and was bigger than the waistband when I went to attach them. That’s what happens when you cut corners and don’t stay stitch… But see the perfect chevrons on the side seam? They make me happy!
I’m wearing modern summer sandals, but I did attempt to do a nod-at-the-1940s hair style for the photos. I don’t mind the style, but clearly I need some more practice (and likely a different hair type without so much frizz) to really get a 1940s style going.
Thanks so much to my wonderful friend photographer, who is so willing and excited to document the things I make so I can share them on my blog! Of course, the trade off is that she gets to practice photography skills on a willing model… Works out well for both of us!
I thought I’d share a couple of extant round reticules that bear some similarity to the one I recently made and posted about here. These both have a gathered or pleated outer circle surrounding a decorated inner circle. The bottom one uses the same cord as the ties are made of to circle the inner circle. Both reticules have an opening that is gathered to close, though the bottom one’s gathering direction is more unusual and unexpected. I like both, and think they are fun! Do you have a favorite between these?
A cotton reticule that the Met dates to the 1st quarter of the 19th century.A silk reticule that the MFA dates to the early 19th century.
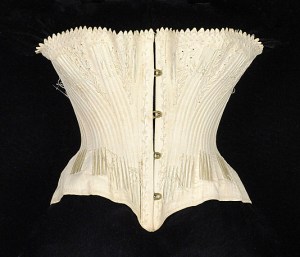
This is a follow-up post to my last post: ca. 1860 Corset For Me! (HSF #4). That post has a short background on my reasons for building the corset, but it doesn’t mention other details, so that’s what this post is for!
My new ca. 1860 corset.
So let’s start with more background, since this post is all about intense amounts of details! We’ll start with the pattern I made for this corset: you’ll notice it has bust and hip gores as well as that curved piece on each side of the front. The bust gores aren’t so unusual for a modern 1860s corset recreation, but I don’t see too many corsets made (and certainly not many corset patterns) with hip gores and I’m not sure I’ve ever seen anyone reproduce an 1860s corset with that curved piece in front. I found these details intriguing and wanted to make this style for two reasons: 1, because it’s a style I haven’t seen recreated, but which I have multiple examples of in my research, and 2, because it seemed like it would fit into a new thought I absorbed a few months ago.
1865-1867 corset, The Met
First, a discussion about the style. It seems like a lot of modern ca. 1860s corsets are cut with vertical seams that run from top to bottom of the corset to create shaping, sometimes with the addition of bust gores. (The corset on the right is an example of one from the 1860s that uses this style of seaming to create shape.) These corsets are cut with shaping in the seams to create space for the bust and hips, but an alternative to this is to use bust and hip gores to achieve shape for the body. The interesting thing is that hip gores do not seem to be very commonly used in historic corsets made by modern people, despite their use in historic clothing. I attribute this to the fact that shaped seams are easier to execute than inserting gores of any type, but especially gores that are not in a seam (like the gores in my corset). Also, I would think that pattern companies have an easier time grading patterns using the shaped seams, because the gores (particularly hip gores) really need a lot more individual adjustment and fiddling on a body than shaped seams do.
Second, about this new thought that I absorbed. While reading Merja’s most recent blog posts about corset construction, I was rather surprised by a simple statement that makes so much sense but which I haven’t necessarily followed in corset making in the past (here are Merja’s gusseted 1870s corset, which has the sentence which mentions this magical new thought, as well as her 1880s purple corset and 1860s white corset with seaming like the Met corset, above, which exhibit the thought without it being explicitly stated). Essentially, she says that she always makes adequate space in the corset for bust and hips, so that the corset is only constraining her waist. Duh! A related thought is that when you tighten your corset you displace some bits to your bust and hips, so your corset really does need adequate room there to accommodate the normal and the extra. That makes so much sense and sounds so much more comfortable than having a corset that digs into your hips or pushes your bust around uncomfortably. I made the goal to take this approach for the new corset and all future corsets! and this new corset was my first attempt at really following this sound piece of information.
So given that the style I set out to make is one that I haven’t ever seen a pattern for, where did I get mine? Well, it’s loosely based off of one in Corsets and Crinolines by Norah Waugh (the pattern is ca. 1873, pg. 80). I say loosely, because I started there, but then began combining pieces and changing the shape of them to suit my measurements and the seam placement that I wanted (most importantly the hip gore and that curved front piece). Interestingly, Waugh notes on a different corset pattern (ca. 1860, pg. 78) that the 1860s style of corset without bust or hip gores (more like what I seem to see in modern made ca. 1860 corsets like the one from the Met at the top of this post) was a style preferred in France. The English preferred the style of corset I am making with gores. (Merja’s white 1860s corset I mentioned in the pervious paragraph uses this French corset pattern in Waugh, if you’d like to see what it looks like made up.)
I wound up making two mockups to get the pattern the way I wanted it even after adjusting the pattern from the beginning (and still made a few alterations before cutting out my real fabric). The original pattern in the book had a waist that was much too small and a bust that was a little large relative to my measurements. Despite my changes, the first mockup was too short waisted, needed bigger and longer bust gores, smaller hip gores (I had overestimated how much ease I needed there), and a little bigger waist. The second mockup was still a little short (I added another ½” to the top), the hip gores were still just slightly too big, and the lacing gap between the back pieces was wider than I wanted it to be by about 3″. Ugh! I actually determined that last fact after cutting out and sewing up my actual fabric. Turns out my shoulder blade area is bigger than I thought. I had an inner struggle about if I wanted to take out the small stitch size flat felled seam to insert a piece or if I wanted to just let it go. Adding a piece won in the end, because I figured that I was spending so much time on the corset that I really wanted to be pleased with it and not have nagging doubts for the next number of years until making a replacement. (The piece I added is between the front and back pieces. You can see it easily in the first picture in this post. It’s a v shaped piece that extends from top to bottom.) Adding the piece actually wasn’t so bad, despite all my inner complaining and I’m very pleased I did it, because I am happy with the result.
1864 corset, The Victoria and Albert Museum.
That’s all the aspects of choosing the pattern and executing it. Now I can move on to my inspiration for creating it. This blue corset at the V and A is the most thoroughly photographed piece of inspiration (click through, there are lots of different angles of the corset, and close up pictures!). As you can see, the blue corset has bust gores, that curved front piece, (and if you look at the pictures of the back…) hip gores, as well as useful close up construction photos showing the flossing, how the busk is sewn in, how the binding is sewn on, etc. You can also see great detail for things like how to sew the points of the bust darts and the tops of the hip gores: they are overcast near the tips of the bust gores and tops of the hip gores before being machine sewn with topstitching to the binding. I used this method in my corset, sewing the overcasting by hand. I found that it was very useful on the bust gores (since mine are set into a slit in the fabric, not a seam) because the amount of seam allowance near the points is negligible (like, less than ⅛”) and that would have been extremely frustrating to try and machine sew! Also, the overcasting kept the edges from fraying as I was working with them. It also adds an extra measure of stability and sturdiness to those areas.
1839-1841 corset, The Met.
Other very useful images to me were this orange 1860s corset front and side views (with generally similar lines as the blue V and A one) and this 1862 Godey’s image of a corset (with very similar lines as the blue V and A one). (As a side note: Does anyone know what collection houses the orange corset? I’ve only been able to find images, but no real source.) These corsets provide a nice end date range for my corset pattern, because in the 1870s the corset begins to change shape. But to determine a good start date for my corset I had to look elsewhere. The Met has a corset dated 1839-1841 with similar hip gores and the front curved piece (great zoomable pictures including an interior view, click through the image!), but it does not have separate bust gores (they are cut in one with the front pieces as is usual for 1840s corsets) and it does not have a front opening busk (those weren’t in general use until 1849). The 1839-41 corset is more curvy than the 1860s ones, as you would expect from an 1840s corset, but it still looks like a forerunner to me! Waugh has an 1844 corset pattern (pg. 77) that has similar lines to the 1839-41 Met one, with bust gores but without hip gores or the curved front piece. These 1840s corsets are useful for determining the start point of my date range, which seems to safely be the 1850s. Thus, my corset is dated ca. 1860, which is just a shorter way of saying 1850-1870. That makes sense looking at the silhouette of the dresses from these decades, as well, since neither the 1850s or 1860s require the curvy shape of 1840s or 1870s corsets.
EDIT: The orange corset mentioned above is in the collection of the Manchester Art Gallery via this link.
I used all of these different images to look for construction details to use in my corset. Specific things I was looking for include: stitch size, width of the binding, method of sewing the binding, placement of bones, design of flossing, seam placement, method of setting bust and hip gores, location of topstitching, placement of eyelets down the back, finishing of the interior of the corset, and length of the busk. Some of these things can be determined by looking at the extant corsets I’ve shared in this post, but others required other helpful research. Specifically, the gusset construction method I used came from this image that Merja shared in her 1870s corset post. It’s from 1872, but is still relevant for my corset, because if you look at the blue and orange corset pictures you will see it used on the overcasting at the bust and hip gores. This image, from 1868, shows similar methods as well (and has a selection of mostly French and a few English style corsets if you’d like to see more examples of those).
And now, here are the close up construction details of my corset that I promised.
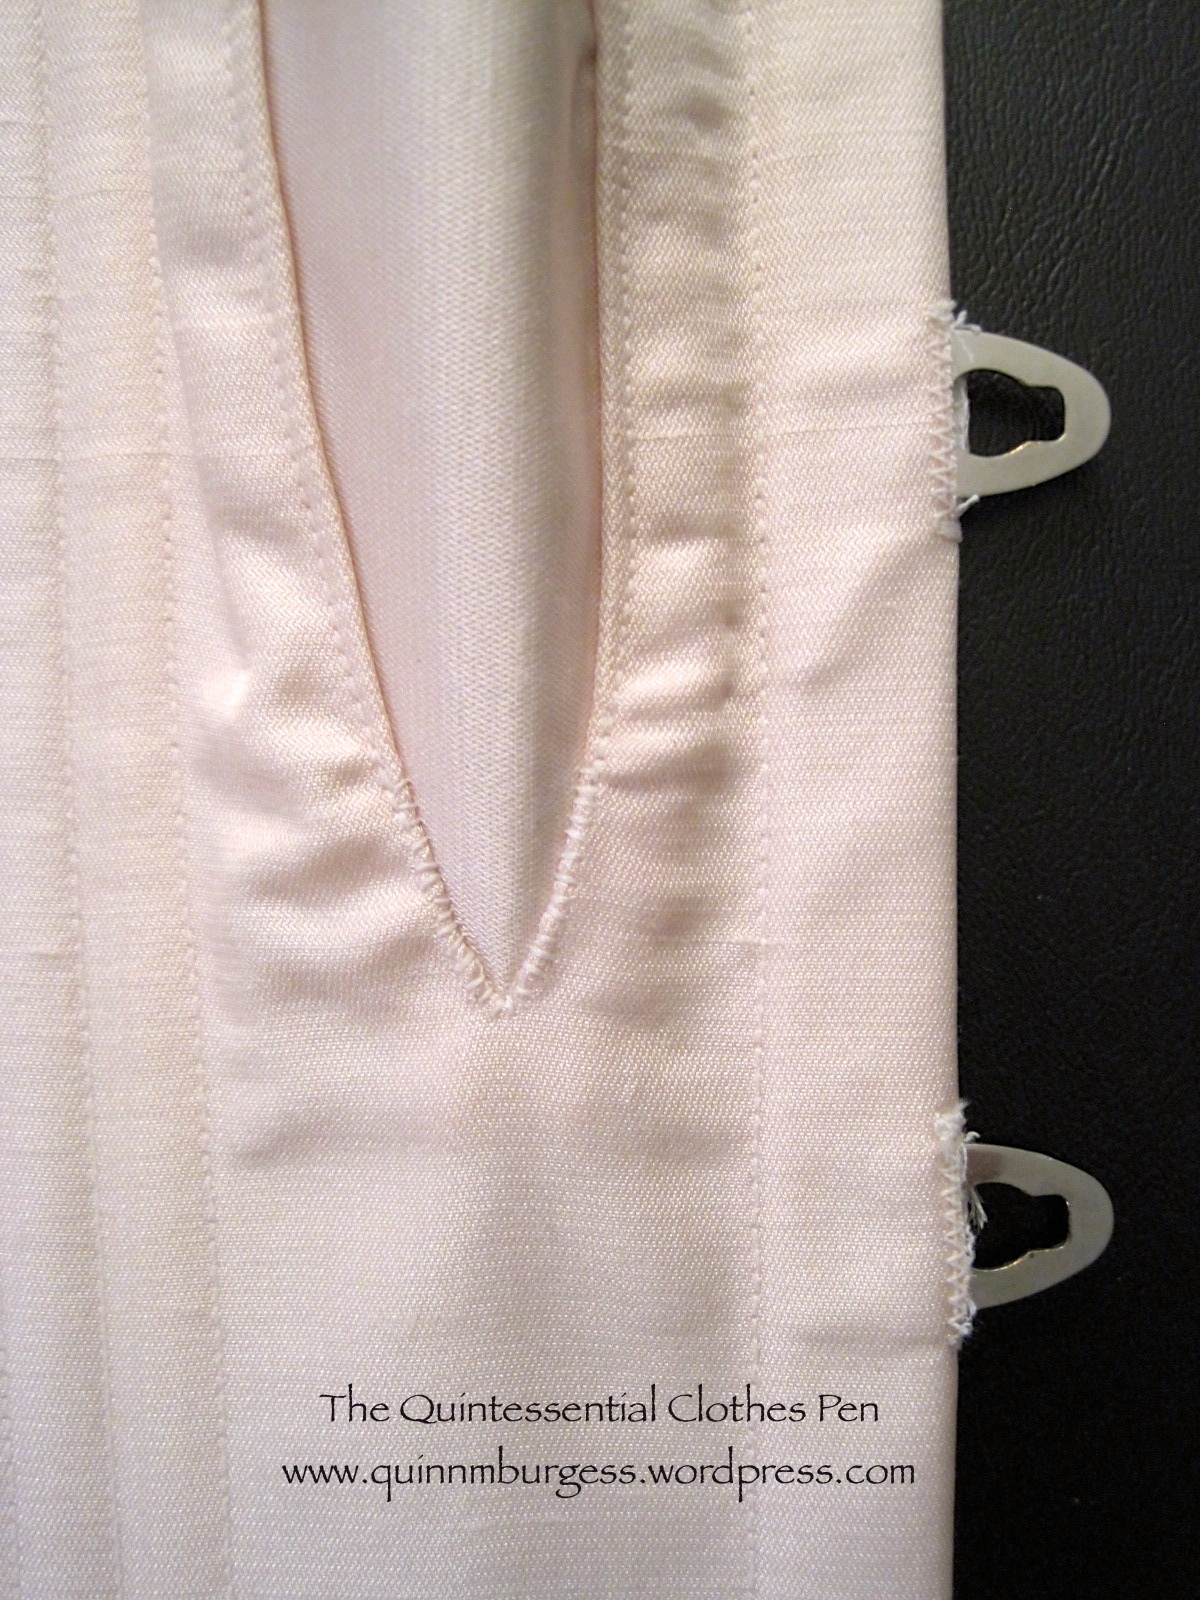
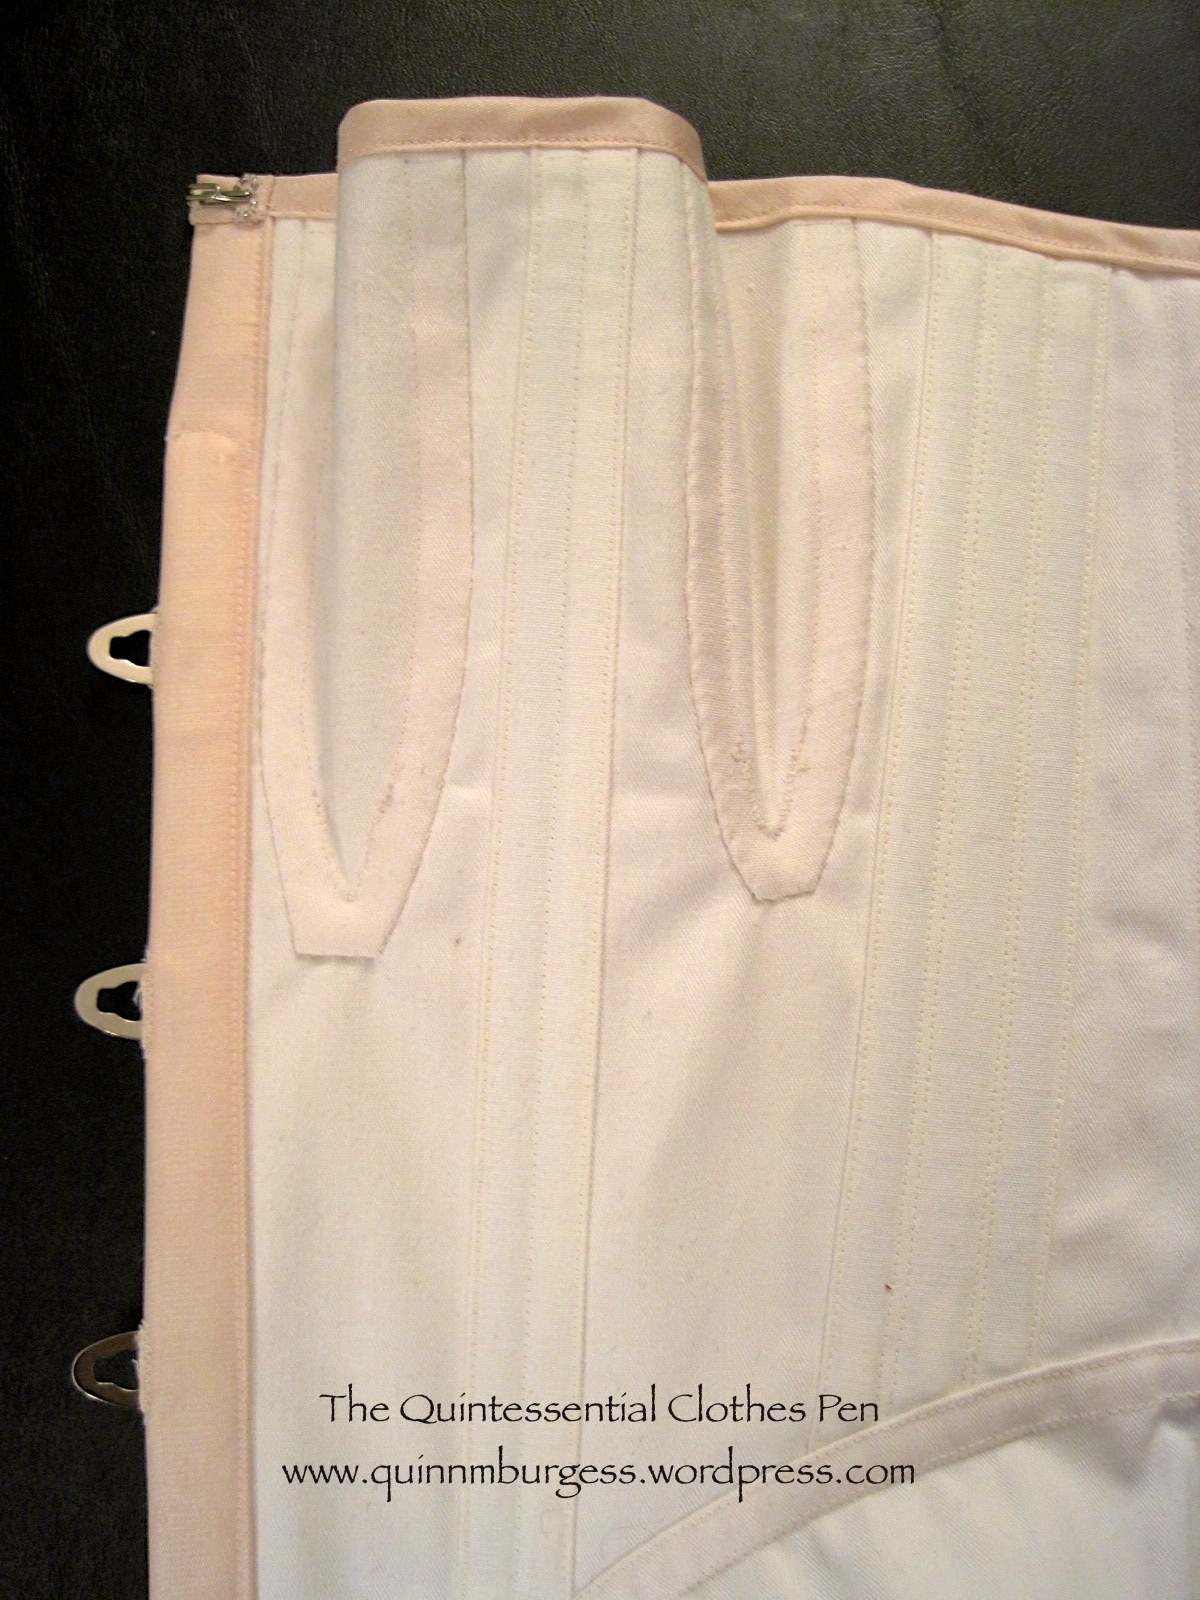
An interior view of my corset. It’s important to me that the inside of garments is as nicely finished as the outside, as you can see. It’s a little hard to see, but the grommets near the waist are set closer together than the ones a the top and bottom.Details: Hand sewn overcast stitches at the bast of the bust gore and machine top stitching above that. Machine sewn button holes for the busk hooks (I’ve found this method to be much sturdier than leaving a gap in a seam on the edge).Details: The busk is top stitched around the top curve to keep it from moving. There is flossing at the top of the boning channels (every boning channel is flossed at the top and bottom). Machine sewn top stitched binding.Details: The top hook of my busk is a few inches below the top of the corset, so I added a hook and thread loop at the top to keep it closed. I used coutil cut on the straight of grain for my boning channels: the edges are pressed under and then they are topstitched into place and into the proper number of channels (keeps the inside tidy and doesn’t require extra notions!). The seam allowance of my bust gores is turned under and flat felled by hand with a whip stitch that only catches the coutil. The curved front piece is flat felled by machine.Years of use have caused my busk to have a bend in it at my waist line. See how it curves up from the table in the middle? Impressive, really, that my body can permanently change the shape of metal.
I’m hoping to get pictures of the corset on me this weekend at its first ever wearing. Hopefully I’ll be able to share those in the near future!
Unfortunately, I’m a few days late completing my project for the HSF Challenge #4: Under It All. I tried really hard on this one and was definitely motivated to keep working consistently by the fact that I wanted to get it done for the HSF challenge. I was held up by a severe cold that took me out for about a week and other dealing with life things. So while I’m late, I’m super glad and excited to be done with this project (especially because the last two days have included a lot of flossing, and my fingers/hand muscles are so done with that for awhile)!
The last ca. 1860 corset I built for myself was made in 2006 or 2007 (you can see it in this post). It’s been worn more times than I can count and has stood up to the test of time and tension well, especially considering it was the first corset I ever made! But the time has come for a new corset for this period–one that is made to fit me using all the skills in pattern making and construction that I’ve gained over the last 7 or 8 years.
I realized while working on this corset that aside from building my first corset to fit me in 2006 or 2007, the only other stays or corsets I wear with my historic clothes that were made to fit me are my 18th century stays, my short Regency stays, and my c. 1825 long stays. I wear other corsets from 1895 (hm, I don’t think there are pictures of this on the blog), 1903, and 1913 but none of them were constructed to fit me (though I did construct them beautifully!). I’ve made them work and they sort of fit me, but all of them have problems because they were made to fit other people: a busk that’s too long, being a little small, especially in the hips, or being too big and needing a tuck. So it occurred to me that I should probably invest in making a few more corsets made to my measurements for the Victorian and Edwardian periods. Sounds obvious, but it was a revelation to me when I sat down and thought about it!
So that’s what this project is: a ca. 1860 corset made to fit me!
Hard to see the details in this picture, I know. There will be detail shots and lots of commentary in an upcoming post!
I have lots of other thoughts and inspiration to share with regard to this project, but I expect it to be lengthy, so I’ll be writing it up in a separate post. Plus, I want to post about my completion of the challenge as soon as possible. So for now, the very much condensed details.
Fabric: 1/2 yd ish of white herringbone cotton coutil and ½ yds ish of slightly slubby pale pink silk satin.
Notions: Metal boning, metal grommets, a recycled metal busk from my old ca. 1860 corset, regular weight ivory thread, and heavy weight ivory thread for flossing.
How historically accurate?: Pretty darn accurate, I’d say. I wanted to create a corset using the seam lines found in extant garments, but which don’t seem to be much recreated. I used construction methods that are accurate as far as I know. Let’s say 90% because you can’t ever quite make it to 100% if it’s modern, can you?
Hours to complete: A lot. I didn’t keep track, but I’ve been working on this for at least 2 or 3 weeks, and some of those days have been a full day’s work on the corset, not just evenings.
First worn: Has not been worn yet, but will be worn to a ball in March.
Make something that is celebration worthy, make something that celebrates the new skills you have learned this year, or just make something simple that celebrates the fact that you survived HSF ’13!
This challenge gave me the inspiration to finally finish my Mineral Felicite jacket!
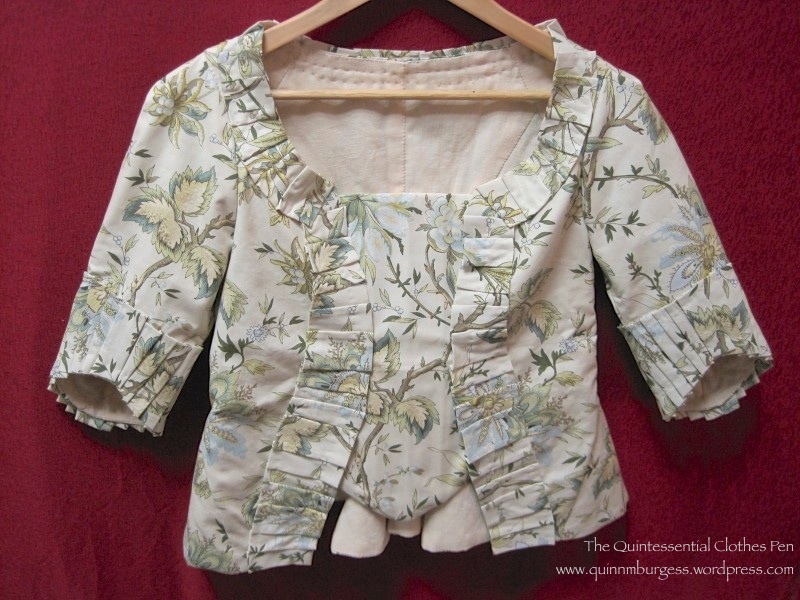
Here’s the story… I bought the fabric over a year ago, but didn’t really start thinking about the project until this summer. I made a mock-up of my chosen 1760s pattern and thought I’d sorted out the fitting issues, but after I’d cut and sewn the real fabric I had many more unexpected problems! I was discouraged, but recieved some really wonderful opinions about what I should do to proceed from you lovely readers. I decided to go with a stomacher front jacket with self fabric pleated trim around the neckline/front opening and around the cuffs on the sleeves, like this jacket at the Met. Then, back in September, the HSF inspired me to make a stomacher to match my jacket for challenge #19. After that, my jacket languished, because I really wasn’t very excited about finishing the sewing for the other decisions I’d made and the alterations that needed to be done to make the jacket the way I wanted it. But I really wanted to finish the jacket in this calendar year. And that brings us to the present, with the jacket finally completed. Yay! I am SO ready to celebrate that this jacket is finally done!!!
Front. The pleated trim easily hides the pins used to attach the stomacher!Back. It’s wrinkly and without a waist on the hanger. You’ll just have to believe that it looks better on a body!
The facts:
Fabric: Almost 2 yds Waverly Mineral Felicite printed cotton and 1yd (I think) peach linen
Pattern: Heavily altered, but I started with the 1760-1790 jacket pattern in Janet Arnold.
Year: Well… 1760s is what I was aiming for in the beginning.
Notions: Thread and cane boning.
How historically accurate?: 60%. This definitely falls in the historic costume category of my wardrobe. The Waverly fabric is in the spirit of the 18th century, but not accurate, though the linen is accurate as are the methods of construction. The trim is based on extant garments but not specifically reproduced. The jacket is 100% hand sewn.
Hours to complete: So many! With all the problems and alterations and re-sewing I completely lost count.
First worn: Has not been worn yet.
Total cost: $30 maybe? I don’t remember exactly what I paid for the fabrics.
Hopefully, I’ll get some more pieces of an 18th century ensemble done at some point and get pictures of the jacket on me. Don’t hold your breath, though, it could be awhile!
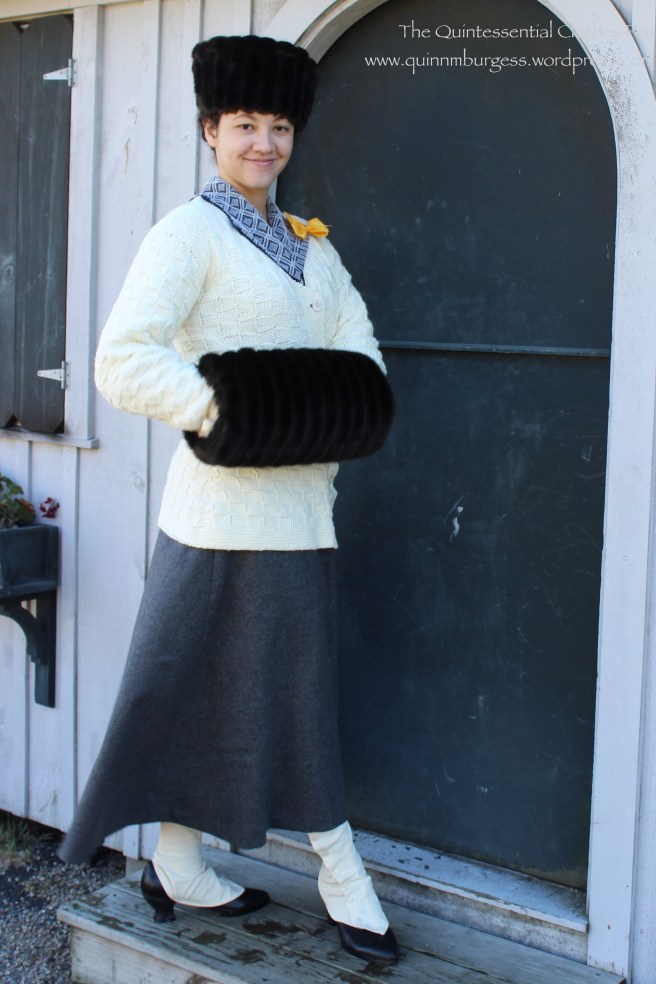
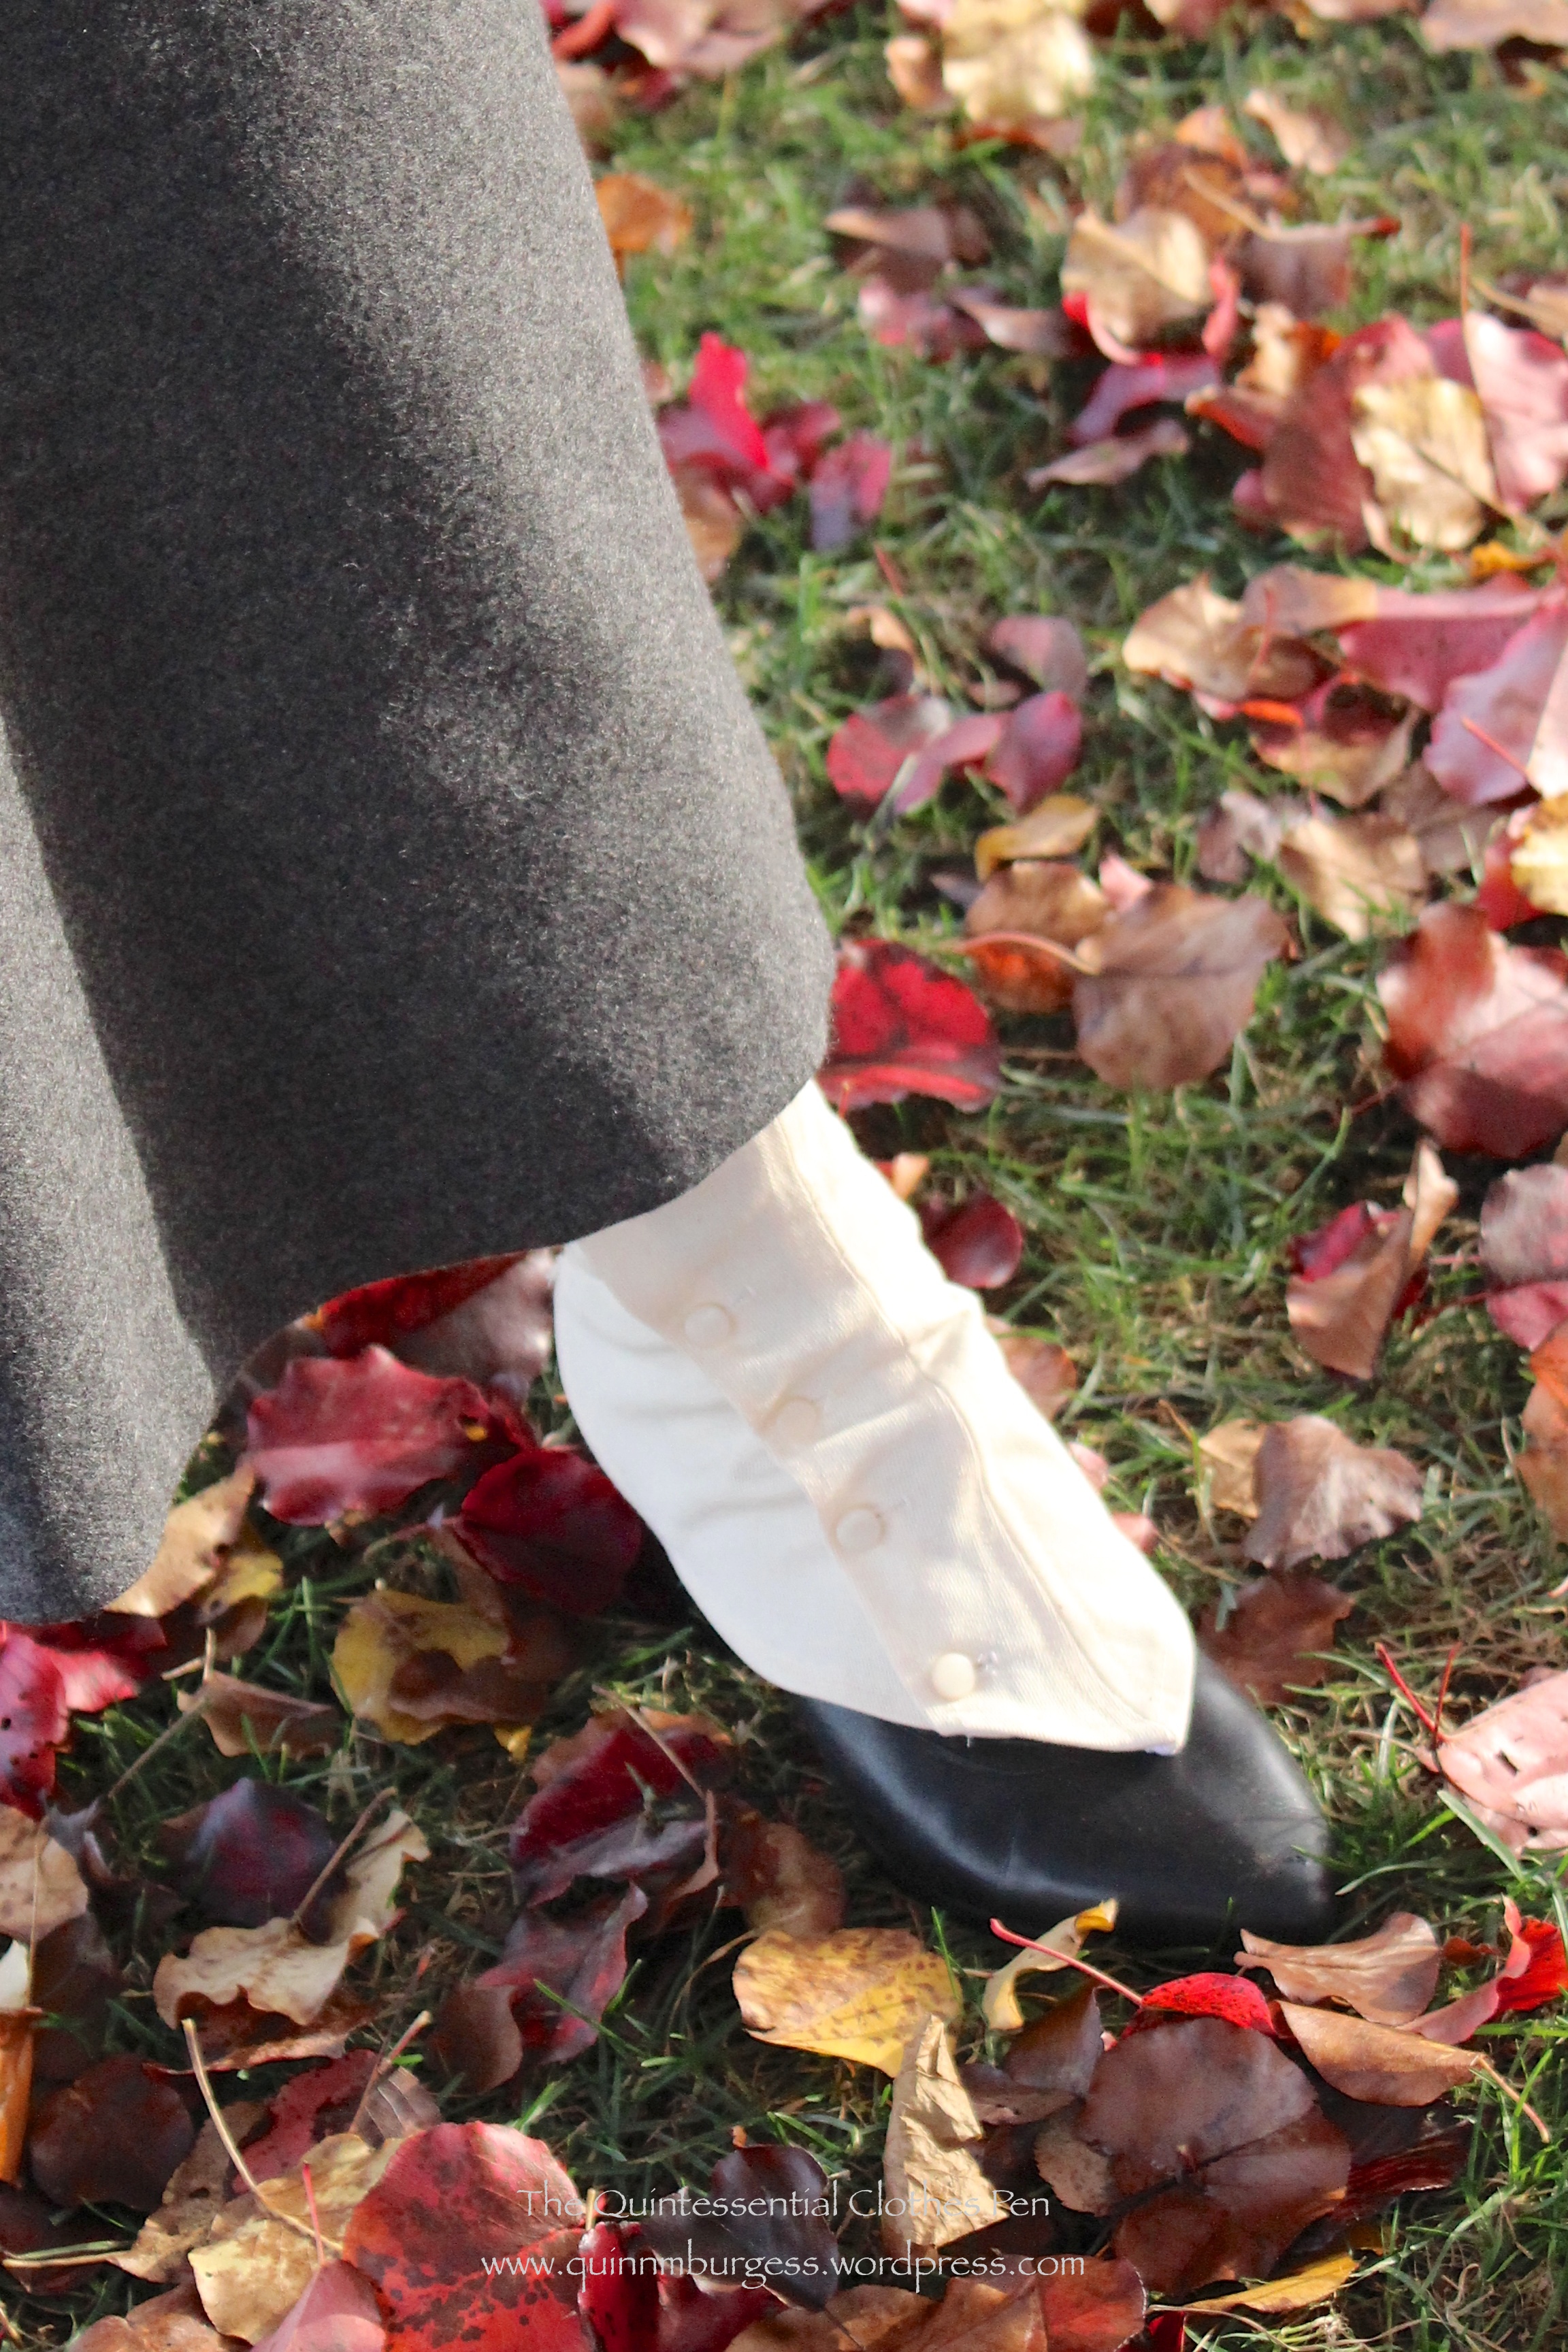
It’s time for the details about my entry for HSF challenge #25: One Metre. I prefer saying I’m wearing “spat-boots” though the actual items I’m really wearing are shoes and “gaiters.” Spat-boots has more of a ring to it, I think.
Close up of my spat-boot look.
The gaiters very effectively turn my sort-of-1910s-but-more-1920s American Duchess Gibsons into very 19-teens spat-boots! If you look at the first black and white image of suffragists in this previous post you can clearly see some similar spat-boot styles. And if you look at the images on my Sewing Project: 1917 Blouse and Accessories Pinterest board you can see multiple examples of the spat-boot style. Some boots, like these from 1917 at the Met, were made in two different colors of leather. That’s the look I was trying to imitate, except that I was doing it with a separate garment rather than as a part of my shoe. The Met actually has quite a number of early 20th century gaiters, made out of leather and cotton. If you’d like to see these examples, I’ve pinned many of them to my Early 20th Century Accessories Pinterest board.
The facts, you ask?
Fabric: Scraps of heavy unbleached cotton.
Pattern: Created by me.
Year: 1917.
Notions: Thread, black elastic, cotton twill tape in various widths, and plastic buttons.
How historically accurate?: 90%. The look is right but the materials are a mix and match of right and modern.
Hours to complete: 6-8? Took a few fittings to get them ready to sew. Then finishing and sewing on buttons took awhile.
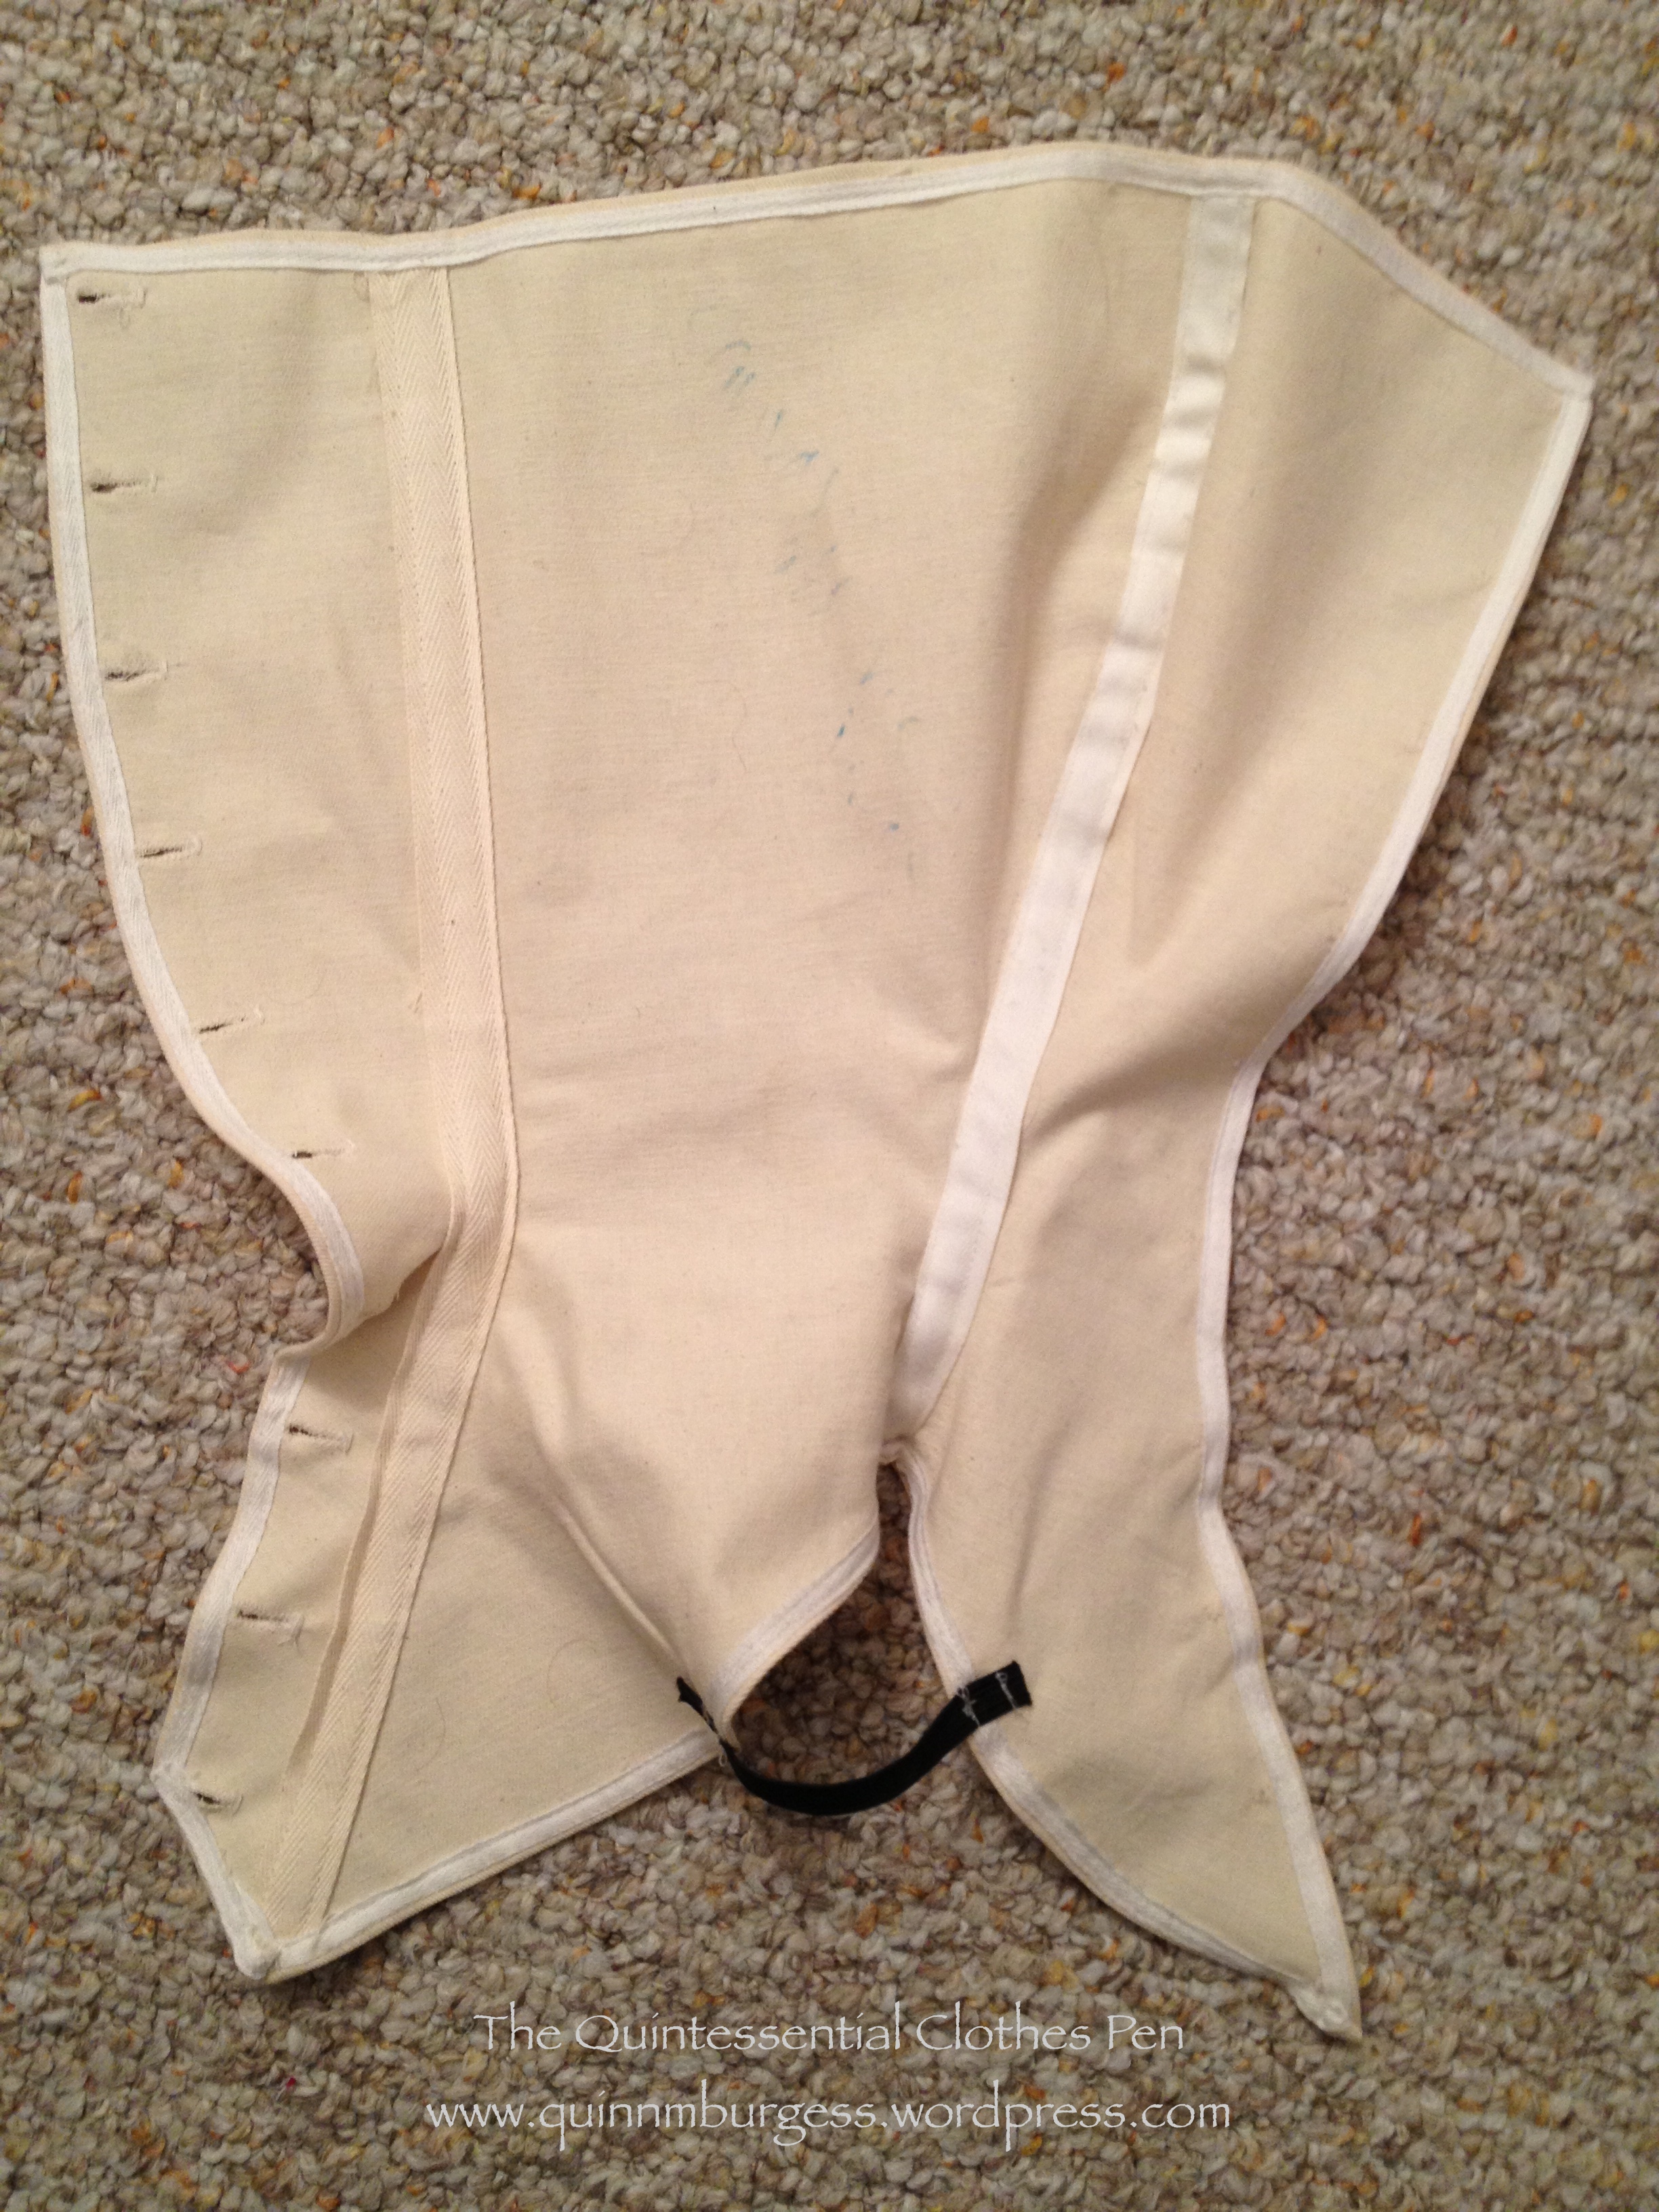
Total cost: None. The fabric was left over from a grad school mock up and the notions were all from my stash. (See that odd marking in the middle of the center piece? That’s blue sharpie that soaked onto this part of the fabric from notes I wrote on the mock up… There was a lot of blue sharpie, and I couldn’t cut around it and still have enough fabric. Doesn’t show on the outside though!)
Here’s an inside view of one of the gaiters. You can see that I’ve used three different kinds of twill tape to bind the seams and the edges. All of the sewing was done by machine except sewing on the buttons.
There are a few things that I would change consider changing if I made these again in some other reality. #1: Having my buttons spaced closer together, as the extant gaiters and boots do. But in this case I only had a limited number of buttons to work with! #2: Potentially putting a strap with a buckle to go under the foot rather than elastic, since the buckle method is what extant gaiters have. But the elastic worked so well and you really couldn’t see it… so I probably wouldn’t actually change this, especially since I don’t have the right sort of buckles in my stash. #3: Making the back part that comes down over my heel longer. I was aiming for a nice swoop up from the part held down by the elastic, but the back of the gaiters kept popping up over the edge of my shoes, which was a little uncomfortable. I spent a lot of time during the day I wore these pulling the back of the gaiters down.
Like a flamengo, I’m standing on one leg and pulling down the back of my gaiter, which had popped up over the back of my shoe.Overall, I’m super pleased. These were quite successful. You should try some yourself!
Product links in this post contain an affiliate code, which provides a small benefit to my shoe fund. This does not affect my impressions and reviews of this product.
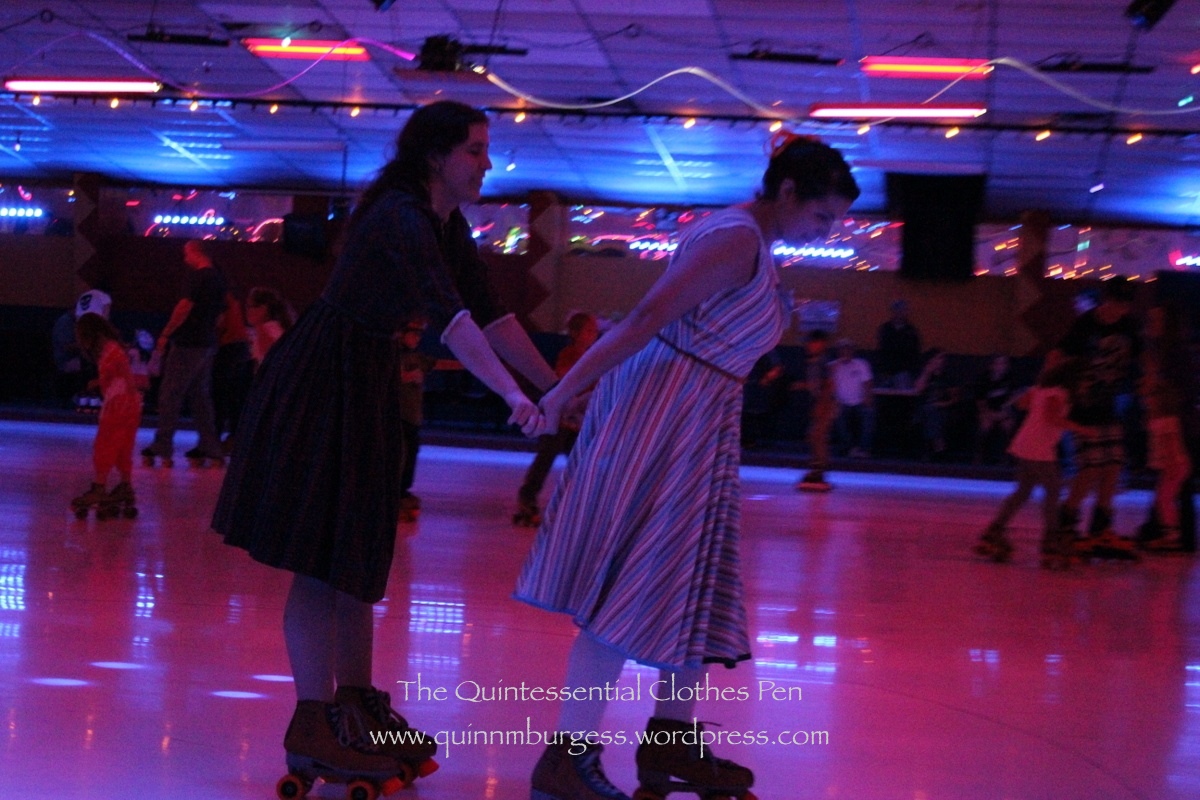
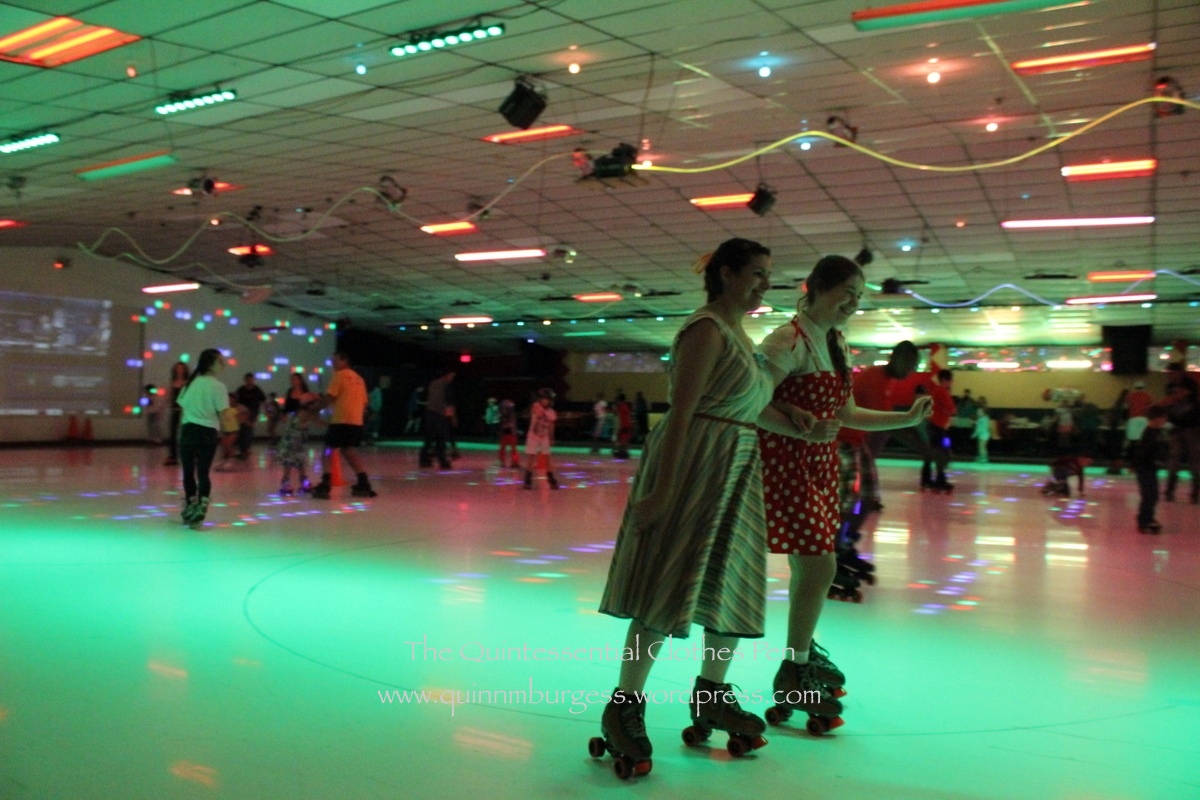
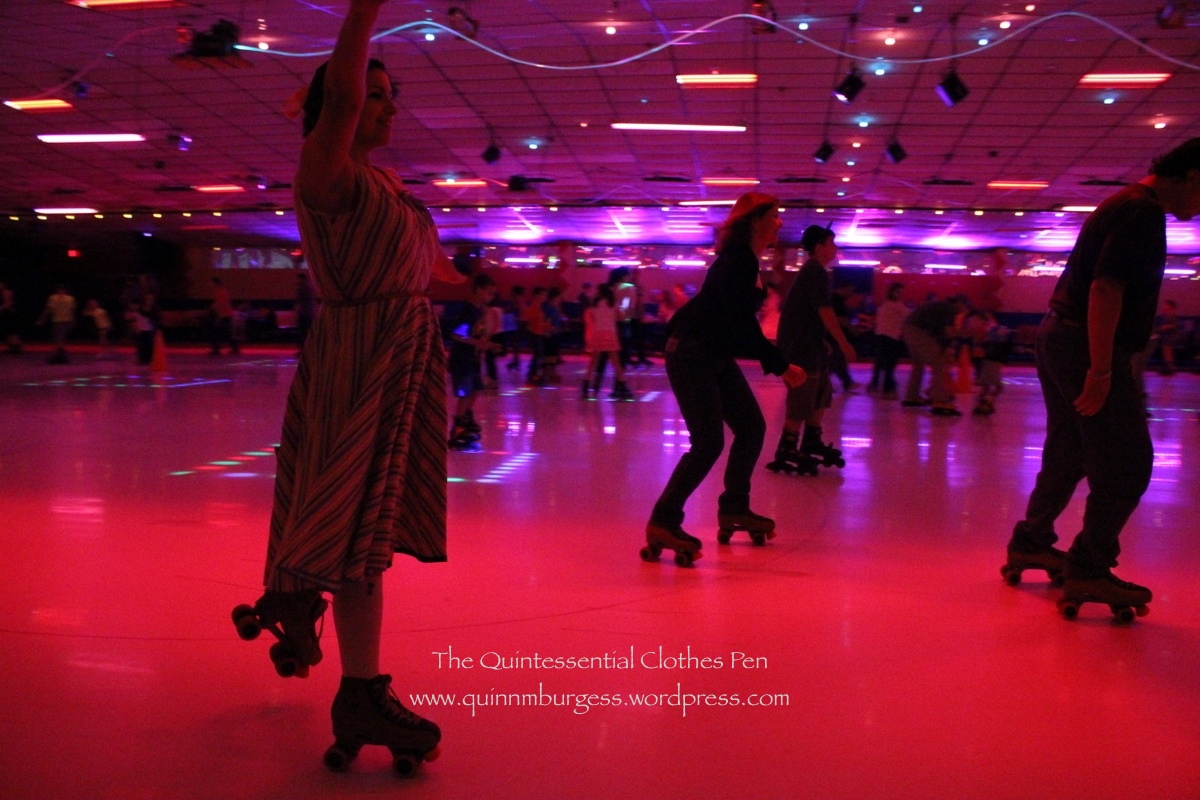
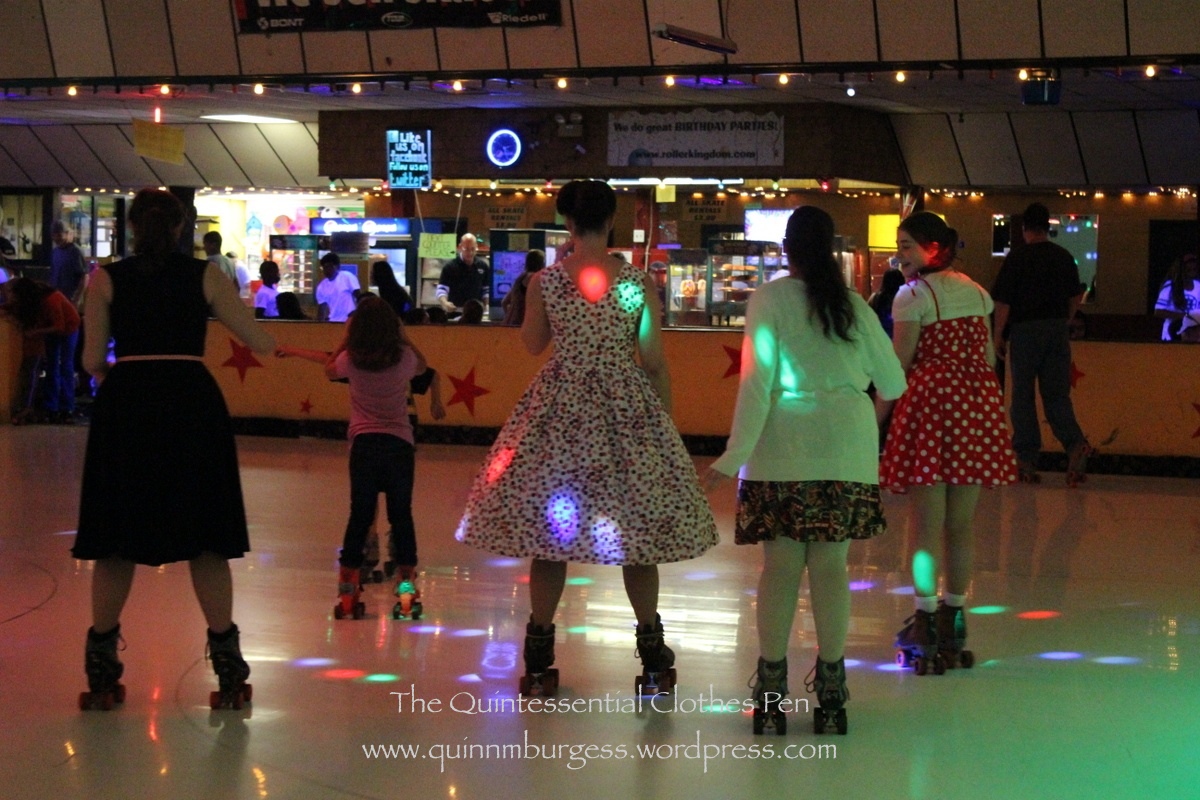
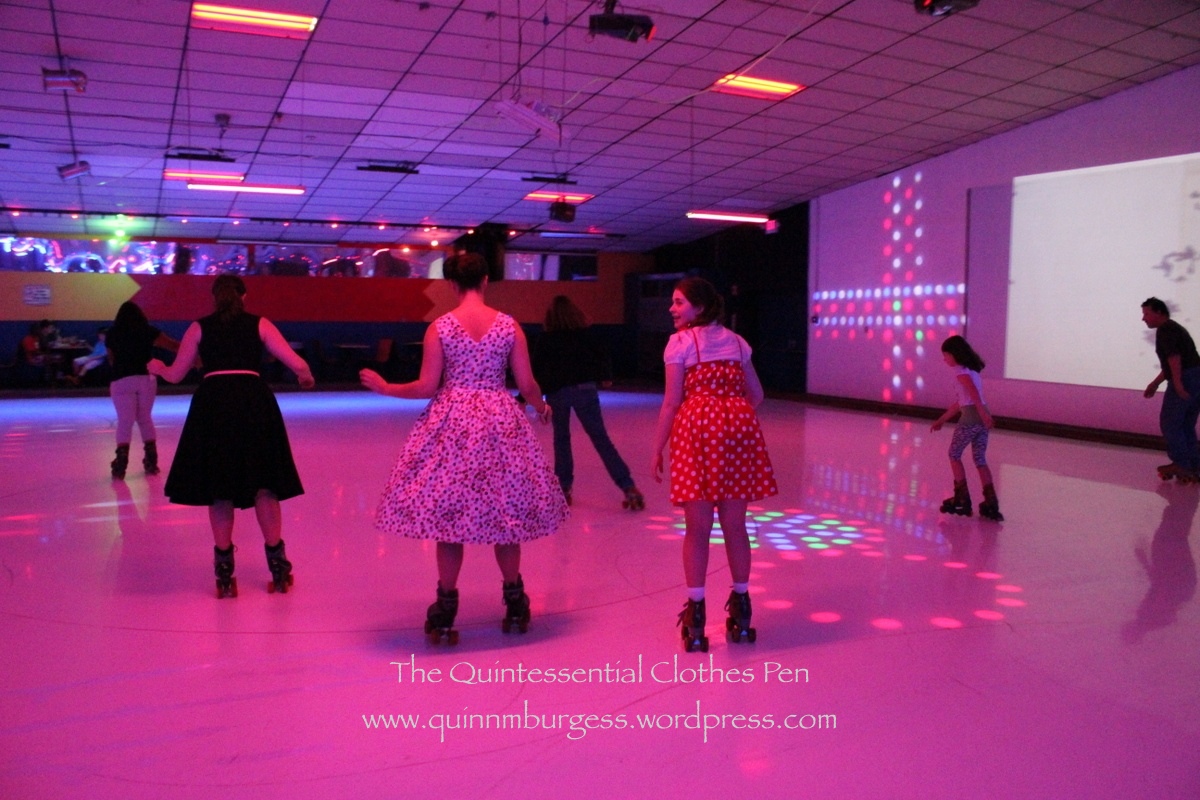
After eating brunch at a 1950s themed diner, stopping along the side of the road to take lovely autumn color pictures, and spending some time at a thrift store before the roller rink opened, we finally headed out to go roller skating! I had been jokingly warned that we were likely to be at the roller rink with a whole lot of 8 year olds and the warning was pretty accurate. There were a few adult couples on dates and a few by themselves, but mostly there were a ton of 5-13 year olds and their adult chaperones. It was a Saturday afternoon, after all, so it was to be expected that there would be a lot of birthday parties… It didn’t bother us, though, we’re used to being unique. And lots of the girls called out that they liked our dresses as we skated by. Perhaps one day they’ll be inspired to make or wear historic clothing!
Some of us had been more used to roller blading, but in the spirit of trying to be 1950s-ish, we all rented roller skates. Granted, the roller rink and the skates are obviously modern and not 50s, as you’ll see, but we had so much fun it didn’t matter at all!
Putting on skates under a black light.Things started off a little shaky for some of us.But we were there to support each other.In fact, I almost fell over before I even made it onto the rink… But I managed to keep my balance, and here I am, successfully skating!Our confidence rose pretty quickly, and soon we were all making it around the rink.We were even managing to be graceful sometimes.And possibly even in sync…I did still lose my balance sometimes and make crazy faces…But they were balanced out by the successful moments.Look, here’s another successful moment!On a roll!This picture amuses me, because we might be dancing, or we might just be loosing our balance…Group shot (with fun lights!).Another group shot…You might remember our “raise the roof Charleston”… We just like to throw in raising the roof any chance we get, and this was a perfect opportunity.It almost looks intentional that we’re all in a line!Full circle. Returning my skates under the black light.
Fun, right? We really enjoyed ourselves and no one actually fell! But the day wasn’t over… we still had a Regency ball to run/attend that night. I’ve got pictures of that coming soon. It sure is a transformation from 1950s!