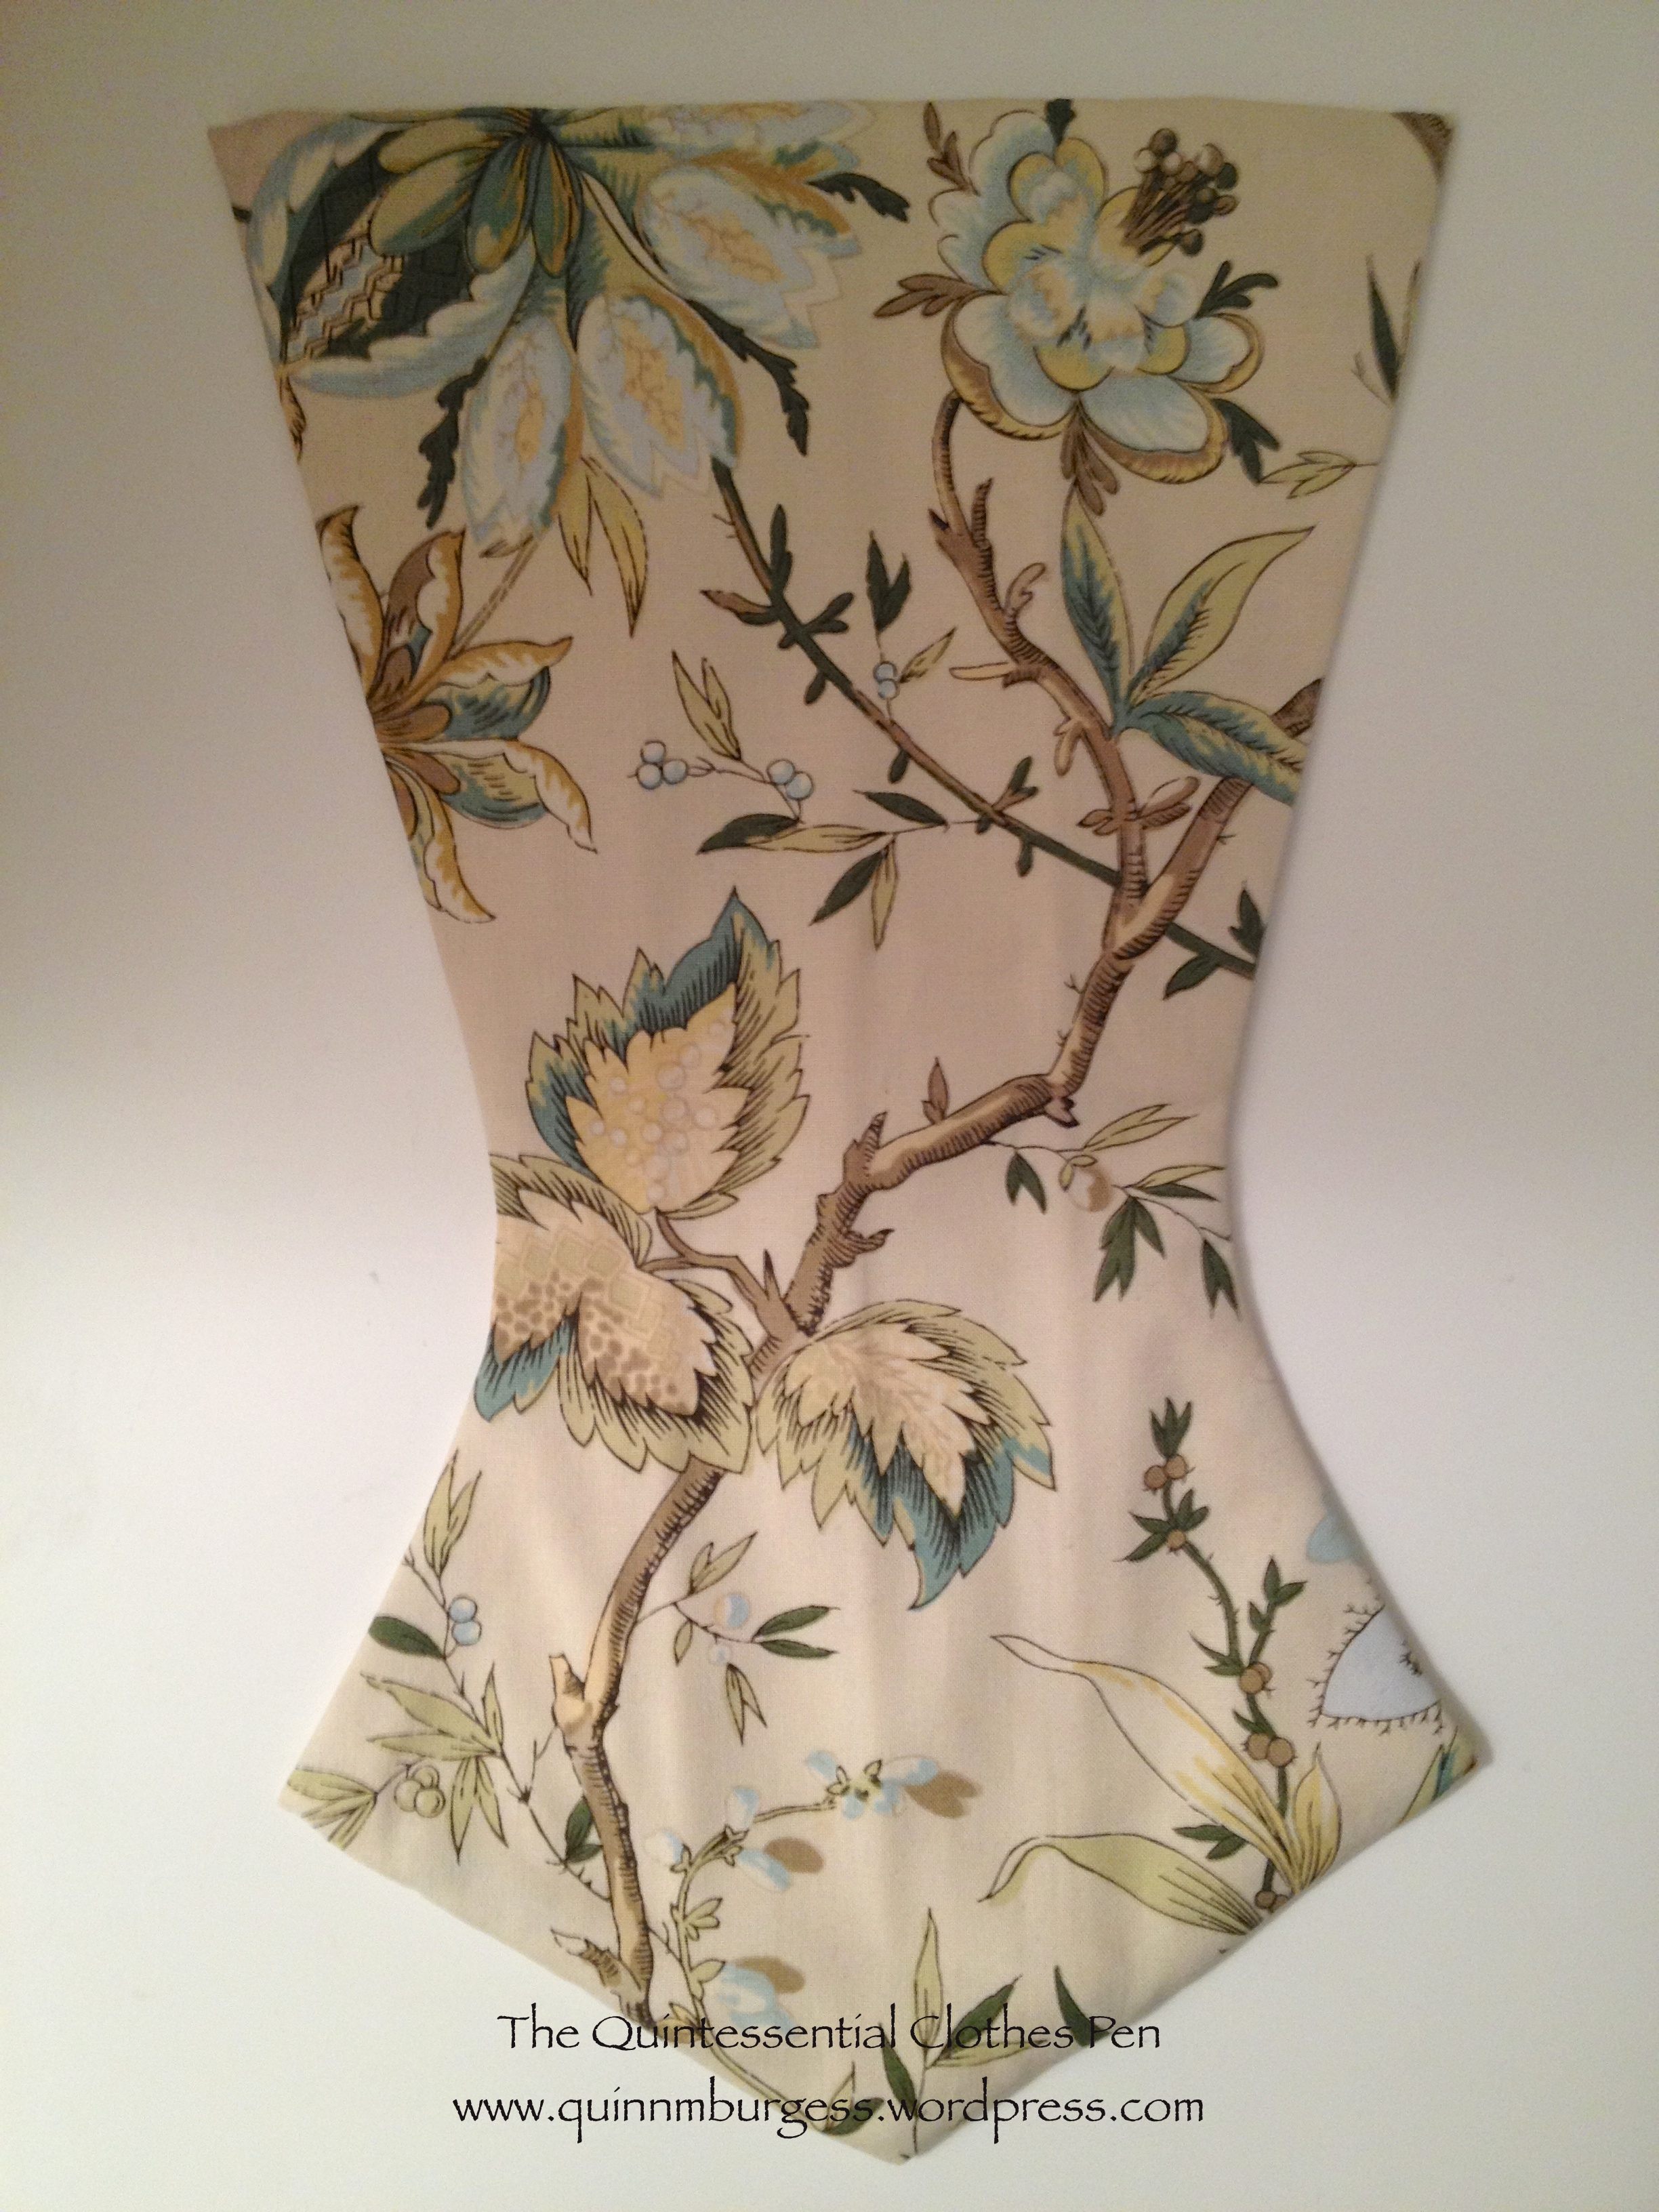
First, I want to say “Thank you!” to all of you who provided me with your thoughts and insights about my Curtain Along troubles. I took all of the things that you mentioned and reconsidered my jacket, coming at last to the conclusion that a stomacher would solve a lot of my problems. Of course then I had to decide if I wanted my jacket to lace over or pin to the stomacher and how I wanted to trim the new design (ribbon or self trim)… for now I’ll leave you in suspense on those two points, because the point of this post is to share my completion of the stomacher, as it fits into the HSF Challenge #19: Wood, Metal, Bone.
Just the facts:
Fabric: A bit of left over Mineral Felicite print from the jacket (it sure is a good thing I had extra!), small bits of leftover peach linen from the jacket lining, and a bit of leftover white linen from another project for the interlining.
Pattern: Made by me and referencing Costume Close-Up.
Year: 1760s-ish.
Notions: Thread and cane.
How historically accurate?: 90%. Accurate fiber contents, though the print of my Mineral Felicite isn’t perfectly accurate. I may not have used the exact stitches that an 18th century garment would have. Also, I feel like I’ve seen stomachers that are boned, but when I was looking for this project I couldn’t find any of them. So I might have made that up. But it will make my stomacher lay so much smoother than without boning, so it’s worth it.
Hours to complete: 6.
First worn: Has not been worn yet.
Total cost: Free since everything was from left overs.
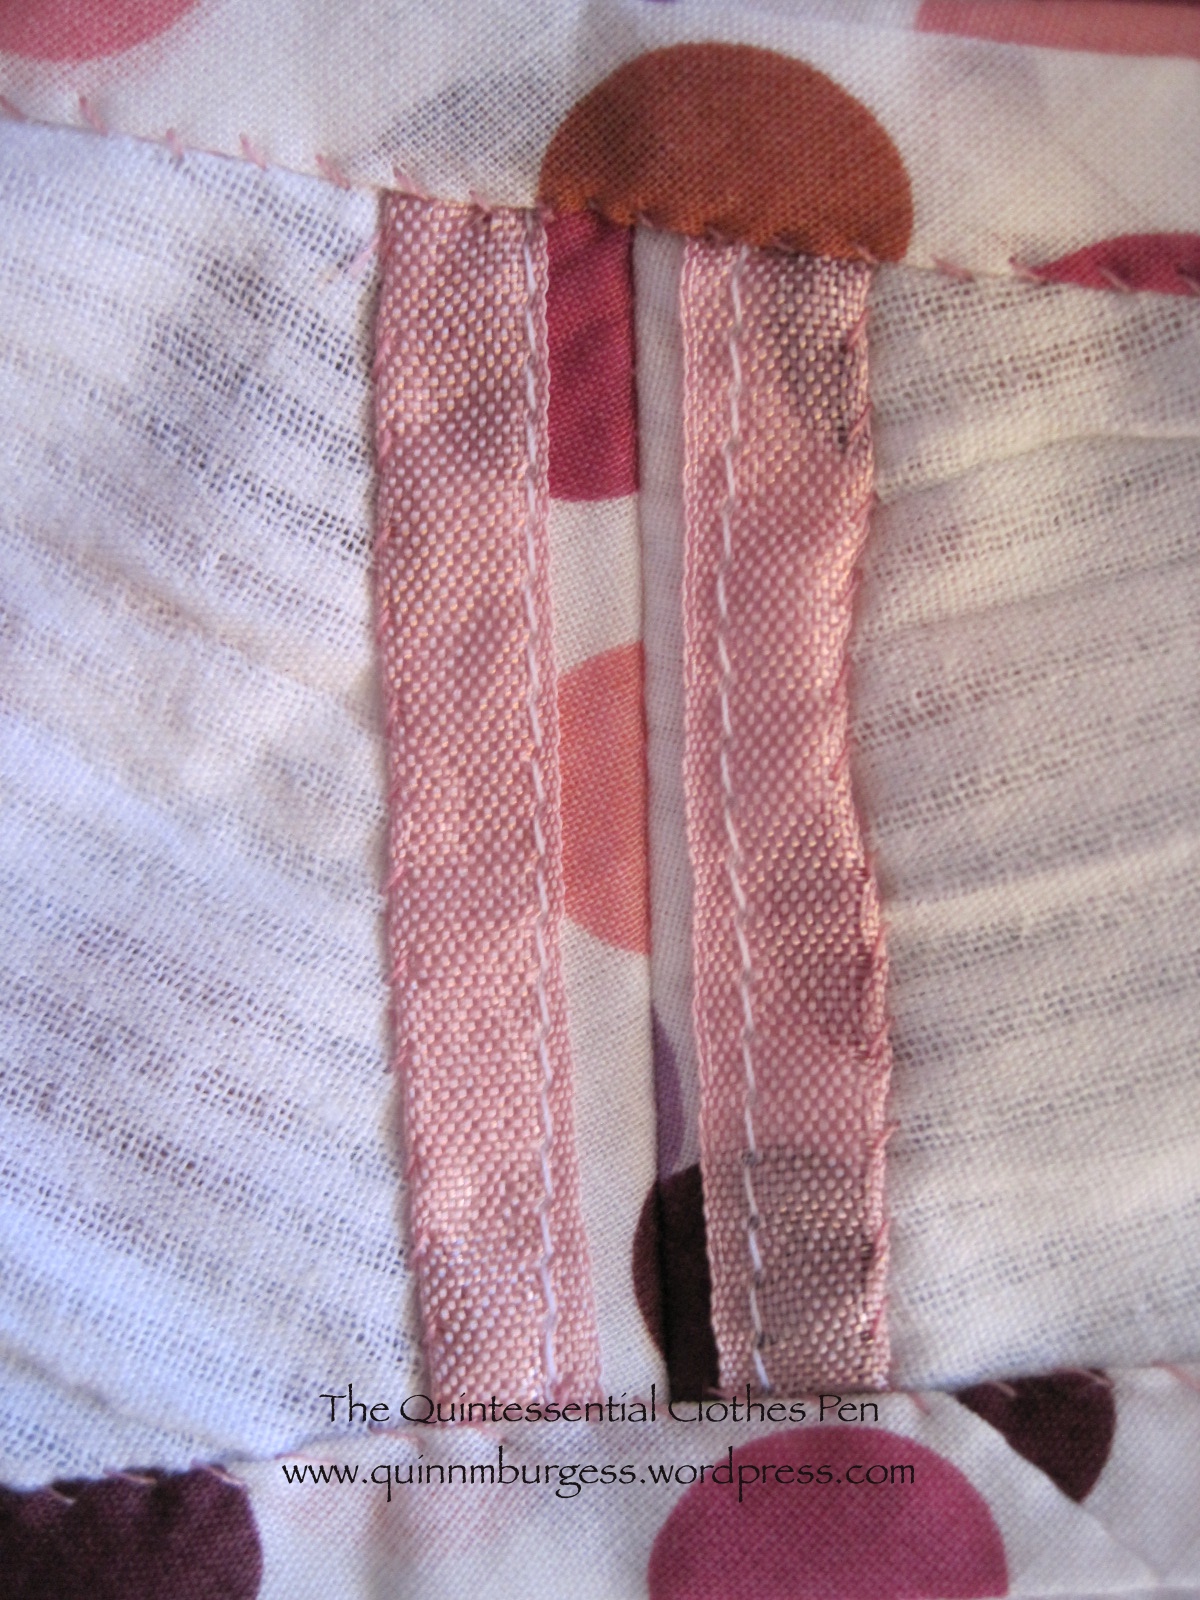
Ok, now here’s the amusing part. As I mentioned in my last post about the jacket, I have only small scraps of the lining linen left. I could have backed my stomacher with a non matching linen all in one piece… but I decided to piece together my matching scraps for the back. It’s a little crazy looking, but it will match the sleeves and amuse me. Actually, I wouldn’t have had enough scraps if I hadn’t reused some of the bits I cut off from the front when changing the line to fit over a stomacher…
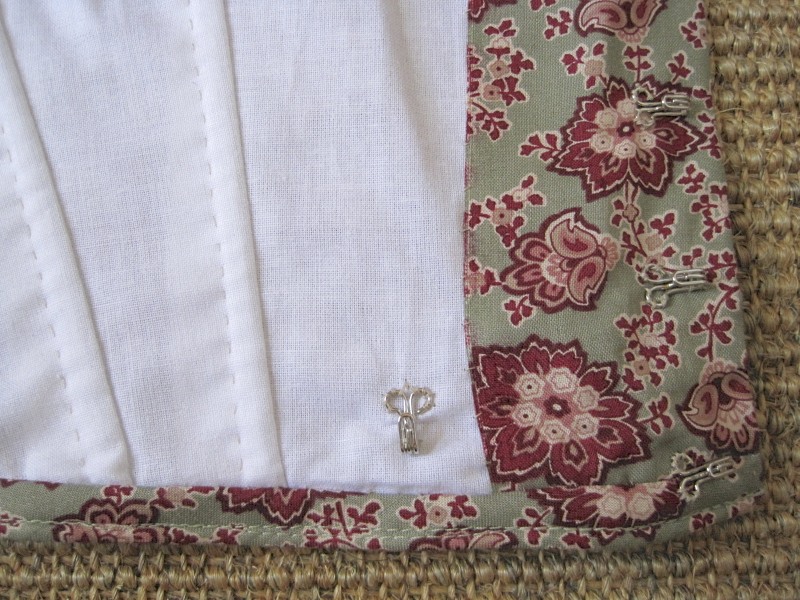
See what I mean? It’s a bit crazy. Oh well. You can see the three bones that run vertically up up the middle of the stomacher. Anyway, work on the jacket has now been put on hold so I can complete some of the other upcoming HSF challenges, but I hope to get back to it soon.
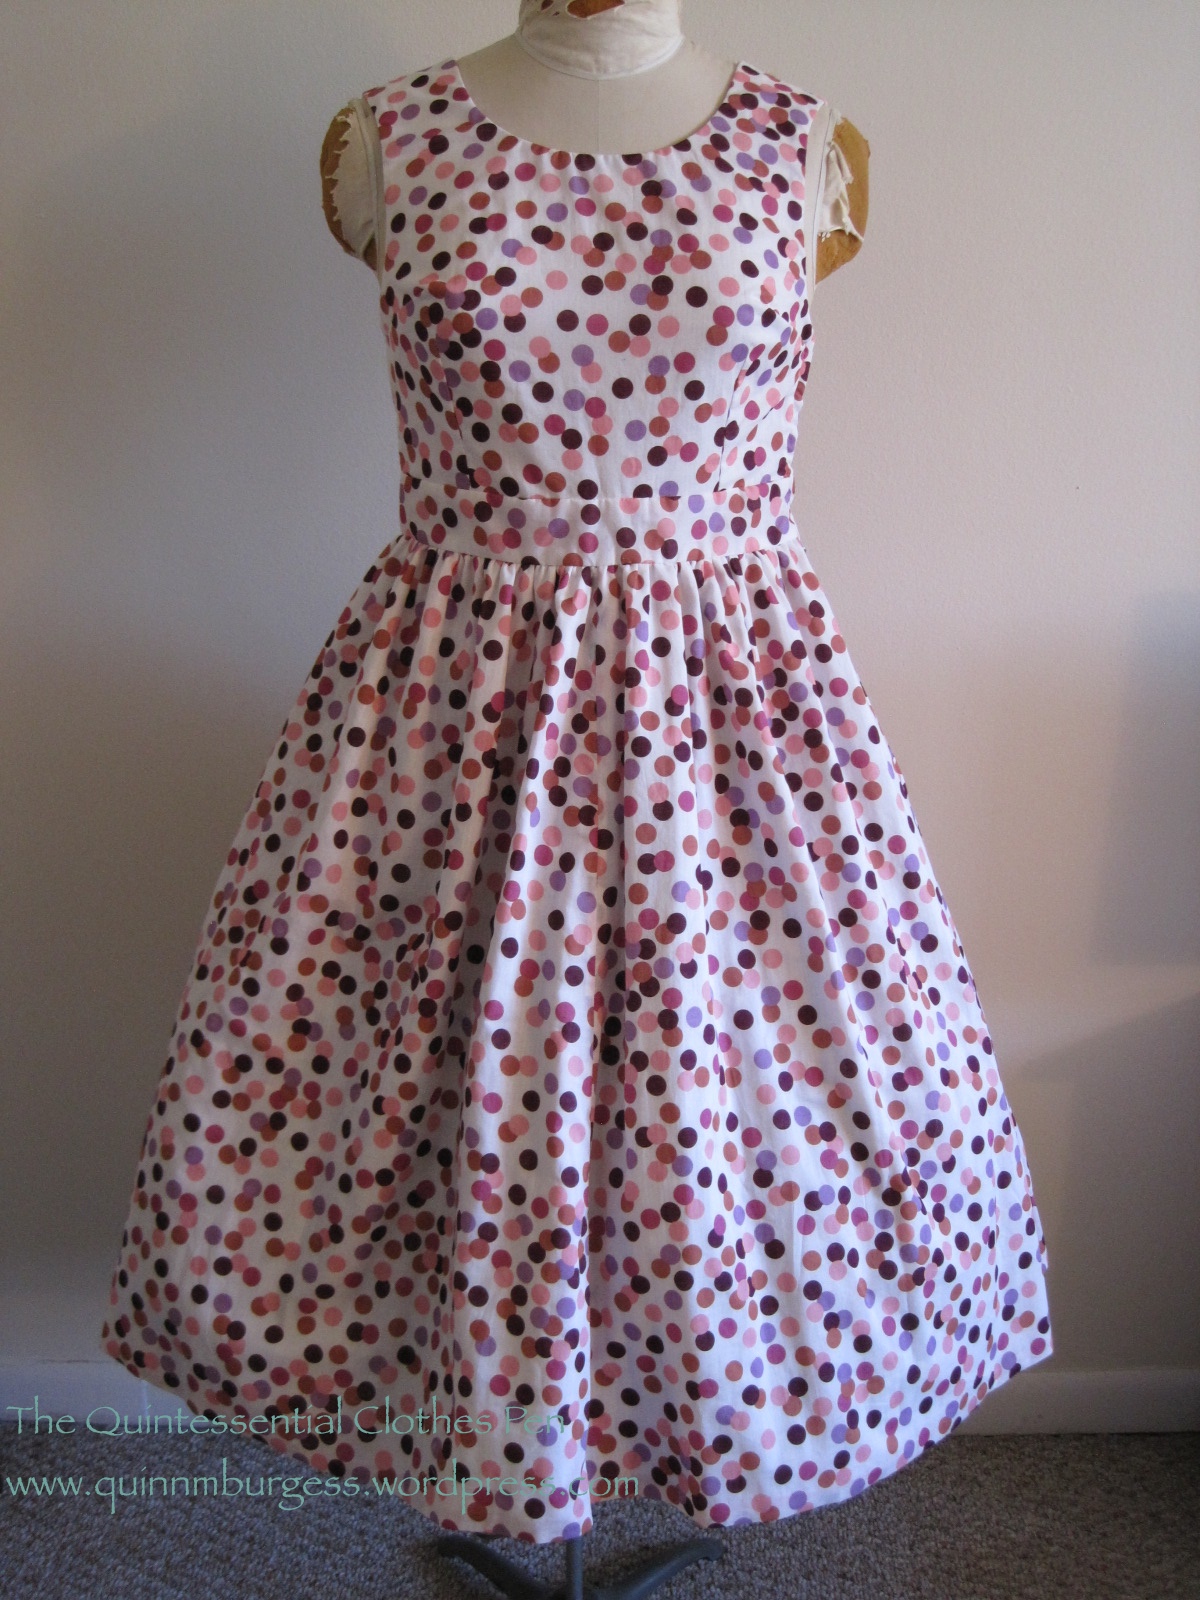
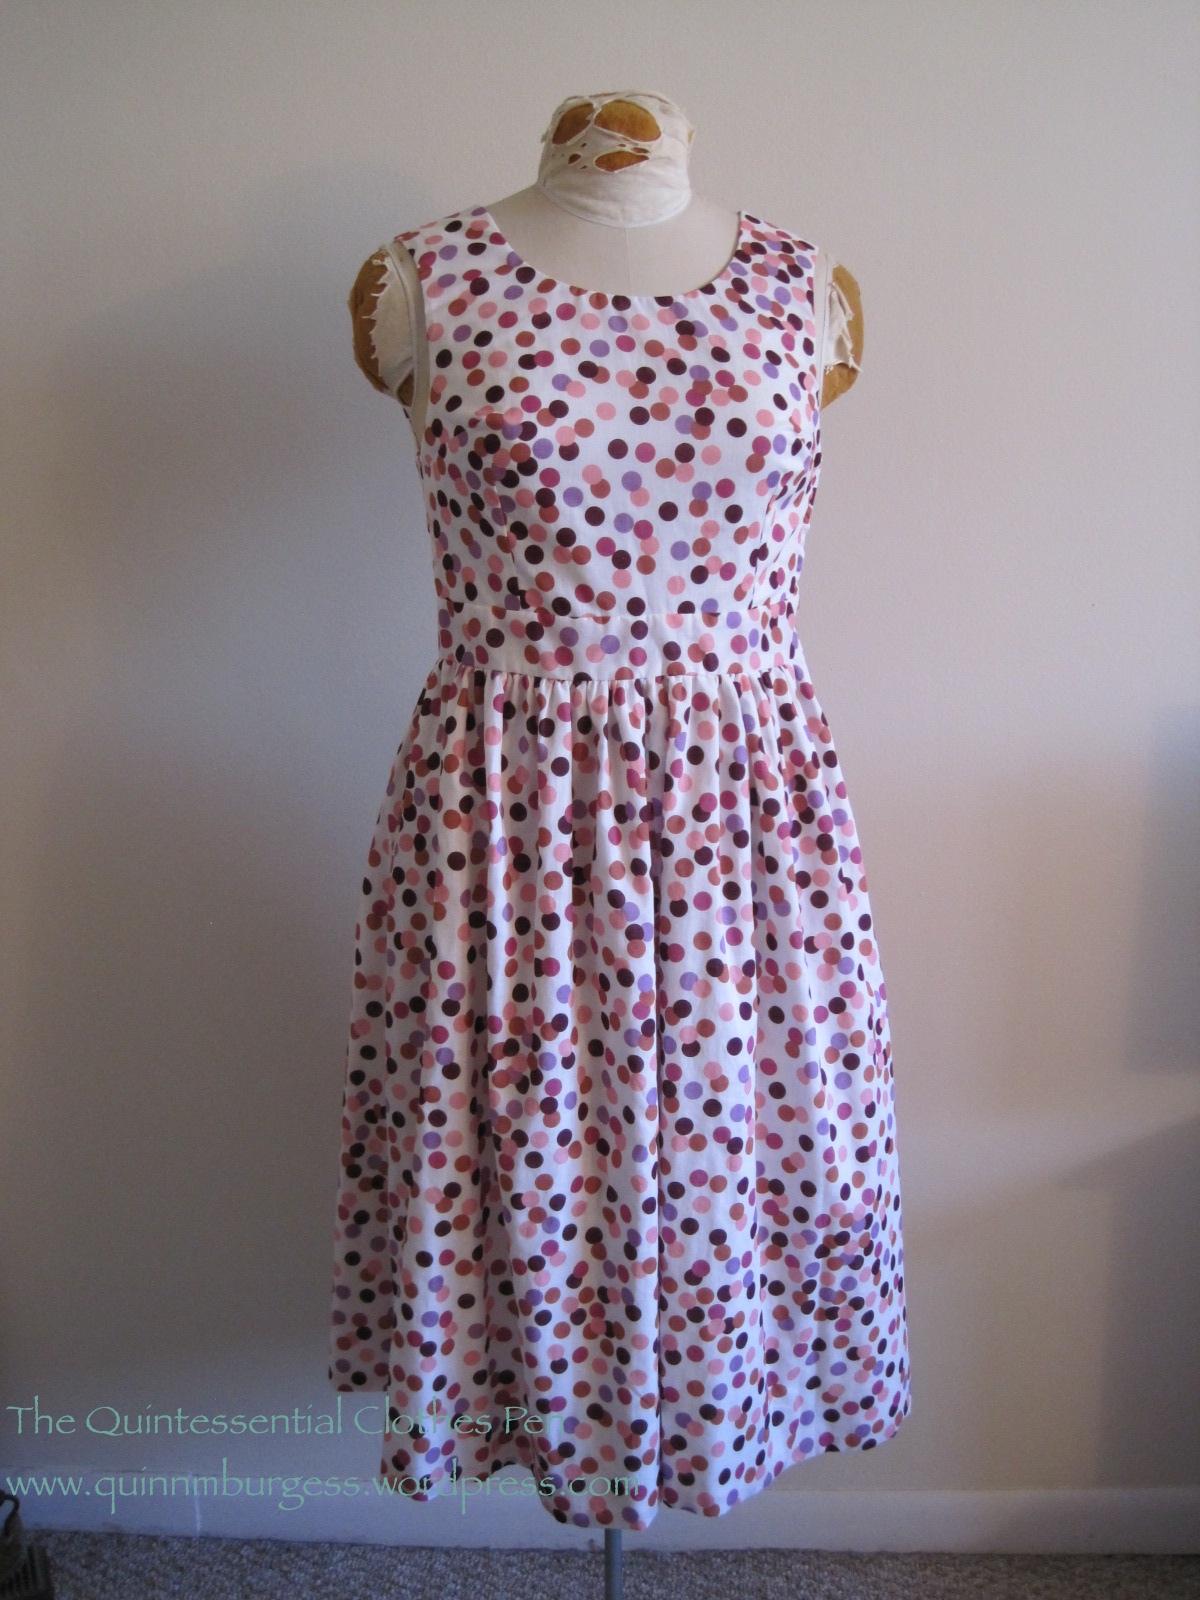
It’s been months since I bought the fabric for this dress (I actually had to look back to see when I purchased the fabric: it was February). I bought it rather on a whim, with the goal of expanding the number of patterned dresses in my historic wardrobe. Well, success! My 1953 dot dress is complete!
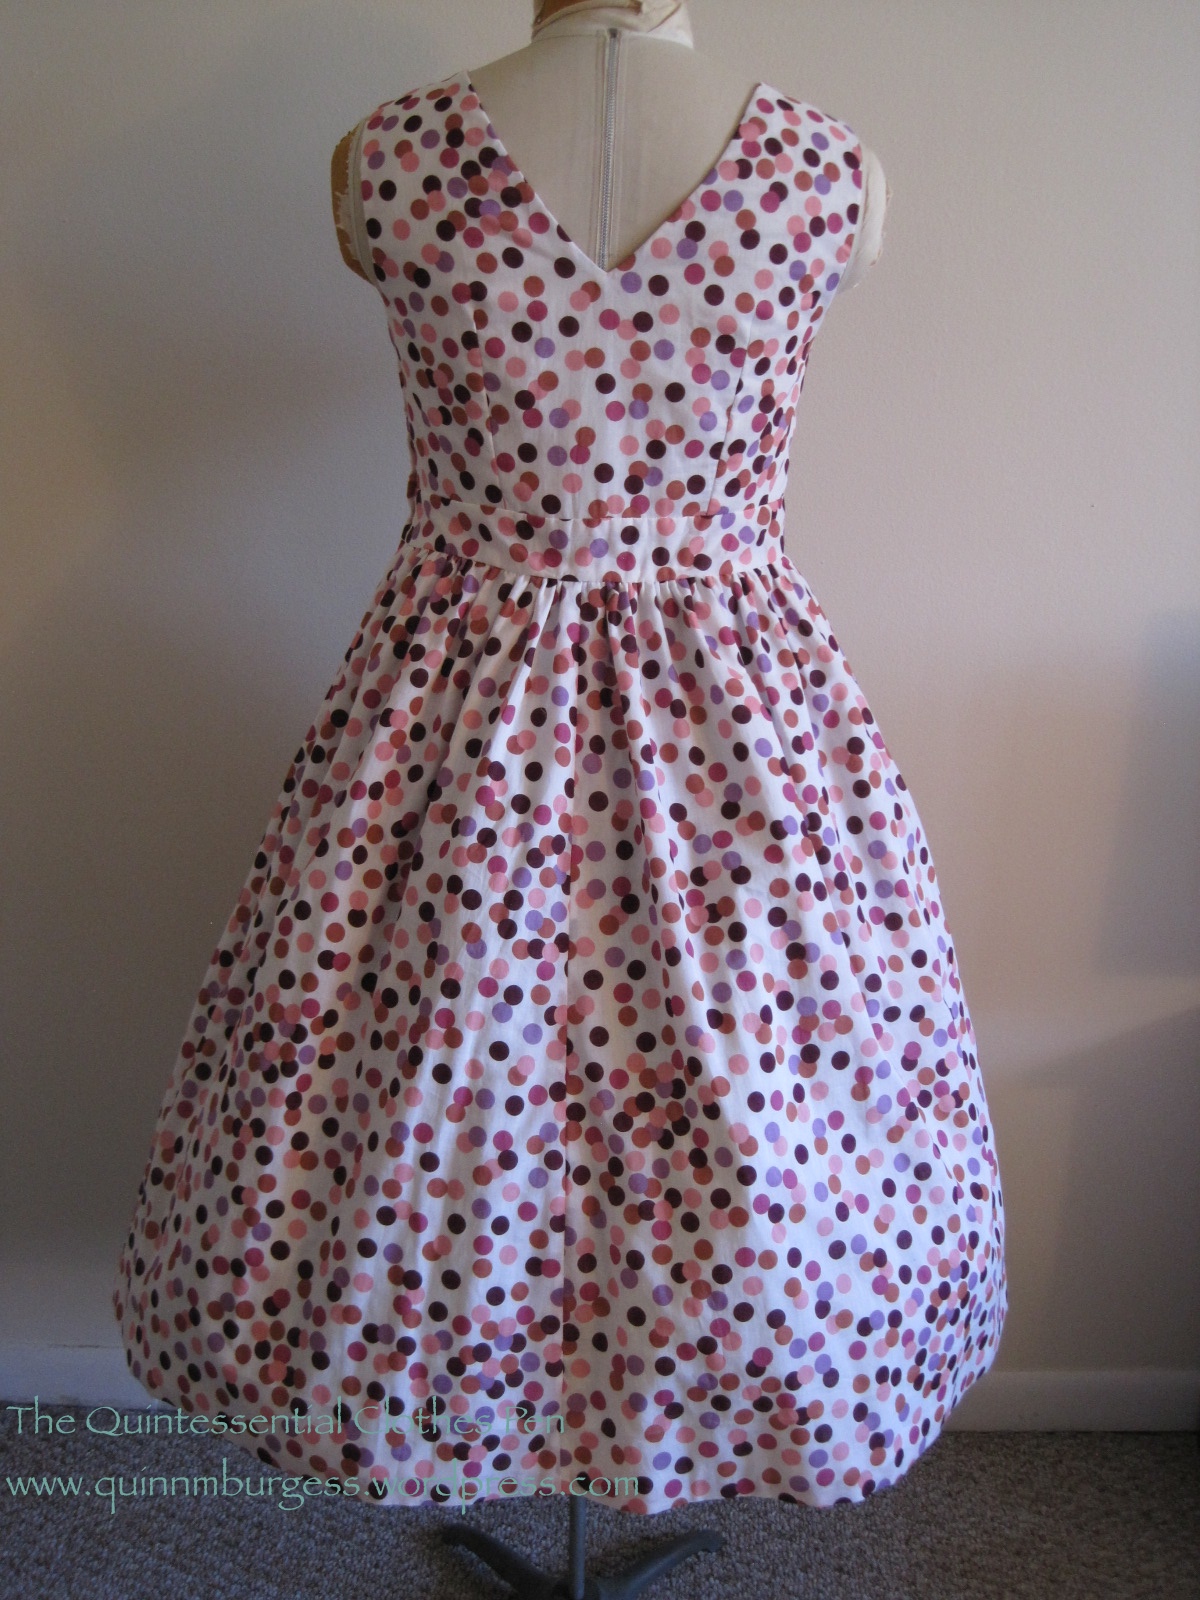
Yay!And the back.
I think it looks more flattering on me than it does on Squishy, but the opportunity I’m hoping to use to wear it and take pictures has been postponed due to the busy lives of my friends. We’ve got a grand plan involving roller skating, a 50s diner, and ice cream. All of those things just scream for pictures!
But for now, the facts (a la the HSF, though unfortunately the cutoff for the HSF is 1937, so this doesn’t qualify!):
Fabric: The dress is constructed from about 3 yds of lightweight cotton lawn printed with dots and lined with some of my white striped $1 a yard cotton fabric. It’s a perfect pairing, because it creates opacity but keeps the lightweight feel of the lawn.
Pattern: The skirt pattern is from a Vogue pattern I bought at Vintage In Vogue last year. The bodice pattern is a simple darted bodice pattern I draped for myself with the neckline adjusted to be a scoop in front and a v in back.
Year: 1953.
Notions: 10-12 yds of pink Hug Snug; white, off white, and pink thread; and an off white plastic zipper (It was all I had that wasn’t dark since I don’t use zippers much for historic sewing…).
How historically accurate?: I give it 95%. Cotton is entirely reasonable for the 1950s. I’m not sure when Hug Snug was first marketed, but the design on the spools certainly looks vintage (and rayon had been in use for at least 20 years by the 1950s). If they didn’t have Hug Snug, they probably had something similar. The pattern was printed in the 1950s and a basic darted bodice is seen on many 1950s dresses and patterns. The sewing machine was in widespread use by the 1950s. The only thing is that my plastic zipper is probably a bit modern (in the 1950s zippers were still metal, I believe).
Hours to complete: 30: lots of interior finishing by machine and hand .
First worn: By Squishy for pictures.
Total cost: My entire 50 yd roll of Hug Snug was only 50 cents, the fabric was about $15, and the zipper was probably about $2… Total: about $17.
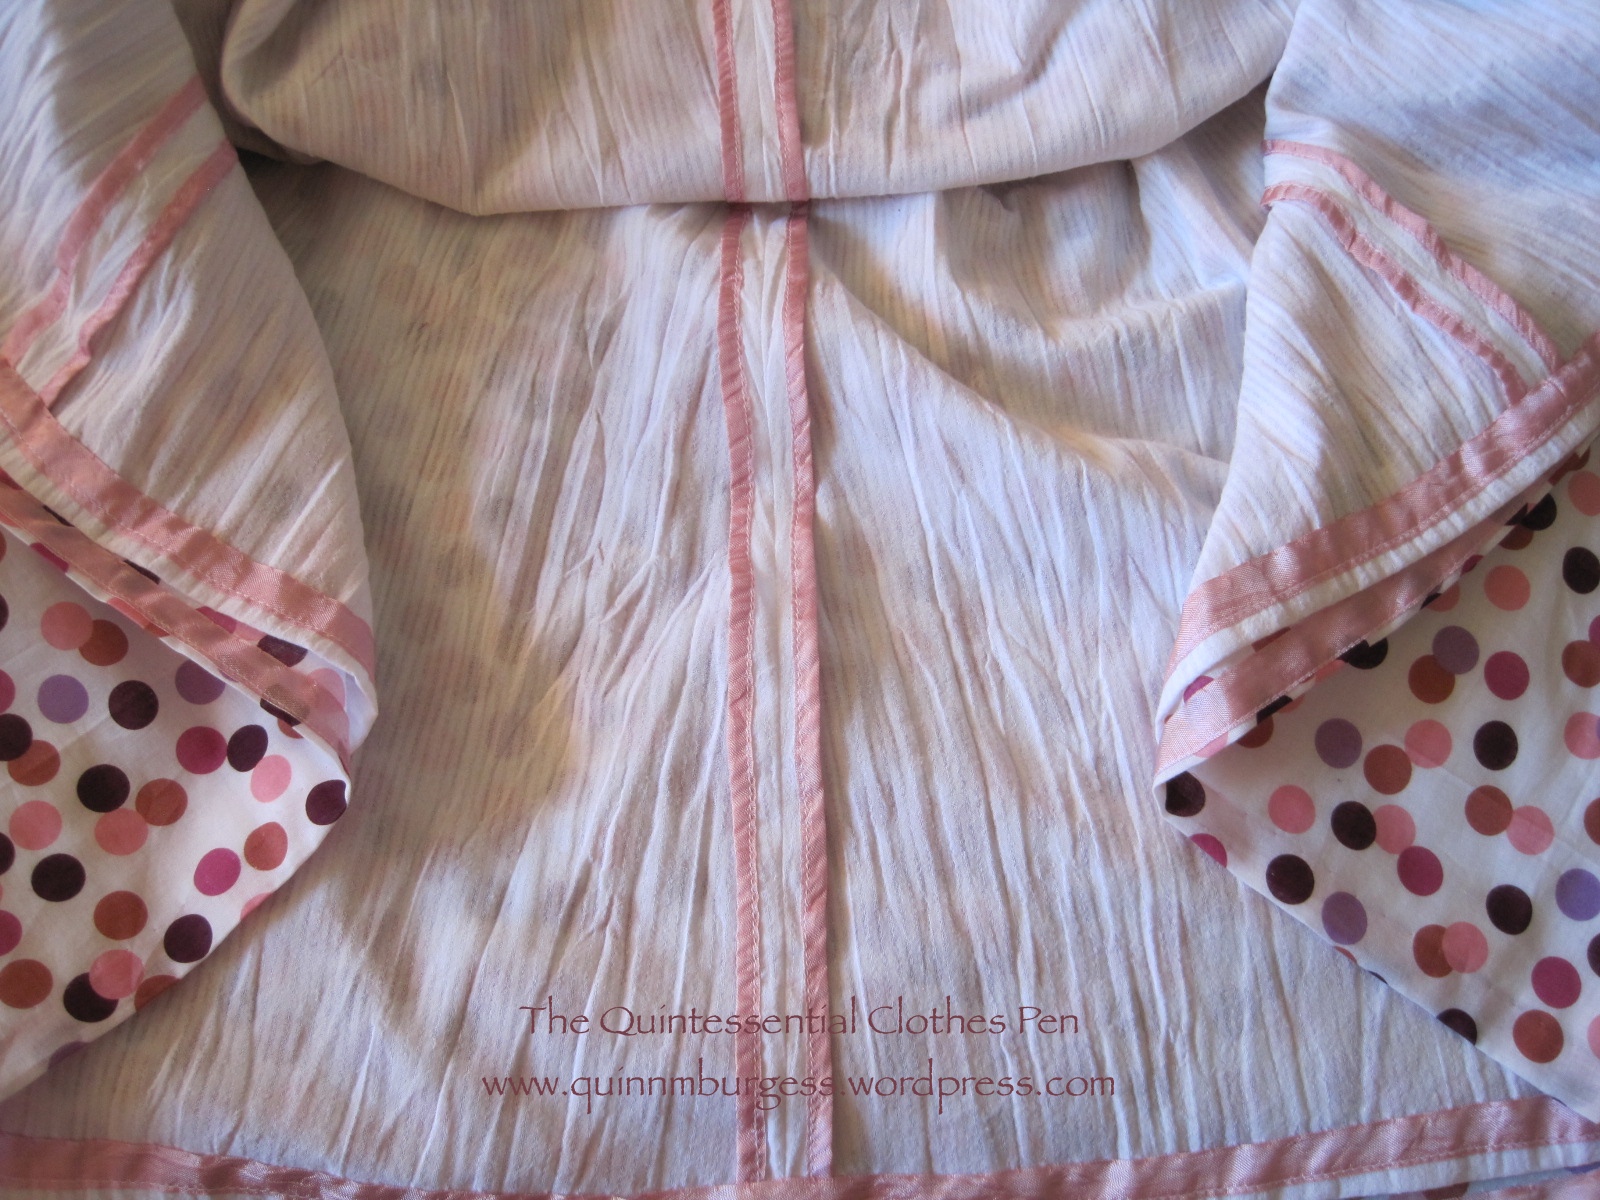
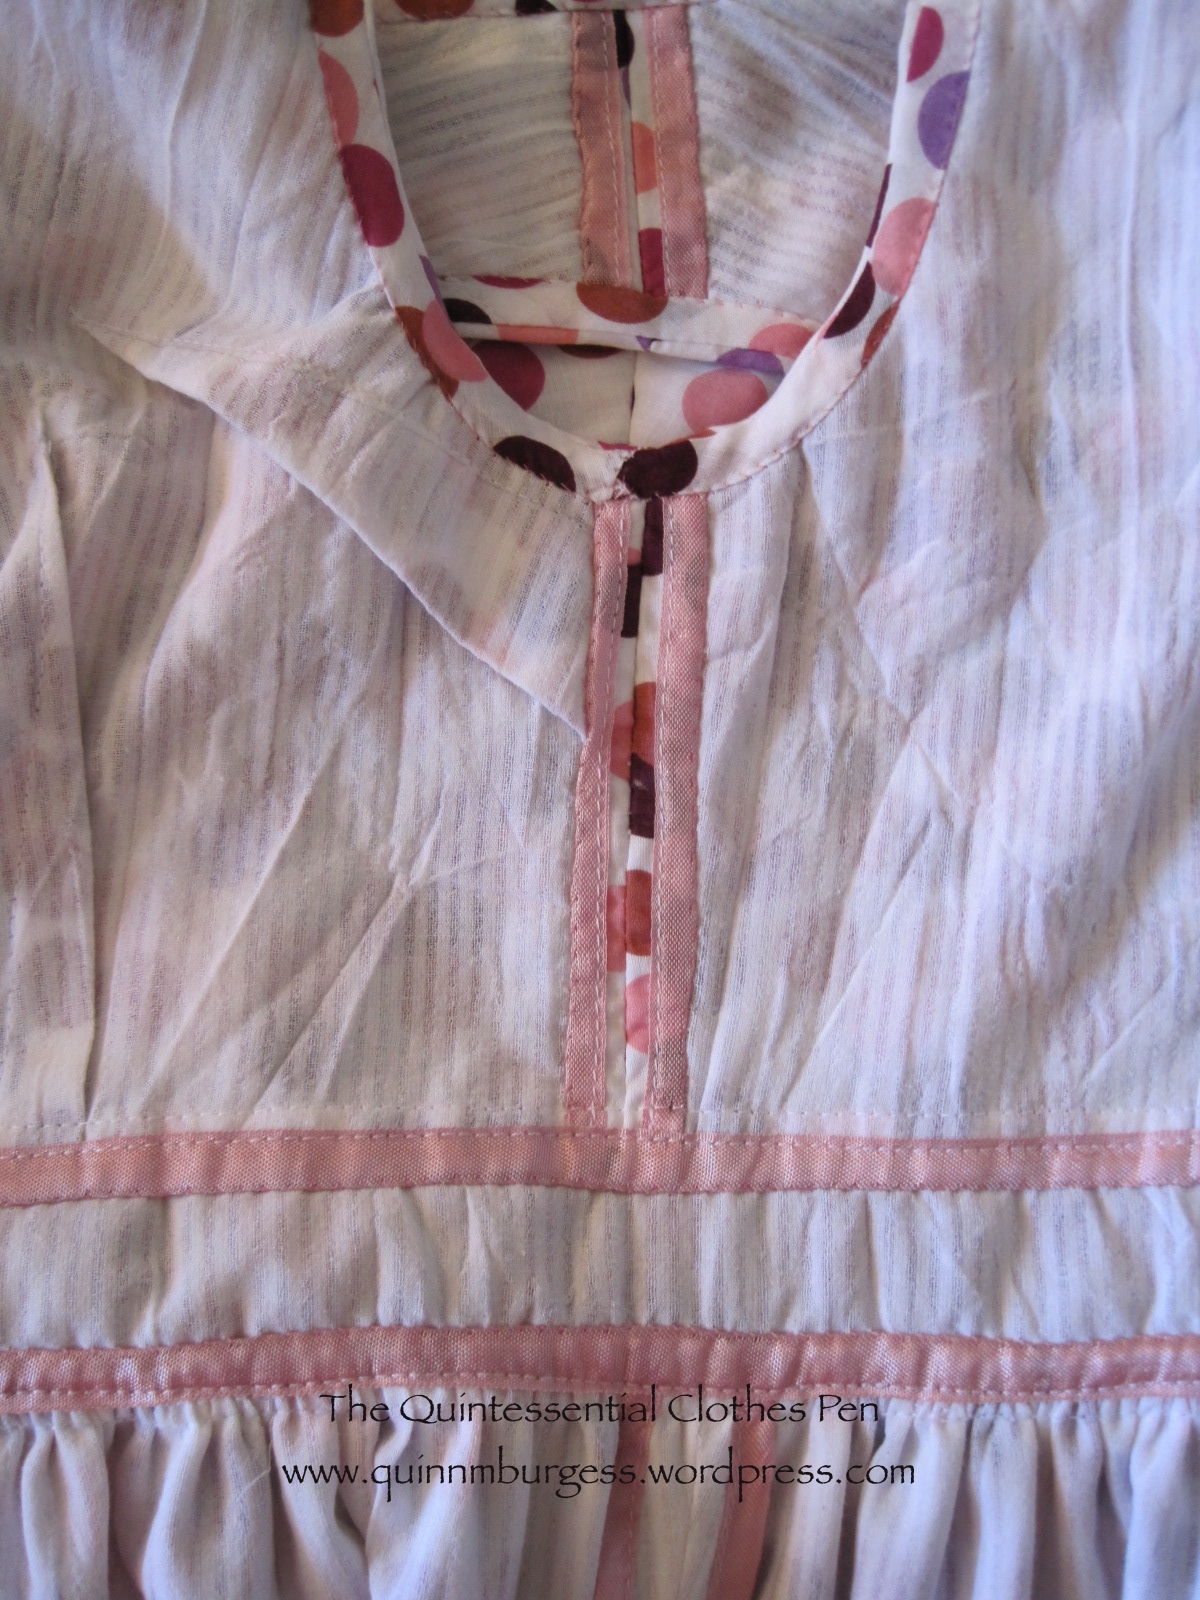
Now, you know that I love paying attention to details. I had a lot of fun spending time on the interior details of this dress. Unfortunately, they won’t be visible, but I know that this dress is as cute inside as it is outside, and now you will, too!
The hems flipped up to see the interior finishing. Both hems are finished with Hug Snug and I also used Hug Snug to bind the seam allowances of the white lining. The seam allowances of the dot fabric are turned and zig zagged (the Hug Snug showed through to the exterior too much when I did a sample using Hug Snug on the dot). The first side of the Hug Snug is machine stitched to the hem and the second side is hand sewn with only tiny prick stitches that go through to the outside fabric so it’s almost invisible.More of the inside of the skirt. It’s like candy, with all the pink Hug Snug seam binding on the white fabric! I love it!Here’s the side seam of the bodice that doesn’t have the zipper. On the bodice the dot and the white stripe fabric are treated as one, unlike on the skirt. All of the seams are bound with Hug Snug. The armhole (at the top of the photo) and the neckline are bound with self fabric bias strips.Here’s a close up of the shoulder seam showing the Hug Snug and the self fabric bias. All of the bodice seam and edge bindings are stitched down to the white stripe lining by hand using whip stitches.Here’s what it looks like without skirt support.
I might even like the inside more than the outside… I’m really looking forward to wearing this at some point! I was even thinking that perhaps I could wear it in my modern life without a crinoline petticoat under it, but I think the skirt is a little too long and the waist is a little too high. If I had more of an every day vintage style I might be able to pull it off, or if I was getting dressed up, but for normal days, unfortunately, I don’t think I’ll be wearing it around my everyday life. All the more reason my friends need to clear their calendars!!!
A few weeks ago, I was super excited and motivated that I had time to work on my Curtain Along jacket. I made the changes I had deemed necessary from my last fitting and was feeling good about getting it done and how much I liked it… but then I tried it on again to determine center front and decide about trim… and there were new problems, and I was so discouraged!
The problems sum up in the following way:
Problem #1- The sleeves that go with the jacket in Janet Arnold just do not work for me without serious alteration. The crown isn’t large enough for me to be able to move or be comfortable, and the sleeve is at least 4 inches too short. With the sleeves set in the jacket was pulled all over the place and was so unbearably uncomfortable! And the annoying thing is that in the mockup the sleeve worked!
After ripping the sleeves out, and being thankful that, at least, they were what was causing the bodice to do all sorts of wonky things, I bounced back and came up with a solution. I’ll use the sleeve pattern from my 1780s Robe A La Anglaise and recut the sleeves. I’ve got extra Mineral Felicite fabric, so that’s no problem. On the other hand, I have only tiny matching linen scraps left. Of course, it would be totally period correct to use a different linen to line the sleeves than what I used to line the bodice. But piecing is also period correct, and I decided to use all my tiny matching linen scraps to piece together pieces big enough to cut out the new sleeve pattern.
Extreme piecing. I’m amused by it at this point. This sleeve is only partially completed (there is more piecing to be done!) but you can see the original pattern shape.
I haven’t finished piecing, or cut out the new Mineral Felicite sleeve, or sewn the new sleeves in… but I think that my solution will work, so we’ll call that problem solved. Whew!
Problem #2- After my initial fittings, I had to add an extension to my center front pieces to get the jacket to close comfortably and without wrinkles. It barely closed in my mockup and I thought it would be enough, but in the real fabric it just wasn’t. So I pieced on extensions. Piecing is totally period correct, but this piecing is so… obvious and symmetrical.
Center front piecing. The yellow headed pins are my center front line. I haven’t done anything about center front since I put those pins in!
This problem is still unresolved. Plus, I can’t decide how I want the jacket to close, anyway. Pins? Hooks and loops? If you have any thoughts about the piecing problem or the closure indecision, please do share!
Problem #3- Trim! I was going to trim the jacket with box pleated blue silk ribbon around the neck, front, hem, and cuffs. I thought I had enough ribbon (6yds), but in the end I think I have not quite enough to trim all of those edges. AND, the blue didn’t seem to pick up the blue in the print as much as I originally thought it did, and I’m worried that even if I do less pleated trim (say, not the sleeves, or something) the trim will look super costume-y and not 18th century. I also have a gold silk ribbon (5 yds). Not enough to trim the whole jacket, but what if I scrap the idea of trimming the edges and instead do some sort of center front bow trim/something of some sort to hide the piecing using the gold? I think the gold looks nice… but what sort of trim would I do that wouldn’t look made-up and costume-y???
Blue silk ribbon. There’s blue in the flowers, but perhaps not enough blue to make the blue ribbon make sense???Gold silk ribbon. Too match-y?Blue and gold together, for comparison.
I have no idea what I’m going to do about the ribbon issue. Bows at center front seem to be used on stomacher front jackets, and stomacher front jackets seem to be exclusively pet en l’air styles. This jacket is not a pet en l’air, though it could be altered to have a stomacher front (thus eliminating the piecing issue). Sigh. I just think myself around in circles. So again, I appeal to you! If you have any thoughts, please share!
Rather more often than I would like, there are trying times in my well dressed historic life when I volunteer/am obliged to help with refreshments at an event after already being dressed in a fabulous ball gown. “Danger! Danger!” is the cry that should be shouted high and low, but, alas, in the past I have had to hope for the best without protection for my dress.
Granted, I’ve never had an awful accident happen. And though it’s possible I sound disgruntled, I’m quite willing to help with refreshments, even if I’m already dressed. There was a single incident a few months ago, however, when a small bit of unwanted refreshment related stain-age made its sneaky way onto my dress. I was super, super grumpy!!! And I decided, at that point, that I needed protection going forward!
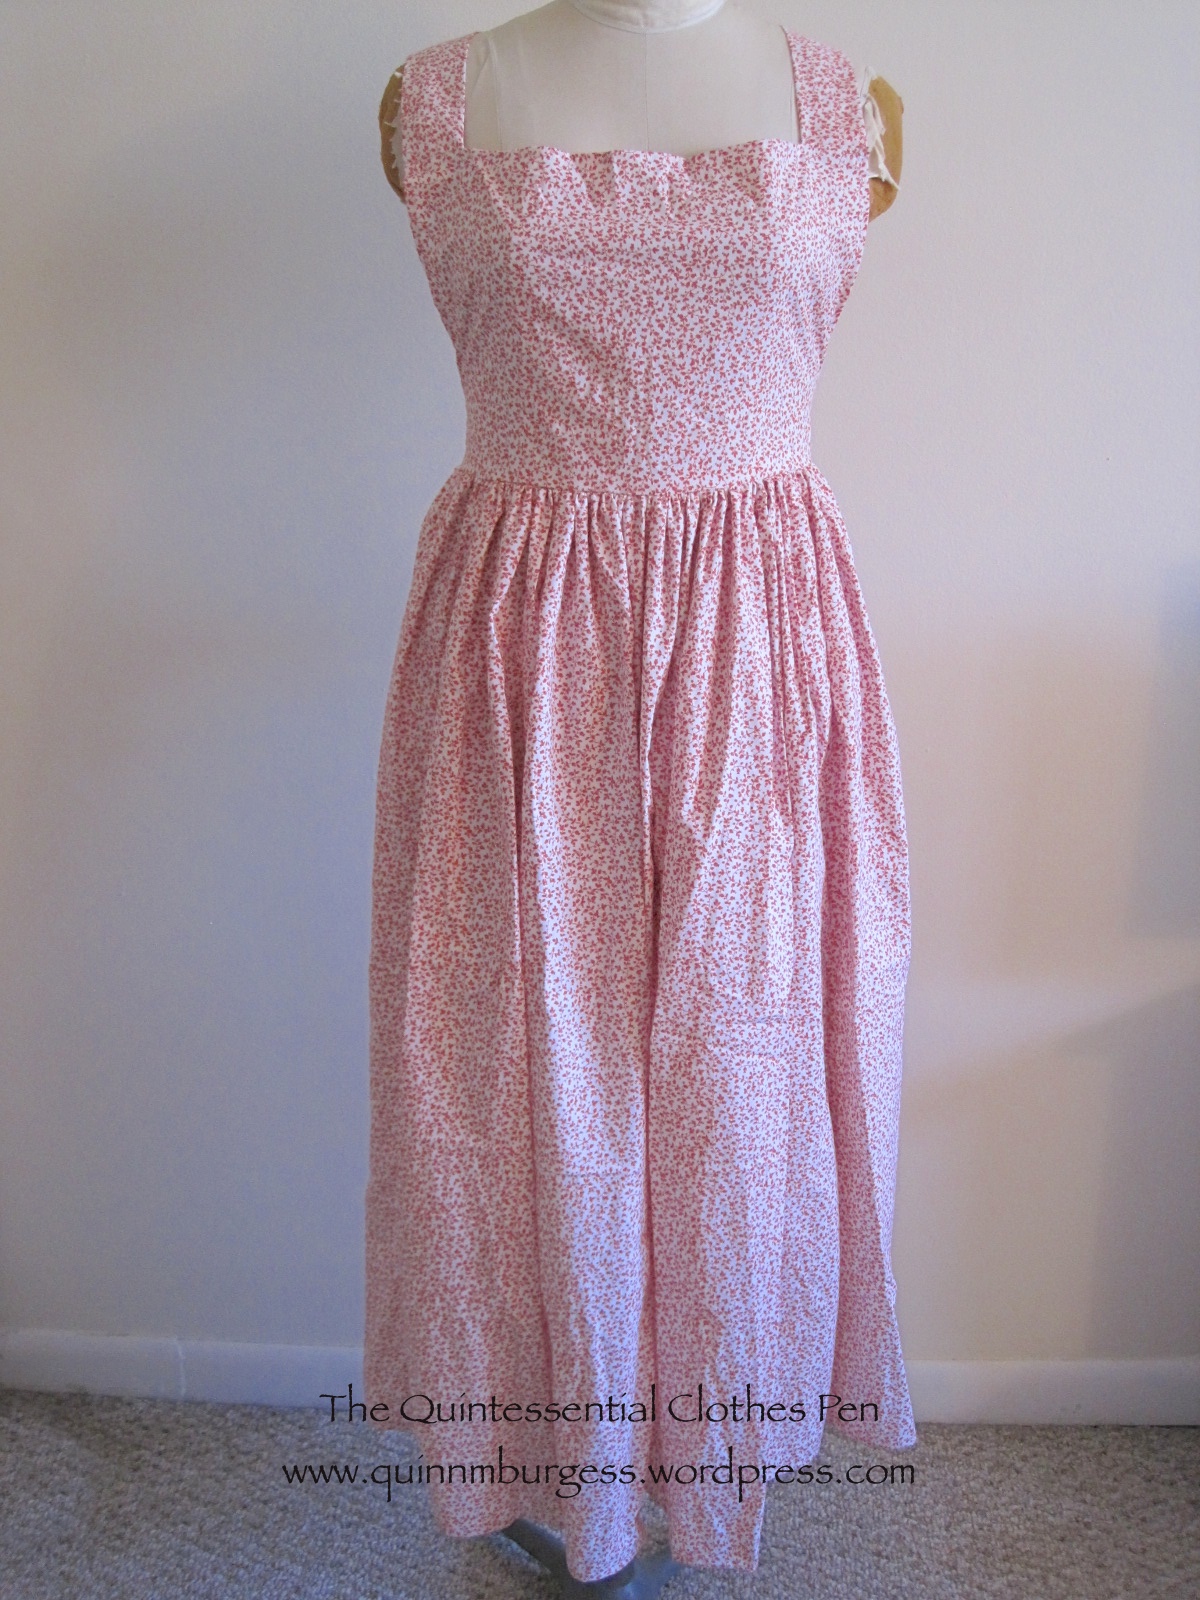
I’ve finally acted upon my decision and sewed up a Refreshing Apron to wear over my dress when helping with refreshments! I’m quite pleased with it and excited to put it to use at some point in the future. I’ll have to get a picture when I’m wearing it over a dress, but for now, I’ve got pictures of the apron on Squishy.
My new Refreshing Apron!And the back. Isn’t it so cute???
I wanted the apron to meet the following conditions: have a full skirt so it can work over everything from Regency to Civil War with maximum coverage, be easy to pattern and easy to sew, and be cute–I really wanted the crossed back. The apron is machine sewn everywhere, except for the ends of the ties and the buttonholes. Yes, the buttons and buttonholes are functional! Perfect for getting the apron on or off with large or elaborately styled hair!
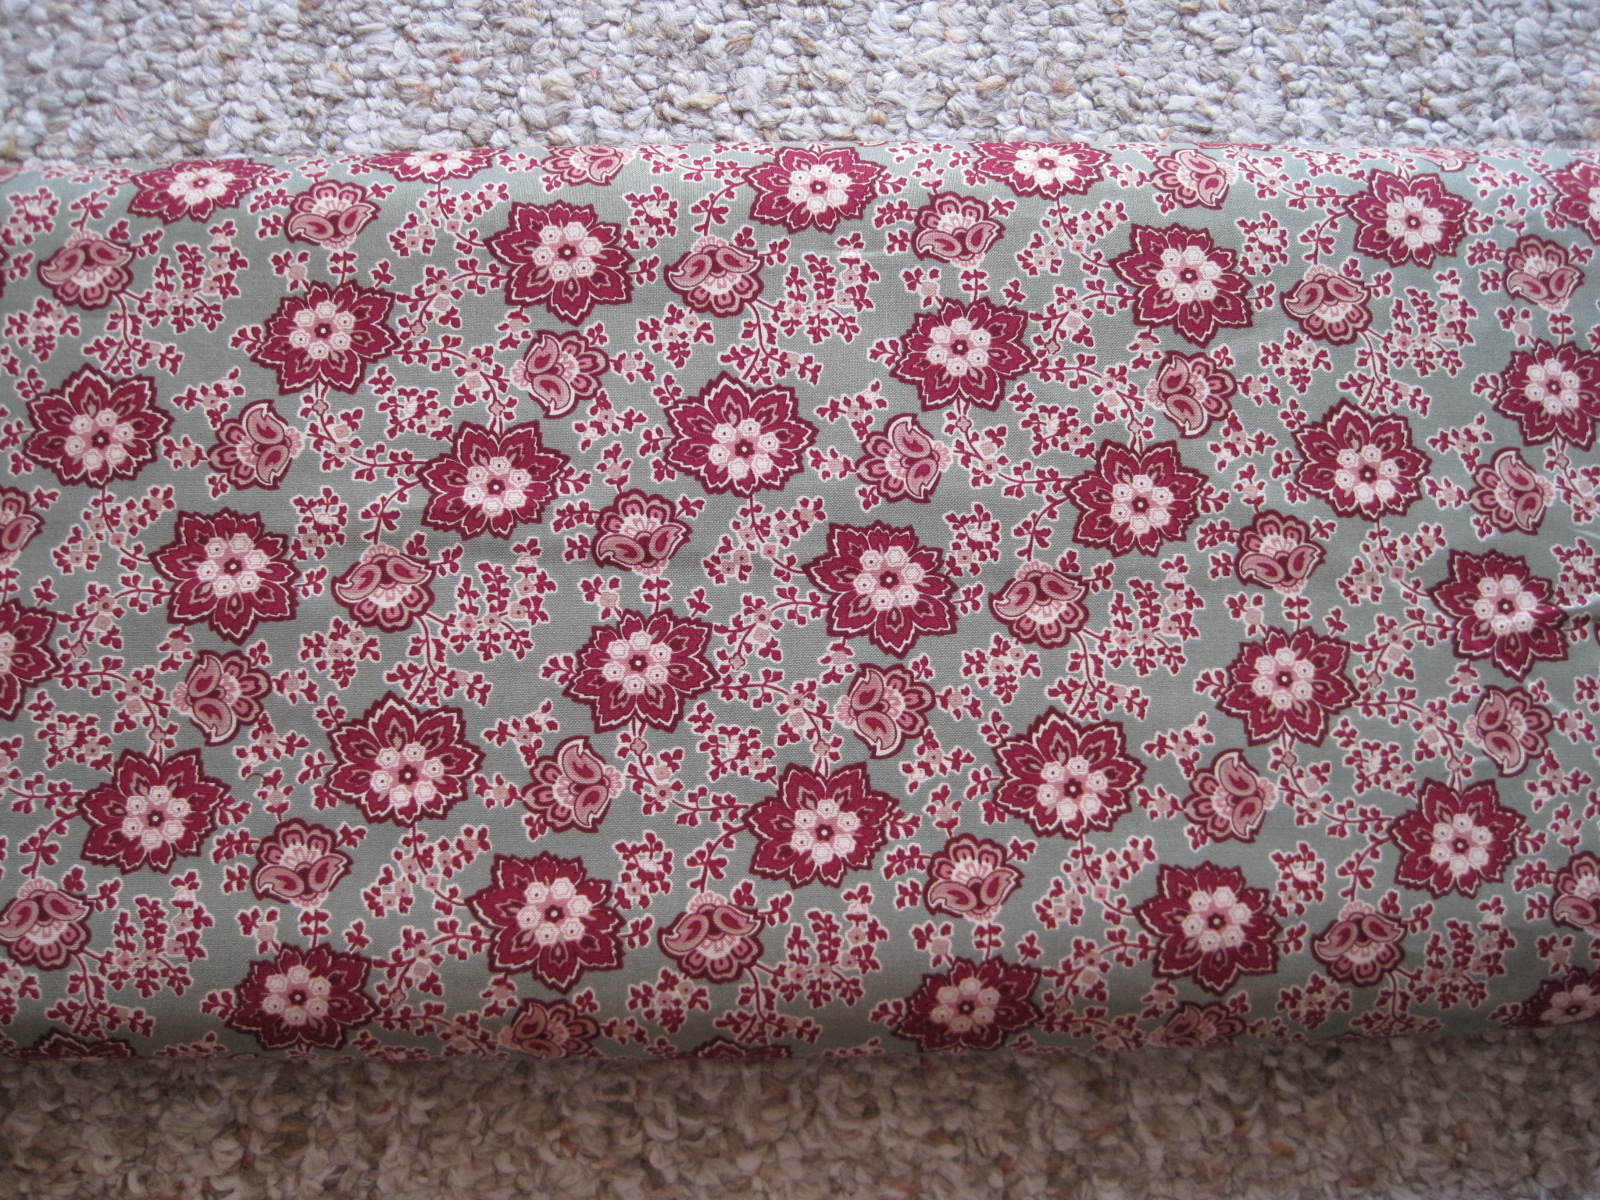
Hand sewn buttonholes and a close-up of the print.
The entire apron is made of rectangles. The skirt is 3 rectangles seamed together, the bib is a rectangle, and each tie and strap is a rectangle. I used about 2 1/4 yds of printed cotton from my stash, and now I can’t seem to remember the width. 45″ sounds pretty plausible for a printed cotton.
The print is rather red up close, but from a distance it blends with the white background and looks more pinkish. I rather like the grown up pink look! I’m guessing I’ll have opportunities to wear this in October or November…
“Georgina” is the name I’ve chosen for my new 1858 cotton print day dress. Being a day dress from a new decade (the 1850s), makes her a fabulous new expansion in my wardrobe of historic clothes!
Georgina: 1858 cotton print day dress.Back view.
The dress is constructed from about 5yds of a Marcus Brothers reproduction historic cotton print I purchased earlier this summer. I used Past Patterns #701 and #702 bodice patterns as a starting point, though I had to make significant alterations to achieve a comfortable and pleasing fit, especially in the shoulder/armsceye area. I used the darted pattern for the fitted lining and the gathered pattern for the gathered exterior. The sleeves are the bishop sleeves from one of the patterns, though I totally changed the cuff design.
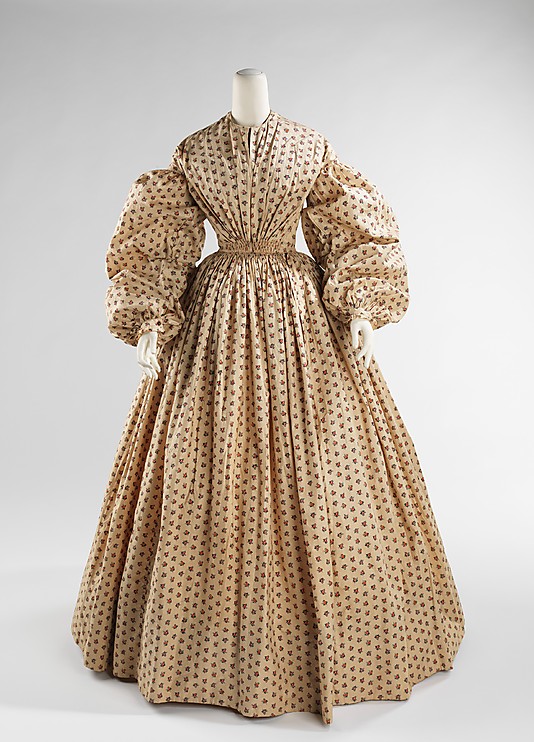
The cuff design and a lot of other fiddly details were taken from this c. 1852 dress at the Met (pictured below). If you zoom in on the cuffs on the Met website you can see that they look just like mine (pictured later in this post)! I also used the following design elements from the Met dress: piping at the neck and waist, gathers that are tacked down beyond the seam line, button closure on the cuffs, and cartridge pleating all around the skirt. I have a whole pinterest board of inspiring images for this dress and hat ensemble, but this dress is the one from which I took the most information and detail.
c. 1852 Dress, Met.
Here are a few pictures of the fiddly details I integrated from the Met dress:
Gathers at the center back that are tacked down beyond the seam line. I like the controlled look these extra stitches produce.Self fabric cuff finished with a small ruffle. The cuffs close with a hand sewn buttonhole and button.
Georgina’s bodice is lined with white cotton. There are hand sewn boning channels sewn into the bodice in the front darts on each side and on the sides. The bones are then slipped in between the layers of fabric. I didn’t have the right length metal bones, so I used heavy duty plastic wire ties–but–I cut them in half the long way so they are much skinnier than normal (they just don’t look at all historically plausible in their normal width, in my opinion). Once they’re in the bodice, you’d never know they are plastic instead of metal.
The proper left side of the bodice: hand stitched boning channels in the darts, front hook closure, a hook to attach the skirt and bodice together, and nicely finished piping along the bottom edge.
The bodice is finished at the neck and bottom edge with piping that is nicely whip stitched to the inside. There is also piping in the armsceye seam. The sleeve seams are french seamed by machine with the opening seam allowance at the cuff turned twice and stitched by hand. The other bodice seams are all machine sewn and the bodice is hand finished. The bodice closes at center front with hidden hooks and bars. It also hooks to the waistband of the skirt to keep the two pieces from gaping while worn.
The skirt has a wide hem that is hand stitched. The long skirt seams are machine sewn. The waistband is the same cotton print with an interfacing layer of canvas to create stability. The skirt is cartridge pleated and hand sewn to the waistband. There is a single layer of lightweight flannel folded into the cartridge pleats to give them a little more bulk than the thin cotton had on its own.
I also took the time to add pockets to this skirt! This turned out to be really useful for storing gloves, sunglasses, chapstick, a fan… with two pockets a lady can store so many things! Here’s how I made them and sewed them into the skirt:
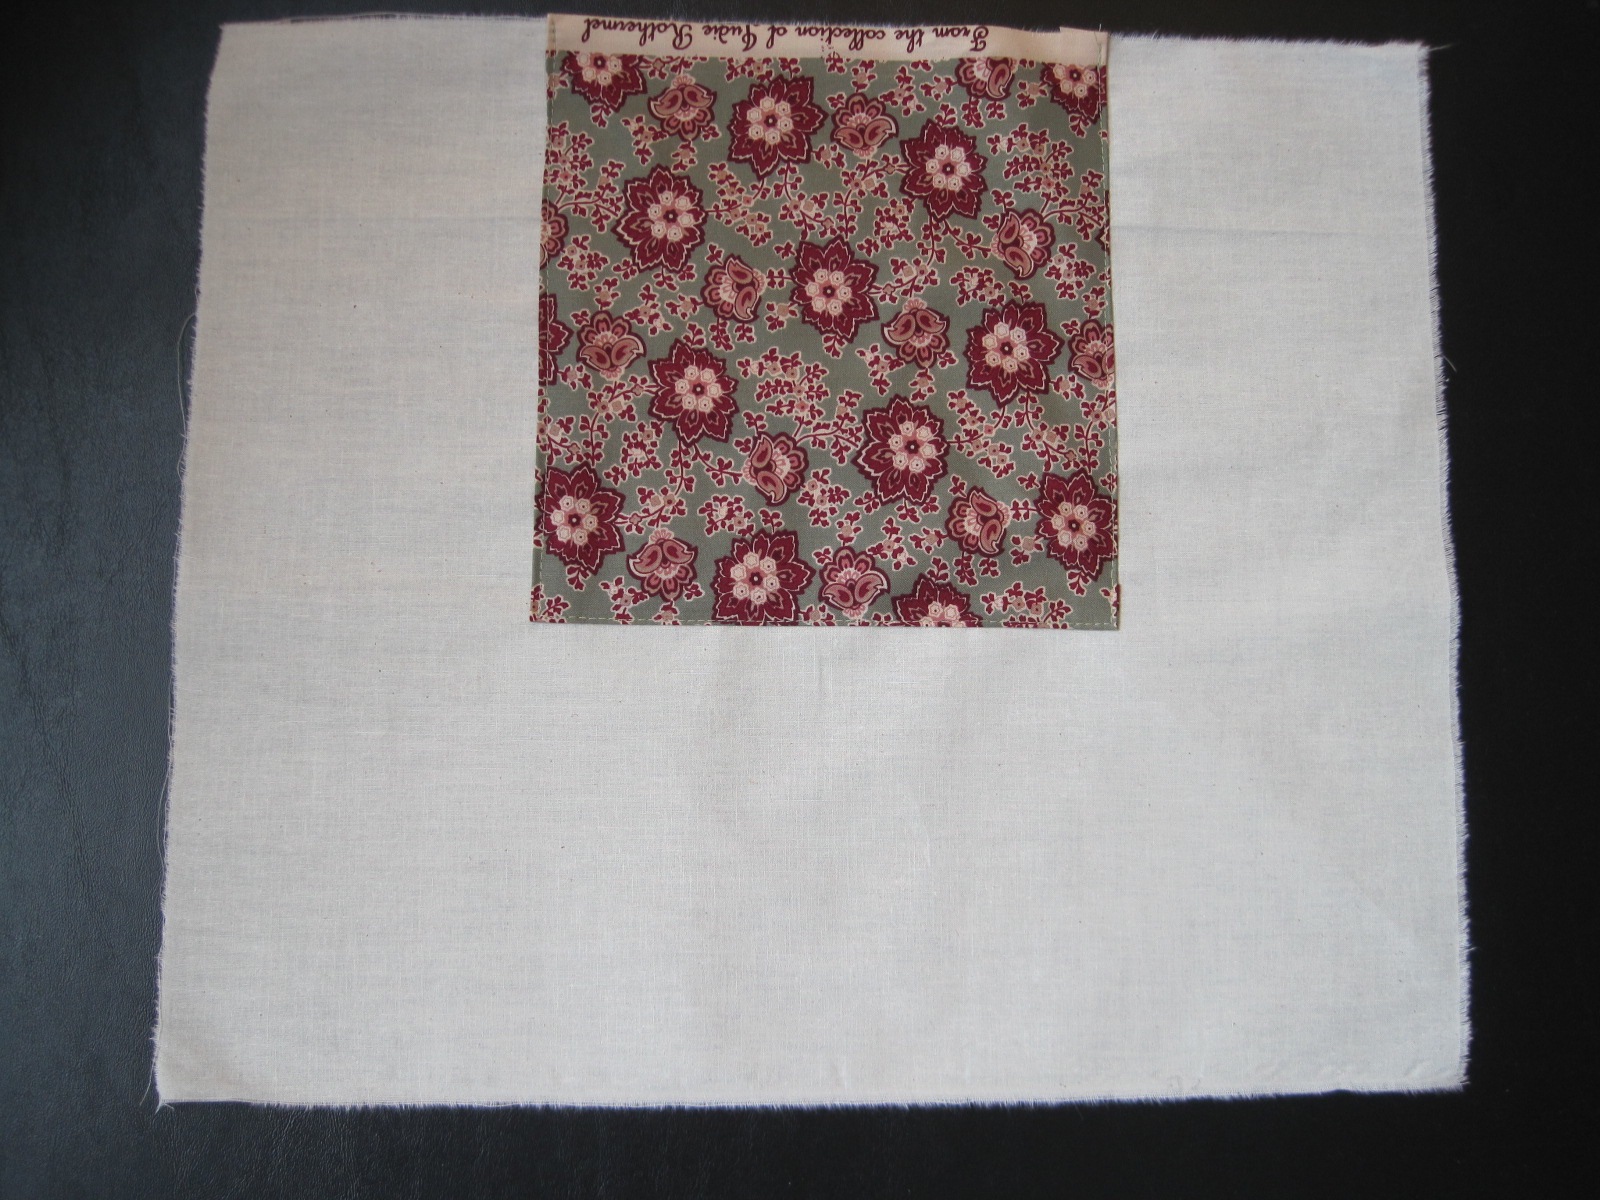
The pockets are muslin rectangles with a piece of the cotton print topstitched on the top center (this is the part of the pocket that can show while I’m wearing the dress and taking things in and out of the pockets).After the cotton print was sewn on I french seamed the vertical seam and then the bottom seam by machine, making sure that the cotton print stayed centered. On the left is what a pocket looks like with the french seams facing out. On the right is a pocket turned inside out to show the cotton print centered at the top.I left the top part of the vertical seam open and hand sewed that into slits in the skirt using a whip stitch through the pocket and the seam allowances (essentially under stitching the pockets, which keeps the muslin from rolling to the outside!). The pocket slits were made after the skirt was cartridge pleated and attached to the waistband, so the slits stop below the cartridge pleats (it was way too much thinking to try and figure out where the pockets should be before cartridge pleating the skirt!).It worked wonderfully, and the pockets blend right in and are hardly noticeable, even when they gap open! (I’ve turned the edges of the pocket so you can see the muslin pocket for this picture, but they don’t actually stay turned out like that, and you can imagine how the print fabric of the skirt blends right into the print section of the pocket).On the inside, the top edge of each pocket is stitched to the cartridge pleats to evenly distribute the weight of anything in them.
Georgina cost about $18: $15 for the fabric and about $3 for hooks and eyes. The various other fabrics (cotton lining, canvas interlining, etc.) were all in my stash from previous projects (yay!). I first wore Georgina last weekend to a vintage dance performance on George’s Island in the Boston Harbor. I’ve got pictures of the performance and pictures of island exploration coming up soon!
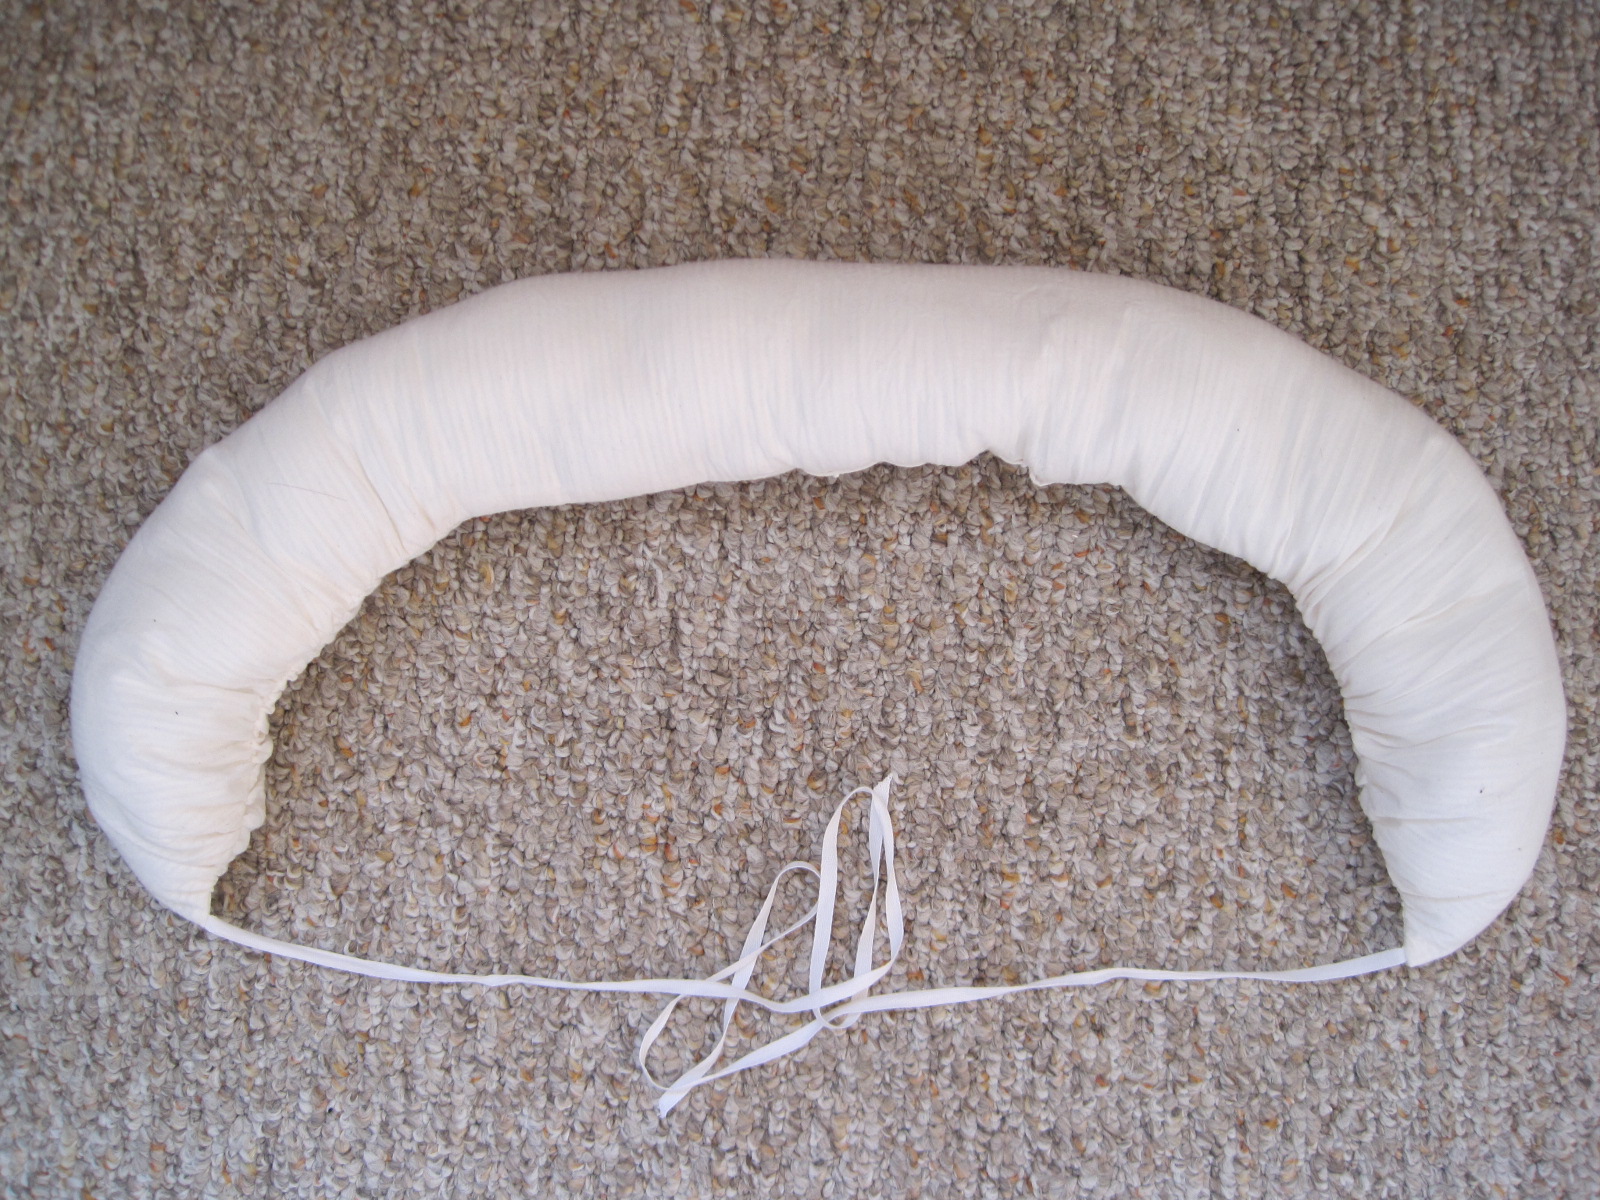
When I posted about my new apricot 18th century petticoat, I also mentioned that there was a sneak peak at my new bum roll in the pictures. Remember? The bum roll fulfills the HSF #15 Challenge: White. It’s a rather simple accessory, so there’s not a whole lot to say about it.
Ooo… A white bum roll!
The facts:
Fabric: About 10″ white striped cotton
Pattern: None, the bum roll is just a rectangle that’s gathered at the sides and tapered a little toward the front points.
Year: Loosely 1700-1780.
Notions: Thread, poly fill, 1/4″ white cotton tape for ties.
How historically accurate?: I give it 80%. Bum pads/rolls in the 18th century were probably not made of cotton or stuffed with poly fill. But the shape achieves the desired silhouette and is in the vein of research I have seen on 18th century bum rolls.
Hours to complete: 1
First worn: Well, Squishy wore it for pictures!
Total cost: The fabric was $1 a yard, so about 30 cents.
The gathers are what creates the crescent shape. It pulls in to be a tighter curve when tied around the body as well.
A few posts ago, when I introduced The First Picnic Of The Summer, I mentioned my involvement with other events that same weekend. It’s time to share pictures of another event from that weekend: an afternoon of music, dancing, and Model Ts at the Braintree Historical Society in Braintree, MA.
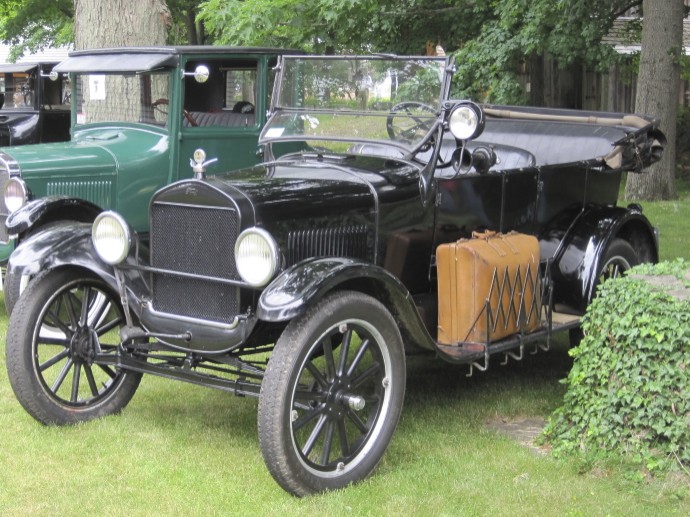
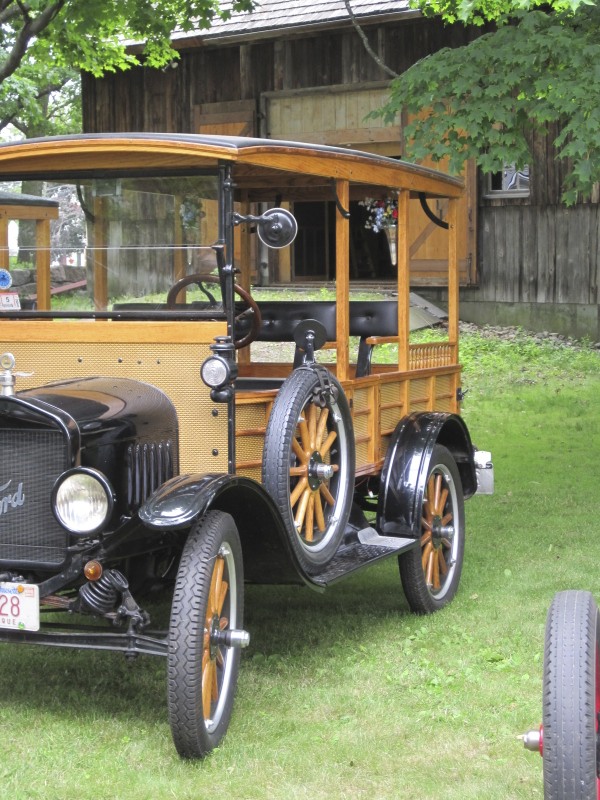
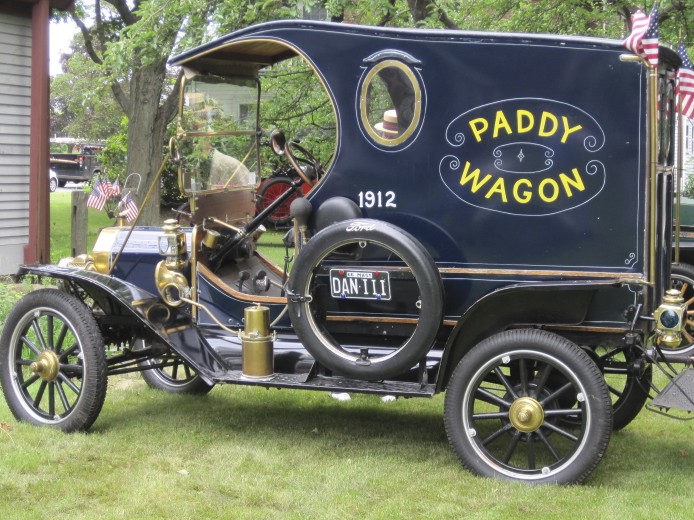
Let’s start with atmosphere: some Model Ts! Model Ts were produced between the years 1908 and 1927 by the Ford Motor Company. My grandfather worked for Ford years ago (though not on Model Ts!) and I have family members who still live in Michigan, so I feel a special connection to that part of car history. As far as I could observe, all of these Model Ts were still operational, drivable, and licensed to drive on the street! Neat!
Front view of a Model T.I love the luggage storage on this one!Pretty swanky, with all that gleaming wood!I like that this picture has a modern car in the background!Need I say more? It’s labeled!“R. I. Brow & Son; Oil Dealer” I love it! Especially with the canisters attached.Two Model Ts parked in front of the barn.A pretty fabulous red Model T with be-boater-ed gentlemen lurking behind it… (They had no idea I was taking a picture! bwhaha!)
The reason we were in attendance at this event was to do a few small dance performances. We did the same 20s dances that we performed at the Great Gatsby: the Charleston, Tango, Foxtrot, and One Step. I don’t have pictures of the performances… but in between performances we had time to wander amongst the Model Ts and have a picnic lunch.
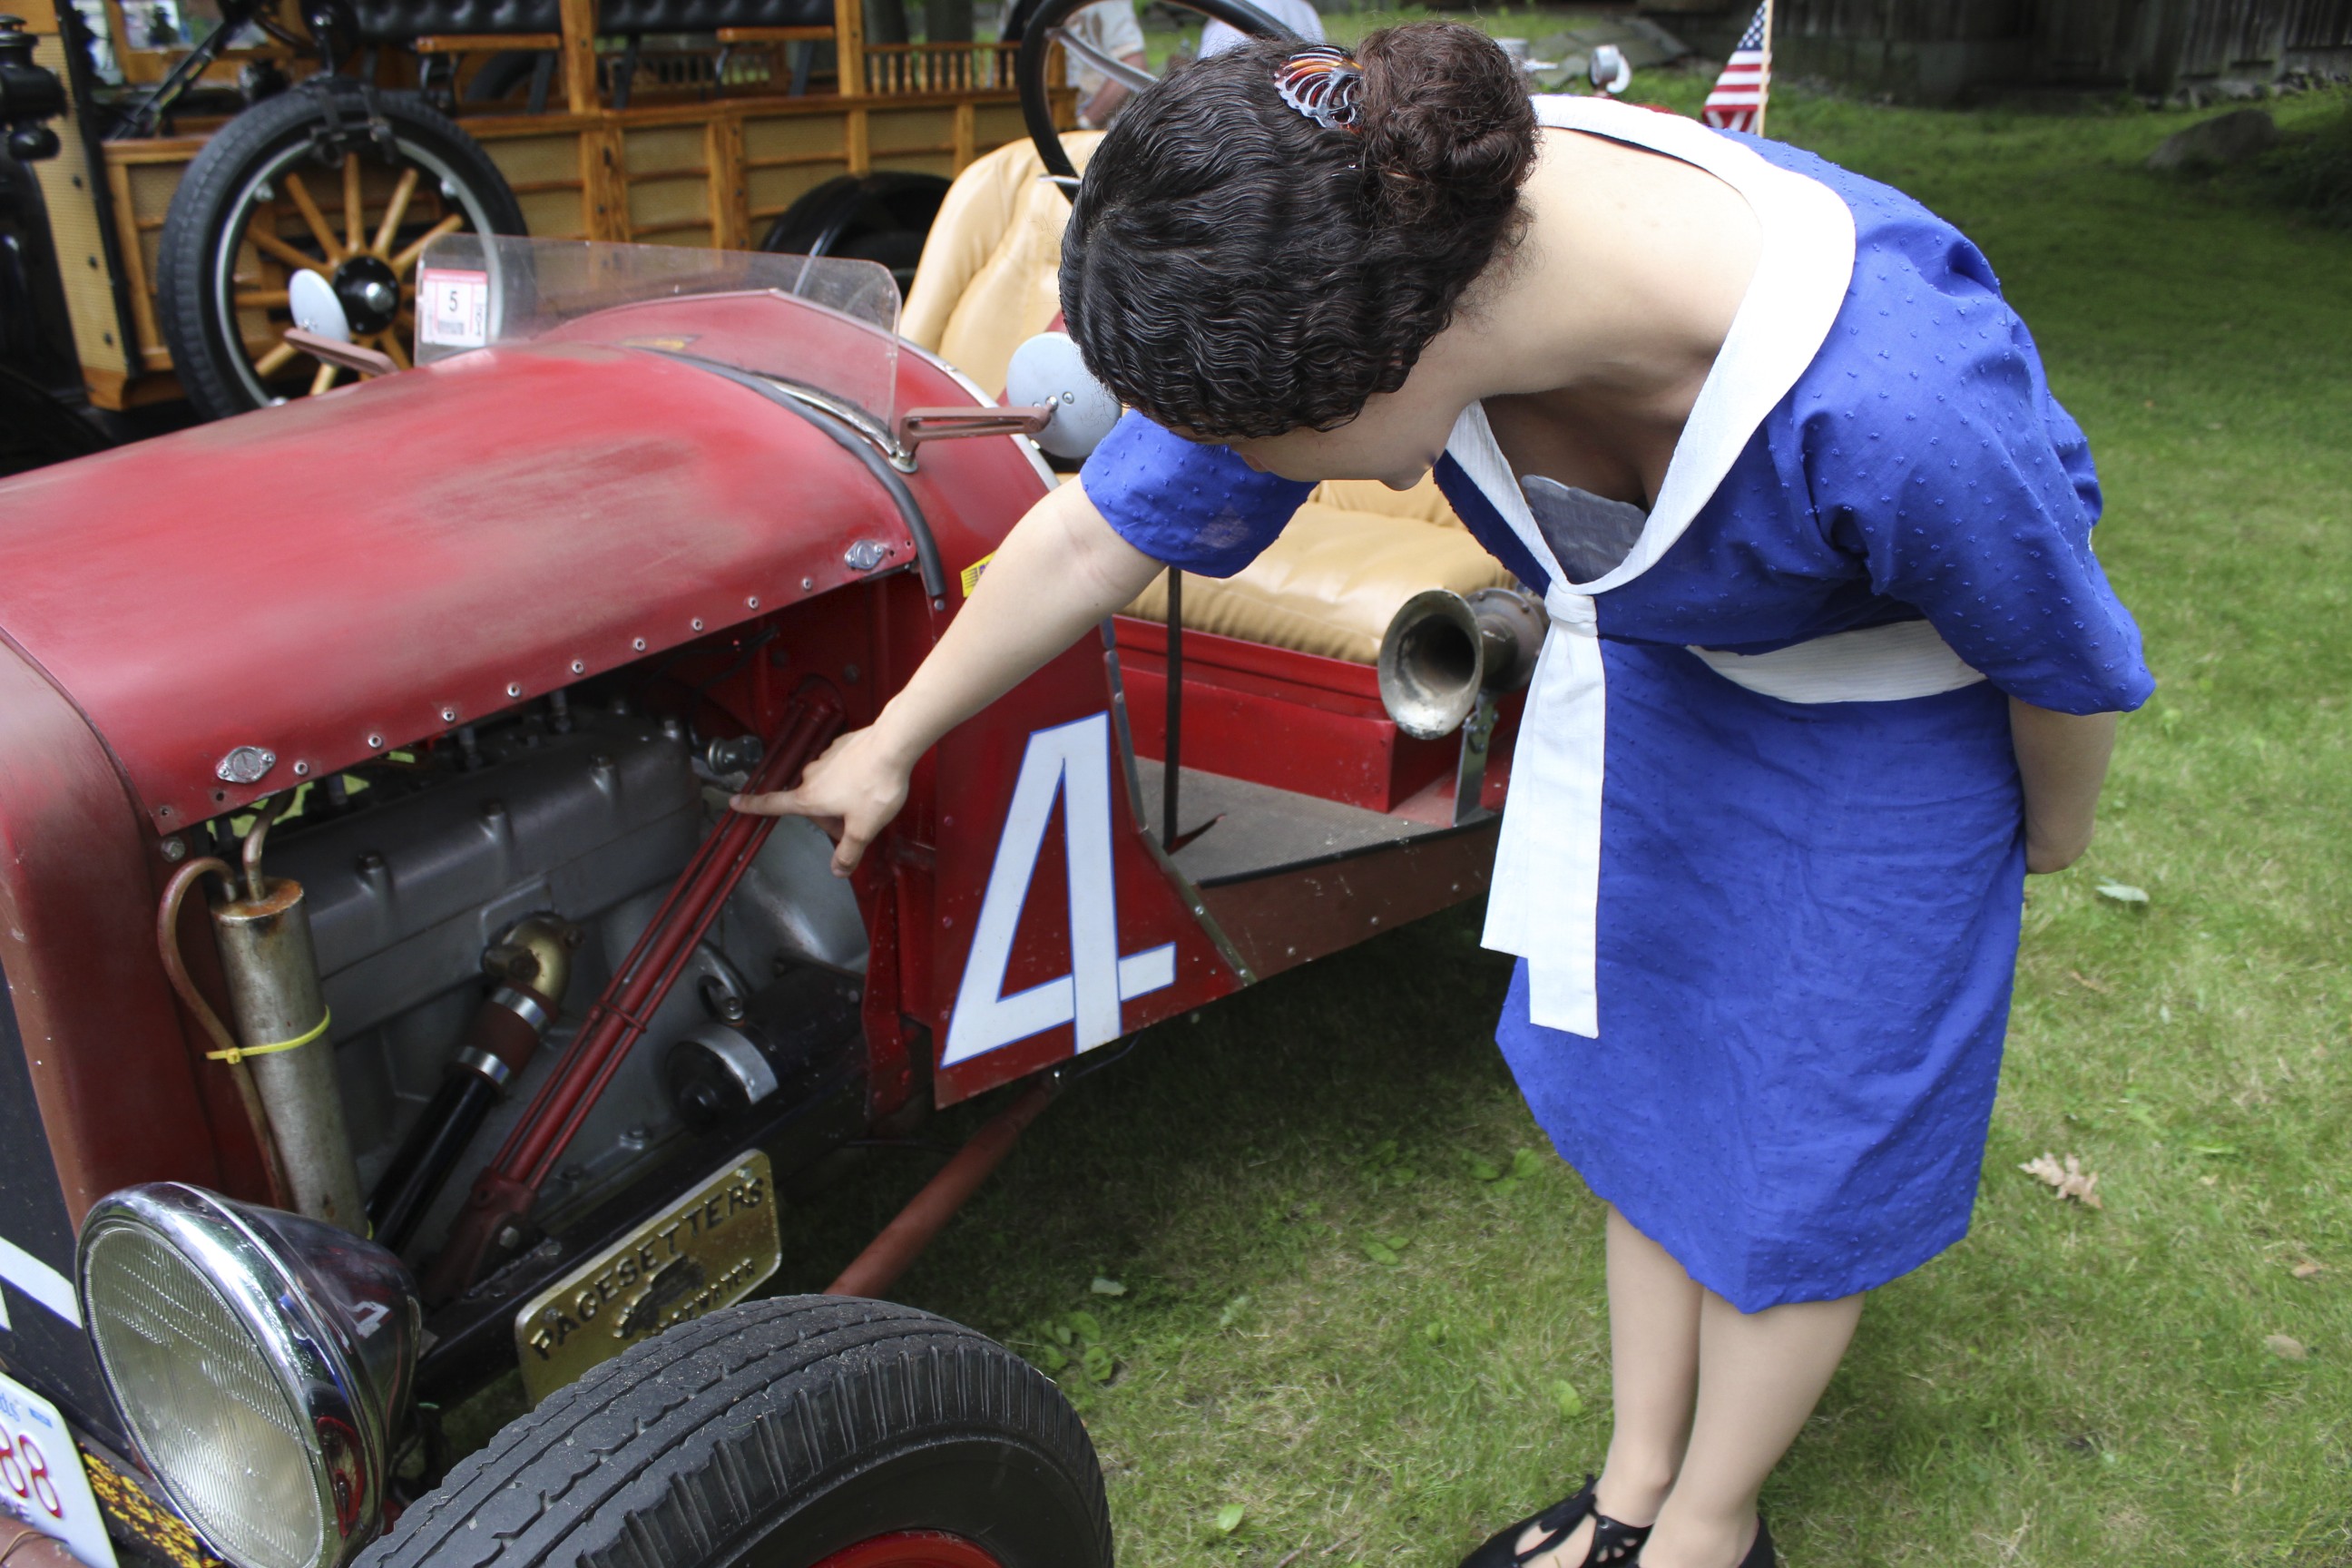
Oh yes, and I wore a new 1926 dress and my all new American Duchess Gibsons! I also attempted some “make-do finger waves” in my hair. Basically, that means that I didn’t try for real finger waves… I just put some gel in my hair and used a fine tooth comb on the top bits. Since my hair has natural waves it just dried in a sort of wavy way and I put up the back in a low bun. I think it turned out pretty well, though, for not trying that hard!
This link contains an affiliate code, which provides a small benefit to my shoe fund. This does not affect my impressions and reviews of this product.
The dress was made because we needed day clothes for this event and my other two 20s evening dresses are not appropriate. As I mentioned in the post May Fabric Stash Additions when I shared this fabric, I wanted a cotton so it would be lightweight and washable… and this is what I wound up with. I thought it might be to sailor-y, but in the end I don’t think it is! I like that it’s a rather striking color and not something I would normally pick out for myself.
I didn’t use a pattern for the dress, I just sort of used my measurements and made it up while referencing a lot of 20s patterns in the COPA archive for skirt shape, mostly. The front and back bodice and sleeves are all one piece cut in the kimono style. It’s all french seamed and the skirt and sleeves are finished with hug snug. The waistband is a little messy on the inside, because I haven’t taken the time to finish it and because the sides were doing a weird thing I had to fix with a wonky side dart. But eh, no one will see the inside! I’m glad it’s done and I like the faked tie-collar.
Gibsons!
The Gibsons are comfortable and cute. I like that the sole is a little thicker than on my Astorias, because it means the pointy toe shoe leather isn’t getting scratched while I walk (as it is on my Astorias). The toes are pretty pointy but they are starting to stretch to my foot shape, so that’s good.
Trying to pose… “This is an engine. It moves the car.” Plus, new dress and a good view of my hair!Looks a lot different from a modern car engine, doesn’t it?A better view of my new 1926 day dress and Gibsons.Another view. The red car is fun, too!
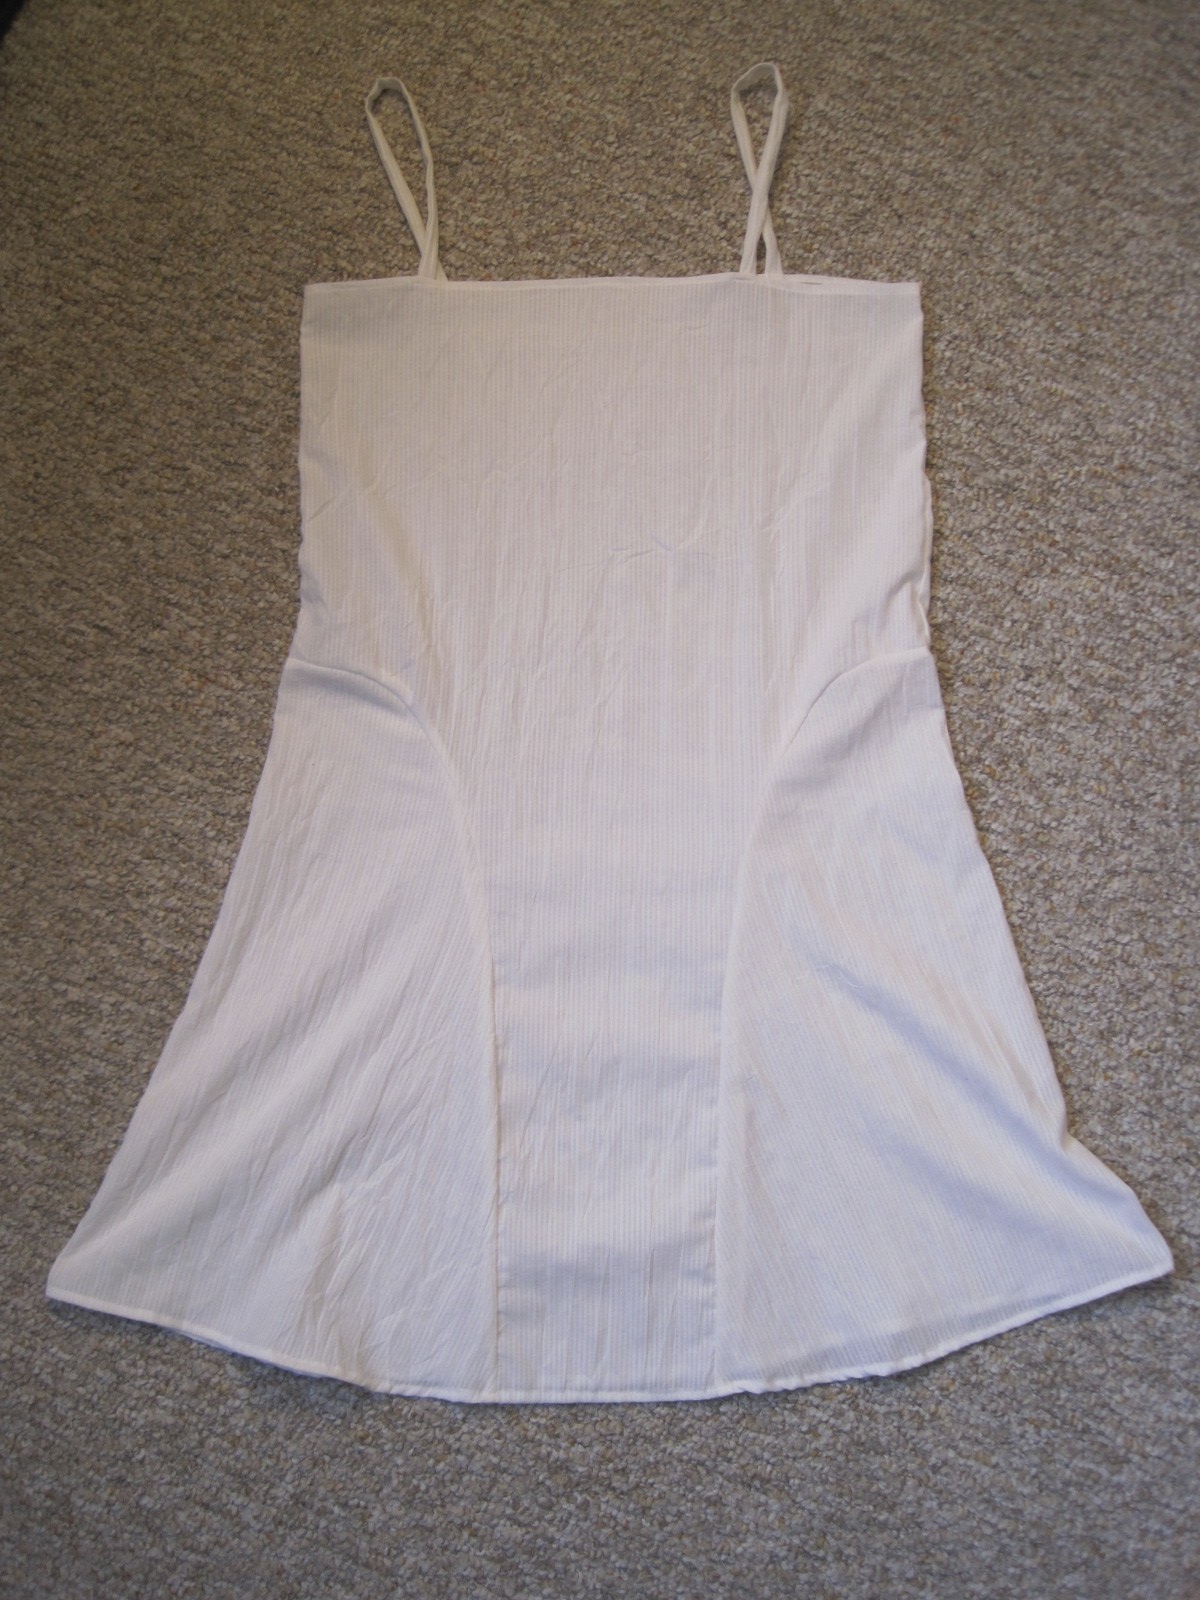
The blue cotton is slightly sheer, so I made a cotton slip to wear under the dress to add opacity. It’s made of the same $1/yd white cotton that the trim on the dress is made of, so if it shows at the neck or elsewhere it just blends right in. I used the same measurements I used for the pink slip of my 1925 beaded dress. I was inspired by looking at 1920s patterns to add the curved panels on the side instead of having another straight slip.
White slip to go under the 1926 day dress.
As I said, in addition to looking at cars and dancing, we also had a picnic lunch.
1920s picnic!After eating we listened to some stories read aloud.And read some 1920s magazines!
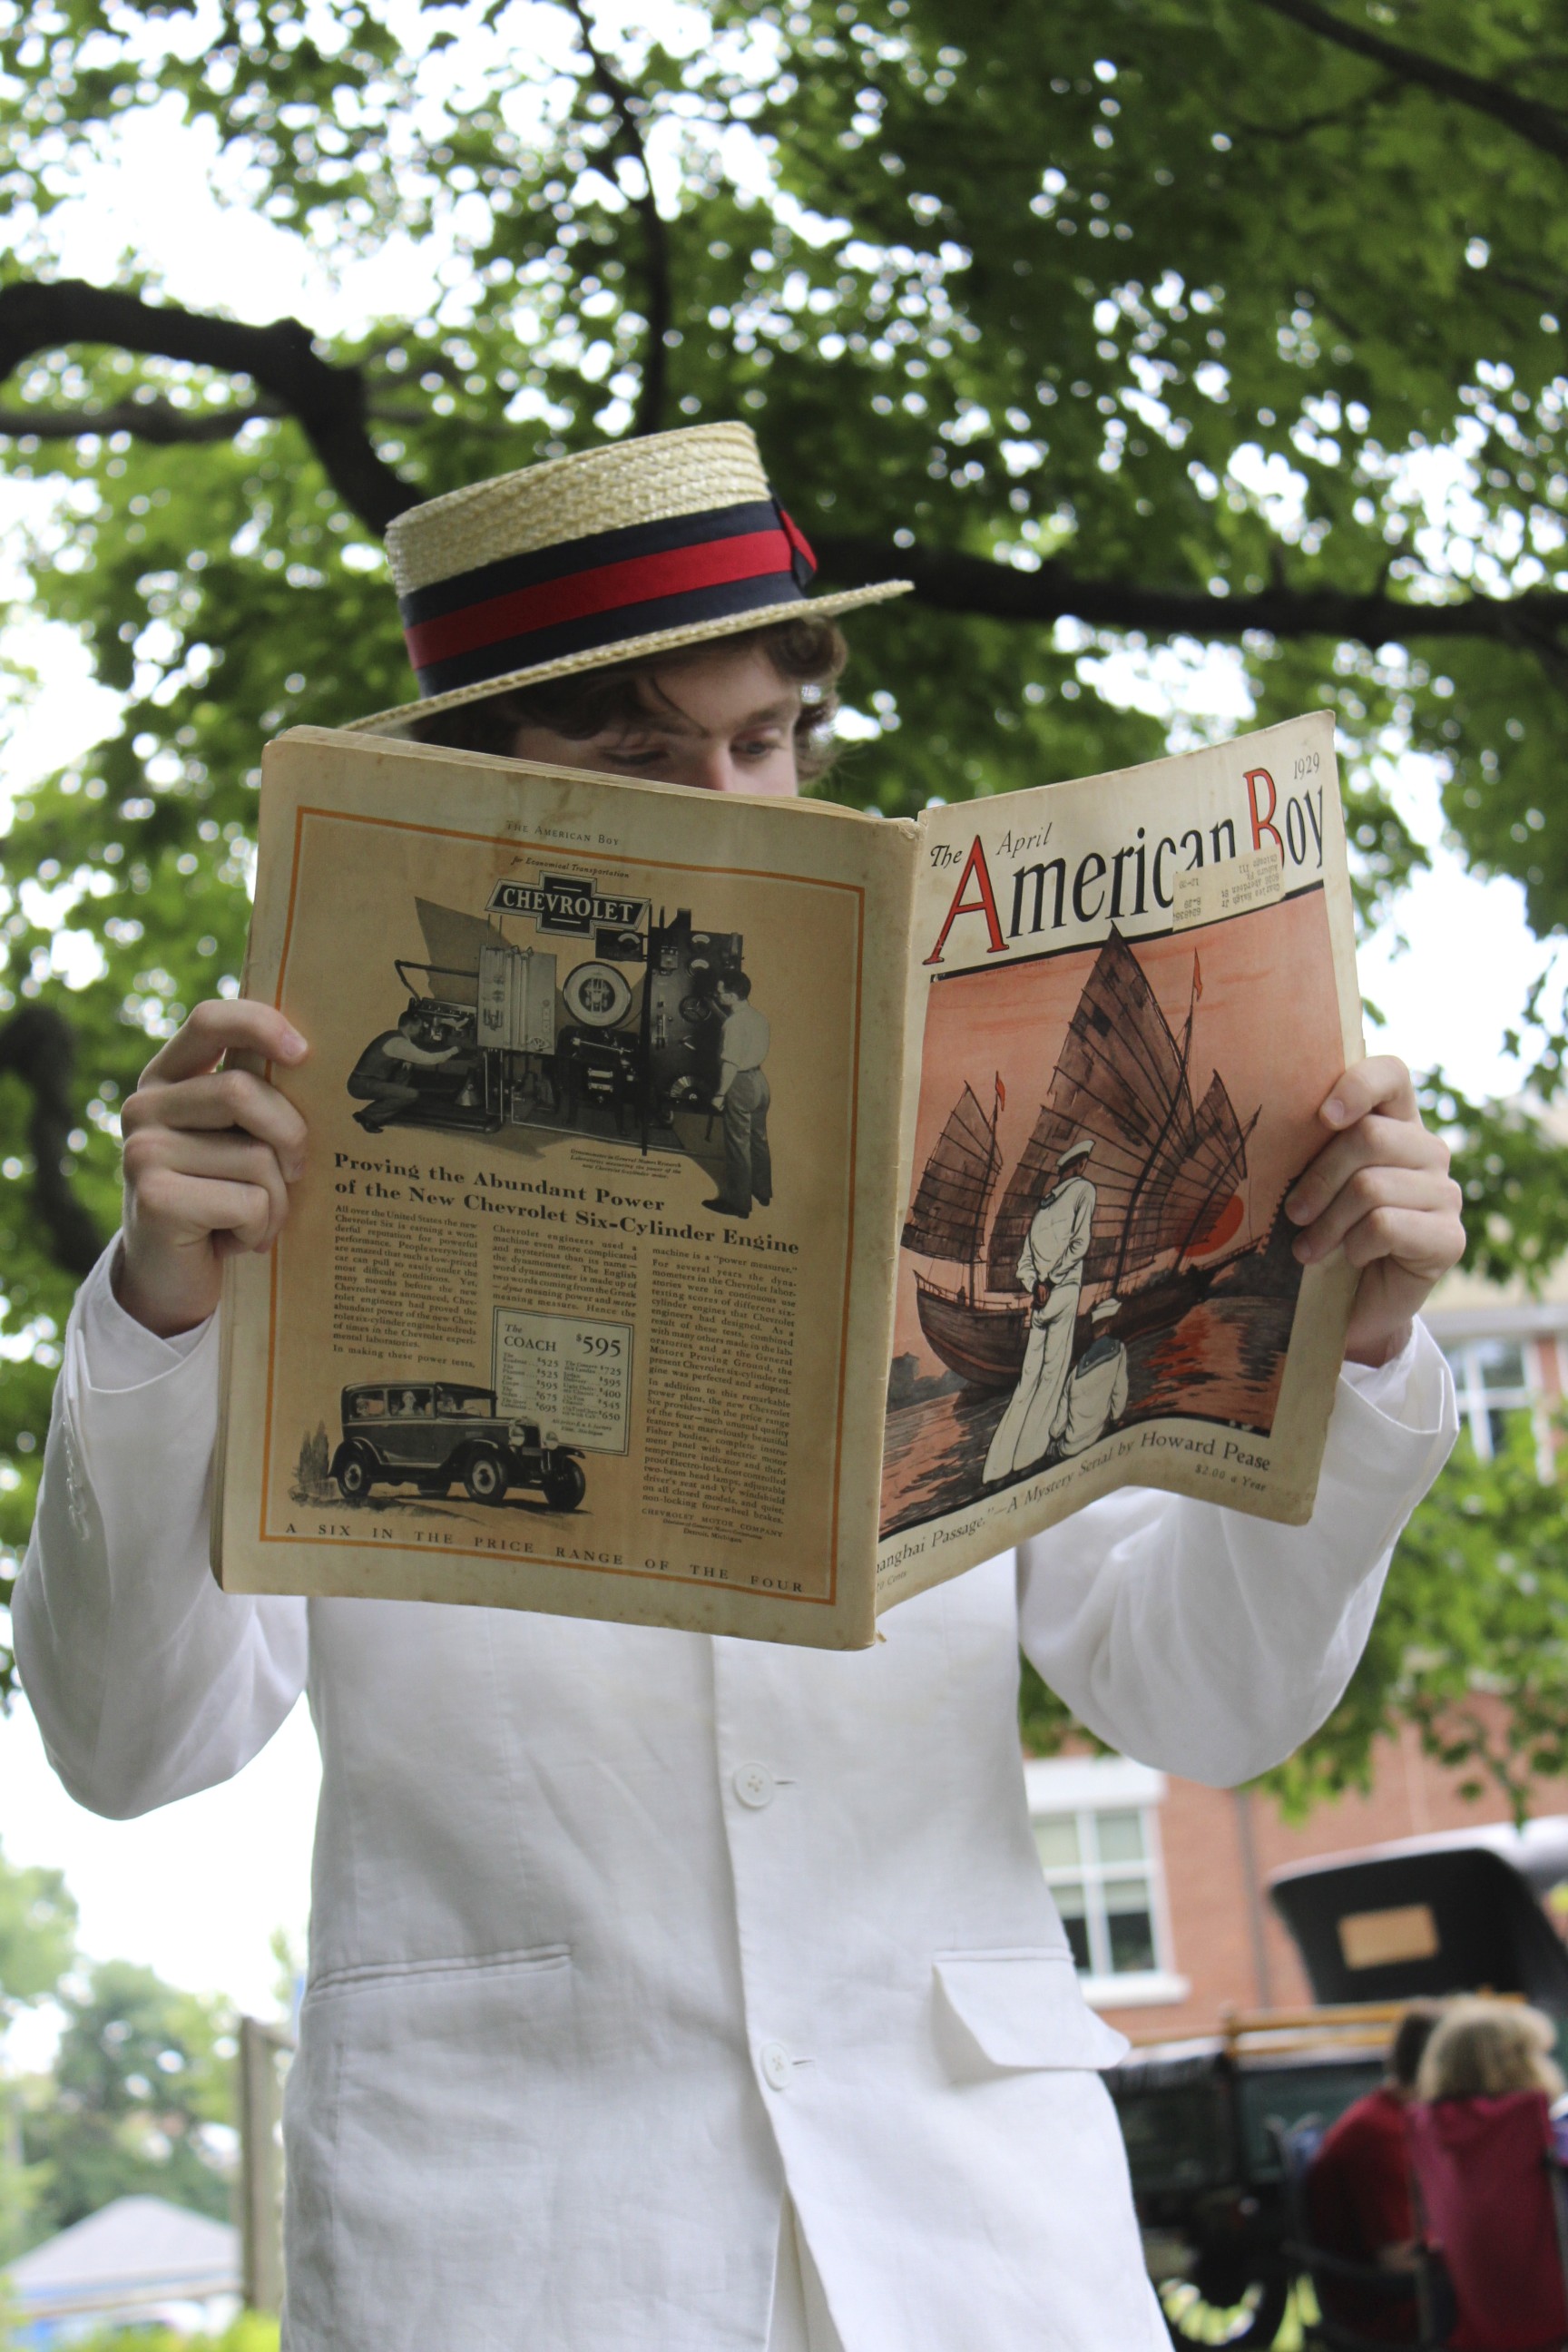
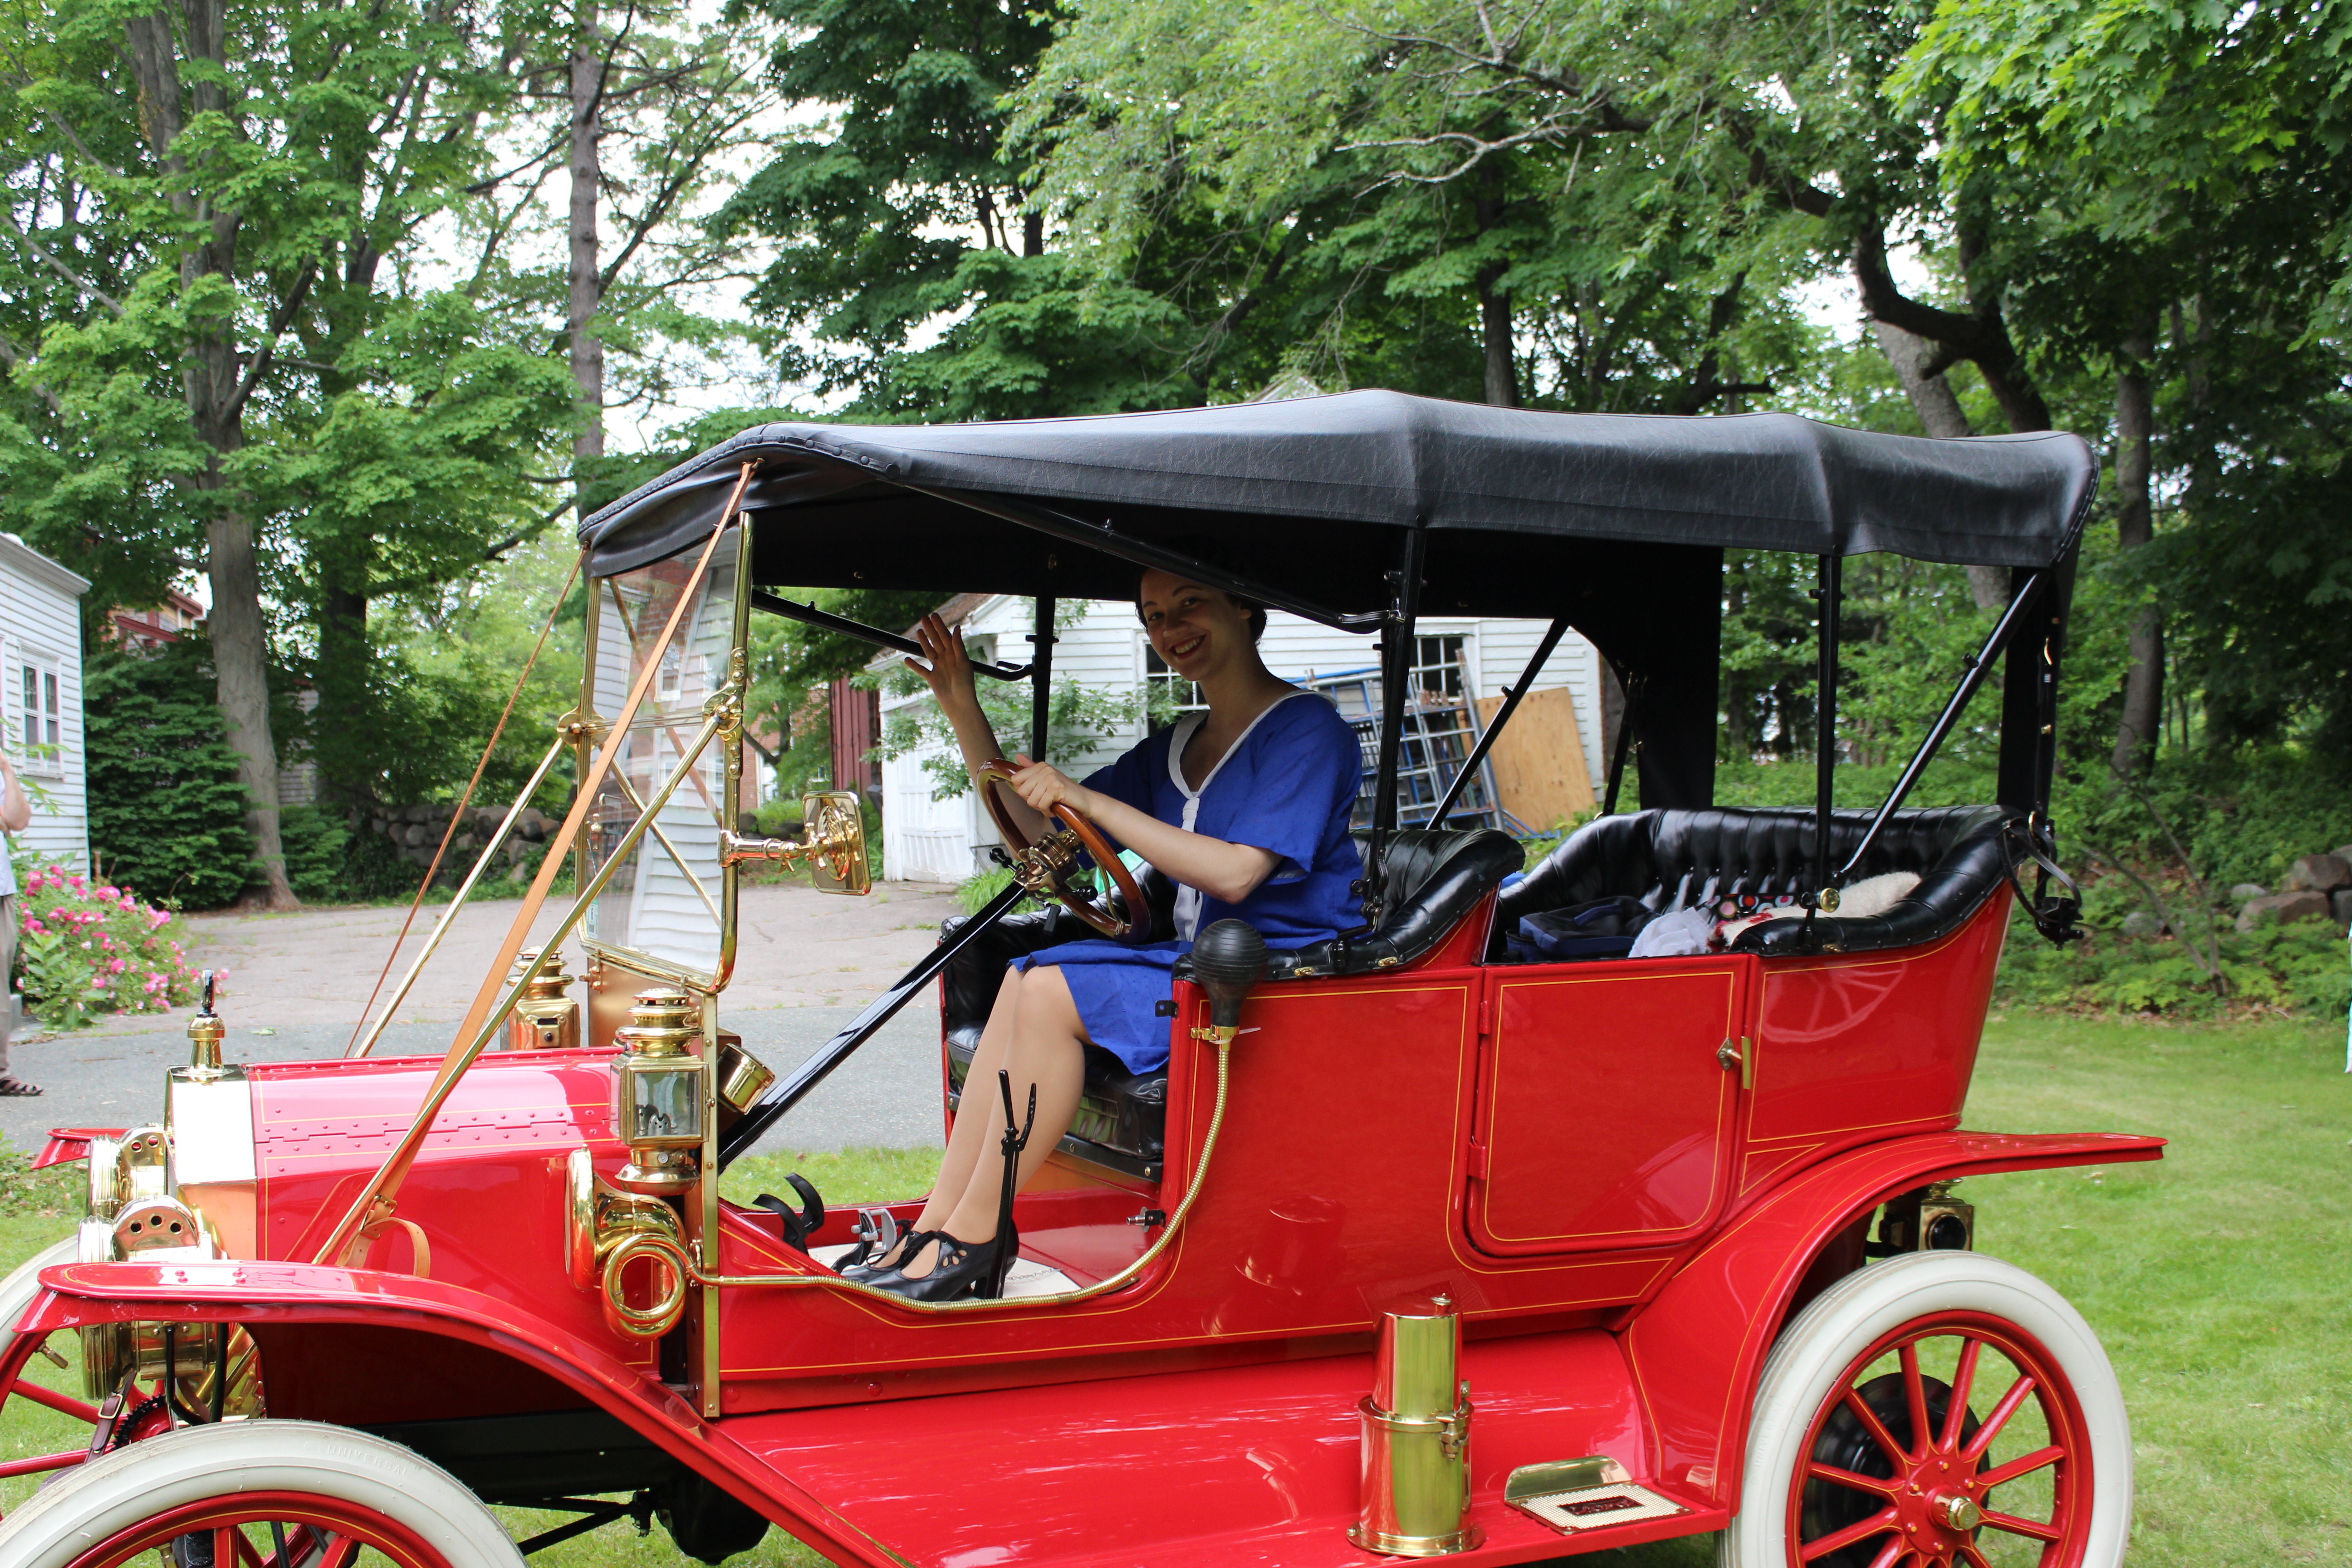
One of the most exciting parts of the afternoon was when one kind gentleman asked if we would like to sit in his 1920s car! Of course we said “Yes!”
“How do I drive a car?”Practicing my princess wave.
All in all, it was a pretty fun, low-key event. Next post I’ll share some of the more “artsy” photos from the day, as I did in The First Picnic Of The Summer: Part II.
Life! Is often great, but does rather get in the way of sewing plans sometimes…
This HSF challenge #11 had a due date of June 3rd. I actually finished sewing on June 18th, but I’ve been busy posting about other things so this has been even further delayed. Oh well, I had the best of intentions: to complete this 18th century petticoat for the Squares, Rectangles, and Triangles Challenge.
Description:
Many historical garments, and the costumes of many people around the world, use basic geometric shapes as their basis. In this challenge make a garment made entirely of squares, rectangles and triangles (with one curve allowed), whether it is an 18th century kimono, a flounced 1850s skirt, or a medieval shift.
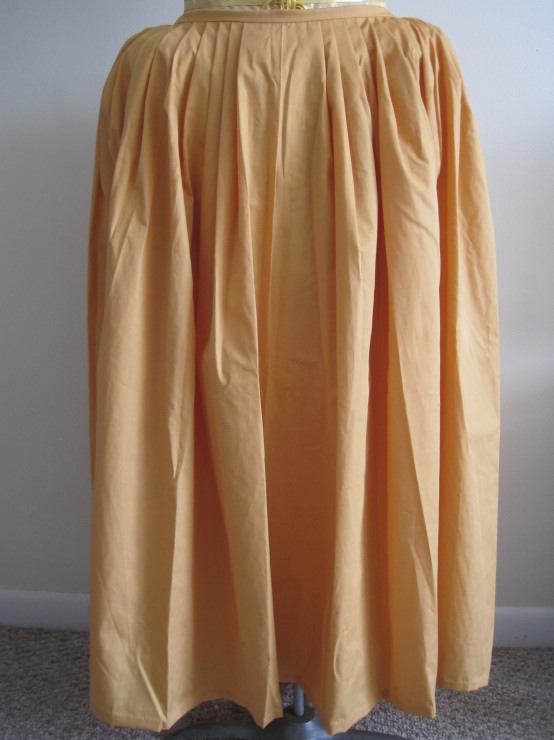
Apricot (orange) 18th century under petticoat.
Pattern: None, but I referenced both of these tutorials on constructing 18th century petticoats. Katherine’s tutorial is for a petticoat with an uneven length (to go over panniers, or a bum roll, for example). Rebecca’s tutorial is for a petticoat with an even length (the same length all the way around, to be worn without extra supports). Both tutorials have construction information, Rebecca’s includes a bit more detail in terms of which stitches and methods to use.
Year: Loosely 1700-1790.
Notions: Thread, yellow polyester ribbon for ties.
How historically accurate?: I give it 70%. Accuracy gets knocked down because: 1- the color is a bit vibrant for the period (but it’s an under petticoat, and I wanted it to be fun!), 2- all unseen seams are machine sewn, 3- I used bright yellow polyester ribbon for ties, 4- I haven’t seen much research that shows cotton being used at this time for a single plain petticoat of this sort. On the other hand: 1- all finishing was done by hand, 2- the dimensions and method of creation are historically accurate.
Hours to complete: 6 or 7? I can’t really remember…
First worn: Well, Squishy wore it for pictures!
Total cost: $12 for the fabric. The ribbon is leftover from my childhood craft projects…
Side view.Front. See the yellow ribbon?Back. I love how the pleats fan out.
I chose to bind the top with self fabric and use polyester ties in a fun color for this petticoat, since I knew it wouldn’t be seen and I might as well use some of those things from my stash! The back half of the petticoat ties in front, then the front ties wrap all the way around to the front and also tie in front. That’s why you can see all the yellow ribbon crossing in the back. This method used a solid 3 yds of ribbon, though the ends I have to tie with are generous and could probably be shorter if I wanted to save on tie length.
Back tied in front before the front gets tied. There are hemmed pocket slit openings on each side.
I just love the color of this petticoat. It’s so bright and sunny and cheerful, especially with the yellow ribbons! There’s also a sneak peek in this last picture at what will likely be a future HSF item: the bum roll… more on that soon-ish.
I was recently able to visit a wholesale quilt fabric company to purchase historic dress fabrics for an upcoming mid-19th century performance on behalf of me and other members in my vintage dance troupe. It was such a treat! The majority of the fabrics we found were Marcus Brothers fabrics, but RJR also had a smaller number of really lovely fabrics.
Marcus Brothers Gettysburg Print 1840-1860. To make an1850s day dress.Windham Fabrics Colonies Archives Print c. 1850 and Marcus Brothers Charleston II Print. For other 1850s/60s day dresses.
There were so many lovely things, but the best part was the prices! All of the fabrics were between $2.50-$3.75 a yard! You had to buy a bolt, which varied between 7 1/2 and 15 yds, but at those prices it’s still outstanding! We came away with fabric for the 1850s/60s dresses and bit more besides… There were some things that were just so fantastic they couldn’t be left behind!
Marcus Brothers Old Sturbridge Village Print. To eventually make an 1840s dress! It’s going to be so pretty! I love this fabric and the colors (it’s actually yellow and pinkish flowers with brownish vines).RJR Print. I have no idea what I will make with this, I just love it. I find it to be so striking!Another sample of the lovely prints. These were purchased by a friend. One will be used for an 1860s dress, eventually, and the other will possibly be used for an 1840s dress, eventually.
Don’t worry, there will be upcoming posts with more on the 1850s day dress I’ll be making as well as the other much farther in the future projects. And I’m sure I’ll also have great pictures from the mid-19th century performance as well.
I’ve been trying to be good about not buying more fabric… but sometimes things are just too good to pass up, or an event comes along that requires new clothes! I think I last bought fabric in January, so that’s a pretty good few months of no-new-fabric.
I wasn’t even looking for this fabric! But I happened upon this great red/pink/brown cotton chintz and couldn’t get it out of my mind. In the end, I decided I would regret it if I didn’t buy it. And there you are. I’m thinking of perhaps an 1790s/1800ish open robe eventually. The other two fabrics wouldn’t have been bought on their own, but with the chintz already being purchased… I tacked them on to the order. There is a small bit of the cherry red linen, to make a 1740s jacket some day, and a bit of that blueish cotton/linen blend. I was hoping it would be more teal colored, but it’s not. So it might get relegated to lining something else.
Later in the month, I was on a grand search to find fabric for an 1860s cotton dress and came across this fabulous light teal stripey fabric for $1/yd. I’m calling it the elusive blue green fabric in my head, because that color is sort of hard to find and I’ve been inspired lately to find it. At $1/yd I couldn’t pass it up!
The pictures don’t really do it justice. I’m thinking of making a new Regency evening gown using it and perhaps a 1906ish evening gown some day as well. I bought that similarly colored lining to go with the stripy for the 1906ish evening gown, because at $1/yd in the right color it’s just meant to be, even if it is polyester. I’m not sure what the fabric content of the stripy fabric is, but I’m guessing it’s probably man-made…
Lastly, I’ll be performing in another 1920s dance event next weekend during the day and I needed a 20s day dress. I wanted it to be washable and I didn’t have any appropriate fabrics in my stash. There weren’t a lot of options that I liked, but in the end I went with this royal blue cotton lawn swiss dot. The dress will have white accents on it (and is looking rather sailor-like, despite that not being my intent). I have to just claim the sailor look so I don’t feel foolish in it.