The Tree Gown For Real (HSF #9)

Textiles and the natural world are inextricably linked.  Until very recently, all textiles were made from flora (linen, raime, hemp) or fauna (wool, silk, fur), and dyed with flora and fauna.  Flora and fauna also influenced the decoration of textiles, from Elizabethan floral embroidery, to Regency beetle-wing dresses, to Edwardian bird-trimmed hats.  Celebrate the natural world (hopefully without killing any birds) with a flora and/or fauna inspired garment.

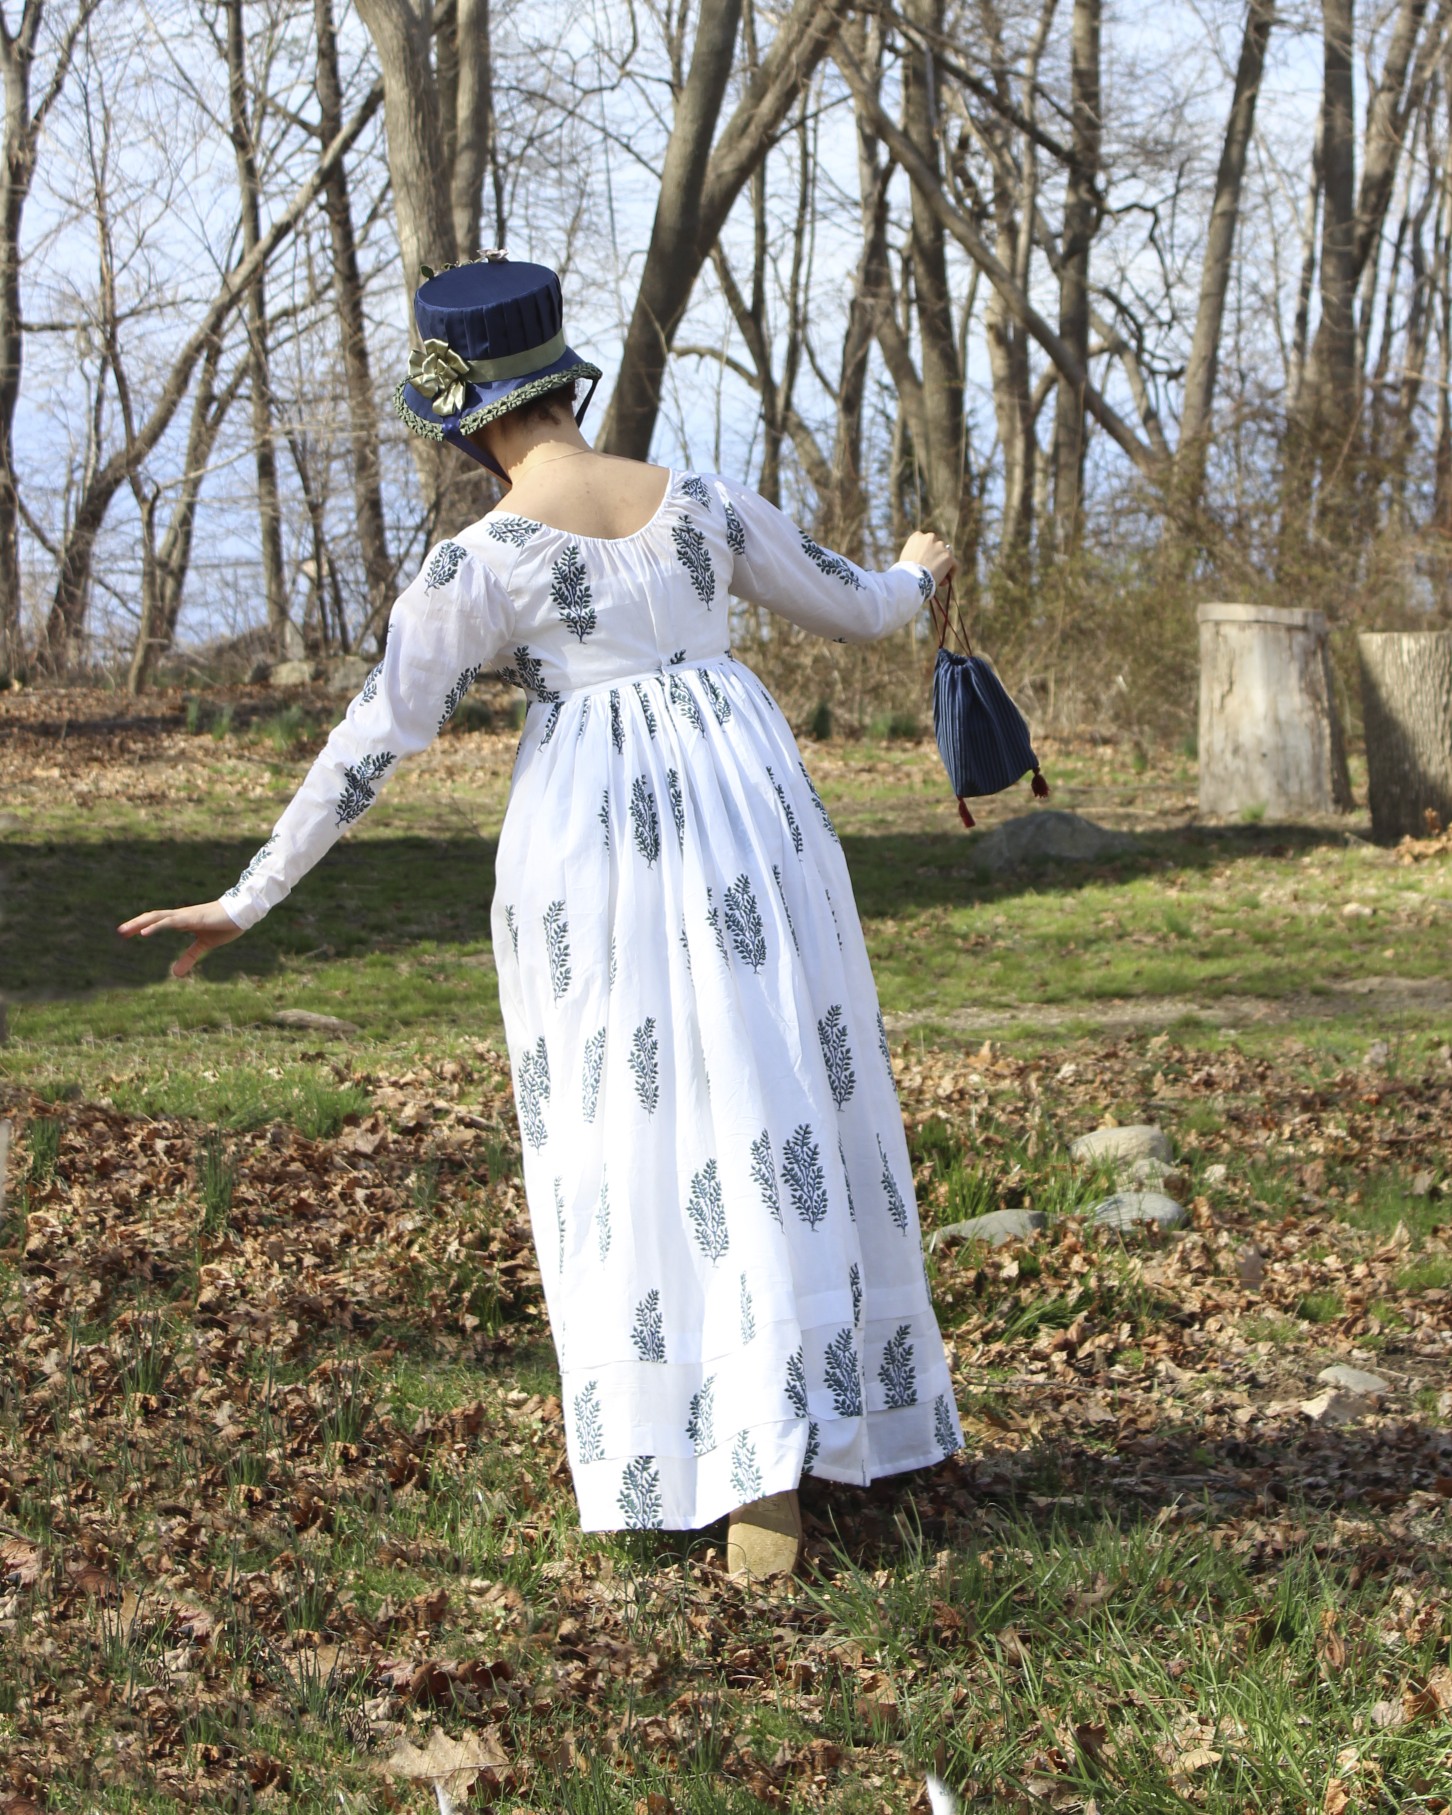
This is the description of the HSF Challenge #9: Flora and Fauna. I’m super excited about my garment: the all new 1815 Tree Gown I recently showed a sneak peak of as well as photos of in action during archery and outdoor lounging! The archery and outdoor lounging, in particular, include great pictures of the dress, so if you haven’t seen them yet, you really should go check them out!

IMG_0791
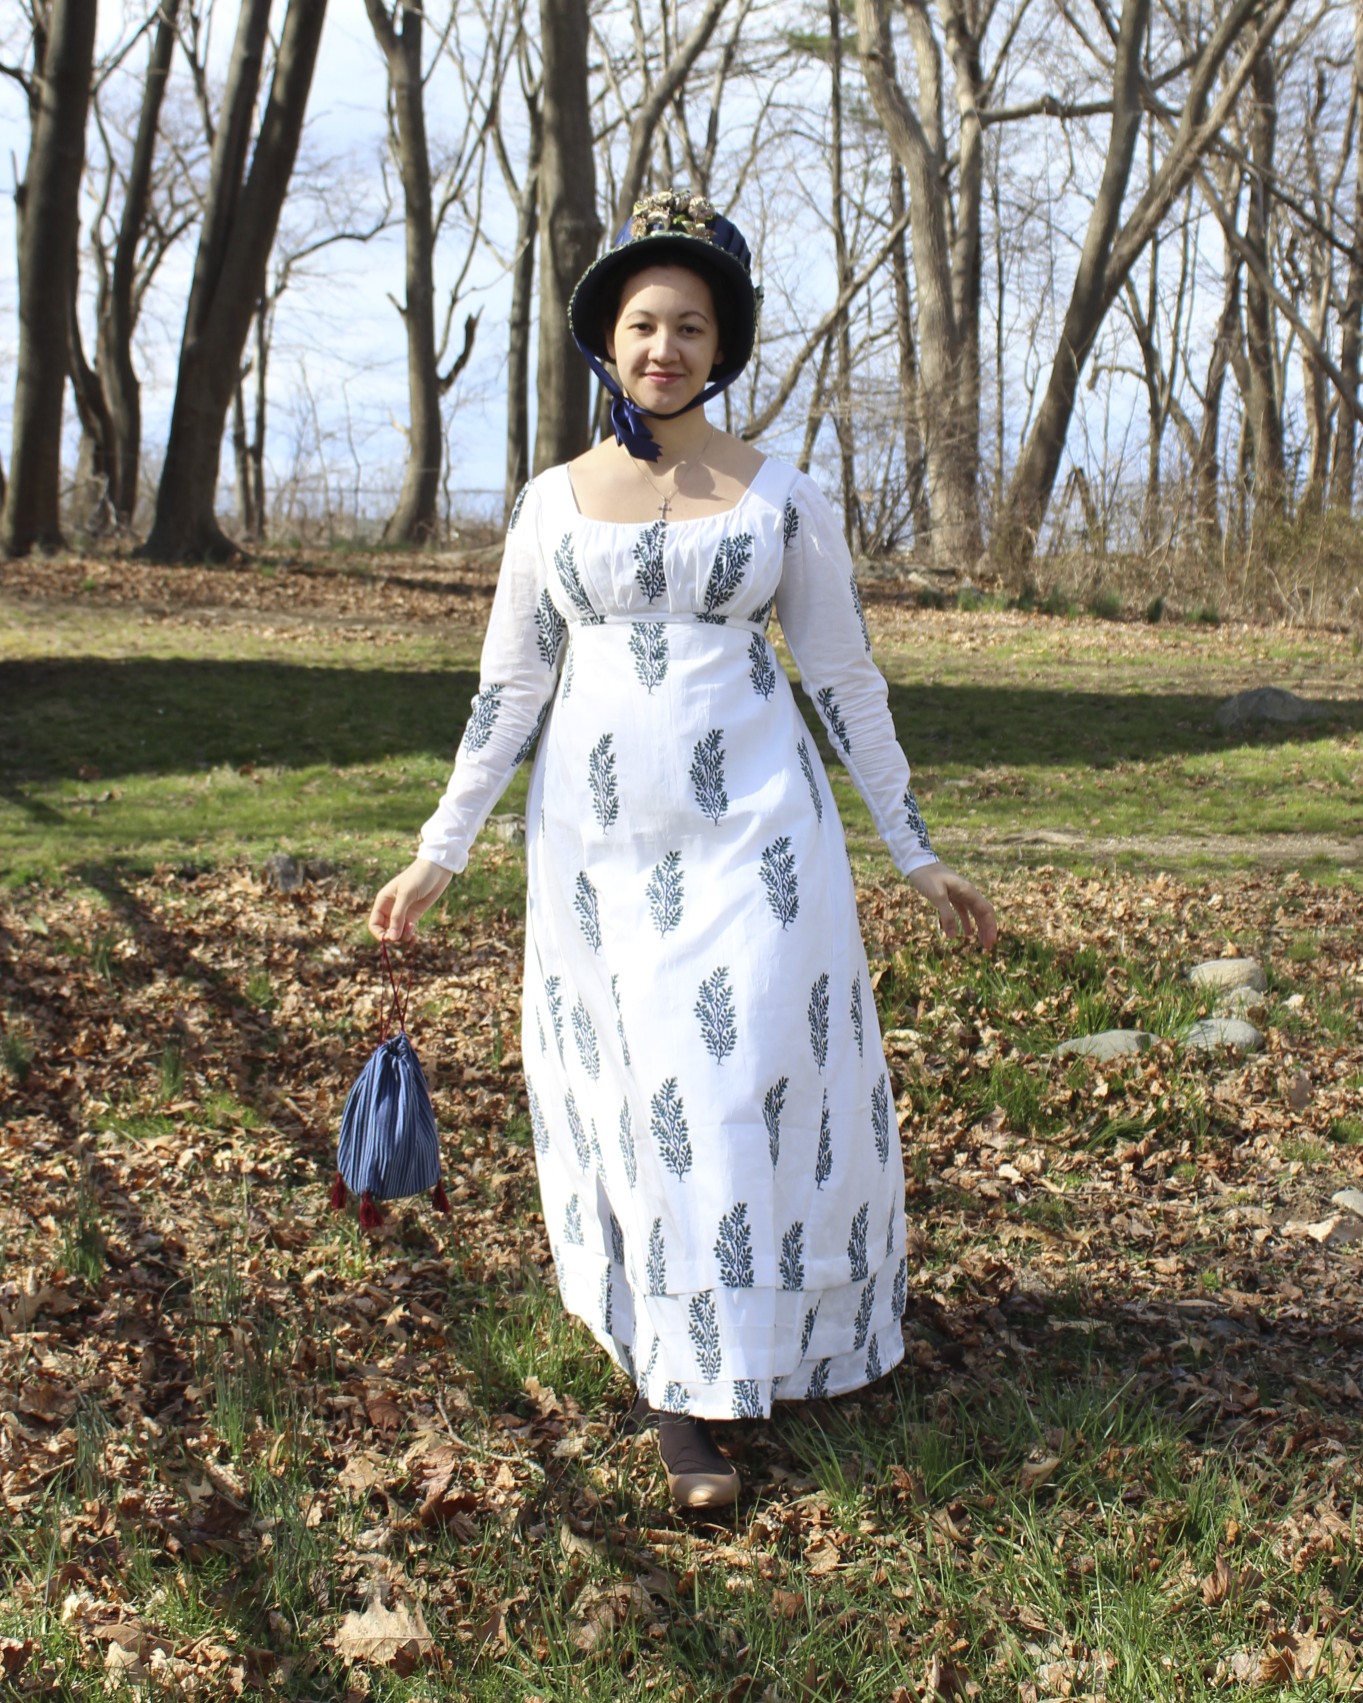
1815 Tree Gown and Bonnet with a Stripe-y Reticule.

I love love love this dress! It’s super comfy and super cute. You might remember that I don’t own many printed or patterned clothes (modern or historic), but I branched out (haha, unintentional bad pun) with this one and I love the results! There’s something so refreshing about the classic white Regency dress that has been shaken up a bit with a bold print. Also, from the HSF perspective, it is made from cotton and printed with a flora inspired motifs! Double duty challenge fulfillment right there.

IMG_0786
Back view. The drawstring at the back neck is so subtle and clean looking, and I love the results of my careful cutting which keeps the print symmetrical on each side.

There are pictures of the interior construction of this dress in this previous post. To summarize, the dress is machine sewn on the inside seams and hand finished. Most of the interior seams are french seams. The dress closes at the back with hooks at the waist and a drawstring at the back neck. The front neck has a drawstring as well.

More facts:

Fabric: almost 5 yds of hand block printed sheer cotton (made in India and sold on eBay via Heritage Trading).

Pattern: loosely based on my other Regency gown patterns for my basic measurements, but adapted to resemble my main inspiration dress at the Met.

Year: 1815.

Notions: two hooks, about 1 yd of 1/4″ cotton twill tape, thread.

How historically accurate?: I give it 95% rating. Really, the only thing keeping it from “as accurate as can be with modern materials” is that it is machine stitched on the inside seams. It is hand printed fabric, sewn in historic ways, and hand finished.

Hours to complete: 16? Total? That’s not bad for me!

First worn: Regency Dance Weekend, mid-April 2013.

Total cost: $25 for the fabric (it’s almost doubled in price since I bought mine!), maybe another $1 for the notions?

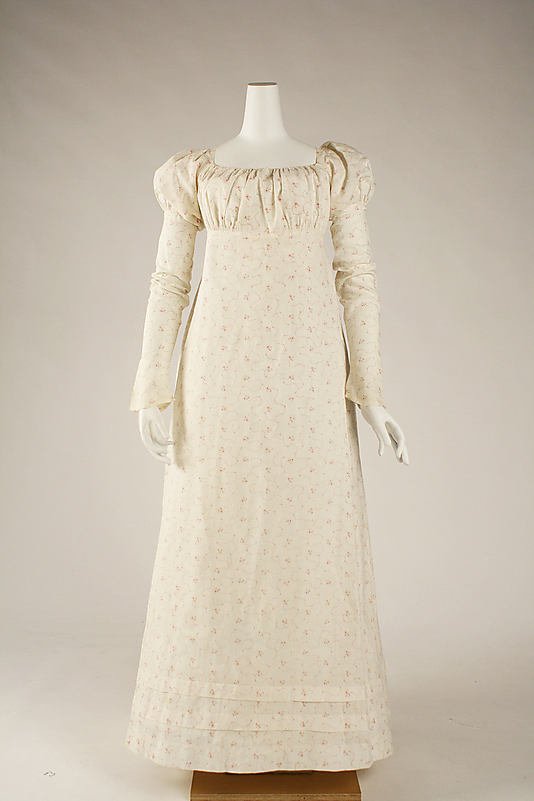
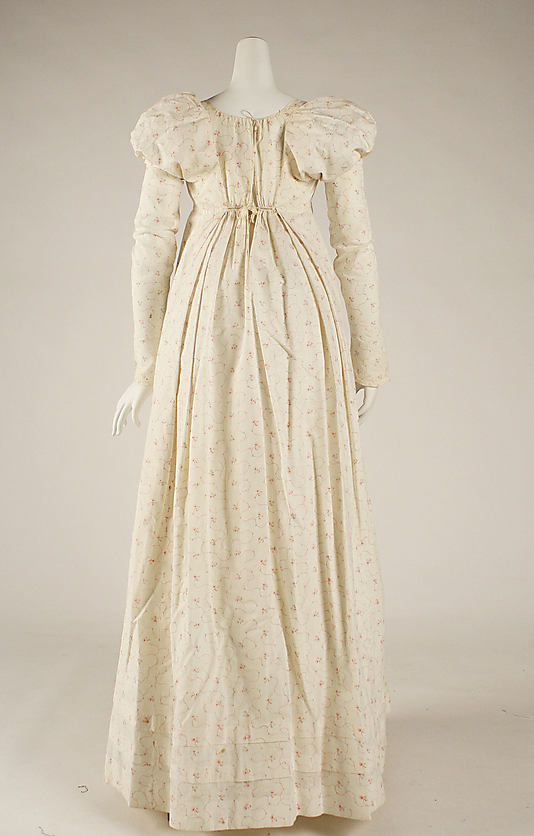
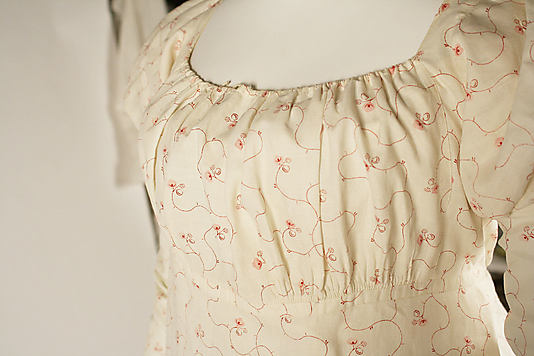
Now for inspiration. The dress is most closely based off of this dress at the Met. I changed some things, but I think the resemblance is quite clear.

1999.224_F
1810-1815. Met.
1999.224_B
1810-1815. Met.
1999.224_d3
1810-1815. Met.

These two dresses were other more minor inspiration for the Tree Gown: 1812 yellow silk wedding dress and early 19th century slip, mostly for their square necks and back tie closures.

Eee! All I can say in conclusion is how much I love my Tree Gown!!!

Patterned Stash Additions!

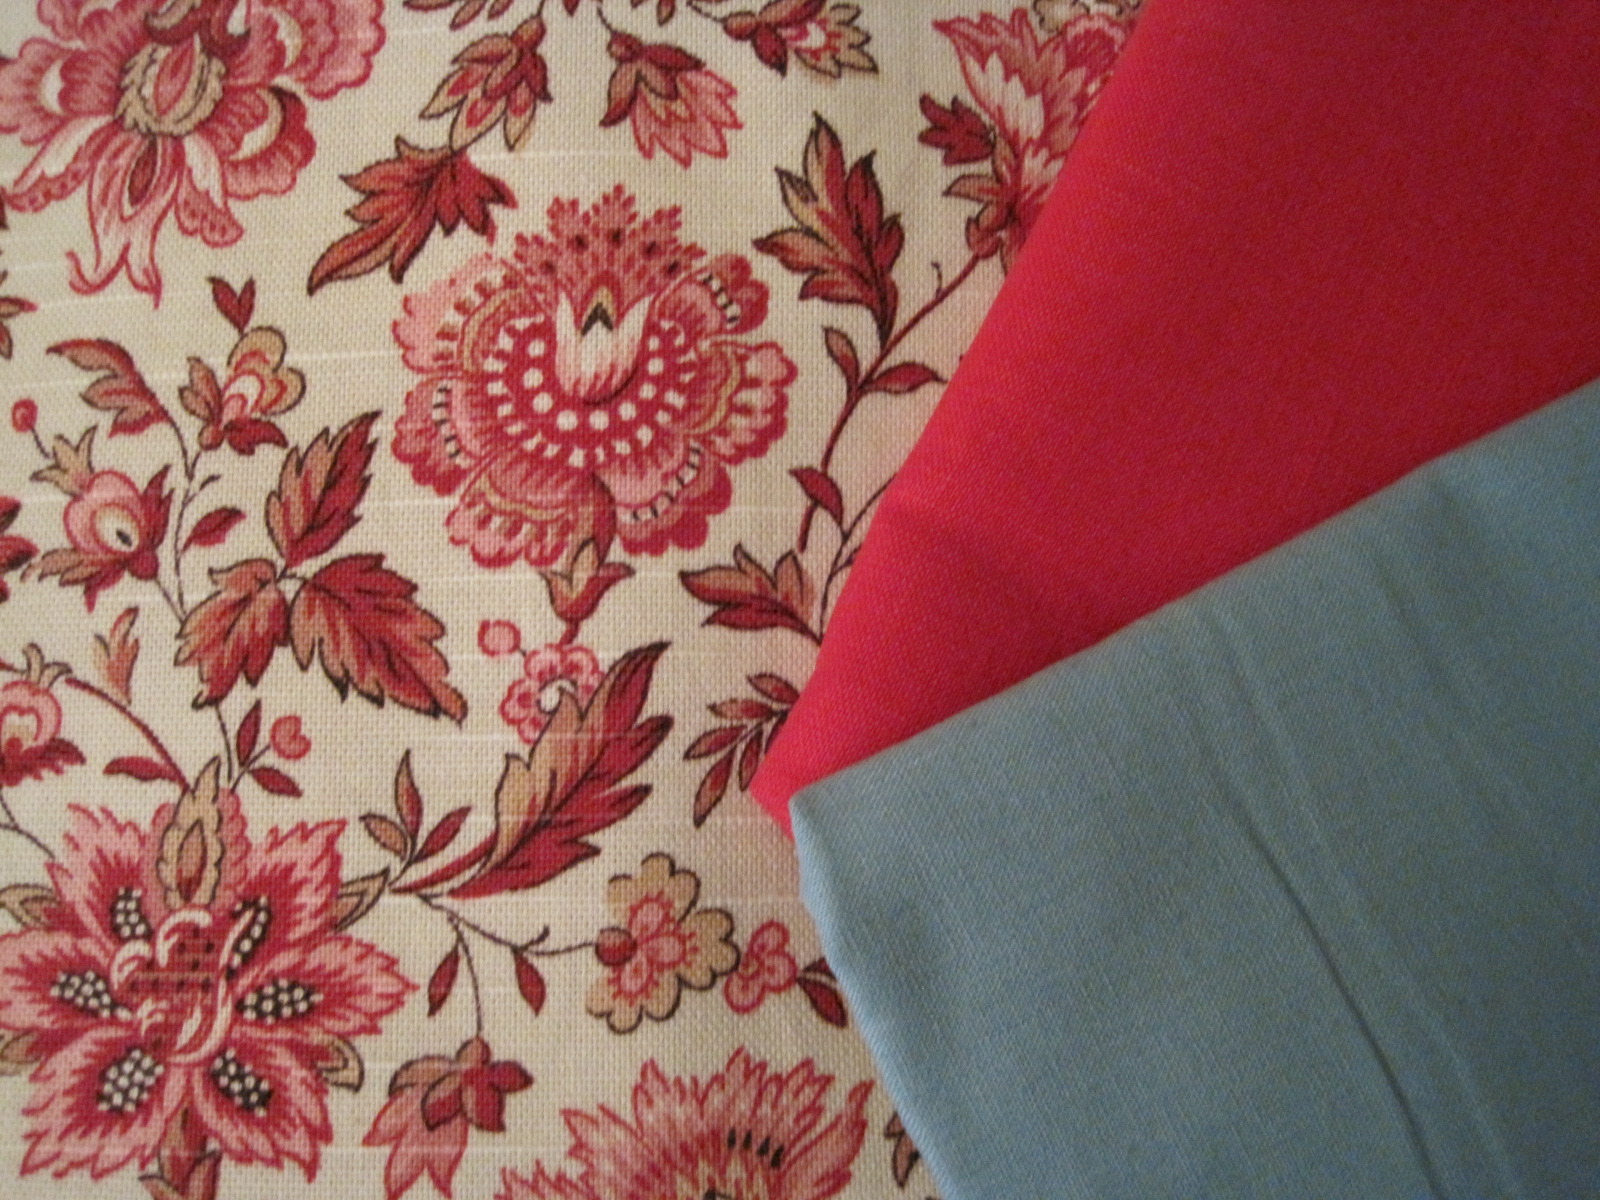
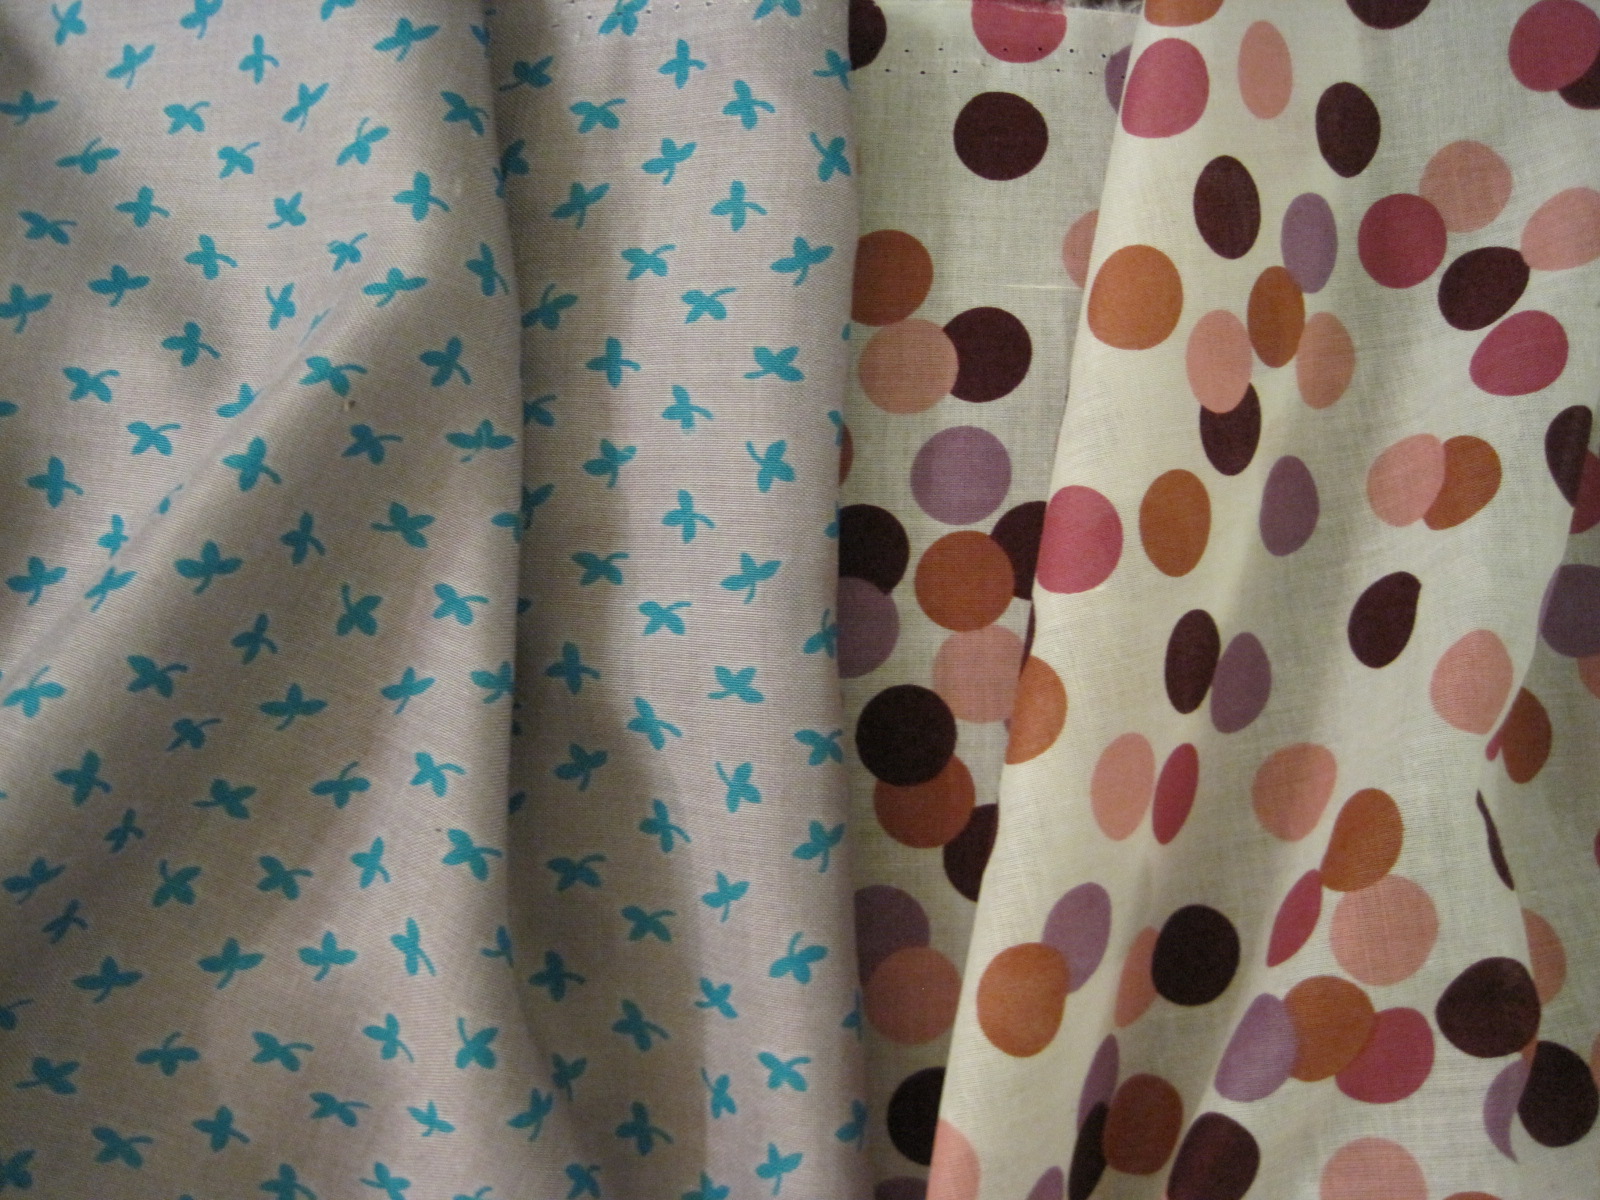
If you look at my clothes, modern and historic, you might notice that I usually wear solid colors. Yes, I do mix solid colors in outfits. But there it is: I hardly ever wear patterned fabric. I want to branch out a bit, at least in my historic wardrobe, so when I saw these patterned fabrics on sale I couldn’t resist.

IMG_4196

So here they are: my most recent stash additions. On the left, a rayon challis with a slightly lilac tinted grey background and little teal clovers all over. On the right, a super lightweight cotton lawn with dots in shades of purple and pinkish/redish/orange. What for? I’m thinking 1930s or 40s for the challis and a 50s summer dress for the lawn. I’m pushing the envelope, thinking outside my normal eras! Of course, these projects are pretty low on the list of things to get done… so don’t expect to see them again soon. But maybe this summer the 50s dress could be a fun project. We’ll see. In the meantime, I’ll know I have patterned fabric in my stash, and that’s enough for me!

HSF #2: UFO

Is there enough alphabet soup for you in the title of this post? In case you’re not familiar with those acronyms, it means that this is a post about the Historical Sew Fortnightly Challenge #2: Un-Finished Object. In this case, the UFO is my 1820s petticoat from the very end of 2012.

You’ll remember that I wore it to Fezziwig’s Ball in December, but that I hadn’t finished the neckline? I’m pleased to say that it is now entirely complete!

IMG_4187
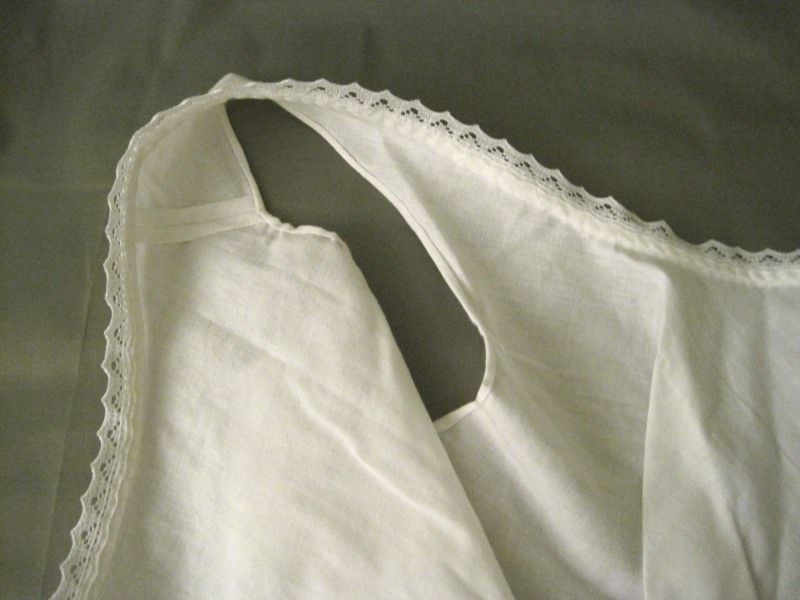
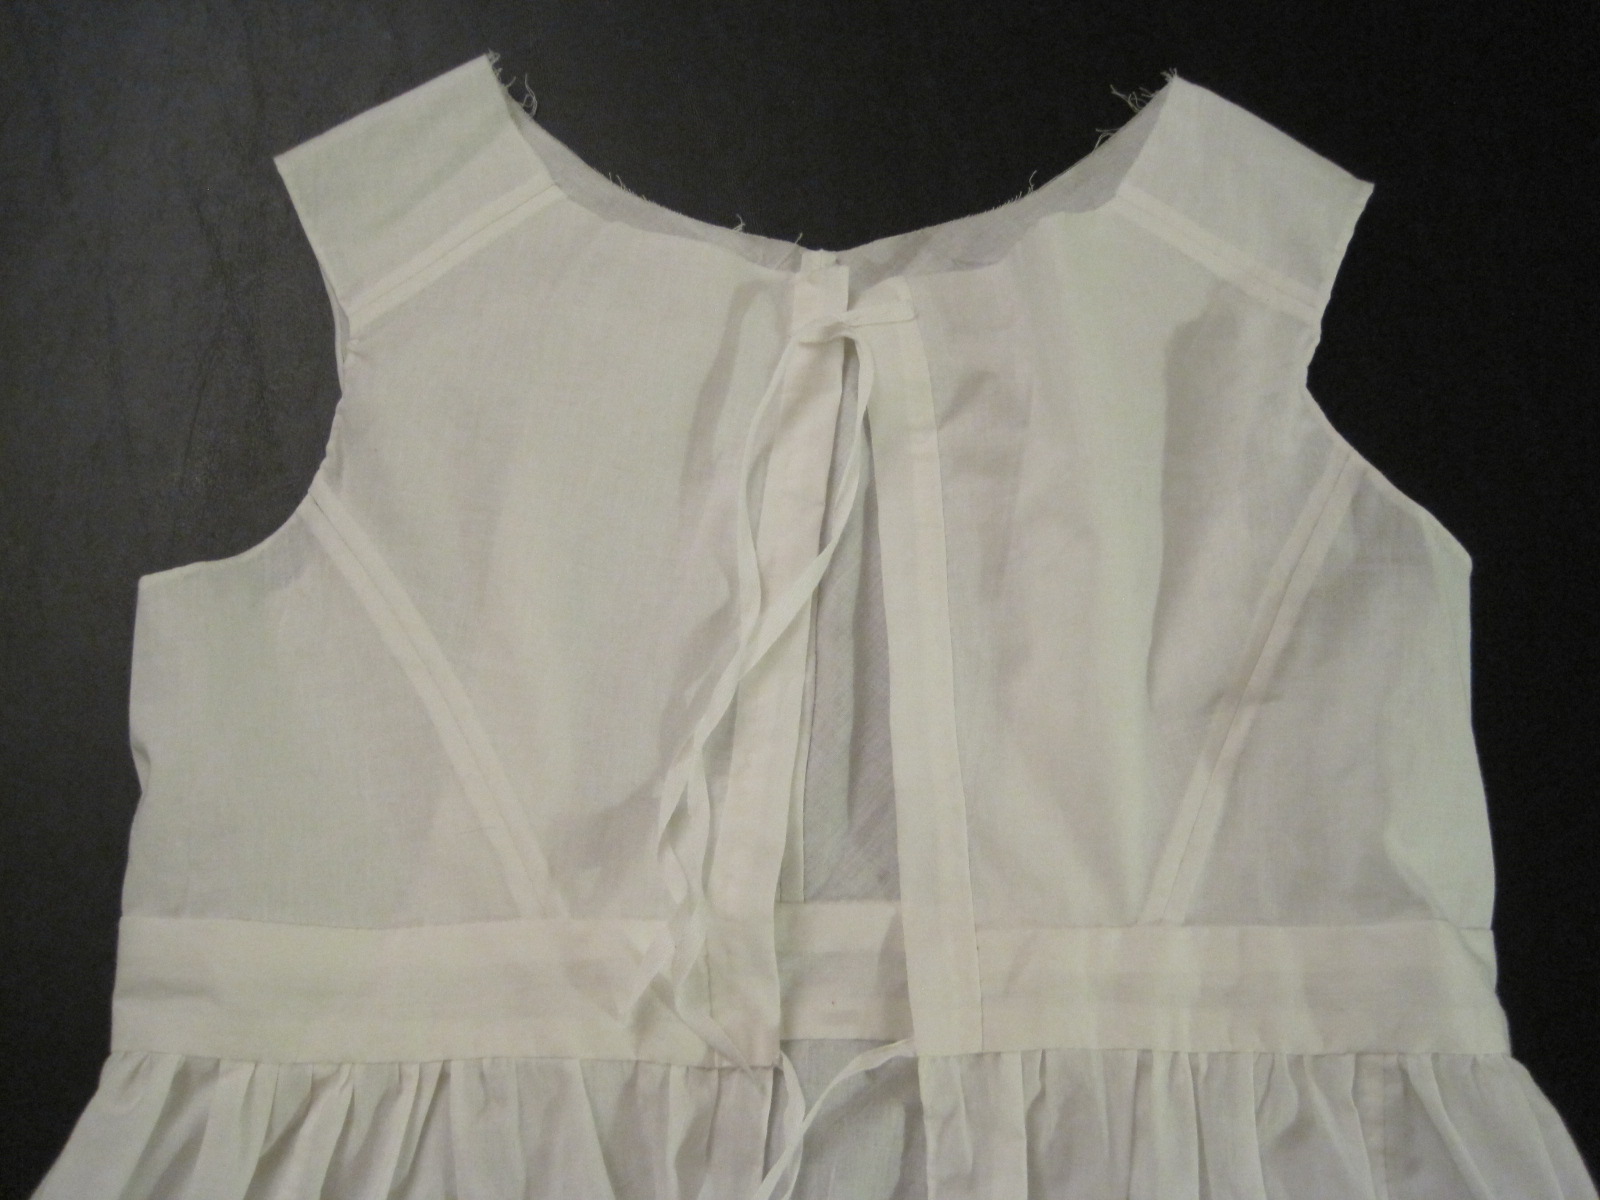
Inside view. This petticoat has three ties at center back to keep it closed.
IMG_4188
You know I like my insides to be pretty. This is a closeup of the arm hole and the neckline, which is bound with bias before having the lace sewn on.
IMG_4189
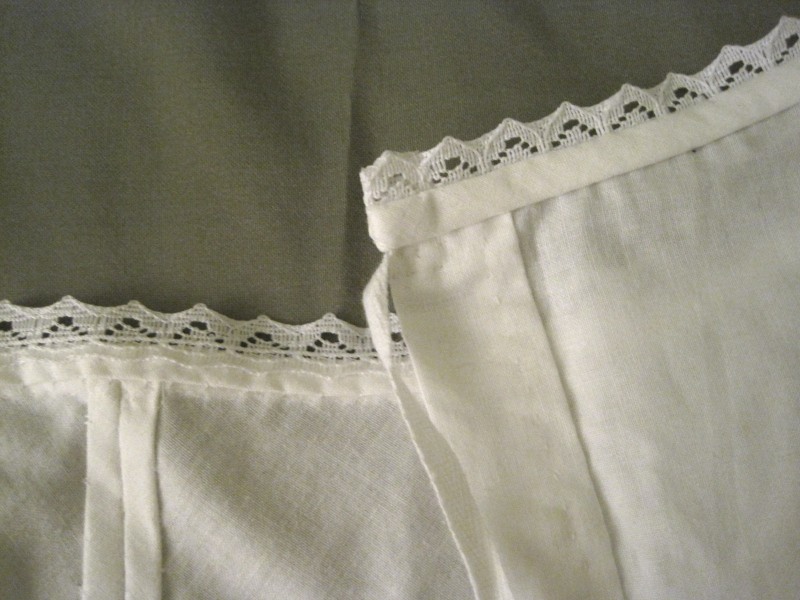
The double hem on the left is center front. Diagonally across the photo is the right side of the back.
IMG_4190
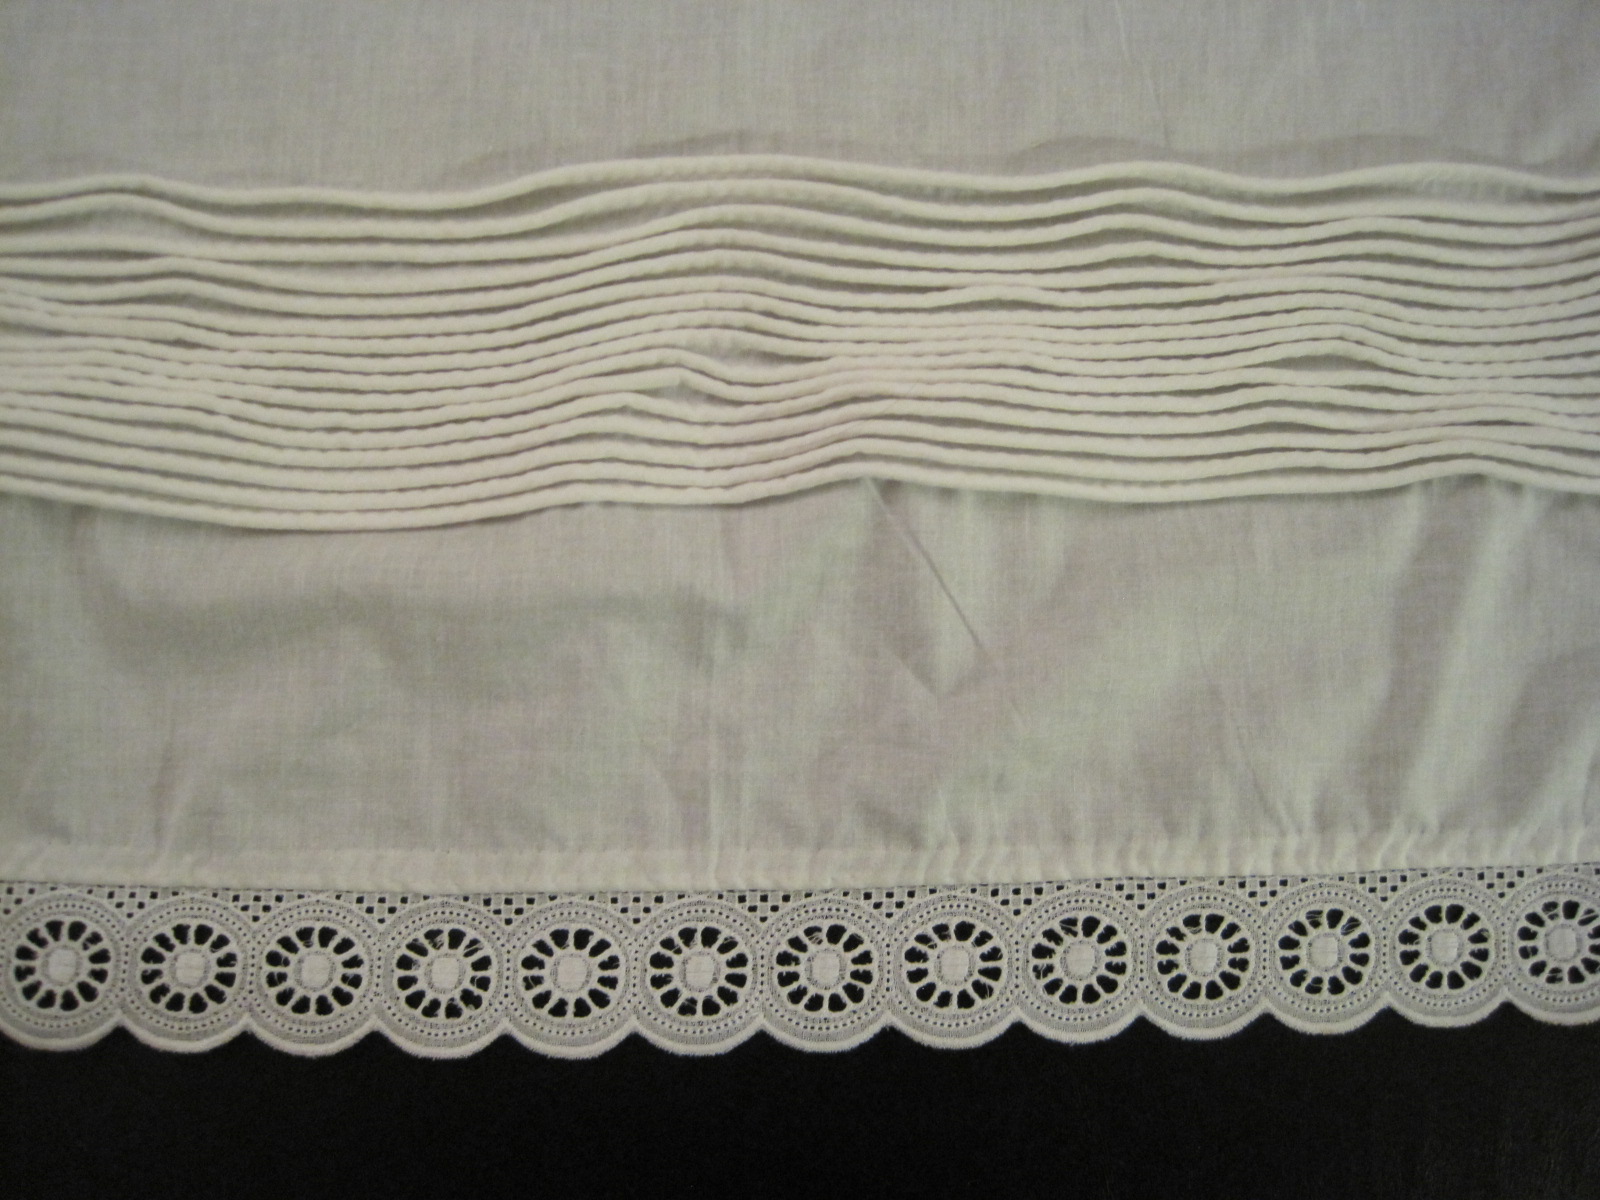
This cording was done last month, so it’s not really part of the UFO-ness, but it is still an accomplishment. 16 rows of hand sewn cording all around the hem.
IMG_4191
A close-up of the lace at the hem and my tiny stitches.

You can see some more detail shots in this past post.

And the facts?

Fabric: 3 1/2ish yds of white cotton

Pattern: Adapted from my 1822 green ball gown pattern. It’s pretty much exactly the same except that it doesn’t have sleeves. The ball gown pattern is based off of a pattern in Janet Arnold and styled as in the fashion plate you can see in this previous post.

Year: 1820s. The inspiration image is dated 1828-1835. You can see the inspiration image and my reasoning for it being more 1820s than 1830s here, in this past post.

Notions: About 1 1/2 yds of broderie anglaise trim, cut in half the long way to create double length; about 1 yd of white edging lace; and about 1 yd of 1/4″ cotton twill tape.

How historically accurate?: Very, having used modern materials. The pattern is from Janet Arnold, so you know it is good on accuracy. The entire petticoat is hand sewn and made of accurate fabric. The lace is machine made and the content is almost certainly not entirely accurate, but it is in the style of the early 19th century and the lace in the inspiration image. I’m not 100% sure that all of my seam finishes are perfectly accurate for this garment, but they are accurate for the period as a whole.

Hours to complete: I’m always bad at estimating this. Let’s say 120 hours.

First worn: To Fezziwig’s Ball in December 2012.

Total cost: Approzimately $13.

Project Journal: 1822-1824 Ensemble Part II: Initial Petticoat Details

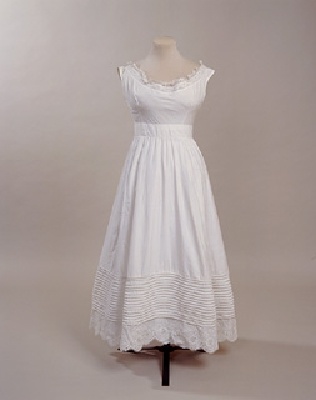
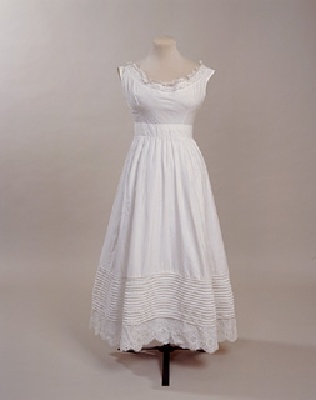
Petticoat. 1828-1835. Manchester City Galleries.

This bodiced petticoat is the inspiration for the first piece of my 1822-1824 ensemble that I need for December events. You can read more about the overview of the ensemble by viewing my last post: here. Despite the slightly later date given for this garment (later than my target of 1822-1824), the shape and construction are consistent with garments from the earlier 1820s, so I have no qualms about using this for my purposes in this case.

The description from Manchester City Galleries:

White cotton with high waist. Low, wide, round neck edged with embroidery and lace frill; piped armholes; front in one bias-cut section, back in two shaped sections, centre back fastening with drawstring at top and bottom of neck edging and at high waistband and two buttons; skirt front in one slightly flared section, two sections each side flared towards back, slit at hip in right back seam, centre back in two straight sections, closely gathered at centre waist; sixteen lines of piping at hem; edging of finer cotton scalloped and with openwork embroidery.


I used this description in combination with the 1820s patterns in Janet Arnold to create the bodice and skirt patterns. My petticoat is constructed out of plain white cotton. It is entirely hand sewn and has 16 rows of cording in the skirt. There is a edging of white cotton openwork embroidery at the hem. The seams are all flat felled in the skirt. The bodice seams are turned twice and stitched on each side of the seam. The petticoat closes in the back with ties.

Bodice of the petticoat with unfinished neckline.
Near the hem: 16 rows of cording and embroidery edging.
Super close up of a flat felled skirt seam, narrow hem, and whip stitches attaching the embroidery. The embroidery is whip stitched to the hem at the very bottom, and the top edge is whipped again on the inside (that’s the top horizontal row of stitches).
Back of the bodice.

The only remaining work to be done is to add another tie between the current two since the back wants to gap open just below my shoulder blades, to finish the neckline, and to adjust the gathers across the back (secret tip I’ve learned through building these garments: to get that great 1820s triangle shape, your gathers have to be super concentrated at the center back area, not spread out across the entire back, as these currently are). I plan to finish the neckline with narrow white lace, but I want to determine the neckline of my ball gown before finishing the neck of the petticoat. You understand that desire, I’m sure!

Differences from the original include: that I have a seam up center front of the bodice (no particular reason, it’s just that’s how it turned out), my cording is spaced closer together (which I’m not sure I like as much as the original, but I’m not taking it out now!), my armholes are narrow hemmed rather than piped, and my skirt closes right in the middle of the gathers rather than off center at the side back seam.

Pictures of the entire petticoat will have to wait. It looks pretty foolish on hanger, doesn’t fit a dress form (because the bust is so high), and it’s super awkward to get a full length picture of oneself… so we’ll just have to wait until I’m wearing it!

Project Journal: 1822-1824 Ensemble Part I: Overview

Well, as you recently read, I have a 9 month sewing plan to get me through May of 2013. It’s not set in stone (which means that mostly I keep adding to it, not taking things away…), but it gives me a great overview of what I need to accomplish and by what month. Deadlines really help in getting things completed!

The first major portion of the sewing plan is an ensemble of clothing from about the year 1823. I’ve been doing lots of looking at fashion plates and extant clothing from the early 1820s, in books and online. Here’s a link to my pinterest board: 1820-1824. I had so many pins in the 1820-1829 board that I had to separate the decade, so I also have a separate pin board of 1825-1829.

The 9 month plan includes the following pieces: petticoat, ball gown, walking dress, muff, bonnet, and chemisette. I’ve added one more thing since the plan was created: a tippet to match the muff! Before I explain why I want these items (ie, where I plan to wear them!), let’s look at my inspiration for the items themselves!

Petticoat. Manchester City Galleries. (I’m making a petticoat out of white cotton. It is entirely hand sewn.)
Actually a Dinner Dress (but I’ll use it as a ball gown). Ackerman’s Repository. May 1824. (I guess I lied about the year… I’ve been looking at the images so much I haven’t even glanced at the date in ages! Anyway… I’m making this in apple green silk with hand sewn silk organza appliqués.)
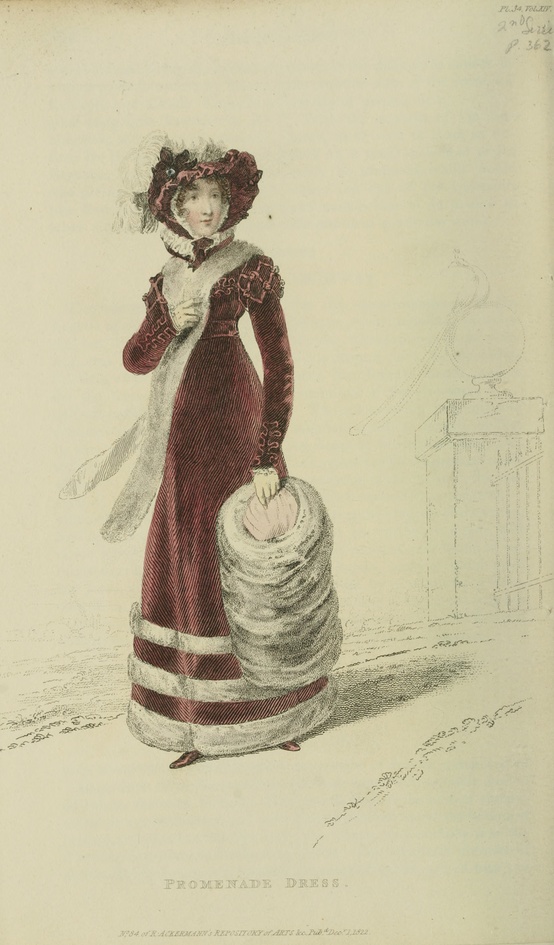
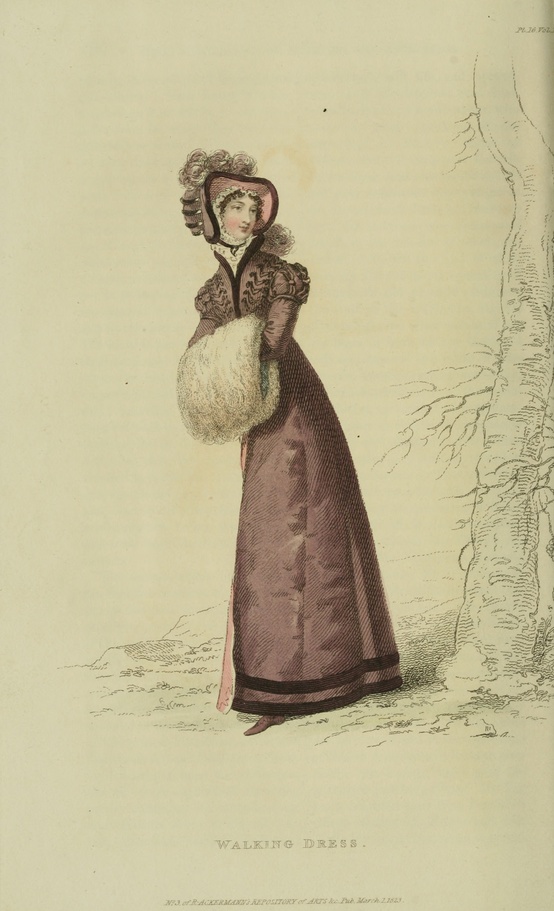
Promenade Dress. Ackerman’s Repository. December 1822. (I am making this out of deep, rich pinkish burgundy wool with hand sewn lavender silk trim.) This is also my inspiration for the tippet. (I’m making the tippet out of white faux fur.)
Walking Dress. Ackerman’s Repository. March 1823. (I think this is where I got the year 1823 from… This is another influence on my walking dress design, especially at the collar.) This is also my inspiration for my muff. (The muff will be the same fur as the tippet, lined with pale blue silk shantung.)
Bonnet. C. 1820. The Met. (I plan to make this in lavender to match the walking dress.)
Chemisette. c. 1810-1825. Snowshill Collection. (Yes, this is one of the ones in Janet Arnold. I plan to make this out of lightweight cotton and use my fluting iron! However, I have to say that if one thing in my December-to-do doesn’t make the cut, this would be it. I really want to take my time on this and play with my fluting iron, and I’m not sure I’ll have the time on this one…)

What is all of this for, you ask? I plan to wear the whole ensemble in December when I attend Fezziwig’s Ball, a 19th century ball hosted by the Commonwealth Vintage Dancers in Salem, MA. Since it’s a ball, I’m sure you understand why the petticoat and ball gown are required! But why the outerwear? Before the ball begins, ball-goers have the opportunity to go caroling around the streets! It’s really fun, and usually pretty cold. I need to stay warm, hence the wool walking dress, tippet, and muff. The chemisette is to fill in the collar of the walking dress, and the bonnet is really icing on the cake to help pull the whole ensemble together! As an added bonus, later this winter my friends and I hope to go ice skating in 19th century dress, so this will also be my ice skating outfit!

Sort-Of-New 1895 Blouse: At A Picnic With Teddy And Me

This is another case of the delays… The Commonwealth Vintage Dancers performed at an event in June (cough, cough… I am so slow!) that was called something like A Picnic for Teddy, Mommy, and Me. It was at the Salem Athenaeum, a private library, and was targeted toward young girls, their mothers, and their teddy bears! Cute!

We performed in 1890s whites. I had been dragging my feet about constructing my own whites, so I took this opportunity to go for it.

Dancing “Teddy Bear’s Picnic.” It’s really a ridiculous dance, but it fit the theme of the event perfectly!
It was super hot that day! Sitting, in the shade, was wonderful. As was my fan…
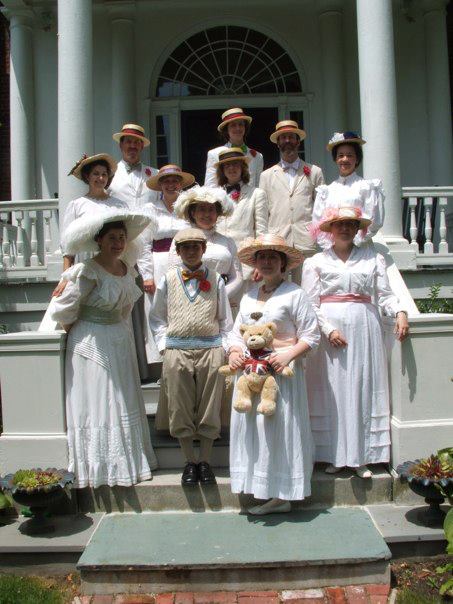
CVD on the steps of the Athanaeum.
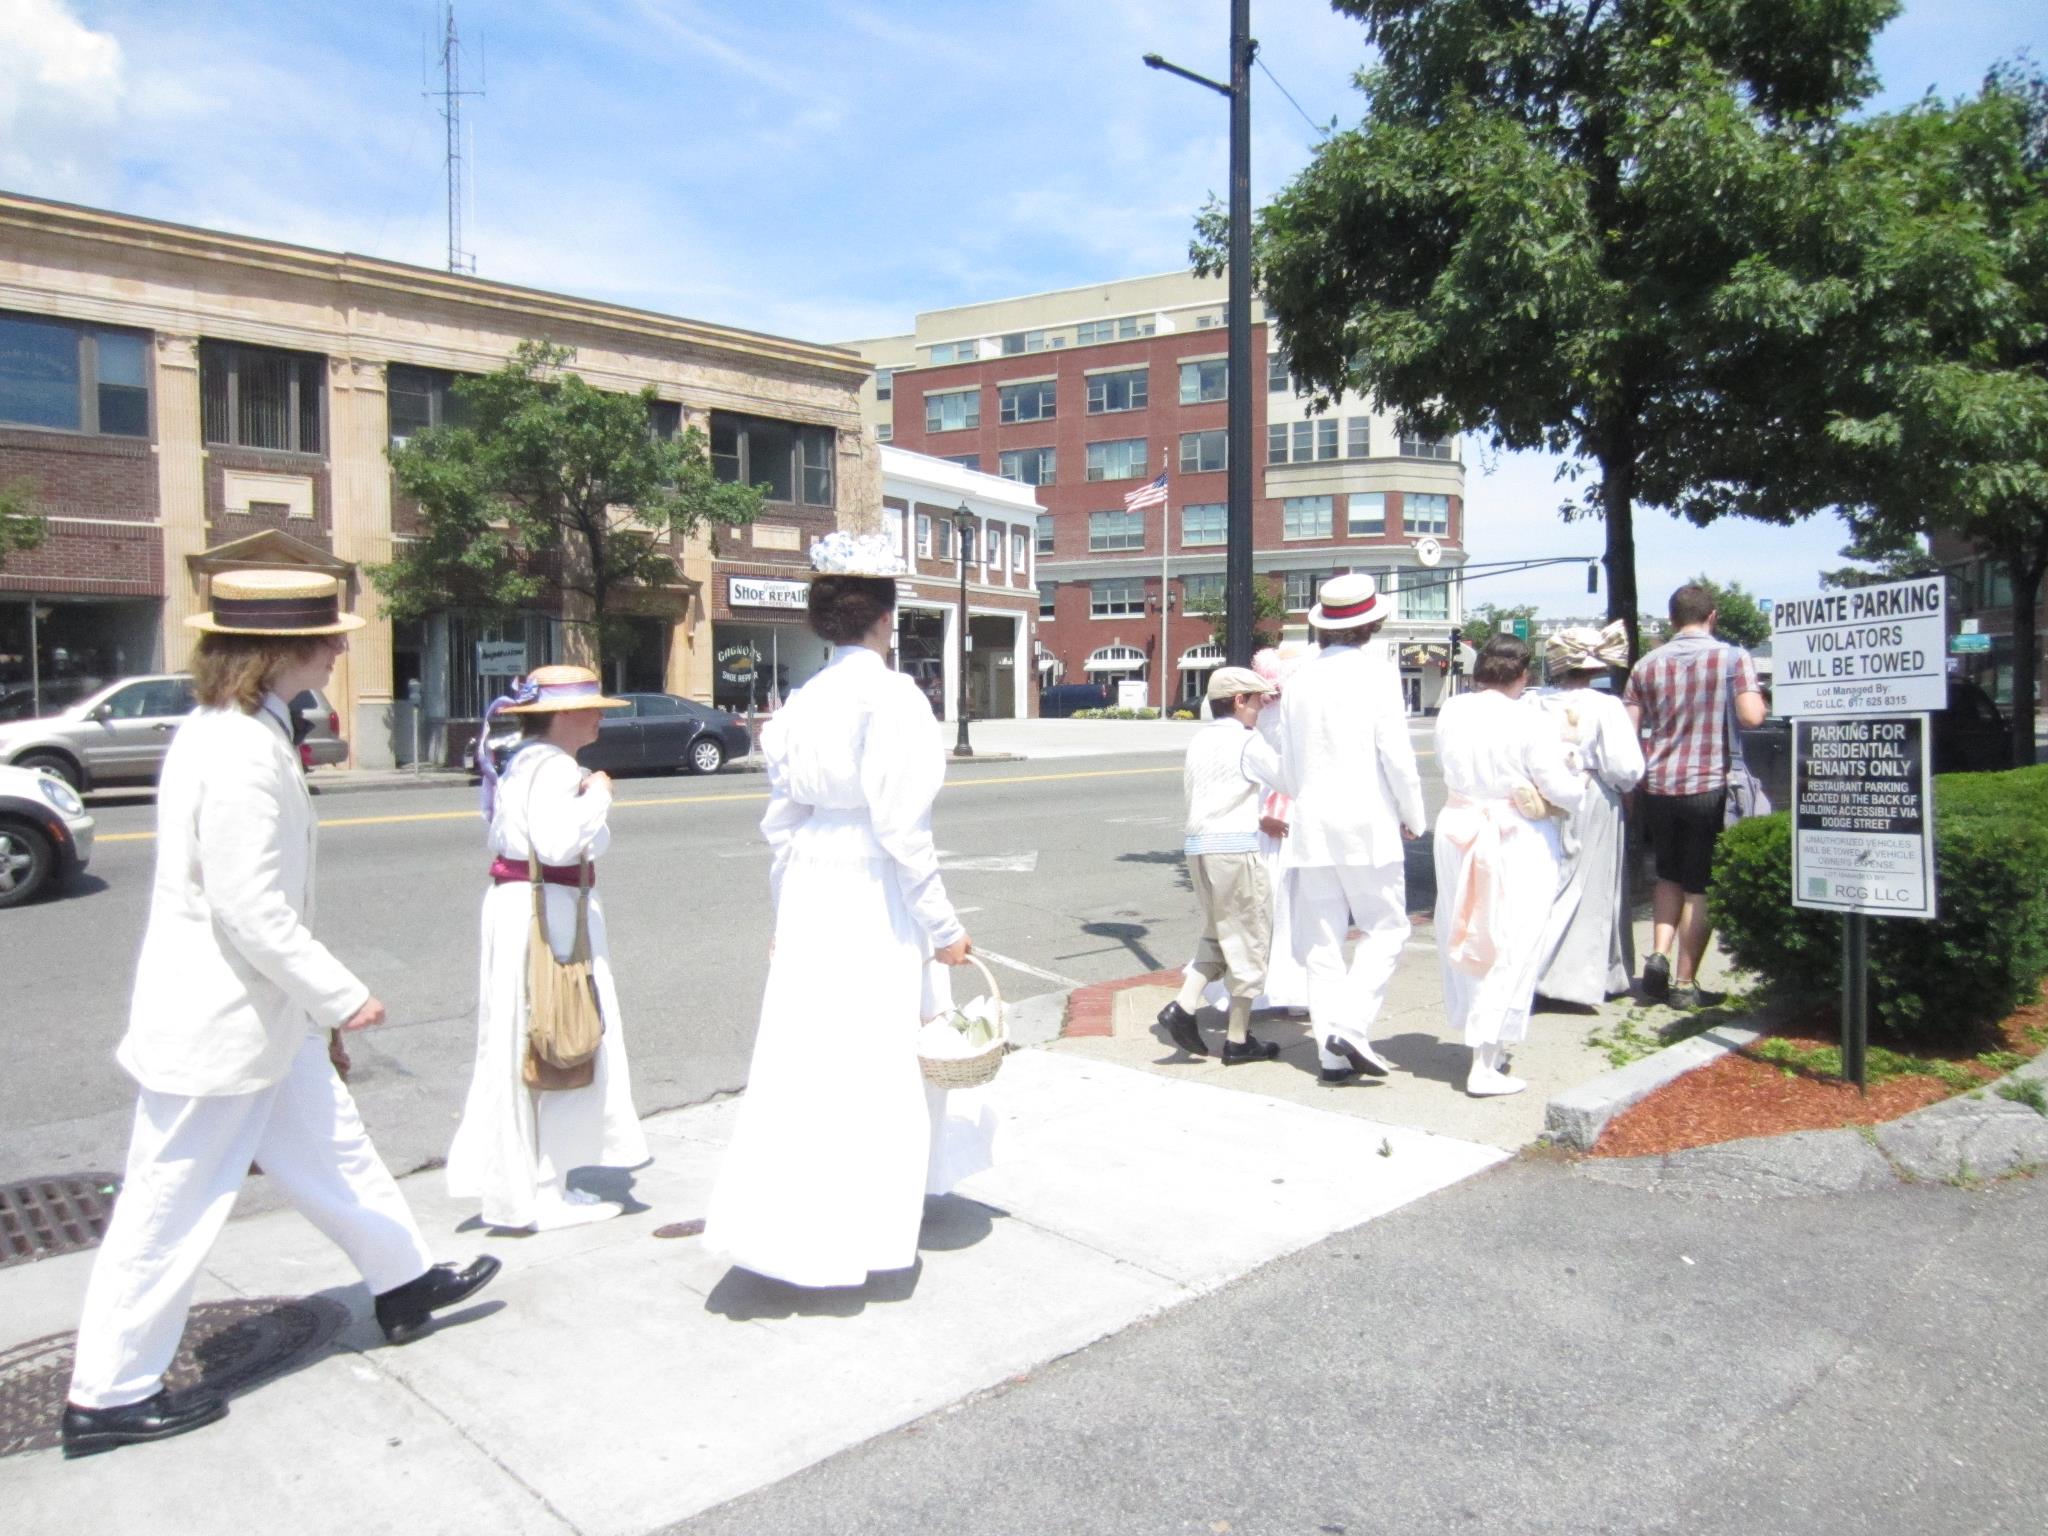
After the event we walked across Salem to get some lunch. Of course, Salem often sees people dressed in odd clothes, so we didn’t surprise people, but they were curious about what event we were going to.

I’m not totally sold on the white skirt I made. It’s a gored skirt and it works fine, it’s just not super eye catching (aka, it’s great for performances, but won’t get worn for other things… maybe it will be a petticoat if needed?). Oh, and I also threw the hat together, thinking that the white and blue would be nautical and good for Newport. But then I totally re-trimmed the hat at Newport because it didn’t have quite enough oomph with the white and blue. But the blouse… I love the blouse! It’s super comfy and lightweight, it closes in front (yay!), is washable,  and I like the fabric. Win!
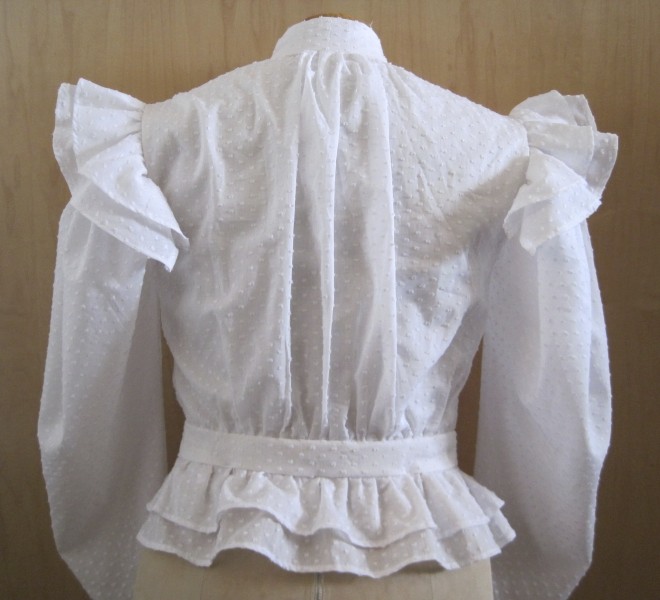
It is based off of a fashion plate in one of my many books. I draped a basic blouse pattern and adapted the pattern as needed to add the gathers in the front and back. The exterior is mounted on a lining made from the basic blouse pattern so that they gathers will stay where they are supposed to be. It is constructed of cotton with swiss dots for the exterior and a lightweight woven stripe cotton for the base (which I bought for $1 a yard a while ago! Love that price!). It closes up the front with concealed hooks and thread bars. The sleeves are quite large gigot sleeves, but because they are not lined they sort of just droop. Here are some pictures! I think I got pretty close to that inspiration image, don’t you? I love the feeling of success that comes with really nailing the look in reproducing a garment! Don’t we all?

The inspiration image.
Front of the blouse, on Squishy, the mannequin.
Back of the blouse on Squishy.
In the garden.

1812 Short Stays, Sleeveless Chemise, and Under Dress

Remember I recently shared with you the square necked 1812 Ikea curtain gown? And I promised pictures of the accompanying undergarments? Now is the time! Please forgive the silly black and white checked walls in these photos… I took the opportunity of having people around to take photos of me in the garments, despite the lack of a fitting setting.

Chemise and short stays.

The chemise is constructed of linen, and despite its rather cute a line shape, it is actually just a tube with shoulder straps. The front has a draw string across it to help it shape over the bust, which I think is part of the reason the front looks so evenly distributed and full. As you can see, I chose to make a sleeveless chemise, specifically for the square necked gown.

Back view.

The back of the chemise is cut low and square to fit within the shape of the square necked gown. Next is a closeup of the stays so you can see more detail.

Short stays.

In this photo you can see the drawstring on the chemise. You can also see the front lacing stays better. They are essentially the same basic shape as my longer pink stays, with a few differences. The pink stays have a simple front, back, hip gusset, bust gusset construction, whereas these new stays have a back piece, side piece, and then front piece with the bust gussets. For this pair, I think I actually could do without one of the bust gussets, since it looks a little big. But it’s WAY too late now to change that! I had to cut the area under the arm pretty low to be comfortable, and I also had to move the straps a few times, especially in front. If they are too far out they cut into your arm joint when you try to move–not comfortable, let me tell you–but they needed to be pretty wide in order to accommodate the wide neckline of the square necked gown.

The stays are white cotton twill layered with two layers of cotton canvas, except the gussets and straps, which are just one layer of the canvas and one layer of the twill. The stays are bound with white cotton bias. They are boned (only at center front to stabilize the eyelets) with plastic wire ties. Despite the light boning they are quite stable when laced up. And let me just say how much easier it is to get dressed when your stays lace in front! So easy! Love it!

These stays were stitched by machine. I needed them done quickly and I wanted to be able to dance and sweat in them without having spent lots of hours hand sewing them. Also… at some point when I washed them (after the 1812 Guerriere weekend, when they were wet through from sweat) they got streaky. Now they are mostly off white, but still have bright white streaks. So I didn’t feel the need to make them super pretty and spend the time hand sewing them. I did hand sew the eyelets for the lacing. I thought about doing spiral lacing, but then when I made the eyelets I forgot to space them that way… so they don’t spiral lace.

Under dress.

The other new undergarment is this under dress–needed because of the sheerness of the dress fabric. So here it is. The skirt is the same dimensions as the square neck dress, and mounted to the bodice in the same way. The bodice also uses the same pattern, except that the front is not gathered. There is a small tuck on each side of the bust, but that’s it. The straps on the under dress are similar to the straps on the chemise and stays, so that they don’t interfere with the sheer sleeves of the gown. The under dress ties in back at the top and where the waist is. The day of these pictures one of the lower ties came off, so you can see the gap where a tie would normally be. Below the ties are an opening of about 8″ that allows me to get in and out of the garment. It all looks quite a-line in these photos, but with the dress on top the whole thing looks much more columnar.

Back of the underdress with the missing tie.

I think I’ll do another separate post with some of my research images for the sleeveless under garments. So for now, this is it!

1812 Guerriere Weekend Part IV: A New 1812 Gown

My favorite picture of my new 1812 gown, from the Guerriere weekend at the Commandant’s House at the Charlestown Navy Yard in Boston.

Ok, I admit that it is not a very clever title, but it fits the subject matter perfectly!

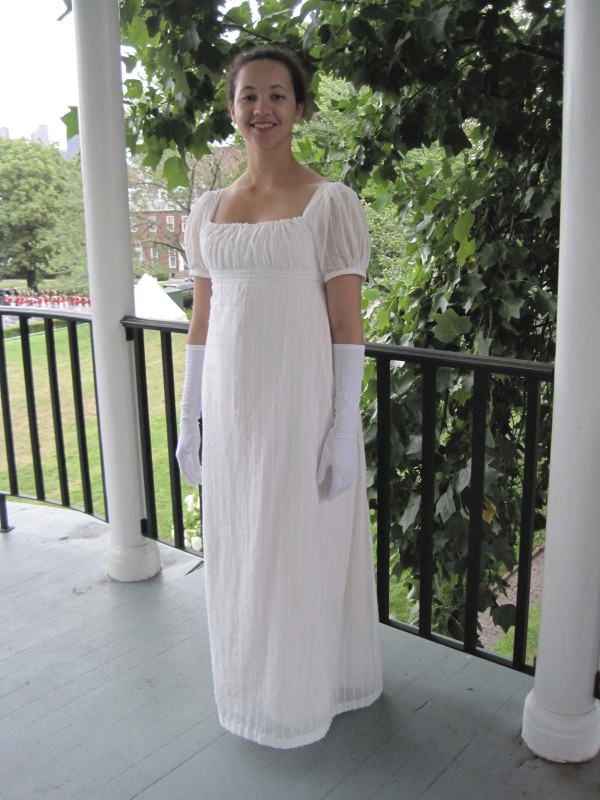
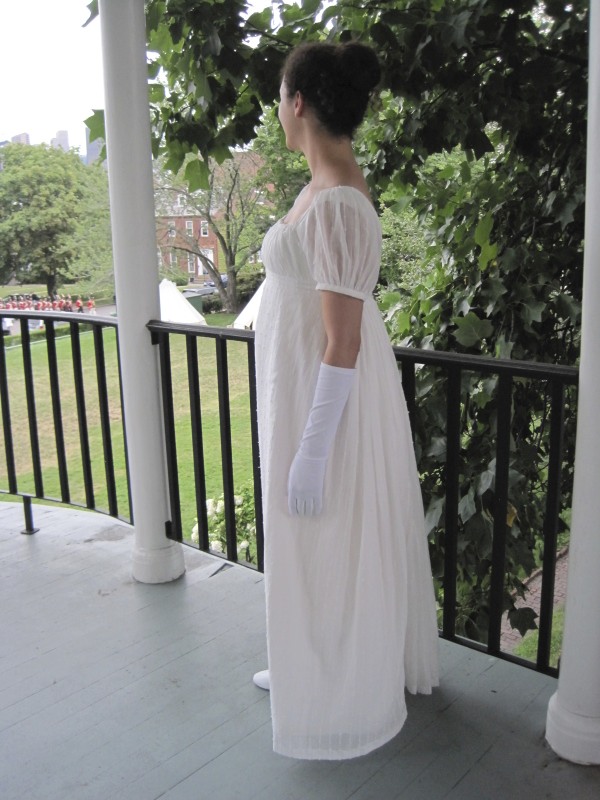
First, some details. This 1812 reproduction gown is constructed from 100% cotton curtains from Ikea. Yes, Ikea. You never know where you’re going to run across fantastic fabric. In fact, these Matilda curtains were made in India, which is very fitting for a Regency gown, because cottons in the early 19th century were being imported from India. It is very lightweight, sheer gauze with a 1/8″ vertical stripe spaced every 1″ across the fabric and with woven in dots every 1″ vertically. I bought a package of two curtain panels, each 55″ wide by 98″ long.

Does it look like a curtain dress? I’m sad to report that Mr. Q didn’t realize, until I explained it to him, that the idea of a curtain dress is a famous theme from Gone With The Wind… How could I have attached myself to someone who doesn’t know that? Opposites attract?

The skirt for the gown is a two panel tube, 43″ long by 110″ circumference. The front is stitched flat to the waistband and the remaining fabric is tightly gathered into the back across 13″. Center front and center back are actually the middle of the panels, so that the two seams are lost in the back gathers. The gown opens center back with hooks and eyes on the bodice and a narrowly hemmed slit that extends 8″ down the center of the back panel. The slit is also lost in the gathers. The waistband is 1″ wide. It was cut on the cross and has long tucks taken all around it so that it has three stripes spaced close together.

You can really see the difference between the flat front and the gathered back in this side view.

The bodice pattern is taken from Janet Arnold Patterns of Fashion I “c. 1806-1809 frock” and adjusted for fit and so that the entire front panel has a 2:1 gather ratio at the top and bottom (essentially, just more gathers than the original dress). What I really love about that pattern is the simplicity of the neckline. The bodice is cut separately from the straps, and the straps are cut on the straight grain, thus they fit really well with a wide square neck that stays square and doesn’t fall off your shoulders! GENIUS! Sometimes those historic tailors and dressmakers really amaze me with their sensible-ness. The bottom gathers are sewn to the waistband, but the top gathers are adjustable with a tie at center front. The ties are stitched to the armsceye seam allowance and can be tightened from center front then tucked inside the gown. The shoulder straps are folded in half with the fold towards the neck so that I didn’t have to finish that edge (another 19th century smart trick!). There is a stripe in the middle of each strap.

Oooo, wait, I love this picture too! Sometimes I think my smile is dorky, but not here! And the leaves make a lovely background. Anyway… you can also see the bodice details better in this photo.

The sleeves are a conglomeration of various patterns… essentially they are just a normal Regency short sleeve pattern with about 6″ extra fullness at the top and bottom which is gathered into the armsceye and the sleeve band. The sleeve bands are cut on the cross, like the shoulder straps, and on the fold. They are placed so that the stripe runs around them. I wanted them to puff more, so after these pictures I took a few tucks in the underarm seams of the sleeves so they can’t hang as low on my arms. We’ll see how that looks next time I wear the dress.

With regard to inside finishing… The skirt seams didn’t need anything, because they are selvedge edges. The hem is 1″ turned twice and stitched down with a small running stitch (stitches every 1/16″ to 1/8″). The waistband is faced on the inside with a second waistband (without worrying about having three stripes running around it) that encloses all of the gathers on the top and bottom. The armsceyes are bound with self fabric bias strips. The few bodice seams are flat felled. The top edge of the back of the bodice has a narrow hem.

You can see the fabric pretty well in this photo.

The best part about this dress is that it is the first entirely hand sewn reproduction garment I’ve made (I think). I’ve come pretty close in work I’ve done in the past, but I’ve always used a sewing machine for inside seams and things that won’t be seen. Not so with this one. There were two reasons for hand sewing it: 1-I wanted to have the satisfaction of it 2-I had a week to make the dress and a long road trip for about half of the week I had… you can’t use a sewing machine in a moving car as far as I know… but you can hand sew! So the second best part about this dress: I whipped it up in one week, with undergarments!

I hadn’t mentioned that part yet. To accomodate the wide, square neckline and sheer sleeves of this gown, I had to make three other new pieces as well! A sleeveless chemise to accommodate the square neck and sheer sleeves, an underdress/petticoat to add some opacity which also needed to have a square neck, and a new pair of stays in white (because my only other regency pair are pink… and that would have not been subtle at all!). To be fair and honest, I didn’t get all the inside finishing done on these four garments the first time I wore them, and I did use a sewing machine for the undergarments. I was saftey pinned into the stays… I was madly hemming the underdress the day of our final dress rehearsal… and the chemise had unfinished edges… but you couldn’t tell once I put the dress on! I still need to finish some of the undergarments, actually… so hopefully once I do that I can take some pictures of them and do a post detailing their construction! Also in the works is another underdress that can be worn under this white dress. It will be a nice medium Regency-like blue.

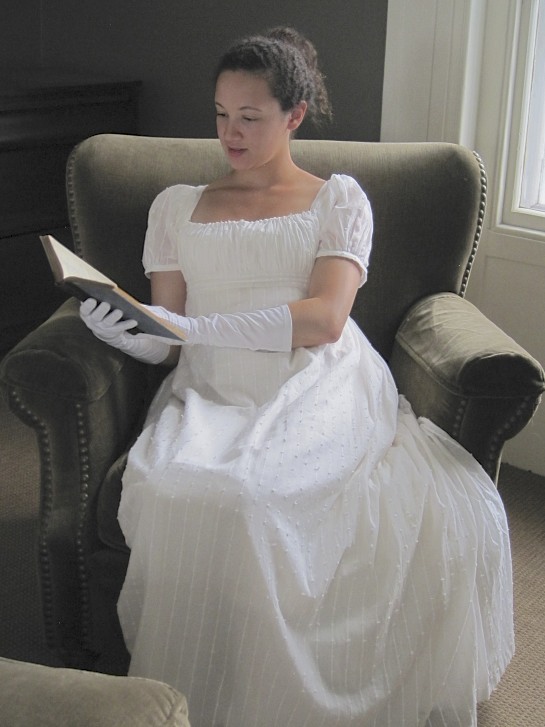
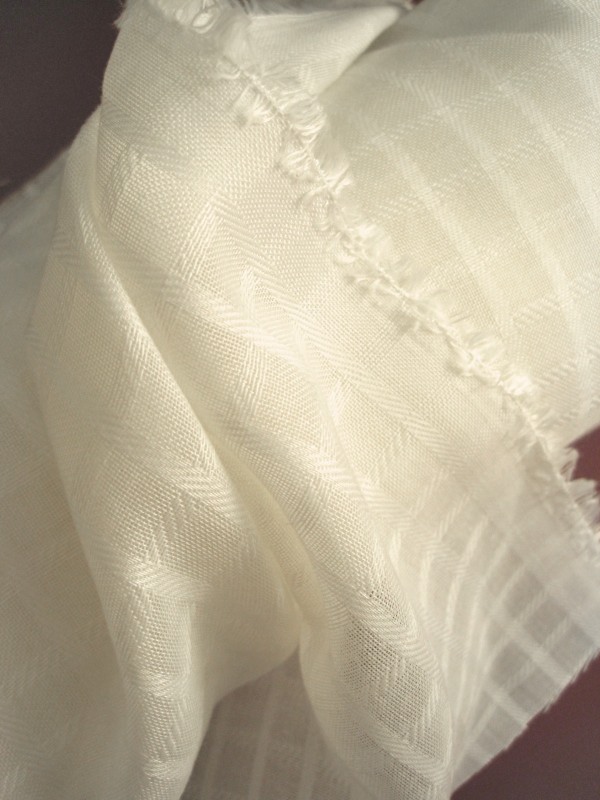
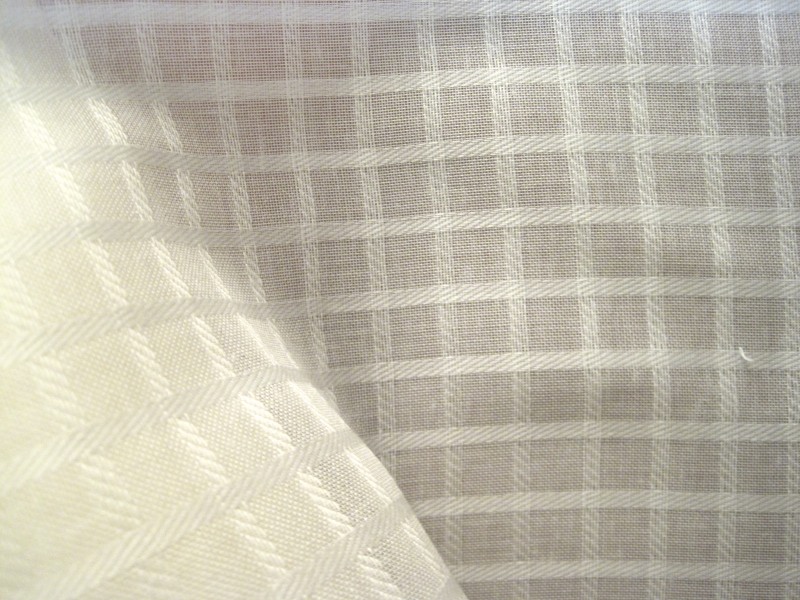
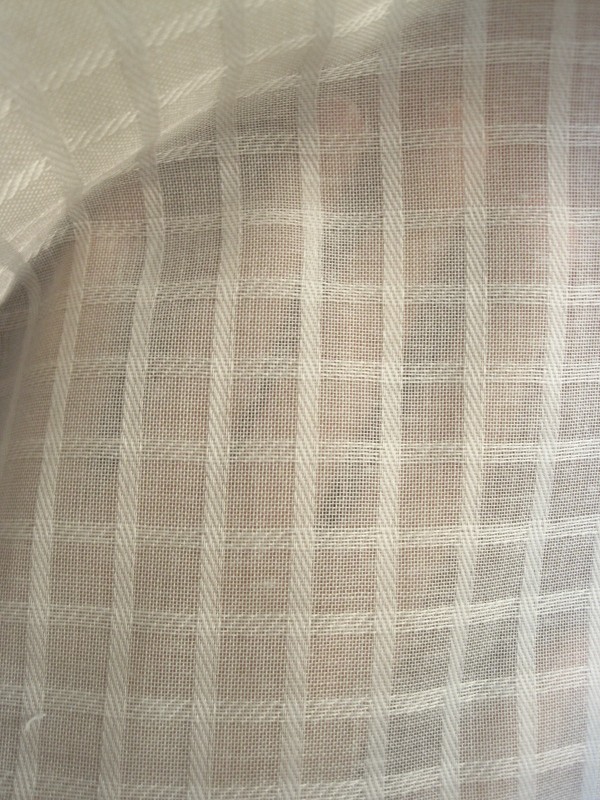
Pictures of A New Fabric Stash Addition: Windowpane Ivory Cotton Gauze

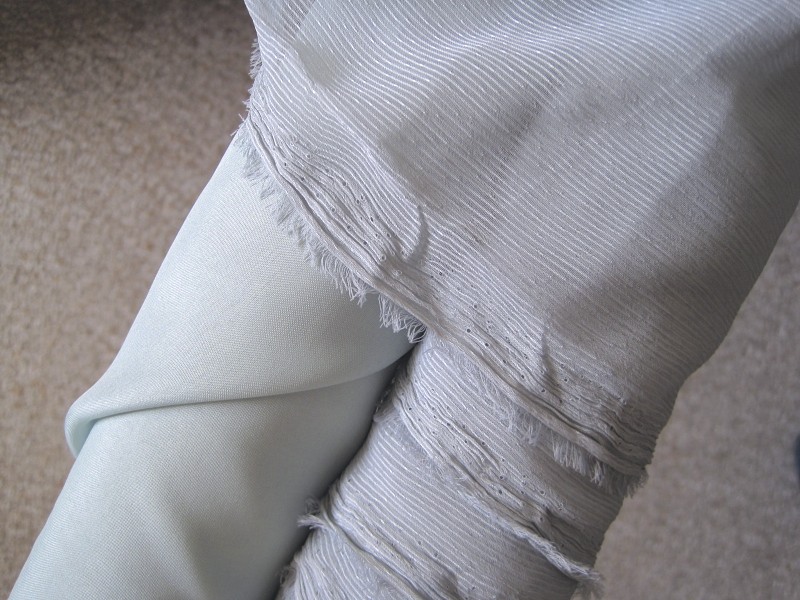
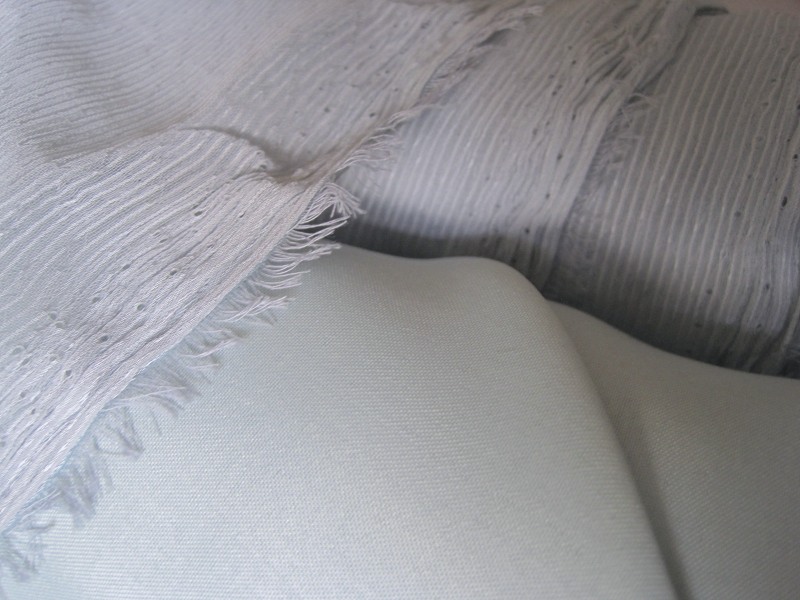
I recently mentioned the addition of a new fabric to my stash! I bought it with the thought to build an early Regency dress and another something or two. Perhaps an 18th century apron? Or an Edwardian blouse? Now I’m also considering a frothy 1908-ish dress. And I’m sure that more ideas will be sparked before I actually construct anything (because there are many other things on the “to be sewn” list that need to come first!). But I did promise pictures. Here they are!

Ivory cotton gauze with windowpane pattern. It’s fairly sturdy, but has a lovely drape and is quite soft to the touch.
It’s semi-transparent. This is with nothing behind it but color.
This is with my hand behind it. You can see the outline of my hand pretty distinctly.

A future project: 18th Century Pockets

For the last month, I have been pondering the idea of making 18th century pockets. It was my idea to wear them to an 18th century ball and use them  as a place to store my modern items (cell phone, credit card, cash, car keys, etc.). I was thinking of making simple linen ones, without embroidery, but once I started researching them I realized that I really wanted to go the full distance. In this case, the full distance meant hand sewn silk embroidery… The realization hit me just a few days before the ball that this plan was flawed. There was no way I was going to complete hand embroidered pockets in the time I had left. My choices: to fudge it and be stressed out while trying to complete hand embroidery with cotton thread or to wait, source my products and make a plan, and enjoy my time hand embroidering. What to do? Well, I decided to do the latter and I am glad to say that I am thankful to have used common sense and avoided stress! For now, the plan to make pockets has been added to my list of things to make in my leisure sewing time (when other, more time sensitive projects are lacking… Does that ever happen???). These charming pink, green, and blue ones are my goal.

Early 1700s pockets, linen embroidered with silk, trimmed with silk ribbon and with silk ties (V and A)

Pockets in the 18th century were often made of linen and elaborately embroidered in colorful silk or wool thread, as with the example above and the following examples. Aren’t these yellow trimmed ones adorable? It looks like the pocket slits are smiling!

Mid-1700s pockets, linen embroidered with silk, trimmed with silk and with silk and linen ties (Manchester City Galleries)

This next pair of pockets has beautiful (and intense) embroidery.

Mid-1700s pockets, linen embroidered with wool, with linen ties (Worthing Museum and Art Gallery)

This next pocket has a lovely embroidered pattern that looks much simpler to replicate than the previous examples. This is my back up plan if the other, more complicated embroidery proves to be too much.

1718-1720 pocket, linen embroidered with silk, with linen ties (V and A)

The pockets with unfinished red embroidery are an excellent example of pocket construction. You can see the manner in which the design is marked as well as the embroidery being completed prior to the pocket being cut out and assembled.

1718-1720 pockets, linen with silk embroidery, the pattern drawn in ink (V and A)

There are also some pockets constructed of silk, such as these, below. These pockets were acquired with a quilted silk petticoat and the Victoria and ALbert Museum assumes that they were intended to be worn together. They look puffy and super cute, but because they are assumed to have such a specific purpose I don’t think they are the right idea for me. Also, I wouldn’t get to embroider!

Mid-1700s pockets, silk with silk ribbon (V and A)

Pockets continued to be used in the 19th century, but they were often constructed of cotton rather than linen and were not as elaborately embroidered as in the pervious century. Some 19th century pockets were constructed of cottons with woven patterns, such as stripes or diamonds as well as the occasional pocket of satin weave cotton fabric. In the middle of the century embroidery was again used as decoration, though the motifs were changed from the 18th century. These next few pockets are just a few 19th century ones I like, either because they use interesting fabrics, or because they are smiling at you!

Late 1800s pockets, twill weave cotton (Oxfordshire Museum Service)
I like this one especially, because it really does look like a smiley face pocket! Early 1800s pockets, ribbed cotton, with cotton tape (Cheltenham Art Gallery and Museum)
Early-mid-1800s pockets, satin weave cotton (Maidstone Museum and Bentlif Art Gallery)
early 1800s pockets, figured silk satin, trimmed with silk (Cheltenham Art Gallery and Museum)

Do you have a favorite pocket amongst these? Does any pair stand out to you?

All of these pockets were recently available at here, at VADS: the online resource for visual arts; however, VADS appears to no longer be operable (perhaps because of recent US government action to curtail internet copyright infringement?).   Alternatively, the Victoria and Albert Museum has a pretty good selection of pockets, including some of the ones featured on VADS.