Plum Pants Photo Shoot

When I made my vintage-inspired Plum Pants With Pointed Pockets in 2020, I didn’t have a great opportunity to get photos of them right away. I made do with photos taken in my yard, with my phone balanced on my lawn mower in lieu of a tripod!

Since then, I’ve worn them relatively often in warm months for ‘real’ life and historical events. I thought I would intentionally wear them for the GBVS Newport Weekend in 2022 because of their comfortable nature but also in order to get pictures of them in fabulous places that have far more glamour than my backyard!

The opportunity presented itself on the grounds of Rosecliff. The grand windows and patio with the lion statue were too much not to pass up!

Accordingly, there is a whole serious of photos showing off the wide legs of pants in the bright summer sunlight.

I can’t decide which pose is my favorite! I do like the ones where the points of the pockets are in the sun rather than the shade, such that you can see them. But some of the photos with the points in the shade have such great attitude!

The side of Rosecliff is beautiful as well, in terms of architectural details and gardens. It was also a lovely place to get photos.

And a closer view with the sun highlighting the pocket points.

Thanks for enjoying this summer-y photo shoot with me!

GBVS Newport Weekend 2022, Part I (Overview)

It’s 2023 now, so that alone is an indication that is post is belated. It will seem even more belated when I share that this event happened in Summer of 2022. Better late than never, though, and I am actually quite excited to share my adventures at this event hosted by the Greater Boston Vintage Society.

To start, a short post sharing some outfits and a brief overview of the weekend’s events. The next post I’ll devote to Newport mansion tour highlights.

The Newport Weekend is a recurring event that takes place in Newport, Rhode Island. In 2022, participants could choose to attend for a single day or stay overnight in the dorms at Salve Regina University. I chose to stay overnight, which allowed for a lengthier stay and therefore more adventures.

On Saturday, I wore my 1925 Blue Coral Dress, a tried and true favorite for hot summer days. Being made of opaque lightweight cotton that doesn’t show wrinkles, it’s an excellent choice for lounging, picnicking, dancing, and being swept about in the occasional breeze. With this dress I wore my Royal Vintage/American Duchess Ginger shoes and 1920s Wide Brim Hat. It’s been awhile since I wore any of these things and the hat, in particular. The large brim is dramatic and enjoyable!

These photos were taken inside and outside the Fairlawn Estate at Salve Regina, which was built in 1852-1853. You can read more about it at the Salve Regina Library site, here.

After various hijinks and shenanigans during the day, I changed into my 1950 Baroness Dress for the evening ball, which I accessorized with sparkly silver jewelry and my silver American Duchess Seabury shoes. I love the dramatic color and massive bow feature on this dress! It was fun to get it out of the closet and wear it again!

Sunday had a bit of picnicking as well as Newport mansion tours. It’s been years since I toured The Breakers, pictured below, so that was fun to do again. The immense expense of Newport ‘cottages’ is jaw dropping, every time. I also chose to visit some of the other mansions that I haven’t visited before. I’ll share photos of those in a separate post.

For now,  here’s an outfit photo as though I’m ‘visiting’ The Breakers. I wore my 1930s vintage-inspired Plum Pants with Pointed Pockets, paired with a modern blouse and my Gingers, again. I’ll admit that it was a lot of walking for heels, even comfortable ones… but, they go so well with my outfit that I couldn’t resist!

And that was the weekend! It was fun to see old friends, meet new acquaintances, and make new memories with everyone. Plus, fabulous locations and historical clothes!

1930s Holyhead Harpies Adventure

Some of my friends decided to make 1930s quidditch uniforms for the Holyhead Harpies team (these are all Harry Potter references, in case that sentence makes no sense to you!). I didn’t have the time to join them in that particular endeavor, but I did have a 1933 dress in my closet in the team colors (green and gold) and we decided it would be fun for me to tag along on the quidditch adventure. One could call me team manager, or a fan, or… take your pick!

My role might depend on which photo you’re looking at… I brought along a wand and my time turner and made sure to run the team through their drills!

Our initial photos were fun, but the backgrounds weren’t great, so we decided to do an autumnal outdoor photo shoot, which we combined with regular photos of my dress, too. The non-Holyhead Harpy photos of the dress can be seen here in a previous post.

You can’t really see the detail of the pennant in the last photo (but look at that gorgeous tree!), so below is a closer photo. One of my friends had great fun making the felt pennants!

We had fun taking action shots, too!

Who says quidditch brooms aren’t real?

Quidditch champions!

Sometimes a bit of silly is good for you. Certainly it brings smiles! To read more about the idea to make 1930s quidditch uniforms, check out this post about it on Plaid Petticoats.

An Autumn Outing For The 1933 Green & Gold Dress

It’s autumn! I think this is my favorite season. Chilly air mixed with sunshine… The return of wool sweaters and skirts… Crisp apples and fresh cider… Yum!

I thought I’d set the season by sharing a few photos from an autumn photo shoot that haven’t made it onto the blog yet. They are so wonderfully autumnal that I’ve been saving them until the perfect time of year!

The story behind the photo shoot is that back in 2017 I made a bias cut 1933 dress. It is green with a small windowpane woven in gold and features gold taffeta accents as well as a gold tilt hat remade from a vintage velour cloche-shaped hat. Construction details and the original photo shoot were blogged about here.

At the time I made the dress I had no particular plans for it, but I’m pleased to say that I have put it to use a few times in the last few years. Most recently, I wore it on this gorgeous autumn day in order to get updated photos of it and to join friends as we photographed them in 1930s-style Holyhead Harpy quidditch uniforms (this is a reference to Harry Potter… more on that in a future post!).

I loved the idea of the gold accents in harmony with the changing leaves, though I think it’s possible the leaves mostly stole the show!

It was such a beautiful day! With or without leaves the trees looked striking against the brilliant blue sky.

In addition to getting photos, we had a picnic followed by a lovely walk as we took in the trees, sunshine, and fresh air. Autumn is only just starting so there’s plenty of time to get some more of that, too!

Making A 1933 Summer Hat

Last post, I shared my 1933 Sunshine Stripes dress with you. One of the accessories that I loved wearing with that dress was a modern sun hat that I remade into a 1930s shaped hat. Now I’d like to share how easy this process was. I hope it inspires you to try remaking something yourself!

I started with this modern ‘straw’ hat from eBay. I say ‘straw’ because the fiber is really plastic rather than any sort of natural material… but I digress. The price was good and I thought white would be a nice neutral for my 1920s summer wardrobe. But the crown on this hat was soooo tall! 5″! It came way down over my eyebrows and combined with the floppy brim it was not a great look nor was it historical. I think I tried to wear it a few years ago but was displeased with the shape. The only bonus is that it squishes well and pops right back into shape–that’s great for packing! (As a side note, in trying to find the link for the hat I realized I ordered this back in 2015… it only took me a few years to make it something I was really pleased with!)

While trying to decide what to accessorize my 1933 dress with, I looked at the hat in my closet and wondered if there was anything to be done to make it better. I figured the white would coordinate well with the white stripes in the dress fabric. I looked for hat inspiration on my 1930s sportswear Pinterest board and 1930s day wear Pinterest board and decided that the main problem with my hat was the tall crown. I wanted a hat that just perched on my head, so I needed to shorten the crown.

I started by ripping out the stitching on the lower part of the crown just above where it connected to the brim. Here’s the hat at this point with the shallower crown and brim still technically attached.

After determining that I liked the new crown height, I cut away the extra braid. Then I wrapped the loose ends around the crown and brim and stitched them down so I had two nicely finished parts.

Then I reassembled the two parts, carefully stitching them together while avoiding the inner hat band. I matched the stitch length to what was already on the hat (rather long, by my usual standards). Because the hat is so malleable it was easy to squash onto the sewing machine.

After stitching, the join blends right in! The only thing left was trim!

I decided on a simple brown band to trim the hat. I had the brown cotton in my stash and it matched my shoes well. It is nicely complimentary for the outfit without being match-y and it’s neutral enough that I can easily wear this with other outfits as well. The brown is carefully hand sewn around the crown with the ends spreading over the brim of the hat. Ta da! Elegant sun protection!

Sunshine Yellow Stripes In 1933

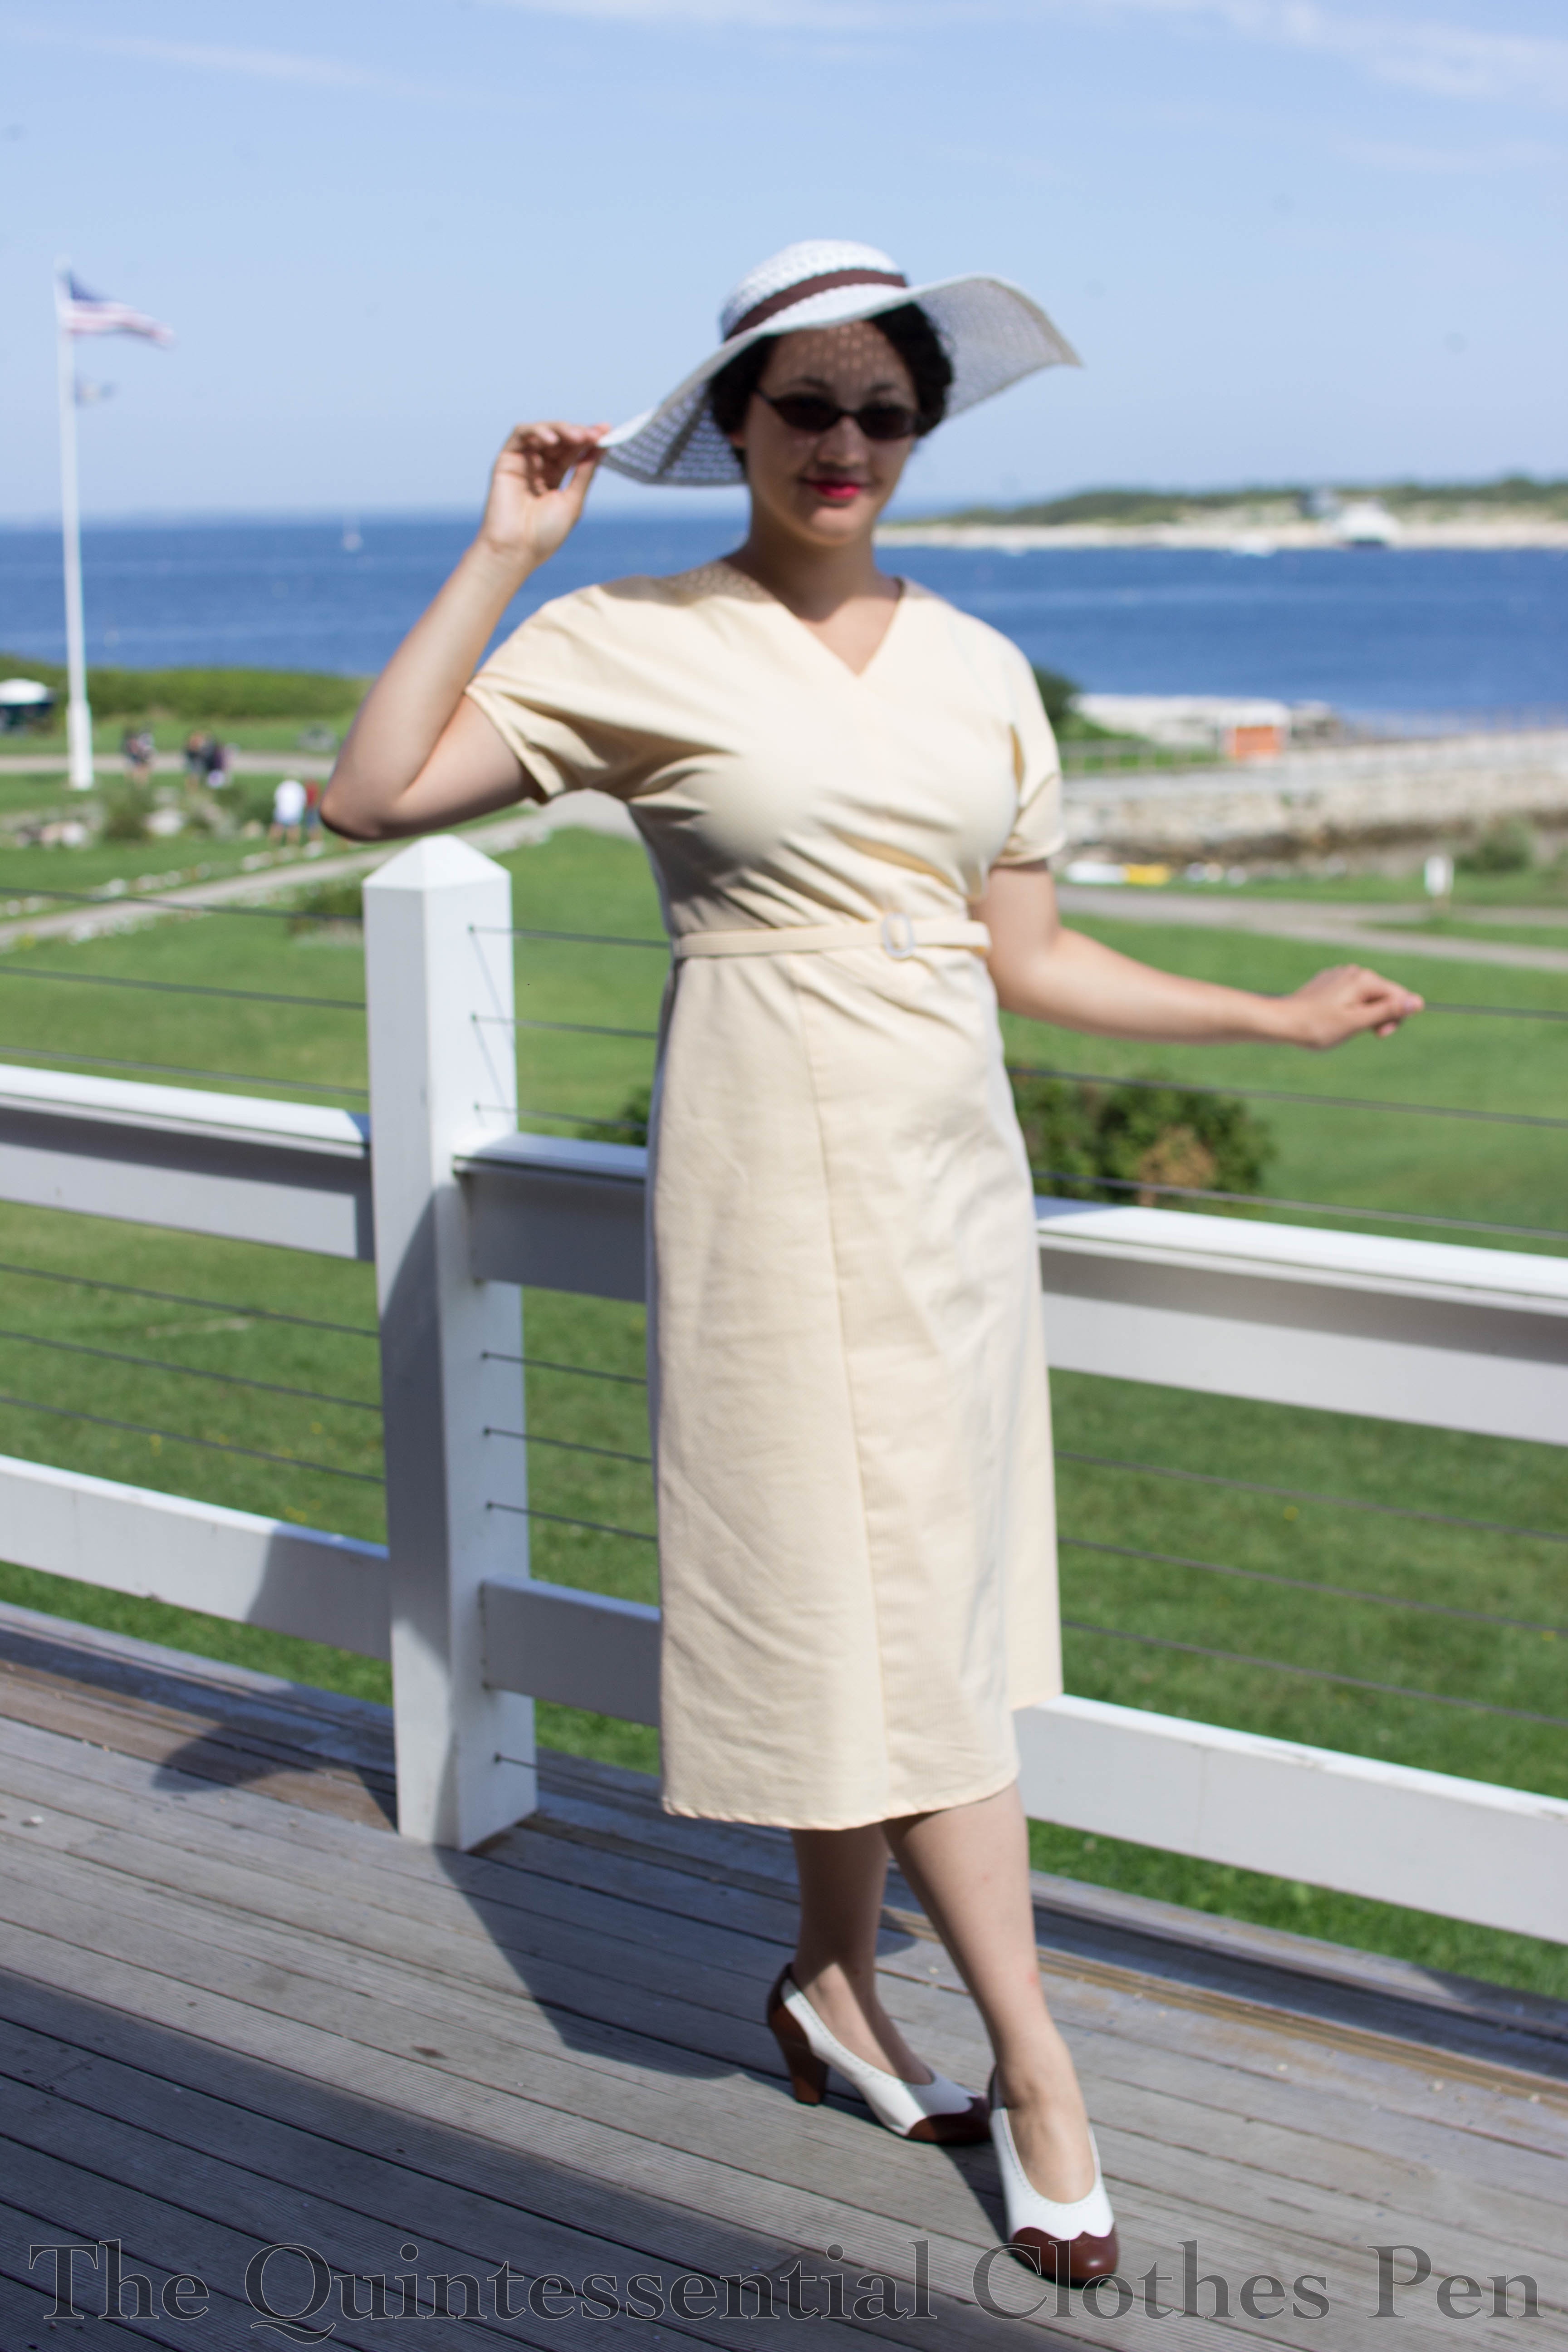
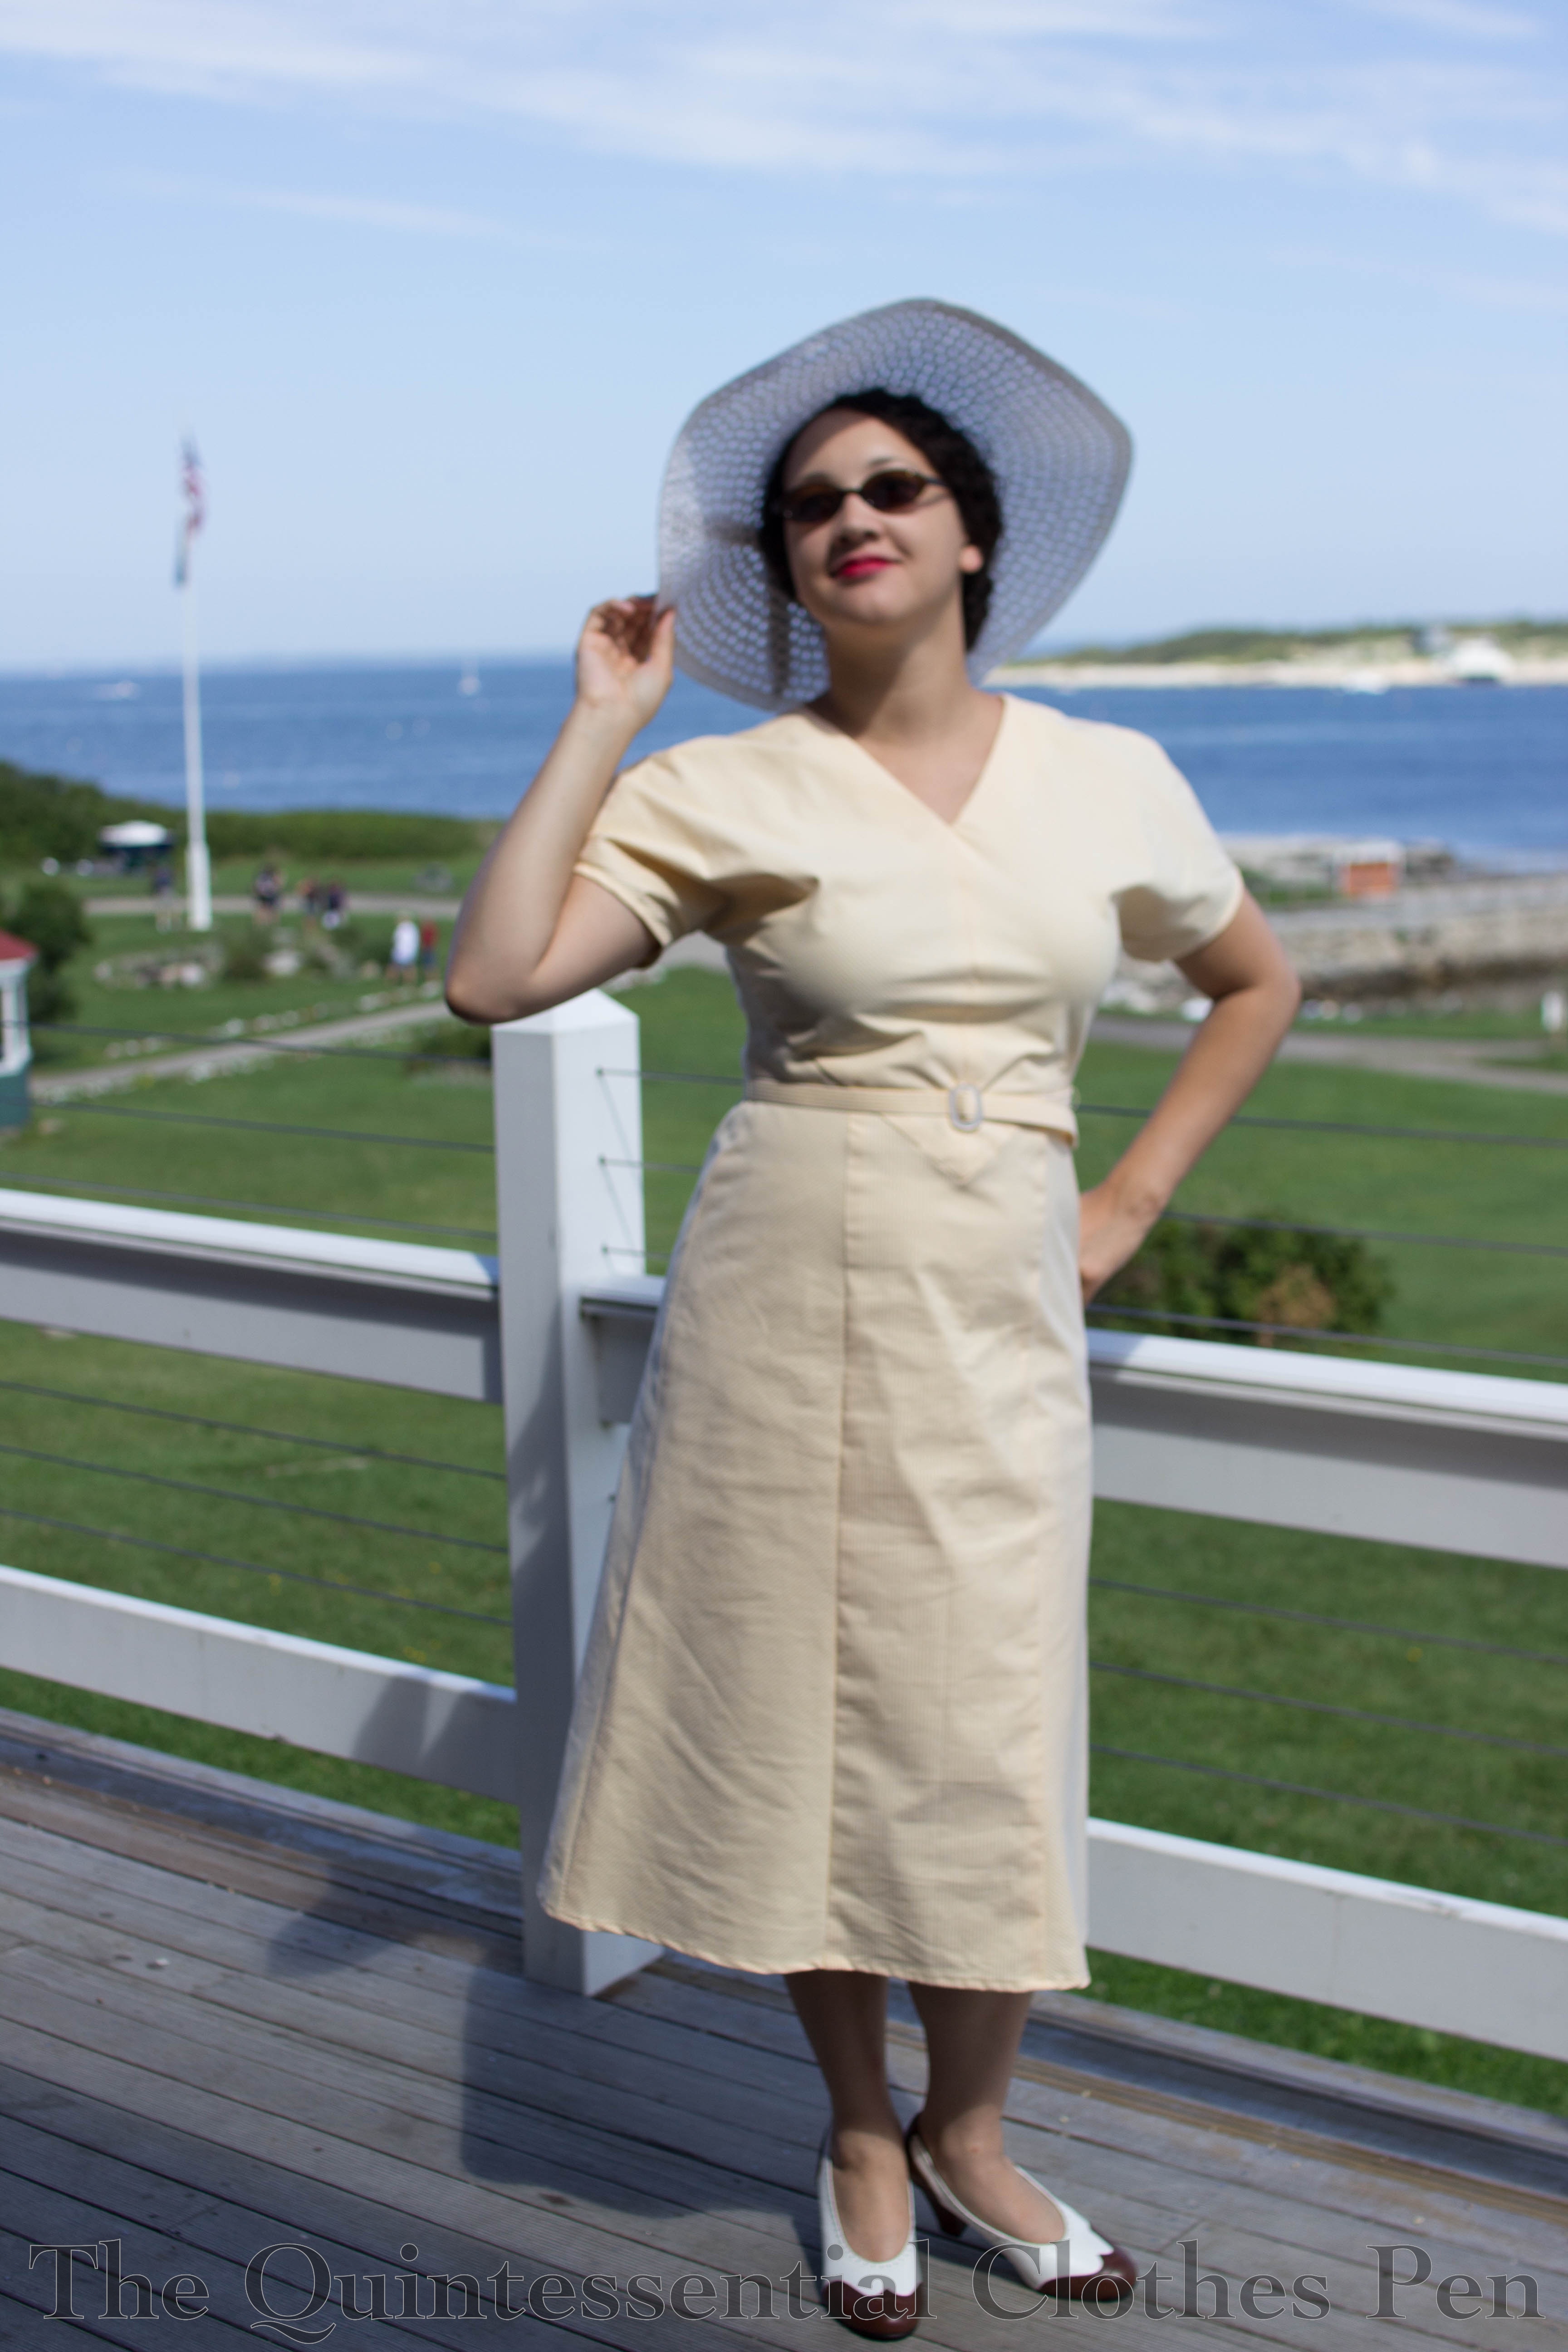
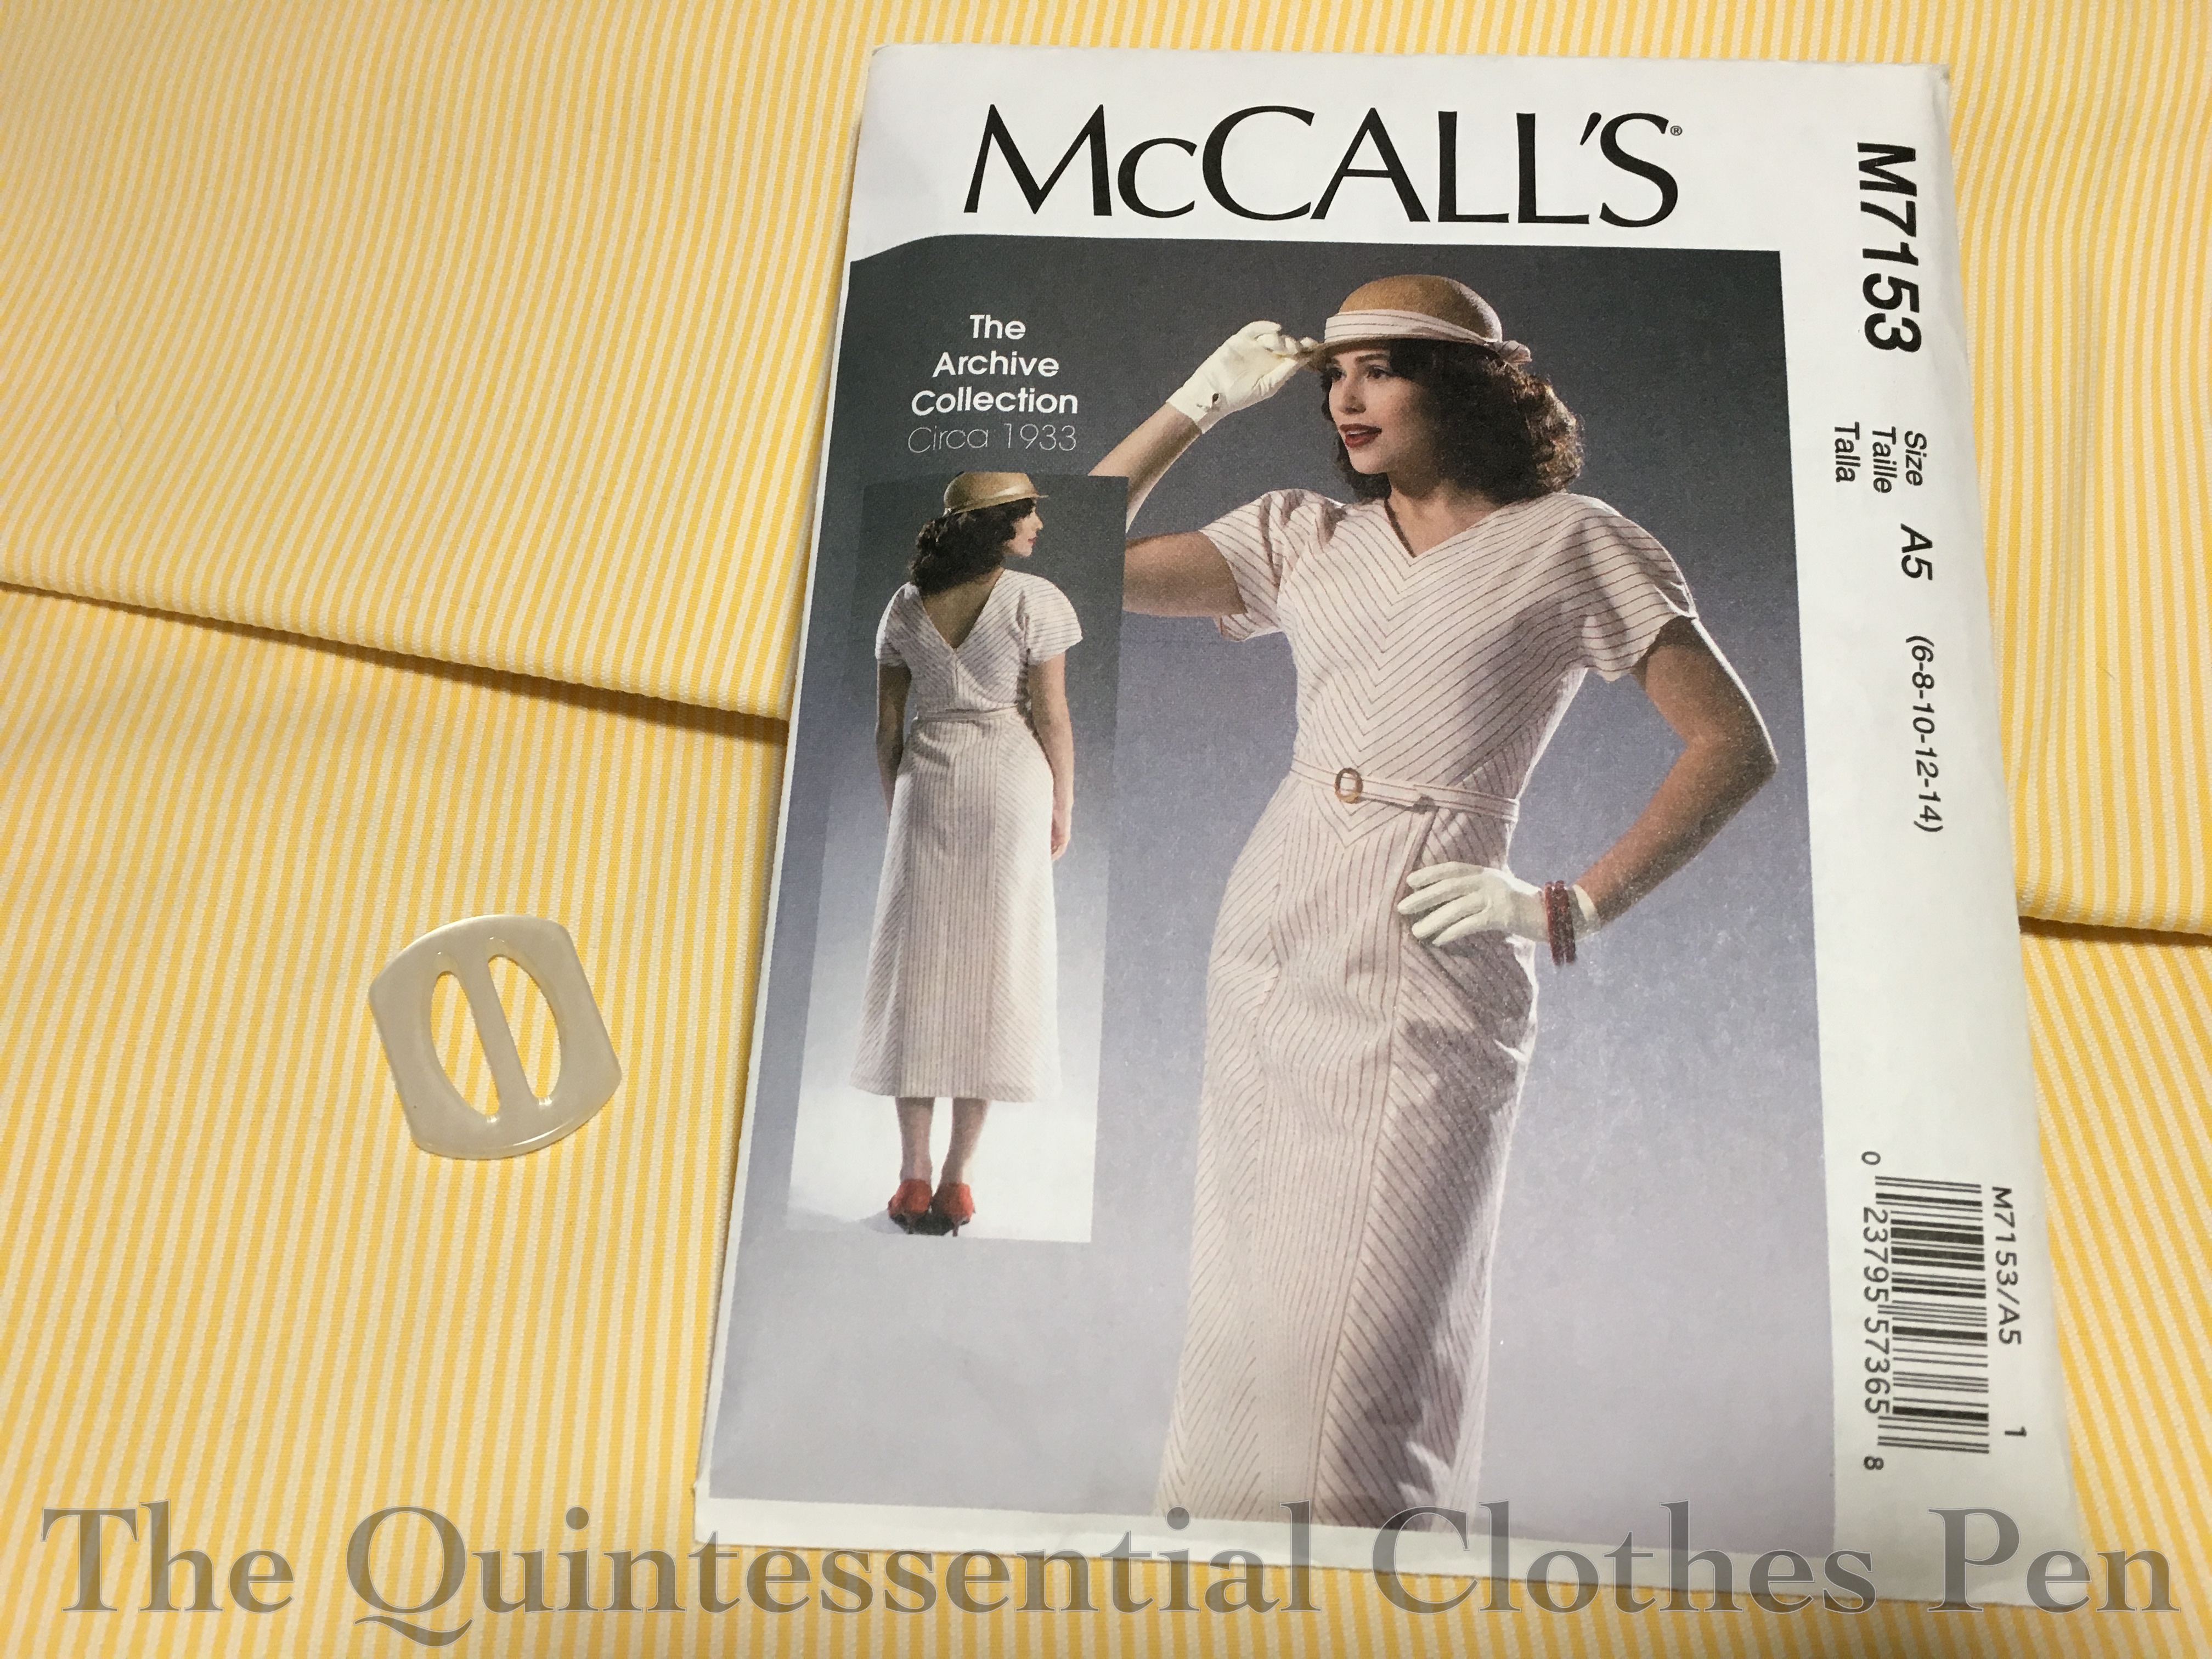
Last summer, I decided to make a dress from McCall’s #7153, an archive pattern from 1933 (although now out of print, it was released in 2015 so it’s pretty easy to find with a quick search). This is a pattern I’ve been eyeing for awhile. I decided to make it because I wanted something comfortable, new, and appropriate for daytime to wear to a Gatsby weekend in the heat of August. 1933 is obviously not in the 1920s, but the weekend tends to be more generally 1920s/1930s in terms of clothing, so I figured this would fit right in.

The style of the dress is quite defined by the differing grain lines on the pieces, a detail that is set off by the stripes used for the sample dress. Accordingly, I went off in search of a good stripe for the dress. I couldn’t find one I liked in the right weight with a stripe quite as delicate, visible, and widely spaced as the sample dress, but I did find a lovely yellow and ivory narrow stripe at Farmhouse Fabrics (although now they have this, which is similar to the sample dress–I’m not sure which one I would choose if I had both options in front of me now!). I couldn’t find a yellow belt buckle that was right, so I decided to go classic with a white mother of pearl one from my stash instead.

I cut out a mockup in size 14. This was a project for my #virtualsewingcircle while I was still finding time to sew live. The mockup fit, but was very tight, so when I cut out the yellow stripe I made the dress a size 16 (for reference, my measurements were about bust 40″, waist 32″, and hips 42″).

The only other change that was required was to take up the shoulders (which I think meant that I also lowered the front neckline and cut new front facings, though now it was long enough ago that I don’t remember perfectly). McCall’s must have been thinking people were going to put in huge shoulder pads–there was so much room! I believe I took about about 2″ (4″ total) of height!

In addition, I took Kelly’s advice from making this dress and omitted the zipper down the back to keep things smooth. This was made possible in part because my fabric has a little bit of stretch in it.

I think I mostly followed the pattern directions for assembly. There are some steps in a specific order to get the nice point, particularly in the front.

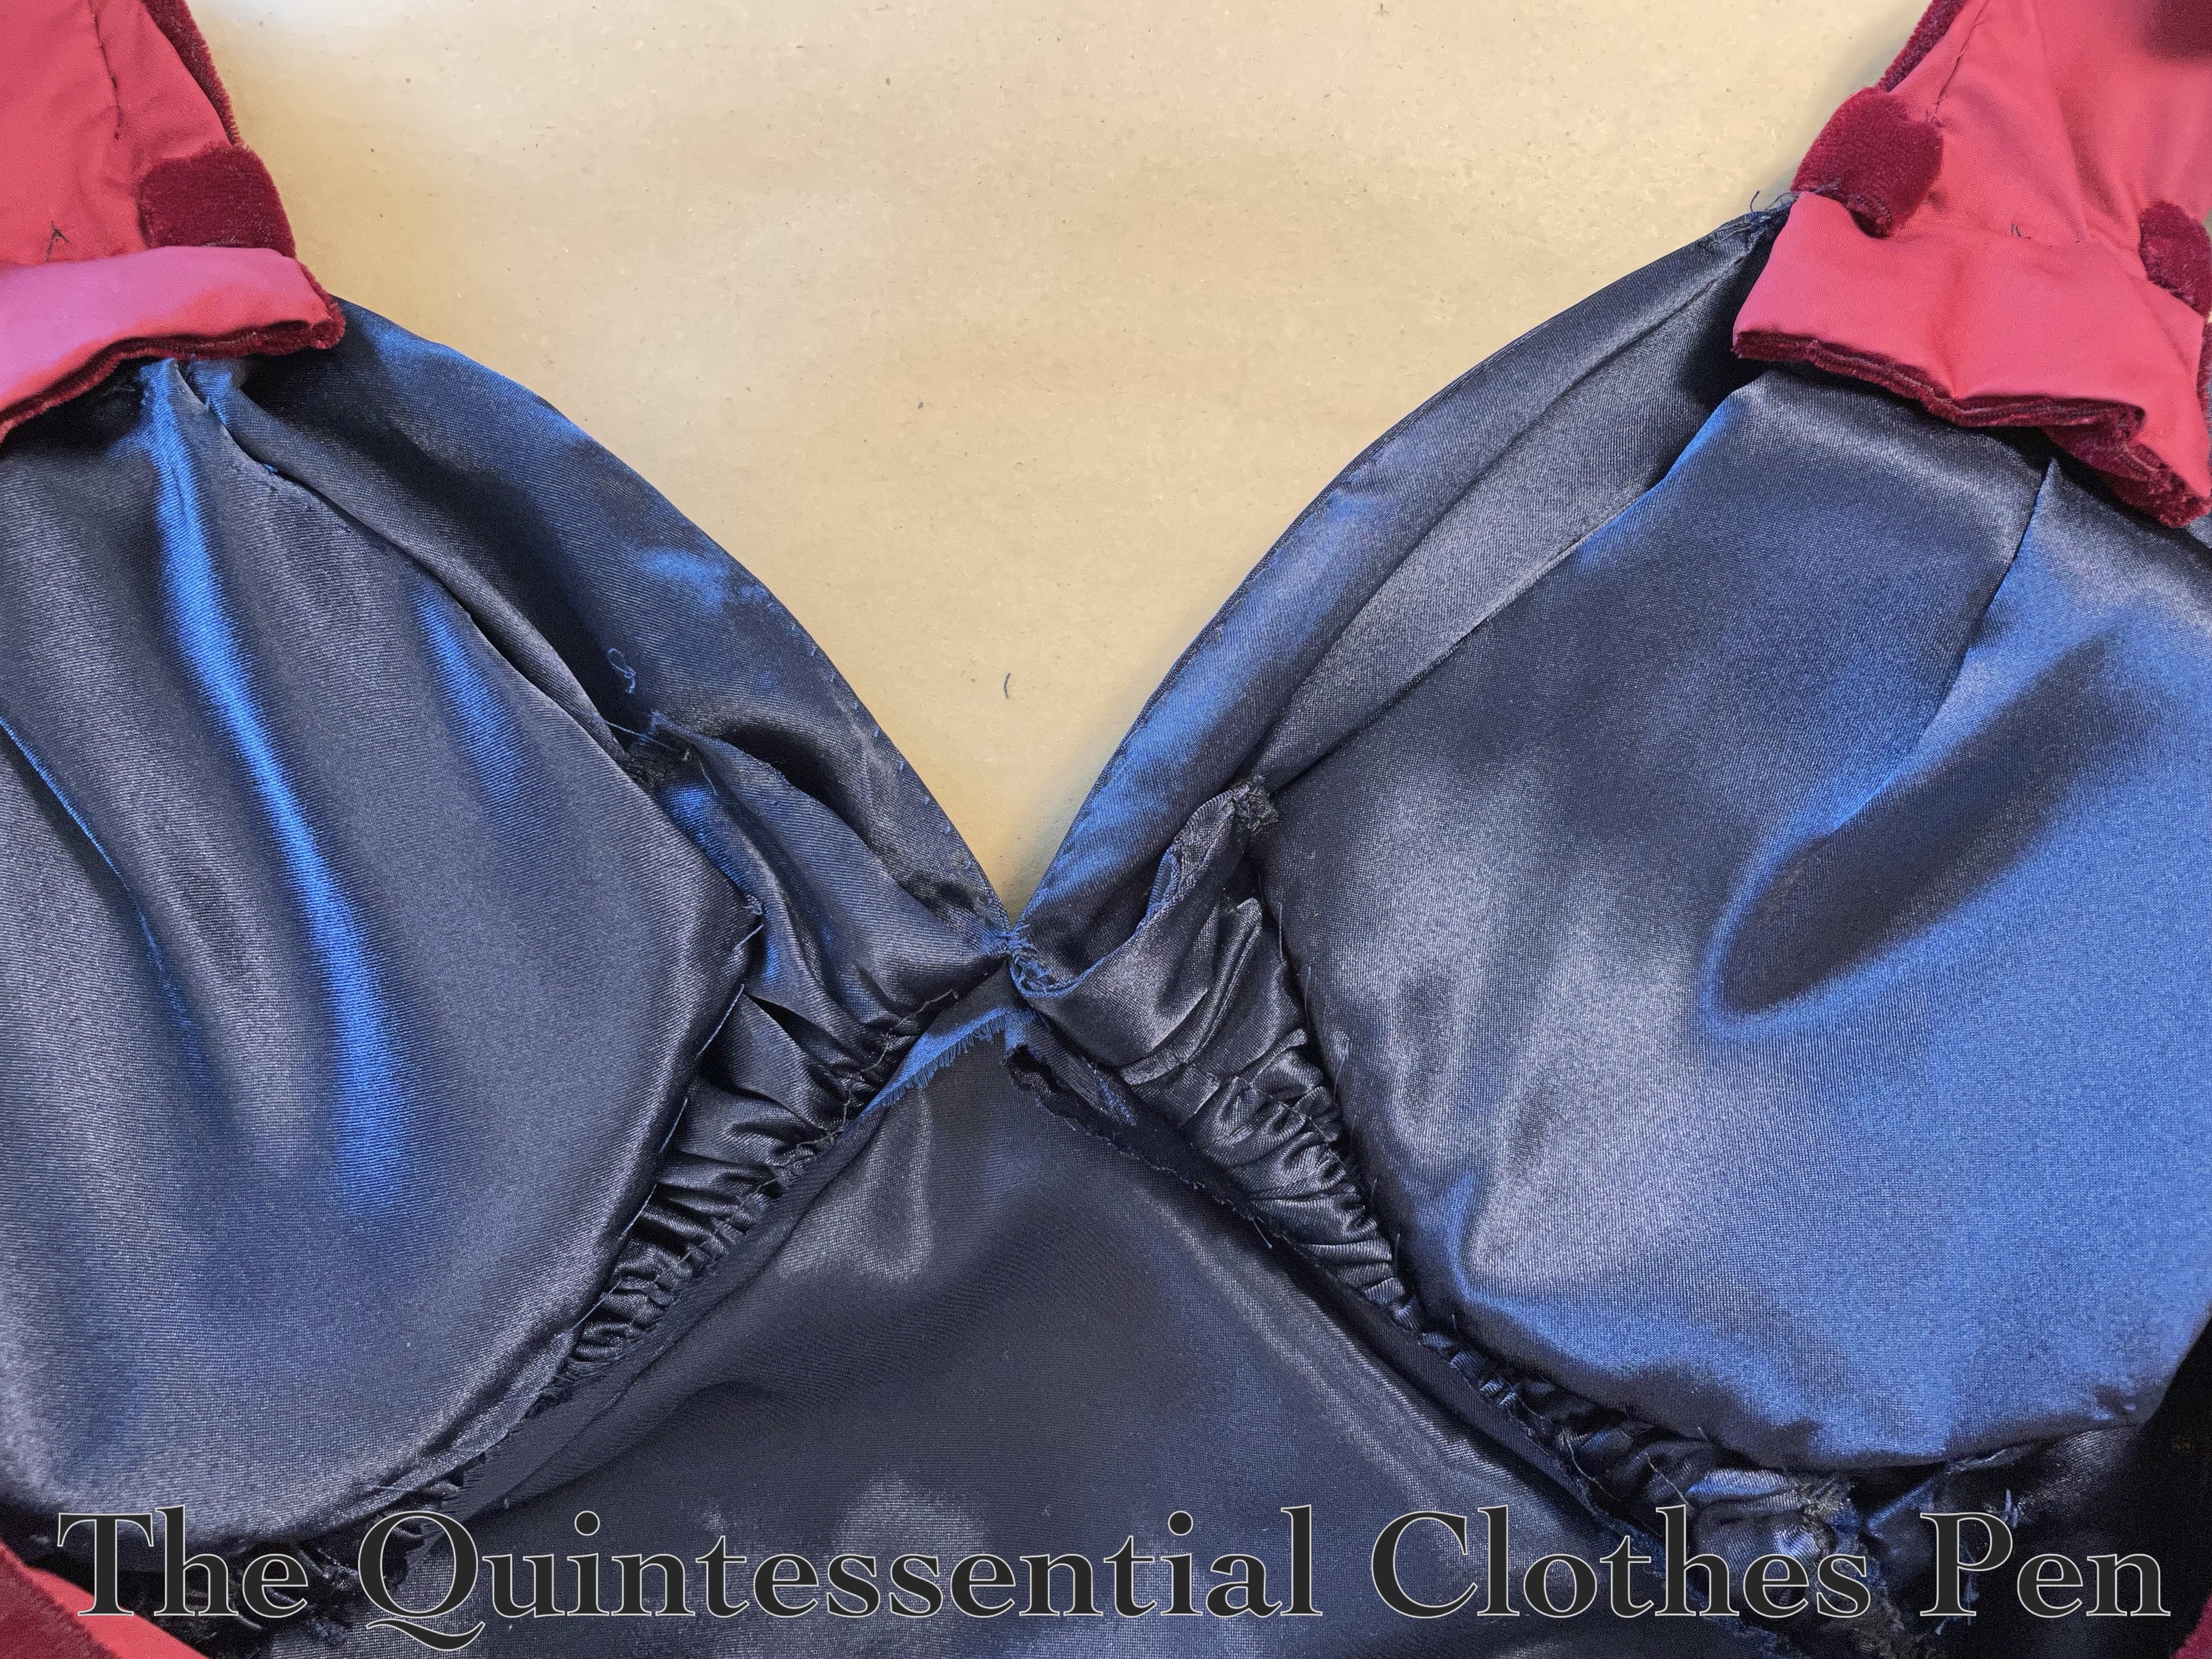
I machine finished the hems, including the sleeves, and under stitched the neck facing, tacking it down by hand to the seam allowances on the inside. The seam allowances were pinked to keep the seams from getting bulky while also keeping them from fraying. This wasn’t important for the bias cut pieces, but it definitely helped the center back and center front panels that are cut on the straight grain of the fabric!

I completely ignored the belt directions, opting instead to use belting encased in a tube of my fabric. Belting is a great product that, as fas as I can tell, stopped being produced in the last few years. Boo! It’s a bendable but stiff plastic backed fabric that you used to be able to purchase in different widths to use as stiffening for self-fabric dress belts (perfect for dresses from the 1930s, 1940s, and 1950s!).

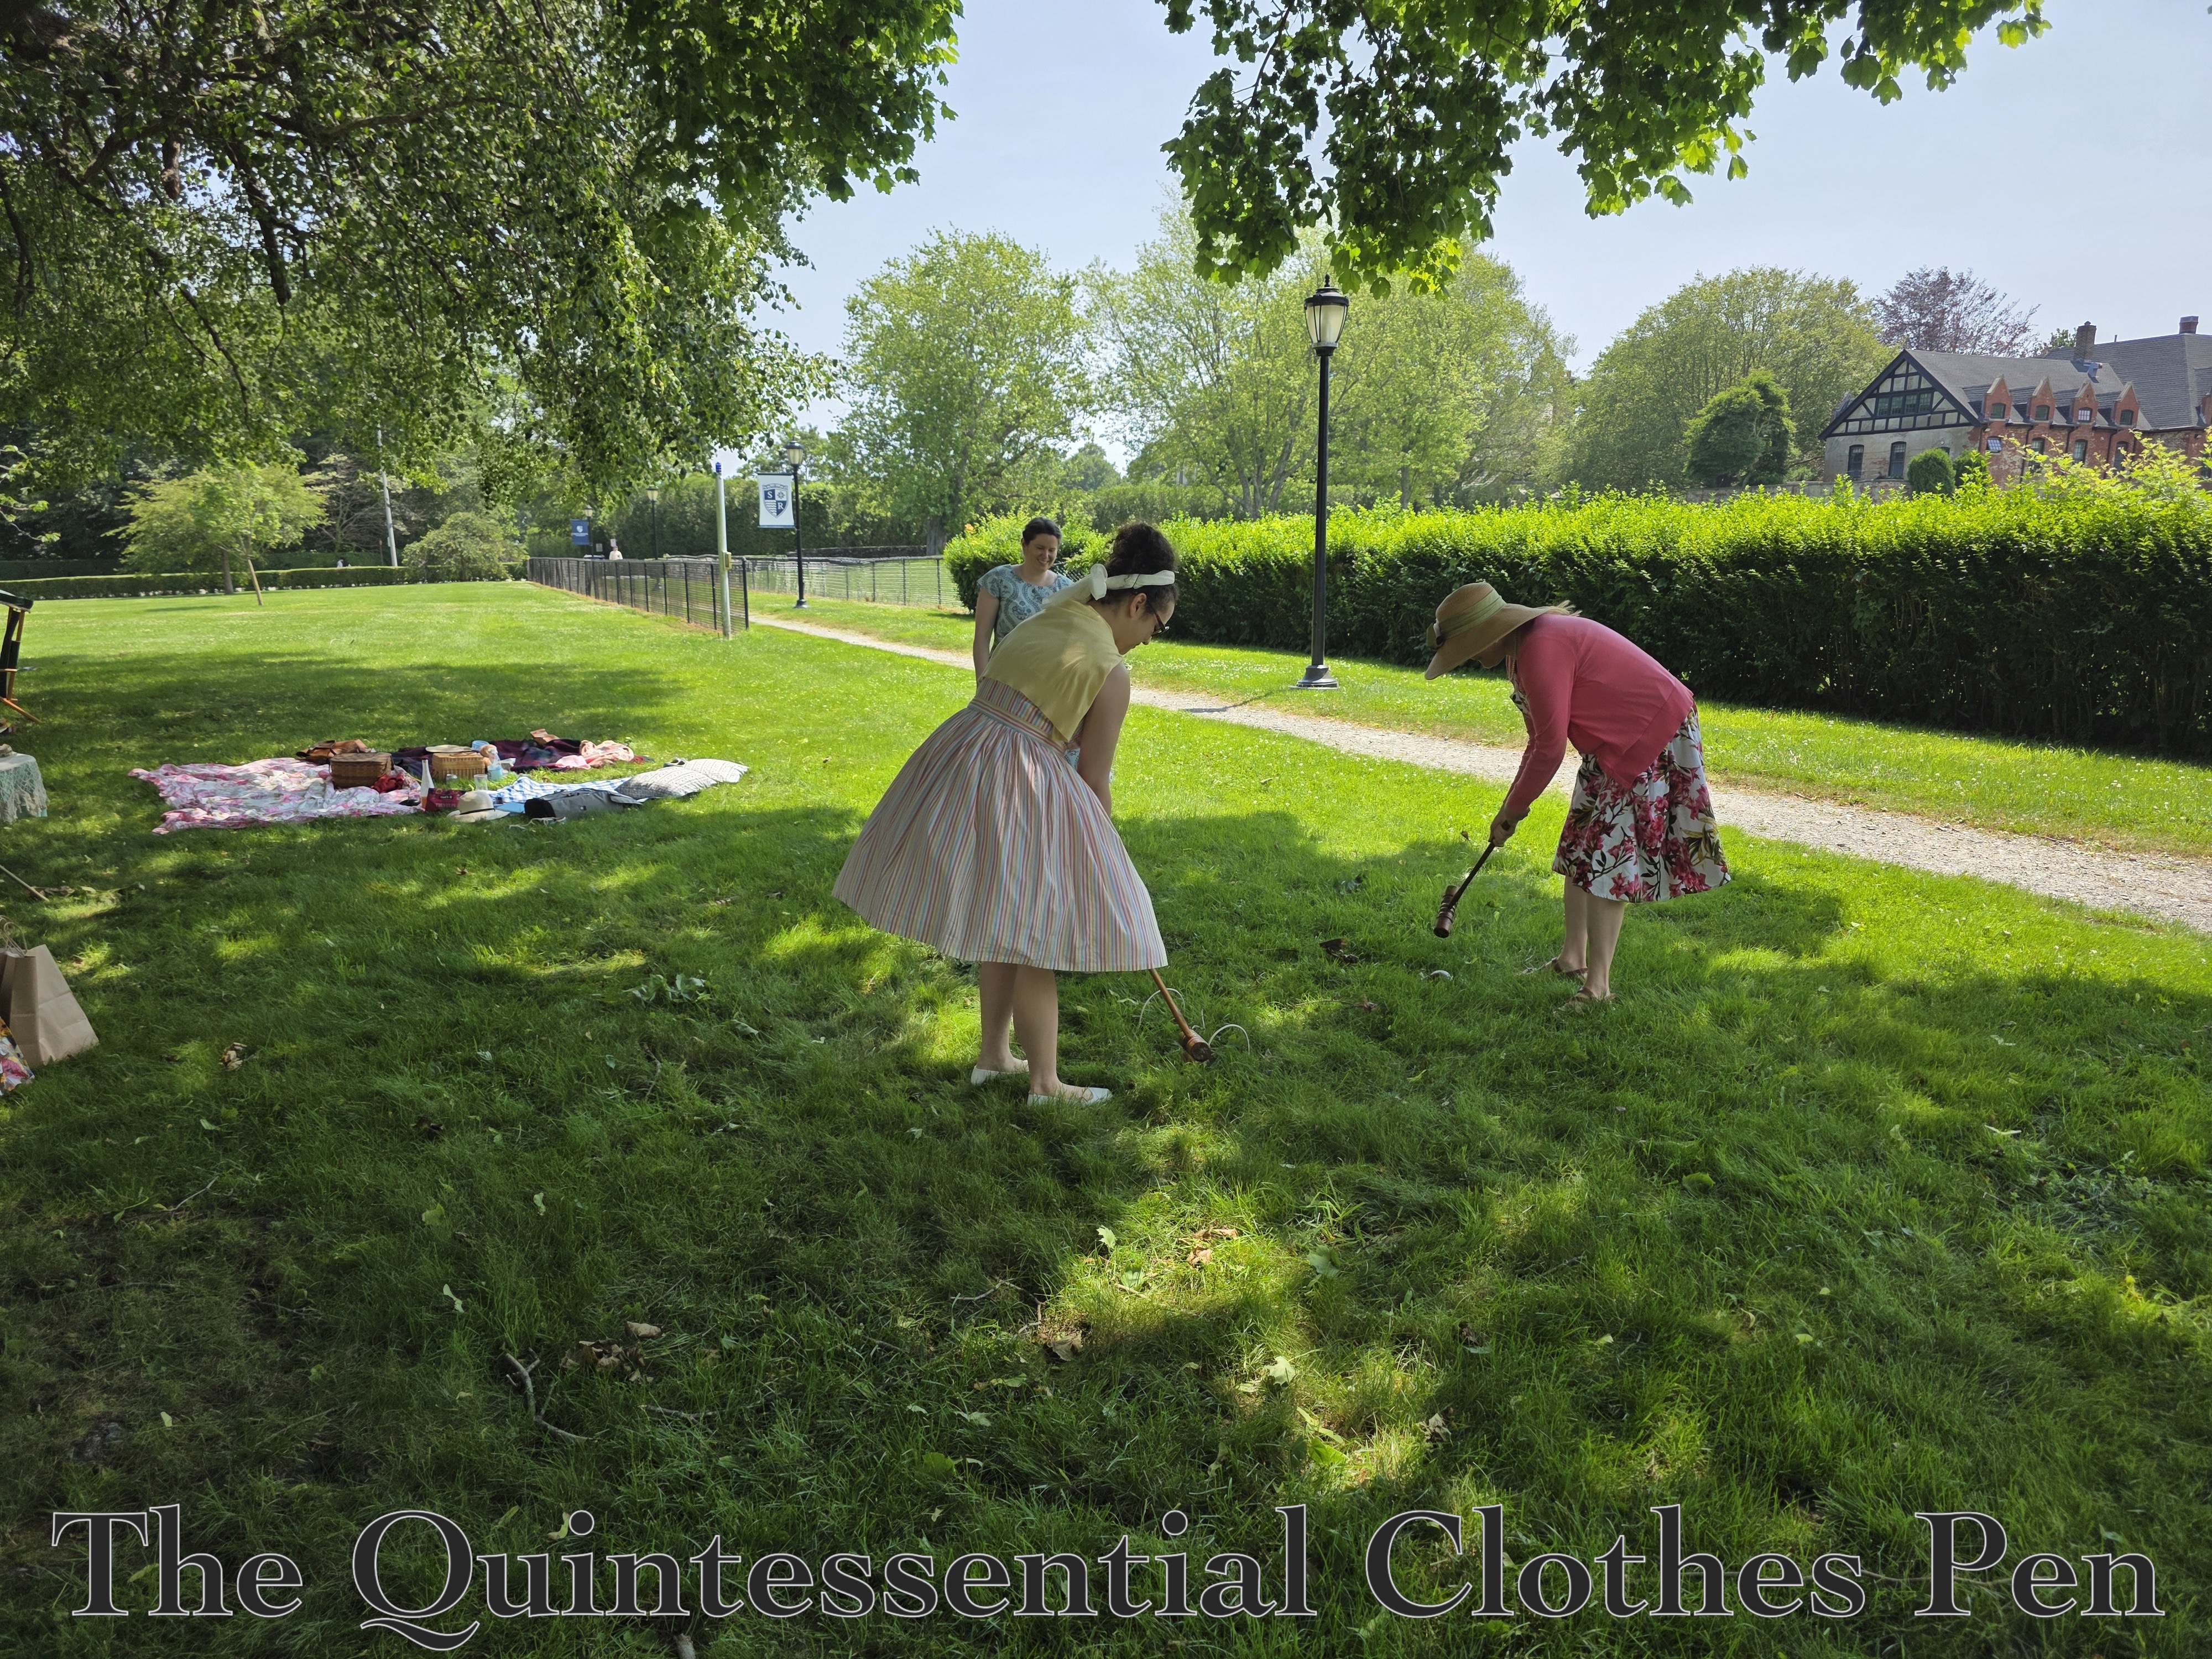
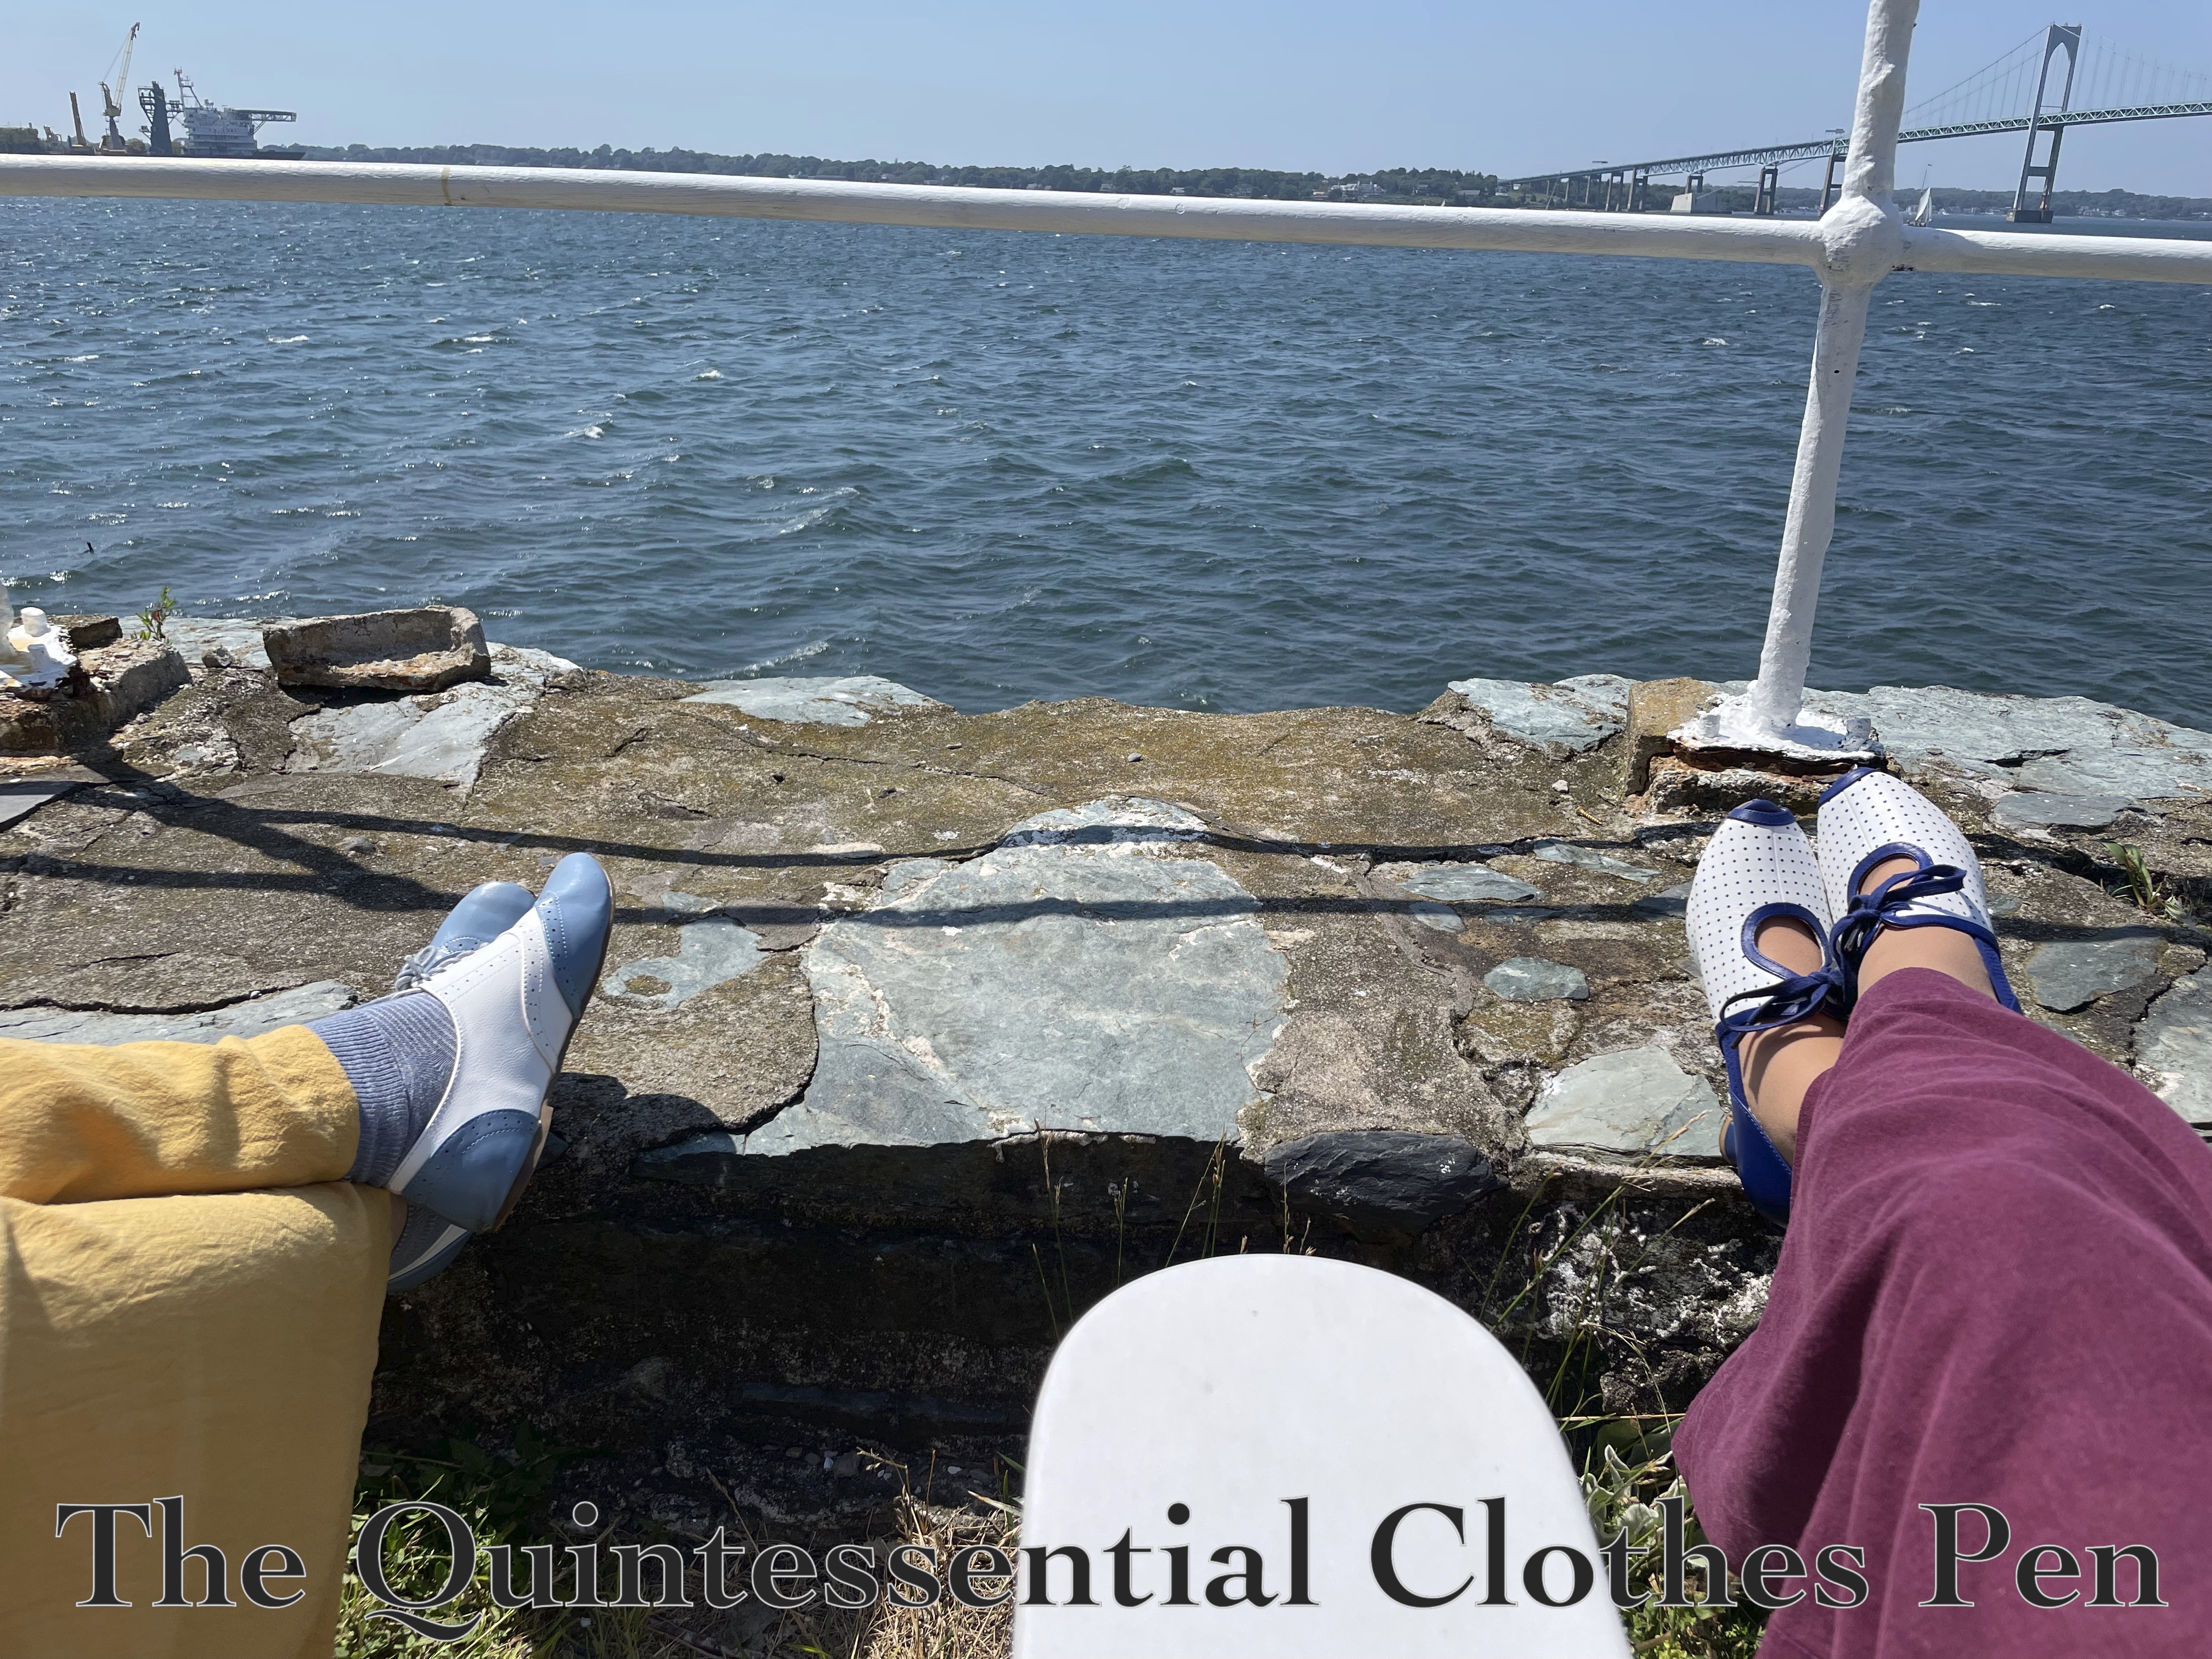
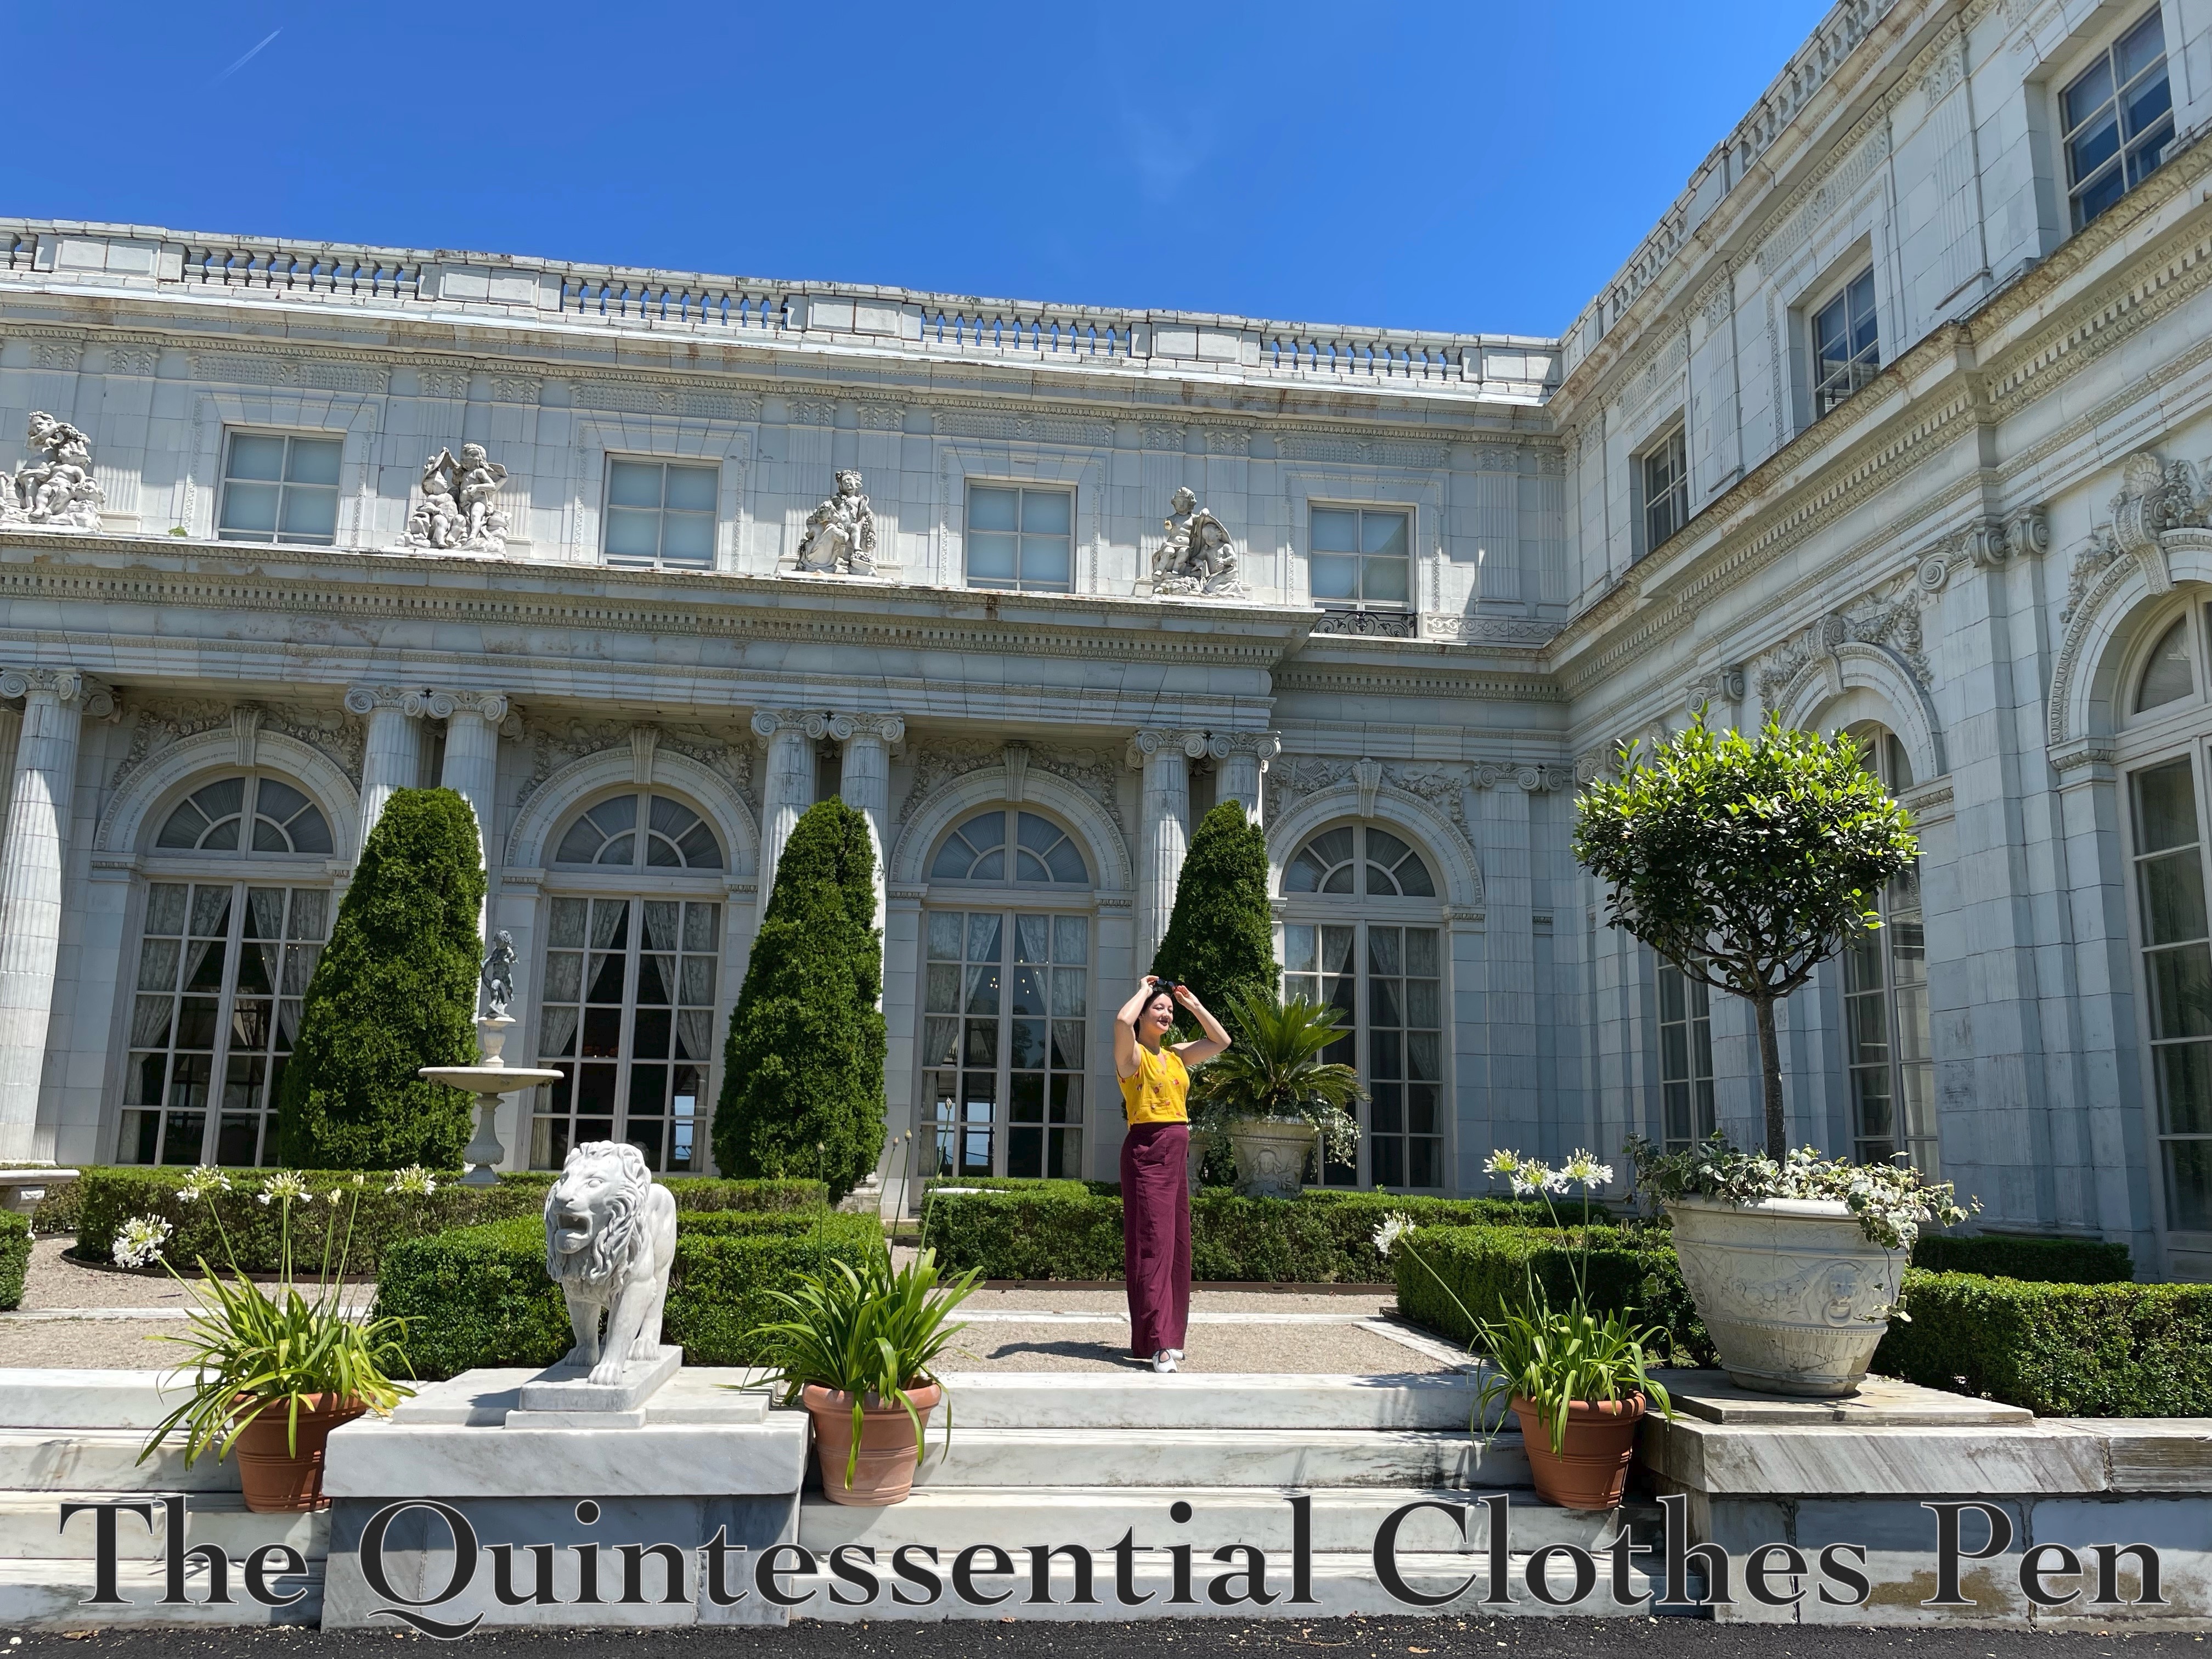
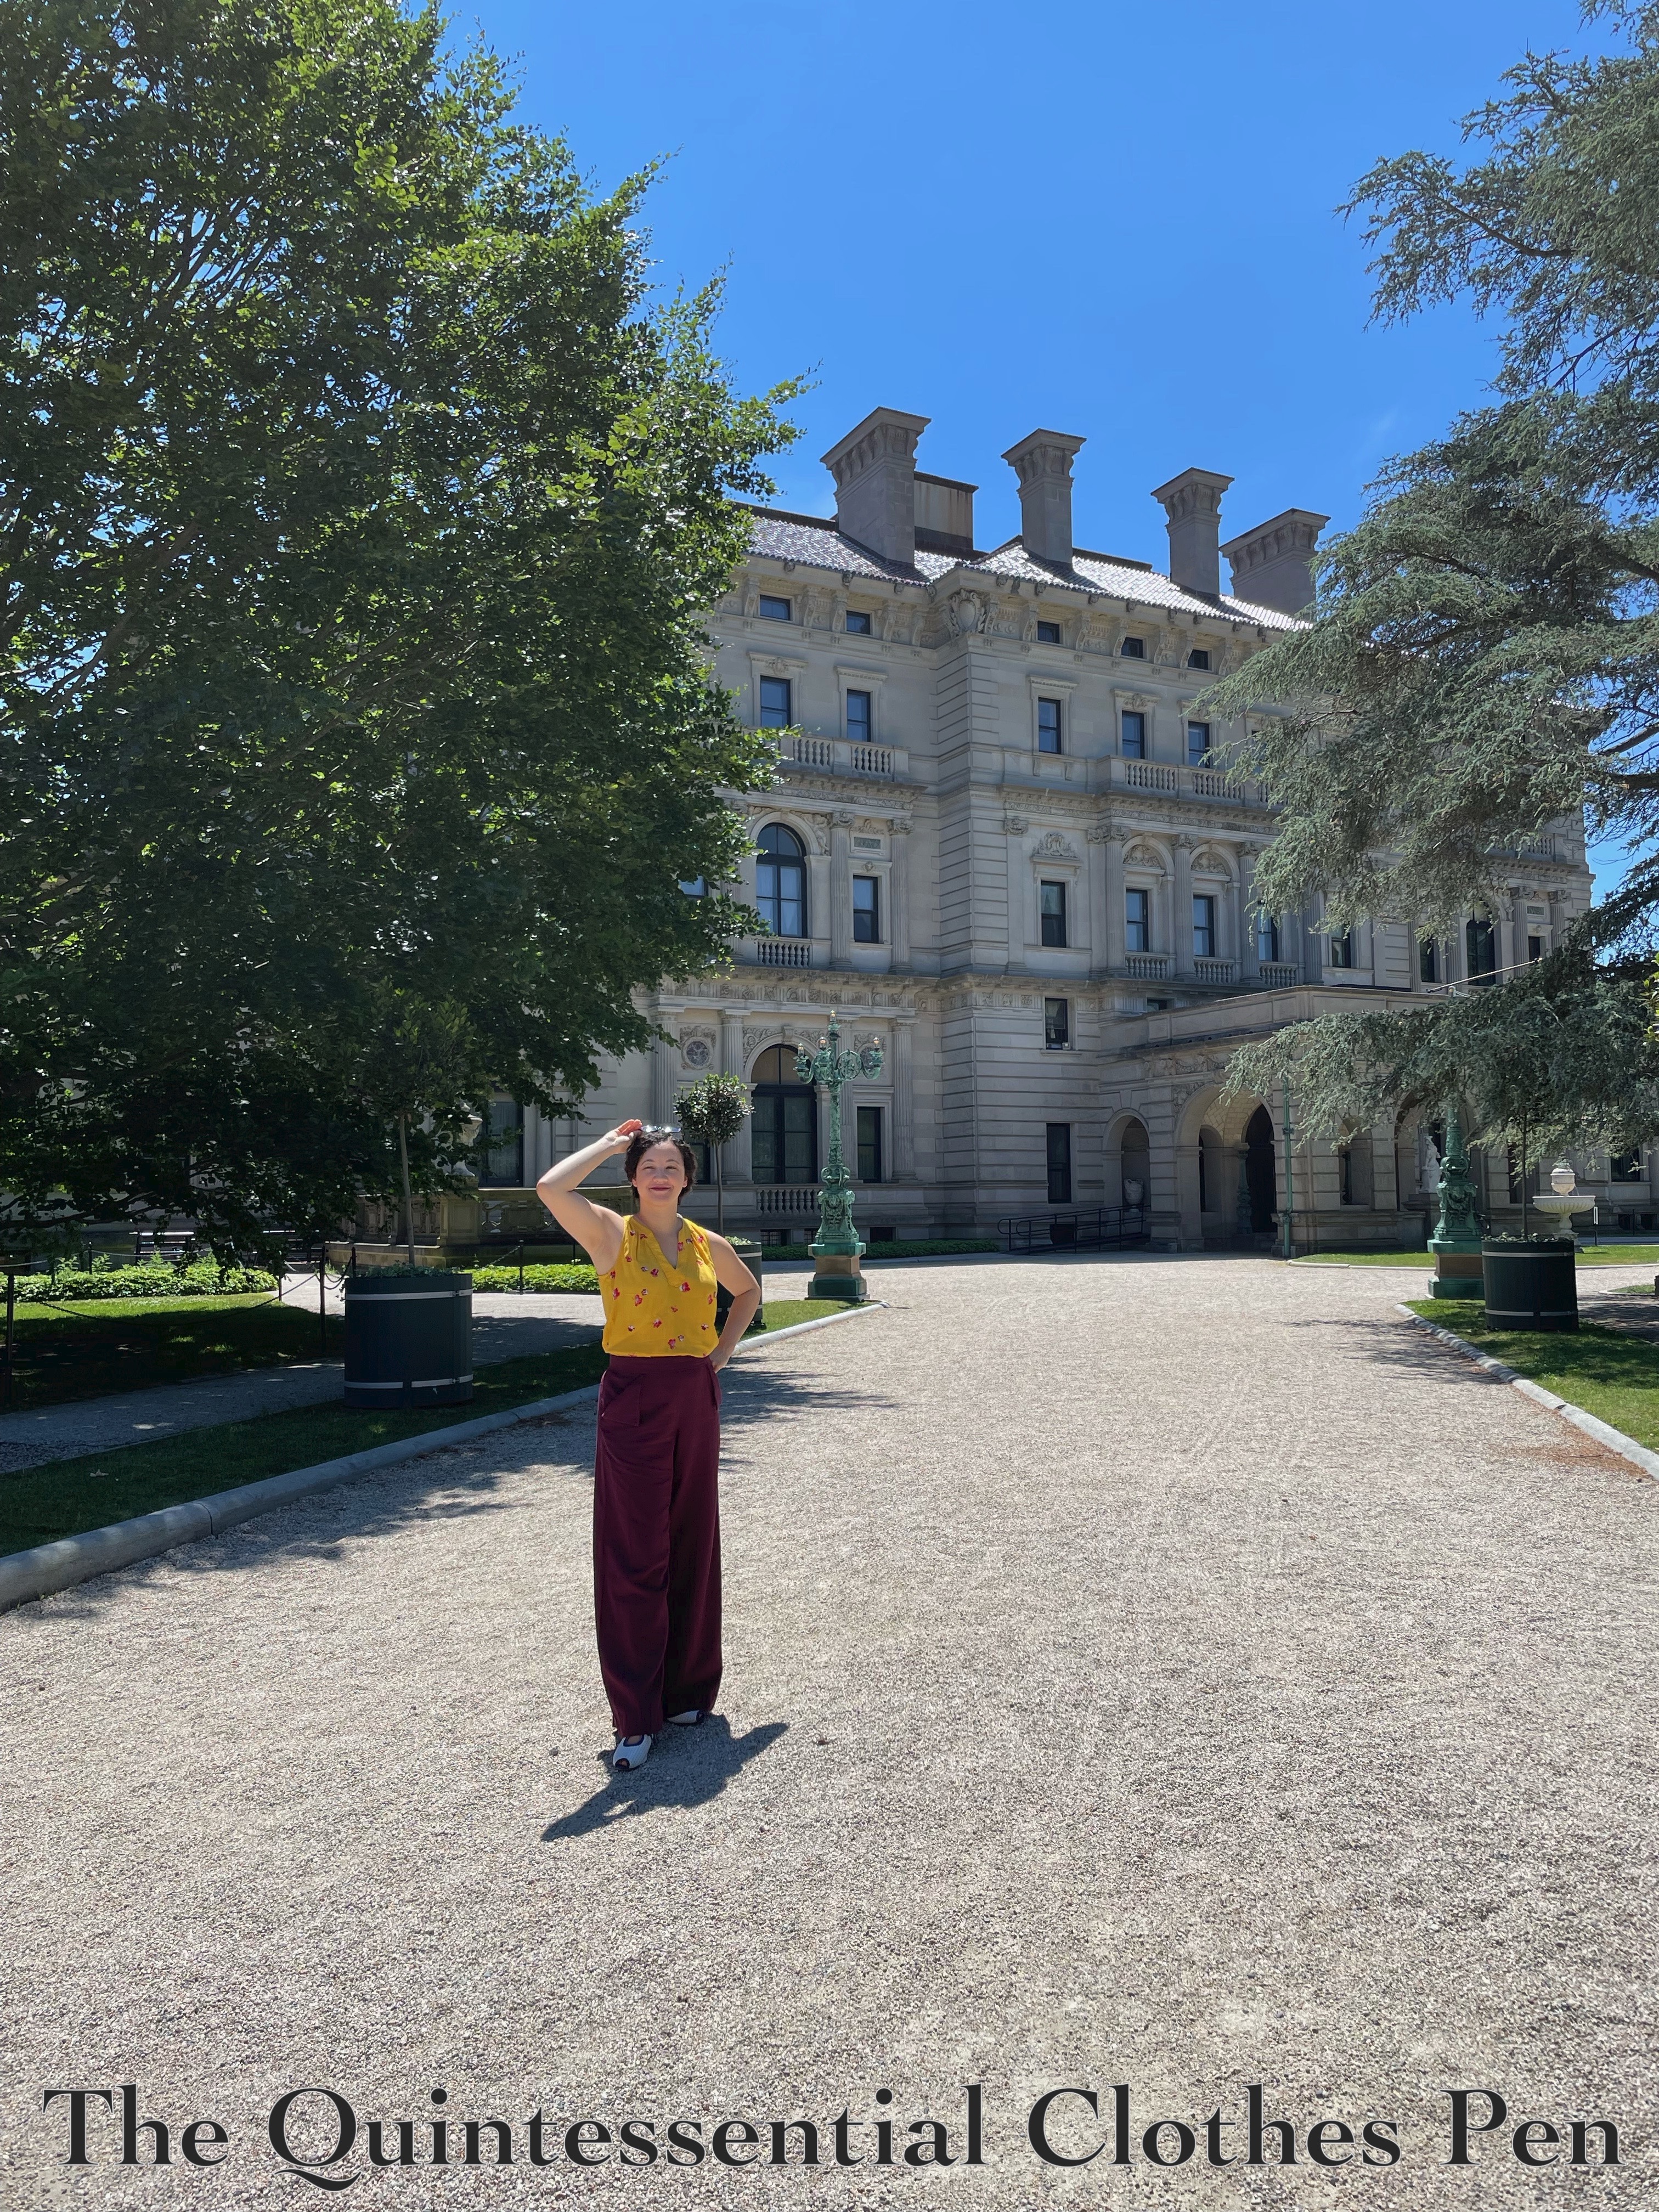
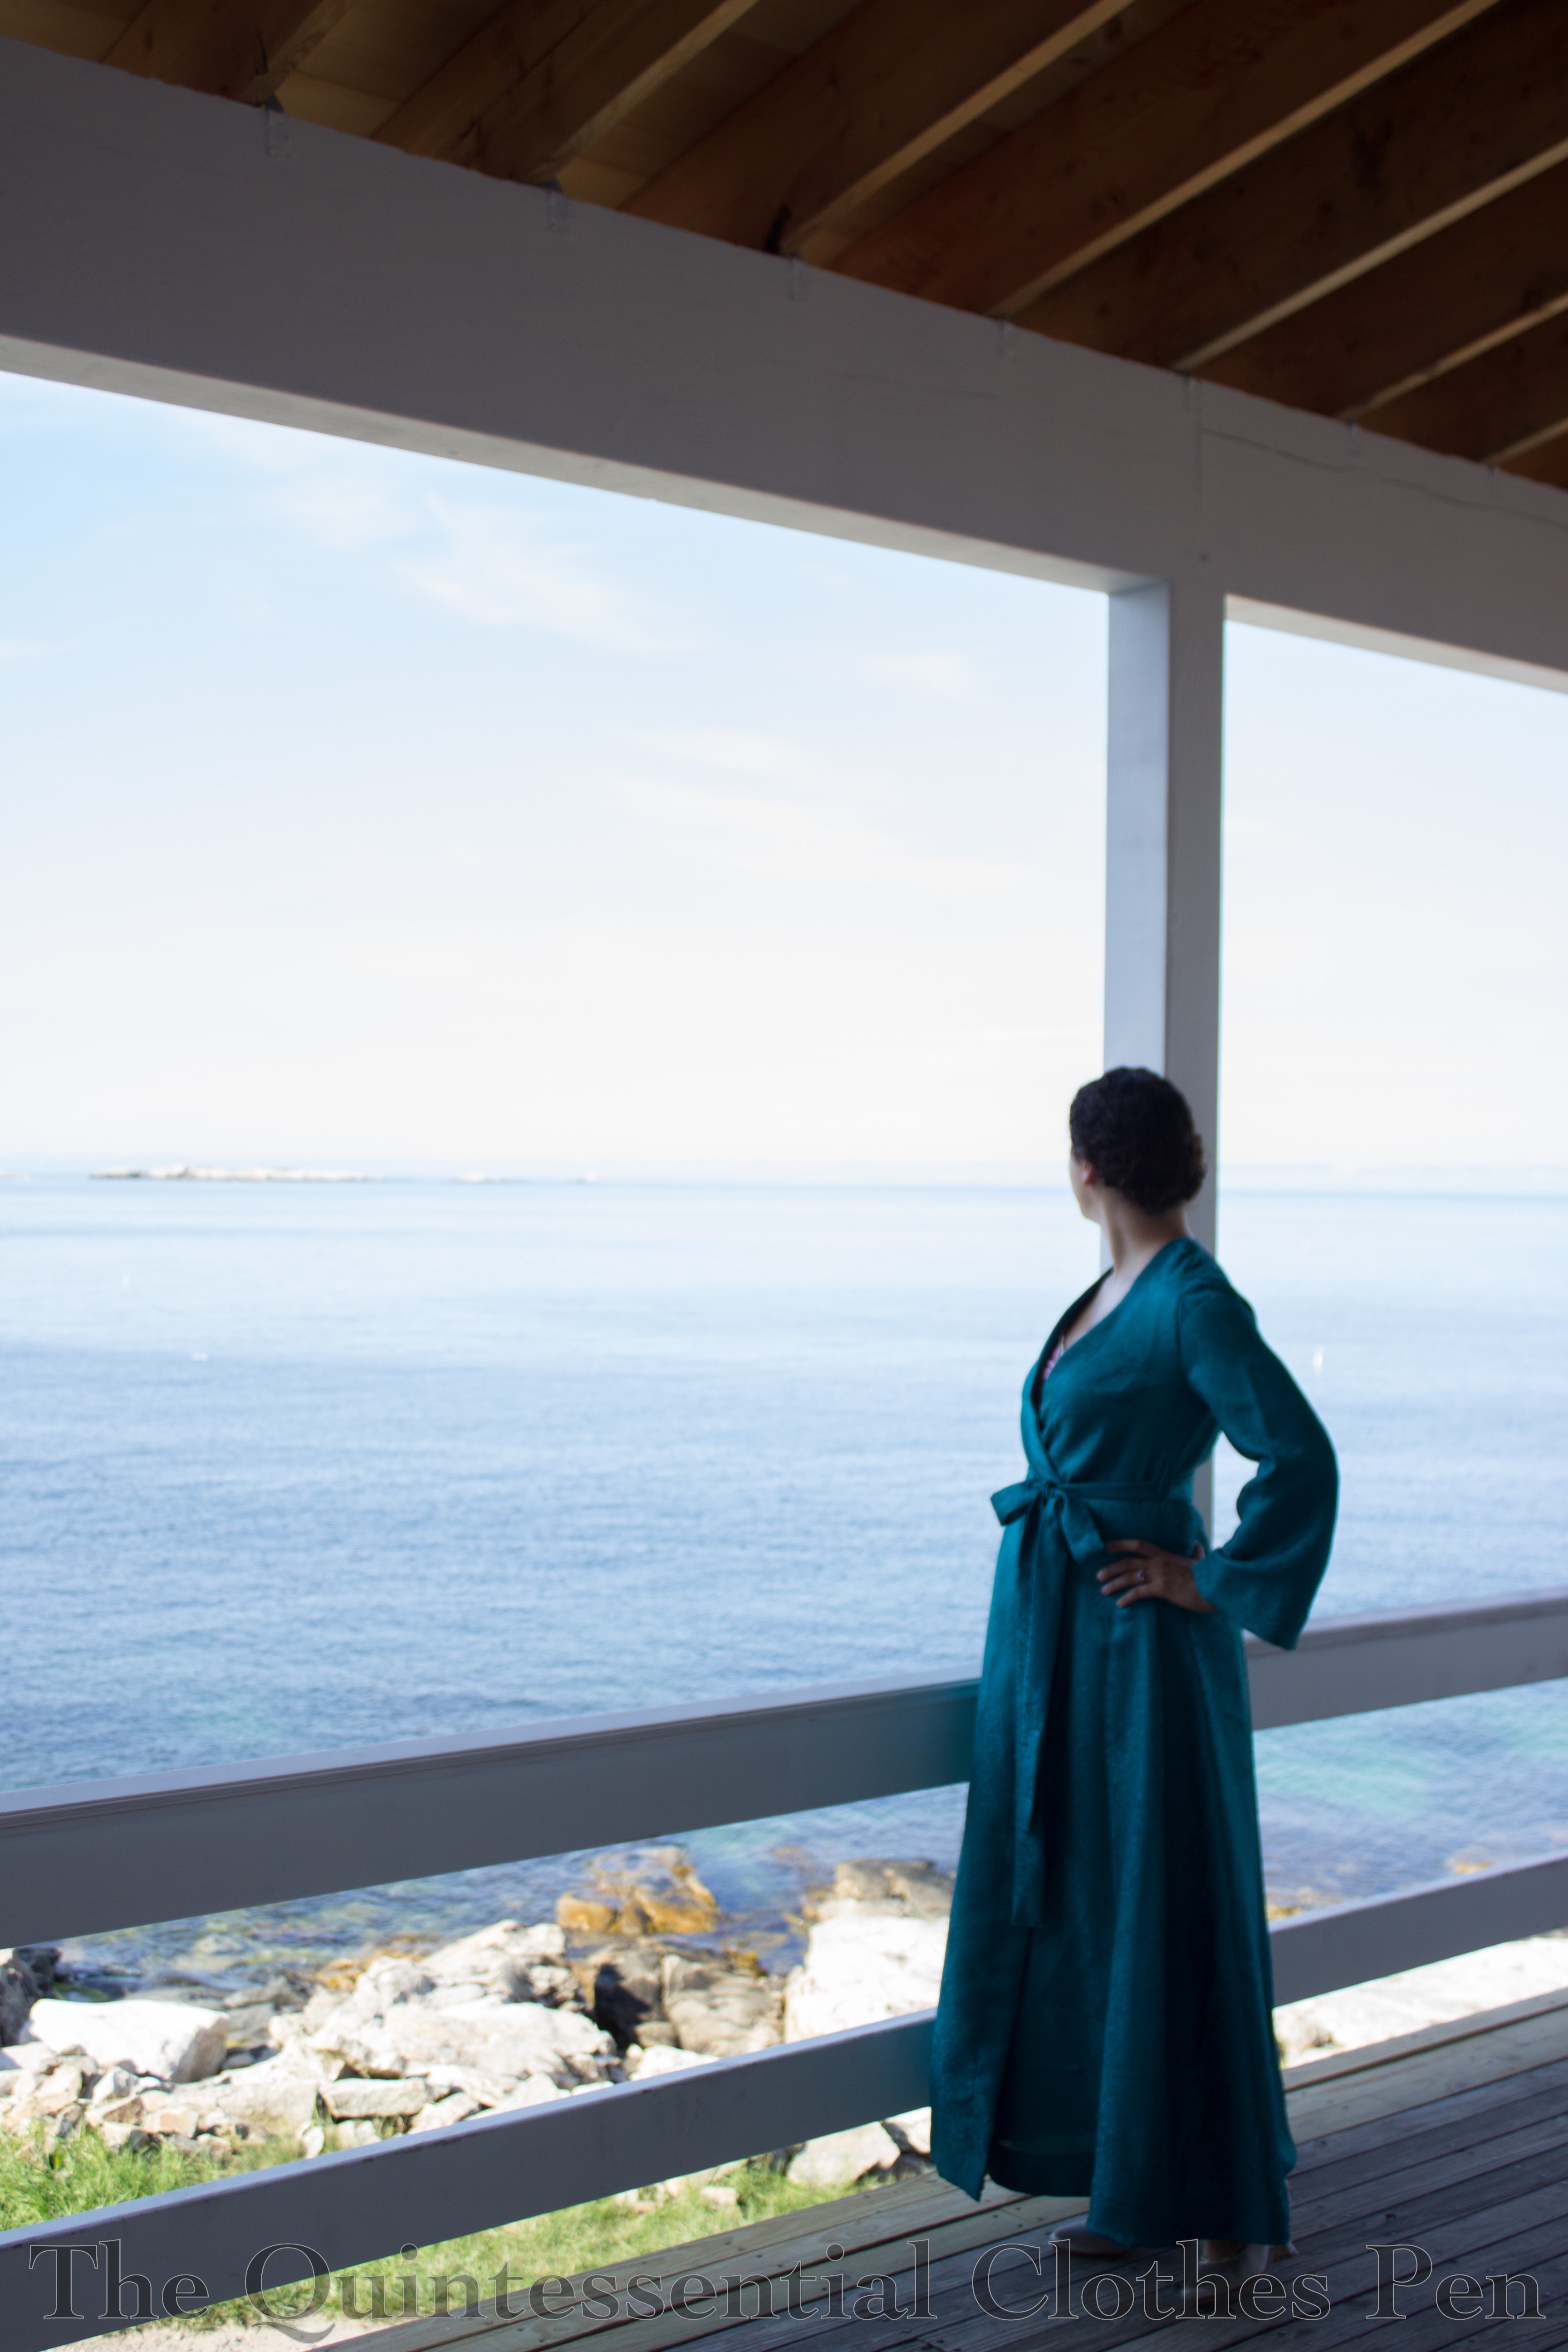
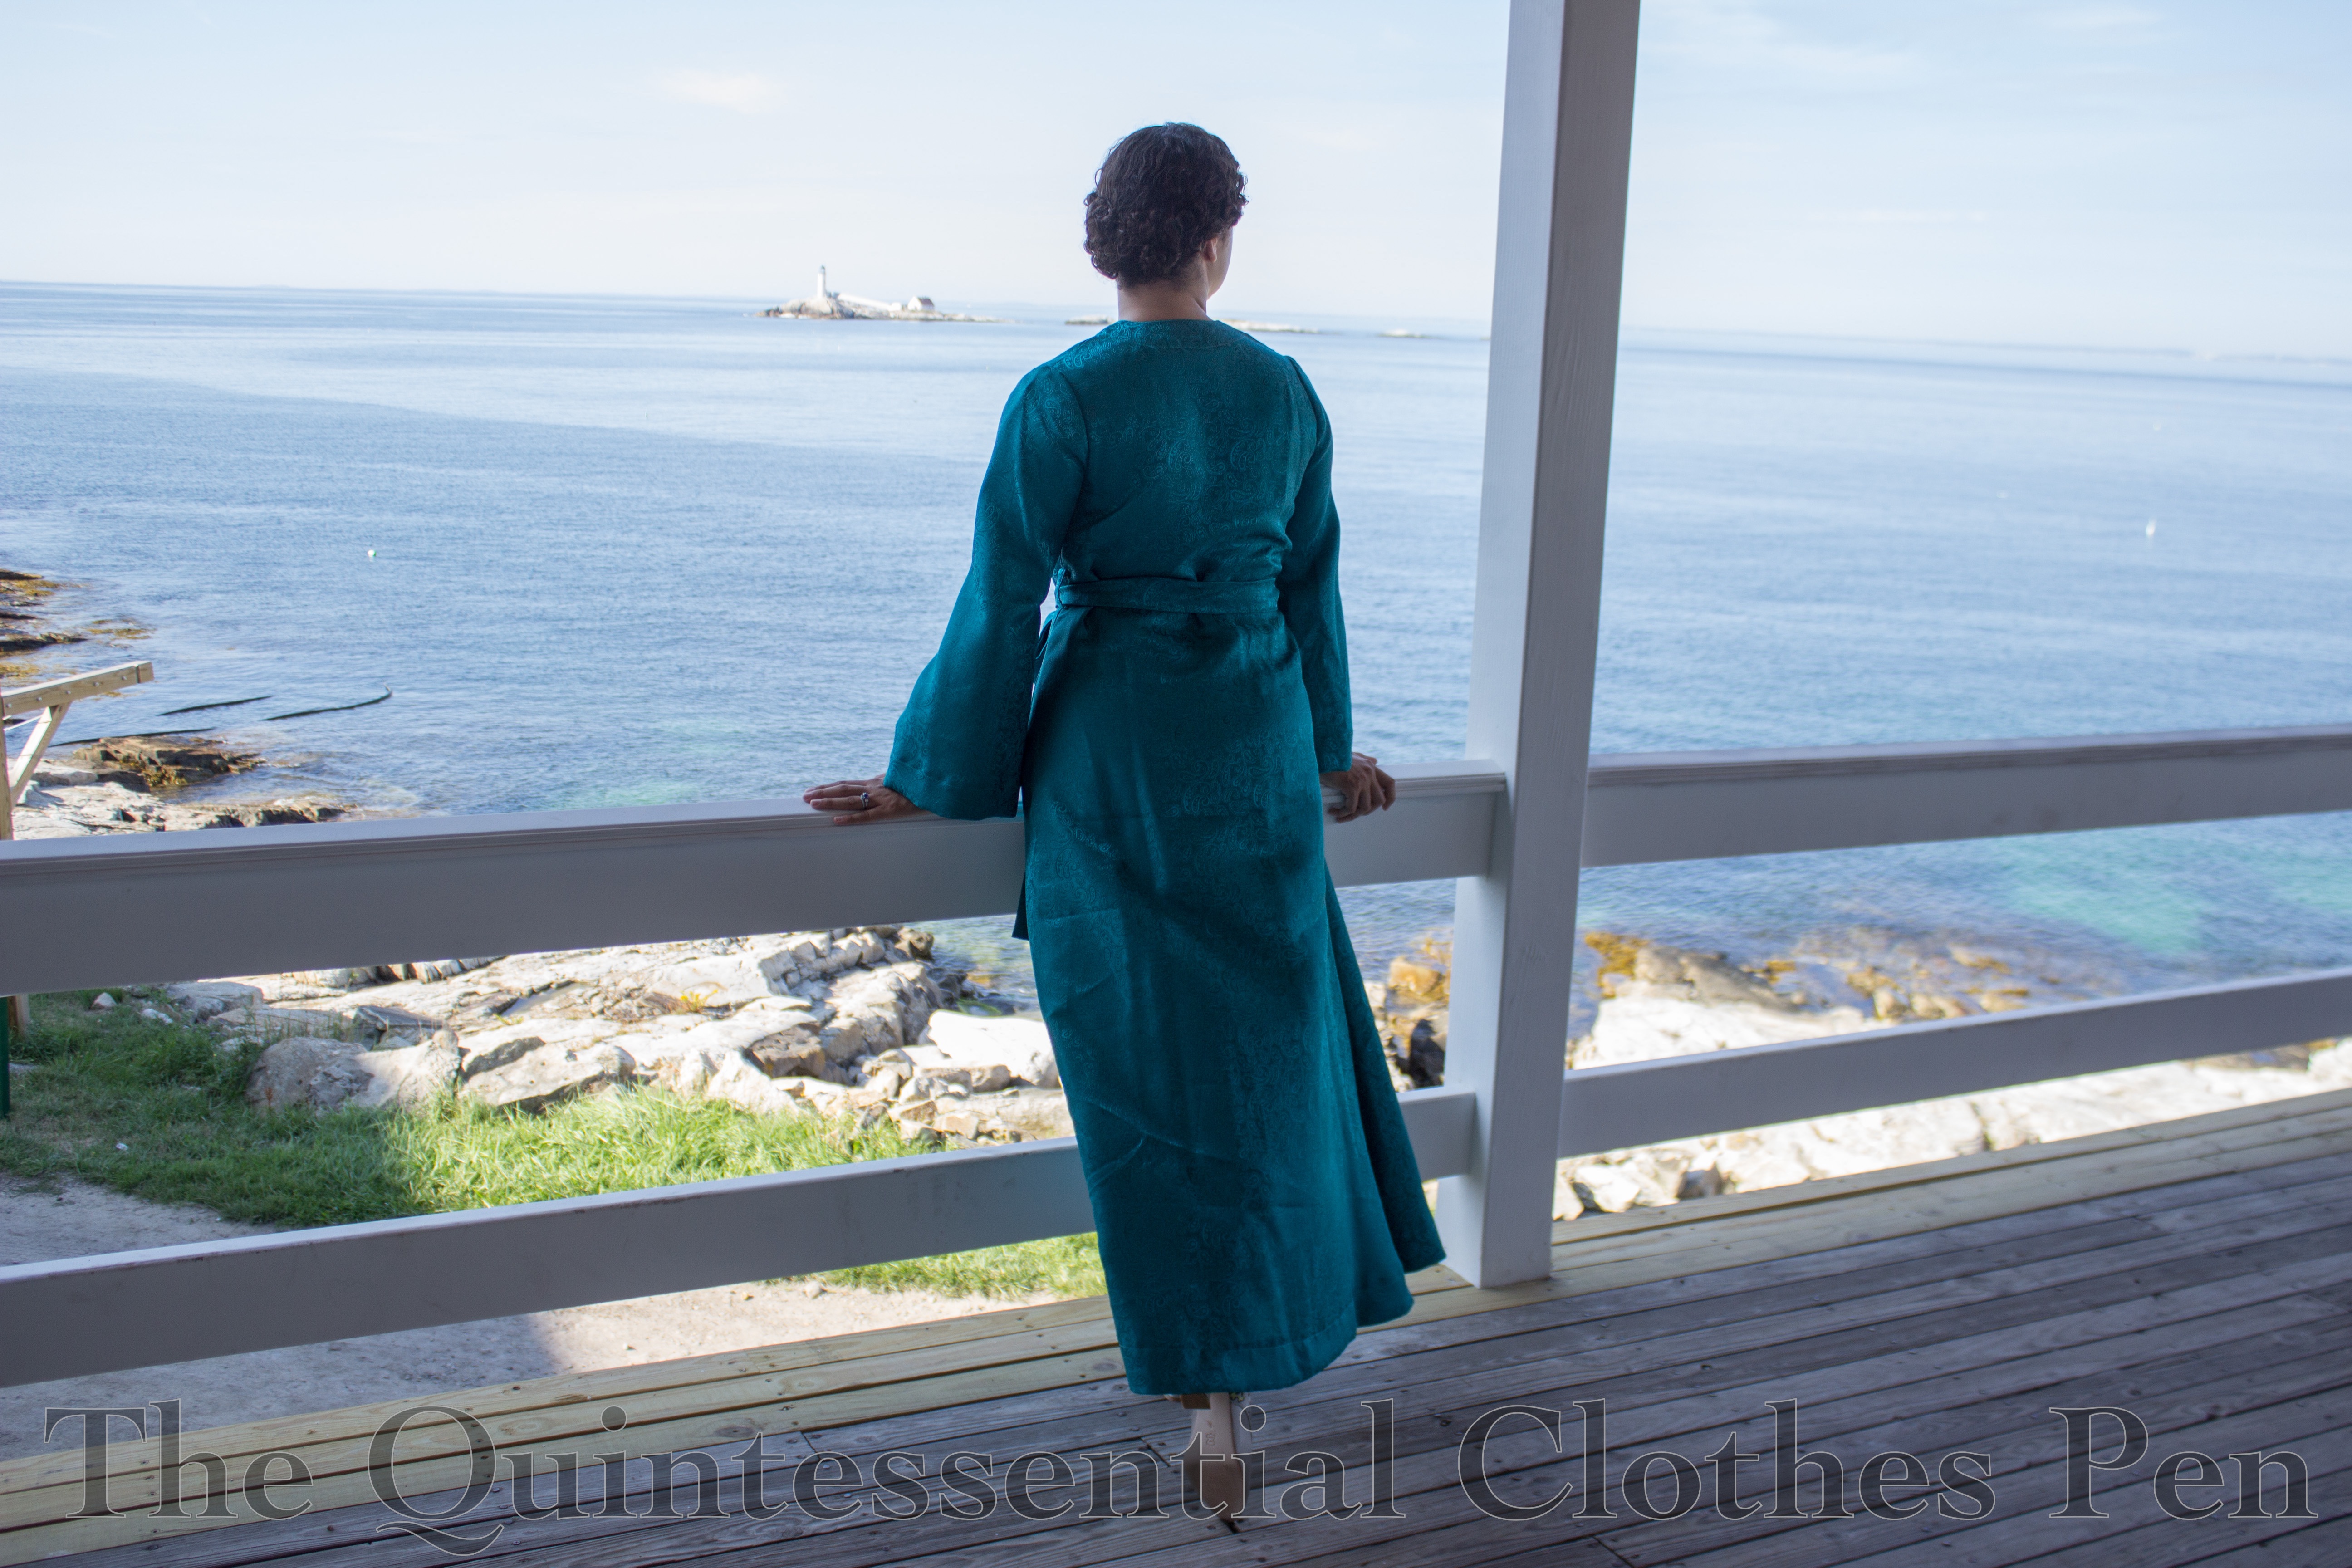
Despite the photos of the whole look with accessories (which I’m very pleased with!), when I tried on the dress after finishing the sewing I was so disappointed! I looked so frumpy in the mirror with the calf length hem and my bare feet! I made a lot of faces. Then I thought, ‘Well, I guess I try on the shoes I plan to wear with this.’ That idea did make me a little happier, because I had snagged a pair of Royal Vintage brown and white spectators but hadn’t found a reason or outfit to wear them with yet. And then… MAGIC. Those 3″ heels absolutely transformed the look! All of a sudden that calf length hem looked great! I was probably standing with more confidence rather than disappointment, too, but really, it was like I was wearing a different dress. Has that ever happened to you? The accessories really make some looks come together! And especially with 1930s calf length hems… the heels really help posture and proportions.

I found that my first pair of Royal Vintage shoes are very comfortable. They have a bit of padding in the sole, which is great under the balls of my feet especially, and also arch support. They don’t pinch or rub in any uncomfortable ways. After wearing them for the better part of two days in a row I can say that my feet were tired of being in 3″ heels, but tired or aching in no other way (that’s just a function of being in 3″ heels, no matter how comfortable they are). And boy, did I feel snazzy for those two days!

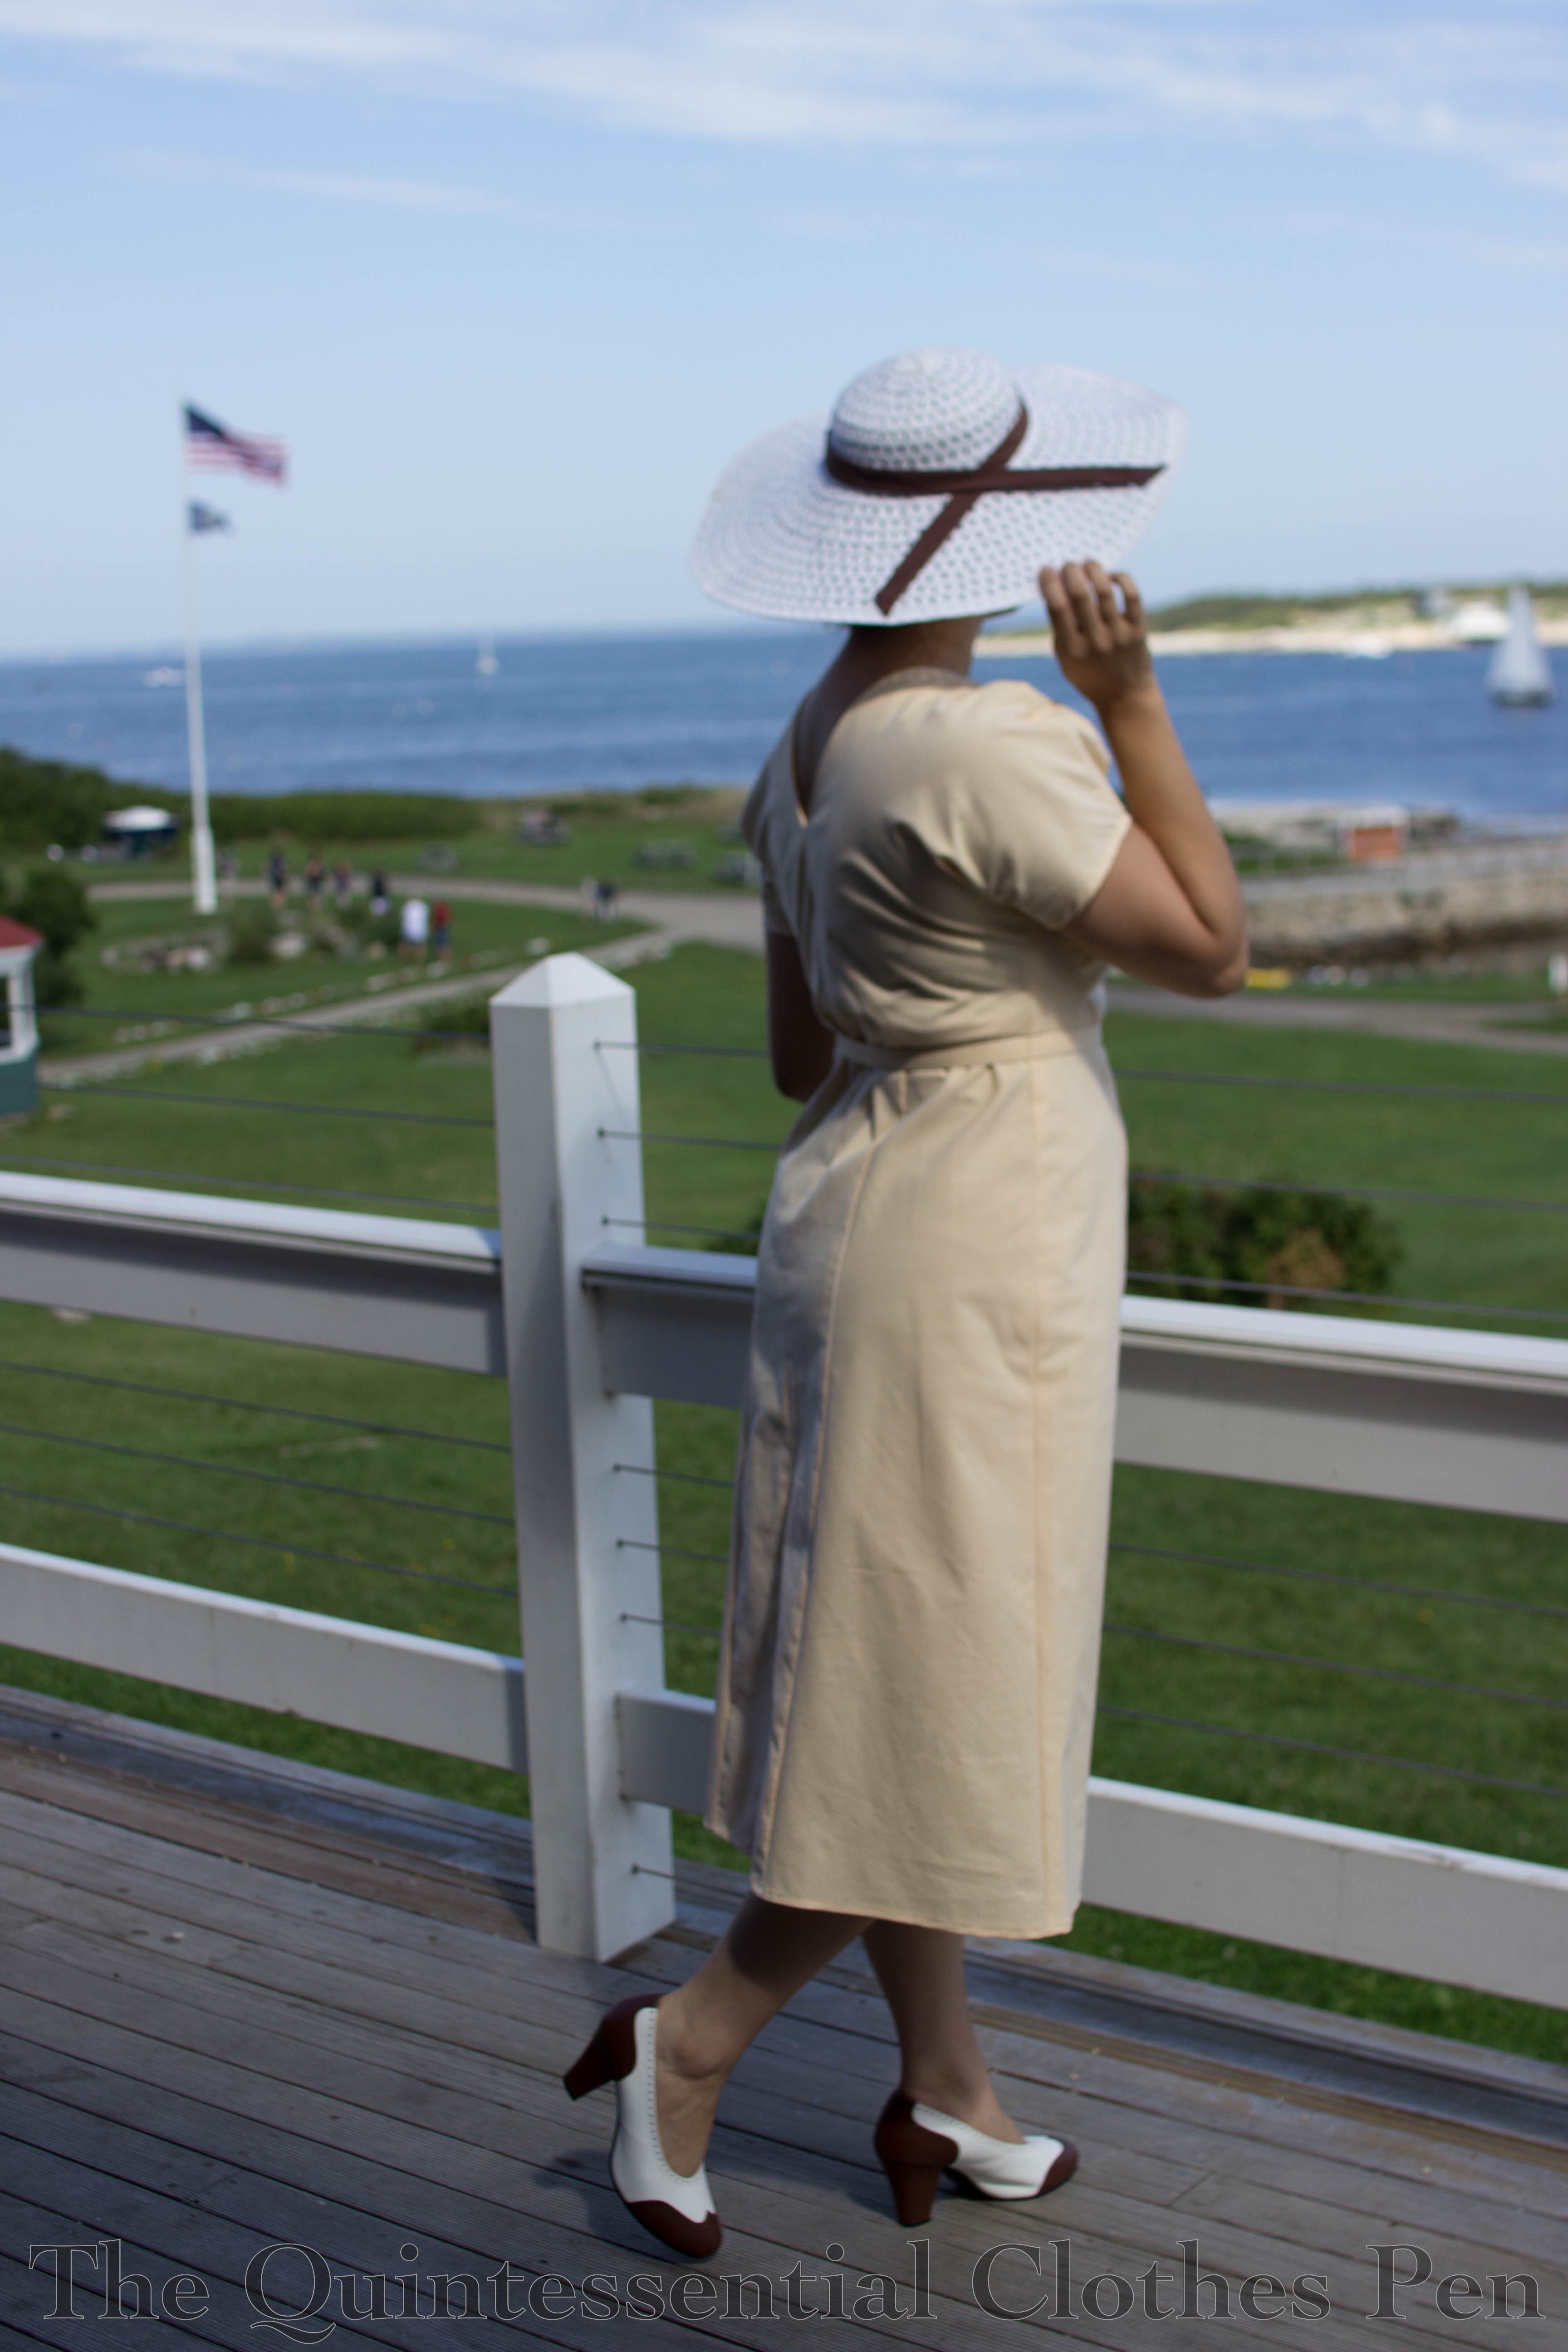
This next one is the ‘Oh no! My hat is flying away!’ face. It was rather windy, so there actually were moments where I had to hold onto my hat to keep it from flying away! This hat is a refashion of a modern sunhat that deserves its own post–coming soon. I’m very pleased with this updated version and I love how well it coordinates with my shoes!

The stripe in the fabric gets a bit lost when you’re not right next to the dress, but I still like it overall. I found the dress was more comfortable to stand in than to sit in, but it did well in the heat and was cool and breezy. Success!

Spring & Summer Fabric Stash Additions: Stripes & Patterns

For most of this year, I’ve had a dress in mind that I want to build for an event in August. I’ve been on the hunt for just the right striped fabric for it for a few months, but really hadn’t found anything that was just right. I was shopping for another fabric and saw that Farmhouse Fabrics had a large section of stripes… I had to come back and look through them!

‘Danger!’ Should have been posted somewhere, because I wound up purchasing three different striped cotton fabrics instead of just the one I’d been looking for!

I have solid plans for all three fabrics, which somewhat justifies their purchase. The green seersucker I plan to make a modern dress out of, most likely with a circle skirt. The cotton candy stripe, as I call it, I’m planning to also use for a modern dress based on New Look #6143. The yellow stripe is intended for McCall’s #7153, a 1933 Archive Collection pattern.

I also came across (yes, I promise, I wasn’t intentionally looking for these either!) two interesting patterned fabrics this spring.

The one on the left is a rayon from Joann’s (and in looking for the link I see they’ve got a whole bunch of lovely looking new rayon prints–more danger!). It’s great that they’ve got a wider variety of fiber contents lately. I think it will make an interesting Henrietta Maria. Leimomi posted one awhile ago that I loved and this fabric reminds me of it a little.

The fabric on the right was super discounted at a local store (though I’ve seen at regular price at another store, so I definitely got a deal). It’s a lovely cotton lawn that I think will make an interesting 1920s day dress. I’ve got lots of evening gowns but my daywear options are somewhat limited. It will be fun to have new 1920s daywear! In fact, I’ve already started making a dress with the cotton lawn! I’ve been posting progress pictures of it on my Instagram account. Check it out!

Oh, I also came across remnants of seafoam green silk taffeta for a bargain price that I also bought, though I don’t have a picture or a specific project in mind for that. It’s hard to pass up silk taffeta even when there is no project in mind, because if you go on a hunt for a specific color you can’t usually find it at a bargain price.

I’m looking forward to putting these new fabric projects high enough on the to-do list to actually accomplish them!

SaveSave

SaveSave

SaveSave

SaveSave

Dressing Gown & Slip c. 1935

I made this robe about four years ago, for the same film that I made the 1934 Metallic Evening Gown I posted about recently. Like that dress, this robe and the accompanying slip were made and never worn, and so have spent the last four years languishing in my closet.

When I had the opportunity to attend Gatsby On The Isles in 2016 I thought it would be a great opportunity to wear these pieces for breakfast on the second day, and also to get some photos!

The robe is inspired by the silhouette of these robes from 1936. The pattern started life as Burda 7627, which I adapted to get the shape I wanted: a longer skirt with more fullness and sleeves with a little more flare. The slip is inspired by slips in this image from 1934. The pattern for this is actually the same as for my evening gown from 1934, just cut off around knee height and with a different strap situation.

The robe is made from a polyester jacquard. It’s not lined, just faced with more of the same fabric on the edges. The slip is made from polyester charmeuse and edged with lace. Both garments are entirely machine sewn.

I thought it would be fitting to pair these garments with my beautiful silver American Duchess Seabury shoes. These shoes are excellent–a unique historical shape, comfortable, sturdy for walking and dancing, and with gorgeous, lustrous silk exteriors. I even wear these in my modern life–they’re a quirky, elegant shoe to wear for a dressed up event.

On the other hand, I don’t have the opportunity to wear this dressing gown that often (I mean, I could wear it around the house as a modern person, but I don’t, generally speaking), so when I do wear it I really enjoy how elegant and put together it makes me feel. It’s fun to have historical comfy clothes in addition to the day dresses and evening gowns!

SaveSave

SaveSaveSaveSaveSaveSave

SaveSave

SaveSave

SaveSave

1933 Dress & Hat In Green & Gold (HSM #10)

The summer was incredibly busy and the things I was making unfortunately didn’t fit into the HSM challenges, but I’m hoping to get back to it for the end of the year. In that spirit, I finished a dress that qualifies for the HSM Challenge #10: Out Of Your Comfort Zone. I’m a bit late posting about it because it took me two tries to have a successful photo shoot and then a bit of time to edit my photos, but nevertheless, the dress was completed within the deadline. It qualifies in that I’m expanding into 1930s daywear with the making of this dress.

Unlike some garments I make which have a specific wearing in mind, this was different in that I was trying the idea out to see if this 1933 shape would be flattering on me. I do like the silhouette a lot and so hopefully I’ll make more similar dresses in the future. The years right around 1933 are a great mix of awfully silly, with their big neck frills/bows and unusual sleeves, and wonderfully elegant, with long hems that look especially flattering on those of us blessed with height.

The inspiration for this dress came from looking through many books of 1930s clothing. I wanted to try out the longer length bias skirt and I liked the bust spray detail I found along the way in 1930s Fashion: The Definitive Sourcebook (page 308). It’s not as crazy as some early 1930s neck frills, making it a good starting point for getting into this decade. (Look at these examples of neck bows from 1934, for example. They make my dress look subdued.) I did add some interesting sleeves though, based on a 1933 pattern for different sleeve types.

As I mentioned, I did two photo shoots for this dress. The first one failed pretty horribly, as I was out in public, pressed for time, and my phone camera wasn’t cooperating with me. But the second photo shoot was much more successful! It may have taken over 300 photos to get ones that I like, but because I was using a timer with burst photos on my camera I could run back and forth across my yard to my heart’s content, practicing all my best dramatic poses and facial expressions. Unfortunately, my phone camera isn’t outstanding enough to have taken great photos with the slanting afternoon sunlight. I’m calling it ‘artsy.’ (What I really need is an event to wear this to in a good-picture-background-setting, so that I can get better quality pictures…)

Anyway, here are the facts (just for the dress, as the hat doesn’t really qualify for the HSM):

Fabric: Green and gold small windowpane mystery (but likely polyester) fabric and gold silk scraps.

Pattern: My own. I draped the bodice and skirt pieces and referenced images to flat pattern the sleeves.

Year: 1933.

Notions: Thread, zipper, hooks, and hug snug.

How historically accurate is it?: Let’s say 95%. It’s entirely recognizable in its own time and made in a way that is straightforward and consistent with historic garments. The materials are not 100% accurate.

Hours to complete: 5-10 sounds likely, although I spread making this out over about a year, so it’s pretty hard to remember!

First worn: October 2017, for pictures.

Total cost: $1/yard for the fabric and all the notions from the stash, so let’s say $4. Win!

The back of the dress is pretty plain. All the interesting details are on the front. But here it is, for the sake of documenting all of the angles.

On the inside, the dress looks like this. The seam allowances are either left raw if they are on the bias or pinked if they are on the straight of grain. The neck is finished with a facing which is tacked in place. There are moderate shoulder pads to help achieve the correct silhouette. The bottom edge is finished with hug snug and an invisible hem. The dress closes on the side with a hand sewn zipper. There is a self fabric belt as well.

Now for a bit about my hat and hairstyle. First, the hat is a remake of a wool velour hat I purchased for $5 at a theatre sale. It was a bowler shape originally. I cut off the brim, cut down the crown, reattached the two, and then took some tucks in the crown to give it a more unique shape.

Hair-style-wise, I was going to do my usual close to my head 1920s/30s style (I explained and documented it in this past post) but it didn’t seem to compliment my hat, so I decided to try a more down around the chin, lightly curled bob style.

My method for this is as follows: I started with wet hair and a bit of Tigi Small Talk. I parted my hair on the side and added wave clips (3 on the longer side and 1 on the shorter side). Then I braided the rest of my hair to keep it damp while the front dried. A few hours later, I removed the wave clips and ran my fingers through the front sections to loosen them up a bit. To create the chin length look, I looped up large sections of my hair and pinned them to the top of my head. The hat hid all the pinned up bits nicely. My hair has much less volume when it’s damp (and even after it’s dried in a not-voluminous way if I don’t touch it at all), so the chin length curls had a nice close to the head look to them.

I’m pretty pleased with this hairstyle. It will definitely get tried out again someday. The outfit is fun, too! I love that the hat matches perfectly and ties the whole thing together. Plus, it reminds me of autumn, my favorite season.

SaveSave

1930s Beach Ensemble

In August, I attended the 1920s Crane Estate Lawn Party again for it’s 3rd year. The last two years I’ve worn dresses (my 1926 sailor dress and my 1922 blouse, hat, and parasol ensemble), but this year I had hoped to go to the beach prior to the lawn party and I really wanted a more beachy ensemble than a dress. It was also on my to-do list to make a 1930s beach ensemble, so I bent the time period of the lawn party a bit and decided to make and wear a new 1930s beach ensemble despite not actually making it to the beach.

It was a super hot day, unfortunately, so I spent a lot of time huddled under an umbrella in the direct sun before we got smart and moved to the shade. Before we hunkered down to avoid the sun I did get some good pictures, though! My hair turned out very well–I’m quite pleased with it, though I can’t remember what I did to get it to look like that!

IMG_2658

unnamed

The halter was made using Leimomi’s tutorial “How to make a 1930s style handkerchief halter top“. I used an old striped silk twill fabric remnant rather than a handkerchief, so I had to finish my edges, but I also had to piece the fabric to get the right beginning square rather than rectangle shape. I also made my square a bit bigger than a scarf’s dimensions so that my lower back would be totally covered by the halter. And I used hug snug for my tie, because it was all I had on hand that matched. The halter was pinned around my body to a comfortable point on each side.

IMG_2647
Front.
IMG_2649
Back.
Colorized-early-30s-postcard-of-fashionable-beach-pyjama-wearing-holiday-ers-on-the-Cote-DAzure-2
My inspiration: one of the images that Leimomi includes in her tutorial post (just like the lady in the middle, I decided to make my center front seam decorative and do a chevron–it makes me very happy!). Beach pyjamas on the Cote D’Azure, colourized postcard, 1930s
IMG_2443
Cutting and piecing to get the chevron.

The pants I drafted myself. They’re actually based on the same pattern I made my dotty tap pants from, adjusted to have a waistband, full length legs, and much more fullness in the width of the legs! The pants close with an invisible side zip. They are constructed from soft washed crepe-like polyester fabric that is super comfy to wear while lounging around on picnic blankets. And bonus, both of these fabrics have been in my stash for years: the stripe for about 7 or 8 years and the pants fabric for about 4 years. Free, and yay for using up stash fabrics!

IMG_2645

IMG_2642

IMG_2651

There are more very fun examples of wide leg beach pajamas on my 1930s Sportswear Pinterest page. I’m looking forward to finding other opportunities to wear these again and hopefully getting pictures of them on a beach at some point!