

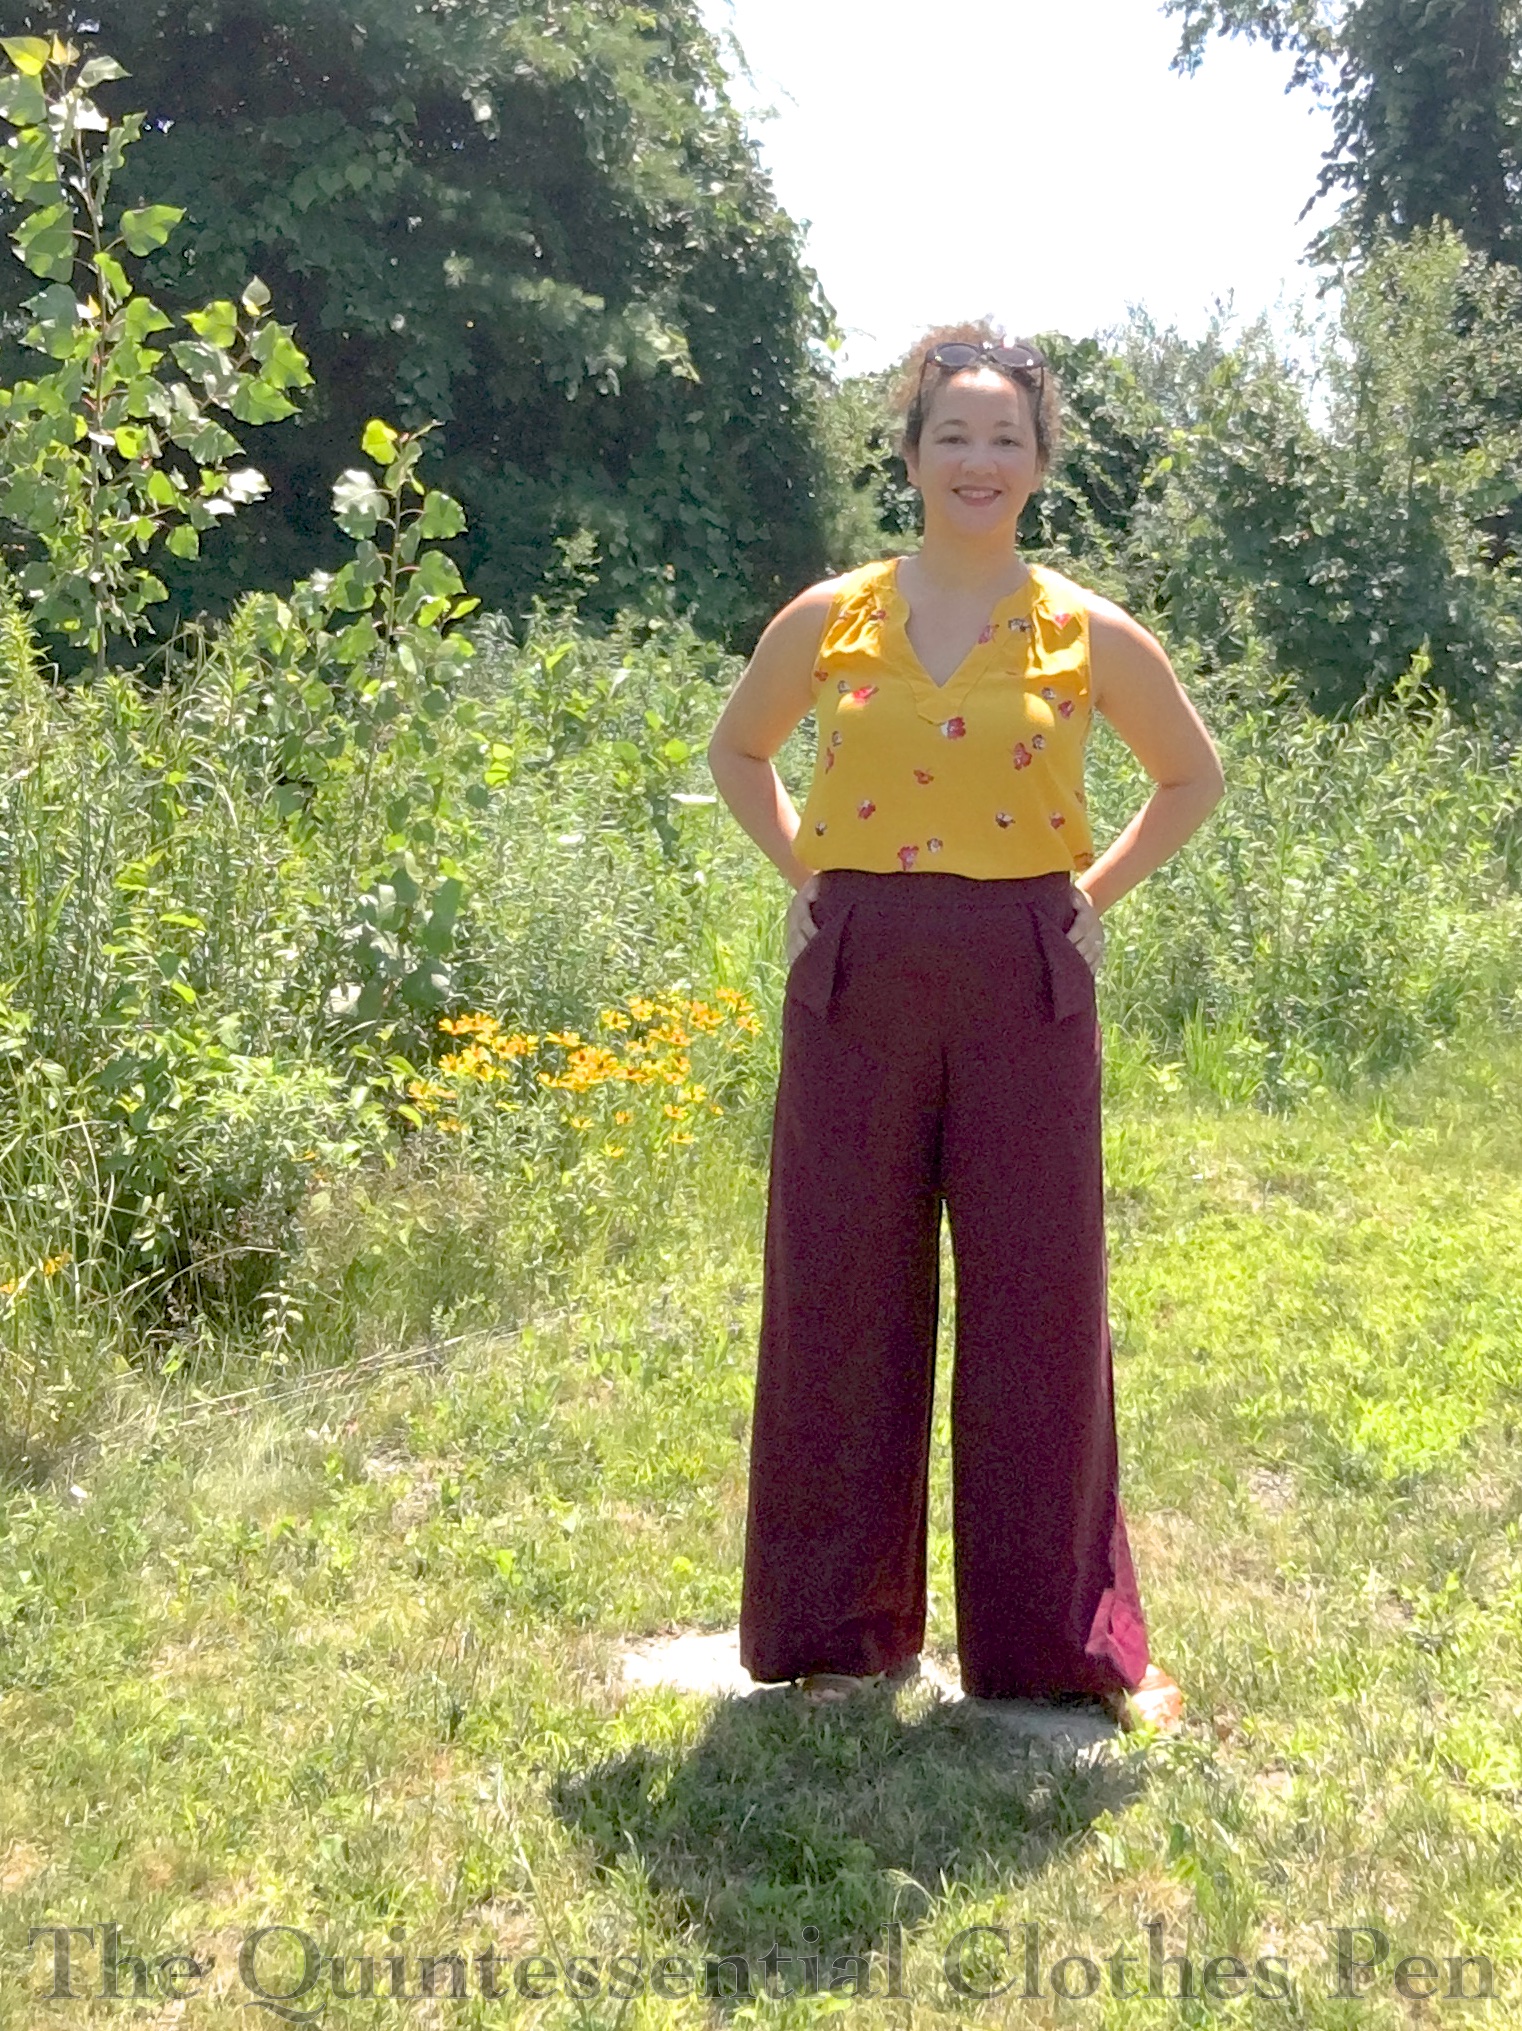
Last year, I happened across a lovely plum colored linen/rayon blend fabric at Joann’s that was such a perfect Quinn-color that I just couldn’t pass it up…. Accordingly, 3 yards came home with me along with the idea to make wide leg pants out of the yardage.
Trying To Determine The Design
I wasn’t really sure exactly what I wanted in terms of specific design details, which made the patterning and mockup process rather slow. I spent a few hours making mockups that fiddled with the width of the legs, the length of the crotch seams, and my design idea–trying to decide exactly what it is I was trying to make!
I was extremely frustrated for awhile (close to despair, as Anne of Green Gables might say) as the mockups looked like medical scrubs. The legs weren’t wide enough to look like the vision in my head at that point and I just couldn’t figure out what the details would be. I thought I wanted a non-functional wide tie at the waist, but that wasn’t looking right with the scrub looking pants. (The scrub problem was likely related to the fact that the old sheets I was using as my mockup fabric are dark grey, so the color and texture was scrub like…)
Not too long after my frustrating mockup sewing session, I was sewing something else and watching the Netflix series High Seas when I saw a pair of high waisted pants on one of the lead actresses and thought ‘That’s it!’. This particular pair of pants had details I loved: a high waist, wide legs, and pockets that added interest and vintage charm. After that, mocking up the pants and finishing the pattern was so much easier!

Getting Started
After pre-washing my fabric, I was ready to go! The basic pants are pretty straight forward with front and back pieces as well as a waistband, but they have additional pieces for the pockets as well as canvas interfacing for the waistband.
The pants are mostly machine sewn, with a bit of hand finishing on the waistband (you can see the whip stitches on the bottom of the waistband in the photo below). The exposed inside edges are either french seamed, as with the pockets (on the left in the photo below), or finished with a serger (on the right in the photo below).

The pockets and waistband facing are cut from an early mockup iteration made from repurposed sheets (yay for reusing old fabric!). I decided to use the mockup fabric for the real pants because 1) the mockup made me mad and I wanted to get back at it 2) the smooth cotton is a good facing/pocket material.
Here’s a look inside one of the pockets. It’s not likely to ever be seen (in any venue other than this!), but the top stitching along the facing edges makes me very happy.

The pants have a wide hem–2″–that is machine top stitched in place. With perfectly matching thread (that was in my stash as a gift from a friend–yay!), the topstitching blends right in.
While all of the visible stitching is done in the perfectly matching thread, I didn’t want to run out of it and so the interior seams are sewn with a more purple thread. The serging is done in brown, because that’s the closest neutral that I had cones of. It blends with the grey facings/pockets to create what appears to be an intentional ‘design choice’!
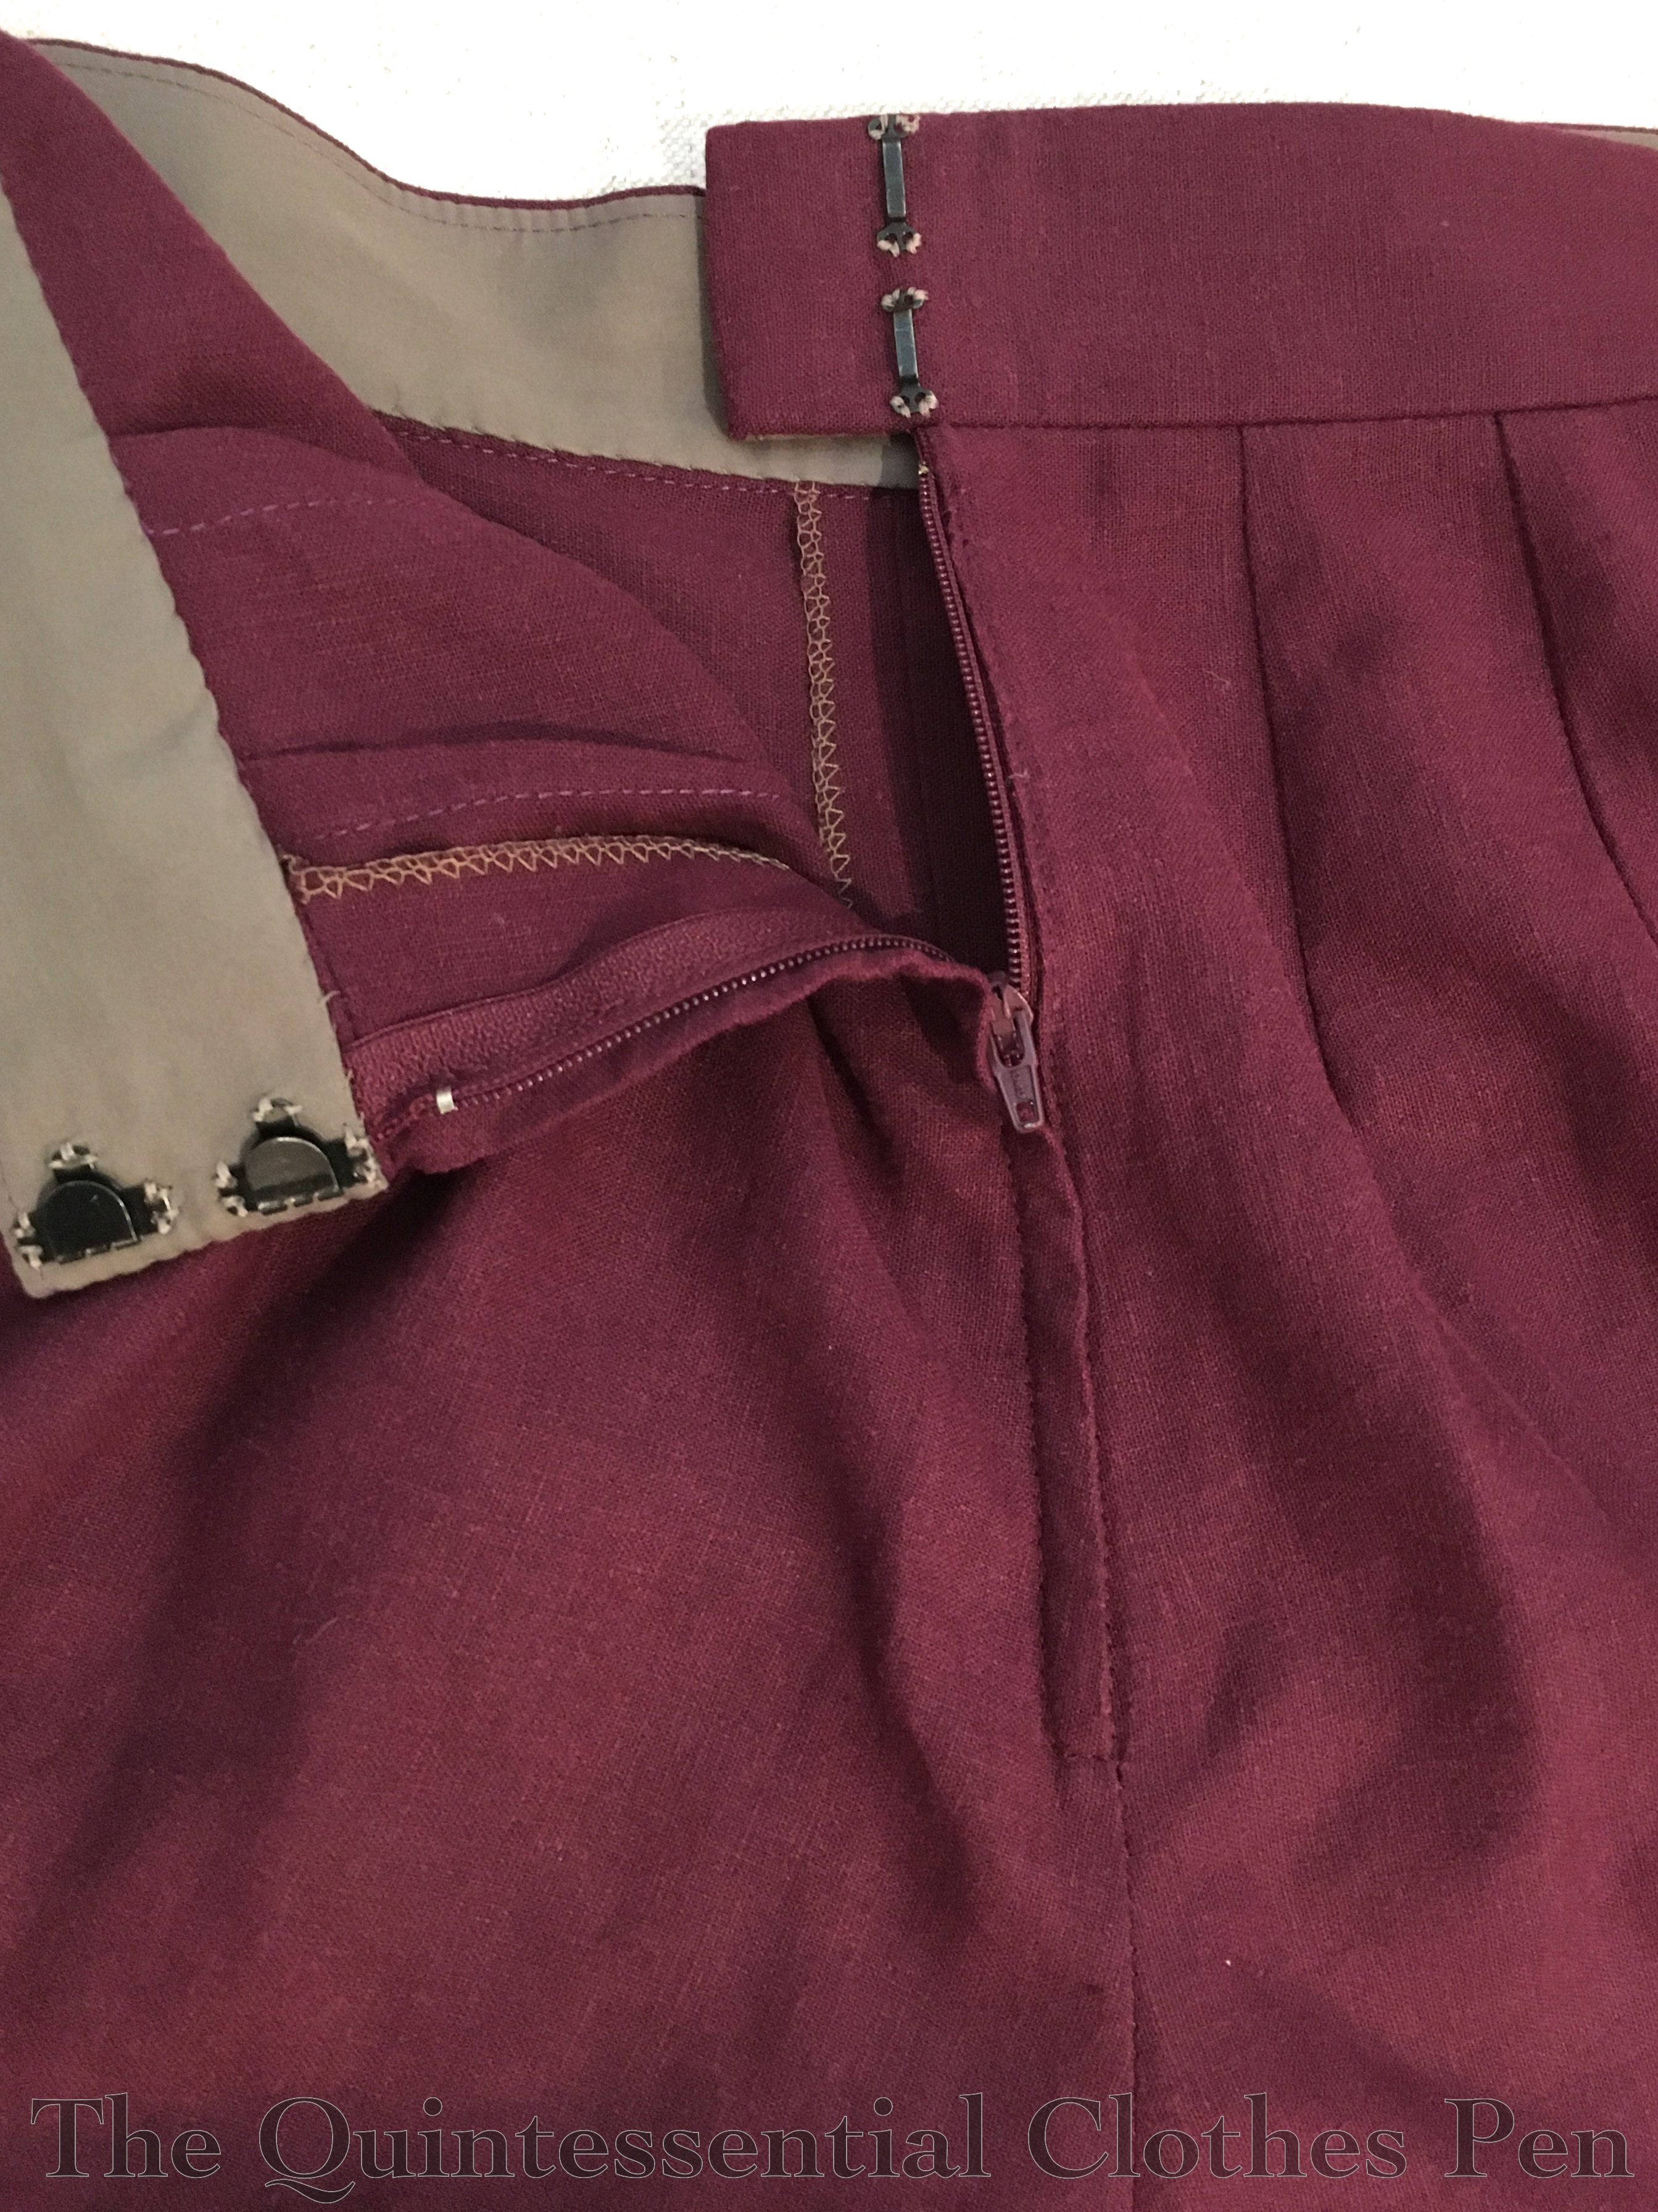
The pants close with a lapped zipper at center back.
The Zipper Saga
Oh, and that’s a story! So I bought a zipper, set it in, and was so excited!
I tried on my pants and showed them off to Mr. Q (who wasn’t particularly impressed, because vintage styles don’t really appeal to him). I went to take off the pants so I could finish them off and couldn’t get the zipper undone… I was stuck! And they’re fitted pants at the top, so it wasn’t like I could shimmy out of them. I tried to pick a few stitches, but couldn’t see what I was doing, because the zipper is at the center back, and I was afraid I’d poke myself instead of the pants, or rip a hole instead of picking stitches… I had to go back to Mr. Q and get his help seam ripping the zipper enough that I could get out of the pants! He thought it was hysterical. I don’t know that I completely agree with that… though it is more amusing after the fact.
After managing to get the pants off, I took this photo to document the debacle.

Then the offending zipper was completely removed. I reset it, thinking that I’d stitched too close to the teeth and that was the problem, and it still didn’t work (I tested it out without putting the pants on the second time!). I doubled checked that I didn’t sew too close to the teeth the second time and that didn’t seem to be the problem. I don’t know what the issue was because I’ve set many zippers and haven’t had this problem and this zipper works just fine when not attached to a garment. Horrible thing–it was sternly put away and may never be used again!
The solution was that I went out to a different store and bought a new zipper. It actually matches much better, though it is a regular zipper as opposed to an invisible one. Most importantly, it works as it’s supposed to! So all is well in the end.
Here is a view of the back of the pants, showing the new zipper, darts, interior finishing, and waistband closure.
Other Inspiration
As I was looking for inspiration for these pants, I was reminded of fabulous wide leg pants made/patterned by other wonderful bloggers. These were all indirect inspiration for my pants.
Lauren Stowell’s 1970s does 1930s Wide Leg Pants
Caroline’s Vacation Pants (made from the pattern below)
Wearing History’s Smooth Sailing Trousers pattern
Final Thoughts
My new pants are super comfortable to wear. The fabric is stable and yet lightweight enough to flow nicely. The waistband is suitably substantial and does not crease when I sit for extended periods.

The pockets are great! They make a statement that elevates the pants to being stylish (vintage stylish, of course!) and I patterned them to be big enough to easily store my phone and other essentials–so helpful!
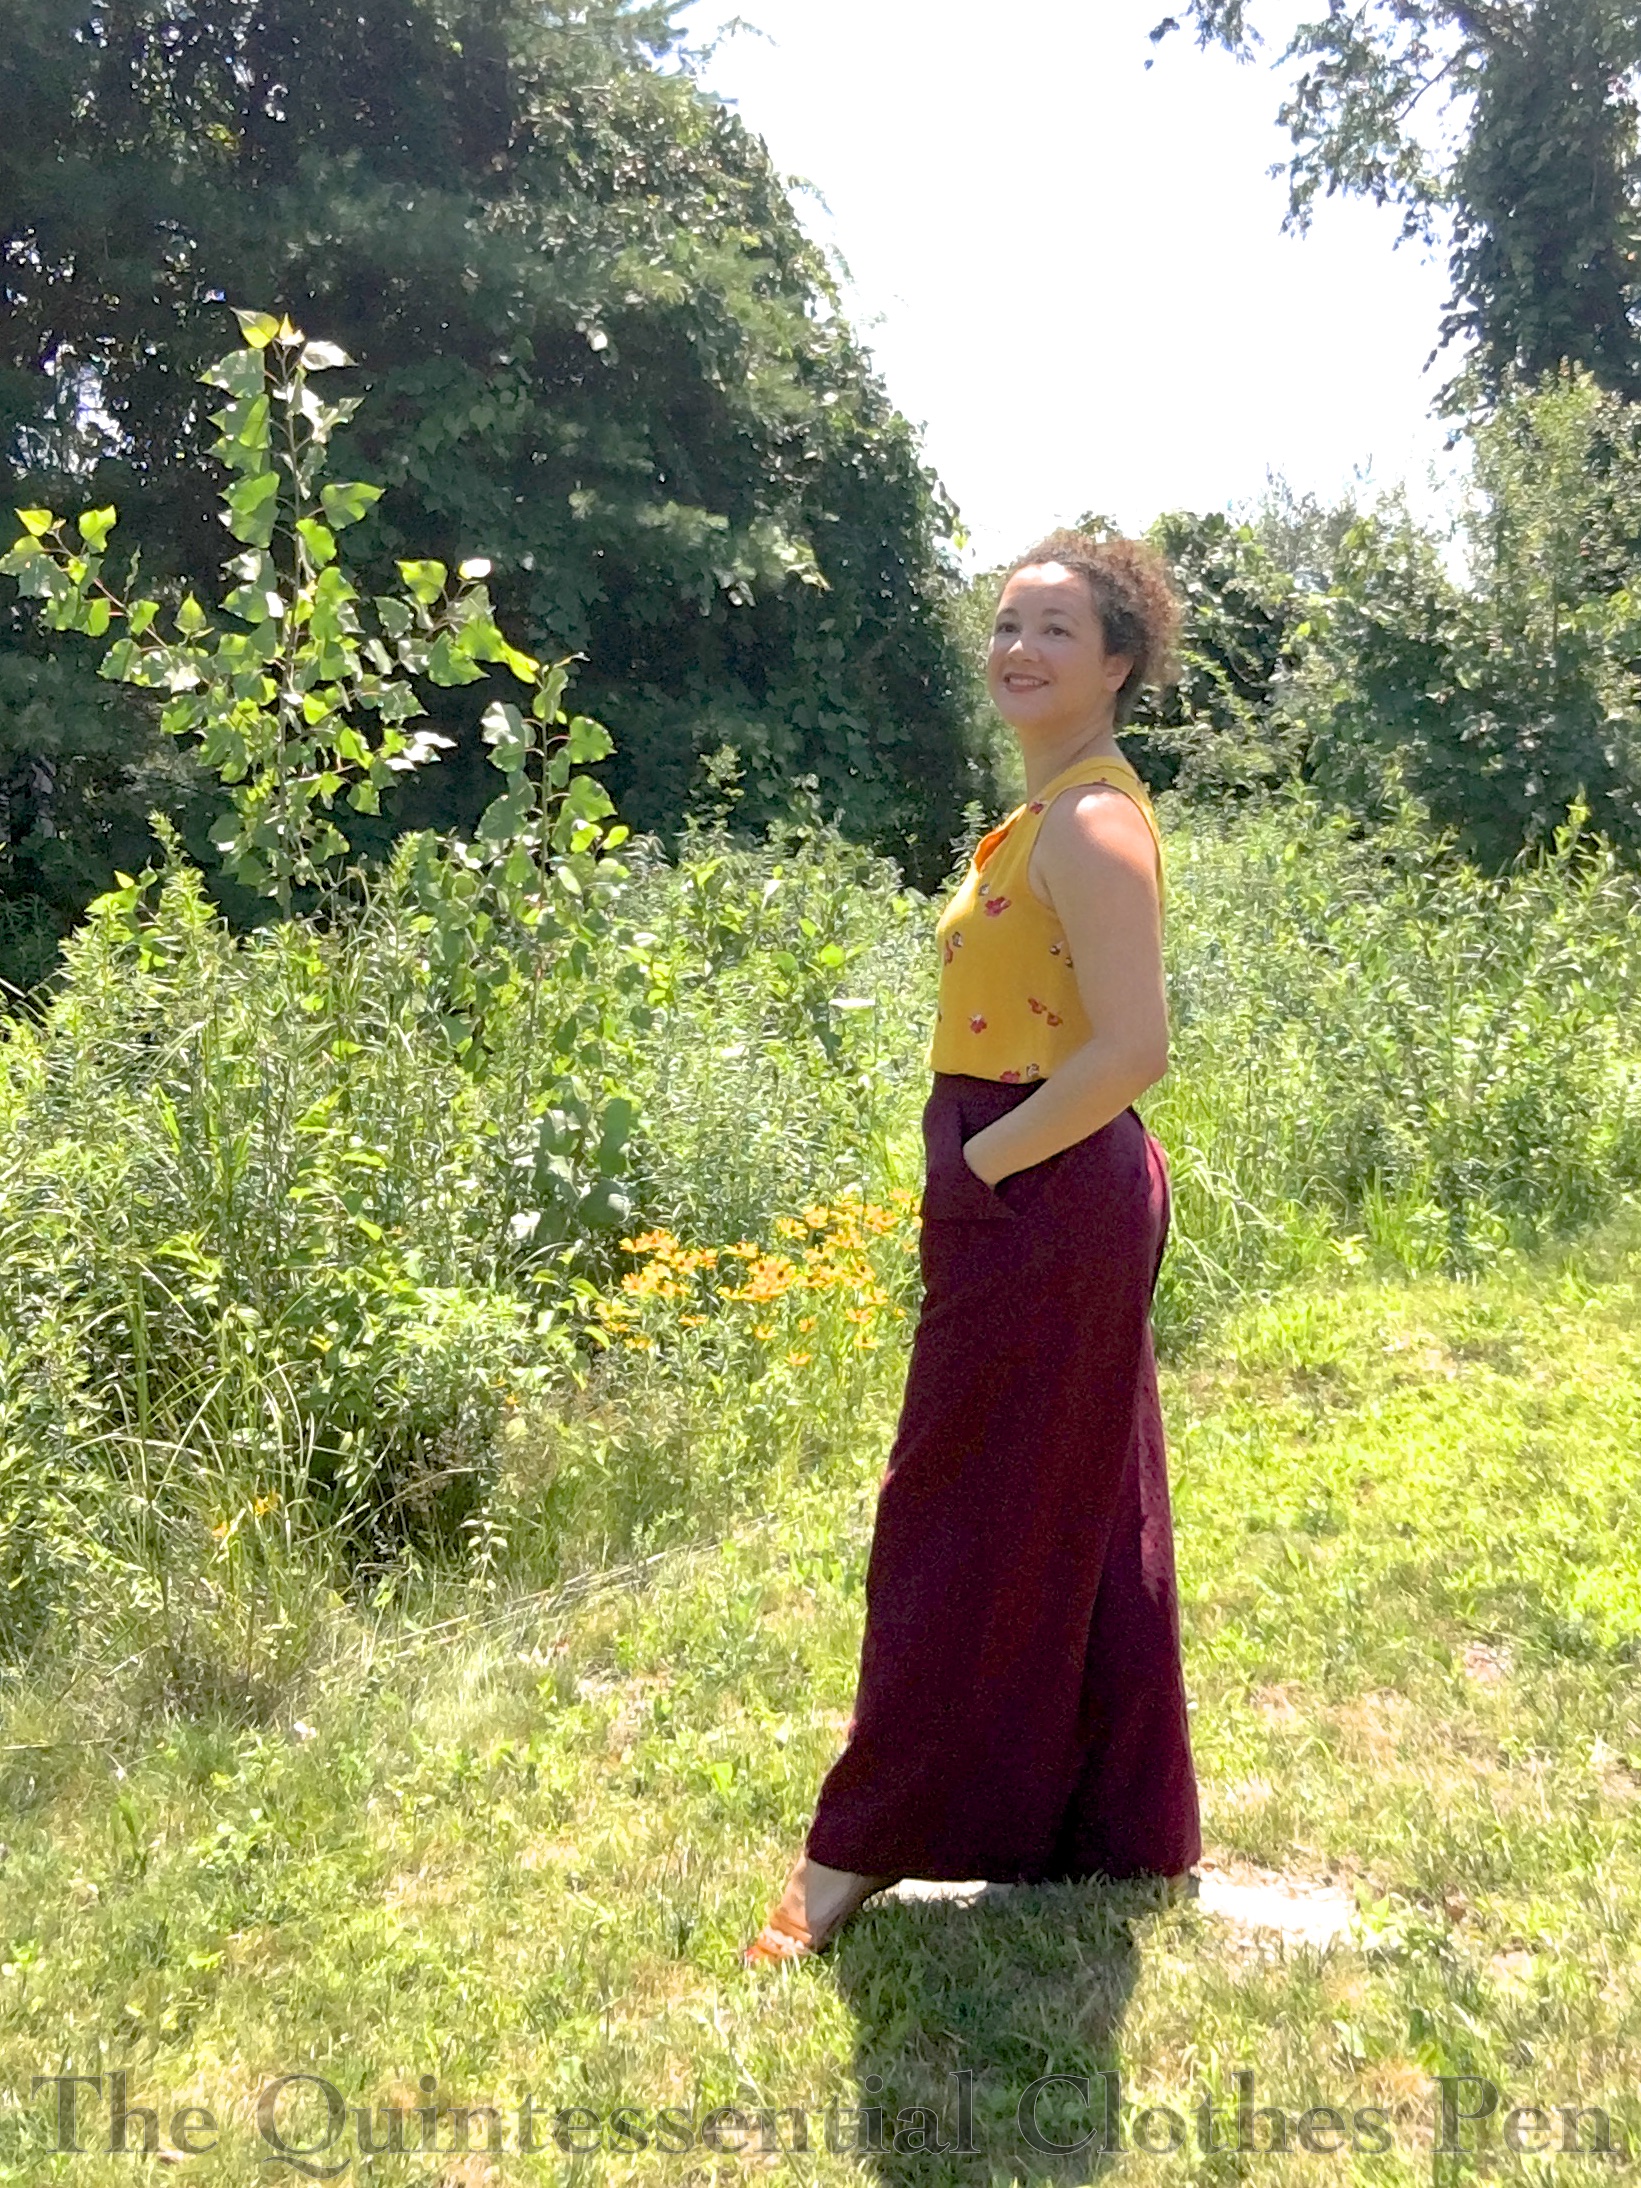
One final photo and story for you… I took these photos in my yard without help, so I needed to figure out a way to stabilize my camera and easily maneuver it around my yard. Prior to this, I’d clamped it to a ladder, but the ladder was heavy to move around, so for this photo session I decided to clamp my phone to my lawn mower handle. Yes–lawn mower! It worked pretty well–easy to roll around the yard, but occasionally my phone would slip and I would get a series of photos of the ground and the lawn mower handle! Any neighbors that saw me probably wondered what I was up to!
Added to the challenge was the fact that I didn’t feel like putting contacts in, so I would leave my glasses on the lawn mower, set the timer on my phone, and then run to my chosen marker to stand for the photos. I have pretty terrible eyesight, so I can’t see the timer on my phone once I stand away from it. That plus the bright sun (it was a hot day!) made for a lot of squinting.
This outtake photo is one of the ones that didn’t make the cut (except to be amusing)–squinting as I walk back towards my lawn mower camera setup!


Love the burgundy fabric! I wish I had seen that at my JoAnn’s. I bet those pants are comfortable too.
I’m smiling at your picture taking set up. You usually have your friends making your pics, not the lawn mower. I’ve not tried that one. Some time ago I was disappointed that I wasn’t getting hardly any pictures, let alone good pictures. You encouraged me to keep trying. My close costumer friend and I have worked at it and getting better, a little bit at a time. I’m trying to remember to offer to make pictures for the newer members that haven’t developed those close friends yet so they aren’t picture-less like I was for so long. Thank you for the encouragement.
Thanks, Helen! I’ve noticed that the stock can vary widely at different Joann’s locations, which can be helpful and less helpful, depending on the situation.
I’m glad to hear my photo setup is amusing! You’re so right–and I would love to have more friend photos, but this is a situation of making do during the pandemic, since there is less of seeing friends and doing activities. A bit of creativity has been in order! 🙂
It’s great to hear that you’re still encouraged in your photo taking adventure and that you’ve found a friend to work at photos with. Excellent! You’re so welcome.
Thanks to you, too, for reading, commenting, and encouraging the blog posting!
Not only are you an amazing designer and seamstress, you are a great story teller! Thanks for your candor and wonderful work…you inspire many of us! –Erik in NW Ohio
Thank you for the kind comment, Erik. It’s good to keep things in perspective and point out mistakes and crazy behind-the-scenes things as well as successes and beautiful photos. 🙂