Making A 1933 Summer Hat

Last post, I shared my 1933 Sunshine Stripes dress with you. One of the accessories that I loved wearing with that dress was a modern sun hat that I remade into a 1930s shaped hat. Now I’d like to share how easy this process was. I hope it inspires you to try remaking something yourself!

I started with this modern ‘straw’ hat from eBay. I say ‘straw’ because the fiber is really plastic rather than any sort of natural material… but I digress. The price was good and I thought white would be a nice neutral for my 1920s summer wardrobe. But the crown on this hat was soooo tall! 5″! It came way down over my eyebrows and combined with the floppy brim it was not a great look nor was it historical. I think I tried to wear it a few years ago but was displeased with the shape. The only bonus is that it squishes well and pops right back into shape–that’s great for packing! (As a side note, in trying to find the link for the hat I realized I ordered this back in 2015… it only took me a few years to make it something I was really pleased with!)

While trying to decide what to accessorize my 1933 dress with, I looked at the hat in my closet and wondered if there was anything to be done to make it better. I figured the white would coordinate well with the white stripes in the dress fabric. I looked for hat inspiration on my 1930s sportswear Pinterest board and 1930s day wear Pinterest board and decided that the main problem with my hat was the tall crown. I wanted a hat that just perched on my head, so I needed to shorten the crown.

I started by ripping out the stitching on the lower part of the crown just above where it connected to the brim. Here’s the hat at this point with the shallower crown and brim still technically attached.

After determining that I liked the new crown height, I cut away the extra braid. Then I wrapped the loose ends around the crown and brim and stitched them down so I had two nicely finished parts.

Then I reassembled the two parts, carefully stitching them together while avoiding the inner hat band. I matched the stitch length to what was already on the hat (rather long, by my usual standards). Because the hat is so malleable it was easy to squash onto the sewing machine.

After stitching, the join blends right in! The only thing left was trim!

I decided on a simple brown band to trim the hat. I had the brown cotton in my stash and it matched my shoes well. It is nicely complimentary for the outfit without being match-y and it’s neutral enough that I can easily wear this with other outfits as well. The brown is carefully hand sewn around the crown with the ends spreading over the brim of the hat. Ta da! Elegant sun protection!

Sunshine Yellow Stripes In 1933

Last summer, I decided to make a dress from McCall’s #7153, an archive pattern from 1933 (although now out of print, it was released in 2015 so it’s pretty easy to find with a quick search). This is a pattern I’ve been eyeing for awhile. I decided to make it because I wanted something comfortable, new, and appropriate for daytime to wear to a Gatsby weekend in the heat of August. 1933 is obviously not in the 1920s, but the weekend tends to be more generally 1920s/1930s in terms of clothing, so I figured this would fit right in.

The style of the dress is quite defined by the differing grain lines on the pieces, a detail that is set off by the stripes used for the sample dress. Accordingly, I went off in search of a good stripe for the dress. I couldn’t find one I liked in the right weight with a stripe quite as delicate, visible, and widely spaced as the sample dress, but I did find a lovely yellow and ivory narrow stripe at Farmhouse Fabrics (although now they have this, which is similar to the sample dress–I’m not sure which one I would choose if I had both options in front of me now!). I couldn’t find a yellow belt buckle that was right, so I decided to go classic with a white mother of pearl one from my stash instead.

I cut out a mockup in size 14. This was a project for my #virtualsewingcircle while I was still finding time to sew live. The mockup fit, but was very tight, so when I cut out the yellow stripe I made the dress a size 16 (for reference, my measurements were about bust 40″, waist 32″, and hips 42″).

The only other change that was required was to take up the shoulders (which I think meant that I also lowered the front neckline and cut new front facings, though now it was long enough ago that I don’t remember perfectly). McCall’s must have been thinking people were going to put in huge shoulder pads–there was so much room! I believe I took about about 2″ (4″ total) of height!

In addition, I took Kelly’s advice from making this dress and omitted the zipper down the back to keep things smooth. This was made possible in part because my fabric has a little bit of stretch in it.

I think I mostly followed the pattern directions for assembly. There are some steps in a specific order to get the nice point, particularly in the front.

I machine finished the hems, including the sleeves, and under stitched the neck facing, tacking it down by hand to the seam allowances on the inside. The seam allowances were pinked to keep the seams from getting bulky while also keeping them from fraying. This wasn’t important for the bias cut pieces, but it definitely helped the center back and center front panels that are cut on the straight grain of the fabric!

I completely ignored the belt directions, opting instead to use belting encased in a tube of my fabric. Belting is a great product that, as fas as I can tell, stopped being produced in the last few years. Boo! It’s a bendable but stiff plastic backed fabric that you used to be able to purchase in different widths to use as stiffening for self-fabric dress belts (perfect for dresses from the 1930s, 1940s, and 1950s!).

Despite the photos of the whole look with accessories (which I’m very pleased with!), when I tried on the dress after finishing the sewing I was so disappointed! I looked so frumpy in the mirror with the calf length hem and my bare feet! I made a lot of faces. Then I thought, ‘Well, I guess I try on the shoes I plan to wear with this.’ That idea did make me a little happier, because I had snagged a pair of Royal Vintage brown and white spectators but hadn’t found a reason or outfit to wear them with yet. And then… MAGIC. Those 3″ heels absolutely transformed the look! All of a sudden that calf length hem looked great! I was probably standing with more confidence rather than disappointment, too, but really, it was like I was wearing a different dress. Has that ever happened to you? The accessories really make some looks come together! And especially with 1930s calf length hems… the heels really help posture and proportions.

I found that my first pair of Royal Vintage shoes are very comfortable. They have a bit of padding in the sole, which is great under the balls of my feet especially, and also arch support. They don’t pinch or rub in any uncomfortable ways. After wearing them for the better part of two days in a row I can say that my feet were tired of being in 3″ heels, but tired or aching in no other way (that’s just a function of being in 3″ heels, no matter how comfortable they are). And boy, did I feel snazzy for those two days!

This next one is the ‘Oh no! My hat is flying away!’ face. It was rather windy, so there actually were moments where I had to hold onto my hat to keep it from flying away! This hat is a refashion of a modern sunhat that deserves its own post–coming soon. I’m very pleased with this updated version and I love how well it coordinates with my shoes!

The stripe in the fabric gets a bit lost when you’re not right next to the dress, but I still like it overall. I found the dress was more comfortable to stand in than to sit in, but it did well in the heat and was cool and breezy. Success!

Sometimes A Shortcut

…is ok. This is a moment of shortcut-ing for me.

I was going to call this post ‘Sometimes A Cheat’, but then I realized that ‘cheat’ isn’t the right word. It’s too unfair and generally harsh. What I wanted to communicate is that it can be ok to start somewhere other than at the very beginning with uncut fabric waiting to be turned into a project.

You see, I need to have the 1896 cycling outfit I’ve been hinting at and sharing accessories for done by early February. This is a project that started at the very beginning. I made my own pattern and started with an uncut pile of fabric. I’ve already put a lot of time into tailoring the jacket (a progress photo is above–it fits!), making the bloomers, and making gaiters to accessorize the ensemble… all from the very beginning. One of the finishing touches that my ensemble needs is a shirt collar and some sort of neck tie to finish it off. I don’t need a full shirt under the jacket and I don’t want the bulk, so I debated about making a dickie (from the beginning…). I also thought about making a neck tie (from the beginning…).

After a bit of deliberation, I decided that I want a shortcut for these pieces and I’m ok with that. Accordingly, I’ve ordered a ready-made dickie on Amazon, re-confirmed that neckties look stupid on me (a thought I’ve had since I needed to wear one 13 years ago, though I thought that might have changed, haha), followed the necktie-looking-stupid-on-me thought with the decision to go with a bow tie, and ordered a knit bow tie, also on Amazon. (I’m hoping the quality of these items is acceptable. Thankfully they come via Prime and have free returns, so if I don’t like them there’s still time to come up with Plan B. If I’d thought of this a month ago I could have saved at least half the price and purchased these exact items on eBay. Now that I’ve made up my mind the shipping would take too long. Oh well!)

Do you ever take shortcuts like this? How do you feel about them? I feel rather relieved that I don’t need to cut, sew, and finish a collared dickie and a bow tie!

Summary Of 2018: Looking Forward To 2019

2019 feels awfully close to 2020 to me… and 2020 sounds like it should still be far away! Luckily, my feelings about how far away a year feels have nothing to do with how much sewing and fun I have in each year! So I’ll leave my feelings aside and recap my sewing adventures from 2018 instead.

To start, projects I completed!

January: Third re-do of 1928 Green Silk Evening Dress (HSM #1)

February: c. 1955 Evening Gown with Queen Of Hearts sash

March: 1934 Metallic Evening Gown

March: c. 1935 Dressing Gown & Slip

July: A New Old(er) Dress

August: 1925 Blue Coral Day Dress (HSM #8)

September: 1925 Lace Cloche

October: Vintage Inspired Book Dress

October: Gave My Old Hoops New Spots

November: A Fortescue Frock

December: 1920s Beaded Bag (HSM #11)

December: 1926 Silver Robe de Style

December: 1896 Black Gaiters

In May and June, I finally posted about my trip to Denmark in 2017 to attend a vintage dance week. That was three separate installments: Part I an introduction to the trip, Part II photos of the events, and Part III documentation of our sightseeing adventures. I also passed along the Mystery Blogger Award and the Liebster Blog Award in June. I appreciate all of my readers and am grateful that you’re interested in sharing my sewing adventures with me! In August, I started a new adventure, #virtualsewingcircle, a livestream of my sewing via Twitch; however, I realized that this format of sharing my sewing did not work for me at this time with my other life activities. I’ve still been plugging away at the projects I announced and I’m still using the hashtag for them on Instagram, but the live sewing is currently on a break. In September, I had the great fortune of going to The Wizarding World of Harry Potter in Florida, which allowed me to photograph two new dresses seen above. The Fortescue Frock was sewn live on Twitch over the summer and the Vintage Inspired Book Dress was made awhile ago but took me this long to photograph!

I participated in my sixth year of the Historical Sew Monthly in 2018. This year I completed only 4 of 12 challenges since I had a lot of other sewing on my plate that did not count but kept my hands quite busy. Hopefully next year I’ll participate a bit more.

In 2018, I attended 10 balls, 7 other events (teas, picnics, outings etc.), and 4 vintage dance performances. That’s generally in line with my numbers from last year.

Last year’s deinfitely-to-do list was intentionally conservative so I could feel like I actually accomplished it. And… I’m proud to say that it was done by March! Of the things on the ‘maybe’ list, I finished one modern dress, made two more, and made a modern wool skirt. The only one of those that hasn’t made it to the blog is the skirt. I wear it all the time and really need to get photos! It’s a lovely cranberry color!

I also have a number of things that I made towards the end of last year but haven’t posted about yet–all made while I was sewing live on Twitch. I couldn’t keep up with photographing all the things I was producing! These include a new Henrietta Maria, a 1933 summer dress and hat, and another modern dress–the Autumn Plaid dress. So one of my goals is to share about those early in 2019. In addition, my definitely-to-do list for 2019 includes:

  • finishing an 1896 cycling ensemble I started at the end of last year
  • finishing a 1925 coat that I announced I would be making at the end of last year

And of course there are maybes. Many of these are the same as last year!

  • a new 1860s evening dress
  • finishing the 1884 plaid wool day dress I started in November 2017
  • 1880s wool mantle
  • sewing the 1790s stays I started in the winter of 2018
  • 1790s petticoat
  • 1790s dress
  • modern dresses, pants, and skirts (I have lots of fabrics and patterns, I just need time…)

Wishing you a very happy new year!
(I think Kreacher wishes us a happy new year, too!)

1896 Black Gaiters For A Sporting Look

Five years ago (yikes, where did the time go?!?), I made ivory gaiters. They were made to wear over heeled shoes, giving the look of two tone boots. Unfortunately, the ivory gaiters I already have don’t work for the the 1896 cycling ensemble on my sewing table! Ivory gaiters would show dirt and be rather impractical for the sporting look, so I decided to make utilitarian black ones for this outfit.

I used the same pattern as for the ivory gaiters with only a few modifications: the top edge curves in a bit more over my calf and the back heel is longer so it stays on top of my shoe (in my blog post about the ivory gaiters I share about how they were riding up over my shoe–I solved this with a little piece I added in after the photos were taken, but for the new pair the pattern was cut longer instead). It was lovely to have a pattern ready to go!

I’m pleased that I squeezed this small project into 2018. I can count it for the HSM Challenge #12: Neglected! This challenge is sort of a catch-all for making something that fits into a previous challenge either from this year or a previous year. I chose the September 2018 challenge, Hands and Feet, for this December challenge.

Just the facts:

Fabric: About ¼ yard slightly stretchy black cotton.

Pattern: Created by me.

Year: 1896.

Notions: Thread, ¼” and ½” cotton twill tape in various widths, and plastic buttons.

How historically accurate?: 90%. The look is right but the materials are a mix and match of right and modern.

Hours to complete: Approximately 5.

First worn: Not yet!

Total cost: $5 for the buttons. The fabric and twill tapes were in my stash!

These are constructed in the same way as my previous pair. The seams are covered with ½” twill tape, the edges are bound with ¼” twill tape, there is a strap (in this case made of the exterior fabric), and then buttons and buttonholes finish it off.

The great thing about my gaiter pattern is that they work for a few different decades. The ivory pair was made for a 1917 outfit, but I feel perfectly confidant that the pattern works for the 1890s and 1900s as well. I’m looking forward to trying these on with my cycling ensemble once that is far enough along to put all the pieces together!

1926 Silver Lace Robe de Style

One of my summer sewing projects was a new 1920s robe de style. (And yes, I am clearly delayed in posting about it!) I already have one (my 1924 Golden Robe de Style) but I stumbled across a lovely lace at Joann Fabrics in the spring that called to join my wardrobe as a second dress in this category. I attend enough 1920s evening events that I can never seem to have enough dresses. Doesn’t that sound grand written out? I actually do have plenty of dresses, but it’s nice to have variety and cycle through different styles, types of fabrics, weights, etc.

I’ve enjoyed wearing my first robe de style and wanted to try another one with different characteristics. The 1924 golden one is made of silk taffeta and has an ankle length skirt, but I wanted this one to be much lighter weight and shorter in length. I also wanted a different neckline. After looking through my Robe de Style Pinterest board for inspiration I settled on this dress, a Boué Soeurs robe de style from fall/winter 1925-6. This is where my date of 1926 for my new robe de style comes from.

Obviously the lace is not opaque so as with the original dress I needed a lining. I settled on the icy blue because it was from my stash. (You’ve seen this fabric before, in my 1899 evening gown.) It was great to use a stash fabric for cost saving and stash-diminishing purposes as well as the fact that the colors coordinate. And, I was able to accessorize with a large flower pin in a very similar color that has been in my stash since before I had a fabric stash! Isn’t it wonderful to find good homes for odds and ends like this?

In addition to the flower pin, I also wore my extra long strand of faux pearls, my American Duchess silver Seabury shoes, and vintage silver hair pins. Oh, and earrings. But I can’t remember which ones and I can’t tell from the photos which pair they are. I’ll have to figure that out again next time I wear this dress!

The pattern for this dress is me-made, composed of mostly rectangular shapes based on my measurements. The body of the lining is basically an upside down T shape, where the sides are gathered into a slit that extends into the main body on each side by a few inches. (You can see what I’m talking about in the photo below.) The lining has a straight top edge with rectanglur straps attached. The hem angles down slightly on the sides intentionally. I still wanted an uneven hem as with my 1924 dress, but I wanted a less dramatic difference than with that dress.

The lace layer was a little more complicated. I wanted an uneven hem to match the lining, but I also wanted to keep the hem following the scallops across the fabric. So… I had to keep my hem straight. That means I had to make the tops of the sides curve up since the bottom couldn’t curve down, but that meant I couldn’t cut my lace layers as a T, because the curve up would cut into the sides of the dress.

My solution was to add a seam across the lace pieces at the height of the gathers. To do this I perfectly matched the scallops, carefully layered and stitched them with a narrow zig zag, and then trimmed away the excess fabric to make the seam almost entirely invisible. Can you spot it in this photo?

I also had to trim away the ‘eyelash’ bits left over after cutting along the scalloped pattern along the hem. This photo shows that step in progress. A bit tedious, but worth it!

Unlike the lining with its straight top edge, the lace has a v neck on one side and a scoop on the other. This layer is interchangeable in terms of which is front and back, since they’re the same with no special shaping. The edges of the lining are finished by machine while the neckline and the armholes of the lace are narrow hemmed by hand.

This new dress can be worn with or without panniers, but for the first wearing I went without in order to make the full skirt more subtle and to differentiate the dress from my 1924 Golden Robe de Style (which needs to be worn with panniers).

While this dress could be worn at any time of year, I am particularly enchanted with the idea of it being perfectly suited to a 1920s New Year party. The colors and silver lace seem well suited to that theme.

And on that note, in case I don’t get another post in before 2019… happy new year!

1920s Beaded Bag (HSM #11)

The November Historical Sew Monthly Challenge was Purses and Bags (you’ve got your arms covered in July, your hands in September, now make something amazing to dangle from them). Late in the month I realized this was a great poke to finish an idea I’ve had for about six years. It was a bit of a challenge to complete my project before the end of the month, but I just slipped in, finishing it on November 30.

The idea came from my 1912 Tea Gown. I had intended it to have elaborate beading, but decided not to do that for a variety of reasons detailed in that past post. However, I had already beaded one panel that I decided not to use. I’ve been holding on to it waiting for the opportunity to put it to use in some other way. And so, I decided to turn it into a handbag.

Saving your scraps comes in handy on projects like this, because I had plenty of velvet to cut the additional pieces I needed for the bag. I looked through my stash to find a lining and came up with grey silk shantung as the best option. This was also a piece of fabric that I only had scraps of. It was originally used for the boning channels on an 1883 corset I made way back in 2011 (you can see it in this rather old post).

My inspiration is this page showing handbags from 1922 (source). It inspired me to go in a more structural direction rather than a gathered top bag, which was my initial thought.

I had the idea in mind, but I was restricted in the shape of the bag based on the beading that already existed on the main piece. So I cut out another rectangle the same shape as the beaded piece, a long strip for the outside edges of the bag, a strap piece, and a triangle piece to make a flap that would close the top.

Along the way I realized that interfacing wasn’t going to stiffen the bag enough for what I was envisioning. I cast about for ideas of what to use for stiffening and settled on cutting up a shoe box that was in my recycle bin. It was a great weight of cardboard–not too thick, not too thin, and not too bendy. There are cardboard pieces on each flat side, along the bottom, and a strip along the top edge to keep the flap nicely shaped. The pieces on the sides and bottom are (shhh…) masking taped together to create a flexible but stiff foundation for the bag. The piece in the top is stitched into a channel that is only sewn through the interlining so it doesn’t show on the velvet or the lining.

I assembled my pieces, thinking hard about which part to leave open to set in the lining, and struggling a bit with the shifty velvet. I wanted to sew most of the seams on the machine for speed, but sewing it by hand would probably have been more pleasant. I wrangled it mostly into submission, only needing to restitch a few sections as I went along. The only hand sewing came when I needed to close up the lining after putting all the pieces together. Things had become a bit wonky with seam allowances and shifting velvet, so I did my best, figuring that the seam would be on the inside and I really just wanted to finish the darn thing.

After that seam, the only thing left was a closure. I decided on a simple hook and bar. Not quite as classy as a real purse, but it gets the job done and I had it on hand. On the outside is a decorative button.

And that’s it, except the facts!

Fabric: Scraps of silk velvet, silk shantung, and cotton canvas.

Pattern: My own.

Year: c. 1925.

Notions: A shoe box, thread, beads, and a button.

How historically accurate is it?: 60%? The silhouette and fabrics are plausible, though the cardboard probably isn’t. The beads are certainly too big and the method of closure is unlikely unless the item was made at home.

Hours to complete: Not counting the beading, approximately 3 hours.

First worn: Not yet!

Total cost: Free! All of the materials and notions came from my stash.

A Wizarding World Of Harry Potter Vacation

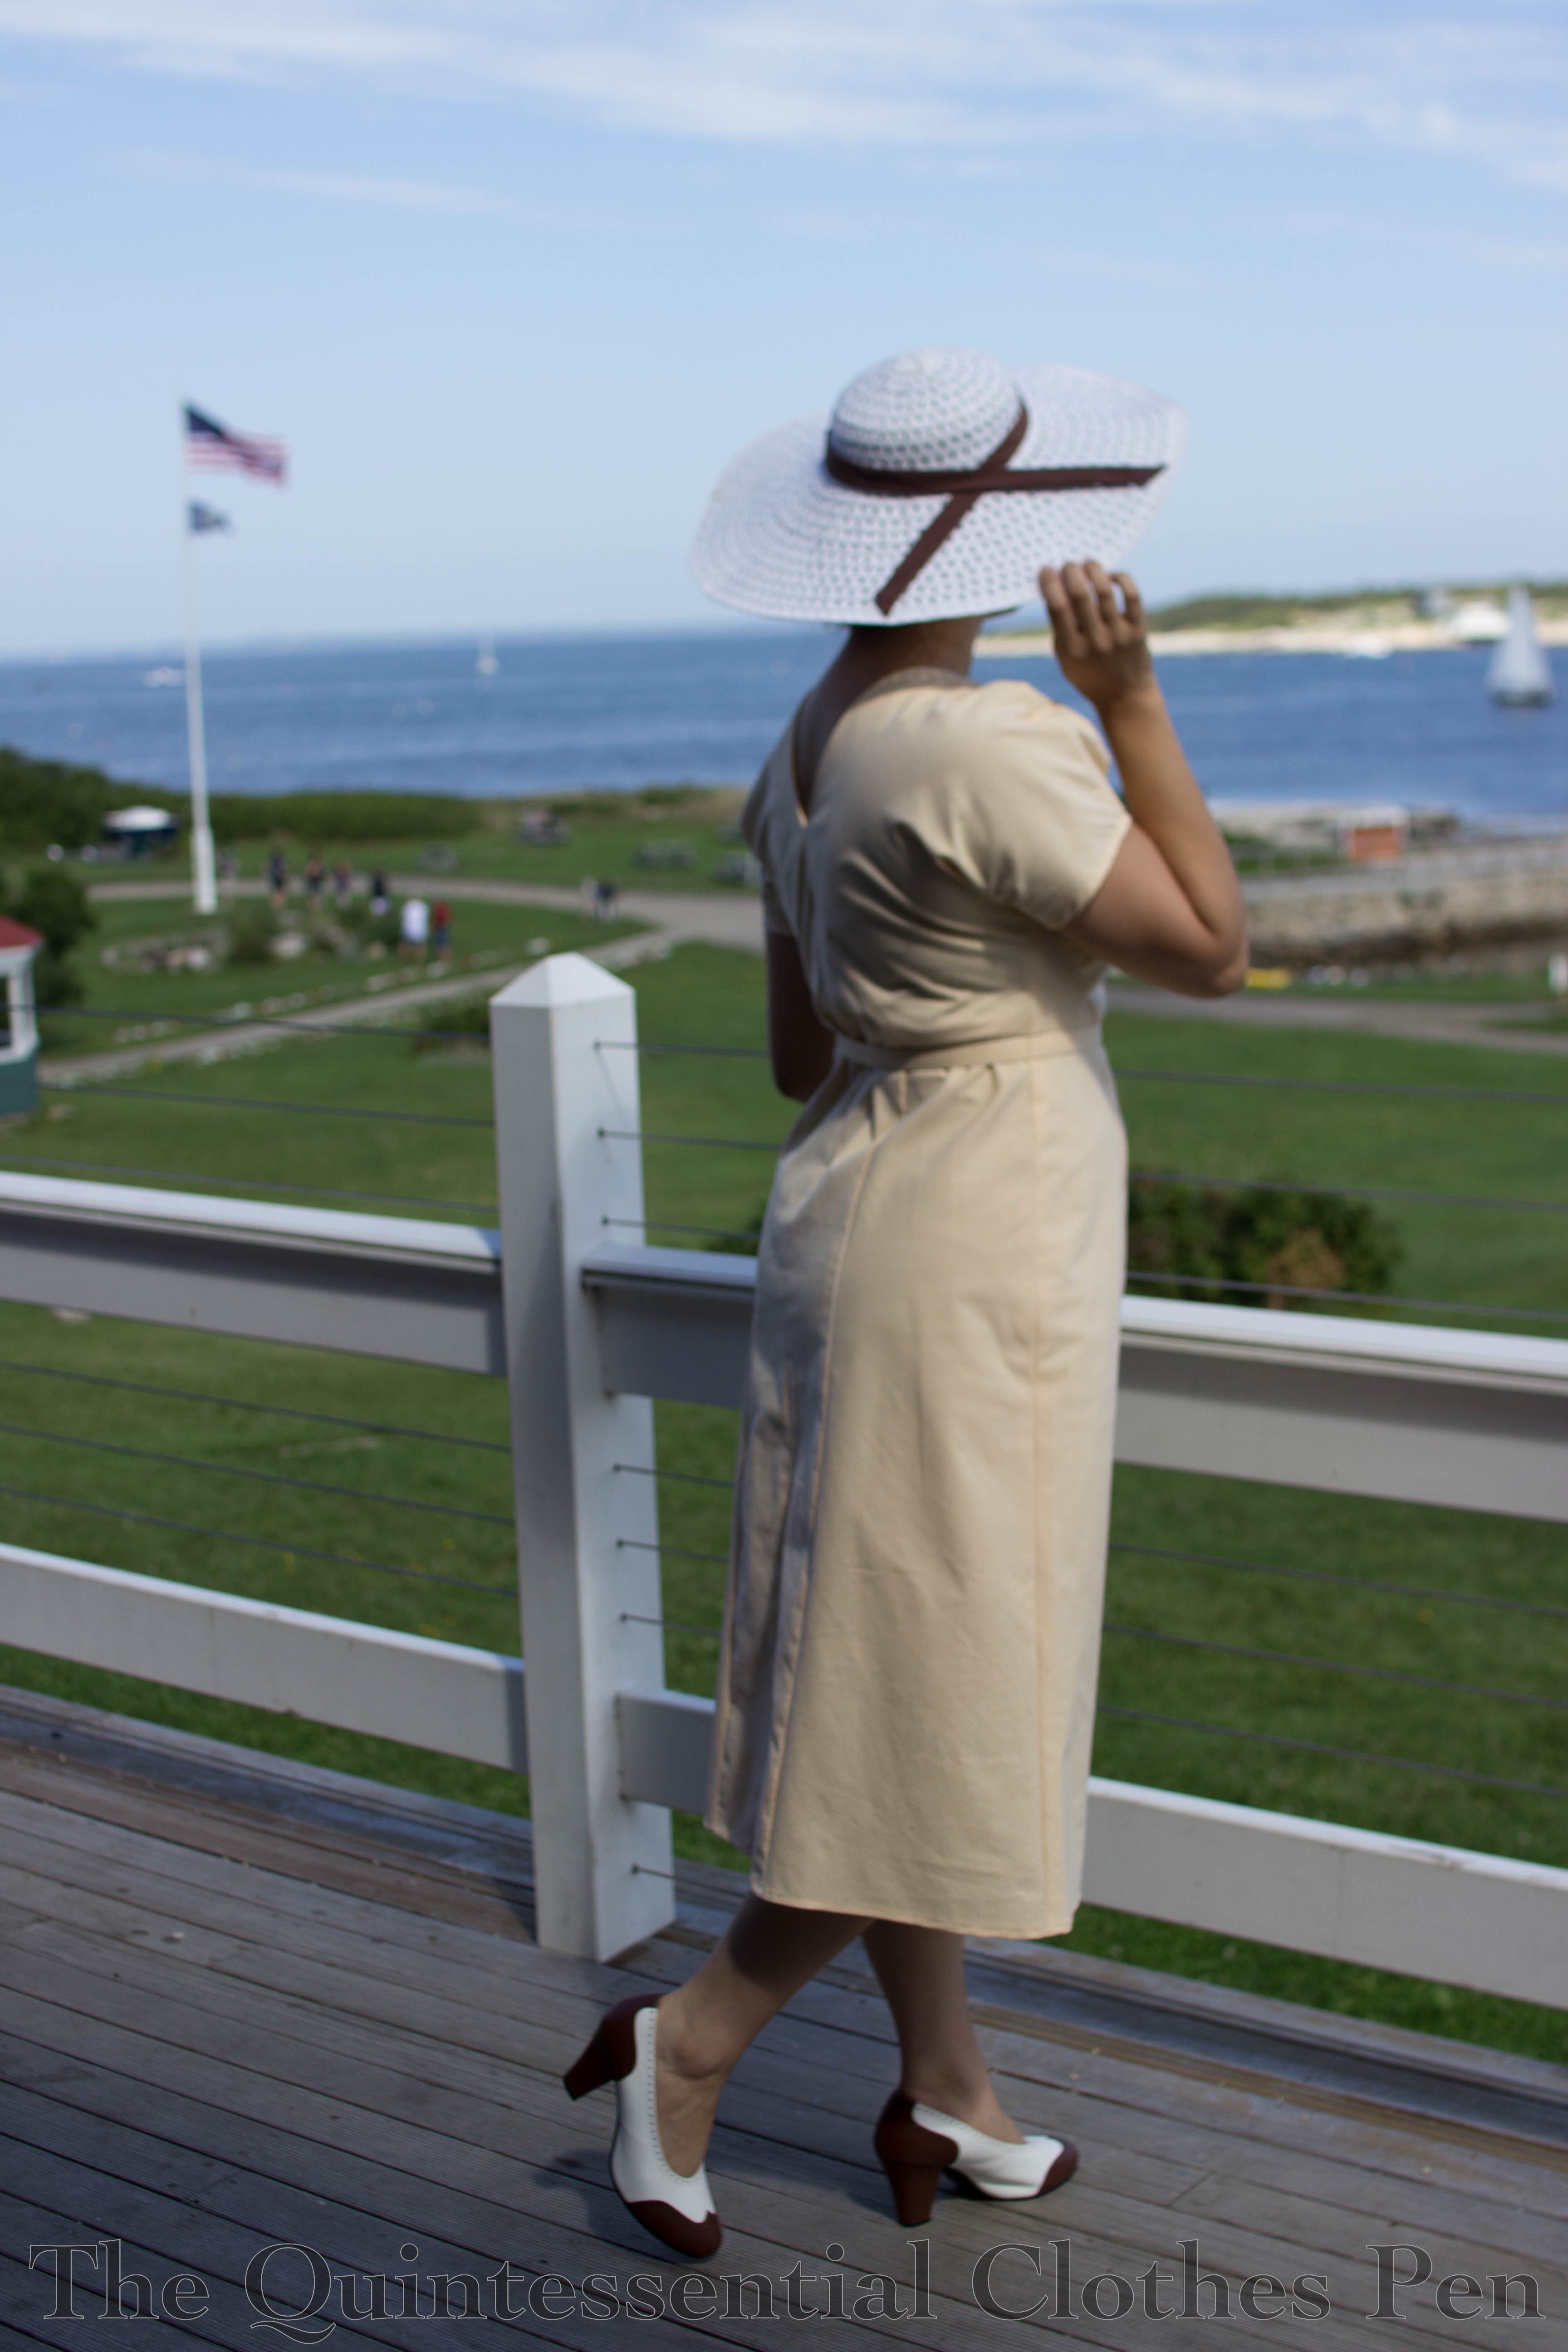
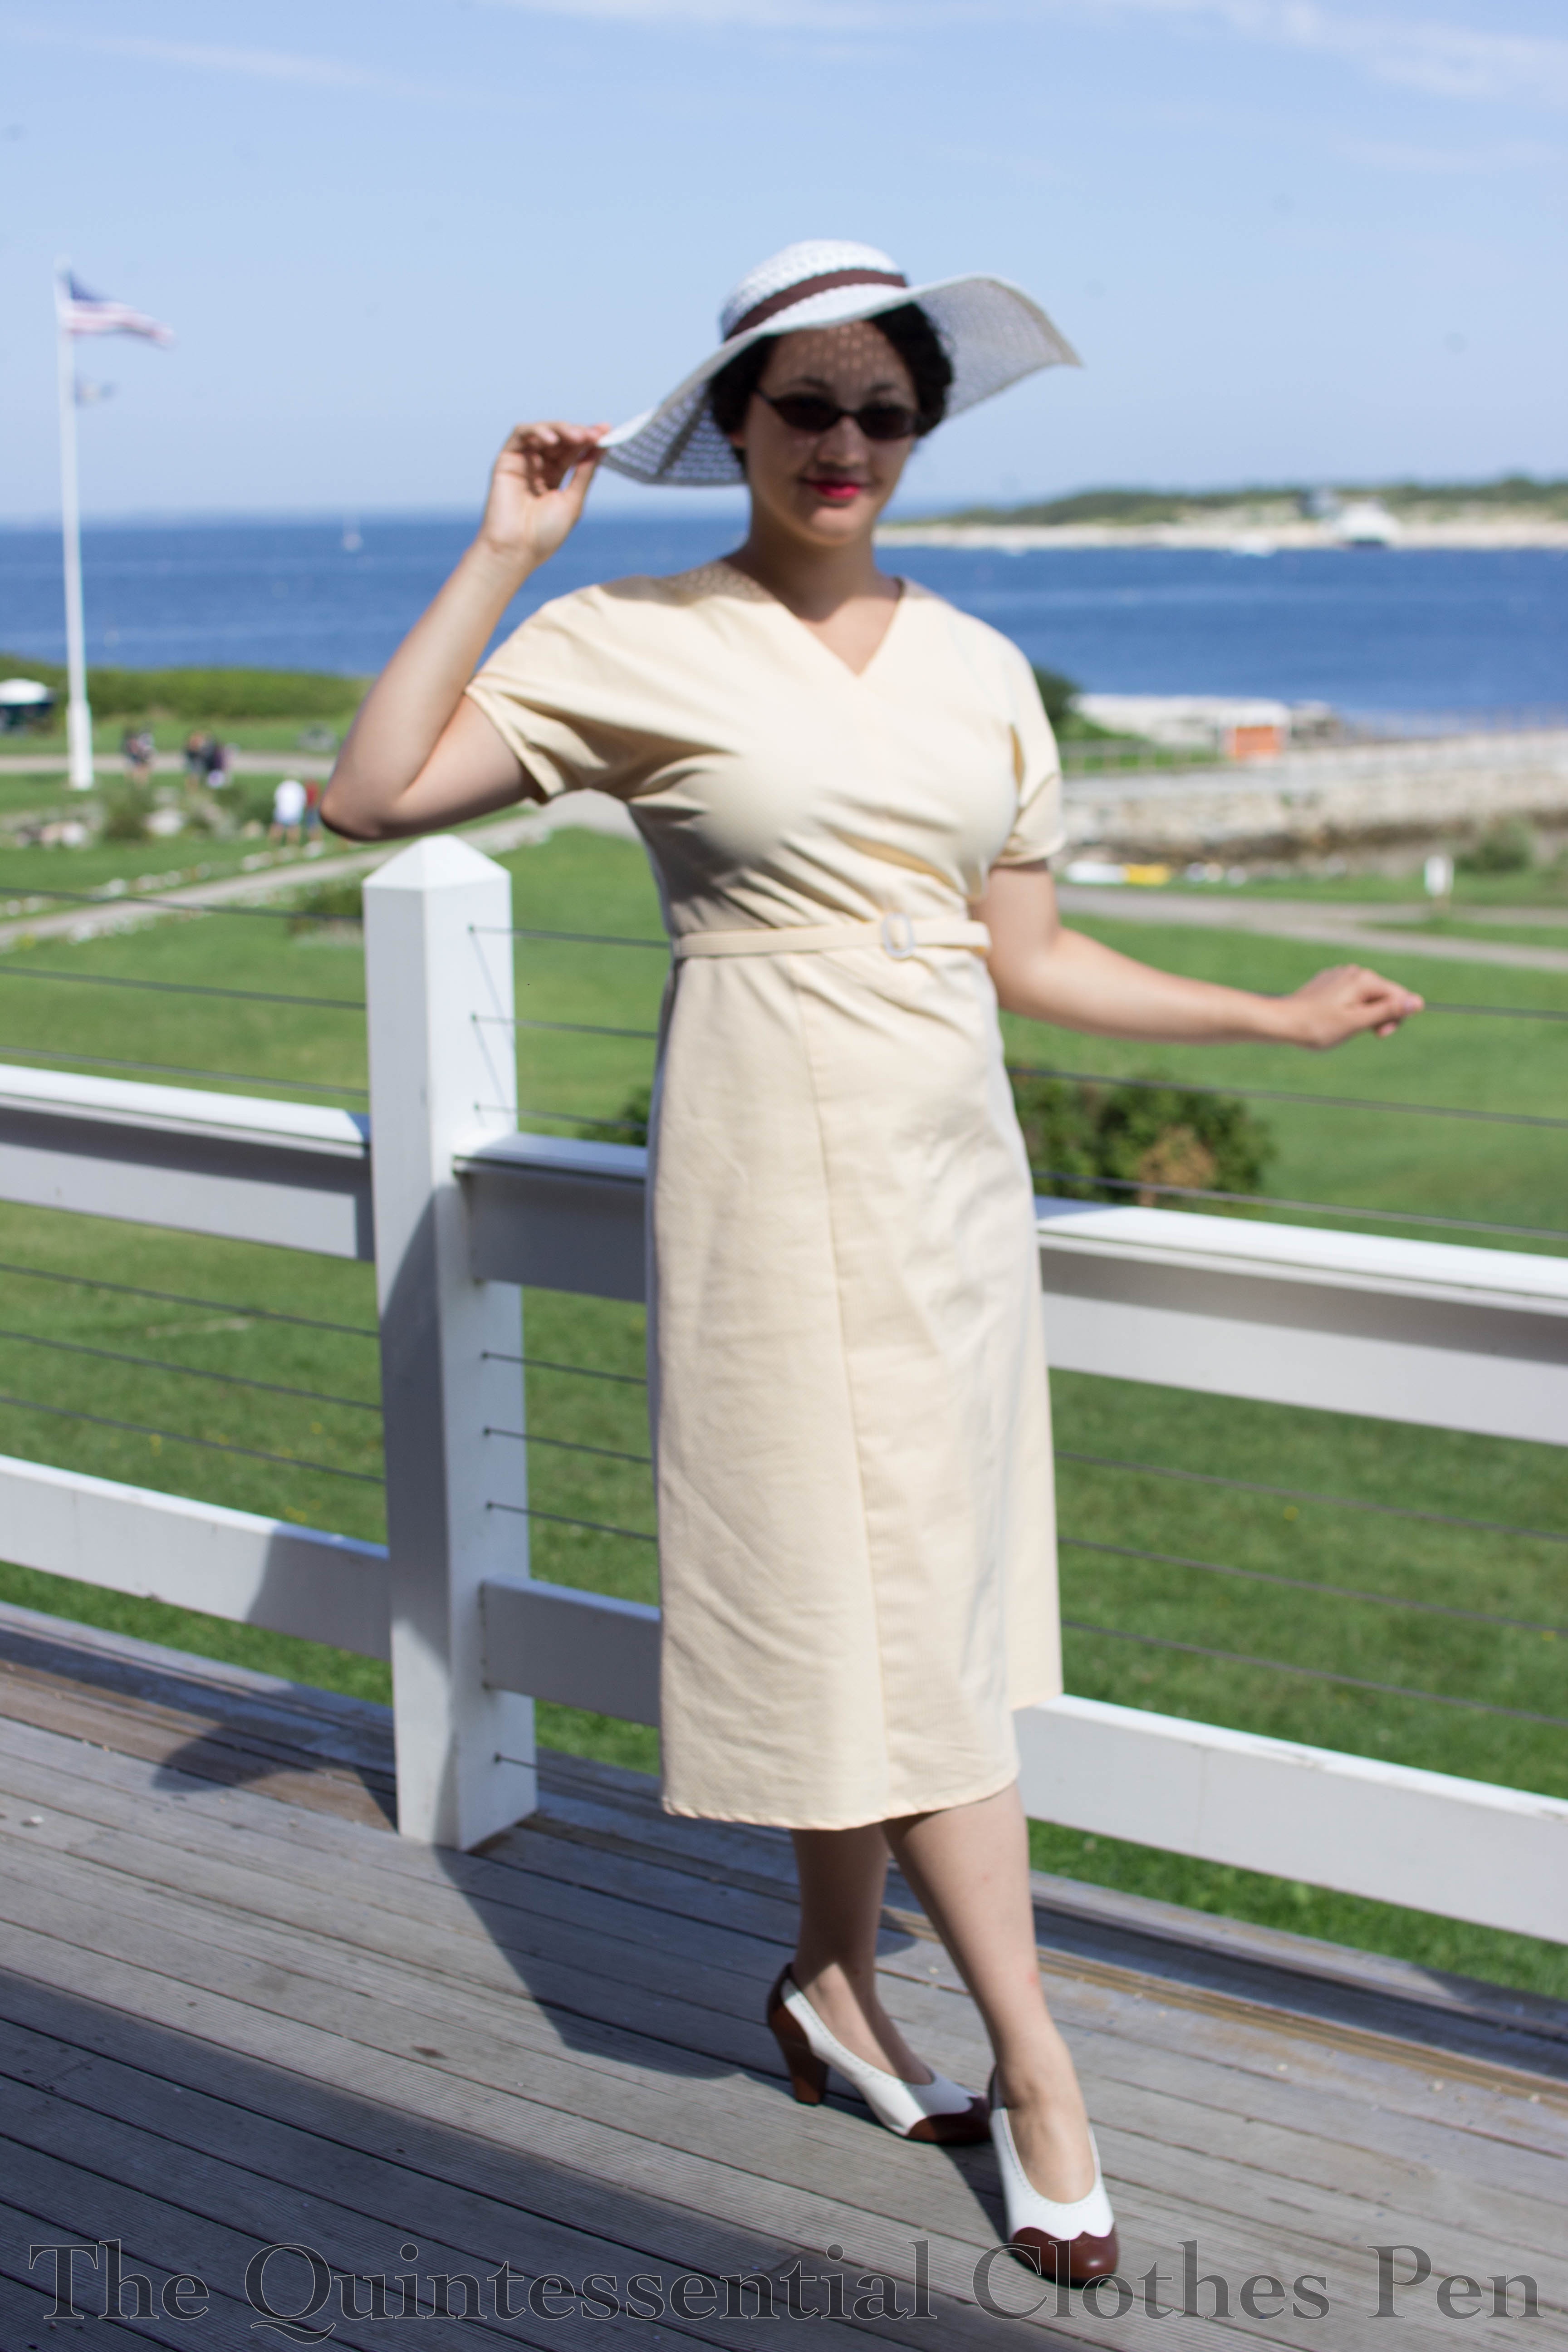
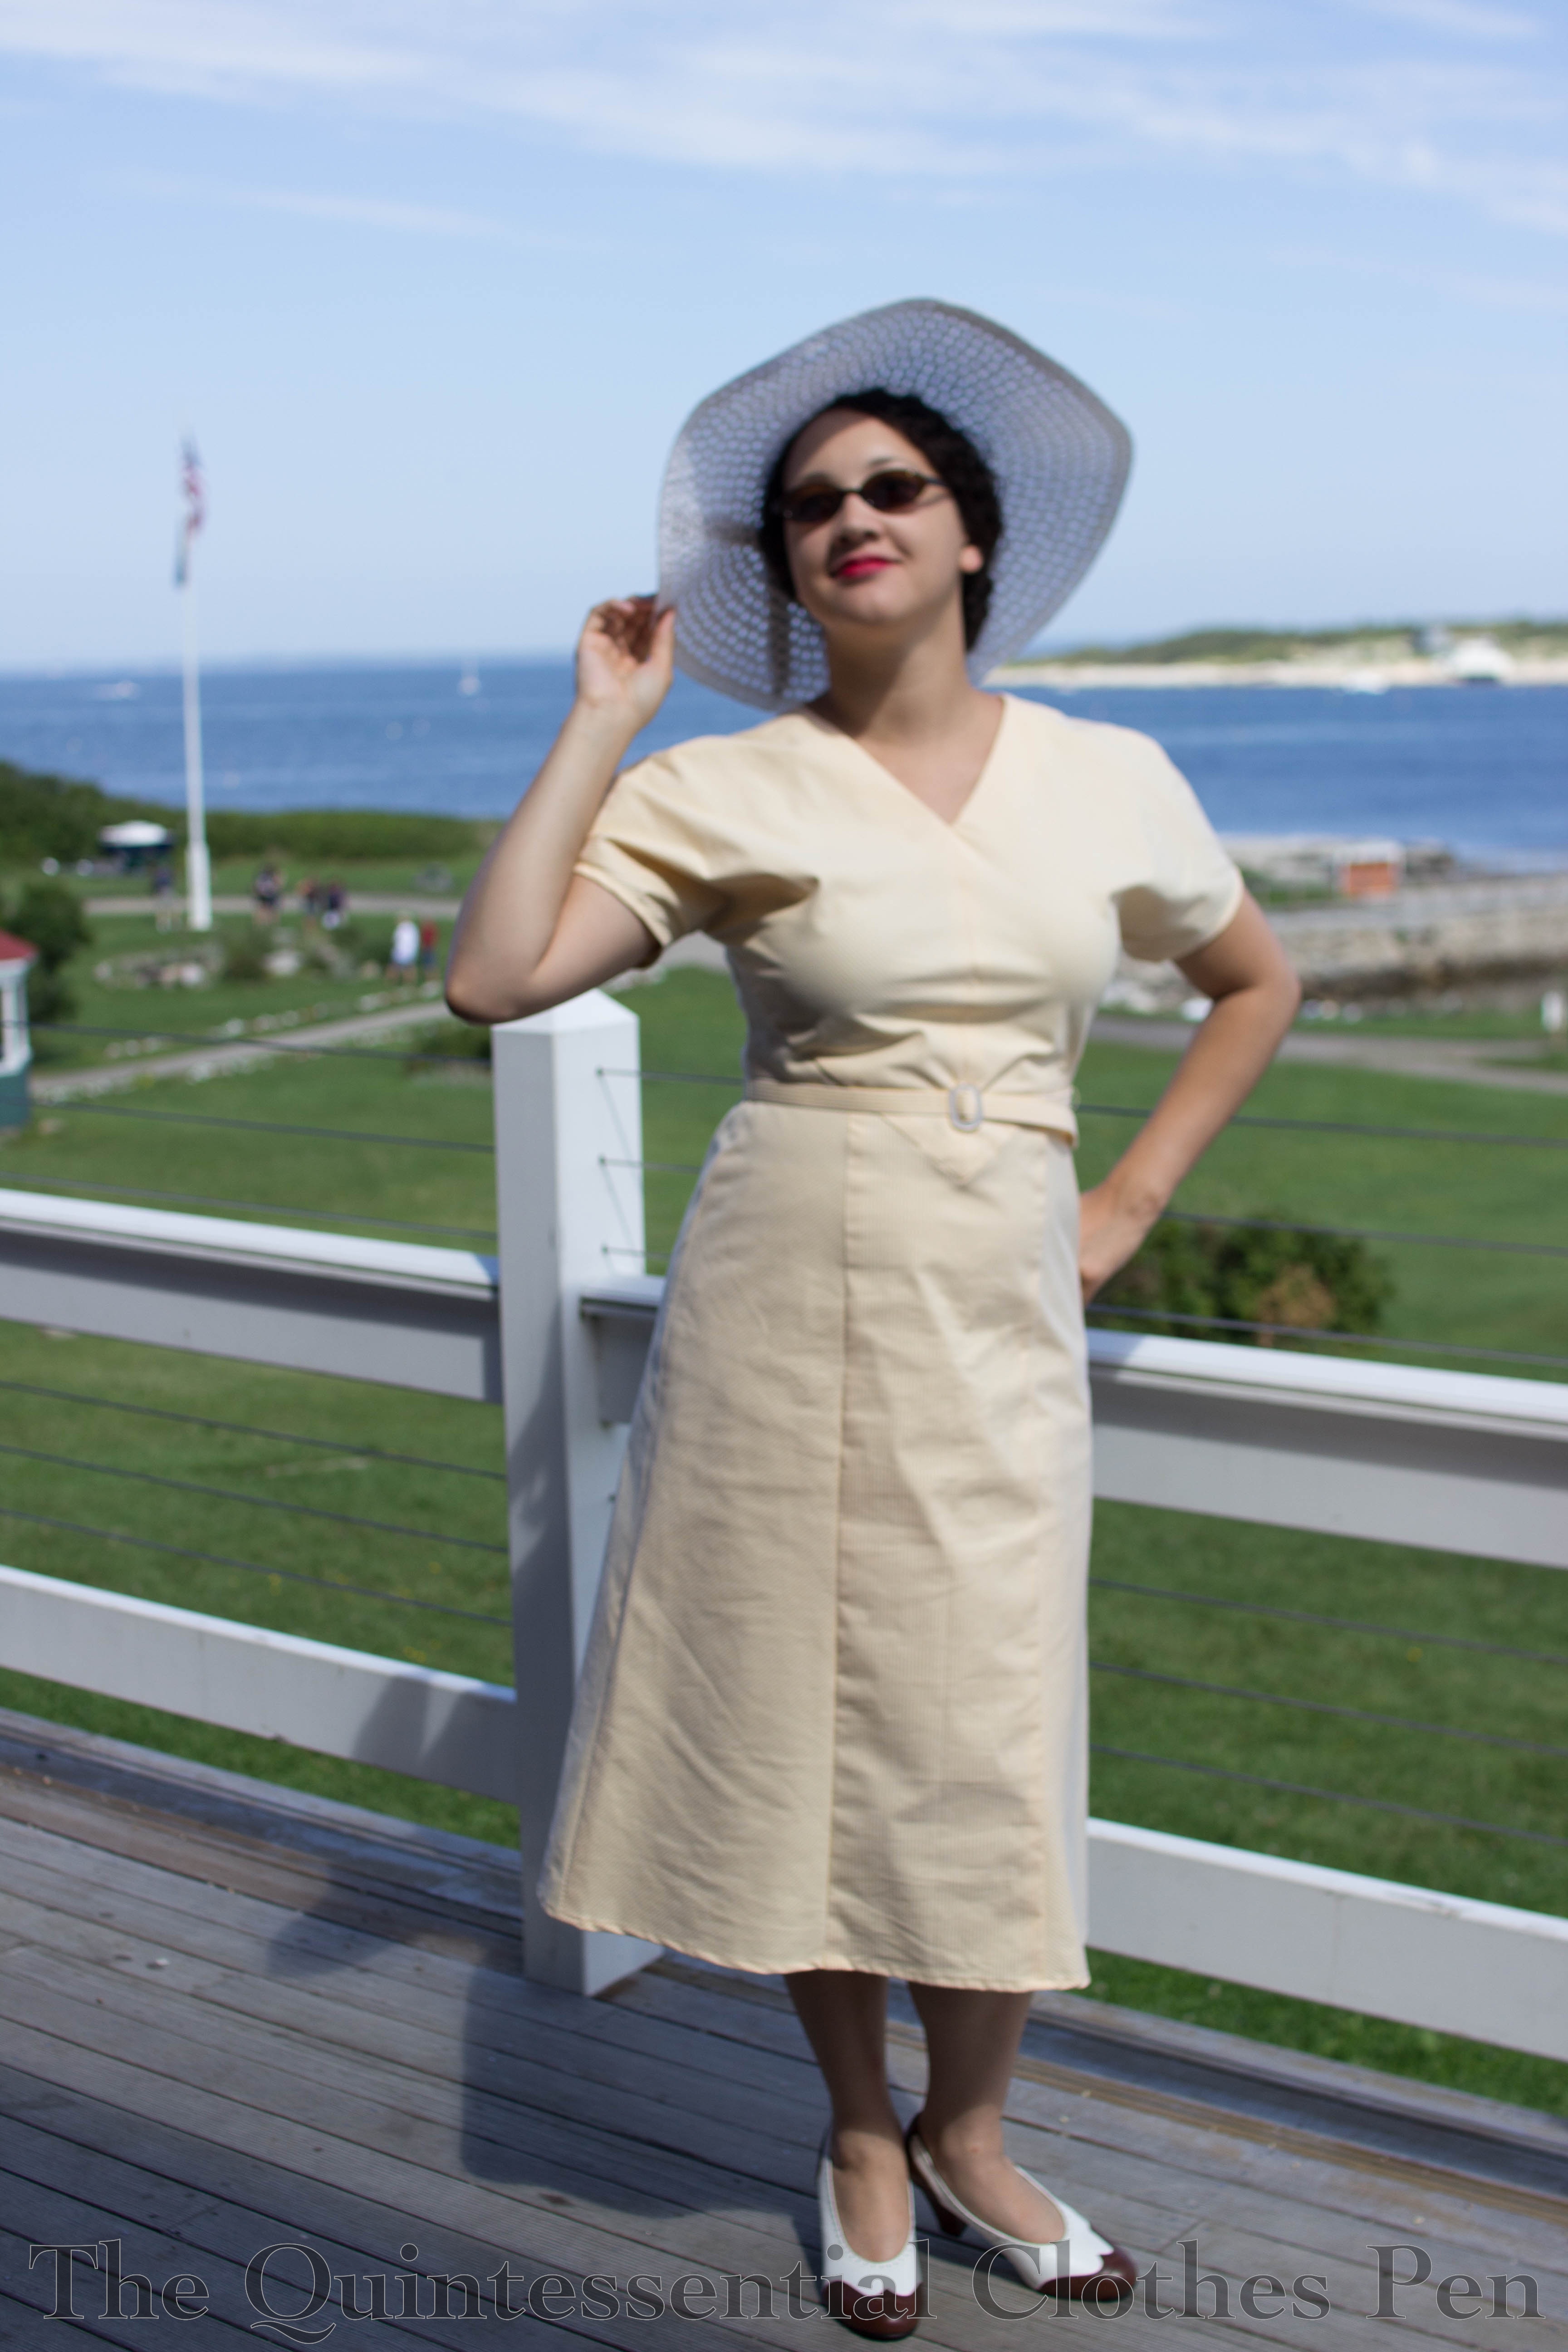
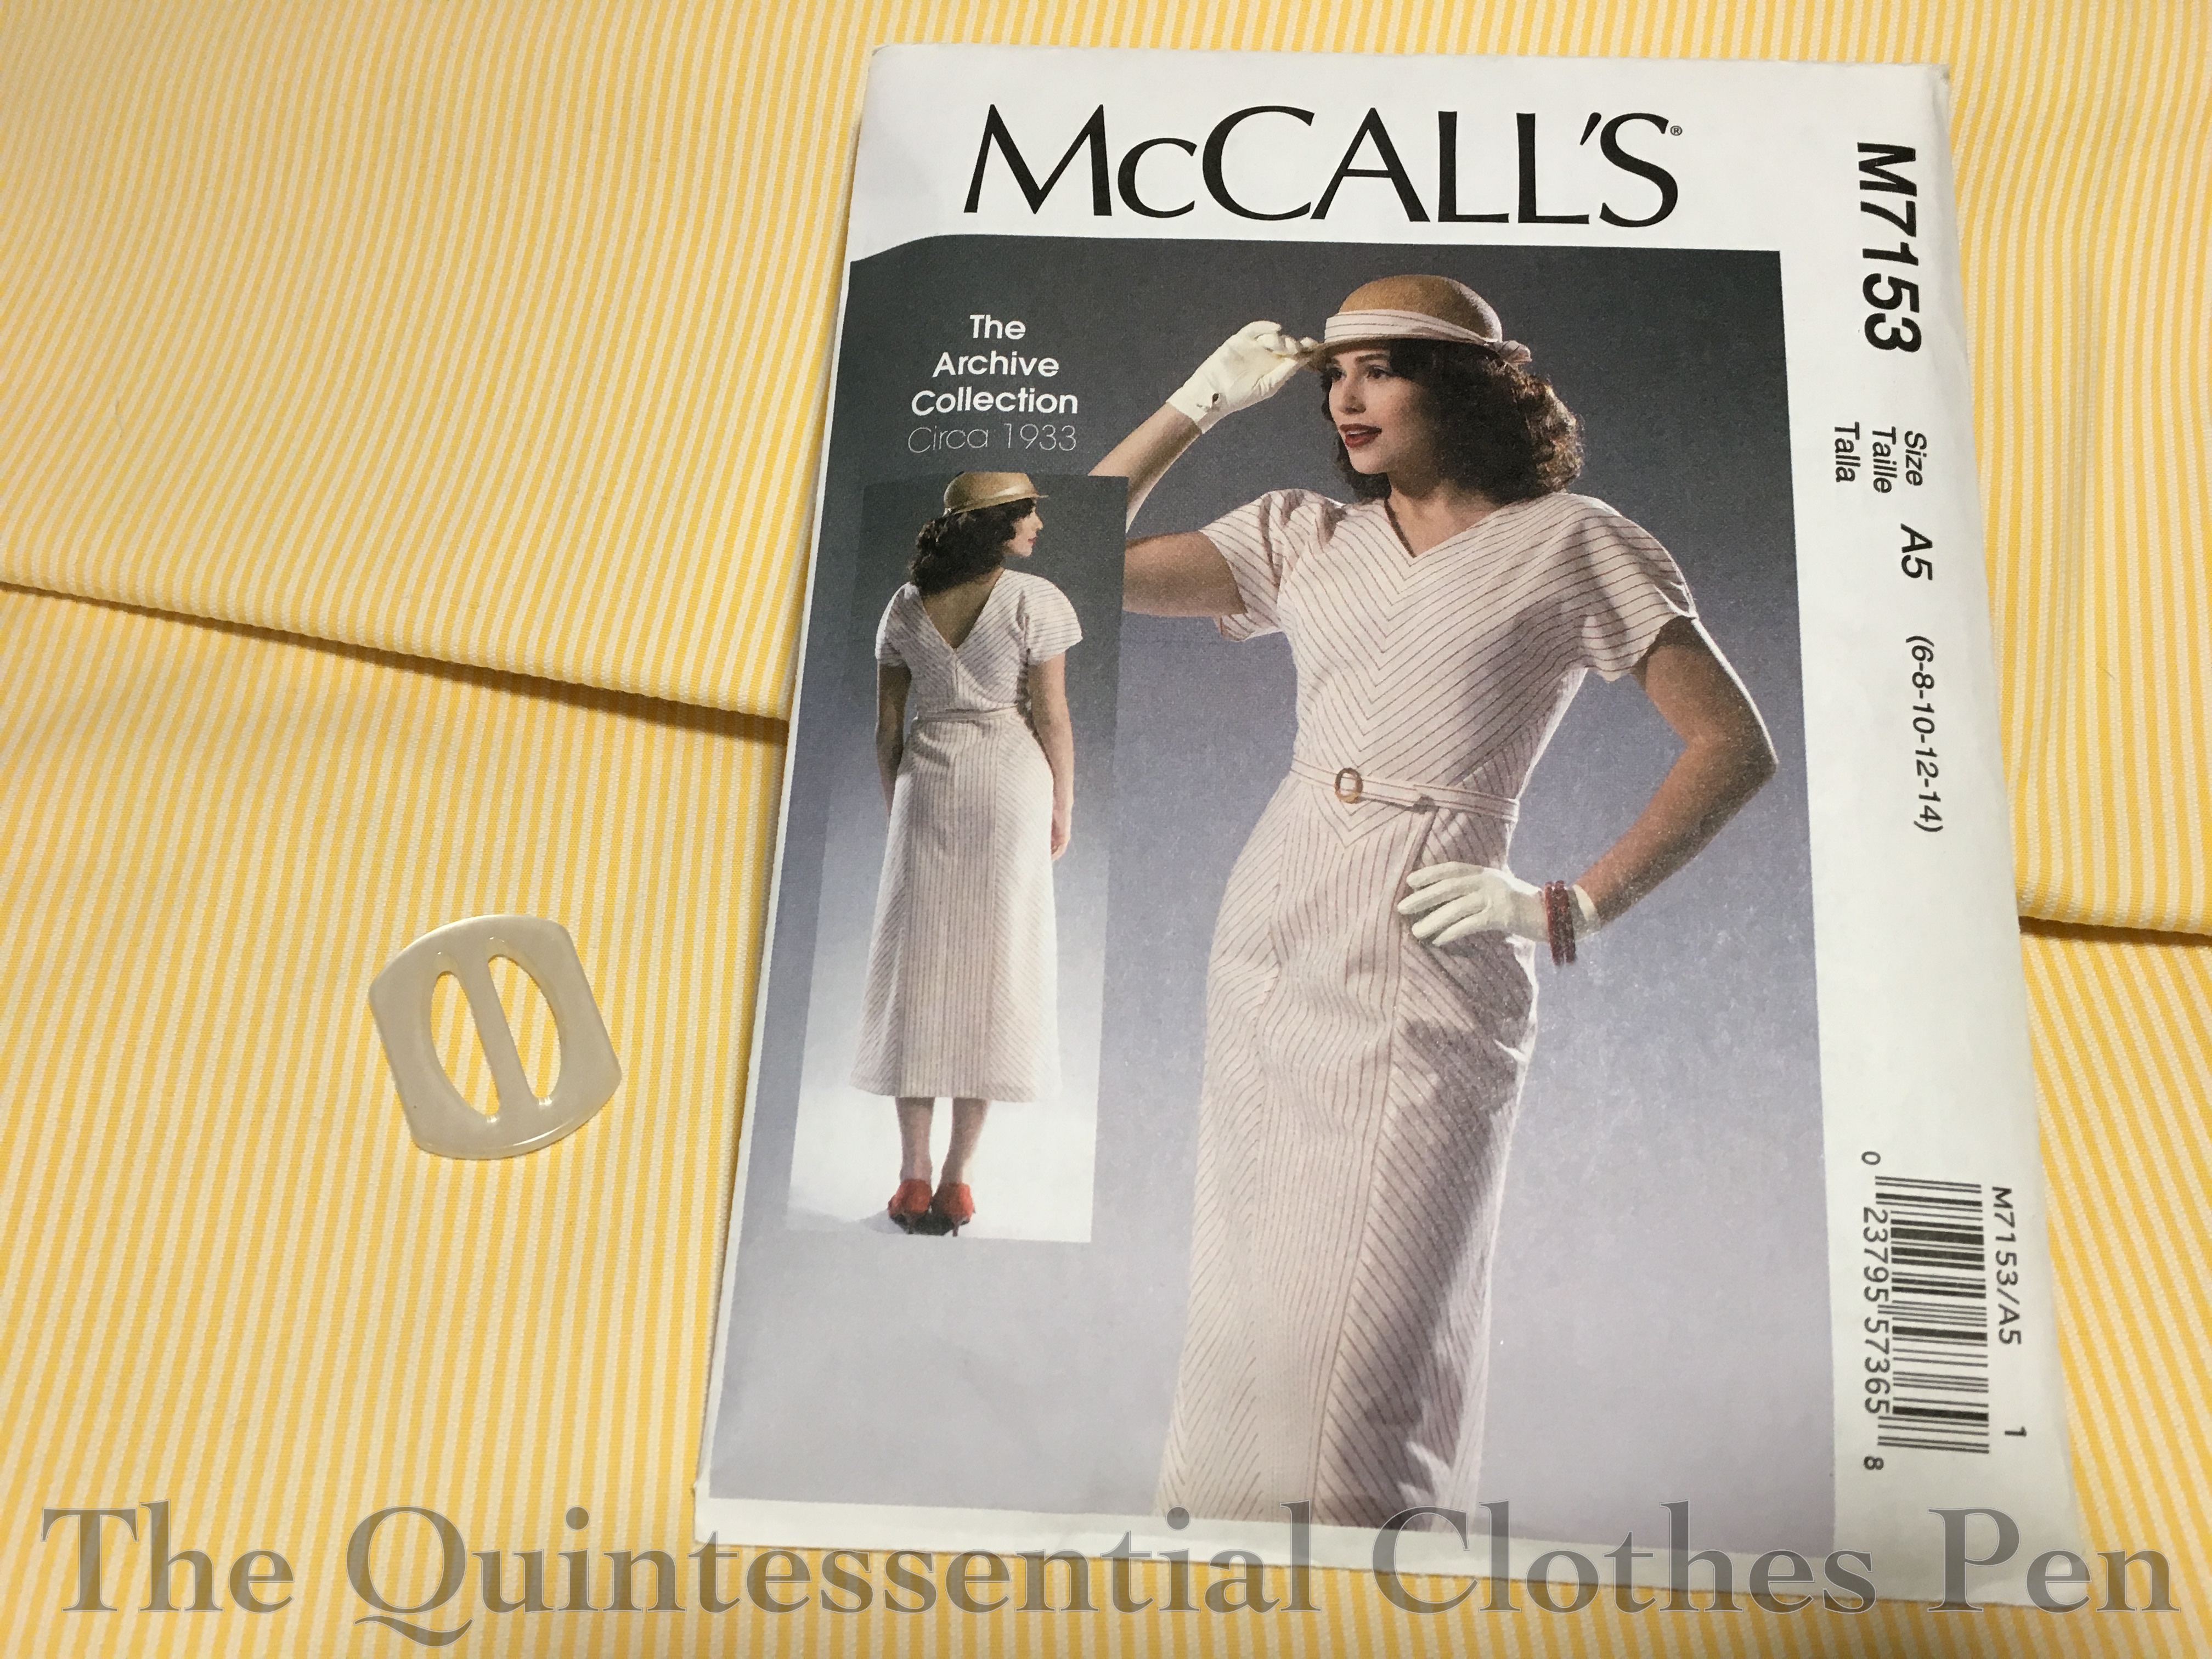
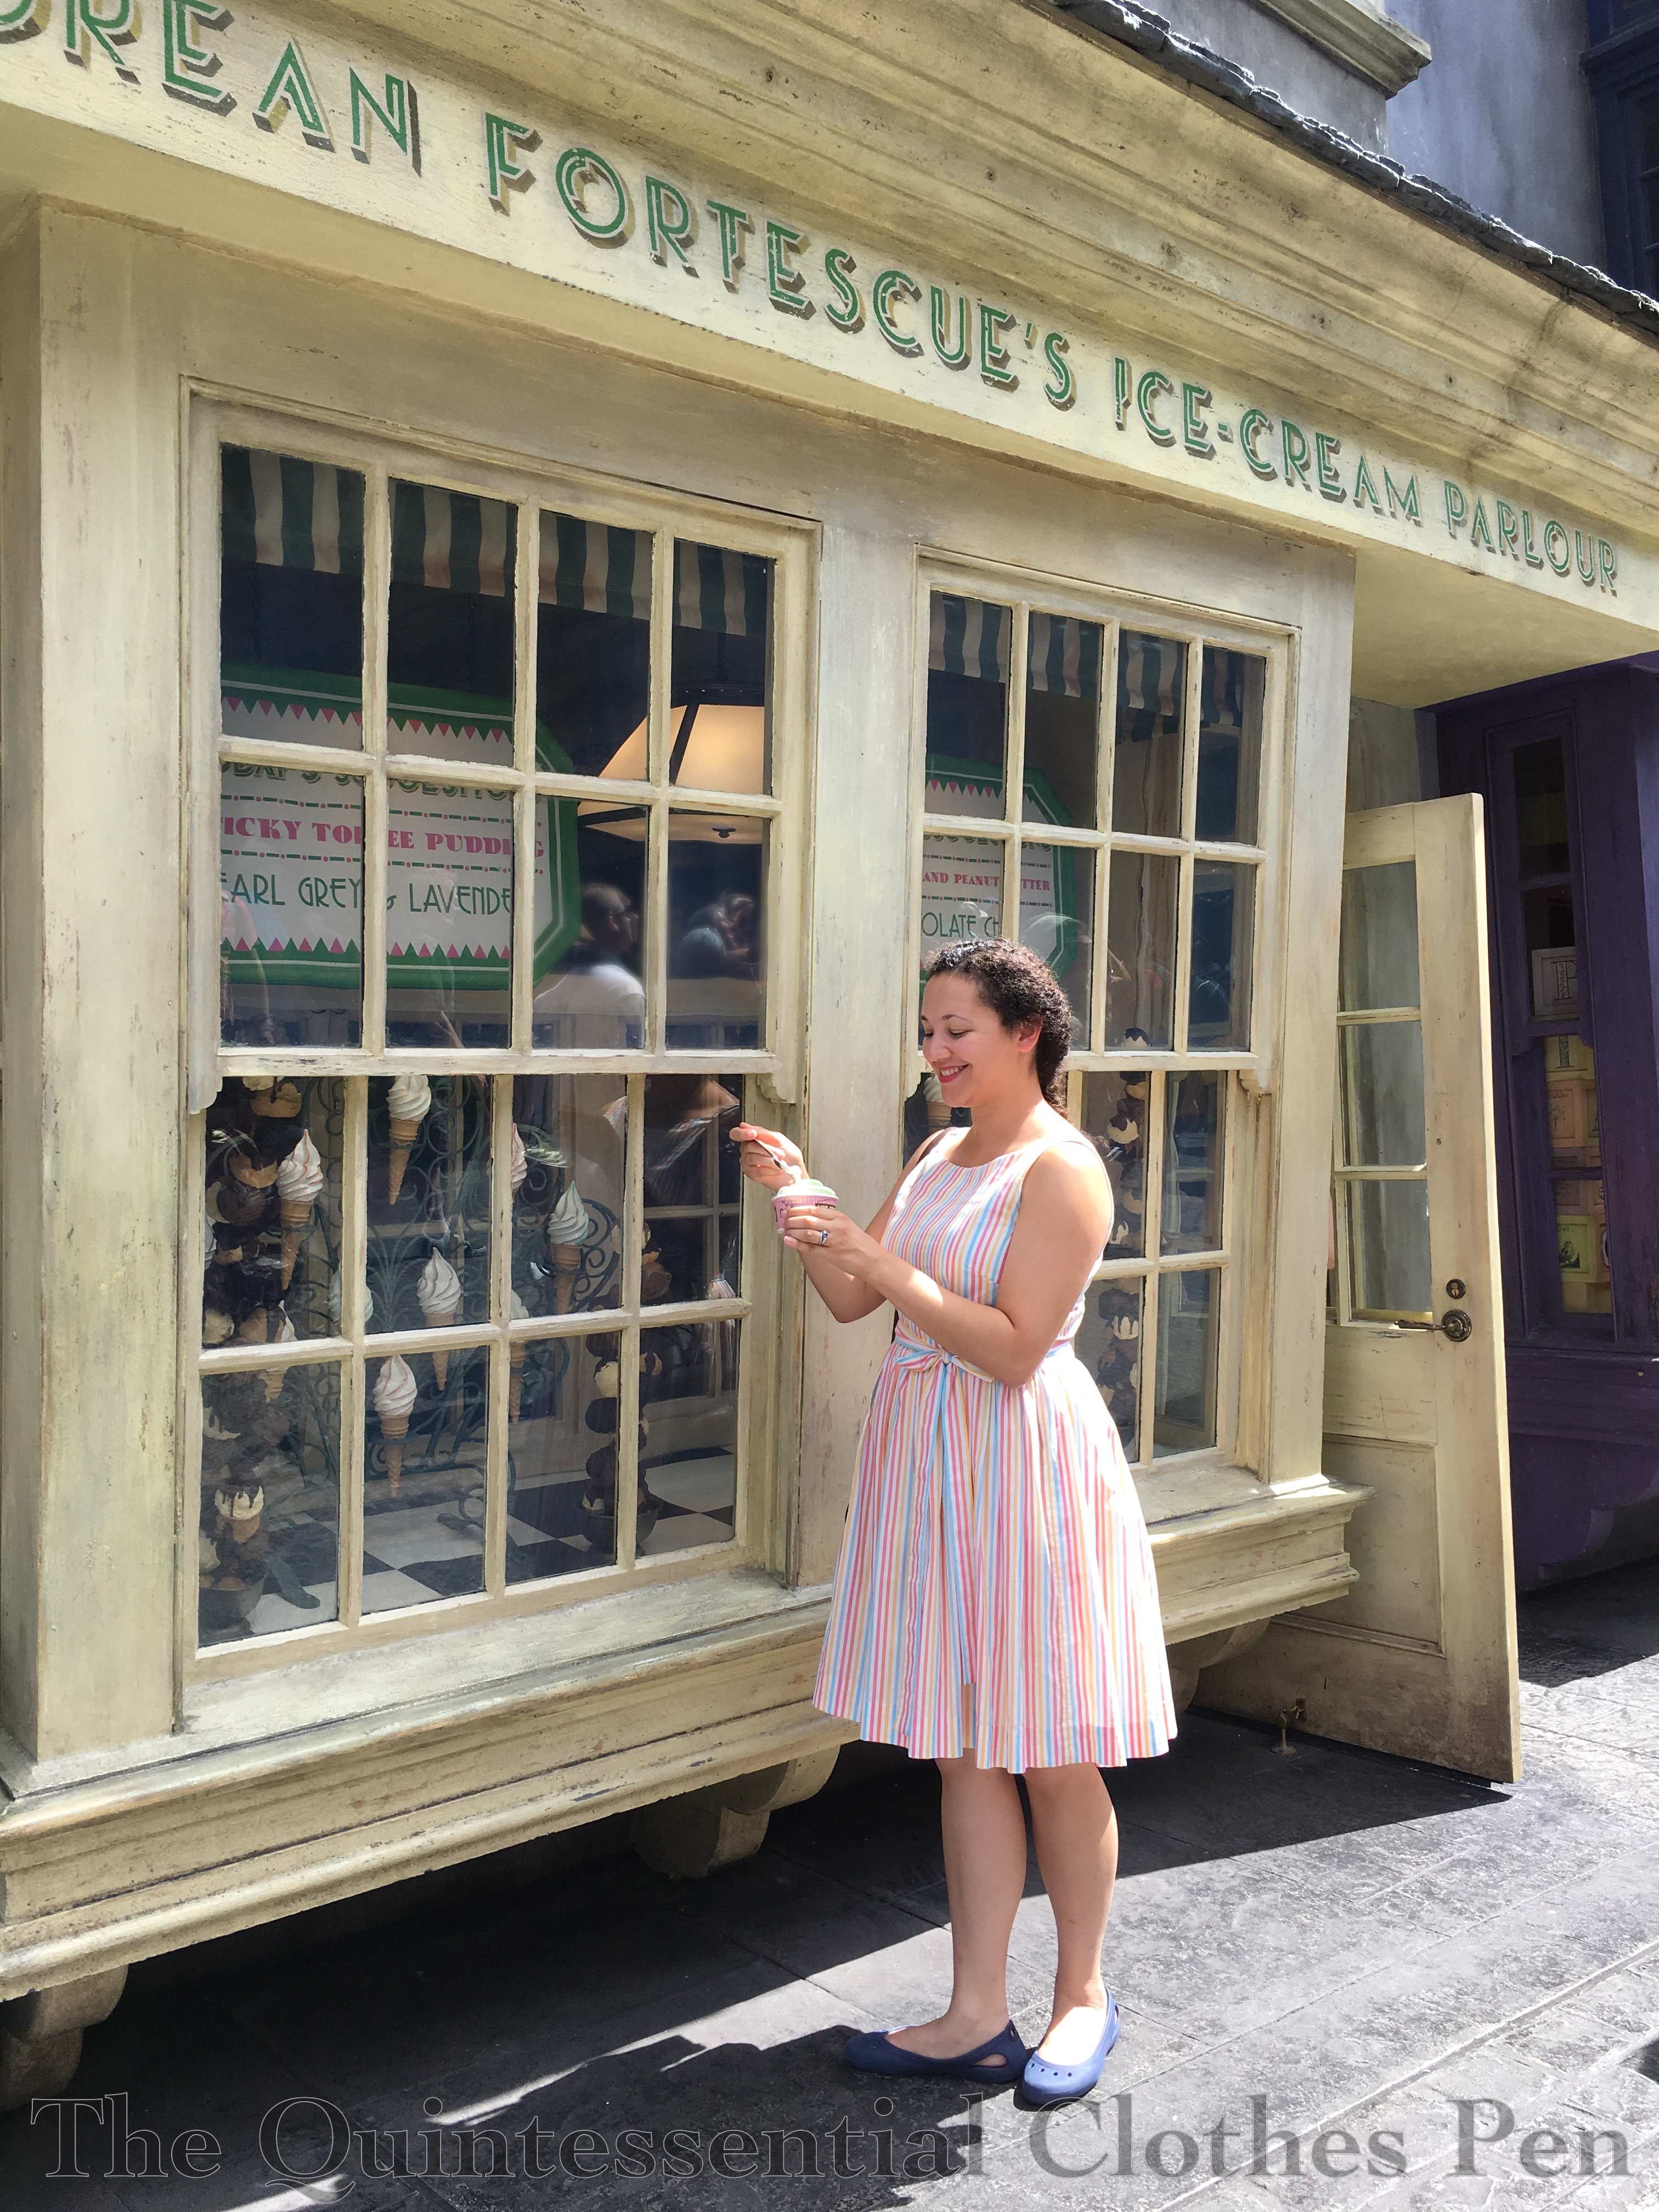
If you’ve been reading the last few posts on the blog, you’ve seen mentions of my visit to The Wizarding World of Harry Potter at Universal Orlando, which provided the backdrops for the photos I shared of my Book Dress and Fortescue Frock. And if you’ve been following my blog since 2015, you might remember how excited I was to share photos from my visit to the Warner Bros. Studio Tour Harry Potter experience. Well, I’m just as excited to share more photos from my more recent trip to Universal Orlando! Not all of these are strictly clothing related, so I thought they merited their own vacation-recap post.

If you’re not familiar with Harry Potter then I think this post will mostly seem like gibberish, but there are probably still some amusing photos you might enjoy!

First, I have to say that I greatly enjoyed my visit! First, Diagon Alley is shady and cooler than the rest of the park. Second, I loved all the detail that went into the design of the atmosphere, the edibles, the staff costumes, the merchandise, the rides… There were so many things to appreciate in terms of details–you can dial the Ministry Of Magic number in the telephone booth, disappear onto platform 9 ¾, see Kreacher periodically looking out of Grimmauld Place, hear Moaning Myrtle in one of the bathrooms, see amusing wizard ads and signage, watch Celestina Warbeck perform the entirety of A Cauldron Full Of Hot Strong Love, talk to a banking goblin who responds to your questions, send a piece of mail via owl post with a Hogsmeade stamp, see Durmstrang and Beauxbatons students show off their staff drills and ribbon twirling skills… the list goes on and on.

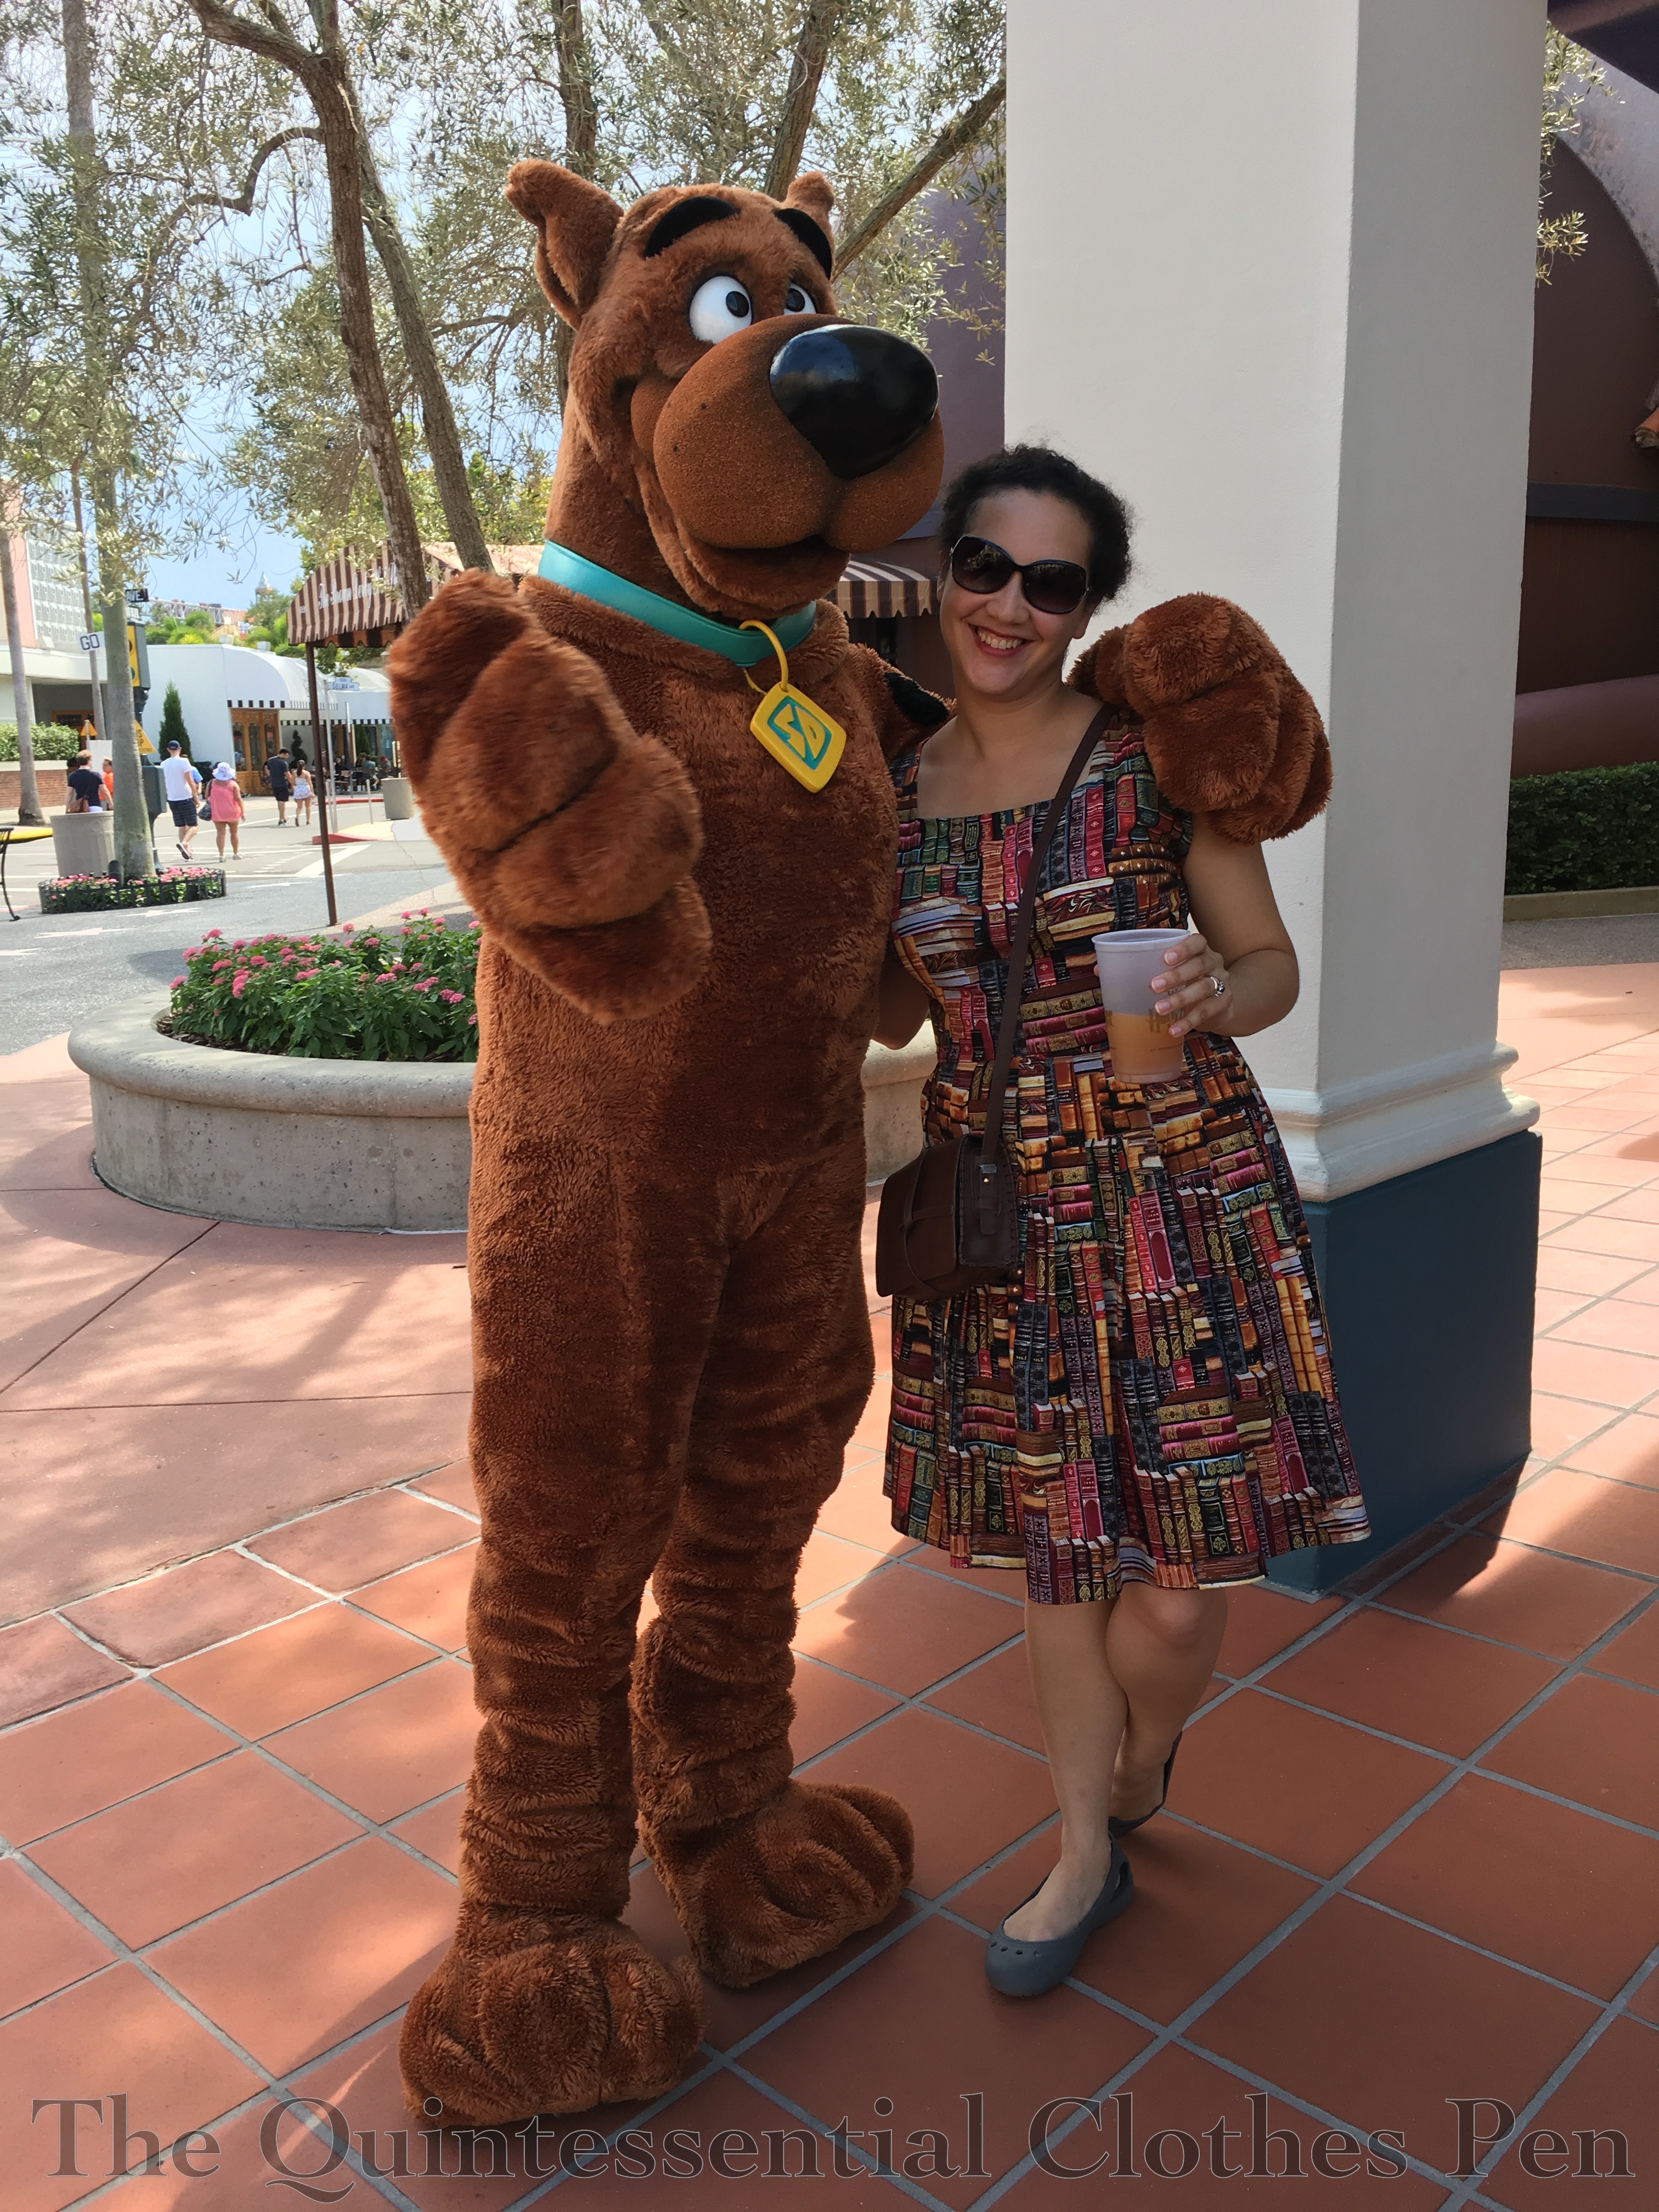
On our very first day in the park we were walking towards Harry-Potter-land (which is at the back of the park) and saw the Mystery Machine from Scooby Doo parked along the road. I’ve enjoyed Scooby Doo since I was a kid so I found it great fun to take photos with the van!

While wandering back through the park sipping pumpkin juice later in the day the van was gone… but there was Scooby Doo, walking down the road! Picture time again! I was amused.

I greatly enjoyed pumpkin juice! I love how the words sound in my head (say it with an emphasis on the consonants) and am always the most intrigued by that edible in the books. Pumpkin juice was delightfully sweet and cold. I don’t know that I would want to drink it all the time, but it was a treat I would definitely have again. On the other hand, butterbeer (which I also tried) was super sweet. I actually didn’t mind the taste as much as I thought I would, not being a fan of cream soda type tastes, but I wasn’t interested in more than a few sips of it. Oh, and pumpkin pasties! We tried one of those, too. That was actually disappointing. Kind of dry and very spiced without being interesting. I’d try making them myself someday, but I wouldn’t want to eat the ones at the park again. There are also special ‘wizard’ beers sold at different shops that I enjoyed tasting. They weren’t particularly special in terms of taste, but it was still fun to try them all!

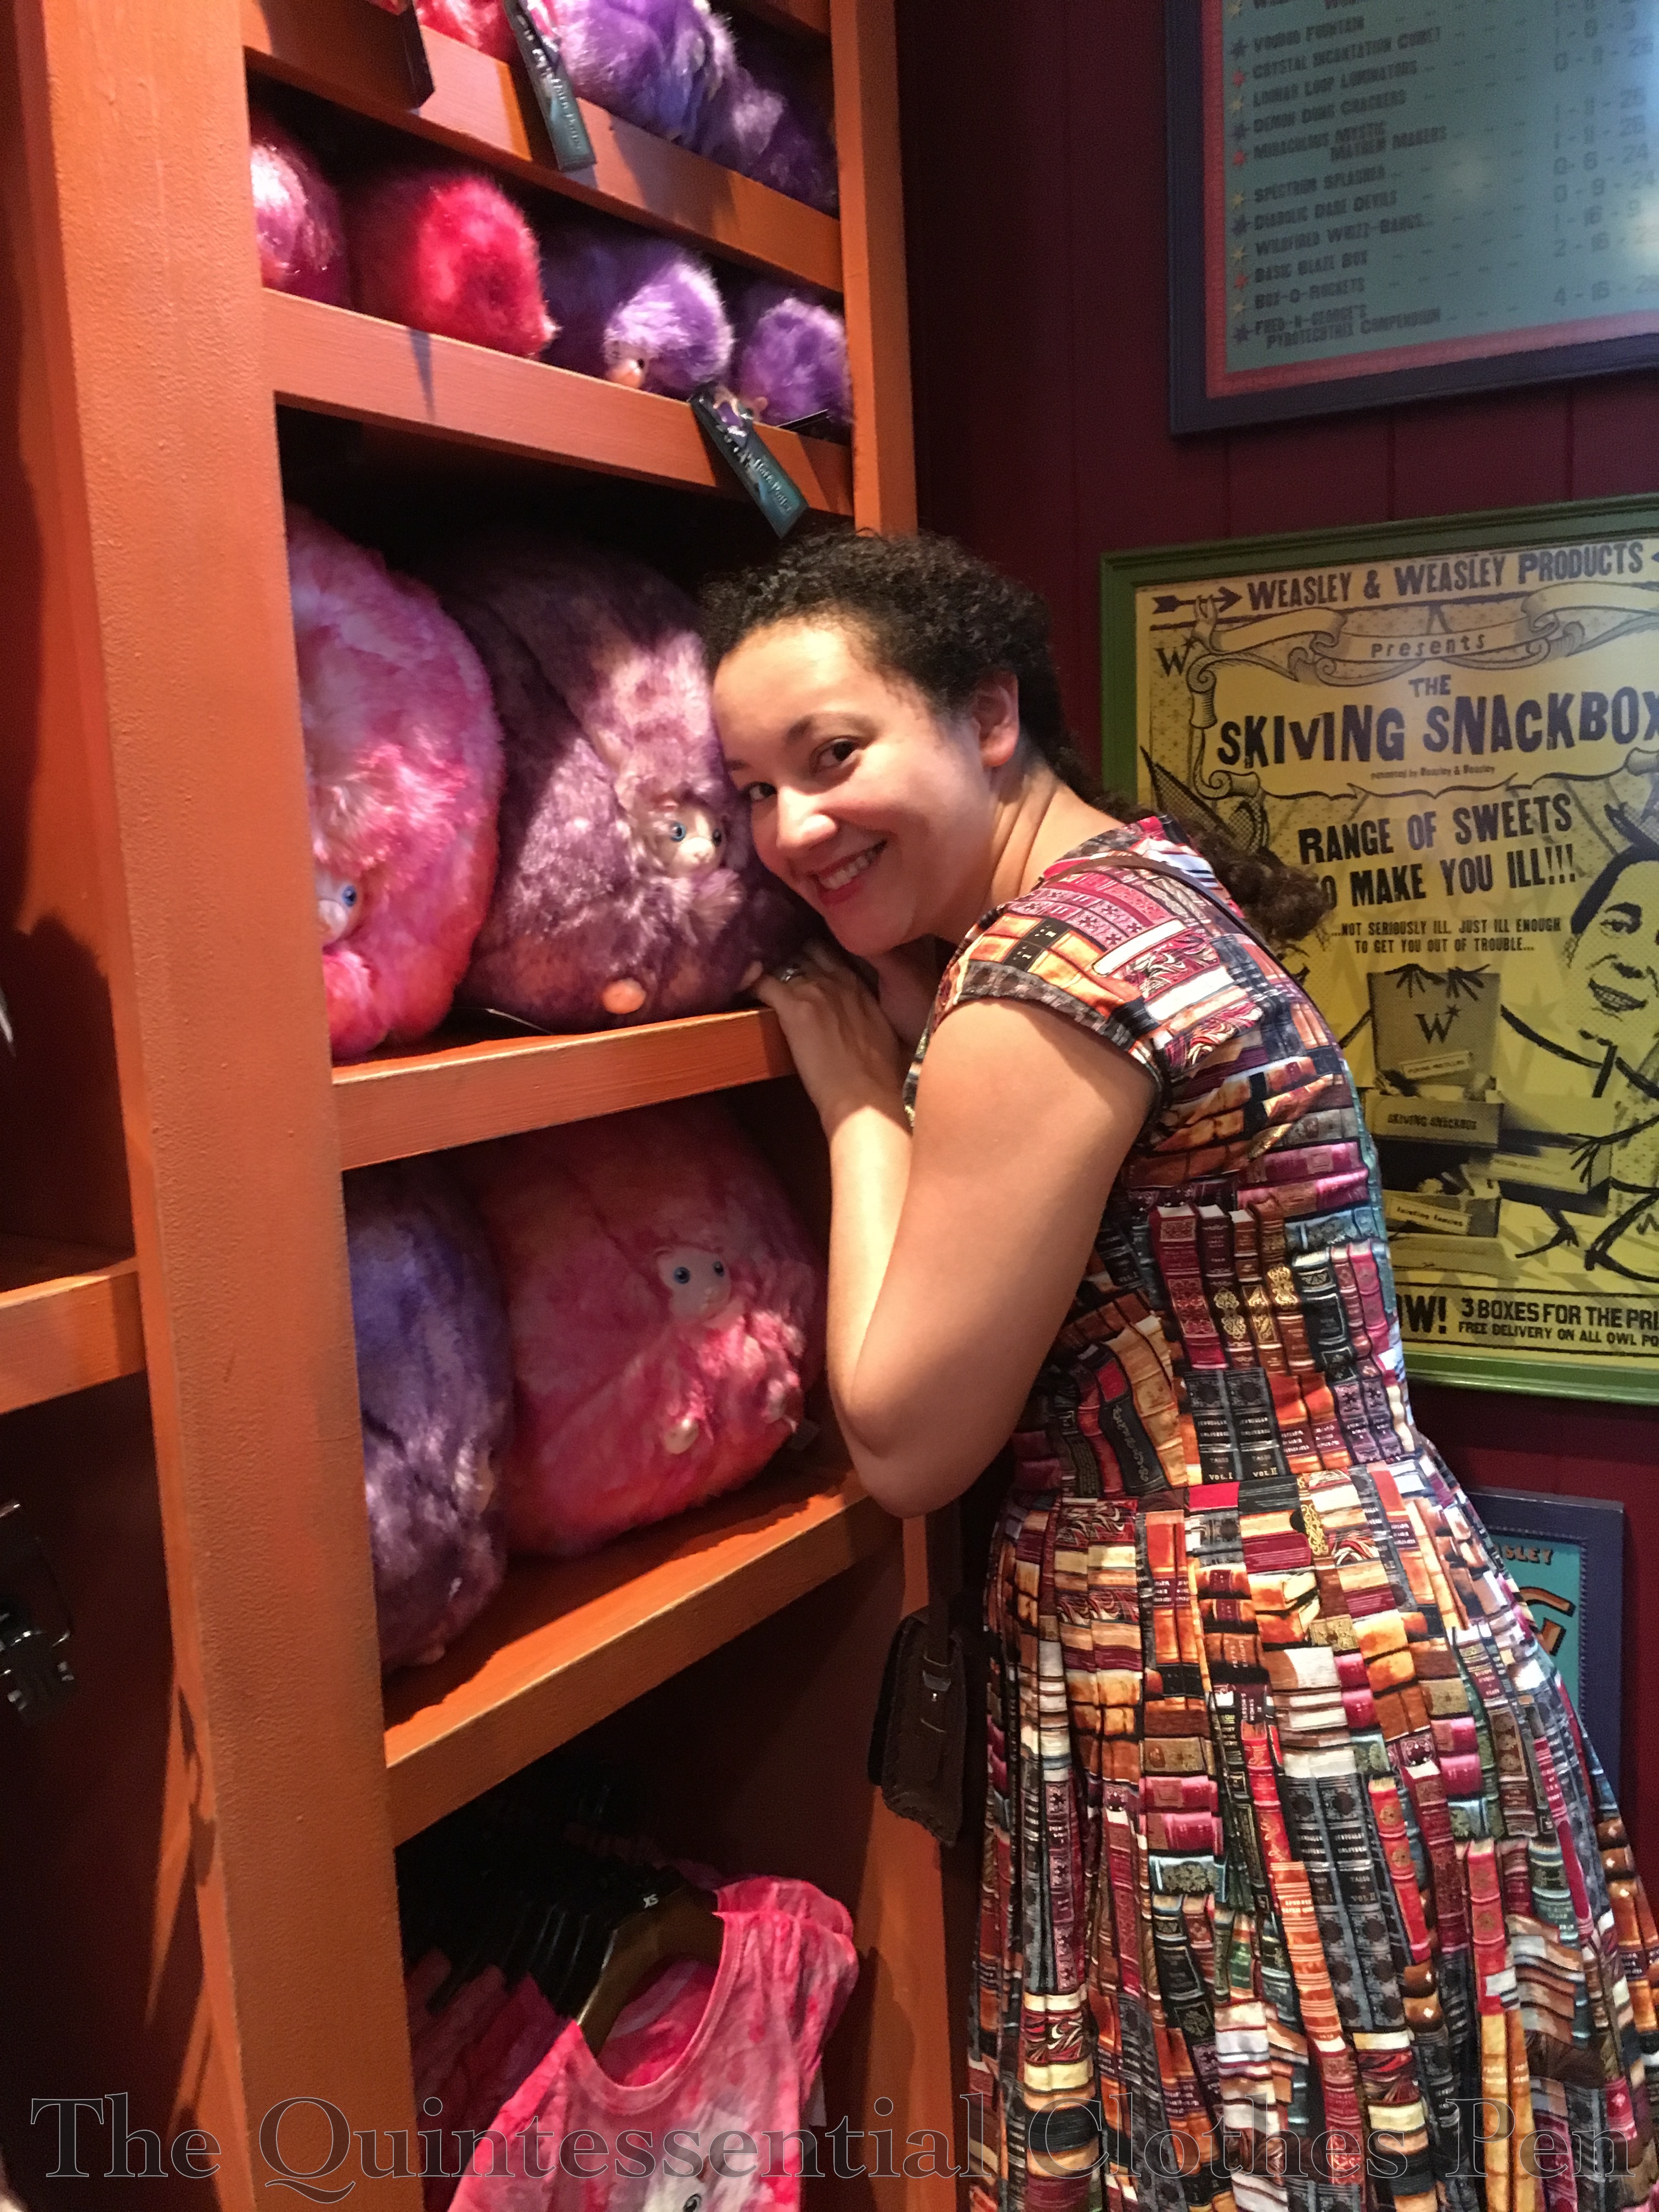
One thing I thought could have been more interactive and full was Weasley’s Wizard Wheezes. There wasn’t a whole lot of merchandise in that store, though it is described as being full and busy. That being said, it was one of the locations with GIANT pygmy puffs, which amused me greatly.

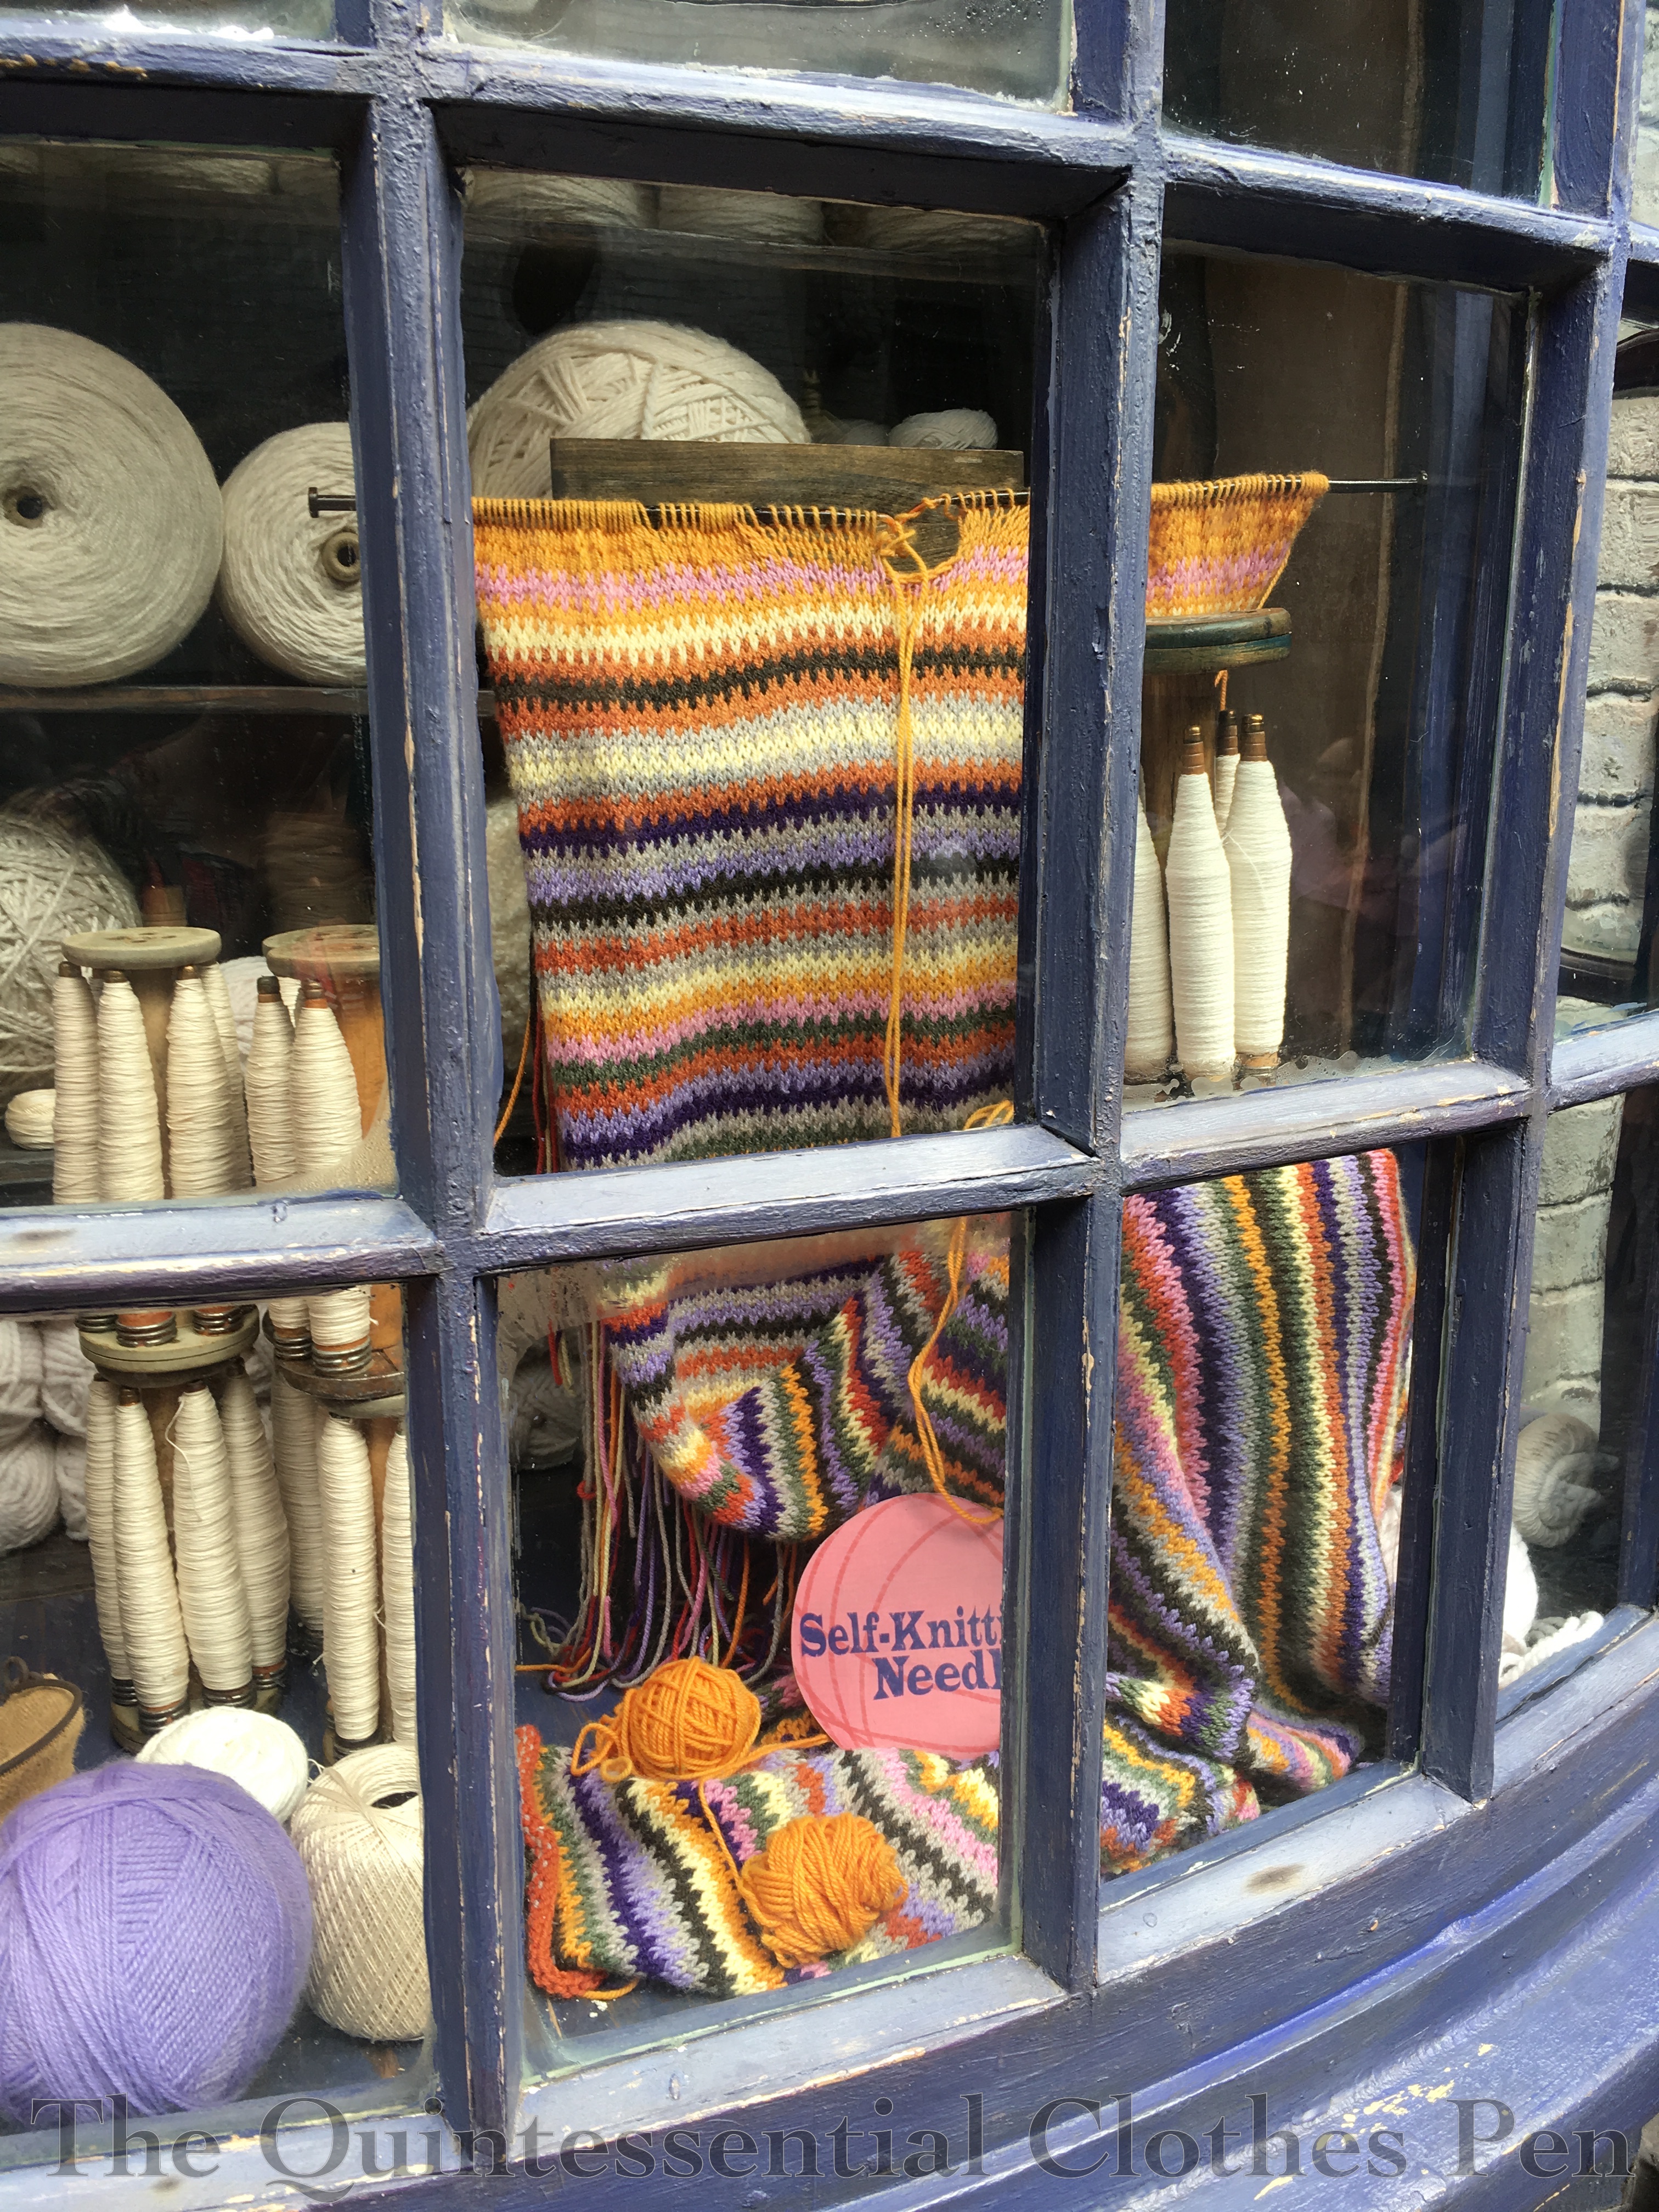
Here’s just one example of another shop window that I was amused by. There are so many shop windows for stores you can’t actually enter. Just imagine if you could enter them all! What fun!

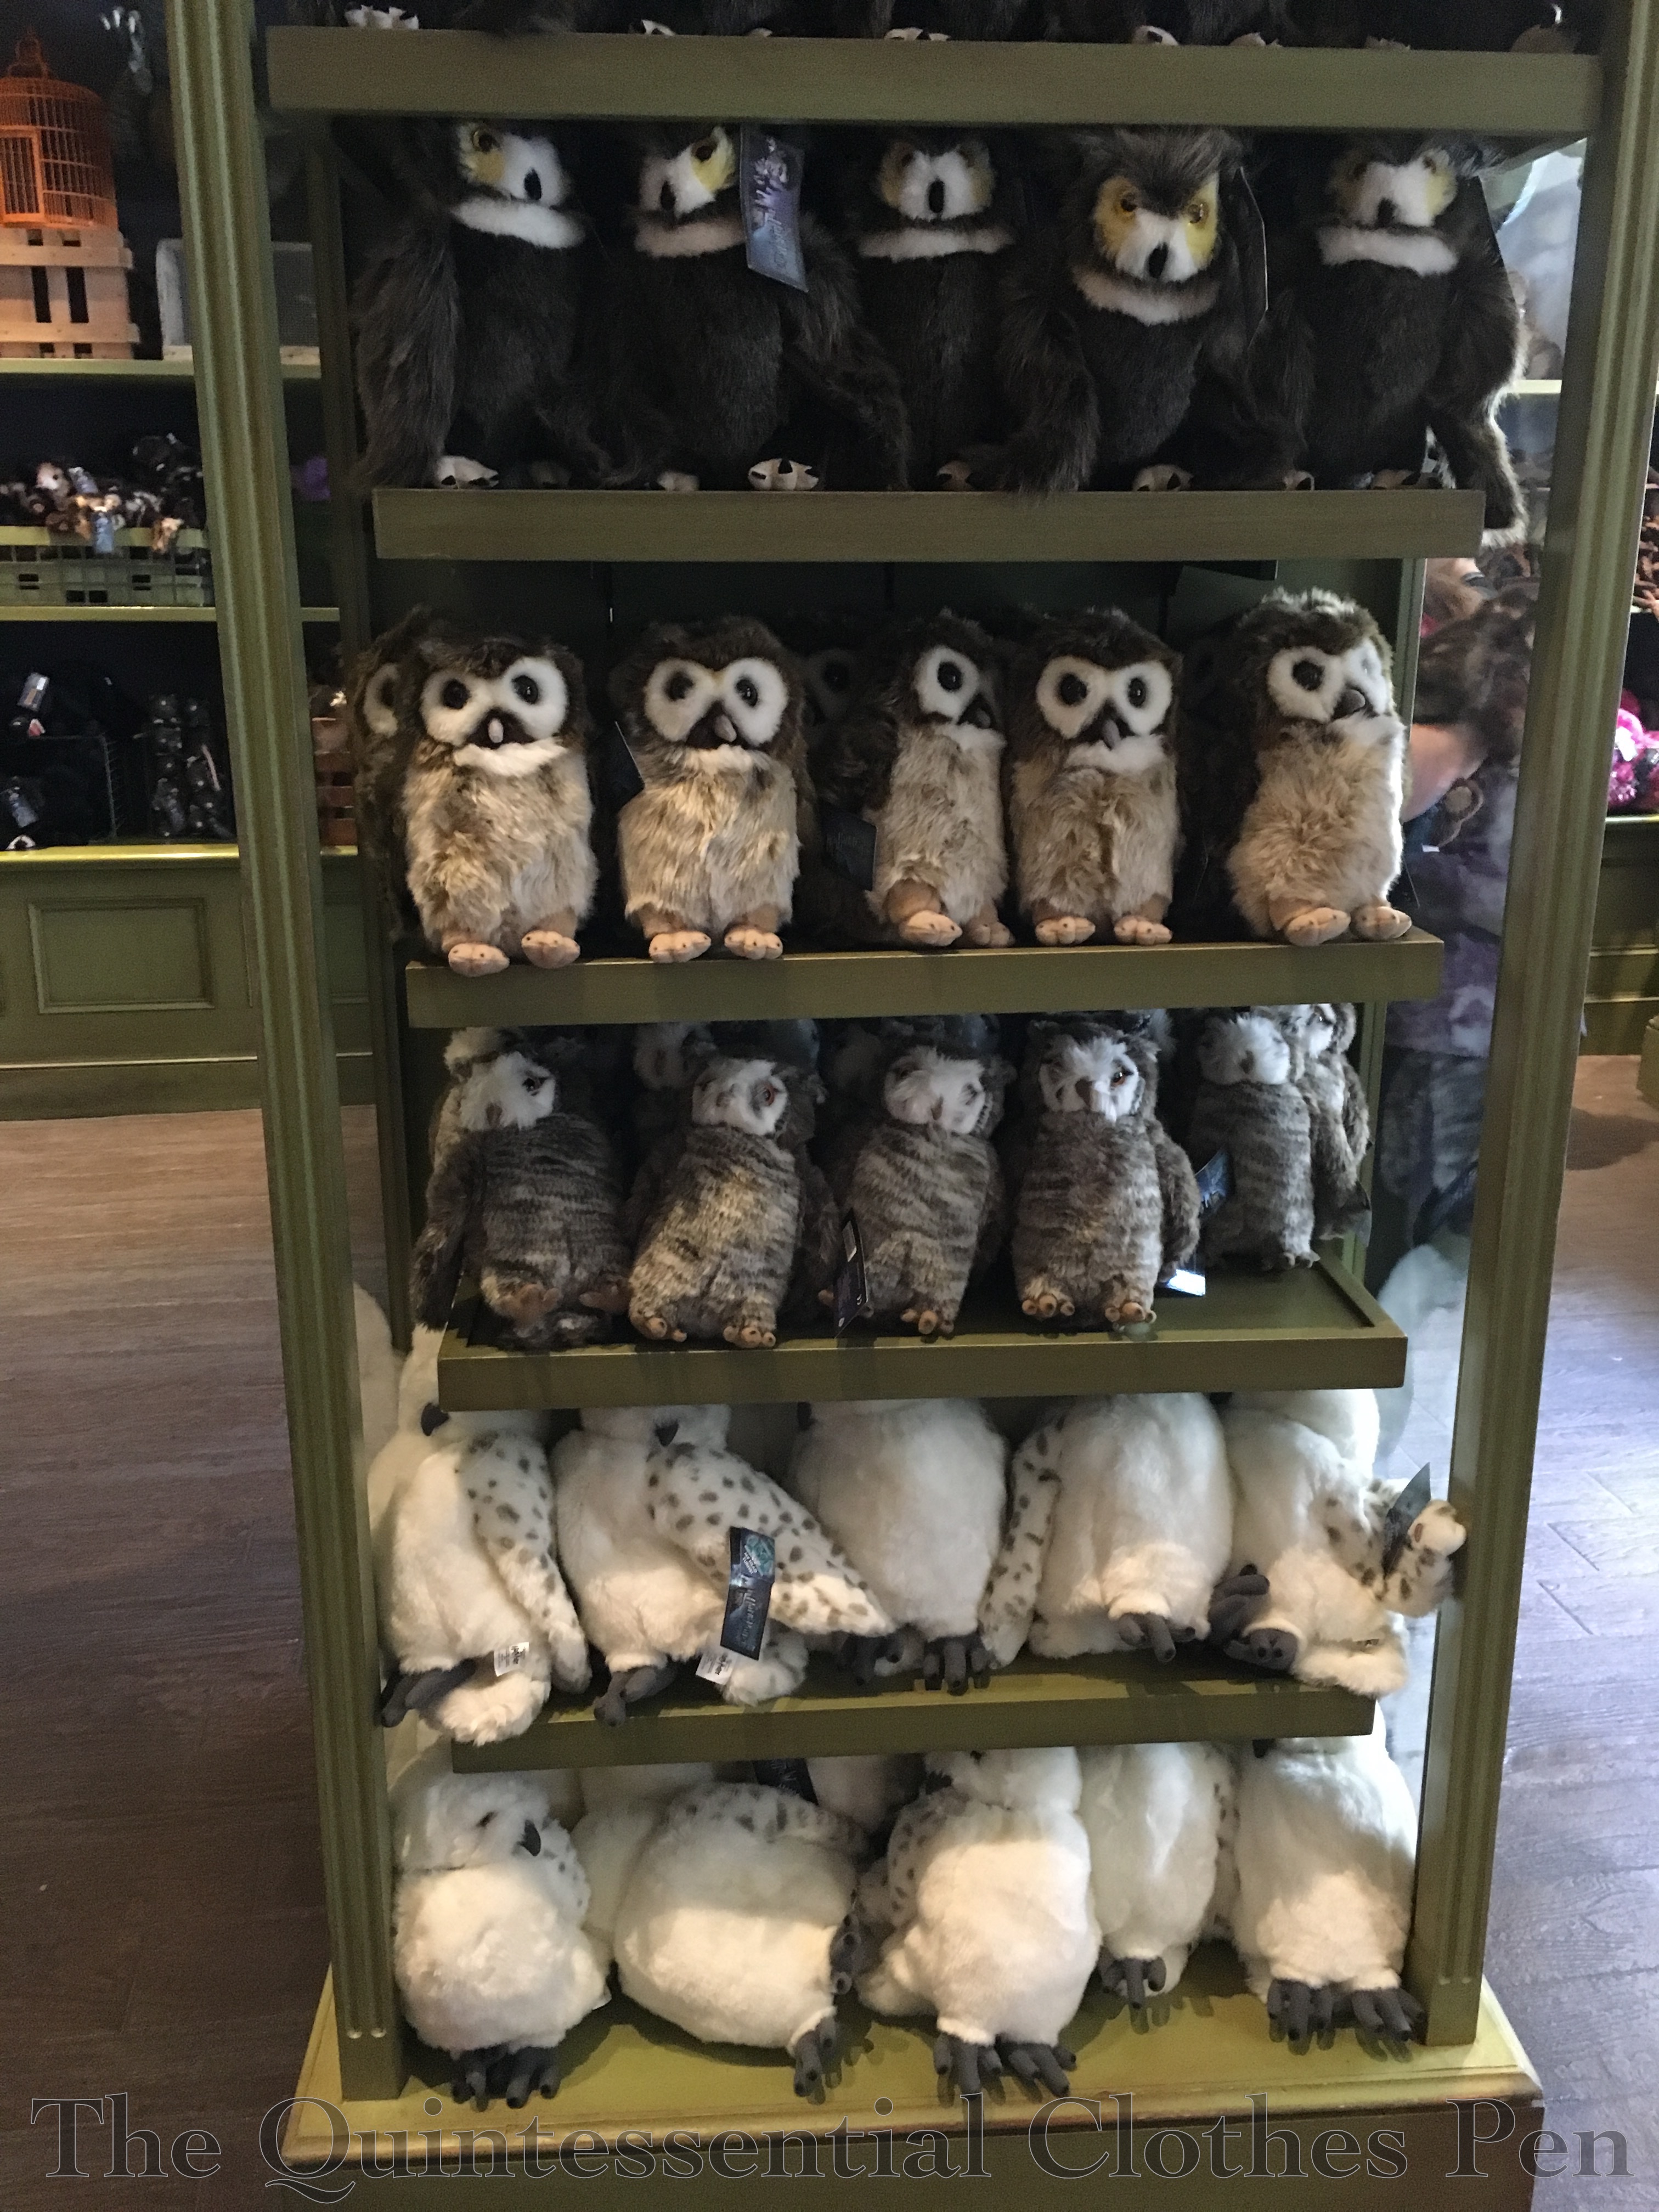
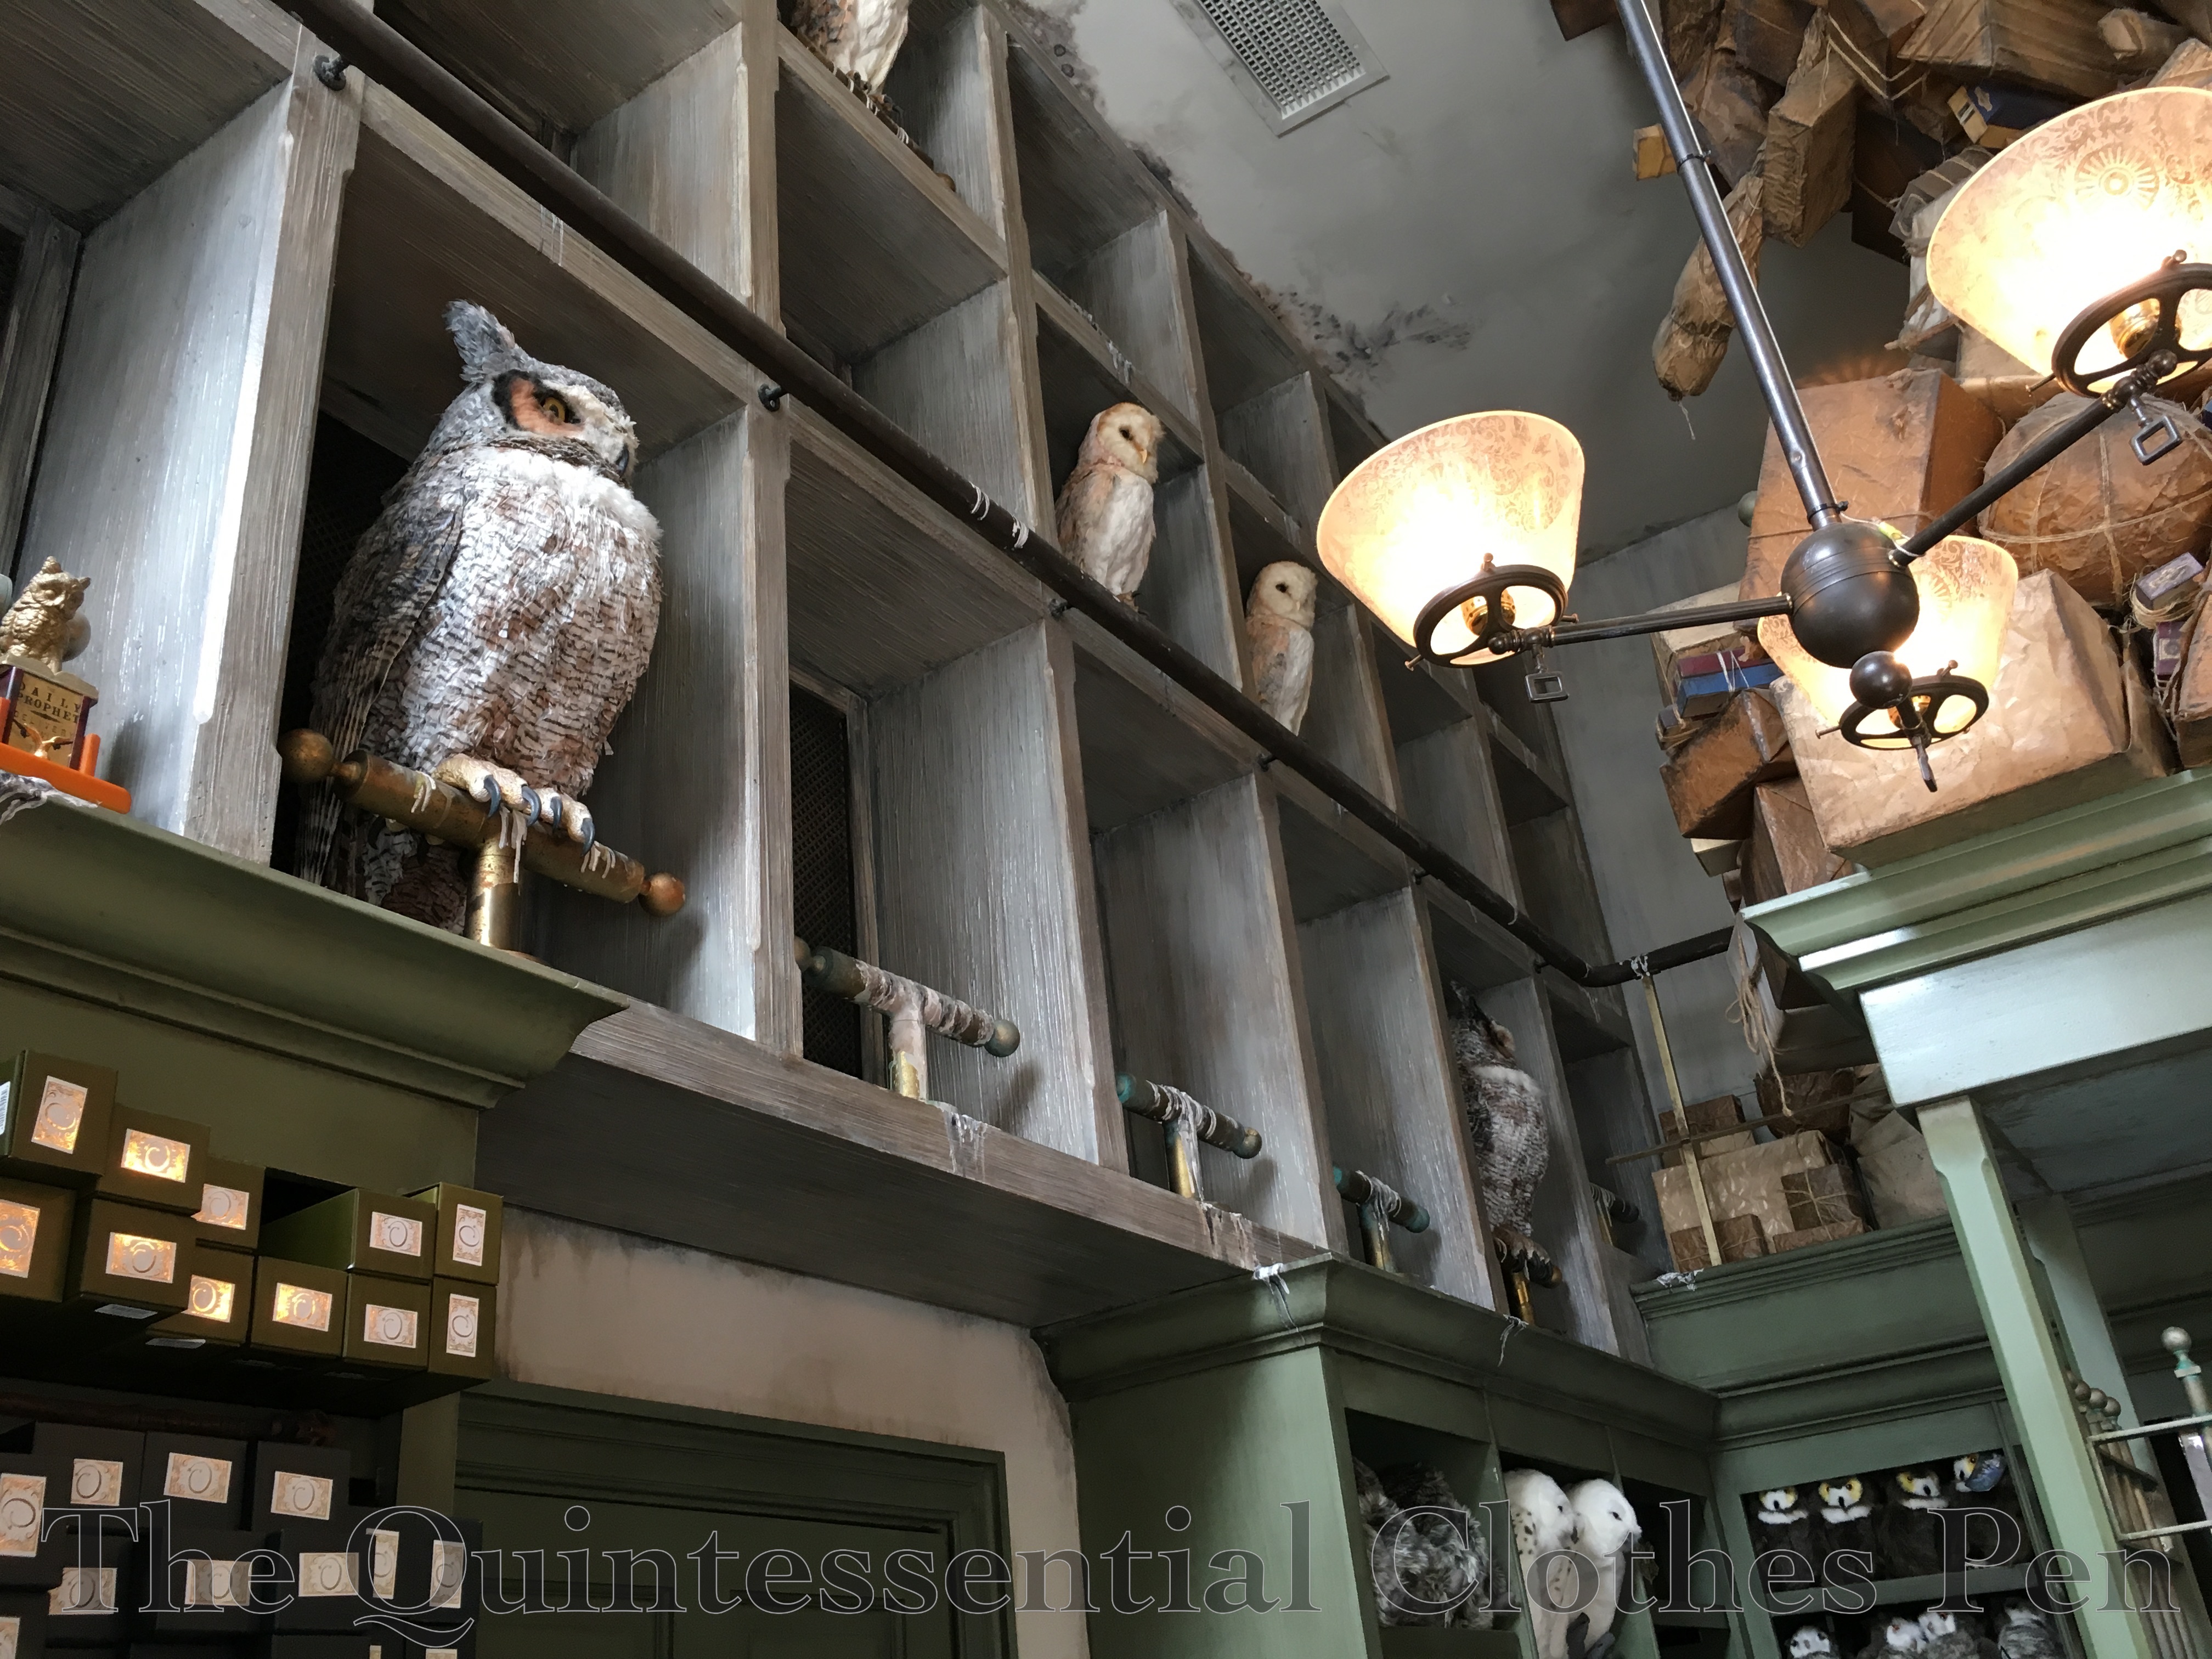
This is in the Magical Menagerie. Mr. Q visited the park without me while I was in Denmark in 2017 (I was sad, especially because he doesn’t particularly care about Harry Potter or know any details, but I was in Denmark so I couldn’t really complain!). He brought me back an owl from the middle shelf, which I call my House Owl, because it was a belated housewarming present and it’s like a house elf…! (You know, I don’t think you could buy a stuffed house elf anywhere. Surprising, because it seems like the sort of thing you might find in Knockturn Alley, perhaps…) All of these owls are characters in the books. I think the top one is Draco Malfoy’s Eagle Owl, the brown one is the Weasley’s old owl Errol, the grey one (my House Owl) is Ron’s owl Pigwideon, and the bottom one is of course Harry’s snowy owl Hedwig. Some if not all of the Hedwig’s are backpacks, which is super amusing and cute but seems like it would get grimy awfully fast!

In addition to the shelving full of owls, pygmy puffs, etc. the Magical Menagerie was a fun place to look around because the gallery around the top was full of moving animals of various different sorts. Here’s the shop from the outside. Cheers!

Just to one side of this shop is Gringotts. I like roller coasters, so I found this ride to be great fun. Oh and that dragon on top of the bank? He breathes real fire about every 10 minutes. It was hot when you were standing under it! And oh dear, but it was amusing when people didn’t realize it would be happening and were sitting on the steps of the bank…

Just near there is Hagrid’s motorbike, which you can actually sit on and fiddle with. Could you actually ride it sideways? Probably not, but I was amused.

Diagon Alley and Hogsmeade are actually in two different parks. To get between them we could walk or take the Hogwarts Express. Of course we did both!

Wandering through the parks allowed us to happen upon things like Scooby Doo and the Mystery Machine, as well as a Greek themed restaurant that made for a lovely spot to get lunch one day. We also passed through Dr. Seuss-land. I meant to get pictures with the Truffula trees, but didn’t when we were passing through and then forgot. (I am the Lorax! I speak for the trees!) Maybe next time. I did get photos of other amusing things though. They gave the topiaries faces and hair!

We also took the Hogwarts Express both directions. When you take the Hogwarts Express from London (Diagon Alley) they’ve engineered the queue so that people appear to actually disappear into the wall at Platform 9 ¾! It’s really neat! And we were there on a weekday when there wasn’t a line, so we could go back and forth and amuse ourselves! After getting on to the platform there are many more things to look at. Here’s Hedwig, who blinks and turns her head.

And here’s the Hogwarts Express after arriving in Hogsmeade. I’m hard to spot, but I’m near the engine in this photo.

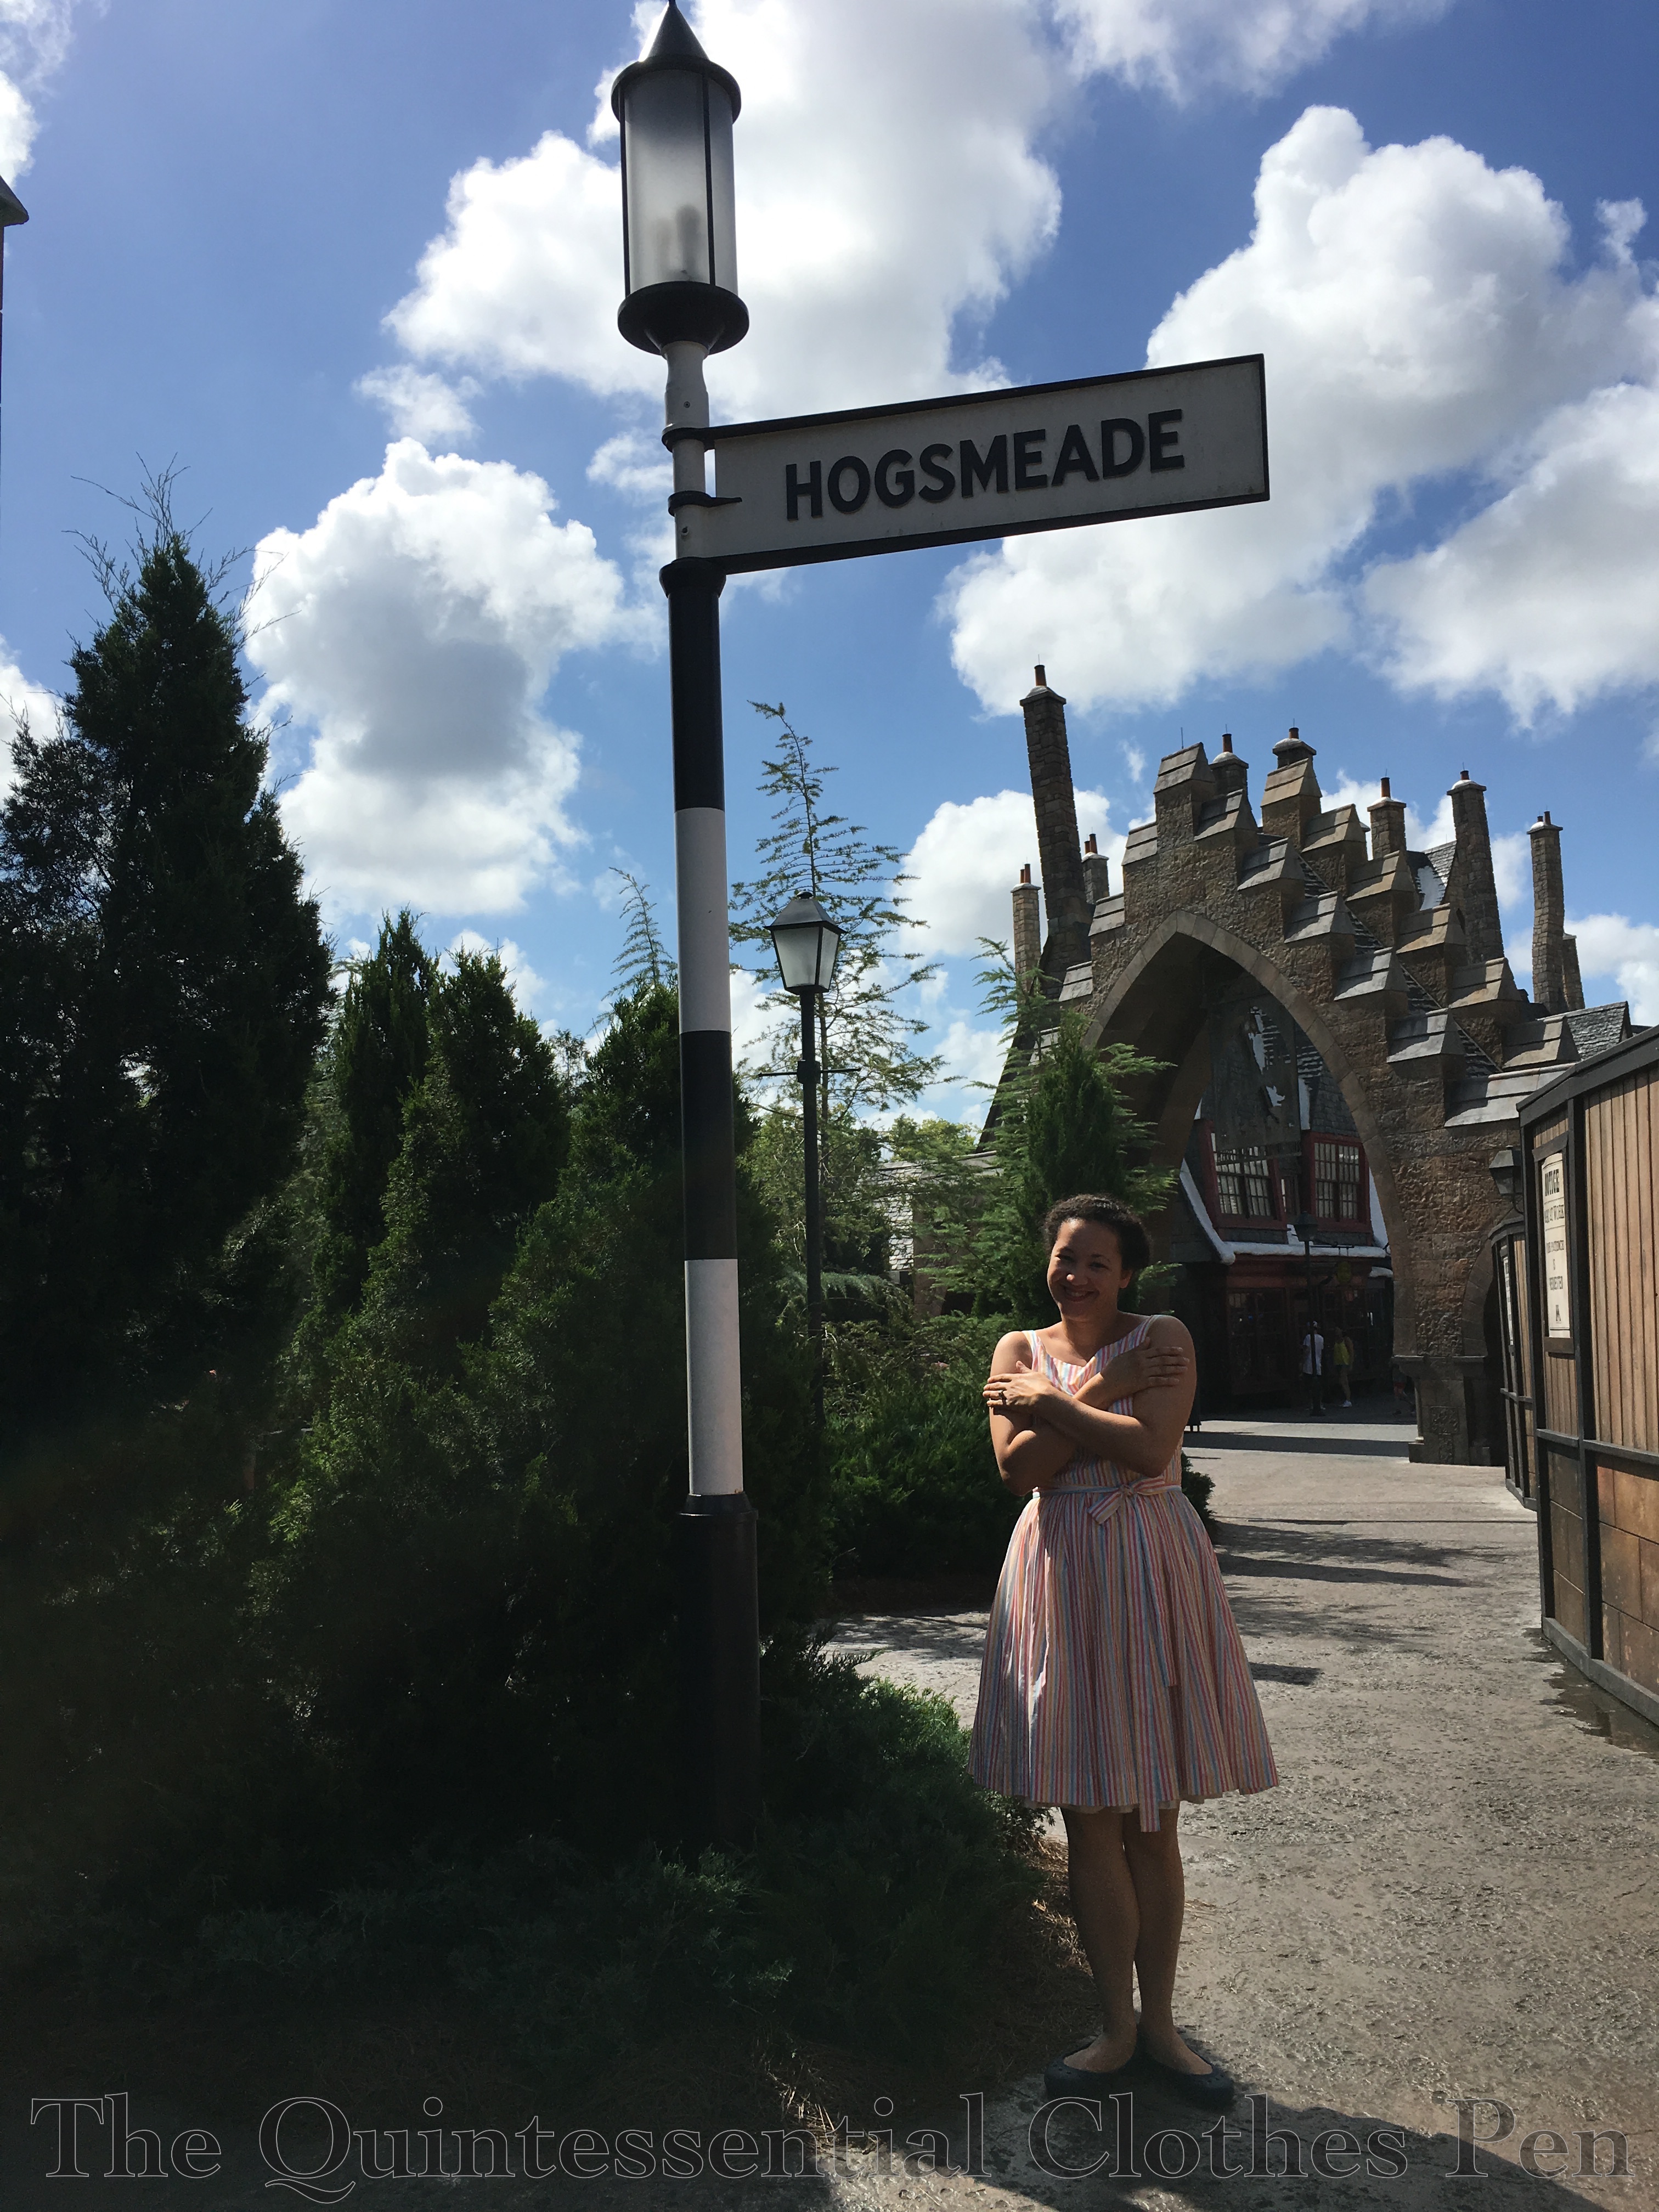
Arriving in Hogsmeade. Brrr! (Not really, it was still 90 degrees!)

A required photo of the castle! I really enjoyed the castle ride (again, I like roller coasters)! …except for the spiders! I closed my eyes for that part, because I do not like spiders.

The snowman (who never melts, of course!) has his own owl! And robe, hat and scarf! I was very amused!

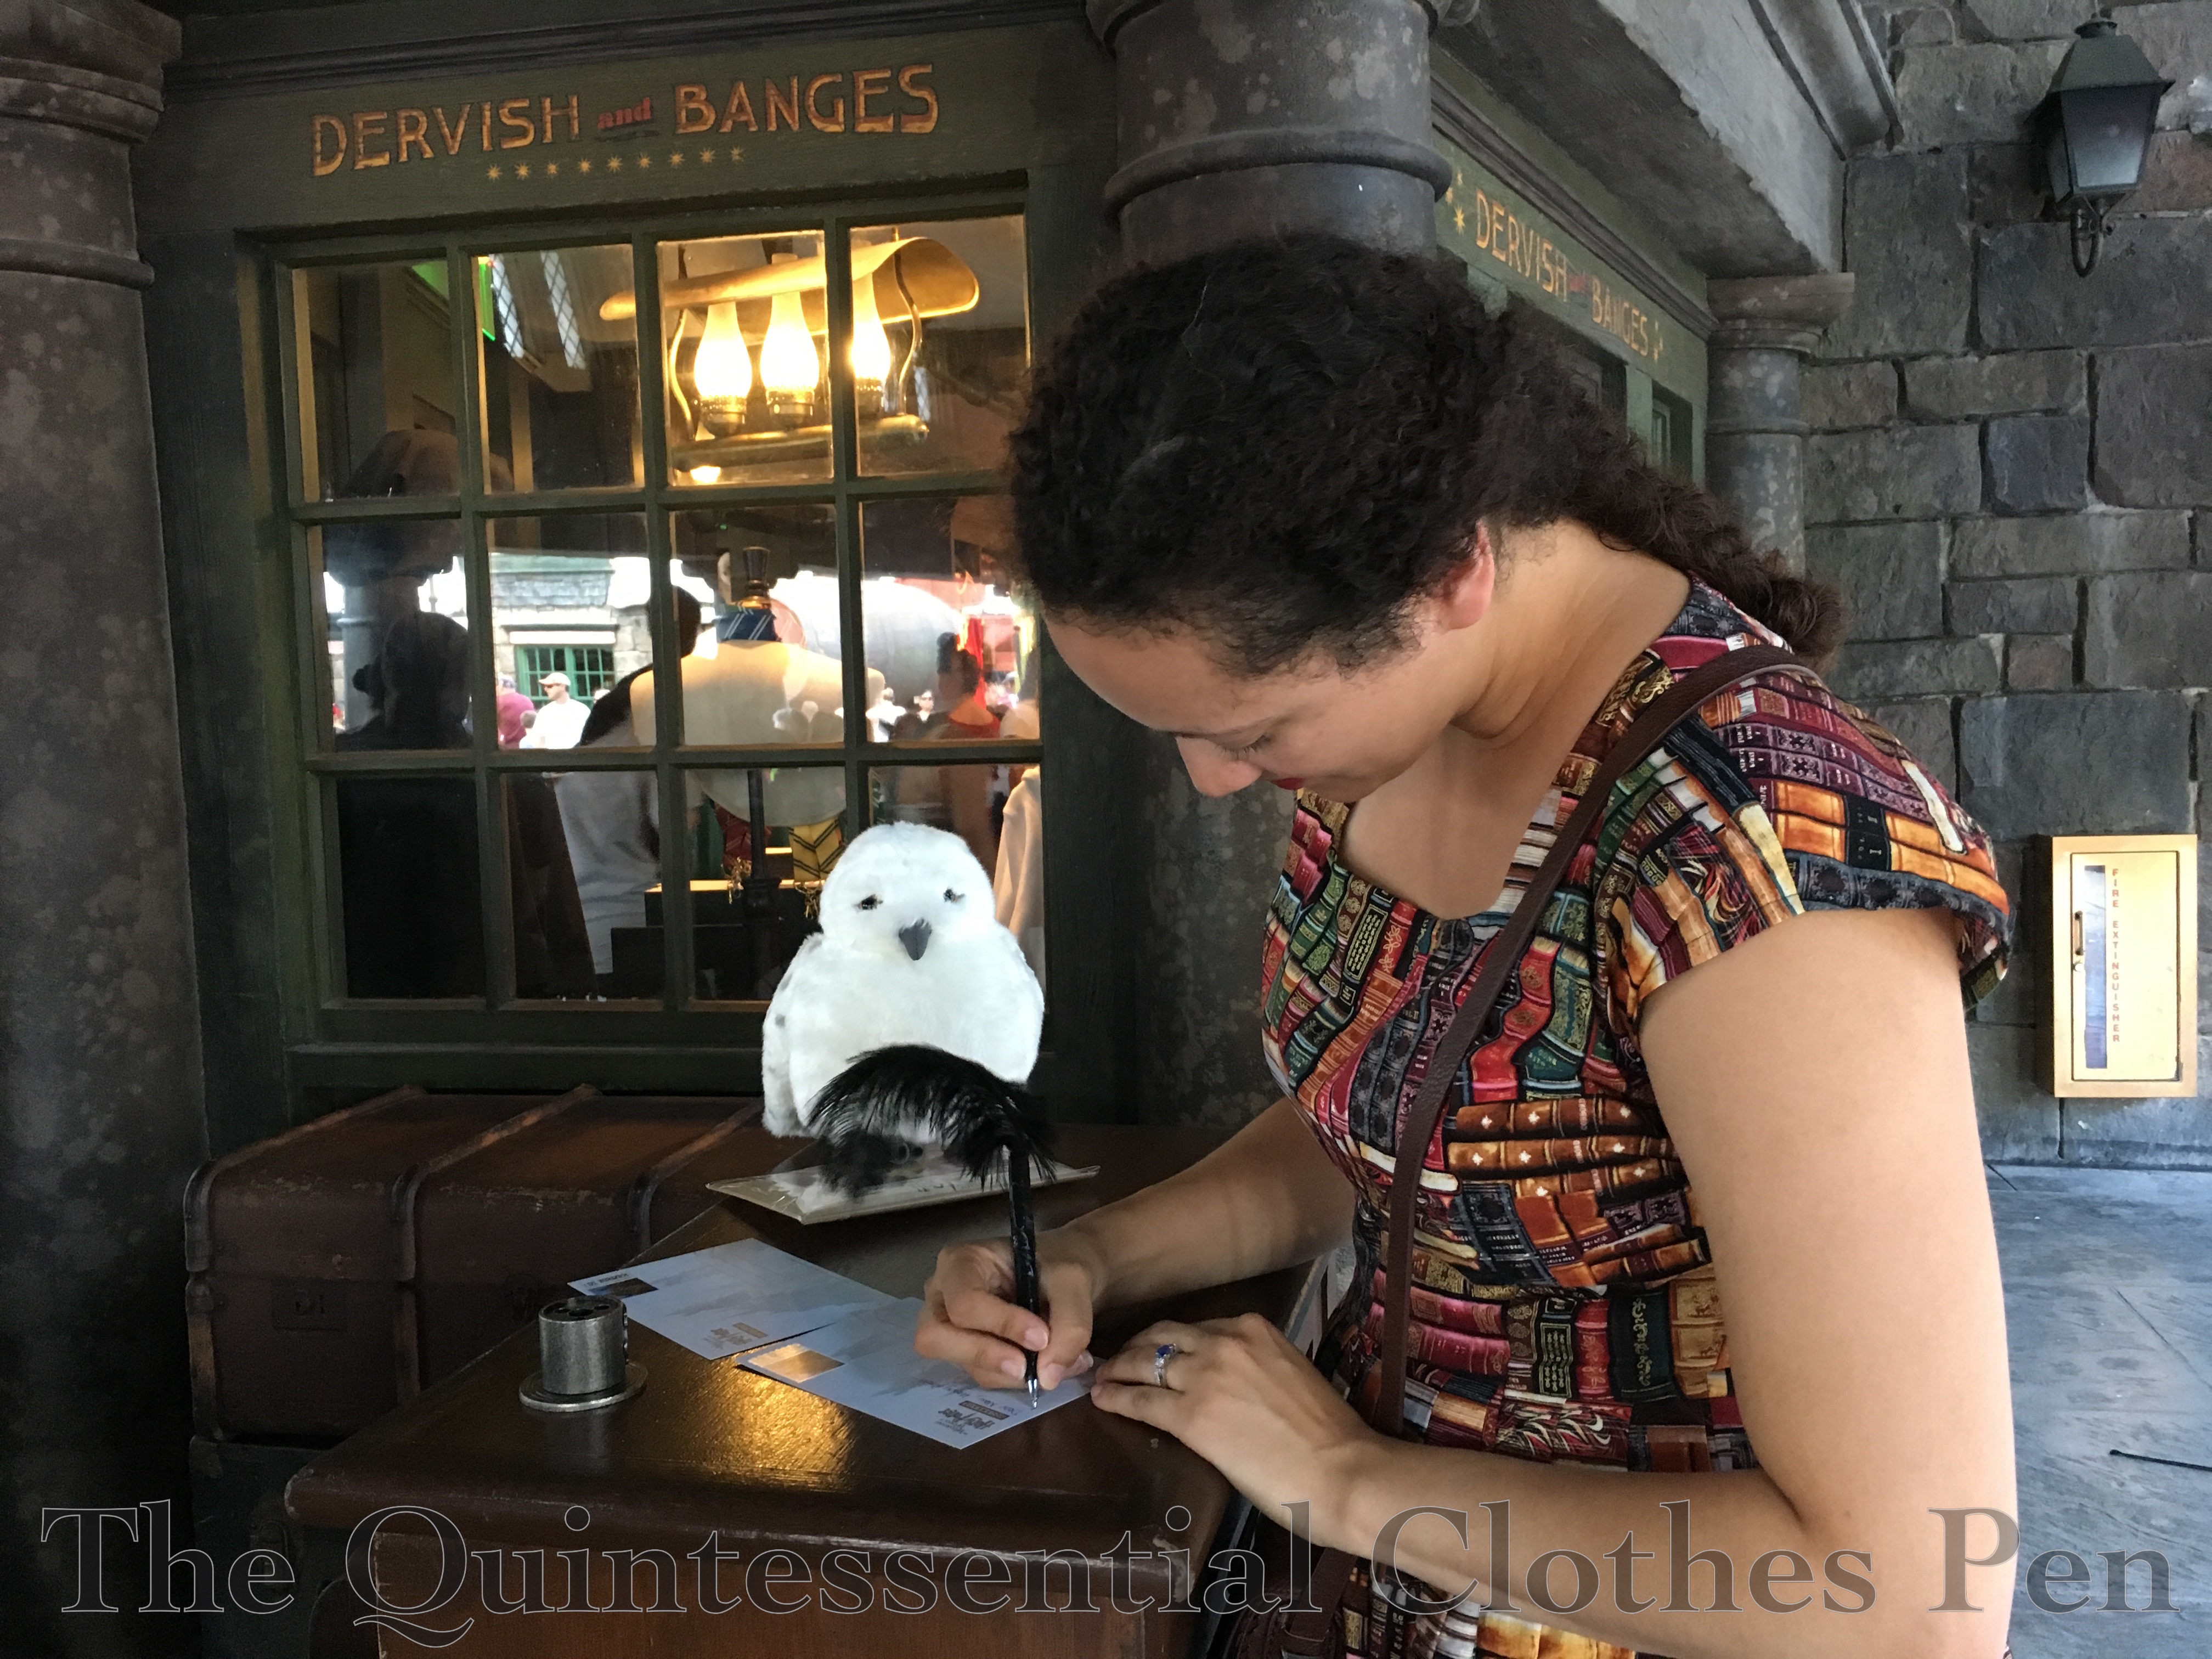
Hogsmeade is where Owl Post is located. There’s a whole shop for it, with owls in the nooks that hoot and move.

You have to go outside to get your Hogsmeade stamp. Here I am writing a postcard to a friend with a snowy owl looking on. I might have also written a postcard to myself…! Even out here there are owls in the rafters that hoot, turn their heads, and move their wings.

Back in London, there is a Knight Bus near the telephone booth where you can phone the Ministry of Magic. Here I am, sticking out my wand hand (sans wand, so clearly I wasn’t the one who summoned the Knight Bus, but oh well!).

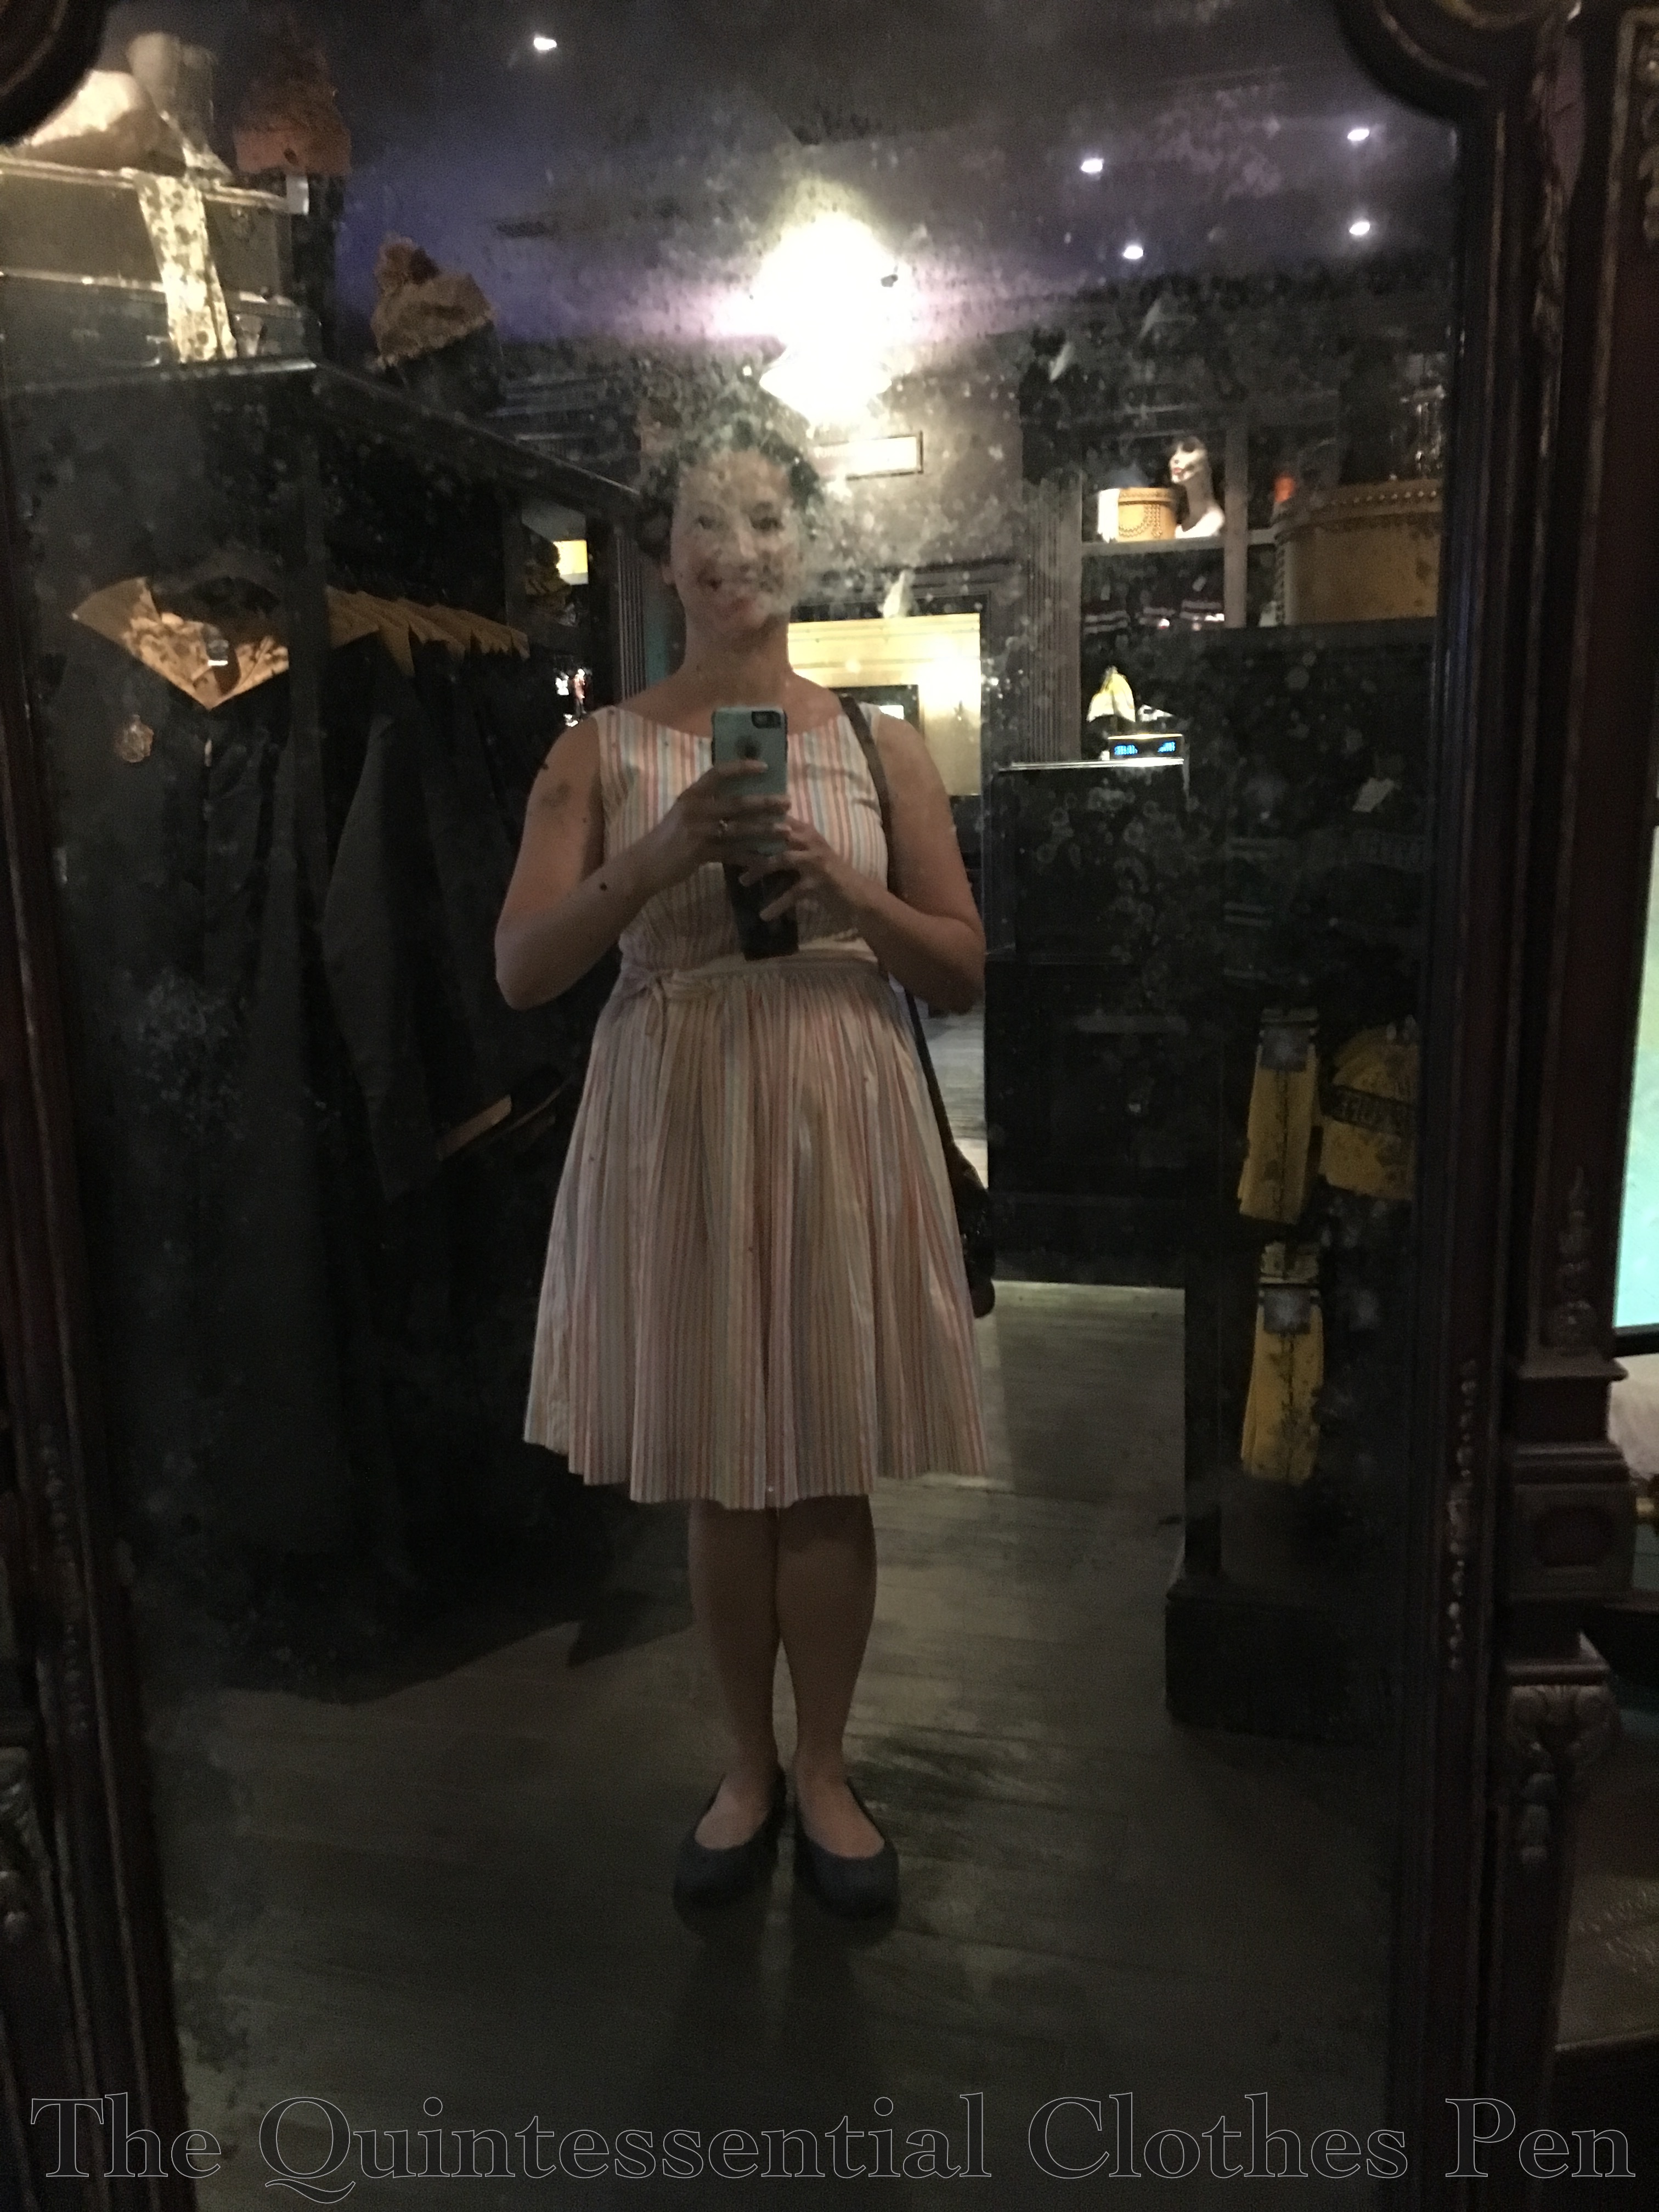
And one more shop photo, from Madame Malkin’s. This mirror would say snarky things as people walked by. It reminds me of the Mirror of Erised, which I enjoy the idea of. What do you see in the Mirror of Erised?

Thanks for enjoying my vacation with me!

A Fortescue Frock

Say that ten times fast! I was originally calling this dress the Cotton Candy Stripe Dress, but while wearing it to The Wizarding World of Harry Potter and seeing how well it matched the decor of Florean Fortescue’s Ice Cream Parlor it earned a new name.

I happened upon this summery fabric while looking for a different striped fabric at Farmhouse Fabrics. I bought it with the plan of using New Look #6143 for the bodice with a gathered skirt similar to my Bubble Dots Skirt.

I very carefully cut out the bodice pieces to match the stripes and was very pleased with the results. Look at how well my center back seam matches with the invisible zipper set in! The shoulder seams match nicely, too, and I didn’t even plan that!

The bodice is lined in lightweight white cotton, in the same way as the New Old(er) Dress I posted about in July. It uses the same bodice pattern and like the other dress this one closes with an invisible zipper down the back as well.

I thought of adding pockets but the fabric seemed to sheer to hide them well, so I decided against it.  I thought of adding a skirt lining, but decided I didn’t want to add bulk at the waist so I would live dangerously and hope that a slip would be enough to provide opacity. Thankfully, a knee length white slip is perfect. To add a just a little bit of volume, I also wear my vintage petticoat with the dress. You can see that petticoat in this past post.

This dress is fun! It’s light, summer-y, and my only fear was getting something on the white fabric while wandering around the amusement park. Thankfully that never happened!  We happened upon this spot while wandering around and it seemed good for a photo! My vacation sunglasses look like a bug and are silly, but I rather enjoy them once or twice a year. I never wear sunglasses that big in my normal life! They were great for the bright Florida sun!

Here are a few end-of-day shots, with frizzier hair and running-out-of-pose-idea poses. We stayed at the Cabana Bay Resort. It’s vintage themed and had some really adorable decor that we really enjoyed!

I made the dress with a 2″ hem but that skirt length was just barely long enough to conceal my petticoat (I realized after looking at photos). It was too close for comfort, so after I got home I decided to lower the hem as much as possible, which I’m very pleased with. Sadly I only got one wearing in with the new length before fall set in. Now the dress is now packed away and waiting for warmer weather next year!

Giving Old Hoops New Spots

Spots are this nifty piece of hardware that can be used to secure interlocking pieces together. They’re similar to a brad in that they have two prongs on the back of a circular top. The difference I see is that they have a domed top and the prongs come out from other side rather than the center.

Back in April, I posted about the dimensions of my large hoops and how I made my new smaller hoops and stated the goal of adding spots to my old hoops just like I had done for the new hoops. Over the last six months I’ve been slowly adding the spots to my old hoops and I’m pleased to report that the process is complete! My ten year old hoops have reinvigorated life!

For the new smaller hoops I used brass colored spots, but I decided to change it up for my older hoops and used gold colored spots instead. (Both of the spots were purchased from this seller on eBay, who I would certainly recommend.) I’d originally intended the vertical tapes on these old hoops to be able to slide around when needed so that I could force the hoops into an elliptical shape, but since I haven’t done that even once in the last ten years I figured that if/when I want elliptical hoops I’ll make a new support structure and will reinforce these hoops in their current cupcake shape instead of contingent to allow them to be adjustable.

My spots are positioned so that the prongs are at the top and bottom of each horizontal wire. I poked the prongs through the twill tape then used pliers to bend the prongs towards each other to secure them in place. The nice thing about the spots is that as they are folded back you have control over how tightly they are attached. So technically they are still loose enough that I can scoot the vertical tapes around if I really want to. But will I? Probably not.