Roseland Cottage is a lovely pink house in Woodstock, CT that was built in 1846 by the Bowen family (you can read more about thr history of the house here on the Historic New England website). I’ve been to the house before and posted about it on the blog — in a different post about playing croquet! That outing, which you can read about in this past post, was in 1860s clothes.
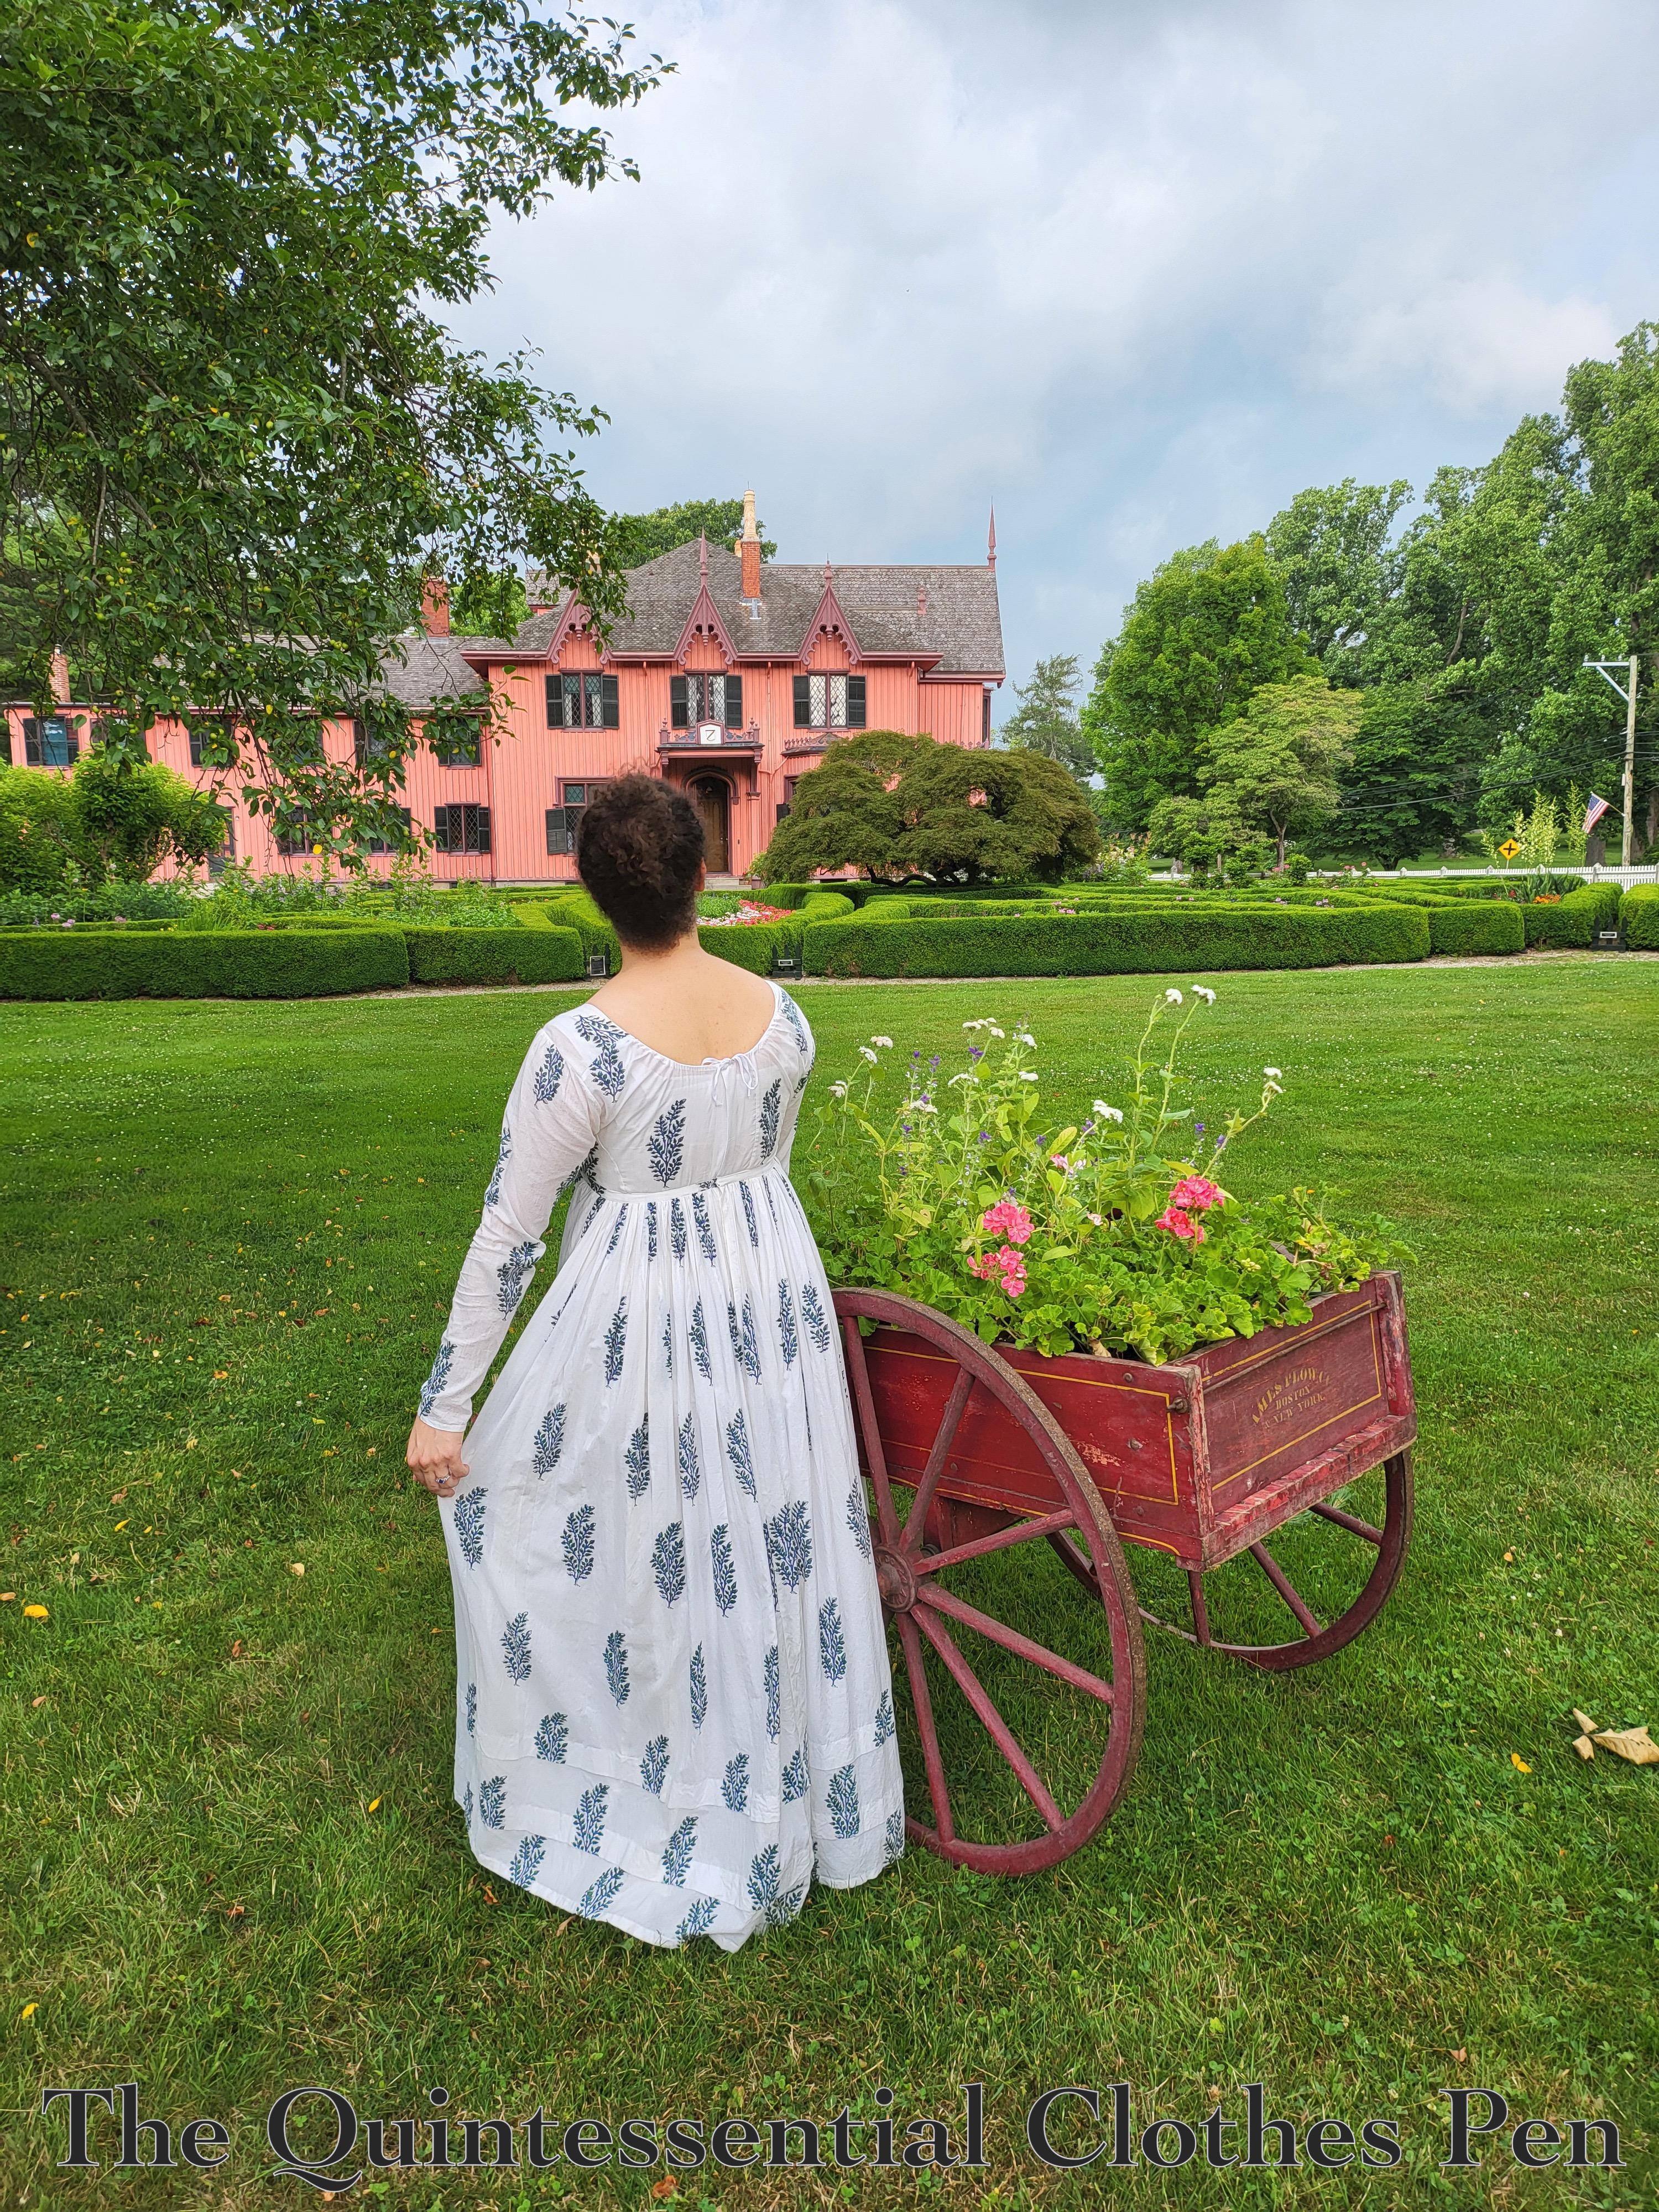
A rather moody looking Roseland Cottage on the day of this year’s outing is pictured below. It was overcast, which was nice because it wasn’t super hot, but we did have a fantastic rain and thunder storm roll through halfway through the event. Lightening struck the lawn outside of the house! Luckily, we knew it was coming and were able to transition indoors to play tabletop croquet and have tea. No one was rained on!
And I was pleased, because Roseland is lovely, the company was delightful, and my updated Tree Gown was freshly revived and very comfortable!
It felt important to show off the updated back of my gown for documentation here on the blog!
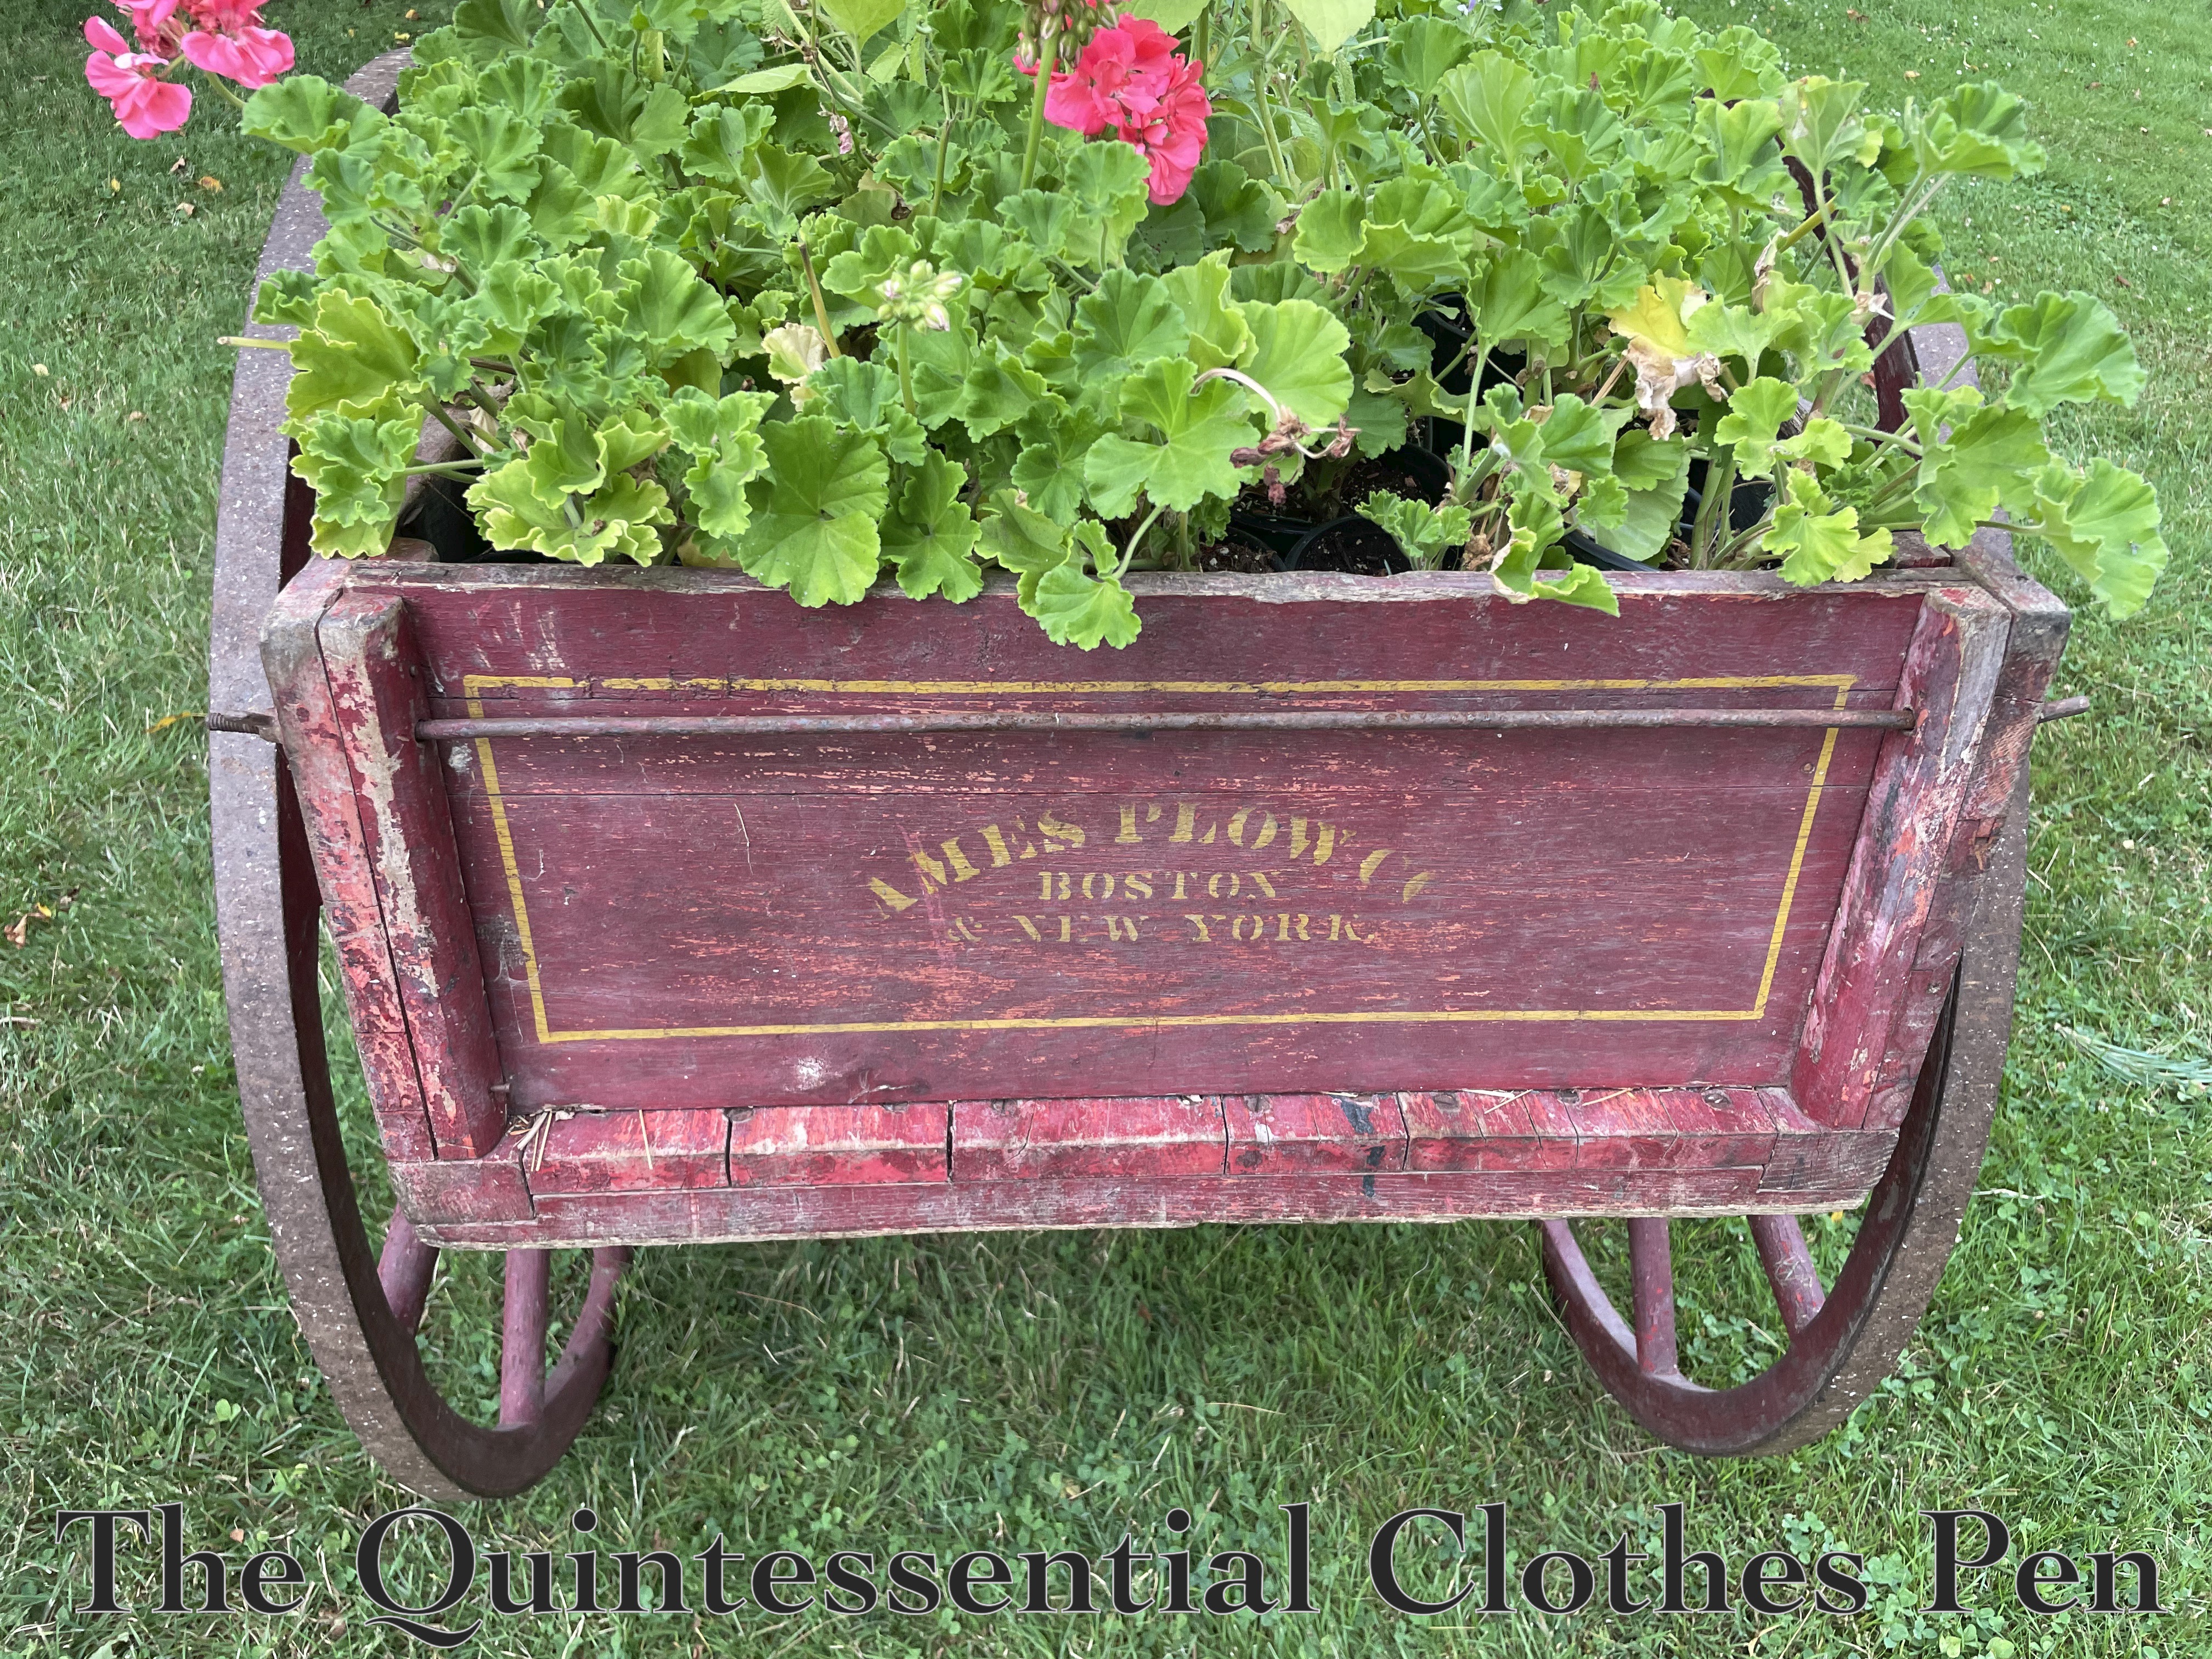
Roseland has a beautiful and well maintained garden, and in addition to that, I also appreciated the cute cart (detail photo below) full of additional flowers that was situated on the lawn. It made for a wonderful photo accessory, as you can see in the photo above!
As I mentioned in my post about altering the gown (linked at the top of this post), I’m so pleased to be able to give this dress extended life!
I’ve loved my 1815 Tree Gown ever since I made it in 2013 (here is the link to the original post about making the dress) and have worn it many times, most recently last summer for a Regency picnic which I posted about here. It was clear at that point that this dress needed to be updated to fit my current shape!
Making a plan
I finally had the brain space to deal with it this summer (and the added encouragement of wanting to be able to wear it in June). So, accordingly, I dug out the small bit of fabric I had leftover from originally making the dress.
Then, I took stock of what was needed. In a fitting, I realized that not only were the sleeves now a bit too tight, but the shoulders were also not quite wide enough for my now-broader shoulder width, which was also contributing to the dress wanting to fall off of my shoulders. Ugh!
There was no easy way to deal with that second problem except to make the back wider… So, I took a deep breath and decided to replace the back panels.
Making it happen: taking the dress apart
I had seam ripped the arm seams last year after realizing they needed to be let out, so the sleeves were already in that taken-apart state.
As I was taking apart the back, I remembered that I had taken a tuck in the finished dress to make the armsceye a little smaller. Alas, letting this out was not nearly enough to prevent me from needing to replace the back panels.
Making it happen: forming a new plan
Fast forward through a bit of seam ripping (French seams make for a lovely finish, but also mean double the seam ripping!), and I had a bunch of loose panels flopping around. I used the original back pieces and my desired new measurements to cut mockup pieces of what I thought the back should become. I safety pinned those in and tried the dress on to make sure I was on the right track.
Here is the old back piece laid over the mockup. It’s not a huge difference, but that 1″ or so on most edges made a huge difference in terms of fit.
I also made a pattern piece for the arm gusset I needed based on the measurements I wanted the new sleeve size to be. In the end, I decided to extend the gusset all the way down to the cuff opening, as I figured a little extra room for my hand to get through was a reasonable idea (it was a tight squeeze otherwise!).
Then, I used my minimal scraps to cut out the new pieces. I’m super pleased that even with small scraps I was able to match up the block printed areas!
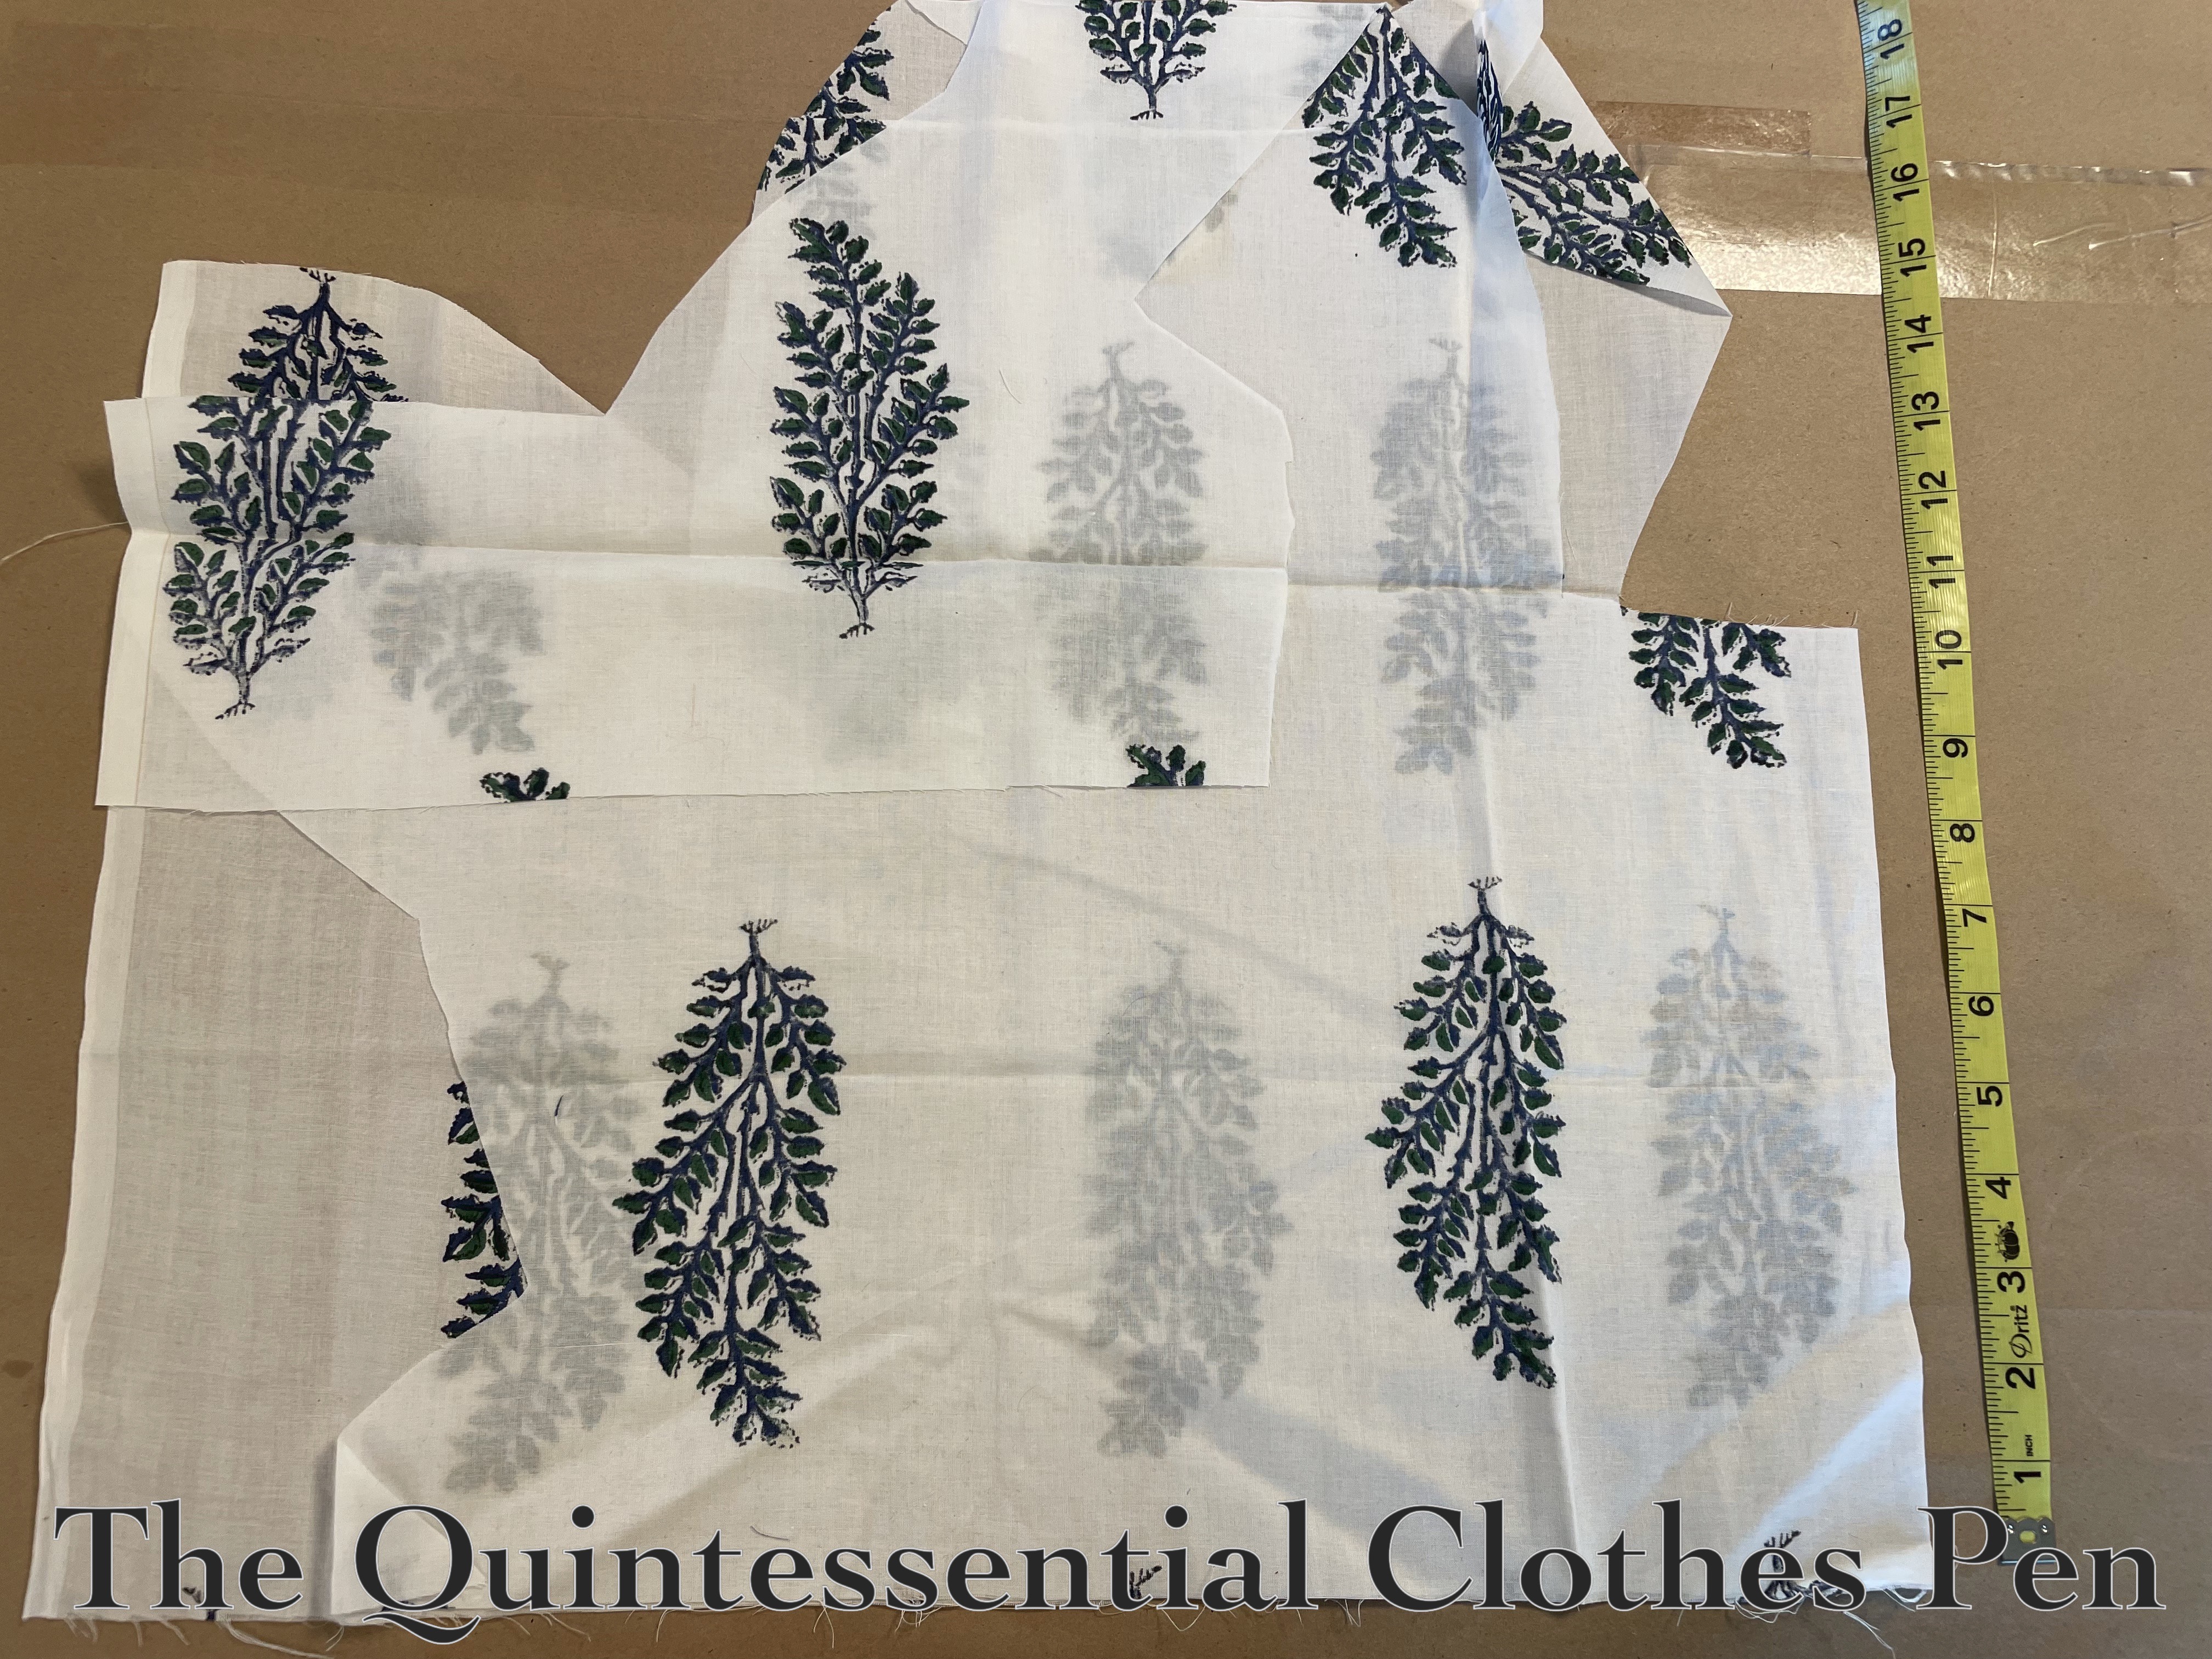
For the back pieces, the image below shows what I had to work with. Not much! I could fit both pieces if I didn’t maintain symmetry in the block print, but… I did such a nice job matching it up when the dress was made! I just couldn’t bring myself not to make the re-do match, too! But I couldn’t get two pieces with matched patterns out of what was left.
It was too much to think about late at night and I knew I only had one chance at cutting to get it right…
So I took a break and came back to it another day. And I had a brainstorm! The way to make my goal happen was to piece one of the pieces somewhere. I could have placed an extra seam in a shoulder area, but that seemed more obvious than my second option given the sheer fabric of the dress. The second option that I decided on is a vertical seam in the white space near the center back opening. There was just enough fabric to make it happen!
Making it happen: putting the dress back together
With my new back pieces cut, it was just a matter of putting them back into all of the seams (including the armsceyes, shoulders, side back, and waist). I was able to reset the sleeves without any of the original gathers, which allowed for the extra circumference my new back pattern had created. Then, I created a new drawstring channel along the neckline and re-applied my closures… and the update was complete!
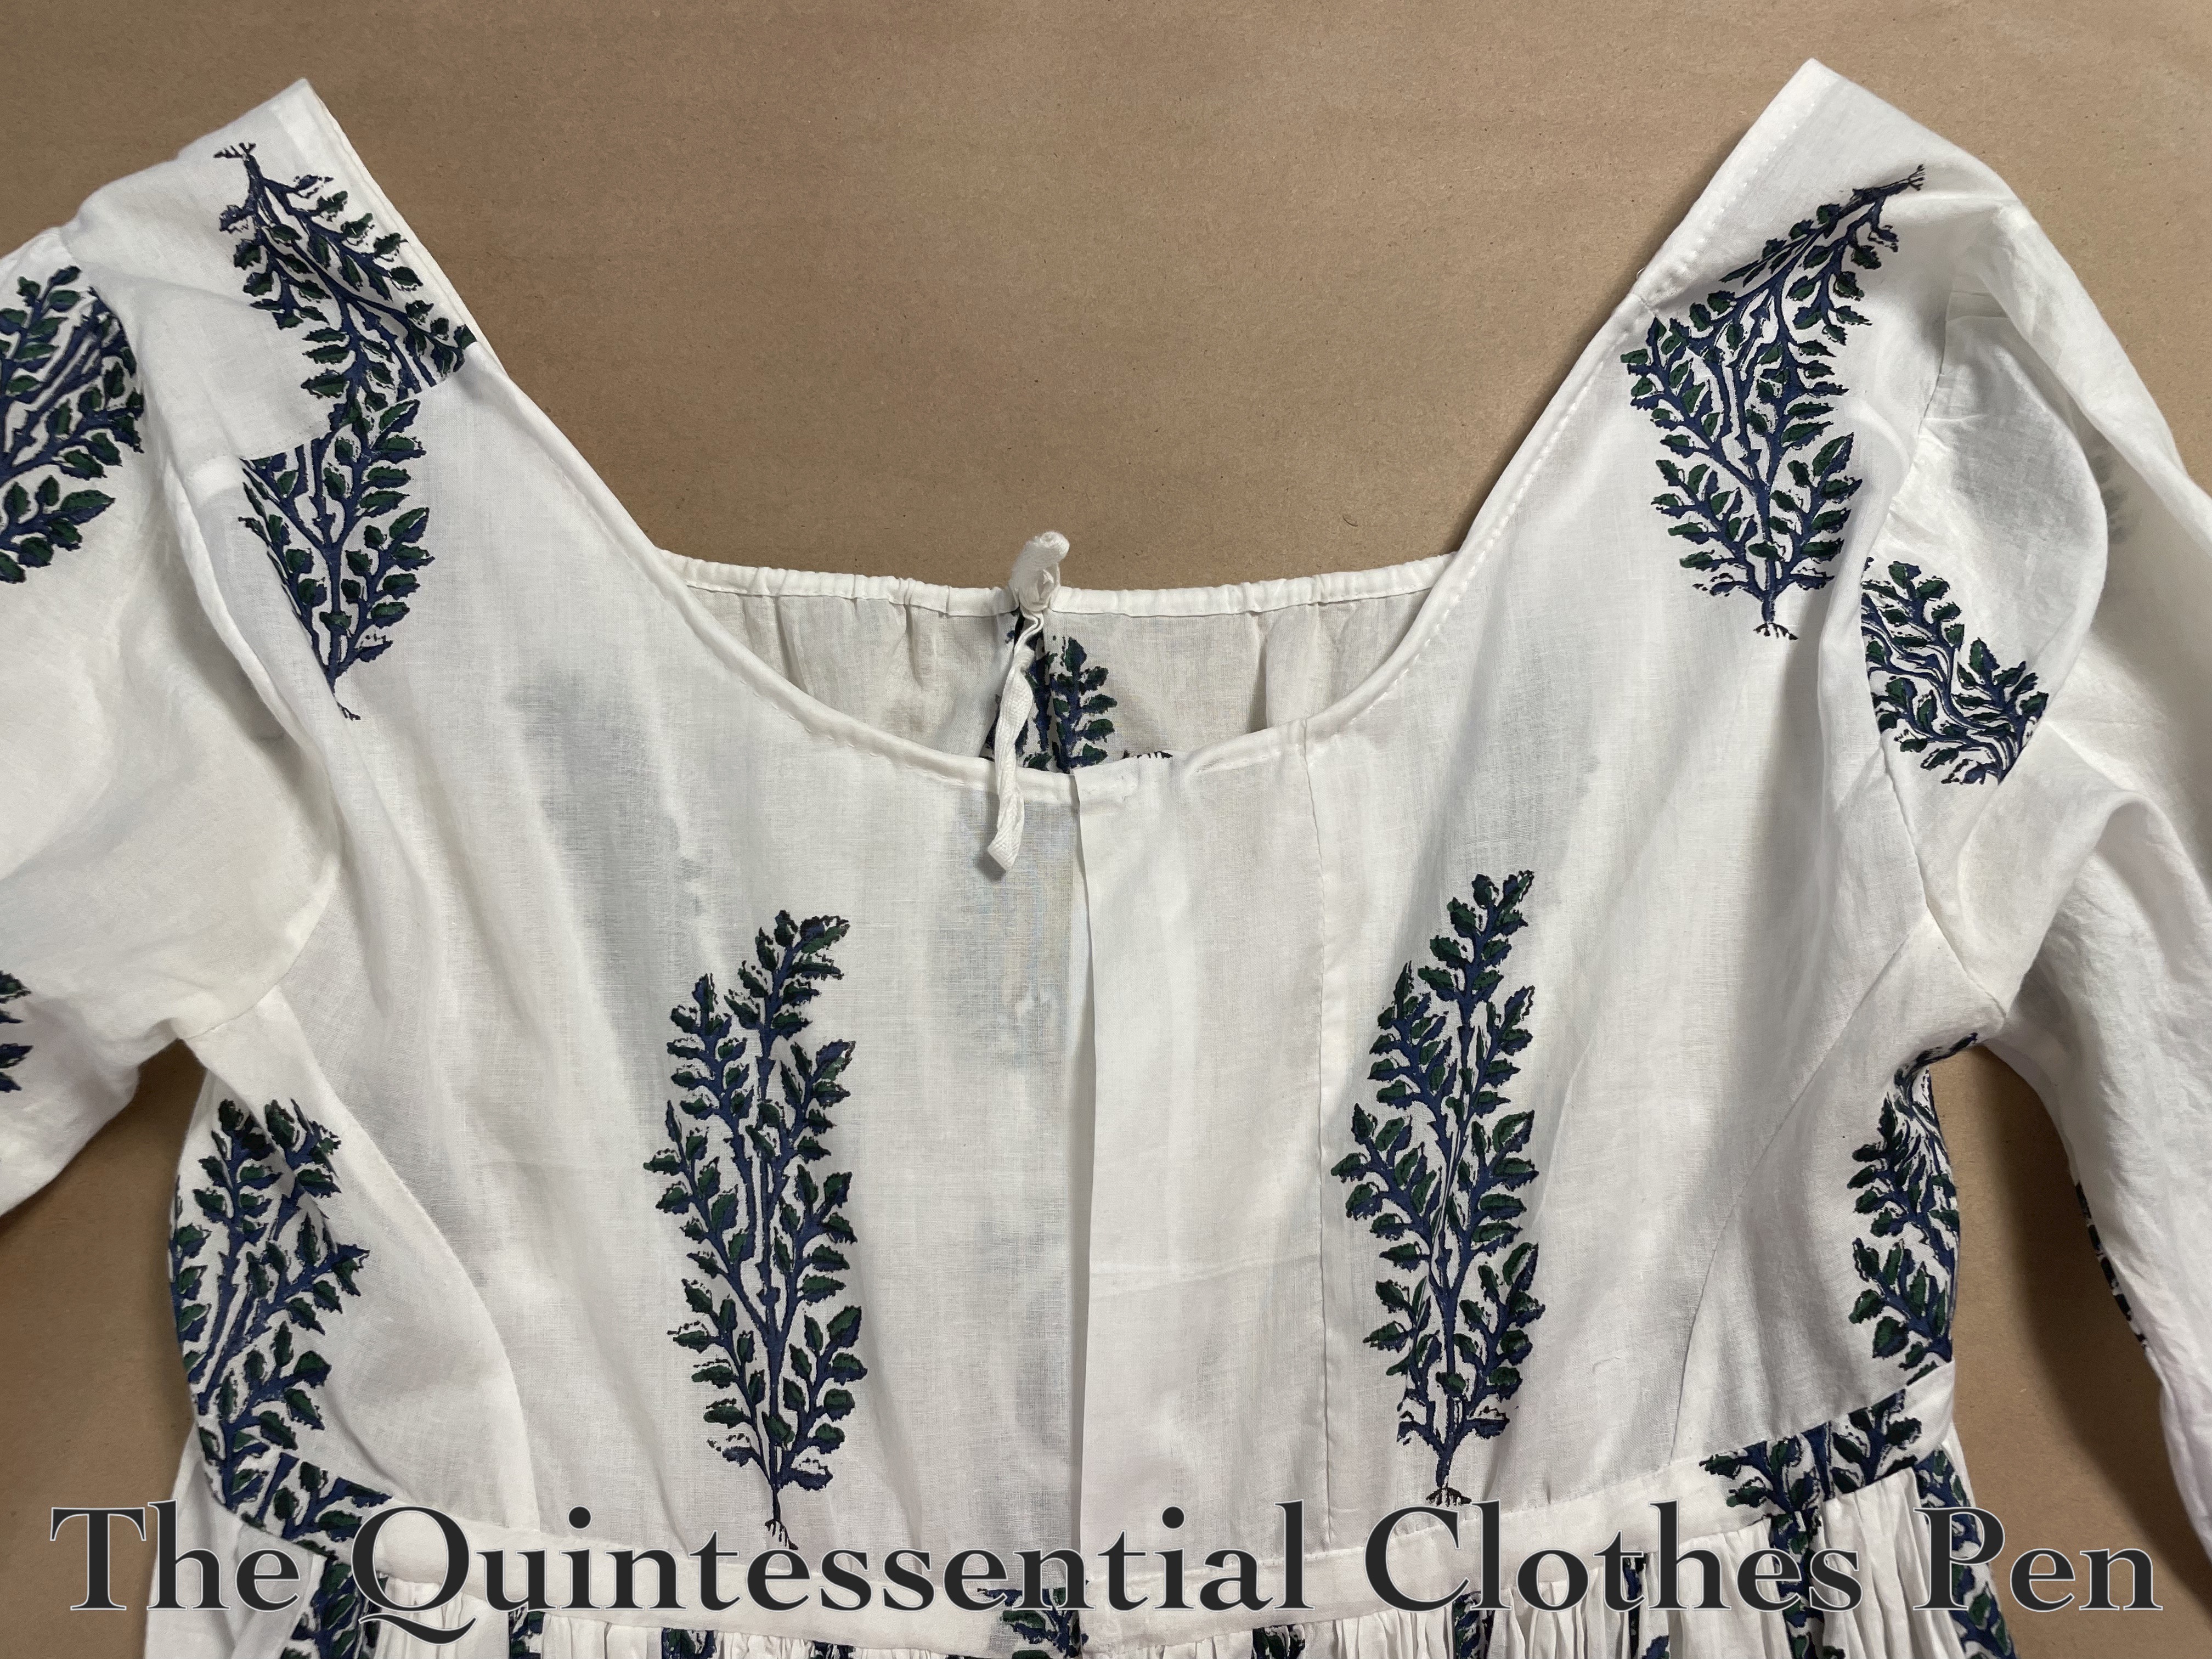
Here is the new back view of this dress, with the pieced seam on right (but with symmetrical block printing!).
I used a French seam to attach the pieced bit, so that it would match all of the other seams in the dress and stay nice and tidy with no fraying edges.
I also made the right side of the drawstring come out before the center back edge, so that the overlap with the hook can still function properly while the drawstring pulls up the excess width across my shoulders that I included. (There was extra in the original version, too… but I maxed that out years ago!)
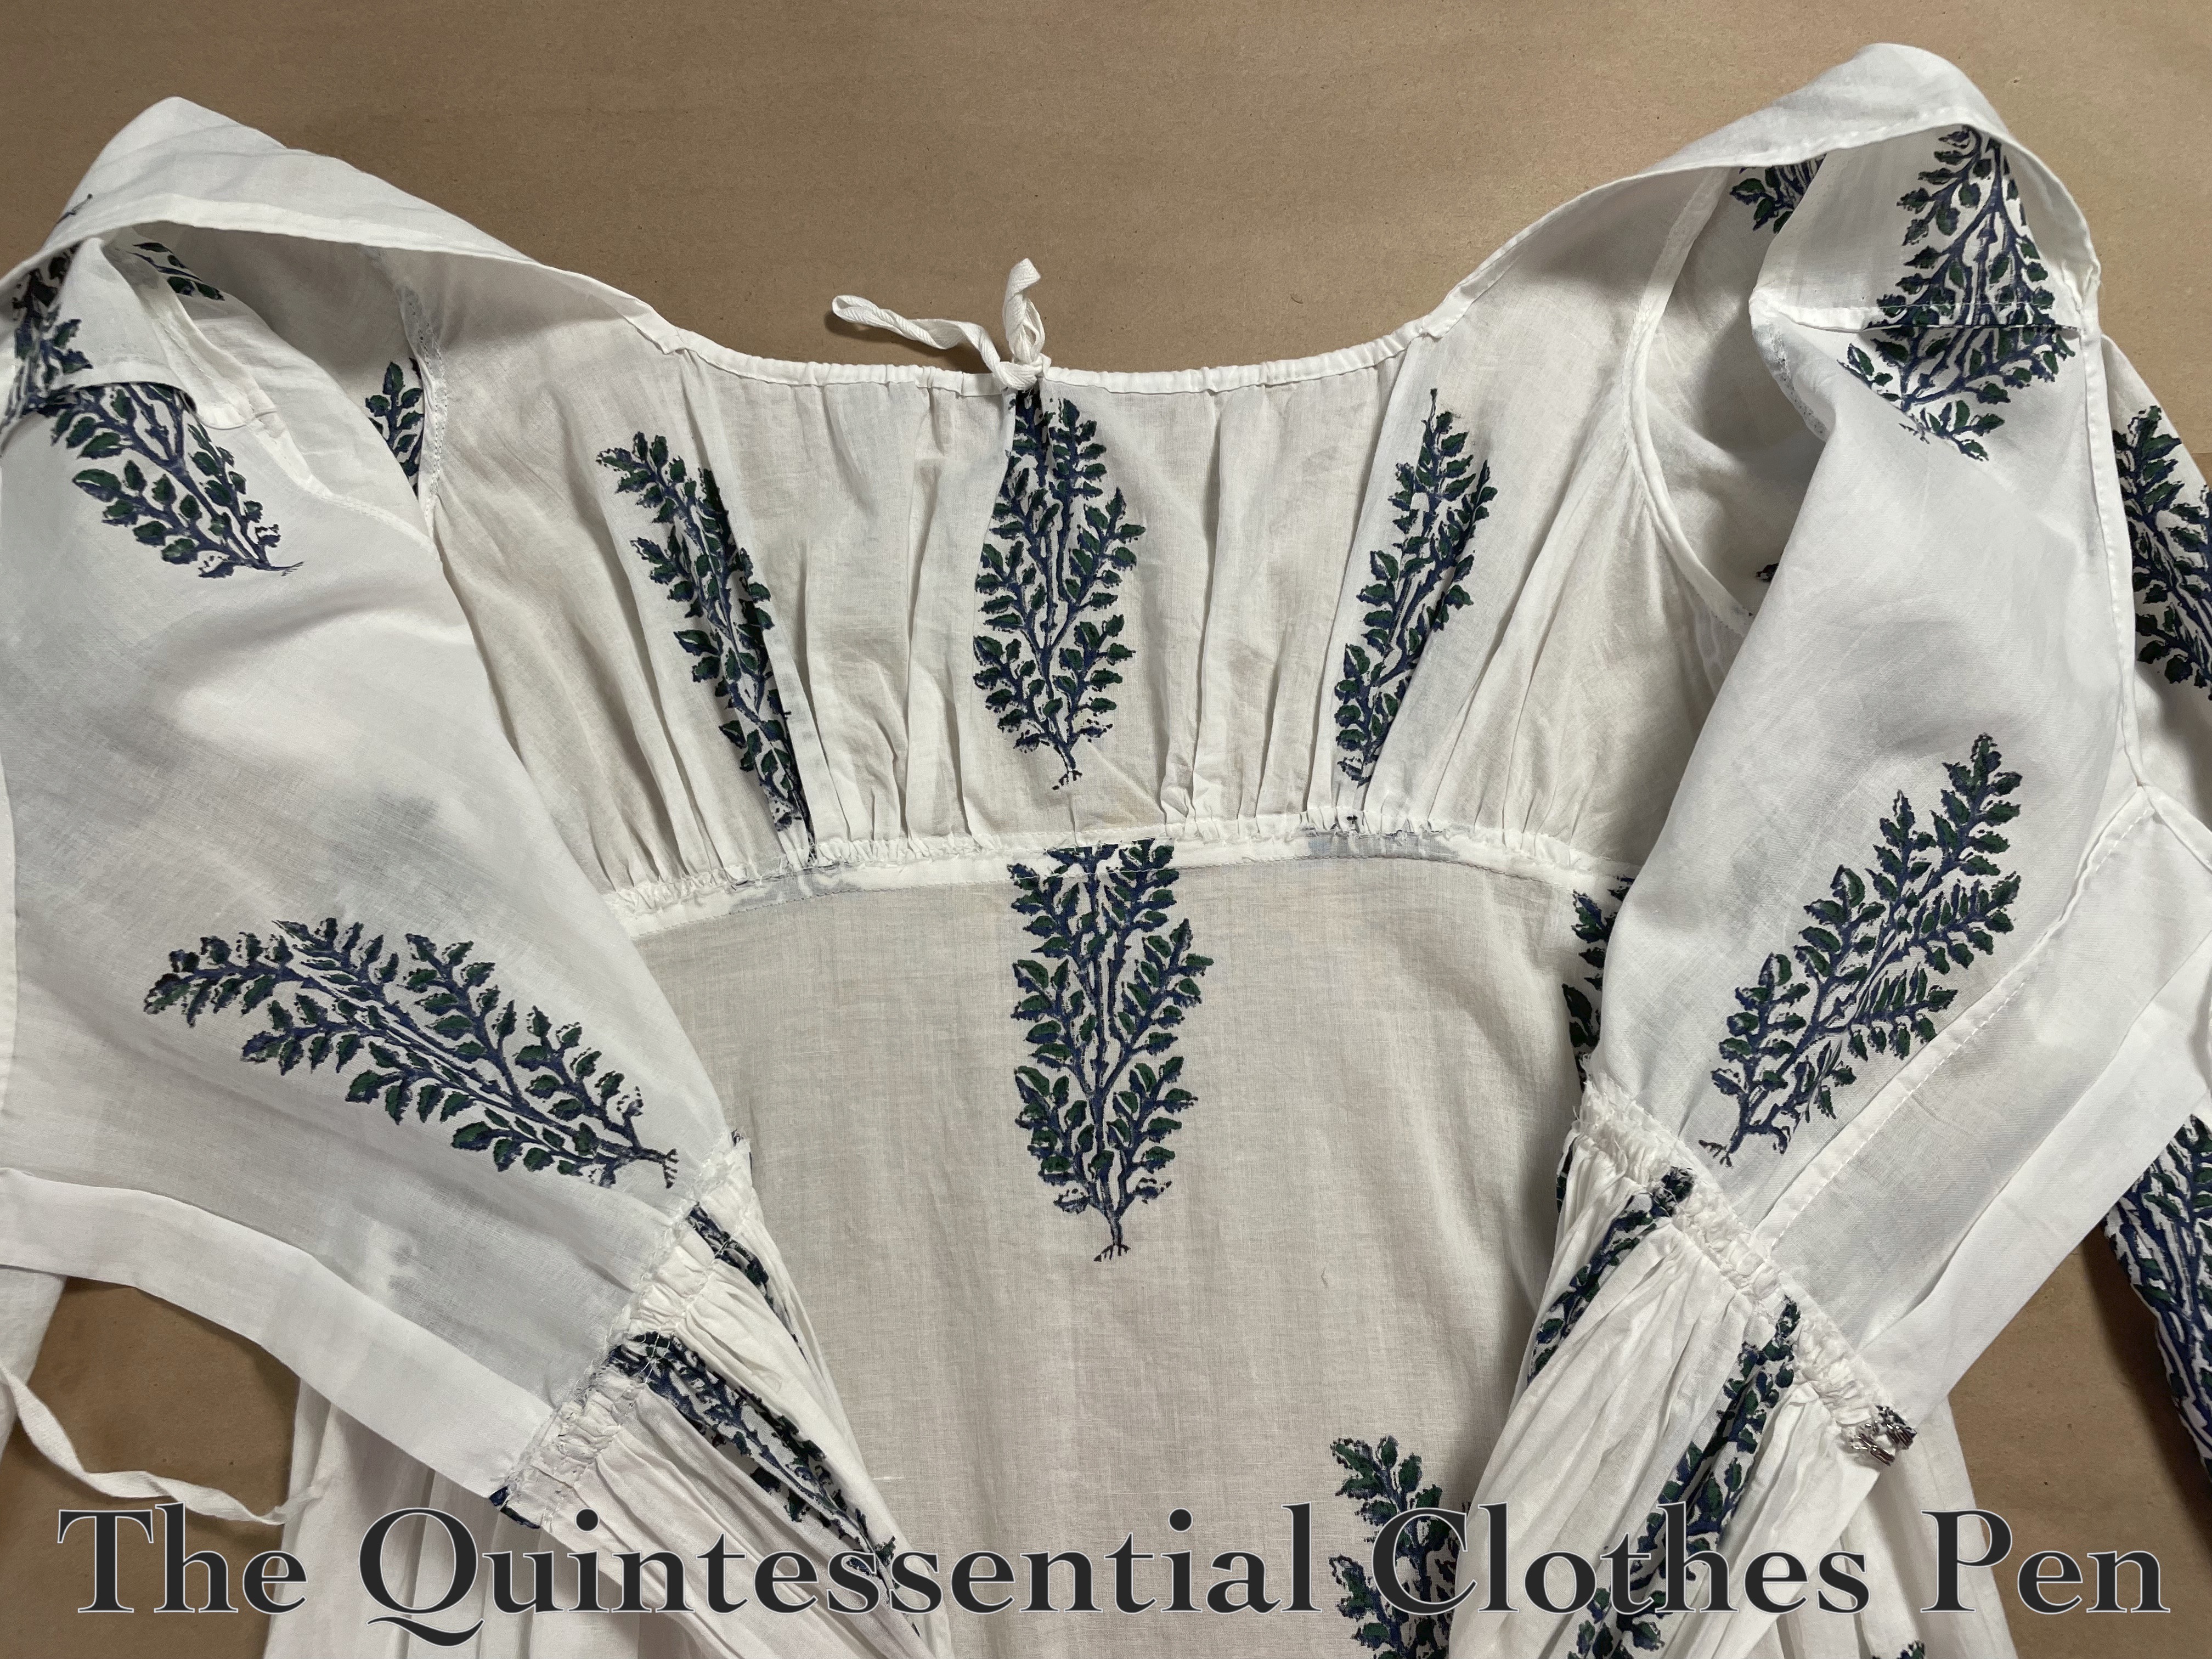
Here’s another view of the lovely, tidy interior of the dress with the updated back.
And finally, here is a photo of the finished sleeves with the added gussets. Where the block printing is located the seams blend so well you can’t even see them! It makes my heart pitter-patter with glee!
The final step after putting in the gussets was to re-hem the cuff openings.
And then… this dress was updated! Now it’s a story of ‘when the dress fits again!’
For this event, I chose to wear my 1817 Duchess Gown (you can read about the inspiration and making of the dress, here). I love this dress and haven’t had a reason to wear it in years. Plus, I figured the neutral color would pair well with a few nods to the colorful style of Bridgerton costumes.
In the past, I’ve had fun pairing this gown with other colors and accessories, as well! You can read another past post where I show multiple wearings together here.
The dress is a sheer striped organza, which is fun because I can show off fancy historical underwear with it! I usually wear my 1814 Vernet petticoat so that the fancy trim around the bottom can be shown off (in addition to a second petticoat to make the ensemble fully opaque.) The second petticoat is functional more than decorative, and is the one I recently posted about that needed a size update to fit properly again!. Wearing it with this sheer dress for the ball was the push I needed to make the petticoat fit really well–I didn’t want odd lines showing under the sheer Duchess Gown!
In addition to the decorative Vernet petticoat, other accessories for this wearing included clocked silk stockings from American Duchess, white flats purchased from a consignment store about ten years ago, a gold bead necklace that ties with a ribbon that I don’t wear often (I usually gravitate towards other more sparkly jewelry), and three nods to the colorful style of Bridgerton.
My nods to color included a green organza sash (that I’ve worn with this dress before–see images in this past post from 2019), green and gold earrings (from the Downton Abbey collection a number of years ago), and flowers in my hair, including some vivid pink ones. I’ve had these flowers for about 25 years and rarely wear them. They’re pretty bright! But for the Bridgerton theme they made perfect sense!
The company at the ball was charming and the dancing was enthusiastic! My Duchess Gown even had an old friend visit in the form of my 1811 Elusive Blue Gown worn by a friend! I love that these garments are getting to be worn again!
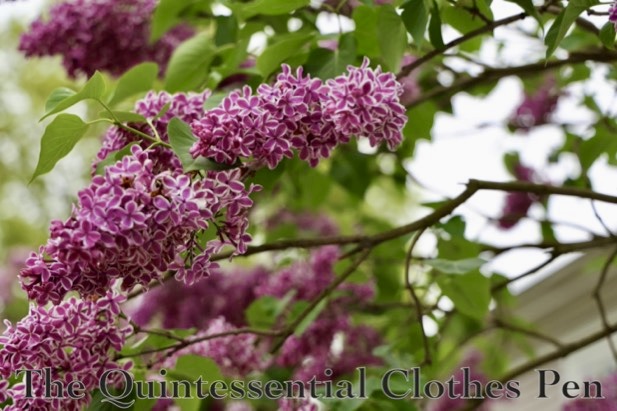
The lilacs were blooming in May, joyfully spreading their scent to all who passed by.
Photo credit for this photo: Steve Lieman
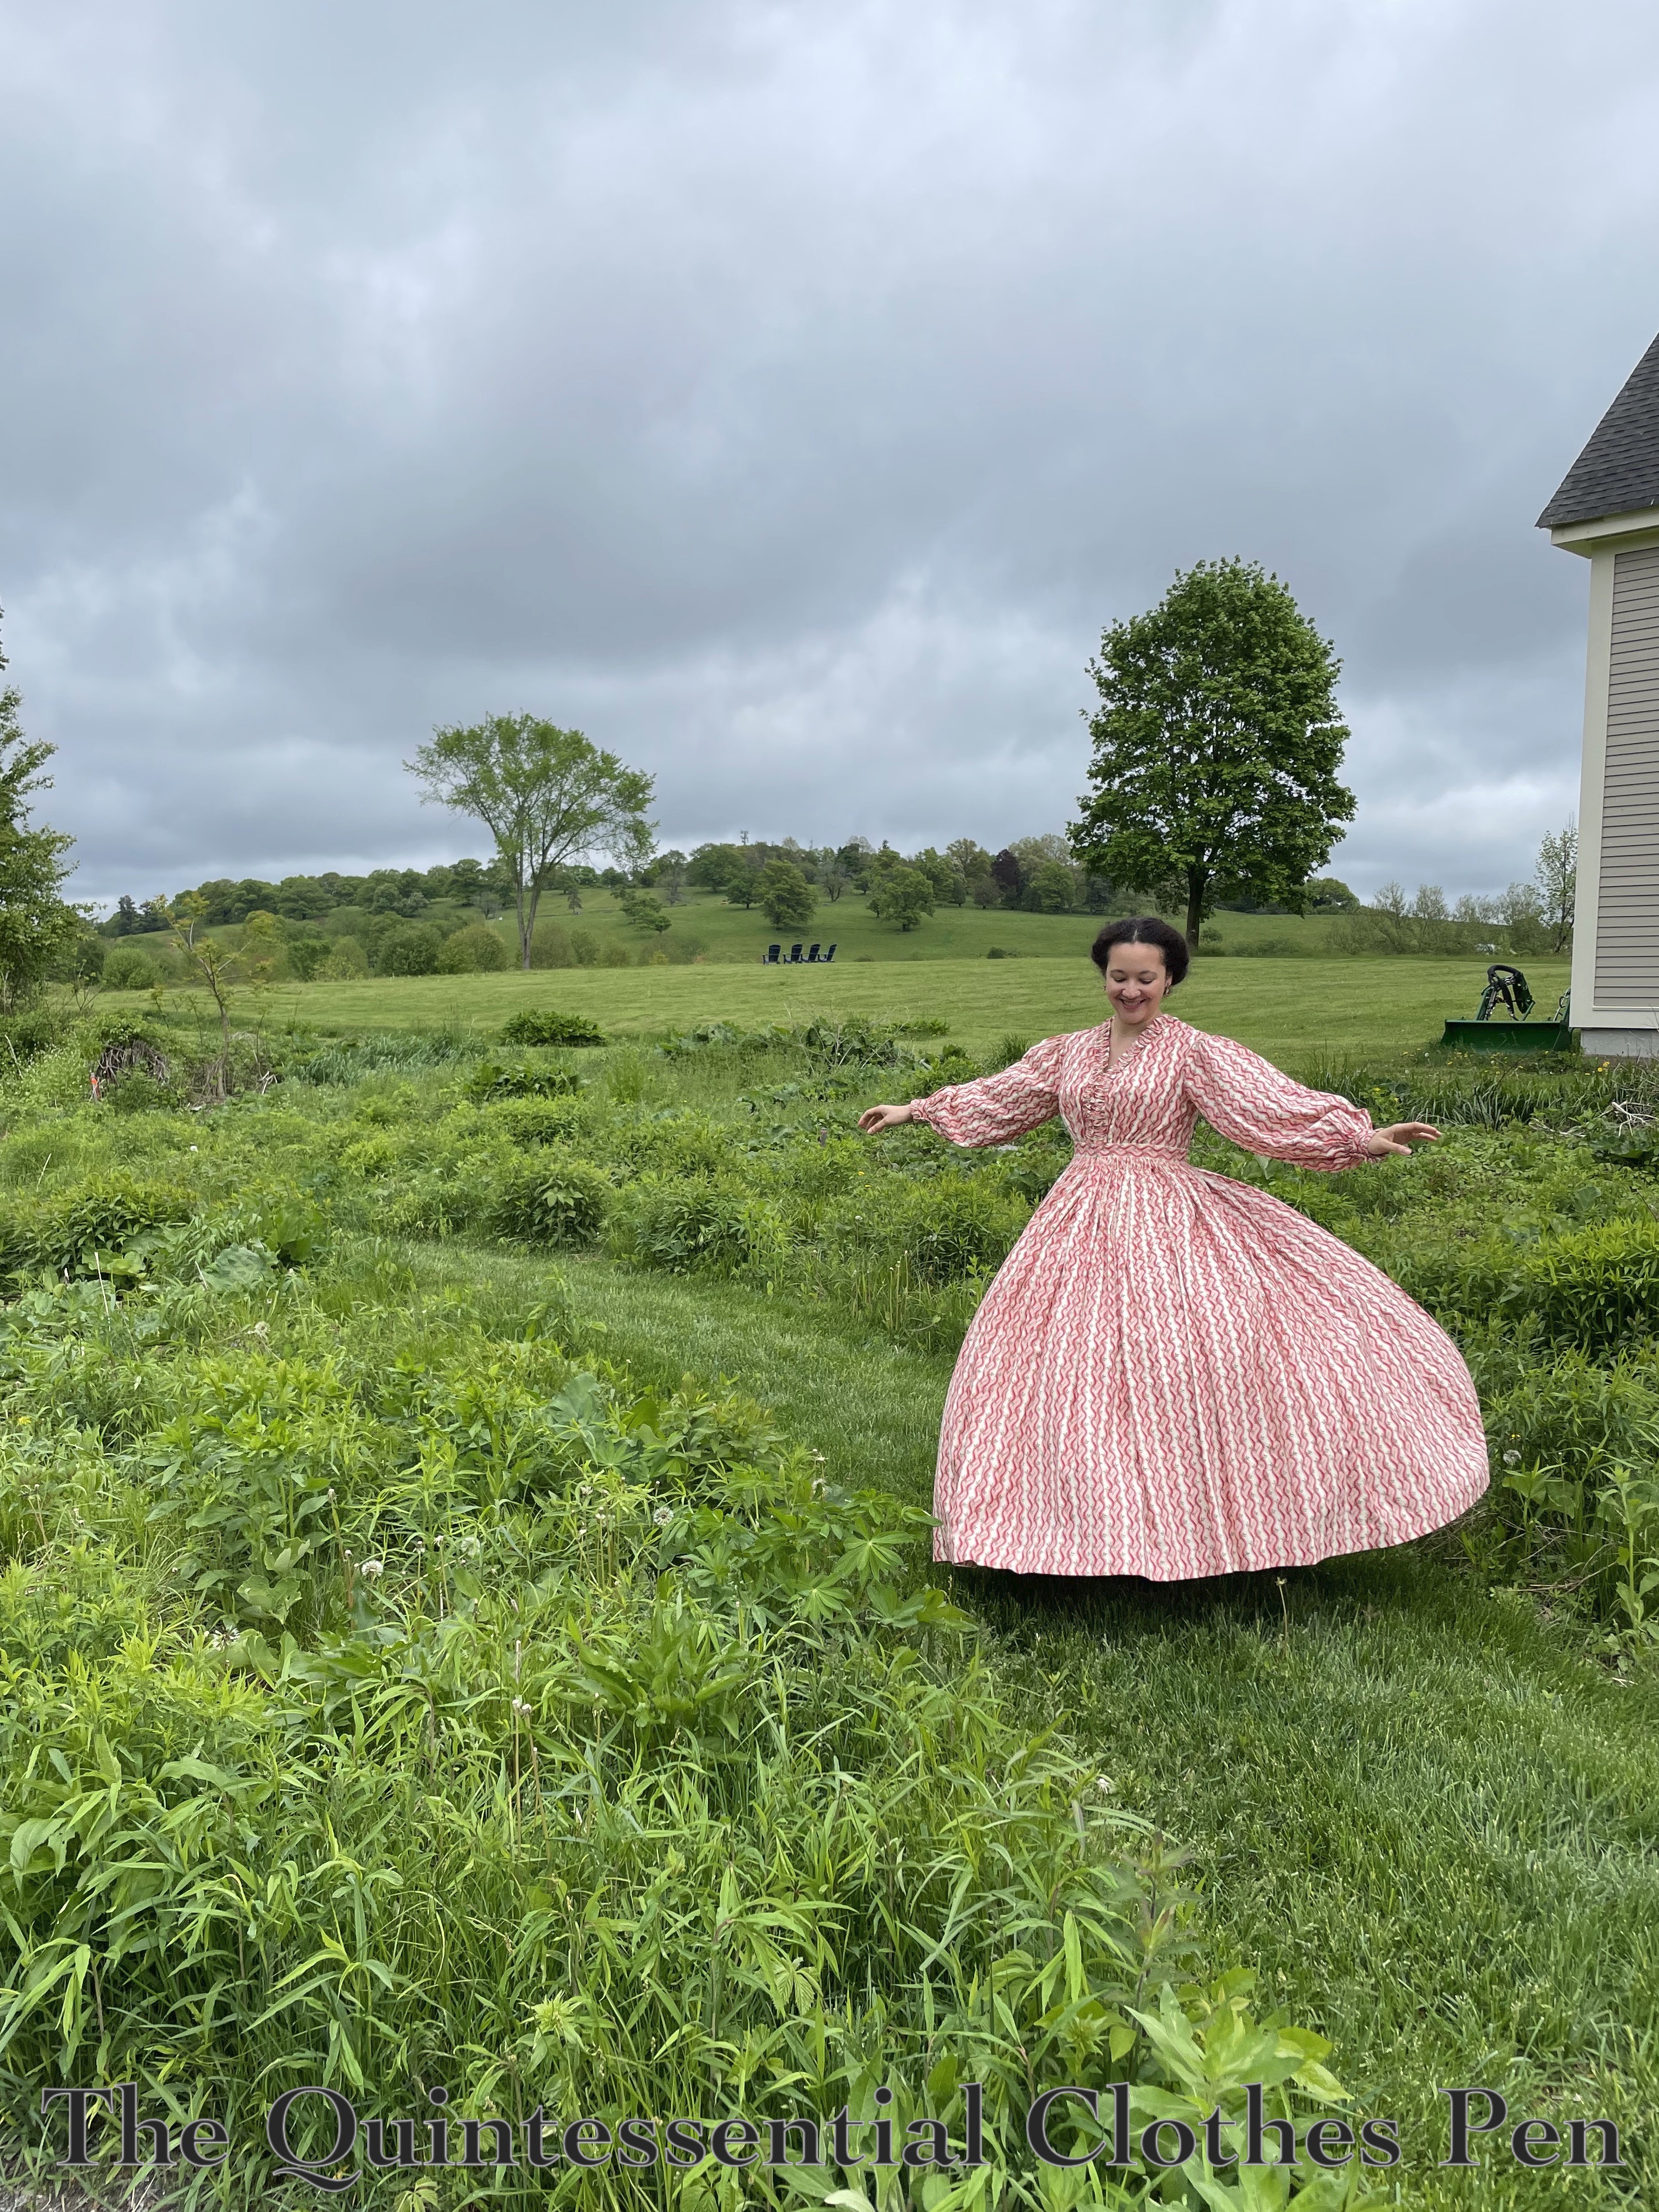
I was grateful to be able admire their beauty and celebrate spring with an outing in Sophie, my trusty 1861 twisted stripe cotton print dress. I made this dress in 2016 and posted about the construction in this past post.
The overcast sky didn’t dampen my spirits!
The diffused light was actually quite lovely and I enjoyed whirling around in the fresh air.
I hope your springtime held unexpected joy, as well!
While we’re on the subject of updating clothing that no longer fits quite right (this is continued from my last post about updating a pair of 1860s drawers, which you can read here), I have another post about updating a layer of historical underwear for fit.
A few background thoughts
In the past 15 years or so that I’ve been making historical clothing, I’ve also changed sizes and some of the clothes I made early on just no longer fit. The usual culprits are the waist, bust, and shoulder width. (It’s not necessarily all for the worst. My shoulders and arms are bigger because I’m gaining strength and being active, so that’s a healthy change!)
I’ve been able to wear more of my historical clothes recently and the more I wear the older ones, the more I realize just how much my shape has changed. Because I have some lovely garments that I still want to be able to wear, I’ve been updating these garments to better fit my current shape.
Background on this particular garment
I made an early 19th century bodiced petticoat in 2012 (here is my post from back then sharing research about this type of garment). Since then, I’ve gained inches in the bust, ribcage circumference, and in the width of my shoulders. So despite wearing this petticoat and making do, I finally reached a point where it became important to make this fit better.
Here is the bodice portion of the petticoat before my alterations, from the front and back.
I determined that I needed a whole new front piece–one that would be wider across the bust and with more gathers to condense to the ribcage size. I also realized that it would be helpful to make the side back pieces a little more substantial, with a taller side seam to match the new front.
Update details
Thankfully, I keep lots of fabric scraps! And in this case, I actually still have yardage of the fabric I made the petticoat from. So no problems there — I was able to easily cut out a new front with updated dimensions as well as bits to add to the side pieces to extend them (I didn’t feel like replacing them entirely — this petticoat already is a bit pieced at the center back, where I had previously added fabric in order to help make it a little larger a few years ago).
After cutting new pieces came the boring part of unpicking the original front. Ugh! I don’t enjoy taking apart things that I’ve made! But I did it.
I thought I might machine sew the new pieces on, but I was more inclined to complete this project while not near my sewing machine, so I did it by hand instead. I replicated all of the same seam finishes from the original bodice front (because I like consistency, but not because they are historically accurate, in this case).
Here are the results!
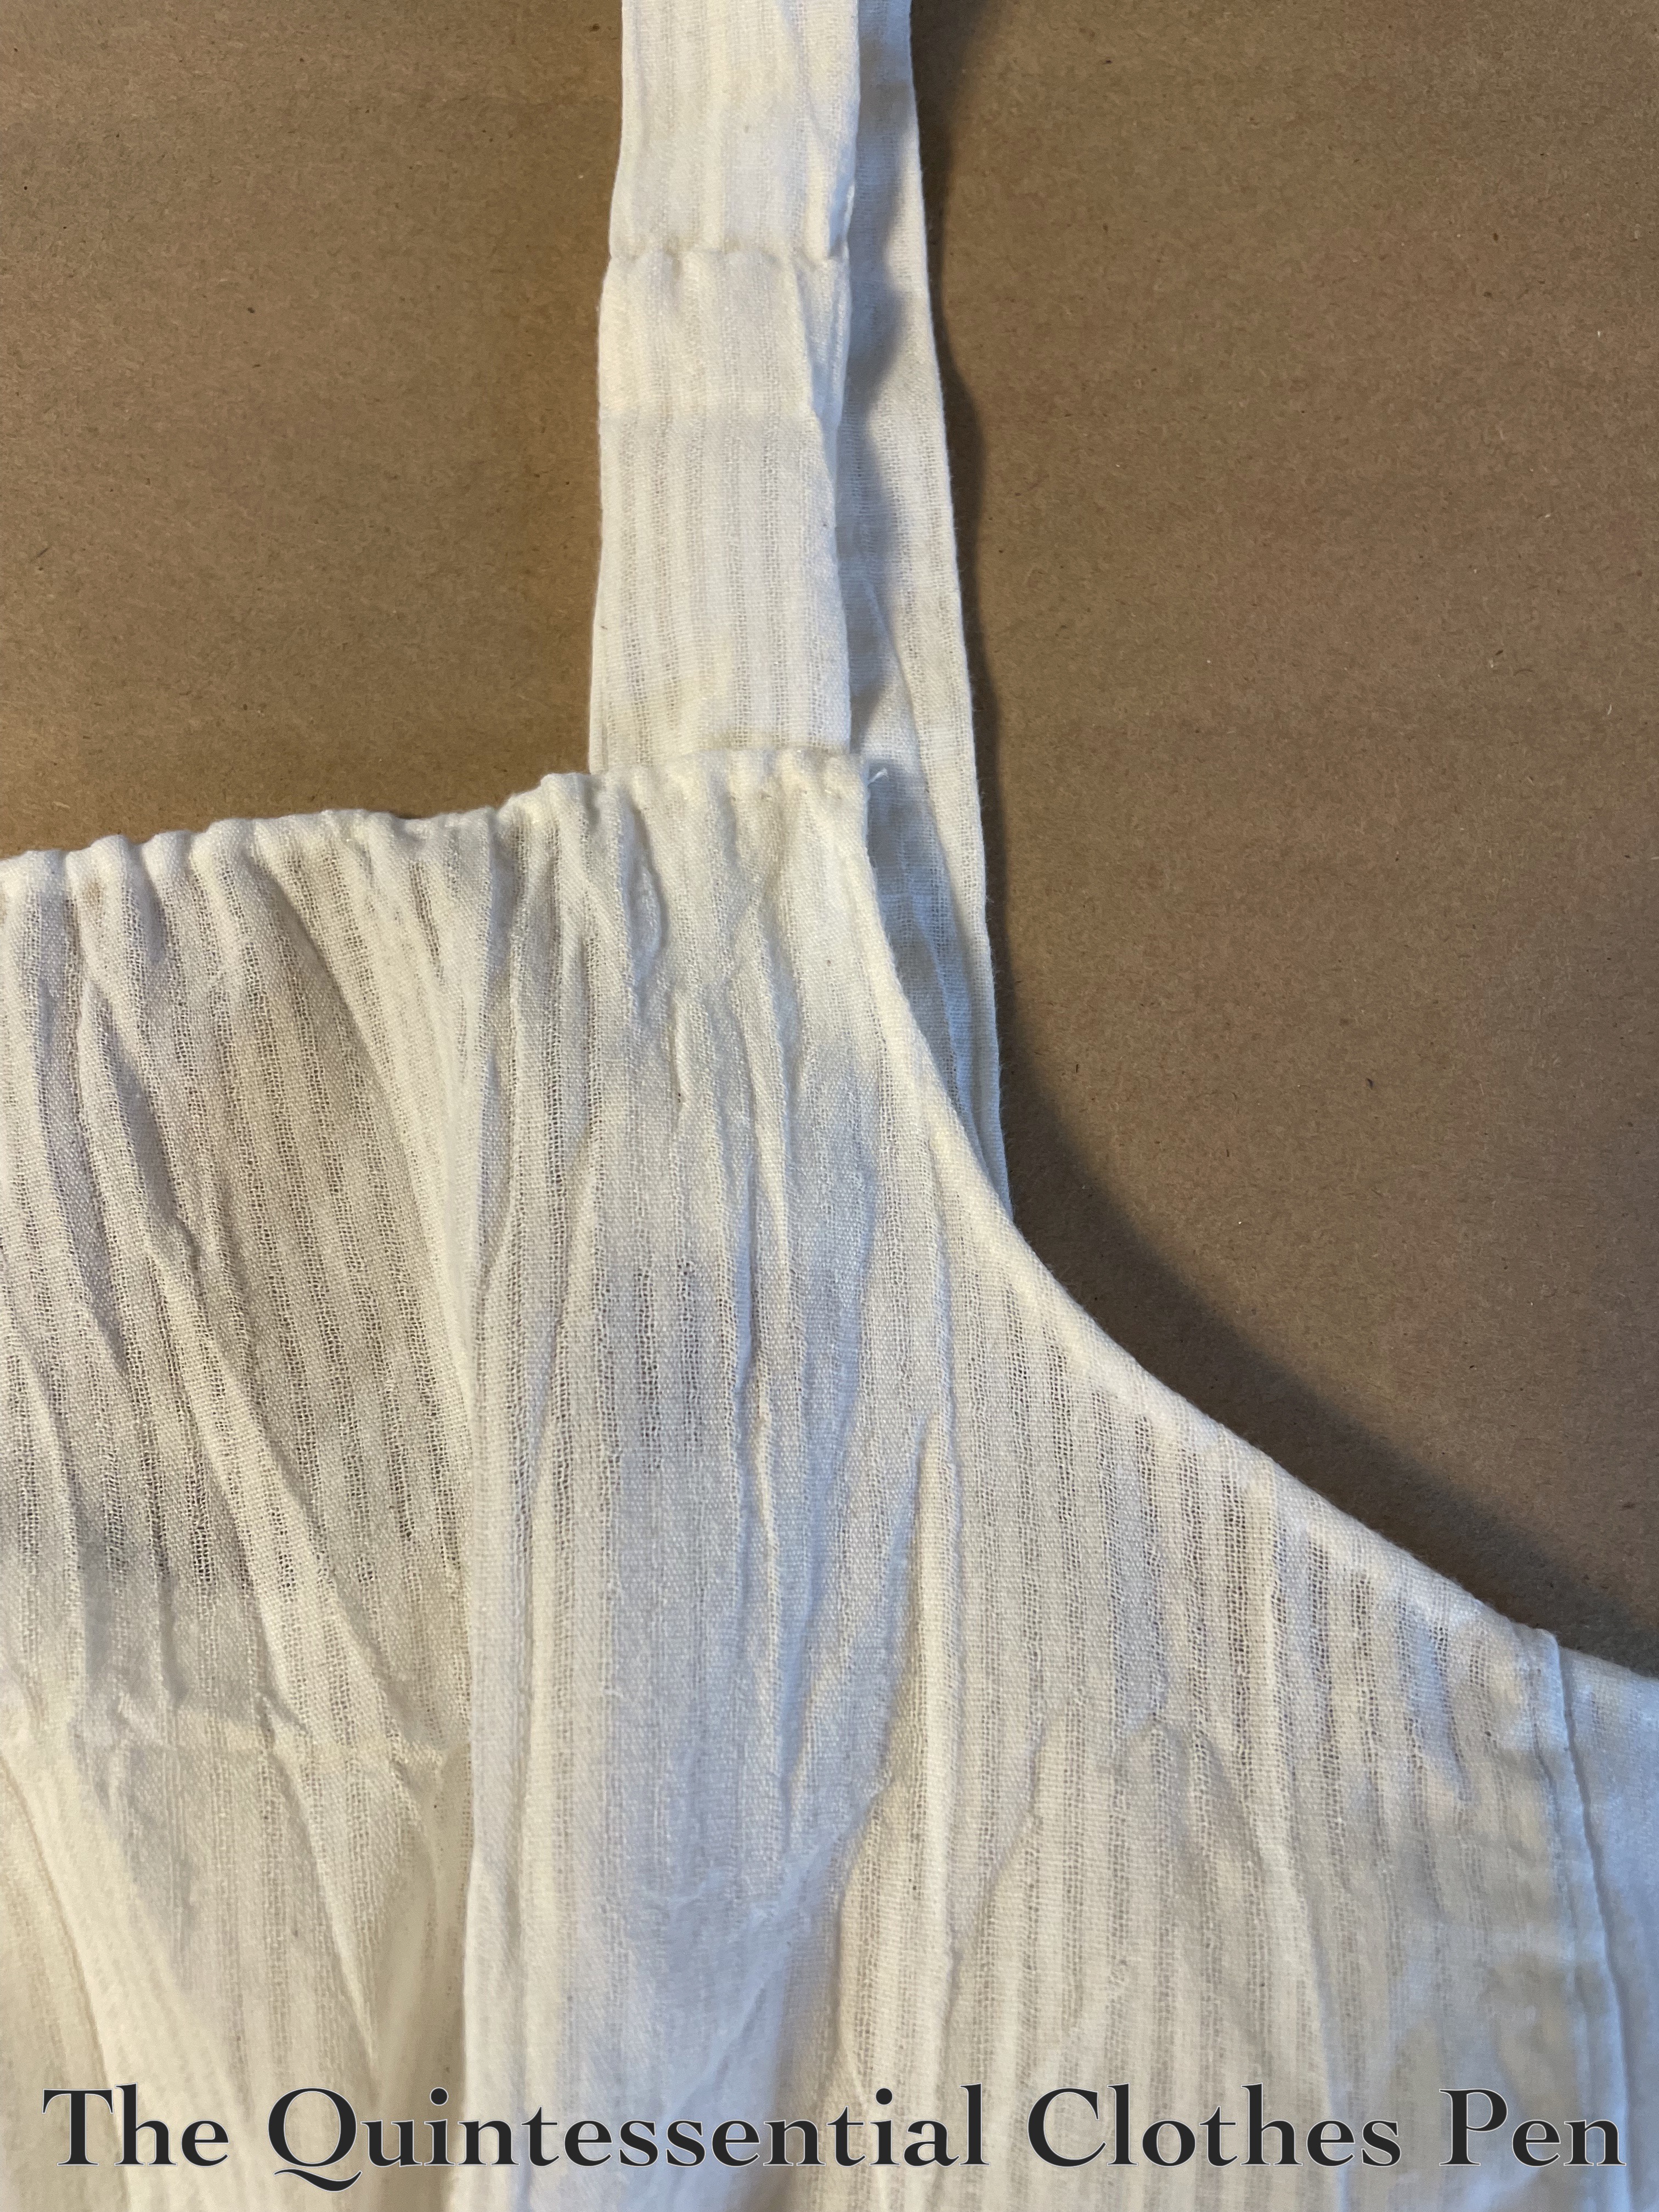
And here are closeups of my very pieced method of creating larger side back pieces (you can also see the extendo I added to the back at some point about 6 years ago).
Unfortunately, when I tried on the adjusted petticoat I realized that the armsceyes were uncomfortably small. I was not going to be able to deal with that! “Get it off!” was my exact though. To fix that problem, I added strap extender bits to the front of the straps.
This worked great! And now, I have a petticoat that fits again! It covers my current bust size AND fits across the back (in fact, I made it even a little too wide across the back because I figured that might be helpful).
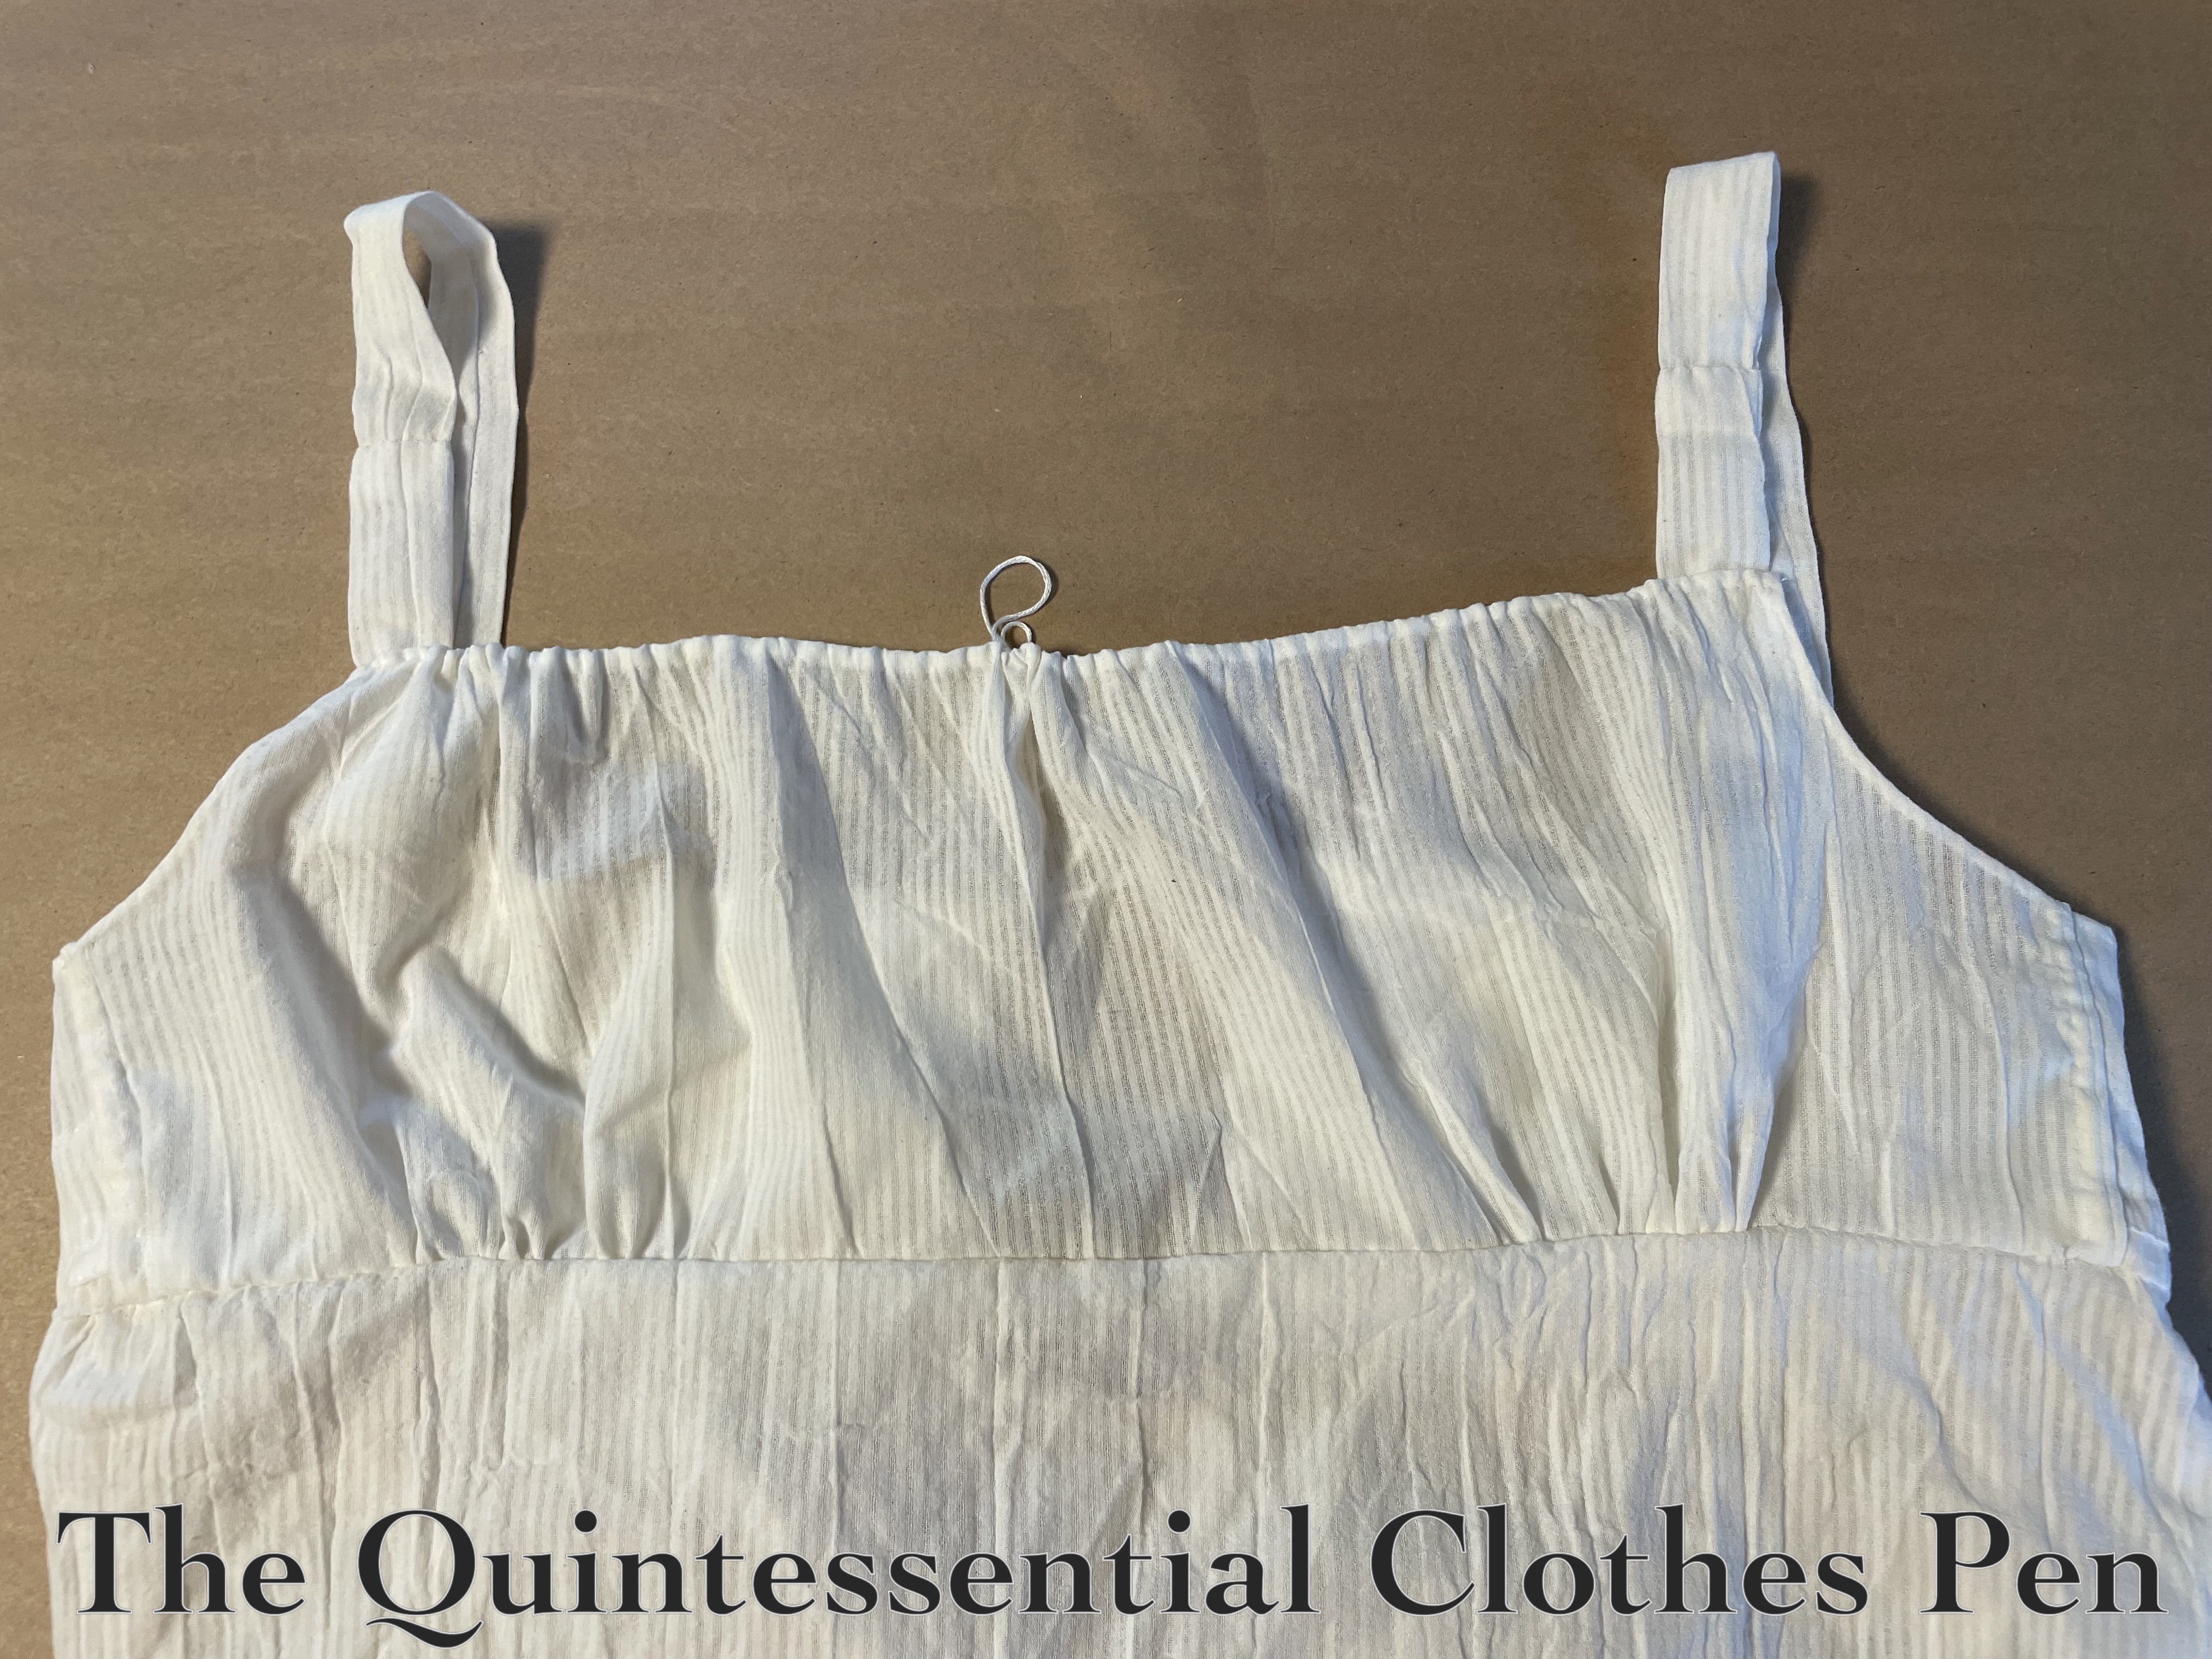
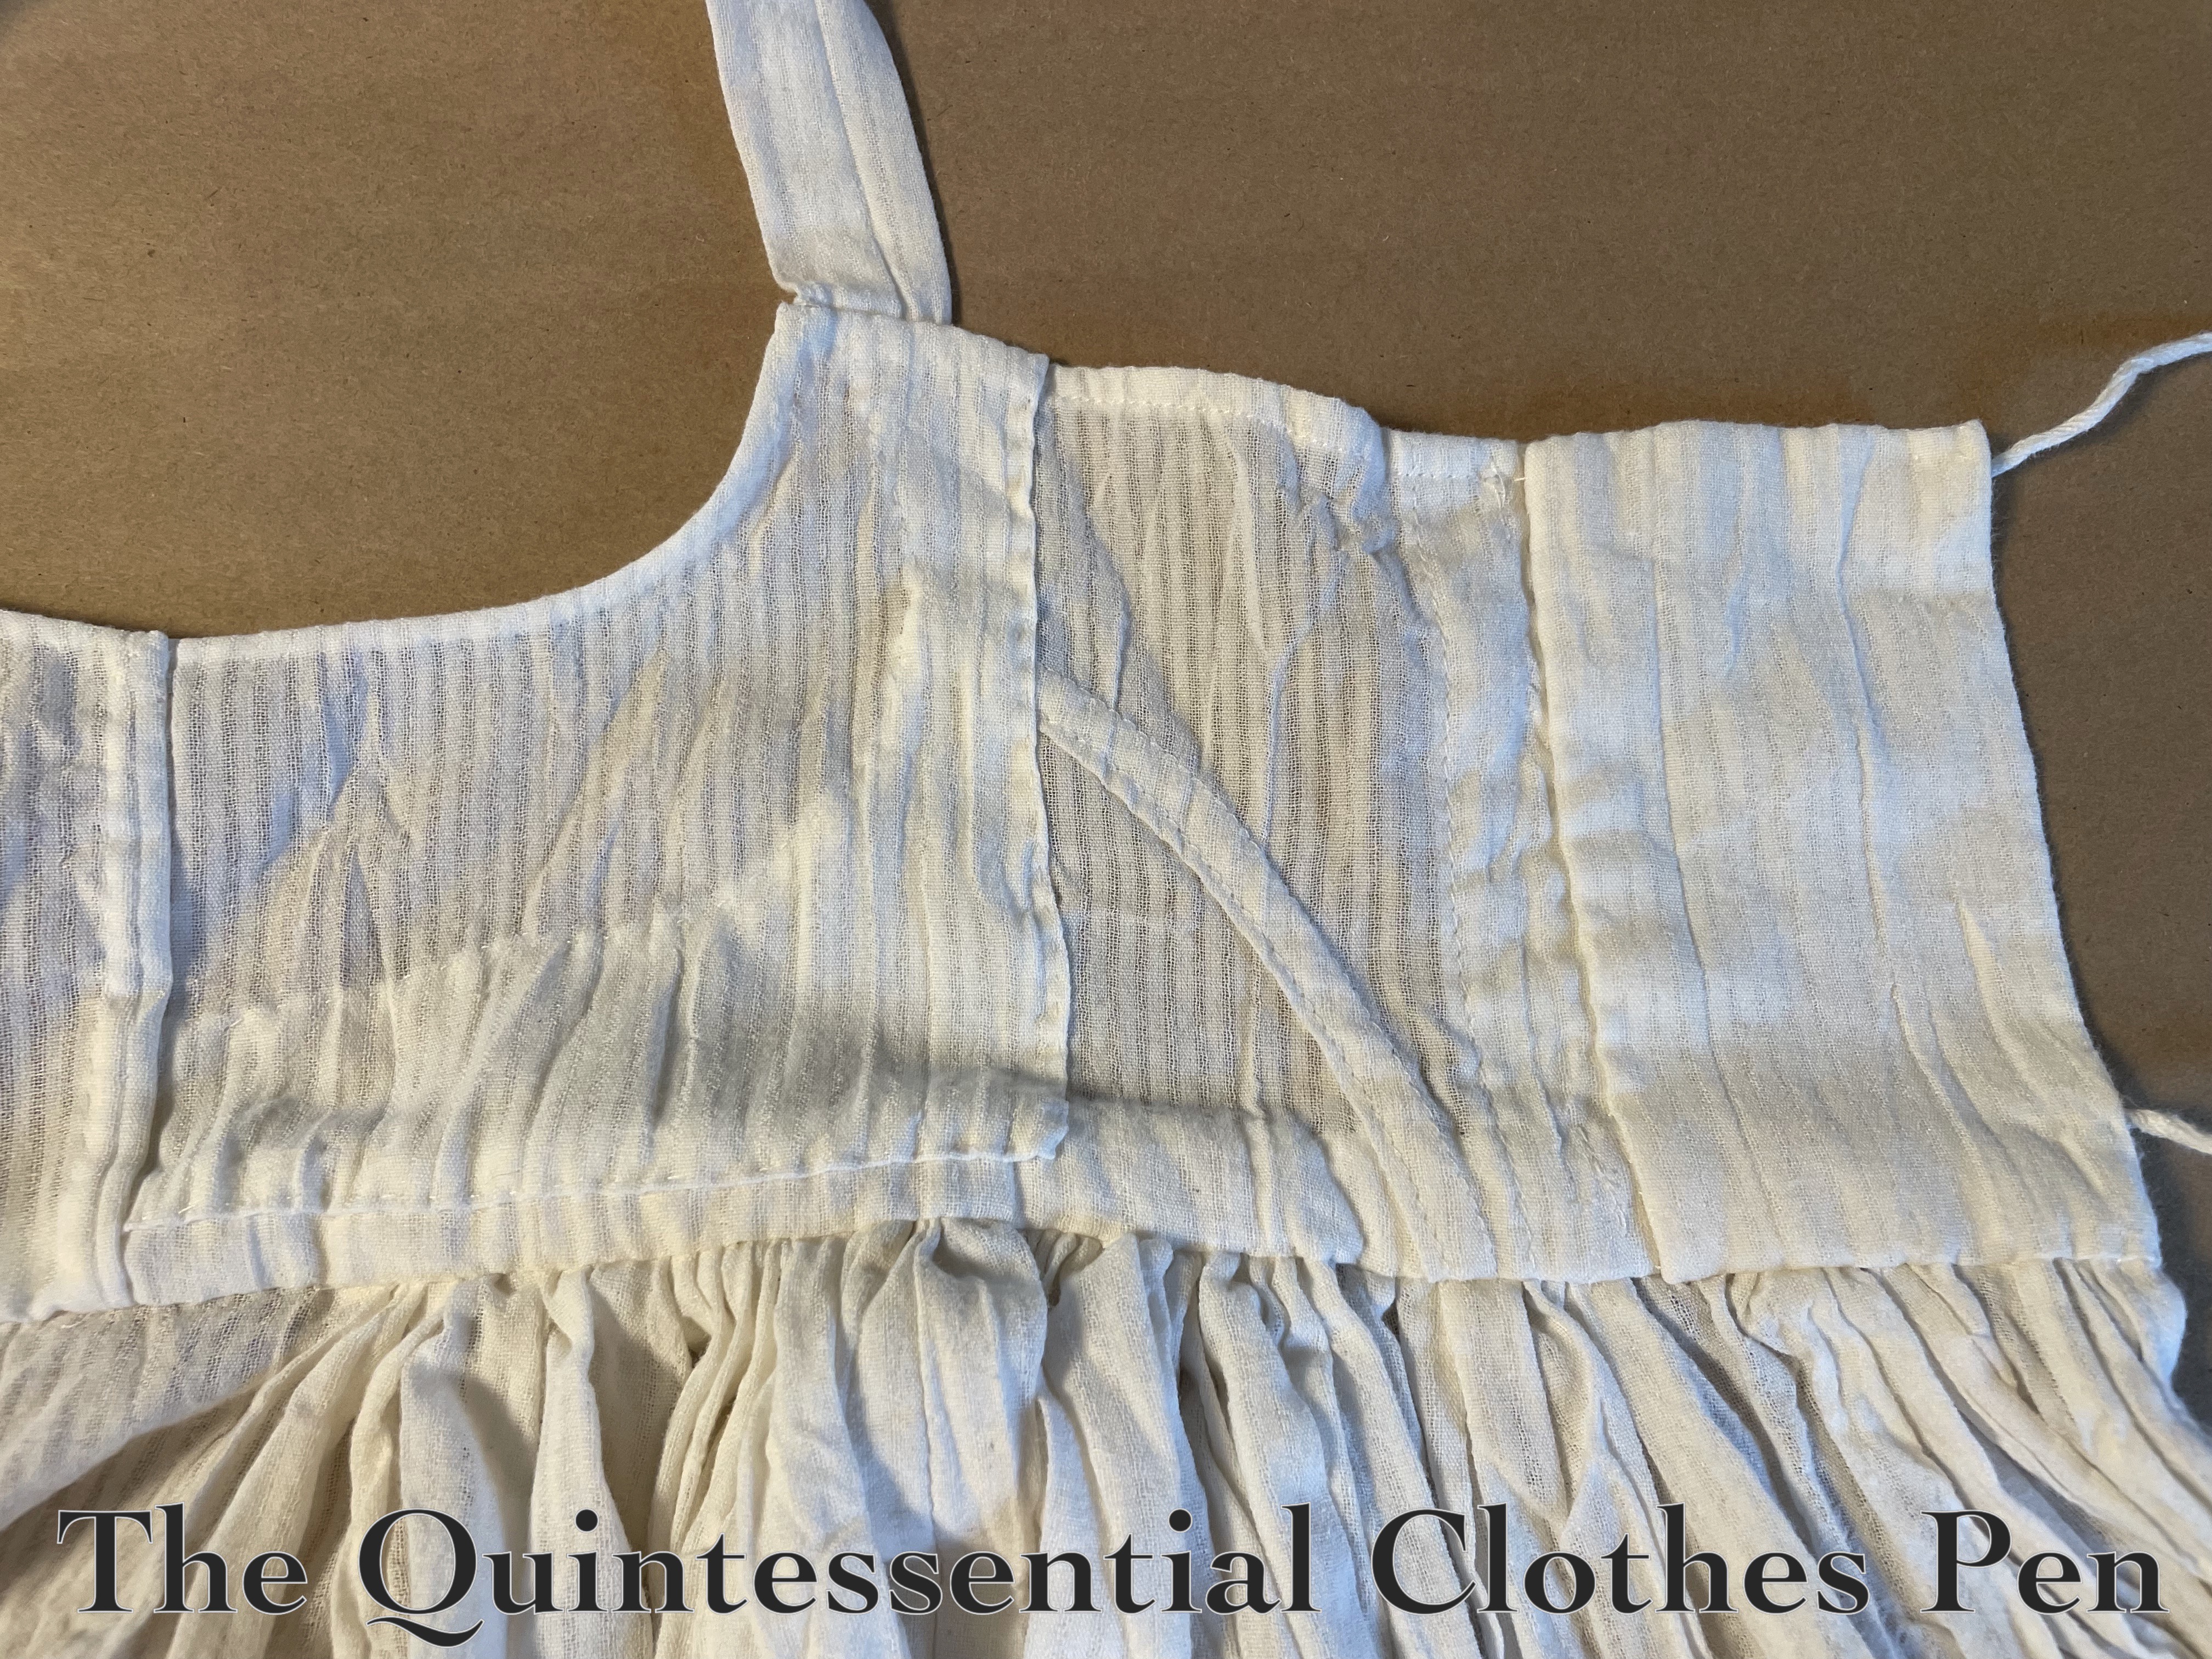
Here is a photo of the inside of the new front bodice piece. Both the old bodice front and the new one have a drawstring along the top edge. And you can see that I left additional strap length for theotrical future of letting-out.
I’m calling this my entry for the Historical Sew Monthly 2024 Challenge #5 New Clothes from Old:
Make something new out of a worn-out garment or accessory. Or make something using recycled materials.
I believe I’ve recycled a worn-out garment into something new and ready to use again!
Just the facts:
Fabric/Materials: Scraps of white cotton.
Pattern: My own.
Year: c. 1812.
Notions: Thread.
How historically accurate is it?: 100%. It’s completely reasonable to extend the life of a garment like this by altering it.
Hours to complete: 4? It took some time to seam rip and then I was meticulous about stitching the new pieces on. I didn’t really keep track.
First worn: On May 4.
Total cost: Free! Materials were scraps left over from the original project.
It took a bit longer than expected to hand sew all of the updates I needed to make, especially with the late-to-the-party addition of the strap update. I was pleased to finish this the day before it was needed! (More on that later!)
As I was getting dressed in my Happy Clover Dress one day last summer, I was pulling up the zipper… and it broke! I don’t remember exactly how it broke, now that I stop and think about it months later… I think that the pull came off of the teeth, or the pulling part came off of the part that grips the teeth… I don’t remember precisely, but needless to say, it was broken.
Below: the Happy Clover dress with its original zipper.
The original zipper was repurposed from a 1980s dress I took apart to make a 1920s beaded dress back in 2013 (a post about making that 1920s dress, including photos of the 1980s dress before I took it apart, can be seen here).
With the broken zipper, the dress wasn’t wearable! So on the day that is broke, I changed my outfit and put the Happy Clover Dress in the to-be-mended pile. Not long after that I bought a new YKK zipper in matching shade of teal. And then… the dress and zipper sat there for about 9 months…
Fast forward to May of this year and I was really tired of looking at my large mending-and-alterations-to-do pile (is that sounding familiar yet?)! I want to get back to sewing some of my larger projects and am craving both the physical space and mental release of completing the mends and alterations in order to do that.
So… that led me to finally put the new zipper into the dress!
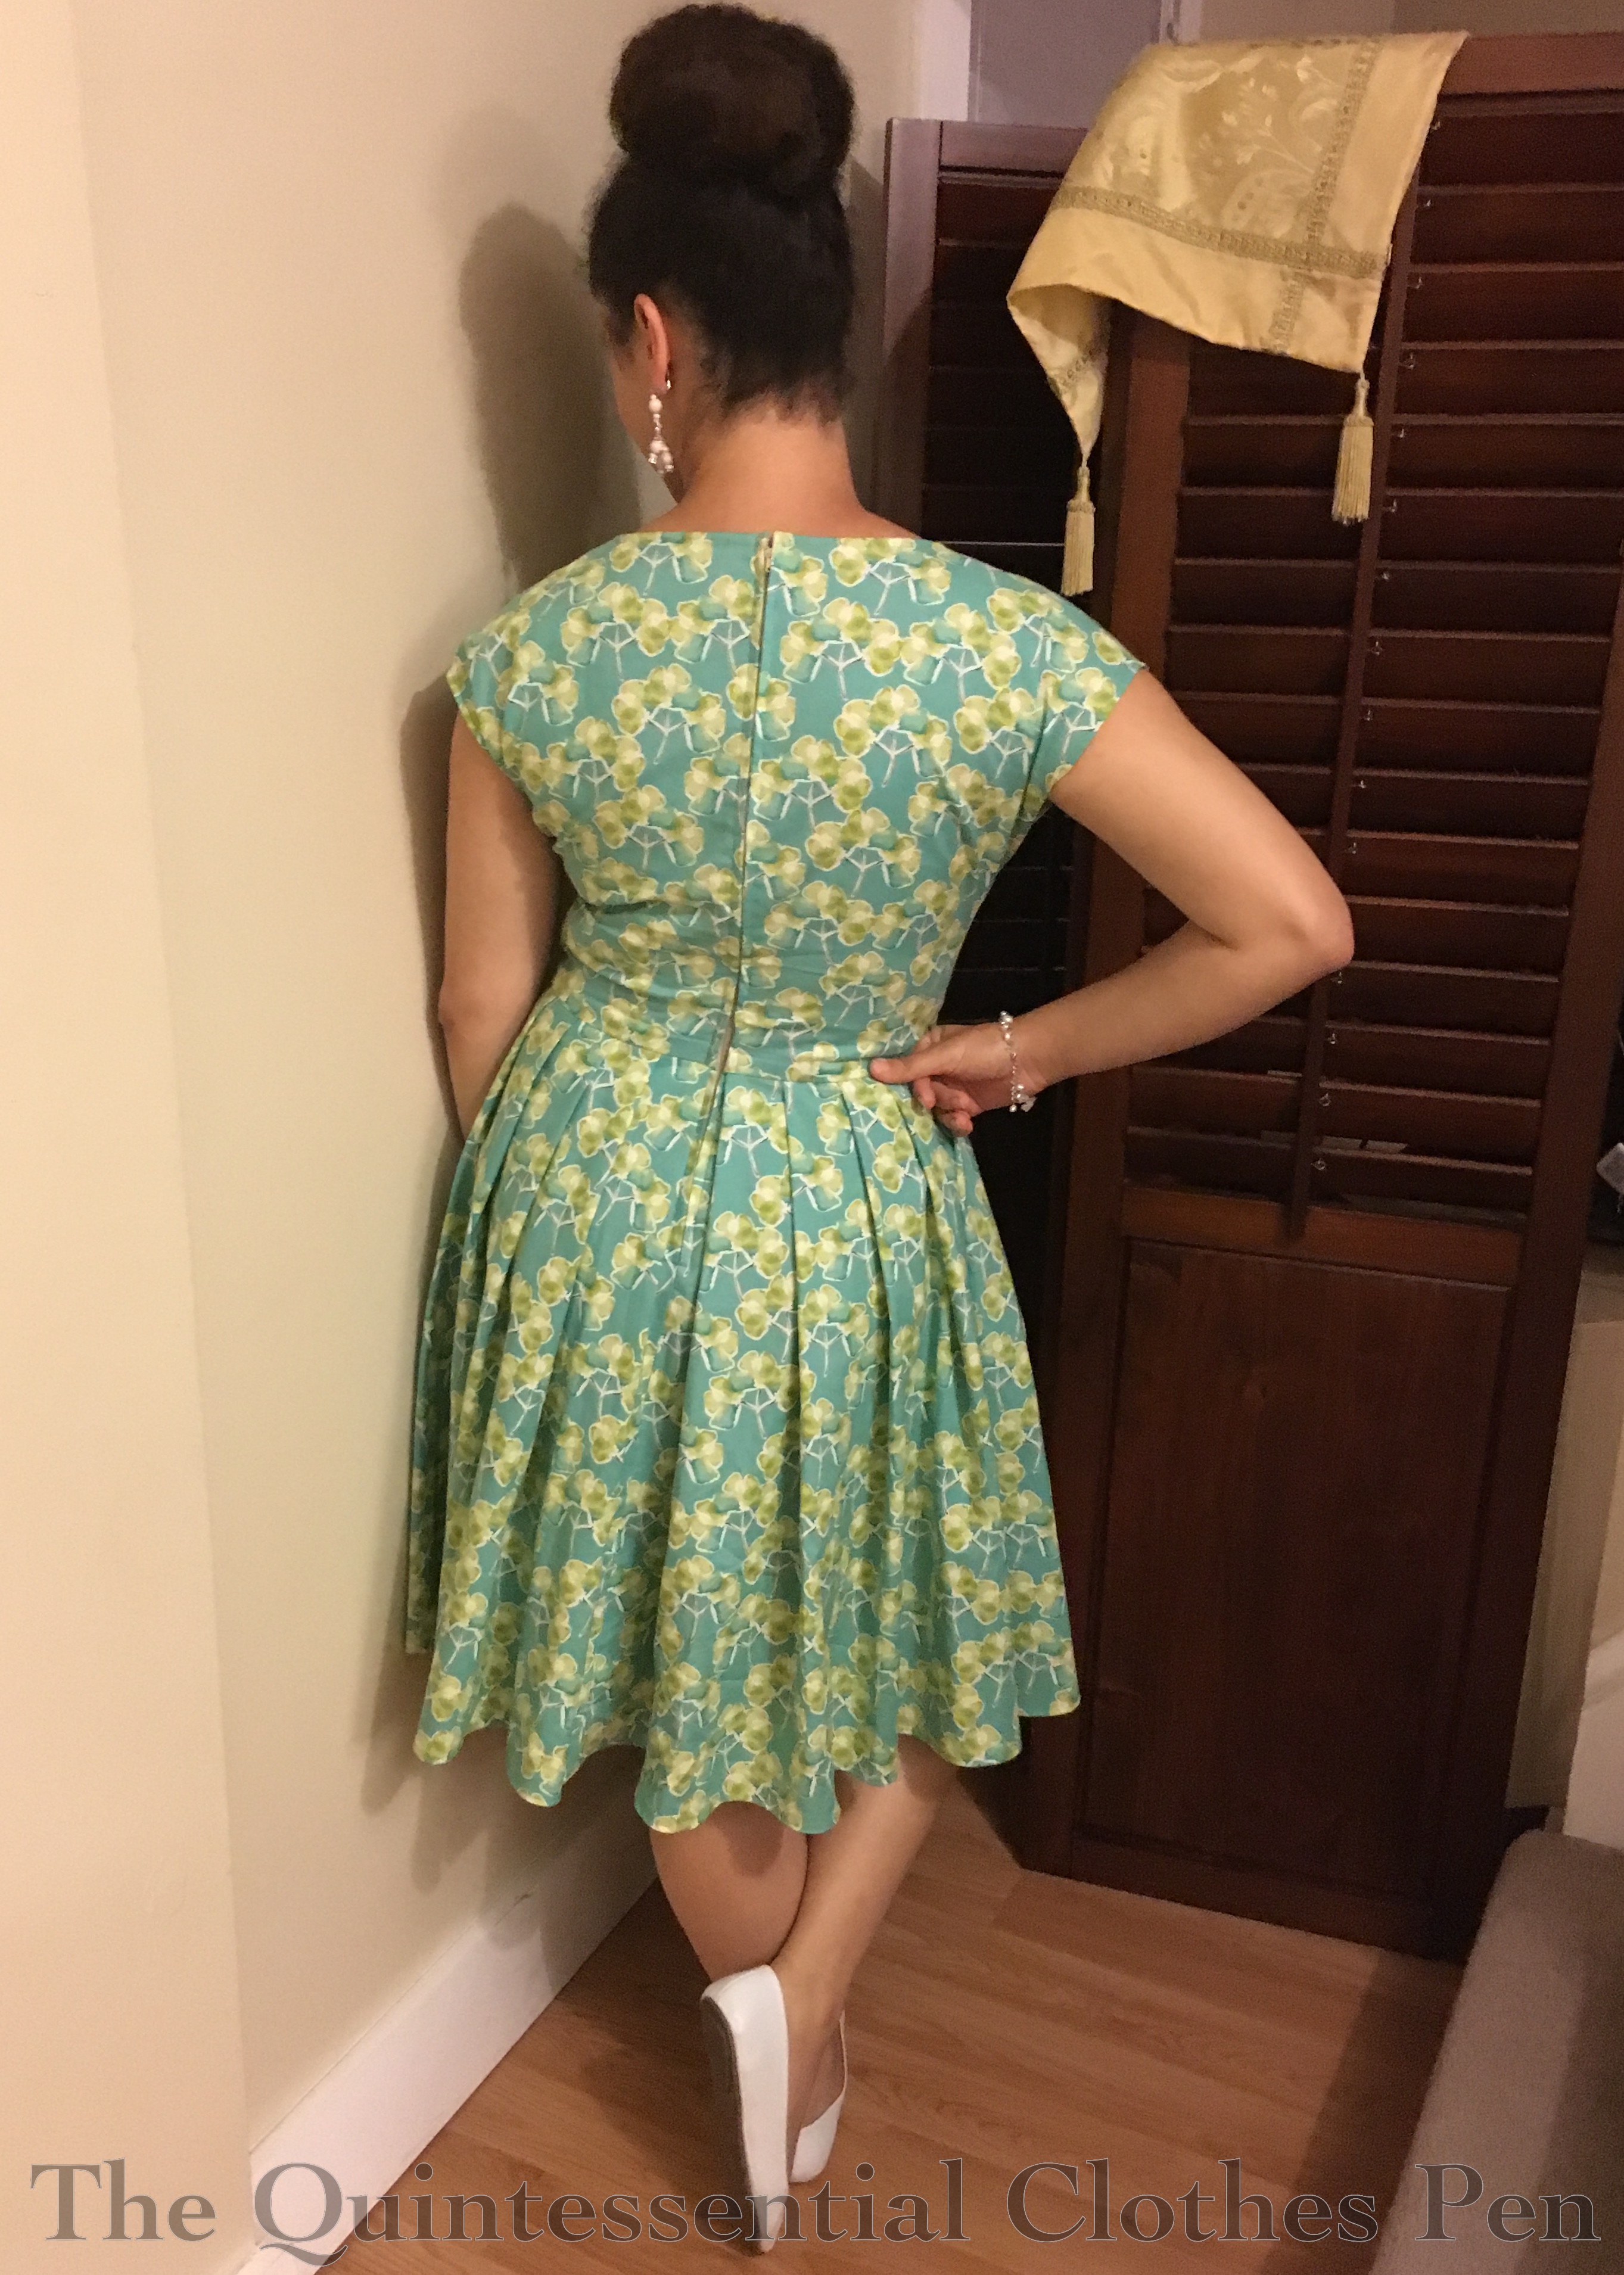
Yes, the zipper is in! Just as before, it is centered and topstitched. This is due mostly to the fact that the zipper nestles under pleats in the back skirt, which means that it has to be sewn in two sections–the bodice section and the skirt section–to keep the pleats form being sewn down with the zipper.
You can see that in the photo above and you can also barely make out my extra backstitching where those two sections of stitching meet in the photo below.
Here’s a closer photo of the fun teal color of the new zipper!
And that’s it! Just in time for warm weather, the Happy Clover Dress is back in action! Yay!
The last batch of cotton print shorts I made to wear during hot summer weather was completed in 2020 (I wrote about them in this past post). I get lots of use out of these garments and some old ones are starting to wear out, so it seemed it was time to create some more!
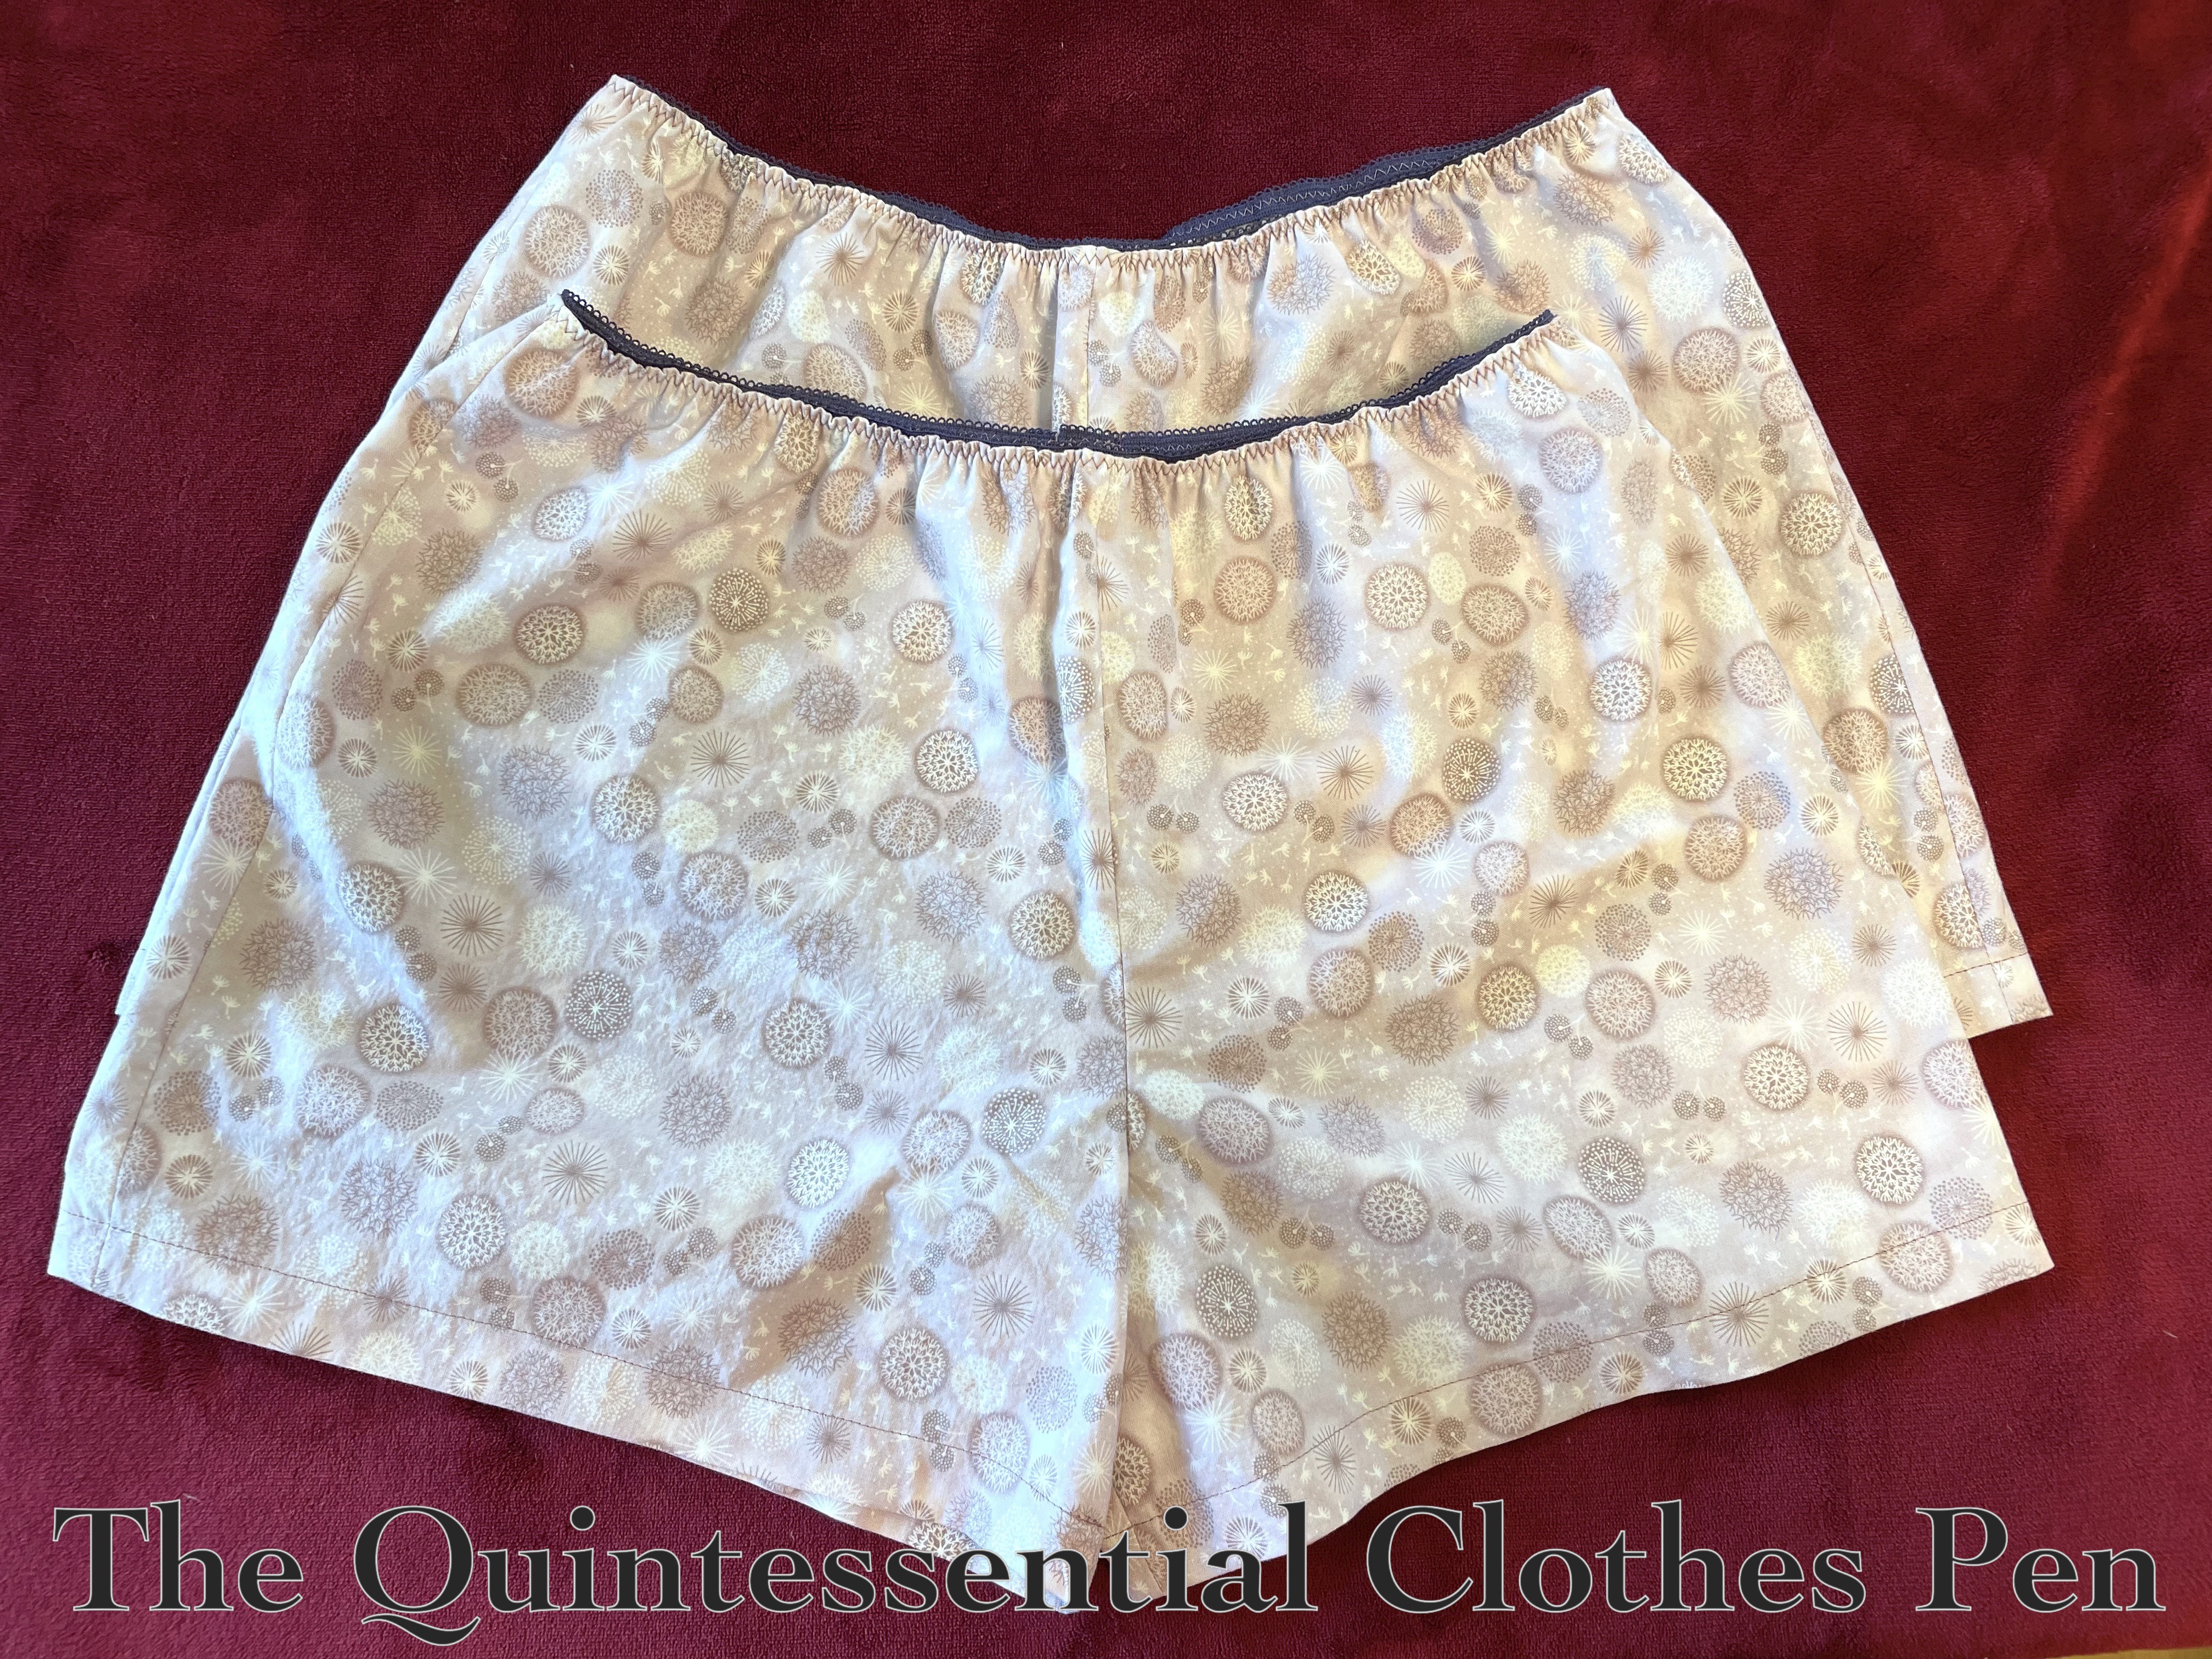
All of the shorts I’ve made along these lines have had circular or dot motifs and when I went fabric searching for this batch I kept that theme in mind. It’s also important for the shorts to be light-ish in color, so that I can wear them under dresses of any color! Those two goals are both met with the light purple allium (or dandelion, if you like) print fabric I used.
For comparison, here are purple allium flowers! I love the round shape the little blossoms create. It brings me joy. (Striking and unique allium exist in a variety of sizes and colors, including some that grow to be about 3 feet high with 6 inch diameter flower clusters!)
As with the previous batch of shorts, the fabric for these was purchased and washed months ago, in September. Then, the fabric sat on my pile of small-things-to-do near my sewing machine. I recently found the oomph needed to tackle the pile-of-small-things and completed the new shorts, along with a host of other small mends and alterations!
These are entirely machine sewn with the the seam allowances finished with an overlock machine. The waist is zig zagged to a bit of loop edged elastic. And really, that’s all there is to them! Two pairs!
I’m super pleased to have them off my to-do pile and ready to wear for the summer. I’m also super pleased to have completed a task that was on my official maybe-to-do list for this year!
My 1860s evening gowns have had far fewer outings in the last few years than they used to, which it made having a reason to wear one a few months ago particularly exciting!
The question was which to choose??? I wore Genevieve (my 1863 apricot-colored covered in lace and pleats silk gown) sort of recently, in April 2022. Other dresses in my historical closet that might still fit (Georginia from 1859, Annabelle from 1859, and Evie from 1864) haven’t been worn recently, but for some reason, plaid was sounding like fun… So I chose to wear Eleanor (my 1862 purple and green silk plaid dress)!
I’m still very pleased with the fabric of this dress and the way I cut the pieces to create interest in an otherwise pretty basic dress. The little details like tiny piping on the bodice, matching hair flowers, and a well matched set of jewelry (earrings and necklace from In The Long Run Designs, as well as a mix of modern and vintage brooches) also bring me joy.
I also had a lovely setting in which to wear the dress. The Boutwell House in Groton, MA was built in 1851 and is now home to the Groton History Center. The Footwork & Frolick Society partnered with them for the town of Groton’s annual WinterFest activities, which included inhabiting the house for an afternoon to give visitors a small view into activities from the period.
I enjoyed being able to wear an 1860s dress again. I’ve always loved the magic of a cupcake shaped hoop skirt–and this was no exception!
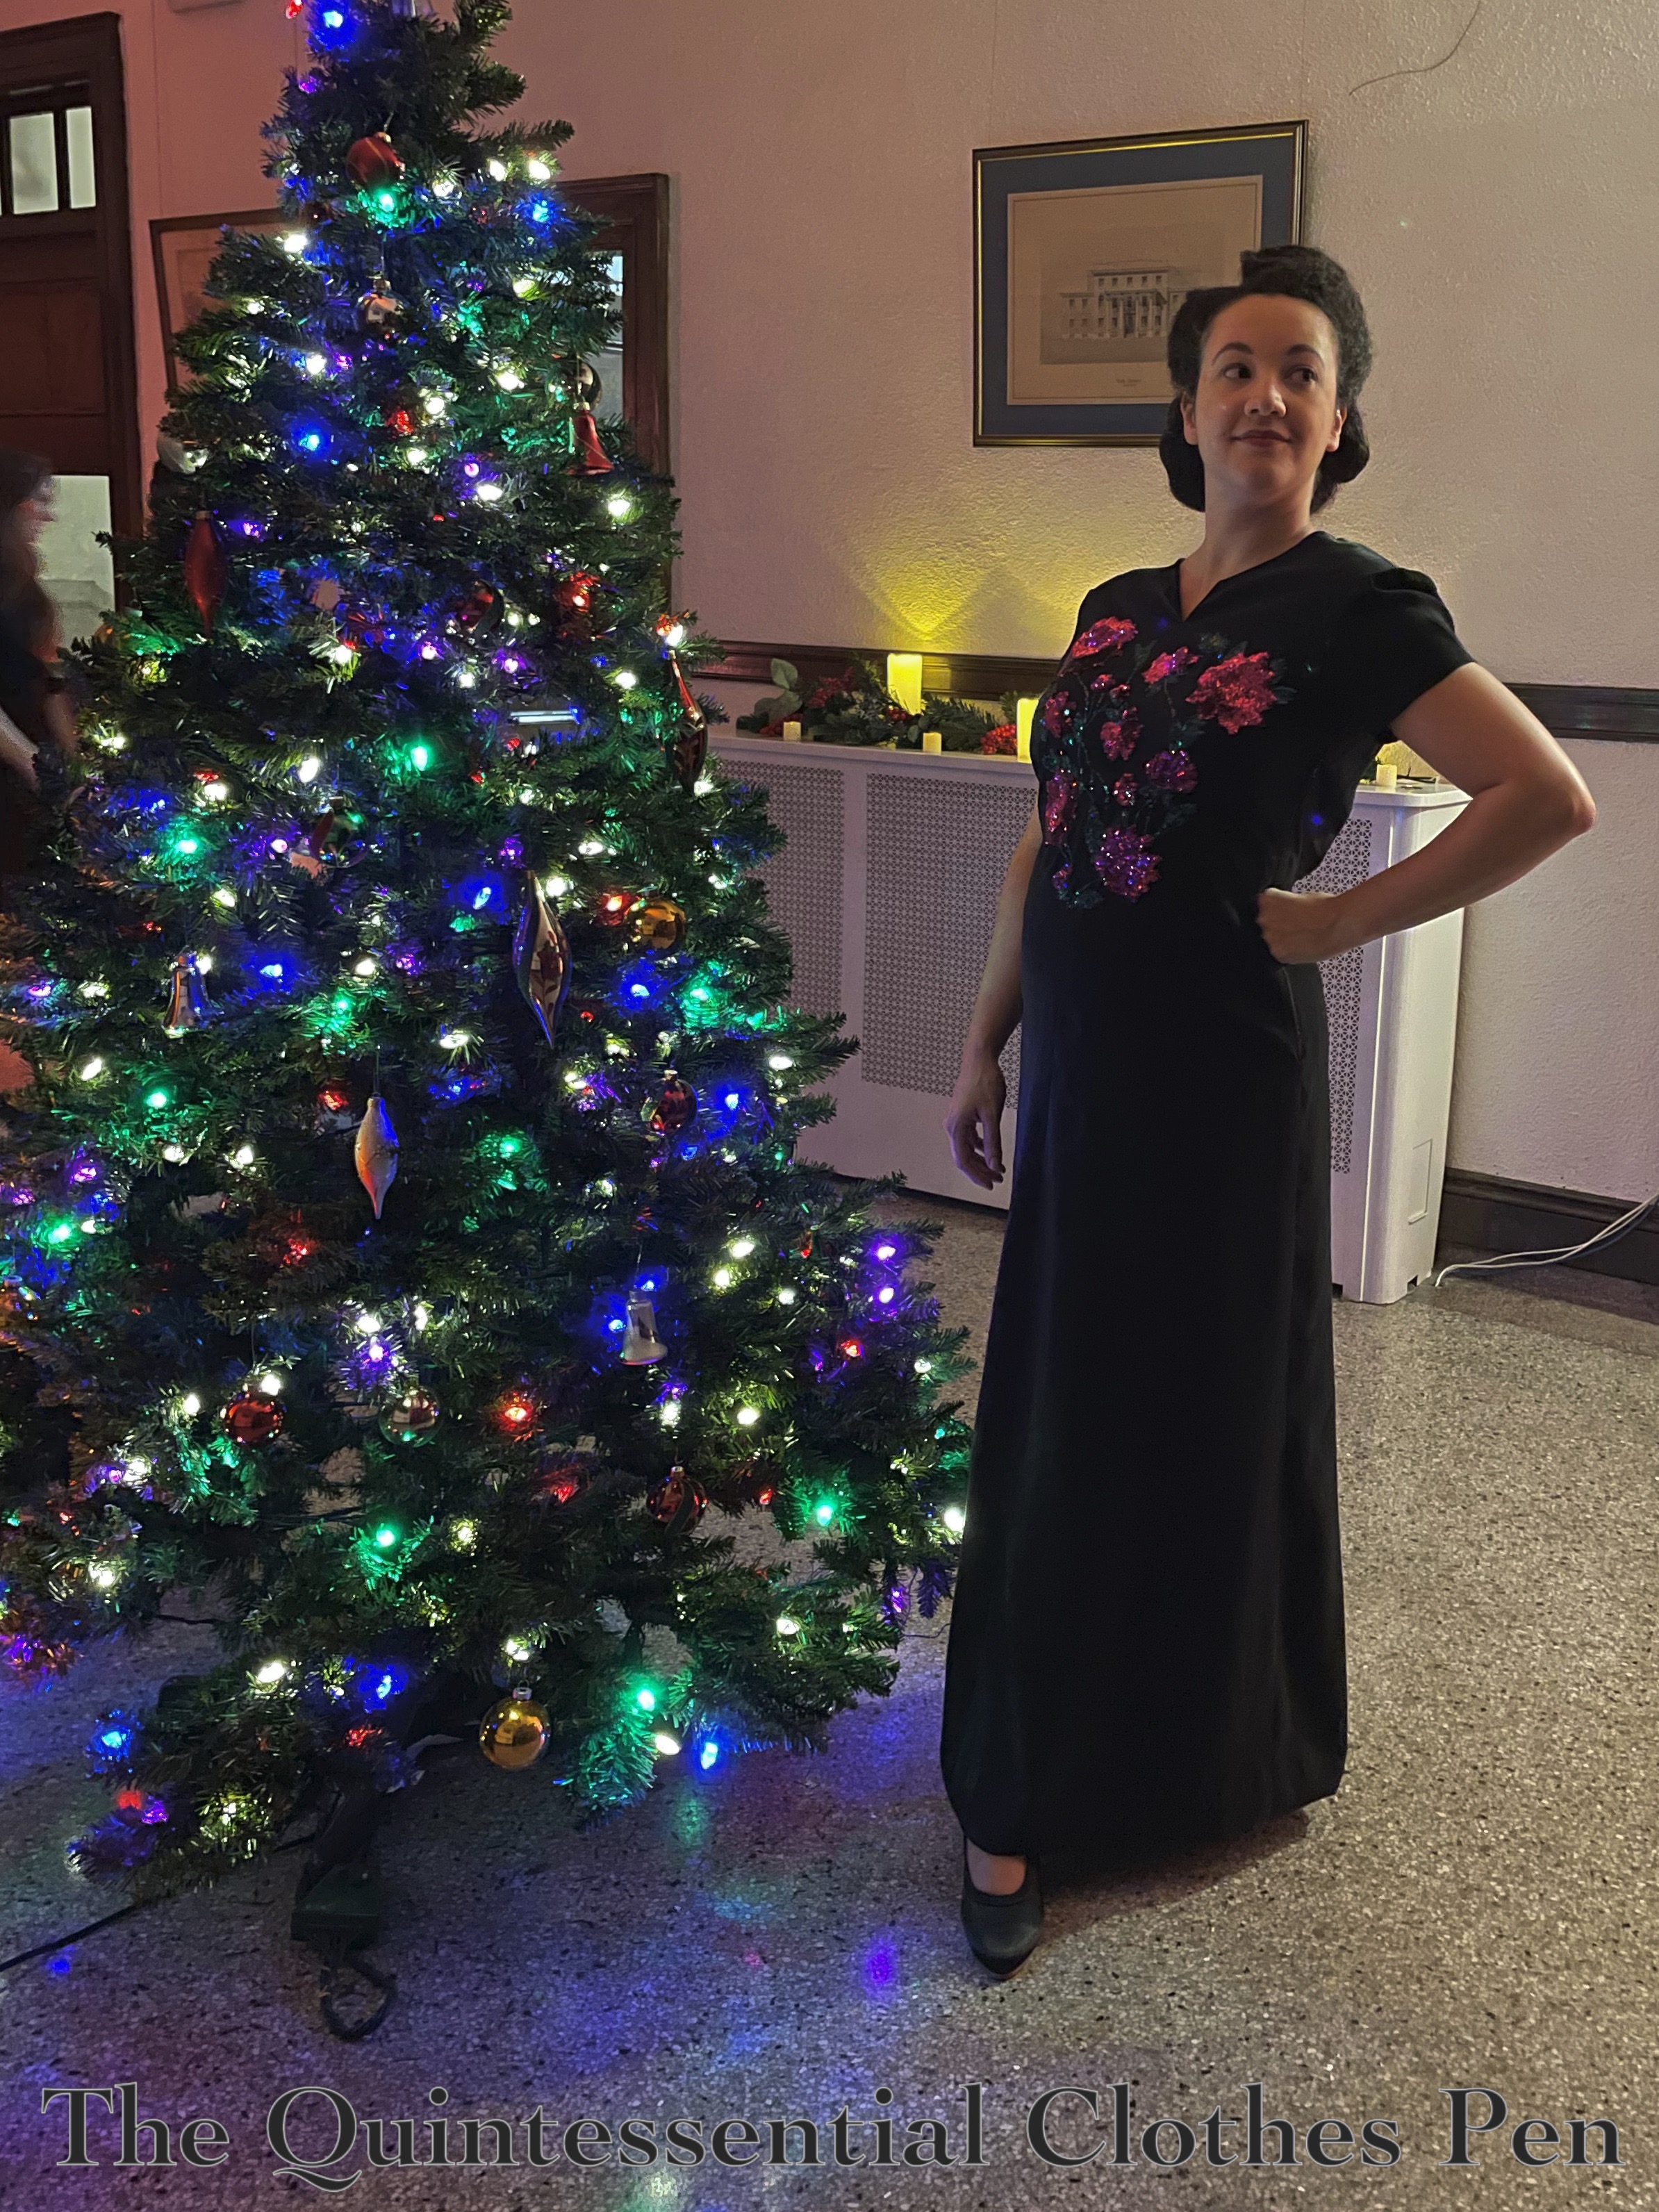
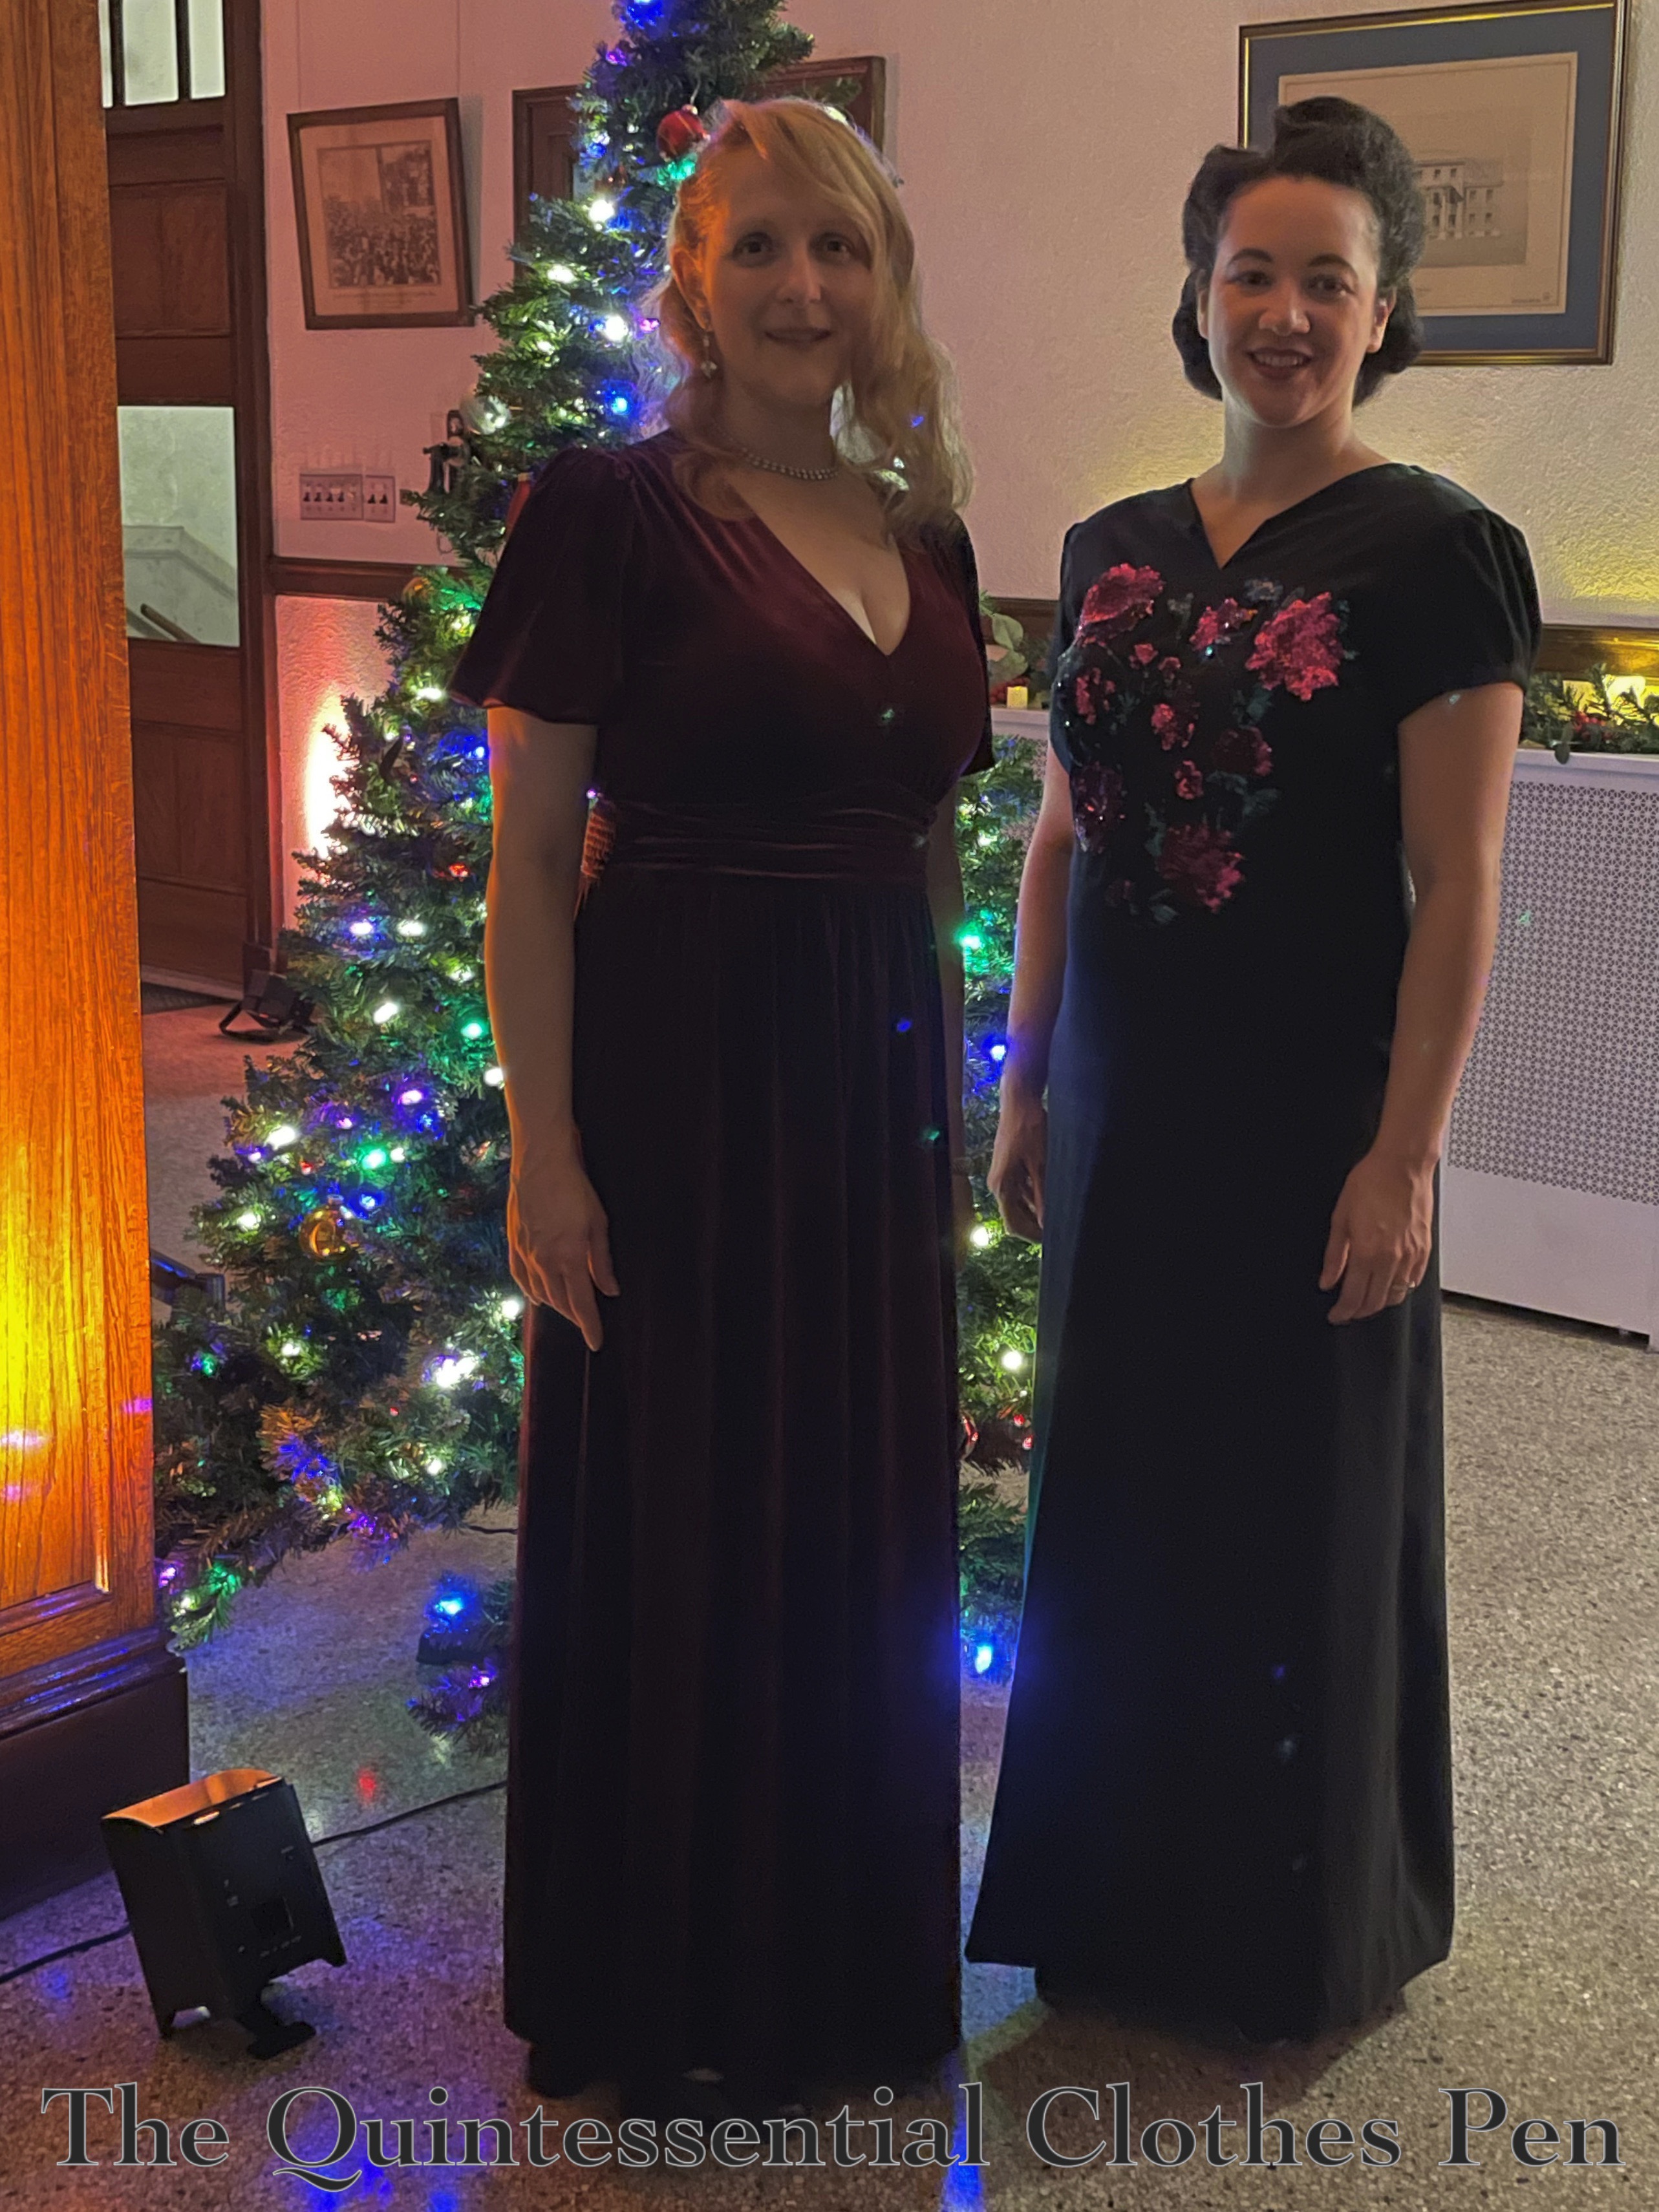
I’m very pleased with my finished 1940 Schiaparelli Inspired Dress! The relatively simple style is set off by the pink and green sequined appliqué on the front of the dress.
This post is going to be all about wearing the finished dress. There is a separate detailed post telling all about how I made it that you can read here.
This dress is dramatic, yet simple, and completely different from anything else I have. And, it lends itself to elaborate and large hair which always amuses me.
I chose to do victory rolls, which I’ve posted about doing with my curly hair type in the past. (Not all rolls are technically victory rolls, but if they make a V there is a good argument for calling them by this name. In this case, I’m arguing that the dip between my two rolls makes a V and that’s why I’m calling them victory rolls. You can read lots more about the history of this hairstyle here, on the Bobby Pin Blog.)
The particular roll pattern and shape I chose to do was mainly inspired by this. My hair has enough volume to sustain the rolls on its own, but I cheated a bit on the teasing and stuffed the larger roll with small hair rat to help maintain the height and shape.
I’m very pleased with how the rolls turned out. They were dramatic, just like the dress and they made me super tall looking in combination with my trusty American Duchess black Seabury shoes and the columnar dress.
The V shaped rolls of hair complemented the V shaped sequins on the front of the dress AND the V shape of the back bodice with its V shaped pleats. There are all sorts of V’s in this outfit!
And, not only did I get to wear a fabulous, formal dress with large and fun hair, I was able to have a great time at Club Drosselmeyer with friends while wearing both!
(If you’re in the New England area and you haven’t heard of Club Drosselmeyer before, I suggest you check it out! I’ve been performing at and/or attending for years. It’s really special and fantastic for all sorts of people and interests. Personally, I really enjoy the live Christmas swing music, puzzles, and fabulous clothes, but there are also interactive actors, special performances, an open dance floor, and more!)
I finally open my rereleased new copy of Patterns of Fashion 2 (Pof2) last summer and had great fun looking through all of the previously included garments (from the original edition) as well as the newly included ones. I remember seeing one dress (picture below), in particular, and thinking that it would be fun to recreate it, but that the beading seemed like it would be quite a challenge!
1940 Evening Dress designed by Elsa Schiaparelli. The Victoria and Albert Museum. T.48-1965
A few months later, I was at Joann Fabrics and saw a fabulous magenta and green sequined net poking out of a shelf. I pulled it out and immediately thought that the colors were very me. But did I have a use for it? Not really… Except… What if I used that fabric to recreate the beaded idea on that dress from PofF2??? Schiaparelli’s designs often made use of magenta pink as a Surrealist inspired color, so it didn’t seem too far fetched for me to include that color in my version of the dress.
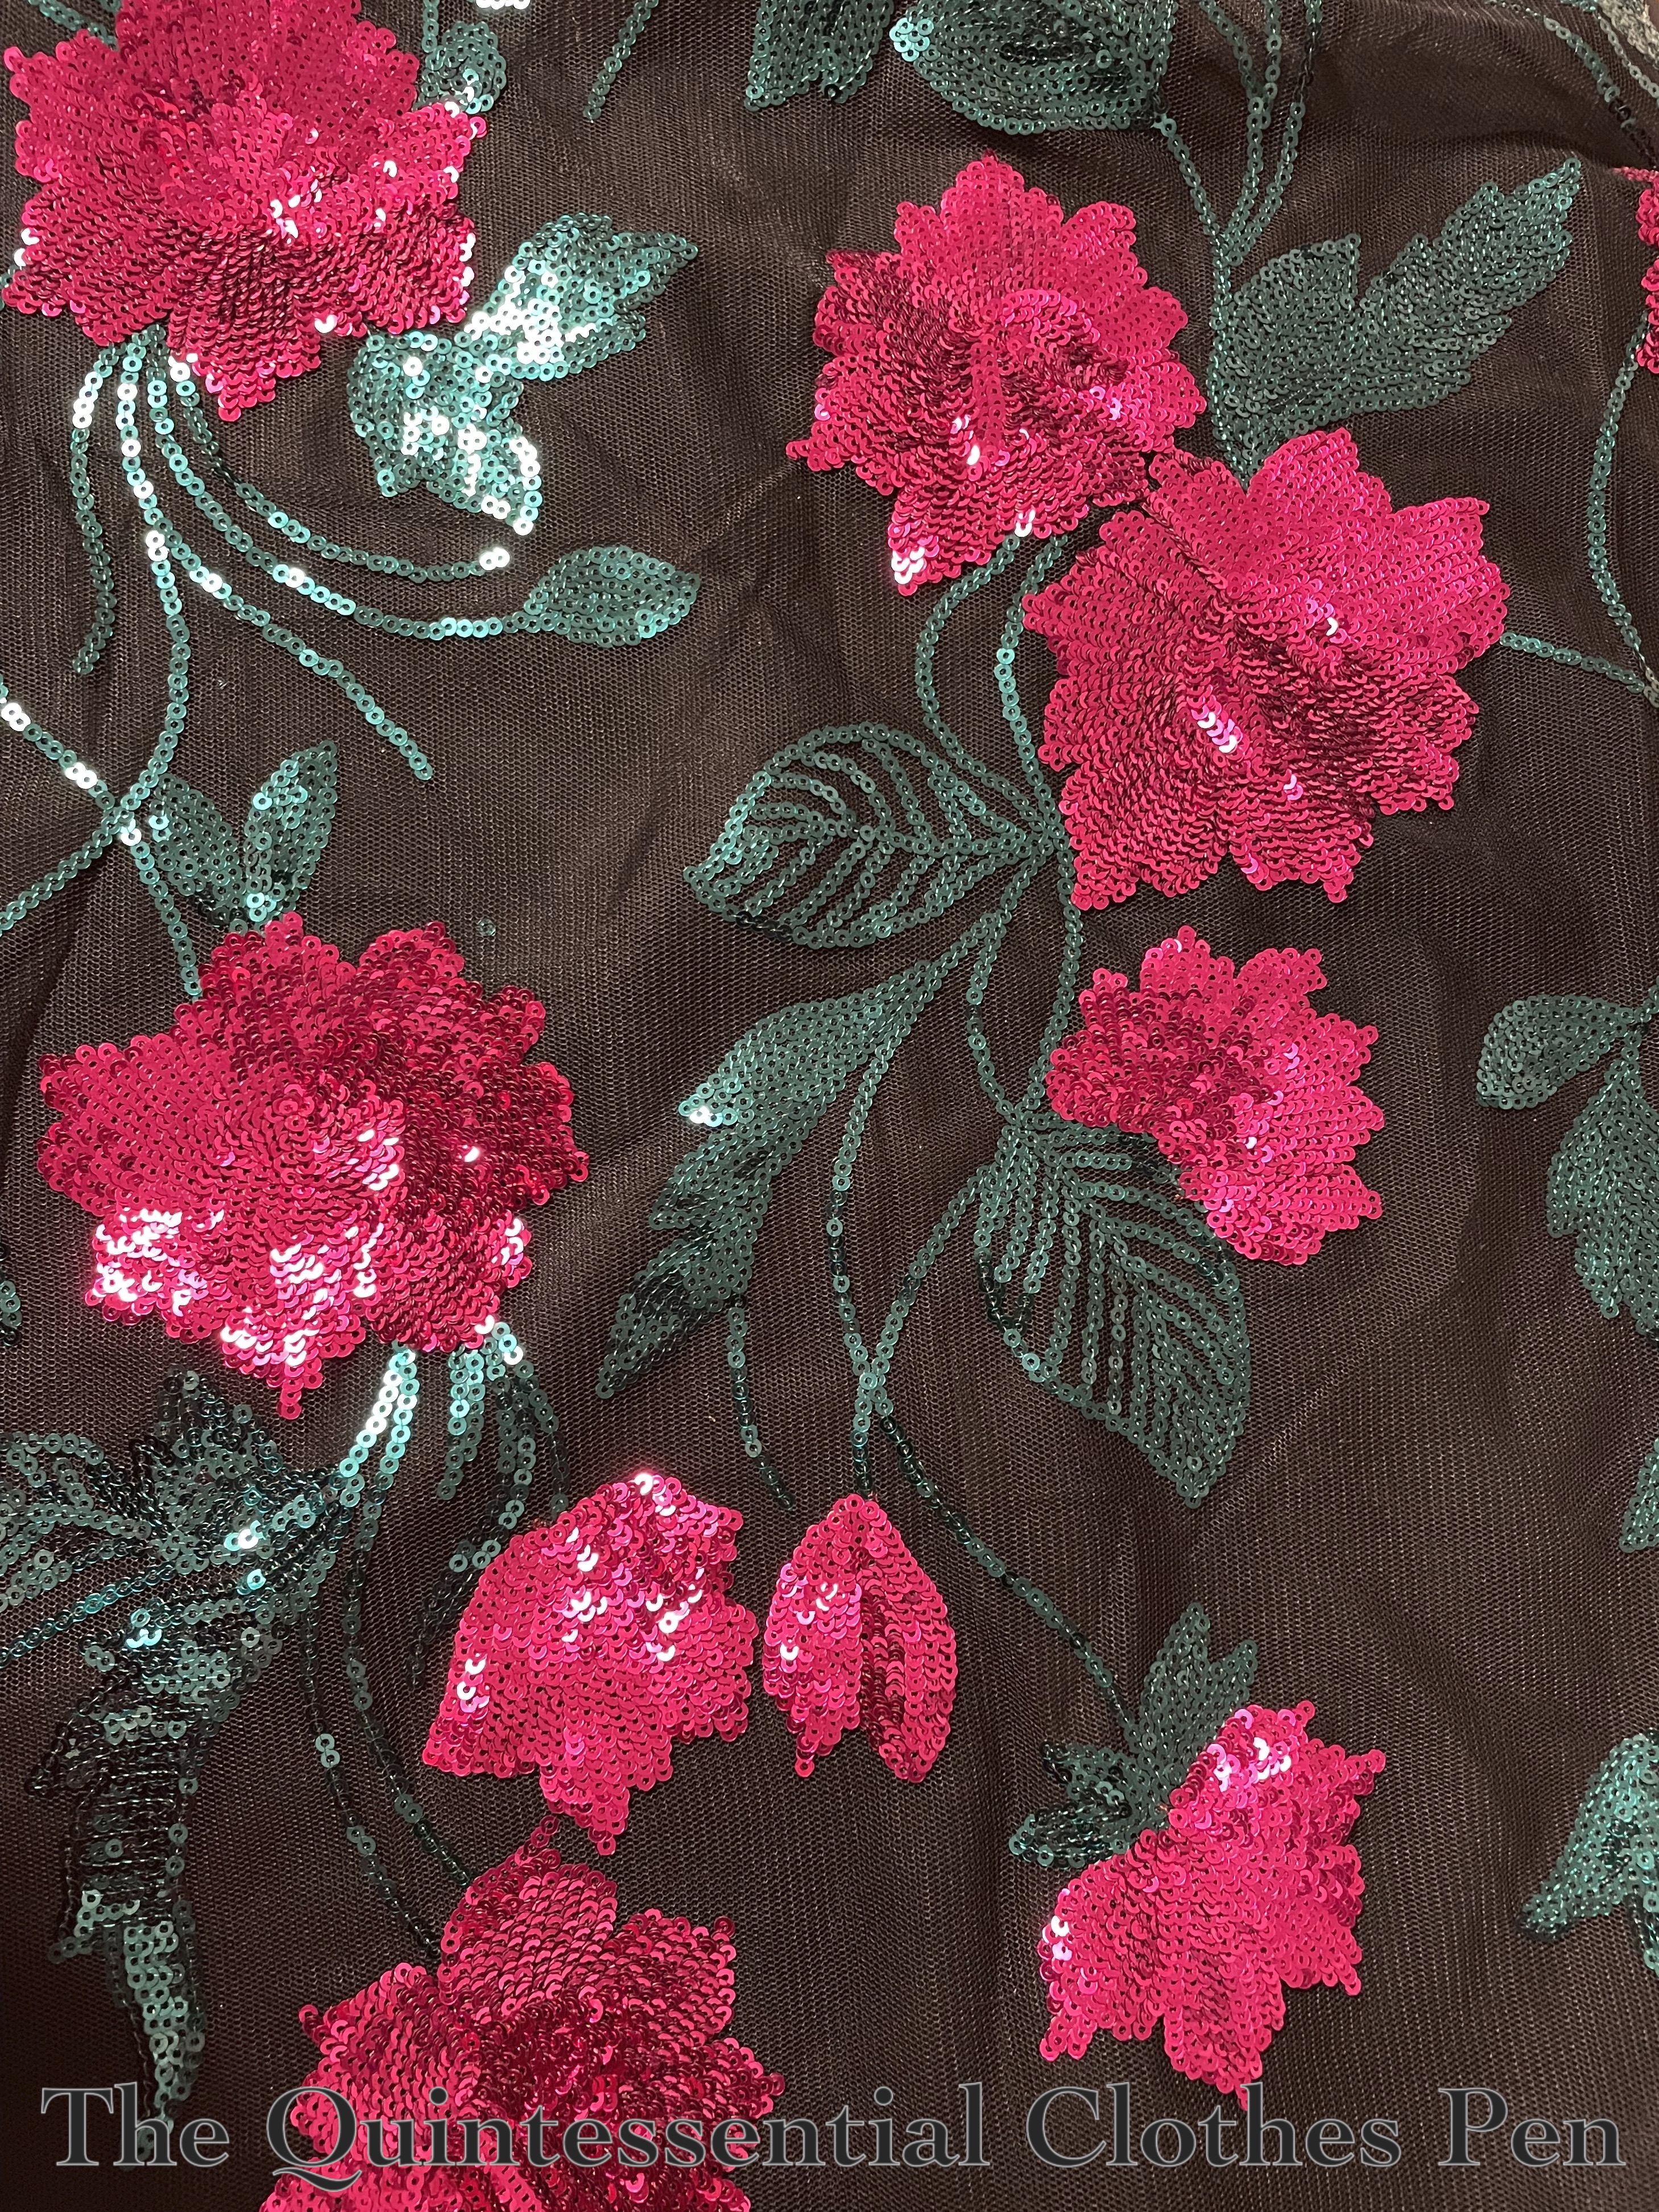
So, I bought some. ¼ of a yard, to be exact. Not too much, but enough to be able to pick and choose different parts of the flowers to create a pattern similar to my inspiration. Below is a photo of the inspiration fabric: magenta and green sequins on black net.
Not too long after that, I decided that instead of wearing my updated 1933 Dramatic Evening Dress to a December event, I would instead make a new one–the 1940 Schiaparelli dress!
The first step after my decision was to find black fabric. The original is silk crepe, but I wanted to keep the cost down a bit more than what silk would allow for. I ordered a few swatches of rayon crepe and also went to stores to look at other options. I’d almost decided on one when I came across another random fabric at Joann that stood out to me. I debated for awhile, but decided the Black Shimmer Twill was more interesting than plain black crepe (the shimmer twill is visible in the above photo underneath the sequined net).
The next step was to size up the pattern in PofF2 and adjust it to be not tiny. I am definitely not the measurements of the original! I did those things and made a mockup:
The dress skirt worked, but I wasn’t happy with what the sleeves were doing.
The neckline needed some work to fit comfortably.
I changed the grainline of the back piece. On the original, the back bodices are cut on the bias, but I decided that they would lay better if I cut them on the straight of grain.
Then, another mockup. I made a few more changes and finally it was time for the real fabric!
Cutting out the pieces was pretty easy. There actually aren’t too many of them, especially because the facings are cleverly cut on with the front and back bodice pieces. The pieces are: back skirt, back bodice, front bodice/skirts, and sleeves.
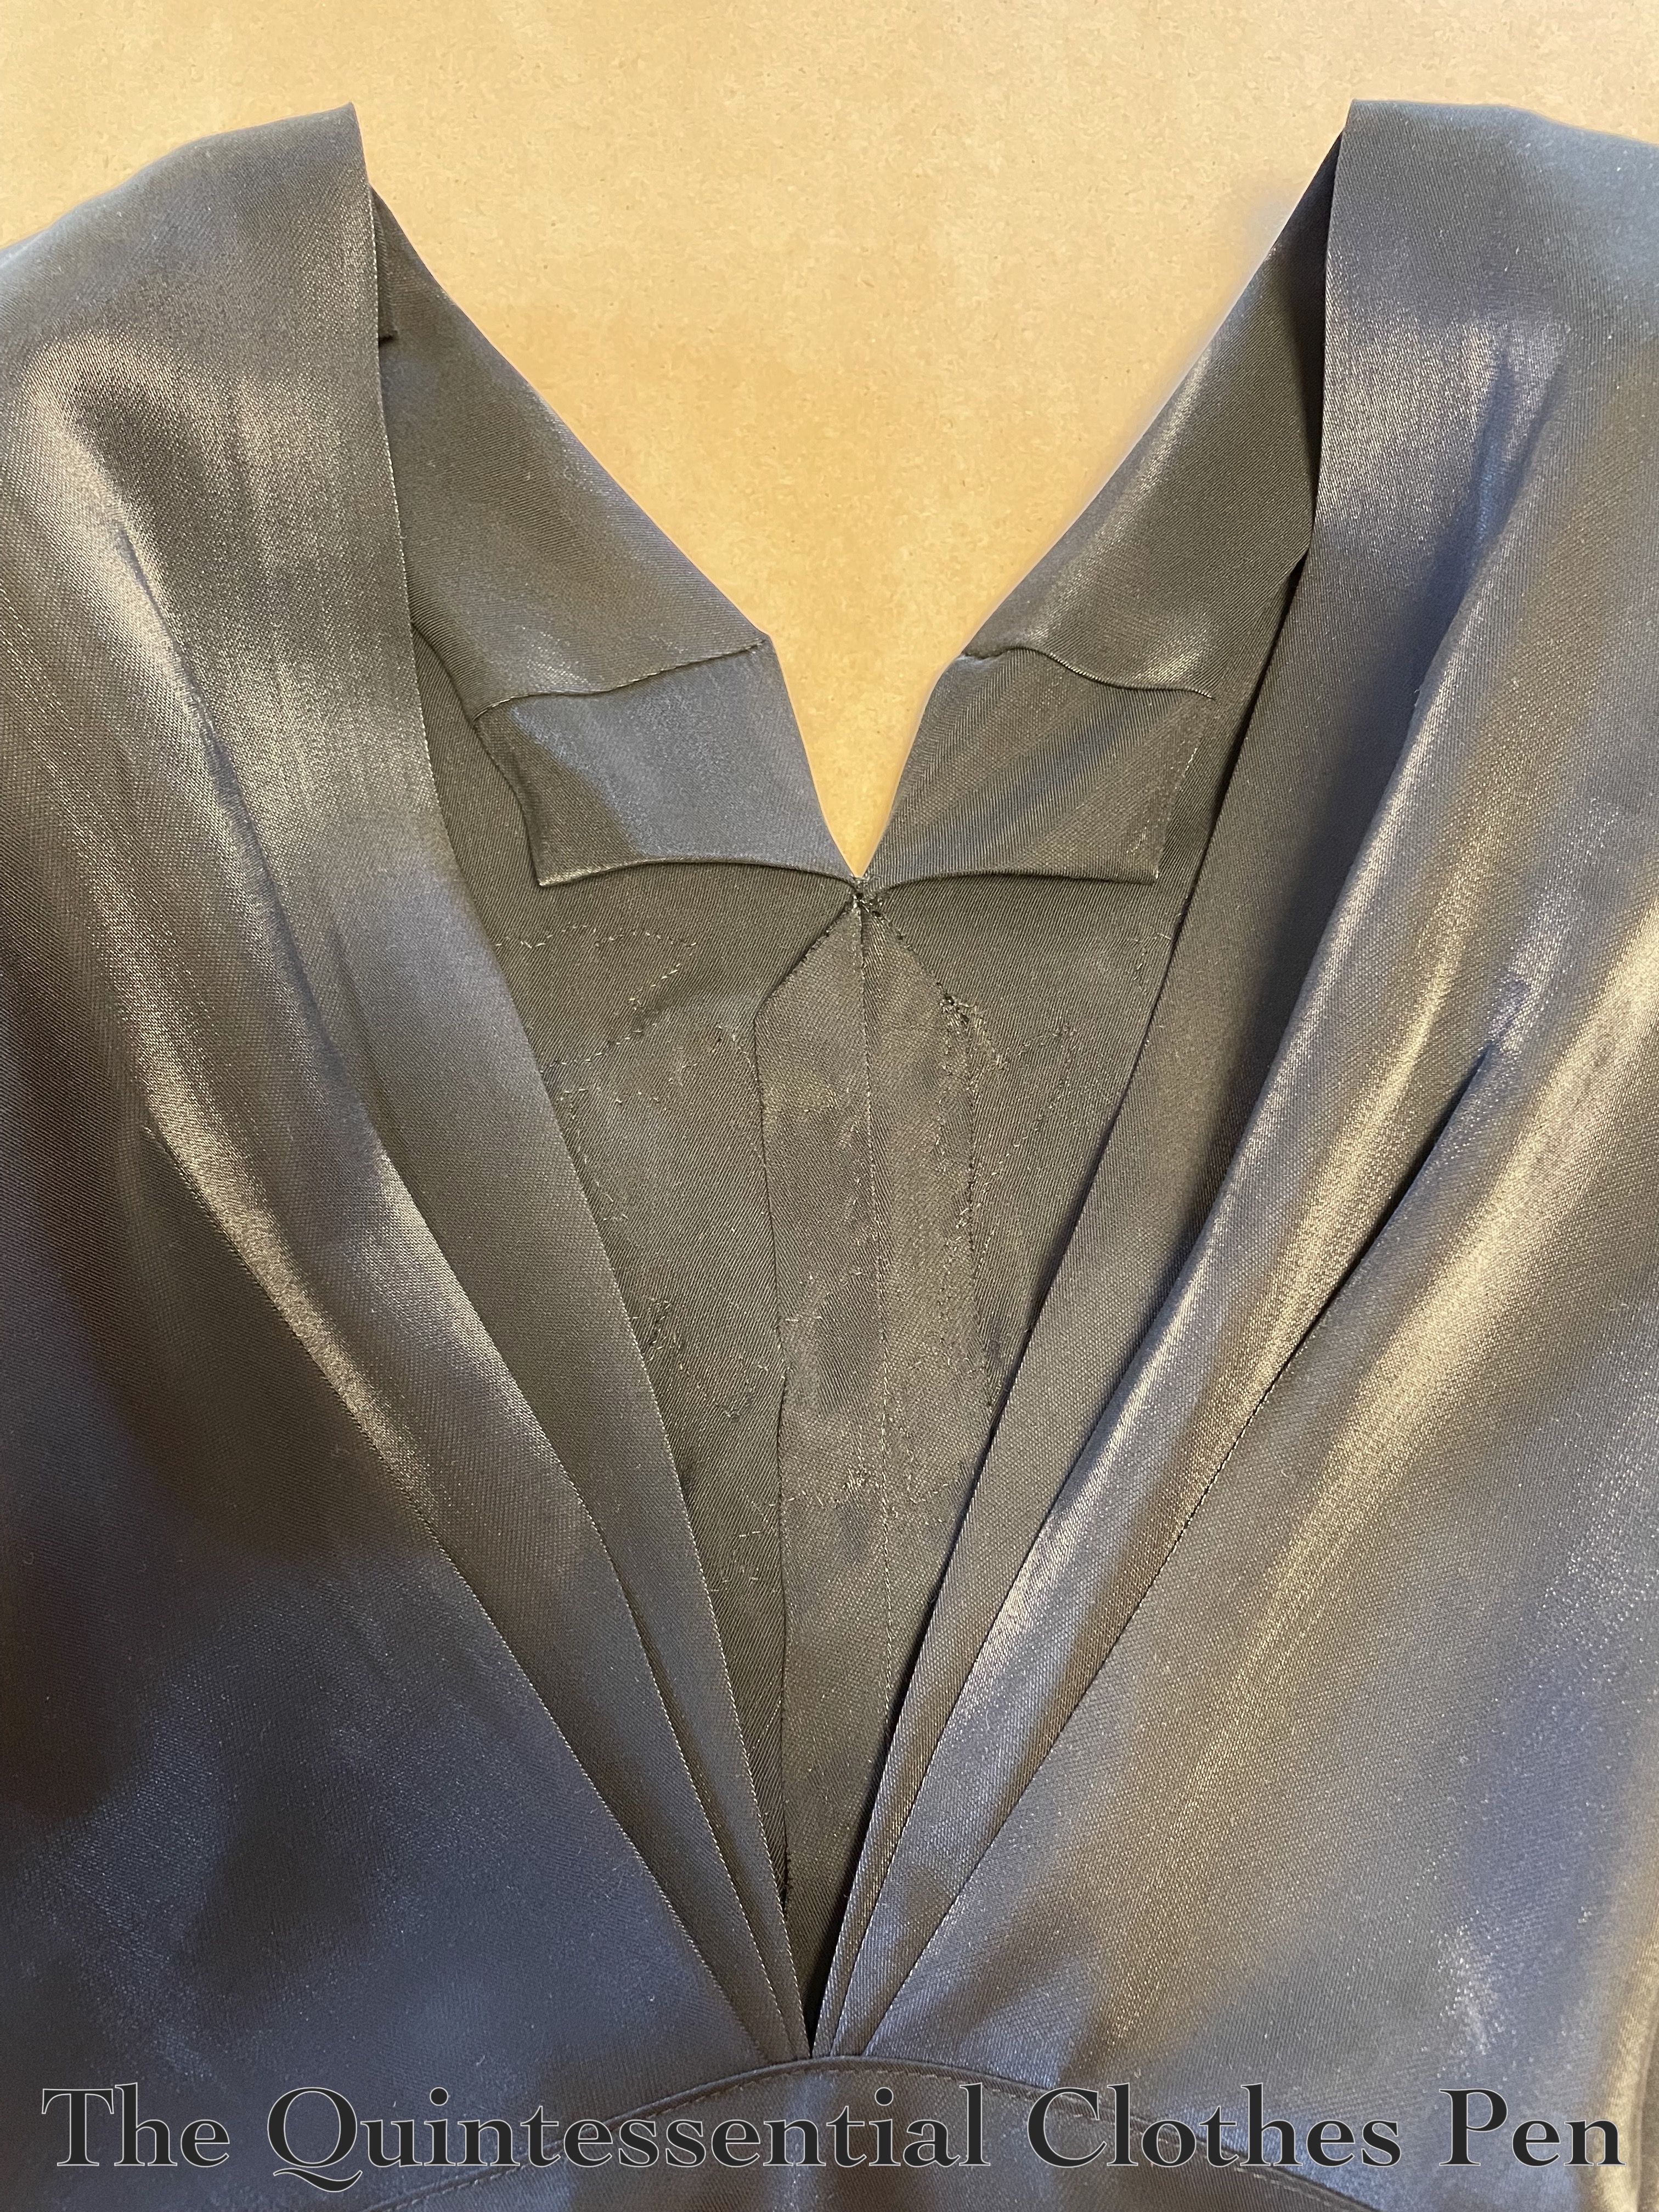
Below is a photo of the finished garment showing the clever front facings and the shimmery quality of the black base fabric I chose. (The photo also shows the fun back element of this dress: three v-shaped pleats that meet at the center.)
I sewed up all of the seams I could (so that was the center front seam, the sleeves, and the back waist seams) while still keeping the front flat, so that I could replicate, or at least imitate, the floral V-shaped beading on the original.
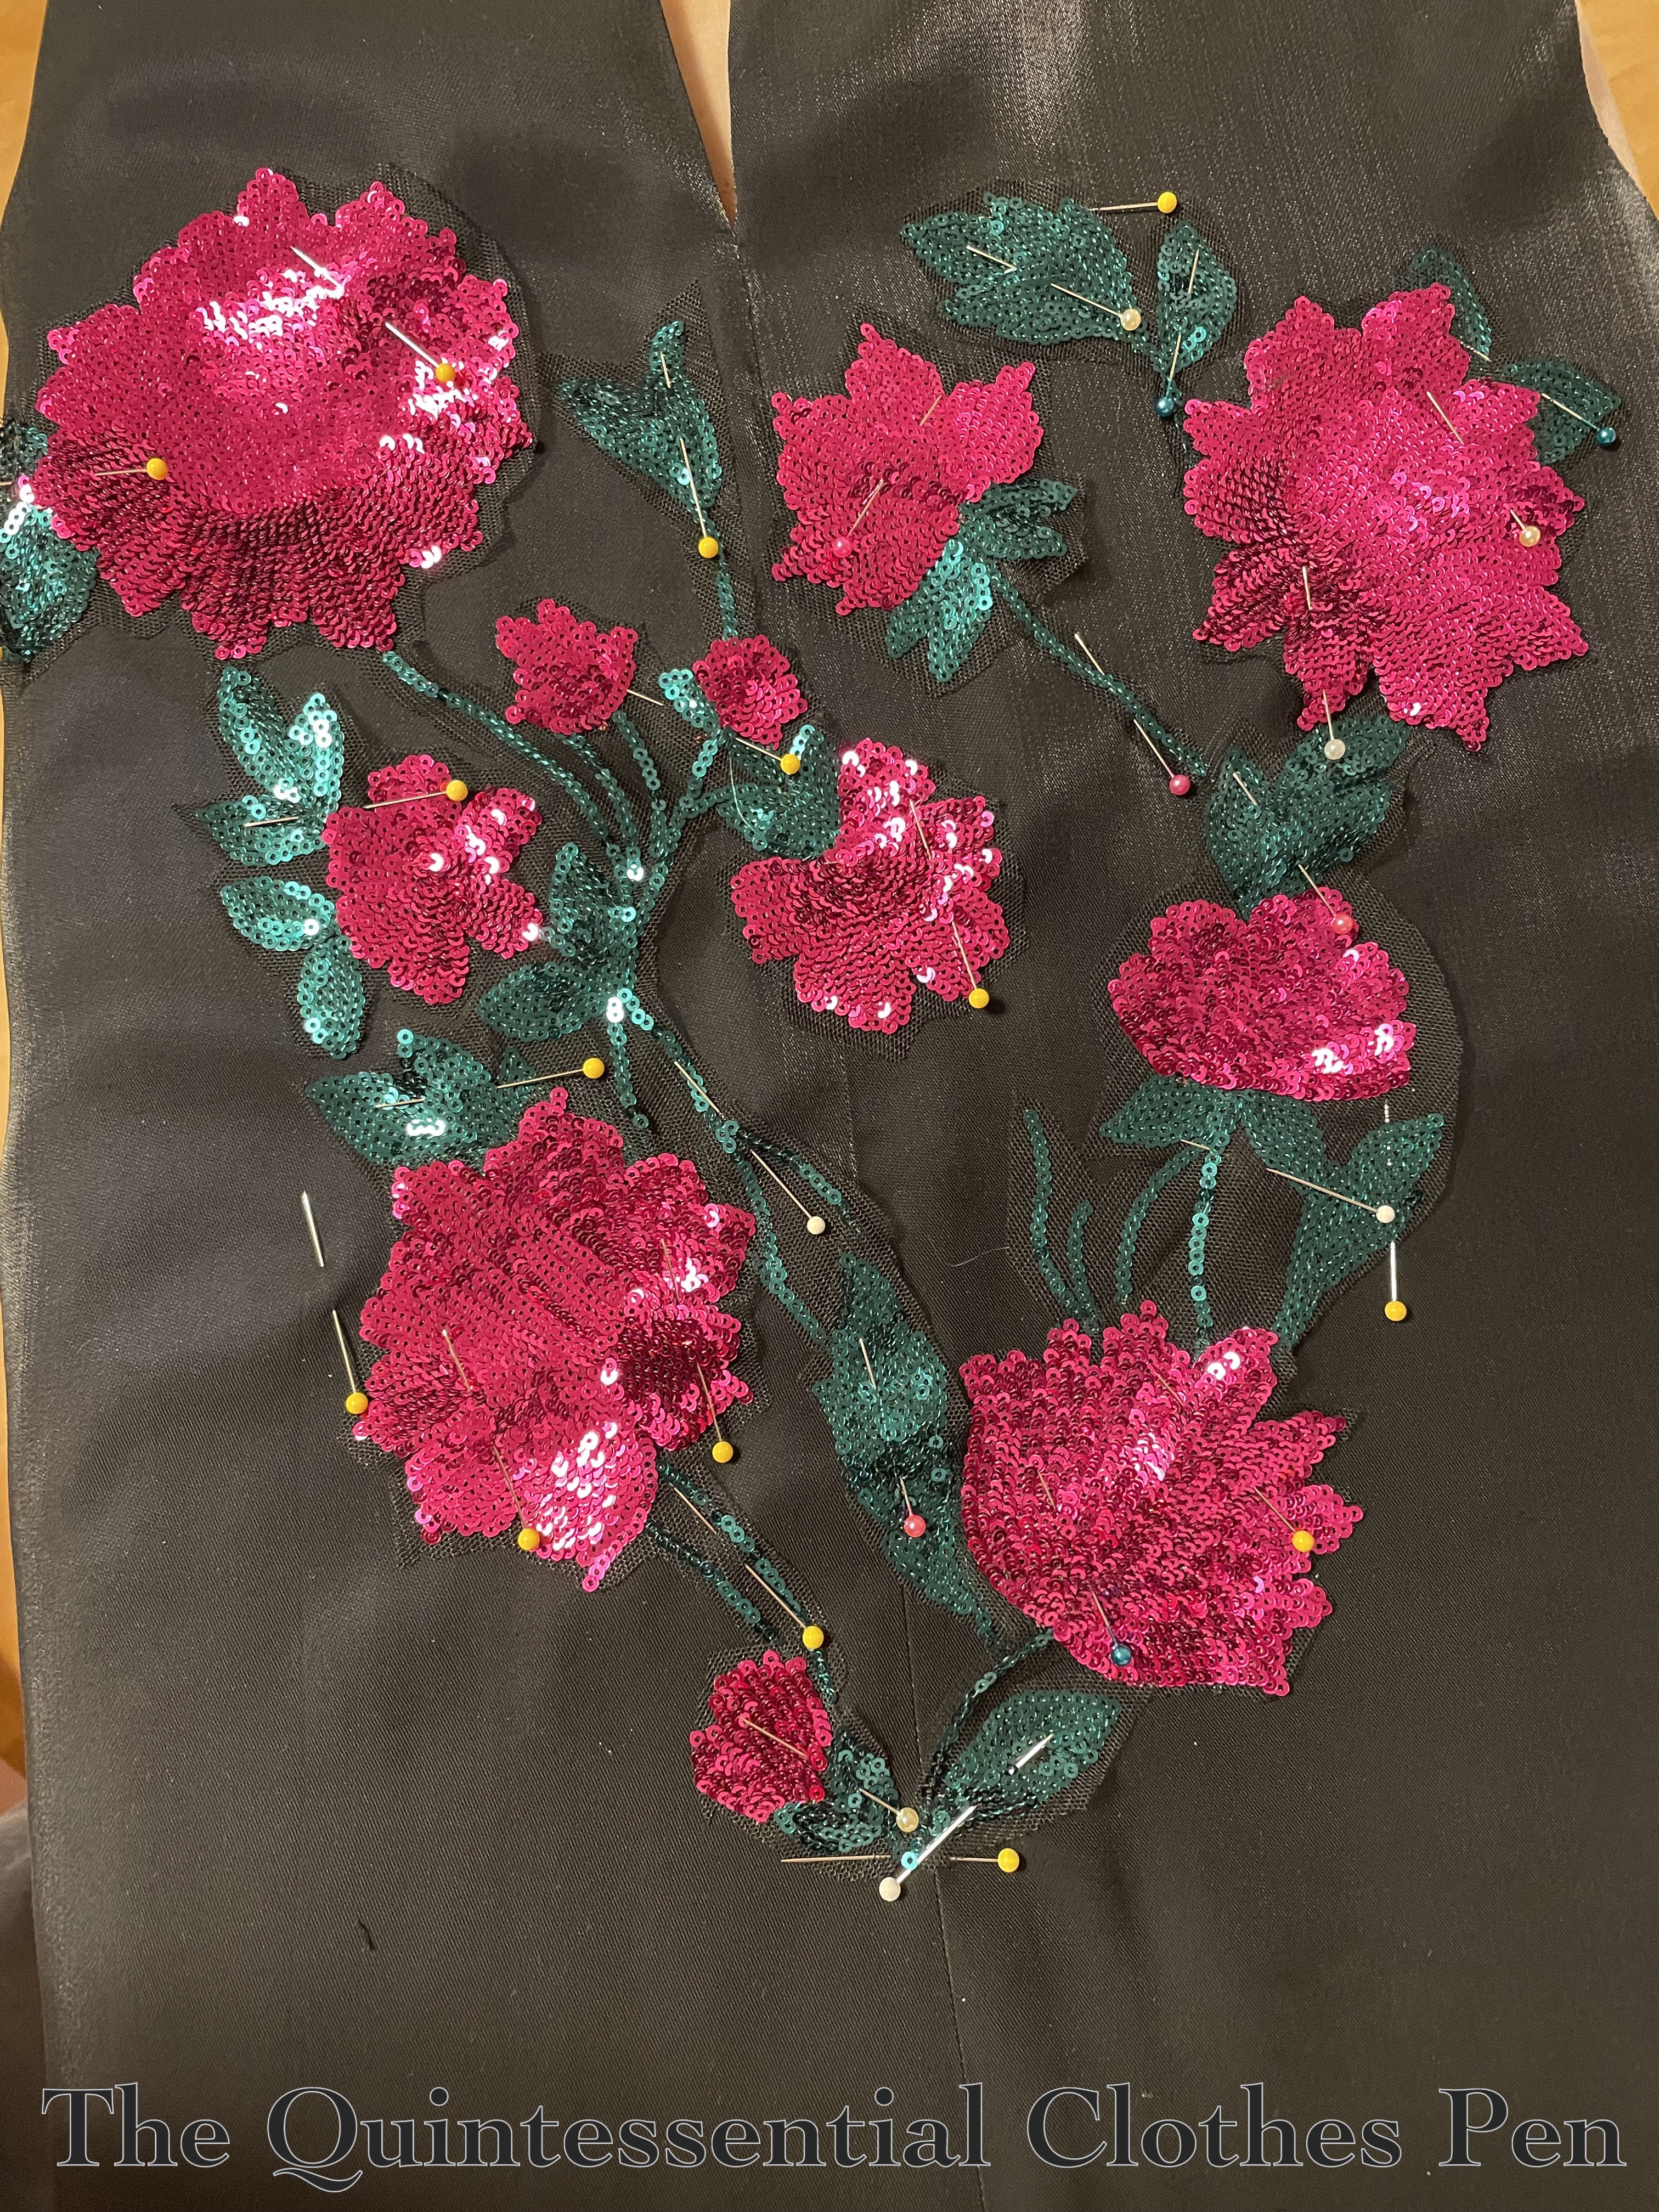
The next big step was using the sequined fabric to create a design similar in shape to the beading on the original. I cut out individual flowers and vines, arranging them on my assembled front pieces and pinning them in place until I was happy with the layout. Below, a photo of my cut out flowers, leaves, and vines while I was deciding on the layout.
Every piece had some net left around the edge so that I could flip them under and appliqué stitch them on. Below is an in-progress photo showing the top right flowers sewn on and some pieces pinned out of the way while I sewed bits that overlapped.
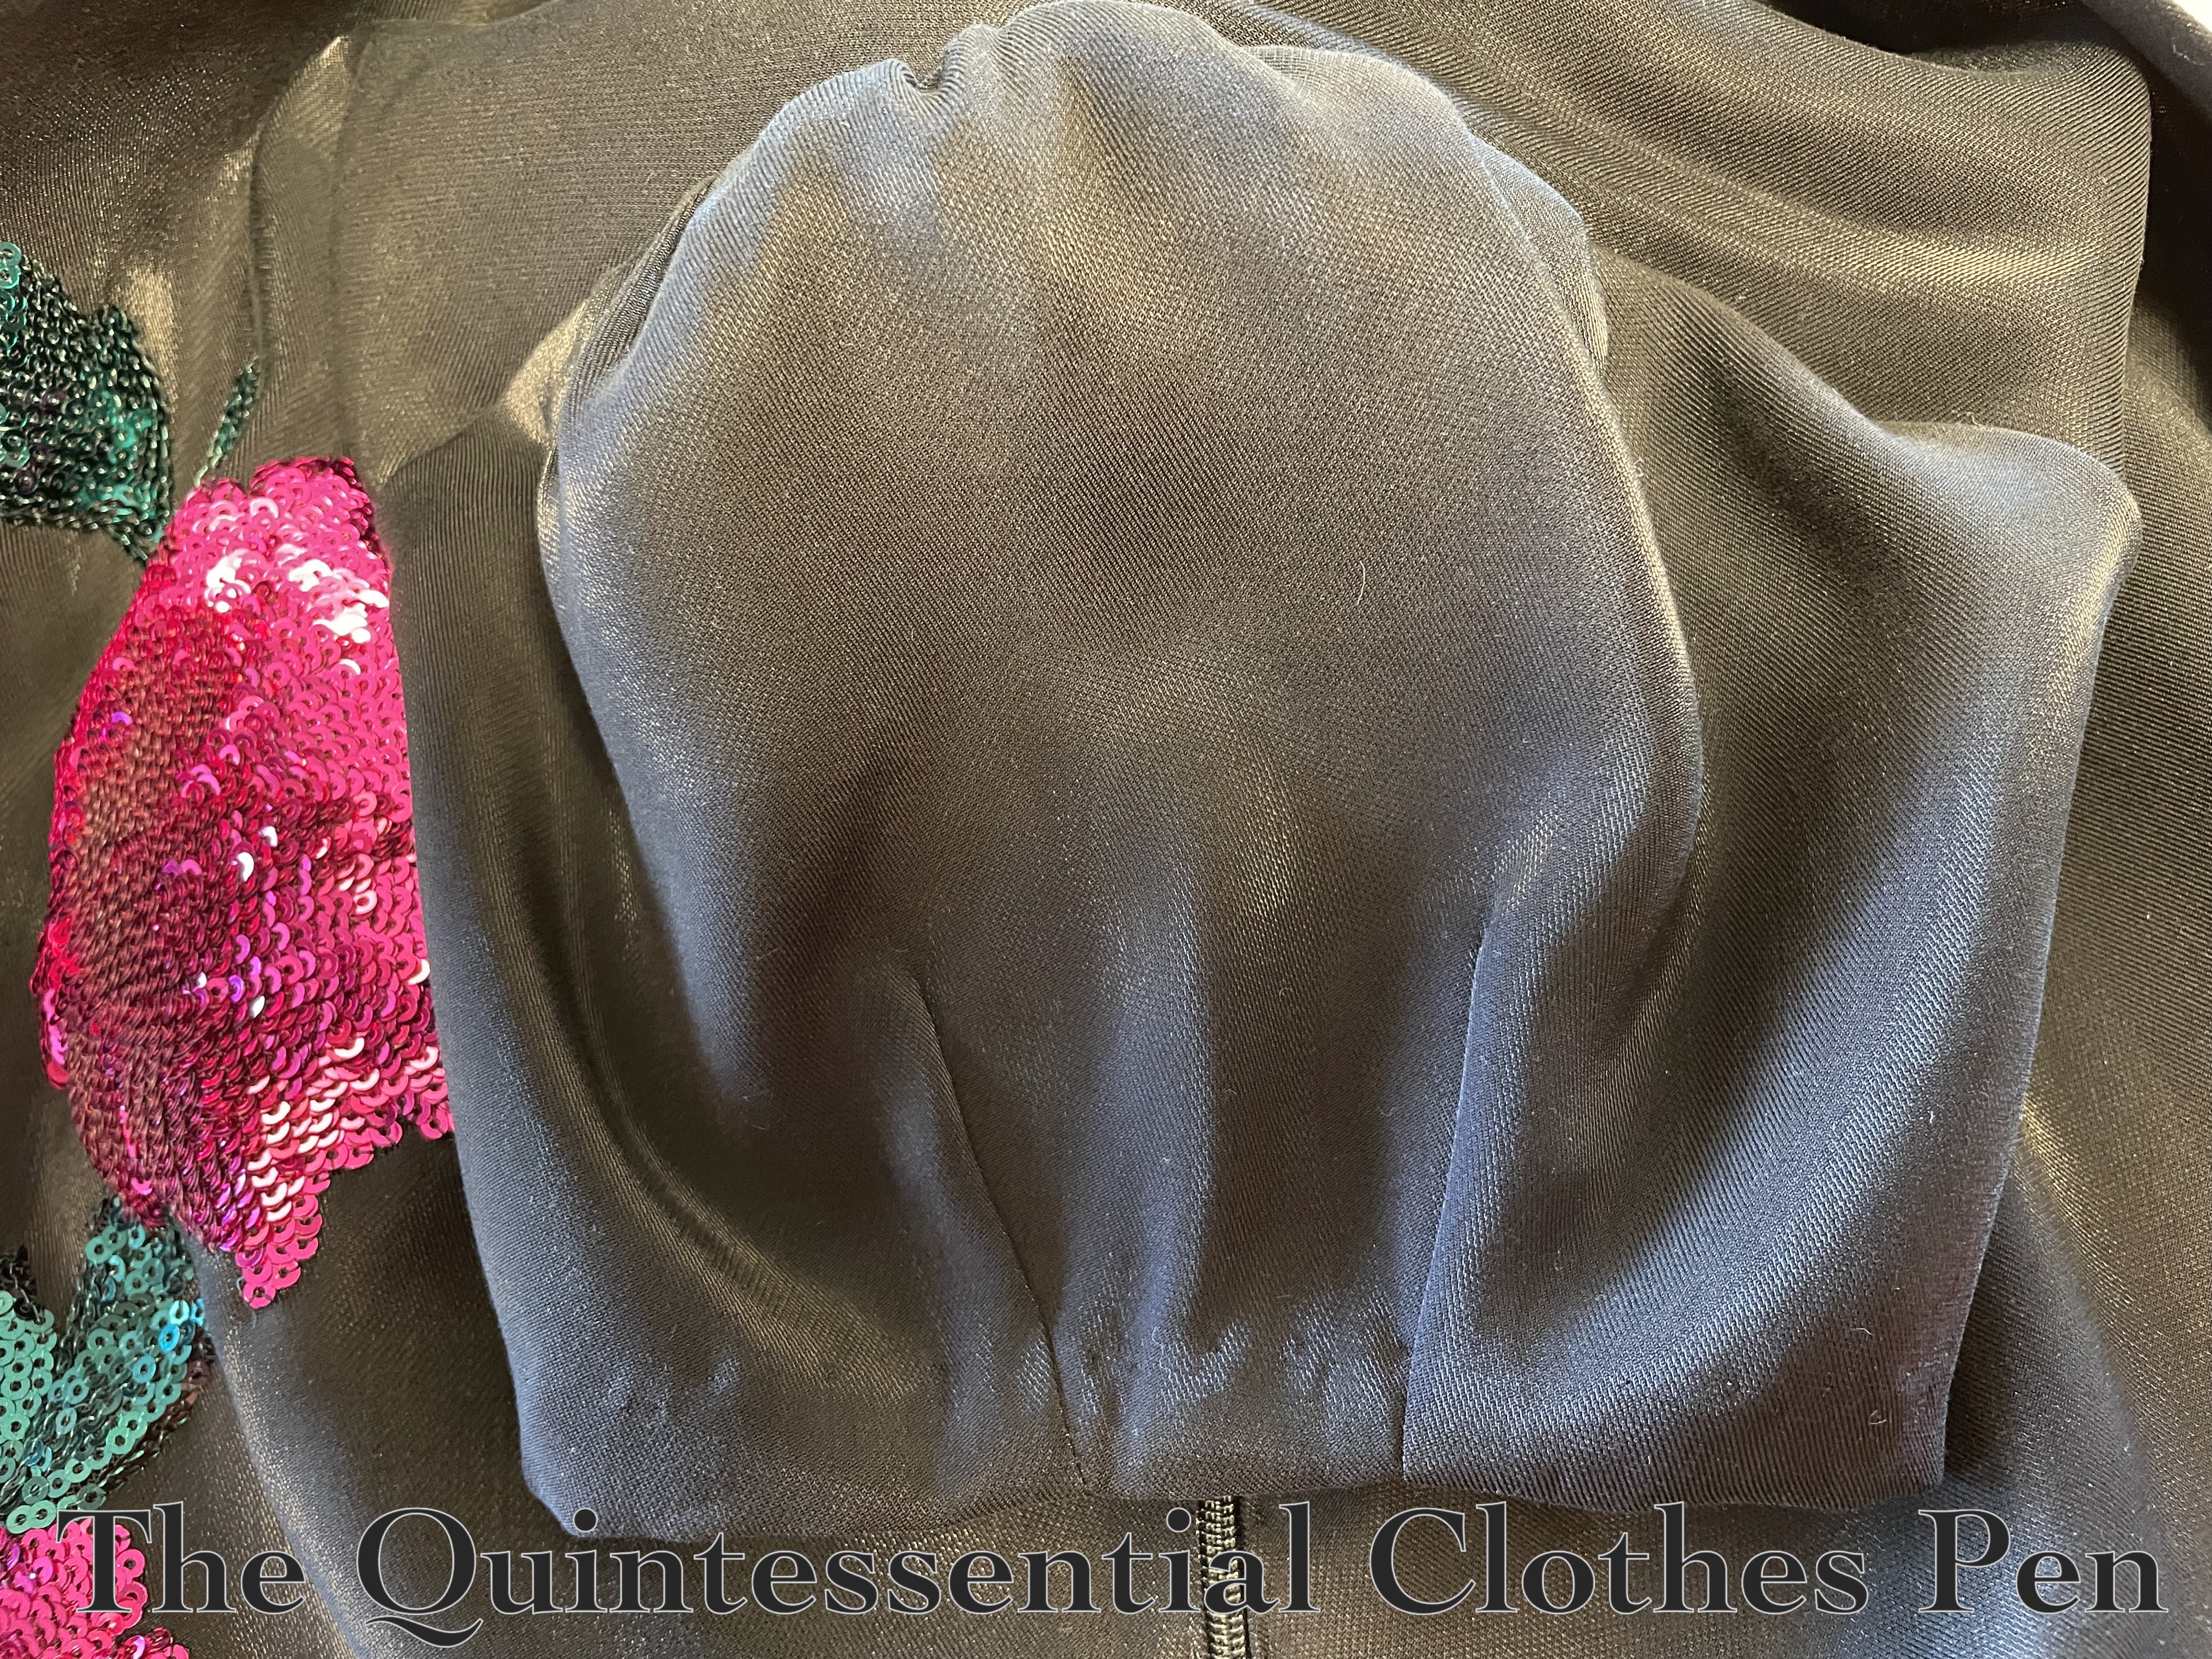
I get great joy out of taking tiny stitches, so I found it fun to catch every sequin as I went around all of the edges of all of the flowers! Here is a view of what all of those stitches look like on the inside of the dress! I didn’t think ahead to put anything to help stabilize the fabric on the inside… I wonder if it would have been less comfortable to wear if I had. Thankfully, the shimmer twill holds its own pretty well and doesn’t show puckers on the outside!
Eventually, all of my sequined bits were sewn in place. And then it was time to finish assembling the dress! The machine sewn seam allowances are all left raw on the inside.
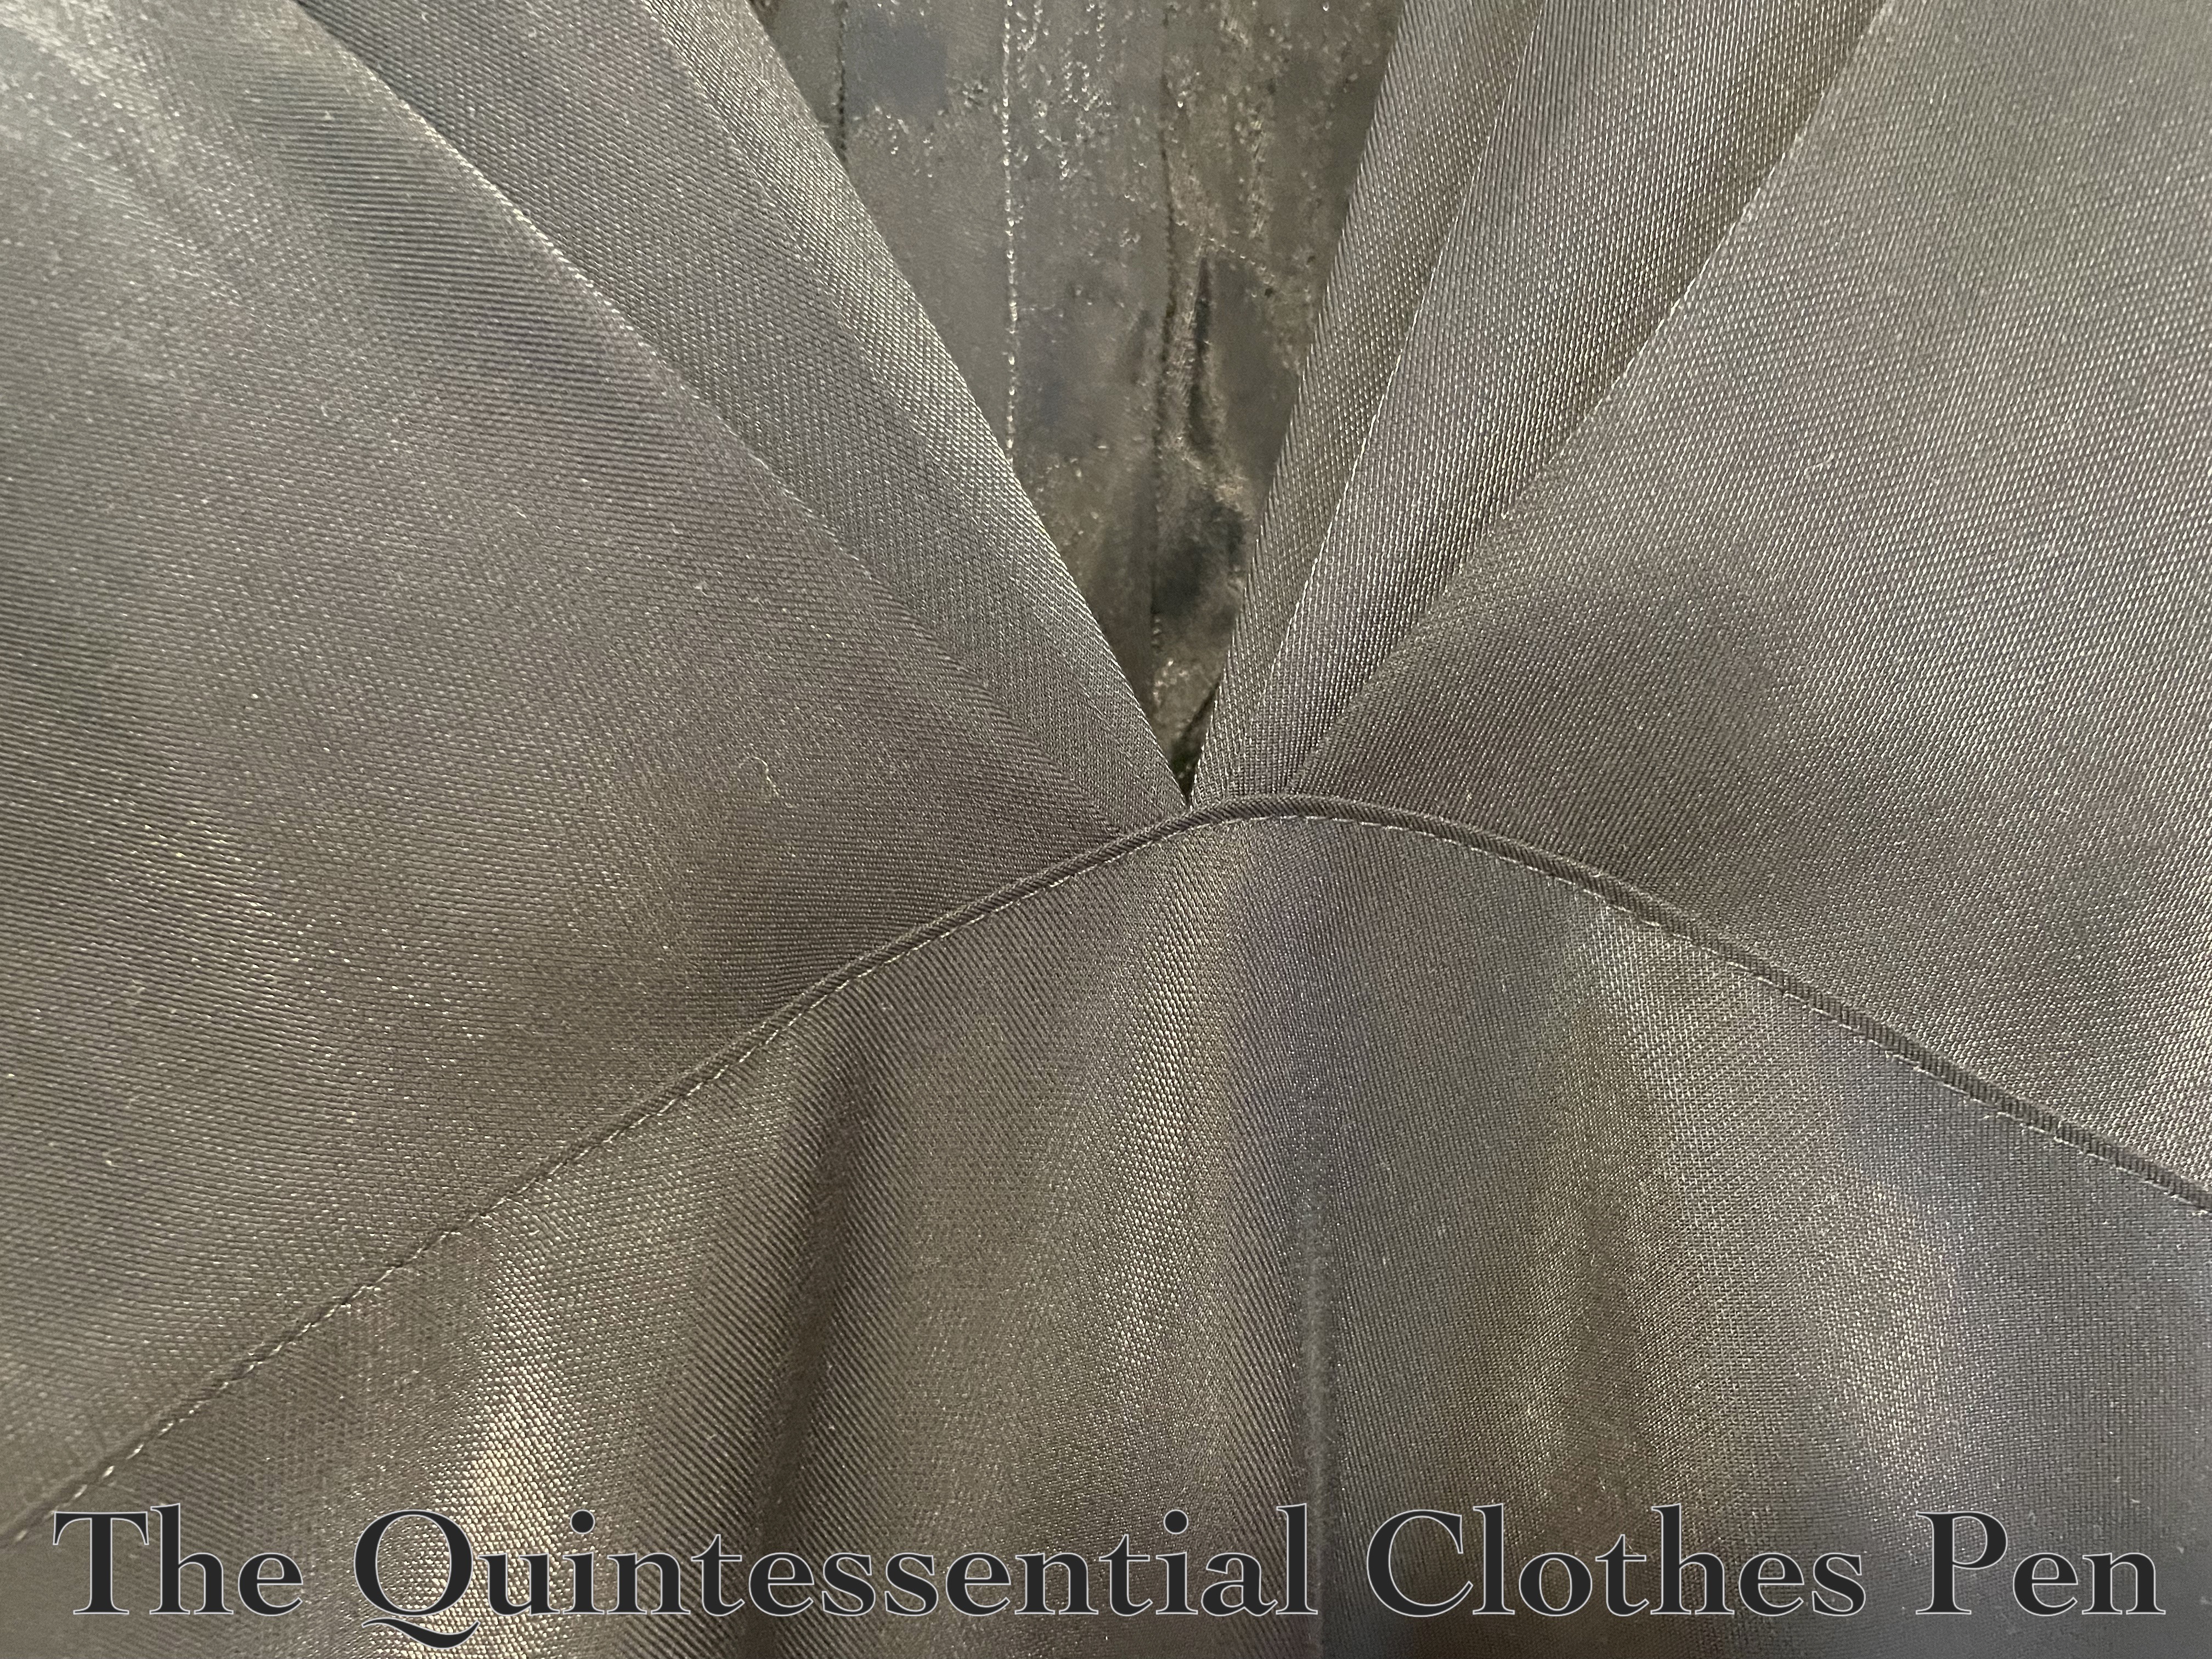
And the top back pieces and back skirt have a fun period way of attaching to each other, which is with a top stitched seam (shown in the photo below). This is pretty common on bias cut dresses I have seen. I understand that this helps to stabilize the seam and is easier to match and line up than it would be to put right sides together in the usual method.
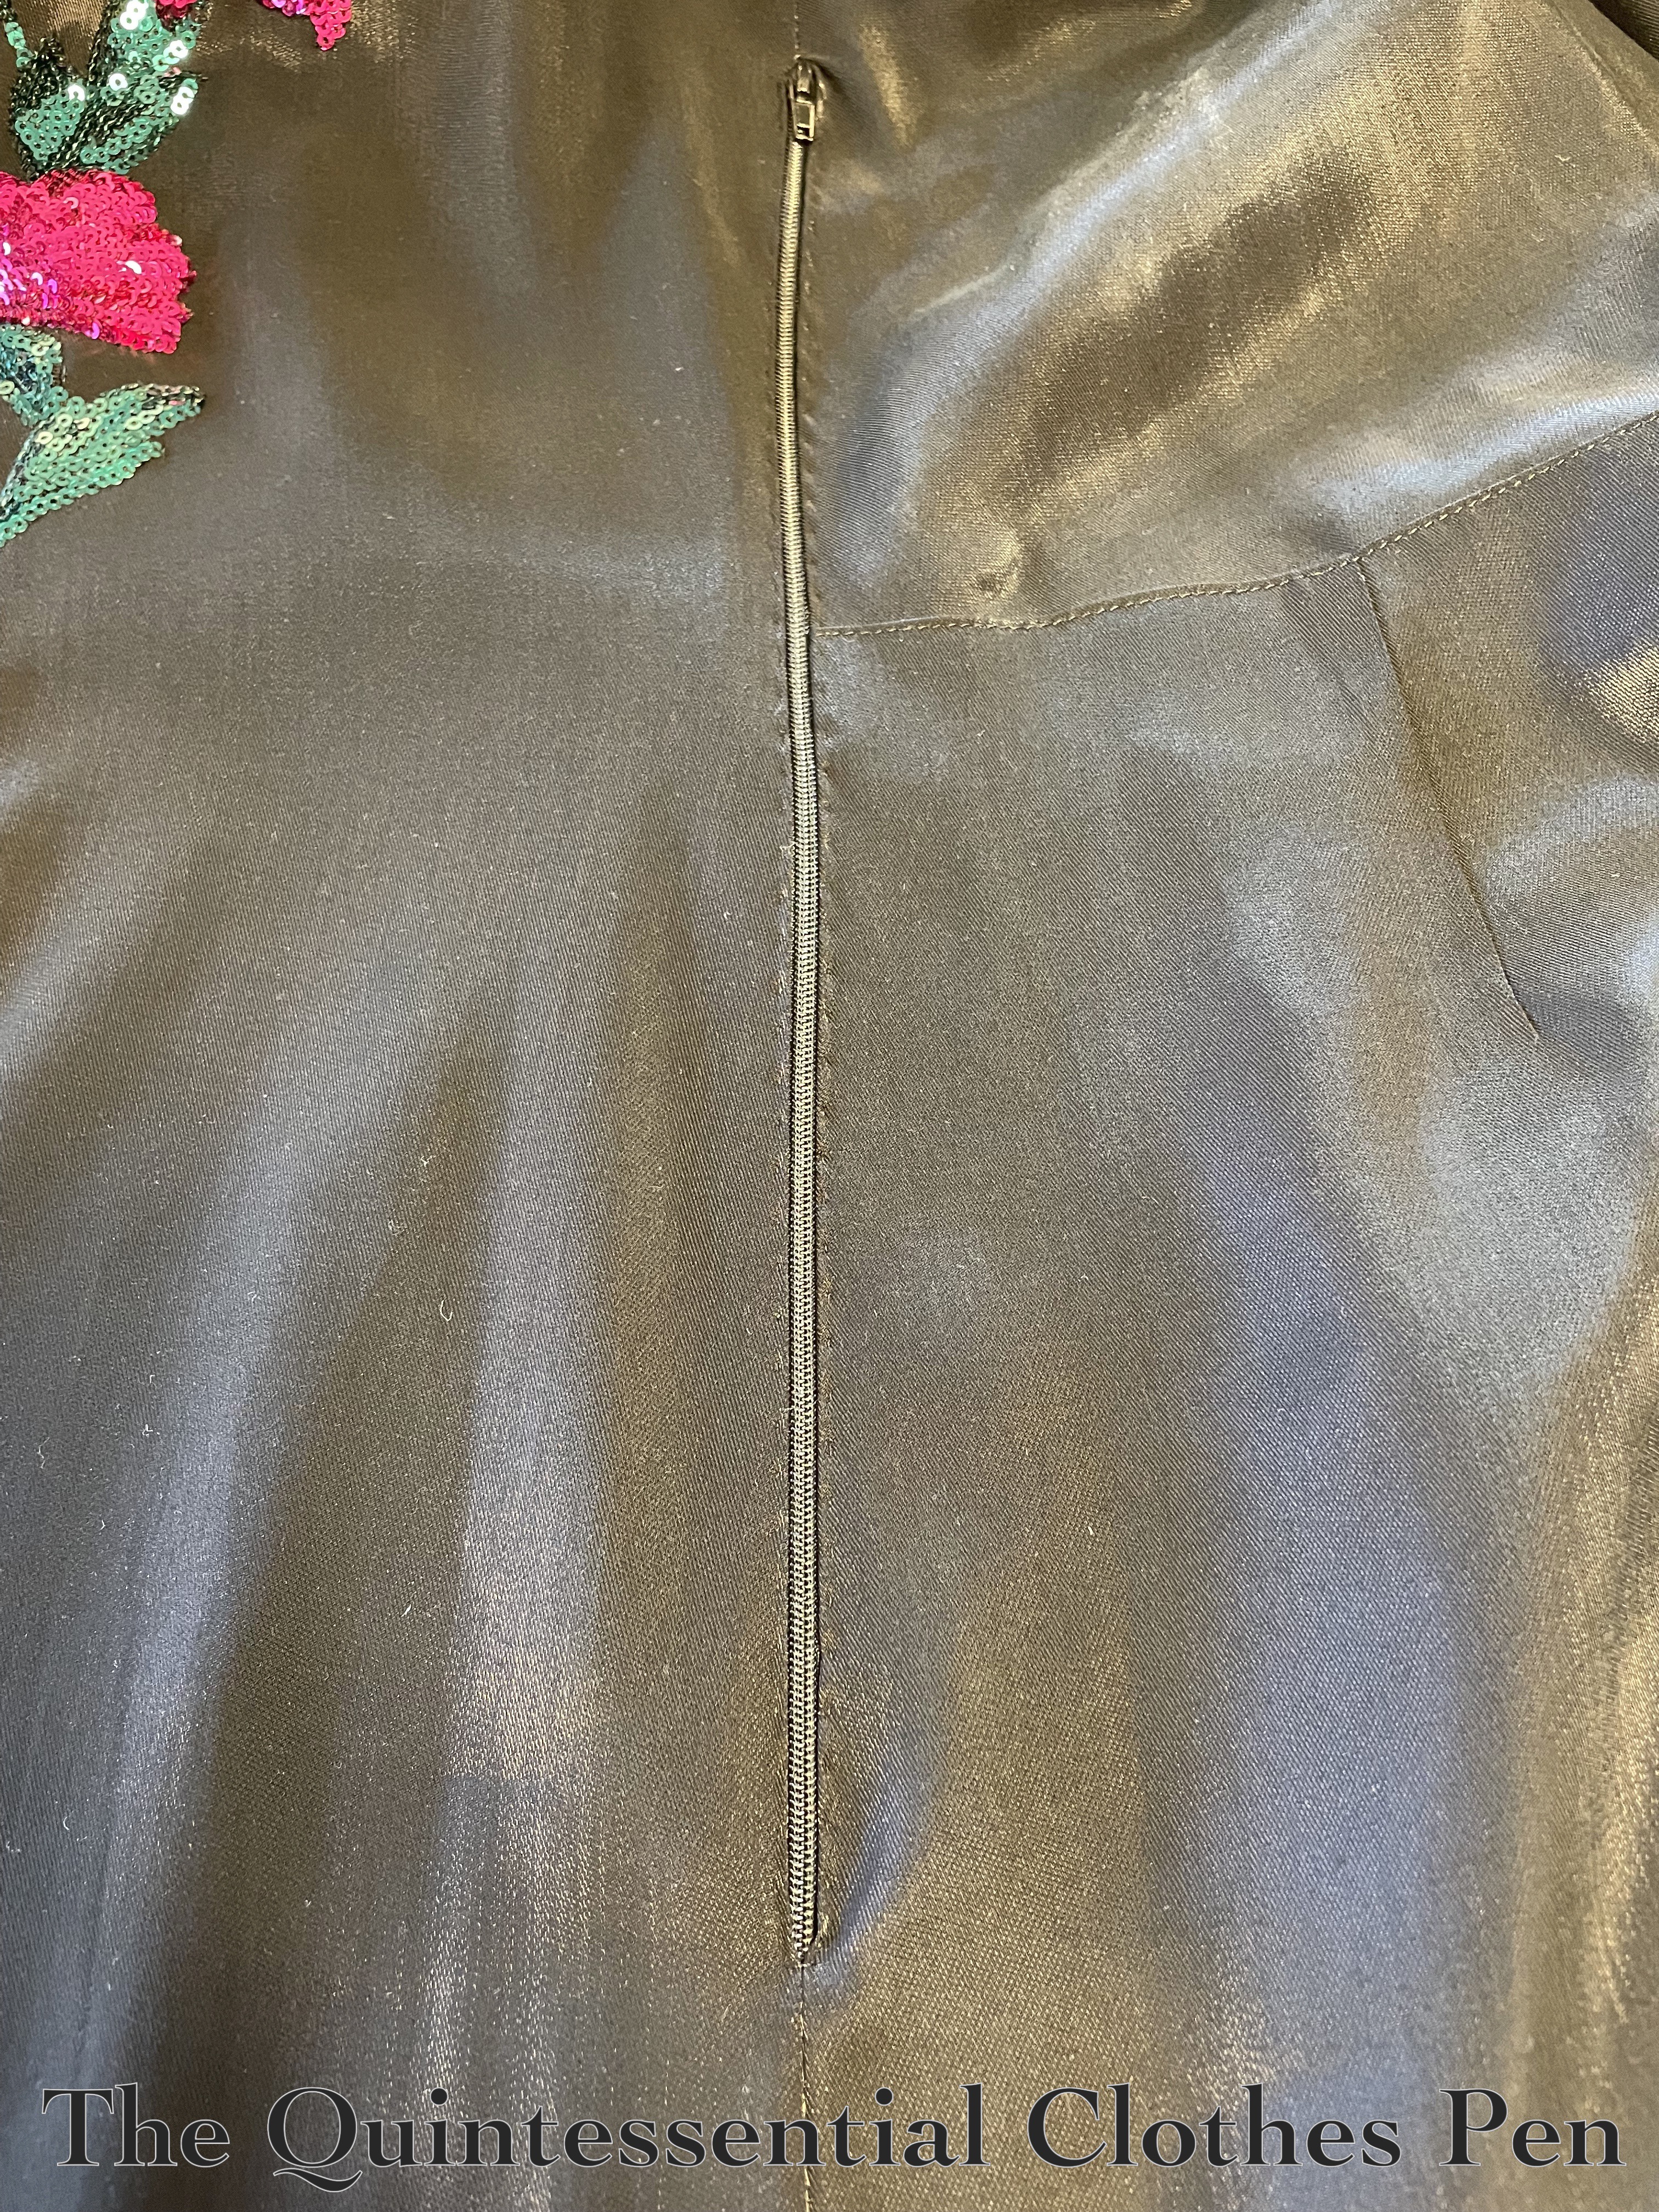
For closures, there is an exposed zipper (gifted to me) on the proper left side of the dress. This method and style was taken directly from the original dress information in PofF2. Below is a photo of the zipper, which is hand stitched into place.
The sleeves and skirt hem are stitched by hand, also following information in PofF2. Here’s a closeup of the sleeve. It is shaped with gathers at the top and two darts at the bottom. The hem is slip stitched into place by hand.
The only other thing that this dress needed was shoulder pads. I don’t think the original has them, as the shoulders look very sloped to me, but they were needed to make the dress sit properly on my body (and they add a very 1940s square shouldered look!).
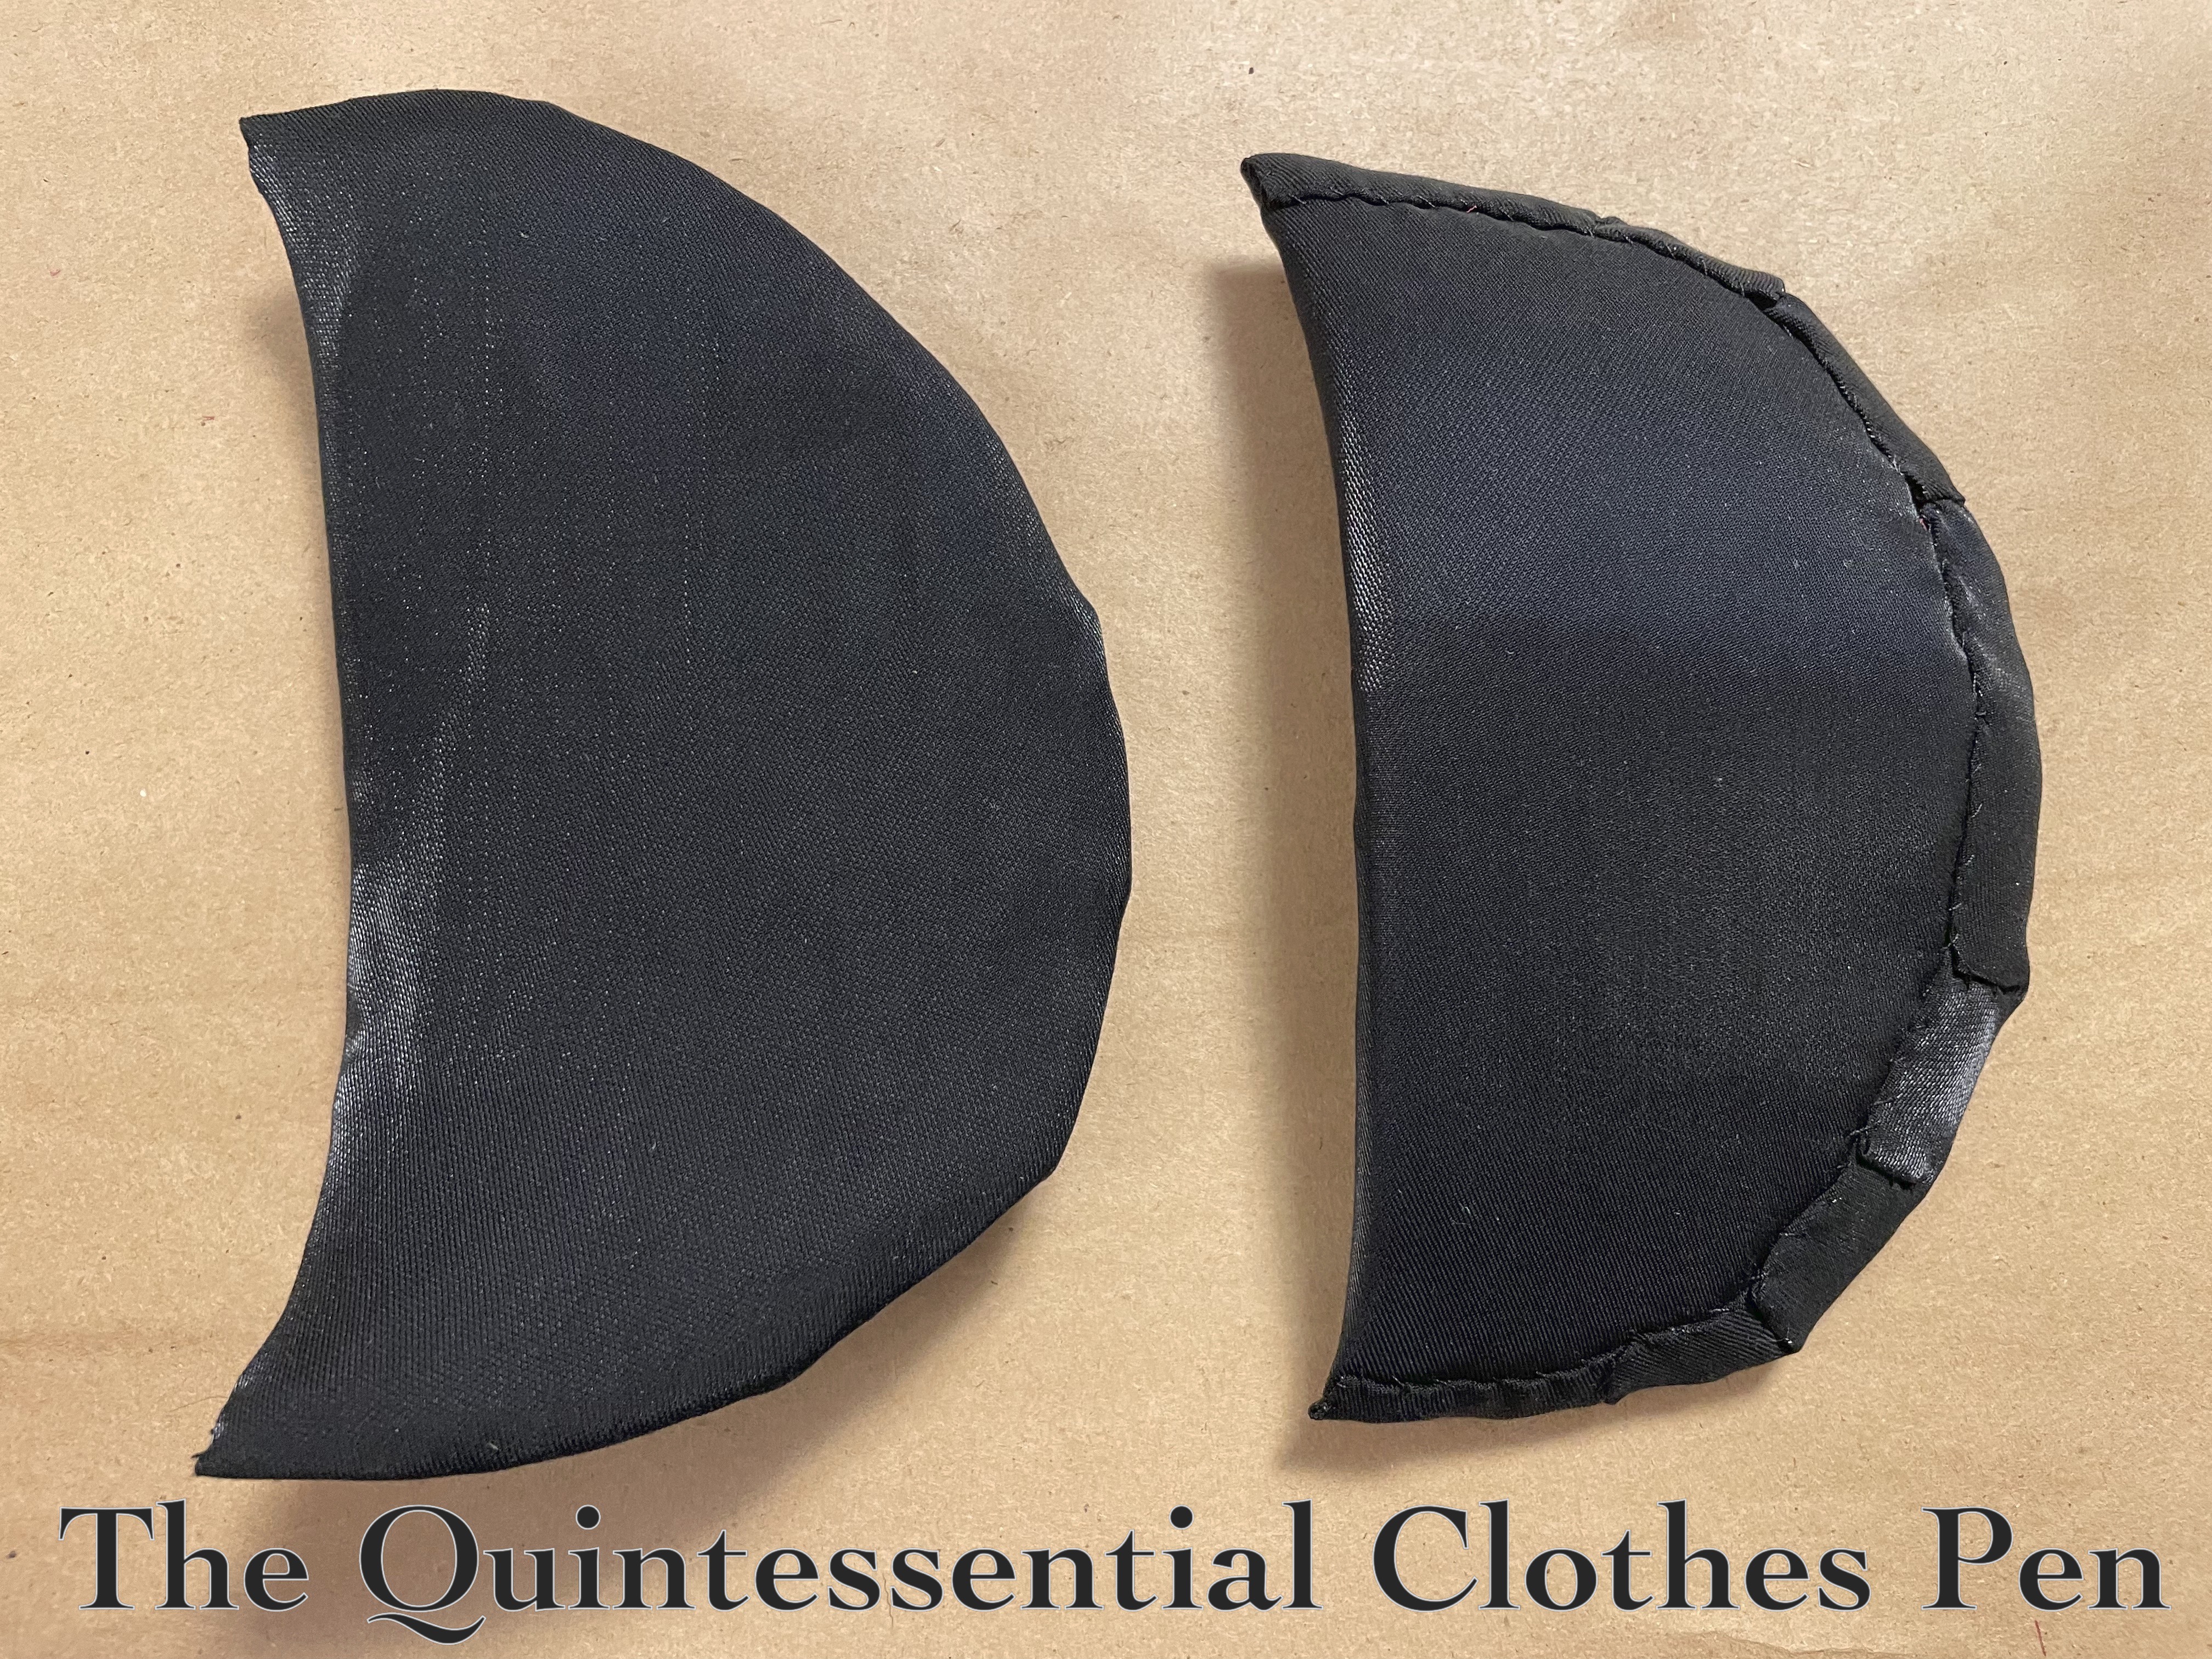
Conveniently, I had a pair of shoulder pads in my stash that worked well. They were, however, light colored and I thought it would be nice if they matched my dress better, so I covered them with scraps of the dress fabric before tacking them in.
Below is a photo of my covered shoulder pads followed by a photo of the shoulder pads sewn in place on the gown, with bra strap keeps added as well.
And that’s it for now! This post is long enough, so pictures of the full ensemble will be in another post!