

I finally open my rereleased new copy of Patterns of Fashion 2 (Pof2) last summer and had great fun looking through all of the previously included garments (from the original edition) as well as the newly included ones. I remember seeing one dress (picture below), in particular, and thinking that it would be fun to recreate it, but that the beading seemed like it would be quite a challenge!

A few months later, I was at Joann Fabrics and saw a fabulous magenta and green sequined net poking out of a shelf. I pulled it out and immediately thought that the colors were very me. But did I have a use for it? Not really… Except… What if I used that fabric to recreate the beaded idea on that dress from PofF2??? Schiaparelli’s designs often made use of magenta pink as a Surrealist inspired color, so it didn’t seem too far fetched for me to include that color in my version of the dress.
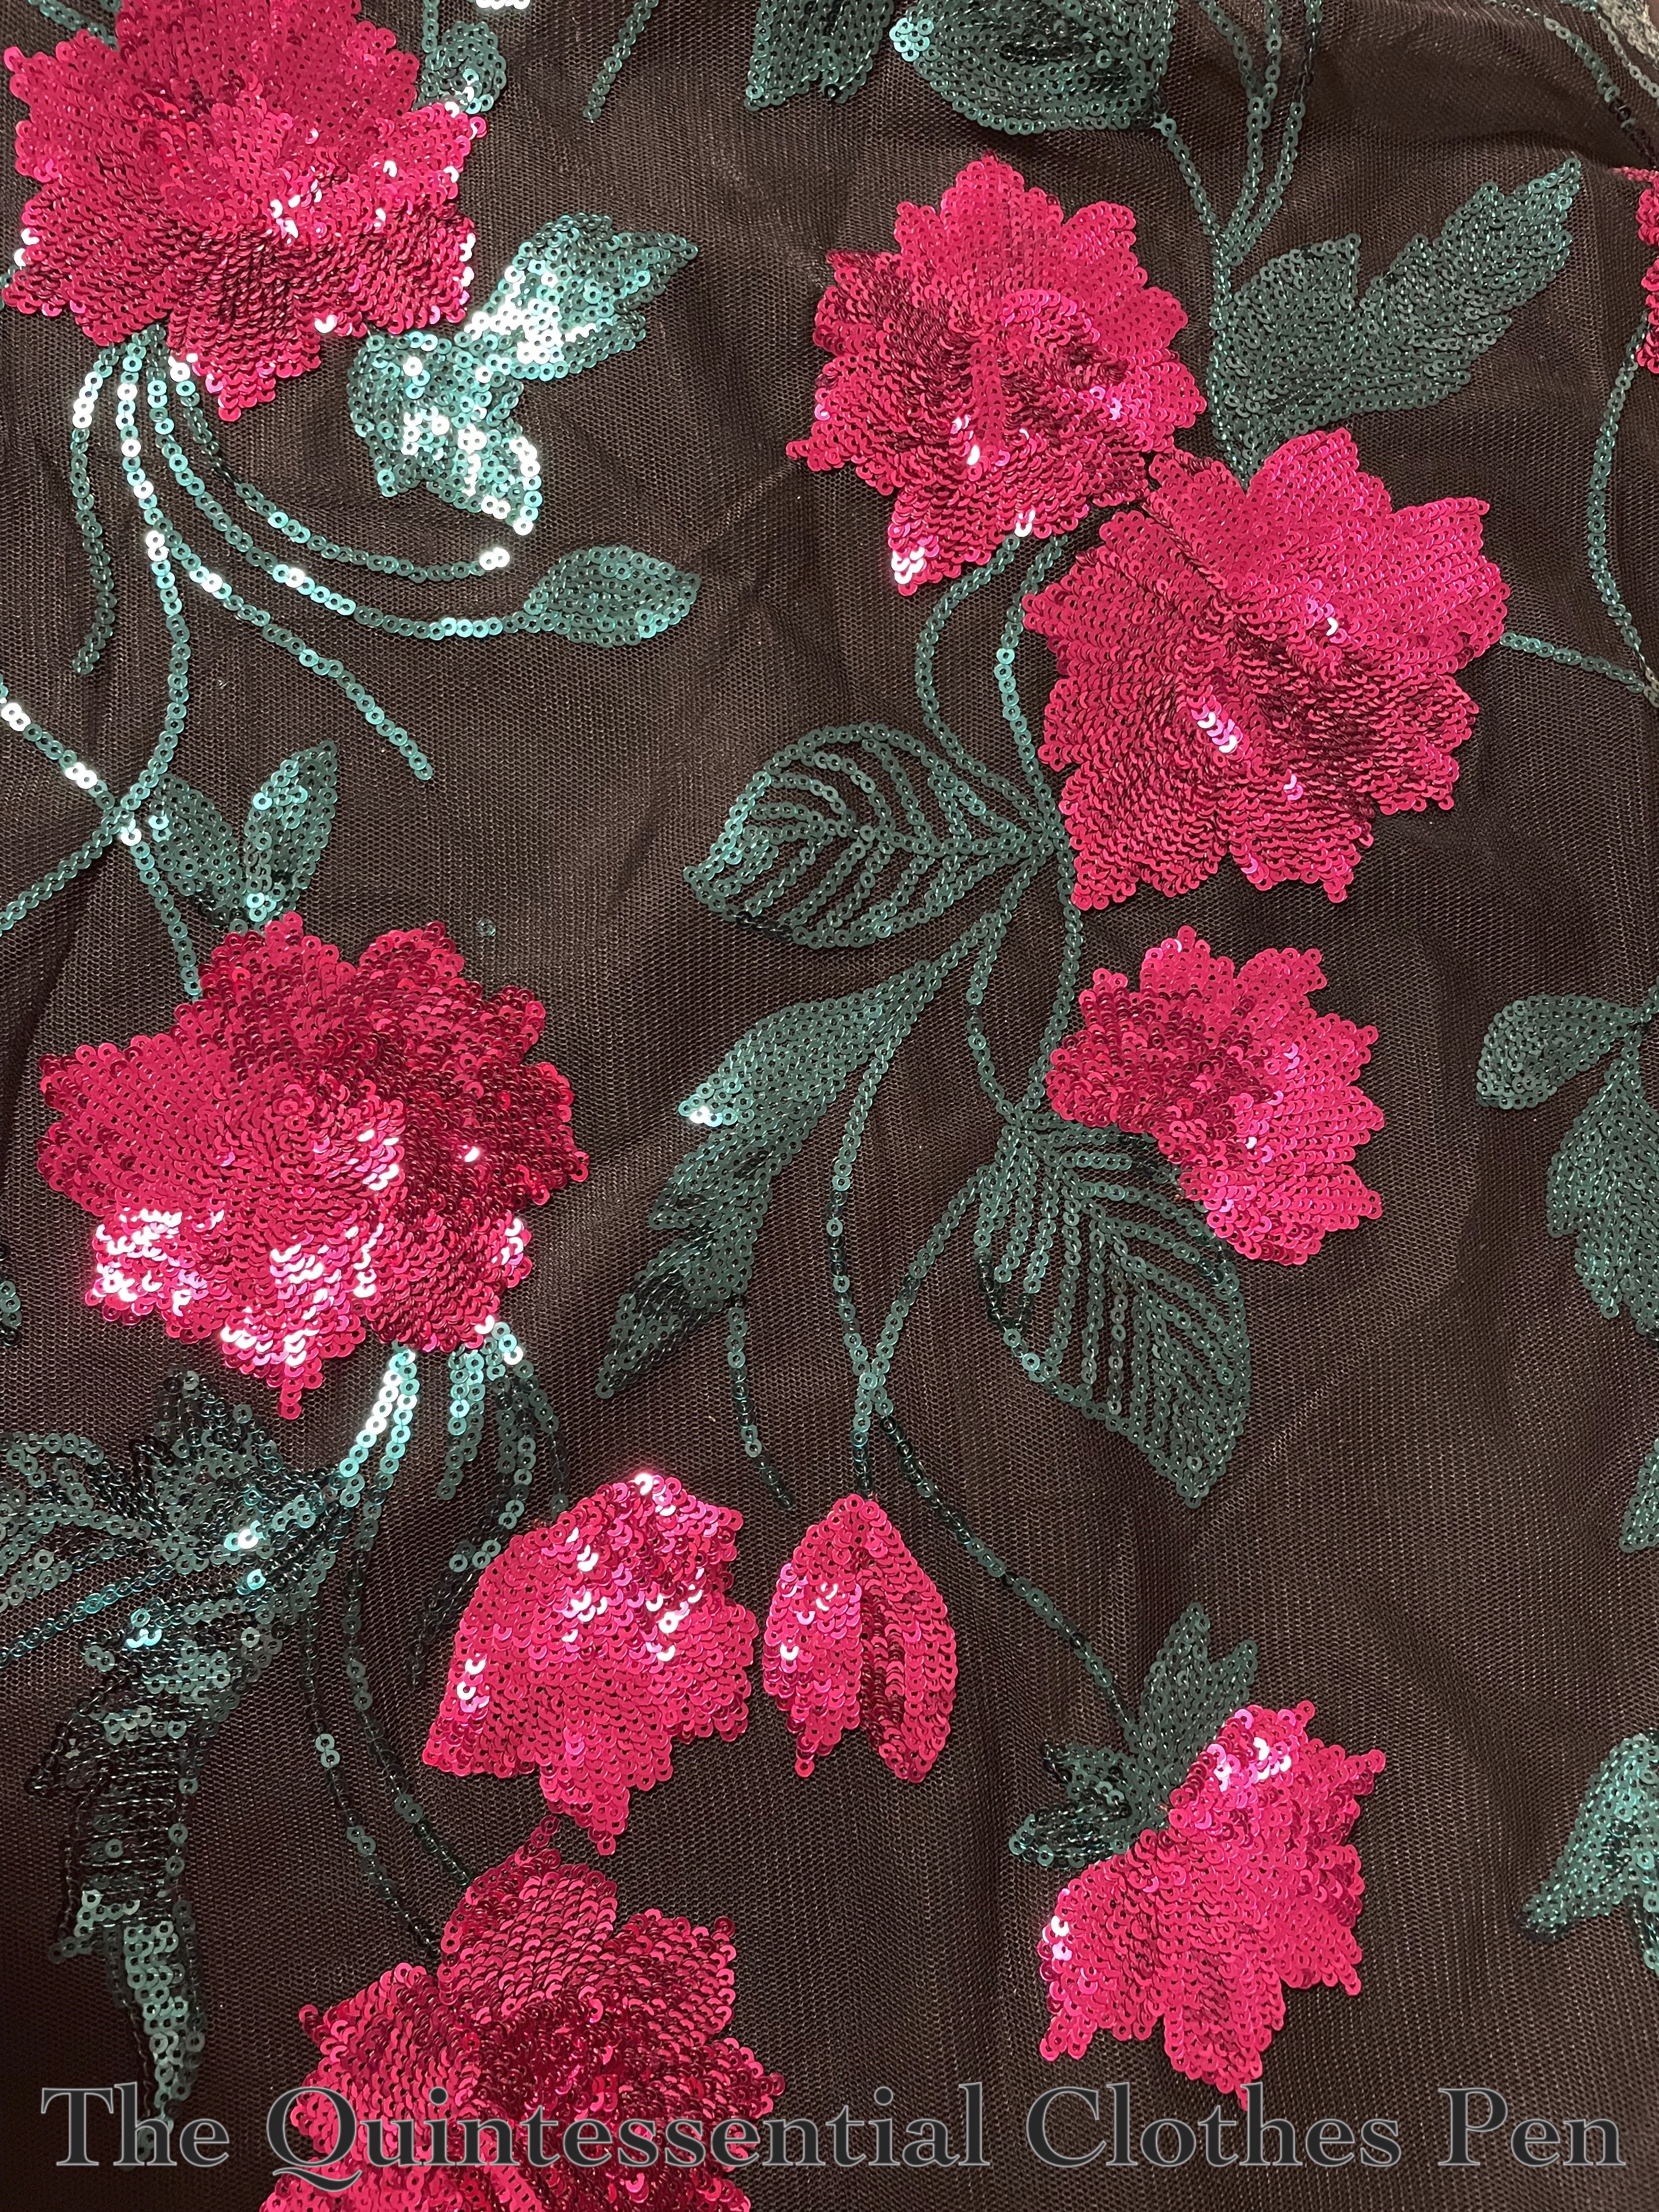
So, I bought some. ¼ of a yard, to be exact. Not too much, but enough to be able to pick and choose different parts of the flowers to create a pattern similar to my inspiration. Below is a photo of the inspiration fabric: magenta and green sequins on black net.
Not too long after that, I decided that instead of wearing my updated 1933 Dramatic Evening Dress to a December event, I would instead make a new one–the 1940 Schiaparelli dress!
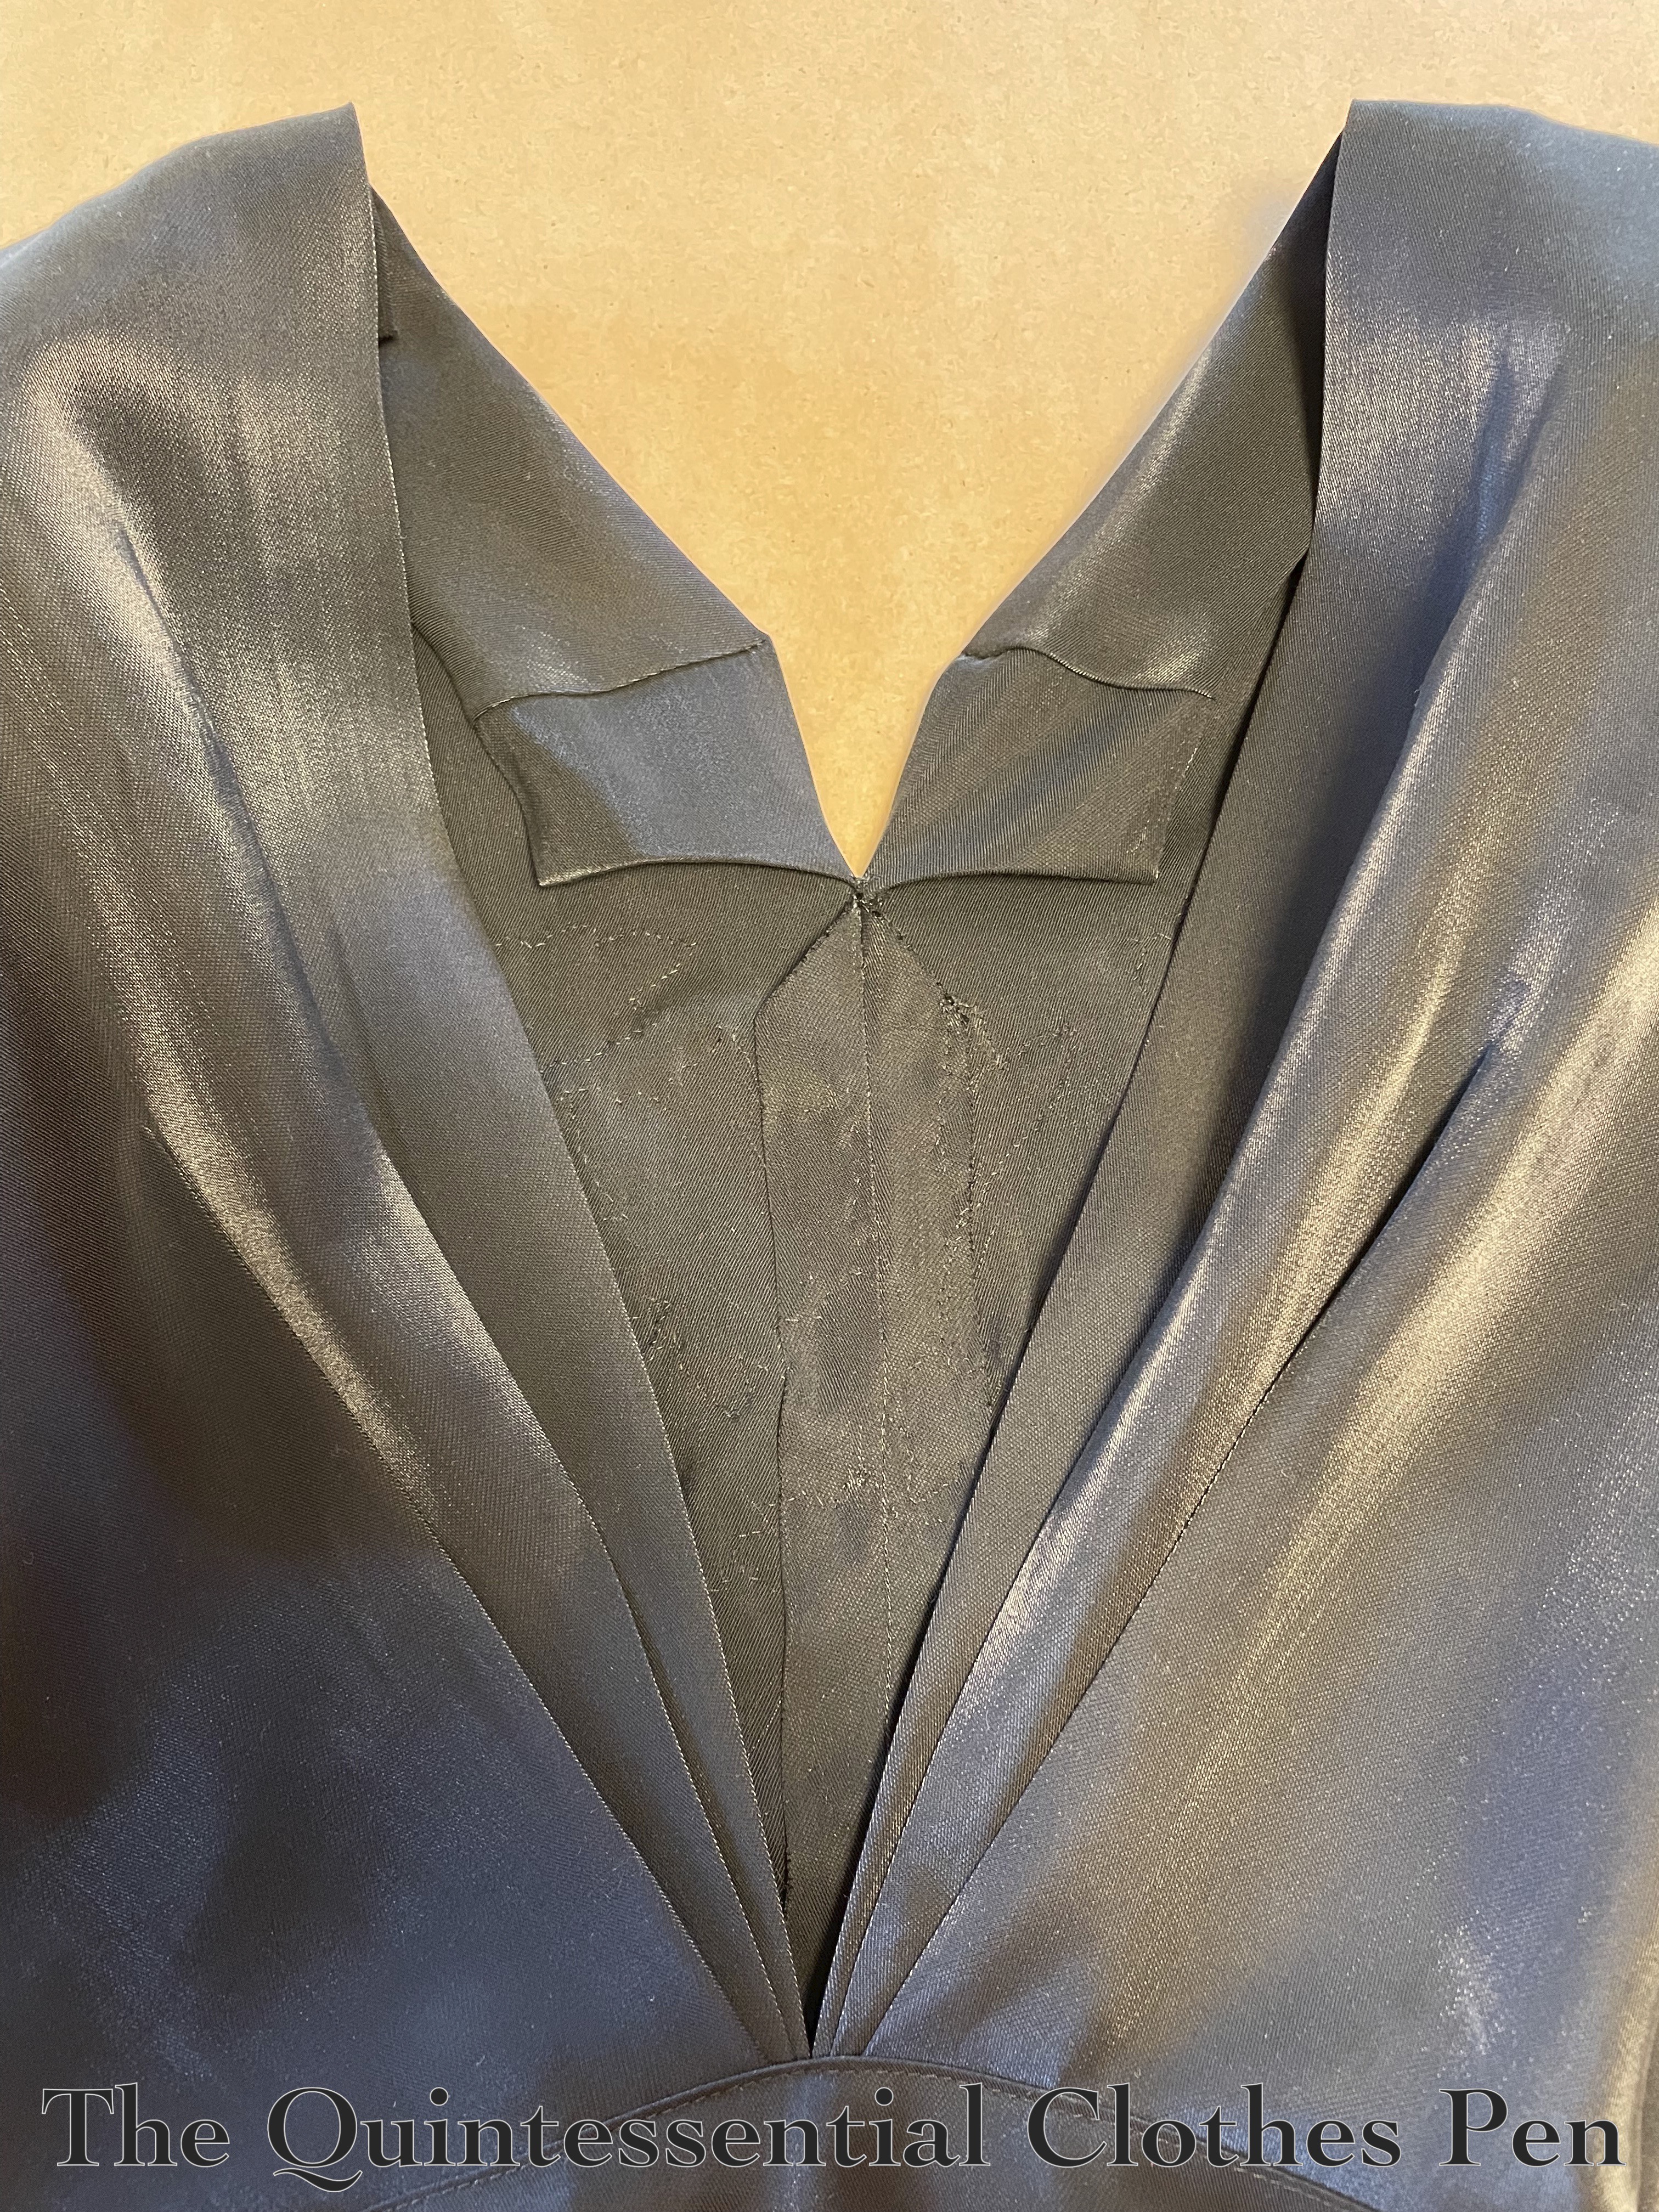
The first step after my decision was to find black fabric. The original is silk crepe, but I wanted to keep the cost down a bit more than what silk would allow for. I ordered a few swatches of rayon crepe and also went to stores to look at other options. I’d almost decided on one when I came across another random fabric at Joann that stood out to me. I debated for awhile, but decided the Black Shimmer Twill was more interesting than plain black crepe (the shimmer twill is visible in the above photo underneath the sequined net).
The next step was to size up the pattern in PofF2 and adjust it to be not tiny. I am definitely not the measurements of the original! I did those things and made a mockup:
- The dress skirt worked, but I wasn’t happy with what the sleeves were doing.
- The neckline needed some work to fit comfortably.
- I changed the grainline of the back piece. On the original, the back bodices are cut on the bias, but I decided that they would lay better if I cut them on the straight of grain.
Then, another mockup. I made a few more changes and finally it was time for the real fabric!
Cutting out the pieces was pretty easy. There actually aren’t too many of them, especially because the facings are cleverly cut on with the front and back bodice pieces. The pieces are: back skirt, back bodice, front bodice/skirts, and sleeves.
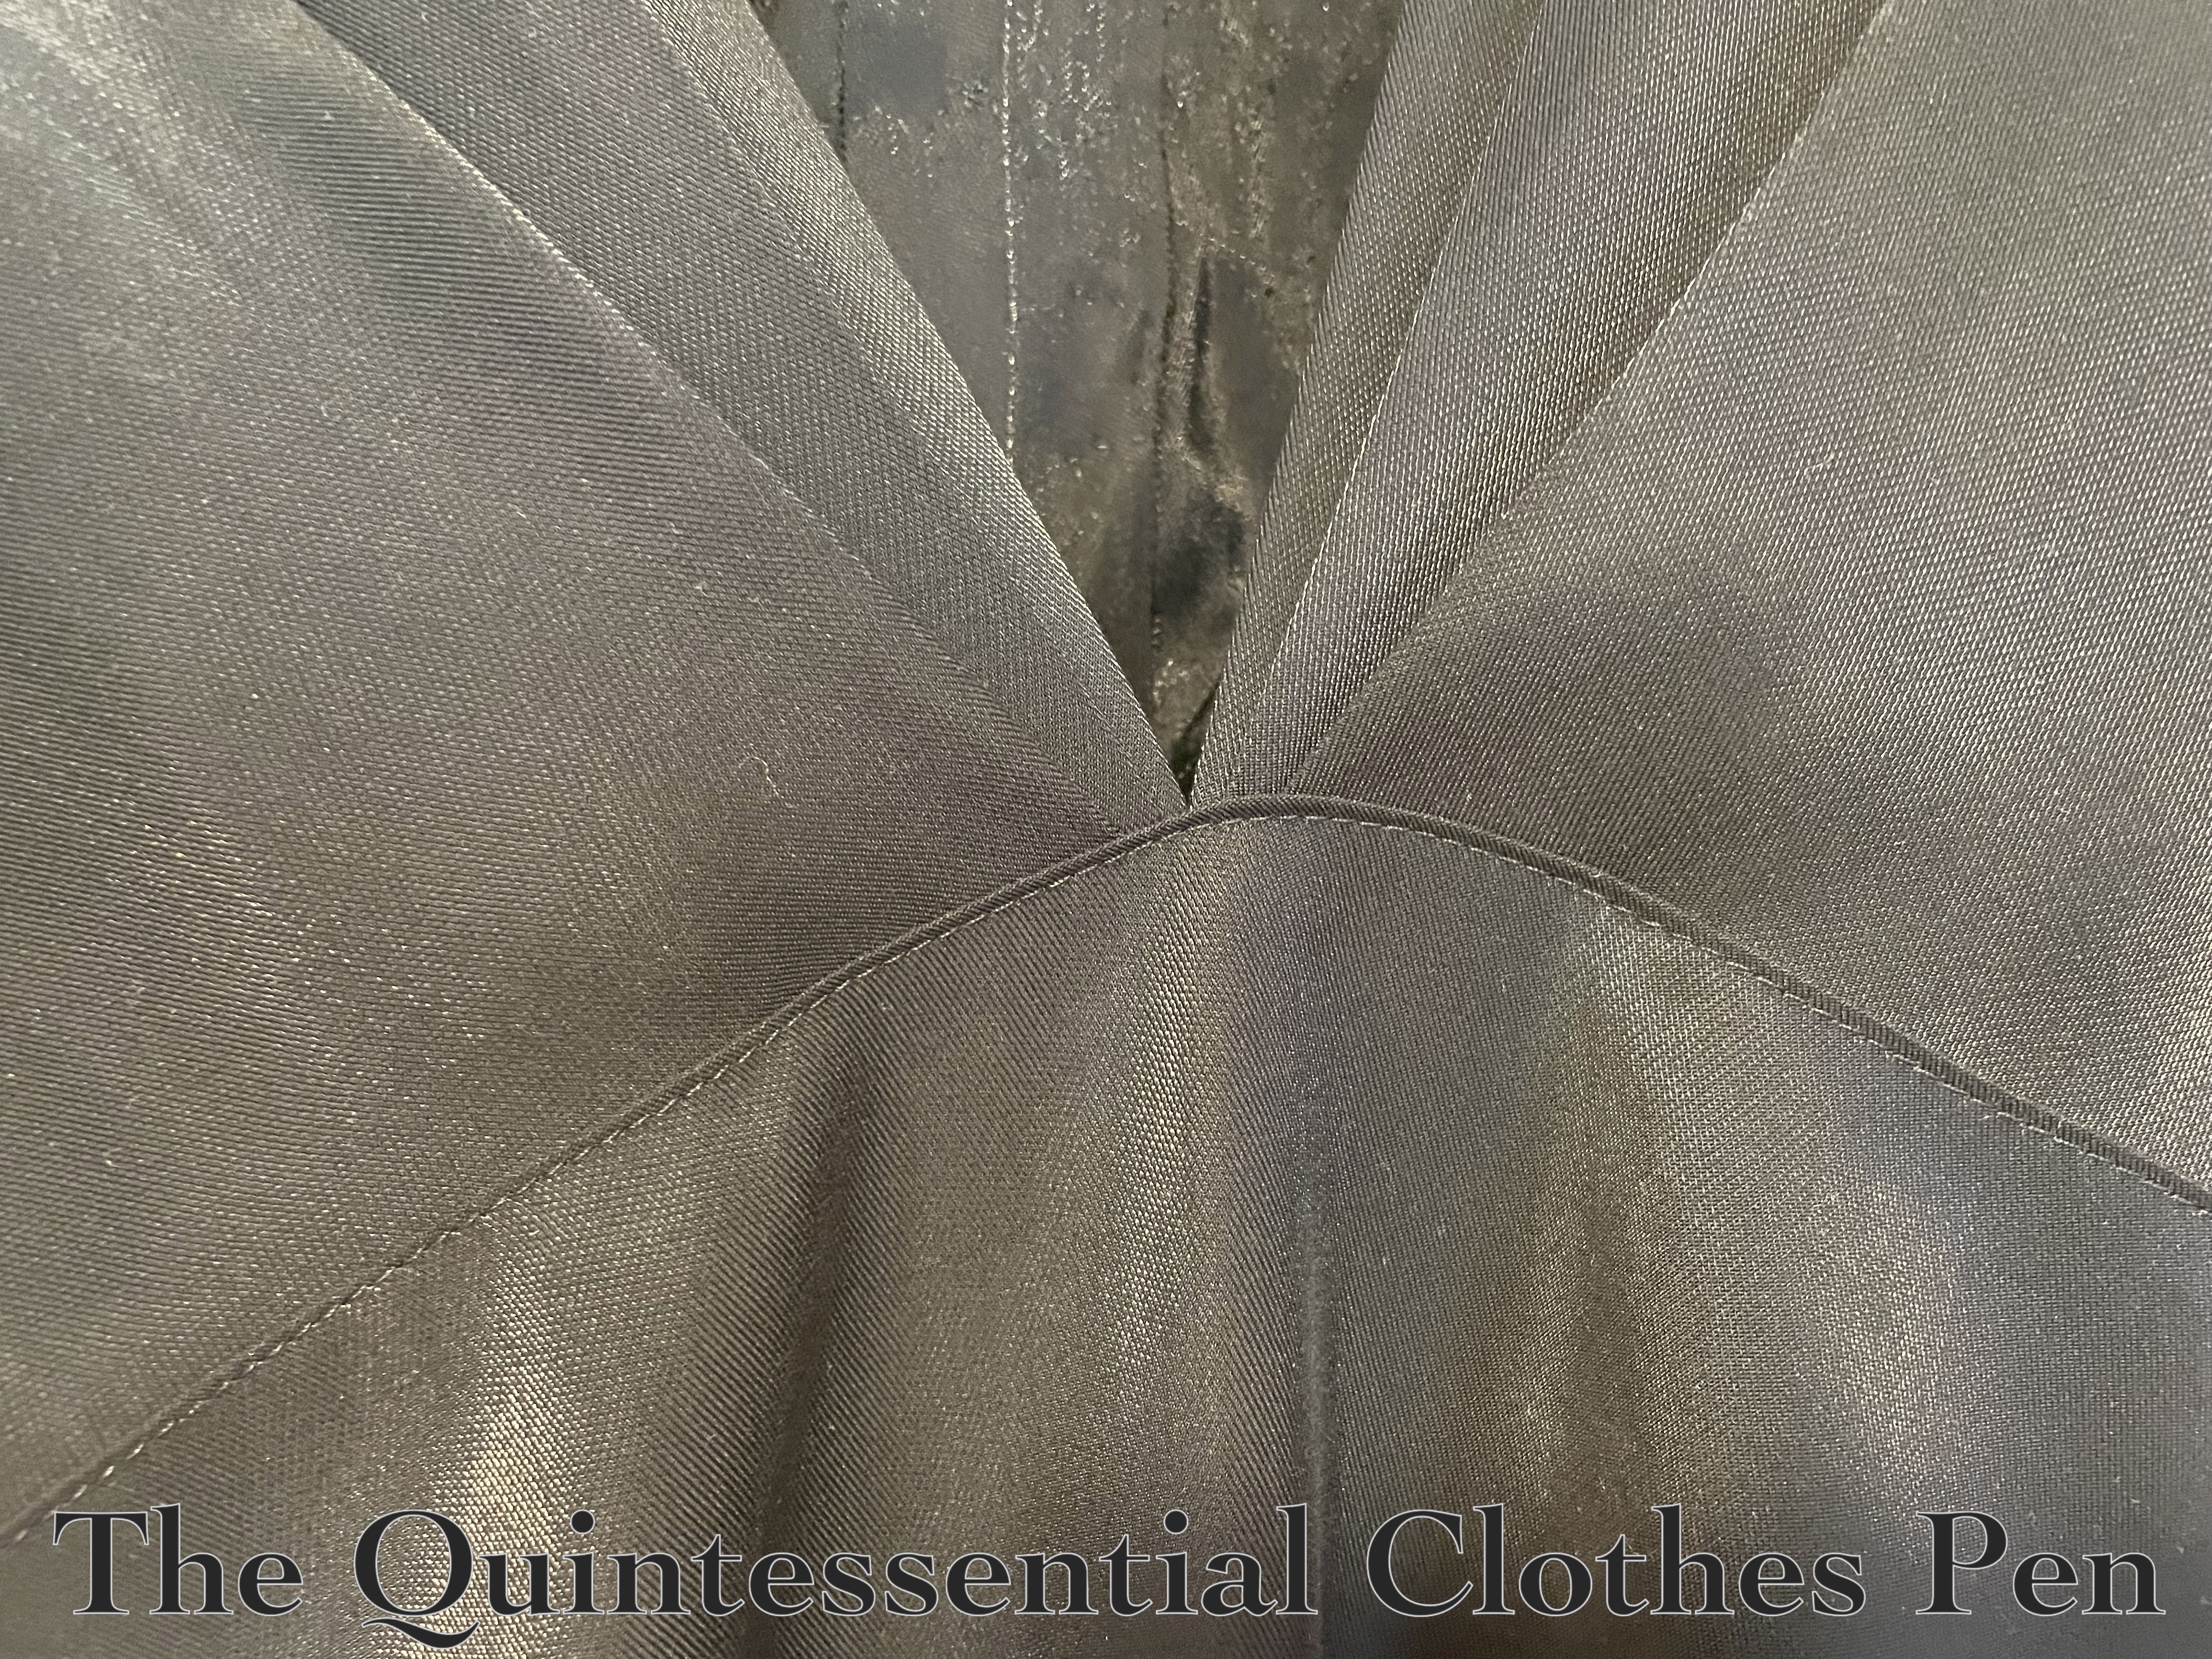
Below is a photo of the finished garment showing the clever front facings and the shimmery quality of the black base fabric I chose. (The photo also shows the fun back element of this dress: three v-shaped pleats that meet at the center.)
I sewed up all of the seams I could (so that was the center front seam, the sleeves, and the back waist seams) while still keeping the front flat, so that I could replicate, or at least imitate, the floral V-shaped beading on the original.
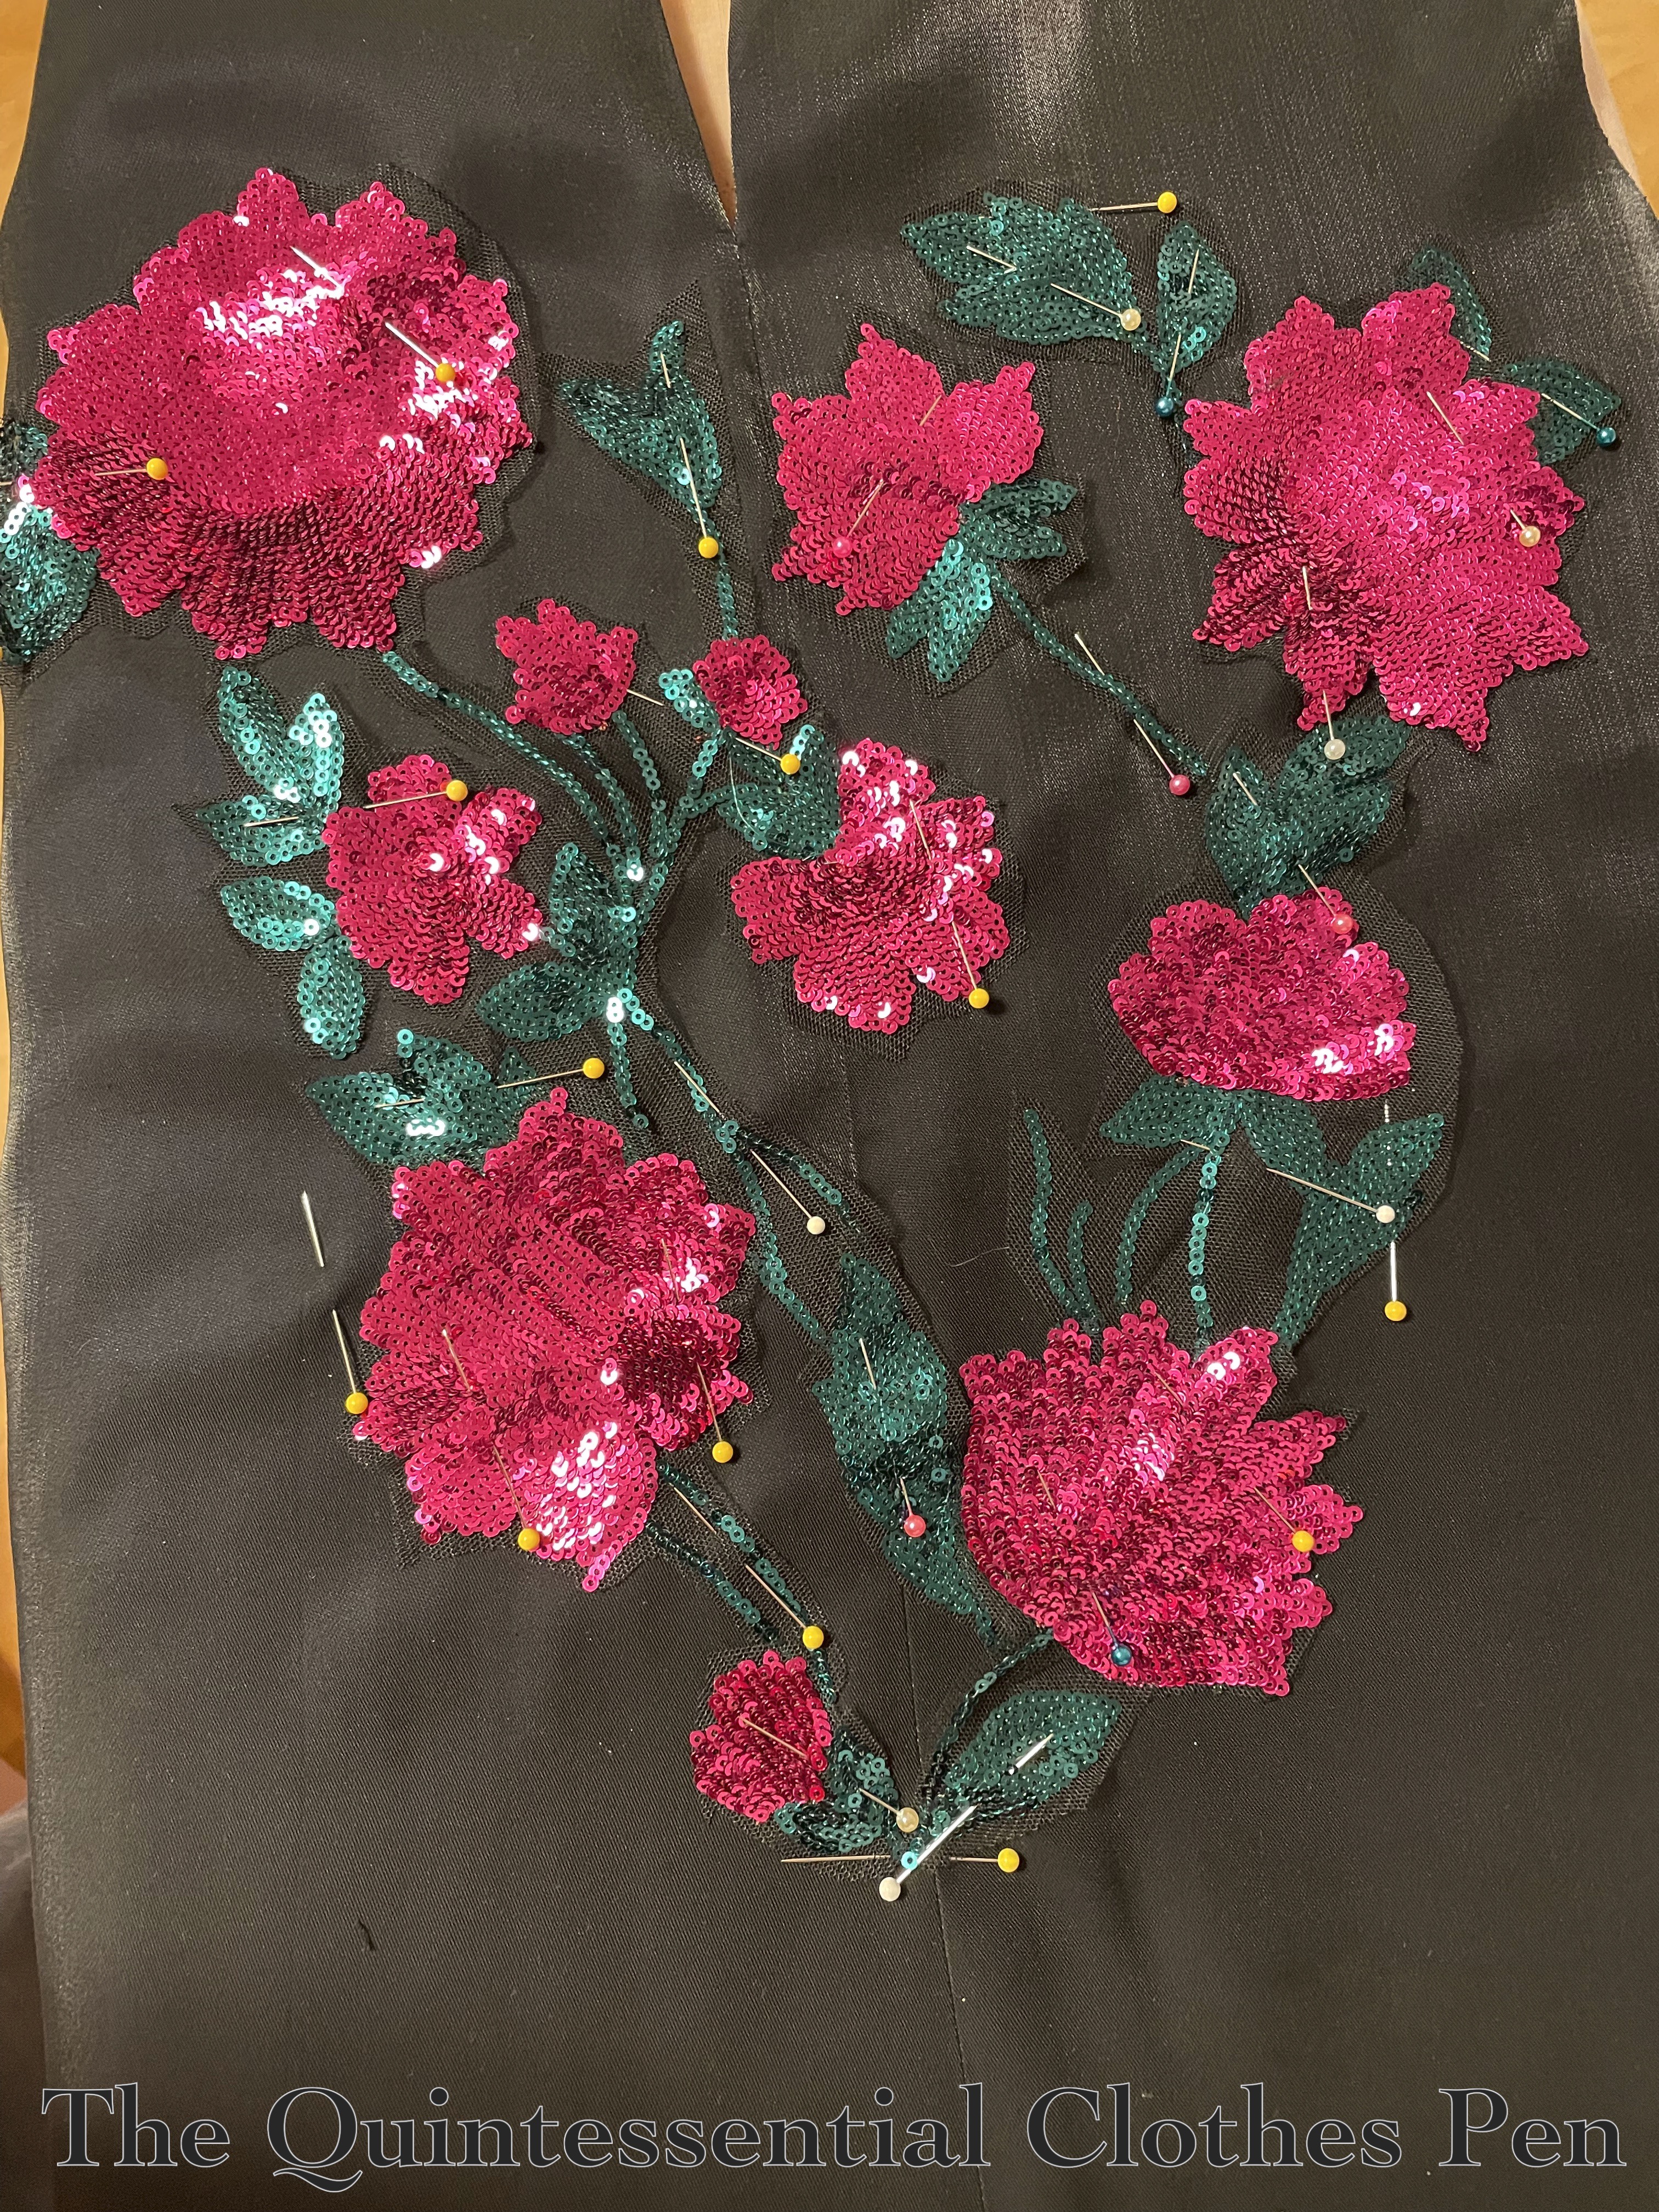
The next big step was using the sequined fabric to create a design similar in shape to the beading on the original. I cut out individual flowers and vines, arranging them on my assembled front pieces and pinning them in place until I was happy with the layout. Below, a photo of my cut out flowers, leaves, and vines while I was deciding on the layout.
Every piece had some net left around the edge so that I could flip them under and appliqué stitch them on. Below is an in-progress photo showing the top right flowers sewn on and some pieces pinned out of the way while I sewed bits that overlapped.
 I get great joy out of taking tiny stitches, so I found it fun to catch every sequin as I went around all of the edges of all of the flowers! Here is a view of what all of those stitches look like on the inside of the dress! I didn’t think ahead to put anything to help stabilize the fabric on the inside… I wonder if it would have been less comfortable to wear if I had. Thankfully, the shimmer twill holds its own pretty well and doesn’t show puckers on the outside!

Eventually, all of my sequined bits were sewn in place. And then it was time to finish assembling the dress! The machine sewn seam allowances are all left raw on the inside.
And the top back pieces and back skirt have a fun period way of attaching to each other, which is with a top stitched seam (shown in the photo below). This is pretty common on bias cut dresses I have seen. I understand that this helps to stabilize the seam and is easier to match and line up than it would be to put right sides together in the usual method.
For closures, there is an exposed zipper (gifted to me) on the proper left side of the dress. This method and style was taken directly from the original dress information in PofF2. Below is a photo of the zipper, which is hand stitched into place.

The sleeves and skirt hem are stitched by hand, also following information in PofF2. Here’s a closeup of the sleeve. It is shaped with gathers at the top and two darts at the bottom. The hem is slip stitched into place by hand.
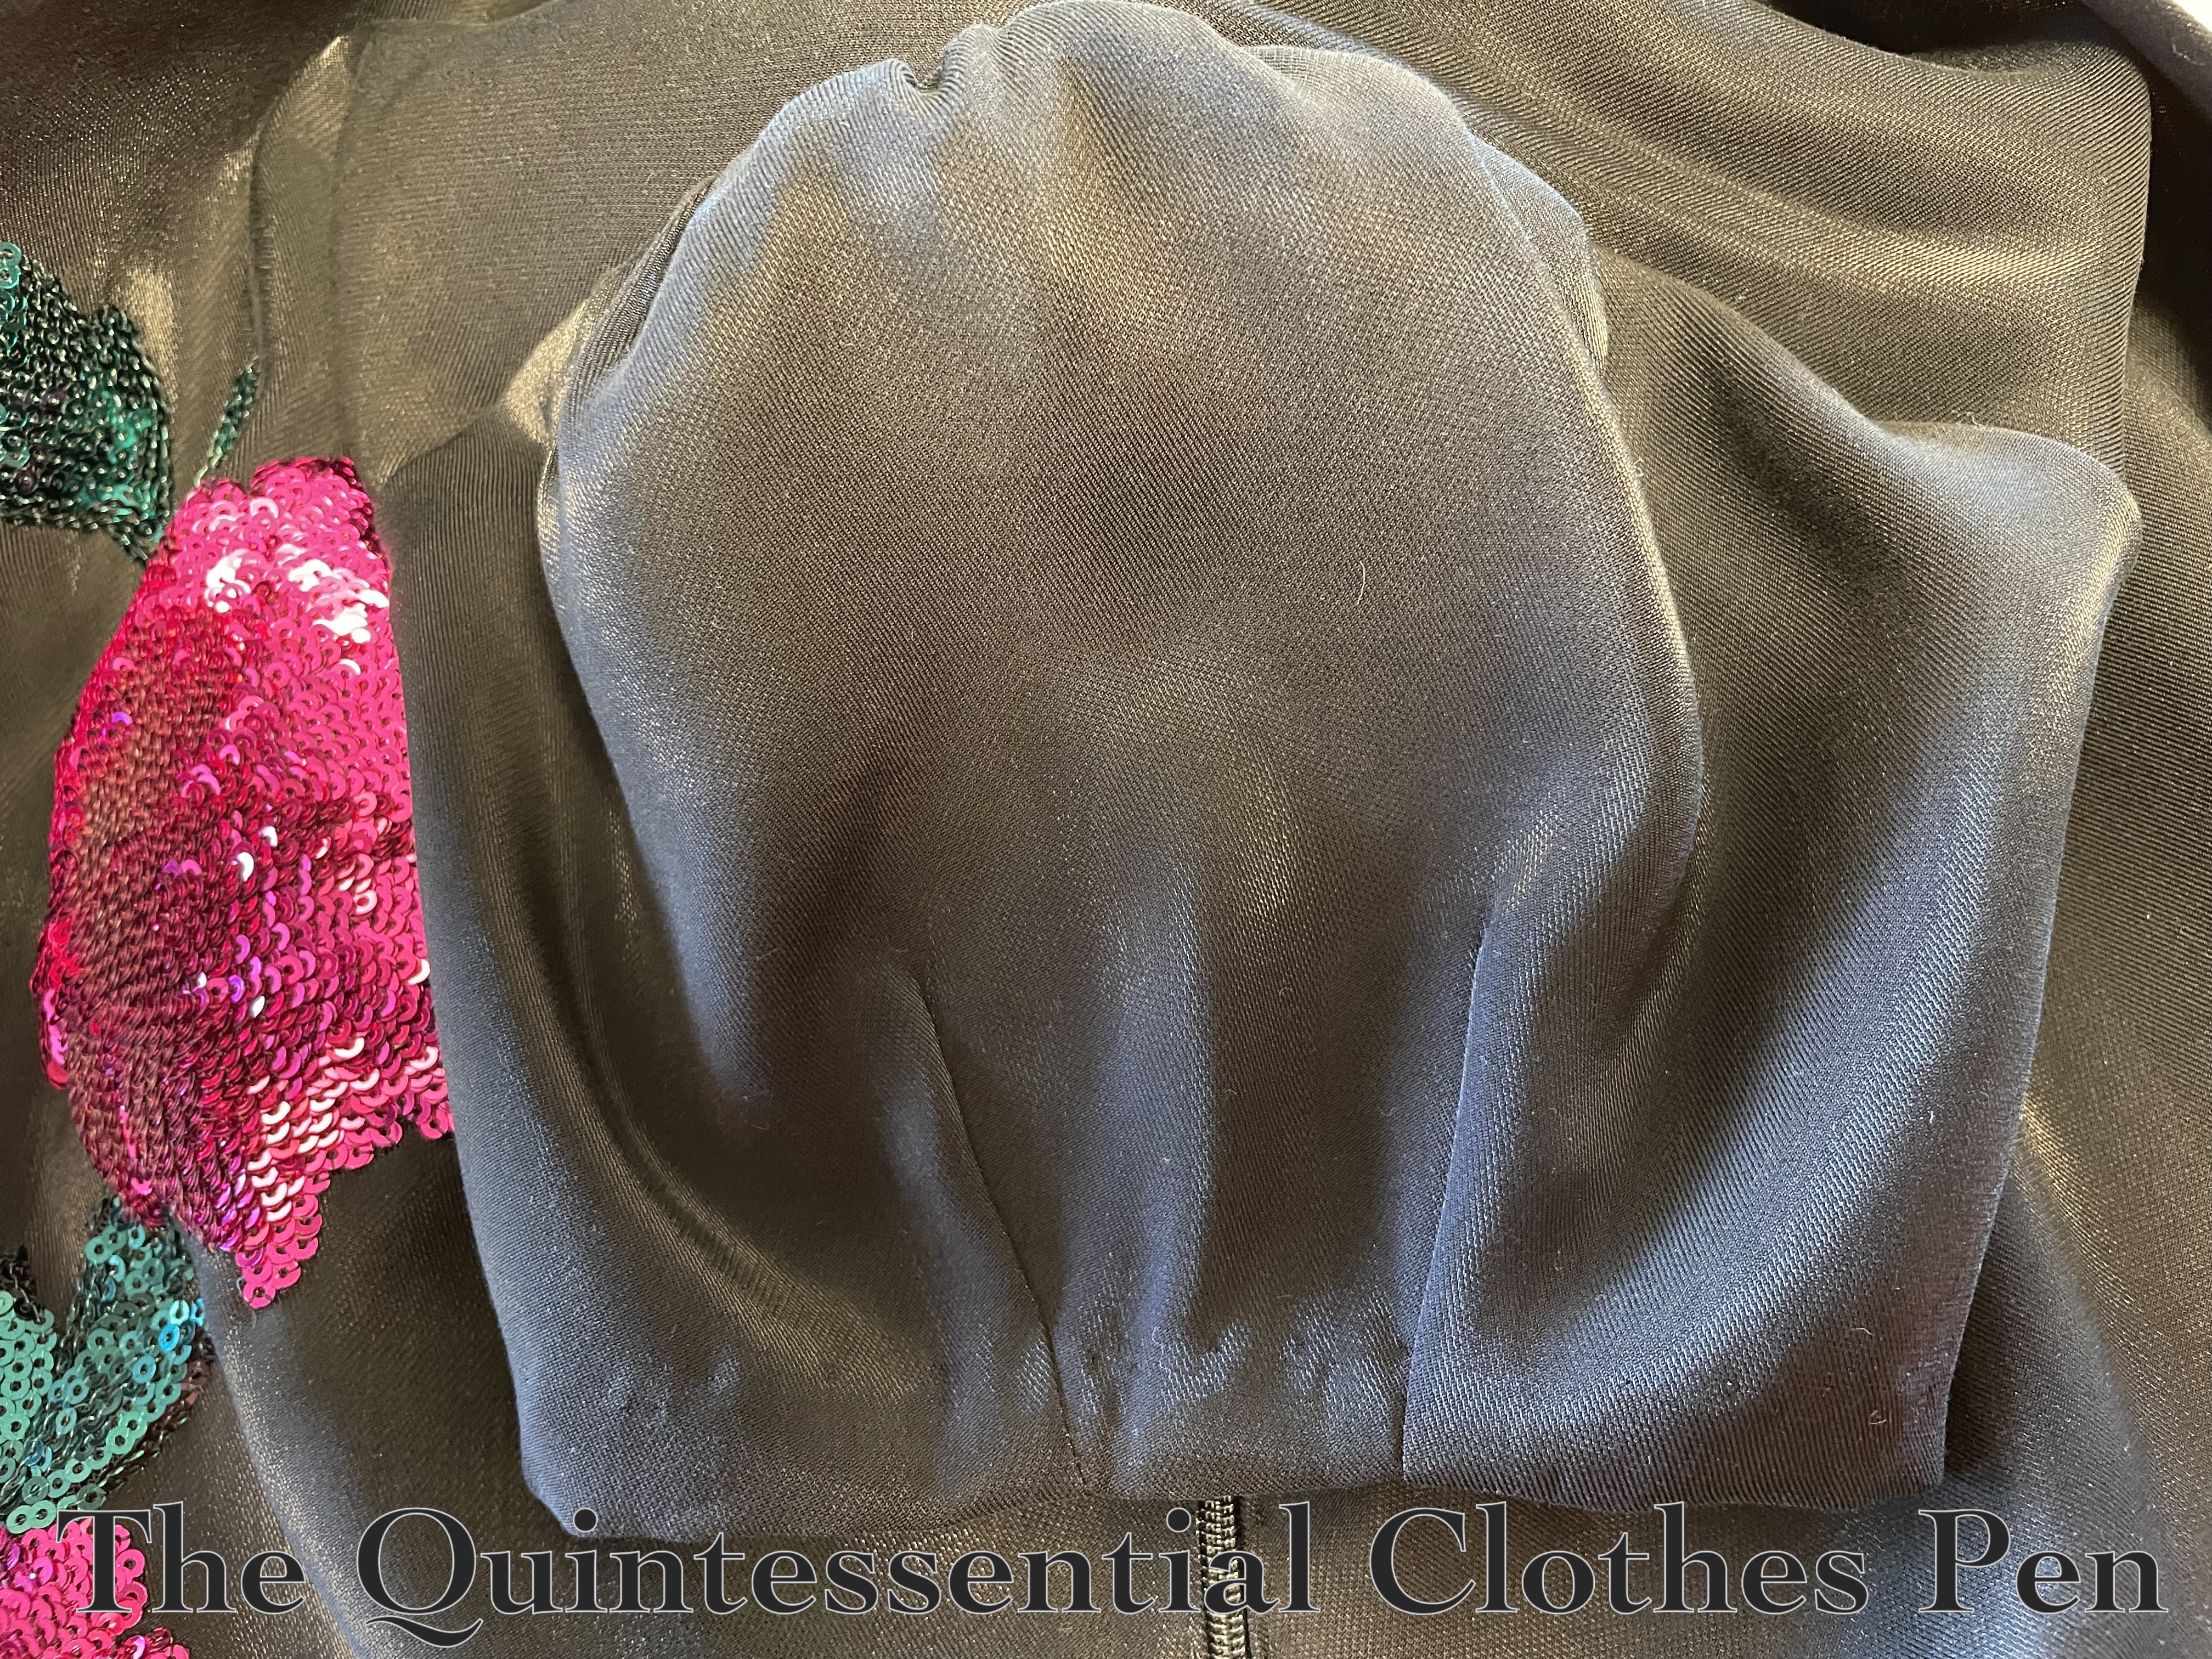
The only other thing that this dress needed was shoulder pads. I don’t think the original has them, as the shoulders look very sloped to me, but they were needed to make the dress sit properly on my body (and they add a very 1940s square shouldered look!).
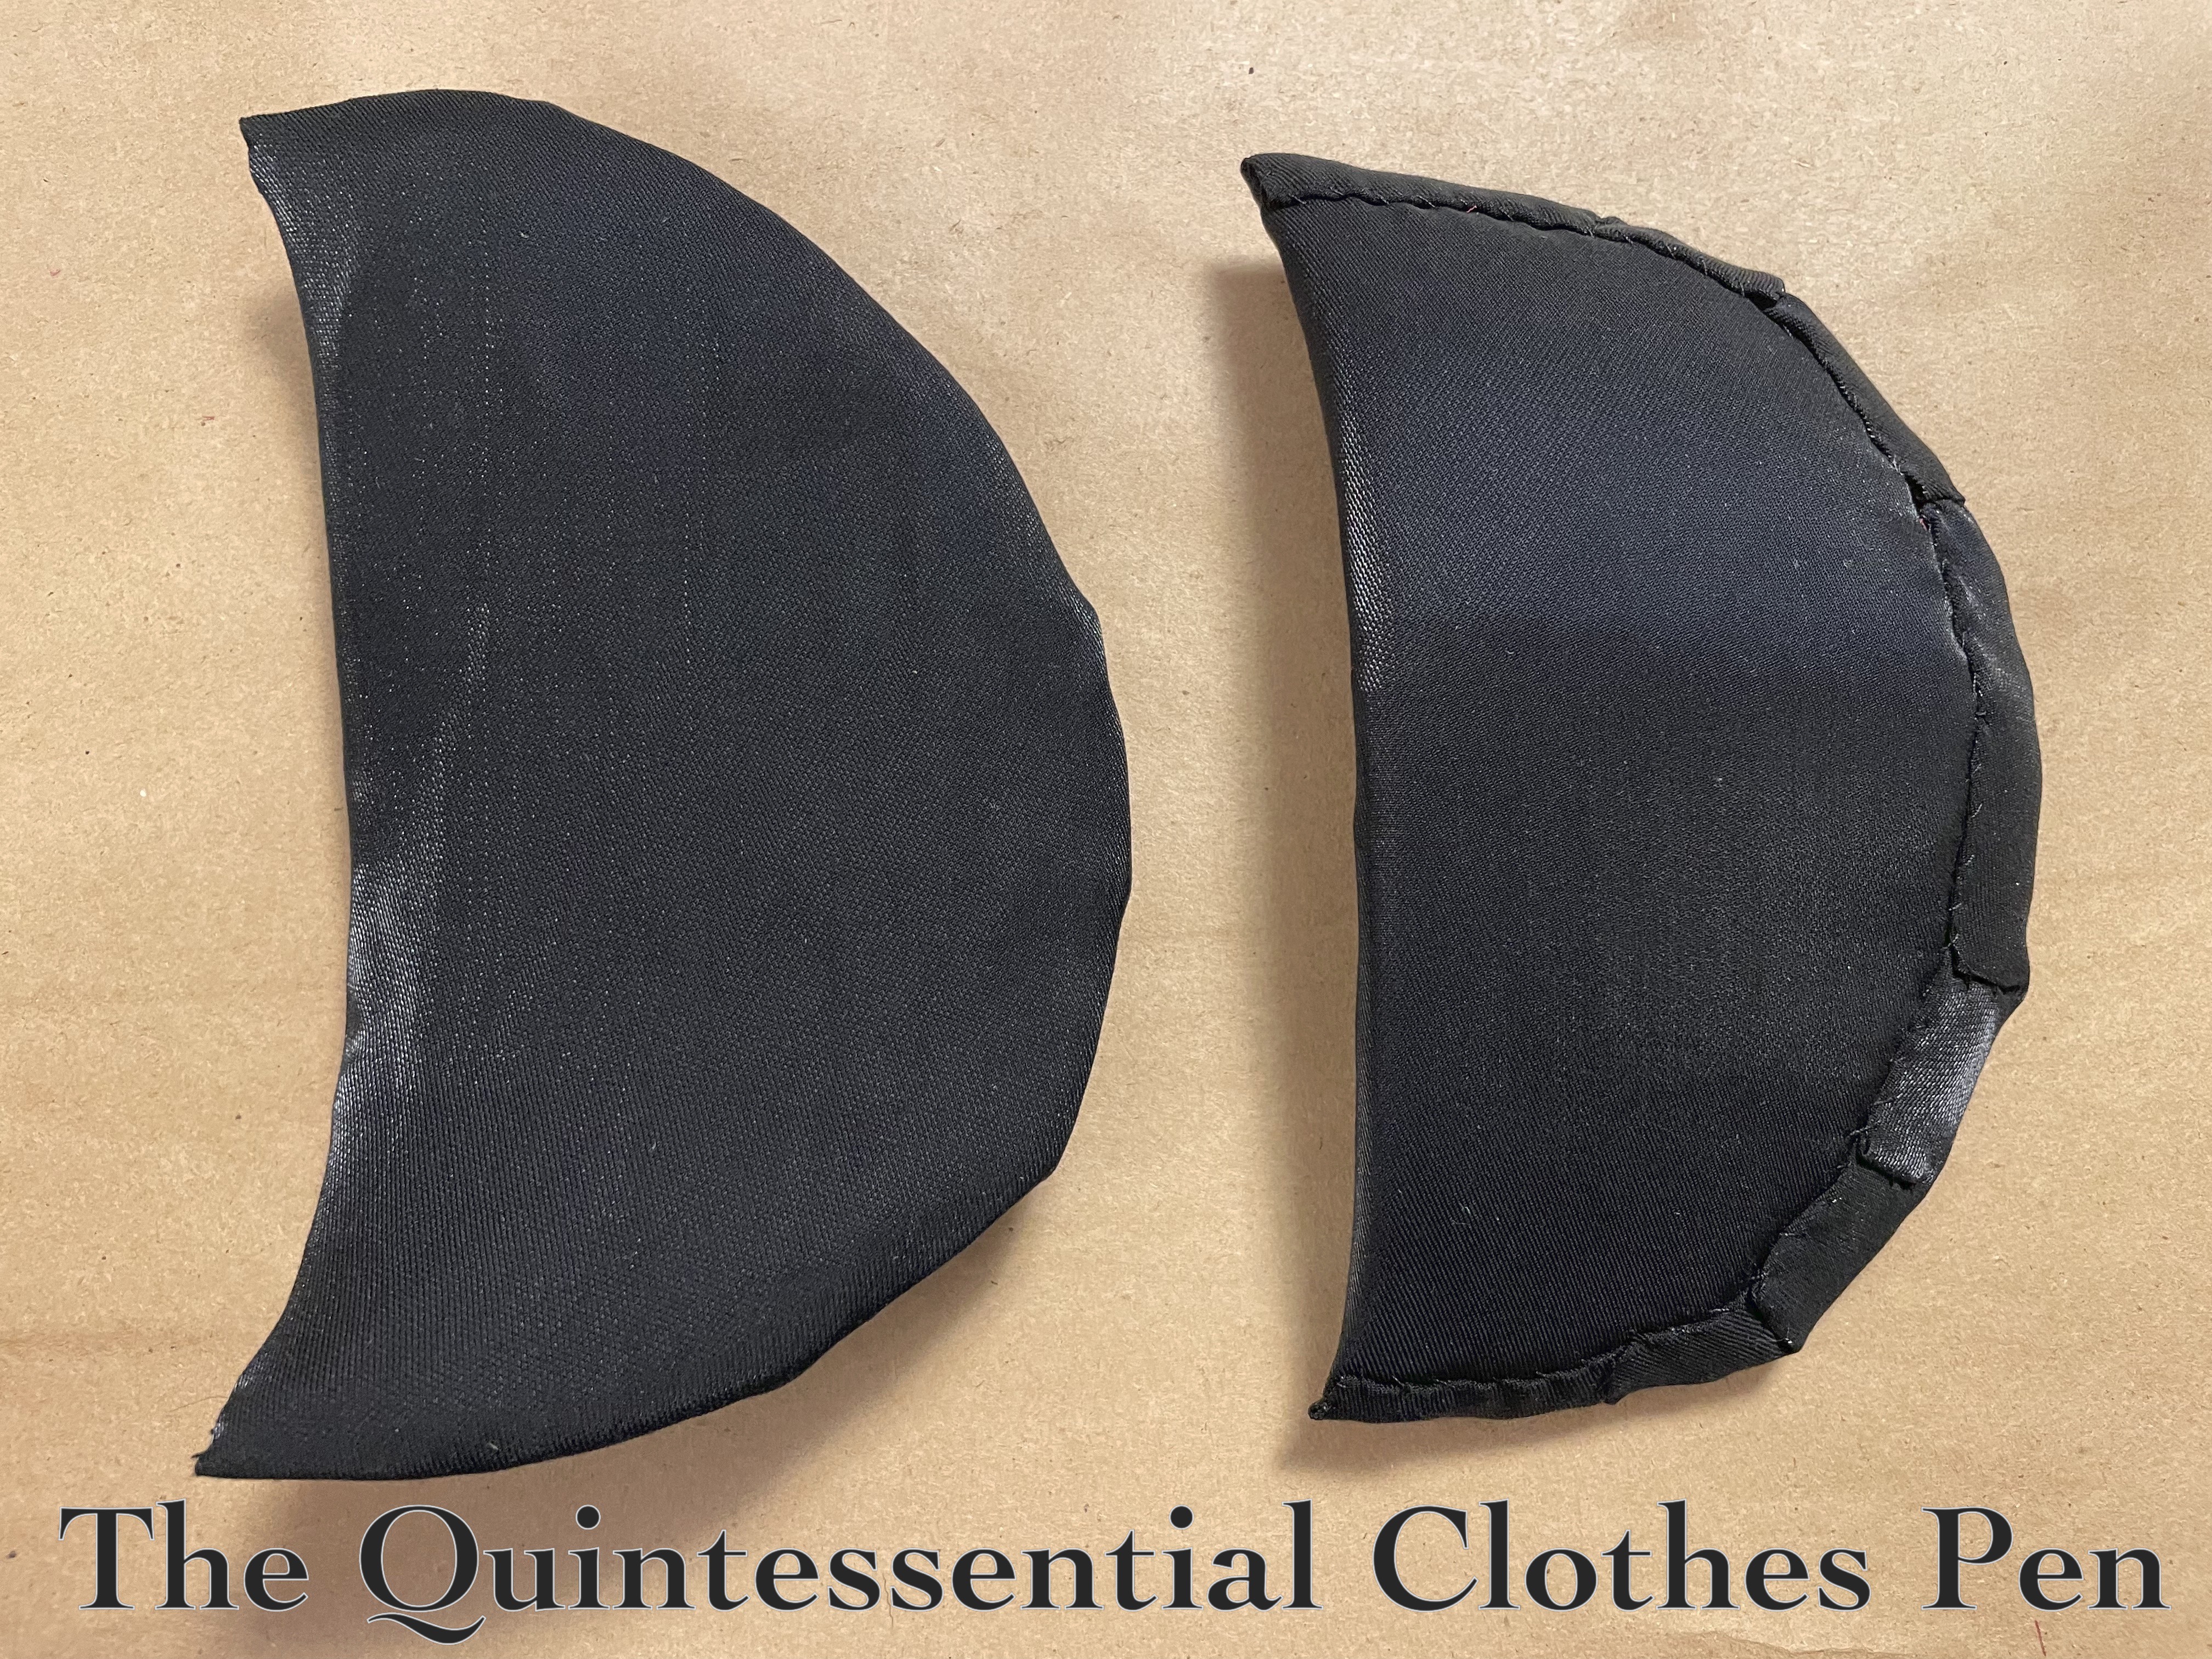
Conveniently, I had a pair of shoulder pads in my stash that worked well. They were, however, light colored and I thought it would be nice if they matched my dress better, so I covered them with scraps of the dress fabric before tacking them in.
Below is a photo of my covered shoulder pads followed by a photo of the shoulder pads sewn in place on the gown, with bra strap keeps added as well.

And that’s it for now! This post is long enough, so pictures of the full ensemble will be in another post!

Looking forward to seeing this dress!
Yay! 🙂 Thanks!
I just know it’s going to be gorgeous!
Aw, that is very kind. Thank you!
As always, thanks so much for sharing you work. I haven’t sewn any clothing for myself for almost 40 years, and and I never made reproduction clothing, but I think I would have enjoyed it and the costume events you attend. I still do take up needle and thread, to mend my clothes and make small alterations as needed. I always enjoy it.
You’re welcome–and thank you for taking the time to appreciate it!
It’s so wonderful that you are able to use your skills, regardless of the size of the project. Being able to extend the life of one’s clothing is a special skill these days!
Quinn, love reading your blog. Looks like a beautiful garment! Looking forward to seeing your finished rendering.
Love you,
~ Mom
Thank you!! 🙂 I appreciate your support and encouragement!