Today’s post is a continuation of the detailed construction posts documenting the creation of my 1875 reception dress. This post is going to focus on the construction details of the skirt. You can check out past posts to learn more about the construction of the bodice, petticoat, balayeuse, hat, and a post about the finished hat and hairstyle.
This is a rather long post, so I hope you’re ready to settle in and take a close look!

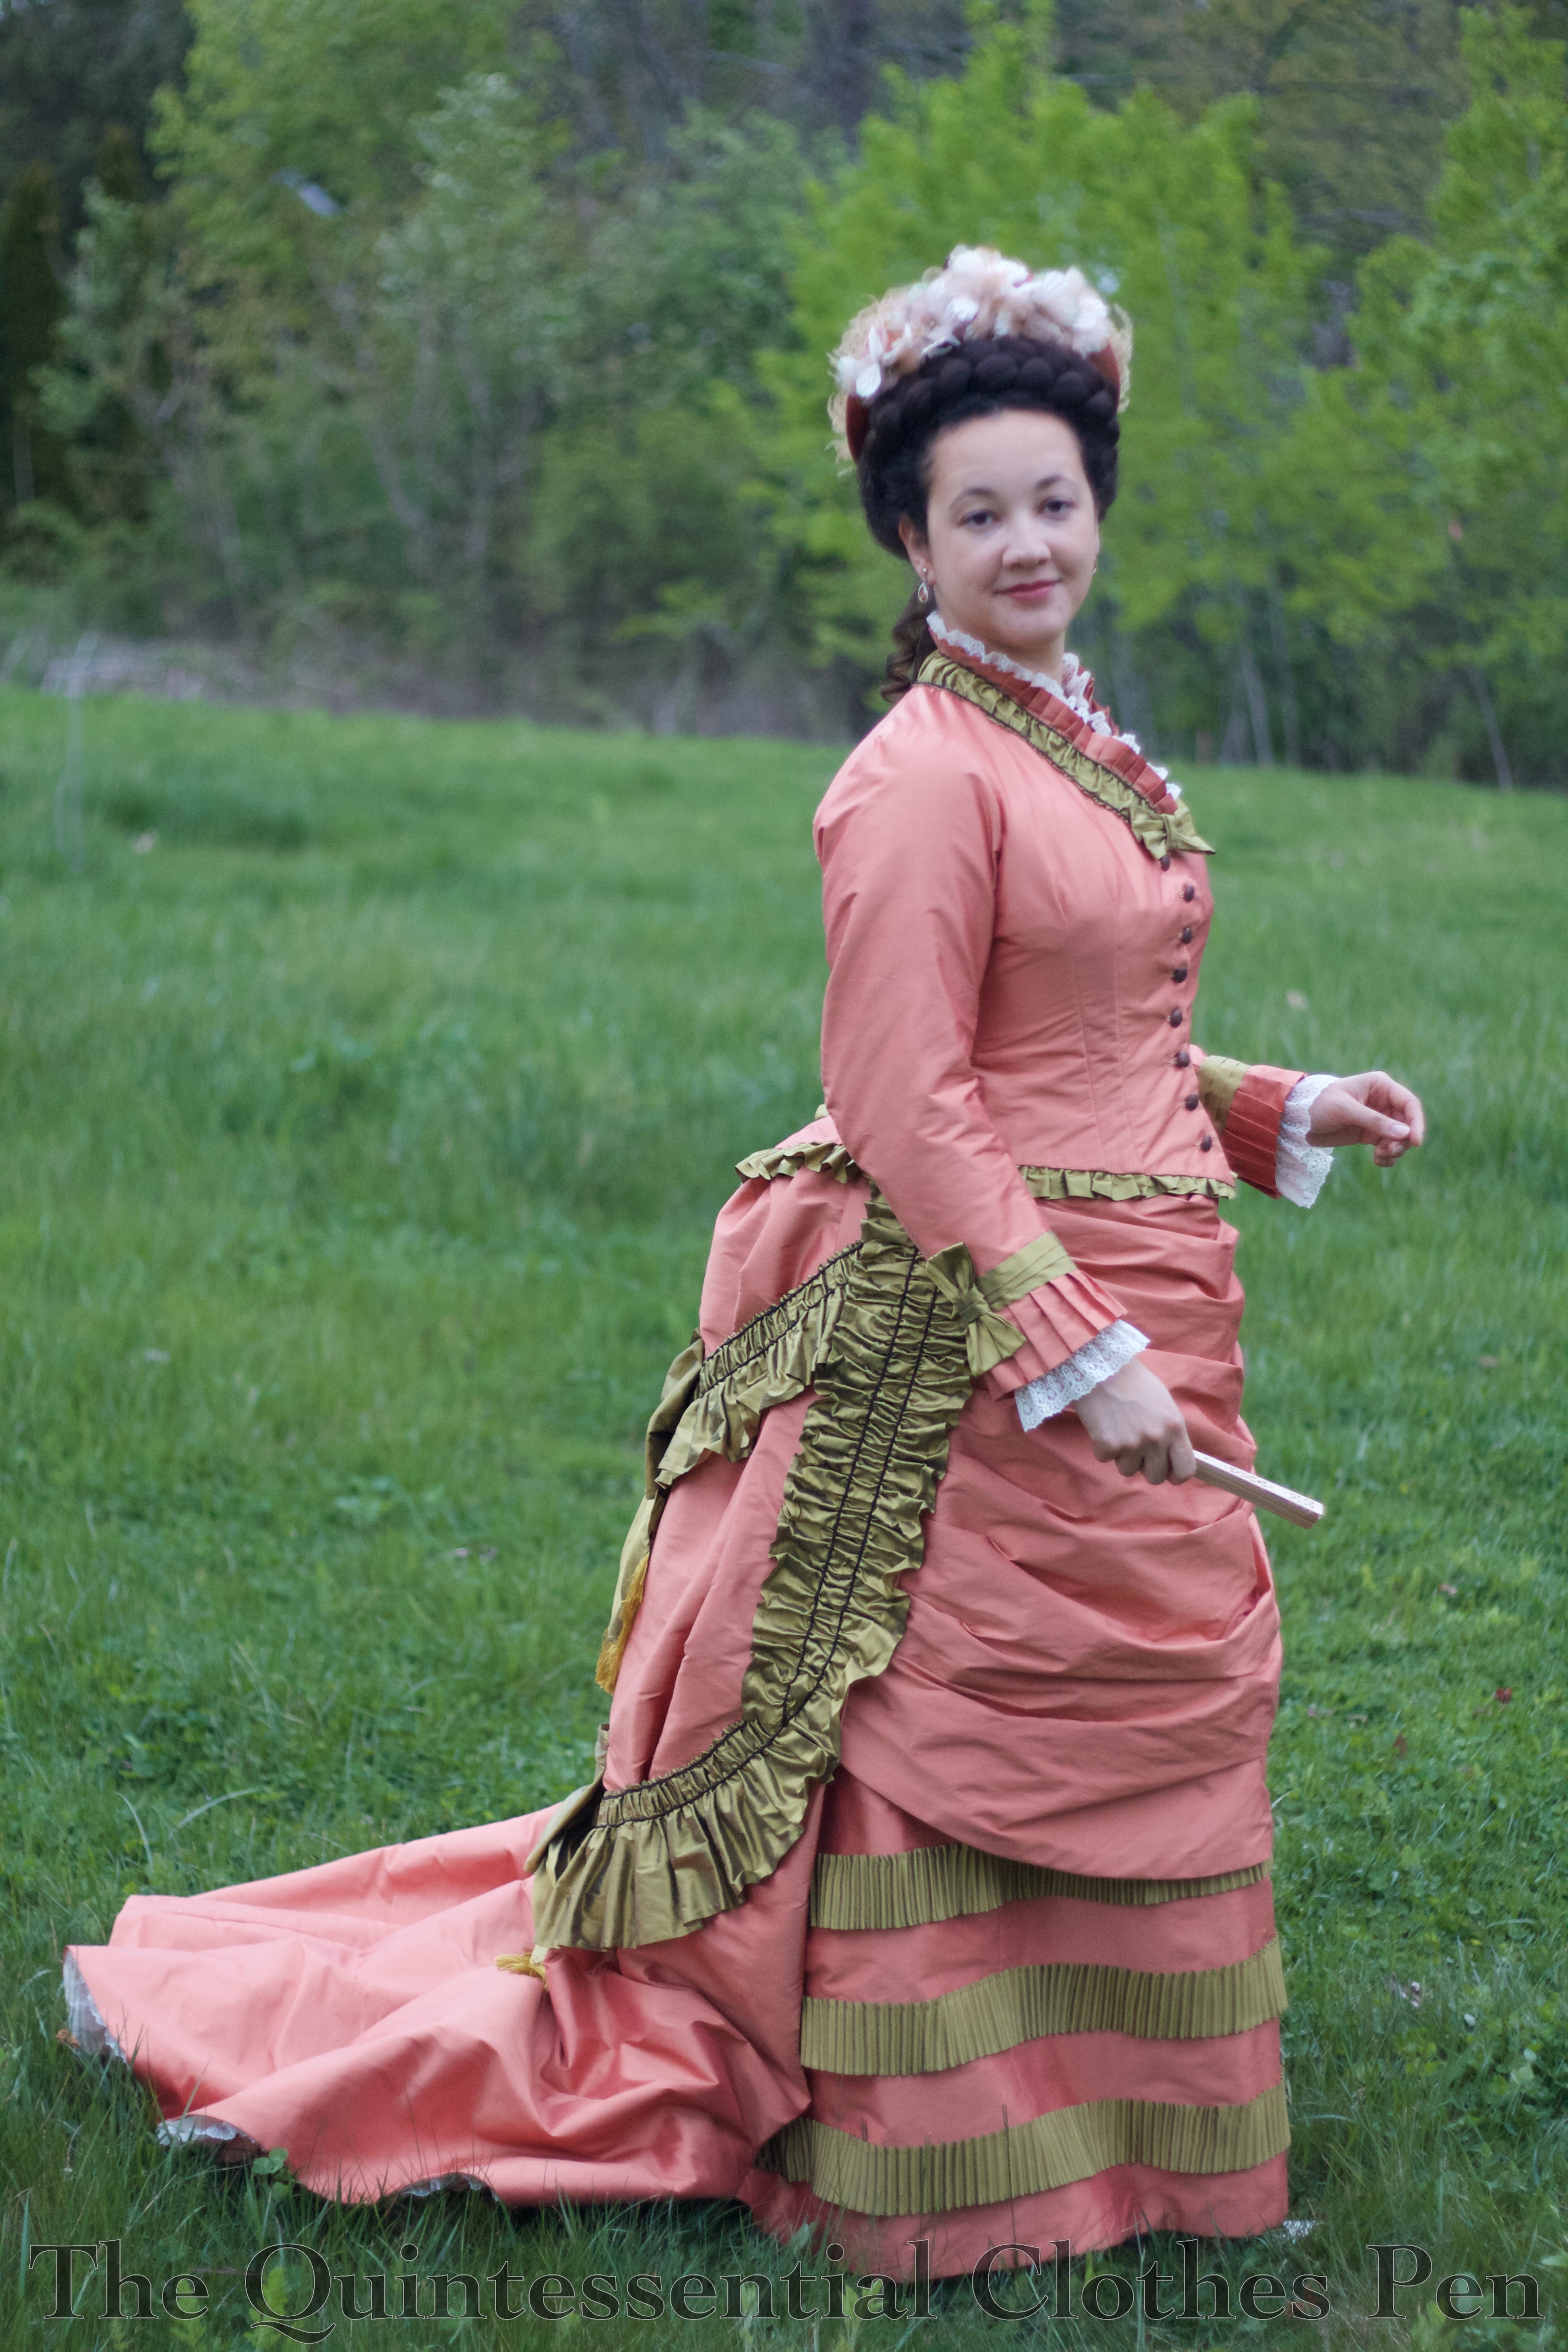
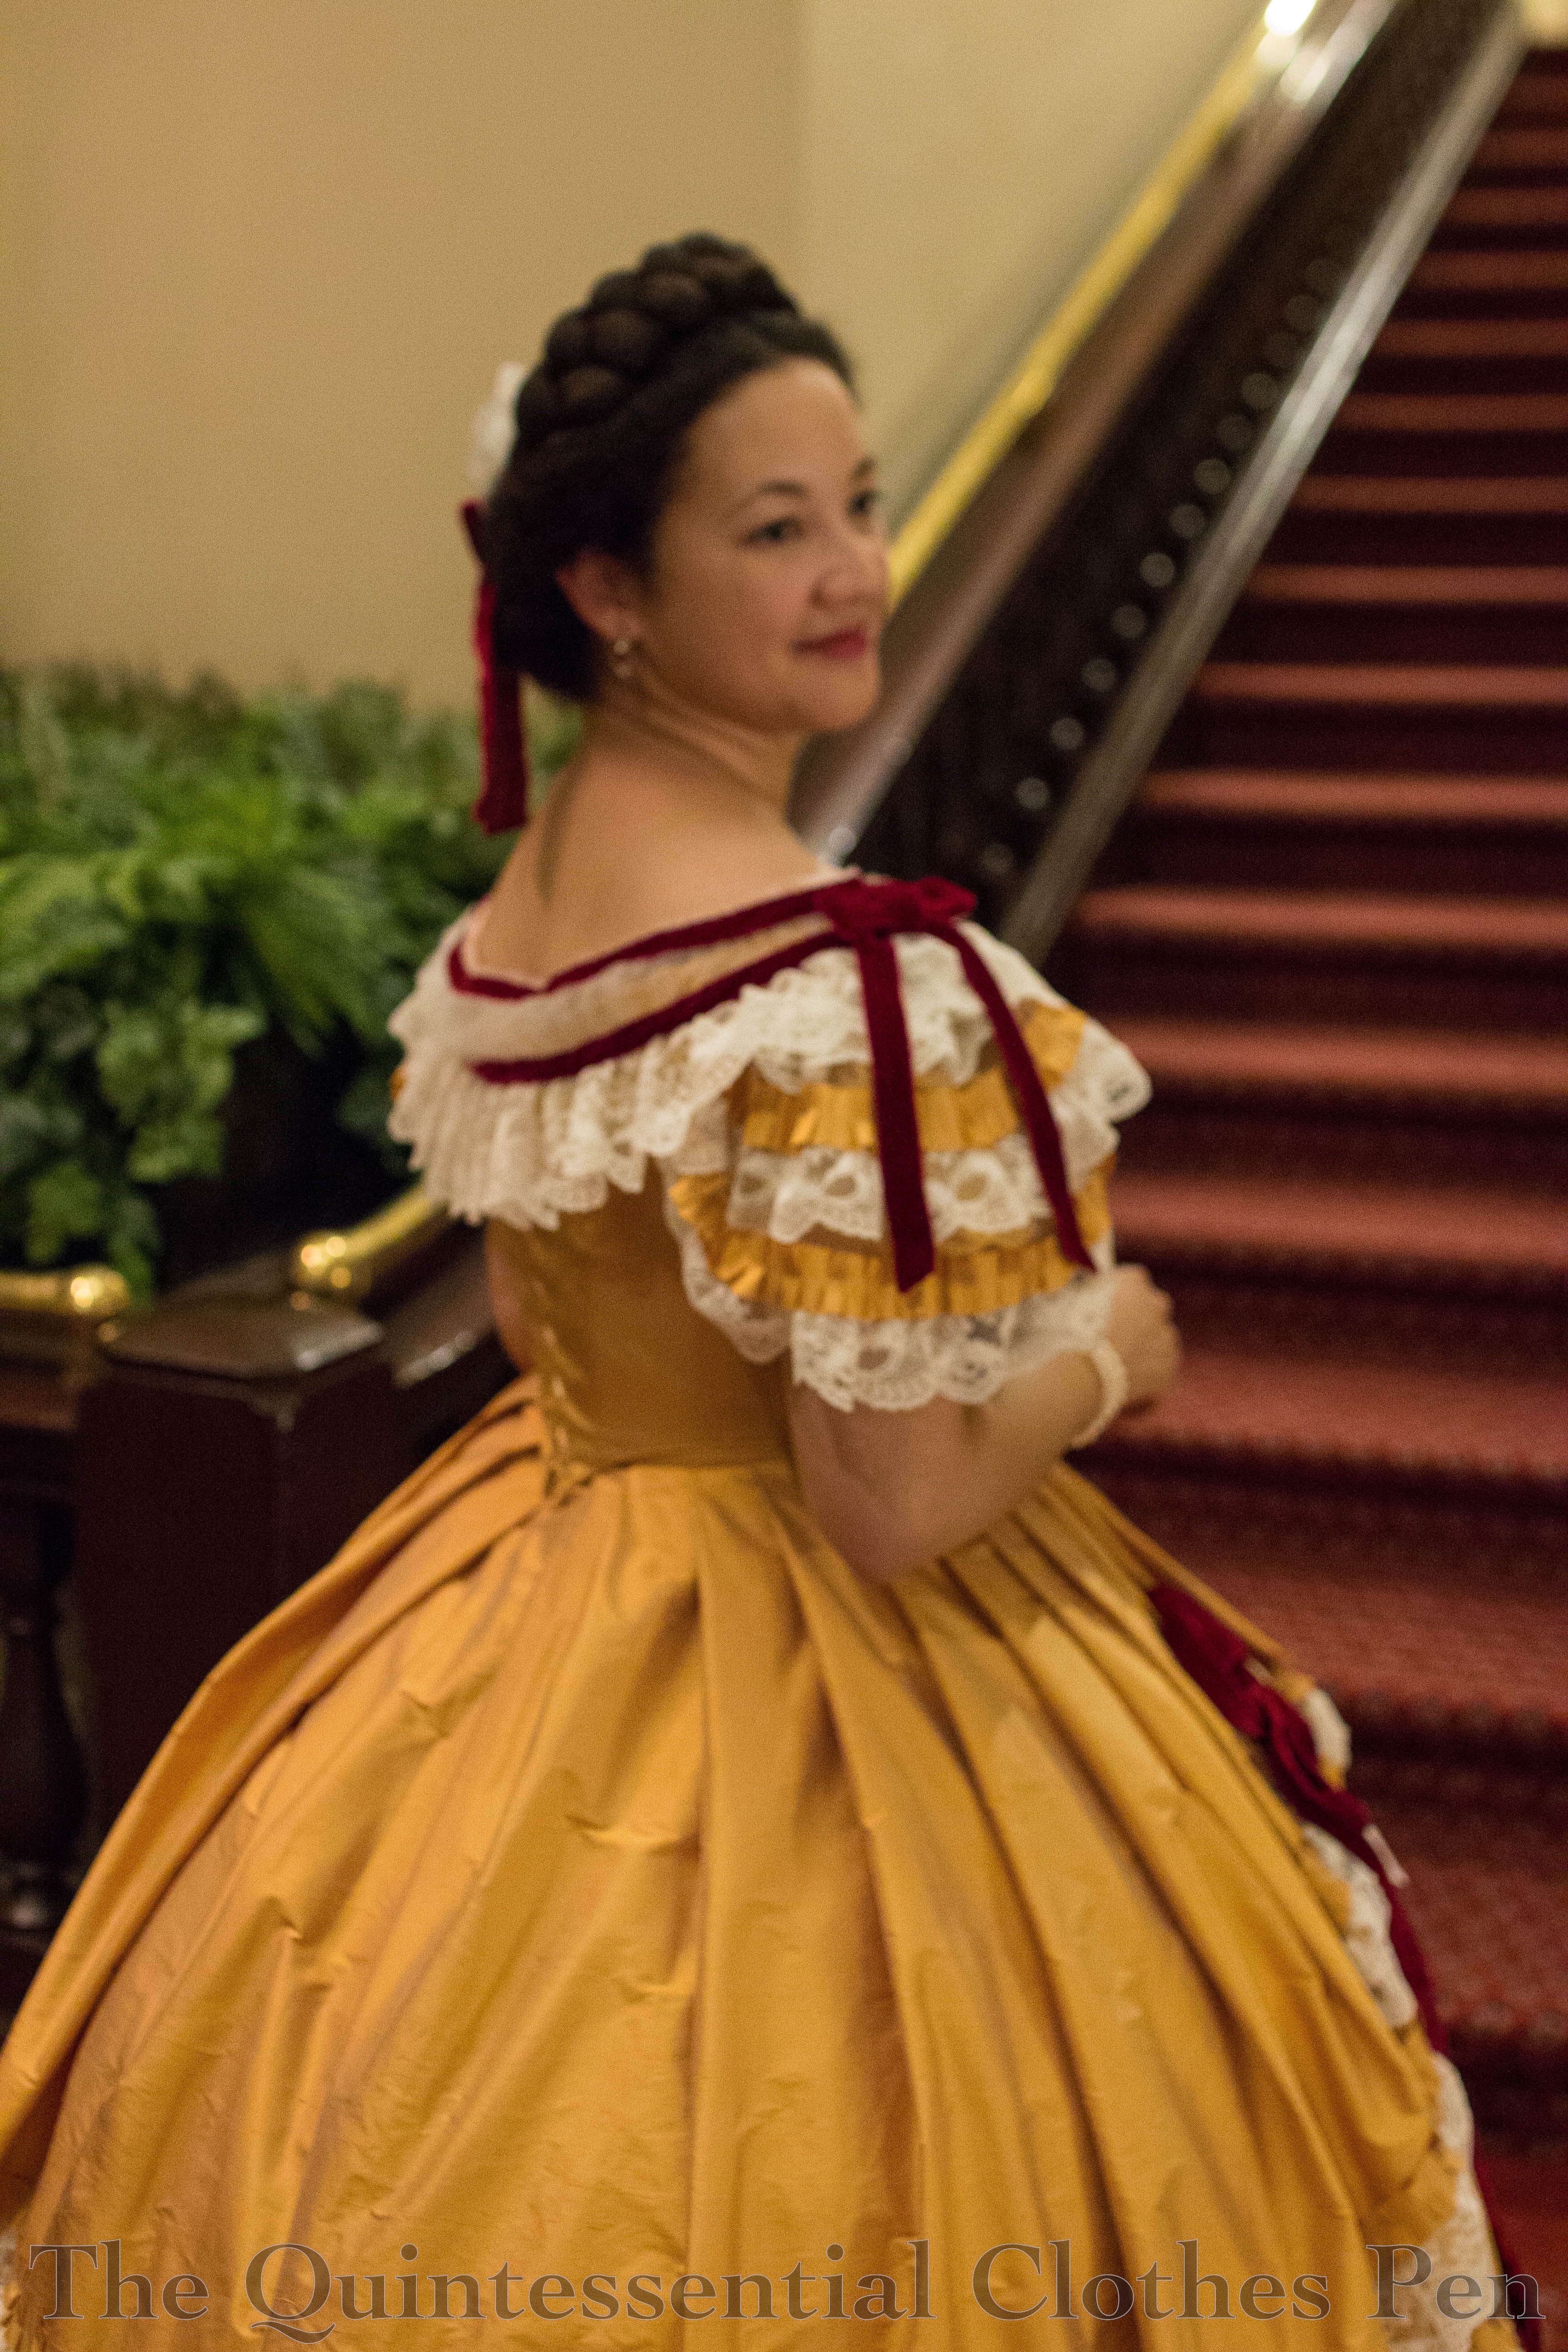
Skirts from this period are often confections crafted from fabrics and trims–and this one is no different. The inspiration came from a fashion plate from L’Elegance Parisienne (June 1875) that is held by the LAPL.
I think I stayed pretty true to the fashion plate for this portion of the project. Slight changes include leaving off the black trim around the bottom apron edge and at the top of the green fluted bands of trim on the skirt base, as well as choosing to stitch one row of soutache in most places instead of two.
(Also …huh… You know what? I just realized, as I am comparing the photo above to the fashion plate, that I sewed the top green bands of trim on upside down. They are supposed to have the black trim at the bottom. Oops! I know I patterned them to follow the fashion plate. Well… they’re probably not changing now.)
So where was I with the skirt construction?
Base Layers
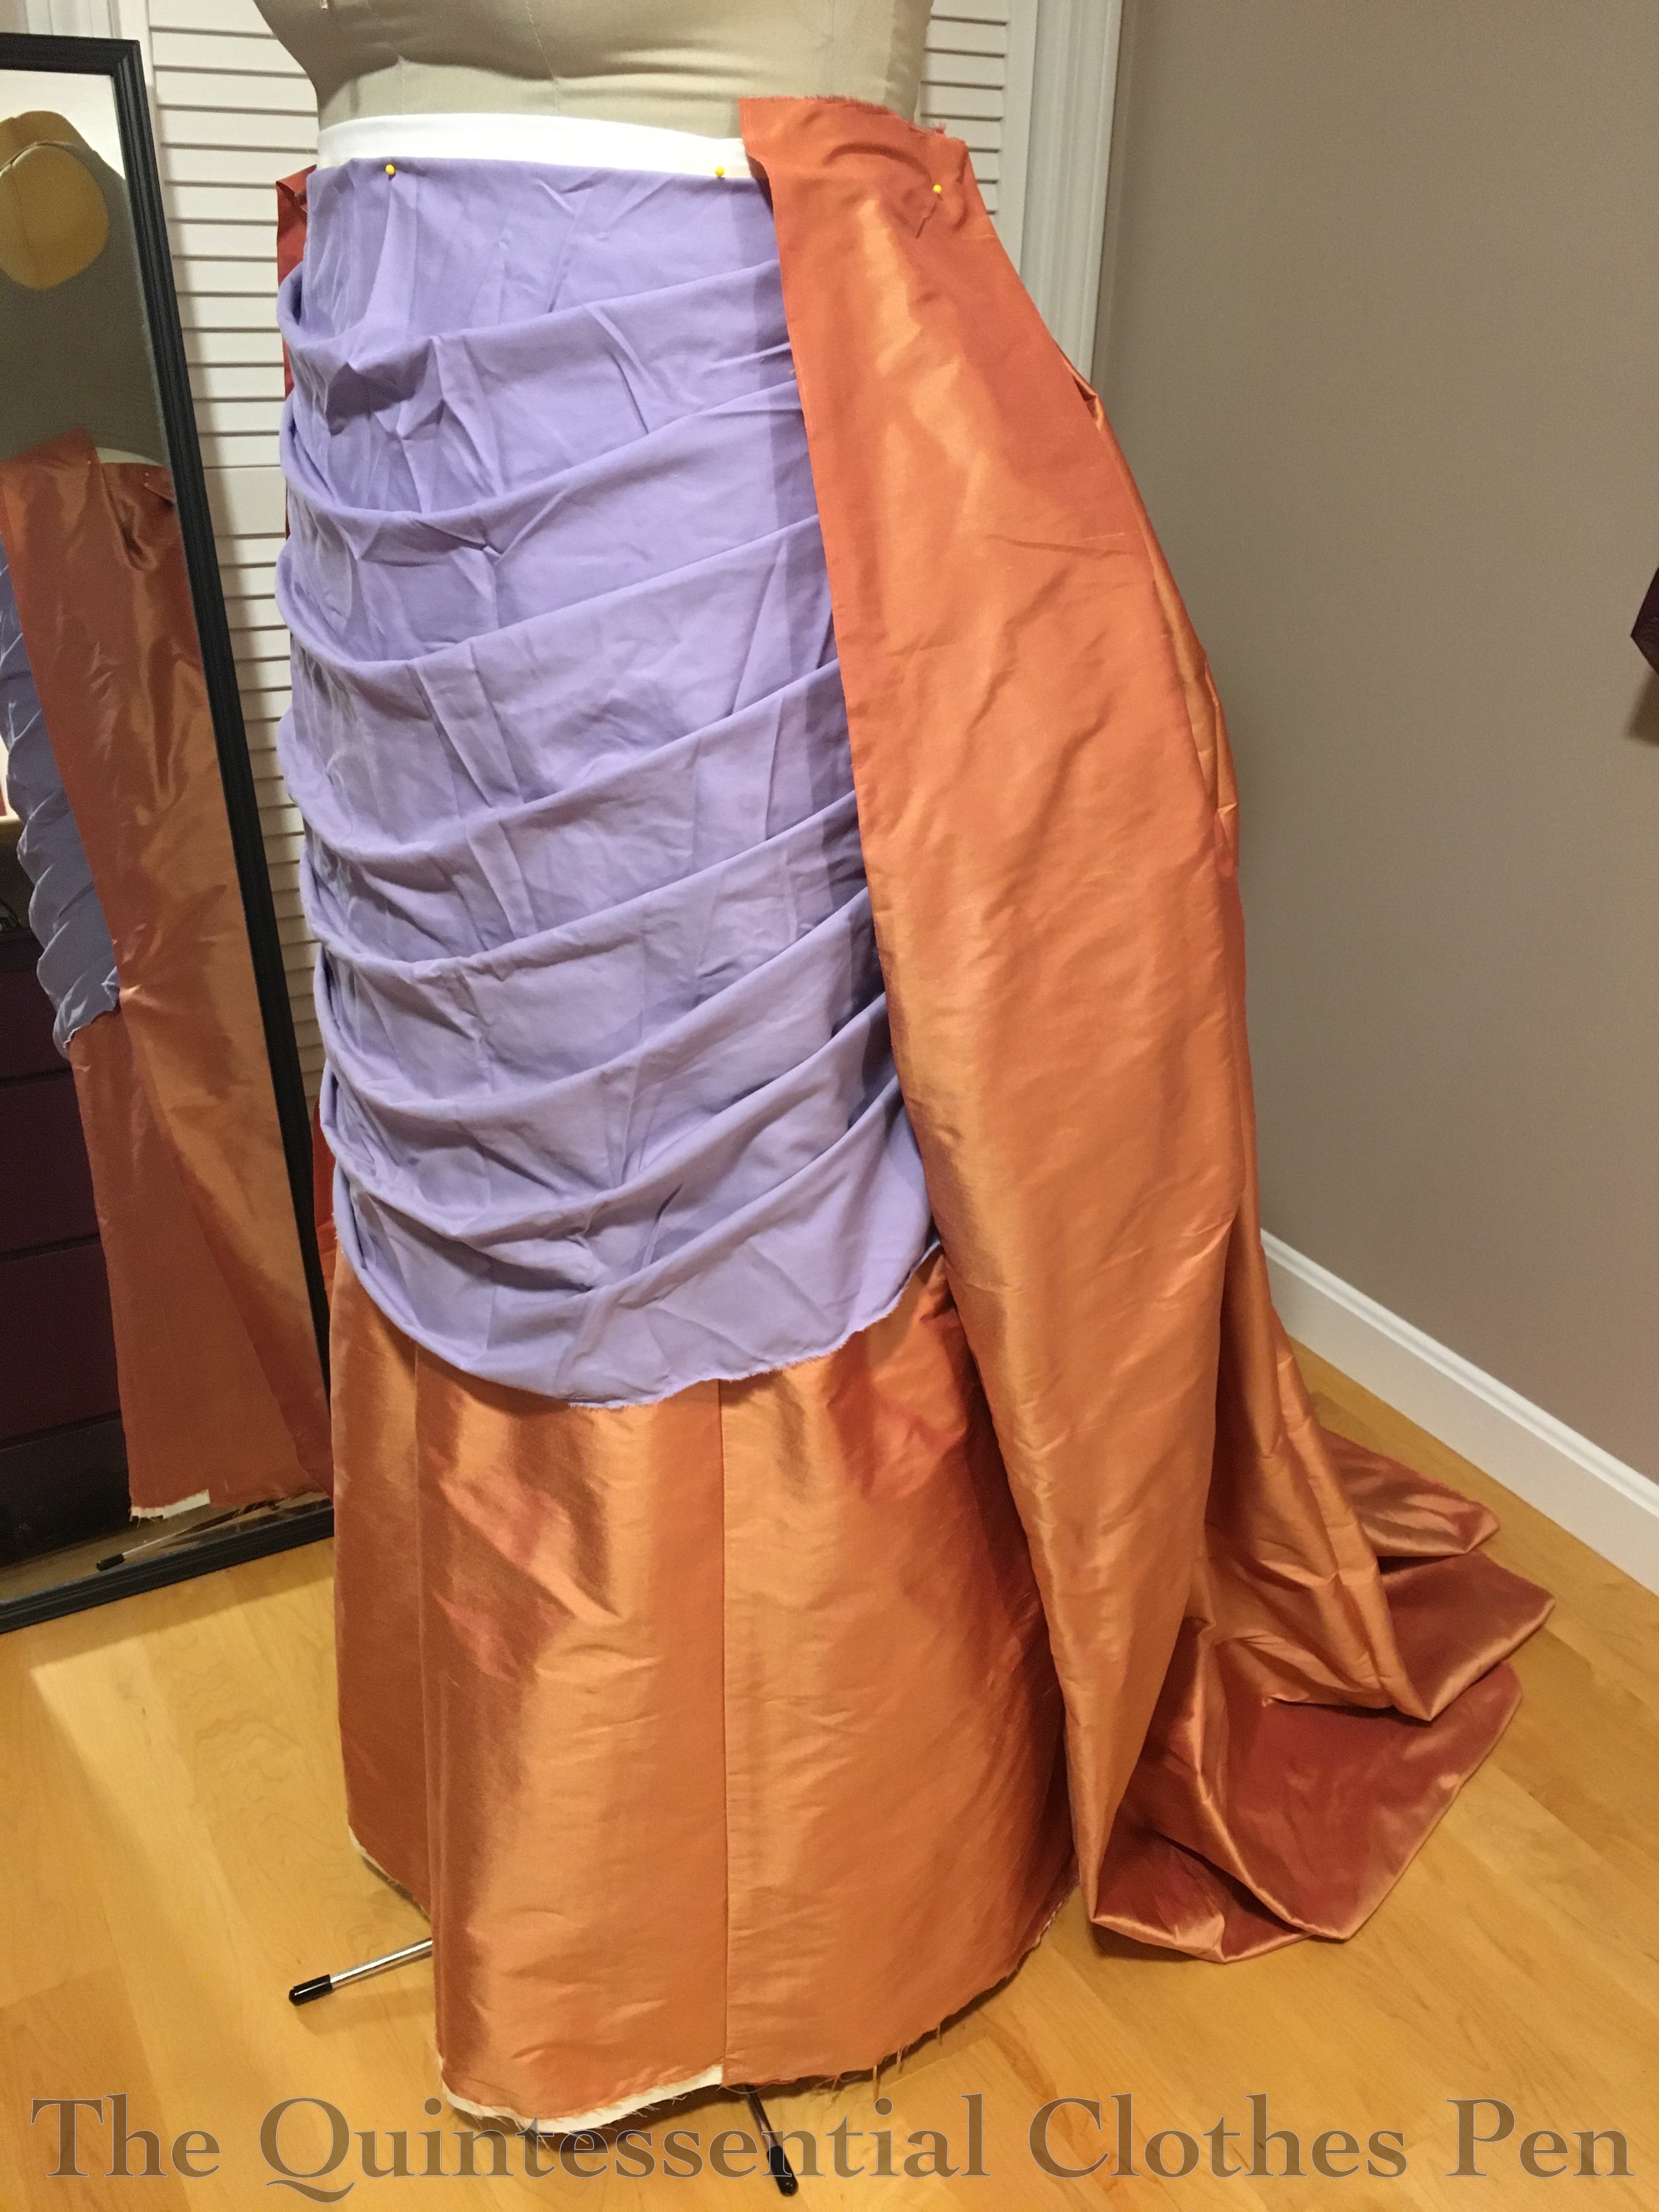
The base of the skirt is cotton muslin, with the bottom front portion covered by silk, as you can see in the photo below. This drastically saves the amount of expensive fabric used and provides a stable base for the following layers.

I started with a pattern I’ve used for my other bustle dresses for the front skirt panels (I think at some point it came from Janet Arnold’s Patterns of Fashion, but I’ve tweaked it since then). It is closer in shape to 1880 than 1870, but I think it works for this particular 1875 dress, since so much of the back fullness is contained in the waterfall of silk underneath the bows and ruffled trim.
The back panel was draped as opposed to flat patterned. I started as double width of muslin with no shaping, but as I tried to figure out how to pleat or gather the top into the waist I realized I should add some shaping along the center back seam. I think I took out about 16″ at the top, tapering to nothing at the hem.
This next photo shows my silk panels on top of the base as I tried to figure out what they were doing. Since this was an entirely draped process it’s not likely to ever be repeated in exactly the same way. I have notes documenting what I was up to, but no actual pattern.
It was important to me to achieve both the gathered look at the top of the skirt and the wonderfully waterfall-ing pleats at the bottom, just as you see in the fashion plate. It turns out that was easier said than done–one of those things that’s easy to draw but not thought out in terms of actually being made up.

After getting a little farther with the back of the skirt, I moved on to the apron. Here, we have a (very wrinkly) old sheet being draped to create the apron pattern. My apron is not quite as long as the one in the fashion plate because I had limited silk fabric to work with.
Waistband & Closures
Many dresses from this period have the skirt base on one waistband and the apron and/or back draping layer on a second waistband. Essentially they are two separate skirts. I decided that I didn’t want to have to arrange the layers separately so I put them all on one waistband. This is a little bulky at the back, where both the muslin base layer and silk drape are gathered, but that’s all hidden by the point on the back of the bodice. The other thing (I realized later) is that this decision made the closures extra complicated. Let’s start there.
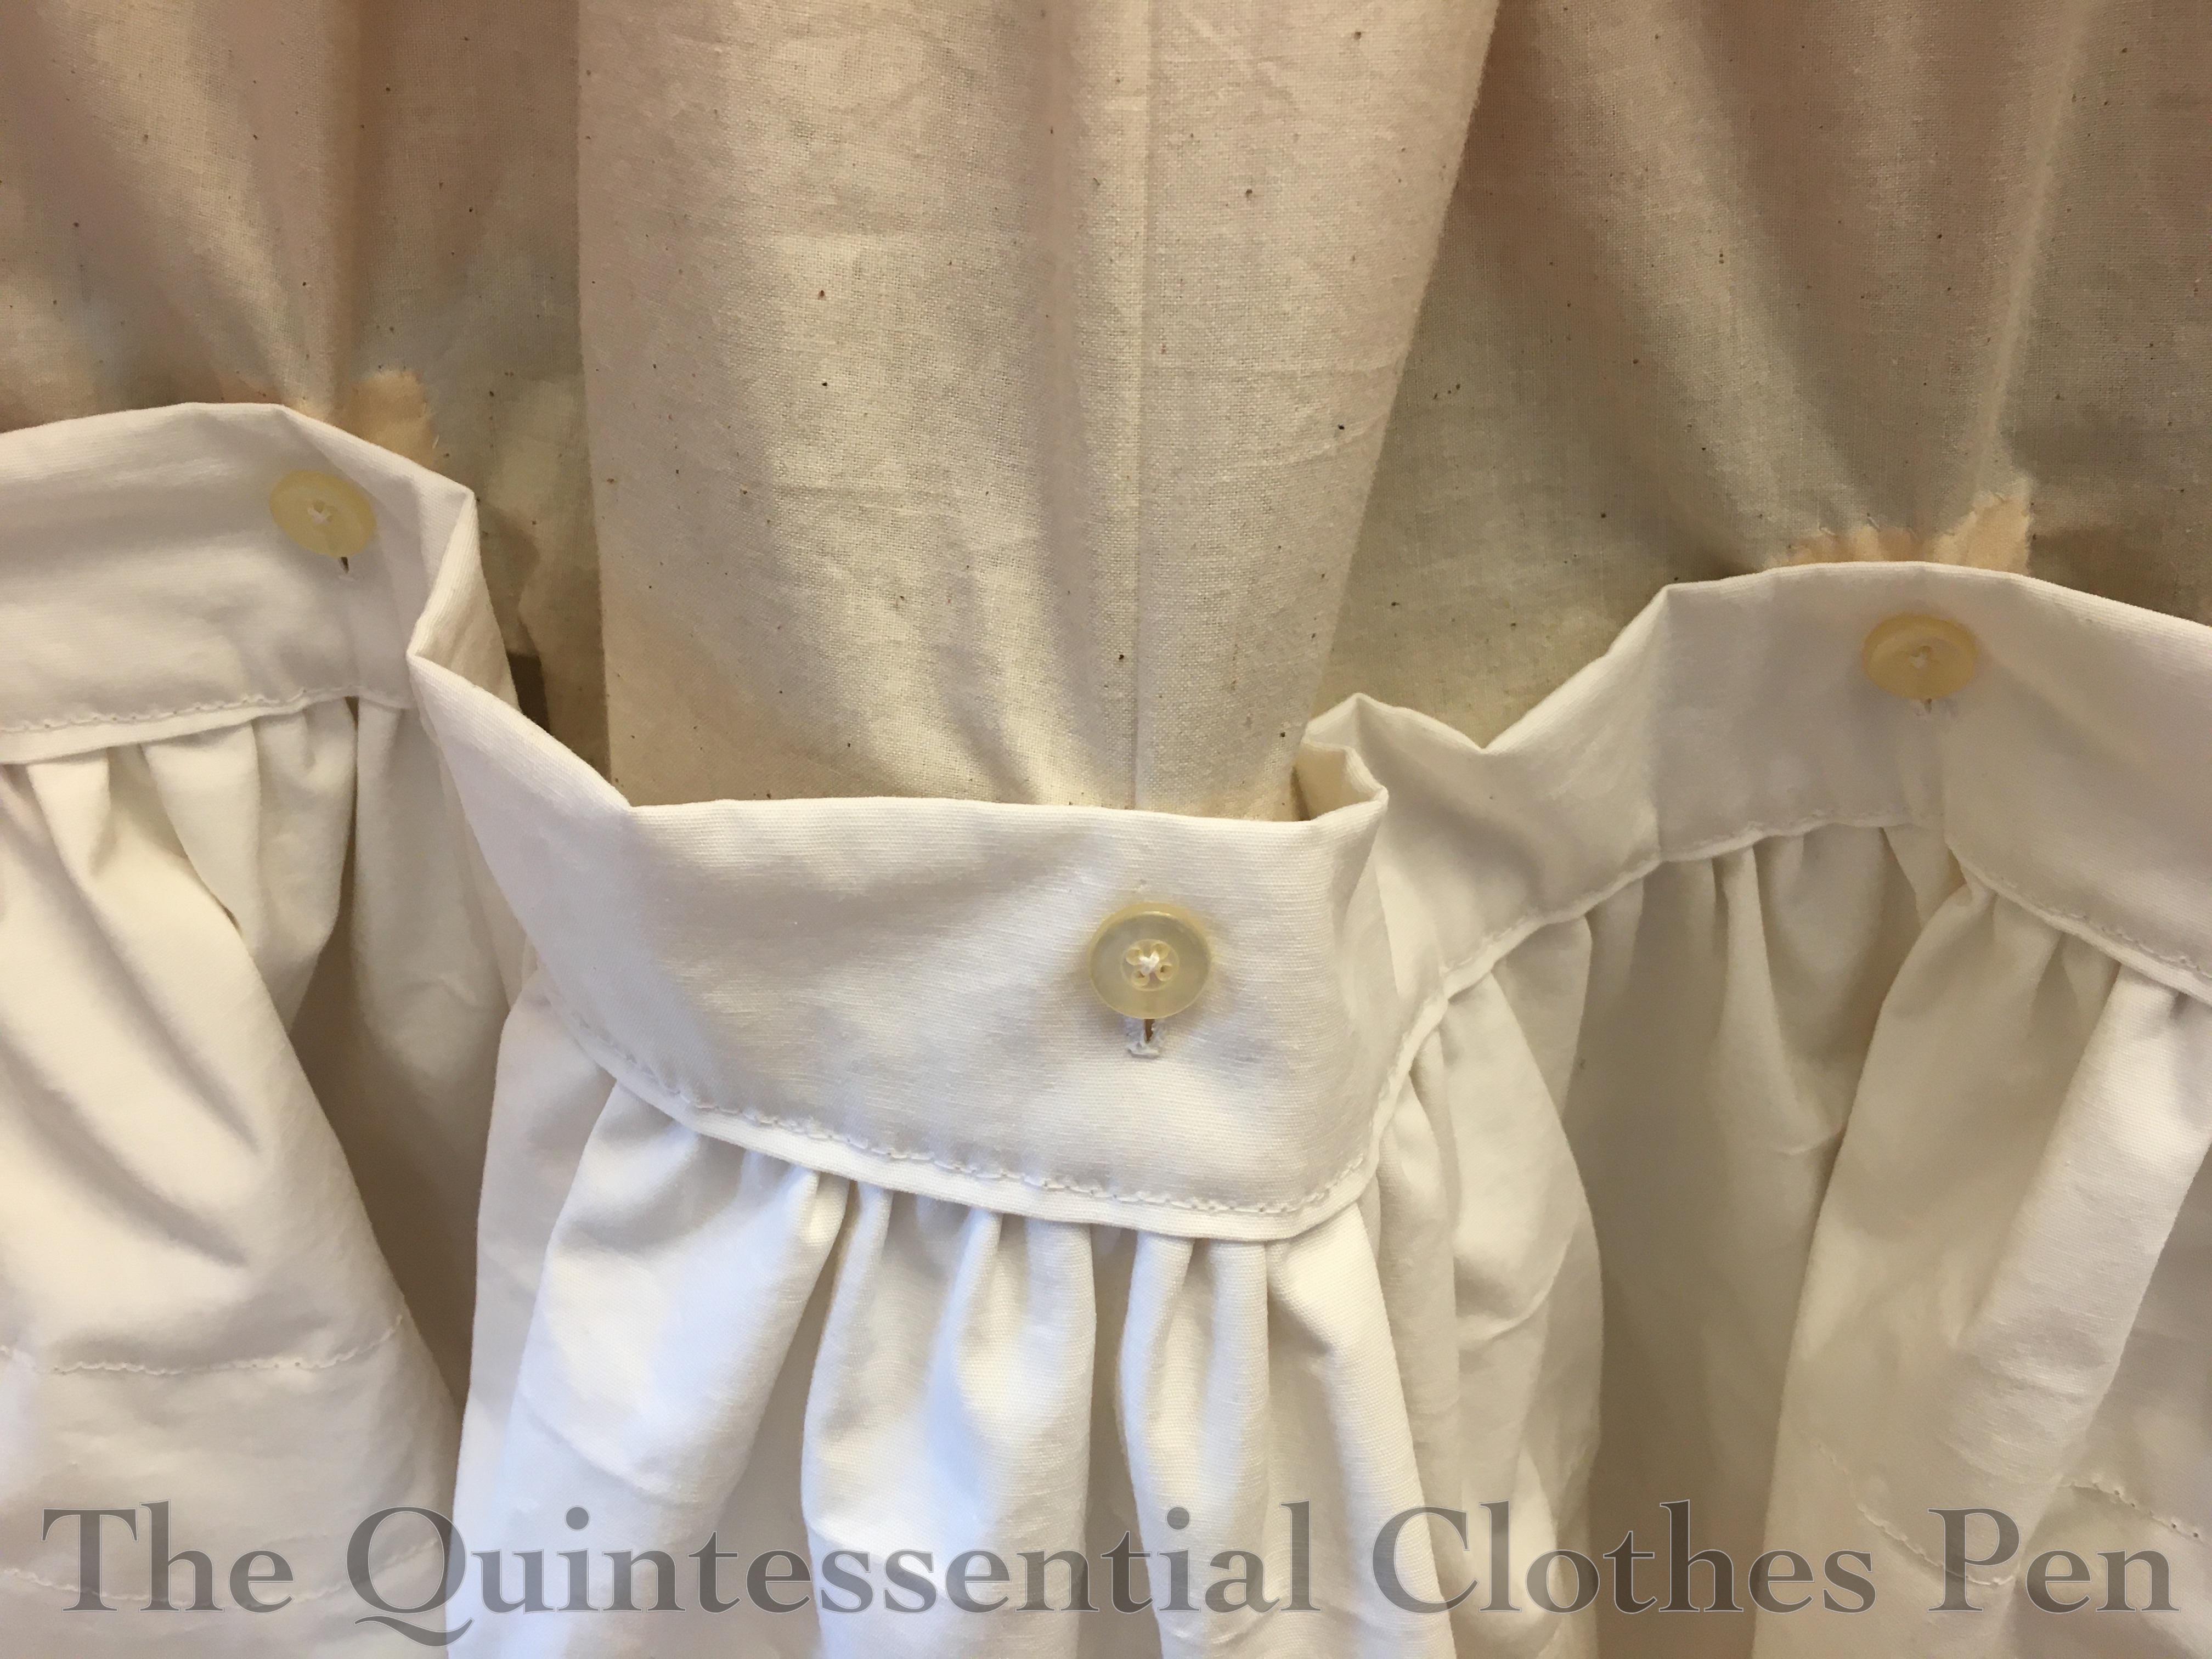
First, the muslin base edges hook together at the waistband (that hook is done up in the photo below). The apron layer then hooks onto the loops on the muslin layer (this layer is open in the photo below so you can see the hooks and loops).

After that, the skirt drape hooks forward, covering the muslin layer completely (this is not done up in the photo below). This completely hides all of the previous closures. To help keep this layer of closures invisible, the hooks attach to thread bars instead of metal loops. You can make them out below if you take a close look.

Pretty neat! It took a waistband extend-o to make it work, and a few brain somersaults, but we got there in the end.
In order to be sturdy enough to attach all of the skirt layers, the waistband is flat lined with muslin and also encases a grosgrain ribbon. That adds a bit of bulk, but it also creates a very sturdy finished product and, again, you can’t see the bulk under the bodice.
Flat Lining & Apron Folds
In the photo above, you might have noticed the rather bold pink organza showing on the back drape panel. That’s just a small portion of what’s actually back there–the entirety of the back panels are flat lined with this pink polyester organza. Polyester organza is not what they would have used in 1875. But other stiff, lightweight fabrics such as silk organza or cotton organdy would have been used to help the silk maintain pouf. I chose the pink because I had the perfect amount in my stash (and both it and the dress are shades of pink, so… it’s not that far off?).
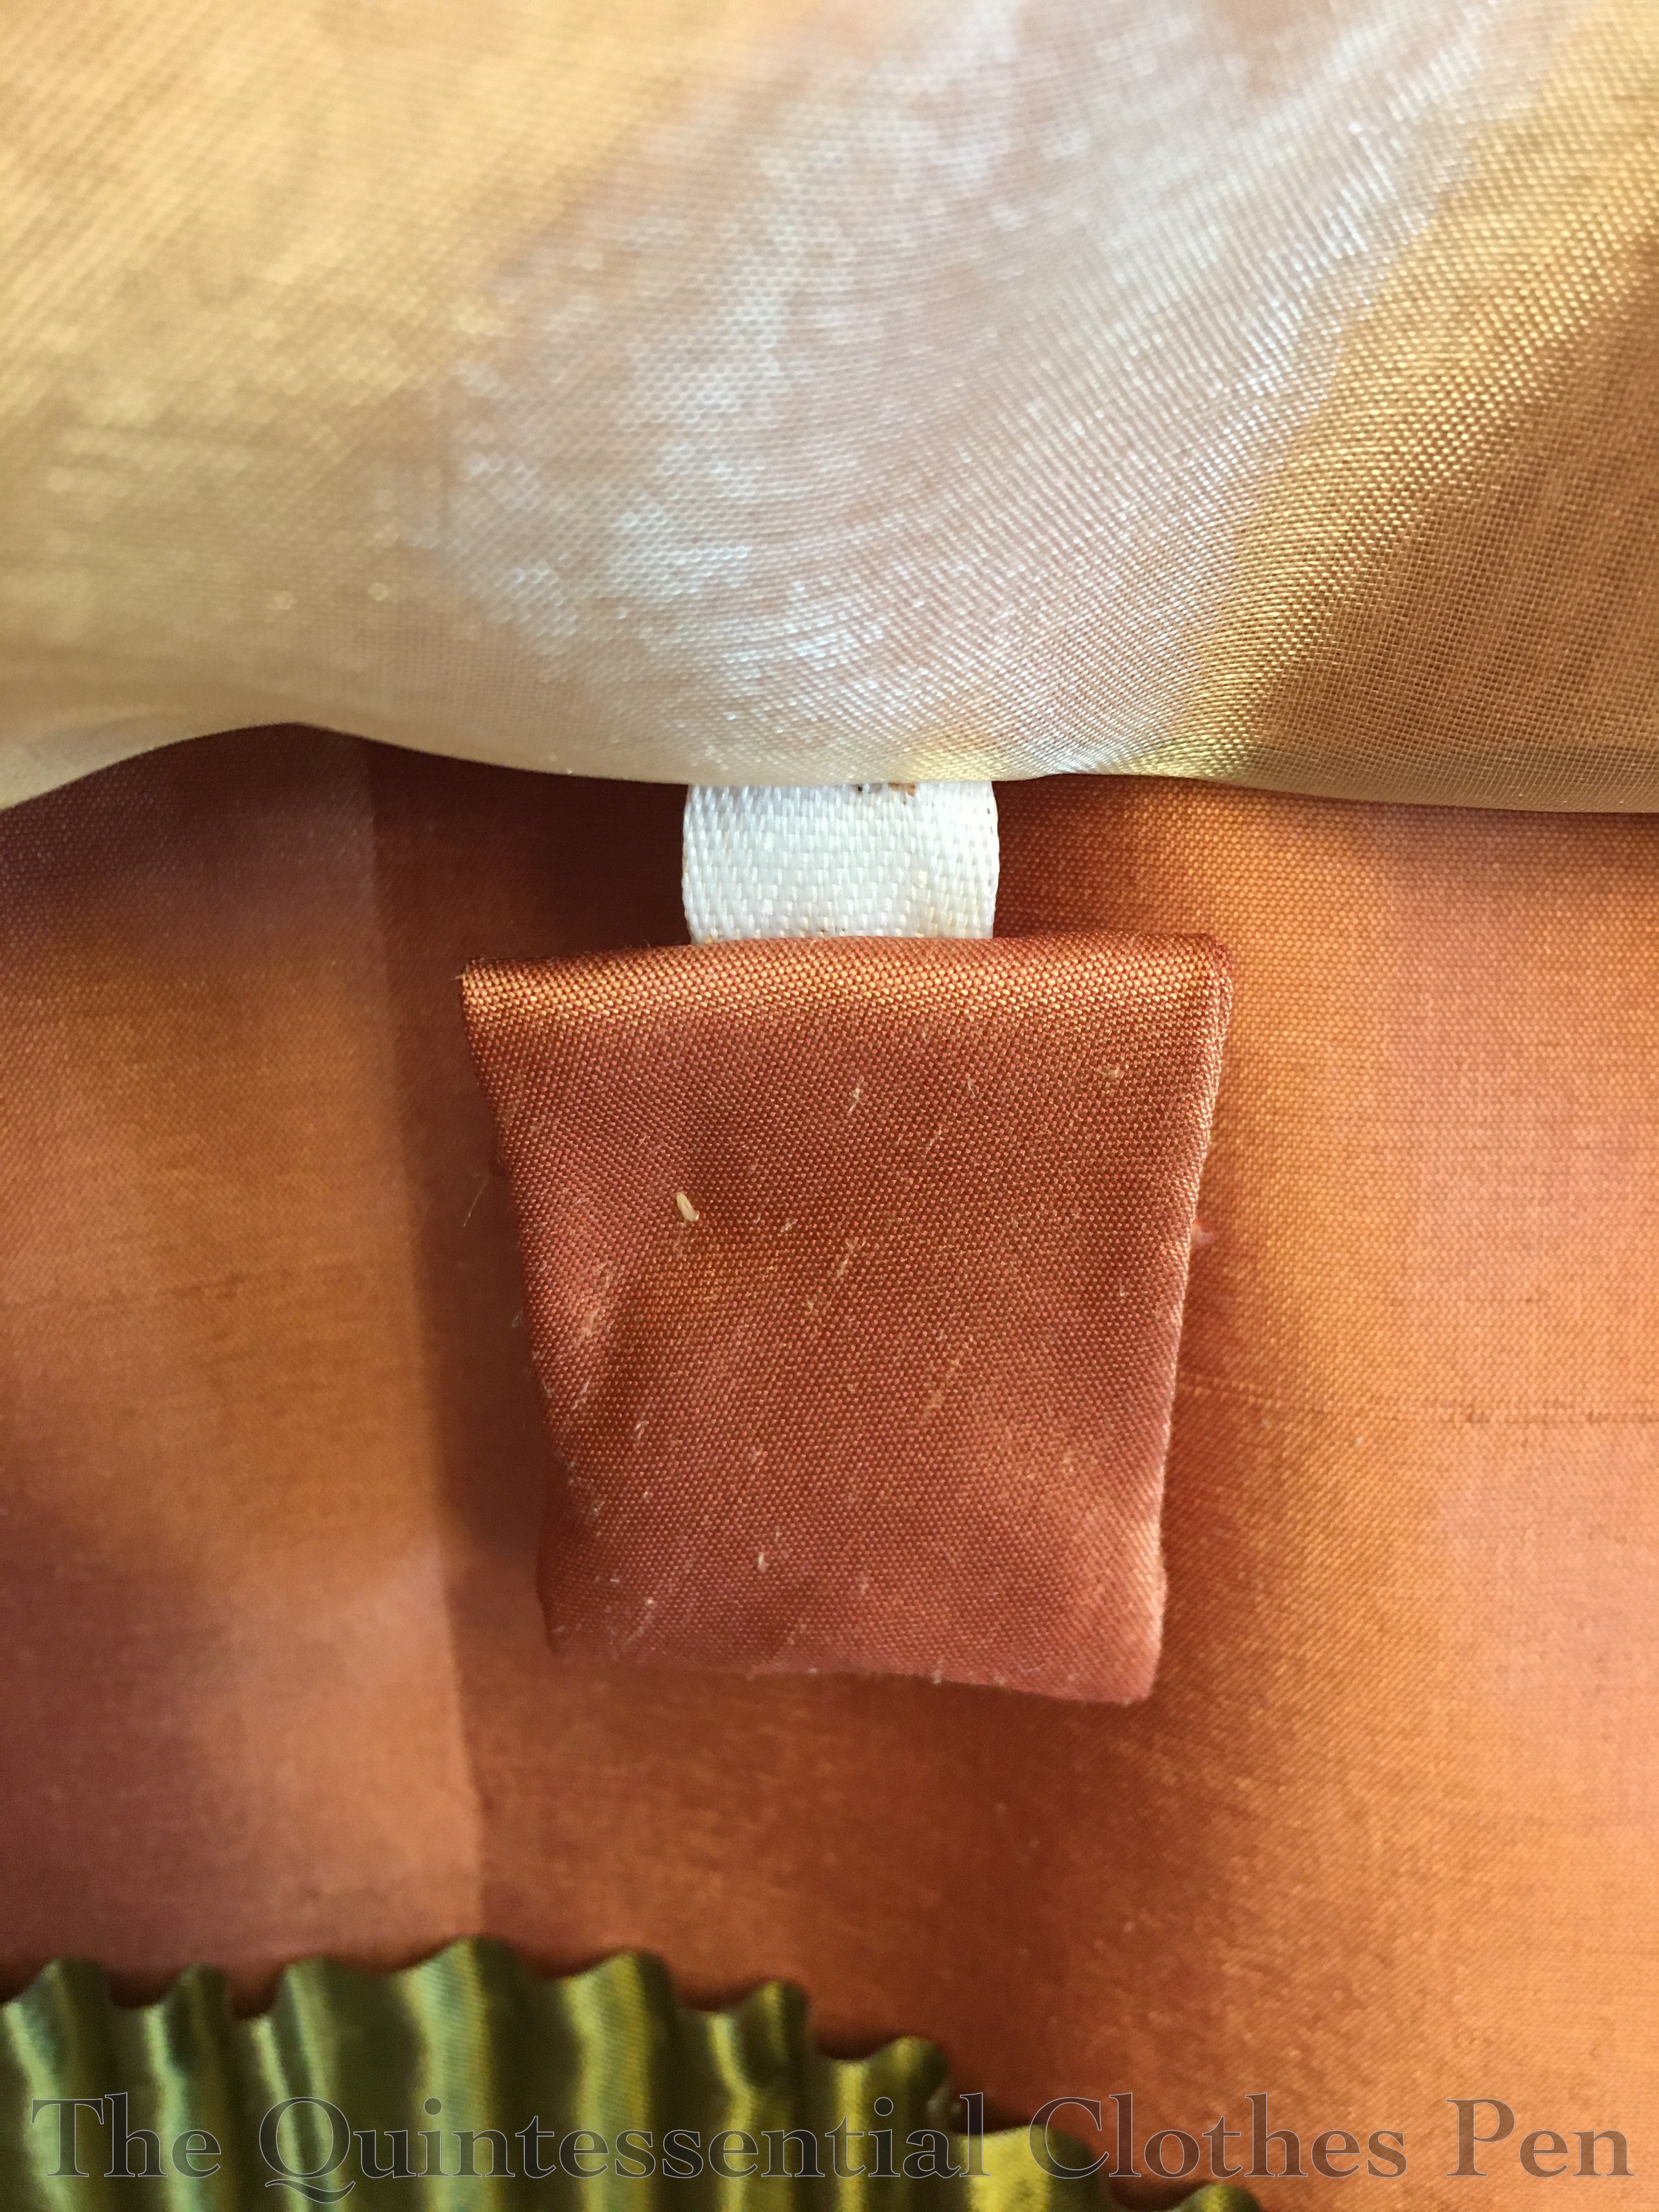
Similarly, I used up some light yellow polyester organza from my stash to flat line the apron. The color was harmonious with the silk and again, I had the perfect amount sitting around, so I think it was meant to be. The polyester organza is springy enough that it keeps the silk from creating tight creases, which helps to maintain the apron folds and the back drape pouf. It’s really quite magical! Both the pink and yellow organzas were left over from old projects and I was happy to be able to use them up. You can see the yellow organza at the top of the next photo.
The next photo is also showing you the quarter bag that is hidden under the apron. You see, I wanted to make sure that all of those folds I took the time to drape for the apron would stay in place and not need to be fussed with to lay nicely with each wearing. My solution was to run a length of twill tape down from the waistband to just above the hem of the apron. The silk is tacked to the twill tape to help keep the folds just so, and the bottom of the twill tape has this small pocket of silk, containing a Canadian quarter (perfect, because I’m not in Canada so it’s not very useful as currency) to help weight it and keep the folds from springing up.
Secret Pocket
Next, I want to share a hidden detail I added to this skirt. A pocket! This is stitched into the muslin base layer at the left side opening. It’s only accessible when the skirt is partially or completely unhooked, but that makes it a perfect place to stash a phone, keys, etc. if I wear this and don’t want to carry a purse or bag.
I made the size quite generous and placed the pocket low enough that anything in it hides under the skirt without adding a bulge.

Hems
There are multiple hems and hem finishing methods used in this skirt. The next photo shows most of the layers of the skirt and their varying hem methods.
Top in this photo is the front base layer of the skirt (that’s the pink with green trim). The pink silk is hemmed with bias strips of muslin that are machine sewn, pressed to the inside, and then hand stitched to the muslin base. This creates an invisible finish. (The apron, though not pictured here, is finished in the same manner, with the bias facing hand stitched to the yellow organza flat lining.)
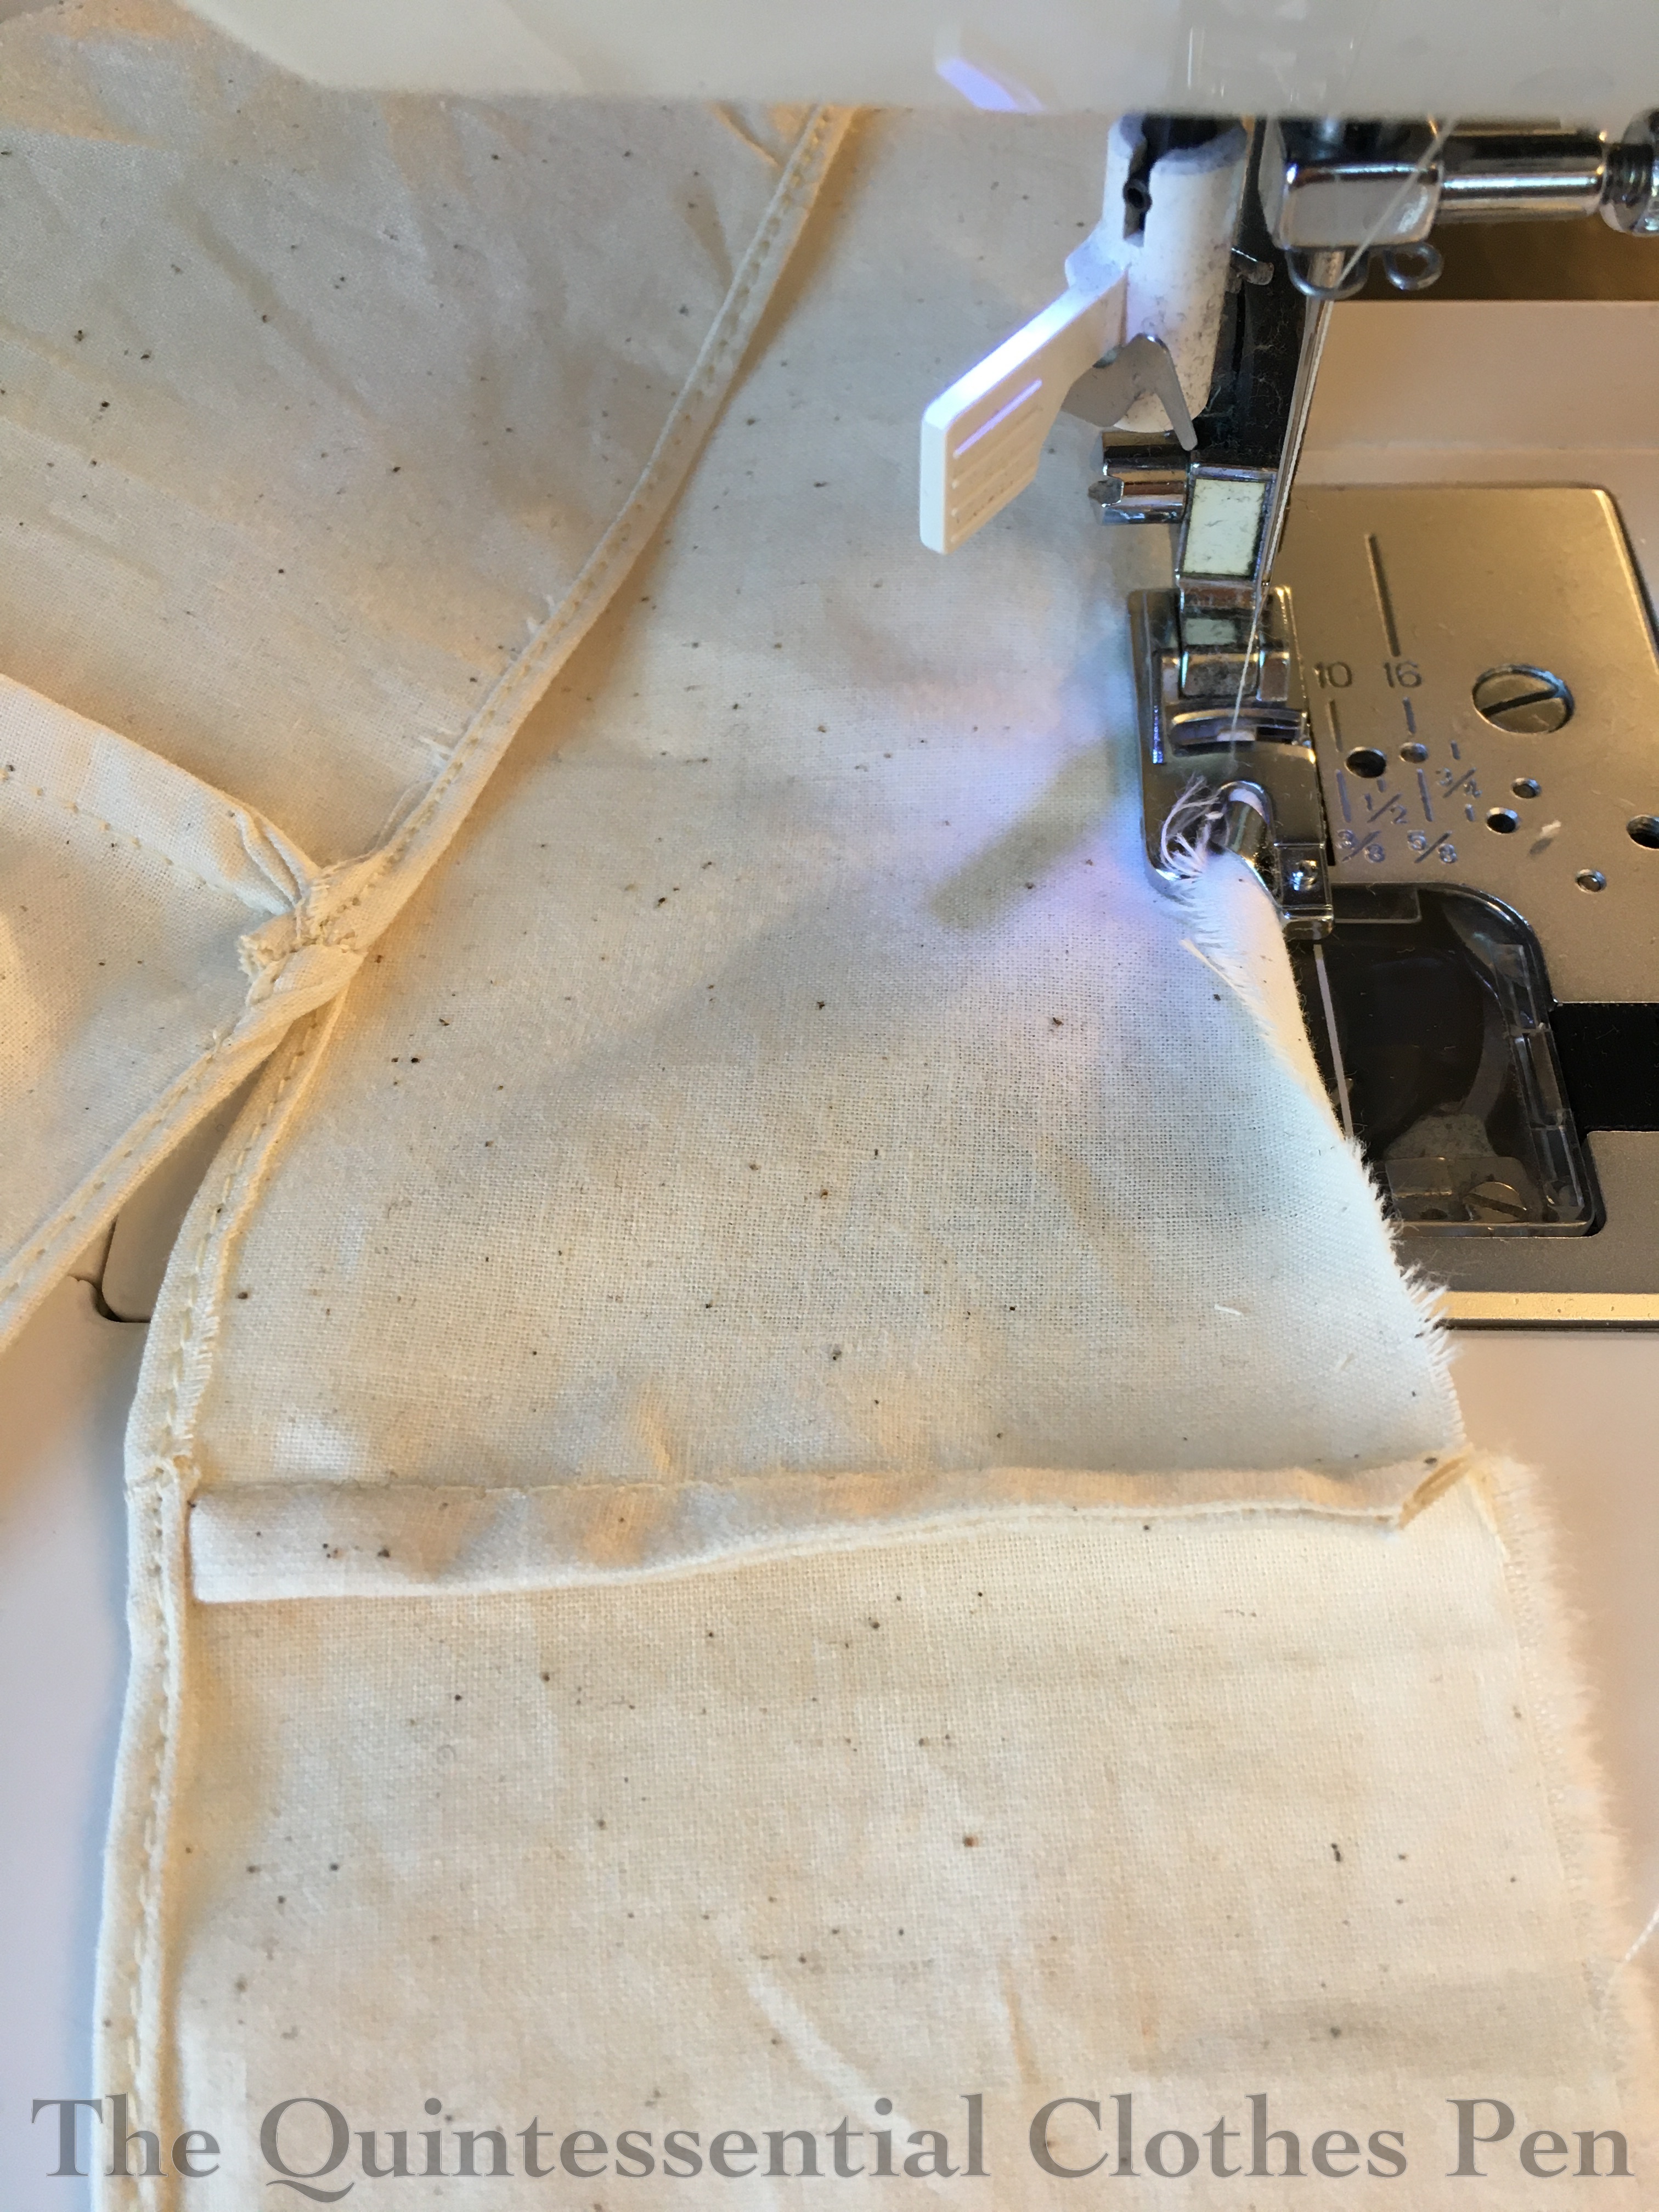
The middle layer in this photo is the back skirt base. This muslin layer is also finished with bias strips of muslin, but in this case I’ve sewn the bias up by machine since it is always covered by the back drape and will not be seen. I amused myself by using a small stitch length to mimic the machine stitching I’ve seen on extant late 19th century clothing as well as the same bronze thread that I used on the silk.

The bottom hem layer you can see is pretty fabulous and the most involved to make in terms of research and sewing.
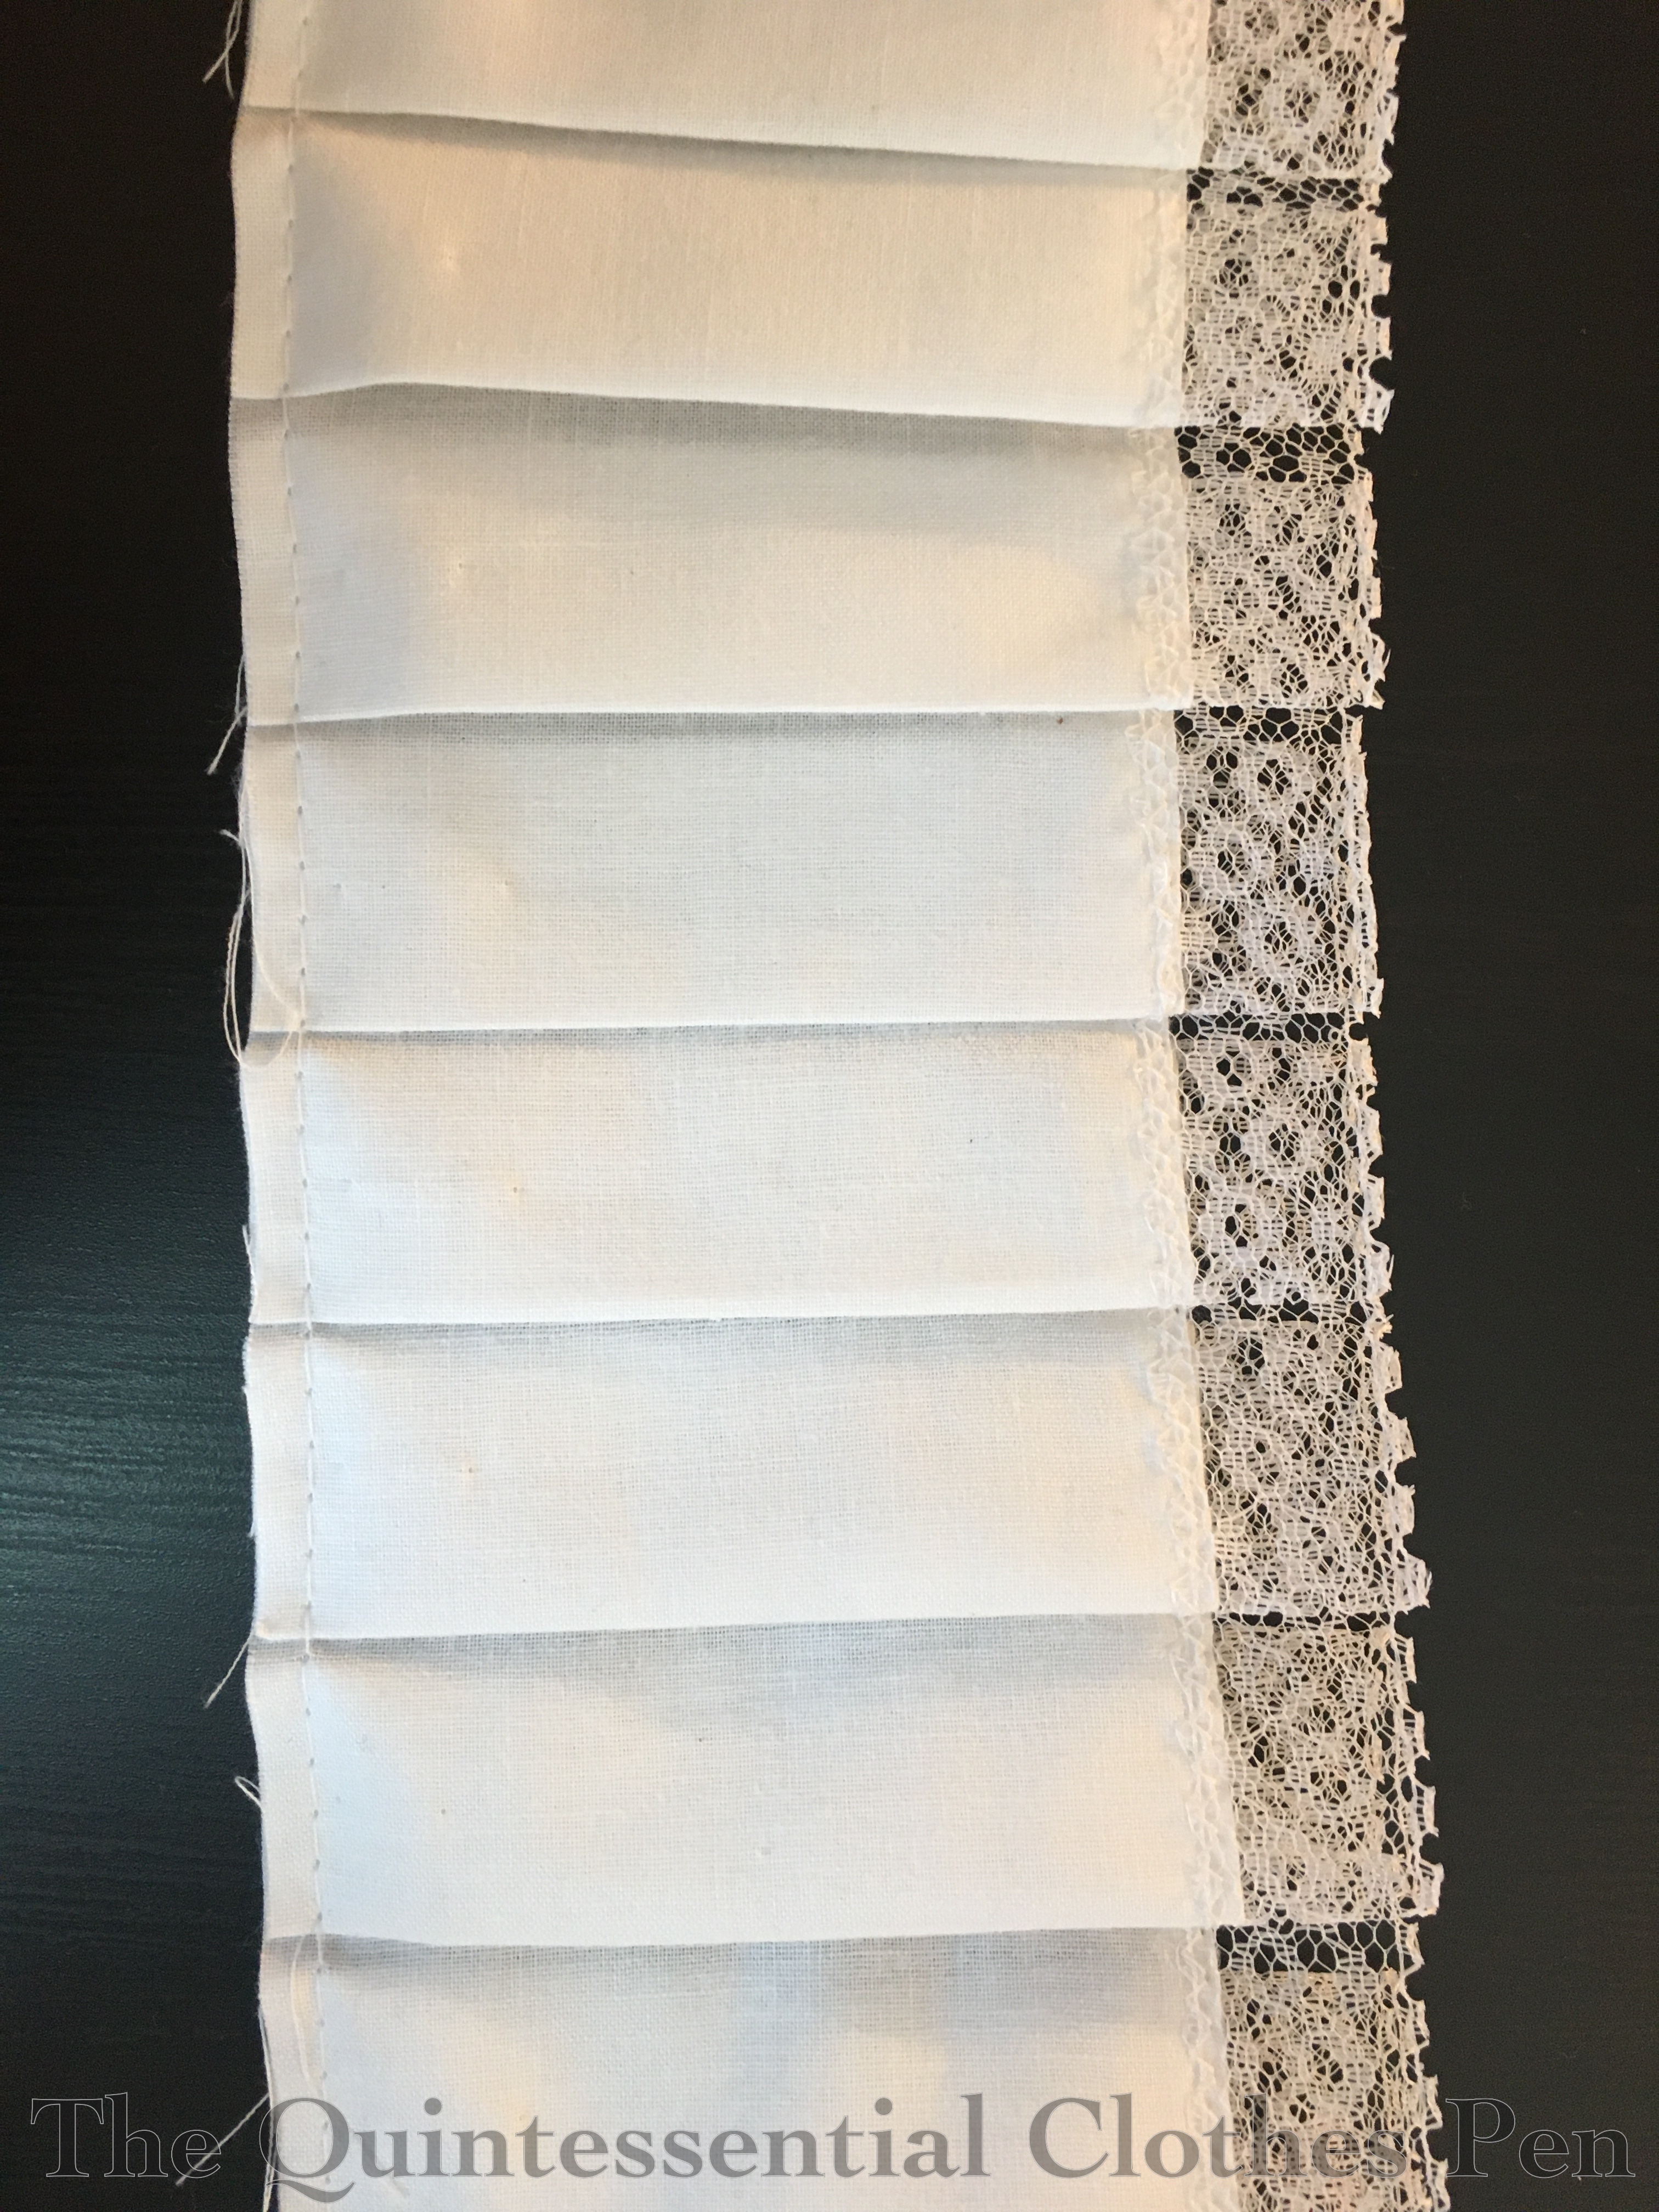
The back drape hem is finished with a muslin facing that ranges from about 12″ high at the sides to 20″ high at center back. This completely covers the portion of the train that drags on the ground, effectively keeping dirt off of the silk and organza layers. After piecing the muslin, but before attaching it to the skirt, I machine sewed the three rows of lace to the facing. I didn’t bother gathering, inside I just eyeballed tucks in the lace as I went along to create fullness.
This creates another form of a balayeuse. Remember that word, from May? I have a whole post about the amazing detachable balayeuse I made for my petticoat for this dress, but a balayeuse can also be an inside frill on the hem of a skirt.
I’ve had fun reading a series of blog posts by Natalie at A Frolic Through Time about creating an 1895 ensemble and her research about the support structures and methods that help maintain the fashionable silhouette. Along the way there have been mentions of the balayeuse! I’m going to include them here, because I am intrigued by them, even though their time period is a little later than this 1875 dress.
1 – In the post 1895 Outfit: Period Methods To Add Skirt Fullness, Part 1, Fullness and Flare, Natalie includes a mention under the heading What Books and Magazines Said About Fullness and Flare in Mid-decade Skirts.
2 – Later in the series, in the post 1895 Outfit: Period Methods To Add Skirt Fullness, Part 5, Steels, Rattan, Candlewicking, and Dust Ruffles, Natalie includes more information under the heading A Balayeuse or Dust Ruffle, Fixed Inside the Outer Skirt.
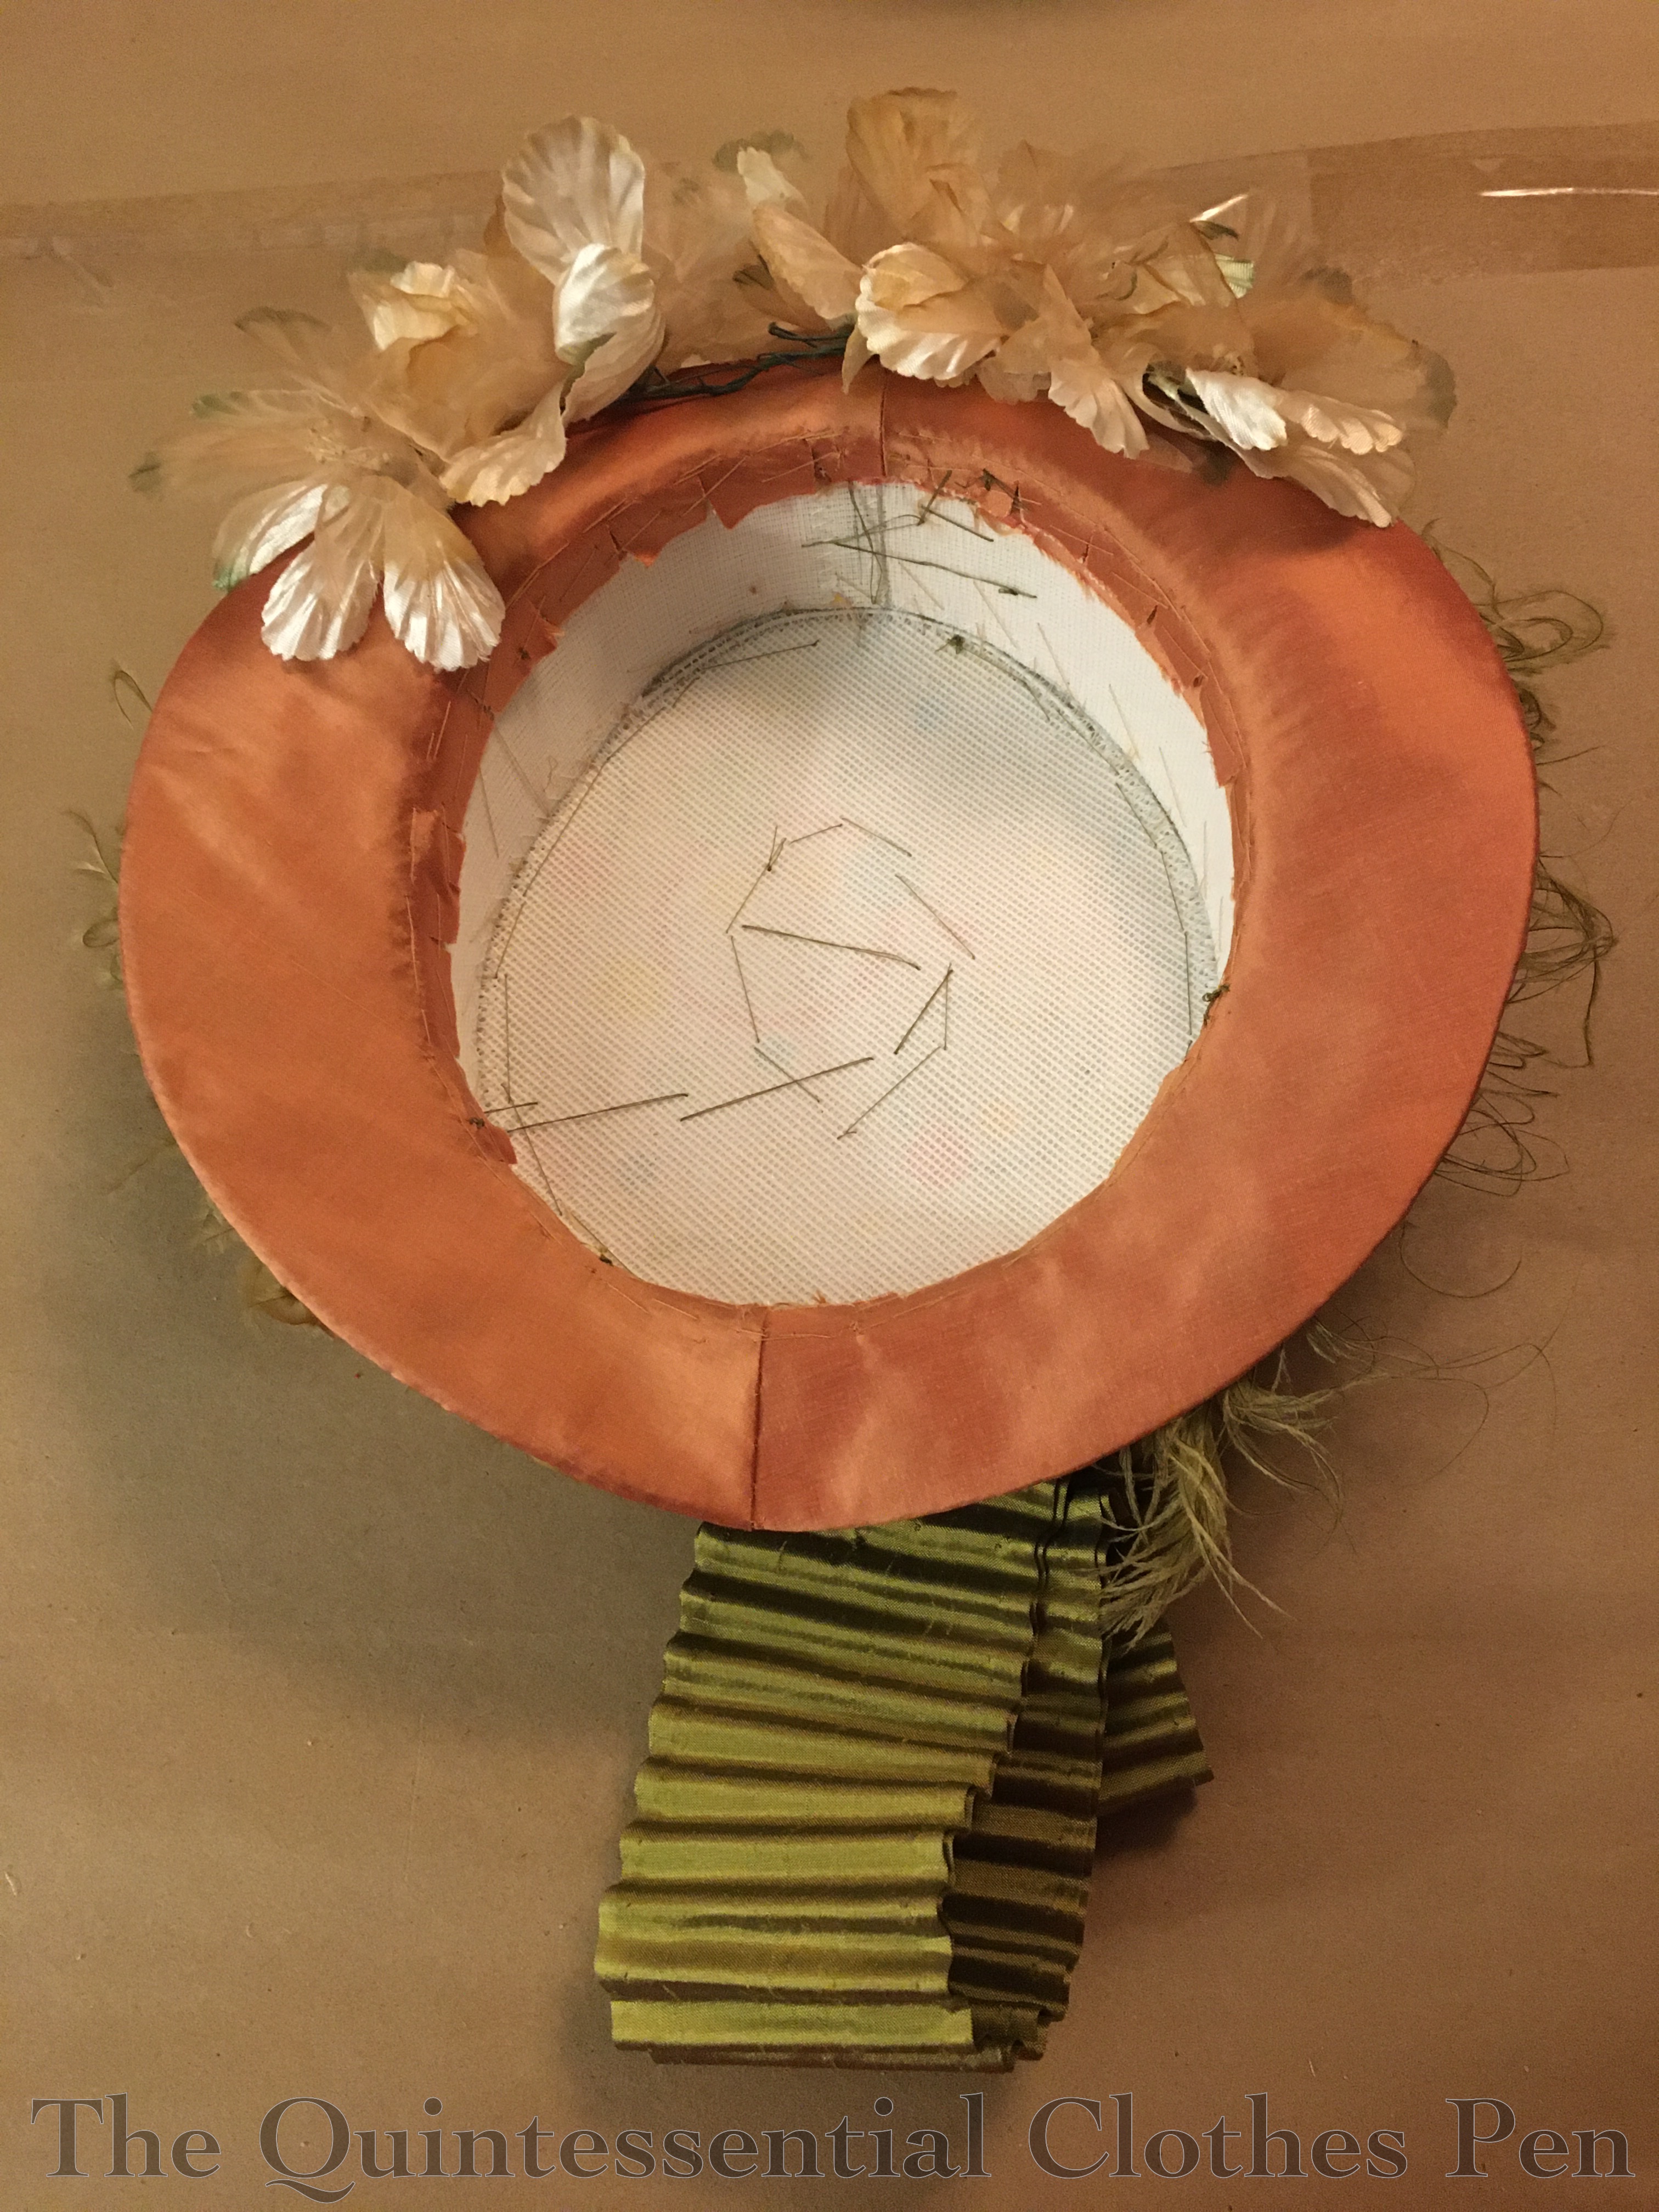
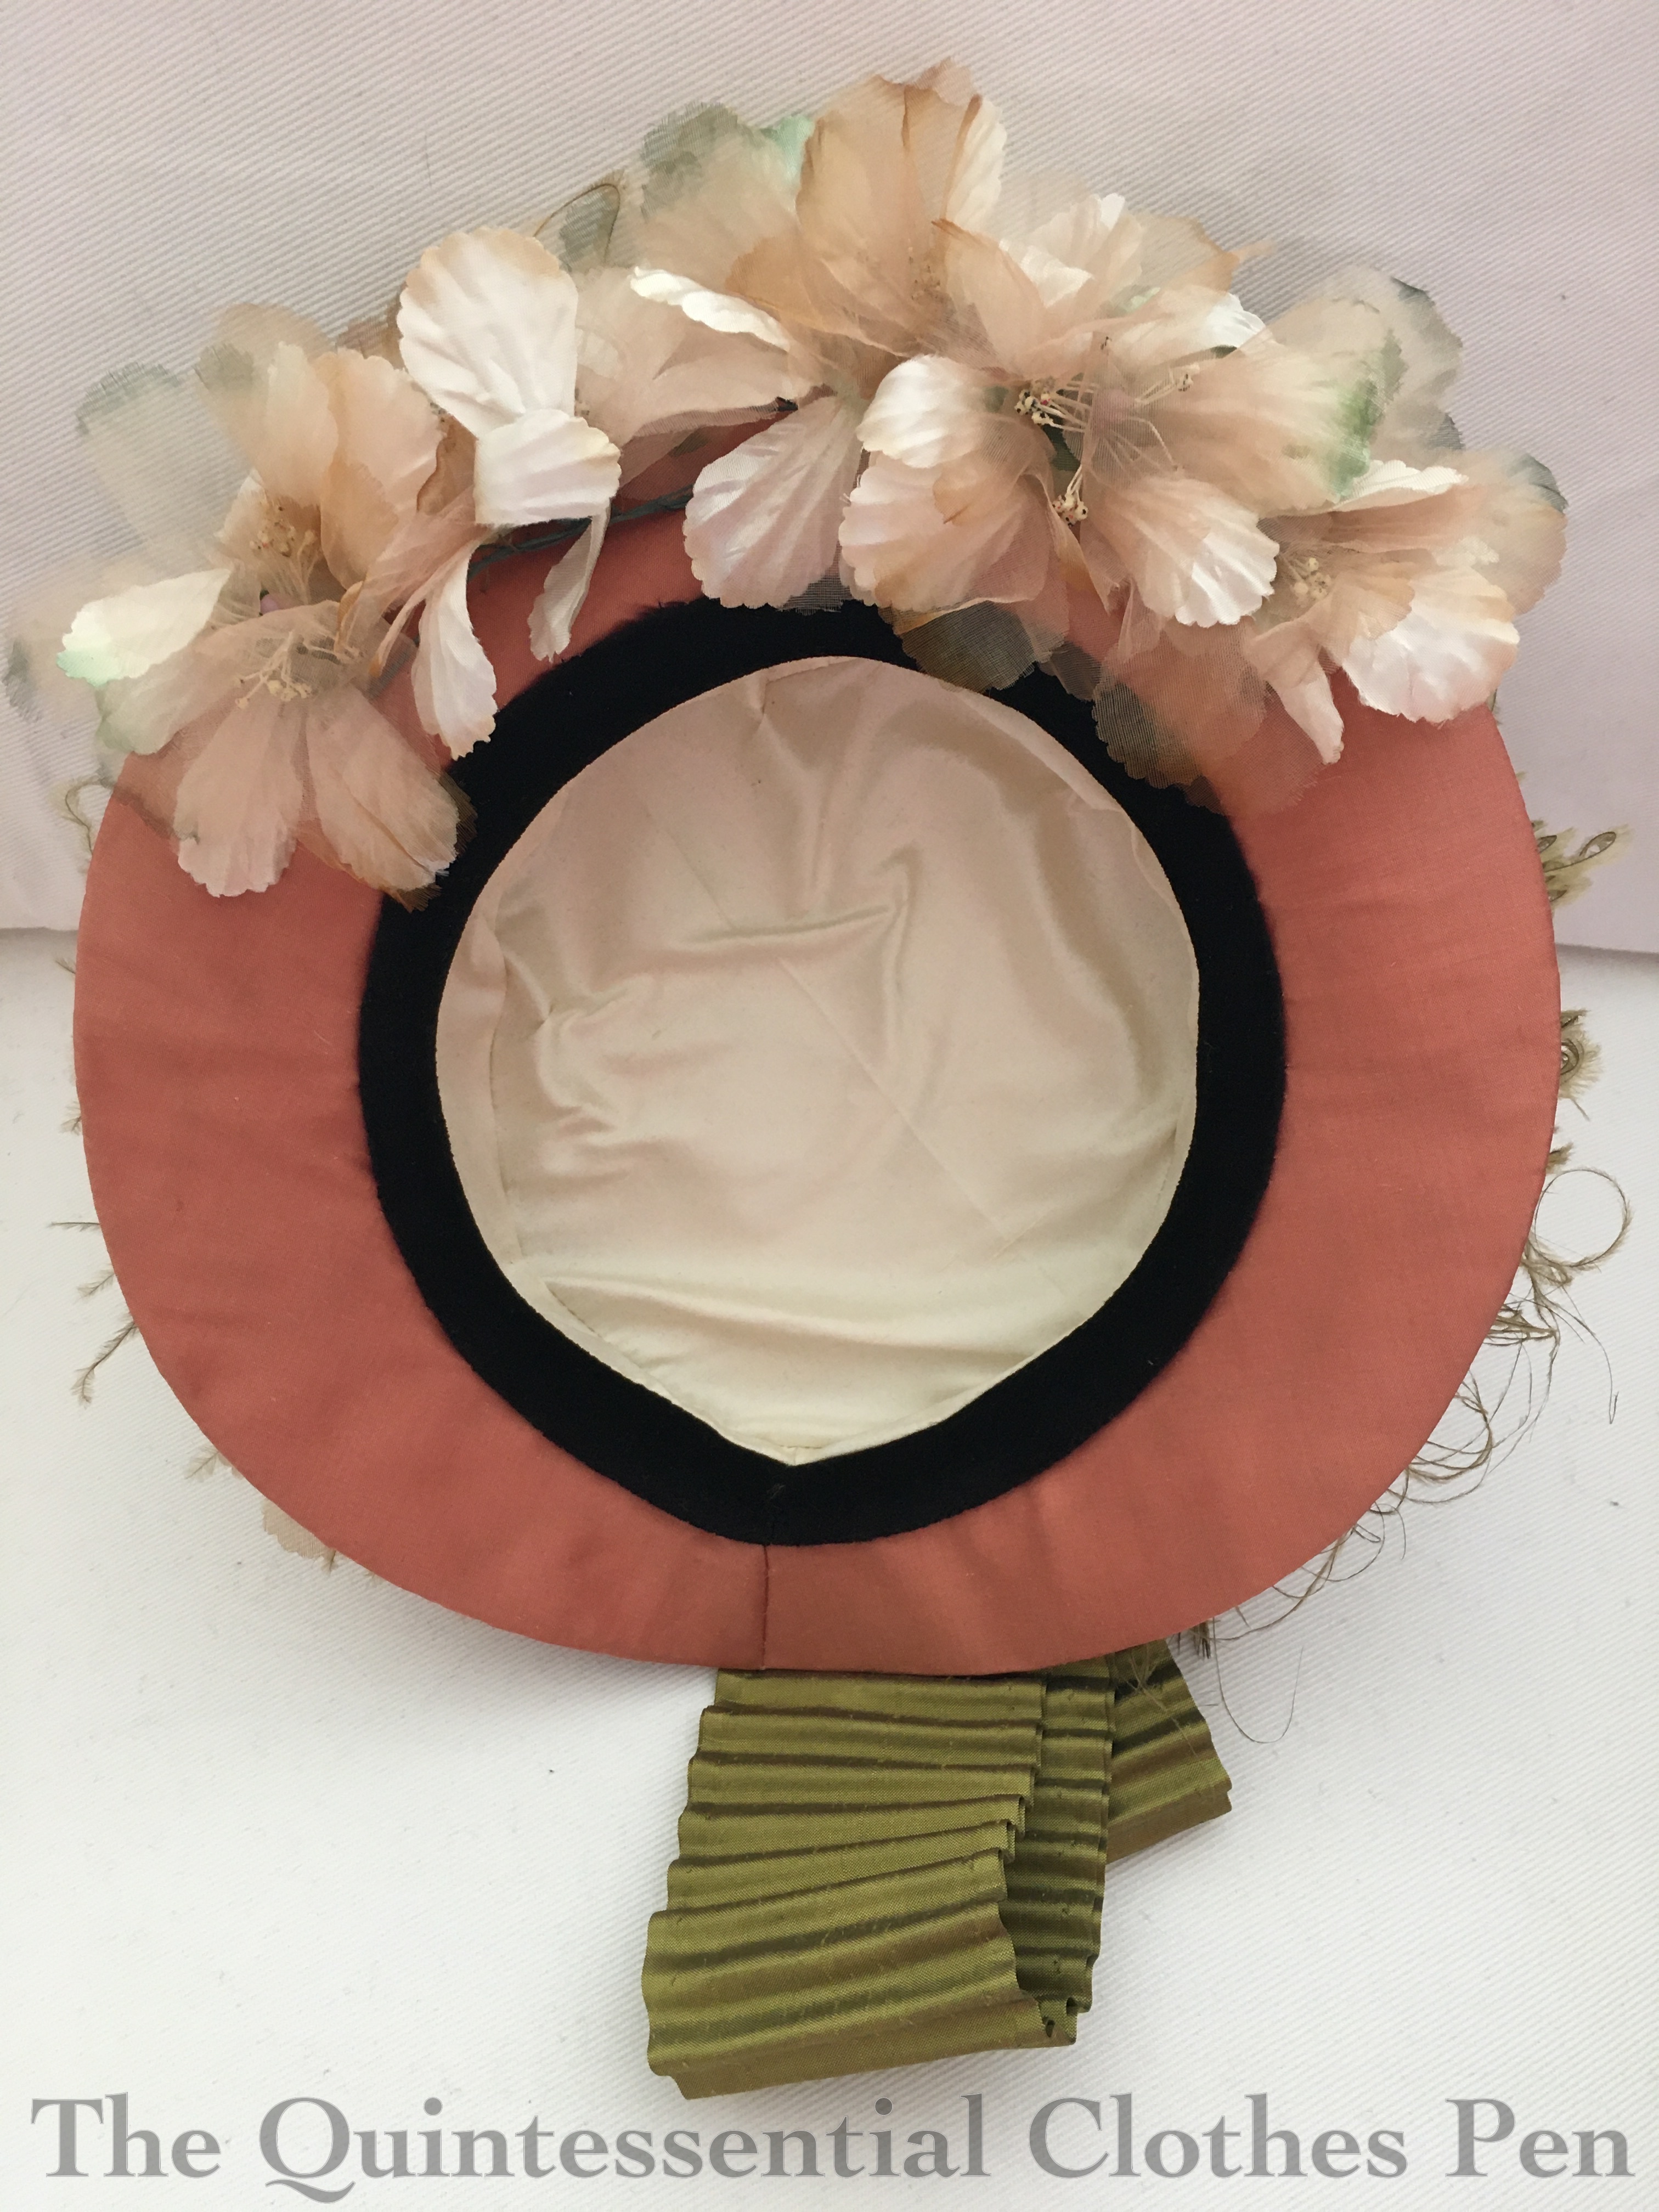
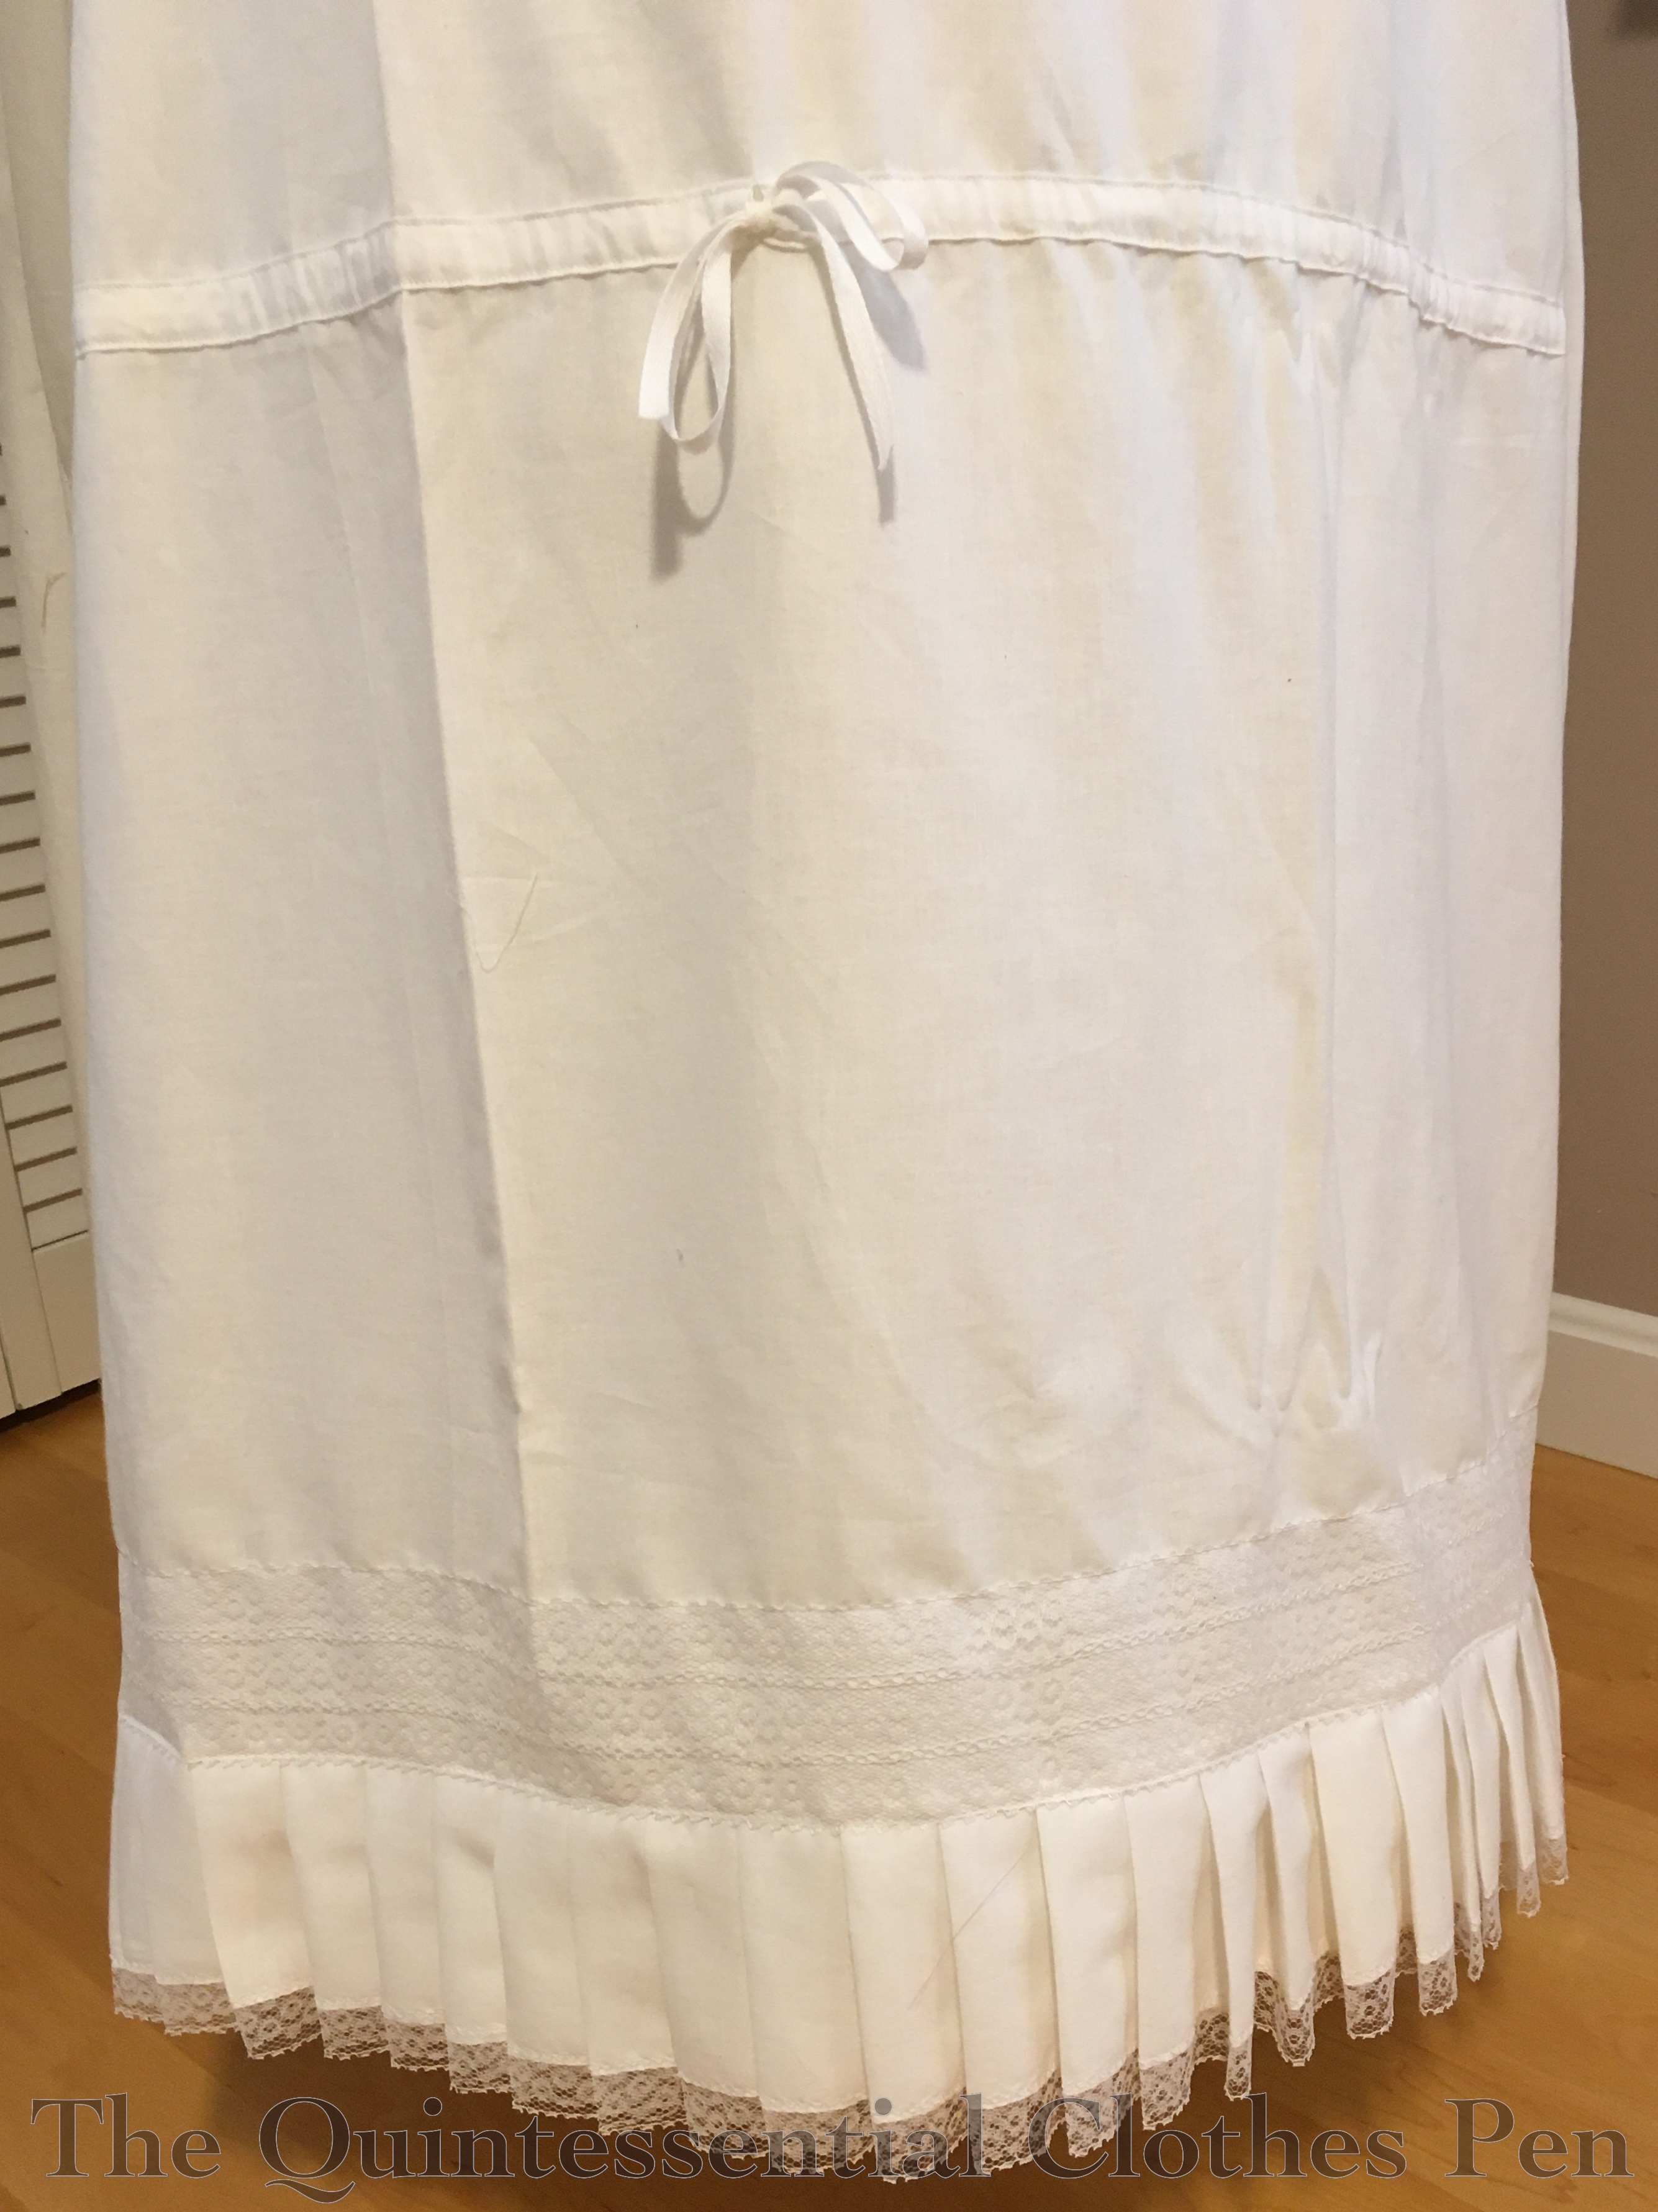
The lace balayeuse extends past the finished hem by just a little bit, so that it peeps out while the dress is being worn, as you can see in the photo below.

This particular detail is not from my inspiration fashion plate, but it’s a feature often seen on extant garments, such as this cream dress dated c. 1879 and this red dress dated 1879, both from the Met Museum.
In addition to being pretty, trailing white garments on the ground show off that you have the resources to keep the garments clean and also that you have the resources to pay for the extra materials to make them. More practically speaking, the lace helps grip the balayeuse that is attached to my petticoat, which helps to keep the skirt folds in place even with movement. I found that moving forward, backward, sideways, and turning all caused no disruptions to the folds of my skirt while being worn.
Trimmings
The final step of making this dress was trimming! Lots of it!
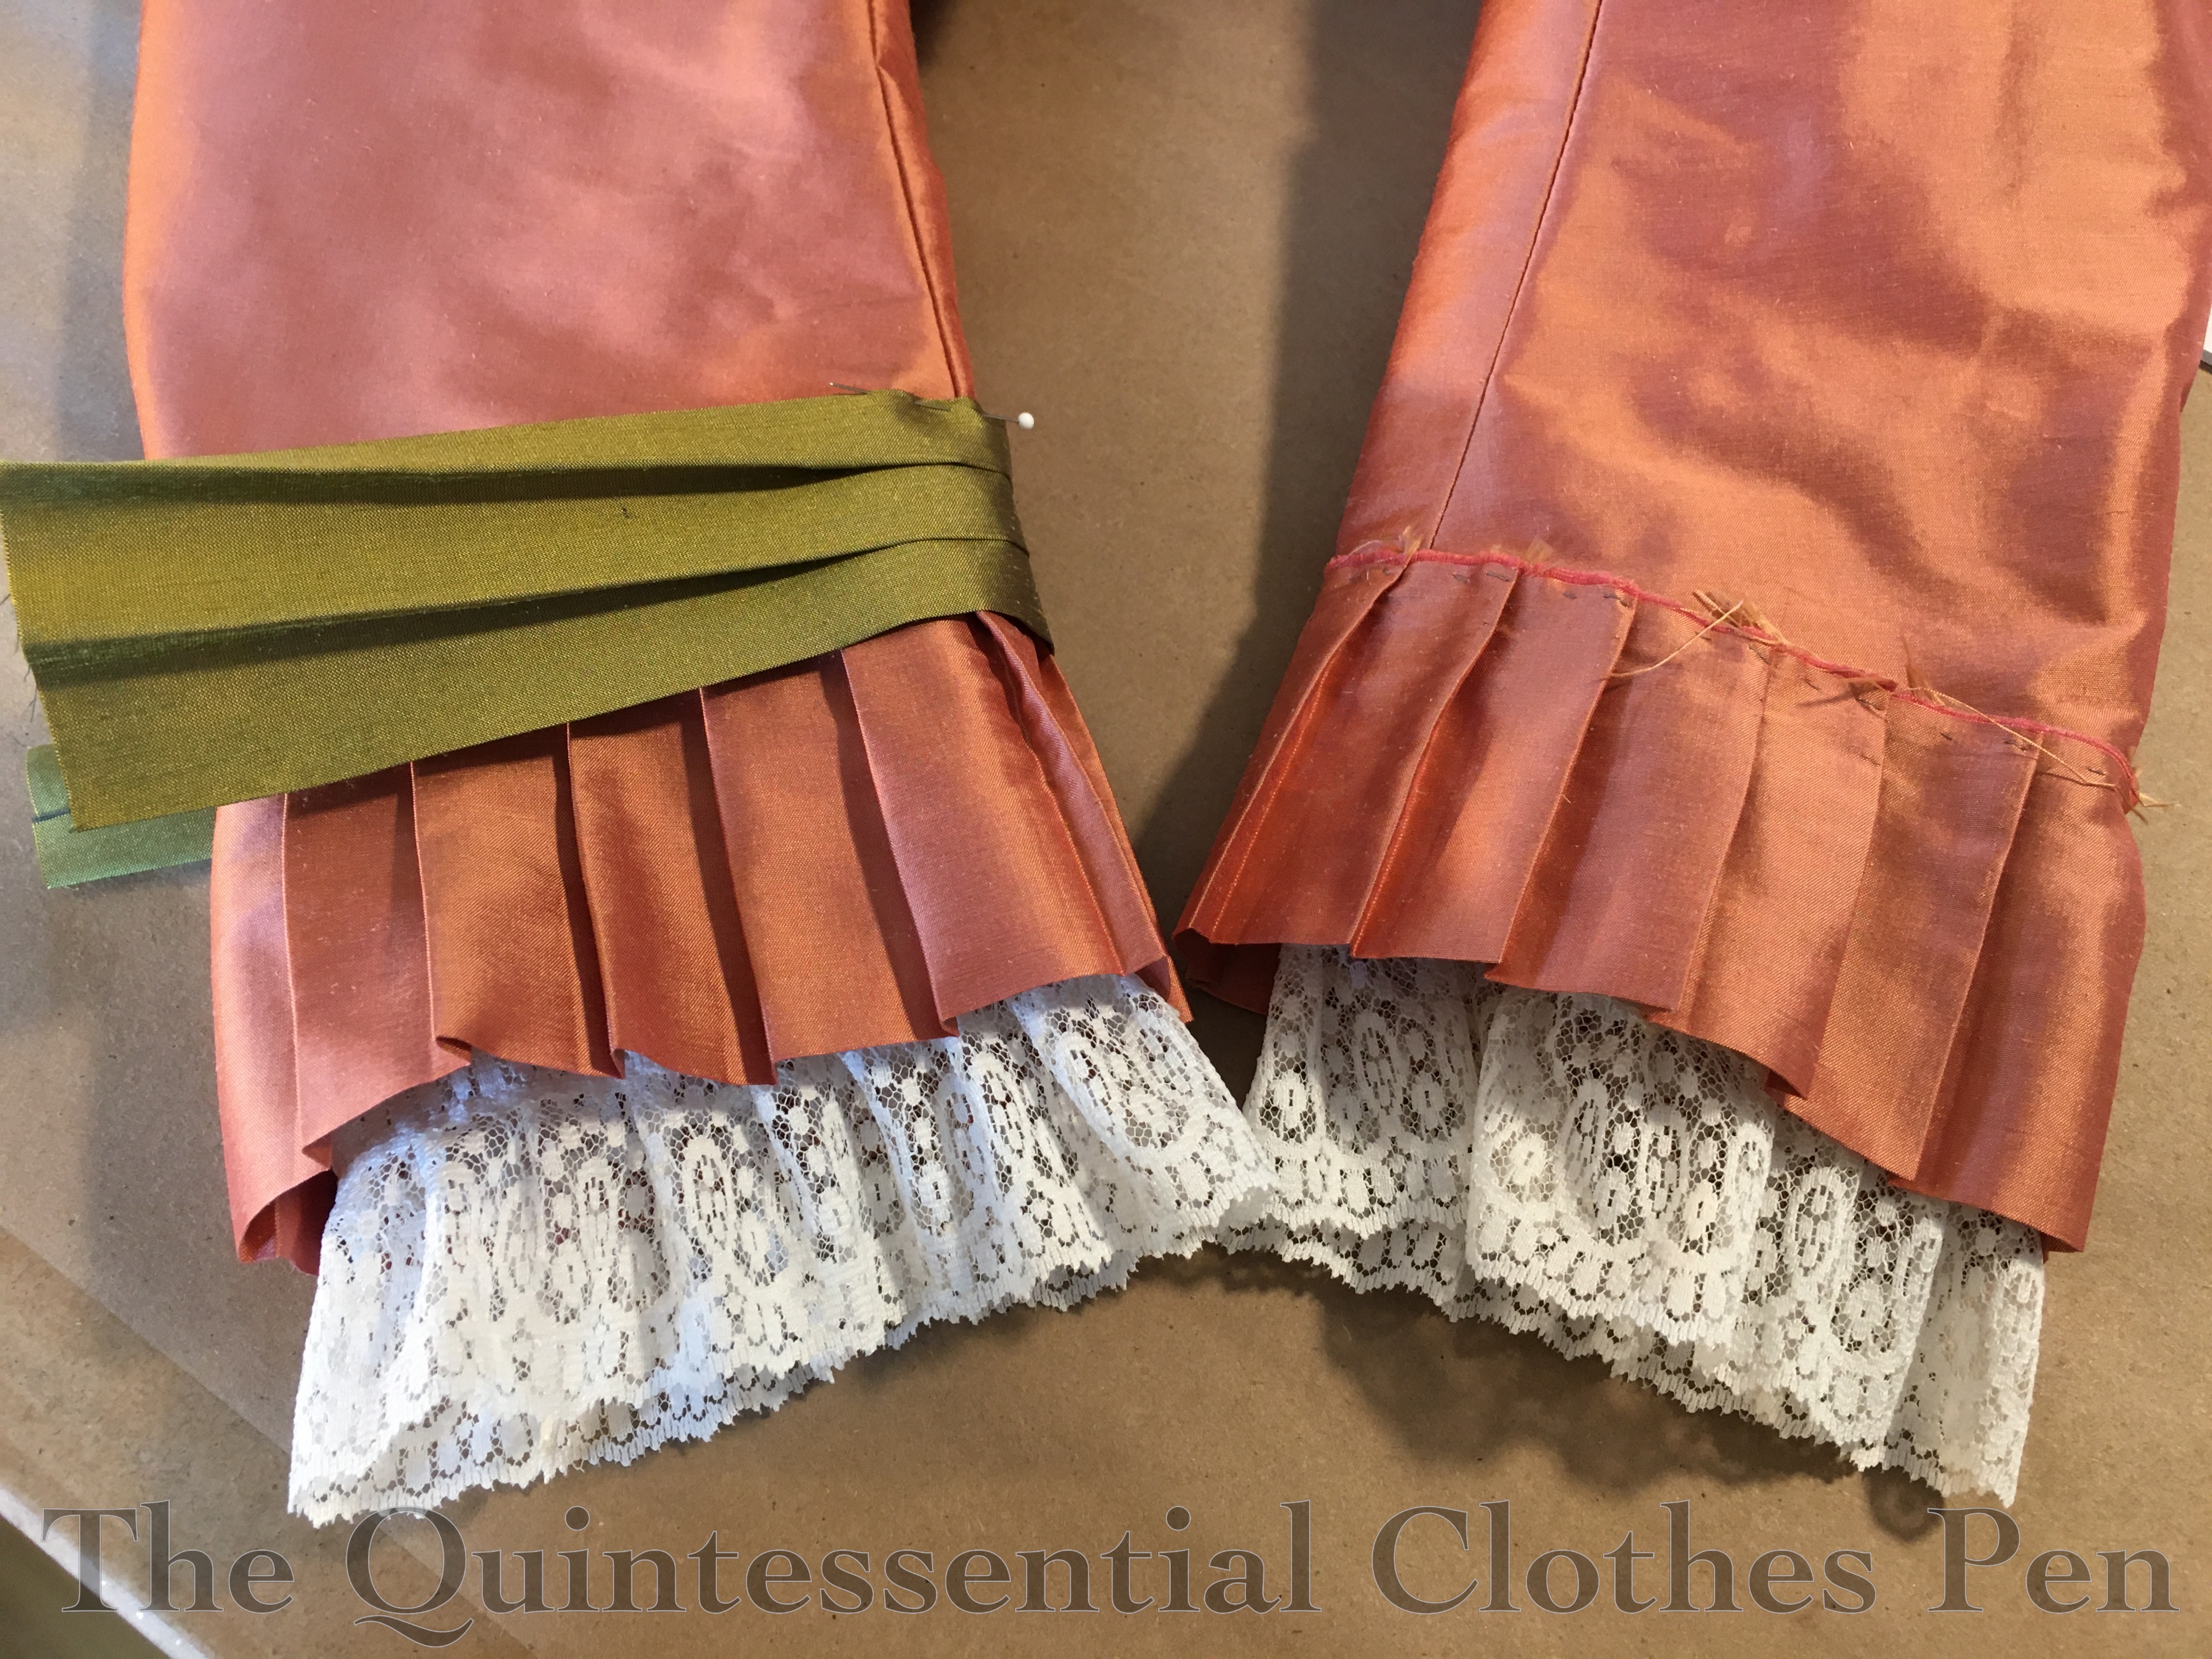
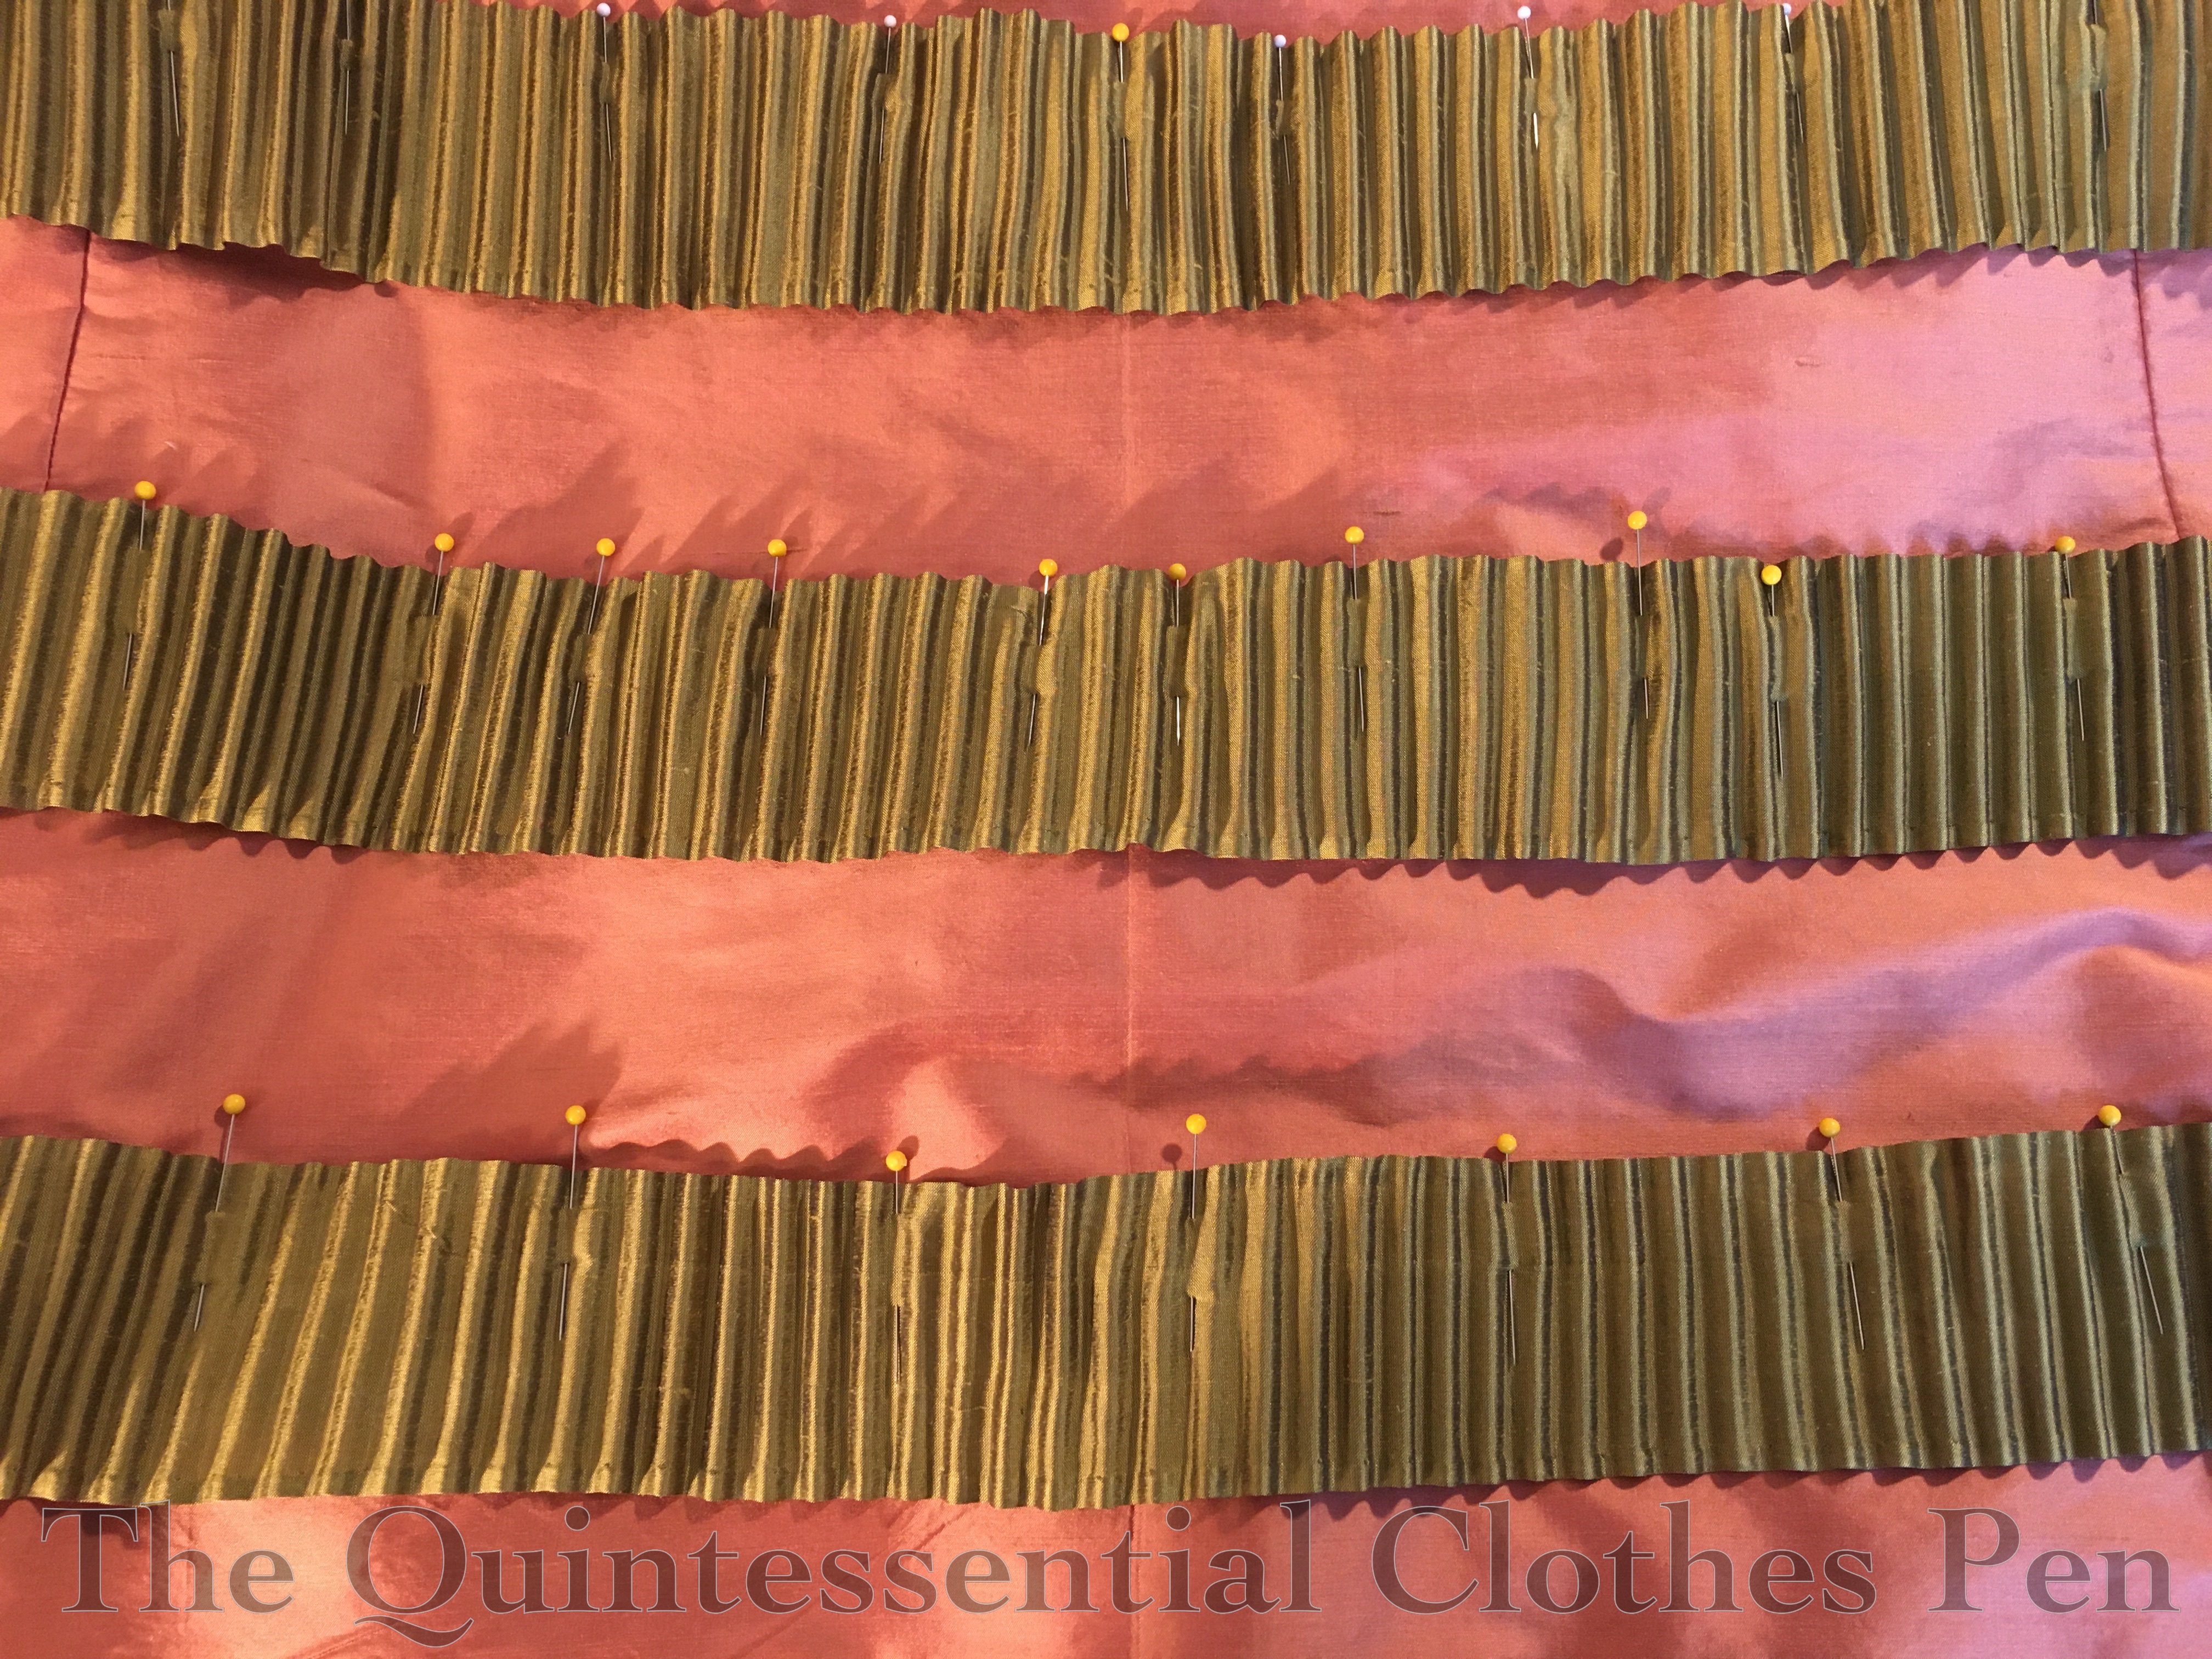
The first bit of trim I tackled was the trim on the front base section of the skirt. In the inspiration fashion plate this looks like knife pleats, but I was inspired to use my antique fluting iron instead. You can read all about making the fluted trim in this past post.
Here is the fluted trim pinned in place on the skirt base.
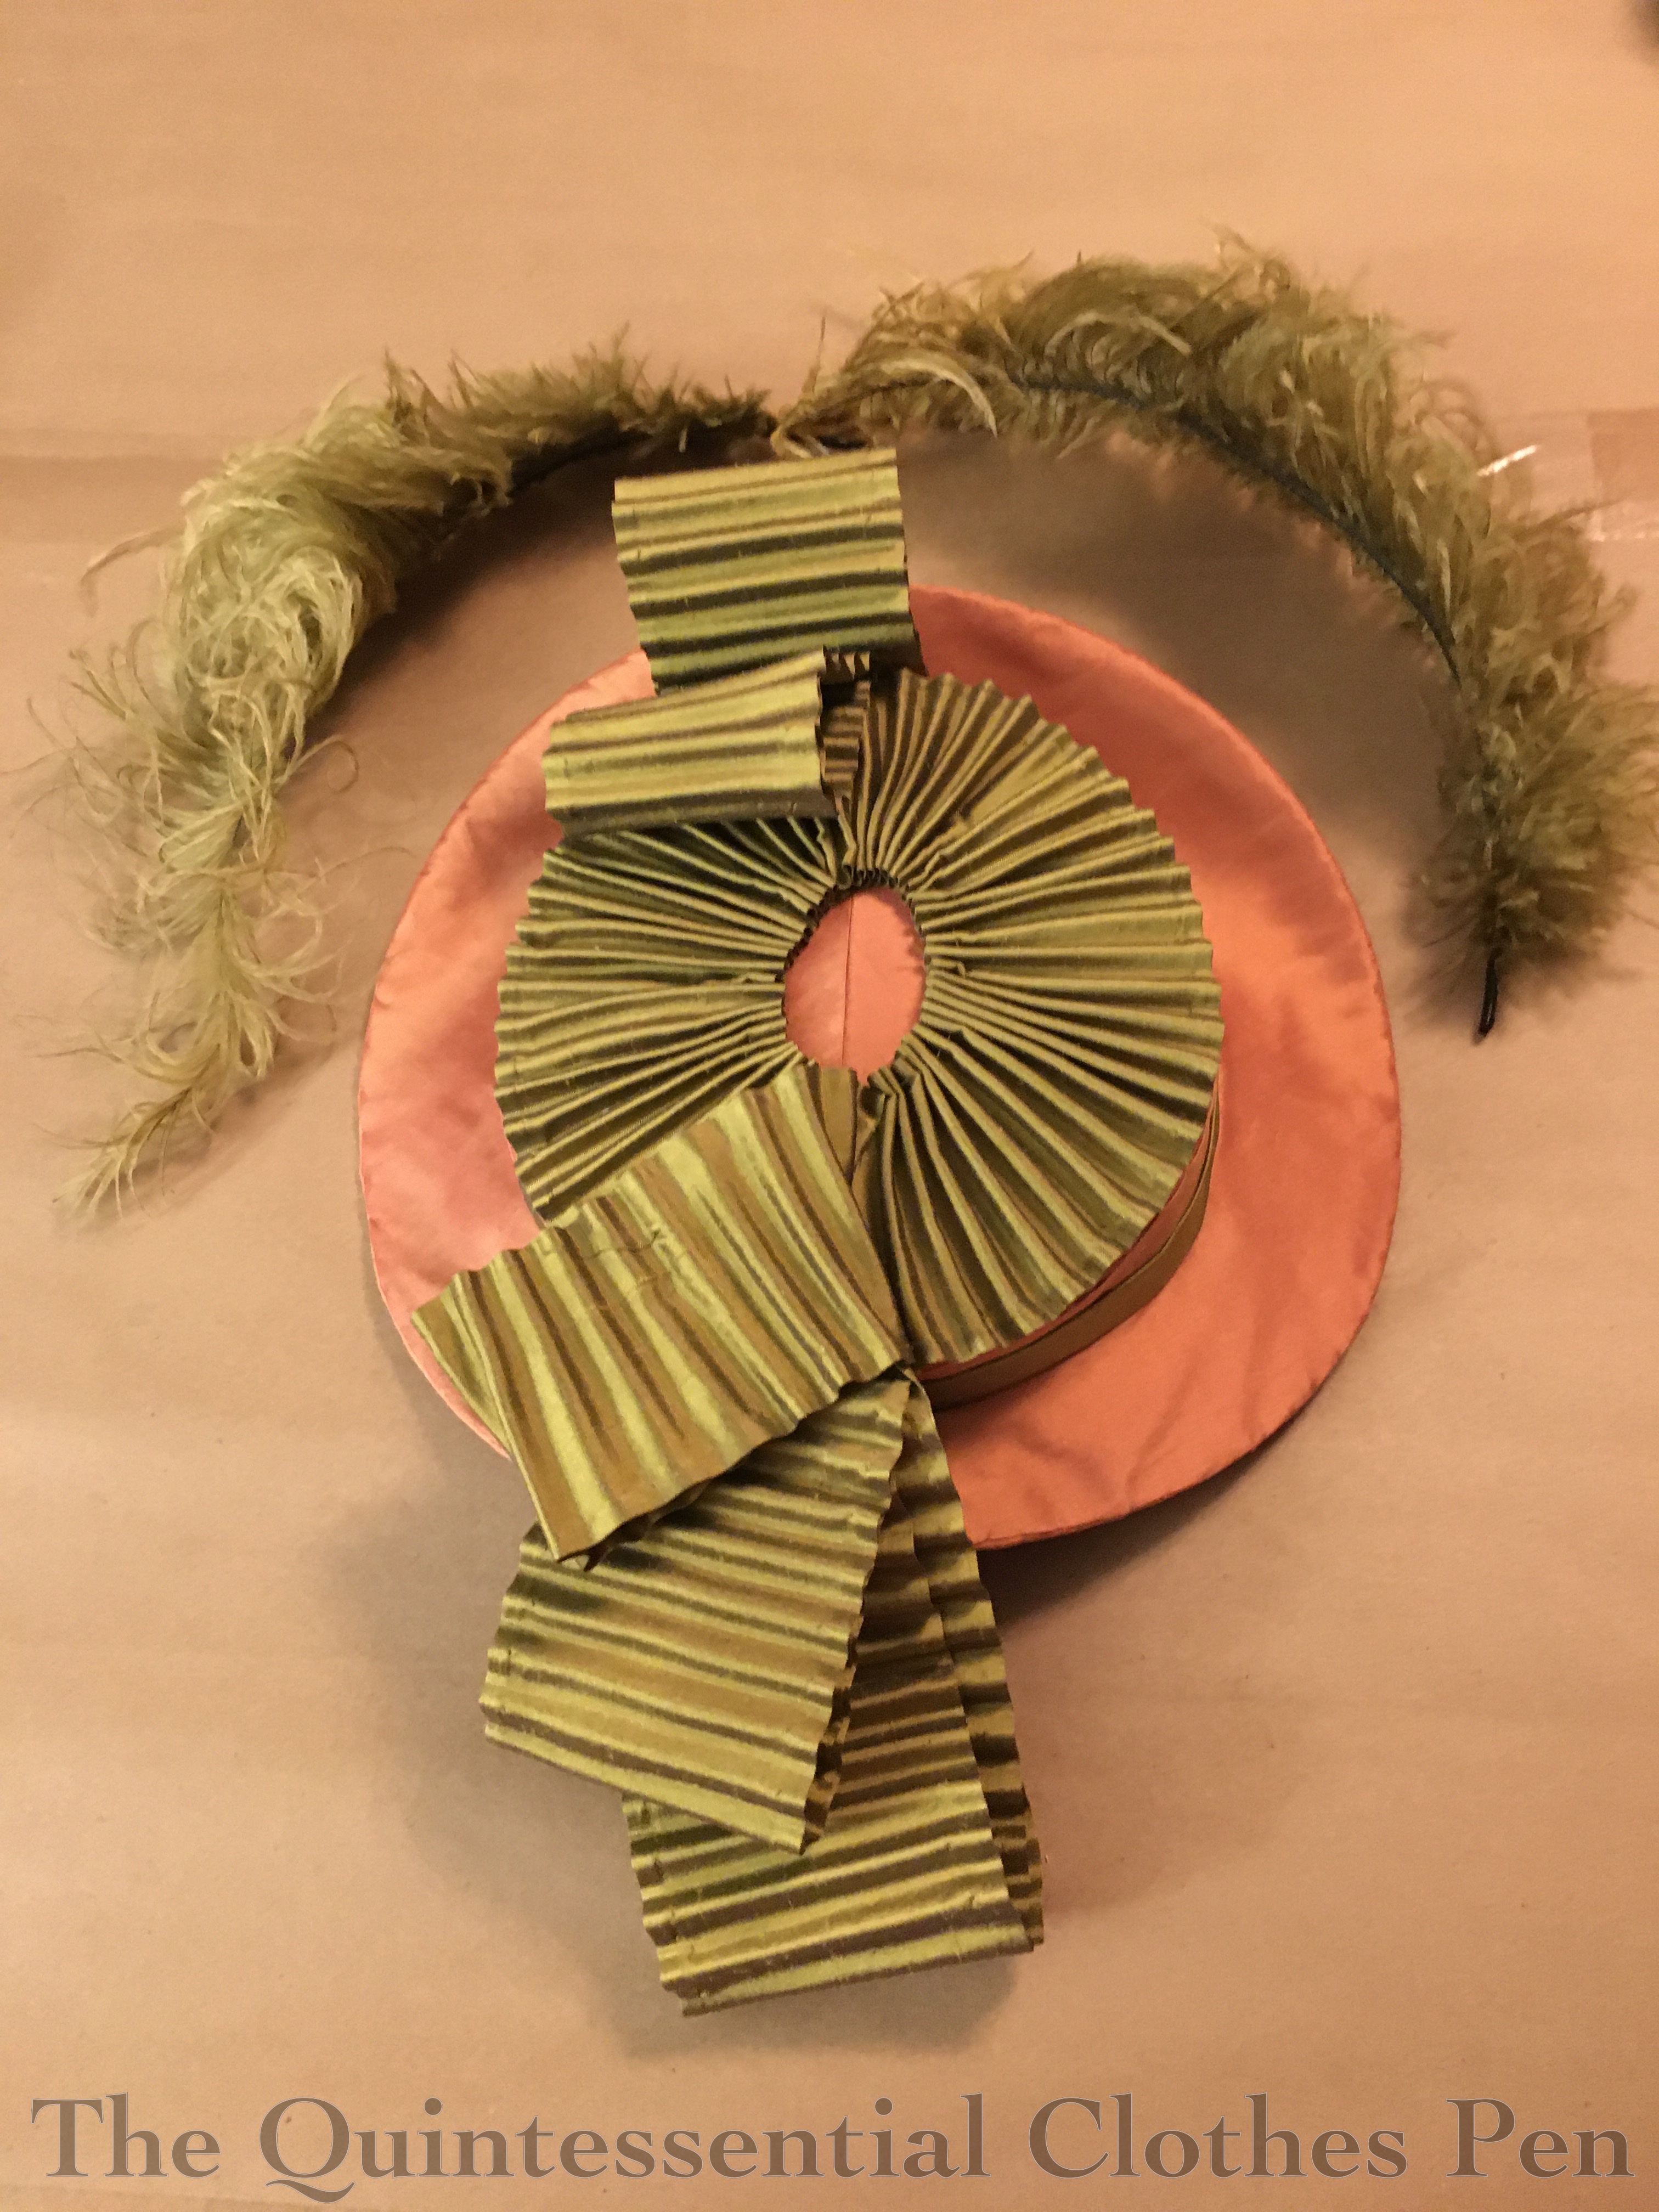
After sewing the fluted trim on, it was time to consider the back trim–all those gathers and the massive bows.
The gathers are strips of silk, some shaped, that are hemmed by hand along one edge. Here are my six pieces of green silk: hemmed, gathered, and ready to go.

The non-hemmed edge was pressed under but not stitched: it was stitched down as I attached to the green cotton bands you can see in the photo below. These are made from old bedding (not the perfect color, but green, and you can’t see them, so I’m pleased to be able to re-use old fabric). The cotton bands are shaped and the ruffles sewn to them so that they can float on top of the gathered pink silk.

The gathering threads in the green panels were sewn my machine. After the green cotton bands were hand tacked in place, the gathering threads were covered by the black soutache trim, which was also hand sewn in place. This image shows this part of the process in progress.

The end result looks like this. It reminds me of heirloom lettuce. Not in terms of color (hopefully!) but in terms of the ruffle-y ness. The edges are all nicely finished, the gathers are covered by black soutache, and the whole thing is invisibly held in place.

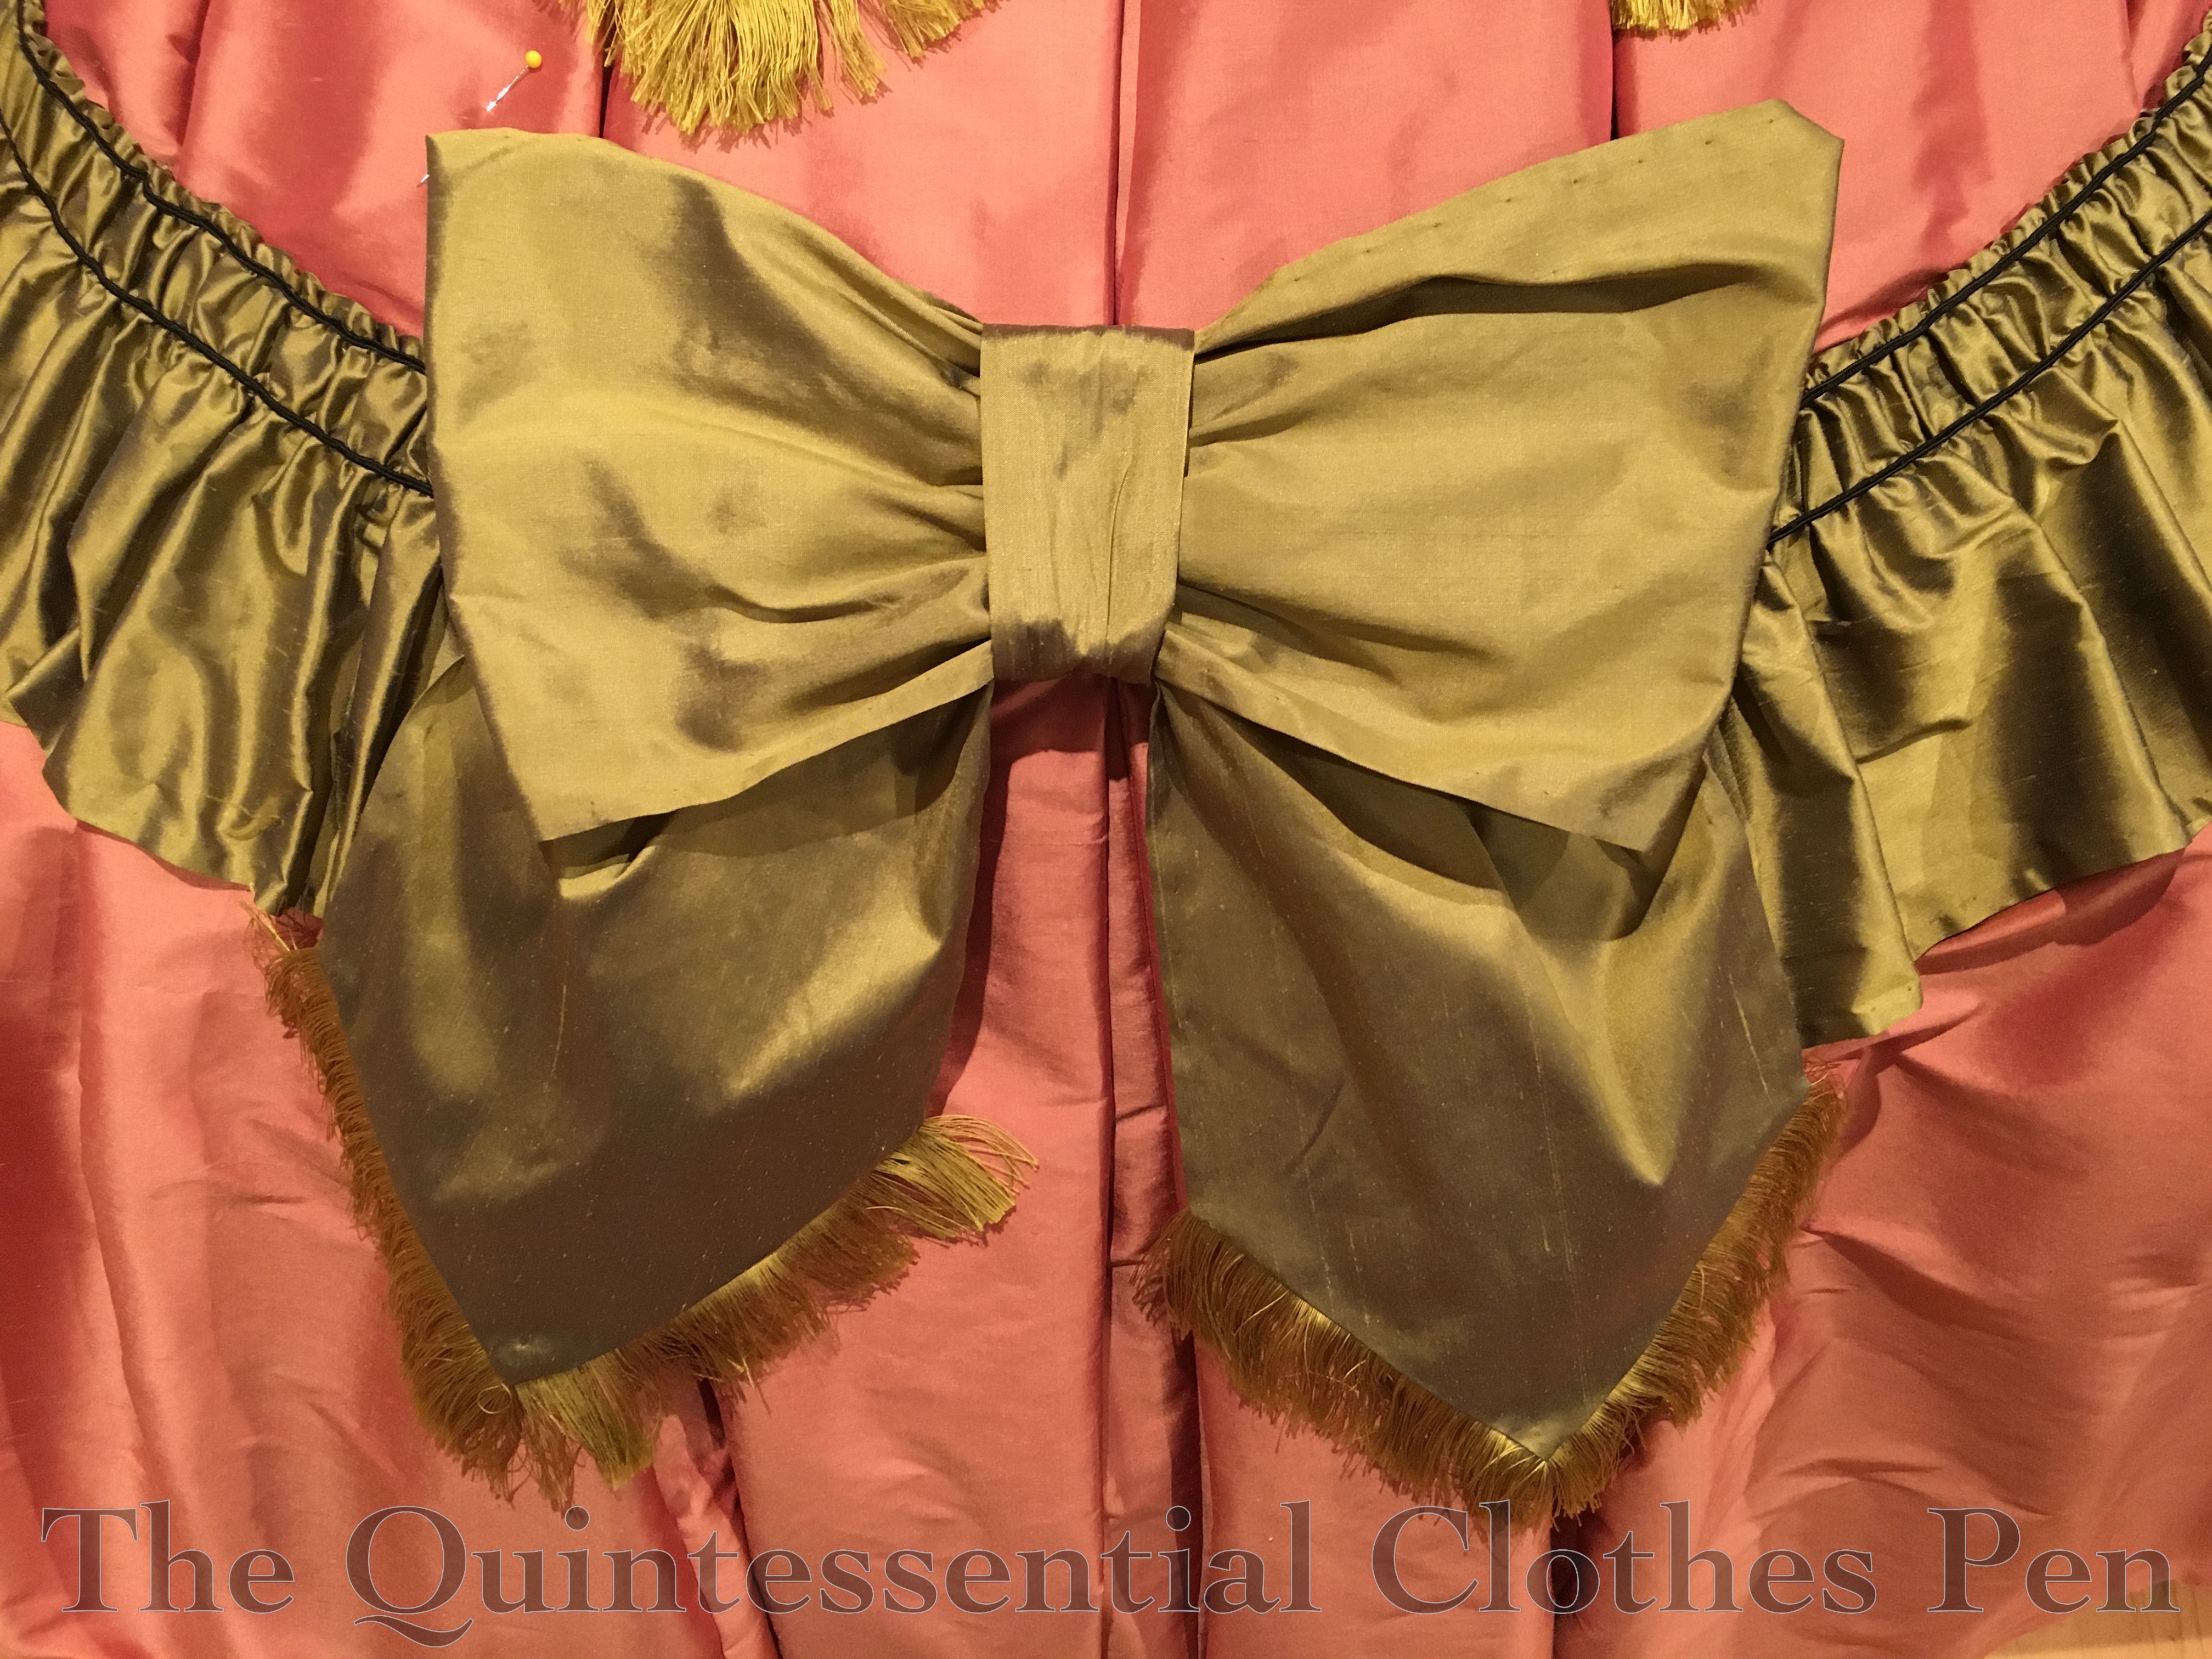
Then there are the bows. I love these massive bows! Here’s a photo showing the wonderful acid green color of the silk. The bow pieces were cut out, hemmed, and assembled by hand. The bottom edges of the bow ends have the edges pressed under (but not hemmed) and finished with self fabric fringe.

Yes, self fabric fringe. I cut strips of the silk and spent a few hours watching Netflix and shredding the silk to remove the black threads, leaving only the green. Here’s my test piece.

On each fringed piece of silk I left a border of non-fringed fabric at the top. I used this to attach the fringe pieces to the pressed under edges of each bow end. It keeps the fringe looking organic and part of the fabric, without any stitches showing.
Here is one of the bows pinned in place. The bows are tacked at multiple points to keep them permanently in place.
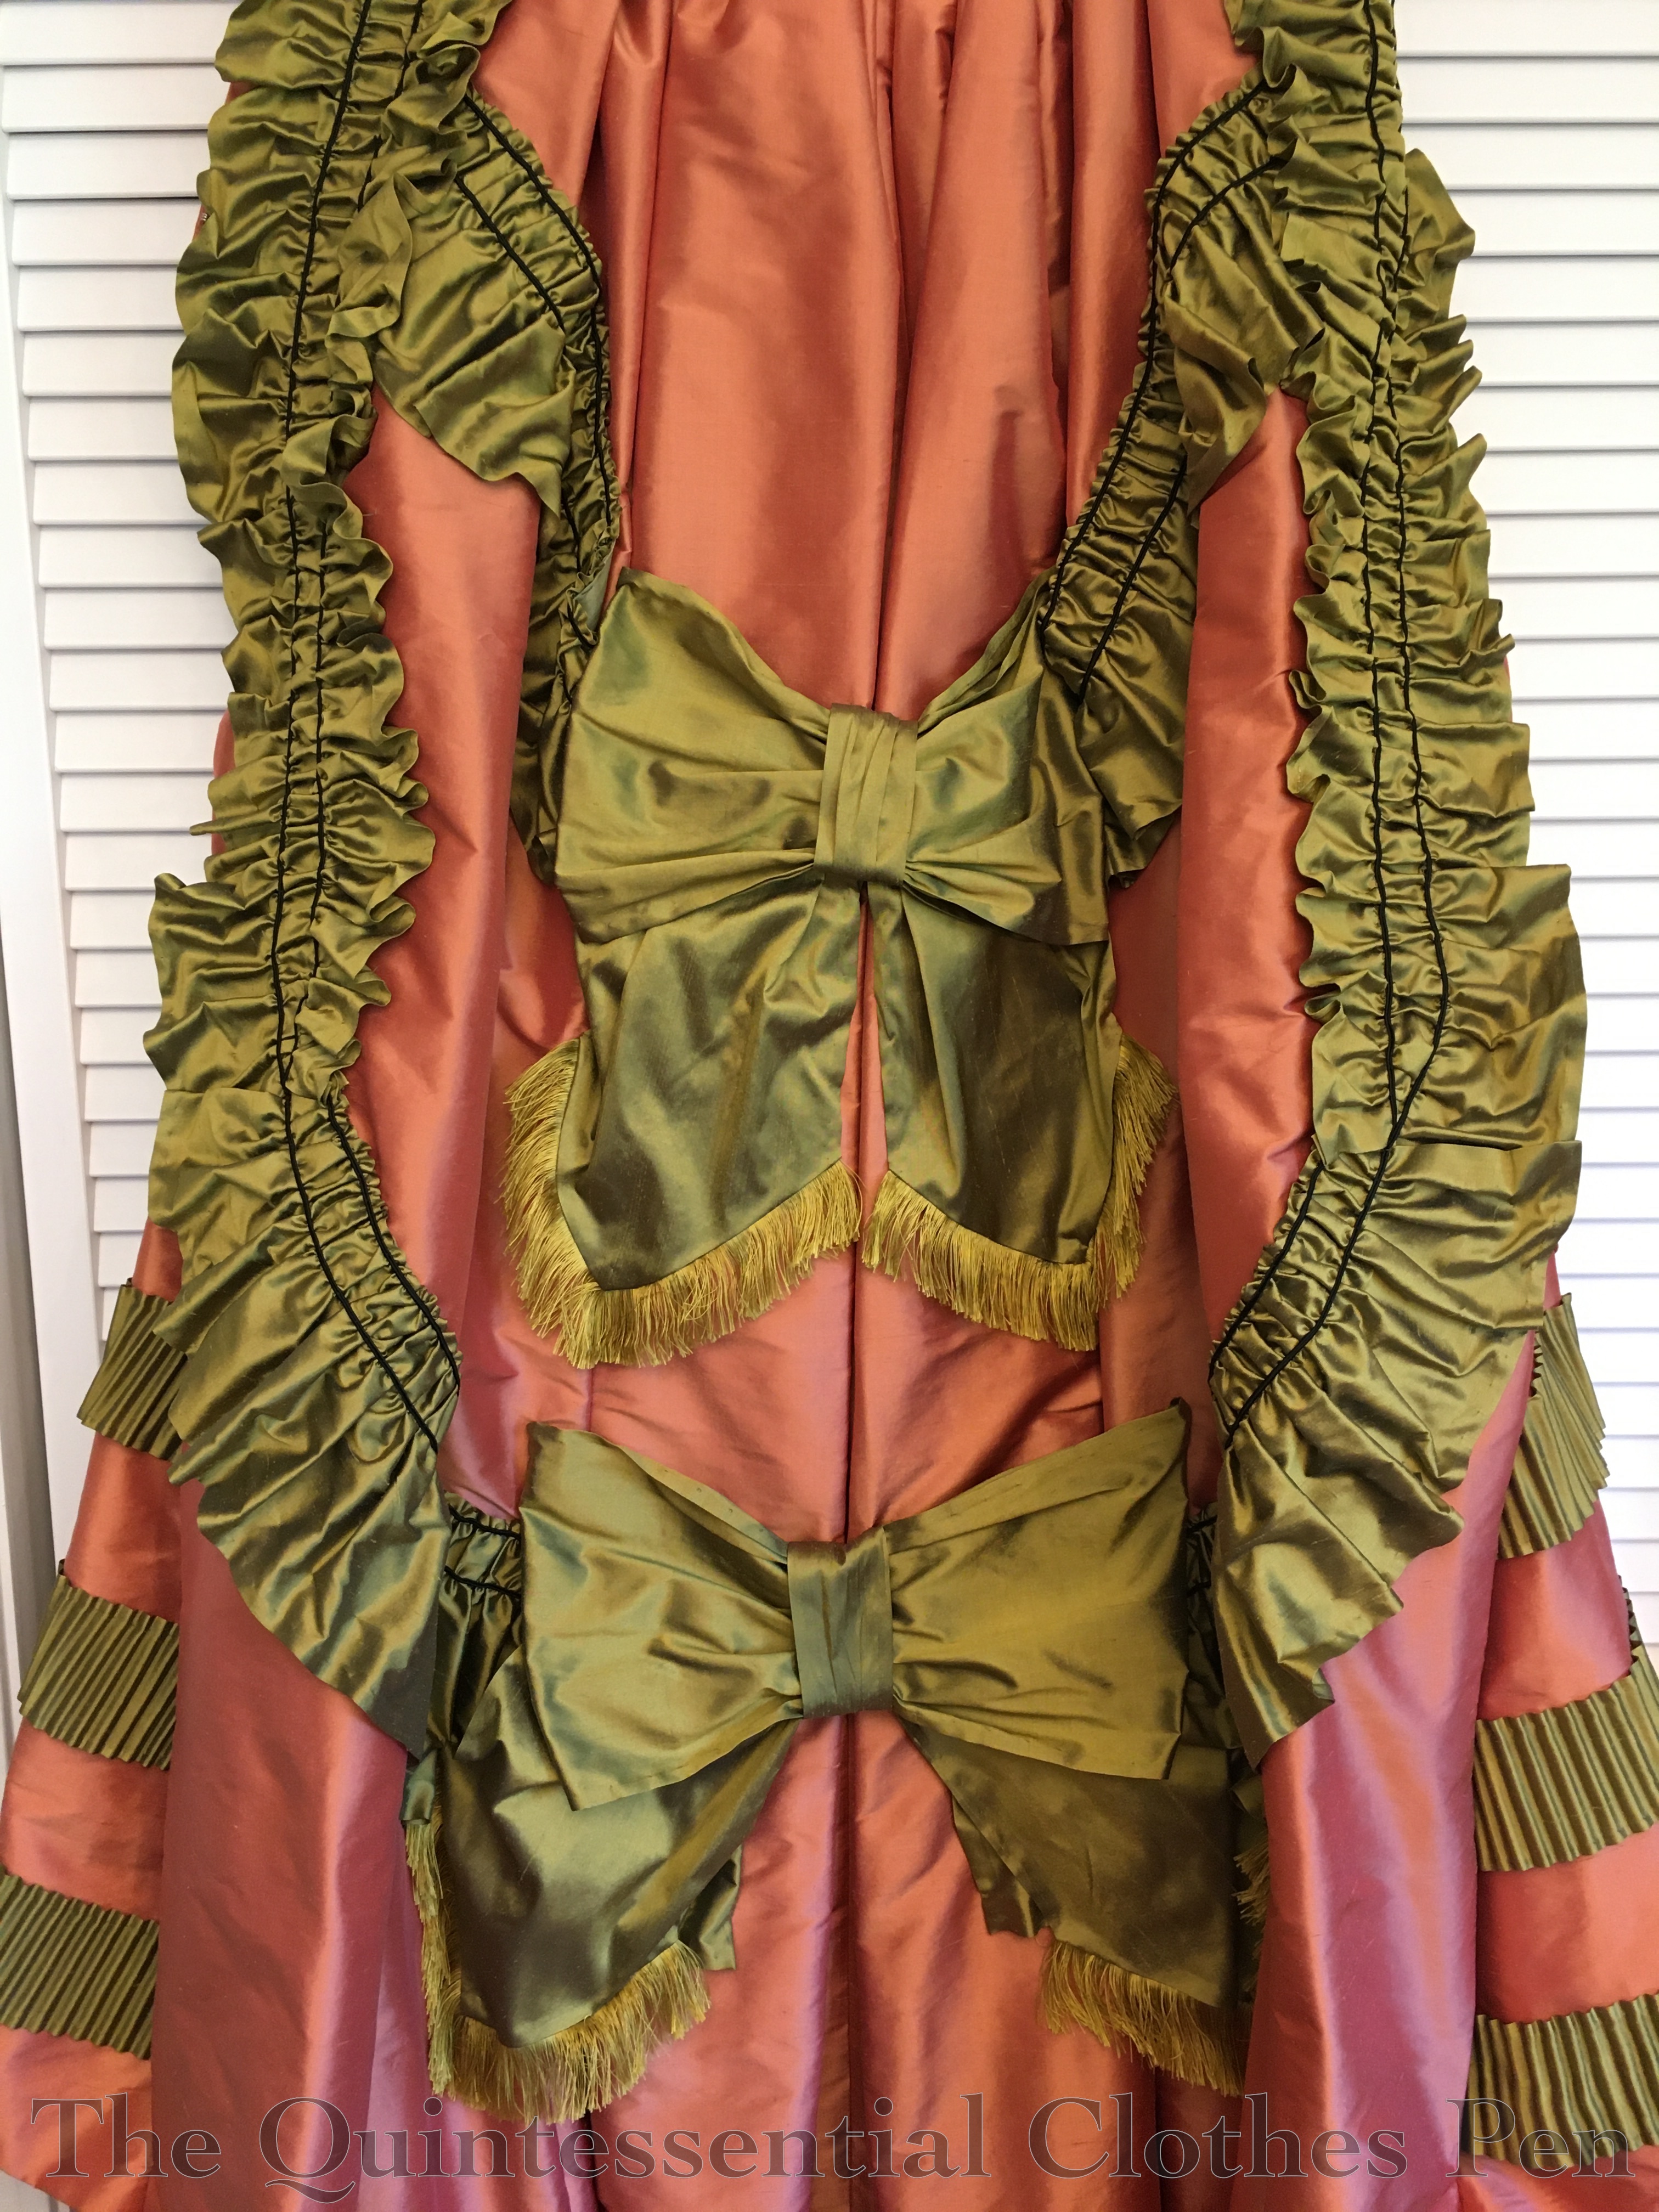
And here is the skirt with all those layers of trim added on!
As I made my dress, I also referenced Caroline’s post on The Modern Mantua Maker about how she made her 1875 Autumn Plaid Dress.
Whew! That was a long post. There are lots of details in this skirt. Next time, I have more finished ensemble photos for you as well as the HSM facts–quantity of materials used, time spent, etc. Thanks for sticking with me through the details of this construction post!