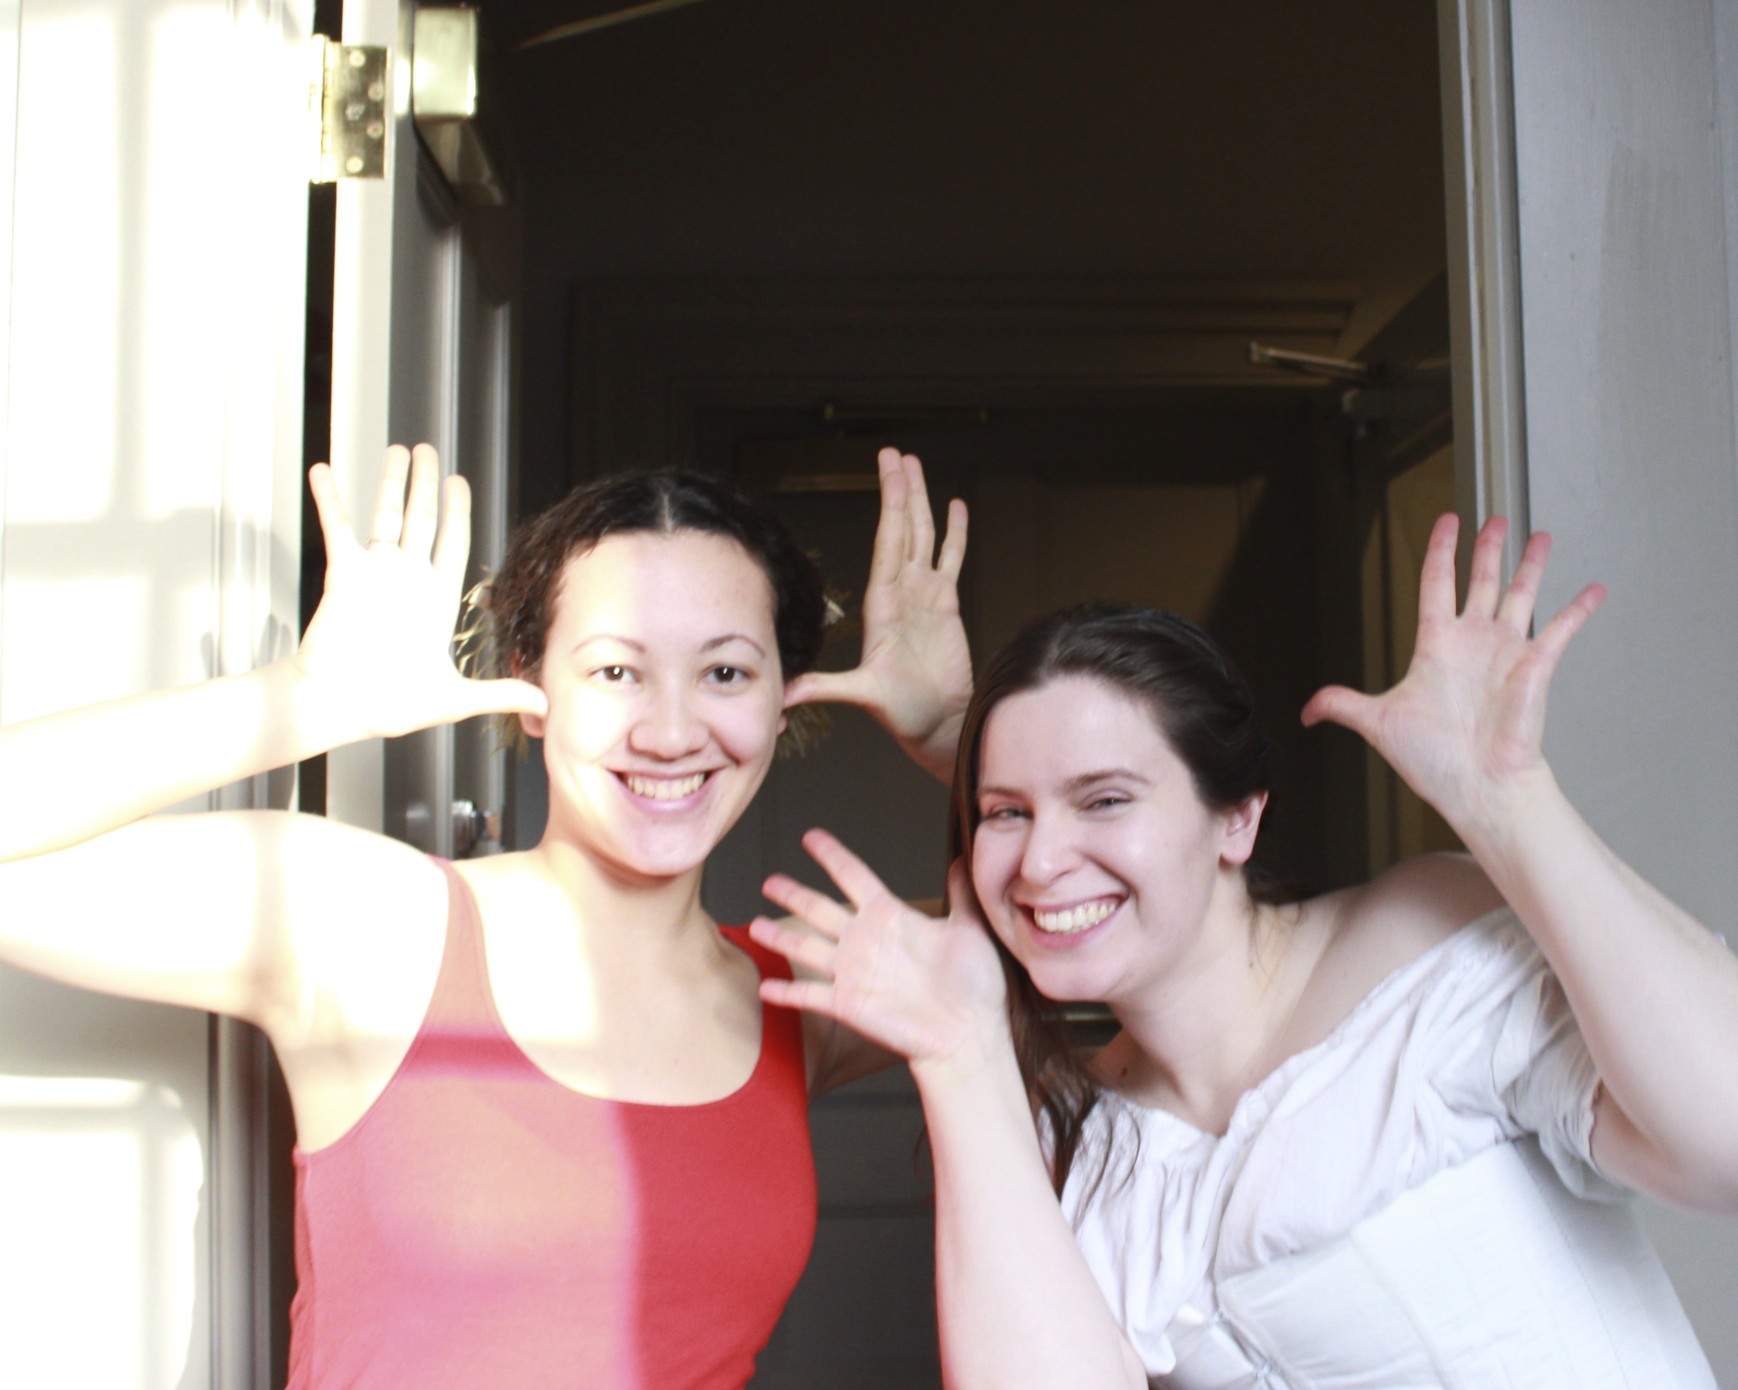
Not very long ago, I shared the first section of Regency Dance Weekend photos: Settling In–about dance classes, an 1807 house, and an informal dance. Now it’s time for Part II: relating to archery (yay!) and outdoor lounging. These outdoor events took place on Sunday afternoon at Pioneer Village in Salem, MA. The village had been opened specifically for our use, so we had our run of the place!
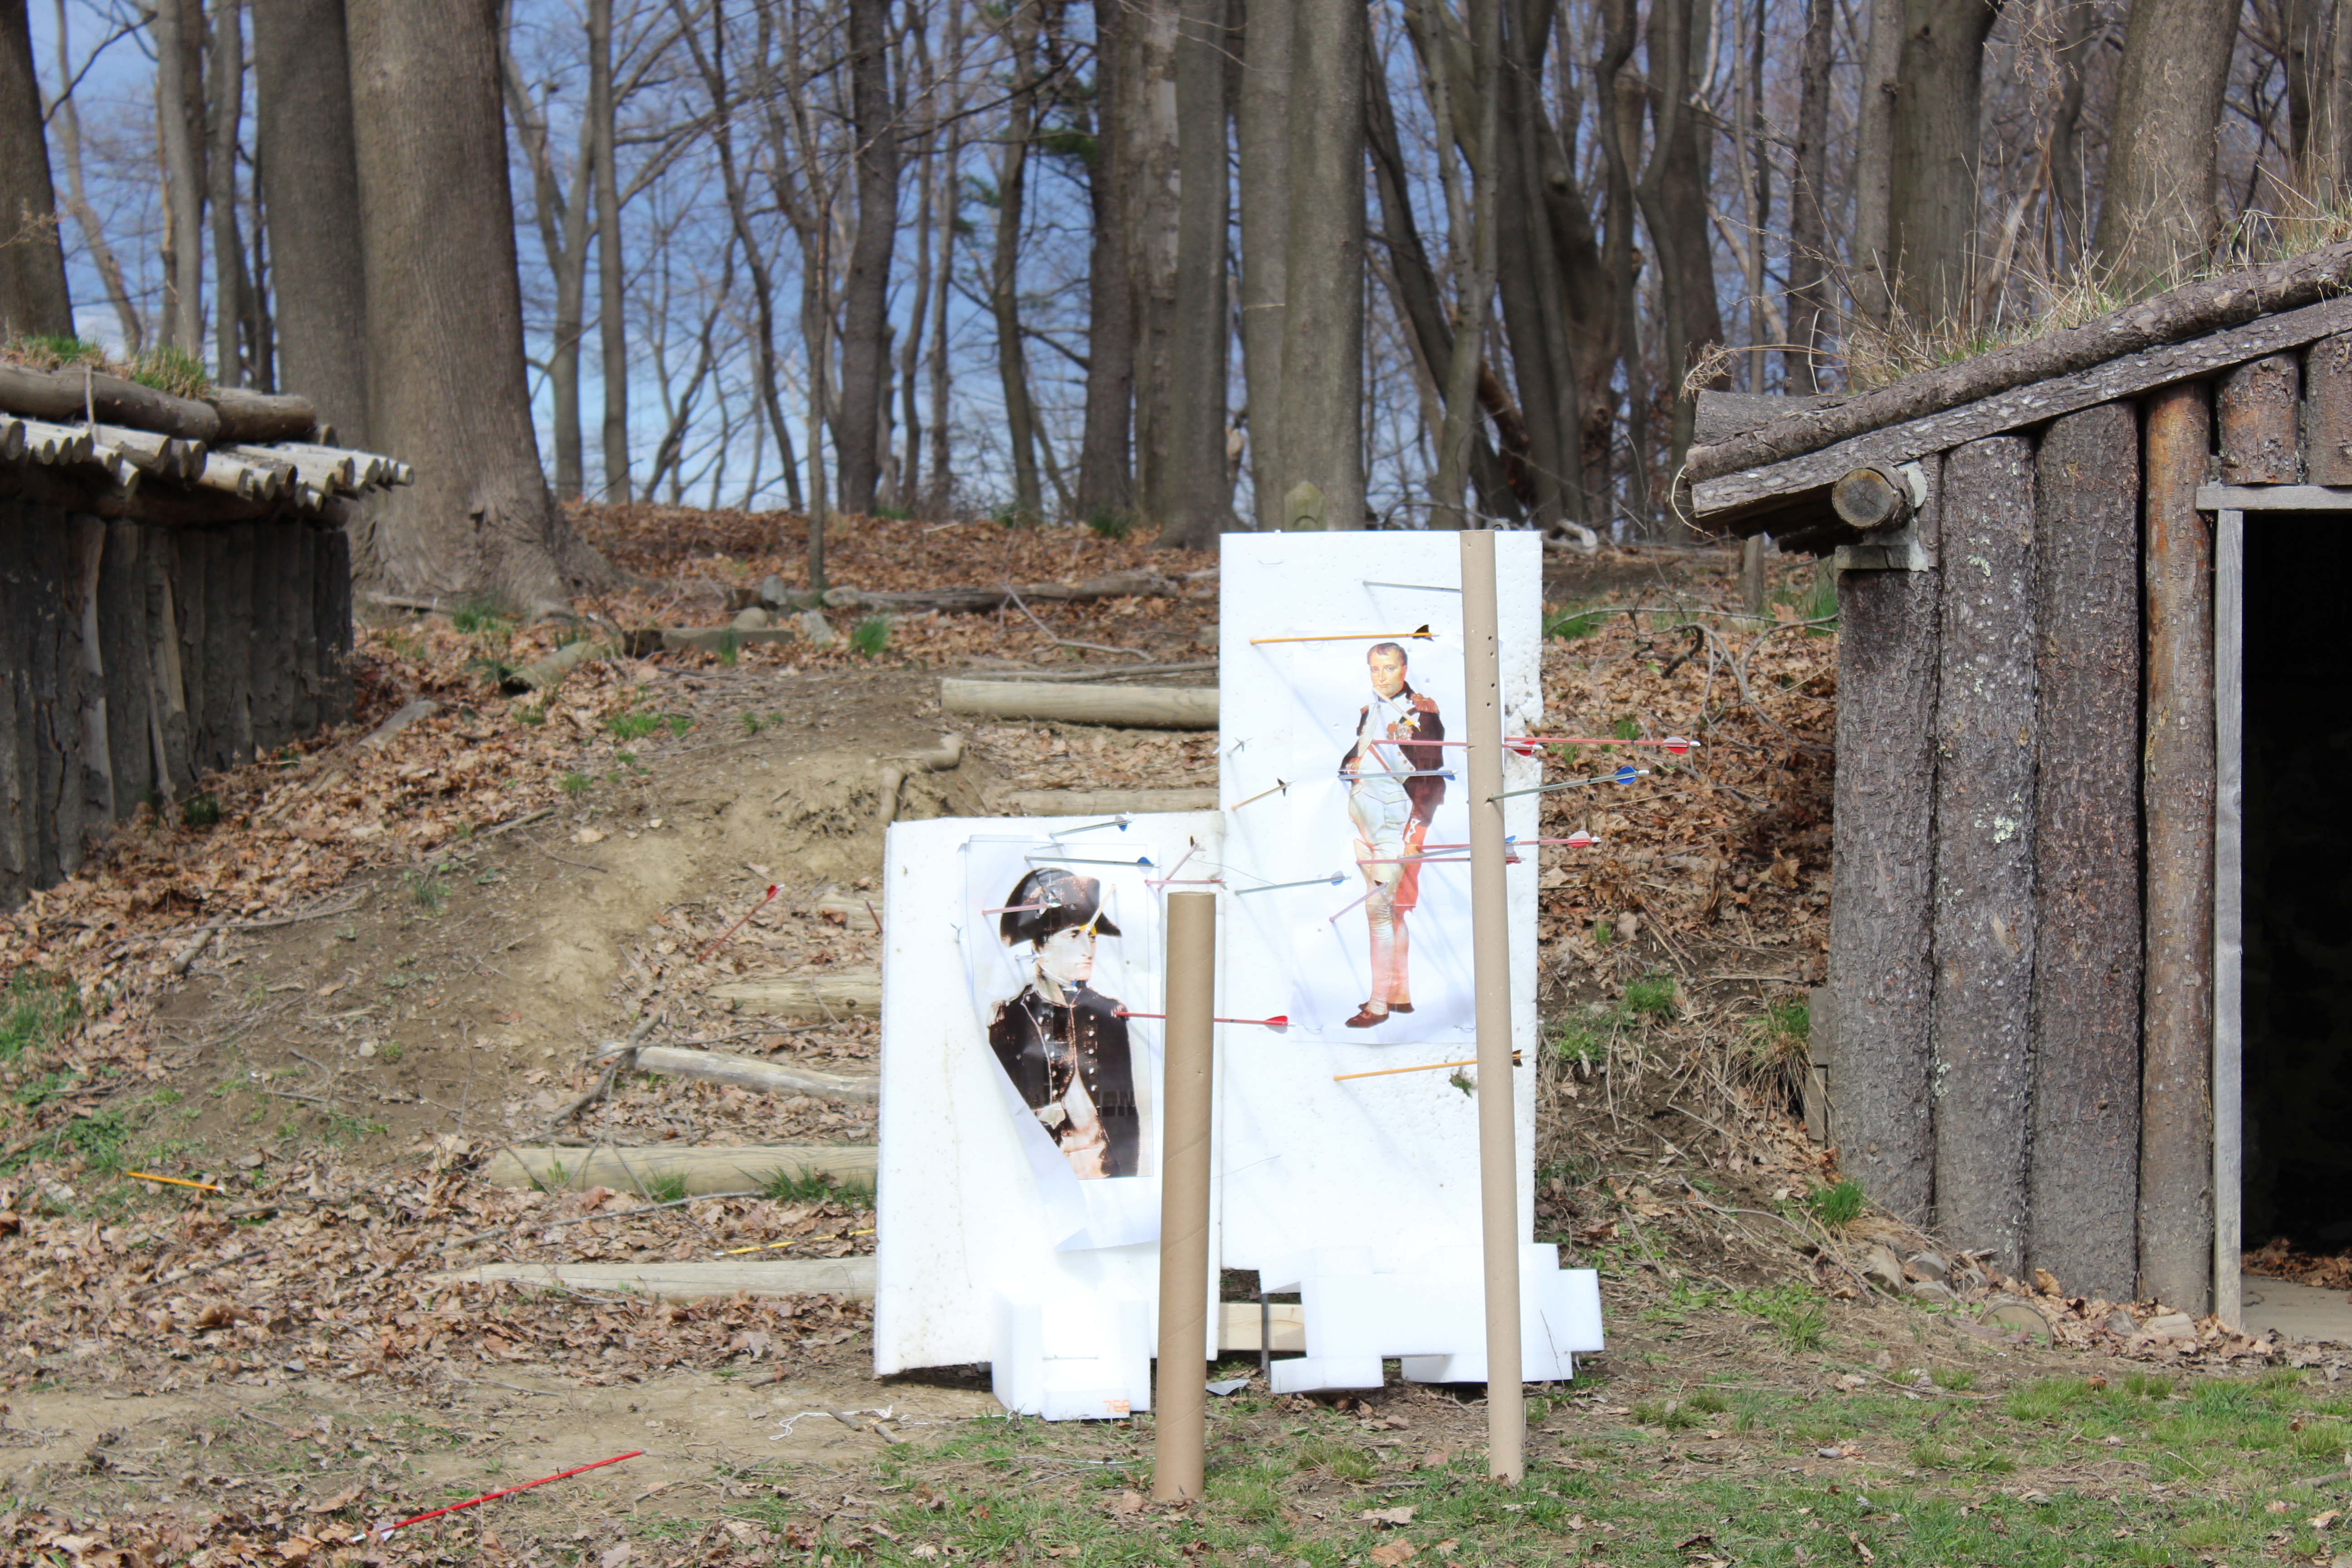
Archery was the major activity and took up most of the time allotted before preparing for the Grand Ball and Reception that evening. Given that it was a Regency period event, there were plans made (and executed) to use images of Napoleon as targets, which was super silly and fun. I think there were perhaps 30-40 people who took part in this daytime event.
Our instructor teaching us basics and safety.I think most people were pretty successful at hitting the target at least sometimes.There he is! Napoleon is lurking on the left.Archery in a bonnet is an extra challenge, but we made it work.Recognize that dress and bonnet? And perhaps the spencer? This is your first glimpse of my new clothes!We got him, and the tubes he was hiding behind!There were replacement Napoleons for when the first few had been well hit.
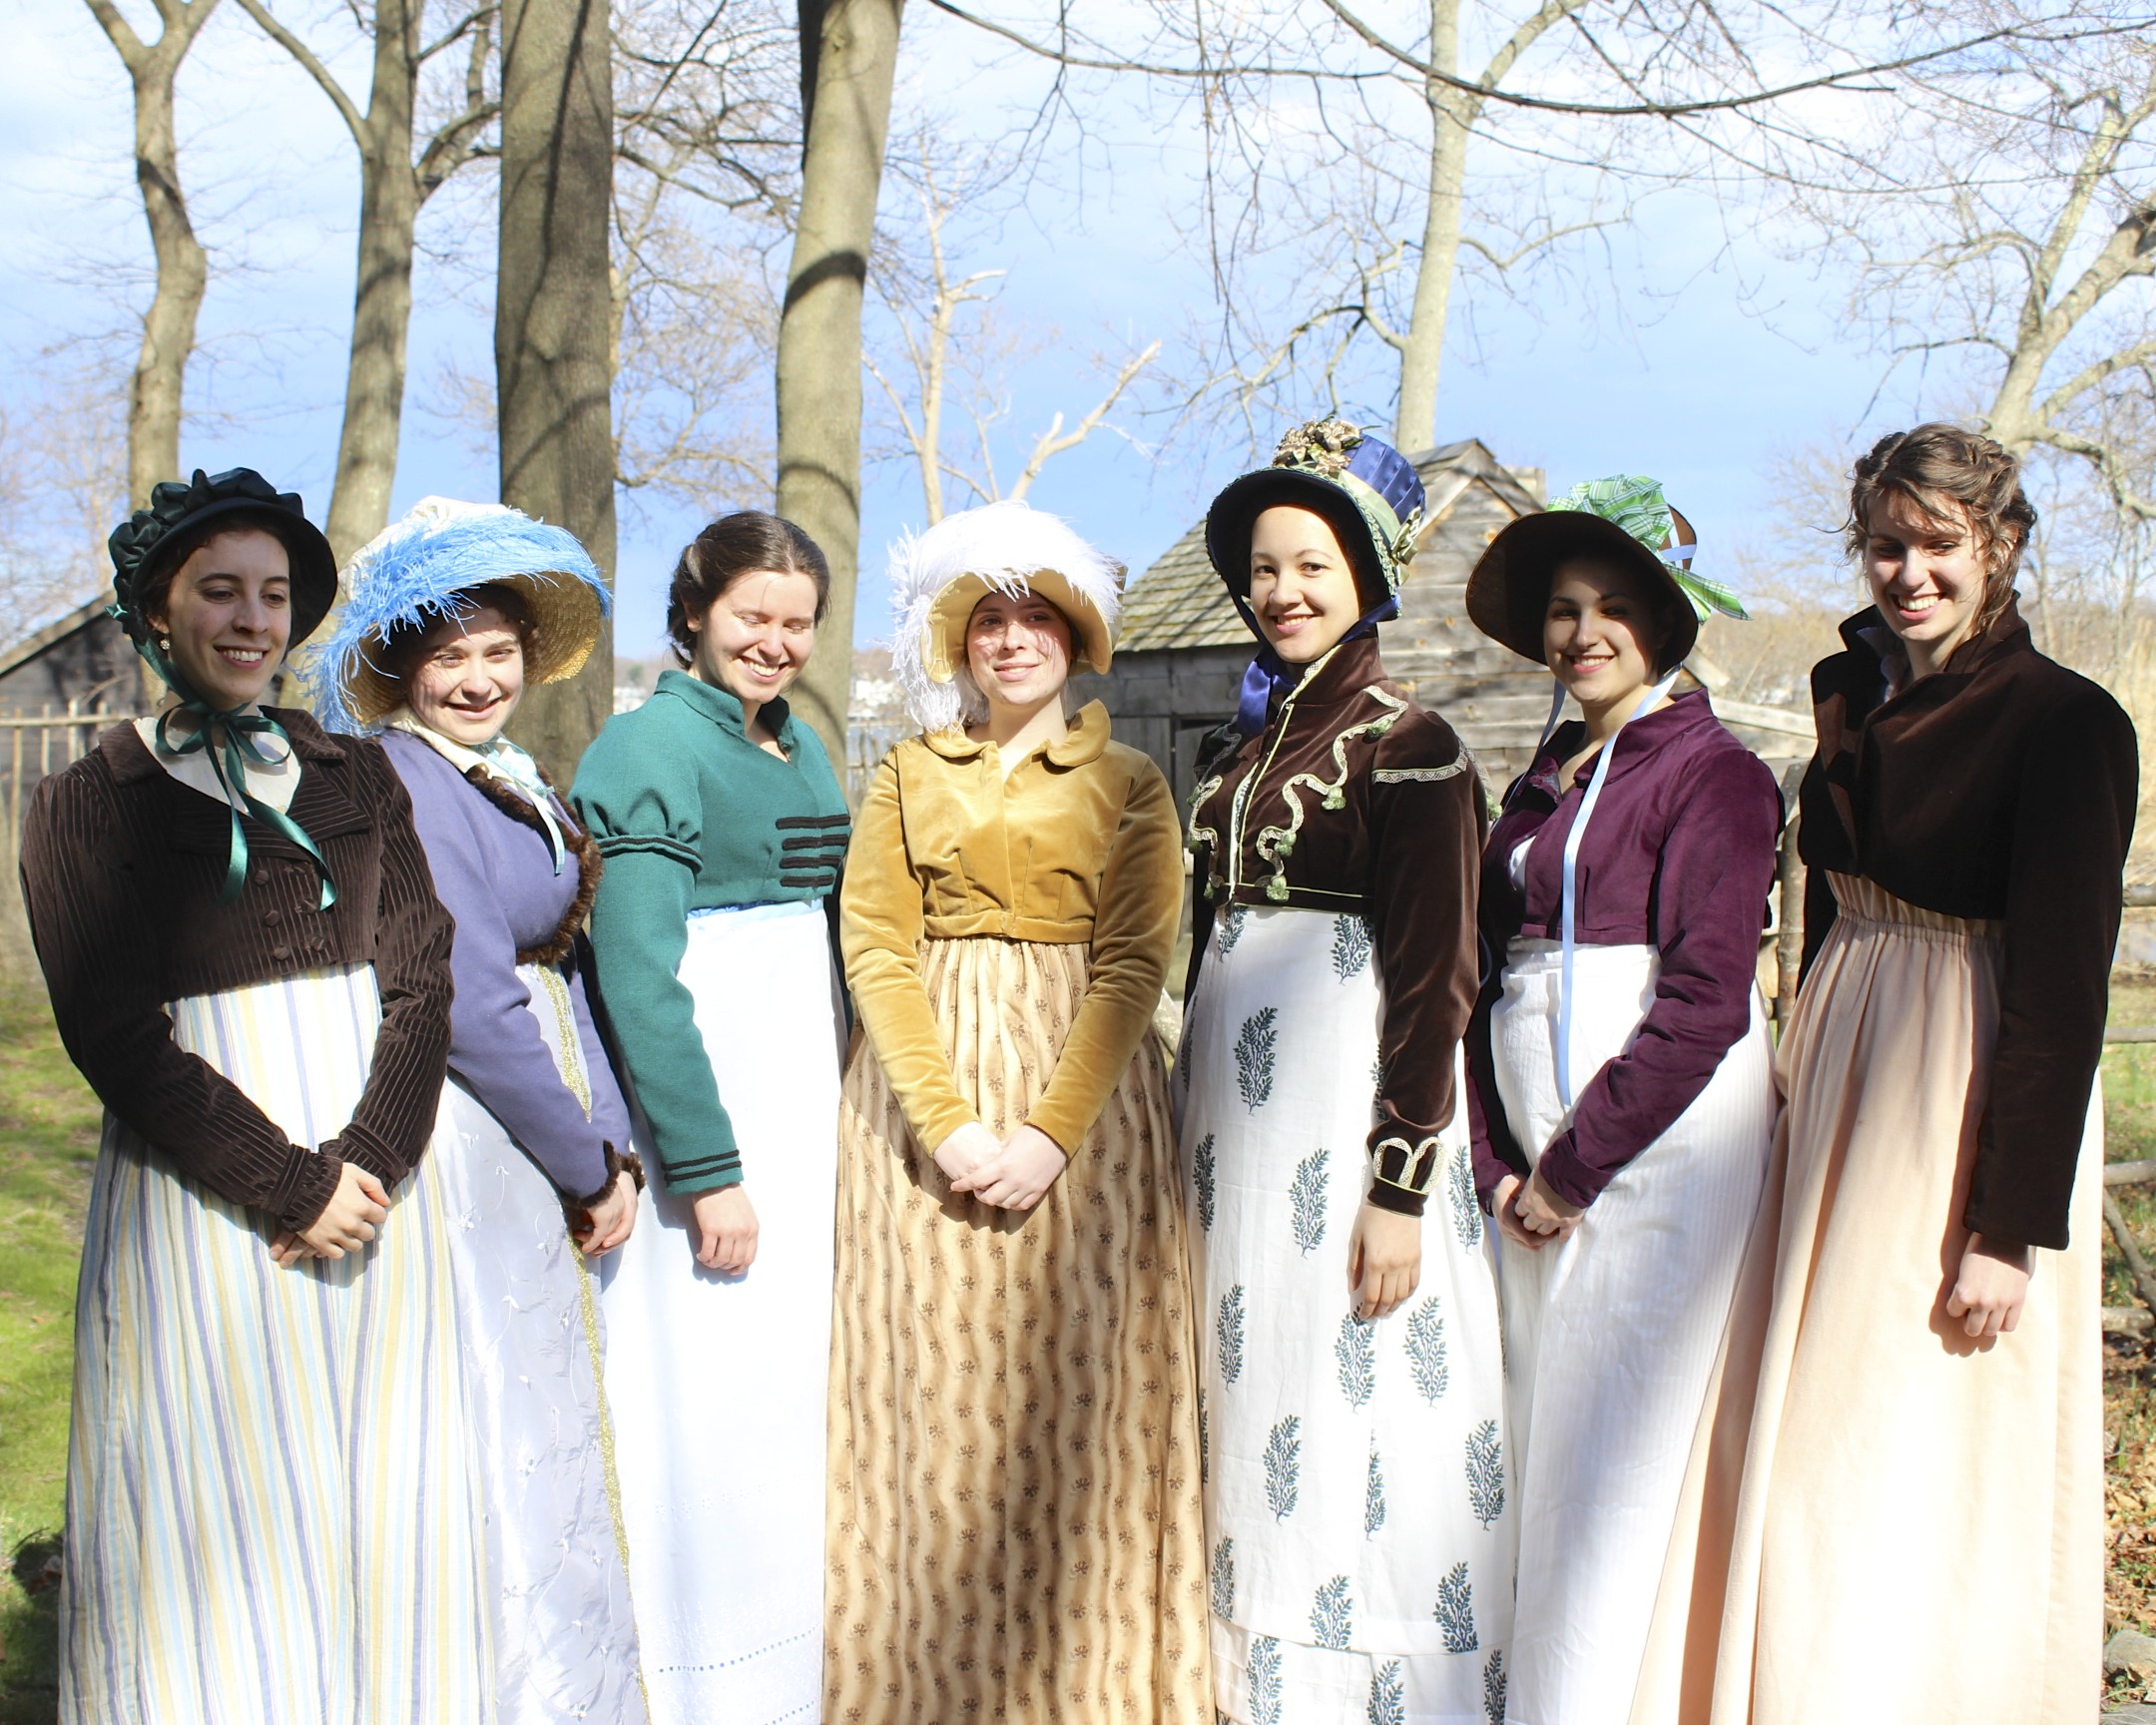
It was pretty cold out, actually, especially when we weren’t distracted by archery! Nevertheless, we prevailed for hours and were still willing to stay outside and lounge for more pictures even after archery was complete.
New clothes amongst the trees.Striking a pose on the footbridge.Climbing a fence. Perhaps while out on a stroll? I feel like this is something the more athletic Jane Austen characters do.New long sleeved day dress and a new bonnet. You know how it is when someone is wearing something new. It always requires pictures!I was very pleased with how my new dress and bonnet look and feel, and I’m so pleased that they coordinate so well with the spencer. Yay!Spencer time. It’s so neat that we’ve built up our wardrobes and are well equipped with dresses and spencers! Bonnets are on most sewing lists, too, which is so much fun!
Next up is a post specifically dedicated to my new tree gown!
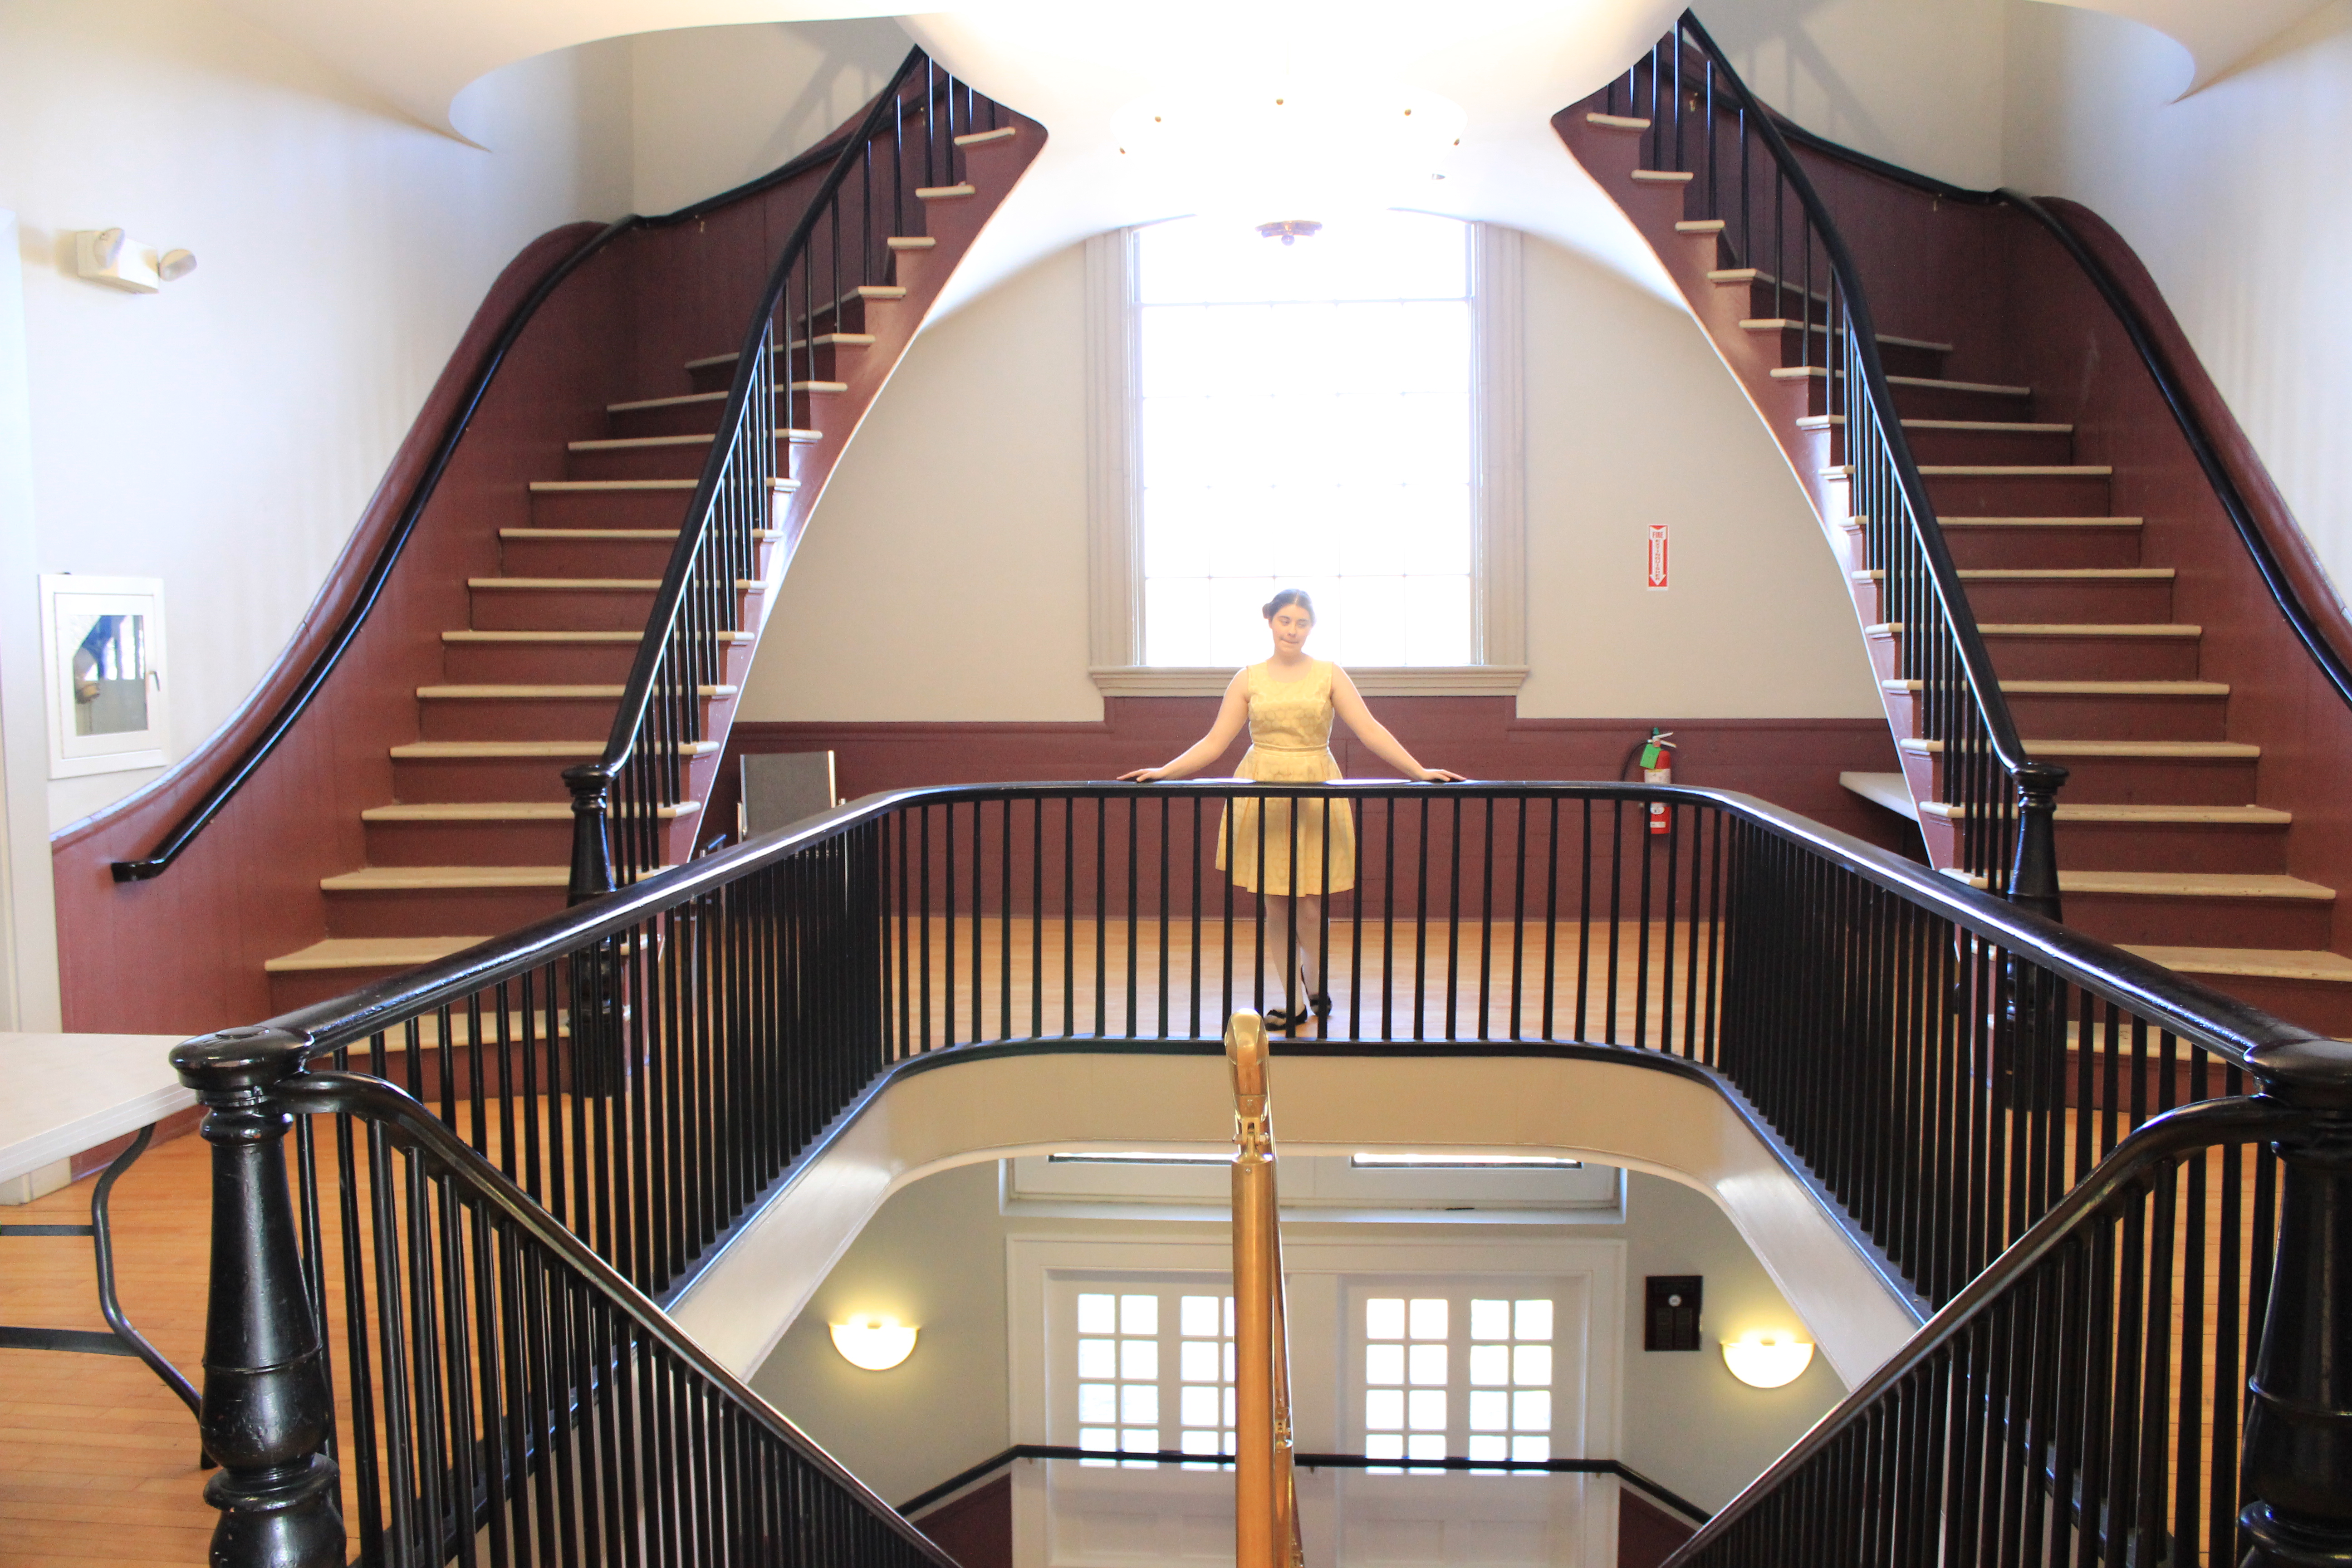
Not so long ago (only about two weeks, though it seems longer), I had the most marvelous time at the Commonwealth Vintage Dancers’ Regency Intensive Dance Weekend. The weekend included classes, archery and outdoor lounging, an informal dance, and a formal ball. Plus, I had the added bonus of staying with friends in a lovely 1807 house and having extra outdoor adventures the day after the weekend ended!
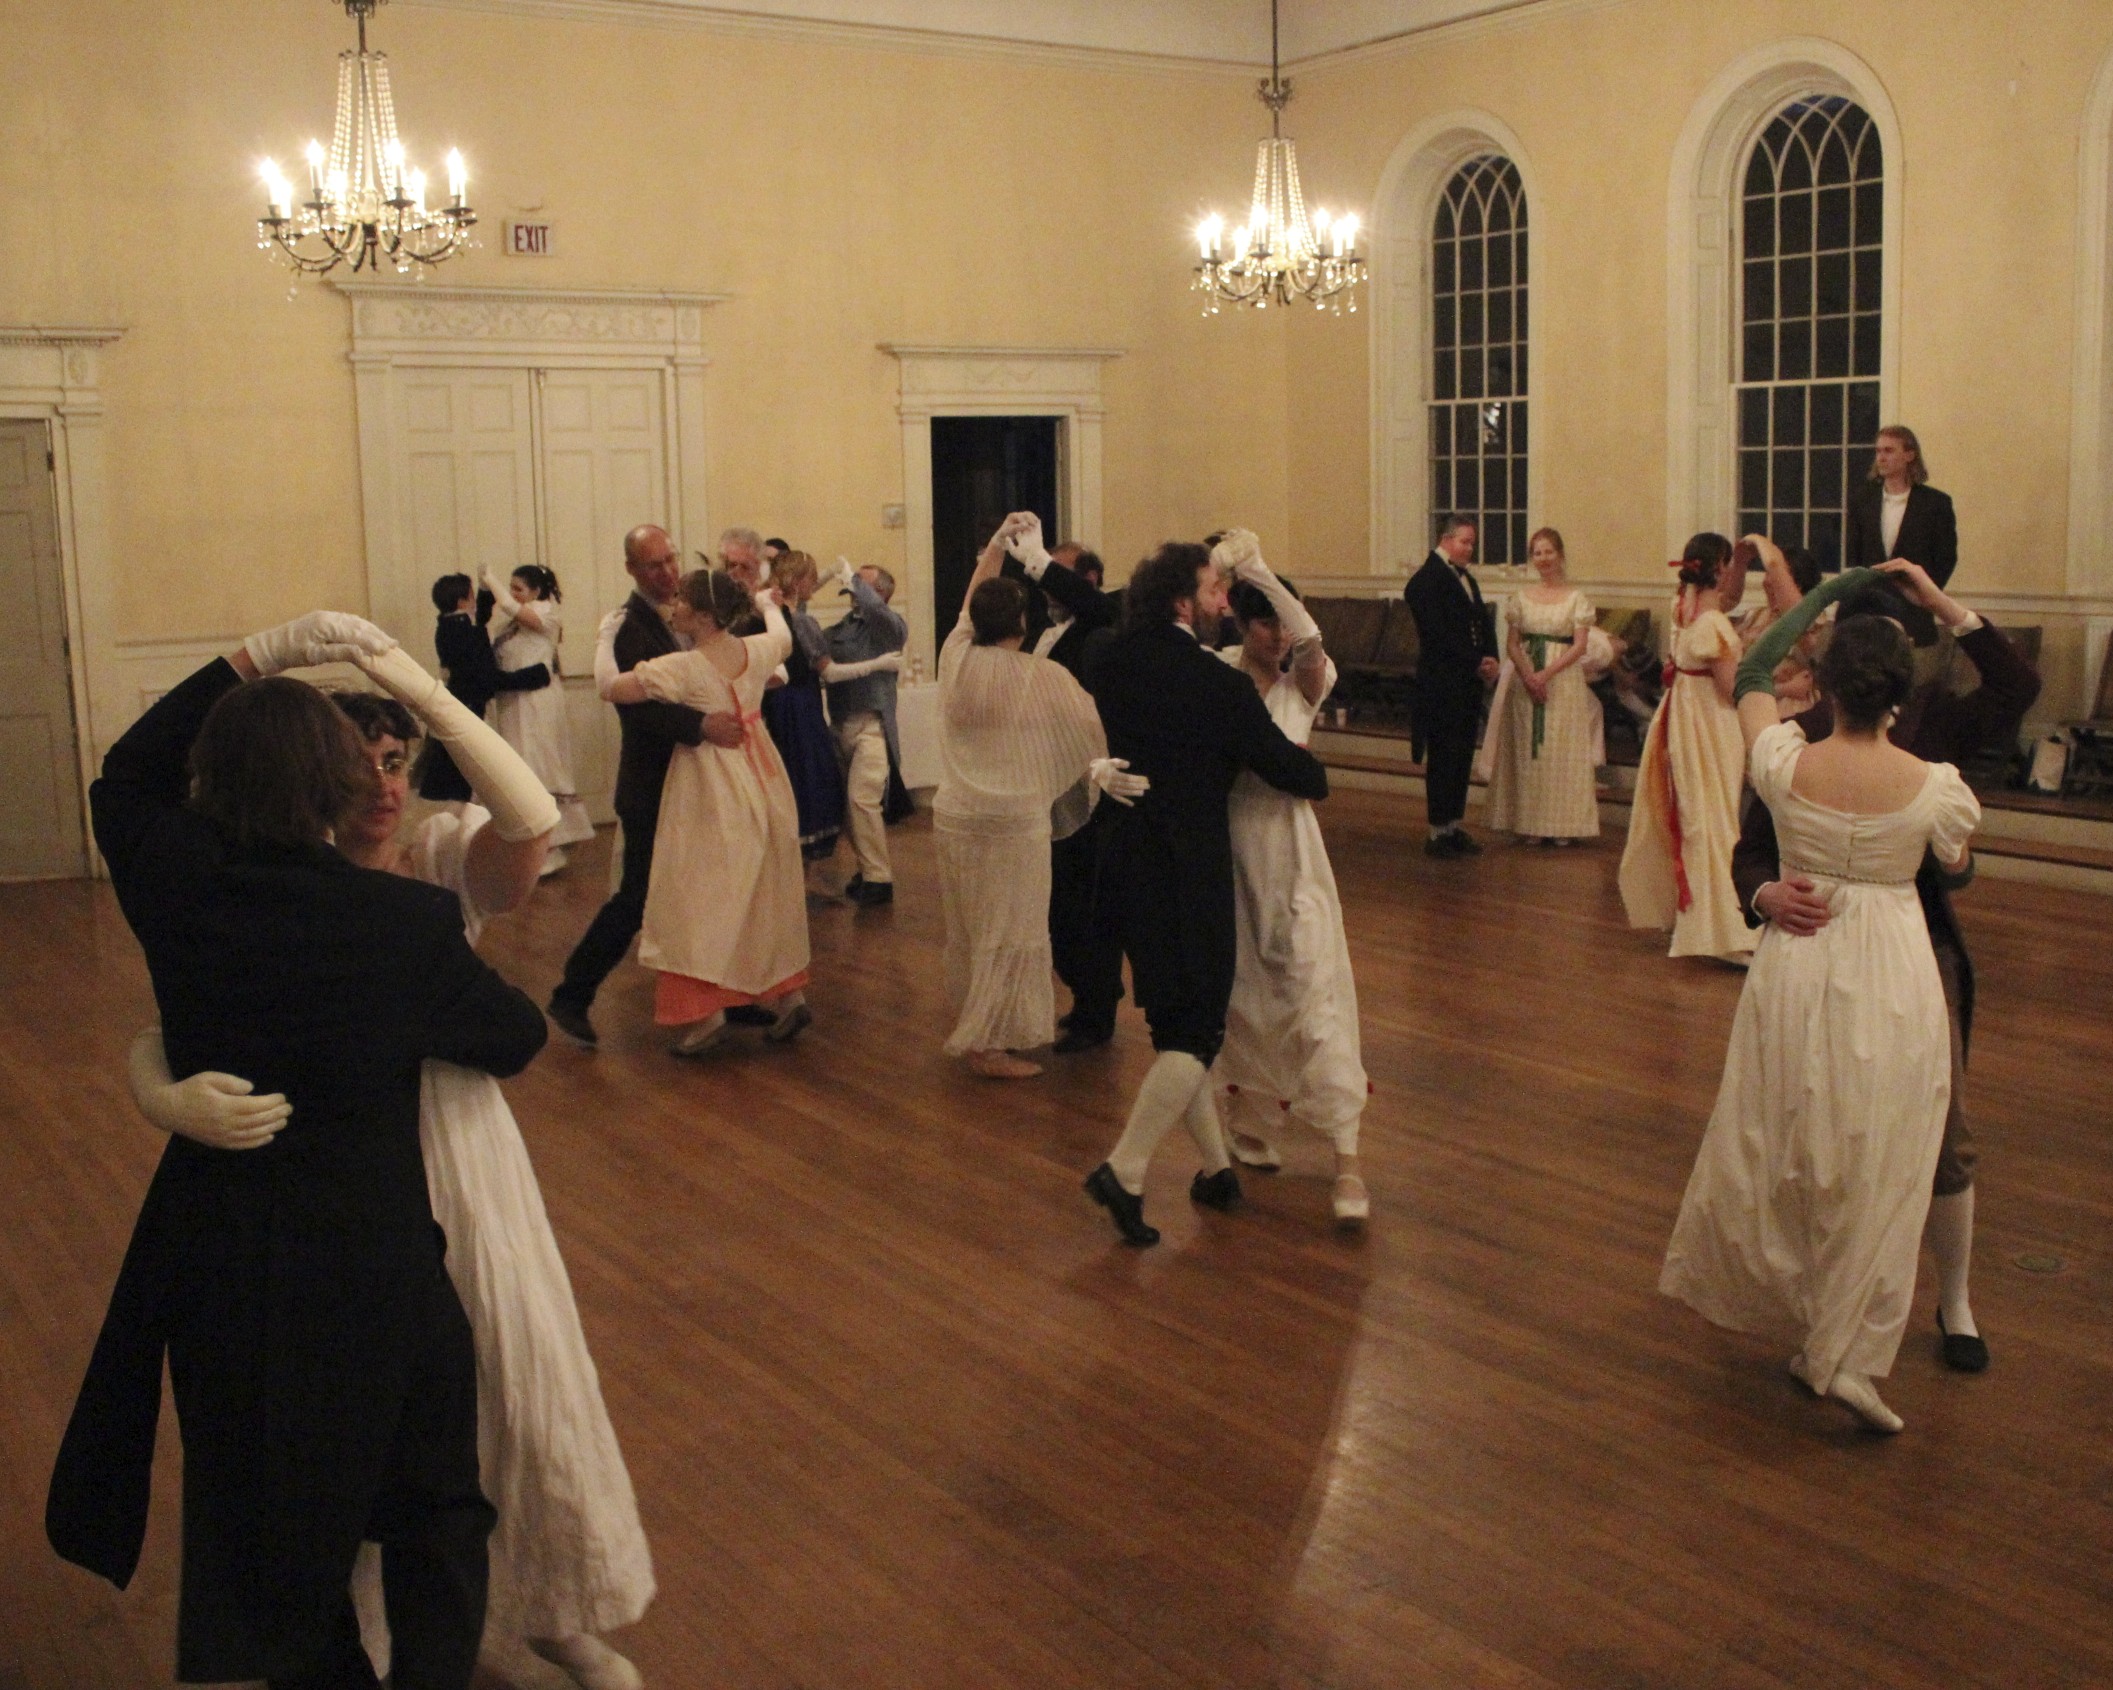
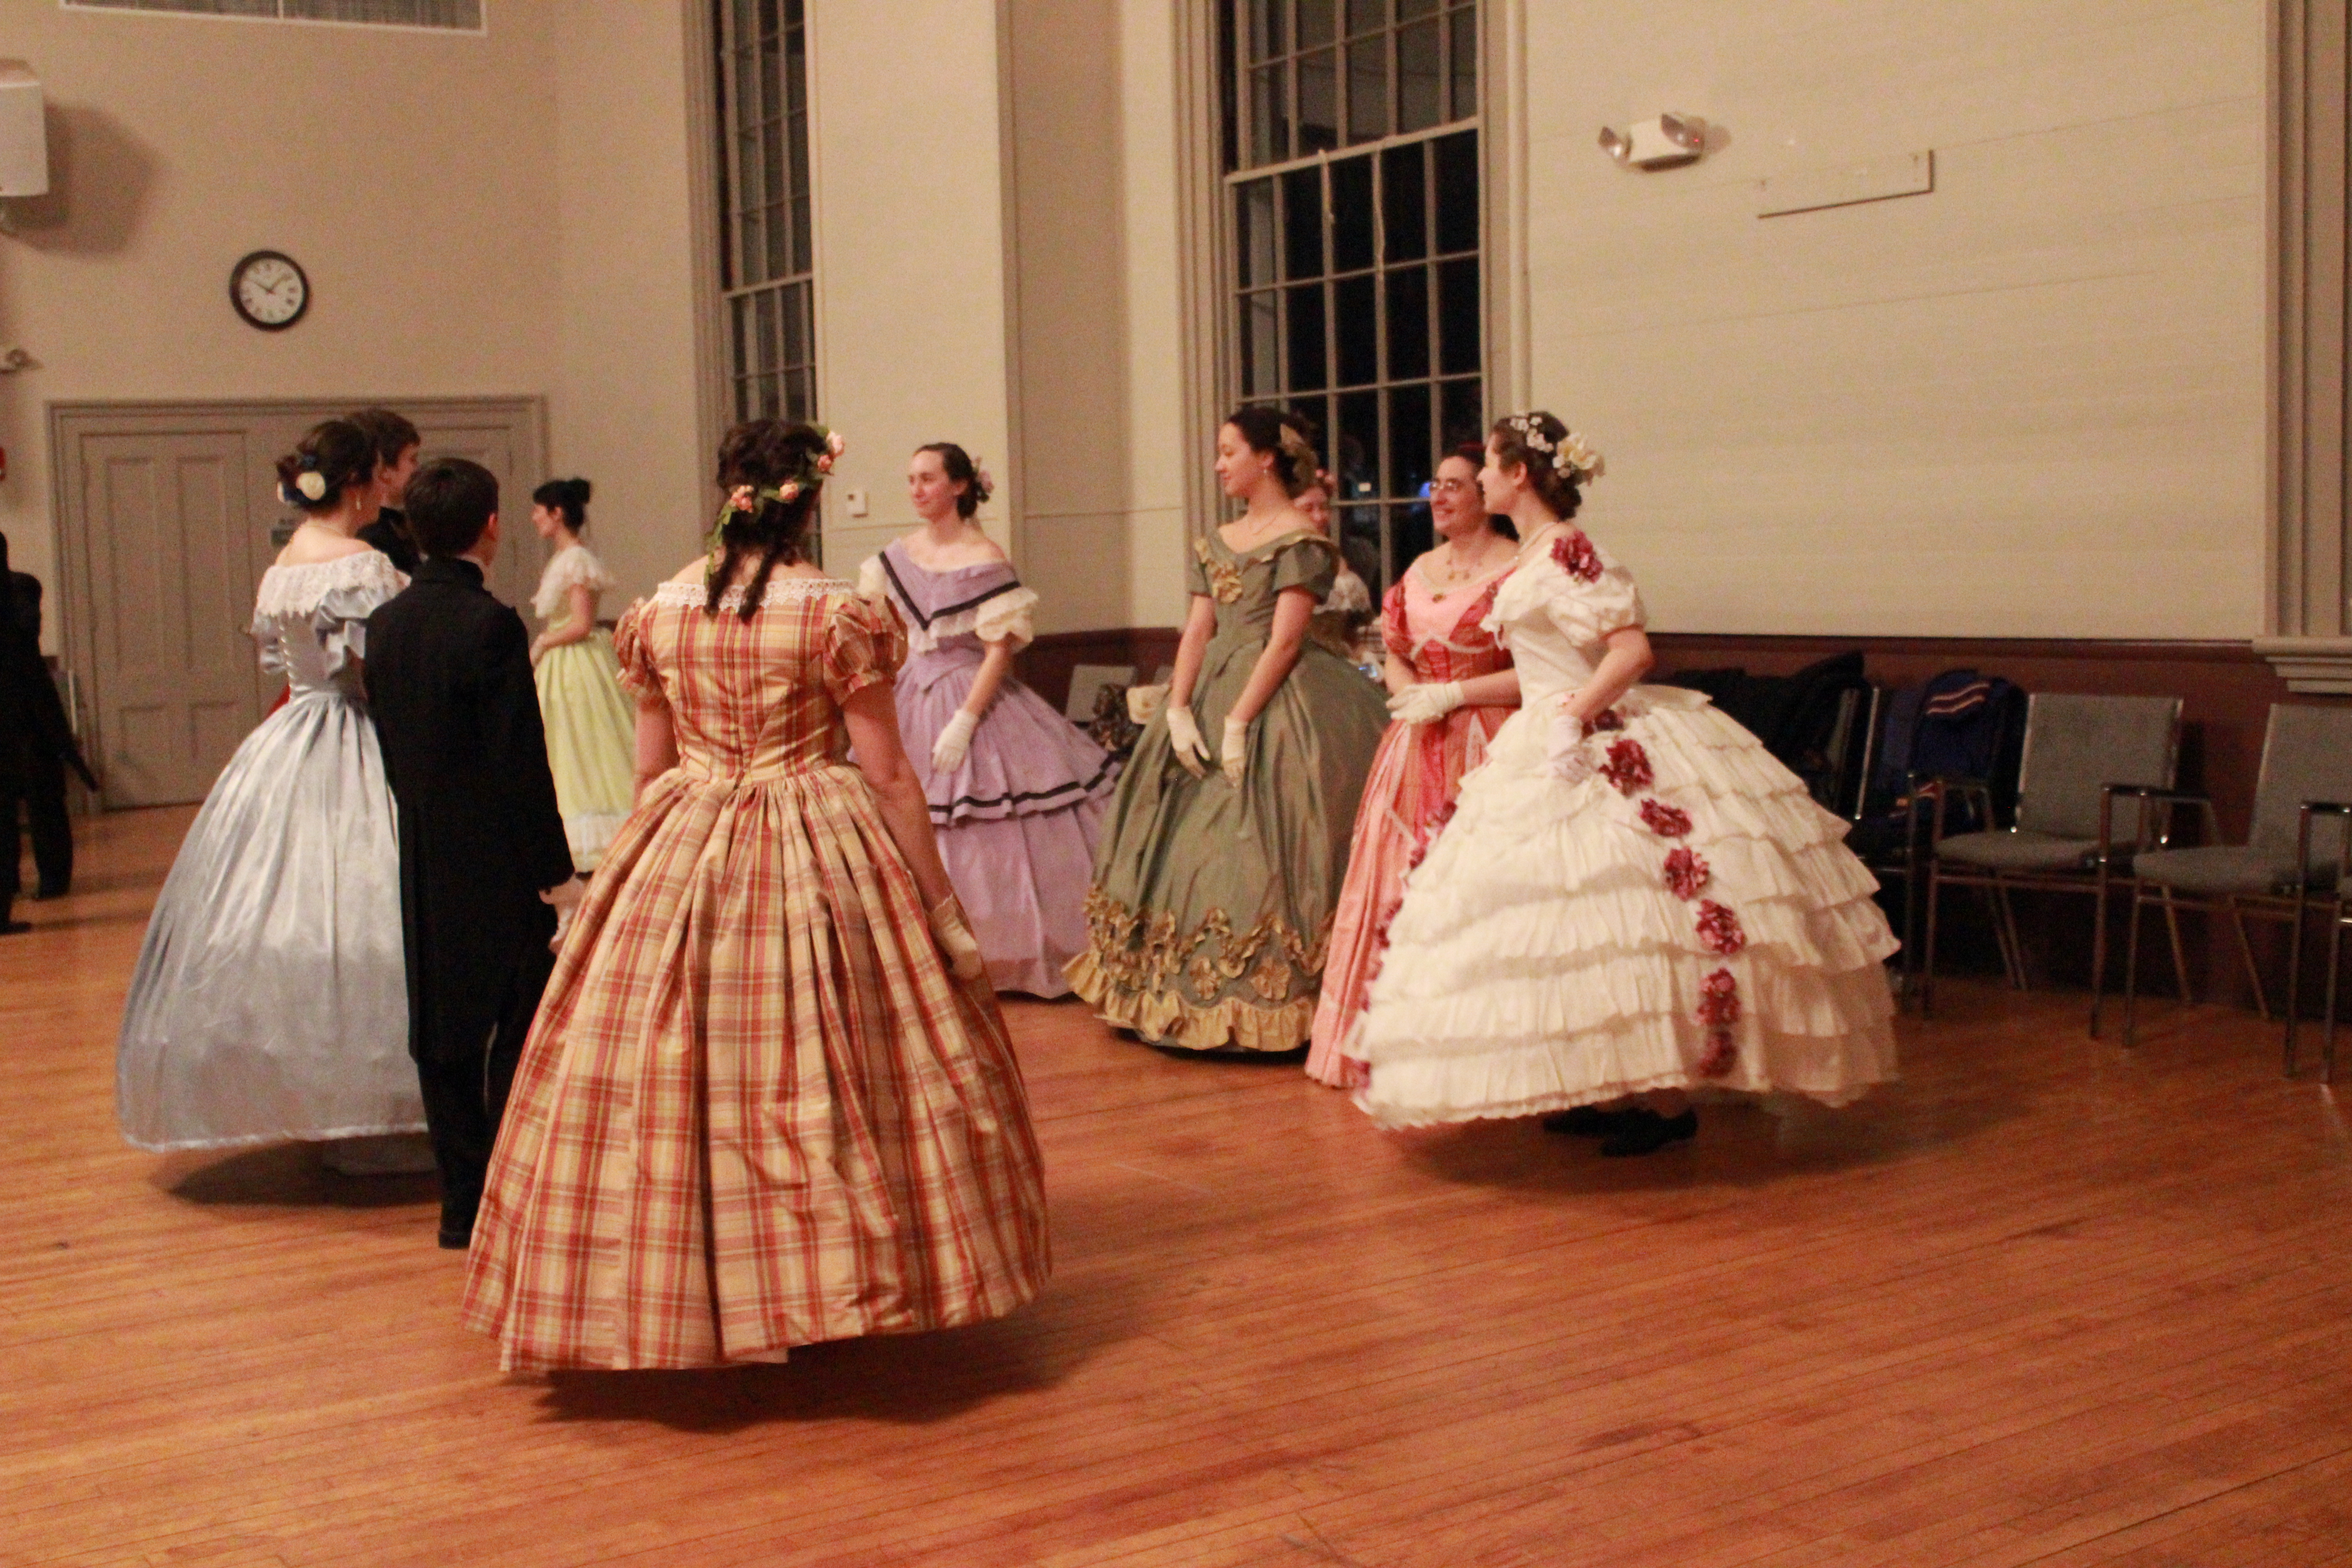
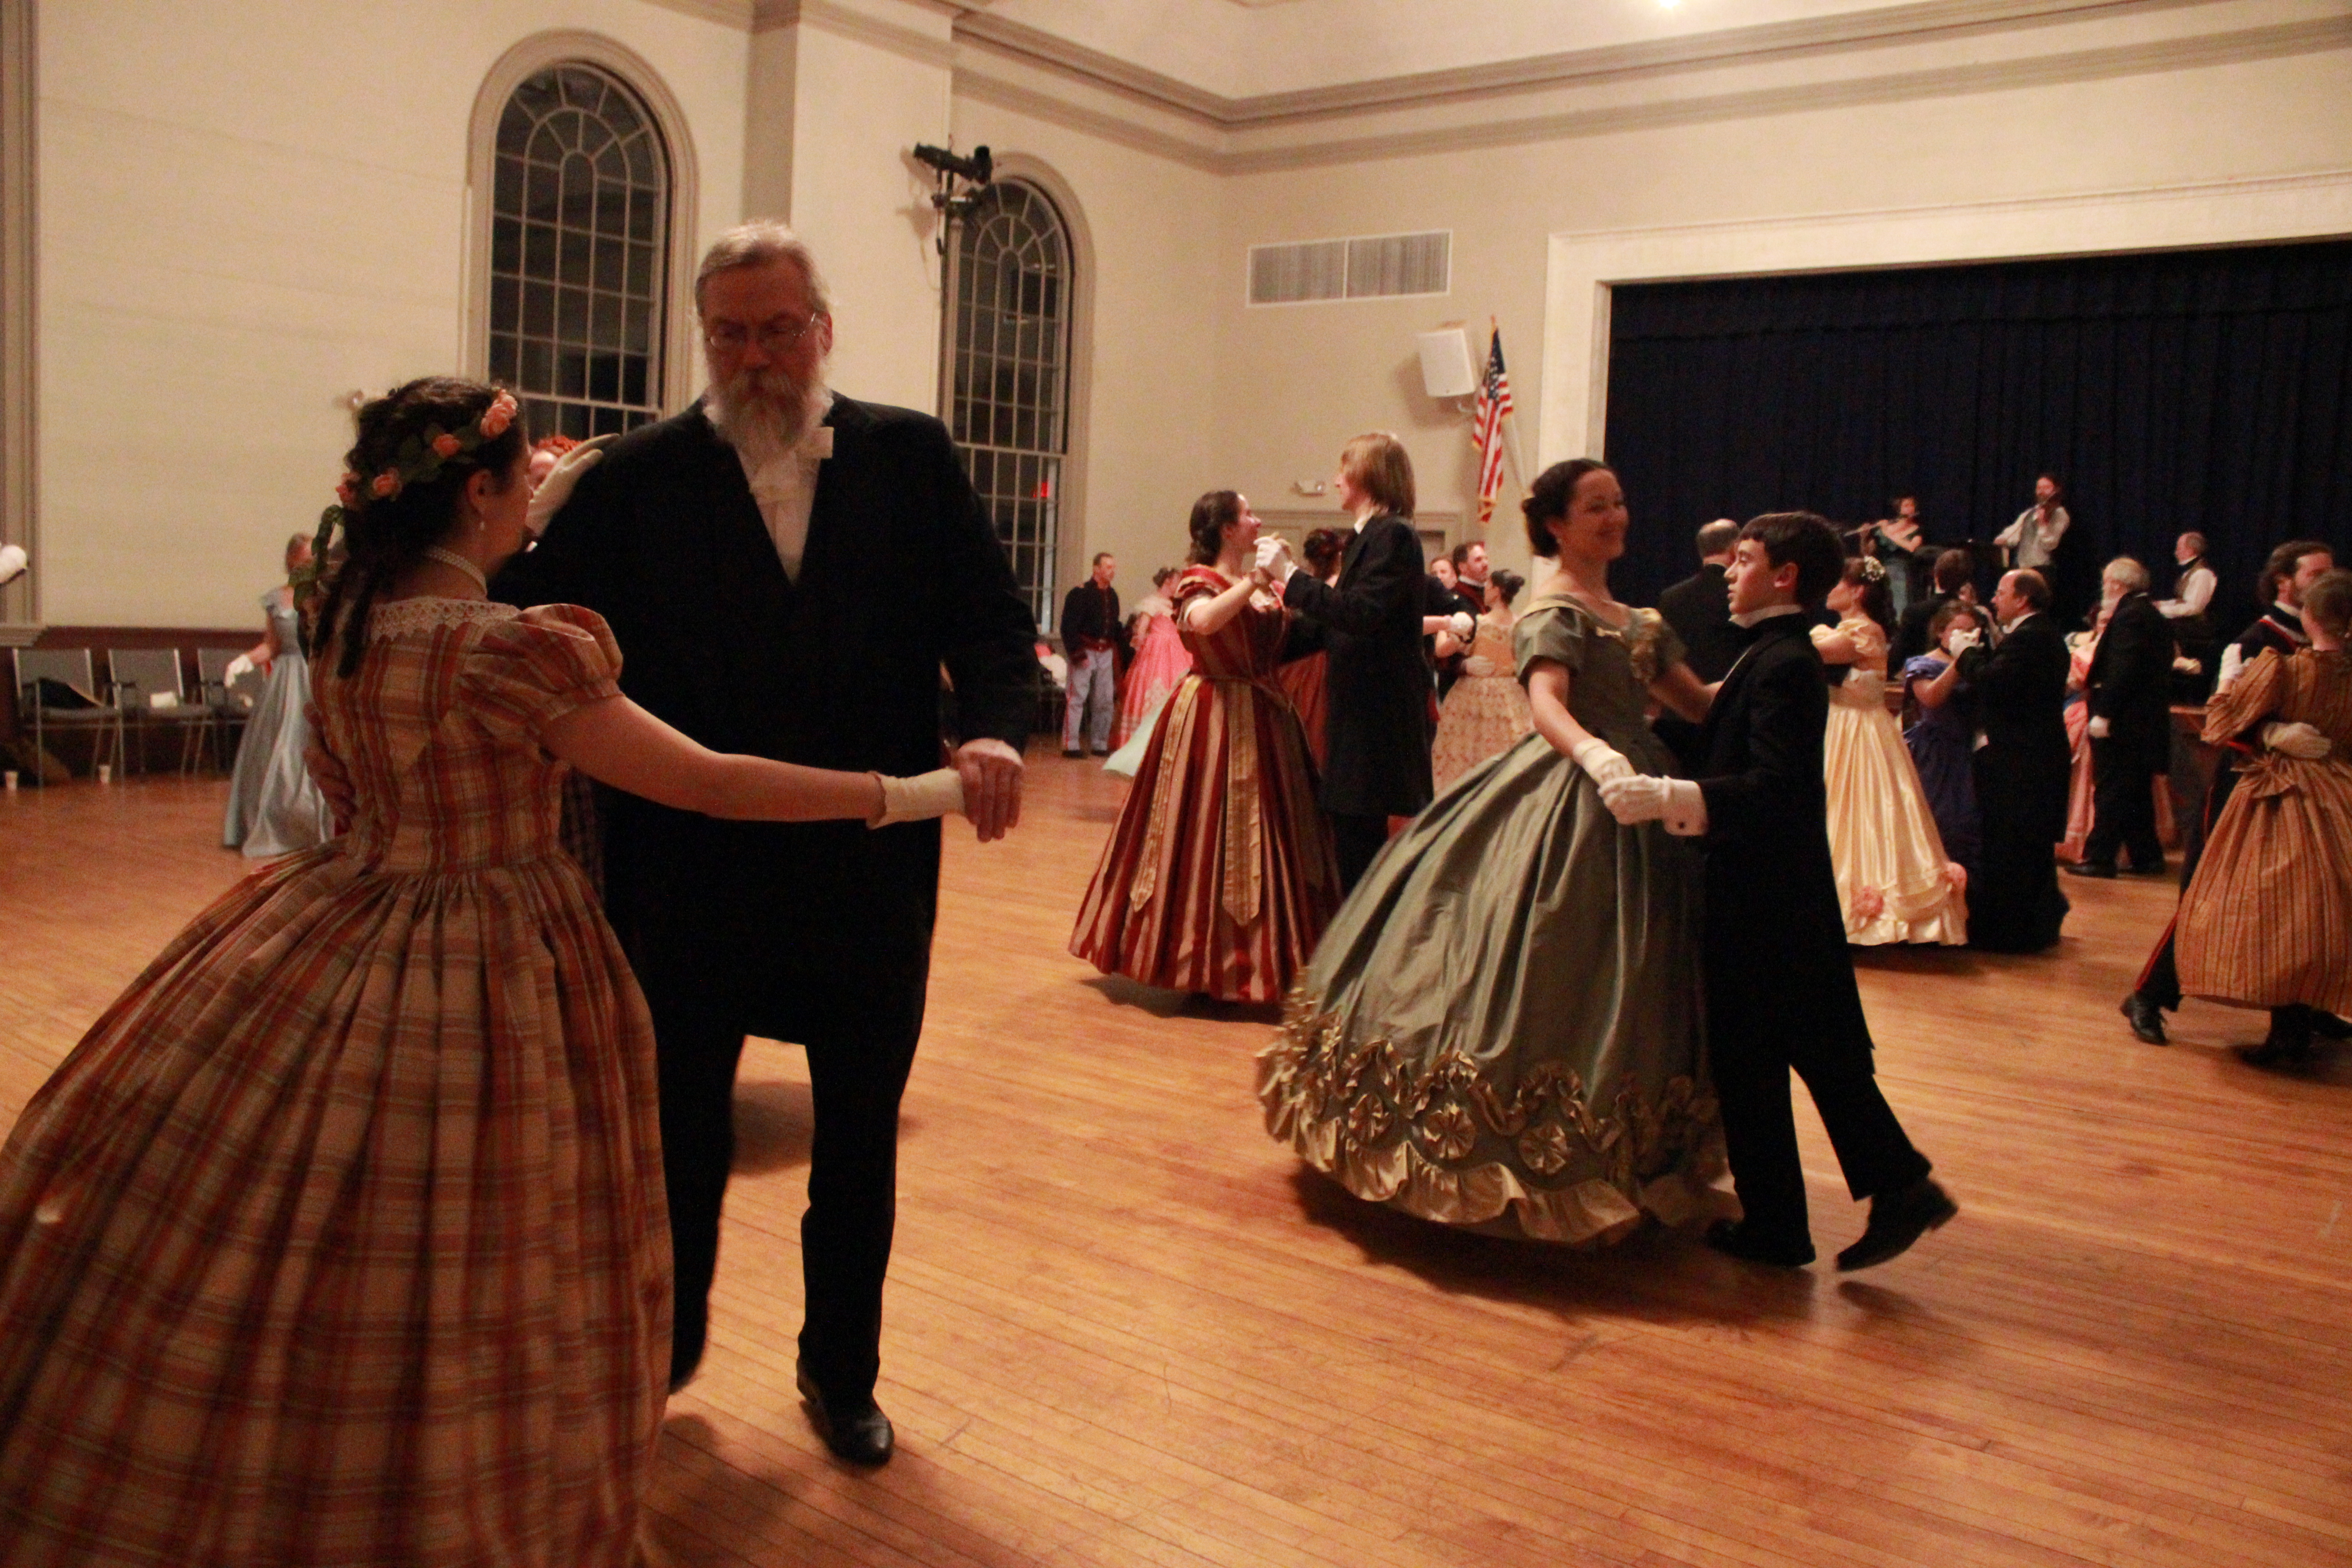
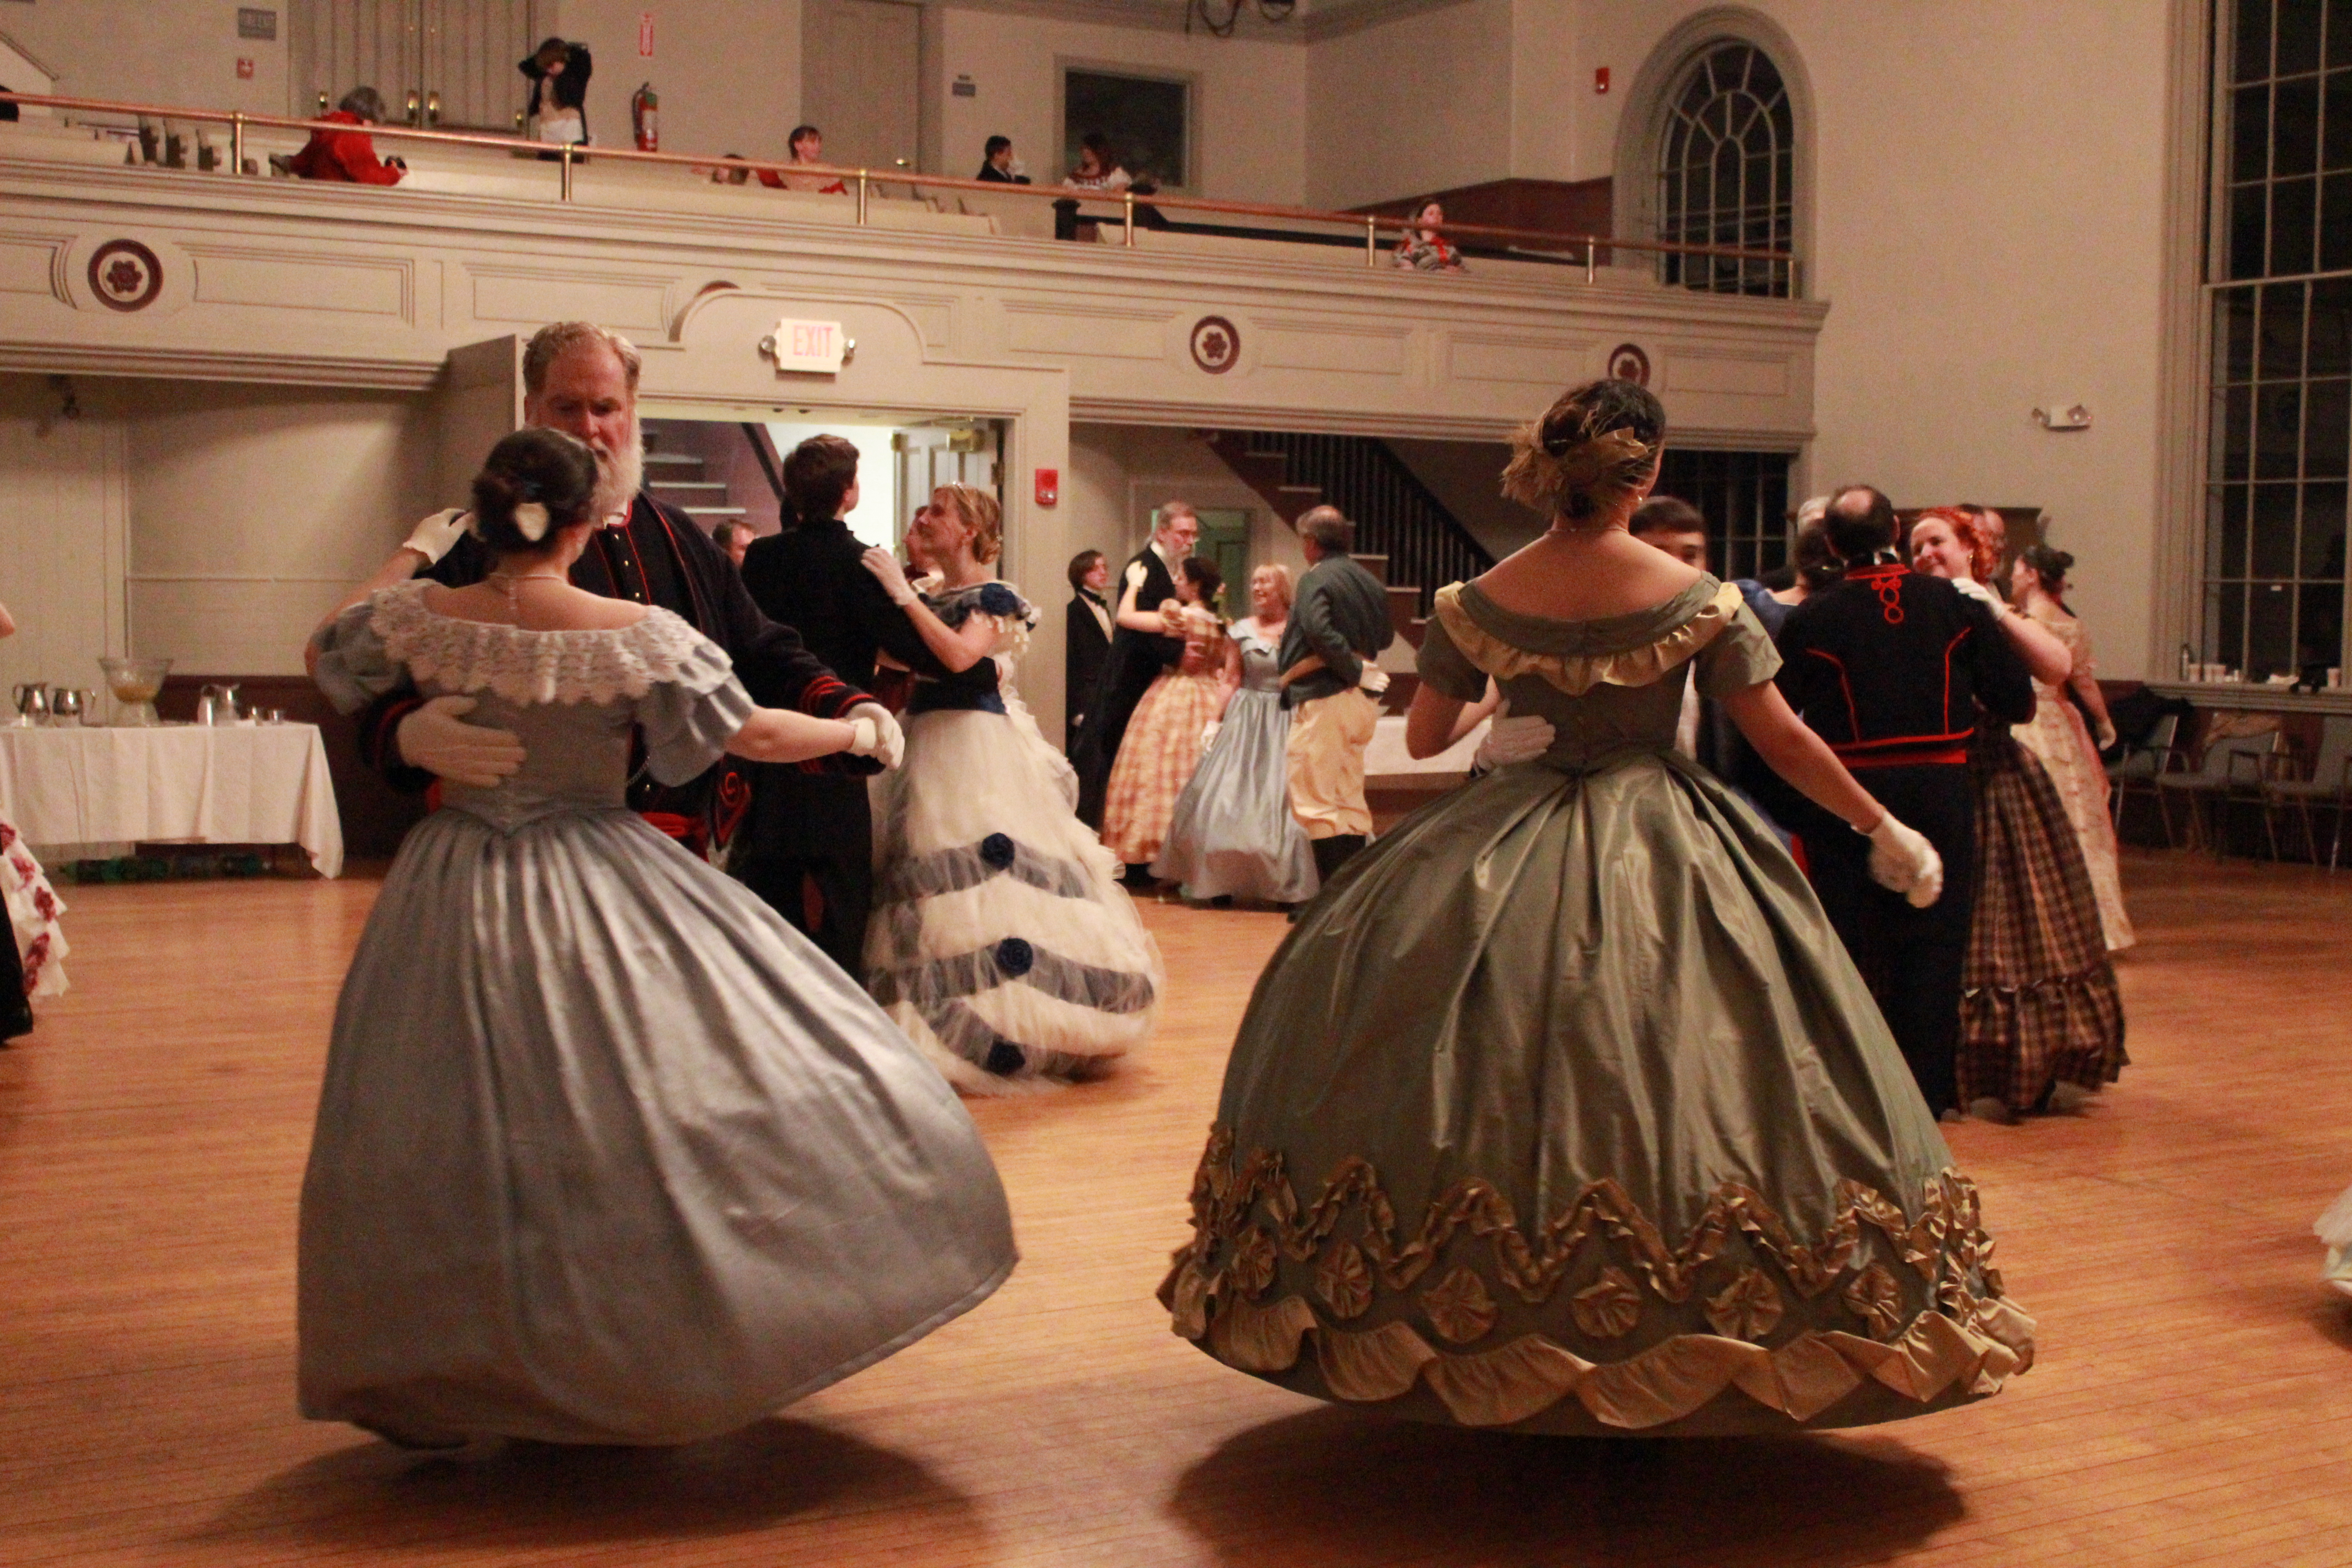
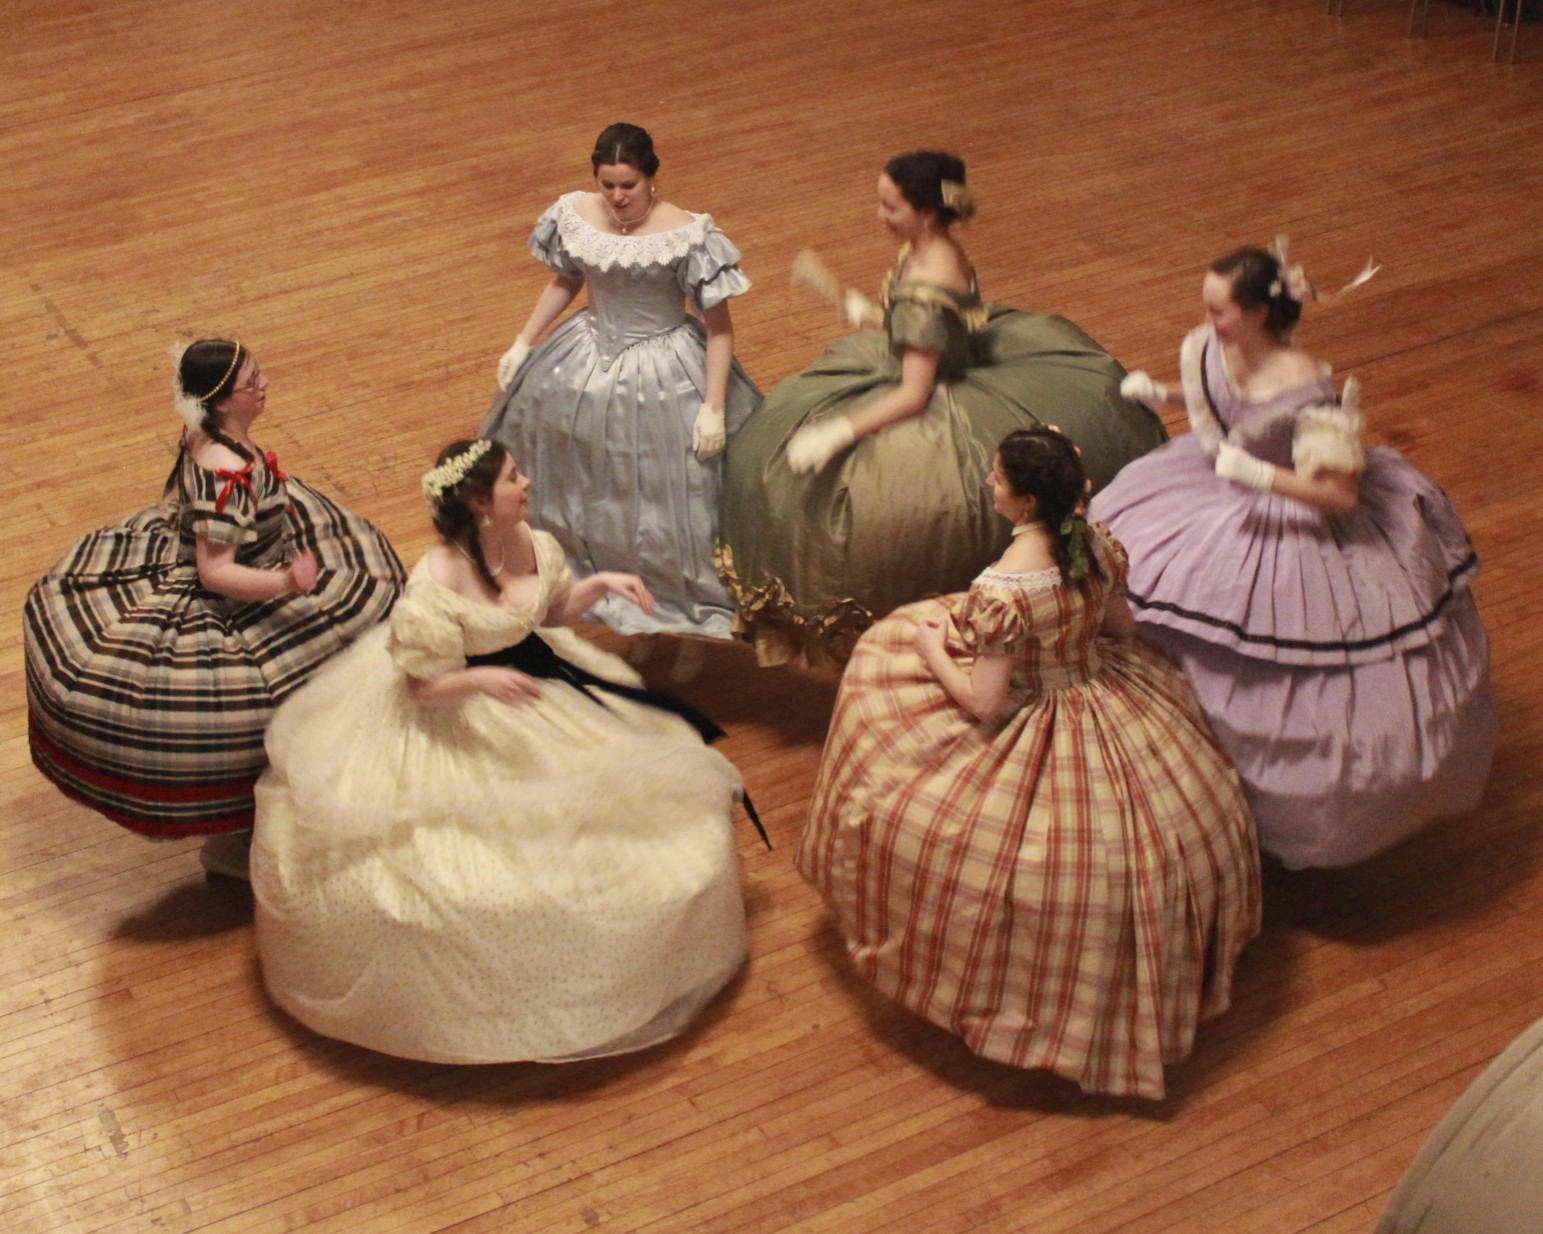
The weekend had about 50 people in attendance, which was a perfect number for socializing, meeting new people, and filling a ballroom without it being over crowded. It was so special to get to know so many new people, not only by name, but also to have time to get to know a little about them. By the final ball on Sunday night the atmosphere was of the kind you usually only get to dream about when reading Jane Austen: it was a ball where you knew everyone in the room , everyone was constantly changing partners, and everyone knew the steps so there was no teaching, just dancing. It was an absolute blast (and after the weekend I had danced so much that my calves were so sore it was hard to walk for a few days)!
Given that I had such a great time, and that I was able to wear some lovely new clothes (like the tree gown, and my new bonnet, and my blue underdress) you can understand that I have lots of pictures to share. Everyone else looked stunning as well and also had new clothes to show off, which was super fun. Really, people really did look marvelous! Yes, I’ve got lots of pictures, and I’m going to break them down into multiple posts.
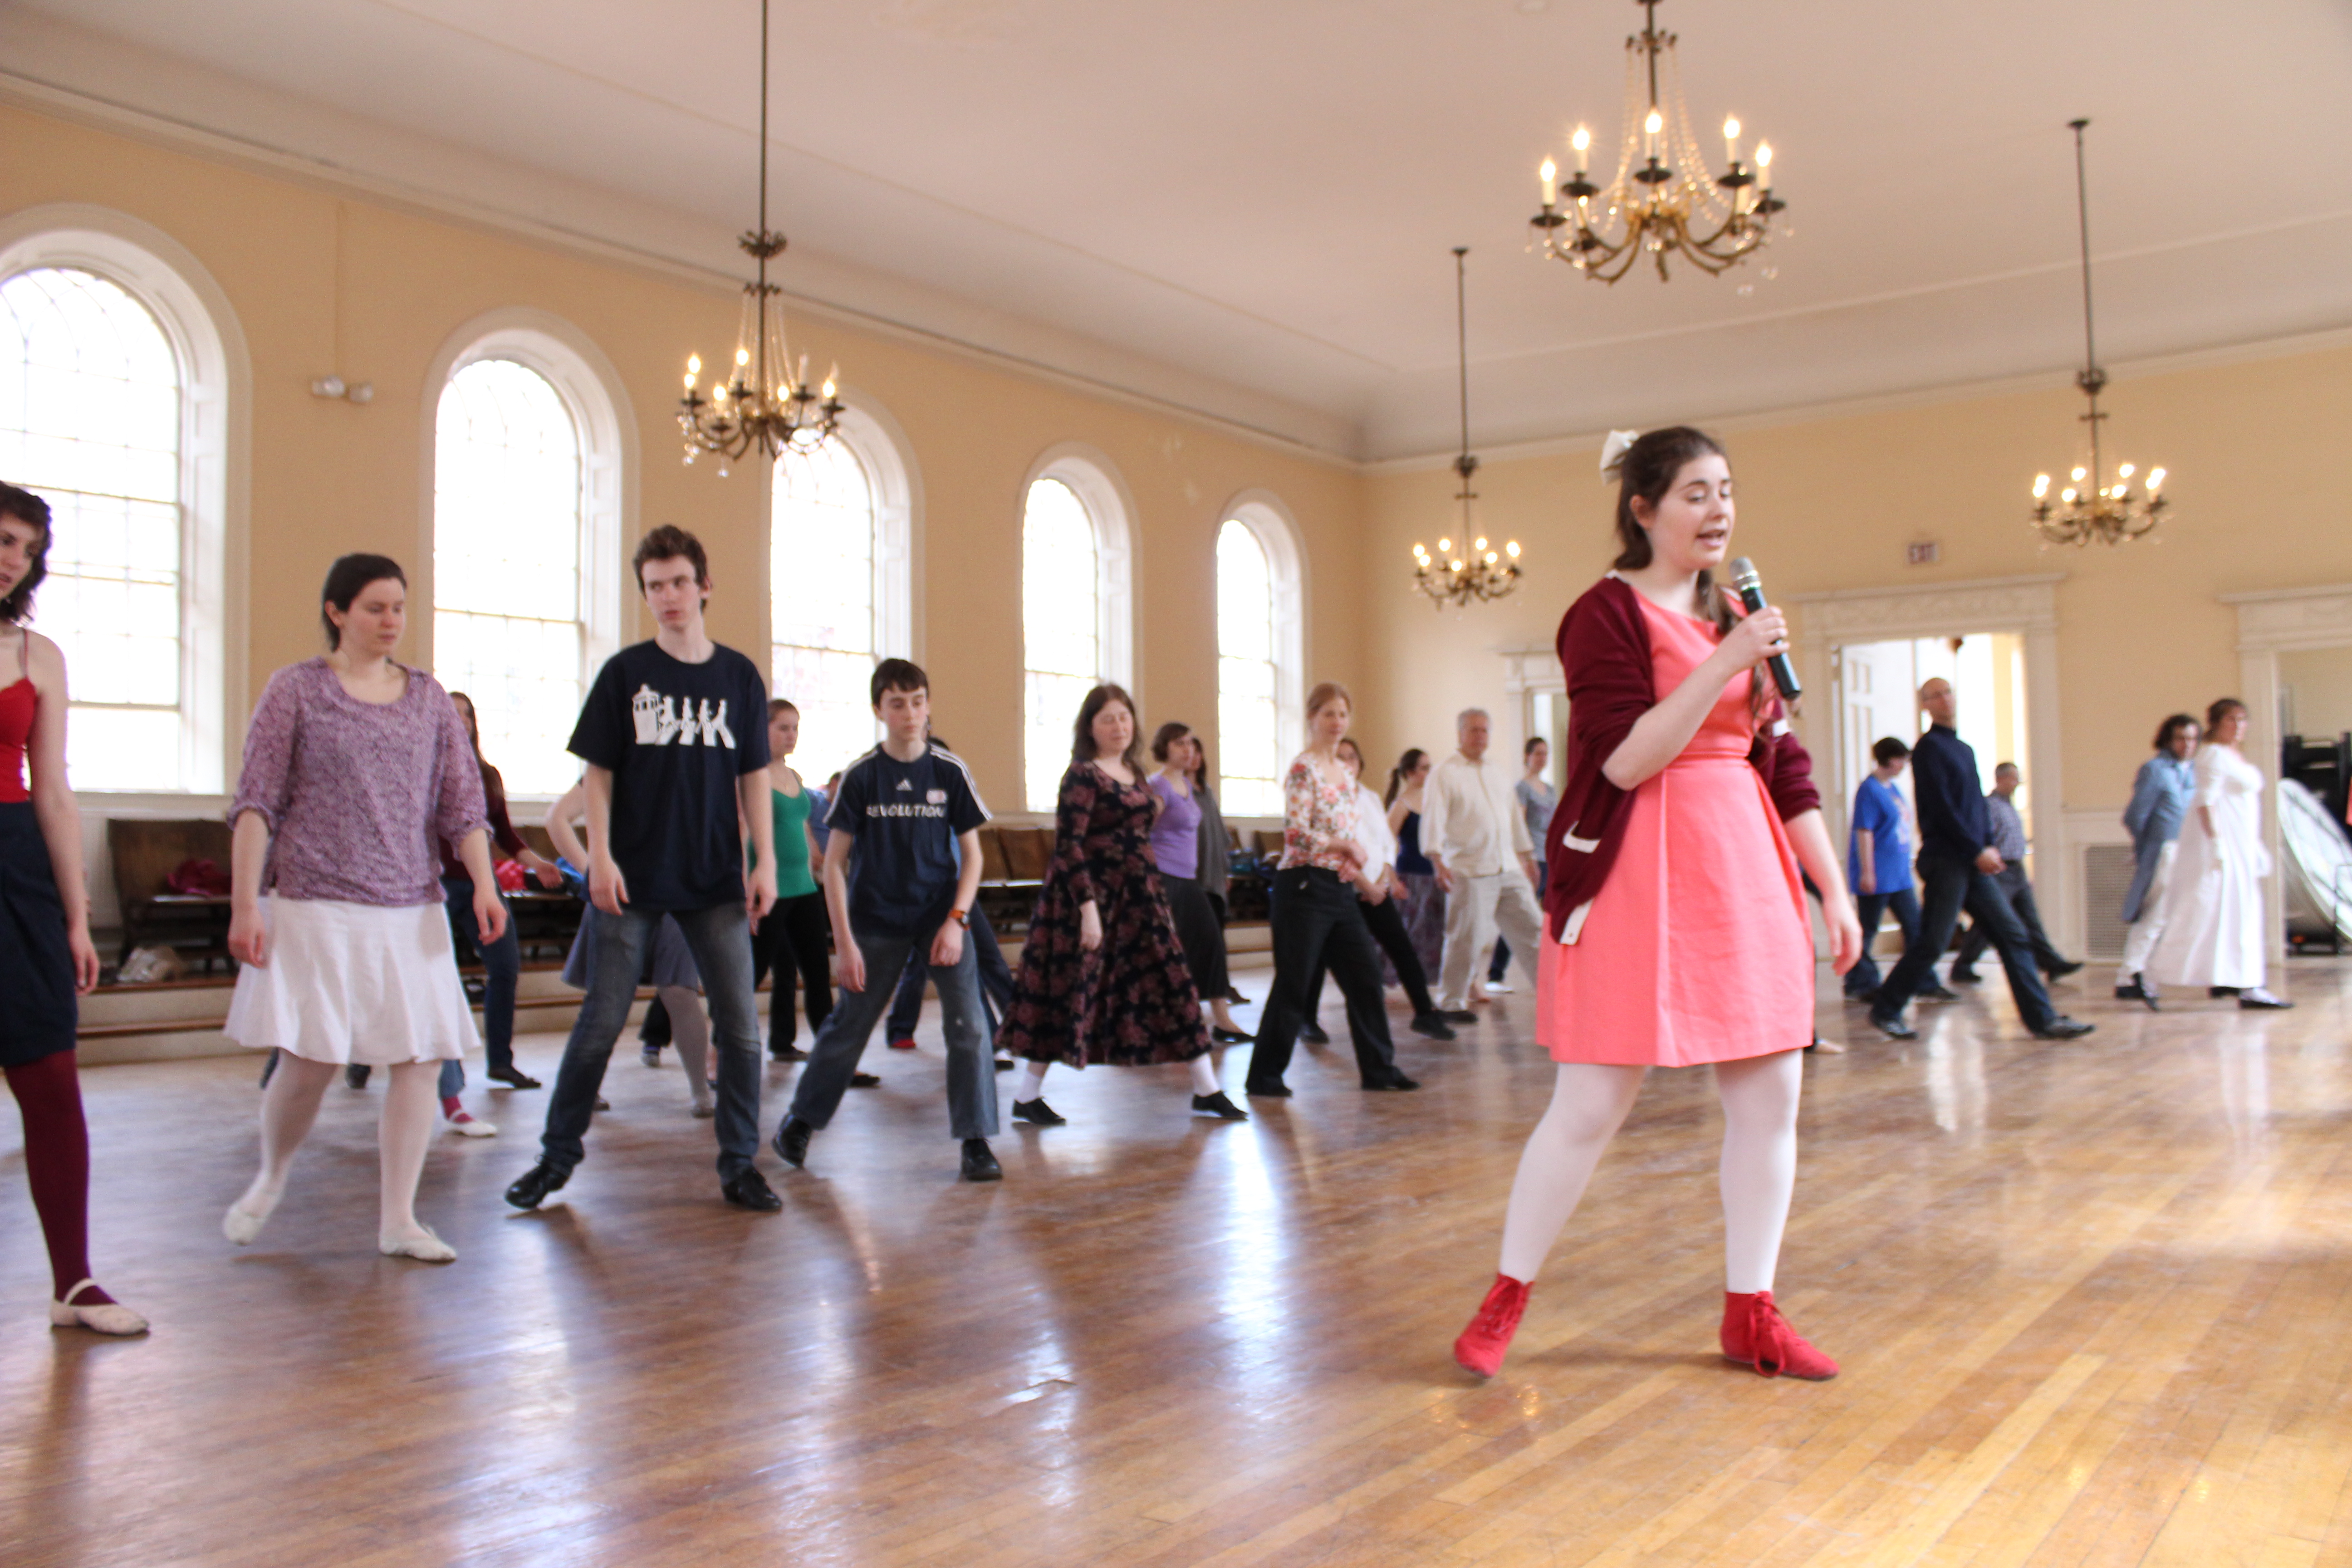
First, we’ll look at Saturday, a day with 5 hours of dance classes, checking in to our lovely 1807 house, and attending an evening dance. (Oh wait, did I mention my friends and I also swarmed our lovely and kind friend’s house on Friday night? No great pictures, but it sure was fun to hang out together and squish 8 people into an apartment…! Plus, it made getting to dance class the next morning so much better since we didn’t have to drive very far!)
Starting to learn Regency dance steps.Working on Regency waltz.The wallpaper in my room of the 1807 house we stayed in for the weekend. The room was decorated in this deep red. It was so beautiful!Dressed in my new blue underdress and square neck gown. I’m heading off to the informal dance. Accessories include my blue American Duchess clocked stockings, blue velvet flats, white gloves, a red bead necklace, and my patterned red pashmina.Waltzers during the dance.Dancing a Regency waltz. Look at us go on our toes!
That’s it for now. Next post will be about archery and outdoor lounging!
In all those pictures of Evie and the Returning Heroes Ball that I’ve posted recently, I don’t think there were any good shots of the front of my dress. So for now, a quick post showing the front of the gown with the double rosette to match the skirt and the graduated ruffle showing itself from under the bertha.
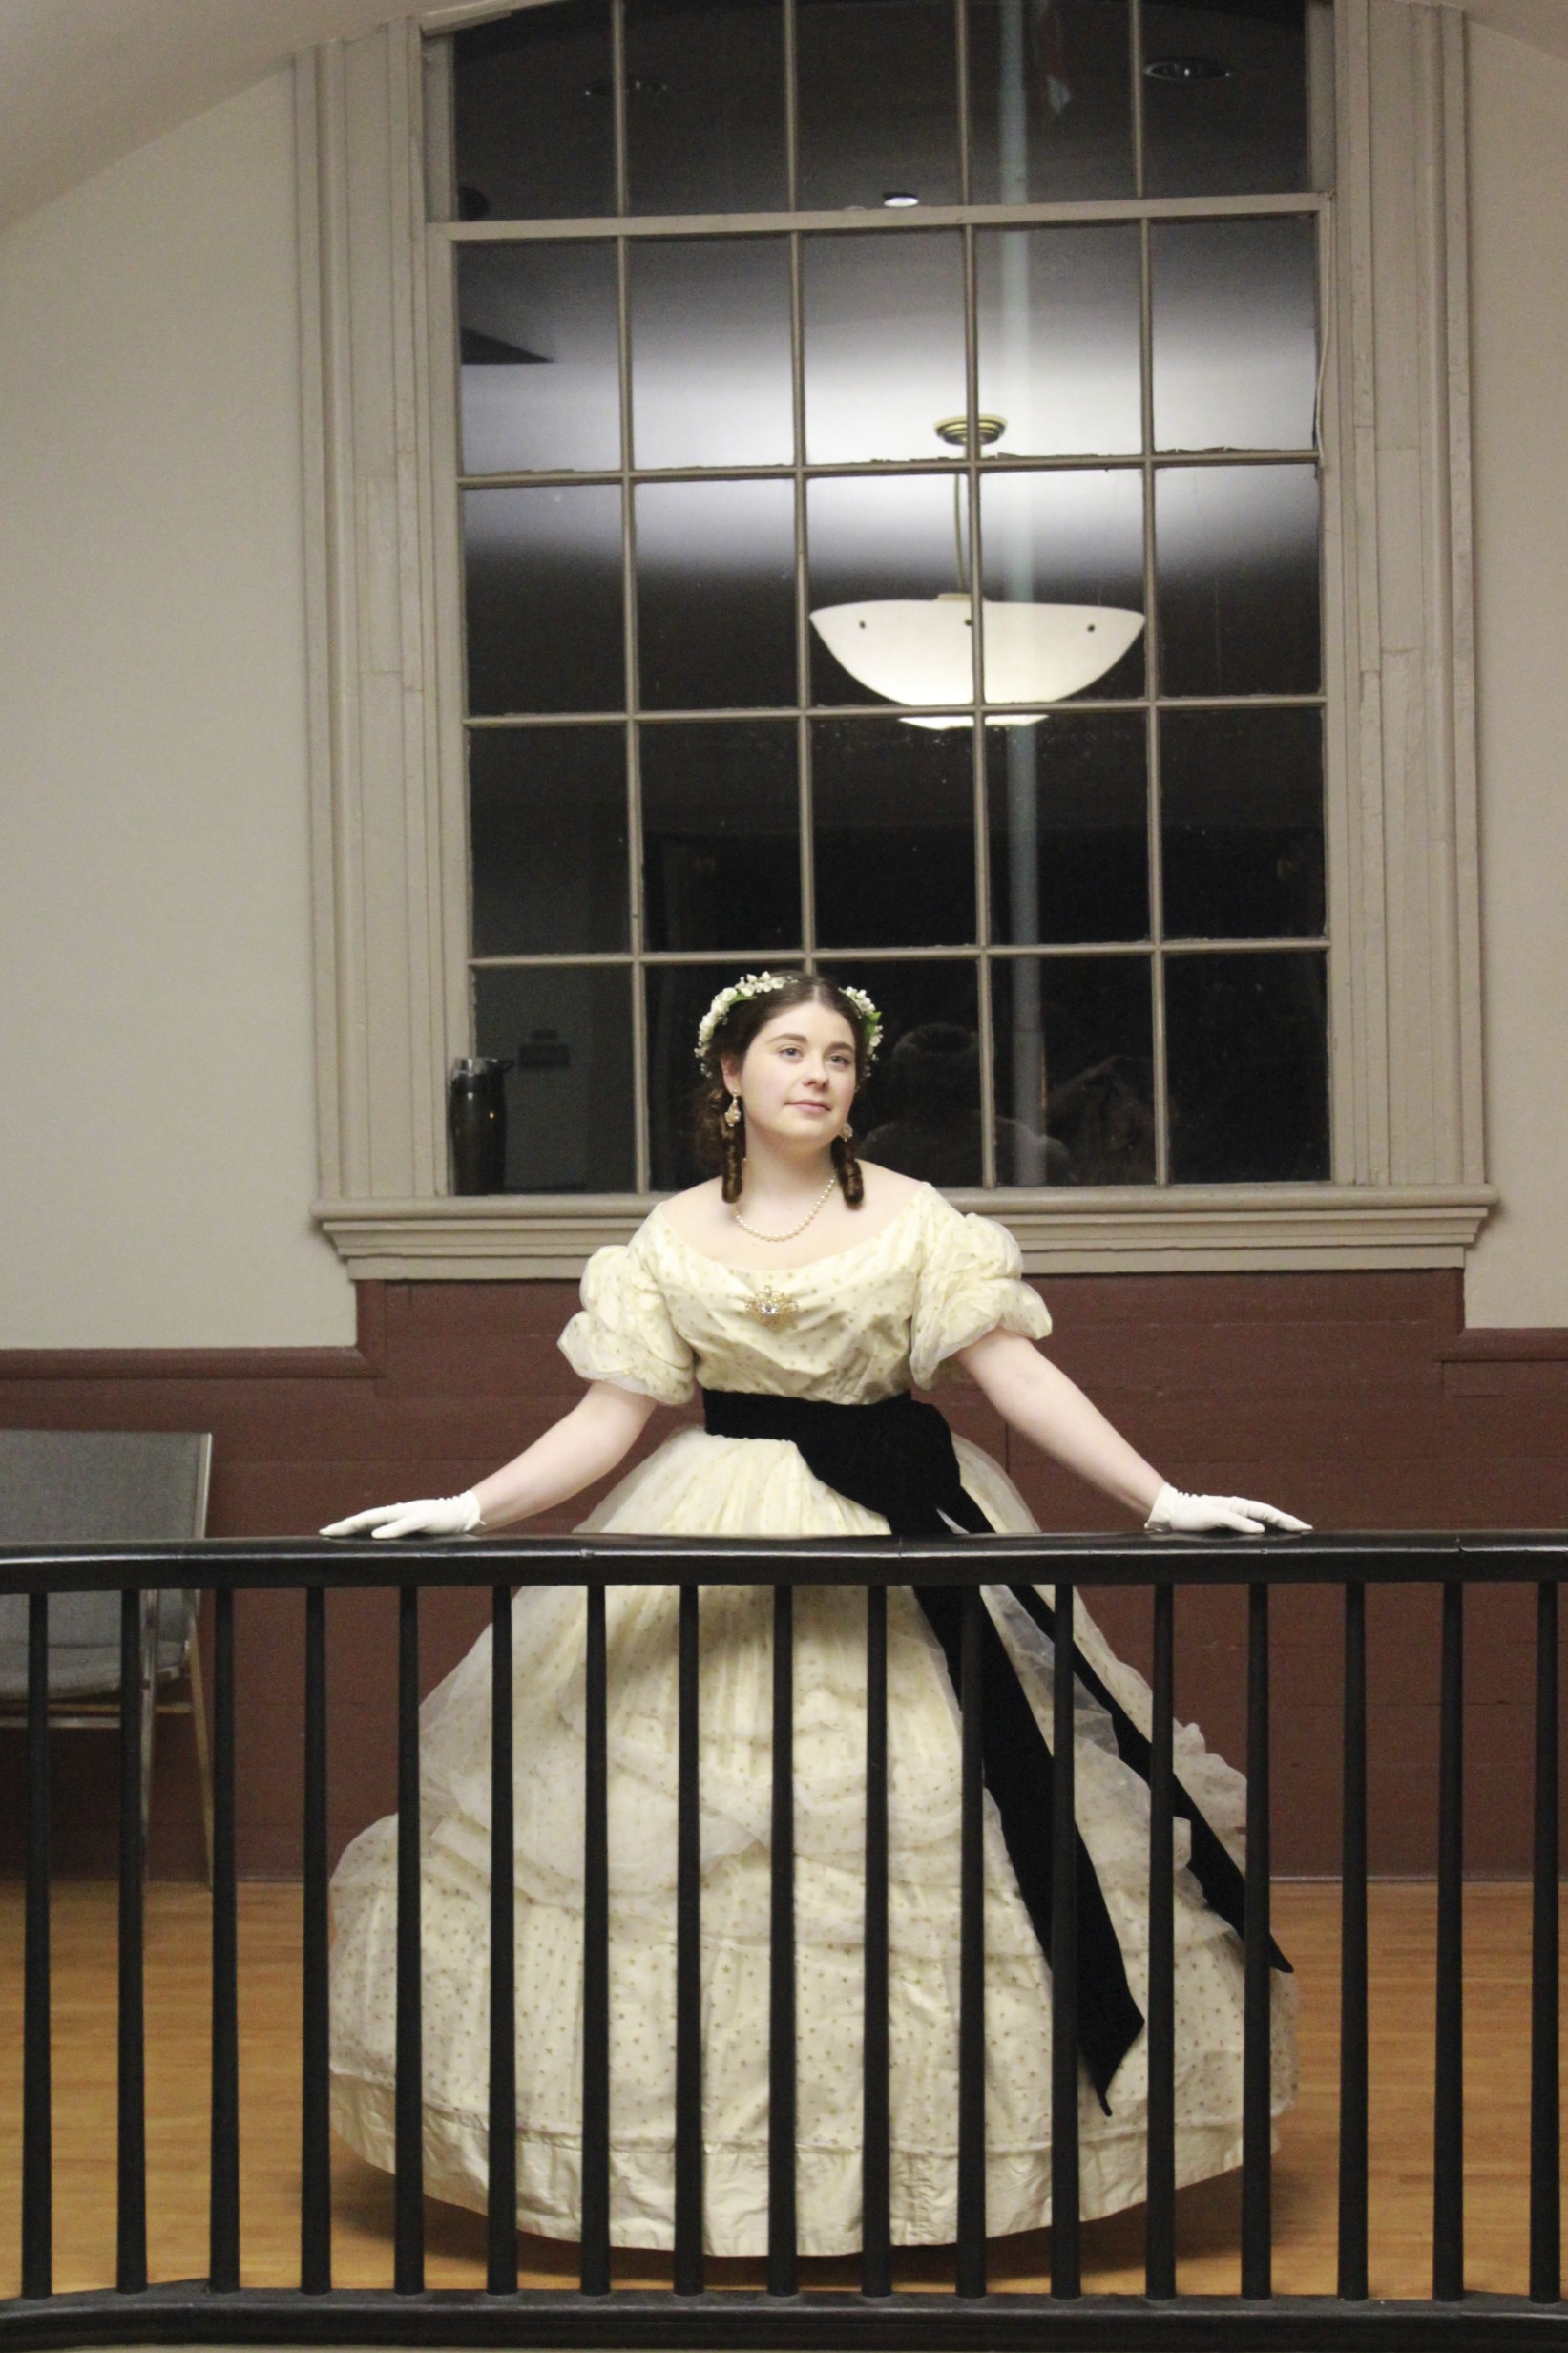
I’ve been slow to post my final group of pictures from this event. Sorry! You’ll remember that I first posted Three Series of Photos of my new green 1864 ball gown, Evie, and her undergarments? Then I posted A Second Series of Photos of friends? It’s finally time for the final installment of posts from the Commonwealth Vintage Dancers’ Returning Heroes Ball back in March.
A ballroom full of hoop skirted ladies and suited gentlemen.A lovely set of dancers. Don’t we all look nice in our light colored dresses?Dancing a waltz.A “German Cotillion” dance game during intermission, in which the two young men vied for the young lady holding the candle, each trying to blow it out first. Whoever blew it out was rewarded with a waltz.More dancing after intermission.Caught on camera!Do The Jellyfish! There are more Jellyfish pictures from Ochre Court last year.The chandelier is perhaps not the loveliest style, but I like the artsy style of the photo. The coffered ceiling is great!
You know how sometimes the best laid plans are waylaid by life? I had every intention of finishing this bonnet before the HSF deadline of yesterday, but along the way got side tracked by life and made conscious choices to do other things with my time instead of bonnet-ing. Oh well, it happens to the best of us!
1815 bonnet (the more interesting side).
I made this bonnet to coordinate with my new Regency Tree Gown (which is why I’m calling it the Tree Bonnet). Lucky for me, it also fulfills the HSF Challenge #7: Accessorize and will coordinate with other items already in my closet (such as my 1819 brown spencer). I’ll be wearing the new gown, the spencer, and the bonnet this weekend for the Regency Dance Intensive, along with a lot of other Regency things, so be prepared for lots of pictures next week!
The facts:
Fabric: Silk twill, changeable silk taffeta for trim, and china silk for lining.
Pattern: Created by me.
Year: 1815.
Notions: Four approximately 8″ pieces of sage green polyester ribbon, a spray of wired millinery flowers, about 1 1/2 yds of navy silk ribbon for ties, about 3/4 yd of navy grosgrain ribbon for inner band, buckram for the base, millinery wire, cotton flannel for mulling, tacky glue, and thread.
How historically accurate?: 95% I’d say. There are a few polyester things, but the overall shape, impression, and majority of materials are accurate.
Hours to complete: 28? Hand finishing and trimming takes a long time, especially on hats, because the angles are weird, so it’s a slow process.
First worn: Not yet, but will be worn this weekend!
Total cost: $6ish for the silk twill bit, the green silk and china silk are remnants from other projects, the polyester bits are old and from the stash, the millinery flowers were from the stash, the buckram was maybe $4, the wire was probably $2… so about $12? I didn’t buy anything special for this bonnet, it’s all from the stash! Yay! Go me!
Close-up of the pleated silk trim and rosette-like decoration. You can also see the pleats on the side band of the bonnet.The millinery flowers on the front of the bonnet.The more plain side.Inside of the brim, looking into the lining and hat band.
This week marks the end of the MpRSW (though I still have one more post to go about that), with the final goal aimed at yesterday, #5: Anything Left! I’d already completed some packing for this goal, and procurement of kite making supplies (yes, there will be a future mention of kites!), but this bonnet also qualifies!
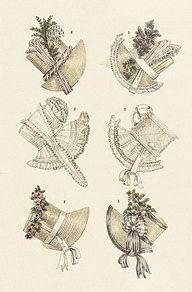
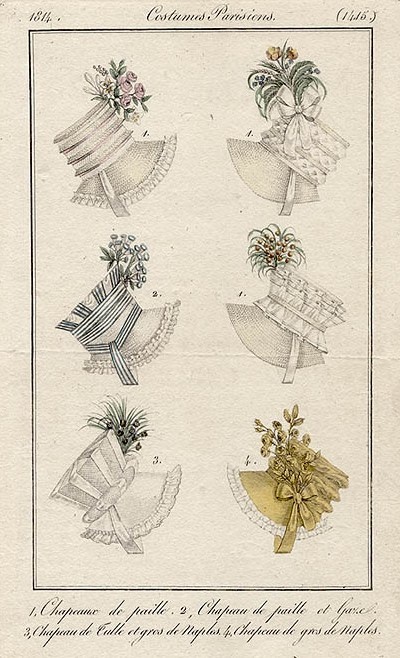
Now let me share some of my inspiration for this bonnet. There are more bonnet images on my 1810s Pinterest page as well.
From 1815. La Belle Assemblee, Parisian Promenade Hats, July 1816.Costume Parisien from 1814.Costume Parisien from 1815.
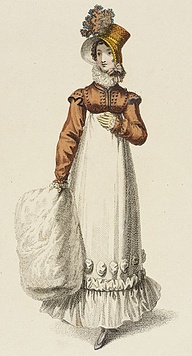
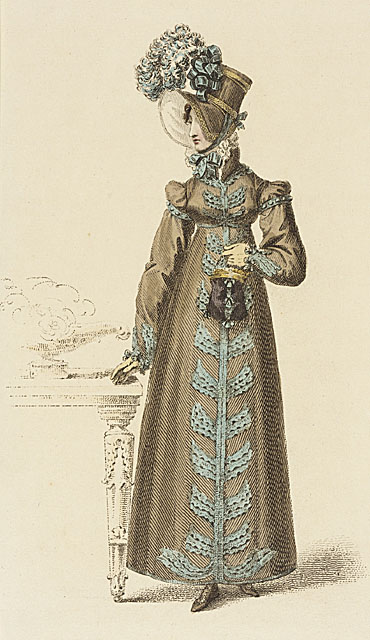
In trying to determine length of ties for the bonnet, I looked to some fashion plates that included people in them. Here are some of the best examples I found.
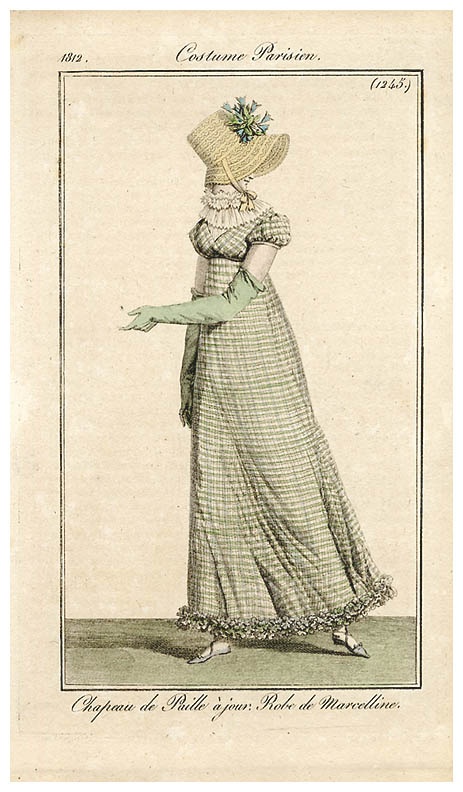
1813 afternoon promenade dress.Ackermann’s Repository, Walking Dress, April 1817.Ackermann’s Repository, Walking Dress, November 1817.Walking dress 1815EKDuncan – My Fanciful Muse: Regency Era Fashions – Ackermann’s Repository 1819Ackermann’s Repository, Walking Dress, February 1818.Robe de Marcelline, 1812 Costume Parisien
Well, there we are. I just finished sewing that pleated brim trim tonight, and I am glad to be done! It’s slow and slightly painful on the fingers. But pretty, so totally worth it!
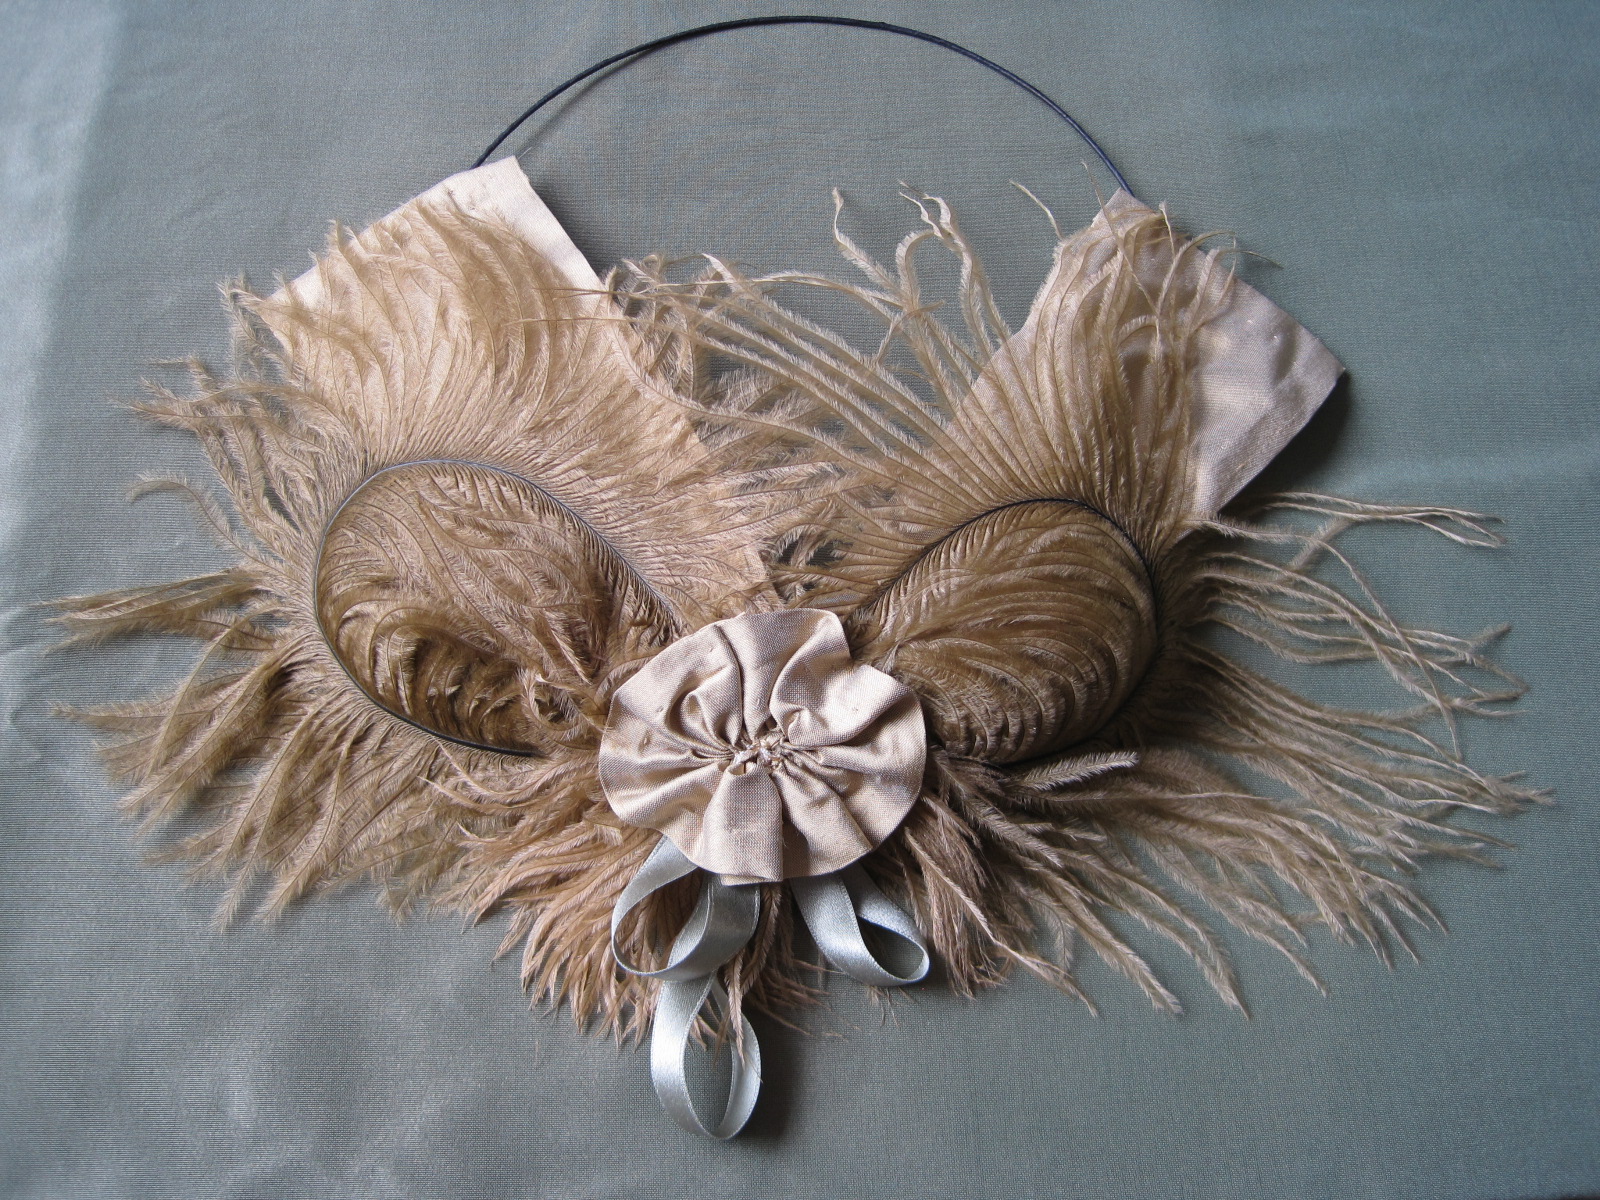
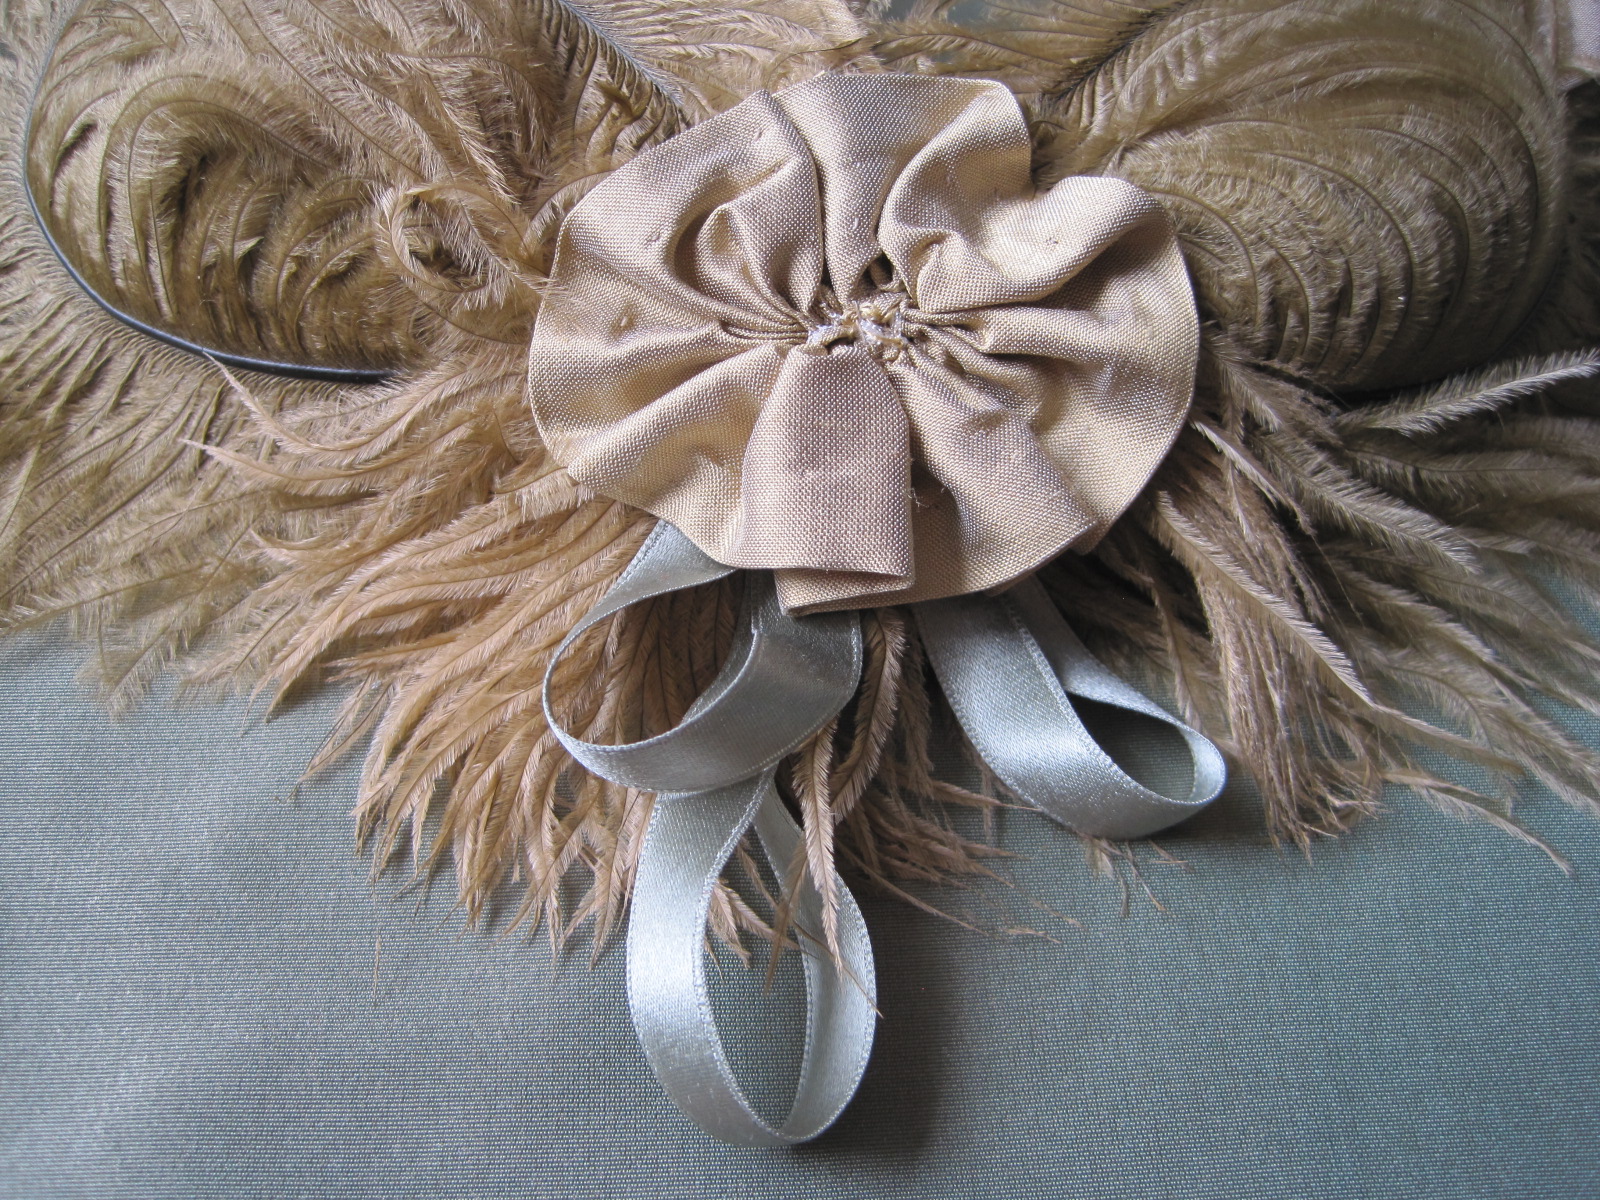
Remember Evie, my 1864 green ball gown? I felt compelled to make a matching hair wreath to wear with her, and here it is! A ring of paper covered millinery wire colored black (to blend with my hair) with a sharpie, decorated with a bit of gold silk, some green silk ribbon, and the mysteriously changeable gold/green ostrich feathers. Here those feather look gold, but I assure you that they sometimes appear as green as the silk background (which is the silk the dress is constructed of).
I think I would like to trim the ostrich feather on the right so it is the same shape as the one on the left, but aside from that one change, this is good as is! It’s super easy to bobby pin the wire to my hair and it’s easy to hide the bobby pins under all that silk and ostrich feather business going on at the bottom.
I intended to complete this reticule for the HSF Challenge #6: Stripes this past week, but as the deadline approached and I reread the fine print, I realized that the challenge was supposed to be fulfilled by a garment. Whoops! I don’t think I can convince myself that a reticule is garment, let alone other people. So I put the project on hold while working on other things (like Evie, my 1864 ball gown, and the completion of my purple ballroom competition dress), but finally got back to it and finished it off towards the end of last week.
Lucky for me, this reticule does fulfill the MpRSW Goal #4: Accessories (due April 8th: I’m early!). (If you’re paying attention, I did fail to post about the MpRSW Goal #2: Evening Gown… I might have fallen off the wagon on that one and not managed to fix the rip in my gown on time. But luckily, the MpRSW is motivating me to complete that repair this week, even if I am delayed!)
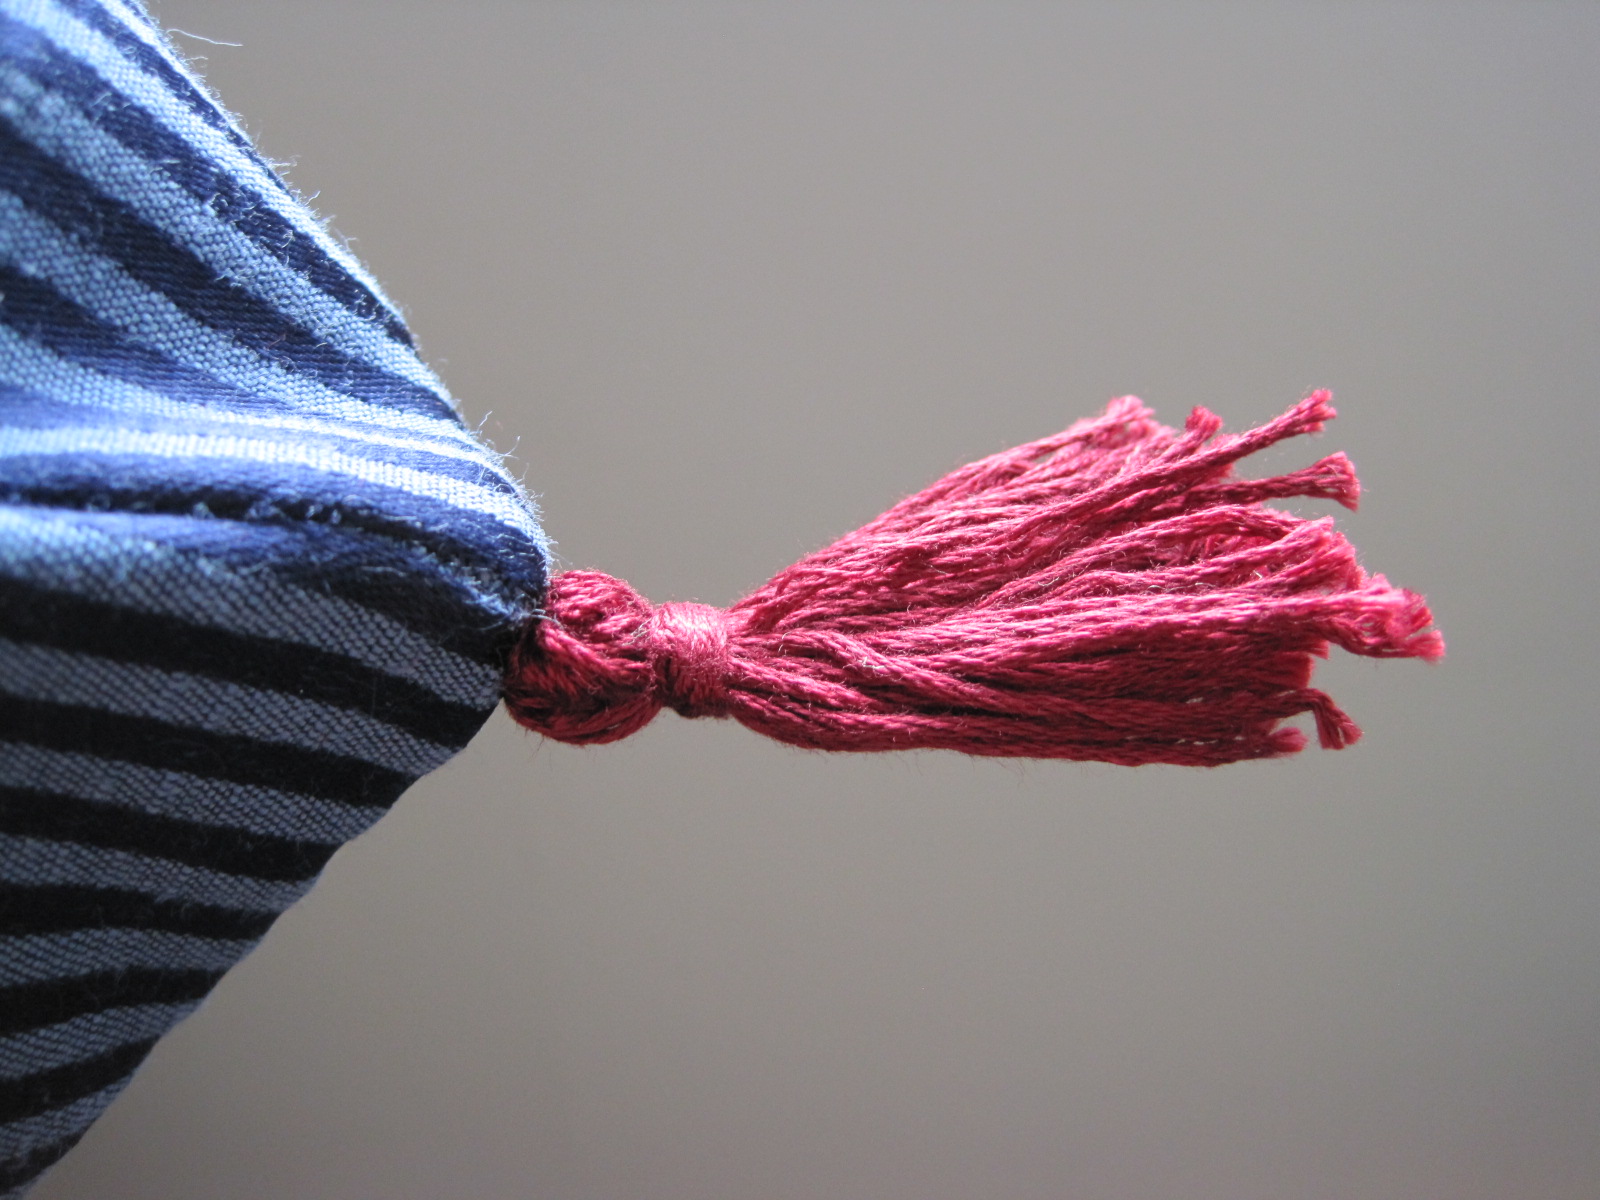
Tassels!
Trust me, this is not a historically accurate reticule. The fiber content is questionable… (probably a blend including polyester), the ribbon is polyester, and the tassels are cotton embroidery floss. But it’s cute and functional and has the general look of the period, so I’m happy. This will get packed for the Regency weekend coming up in April!
Inside the reticule: french seams and a cotton canvas purple (woohoo, extra fun on the inside!) layer whip stitched to the inside of the bottom to provide stability and help keep the triangular shape. The seams are hard to spot because the stripes blend into each other so much, but they’re there!
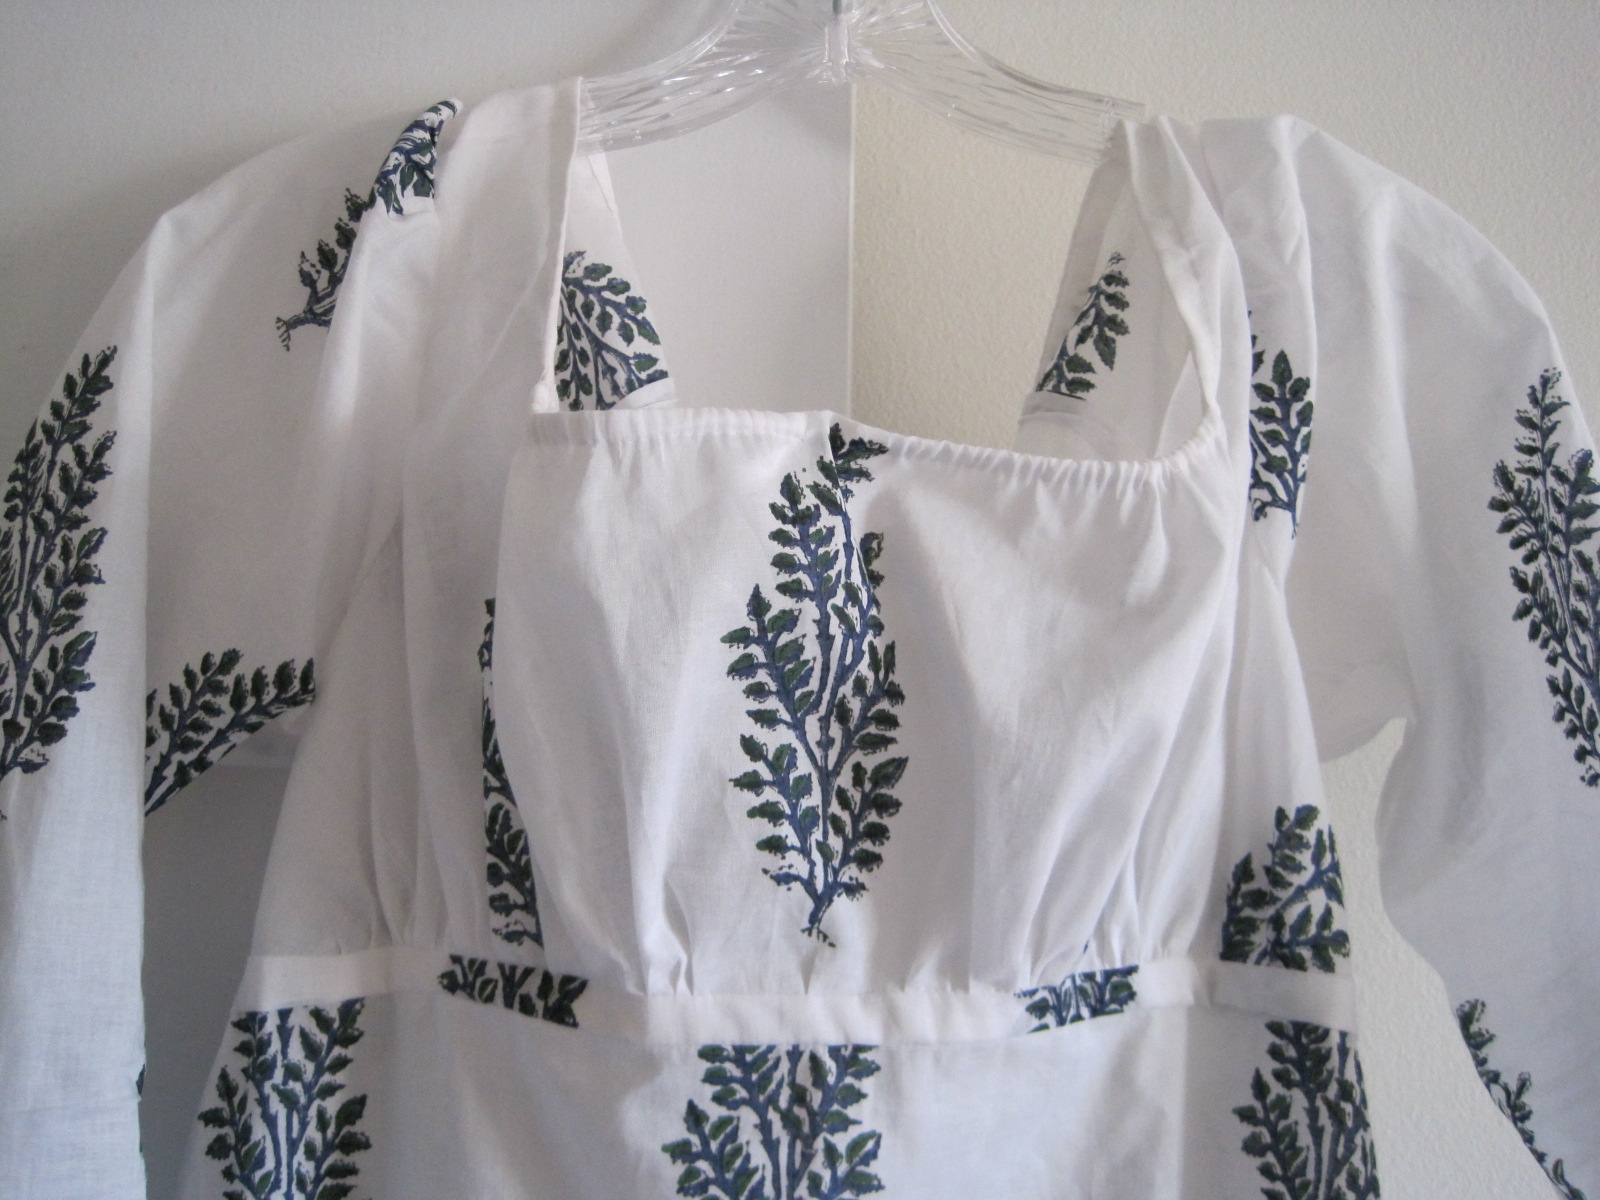
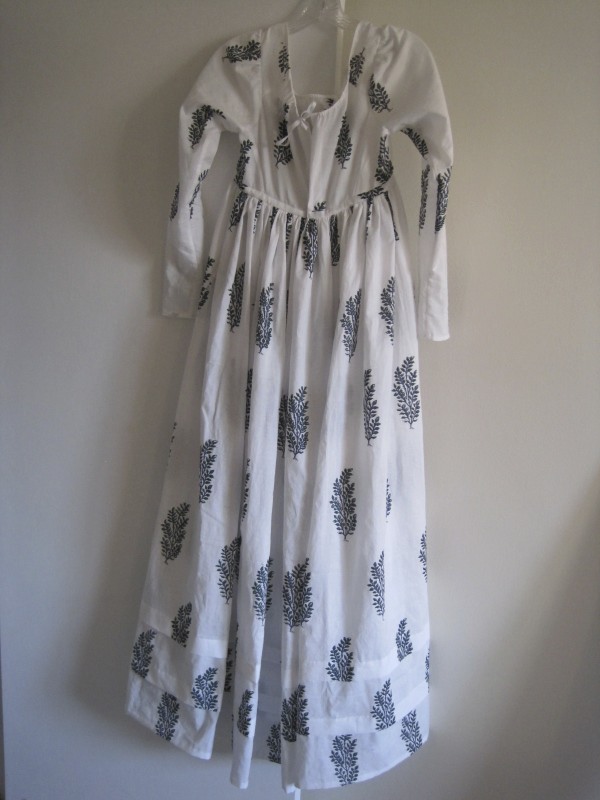
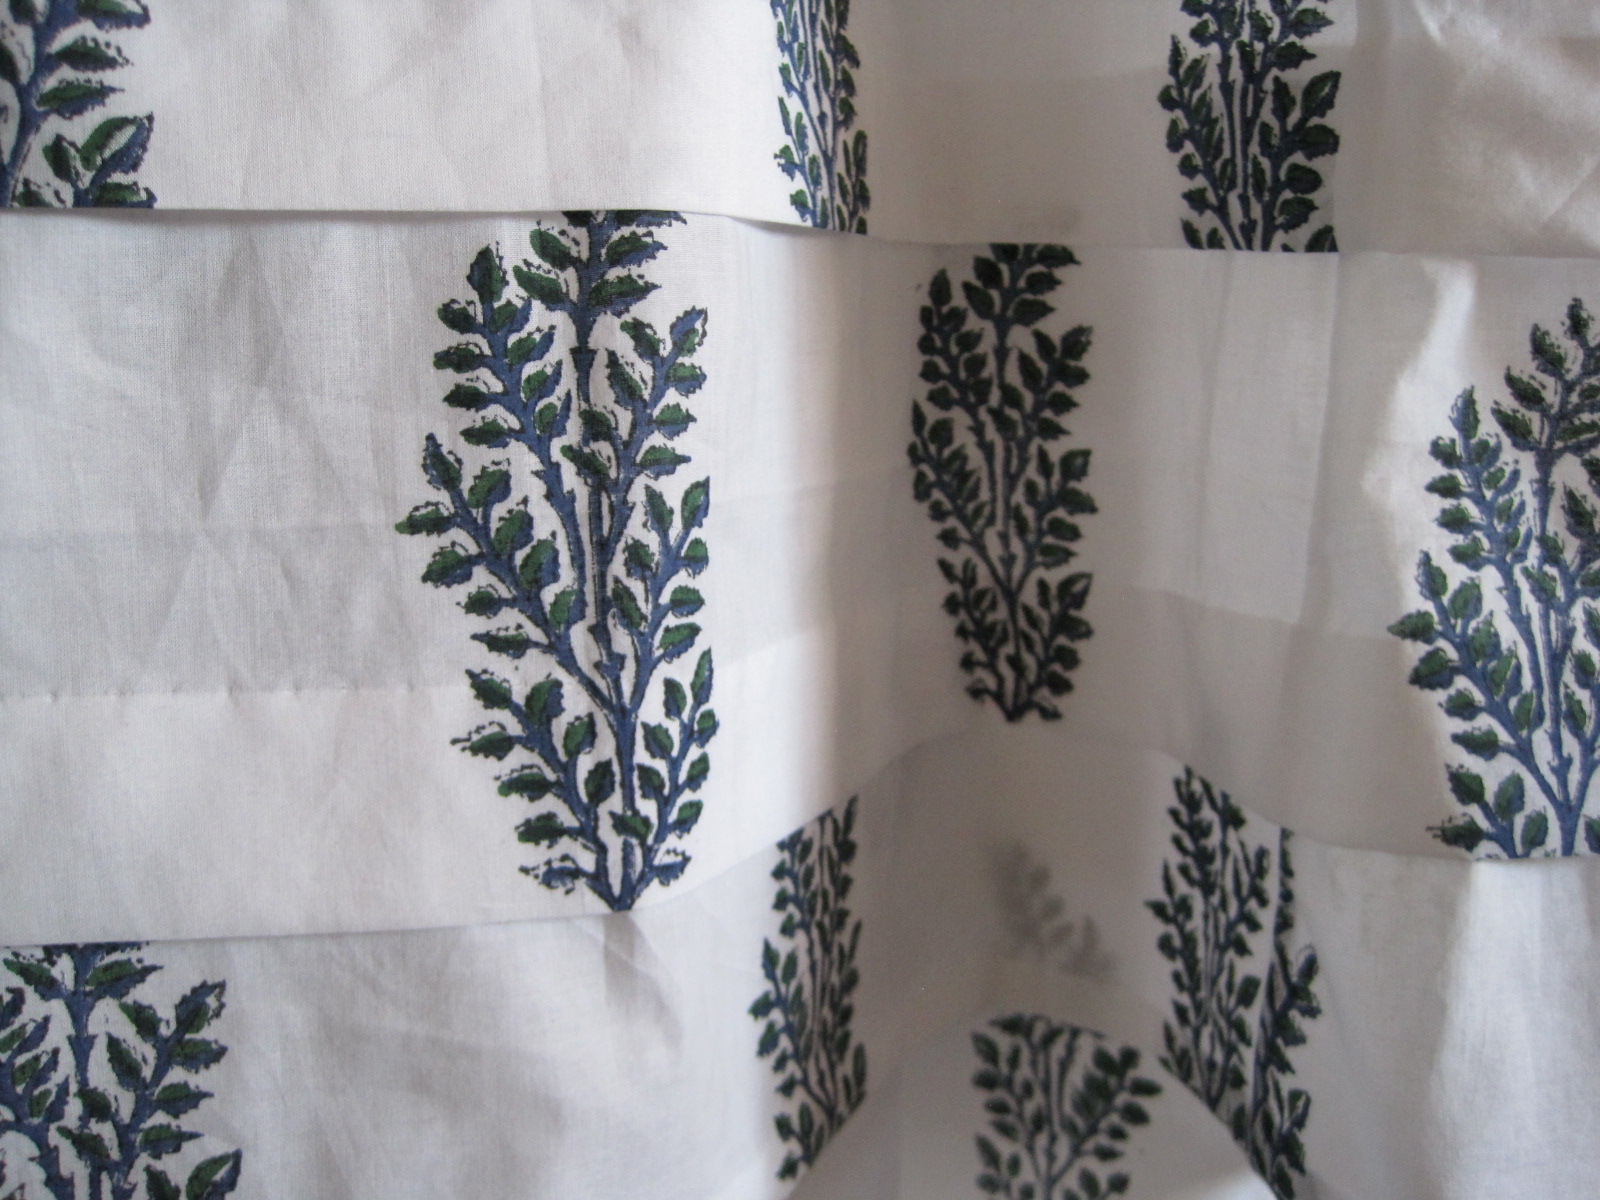
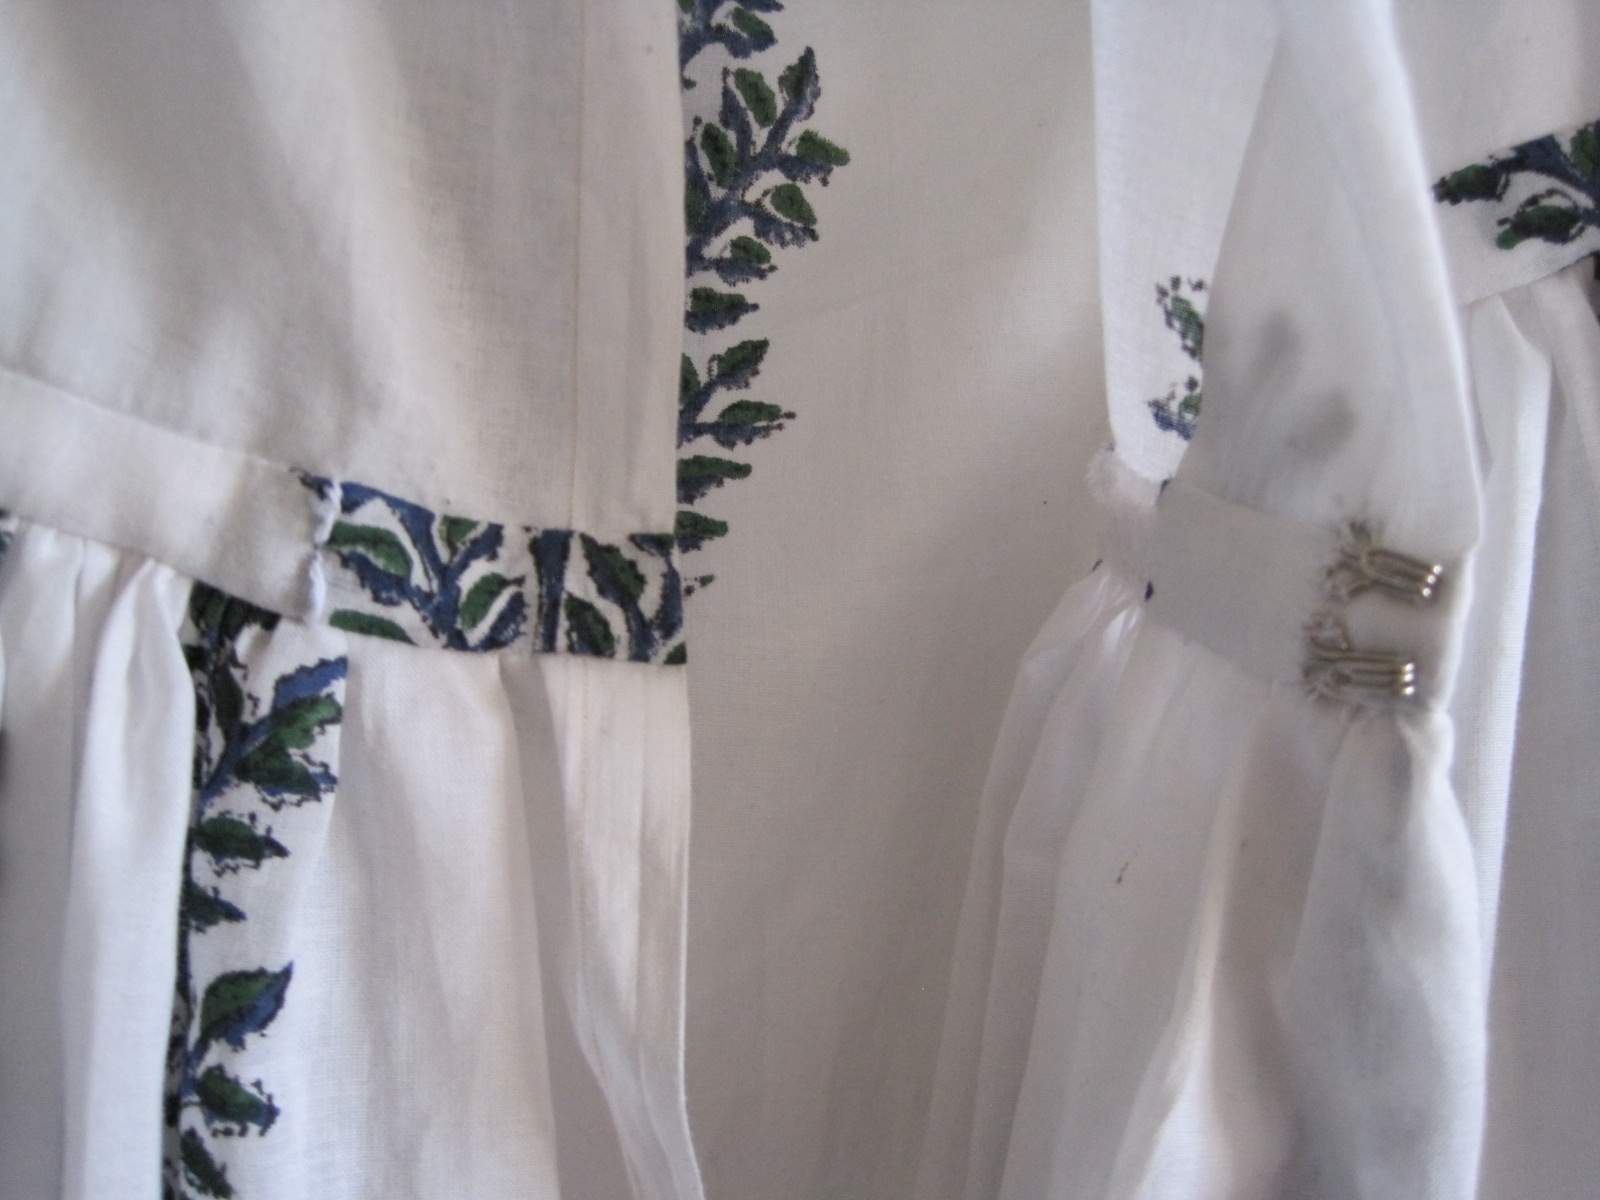
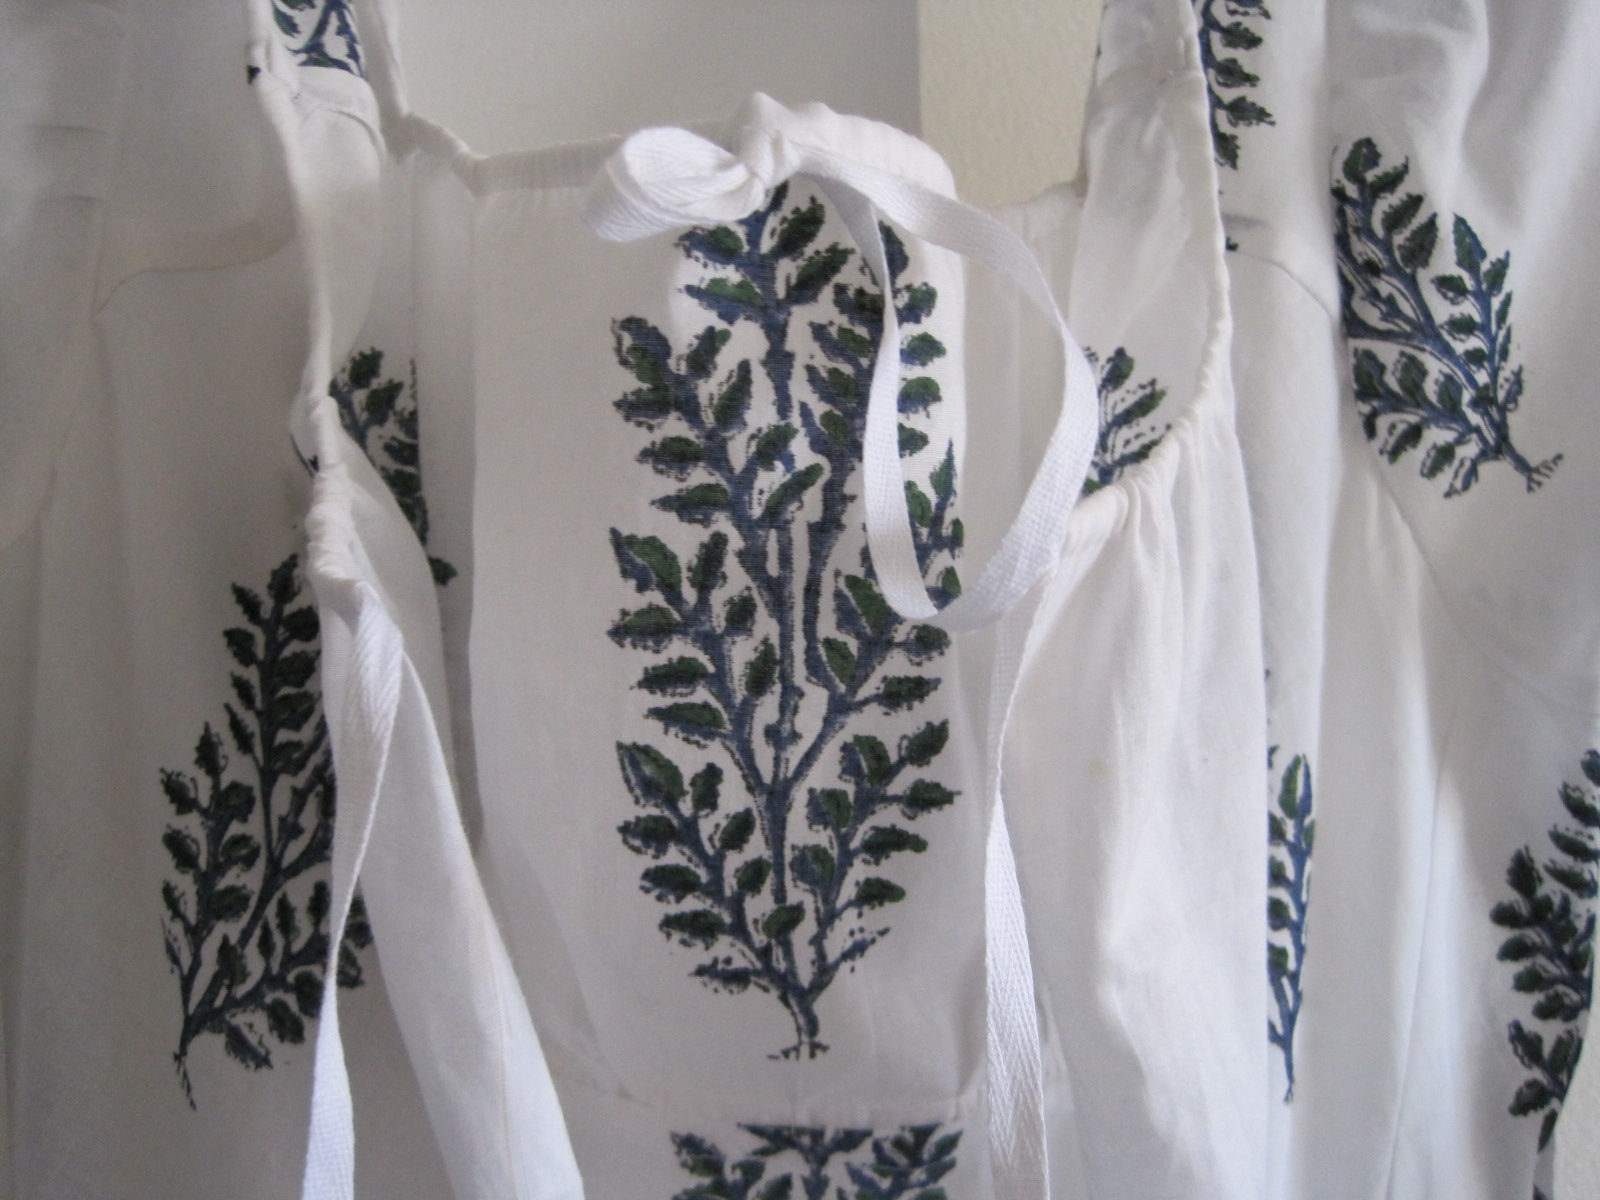
What you saw in the first picture (behind the reticule) was a first glimpse of my latest Regency gown! This new block printed cotton gown, from 1815, is “The Tree Gown” in my head because the motif reminds me of trees (or shrubs perhaps, but I like the sound of The Tree Gown better than The Shrub Gown). This gown fulfills the MpRSW Goal #3: Day Wear! It’s due today, so I’m right on time. The gown is machine sewn on all of the non visible seams, and hand finished on the visible sections.
Center front. This gown has a mostly squared neckline with a drawstring across the bust, like my 1812 white striped gown.Unlike previous Regency gowns in my possession, this gown has long sleeves! (This is a back view.)There are two 1 1/2″ tucks around the hem of this gown, for decoration.The gown closes at center back with two hooks on the waistband (see the thread loops?) and a tie at the top of the back.The tie at the top of center back is a drawstring that continues to the shoulder seam, allowing the back to gather slightly. The bow in the middle is the drawstring for center front.The fullness at center back is gathered. This gown has french seams and the waistband seam allowance is just whip stitched together to keep it tidy.The inside of the neck opening. The area over the shoulder is reinforced with an extra bit of fabric cut on the straight of grain to keep it from stretching.
This gown below is my main inspiration for this dress: the tucks at the hem, the sleeves, the pattern for the skirt, the gathers on the bodice, the mostly squared neck in front, the tie at the back of the neck… I omitted the extra sleeve puff (partly because I didn’t have enough fabric, partly because I wanted this dress to be more streamlined) and the tie at the back waistband. I love the super zoom on the Met’s website because you can see so many great details!
For example, I could see where the center front skirt panel ended and the angle of that seam (as well as the angle of the back panel). Using that information, I determined that my front panel should be a rectangle (it’s 21″ across in my dress given my proportions) and that the back panels should be cut straight at center back, but with an angle on the side seams that goes up toward center back making an elongated trapezoid. There is a seam at center back, so the hem of each back piece is 45″, but each top narrows to 31″. I’m curious to see how that style of skirt fits me. I certainly like the look of the skirt on the dress in the museum!
1810-1815 dress at the Metropolitan Museum of Art.
This gown also fills the HSF #9 Challenge: Flora and Fauna, so you’ll be seeing another post about it with some more details (and pictures of it on a body!) coming up in a few weeks (after the Regency Weekend in April, you know!).
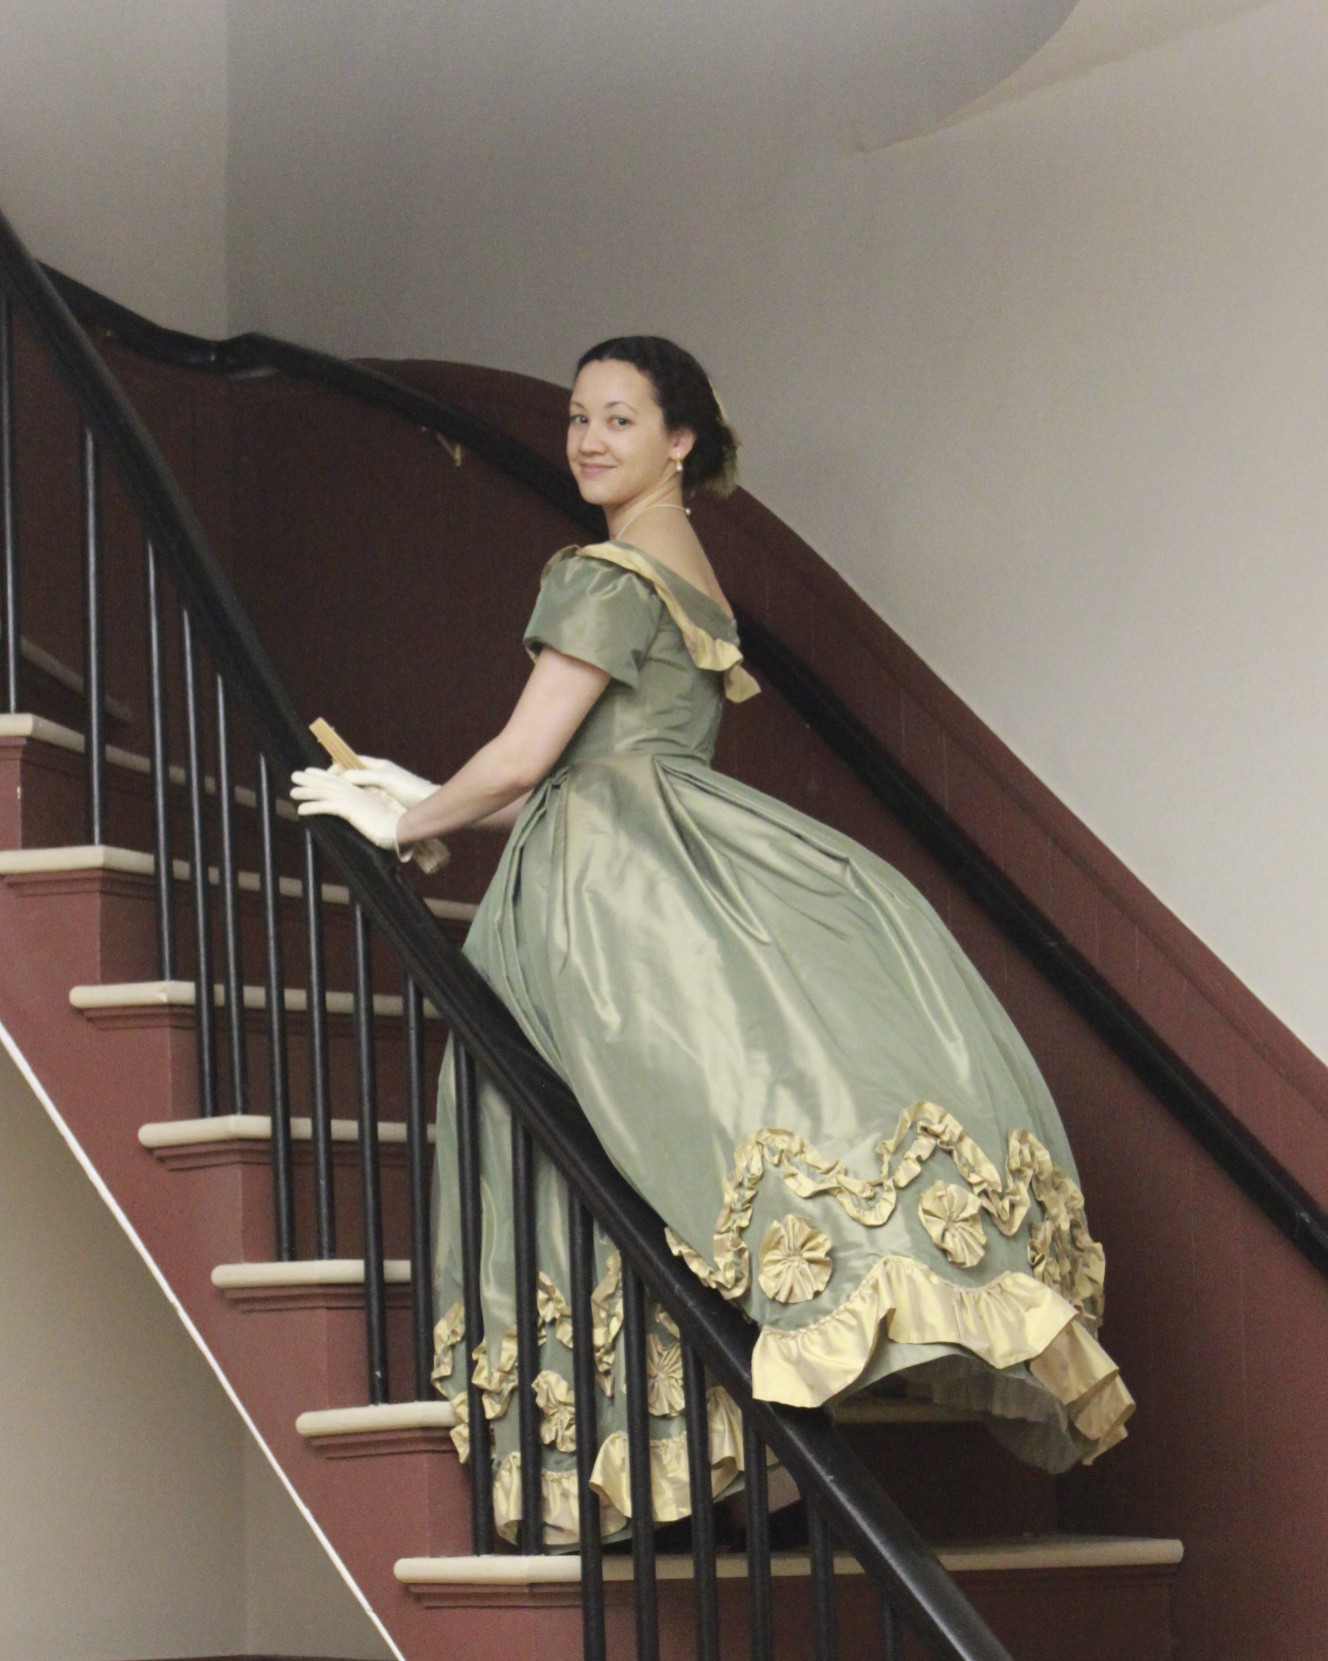
Last post, I shared the three series of photos of Evie with you. Now it’s time to expand the focus of the camera to include other lovely people from that night!
First: Series Of A Friend
First layer (aka modern).Second layer. Isn’t this entry area gorgeous (even with the modern fire extinguisher!)?Third layer. All dressed up.
Second: One More Quick Series
First layer.Second layer. I just wish that table in the background wasn’t there!
Finally: A Few More Non-Series Photos
First time in hoops. She had so much fun!A chat on the stairs.New dress!And an artsy shot to end this series.
I have one last grouping of photos to share from this event: photos of the ball itself! They’ll be coming soon and they’re lovely/super cute!
Remember in my last post I promised pictures of the finished ball gown now known as Evie? The time has come! I had a hard time narrowing down the options (because of course I wanted to share ALL of the good pictures), but I’ve tried to limit myself to only the best of the best. This post will focus on the completion of my dress, Evie, but there are two more posts coming soon that will share some of the other photo series as well as pictures of the ball itself!
These photos are the idea of my friend with the camera. She wanted to take series of pictures of us in our modern clothes, 1860s undies, and then dressed in our 1860s ball gowns: all in the same location and the same pose. It’s a neat idea and the results are great, not only because it provided lots of pictures (yay!) some of which are of things I don’t have pictures of (like my 1860s undies), but also because you can see the time passing through the evening by looking at the light in the photos. They start in the afternoon, proceed to early evening, then finish at night. Not all the series are a complete set, but all around, it’s pretty cool. Which series do you like best?
Series 1: To The Right
To The Right: first layerTo The Right, second layerTo The Right, third layer
Series 2: What A Change
What A Change, first layerWhat A Change, second layerWhat A Change, third layer
Series 3: On The Stairs
On The Stairs, first layerOn The Stairs, second layerOn The Stairs, third layer
I’ve never been able to get pictures of my 1860s undies before, so this is exciting! I’ve got a chemise, corset, drawers, cage crinoline, and petticoat (in addition to stockings, shoes, jewelry, hair wreath, gloves, fan, and gown). The crinoline is entirely hand sewn, except for the waistband. The measurements of the hoops are taken from an extant crinoline, and I believe the circumference of the bottom hoop is about 120″. The crinoline closes with a hook on the waistband. The other pieces are machine sewn and trimmed with lace, pin tucks, and ribbon. The chemise slips over the head and the drawers close at the back with a button and loop arrangement. (And that poor petticoat does need a press… but I threw it in the washer and dryer a while ago and since it doesn’t usually get seen I haven’t taken the time to press it.) The petticoat ties around the waist. As you can see, the crinoline stops mid-calf, so the intense petticoat ruffle really helps keep the shape for the skirt below that point, in addition to keeping my hoops from showing as horizontal lines through the skirt of the gown.
Want to be further amused? Look at the apparently changeable feathers on my hair wreath. Sometimes they’re brownish/gold and sometimes vivid green! They really do seem to change color depending on the light!
I don’t think I’ve mentioned it yet, but the basic pattern for this gown is essentially taken from Janet Arnold’s Patterns of Fashion 2. The trim however, is based on two things. Thing 1: the skirt trim is from the fashion plate I shared with you in the first post of this project journal. Thing 2 : the bodice trim is based on this gown, below. I went through a lot of phases trying to decide how to trim the bodice, since I didn’t really like the fashion plate bodice trim. In the end, I decided on this look: a graduated ruffle (just one, in my case, to match the one ruffle on the skirt) that gets longer toward center back, a triple pleated bertha that has a swoop towards center front rather than being straight, and a big trim thing right at the center (in my case, a rosette to match the skirt, rather than a bow). It’s pretty hard to see the front of my dress in these pictures I’ve shared so far, but there are some coming up in the next two posts which will show off the front of the gown better, so stay tuned for that!
A costume from the movie Il Gattopardo (1962, costume design by Piero Tosi). It’s lovely, despite the fact that it is not an extant gown from the 1860s.
While getting dressed we might have been making silly faces for the camera while the owner walked away…
Haha! Moose making companion! In case you don’t know, this is my favorite silly face to make. Don’t believe me? Look here and here!
It’s been a little while since I posted about my new 1864 ball gown. Over a month, I think, because in February I posted about the plan/inspiration and then about the progress I made on the trim. I was steadily working on it during the month of March and had it ready to go for the Returning Heroes Ball a week ago. That’s not to say there wasn’t a little bit of last minute sewing the afternoon of the ball. My last minute sewing was gloves and hair piece, though, not dress, so that’s an accomplishment! And I wasn’t alone in my afternoon sewing… friends were sewing with me! There are lots of upcoming pictures but for now I’m going to post about the insides of the skirt and bodice. It’s a sneak peak, since you have to wait for the others pictures to see the full ensemble!
Completed skirt trim! I was SO ready to be done with it by the time I was sewing down the green zig zag (the last step of the skirt trim).
My other 1860s dresses have names: Belle is my dark blue gown and Annabelle is my white gown. I haven’t really been thinking of this dress by name until recently. Upon consideration, I’ve decided that she’s named Evelyn, or perhaps Evie for short. Why that name? I just like it, it’s old fashioned, and it has Y, and I have a fondness for the less commonly used letters of the alphabet. So here she is: Evie.
Skirt waistband of self fabric, to which the box pleated skirt is sewn. There is a cleverly hidden opening on the fold of one of the pleats.Magic! The pleats are deep enough that you can’t see the opening when the skirt is hooked closed, even with my hoops underneath.
The raw top edges of the skirt are just turned to the inside and left alone. The silk skirt is flat lined with muslin, which helps give it some body, preventing creasing, and some stability at the hem for all that trim. There are six double box pleats evenly spaced around the skirt, as you can see. I haven’t tried this evenly distributed method on an 1860s skirt before (my previous dresses have knife pleated fronts and cartridge pleated backs, which makes them much heavier in the back than the front… I suppose I could divide the skirt in half and do that method, but given how those skirts are weighted, I’m sure there’s more fabric in back than in front). All that to say that I love how evenly weighted this skirt is! It means I don’t need a giant bum pad to keep my hoops level with the floor. (Come to think of it, I suppose I could remount the skirts of my other dresses onto new waistbands and redistribute the fabric… hm… I’ll have to think about that!)
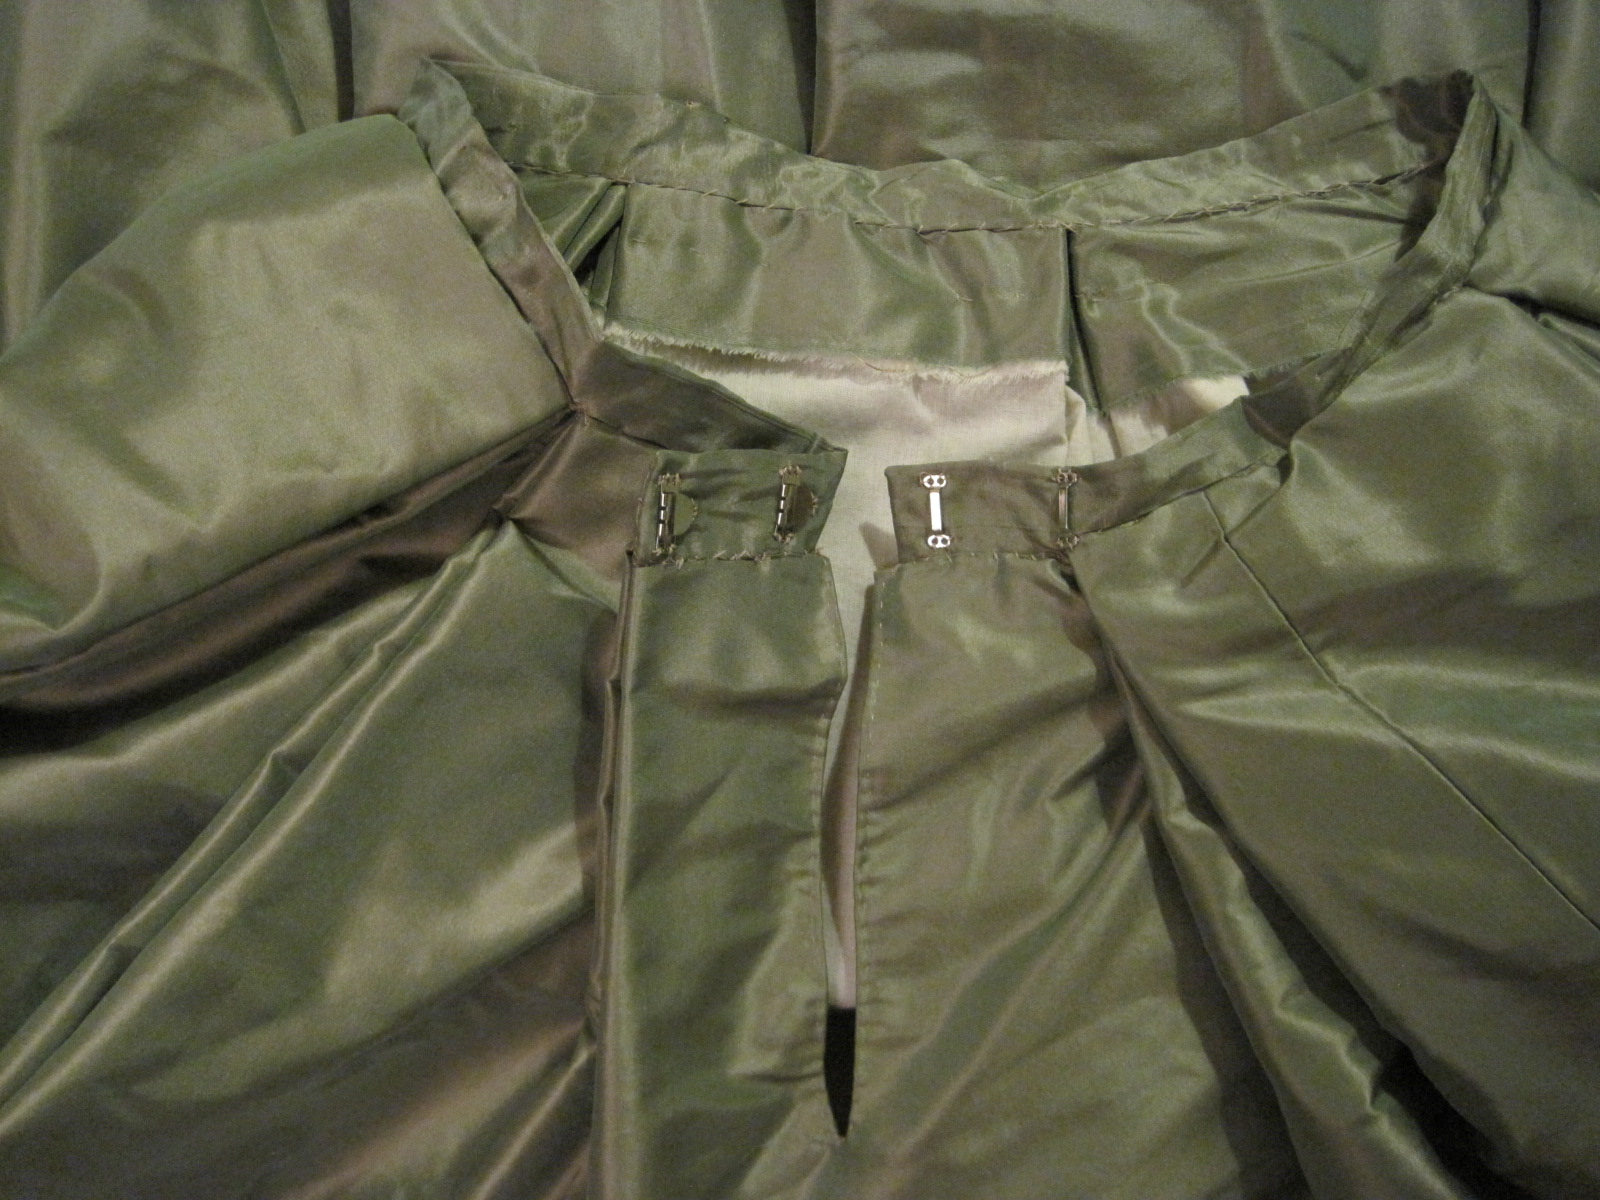
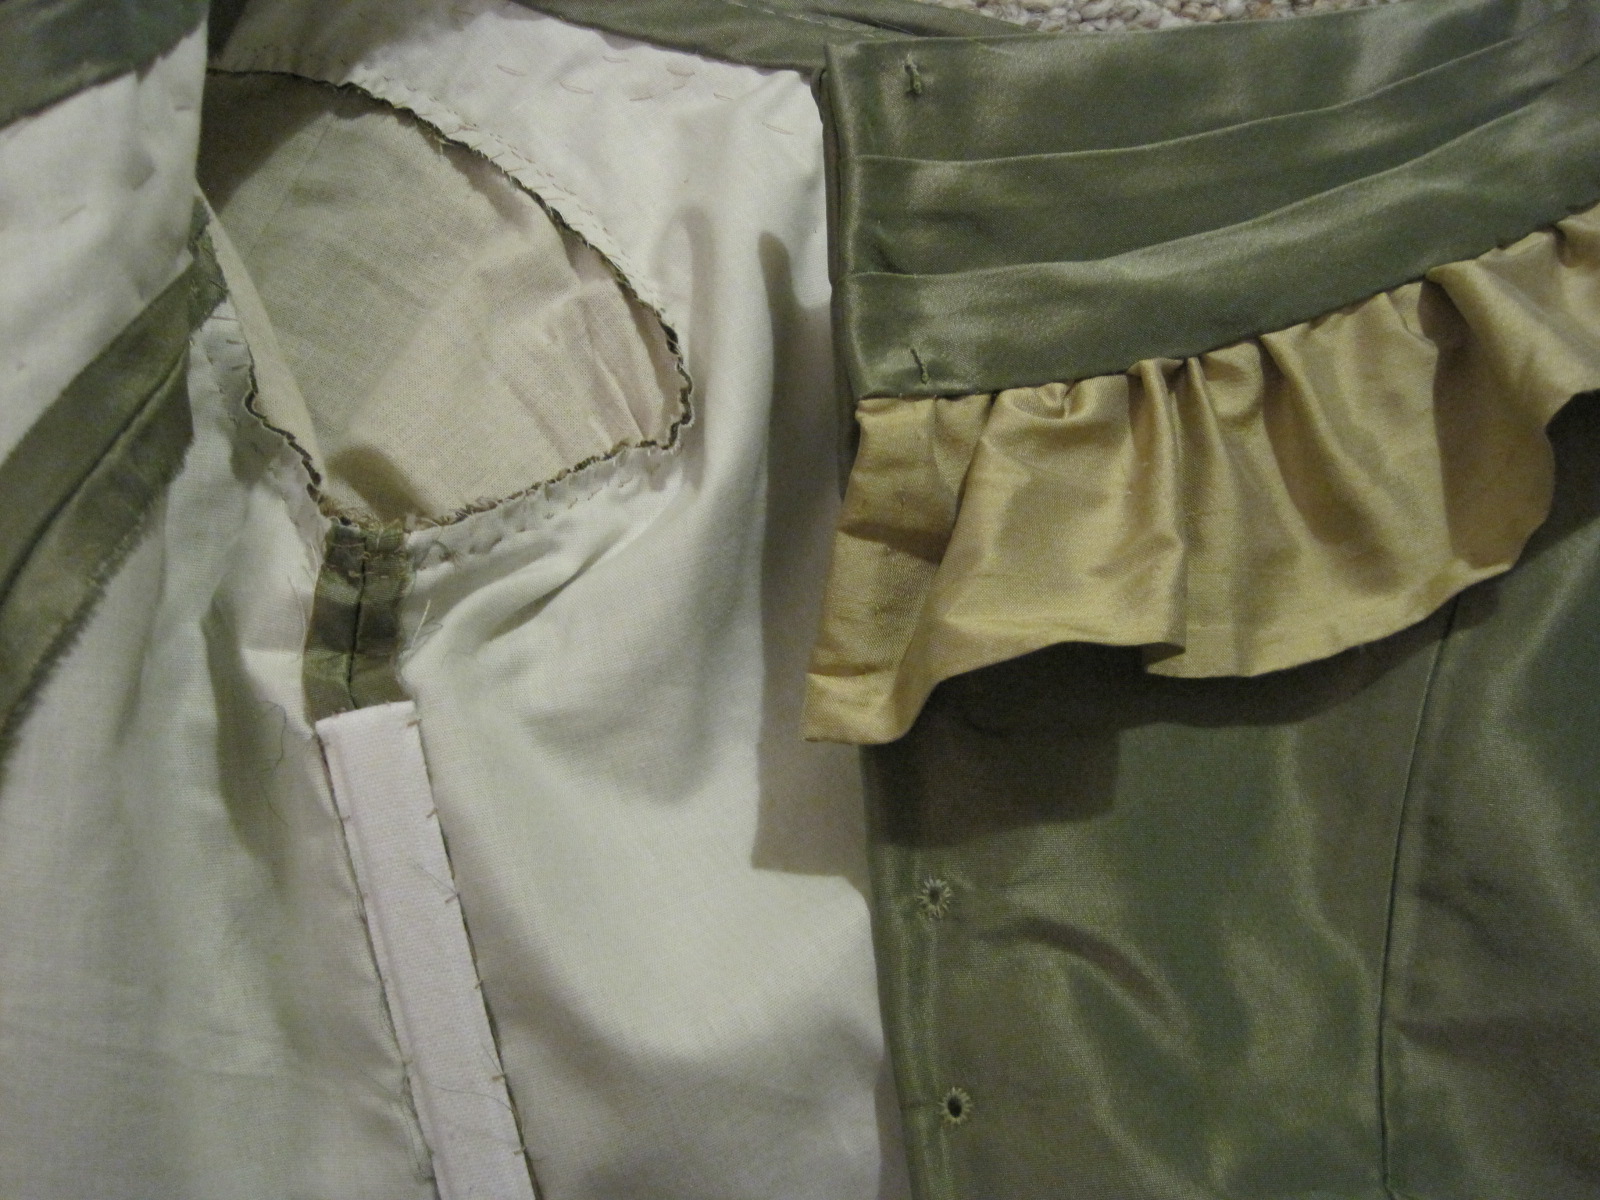
Inside of the bodice at center front. The bodice is flat lined in ivory polished cotton. The edges are finished with cording (even the top edge, which you can’t see on the outside because it is hidden by the bertha, grrr, but oh well!).Inside of the left front and outside of the right back.
The sleeve is lined in muslin. I originally intended that it wouldn’t be seen, but then changed the sleeve design so now the muslin is visible on the inside of the bodice. It doesn’t matter, though, but I do like it when everything matches. The seam allowances of the bodice are just left unfinished (I might whip stitch over the edges some day, but that’s unlikely, since I’ll probably be sewing something else!). The armhole seam allowances are whip stitched together to keep them from fraying and to keep all those layers together. The armholes also have cording in them. The bodice closes at center back with lacing. The eyelets, like everything else, are hand sewn. The bertha also closes at center back (unusual, since a lot of them close on the shoulder, but I didn’t want my bertha pleating to be able to move or show the top of the ruffle). You can see the stitching holding the bertha in place in the first bodice picture, because those stitches go right through to the inside of the bodice.
I stopped keeping track of how many yards of hand sewing went into this dress… but now I’m curious again. So when I finished stitching the gathering stitches I was at 86 1/2 yds just for the trim. I’d estimate about another 22 yds of stitching to attach the trim and about 12 yds of stitching to construct the skirt before attaching it to the waistband. Waistband attachment was probably about 7 yds (it’s quite sturdy and all those pleats are well sewn!). That puts the skirt at a total of about 127 1/2 yds of hand sewing. Then there’s the bodice, which is maybe 12 yds of hand sewing total? That’s a harder one to estimate. That brings Evie to a total of approximately 140 yds of stitching.
I’m proud to say that every single stitch is hand sewn. Next time, though, I’m planning on machine stitching the inside seams. It’s super satisfying to have an entirely hand sewn dress, but it took about two months, and that could have been much sped up with the use of a sewing machine, which means I could have made more things! Who knows, I might change my mind, but right now even I am tired of hand sewing that dress.