More 20s! (Prohibition Ball 2013)

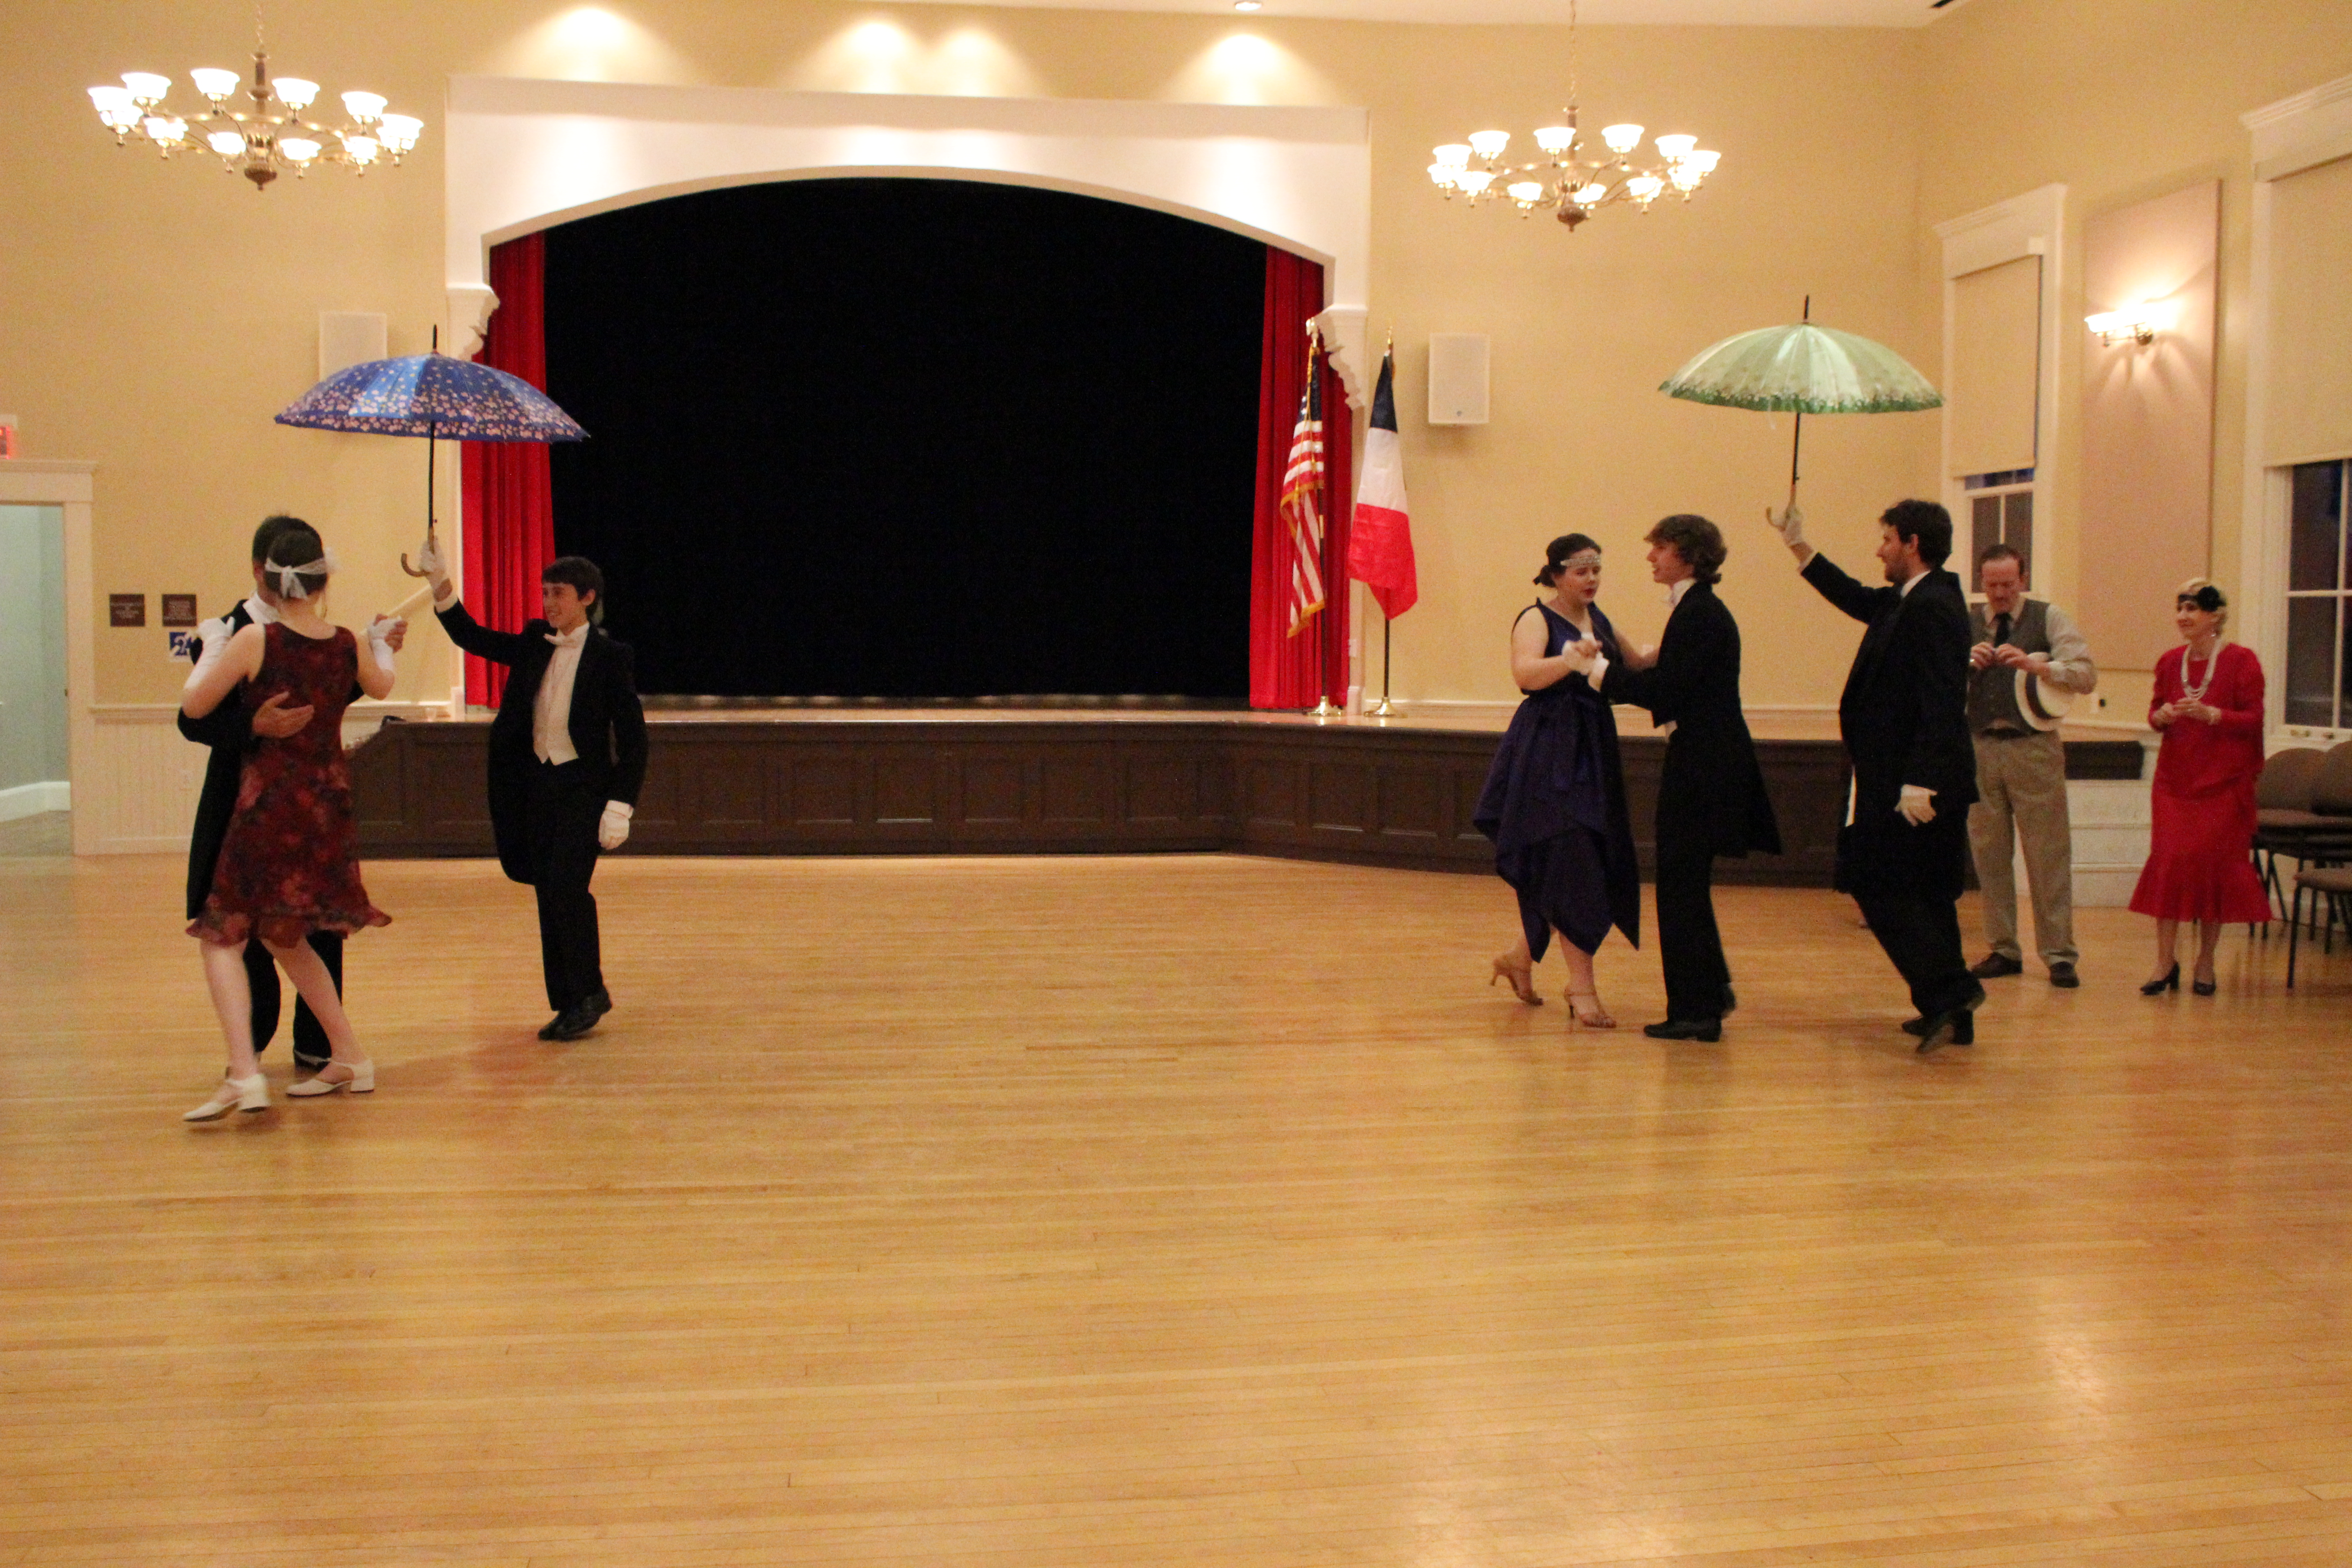
Only one week after I attended the 1920s Lawn Party, I was immersed in the 1920s again, this time at a Prohibition Ball in Chelmsford, MA. I would guess the attendance at maybe 40-50 people total, though I’m not sure we were ever all in the ballroom at the same time. It was a nice, social group of people and I saw everyone meeting and greeting new people, dancing with a variety of people, and generally being social and having a good time with everyone around. It was also nice to see some of the new people we had met at the 1920s Lawn Party at the ball. The venue, the Chelmsford Center for the Arts, was a lovely place I’d never seen before.

IMG_4196
I wore my 1925 beaded dress and accessorized with a long string of pearls and jeweled/feather hair decoration.

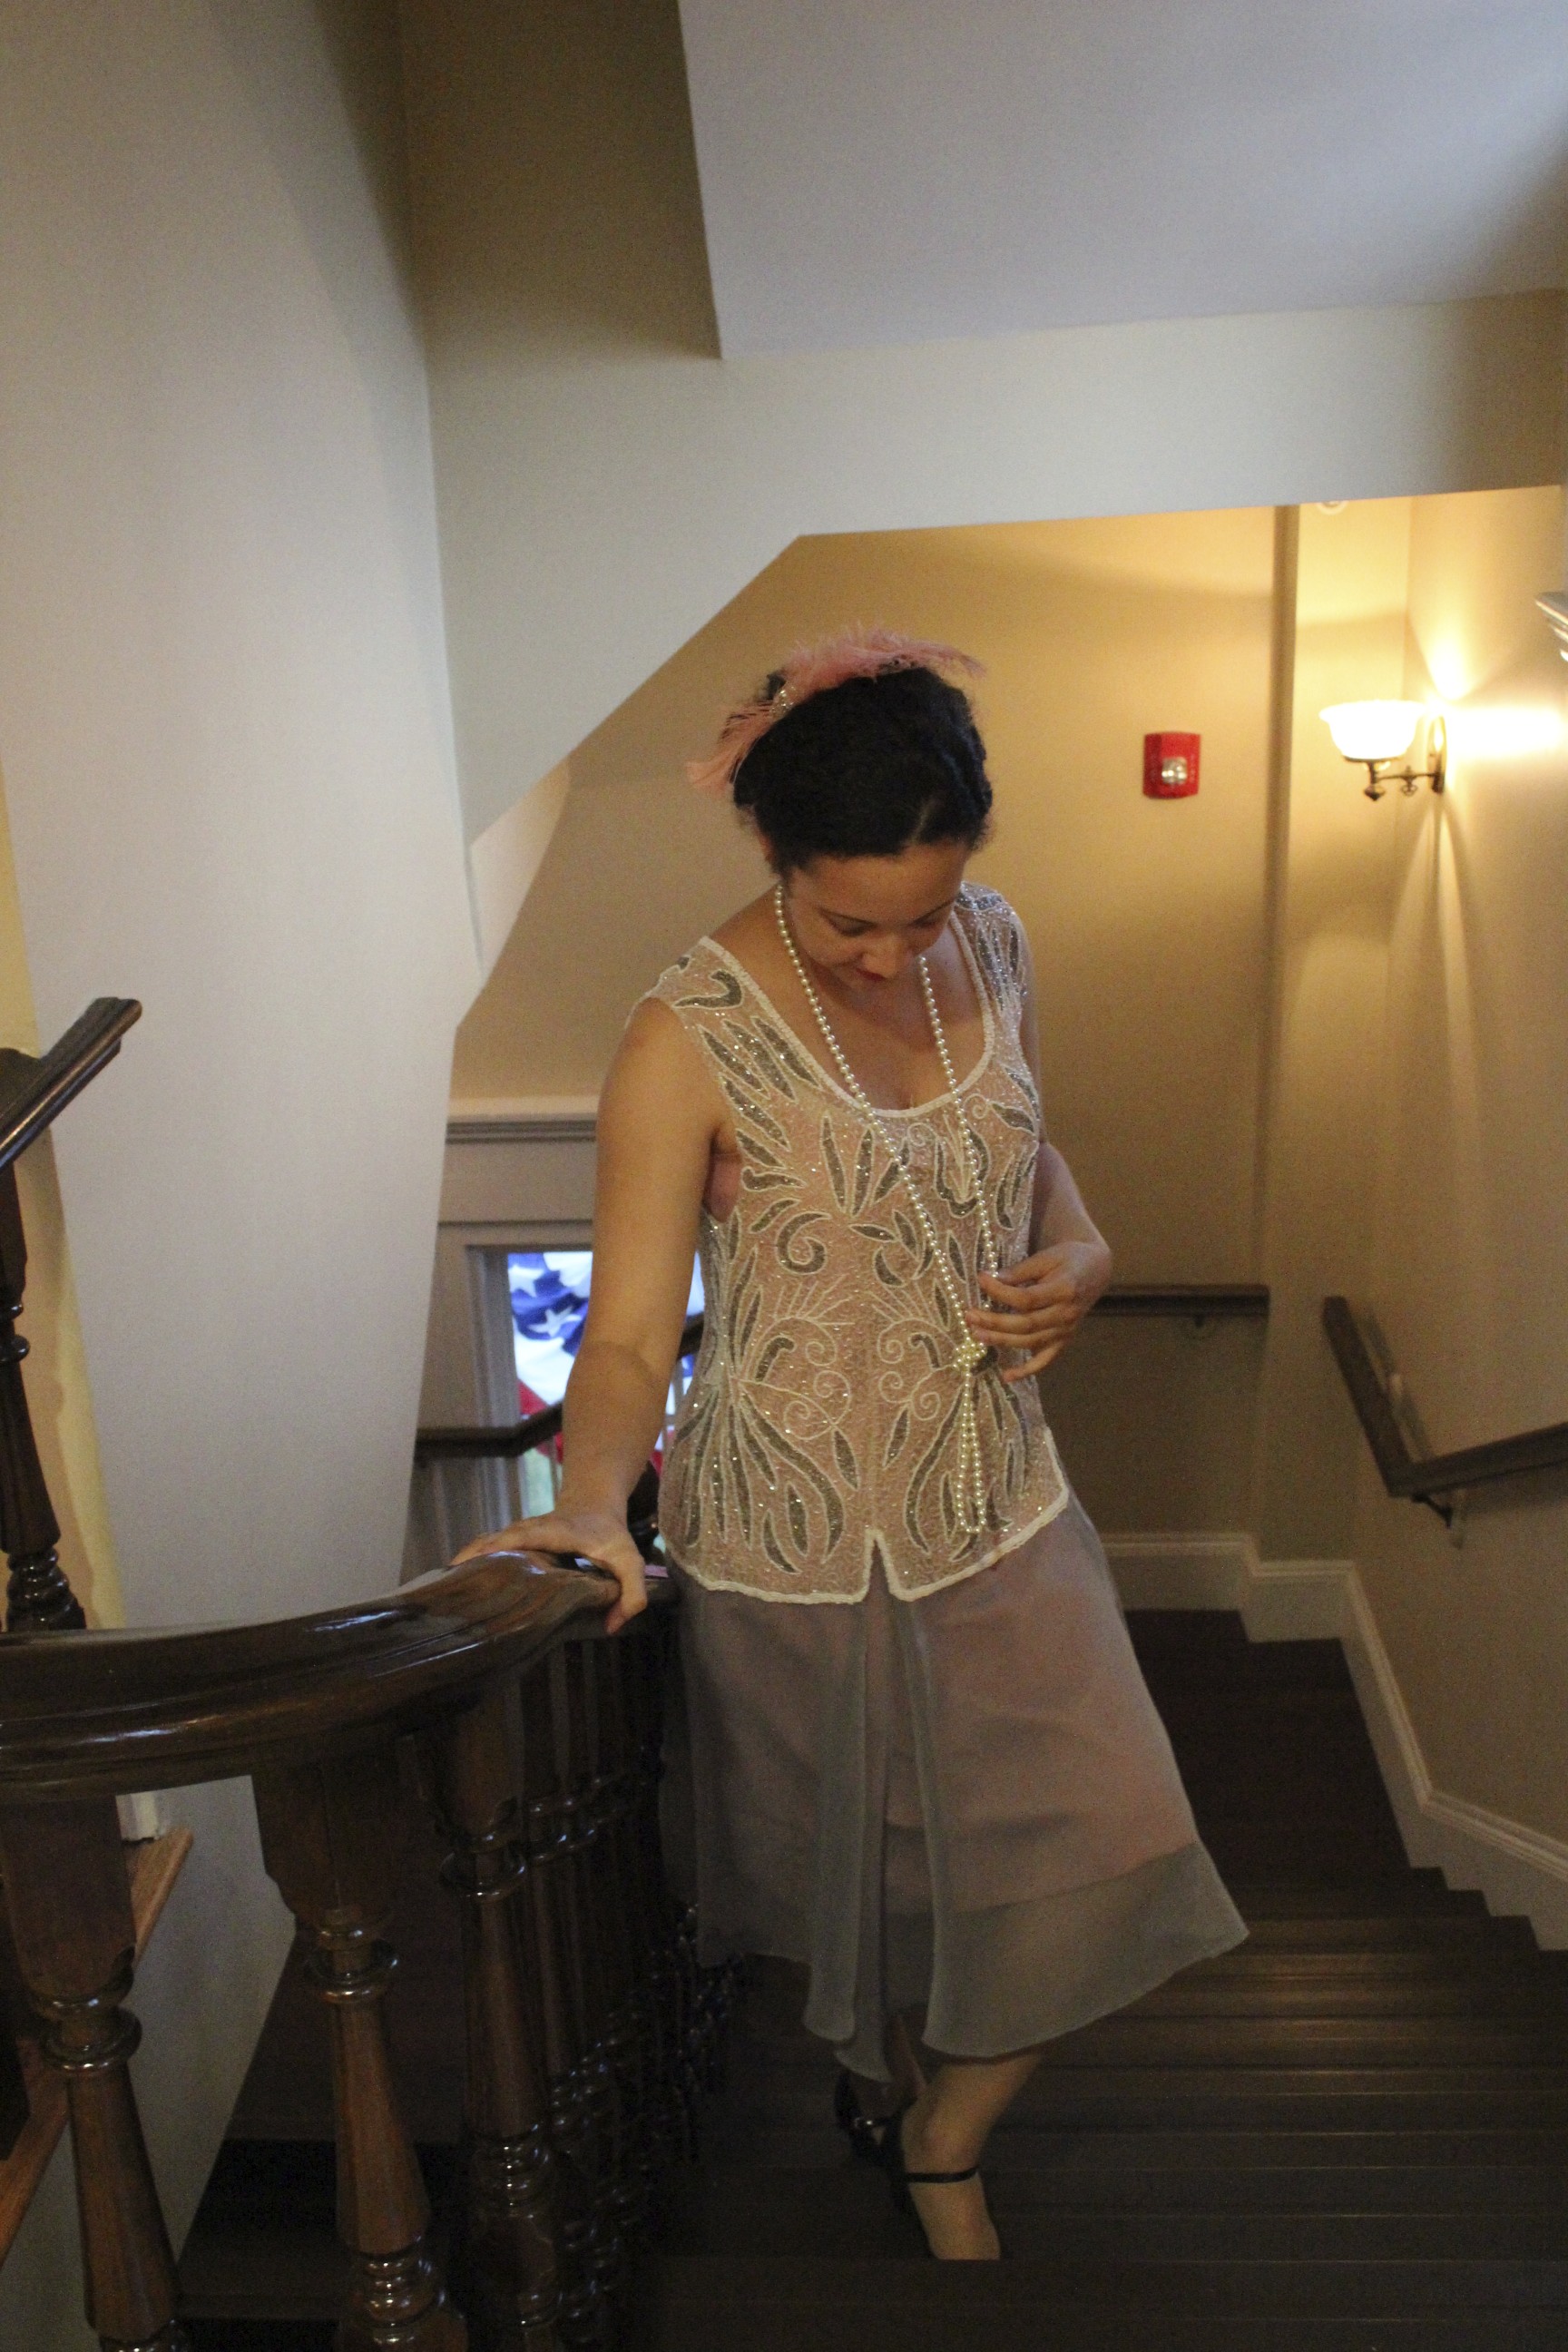
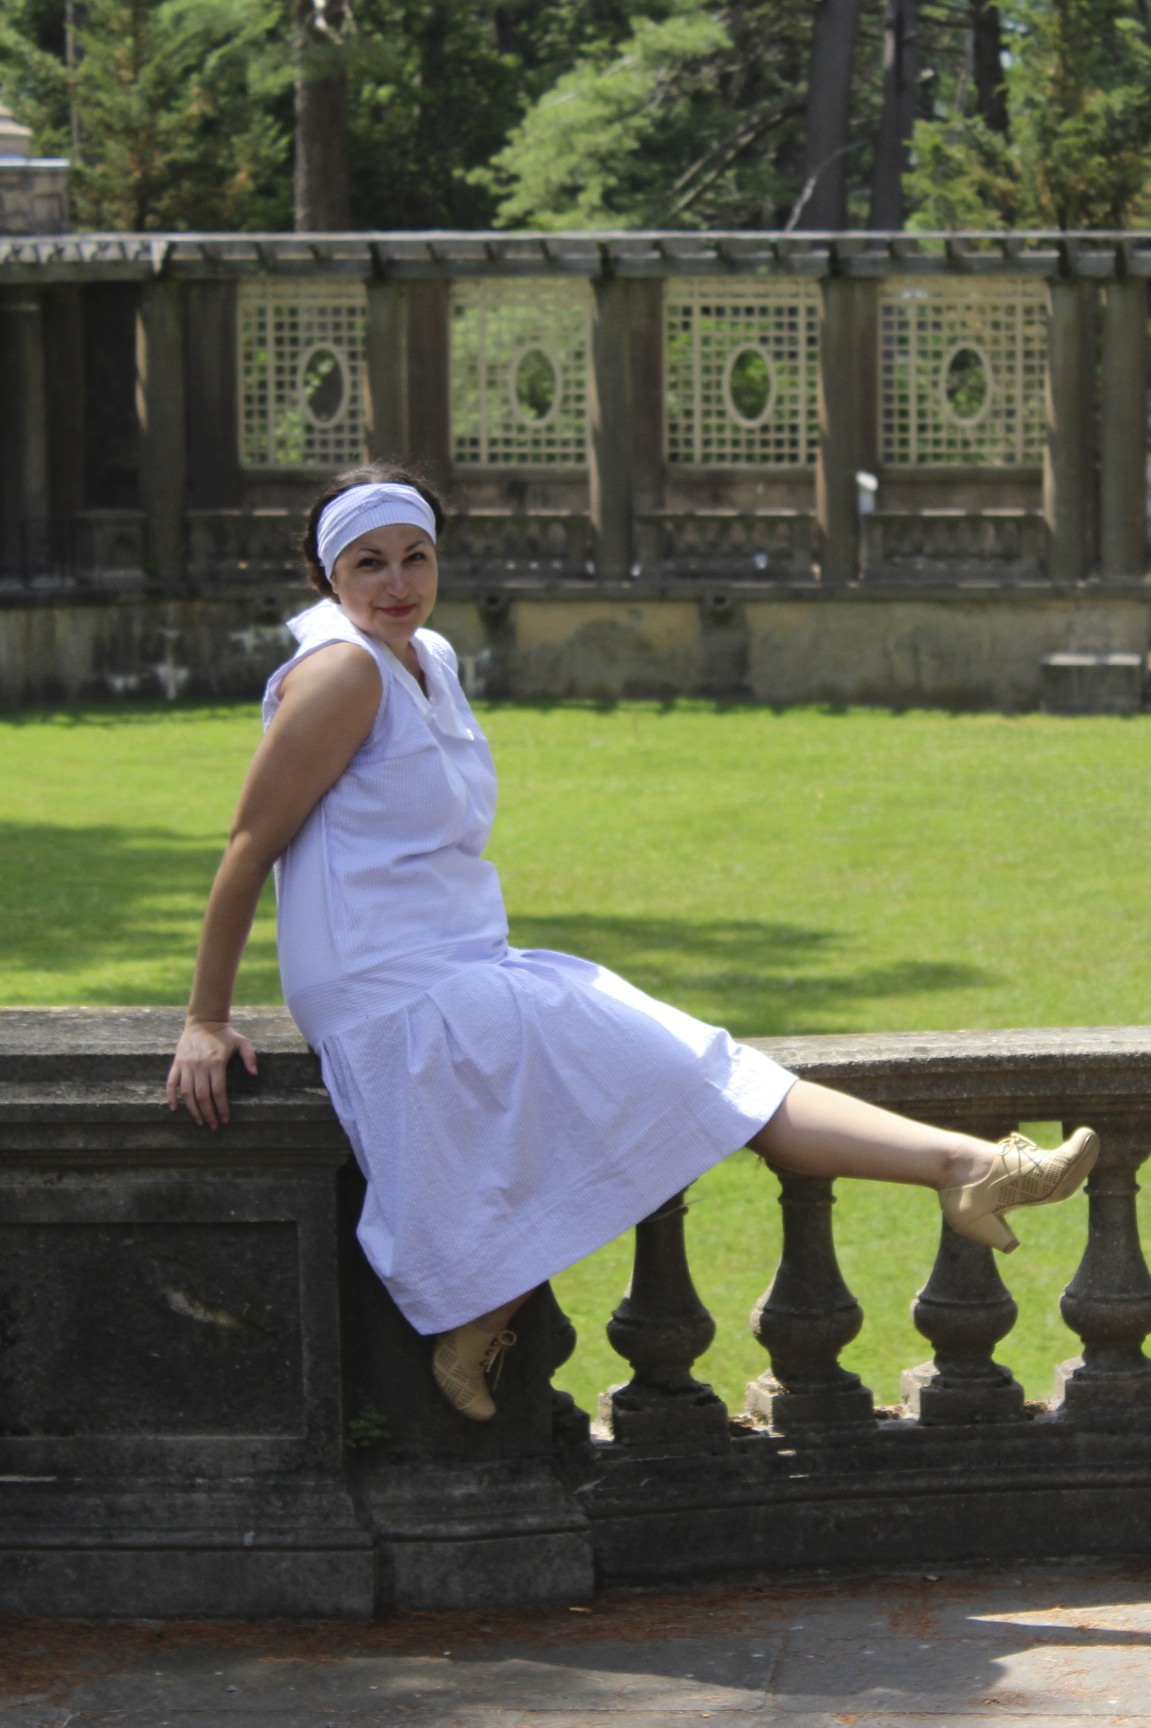
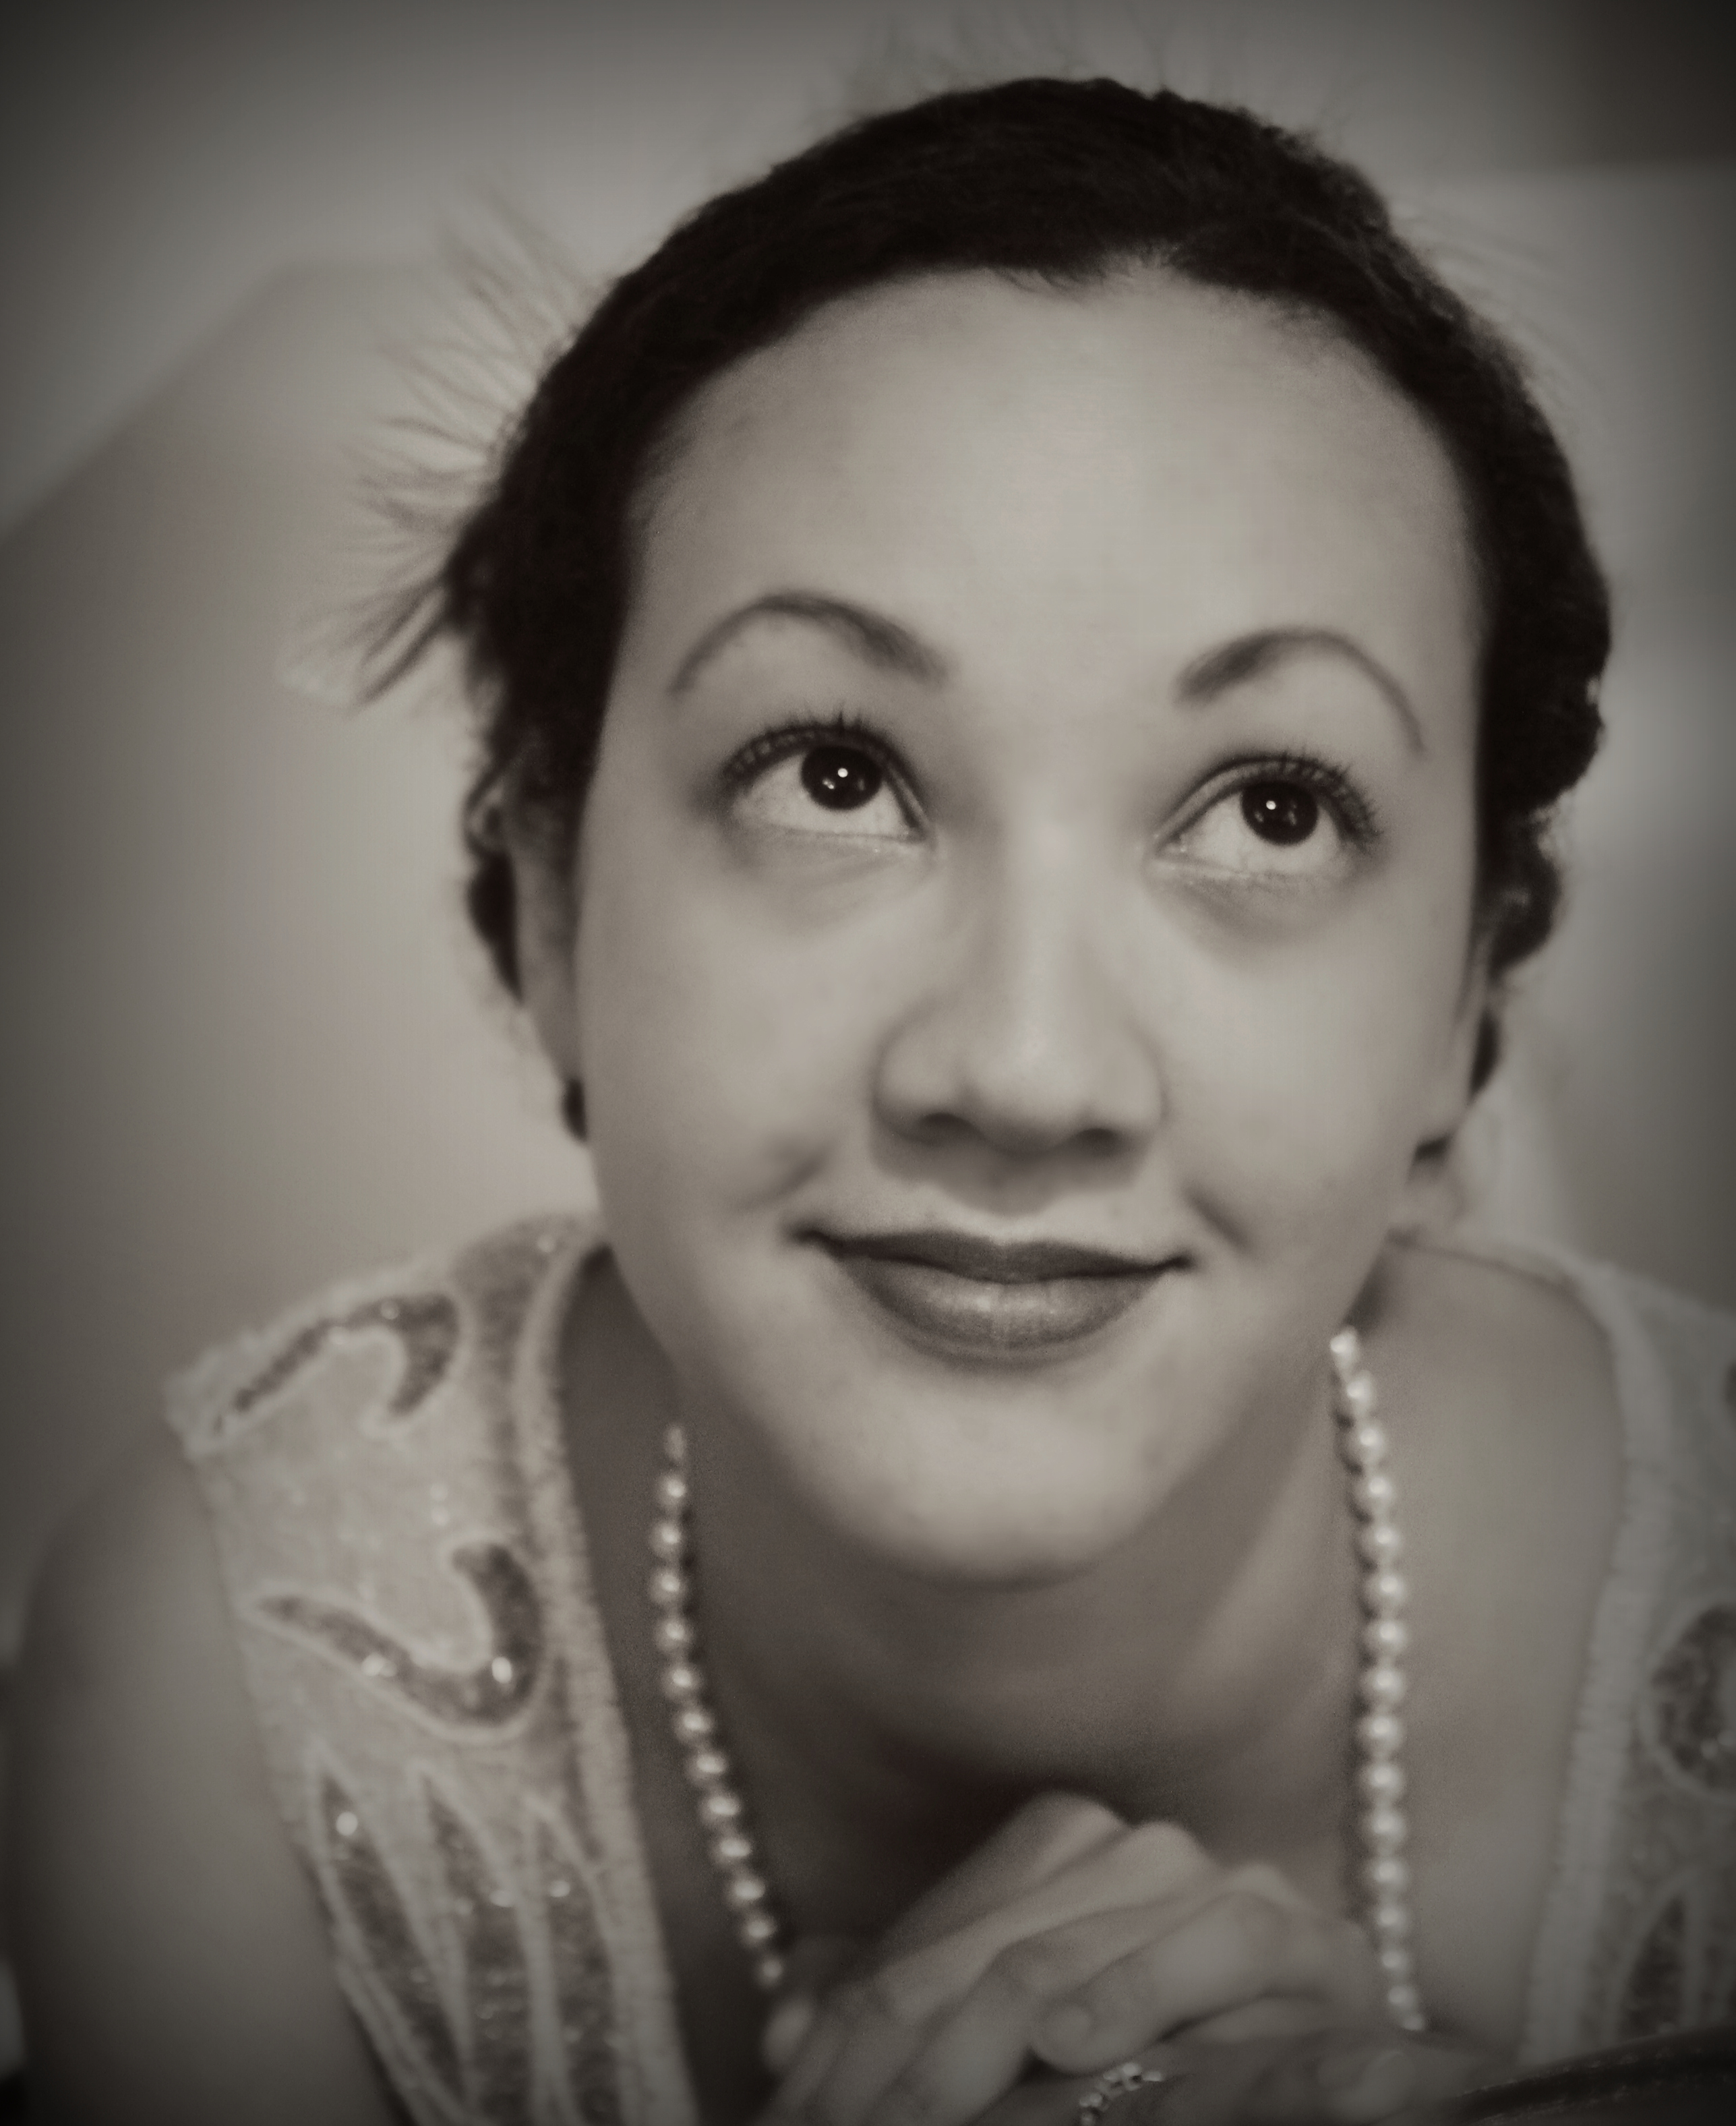
I tried a new style with my hair! I did my now usual 20s thing, where I gel the front sections and use a fine tooth comb to create waves in front while my hair is wet. Then I secure it to my head and let it dry. Usually, I’ve taken the back and put it in a tight bun at the base of my head (like when I’ve worn my not-quite-sailor dress). The idea in doing that is that it makes my hair close to my head and  thus, maybe, more bob-like (I know, I’m kidding myself, it does not actually look like a bob!). This time however, I did something totally different with the back. It seems counter-intuitive, so be prepared… I took my curly hair, and curled it with a curling iron. Yup. Actually, the curling iron eliminates all my usual frizz (that alone is amazing!), but it also creates nice, even, wide curls. I was in a super hurry to get my hair done, so I just did some rather messy curling iron curls then pinned them up in a mass at the back and added my jeweled/feather clip. I love the defined curly mass (different than my normal frizzy, curly mass)! I’m excited to try out curling ironed styles for other events, too!

IMG_4164-001
Defined curls coiffure surmounted by feathers and jewels.

The other cool thing about the feather/jeweled clip is that from the front I have a small halo of feathers showing. I like that it is visible from the front and packs a big punch in the back! Success!

IMG_4199-001
Glamour shot! I often make really silly 20s faces, but I think this one works! I love the defined eyelashes, the red lips, the feathers, the pearls…
IMG_4202 close-001
More glamour! I’d call this a more sultry shot than mine, which is more playful. It’s got those same fun elements, though, eyelashes, lips, sequins, jewels…

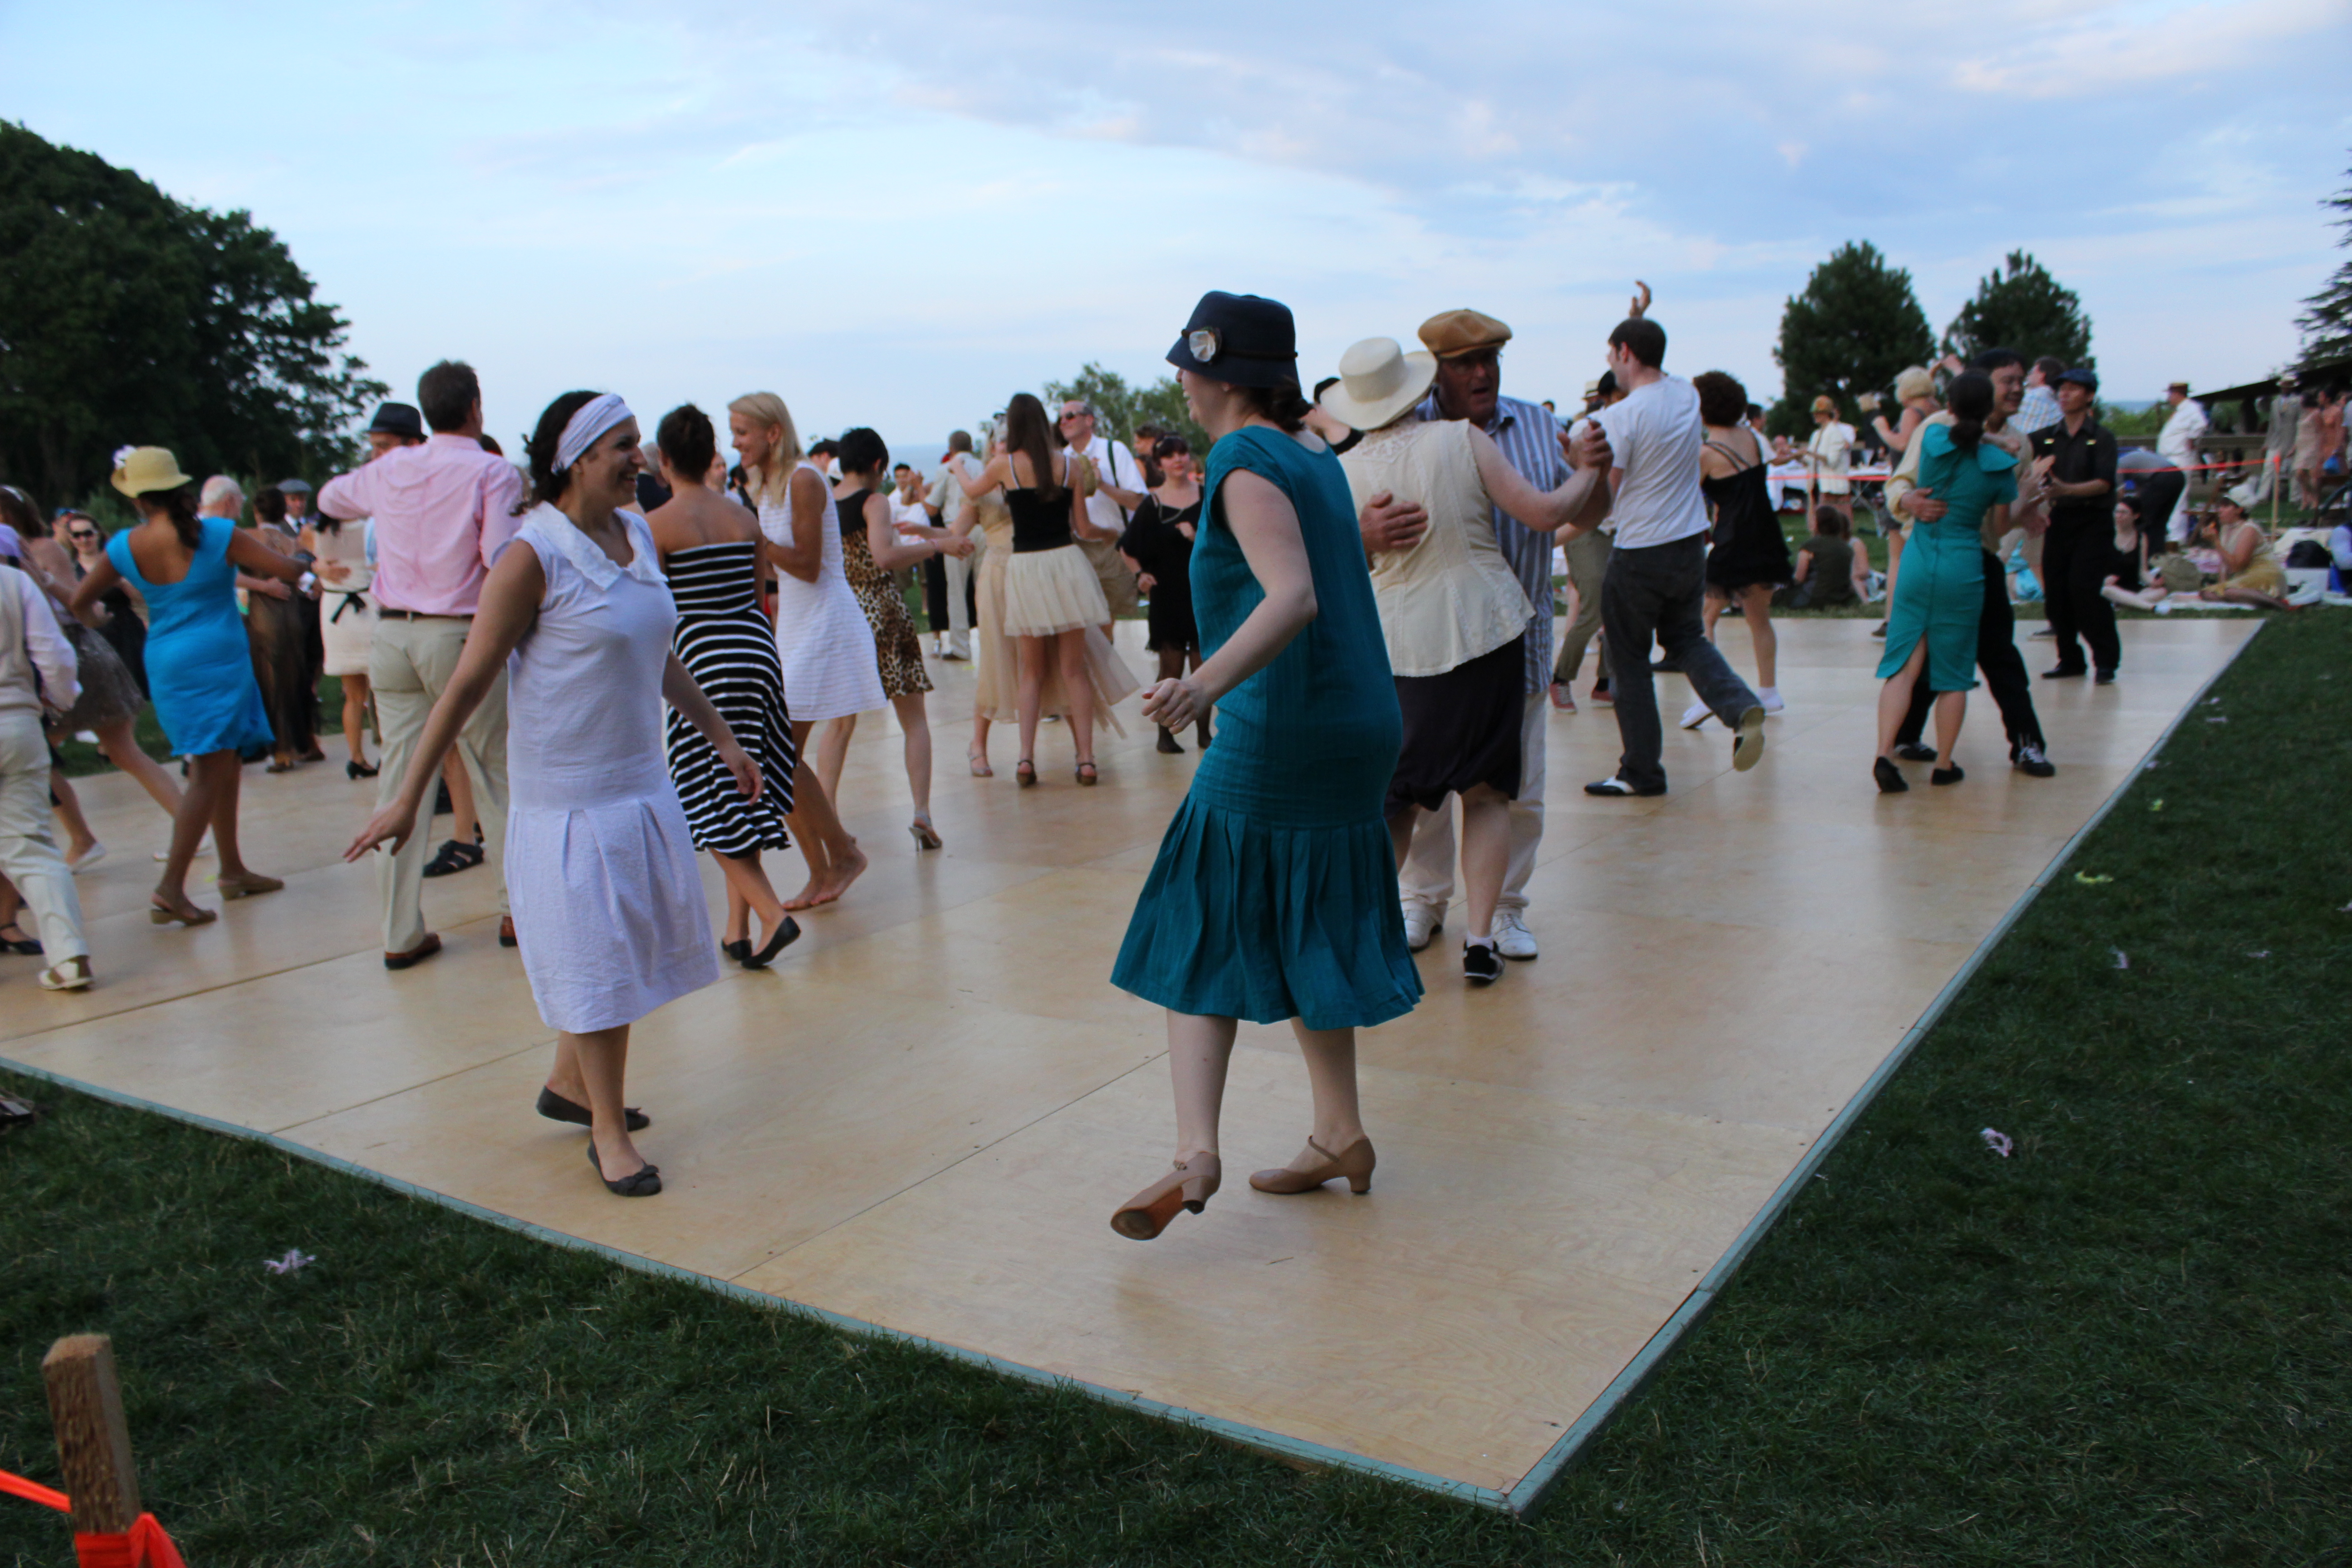
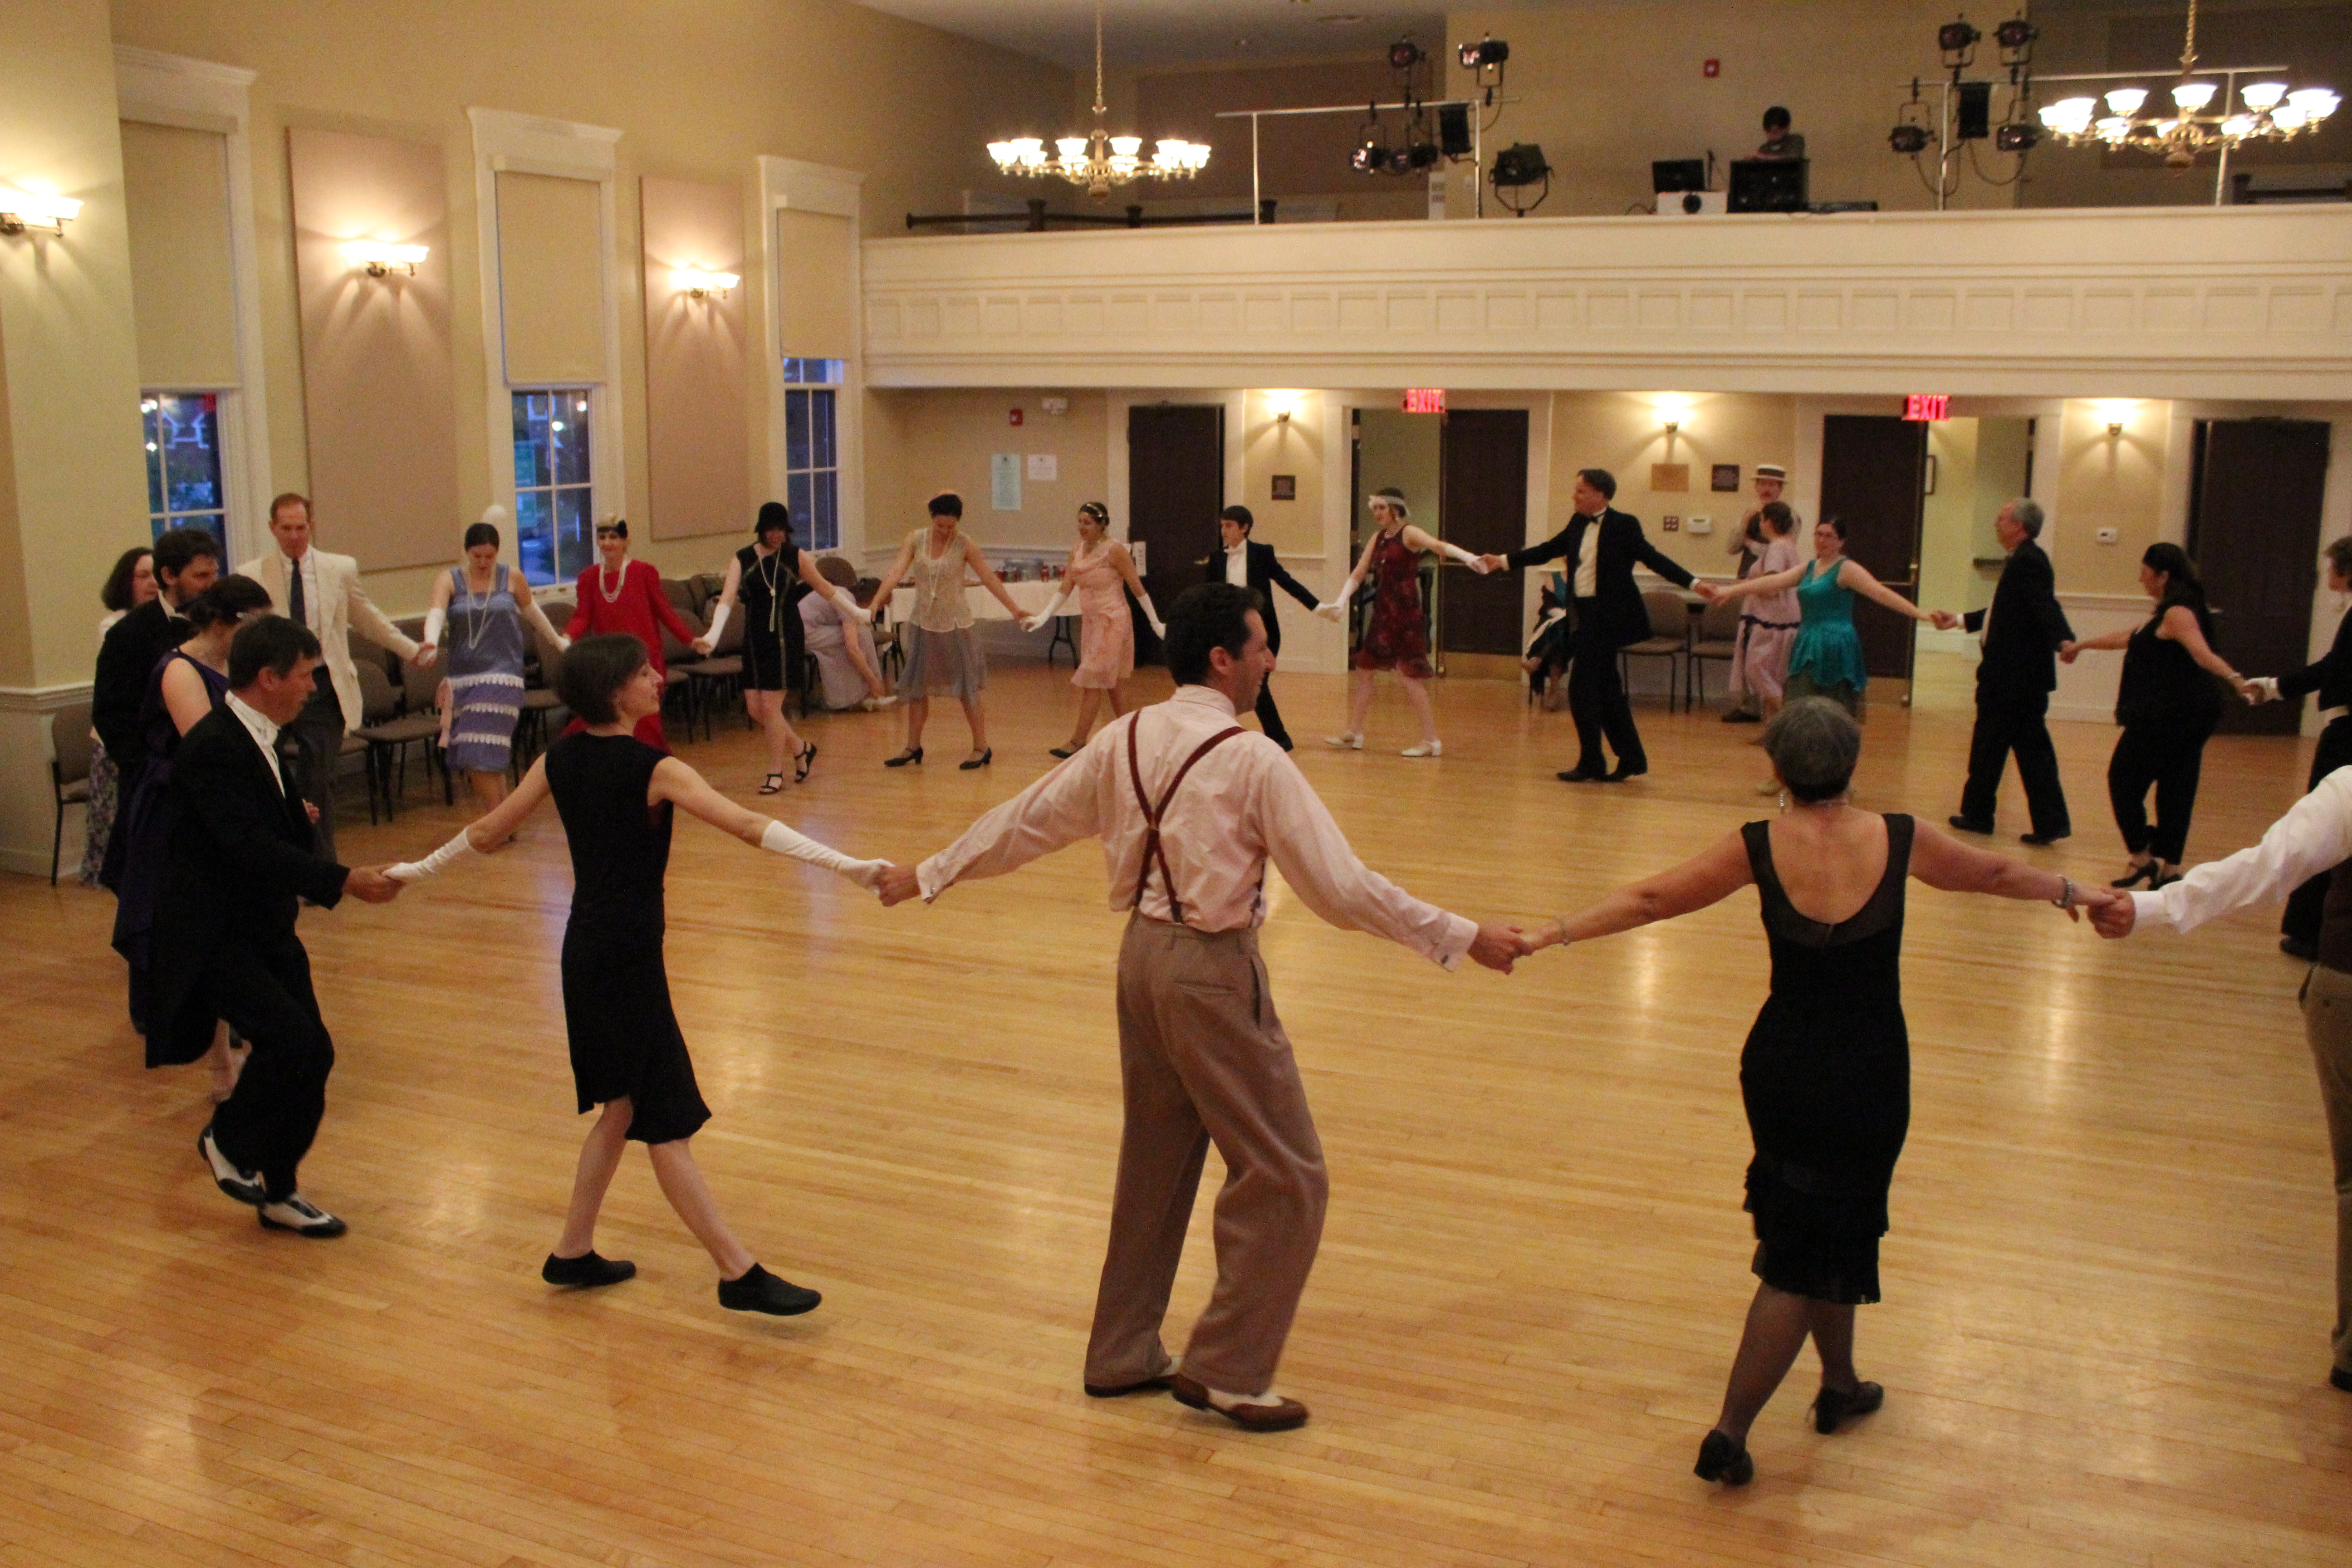
I did mention that this was all for a ball, right? And the ball did include dancing! In addition to normal couple dancing, and large group Charelstons (you can dance the Charleston in a circle like you used to dance in high school!), there were also a lot of mixer-type dances, where participants changed partners, or danced with unknown partners…

IMG_4178
Attendees chatting with each other and looking great.
IMG_4150
Dancing… A foxtrot or one step, perhaps?
IMG_4204
Dancing!
IMG_4207
One of the mixers with a name like “Paul Jones” or something similar.
IMG_4276
The dancing couples trying to escape the gentlemen with umbrellas.
IMG_4320
Another mixer. See the hand over the sheet? Neither gentleman nor lady knows who his or her partner will be.
IMG_4321
Surprise!

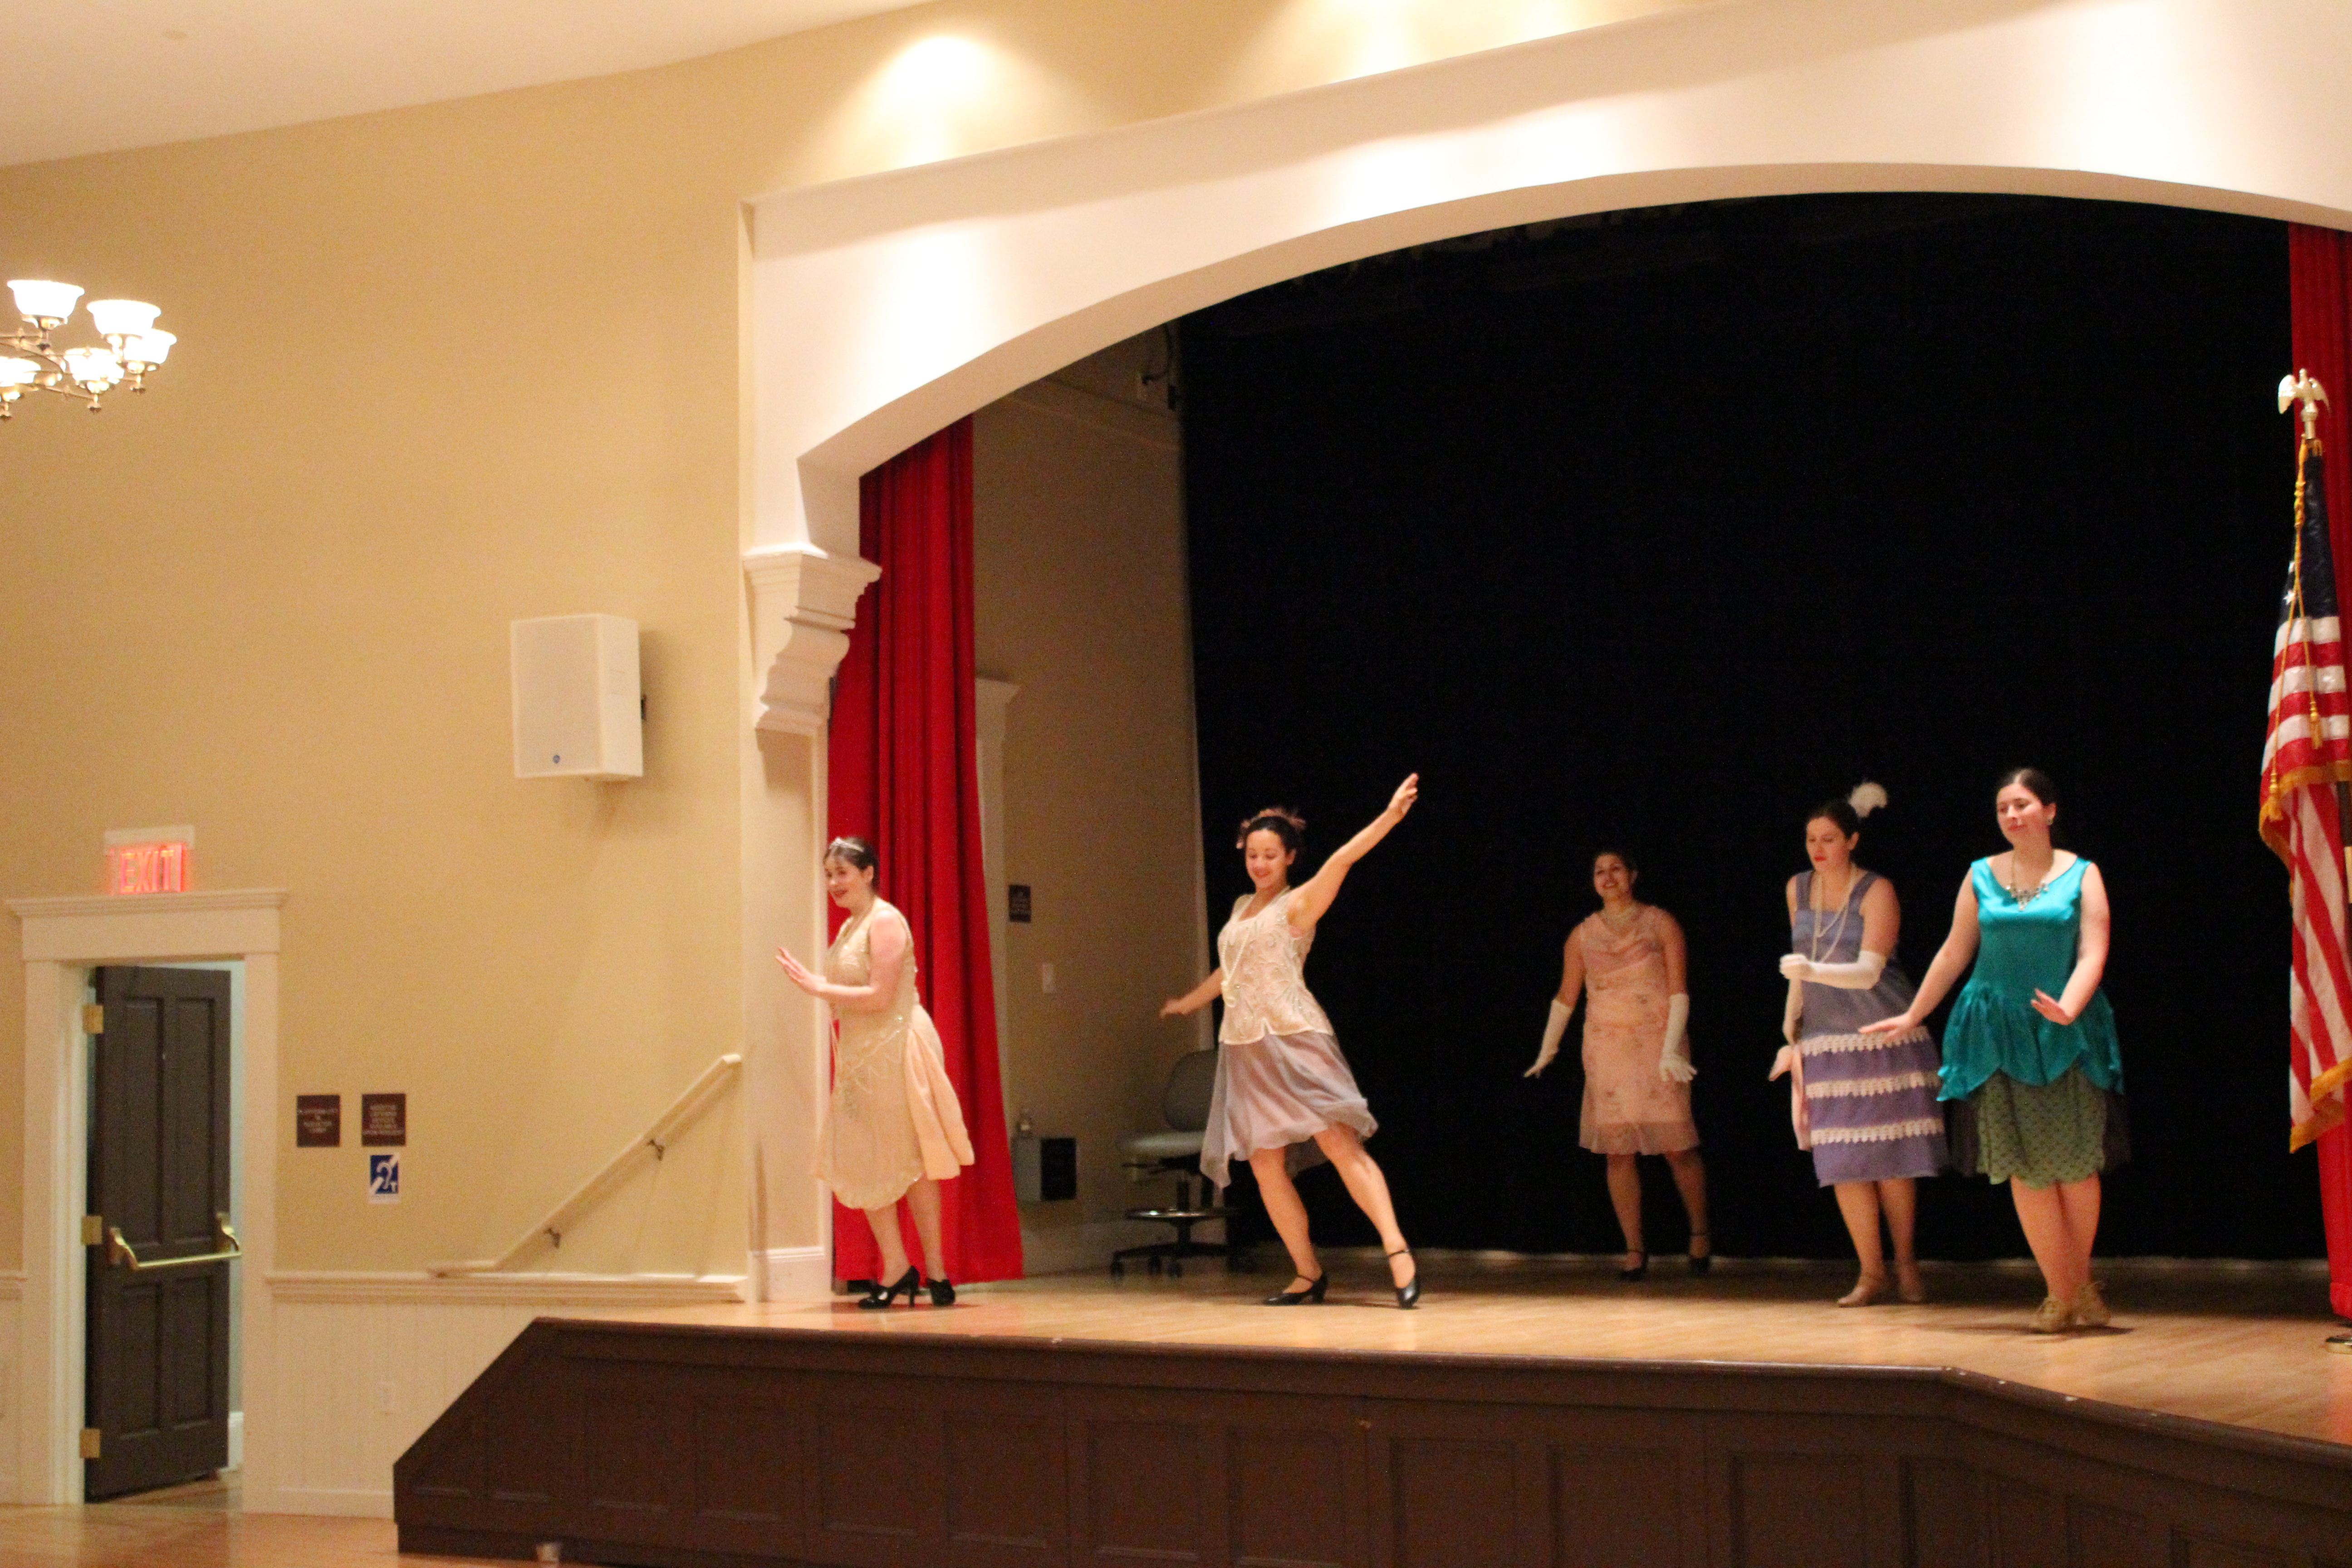
There was also a slightly unplanned performance of our five lady Charleston (the same one we performed at the Great Gatsby in May). People really enjoyed it, and it’s always a pleasure to dance a Charleston to the song Egyptian Ella. The Great Gatsby performance post includes a video you can listen to that has the song we performed to, if you’re curious. It’s a fun song!

IMG_4378
We sort of look like penguins in this shot… At least we’re on the same feet!
IMG_4360
There are little bits where we do solos: here I am washing the windows.
IMG_4361
Then I turn and back up. There really isn’t a good way to describe it… looks fun though, right?
IMG_4365
Another solo (well, duo, I suppose). I don’t actually know what this figure is called, but it’s super fun to watch.
IMG_4375
Starting to do the shimmy! (I think it’s the shimmy… It’s really just wiggling, it’s not as shimmy-like as you’re probably imagining!) It was super scandalous in the 20s!
IMG_4388
Final pose.

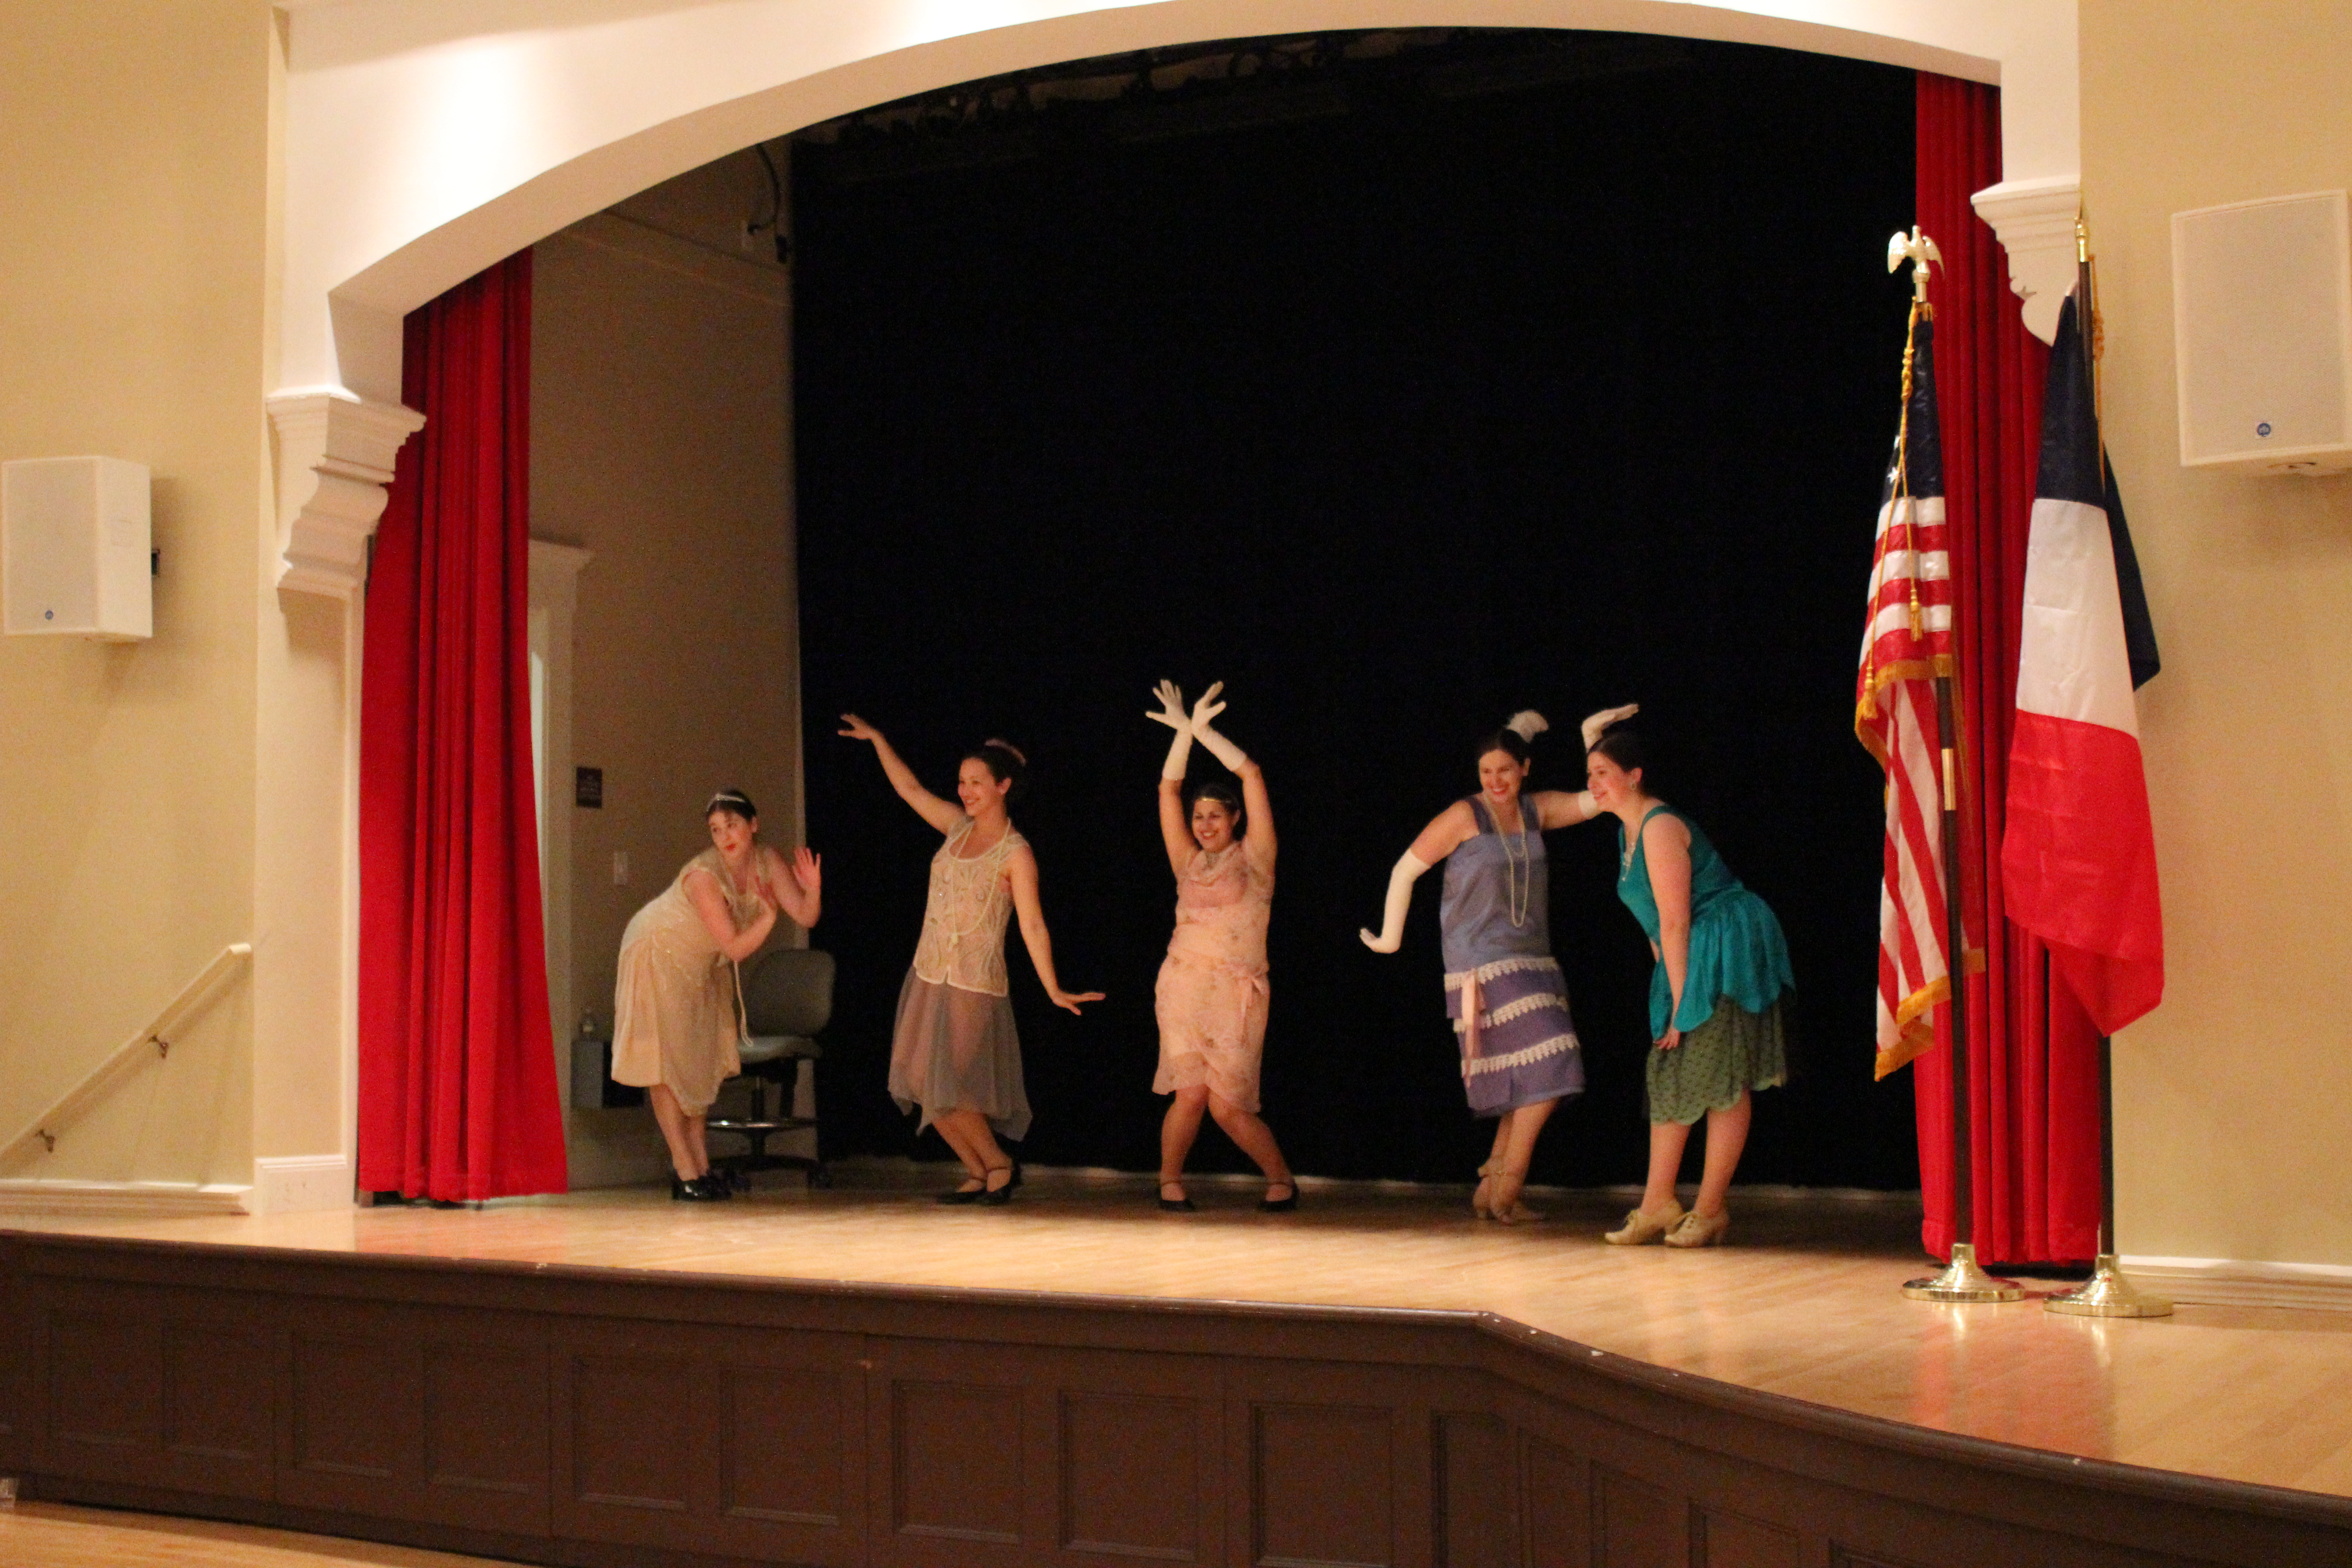
And of course, there was silly-ness. That’s to be expected when I’m around.

IMG_4355
The “Hello Charleston”… (I made it up…)
IMG_0544
How low can you go?

I had the added bonus of my parents being available to experience, in person, their first vintage dance event. They’ve seen thousands of pictures but have never been able to attend. It was fun to share the experience with them and to Charleston with them! I sure had fun, I hope that you’ve had fun reading about it!

1920s Lawn Party

I had the opportunity to attend a 1920s Lawn Party at the Crane Estate in Ipswich, MA, the day right after I participated in the George’s Island Vintage Dance Performance. Luckily, the weather wasn’t so hot. In fact, when we first arrived we were thinking sweaters would have been nice, given the sea breeze, but that thought didn’t last for long as the day heated up.

The lawn party was hosted by Boston Swing Central and included live music by the Baby Soda Jazz Band. The music was lovely and the venue was lovely, as you’ll soon see, but I have to say that I wished for more 20s dancing and less swing… of course, that’s because I’m biased towards older styles of dancing, but I did feel that the event had a vague “I’m not sure what decade I’m in” feel to it rather than strictly as 20s as I had hoped. Ah well, we made our own fun 20s atmosphere.

I wore my 1926 cotton not-quite sailor dress and American Duchess Gibsons, and it was nice to see friends with new 1920s day dresses! I think I had the most fun just walking around the lovely estate and taking pictures, so that’s what most of these pictures are.

IMG_3754
Practicing our 20s poses with the Crane Estate behind us.
IMG_4730
The view from the house looking out towards the ocean. Those lovely rolling hills don’t look that big, but I promise you they are!
IMG_4732
Did you happen to notice the statues along the edges of the grass?
IMG_4735
Well you know silly-ness often happens when I’m around…
IMG_3741
So we each took turns imitating the statues.
IMG_4073
When you’ve walked all the way to end of the hills, this is the view that greets you.
IMG_4084
Lovely!
IMG_4062
Looking back at the house from the farthest point with the grounds full of people.
IMG_3859
Looking over the Italian garden tucked away from the main house.
IMG_3924
While in the garden we took the opportunity for fun photos: telling secrets…
IMG_3846
Lounging on the rails…
IMG_3796
Posing with sporting equipment…
IMG_3884
Admiring the flowers…
IMG_3931
And playing with accessories and wrought iron gates!
IMG_4015
There were vendors of vintage items, which were fun to look through. I especially like this dress!
IMG_4032
And we met some well dressed new people!
IMG_4108
We also took part in the dancing, especially when there was a song to which we could dance a Charleston!
IMG_4091
By the end of the day I was feeling pretty tired along with everyone else I was with. We took the opportunity to explore the side of the house that had parking space rather than dancing action, which was quiet and relaxing. This side of the house looks out over marshes.

Not long after that the event was over and it was time to return home, feeling like I needed a weekend to unwind from my weekend!

Product links in this post contain an affiliate code, which provides a small benefit to my shoe fund. This does not affect my impressions and reviews of this product.

SaveSave

Georgina’s Island Exploration

After our vintage dance performance on George’s Island, we had time to explore the island and express our silly-ness. Most of the island is occupied by Fort Warren. We were joined on our ramblings by someone with exceptional knowledge of the fort and stories of reenactments that have taken place there, so we basically got an insider’s tour, which was really fun and interesting.

IMG_3563
Oh no, don’t blow away! Silly-ness started before we even made it into the fort!
IMG_4678
Aside from the wrong-era clothing, doesn’t this look like a Jane Austen type scene?
IMG_3487
Lovely historic cotton print dresses along the water before entering the fort.
IMG_3517
There was also a jungle gym fort with a slide outside the main entrance to the actual fort. No one actually slid down, but this is what would have happened if one of us had tried it!
IMG_3595
After walking through the initial gate house, you have to pass through an outer courtyard area, two sides of which are walled with openings through which you could be shot at when the fort was active. Luckily for us no shots were fired!
IMG_4687
Apparently there was also a moat to the right, which could only be crossed by a drawbridge. Now there’s a solid bridge, but when the fort was in use there was a portcullis in addition to the drawbridge!
IMG_3506
After passing through the drawbridge/portcullis entry, you emerge into the main part of the fort (that large grassy area on the right of this photo). There are ramparts all around which overlook the ocean and originally were home to many large guns.
IMG_4717
The view looking out over the ocean-facing side of the fort.
IMG_4715
The view looking back towards Boston. That’s the Boston skyline.
IMG_3693
Historic cotton print dresses! The two dresses on the right are fabrics that I bought at the same time I bought the fabric for Georgina. The white dress is similar reproduction fabric. I think all of these dresses are variations on Past Patterns #701 and #702.
IMG_4725
Looking out over the main grassy area of the fort.
IMG_4711
Walking along the ramparts.
IMG_3683
Despite the sign’s warning, there was nothing behind it except grass…
IMG_3653
Interior room in the fort. There are lots of these dark spaces that you can walk and look through, though they all start to look the same if you don’t have someone there to explain the differences to you. Luckily, we did have someone to explain, which made the exploration a lot more interesting.
IMG_3714
We exited the fort in a different way than we entered and found new opportunities for silly-ness. Here, I’m aiming along a large inoperable gun.
IMG_3720
The gun was right at the top of a hill… You can see the sparkle in my eye as I thought “Let’s run down the hill!”
IMG_3721
And we’re off! The normal island visitors looked a little shocked to see four hoop-skirted ladies hurtling down a hill with hats and arms flying!
IMG_4726
But we had fun! Indeed, there were some shoes that got left behind part way down the hill!

Thankfully, there were storms that night (we were beginning to see lightening before we even left the island!). The intense heat broke and the weather became much more manageable, which is good for us, because the very next day we were at it again, this time at a 1920s lawn party. More on that soon!

George’s Island Vintage Dance Performance

You’ll remember that I introduced you to Georgina in my last post? Georgina’s first outing was for at a mid-19th century vintage dancer performance on George’s Island in the Boston Harbor. It was a super toasty day and we were dancing mostly on asphalt or an uneven wood dock, but we all survived and looked lovely and dashing.

IMG_3483
Members of the Commonwealth Vintage Dancers who performed on George’s Island. Look at all those awesome dress fabrics! Sheers and historic cotton prints galore!
IMG_3493
We were dancing right in front of the visitor center where visitors were being dropped off by the harbor ferries.
IMG_0064
Due to the heat and dance surface (a kind way to say “asphalt”) we did a lot of walking dances.
IMG_0125
Part way through the afternoon a strong breeze picked up. It didn’t alleviate the heat much, but it was nice, and certainly swung our hoops and skirts around a lot!
IMG_3496
Dancing in the sun and wind.
IMG_4641
Dancing on the dock.
IMG_4649
More dock dancing.

After the performance we had some time to explore the island, most of which is occupied by Fort Warren. We had lots of fun and took lots of pictures. So next post, look forward to Georgina’s Island Explorations!

Meet Georgina!

“Georgina” is the name I’ve chosen for my new 1858 cotton print day dress. Being a day dress from a new decade (the 1850s), makes her a fabulous new expansion in my wardrobe of historic clothes!

IMG_4675
Georgina: 1858 cotton print day dress.
IMG_4671
Back view.

The dress is constructed from about 5yds of a Marcus Brothers reproduction historic cotton print I purchased earlier this summer. I used Past Patterns #701 and #702 bodice patterns as a starting point, though I had to make significant alterations to achieve a comfortable and pleasing fit, especially in the shoulder/armsceye area. I used the darted pattern for the fitted lining and the gathered pattern for the gathered exterior. The sleeves are the bishop sleeves from one of the patterns, though I totally changed the cuff design.

The cuff design and a lot of other fiddly details were taken from this c. 1852 dress at the Met (pictured below). If you zoom in on the cuffs on the Met website you can see that they look just like mine (pictured later in this post)! I also used the following design elements from the Met dress: piping at the neck and waist, gathers that are tacked down beyond the seam line, button closure on the cuffs, and cartridge pleating all around the skirt. I have a whole pinterest board of inspiring images for this dress and hat ensemble, but this dress is the one from which I took the most information and detail.

61.141.3_front_CP4
c. 1852 Dress, Met.

Here are a few pictures of the fiddly details I integrated from the Met dress:

IMG_4773
Gathers at the center back that are tacked down beyond the seam line. I like the controlled look these extra stitches produce.
IMG_4767
Self fabric cuff finished with a small ruffle. The cuffs close with a hand sewn buttonhole and button.

Georgina’s bodice is lined with white cotton. There are hand sewn boning channels sewn into the bodice in the front darts on each side and on the sides. The bones are then slipped in between the layers of fabric. I didn’t have the right length metal bones, so I used heavy duty plastic wire ties–but–I cut them in half the long way so they are much skinnier than normal (they just don’t look at all historically plausible in their normal width, in my opinion). Once they’re in the bodice, you’d never know they are plastic instead of metal.

IMG_4769
The proper left side of the bodice: hand stitched boning channels in the darts, front hook closure, a hook to attach the skirt and bodice together, and nicely finished piping along the bottom edge.

The bodice is finished at the neck and bottom edge with piping that is nicely whip stitched to the inside. There is also piping in the armsceye seam. The sleeve seams are french seamed by machine with the opening seam allowance at the cuff turned twice and stitched by hand. The other bodice seams are all machine sewn and the bodice is hand finished. The bodice closes at center front with hidden hooks and bars. It also hooks to the waistband of the skirt to keep the two pieces from gaping while worn.

The skirt has a wide hem that is hand stitched. The long skirt seams are machine sewn. The waistband is the same cotton print with an interfacing layer of canvas to create stability. The skirt is cartridge pleated and hand sewn to the waistband. There is a single layer of lightweight flannel folded into the cartridge pleats to give them a little more bulk than the thin cotton had on its own.

I also took the time to add pockets to this skirt! This turned out to be really useful for storing gloves, sunglasses, chapstick, a fan… with two pockets a lady can store so many things! Here’s how I made them and sewed them into the skirt:

IMG_4597
The pockets are muslin rectangles with a piece of the cotton print topstitched on the top center (this is the part of the pocket that can show while I’m wearing the dress and taking things in and out of the pockets).
IMG_4598
After the cotton print was sewn on I french seamed the vertical seam and then the bottom seam by machine, making sure that the cotton print stayed centered. On the left is what a pocket looks like with the french seams facing out. On the right is a pocket turned inside out to show the cotton print centered at the top.
IMG_4777
I left the top part of the vertical seam open and hand sewed that into slits in the skirt using a whip stitch through the pocket and the seam allowances (essentially under stitching the pockets, which keeps the muslin from rolling to the outside!). The pocket slits were made after the skirt was cartridge pleated and attached to the waistband, so the slits stop below the cartridge pleats (it was way too much thinking to try and figure out where the pockets should be before cartridge pleating the skirt!).
IMG_4778
It worked wonderfully, and the pockets blend right in and are hardly noticeable, even when they gap open! (I’ve turned the edges of the pocket so you can see the muslin pocket for this picture, but they don’t actually stay turned out like that, and you can imagine how the print fabric of the skirt blends right into the print section of the pocket).
IMG_4775
On the inside, the top edge of each pocket is stitched to the cartridge pleats to evenly distribute the weight of anything in them.

Georgina cost about $18: $15 for the fabric and about $3 for hooks and eyes. The various other fabrics (cotton lining, canvas interlining, etc.) were all in my stash from previous projects (yay!). I first wore Georgina last weekend to a vintage dance performance on George’s Island in the Boston Harbor. I’ve got pictures of the performance and pictures of island exploration coming up soon!

HSF #16: Eugenie Inspired 1857 Straw Hat

I recently participated in an outdoor mid-century dance performance for which the weather was an un-obliging 90-something degrees + humidity. Yup, not kidding. It was HOT! And we were dancing on asphalt. Luckily, we were out on an island in the Boston harbor and had a breeze. But it was HOT!

Anyway, more on that performance soon, because it involved a new cotton print day dress made from one of my recently acquired historic cotton prints! In addition to the dress, I also restyled a straw hat to go with the outfit and keep some of the sun off of my head. The hat has been used with various other clothes (1780s and Regency come to mind), but I had only ever added a simple ribbon to it rather than really styling it. This was the perfect opportunity to really make something of the hat!

I wanted to keep it simple and in the 1850s/60s, so I started by adding inspirational images to my pinterest board for this project. I visited the board many times before making a decision that I loved the shape of Eugenie’s straw hat in this painting. The hat has that nice downward curve in the front that sort of frames the face and accentuates the fashionable heart shape. The gauzy/tulle trim was a little whimsical for my purposes, so I opted for a more subdued and practical trim style on my hat.

Empress_Eugénie,_Hillwood_Museum,_1857
Franz Xaver Winterhalter (1805–1873) Eugénie of Montijo, Empress of France Date 1857

I started by wetting my hat in the bathtub then tying it with string so it would dry with the curve that I wanted to achieve in the brim. I also wanted the back to curve under a bit, so I let the hat curve on both sides.

IMG_4612
Tying the hat to create curves.

Once the hat had dried all that was left was to trim it! I chose to use green silk left over from Evie, my 1864 ball gown, and some silk millinery flowers. The silk is narrow hemmed on both sides and the ends are fringed, showing gold threads (the fabric is green/gold shot taffeta). The long ends hang down the back while the hat is worn, a style like the one below which you can see in the images on my pinterest board. I also added a bow on the front like you see in the images. Turns out that the bow is not quite centered… whoops!

56737fd6fd819eb71c2360fd4be5679f
LAPL, Magasin des Demoiselles, August 1858

And here is the result of my labors, and my fulfillment of the HSF Challenge #16: Separates. “Make a non-matching garment which can be paired with other items in your historical wardrobe to extend your outfit choices.”

IMG_4729
You can’t see the curve since the hat is sitting flat on the table… but you can see the trim!

Just the facts:

Fabric: A 4″ width of green silk 60″ wide plus a few scraps.

Pattern: None.

Year: 1850s generally, 1857 specifically.

Notions: Straw hat, silk flowers, thread.

How historically accurate?: I give it 98% (and that’s pretty high for me!). Straw, silk, more silk… The sewing machine was even invented by 1858, so the machine sewn hat isn’t totally out of the realm of possibility. The -2% is for the polyester thread.

Hours to complete: 2, not including time for the straw to dry.

First worn: July 20 for a vintage dance performance on George’s Island in the Boston harbor.

Total cost: I bought the hat a few years ago for probably about $25, the silk was leftover from another project, and the flowers cost some small number of cents since I got them as part of a large box for only $5! Let’s just say $26 total.

IMG_4617
Back view of the hat on my head. See how the front dips? This is also a sneak peak of my new gown, Georgina, to whom you will be formally introduced soon.
IMG_4623
Front view. See the dip?

At first I thought I had made the curve too pronounced, but when I look at the pictures again, I think I was pretty darn spot on! Woo! Completed new separates accessory for my historic wardrobe: check. Oh, and did I mention I’m in early on this project? The deadline is August 12!

HSF #15: 18th Century Bum Roll

When I posted about my new apricot 18th century petticoat, I also mentioned that there was a sneak peak at my new bum roll in the pictures. Remember? The bum roll fulfills the HSF #15 Challenge: White. It’s a rather simple accessory, so there’s not a whole lot to say about it.

IMG_4603
Ooo… A white bum roll!

The facts:

Fabric: About 10″ white striped cotton

Pattern: None, the bum roll is just a rectangle that’s gathered at the sides and tapered a little toward the front points.

Year: Loosely 1700-1780.

Notions: Thread, poly fill, 1/4″ white cotton tape for ties.

How historically accurate?: I give it 80%. Bum pads/rolls in the 18th century were probably not made of cotton or stuffed with poly fill. But the shape achieves the desired silhouette and is in the vein of research I have seen on 18th century bum rolls.

Hours to complete: 1

First worn: Well, Squishy wore it for pictures!

Total cost: The fabric was $1 a yard, so about 30 cents.

IMG_4610
The gathers are what creates the crescent shape. It pulls in to be a tighter curve when tied around the body as well.

Model Ts, A New 1926 Dress, And New Shoes: Part II

IMG_2996
A 1926 Ford Model T.

Remember last post, I told you I was going to share some “artsy” photos from the Model T event that occurred recently? Here we are, it’s time.

IMG_4577
Close up of a wheel with the Ford logo in the center.
IMG_4585
Isn’t the stop/brake light situation cute? I love it!
IMG_3123
I like the spare tire on this green car.
IMG_4583
And the glass in this headlight has a lovely pattern.
IMG_4589
I wanted to get this shot of the Ford logo with my new shoes, American Duchess Gibsons.
This link contains an affiliate code, which provides a small benefit to my shoe fund. This does not affect my impressions and reviews of this product.
IMG_3056
Here I am! Someone else got me getting my feet!
IMG_3134
Speaking of shoes, we were playing with focus in this shot and the next.
IMG_3133
Same photo, but in one the focus is the wheel and in the other it’s my feet.
IMG_3000
Attached to one of the cars. (The 18th Amendment is the one that established Prohibition.)
IMG_3115
See us reflected in the windshield? We tried to look like we were driving, but that didn’t work, so we had to settle with this.

That’s it! I hope you enjoyed this 1920s Model T adventure. I sure did!

SaveSave

Model Ts, A New 1926 Dress, And New Shoes: Part I

A few posts ago, when I introduced The First Picnic Of The Summer, I mentioned my involvement with other events that same weekend. It’s time  to share pictures of another event from that weekend: an afternoon of music, dancing, and Model Ts at the Braintree Historical Society in Braintree, MA.

Let’s start with atmosphere: some Model Ts! Model Ts were produced between the years 1908 and 1927 by the Ford Motor Company. My grandfather worked for Ford years ago (though not on Model Ts!) and I have family members who still live in Michigan, so I feel a special connection to that part of car history. As far as I could observe, all of these Model Ts were still operational, drivable, and licensed to drive on the street! Neat!

IMG_2970
Front view of a Model T.
IMG_4565
I love the luggage storage on this one!
IMG_4572
Pretty swanky, with all that gleaming wood!
IMG_4563
I like that this picture has a modern car in the background!
IMG_4570
Need I say more? It’s labeled!
IMG_4580
“R. I. Brow & Son; Oil Dealer” I love it! Especially with the canisters attached.
IMG_3125
Two Model Ts parked in front of the barn.
IMG_4587
A pretty fabulous red Model T with be-boater-ed gentlemen lurking behind it… (They had no idea I was taking a picture! bwhaha!)

The reason we were in attendance at this event was to do a few small dance performances. We did the same 20s dances that we performed at the Great Gatsby: the Charleston, Tango, Foxtrot, and One Step. I don’t have pictures of the performances… but in between performances we had time to wander amongst the Model Ts and have a picnic lunch.

Oh yes, and I wore a new 1926 dress and my all new American Duchess Gibsons! I also attempted some “make-do finger waves” in my hair. Basically, that means that I didn’t try for real finger waves… I just put some gel in my hair and used a fine tooth comb on the top bits. Since my hair has natural waves it just dried in a sort of wavy way and I put up the back in a low bun. I think it turned out pretty well, though, for not trying that hard!

This link contains an affiliate code, which provides a small benefit to my shoe fund. This does not affect my impressions and reviews of this product.

The dress was made because we needed day clothes for this event and my other two 20s evening dresses are not appropriate. As I mentioned in the post May Fabric Stash Additions when I shared this fabric, I wanted a cotton so it would be lightweight and washable… and this is what I wound up with. I thought it might be to sailor-y, but in the end I don’t think it is! I like that it’s a rather striking color and not something I would normally pick out for myself.

I didn’t use a pattern for the dress, I just sort of used my measurements and made it up while referencing a lot of 20s patterns in the COPA archive for skirt shape, mostly. The front and back bodice and sleeves are all one piece cut in the kimono style. It’s all french seamed  and the skirt and sleeves are finished with hug snug. The waistband is a little messy on the inside, because I haven’t taken the time to finish it and because the sides were doing a weird thing I had to fix with a wonky side dart. But eh, no one will see the inside! I’m glad it’s done and I like the faked tie-collar.

IMG_4457
Gibsons!

The Gibsons are comfortable and cute. I like that the sole is a little thicker than on my Astorias, because it means the pointy toe shoe leather isn’t getting scratched while I walk (as it is on my Astorias). The toes are pretty pointy but they are starting to stretch to my foot shape, so that’s good.

IMG_3004
Trying to pose… “This is an engine. It moves the car.” Plus, new dress and a good view of my hair!
IMG_3132
Looks a lot different from a modern car engine, doesn’t it?
IMG_3108
A better view of my new 1926 day dress and Gibsons.
IMG_3110
Another view. The red car is fun, too!

The blue cotton is slightly sheer, so I made a cotton slip to wear under the dress to add opacity. It’s made of the same $1/yd white cotton that the trim on the dress is made of, so if it shows at the neck or elsewhere it just blends right in. I used the same measurements I used for the pink slip of my 1925 beaded dress. I was inspired by looking at 1920s patterns to add the curved panels on the side instead of having another straight slip.

IMG_4596
White slip to go under the 1926 day dress.

As I said, in addition to looking at cars and dancing, we also had a picnic lunch.

IMG_3057
1920s picnic!
IMG_3068
After eating we listened to some stories read aloud.
IMG_3060
And read some 1920s magazines!

One of the most exciting parts of the afternoon was when one kind gentleman asked if we would like to sit in his 1920s car! Of course we said “Yes!”

IMG_3024
“How do I drive a car?”
IMG_3032
Practicing my princess wave.

All in all, it was a pretty fun, low-key event. Next post I’ll share some of the more “artsy” photos from the day, as I did in The First Picnic Of The Summer: Part II.

Belated HSF #11: 18th Century Apricot Petticoat

Life! Is often great, but does rather get in the way of sewing plans sometimes…

This HSF challenge #11 had a due date of June 3rd. I actually finished sewing on June 18th, but I’ve been busy posting about other things so this has been even further delayed. Oh well, I had the best of intentions: to complete this 18th century petticoat for the Squares, Rectangles, and Triangles Challenge.

Description:
Many historical garments, and the costumes of many people around the world, use basic geometric shapes as their basis. In this challenge make a garment made entirely of squares, rectangles and triangles (with one curve allowed), whether it is an 18th century kimono, a flounced 1850s skirt, or a medieval shift.
 
IMG_4606
Apricot (orange) 18th century under petticoat.

Just the facts:

Fabric: Almost all of 4yds of apricot cotton I bought back in January.

Pattern: None, but I referenced both of these tutorials on constructing 18th century petticoats.  Katherine’s tutorial is for a petticoat with an uneven length (to go over panniers, or a bum roll, for example). Rebecca’s tutorial is for a petticoat with an even length (the same length all the way around, to be worn without extra supports). Both tutorials have construction information, Rebecca’s includes a bit more detail in terms of which stitches and methods to use.

Year: Loosely 1700-1790.

Notions: Thread, yellow polyester ribbon for ties.

How historically accurate?: I give it 70%. Accuracy gets knocked down because: 1- the color is a bit vibrant for the period (but it’s an under petticoat, and I wanted it to be fun!), 2- all unseen seams are machine sewn, 3- I used bright yellow polyester ribbon for ties, 4- I haven’t seen much research that shows cotton being used at this time for a single plain petticoat of this sort. On the other hand: 1- all finishing was done by hand, 2- the dimensions and method of creation are historically accurate.

Hours to complete: 6 or 7? I can’t really remember…

First worn: Well, Squishy wore it for pictures!

Total cost: $12 for the fabric. The ribbon is leftover from my childhood craft projects…

IMG_4608
Side view.
IMG_4607
Front. See the yellow ribbon?
IMG_4609
Back. I love how the pleats fan out.

I chose to bind the top with self fabric and use polyester ties in a fun color for this petticoat, since I knew it wouldn’t be seen and I might as well use some of those things from my stash! The back half of the petticoat ties in front, then the front ties wrap all the way around to the front and also tie in front. That’s why you can see all the yellow ribbon crossing in the back. This method used a solid 3 yds of ribbon, though the ends I have to tie with are generous and could probably be shorter if I wanted to save on tie length.

IMG_4604
Back tied in front before the front gets tied. There are hemmed pocket slit openings on each side.

I just love the color of this petticoat. It’s so bright and sunny and cheerful, especially with the yellow ribbons! There’s also a sneak peek in this last picture at what will likely be a future HSF item: the bum roll… more on that soon-ish.