Brushing Off My Knitting Needles

I’ve brushed off my knitting needles and am attempting to knit my first sweater! Not just any sweater, though, this sweater pattern is from 1917.

knisweofangpic1-1
“Knitted sweater of Angorina” from the Star Needlework Journal 1917.

This most recently started project has me going in a slightly different direction than in my previous knitting adventures. I taught myself how to knit in college (it was a popular thing lots of my friends and I did). I would often knit in class (and I had awesome professors who realized that I actually paid more attention while I was knitting because it kept my brain engaged during lectures and discussions). Mostly I knit scarves… so many, in fact, that I ran out of people to give them to. Then I started on afghans and pillows. I loved to figure out complicated patterns and cabling… But I never could figure out how to knit in the round (to make hats and such) and I never wanted to deal with sizing and non-rectangular patterns to create a sweater. I’ve since been taught how to knit in the round, though I haven’t tried it yet, but this is my first attempt at a sweater!

I decided to knit a sweater for an event I’m likely to attend in November for which we’ll be wearing WWI era clothes. That’s what sparked my interest in looking for knitting patterns from that period. I found the pattern I’m using through Ravelry, but in searching the internet for other patterns I came across other resources for period knitting that I’ve included at the end of this post. I also came across a pattern for a 1922 sweater that I’m hoping to try eventually (and assuming this one isn’t a complete failure!). It’s a more complicated pattern that uses two colors, so that will be new and exciting… some day.

I was further spurred on my knitting mission by coming across knitting needles and skeins of yarn for 50 cents in the bargain attic at our local fabric store. The yarn is a lovely cream color and super soft. I’m guessing it’s acrylic, but it had no label and I haven’t bothered burn testing it, so I’m not certain of the fiber content. I figured that for about $3 I could take a chance on knitting a sweater. If it works out I can always buy more expensive (or normally priced, haha) yarn later and make another sweater. Oh, and did I mention that the pattern I’m using is free??? Love that price!

Here’s my progress so far:

IMG_4893
The back of the sweater. I’ve still got about 6″ to go, but you can see that it’s starting to look like something!
IMG_4894
Here’s a close up of the basket weave pattern. It’s just knits and purls in sets of 5 stitches.

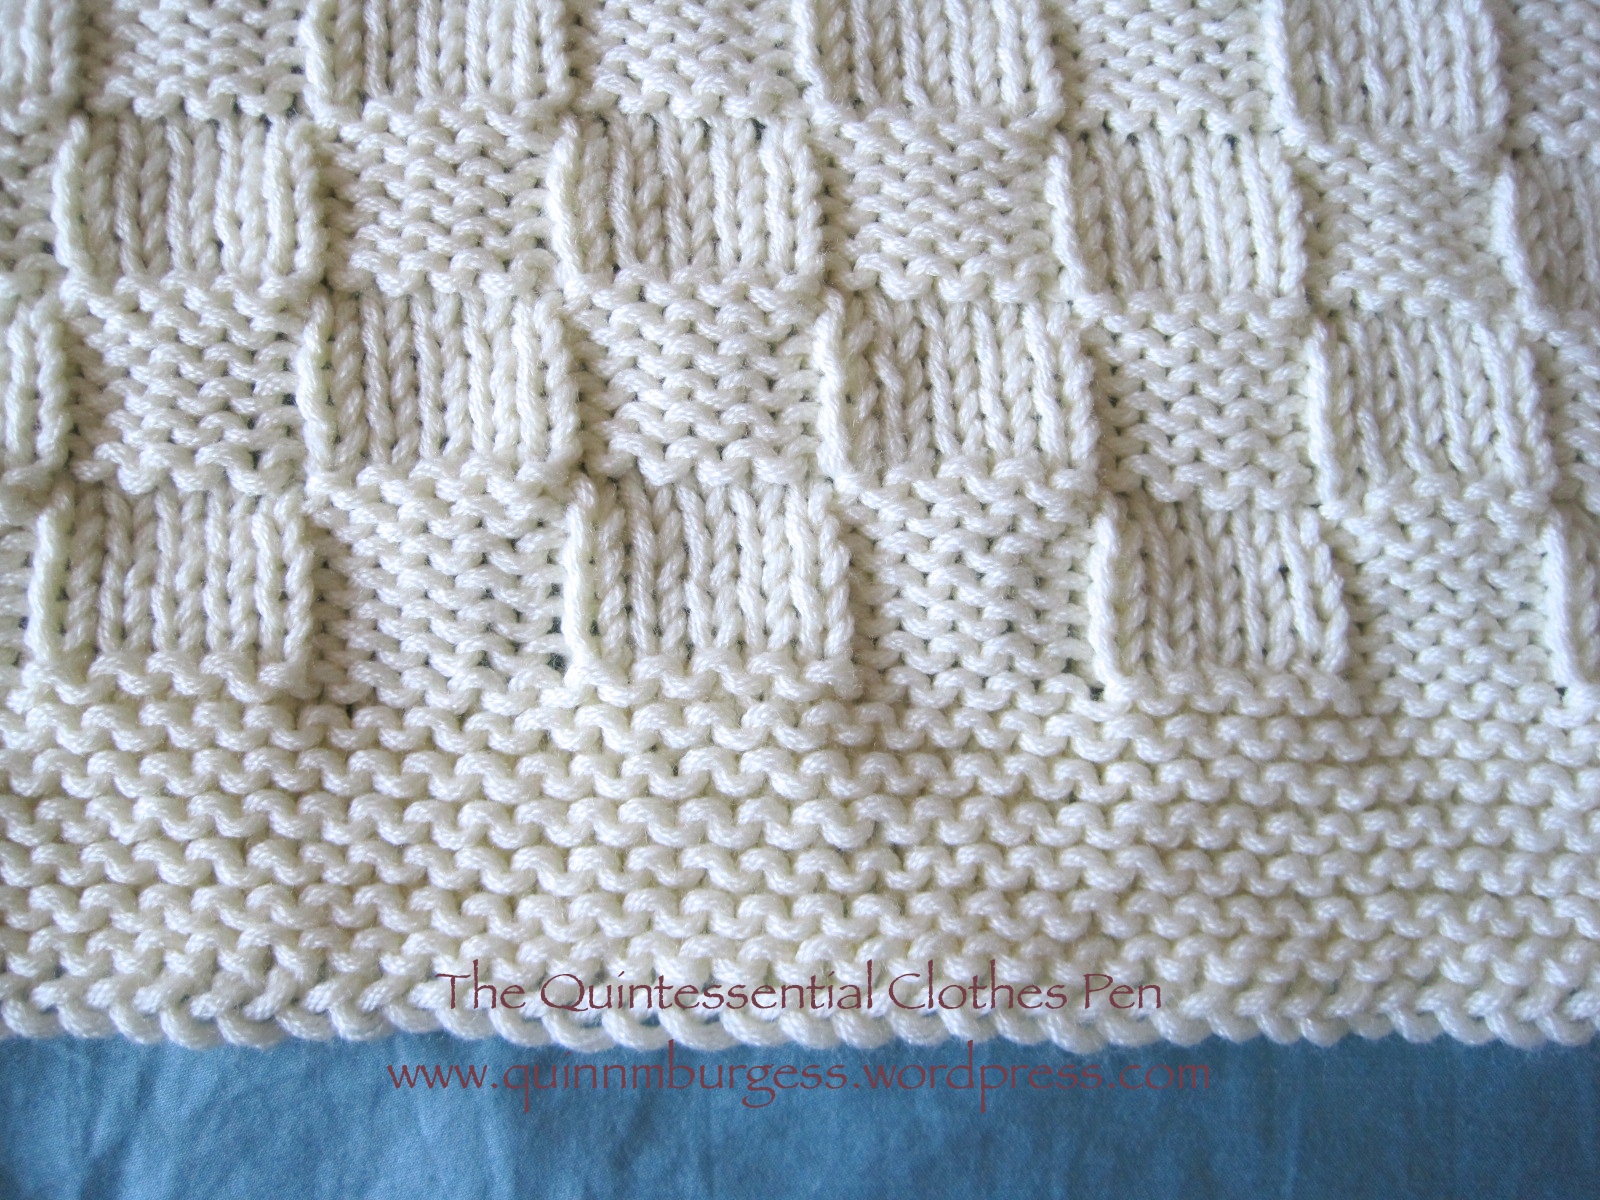
I’ve been  knitting rather than sewing for the last week or so and it has been a nice change, plus it’s really neat to see the sweater starting to turn into something. As I get further I’ll post more about my progress.

Here are some other early 20th century knitting pattern sources I came across:

http://www.historylink.org/index.cfm?DisplayPage=output.cfm&File_Id=5721 (a history of knitting related to WWI, specifically in Washington State: it’s quite interesting!)

http://blog.caseybrowndesigns.com/2010/10/vintage-knitting-resources/ (links to vintage knitting patterns from the 1900s-1950s)

http://freevintageknitting.com/women.html (vintage 20th century sweater patterns: looks like mostly 1930s-1960s patterns but they don’t have dates, just images)

http://www.hjsstudio.com/patterns.html (has a variety of patterns from WWI and WWII)

Oh hey, and wordpress just reminded me that this is my 200th post on this blog! That’s pretty exciting!

Picnic At The Commandant’s House

A few weekends ago I participated in a picnic and dance performance at the Commandant’s House. You might remember that we danced there last August? It was great fun last year and we were pleased to be able to participate in another event at this lovely location.

This time around we were there mostly to picnic, so that’s what the majority of my pictures are from. But we did dance a little in the house and lounged around to take a few pictures. Enjoy!

IMG_4835
I love how picturesque we all look in this photo! It’s sort of funny how the white dresses all clumped on one side and the colored dresses on the other.
IMG_4871
After eating we played Graces.
IMG_4861
It’s much more fun with lots of people and lots of hoops!
IMG_4953
We played it in a big circle and would just call someone’s name to get their attention (hopefully) before flinging the hoops at them.
IMG_4910
There were some really good catches and really close misses.
IMG_4936
We had a great time and laughed a lot!
IMG_4911
With trees around, I’m sure you can guess what happened…
IMG_4898
I didn’t want to do a boring bun, so I opted for two rolls of hair instead.
IMG_4992
We were called from Graces to dance inside the house. I was particularly appreciative of this wallpaper this time around. It’s in the entry hallway. You can see other interior pictures of the house in this post from last year.
IMG_4980
The curtains in this room have a lovely glow when the sun shines on them.
IMG_4988-001
Looking for Mr. Darcy, perhaps? I just love the shadows and the glow.

HSF #19: Mineral Felicite Stomacher

First, I want to say “Thank you!” to all of you who provided me with your thoughts and insights about my Curtain Along troubles. I took all of the things that you mentioned and reconsidered my jacket, coming at last to the conclusion that a stomacher would solve a lot of my problems. Of course then I had to decide if I wanted my jacket to lace over or pin to the stomacher and how I wanted to trim the new design (ribbon or self trim)… for now I’ll leave you in suspense on those two points, because the point of this post is to share my completion of the stomacher, as it fits into the HSF Challenge #19: Wood, Metal, Bone.

IMG_0571

Just the facts:

Fabric: A bit of left over Mineral Felicite print from the jacket (it sure is a good thing I had extra!), small bits of leftover peach linen from the jacket lining, and a bit of leftover white linen from another project for the interlining.

Pattern: Made by me and referencing Costume Close-Up.

Year: 1760s-ish.

Notions: Thread and cane.

How historically accurate?: 90%. Accurate fiber contents, though the print of my Mineral Felicite isn’t perfectly accurate. I may not have used the exact stitches that an 18th century garment would have. Also, I feel like I’ve seen stomachers that are boned, but when I was looking for this project I couldn’t find any of them. So I might have made that up. But it will make my stomacher lay so much smoother than without boning, so it’s worth it.

Hours to complete: 6.

First worn: Has not been worn yet.

Total cost: Free since everything was from left overs.

Ok, now here’s the amusing part. As I mentioned in my last post about the jacket, I have only small scraps of the lining linen left. I could have backed my stomacher with a non matching linen all in one piece… but I decided to piece together my matching scraps for the back. It’s a little crazy looking, but it will match the sleeves and amuse me. Actually, I wouldn’t have had enough scraps if I hadn’t reused some of the bits I cut off from the front when changing the line to fit over a stomacher…

IMG_0572

See what I mean? It’s a bit crazy. Oh well. You can see the three bones that run vertically up up the middle of the stomacher. Anyway, work on the jacket has now been put on hold so I can complete some of the other upcoming HSF challenges, but I hope to get back to it soon.

Get Me To The Church On Time

Well, not me, exactly… (But please, tell me you know what movie the title of this post is referencing! I love that movie!)

Anyway, let’s start at a place that’s not at the beginning (yikes, I’m full of movie references right now!) and explain about the church, and getting there on time.

IMG_4799
It’s hard to see, but right there in the middle of the board is the Parish Church.

This is the Pride and Prejudice board game, one of the amusements we took part in at a somewhat recent Regency picnic! There are four players who each control two characters (a male and a female). The goal is to collect various tokens either by visiting different places on the board or answering trivia questions and then, finally, to be the first person to get both of your chracters to the church. Now does the title of this post make more sense?

IMG_4796
I was Jane and Mr. Bingley.

The game was quite fun and amusing, though I could imagine it would be a lot slower and less interesting if the players had a very low level of knowledge about Pride and Prejudice.

To back up to the beginning, though, the game followed food eating time at the picnic. We had a pretty elaborate picnic set-up with vases, and silver, and vinyl lace table cloth…

IMG_4783
Food!
IMG_4789
Flowers, lemonade, sparkling cider…
IMG_4791
Sandwiches, muffins, cupcakes, pastries…
IMG_4782
Obviously, Newman was around in the Regency.

After food and board games, we took a walk around the park we were picnicking at for some photos. The park is full of lovely little dips, stone walls, creeks, waterfalls, and plants. It’s quite lovely!

IMG_4800

IMG_4807

IMG_4810

IMG_4801

IMG_4806
So picturesque! This could totally be out of a Jane Austen scene.
IMG_4817
Group shot. I wore my 1815 Tree Gown and bonnet, accessorized with a sapphire cross necklace, my stripe-y reticule, blue American Duchess stockings, and pointy tan shoes.
IMG_4819
I didn’t bring a fan, but the other ladies did. Aren’t they all lovely?

Ok, so if you have read to the bottom of this post and you’re still wondering what movie the title is referencing, I’ll give you the answer. It’s My Fair Lady. Fabulous hats, gorgeous jewels and tiaras, cups of tea, fun and funny songs, Audrey Hepburn, and Rex Harrison. Please go watch it, if you like these things and have never seen it! (Oh, and the second movie reference is The Sound of Music. Another amazing movie you should watch many, many times!)

Cute Claremonts!

claremont-1930s-suede-oxford-brown-2
1930s Claremonts from American Duchess

Lauren of American Duchess just keeps rolling out lovely new shoe styles! This most recent one is super cute and tempting! There have been hints that black and maroon might be coming in the future so I’m going to hold out for those. Because how awesome would these be in maroon??? But don’t let me stop you from ordering the brown ones… they’re seriously tempting, right???

SaveSave

1953 Dot Dress

It’s been months since I bought the fabric for this dress (I actually had to look back to see when I purchased the fabric: it was February). I bought it rather on a whim, with the goal of expanding the number of patterned dresses in my historic wardrobe. Well, success! My 1953 dot dress is complete!

IMG_4829
Yay!
IMG_4830
And the back.

I think it looks more flattering on me than it does on Squishy, but the opportunity I’m hoping to use to wear it and take pictures has been postponed due to the busy lives of my friends. We’ve got a grand plan involving roller skating, a 50s diner, and ice cream. All of those things just scream for pictures!

But for now, the facts (a la the HSF, though unfortunately the cutoff for the HSF is 1937, so this doesn’t qualify!):

Fabric: The dress is constructed from about 3 yds of lightweight cotton lawn printed with dots and lined with some of my white striped $1 a yard cotton fabric. It’s a perfect pairing, because it creates opacity but keeps the lightweight feel of the lawn.

Pattern: The skirt pattern is from a Vogue pattern I bought at Vintage In Vogue last year. The bodice pattern is a simple darted bodice pattern I draped for myself with the neckline adjusted to be a scoop in front and a v in back.

Year: 1953.

Notions: 10-12 yds of pink Hug Snug; white, off white, and pink thread; and an off white plastic zipper (It was all I had that wasn’t dark since I don’t use zippers much for historic sewing…).

How historically accurate?: I give it 95%. Cotton is entirely reasonable for the 1950s. I’m not sure when Hug Snug was first marketed, but the design on the spools certainly looks vintage (and rayon had been in use for at least 20 years by the 1950s). If they didn’t have Hug Snug, they probably had something similar. The pattern was printed in the 1950s and a basic darted bodice is seen on many 1950s dresses and patterns. The sewing machine was in widespread use by the 1950s. The only thing is that my plastic zipper is probably a bit modern (in the 1950s zippers were still metal, I believe).

Hours to complete: 30: lots of interior finishing by machine and hand .

First worn: By Squishy for pictures.

Total cost: My entire 50 yd roll of Hug Snug was only 50 cents, the fabric was about $15, and the zipper was probably about $2… Total: about $17.

Now, you know that I love paying attention to details. I had a lot of fun spending time on the interior details of this dress. Unfortunately, they won’t be visible, but I know that this dress is as cute inside as it is outside, and now you will, too!

IMG_4831 (1)
The hems flipped up to see the interior finishing. Both hems are finished with Hug Snug and I also used Hug Snug to bind the seam allowances of the white lining. The seam allowances of the dot fabric are turned and zig zagged (the Hug Snug showed through to the exterior too much when I did a sample using Hug Snug on the dot). The first side of the Hug Snug is machine stitched to the hem and the second side is hand sewn with only tiny prick stitches that go through to the outside fabric so it’s almost invisible.
IMG_4835
More of the inside of the skirt. It’s like candy, with all the pink Hug Snug seam binding on the white fabric! I love it!
IMG_4837 (1)
Here’s the side seam of the bodice that doesn’t have the zipper. On the bodice the dot and the white stripe fabric are treated as one, unlike on the skirt. All of the seams are bound with Hug Snug. The armhole (at the top of the photo) and the neckline are bound with self fabric bias strips.
IMG_4840
Here’s a close up of the shoulder seam showing the Hug Snug and the self fabric bias. All of the bodice seam and edge bindings are stitched down to the white stripe lining by hand using whip stitches.
IMG_4827
Here’s what it looks like without skirt support.

I might even like the inside more than the outside… I’m really looking forward to wearing this at some point! I was even thinking that perhaps I could wear it in my modern life without a crinoline petticoat under it, but I think the skirt is a little too long and the waist is a little too high. If I had more of an every day vintage style I might be able to pull it off, or if I was getting dressed up, but for normal days, unfortunately, I don’t think I’ll be wearing it around my everyday life. All the more reason my friends need to clear their calendars!!!

HSF #18: Red And Gold Regency Tiara

The theme of this HSF challenge is Re-make, Re-use, and Re-fashion. For this challenge I took two modern bracelets and turned them into a Regency tiara.

IMG_4880
Red and gold Regency inspired tiara.

The facts:

Fabric: None! But I started with two modern bracelets that were a gift from my mom.

Pattern: None.

Year: Loosely 1790-1820, but who knows, perhaps this will find a use in another period as well!

Notions: Gold wire and hot glue.

How historically accurate?: I give it 50%. This is absolutely on the more on the historically inspired side of things rather than the accurate historic costume side of things. The jewels are almost certainly plastic and the design is based on general Regency styles rather than any specific inspiration. Oh, they also did not have hot glue back then…

Hours to complete: 2.

First worn: Has not been worn yet, but will get worn to a Regency ball in Chelmsford, MA on October 5th!

Total cost: Free (the wire and the hot glue was in the stash)!

Here are some more shots of the construction of this tiara:

IMG_4876
In the beginning: stretchy bracelets. Thanks mom!
IMG_4877
The loose jewels after I cut off the elastic.
IMG_4878
Another possible design. I decided against having some of the jewels turned on their corners. It would have been hard to engineer and, after all, simplicity was a popular style in the Regency!
IMG_4883
The back of the tiara, where you can see the wires holding it together. There is also a loop at the center of the bottom row of jewels so I can pin the tiara to my hair at that point to keep it from bouncing.
IMG_4885
There are wire loops at the ends of the tiara so I can pin it to my hair. The hot glue covers the ends of the wires so they don’t also catch my hair.

That’s all for now. When I wear this I’ll be sure to take more pictures!

Trouble In Curtain Land

A few weeks ago, I was super excited and motivated that I had time to work on my Curtain Along jacket. I made the changes I had deemed necessary from my last fitting and was feeling good about getting it done and how much I liked it… but then I tried it on again to determine center front and decide about trim… and there were new problems, and I was so discouraged!

The problems sum up in the following way:

Problem #1- The sleeves that go with the jacket in Janet Arnold just do not work for me without serious alteration. The crown isn’t large enough for me to be able to move or be comfortable, and the sleeve is at least 4 inches too short. With the sleeves set in the jacket was pulled all over the place and was so unbearably uncomfortable! And the annoying thing is that in the mockup the sleeve worked!

After ripping the sleeves out, and being thankful that, at least, they were what was causing the bodice to do all sorts of wonky things, I bounced back and came up with a solution. I’ll use the sleeve pattern from my 1780s Robe A La Anglaise and recut the sleeves. I’ve got extra Mineral Felicite fabric, so that’s no problem. On the other hand, I have only tiny matching linen scraps left. Of course, it would be totally period correct to use a different linen to line the sleeves than what I used to line the bodice. But piecing is also period correct, and I decided to use all my tiny matching linen scraps to piece together pieces big enough to cut out the new sleeve pattern.

IMG_4850
Extreme piecing. I’m amused by it at this point. This sleeve is only partially completed (there is more piecing to be done!) but you can see the original pattern shape.

I haven’t finished piecing, or cut out the new Mineral Felicite sleeve, or sewn the new sleeves in… but I think that my solution will work, so we’ll call that problem solved. Whew!

Problem #2- After my initial fittings, I had to add an extension to my center front pieces to get the jacket to close comfortably and without wrinkles. It barely closed in my mockup and I thought it would be enough, but in the real fabric it just wasn’t. So I pieced on extensions. Piecing is totally period correct, but this piecing is so… obvious and symmetrical.

IMG_4841
Center front piecing. The yellow headed pins are my center front line. I haven’t done anything about center front since I put those pins in!

This problem is still unresolved. Plus, I can’t decide how I want the jacket to close, anyway. Pins? Hooks and loops? If you have any thoughts about the piecing problem or the closure indecision, please do share!

Problem #3- Trim! I was going to trim the jacket with box pleated blue silk ribbon around the neck, front, hem, and cuffs. I thought I had enough ribbon (6yds), but in the end I think I have not quite enough to trim all of those edges. AND, the blue didn’t seem to pick up the blue in the print as much as I originally thought it did, and I’m worried that even if I do less pleated trim (say, not the sleeves, or something) the trim will look super costume-y and not 18th century. I also have a gold silk ribbon (5 yds). Not enough to trim the whole jacket, but what if I scrap the idea of trimming the edges and instead do some sort of center front bow trim/something of some sort to hide the piecing using the gold? I think the gold looks nice… but what sort of trim would I do that wouldn’t look made-up and costume-y???

IMG_4847
Blue silk ribbon. There’s blue in the flowers, but perhaps not enough blue to make the blue ribbon make sense???
IMG_4848
Gold silk ribbon. Too match-y?
IMG_4844
Blue and gold together, for comparison.

I  have no idea what I’m going to do about the ribbon issue. Bows at center front seem to be used on stomacher front jackets, and stomacher front jackets seem to be exclusively pet en l’air styles. This jacket is not a pet en l’air, though it could be altered to have a stomacher front (thus eliminating the piecing issue). Sigh. I just think myself around in circles. So again, I appeal to you! If you have any thoughts, please share!

Help! I’d really appreciate it!

A Refreshing Apron

Rather more often than I would like, there are trying times in my well dressed historic life when I volunteer/am obliged to help with refreshments at an event after already being dressed in a fabulous ball gown. “Danger! Danger!” is the cry that should be shouted high and low, but, alas, in the past I have had to hope for the best without protection for my dress.

Granted, I’ve never had an awful accident happen. And though it’s possible I sound disgruntled, I’m quite willing to help with refreshments, even if I’m already dressed. There was a single incident a few months ago, however, when a small bit of unwanted refreshment related stain-age made its sneaky way onto my dress. I was super, super grumpy!!! And I decided, at that point, that I needed protection going forward!

I’ve finally acted upon my decision and sewed up a Refreshing Apron to wear over my dress when helping with refreshments! I’m quite pleased with it and excited to put it to use at some point in the future. I’ll have to get a picture when I’m wearing it over a dress, but for now, I’ve got pictures of the apron on Squishy.

IMG_4820
My new Refreshing Apron!
IMG_4822
And the back. Isn’t it so cute???

I wanted the apron to meet the following conditions: have a full skirt so it can work over everything from Regency to Civil War with maximum coverage, be easy to pattern and easy to sew, and be cute–I really wanted the crossed back. The apron is machine sewn everywhere, except for the ends of the ties and the buttonholes. Yes, the buttons and buttonholes are functional! Perfect for getting the apron on or off with large or elaborately styled hair!

IMG_4824
Hand sewn buttonholes and a close-up of the print.

The entire apron is made of rectangles. The skirt is 3 rectangles seamed together, the  bib is a rectangle, and each tie and strap is a rectangle. I used about 2 1/4 yds of printed cotton from my stash, and now I can’t seem to remember the width. 45″ sounds pretty plausible for a printed cotton.

The print is rather red up close, but from a distance it blends with the white background and looks more pinkish. I rather like the grown up pink look! I’m guessing I’ll have opportunities to wear this in October or November…

Surrender!

…to the costuming peer pressure…

icon

The short explanation of the crazy is that Kendra, of Demode Couture, has started an 18th Century Court Ensemble Sew-Along. The longer explanation of the crazy is written by Kendra herself, here on her blog.

I’m talking about it on my blog because I’ve submitted to the indirect costuming peer pressure and joined in! (You should too…) I’ve got my fears about my participation (I spent about two days debating my decision to join in!): I’m unlikely to have a relevant event to wear a court gown to (unless I make one!), I’m not super confident in my ability to get 18th century “right” yet, and I don’t want to spend mounds of money on this project (which you could so easily do!).But… I want to participate! So, I’ve found some cures for my fears and committed, in a thoughtful and careful way, to the crazy.

This is the gown I’ve decided on. It was a hard choice! But it’s a good choice for me, because I’ve already got pink silk in the stash that I bought back in January with the intent of making “an 18th century something” perhaps, so that takes care of the bulk of the materials (and the cost). So I’ve just got to procure the trim materials and accessories. I’ve already found the things I want, but I’m going to wait a bit to purchase them and get started on the sewing, so stay tuned for more posts about that in a few months!

e97cee6a74d1756827c28213e6397915
Grand Duchess Maria Feodorovna by Roslin, wearing the Star and Badge of the Order in 1770. (I’ve also seen this dated as 1777.)
c628b97dc89626f6577689f549884f42
Slightly different version of same painting. Included in an article about Women’s Imperial Court Costume In Imperial Russia.

I also considered these other gowns, but decided against them in the end.

2b3135733bdb0420963a1a7c04afd51a
Robe de cour from Les Arts Decoratifs

I love this robe de cour! It looks more like fancy dress than a court gown to me. I can imagine it as “Snowflake” or “Winter” or “Snow Queen.” I seriously considered this one… but I don’t have any of the appropriate materials in my stash right now, and the cost of the materials I wanted to use was more than I wanted to spend on this project. So I’ve added this to my list of “things I eventually want to sew.” I can even envision it as fancy dress in the 19th century with a different skirt shape… a bustle gown, perhaps? I just love that the triangles look like icicles, and the diagonal trim looks like snowflakes… It’s pretty ridiculous!

4af7326884f958d2409f5320c53b6e7b
1795 – Caroline, Princess of Wales

Then there’s this absurd looking court gown from the very end of the 18th century. I love the periwinkle color, the tassels, and what looks like chain (wouldn’t that be fun to figure out!) edging the poofs. It’s pretty silly. But again, I don’t have any appropriate fabrics in my stash…

25e7c98dcf6e7807e2e4806bdbfd1107
Robe de cour from Les Arts Decoratifs

I like this last one, too, although not as much as the first two. I feel like this would be a great use of an iridescent shot silk, at least for the green part. I like the fur trim, and the gold, but I’m just not overwhelmed by awesome-ness.

The choice was made more difficult by the fact that other people have already “claimed” certain court gowns they want to make, and the idea is that no two dresses are the same. (So I might have had more options, but they’d already been claimed!) You can see what other people have picked and keep track of all the court ensembles being made on Kendra’s blog: Demode Couture. There are at least 30 people participating so far and lots of pretties have been chosen! These are my favorite gowns from among the ones that are already claimed.

18th century court gown. It’s so cute!
ef20e9a8894c14ec10b57fac190c75fc
18th century robe de cour. How to achieve those fantastic waves? But I do love this one!
183fec6f65f70eced493dc859b7a9326
18th century robe de cour. This one has great waves as well! Lovely.

Kendra already did a post on 18th Century Court Gown Basics that’s a great introduction to this oddly specifc class of garments, and I’m sure more information will be coming over the next year from all of the participants.