When The (Regency) Petticoat No Longer Fits (HSM #5: New Clothes From Old)

While we’re on the subject of updating clothing that no longer fits quite right (this is continued from my last post about updating a pair of 1860s drawers, which you can read here), I have another post about updating a layer of historical underwear for fit.

A few background thoughts

In the past 15 years or so that I’ve been making historical clothing, I’ve also changed sizes and some of the clothes I made early on just no longer fit. The usual culprits are the waist, bust, and shoulder width. (It’s not necessarily all for the worst. My shoulders and arms are bigger because I’m gaining strength and being active, so that’s a healthy change!)

I’ve been able to wear more of my historical clothes recently and the more I wear the older ones, the more I realize just how much my shape has changed.  Because I have some lovely garments that I still want to be able to wear, I’ve been updating these garments to better fit my current shape.

Background on this particular garment

I made an early 19th century bodiced petticoat in 2012 (here is my post from back then sharing research about this type of garment). Since then, I’ve gained inches in the bust, ribcage circumference, and in the width of my shoulders. So despite wearing this petticoat and making do, I finally reached a point where it became important to make this fit better.

Here is the bodice portion of the petticoat before my alterations, from the front and back.

I determined that I needed a whole new front piece–one that would be wider across the bust and with more gathers to condense to the ribcage size. I also realized that it would be helpful to make the side back pieces a little more substantial, with a taller side seam to match the new front.

Update details

Thankfully, I keep lots of fabric scraps! And in this case, I actually still have yardage of the fabric I made the petticoat from. So no problems there — I was able to easily cut out a new front with updated dimensions as well as bits to add to the side pieces to extend them (I didn’t feel like replacing them entirely — this petticoat already is a bit pieced at the center back, where I had previously added fabric in order to help make it a little larger a few years ago).

After cutting new pieces came the boring part of unpicking the original front. Ugh! I don’t enjoy taking apart things that I’ve made! But I did it.

I thought I might machine sew the new pieces on, but I was more inclined to complete this project while not near my sewing machine, so I did it by hand instead. I replicated all of the same seam finishes from the original bodice front (because I like consistency, but not because they are historically accurate, in this case).

Here are the results!
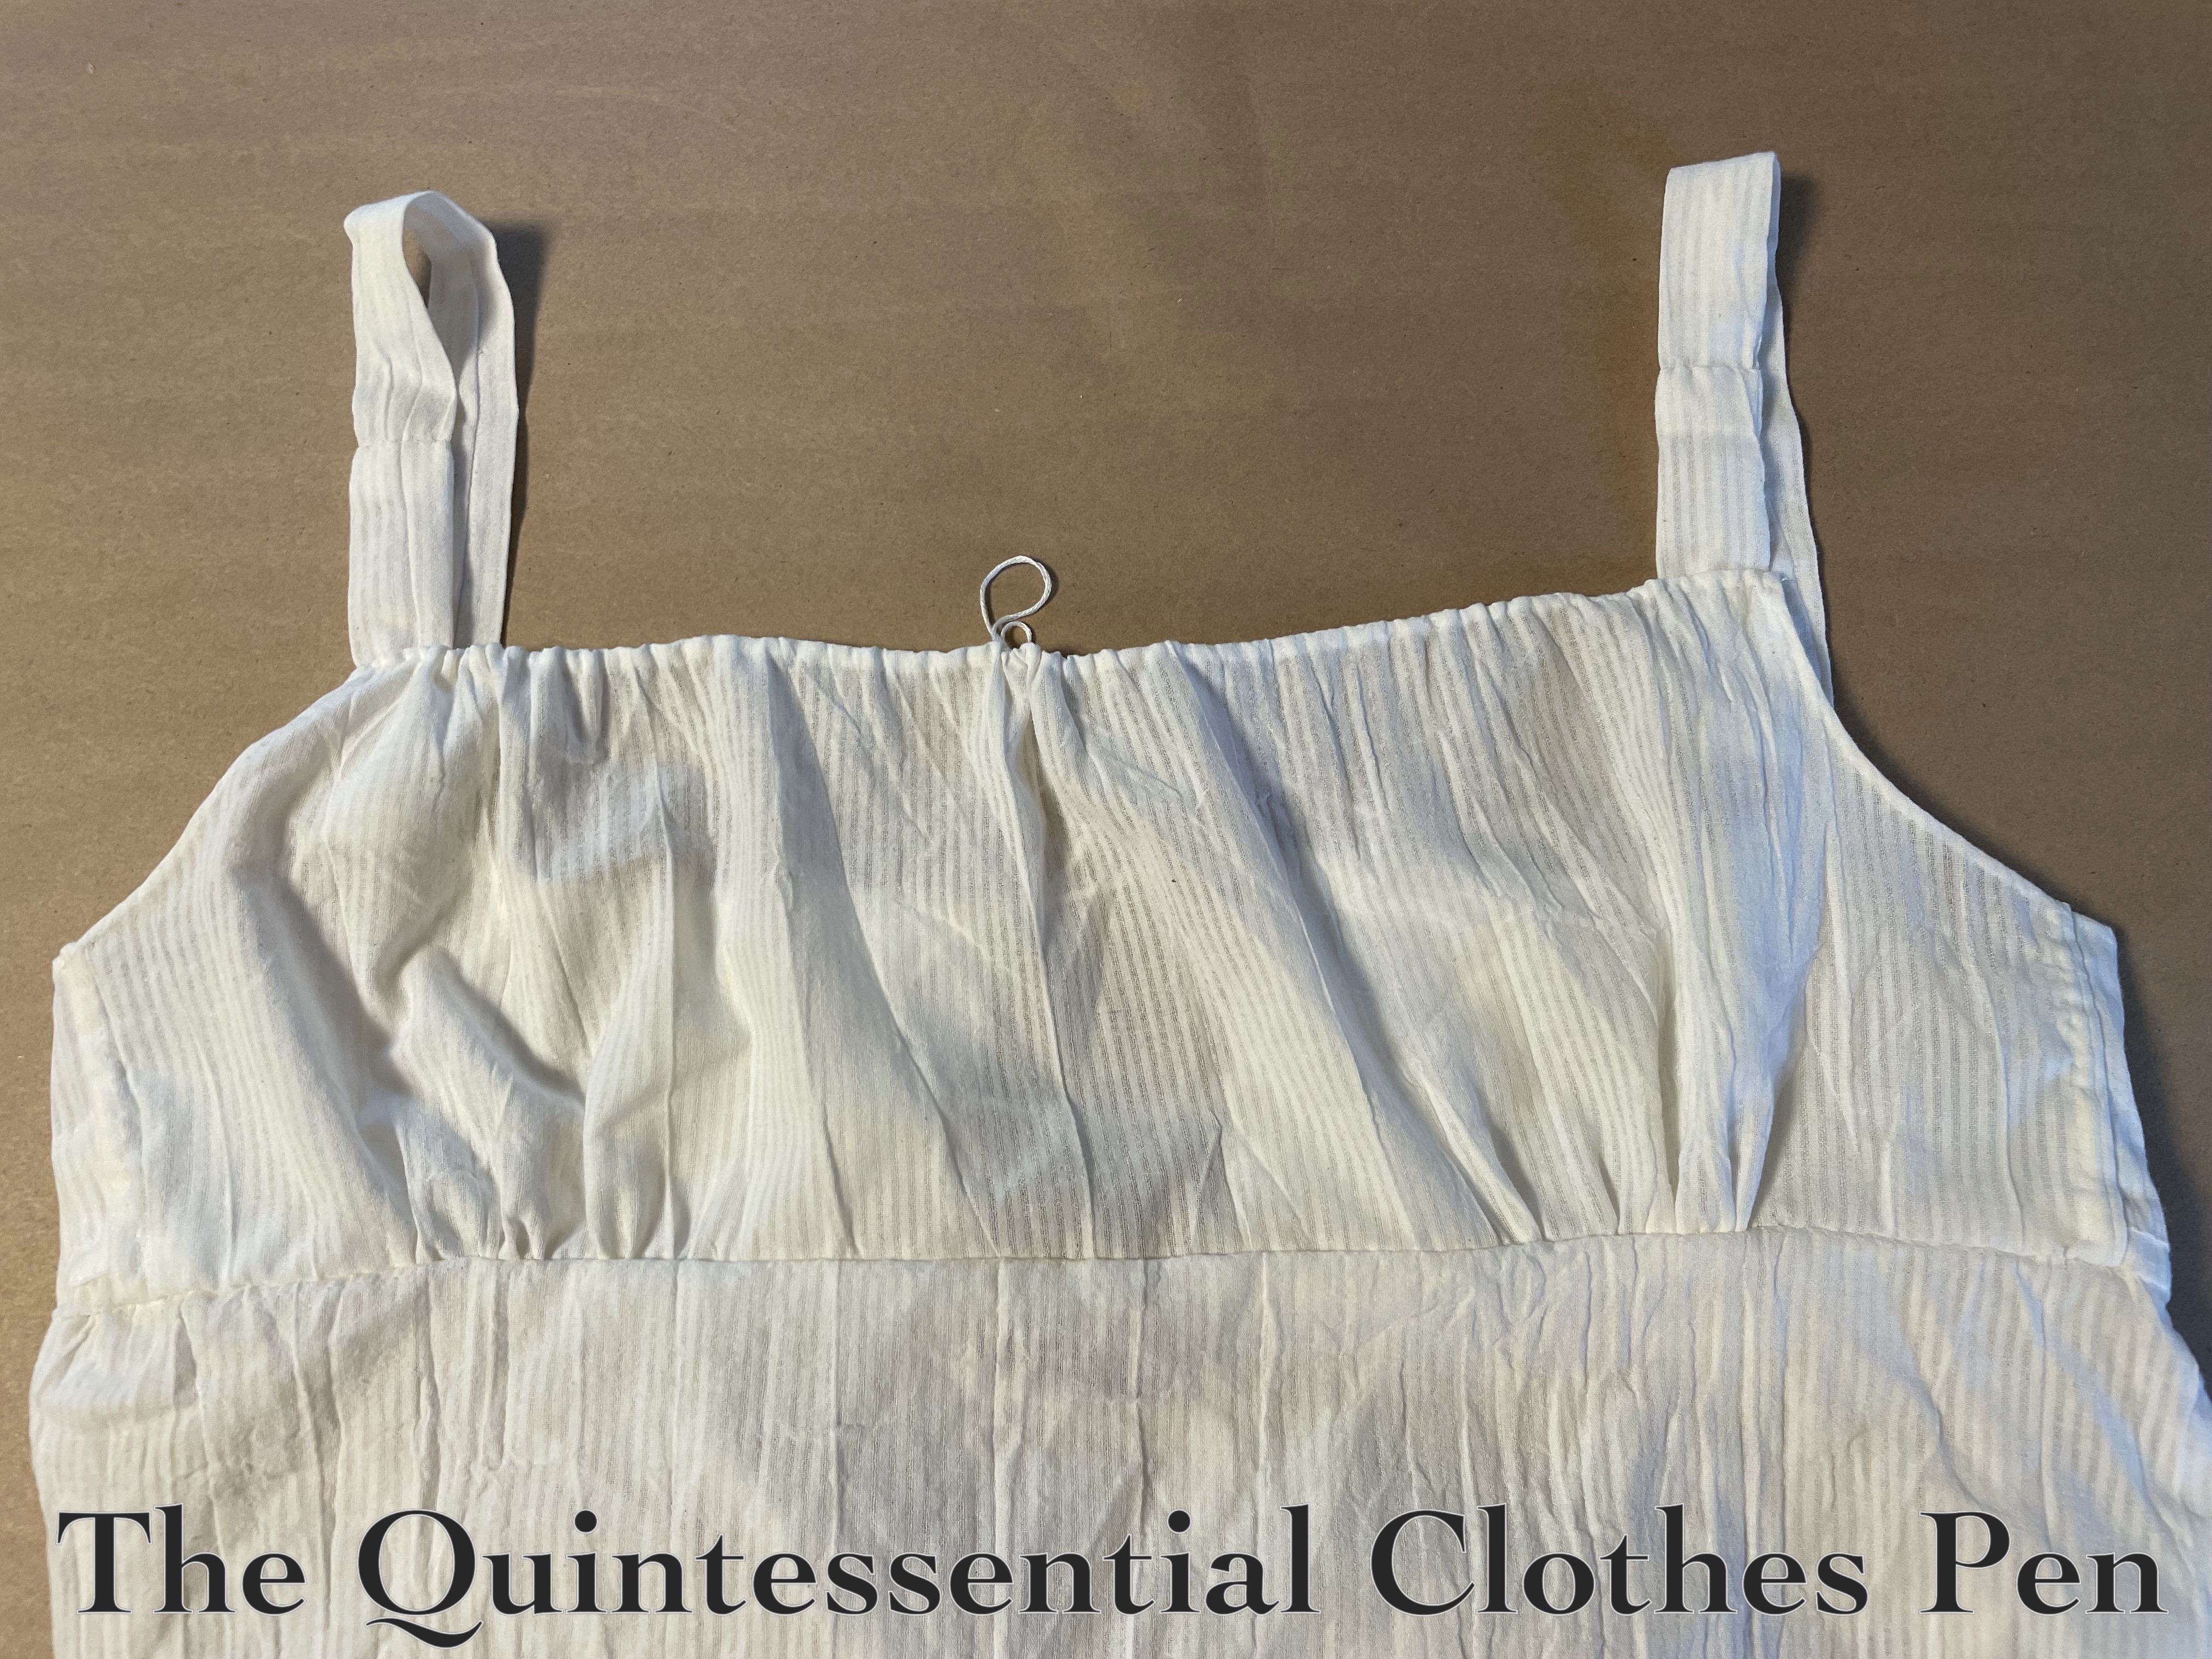
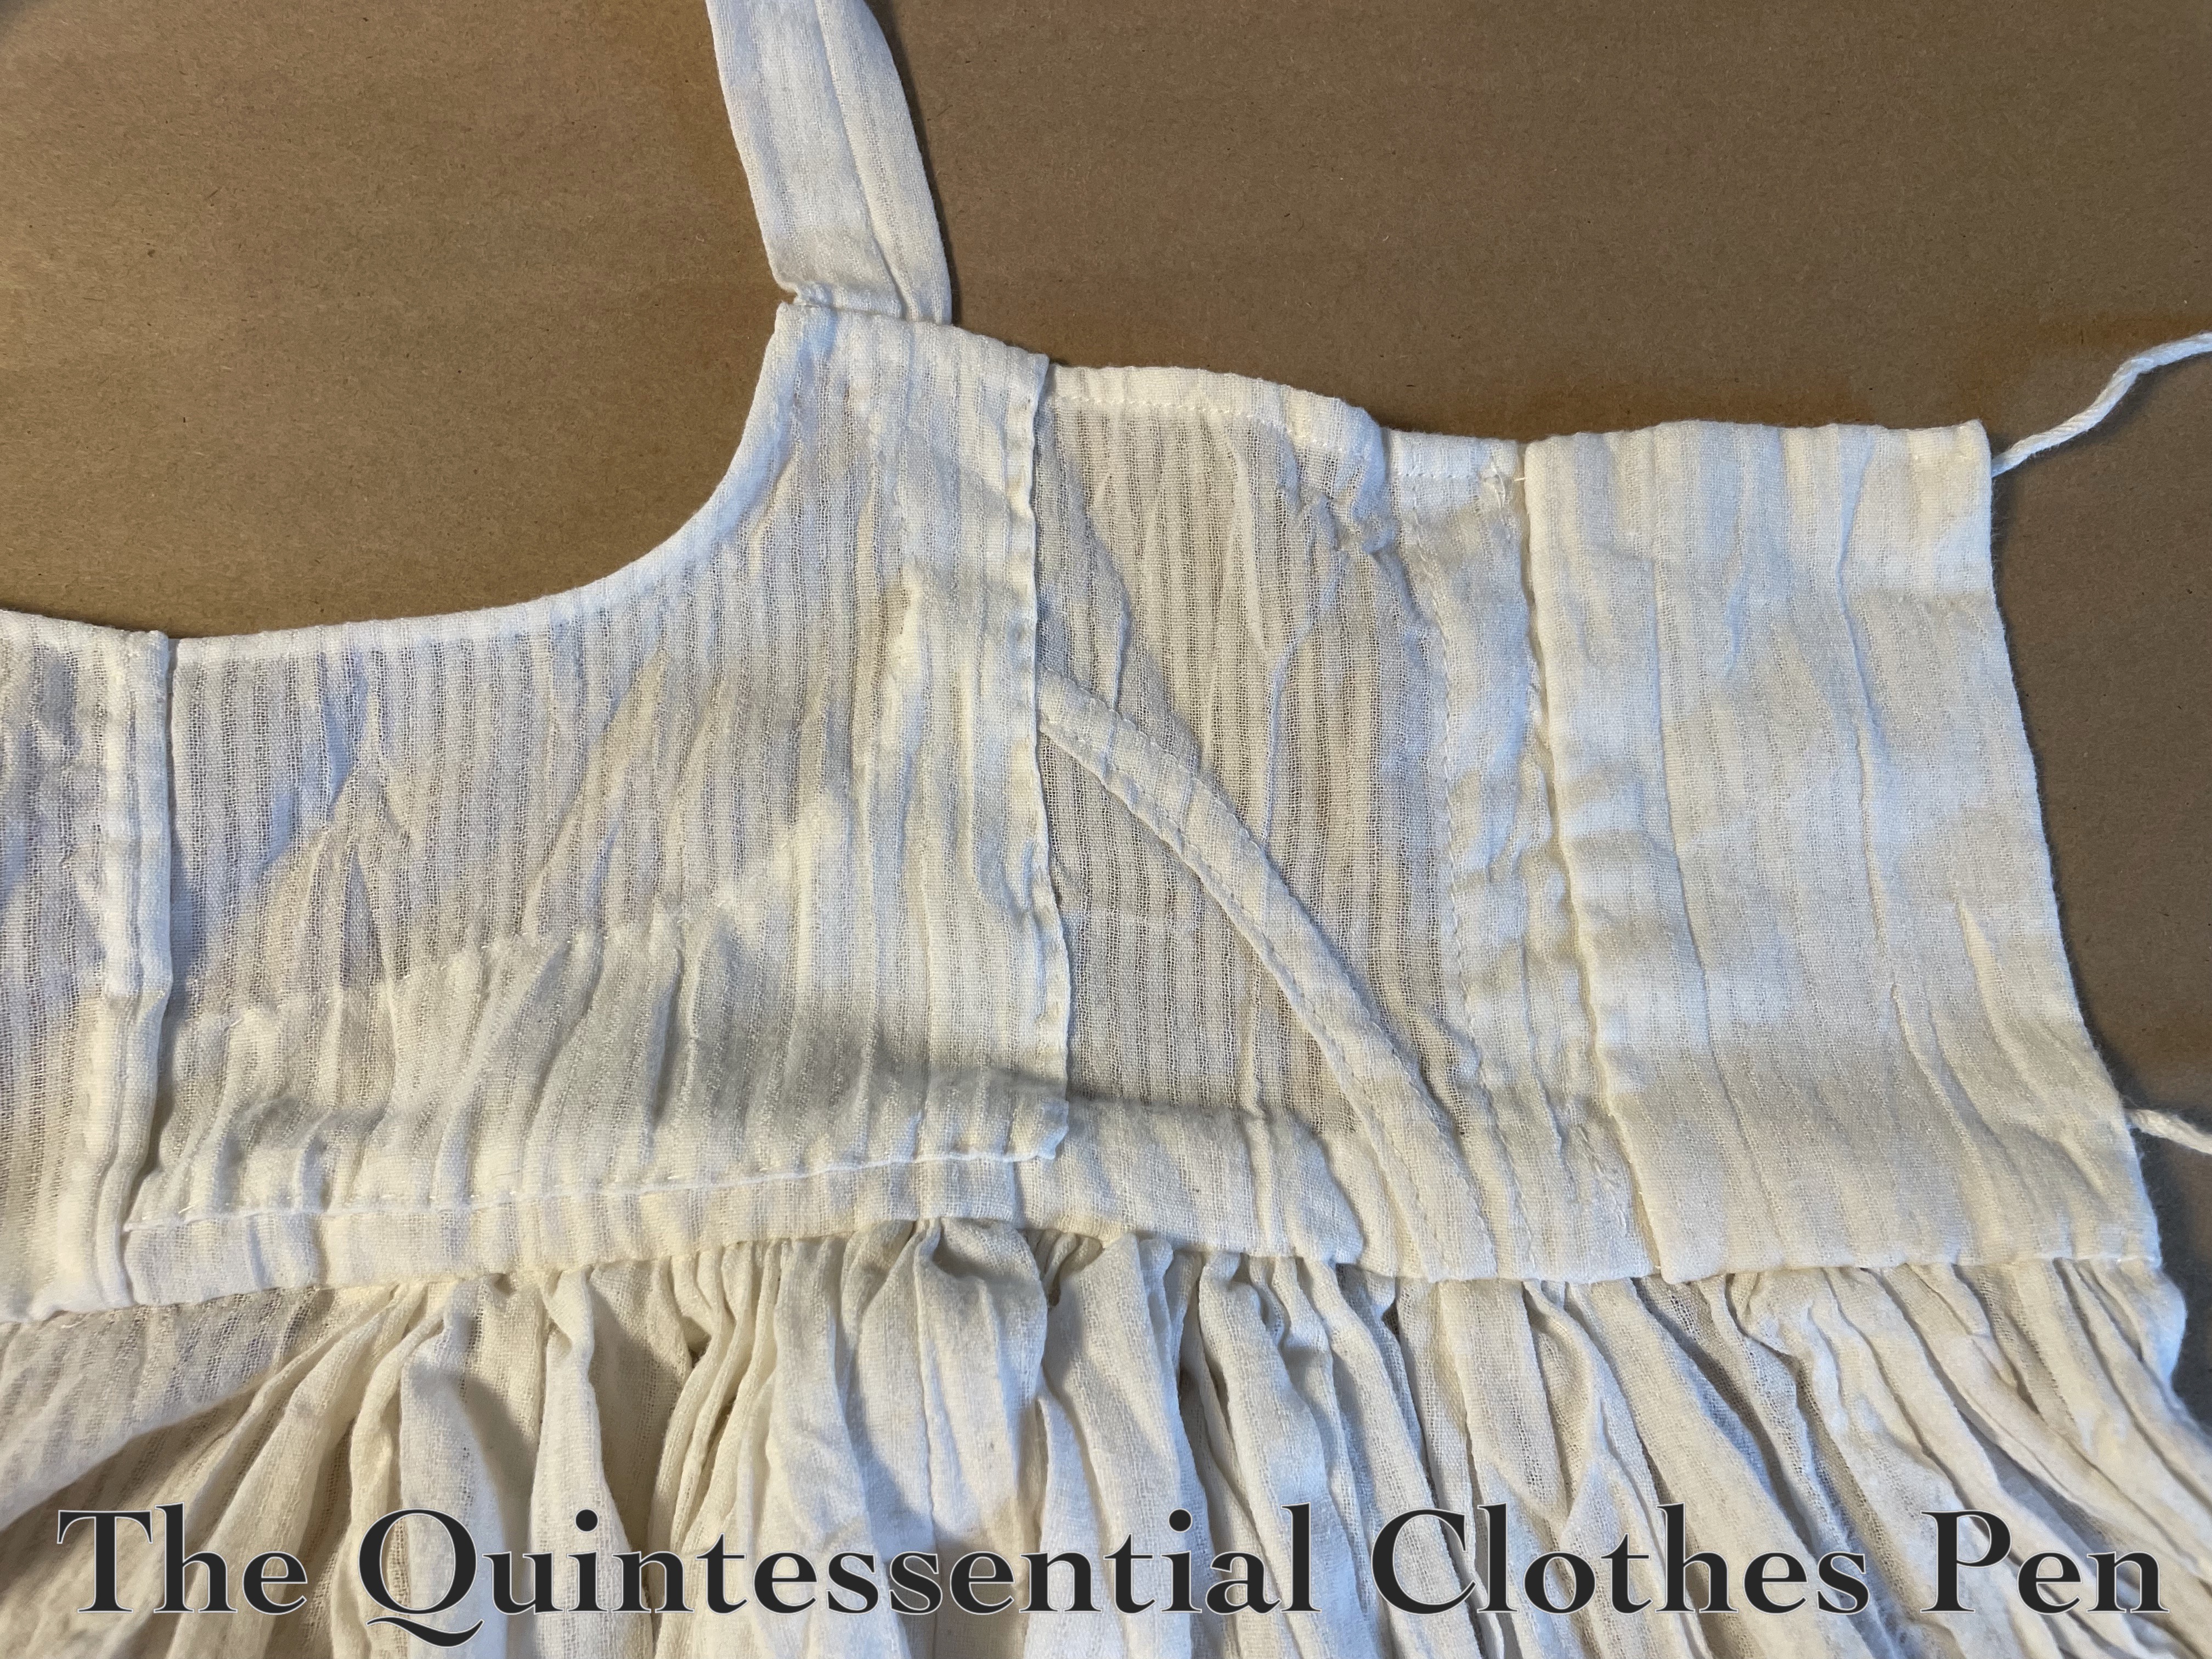
And here are closeups of my very pieced method of creating larger side back pieces (you can also see the extendo I added to the back at some point about 6 years ago).
Unfortunately, when I tried on the adjusted petticoat I realized that the armsceyes were uncomfortably small. I was not going to be able to deal with that! “Get it off!” was my exact though. To fix that problem, I added strap extender bits to the front of the straps.
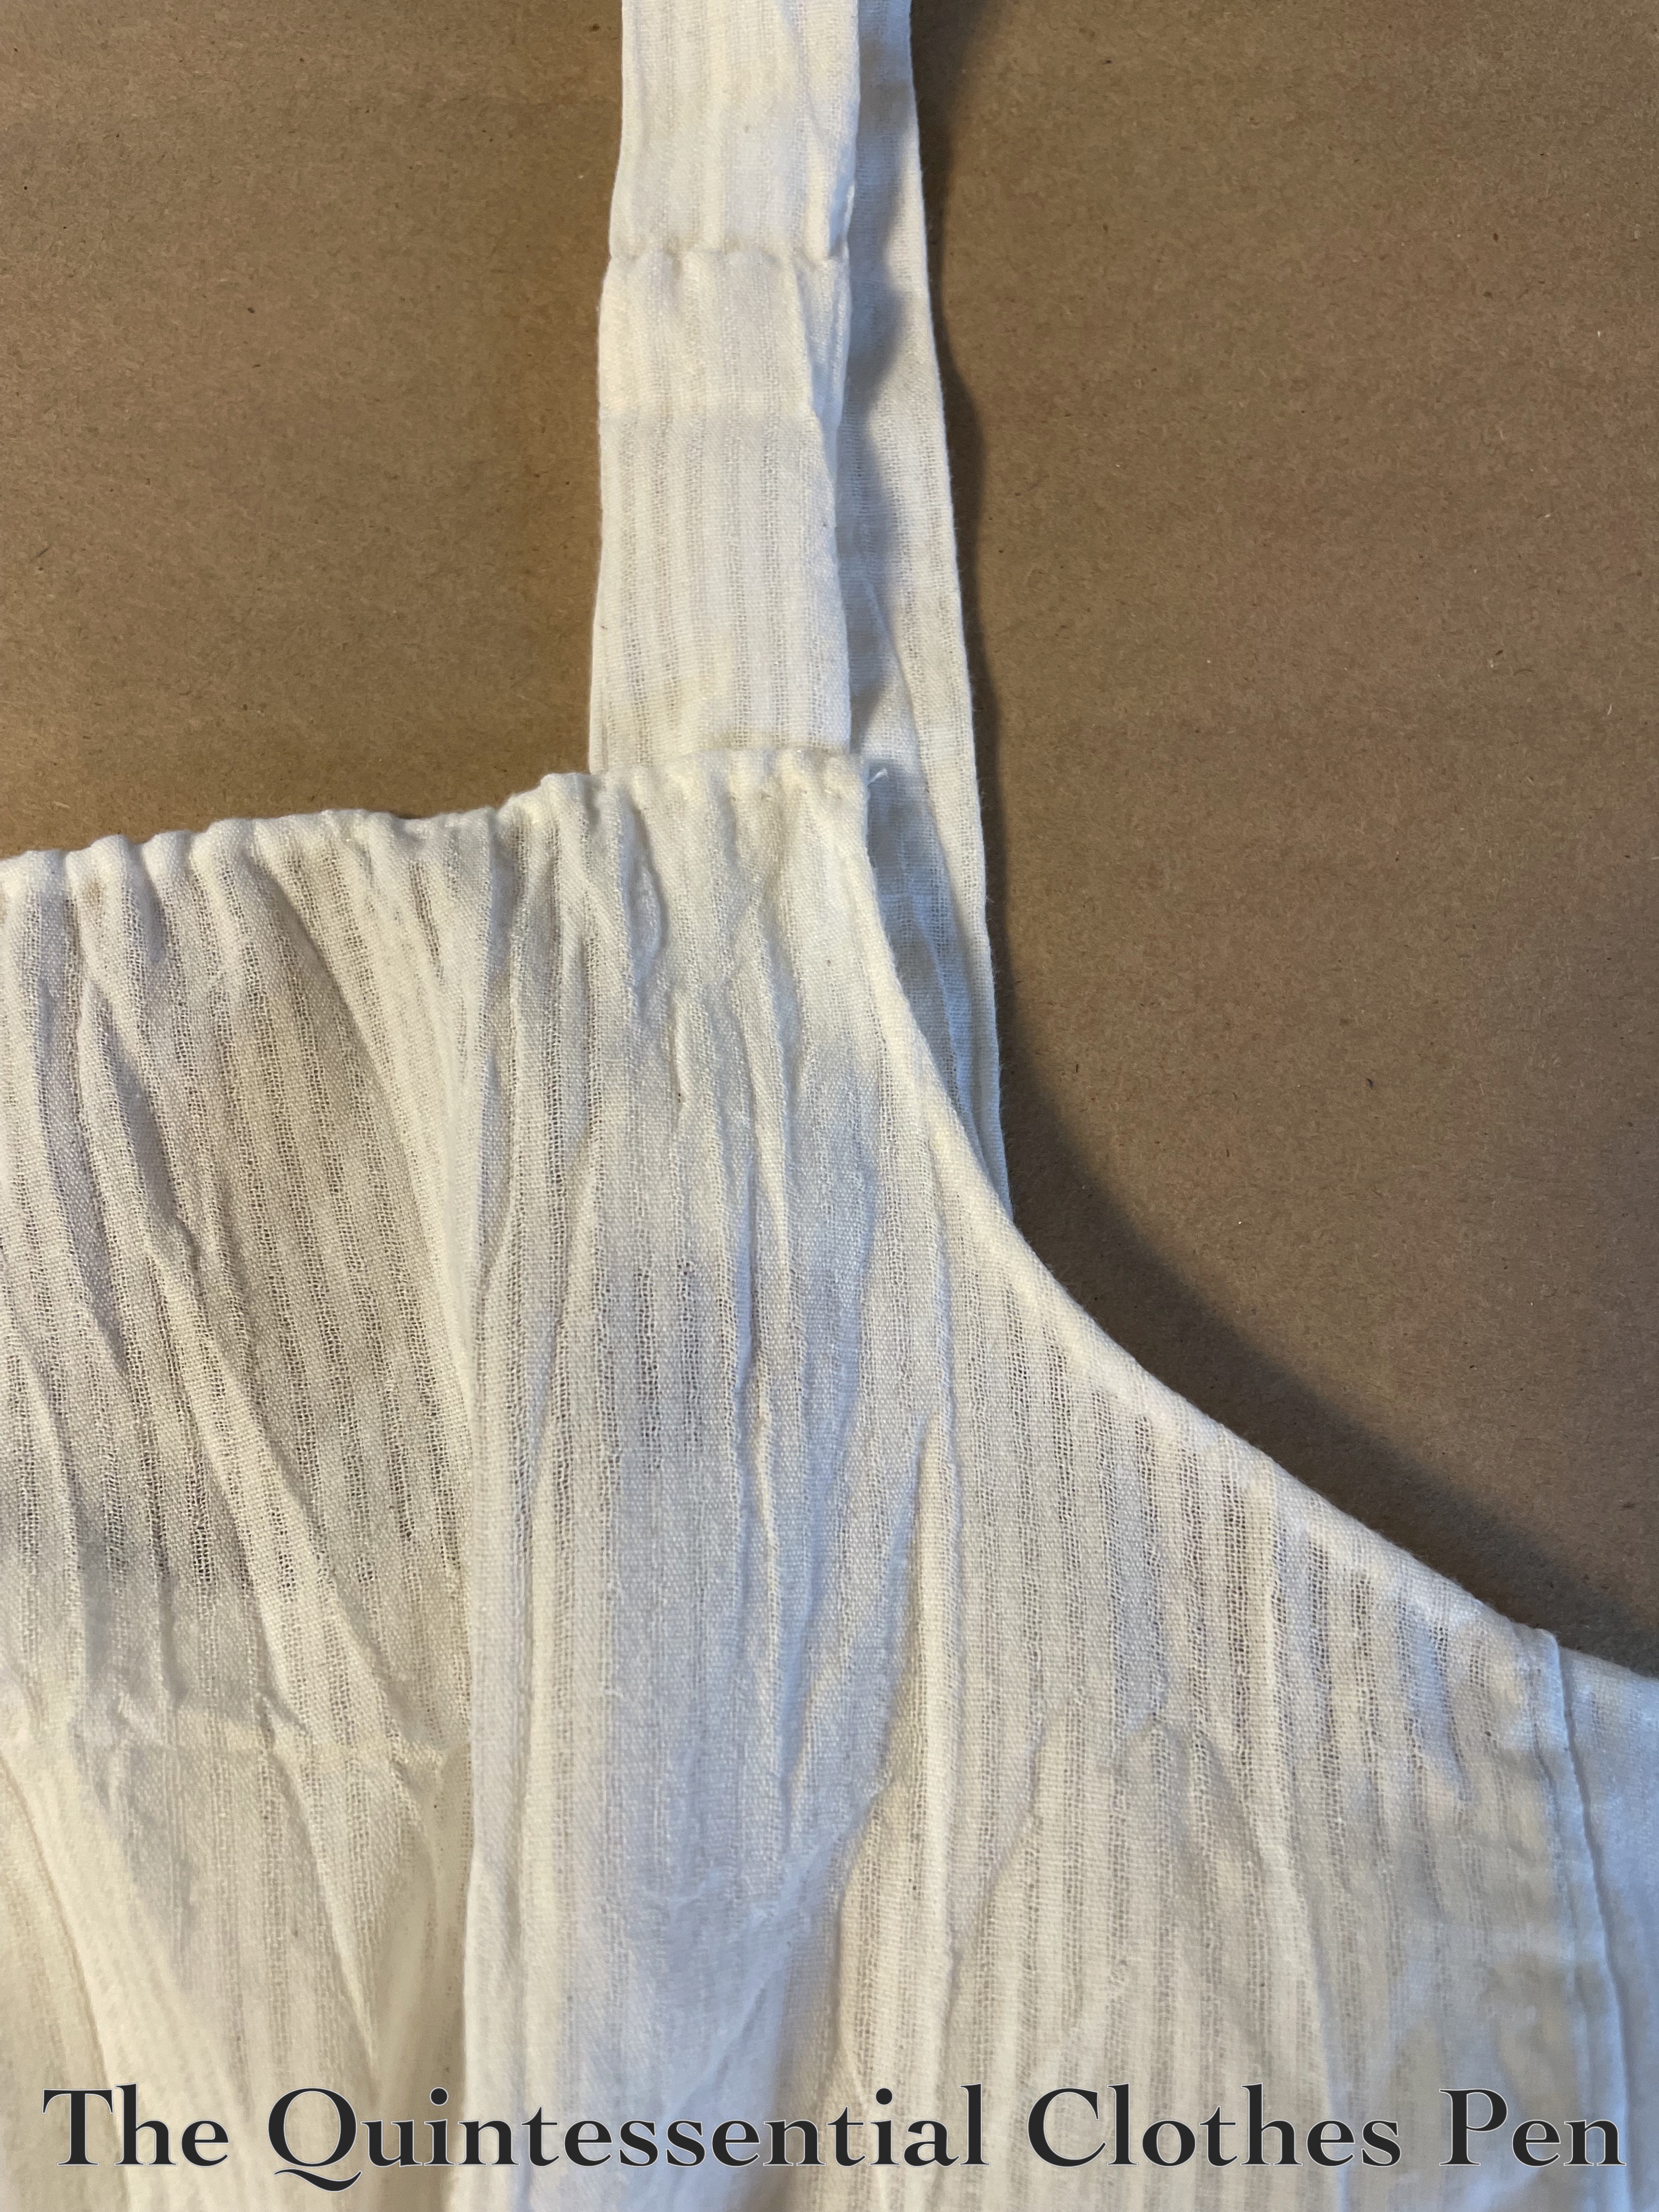
This worked great! And now, I have a petticoat that fits again! It covers my current bust size AND fits across the back (in fact, I made it even a little too wide across the back because I figured that might be helpful).

Here is a photo of the inside of the new front bodice piece. Both the old bodice front and the new one have a drawstring along the top edge. And you can see that I left additional strap length for theotrical future of letting-out.

I’m calling this my entry for the Historical Sew Monthly 2024 Challenge #5 New Clothes from Old:

Make something new out of a worn-out garment or accessory. Or make something using recycled materials.

I believe I’ve recycled a worn-out garment into something new and ready to use again!

Just the facts:

Fabric/Materials: Scraps of white cotton.

Pattern: My own.

Year: c. 1812.

Notions: Thread.

How historically accurate is it?: 100%. It’s completely reasonable to extend the life of a garment like this by altering it.

Hours to complete: 4? It took some time to seam rip and then I was meticulous about stitching the new pieces on. I didn’t really keep track.

First worn: On May 4.

Total cost: Free! Materials were scraps left over from the original project.

It took a bit longer than expected to hand sew all of the updates I needed to make, especially with the late-to-the-party addition of the strap update. I was pleased to finish this the day before it was needed! (More on that later!)

When The 1860s Drawers No Longer Fit (HSM #11: Worn By All)

I have a series of posts called When The Dress No Longer Fits that document how I’ve updated the size of various dresses I’ve made to fit better as my size changes over time (or as the dresses shrink in the closet, which is how I usually describe it!).

In this case, I’ve adapted that post-naming-style for another garment I recently updated. In this case, I altered an old pair of 1860s drawers rather than a dress!

It brings me joy to be able to extend the life of garments I already have in my closet. For these drawers, being able to adjust the size of the waistband has allowed me to continue to use them for many years. Proof: I documented these drawers on the blog in 2013 (and I’m pretty sure I made them in 2011 or 2012) so they have being faithfully serving their duty for over 10 years!

In that time, they’ve seen lots of use. I’m pleased that they have held up very well. About 8 years ago, I let down some tucks to make the legs a little longer (so that the top of my stockings/knees wouldn’t show–because, gasp, that would be shocking!) and I also increased the waistband size about 6 years ago. Below, a photo of the drawers with those first round of alterations made.

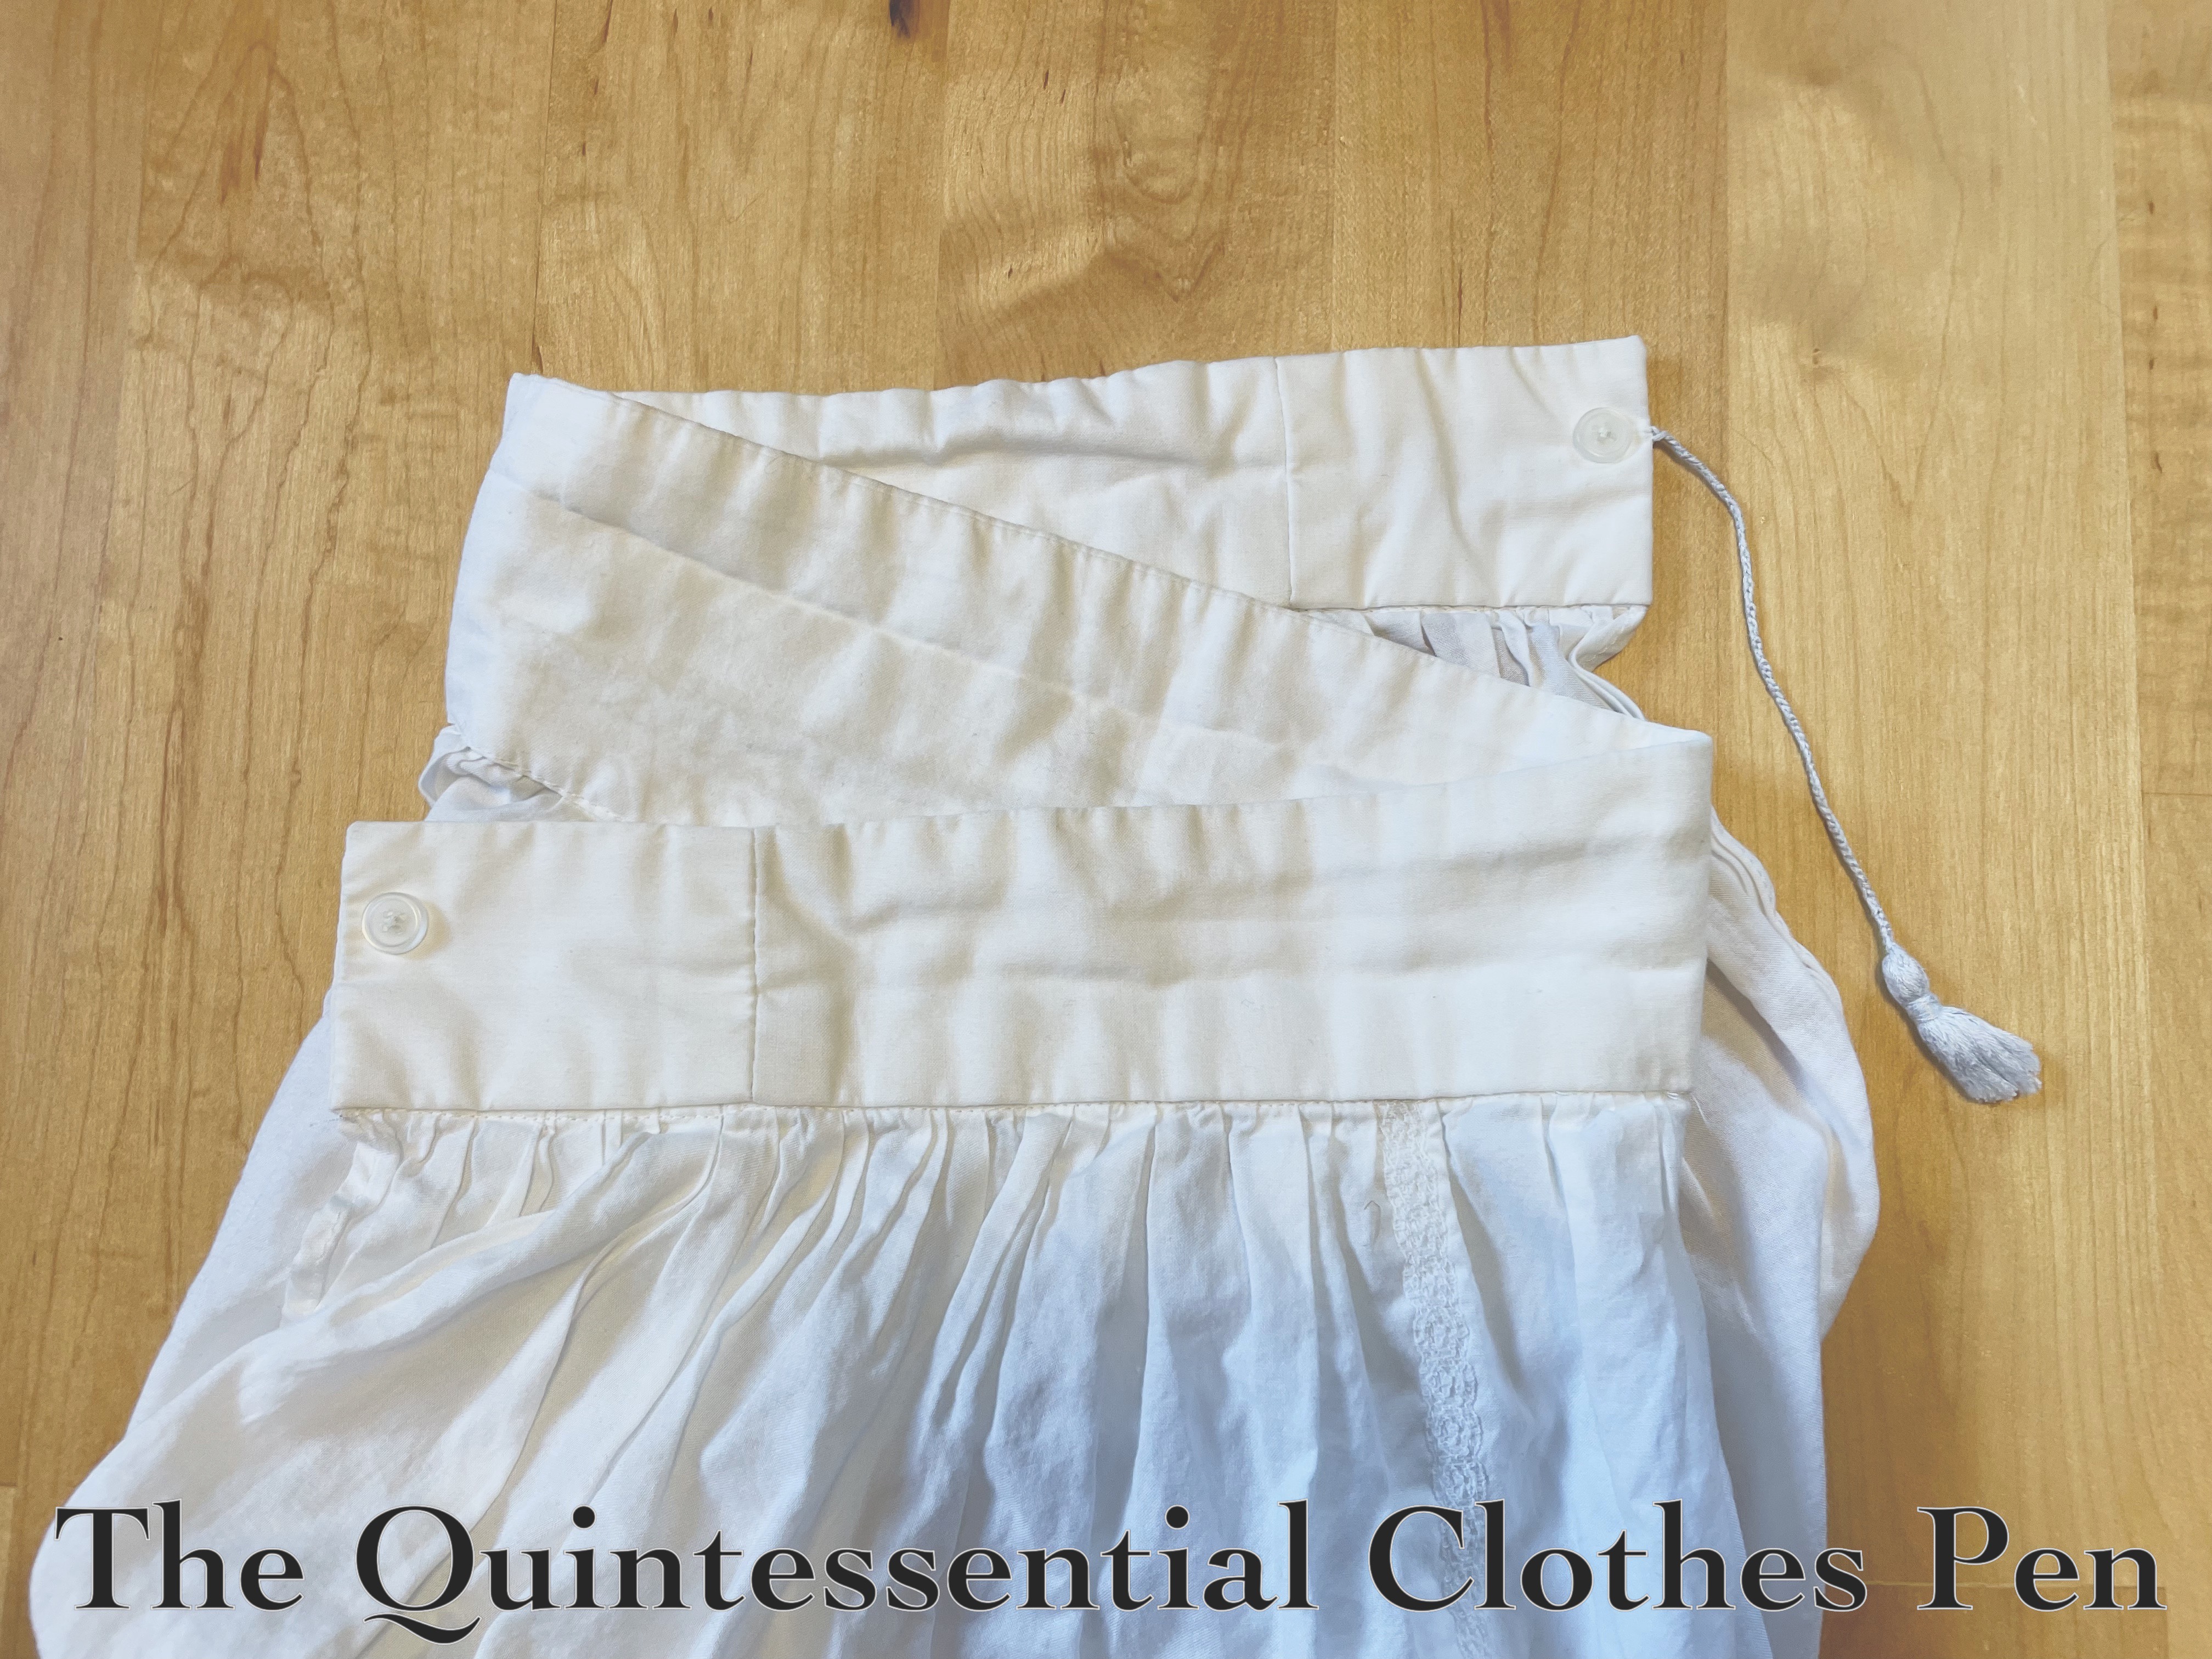
And below is a closeup of the waistband after that first round of alterations. I don’t remember why I thought a closure method of a cord looped in a figure eight around two buttons made sense. I can’t remember a source for this idea… but it has worked for many years. It’s been wonderful because it allows for adjustability (up to a point of running out of cord length to loop between the buttons securely, of course).

But recently, even with the increased waistband size, there was still a gap at the waist and the gathering of the legs into the waistband was no longer distributed in a way that helped the back edges stay closed when being worn. That’s not the end of the world in terms of modesty, as I always have a chemise on underneath, but it wasn’t my favorite look, either.

So I decided to do something about it. I added yet another extendo to the waistband. “Why remake the entire waistband?” I mused. The would need a bigger section of fabric and be more work. No one sees the waistband of my drawers except me, friends getting dressed near me, and you readers on the blog!

So now, here are the most recent updates to these old drawers, with a second extendo added to the waistband. Taking the waistband apart to add the new pieces reminded me that I’d stiffened the waistband lightly by adding a layer of linen in between the two layers of cotton. This is a note to self that this method has worked well, creating a waistband that doesn’t collapse and wrinkle horribly around the waist while also not being super stiff.

I also decided to change the closure method to a button and button hole. The old wrapping the cord in a figure eight method had the added challenge of being a bit tricky to do behind my own back. I decided that while a button would be less adjustable (without resewing it), the larger size button would be easier to do up than the cord wrapping.

I also made a bit of extra waistband for the day when I might need to increase the waist size even more (but I’ll pretend that day isn’t coming). And I decided to hand sew the buttonhole, because it was being fussy on my machine and I figured it would be faster to sew it by hand than fight the machine!

Here is a closeup of what the waistband looks like with the most recent extendo. For this round of alterations, I also completely removed the waistband and redistributed the gathers and side points to better match the new waistband size (these alterations are machine sewn). This makes the drawers more effectively lay in place.

I’m calling this my entry for the Historical Sew Monthly 2024 Challenge #11: Worn by All:

Make a garment that would be worn as everyday clothing by most social classes during your chosen time period and/or place.

Just the facts:

Fabric/Materials: Scraps of white cotton and linen (Is it the same white cotton and linen as the original drawers? Nope, but that’s ok with me for this project!)

Pattern: None. I just added rectangles.

Year: c. 1860.

Notions: 1 shell button and thread.

How historically accurate is it?: 98%. It’s completely reasonable to extend the life of a garment like this by altering it. The only non-accurate thing might be the machine sewing–although it is pretty subtle!

Hours to complete: 2? I didn’t really keep track.

First worn: Worn on May 19 with an 1860s ensemble.

Total cost: Free! Materials were scraps left over from other projects.

This was one of the small sewing tasks on my Maybe-To-Do list for 2024 as well as being one of the small projects that was stacking up on my alterations-and-mending pile. I’m so pleased to have checked it off!

18th Century Blue Foundation Petticoat (HSM #8)

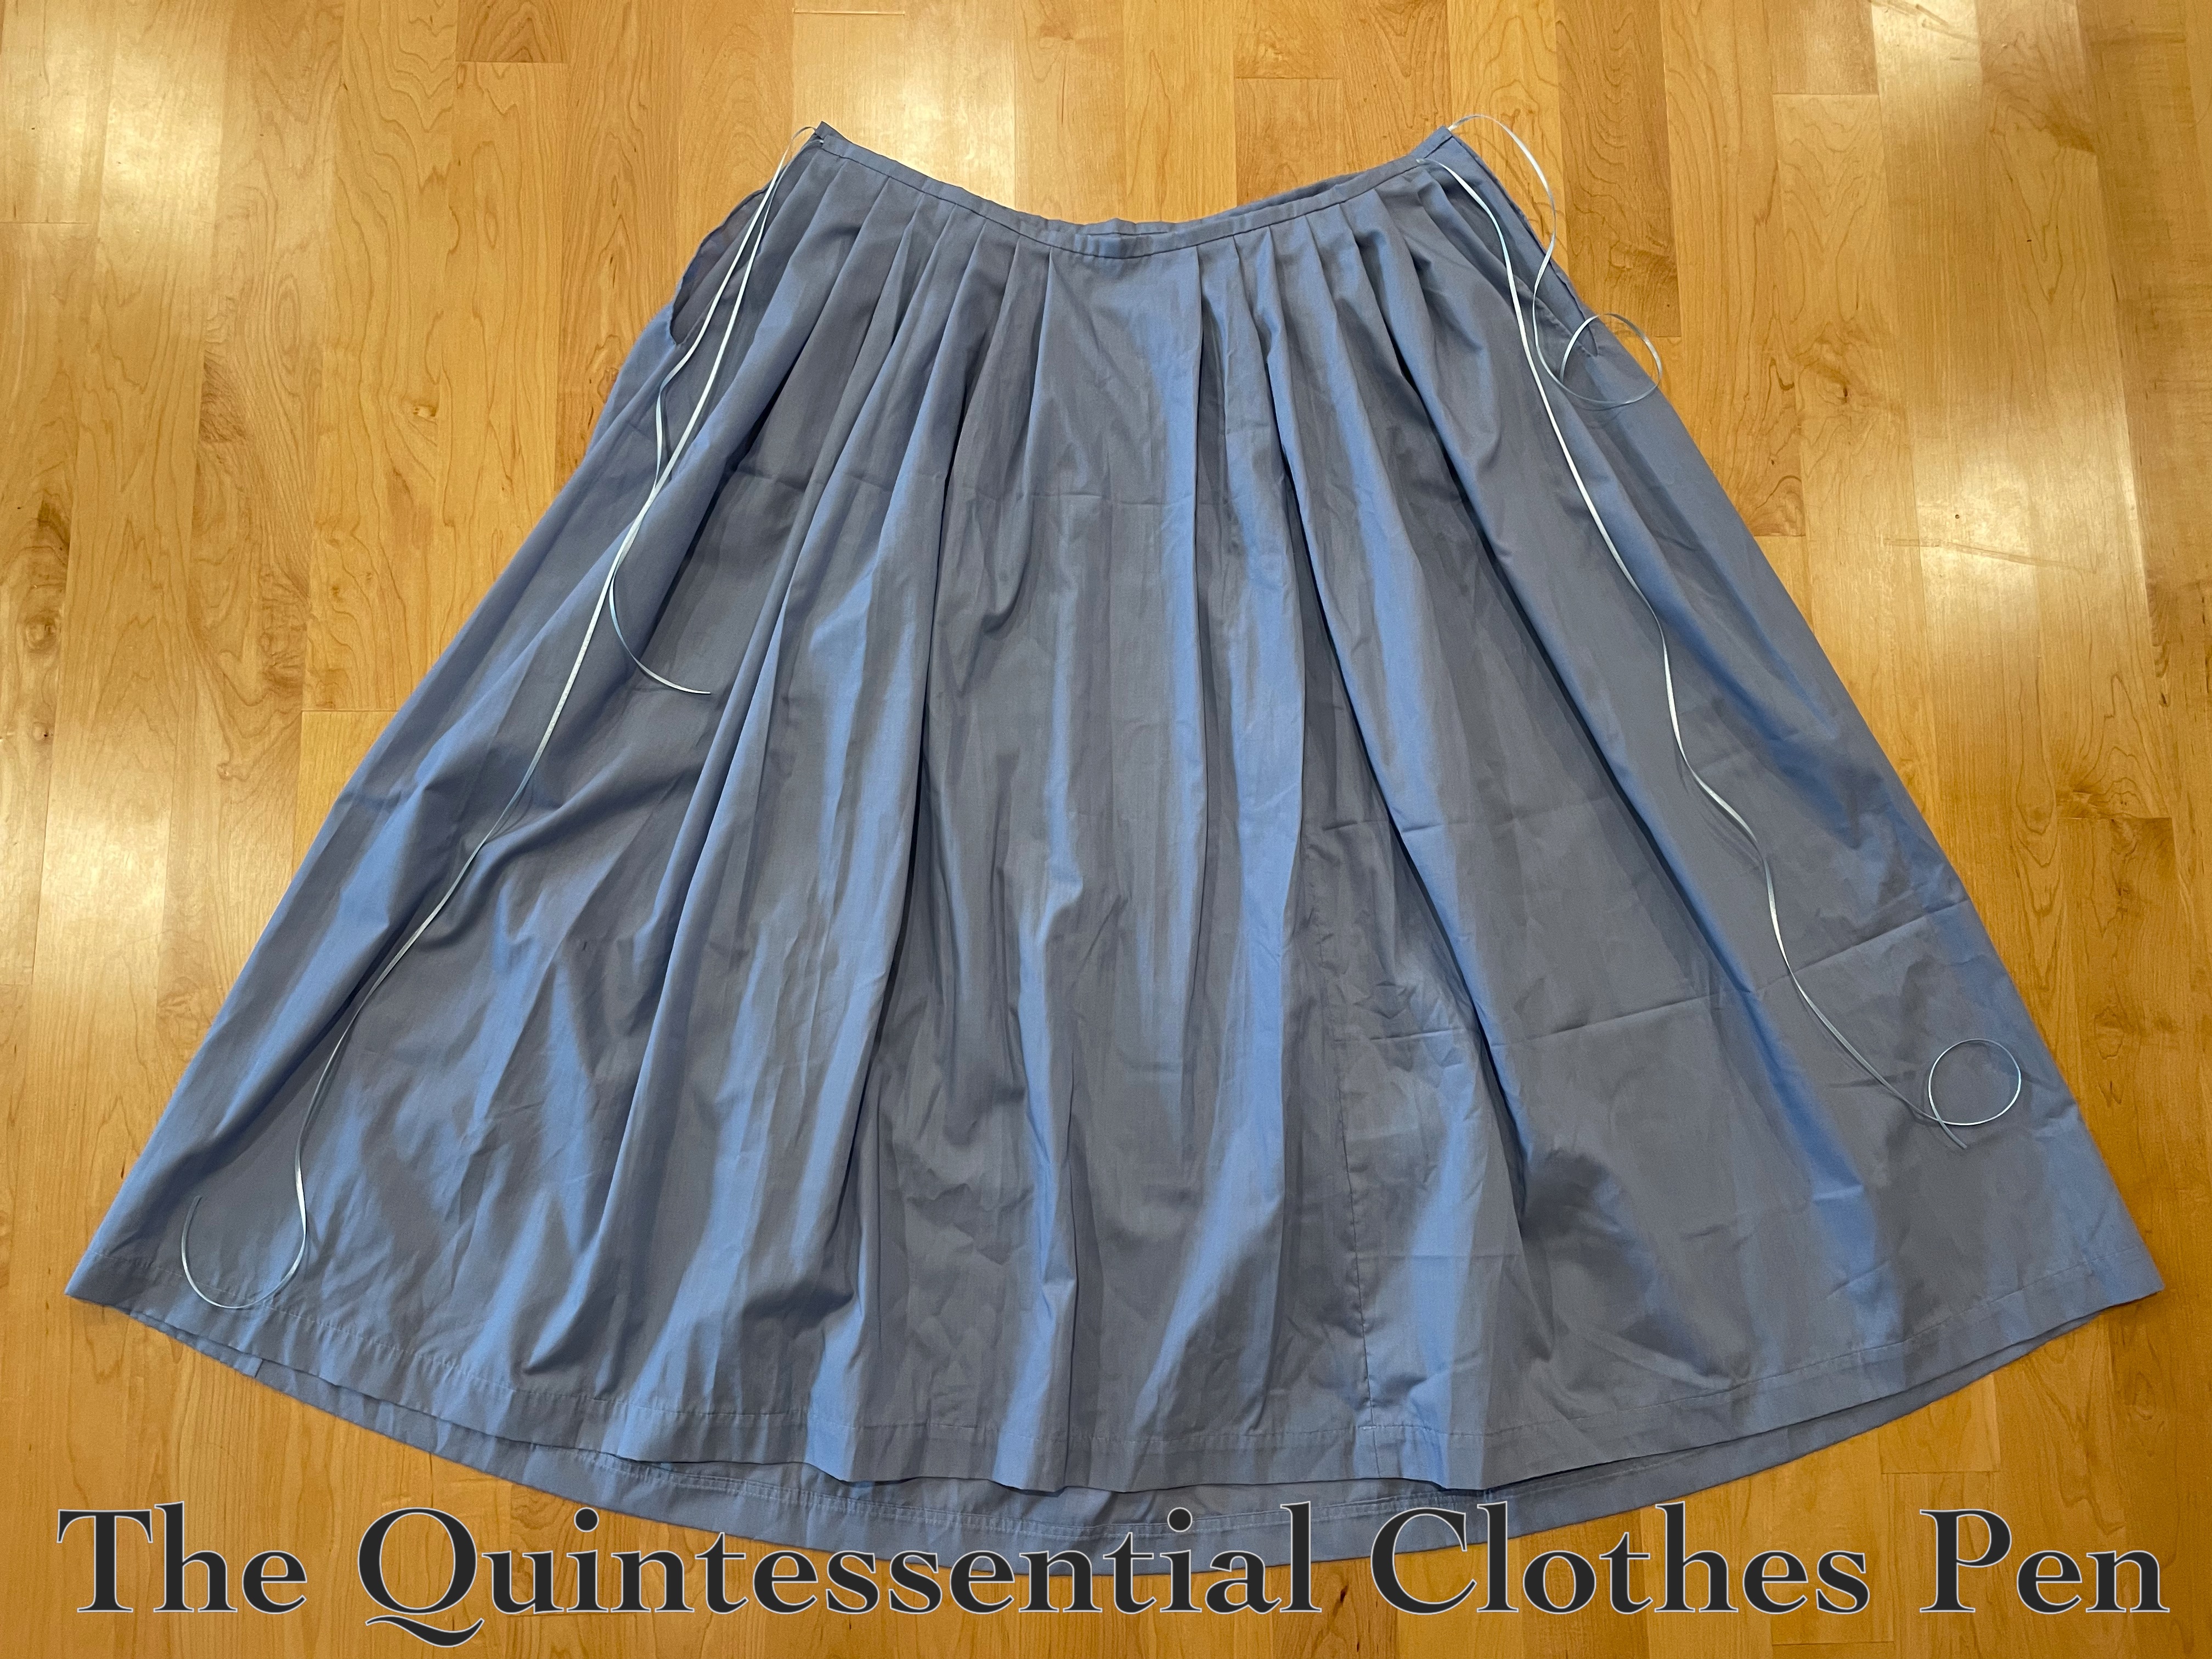
In addition to the c. 1770 Pink Panniers that I recently posted about, the blue foundation petticoat pictured below (front view) is also intended to be easily loaned to friends.

I’m super pleased with this for a few reasons:

1 – I was able to easily replicate the construction steps that I used for my Apricot Petticoat in 2013, ten years ago!

2 – I was able to re-make the petticoat from an old project: the 1812 Blue Under Dress I also made in 2013. I was never very happy with this color under my 1812 Striped White Gown (it was blah) and within even a few years of being made it no longer fit the width of my back, anyway.

3 – This remake qualifies for the HSM Challenge # 8, All Tied Up:

Make something that closes with ties, or something that uses knots/bows as a decorative feature.

Just the facts:

Fabric/Materials: Approximately 3-4 yards blue cotton/polyester blend fabric (salvaged from an old dress).

Pattern: None, but I referenced both of these tutorials on constructing 18th century petticoats. Katherine’s tutorial is for a petticoat with an uneven length (to go over panniers, or a bum roll, for example). Rebecca’s tutorial is for a petticoat with an even length (the same length all the way around, to be worn without extra supports). Both tutorials have construction information, Rebecca’s includes a bit more detail in terms of which stitches and methods to use.

Year: Loosely 1700-1790.

Notions: 3ish yards of 1/8″ blue polyester ribbon and thread.

How historically accurate is it?: 70%. Accuracy gets knocked down because: 1- all unseen seams are machine sewn, 2- I used polyester ribbon for ties, 3- I haven’t seen research that shows cotton being used at this time for a single plain petticoat of this sort.

Hours to complete: 5? I didn’t really keep track.

First worn: Has not been worn yet.

Total cost: Free! Materials were either in the stash/gifted to me or re-used from other projects.

Here are more photos of the petticoat, starting with a back view.

And, close-up evidence of weird things, such as the twice-stitched machine hem, which could be useful if I ever want to lengthen this petticoat. These hems are leftovers from the salvaged dress–no hemming required for this petticoat. Perfect!

I followed the instructions as indicated in Just The Facts earlier in this post. This leads to tidily finished waistbands, as you can see here (along with a randomly located vertical seam).

(Another weird thing about this petticoat is where the seams landed on this, now that it is a petticoat and not the skirt of a dress, and that each seam is finished in a different method!)

And here’s a the same view, but with the front folded down to show how the petticoat is made shorter at center from than it is anywhere else.

Below, a final closeup of the extra length at the front folded down and left raw. The top fold is encased in the waistband, which is machine sewn and whip stitched down on the inside.

I was super pleased to just barely fit this petticoat length out of the skirt length of the old dress. The hem circumference was just about perfect, too! And, I was able to cut the waistband strips from the front bodice pieces of the original dress!

All in all, a quick and satisfying project! I’m much more pleased with this as a petticoat than I ever was with it as a dress.

c. 1770 Pink Panniers (HSM #12)

I have a longer-term goal to make a another sacque (similar the one I made for Versailles in 2016–documented in these many past posts). I specifically want this new one to be loan-able to a few friends, so I’m adjusting the size a bit from the one I made for myself.

I know that foundations make the garment on top look good, so it’s important to me to also be able to provide the foundation pieces that might be needed to go with the sacque. Stays are covered, as I now have the c. 1785 Green Linen Stays that can be loaned and/or some friends have their own, but panniers and an additional foundation petticoat felt like items that I don’t already have and therefore should make in addition to the sacque itself.

This post is going to document the panniers I made for this new ensemble. I’m pleased that they qualify for the Historical Sew Monthly Challenge #12, Paired to Perfection:

Make something that comes in a pair (mittens, stockings, garters, braces etc.) Or make something in which the trim or construction prominently features sets of two.

Just the facts:

Fabric/Materials: 1 yd (or probably a little less) pink cotton twill.

Pattern: The Dreamstress’s pattern from the Pannier Along in (oh my, has it been this long…???) 2013! All the steps, information, etc. is available on Leimomi’s blog, here.

Year: c. 1770.

Notions: Thread, 3 24″ x 3/8″ zip ties, and approximately 2 yds grosgrain ribbon.

How historically accurate is it?: 70%. Machine sewing and materials are generally not historically accurate, but the overall pattern and shapes are.

Hours to complete: I didn’t really keep track. Let’s say 5.

First worn: Has not been worn yet.

Total cost: All of the materials are from the stash (leftovers from other projects), so let’s say free!

A view of the top of the stays, with them collapsed down on themselves.

I made these following all of the steps in The Dreamstress’s tutorial, as mentioned above. I decided to mostly machine sew them, in the spirit of speed and because I knew the fabric I chose was not accurate to start with.

I made my boning channels out of the same fabric as the exteriors (pink cotton twill leftover from making early 19th century stays over ten years ago).

There are only two hand sewn bits. One is the slit on top (to be able to use these as pockets and store things in them), pictured below. Each slit is reinforced at the bottom to keep the fabric from ripping during use.

The other hand sewn bit is the band at the top, which is whipped down after being machine sewn on.

And that’s it! Pink panniers! It has a bit of a ring to it, I think!

1790s Organza Cap With Gold Stripe Trimming (HSM #5)

I’ve been on a roll finishing up foundation and accessory projects that I started over the summer as smaller pieces of larger ensembles I have in the works! Today, I’m sharing about a hand sewn 1790s cap!

This accessory qualifies for the Historical Sew Monthly Challenge #5, Hair Apparel:

Make something worn in the hair or on the head.

Just the facts:

Fabric/Materials: ¼ yd white linen, ¼ yd white silk organza, ¼ yd gold striped polyester organza, and 1 yd ¼” white cotton twill tape.

Pattern: 1790s “Vigée le Brun” Turban Cap in the book The American Duchess Guide To 18th Century Dressmaking, by Lauren Stowell and Abby Cox.

Year: c. 1790.

Notions: Thread.

How historically accurate is it?: 95%. Polyester is obviously not historically accurate, but most of the materials,  methods, and hand sewing method are.

Hours to complete: 5.

First worn: Has not been worn yet.

Total cost: All of the materials are from the stash (leftovers from other projects), so let’s say free!

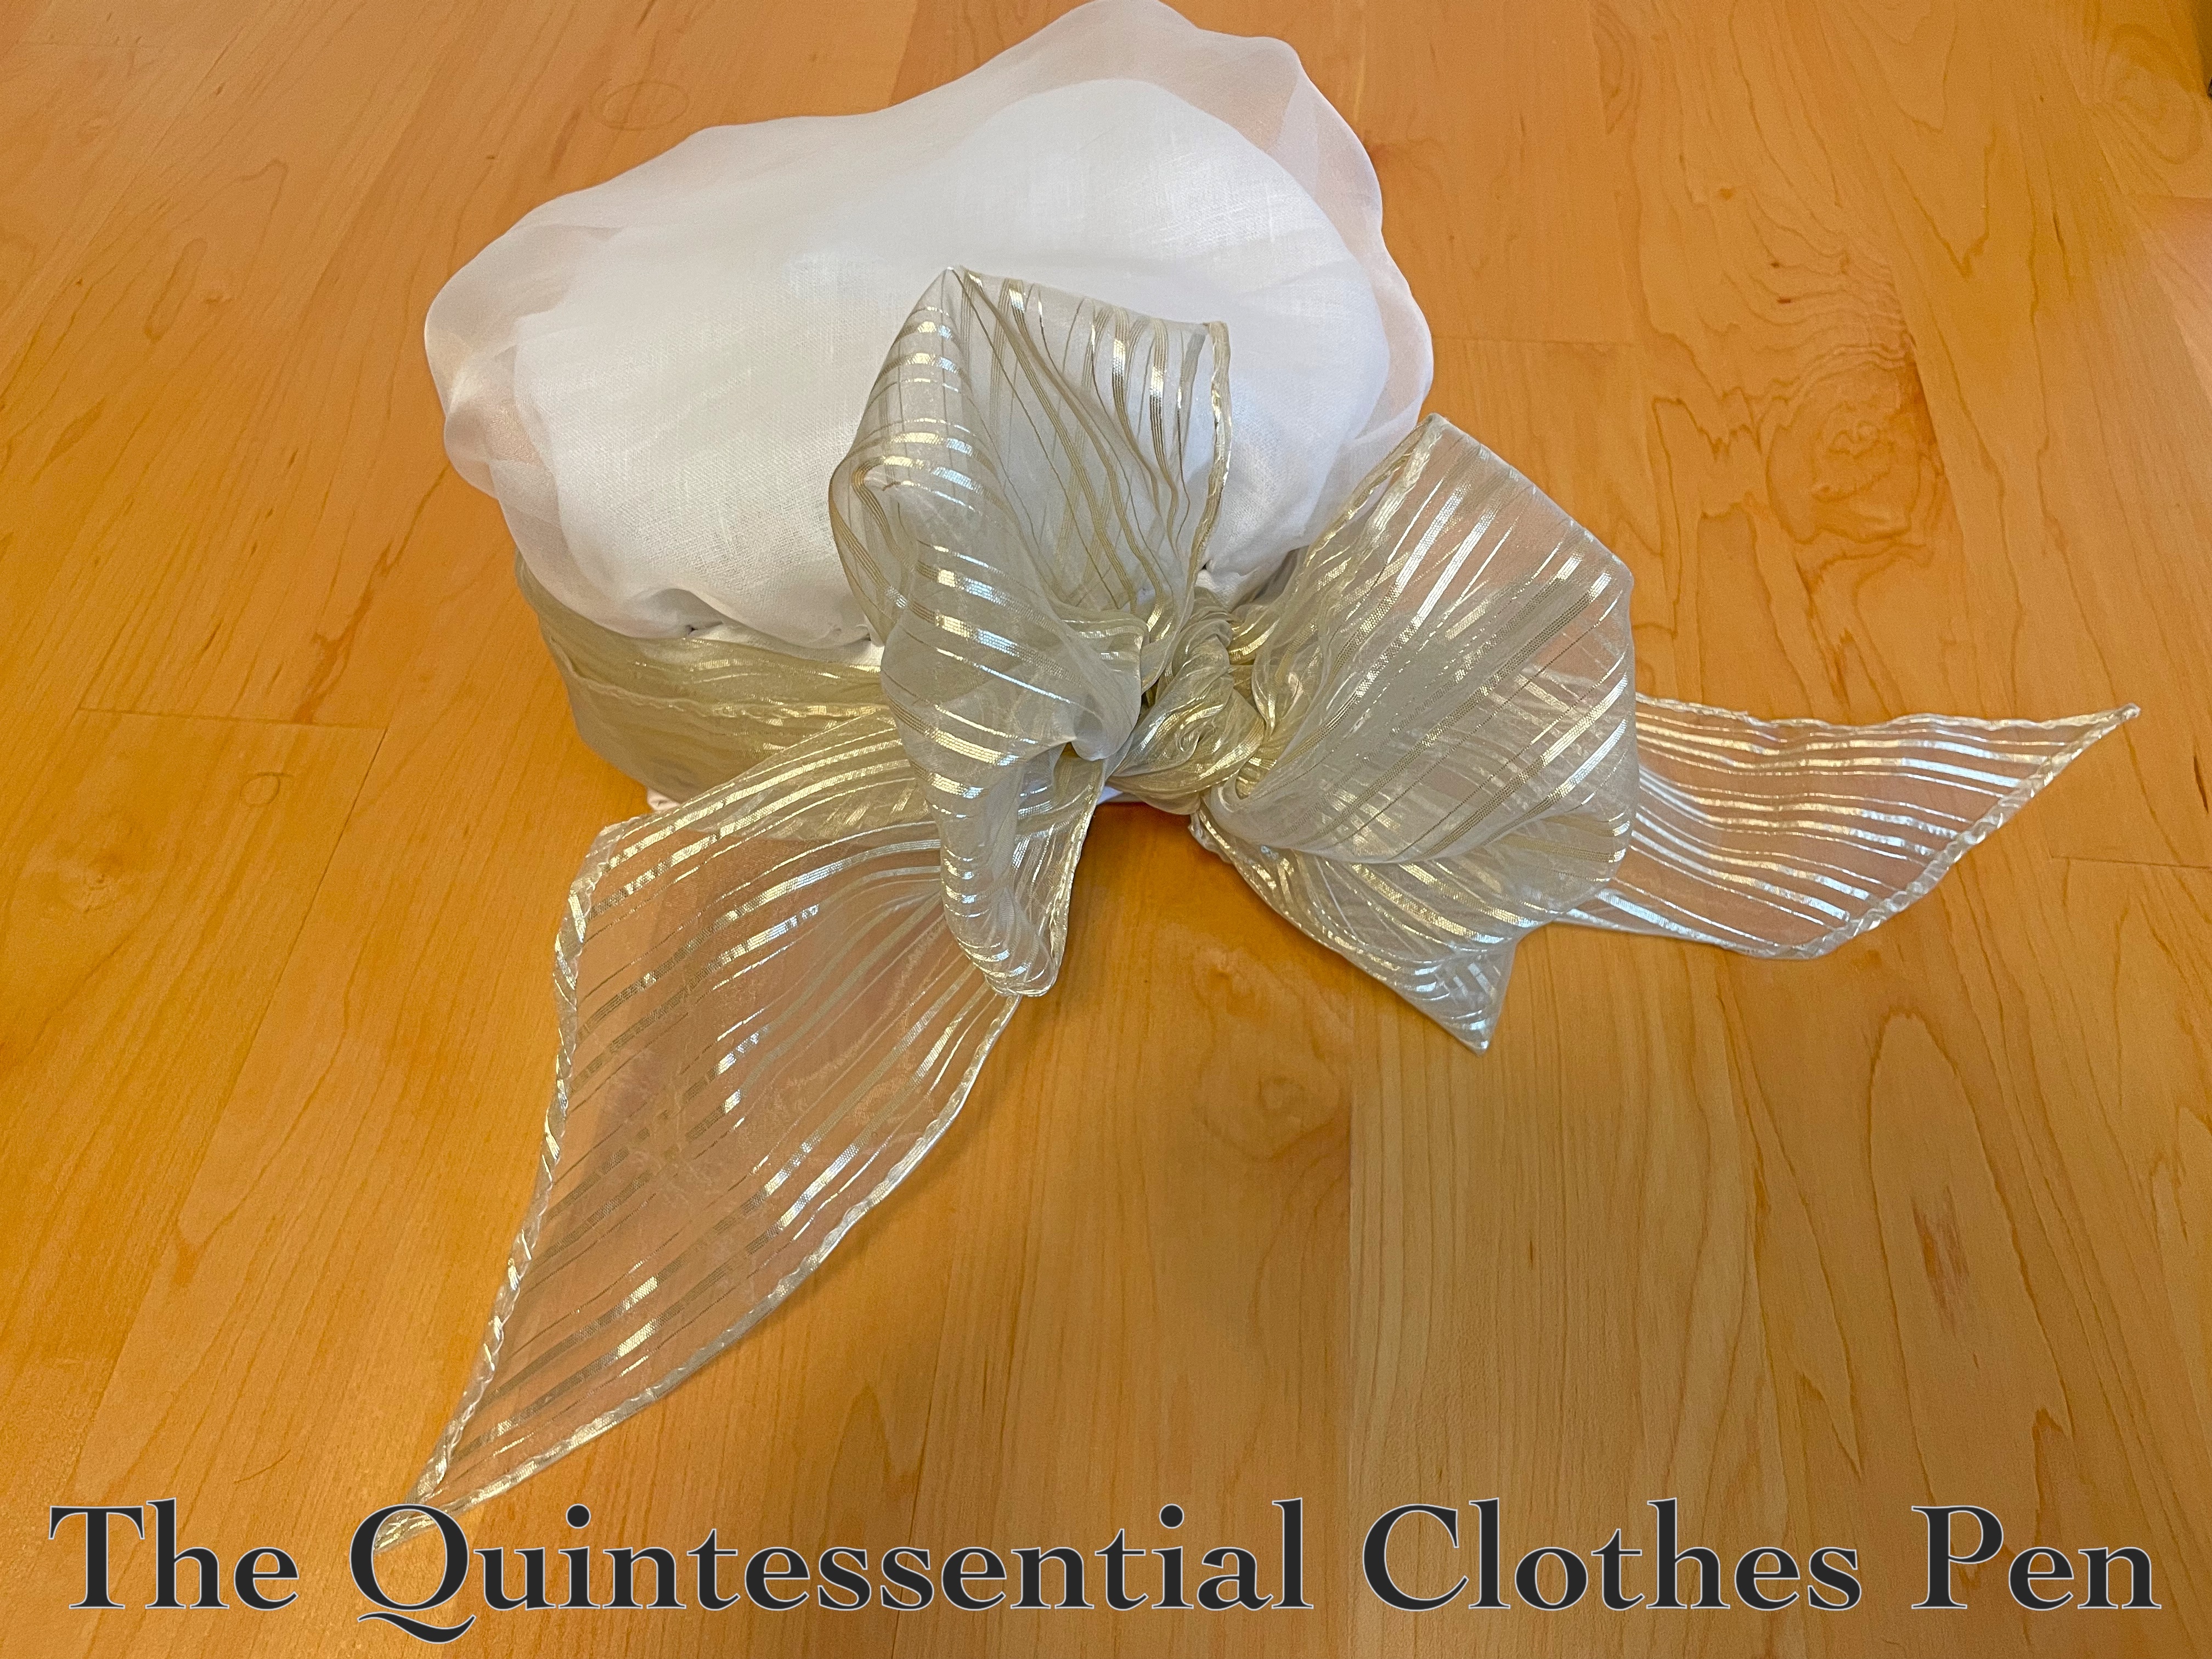
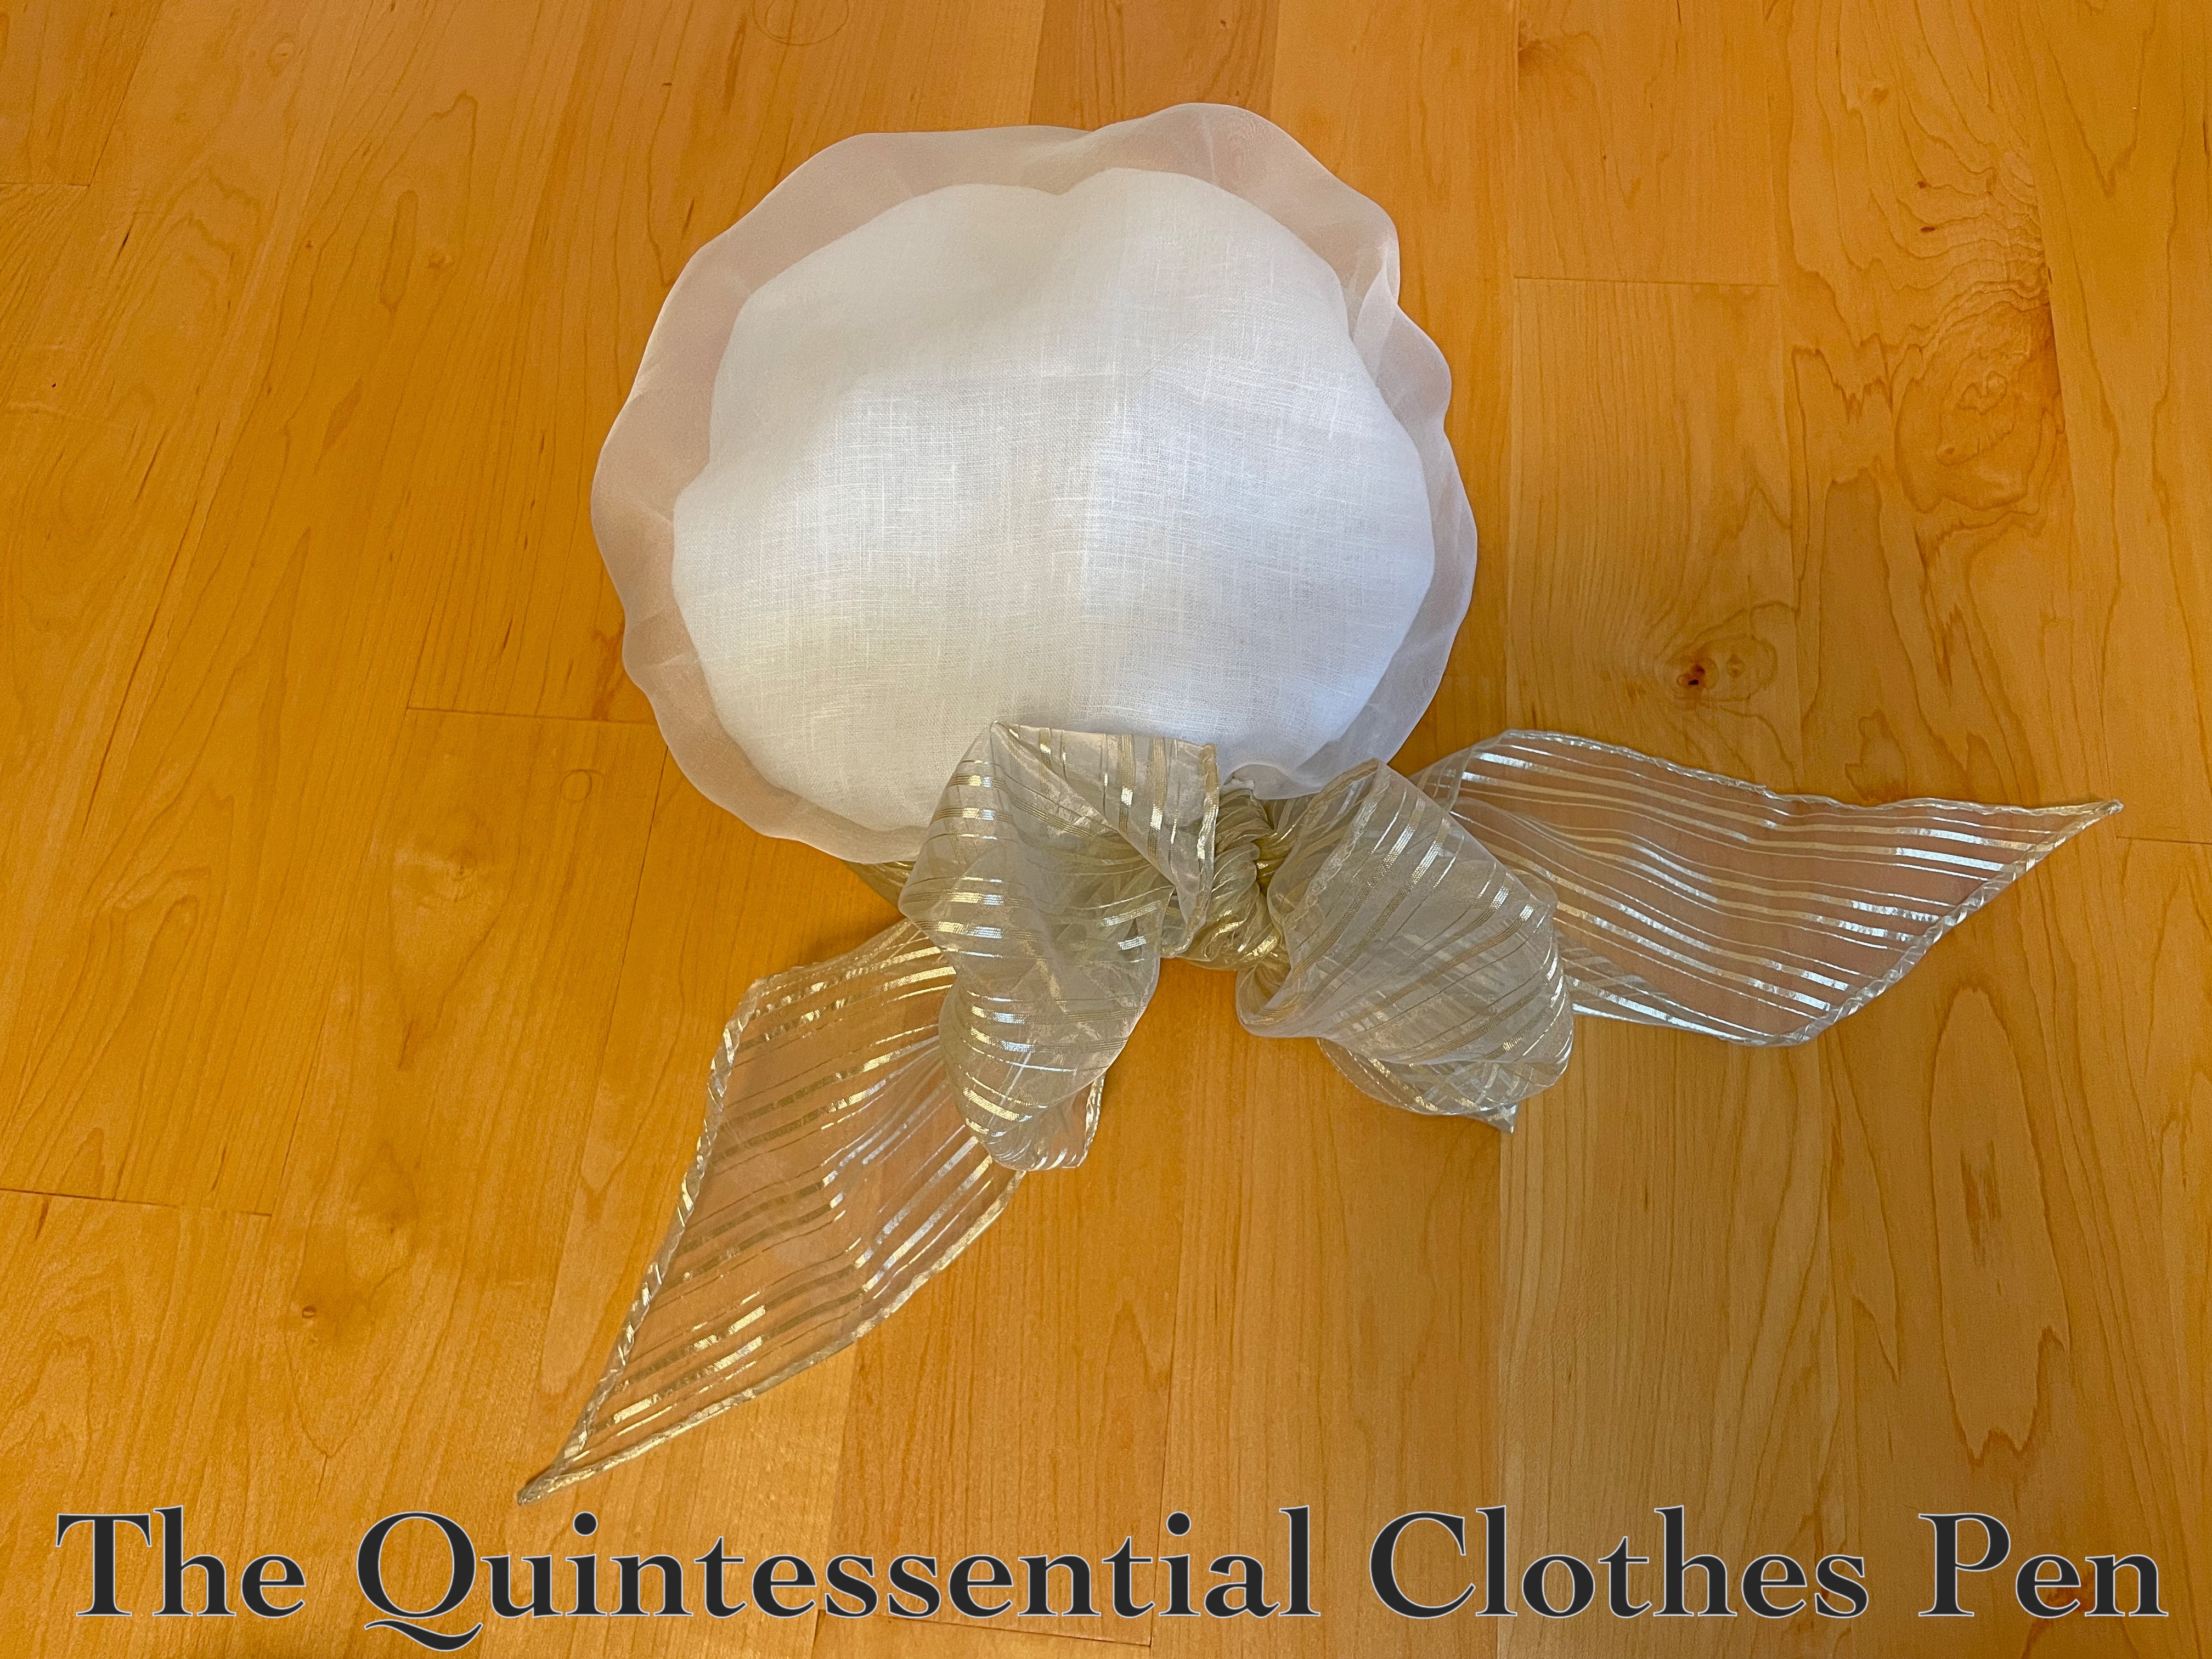
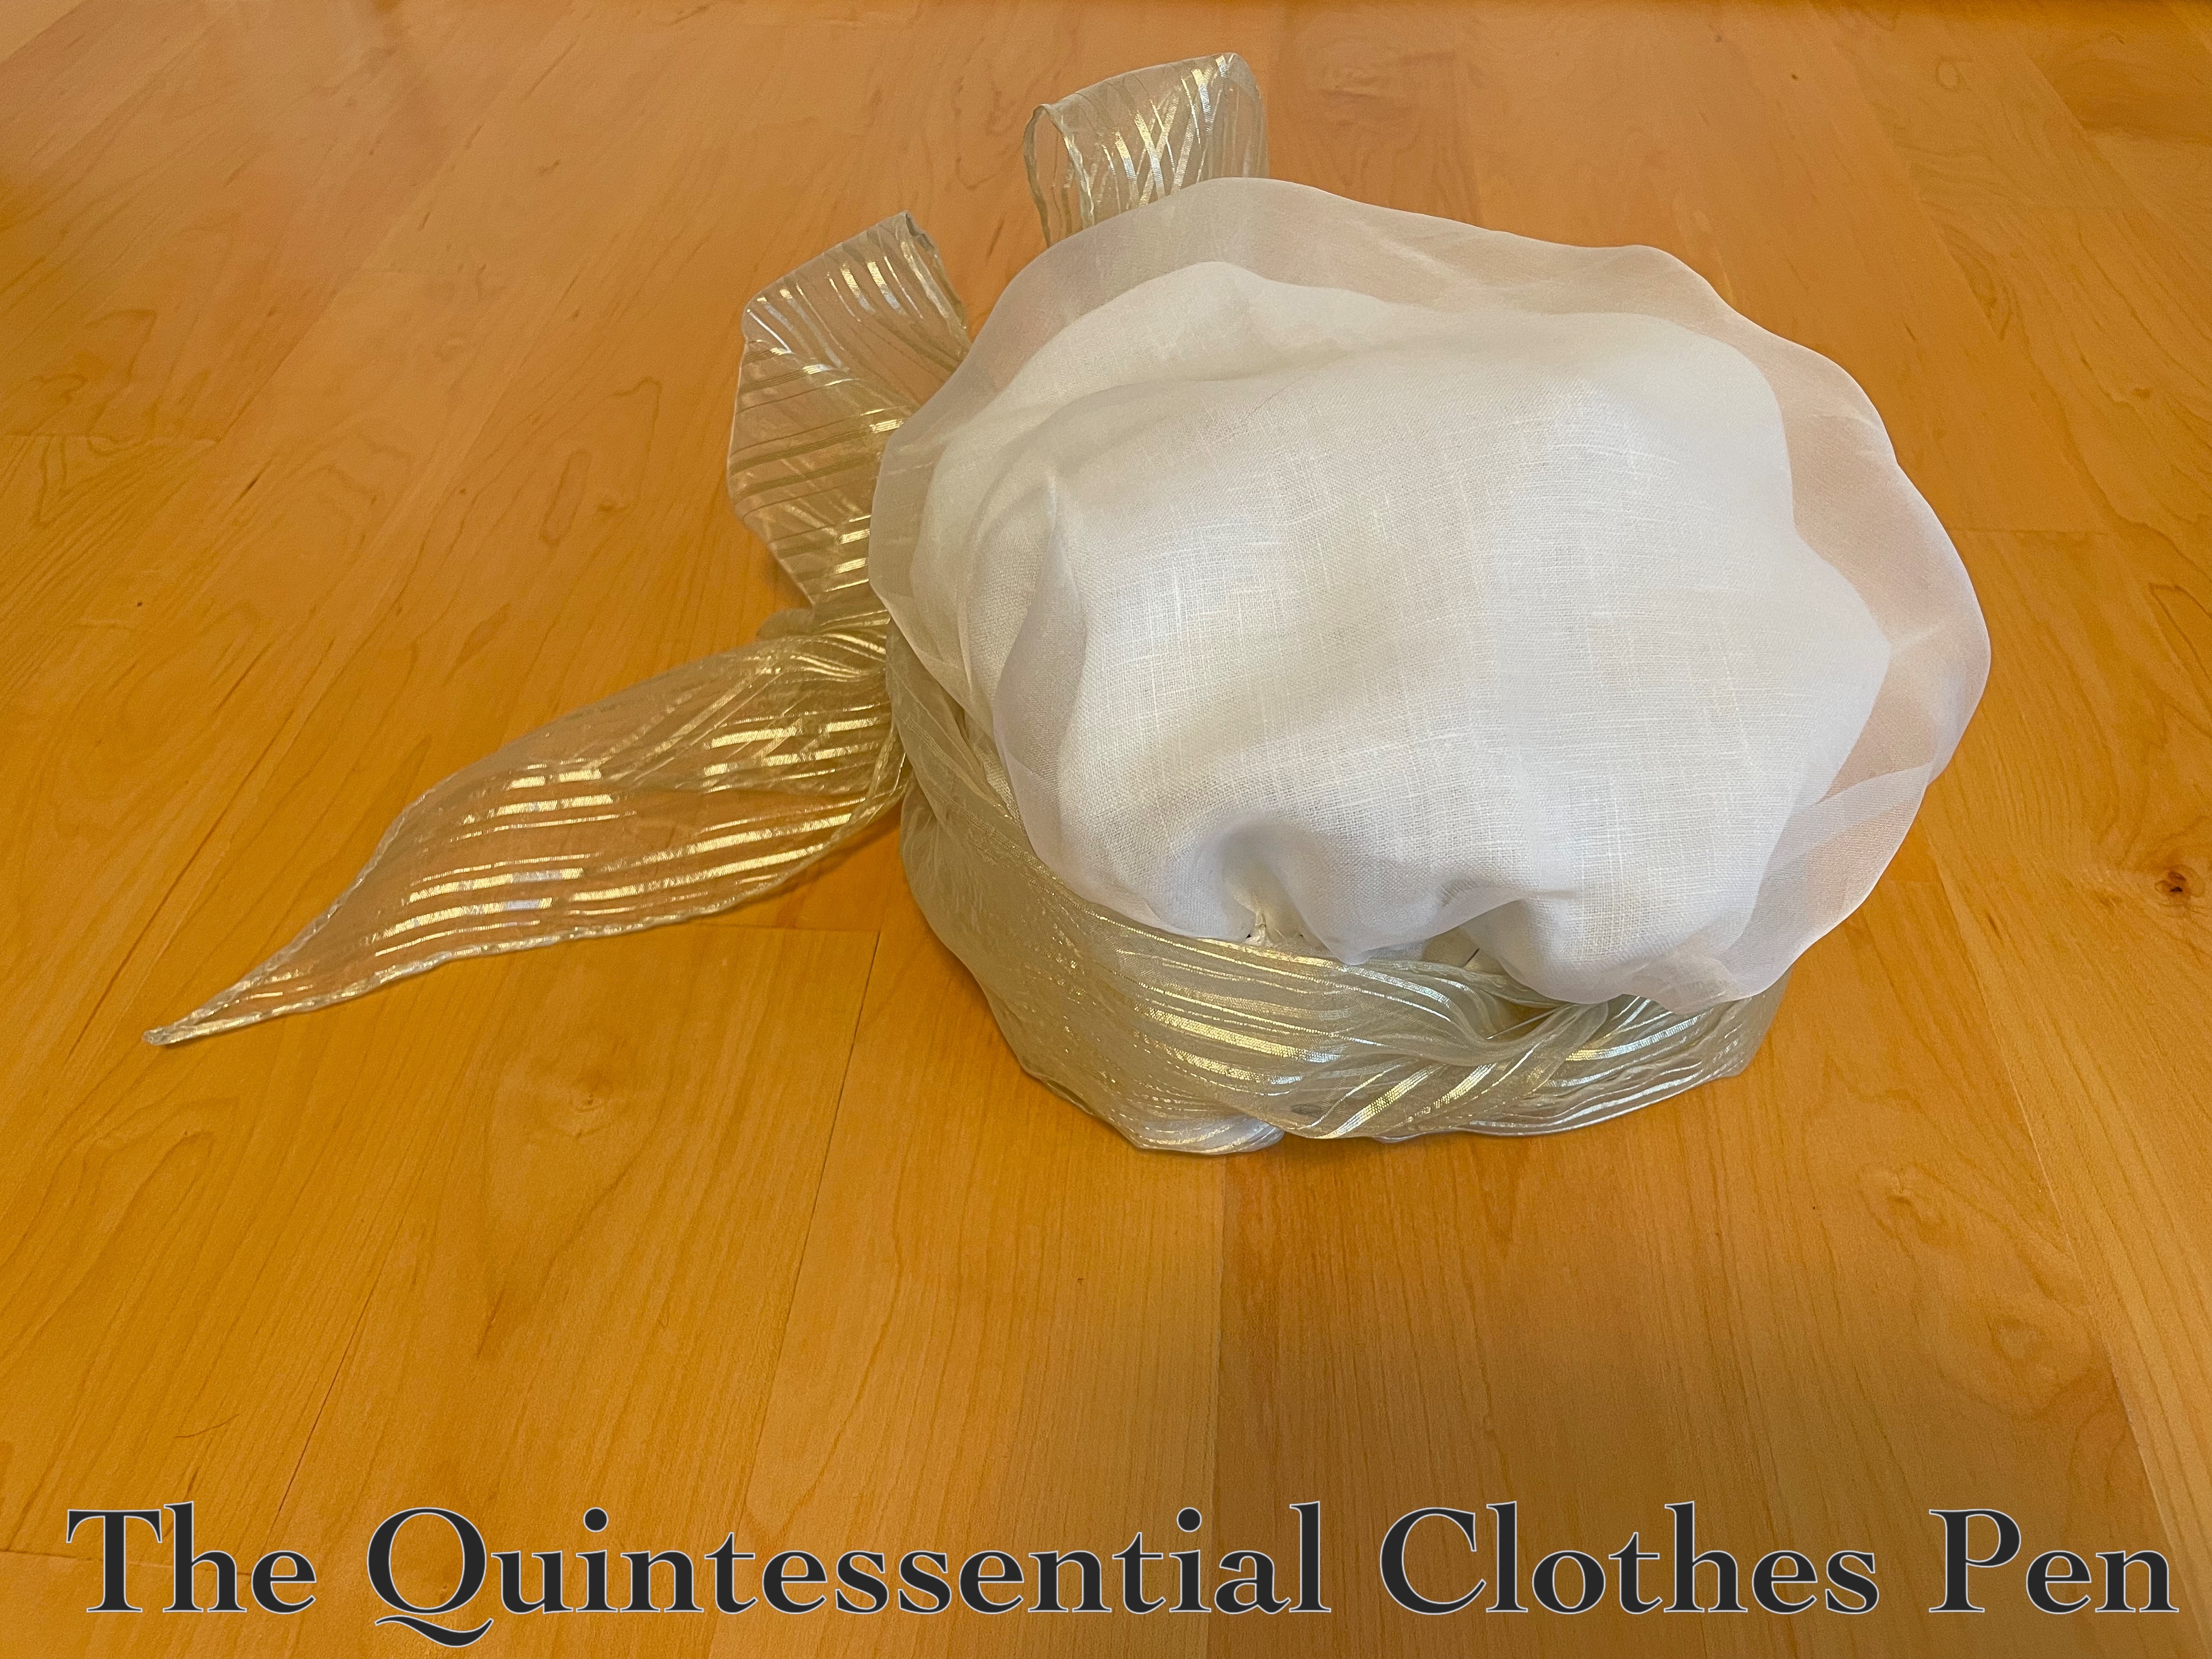
This is a fun accessory to add to my collection! I’m amused by the oversized crown and bow. The oversized crown, especially, is visible in the photo below.

The silk organza used for the outer crown is fun, but when considered with the all white dress in the works it seemed a bit monochromatic. So to liven things up a bit, I decided on a gold stripe organza (leftovers from my 1817 Duchess Gown) for the bow. It’s polyester, so points off for historical accuracy, but I like that it’s neutral but more interesting than white.

For now the cap is just living on my sewing table so the carefully pressed fabrics don’t crease. Hopefully, next year the cap will get an outing and be documented on my head!

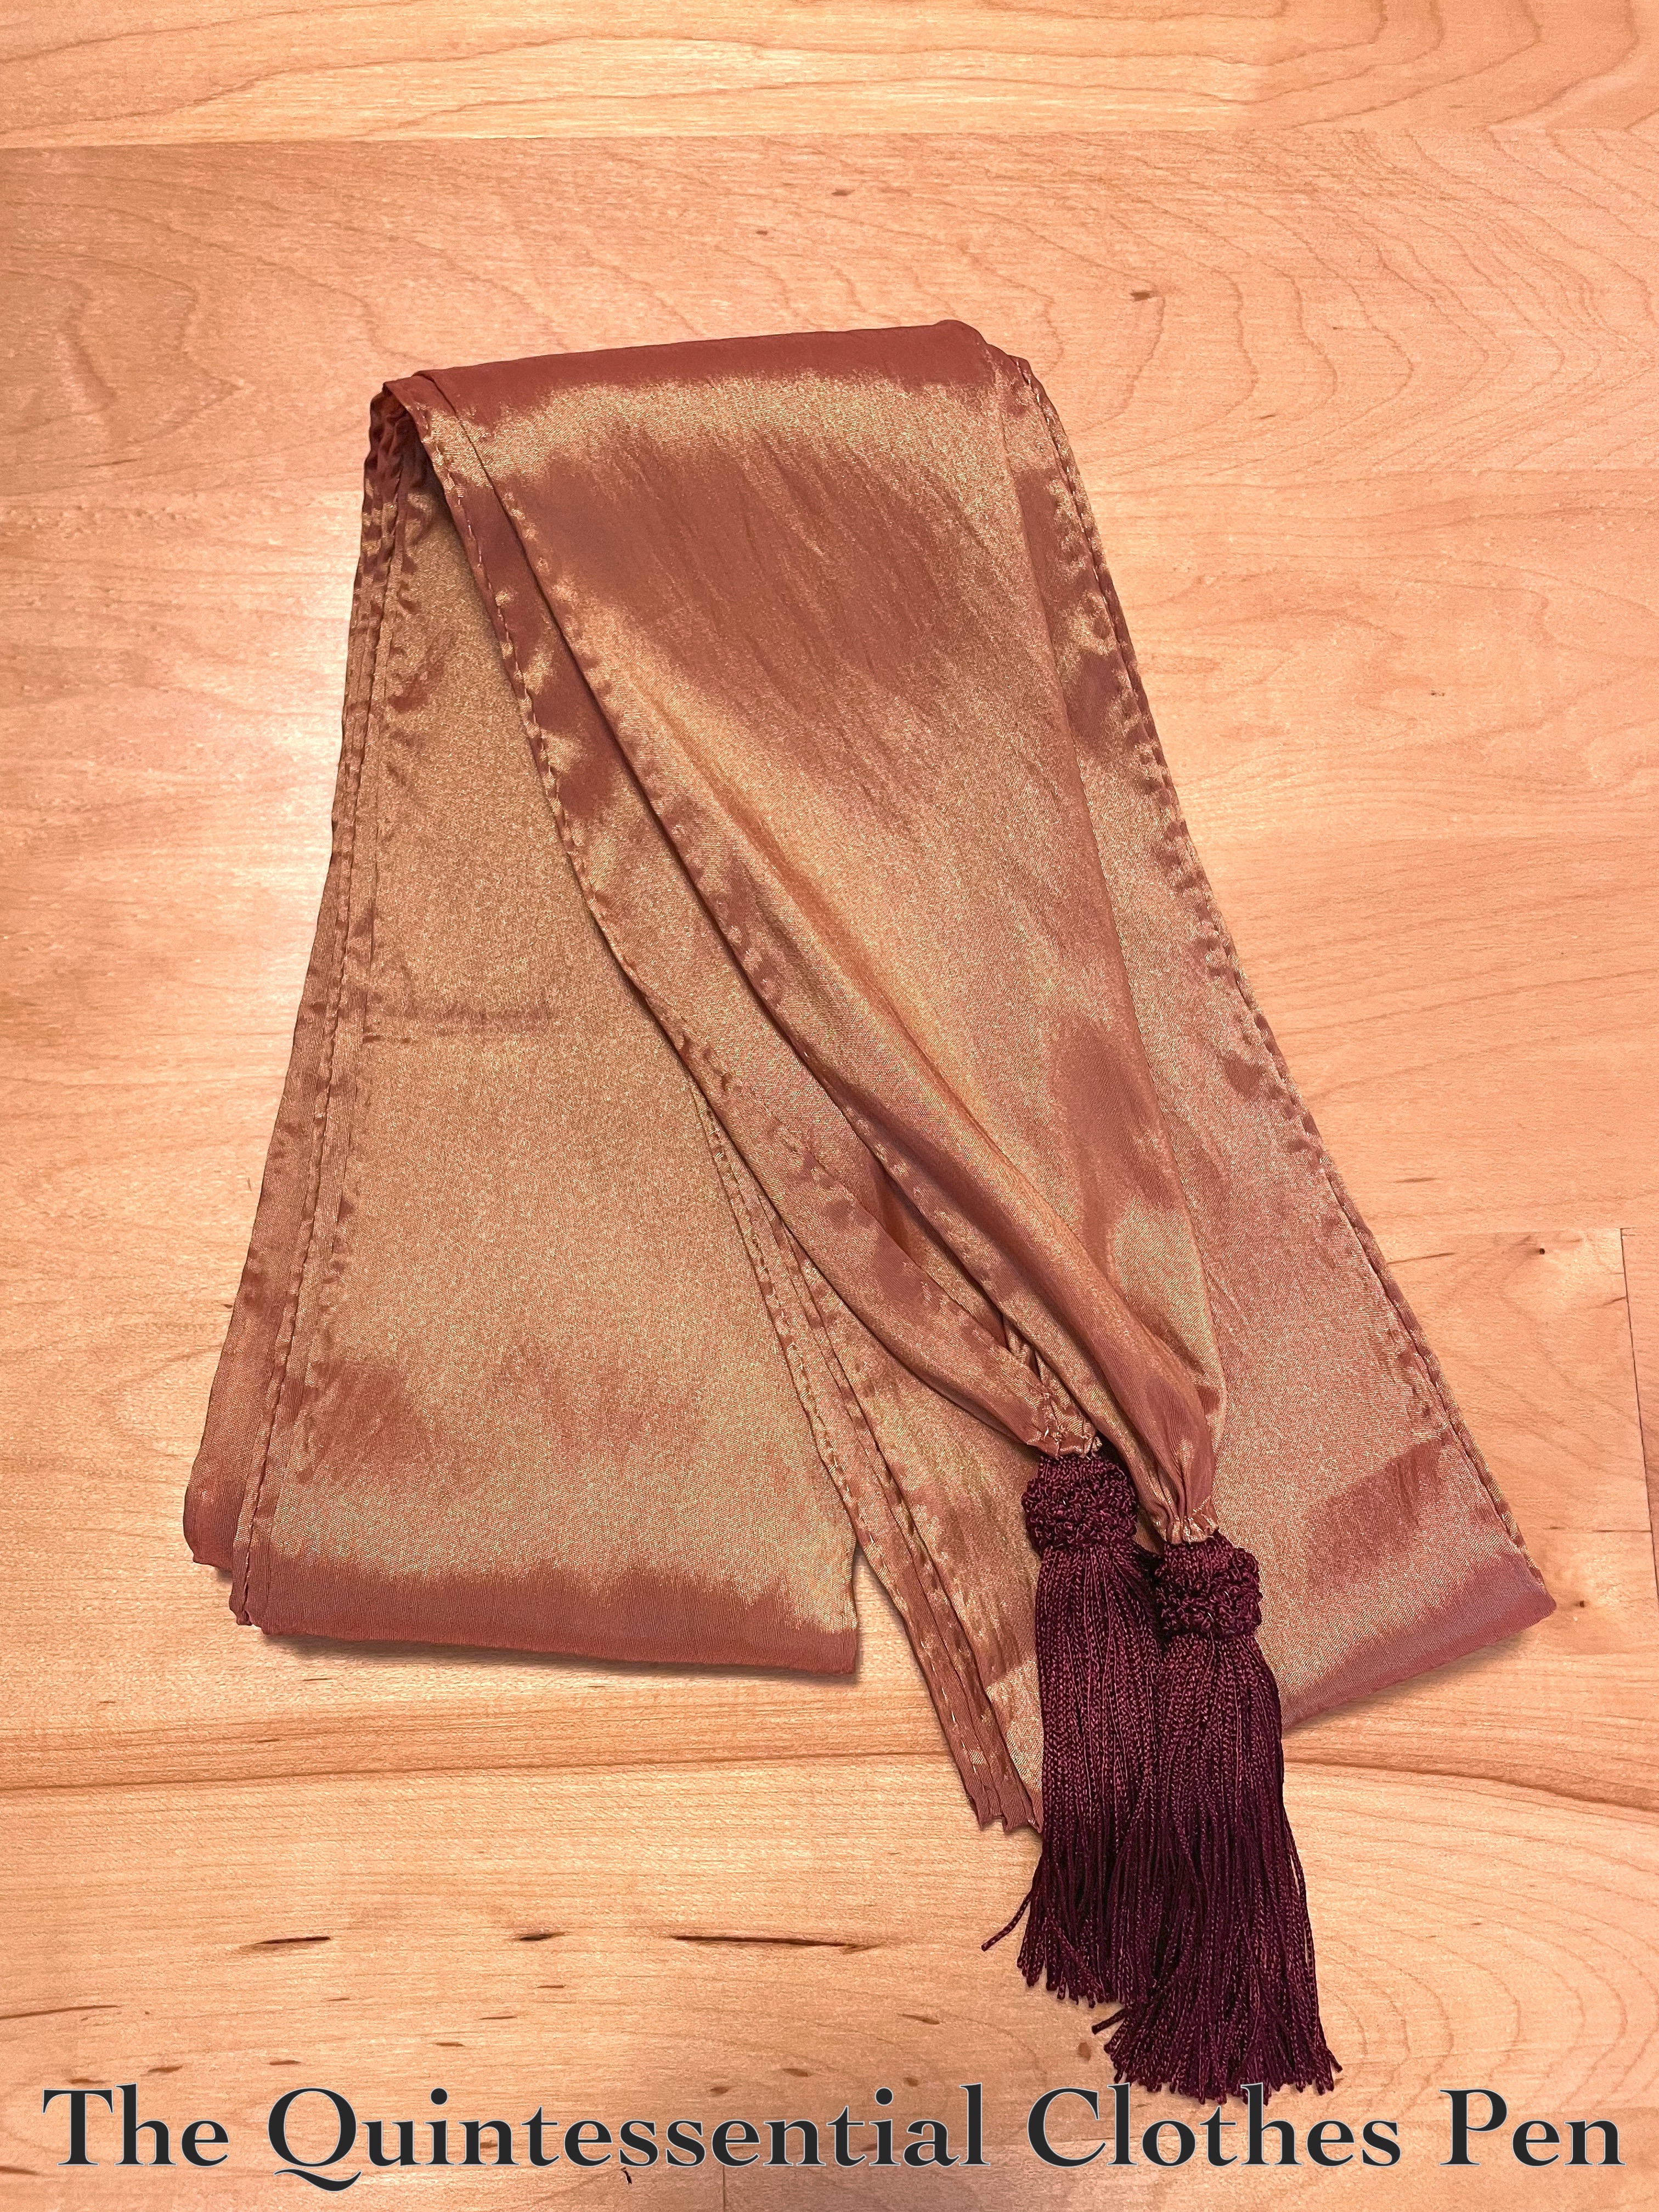
HSM #3: Copper Colored 1790s Sash

I finished a project! It’s small, but I’m very pleased with it.

The project is a sash to be worn with an in-progress 1790s dress. The goal is to be slowly progressing towards an entire 1790s outfit, with all of the appropriate accessories.

I’ve enjoyed making lists of what those accessories might be and getting them cut out and lined up for mindless hand sewing. That way, even when life is busy and I don’t have time to think about a project, I can still make progress and have something to sew, which brings me great joy and a sense of calm.

This project takes its inspiration and instruction from The American Duchess Guide To 18th Century Dressmaking, by Lauren Stowell and Abby Cox.

I’m excited that the sash qualifies for the Historical Sew Monthly Challenge #3, Focus on the Fabric:

Make something in which the fabric colour/ texture/print/material etc. is the central feature of the design.

This fits the challenge in that the sash really isn’t at all about the construction details… The only cuts to the fabric were to make strips, and the only sewing is joining them and finishing the edges. So it really is all about the fabric!

Just the facts:

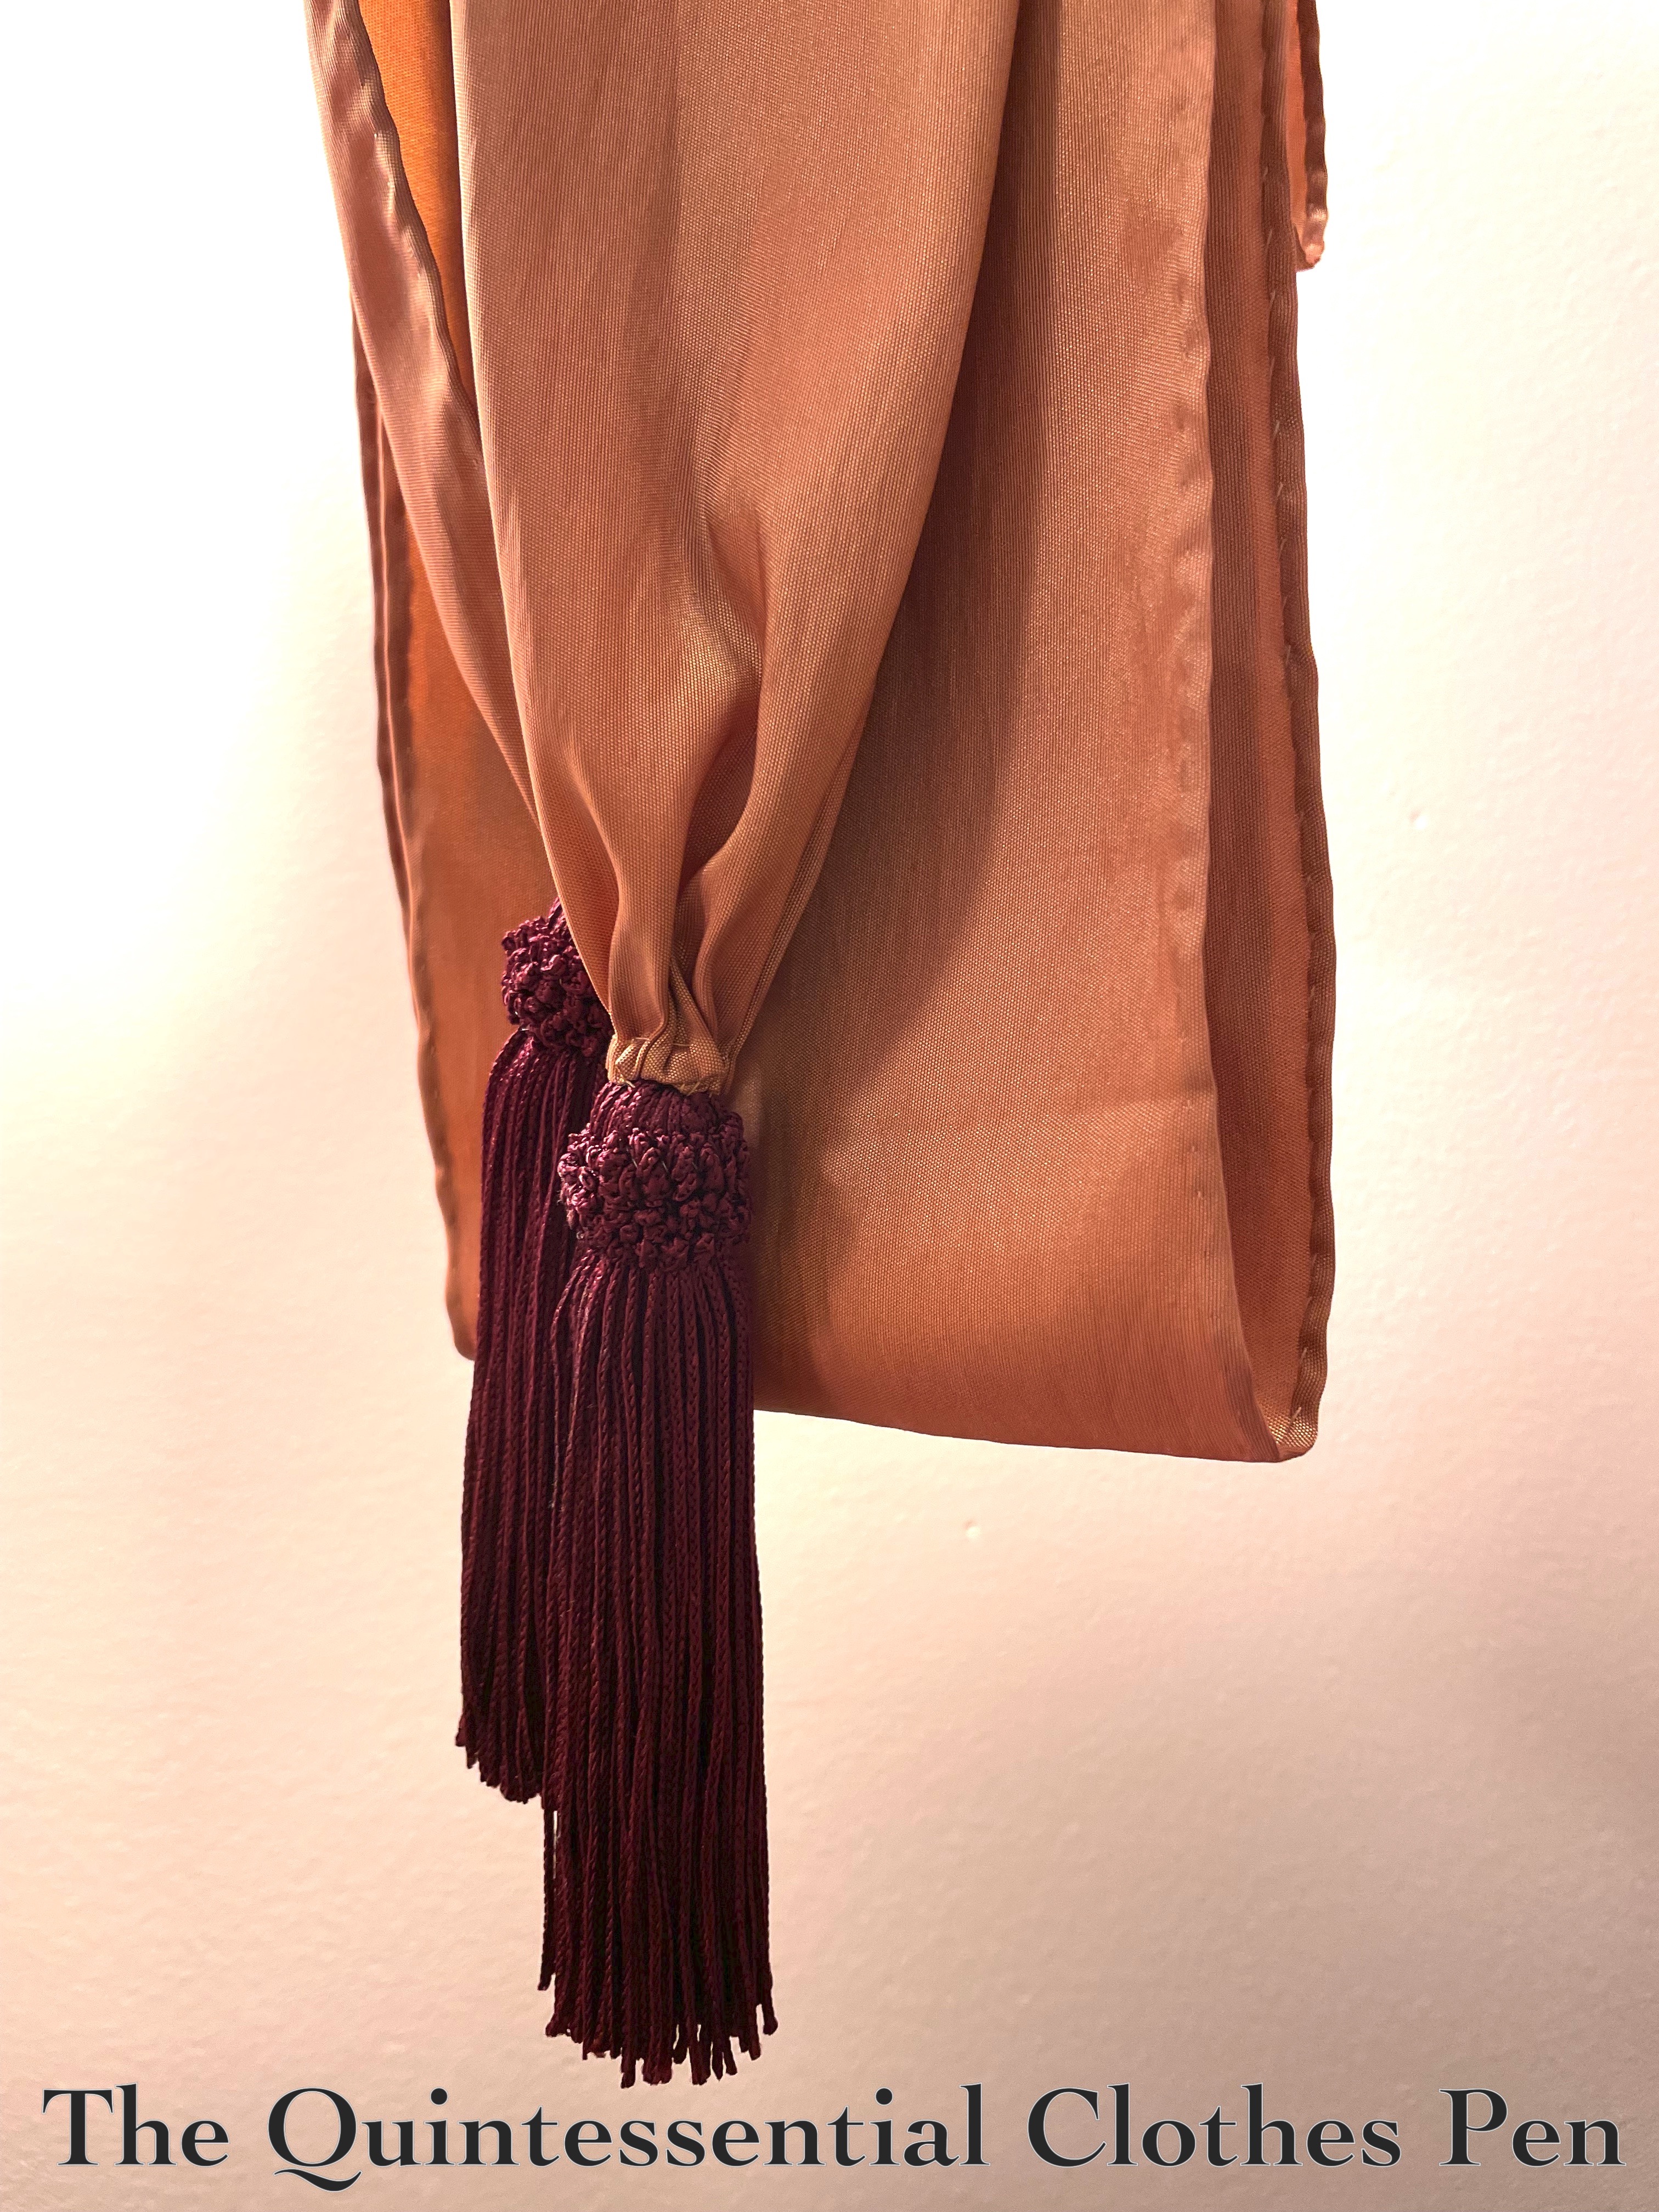
Fabric/Materials: ½ yard or so orange/gold shot polyester taffeta leftover from a very old project and 2 burgundy tassels.

Pattern: 1790s Sash in the book The American Duchess Guide To 18th Century Dressmaking, by Lauren Stowell and Abby Cox.

Year: c. 1790.

Notions: Thread.

How historically accurate is it?: 90%. Polyester is obviously not historically accurate, but the dimensions and hand sewing method are.

Hours to complete: 5.

First worn: Has not been worn yet.

Total cost: $2 for the tassels and let’s say $.50 for the thread. We’ll count the fabric as free. So, $2.50.

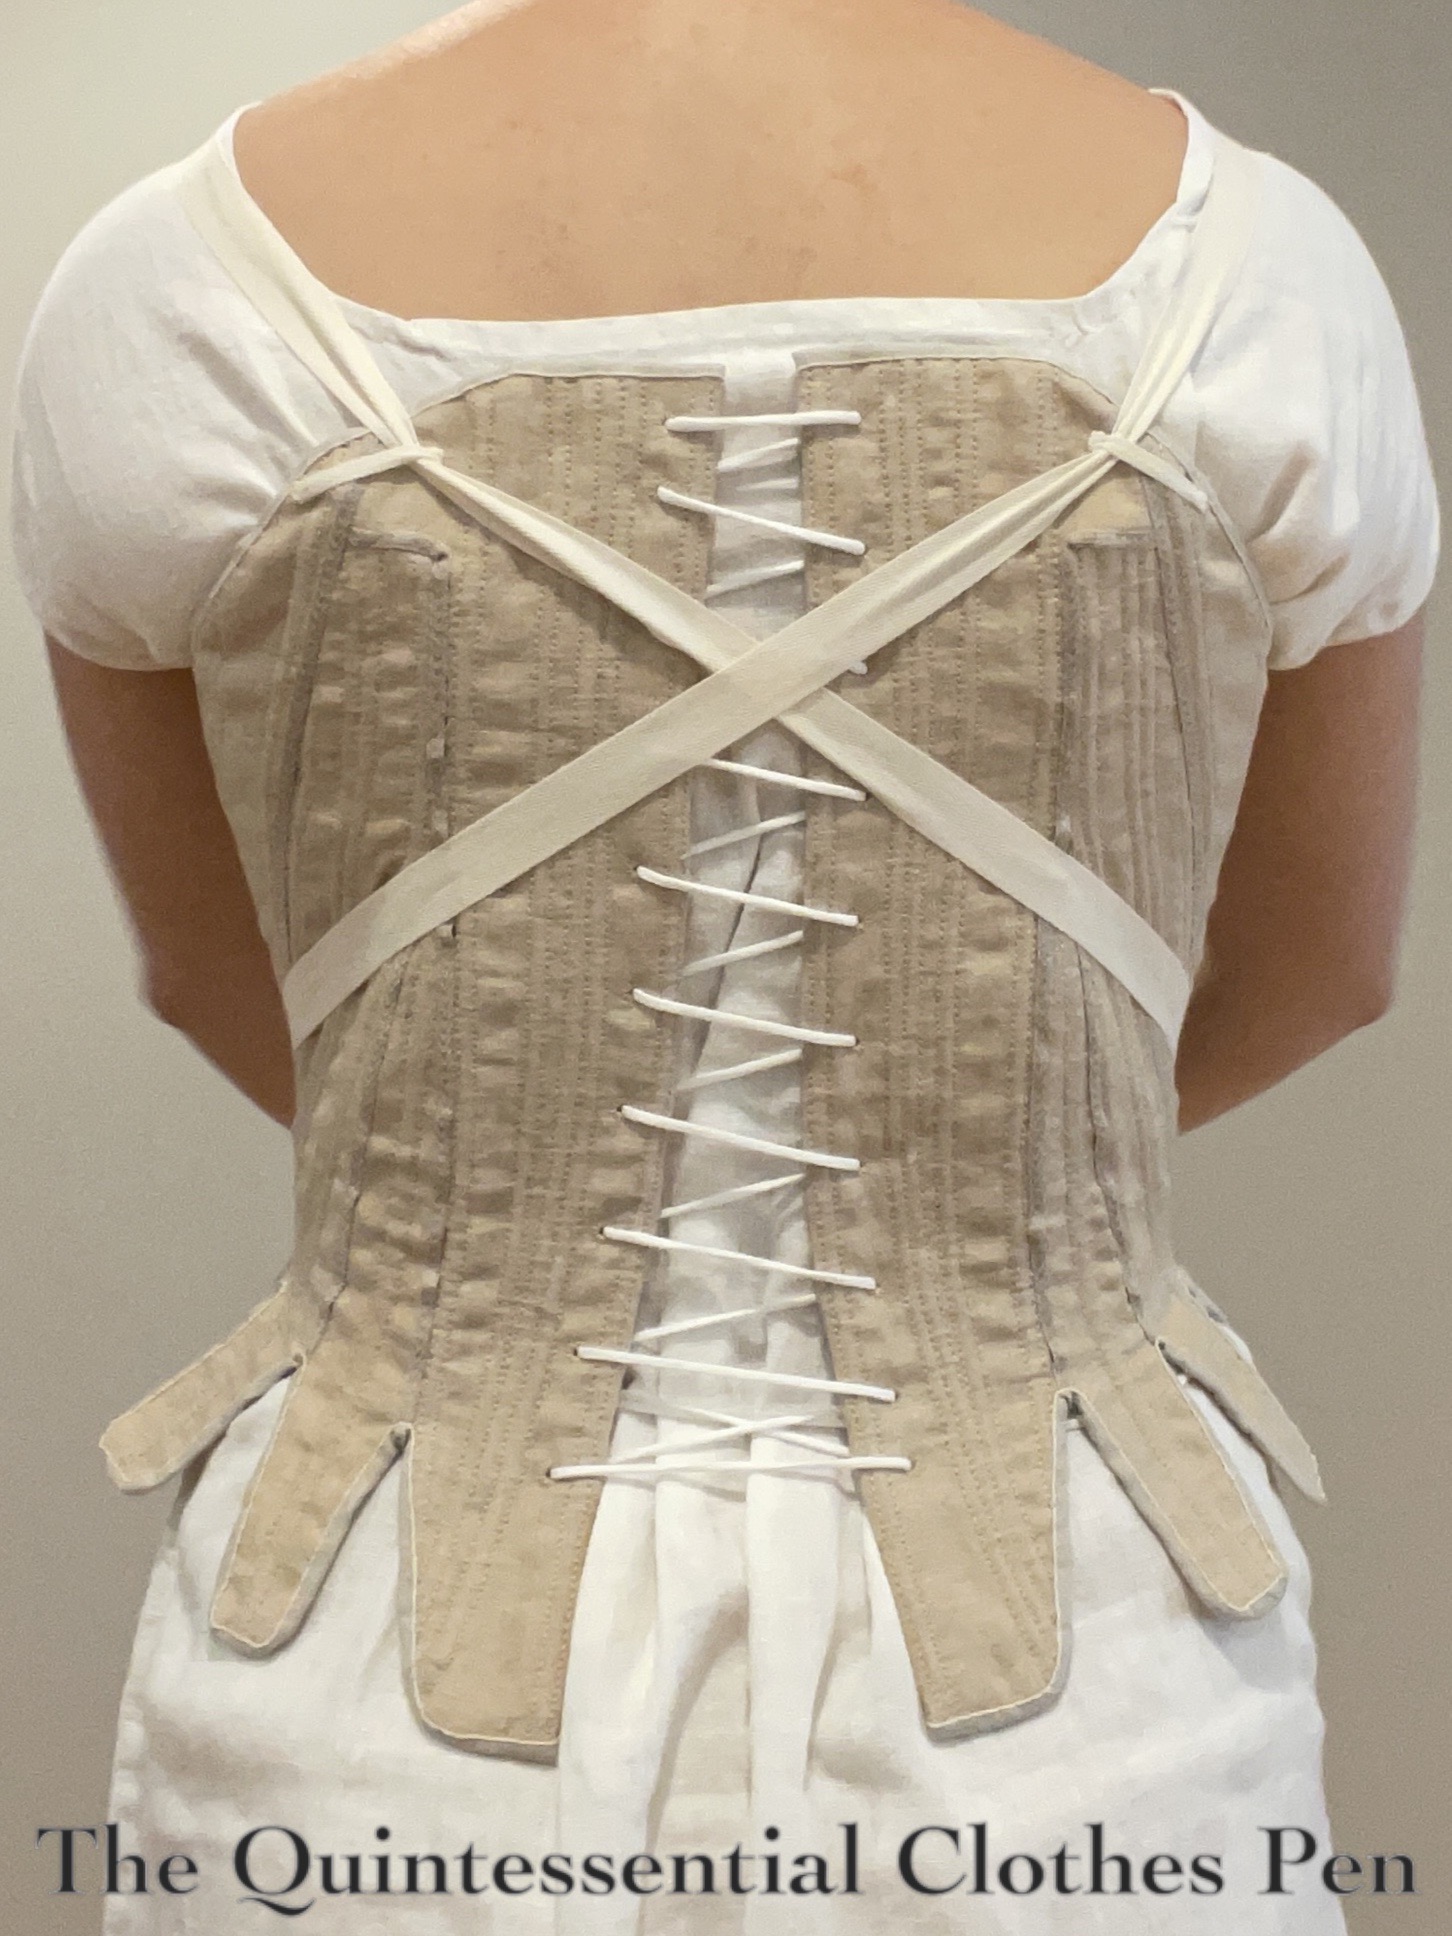
HSM #11: c. 1785 Hand Sewn Natural Linen Stays (Of Success!)

I recently finished up a series of blog posts that document the trials, tribulations, and triumphs of a new pair of 18th century stays. Here is the link to the most recent post (and I’ll include a link to all of the posts in the series at the end of this post).

I’m really, really excited that this pair of stays is complete! They are entirely hand sewn, which took quite a bit of time. And, they were a struggle to fit that ended in success. For both of those reasons, I’m excited that these qualify for the HSM Challenge #11: Style Starts At Home:

Make something which would generally be seen only within the household (ex: informal at-home wear, nightwear, undergarments)

How do these fit the challenge? Well, stays are an undergarment that would generally only be seen at home!

Just the facts:

Fabric/Materials: ⅔ yard natural linen for exterior (scraps from another project), 1 ⅓ yards thick/heavy white linen for interlining (scraps from another project), and ½ yard cream linen/cotton blend for lining

Pattern: 1785-1788 Half-Boned Stays from Mandy Barrington’s book Stays and Corsets: Historical Patterns Translated for the Modern Body

Year: c. 1785-1788

Notions: 29 10″-14″ zip ties that I cut to be 3/16″ wide for boning, 2 ½ yards 3/16″ wide natural linen twill tape for seam covering, 4 yards 1/2″ wide natural linen plain weave tape for binding, 3 yards white cotton cord for lacing, 1 yard ¼” wide cotton twill tape for front lacing, 2 yards ¾” wide cream cotton twill tape for straps, regular weight thread, and heavy weight thread

How historically accurate is it?: 90%. The pattern and methods are based on historical examples. The materials are pretty close, though the zip ties and cotton/linen blend aren’t perfect replicas of 18th century materials.

Hours to complete: I only kept track of about 50 hours, but my guess is that I spent at least 70-80 on these stays.

First worn: In May 2023 for photos.

Total cost: Approximately $40.

And, a few more photos: side and back view, as well as a view of the stays folded in half from the inside.

You can read previous posts in this series here:

c. 1785 Stays of Success, Part VII: Conclusion, Reflections, and Resources
c. 1785 Stays (Of Fail), Part VI: Finishing Construction Details
c. 1785 Stays (Of Fail), Part V: Middle Construction Details
c. 1785 Stays (Of Fail), Part IV: Early Construction Details
c. 1785 Stays (Of Fail), Part III: The Pattern
c. 1785 Stays (Of Fail), Part II: Fitting Update
c. 1785 Stays (Of Fail), Part I: Beginnings

HSM #11: c. 1785 Green Linen Stays

I’m excited that the green stays in my most recent post qualify for the Historical Sew Monthly Challenge #11: Fitting (Make something that focuses on fit).

If you read my lengthy post about making these, you’ll hear all about how fit was both one of the reasons I started these and that I had a joyful time playing with fit as I created them.

I actually finished these on March 30 and I’m excited to post about them before 2022 ends so that they can officially qualify for the HSM this year!

Just the facts:

Fabric/Materials: ½ yd green linen (exterior), 1 yard heavy olive linen (inner layers), and ½ yd ivory linen/cotton blend (lining).

Pattern: My own, but using the drafting guide on page 155 of Patterns of Fashion 5.

Year: c. 1785.

Notions: Heavyweight ivory Guterman thread, regular weight tan Guterman thread, cotton covered polyester quilting thread, approximately 410″ of ⅜” wide zip ties (boning), 11 ½” heavy duty steel bone (busk), 2 ⅛ yard ¼”  linen twill tape (covering seams), and 4 yards ½” linen twill tape (binding).

How historically accurate is it?: 90%. The pattern and materials are good. The construction methods are a mix of modern and historical.

Hours to complete: It seems that I didn’t keep track. Maybe 32 hours?

First worn: Has not been worn yet, except to get photos for the blog.

Total cost: The fabrics came from the stash as leftovers from other projects or were gifted to me. I’d say the notions cost about $16 +  $15 for the linen twill tape. So, let’s say about $35, if we include thread.

There is a lengthy post sharing the story behind these stays, my musings about the journey to complete them, many photos of the construction process and the stays on the body, and written construction details that you can read here.

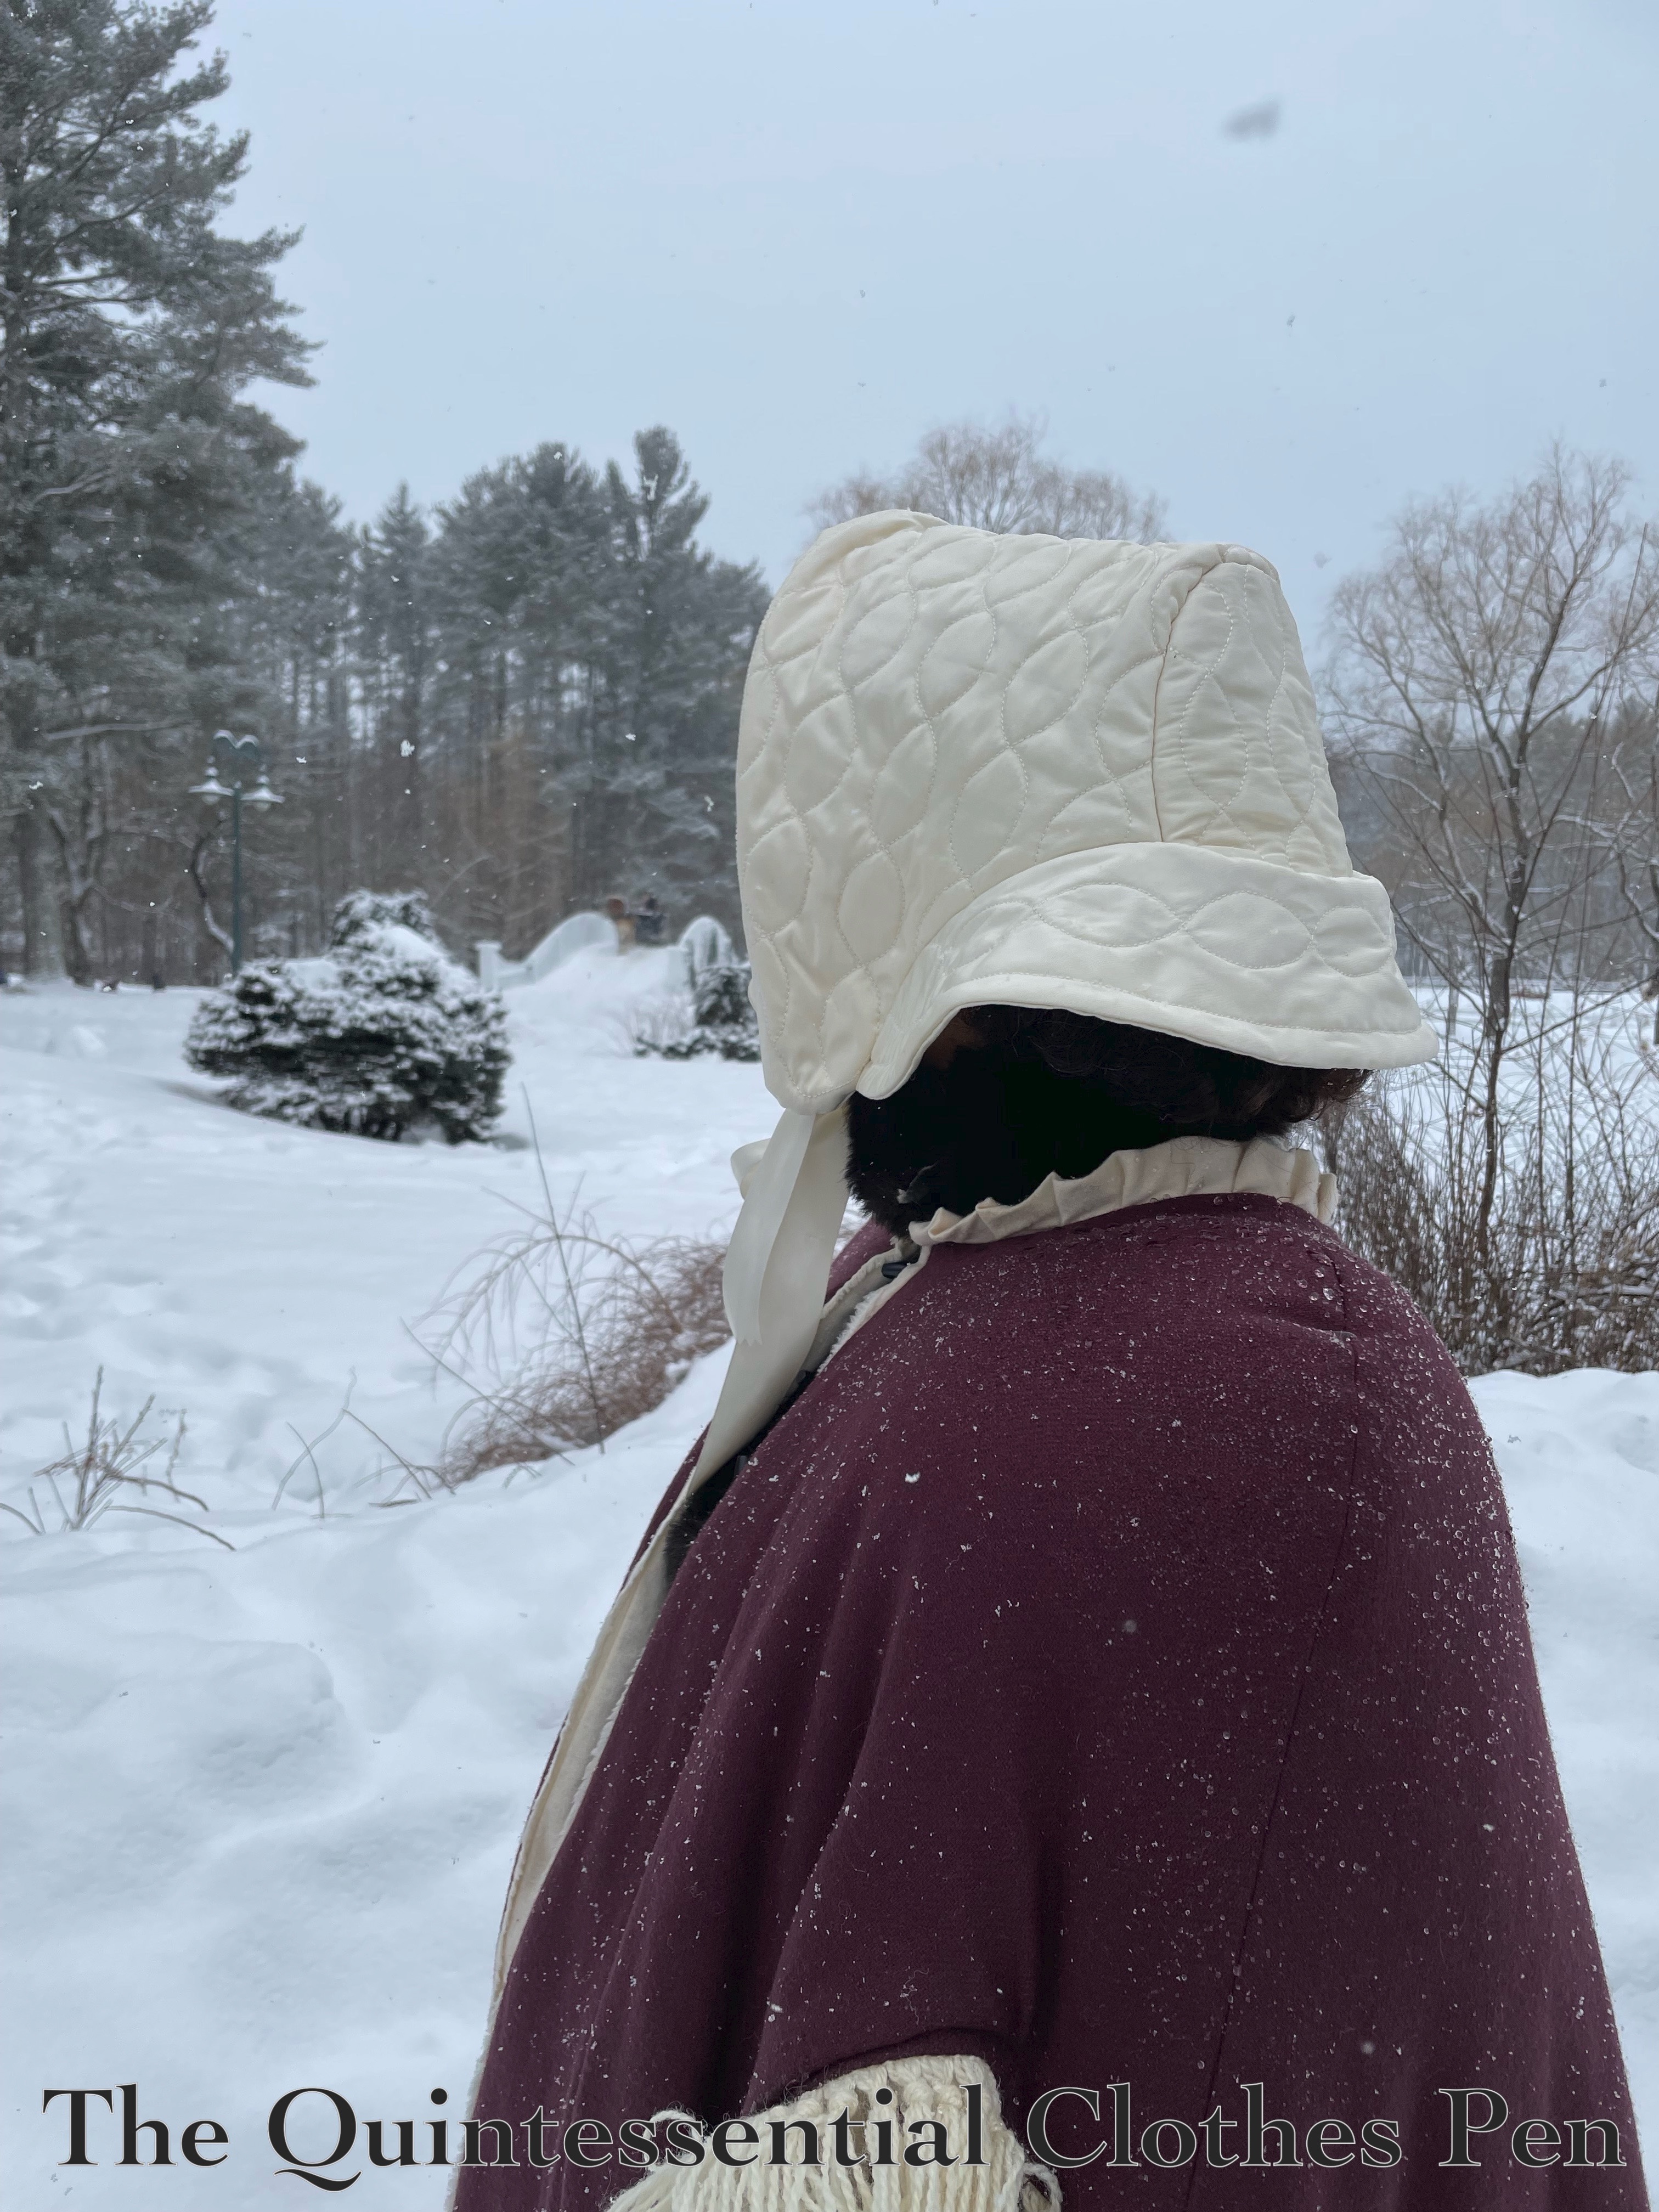
1850s Ivory Quilted Winter Hood (HSM #5)

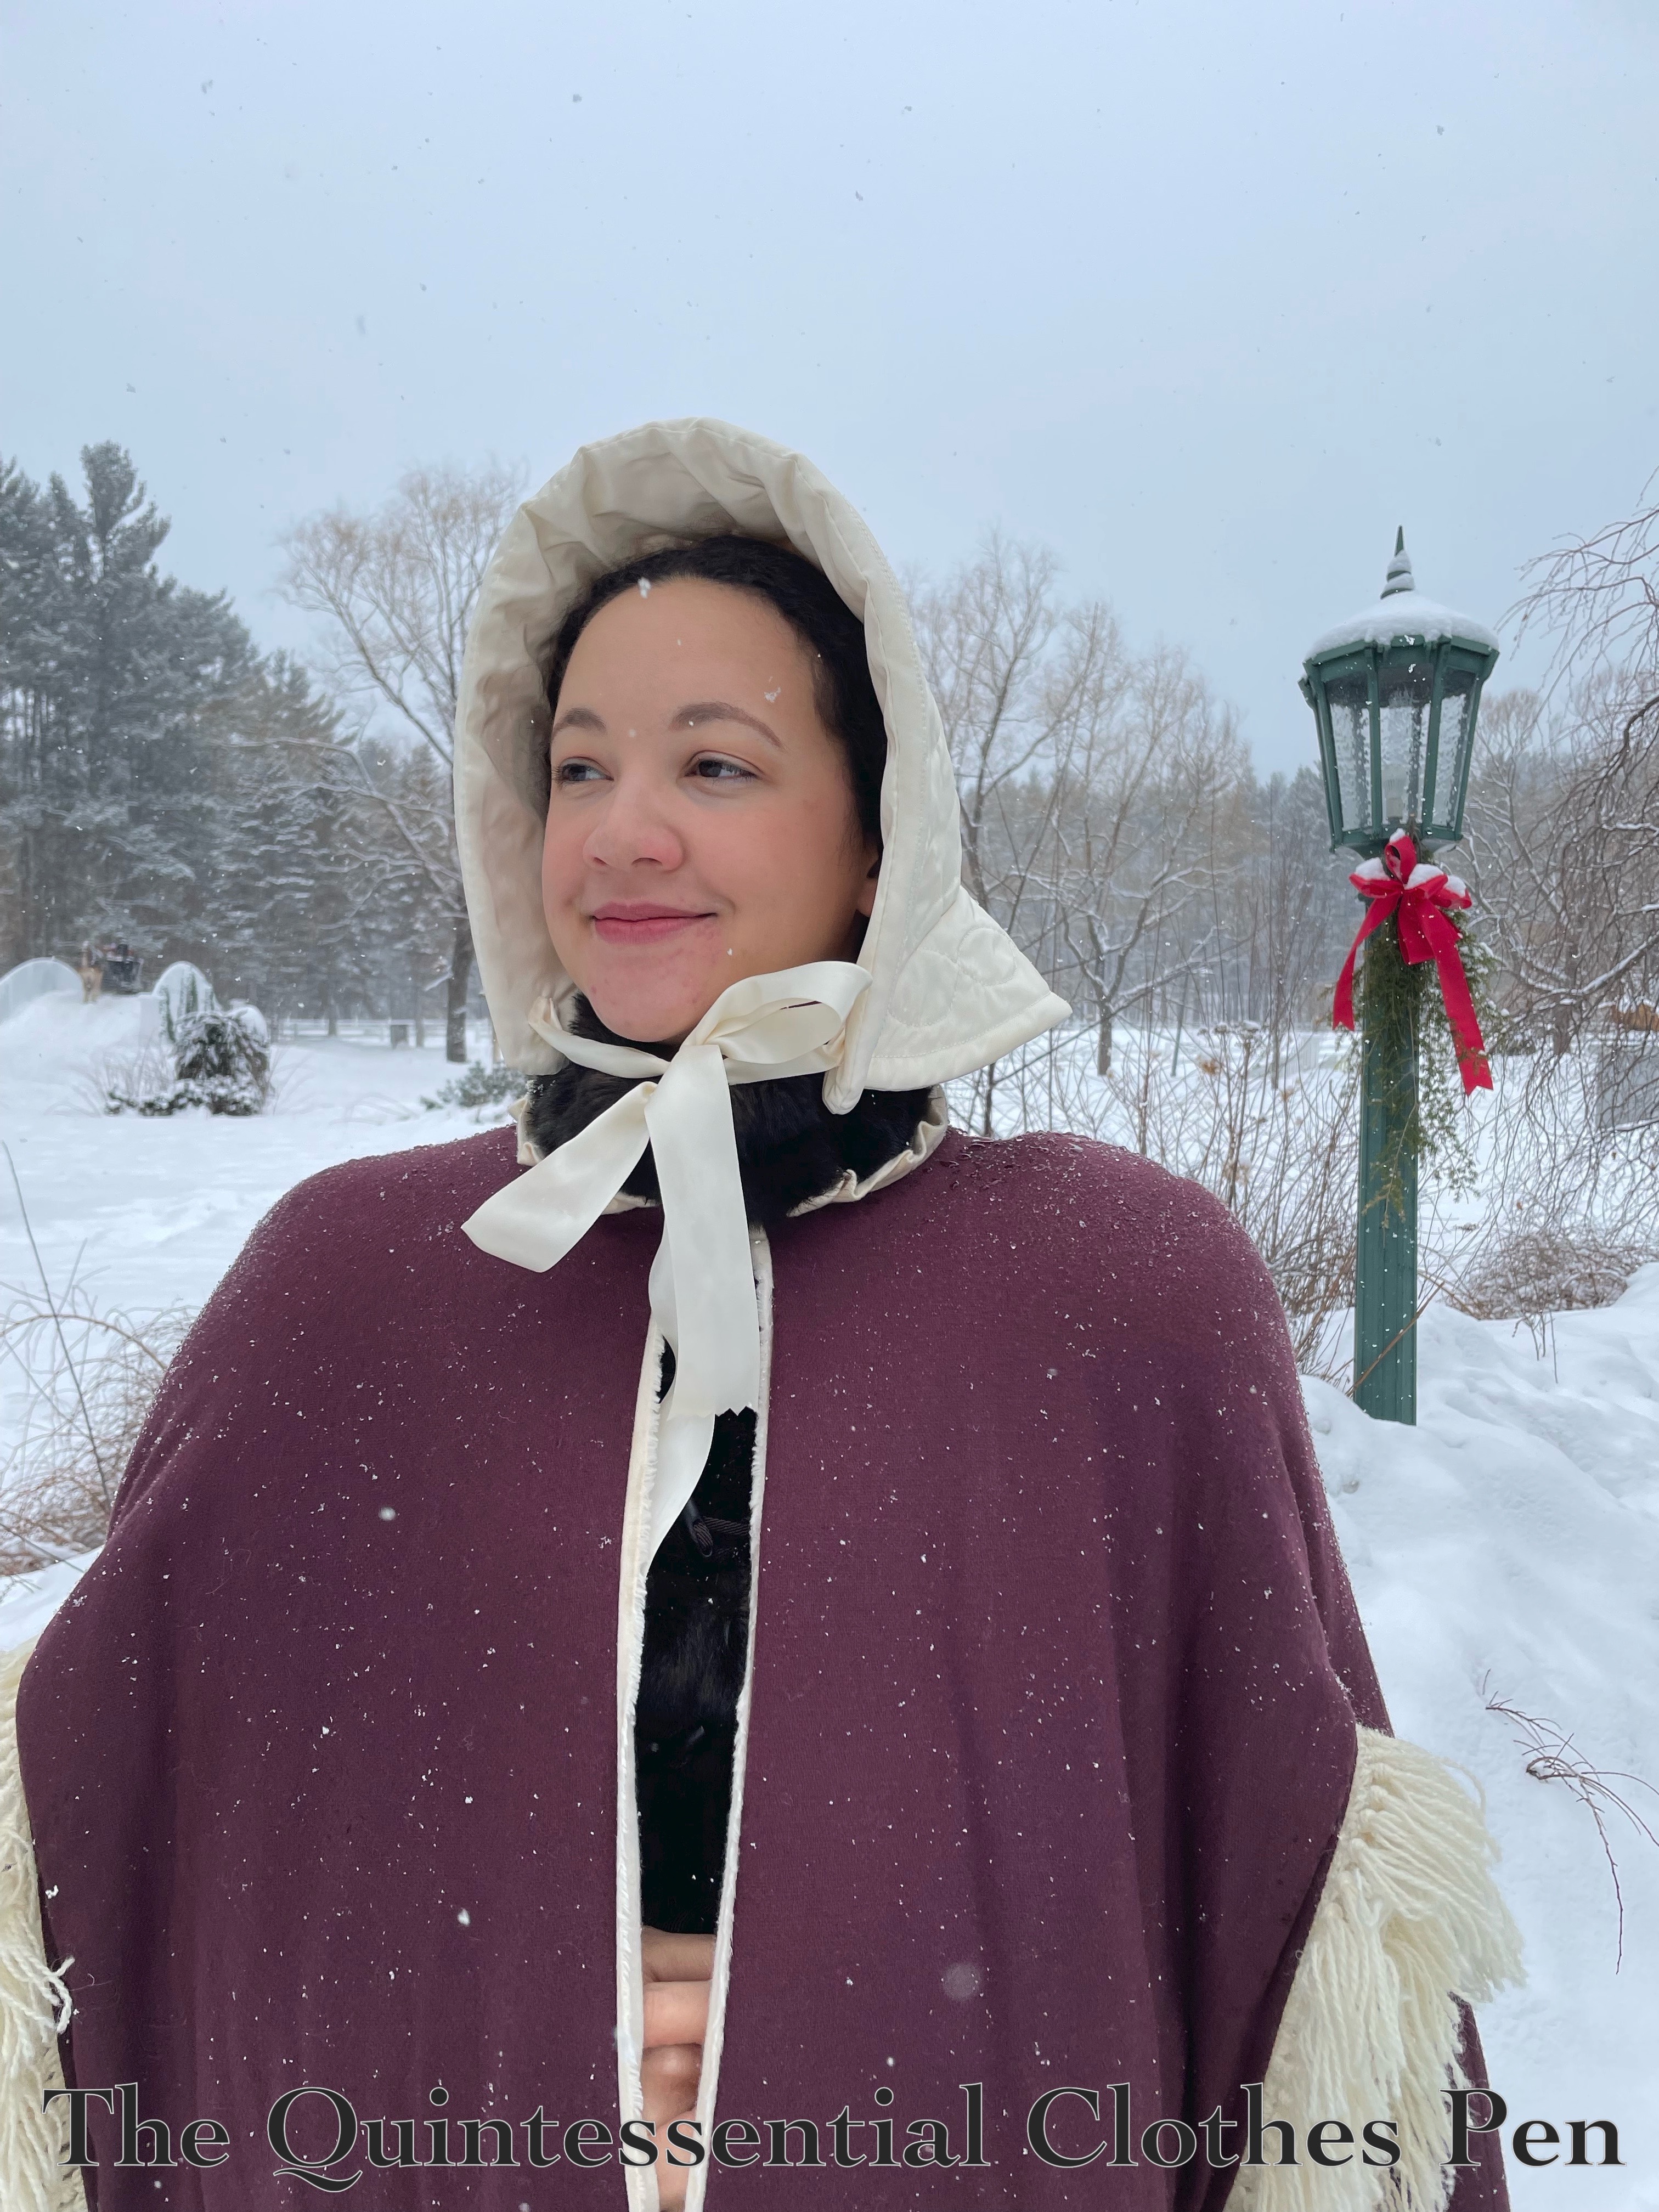
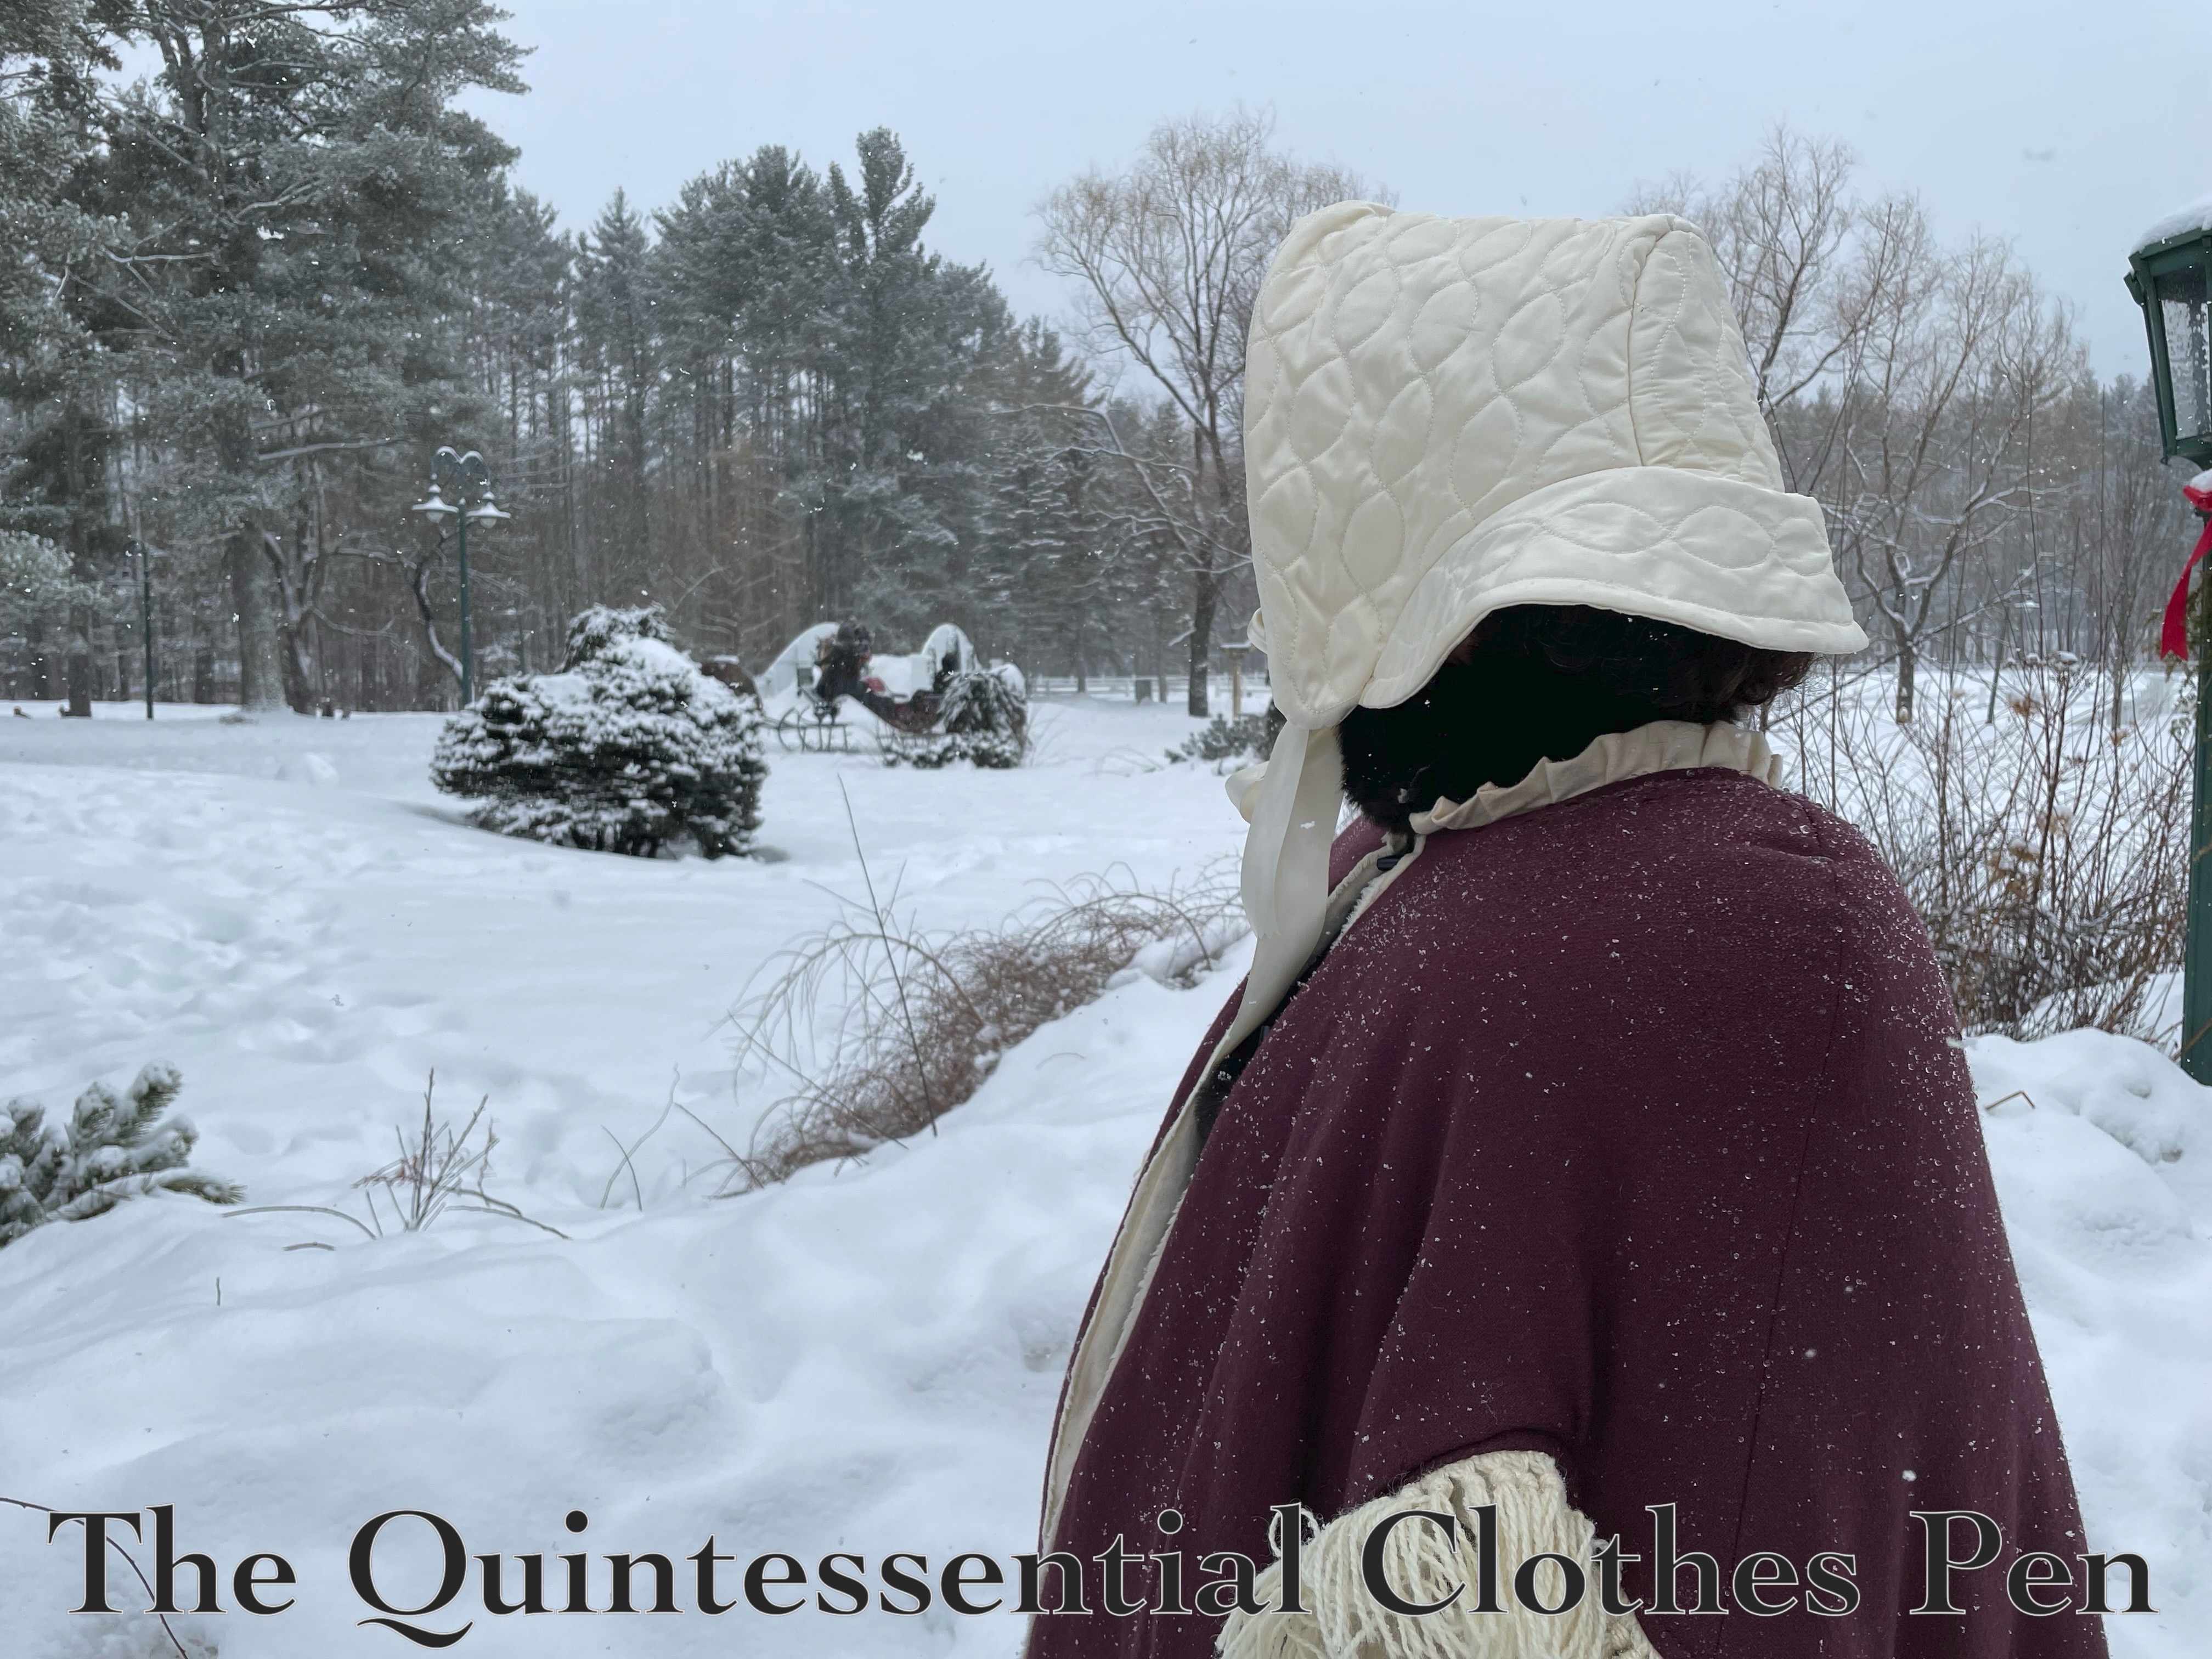
I was mentally preparing for my 19th century winter adventure a few months ago by taking note of the suitable warm winter outerwear in my historic closet. One of the warmest garments I have is my 1855 Wool Cape; however, my thoughts ran along the lines of “I don’t have any 1850s winter appropriate headwear to go with the cape….”

That was easily remedied!

Last fall, I’d purchased Anna Worden Bauersmith’s Quilted Winter Hood pattern on a whim (the pattern was being discontinued for the moment and I didn’t want to miss out). I hadn’t had a project with a deadline in awhile and so I decided to quickly make up the Quilted Winter Hood for the winter adventure… by hand (including the quilting!), of course, because I can be a bit crazy sometimes.

Since the goal of the hood was to keep me warm, it is a perfect garment for the Historical Sew Monthly 2022 May Challenge! Protection: Create a garment that protects you from something: weather, dirt, wear, weapons, etc.

As such, here are the facts:

Fabric/Materials: ½ yd of ivory silk taffeta, ¾ yd  ivory cotton, and 1 yd cotton batting.

Pattern: Anna Worden Bauersmith’s Quilted Winter Hood.

Year: c. 1850.

Notions: 1 ¼ yds 1 ½” ivory satin ribbon, 1 yd millinery wire, approximately 45 yards of silk quilting thread, and regular sewing thread.

How historically accurate is it?: 90%. The pattern, construction methods, and fabric are all quite good and it is entirely hand sewn. I’m sure it’s not quite the same as an original, though.

Hours to complete: 13.

First worn: February 2022.

Total cost: $27 (approximately $17 for the materials and $10 for the pattern).

The pattern offers ideas for quilting patterns as well as detailed observations on extant hoods and their common features. While straight lines of various sorts seem more common for quilting patterns, I decided to go with the scalloped suggestion taken from a period magazine.

This front view photo looks like a little silly to me because of the very square shouldered silhouette (that isn’t 1850s at all!). It’s due to the 1890s sleeves that are underneath the 1855 cape…

A woman has to stay warm!

Some of my favorite inspiration hoods are on my Pinterest board for this project. (Many more quilted hoods can be found on Anna Worden Bauersmith’s Winter Hoods Millinery Pinterest board, as well.)

In the process of creating my board, I was drawn to a few other winter hoods and cloaks. That set me off down a brainstorming path to see what else I have in my too-full wool stash that could be made into more 1850s and 1860s winter outerwear!

Not that I need more… I’m only one person, after all, and how many wool capes can one person reasonably wear at once? But… there are at least two other hoods and another cape that I’m now seriously pondering. So this quilted hood (and the cape I already have) might just be the beginning of a whole series of mid-19th century winter outerwear someday. (And maybe I should eventually take a photo layering all of it at once, just to be silly!)

1928 Egyptomania Inspired Green & Teal Dress (HSM #2)

I was inspired to make a dress! That seems like quite an accomplishment these days as I’ve been so busy with other things that I haven’t made much for myself this year.

It was summer, you see, and I knew that Gatsby On The Isles was coming up. (I’ve attended in the past, check out the past posts from 2019, 2018, and 2016.)

I have plenty of dresses (and let’s be honest, not many of them have been worn in the last two years or so), but I also had fabric that was waiting to be turned into a dress… So it didn’t take too much self-convincing to decide that the fabric ought to be turned into a dress, right now!

My first idea was to create something like the dress on the bottom right (#2346) in next image, but after making a mockup I realized that I didn’t have enough yardage of my proposed fabric.

Needlework Magazine, March, 1925

I’d bought the fabric thinking I’d make a rather simple 1920s dress, but the dress I’d been pursuing wasn’t quite that–and the length was longer than I had yardage for. So it was back to Pinterest to find another idea. I settled on using the green dress below, another one I’d been eyeing for years, as my inspiration.

1928

I’d purchased the green and teal accent fabrics in 2021 and thought they would work well for this second design idea.

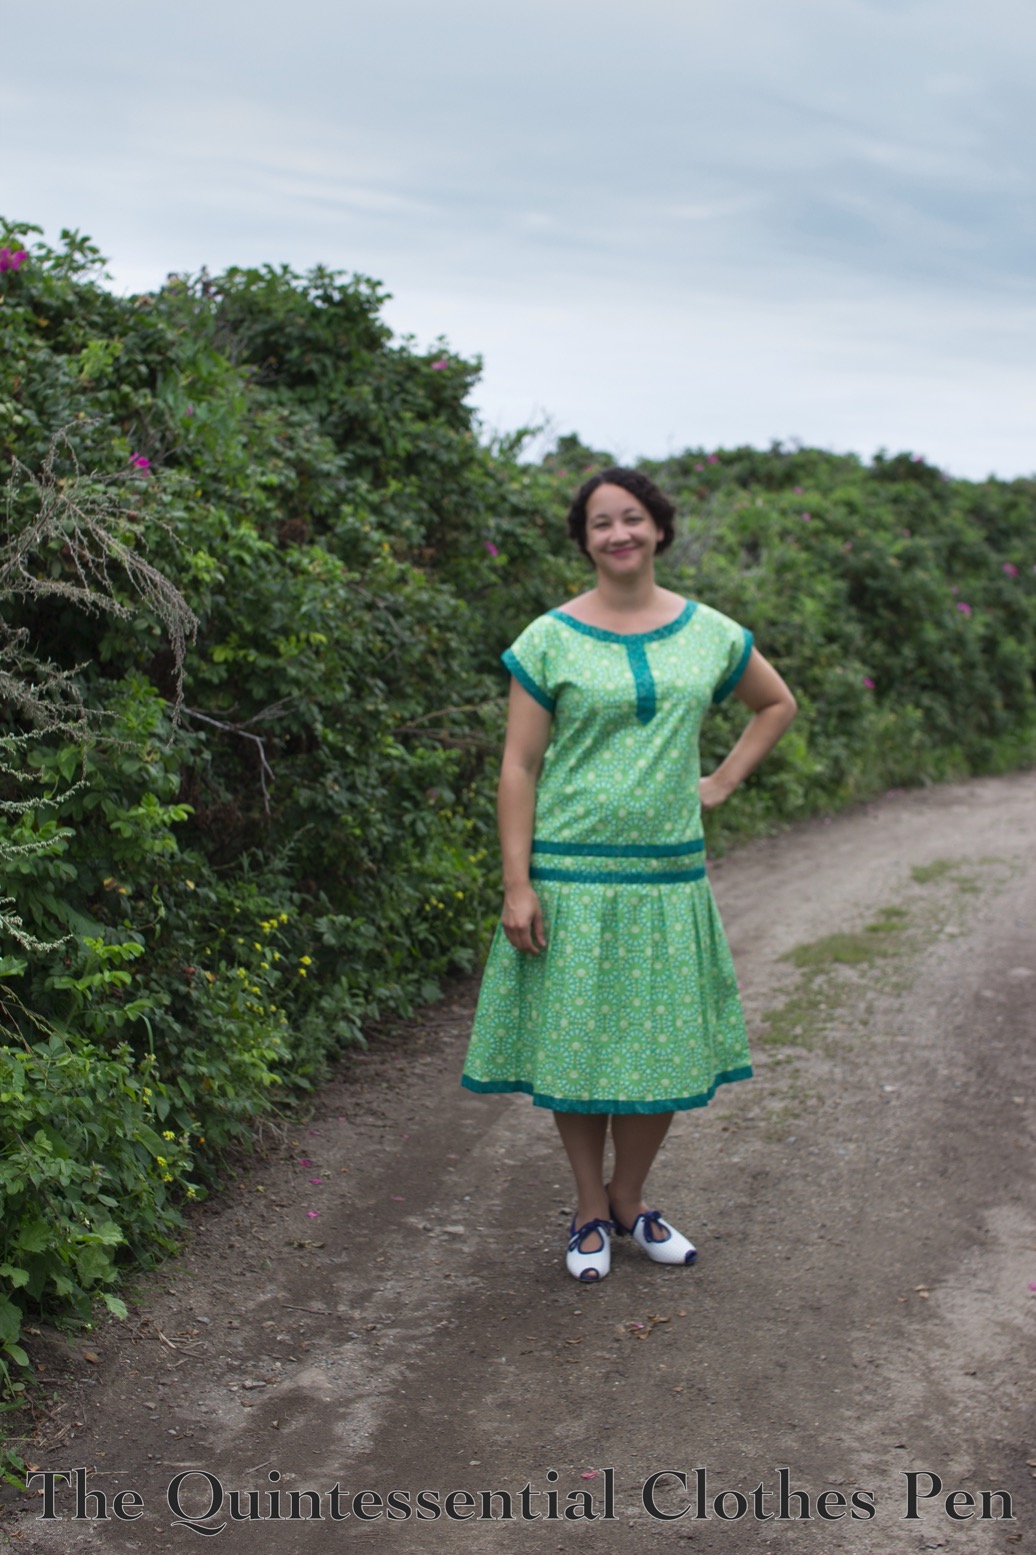
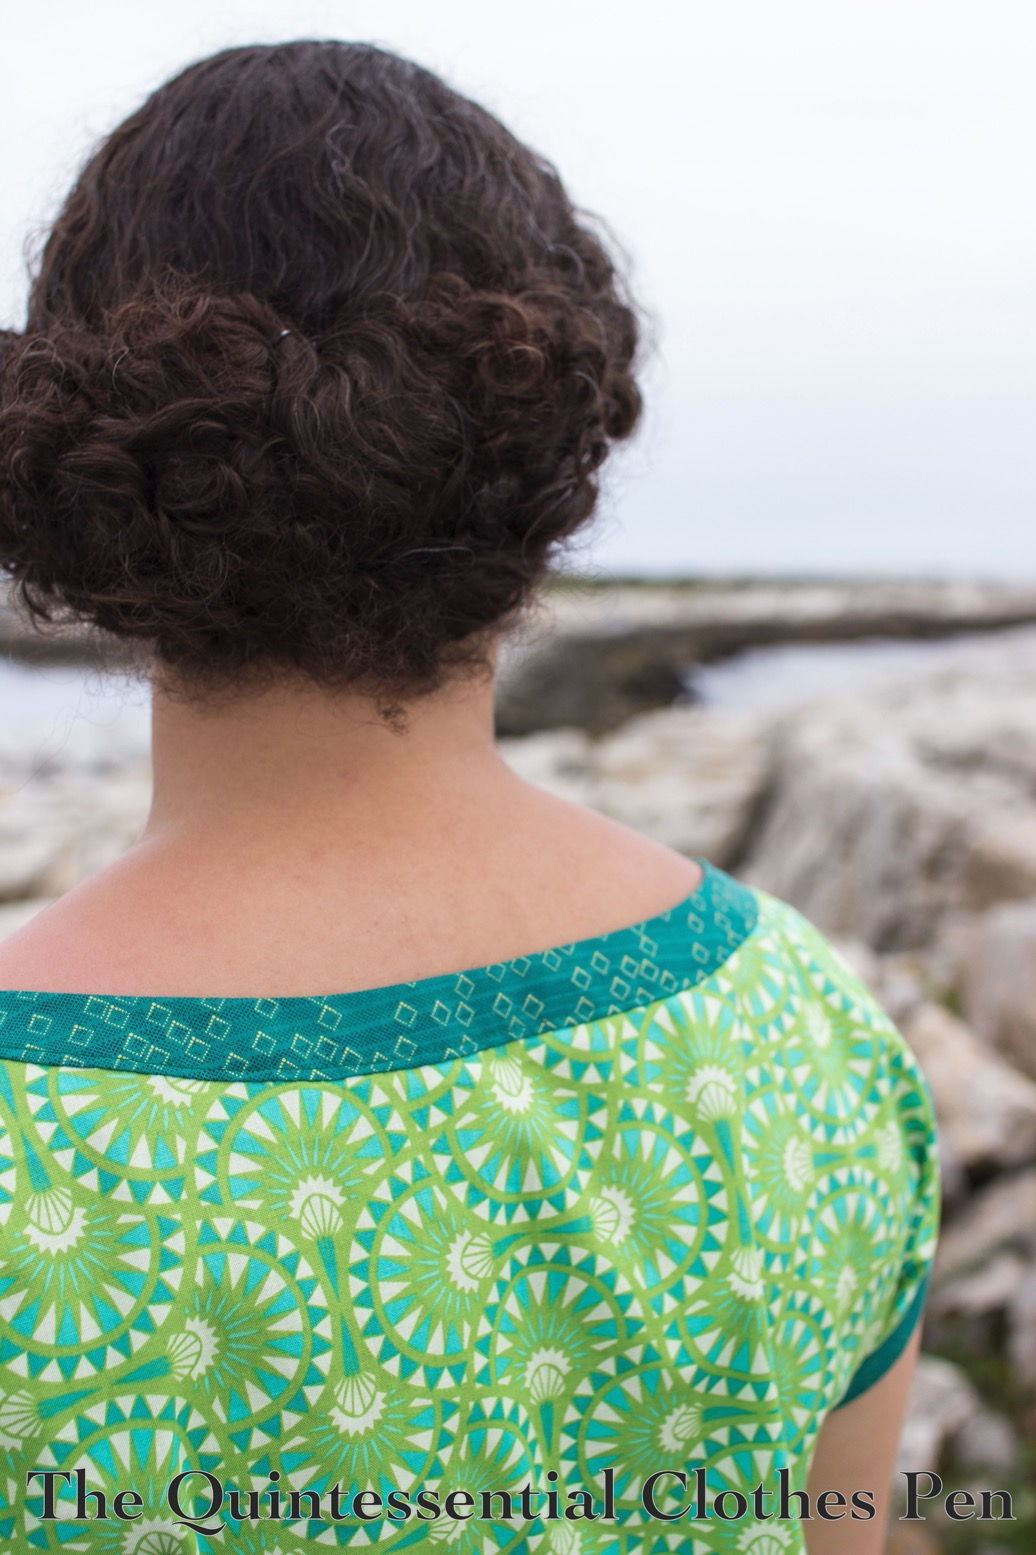
My bodice pattern was adapted from my 1925 Blue Coral Dress, to get the general size, in combination with my late 18th century shift, to get the cut on sleeves. The skirt is just a tube made from what was leftover after that. I wanted to get two full widths of 45″ but didn’t have enough, so the skirt is one full width and two additional sections.

I wanted to match the pattern perfectly at the seams, but that ate up too many inches of my circumference so I settled on not matching them–and frankly, you can’t tell! I spent a lot of time making perfect pleats (the print on the fabric makes that pretty easy, actually), but of course they smoothed out as soon as I wore the dress. Oh well!

The dress qualifies for the Historical Sew Monthly Challenge #2

The Roaring 20s: Make something from the 20s (any century) or that somehow incorporates a number in the 20s. .

Just the facts:

Fabric/Materials: 2 yds green cotton and 1 yd of teal cotton.

Pattern: Created by me.

Year: 1928.

Notions: Thread.

How historically accurate is it?: 95%. The pattern and construction methods are quite good. The fabrics are a bit stiffer than those that I think would have been used 90 years ago.

Hours to complete: Perhaps 12? I didn’t keep track.

First worn: August 2021.

Total cost: Approximately $9.

This dress is mostly machine sewn. The goal was to entirely machine sew the dress, including attaching and top stitching the trim, but then as I was reaching the end of the sewing process I realized there were a few things that would look nicer with a bit of hand sewing.

Why is this Egyptomaina inspired?

Well, ancient Egypt was all the rage in Europe and America in the 1920s, particularly after Howard Carter and Lord Carnarvon discovered the tomb of the Pharaoh Tutankhamun in 1922. Egyptian motifs were used in Art Deco design elements for furnishings, jewelry, and clothing. So, while not exactly Egyptian… the colors and patterns in my fabrics remind me of Egyptian things: the Nile river, lapis lazuli, the Egyptian lotus flower, and the tops of many ancient Egyptian columns, for example.

Obelisks were often erected in pairs at the entrances to ancient Egyptian temples, so given the Egyptian association of my dress, I wanted to try and get a photo of my dress with the obelisk on the island. The photo is not quite just me and the obelisk, but it will do. (The problem is that the obelisk is so tall that if you’re close to it you can’t tell what it is… but being far enough away to get the full height means that other elements make their way into the photo, too!)

There are lots of additional photos from tromping around looking for good photo opportunities for this dress, so you’ll be seeing more of it and my accompanying adventures in more posts soon!