

The Beginnings, The Abbreviated Version
The very late 18th century (1780s and 1790s) is a mostly new period for me. I have a chemise… but no other underclothes that fit, no dresses, and quite likely no accessories… I’m starting mostly from scratch! And as one does (or at least as I do) when faced with a new period, I decided to make completely hand sewn stays as the foundation. That was in 2018!
I thought I had a grand plan. I was so excited about my stays! I tried a new way of patterning, tried a new method of stiffening my fabric, sewed oodles of boning channels by hand, shoved bones into all the channels that were just a little too tight, put in my eyelets by hand… And I documented all of it to share it here.
Catching Up To The Current State Of Things
Then in mid-2021, I did a fitting… and realized that I was really unhappy with the stays. Really unhappy. Mostly due to the fit.
The stays pushed my tummy downwards so it rounded out underneath the front point and tabs, but, even worse, the back pushed down on my lower back and was super uncomfortable! AHHHHH! After all that time spent hand sewing! And it’s not like I jumped right in to hand sewing stays without mockups and thinking that the pattern fit. No, I’d done those steps and hadn’t noticed anything wrong! GRRRR.
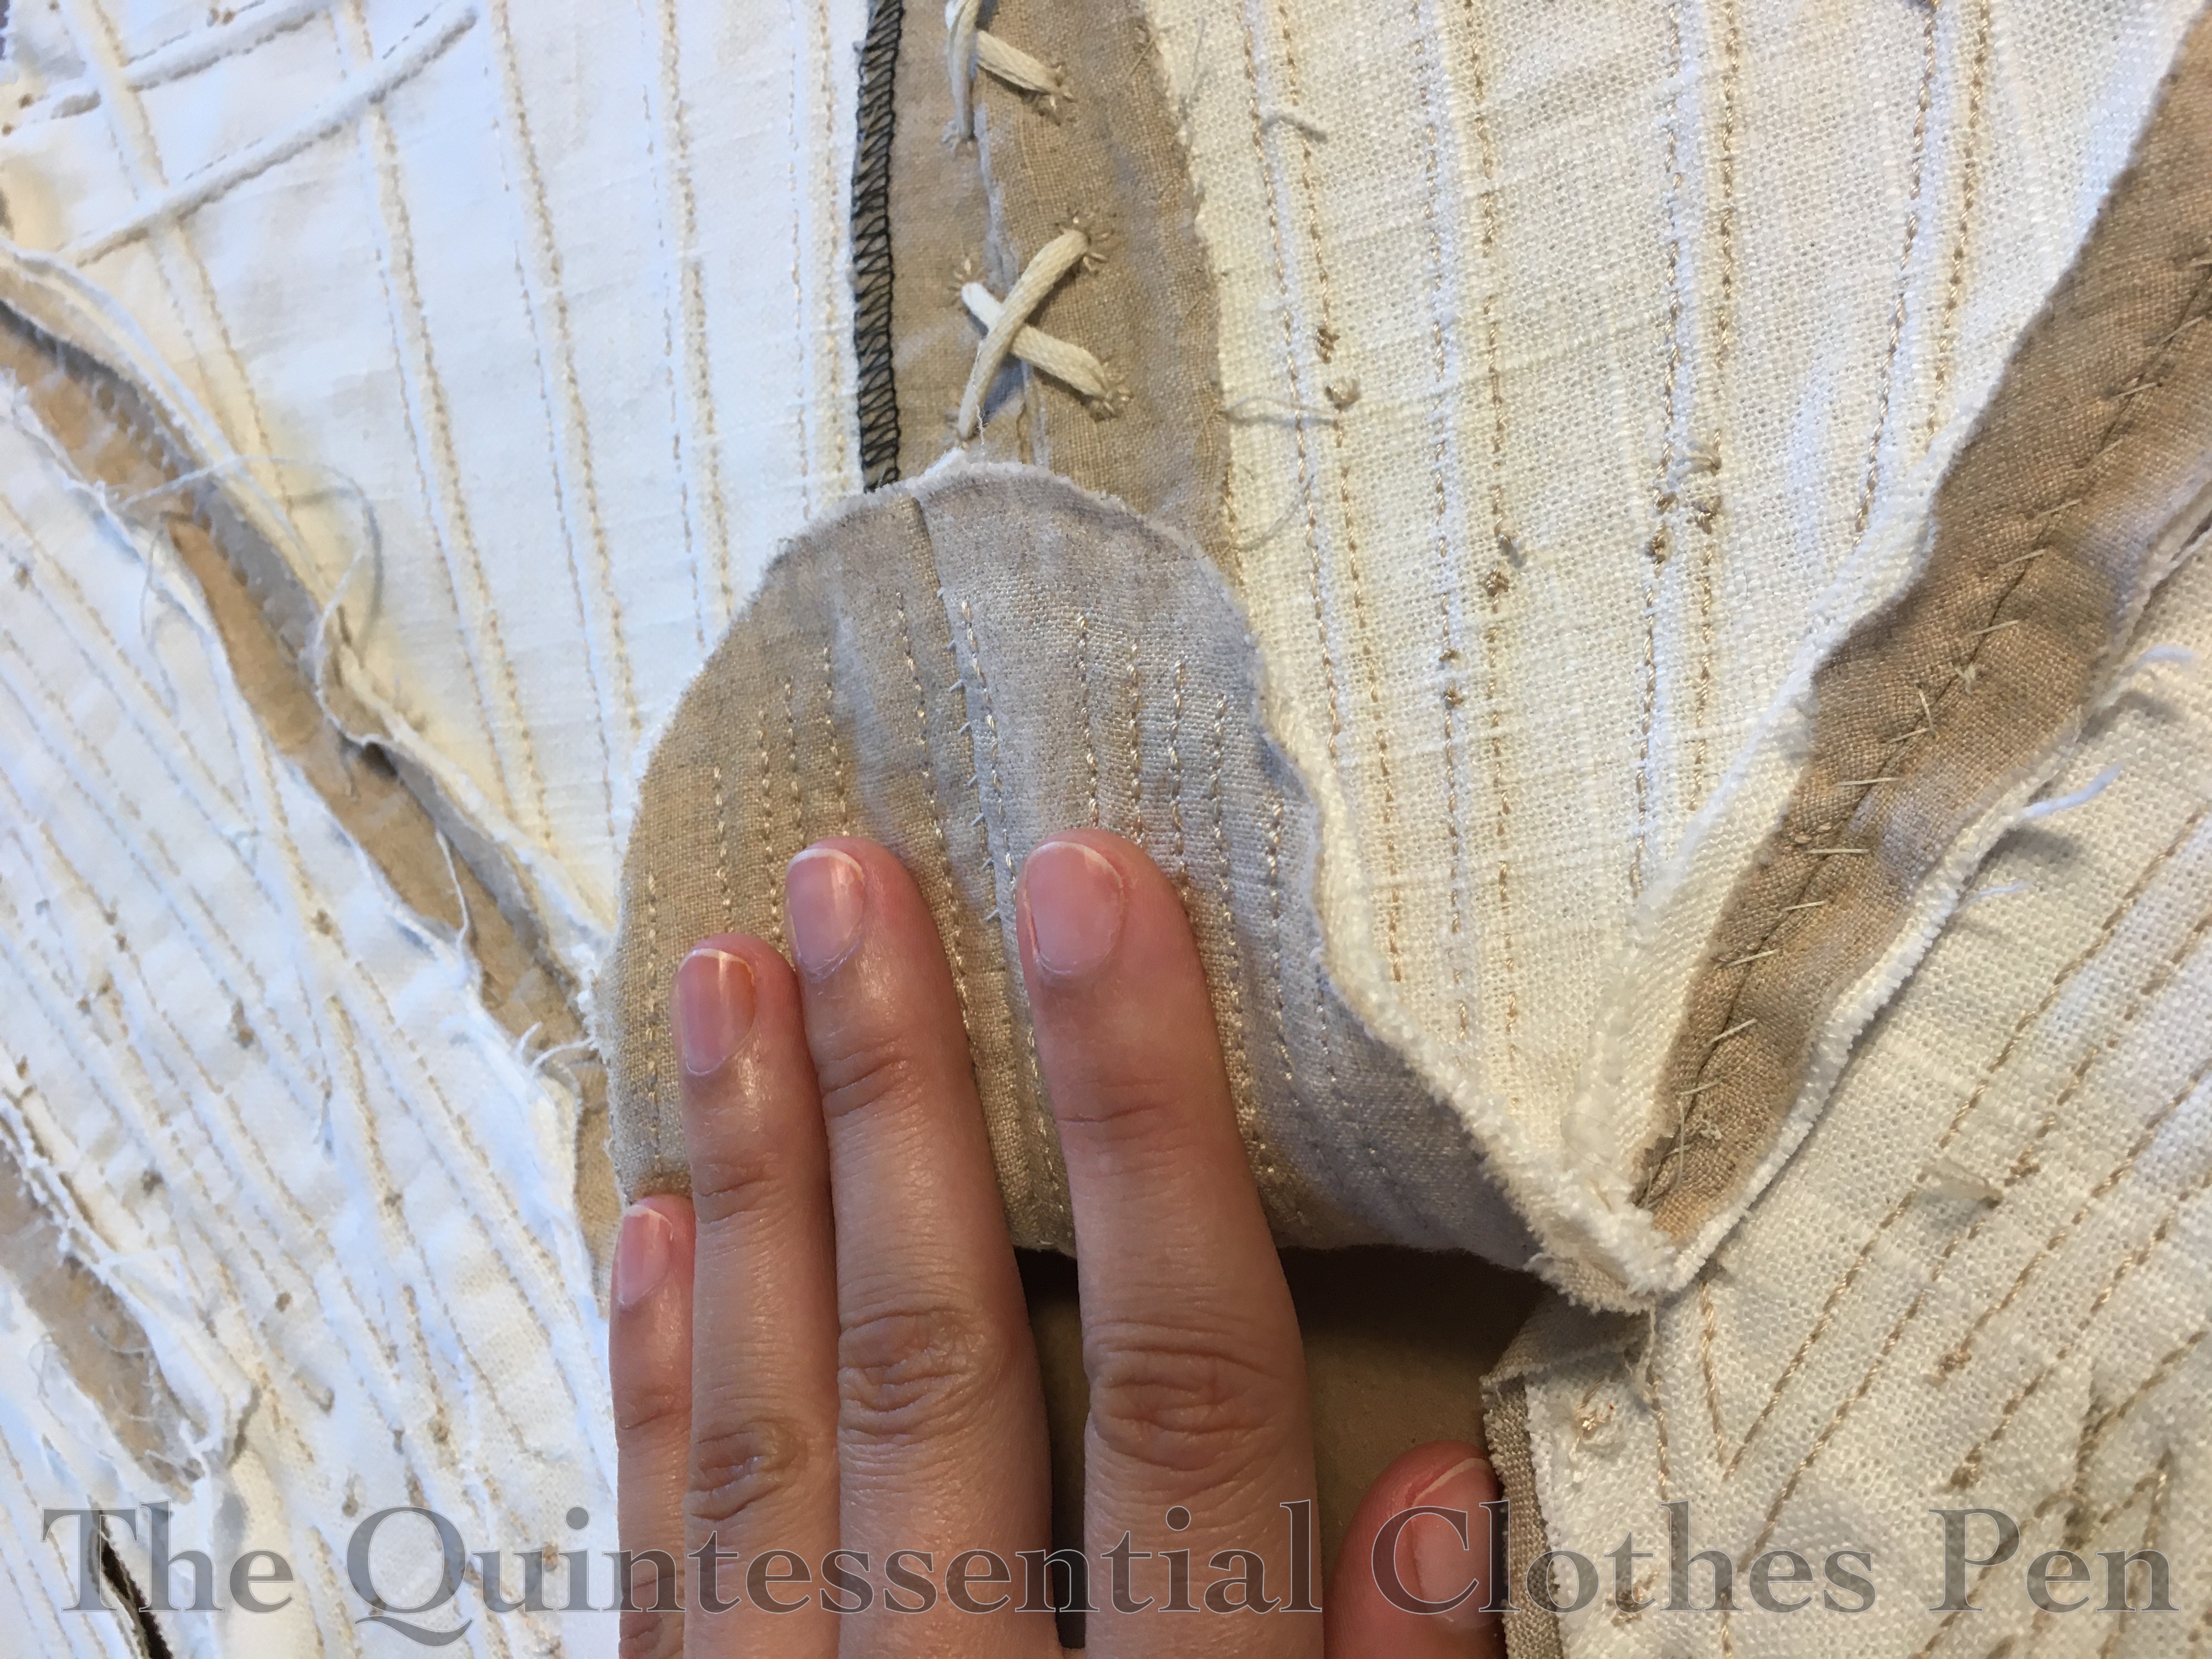
My immediate reaction was to put the project away. I just couldn’t bear it. After I calmed down (weeks later, mind you!), I tried to see what I could do to fix the issues. I decided to add a gusset into the back, since the pressure seemed partly to come from the bottom of the lacing gap being quite wide. I had only very small scraps left, so the only way to do this was to cannibalize my straps (which is fine, because I wasn’t super keen on them restricting my shoulders, anyway).
Here’s a photo of the back of the stays with the triangular gusset already added (and some other things that I’ll talk about later). The gap at the bottom was even wider before I added the gussets!

Fast forward a bit more and I had another fitting. The gusset helped a little, but I still had pressure on my lower back. And… the front problem, I realized, was due to a combination of the front being too short for my frame and this idea I had to use ⅛” bones, to mimic the size of originals…
I’ve had success with plastic zip ties as bones, so I thought I could use narrow ones to create the width I was looking for (I used these, purchased on Amazon). Unfortunately, they were very tight in the channels. It took a lot out of my wrists to cut and push in all the bones. The width of the zip ties looks great, but they’re too flimsy. Look how much I can bend back the front tab!
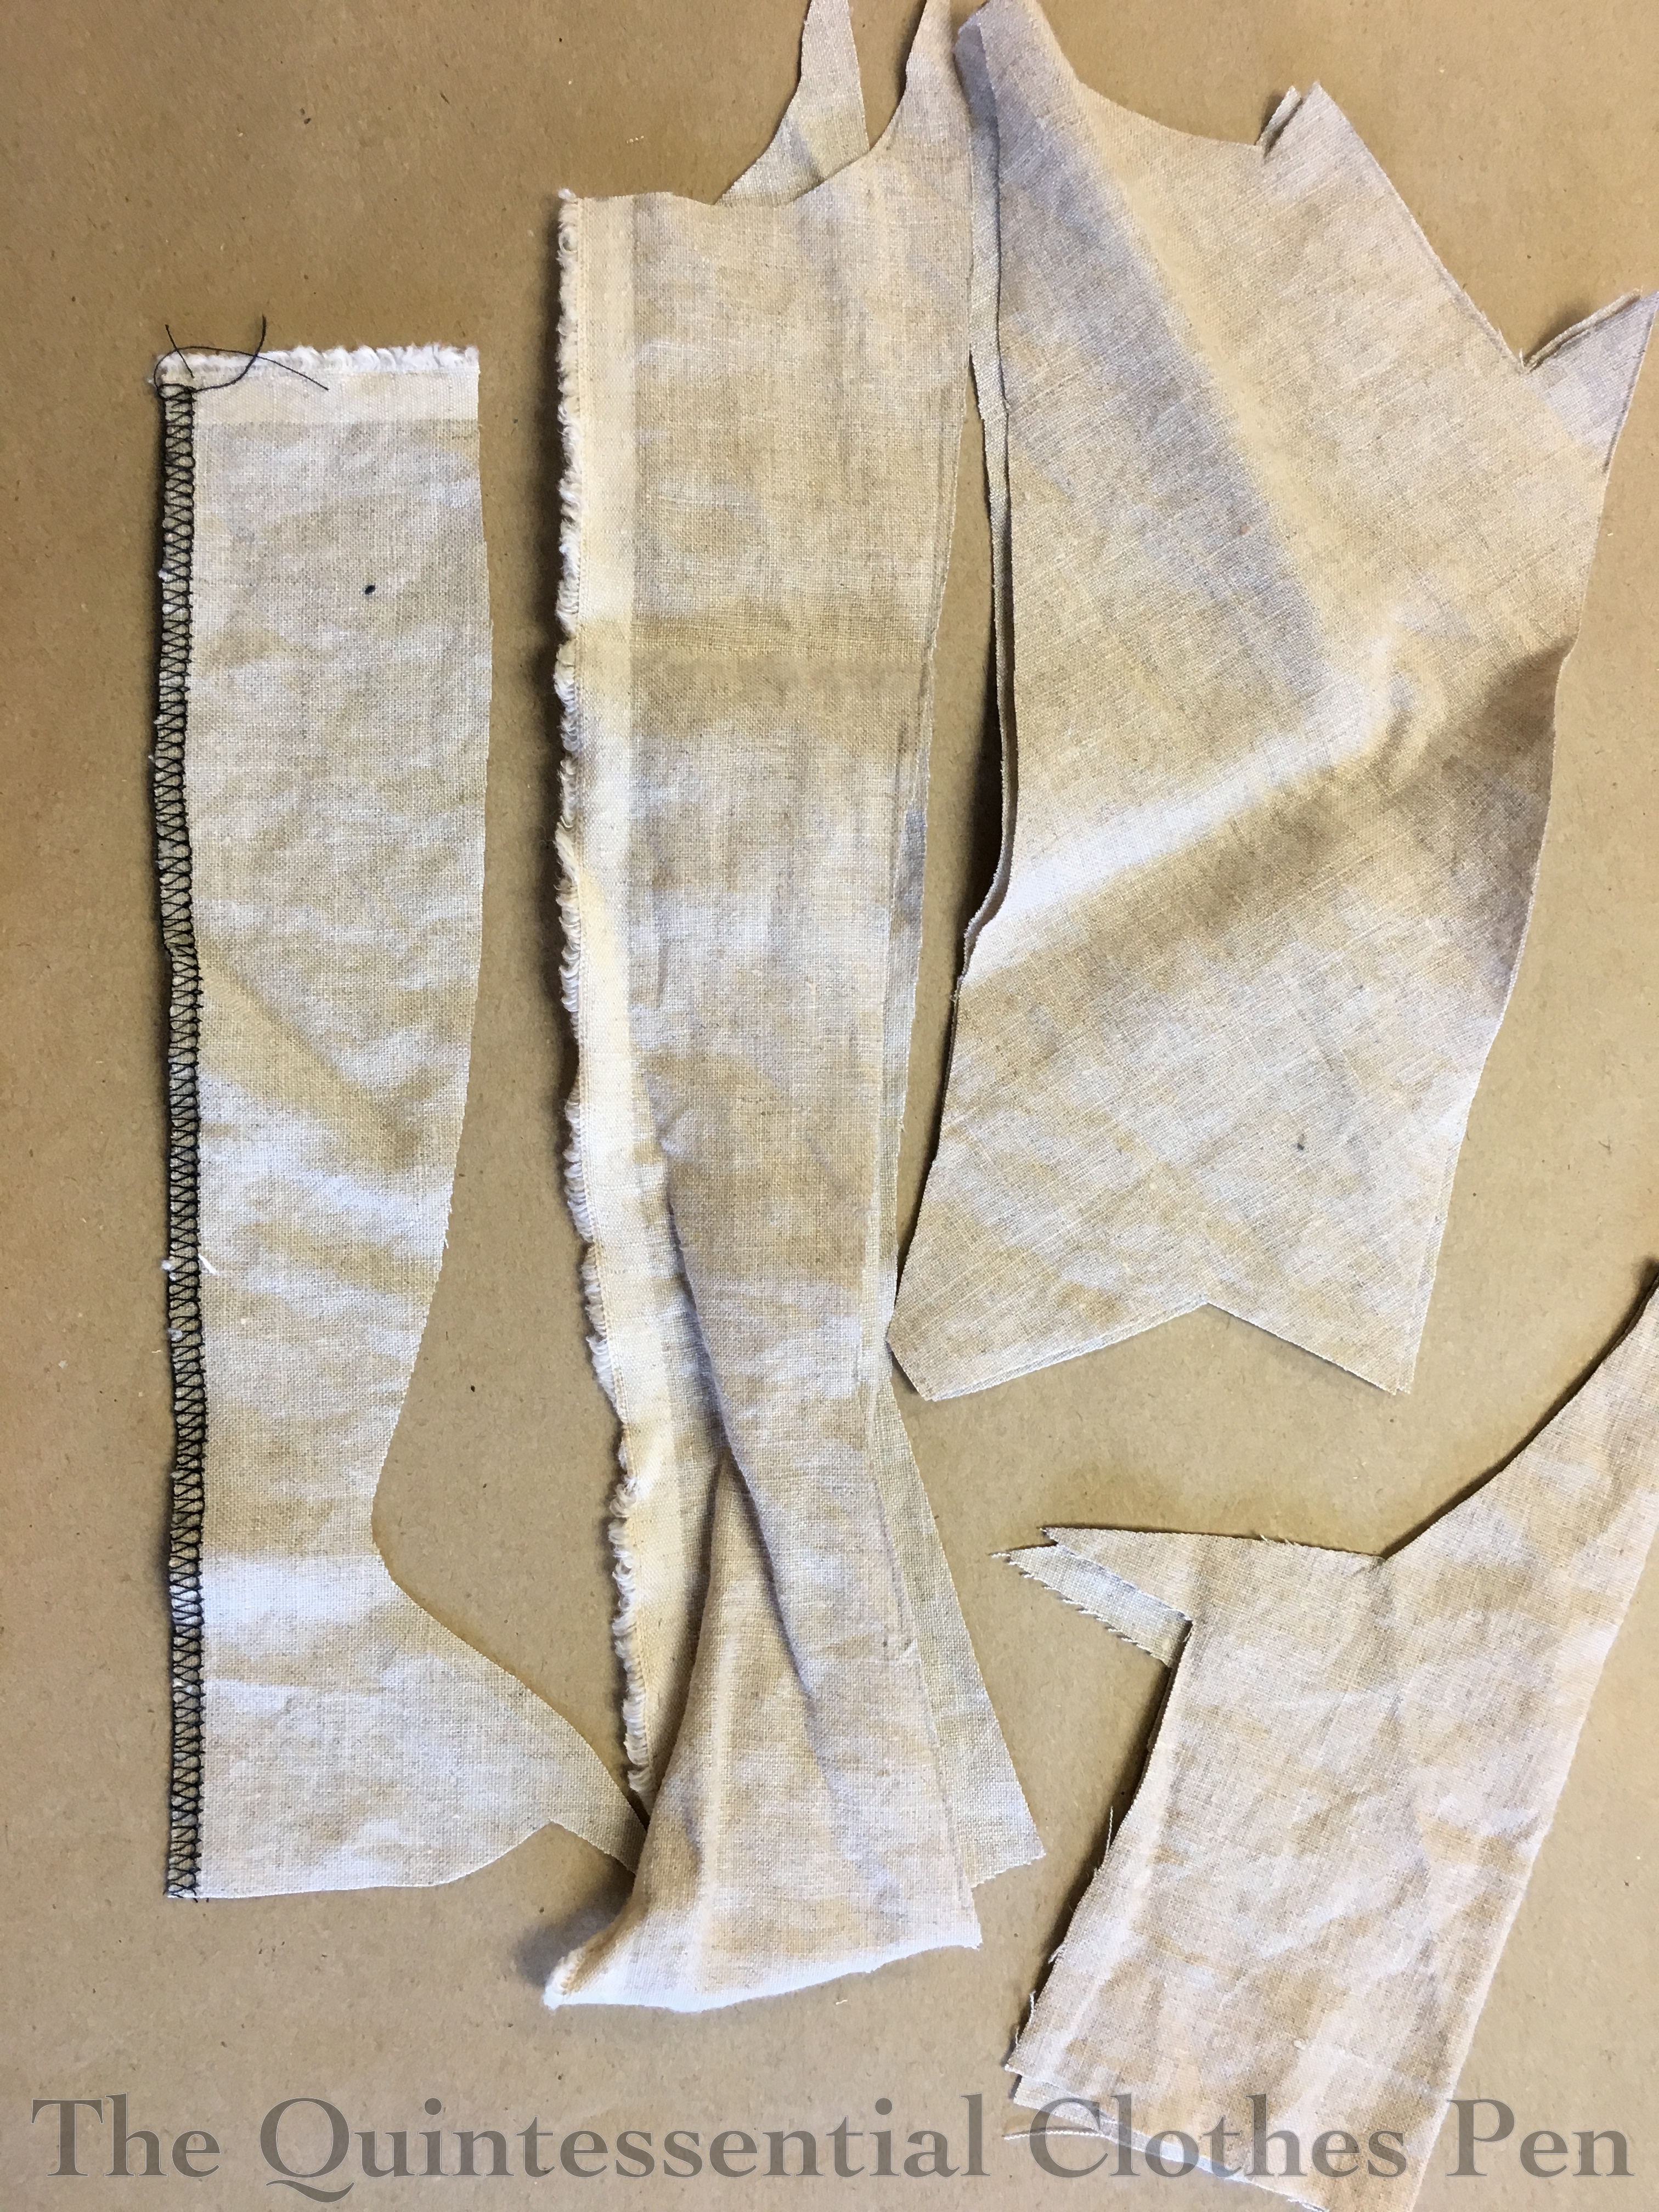
After much deliberation that included going back to look at the original that the pattern I used is based off of, and the reproduction made from it that is in the book I used, I realized that the original stays are just really short in the front. AHHHHH! (More about the book I used will be coming in a future post.)
I didn’t process this earlier, in any of my fittings, or my mockup, or my patterning, or my looking at the book! And I’m incredibly low on fabric! Below are my scraps, minus the long ones in the center, which were already used to face the eyelets.
So… I was left with a half finished pair of stays that took many, many hours to even get to this point–wonderfully sewn in terms of methods, but which I couldn’t wear. I was very upset and put the stays into time-out (again!).
I’ll stop the story of the stays here and continue on with my updates from the most recent fitting next time.

Oh dear, yes, I know this frustration of putting in so much time and effort and a project isn’t even useful! I’m curious to see the rest of the story though, fingers crossed it has a happy ending!
I hope it will be! The stays are still in progress, but there’s lots of in progress construction information to share while I keep plugging away. Thanks for the encouragement. 🙂
I feel like we were probably using the same pattern and getting the exact same problems! Mine weren’t hand sewn, and I didn’t realize they hurt my back until after they were finished. I’m still not sure why they hurt so much other than the ziptie boning was curving right into my back. Maybe i put the waist a little too low in the back since my waist seems to angle down towards the front? Either way, I’m looking forward to part 1!
Thanks for letting me know you are enjoying this crazy stay-story! I’ll be sharing more information about the pattern I used in a future post. I’ll be curious to know how it compares to what you used. Sorry that your stays were problematic, as well. Stay fitting is difficult!
We are in the same boat; I’m trying to sew a new pair of stays but now being more conscious of my particular measurements and by golly, I’m having a dickens of a time fitting patterns.
I bought the Simplicity ones a few years ago, made the stays, which are not a good fit now. Bought the Redthreaded 1785 one and I went by my bust measurement and of course everything else doesn’t fit (not the patterns fault, purely the buyers lack of knowledge, and a change in only wanting a back lacing). So now I’m back to researching and gathering information to arm myself with how to tweek a pattern, including buying a few books (never have enough historical sewing books!), viewing Youtube videos (highly recommend the one on pattern drafting by Timesmith Dressmaking – Rebecca Olds), and scouring blogs.
I don’t have anyone to assist other than a fitting model either. But perseverance is the name of the game.
Looking forward to seeing how you progress!
Thanks for sharing your experiences! Fitting stays is quite difficult, especially on yourself. It sounds like you are deep into a lot of helpful research, though. Thanks for the suggestions and interest in this project. Best of luck on yours, as well!