1925 Lace Cloche

I knew I wanted a cloche to go with my 1925 Blue Coral Dress from early on in the process of making it. It was going to be hot when I wore the dress, so I knew I wanted something that would both look and feel lightweight. Turns out any hat was warmer than a bare head (well, one with hair on it!), but that being said, I think this was on the right track with a lightweight hat.

I considered making the cloche from fabric, but couldn’t decide on a style with seams that I liked. However, as I was browsing my Pinterest board, my eyes kept settling on straw, horsehair, and lace hats. It seemed like that was the way to go.

I didn’t have any particular materials on hand or in mind for that type of hat but I had come across a modern cotton lace cloche on Amazon for $14 that seemed like a good starting point. It’s no longer available, but I’m sure a careful search could find something similar. To the right is what it looked like before I started changing it up.

Generally, modern cloches have such a deep crown that they don’t leave any space for hair arranged on the back of the head. I have long hair, so that just doesn’t work for me. Cloches from the 1920s frequently have a cutout in the back to allow for your neck… or hair! They also have more interesting brims than modern cloches often do. Perfect. That’s what I wanted. An interesting brim and a cutout for my hair.

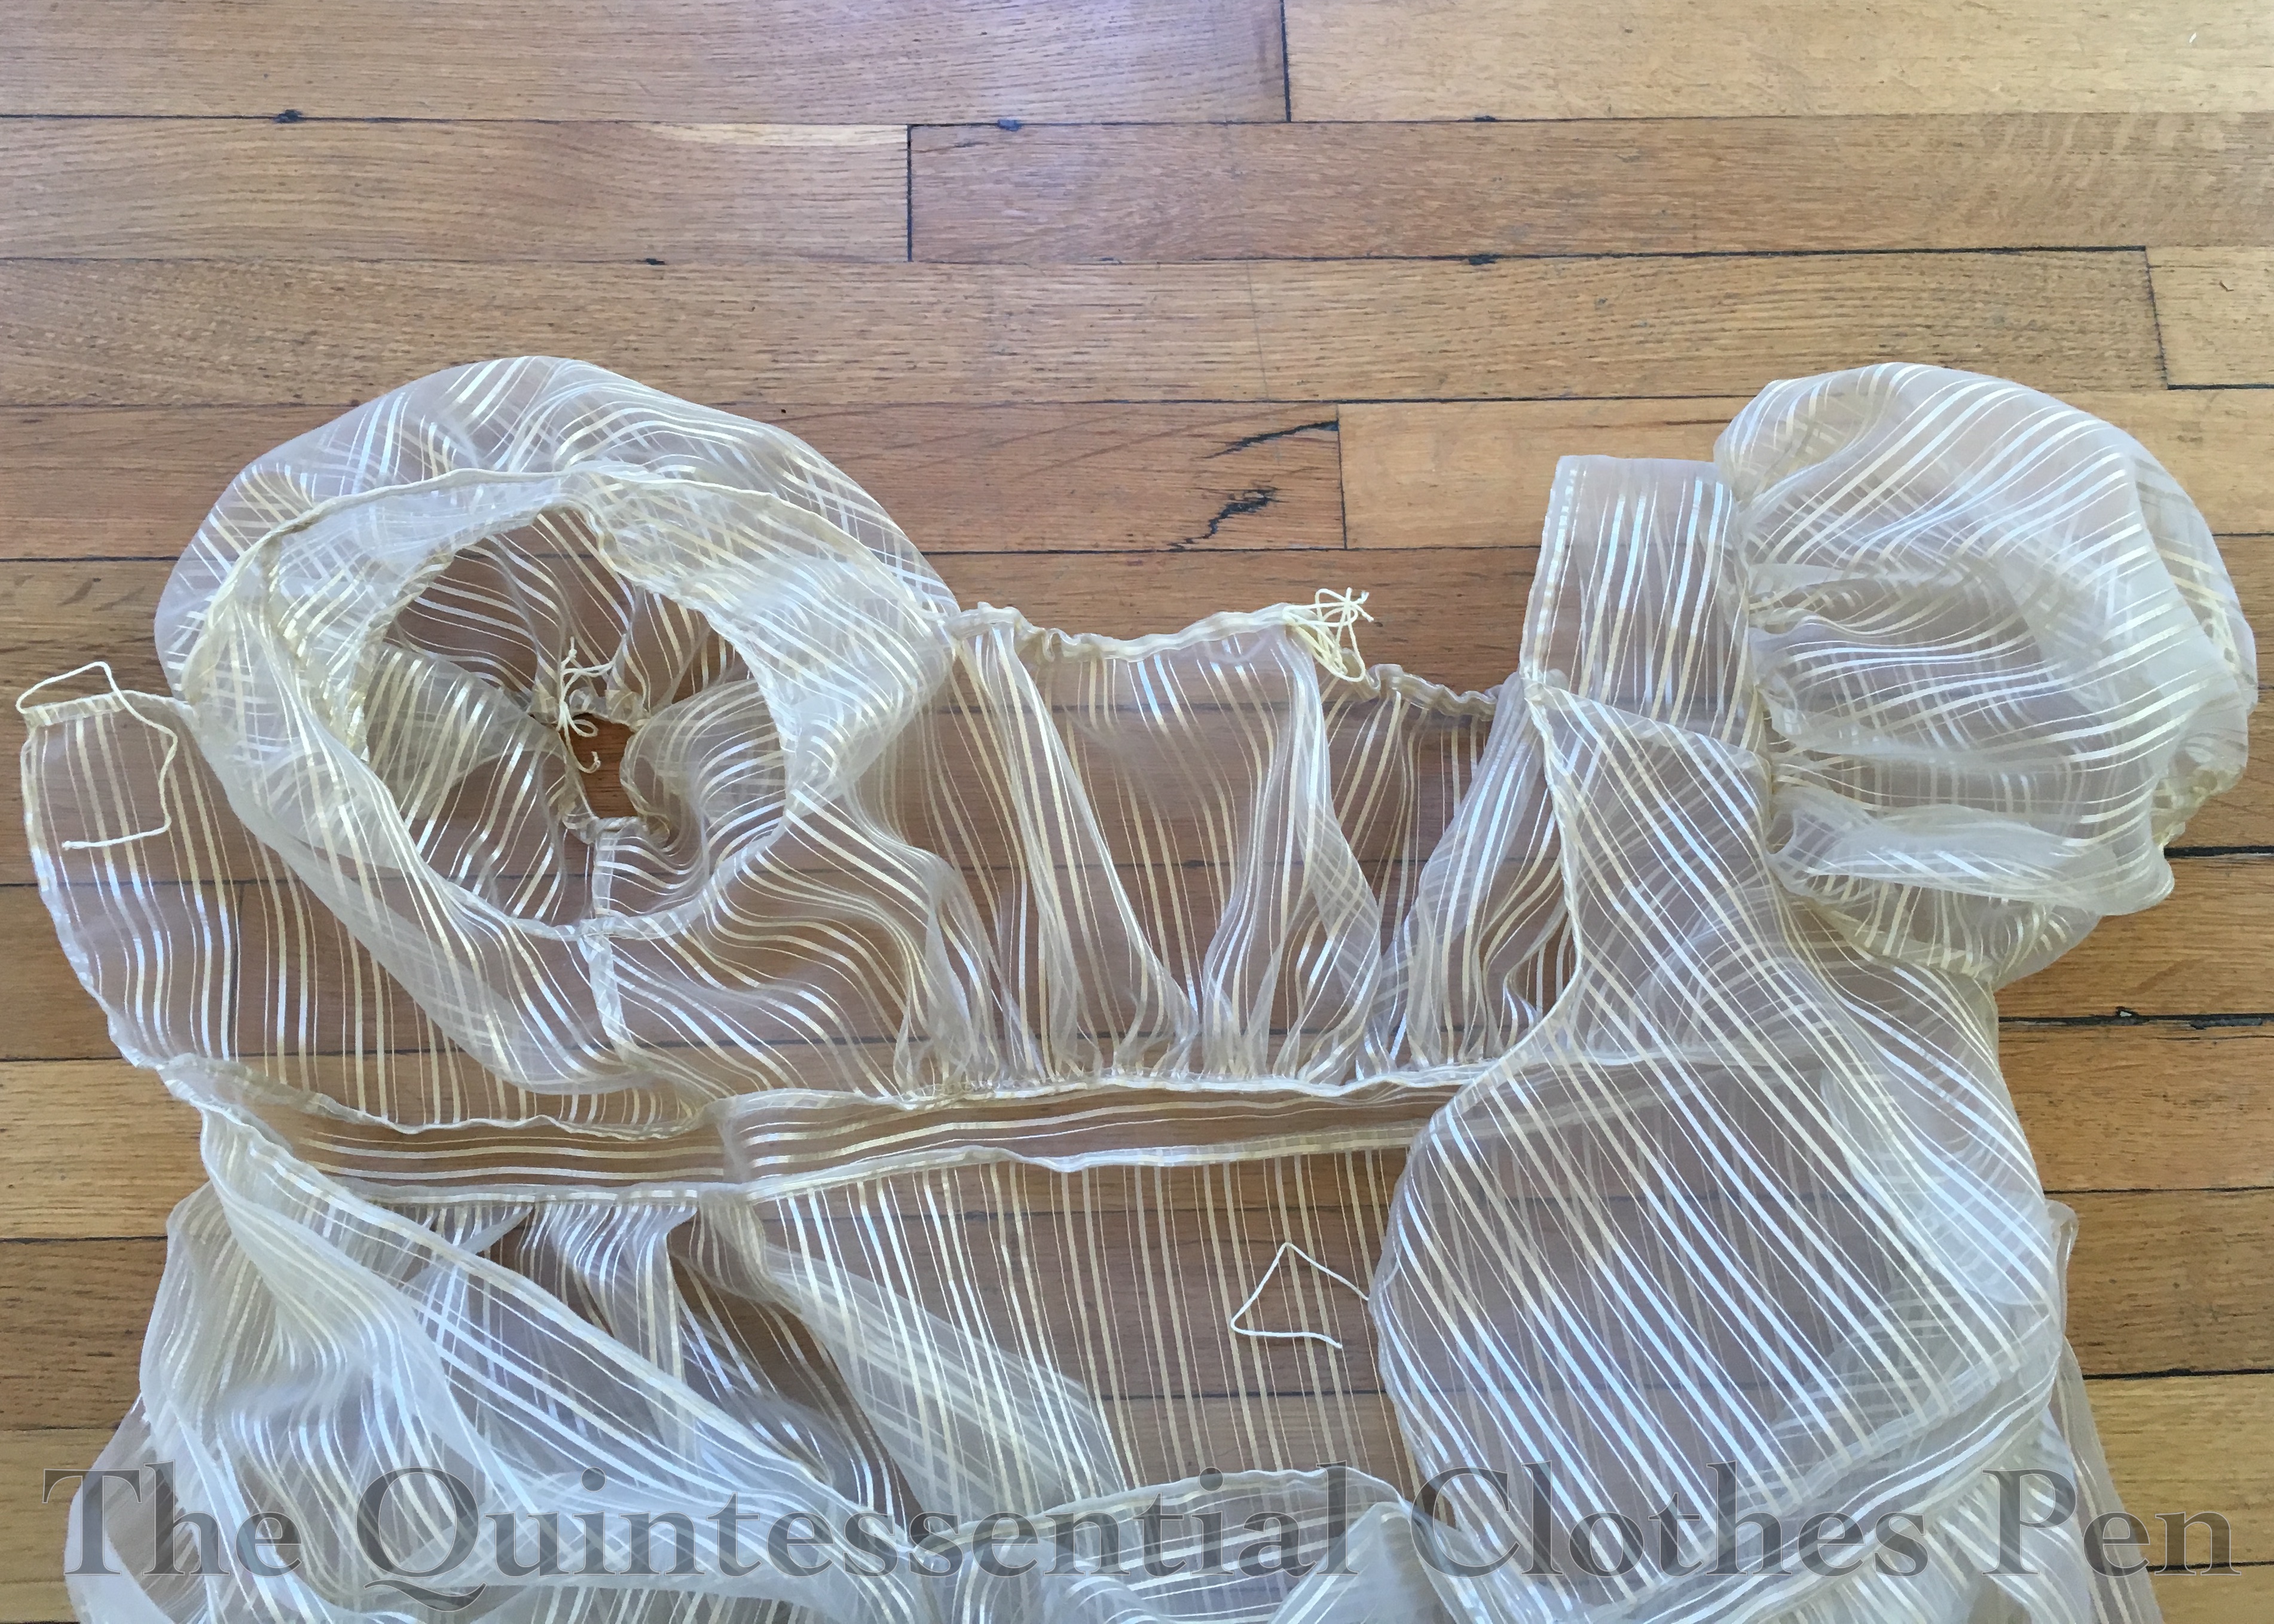
With my design plan in place, I started disassembling the modern cloche. First, I removed the braided band and flower. Then, I started unwrapping the lace on the brim, taking out the stitching that held one circumference to the next. I stopped at the bottom of the crown. I removed the inner hat band for most of the way around the hat, so I could stitch the new brim shape and the back cutout without stitching through the hat band.

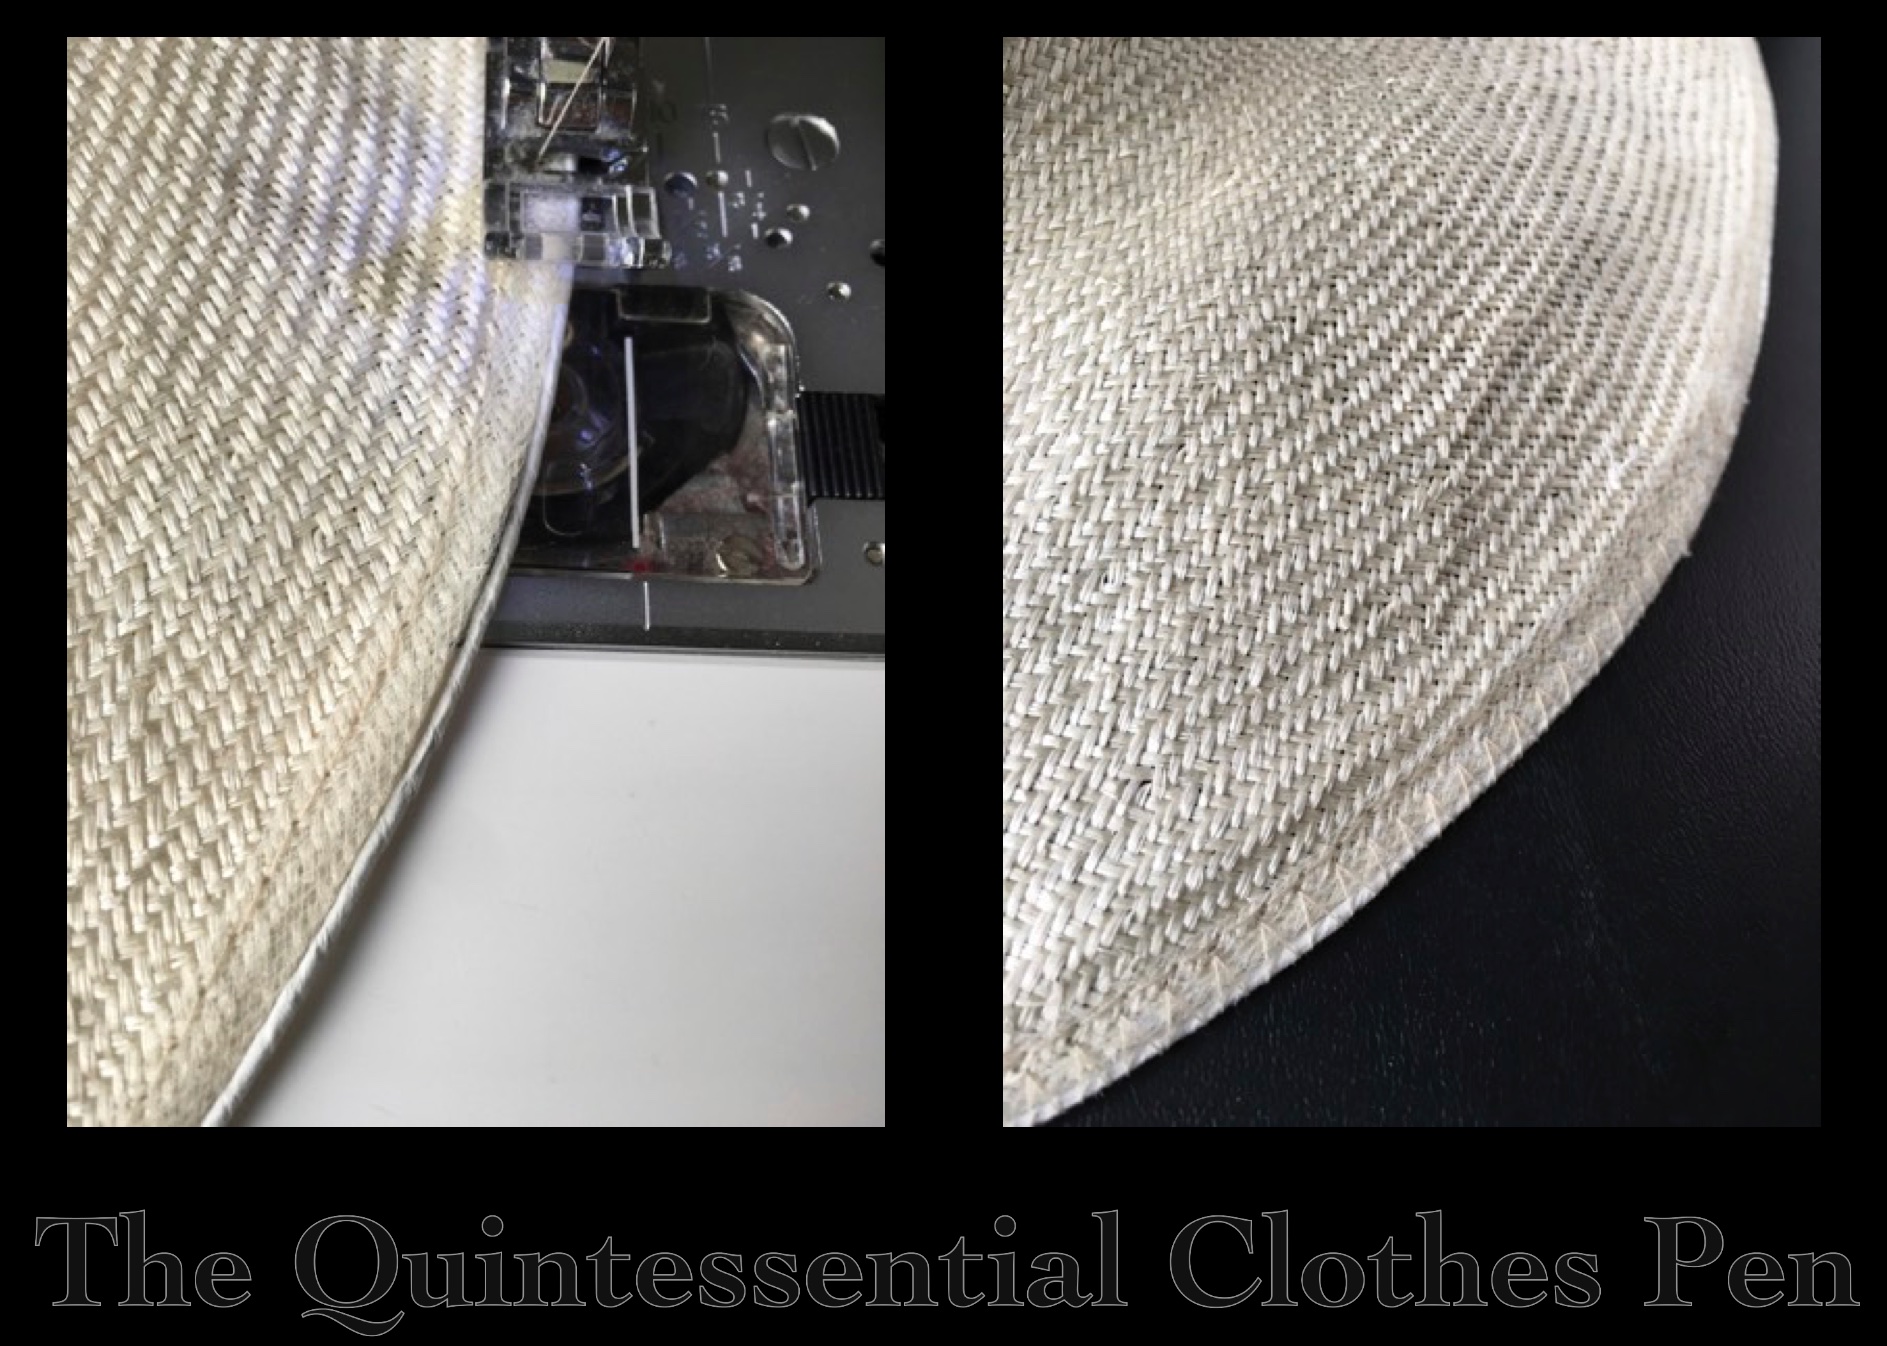
Next, I played with the lace I had unwrapped for the brim to decide on a new shape. Once I made some decisions I had to make a few shorter pieces out of the lace, but most of it I tried to keep intact. In the back, I decided where I wanted my cut out to be… and cut it! Then I bound the edge using the lace and topstitched it down to encase the edges.

It was a bit tricky to find an acceptable shape for the new brim. The first few tries were so similar in shape to the crown of the hat that they hardly showed when I put it on my head. I ended up with a brim that flares out a bit so it stands away from the crown of the hat, especially in the front. I had to be careful to cover the ends of the plastic horsehair braid that backs the cotton lace, as it is very poky when cut. I covered the ends either by turning them under or having the inner hat band cover them.

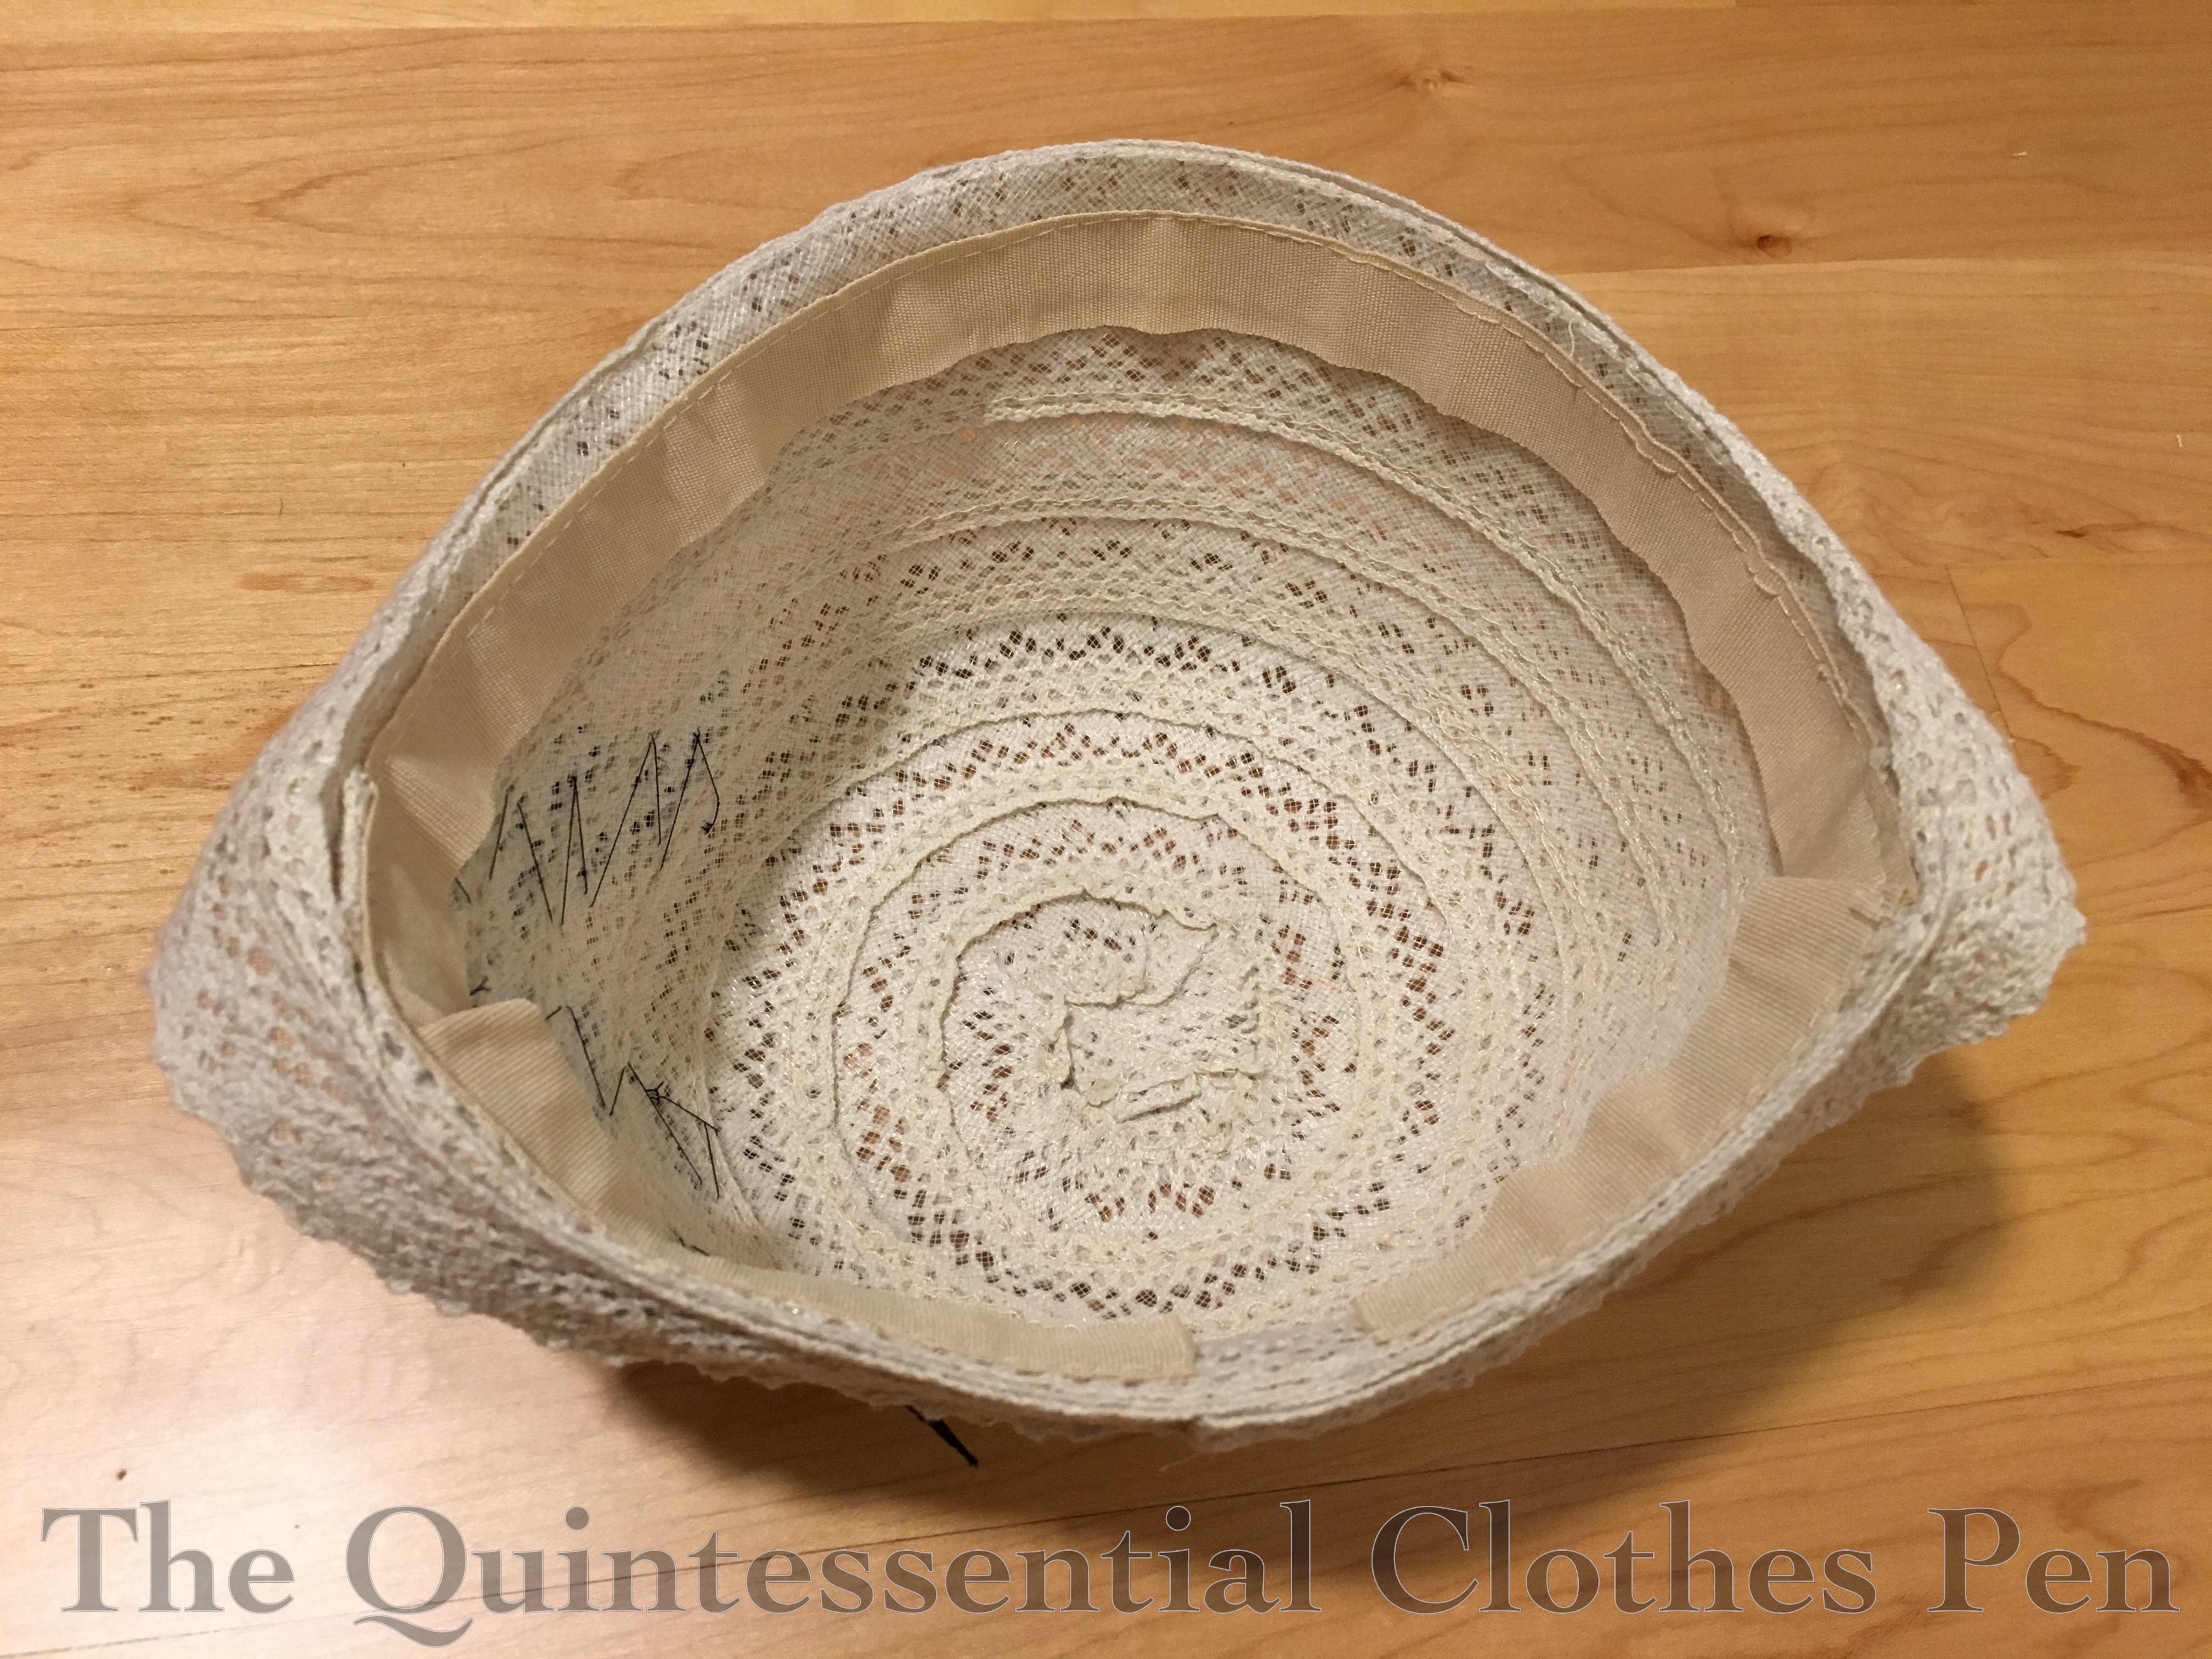
After sorting out the brim and back cutout it was time to reattach the inner hat band. Then I sewed on my trim. Here’s what the hat looked like on the inside after all that.

I’ve loved Leimomi’s cloche decoration in this post since she posted about it in 2014. Having that in mind, I thought of what bits of trim I already had in my stash and what might work for this hat. I decided on a random yard of navy grosgrain ribbon, which I cut into thirds, pleated, and attached in imitation of this hat.

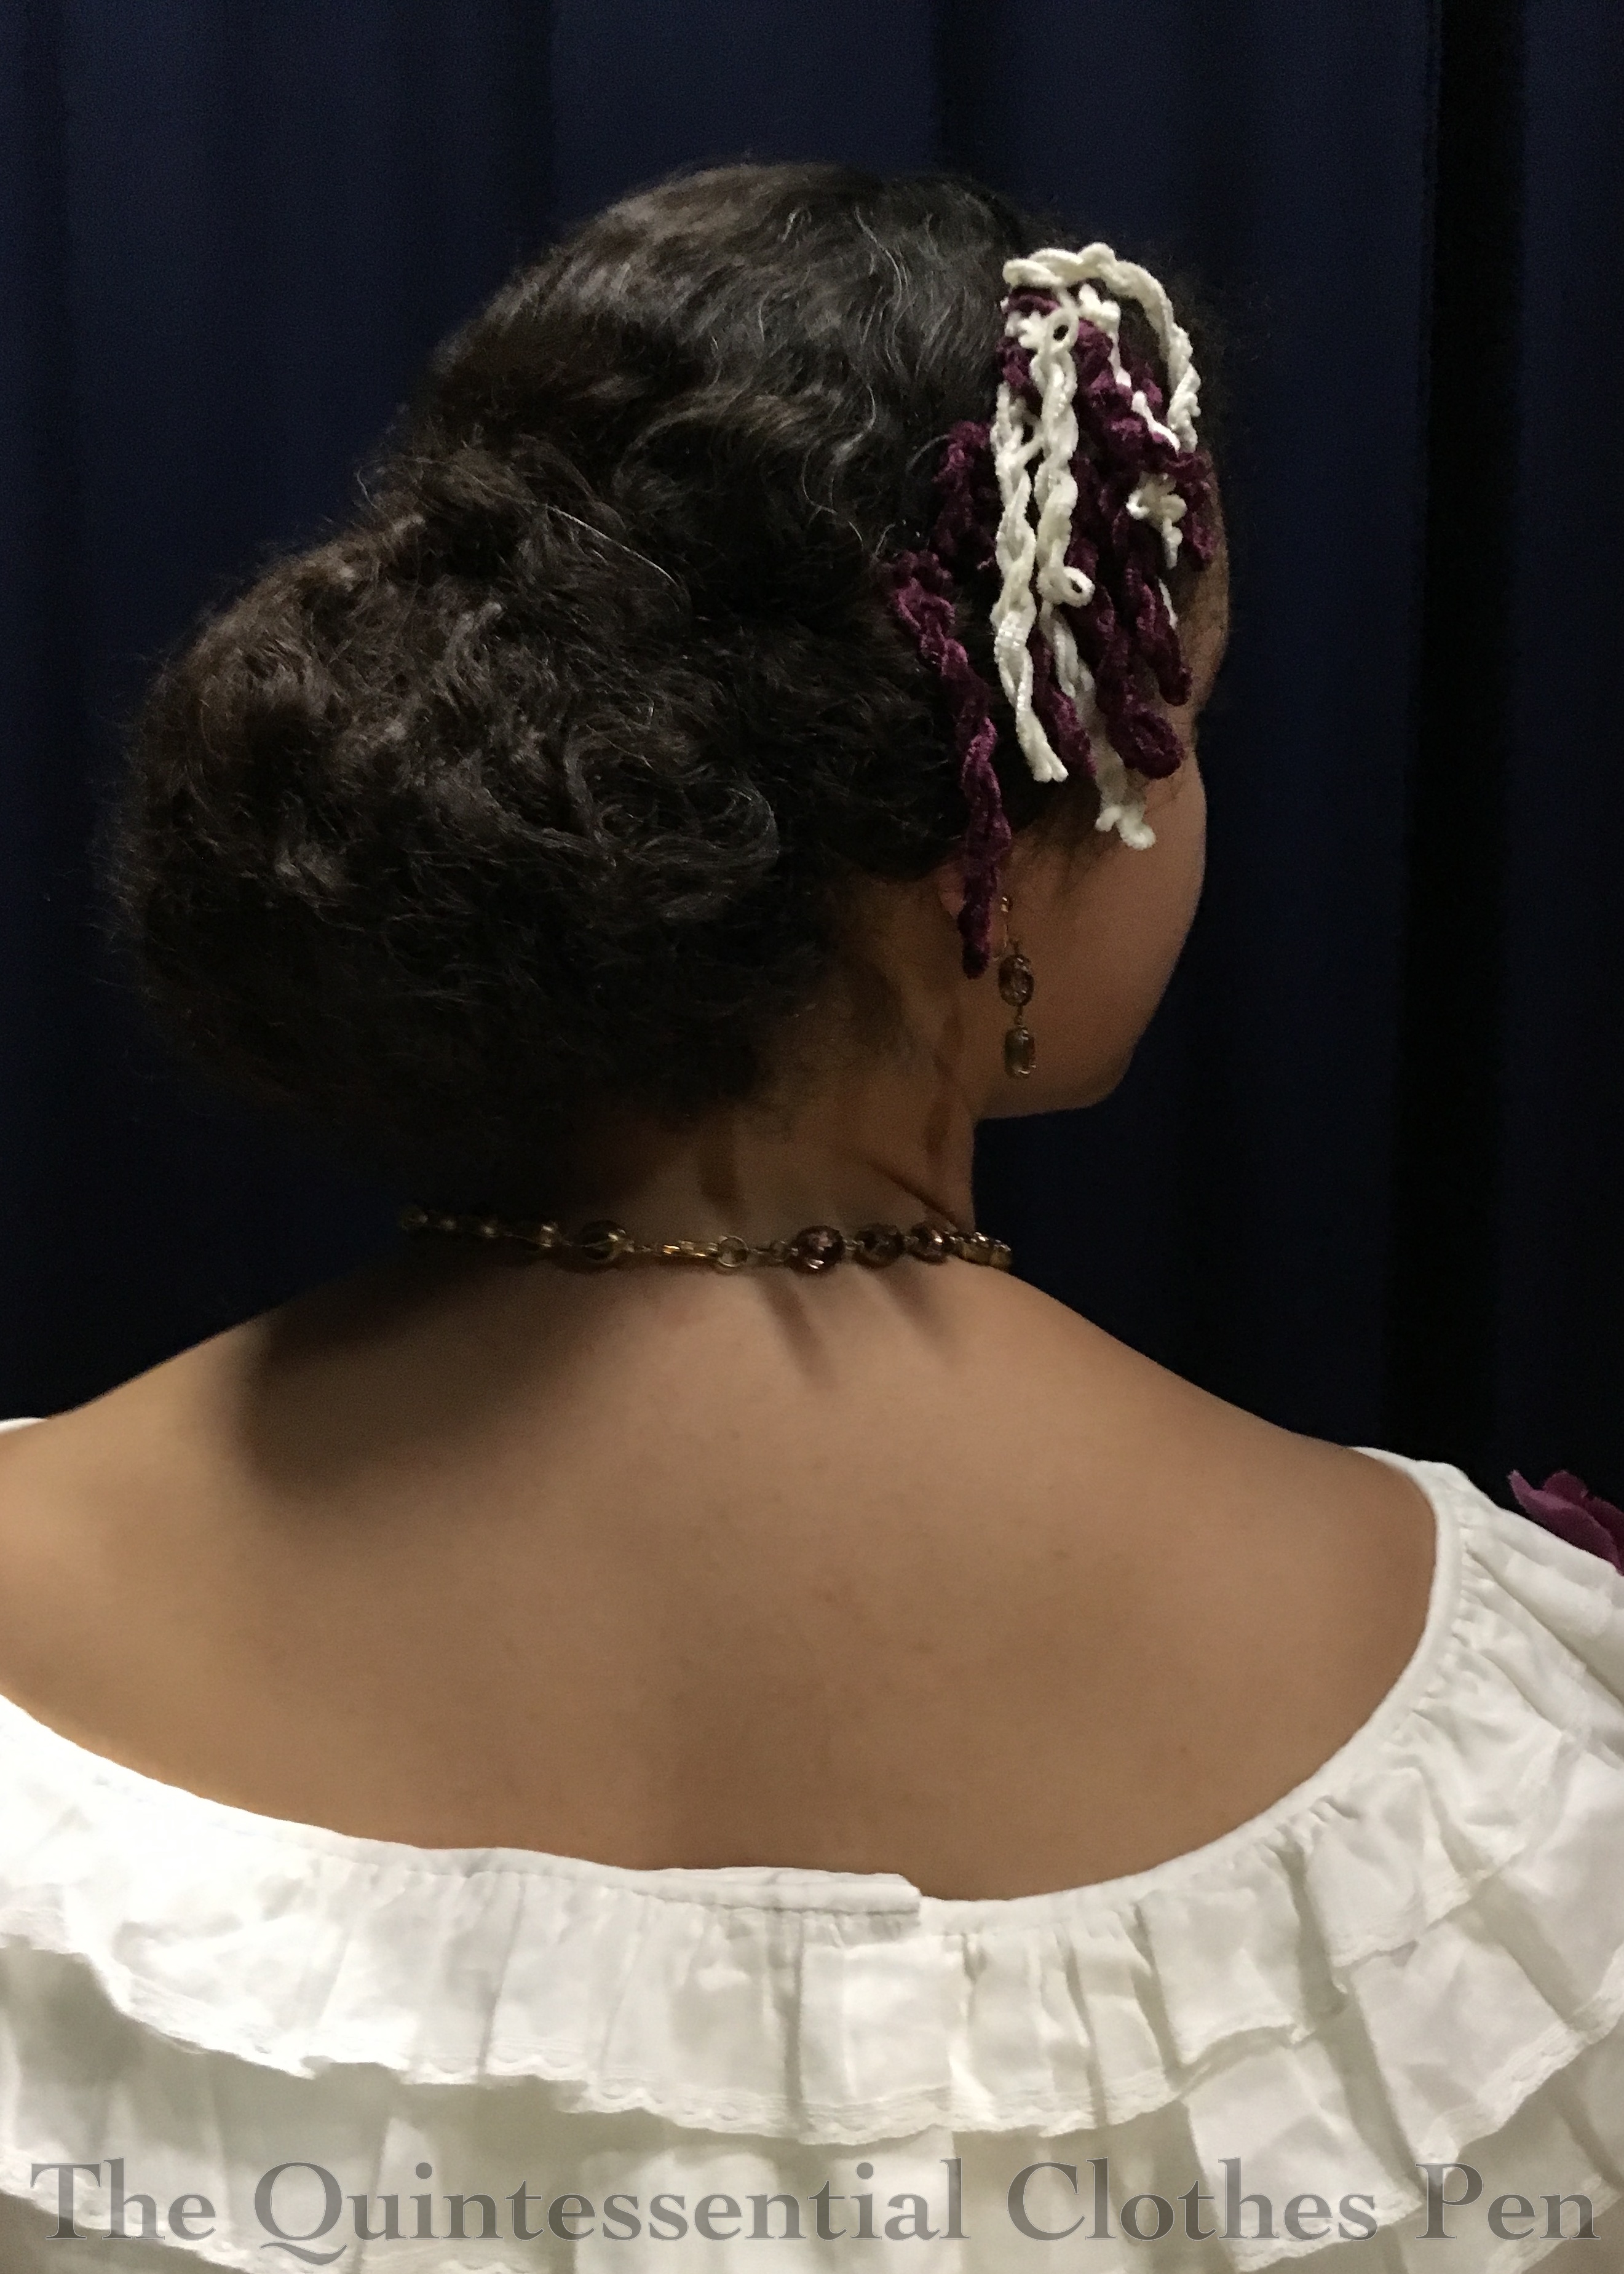
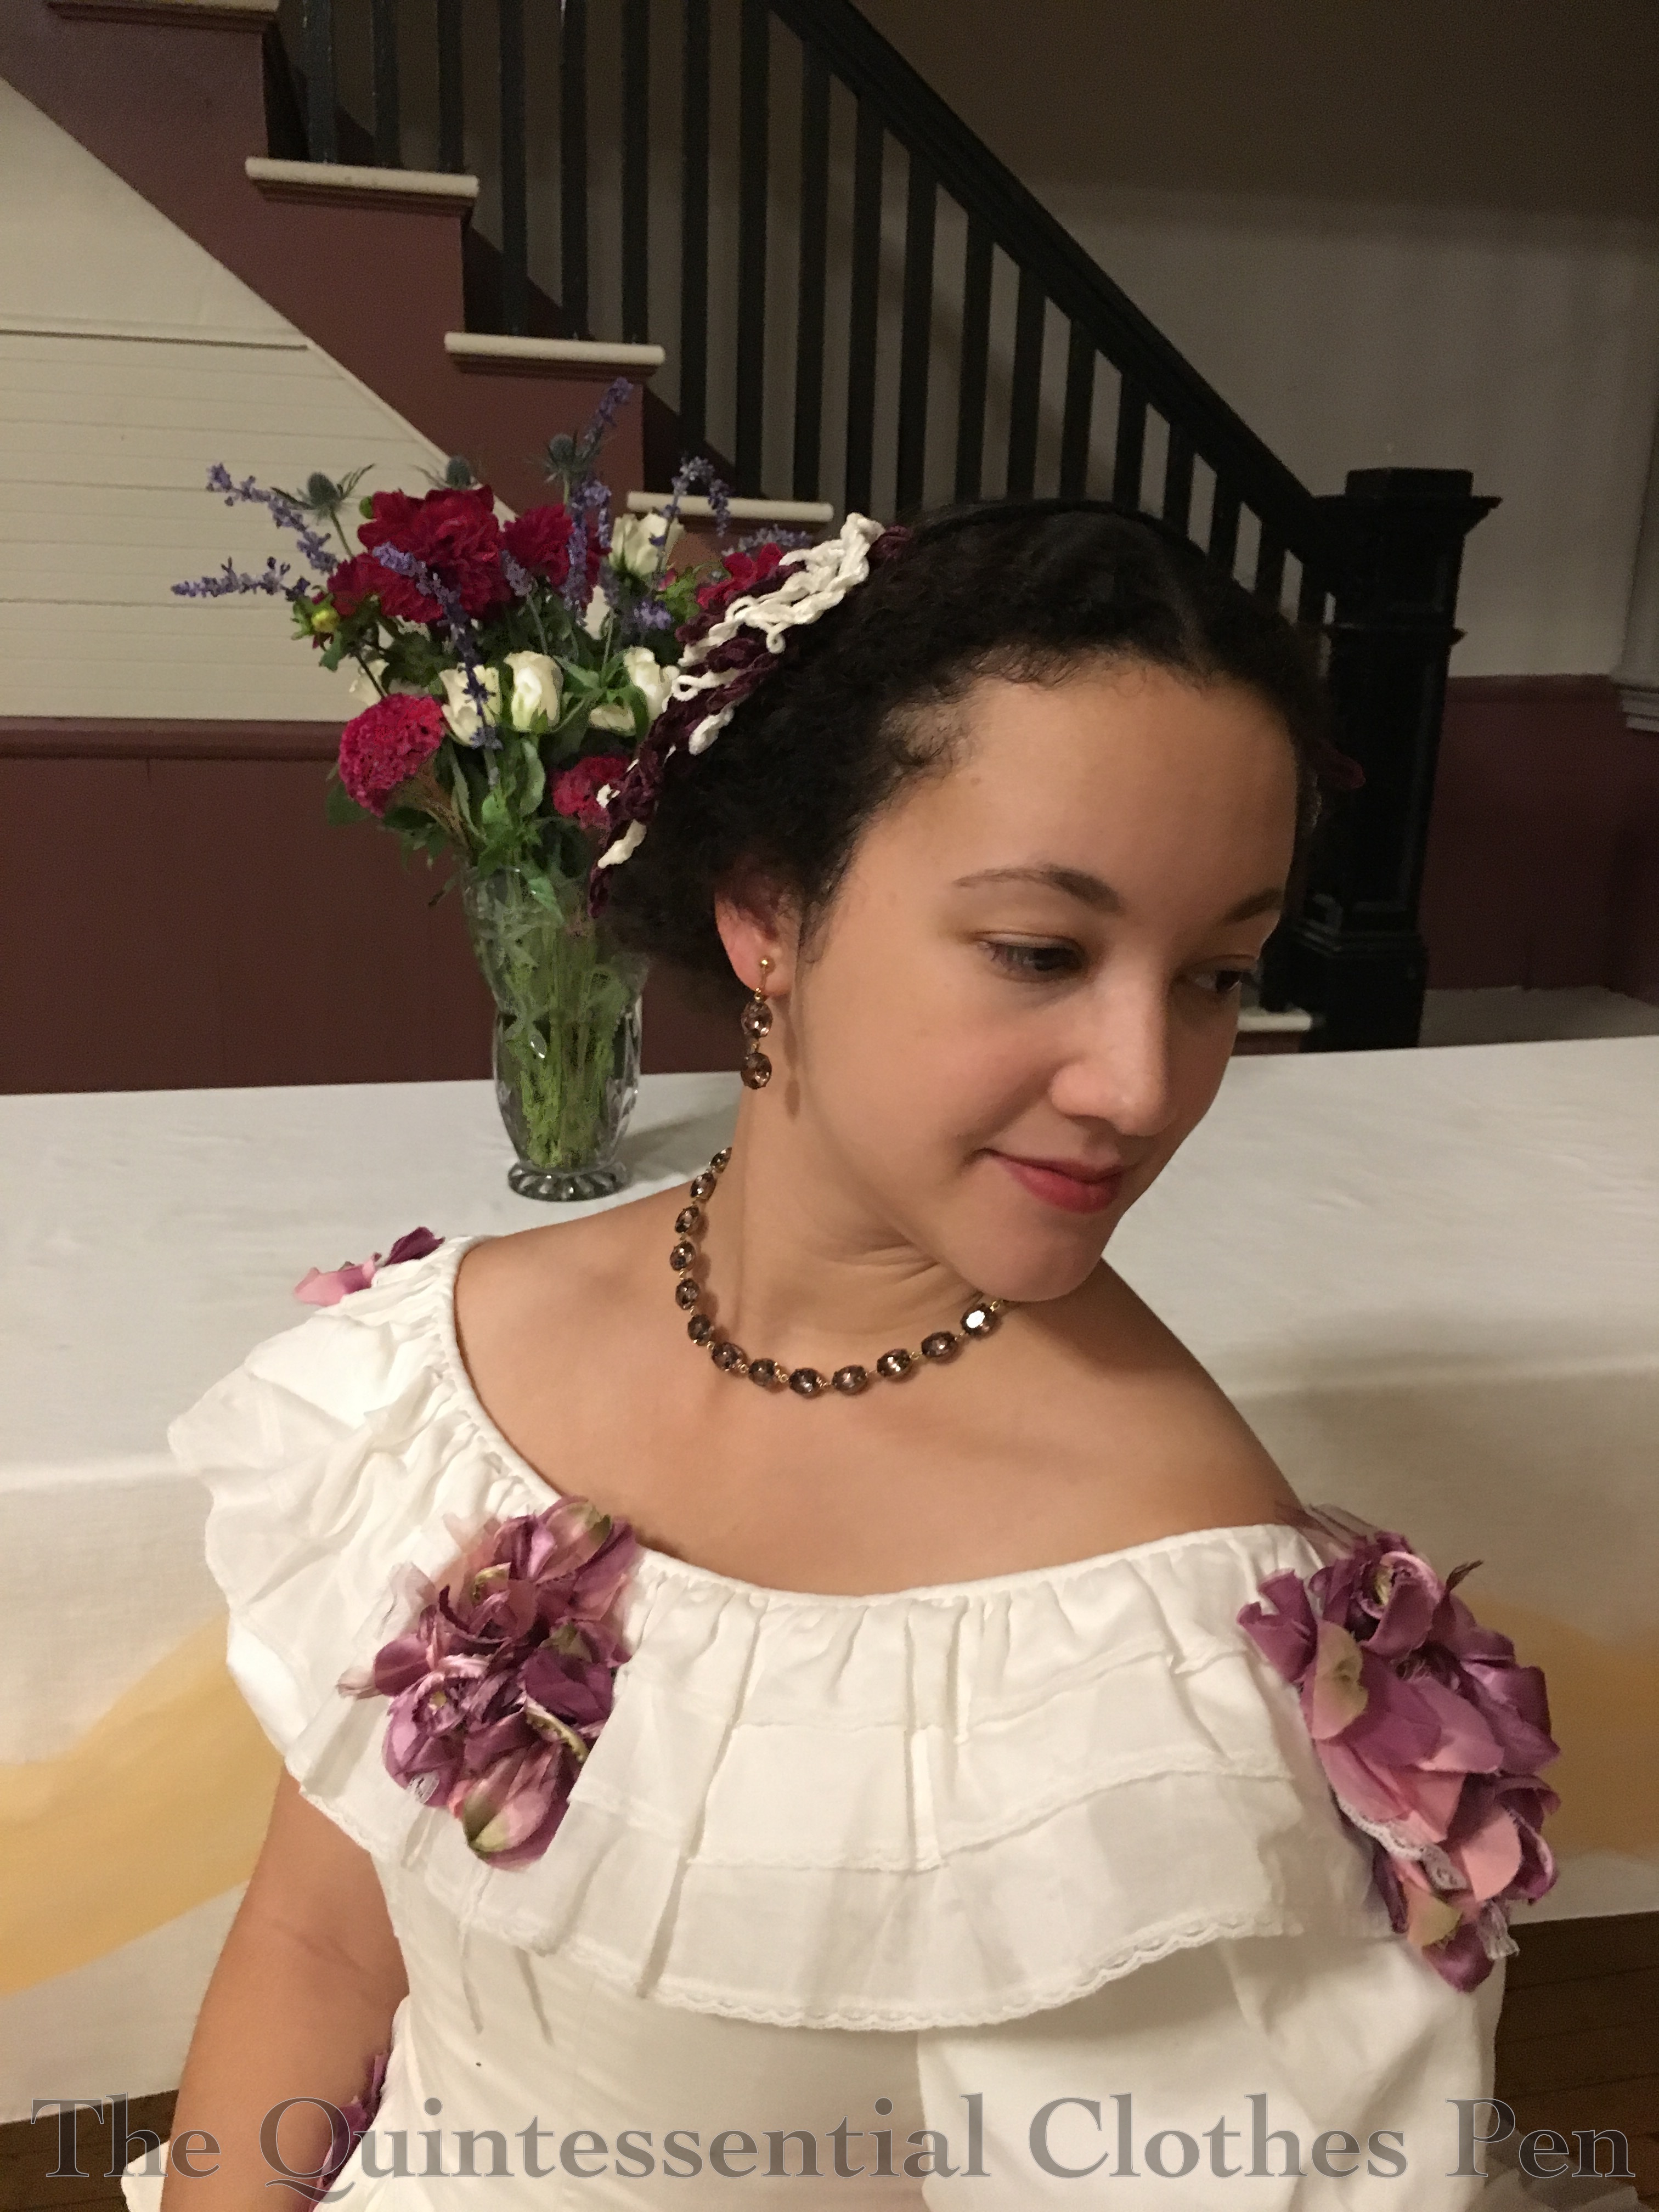
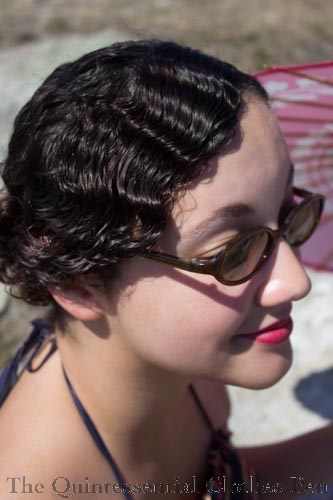
When I styled my hair, I tried to have hair come down to my jawline more than I usually do. I think cloches look less silly if there is some hair showing around them. My hair didn’t really look like a bob, but at least there was some hair showing in the front. In the back, it was pinned into a low twist-y mass of curls.

The great thing about the materials of this hat is that they are intended to be flexible for packing and traveling. Not only is it easy to store this hat but it’s also easy to remove it at a picnic and leave it on the blanket or put it in a bag without worrying that it will be damaged. It can get crushed and bounce back into shape!

In the end, I continue to think my head looks like an egg when I wear a cloche. I like styles that don’t hug my head better! That’s my own feeling–other people don’t think it’s nearly as egg-like as I do! But as egg-heads go, this was better than some attempts, so I think we’ll call it a success! It certainly looks cute on the fence!

The Simple, The Complicated, & The Continent Part II

In Part I of The Simple, The Complicated, & The Continent, I shared casual pictures from the mid-19th century dance week I attended last August. Now it’s time for the (mostly) more elegant pictures of the formal balls from the week. You’ll see why I say mostly elegant… there are some silly pictures, too!

On the Wednesday of the dance week we had an informal ball at the school. In terms of dancing, it went generally well. We’d had two days of dance classes and we weren’t completed exhausted yet. Everyone looked lovely so it was fun, as always, to admire other people’s ensembles. We were informed that the social custom of Denmark is to only post photos of other people if you have their permission, so I don’t have too many photos I can share of the informal ball, in particular. It’s a reasonable custom, I think, just quite different from what we’re used to in America. It really is the Wild West of willy-nilly picture posting here! Maybe the Wild West village on the grounds of the school made more sense than I thought…

So here I am dressed for the informal ball. My hair was frizzy and big by the evening of the day so I decided to run with it! Big round hair is perfect for the 1858 anyway. I wore Georgina, with her evening bodice. Actually, all of the Americans wore our mid-19th century cotton ballgowns (many of which you can see in this past post), which quite impressed many of the other attendees. We were told that fabrics like these are difficult to find in and around Denmark.

After another two days of classes, the week ended with a formal dinner and ball. We were bussed to the town where these events were to be held (and it was quite an adventure, getting all the large dresses onto the tour buses and into the seats!) and then did a small walking tour of the town before dinner. A new friend snapped this photo of me traipsing across the street after getting some photos taken. I chose my matching crocs to wear around the town before going into dinner and the ball, but I didn’t think anyone would see them!

OLYMPUS DIGITAL CAMERA

Dinner was lovely and then it was time for the ball. It was quite exciting to be attending a formal ball on ‘the continent!’ It sounds so fashionable in a 19th century way!

The ballroom contained actual candles! These are forbidden in many of the halls I normally get to dance in, so that was a nice novelty. They were especially lovely as the light faded outside.

Our hosts provided us with dance cards, which had a convenient hook for hanging the dance card off of a belt or waistband. In my case, the belt on my dress was perfect!

The ballroom was rather small for the number of people we squashed into it, but I suppose that is probably rather accurate for some events in the 19th century. It did mean that the room became quite hot, so I spent a fair bit of time enjoying the lovely garden outside.

As you can see, I wore Eleanor, my plaid silk ball gown. It was a good choice for traveling and it was fun to be elegantly simple in my clothing choice.

Capturing the photographer in a photo! Isn’t it lovely how well their dresses coordinate with the colors in the garden?

Why was I lifting my skirt so scandalously? I think to see how high I could easily lift my leg in my dress. Or perhaps to check my balance? Doesn’t really matter, does it? Silly photos are fun!

I did get permission to share this photo of me with two new friends. Our colors coordinated so well and that uniform was absolutely stunning! And it had fur on the cuffs. Such soft fur! I bet it was boiling hot, but it was also quite dashing!

Unfortunately, by this point in the week we were all brain-dead, so the room in general didn’t do a great job of executing all the dancing we had been working on without many mistakes. That felt like rather a let down, sadly, as it would have been nice to dance at a ball on ‘the continent’ with perfect execution. I guess this gives me another reason to go back and try again some day!

SaveSave

SaveSave

SaveSave

1864 Evie Hair (Returning Heroes Ball 2018)

In March, I again had the pleasure of attending The Commonwealth Vintage Dancers‘ annual Returning Heroes Ball (you can read about other years I’ve attended here). I decided to wear Evie, my 1864 ballgown, simply because it had been a year or so since the last time I wore that particular gown.

In order to change things up I did two things differently with this wearing: I wore different earrings and did my hair differently. Small changes, but it makes wearing an old dress feel new and exciting!

I don’t think I’ve ever worn these earrings for mid-19th century events before (only for things later and earlier than this period), though now that I’ve tried it I think they work quite well. I made them from triple drop earrings that I bought from a modern store (I forget now, but I think it was New York and Company). I just took off the bottom drop and attached them to clip hardware. They catch the light and sparkle nicely.

1860s and earrings together reminds me of the scene in Gone With The Wind in which a straggling soldier try to steal ‘ear bobs’ from the house. Not that these look at all similar (and luckily my story ends on a happier note than that scene), but a GWTW reference generally makes me smile.

I was going to do a simple hairstyle (my usual go-to c.1860 style with a center part and the hair in a low mass at the back of my head), but as I was getting ready I chanced a look at Pinterest and got excited about trying a more complicated style than I usually do. In particular, I liked the puffed fronts on some of these styles from 1864 and the curls on the sides like some of these from 1861.

I sort of mashed these two looks together, using small rats to puff the front sections of hair and a curling iron to get smooth curls for the sides. My hair is getting to be so long that I had to pin the hanging curls up to shorten them! The rest of my hair was just twisted and pinned on my neck without too much attention paid to it. I was running out of time and knew I’d be adding my hair piece on top, which would cover most of the back of my hair anyway.

I really like the end result for this particular dress of mine. I feel it compliments the hair piece and the silk dress nicely. Isn’t it lovely when all these little details come together to create one cohesive end result? Yay!

SaveSave

If At First You Don’t Succeed… (HSM #1)

I made this 1928 evening dress and first wore it in 2012. Back then it was simple, with just a small cascade of fabric and no sash or bow (I show the construction in detail in this past post). Three years later, I decided to add the sash, bow, and extra cascade of fabric (and wrote a post about it). I liked the effect but wasn’t pleased with the slippery silk moving all over and sliding around. The armholes were also a bit high under the arms from the beginning, causing the trim to dig in a bit which wasn’t very comfortable.

Due to these issues and the addition of other 1920s evening dresses to my wardrobe I hadn’t worn this dress in a few years. But for an event this January, I decided to give it another go. Luckily, the dress still fit and didn’t cling in unwanted places! The first HSM challenge of 2018, Mend, Reshape, Refashion, was the perfect complement for the updates I wanted to complete.

To be specific about the updates, this time I lowered the armholes about 1″ and then pieced in extra trim to fill in the gap, sewed the sash/bow in place, and added an interior waistband that supports the weight of the bow and keeps the dress from pulling down on one side.

Our hotel room had a bonus vanity table and stool that was a perfect prop for photos…

I did my hair like I did last year but added a gold hair comb I recently discovered at my parent’s house. I’m pretty sure my mom gave it to me when I was a child or maybe a teenager… It’s just been sitting there waiting for me to put it to use again!

Just the facts:

Fabric: The only new fabric was a scrap of tightly woven polyester for an inner waistband.

Pattern: My own, based on measurements.

Year: 1928.

Notions: Extra trim to piece under the arms, thread.

How historically accurate is it?: Let’s say 95%, with points lost for the polyester.

Hours to complete: The updates took about 4 hours. I felt like hand sewing most of it so I could watch Netflix!

First worn: With the updates in January, 2018.

Total cost: Free!

I love how this dress looks and fits now! Yay! It only took three tries… It’s a good lesson: if you don’t succeed the first time, try again! And keep trying…! Third time is the charm on this one!


SaveSave

1933 Dress & Hat In Green & Gold (HSM #10)

The summer was incredibly busy and the things I was making unfortunately didn’t fit into the HSM challenges, but I’m hoping to get back to it for the end of the year. In that spirit, I finished a dress that qualifies for the HSM Challenge #10: Out Of Your Comfort Zone. I’m a bit late posting about it because it took me two tries to have a successful photo shoot and then a bit of time to edit my photos, but nevertheless, the dress was completed within the deadline. It qualifies in that I’m expanding into 1930s daywear with the making of this dress.

Unlike some garments I make which have a specific wearing in mind, this was different in that I was trying the idea out to see if this 1933 shape would be flattering on me. I do like the silhouette a lot and so hopefully I’ll make more similar dresses in the future. The years right around 1933 are a great mix of awfully silly, with their big neck frills/bows and unusual sleeves, and wonderfully elegant, with long hems that look especially flattering on those of us blessed with height.

The inspiration for this dress came from looking through many books of 1930s clothing. I wanted to try out the longer length bias skirt and I liked the bust spray detail I found along the way in 1930s Fashion: The Definitive Sourcebook (page 308). It’s not as crazy as some early 1930s neck frills, making it a good starting point for getting into this decade. (Look at these examples of neck bows from 1934, for example. They make my dress look subdued.) I did add some interesting sleeves though, based on a 1933 pattern for different sleeve types.

As I mentioned, I did two photo shoots for this dress. The first one failed pretty horribly, as I was out in public, pressed for time, and my phone camera wasn’t cooperating with me. But the second photo shoot was much more successful! It may have taken over 300 photos to get ones that I like, but because I was using a timer with burst photos on my camera I could run back and forth across my yard to my heart’s content, practicing all my best dramatic poses and facial expressions. Unfortunately, my phone camera isn’t outstanding enough to have taken great photos with the slanting afternoon sunlight. I’m calling it ‘artsy.’ (What I really need is an event to wear this to in a good-picture-background-setting, so that I can get better quality pictures…)

Anyway, here are the facts (just for the dress, as the hat doesn’t really qualify for the HSM):

Fabric: Green and gold small windowpane mystery (but likely polyester) fabric and gold silk scraps.

Pattern: My own. I draped the bodice and skirt pieces and referenced images to flat pattern the sleeves.

Year: 1933.

Notions: Thread, zipper, hooks, and hug snug.

How historically accurate is it?: Let’s say 95%. It’s entirely recognizable in its own time and made in a way that is straightforward and consistent with historic garments. The materials are not 100% accurate.

Hours to complete: 5-10 sounds likely, although I spread making this out over about a year, so it’s pretty hard to remember!

First worn: October 2017, for pictures.

Total cost: $1/yard for the fabric and all the notions from the stash, so let’s say $4. Win!

The back of the dress is pretty plain. All the interesting details are on the front. But here it is, for the sake of documenting all of the angles.

On the inside, the dress looks like this. The seam allowances are either left raw if they are on the bias or pinked if they are on the straight of grain. The neck is finished with a facing which is tacked in place. There are moderate shoulder pads to help achieve the correct silhouette. The bottom edge is finished with hug snug and an invisible hem. The dress closes on the side with a hand sewn zipper. There is a self fabric belt as well.

Now for a bit about my hat and hairstyle. First, the hat is a remake of a wool velour hat I purchased for $5 at a theatre sale. It was a bowler shape originally. I cut off the brim, cut down the crown, reattached the two, and then took some tucks in the crown to give it a more unique shape.

Hair-style-wise, I was going to do my usual close to my head 1920s/30s style (I explained and documented it in this past post) but it didn’t seem to compliment my hat, so I decided to try a more down around the chin, lightly curled bob style.

My method for this is as follows: I started with wet hair and a bit of Tigi Small Talk. I parted my hair on the side and added wave clips (3 on the longer side and 1 on the shorter side). Then I braided the rest of my hair to keep it damp while the front dried. A few hours later, I removed the wave clips and ran my fingers through the front sections to loosen them up a bit. To create the chin length look, I looped up large sections of my hair and pinned them to the top of my head. The hat hid all the pinned up bits nicely. My hair has much less volume when it’s damp (and even after it’s dried in a not-voluminous way if I don’t touch it at all), so the chin length curls had a nice close to the head look to them.

I’m pretty pleased with this hairstyle. It will definitely get tried out again someday. The outfit is fun, too! I love that the hat matches perfectly and ties the whole thing together. Plus, it reminds me of autumn, my favorite season.

SaveSave

1850s Chenille Headdress At The Victoria & Albert Ball

It’s been almost exactly a year since the inspiration for a new mid-19th century headdress stuck in my mind. I was attending a workshop at the Civil War Weekend last October and watching others make lovely floral headdresses with low hanging flowers, like this. Another inspiration headdress was similar in having two sections of decoration on each side of a headband, but made of loops of silk chenille rather than flowers. I decided then and there that I wanted to try out this more unusual style. The image below was my main inspiration, followed by a similar style made of silk ribbon.

MFA. Hair Ornament. Mid 19-th Century. Accession number 53.2245.

MFA. Headdress. Mid 19-th Century. Accession number 51.376.

It’s charming, right? I thought it would be silly, fun, and different, so I went on a hunt for chenille yarn to complement one of my mid-19th century dresses, Annabelle. It was rather harder than I thought it would be to find just the shade of purple that I was looking for as well as an off white, but I persevered and found them on Esty.

The base of my headdress is millinery wire. I formed loops at the ends in order to have a section to easily bobby pin to my hair. The over-the-head millinery wire is covered in black acrylic yarn from the stash to blend in with my hair, while the ends are black because I colored them with a sharpie–easy and quick. No yarn to get stuck in the bobby pins on the ends.

The loops of chenille vary in length. Each piece was folded in half, twisted, and then tied to the base. The chenille I found is not as plush as my inspiration, but with overlapping twists I was able to achieve a similar overall shape.

Here are two pictures of the headdress, one from the back, which better shows off the chenille headdress, and one from the front, which also shows one of our lovely bouquets from the ball.

As the title mentions, I was able to wear this ensemble to a mid-19th century Victoria and Albert themed ball. In addition to the usual loveliness of balls (live music, refreshments, etc.), we had added decorations, special fan shaped dance cards, a quadrille performance, and sashes. Here are the dance cards laid out on a silver tray in the entryway.

And here’s the whole ensemble worn with my sash. The chenille frames the sides of my face and puffs out a bit farther than my hair. Fun and different! I really like this somewhat quirky and unusual headdress!

1940s Victory Rolls For Curly Hair

I really wanted to try victory rolls as a hairstyle to accompany my 1943 mauve dress. This was in part because they’re so iconic (though not universal, which perhaps means that we shouldn’t all represent them, but still, I couldn’t resist) but also because my hair texture proves to be such a challenge that I had to take it on and see if I could subdue it to my will.

I’ve been interested in trying this style for awhile, so I’ve read and watched various instructions on how to create victory rolls. My favorite for the most information and ease of watching is Miss Victory Violet’s tutorial, which is available here. She’s got lots of other great content about vintage styles in videos and as written blog posts, too. Her blog can be found here. I highly recommend browsing through it!

Here’s the thing. My hair is naturally curly and frizzy. Neither of these things are your friend when you’re trying to make a smooth hairstyle like this. The frizz is an obvious opposite to the smooth goal, but the natural curl is also not helpful. The natural waves actually obscure the beautiful swoop of the rolls! I found that in order to get a successful roll I had to first straighten my hair. Time consuming, yes, but also successful.

Here are some close-ups. It was so hot that my own sweat and the humidity was starting to cause my hair to revert to its natural state, especially near the roots.

Another challenge for me in creating this shape is that my hair is long. Down-to-the-middle-of-my-back-when-it’s-straight long. That’s great for making 18th and 19th century up-dos (1770s1830s, and 1890s, to name a few), but less great for making tidy victory rolls. It’s really easy for them to get messy as I roll 18″+ inches of hair in from the ends to my head. The only trick I found for that was practice. I definitely had many rolls fail because they weren’t tidy enough to show off the shape of the roll by the time they made it to my head.

The other obstacle presented by my long hair was what to do with the back of it. Most of these hairstyles were achieved with hair much shorter than mine, which was easier to tuck up into cute 1940s shapes in the back. It was much harder to find inspiration for what to do with long hair. Eventually, though, I came upon an image which shows two asymmetrical buns in the back.

The Double Chignon would work for me! I even had visual instructions and a lovely description encouraging me to try out the style. Here’s the result.

It’s down on my neck like I wanted it to be, but I wonder if the asymmetry just looks like I made a mistake rather than a choice… That’s not a comment on the style, just on my execution of it. Oh well! I was very pleased with the two front rolls and the overall heart-shaped silhouette stye gave my face.

Has anyone else tried victory rolls with long or naturally curly/frizzy hair? Have you been successful? I’m curious to know your experiences and find out your tricks or tips!

SaveSave

SaveSaveSaveSaveSaveSaveSaveSaveSaveSaveSaveSave

1904 Anne Of Green Gables Inspired Ensemble

The Background Story

In 2012, I made and wore a c.1900 green skirt and straw hat at Newport Vintage Dance Week. I had plans to make a blouse as well with it but ran out of time and wore a 1913 blouse I already had instead. I wasn’t terribly pleased with the whole look, so I didn’t ever focus on it in a blog post, though I did include it in my overview of the dance week.

At Newport Vintage Dance Week in 2012.

Since then I’ve worn the skirt a few times, but haven’t been able to for the last few years because (and this shouldn’t be surprising given the subject of my last post) the waist was too small!

Thankfully, I had two things going for me that made changing the waist size quite simple. First, I had extra fabric. Second, when I’d originally made the skirt the waist circumference was a few inches too big for the waistband, so I took a tuck on each side of center back. Now all I had to do was let out the tucks and extend the waistband with my extra fabric!

Updated ensemble in 2017.

It took me years to finally get around to doing it, but I’m glad I did, because I really like this skirt and it’s fun to remember the lovely wading adventure we had back in 2012 while I was wearing it! What gave me the final push to do the change was the opportunity for an early summer picnic, for which I had clothes but really wanted to have something new. Who hasn’t experienced that desire?

More About The New/Updated Ensemble

Ducks (and baby ducks) at the picnic!

The picnic provided some lovely backgrounds to take documentation pictures of all the new and updated pieces that form my Anne-inspired ensemble! I ironed out all the wrinkles in the skirt ahead of time… and then sat on picnic blanket before taking pictures, so the back pictures have a rather wrinkly bum.

The Blouse Inspiration

In addition to wanting to update the skirt, I’ve also had that blouse to go with it on my to-do list for years. Instead of going back to the blouse plan from 2012, I started over with new inspiration. (Never fear, the unfinished blouse from 2012 is still in a box waiting for me to go back to it… someday.)

The new inspiration came directly from the scene in Anne of Green Gables when she’s walking down the lane with Gilbert and his horse (just before she gets mad and whacks him with her basket!). I’ve always love her silhouette and decided a blouse with a similar shape would suit the green skirt nicely.

Anne and Gilbert! (And the horse.)

I researched blouses from this period and decided on the year 1904 for my blouse. I was particularly inspired by this ivory c. 1905 blouse, this black c. 1905 blouse, and this blouse that The Met dates to 1899-1902. The idea to play with the direction of the stripes and to have curling lace trim (mimicking embroidery) was taken directly from this page from The Ladies’ Home Journal for April 1904 that Lauren of Wearing History kindly shared on her blog. Other views of some of these blouses as well as other inspiration are gathered on my Pinterest board for this project, here.

The Blouse Construction

My blouse is made of an ivory cotton that is woven with narrow stripes. In the center front panel the stripes are horizontal, while on the rest of the blouse they are vertical. The blouse is trimmed with lace appliqués in the same pattern as the Ladies’ Home Journal blouse from 1904. Unfortunately, all of the subtle ivory on ivory details are hard to photograph.

The blouse is mostly machine sewn and uses French seams except at the armholes, which are left raw. It is finished by hand and closes up the front with concealed hooks and thread bars. There is a twill tape channel for a drawstring at the waist to help control the fullness and the pigeon front.

The silhouette was looking a little deflated for a 1904 pigeon breast look, so I tacked ruffles down the front seams to help fill out the blouse. It’s subtle-but-useful method and was easy since I already had the circular ruffles in my stash.

The Hat Inspiration

The most direct inspiration for my hat was this image from 1903. While I decided against feathers, the general trim placement as well as the poofs under the back of the brim are present in my hat.

There are more inspirational hats here, on my Pinterest board for this project.

The Hat Construction

The hat in the 2012 version of this ensemble was an admirable idea in theory, but not execution. (I was displeased enough that it was remade into my 1885 Flower Pot Hat in 2015.) However, I had another of the same straw base that I decided to remake for the new Anne ensemble.

In 2012, I had used the second straw base to make a Regency bonnet, another project I wasn’t entirely happy with (this is not the right type of straw to get a good bonnet shape). All that needed to be done was removing the trimmings from the hat and taking out the stitching holding the wire around the edge… and I had a straw hat blank ready to be remade into a new hat!

For a hat block, I used a shallow glass bowl covered in tin foil and plastic wrap. I wet the straw base in the bathtub, then used a paintbrush to cover the straw with a layer of my sizing (a bit of elmer’s glue dissolved in water–no formula, I just winged it). I set the hat out in the hot sun to let it dry, holding the edges down with spice jars to keep it from blowing away. (Can you tell I just wandered into my kitchen to see what I had that would work to help me with this hat?)

Reshaped straw hat base next to my improvised hat block.

I tidied up the edges of the hat with scissors, bound the edge of the straw with narrow strips of tulle to keep the straw from fraying, and then reshaped my wire and resewed it around the edge of the hat. I covered these edge treatments with a binding of ivory silk satin, trimmed the hat, and I was done!

The tulle was sewn with a straight stitch. The wire was then stitched with a zig zag.

Sundries

In order to achieve my desired pigeon breast silhouette of 1904, I needed some omph in the back in addition to the ruffles inside the blouse in the front. I tried wearing a small bum pad (about 10″ wide), but then my hips looked sunken by comparison. I determined I needed a new bum pad that would fill in both my hips and backside to help create the illusion I was aiming for.

I also made a new belt to go with this ensemble. I wanted something a little more V shaped in front and a little less dramatic in terms of color. I actually reused the lining from the previous iteration of my new hat to make a new belt. The two shades of green don’t quite match, but they also don’t offend, so I’m pleased.

Instead of a traditional Gibson Girl hair style, I tried a style more like this, with a center part and poofs on each side. It was a bit squashed by my hat, but I was quite pleased with it overall. Unfortunately, I didn’t get any perfect shots of just my hair style. I’ll have to try it again someday and get hair pictures.

SaveSave

SaveSave

SaveSave

SaveSaveSaveSave

SaveSave

SaveSave

SaveSave

A Gown Worthy Of A Duchess

On the same January shopping trip that I unexpectedly found the blush sparkle fabric I made a 1920s dress out of I also unexpectedly found an excellent fabric for a new Regency evening dress. I hadn’t made one in awhile, but I had a Regency weekend coming up and I was wanting something new for the fancier ball (and of course nothing in my stash was inspiring me). In my wanderings around the store, I discovered an organza curtain sheer that brought to mind this particular fashion plate that has been on my ‘to-sew’ list for years.

1819 – Ackermann’s Repository Series 2 Vol 7 – March Issue

I’d been on the look-out for a sheer with black stripes but hadn’t found anything suitable. Once I found the curtain fabric, I debated whether to use it for a dress in this style or to hold out for the black stripe. As you’ll see, I decided to call this inspiration fulfilled by the gold striped fabric that I found. It’s polyester, but that means it was a good price. Occasionally, a polyester can be just the thing.

In addition to the Ackerman’s fashion plate, I also borrowed design ideas from two other striped evening gowns: this earlier Costume Parisien fashion plate from 1809 and this image of the Duchess d’Angoulême c. 1815. My dress is a conglomeration of these and the 1819 fashion plate. I borrowed the sheer overdress idea from 1819, the single row of scalloped trim from 1809, and the bias cut sleeves from 1815. I date my dress to 1817, as the fluffy nature of the organza pushes the silhouette towards 1820, but the single row of trim pulls it back from 1819 just a bit.

I have a full compliment of nicely finished underthings that are perfect for making the sheer dress opaque. It was never my intention to be a scandalous Regency lady with minimal underthings! In fact, to make the ensemble sufficiently opaque, I wore my chemise plus two petticoats under the sheer dress. Without the second petticoat it was clear where my chemise ended (at my knees, in case you’re curious), but I didn’t want to have the illusion of scandal with this, I really wanted opacity all the way down.

Like the new pelisse, the sheer dress provided another perfect opportunity to make further use of my Vernet petticoat, which has a lovely eyelet border at the hem. Here’s another view that shows off the lace on the petticoat.

It’s usual for me to meticulously finish the insides of my garments, but in the case of a sheer dress, that desire became a necessity. Accordingly, all of the inside seams are nicely finished with a mix of French, flat felled, and folding seam allowances to hide raw edges and whipping them together. I kept the finished seam allowances small, so that they wouldn’t detract from the stripes.

The bottoms of the sleeves and the front and back necklines are all adjustable with tiny drawstrings made from champagne colored embroidery floss. The goal was to have ties that would blend and not be noticeable through the sheer fabric.

The pattern for this dress was adapted from other Regency dresses I have made. I think I most closely referenced the patterns for my tree gown and square neck gown, but adjusted the fullness to give this dress a little more oomph.

This dress is machine sewn and hand finished. All of the French seaming was done on machine, as was the assembly of the bodice, waistband, and skirt to make a dress, but all of the other stitching (casings, hems, trim, finishing seam allowances in non-French ways, etc.) was done by hand.

The dress has a scalloped trim band around the bottom, set up high enough to show off the lace on the Vernet petticoat. It’s hand hemmed and it seems like miles… though I think it was only about 9 yards. Hemming, gathering, and attaching this was one of the last tasks and it was going right up until about 2am on the morning of the ball. By the time it was being sewn on there was no measuring or sectioning, just eyeballing, so it’s a little wavier than I would normally allow, but one has to make accommodations (sometimes). I was envisioning the scallops would be spaced out more and therefore be more defined, but as I was furiously sewing the trim on I was not about to cut it up and resew it, so all 9 yards made it onto the dress. It’s fine. I’m happy. I do not plan to re-do the fullness of the trim or the placement!

I decided that such a dress needed grand hair and hair ornamentation, and so I justified my desire to wear a tiara by scouring my Pinterest boards for documentation. The Duchess d’Angouleme sports a pretty grand tiara in 1818. And here she is in 1817 wearing what I think is the same tiara.This is Victoria, Duchess of Kent, sporting a fabulous tiara and giant hair poof/bun. Empress Josephine and Caroline Murat (Queen of Naples) have some pretty fabulous tiaras, too. To match the tiara, I accessorized with a pearl necklace and pearl earrings. Worthy of a duchess? I think so!

SaveSave

SaveSave

A 1920s Island Escapade

I’m terribly delayed in writing about a lovely event I attended last summer… Gatsby On The Isles was a 1920s weekend getaway to a coastal island, including a ferry ride, picnic, clambering on the rocks and in the water, lawn games, dancing, card games, and napping in rocking chairs on the large porch of the grand hotel. A fabulous live jazz band played great music throughout the weekend. It was very much like having a soundtrack to my own personal movie!

It was quite hot last August, so the strong breeze on the ferry and some parts of the island was quite welcome, as was wading and hiding under my parasol. (Had I not had a sturdy grip, my parasol would surely have been blown away during these pictures.)

I wore my 1930s beach ensemble for travel to the island and the afternoon picnic. I am always pleased with how the (polyester, ahem) pants don’t wrinkle, even with heat and sweat and sitting, and how gloriously cool and comfortable I am while wearing it.

Partway through the afternoon I changed into my 1925 bathing suit in order to go wading. Again, a very comfortable and fun item of clothing! I can now report that wearing a wool bathing suit in the heat is no different than wearing a modern suit. I certainly wasn’t any warmer than I would have been in a more modern style.

Getting to the water at this part of the island required some clambering over rocks, but also made a great backdrop for pictures!

Dinner was a casual affair, for which I changed into my 1926 sailor dress. An unplanned wardrobe similarity required picture documentation.

For the evening dance, I changed into my 1924 Golden Robe de Style. The parlor of the hotel had some fabulous couches that called for lounging and sultry faces. Despite being hot, it was fun to dance the night away to wonderful music, with breaks to sit out on the porch with a 1920s cocktail.

The next day was low-key. I explored the island, played cribbage, and took an unexpected nap in a rocking chair on the porch. I decided to be slightly old fashioned and wore my 1919 Ivory Eyelet Dress, another comfortable summer ensemble, with my 1920s Sinamay Hat.

I tried a forward thinking 1930s inspired hairstyle for the weekend. I did it early Saturday morning before hitting the road and then wore it all weekend without a change. It went from day to evening with no problem and stayed in place through wind, hats, and sleeping. (This is the same hairstyle I hinted about in the post about my 1927 Blush Sparkle Dress.)

In order to keep the frizz down, I did my hair while it was still wet, using Tigi Small Talk as setting lotion to help the waves and curls stay in place. The front and crown were shaped with wave clips while the rest of my hair was massed lower on my head in tight curls. There were TONS of bobby pins hidden in there and it was very secure. I was very pleased with the security of the style and with how well it lasted without frizzing!

It was a very fun escape to the past and I’m so pleased to have great pictures to document it all. What a different scene and temperature than these last four or five months of winter!