Back in October 2024, I posted about the inspiration and construction details of a freshly completed 1794 dress (you can view that past post here). At the time, I promised myself that I would figure out how to get my hair to look vaguely 1790s and find a fun opportunity to wear the dress and get photos!
Every few months after finishing the dress, I found the inspiration needed for a trial to figure out how to get my small-diameter-curly hair to look remotely like the billowing-larger-scale curls found in 1790s fashion plates. Of course, one could wear a wig… but I really enjoy using my own hair for these things! It’s a fun challenge, I think.
My first trial attempt was unsuccessful in the overall look, but I learned that curling iron curls didn’t look so far off as to be implausible. My second trial attempt taught me that the 1790s organza cap I made (finished even earlier, in 2023, and which you can read all about here, in a past post) that was intended for this outfit looked silly when perched directly on my head. It really, really needed volume so it appeared to be floating on my hair. Enter, a giant bun form. (The same bun form, in fact, that makes up the biggest part of my hair support for giant 1770s hair in this past post.)
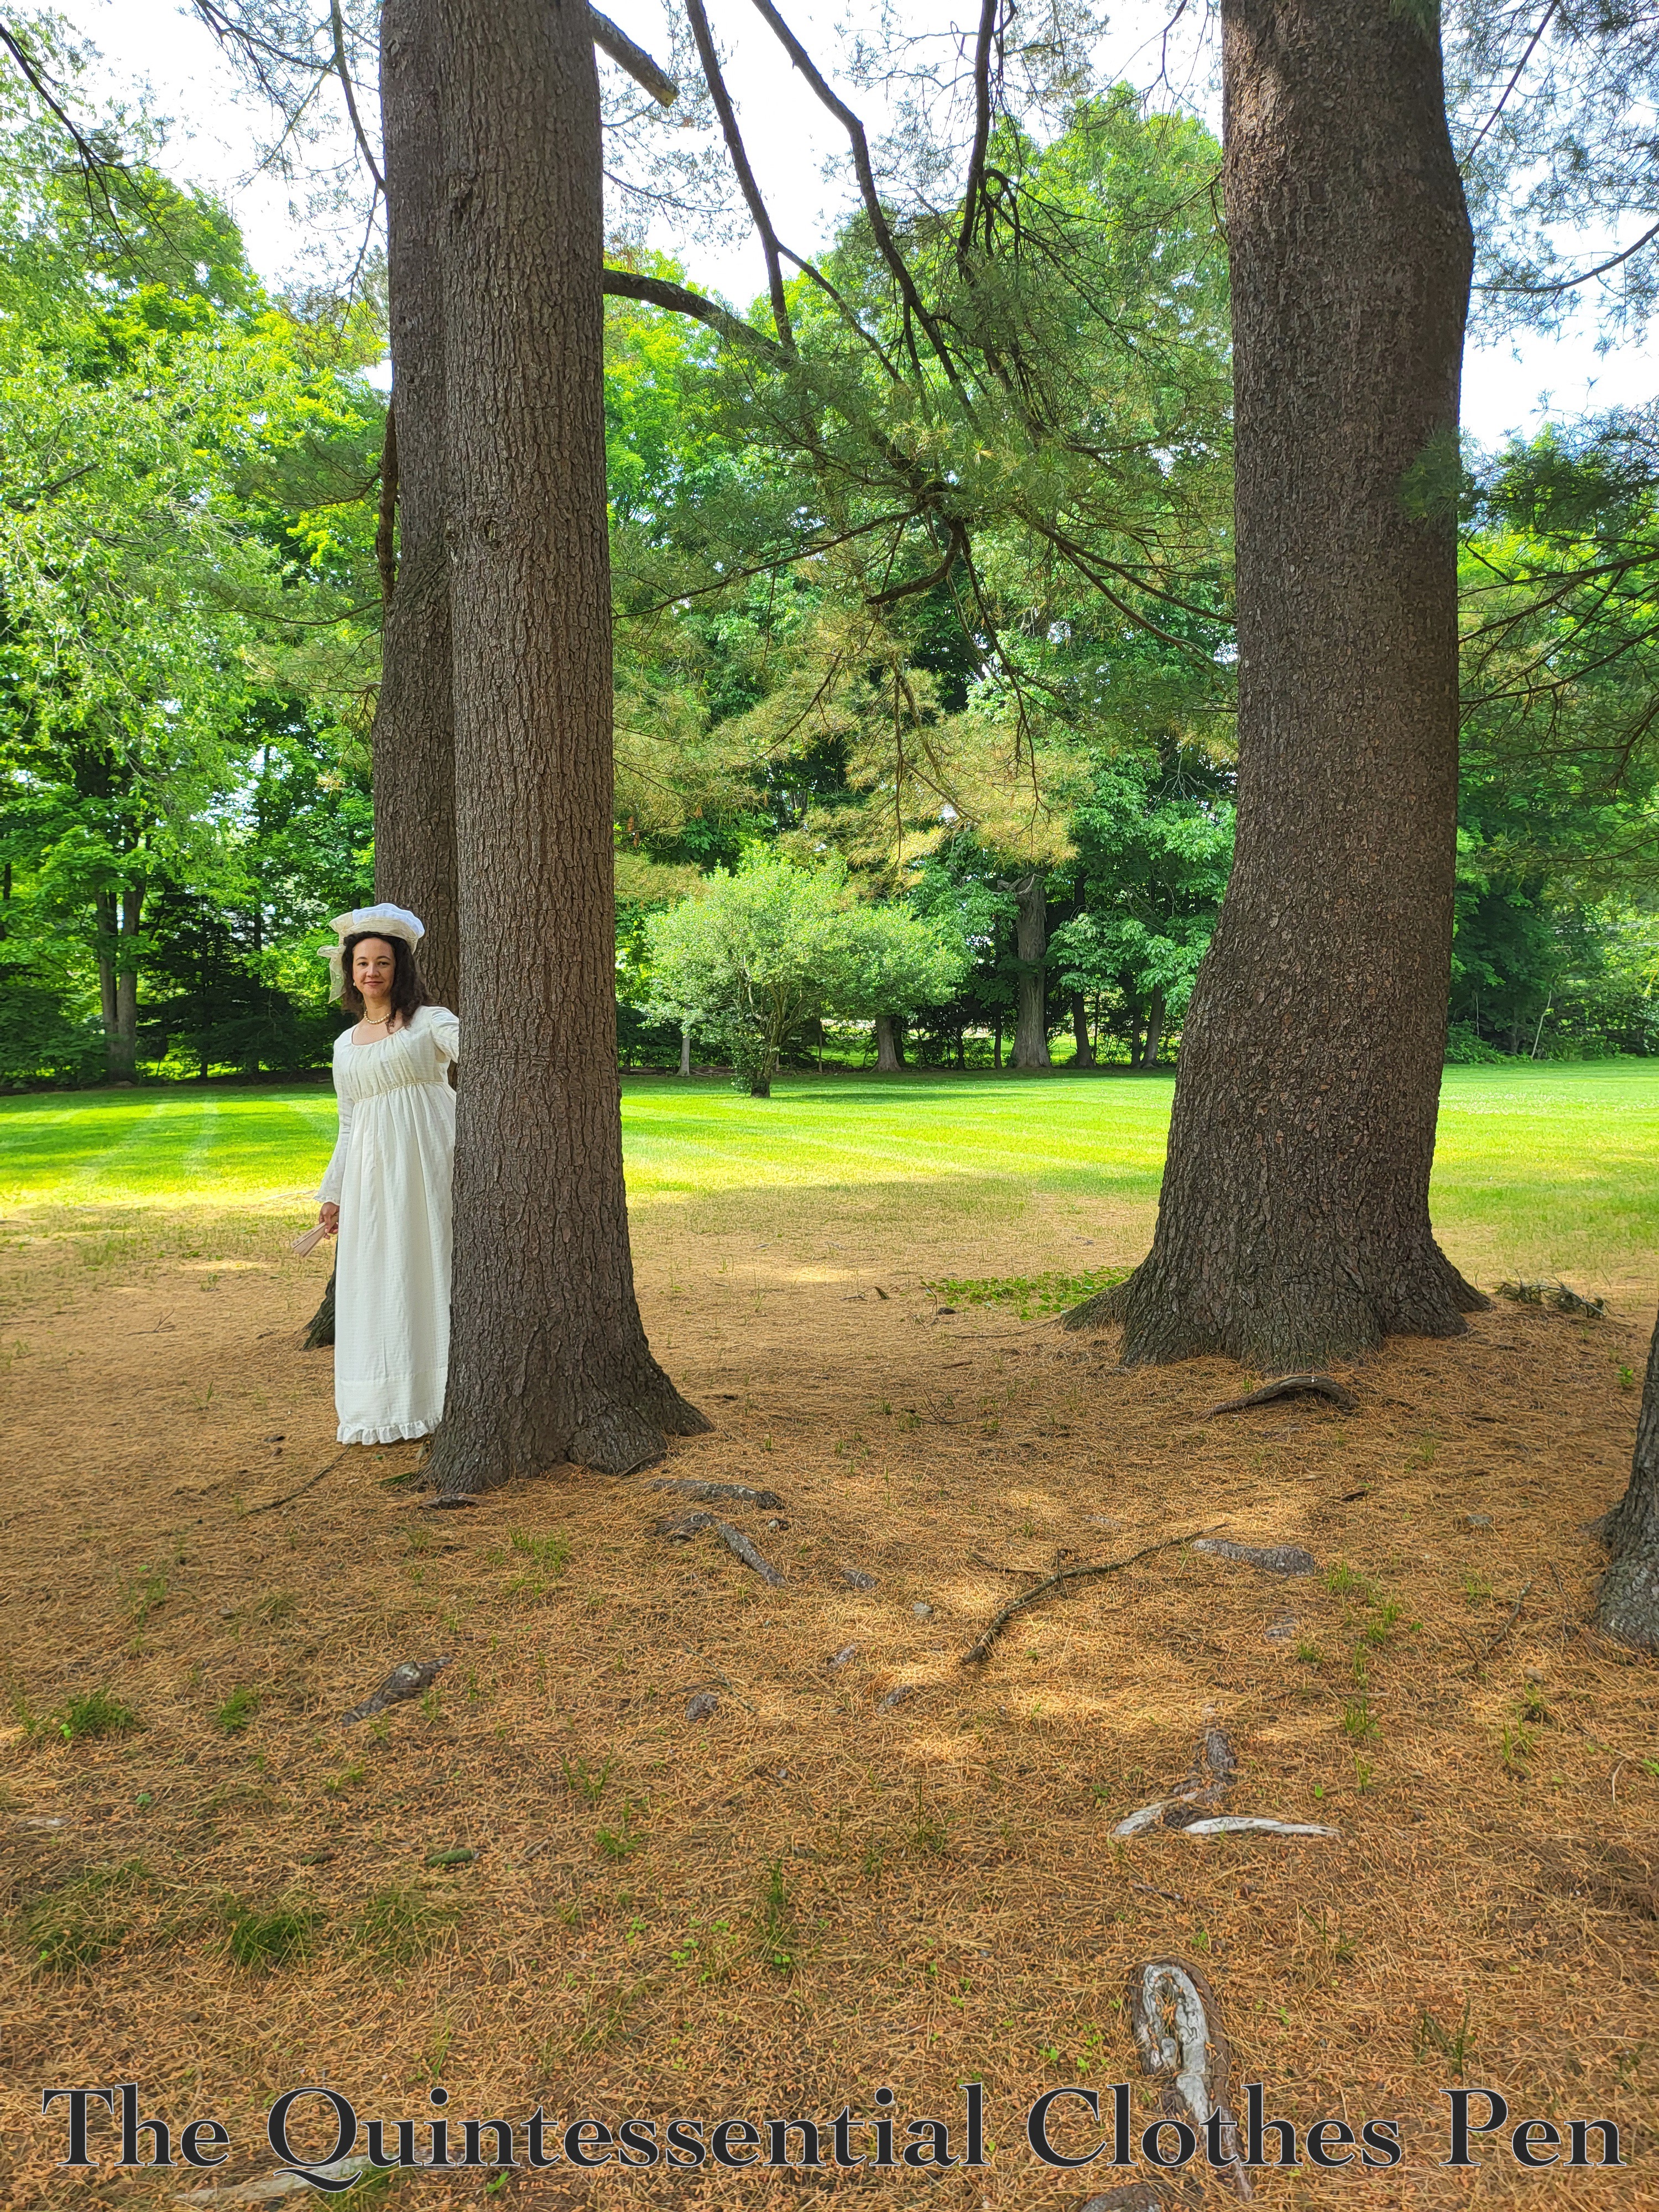
See? The cap isn’t really on my head at all. It’s just floating on my hair. Aside from curling all of my hair, the only other part of creating this hairstyle was to artfully pin the curls up to make them elegantly descend from the cap on every side.
With this dress, I wore the foundations of the 1790s ensemble I’ve been putting together for the last few years. This included my entirely hand sewn c. 1785 Stays of Success and 1790s Petticoat & Bum Pad. Also finished in 2023 and 2024, this was the first real outing for the stays, which you can read all about in this past post, and for the petticoat and bum pad, which you can read all about in this past post.
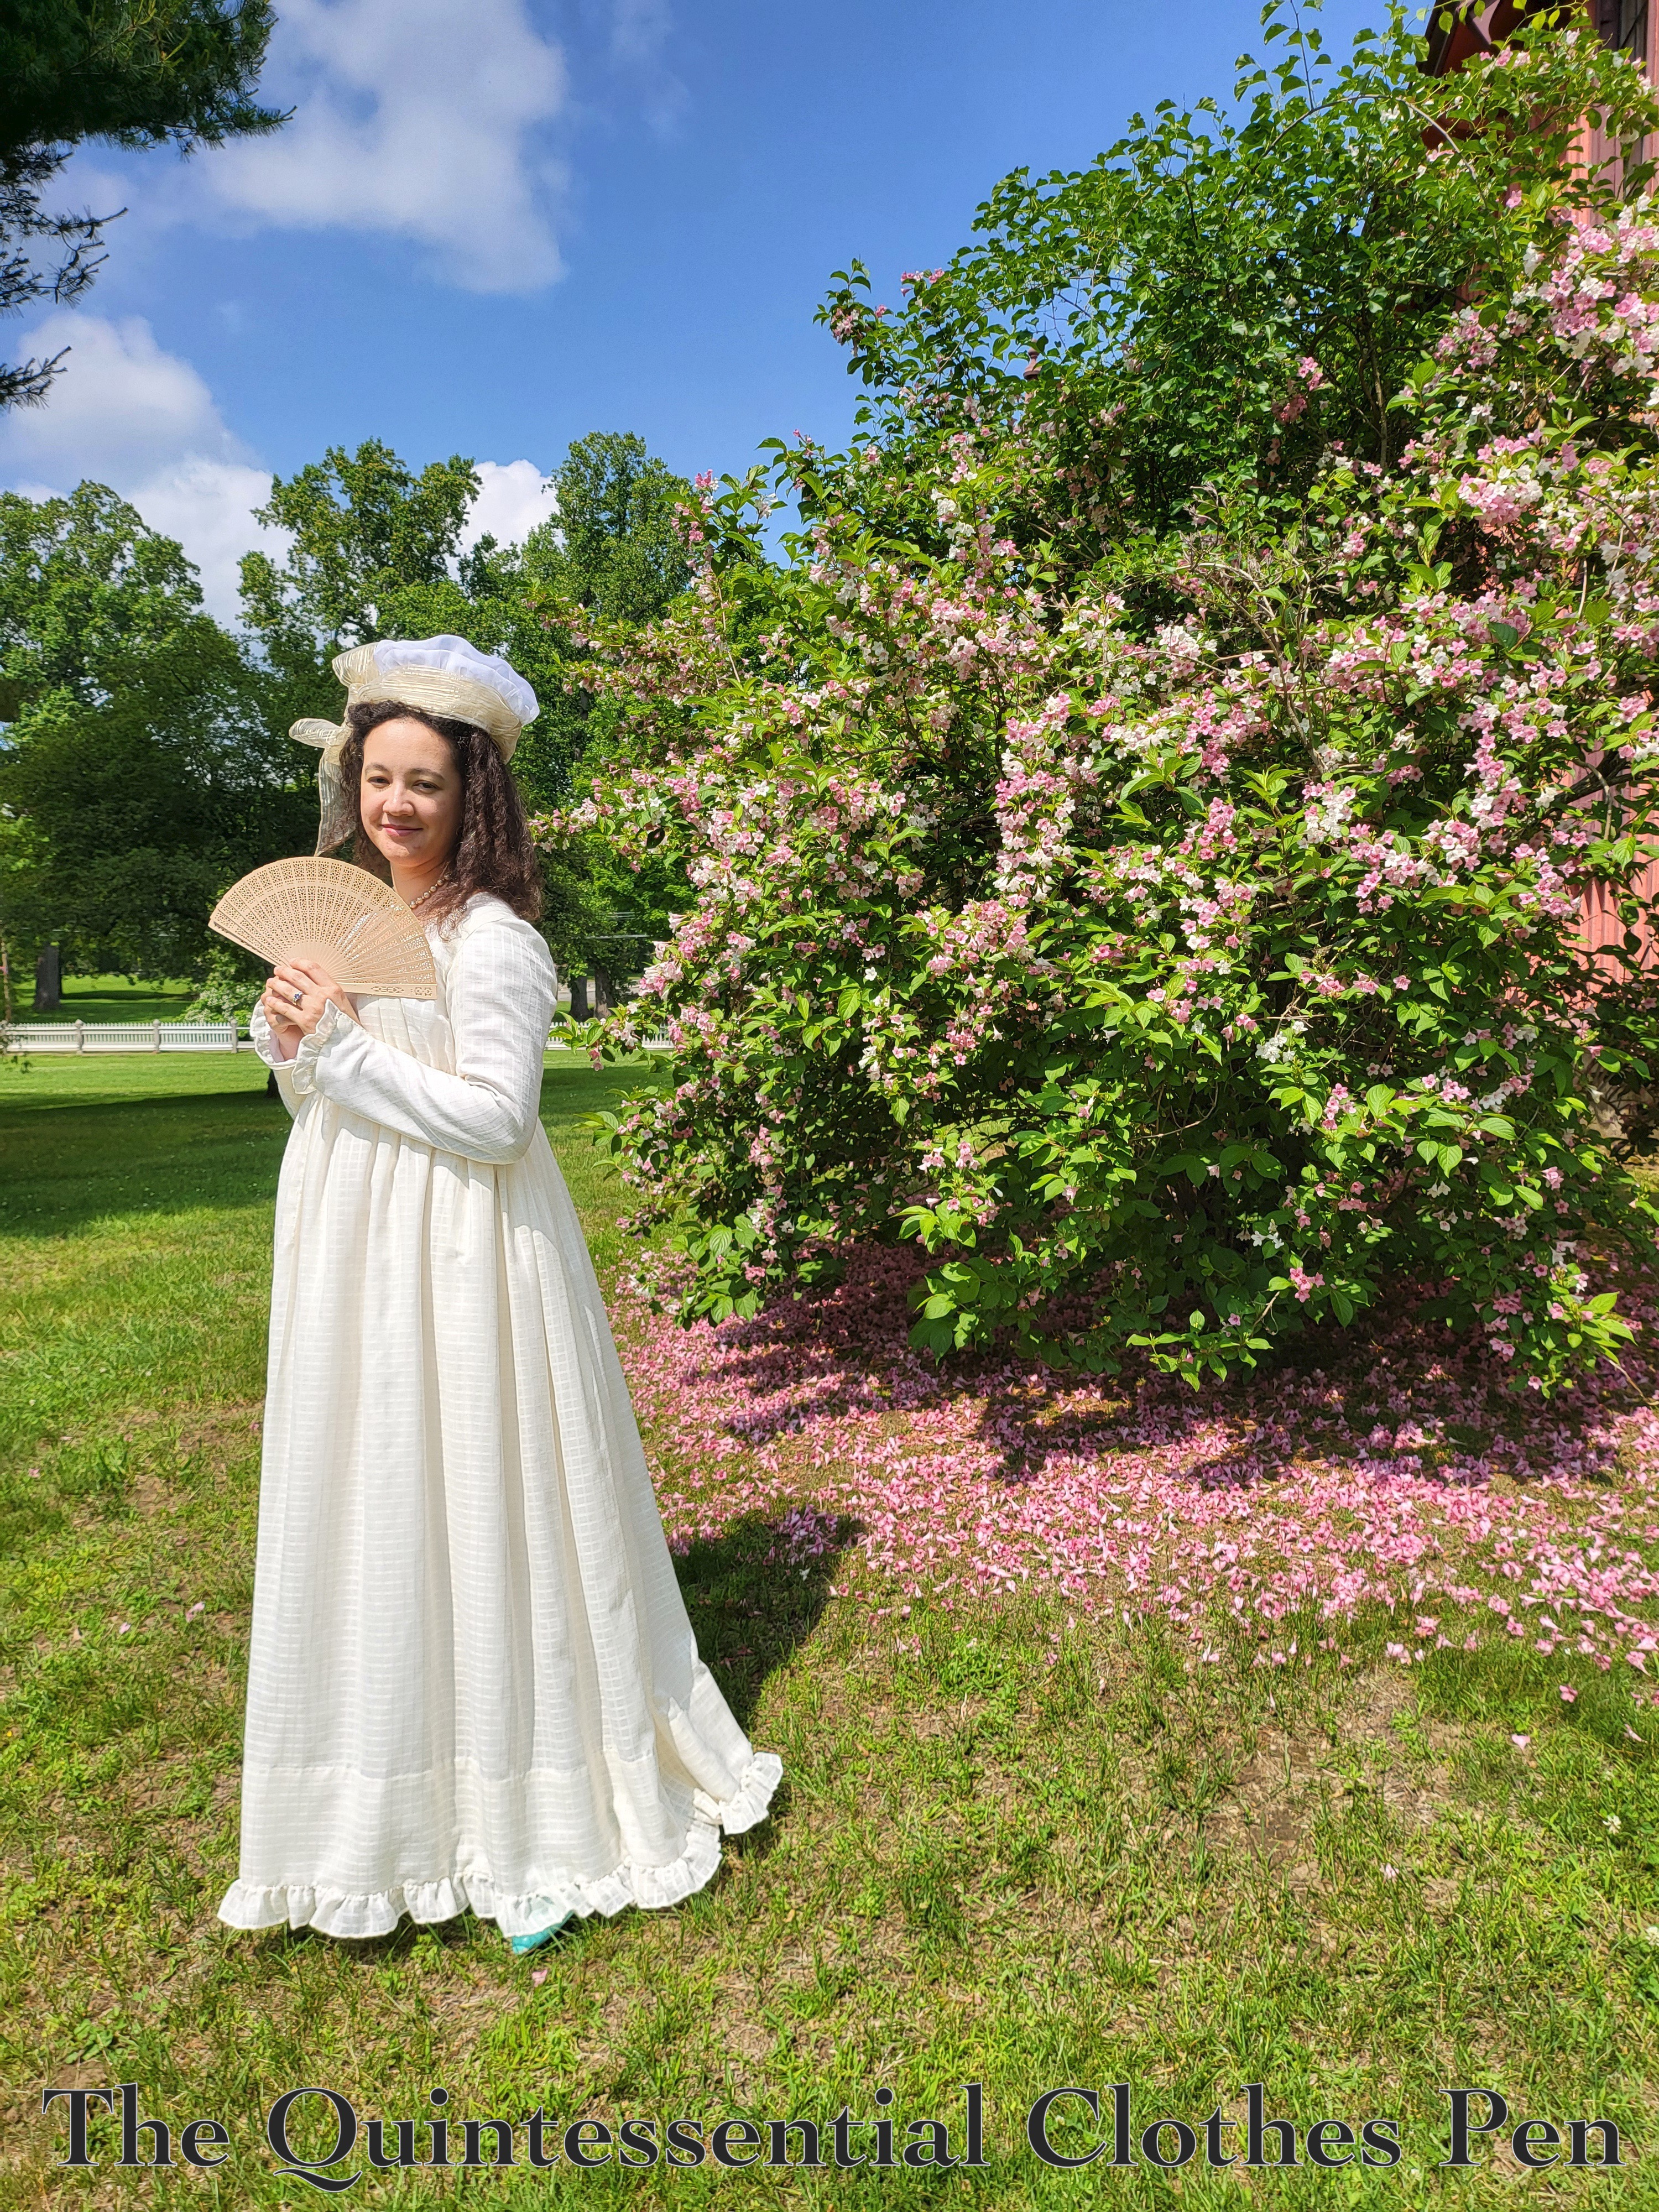
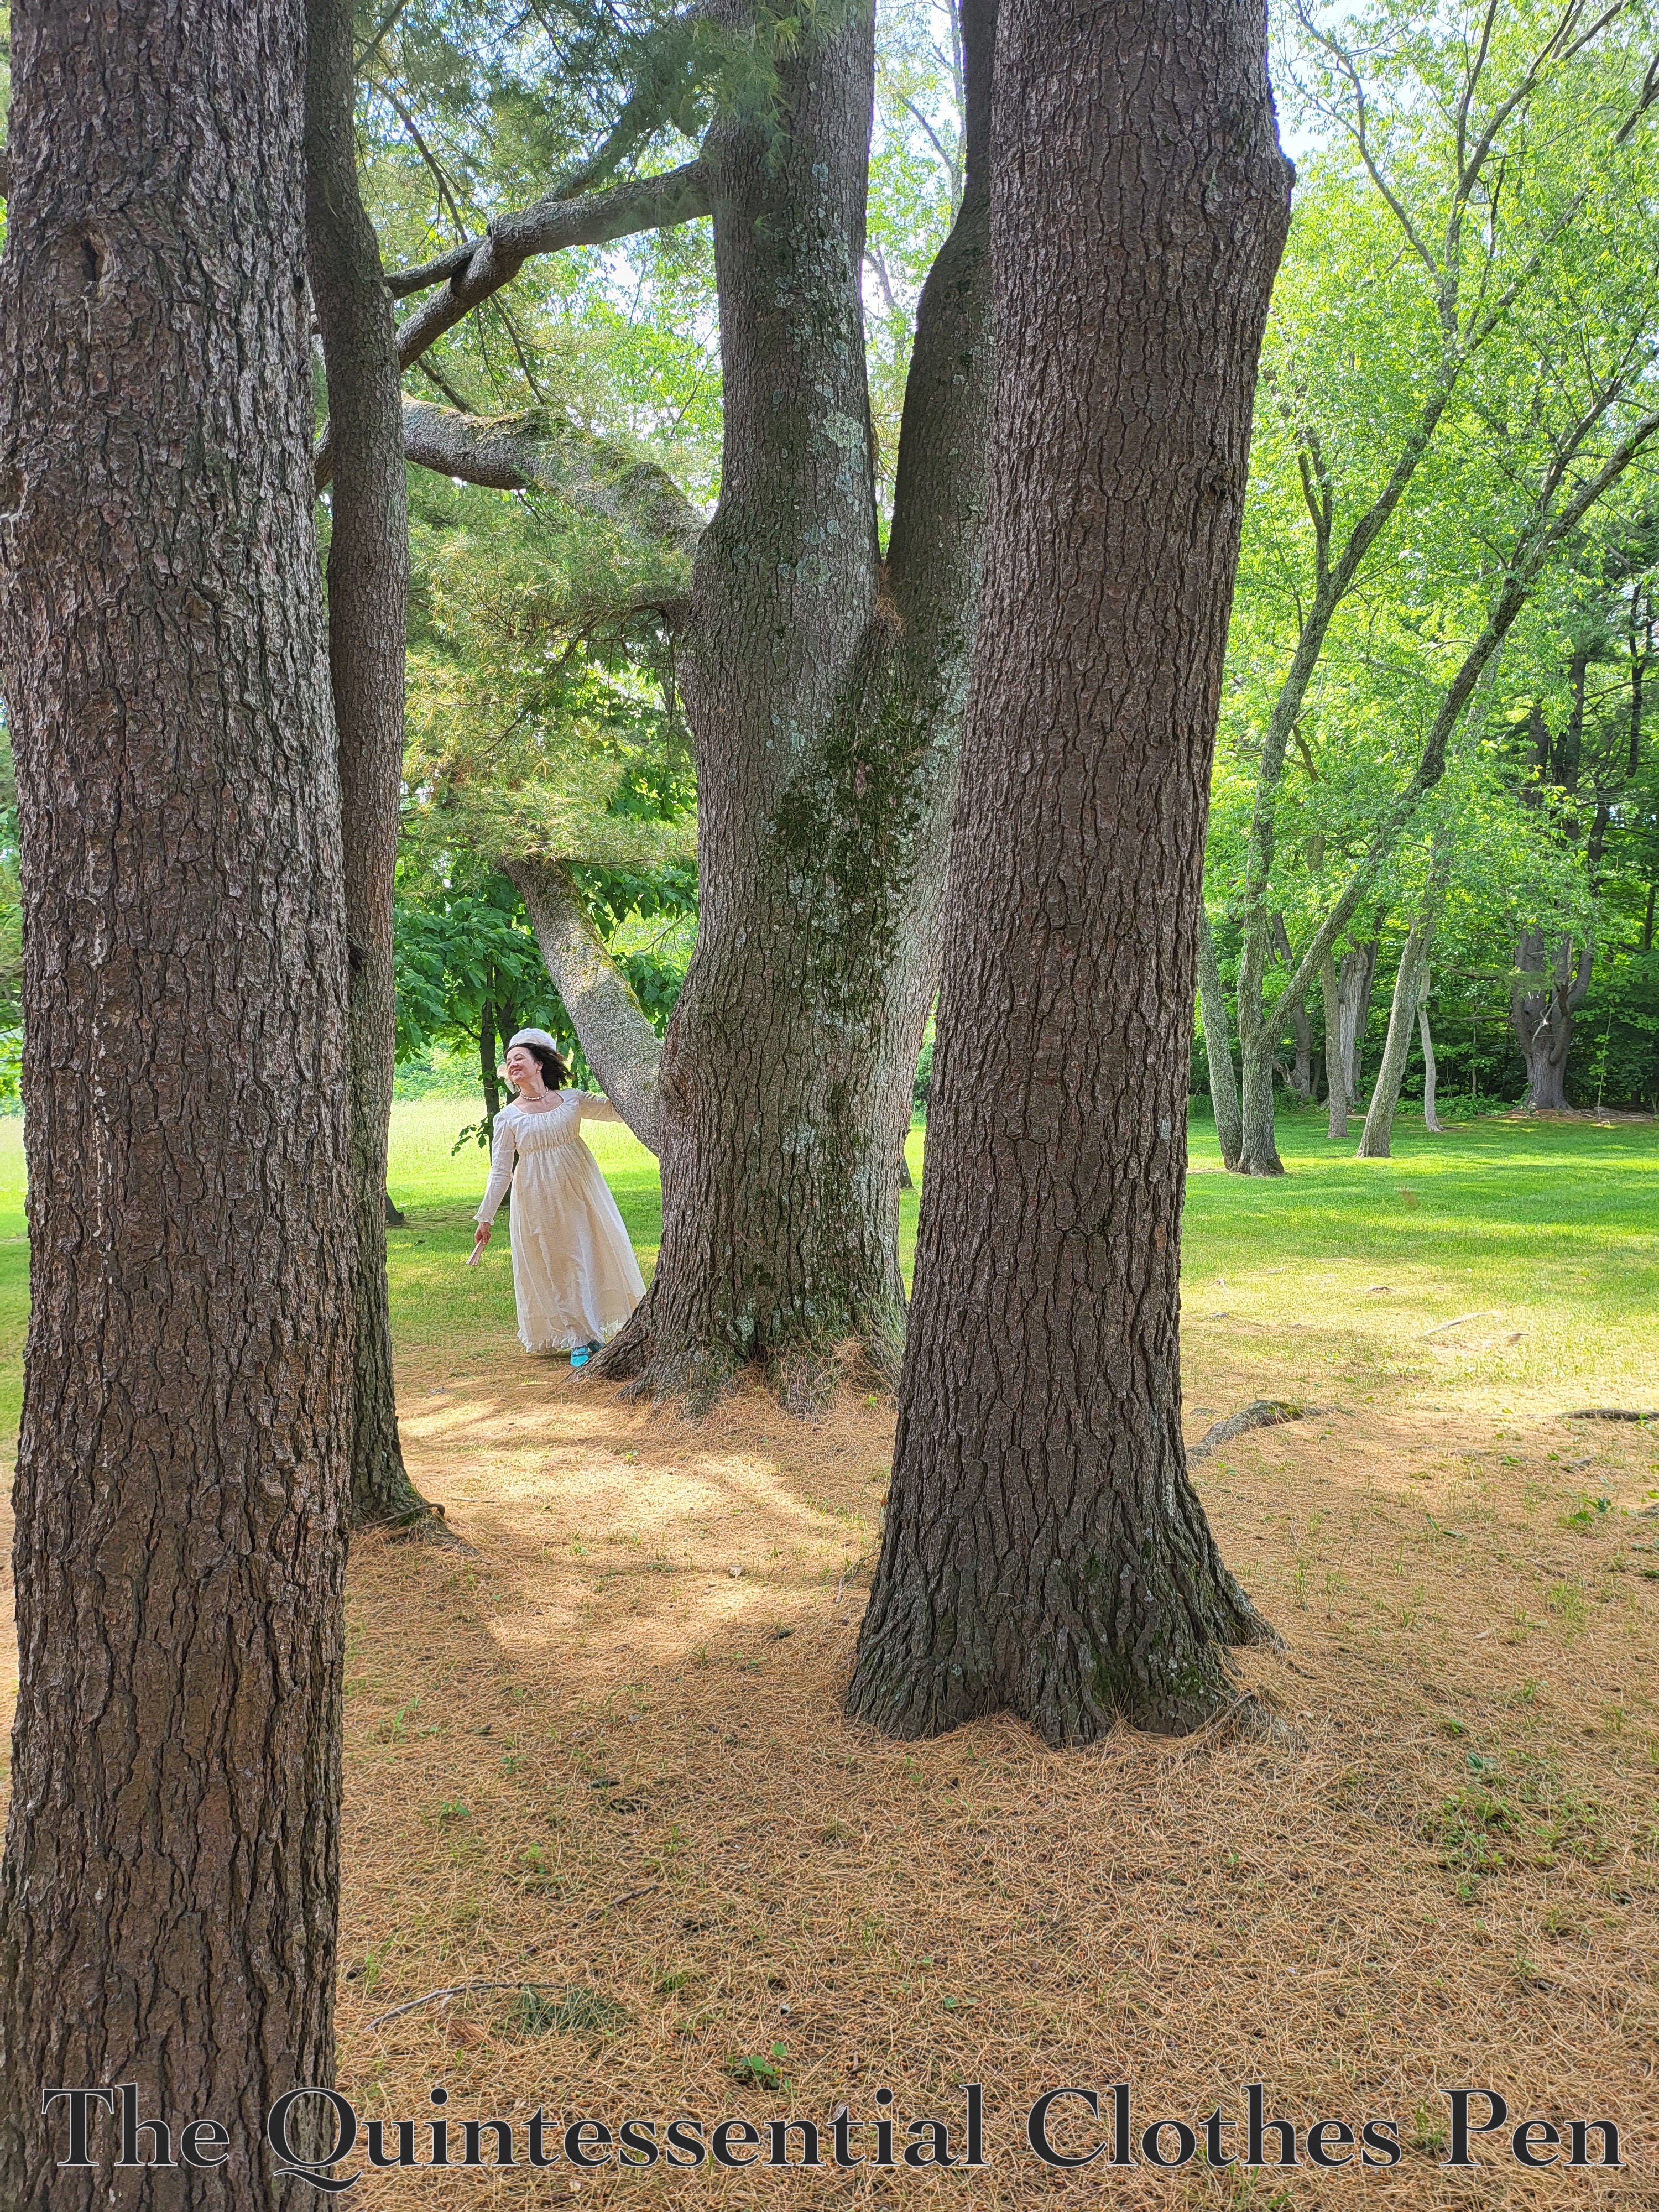
The whole ensembles is super comfortable! The stays are, in fact, a success! And the layers, with their generously gathered skirts, are full of movement. The ruffles add a bit of fun. And the front closures on the petticoat and dress are definitely easy to use!
The only difficulty of wearing this dress came from the hem that just brushes the ground. Wearing it outside meant that it collected twigs, pine needs, and leaves that I was constantly removing. Not to mention the fact that the layers attracted multiple stinging bee-like creatures to get stuck between them! Ack! Luckily, kind people around me helped me separate the layers enough to let the winged creatures free, and not a single person was stung! Whew!
Perhaps this ensemble is better suited to a marble-floored walkway, but… it was breezy, and cool, and elegant to wear outside (when one ignored the bits of nature stuck in the hem ruffle!).
I am finally ready to share a full set of photos of the new Yellow Sacque and its friend, my older Versailles sacque (all of the construction details for these dresses can be found by clicking the links)! The two dresses had a joyful outing together at an event last year. This post is going to share about the event itself as well as photos and recollections.
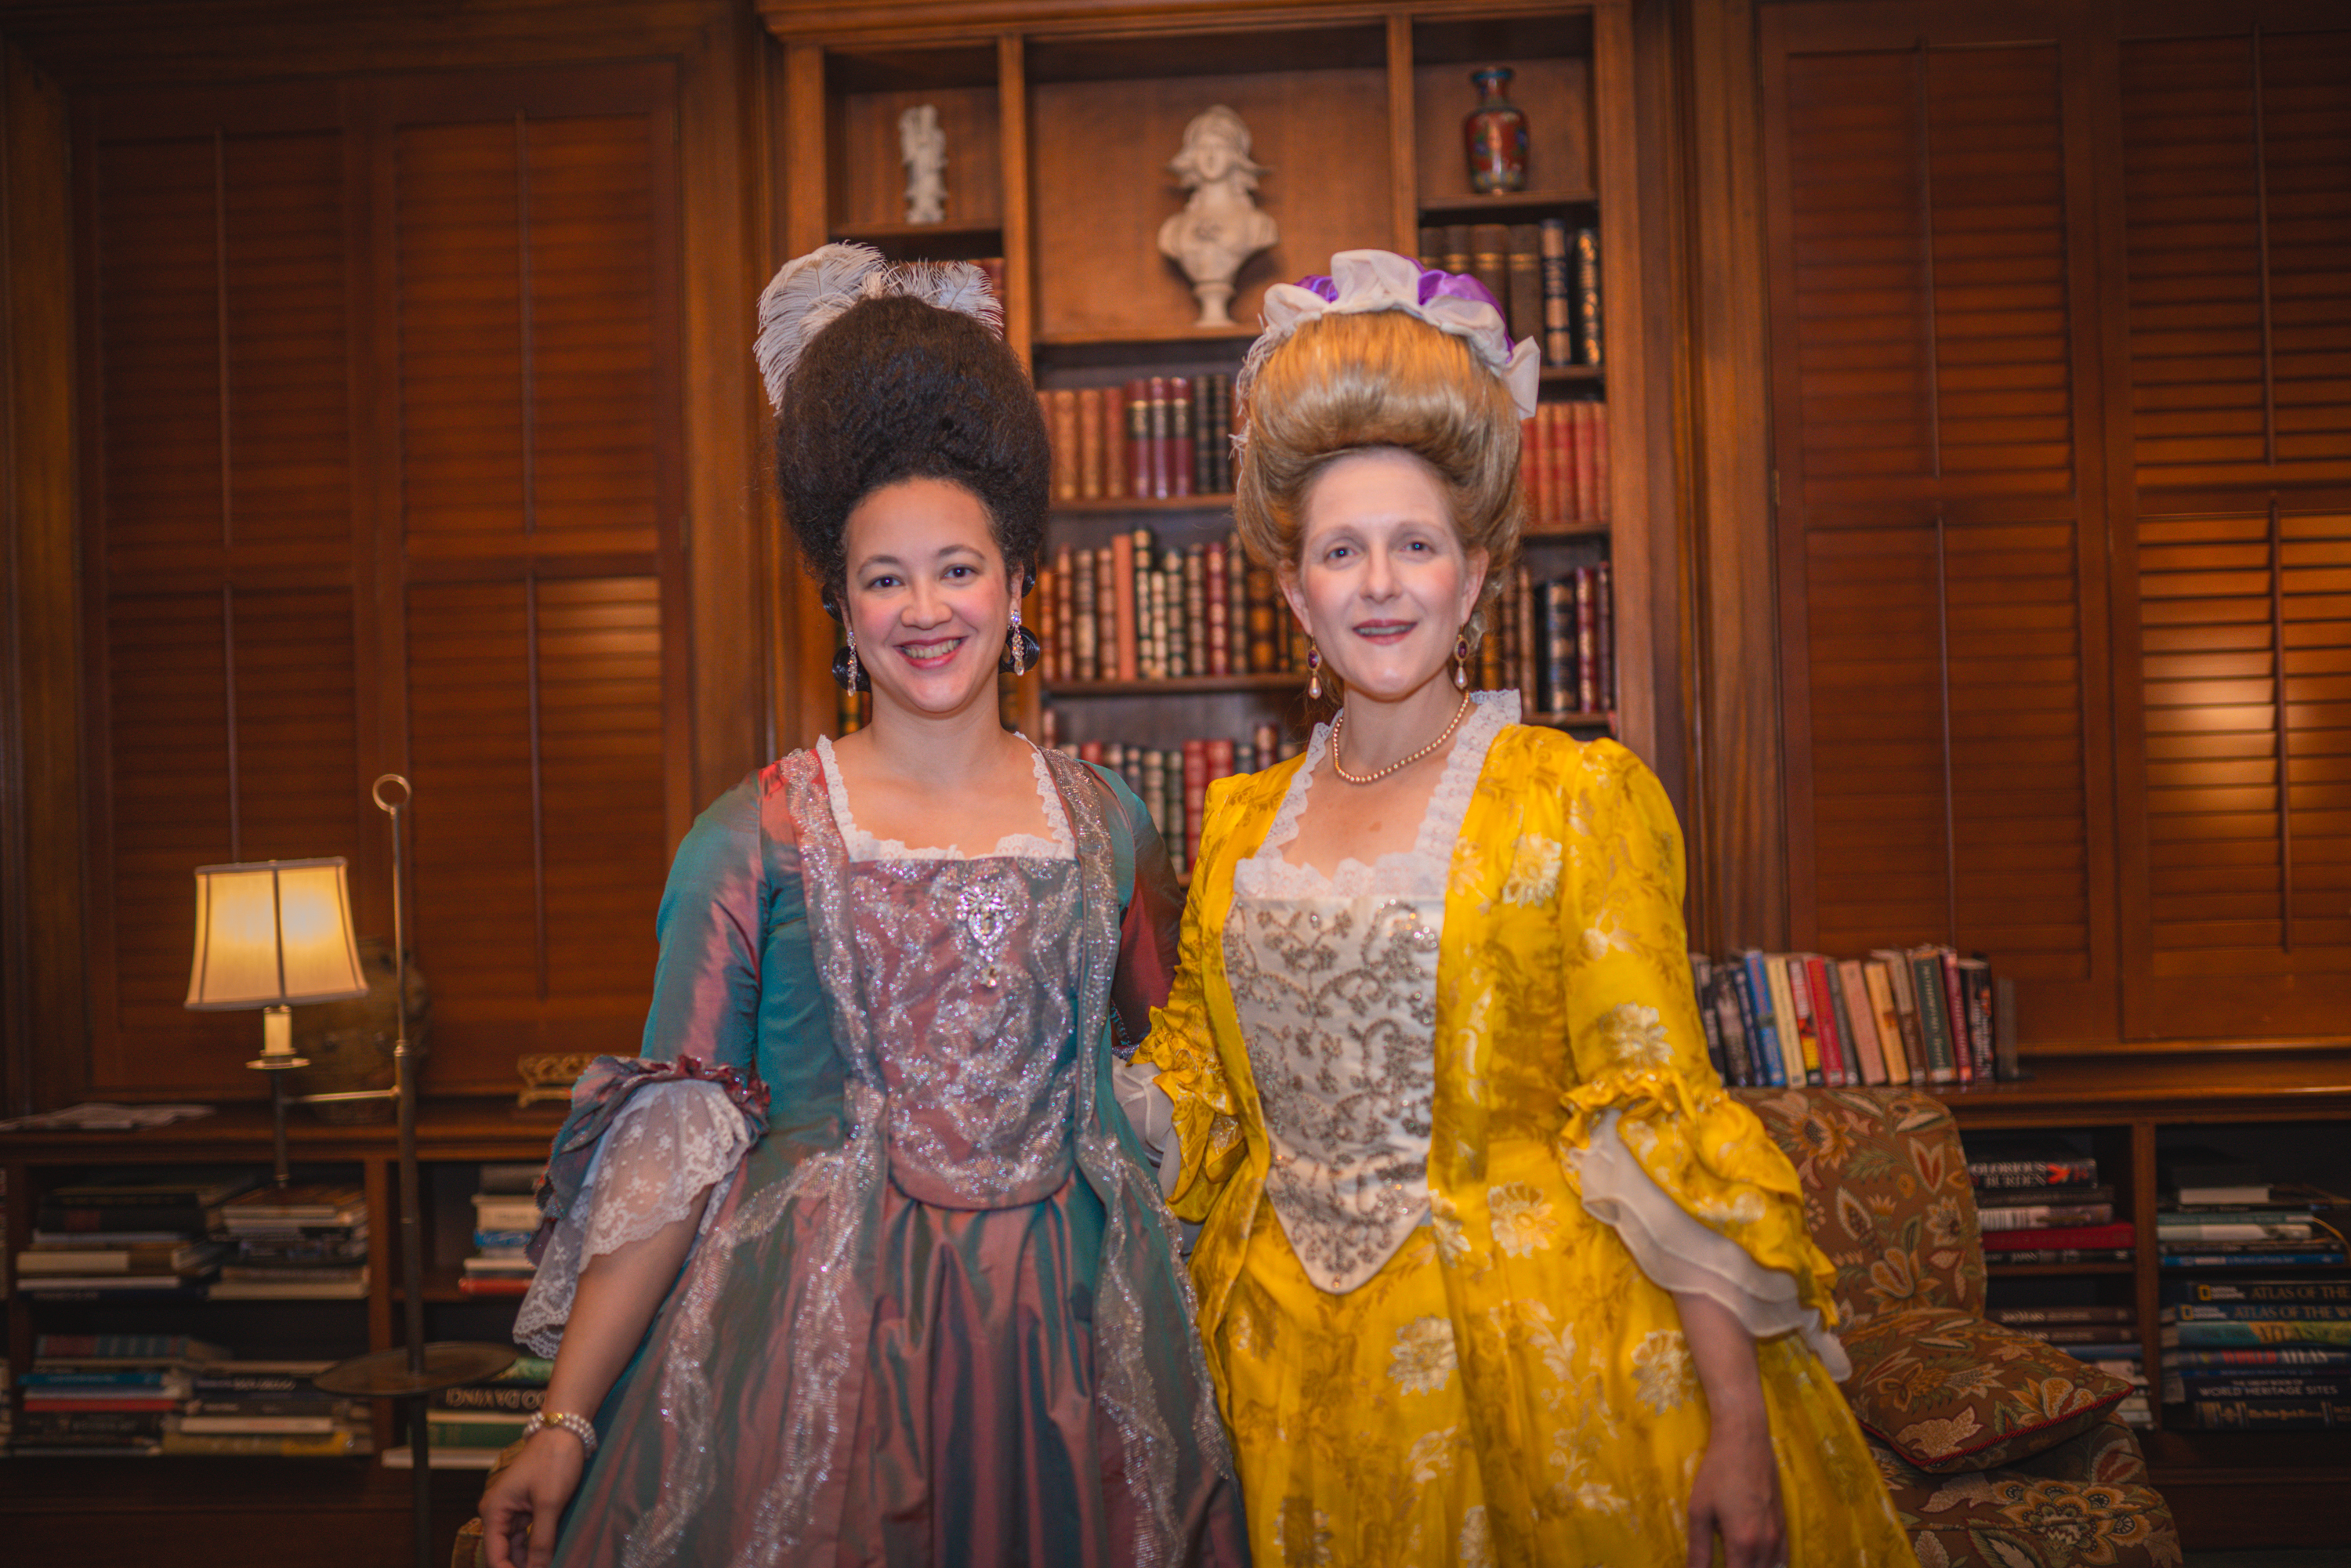
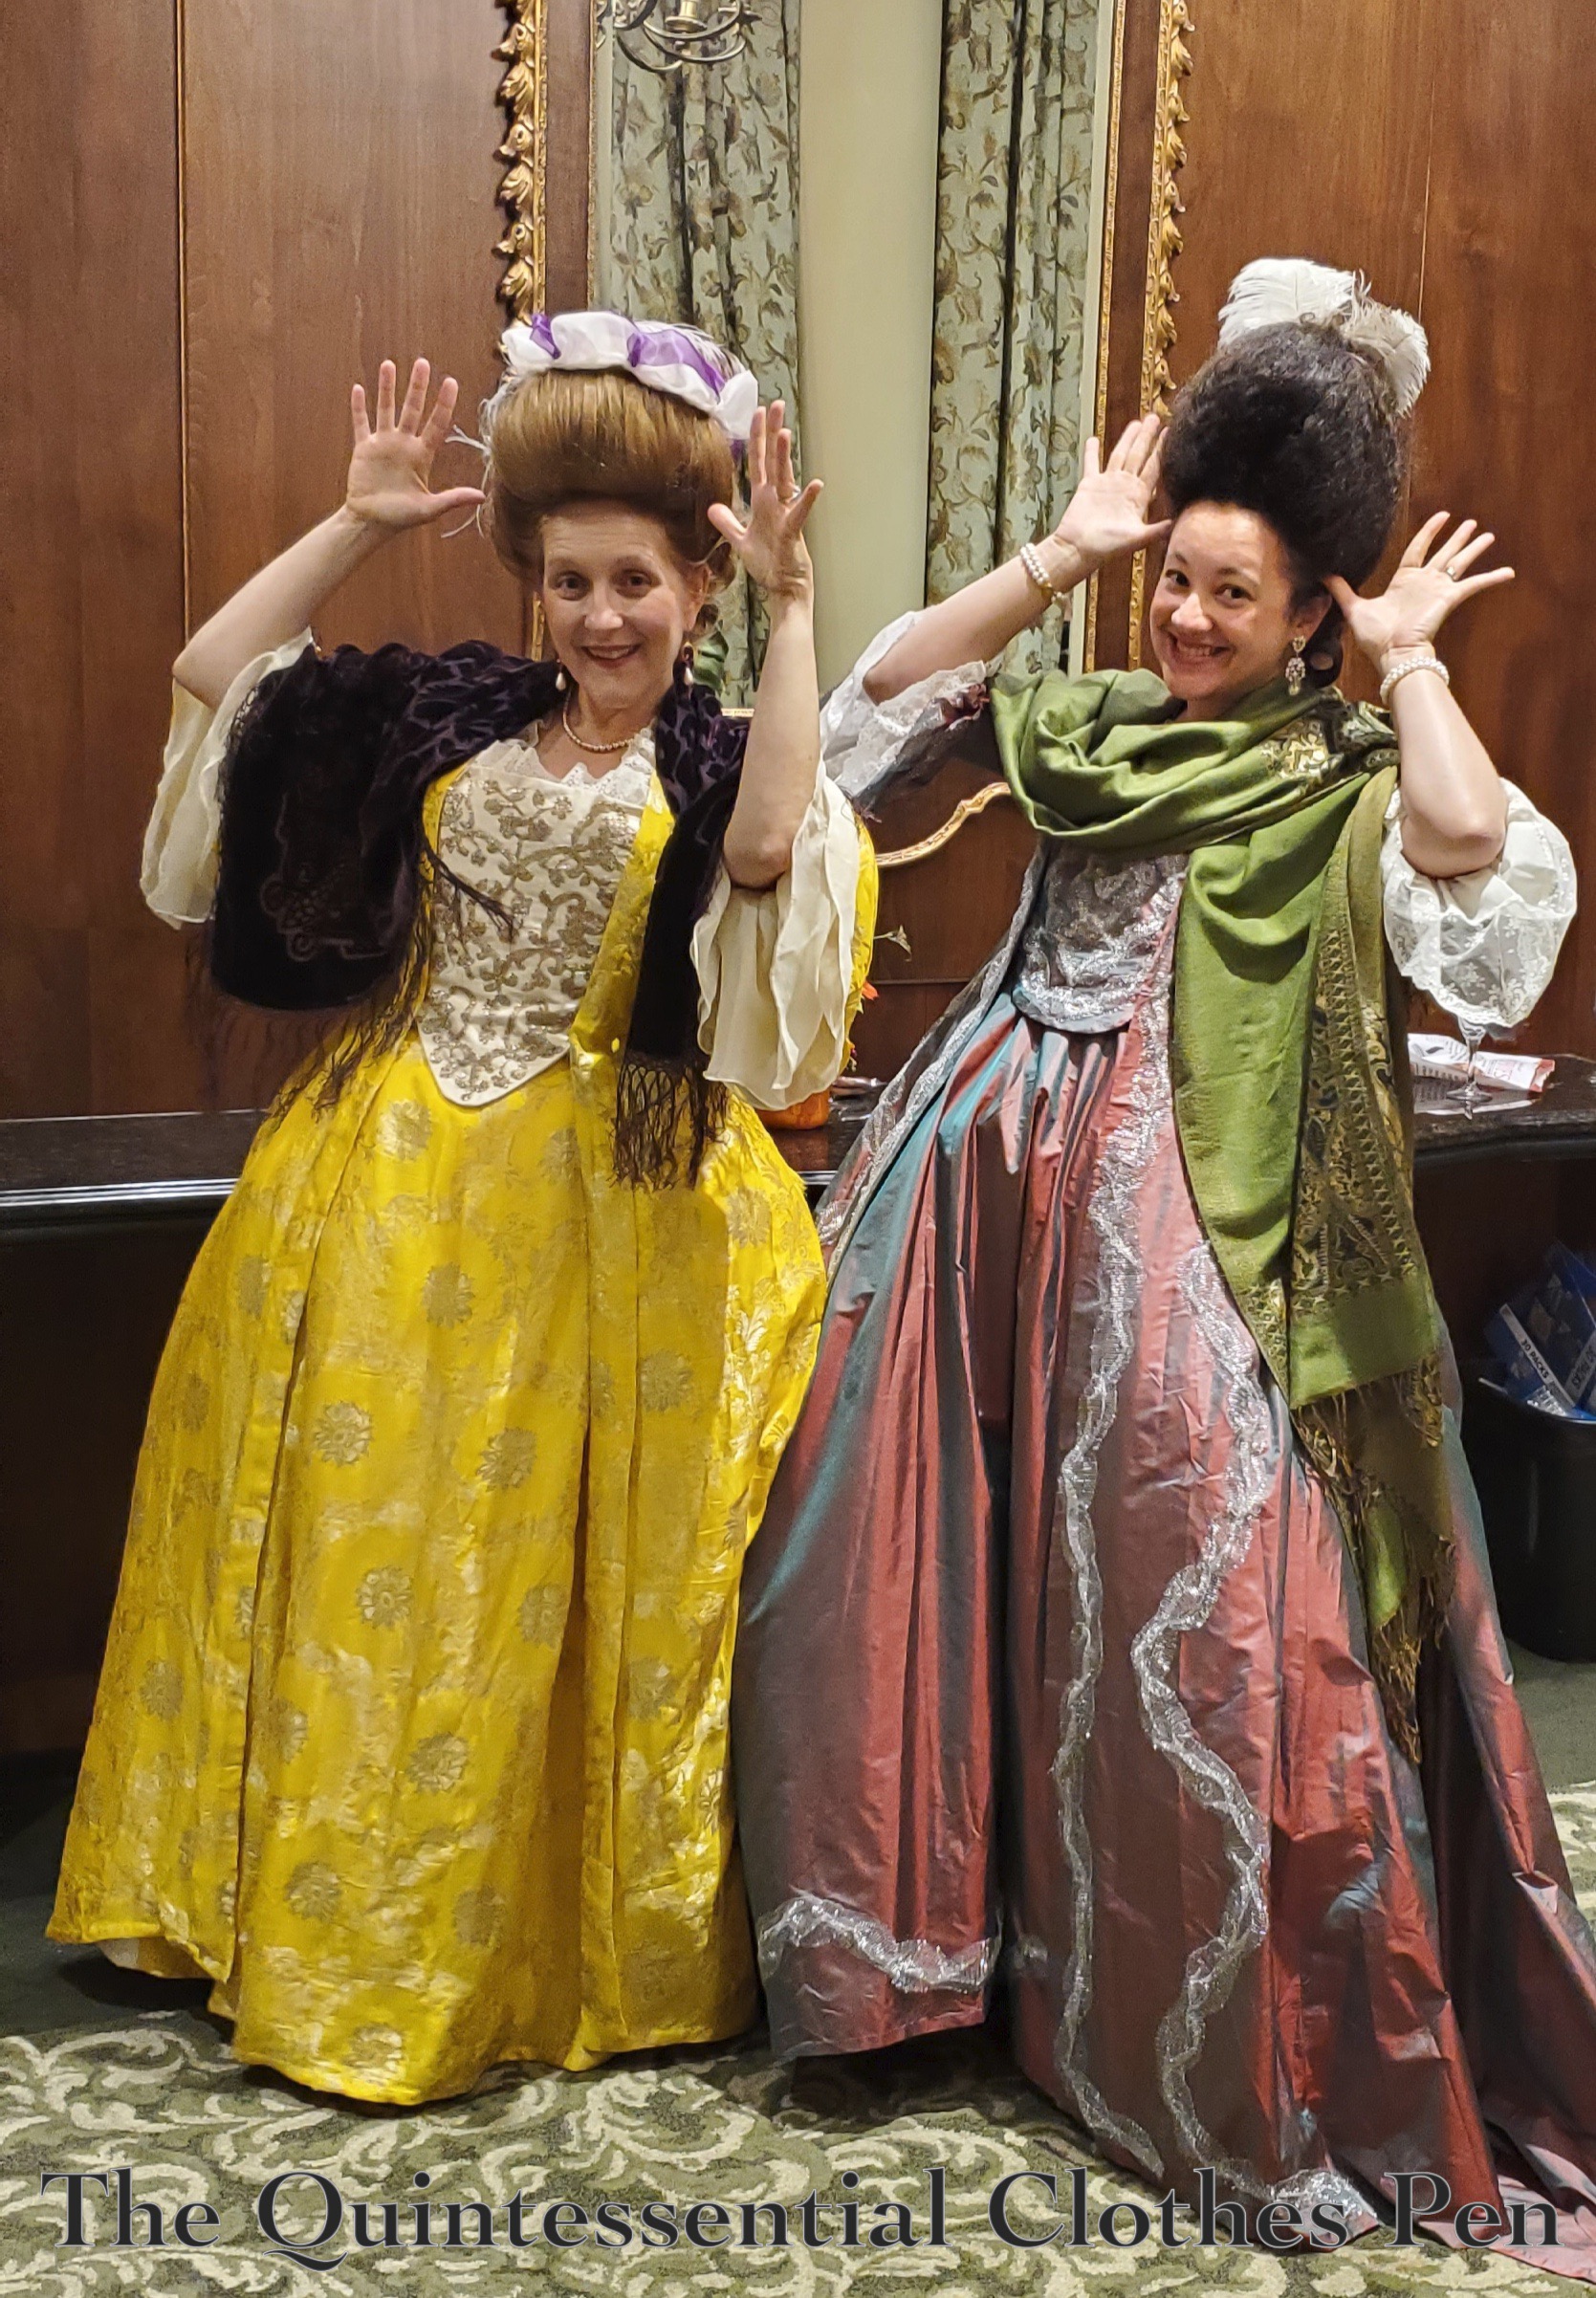
Below, a photo of the Versailles Sacque and new Yellow Sacque next to each other!
Photo courtesy of Aleks Vu
About The Event
In October 2024, I had the great joy of attending the ‘Salon at Palais-Royal: An 18th-Century Chevalier Experience’ weekend hosted by Costumers of Color. The program included educational lectures, a violin concert, historical activity discussions and demonstrations, dancing, and more, with the goal of providing an inclusive environment for people of color both in terms of attendance and in terms of the educational theme of the event.
It was a success! Costumers of Color shared on the page for the event that “over 40 of the 140 attendees were POC (people of color).” That’s pretty amazing, and special! (If you go to the linked page, you can see group photos, one of which is of all the people at the event who identify as people of color.) I enjoyed that aspect of the event, as well as the educational theme that centered Joseph Bologne, Chevalier de Saint Georges, an 18th century Black “scholar, a fencer, a virtuoso violinist and a famous and sought-after composer.” (This quote is from the Costumers of Color blog post about Joseph Bologne. Please go give it a read if you would like to learn more! Bologne’s achievements are impressive!) In addition to these elements, I also enjoyed the combination of learning and participating that was incorporated into the weekend.
What Was Worn
For the formal evening part of the event, I chose to wear my Versailles Sacque (made and last worn in 2016, which I posted about here)! For this wearing, I updated the ensemble with a lace tucker around the neckline of the dress. This small new accessory helps complete the full look. It took a little bit of referencing my old blog posts to reconstruct my hair form and remind myself what accessories to wear, but I was successful. I was very grateful to myself for documenting things so well!
I also had the pleasure of seeing the new Yellow Sacque and all of the new accessories I’ve been making being elegantly worn by a friend!
Below, showing off both the front and back of the sacque (or Robe à la Française) style of dress.
Photo courtesy of Aleks Vu
More Photos
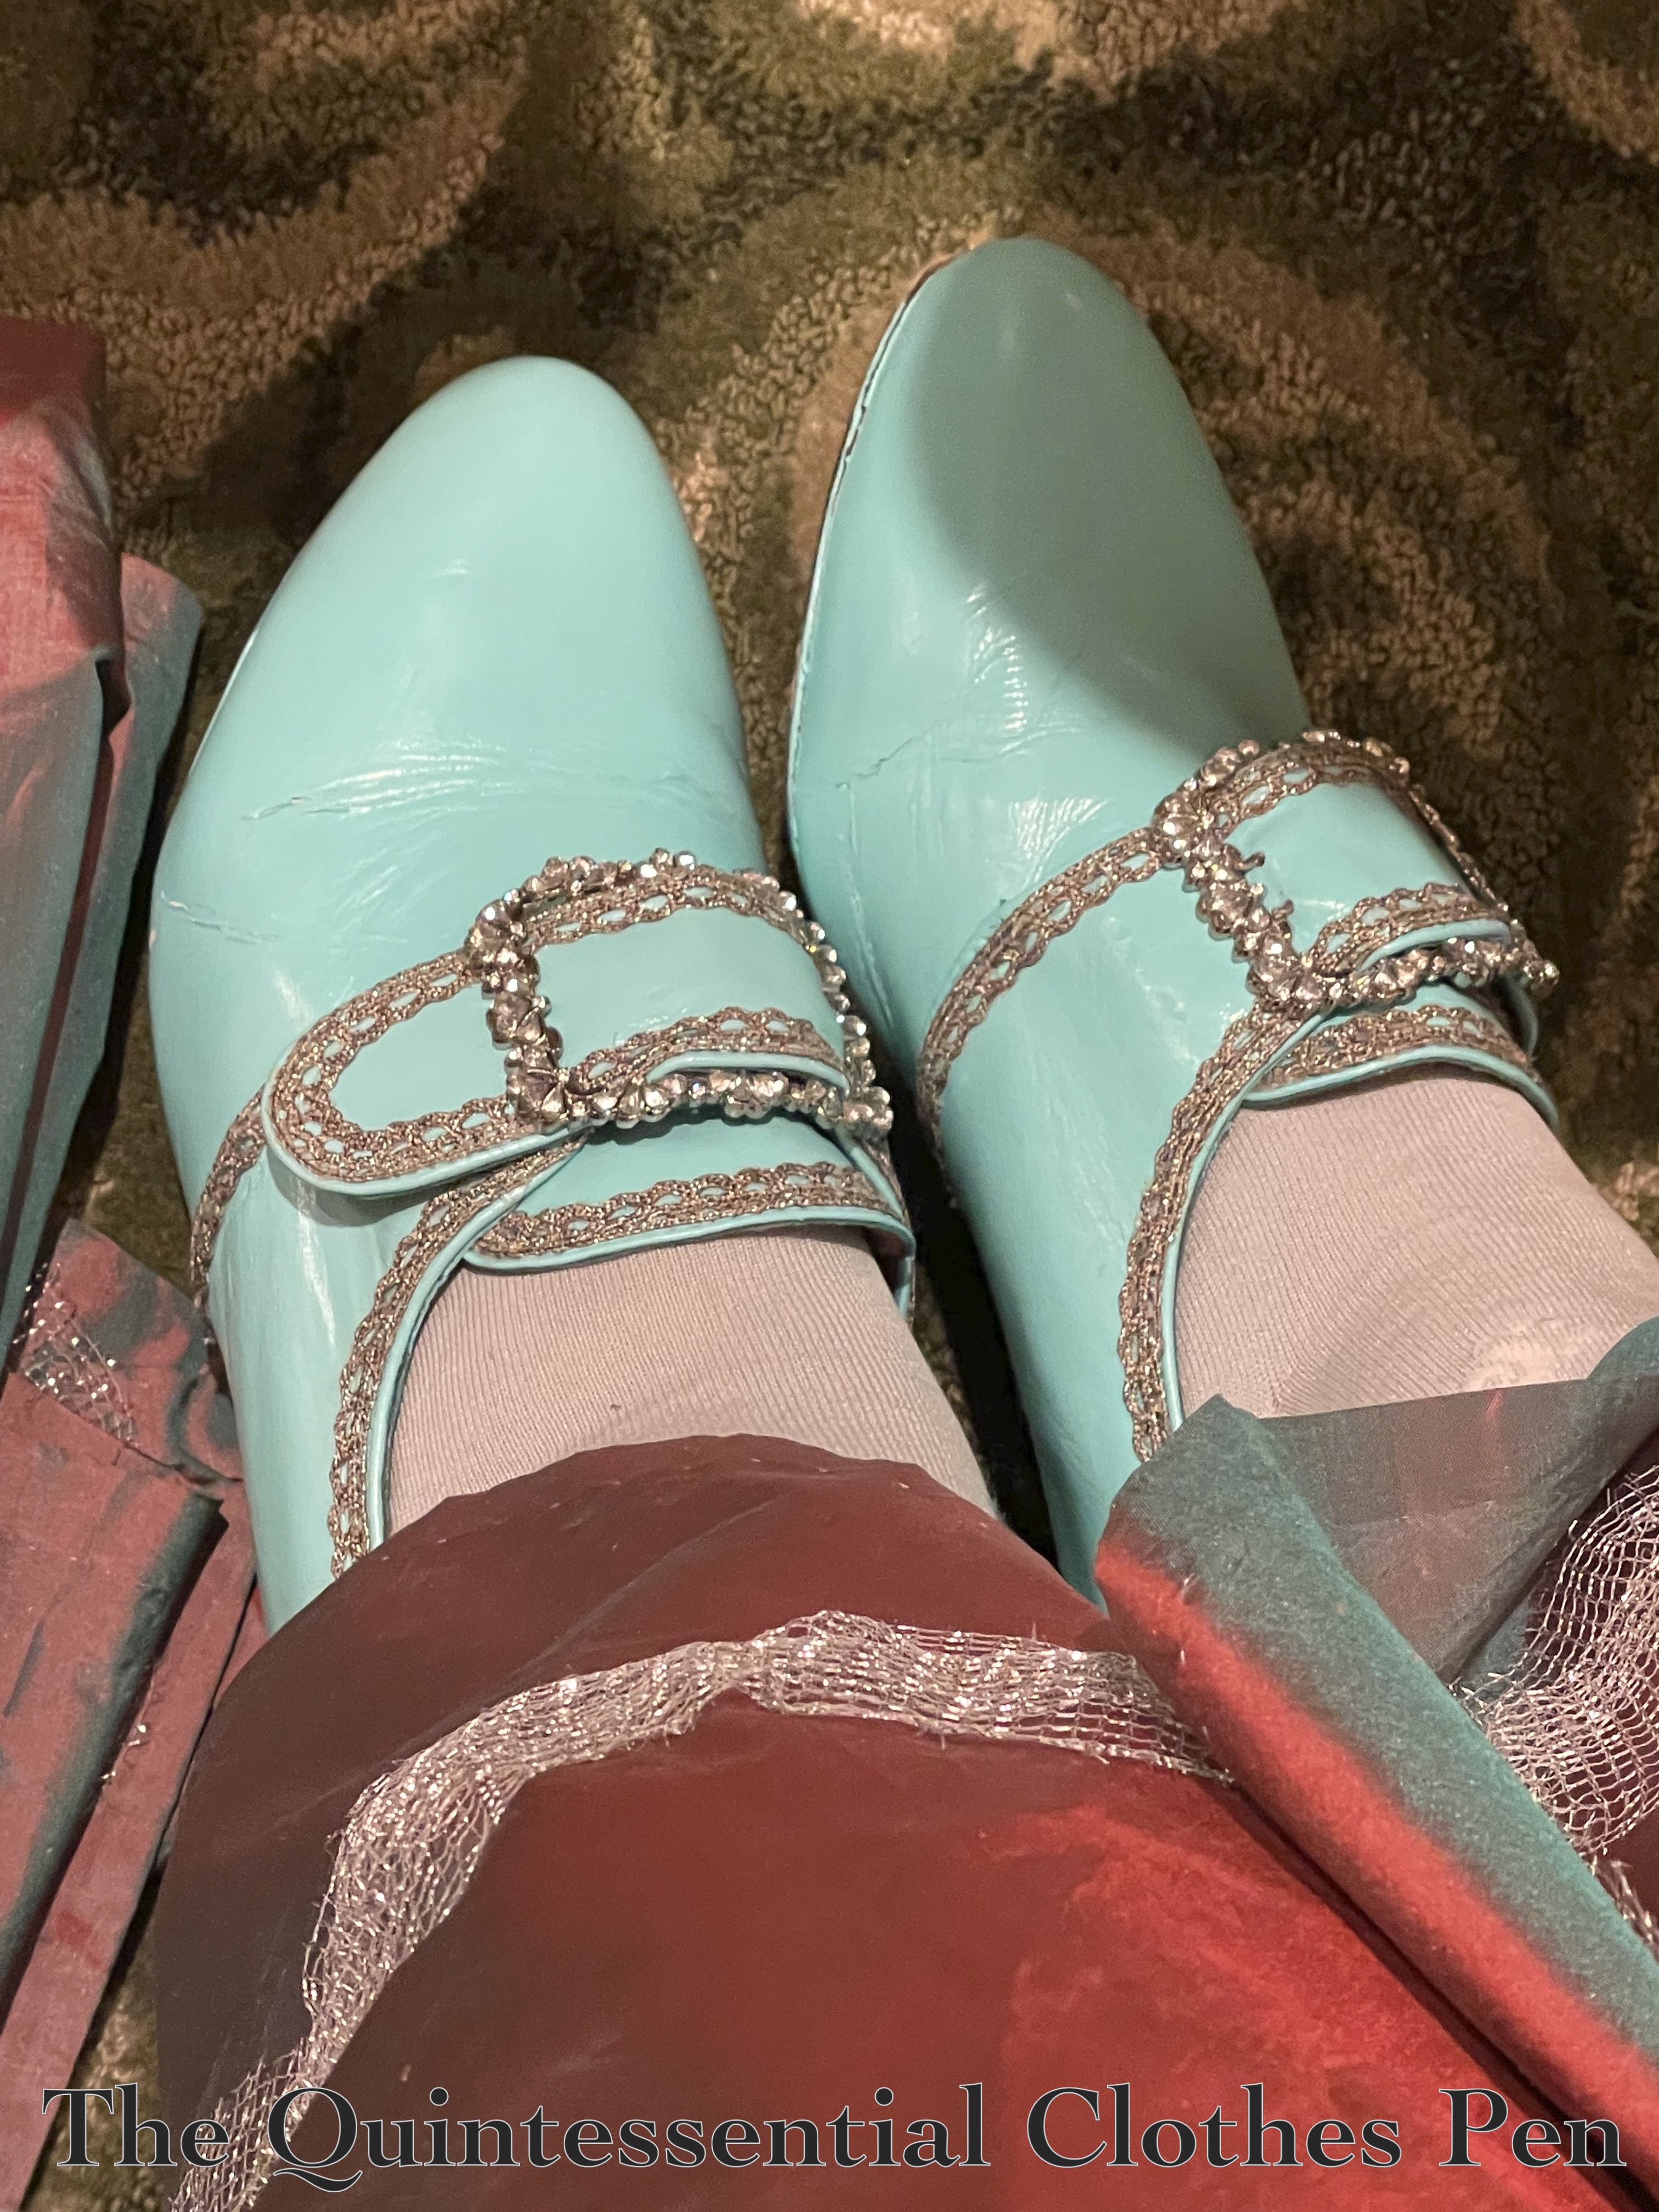
I was so pleased that my American Duchess Kensingtons were still in good shape after the immense amount of rain they endured in 2016. It was really exciting to break them out again with this dress! I’m still chuffed with the metallic lace I added. For Versailles, more bling was the thing! And in this photo, you can see how the light turquoise paint color picks up on the hints of turquoise in the dress fabric!
One of the things that I’d struggled to capture in photos for the Versailles dress’s first wearing was the changeable nature of the silk fabric. It is a ‘shot’ fabric, meaning that it uses two different colors woven in opposite directions: a vibrant turquoise and a deep red. This means that fabric appears to be both colors, or a mixture that looks a bit purple, depending on how the light hits it.
Most of my photos from the first wearing of the dress show the purple color, but the lighting at this event captured the many colors of the fabric much more clearly! Below is one example. Most of the dress appears in the red tone, but the shadows of the dress in the back look like the green color.
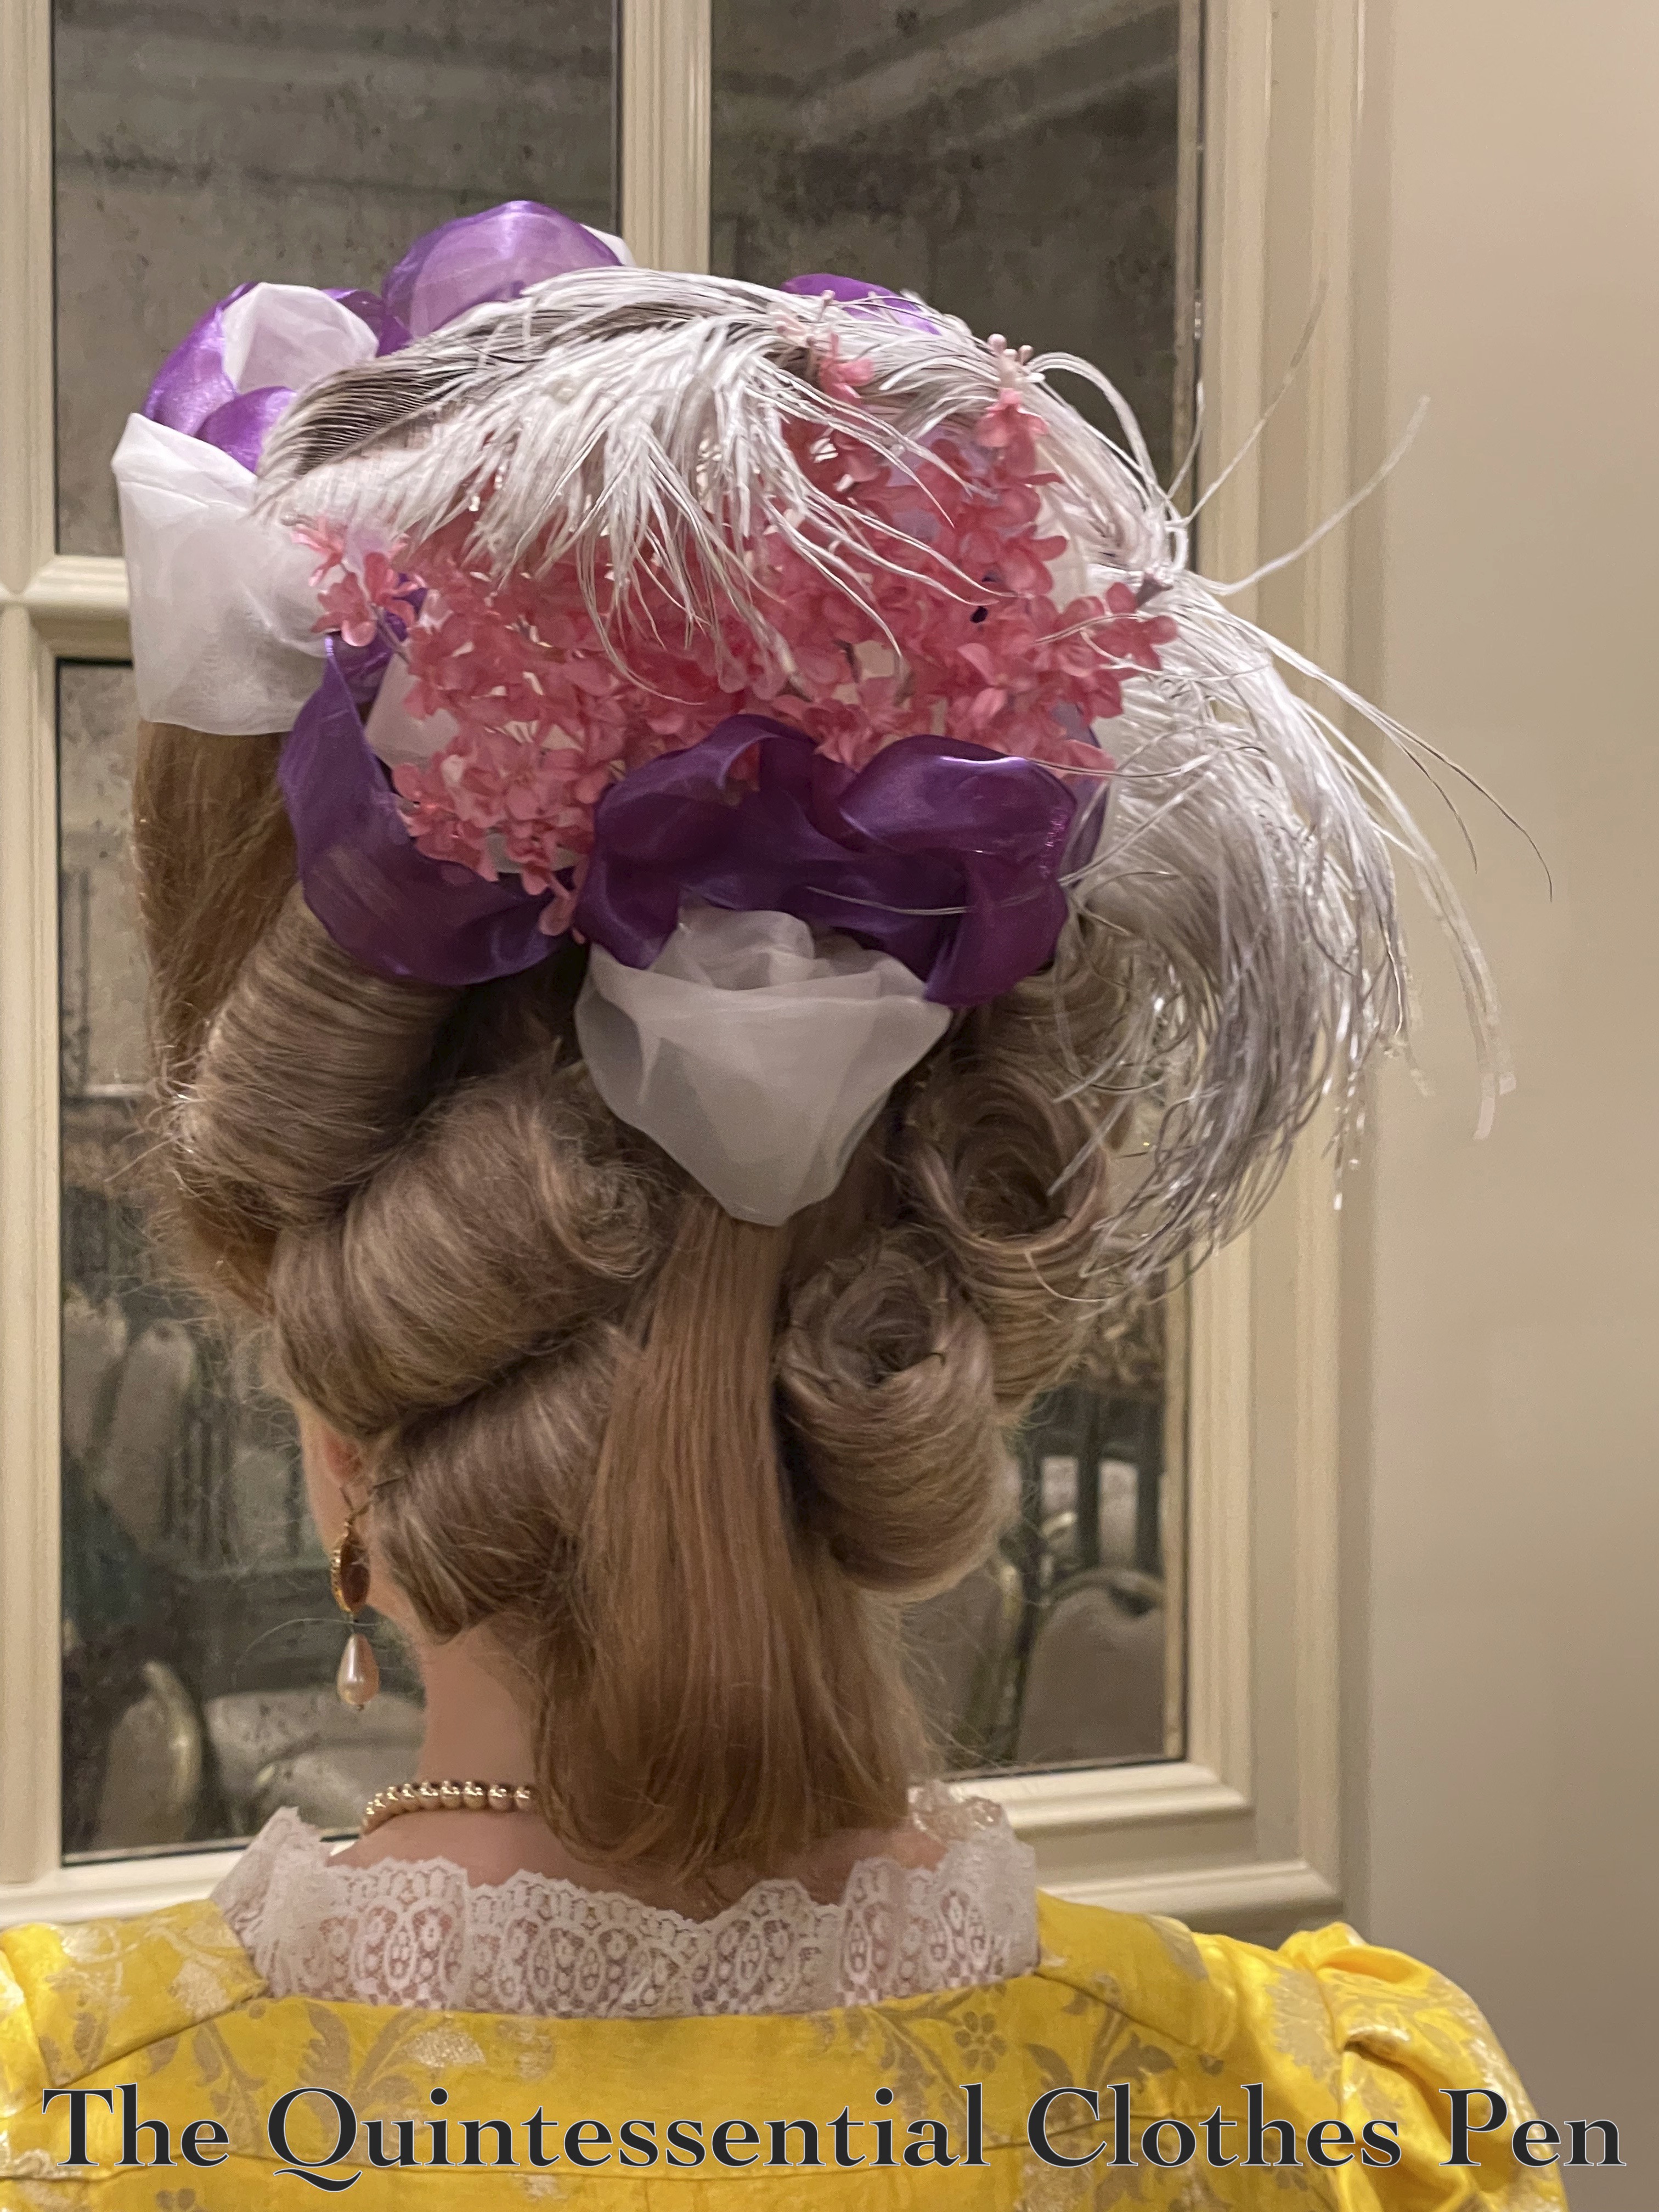
As I mentioned earlier, I had to reconstruct my hair style for this wearing. In 2016, I cobbled together a large form from many hair supports on hand (you can read about that in this past post). After that event, I deconstructed the large form in order to be able to use the individual parts again. So for this, re-forming the large form was necessary.
Below, you can see the final result of the style. This is the same style I created in 2016. (You can read more about it in this past post.)
My friend wearing the Yellow Sacque also had a fabulously large hairstyle! Her style uses elements from the book The American Duchess Guide To 18th Century Beauty, including the ‘Ski Slope Hair Cushion’ and ‘1770s Pouf’ on pages 119 and 127. She also created her own buckles (those pre-made rolls of hair on the sides). And I had fun helping her place them the day of. It was fun to make two styles that are similar, but different in shape and details!
Recollections
I had a fantastic time traveling with friends to this event. We all enjoyed the content of the weekend as well as the opportunity to make or refresh our clothing and accessories.
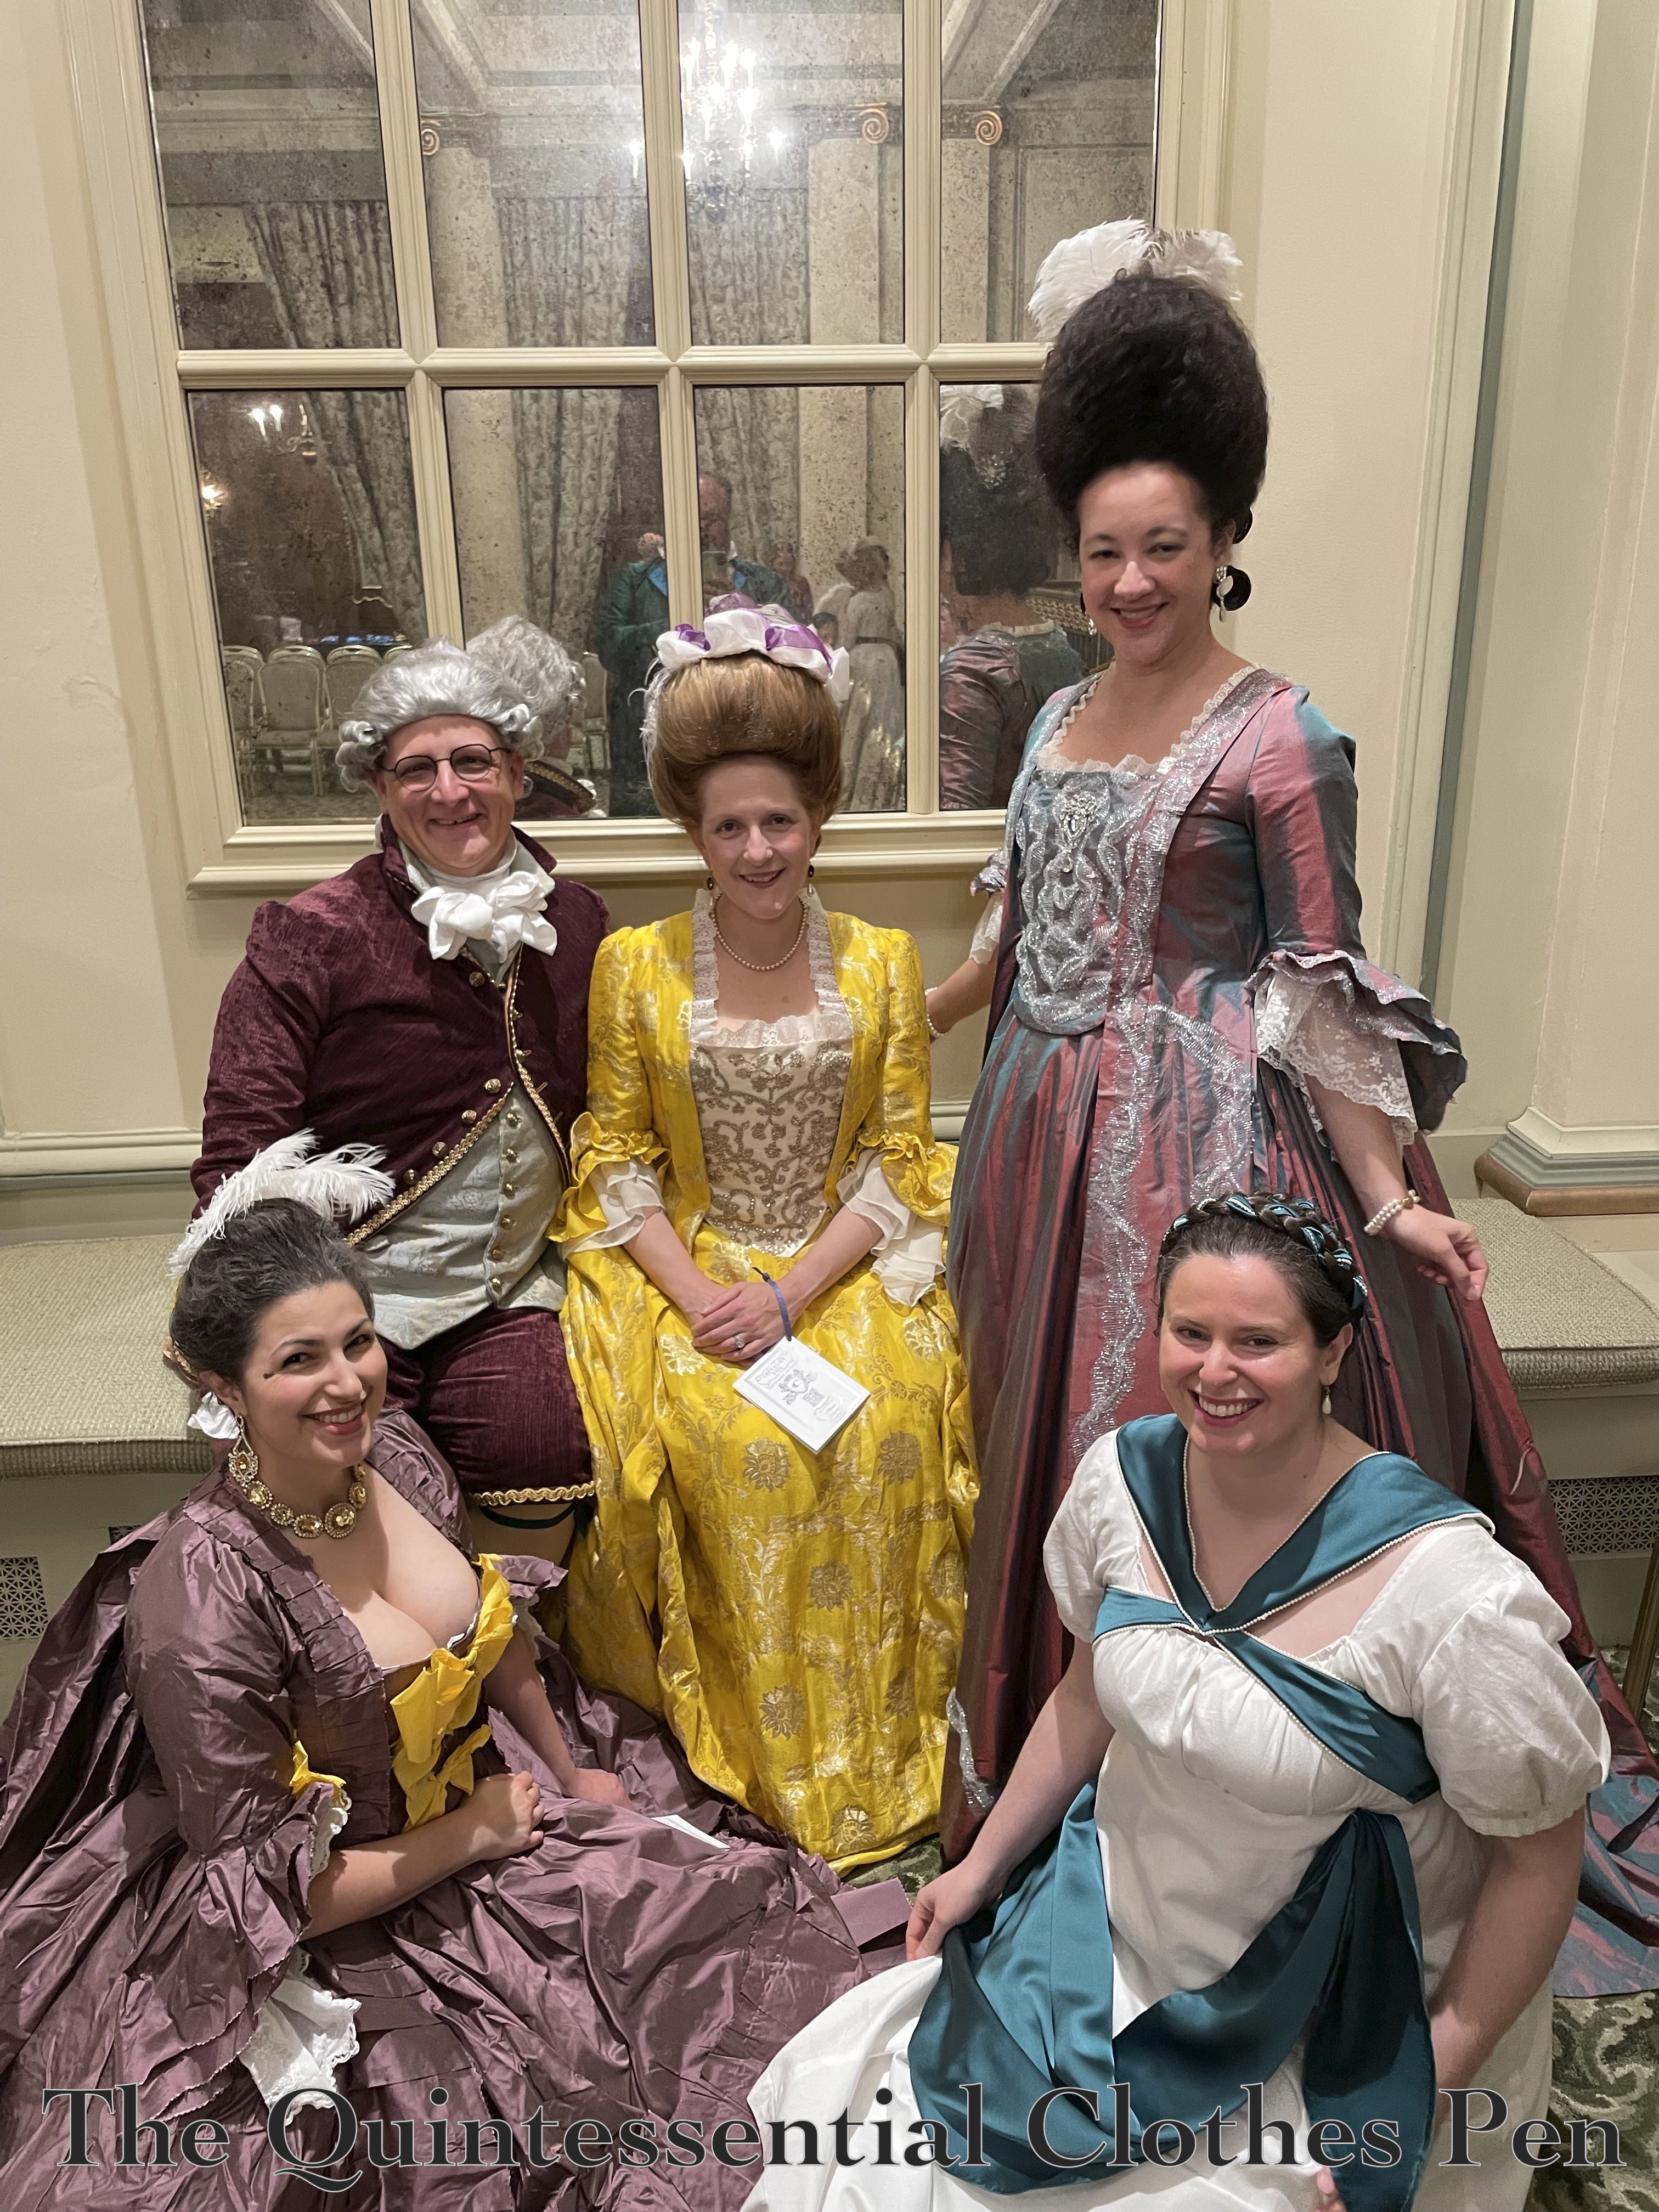
In fact, we had such a lovely time we felt the need to take a break in the ladies dressing room! How could we not, with such an elegant day bed and foot stool to lounge on?
It was also a special experience to have the opportunity to meet other bloggers and costumers I don’t often (or ever) get to see in person! We might exchange comments and be inspired by each other’s creations, but to meet people and have a conversation is extra wonderful. I’m so grateful that Cindy, of Cation Designs (who is in the photo with me, below), took the time to chat with me and express her appreciation for how this blog has made costuming feel approachable for her!
After a lovely evening, it was time to head out. It wasn’t particularly warm outside, so an extra layer was much appreciated!
But a pause was necessary… I love my silly moose poses! Thanks for enjoying this outing with me!
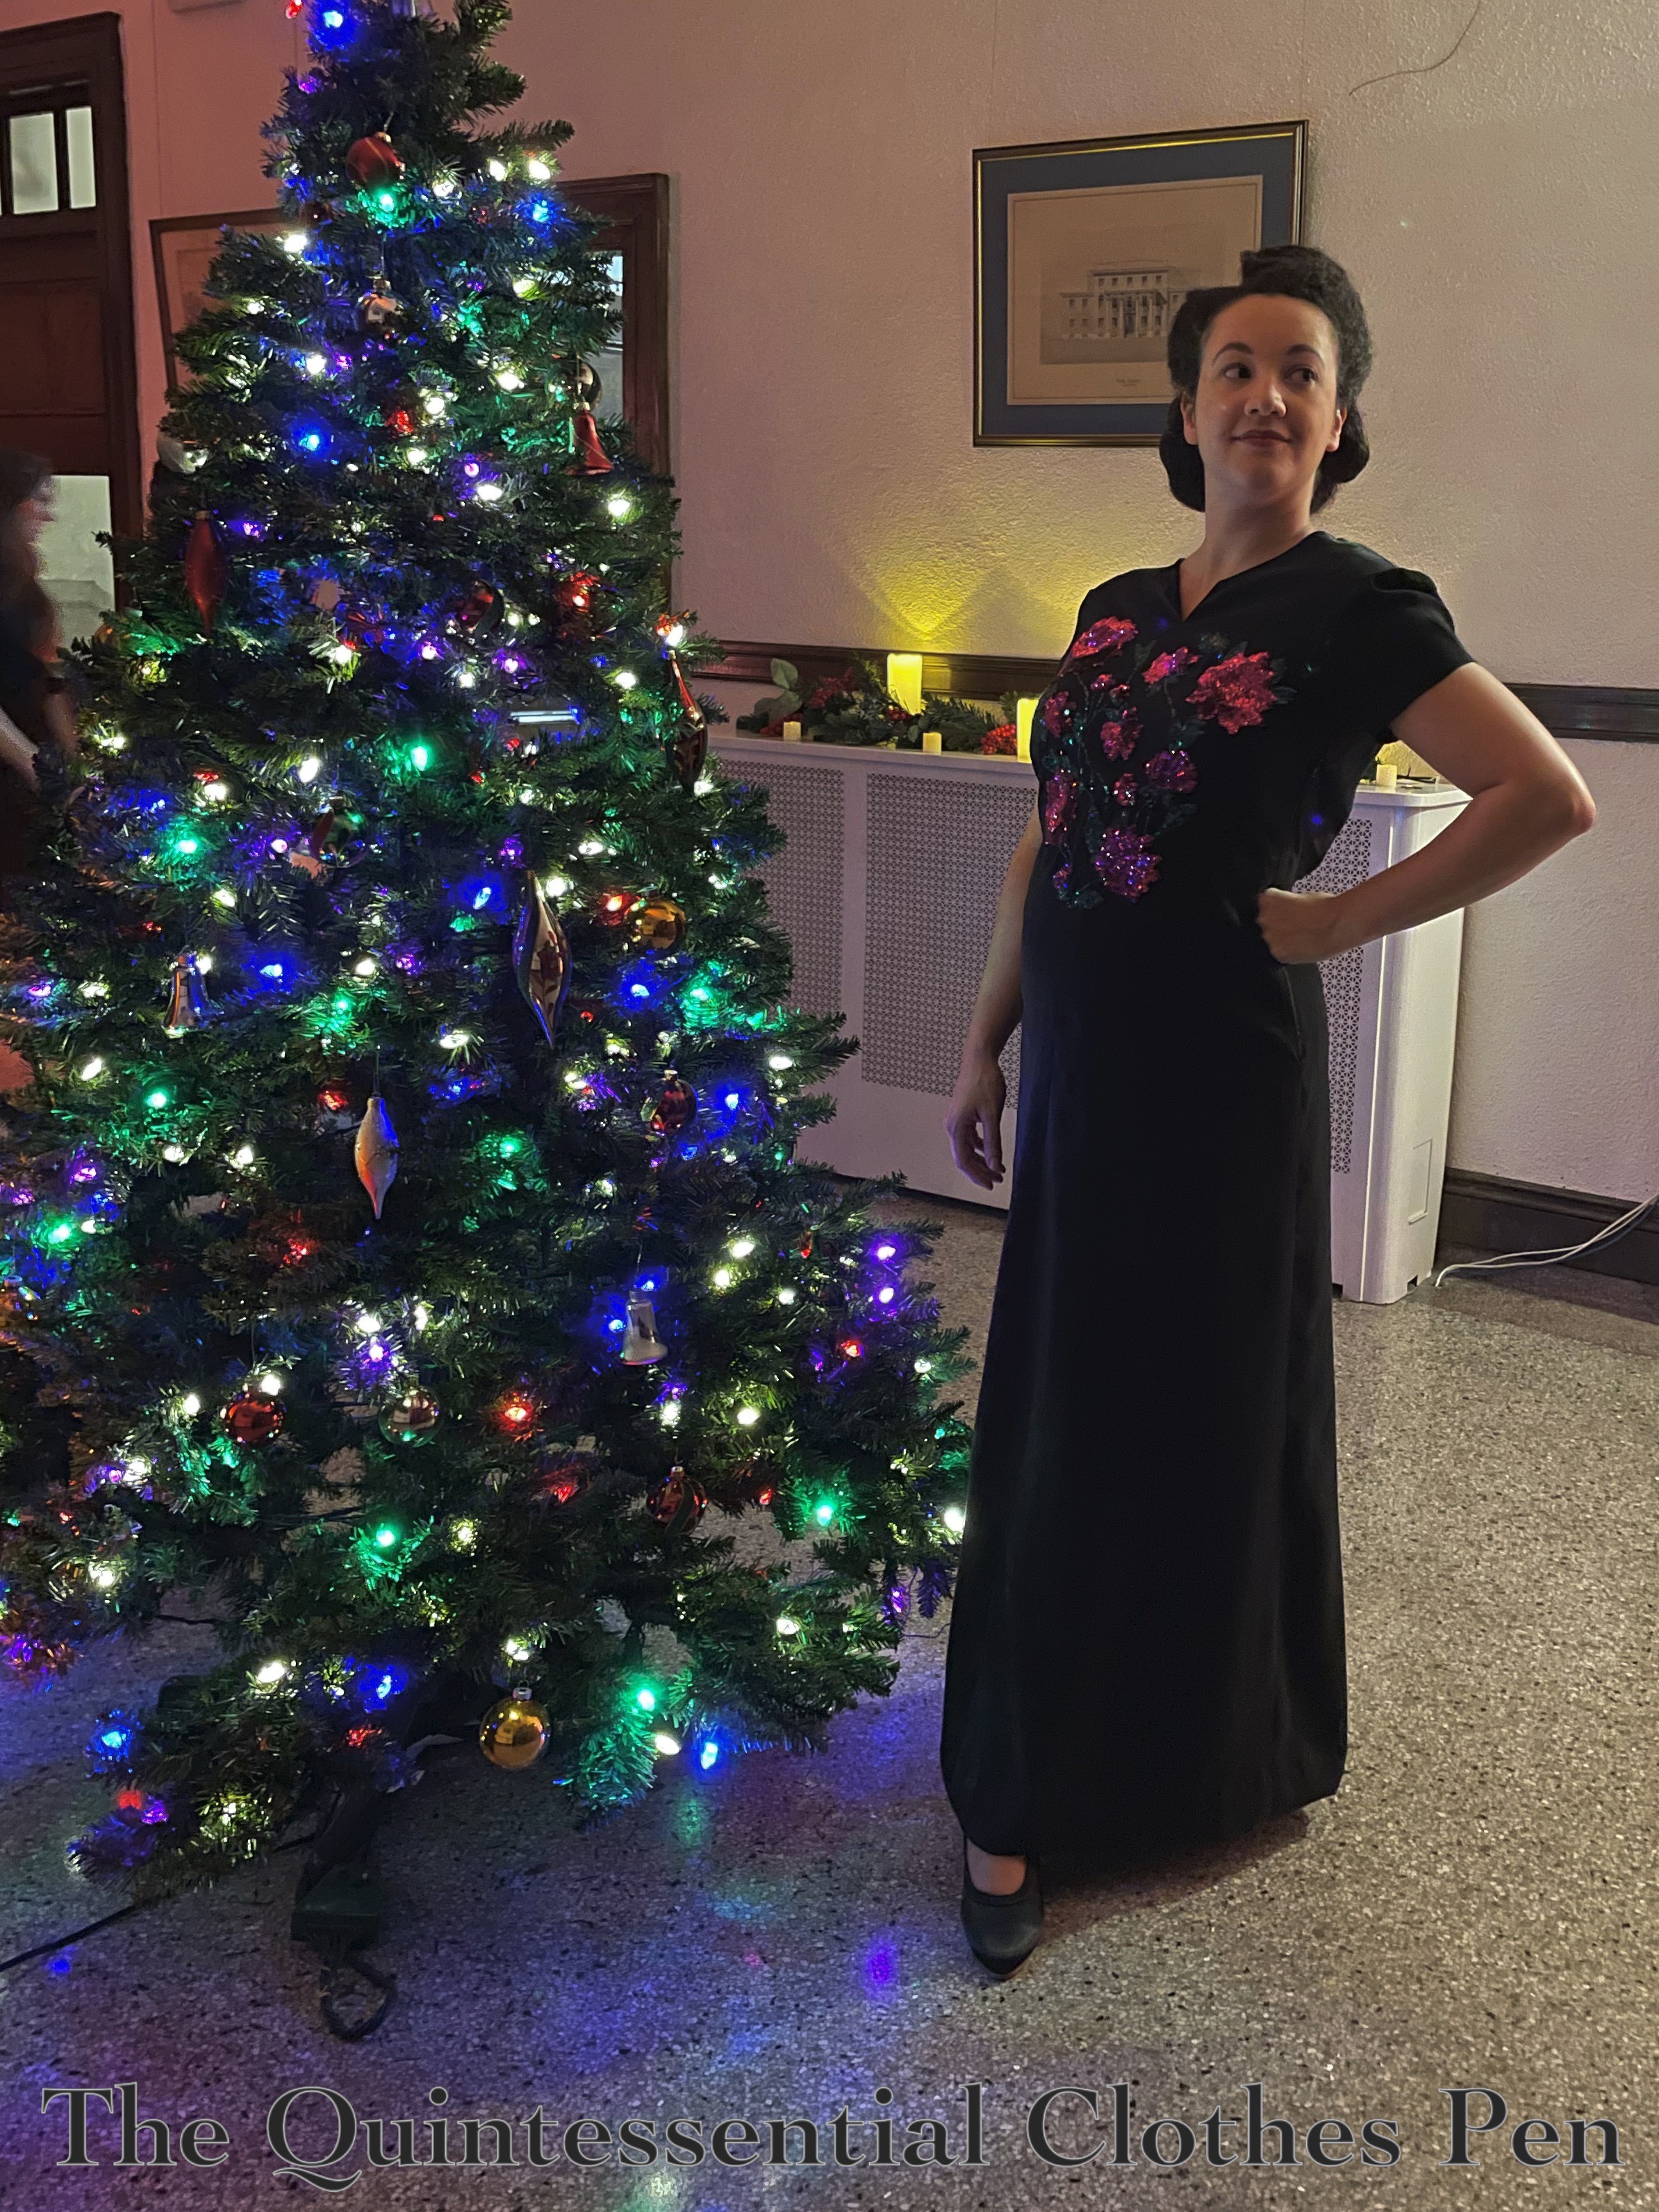
I’m very pleased with my finished 1940 Schiaparelli Inspired Dress! The relatively simple style is set off by the pink and green sequined appliqué on the front of the dress.
This post is going to be all about wearing the finished dress. There is a separate detailed post telling all about how I made it that you can read here.
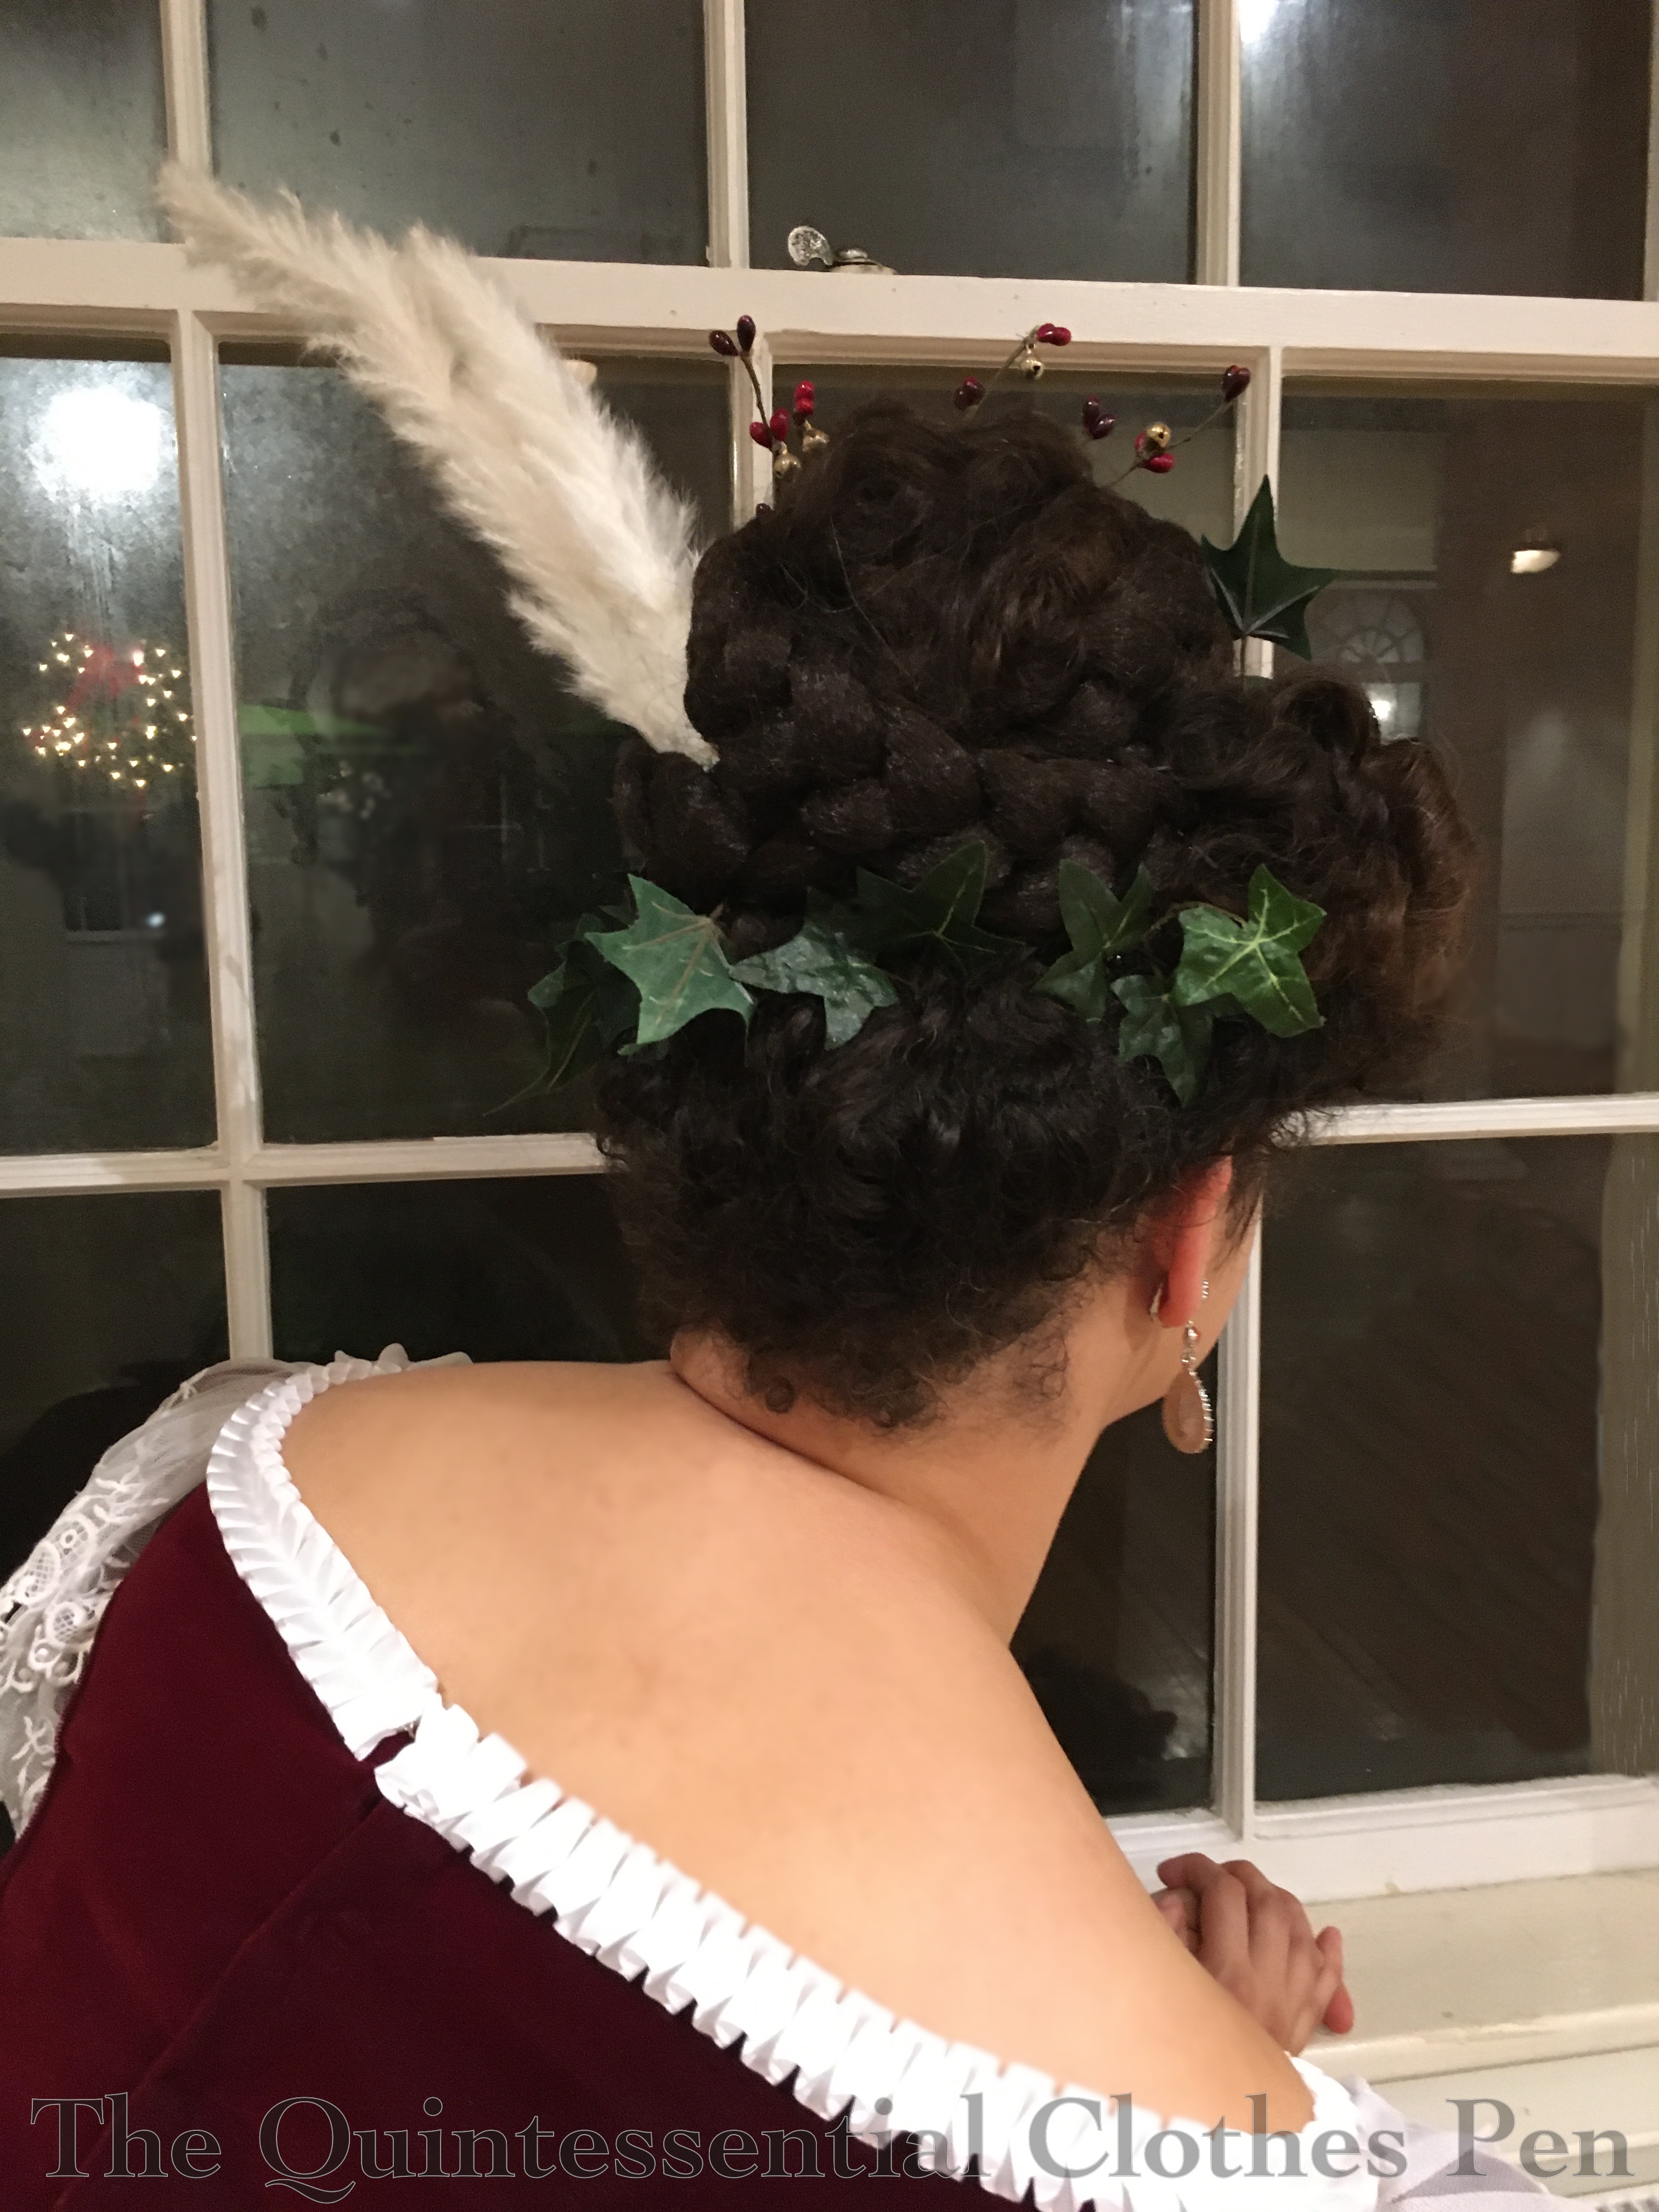
This dress is dramatic, yet simple, and completely different from anything else I have. And, it lends itself to elaborate and large hair which always amuses me.
I chose to do victory rolls, which I’ve posted about doing with my curly hair type in the past. (Not all rolls are technically victory rolls, but if they make a V there is a good argument for calling them by this name. In this case, I’m arguing that the dip between my two rolls makes a V and that’s why I’m calling them victory rolls. You can read lots more about the history of this hairstyle here, on the Bobby Pin Blog.)
The particular roll pattern and shape I chose to do was mainly inspired by this. My hair has enough volume to sustain the rolls on its own, but I cheated a bit on the teasing and stuffed the larger roll with small hair rat to help maintain the height and shape.
I’m very pleased with how the rolls turned out. They were dramatic, just like the dress and they made me super tall looking in combination with my trusty American Duchess black Seabury shoes and the columnar dress.
The V shaped rolls of hair complemented the V shaped sequins on the front of the dress AND the V shape of the back bodice with its V shaped pleats. There are all sorts of V’s in this outfit!
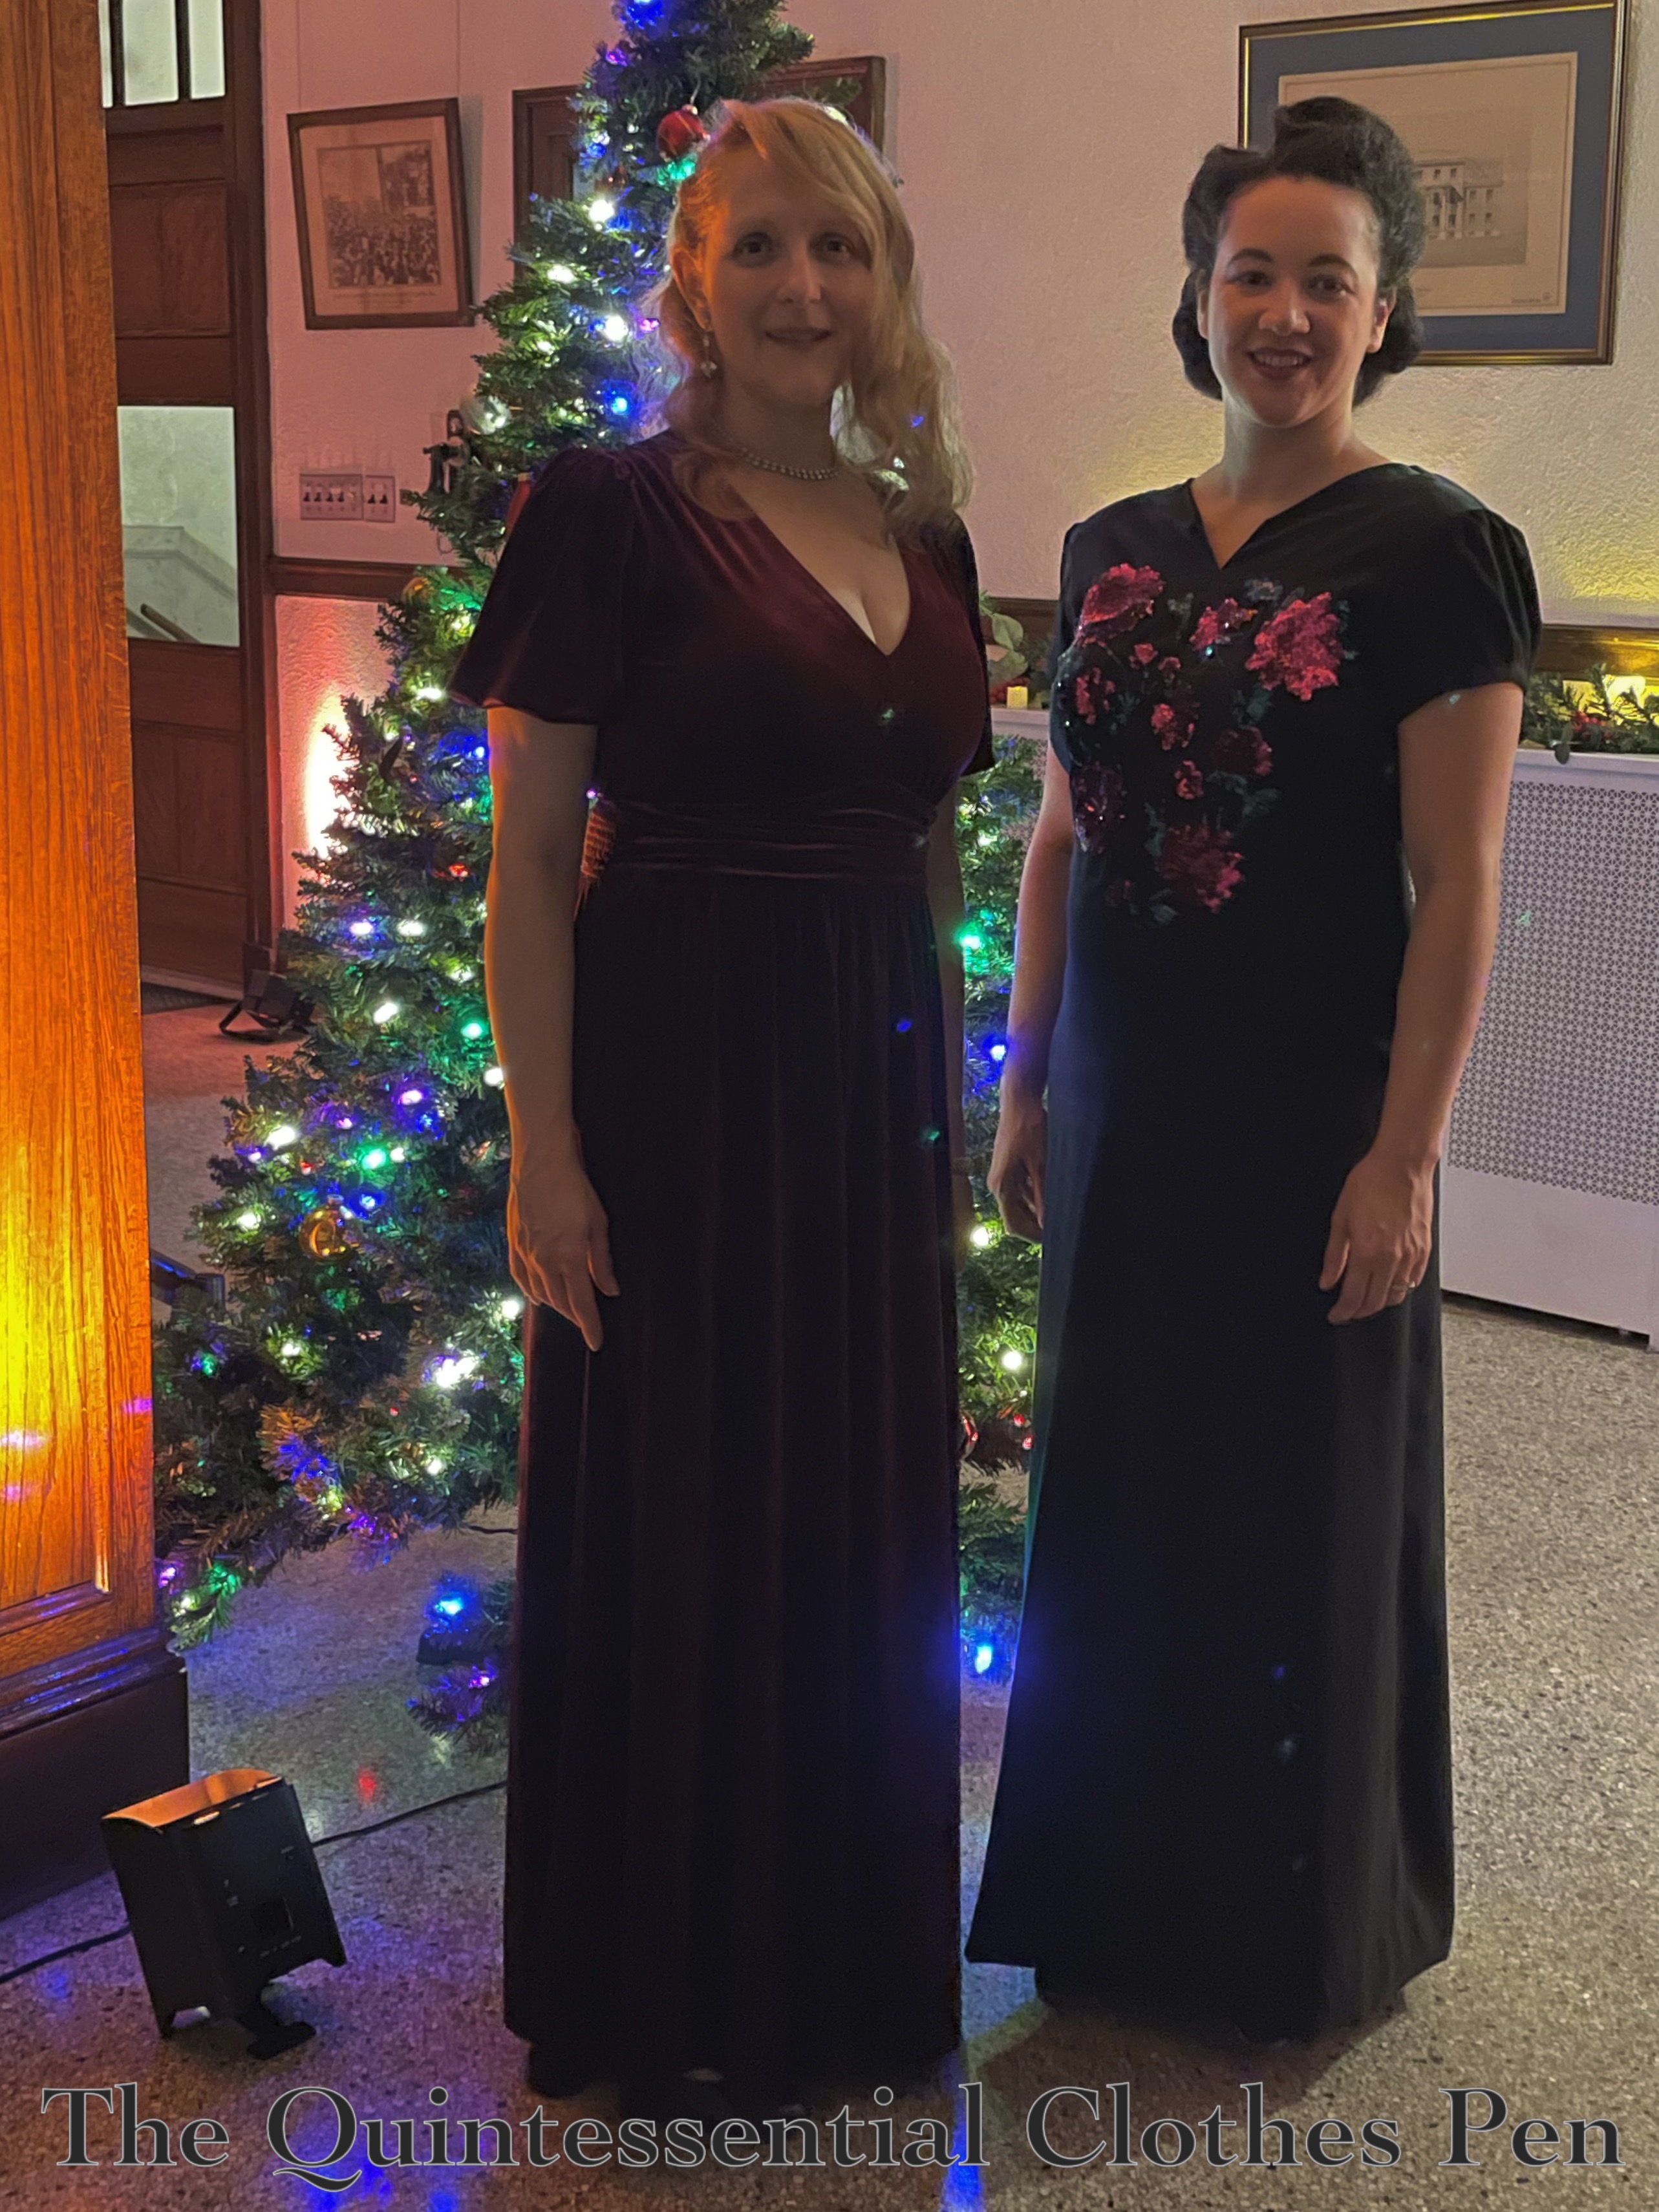
And, not only did I get to wear a fabulous, formal dress with large and fun hair, I was able to have a great time at Club Drosselmeyer with friends while wearing both!
(If you’re in the New England area and you haven’t heard of Club Drosselmeyer before, I suggest you check it out! I’ve been performing at and/or attending for years. It’s really special and fantastic for all sorts of people and interests. Personally, I really enjoy the live Christmas swing music, puzzles, and fabulous clothes, but there are also interactive actors, special performances, an open dance floor, and more!)
Many years ago (well, in 2012), I started a bonnet that was intended to match my 1822 Walking Dress. I was making a whole ensemble, with the dress, a muff and tippet, and also a bonnet and chemisette. It was more than I had time to complete for the deadline at the time. The chemisette was not even started, but the bonnet was patterned, cut out, started, and then abandoned.
In the intervening years, the bonnet pieces have sat in my UFO box, patiently waiting for me to come back to them. This year, as I was making my 1834 yellow dress and thinking about how to accessorize it, I remembered the bonnet and wondered if the shape and color might work for the 1830s. It seemed more useful to use something that already existed, and was already partly finished, as opposed to starting something new, so I decided to go for it!
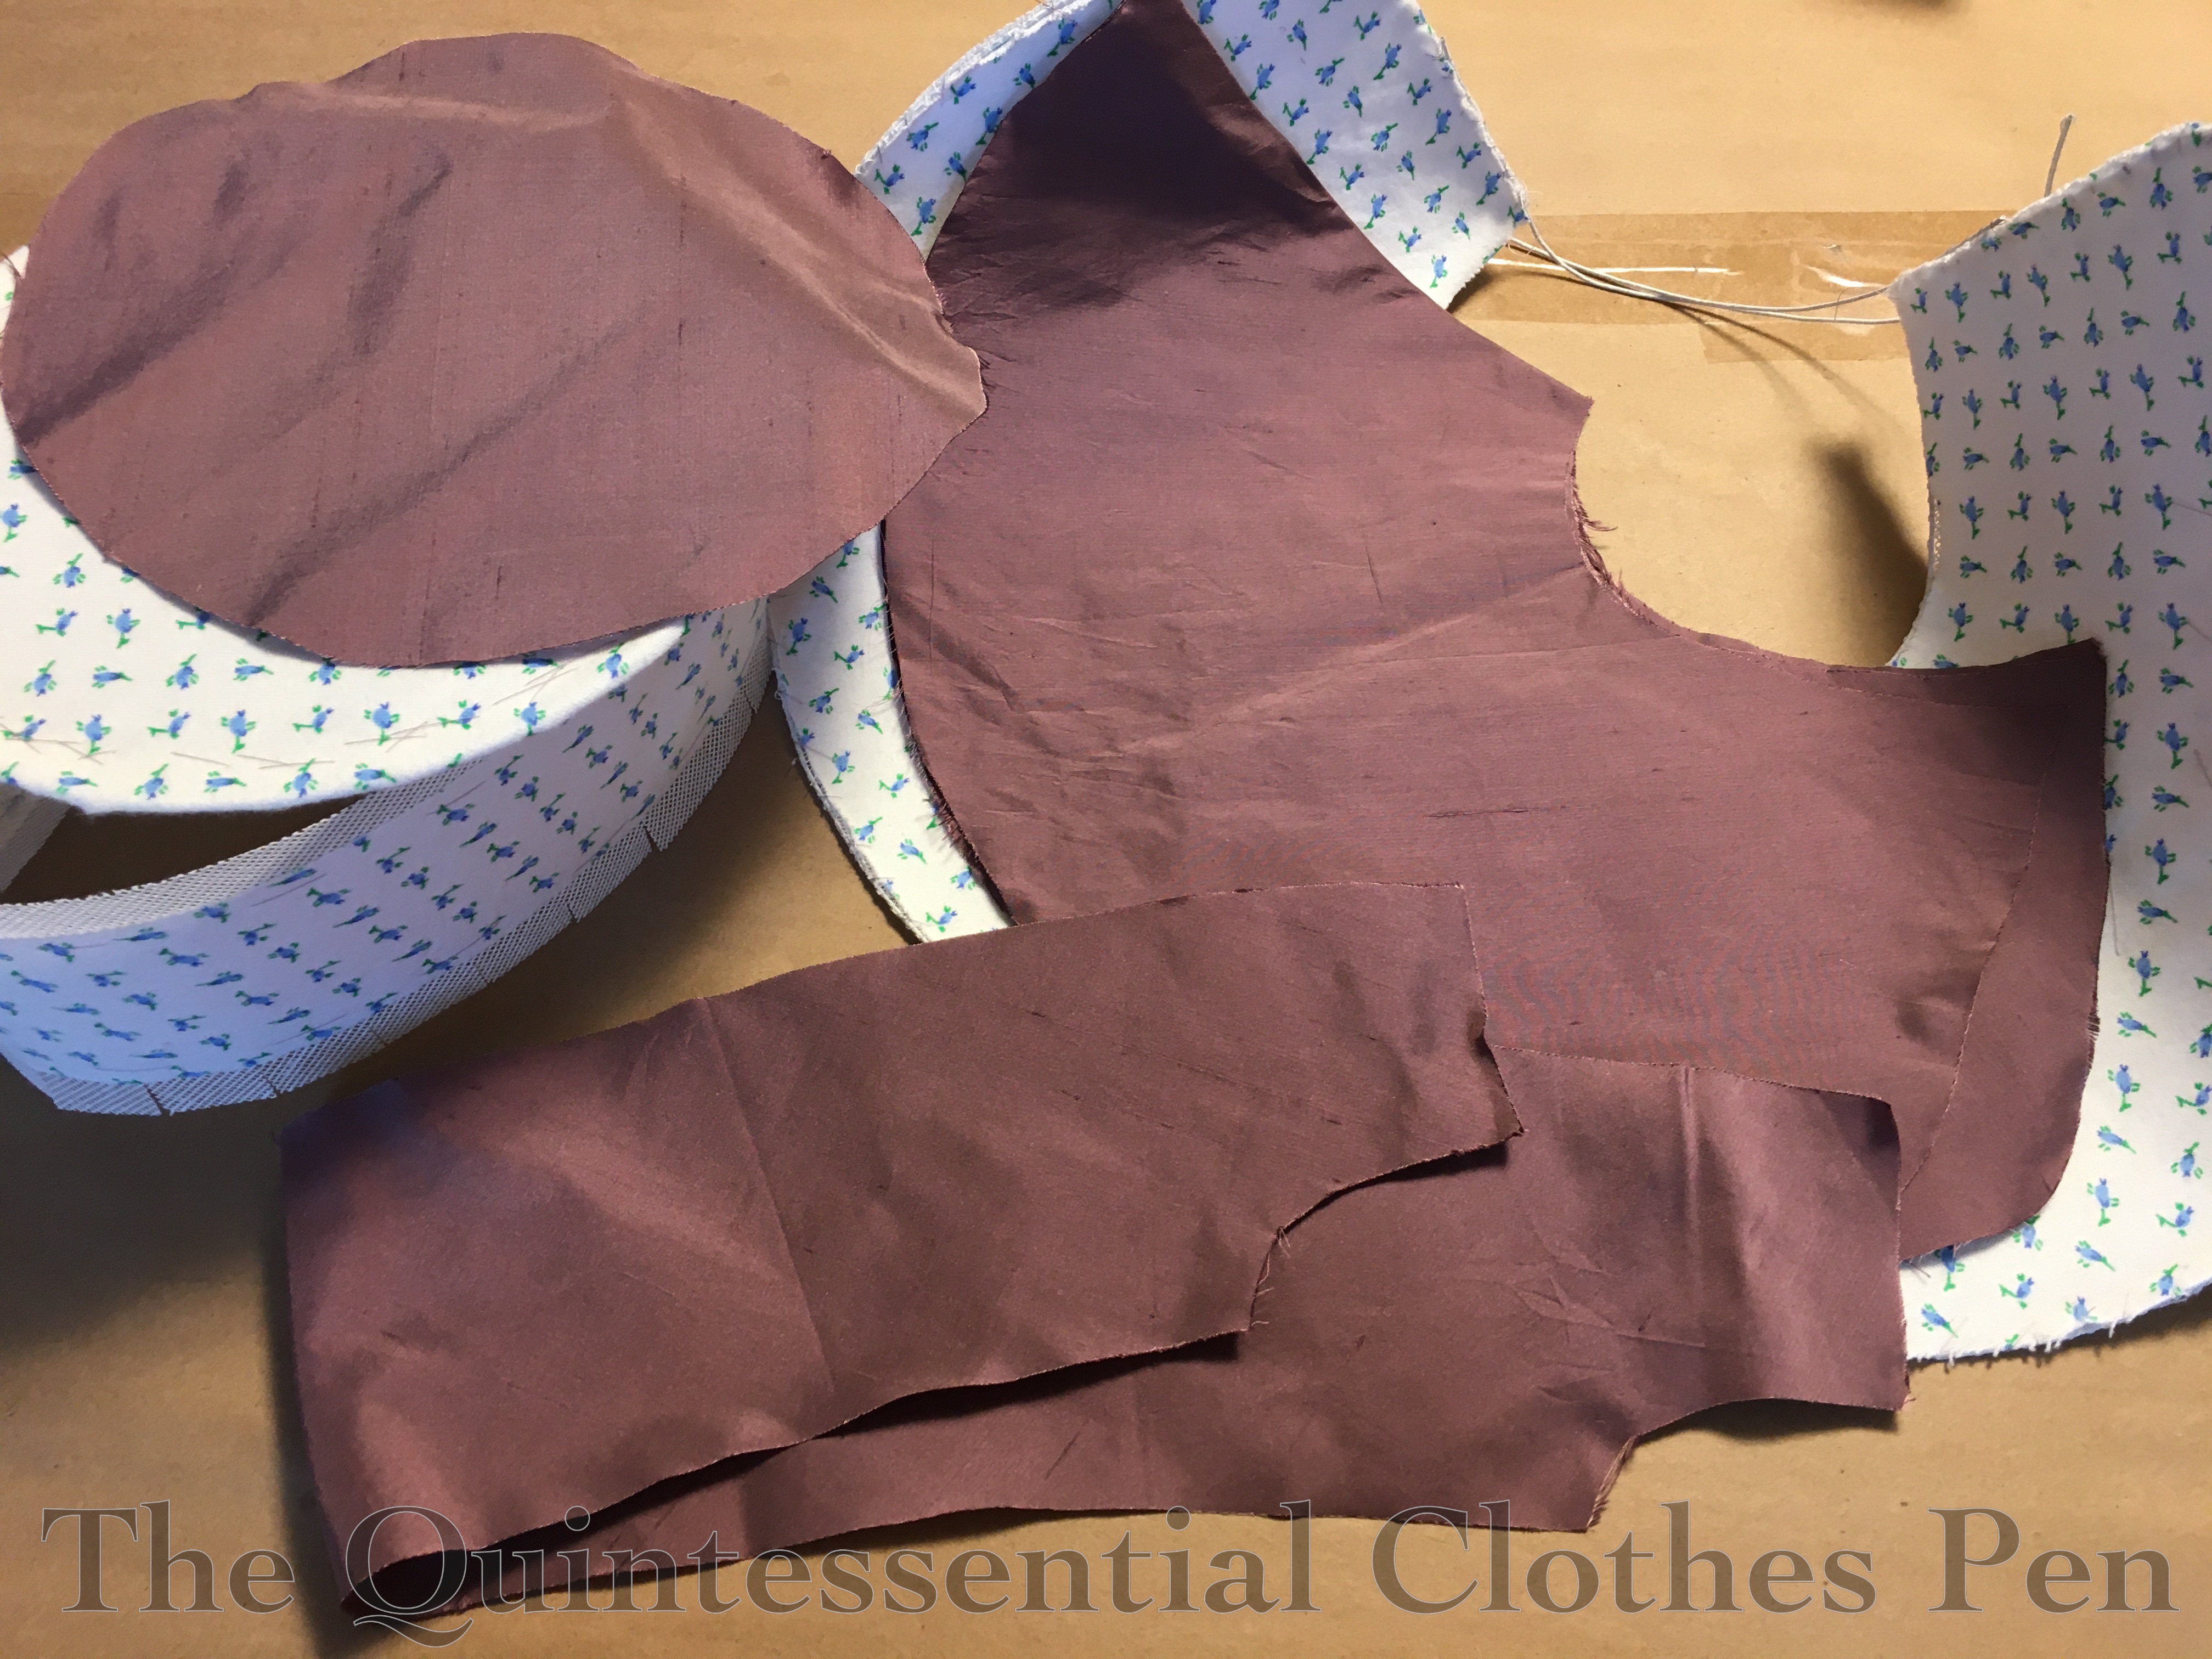
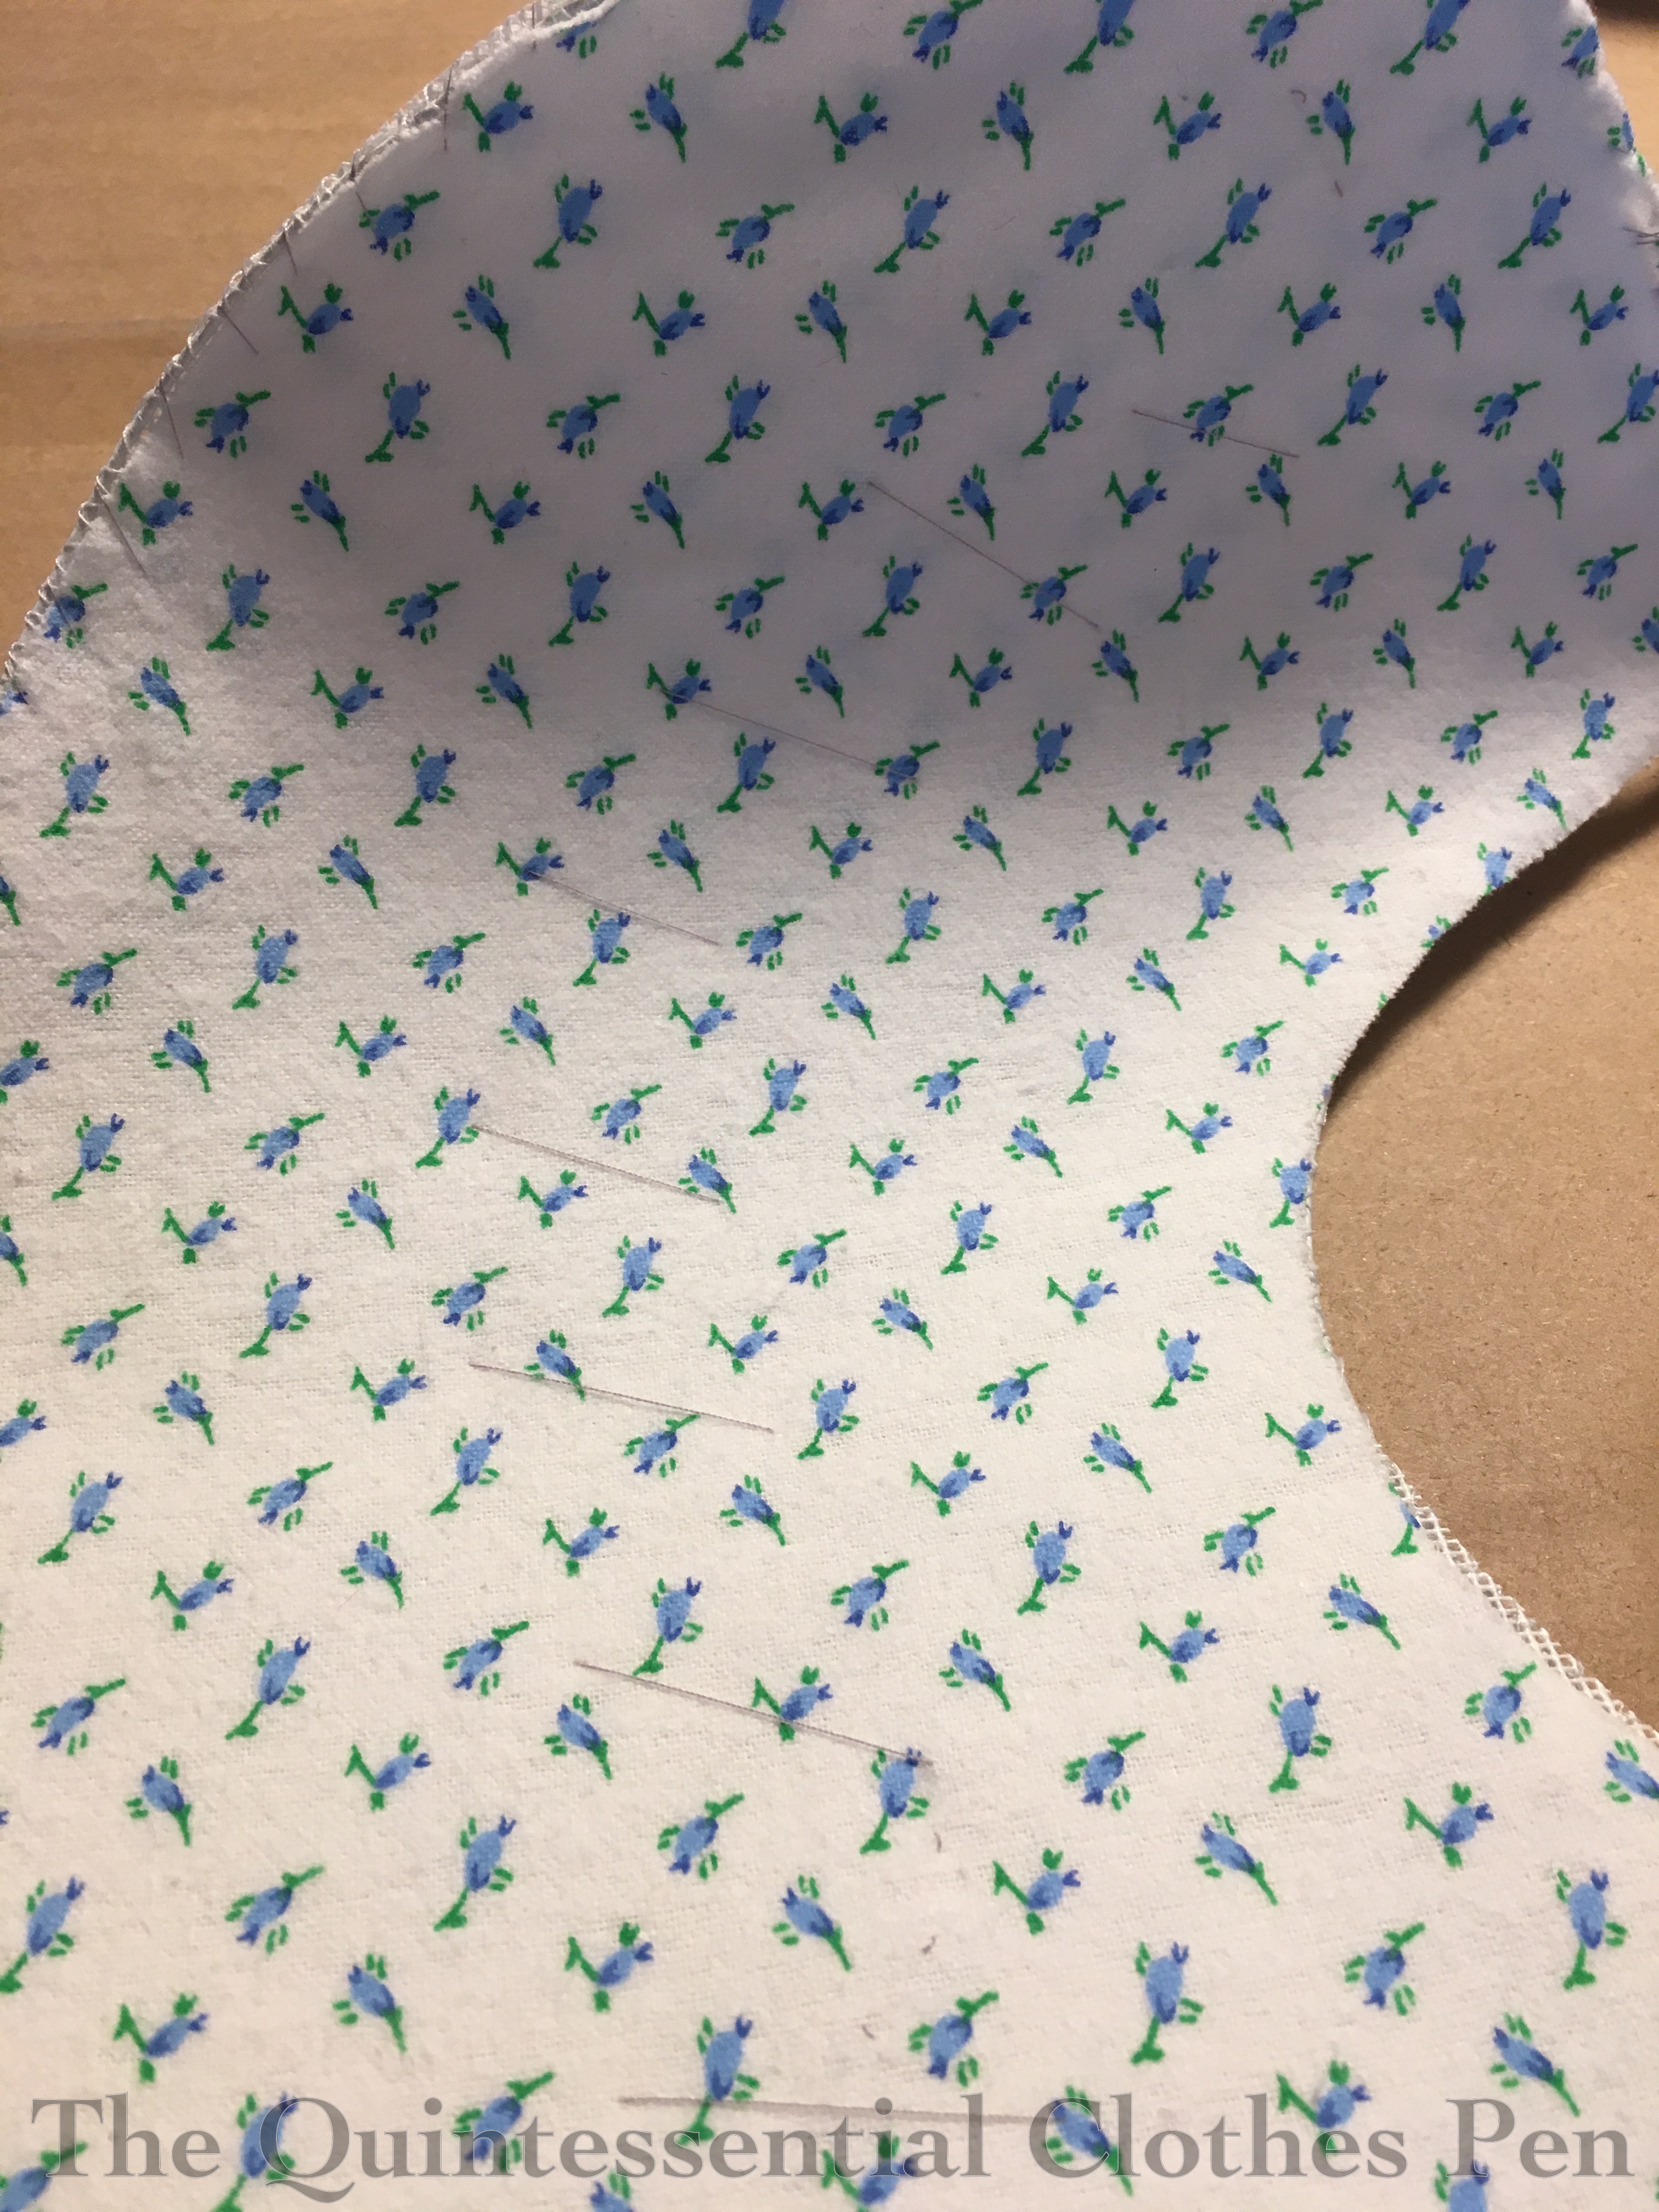
This is the state of the bonnet when I picked this project up again this fall. It’s not bad progress, actually. All the pieces were cut out of buckram, flannel, and slightly slubby silk; the buckram assembly was started; the flannel was basted on; and the edges of the pieces were wired.
All of that turned into this!
In this post, we’ll follow along with my construction process. Future posts will have more finished ensemble photos as well.
Inspiration
First, let’s go back to the inspiration for this bonnet.
The Metropolitan Museum of Art has a bonnet that is dated c. 1820, pictured below. It is silk and appears to be satin edged in velvet. It looks brown to me, but it’s also possible that it is black and that lighting and fading from age cause it to appear brown.
This is what I was aiming for when I started patterning in 2012. However, after finishing my bonnet, I realized that my brim shape is more open and high, and less forward, than the shape of this bonnet. This surprised me! And actually, it worked out in my favor, as the shape I patterned is more 1830s than 1820s.
Despite the shape not being quite like The Met bonnet (maybe someday I’ll alter the pattern and try again for the 1820s shape), I still took much color and material inspiration from it. I liked the tone on tone silk with velvet trim, the edges trimmed in velvet, and liked the lightweight silk ties (plus, I had all of these materials in the stash in perfectly coordinating purples!).
The trim needed to be different for the 1830s, though. I liked this 1830 bonnet, particularly for the inside of the brim trim, and this 1826-1830 bonnet for the fabric loop trim. There are other inspirational fashion plates showing floral trim inside and outside the brim on my Pinterest board for this project, as well. My bonnet is a melding of all of these sources of inspiration.
Construction
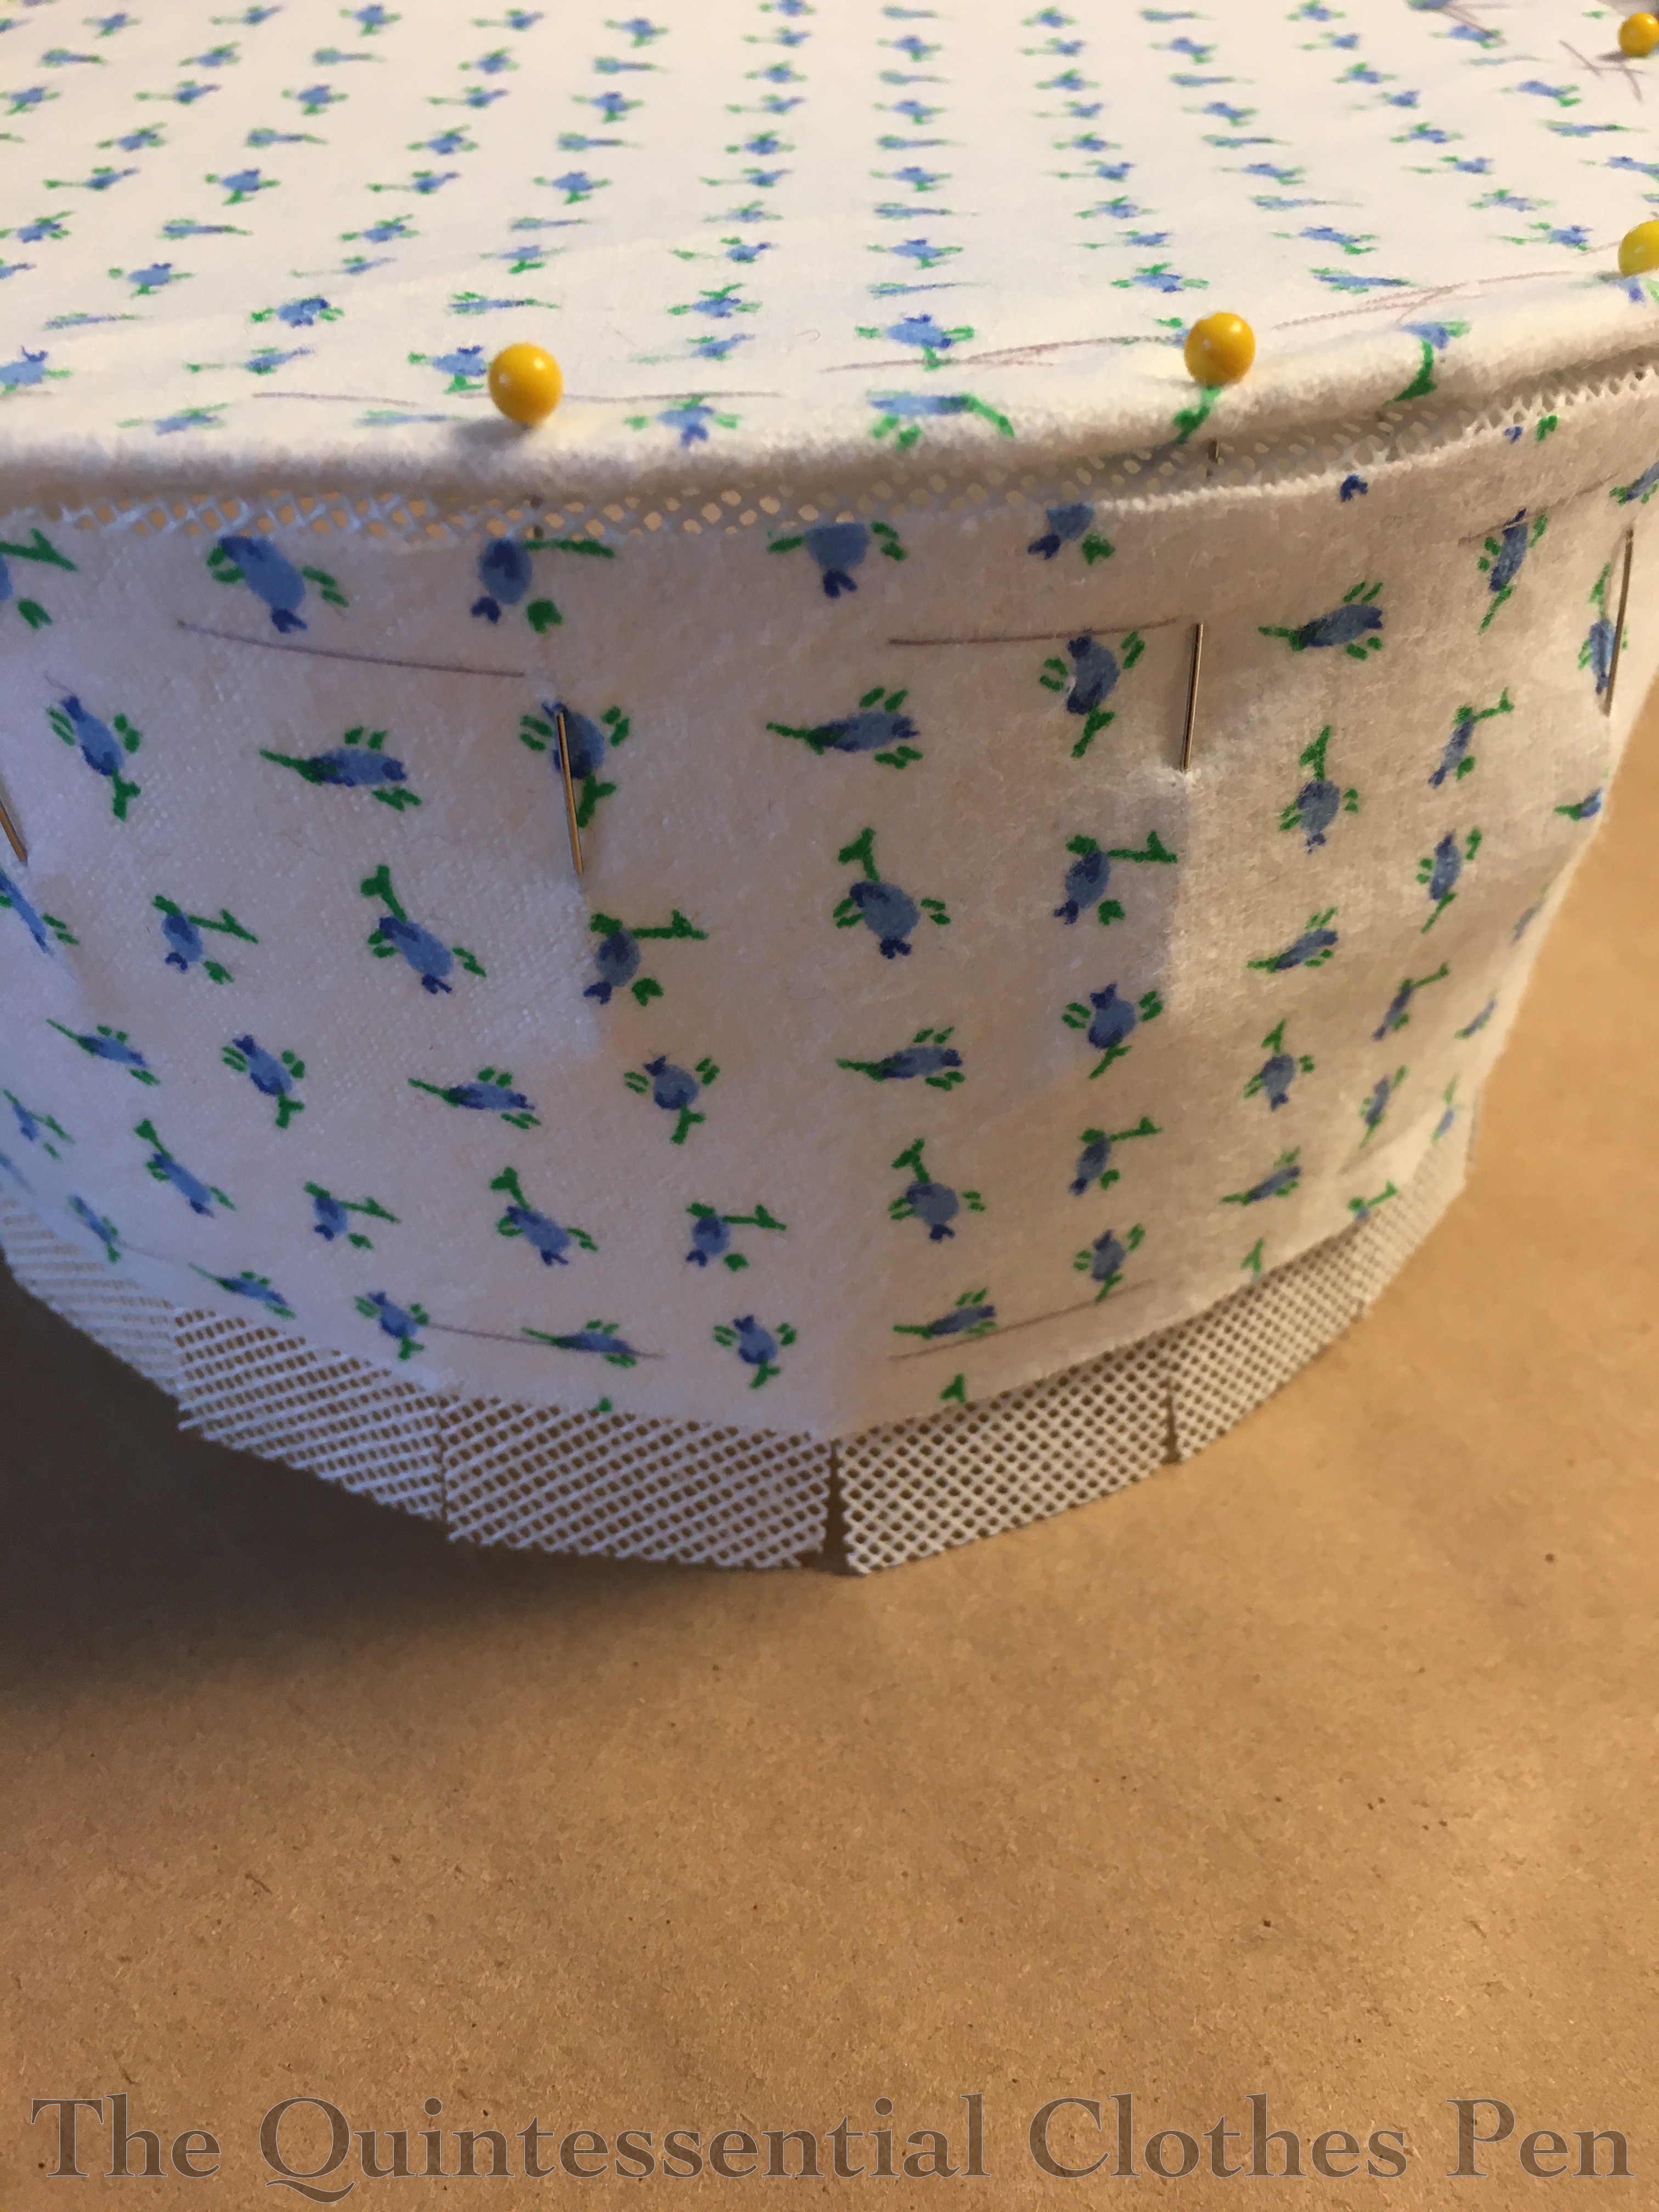
With my half finished pieces in hand, I decided to attach the tip of the bonnet to the side. Here is that step, pinned in place. These pieces were hand sewn together.
I’d decided to baste my flannel in place in order to help it follow the contours of the shapes instead of pulling away. On some bonnets (such as one covered in transparent fabric) these stitches might be seen, but I was confident that my silk would hide these quite well. The alternative would be to use spray adhesive to hold the flannel in place, but I didn’t have that at my fingertips 8 years ago.
In addition to the basting stitches in the middle, I also roughly whip stitched over the outside edge of the brim to hold the flannel in place.
I took this brim piece and basted it to my assembled crown, then stitched those two layers together using a Z stitch. Pinning this was fiddly, as I had to get the buckram seam allowance of the side to slip under the flannel of the brim smoothly.
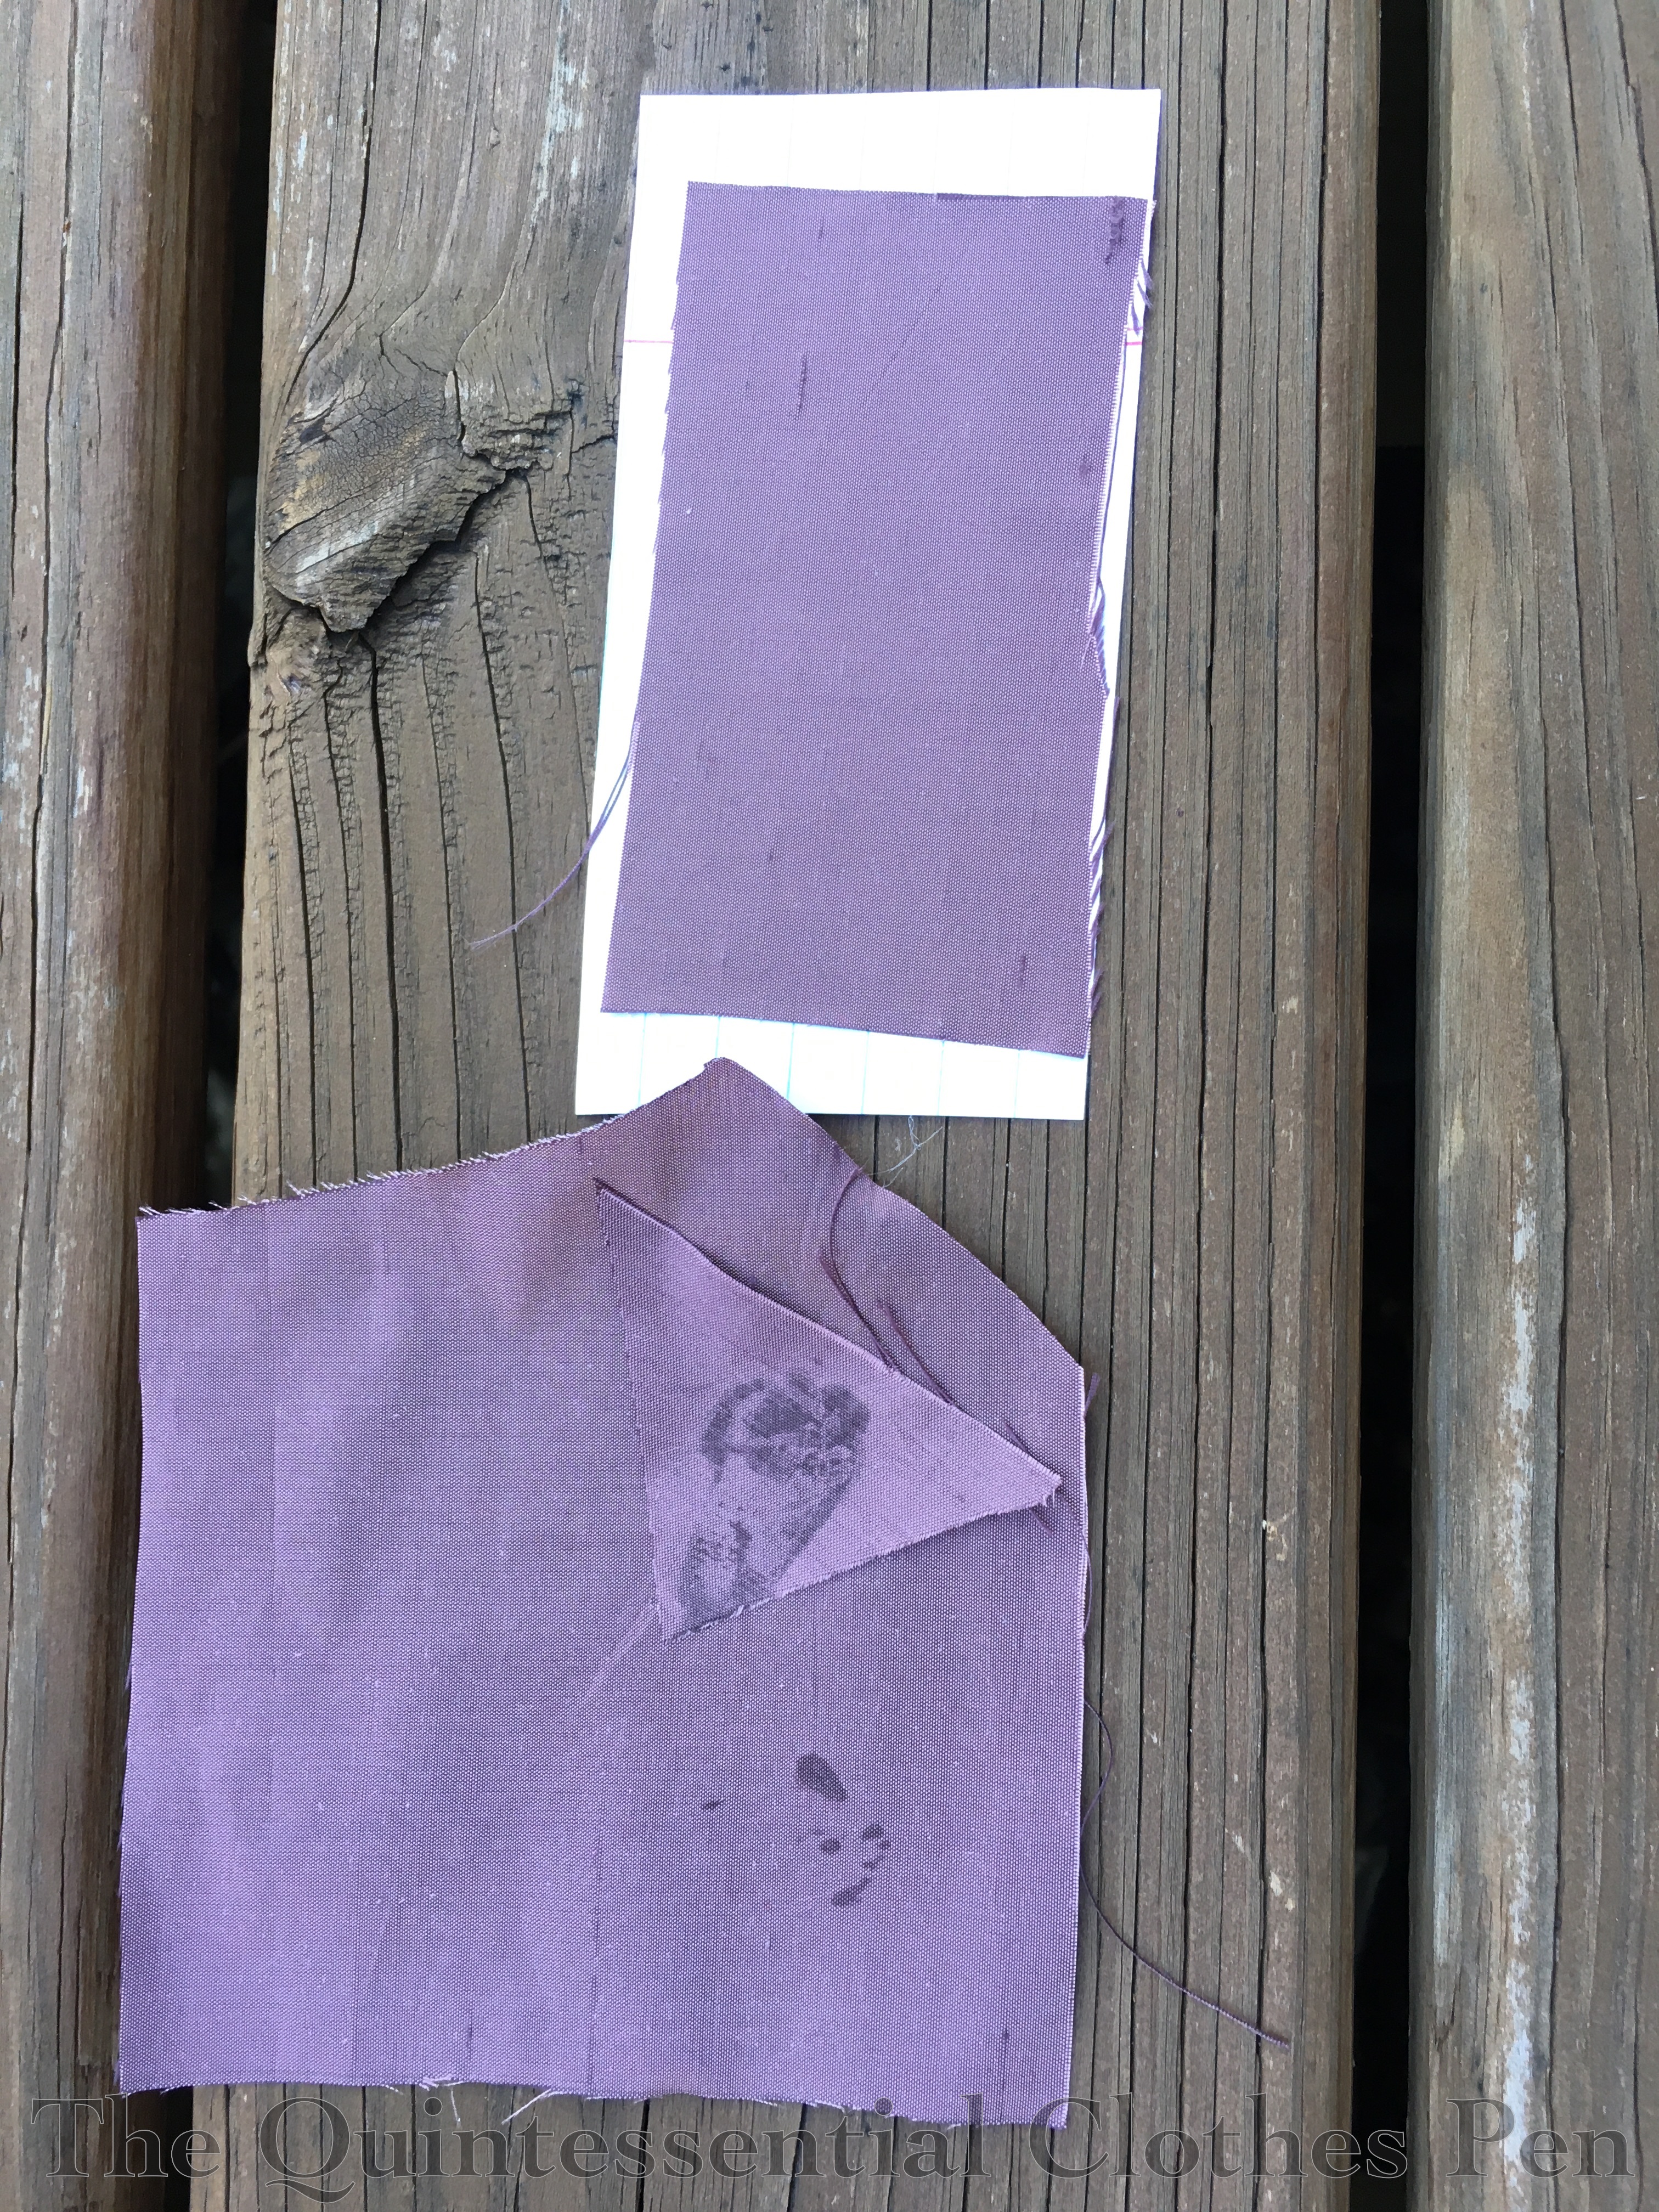
The next thing to do was cover the brim with my silk, but I still had the problem of getting the fabric to follow the contours of the curves without pulling away. When I started on this step I only had rubber cement on hand. I (smartly!) tried a sample to see if it would show through the silk. It definitely did! The rubber cement sample is on the bottom of the photo below. Not what I wanted! So, I ordered Krylon spray adhesive, which I knew would do the job. When it arrived, I tried another sample. The spray adhesive sample is on the top of the photo below. Success!
I used the spray adhesive for the inner and outer layers of the brim covering. It worked wonderfully, just as I had expected it to. The only exception is that I accidentally left a mark on one of my brim pieces where I’d let too much spray build up and had to recut that piece. So if you try this, make sure to do very light coats with the spray adhesive if your fabric is thin enough for it to show through!
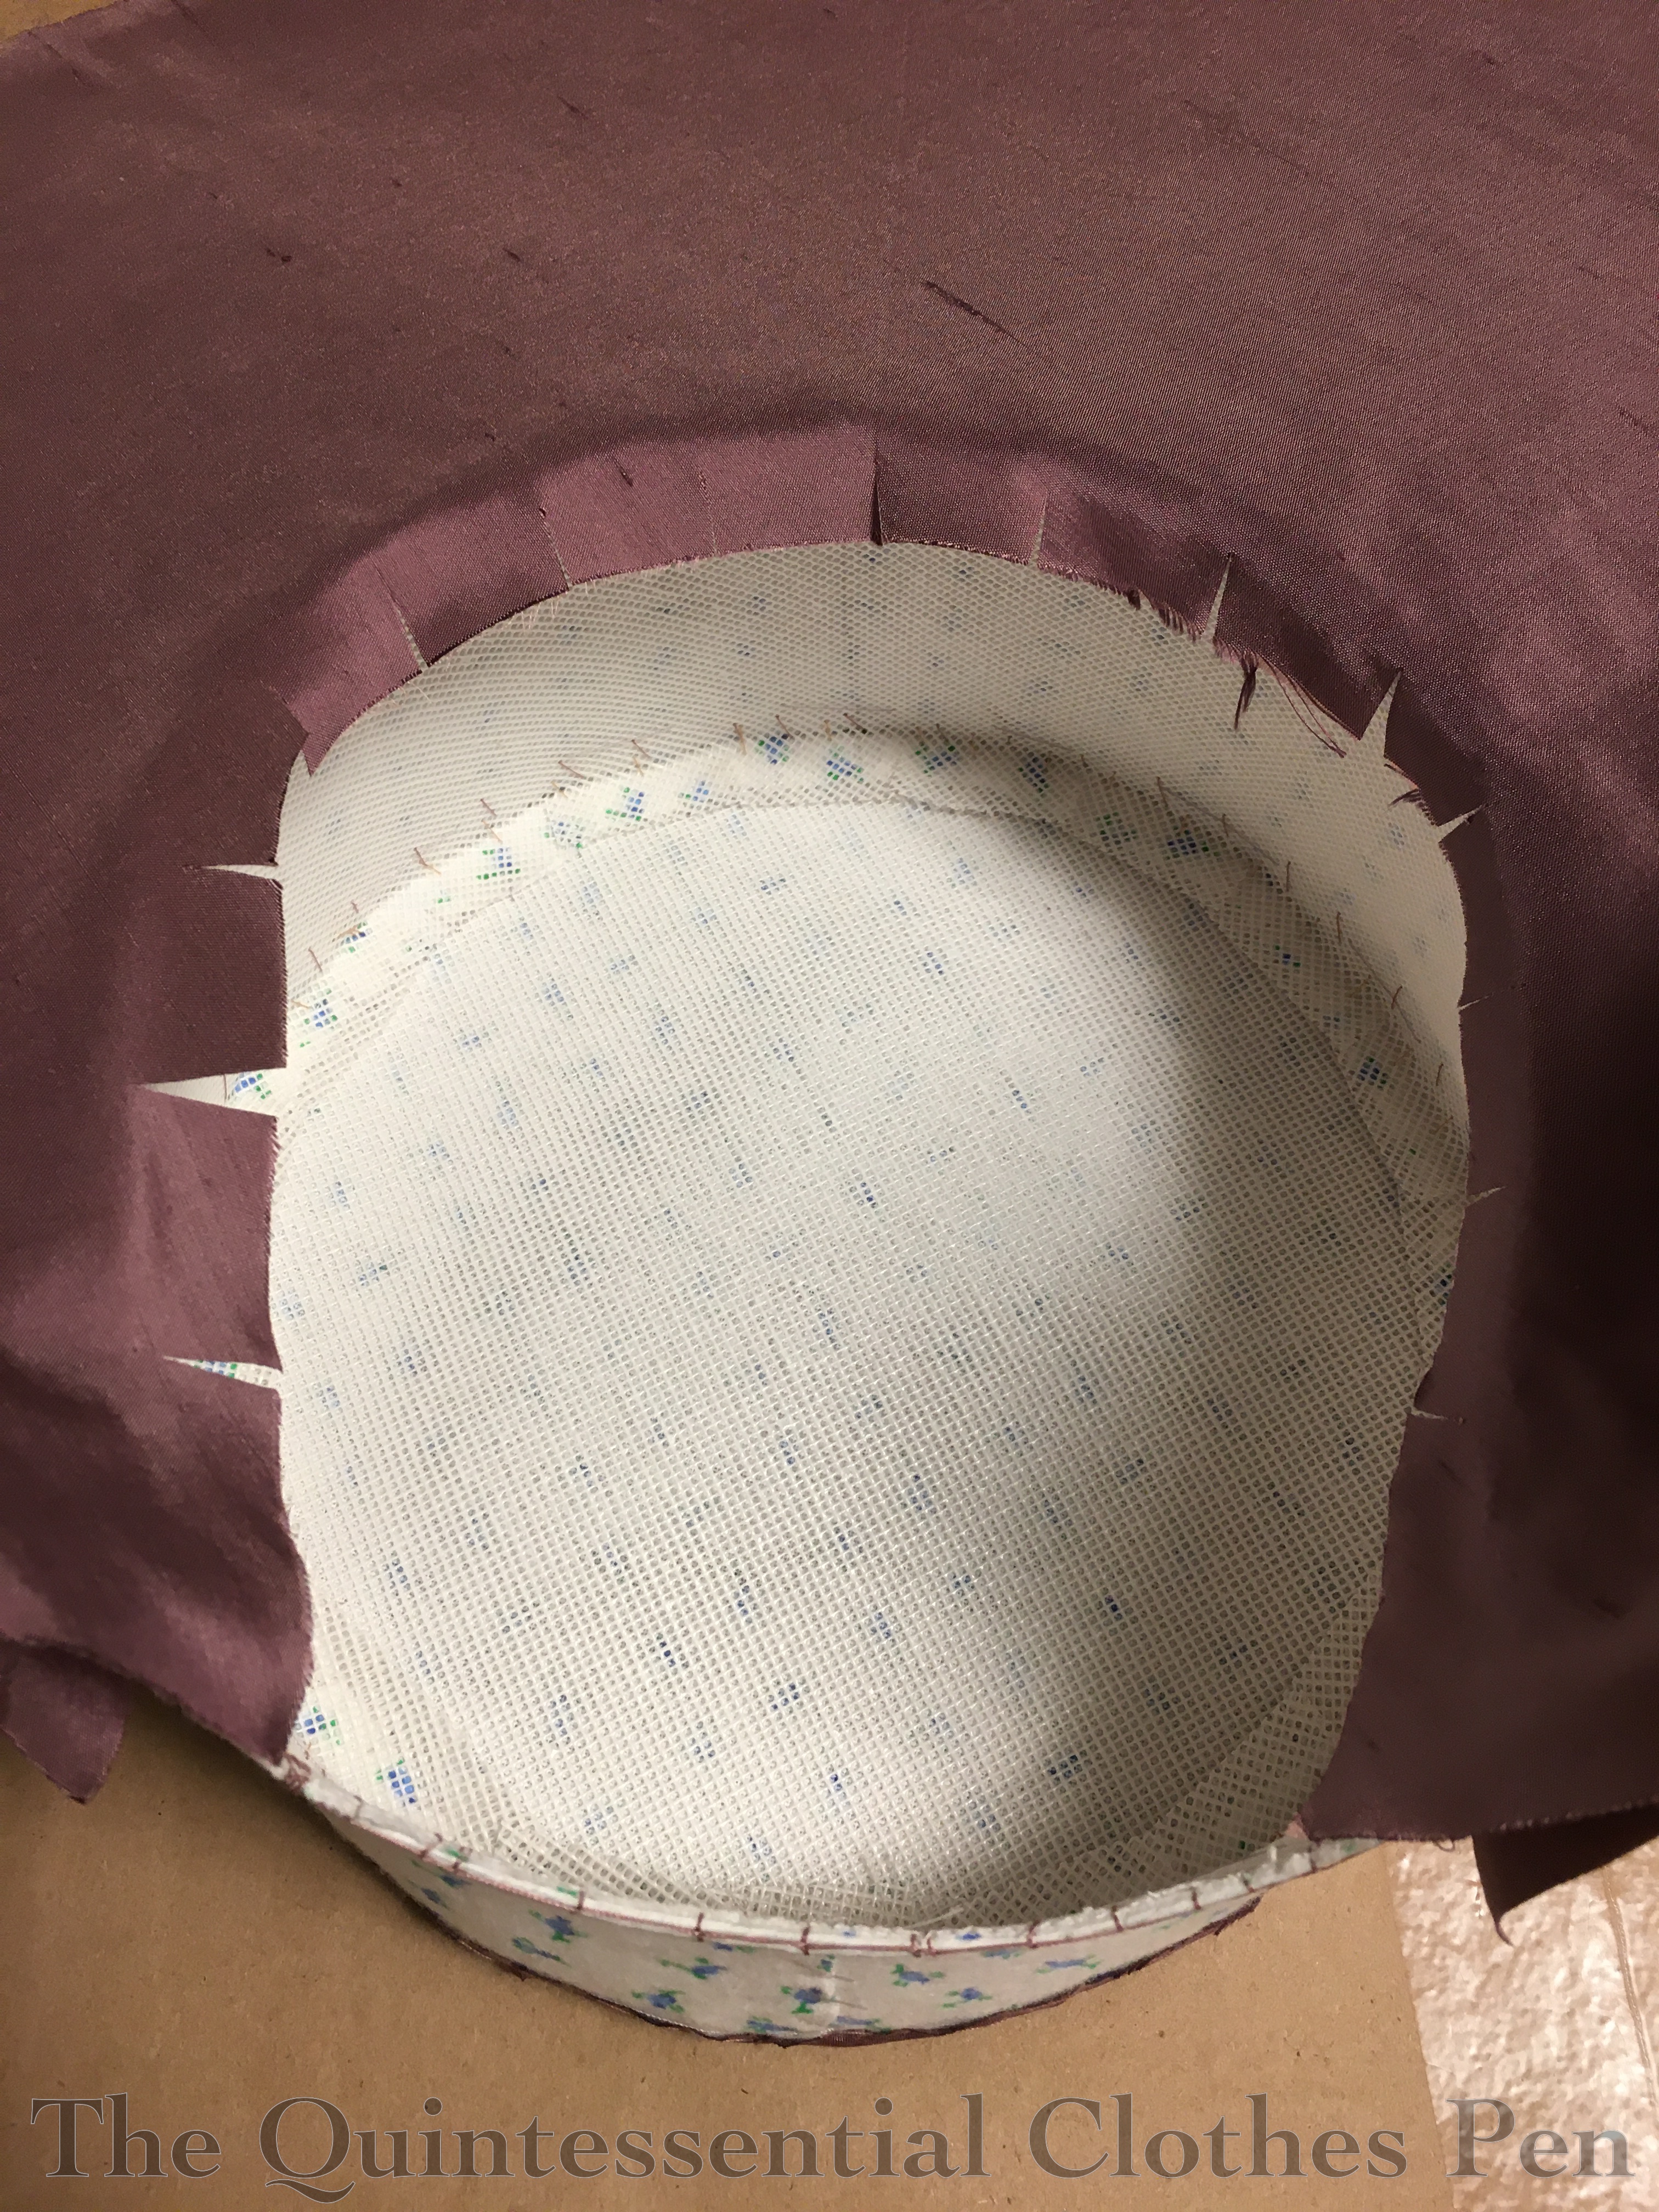
Here is the inside of the brim, with the seam allowance clipped where it meets the crown.
And here is the outside of the brim, with the seam allowance clipped so it can lay along the outside of the side band. You can see the interior of the brim showing on the extreme left of the photo, on the other side of the wired edge of the buckram. You can also see that by this point I’d put the silk covering on the tip of the bonnet. The seam allowances of that piece are clipped and then stitched over onto the side band through all the layers.
This photo shows the Z stitches holding the silk tip piece in place a little better than the last photo. It also shows the side band. For this piece, I pressed under the brim side seam allowance ahead of time, pinned it in place, and then turned the top edge under as I went along, so it would be just the right width. Stitching this piece on covered all of the seam allowances you can see in this photo.
In the next photo ,a few more steps have been completed. The side band was sewn on, the silk edges were trimmed and bound with bias velvet, I cut bavolet pieces (out of my glue stained brim piece!), edged the bavolet with bias velvet, and attached the bavolet. The great thing about the spray adhesive is that it’s not so glue-y that it gums up a needle or makes things hard to sew through, so I had no problem with any of these sewing steps.
As a side note, what is a bavolet? Interestingly, my go-to source for definitions, the Oxford English Dictionary, does not have an entry for this word! I believe that is because it is actually French, not English. I would define bavolet as ‘the curtain piece at the back of the bonnet’. There is more information about this word, including examples of the word in use from the 19th century, in this French Vocabulary Illustrated blog post. If you know of other good places to find a definition or etymology of the word bavolet I would love for you to share!
Back to the photos! All the long purple stitches around the side band are from attaching trim. I find that double thread makes it much easier to attach trimmings such as feathers and flowers, as you can double back through your looped thread to hold things in place and it makes it a little extra sturdy. The nice thing about doing all of that before lining the hat is that it makes for a really elegant interior when all is finished!
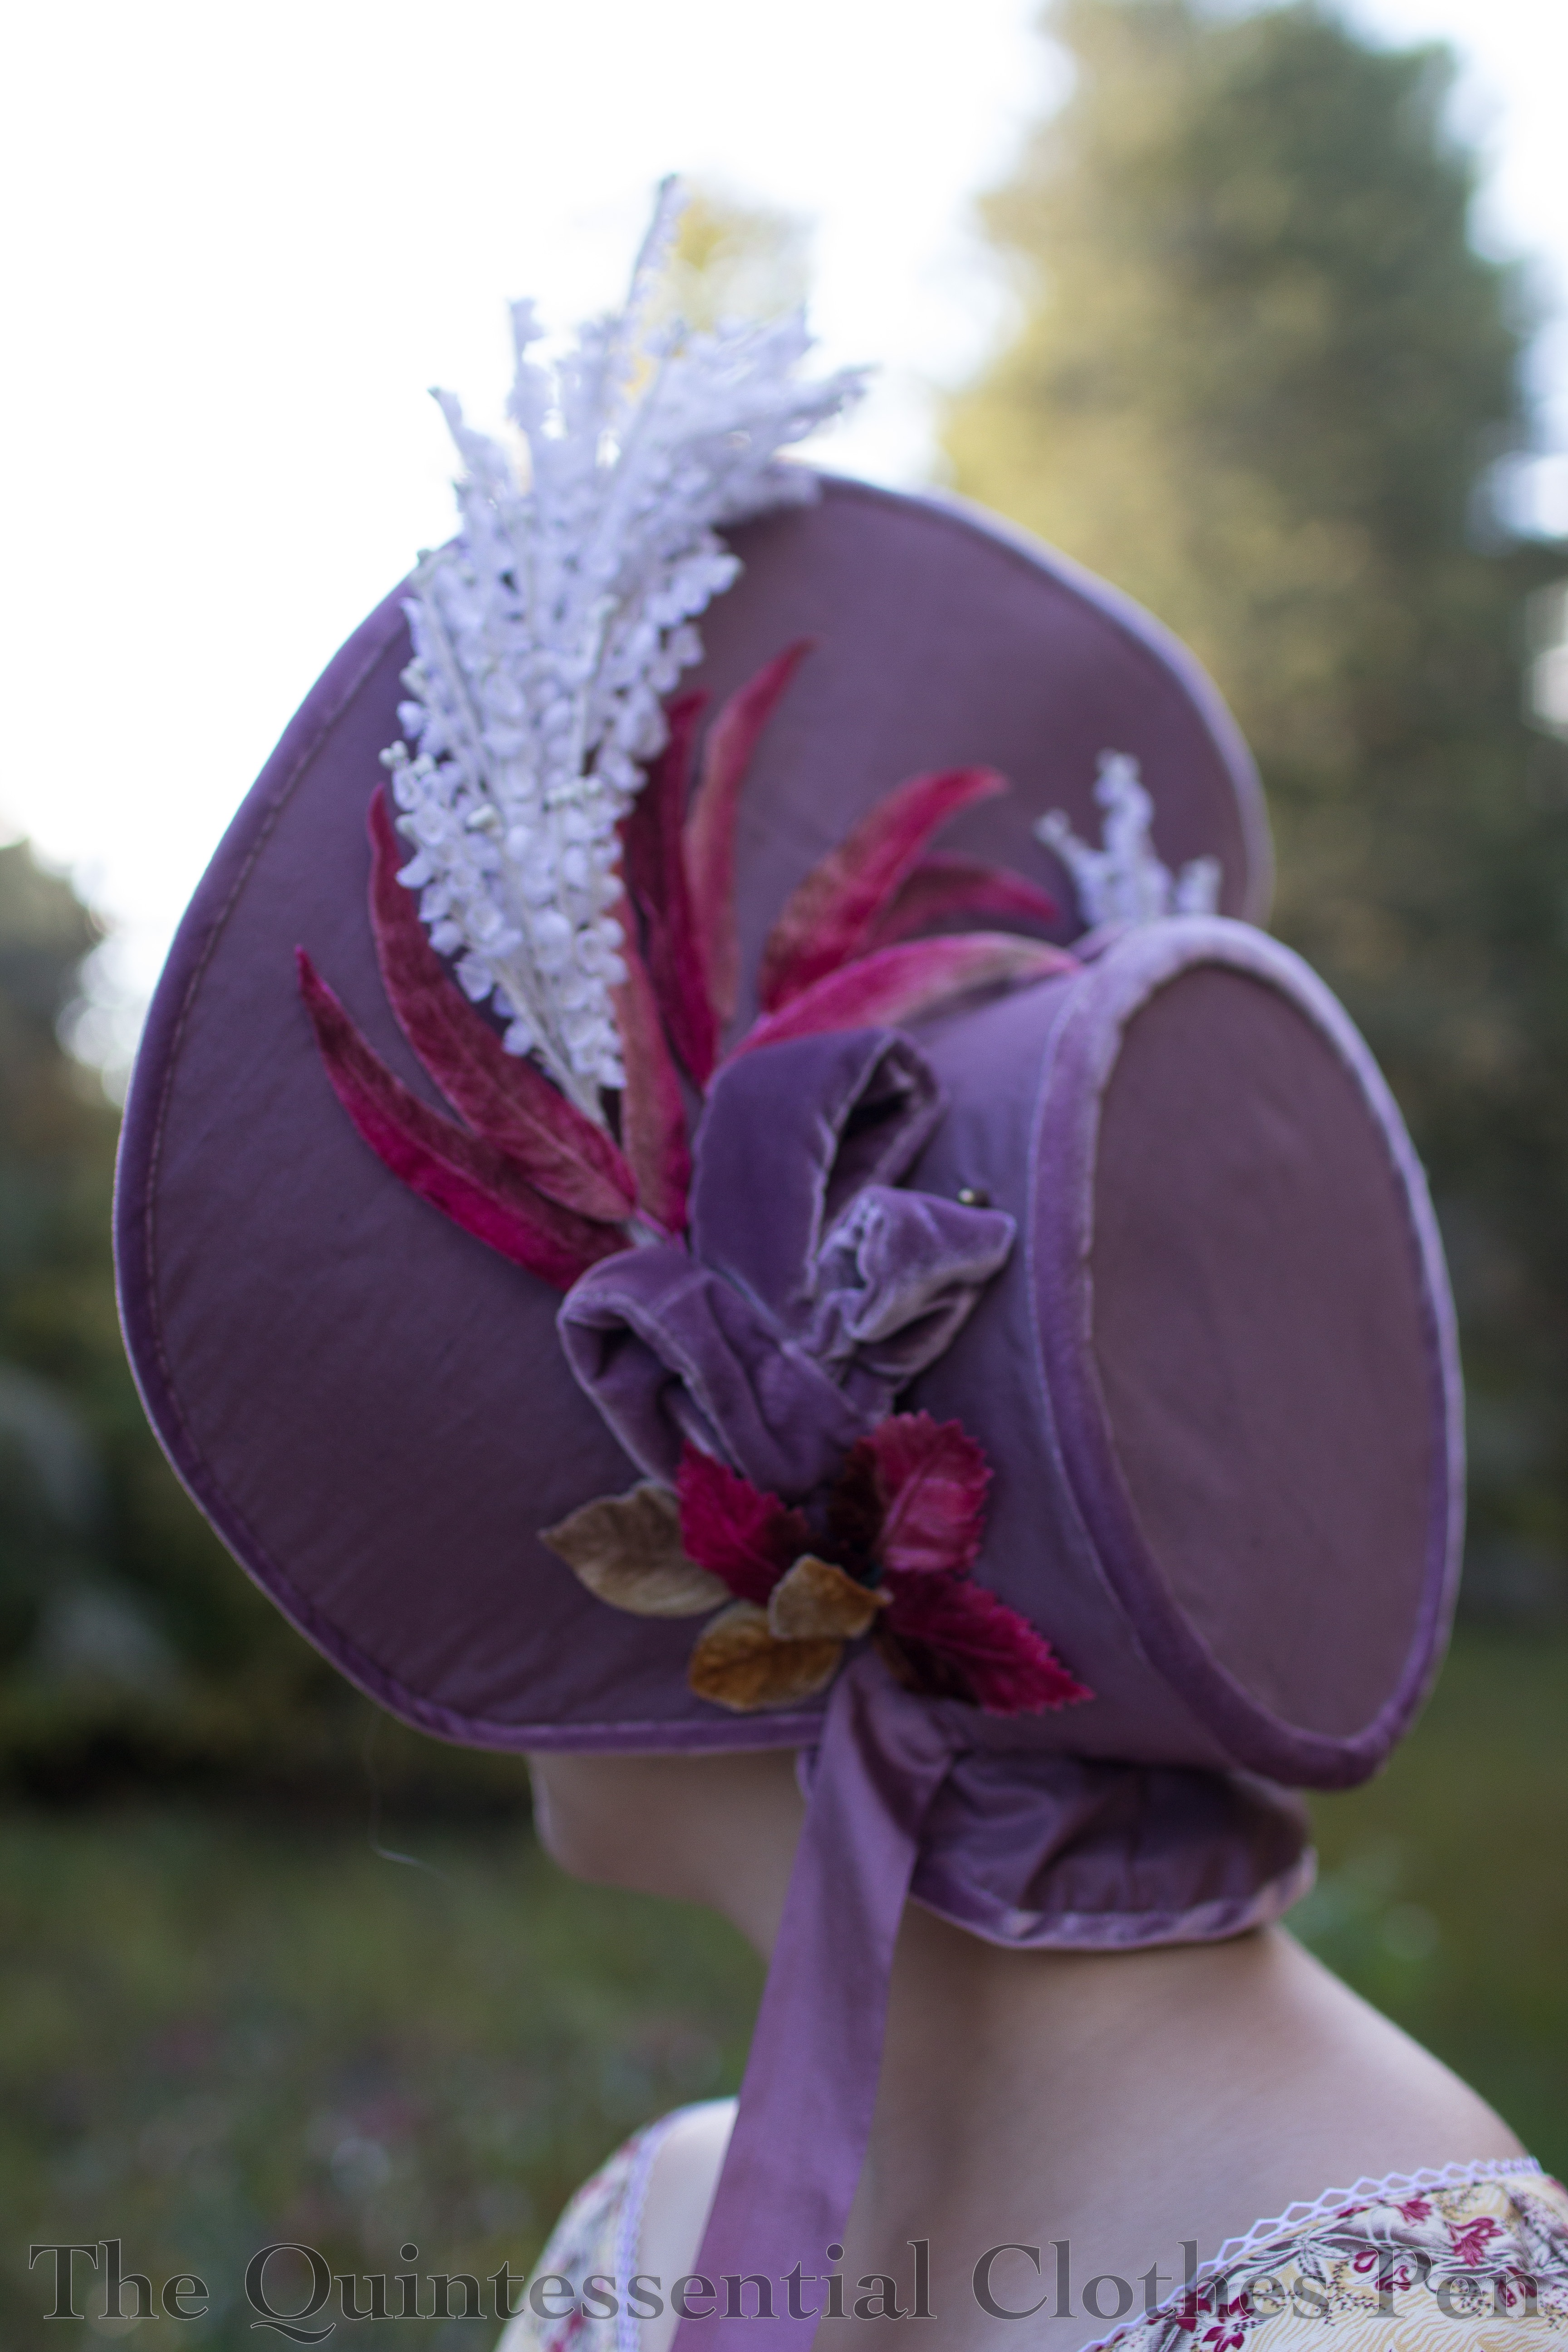
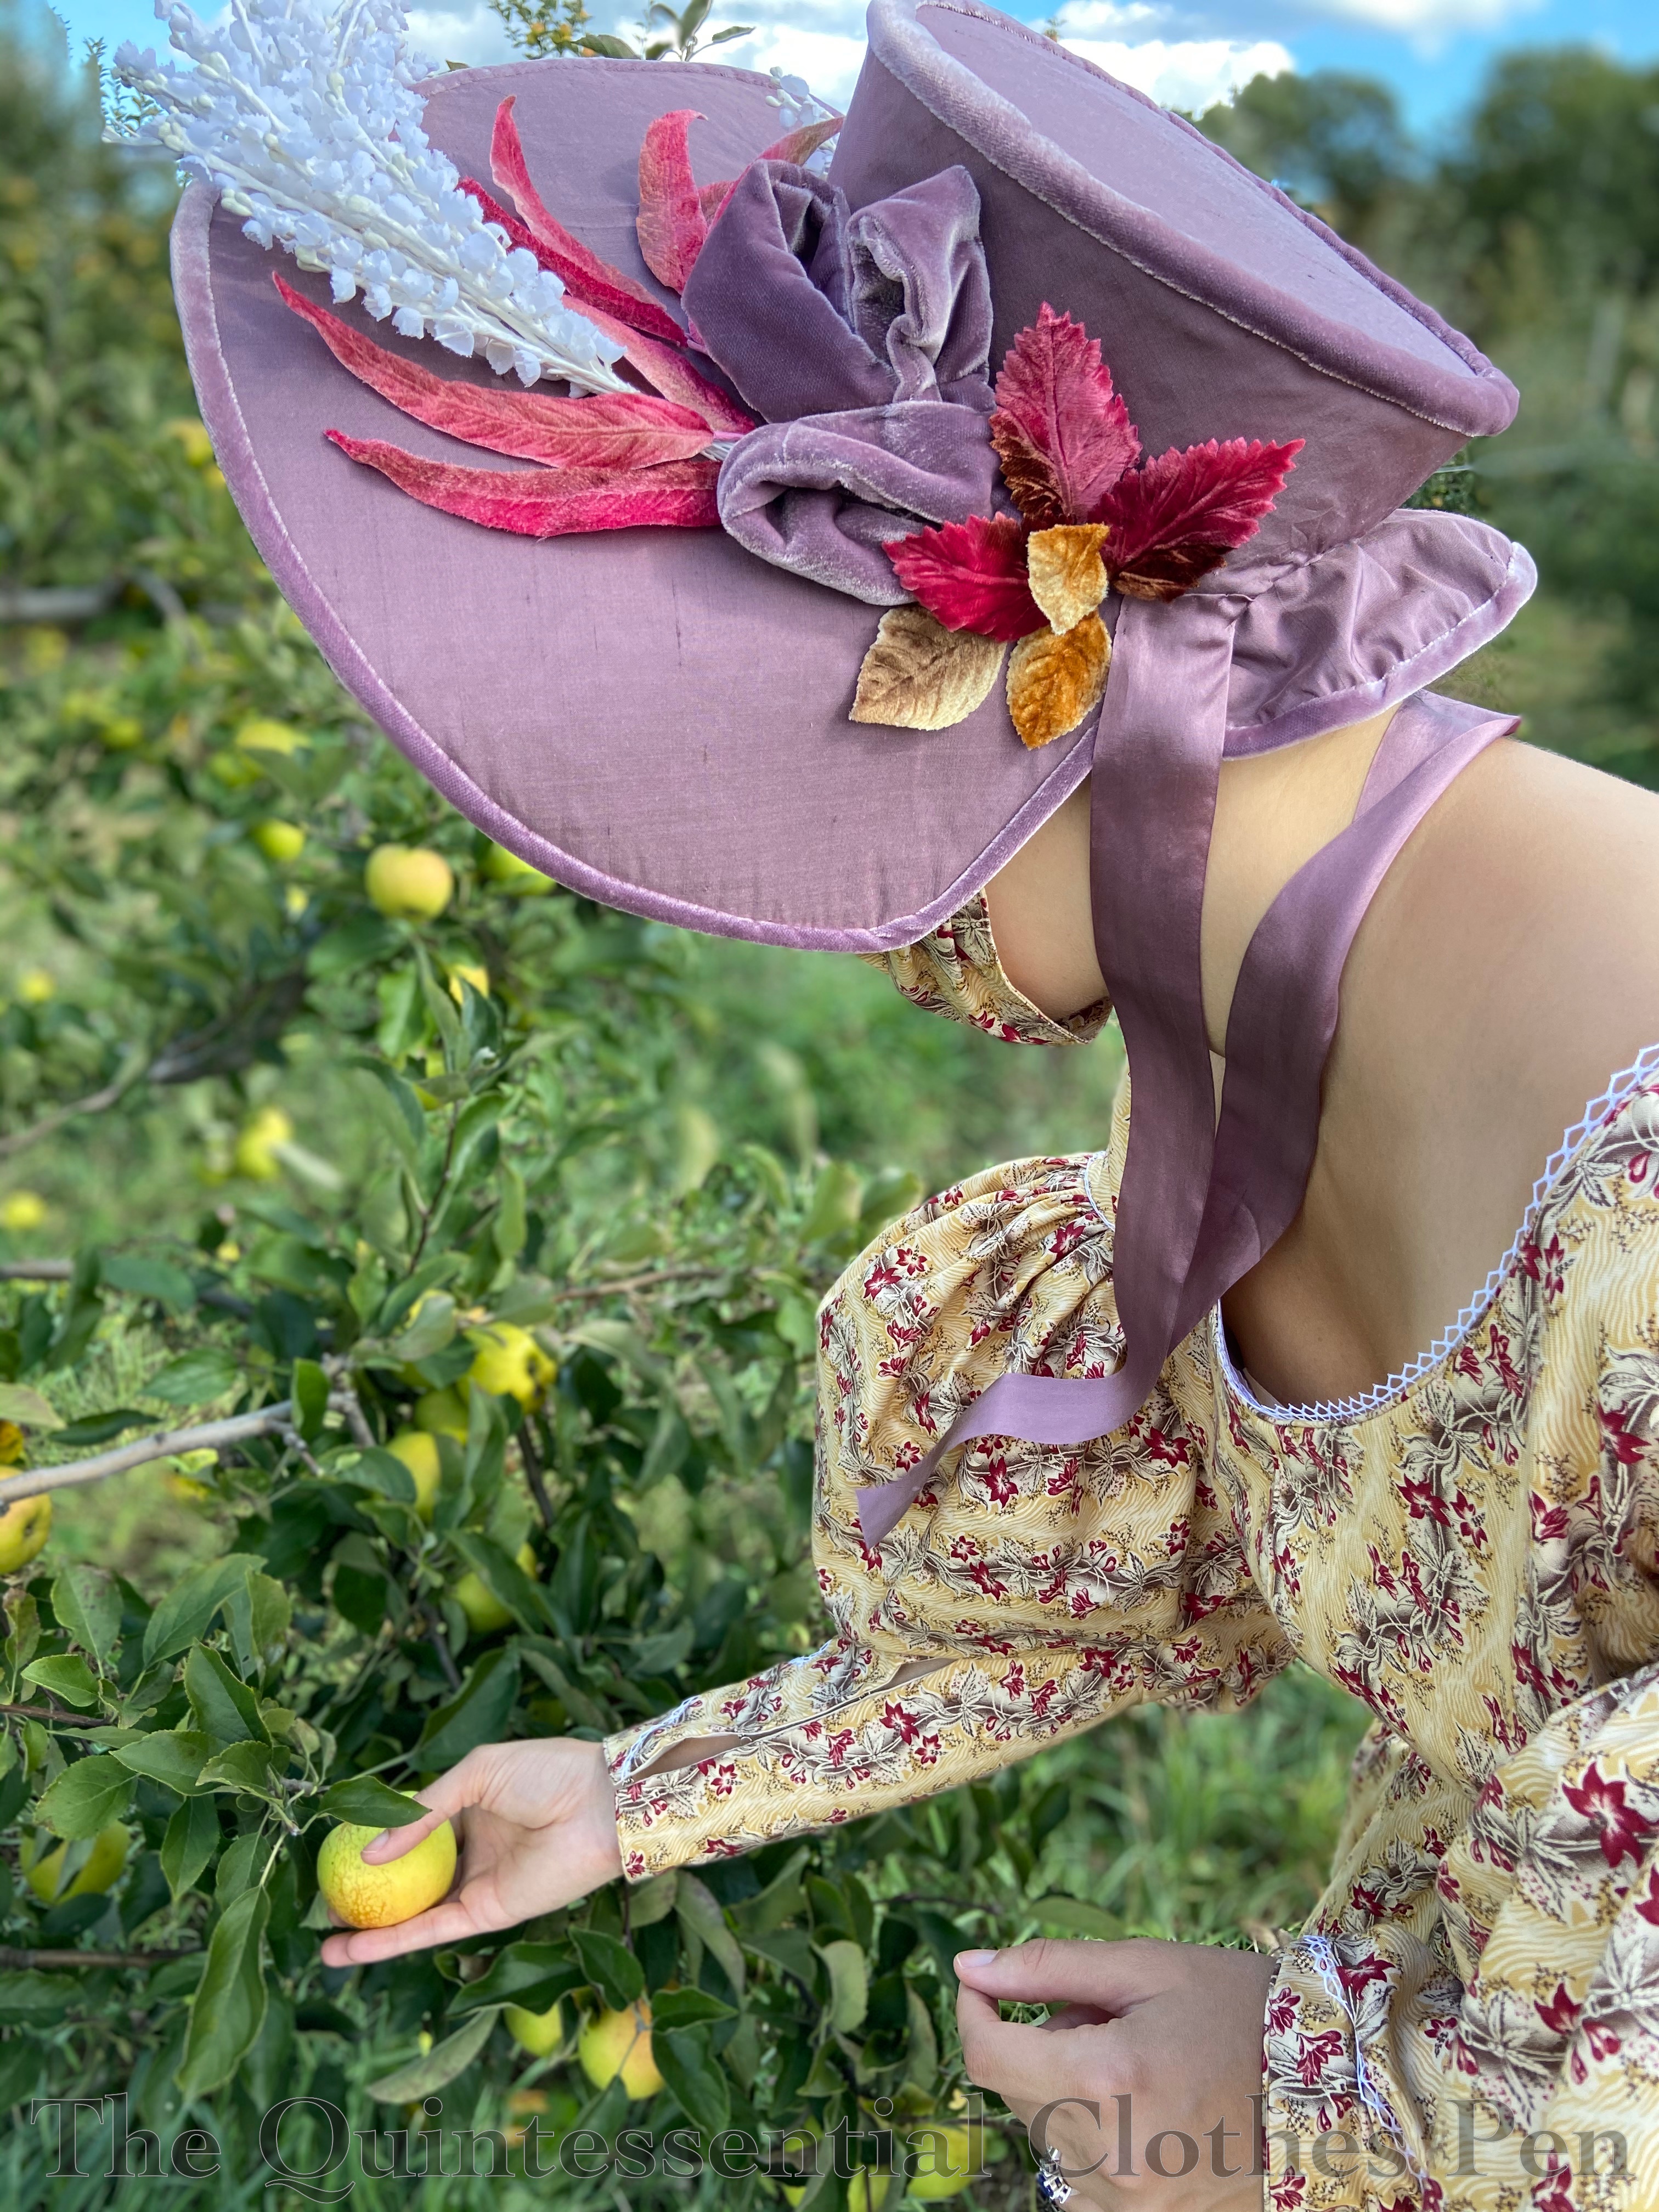
Below, you can see what that trim looks like from the exterior. I used some scraps of velvet to make loops and a variety of vintage paper and velvet millinery flowers and leaves in white, pink, and gold.
I’m super pleased with how it turned out, but it took hours to decide on the placement and then sew everything in place. It was finicky… The trim kept causing the bonnet to fall over as I was trying to place it and when sewing it the thread kept getting wrapped around the different elements and getting stuck. Plus, to make the stitches on the brim invisible they had to catch just one layer of the silk (as opposed to being stitched all the way through all of the layers) without pulling the silk away from the flannel.
Finally, it was time to make a lining! This used the same pattern pieces as the tip and side band and was cut from scraps of ivory shantung. The seams for the lining were machine sewn.
After I put the lining inside the crown of the bonnet, I covered most of the raw edges of the purple and ivory silk with a band of brown cotton velvet. This blends with my hair and provides a bit of a velcro effect to help keep the bonnet in place, in addition to providing nice finishing! This is the same process that I used when making my 1875 hat earlier this year.
At the bavolet edge, where there is no brown velvet, the ivory silk was turned under and sewn in place. I also added lightweight silk ribbon ties as a finishing step.
Finished!
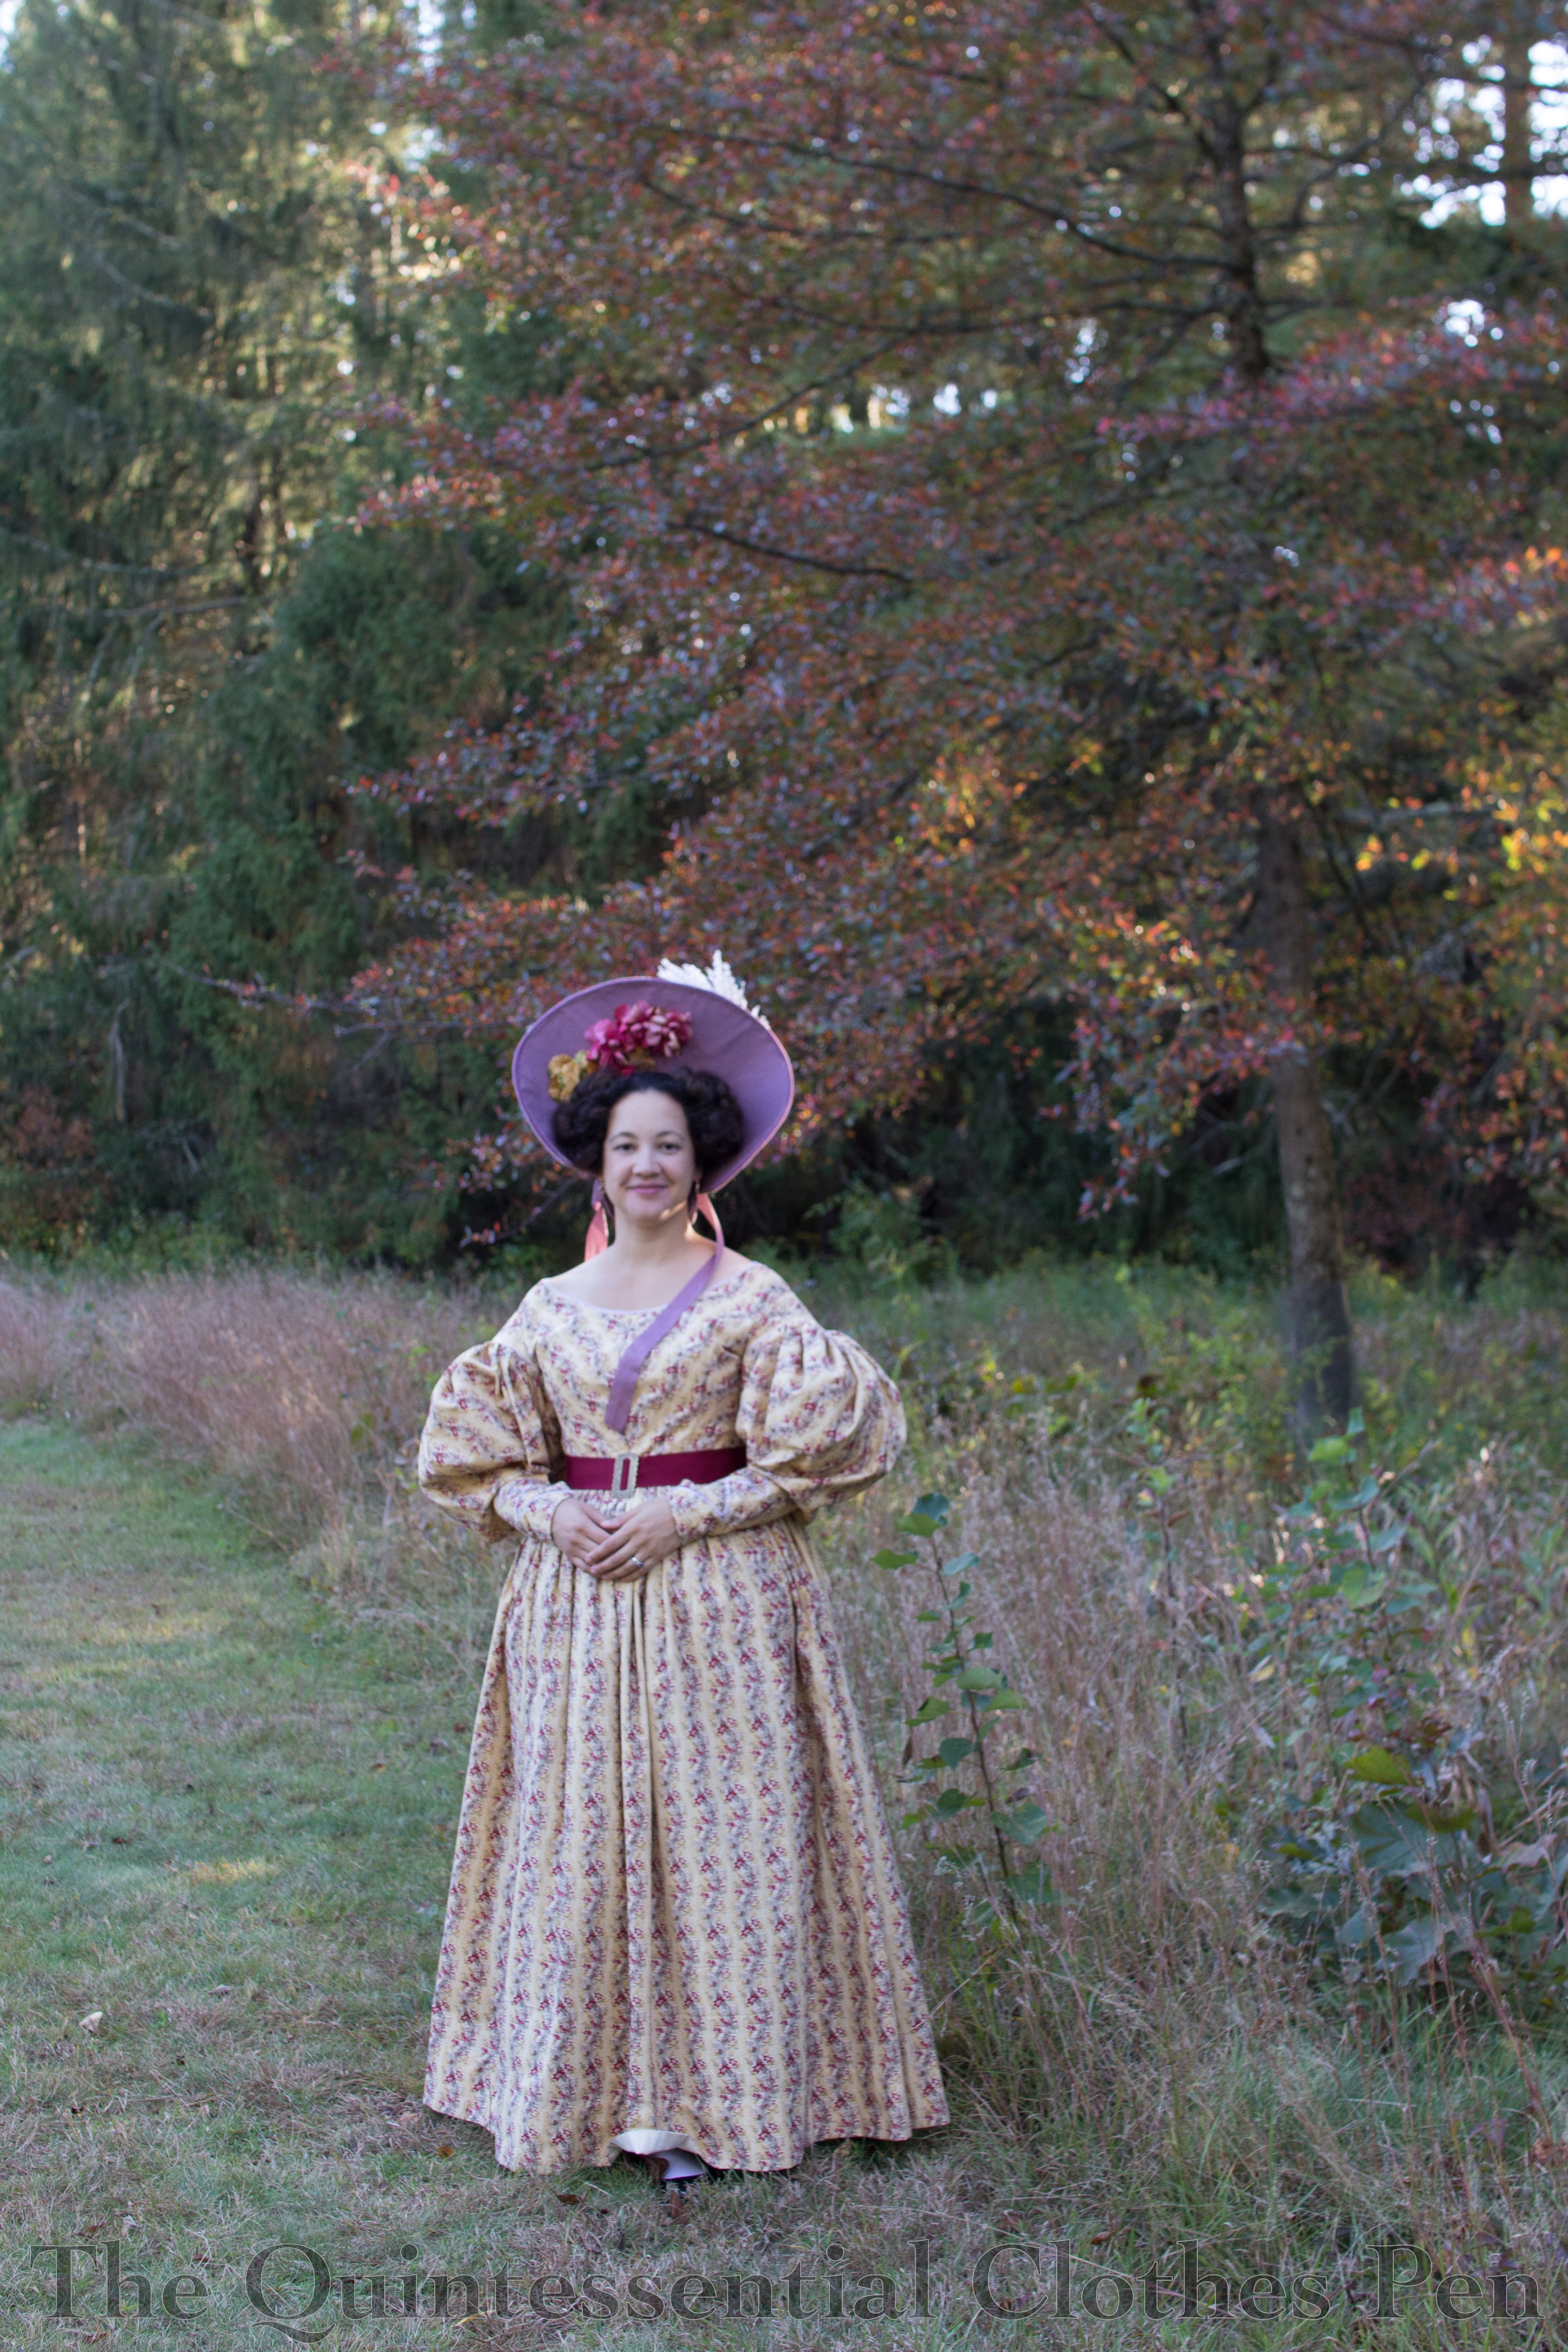
Here is the finished bonnet, being worn with my 1834 yellow dress! I love that the purple coordinates with my yellow print dress fabric without directly matching any of the colors in the print. It was also fun to choose white, pink, and gold floral trimmings for the bonnet to echo the colors in the print. I think the combination is anchored well while still being distinctive parts.
This photo clearly shows that the ties are purely decorative. I left them hanging free so that they could elegantly (usually!) move around. So what keeps this giant sail in place on my head? (Because I can say with certainty that a bonnet this big is basically just a wind catcher on the top of your head!) It will stay on its own… until moving around. I used the back section of my hair to make a bun, at just the right height so it would sit in the crown of the bonnet, and then used two hat pins at different angles to anchor the hat in place through the bun
I found that I placed the curl bunches too far back on the sides of my head when I tried to put on the bonnet and had to push them forward to get it to sit in the right place. It was unexpected how far forward the curls needed to be. As I’ve done in the past for 1830s side curls (explained here in 2016 and again in 2019), I used my own hair on top of mesh poufs to create the side curls. The combination of my hair getting very long and the curls needing to sit in front of the bonnet means that these curls are larger looking vertically than what I’ve had in the past. It seems to fill in the shape of the bonnet well, so I guess it’s good!
The other thing that the above photo does a good job of showing is the trim on the inside of the bonnet, which was also finicky to place. I had to get it in the right location so that it would organically grow out of my planned side curls hairstyle. The bonnet looks quite silly without the 1830s hair to go with it (and one might argue that it looks silly, in scale at least, even with 1830s hair!).
Speaking of scale, this bonnet is quite large. With the trim, it stands more than 8″ high on top of my head. I had to hold the brim when wind picked up while wearing it–the hat pins kept it in place but it would pull at my hair which wasn’t comfortable. Also, it required a pretty severe slouch in the car in order to not hit the roof! Thankfully, I was able to be a passenger while wearing the bonnet, so that I could arrange it, with the hat pins, in front of a mirror and then not need to sit up or look around while driving. Pretty silly! A carriage would have made so much more sense!
Just The Facts
While this bonnet does not qualify for any of the remaining challenges of the Historical Sew Monthly this year, I would still like to share the facts about this bonnet in the format I would use for an HSM garment. So, without further ado, the facts!
Fabric/Materials: ½ to ¾ yard each of floral cotton flannel and purple silk shantung, scraps of purple polyester velvet and ivory silk shantung, about ½ yard of buckram, about 3 yards of millinery wire, and a small piece of brown cotton velvet.
Pattern: My own.
Year: 1831.
Notions: Vintage millinery flowers, thread, and about 1 ½ yards lightweight silk ribbon.
How historically accurate is it?: 90%. Pretty good in terms of silhouette, construction methods, and materials; however, there are a few modern materials mixed in (such as spray adhesive).
Hours to complete: 15.75 hours to finish, plus maybe 6-8 from years ago.
First worn: In early October, 2020.
Total cost: Approximately $35.
Thanks for sticking with me through another long construction post! I have one final photo that also hints at an upcoming post… 1830s apple picking adventure photos! Happy autumn!
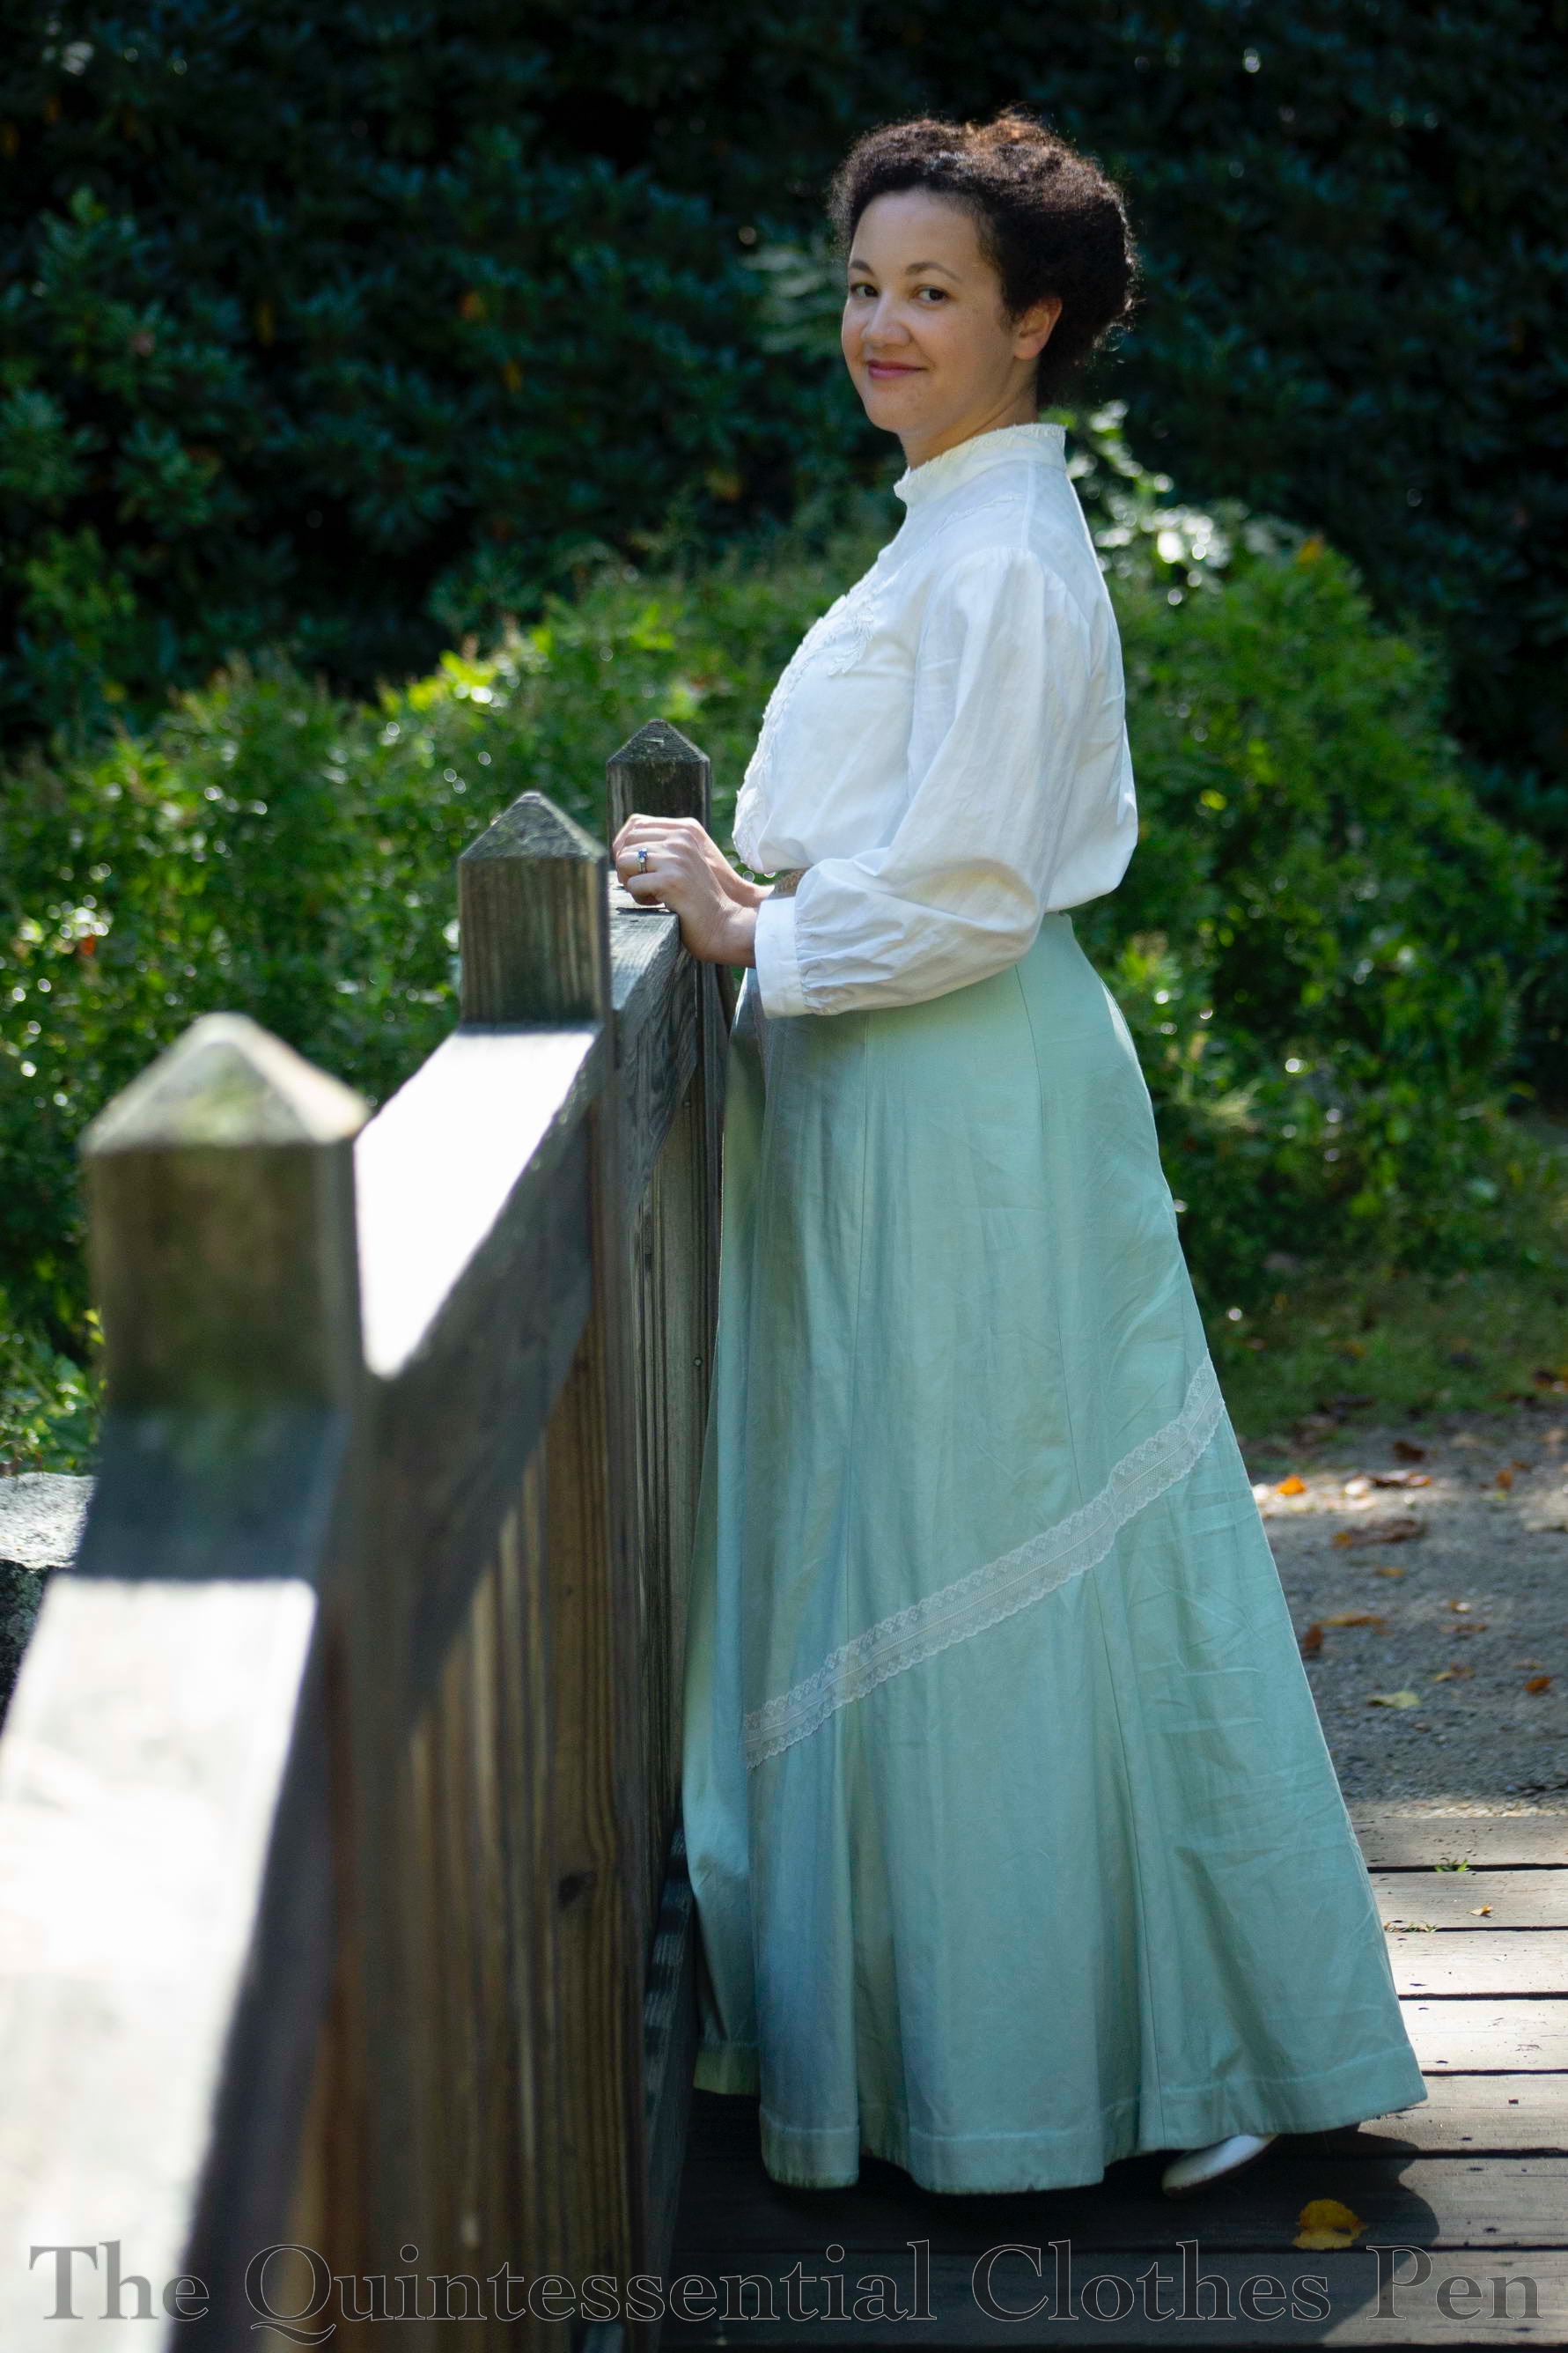
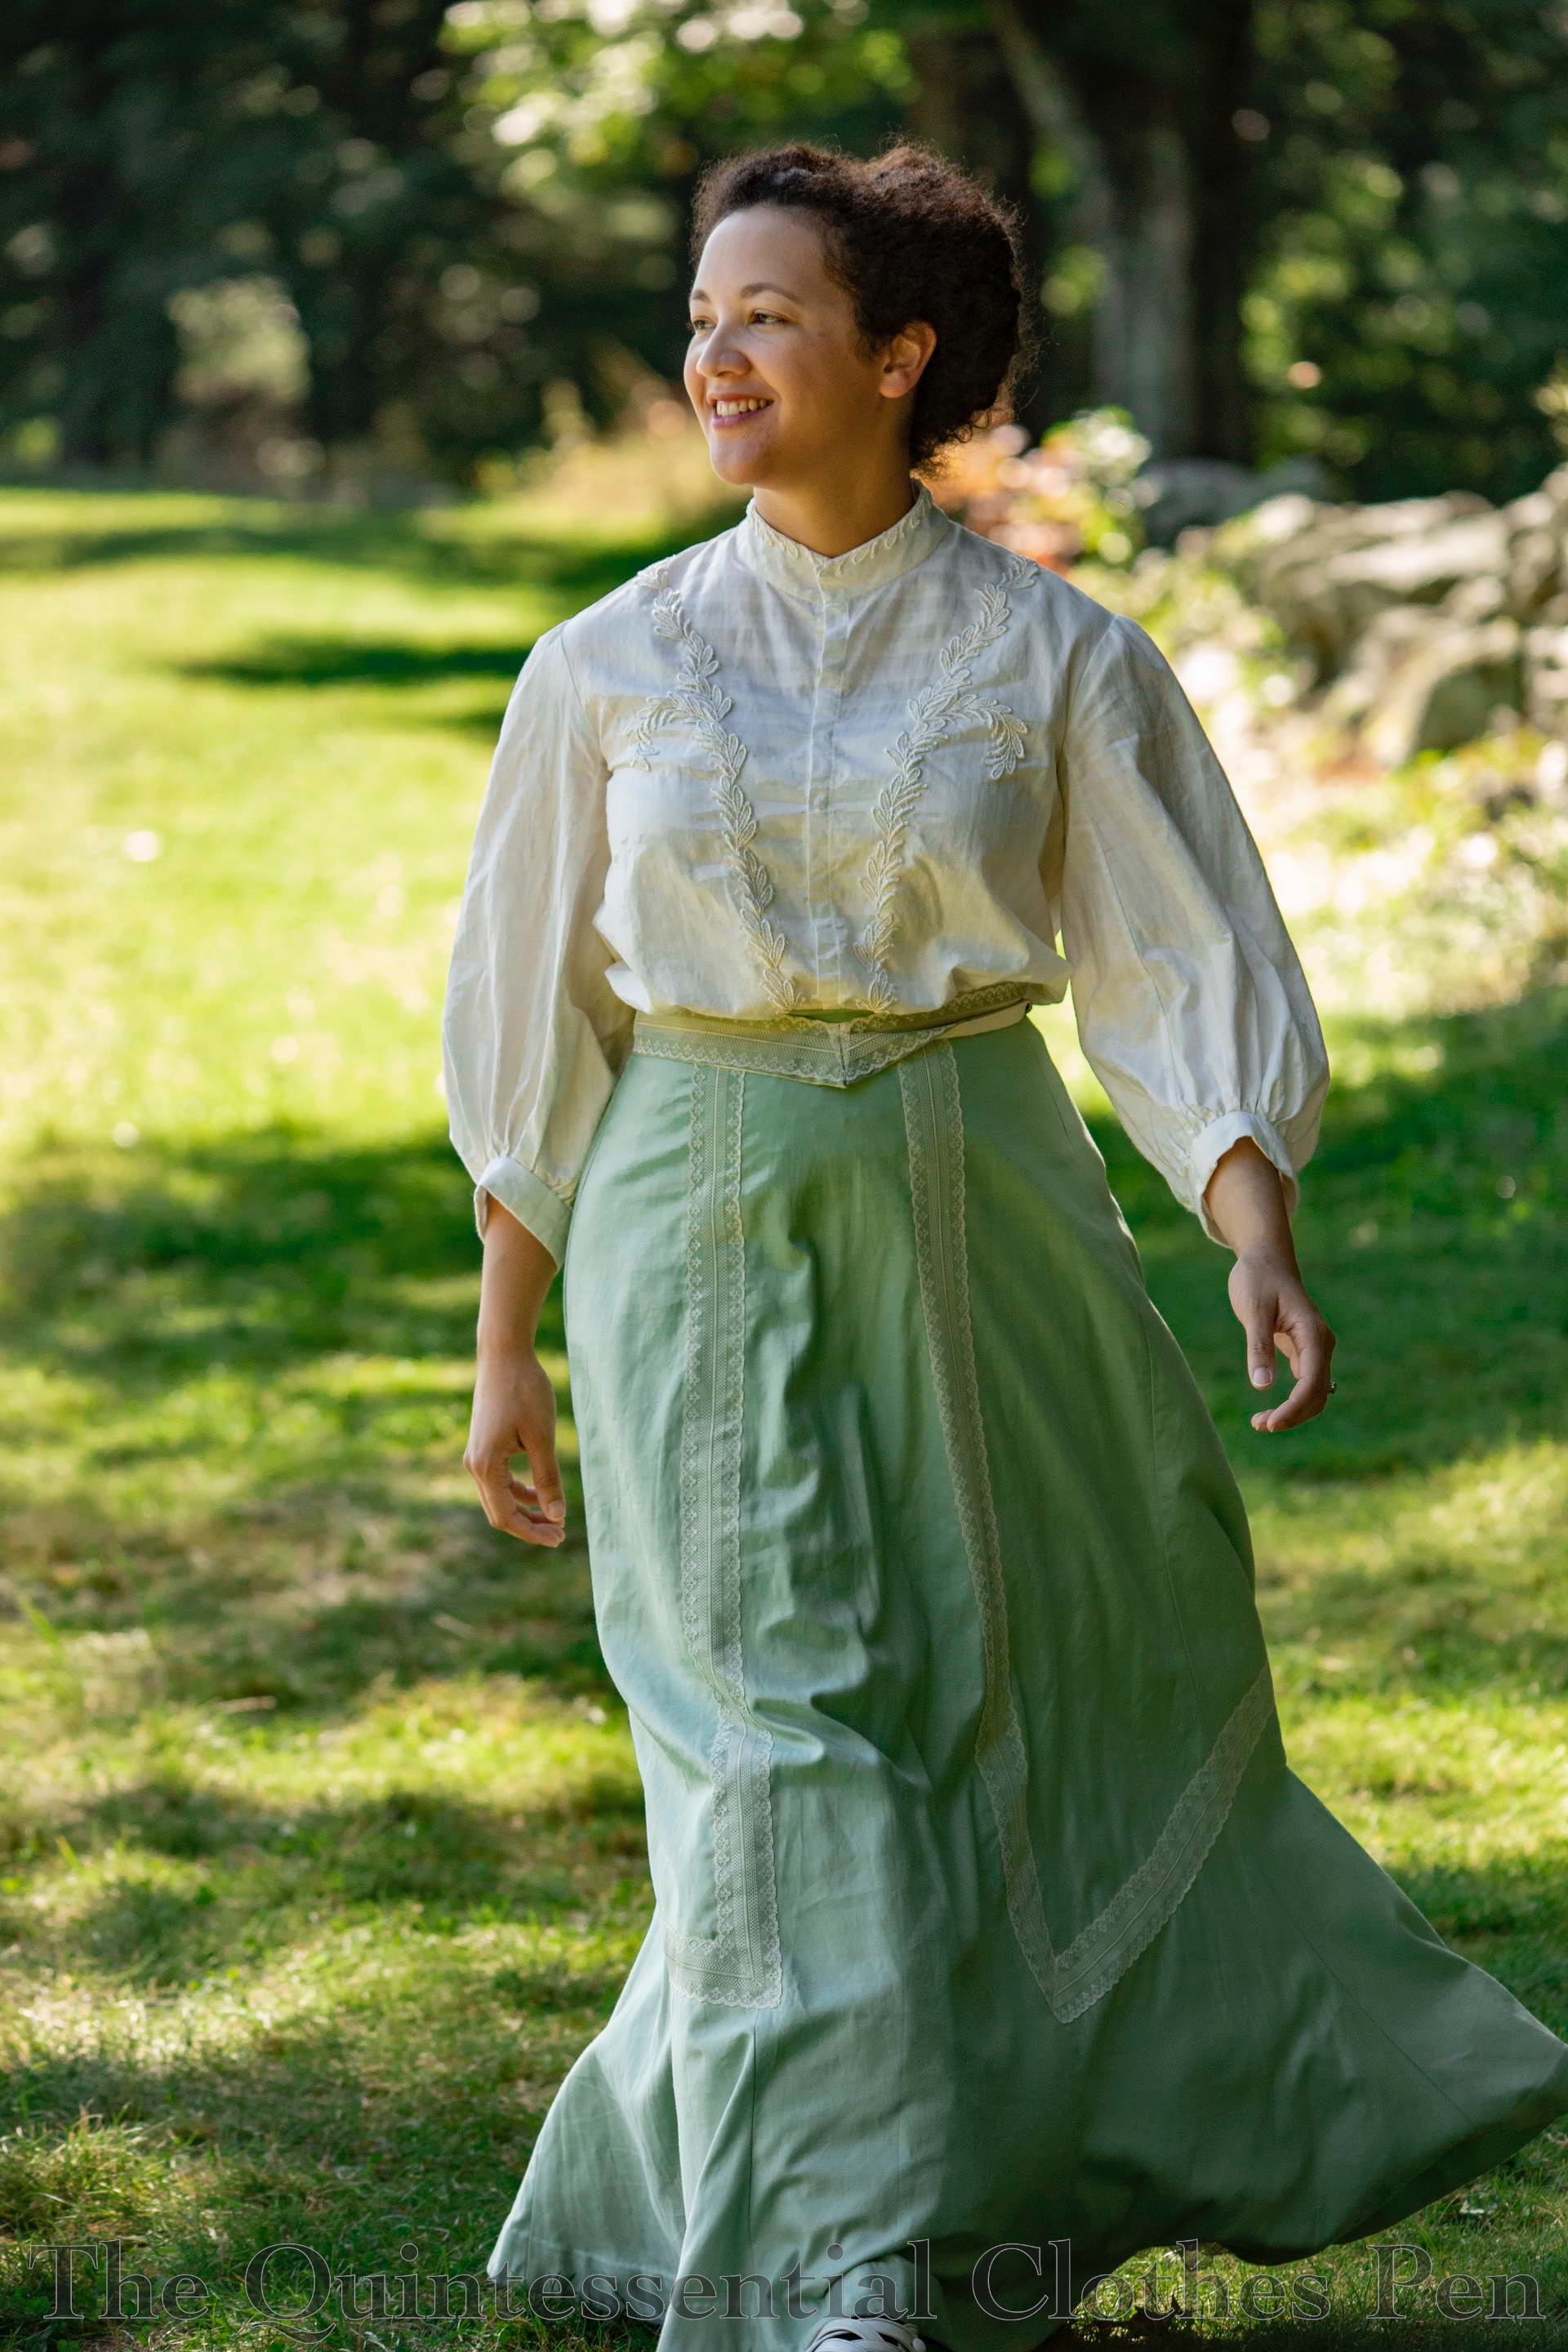
Last fall, I had the opportunity to take part in a presentation focused on the clothing of middle and upper class African Americans in Providence, RI around the turn of the 20th century (you can see photos of and information about this event here). In order to generate some promotional materials that incorporated both of the presenters (as opposed to having separate photos of each of us), my co-presenter, Lady Estelle Barada, suggested that we schedule a photo shoot together and so we spent a beautiful, sunny summer morning traipsing around a state park, accompanied by photographer David Cruz.
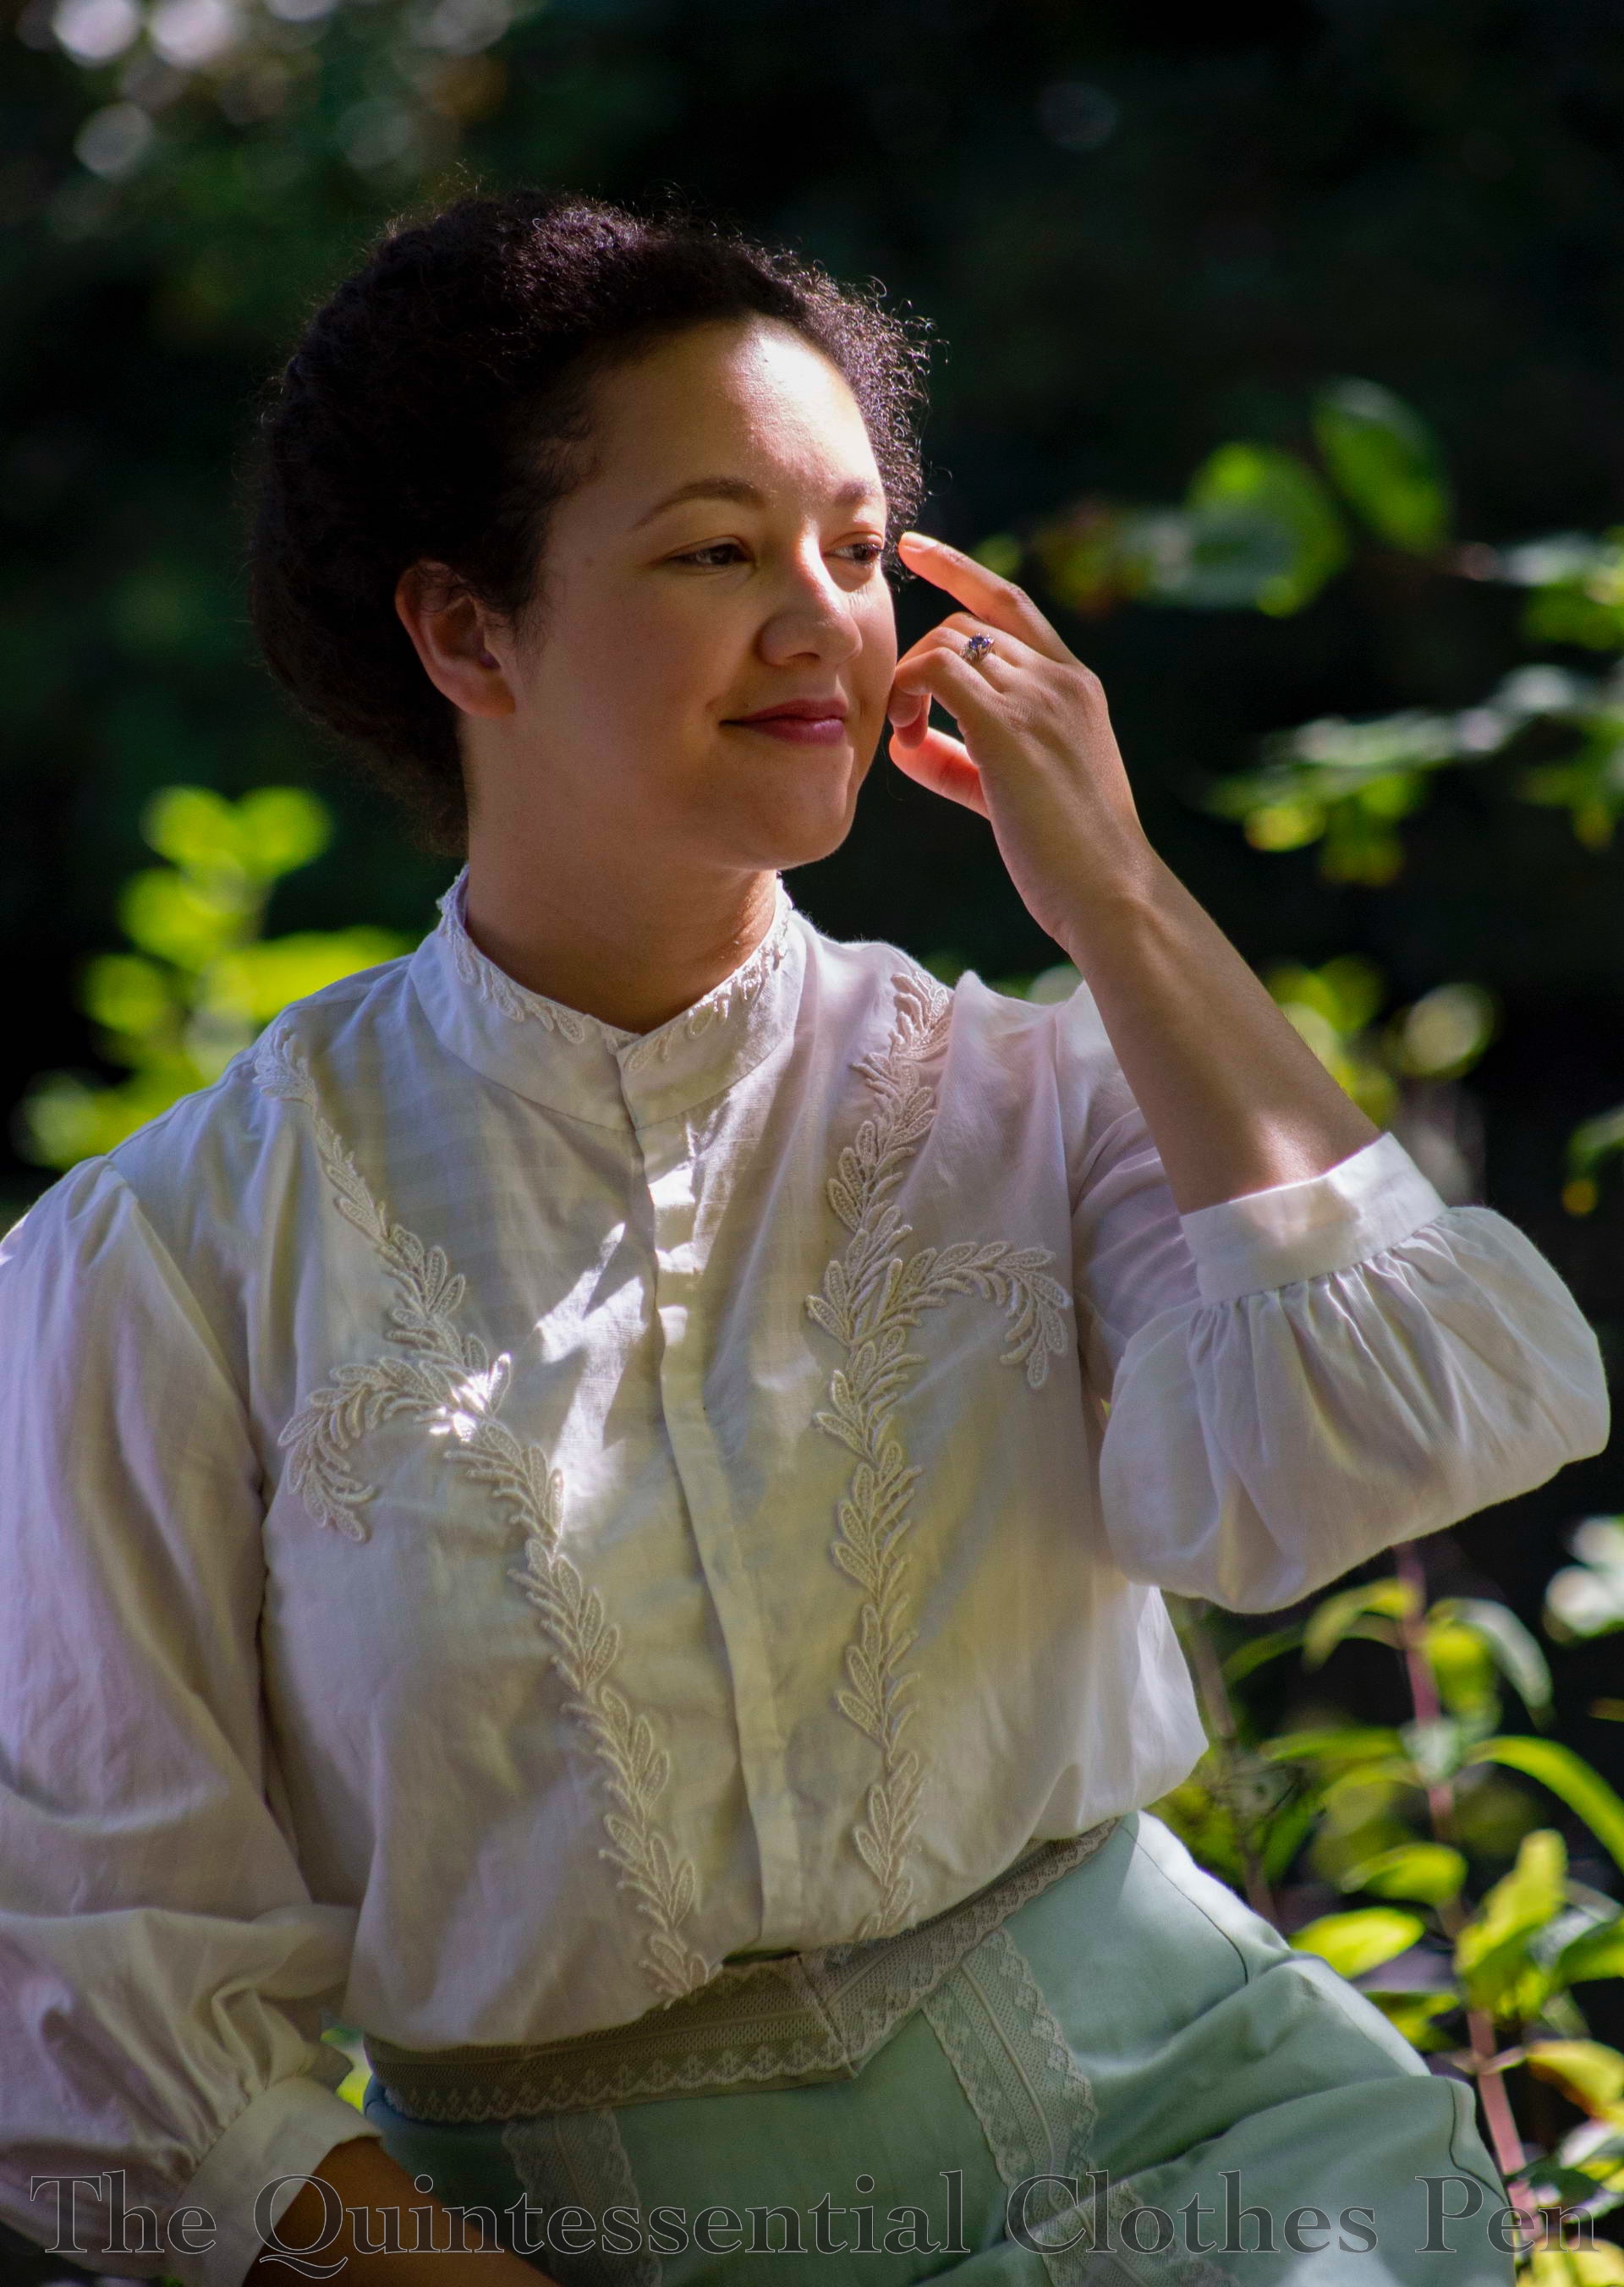
The outfit I chose to wear, my 1904 Anne of Green Gables Ensemble, has been a difficult outfit to photograph in the past, especially the blouse with its white-on-white lace trim and the subtle changes in the direction of the stripes. Given that challenge, I was extra excited when I saw the results of David’s work. He clearly captured the small details of our clothing, including the blouse details!
There are many wonderful photos from our shoot and I enjoy the captivating liveliness that each photo shares–you can just image that movement will continue as soon as you blink or look away.
On the outfit front, I love how comfortable my ‘Anne Ensemble’ is. I had no difficulty tromping through tall grass, climbing over rock walls, sitting on a picnic blanket, and more!
I was also pleased with how my hair turned out. I was able to achieve Edwardian volume around the face while maintaining a side part that gave me two separate poufs on the top/side of my face.
I’m very grateful that David graciously gave permission for me to share these photos with you. As always, please do not share these photos without appropriate photographer credit and a link back to this source.
Last post, I shared details about the style I decided on for the hat to accompany my 1875 reception dress, as well as how I made the hat.
Today, we get to see the finished hat being worn and take a look at the hairstyle I created to support the it!
This hat qualifies for the Historical Sew Monthly challenge #7: No-Buy! I was pleased that I had everything I needed for this hat on hand and it was a bonus that I was even able to use scraps in a lot of places!
Make something without buying anything.Whether it’s finishing off a UFO, using up scraps of fabric from earlier challenges in the year, sewing entirely from stash, or finding the perfect project for those small balls of yarn, this is your opportunity to get creative without acquiring more stuff.
Just the facts:
Fabric/Materials: Scraps of buckram, scraps of cotton flannel, scraps of pink, green, and ivory silk, 2 green-ish/brown ostrich feathers, 9 vintage silk millinery flowers, and a bit of cotton velvet.
Pattern: My own.
Year: c. 1875.
Notions: Millinery wire and thread.
How historically accurate is it?: Let’s say 85%. It’s pretty good on shape, materials, and methods, I believe, and it would be recognizable in its time.
Hours to complete: 10 ¾ hours.
First worn: In May, for photos with my 1875 ensemble!
Total cost: This was a stash project, so I count it as free; however, not counting fabric scraps I think I spent about $12 on the other materials at some point in the past.
Hairstyle Possibilities
When I was deciding on the style of hat I would be making, I also had to consider what my hairstyle might be, as the two support and complement each other. The post showing how I made this hat also shows a variety of hat styles popular at this time.
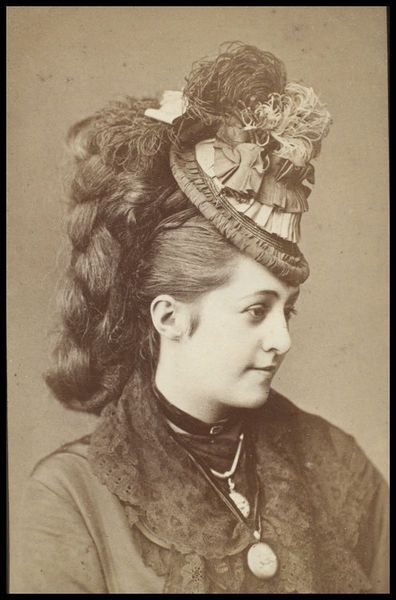
Along those same lines, let’s look at possible hairstyles from the years around 1875. Hairstyles changed throughout the 1870s, sometimes in subtle ways… and sometimes in not subtle ways! Here is not subtle for you.
I love this look (though I can see why you might chose to have a differing opinion), with ginormous braids and twists that use much more hair than most people naturally have on their heads. However, this style (with all of the additional hair at the back of the head) does not coordinate with the type of hat I chose–one that would sit on the back of my head, creating a crown effect.
Looking at the years right around 1875 (the year of my reception dress), I found hairstyles with lots of curls and twists hanging down. 1875 is the part of the decade when the fashionable silhouette of dresses changes from the very round styles of 1870-1874 (like this, for example, from 1870) to the styles from 1875-1877 that have fabric starting to slide down the backs of skirts (like this, for example, from 1875).
As if in sympathy with the dresses, I notice that hairstyles start to slide down, too. It is these years when I see curls and twists hanging down the back, while the top parts of the hair are still sculptural, decorative, and large. Here is another example showing both the cascading fabric and the sympathetic hanging curls.
Interestingly, there are lots of advertisements for hair pieces to help achieve these styles–for ready-made curls, twists, braids… we know that women were not achieving this with only their own hair!
Another hairstyle option is much more subdued and most popular starting in 1878. This is the Natural Form period, when skirts are quite narrow by comparison with earlier years (like this, for example, from 1880). In keeping with the streamlined silhouette, the hair is now generally swept up, but with much less ornamentation and volume than we see in the previous years. Here is an example. No hanging curls or twists and no masses of faux hair.
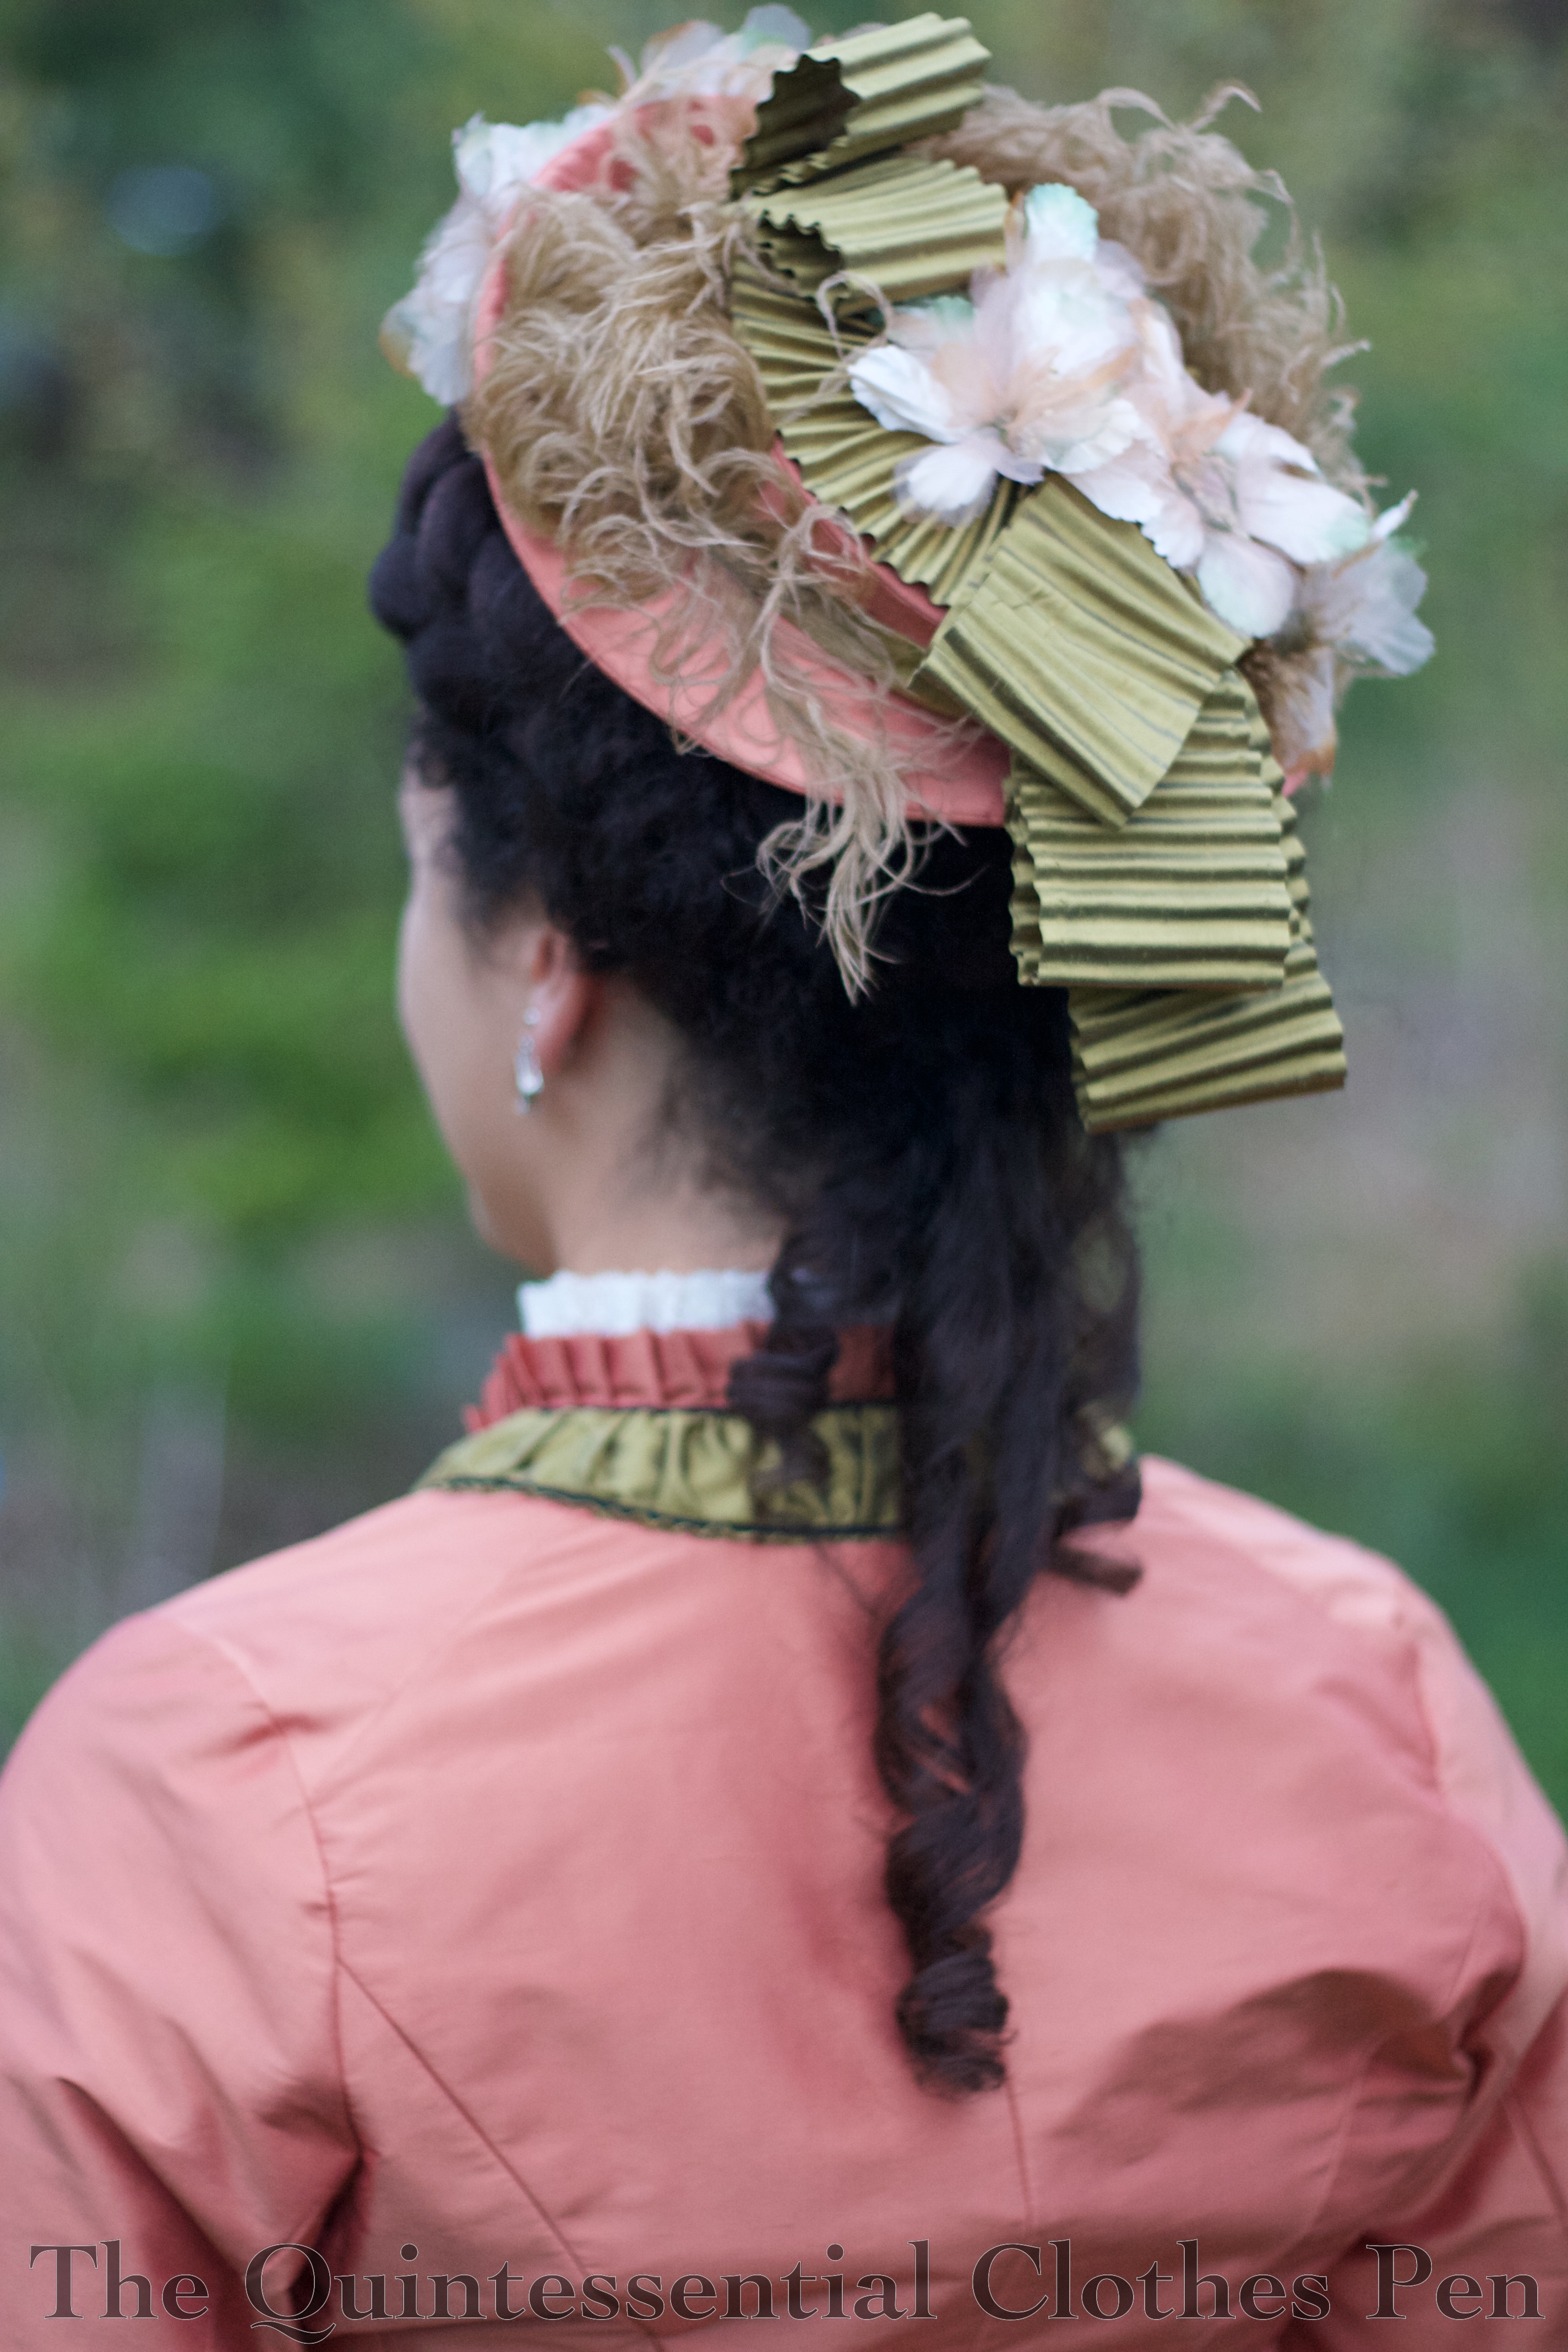
I settled on the mid-century hairstyle of decorative bits hanging down the back with sculptural hair on the top of my head, to complement the hat. This style provided a solid base that helped visually and physically balance and anchor the hat. Indeed, without all the extra volume on top of my head the hat just looks out of place.
As you can see in the front view photo (above), I used a giant braid for the top/front of my style. There’s a whole blog post about how I created the braid here. Behind that, there is a bun form to help create volume on top of my head. This worked wonderfully for anchoring my hat pin, which you can just see poking out on the right side of the photo below–it’s tipped in a green glass leaf.
I attempted to create loops and swirls of hair around and below the bun, but I’m afraid that part of the style wasn’t as successful as I was hoping for. It’s difficult to do on the back of your own head and it’s hard to make the loops distinct, especially with my hair texture. I suspect it would be easier with smoother hair and definitely easier to do on someone else instead of yourself. I’ll have to try this style again some day. For this first attempt the back of my head was completely covered by my hat, so it doesn’t really matter what it looks like!
Below the loopy/swoopy bit I left curls hanging down at a few different lengths, as I saw in many fashion plates. This part turned out well!
That’s it, really. Massive hair, some hanging curls, plop the trimmed hat on top, secure it with a hat pin, and suddenly my head is about double the size it normally is! Here is another photo showing the hat and a sneak peak at more of the dress. Lots of details are coming up about the dress in future posts!
December’s HSM challenge was On a Shoestring. The description is as follows:
It’s an expensive time of year, so make an item on a tight budget (say, under $15, or less than you’d spend on a reasonable priced takeaway meal for one person in your country – and no ‘stash’ doesn’t count as free: you still have to count what you would have originally paid for those items)
I haven’t been sewing much in the past month and so I was having trouble coming up with any ideas for this challenge. Then I remembered that I had, in fact, sewn a small item that fits this challenge–a new faux hair braid to add to my 1830s hairstyle for the annual Christmas ball!
How historically accurate is it?: 95%. Adding faux hair to make complicated styles was a popular practice in the late 18th century and through most of the 19th century, but of course my braid is made of modern materials.
Hours to complete: 3.
First worn: December 14, 2019.
Total cost: Approximately $9.
The wonderful thing about covering the braid in hair nets is that it stays super smooth and not frizzy. Sometimes I like the frizz (to match my own) so I also have a braid that does not have the hair nets on it. And, I’ve decided that it’s fun to have a sleek braid, too. You can see (and read about) my method for covering the braid with the hair nets in this post.
This braid is 40″ long. It is simple and ready to be styled in any way I can think of!
I am very pleased with how my hairstyle turned out for the first wearing of Genevieve, the 1863 dress I’ve been blogging about for the last few months. I took the idea directly from my inspiration drawing, though I changed the hair decoration that accompanied the style.
I’ve used false hair to have braided crown styles before (here’s an example of the same braid used for a Regency hairstyle), but that old braid is only about 1 ½” wide, which is a bit subtle for the look I wanted for this dress. It’s also long enough to wrap around my head about 1.5 times, which is longer than what I wanted for the new hairstyle.
So I decided to buy some new false hair and make a new, fatter braid. I used this hair in dark brown. It’s intended for African style braid extensions, so it has a texture that’s great for matching my curly hair–I don’t think it would work well for someone with straight hair. I also bought these black hair nets.
I used one bundle of the false hair for this braid. The hair comes braided already, but I took it out and re-braided it a little tighter than how it was originally. Then I cut the elastic on one of the hair nets so that it would stretch out to be as long as my braid.
I laid the braid on top of the hair net and wrapped the hair net around to the back side of the braid. Then I used large whip stitches to secure the net to the braid. You can see one of those stitches mostly centered in the next photo. Covering the braid with a hair net helps keep all the frizzies from making the braid look messy. (My old braid isn’t covered in a hair net, so it looks very organic, like my real hair… nice and frizzy!)
The final step was to go back and stitch the hair net down in the dips between each section of the braid. In the photo above you can see the hair net traveling between braid bumps, but in the finished photo below those are mostly sewn down and much less visible.
For the actual hairstyle, I secured the braid to my head behind the sections near my face that get swept back over my ears. (I also pinned the braid to the top of my head to keep it in place while dancing. Those pins were put into the back side of the braid (to keep them hidden) and secured into the roots of my hair.) After securing the braid I was able to arrange the front sweep sections on either side of my face. I made sure to cover the ends of the braid with these sections.
Then I arranged the back of my hair. I wanted to keep it simple to showcase the braid and the velvet bow, so I arranged the back of my hair into a low puff. It continues the ring of the braid around my head while being more unobtrusive than the braid itself.
The final step was the bit of lace and the velvet bow. I opted for those instead of the lace framing the braid in the inspiration image. I wasn’t sure how I would accomplish that without essentially creating a cap… and that’s not the look I wanted. So I made up something else!
The bow is one I was able to make after my bow disaster. I think it adds a nice touch of color on my dark hair. I wasn’t sure what I was going to do with it and the lace until the ball, so I bobby pinned each piece in place for that first wearing. Then one of my after-the-ball tasks before I could put this away was to sew these two pieces together and add a comb so that it is now an official accessory that will be easier to put in my hair the next time I wear this dress.
Here’s a side view of what all of that amounts to. I intentionally placed the bow and lace off-center on my head in order to pick up on the asymmetrical bow on the skirt of the dress.
When I did a quick trial with the braid in modern clothes it felt very large and I was worried it would be too big, but once dressed in Genevieve I think the scale of this new braid is great–an excellent hair crown size and length, and the hair net keeps it looking super tidy and frizz free!
DONE! I am so glad to be done. I’m also excited to have a new dress (and, despite the challenges and worries along the way, one I like the look of! YAY!).
I’ve kept you waiting to see photos of the finished dress. Life got a bit busy after the ball and then I wanted to share my final sewing details with you. But now it’s time to introduce you to Genevieve, my 1863 Apricot Evening Gown, also known as the Orange Monster for the last few months. Here she is!
I’m excited that this dress qualifies for the October HSM challenge.
Details: Sometimes the little things really make something fabulous. Focus on the details of your garment, to create something that just gets better the closer you look.
This dress is definitely one of those garments! I’ll explain and show you lots of reasons why in these finished photos, but there are currently seven other posts in this series sharing tons of details about the planning, patterning, sewing, and trimming process as well.
First, the facts:
Fabric: 6 ⅔ yards of apricot silk, ½ yard of dark red silk velvet, approximately ½ yard of ivory tulle, muslin scraps for hem facing, a scrap of canvas for stiffening the waistband, and about ½ yard of drab cotton for flat lining.
Notions: 25 yards of 3 ¾” lace, 2 brooches, 3 yards of ⅜” polyester ribbon, a few plastic cable ties, about 1 yard of bone casing, a variety of hooks and bars, and thread.
How historically accurate is it?: 95%. A few substitutions of modern materials exist but aside from that it’s pretty much as close as I can get.
Hours to complete: 57.
First worn: September 28, 2019.
Total cost: $112.78
The cost breakdown is as follows: $66 for the silk (local discount store in 2016), $12.50 for the velvet (WM Booth Draper in 2011), ~$2 for the tulle (local discount store in 2011),~$1 for the drab cotton (local discount store in 2018), ~$15 for the lace (Debs Lace and Trims in 2019), $6.28 for the brooches (Etsy in 2019), ~$6 for the ribbon (Farmhouse Fabrics in 2019), and we’ll say $4 for the scraps and other notions since they’re from the stash, reused from other projects/mockups, or used in very small quantities.)
Visible details, you ask? Well, in addition to sharing so many other details along the way, the finished dress has many visible layers of details. The most time consuming detail is the hand sewn 3 tiers of lace ruffle/silk scalloped & pleated trim around the skirt. This detail alone took 17.5 hours. There is a whole post dedicated to this aspect and the details that went into it.
That form of decoration is continued on the bodice sleeve caps. Here’s a closeup where you can see the pleated silk. It is meticulously hand stitched with tiny stitches everywhere it is used.
Another layer of detail is the bertha and sleeve caps. Those have tulle, gathered tulle, and lots of velvet details. My last post explains how these are made.
I found the sleeve caps to be rather unusual amongst dresses from this period, so I was pleased to find this fashion plate which has a similar look.
(This next one is a great ‘I’m plopped and tired of standing’ photo!)
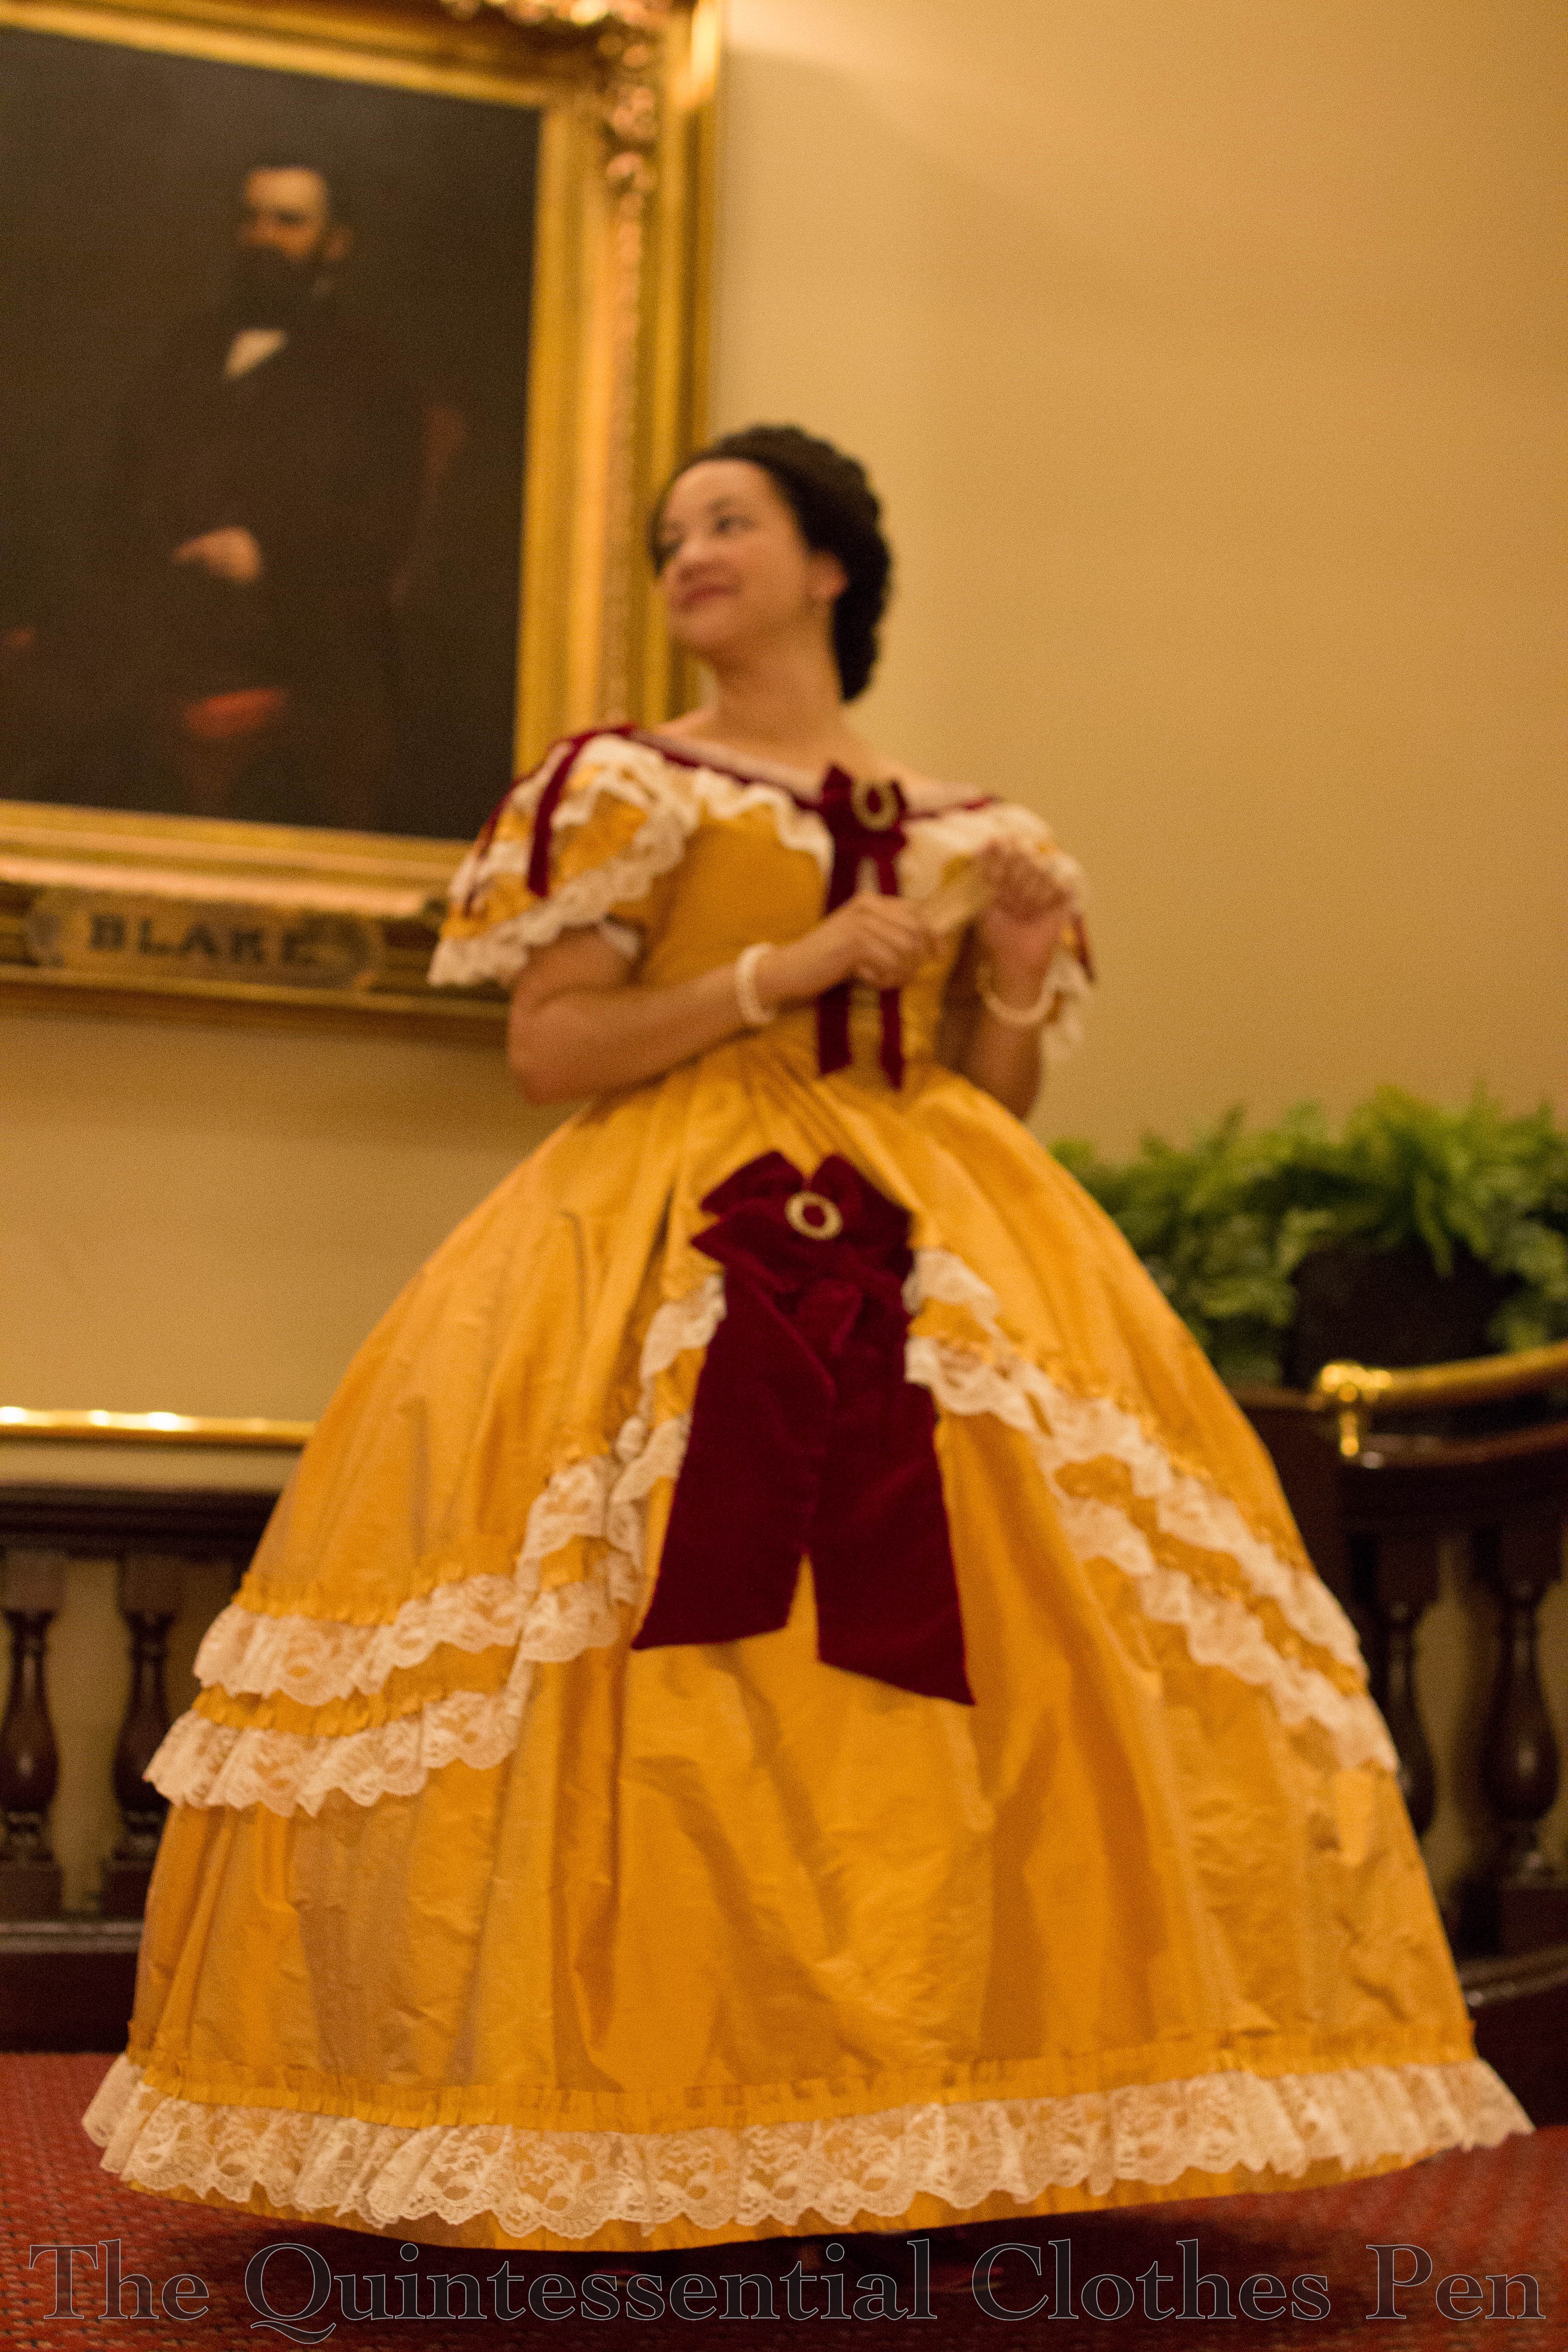
And as for details, let’s not forget the velvet bows in addition the velvet trim. Especially that oversized skirt bow! I also spent quite a bit of time looking for the gold brooches to go on the velvet bows.
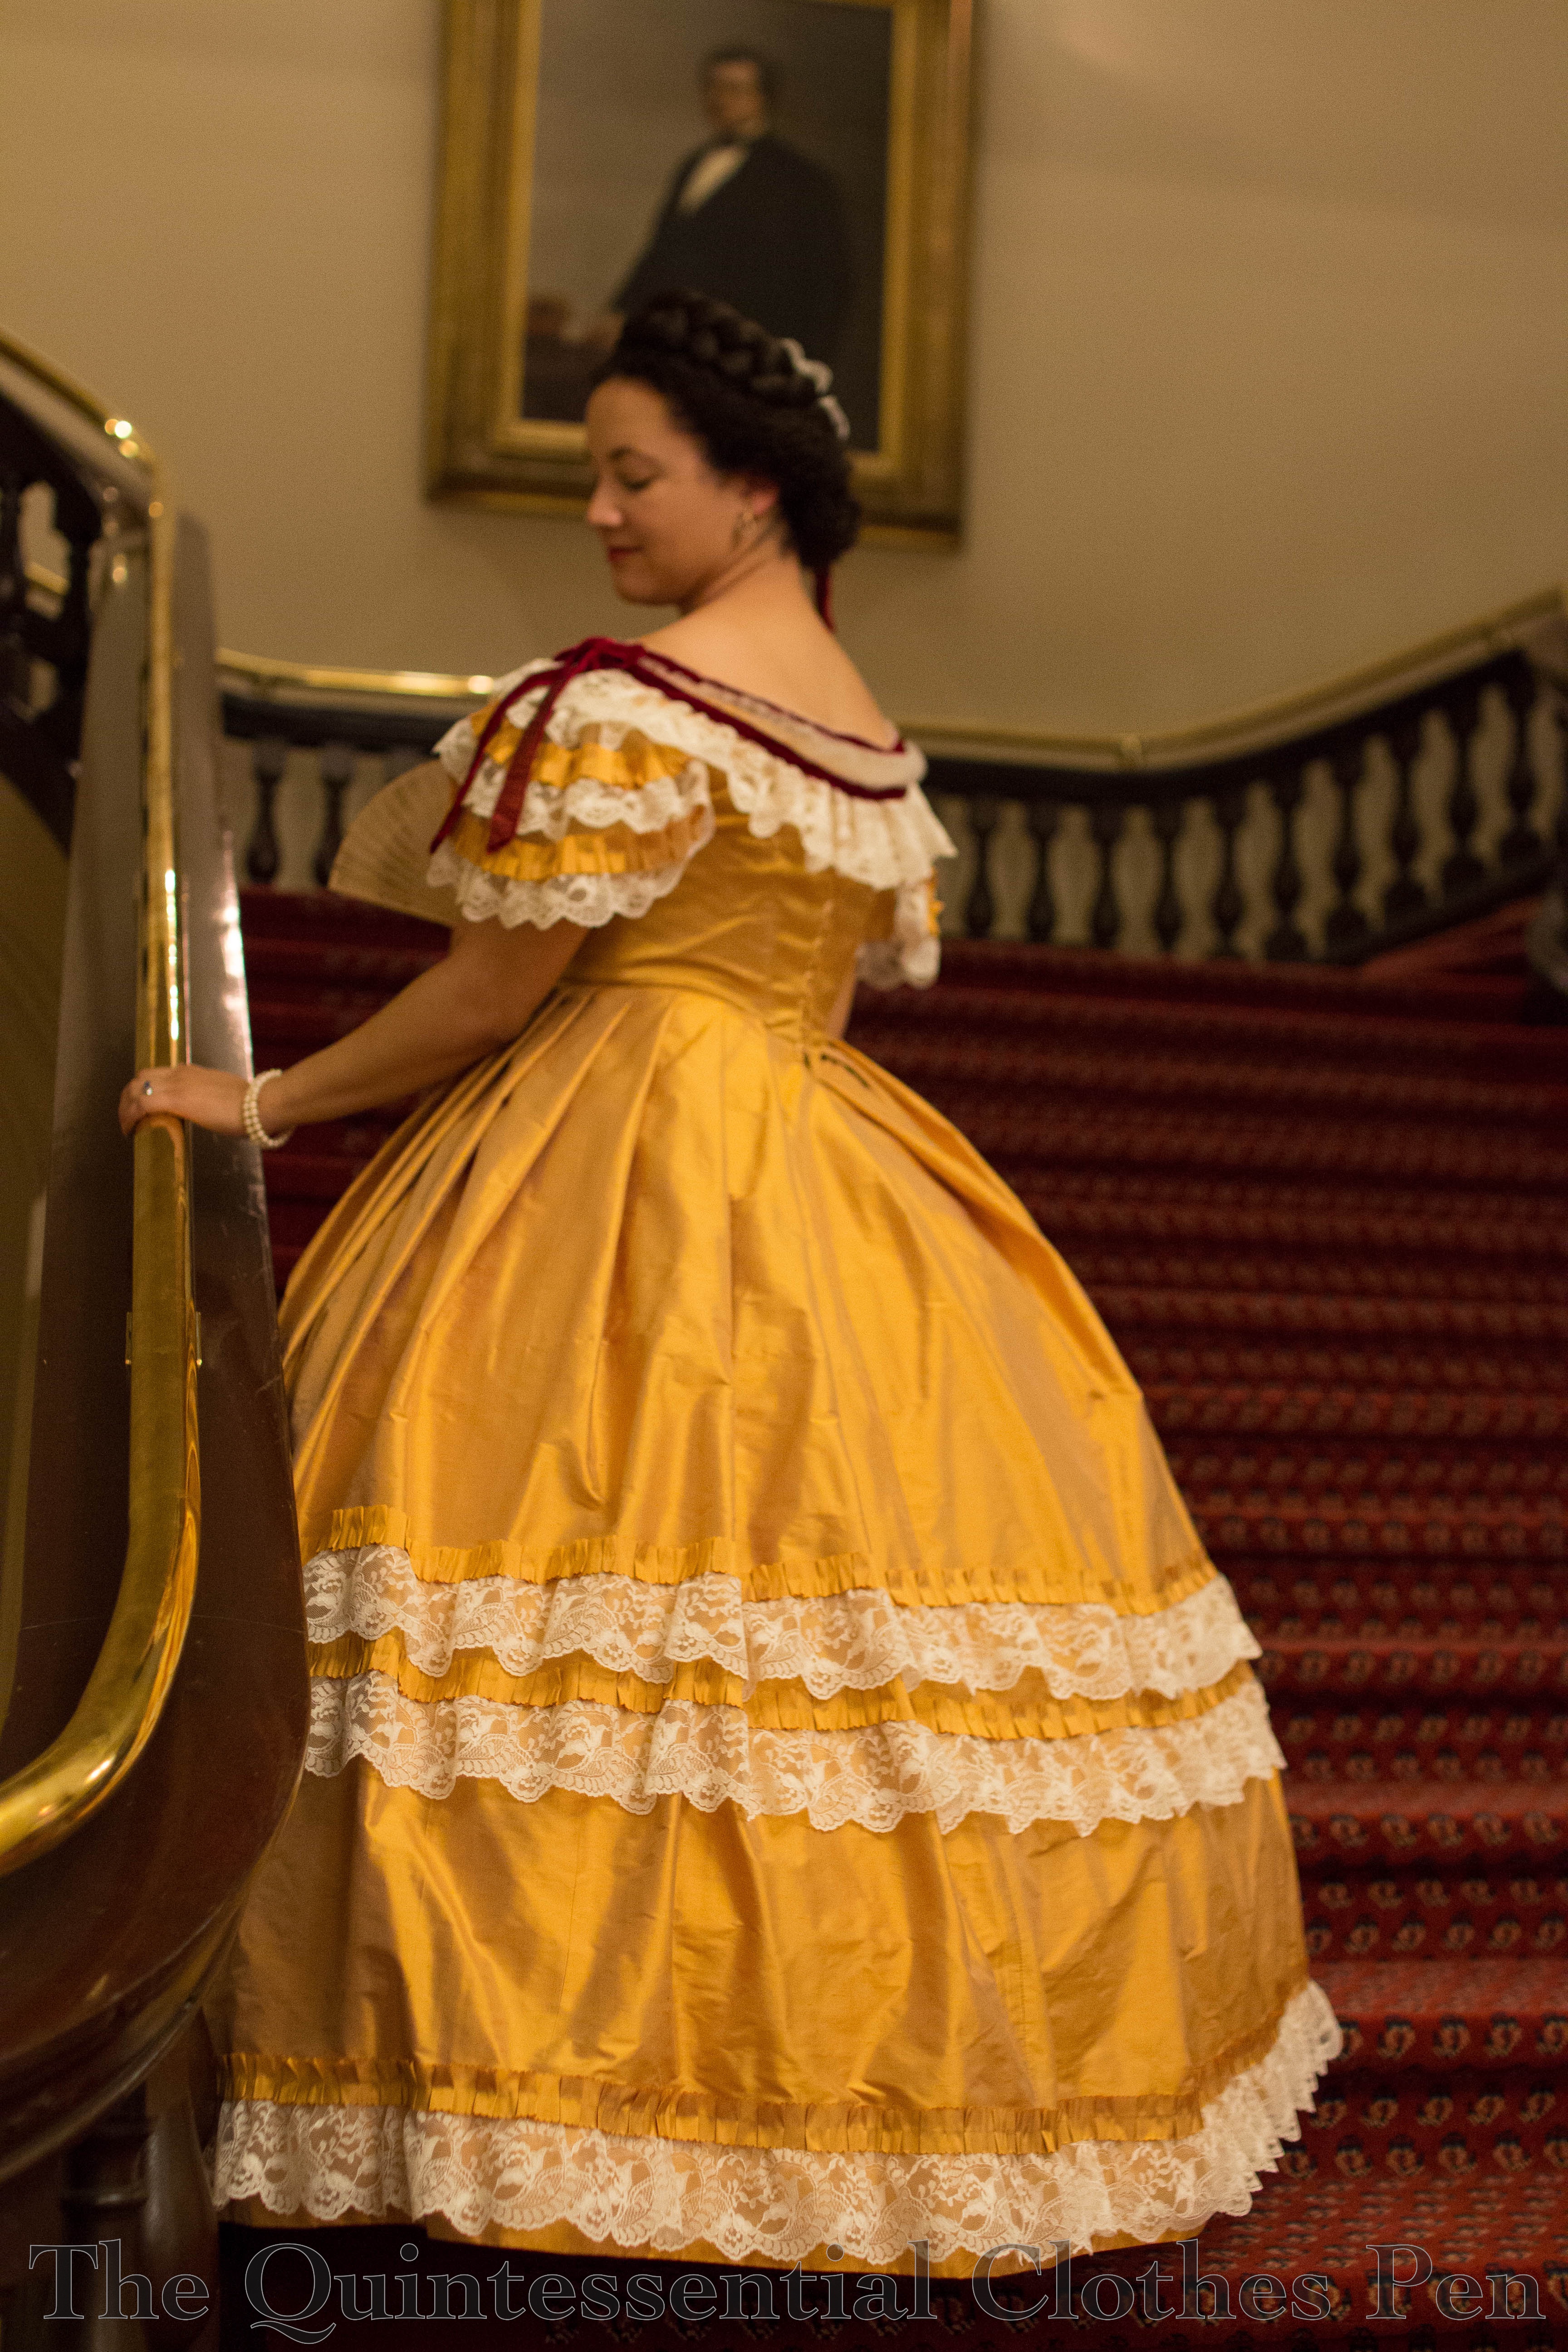
Aside from the photo above I don’t have many directly front facing photos of this dress–I guess I did a lot of my posing at an angle–but here is one that is slightly less angled and gives the full effect of all the trimmings.
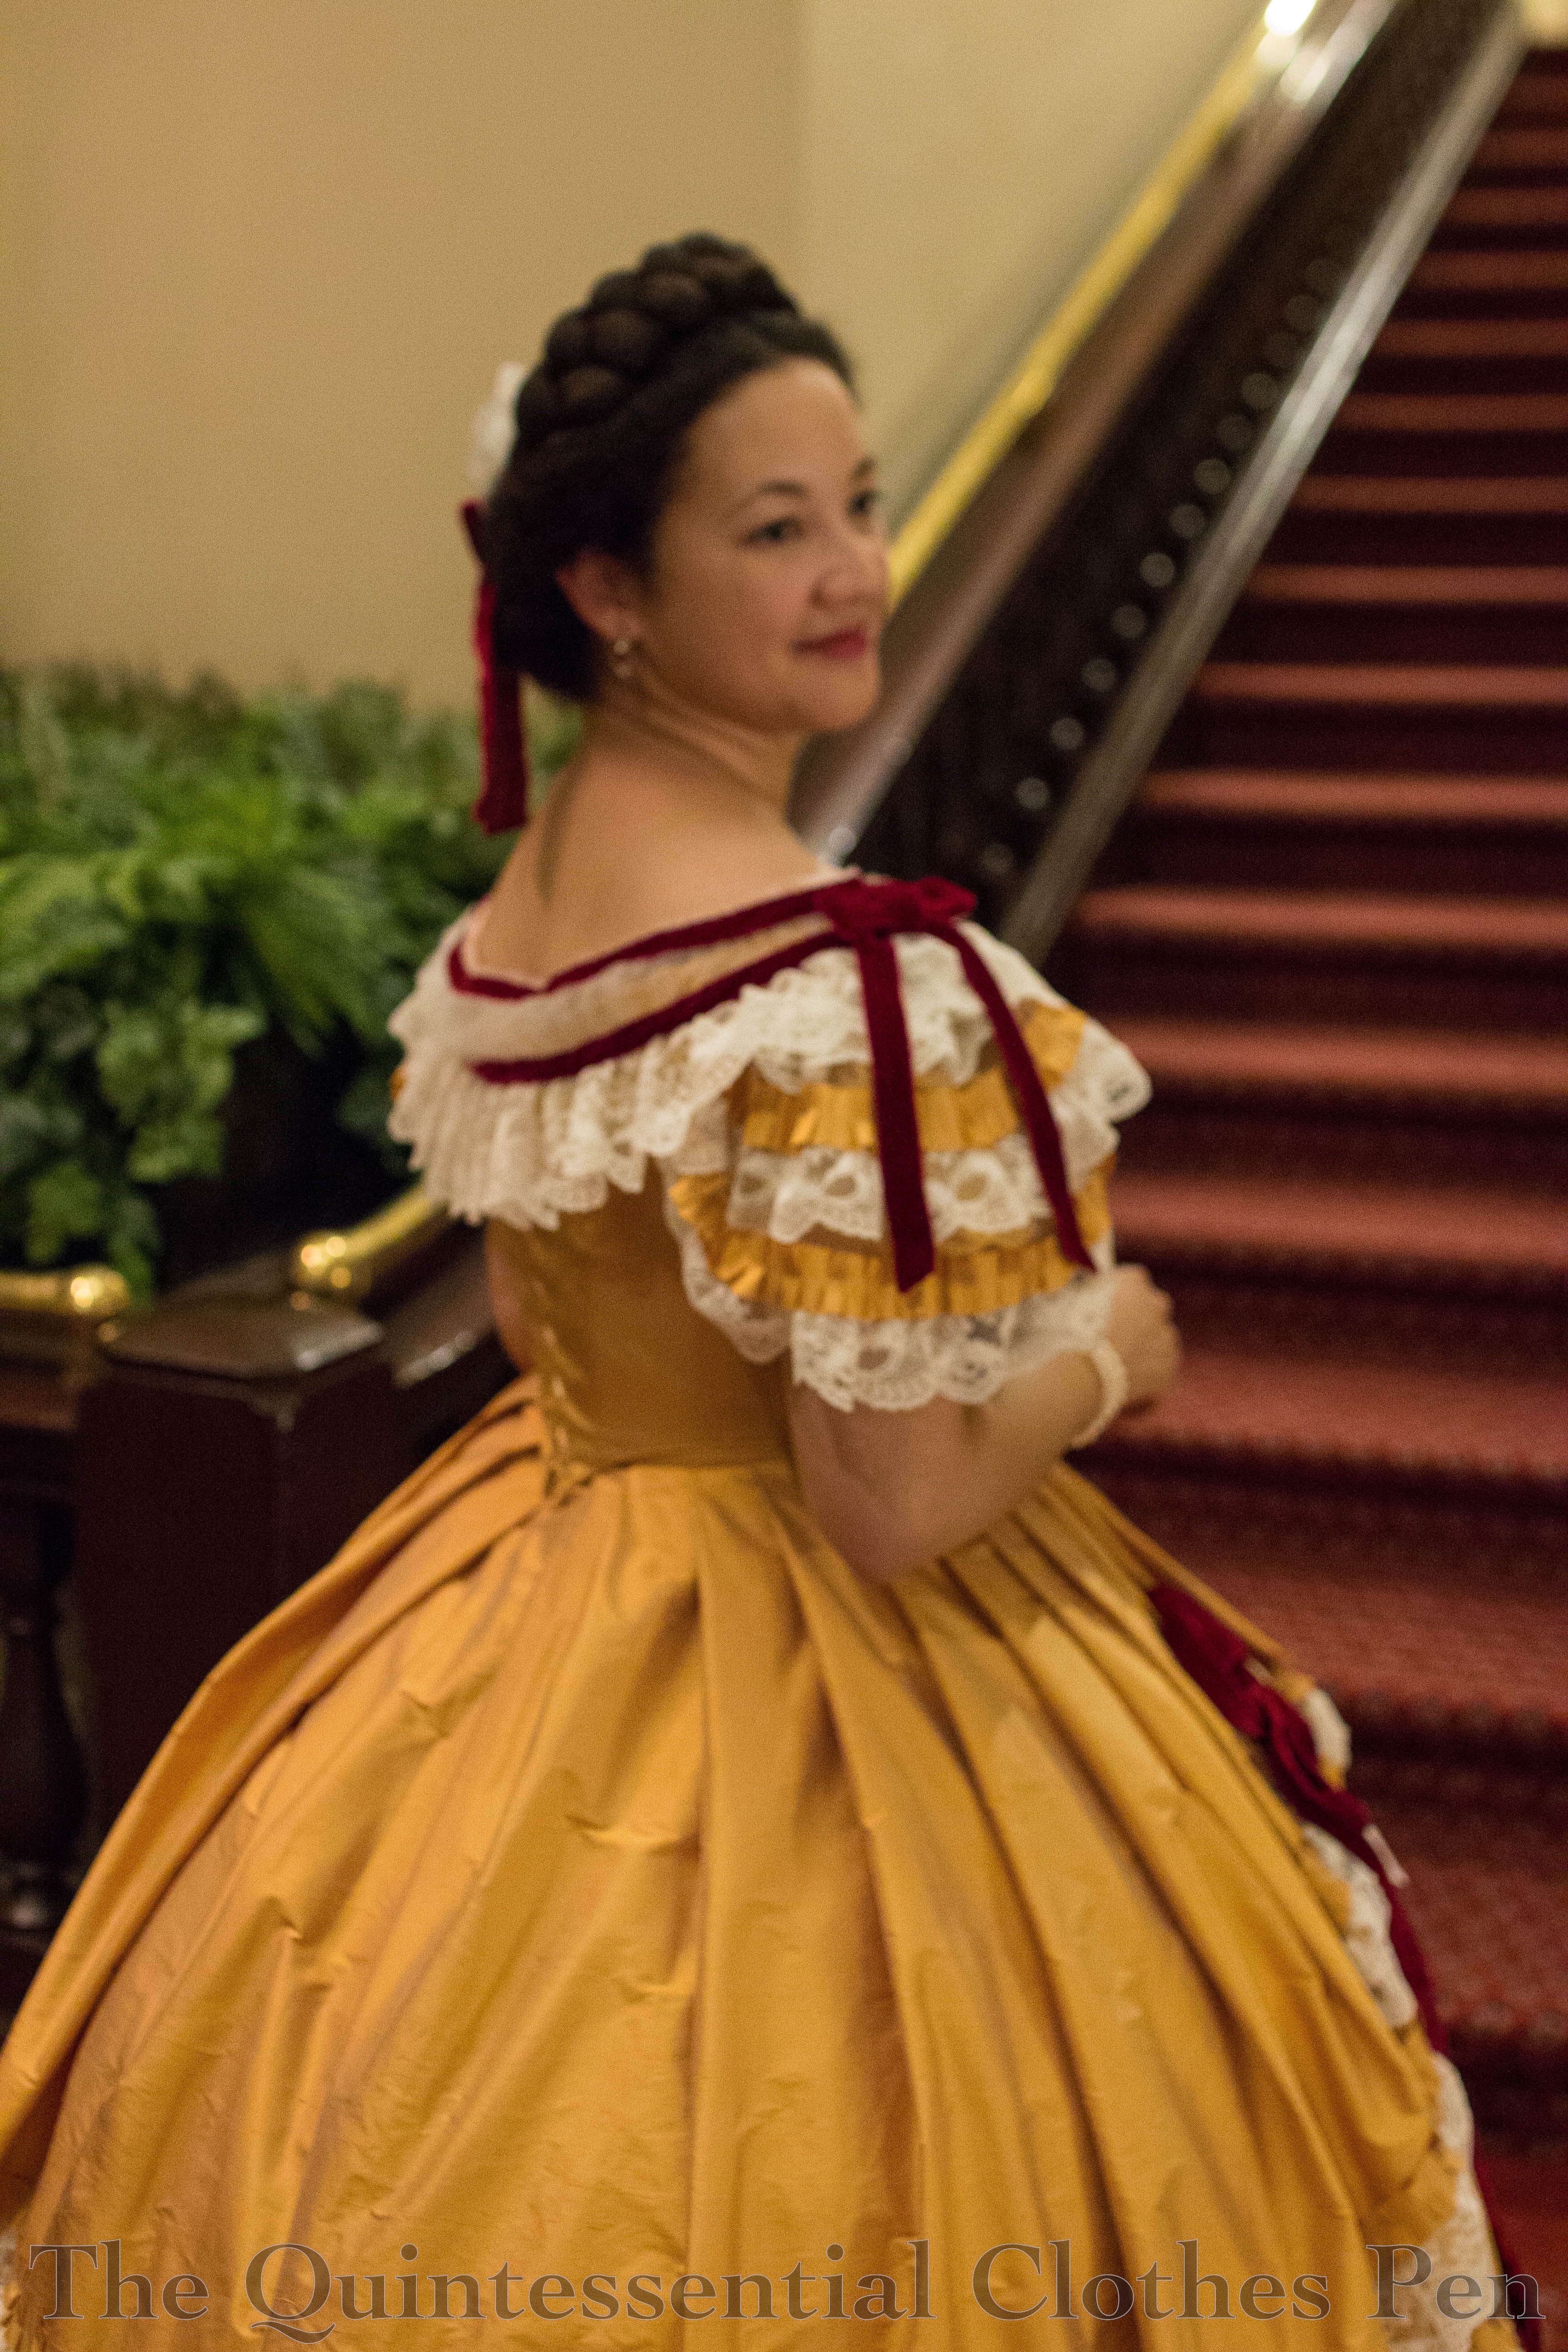
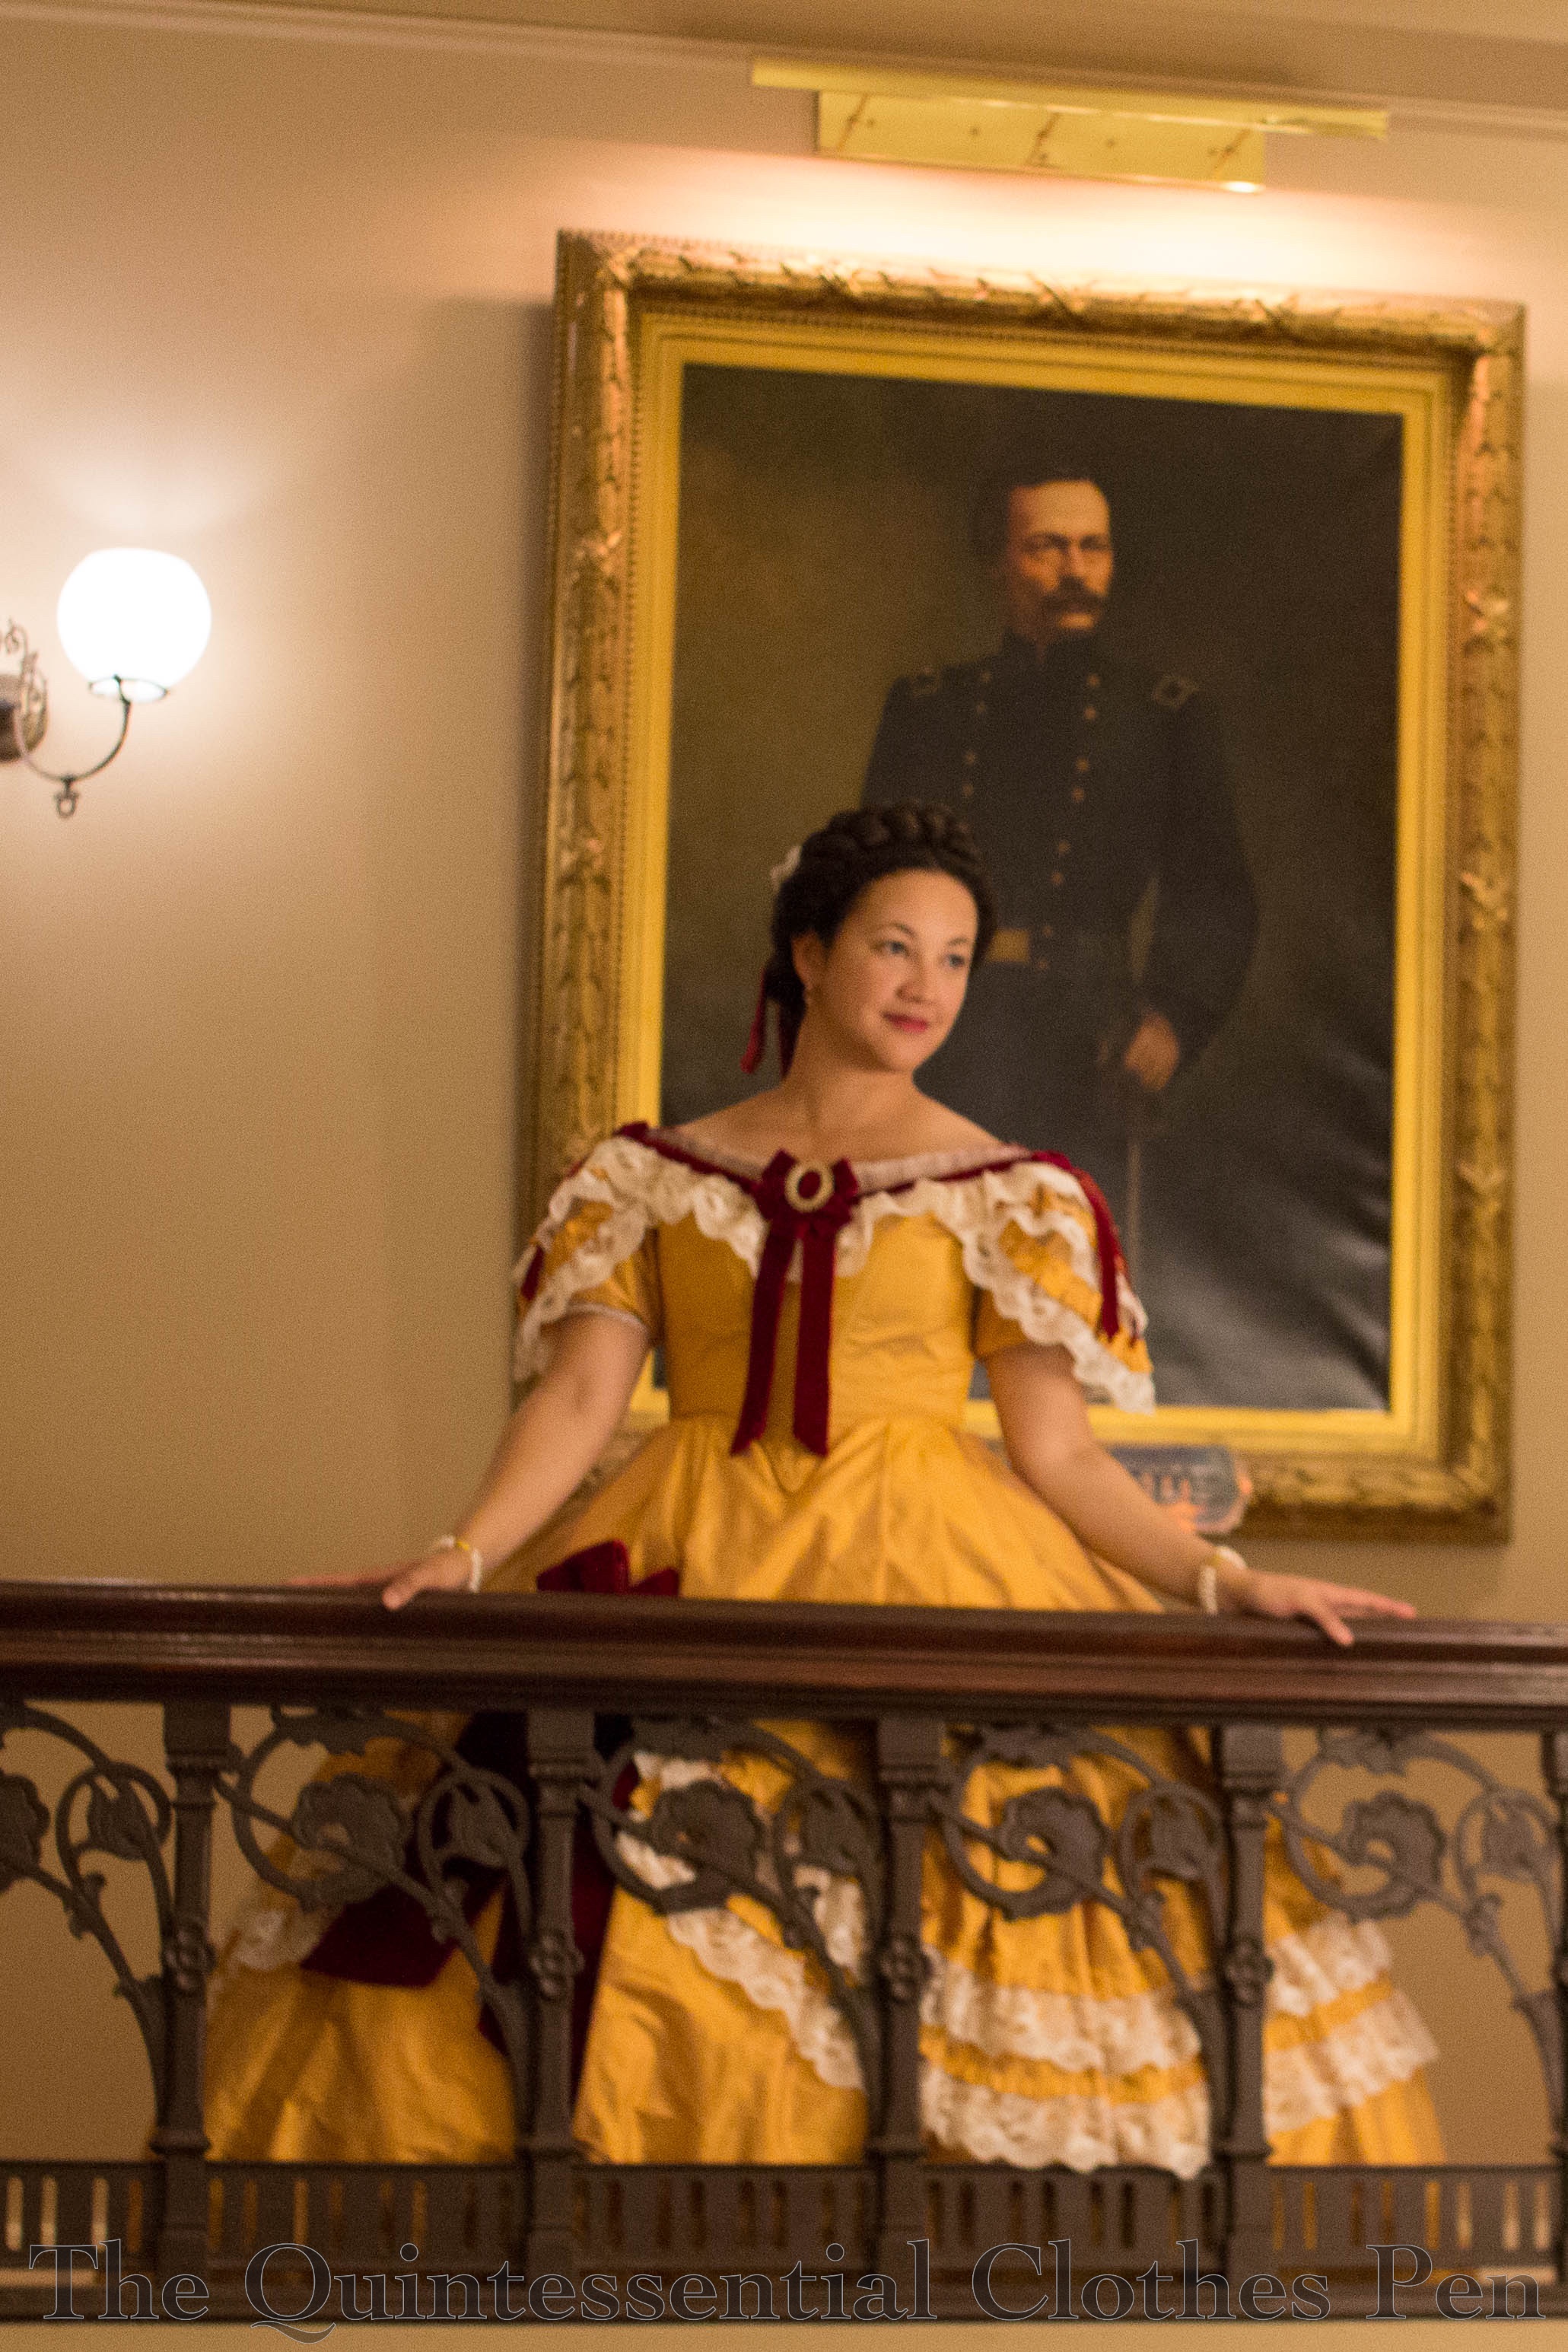
I was super pleased to wear my American Duchess burgundy satin Amelie shoes with this dress! They matched my velvet trim quite well and were fun to have peeking out from under the giant skirt. It’s such a fun piece of history to have contrasting shoes that actually match your dress! Yay! You can see them in this next photo.
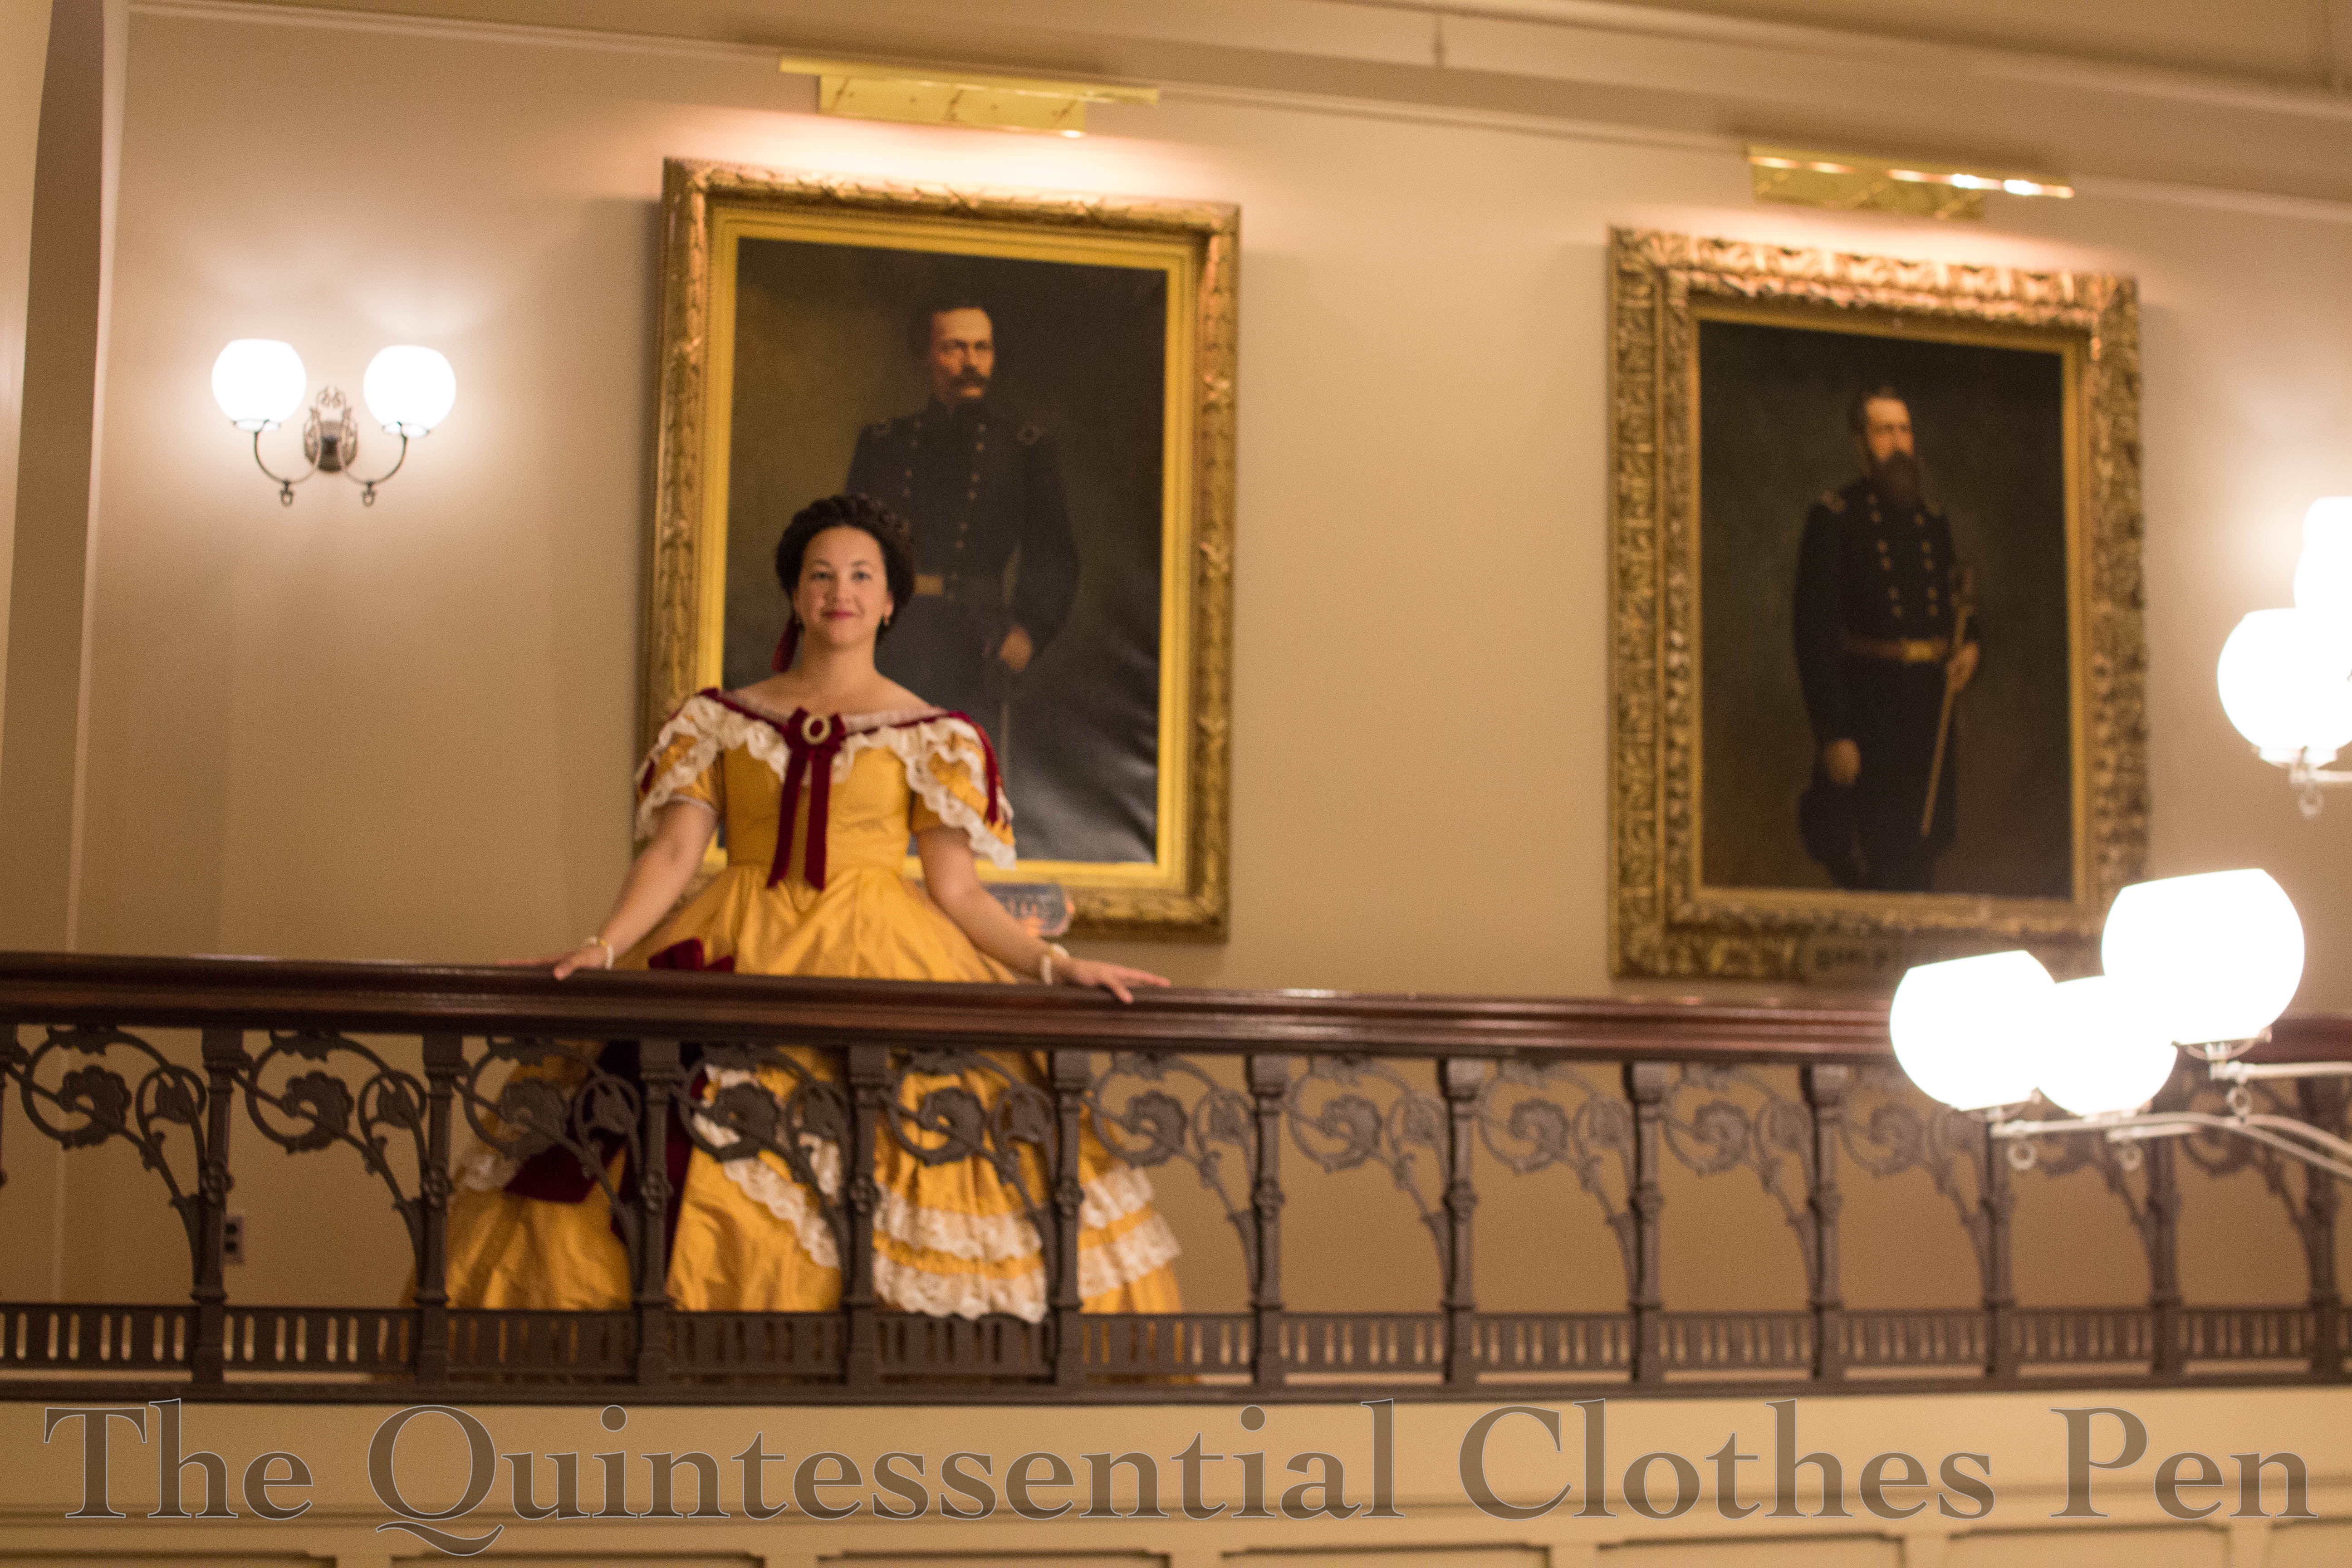
The venue we were in for the ball not only had a number of fabulous staircases leading to the ballroom but also many photos of generals and other military figures from the Civil War. It seemed fitting for this period of dress even if they do occasionally seem to be ‘photo-bombing’! Here’s an example. I love this photo! But does the painting look amused, or disapproving? Hm…
I’ve got a post coming up specifically about my grand crown hairstyle as well as a few photos of the ball in general. For now though, thanks very much for bearing with me through this project! I’ve appreciated your encouraging words and excitement about seeing the finished product!
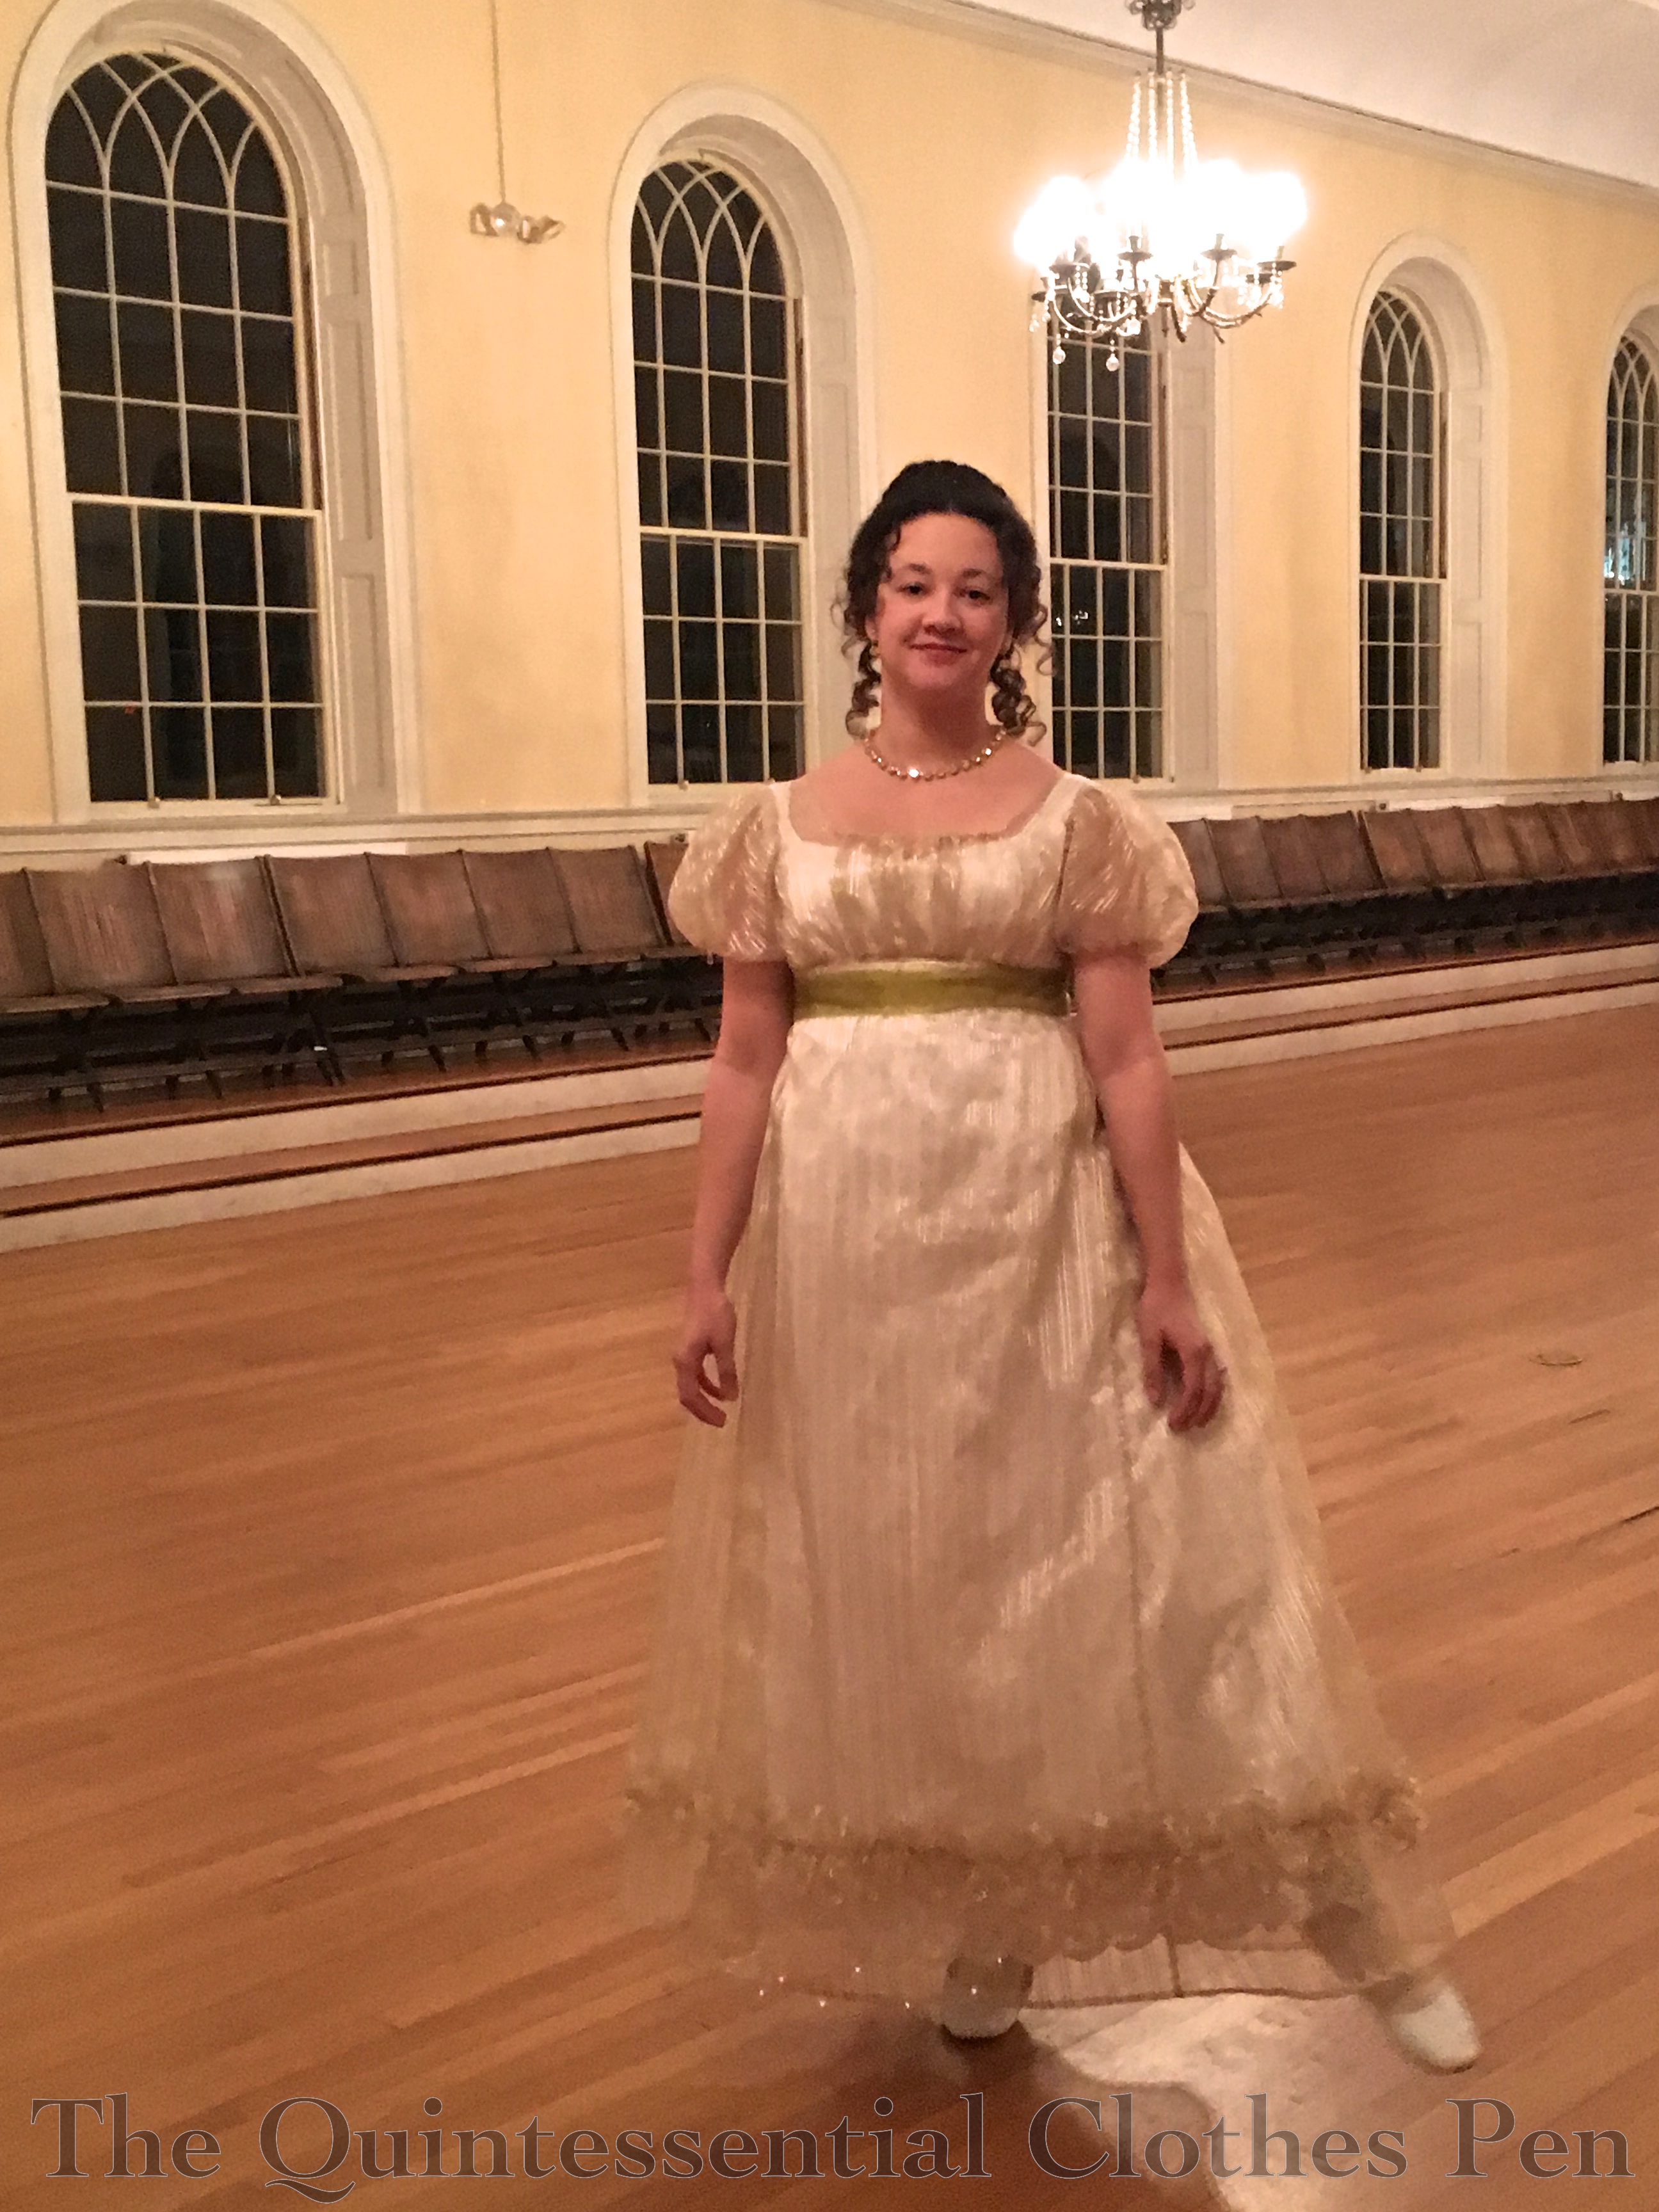
I love this dress! The sheer fabric is unusual to see in modern recreation settings and has lots of body, making for a lovely shape that is fun to dance in. It turns out that the gold stripe is rather neutral, so I’ve had fun accessorizing it in different ways this spring. We’ll start with this wearing, but there’s another one to blog about as well!
This time I decided to add a bit of color to the dress by adding a wide chartreuse organza sash with a simple bow in the back and rather long ends. (I’m all for variation in ribbon sashes for Regency dresses. In fact, I wrote a post detailing different sash styles a number of years ago!)
I also added lovely new jewelry from In The Long Run Designs. The color I chose, jonquil, is a light yellow color . It compliments my skin tone and adds quite a bit of neutral-toned sparkle to my ensembles (the goal was to match as many dresses as possible so I can get the most use out of the set).
The day of the ball I thought I had lots of time and so I decided on a whim to do a complicated hair style with face curls. It turns out I was off by an hour but I didn’t realize it until I was in the car! Thankfully I arrived in time and didn’t cause anyone else issues with my lateness. Oops! But I was very pleased with my hair (and the fact that it was done before I arrived to get dressed definitely helped offset the fact that I was late).
The hairstyle is directly inspired by the following image of Maria Leopoldine of Austria from 1815 (source). I have a note that it was painted by Friedrich Johann Gottlieb Lieder but I can’t find documentation for that detail outside of my note-to-self. Maria Leopoldine caught my eye because I love big braid buns (my hair does volume so well!) and I thought it was high time to try face curls again (see my 2014 attempt and a different narrower circumference of curl in 2016 to see other attempts I’ve posted about).
So off I went with a curling iron to try and reproduce this hairstyle. Given that I thought I had lots of time, I even took photos of the process so I could share it with you!
Let me start by saying that yes, even though my hair is curly I still use a curling iron (or other curling method) to get precise curls. To show the difference, here’s my hair at a partially done stage. You can see the curling iron curls to the left of my forehead and chin with my natural curls being held sideways in between them and on the right side of my face.
How did I get to that point? I’ve determined that great looking historical hairstyles are often styled in many parts. The complicated thing about face framing curls with my hair is that it’s all quite long: past my shoulders when it’s curly and almost to the middle of my back when it’s straight. I don’t have short lengths around my face to curl, so I have to fake it with long lengths that are pinned up to be shorter.
To begin, I split each half of my hair into sections–a front top section, a back top section, a section behind my ear, and the rest of the hair on the back of my head. In the photo above, I’ve already used the curling iron to curl the top back section of hair, pinned up some of the length, and used the front top section of hair to smooth out and cover up the pinned up length. I’ve also curled the back section behind my ear and pinned the curls up to shorten them as well. The rest of the hair is being held out to the side so you can see the different sections I’m referring to.
I realized after taking that photo that I should show a better example of what all of those words mean. So in the next photo I’ve let go of the back section and put a loose hair tie around it to keep it separate from my nicely curled sections. And I’ve curled the back top section of the other side of my hair, but I haven’t pinned those curls up to shorten or arrange them. I’m holding the front top section up in the air so you can see how untamed the curling iron curls look before being arranged.
The curls are the hard part. After arranging the top front sections and pinning them down around the back of my head it was a matter of wrapping and pinning up the back sections to look nice and make a big bun on the top of my head. I’m pretty sure I used a big bun form under there (the medium one from my Versailles hair in 2016–and for reference that post pretty clearly shows how long my hair is–it’s great for volume but can be a lot to wrangle), but it’s hard to remember as that was now almost three months ago and I didn’t take photos of those steps!
The final step was to wrap and pin my trusty (and yikes, 15 years old!) faux braid around the bun and give the whole thing a liberal dose of hairspray!
I love that I’ve found a new look for this dress and a new historical hairstyle. Looking at the photos, it doesn’t look like my braid bun is quite as large or wide as Maria Leopoldine’s (I’ll have to try again someday!). Despite that, I was very pleased with the face framing curls and the bouncing curls behind my ears. The style felt very regal!