1899 Elusive Blue: The Snow Queen Fancy Dress Version

It’s time to share photos of my completed Snow Queen fancy dress outfit! This outfit, which is a re-trimming of my 1899 Elusive Blue dress, made use of new beaded snowflakes (posted about in detail here) and a recycled plastic clamshell icicle crown (posted about in detail here). Below is the finished outfit with all of the trimmings!

The trimmings included big sparkly earrings and a long strand of faux pearls worn in an 1890s style, long white gloves (an essential for an 1890s ball!), the afore-mentioned snowflakes and crown, and a bit of white fur to capture the idea of snow.

The fur tippet amuses me because it is super soft and comes in handy as a historical accessory, but also because, looking back, I made it in 2012! Here is the original blog post about it, including a definition of what a tippet is and research showing examples of tippets. How fun that it is still in my wardrobe and still coming in handy!

Here is the icicle crown in action, to give some context to the description of how it sits on my head.

To finish off, here is one more full length view of the ensemble, zoomed out far enough to see the fun bubble-shaped light fixture!

Happy new year! Thanks for enjoying this ensemble with me!

Making Beaded Snowflakes!

As part of my Snow Queen idea for The Footwork & Frolick Fairytale Ball I wanted to incorporate some snowflakes! In my brainstorming of materials I remembered that many years ago (twenty-ish, I think!) I had been gifted a whole bunch of beads and little trimming bits and bobs. I stored them for years and didn’t really find uses… but all of those pearls, silver, and blue beads would be perfect for making snowflakes!!

I actually started these in the middle of making my icicles. I was completely distracted! My thought was to put one snowflake on top of each of the black flower accents on the Elusive Blue 1899 Dress I made back in 2016 (visible in it’s original form below). There are 8 flowers total, so I would need 8 snowflakes.

I did a quick internet search for ‘beaded snowflake tutorial’. There are many! But this one, on Instructables, use beads similar to the types I had available, so that was my main inspiration. I laid out my beads in a few ways to see what would best approximate the pattern in the tutorial, as you can see below.

Then I dug out a spool of wire I had accumulated doing other craft projects. Honestly, I’ve probably had this wire for 20 years, too, and I have no idea what project I purchased it for… but it came in handy to have it on hand! Mr. Q contributed wire cutters that lowered my frustration by cutting the wire more effectively than my sewing pliers, and I was off!

I easily created the first snowflake, on the left in the image below!

No two snowflakes are the same, right? So I wanted variation and decided to make up my own design, which you can see on the right in the image above. Turns out I made it pretty complicated… and a triangle! I had a bit of a meltdown… Would a triangle snowflake make sense?? Are snowflakes always symmetrical?

There ARE triangular snowflakes! Here’s an article explaining how they form.

I went back to icicles for awhile and then over the next few weeks made more snowflakes. Some are similar, but no two snowflakes are the same.

It was fun! For me, it was also a perfectionist rabbit hole! I wanted to find eye catching designs for the beads I had, make sure the beads were tightly pulled on the wire, make sure each area of each snowflake matched the other areas… There were many conditions to be met!

It all turned out well, though. I decided to replace the black flowers with snowflakes, but saved the black flowers and took note of the placement so they could easily be switched out in the future. Next post I’ll share the finished effect of the icicle crown and snowflakes for my Snow Queen fancy dress outfit!

A Mysterious Domino, Part I: Background & Research

Earlier this year, The Footwork and Frolick Society hosted an early 19th century themed Masquerade Ball. I enjoy fancy dress themes, and so the idea of a masquerade (which takes the idea of a costume to another level by adding a mask) seemed like a lot of fun. But what was I to do to about a costume?

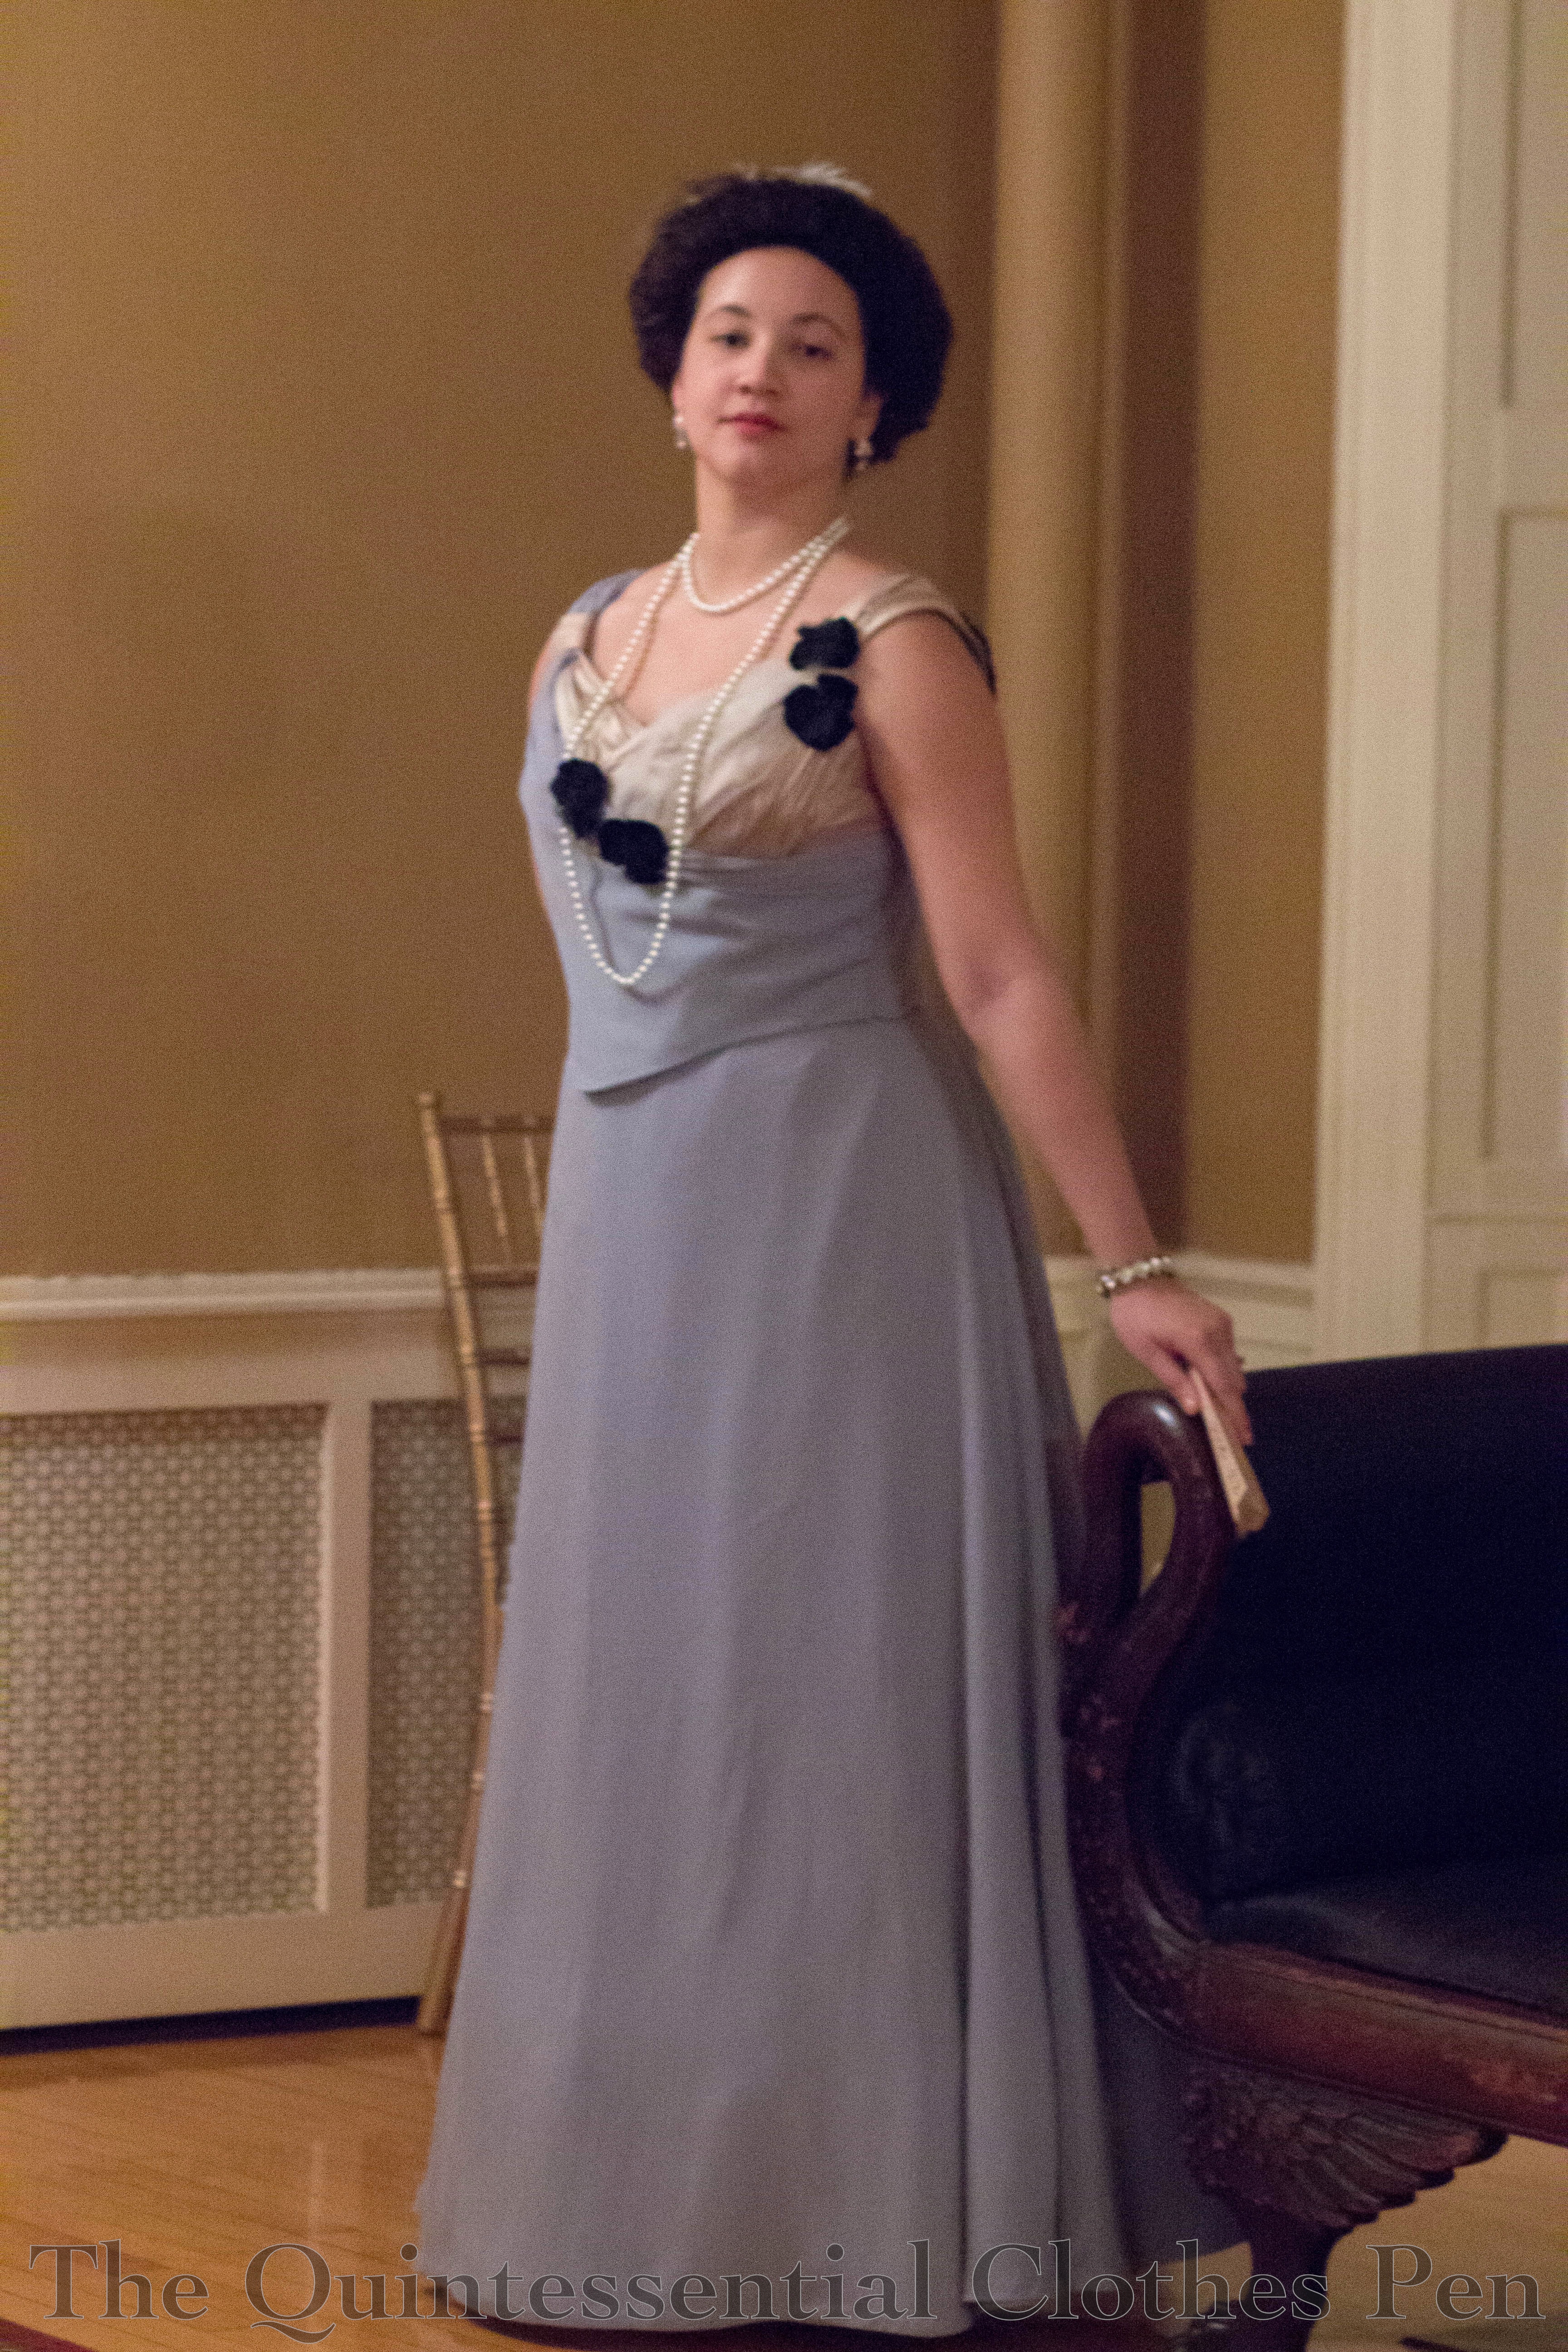
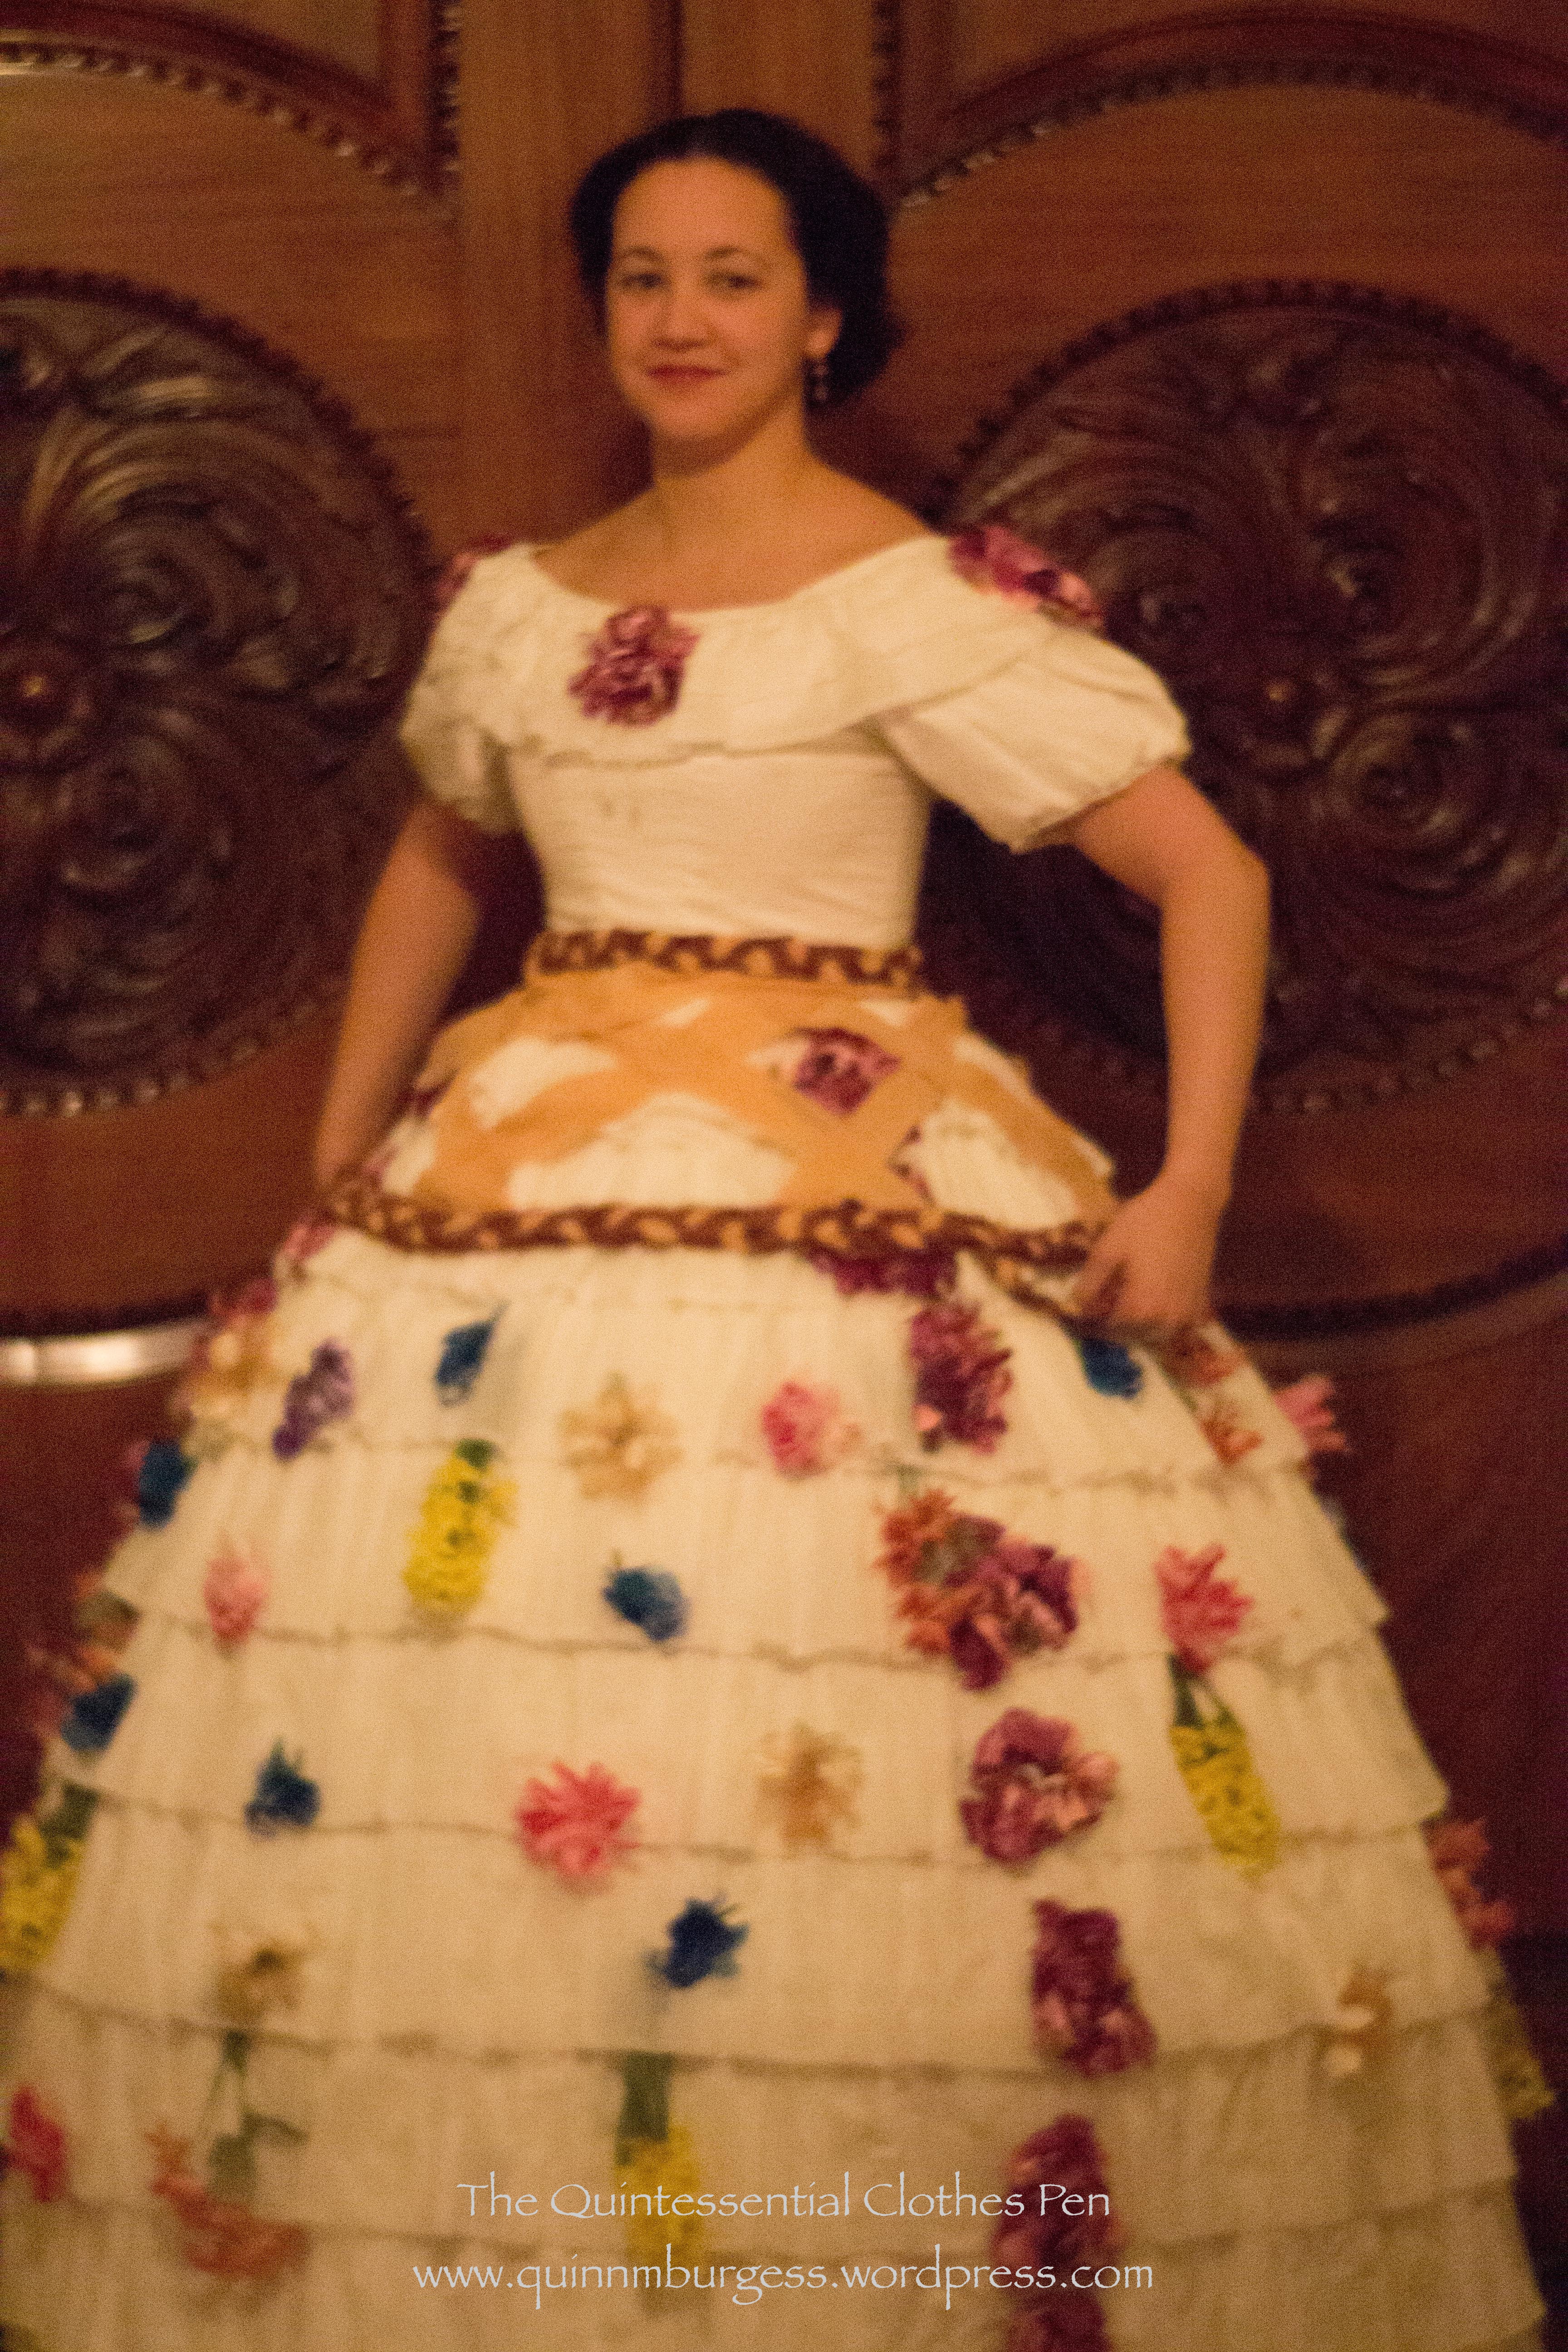
The dress: I had already decided that I wanted to wear an oldie-but-goodie dress to the ball — my ivory 1819 ruffle dress, finished in 2012 (and resized at some point, though I don’t seem to have a post about that on the blog).

The mask: I don’t really enjoy wearing masks (unless they are on a stick, like this, but that’s not good for a ball when you need your hands!). I find that masks irritate my face, but at some point I did buy a black lace mask for a fantasy masquerade that is very malleable and irritates me less. So I knew that I wanted to incorporate that mask into my outfit.

The costume: I wasn’t sure… my creative problem was to figure out what kind of costume would unite an ivory dress and a black mask!

I liked the idea of choosing something historically plausible and I know that themes like flowers, seasons, and historical periods were all popular for Fancy Dress costumes (and therefore, I figured, for masquerades), but I couldn’t think of a good theme that made sense with my color choices.

So I started doing some research, and came across the idea of a domino. Not a numbered playing piece from a game… but a mysterious, historical domino!

What Is A Domino?

What is that, then? A mysterious, historical domino?

A domino is traditionally a voluminous black robe-like hooded cape worn with a black half mask as a disguise during Venetian Carnival. Dominos were popular during the 18th century at masquerades and it seems that hooded capes in this century were sometimes just generally called dominos (such as this one, perhaps, at the Metropolitan Museum of Art). By the 19th century, dominos were occasionally seen at masquerades, and even less often at fancy dress events (a costume party without masks).

Examples Of Dominos

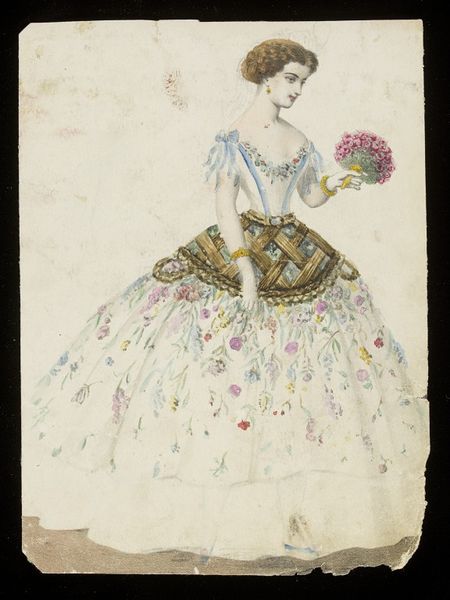
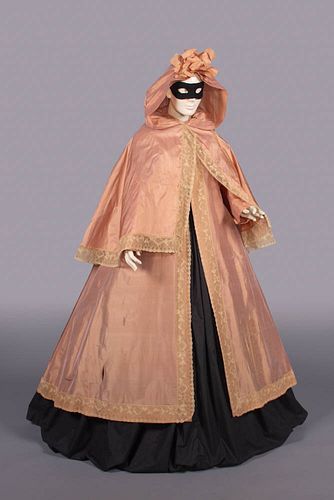
Below is an example of an 18th century domino in the collection of the Victoria and Albert museum. In this case, the idea has been reimagined in pink, rather than the usual black. The museum gives this information regarding a date: 1765 – 1770 (sewing), ca. 1775 (altered) (accession number T.195-1968).

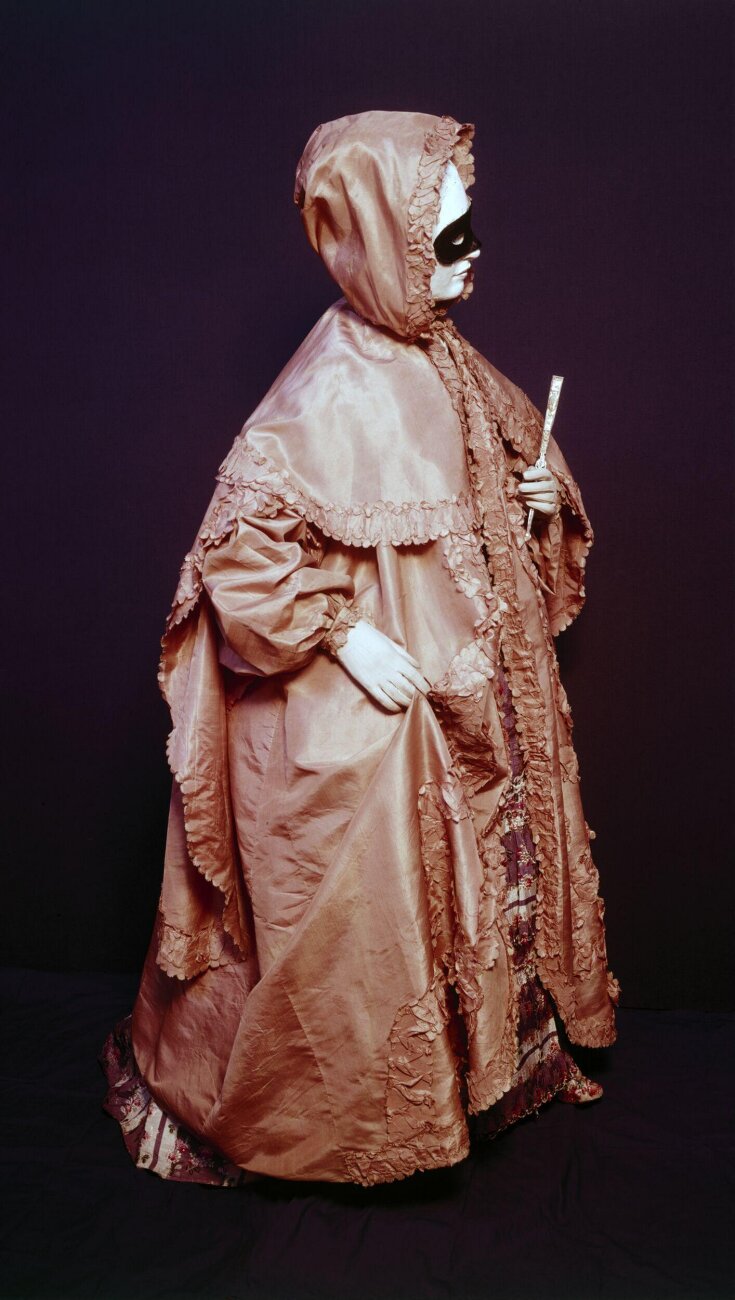
Below is another example, from the late 18th or early 19th century, also pink. This domino still shows evidence of 18th century construction styles — particularly the large gathered hood and what appear to be rectangle shaped sleeves. The extant example below is from Augusta Auctions. They labeled it as a Two Piece Shot Silk Domino, c.1800.

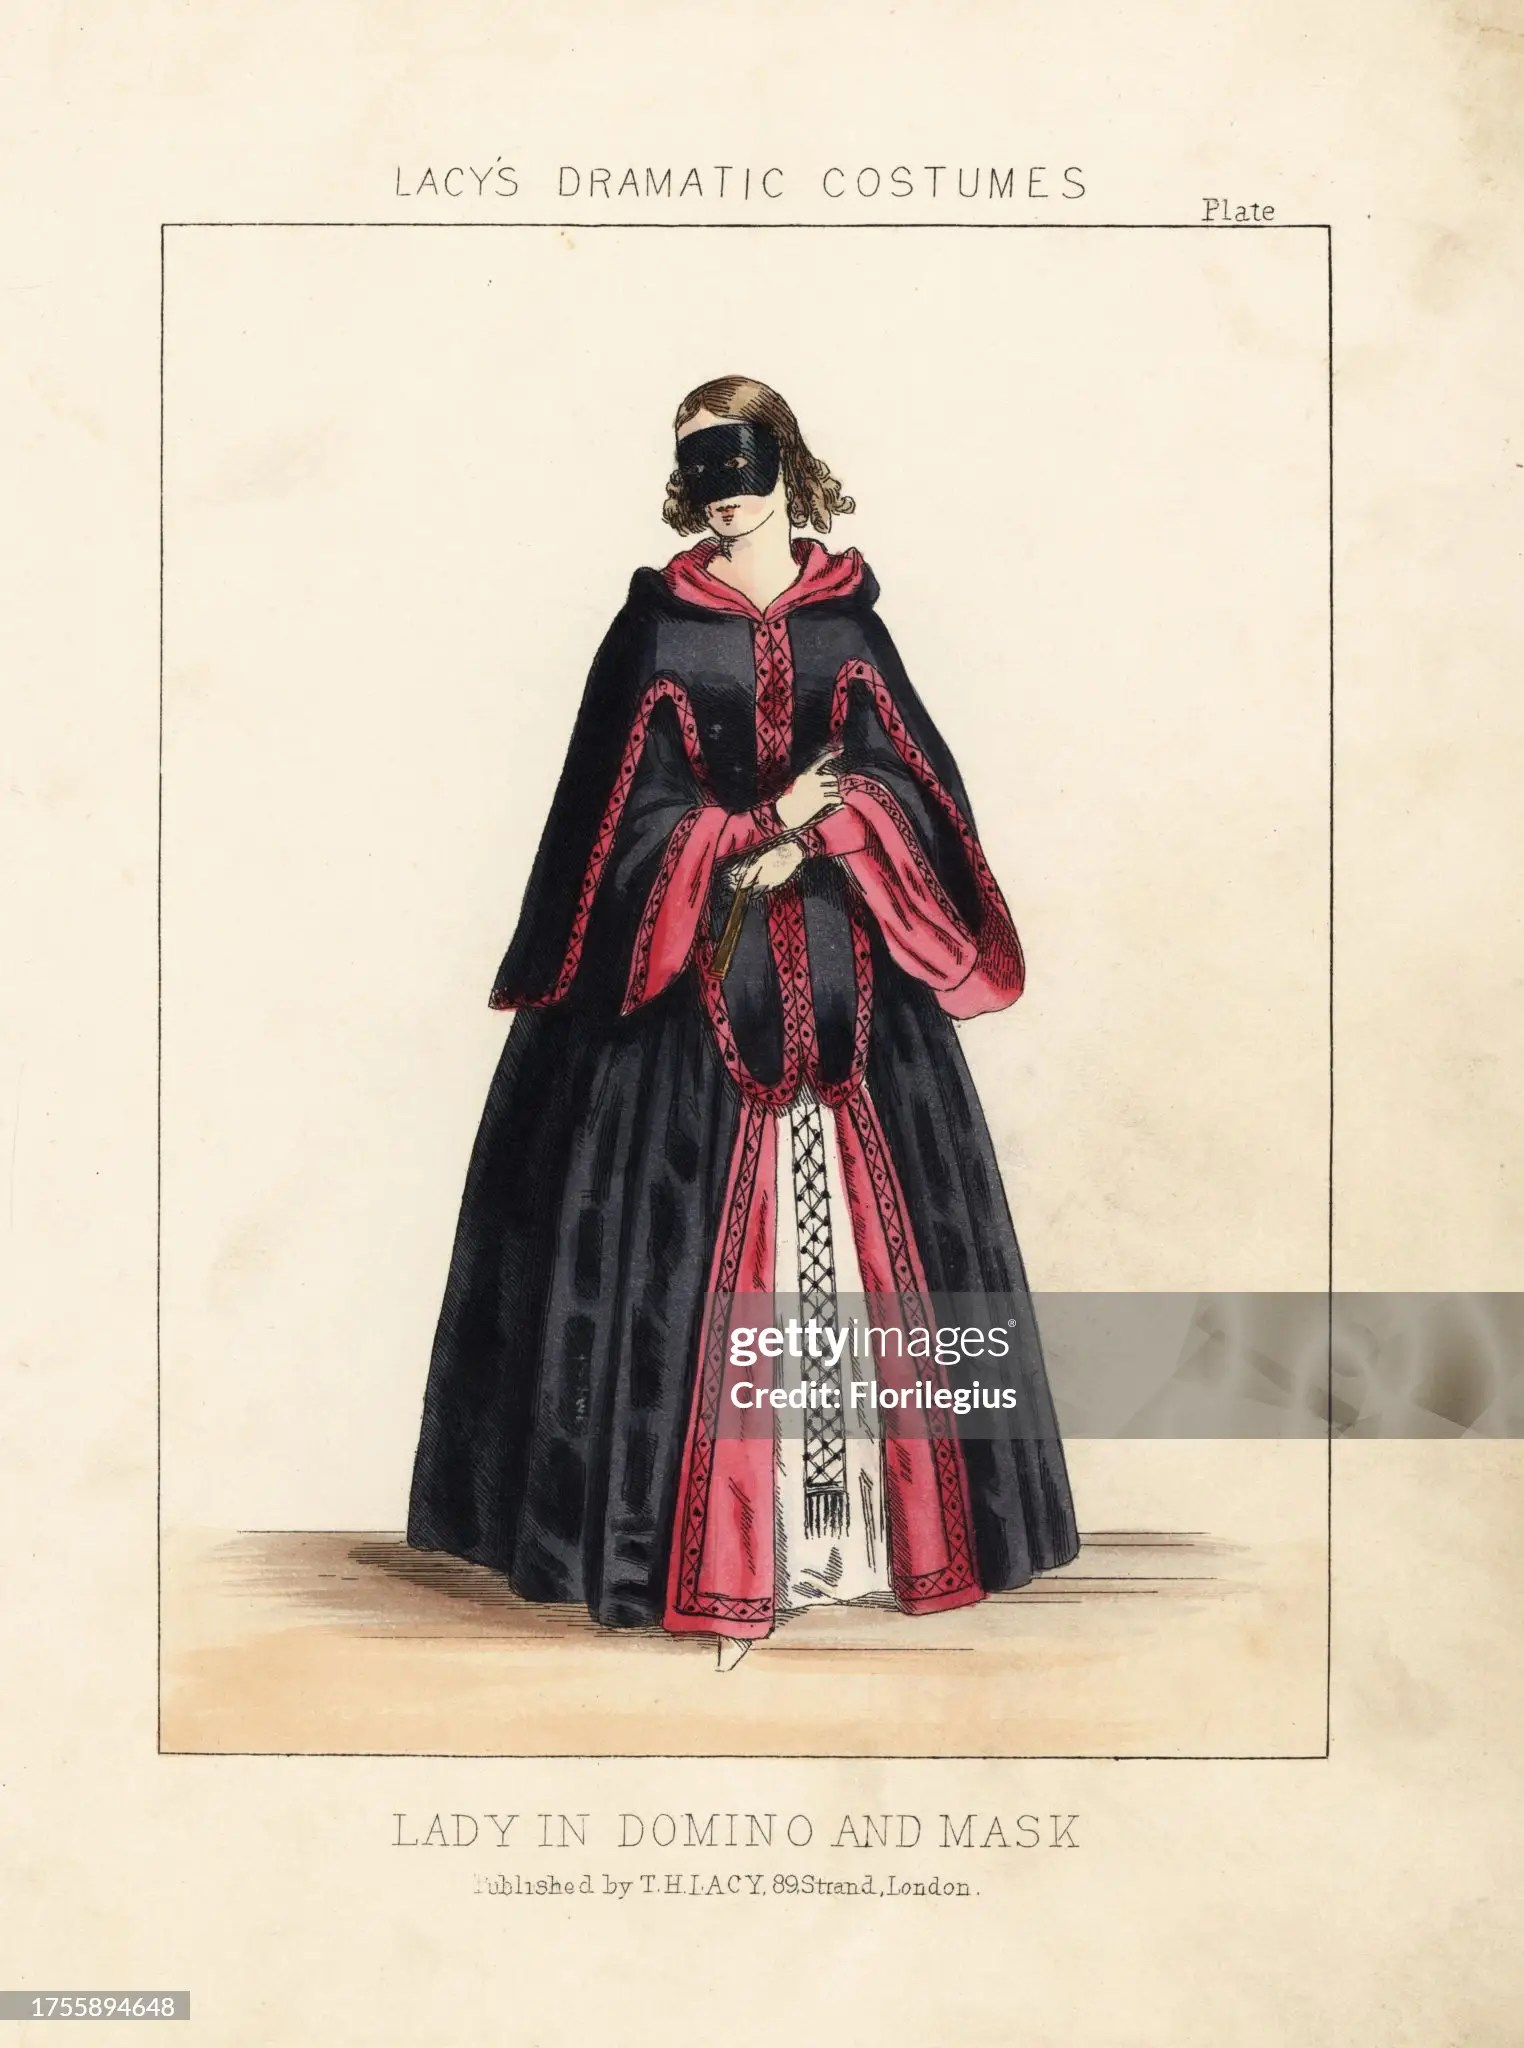
Below is an example of a mid-19th century take on a domino. This is a costume idea for a masked ball (or masquerade). This plate is from Thomas Hailes Lacy’s “Female Costumes Historical, National and Dramatic in 200 Plates,” London, 1865 (from Getty Images).

Susan de Guardiola has collected later 19th century descriptions of dominos that are available here, as well.

Though less common, dominos were still in use for masquerades even in the early 20th century. While looking for other unrelated research, I came across a mention of them from January 1920, when the accomplished fashion designer Erté wrote in a letter he was asked to write from Monte Carlo to the editor of Harper’s Bazar:

This winter will mark the first organized effort at gaiety since the dark night of war… Already we are planning to revive the masked ball in all its mad gaiety…

The domino–aha! … In Venice until the fall of the Republic, it was commonly worn in the streets. There reigned in the enchanted city at this decadent epoch a strange corruption of manners, and the mask was a necessity. At every entrance hung the black domino. Rich and poor alike donned it, in order that they might sally forth enveloped in anonymity…

“But,” argue some, “the domino gives to the fête an air of mystery.” I reply, “Then one may attain this illusion by means of a domino of distinguished cut, a domino which shall not make one’s figure look like a shapeless bundle.”

(From Designs By Erté: Fashion Drawings & Illustrations From ‘Harper’s Bazar’ Including 8 Covers In Full Color By Stella Blum)

I think this is a great place to pause. I’ll continue sharing in my next post, which will focus on how I whipped up a quick domino and what it looked like when worn!

1863 Fancy Dress: Genevieve As The Queen Of Hearts

Back in September, The Footwork and Frolick Society hosted a Wonderland-themed 19th century fancy dress ball. The idea was inspired by the whimsy of Lewis Carroll’s Alice In Wonderland (published in 1865) and Through The Looking Glass (published in 1871).

There were so many fabulous interpretations of Alice In Wonderland! You can get a sense of the fun in the gallery from the event on the Footwork & Frolick website, here.

I chose to re-use an idea I’d executed in 2018 when I turned a 1980s dress into a 1950s dress and style it as The Queen of Hearts. You can read about the dress re-make and original fancy dress styling here, in a past blog post. For this new wearing in 2024 I chose to use The Queen of Hearts theme and accessories again, but with one of my 1860s dresses to suit the mid-19th century goal of the Wonderland Ball!

Genevieve, the name of my apricot ballgown from 1863, seemed to be the most fitting choice for a Queen of Hearts theme. (You can read all about the making of this dress in this Project Journal series of posts.) The two main elements of my fancy dress ensemble were a tiara and a royal order sash. I figured that could easily work again.

We captured a series of photos of The Queen of Hearts elegantly (and somewhat aloofly!) preparing for the ball!

The ball itself took place in the lovely Andover town hall. It has all sort of beautiful details. Look at the ceiling!

And the company was lively! I met charming new acquaintances and reconnected with creative friends. Below are a few of them… and we are joined by a golden lobster! (The lobster wanted to participate in the Lobster Quadrille, but had to step up the bling-factor to be ball appropriate!)

Gatsby On The Isles Adventure (2021)

It was super exciting to be able to attend Gatsby On The Isles again last year! There haven’t been many multi-day historical adventures of late, so that made this one extra needed and appreciated!

I’ve loved wearing my 1930s Beach Pajamas to this event over multiple years. They are super comfy and don’t show wrinkles (great for long car and boat rides!). I opted for them again this year but wanted to change them up to create a new outfit. After a look through my closet I decided to try wearing my 1922 silk blouse tucked into the pants for a new take on these old favorites.

I added a decorative head scarf for a bit of a jaunty flair and finished off the bottom of the outfit with my American Duchess Ginger shoes. The scarf is one I’ve had for over 20 years. I used to wear it in the belt loops of my jeans as a decorative belt, I think… I haven’t used it for anything in probably 10 years or so, but I held on to it, thinking that the dusty pink color and gold sheen would be useful for something someday… and it was! I like how it blends the bold color of the pants with the bright white of the blouse.

I might have been slightly distracted from drinking my tea at the clifftop gazebo by the opportunity to take photos (or be in them)… Some with a stereoscope!

Croquet the following morning was also well documented.

The weekend included other opportunities for fun photos, as well. The evening dance had a masquerade theme, for which I turned my 1926 Silver Robe De Style into a star-themed fancy dress outfit. There’s a whole post about the fancy dress inspiration that you can read here.

We also ‘played’ tennis! Or at least, we batted a ball around a bit.

I had no trouble running around in my heels. It was quite fun, actually! I felt very sporty in my Gingers and new 1928 dress!

In addition to playing tennis, we also wandered around the rocky back side of the island in pursuit of stunning photo settings.

We achieved great photos, some alone and some in groups. These are just a few of them… There are are so many fun ones that I’m going to do another post just to share rocky background photos!

My shoes had no trouble on the rocks! I did tread carefully, for safety and so I didn’t bang up my shoes unnecessarily, but I enjoyed proving to myself (as I have before) that one can clamber even in fabulous historical shoes.

It was so nice to have a getaway! And see people! And wear historical clothing!

1920s Star Fancy Dress

The theme recommendation for the evening soiree at Gatsby On The Isles earlier this year was a masquerade. I took that to heart and decided to adapt an existing dress in my closet to make it fancy dress. (It turns out that the majority of people who attended didn’t adhere to the guidelines, so I was a bit out of place, but I enjoyed my fancy dress regardless!)

My requirements for this outfit were: to use a dress as a base that was already in my closet, to not cost much, to not take much time, and to have the elements of fancy dress be easily reversible.

I looked through my 20th Century Fancy Dress Pinterest board and settled on the image below as my inspiration. (Unfortunately, I can’t find a source for the image that isn’t Pinterest. If anyone has information, please share.)

I thought the idea of stars would work well with my 1926 Silver Lace Robe de Style. I briefly considered creating the stars myself and then I remembered that I didn’t want this too take too much time and I started researching purchasable stars. I wanted something nice looking but not costly, remember, and I also wanted to stay away from glitter–the shedding! Ugh! While considering various metallic and cardboard style stars I realized that: 1- those may not travel well (I didn’t want bent stars!) and 2- they probably wouldn’t be comfortable to wear. So I started researching felt stars!

I decided on these felt stars. They were a good size, I liked the color, and they weren’t supposed to be too stiff. Not being stiff would be more comfortable to wear and also easier to sew through! I’d considered making garlands of the stars but I figured they would get tangled, so instead I opted to sew the stars directly onto the lace.

I started by placing the stars in a line diagonally across the top of the dress. The goal was to capture the feeling of my inspiration but didn’t feel the need to add as many stars as the drawing has, so I stopped with the one line. I liked the stars hanging from the hem, so I did those next–one star per each dip in the pattern of the lace.

After that I didn’t have many stars left! I used a scrap of metallic knit fabric to make a veil and put a star on each corner. The veil is a square, with one corner turned under, gathered, and stitched to a hair comb.

I also used some black felt scraps to cut a few stars by hand to accent the star at the waist. I thought this might tie in the metallic knit veil and also draw attention to the grey stars on the grey dress!

I added some sparkly shoe clips, pearl bracelets, and sparkly stars for my hair (reused from my 1885 Night Sky Fancy Dress) and the outfit was complete! It pays off to reuse themes for fancy dress, I guess!

1950s Queen Of Hearts

At the same sale that I purchased the base of my 1950s super-petticoat and the hat that I refashioned into a 1930s style I also purchased a rather sad 1980s style evening dress. I liked the brocade fabric and had an idea that I could remake the dress into a cocktail length 1950s style dress by removing the sleeves, changing the neckline, and shortening the hem.

I also had this dress in mind. I love the massive decorative butt bow and this remade dress seemed like a great opportunity to put the idea to use. The red had to wrap around the waist as well as making the bow, in order to cover up the original gold waistband, but I had a remnant of cherry silk in my stash that was nicely complimentary in terms of color and just the right size for the job!

From the front I feel generally ok about the dress, but from the back, I love it! Plus, that’s two things checked off the to-do list: I remade the 1980s dress into a wearable 1950s style and I put the butt bow inspiration into action. Plus the fact that I used up a fabric from the stash, which is a bonus!

But why the Queen of Hearts? I decided this was a dress I wanted to wear to an Alice In Wonderland themed event that I recently attended so I had to fit the dress into the theme. I decided on the idea of an elegant 1950s historical nod to Queen Elizabeth in The Crown (which I might have been watching right around the time I was looking for inspiration…). Aloof queen looks are totally my jam, so that works really well.

As long as I was going with a queen look, I decided that a royal order sash would be an easy way to say royalty and hearts all at the same time while also being easy to remove from the dress itself. I did some royal order sash research and decided I liked a sash with a narrow border of a contrasting color. Of course, mine needed to be made in Queen of Hearts colors: black, red, and gold seemed perfect. I pinned heart appliqués behind my shoulder brooch and on the bow to play up the Queen of Hearts theme.

It was fun to accessorize the dress and sash with long gloves, red drop earrings, a tiara, and my silver American Duchess Seaburys (the gold brocade fabric that makes up the back of the shoes complimented the gold brocade dress very nicely!). I think I like the butt bow with the sash even better than the butt bow by itself!

To make the sash, I googled ‘royal order sash’ and looked at lots of images to decide on a design. Mine is made of two rectangles, with an angled shoulder seam and tucks behind the bow loops for shaping. It’s made of red polyester with woven-in tiny black stripes and edged with sheer gold ribbon. For more detailed sash making information, Gina posted very detailed tutorial for making royal sashes that would probably be quite useful if you’re thinking of making one for yourself.

I’ll leave you with this silly shot of the Queen of Hearts with a flamingo. Croquet, anyone?

SaveSaveSaveSave

SaveSave

SaveSave

SaveSave

SaveSave

SaveSave

SaveSave

Suggestions For Dressmakers, 1896

“When it comes to making, the actual sewing and finishing, the American dressmaker has nothing to learn from anyone. First class American dressmakers turn out the best work, so far as the mechanics of dressmaking go, of any dressmakers in the world. In point of fact, they make dresses too well. They might with advantage to themselves, and with no disadvantage to their patrons, unlearn something about sewing, and let some of the fussy details, over which they now bother their heads to very little purpose, go by default.

But the A-1 American dressmaker puts too much fine sewing into her dresses. They look well; they look about as well on the wrong side as upon the right side; perhaps if they were not such marvels of patience in the inside finishing, they might be more artistic to look like on the outside. Look at even the highest priced foreign made dresses; by comparison, they seem almost slovenly in workmanship, compared with American dress, but after all to what end put such an infinite amount of pains into finishing off a dress that, nowadays, is worn but a few times…house dresses and evening dresses might be slighted in finishing just as the Parisian dressmakers slight them without suffering an iota in looks or wearing possibilities, and with a notable saving in time and trouble.

The Parisian dressmaker is clever. She knows every trick in putting her work where it will make the most show. So long as she gets the effect she wants, and it stays as long…as it is required, which is not long, for instance, in a tulle party frock, she doesn’t try to make the sewing in every part of the sort that would win a prize at a school exhibition. The Parisian Milliner long, long ago, found that she could get effects by pinning on her hat and bonnet trimmings that absolutely defied sewing, and the Parisian dressmaker will catch a flounce of lace here and a ribbon there with fascinating grace, and never bother her head about what it looks like on the wrong side. Why should she?”

7138bd5bed5bd5a8921d1fd61bbdfd27I came across this passage in Suggestions For Dressmakers (1896) a number of months ago around the time I was completing my 1899 elusive blue evening gown. It is from the chapter called “Making” on pages 27-28.

The passage immediately brought to mind my process for making historical garments, which is usually along the lines of the “American dressmaker” in that I put many hours of fine sewing into my dresses to make the insides just as much as work of art as the exterior.

The obvious and most current example that came to mind was the dress I was completing at the time, but there are many others as well. Here are a few made during the last few years and spanning the 19th century in terms of their origins.

IMG_0544
In the style of the “American Dressmaker”, the beautifully finished interior of my 1899 elusive blue bodice made in 2016.
IMG_0951 (1 of 1)
Another beautifully finished bodice in the “American Dressmaker” style from 2014. This is Georgina’s 1858 evening bodice.
IMG_4277
Tidy insides in my 1813 evening gown made in 2013, also in the “American Dressmaker” style.

I also had this passage in mind while working over the first part of this year on my recent 1885 Night Sky fancy dress. I decided with that ensemble to follow the suggestion to adapt to the “Parisian Dressmaker” style and not worry about the insides as I usually do. While still quite tidy, I did not spend time finishing unseen seams inside the skirt or finishing the edges of the vertical seams on the bodice, as you can see below. It was a bit of a struggle with my natural instincts, but worked out very well in terms of the working on this right up until the deadline and not having time for all the pretty finishing anyway.

IMG_1483
I couldn’t entirely shake the urge to be tidy and nicely finish things, but I did leave some edges raw and basted on the trim in case I want to easily remove it in the future.

There’s also the mention of pinning trim on hats. That is a suggestion that I often make use of! I can think of multiple examples of hats that have had trim pinned on for years even while the hats are in storage. For example, remember the hat that I wear with my 1895 Skating Ensemble? That’s the same hat from my 1883 Tailored Ensemble with fur trim and extra feathers that have been pinned on since early 2015. I’ve felt no need to sew those on!

Do you sew like American dressmaker or a Parisian dressmaker? Is it a conscious choice for you to pick one style or the other, or is it just your natural sewing method? What about hats? Do you ever pin your trimmings on?

1885 Night Sky Fancy Dress

It has been a goal to make a specifically fancy dress outfit for years, but particularly since I made a makeshift 1860s flower basket fancy dress outfit in 2015. This May I had the perfect opportunity in the form of a fancy dress ball!

I decided to make an 1880s bustle dress because I already had all the undergarments, including my still-new-feeling 1880s steam molded corset, and because it’s a period of dress that I rarely wear, especially for dancing. I wanted to experiment with dancing in a bustle to see how it worked and what it felt like.

Design-wise, I was inspired by Mrs. Alice Gwynn Vanderbilt’s Electric Light fancy dress outfit made by Worth in 1883, but wanted to adapt the idea to fabrics I already had on hand. Since the fabric I came up with was navy blue, I decided on Night Sky as my inspiration.

2753c5268e0e74e0fc49e0c0d77e3053
Mrs. Alice Gwynn Vanderbilt’s Electric Light fancy dress outfit, 1883

I started my outfit in January and worked on it over the next four months or so, but despite all that preparation time I was still working on it right up until the day before the event. Luckily, I did the vast majority of the work of cutting, sewing, and fitting before March and April when I became super busy. Tasks left at that point included finishing the bodice edges, trimming, and closures.

IMG_0999 (1)

In addition to the Mrs. Vanderbilt’s inspiration I also looked at other 1880s skirts for draping ideas and other 1880s fancy dress outfits for trimming ideas. You can see the most inspiring images and extant garments on my Pinterest board for this project here.

For ease of documentation, I’ll do the facts as with the HSF:

Fabric: 2-3 yards of navy blue cotton twill for underskirt, 6ish yards of navy blue polyester charmeuse, 1ish yard of pink cotton twill for flat lining, and 1-2yds of silver net.

Pattern: My 1885 Frills and Furbelows Bustle Dress pattern, adapted for evening and for the style of skirt desired.

Year: 1885.

Notions: A 3yd tinsel garland, 6 star brooches, 3yds of navy polyester ribbon for lacing, hook and bar closures for the skirt, and thread.

How historically accurate is it?: 90%. Recognizable in it’s own time, certainly. Reasonable construction, certainly. Materials, not so much. It was much more important to use what was on hand than to purchase new fabrics, especially since this is an outfit that I don’t see getting a lot of use.

Hours to complete: Tons. I didn’t keep track. Bustles are fussy and require lots of time with a dress form to achieve an elegant drape.

First worn: May 21.

Total cost: Most of the fabrics were in the stash with the exception of the silver net and most of the notions were purchased cheaply on eBay. Let’s say $20.

IMG_1011 (1)

For the photos I wore the dress with my black Seaburys and the new rhinestone shoe clips that I purchased in March. It was quite sparkly and elegant, but for dancing I changed into navy blue velvet flats. They were just as cute but did not get the special treatment of being shown off in photos.

I had the grand idea to use my curly hair ends flipped up on top of my head like the curled fringe popular in the 1880s. It’s also long enough that I was able to make the bun shape on the back also using only my natural hair. I pinned in star brooches to match those on my dress as decoration.

IMG_1034 (1)

All in all I’m quite happy with the final result! Dancing in the bustle was just as easy as any other Victorian style. The differences were that all the extra fabric was behind me making some movements more challenging due to space such as during a quadrille, and that the bustle and layers of fabric on the back gathered a fair bit of momentum when turning, creating quite a swish!

Construction wise the only change I would like to make after one wearing is to bone the center back edges so that the back lies flat when laced onto my body and to sew in a matching fabric piece behind the lacing holes to hide any white from undergarments that wants to peak out. I’ll also need to wear a different chemise or tuck the top down so there’s not white cotton poking out at the armholes. However, these are minor changes and I’m not sure when I’ll have the opportunity to wear this again so it might be awhile before they happen.

IMG_1023 (1)

For this ball we set up a double sided picture backdrop, one side of which you’ve already seen. The other side included a large stuffed jaguar/panther I dubbed Jaggy for the night. You often see backdrops in regular Victorian photos as well as fancy dress photos. Unfortunately, with my heels on I was too tall for them! Oops! Being too tall inspired me to take some fun sitting photos.

IMG_1094 (1)
Hanging out with Jaggy.
IMG_1097 (1)
Tired after a night of dancing.

For decoration out of the ordinary, we had the lucky and unexpected use of the fabulous blue and turquoise lanterns in many of the pictures as well as multicolored paper lanterns with lights inside. We put the lanterns around the room in glass vases as bouquets. First, a picture from the set up part of the evening. Second, a picture with some lanterns creeping into the photo.

IMG_0973 (1)

IMG_1080 (1)

Fancy dress outfit, check!

1860s Flower Basket Fancy Dress

A few weekends ago now, I went to an event at The Down Town Association in New York. It was an event out of my usual ordinary line of events and so I took the opportunity to create something out of the ordinary to wear. The title of the post rather gives it away… but I only had a week to put my outfit together!

20493f96d0c4b86b724418e53a1d9f25
Flower Basket, 1860s. This design was created by Jules Helleu or Léon Sault, possibly for Charles Frederick Worth.

Using this image as my inspiration, I determined that I needed to make a flower basket, but that I could use Annabelle as the base for the floral dress. I also wanted to use only items from my stash, thus limiting my options a little bit. So I spent my weeknights creating a fabric basket that fit over my hoops and then furiously pinned flowers to my skirt the day we were leaving for New York in the hopes that they would look good and at least a little like my inspiration image…

IMG_2154
(What does a flower basket do with her hands without a bouquet?)

In the end, I enjoyed my flower basket very much, but didn’t like the fact that my furious pinning job didn’t really achieve the cascading flower look I was going for and that Annabelle’s pre-existing flowers were rather heavier looking than I had hoped, also contributing to the lack of cascading flower look. Maybe someday I’ll try again with the same basket and a different, or differently modified dress, but it was fun to do something different even if the results were not as great as I hoped for.

IMG_0622
I like the basket when you don’t see the skirt flowers.
IMG_0618
(Maybe a flower basket holds her handles?)

As I mentioned, this event was held at The Down Town Association in New York, which was established in 1860 (perfect for my fancy dress!). As far as I can tell the association is still housed in the same building they’ve been in since 1860. It was quite lovely inside, with detailed architecture and beautiful rooms. One room was a library full of a rather random collection of books. I enjoy perusing books and so proceeded to examine the titles closely. And guess what I found? A volume of Burke’s Peerage and Baronetage from 1912!

This excited me quite a bit, not only because it was from 1912, but I think also because it reminded me of Persuasion, in which Mr. Elliot is described as putting Burke’s Peerage in a position of honor in his estimation of important things in the world. Regardless, I got distracted and insisted that I needed to take pictures and look through.

IMG_2122 2

IMG_2124 1

IMG_2131 1

IMG_2130 2

IMG_0604
Here I am, reading Burke’s Peerage!

Burke’s Peerage certainly is an undertaking, and this volume only covered the alphabet through letter L! Unfortunately, I didn’t spot a second volume in the library, but I hope it’s there somewhere.