One of the fun features of The Footwork & Frolick Society’s annual fundraiser tea event is that F&F members and volunteers wear clothing representing the span of the Victorian period. (I recently posted a behind the scenes look at the tea that you can read here, if you are interested.) If you read this blog often, you likely know that I love pulling different historical outfits out of my closet for things like this!
Last year, I wore the 1884 Plaid Wool Dress in the photo below (which you can read more about here, in a detailed post about this garment). This made sense as Boutwell House, where we host the tea, starts out at a pretty cool temperature. I hadn’t worn this outfit in awhile, so that was fun, too! However, after brewing tea for hours and the warmth of everyone’s body heat (and the fact that the heating system finally kicked in), I was pretty warm in my wool outfit by the end of the day!
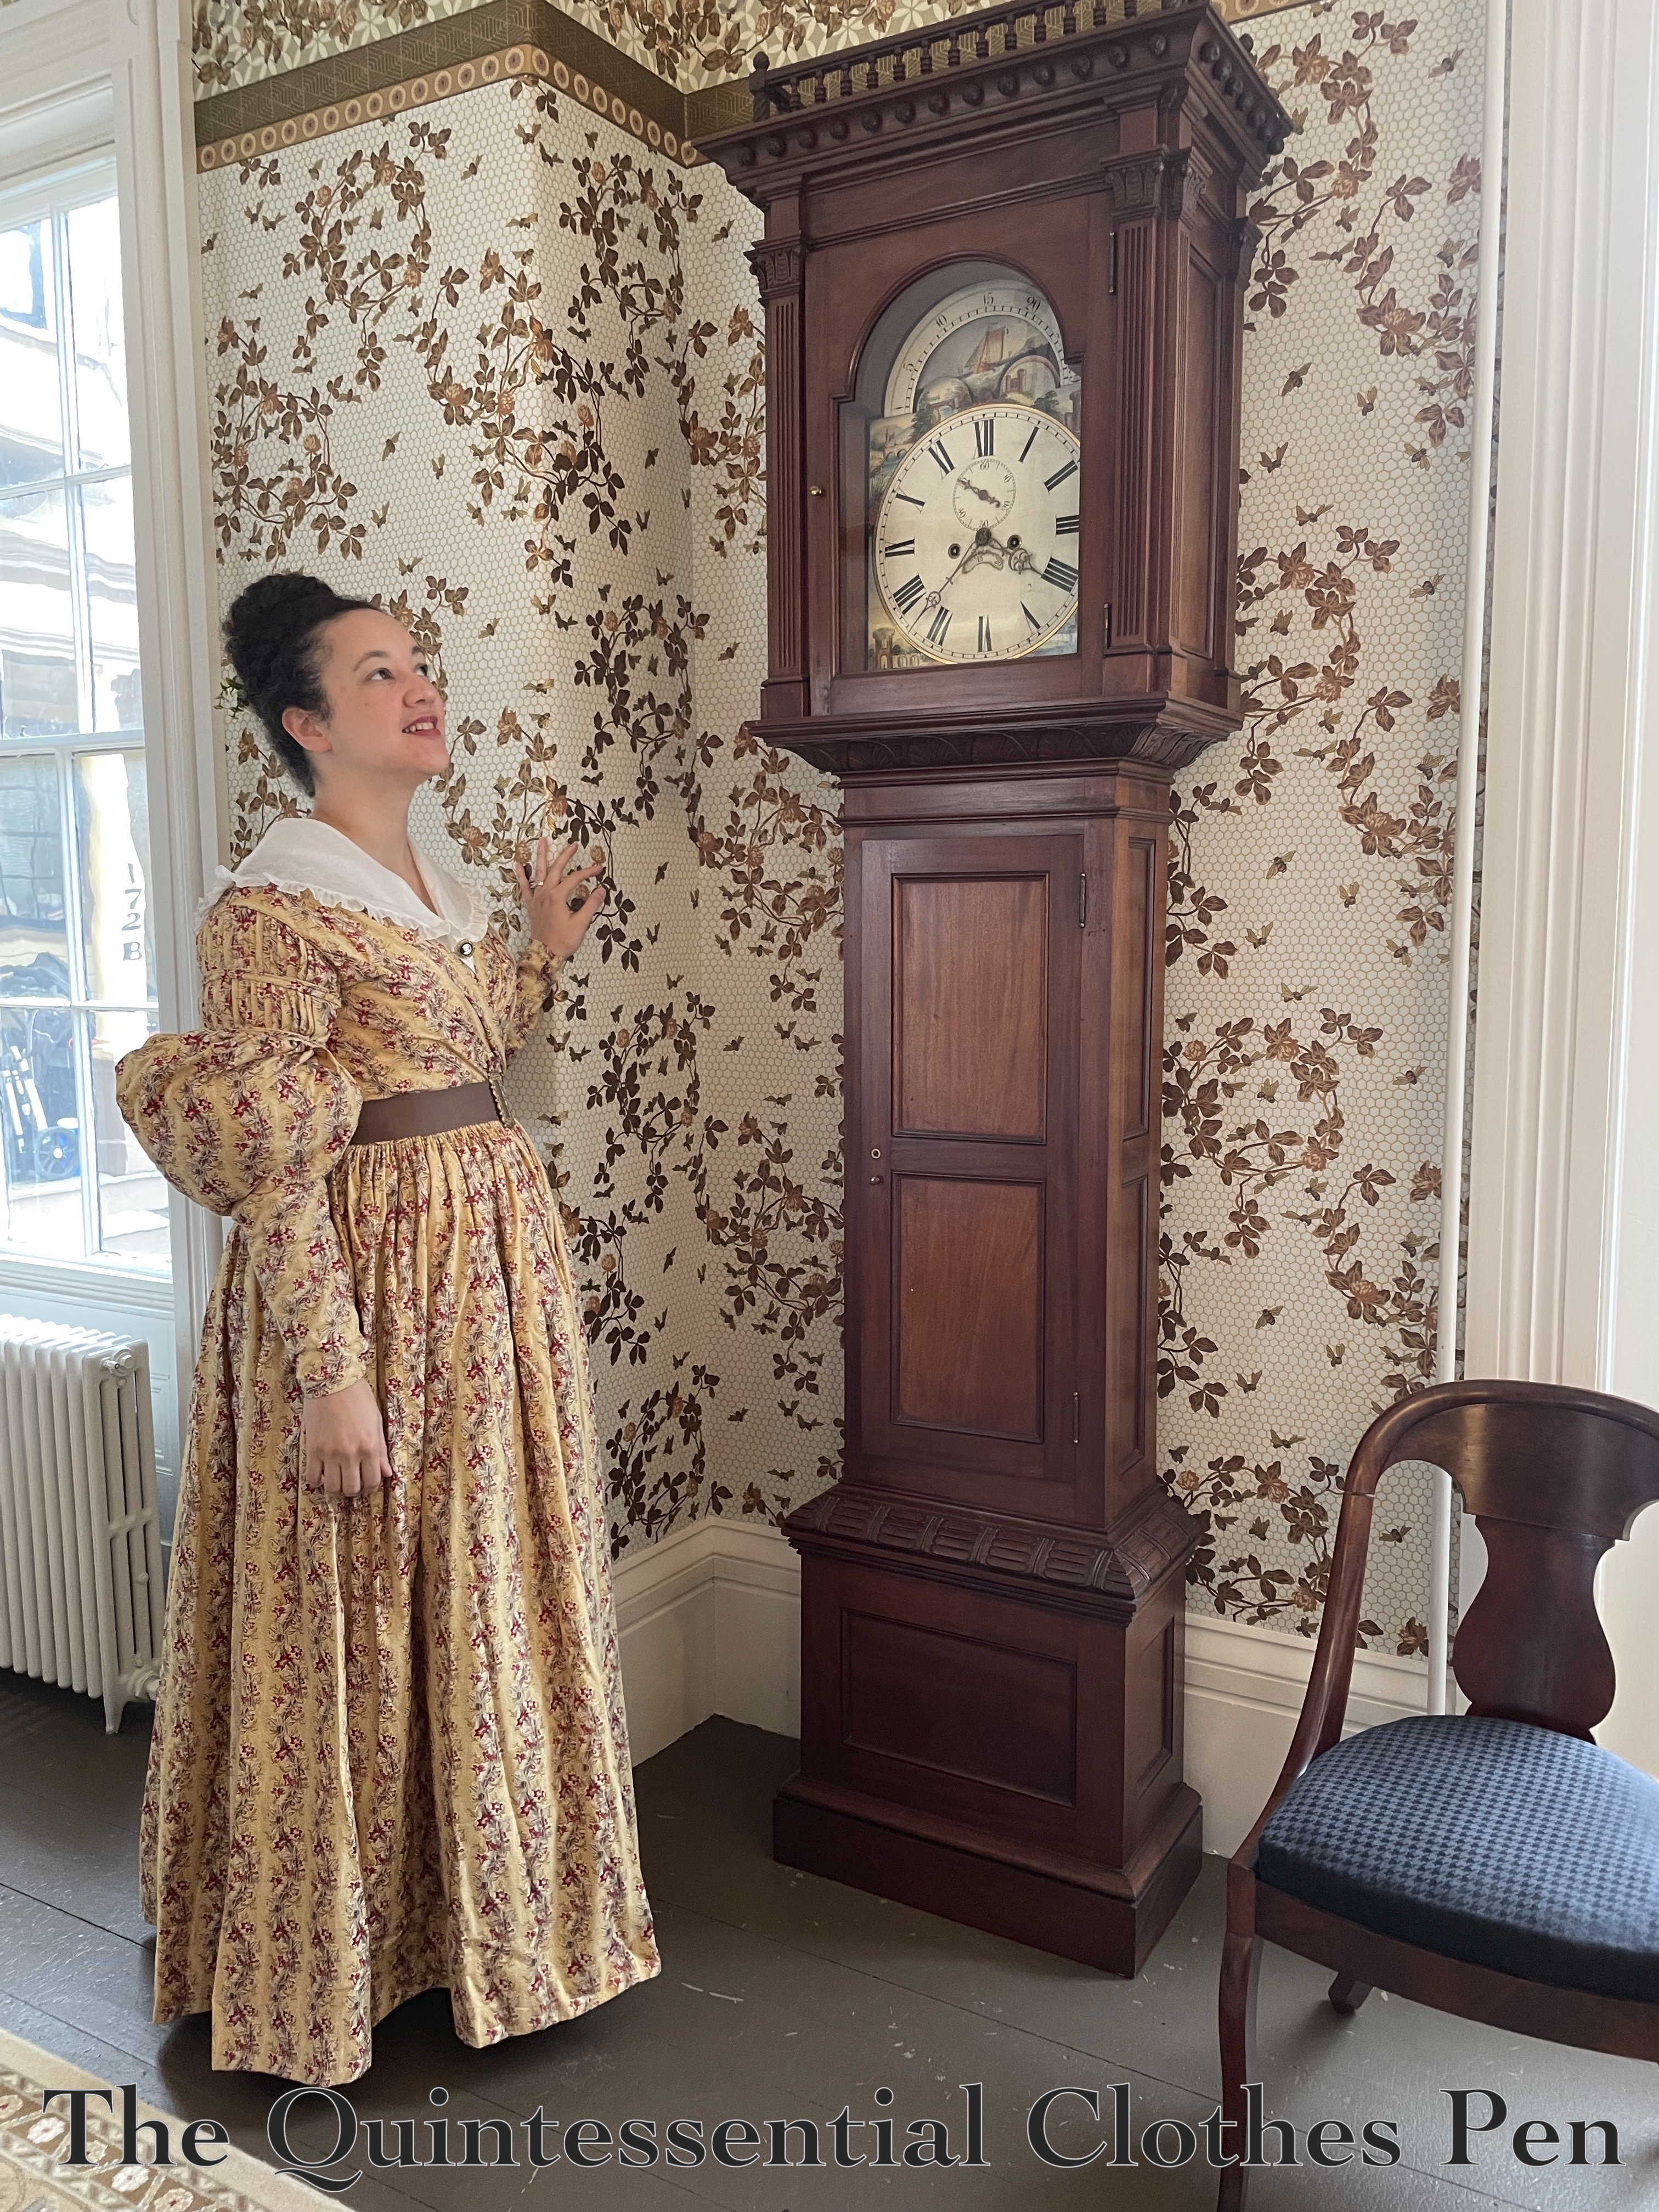
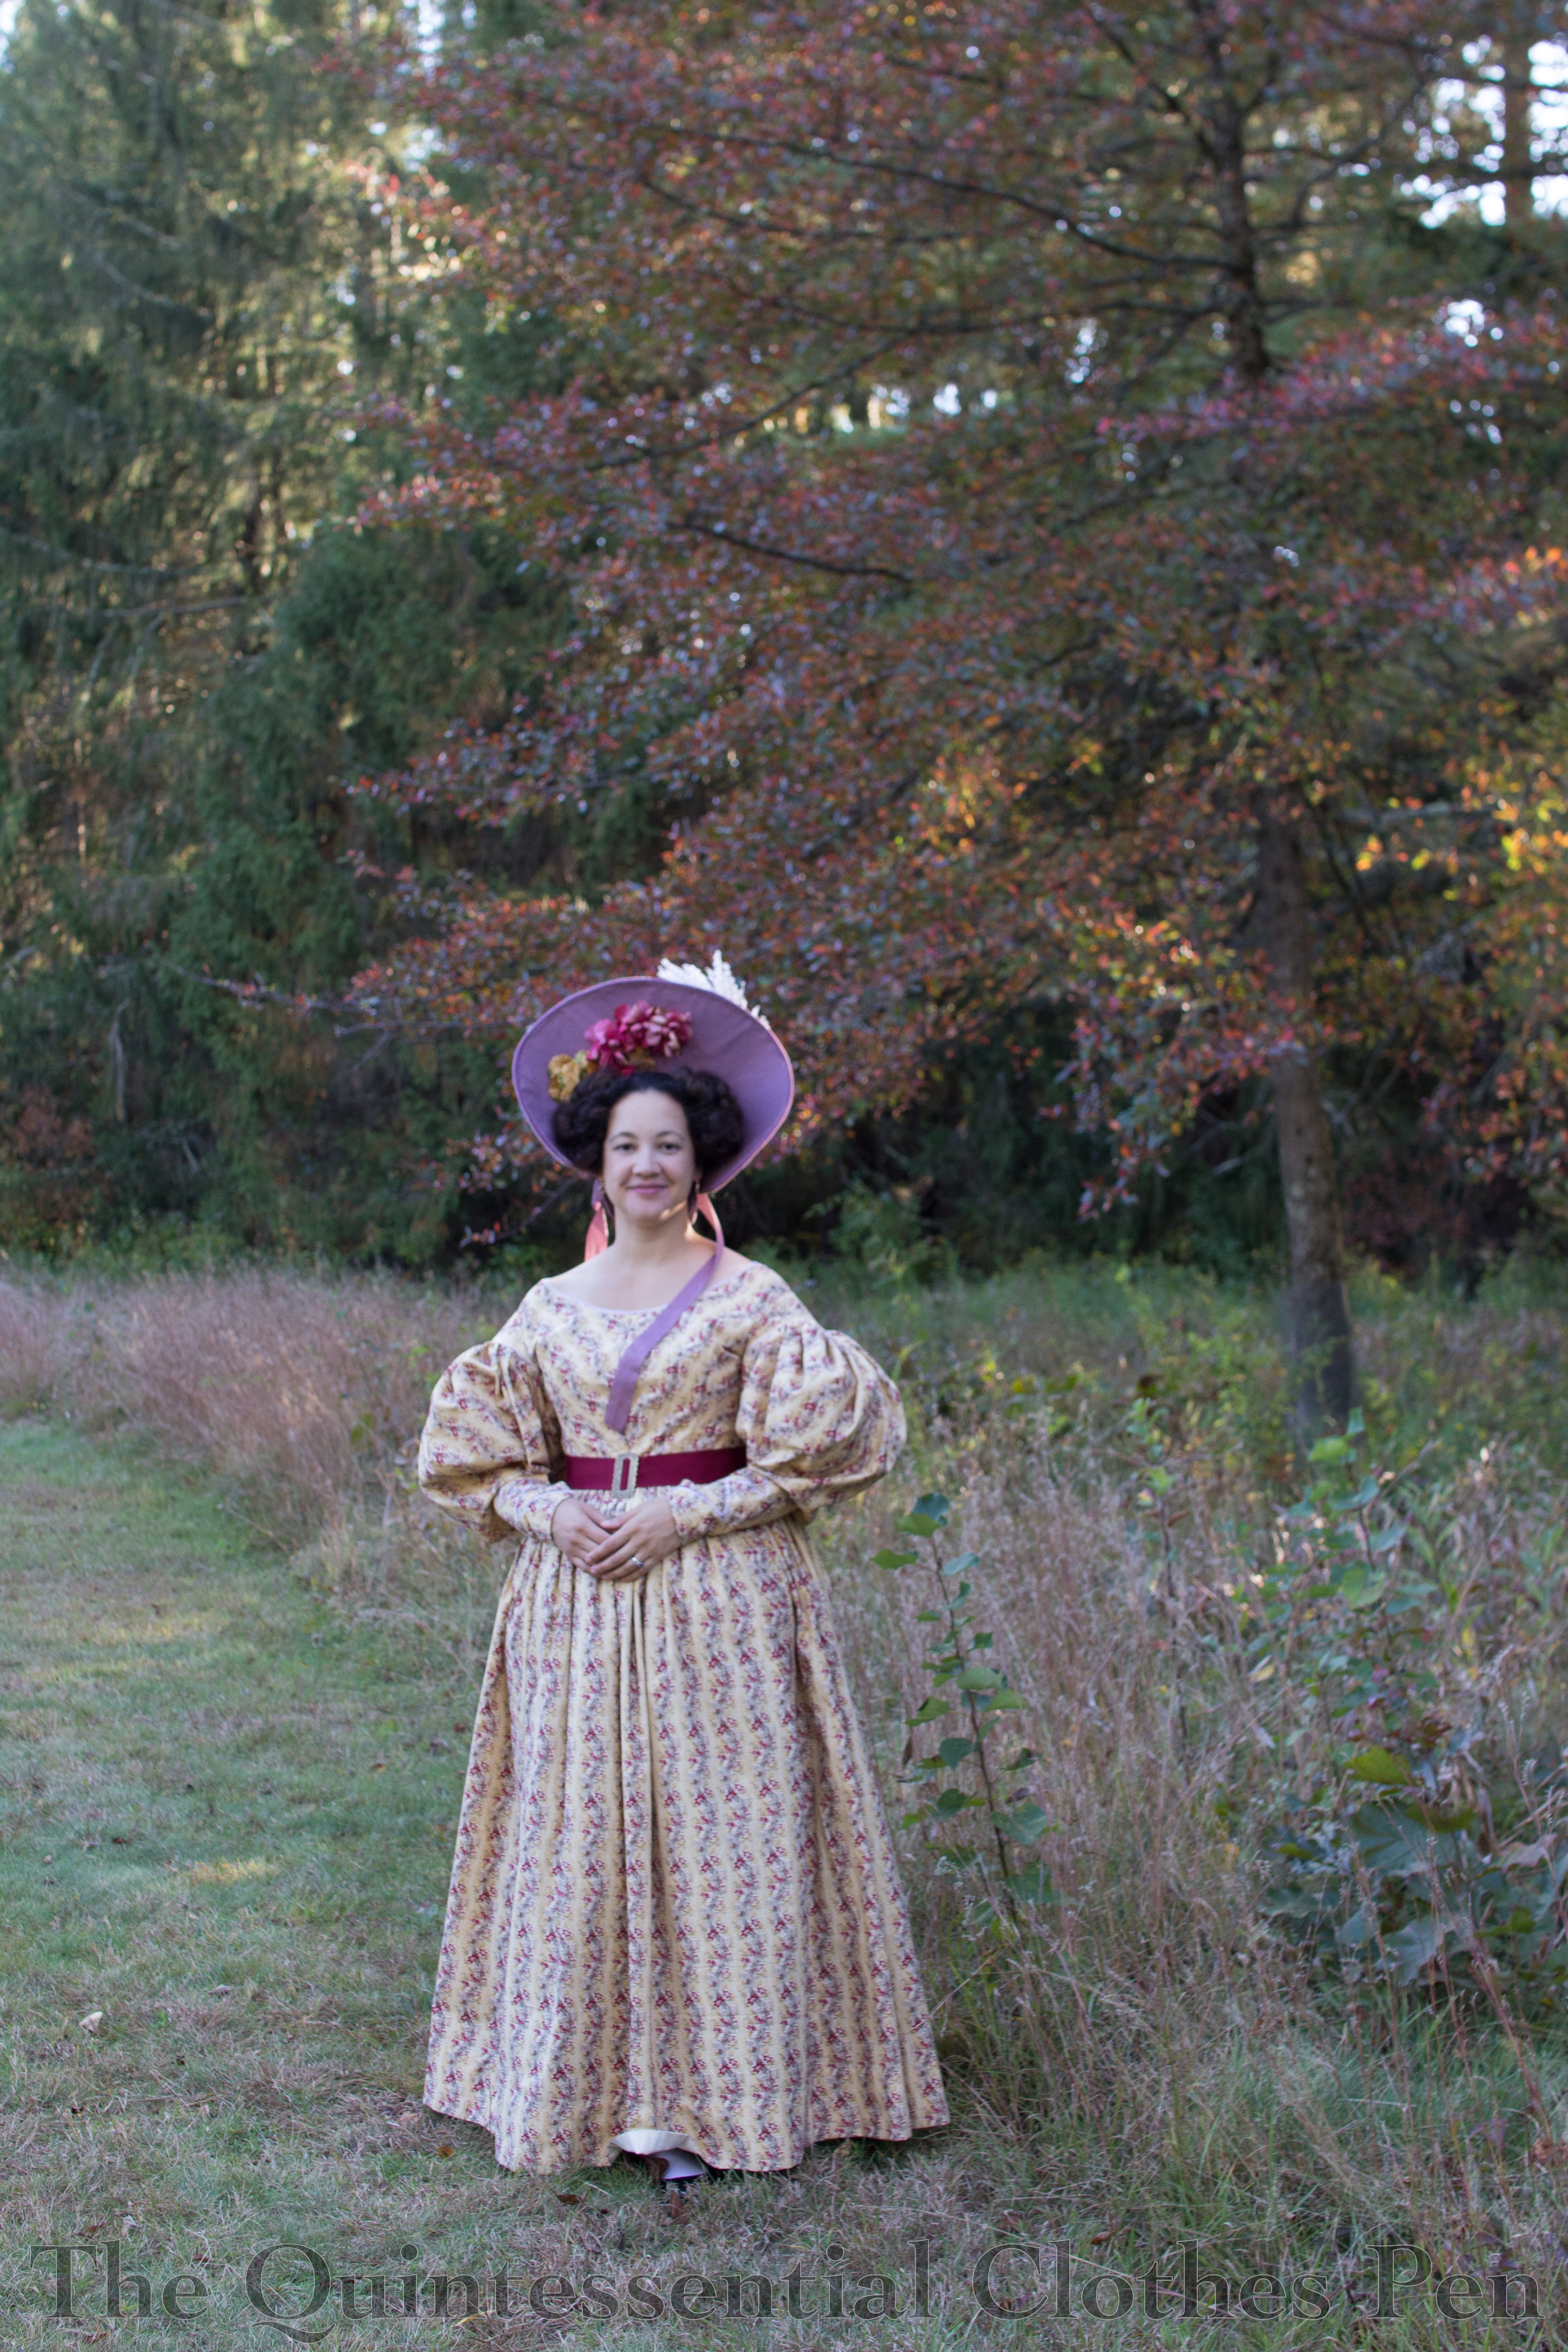
So this year, I decided to wear cotton! I landed on my 1838 yellow print dress because I hadn’t worn it in awhile, I wasn’t worried about it being in the kitchen (in terms of space and fabric type), and the sleeves are just plain silly! Below, this year’s 1838 yellow print dress in the dining room with the fabulous honeycomb wallpaper!
Looking at the photos, I realized I forgot to put on (or didn’t think I’d need, perhaps) my 1830s skirt puffer. You can read more about what that is in this past post, but essentially it’s a stiff ruffle that helps hold out the skirt at the top. This works in tandem with a corded petticoat to help hold the skirt out throughout the rest of the length. You can read all about the corded petticoat I made in this past post. What I’ve realized is that I DO need the skirt puffer! Always!
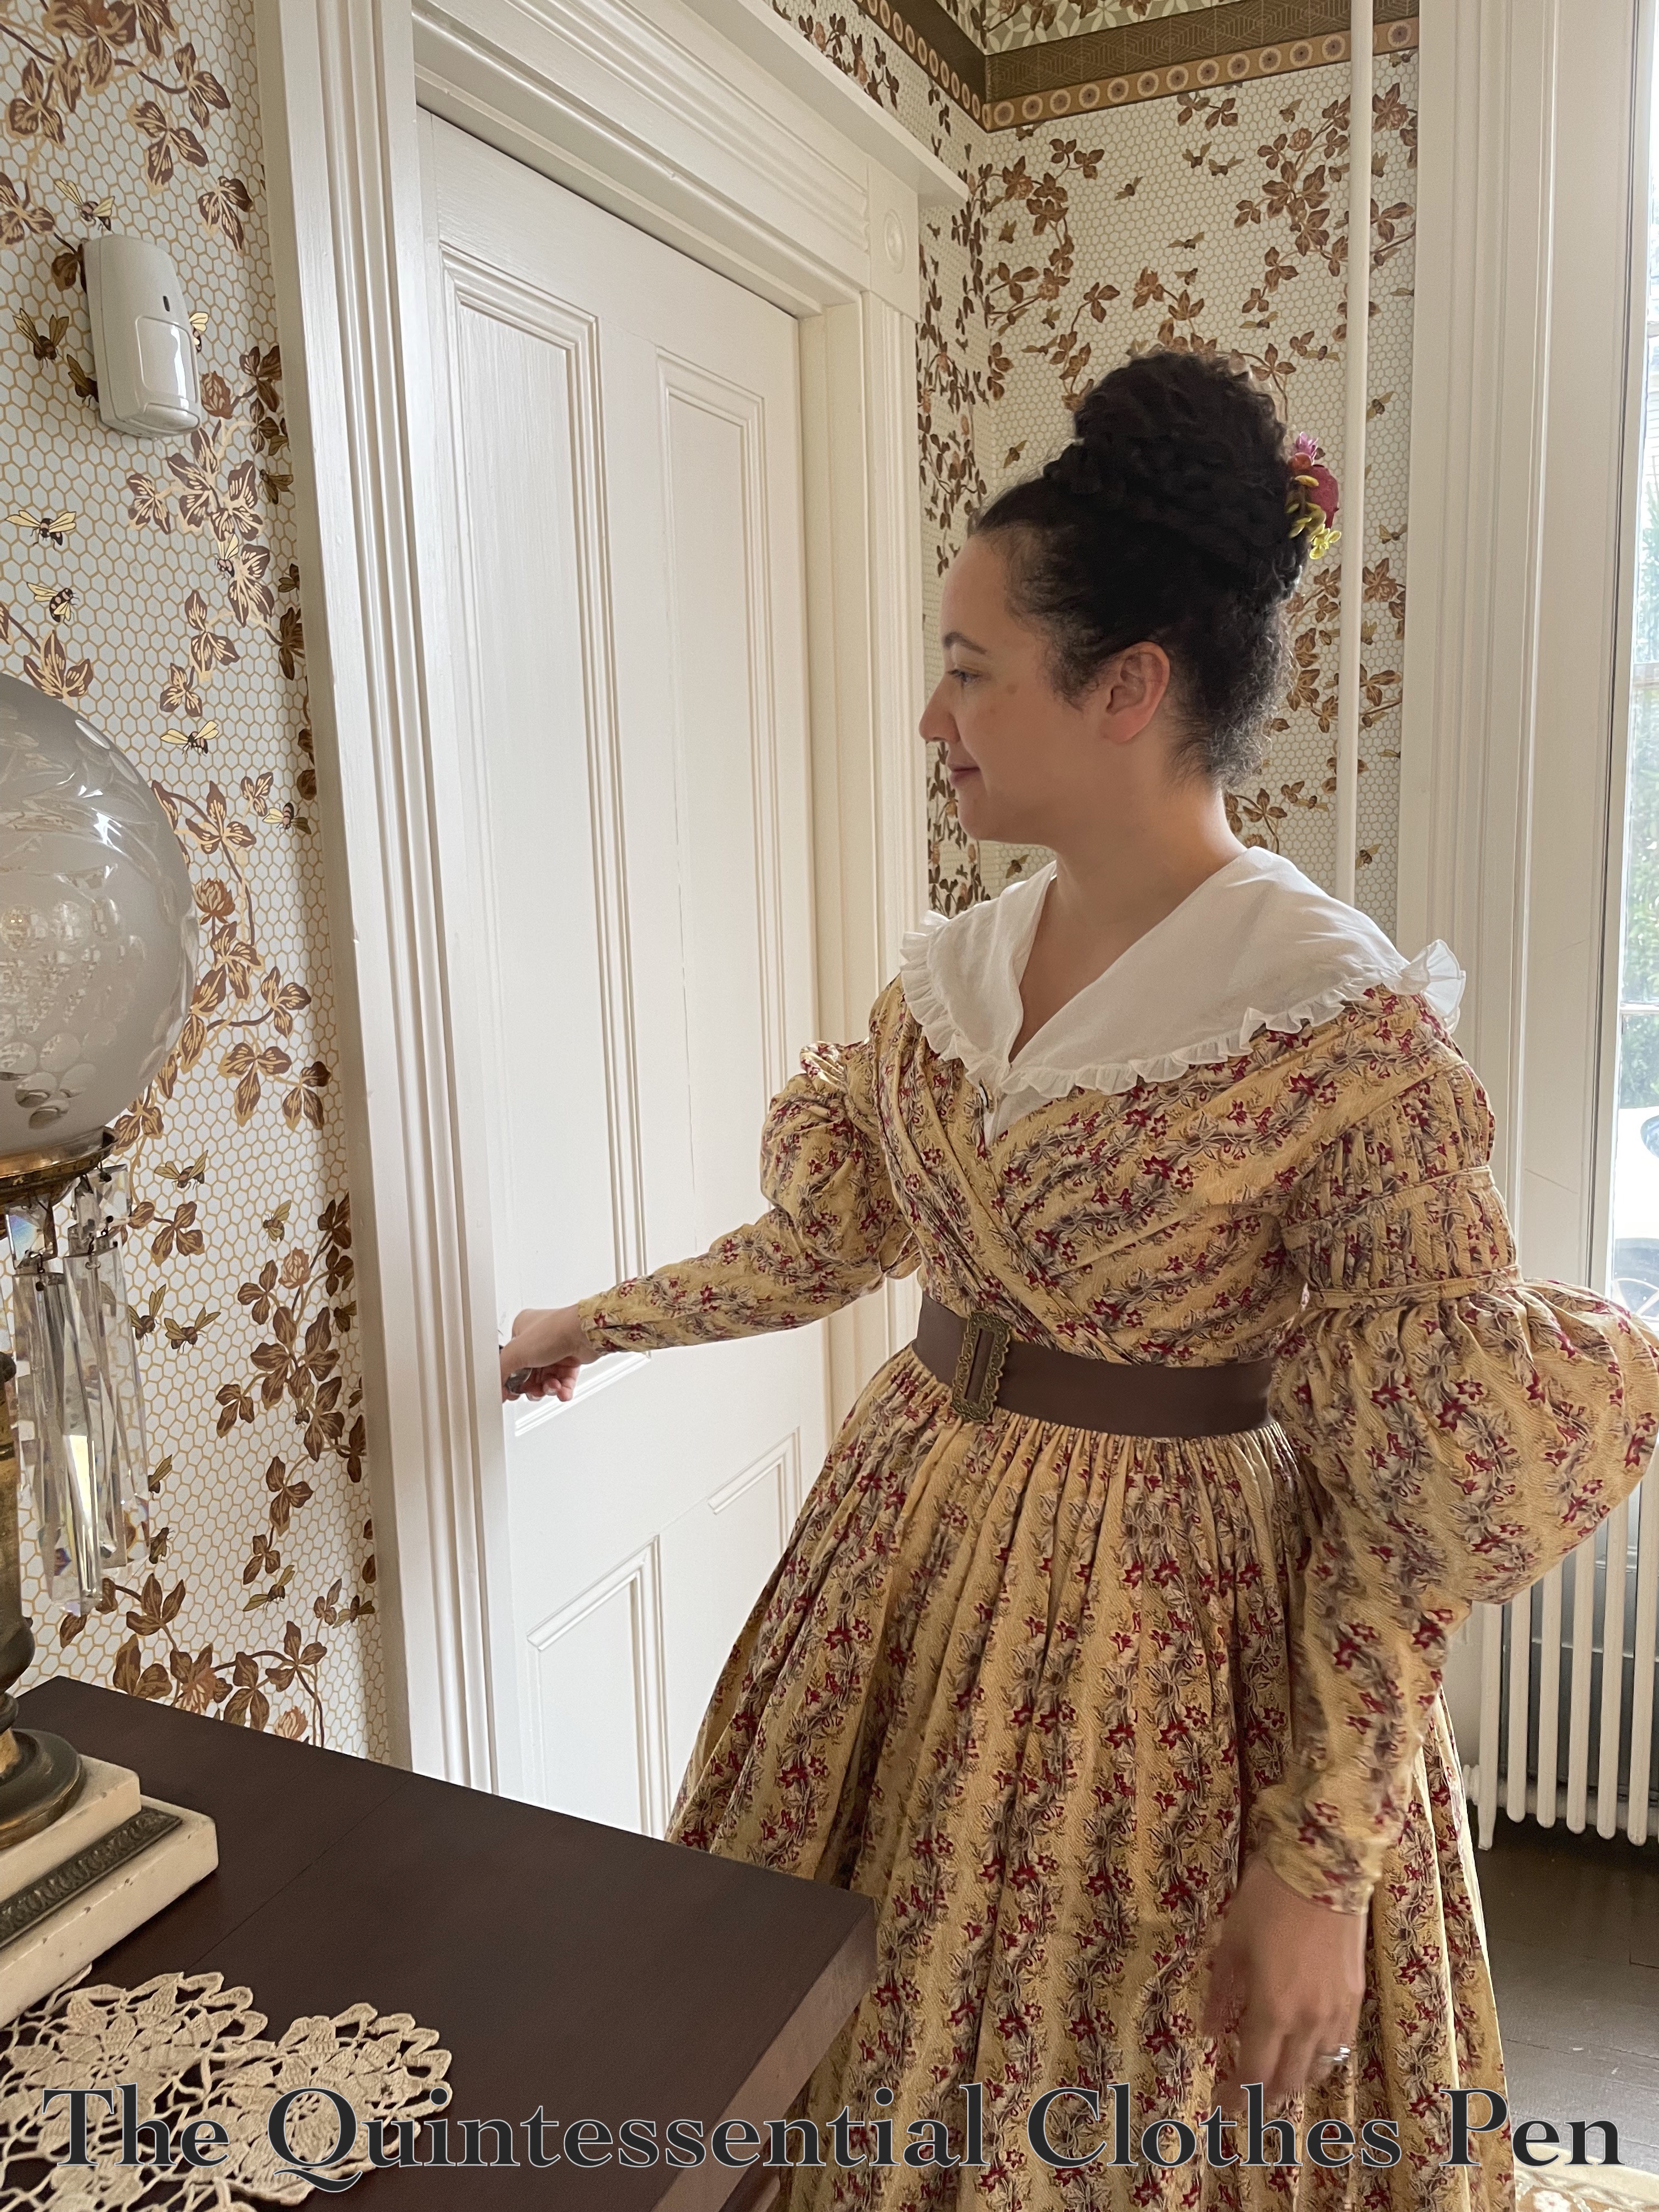
Despite this oversight, I was excited to try out a new ribbon belt color for this wearing. The last time I wore this bodice, in 2021, I chose not to wear a belt at all. Details about that wearing are in this past post and below is a photo of what this dressed looked like in that iteration.
I’m not sure which version I like better! I think no belt helps make the pleats on the bodice stand out more, but I also like that the belt helps break up the print. What do you think?
In case anyone is curious, I’ll share my sources for these accessories. I share because I think the items are great, not because I earn a commission or anything of that sort.
The ribbon is petersham, purchased from The Sewing Place. They have a delectable variety of colors offered in various widths and for what I consider to be a reasonable price for this sturdy and beautiful type of ribbon.
The yellow fabric of the dress is a Marcus Brothers Old Sturbridge Village Print that I acquired in 2013. I remember that detail because I posted about the fabric back then! You can read that past post here. In addition to my yellow fabric, reproduction floral stripes were a theme in other outfits at this year’s tea, as well, as you can see below!
Below, floral stripes consulting about… who knows!?! But it was a lovely opportunity to catch a photo.
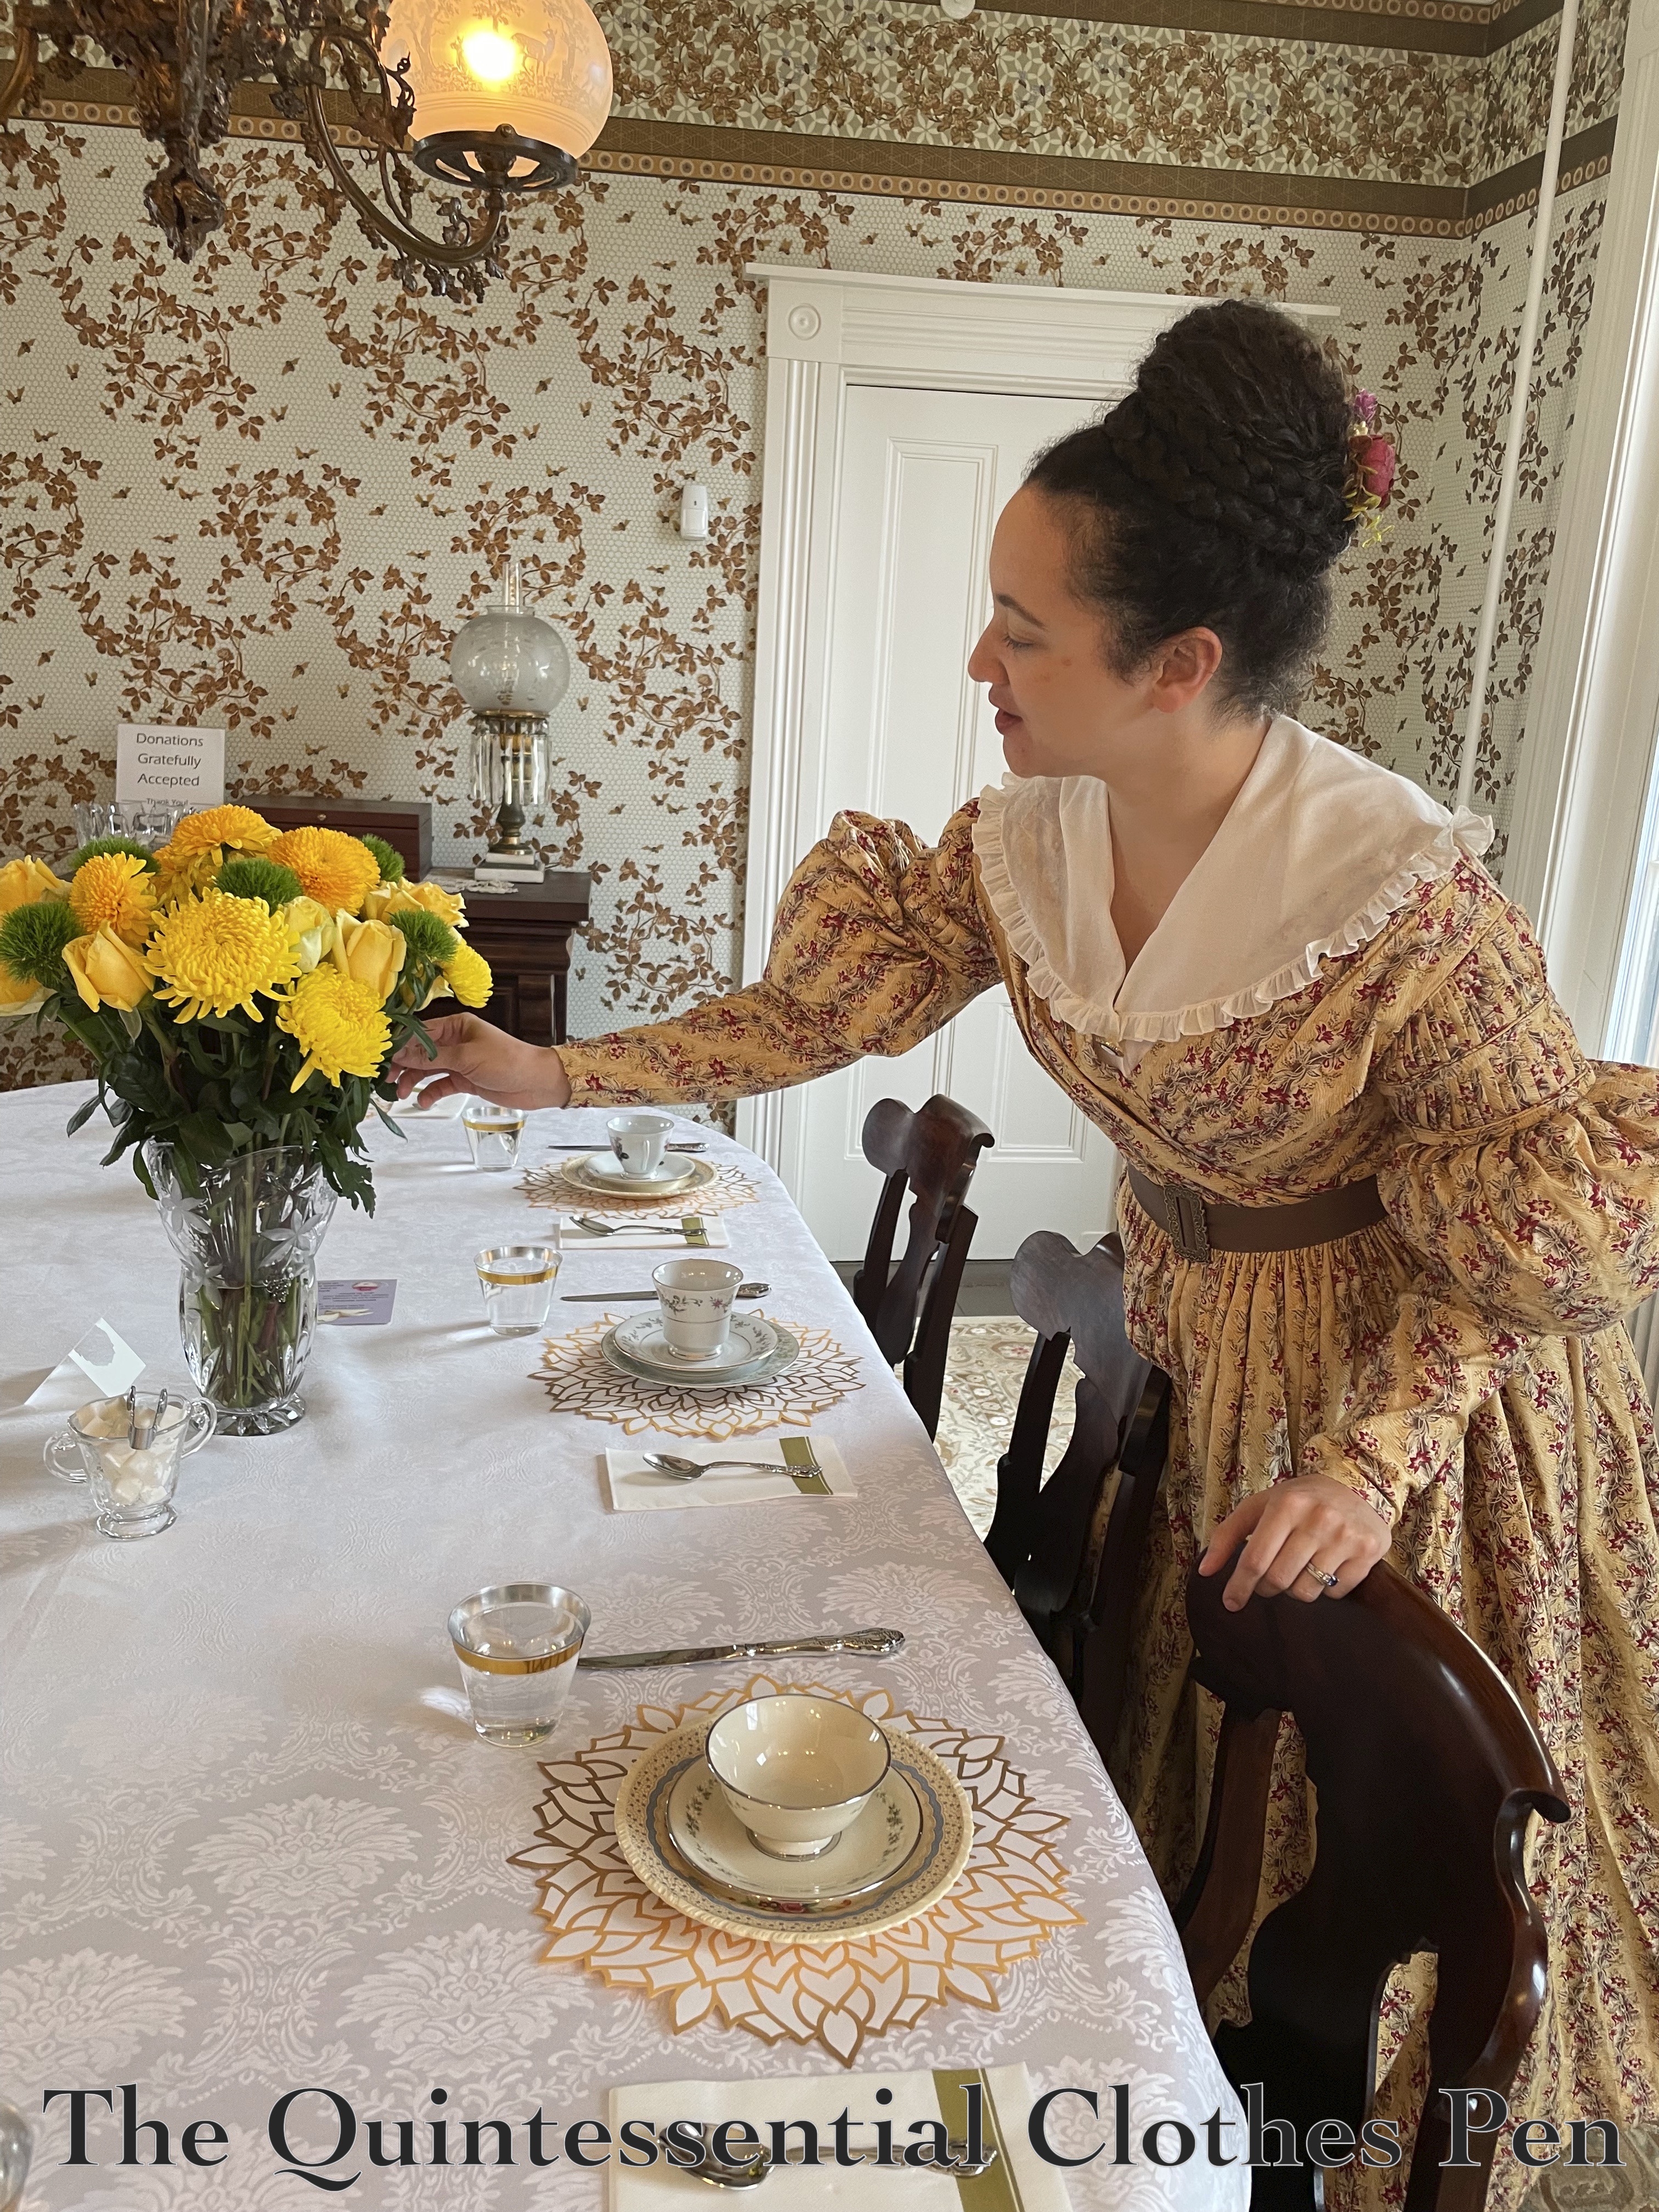
Not only did I really enjoy the shapes of the flowers in this bouquet (rounded flowers always appeal to me!), but I also enjoy the yellow flowers and yellow dress in the whimsical atmosphere created by the wallpaper in this room.
In the midst of the busyness of hosting, F&F members did take a few moments to gather and have a brief sit. I love how the outfits in this photo complement each other and the room! And I always appreciate good company and hearty laughter. This was a wonderful start to spring!
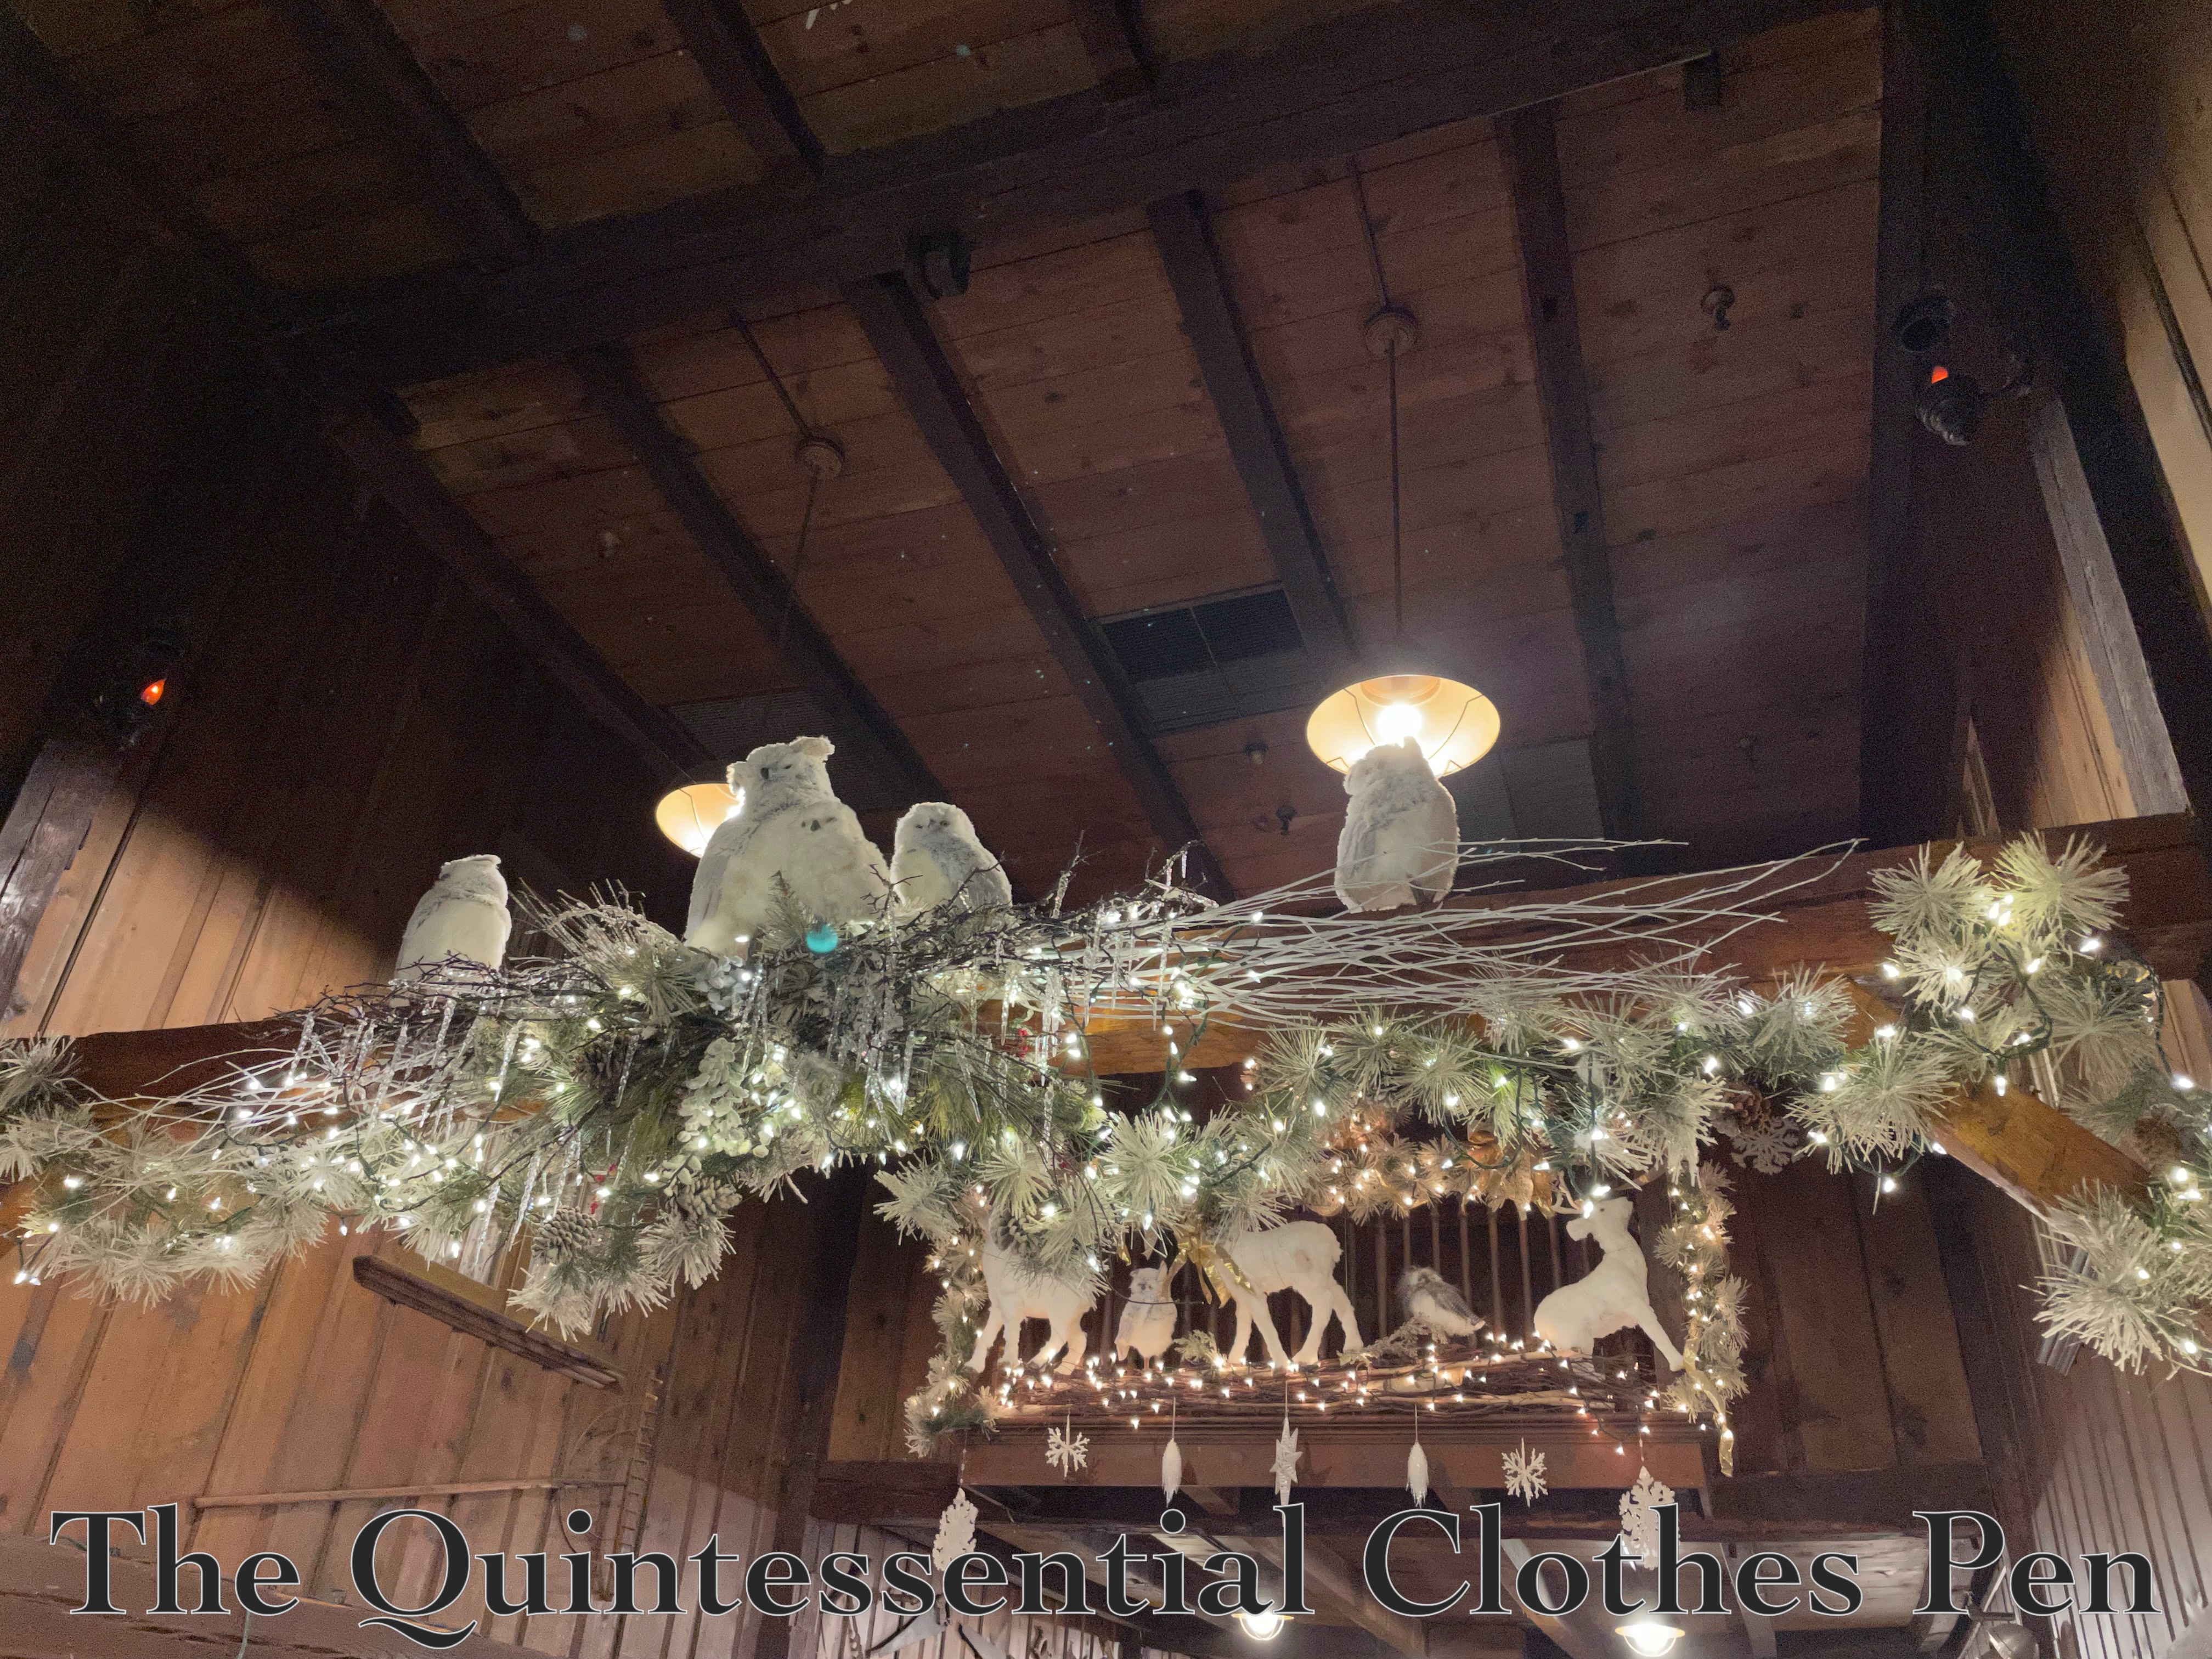
For the holidays last year, friends and I decided to have an 1830s-clothed dinner at a local historical inn. We had a lovely meal, enjoyed the company, and had fun looking around at all of the lovely seasonal decorations!
There were new vignettes around every corner, with everything from human-sized nutcrackers to animals and greenery. These owls, perched up on a rafter, amused me very much!
In another, more modern part of the building, we paused to take photos with a tree whose decorations matched my 1832 Velvet Gown and 12 Days Of Christmas bells & berries hair accessory. This dress is always fun to wear–lightweight, despite the velvet, and with a silhouette that is always entertaining.
I hope your holidays are full of joy, friendship, and gratitude!
I was on a bit of a 1830s tear back in 2020, when I made my 1834 yellow print dress followed up with a coordinating 1838 yellow print bodice and 1836 chemisette. But in fact there was even more than that, because I also made an 1835-1840 (let’s just call is 1837) blue cotton print dress for friend at the same time!
You can spot this dress in the photos from my 1830s Woods Walk blog post from 2021. The fabric for was a bargain at the the local discount fabric shop–only $3 per yard! It’s not technically a reproduction historical print, but the colors, motifs, and details (such as little dots for texture in the design) have the right look to me.
In terms of a pattern, I used my 1834 yellow print bodice as a starting point for this new blue dress, so the two bodices are very similar aside from size. The skirt of the blue dress is made in exactly the same way as the yellow dress (I blogged about that construction process in detail here).
The big different is the sleeves!
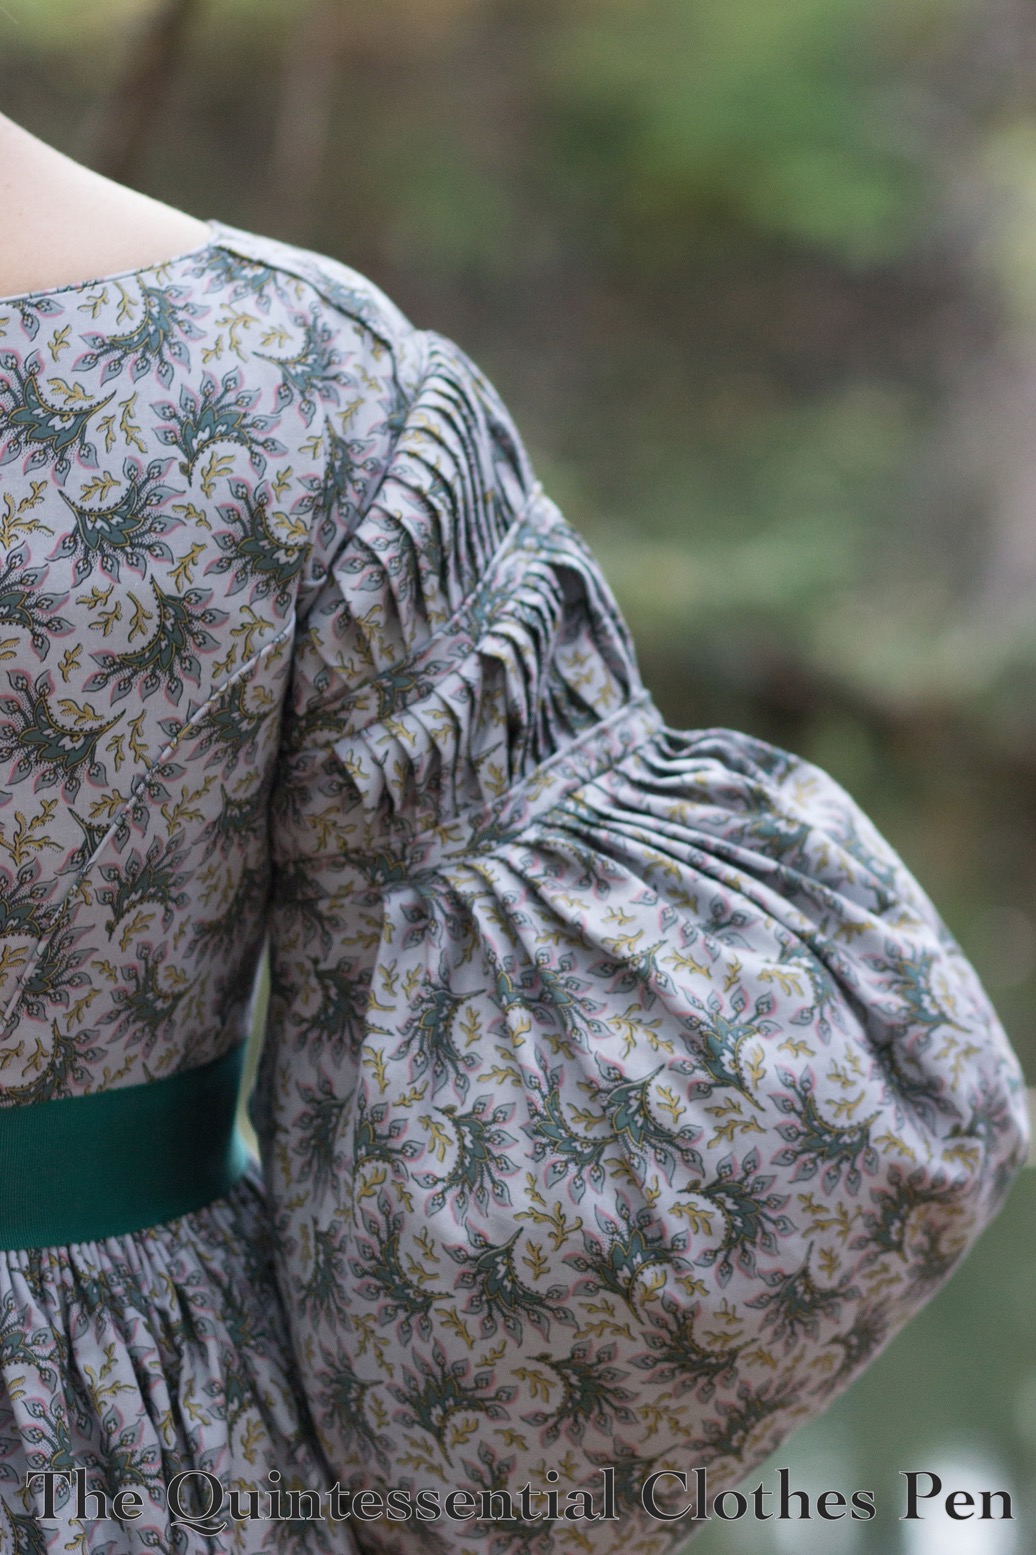
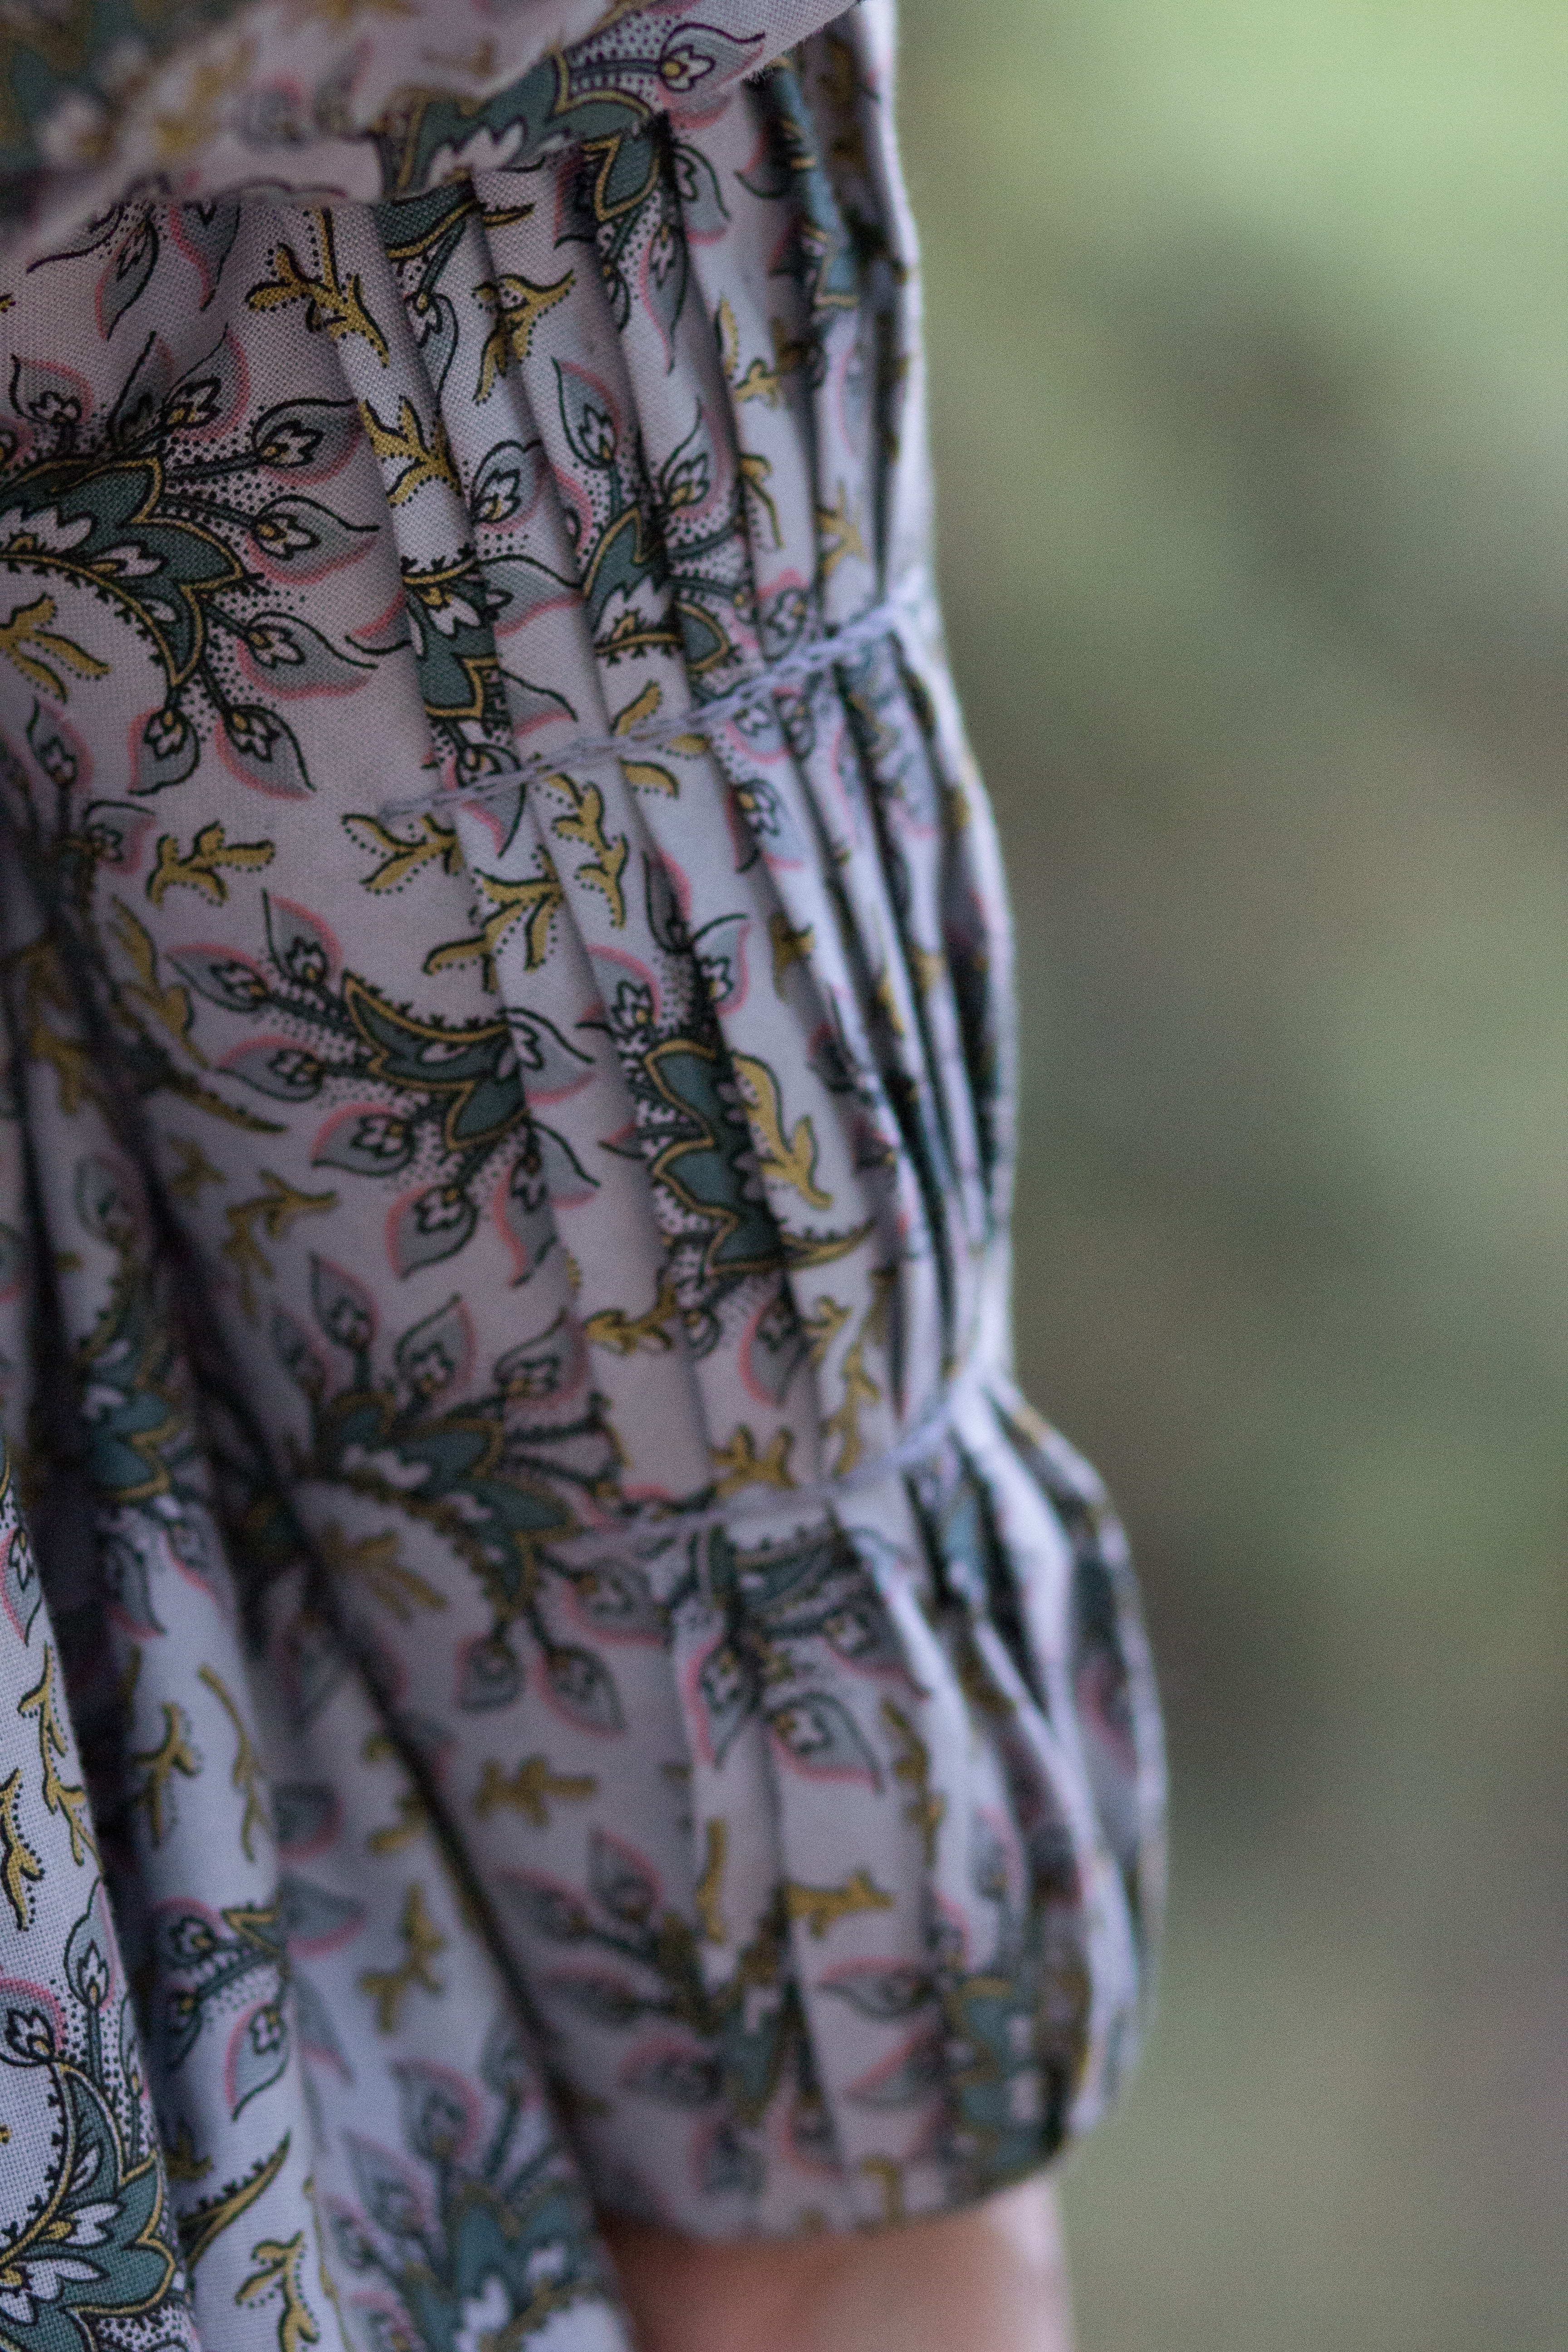
After trying a few silly sleeve shapes, we settled on giant elbow height puffs that are set off at the top and bottom with pleats and feature a bit of embroidery and corded bands to hold the pleats in place.
Here’s a view of the pleats and corded bands at the top of the sleeve. This dress has similar pleats.
The sleeve puffs are supported by separate interior puffs that tie in. I used the method outlined in my 1830s Sleeve Puff Tutorial to make them.
In addition to the base dress, we decided to go all in on the 1830s aesthetic and create a matching fabric pelerine for this ensemble.
I looked at images of pelerines to determine what the shape and edges should be. We decided on a simple but flattering shape (as much as a matching fabric piece can be!) without extra difficulty in the form of scalloped or dagged edges, ruffles, etc. This is the finished shape we decided on.
Cording helps to define the edge and a similarly colored grey/blue cotton lining finishes off all of the raw edges. This was great, as the pelerine could be almost entirely made by machine!
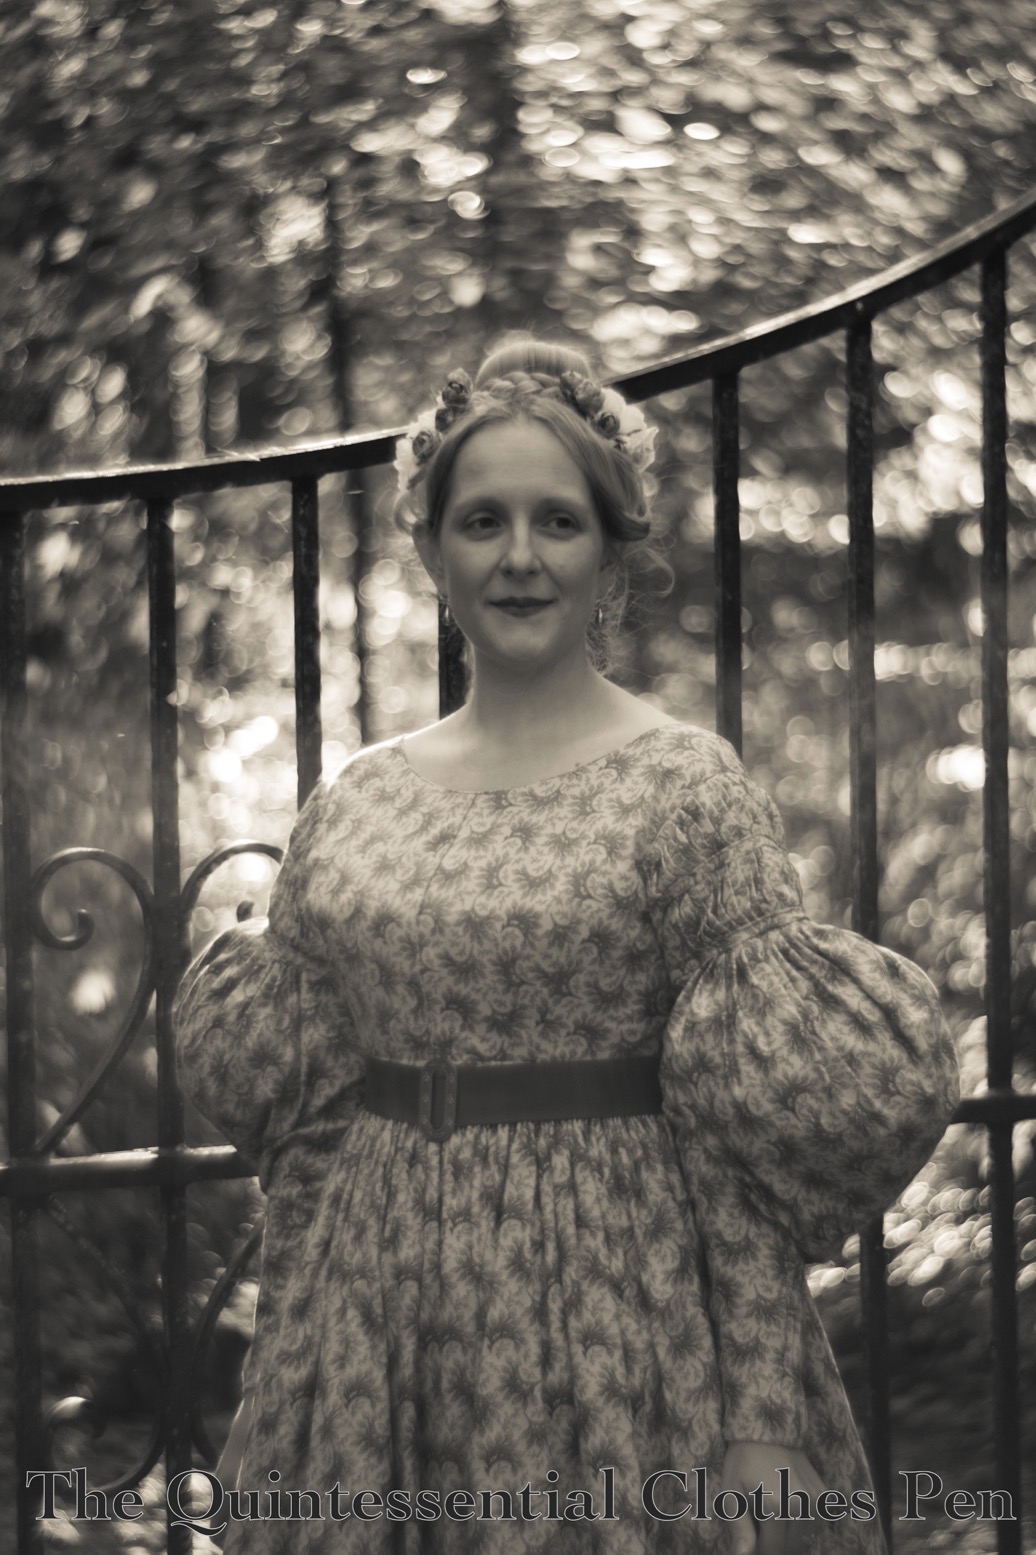
On our woods walk, my usual photographer friend (who blogs at Plaid Petticoats) enjoyed taking a few photos with her Petzval camera lens, which creates the swirled background in the next two photos (you can read more about the Petzval lens in this Plaid Petticoats blog post). I can’t decide whether I like the color or black and white version better, so I’m including both!
So why is the title of this post include the #1? Well… because I enjoyed the effect of the fabric so much that I purchased additional yardage for myself and started making an additional dress for myself, too! What an excellent excuse to try out further 1830s sleeve variations!
Blue dress #2 has been cut out for quite awhile (a year, I think?). However, I’ve been busy and other things have been a priority, so the dress is 0% done in terms of being assembled. Someday…!
Last year, I made a yellow cotton print 1834 dress (there are tons of details about it in this past post). The yardage leftover after that project wasn’t enough for another full dress, but it was enough for another bodice, and I’d been caught up in 1830s fever!
There are so many ridiculous sleeves to explore! Accordingly, I decided to make a second 1830s bodice with different sleeves. I finished the new 1838 bodice earlier this year and over the summer I was able to wear it with my recently finished chemisette.
The 1834 dress was made in two parts, a skirt and separate bodice, so that it was easy to make a second bodice and save yardage on the skirt.
Construction Overview
First, the construction details of the new 1838 bodice, starting with the HSM facts, because this bodice fits Challenge #4:
The Costumer’s New Look: Give an old costume a new look, either by creating a new accessory or piece which expands or changes the aesthetic and use of an outfit, re-fashioning something into a costume item, or re-making an old costume.
Fabric/Materials:Approximately 2.5 yds reproduction print cotton and 1 yd of muslin.
Pattern: The pattern for this bodice is based on patterns contained in Janet Arnold’s Patterns of Fashion 1 and Norah Waugh’s The Cut of Women’s Clothes, as well as sleeve information fromThe Workwoman’s Guide.
Year: 1838.
Notions: 2 ½ yds narrow cotton yarn for cording, about 10 hooks and loops, and thread..
How historically accurate is it?: 90%. The pattern, construction methods, and fabric are all quite good. Inside seams are sewn by machine.
Hours to complete: 22.
First worn: August 2021.
Total cost: Approximately $15.
Construction Details
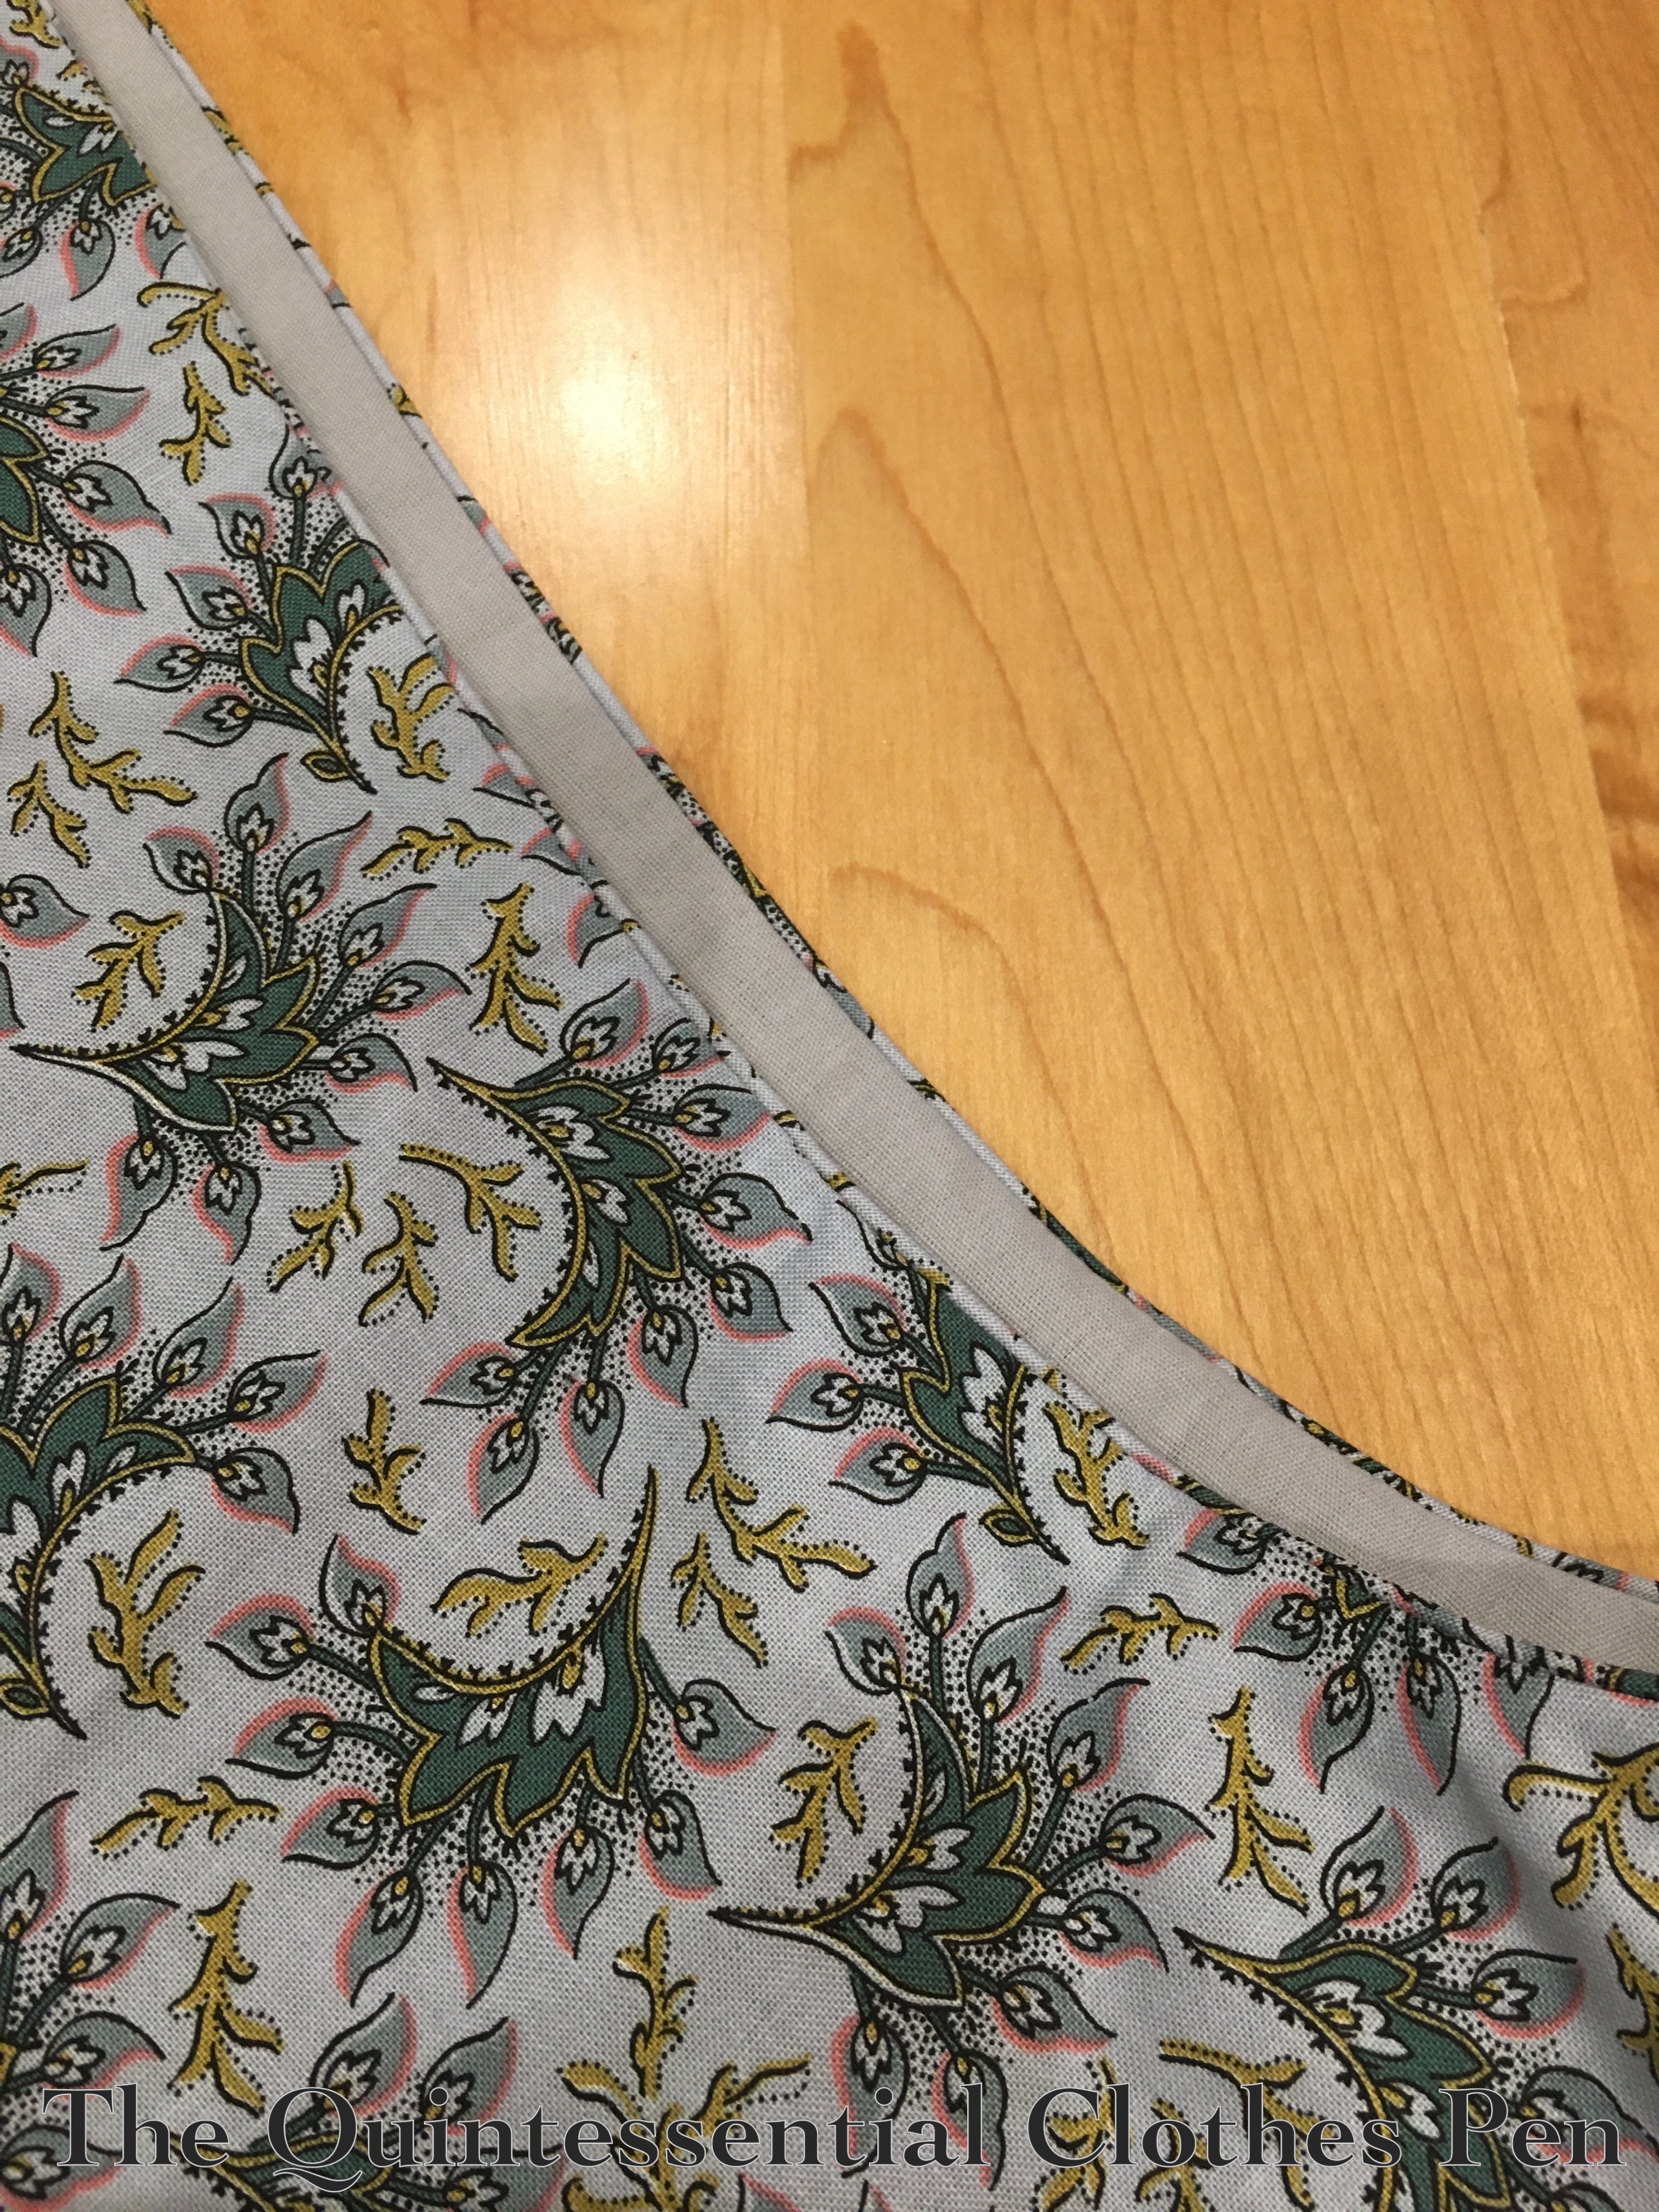
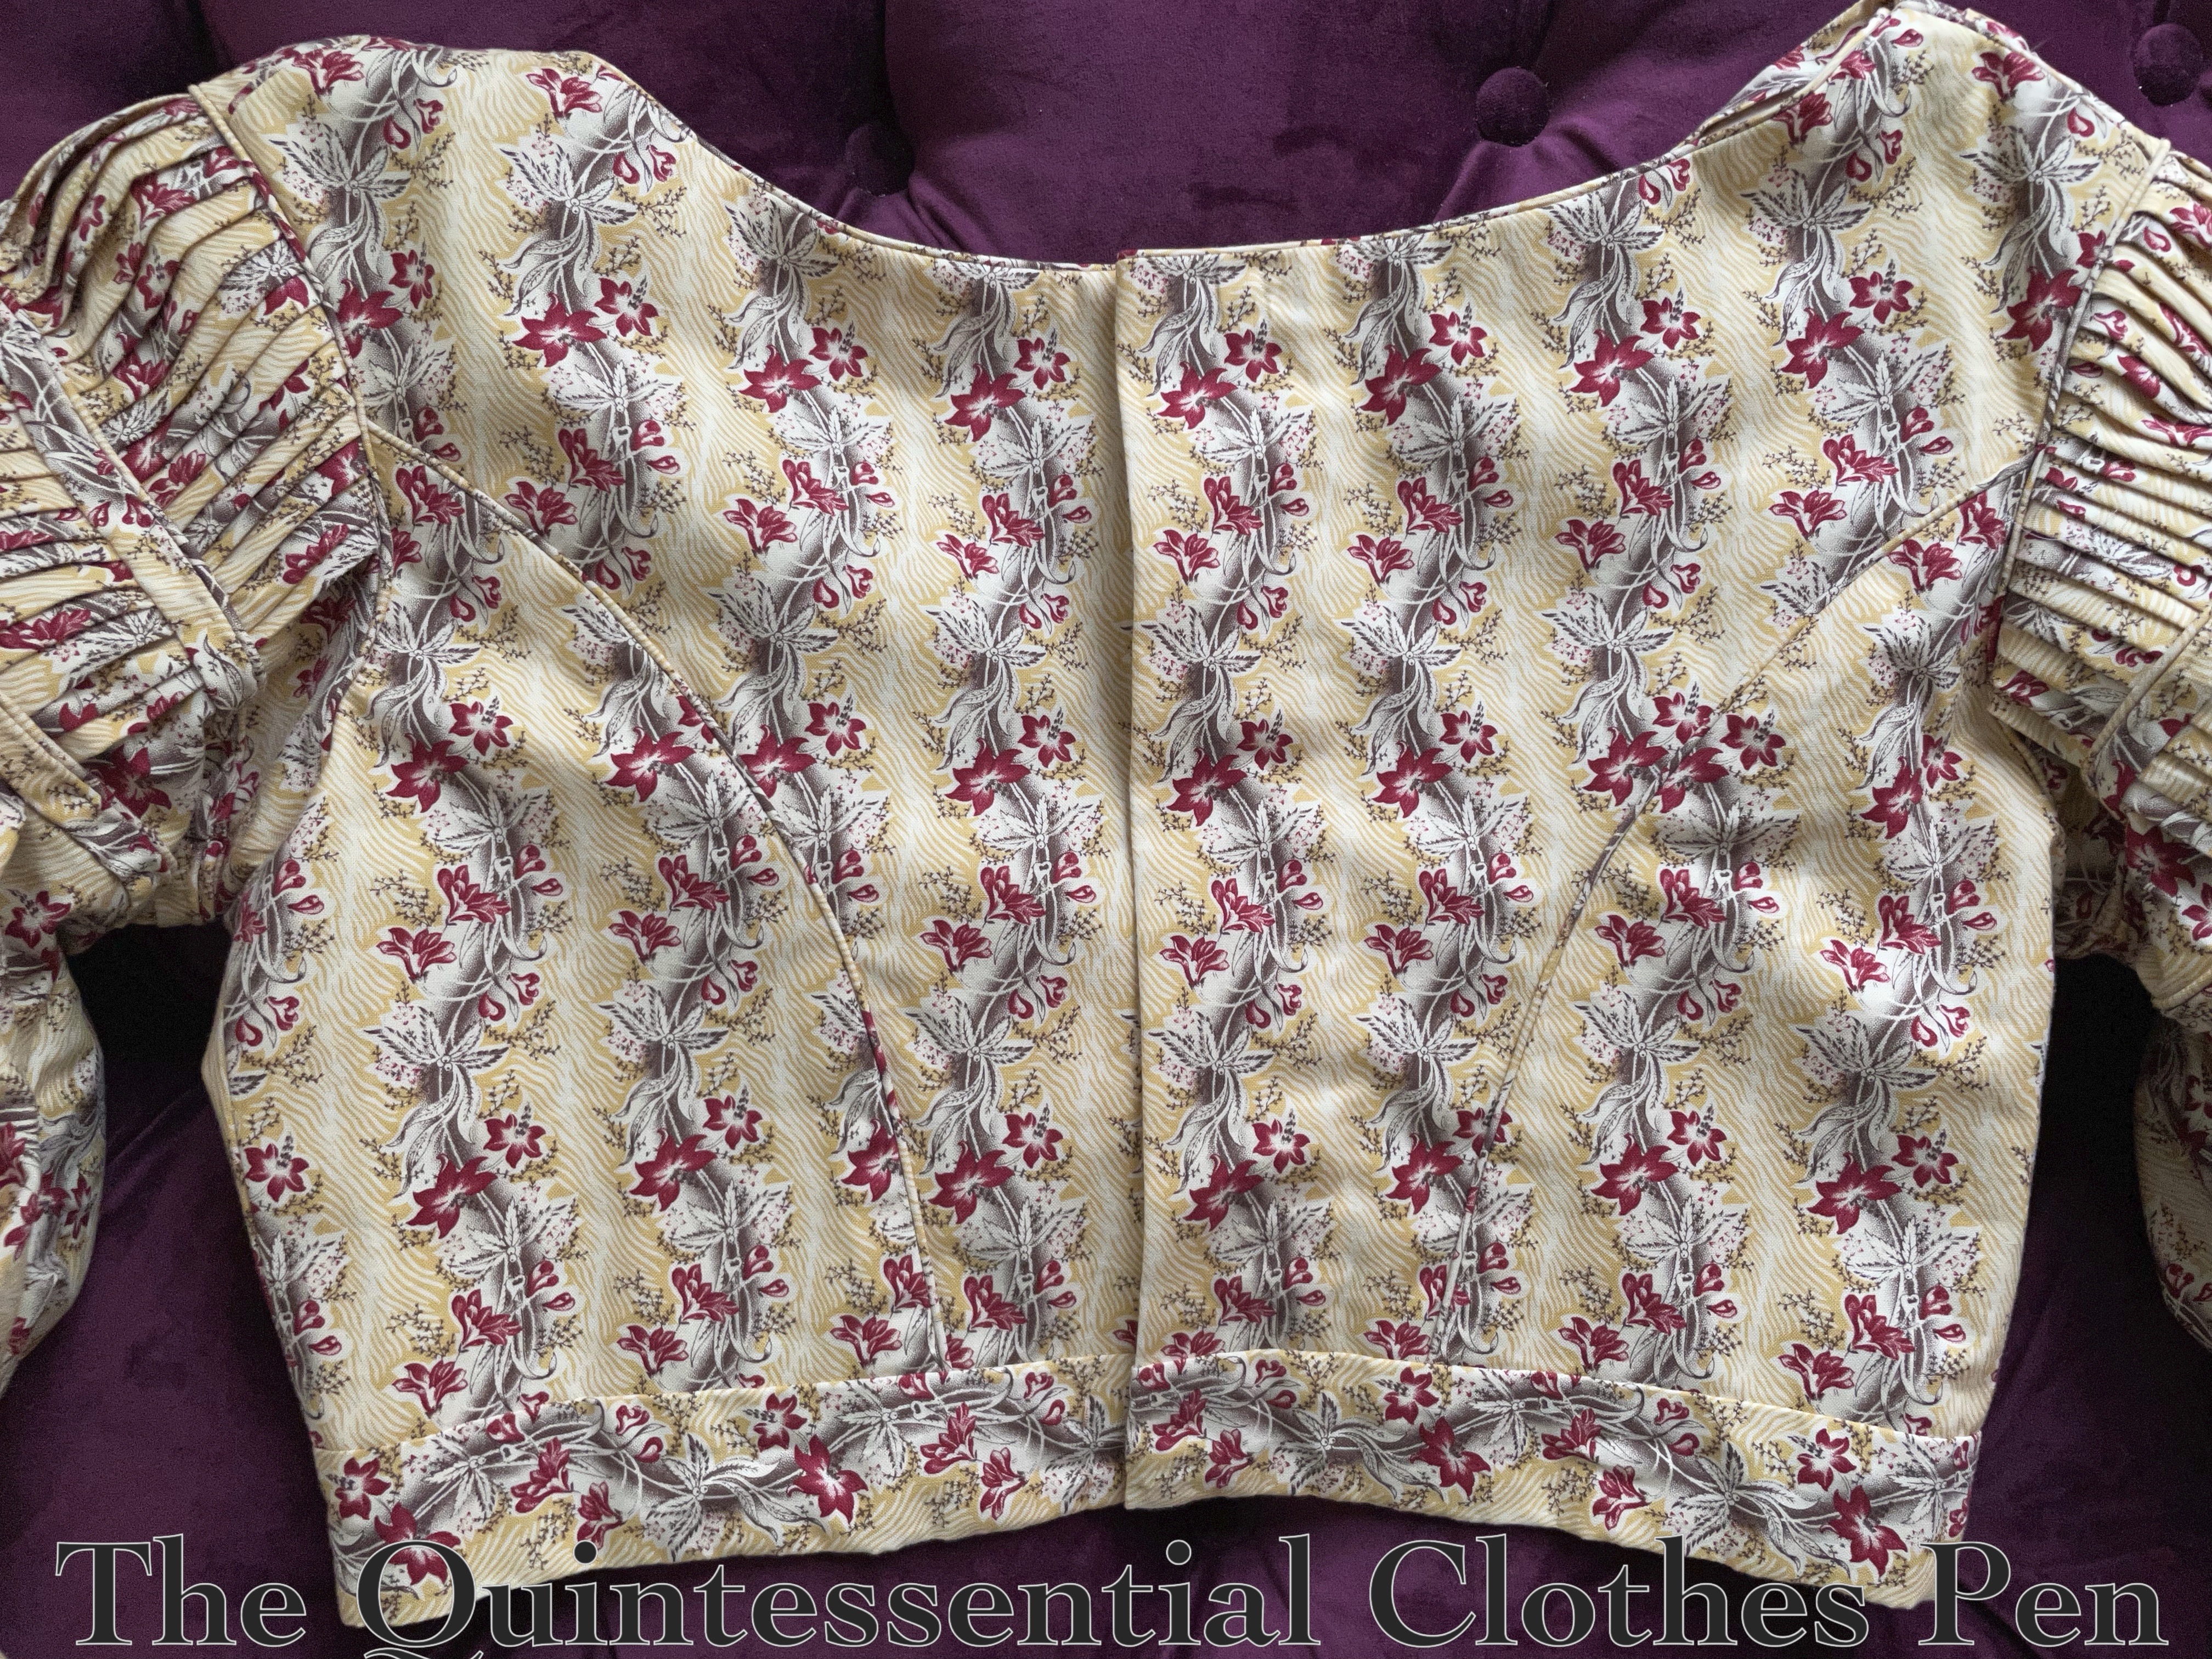
The back of this bodice is made just like the 1834 bodice, with piping in the side back seams. The armsceyes and neck are also finished with piping.
The main difference in the bodice (aside from the sleeves, which we’ll get to shortly) is the front, which has a deep V shape.
What I saw is that instead of being flatlined (as with the yellow and muslin layers of the back pieces), the lining was stitched separately from the gathered front panels. The muslin provides a fitted shape for the yellow exterior layer. There is a photo of the inside of the bodice of the extant bodice that shows this very clearly.
For my dress, the piping that finishes the back neck continues around the muslin to finish the edge. The yellow exterior pieces of the V edges (which are cut on the straight of grain) are simply pressed under twice.
Here is a closeup of the armhole of my bodice from the inside. The muslin front edge and exterior yellow layer are on the right of the photo. You can also see the ties that hold the sleeve puffs in place.
In addition to those details, the photo below also shows the hooks that are used to attach this bodice to the skirt.
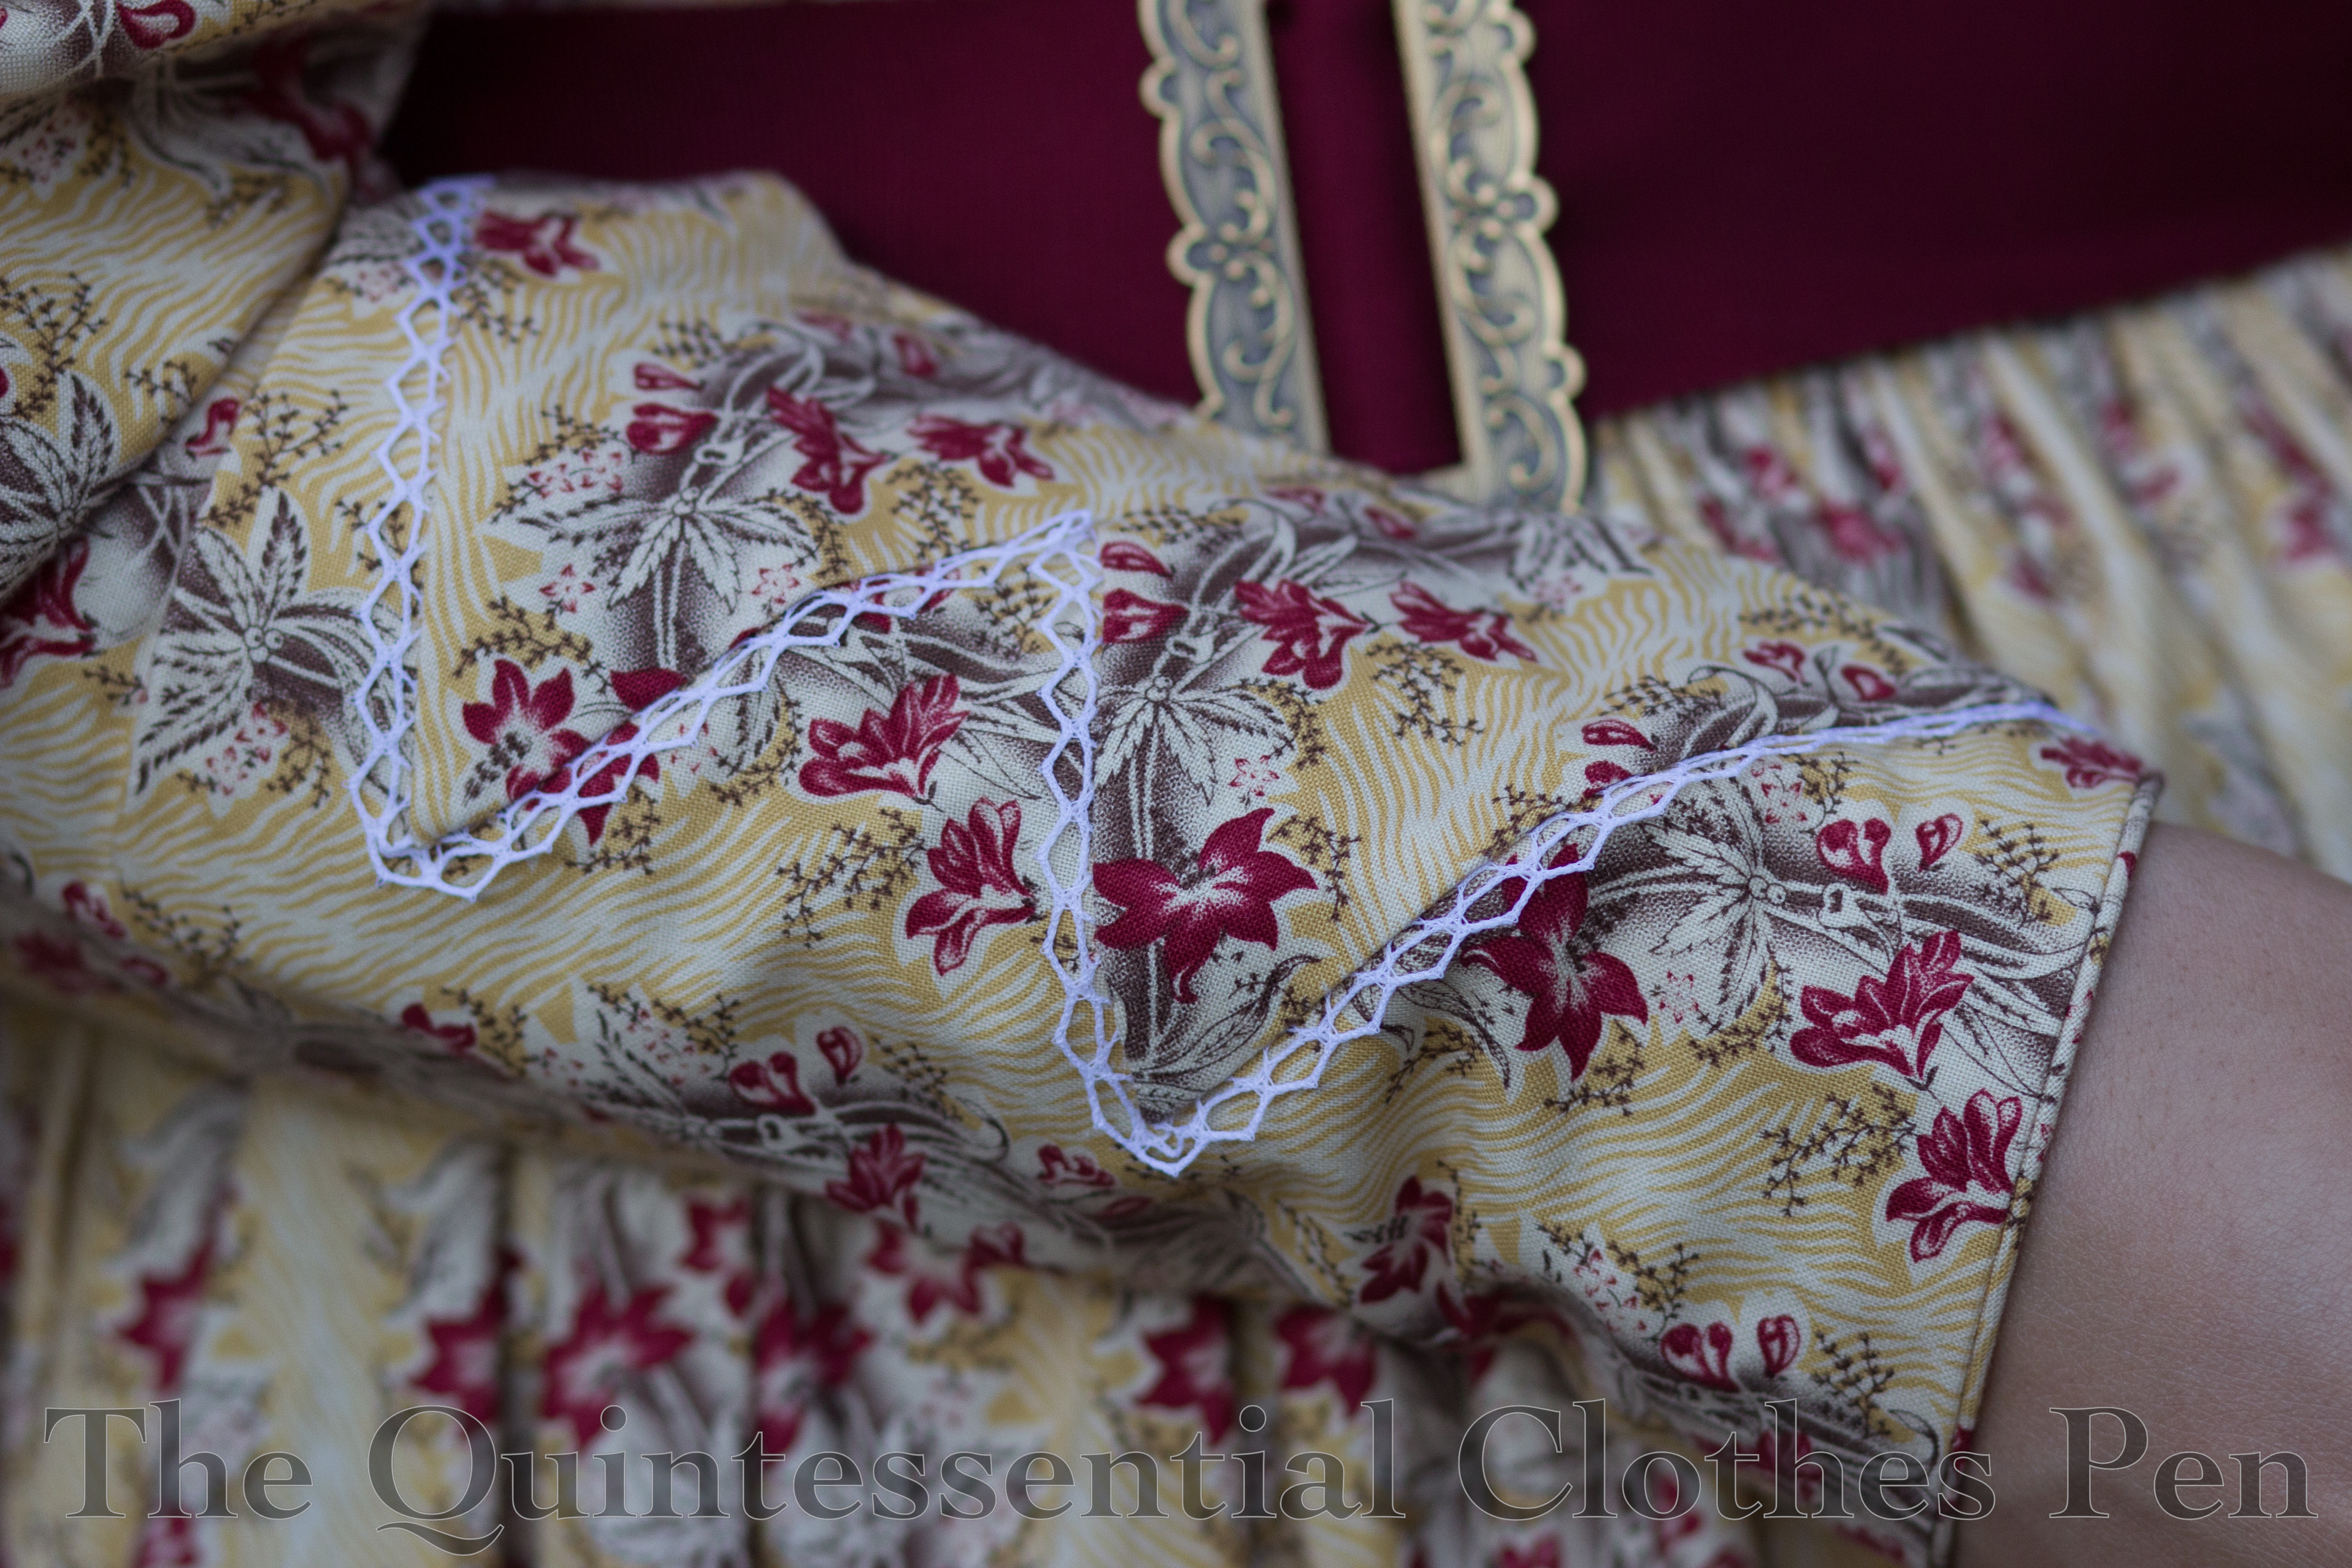
Ok, but the sleeves are the star of the show here, so let’s discuss them! Being from 1838, they still use a lot of fabric (a yard each), but the fullness is pleated to force the puff down to the elbow level.
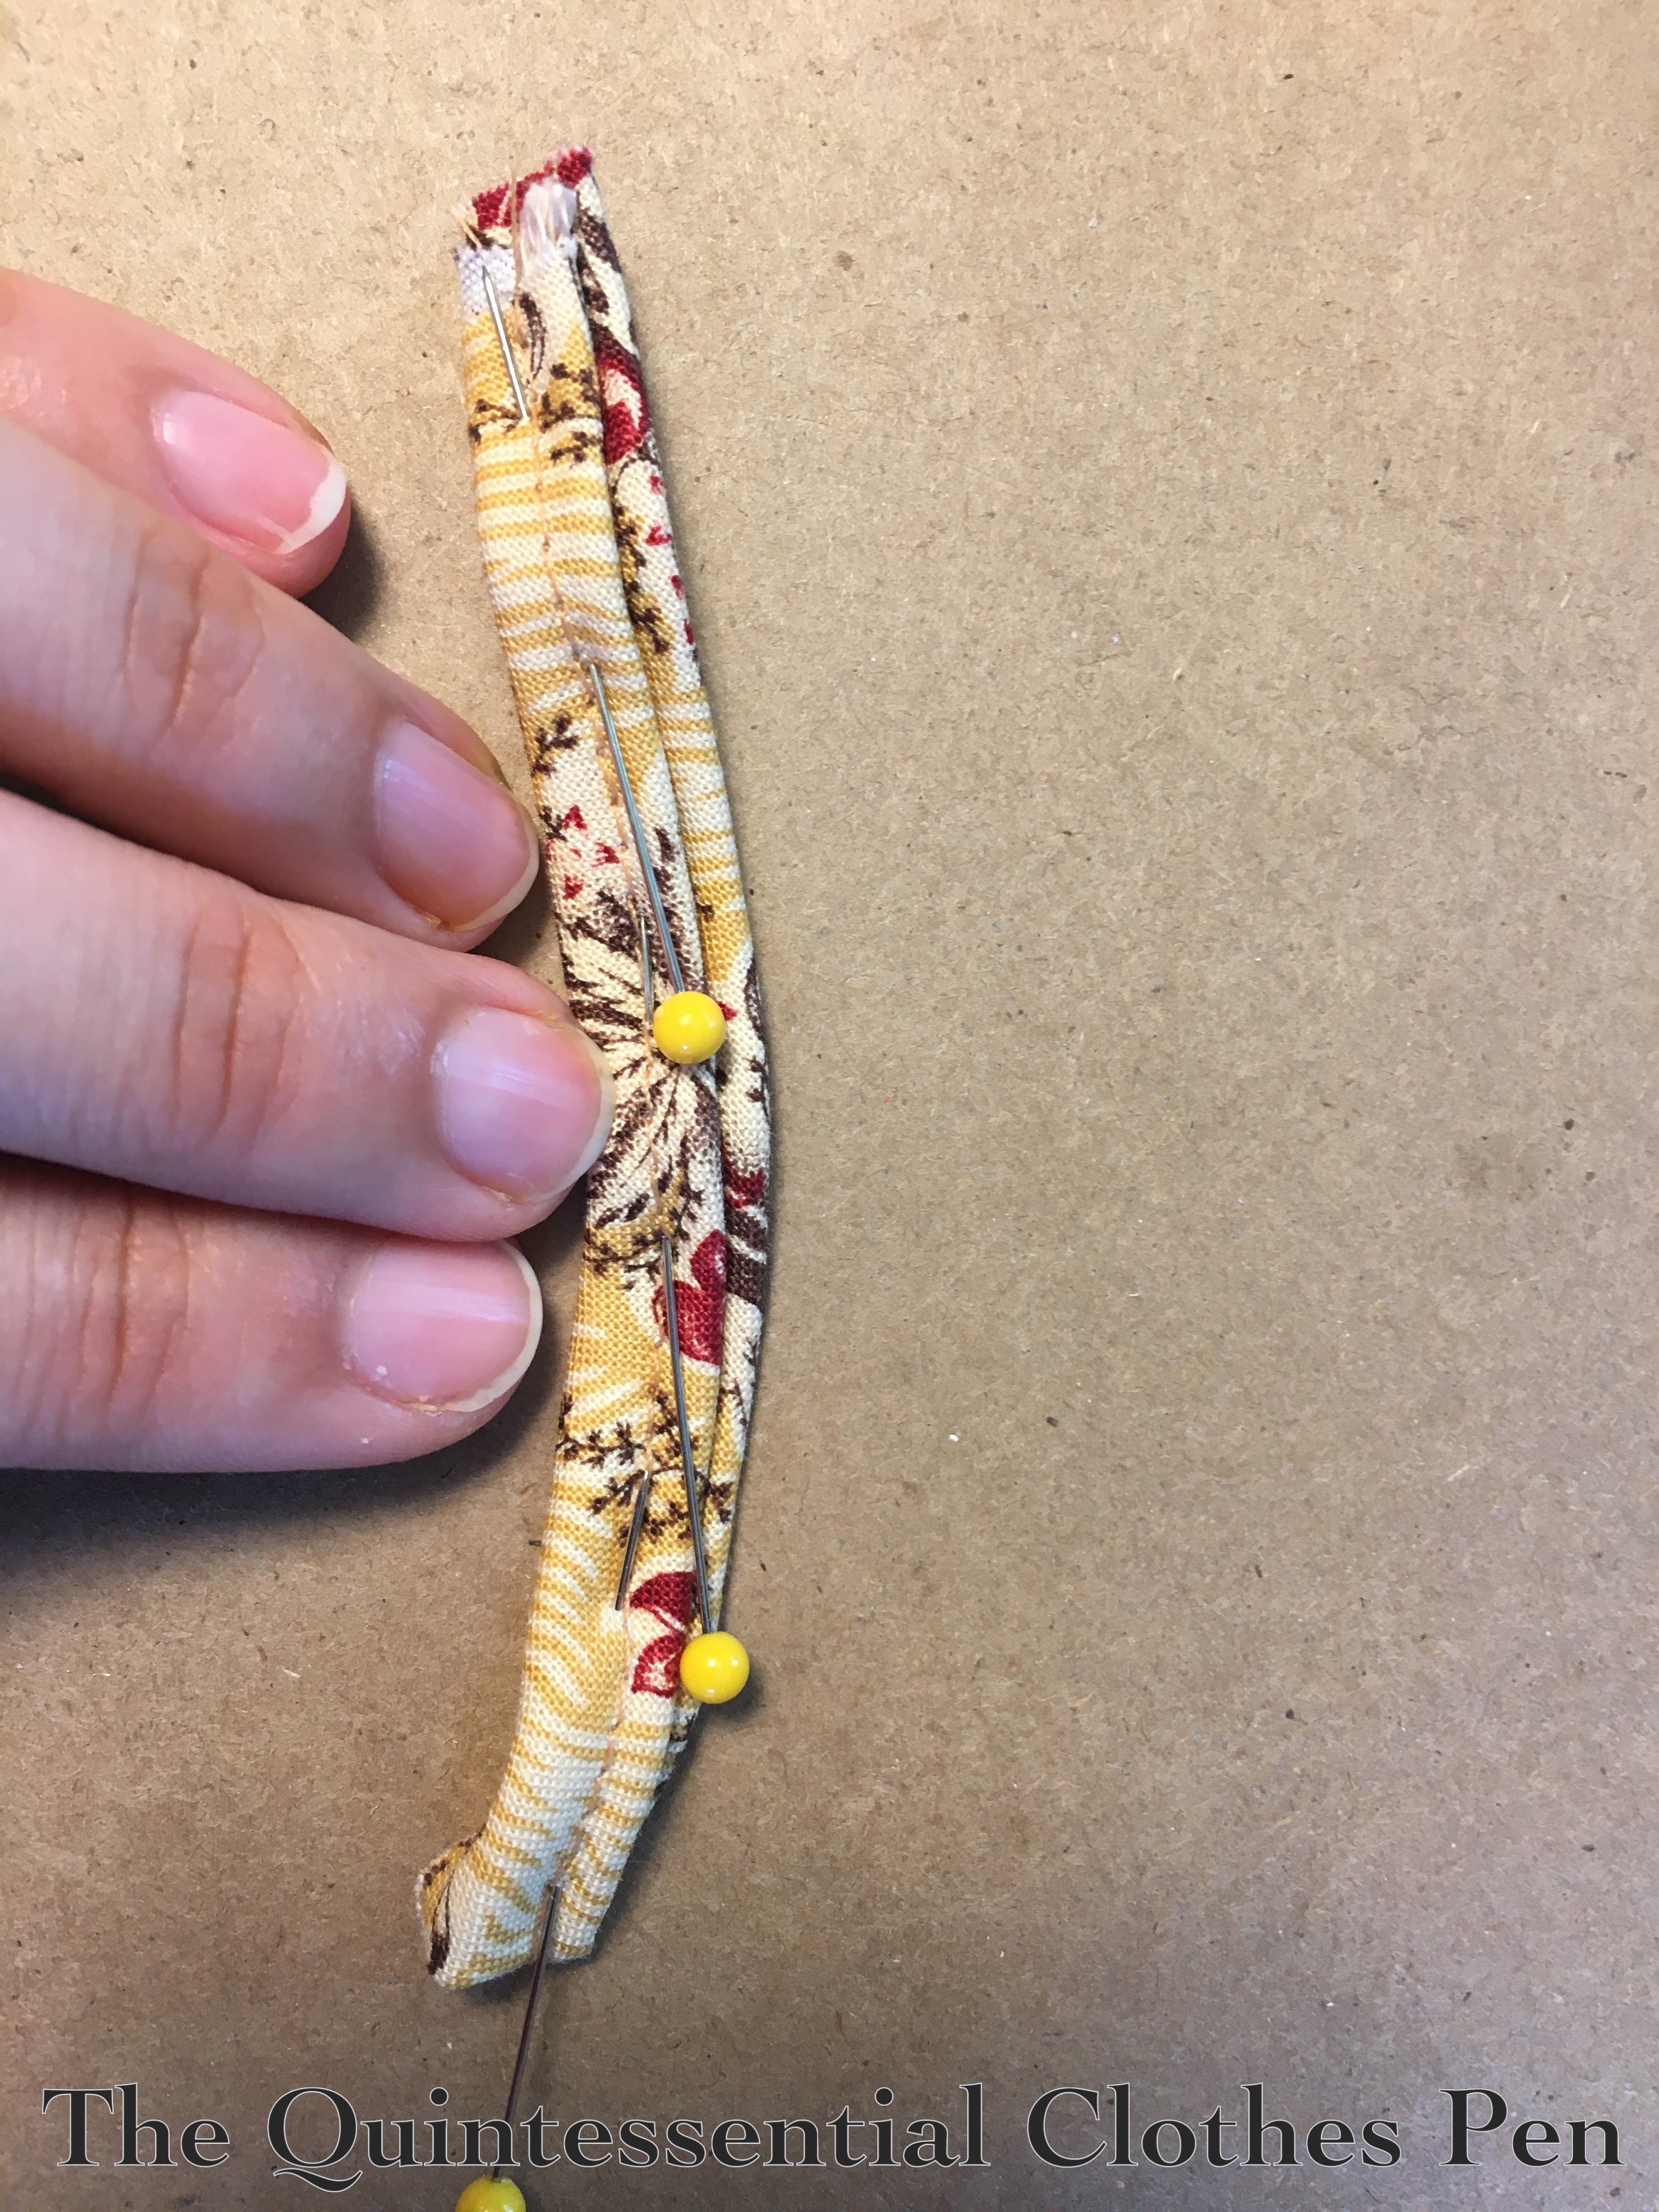
Here’s a closeup of the completed sleeve. The pleats are held in place by two bands of double piping that are hand sewn in place. To make the double piping I machine sewed the cord into one side of my bias and hand sewed it into the other, then pressed the bias in half and attached it through all the layers. In my sample below I didn’t bother to put the machine stitching on the under side, but on the dress the machine stitching is not visible.
Before the piping was added, the pleats were machine basted in place. My machine basting wasn’t exactly where the piping ended up, so I removed the basting anywhere it showed.
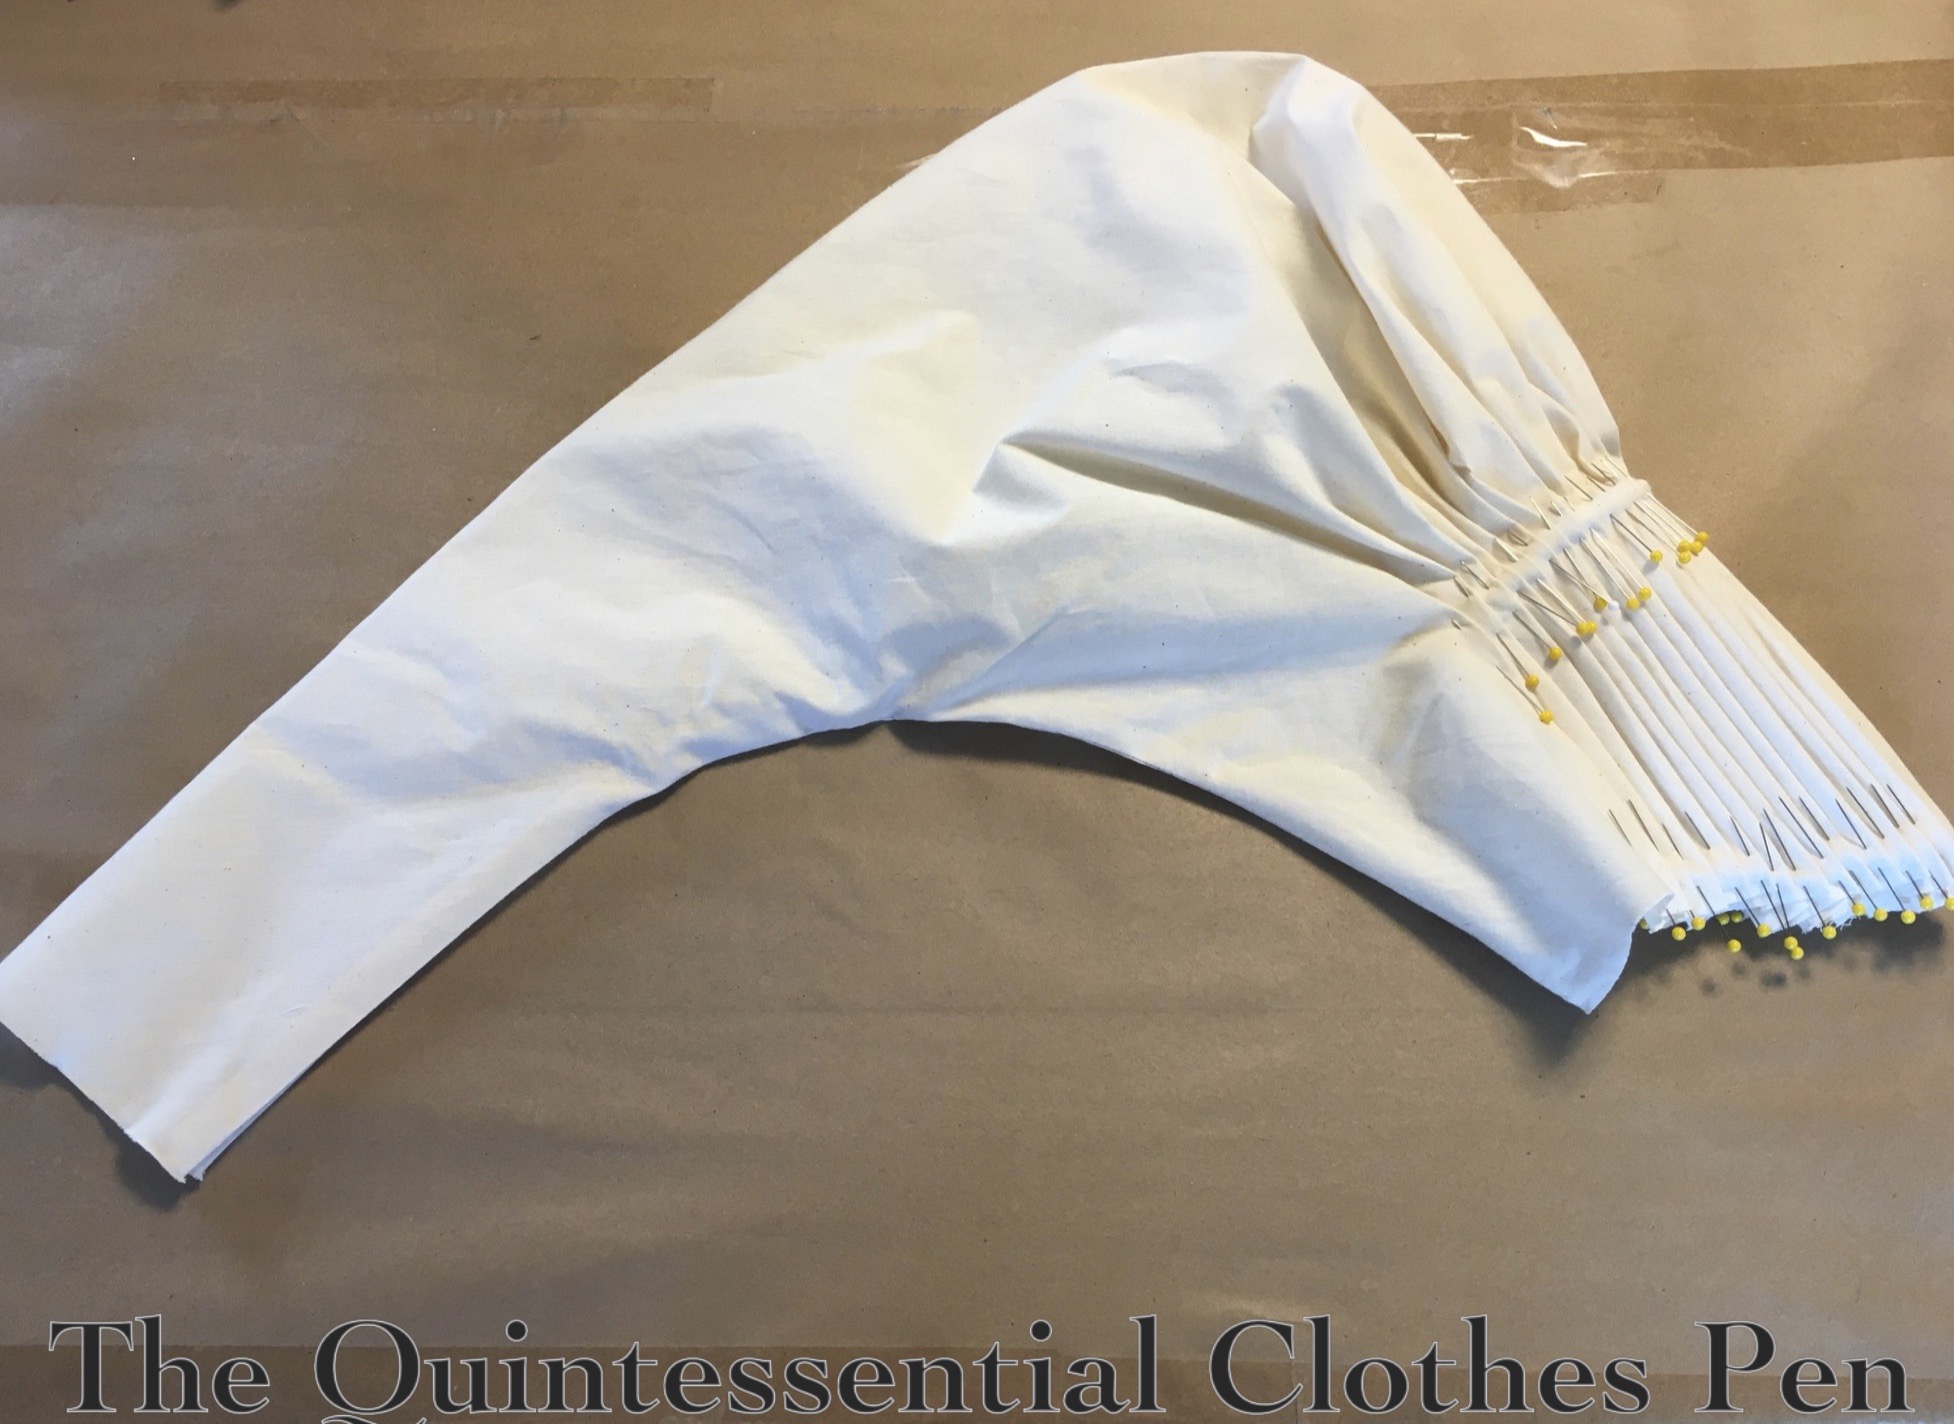
Backing up some more in the process, below is one of the sleeves with the pleats pinned in place. I did this while the sleeves were flat, before I sewed up the inseams.
There’s no pattern for the pleats… it was just a matter of knowing what dimensions I wanted to end up with for my top edge and bicep and then eyeballing it. The pleats vary in depth on the inside, even though the outside is pretty even at ¼”. Part of this is due to the fact that the pleats have to angle in order to create an armsceye that keeps a curve up in the middle. Figuring it out is a great mind puzzle!
Below is the sleve before being pleated, etc. Between being over a yard high and also being cut on the bias you can see why each sleeve takes a yard of fabric!
After pleating and sewing the inseam the sleeves had this shape (below is my mockup sleeve). I really wanted an exaggerated elbow puff, so this isn’t quite the shape I wanted to end up with. To get the shape I wanted, I took horizontal tucks about halfway down the sleeve. This keeps the forearm relatively unwrinkled while creating lots of elbow puff. The tucks are lost in the pattern of the finished dress.
Could I have altered my pattern to not have to take tucks? Sure! I’d probably change the curve of the sleeve inseam to do that. But… I’d already cut my pieces. And adapting sleeve shapes to adjust for changes in styles seemed very appropriate and in the spirit of what 1830s ladies might have done.
So for a bit more sleeve information… These sleeves have an opening at the cuff to allow for the tight fit of the forearm. The openings are finished with self fabric facings and then the hem is turned up.
Here’s what that looks like on the inside.
And that’s it for construction!
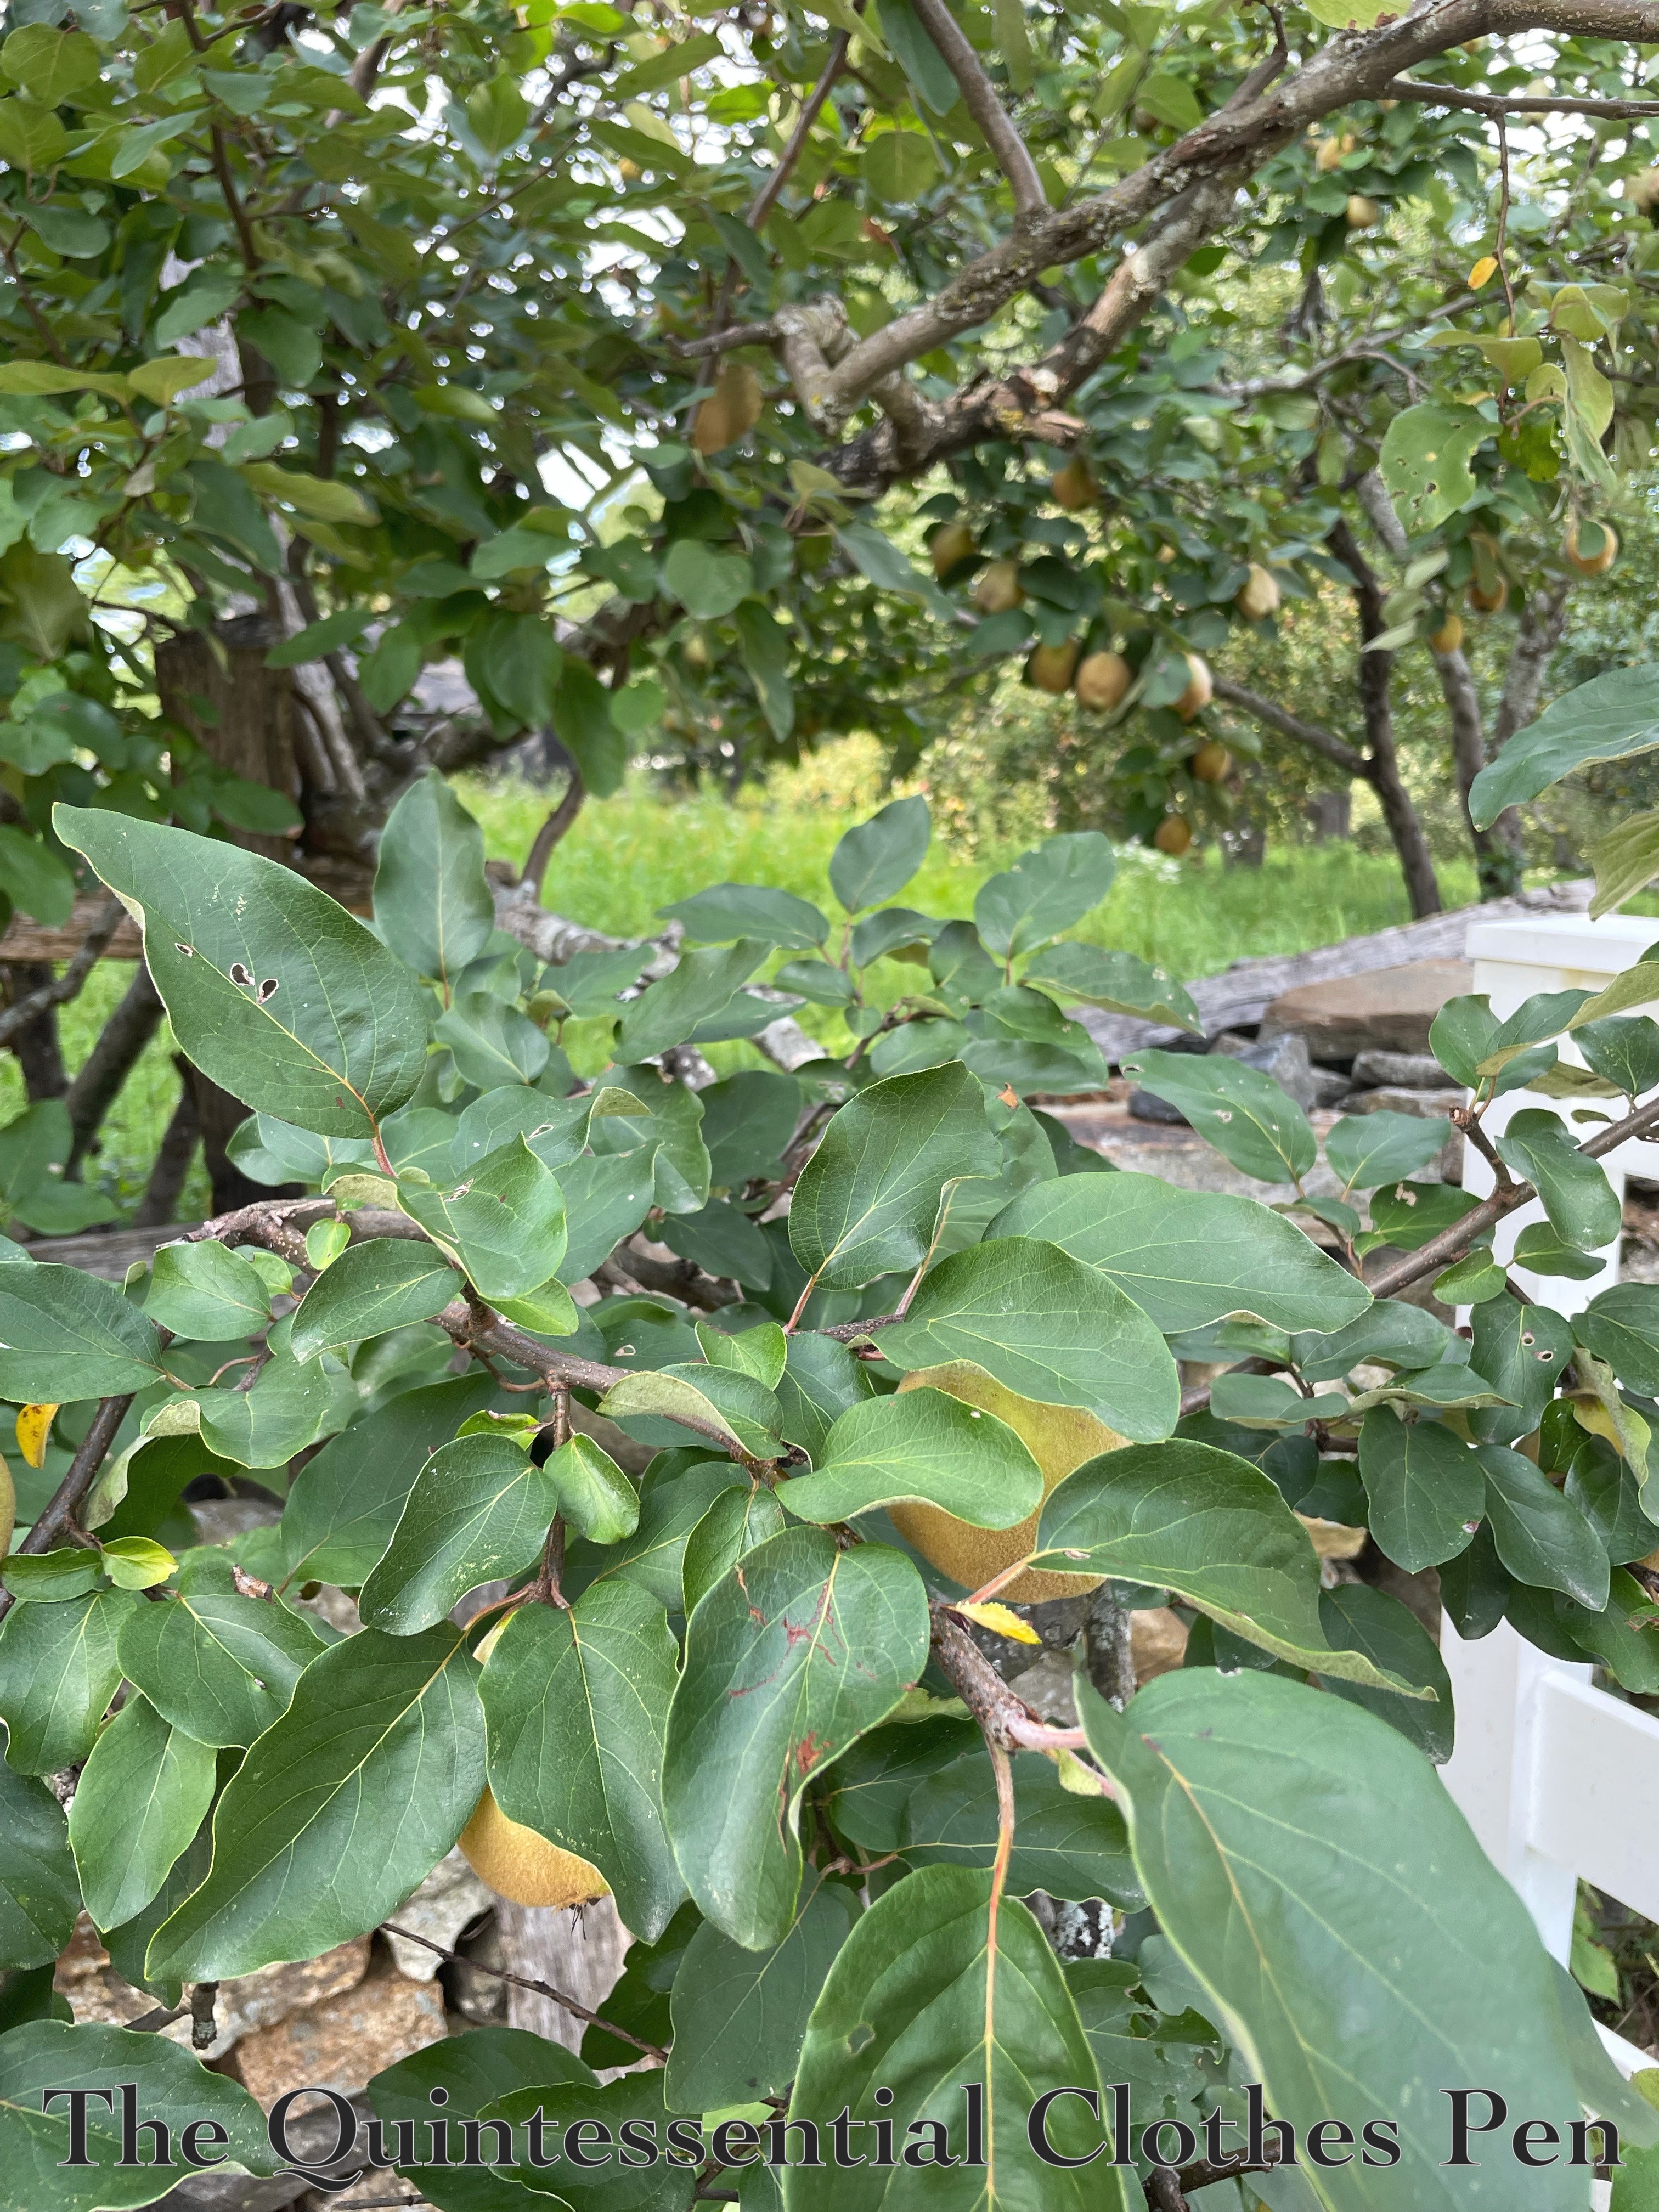
Here’s a bonus photo of the dress with a quince tree. I’ve heard of quinces but never encountered them before.
They sort of look like pears!
I’m very pleased with this cross front bodice and the sleeves that go with them. I appreciate their minute detail even though they were definitely the most time consuming part of this bodice!
The third challenge for the Historical Sew Monthly 2021 is ‘small is beautiful’. Little things can make a big difference to the finished look.Make something small but perfect. My entry for this challenge is an 1830s chemisette to fill in the neckline of my 1838 bodice (the sister of the 1834 dress I posted details about last year).
Pattern: Adapted from Janet Arnold’s Patterns of Fashion 1, with adjustments for fit and style.
Year: 1836.
Notions: 1 ½ yds ¼” white cotton twill tape, 1 metal hook, 1 cameo button and thread.
How historically accurate is it?: 90%. The pattern, construction methods, and fabric are all quite good. It is entirely hand sewn. The most modern element is the plastic cameo button.
Hours to complete: 19 ¾.
First worn: August 2021.
Total cost: Approximately $5 for the fabric/shipping (though it is leftover from another project), $1 for the twill tape, and $1 for the button = approximately $7.
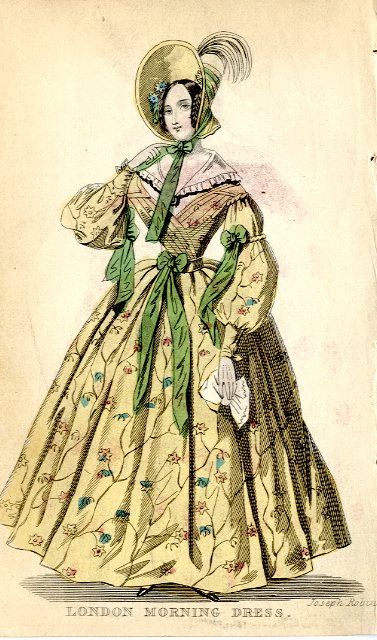
The chemisette pattern shape was based on this fashion plate from 1836.
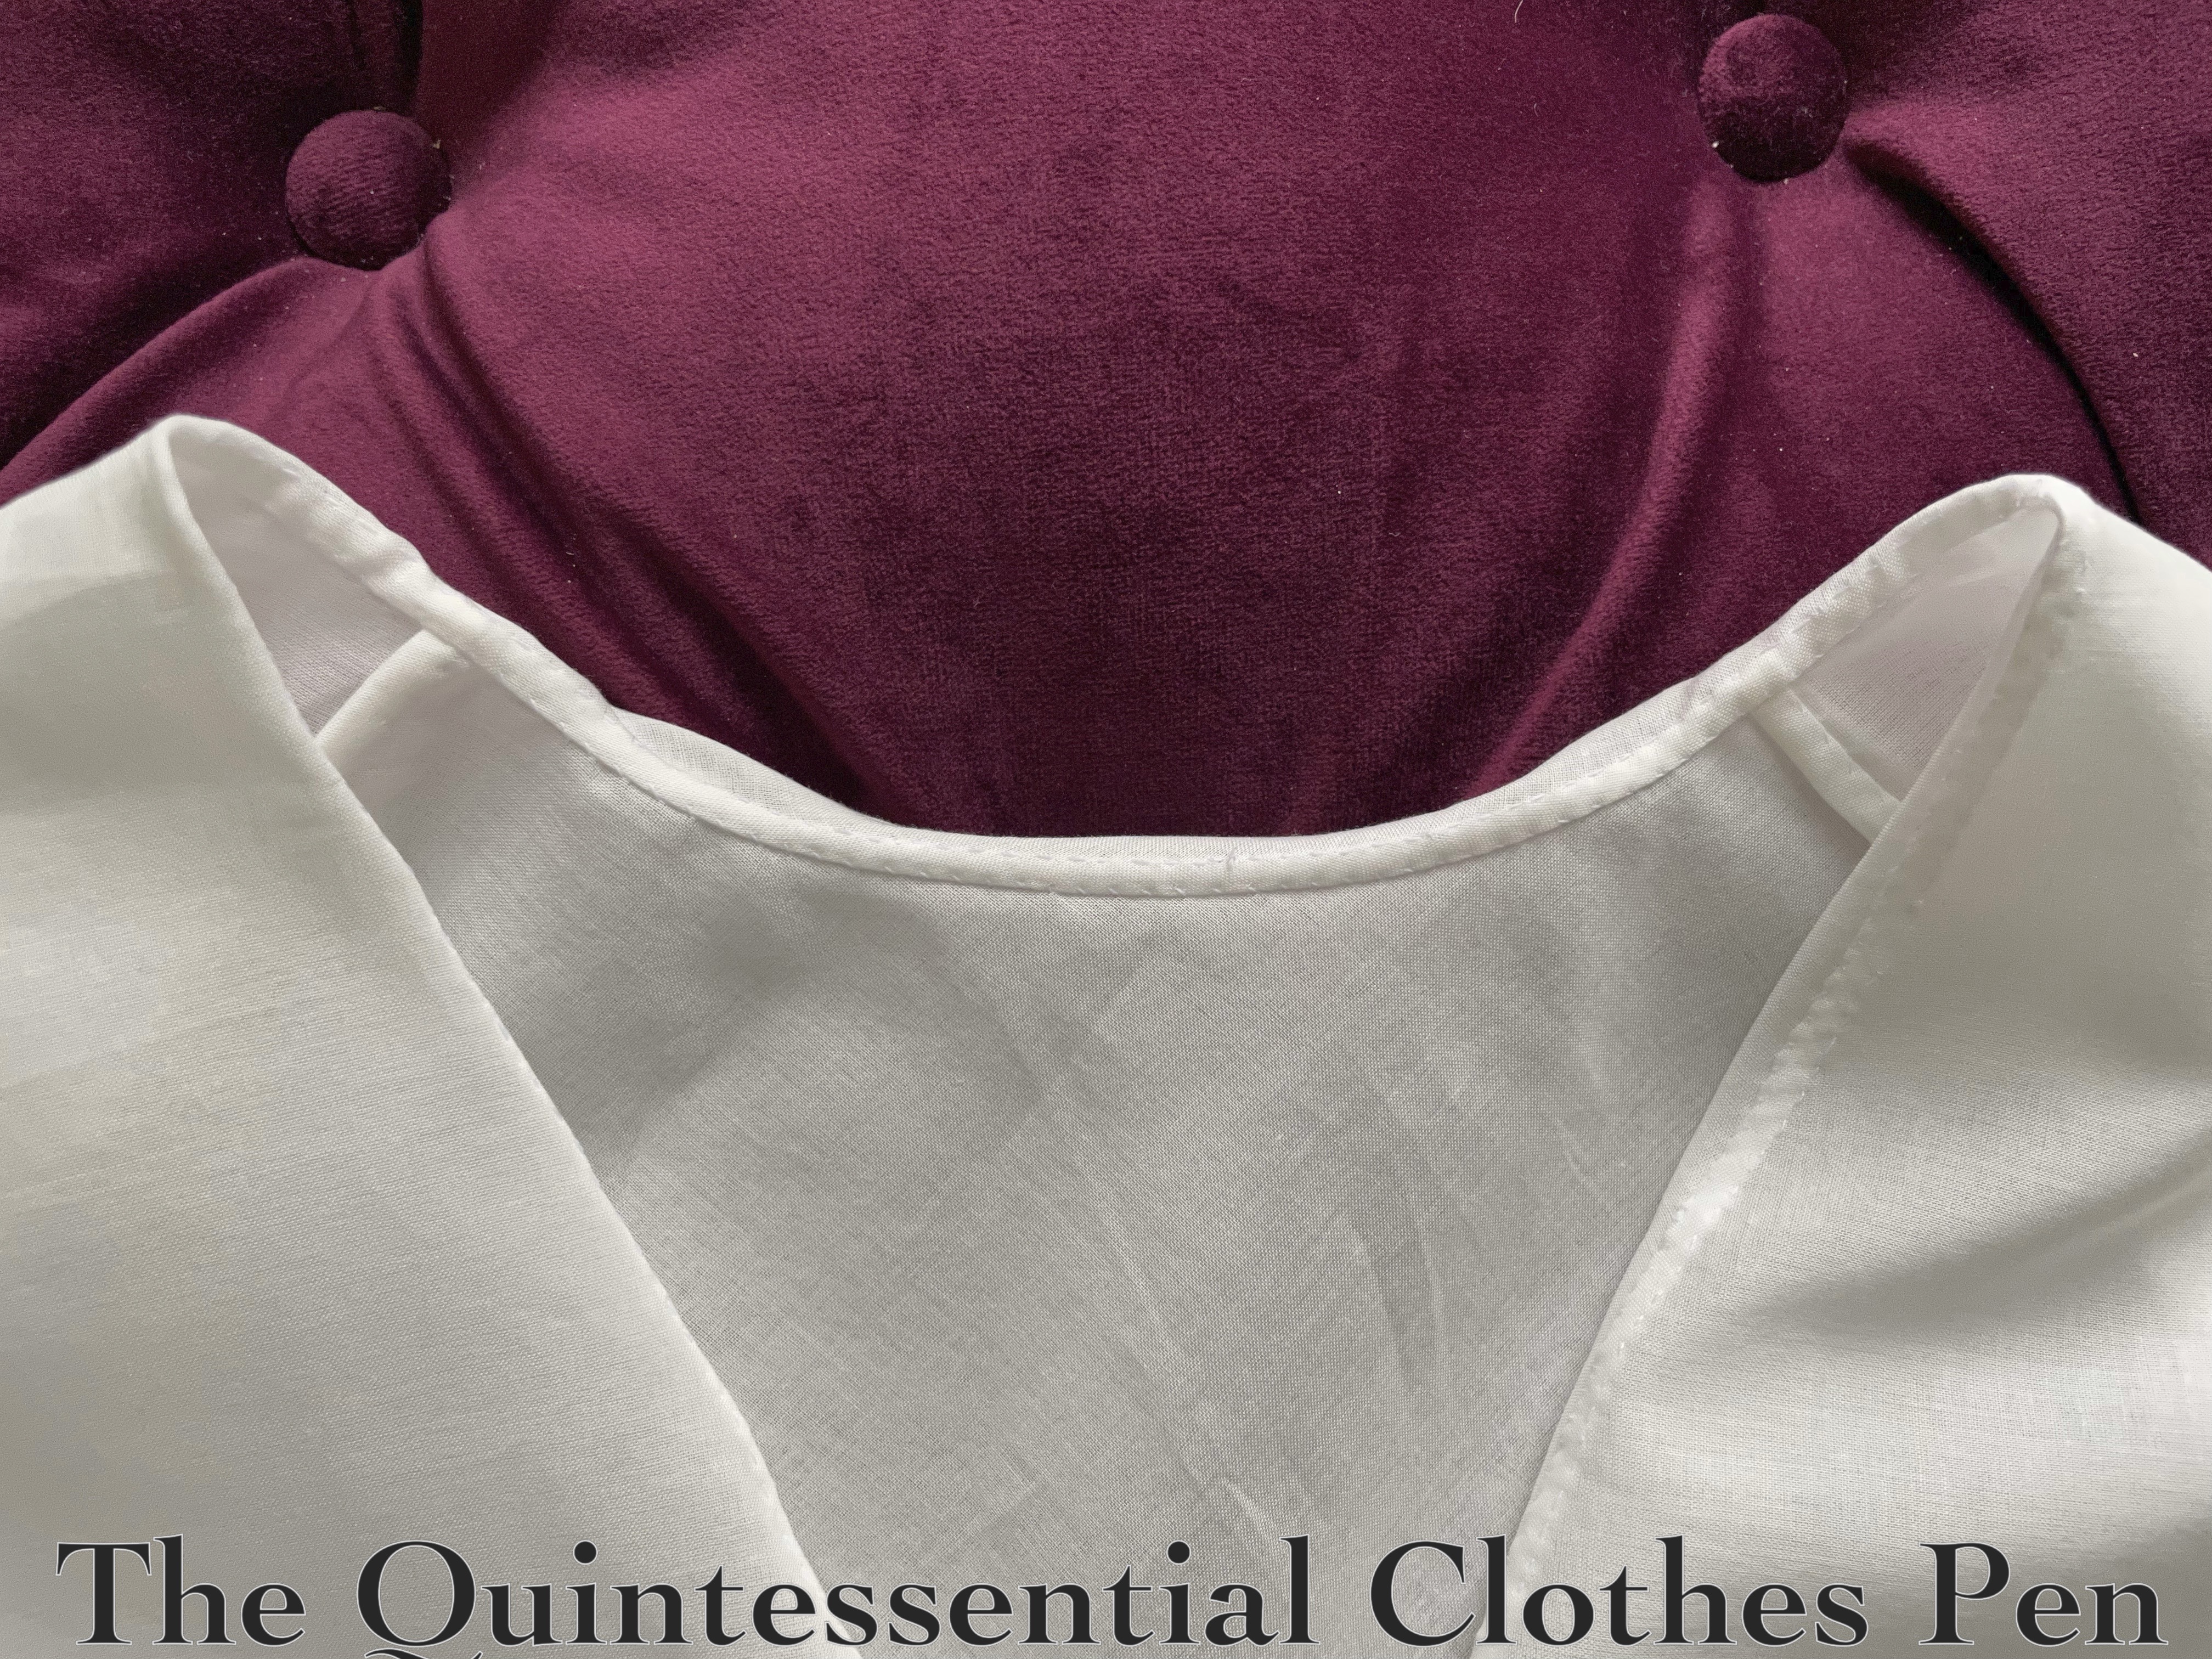
Without a body in it, the chemisette looks like this. It is entirely hand sewn, with small rolled hems and drawstring channels on the bottom edges.
The shoulder seams are sewn with French seams to encase the raw edges. The collar is attached with a flat felled seam for the same reason.
The gathered ruffle on the edge is hemmed on all sides with a tiny rolled hem and then whip gathered to the hemmed collar edge. I haven’t tried whip gathers before and this seemed like it would be a fun project to try them out.
On the underside of the ruffle the whip stitches are more visible.
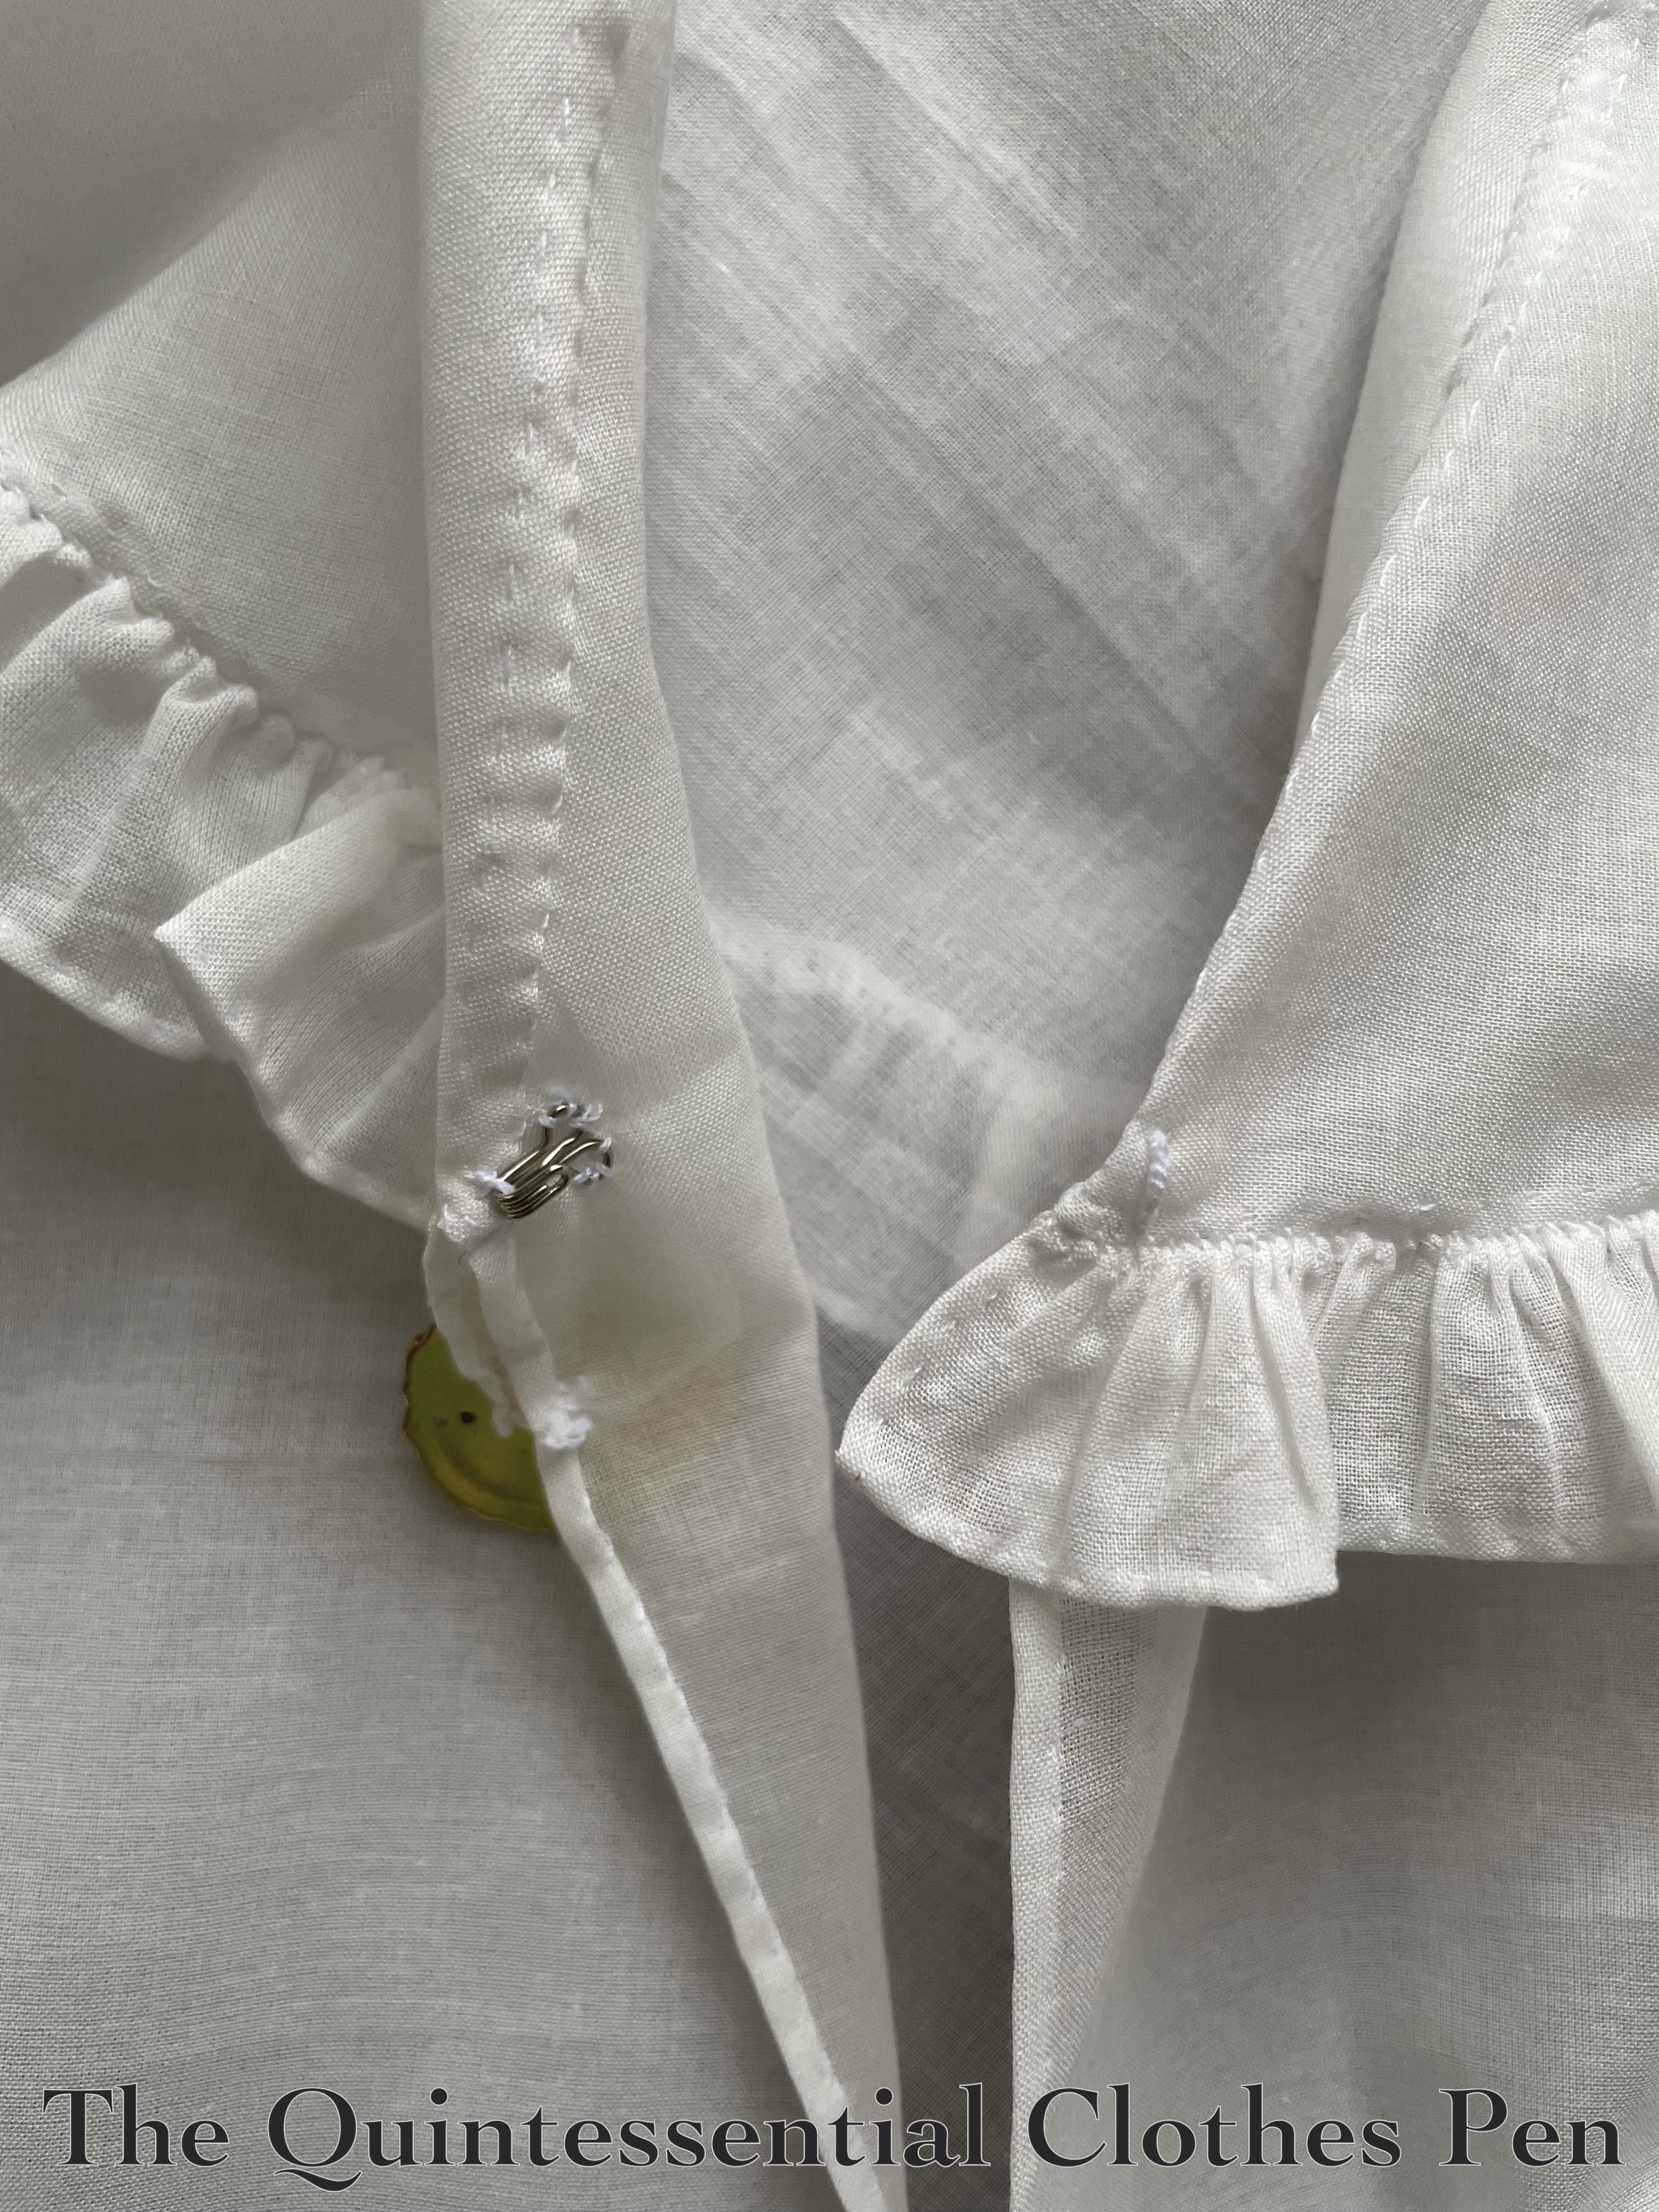
The inspiration fashion plate doesn’t show the back of the chemisette, so I had to decide on what I wanted. After looking at extant collars and chemisettes, I settled on a rounded point that extends just under halfway down the back.
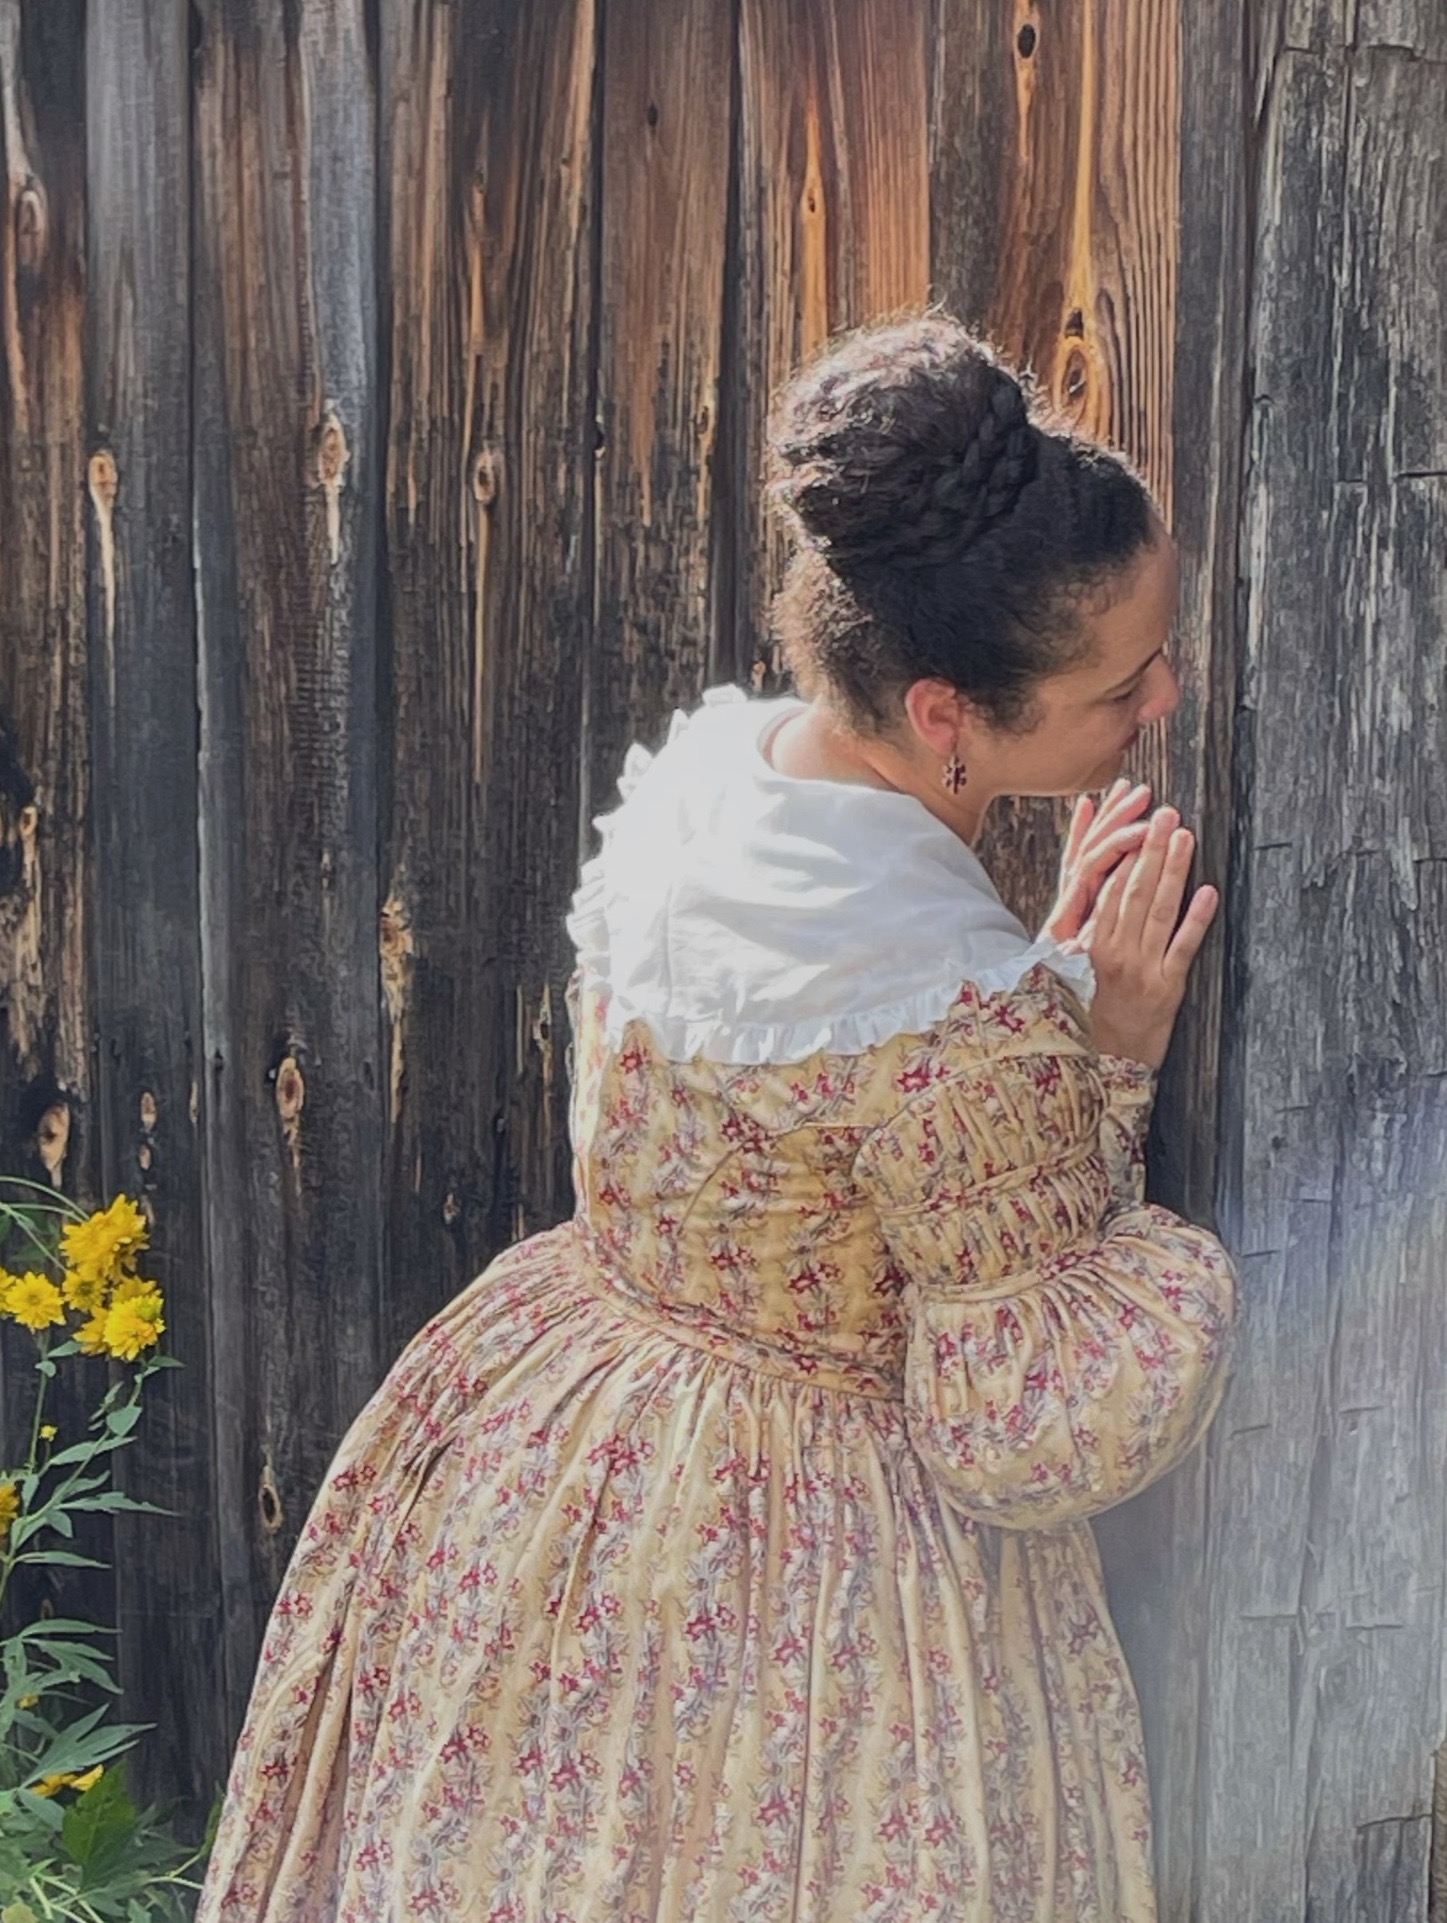
On a body, it looks like this.
The final touch is a hook and thread loop to close the collar, with the decorative cameo button on top. The plastic is obviously not correct for the 1830s, but it does have the benefit of being lightweight! I was worried that if I used a metal brooch (not that I have one, but if I did…) it would pull the collar down or out.
And that’s it! There was no rushing with this project. I took my time and enjoyed the hours of tiny hems and whip stitching.
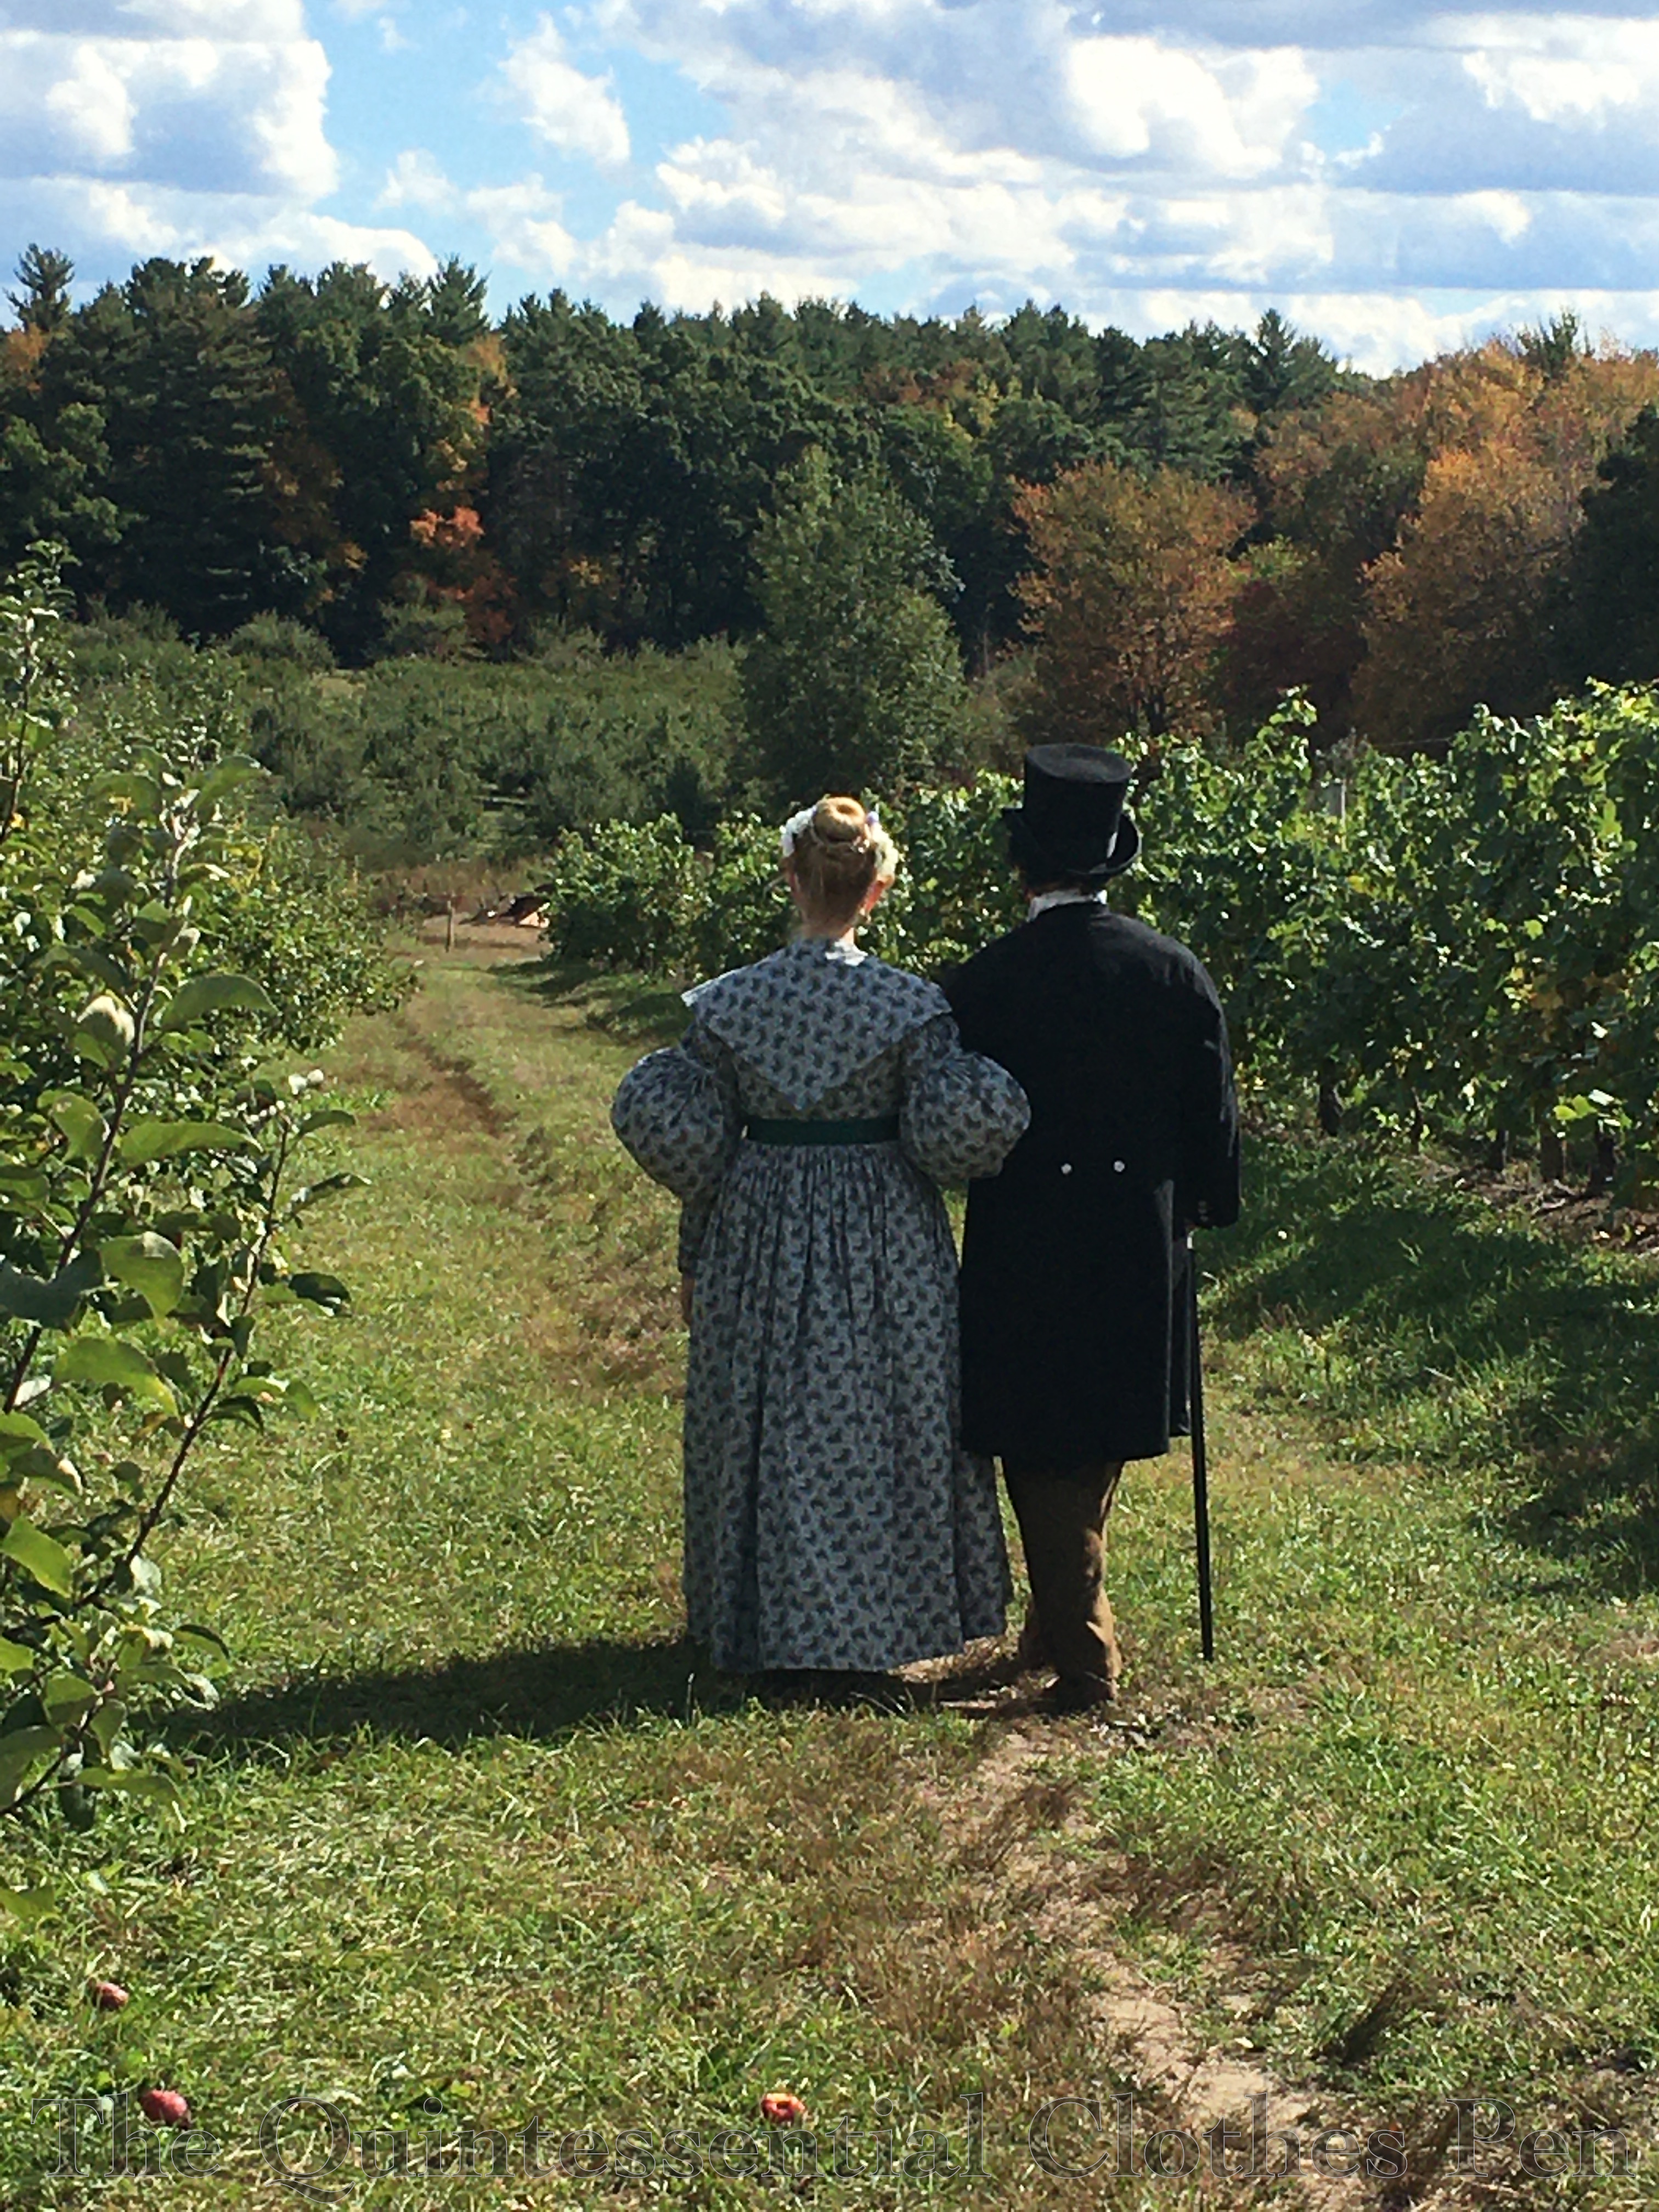
My 1830s apple picking adventure last fall was followed by a ramble through the woods for exercise and to get more photos. I shared a bunch of the photos in the construction posts for my 1834 dress (here and here), but even after that there were still a bunch of lovely photos I wanted to share. At that point, I decided to take a break and post about other topics since I’d posted a few blog posts in a row about 1830s things and so the photos from the woods have been patiently waiting to have their moment to shine. Today is the day! I bring you an 1830s armchair ramble through the woods!
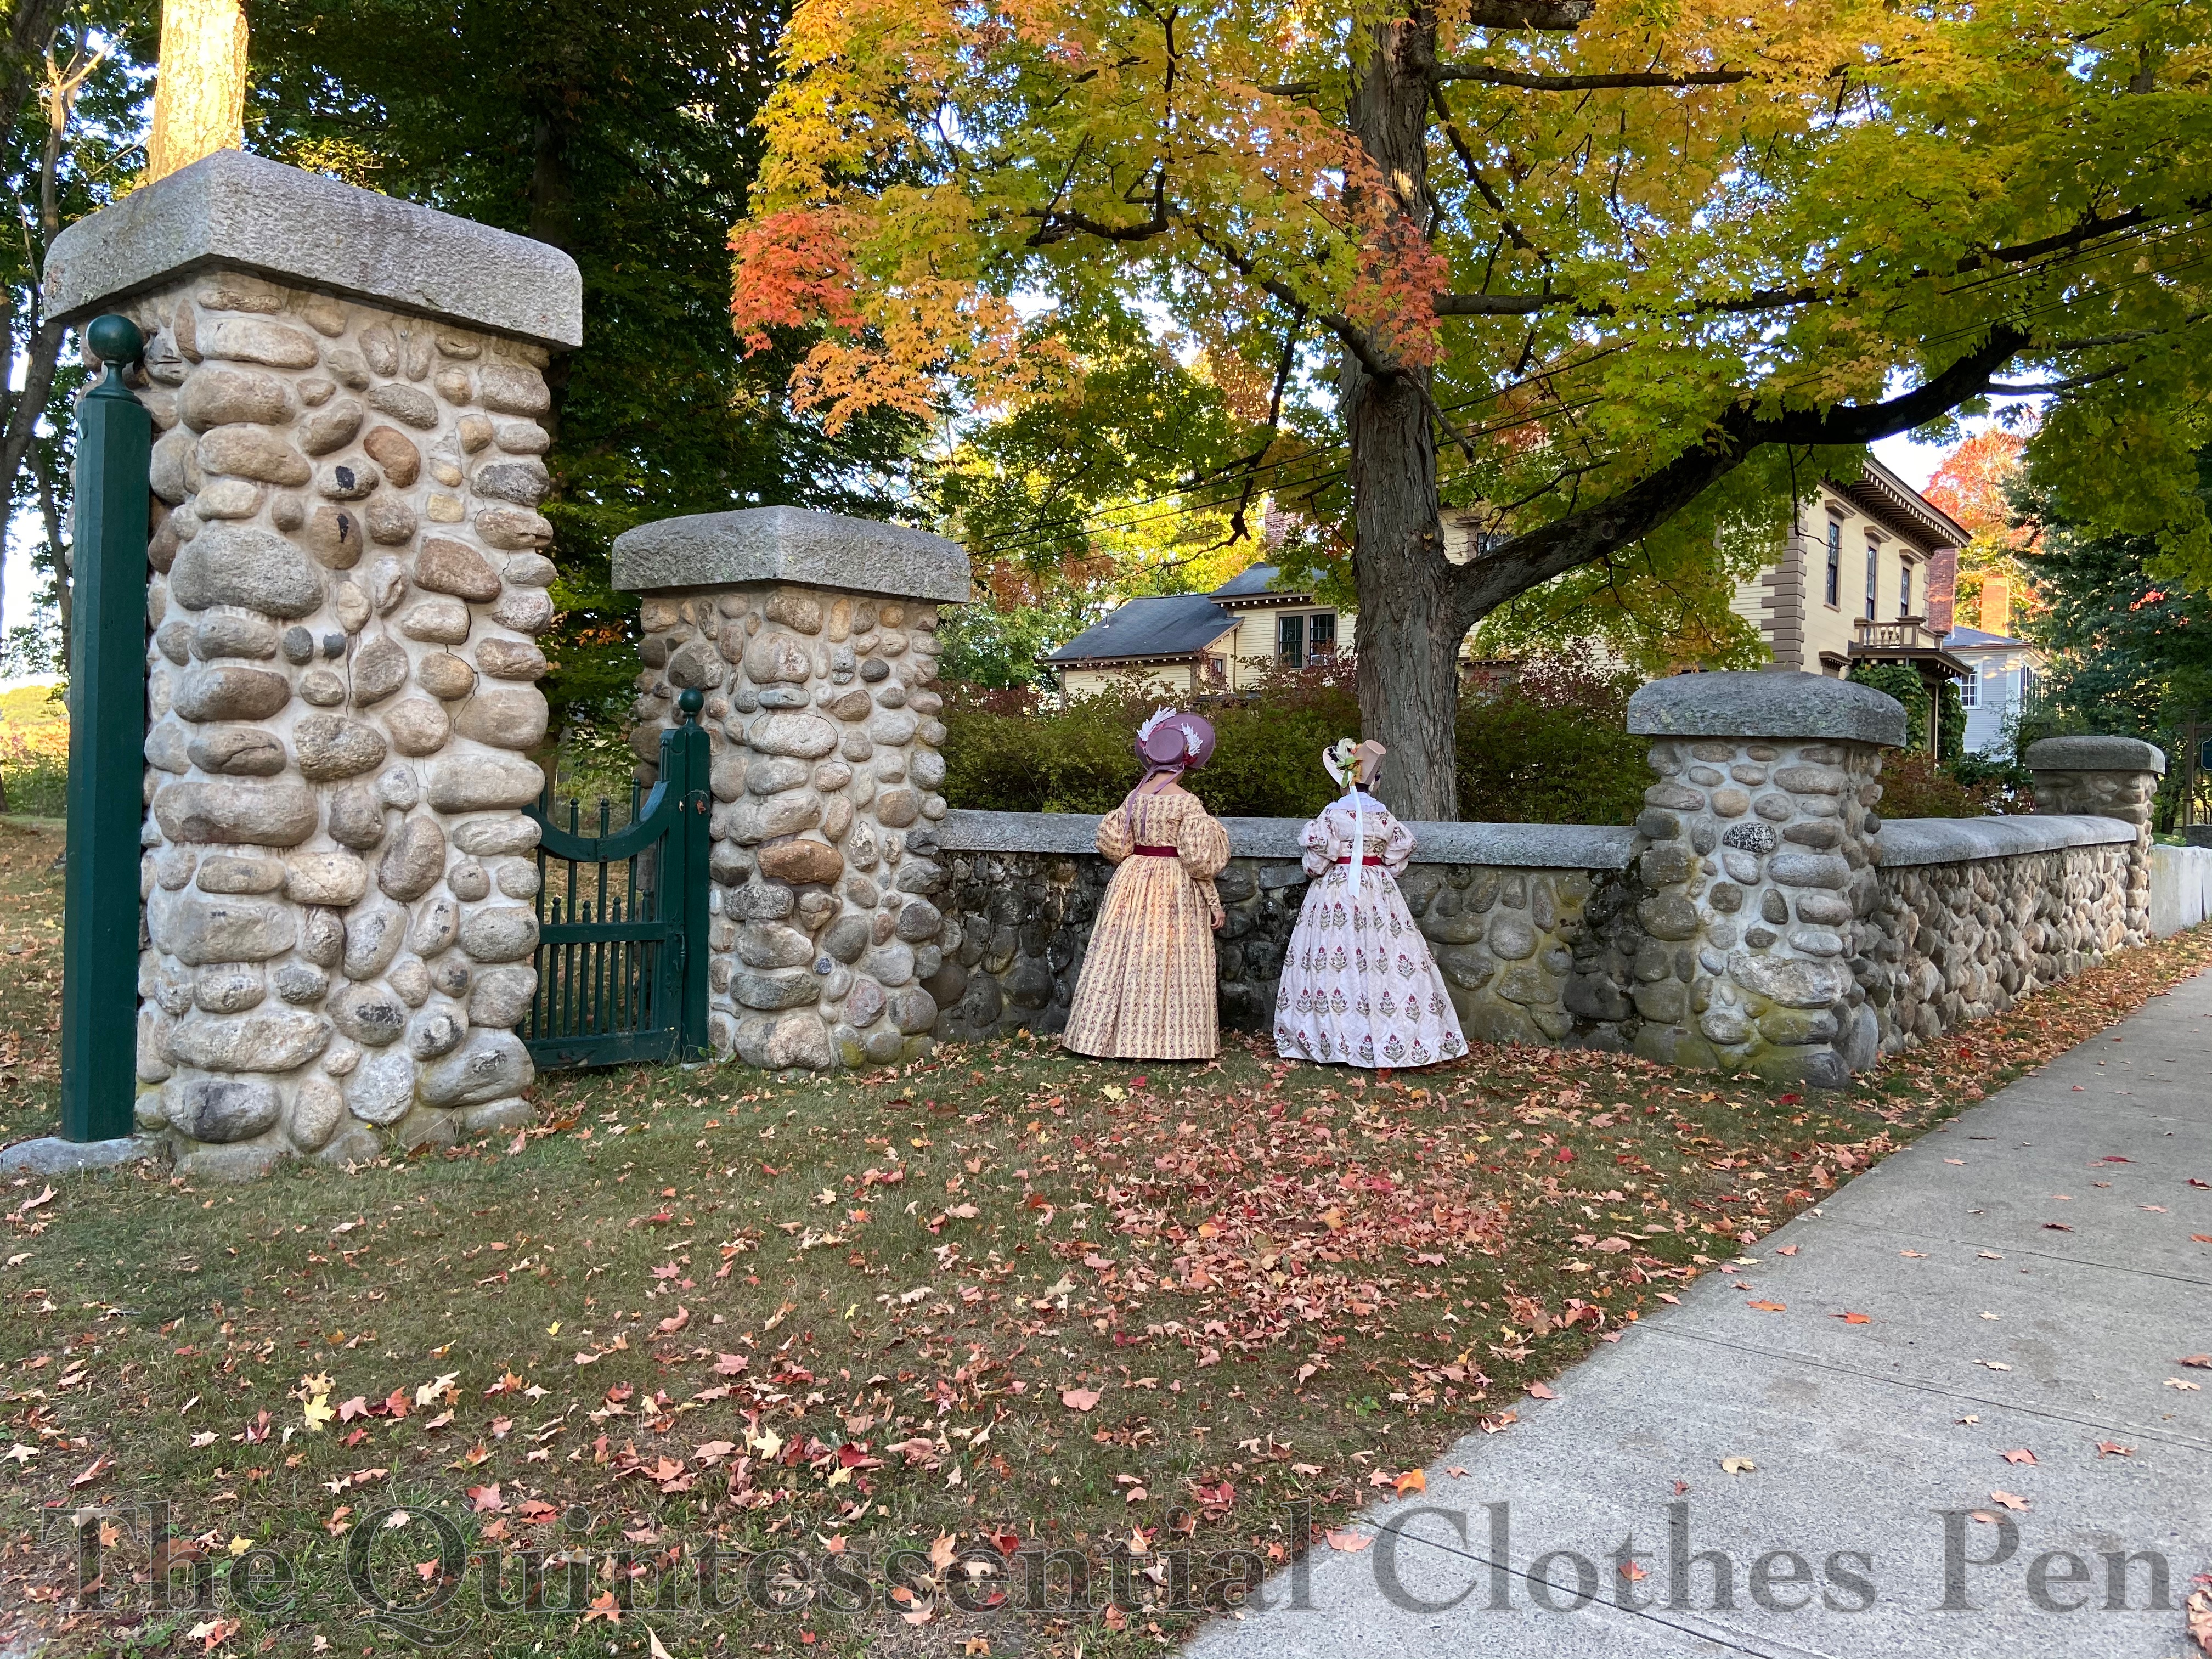
On our way to the wooded area, we stopped to take advantage of this stone wall and gate.
The main gate to the wooded area is similar, though with bricks instead of stones and with animal sculptures to delight visitors. My usual photographer friend (who blogs at Plaid Petticoats) enjoyed taking a few photos with her Petzval camera lens, which creates the swirled background in the next two photos (you can read more about the Petzval lens in this Plaid Petticoats blog post).
Just past the main entrance to the wooded area is a little bridge spanning a lovely bit of water. It looks like a pond, but I think it might actually be connected to the nearby river.
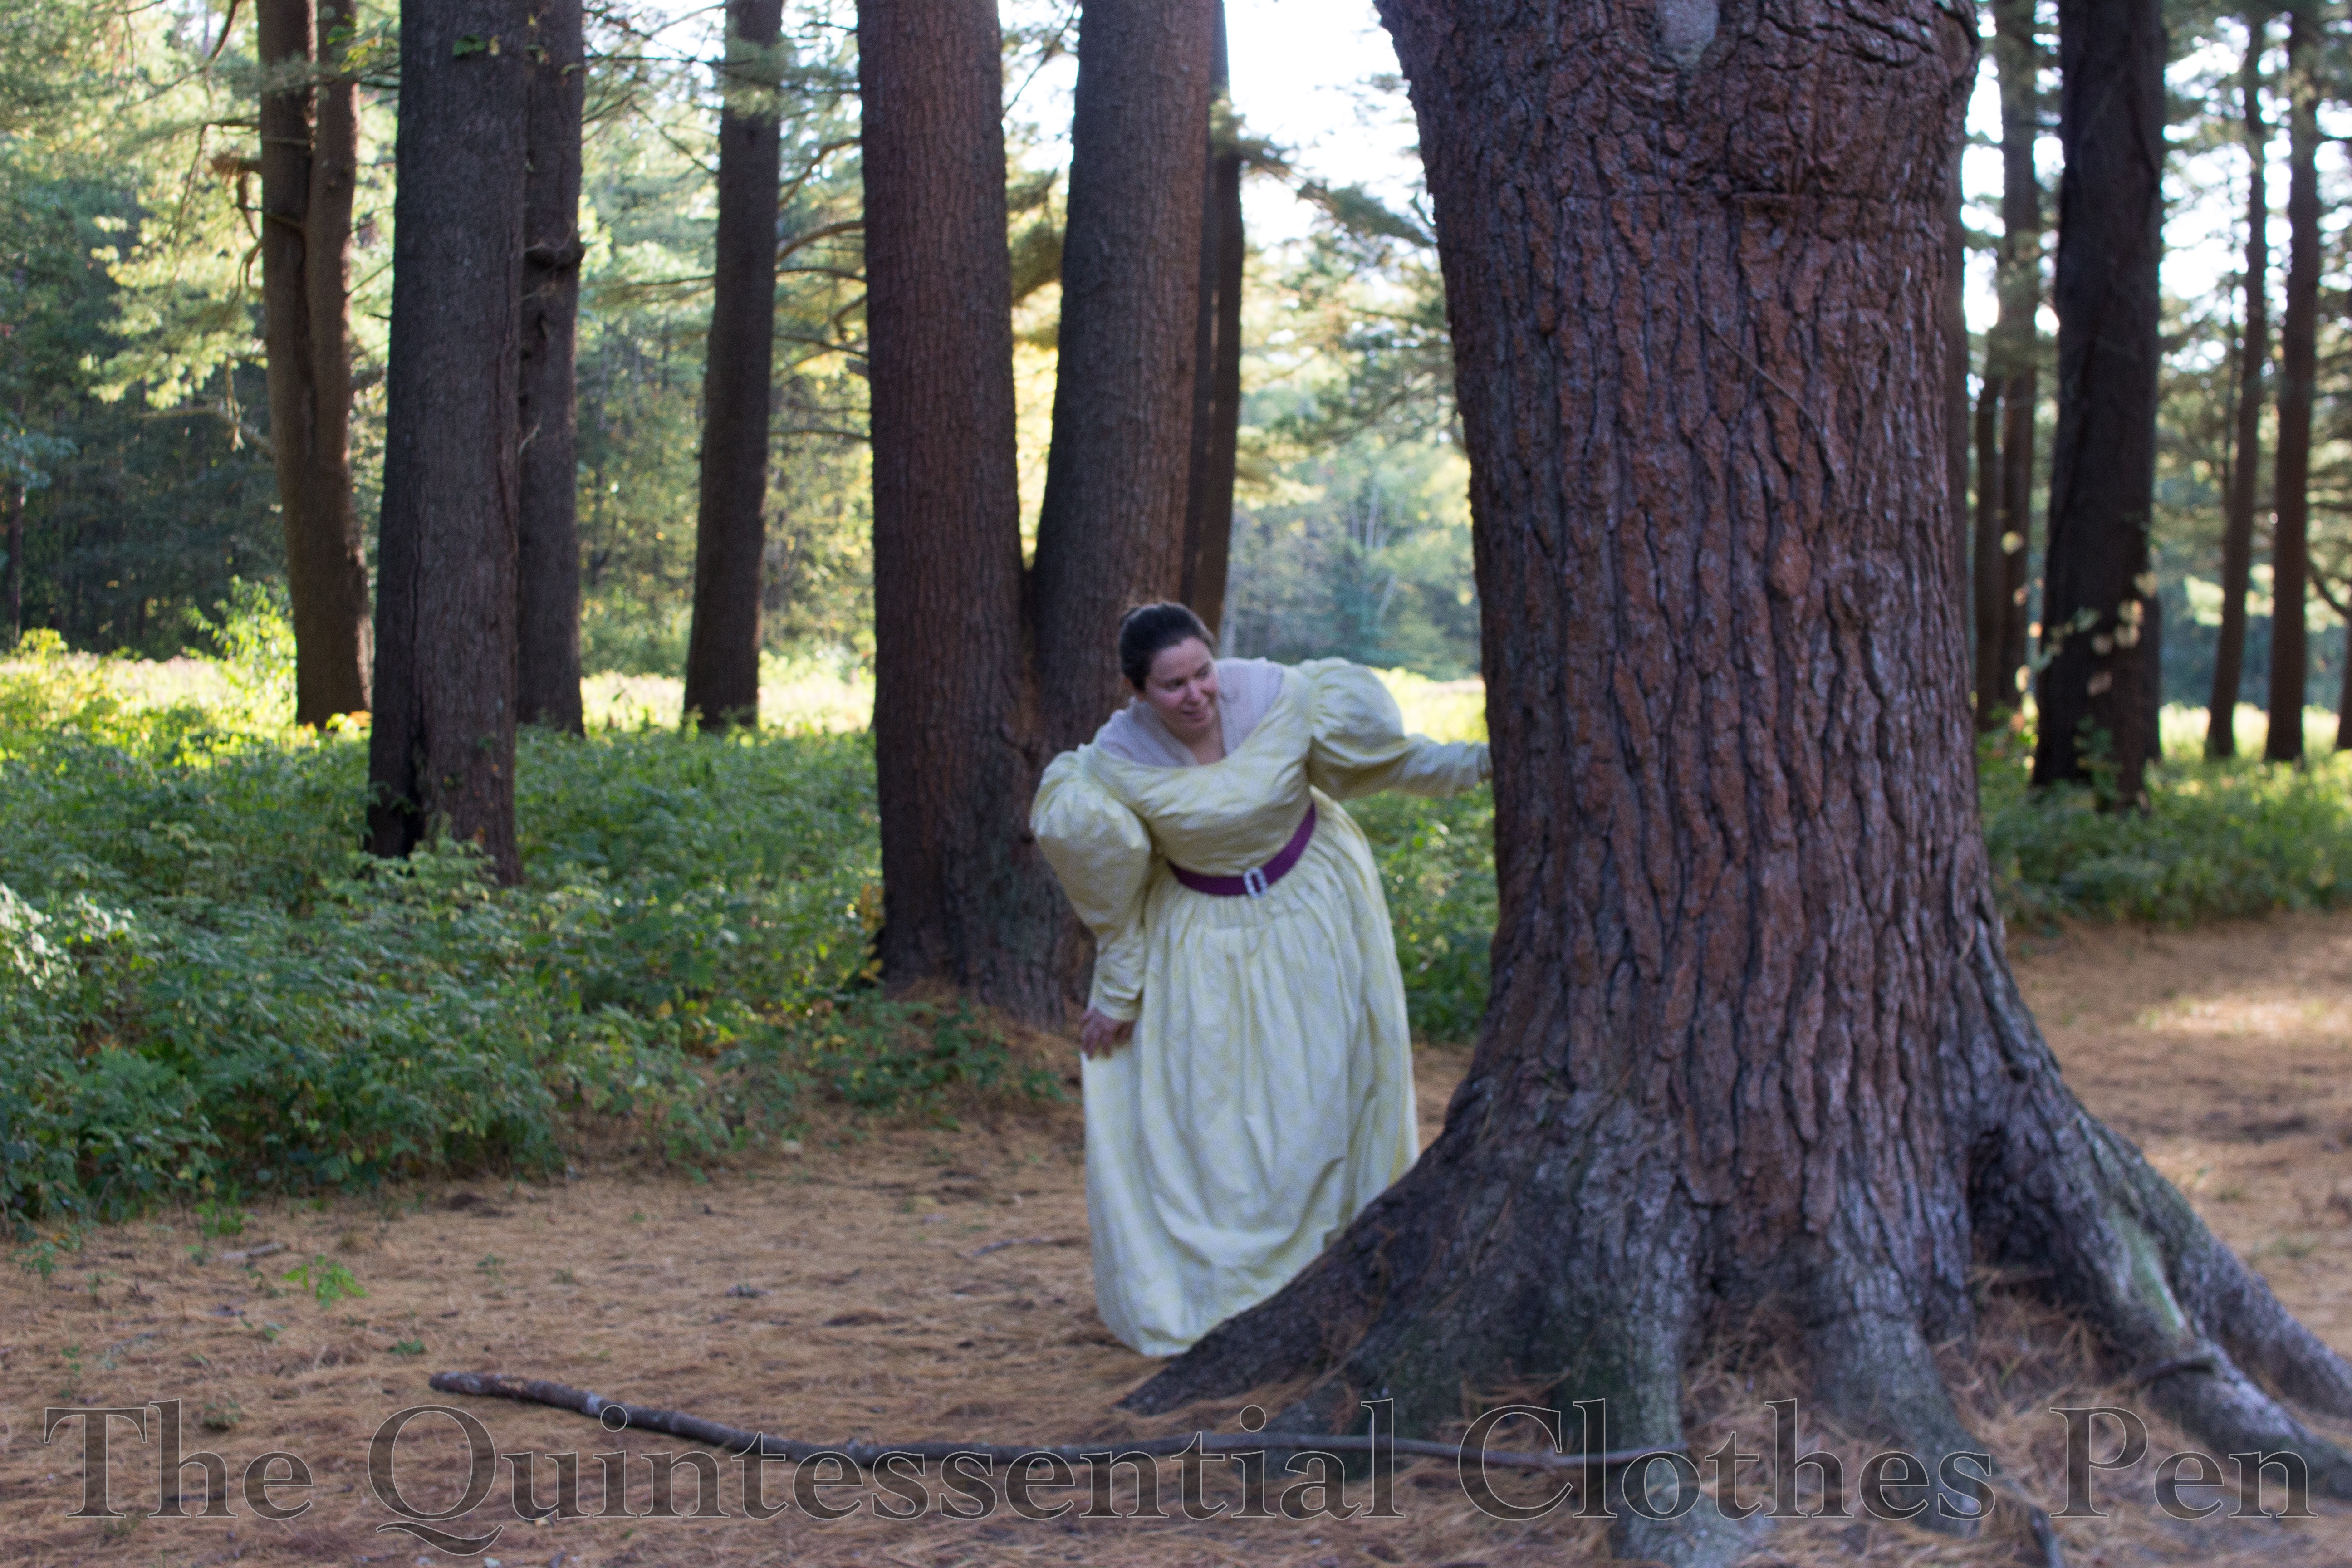
Around the bend is one of my favorite vistas, a grand line of pine trees bordered on one side by a small meadow. It’s a magnificent and playful place to stop for photos.
Continuing towards the river is a path along one side of the meadow. Thankfully, the grass on the path is maintained and easy to walk through.
This group photo uses the Petzval lens to make a glorious twinkling arch of greenery out of the dwindling afternoon sunlight.
Along the way to the river are small bits of interest. Enterprising greenery in unique shapes and more watchful animal statues.
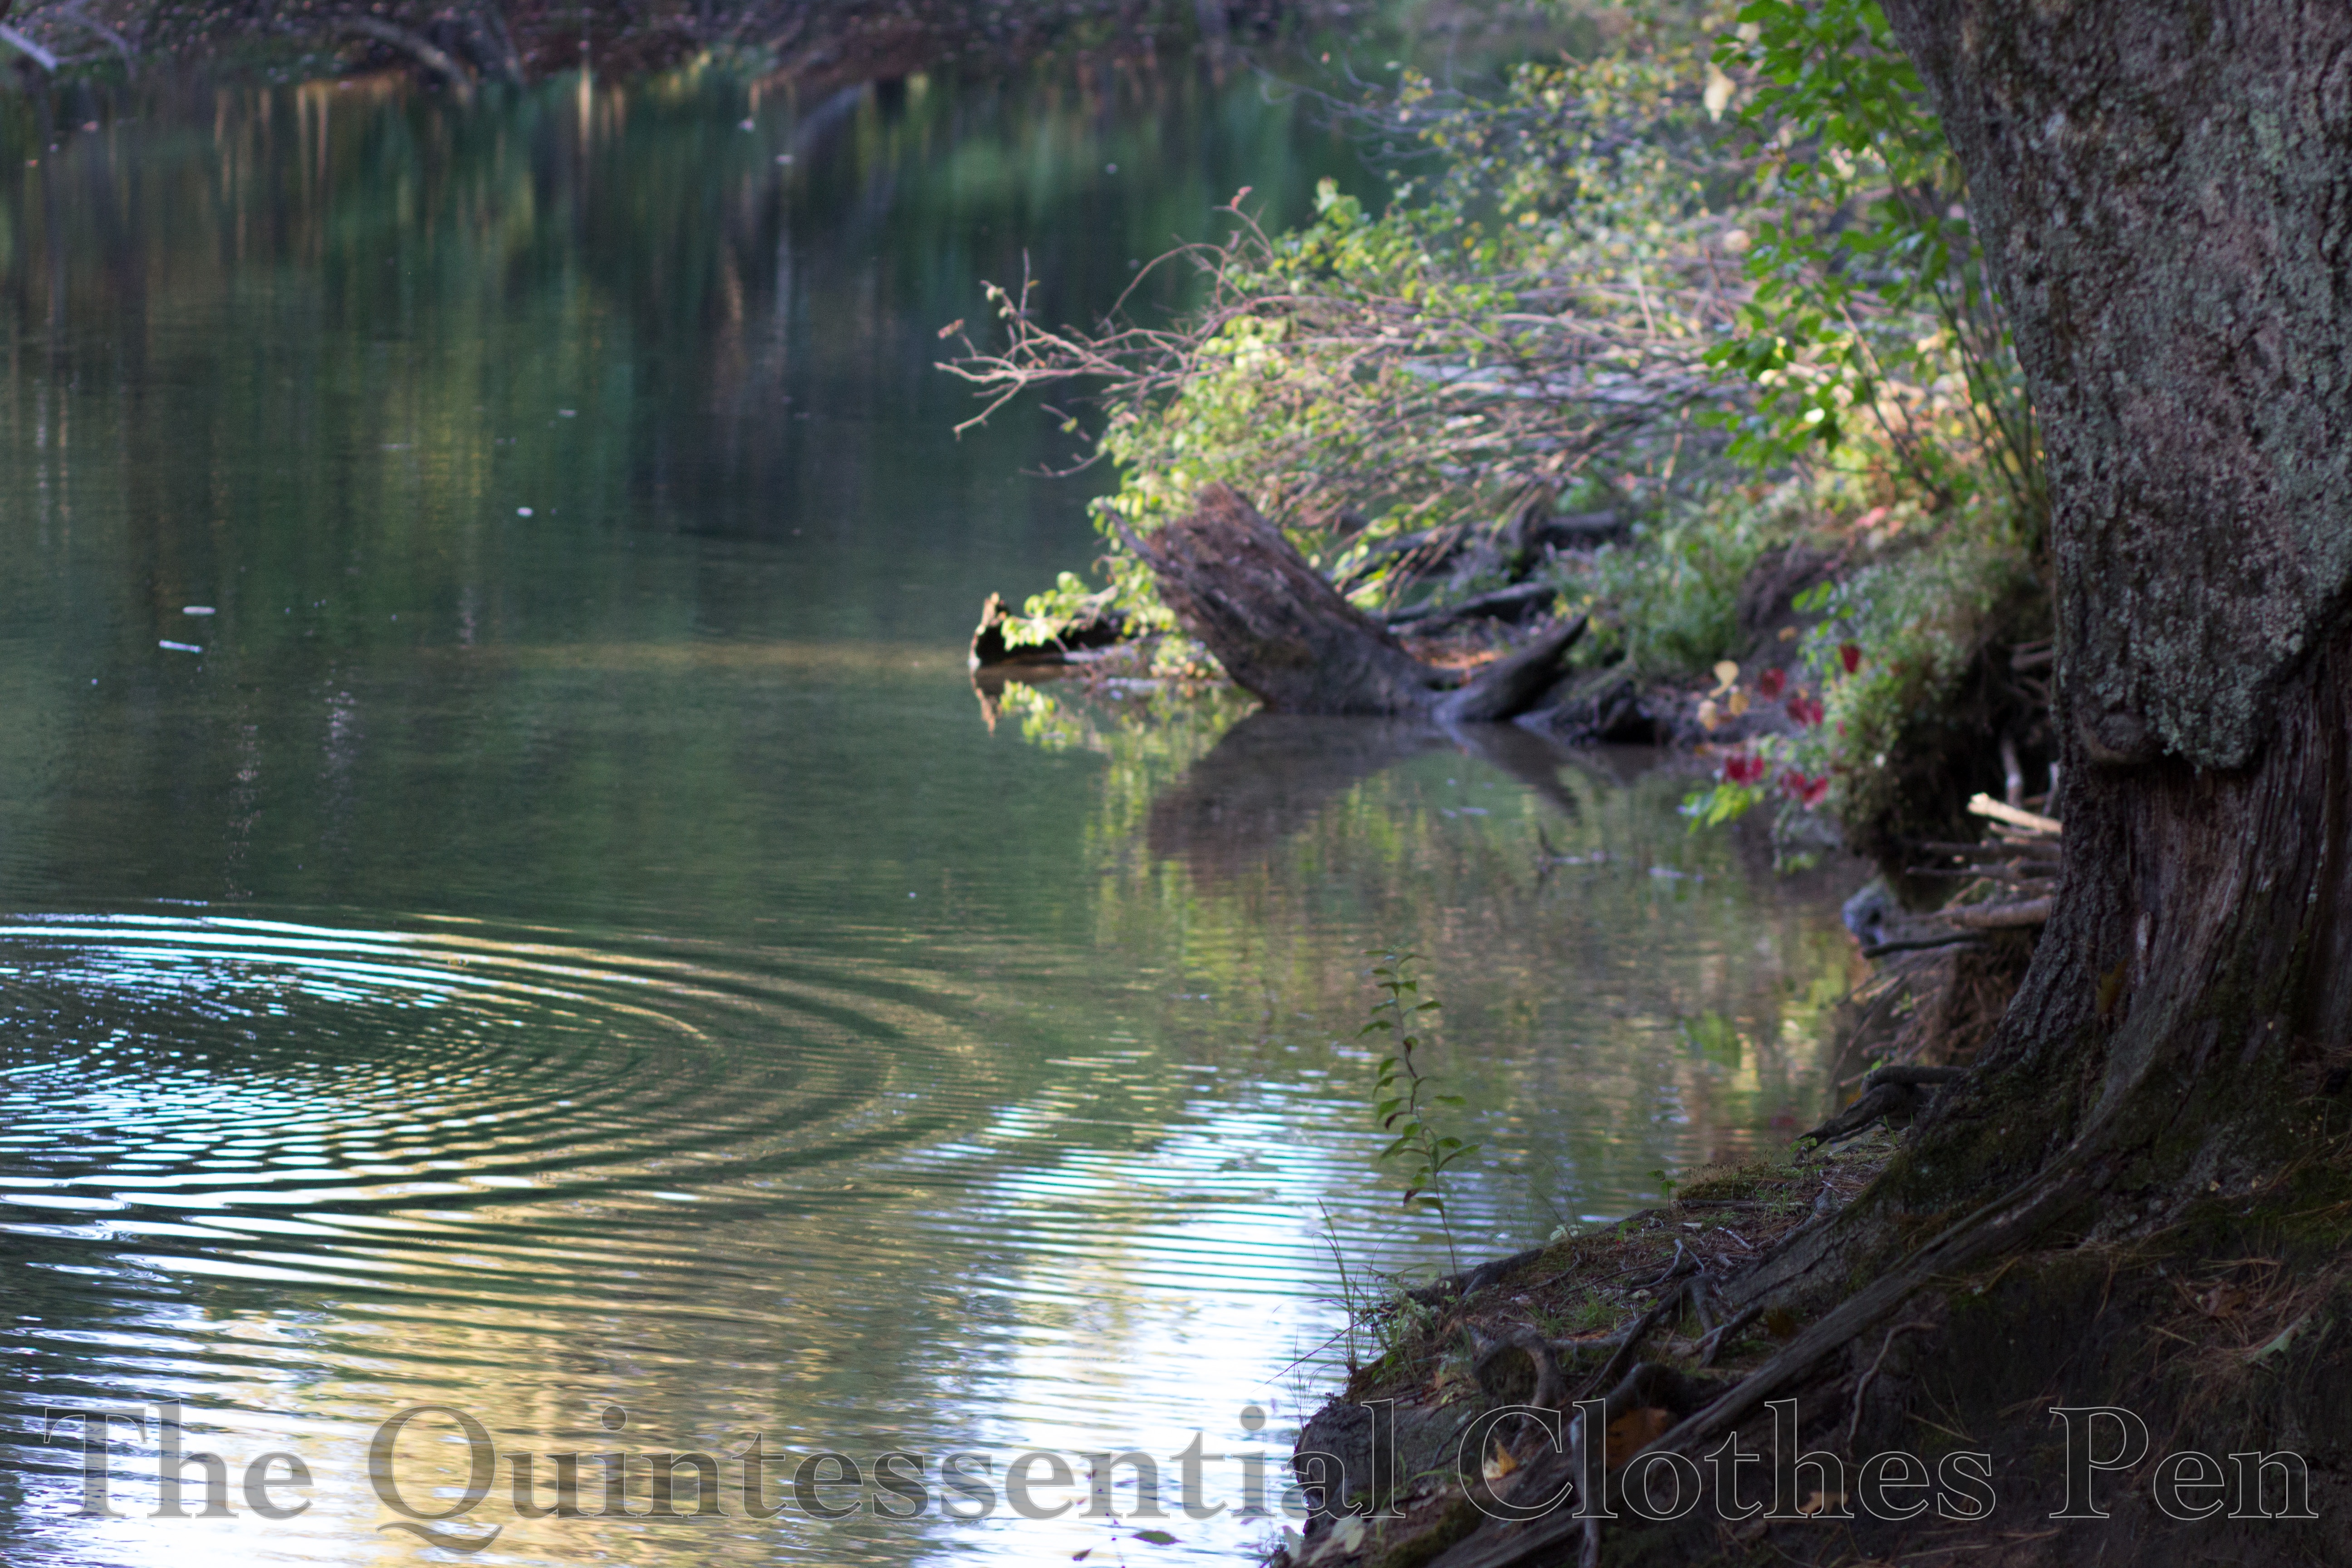
Near the river we stopped for more photos. The drooping trees made dramatic backgrounds for us.
I love the next photo. It captures the reflection of the golden leaves in a way that almost looks like a painting, in juxtaposition with the oak leaves and branches on the far side.
Thanks for joining me on this autumnal walk through the woods. I find outings like this are wonderful moments for reflection and appreciating the natural beauty of the seasons.
I’ve picked up a few patterned cotton fabrics over the last few months at my local discount fabric store. (Everything in the store is $3 per yard. Crazy!) I enjoy all of them and want to document their new status here. Hopefully, I can link back to this post when I eventually make garments out of them… This is encouragement to not let them languish in the stash for too long!
First, there is this light blue-ish grey cotton print. The mixture of colors and style of the printing reminds me of fabrics from the 1830s and 1840s. In fact, I used this very fabric to make an 1830s dress for a friend (you saw it in my posts last fall about apple picking). After seeing how wonderfully that dress turned out I decided I needed one of my own. And so… my stash has gained 7 yards of this.
I justify it by the price and the fact that I have very specific plans already. In the spirit of trying out different 1830s sleeve shapes, I want to make a dress from 1836 that has sleeves that are fitted around the upper arms but full around the elbow and down to the wrists.
Second, there is this purple mosaic looking fabric that has an Art Deco vibe. This one doesn’t have a specific plan, but I couldn’t pass up the colors, so I got 1 yard.
The mosaic Art Deco fabric came in four colorways: the purple above, as well as pink, orange, and… lime green! The lime green reminds me of palm fronds and Egyptomania styles.
On its own it’s a bit bright, but I also came across a teal fabric with gold metallic squares on it that I liked but couldn’t think of a use for… until I put it next to the lime green fabric. It helps bring out the blues in the pattern which tones down the lime green a bit. I’m thinking of a short sleeved 1920s summer dress like this using the teal as trim on the lime green.
I’m hoping to get around to the 1830s dress sooner rather than later, but the 1920s dress is lower on the priority list. Unless (maybe) this year brings the ability to reconvene and have 1920s summer events… and then maybe this dress will shoot up the to do list ladder! Ahhh, dreaming!
But enough about sewing for now! Let’s share a beautiful day full of dazzling sunlight and gorgeous fall leaves. And apples!
This outing started with the idea that I wanted to go apple picking for my birthday. It was determined by my friends at some point over the summer that apple picking should be done in 1830s dresses. The result was lots of sewing… and new dresses all around! (And as you’ve seen, we also took tons of photos to document the new dresses!)
But back to the point: apples!
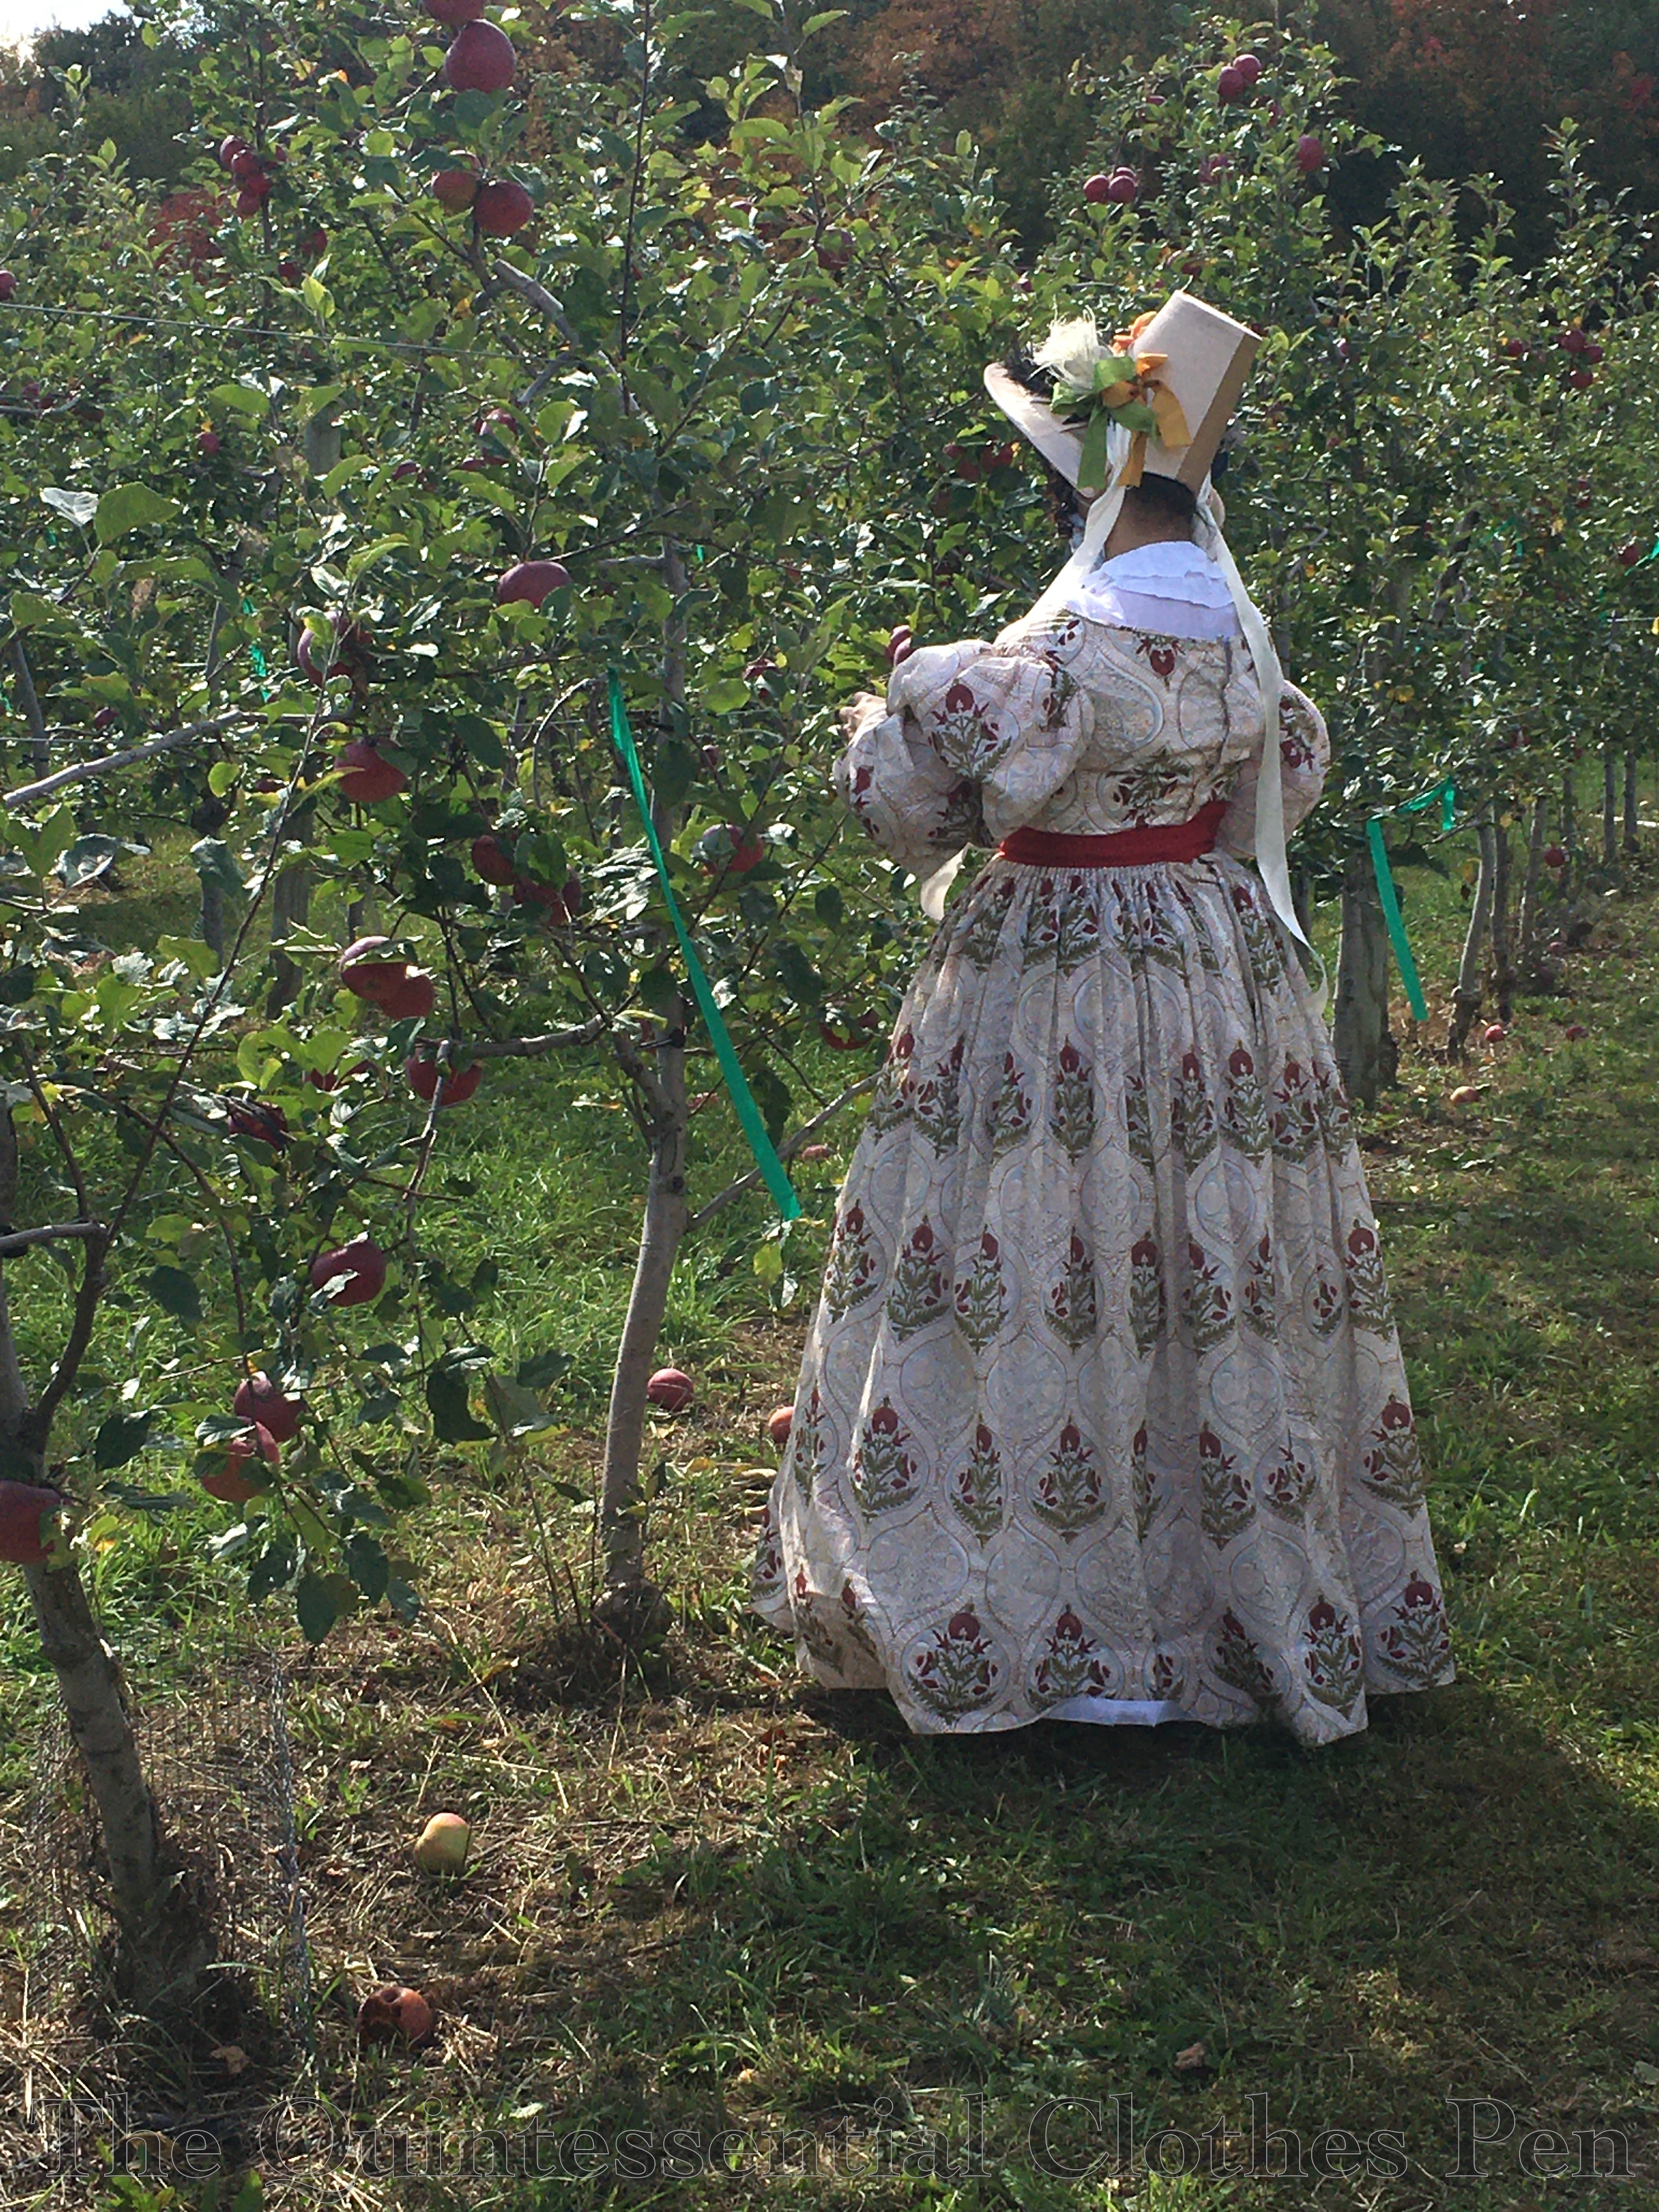
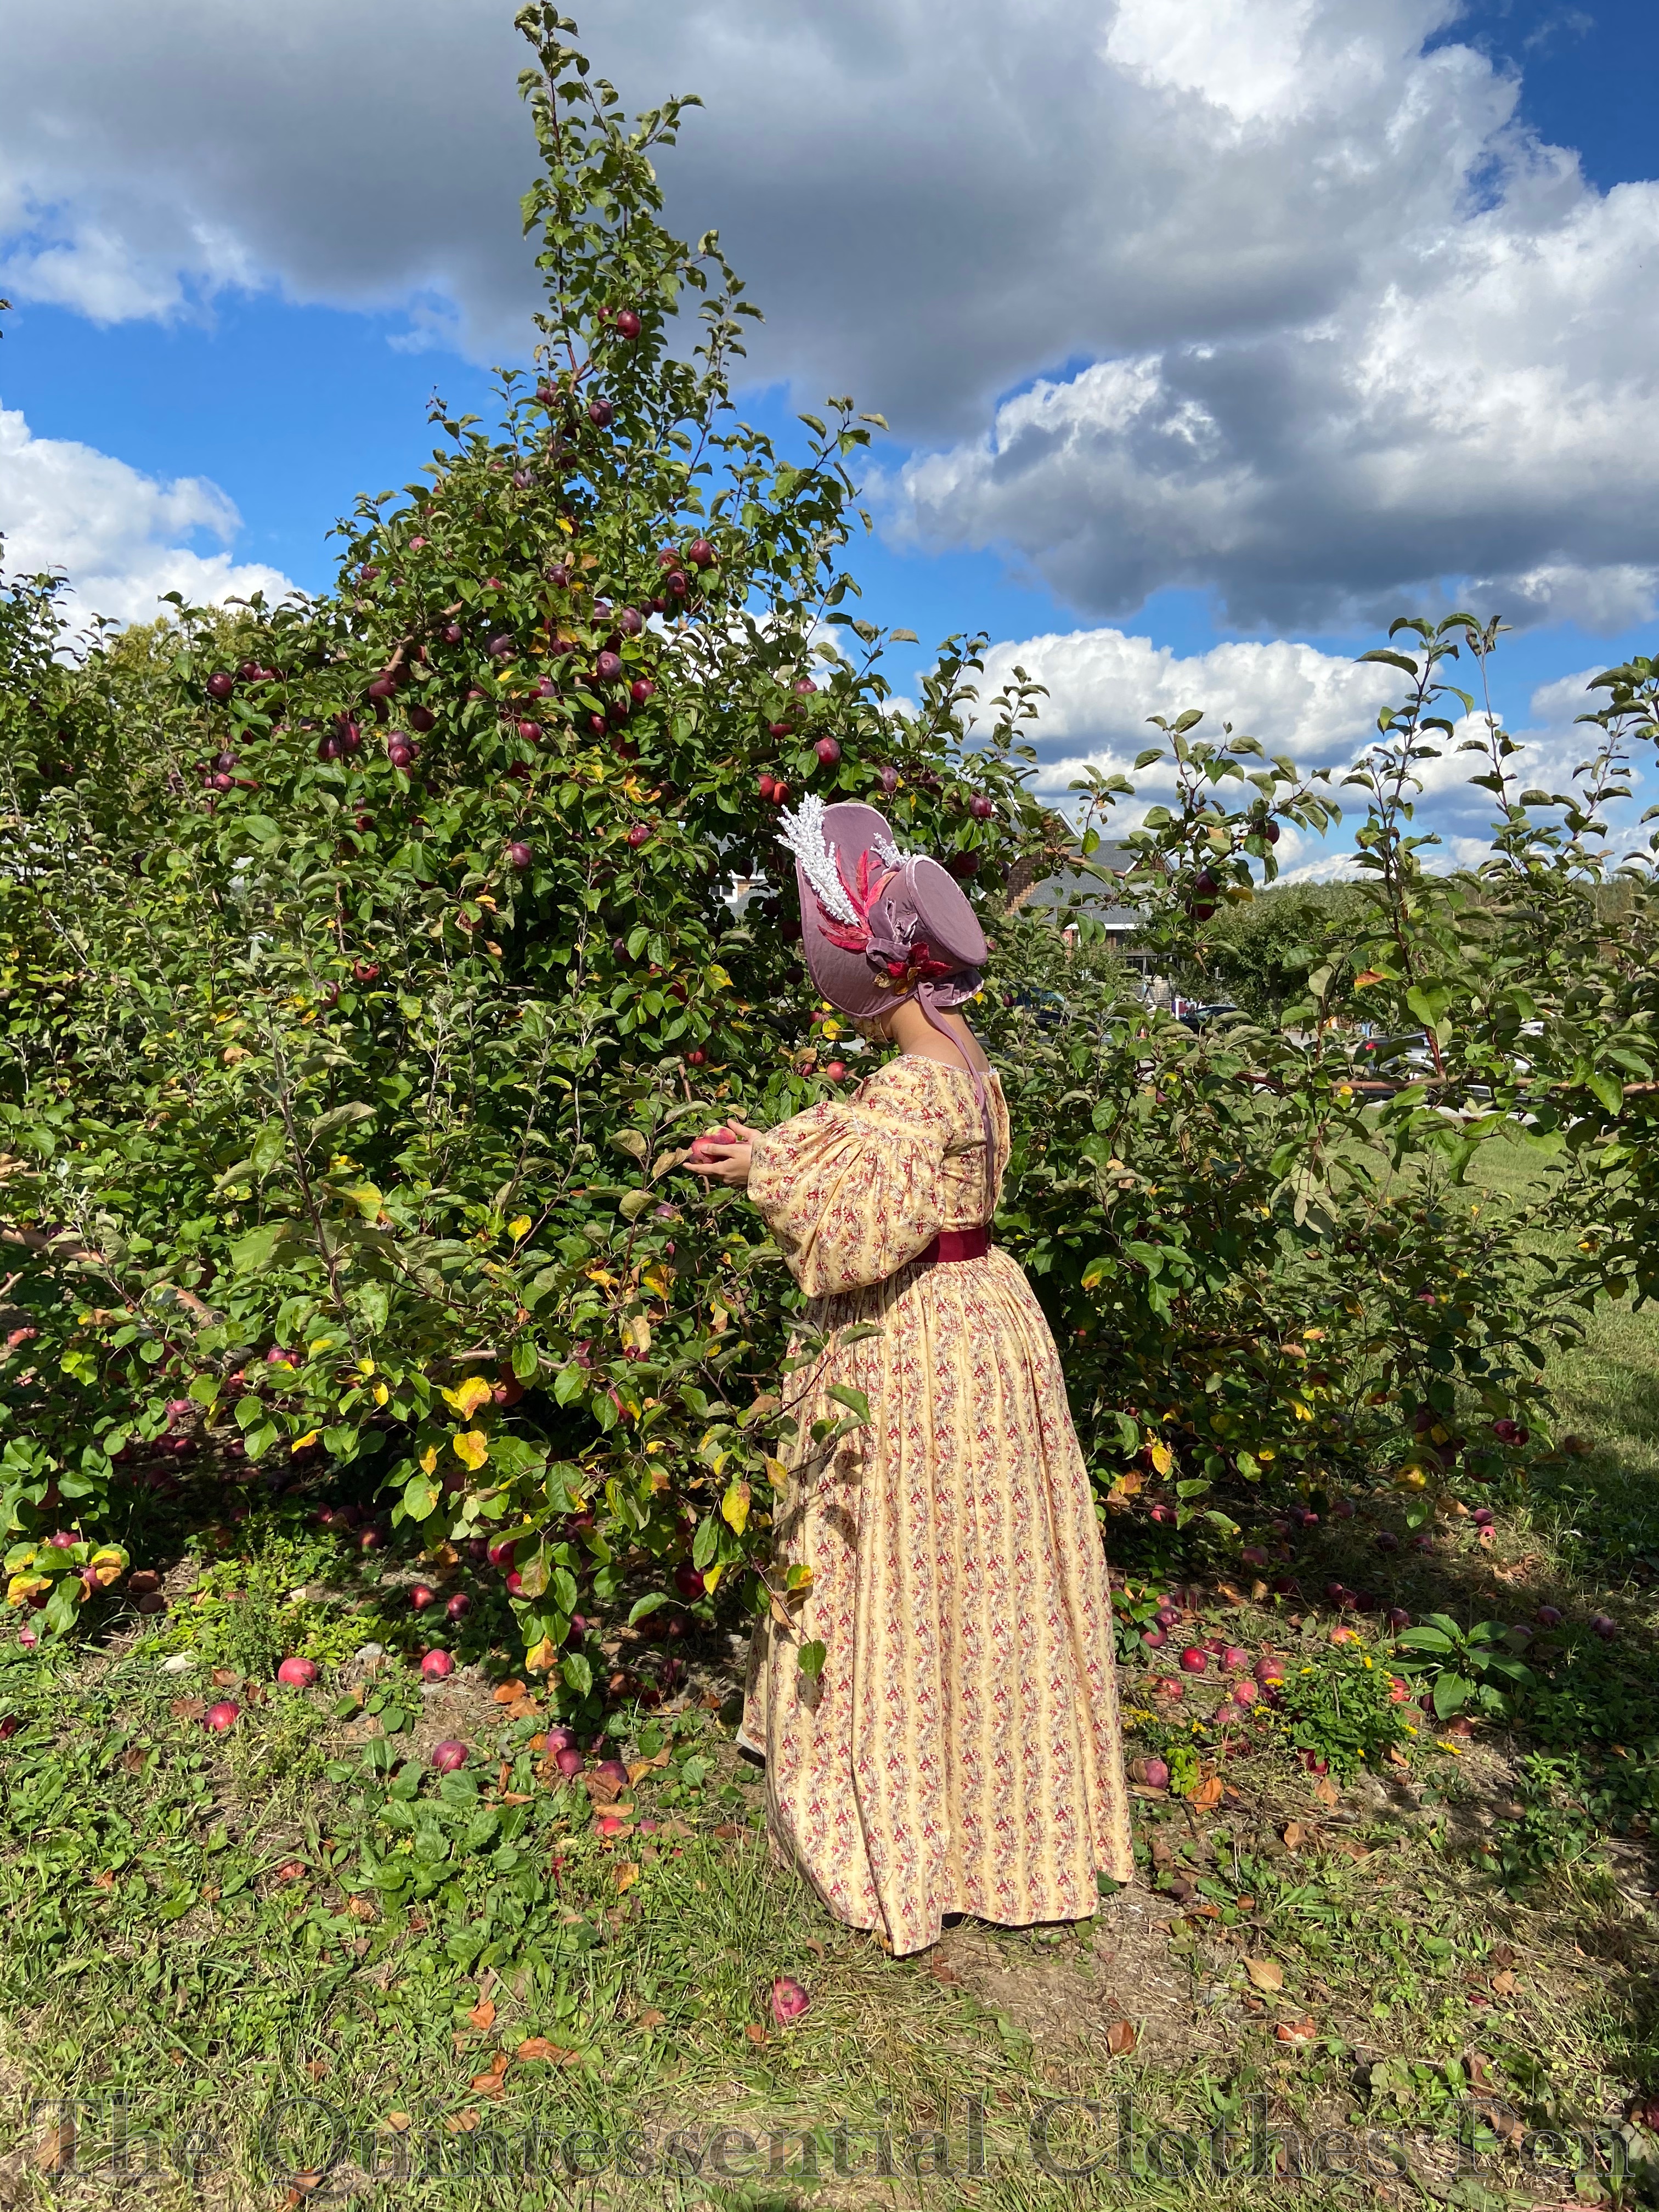
The orchard we went to had a variety of apples available to choose from, some of which were historical heirloom varieties! They varied in size, quite small (2″ or so across) to large (4″ or so), and color, from very dark red, to yellow, to nice medium red.
It was fun to hunt in the trees for apples that were special enough to make it into our collection bags.
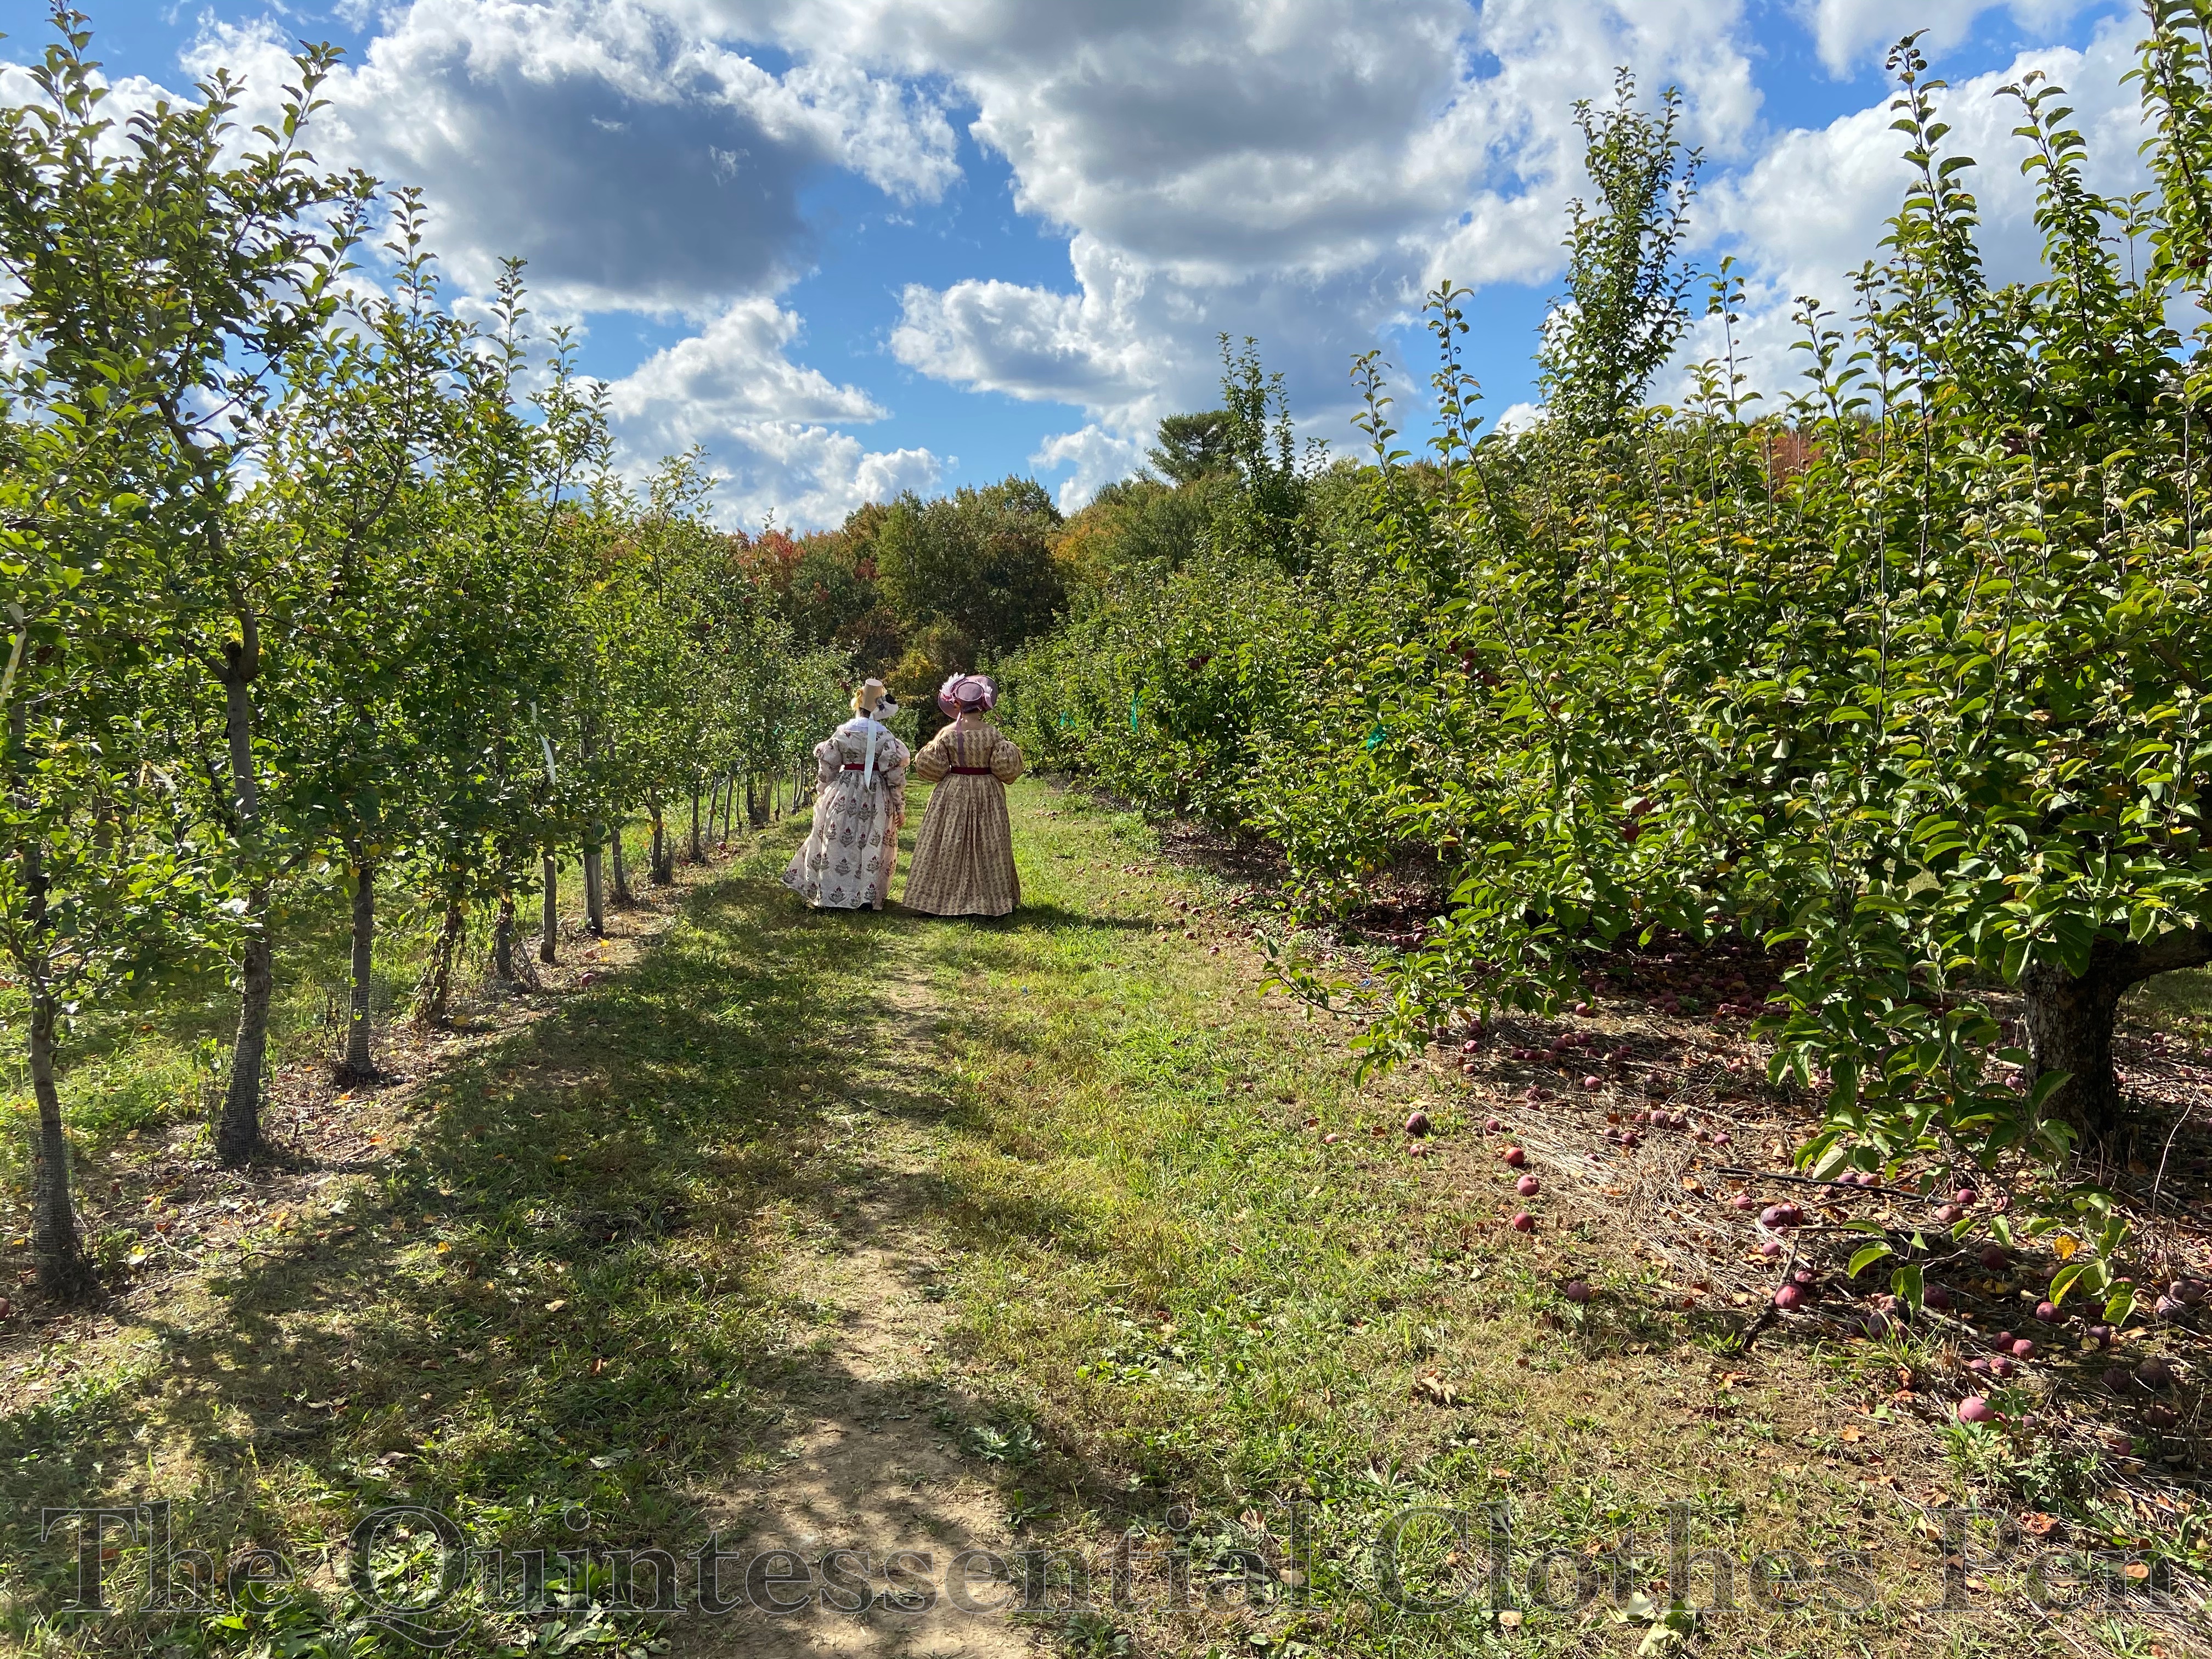
We often went father away from the paths than most people, which helped us find areas without other people for photos and good looking apples!
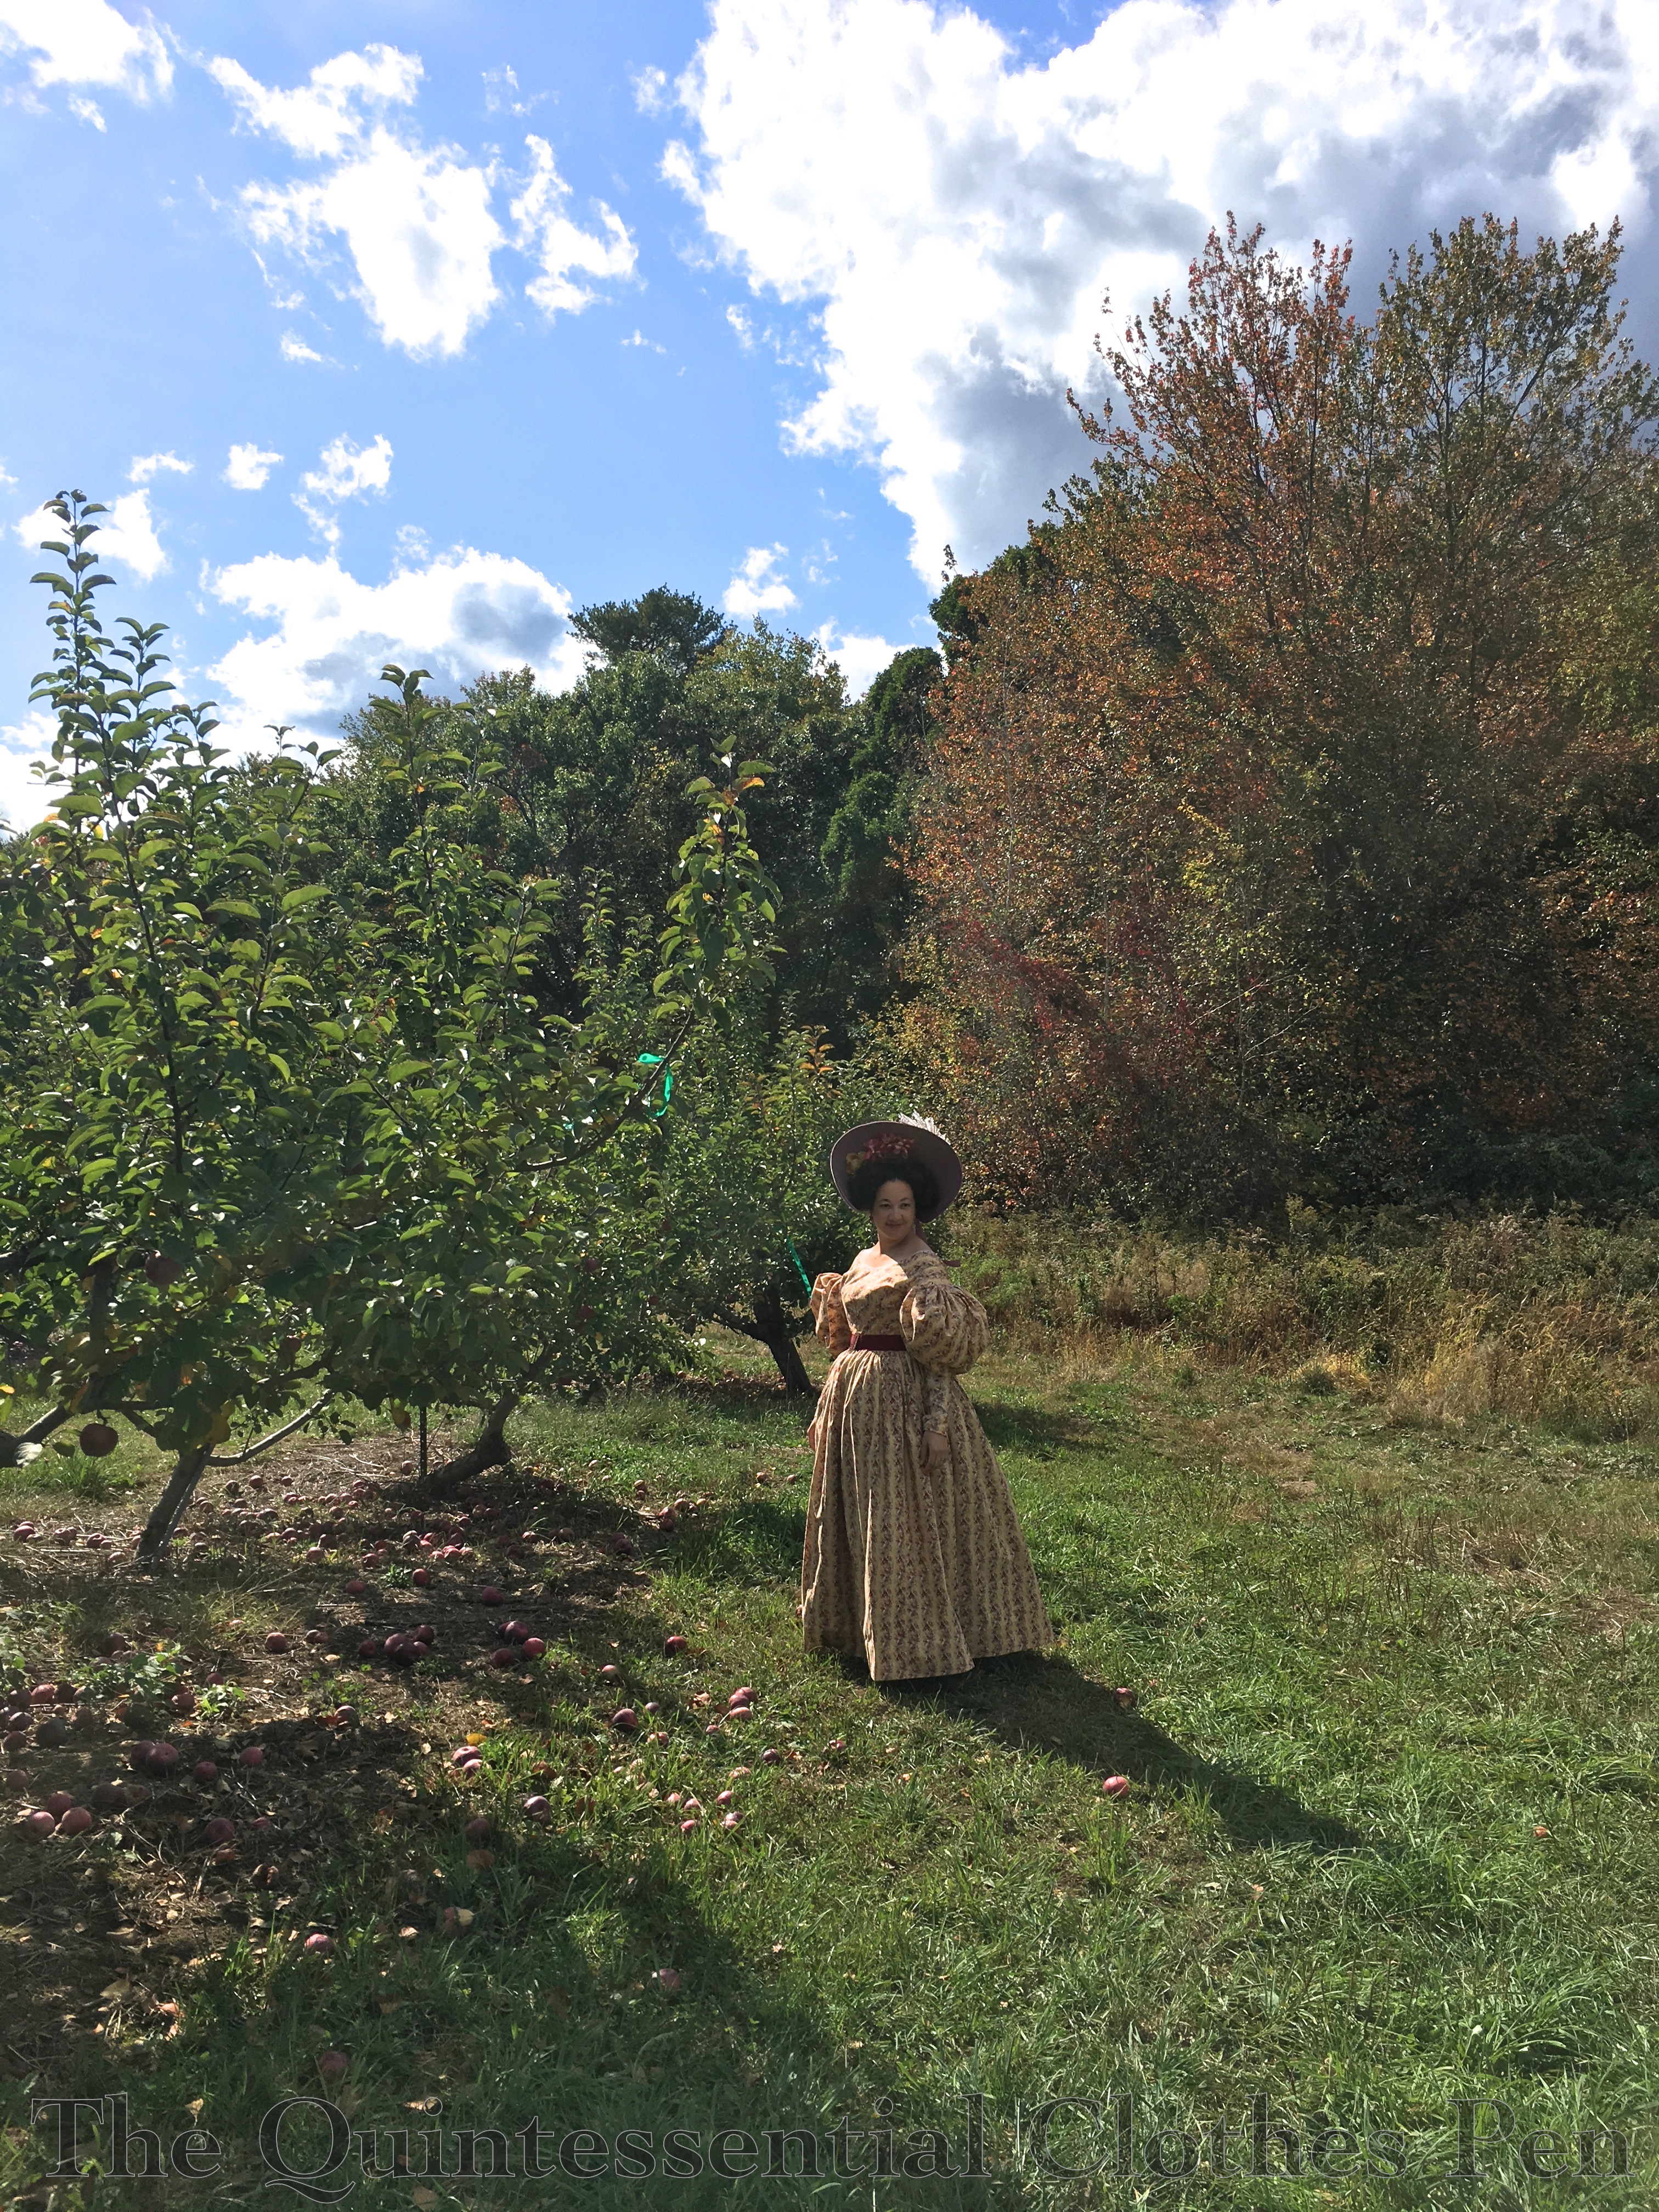
We couldn’t have had better weather! It was a perfectly comfortable temperature and the sun was beautiful.
It was also a bit breezy, which was lovely and fresh feeling.
The leaves were starting to change, adding pops of orange, red, and yellow to the sea of green foliage.
One can work up an appetite apple picking! We had a picnic lunch on a local town common to refresh ourselves before another round of photo taking.
I imagine we made a spectacle at the apple orchard. Mostly because of our clothes, of course, but also because of the photo chains! It’s hard to see, but there are actually three of us taking photos in this photo, which is being taken by a fourth person!
Isn’t this apple tree magical looking? It reminds me of some sort of gateway into another (pandemic free…) land.
In this year of curtailed historical adventures, it was especially wonderful to have a sunny outing full of fun and laughter! Plus, we had yummy apples to eat at the end of the day and to take home with us!
Today’s post is going to share more details about and photos of my new 1834 yellow dress. If you missed my last post about this dress, it was a lengthy one sharing oodles of construction details and photos. You can read that past post here.
Here is a reminder image of the fully accessorized dress!
The biggest accessory is my newly completed 1831 bonnet. There is a recent (lengthy) post about the construction of that here, if you want to learn more about it.
I also added smaller accessories, in the form of a petersham belt and brand new reproduction buckle. The wide petersham is a length of ribbon I purchased from The Sewing Place–I highly recommend their many colors and widths! The buckle is a fabulous reproduction buckle from Ensembles of the Past. It’s a bit hard to see the wonderful detail in this photo, but there’s a photo later in the post that shows the detail much better! The Ensembles of the Past blog also has a post sharing how to easily use ribbon to make an endlessly (and easily) adjustable belt out of ribbon! I highly recommend both the buckles and a read through the blog post!
Back to the dress itself. Let’s start off with the Historical Sew Monthly details. Challenge #9 is Sewing Secrets:
Hide something in your sewing, whether it is an almost invisible mend, a make-do or unexpected material, a secret pocket, a false fastening or front, or a concealed message (such as a political or moral allegiance).
In this dress, I have two secrets, both of which I mentioned in the dress construction details post. One is pockets in the skirt and the other is that the bodice of this dress is detachable.
First, the pockets. Yay! My pockets are made from the dress fabric. They are French seamed and set into the side front seams of the skirt. On the inside, they look like this.
On the outside, they look like this. They’re a secret because they camouflage so well that you really can’t see them at all unless I pull them open or my hand is disappearing inside!
Second, the bodice detaches. This is very unusual (and possibly unheard of) for the 1830s, though it becomes common practice by the 1850s and 1860s. This system allows me to attach the current bodice, which I’ve dated 1834, or a second bodice that I have in the works which is dated 1838. That opens a whole world of possibilities in terms of showing changing bodice and sleeve styles without needing to create an entire second dress!
A bit closer up, you can just barely make out a loop on the skirt waistband that connects to a hook at center front. There are hooks and loops all around the skirt and bodice waistbands to connect them together.
Now that we’ve seen the relevant dress features, let’s look at the other HSM facts:
Fabric/Materials: 7 ¼ yds of reproduction print cotton, 1 yd muslin, a scrap of canvas for the waistband of the bodice, and a scrap of flannel for the cartridge pleats.
Pattern: Adapted from Janet Arnold’s Patterns of Fashion 1, with adjustments for fit and style, as well as The Workwoman’s Guide.
Year: 1834.
Notions: 2 ½ yds narrow cotton yarn for cording, 2 ½ yds of narrow white lace, and about 23 hooks and loops.
How historically accurate is it?: 95%. The pattern, silhouette, construction methods, and fabric are all quite good, but there is machine sewing on the interior seams.
Hours to complete: 25.75 hours.
First worn: In early October, for an apple picking outing, picnic, and photos!
Total cost: Approximately $60.
In addition to the HSM details, I want to share some more photos as well. These photos were taken during an all day outing in October. There’s still a post coming that will share apple picking photos from the outing, but there were many good ones from our later in the day photo shoot as well.
These next photos were taken in a neat conservation area that has beautiful, varied scenery that includes a pond area, open fields, wooded paths, huge rhododendrons, a meandering river, and this lovely row of pine trees.
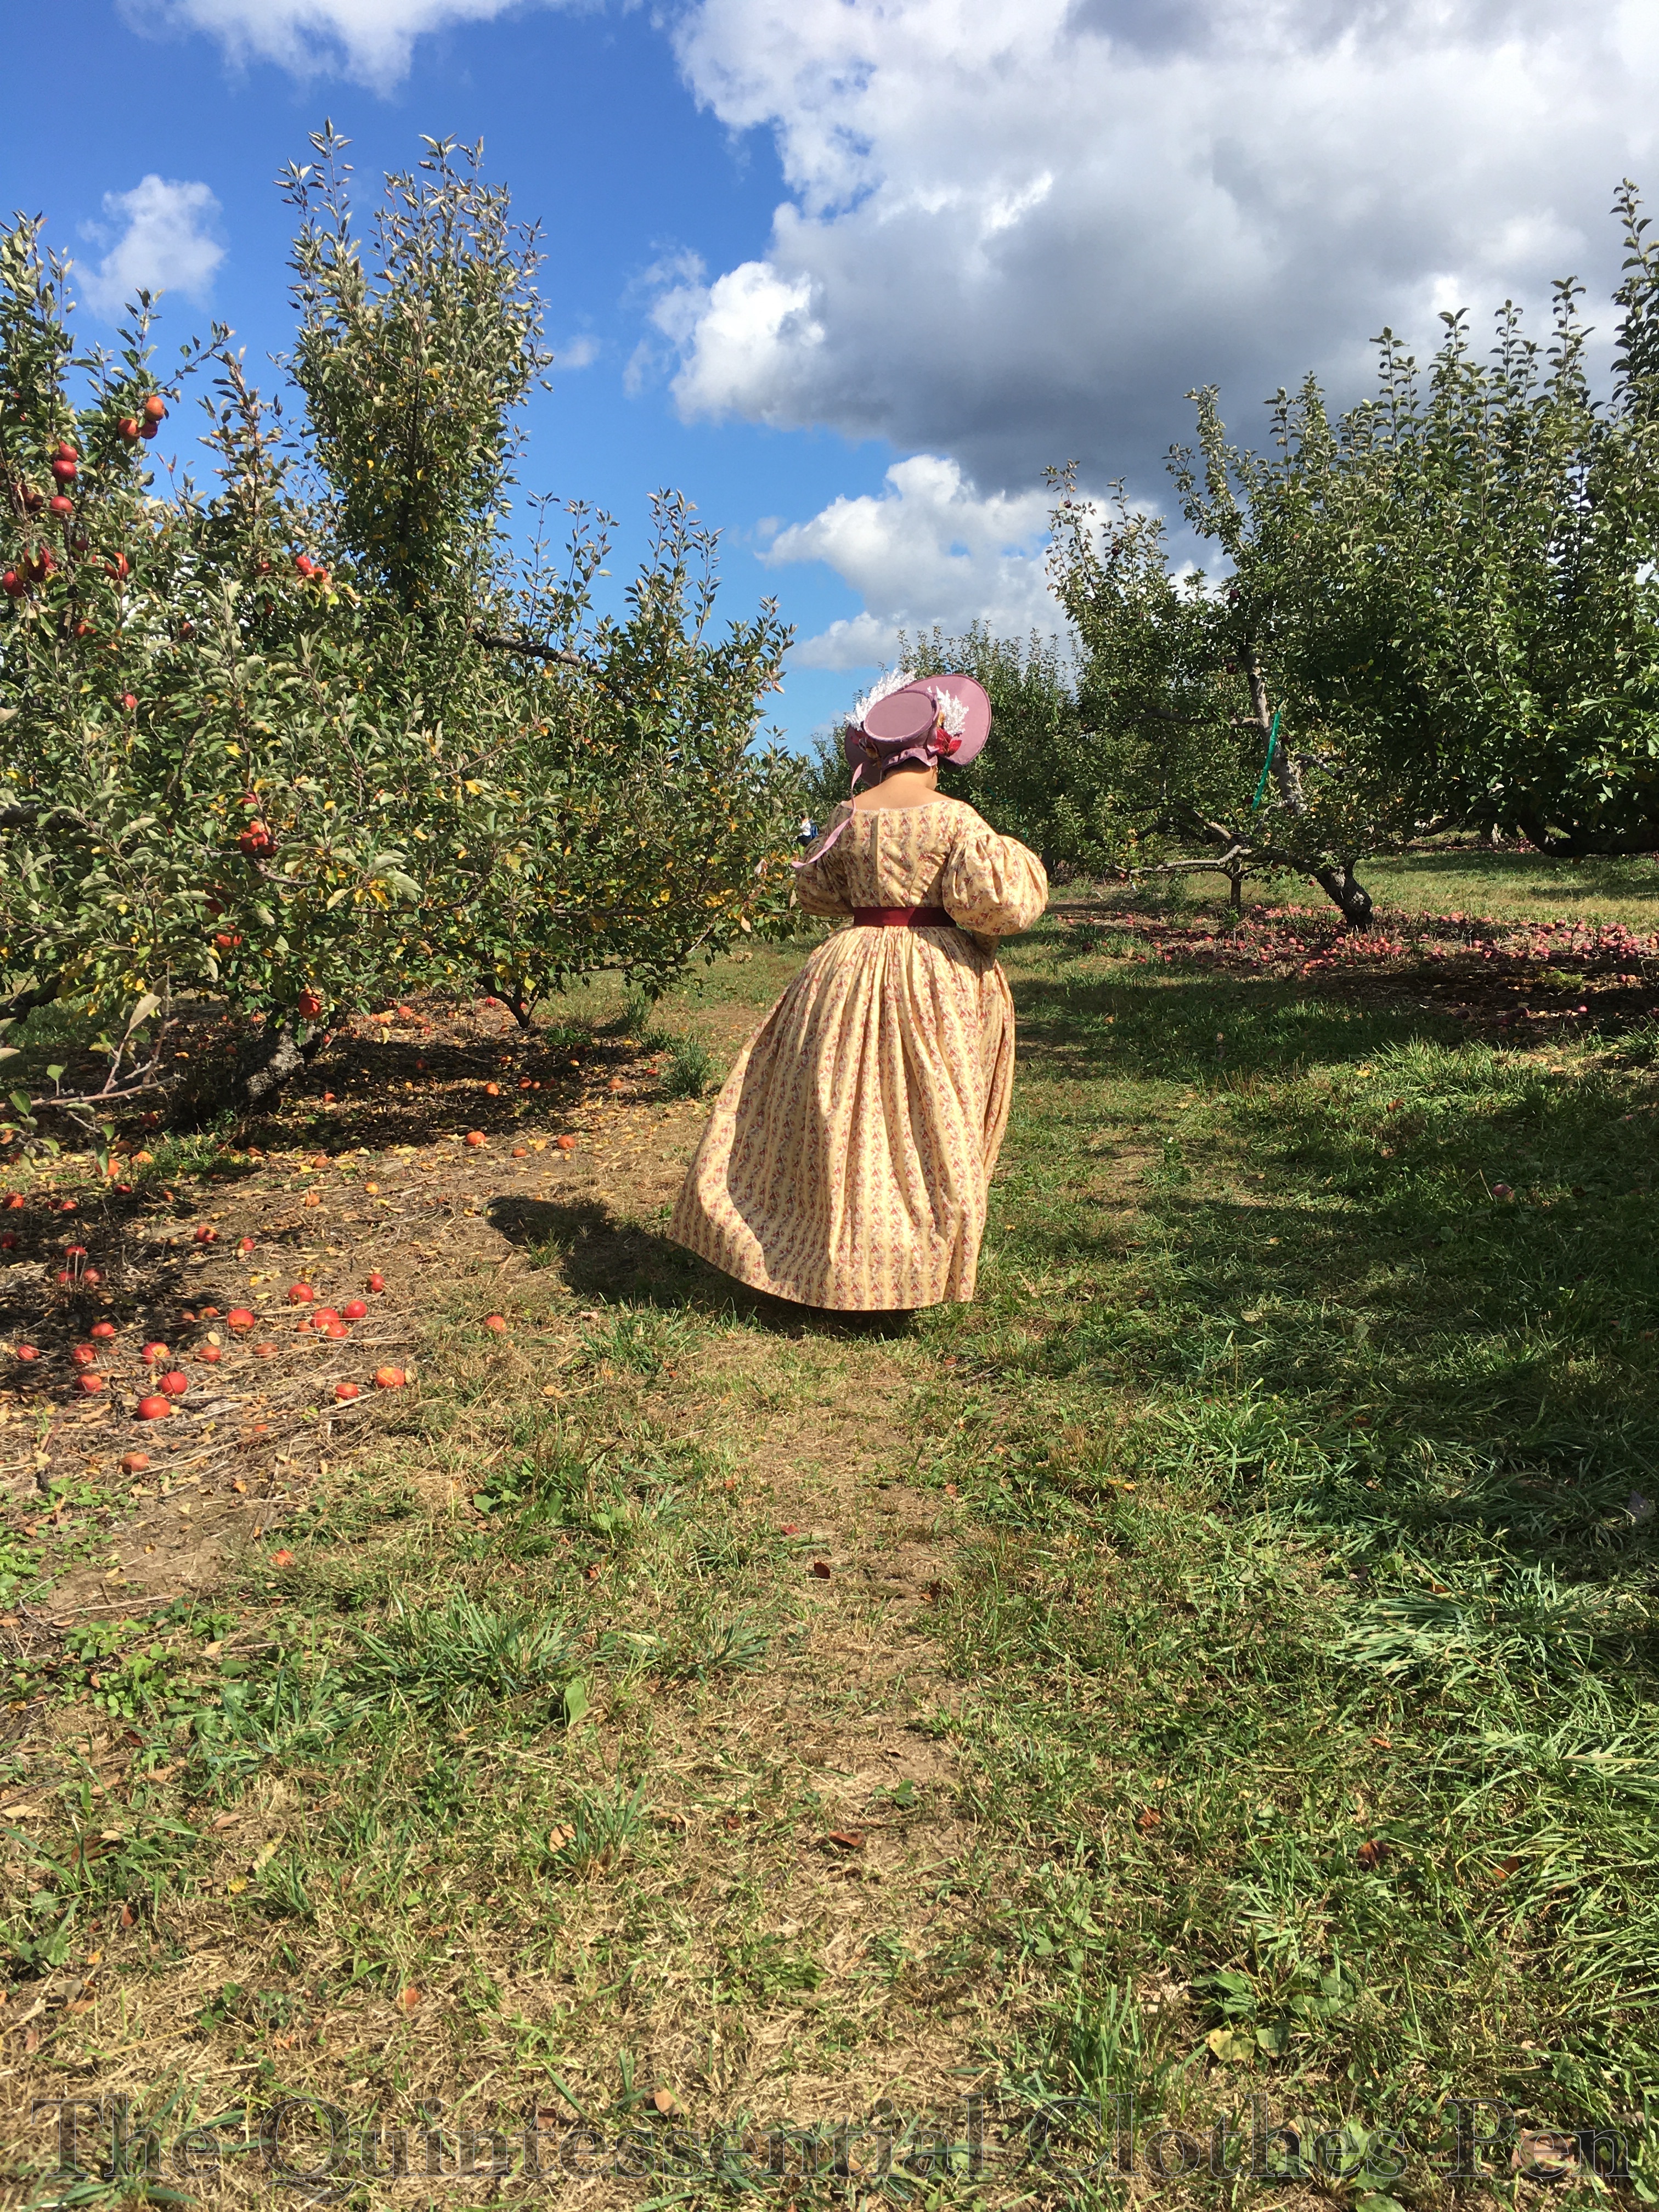
I enjoy the line of trees and the interesting perspective they provide. So here you go, a front and back view of this ensemble.
Farther along our walk through this beautiful area we stopped to take some artistic detail shots of the sleeves of this dress. First up, the mancheron on the shoulder of the dress. There’s some pretty good pattern matching to admire and it’s fun to see the gathers up close, too.
Here’s another view of the mancheron and sleeve puff, with the zig zag cuff trim in the background.
I can’t decide if I like that photo or this next one best! The next one is similar, but the focus of the photo is on the zig zag cuff trim instead of the mancheron.
The last detail photo shows the cuff trim in even greater detail, as well as my new belt buckle from Ensembles of the Past!
I purchased the ‘antique gold’ color. I love it! It’s substantial in weight, has precise and delicate details, and will probably outlast me in terms of durability. (This is just my opinion–I’m not paid to say these nice things!)
The last photos I have to show you are a bit of a teaser for the apple picking photos that are still to come. We had the most gorgeous autumn New England day!
The sky was a brilliant blue. The temperature was wonderfully comfortable–neither hot nor cold. The leaves were changing and were starting to crown the trees in vibrant red, yellow, and orange.
And a fresh breeze lifted our spirits and our bonnet ribbons! I’ve so missed events and outings. This was much needed (socially distanced) relief for weary souls. I hope that you have also found relief and joy in these trying times!
Many years ago (well, in 2012), I started a bonnet that was intended to match my 1822 Walking Dress. I was making a whole ensemble, with the dress, a muff and tippet, and also a bonnet and chemisette. It was more than I had time to complete for the deadline at the time. The chemisette was not even started, but the bonnet was patterned, cut out, started, and then abandoned.
In the intervening years, the bonnet pieces have sat in my UFO box, patiently waiting for me to come back to them. This year, as I was making my 1834 yellow dress and thinking about how to accessorize it, I remembered the bonnet and wondered if the shape and color might work for the 1830s. It seemed more useful to use something that already existed, and was already partly finished, as opposed to starting something new, so I decided to go for it!
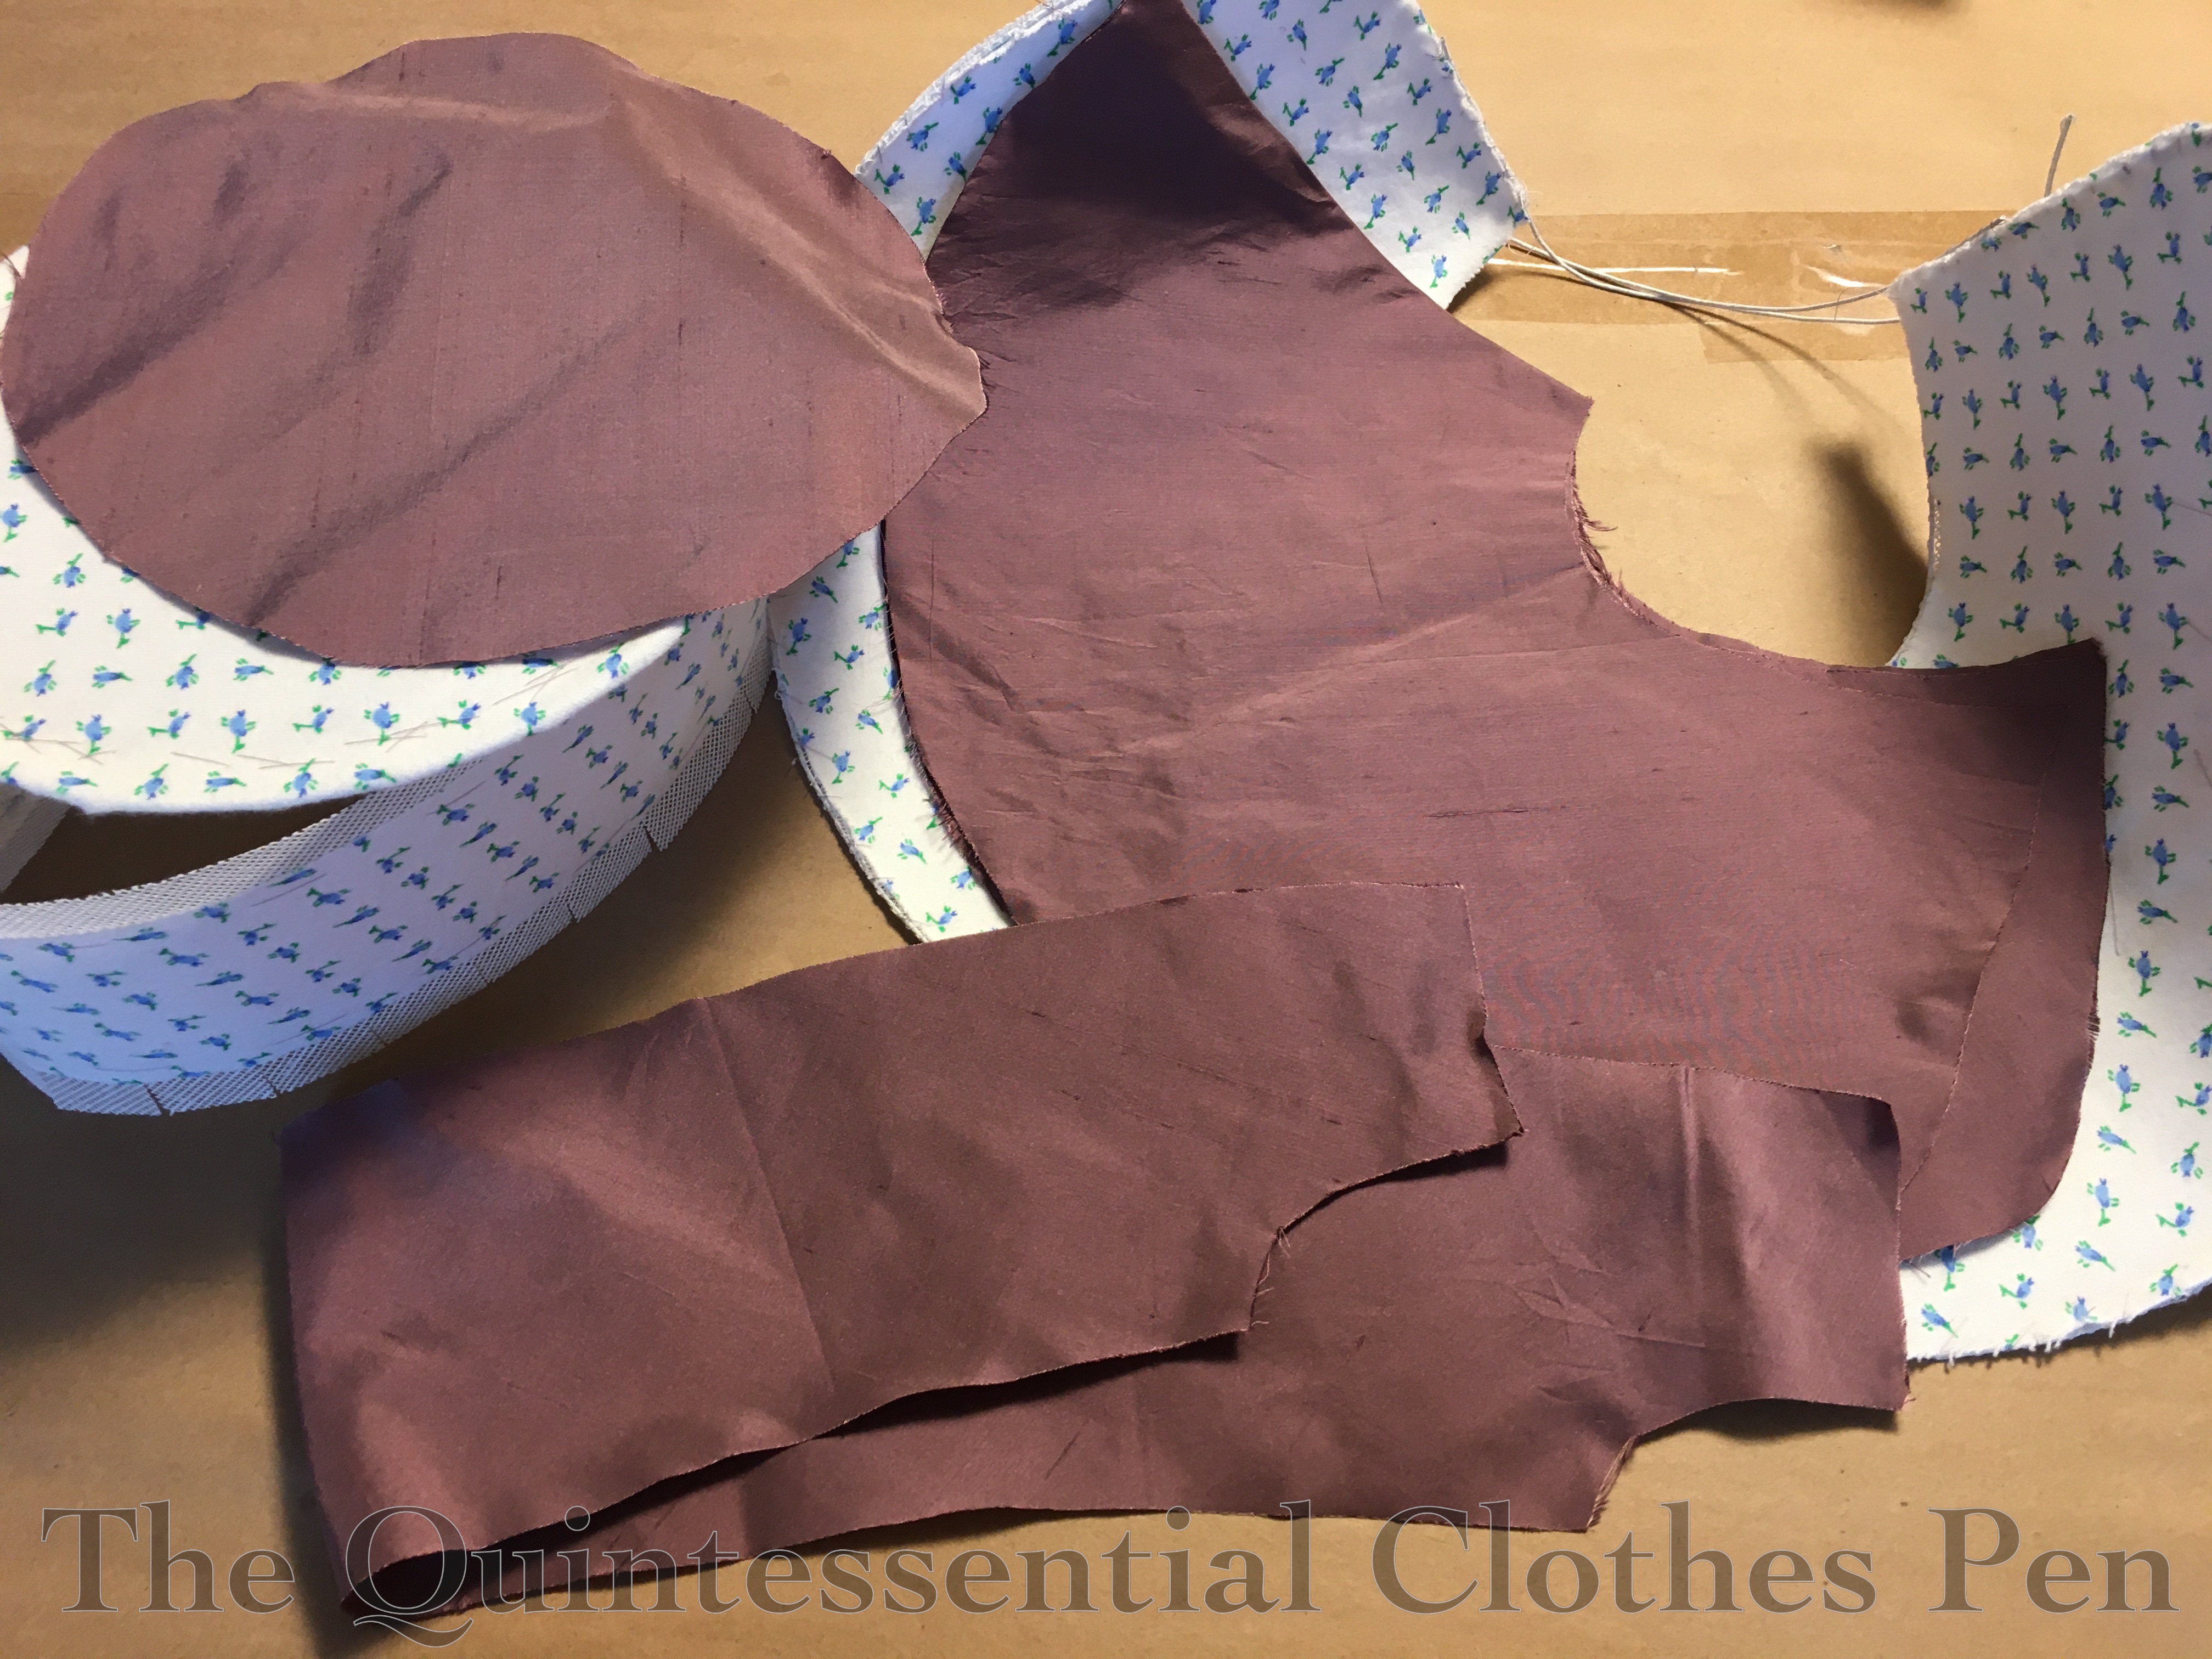
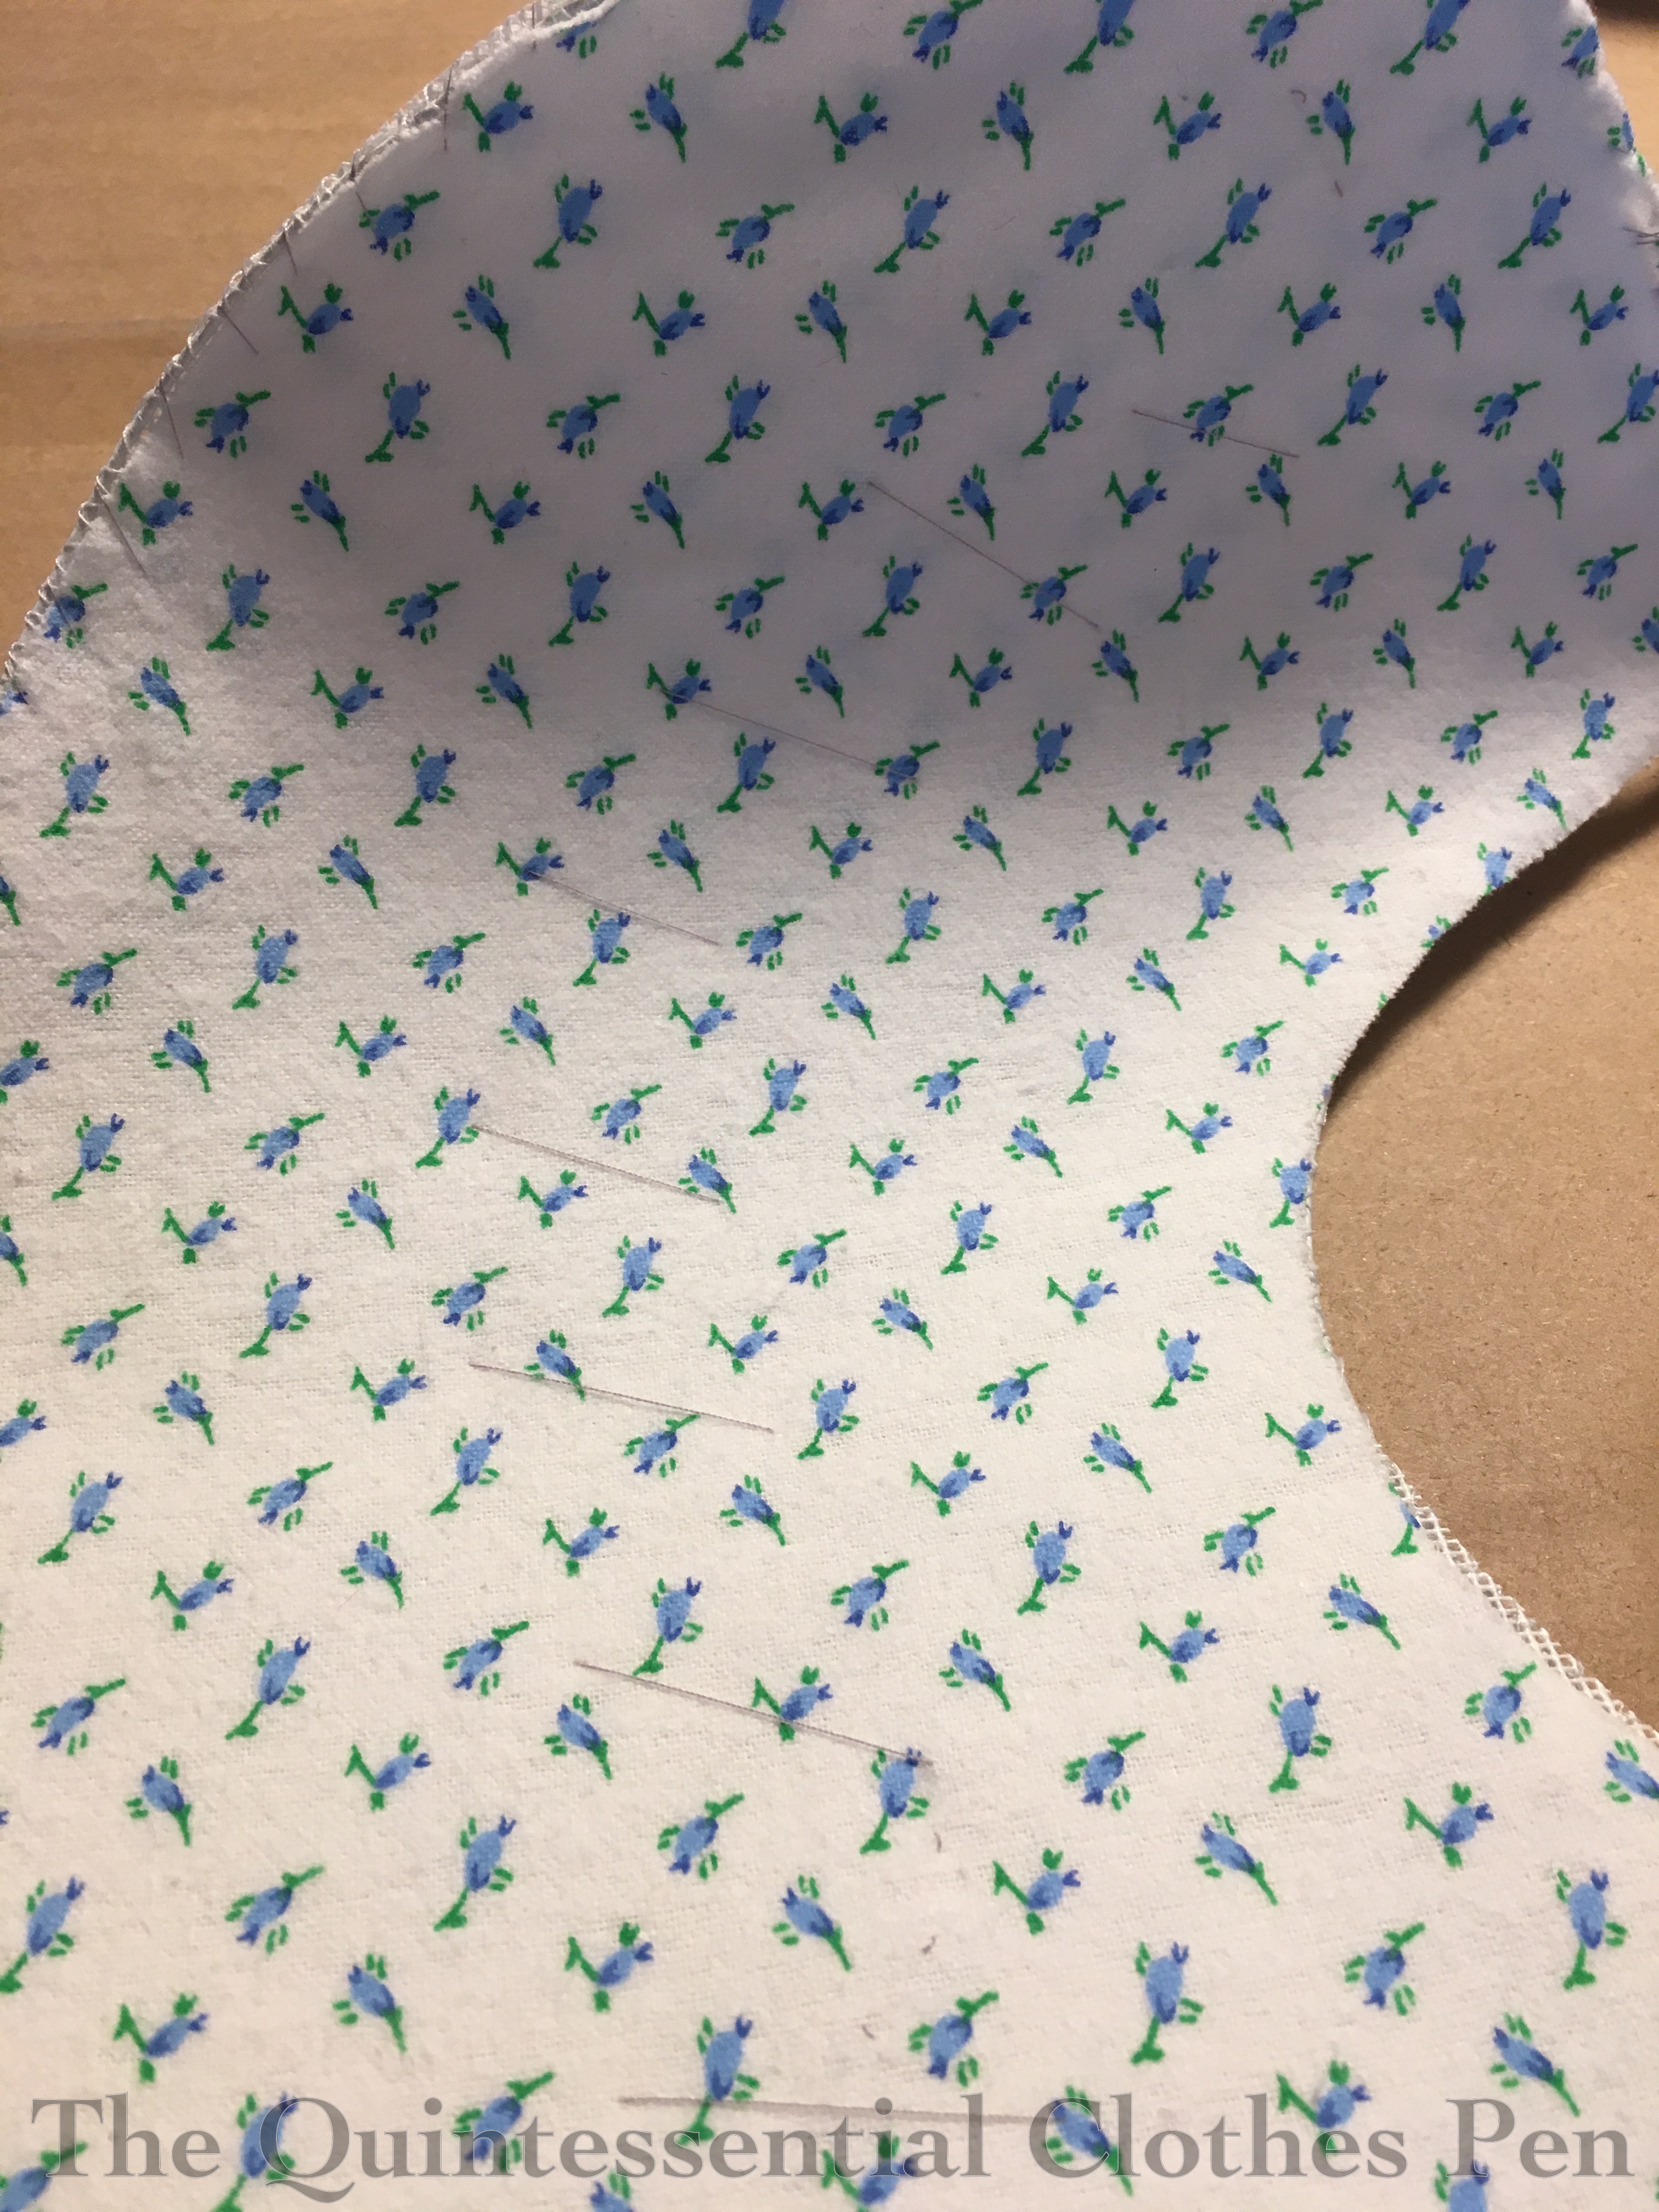
This is the state of the bonnet when I picked this project up again this fall. It’s not bad progress, actually. All the pieces were cut out of buckram, flannel, and slightly slubby silk; the buckram assembly was started; the flannel was basted on; and the edges of the pieces were wired.
All of that turned into this!
In this post, we’ll follow along with my construction process. Future posts will have more finished ensemble photos as well.
Inspiration
First, let’s go back to the inspiration for this bonnet.
The Metropolitan Museum of Art has a bonnet that is dated c. 1820, pictured below. It is silk and appears to be satin edged in velvet. It looks brown to me, but it’s also possible that it is black and that lighting and fading from age cause it to appear brown.
This is what I was aiming for when I started patterning in 2012. However, after finishing my bonnet, I realized that my brim shape is more open and high, and less forward, than the shape of this bonnet. This surprised me! And actually, it worked out in my favor, as the shape I patterned is more 1830s than 1820s.
Despite the shape not being quite like The Met bonnet (maybe someday I’ll alter the pattern and try again for the 1820s shape), I still took much color and material inspiration from it. I liked the tone on tone silk with velvet trim, the edges trimmed in velvet, and liked the lightweight silk ties (plus, I had all of these materials in the stash in perfectly coordinating purples!).
The trim needed to be different for the 1830s, though. I liked this 1830 bonnet, particularly for the inside of the brim trim, and this 1826-1830 bonnet for the fabric loop trim. There are other inspirational fashion plates showing floral trim inside and outside the brim on my Pinterest board for this project, as well. My bonnet is a melding of all of these sources of inspiration.
Construction
With my half finished pieces in hand, I decided to attach the tip of the bonnet to the side. Here is that step, pinned in place. These pieces were hand sewn together.
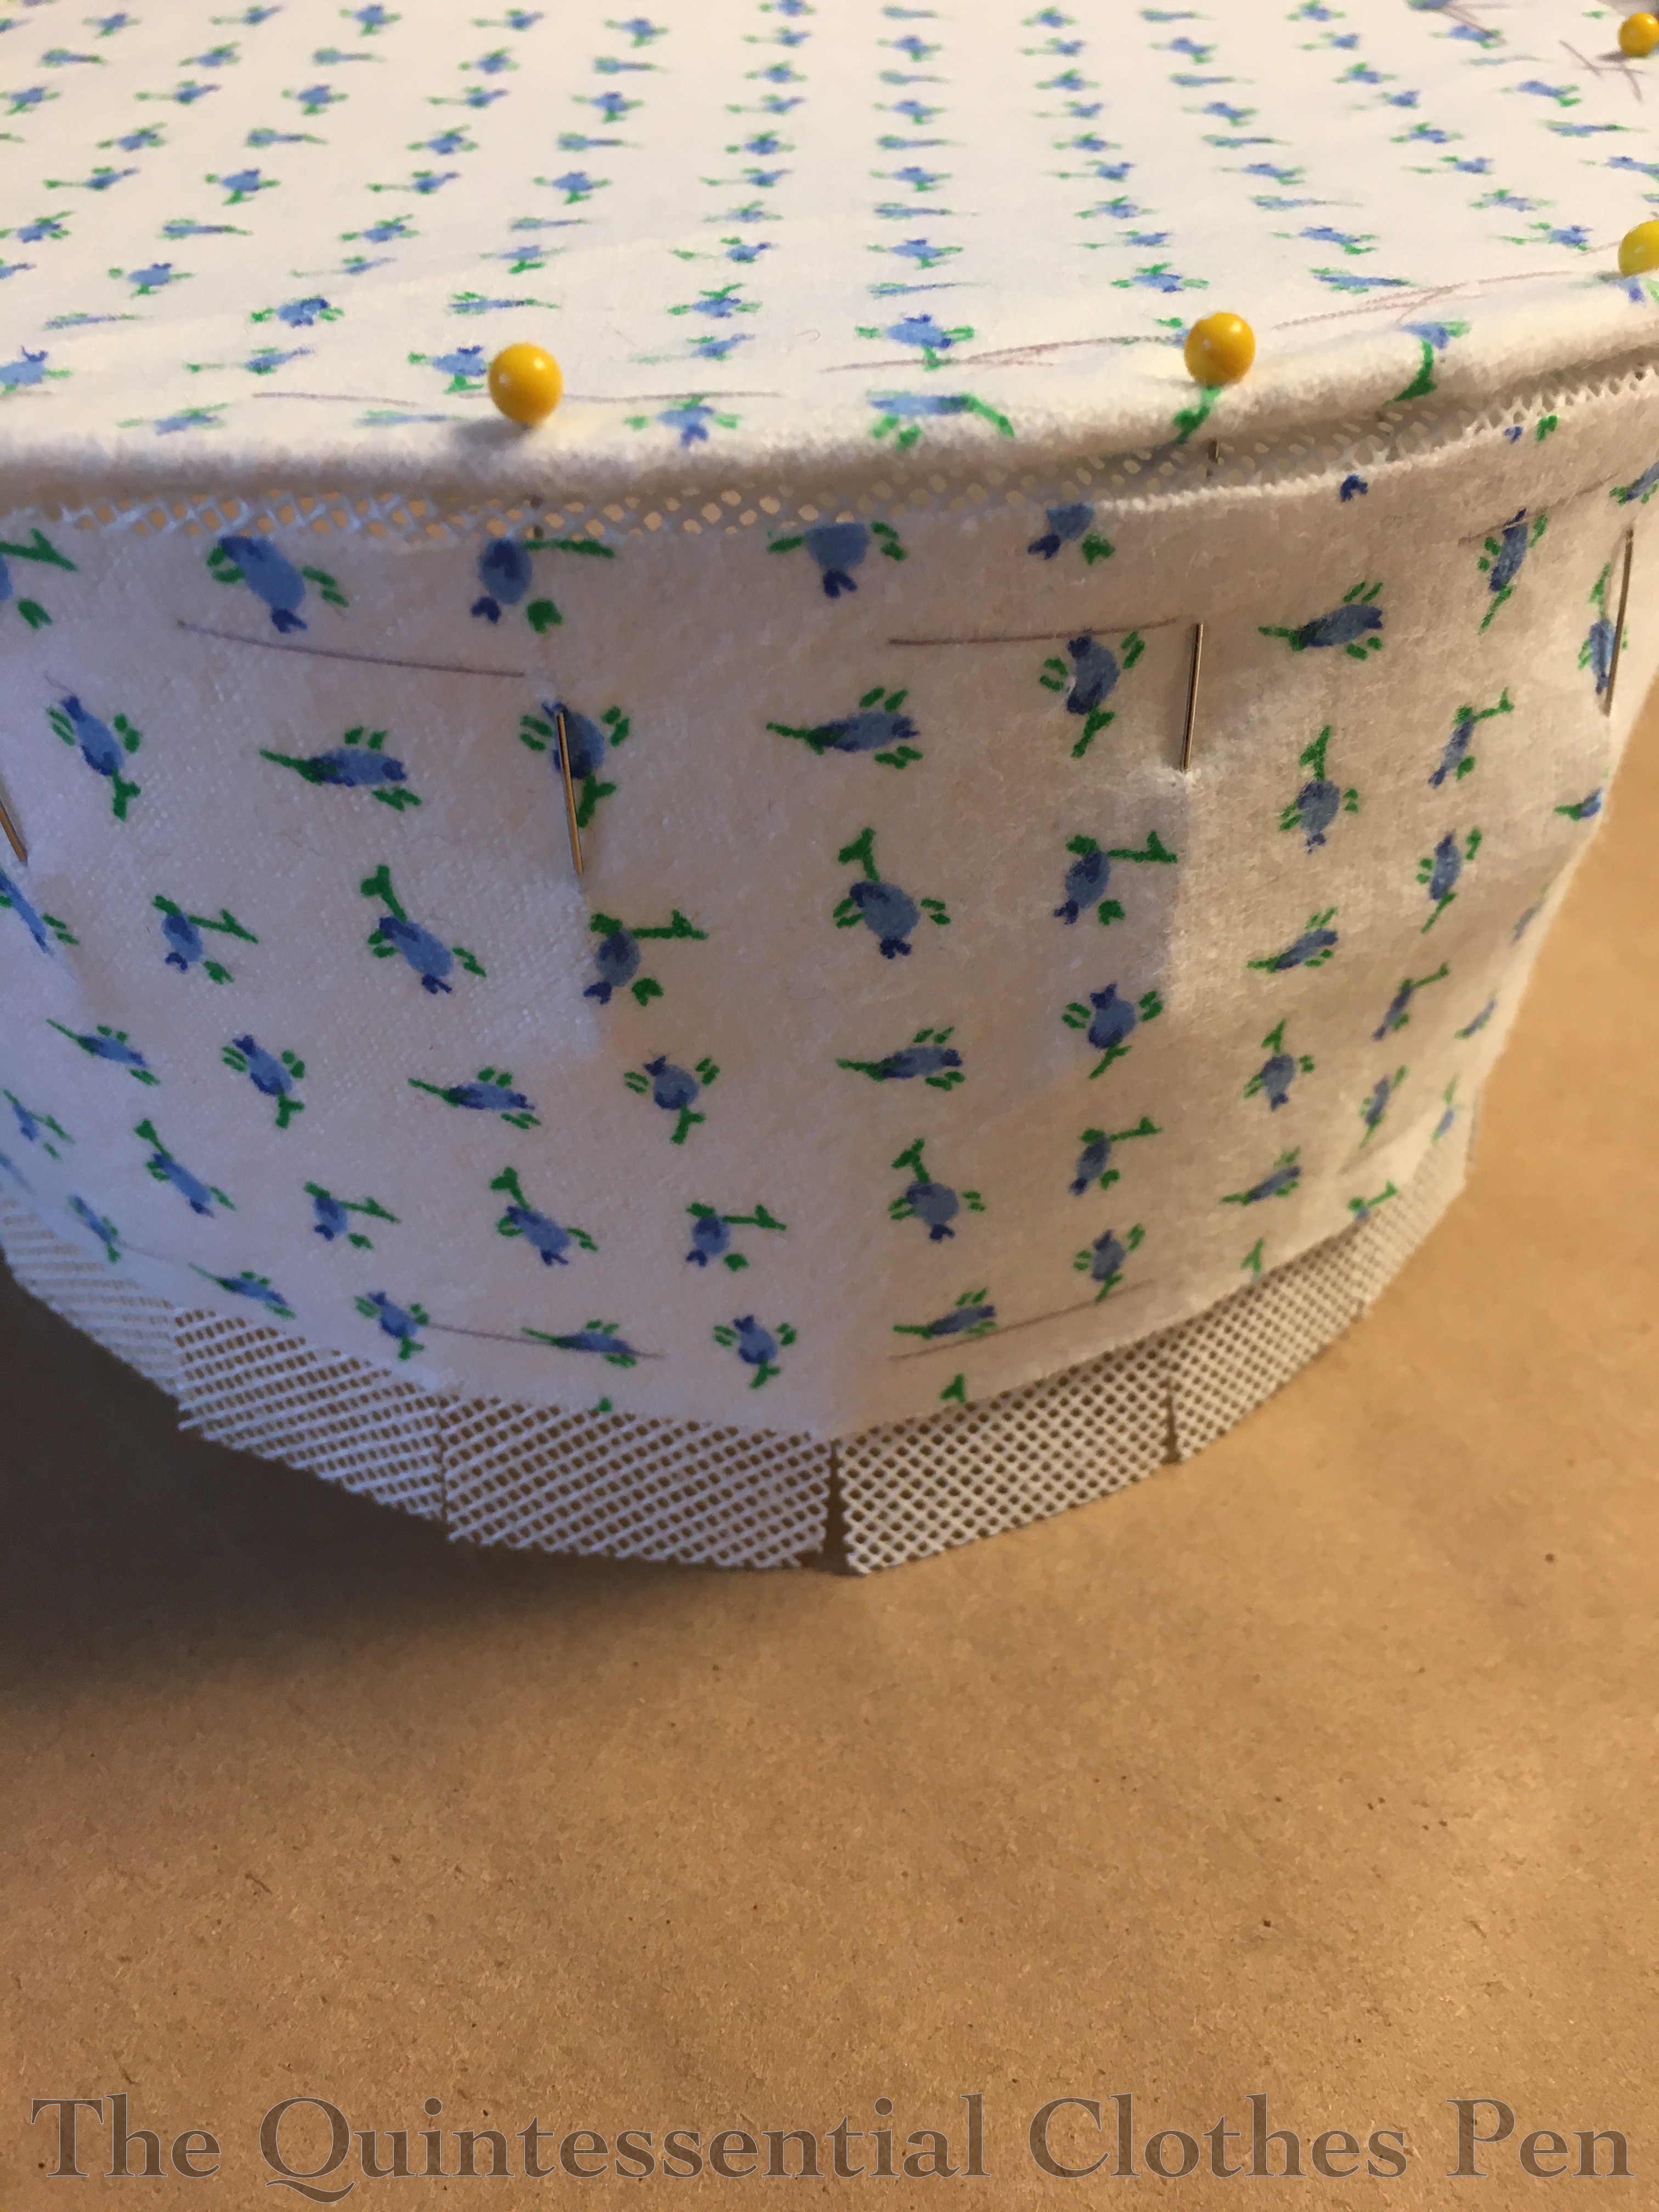
I’d decided to baste my flannel in place in order to help it follow the contours of the shapes instead of pulling away. On some bonnets (such as one covered in transparent fabric) these stitches might be seen, but I was confident that my silk would hide these quite well. The alternative would be to use spray adhesive to hold the flannel in place, but I didn’t have that at my fingertips 8 years ago.
In addition to the basting stitches in the middle, I also roughly whip stitched over the outside edge of the brim to hold the flannel in place.
I took this brim piece and basted it to my assembled crown, then stitched those two layers together using a Z stitch. Pinning this was fiddly, as I had to get the buckram seam allowance of the side to slip under the flannel of the brim smoothly.
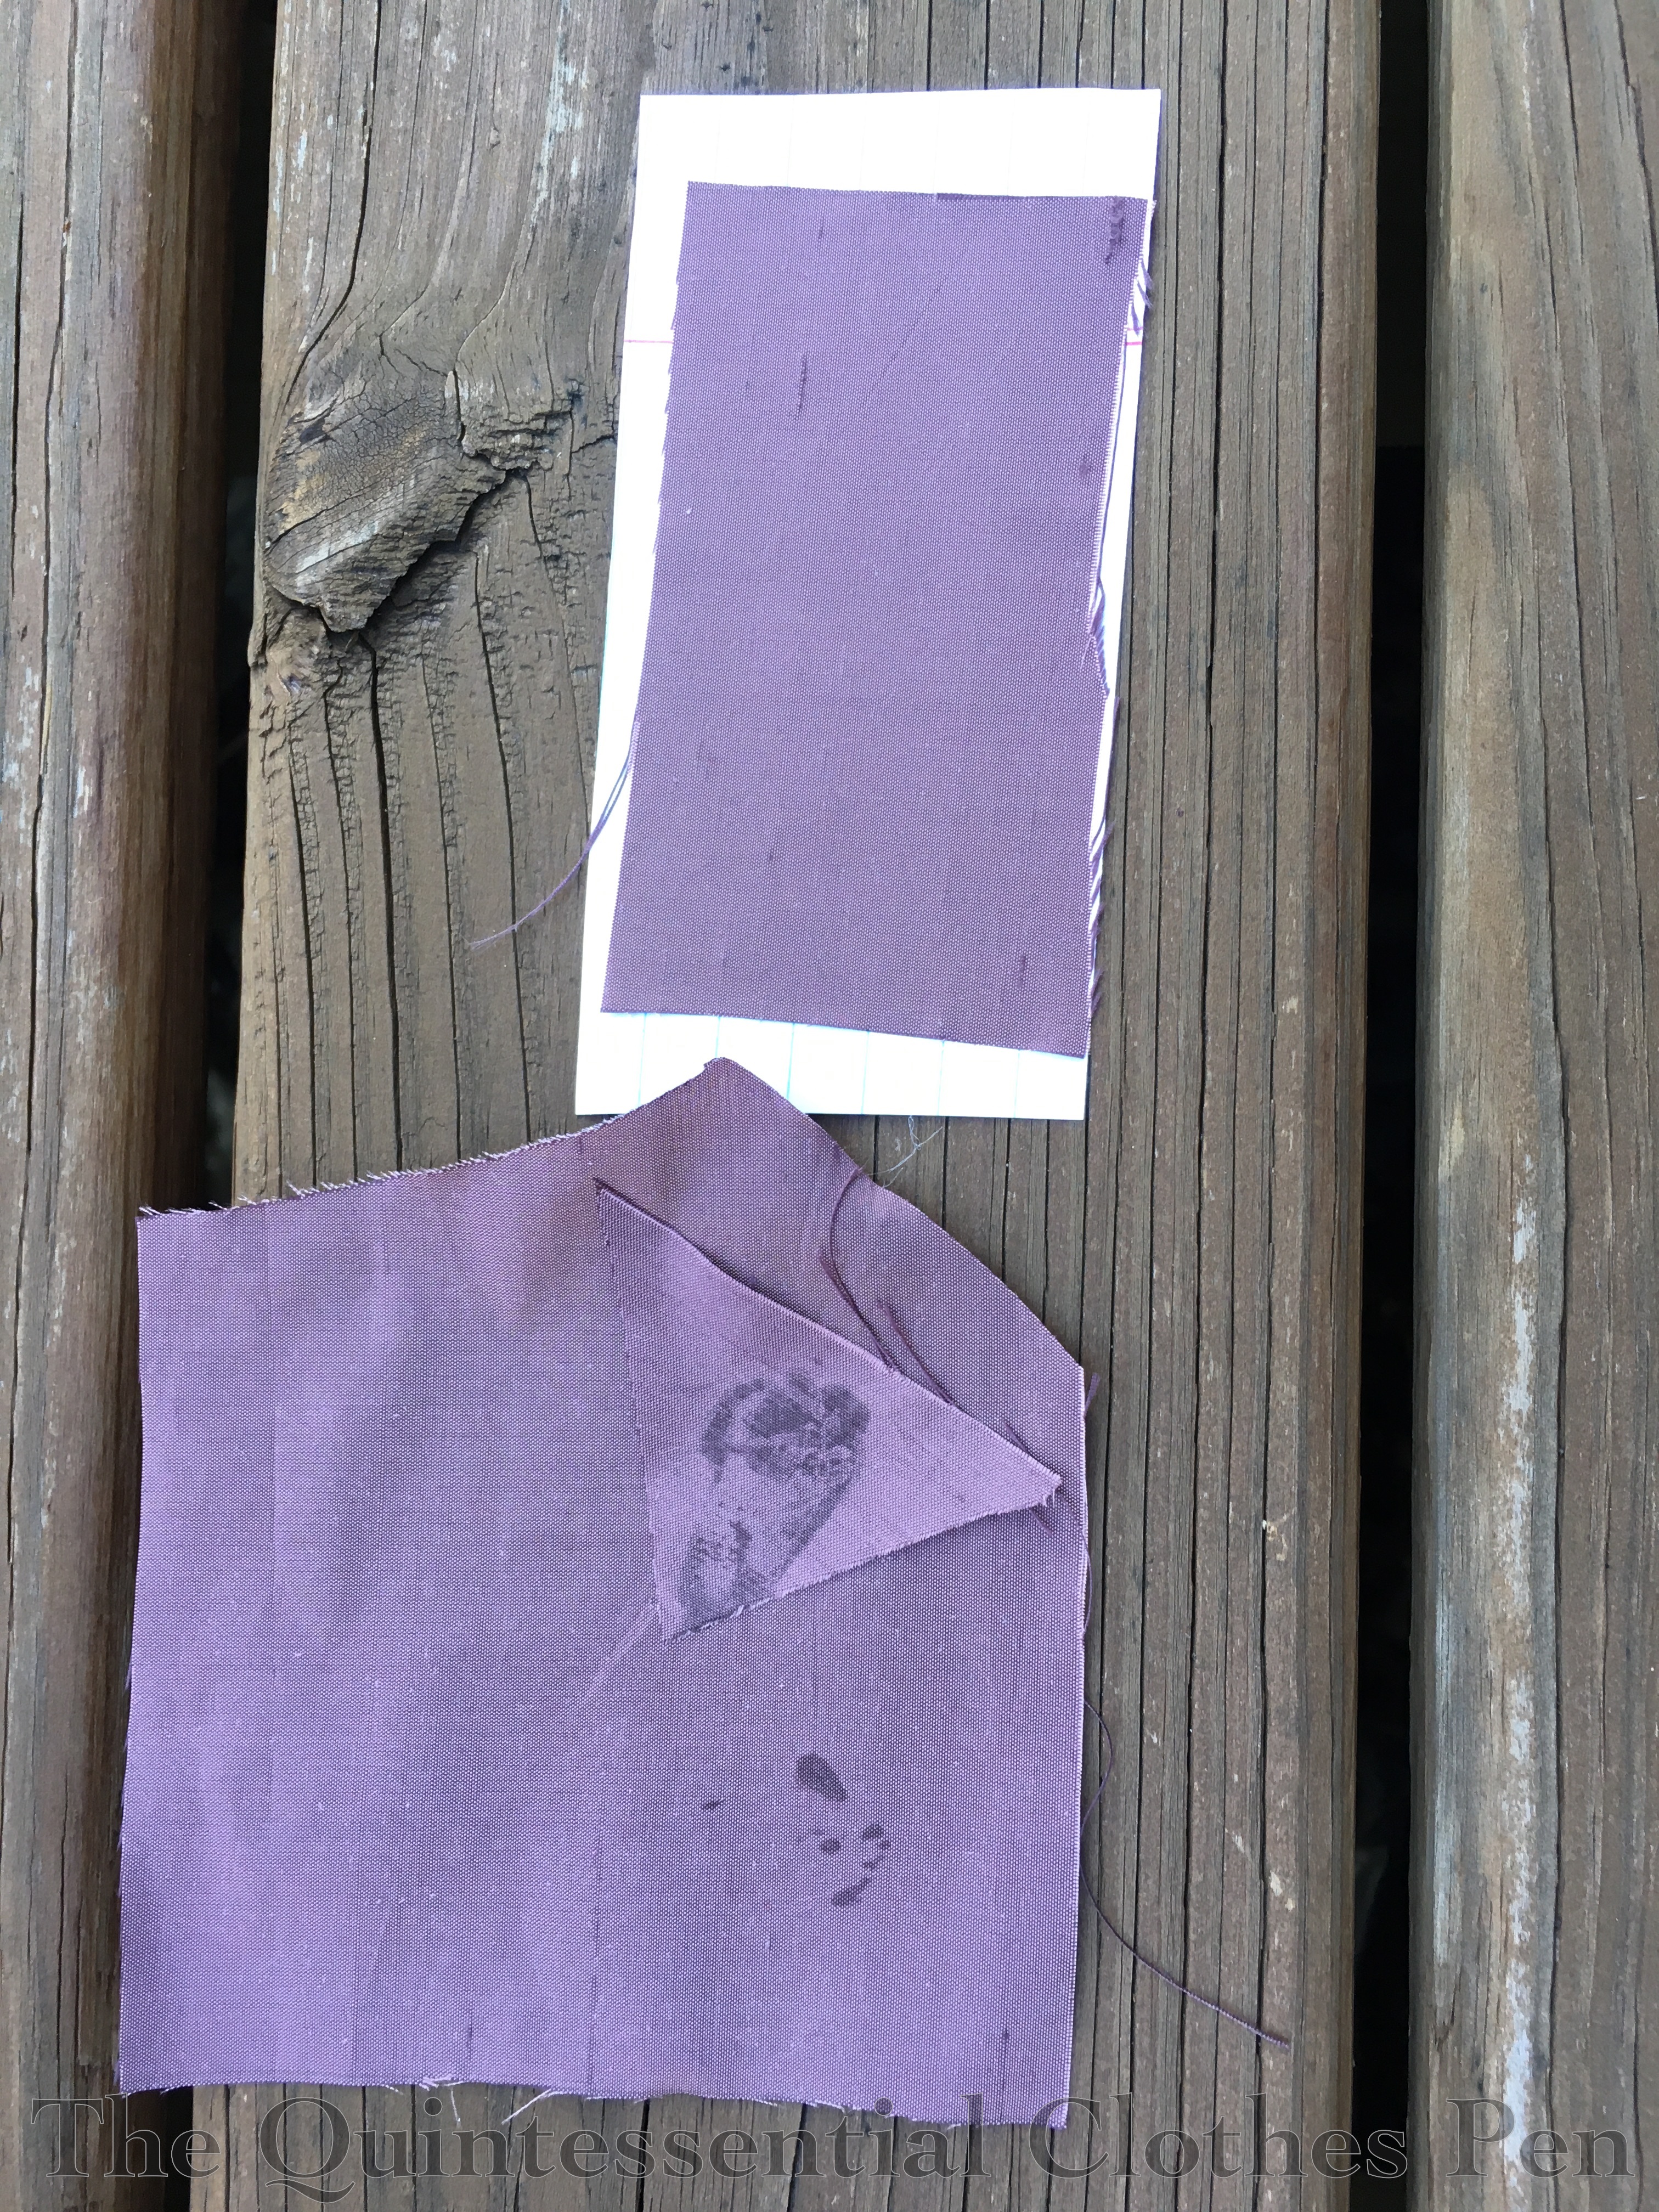
The next thing to do was cover the brim with my silk, but I still had the problem of getting the fabric to follow the contours of the curves without pulling away. When I started on this step I only had rubber cement on hand. I (smartly!) tried a sample to see if it would show through the silk. It definitely did! The rubber cement sample is on the bottom of the photo below. Not what I wanted! So, I ordered Krylon spray adhesive, which I knew would do the job. When it arrived, I tried another sample. The spray adhesive sample is on the top of the photo below. Success!
I used the spray adhesive for the inner and outer layers of the brim covering. It worked wonderfully, just as I had expected it to. The only exception is that I accidentally left a mark on one of my brim pieces where I’d let too much spray build up and had to recut that piece. So if you try this, make sure to do very light coats with the spray adhesive if your fabric is thin enough for it to show through!
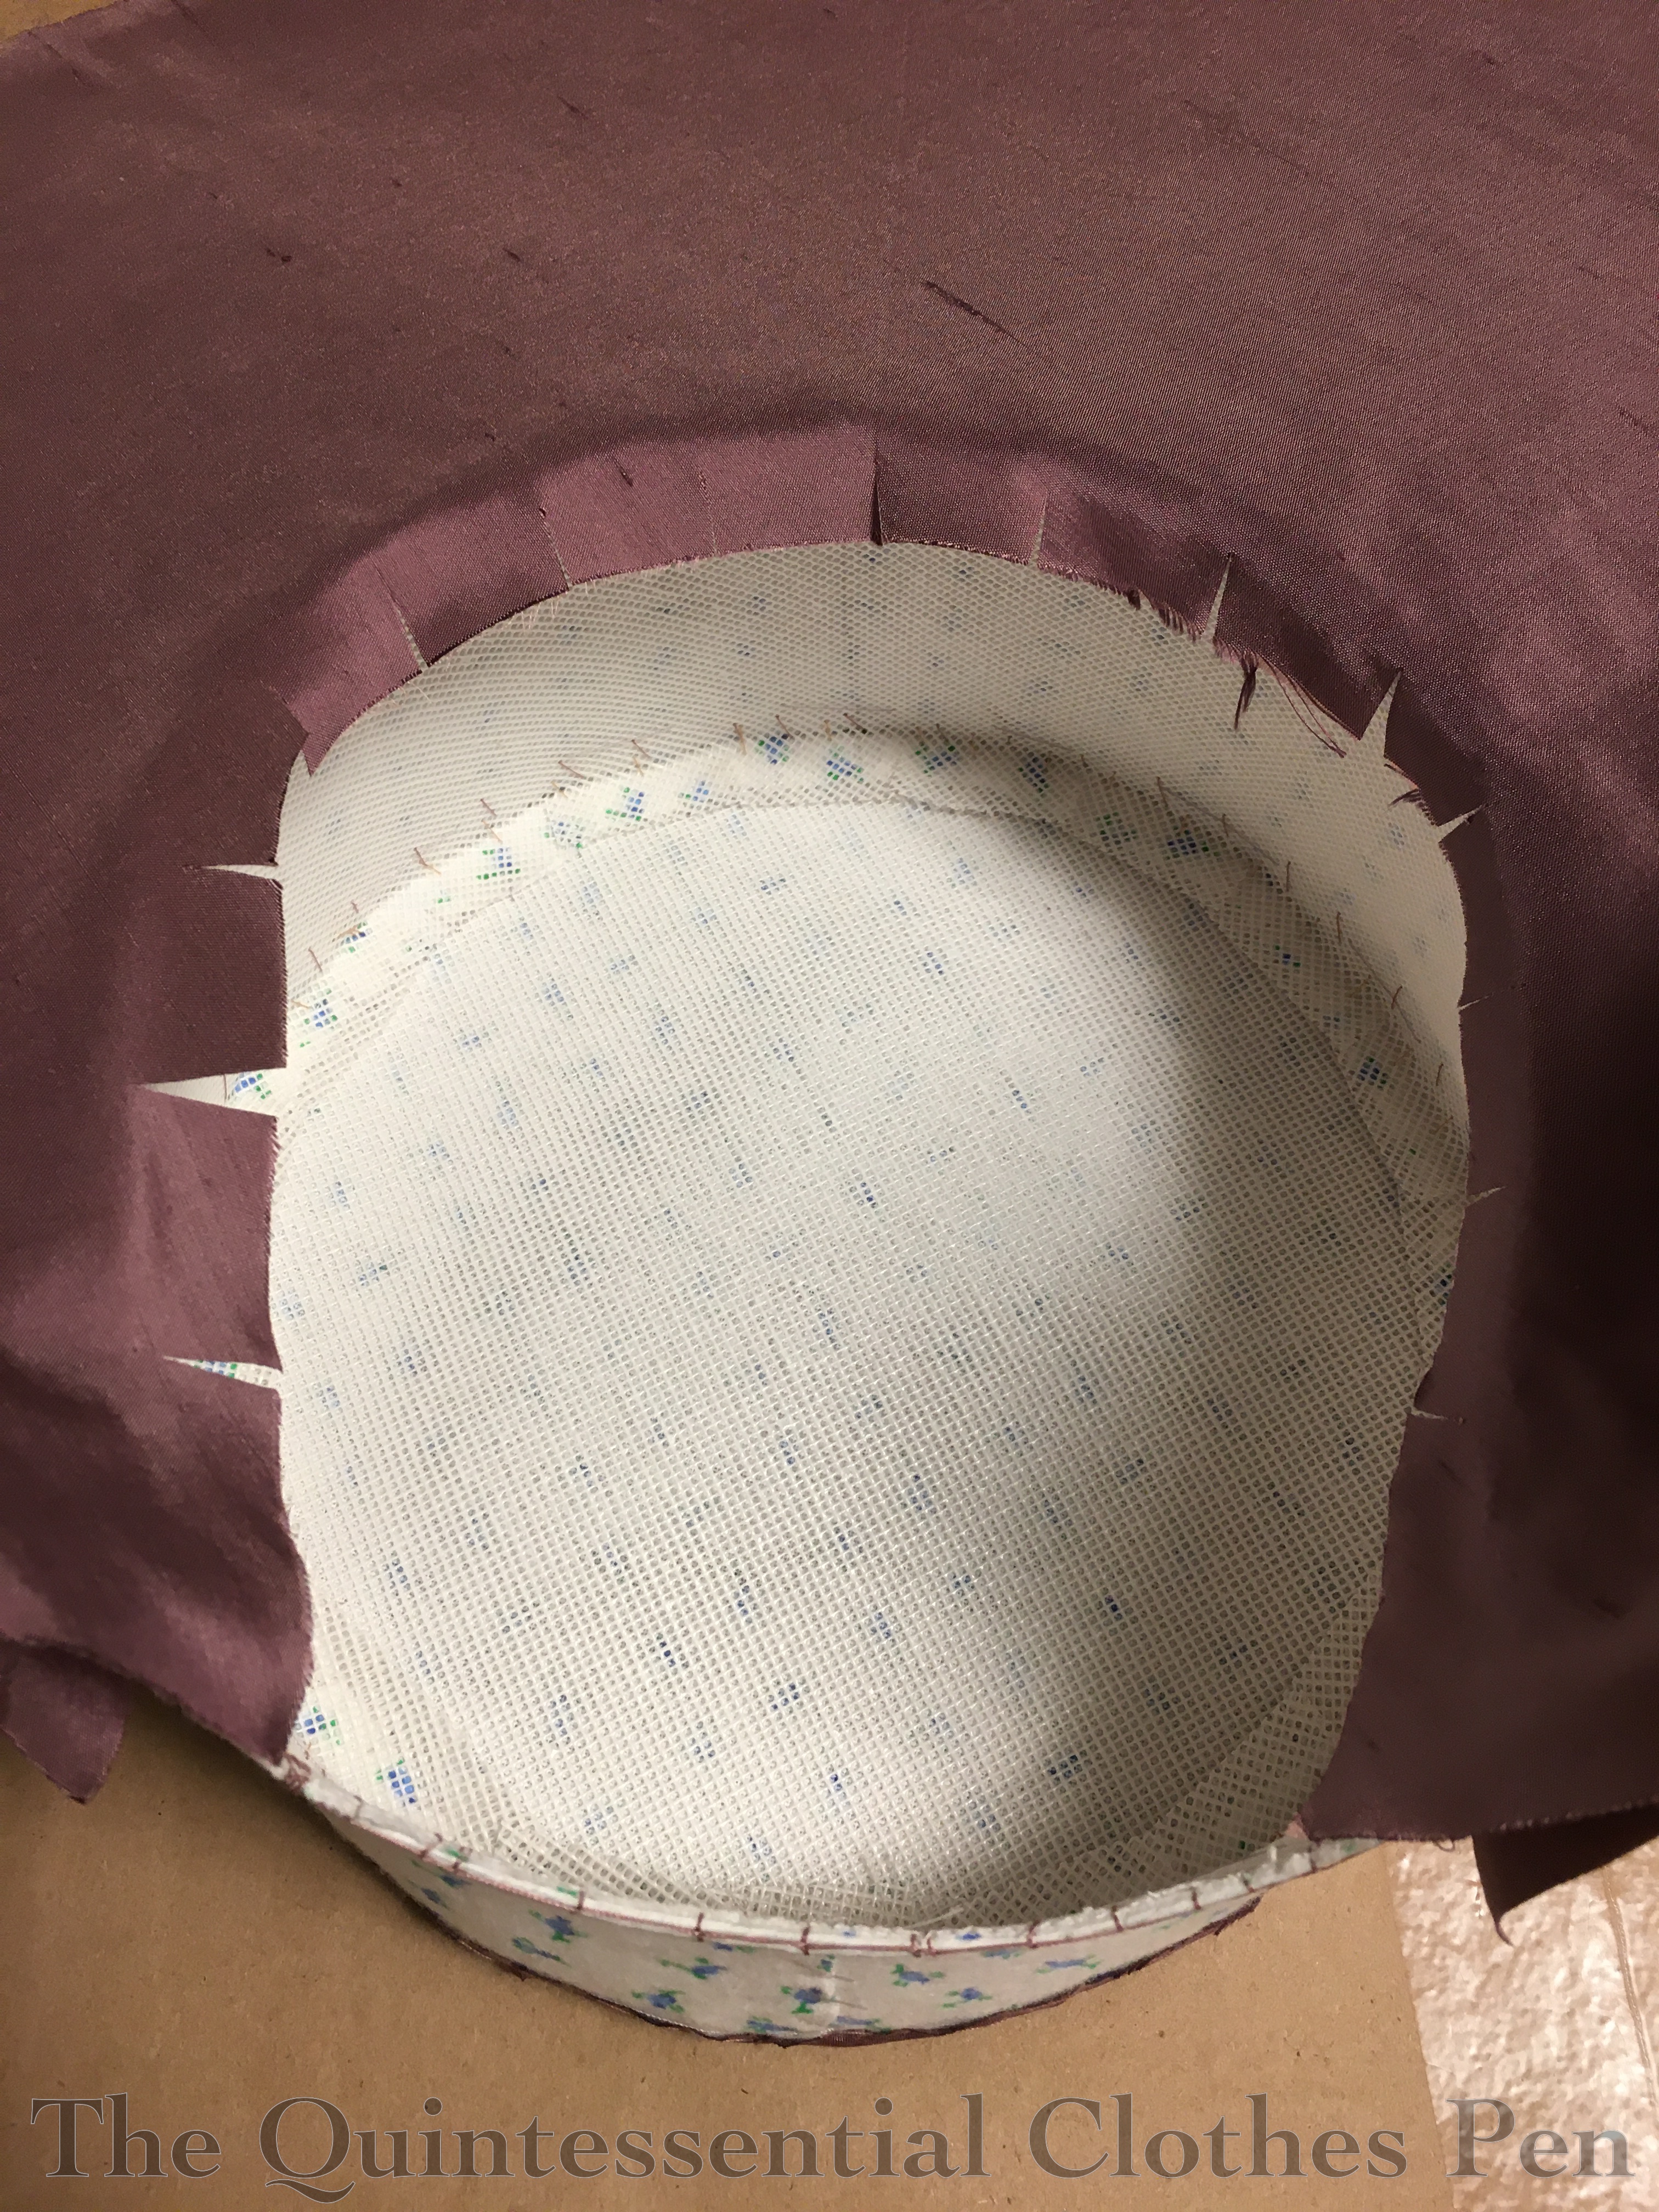
Here is the inside of the brim, with the seam allowance clipped where it meets the crown.
And here is the outside of the brim, with the seam allowance clipped so it can lay along the outside of the side band. You can see the interior of the brim showing on the extreme left of the photo, on the other side of the wired edge of the buckram. You can also see that by this point I’d put the silk covering on the tip of the bonnet. The seam allowances of that piece are clipped and then stitched over onto the side band through all the layers.
This photo shows the Z stitches holding the silk tip piece in place a little better than the last photo. It also shows the side band. For this piece, I pressed under the brim side seam allowance ahead of time, pinned it in place, and then turned the top edge under as I went along, so it would be just the right width. Stitching this piece on covered all of the seam allowances you can see in this photo.
In the next photo ,a few more steps have been completed. The side band was sewn on, the silk edges were trimmed and bound with bias velvet, I cut bavolet pieces (out of my glue stained brim piece!), edged the bavolet with bias velvet, and attached the bavolet. The great thing about the spray adhesive is that it’s not so glue-y that it gums up a needle or makes things hard to sew through, so I had no problem with any of these sewing steps.
As a side note, what is a bavolet? Interestingly, my go-to source for definitions, the Oxford English Dictionary, does not have an entry for this word! I believe that is because it is actually French, not English. I would define bavolet as ‘the curtain piece at the back of the bonnet’. There is more information about this word, including examples of the word in use from the 19th century, in this French Vocabulary Illustrated blog post. If you know of other good places to find a definition or etymology of the word bavolet I would love for you to share!
Back to the photos! All the long purple stitches around the side band are from attaching trim. I find that double thread makes it much easier to attach trimmings such as feathers and flowers, as you can double back through your looped thread to hold things in place and it makes it a little extra sturdy. The nice thing about doing all of that before lining the hat is that it makes for a really elegant interior when all is finished!
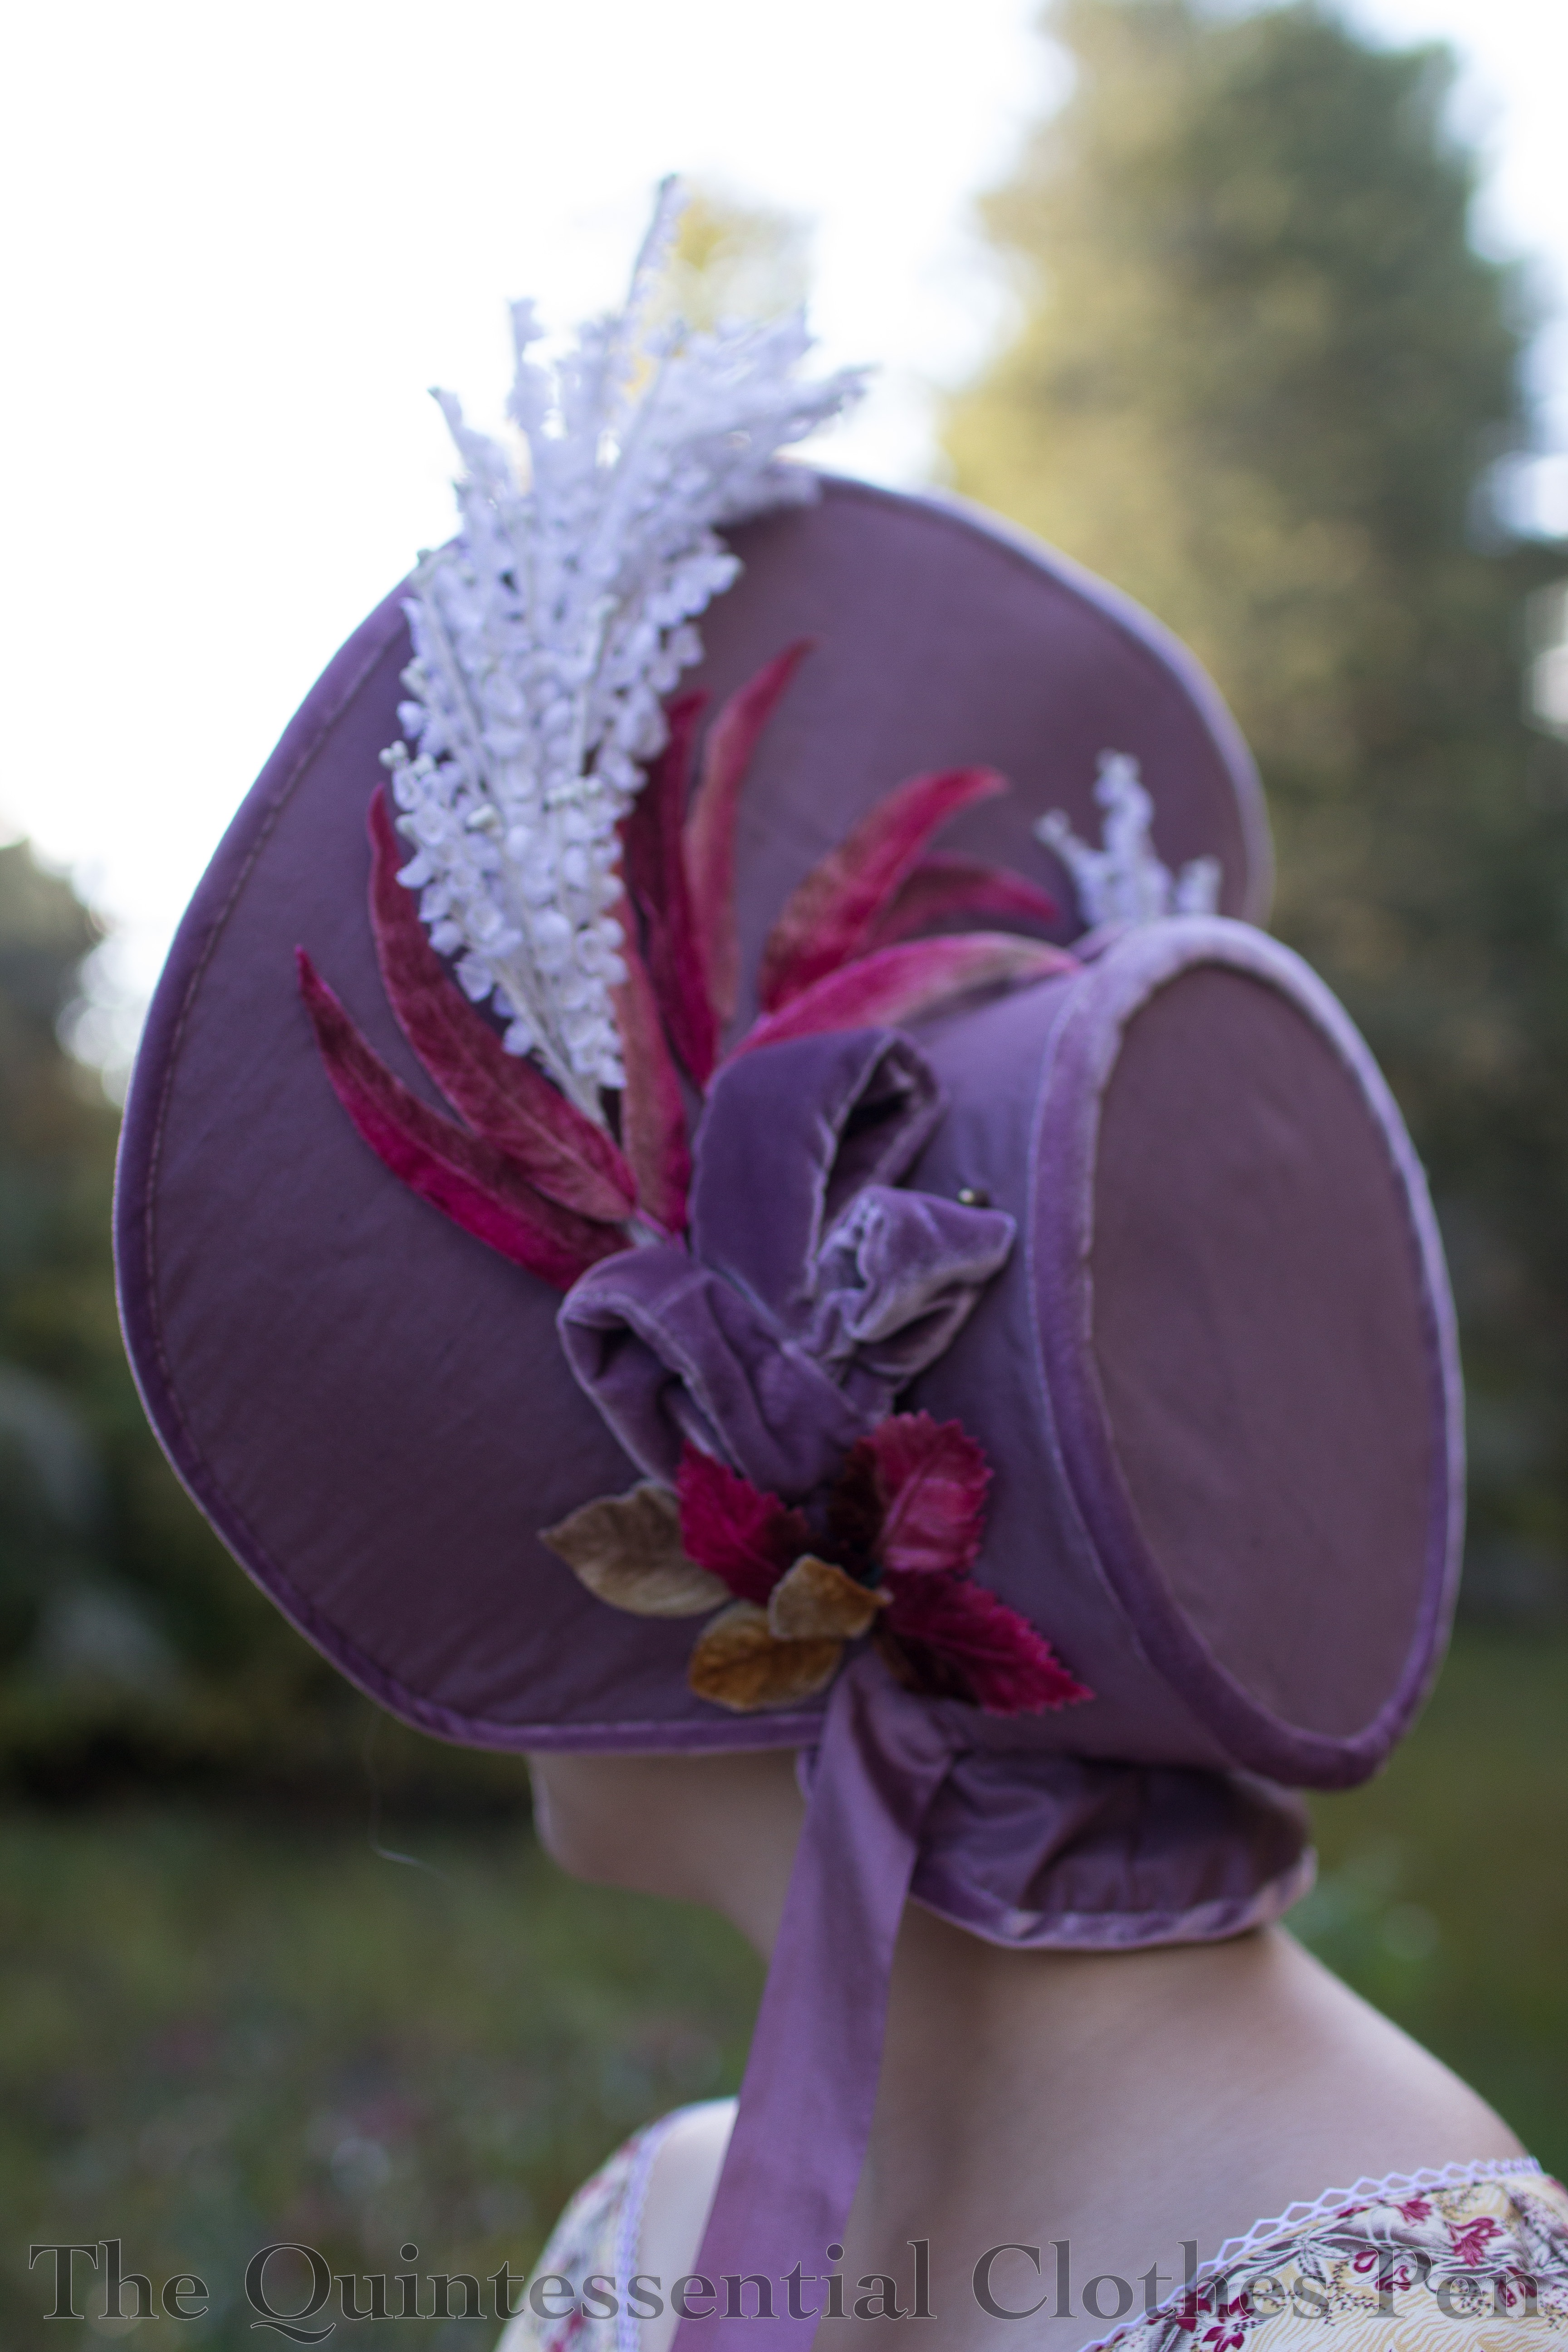
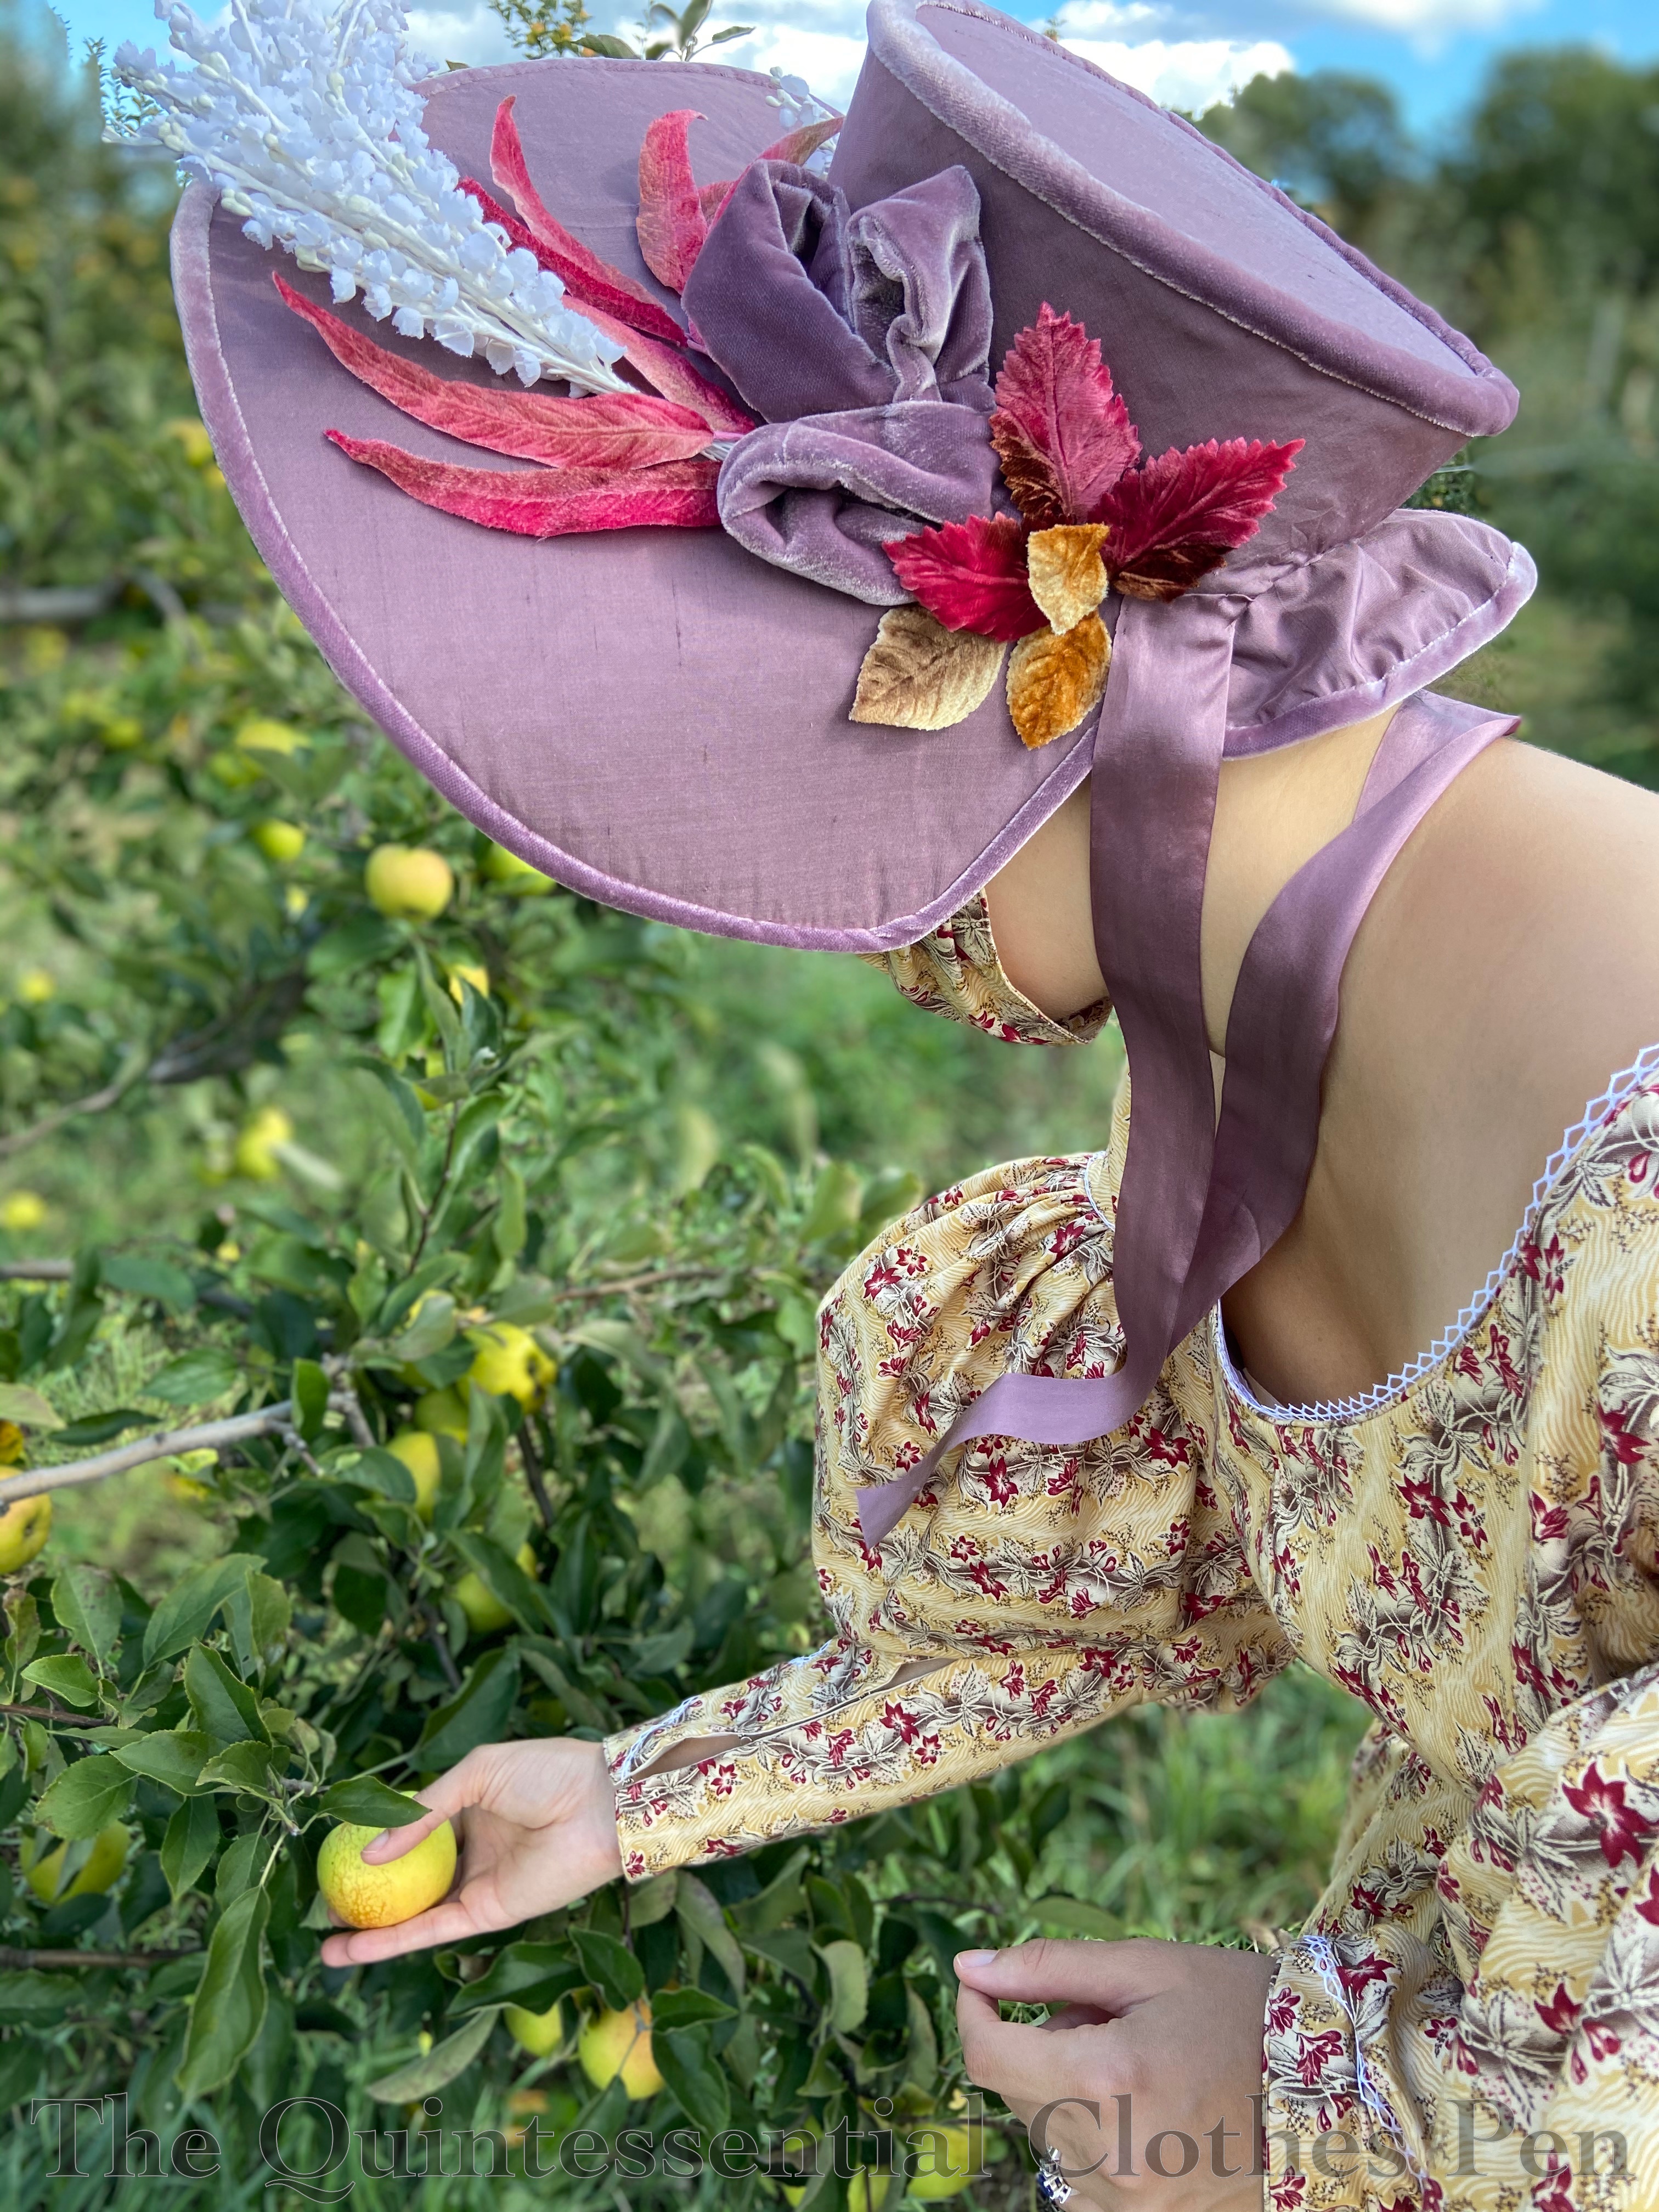
Below, you can see what that trim looks like from the exterior. I used some scraps of velvet to make loops and a variety of vintage paper and velvet millinery flowers and leaves in white, pink, and gold.
I’m super pleased with how it turned out, but it took hours to decide on the placement and then sew everything in place. It was finicky… The trim kept causing the bonnet to fall over as I was trying to place it and when sewing it the thread kept getting wrapped around the different elements and getting stuck. Plus, to make the stitches on the brim invisible they had to catch just one layer of the silk (as opposed to being stitched all the way through all of the layers) without pulling the silk away from the flannel.
Finally, it was time to make a lining! This used the same pattern pieces as the tip and side band and was cut from scraps of ivory shantung. The seams for the lining were machine sewn.
After I put the lining inside the crown of the bonnet, I covered most of the raw edges of the purple and ivory silk with a band of brown cotton velvet. This blends with my hair and provides a bit of a velcro effect to help keep the bonnet in place, in addition to providing nice finishing! This is the same process that I used when making my 1875 hat earlier this year.
At the bavolet edge, where there is no brown velvet, the ivory silk was turned under and sewn in place. I also added lightweight silk ribbon ties as a finishing step.
Finished!
Here is the finished bonnet, being worn with my 1834 yellow dress! I love that the purple coordinates with my yellow print dress fabric without directly matching any of the colors in the print. It was also fun to choose white, pink, and gold floral trimmings for the bonnet to echo the colors in the print. I think the combination is anchored well while still being distinctive parts.
This photo clearly shows that the ties are purely decorative. I left them hanging free so that they could elegantly (usually!) move around. So what keeps this giant sail in place on my head? (Because I can say with certainty that a bonnet this big is basically just a wind catcher on the top of your head!) It will stay on its own… until moving around. I used the back section of my hair to make a bun, at just the right height so it would sit in the crown of the bonnet, and then used two hat pins at different angles to anchor the hat in place through the bun
I found that I placed the curl bunches too far back on the sides of my head when I tried to put on the bonnet and had to push them forward to get it to sit in the right place. It was unexpected how far forward the curls needed to be. As I’ve done in the past for 1830s side curls (explained here in 2016 and again in 2019), I used my own hair on top of mesh poufs to create the side curls. The combination of my hair getting very long and the curls needing to sit in front of the bonnet means that these curls are larger looking vertically than what I’ve had in the past. It seems to fill in the shape of the bonnet well, so I guess it’s good!
The other thing that the above photo does a good job of showing is the trim on the inside of the bonnet, which was also finicky to place. I had to get it in the right location so that it would organically grow out of my planned side curls hairstyle. The bonnet looks quite silly without the 1830s hair to go with it (and one might argue that it looks silly, in scale at least, even with 1830s hair!).
Speaking of scale, this bonnet is quite large. With the trim, it stands more than 8″ high on top of my head. I had to hold the brim when wind picked up while wearing it–the hat pins kept it in place but it would pull at my hair which wasn’t comfortable. Also, it required a pretty severe slouch in the car in order to not hit the roof! Thankfully, I was able to be a passenger while wearing the bonnet, so that I could arrange it, with the hat pins, in front of a mirror and then not need to sit up or look around while driving. Pretty silly! A carriage would have made so much more sense!
Just The Facts
While this bonnet does not qualify for any of the remaining challenges of the Historical Sew Monthly this year, I would still like to share the facts about this bonnet in the format I would use for an HSM garment. So, without further ado, the facts!
Fabric/Materials: ½ to ¾ yard each of floral cotton flannel and purple silk shantung, scraps of purple polyester velvet and ivory silk shantung, about ½ yard of buckram, about 3 yards of millinery wire, and a small piece of brown cotton velvet.
Pattern: My own.
Year: 1831.
Notions: Vintage millinery flowers, thread, and about 1 ½ yards lightweight silk ribbon.
How historically accurate is it?: 90%. Pretty good in terms of silhouette, construction methods, and materials; however, there are a few modern materials mixed in (such as spray adhesive).
Hours to complete: 15.75 hours to finish, plus maybe 6-8 from years ago.
First worn: In early October, 2020.
Total cost: Approximately $35.
Thanks for sticking with me through another long construction post! I have one final photo that also hints at an upcoming post… 1830s apple picking adventure photos! Happy autumn!