A Mysterious Domino, Part II: Making & Wearing

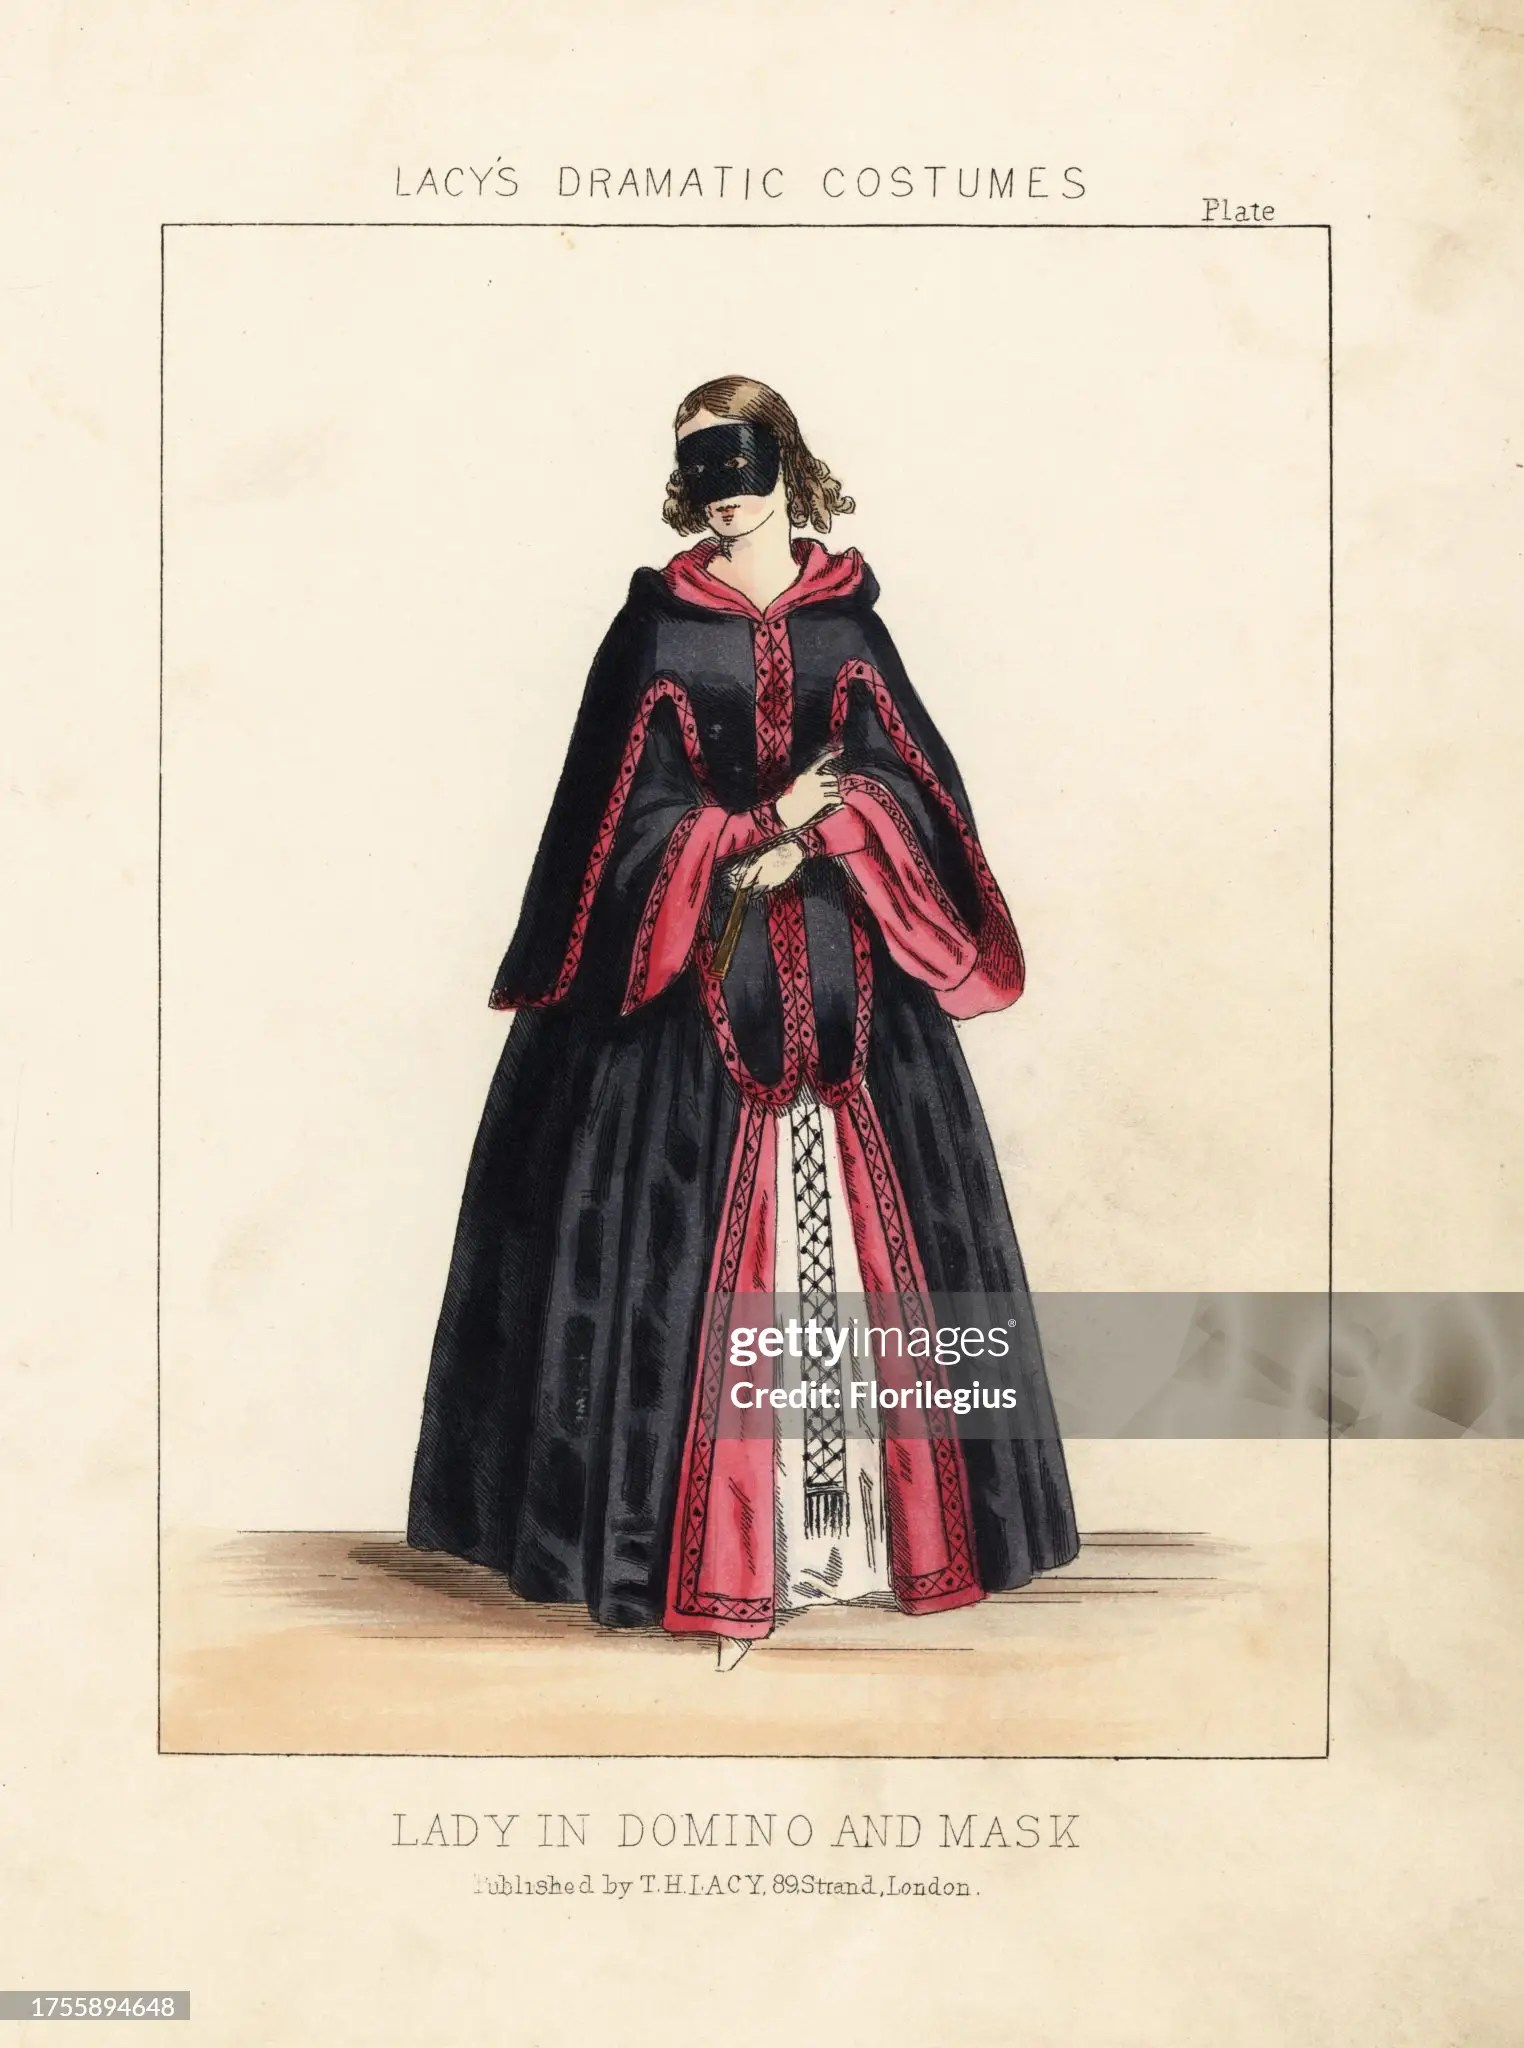
This is a continuation of my last post, which shared the background of why I created this black domino cape as well as research about what a domino is and its history.

Making My Mysterious Domino

Having decided on an idea, and probably conducted more research into its history than was strictly necessary for this purpose, I proceeded to figure out how to bring my idea to life. I had the additional goal of not wanting to spend money and therefore restricted my domino-endeavors to the stash.

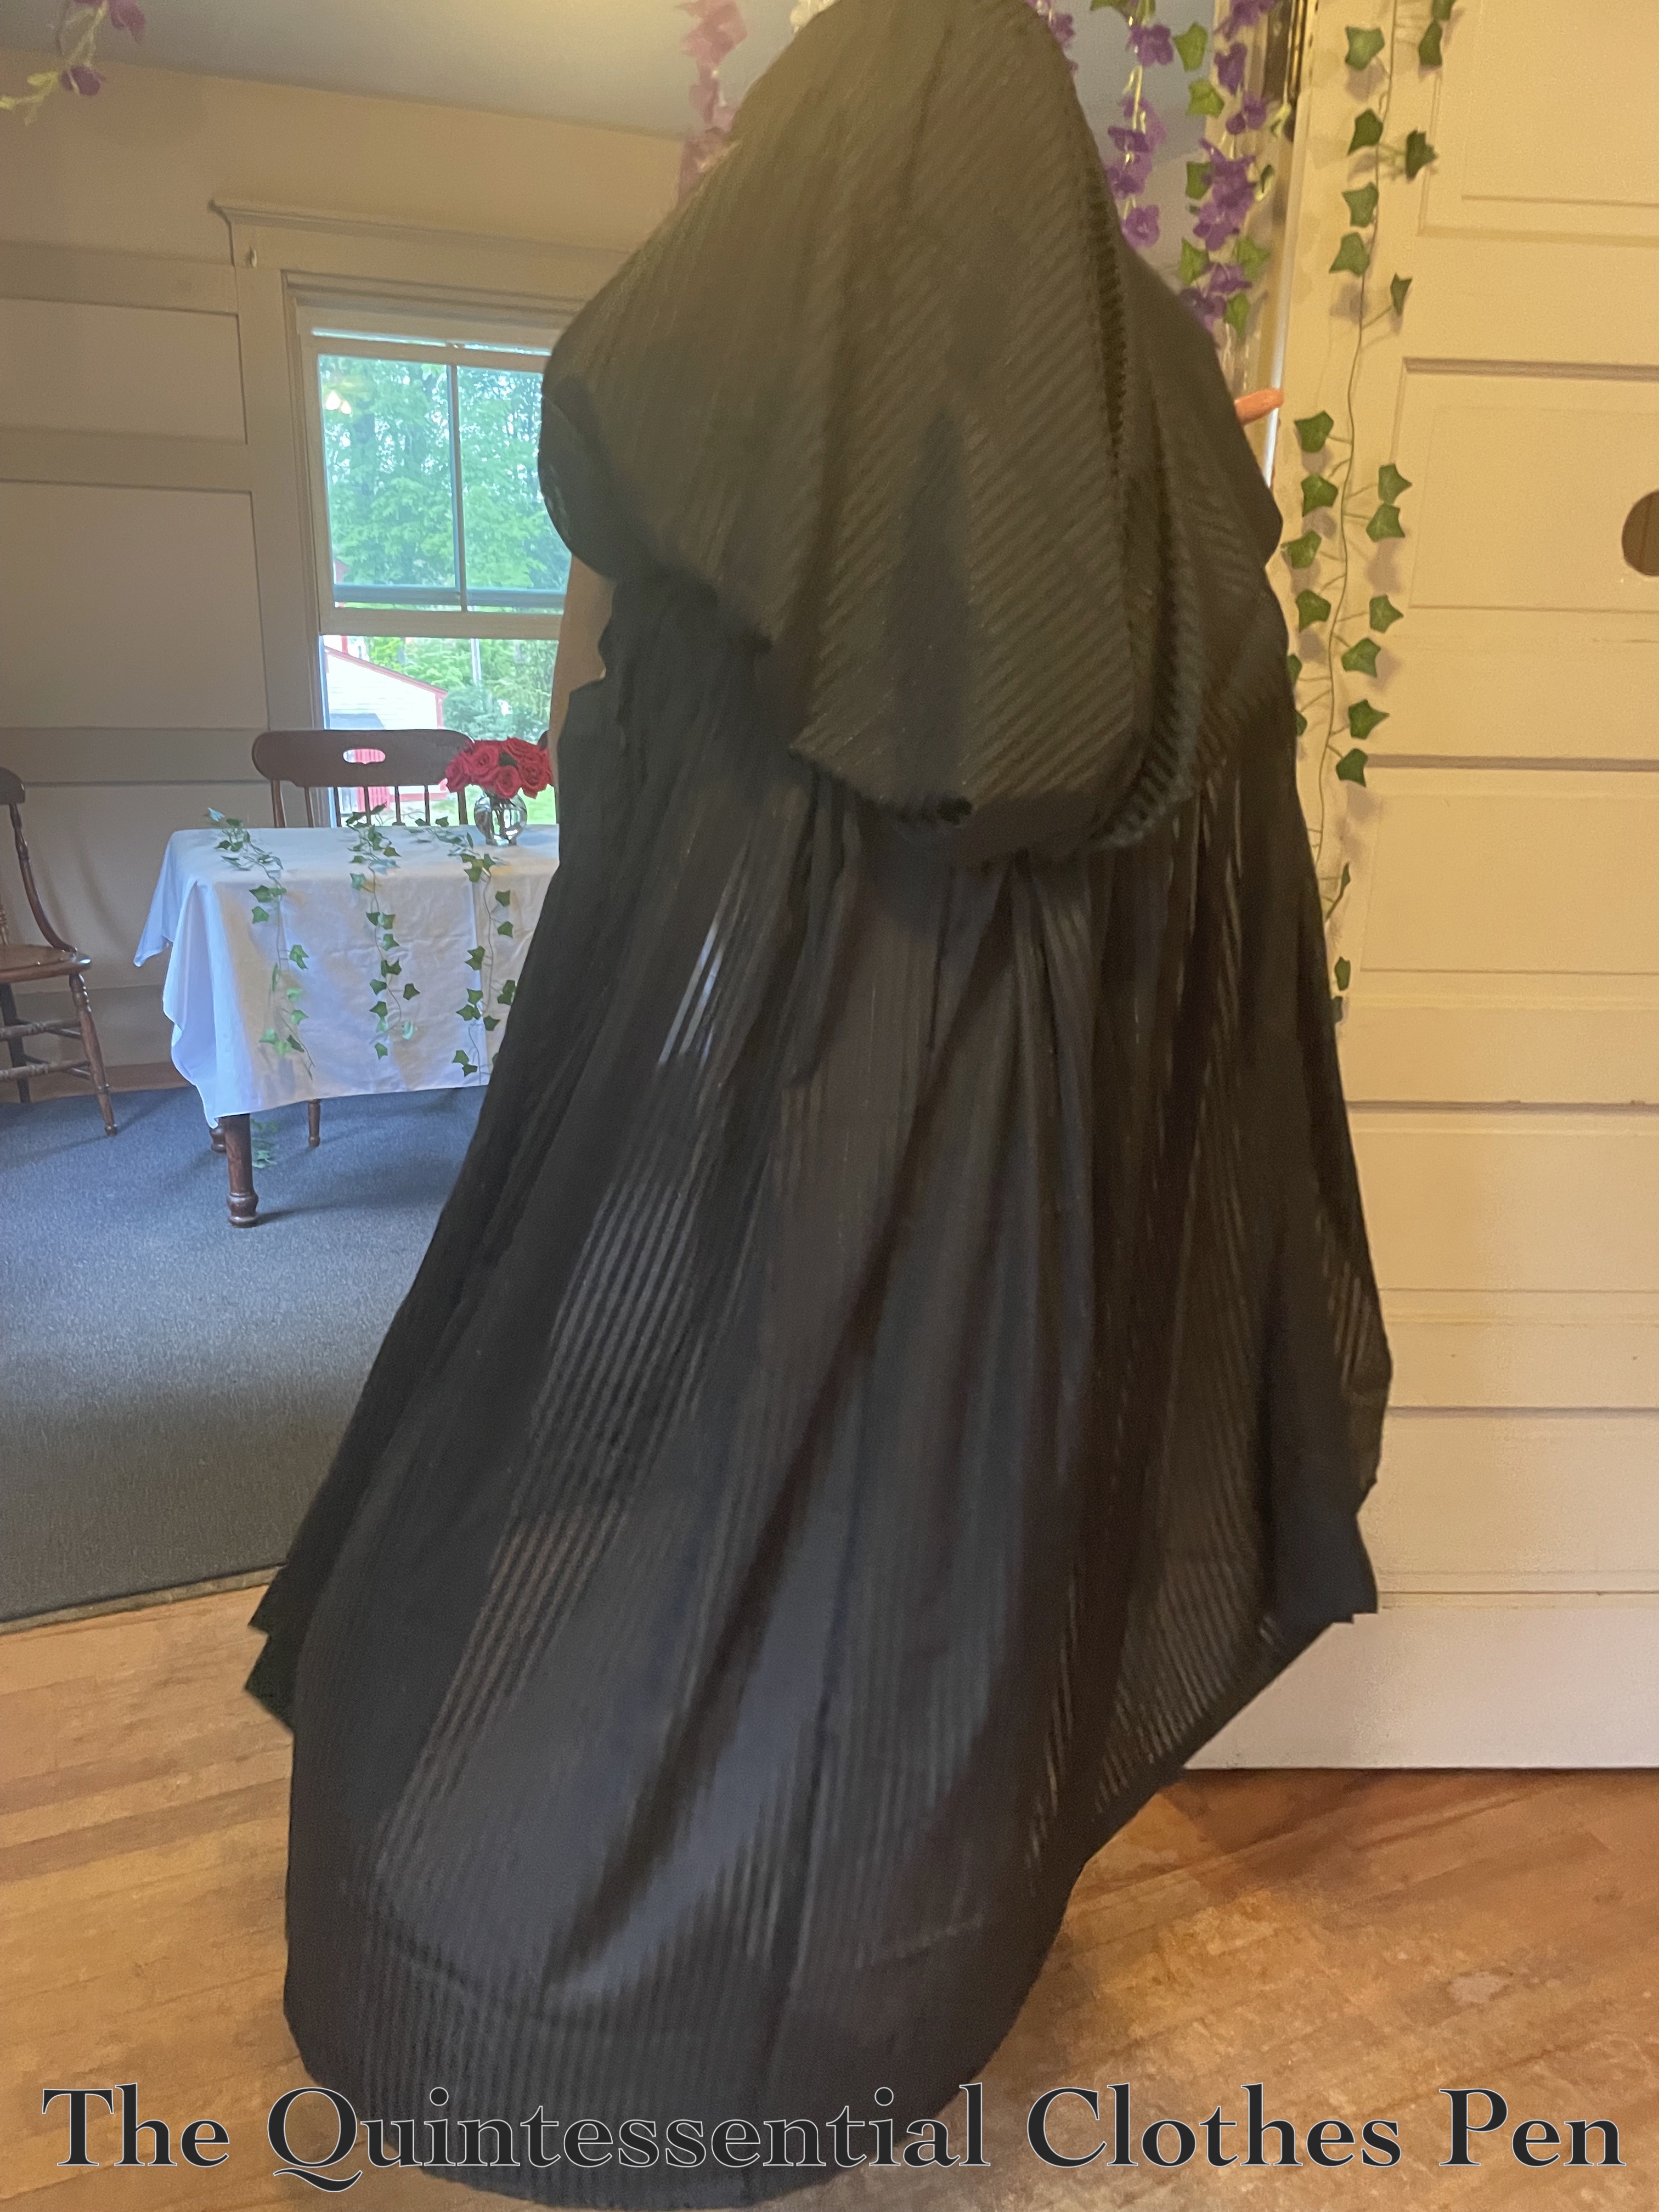
I started by looking through my stash binder (I posted about my stash organization in this past post) to see what fabrics I had on hand that might be able to be made into a quick and easy domino. I came up with just one — a gifted-to-me three yard piece of a black synthetic sheer, with alternating satin and sheer narrow stripes and a bit of metallic thread woven in between each stripe. I liked the drape of the fabric, as I thought it would move nicely while dancing, and I liked that while being black, it was also interesting and had more to look at than a plain solid. Three yards was plenty of fabric to allow for a large hood and plenty of length!

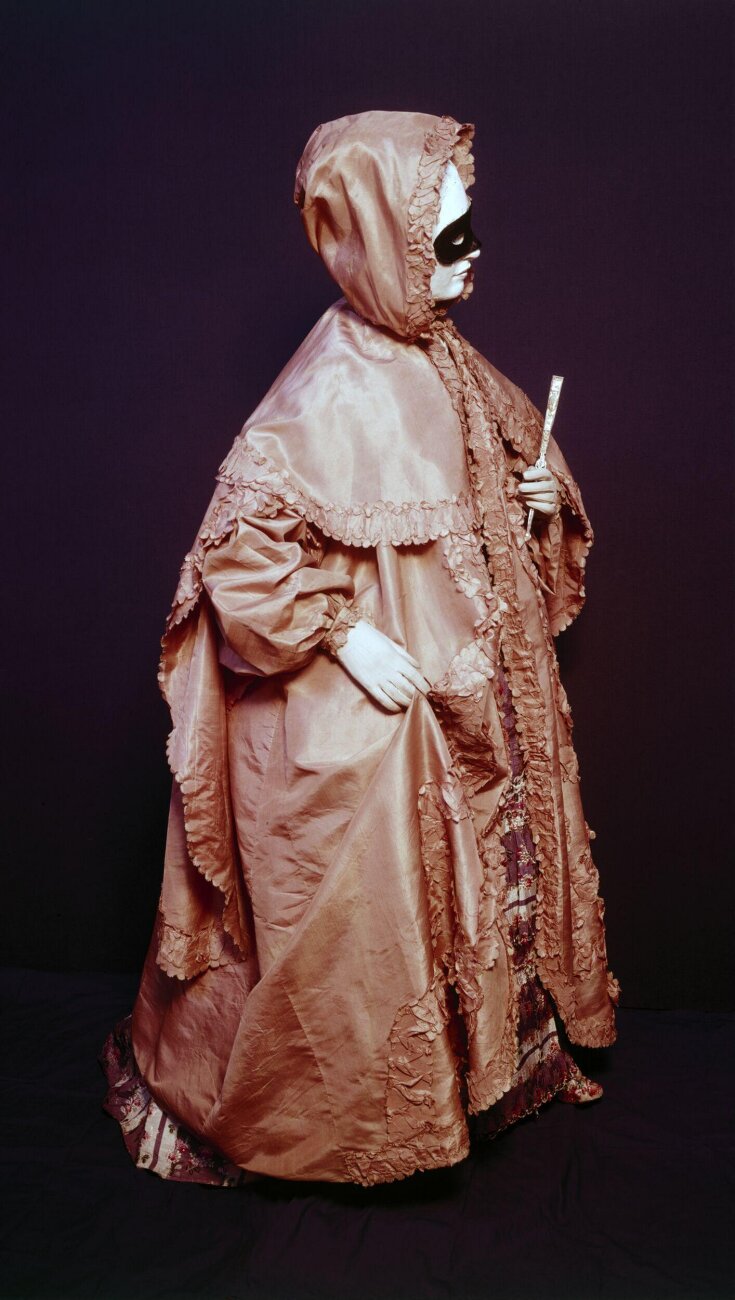
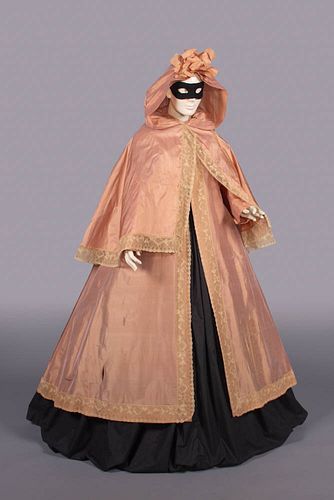
I think this fabric might be fun to use for something else someday, so I was loathe to actually cut it to make a domino cape. From past experience (and my patterning books), I was aware of the general shape and construction of the hoods of 18th century capes, which I was more excited by than the shape of the main body portion of capes from this period. The hoods often have quite a bit of fabric pleated into a central spot on the back of the hood and the bases are often pleated into the neck area, as well.

I started experimenting with my fabric and safety pinned a central pleated area in the center of my three yard piece. Then, I safety pinned a center back seam in the two ends of the piece, which hung down below the ‘hood.’ The next step was to safety pin a row of large pleats around what would be the ‘neck’ area, to draw in the width of the fabric around the shoulders. And… I basically had a cape!

A bit rough and ready, but my safety pinning did create a cape with a hood!

I fiddled a bit, by turning under some of the depth of the hood (and pinning it back near the central pleats) as well as pinning up swags at the front shoulder areas. I agreed with Erté (in the quote in my previous post)– that my domino should have a distinguished cut to keep me from looking like a shapeless bundle!

At that point, I realized that most of my pinned areas really didn’t need to be sewn… I could just leave in the safety pins, making it much faster to take apart if I wanted to do that someday! In the end, the only two things I sewed were the center back seam (with basting stitches by hand) and the hem (again, with basting stitches by hand). Calling it a ‘hem’ is generous, I think! I really just turned it up once with the raw edge left visible.

Wearing My Mysterious Domino

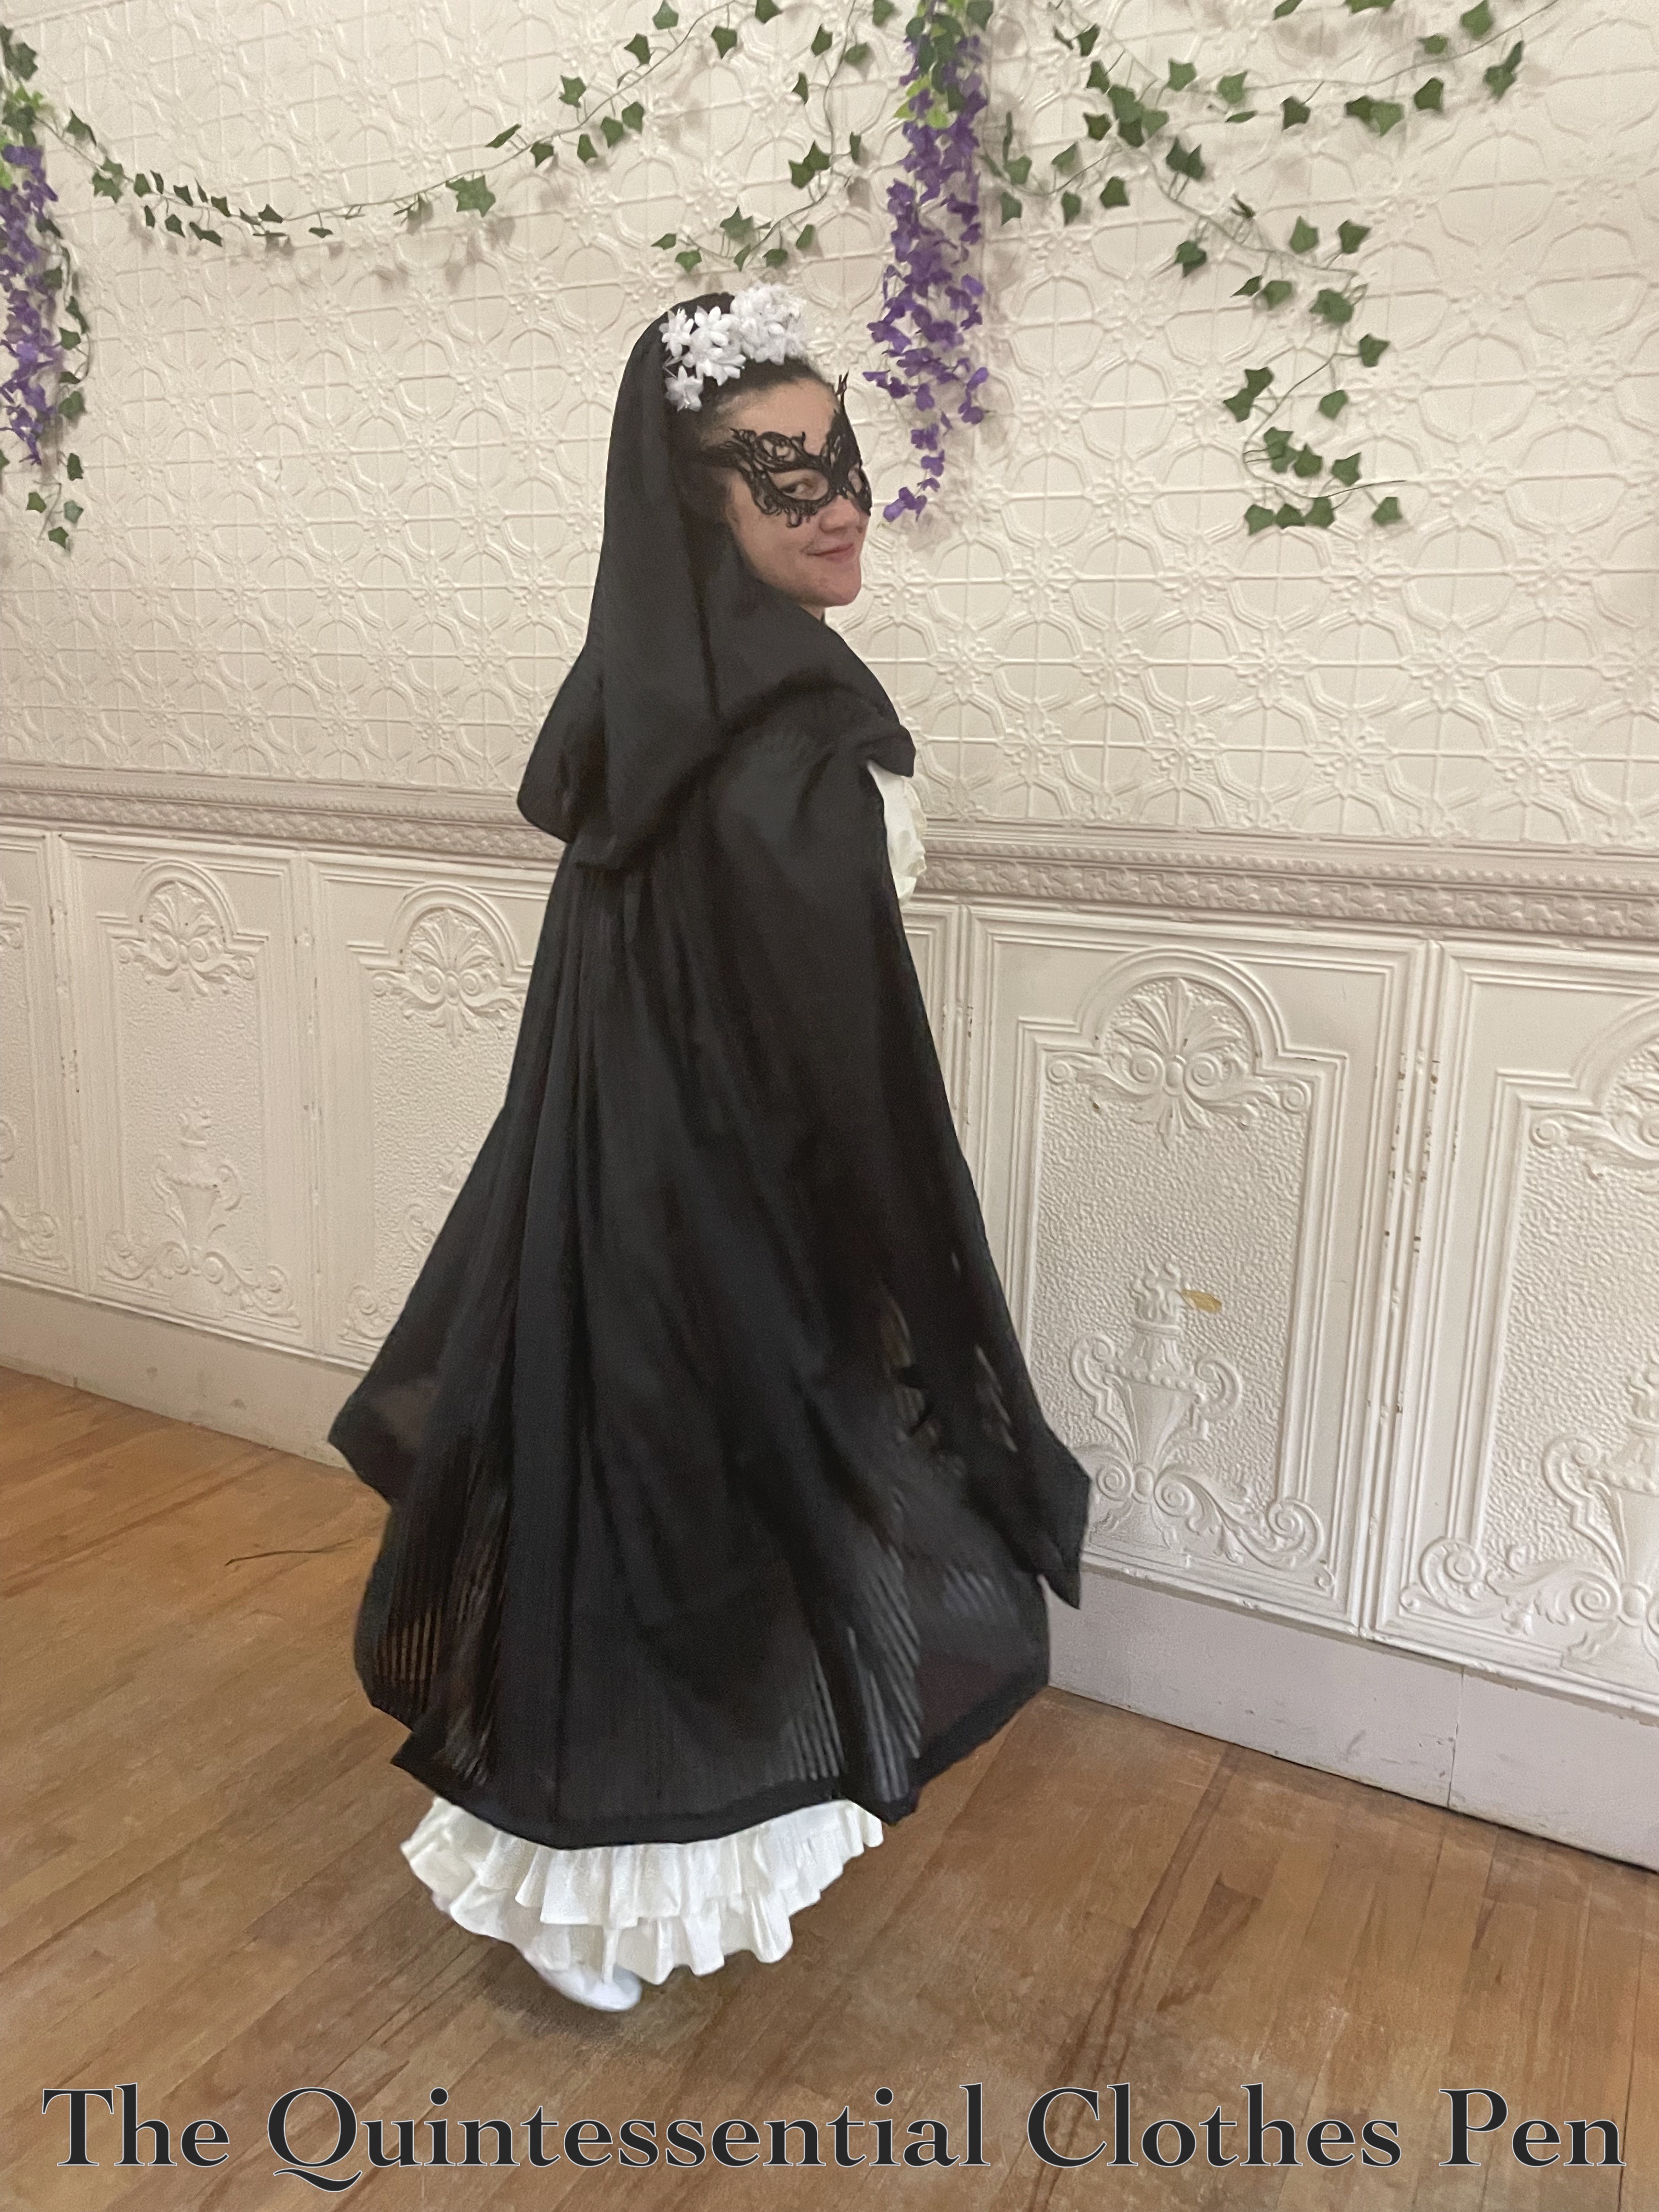
My historically plausible, mysterious looking domino cape was ready to go. I was all prepared for The Footwork and Frolick Society’s early 19th century themed Masquerade Ball!

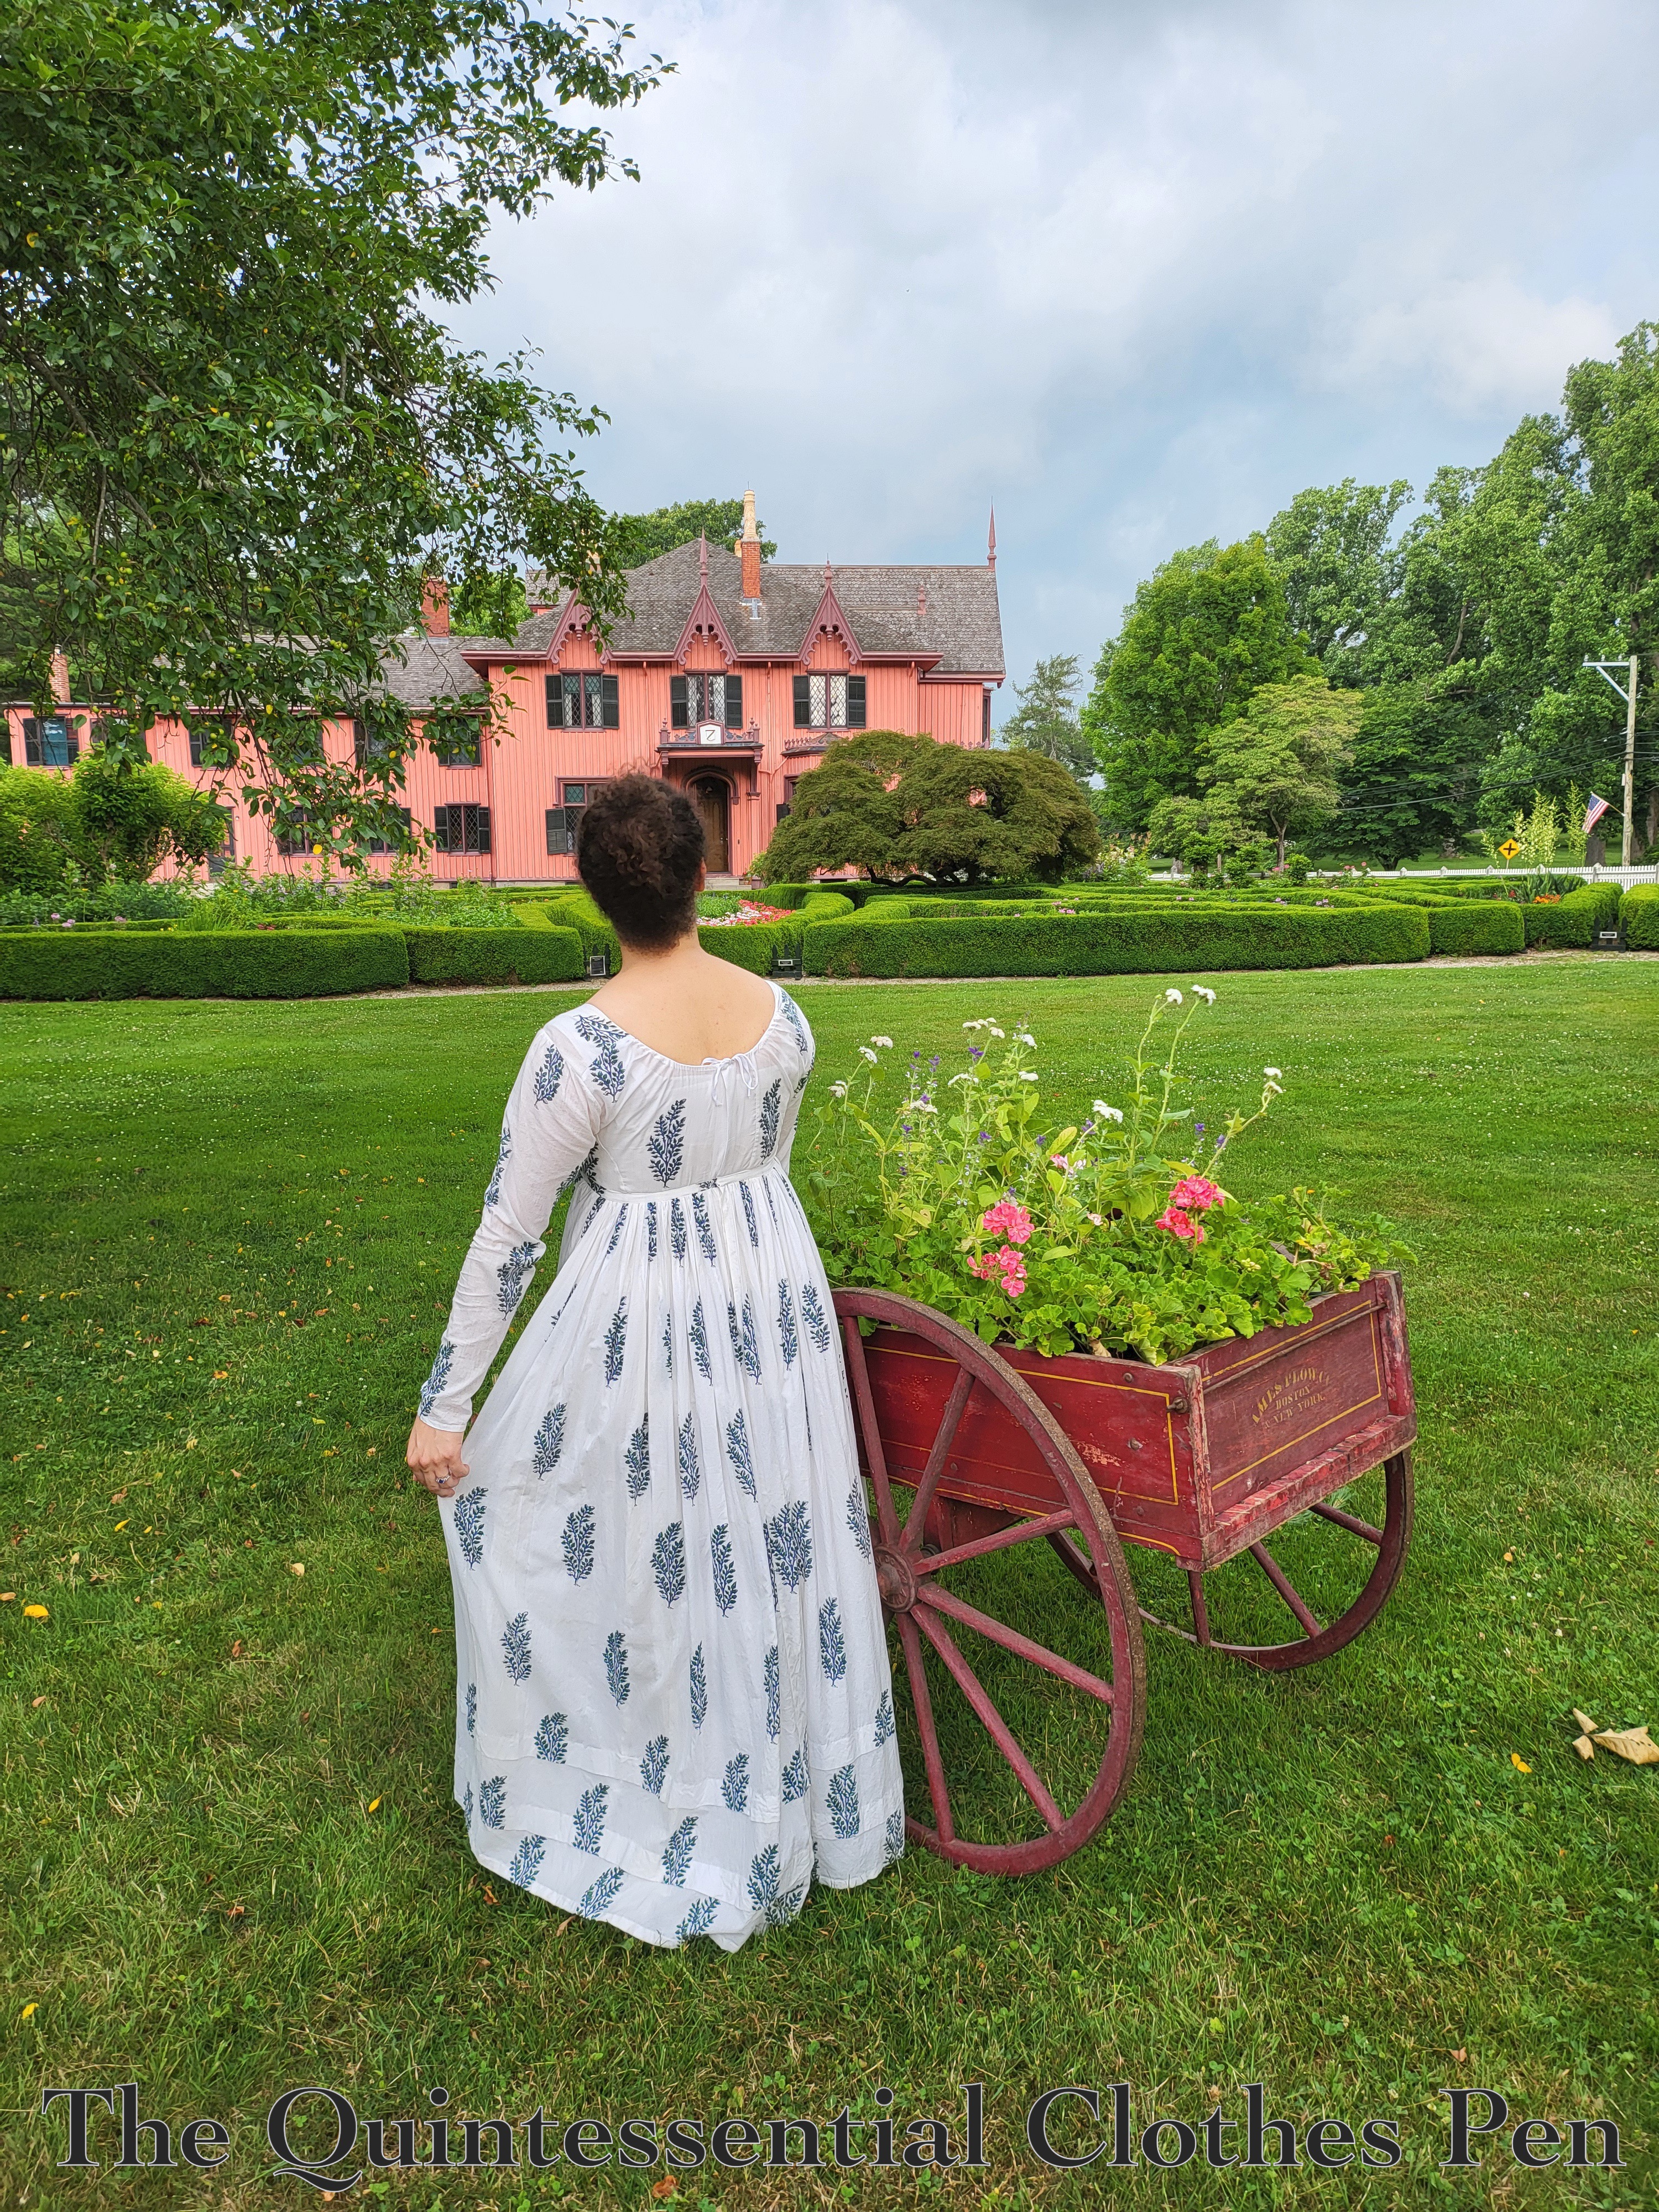
I chose to pin the cape to my dress rather than having it closed at my neck. It made the hood pretty long in the back, but it kept the cape from pulling backwards and feeling claustrophobic, while also opening up the front view and not covering my entire dress.

And, since I felt like black mask, dark hair, and black hood was all a bit much around my face, I put my hair up around a huge bun form to raise the hood and added white flowers in front to add some contrast and a relief for the eyes.

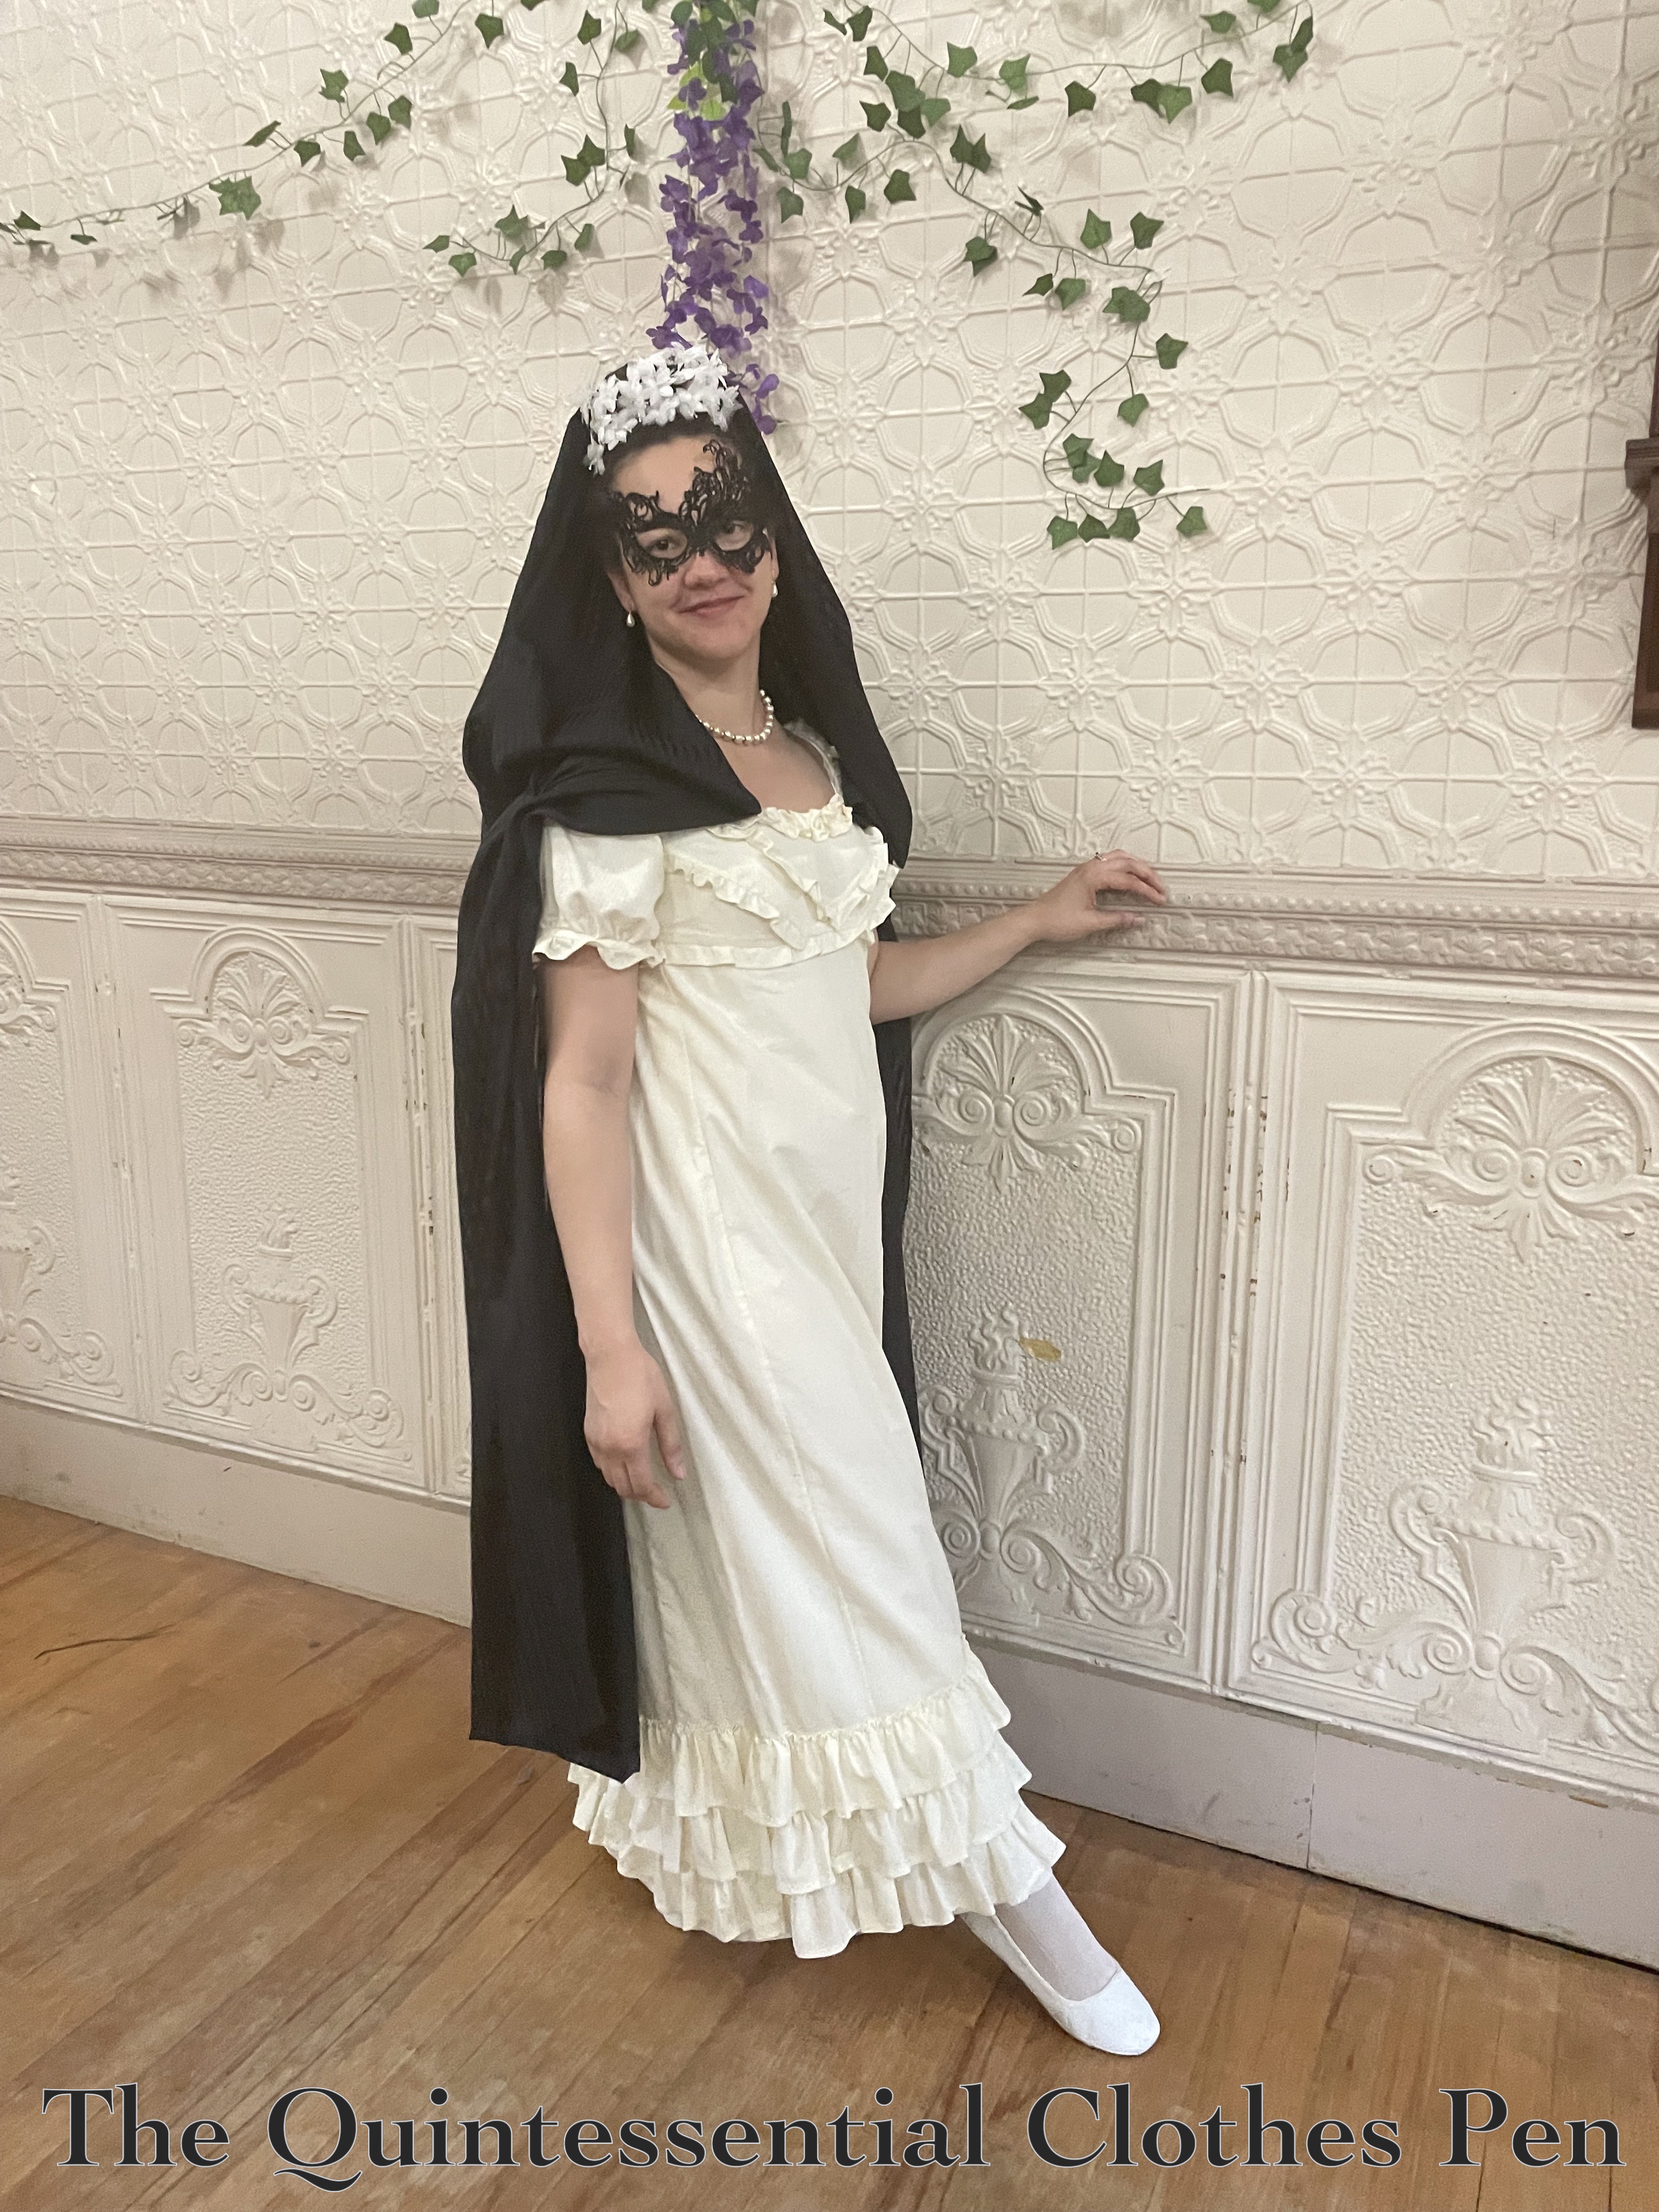
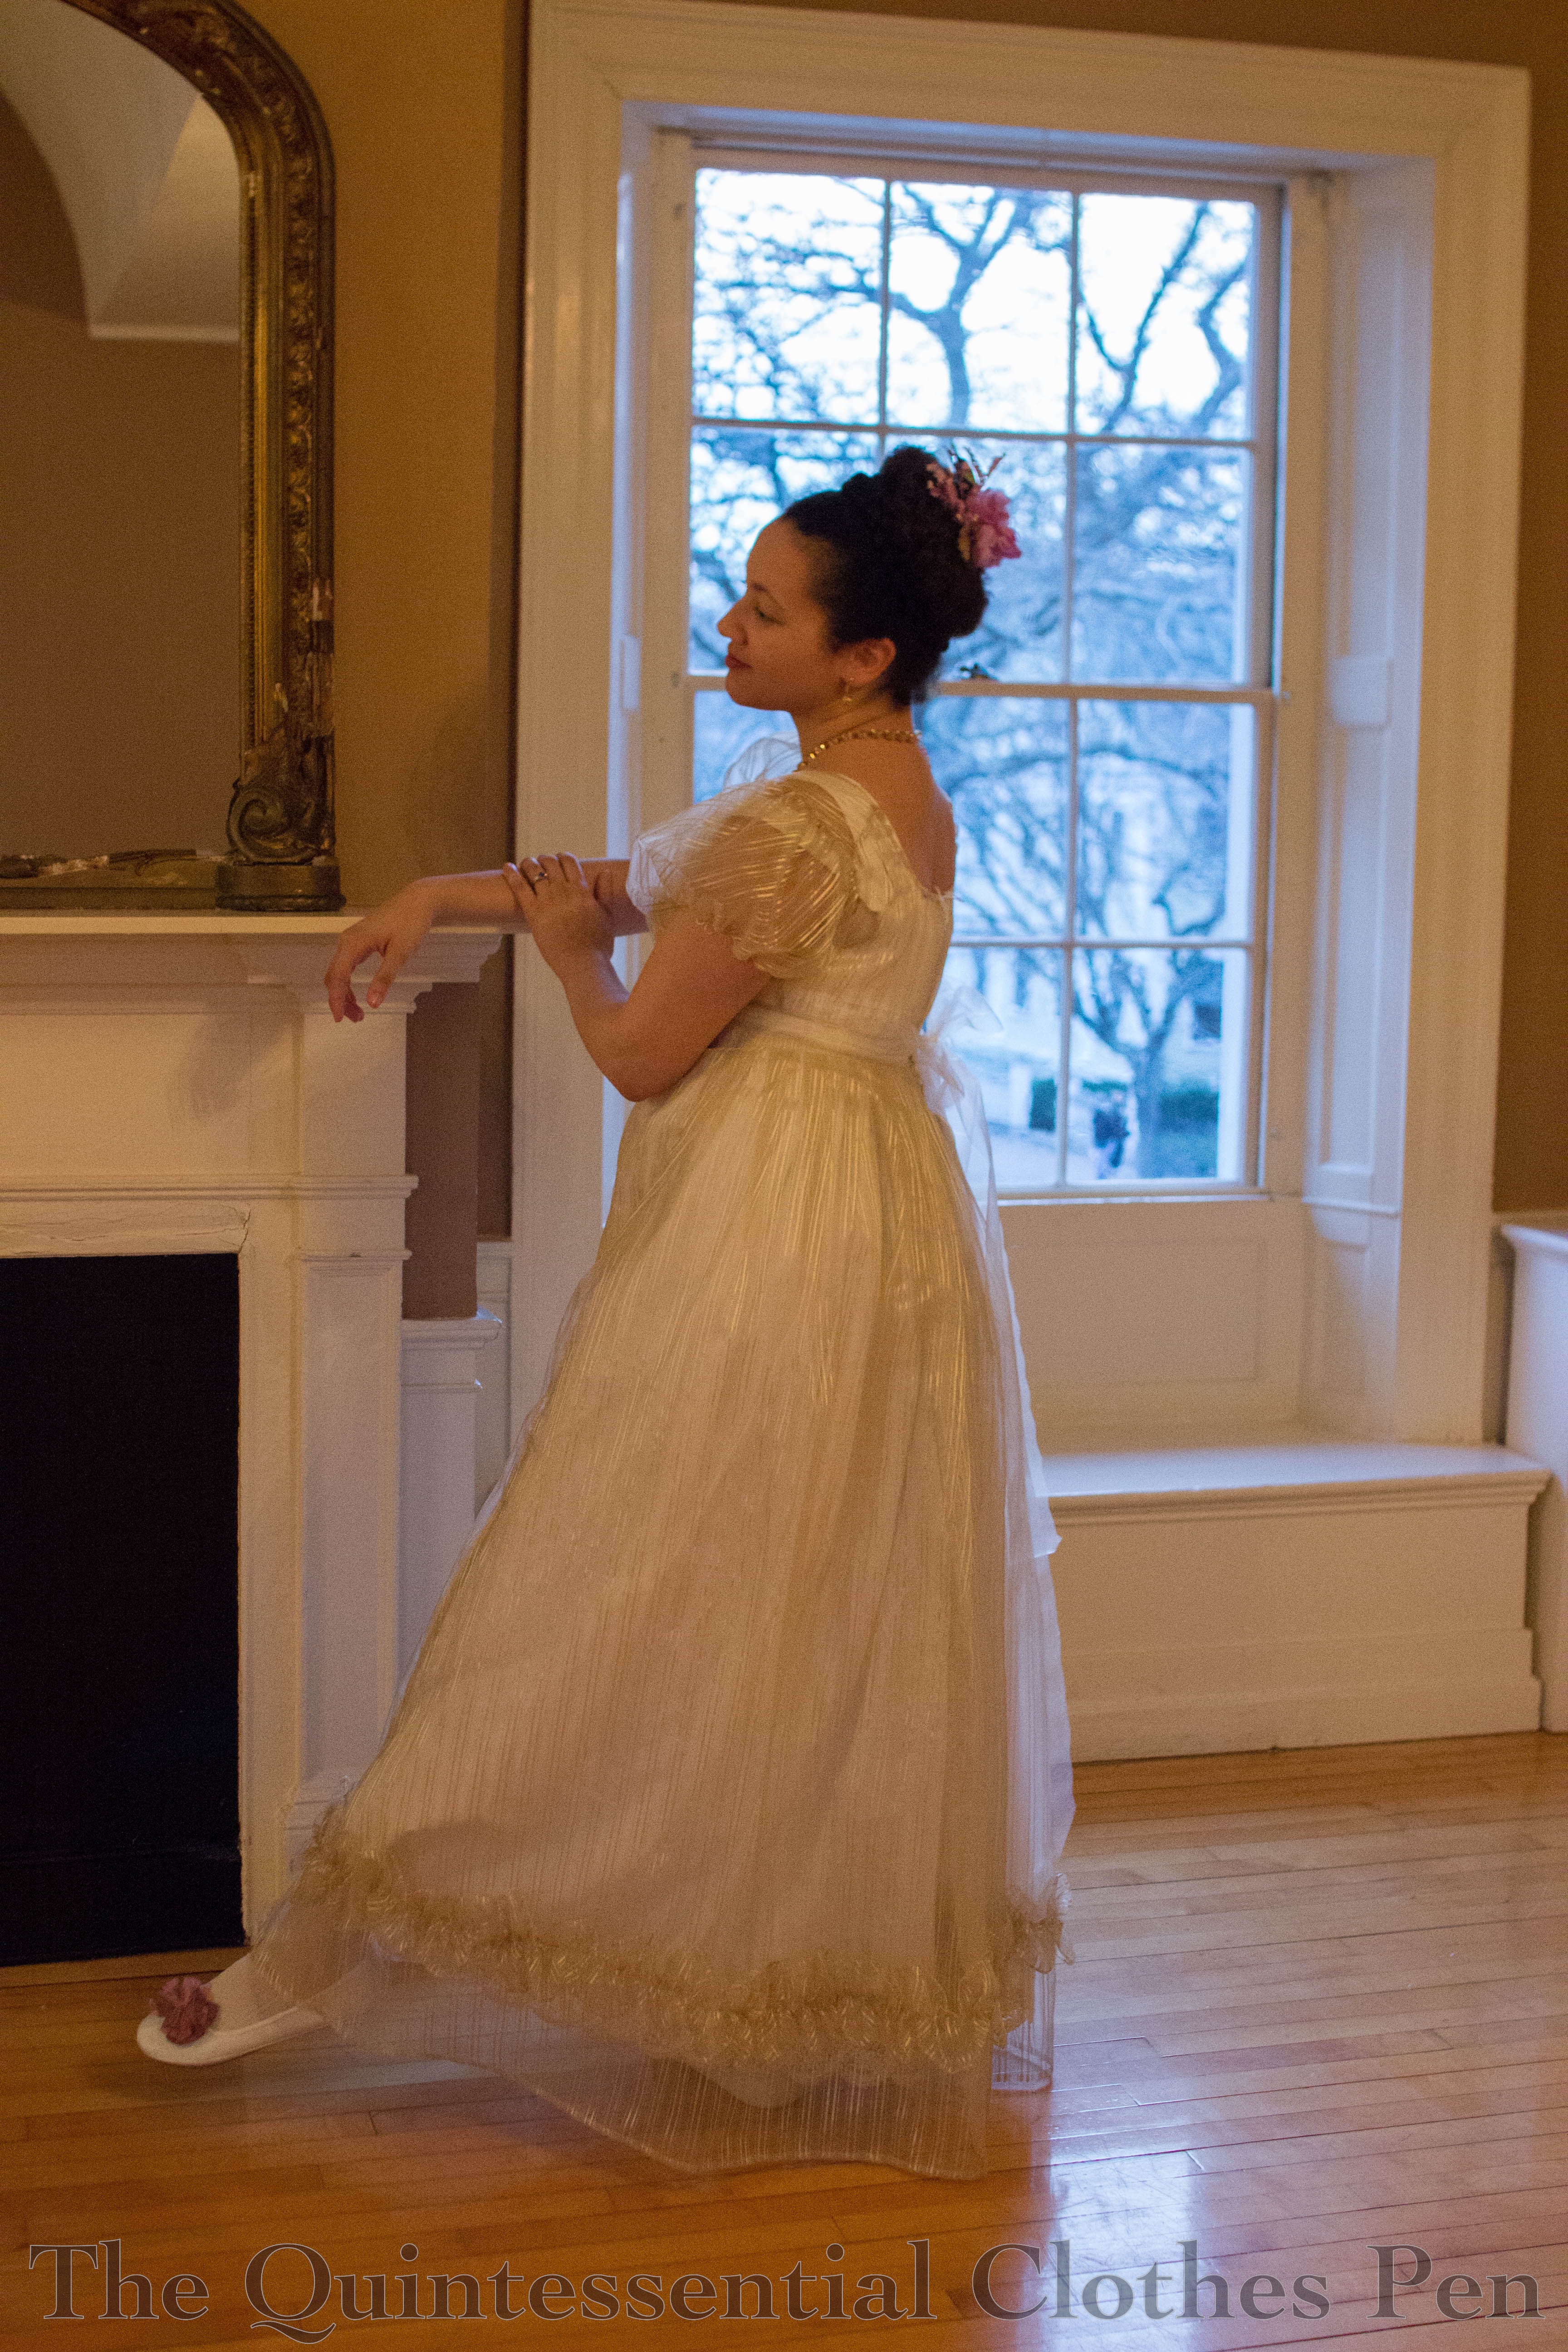
Paired with white, gold, and pearl accessories, I created a fun new variation on an old dress!

A Mysterious Domino, Part I: Background & Research

Earlier this year, The Footwork and Frolick Society hosted an early 19th century themed Masquerade Ball. I enjoy fancy dress themes, and so the idea of a masquerade (which takes the idea of a costume to another level by adding a mask) seemed like a lot of fun. But what was I to do to about a costume?

The dress: I had already decided that I wanted to wear an oldie-but-goodie dress to the ball — my ivory 1819 ruffle dress, finished in 2012 (and resized at some point, though I don’t seem to have a post about that on the blog).

The mask: I don’t really enjoy wearing masks (unless they are on a stick, like this, but that’s not good for a ball when you need your hands!). I find that masks irritate my face, but at some point I did buy a black lace mask for a fantasy masquerade that is very malleable and irritates me less. So I knew that I wanted to incorporate that mask into my outfit.

The costume: I wasn’t sure… my creative problem was to figure out what kind of costume would unite an ivory dress and a black mask!

I liked the idea of choosing something historically plausible and I know that themes like flowers, seasons, and historical periods were all popular for Fancy Dress costumes (and therefore, I figured, for masquerades), but I couldn’t think of a good theme that made sense with my color choices.

So I started doing some research, and came across the idea of a domino. Not a numbered playing piece from a game… but a mysterious, historical domino!

What Is A Domino?

What is that, then? A mysterious, historical domino?

A domino is traditionally a voluminous black robe-like hooded cape worn with a black half mask as a disguise during Venetian Carnival. Dominos were popular during the 18th century at masquerades and it seems that hooded capes in this century were sometimes just generally called dominos (such as this one, perhaps, at the Metropolitan Museum of Art). By the 19th century, dominos were occasionally seen at masquerades, and even less often at fancy dress events (a costume party without masks).

Examples Of Dominos

Below is an example of an 18th century domino in the collection of the Victoria and Albert museum. In this case, the idea has been reimagined in pink, rather than the usual black. The museum gives this information regarding a date: 1765 – 1770 (sewing), ca. 1775 (altered) (accession number T.195-1968).

Below is another example, from the late 18th or early 19th century, also pink. This domino still shows evidence of 18th century construction styles — particularly the large gathered hood and what appear to be rectangle shaped sleeves. The extant example below is from Augusta Auctions. They labeled it as a Two Piece Shot Silk Domino, c.1800.

Below is an example of a mid-19th century take on a domino. This is a costume idea for a masked ball (or masquerade). This plate is from Thomas Hailes Lacy’s “Female Costumes Historical, National and Dramatic in 200 Plates,” London, 1865 (from Getty Images).

Susan de Guardiola has collected later 19th century descriptions of dominos that are available here, as well.

Though less common, dominos were still in use for masquerades even in the early 20th century. While looking for other unrelated research, I came across a mention of them from January 1920, when the accomplished fashion designer Erté wrote in a letter he was asked to write from Monte Carlo to the editor of Harper’s Bazar:

This winter will mark the first organized effort at gaiety since the dark night of war… Already we are planning to revive the masked ball in all its mad gaiety…

The domino–aha! … In Venice until the fall of the Republic, it was commonly worn in the streets. There reigned in the enchanted city at this decadent epoch a strange corruption of manners, and the mask was a necessity. At every entrance hung the black domino. Rich and poor alike donned it, in order that they might sally forth enveloped in anonymity…

“But,” argue some, “the domino gives to the fête an air of mystery.” I reply, “Then one may attain this illusion by means of a domino of distinguished cut, a domino which shall not make one’s figure look like a shapeless bundle.”

(From Designs By Erté: Fashion Drawings & Illustrations From ‘Harper’s Bazar’ Including 8 Covers In Full Color By Stella Blum)

I think this is a great place to pause. I’ll continue sharing in my next post, which will focus on how I whipped up a quick domino and what it looked like when worn!

Croquet At Roseland Cottage

The outing for which I planned to wear my updated 1815 Tree Gown was an afternoon of croquet and house tours at Roseland Cottage: a joint event hosted by The Footwork & Frolick Society and Historic New England (the organization that runs Roseland Cottage).

Roseland Cottage is a lovely pink house in Woodstock, CT that was built in 1846 by the Bowen family (you can read more about thr history of the house here on the Historic New England website). I’ve been to the house before and posted about it on the blog — in a different post about playing croquet! That outing, which you can read about in this past post, was in 1860s clothes.

A rather moody looking Roseland Cottage on the day of this year’s outing is pictured below. It was overcast, which was nice because it wasn’t super hot, but we did have a fantastic rain and thunder storm roll through halfway through the event. Lightening struck the lawn outside of the house! Luckily, we knew it was coming and were able to transition indoors to play tabletop croquet and have tea. No one was rained on!

And I was pleased, because Roseland is lovely, the company was delightful, and my updated Tree Gown was freshly revived and very comfortable!

It felt important to show off the updated back of my gown for documentation here on the blog!

Roseland has a beautiful and well maintained garden, and in addition to that, I also appreciated the cute cart (detail photo below) full of additional flowers that was situated on the lawn. It made for a wonderful photo accessory, as you can see in the photo above!

As I mentioned in my post about altering the gown (linked at the top of this post), I’m so pleased to be able to give this dress extended life!

When The Dress No Longer Fits (1815 Tree Gown)

I’ve loved my 1815 Tree Gown ever since I made it in 2013 (here is the link to the original post about making the dress) and have worn it many times, most recently last summer for a Regency picnic which I posted about here. It was clear at that point that this dress needed to be updated to fit my current shape!

Making a plan

I finally had the brain space to deal with it this summer (and the added encouragement of wanting to be able to wear it in June). So, accordingly, I dug out the small bit of fabric I had leftover from originally making the dress.

Then, I took stock of what was needed. In a fitting, I realized that not only were the sleeves now a bit too tight, but the shoulders were also not quite wide enough for my now-broader shoulder width, which was also contributing to the dress wanting to fall off of my shoulders. Ugh!

There was no easy way to deal with that second problem except to make the back wider… So, I took a deep breath and decided to replace the back panels.

Making it happen: taking the dress apart

I had seam ripped the arm seams last year after realizing they needed to be let out, so the sleeves were already in that taken-apart state.

As I was taking apart the back, I remembered that I had taken a tuck in the finished dress to make the armsceye a little smaller. Alas, letting this out was not nearly enough to prevent me from needing to replace the back panels.

Making it happen: forming a new plan

Fast forward through a bit of seam ripping (French seams make for a lovely finish, but also mean double the seam ripping!), and I had a bunch of loose panels flopping around. I used the original back pieces and my desired new measurements to cut mockup pieces of what I thought the back should become. I safety pinned those in and tried the dress on to make sure I was on the right track.

Here is the old back piece laid over the mockup. It’s not a huge difference, but that 1″ or so on most edges made a huge difference in terms of fit.

I also made a pattern piece for the arm gusset I needed based on the measurements I wanted the new sleeve size to be. In the end, I decided to extend the gusset all the way down to the cuff opening, as I figured a little extra room for my hand to get through was a reasonable idea (it was a tight squeeze otherwise!).

Then, I used my minimal scraps to cut out the new pieces. I’m super pleased that even with small scraps I was able to match up the block printed areas!

For the back pieces, the image below shows what I had to work with. Not much! I could fit both pieces if I didn’t maintain symmetry in the block print, but… I did such a nice job matching it up when the dress was made! I just couldn’t bring myself not to make the re-do match, too! But I couldn’t get two pieces with matched patterns out of what was left.

It was too much to think about late at night and I knew I only had one chance at cutting to get it right…

So I took a break and came back to it another day. And I had a brainstorm! The way to make my goal happen was to piece one of the pieces somewhere. I could have placed an extra seam in a shoulder area, but that seemed more obvious than my second option given the sheer fabric of the dress. The second option that I decided on is a vertical seam in the white space near the center back opening. There was just enough fabric to make it happen!

Making it happen: putting the dress back together

With my new back pieces cut, it was just a matter of putting them back into all of the seams (including the armsceyes, shoulders, side back, and waist). I was able to reset the sleeves without any of the original gathers, which allowed for the extra circumference my new back pattern had created. Then, I created a new drawstring channel along the neckline and re-applied my closures… and the update was complete!

Here is the new back view of this dress, with the pieced seam on right (but with symmetrical block printing!).

I used a French seam to attach the pieced bit, so that it would match all of the other seams in the dress and stay nice and tidy with no fraying edges.

I also made the right side of the drawstring come out before the center back edge, so that the overlap with the hook can still function properly while the drawstring pulls up the excess width across my shoulders that I included. (There was extra in the original version, too… but I maxed that out years ago!)

Here’s another view of the lovely, tidy interior of the dress with the updated back.

And finally, here is a photo of the finished sleeves with the added gussets. Where the block printing is located the seams blend so well you can’t even see them! It makes my heart pitter-patter with glee!

The final step after putting in the gussets was to re-hem the cuff openings.

And then… this dress was updated! Now it’s a story of ‘when the dress fits again!’

1817 Duchess Gown in Bridgerton Style

The Footwork and Frolick Society hosted a Bridgerton themed ball in May! Here are a few atmospheric shots.

For this event, I chose to wear my 1817 Duchess Gown (you can read about the inspiration and making of the dress, here). I love this dress and haven’t had a reason to wear it in years. Plus, I figured the neutral color would pair well with a few nods to the colorful style of Bridgerton costumes.

In the past, I’ve had fun pairing this gown with other colors and accessories, as well! You can read another past post where I show multiple wearings together here.

The dress is a sheer striped organza, which is fun because I can show off fancy historical underwear with it! I usually wear my 1814 Vernet petticoat so that the fancy trim around the bottom can be shown off (in addition to a second petticoat to make the ensemble fully opaque.) The second petticoat is functional more than decorative, and is the one I recently posted about that needed a size update to fit properly again!. Wearing it with this sheer dress for the ball was the push I needed to make the petticoat fit really well–I didn’t want odd lines showing under the sheer Duchess Gown!

In addition to the decorative Vernet petticoat, other accessories for this wearing included clocked silk stockings from American Duchess, white flats purchased from a consignment store about ten years ago, a gold bead necklace that ties with a ribbon that I don’t wear often (I usually gravitate towards other more sparkly jewelry), and three nods to the colorful style of Bridgerton.

My nods to color included a green organza sash (that I’ve worn with this dress before–see images in this past post from 2019), green and gold earrings (from the Downton Abbey collection a number of years ago), and flowers in my hair, including some vivid pink ones. I’ve had these flowers for about 25 years and rarely wear them. They’re pretty bright! But for the Bridgerton theme they made perfect sense!

The company at the ball was charming and the dancing was enthusiastic! My Duchess Gown even had an old friend visit in the form of my 1811 Elusive Blue Gown worn by a friend! I love that these garments are getting to be worn again!

Photo credit for this last photo: Lucas Clauser

When The (Regency) Petticoat No Longer Fits (HSM #5: New Clothes From Old)

While we’re on the subject of updating clothing that no longer fits quite right (this is continued from my last post about updating a pair of 1860s drawers, which you can read here), I have another post about updating a layer of historical underwear for fit.

A few background thoughts

In the past 15 years or so that I’ve been making historical clothing, I’ve also changed sizes and some of the clothes I made early on just no longer fit. The usual culprits are the waist, bust, and shoulder width. (It’s not necessarily all for the worst. My shoulders and arms are bigger because I’m gaining strength and being active, so that’s a healthy change!)

I’ve been able to wear more of my historical clothes recently and the more I wear the older ones, the more I realize just how much my shape has changed.  Because I have some lovely garments that I still want to be able to wear, I’ve been updating these garments to better fit my current shape.

Background on this particular garment

I made an early 19th century bodiced petticoat in 2012 (here is my post from back then sharing research about this type of garment). Since then, I’ve gained inches in the bust, ribcage circumference, and in the width of my shoulders. So despite wearing this petticoat and making do, I finally reached a point where it became important to make this fit better.

Here is the bodice portion of the petticoat before my alterations, from the front and back.

I determined that I needed a whole new front piece–one that would be wider across the bust and with more gathers to condense to the ribcage size. I also realized that it would be helpful to make the side back pieces a little more substantial, with a taller side seam to match the new front.

Update details

Thankfully, I keep lots of fabric scraps! And in this case, I actually still have yardage of the fabric I made the petticoat from. So no problems there — I was able to easily cut out a new front with updated dimensions as well as bits to add to the side pieces to extend them (I didn’t feel like replacing them entirely — this petticoat already is a bit pieced at the center back, where I had previously added fabric in order to help make it a little larger a few years ago).

After cutting new pieces came the boring part of unpicking the original front. Ugh! I don’t enjoy taking apart things that I’ve made! But I did it.

I thought I might machine sew the new pieces on, but I was more inclined to complete this project while not near my sewing machine, so I did it by hand instead. I replicated all of the same seam finishes from the original bodice front (because I like consistency, but not because they are historically accurate, in this case).

Here are the results!

And here are closeups of my very pieced method of creating larger side back pieces (you can also see the extendo I added to the back at some point about 6 years ago).

Unfortunately, when I tried on the adjusted petticoat I realized that the armsceyes were uncomfortably small. I was not going to be able to deal with that! “Get it off!” was my exact though. To fix that problem, I added strap extender bits to the front of the straps.

This worked great! And now, I have a petticoat that fits again! It covers my current bust size AND fits across the back (in fact, I made it even a little too wide across the back because I figured that might be helpful).

Here is a photo of the inside of the new front bodice piece. Both the old bodice front and the new one have a drawstring along the top edge. And you can see that I left additional strap length for theotrical future of letting-out.

I’m calling this my entry for the Historical Sew Monthly 2024 Challenge #5 New Clothes from Old:

Make something new out of a worn-out garment or accessory. Or make something using recycled materials.

I believe I’ve recycled a worn-out garment into something new and ready to use again!

Just the facts:

Fabric/Materials: Scraps of white cotton.

Pattern: My own.

Year: c. 1812.

Notions: Thread.

How historically accurate is it?: 100%. It’s completely reasonable to extend the life of a garment like this by altering it.

Hours to complete: 4? It took some time to seam rip and then I was meticulous about stitching the new pieces on. I didn’t really keep track.

First worn: On May 4.

Total cost: Free! Materials were scraps left over from the original project.

It took a bit longer than expected to hand sew all of the updates I needed to make, especially with the late-to-the-party addition of the strap update. I was pleased to finish this the day before it was needed! (More on that later!)

Proof Of A Regency Picnic

Historically clothed events continue to be somewhat sparse on my calendar, but I have photographic evidence of having gathered with friends last summer to partake in a Regency themed picnic. We were rained out of the original date and the alternate date was very hot, so we decided to mostly stay indoors. But we did go outside for a few fun documentation-of-our-gathering photos.

Did I mention it was hot? I was kind of melting. But I did really enjoy getting my 1815 Tree Gown out of the closet and giving it a wear. This continues to be one of my favorite early 19th century dresses! I still love the patterning, which creates a comfortable and elegantly shaped dress, as well as the lightweight block print cotton fabric. At least I had a cool fabric to wear in the heat!

Made in 2013, this dress has held up to 11 years of wear very well; however, I did notice that the forearms are very tight these days… so tight that they don’t let the armsceye seams sit where they should, causing the shoulders to constantly be pulling down my arm! And sadly, even with the 1/4″ French seams I originally made, they don’t have enough circumference to be let out.

On the bright side, though, I keep everything and I have scraps of this fabric in my stash. So for now, the forearms have been seam ripped and the dress is, metaphorically in the pile of things-that-need-alterations, awaiting my action of actually digging out the fabric scraps so that I can adjust the fit (it’s metaphorical because it’s actually hanging in the closet not in a pile!). This will assuredly become a When-The-Dress-No-Longer-Fits post… someday!

Early & Mid 19th Century Commission For NSCDA-MA

I find great joy in the pursuit of researching and making historical clothing. Here on the blog, I post most often about the garments I make for myself, but I rarely post about commissions to make custom historical garments for private individuals, museums, historical institutions, etc. Today’s post is different from the usual in that I’m going to share a commission project with you!

This commission came about through the kindness of Myrthe, who blogs at Atelier Nostalgia. (And how fitting, that we were just communicating about how wonderful it is to connect with people who love historical clothes from around the world!) The commission was from the Massachusetts Chapter of the National Society of the Colonial Dames of America (NSCDA-MA).

The NSCDA-MA owns the beautiful William Hickling Prescott House in Boston, which was built in 1808 and upgraded throughout the 19th century. The NSCDA-MA website (linked above) shares many more details about the various owners of the house and its architecture. In addition to the house itself, the NSCDA-MA also holds a wonderful collection of historical clothing, some items of which have been used for display purposes throughout the house (though most of the garments are in storage and only available for research visits by appointment). Unfortunately, historical garments are often not suited to permanent display as they can be made of delicate fabrics that can be damaged by light, dust, and gravity, just to name a few possible problems. The NSCDA-MA was looking for custom made historical dresses to display instead of the extant historic garments and I was very excited to work with them to make that goal a reality!

The commission involved two dresses: one from about 1810 and one from about 1845. The two dresses haven’t been mounted yet and aren’t available to visit due to ongoing closures, but I hope to eventually go see them in one of the glorious rooms of the house. For now we’ll have to make do with flat photos that were taken for my own archival purposes.

The c. 1810 dress was inspired by a few different dresses, including this c. 1810 cotton dress held by The Metropolitan Museum of Art. The goal was to merge the inspiration dresses into one dress with a repeated pattern on cotton, an adjustable drawstring neck, and long sleeves. In order to support the silhouette and provide opacity I also made a bodiced petticoat to go with the dress. Below are front and back views.

Unlike the first dress, the c. 1845 dress was inspired by this specific c. 1848 silk dress held by The Met. The goal was to keep the details of The Met inspiration dress but make the new dress proportional to the measurements of the form that would be wearing it. The dress includes extra structure to help the bodice keep its shape even without a corset underneath. Below are a full length front view and a close up of the bodice.

I had lots of fun finding trimmings for this dress that recalled the original. In the case of the tassels, I combined sections of the fringe with tassel tops and vintage passementerie buttons in order to get the right look and create tassels. Below, a closeup of tassel parts and the final result.

The designs of each dress were settled on with much collaboration to determine fabrics, trimmings, style details, and more. Both patterns were individually created to fit the requirements and specifications for each dress. Both dresses use a mixture of machine sewing/modern methods on the interiors and hand finishing on the exteriors. This speeds up construction and provides the necessary foundation for the dresses even without a full set of supportive undergarments.

I love projects like this! It’s so wonderful to collaborate with others who appreciate the minute details of historical clothing while also making garments that can be used to help interpret history to the public. These sorts of projects are often initiated through word of mouth suggestions, so please reach out if you know of museums, historic sites, historical societies, etc. who are looking for this type of collaboration!

Regency Shoe Revive (HSM #2)

Back in 2012, I happened upon an unusual pair of shoes in a small clothing store. They were quite flat, with little support or durable sole and a slightly square but still rounded toe. The price was great–$10 per pair. I thought the shoes would make excellent Regency dancing shoes, so I bought two pairs, an 8.5 and a 9. The 8.5 were a little tight on my feet which was perfect for dancing as they stayed on my heels even when I rose onto my toes, but the 9 also fit and was great for walking around.

I’ve kept the size 9 nice looking over the last eight years. They have a surprising mid-20th century vintage look in addition to the Regency look, so they are most often worn with 1950s inspired dresses (you’ll spot them with my vintage inspired Happy Clover Dress and 1953 Dot Dress, both pictured below).

But while the size 9 pair hasn’t been worn all that often, the size 8.5 pair have been worn almost anytime I’ve been dancing in Regency clothes for the last eight years. You’ll spot them in all of the posts below (with a few of those highlighted with photos, as well), but of course this is only a small portion of the times these shoes have been worn.

1817 Duchess Gown In Three Stylings
Regency Intensive Dance Weekend 2019
1817 Gold Stripes And Face Framing Curls
Regency Dance Weekend 2017
A Gown Worthy Of A Duchess
Regency Dance Weekend 2016
Regency Shoe Poms!
A Turban Fillet, 1811
Regency Dancing At The Salem Maritime Festival
Refreshing Proof (Chelmsford Regency Ball 2013)
Regency Dance Weekend Part IV: Reception
Lovely Clothes, Lovely Ball: Part I (Pride And Prejudice Ball 2013)
Regency Christmas Party At The Commandant’s House
1812 Guerriere Weekend Part IV: A New 1812 Gown

All that wear has caused the shoes to show their age. While still functional, the exteriors were cracking and peeling around the top and the toes/sides/back were worn and scratched.

But I’m not ready to let these shoes go! So I decided to revive them with a few touch up treatments.

The first touch up step was to glue petersham ribbon around the top edge to bind it off, as well as down the center back seam, for an additional historical touch. I wanted to be done quickly, so I used hot glue, but this really wasn’t the best choice of glue, as it is a bit lumpy under the ribbon in some places.

I purchased the grosgrain from The Sewing Place. They have a beautiful selection of colors, reasonable prices, and low shipping charges.

The second touch up was a bit of white Angelus leather paint to cover the scuffs. (Thinking back, I should have cleaned my shoes before painting them… But I didn’t. So, there’s that.) Again, I was just trying to be quick. I figure these shoes are going to get banged up again as soon as I wear them, so I didn’t need to be too fussy. The white paint didn’t perfectly match my shoes, so I did thin coats and buffed the edges with scraps of cotton to get them to blend. It’s not perfect, but it looks reasonable from standing height.

This was a simple project, but it qualifies for this year’s HSM challenge #2: Re-Use.

Use thrifted materials or old garments or bedlinen to make a new garment.  Mend, re-shape or re-trim an existing garment to prolong its life.

Just the facts:

Fabric/Materials:  1 pair of soft soled flats and white Angelus leather paint.

Pattern: None.

Year: c. 1810.

Notions: Approximately 1 yd of petersham ribbon.

How historically accurate is it?: 50%. In general, the silhouette and style works, but of course these shoes are not perfectly historical in style and the materials are modern.

Hours to complete:  1 hour.

First worn: November 23, 2019.

Total cost: If we’re only counting the revive and not the original cost of the shoes, then approximately $5 for the ribbon. (The glue and paint were in the stash.)

Here’s another view of the completed shoes.

It was my goal to revive these before this year’s Regency Dance Weekend (an annual event each April). I achieved that goal in terms of the date, though sadly the weekend was cancelled this year. But even though I didn’t get to use these for that event, at least now they’re ready for more years of adventure (and I can return them to the closet–they’ve been sitting out since last year to remind me to deal with them!). I’m quite pleased with the end result and the small amount of effort required to update these shoes.

Check out the following links if you’d like to see tutorial-like photos and descriptions of the painting and ribbon-ing process:

Lauren, of American Duchess, wrote a very helpful blog post tutorial back in 2012 showing how to paint shoes as well as the petersham ribbon edging.

Chelsea, of A Sartorial Statement, wrote a blog post about her freshly painted and ribbon-trimmed flats in 2019.

1817 Duchess Gown In Three Stylings

A few years ago, I made my 1817 Duchess Gown. I started out wearing it rather plainly (if wearing a tiara count as a plain ensemble…), but since then I’ve worn it multiple times and accessorized it different ways. I thought it would be fun to pull some of these wearings together in one place, to look at how accessories can change the look and feel of a dress.

First, a side by side comparison. Do you have a favorite amongst these?

The first year I made the dress I was furiously sewing the hem trim on the night before the ball, so I didn’t have too much time to think about accessories. I wanted the dress to be regal looking and so I decided on the tiara to wear with it, as well as a pearl necklace and earrings.


Fast forward to February 2019, when I’d worn the dress a few times and wanted to change it up with more color than just white and gold. For this wearing, I added a green sash as well as new sparkly jewelry from In The Long Run Designs.

I loved the green sash look, but wearing the dress just a few months later in April 2019 I wanted something different. I decided to pull out some older accessories, purple shoe clips and purple hair flowers, and pair them with a white sash.

You really can’t see the white sash much, but the purple accessories give the dress a different feel than the previous wearings, I think. (This might be a stronger statement with a purple sash. Hm… But I don’t have wide purple organza ribbon, as I did with the green and white. Maybe that’s something to keep my eyes open for!)

The neat thing is that this dress is also captured on video! At the Regency ball last February, The Commonwealth Vintage Dancers (CVD) did a performance of the type of advanced dancing taught at CVD’s Regency Weekend every April. Check out this blog post by another CVD member showing the Duchess Gown in action as well as great information about the dance we are performing, Paine’s First Set.

Are you ever able to wear the same outfit (modern, vintage, or historical) styled in different ways and with different accessories? I choose to do this with some of my modern clothes in addition to my historical ones and I can think of a few of you who are definitely subscribers to this idea, too!