In 2015 and 2016, I posted a ‘project journal’ series of blog posts about making a yellow duchess satin c. 1880 Steam Molded Corset (this link will take you to the whole series, which includes specific posts about the plan, inspiration, mockups and patterning, the final pattern, construction, steaming, and finished garment photo shoot). Late last year, I made another one as a commission for a friend, this time in a blush pink duchess satin I picked up at the fabric store with no particular purpose, but thinking it would be really good for this specific use (in fact, I mention this exact idea in the fabric stash additions post where I shared about the purchase of this fabric in 2020).
Having already figured it out once, I used my old blog posts as a guide for making the new corset. This post is intended to document the new corset and the changes and updates I made from the yellow one.
To start, I adjusted the pattern I’d developed for size as well as some of the boning patterns to accomodate the adjusted seam lines and to simplify some of the boning patterns, especially in the back. The yellow corset has a whole bunch of bones… It’s great and based directly off my inspiration image, but time consuming and unnecessary for this purpose.
Once I had a solid pattern, I cut out all my pieces: one layer of silk satin for the exterior and two layers of white coutil for the inner layers. For the most part, the layers for each piece are exactly the same, but there are some differences at front and back panels.
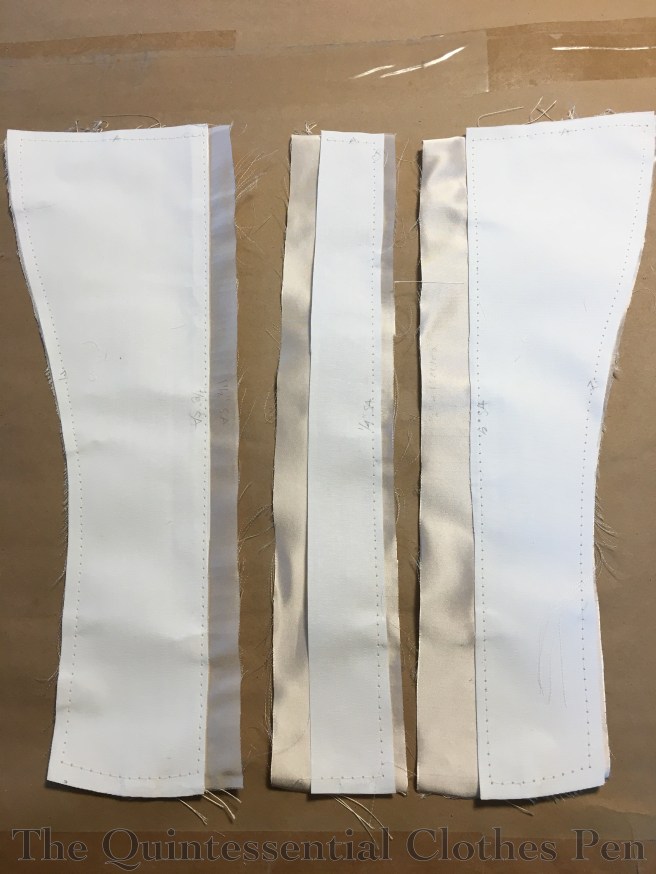
Below are the front panels, where I’ve intentionally cut the coutil to be smaller than the silk. This allows for the seam allowances to be less bulky and therefore more crisp as they fold inward around the busk. The piece on the left is for the proper left side of the corset while the two other pieces are both for the proper right side of the corset. I’ll show how these pieces are put together later in this post.
Next are the back panels, again showing that all of the layers are not cut to be exactly the same. The cut edge of the narrowest coutil layer provides a crisp edge over which to turn the other piece of coutil for the back edge. It also creates 3 layers of coutil where the grommets will be while allowing the silk to fold under the outermost edge of the coutil for a crisp line there as well.
You can see in both of the above images that I machine flat lined the layers for each piece together on almost every edge (some were strategically left alone).
Next, I prepared the center back grommet areas. The silk only seam allowance was crisply turned back over the straight cut edge of the coutil, then the coutil was crisply pressed back over the narrower layer of coutil. You can see the folds opened on the right and the resulting crisp panel on the left.
These were very carefully pinned in place (duchess satin does not hide pin marks!) and then the channels were stitched. I made sure to make them wide enough to not struggle when putting in bones (the last corset had boning channels that were a bit narrow for the bones and it was terribly hard to put them in!).
I used an edge stitch foot to get the lines of stitching right along the folds. Edge stitch feet are magical! I discovered mine while making masks last summer and have since started using it for all kinds of projects–any time I need to stitch close to the edge of a fold! My machine, which is pretty basic, came with one (though I hadn’t used it in, oh… 12 years???). I encourage you to it out if you haven’t before!
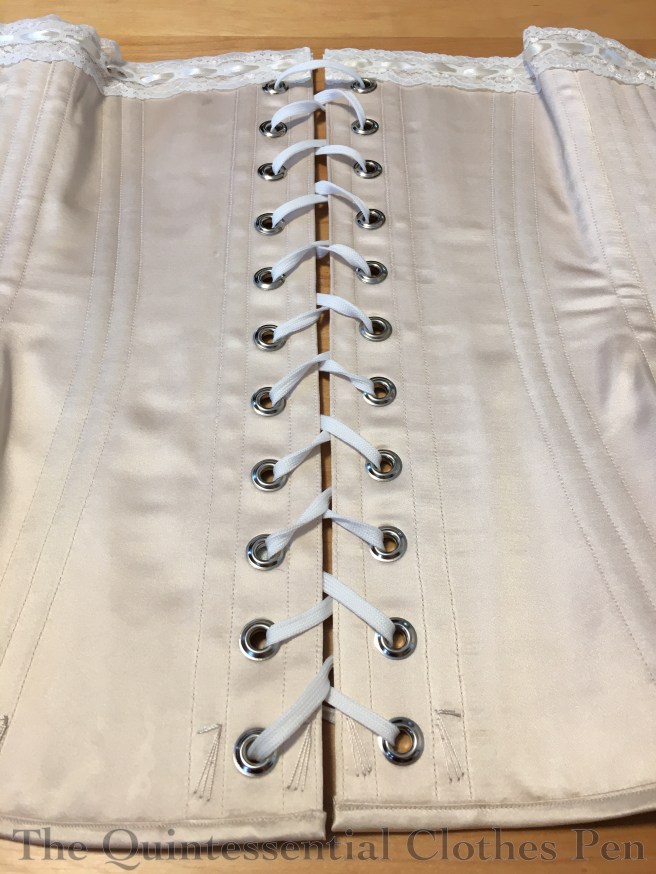
Here you can see the exterior of the grommet panels on the left and the interior on the right.
Later, I added size 0 silver grommets. Skipping ahead in construction, here’s a finished image of the corset, showing the finished grommets in place.
After preparing the grommet area, I assembled each side of the corset. No photos of that here, since I did this in the same way as my last corset: grading my seams, binding them with ⅝” cotton twill tape, and then stitching these down to create channels for the bones. (My original construction post has detailed pictures and explanation of this method. The part of the post discussing this also has some images showing the many bones on the back of that yellow corset that I mentioned earlier.)
Next, I put in the busk, starting with the socket side, which is the proper right side of the corset. I used a different method on this corset than on my yellow one. Further inspection of originals shows a seam that the busk sockets are pushed through, rather than reinforced holes without a seam, so that’s what I wanted to do!
This is where I used the two pieces I cut. In the photo below you can see that the two pieces are pinned together (pin heads are on the underside, in case you’re wondering) and I’ve marked small lines where the sockets will land on the seam. This allows me to leave openings in the seam for each socket. The openings need to be snug, but not too tight. The seam is sewn just outside of the coutil, so that the layers fold crisply. As you can see, my seam allowance is uneven. I left the side of the silk that will be visible as the busk is pulled on a little wider to make a solid facing even after years of use.
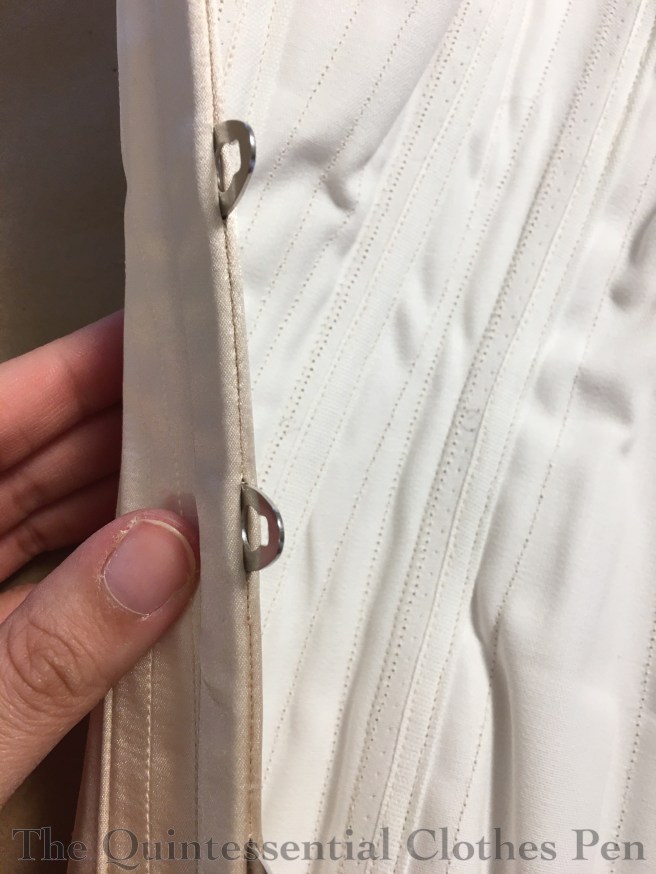
Here is the finished seam, pressed open. If you look carefully you can see the gaps in the seam that I left for the sockets of the busk. My ruler at the bottom shows the scale. (This photo also shows some of the finished seam allowances and boning channels on the other seams, as well.)
Now the socket half of the busk is pushed into place. The single layer of silk seam allowance is pressed over the cut edge of the coutil and the whole thing is carefully pinned in place. I made sure that the busk is quite snug, so that it can’t shift in any direction.
To do this, I started with pinning the inside, to ensure that the silk is perfectly wrapped under the busk–no gaps or bubbles there! Then, I very carefully pinned from the outside. As you can see, I only pushed the pins through the silk once (they come up through the coutil again, but not through the satin) to minimize holes.
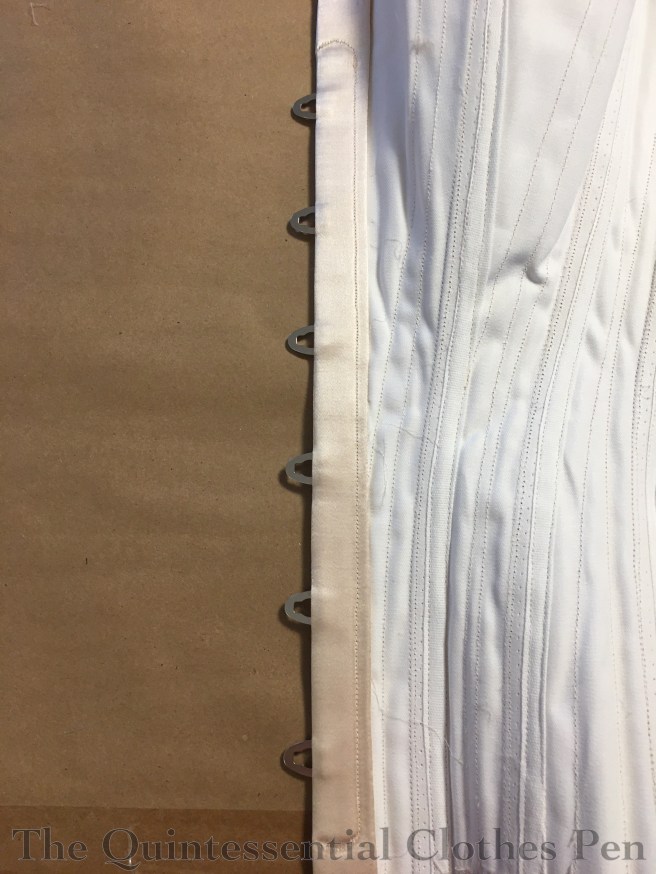
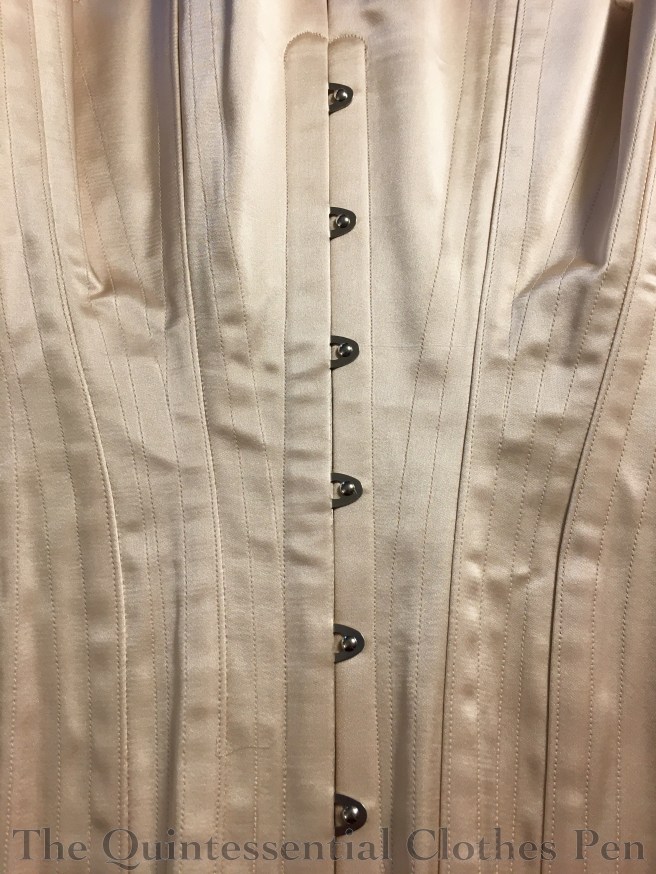
After that, some very careful stitching with a zipper foot was in order. I curved my stitching around the top and bottom of the busk (a detail from extant garments). It’s tricky to make the curves look nice, but it’s a small detail that helps elevate the finished garment, I think.
On the inside, it looks like this. I was able to keep the stitching a consistent distance from the fold in the silk due to my careful pinning. I’ll admit that this turned out better than my yellow corset! The yellow corset has a few bubbles and variation in the width of the turned under seam allowance.
Here is the busk from the side. You can see the seam and the snug openings, with solid back stitching, which leave space for the sockets to push through.
Ok, on to the stud side of the busk! This is the proper left side. Here, you can see the marks I’ve made to show where the studs will poke through and where the edge of the busk will fall. It is intentionally set back from the cut edge of the coutil.
One thing I was very careful about was poking my holes for the studs, because I found that on my yellow corset the silk pulled where I used an awl to make the holes. No one but me would probably see this, but I wanted to do better with this corset. I believe I used very sharp snips to cut small holes rather than using an awl to push the fibers apart. This is fiddly work, because a hole too big can’t be saved and will fray and cause the stud to move around, but it produced better end results, I think.
After making my holes and getting all the studs through, I carefully pinned and then stitched around the busk just like I did on the socket side.
Ta da! Busk!
Next up was binding the top and bottom edges. I used almost the same method as on my last corset. To quote myself:
The bottom binding is bias strips cut 1″ wide. I stitched them first to the right side of the corset with ⅛” seam allowance on my bias, trimmed my corset seam allowance to just about ⅛”, folded the bias over the edge, turned the raw edge under on the wrong side, [basted the seam allowance in place on the inside instead of hand whip stitching the bias down on the inside (slow, but a more effective method than pinning in this case)], then turned the corset back to the right side and topstitched very close to the edge of the first fold. This narrow topstitched binding seems to be common on late 19th century extant corsets and looks very tidy.
Below you can see the bias turned to the inside, pinned, and being basted in place. On the right are finished edges from the inside and outside.
This corset is boned with spiral steel for the bulk of the seams and flat steel on either side of the grommets.
I usually apply the bottom binding first, then put in my bones, and then bind the top. It’s a bit trickier sometimes to bind the corset after the bones are in, and if the top will have decorative lace then it can help hide any struggles that occur. (Thankfully, I learned from my last experience and made a test sample of the boning channel width that was perfect, so it was relatively easy to bone this corset!)
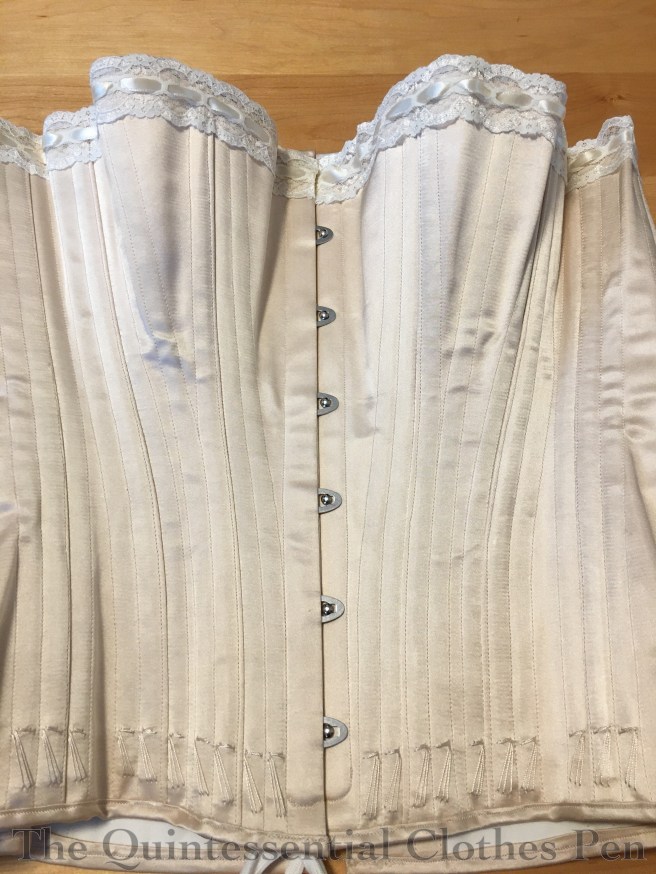
At this point the corset was basically done! The only things left were to add ivory beading lace and ribbon around the top and silk flossing along the bottom of the boning channels.
I was excited that I had all of the necessary materials in the stash, including the silk thread in the perfect ivory color.
I’m very pleased with the end result. It takes all the struggles and things I learned along the way with my yellow corset and perfects them, creating crisper folds and finishes and a comfortable garment with a great silhouette.
There’s no trickery in the next photo, this corset holds its shape with no support other than what is built in!










Always such exquisite work! I really enjoy seeing your process, even though I’m not quite at the point of making my own Victorian undergarments…maybe some day!
Dear Quinn,
I thought the yellow corset was really nice…but this one has outdone it. Agree that the curved stitching around the busk is a step up — it’s precise and elegant.
Curious about the steaming. Corset makers very rarely steam mould their corsets. What do you think the steam moulding does for the corset while worn? Help it to hold the curves in the correct positions?
Very best,
Natalie in KY