

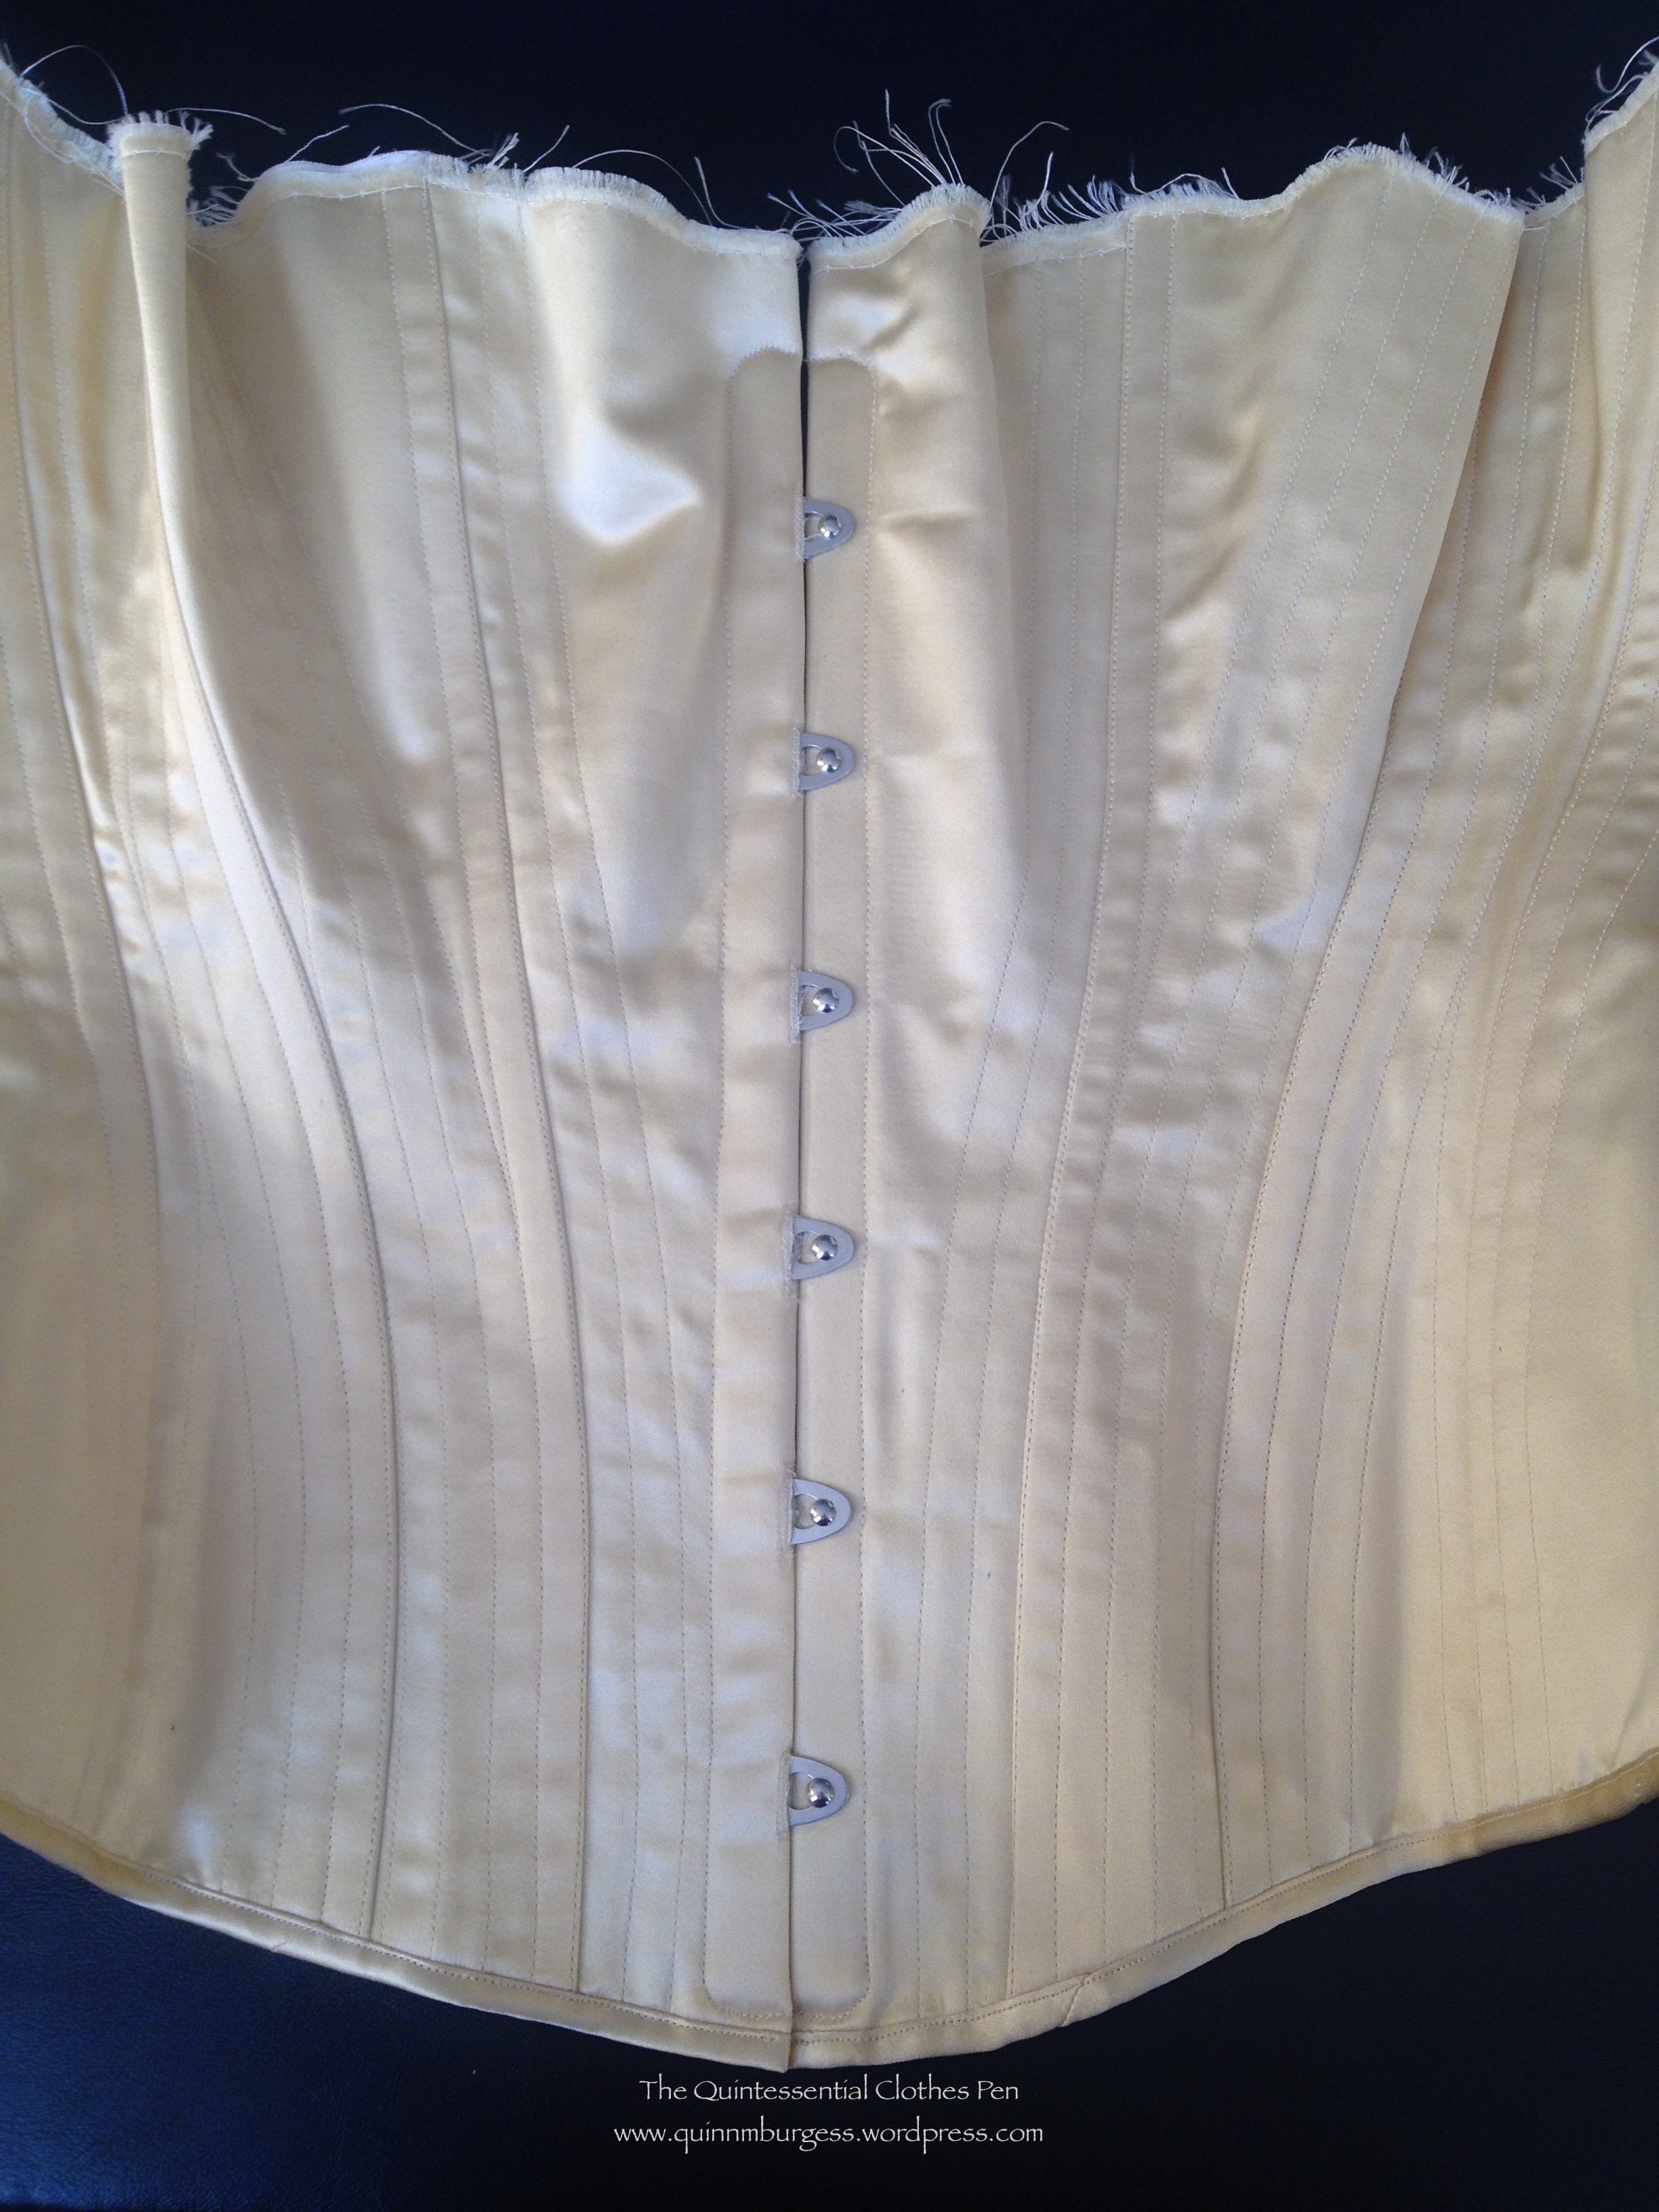
This corset is made up of three different fabrics, all sandwiched together and flat lined. The outer fashion fabric is a scrap of butter yellow duchess silk satin that just barely fit all my pattern pieces (whew!). The inner layer is a white herringbone cotton coutil. Sandwiched in between these two layers is a tightly woven slightly off white linen. I chose this fabric for a few reasons: #1, because it was in the stash and an odd shaped scrap not likely to be used for a garment that required large pattern pieces; #2, because it didn’t have any dye that might leech through onto the yellow silk; and #3, because it is tightly woven enough that I’m not worried about the bones poking through it over repeated use.

I decided to use three fabrics instead of the usual one (coutil) or two (coutil and a fashion fabric) for two reasons: #1, because I wanted an extra layer of fabric between my silk fashion fabric and my inner coutil layer so there would be less chance of any sort of spotting from the starch; and #2, because applying boning channels of any material would have been incredibly bulky and challenging with all the curves and bones on seams, but by having a third layer of tightly woven fabric I could sew boning channels anywhere I pleased without adding bulk.
After cutting out all 12 pieces in each fabric I machine basted the layers together so nothing would be sliding around creating bubbles while I assembled the pieces. Most of the basting wound up being removed as I moved through other steps in the process–either during the grading of the seams or while inserting bones.
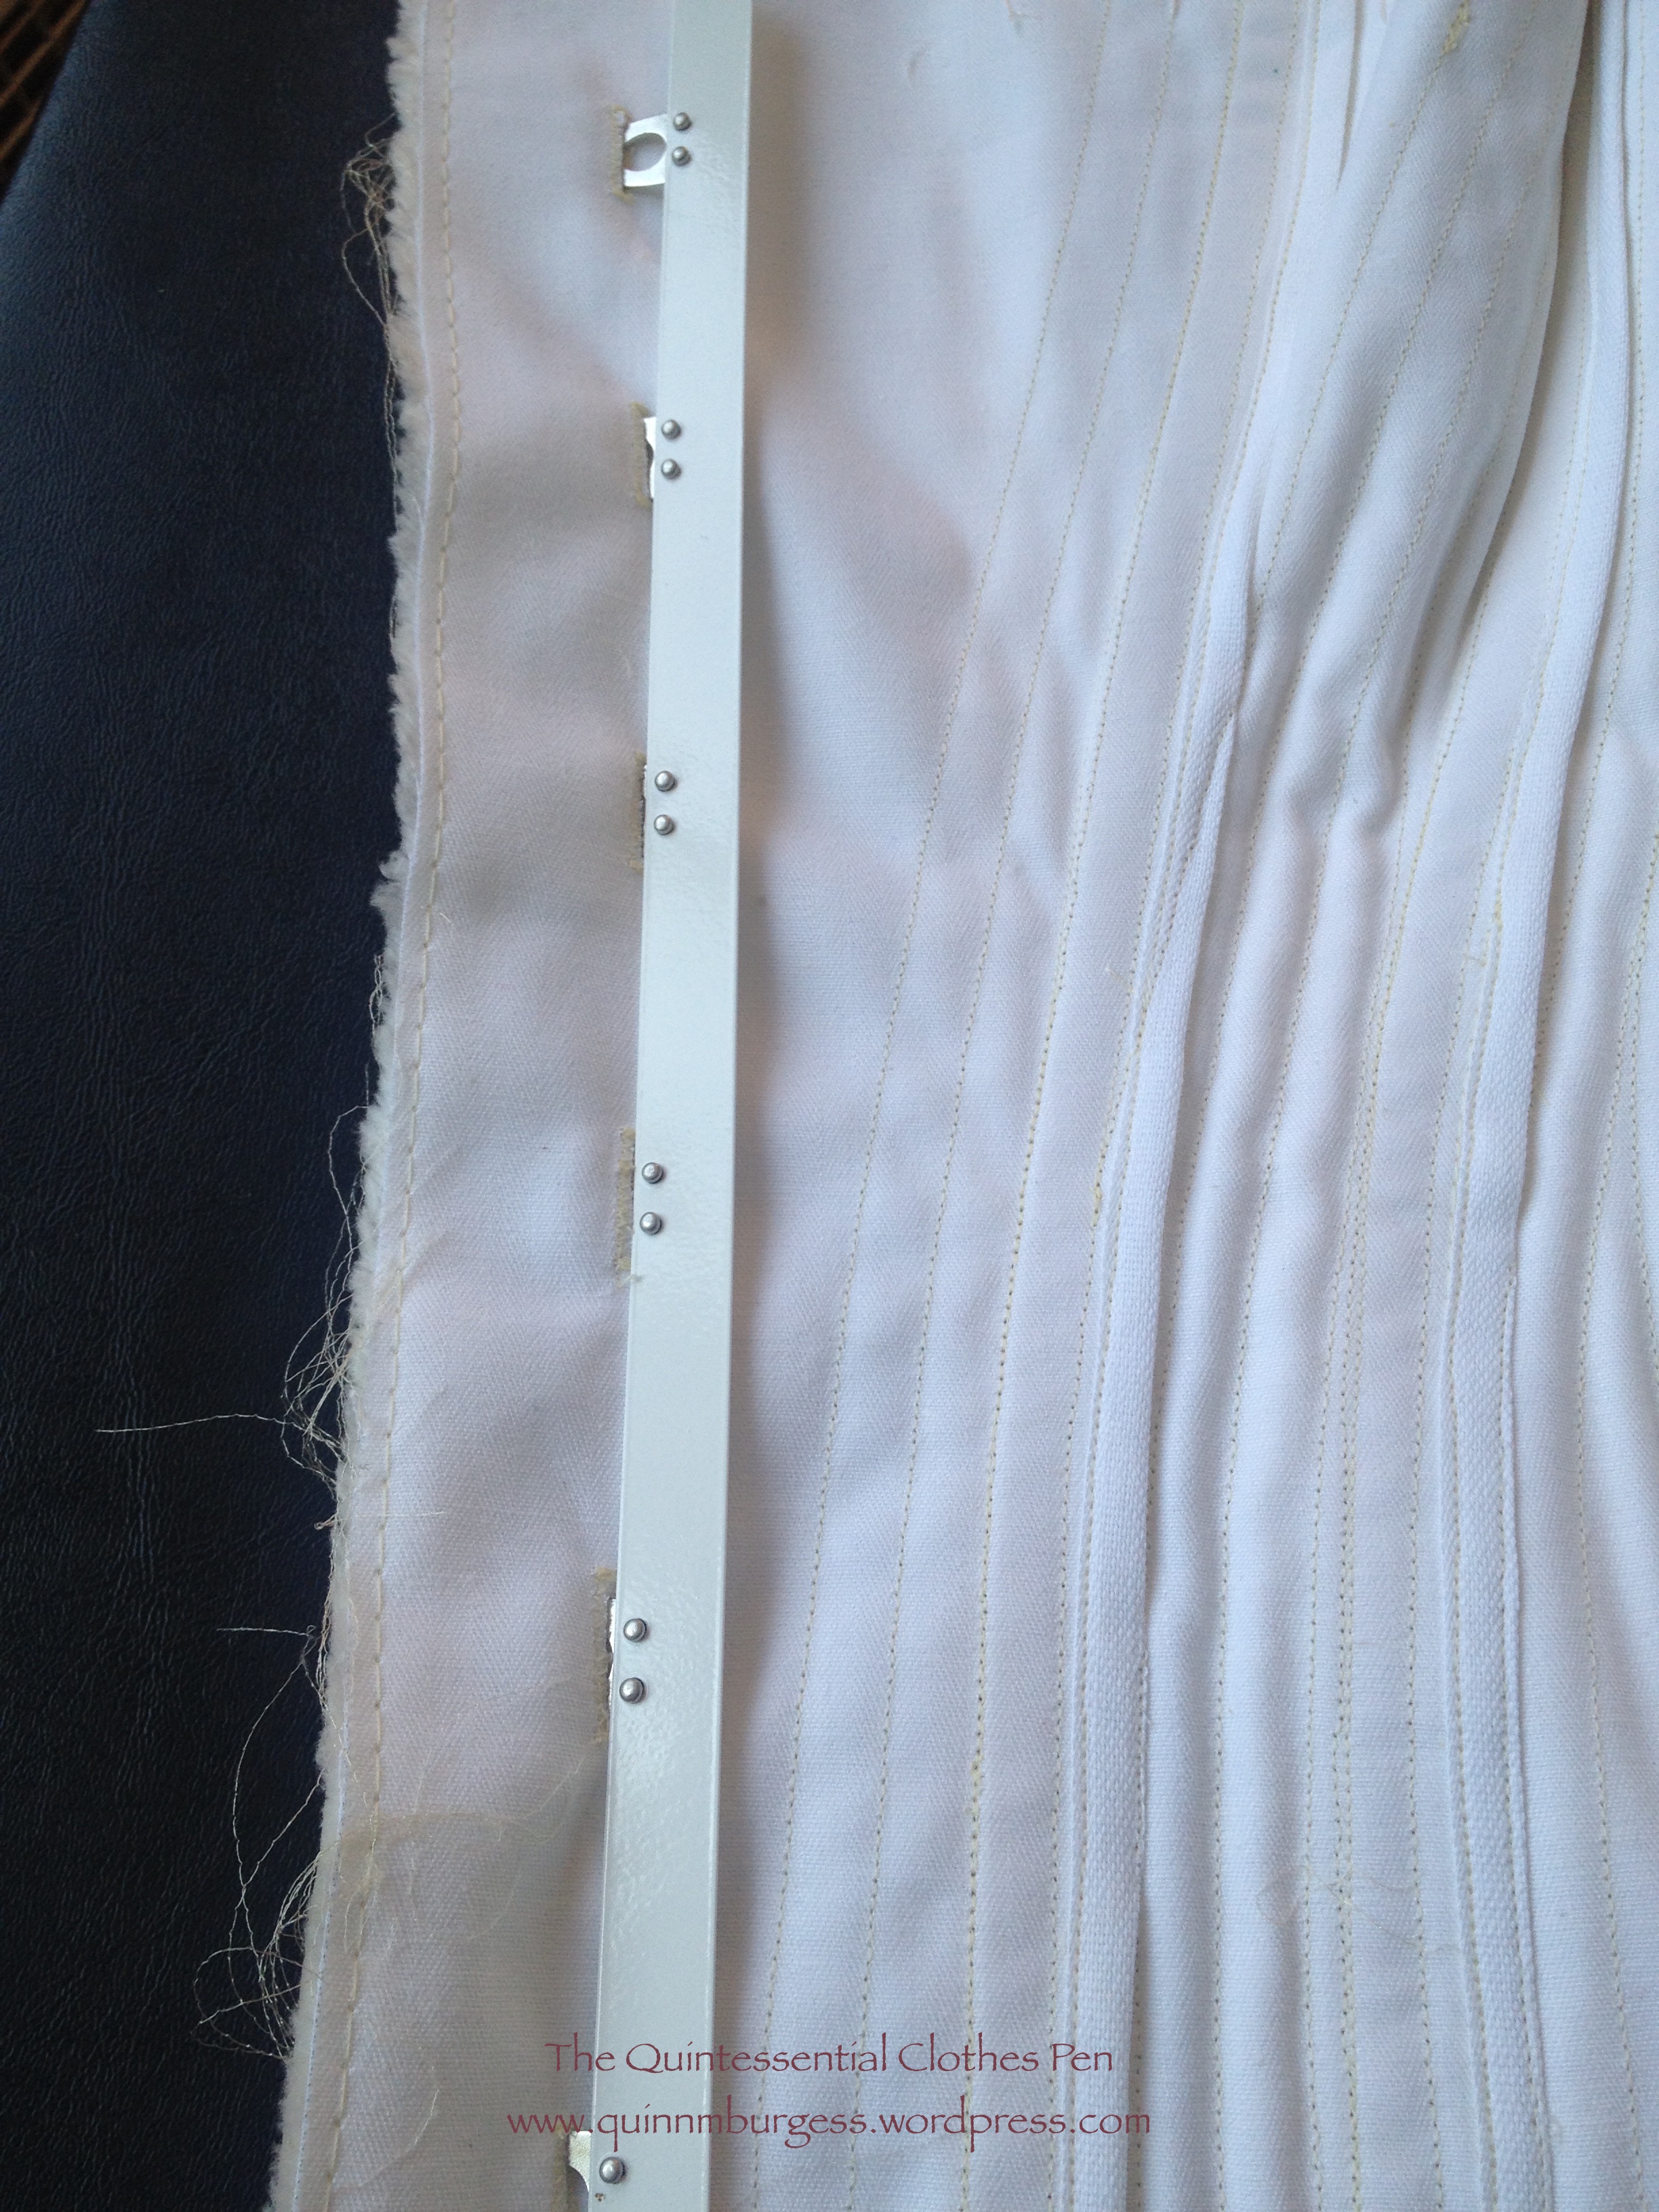
Once the layers were flat lined I put the grommets in the two back pieces. Normally, I do this later in the process, but this time it worked well placed here. I used size 0 silver grommets. They are a little larger than extant corsets seem to have, but they are what I had available. After that, I assembled the pieces along their vertical seams. Then I graded each seam so that when it was pressed towards the back of the corset it would be less bulky.


Most of my previously made corsets have flat felled seams, some of which are used as boning channels and some of which are not. I prefer this method because it provides more strength along each seam than any method in which seam allowances are left pressed open. In this case, though, 3 layers of fabric getting flat felled was very thick, so I decided to try a different method. I bound each seam with ⅝” cotton twill tape, not worrying about the fact that the graded fabrics closest to the original seam were not encased in the binding.

The seam allowances were all pressed towards the back, but not immediately topstitched as with a flat felled seam. Instead, they were caught and stitched down as I stitched boning channels. Some of them have boning channels that run all the way down the seam while others are held down by boning channels in enough places that, when combined with a binding on the top and bottom edges, will be sufficient to keep the binding flat and not allow any of the graded seam allowances to peek out.

Another detail unique to this corset is related to stitching the boning channels. Often when I flat fell seams for corsets I don’t also topstitch right along the seam. For this corset, however, I stitched an extra line of stitching next to the fold of the seam allowance. This detail is taken directly from my inspiration corset at the V and A. While this might provide a little extra strength, I believe it is mostly a decorative and flattening stitch.

I was able to stitch most of the boning channels prior to inserting any of my boning. This corset was intended to have 4o bones, as the V and A description states, but wound up with 38. Unlike the original, which has whalebone, this corset has ¼” spiral steel bones except for the bones that flank the grommet channel, which are ¼” flat steel.
This is the first corset I’ve made that uses this much spiral steel. Usually I use flat steel, but these boning channels are much to curvy for that. The spiral steel definitely lends itself to the curviness of the corset, allowing it to shape to my body rather than making it a more cylindrical shape.
This is also the first corset I’ve made with this much boning. I’d say it has about double the usual amount of boning. That, combined with the three layers of fabric, make this one heavy corset (and heavy duty, too!)! Unfortunately, I don’t own a scale to weigh it, but the weight is surprising every time I pick it up.
The back of this corset has diagonal boning channels that bump up against a seam on one side and the grommet channel on the other. I order to sew those and also get a bone in them, I first stitched the bottom line of stitching, then inserted a bone and used a zipper foot to sew very close to the other side of that bone to create the channel. These diagonal back channels are where I lost 1 bone on each side of the corset. My estimates must have been off, because I had one bone that was way to long for the channel, but eliminating it fixed everything. I was ok with that deviation from my inspiration corset by this point in the process.

The above picture shows another corset trick, also. When I’m stitching boning channels that end partway across a panel, rather than at the top or bottom, I leave my thread tails and do not backstitch. Once I’ve completed the channel I flip the corset over to the wrong side, use a seam ripper to pull both thread ends to the inside, hand tie them, and snip them close. That leaves no tiny thread ends on the outside of the corset making little shadows that look un-tidy. The method works wonderfully!
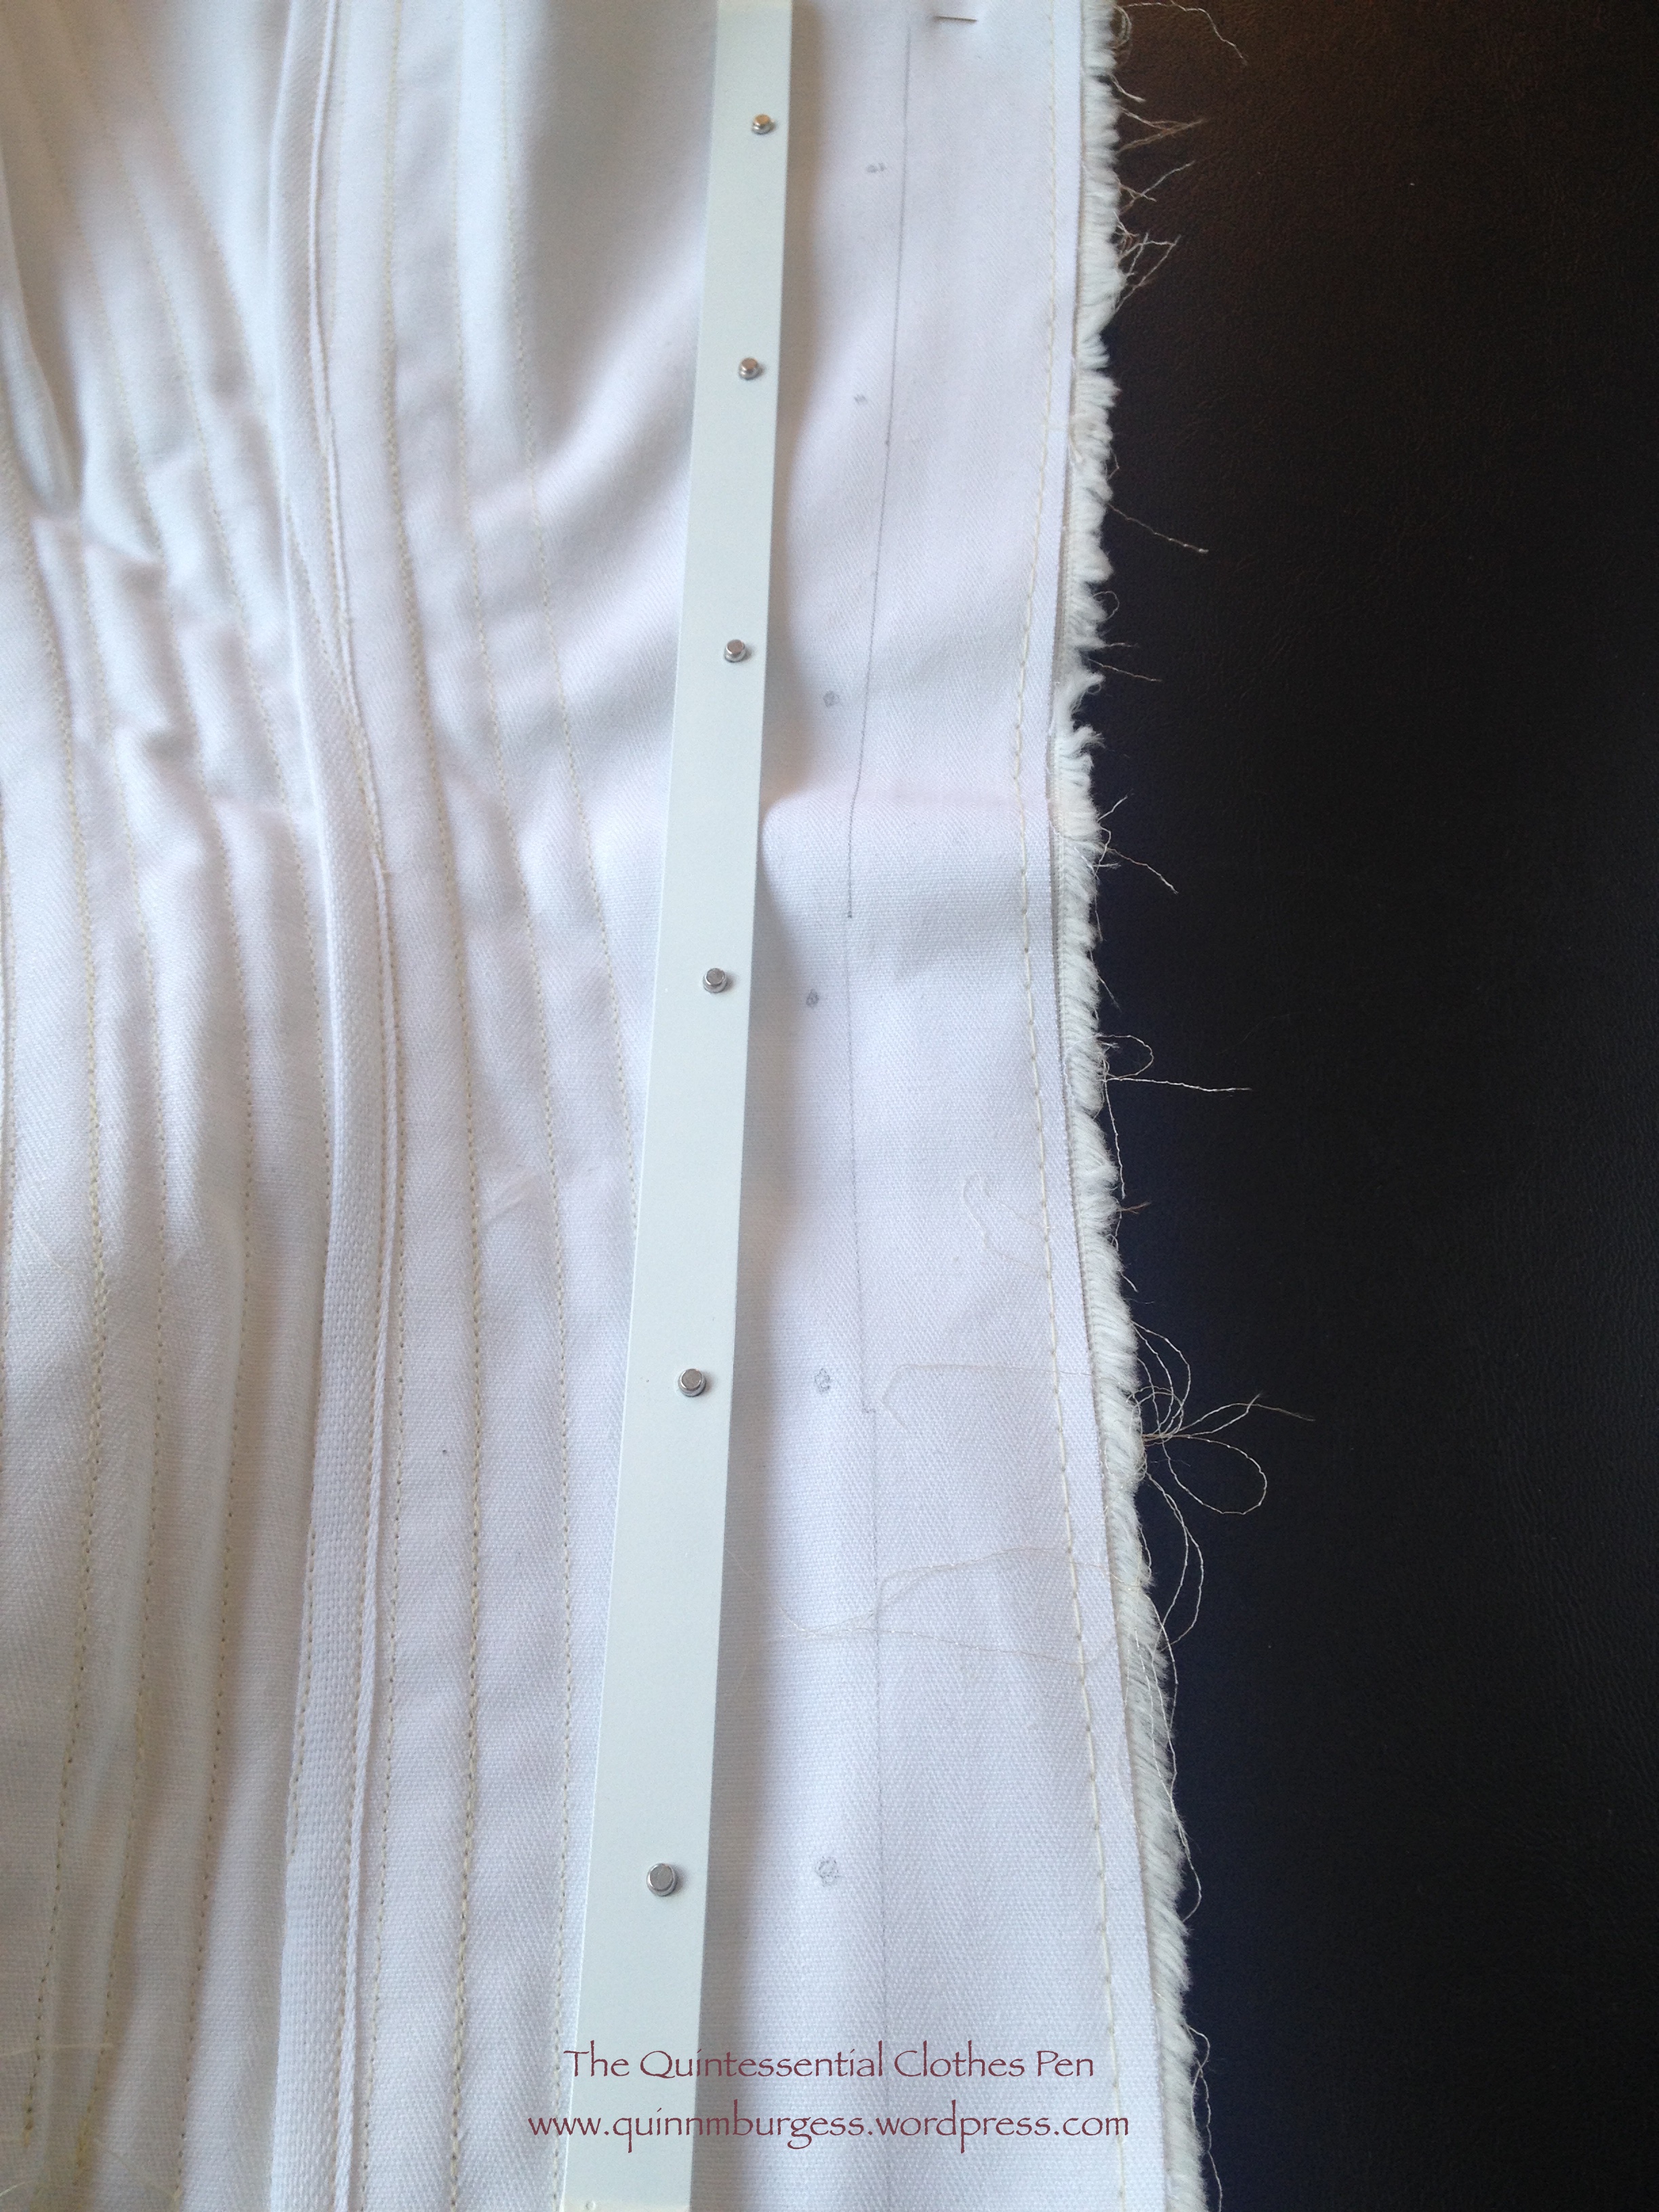
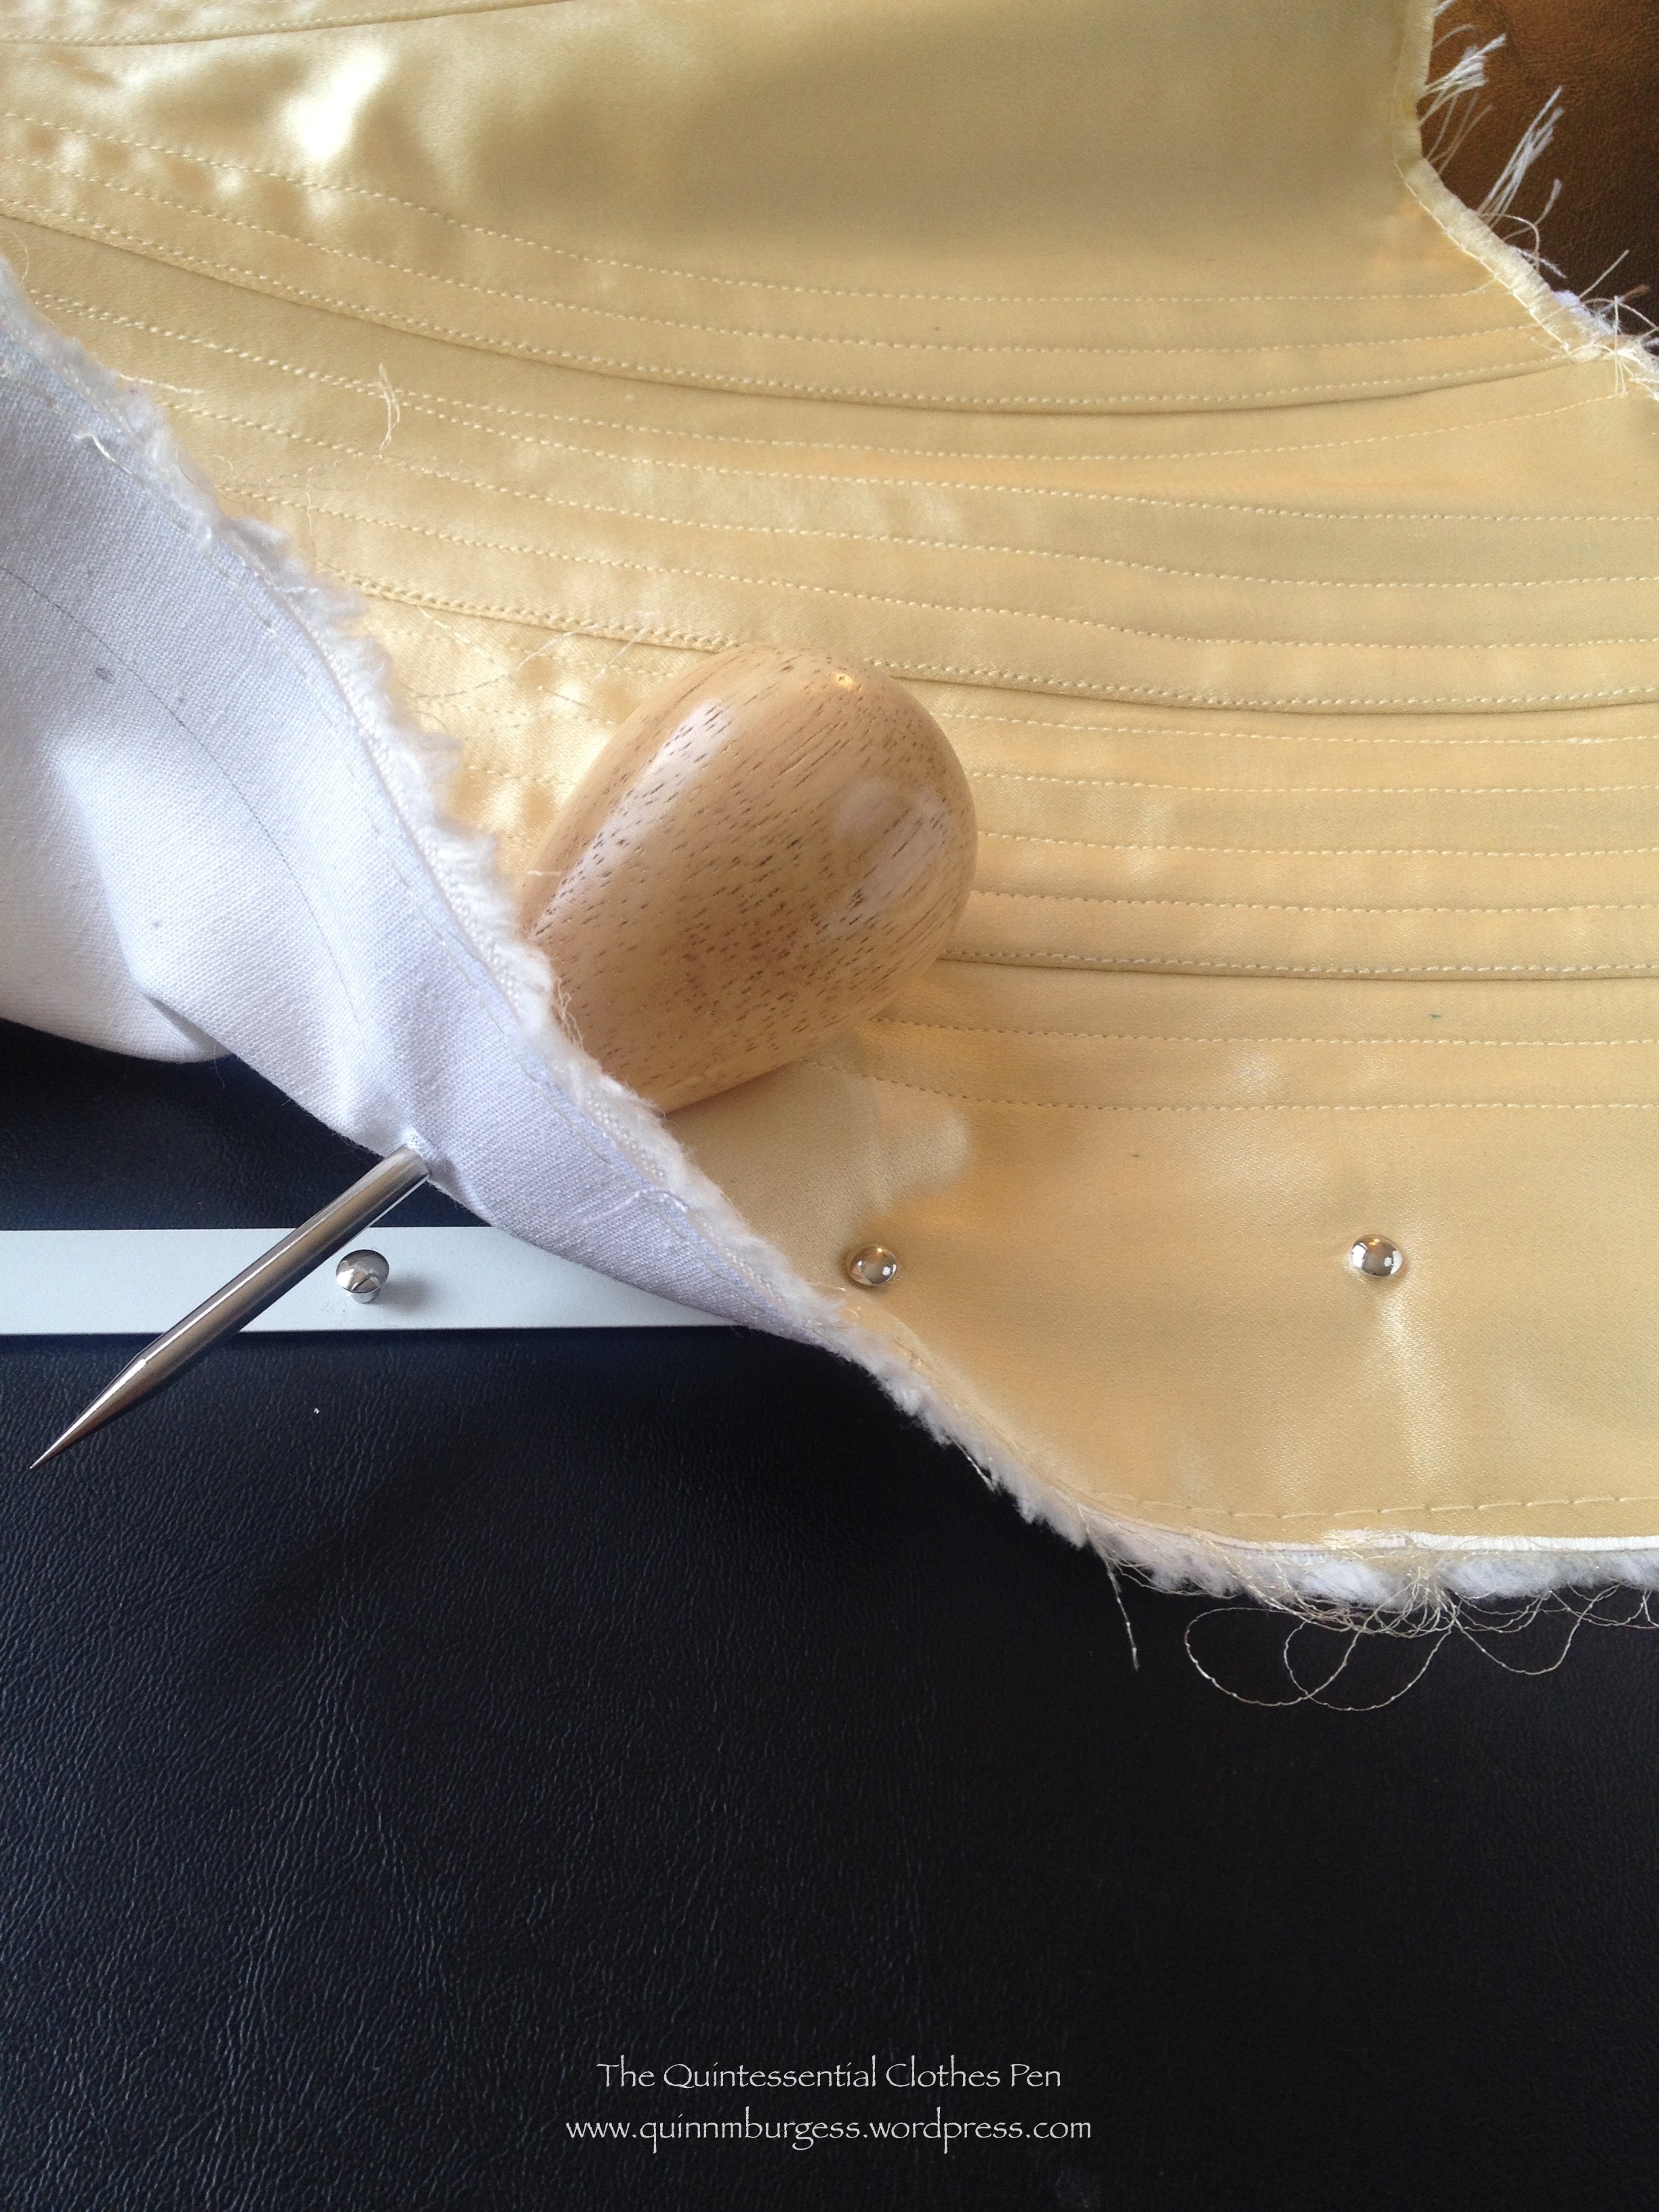
Once I finished the boning channels I put the busk into the two front edges of the corset. I thought I’d show you how I like to do those steps in more detail. After the steps that are pictured, I turn the extra seam allowance under the busk on the inside (trimming it if I’ve left too much) and top stitch with a zipper foot right next to the edge of the busk. On my older corsets, I stitched a straight line from top to bottom, but on more recently made corsets I curve around the top and bottom of the busk to keep it from sliding up and down (another detail I’ve noticed in extant corsets).

After that, I was ready to bind the bottom edge of the corset! Sewing all 38 boning channels took hours (this corset is thick and sewn with small stitches, another detail I’ve noticed in extant corsets), so I was excited to move on to the next step. Luckily, I thought ahead and realized that there are three vertical bones on the back panels that dead-end at those diagonal channels–the bones for those channels had to be inserted before I sewed the bottom binding on. I didn’t take a picture of that exact step, but I did take a picture of the assembled corset with boning channels before I bound either edge.

The bottom binding is bias strips cut 1″ wide. I had to do a lot of piecing of my small scraps to have enough binding for the entire corset (see that seam just to the right of the busk in the picture below?). I stitched them first to the right side of the corset with ⅛” seam allowance on my bias, trimmed my corset seam allowance to just about ⅛”, folded the bias over the edge, turned the raw edge under on the wrong side, hand whip stitched the bias down on the inside (slow, but a more effective method than pinning in this case), then turned the corset back to the right side and topstitched very close to the edge of the first fold. This narrow topstitched binding seems to be common on late 19th century extant corsets and looks very tidy.
Then came the struggle of the bones! I really struggled with this! I spread the job out over about a week and worked on it a little each day because it was hard on my fingers and wrists. The spiral boning condenses when pressure is applied, so pushing it through tight boning channels was a challenge! I wound up wrangling the corset bones into submission using a thimble, pliers, and a chopstick to help out my hands. Turns out that especially at the boning channels on seam lines, where the seam allowances were thick, I should have made the channels a little wider to make getting the bones in easier. There were one or two channels I finally resorted to unpicking and then restitching after inserting the bones for part of their length. In the end, victory was mine and I was able to move on and bind off the top edge of the corset. This was done in the same way as the bottom edge, being careful to be symmetrical between the sides and avoid sewing over bones.


Absolutely gorgeous! Your work is so meticulous. And your photography is so well done and well lit that it is easy to see your construction steps. Bravo!
Thanks for all the details! The construction steps and your reasons for the way you do things are really clear!
How lovely!! You did an excellent job!
Thank you for the kind words! 🙂