

Well, I’ve got the green silk ball gown sewn together. That’s good, because the ball is fast approaching. There’s only a week to go! Eep!!! I’ve finished the padded hem, but I still need to have someone mark center back for me so I can put closures on. And I haven’t set the neckline yet, either, because I’m waiting to see how it looks with the back actually closed… So far every time I’ve tried it on the back has just been hanging open, because I can’t actually reach that part of my back by myself. Never fear, though, I’ll be seeing friends this weekend who can help with marking the back for me! Yay!
You’ll remember from my overview of this early 1820s ensemble that the fashion plate below is my inspiration for this gown.

I’ve been furiously hand sewing, working on the skirt appliqués on the ball gown. These are my first priority. In part this is because they’re already started (and it would look silly to have only a fraction of them done) and in part this is because the hem decoration is pretty essential for 1820s dresses. This is how I’m making the appliqués.
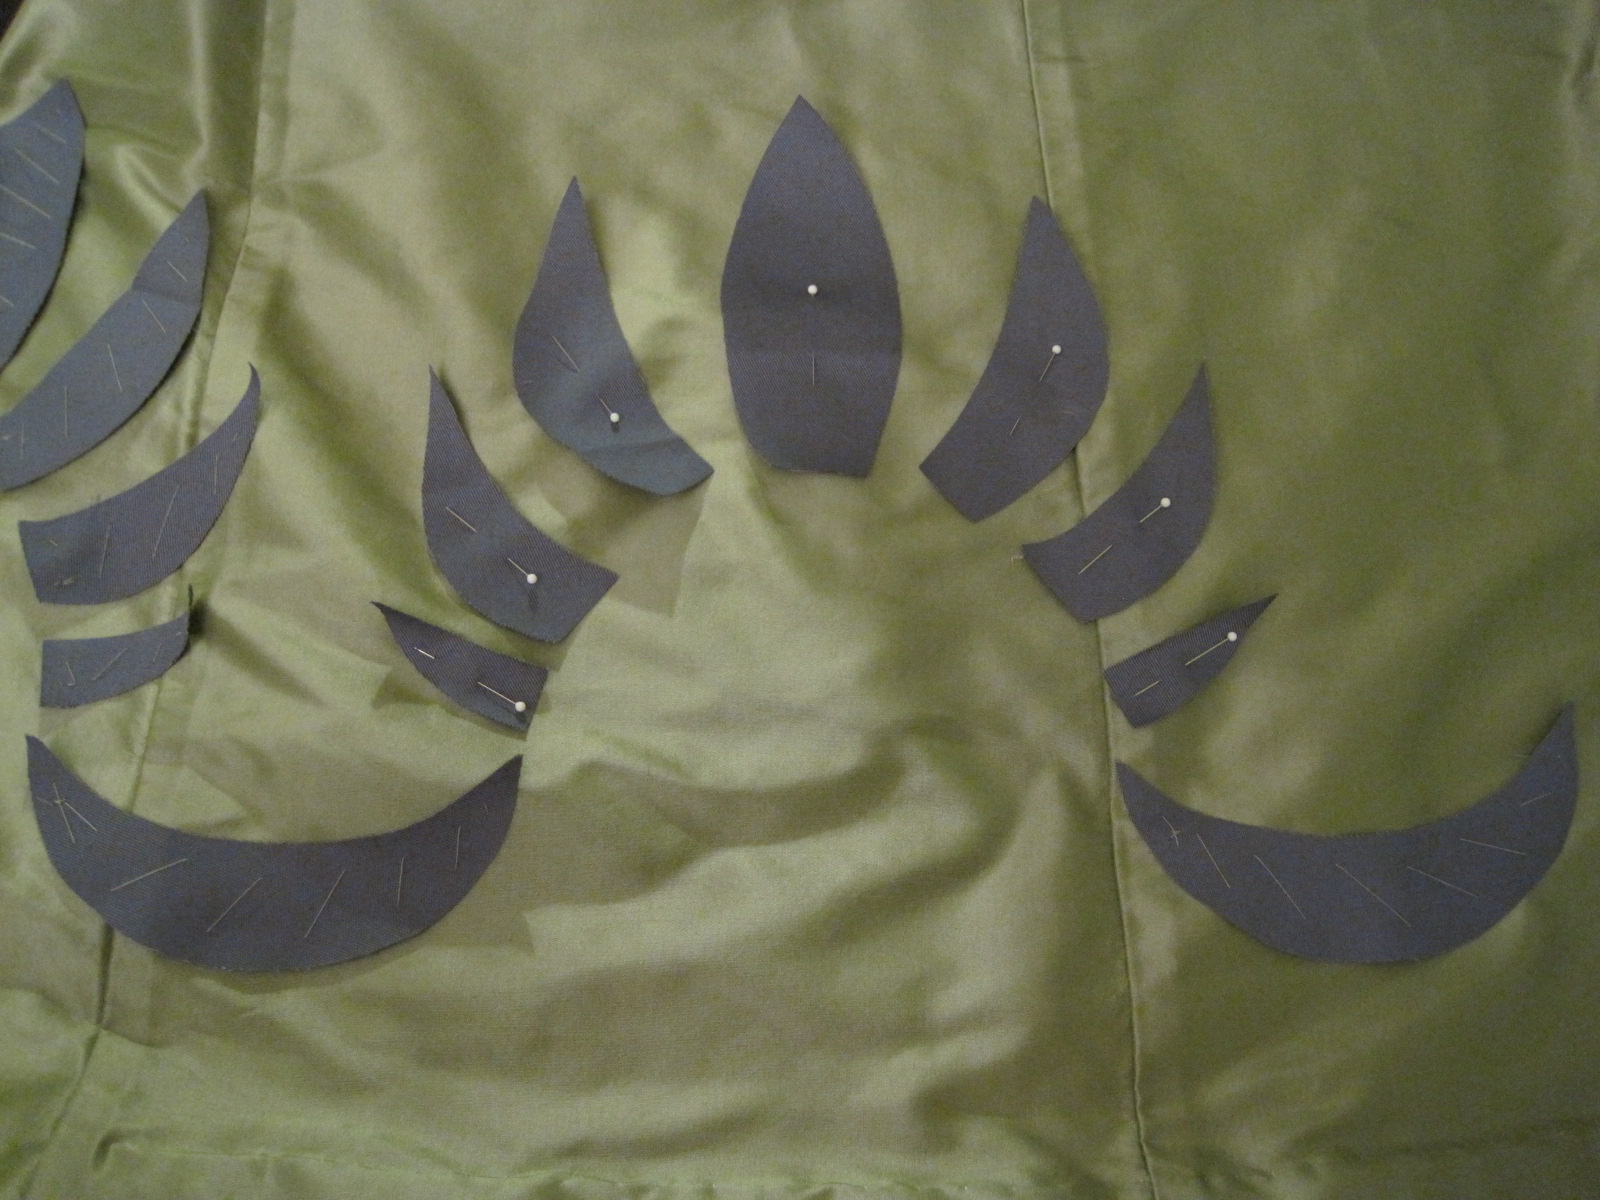


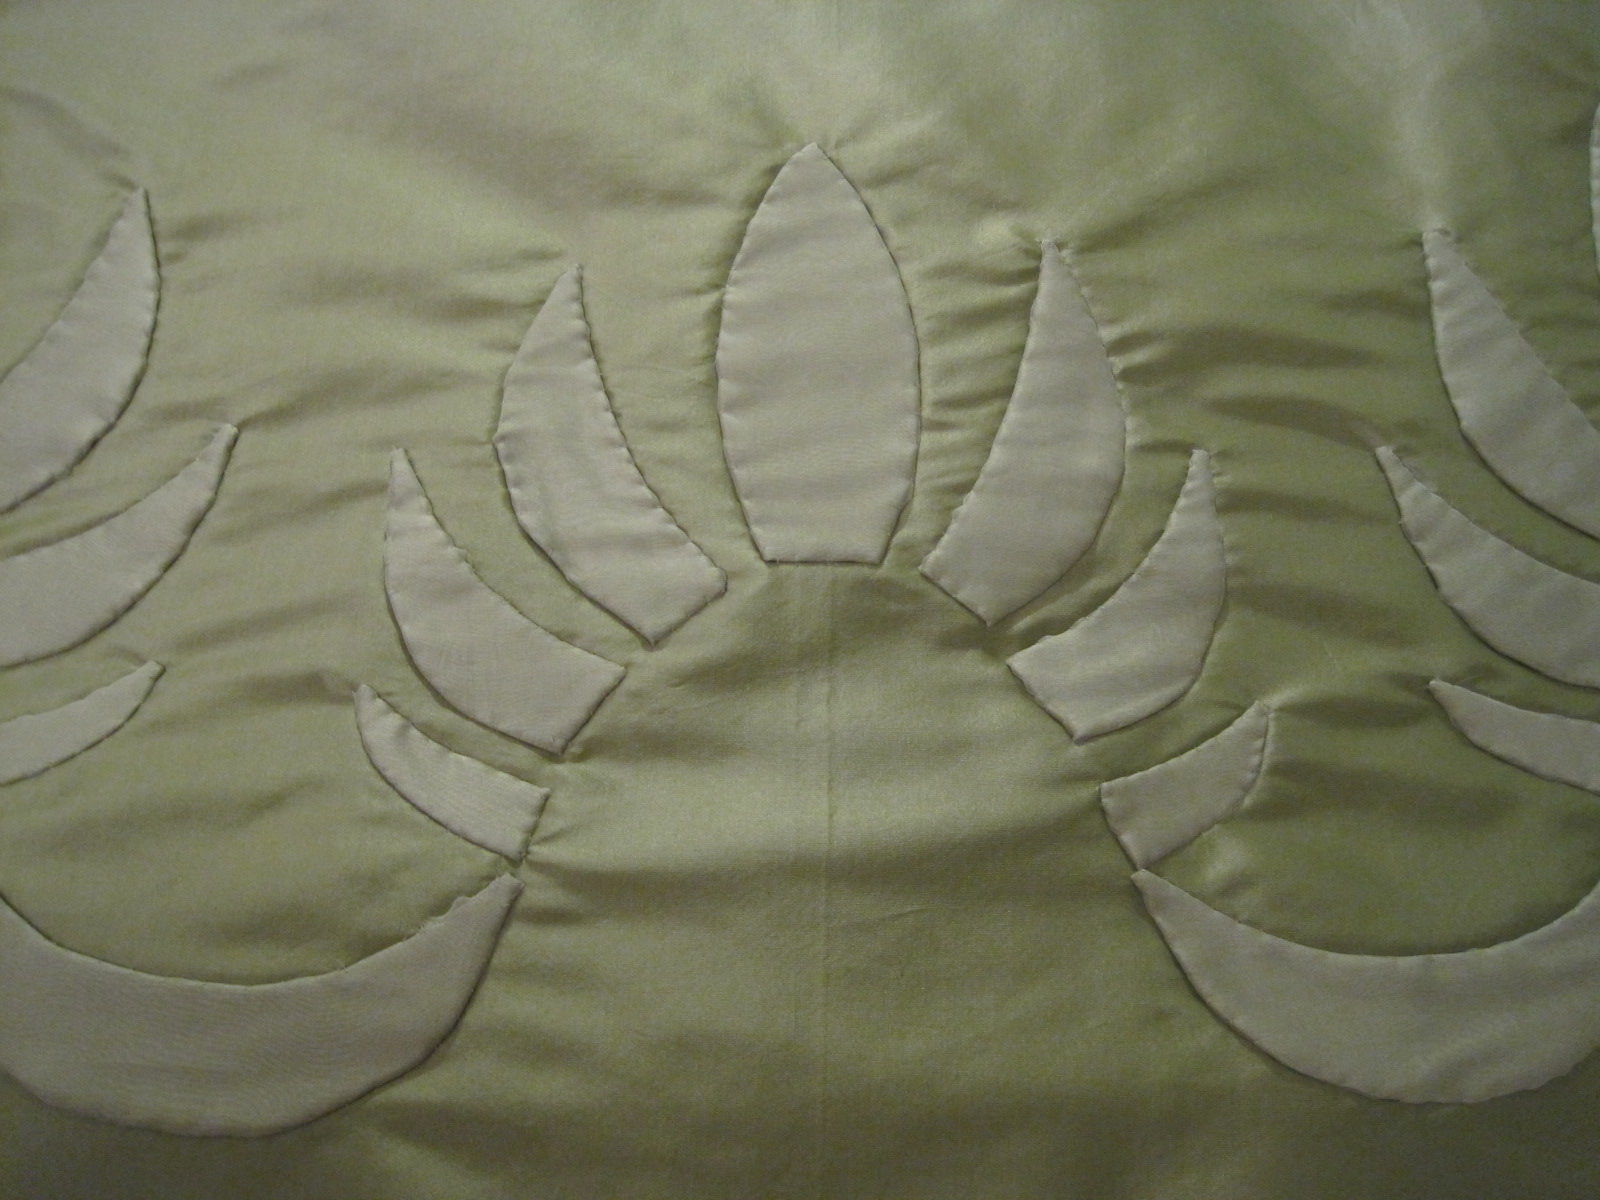


Right now the motifs really remind me of pineapples, a common motif in appliqué quilts (as a quilter as well, I appreciate the overlap between related interests). I’m sure once the centers are added they will look more like flowers and much more like the fashion plate. Each motif is 11″ tall and the repeat is 12″.
As I continue to sew these, I’m thinking about the sleeve appliqués. Currently, I’m stumped. I was going to sew my motifs on in the same way as the skirt, but I also made my sleeves pretty gathered… so I’m not sure how to nicely hide my seam allowances while also keeping the gathers looking un-squashed. I want the sleeve appliqués to sort of float on the gathered sleeves… I’m still brainstorming on how to make that happen. Perhaps I’ll stitch the seam allowance to the back of the base and then hope that the gathers mean you won’t see the base past the 1/4″ seam allowance that gets turned? If you have ideas, I’d love to hear them!

Oh Quinn,
That is going to look FANTASTIC!!! I love the way you’ve added the appliques and I’m looking forward to seeing the beautiful lower buds being added!!!
You really rock the early 1820s!!!
For the sleeve puffs…I have a bit of a problem to figure them out as the picture isn’t too clear (or it’s my lack of proper eyesight…lol), but it looks as if the flower bud sits directly on the shoulder tip (will you do those more three dimensional?) and the leafs spread from it. I would do the appliques doubled so that the top and left side look completely similiar (kind of sandwich the silk around the base), then I would secure them on the flower bud and chose a few points (or only one at the tip of the leaf) on the puffed sleeves to attach them, thus it wouldn’t look squashed, but is able to move with the gathers. Hope this makes sense, I’m afraid I’m not good at giving written advice, wish I could show you in person instead.
However this will be a masterpiece!!! Yipeeh for the 1820s 🙂
Yes, that fashion plate makes it a bit hard to see the detail on the sleeve, but I interpret it in the same way you did, Sabine, with the bud on the shoulder and the leaves pointing down away from the bud. I completely understand what you’ve suggested for the leaves (sandwiching is a way I explain things all the time! I’m glad other people use that word for sewing things, too.). I think that is a great plan and will keep the sleeves nice and full without any squashing. Yay! Thanks! (And yay 1820s! They’re so cute!)
Wow! That’s lovely. You always have such beautiful, intricate projects going. I look forward to seeing them whenever a post pops up!
Have a happy weekend!
Caroline
Thanks! 🙂 And same to you, of course (with the beautiful projects!). 🙂