Project Journal: 1822-1824 Ensemble Part VII: Trimming Complete (Fezziwig’s Ball 2013)

I am very excited to share that I am finally done sewing the trim on my 1822 Walking Dress and 1824 Ball Gown. I actually finished sewing the trim on both garments about two months ago. Yay me, for being ready for a ball a full month ahead of time!

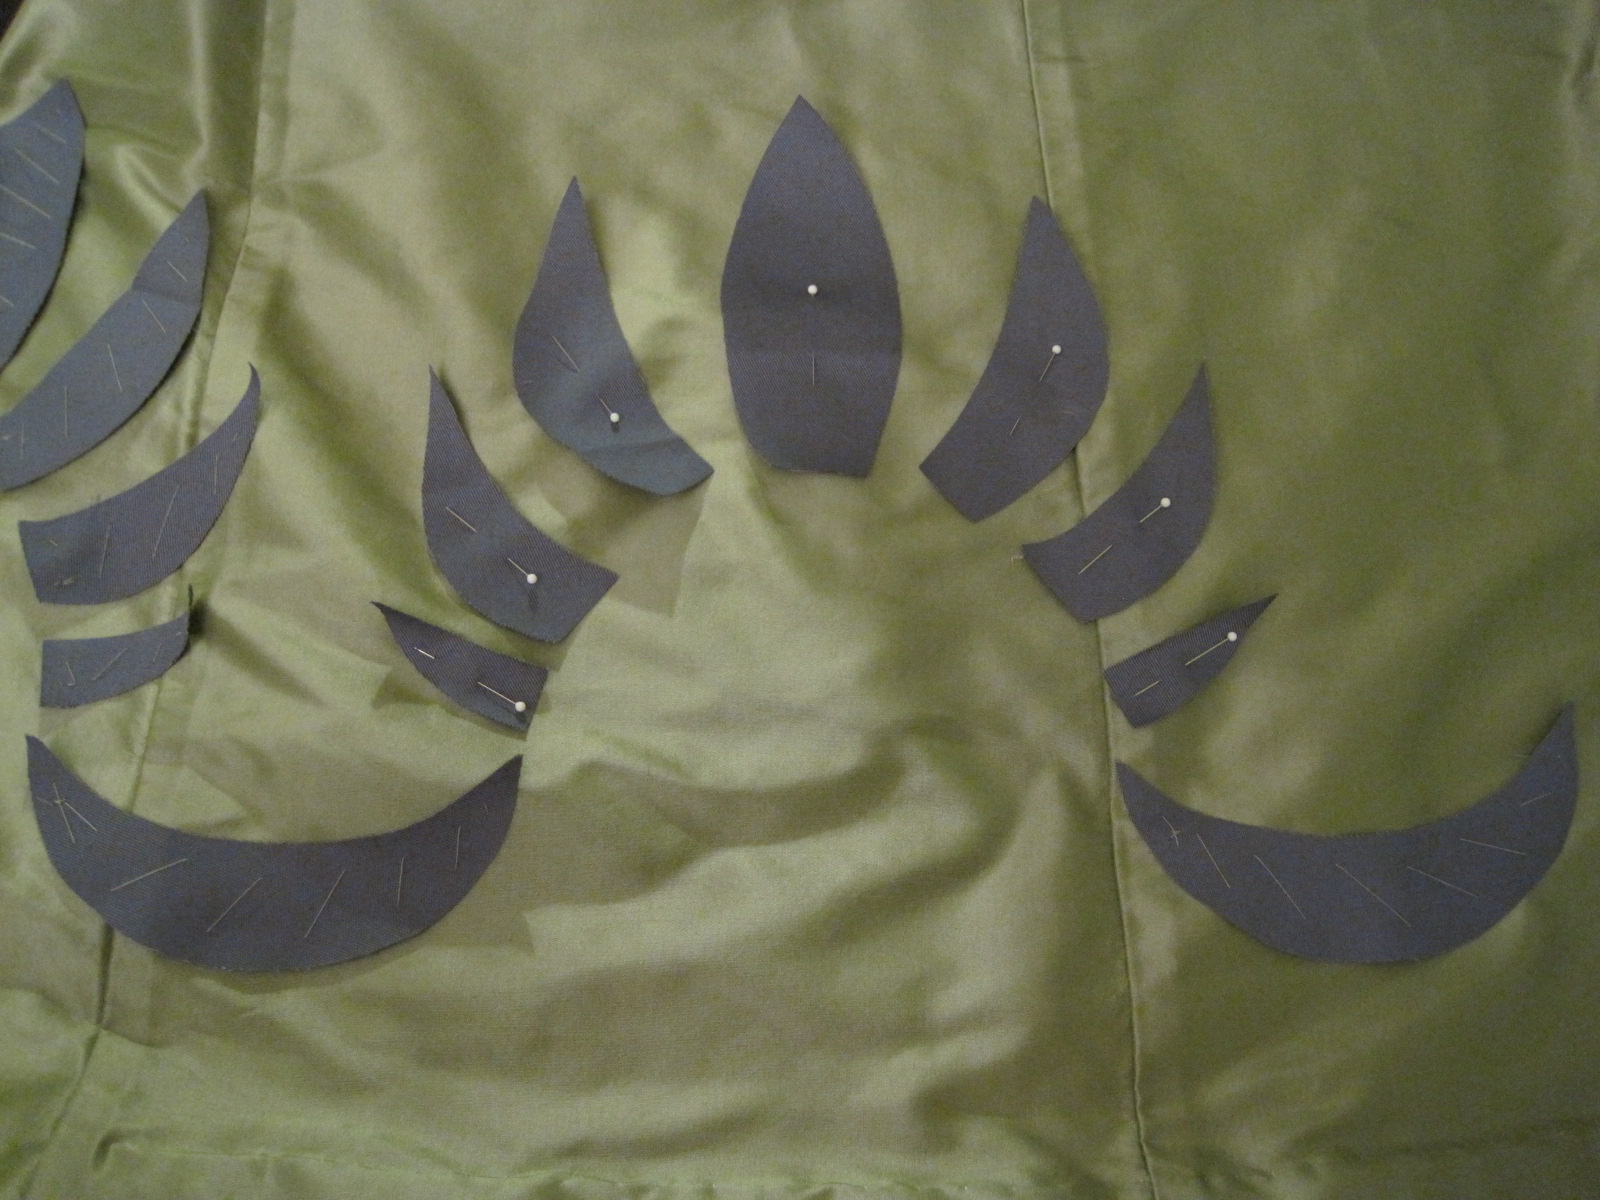
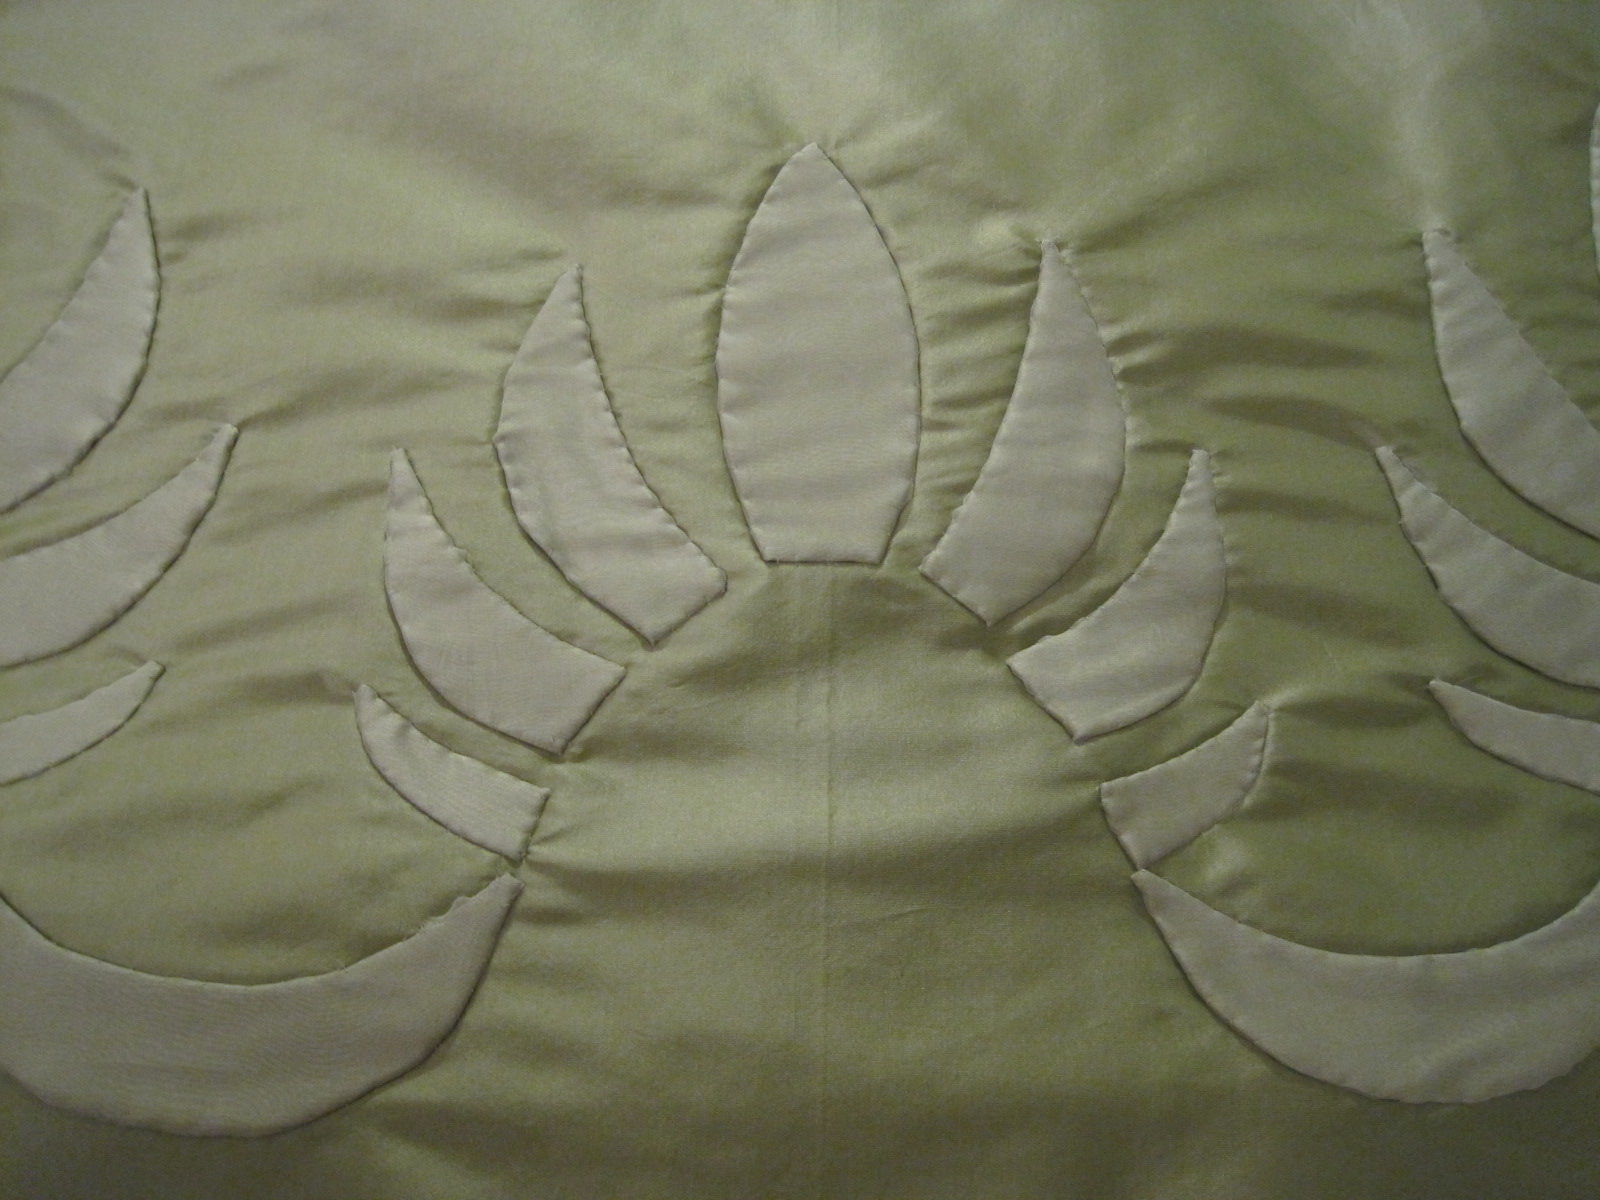
The walking dress has a previous post from when I completed sewing the trim. The ball gown has previous posts about being worn partially trimmed last year and about sewing on the hem appliques. Here is the link to the category that shows all the posts related to this ensemble.

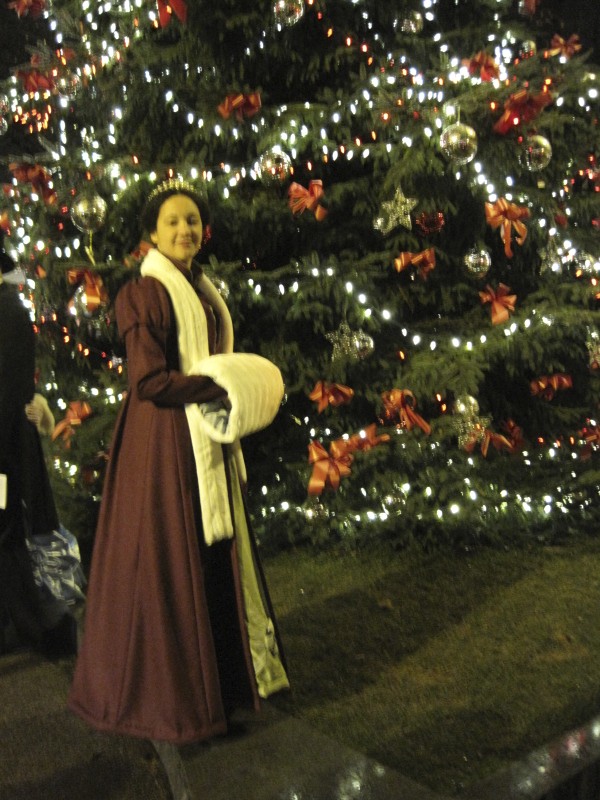
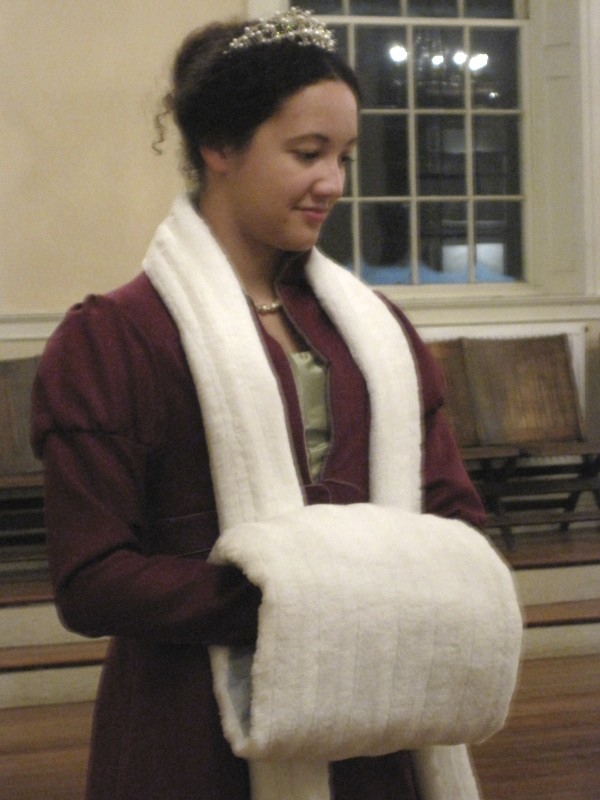
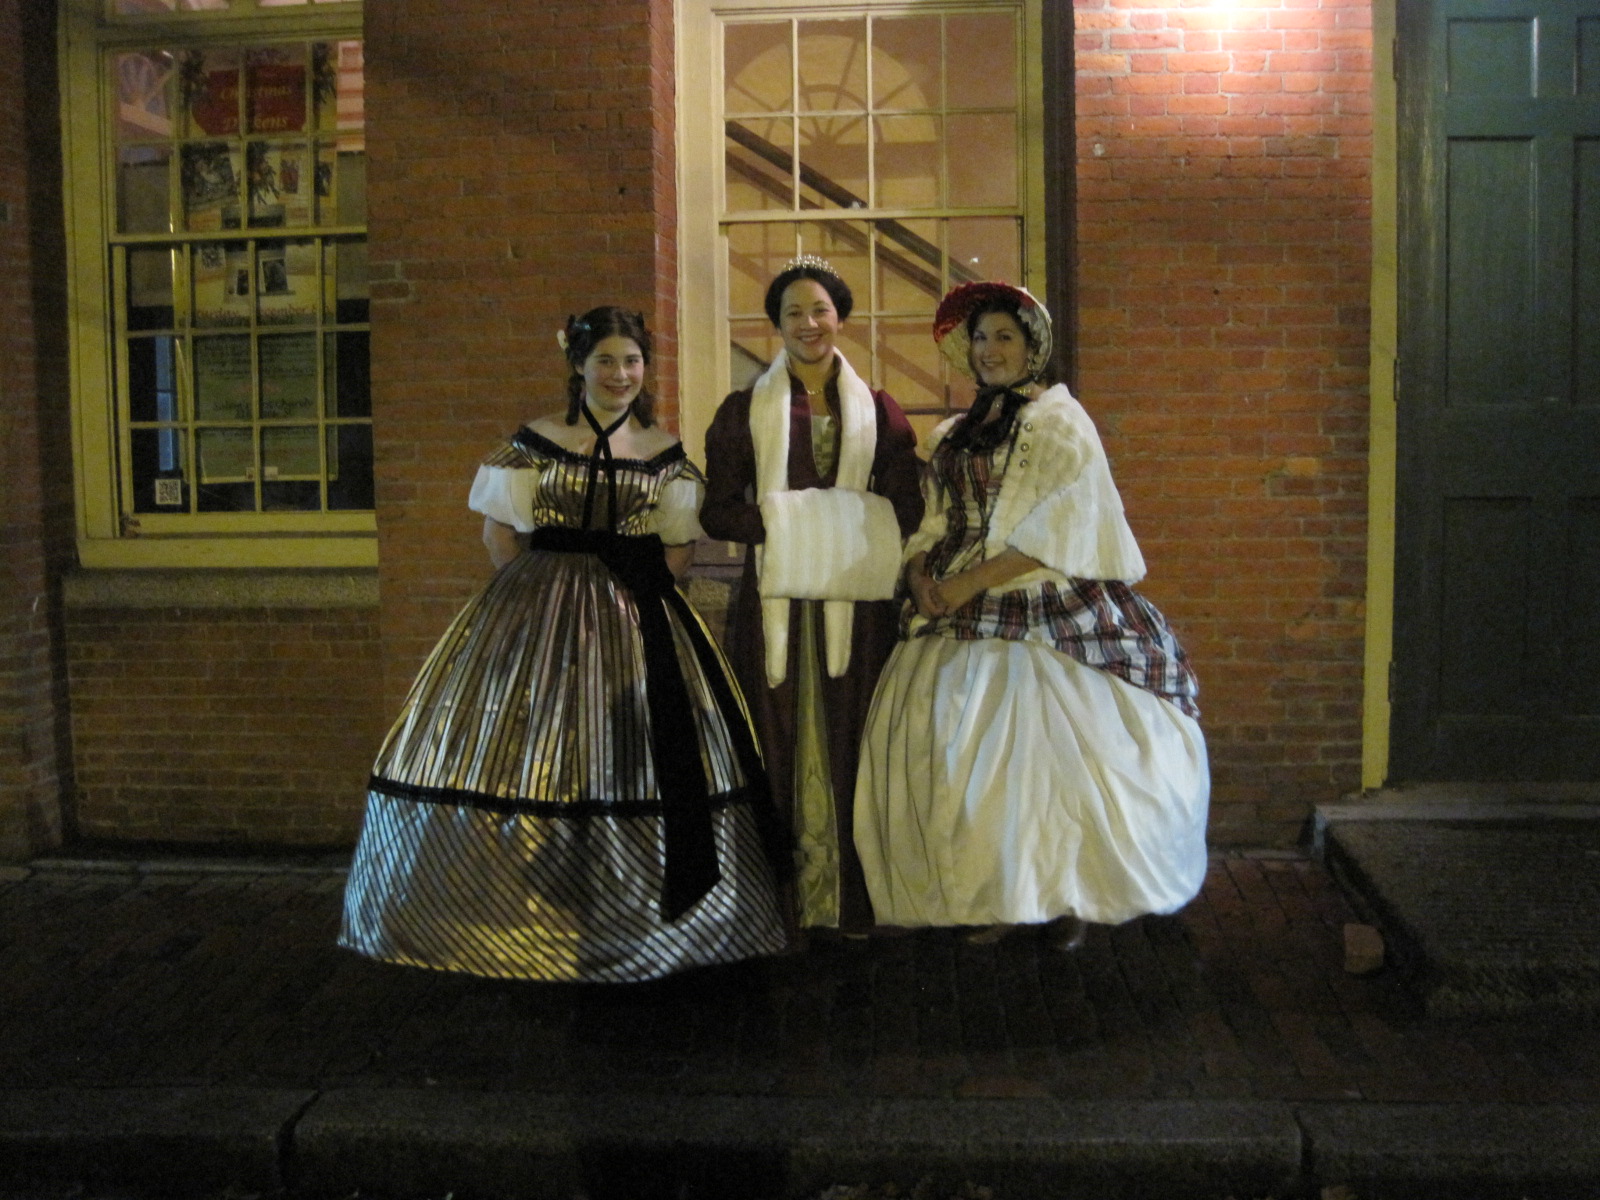
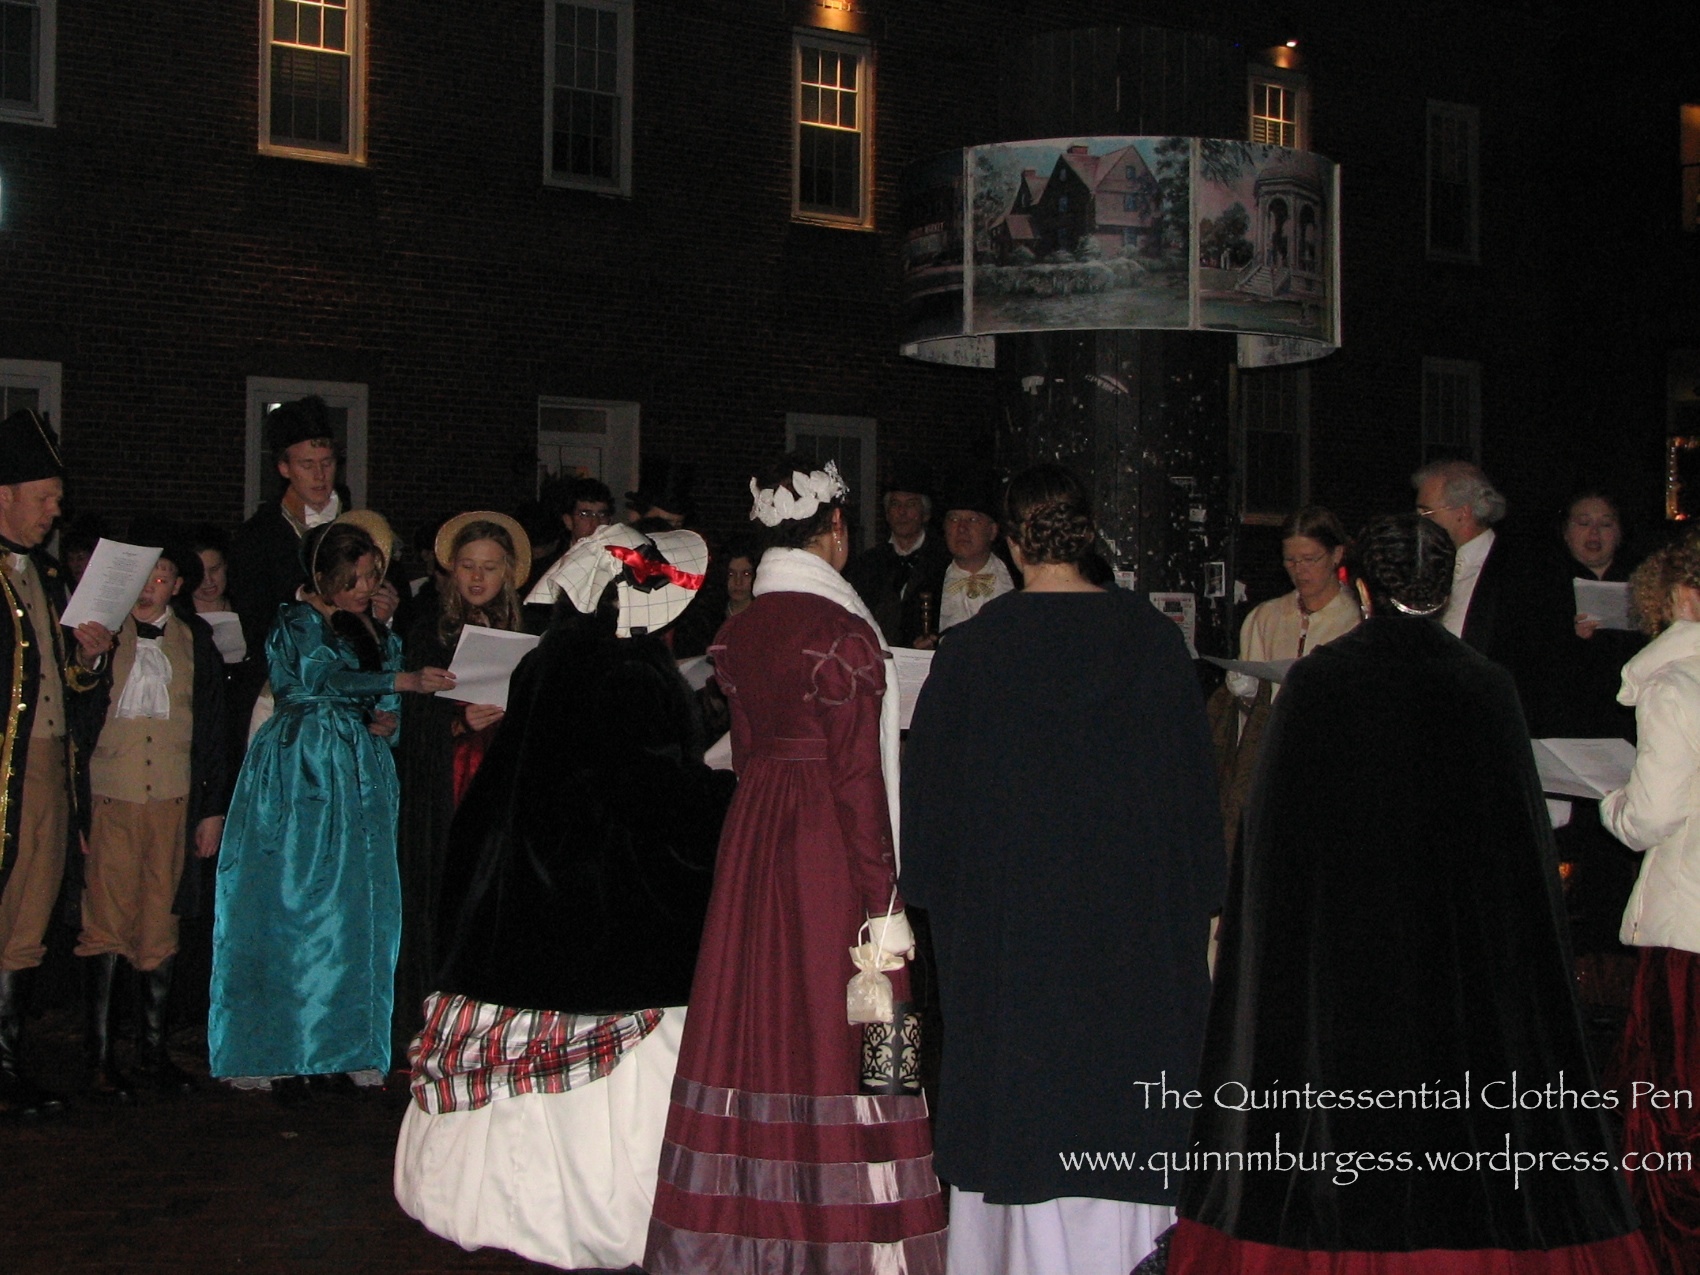
I wore both garments this year at Fezziwig’s Ball, hosted by the Commonwealth Vintage Dancers, just as I did last year. Last year, however, I didn’t have enough time to trim them like I wanted to and I didn’t really have time to look into proper hair styles either. So this year, in addition to adding trim, I also decided to try out a different hair style that would be much more early 1820s.

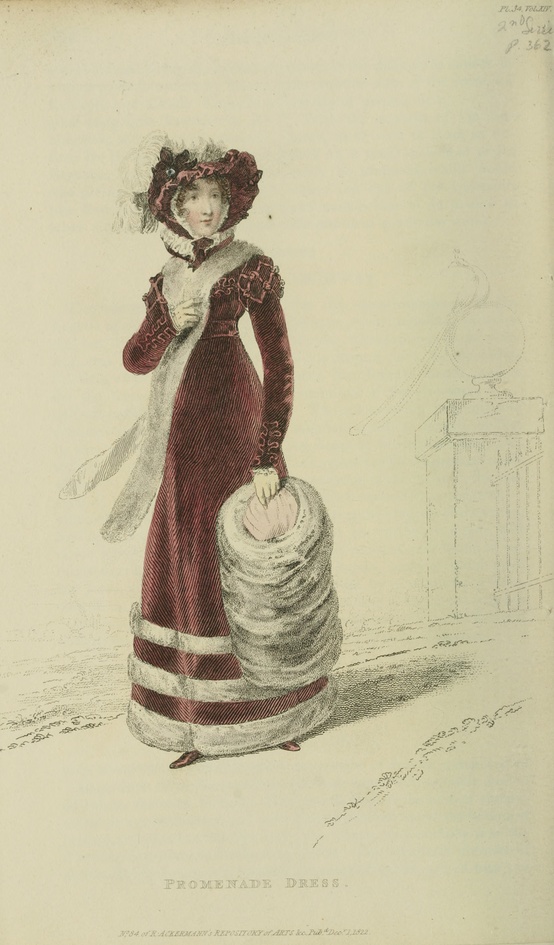
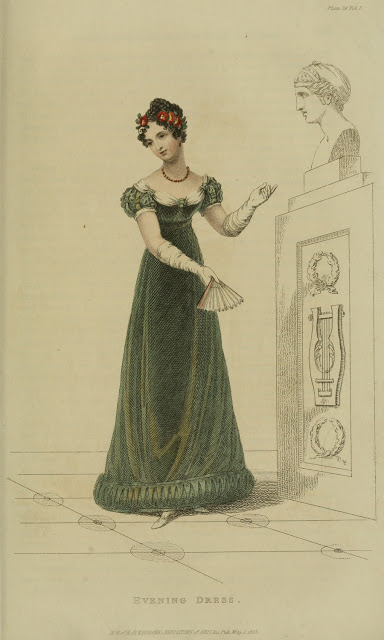
I looked at lots of fashion plates and noted what elements made the styles look 1820s. This is the look, from 1823 (also pictured a little farther down). The style required a new hair wreath, so that was the only last minute sewing for this year’s event. I did the same style as the fashion plated: crossed braids on top of my head and little curls around my hair line. When you have long hair and no bangs like me it’s quite a challenge to get curls around the hair line. I managed to make the little curls happen, but I still want to improve my methods. The hair wreath was essential for hiding my long hair and only showing the curly ends. It is made of wired millinery flowers sewn to a length of millinery wire. The front bits are small flower sprays and the back is velvet leaves.

IMG_3222
Caroling before the ball.
IMG_3213
This is a great view of the back of my walking dress and the back of my new hair wreath.
IMG_7406
Here we are: 1822 walking dress with trim, worn with a chemise, corset, corded petticoat, muff, tippet, gloves, and my new hair wreath. (If you want to see/read more details about these garments you can view the entire Project Journal for this ensemble.)
Ser3 v1 1823 Ackermann's fashion plate 29 - Evening Dress
1823 – Ackermann’s Repository Series 3 Vol 1 – May Issue (My inspiration for my hair wreath, hair style, and for the picture below.)
IMG_7416
Changed for the ball: 1824 ball gown with finished trim on the sleeves and front. Same undergarments with different accessories (long leather gloves with red stockings and burgundy shoes to be in the holiday spirit!).
IMG_3272
Lining up for a grand march during the ball. I loved the garlands hanging in the background.

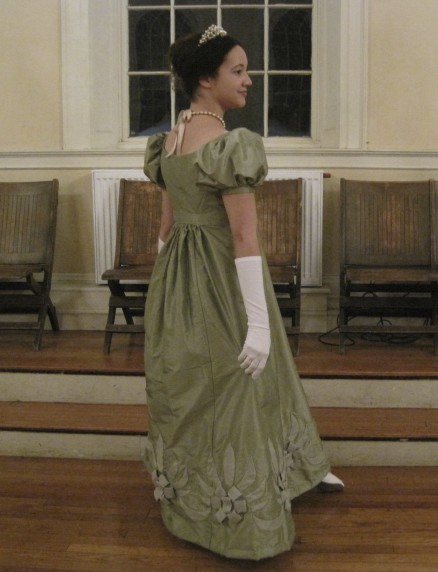
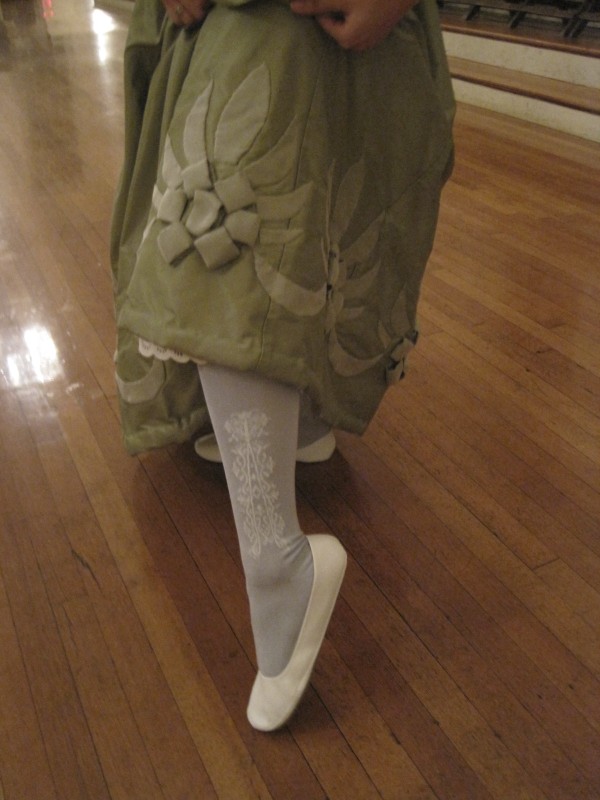
I was amused throughout the night that people kept commenting on how much they liked the sleeve appliques on my green dress. I didn’t realize they were so exciting, but I do think they balance out the skirt nicely. By the end of the night my curls were looking a bit crazed… but it was fun, and I do enjoy wearing these garments and the style of the 1820s, in general. Oh, and I was able to wear my refreshing apron, too, though we were too busy refilling refreshments to take pictures. So yay for completion! It’s nice to get these things off the sewing list to make room for other fancily trimmed things!

HSF #20: Finally Finished 1822 Walking Dress

…It’s only been a year! Or pretty close to a year. I posted an overview of my early 1820s project last November. The project included a petticoat, 1824 ball gown, 1822 walking dress, muff, tippet, bonnet, and chemisette. Some of these things are still in the UFO pile or on the to do list, but I’m super pleased that this post is about the completion of the 1822 walking dress!

The image below is my inspiration for the now complete walking dress. I wore it last December to go caroling outside before Fezziwig’s Ball, but at that point my time had run out and though the construction was complete there was no trim. Below the image of my inspiration is an image of the walking dress as it looked last December with no trim. And below that is an image of the now completed walking dress with trim! It certainly fits me better than the hanger, but you’ll have to wait a few months to see it on me.

19562579602401776_TvaRkZoN_c
Promenade Dress. Ackerman’s Repository. December 1822.
IMG_4083
December 2012. Unfinished early 1820s ensemble.
IMG_4889
Yay! All the trim is on!

Before I share some close ups of the trim and construction, let me share the facts:

Fabric: 4-5 yds of dark pink wool, 4-5 yds of ivory super soft and thick cotton twill, 1/2 yd-ish of lavender polyester velvet, 1/2 yd-ish of lavender silk shantung,  and a bit of canvas for the collar.

Pattern: Adapted from my 1822 green ball gown pattern, I think. It’s pretty much exactly the same except that it has a higher back, collar, and sleeves. The ball gown pattern is based off of a pattern in Janet Arnold.

Year: 1822.

Notions: Pink and lavender thread, polyester batting in the hem, and hooks for the waist.

How historically accurate?: Very, having used modern materials and a few very nice looking modern fabrics . The pattern is from Janet Arnold, so you know it is good on accuracy and the trim scale and pattern is taken from a fashion plate from 1822. As a historic costume I give it 98%.

Hours to complete: Oh goodness… I’m sure the main construction took at least 40 hours and the trim took probably 50ish hours to cut, press, and hand sew. I didn’t keep track at all on this project.

First worn: To Fezziwig’s Ball in December 2012, though with trim it will debut at Fezziwig’s Ball in December 2013!

Total cost: $40 perhaps?

Ok, now for the trim and construction shots.

IMG_4892
Top of the sleeve. First I had to sew the bias into a tube so the raw edges would be finished and the bias could “float” without having to be sewn down all along the edges. Then I tacked the bias tubes in a zig zag then crossed and tied other zig zags to get the finished pattern.
IMG_4891
The front. The pattern looks very much like an oak leaf to me. The bias is stitched in a tube with the raw edges showing on the back, then the edges are stitched down all around to create the pattern.
IMG_4890
The sleeve. The bias is stitched on the same way as it is on the front. The motifs are sewn on the front of the arm rather than the outside.

I actually had forgotten that I’d taken these construction shots. In fact, I had totally forgotten the method I had used to construct my sleeves until I saw the picture again! These pictures where the wool looks more pink than maroon show the color best. It’s really much more vibrant, and much less brownish, than some of the pictures make it look.

IMG_3946
The canvas pad stitched into the collar before sewing the pieces together.
IMG_3949
The top of the sleeve before the gathered sleeve top was sewn on. I didn’t want to waste wool where it wouldn’t be seen, so it stops part way up the lining, then the gathered cap is sewn on and hides the raw edge of the wool.
IMG_3951
The lining is stab stitched to the wool at the cuff.

And just in case you want to read more about my entire project from the early 1820s, here’s a link to that category of entries on my blog. As I continue to finish up other bits and pieces I’ll keep adding them to that category, and it’s neat because the category filters only those posts so there’s a nice continuity.

HSF #2: UFO

Is there enough alphabet soup for you in the title of this post? In case you’re not familiar with those acronyms, it means that this is a post about the Historical Sew Fortnightly Challenge #2: Un-Finished Object. In this case, the UFO is my 1820s petticoat from the very end of 2012.

You’ll remember that I wore it to Fezziwig’s Ball in December, but that I hadn’t finished the neckline? I’m pleased to say that it is now entirely complete!

IMG_4187
Inside view. This petticoat has three ties at center back to keep it closed.
IMG_4188
You know I like my insides to be pretty. This is a closeup of the arm hole and the neckline, which is bound with bias before having the lace sewn on.
IMG_4189
The double hem on the left is center front. Diagonally across the photo is the right side of the back.
IMG_4190
This cording was done last month, so it’s not really part of the UFO-ness, but it is still an accomplishment. 16 rows of hand sewn cording all around the hem.
IMG_4191
A close-up of the lace at the hem and my tiny stitches.

You can see some more detail shots in this past post.

And the facts?

Fabric: 3 1/2ish yds of white cotton

Pattern: Adapted from my 1822 green ball gown pattern. It’s pretty much exactly the same except that it doesn’t have sleeves. The ball gown pattern is based off of a pattern in Janet Arnold and styled as in the fashion plate you can see in this previous post.

Year: 1820s. The inspiration image is dated 1828-1835. You can see the inspiration image and my reasoning for it being more 1820s than 1830s here, in this past post.

Notions: About 1 1/2 yds of broderie anglaise trim, cut in half the long way to create double length; about 1 yd of white edging lace; and about 1 yd of 1/4″ cotton twill tape.

How historically accurate?: Very, having used modern materials. The pattern is from Janet Arnold, so you know it is good on accuracy. The entire petticoat is hand sewn and made of accurate fabric. The lace is machine made and the content is almost certainly not entirely accurate, but it is in the style of the early 19th century and the lace in the inspiration image. I’m not 100% sure that all of my seam finishes are perfectly accurate for this garment, but they are accurate for the period as a whole.

Hours to complete: I’m always bad at estimating this. Let’s say 120 hours.

First worn: To Fezziwig’s Ball in December 2012.

Total cost: Approzimately $13.

Project Journal: 1822-1824 Ensemble Part VI: Muff and Tippet

One thing I actually did finish for the recent ball was the muff and tippet. For visual reference, the picture below shows the garments I’m discussing.

IMG_4145
1822 walking dress with muff and tippet (and a bit of the 1824 ball gown peeking out).

What is tippet, exactly? Merriam-Webster defines it, thus:

1: a long hanging end of cloth attached to a sleeve, cap, or hood
2: a shoulder cape of fur or cloth often with hanging ends


So, how did I make my tippet? First, I cut a piece of high loft polyester batting the length and width that I wanted. (I know they didn’t have poly batting  in the 19th century… but it’s super warm and sometimes just worth it!) Then I cut a piece of my faux fur that was double the width of the batting plus an extra 3/4″ or so on each side as well as about 1″ longer on each end. I centered the batting on the wrong side of the fur, wrapped the fur around to the back, turned one edge under, and pinned. The ends of the fur I just turned up and under the other pinned bits. Then I whip stitched that folded edge down using pretty large stitches. The stitches disappeared in the fur… and voila, tippet! Too bad I didn’t take pictures of the construction!

The muff was slightly more tricky, not because of construction details, but because I agonized over what color lining to use! (To construct the muff, I made two tubes, one out of fur and one out of silk lining. I stitched one end of each tube to the other, turned the whole thing right sides out, inserted a tube of poly batting (warm!), pulled the lining through the middle, and pinned the open side of the fur to the silk, with the fur edge turned under. Then I simply whip stitched it like I did the tippet.

But before I could make the muff, I had to pick the lining color! Did I want it to match my walking dress trim (and be lavender?) Did I want to pick a color from a fashion plate? What colors were used in fashion plates? So many questions! I determined that of the muff linings I could see in fashion plates from that general period, there were three recurring colors: pink, blue, and white. Here’s what I came up with, image-wise:

PINK

19562579602803386_gVTjJrmC_c
January 1823 Walking Dress. La Belle Assemblee.
19562579602401776_TvaRkZoN_c
December 1822 Promenade Dress. Ackerman’s Repository.
19562579602401842_51zasE7P_c
January 1826 Promenade Dress. Ackerman’s Repository.

BLUE

19562579602401785_nUUKnK8g_c
March 1823 Walking Dress. Ackerman’s Repository.
186688347022992512_HVaD6lEY_c
December 1825 Carriage Dress. Lady’s Magazine.

WHITE

186688347022992610_ERzVeK6C_c
1825 Promenade Dress.
83035186849486953_XGi68fzU_c
1829 Walking Dress. Ackerman’s Repository.

UNKNOWN/OTHER

145663369167455361_eRX7bB2f_c
c. 1810 Redingote (and muff!). KCI. (Also a tippet, though they call it a “palantine”: which M-W defines as a fur cape or stole covering the neck and shoulders.)
19562579602930398_Bi3xvCKC_c
November 1814. La Belle Assemblee.
Volare Digital Capture
November 1817 Walking Dress. Ackerman’s Repository.
186688347023026494_QoWFeN5r_c
1823 Carriage Dress

So pink came in with 3, blue and white tied with 2 each, and then there were an assortment of unknown/other. But I didn’t like the idea of pink with my dark pinkish wool (you can see what that would look like in the December 1822 fashion plate: that’s the inspiration for my walking dress), so I settled for the light blue, which I think is delicate and softly Regency. Also, I had just a small amount of that color silk, and it’s a color that doesn’t really complement my skin, so I wasn’t likely to use it for a bonnet or something similar… but with a muff most of my skin is hidden! You can see the predominance of white fur for the muffs in these fashion plates (one of the reasons I chose white fur for the muff and tippet). There are brown, too, but a lot of white! 7 out of the 11 I included are white. Well, there you go. That’s my rationale for the muff and tippet.

All of these images are on my Pinterest pages with lots of other beautiful garments. Specifically, these are on the 1810s Inspiration1820-1824 Inspiration, and 1825-1829 Inspiration pages.

Project Journal: 1822-1824 Ensemble Part V: Almost Finished Petticoat

Recently, at Fezziwig’s Ball, I was able to wear my almost-finished 1820s ensemble. You can see pictures of that event, which includes pictures of the ball gown, walking dress, muff, and tippet in this previous post. In that post, I didn’t get to share pictures of the petticoat that went along with these 1820s garments, so that’s what this post is about! For the record, after the ball I simply starting taking off layers and having my friends take pictures so I would have evidence of all my sewing (while I still was wearing the proper hair style and accessories!).

IMG_4147
Ok, I’m making a funny face (I think my eyes are closed)… but it’s full length picture of the petticoat! You can see the shape, and the cording, and the lace at the bottom.
IMG_4148
I didn’t get to finish the neckline before the ball… so you can see how that right shoulder seam is starting to split. I’ll have to repair it before finishing the neckline.

This simple white cotton petticoat has 16 rows of cording to help it stand out. It is entirely hand sewn and closes in the back with ties. Close up photos showing the construction of this petticoat are in this previous post.

With this petticoat I wore my short sleeve linen chemise and pink 1820s/30s corset. Both of these things were made last year and have been worn multiple times since then (especially the linen chemise, which gets worn often!). I finally have pictures of me (versus Squishy, the dress form) in the corset! Granted, it’s not a particularly exciting picture, but sometimes you just have to take what you can get.

IMG_4079
1820s/30s corset. You can read more about the inspiration and construction by clicking on the links. Clearly, I haven’t actually quilted a diamond pattern on the front like I planned to do when it was built…

And just for fun, I thought I’d include this fun picture of me getting ready for the ball. One of my friends is on an “artsy photo” kick… I didn’t even know she was taking this picture, but I like it! I especially like the mixture of modern and historic that is me in my chemise and corset putting on mascara… they had modern mascara in the 1810s, right?!?

IMG_6411
Hee hee! (My putting on mascara face…)

Project Journal: 1822-1824 Ensemble Part IV: Partial Completion For The Ball (Fezziwig’s Ball 2012)

Yikes, that is a long title… but I do like my titles to be descriptive sometimes…

As is suggested by the title of this post, though I did have new, wearable 1820s clothes (with closures, yay!) for Fezziwig’s Ball this past weekend, not all of the garments were entirely completed. I had set out with a rather rigorous plan for the month of December and I will admit that “my eyes were bigger than my stomach” and I wasn’t able to fully complete all of the projects I wanted to. That being said, however, I was very pleased with how things looked. (I will also admit that I spent the week before the ball furiously sewing every night… in fact, I was still sewing appliqués on the afternoon of the ball!)

IMG_4083
Caroling before the ball! We stopped at the super huge town Christmas tree to take pictures. I was perfectly warm in my new clothes!
IMG_7378
After caroling we paused outside the hall to take some more pictures… As you can see, the muff and tippet did get done! Entirely! Yay!
IMG_4101
Back of the new walking dress. I only just noticed that someone is in the window… That’s sort of creepy looking!
IMG_4104
Friends outside the hall.
IMG_4106
Staging a “gossiping” photo before the ball officially began.
IMG_4110
Waiting for the dance, Sir Roger De Coverley, to begin.
IMG_4113
Dancing Sir Roger. It is similar to the Virginia Reel.

I had a wonderful time during the ball. It was crowded, but that didn’t stop me from enjoying myself. Perhaps because I knew more people than I have in any year past, the entire evening felt full of friendship and fun. Also, it’s super new and exciting to dance the same dances as other balls, but to the tune of Christmas music! And there were lots of beautiful dresses and fashionable gentlemen to keep one’s eyes occupied.

After the ball I imposed on my friends to take pictures (in better lighting) of my new clothes, so I could document them here on my blog. I, in turn, took pictures of them so they would have pictures as well! That’s only fair, really.

IMG_4123
I am the photographer in this one.
IMG_4131
Here it is! Clear, full length picture of my new gown! I finished the hem appliqués! Whew! But it is missing it’s sleeve appliqués and the center front appliqués.
IMG_4135
I was having trouble making my hair look the way I wanted to, so I settled for a tiara (it’s actually the same one I wore to the 1890s Soiree during Newport Vintage Dance Week). In the end, I really liked how it looked!
IMG_4076
A closeup of the finished appliqué motif around the hem.
IMG_4136
For this event I took the opportunity to wear my blue American Duchess clocked stockings. I liked them! The only annoying thing is that one got brown puddle stains on it during caroling. I’ll have to see if I can scrub it out. I think I can.
IMG_4145
Here we are, a picture of the walking dress with better lighting! You can actually see the dark raspberry color of the wool. It’s pretty scrumptious. It’s soft on it’s own, but also lined with soft cotton, so really it’s quite cozy.
IMG_4152
This is how we all felt after the ball.
IMG_4156
Proof that the sleeve appliqués were partially complete! I didn’t have the time to finish the raw edges, make the centers, or sew them on…

Pictures of the petticoat will be in an upcoming post. It was almost finished for the ball. I’m looking forward to adding trim to the walking dress and the front and sleeves of the ball gown, as well as finishing the bonnet. All of these things were started (the pieces cut out and even sewn in some cases), but as you can see in the pictures, they didn’t make it in time for the ball. Oh well!

SaveSave

Project Journal: 1822-1824 Ensemble Part III: Green Dress Hem Appliqués

Well, I’ve got the green silk ball gown sewn together. That’s good, because the ball is fast approaching. There’s only a week to go! Eep!!! I’ve finished the padded hem, but I still need to have someone mark center back for me so I can put closures on. And I haven’t set the neckline yet, either, because I’m waiting to see how it looks with the back actually closed… So far every time I’ve tried it on the back has just been hanging open, because I can’t actually reach that part of my back by myself. Never fear, though, I’ll be seeing friends this weekend who can help with marking the back for me! Yay!

You’ll remember from my overview of this early 1820s ensemble that the fashion plate below is my inspiration for this gown.

19562579602401819_964eyRUt_c
May 1824. Ackerman’s Repository.

I’ve been furiously hand sewing, working on the skirt appliqués on the ball gown. These are my first priority. In part this is because they’re already started (and it would look silly to have only a fraction of them done) and in part this is because the hem decoration is pretty essential for 1820s dresses. This is how I’m making the appliqués.

IMG_3966
After cutting out literally hundreds of pieces… I pin the blue canvas bases to the silk of the gown. The pinning allows me to make sure everything is symmetrical before sewing the bases down. Once I’m satisfied, I baste the bases to the silk, leaving 1/4″ around all the edges unsewn, so I can tuck seam allowance under later.
IMG_3963
Whew! Finished basting that repeat of the pattern. The blue canvas is tightly woven and hardly frays, even at the points and in the curves! And even after being manipulated and folded while I’m basting all the pieces down, which is important because it keeps the shape accurate for the layers that go over the base.
IMG_3965
The next step is to take the two top layers (a layer of the green silk and a layer of white silk organza) and sew them over the base. The base provides sturdy edges so that I keep all those nice curves when turning under my seam allowance. This piece is just about done, except for the last corner. I used the technique in this great quilting appliqué blog post to make my sharp corners as sharp as possible.
IMG_3969
And here’s what the motif looks like when all the bases are covered! The silk organza is pretty tricky for making sharp points, so I think these turned out pretty well! The motifs are still missing their center sections. I’m focusing on all the pointy bits first. Right now I’ve got 3 out of 7 motifs done.
IMG_3970
This is what the inside of the skirt looks like after the appliquéing is finished. It’s kind of neat, I think, to see the relief of the front shapes.
IMG_3967
Most recently, I’ve just finished basting on the bases where they meet at the back. You can see in this picture there was only one more motif to go!

Right now the motifs really remind me of pineapples, a common motif in appliqué quilts (as a quilter as well, I appreciate the overlap between related interests). I’m sure once the centers are added they will look more like flowers and much more like the fashion plate. Each motif is 11″ tall and the repeat is 12″.

As I continue to sew these, I’m thinking about the sleeve appliqués. Currently, I’m stumped. I was going to sew my motifs on in the same way as the skirt, but I also made my sleeves pretty gathered… so I’m not sure how to nicely hide my seam allowances while also keeping the gathers looking un-squashed. I want the sleeve appliqués to sort of float on the gathered sleeves… I’m still brainstorming on how to make that happen. Perhaps I’ll stitch the seam allowance to the back of the base and then hope that the gathers mean you won’t see the base past the 1/4″ seam allowance that gets turned? If you have ideas, I’d love to hear them!

Project Journal: 1822-1824 Ensemble Part II: Initial Petticoat Details

Petticoat. 1828-1835. Manchester City Galleries.

This bodiced petticoat is the inspiration for the first piece of my 1822-1824 ensemble that I need for December events. You can read more about the overview of the ensemble by viewing my last post: here. Despite the slightly later date given for this garment (later than my target of 1822-1824), the shape and construction are consistent with garments from the earlier 1820s, so I have no qualms about using this for my purposes in this case.

The description from Manchester City Galleries:

White cotton with high waist. Low, wide, round neck edged with embroidery and lace frill; piped armholes; front in one bias-cut section, back in two shaped sections, centre back fastening with drawstring at top and bottom of neck edging and at high waistband and two buttons; skirt front in one slightly flared section, two sections each side flared towards back, slit at hip in right back seam, centre back in two straight sections, closely gathered at centre waist; sixteen lines of piping at hem; edging of finer cotton scalloped and with openwork embroidery.


I used this description in combination with the 1820s patterns in Janet Arnold to create the bodice and skirt patterns. My petticoat is constructed out of plain white cotton. It is entirely hand sewn and has 16 rows of cording in the skirt. There is a edging of white cotton openwork embroidery at the hem. The seams are all flat felled in the skirt. The bodice seams are turned twice and stitched on each side of the seam. The petticoat closes in the back with ties.

Bodice of the petticoat with unfinished neckline.
Near the hem: 16 rows of cording and embroidery edging.
Super close up of a flat felled skirt seam, narrow hem, and whip stitches attaching the embroidery. The embroidery is whip stitched to the hem at the very bottom, and the top edge is whipped again on the inside (that’s the top horizontal row of stitches).
Back of the bodice.

The only remaining work to be done is to add another tie between the current two since the back wants to gap open just below my shoulder blades, to finish the neckline, and to adjust the gathers across the back (secret tip I’ve learned through building these garments: to get that great 1820s triangle shape, your gathers have to be super concentrated at the center back area, not spread out across the entire back, as these currently are). I plan to finish the neckline with narrow white lace, but I want to determine the neckline of my ball gown before finishing the neck of the petticoat. You understand that desire, I’m sure!

Differences from the original include: that I have a seam up center front of the bodice (no particular reason, it’s just that’s how it turned out), my cording is spaced closer together (which I’m not sure I like as much as the original, but I’m not taking it out now!), my armholes are narrow hemmed rather than piped, and my skirt closes right in the middle of the gathers rather than off center at the side back seam.

Pictures of the entire petticoat will have to wait. It looks pretty foolish on hanger, doesn’t fit a dress form (because the bust is so high), and it’s super awkward to get a full length picture of oneself… so we’ll just have to wait until I’m wearing it!

Project Journal: 1822-1824 Ensemble Part I: Overview

Well, as you recently read, I have a 9 month sewing plan to get me through May of 2013. It’s not set in stone (which means that mostly I keep adding to it, not taking things away…), but it gives me a great overview of what I need to accomplish and by what month. Deadlines really help in getting things completed!

The first major portion of the sewing plan is an ensemble of clothing from about the year 1823. I’ve been doing lots of looking at fashion plates and extant clothing from the early 1820s, in books and online. Here’s a link to my pinterest board: 1820-1824. I had so many pins in the 1820-1829 board that I had to separate the decade, so I also have a separate pin board of 1825-1829.

The 9 month plan includes the following pieces: petticoat, ball gown, walking dress, muff, bonnet, and chemisette. I’ve added one more thing since the plan was created: a tippet to match the muff! Before I explain why I want these items (ie, where I plan to wear them!), let’s look at my inspiration for the items themselves!

Petticoat. Manchester City Galleries. (I’m making a petticoat out of white cotton. It is entirely hand sewn.)
Actually a Dinner Dress (but I’ll use it as a ball gown). Ackerman’s Repository. May 1824. (I guess I lied about the year… I’ve been looking at the images so much I haven’t even glanced at the date in ages! Anyway… I’m making this in apple green silk with hand sewn silk organza appliqués.)
Promenade Dress. Ackerman’s Repository. December 1822. (I am making this out of deep, rich pinkish burgundy wool with hand sewn lavender silk trim.) This is also my inspiration for the tippet. (I’m making the tippet out of white faux fur.)
Walking Dress. Ackerman’s Repository. March 1823. (I think this is where I got the year 1823 from… This is another influence on my walking dress design, especially at the collar.) This is also my inspiration for my muff. (The muff will be the same fur as the tippet, lined with pale blue silk shantung.)
Bonnet. C. 1820. The Met. (I plan to make this in lavender to match the walking dress.)
Chemisette. c. 1810-1825. Snowshill Collection. (Yes, this is one of the ones in Janet Arnold. I plan to make this out of lightweight cotton and use my fluting iron! However, I have to say that if one thing in my December-to-do doesn’t make the cut, this would be it. I really want to take my time on this and play with my fluting iron, and I’m not sure I’ll have the time on this one…)

What is all of this for, you ask? I plan to wear the whole ensemble in December when I attend Fezziwig’s Ball, a 19th century ball hosted by the Commonwealth Vintage Dancers in Salem, MA. Since it’s a ball, I’m sure you understand why the petticoat and ball gown are required! But why the outerwear? Before the ball begins, ball-goers have the opportunity to go caroling around the streets! It’s really fun, and usually pretty cold. I need to stay warm, hence the wool walking dress, tippet, and muff. The chemisette is to fill in the collar of the walking dress, and the bonnet is really icing on the cake to help pull the whole ensemble together! As an added bonus, later this winter my friends and I hope to go ice skating in 19th century dress, so this will also be my ice skating outfit!