A White 1780s Petticoat (HSF #7)

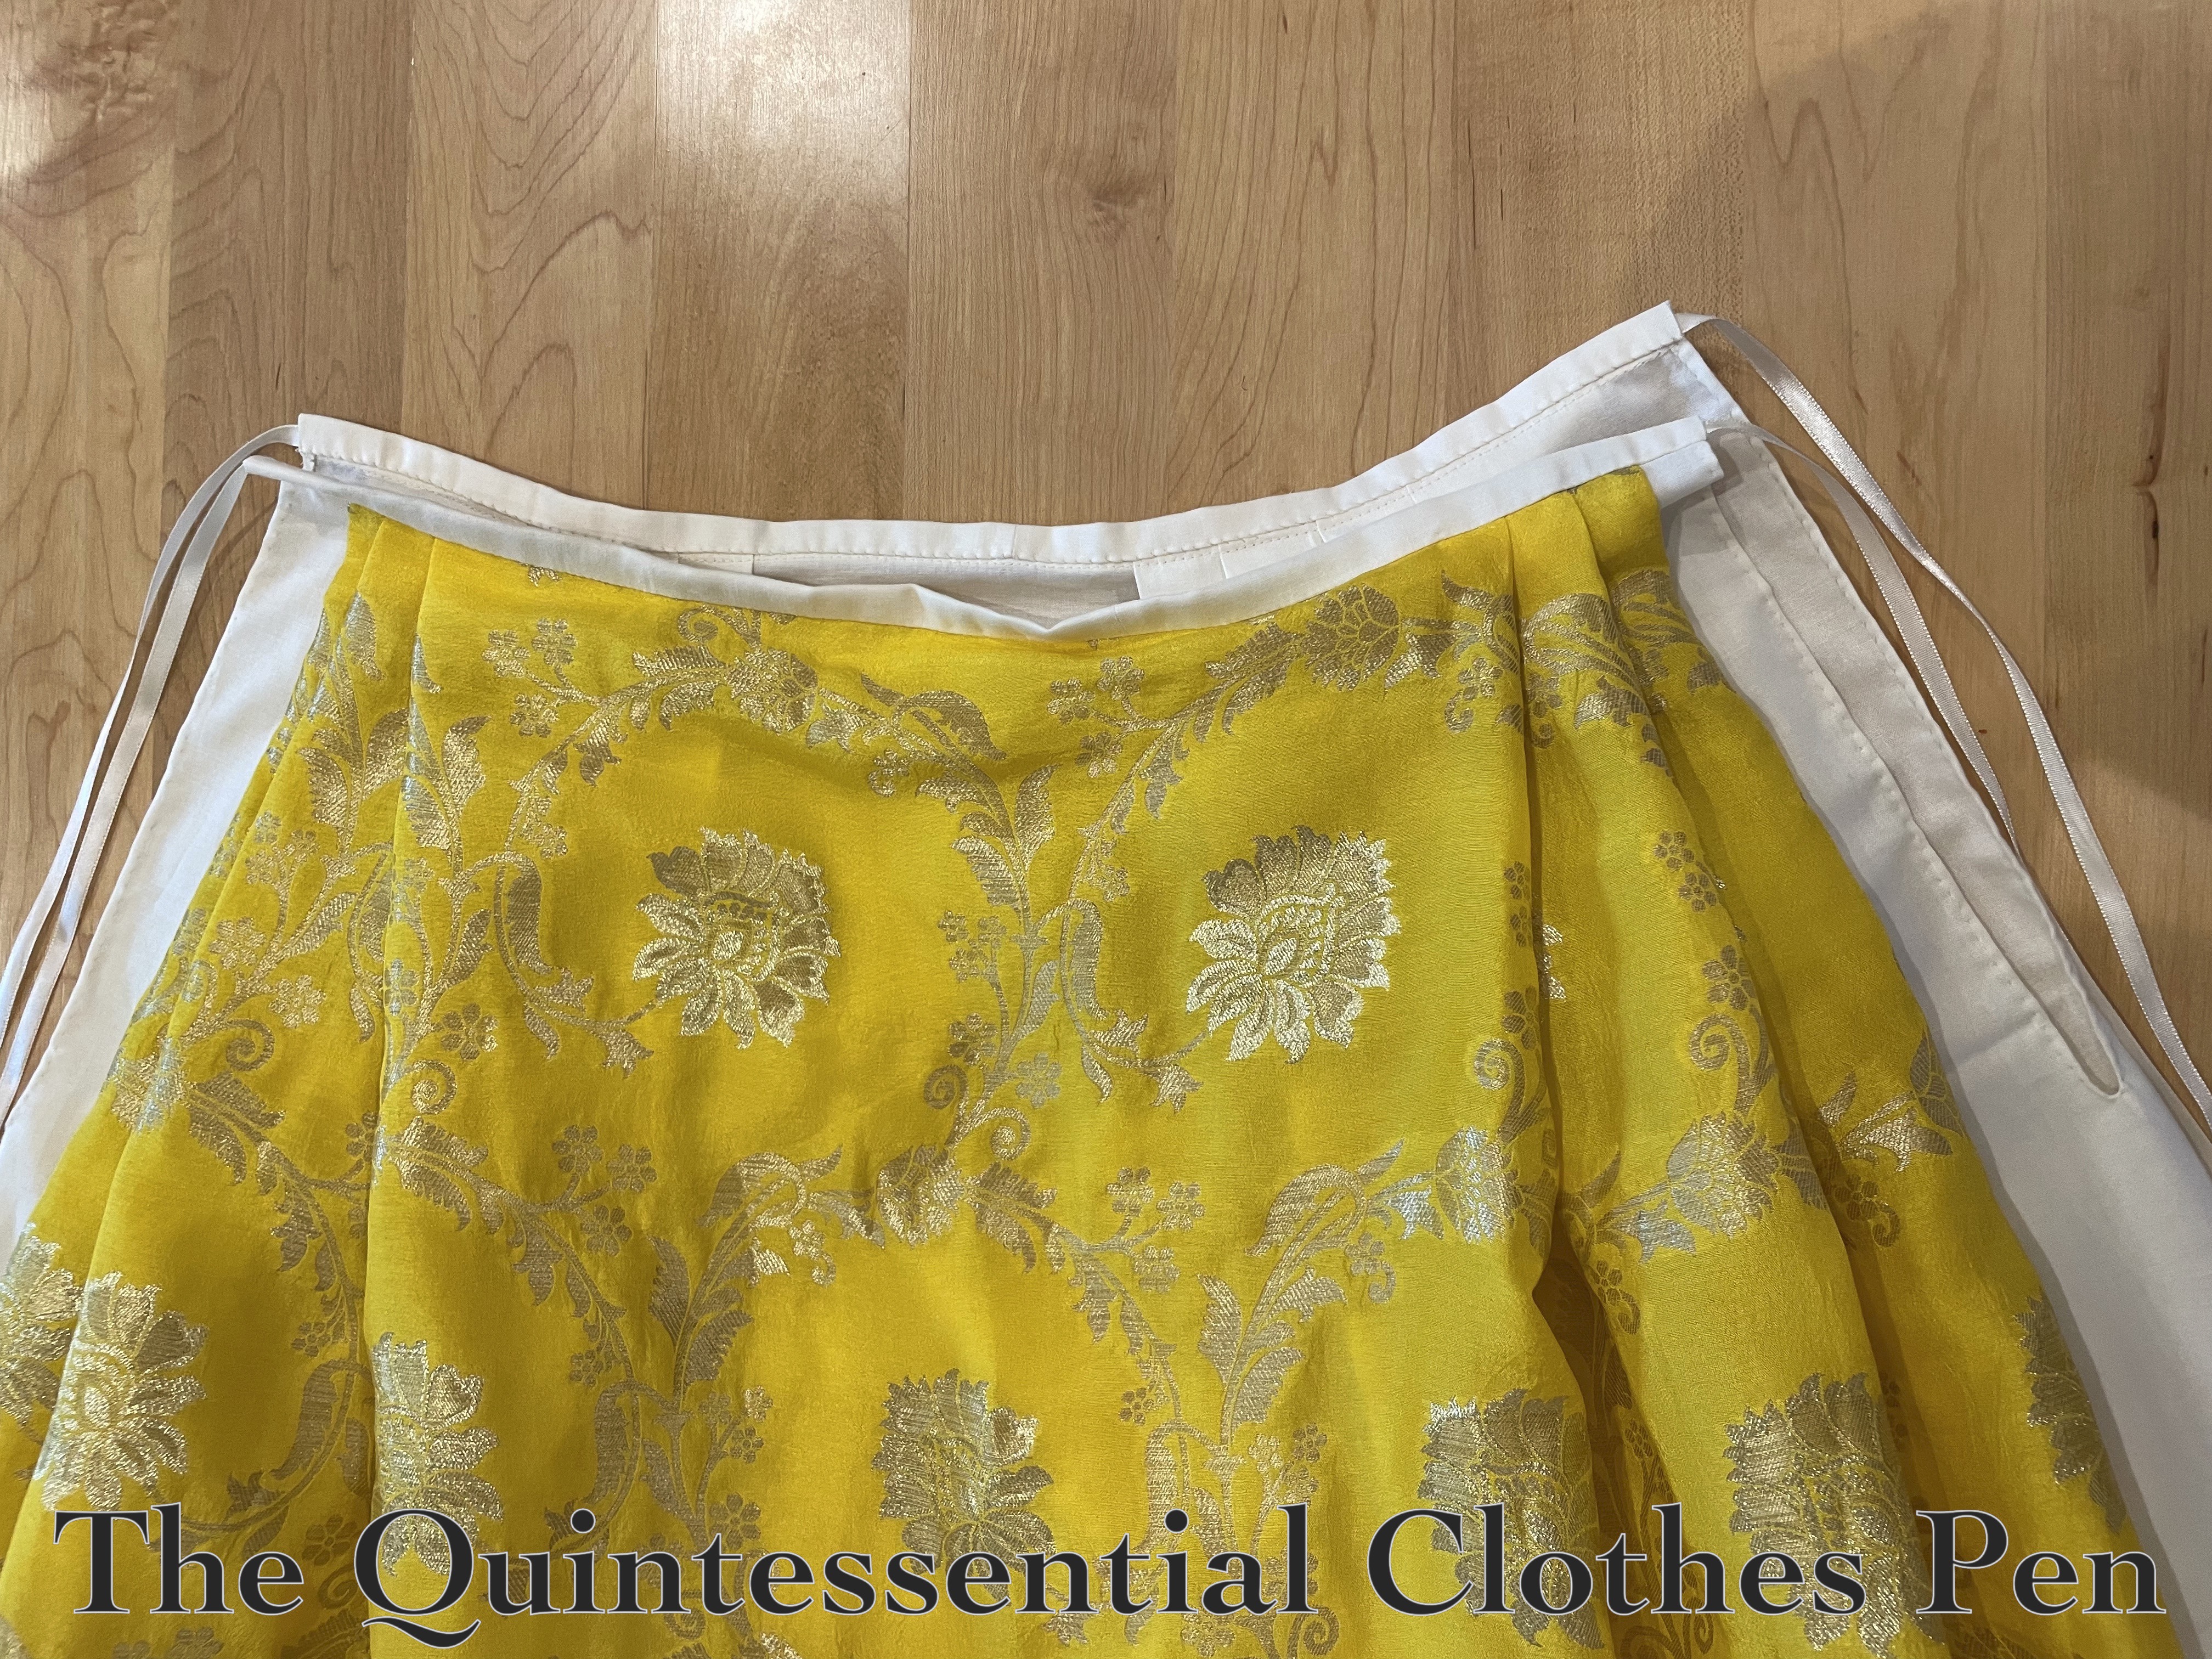
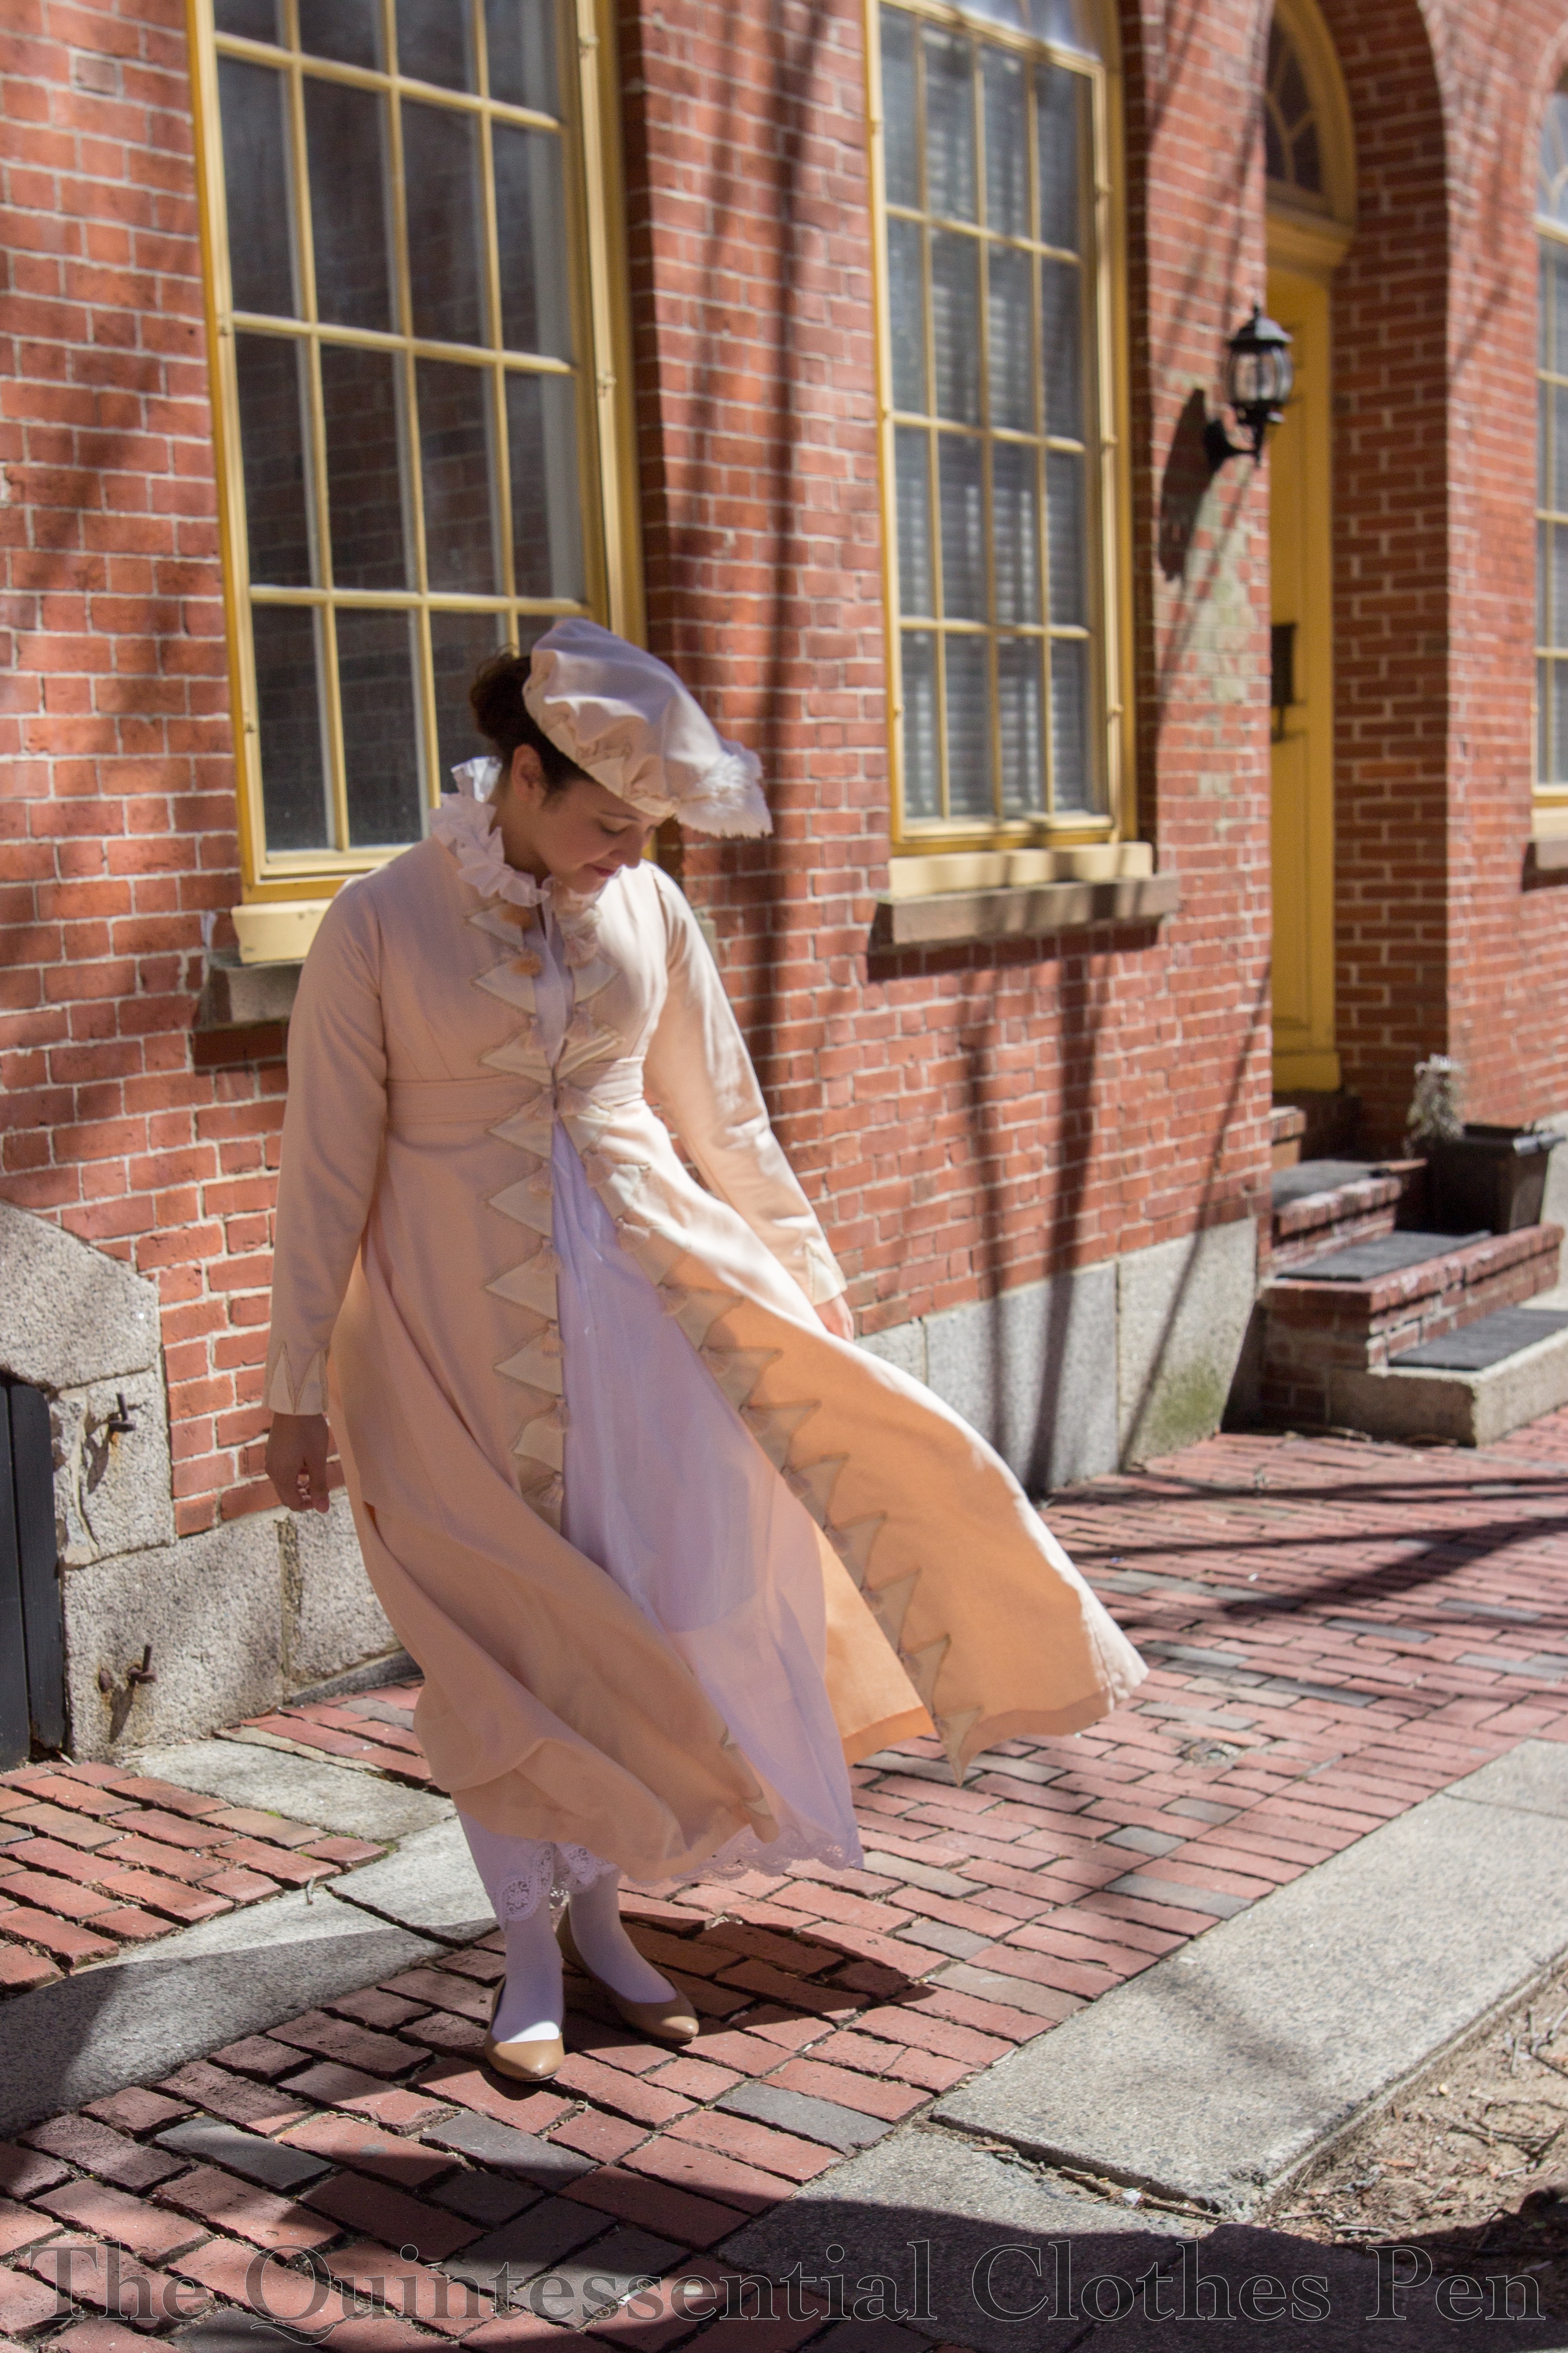
The plan for the yellow sacque ensemble I’ve been working on was to provide an under petticoat that would help the yellow silk petticoat (that I posted about in November 2024) hang nicely and be opaque. I thought I’d completed this goal in December 2023, when I re-used fabric from an old Regency style dress to make a base petticoat (you can read the details about that here).

As I started working on the yellow petticoat, though, I realized that the silk was very thin, and that the blue under petticoat (made from the dress) was distorting the yellow color, making it look washed out and less vibrant. Ugh! What to do??

I determined that a light, neutral color under petticoat was needed and looked through my stash to see what I has in enough quantity for a new petticoat. The goal was to make this from the stash!

I found that I still had yardage of the mystery $1 per yard fabric I’d purchased two ten yard rolls of about ten or twelve years ago. I’ve used it for many projects, including all sorts of historical underwear and other projects (my recent 1790s petticoat and bum pad, a recently updated 1810s petticoat, lining a sheer 1895 blouse, lining a 1953 dress… and probably more things that aren’t coming to mind right now!). It’s very versatile!

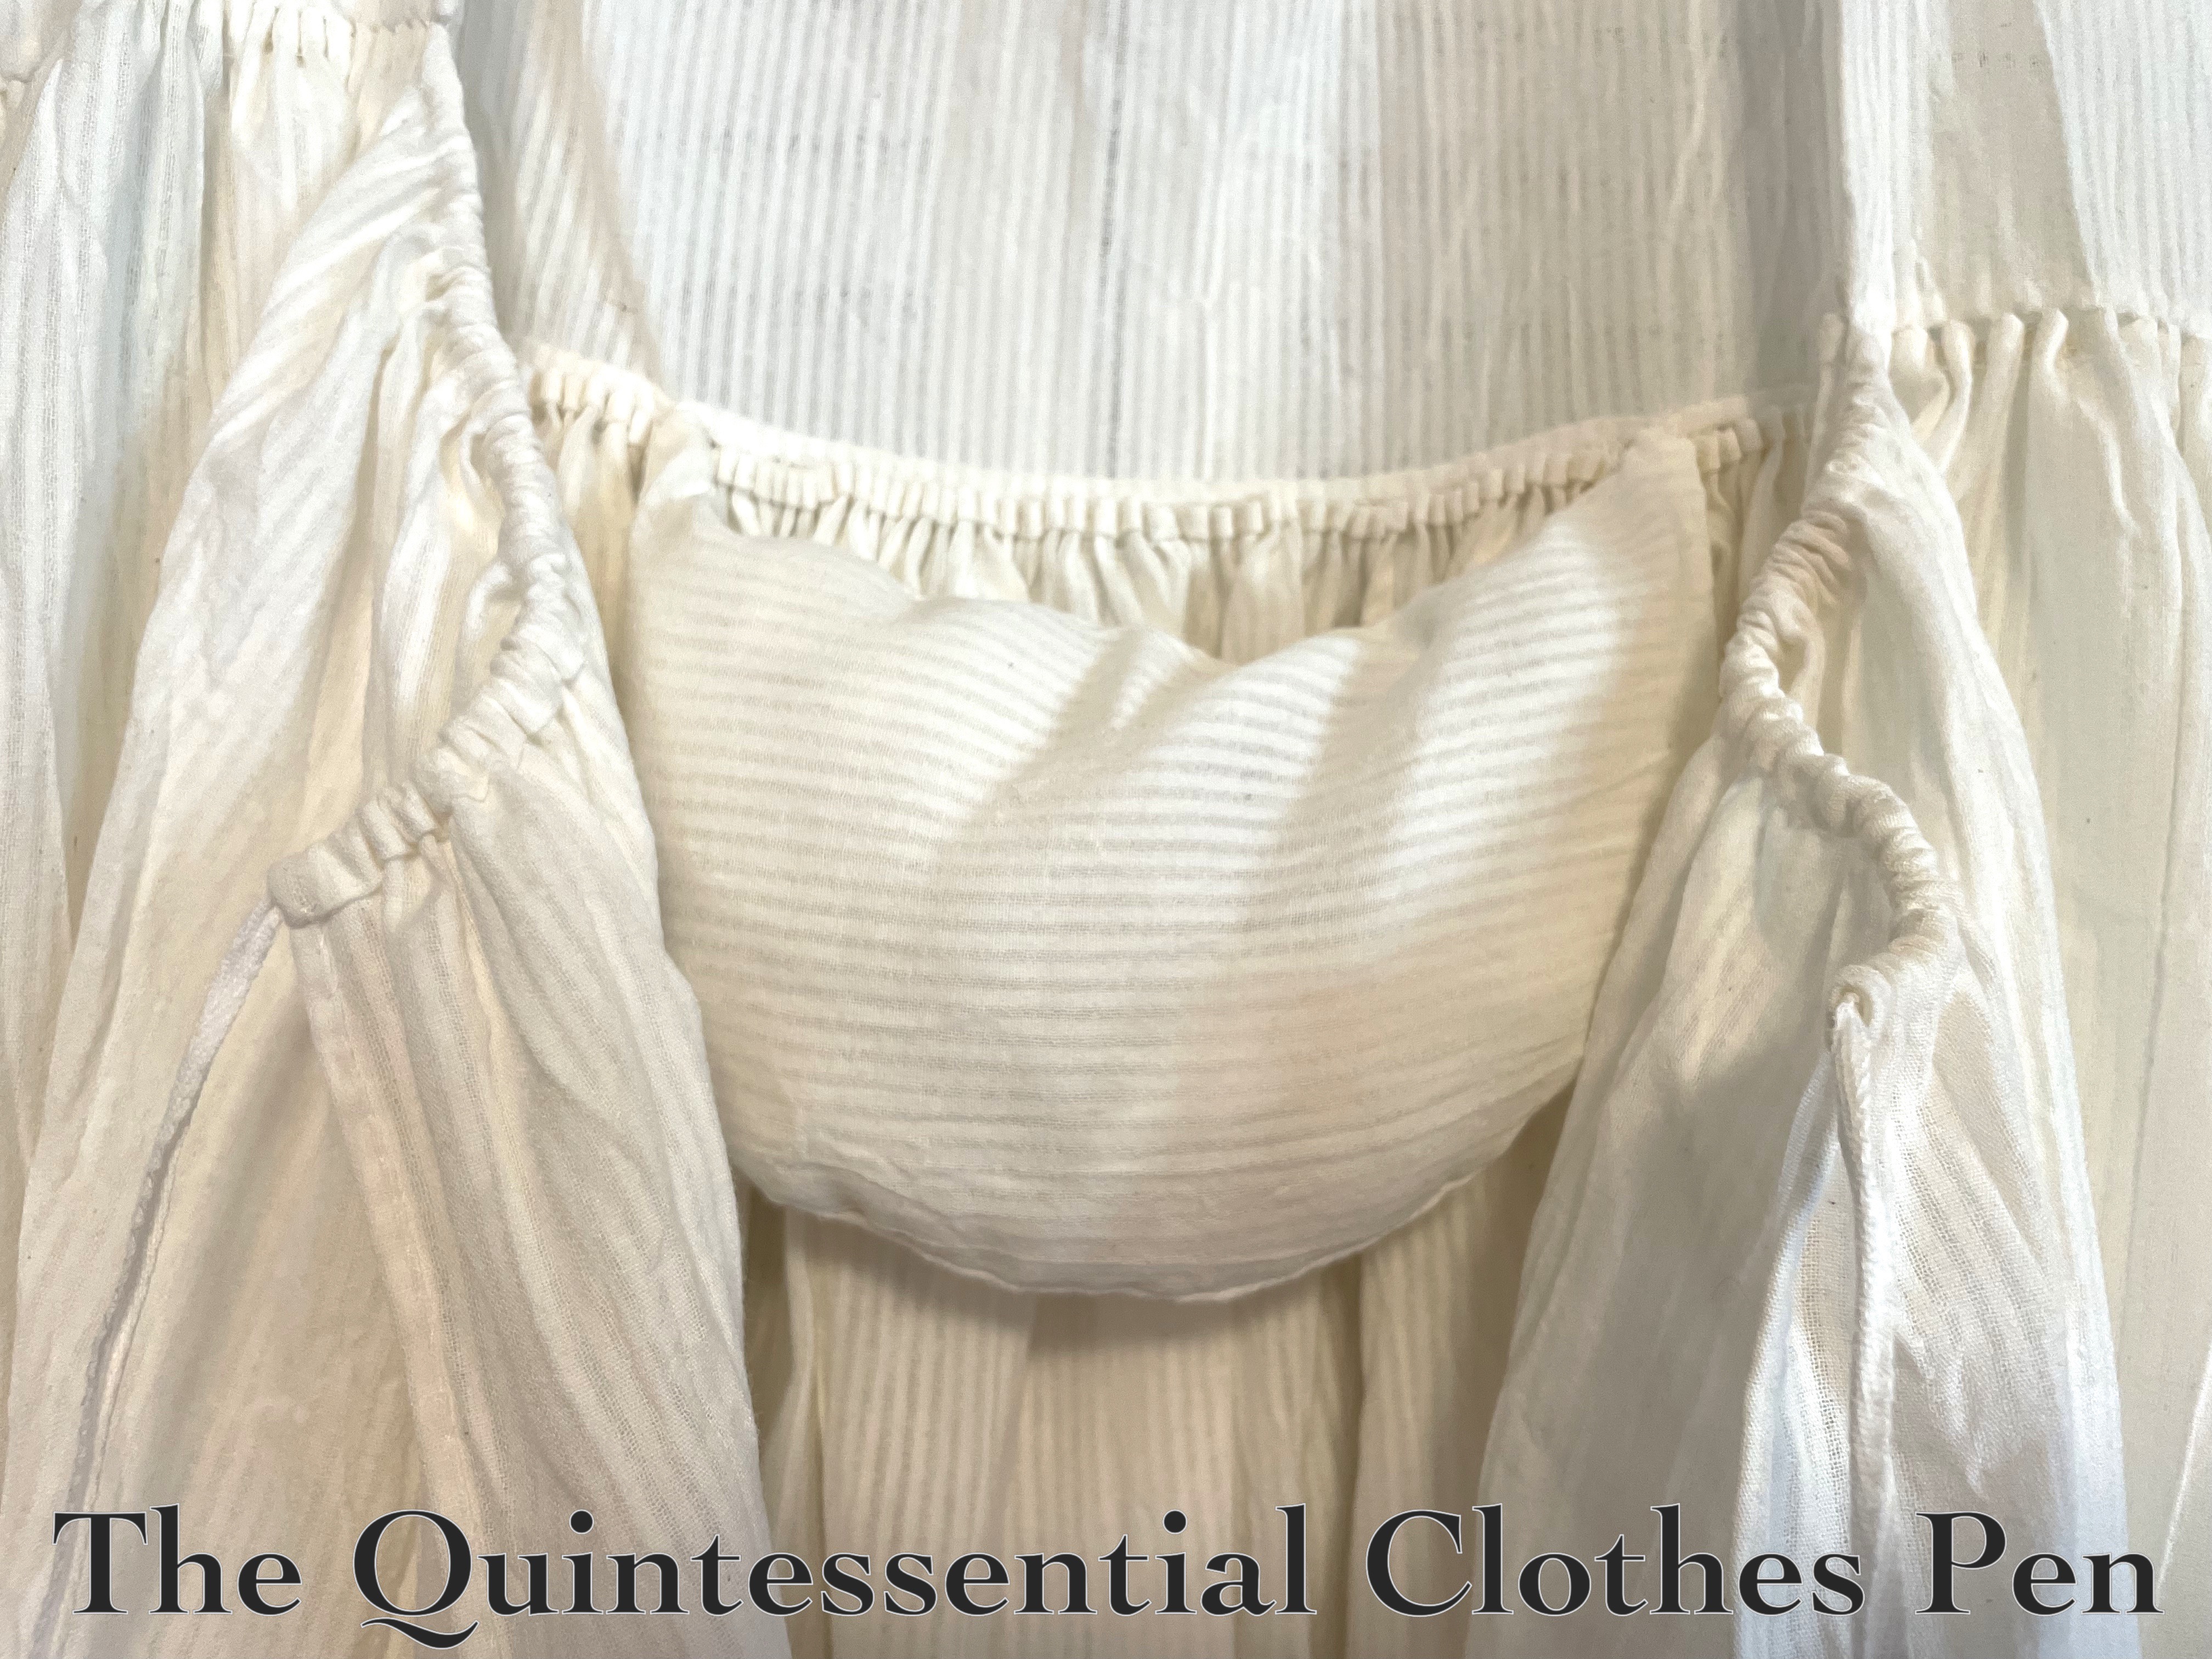
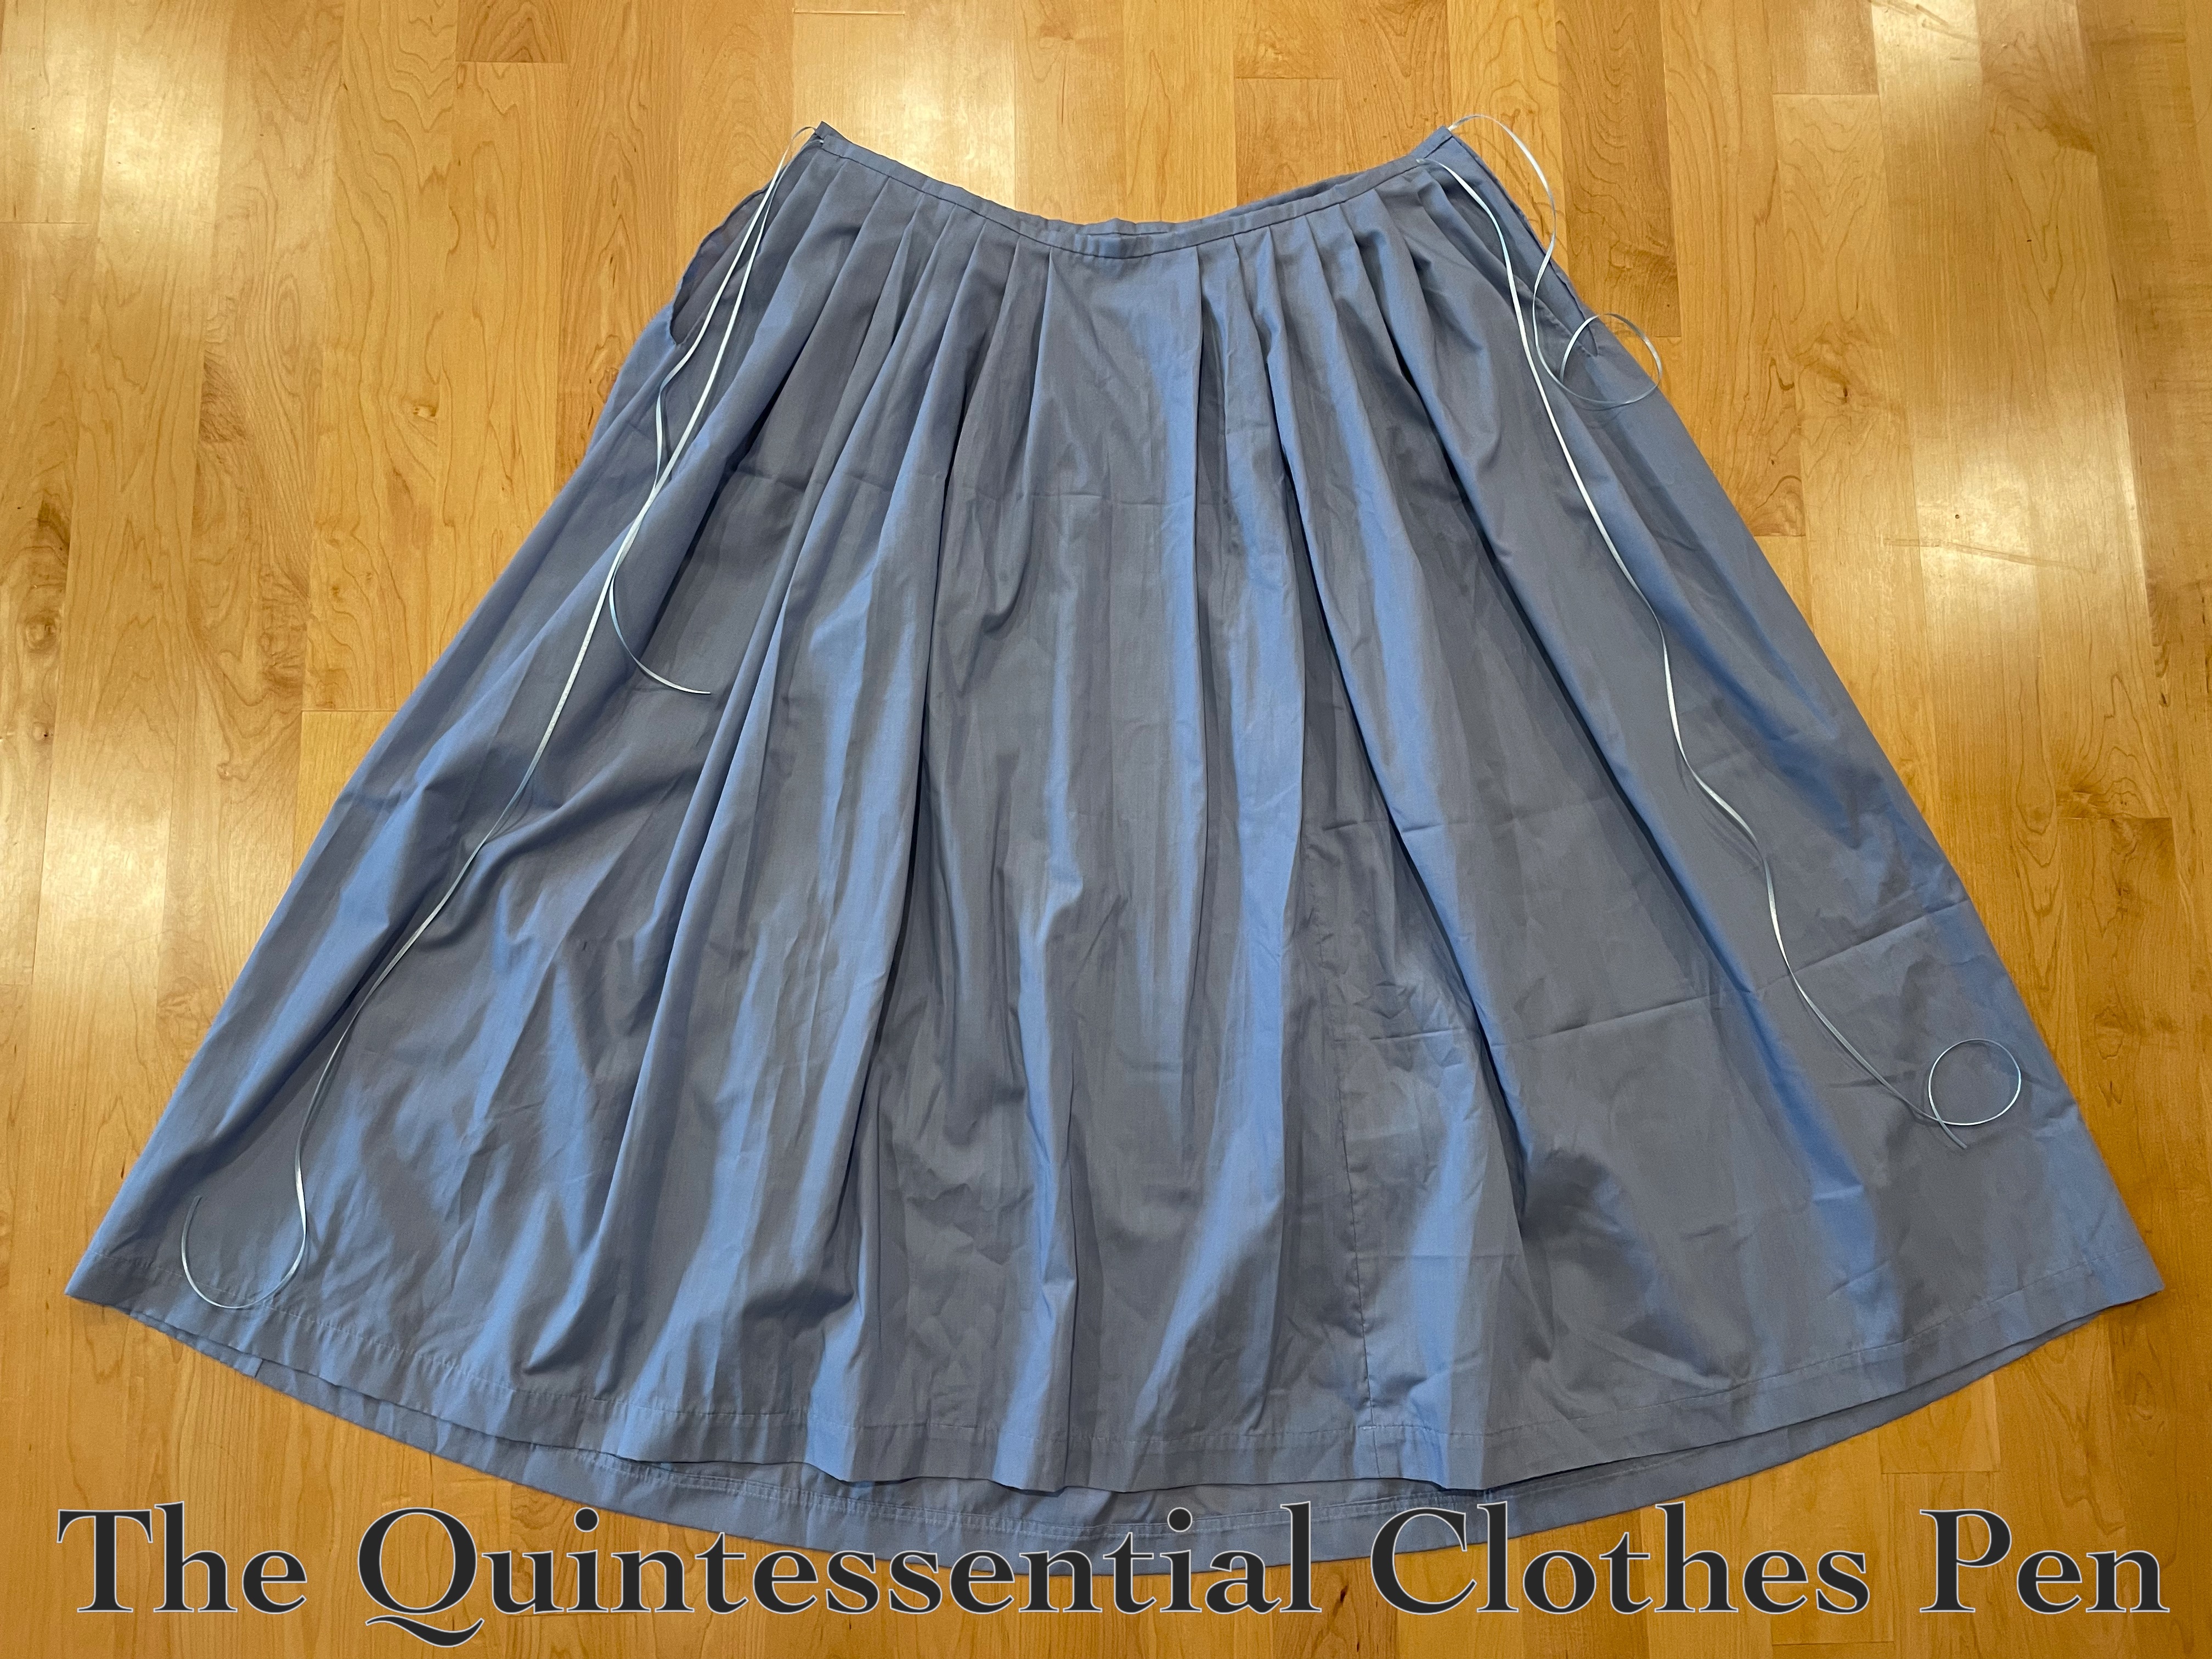
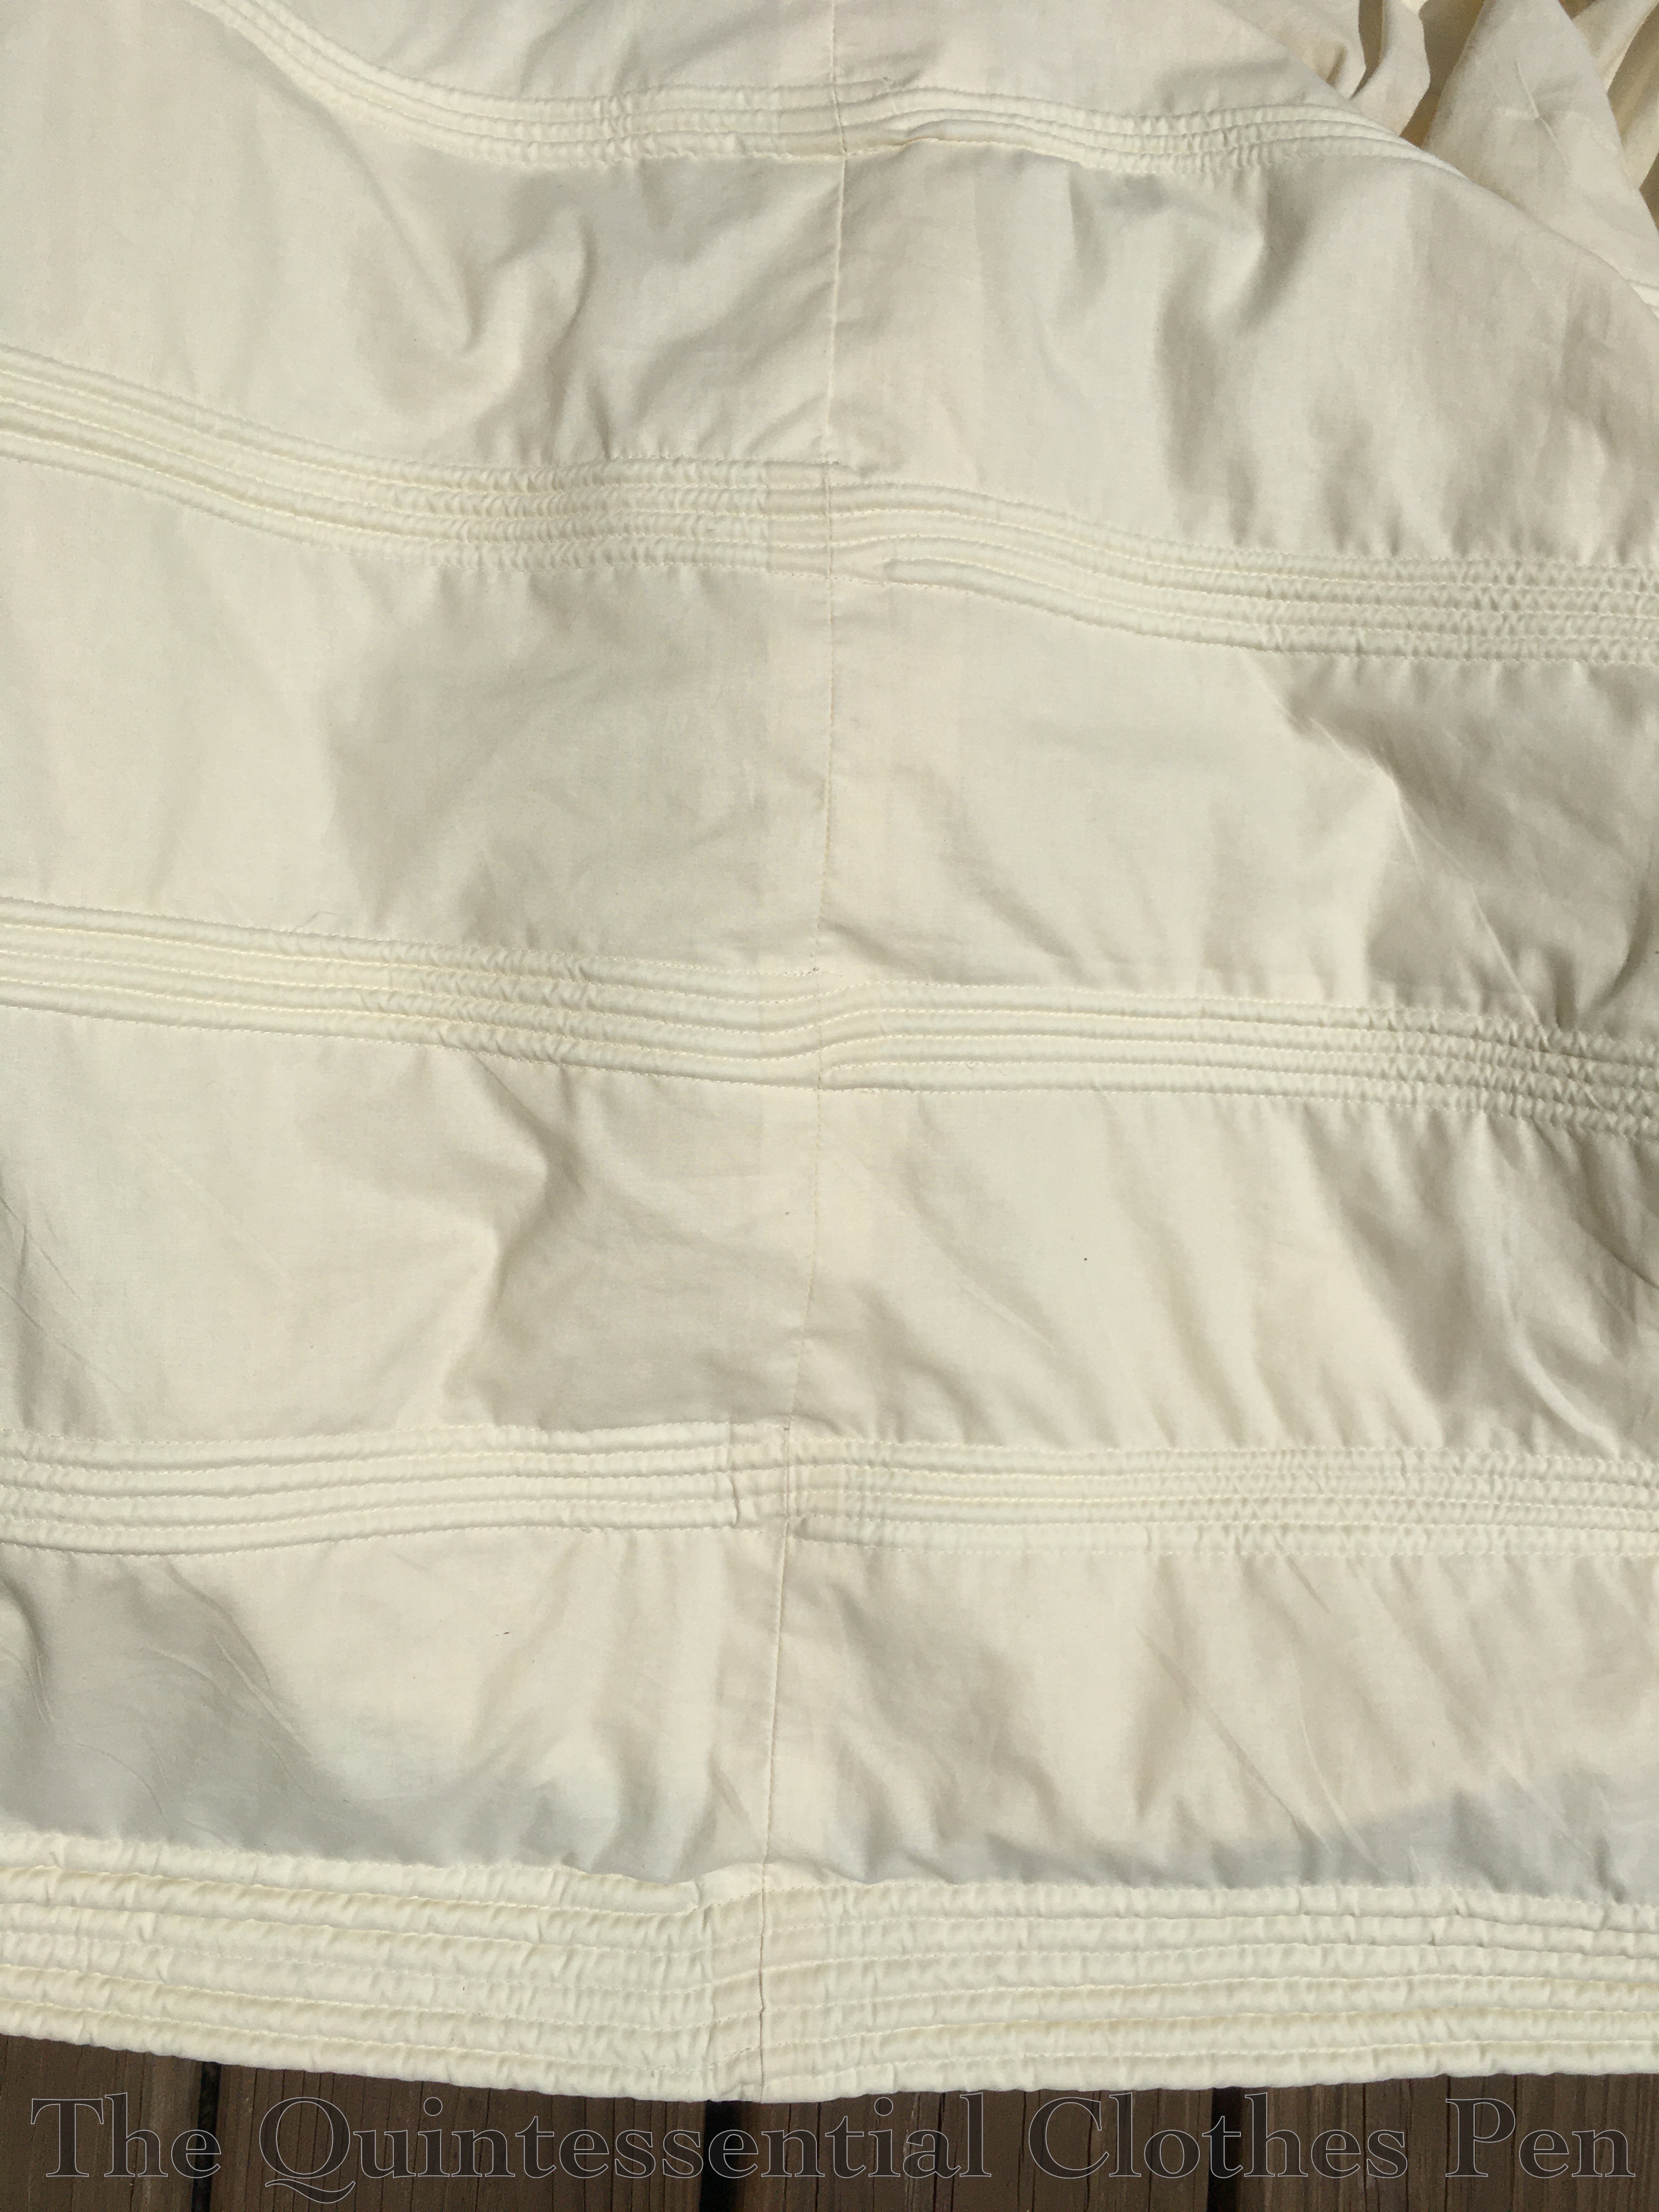
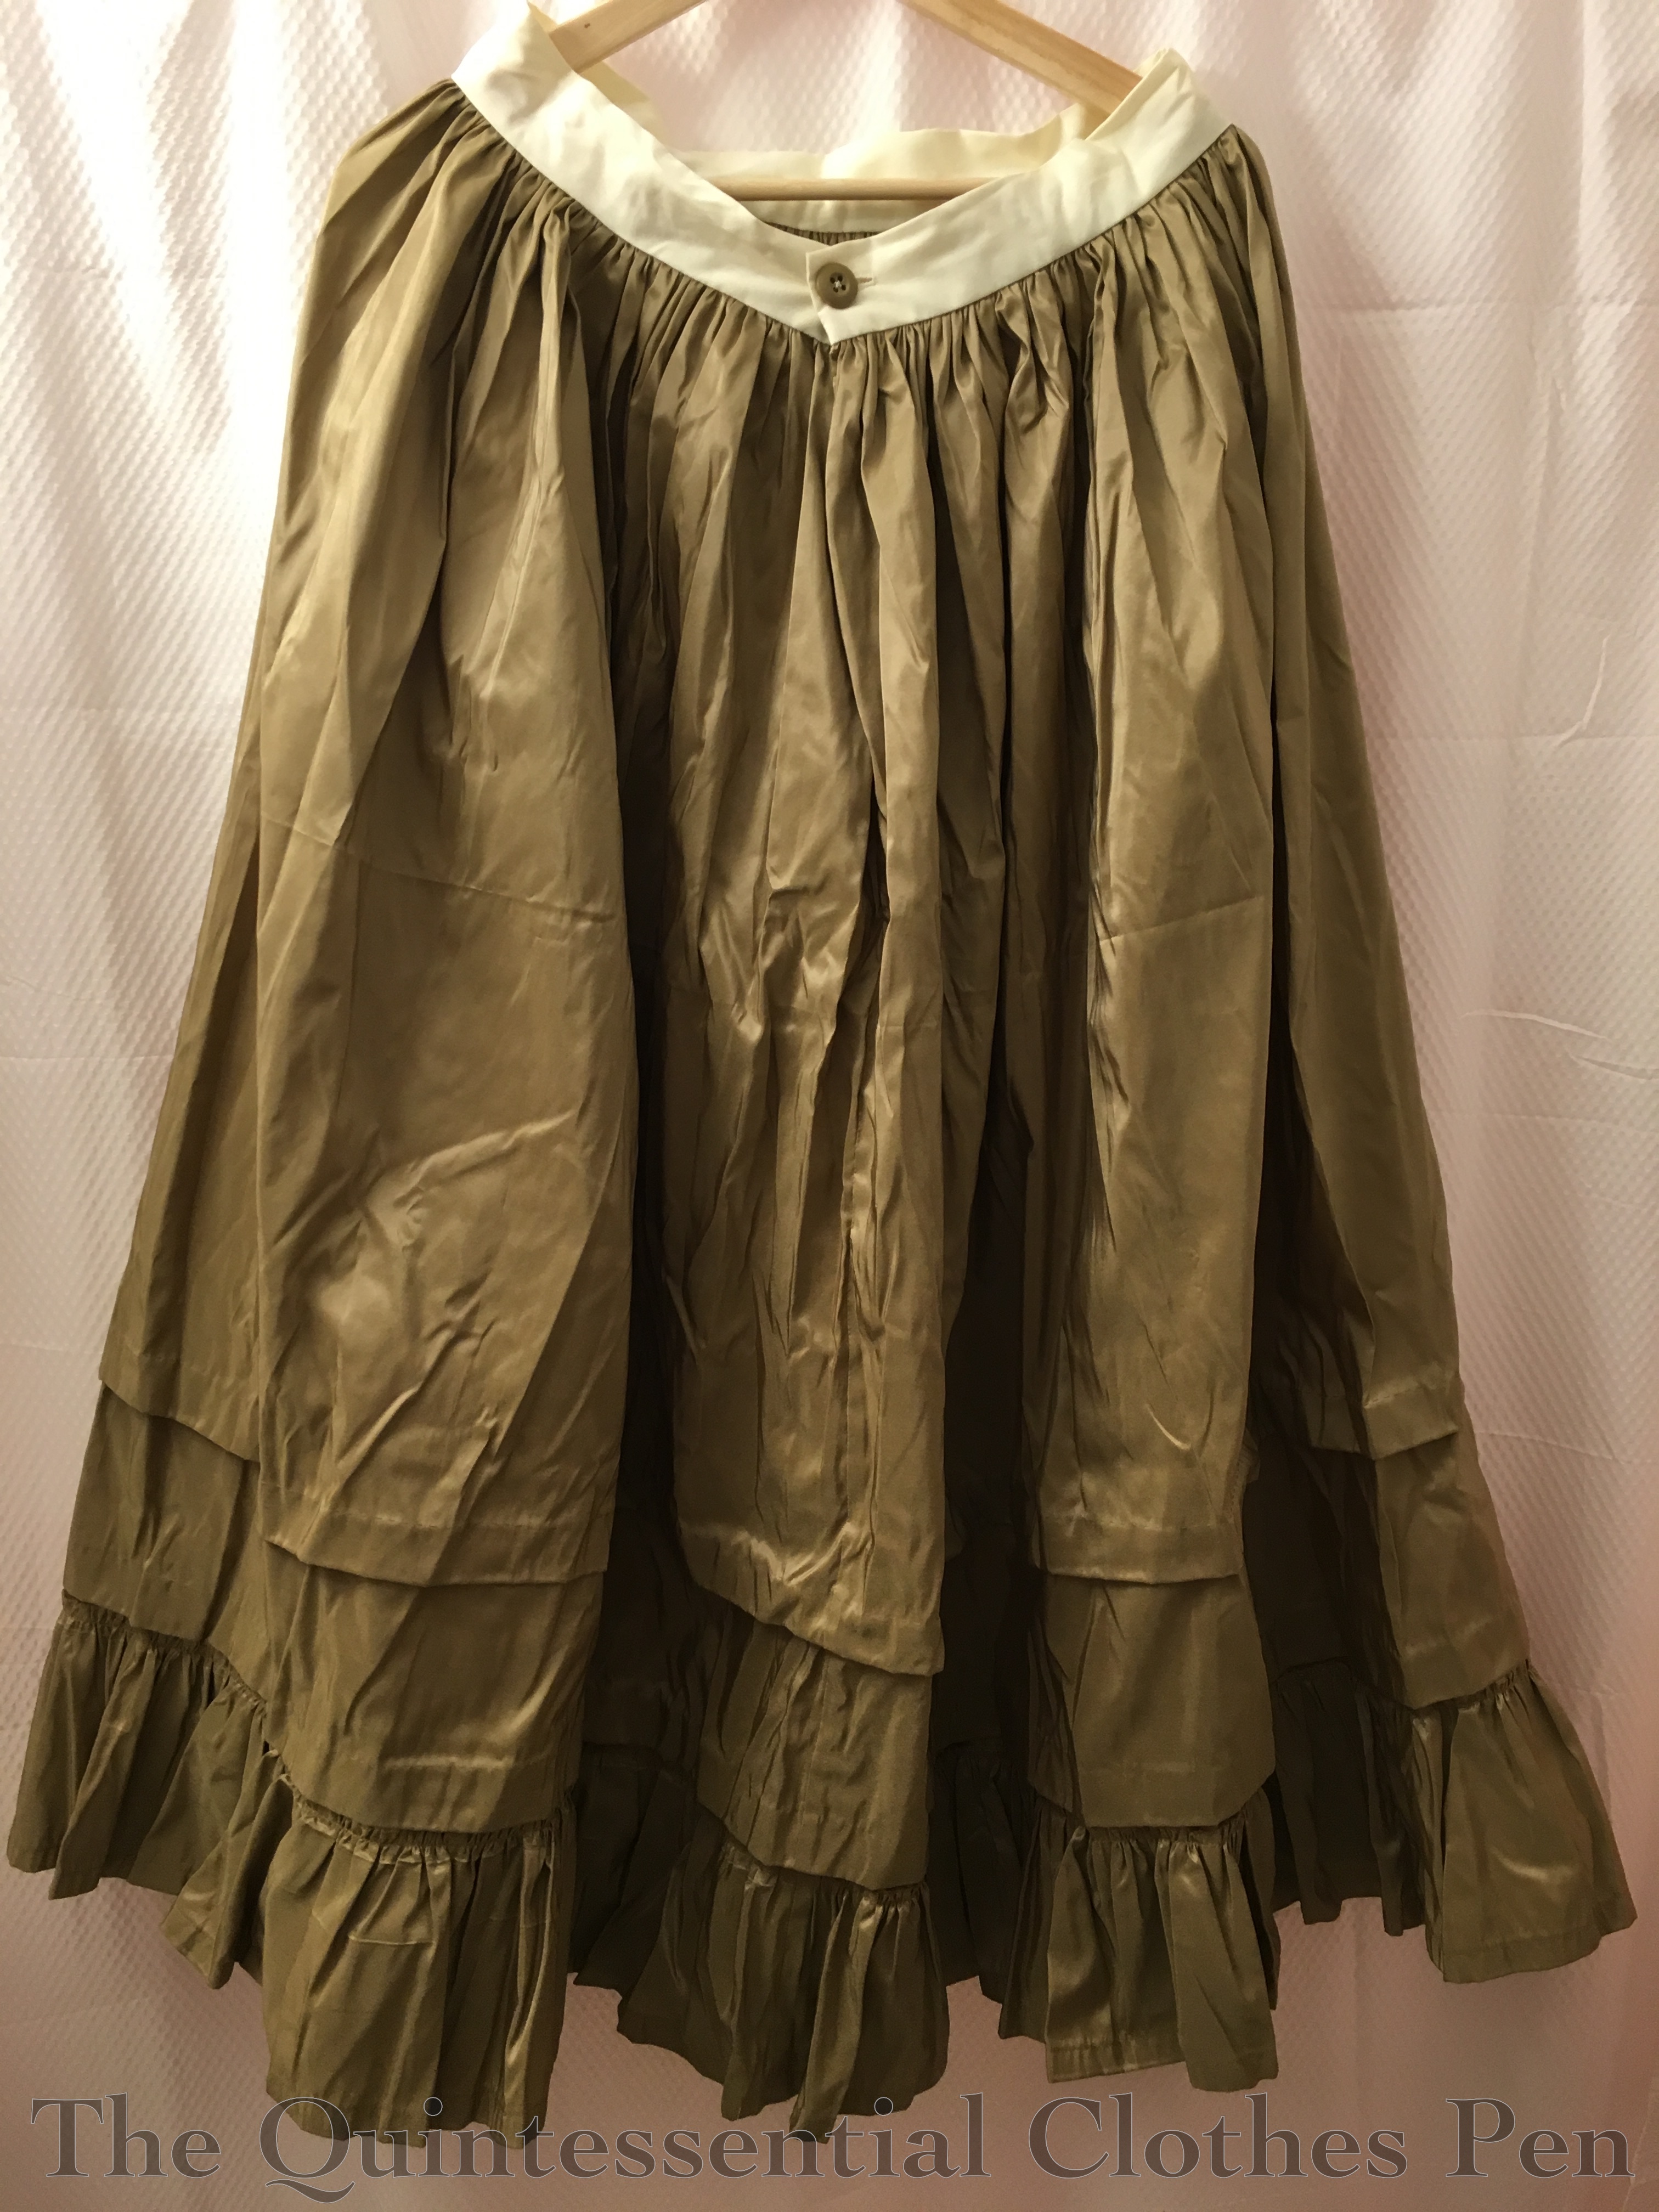
Above is a front view of the new petticoat. I made this in exactly the same way as the blue petticoat, referencing the same tutorials, etc. Essentially this is a tube that is pleated at the waist, with ties to hold it on the body.

The front has an outward box pleat at center front, while the center back (pictured above) has an inverted box pleat. The pleats are finished off by on the grain strips that form the ½” waistbands. Ivory satin ribbon ties are set into these waistbands.

Given that I had to make a whole new petticoat, it was my goal to make one that I could reuse for other purposes. Namely, I have 1780s ensembles in my sights and I wanted this petticoat to be able to be used for those. So it was important to me to level the petticoat in a way that would make sense for that purpose, but I also needed to make sure the petticoat to be long enough in the front to fully back the yellow silk for the sacque project.

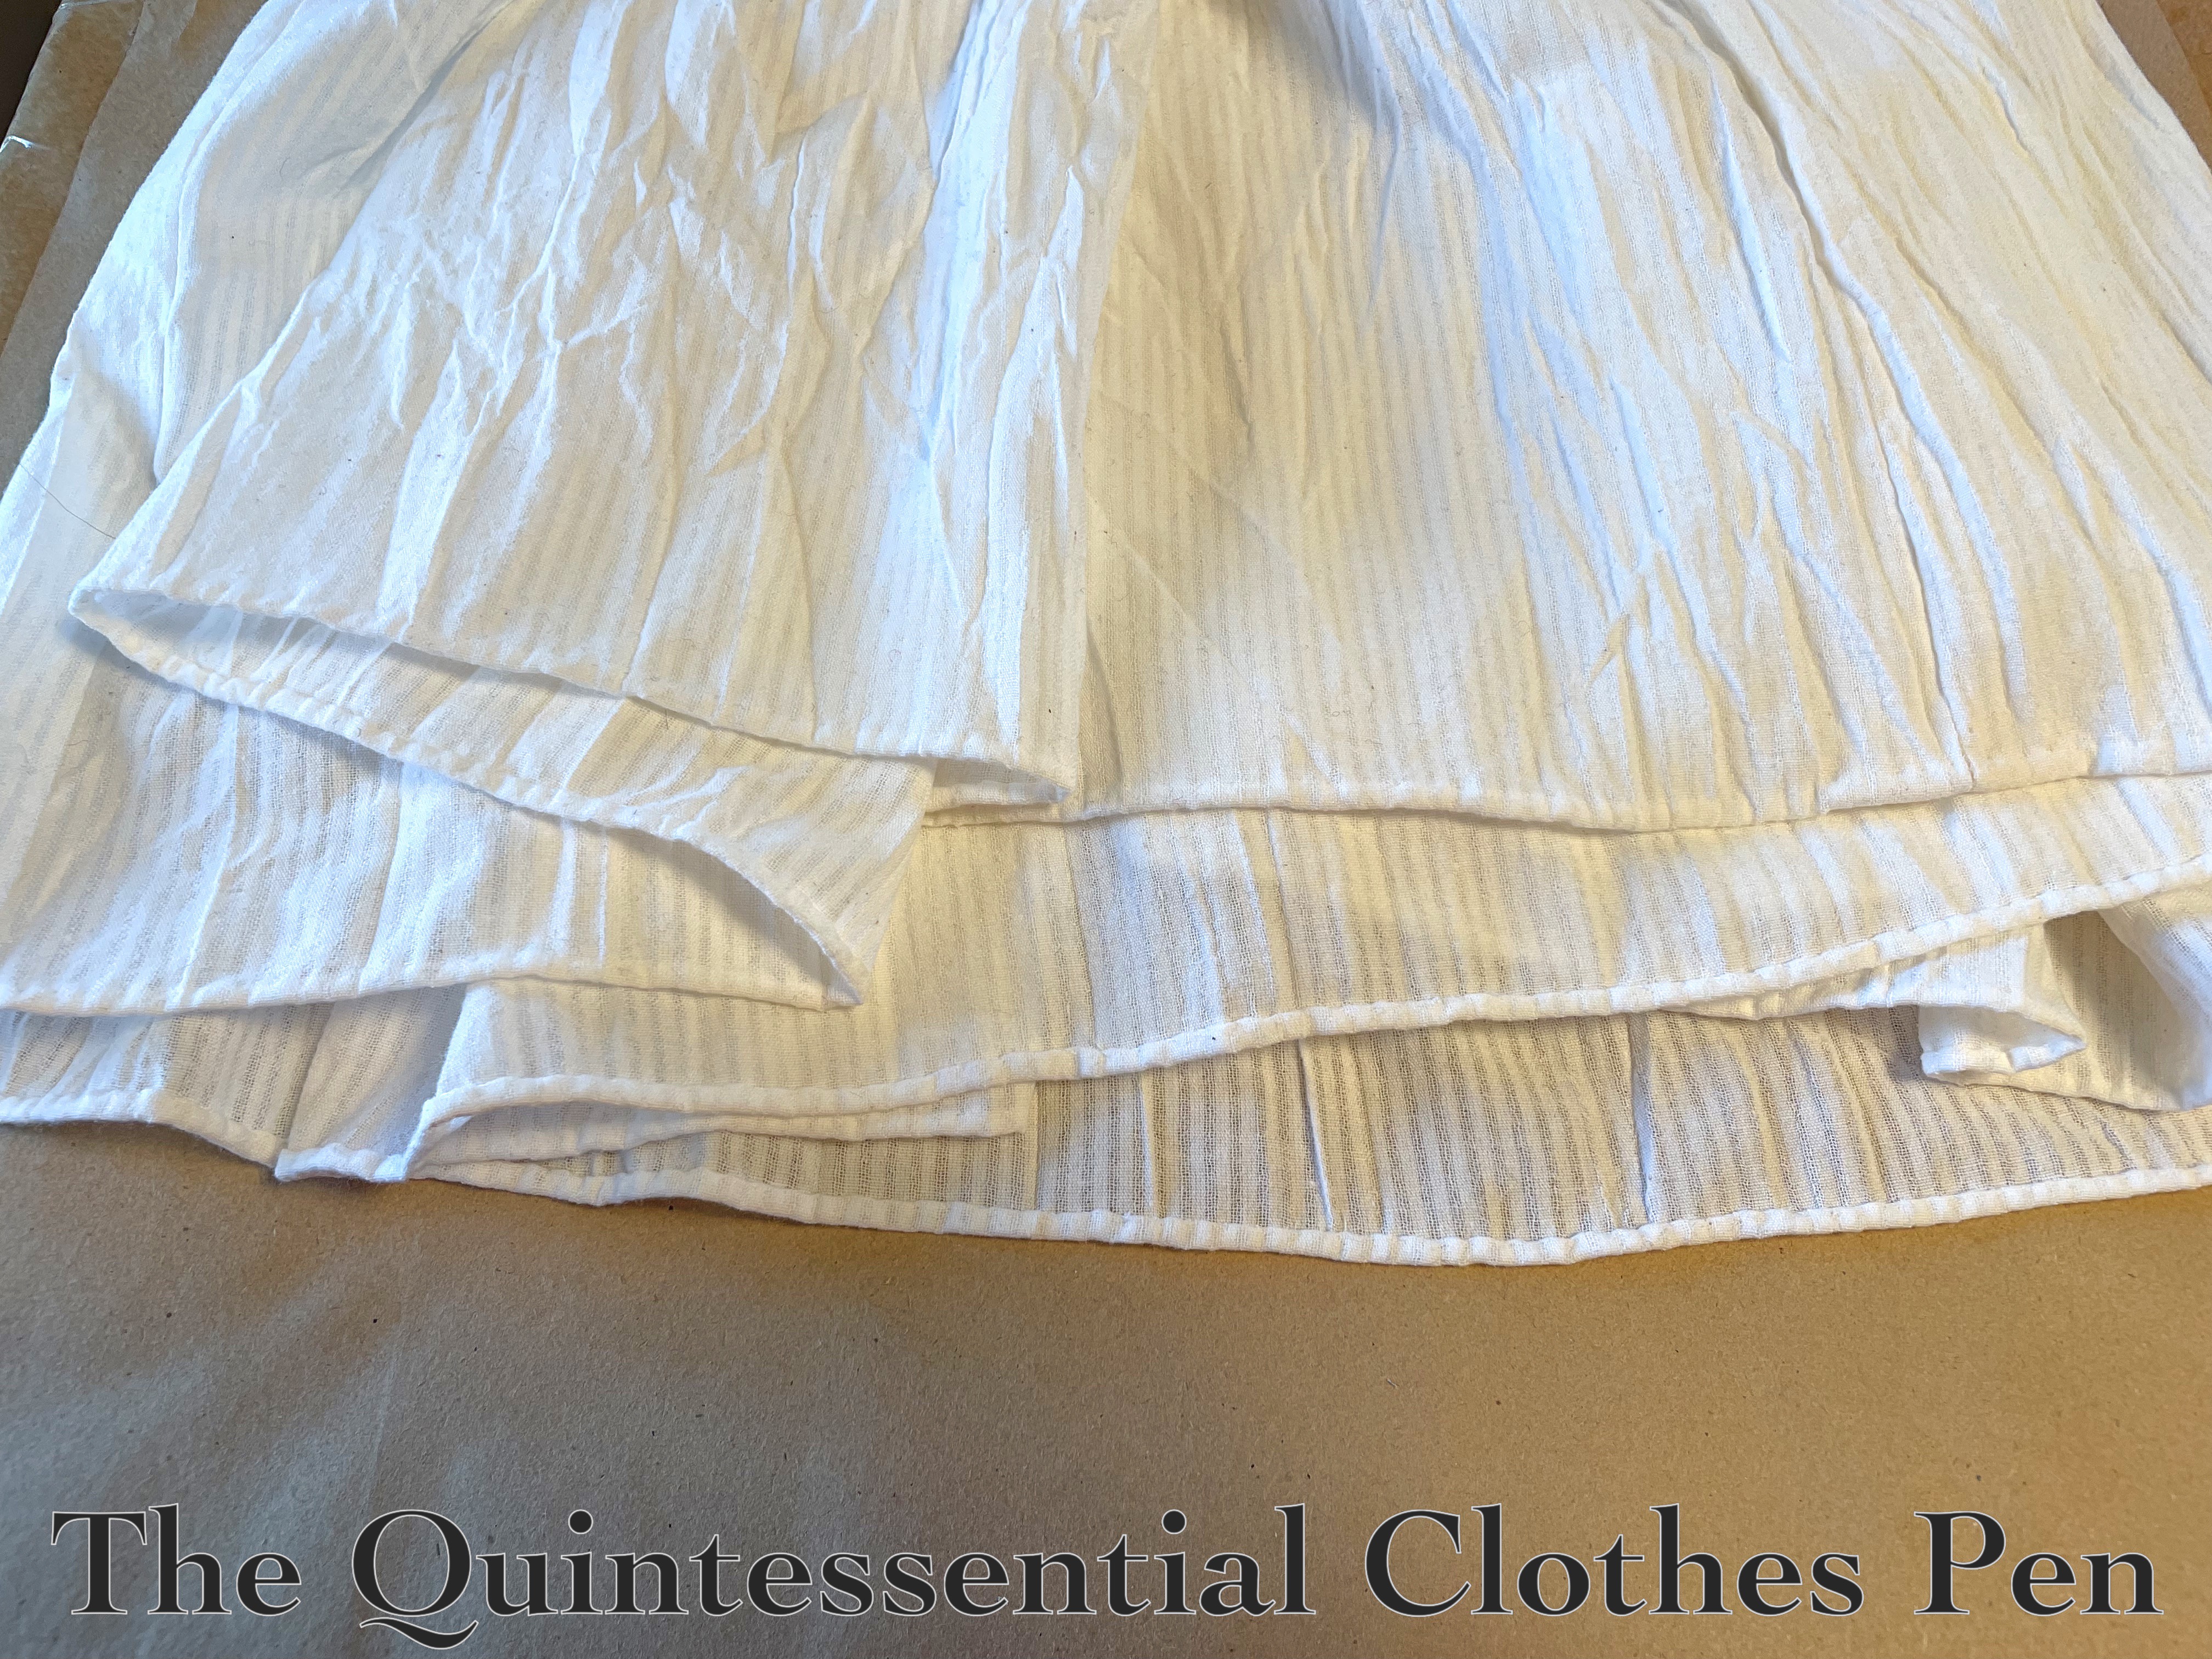
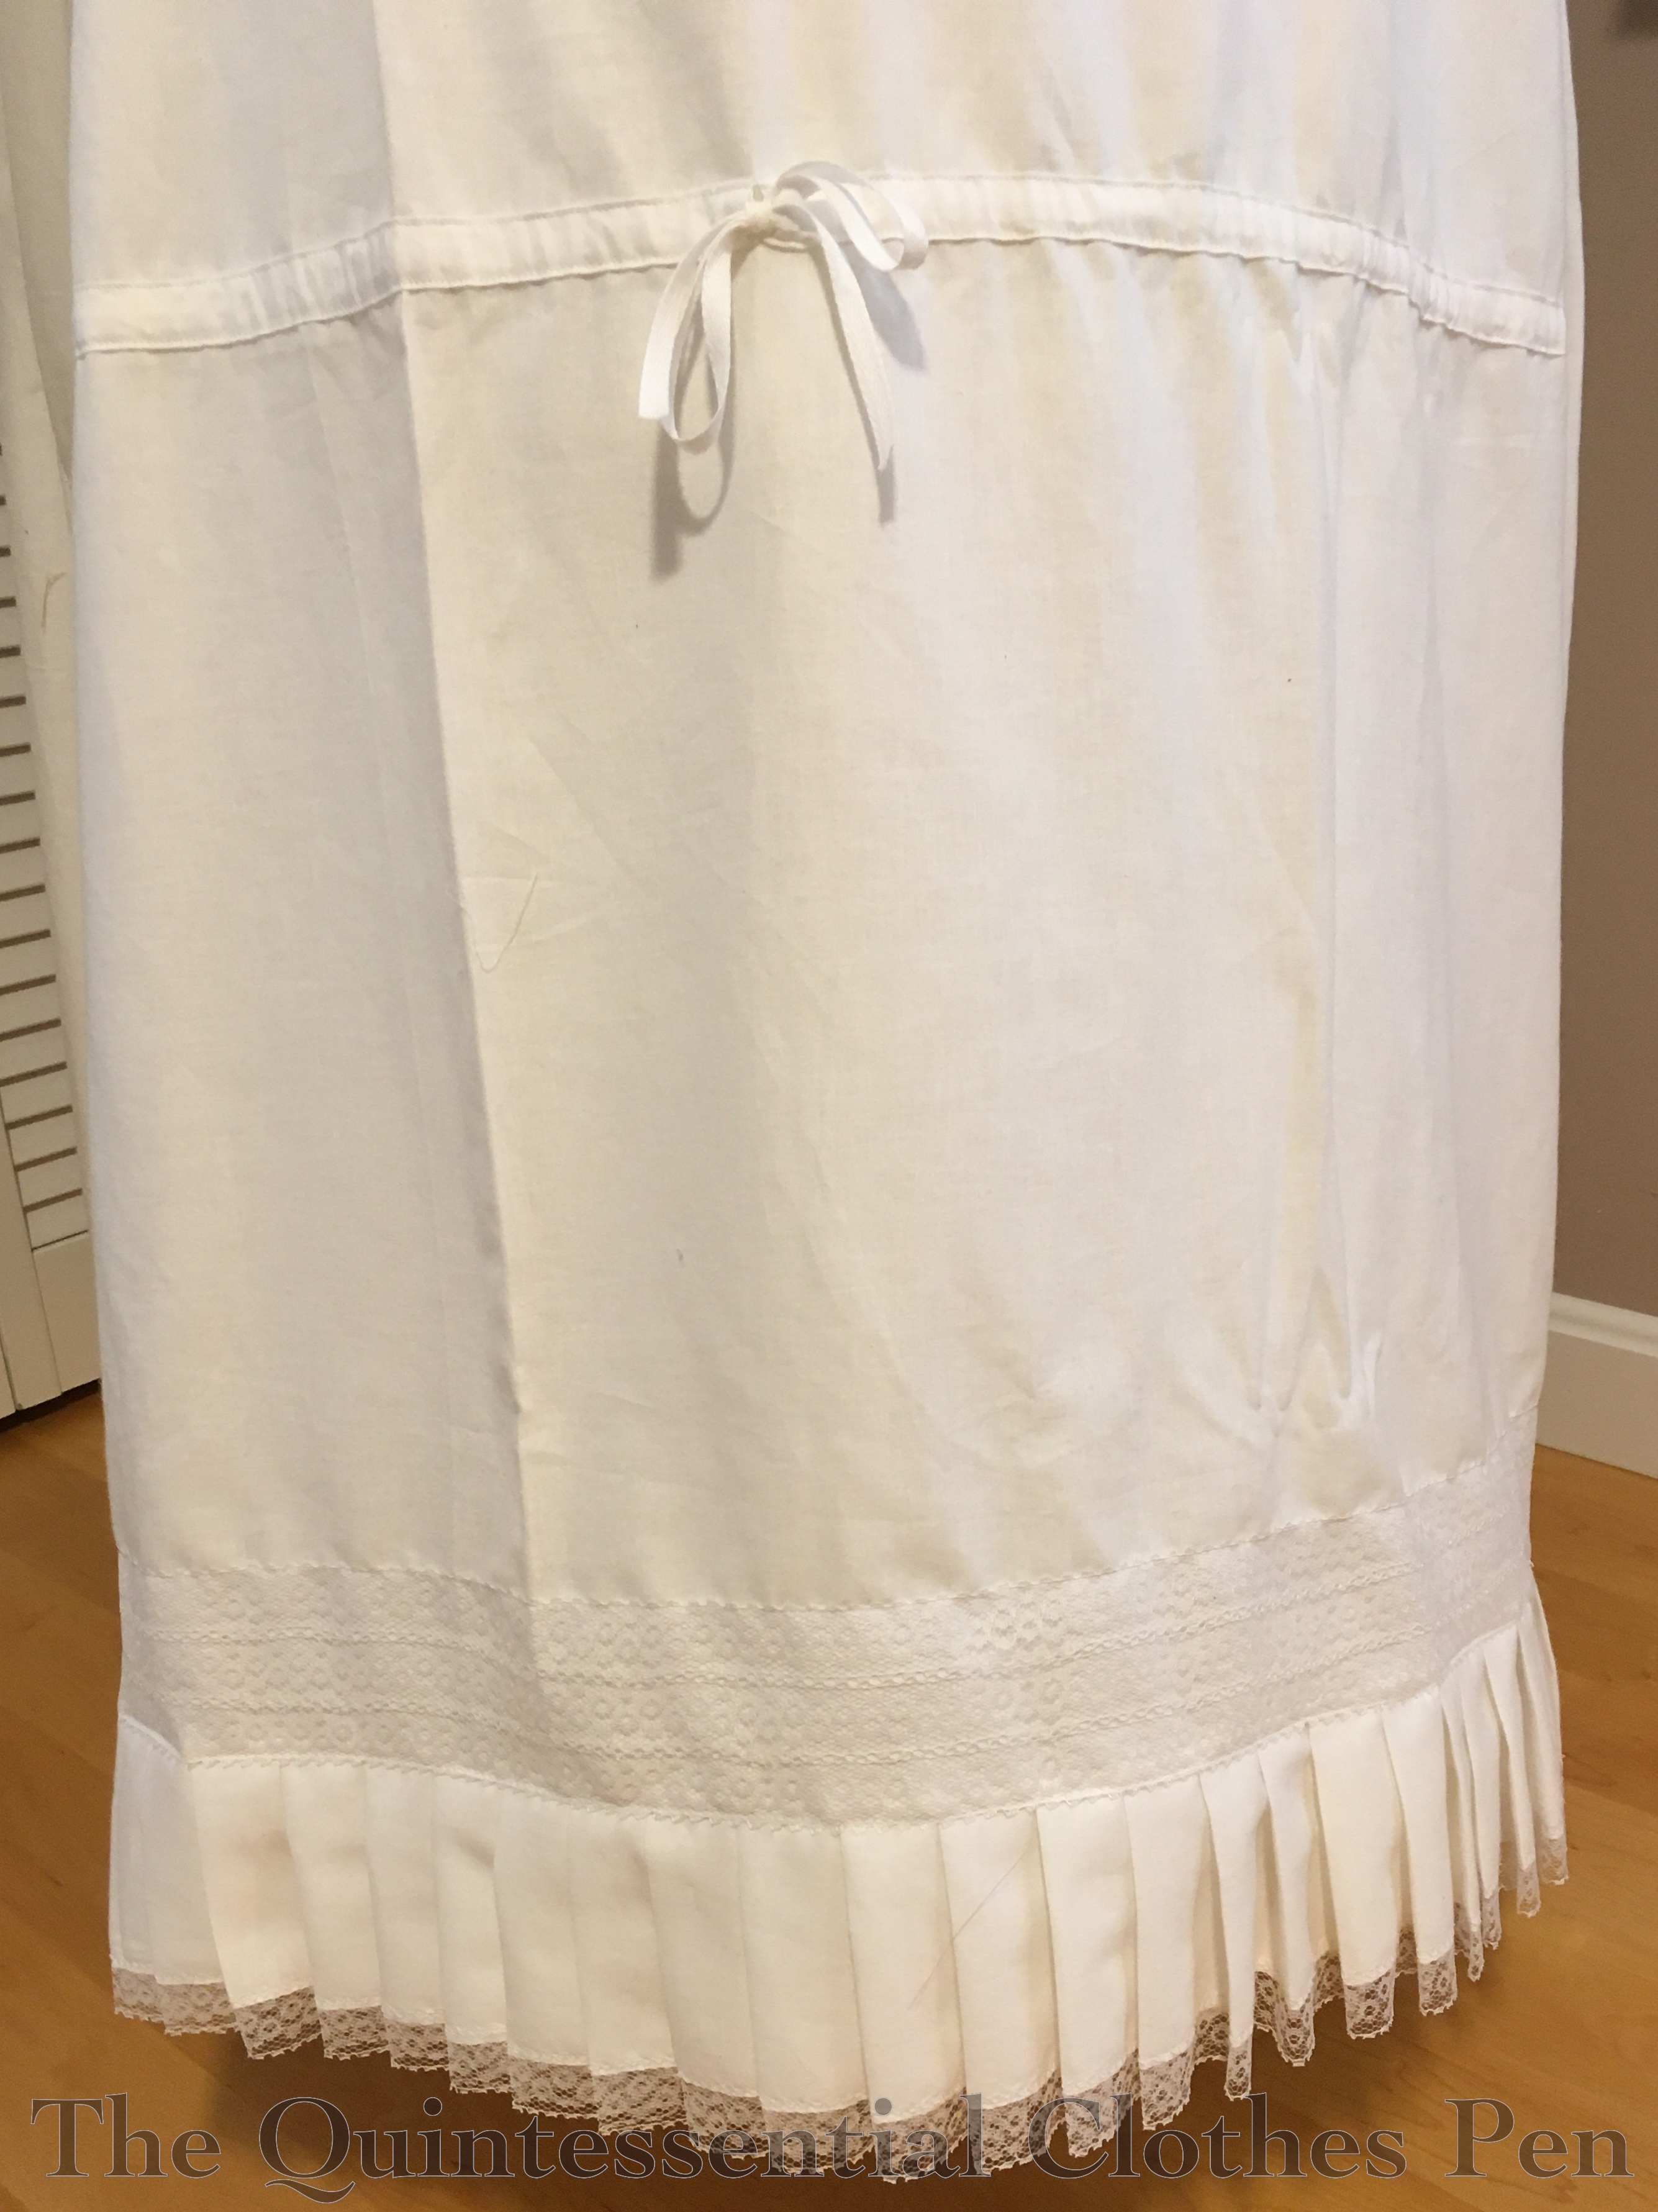
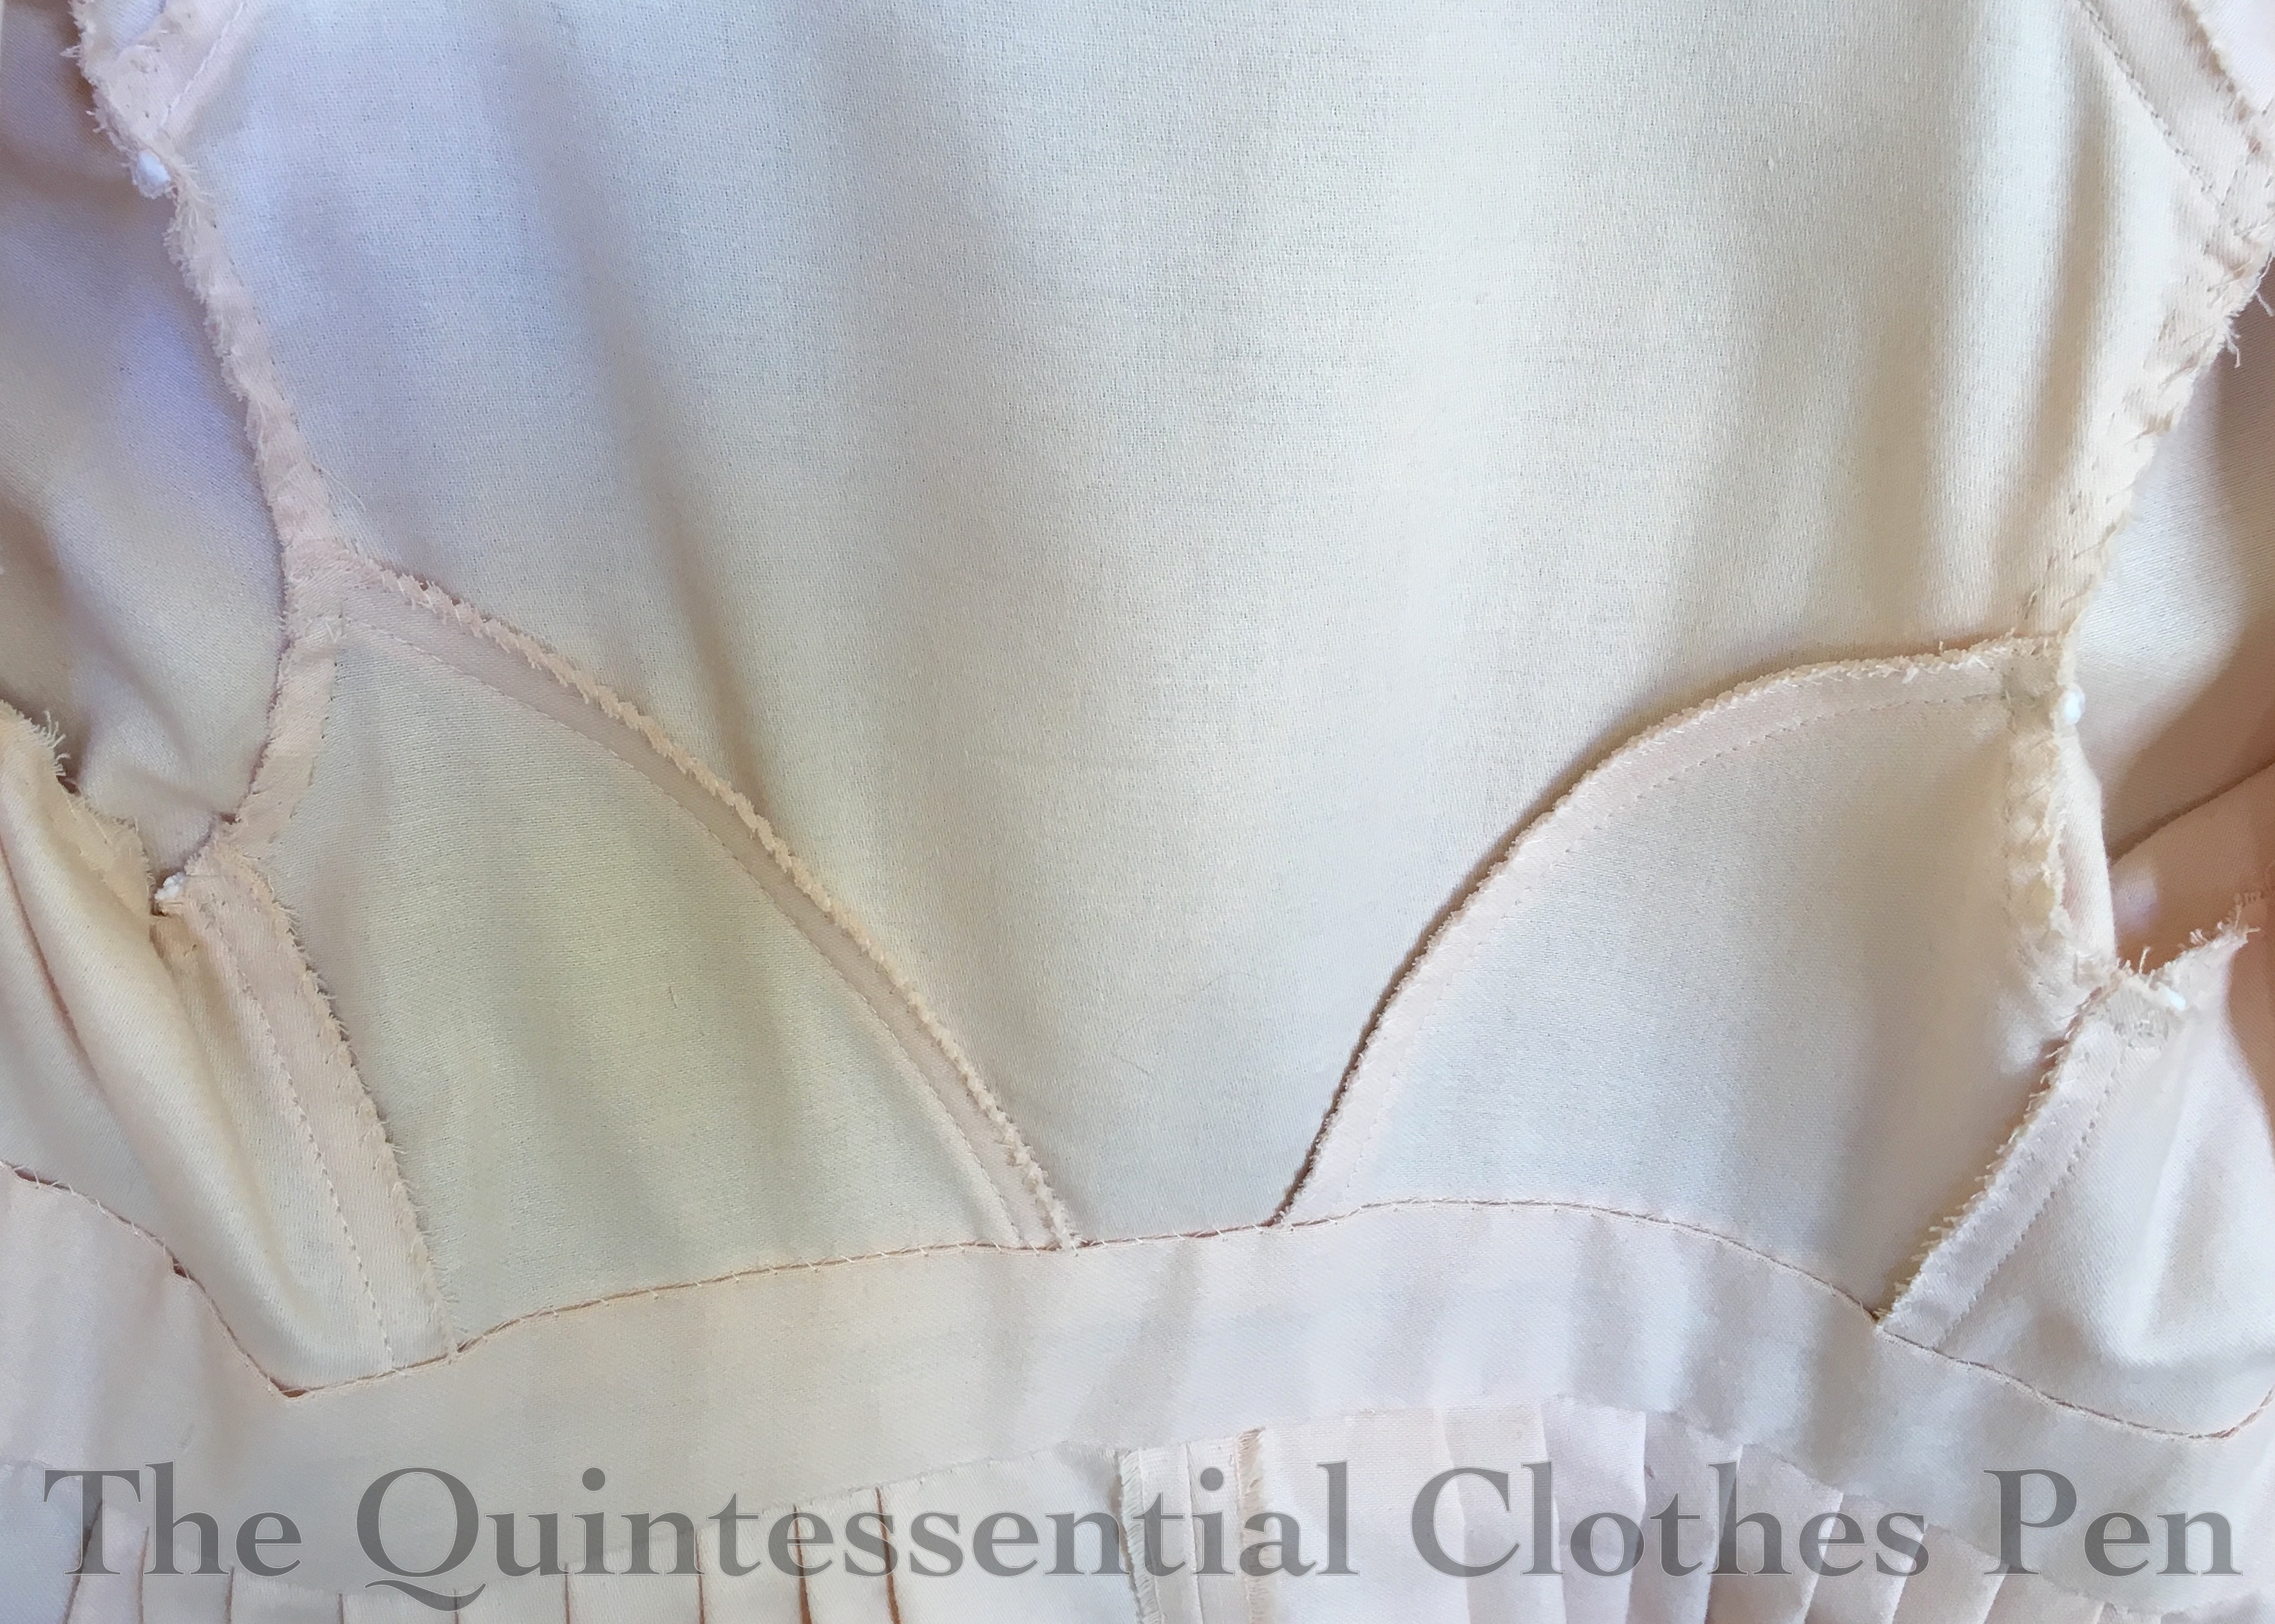
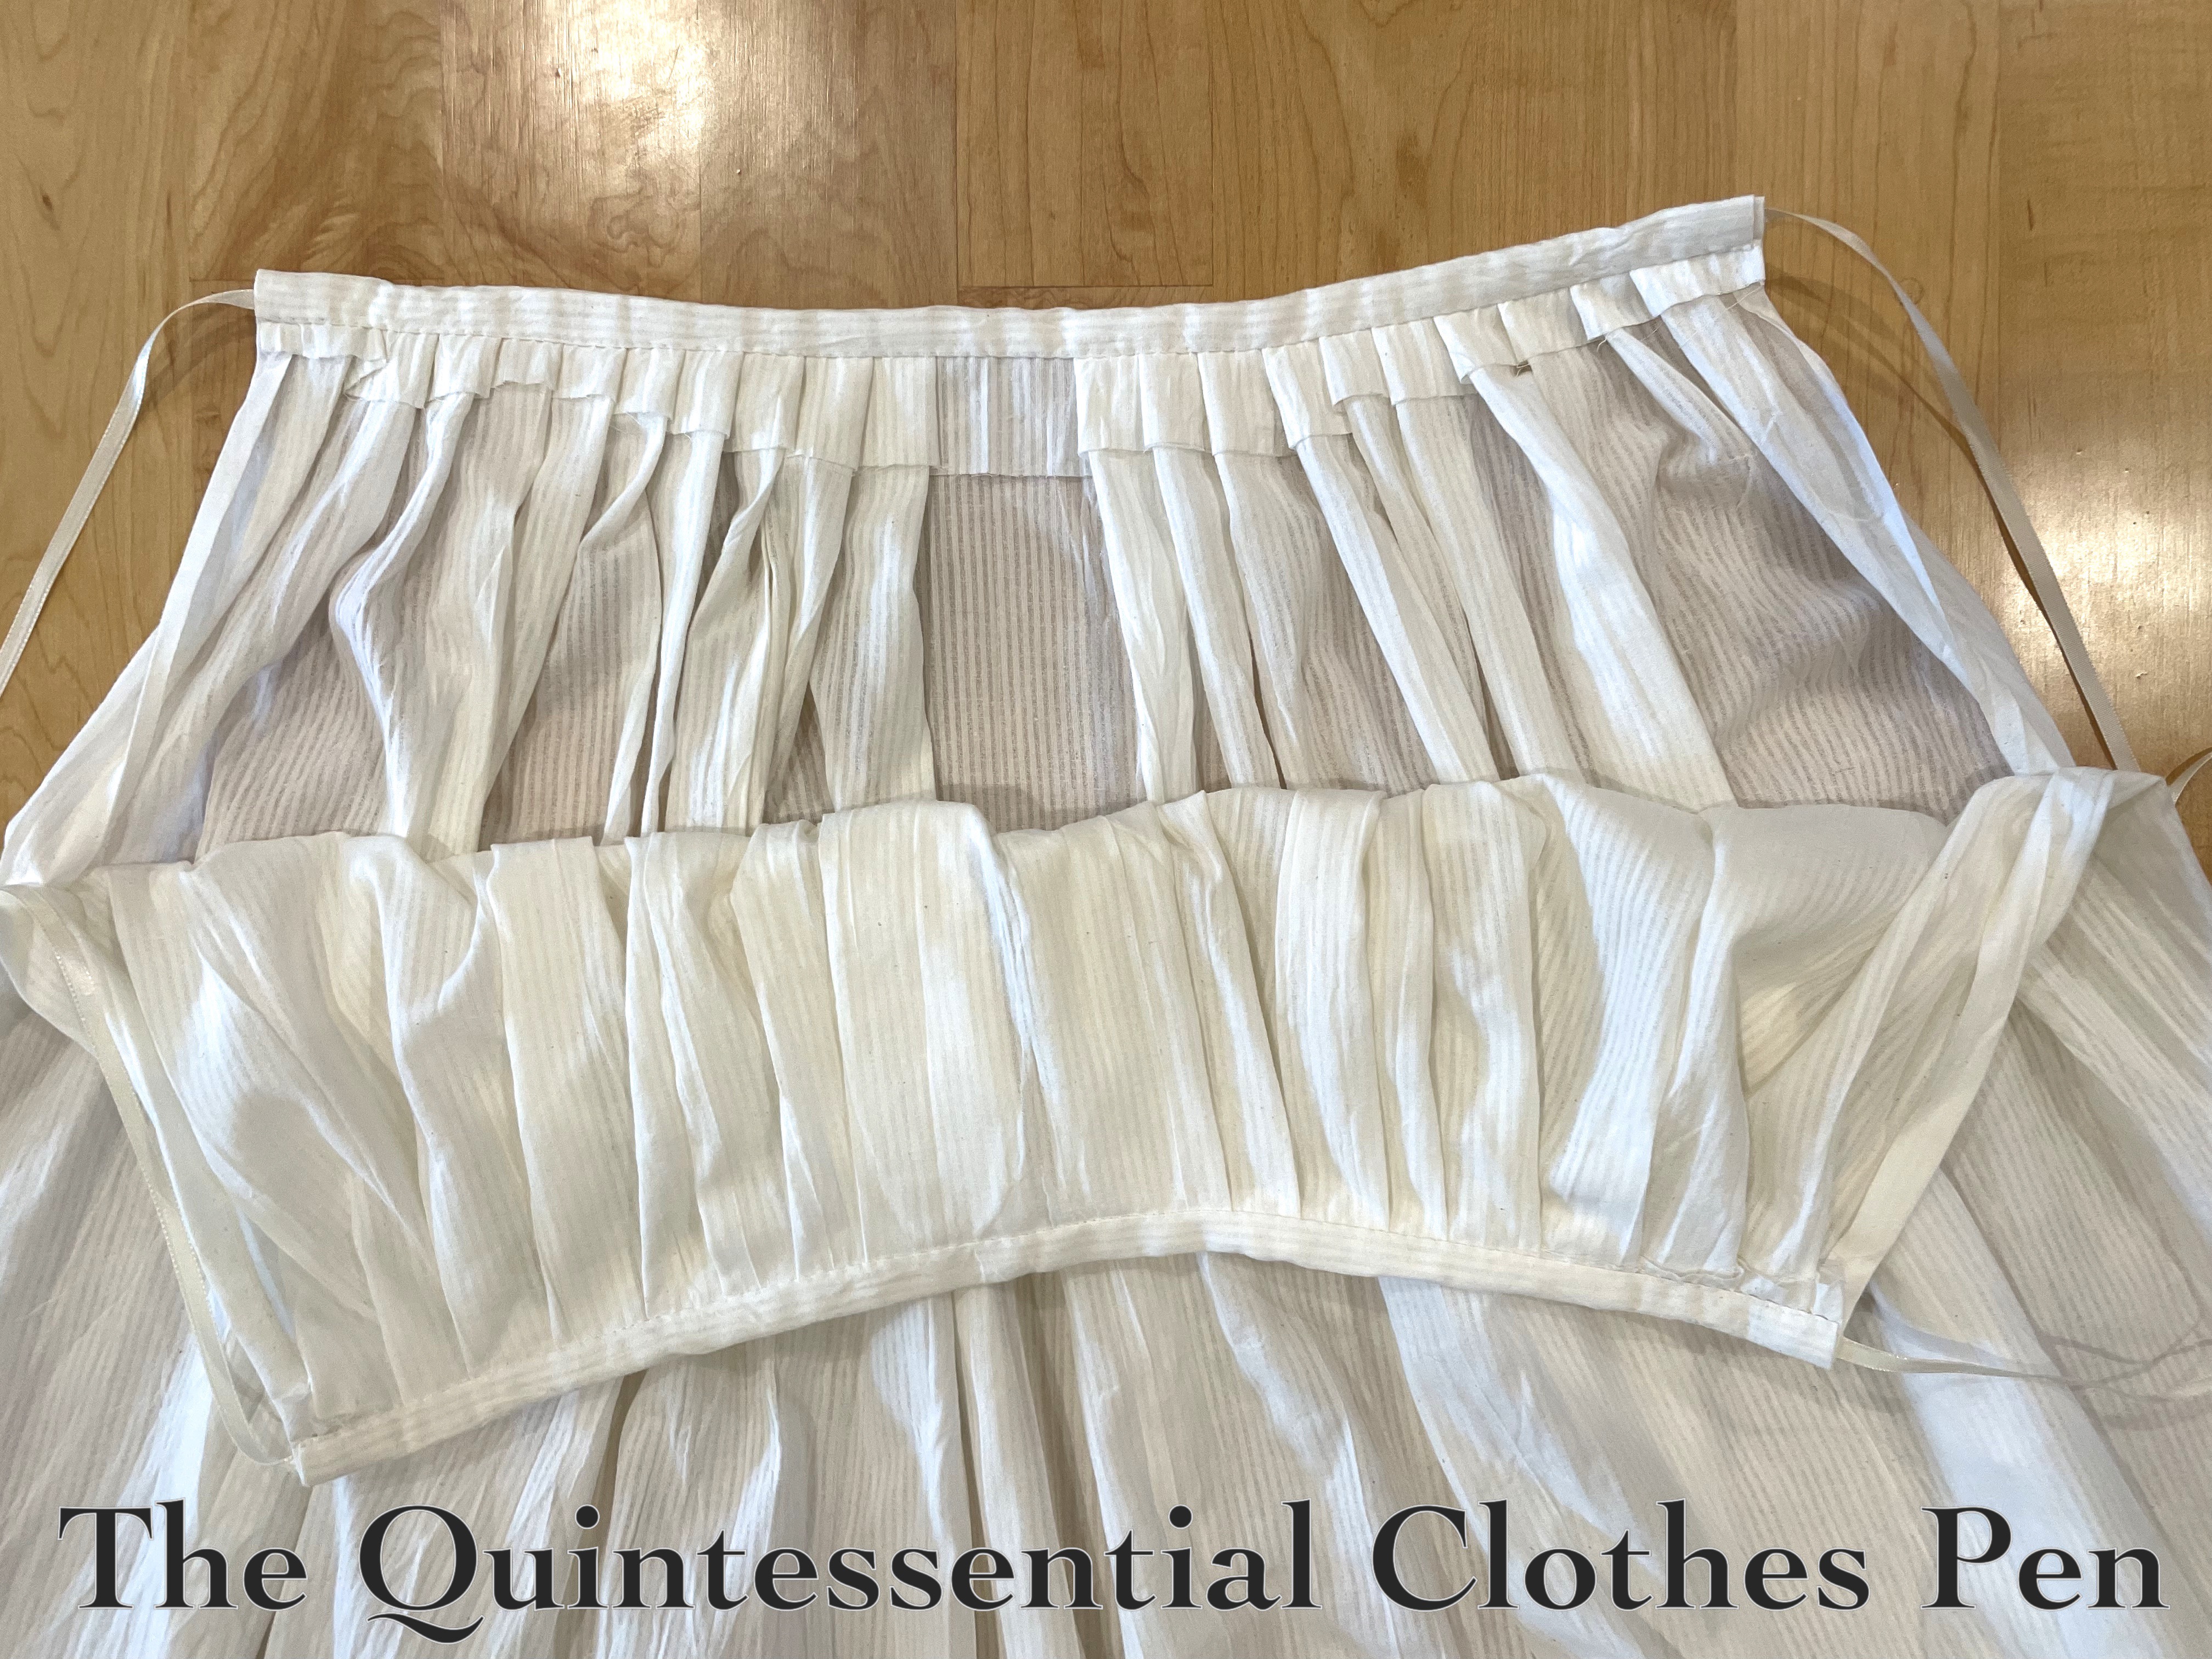
I’m pleased that with some careful figuring I was able to accomplish both goals! This petticoat doesn’t sit evenly over the pink panniers for the yellow sacque, but it does sit evenly over a not-quite-finished Scroop Patterns Frances Rump for a 1780s style! In order to know this would work, it meant I also had to make the Frances Rump and get it far enough along to be put on so I could figure out the leveling. More on the Frances Rump later! For now, a photo (below) of the insides of the white petticoat.

In the photo, the back is flipped down, showing that the skirt is leveled in a way that is pretty straight across. You can just see a little extra fabric length poking out of the waistband on the right side. The front of the petticoat is facing the top of the image. You can see how it needed to be a little bit shorter (therefore more fabric turned down to the inside) to accommodate the lack of bum pad on the front of the body.

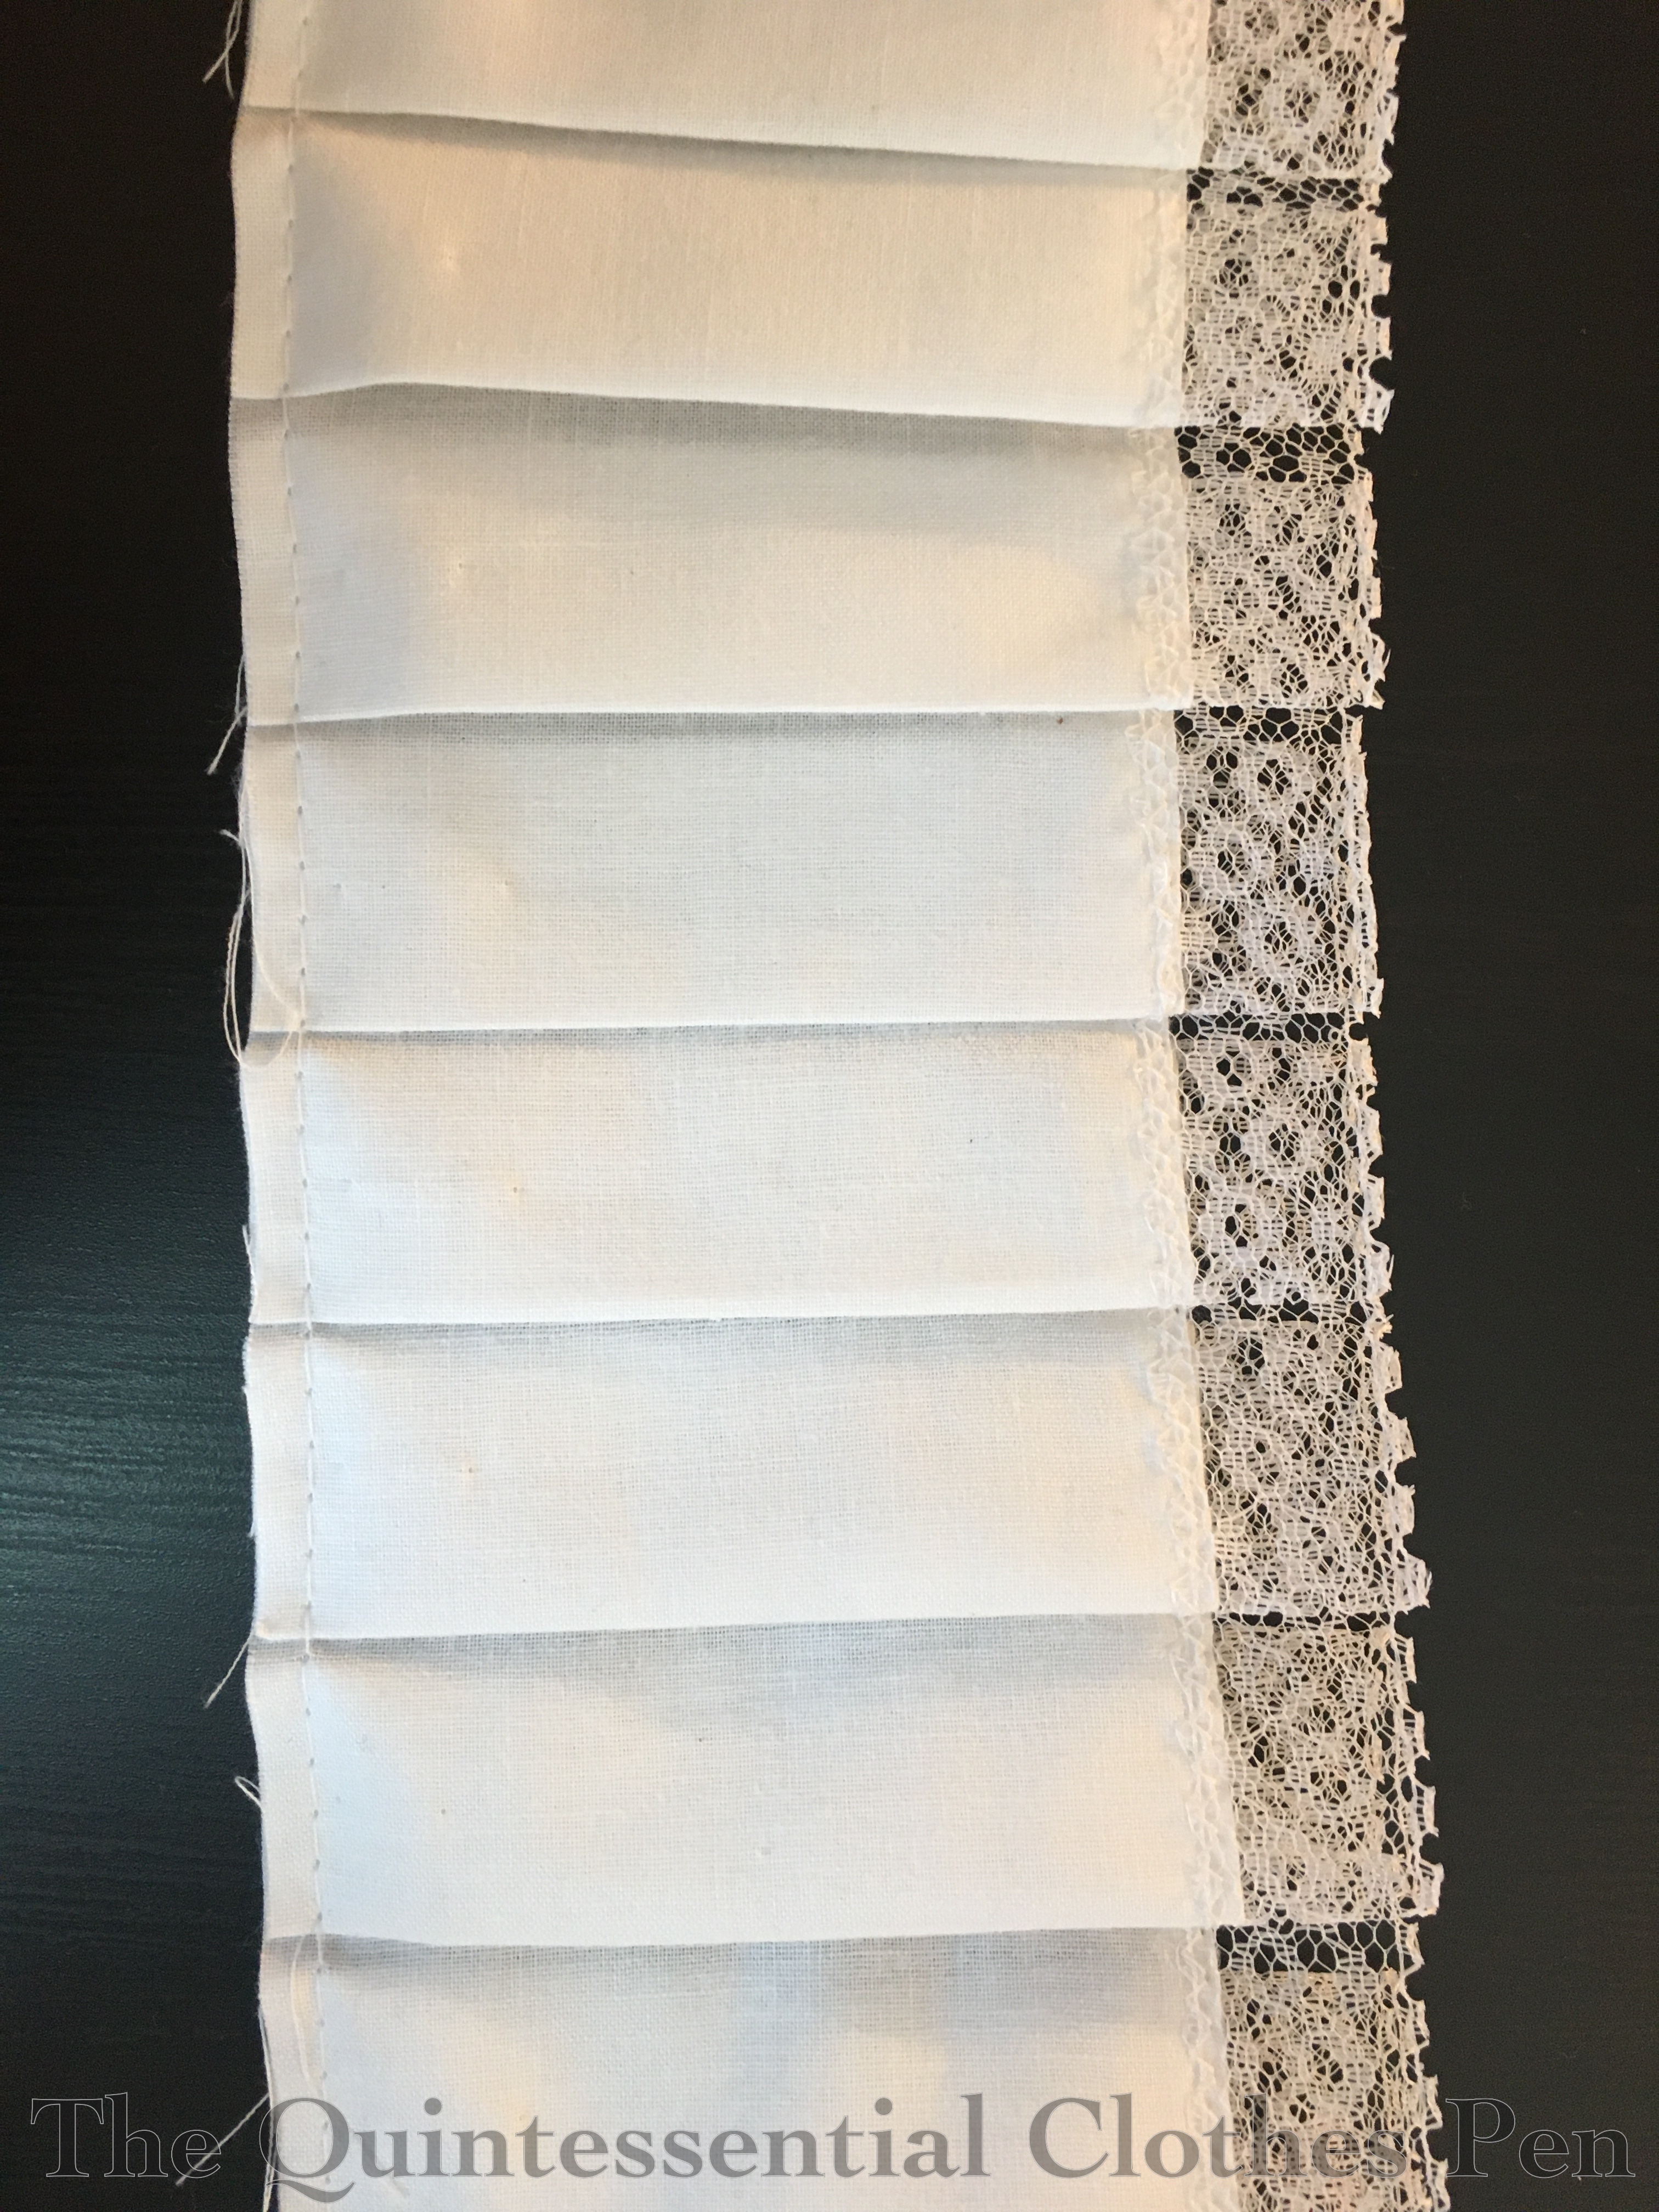
The petticoat is finished with a whipstitched 1″ hem. It’s just the right length for me (and luckily also for the person who wore it in October), but might need to be whacked up with a basting stitch if I loan it to a friend with shorter legs. That’s easy, though!

And that’s it!

This garment qualifies for the HSM Challenge # 7, Always In Style:

Make a garment or accessory that is appropriate for more than one historical period…or even a historical piece that can be worn with modern clothing! (Note that the piece should still be ‘historical’, not just ‘historically-inspired’.)

Just the facts:

Fabric/Materials: Approximately 3-4 yards white striped cotton.

Pattern: None, but I referenced both of these tutorials on constructing 18th century petticoats. Katherine’s tutorial is for a petticoat with an uneven length (to go over panniers, or a bum roll, for example). Rebecca’s tutorial is for a petticoat with an even length (the same length all the way around, to be worn without extra supports). Both tutorials have construction information, Rebecca’s includes a bit more detail in terms of which stitches and methods to use.

Year: Loosely 1700-1790, but leveled to be appropriate for c. 1785.

Notions: 3ish yards of ¼″ ivory polyester ribbon and thread.

How historically accurate is it?: 70%. Accuracy gets knocked down because: 1- all unseen seams are machine sewn, 2- I used polyester ribbon for ties, 3- I haven’t seen research that shows cotton being used at this time for a single plain petticoat of this sort.

Hours to complete: 5? I didn’t really keep track.

First worn: October 5, 2024.

Total cost: The fabric was $1 per yard. The ribbon was gifted to me. So approximately $4.

Yellow Sacque Petticoat (HSM #12)

Over the last year or so I’ve been working on another new ensemble: a second 1770s sacque dress (also called a Robe à la Française or sack-back gown) to be friends with my original Versailles dress (which you can read all about in this past series of posts). My goal was to have a new dress that I could loan to two different friends so that they could join me in 18th century splendor. Luckily, the two friends I have in mind are not too different in circumferences!

The new ensemble has many individual garments — under petticoat, over petticoat, the sacque itself, a tucker, and sleeves flounces (or engageantes) — so there will be a number of posts coming up that share details about these various pieces. This post is going to focus on the over petticoat that I made for this ensemble.

The petticoat front is made up of the yellow jacquard fabric that the dress itself is made out of, while the sides and back are made of a cream colored cotton. No need to use expensive fabric where it is unlikely to be seen! This was a common 18th century practice. Above is an image of the front of the petticoat. Below is an image of the back of the petticoat.

There are three fabric panels — two of the cotton and one of the silk. These are seamed together and then divided in half, such that some of the cotton falls on the ‘front’ of the petticoat (since it makes up ⅔ of the circumference of the skirt). There are slits cut into the sides at the halfway points. These are narrowly hemmed by hand.

Below is a closeup of the top the petticoat, which shows the pocket slit on the right side.

The front and back are pleated in the same way, though with differing quantity and depth of pleats. They have an outward box pleat at the center and additional deep knife pleats towards the sides. The pleats are held in place by front and back waistbands that are finished at ½”. Below, you can see the inside of the front and inside of the back, showing the knife pleats and waistbands.

And here is one more interior closeup of the waistband. You can see that it was sewn on by machine and then flipped to the inside and whip stitched in place. You can also see the ribbon tie on the right as well as a little bit of the pocket opening.

Set inside of the waistbands are long ties (in this case, made of ivory polyester ribbon because it was on hand). The back ties are long enough to tie around the front of the body. Then the front ties warp around the back and are long enough to tie in front. (You can see how this works in this past post about the petticoat I wear under my Versailles sacque.)

The bottom of the skirt has a ½” hand sewn whip stitched hem, which you can see in the image below. It is leveled to sit over 1770s panniers (which you can read about in this past post).

And that’s basically it! This petticoat qualifies for the Historical Sew Monthly Challenge #12 That’s A Wrap:

Make an accessory or garment that is worn by wrapping it around the body.

Just the facts:

Fabric/Materials: Approximately 1.25 yards of yellow jacquard silk and 2 yards of cream cotton.

Pattern: I referenced my first petticoat, which referenced Katherine’s 18th Century Petticoat Tutorial and The Standard 18th Century Petticoat Tutorial at A Fashionable Frolick. The nice thing about Katherine’s tutorial is that it’s adjusted for a petticoat to go over pocket hoops, while the great thing about the tutorial at A Fashionable Frolick is that it has tons of detailed construction information like which stitches to use. Both tutorials are clear and very helpful.

Year: c. 1775.

Notions: Approximately 3 yards of ¼” ivory polyester ribbon and thread.

How historically accurate is it?: 90%. All of the visible bits are hand sewn. The construction methods are accurate, though cotton is not the most likely fiber content as it was expensive in the 18th century.

Hours to complete: I didn’t keep track (a nice change from some of my projects). My guess is about 5 hours for machine sewing non-visible areas and hand finishing.

First worn: October 5, 2024.

Total cost: Approximately $30 (the cotton was $4/yard, the silk was $17/yard, and the ribbon was free).

1790s Petticoat & Bum Pad (HSM #8)

This post is part of my ongoing and slow work on a 1790s ensemble.

Last year, I was working on a petticoat and bum pad to create a foundation for a dress. The petticoat was pretty much done by the end of the year. The bum pad needed just a final fitting for me to decide if I liked the plumpness before sewing it closed.

After a fitting when the dress was very close to done I determined that I did like the plump pad (stuffed with scraps of the white striped cotton the petticoat and bum pad are made of).

With the bum pad being good to go, I was finally able to finish up the petticoat!

This is my entry for the Historical Sew Monthly 2024 Challenge #8 Stripes and Dots:

Make something using striped or dotted material. The stripes or dots can be printed on the material, knitted/woven in to the material, or created with surface embellishment (ex: embroidery). Textural stripes or dots (i.e: those that are the same colour as the base fabric) are permitted!

This petticoat is made from fabric with a narrow woven in stripe.

Just the facts:

Fabric/Materials: Approximately 3 yards of white striped cotton.

Pattern: From The American Duchess Guide To 18th Century Dressmaking by Lauren Stowell and Abby Cox.

Year: c. 1795.

Notions: Approximately 1 yard of 1/4″ white cotton twill tape, 4 hooks and loops, and thread.

How historically accurate is it?: 100%. Entirely hand sewn, made from plausible fabric, using a pattern that is backed up by lots of research… I’d say this one is pretty accurate!

Hours to complete: About 2 ¼ hours.

First worn: Not yet worn.

Total cost: Approximately $4. The fabric was just $1 per yard when I purchased it years ago and the twill tape and hooks/loops were bought in super bulk and probably cost no more than $1 for all of the bits that I used.

More details:

The petticoat closes with a drawstring, as can be seen below. I love this, as it will make it easily adjustable (a common theme in my recent sewing projects!)

The front opening is finished on both sides with a narrow hem. It’s long enough that I didn’t feel the need to reinforce the bottom, as I don’t think I’m likely to rip it getting in and out.

The next photo shows that I left extra seam allowance at the sides and shoulder seams… again on the theme of garments being alter-able!

And finally, a hem! I needed to max out the length to accommodate the sheer dress that will be worn over this, so the hem is only about ¼”.

And that’s it! I’m excited to have another foundation piece for a new-to-me decade of clothing and I’m pleased that it is entirely hand sewn.

18th Century Blue Foundation Petticoat (HSM #8)

In addition to the c. 1770 Pink Panniers that I recently posted about, the blue foundation petticoat pictured below (front view) is also intended to be easily loaned to friends.

I’m super pleased with this for a few reasons:

1 – I was able to easily replicate the construction steps that I used for my Apricot Petticoat in 2013, ten years ago!

2 – I was able to re-make the petticoat from an old project: the 1812 Blue Under Dress I also made in 2013. I was never very happy with this color under my 1812 Striped White Gown (it was blah) and within even a few years of being made it no longer fit the width of my back, anyway.

3 – This remake qualifies for the HSM Challenge # 8, All Tied Up:

Make something that closes with ties, or something that uses knots/bows as a decorative feature.

Just the facts:

Fabric/Materials: Approximately 3-4 yards blue cotton/polyester blend fabric (salvaged from an old dress).

Pattern: None, but I referenced both of these tutorials on constructing 18th century petticoats. Katherine’s tutorial is for a petticoat with an uneven length (to go over panniers, or a bum roll, for example). Rebecca’s tutorial is for a petticoat with an even length (the same length all the way around, to be worn without extra supports). Both tutorials have construction information, Rebecca’s includes a bit more detail in terms of which stitches and methods to use.

Year: Loosely 1700-1790.

Notions: 3ish yards of 1/8″ blue polyester ribbon and thread.

How historically accurate is it?: 70%. Accuracy gets knocked down because: 1- all unseen seams are machine sewn, 2- I used polyester ribbon for ties, 3- I haven’t seen research that shows cotton being used at this time for a single plain petticoat of this sort.

Hours to complete: 5? I didn’t really keep track.

First worn: Has not been worn yet.

Total cost: Free! Materials were either in the stash/gifted to me or re-used from other projects.

Here are more photos of the petticoat, starting with a back view.

And, close-up evidence of weird things, such as the twice-stitched machine hem, which could be useful if I ever want to lengthen this petticoat. These hems are leftovers from the salvaged dress–no hemming required for this petticoat. Perfect!

I followed the instructions as indicated in Just The Facts earlier in this post. This leads to tidily finished waistbands, as you can see here (along with a randomly located vertical seam).

(Another weird thing about this petticoat is where the seams landed on this, now that it is a petticoat and not the skirt of a dress, and that each seam is finished in a different method!)

And here’s a the same view, but with the front folded down to show how the petticoat is made shorter at center from than it is anywhere else.

Below, a final closeup of the extra length at the front folded down and left raw. The top fold is encased in the waistband, which is machine sewn and whip stitched down on the inside.

I was super pleased to just barely fit this petticoat length out of the skirt length of the old dress. The hem circumference was just about perfect, too! And, I was able to cut the waistband strips from the front bodice pieces of the original dress!

All in all, a quick and satisfying project! I’m much more pleased with this as a petticoat than I ever was with it as a dress.

Making A Corded Petticoat For 1830s & 1840s Ensembles

My sewing has taken a sharp turn into the 1830s in the last two months or so. It’s an exciting detour that has been on the horizon for a long time–ever since I purchased this yellow block print cotton back in 2013, in fact.

I wanted to up my silhouette game for the 1830s and achieve a fuller looking skirt than I’ve been able to do with my 1832 velvet gown in the past. To that end, I decided to make a corded petticoat.

I followed the directions from American Duchess in this video and only changed the cording pattern to suit my materials. If you’re interested in making a corded petticoat yourself I definitely recommend the American Duchess video. I found it easy to follow along with the steps and appreciated the mentions of pitfalls and tips along the way.

I was super excited to get started and maintained my enthusiasm for the first 4 sections of cording, but by the top 2 sections I was definitely feeling ready to be done! By that point the petticoat was unruly and difficult to turn as I sewed around each channel. Despite being less fun than when I started, I pushed on, and I was quite grateful when I finished the last section of cording!

Here’s a closeup photo of the cording sections. I used a continuous piece of cord for each section, as suggested in the American Duchess video.

My opening is just a portion of one seam left open just above the top section of cording. This is what it looks like from the outside. I made the waistband extra long to allow for future adjustment (just in case!), which is why the button is set over so far from the edge of the waistband.

On the inside, that opening looks like this. The second layer of fabric is just turned back from the edge and top stitched in place. The other seam allowance edges are selvedges, so they didn’t require finishing. Easy and tidy!

The ivory cotton waistband is whip stitched on the inside finish it all off nicely. Hidden underneath is a layer of cotton canvas that helps to stiffen the waistband a bit.

This petticoat is almost entirely machine sewn and took 8.5 hours to make. I used 4 ¼ yards of ivory cotton, 13 ¼ yards of 5/16″ cording from Wawak, 39 ¼ yards of 7/32″ cording also from Wawak, the canvas scrap for the waistband, and a lone ivory button from the stash. The materials cost about $33.

When I started this petticoat, I thought that it would only be worn with the 1832 velvet gown I mentioned earlier, but since then 1830s daywear using the yellow print cotton has made it onto my sewing table… and this will definitely get worn with the new dress. I also hope to be able to wear it with 1840s dresses that will someday make it onto my sewing table. It’s a great step towards improving my silhouette!

c. 1880 Petticoat (HSM #5)

I decided I needed a new petticoat as part of the 1875 ensemble I’ve been working on for the last few months. I have a very ruffly petticoat from 1883 (shown in this past post) that helps with the shelf backside shape that became popular in that year, but I wanted a different shape for 1875… something to produce a more rounded silhouette and support the train I was expecting to include on my new dress.

My original thought was that my balayeuse would button to this new petticoat to create the support for the train of my dress (as opposed to making a trained petticoat and then potentially needing an additional petticoat without a train in the future). The idea is that the balayeuse + new petticoat will provide lots of wearing options for the future.

Along those lines, this new petticoat is able to fit over my large bustle from 1883 as well as having the ability to contain the back fullness so that it can also be used for the Natural Form years of approximately 1877-1882 (you can see the bustle in the same past post as the super ruffle-y petticoat). I don’t have a Natural Form dress yet, but it is on the to-do-someday list and in the spirit of reusing garments and saving time, this seemed like a reasonable decision.

Here is the new petticoat over my large bustle. The drawstring partway down the back allows for the adjustment for different bustle shapes. It is anchored in the side seams.

Here is the petticoat without the large bustle. This is approximating the Natural Form look. While the hem pulls up a bit over the large bustle (above), it is pretty even for the Natural Form look (below). The great thing is that once there is a dress over the petticoat you can’t tell what the hem is doing!

The pattern for my petticoat is from Frances Grimble’s Fashions Of The Gilded Age Volume 1, page 107. It’s a pretty simple shape. Accordingly, I made mine using straightforward details and machine sewing/finishing.

The petticoat has a drawstring at the waist, for adjustability. The drawstrings run through the waistband and are anchored along the sides with a line of machine stitching.

At center back the drawstring closes the top of the placket. The placket is just a slit that is bound with a strip of cotton cut on the grain. No bias here–this saves fabric and makes things easier to sew! The waistband and placket biding are finished by stitching in the ditch.

I decided on a medium width pleated ruffle for the bottom edge of this petticoat. I used a fork to help space the pleats, eyeballing and ironing as I went along.

The ruffle is edged with a stiff lace from my stash. I’ve had this for nine years and always wondered what to do with it, because it is so stiff. Turns out it was perfect for a petticoat, when a little stiffness is helpful! The lace comes in the stack of three that I used to top the ruffle. To get the single width I simply cut apart sections of the stack.

Here’s another view of the stack of three lace, the pleated ruffle, and the drawstring. Both this drawstring and the one in the waist are cotton twill tape.

This simple garment qualifies for the Historical Sew Monthly challenge #5: Basic. I imagine it will be used for any project I make, day or evening, from about 1875 through 1882.

Make a garment that can be used for many occasions (like a shift, or the classic ‘Regency white dress’), or a simple accessory that will help you stretch the use of an already existing garment.

Just the facts:

Fabric/Materials:  3.5 yards plain cotton.

Pattern: From Frances Grimble’s Fashions Of The Gilded Age Volume 1.

Year: c. 1880.

Notions: 1 yard ⅝” cotton twill tape, 1 yard ¼” cotton twill tape, 5 yards lace, and thread.

How historically accurate is it?: I’m going to give this one 95%. It’s good on shape, materials, and methods. I believe would be recognizable and plausible for its time.

Hours to complete:  8 ¼ hours.

First worn: In May, for photos with my 1875 ensemble!

Total cost: This was a stash project, so free, but the original cost of the materials were $10.50 for the fabric, $2 for the lace, and about $2 for the twill tapes, so $14.50 total.

While not the most exciting project, this was a great start on the way to making my 1875 ensemble. I’m pleased to have made a garment that is easily adjustable, useful for multiple types of events and silhouettes, and is functional but still pretty!

Orange Boven Pelisse At A Promenade

These photos are rather belated in being posted, as they are from a Regency event that occurred last September, but better late than never, right? The event was a promenade, for which we had beautiful weather with temperatures that were just right for this type of event. It’s a bit cloudy today, so these blue skies look extra beautiful to me.

I took the opportunity to wear my 1814 Orange Boven pelisse ensemble (which includes the pelisse and matching hat as well as the chemisette and my Vernet petticoat). I also carried the red & gold reticule I posted about back in 2014. It was only the second wearing of this finished ensemble and the first one where I actually wore it to promenade in outdoors rather than being indoors. I’m happy to report that it’s great for its purpose–comfortable, suitably warm, and with the ability to blow in the wind nicely, as you can see.

It was lovely to meet some new people at the event. We had lots to chat about as we wandered down towards this lighthouse: sewing, clothes, accessories…

It was quite an enjoyable afternoon. I believe this event will be held again this year, so I hope to have an equally lovely experience in a few months.

SaveSave

SaveSave

SaveSave

SaveSave

SaveSave

SaveSave

A Gown Worthy Of A Duchess

On the same January shopping trip that I unexpectedly found the blush sparkle fabric I made a 1920s dress out of I also unexpectedly found an excellent fabric for a new Regency evening dress. I hadn’t made one in awhile, but I had a Regency weekend coming up and I was wanting something new for the fancier ball (and of course nothing in my stash was inspiring me). In my wanderings around the store, I discovered an organza curtain sheer that brought to mind this particular fashion plate that has been on my ‘to-sew’ list for years.

1819 – Ackermann’s Repository Series 2 Vol 7 – March Issue

I’d been on the look-out for a sheer with black stripes but hadn’t found anything suitable. Once I found the curtain fabric, I debated whether to use it for a dress in this style or to hold out for the black stripe. As you’ll see, I decided to call this inspiration fulfilled by the gold striped fabric that I found. It’s polyester, but that means it was a good price. Occasionally, a polyester can be just the thing.

In addition to the Ackerman’s fashion plate, I also borrowed design ideas from two other striped evening gowns: this earlier Costume Parisien fashion plate from 1809 and this image of the Duchess d’Angoulême c. 1815. My dress is a conglomeration of these and the 1819 fashion plate. I borrowed the sheer overdress idea from 1819, the single row of scalloped trim from 1809, and the bias cut sleeves from 1815. I date my dress to 1817, as the fluffy nature of the organza pushes the silhouette towards 1820, but the single row of trim pulls it back from 1819 just a bit.

I have a full compliment of nicely finished underthings that are perfect for making the sheer dress opaque. It was never my intention to be a scandalous Regency lady with minimal underthings! In fact, to make the ensemble sufficiently opaque, I wore my chemise plus two petticoats under the sheer dress. Without the second petticoat it was clear where my chemise ended (at my knees, in case you’re curious), but I didn’t want to have the illusion of scandal with this, I really wanted opacity all the way down.

Like the new pelisse, the sheer dress provided another perfect opportunity to make further use of my Vernet petticoat, which has a lovely eyelet border at the hem. Here’s another view that shows off the lace on the petticoat.

It’s usual for me to meticulously finish the insides of my garments, but in the case of a sheer dress, that desire became a necessity. Accordingly, all of the inside seams are nicely finished with a mix of French, flat felled, and folding seam allowances to hide raw edges and whipping them together. I kept the finished seam allowances small, so that they wouldn’t detract from the stripes.

The bottoms of the sleeves and the front and back necklines are all adjustable with tiny drawstrings made from champagne colored embroidery floss. The goal was to have ties that would blend and not be noticeable through the sheer fabric.

The pattern for this dress was adapted from other Regency dresses I have made. I think I most closely referenced the patterns for my tree gown and square neck gown, but adjusted the fullness to give this dress a little more oomph.

This dress is machine sewn and hand finished. All of the French seaming was done on machine, as was the assembly of the bodice, waistband, and skirt to make a dress, but all of the other stitching (casings, hems, trim, finishing seam allowances in non-French ways, etc.) was done by hand.

The dress has a scalloped trim band around the bottom, set up high enough to show off the lace on the Vernet petticoat. It’s hand hemmed and it seems like miles… though I think it was only about 9 yards. Hemming, gathering, and attaching this was one of the last tasks and it was going right up until about 2am on the morning of the ball. By the time it was being sewn on there was no measuring or sectioning, just eyeballing, so it’s a little wavier than I would normally allow, but one has to make accommodations (sometimes). I was envisioning the scallops would be spaced out more and therefore be more defined, but as I was furiously sewing the trim on I was not about to cut it up and resew it, so all 9 yards made it onto the dress. It’s fine. I’m happy. I do not plan to re-do the fullness of the trim or the placement!

I decided that such a dress needed grand hair and hair ornamentation, and so I justified my desire to wear a tiara by scouring my Pinterest boards for documentation. The Duchess d’Angouleme sports a pretty grand tiara in 1818. And here she is in 1817 wearing what I think is the same tiara.This is Victoria, Duchess of Kent, sporting a fabulous tiara and giant hair poof/bun. Empress Josephine and Caroline Murat (Queen of Naples) have some pretty fabulous tiaras, too. To match the tiara, I accessorized with a pearl necklace and pearl earrings. Worthy of a duchess? I think so!

SaveSave

SaveSave

1814 Orange Boven Pelisse

At least three years ago I was inspired by a fashion plate, as one often is, and started working on a Regency pelisse following the design in the image. I got really far along, finishing the construction and even part of the trimming, but then stalled and let the ensemble languish for years before determining to pick it up and finish it off this year or else! I’m excited to have finally reached a ‘done’ point in this project so I can remove it from the UFO list!

The pelisse (and hat) are directly inspired by the following fashion plate, which can be seen here with slightly different coloring and here in black and white. In the first of those two links, the garment is labeled as a dinner dress, but I thought the design would make excellent pelisse trimming and so I adapted it.

You’ll notice, perhaps, that the finished pelisse does not have as much trim on it as the inspiration image. Early in this project, before it languished, I cut out all of the appliqués for the neck, sleeves, and hem as well as the front edges. I pressed under a 1/4″ on each side of each piece, too. And then, as I was finishing all that triangle trim on the front earlier this year, two things happened:

#1- I lost steam and really just needed to be done with this project.

#2- I decided I liked the simplicity of the pelisse without the extra trim. It’s so easy to draw lots of details, but then in a real garment the details don’t always translate. For example, the triangles around the neck just looked bad and awkward (plus, I wonder if that is a chemisette collar and not trim on the dress itself?) and the sleeves just looked too crowded. I was also afraid that putting all that work into triangles around the hem would just get dirty and not be a good use of many more yards of the vintage lace I used to edge the triangles.

In fact, despite the somewhat-simplified trim, there are actually a lot of details in the construction of the pelisse. Each back seam is piped and the belt has double piping above and below it. The neck is bound with piping, which is sewn with small, invisible stitches around the neck to hold the seam allowance to the inside. Also, the skirt is knife pleated into the back, allowing for a nice silhouette from all sides.

The pelisse is made entirely from peach colored cotton. It is unlined, except on the belt, where it is lined in order to hide the raw edges. The other seam allowances are whip stitched to keep them tidy. Here is an inside view of the bodice section. I do like my insides to be tidy!

The trim fabric is a cream colored poly/cotton blend. Each triangle is edged in very light tan vintage lace. Then, to top it all off, there are peach tassels on each triangle down the front as well. The peach tassels were removed from a length of upholstery trim that happened to be a perfect color match!

The pelisse is machine sewn on the interior seams and hand finished, including the hem, neckline, seam allowances, and all that trim. The darts are also sewn by hand with a small running stitch, a detail I picked up from looking at extant pelisses, though of course it’s been so many years now that I can’t find a specific example. I like how the top stitched darts at a little extra interest.

The pattern for this pelisse is of my own design. I’m pretty sure it was based on my 1819 spencer, but adapted slightly for a different fit. It’s hard to remember since it’s been so many years since I made the pattern! The skirt is a large rectangle–two panels of fabric seamed at center back.

I’m wearing the pelisse with the following garments: a chemise and my short stays, my Vernet petticoat , my recently finished chemisette, and the hat that matches the whole ensemble. I’m excited to have found a use for the Vernet petticoat that shows off the trim at the hem! I did take out the tucks that made it the right length for my Witzchoura so that it would be the right length for the pelisse, but that’s what tucks are for, right? On picture day there was a nice breeze blowing everything around and showing off all the layers nicely.

I was lucky to take these photos in and around some of the Regency period buildings in Salem, MA. You can’t beat buildings from the right period for a suitable backdrop for a garment like this!

Now I have my first pelisse. More outings will hopefully arise in the future so I can wear it again. I’m so glad I’ve decided it’s finished and that it was a comfortable garment to wear, though I maintain that the hat is a bit silly.


HSM #1: Brown Silk Petticoat

While making my 1832 velvet gown at the end of last year, I decided that a generic 1830s/40s petticoat might add to the silhouette, besides being elegant and fun to own. Silk petticoats remind me of Mammy, in Gone With The Wind, who is very excited (and a bit scandalized) about a red silk petticoat gifted to her by Rhett.

I had purchased this silk taffeta a number of years ago on clearance, but it was languishing in the stash due to its unflattering shade of brown. I had 3 yards, which was just right for a petticoat. And since the garment is never seen nor worn near the face, the color was perfectly suited to the project.

img_2372

I made a tube of the yardage, then cut off the excess length and used that to make the ruffle. I had thought of making the ruffle twice as high, but realized that I needed to have more than a 1:1 ratio to gather… duh! I was sick while making this and clearly my head wasn’t working terribly well. Anyway, I cut my tall ruffle in half to make a 2:1 ratio and that was that.

The waistband is made of small bits of leftover cotton from some other project. There is evidence of quilted petticoats from the 1830s and 1840s having waistbands made of other fabrics, which was my inspiration (examples can be found here, here, and here). It was a perfect idea, as I was trying to make the best use of my fabric and I did not want to cut a waistband piece out of it.

Petticoats of this type also sometimes close with buttons (like this one), so I chose to close this petticoat in that way as well. It used up a single, random, khaki colored button from the stash and matches the fabric perfectly!

img_2373

I added tucks to the petticoat after trying it on with the 1832 dress and realizing it needed to be shorter. Those are hand sewn, but the rest of the construction was done on a machine except for the buttonhole and sewing down the inside of the waistband.

This garment fits the first HSM challenge of the year, Firsts and Lasts (create either the first item in a new ensemble, or one last piece to put the final fillip on an outfit), as it was the start of the 1830s ensemble.

Just the facts:

Fabric: 3 yards brown silk taffeta.

Pattern: None. Just rectangles and math, sort of.

Year: 1830s/40s.

Notions: Thread, a button, and a cotton scrap.

How historically accurate is it?: I’m going to go with 95% on this one. The materials are good and so is the method. The only thing off is the machine sewing and the plastic button.

Hours to complete: Not many, for me. Maybe 10? It didn’t help that I was sick  and not thinking straight.

First worn: December 10 for a ball.

Total cost: $18.