1834 Yellow Dress: Construction Details

Some of my recent posts have mentioned my excursion into sewing clothing from the 1830s. Most recently, in September, I posted about making a corded petticoat to help support a fashionable 1830s silhouette. I also shared a reminder about the fabric I’ve had in mind for an 1830s dress since I bought it seven years ago. It’s finally time to share the finished ensemble created with that fabric!

Today’s post is going to focus on the construction of this dress, but, never fear, upcoming posts will share more finished garment photos as well as construction details about the bonnet.

There is a lot of information about this dress to share and many photos of the process, so I hope you’re ready for a lengthy post!

Inspiration

As you probably guessed from the title of this post, this dress is from the year 1834. The trimming details and shape are directly inspired by the dress pictured below, which is in the collection of the Victoria and Albert Museum.

Day dress. 1830-1834. Victoria and Albert Museum. T.168&A-1915

The V & A Dress is dated to 1830-1834. From a style perspective, this makes sense as these are the years from this decade with the largest sleeves, but it is also around this point in the decade that sleeve fullness starts to slide down the arm. This look that is just beginning to show in the V & A dress, which achieves the falling look with the addition of the mancherons at the top. The mancherons both practically and visually push the fullness of the sleeve off the shoulder.

What is a mancheron? The Oxford English Dictionary has the following entry):

mancheronn.
1. French Heraldry. A sleeve used as a charge. Obsolete.
2. A piece of trimming on the upper part of a sleeve on a woman’s dress. Now historical.

Patterning

The pattern for this bodice is based on patterns contained in Janet Arnold’s Patterns of Fashion 1 and Norah Waugh’s The Cut of Women’s Clothes. I was able to start with my basic darted 1860s bodice and adapt it for the 1830s using information about grain line, dart placement, etc. from the books. This worked well because I know the basic darted bodice fits in areas that can be fussy to fit such as neckline, armhole, etc. and those things (in the 1860s) are still very similar to the shapes from the 1830s.

The sleeve pattern is from Plate 12 (page 84) in The Workwoman’s Guide (published in 1838), which can be viewed on Google Books here. I used the big circle sleeve (Figure 8–shown made up in Figure 7) and varied the top shape so that it forms a downward V shape to allow for my mancherons, which are patterned based on the V & A inspiration dress.

The ladies at American Duchess created a very helpful video discussing sleeve shapes from the 1830s, including showing mockups of a few different sleeve patterns from The Workwoman’s Guide. It is wonderful for seeing how the flat patterns turn into 3D shapes, which I found to be very helpful as I dithered about sleeve patterns.. You can view the video here. Lauren also has a blog post talking about 1830s sleeves, which shows the pattern I chose to use in various stages of its construction, from being flat to being made-up.

The skirt is based on information from the same books as the bodice pattern. It is made of 3 panels of my 45″ wide cotton fabric.

Construction Method Disclaimer

I chose to construct this dress in the mid-19th century way of separate bodice and skirt. This is odd for the 1830s (in fact, I can’t think of any examples that are done this way) as they are usually sewn together to make a one piece dress. However, as I was pondering sleeve options and considering my yardage I was faced with an exciting prospect.

There are so many sleeve variations in the 1830s–super poof, takes-a-while-to-get-used-to-looking-at elbow poof, meticulous pleated details as the poofs are reduced and contained… I wanted to make more than one! Also, I had 10 yards of my beautiful reproduction cotton and I expected my 1834 dress to only use about 7. What would I do with the last 3 yards? That’s not enough to make another dress. But… it is enough to make another bodice, even with giant 1830s sleeves that use a full yard for each arm!

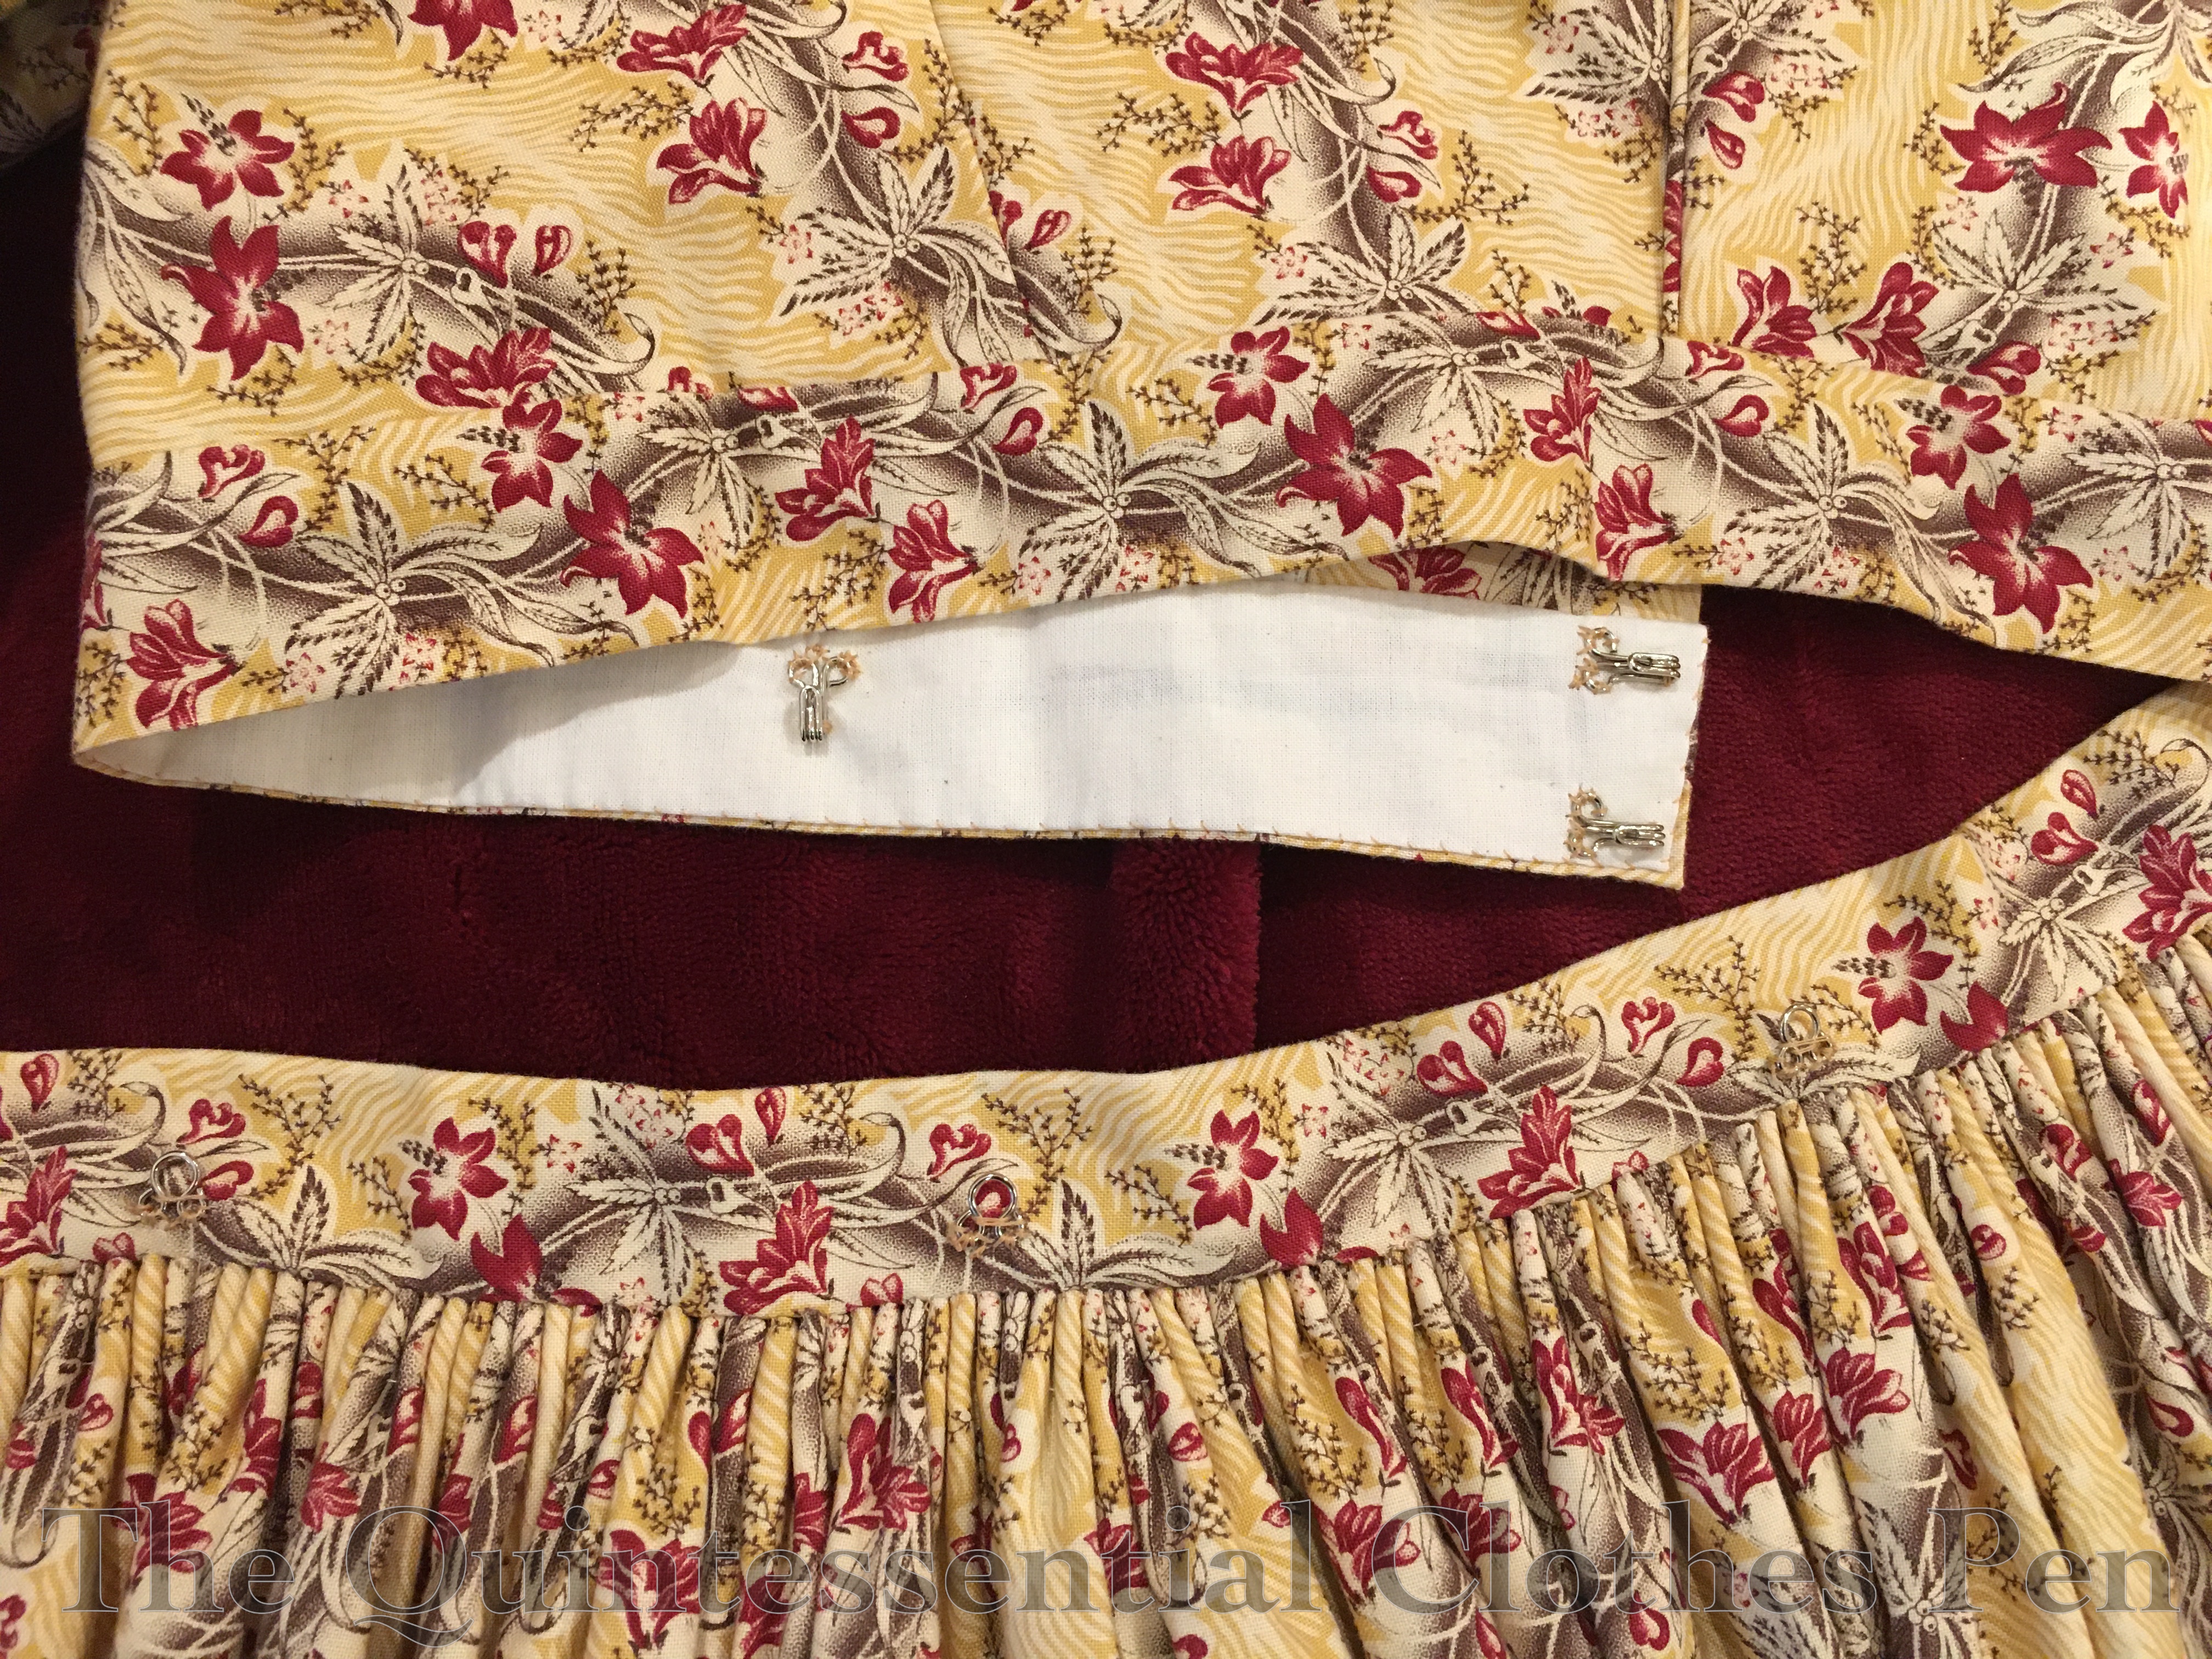
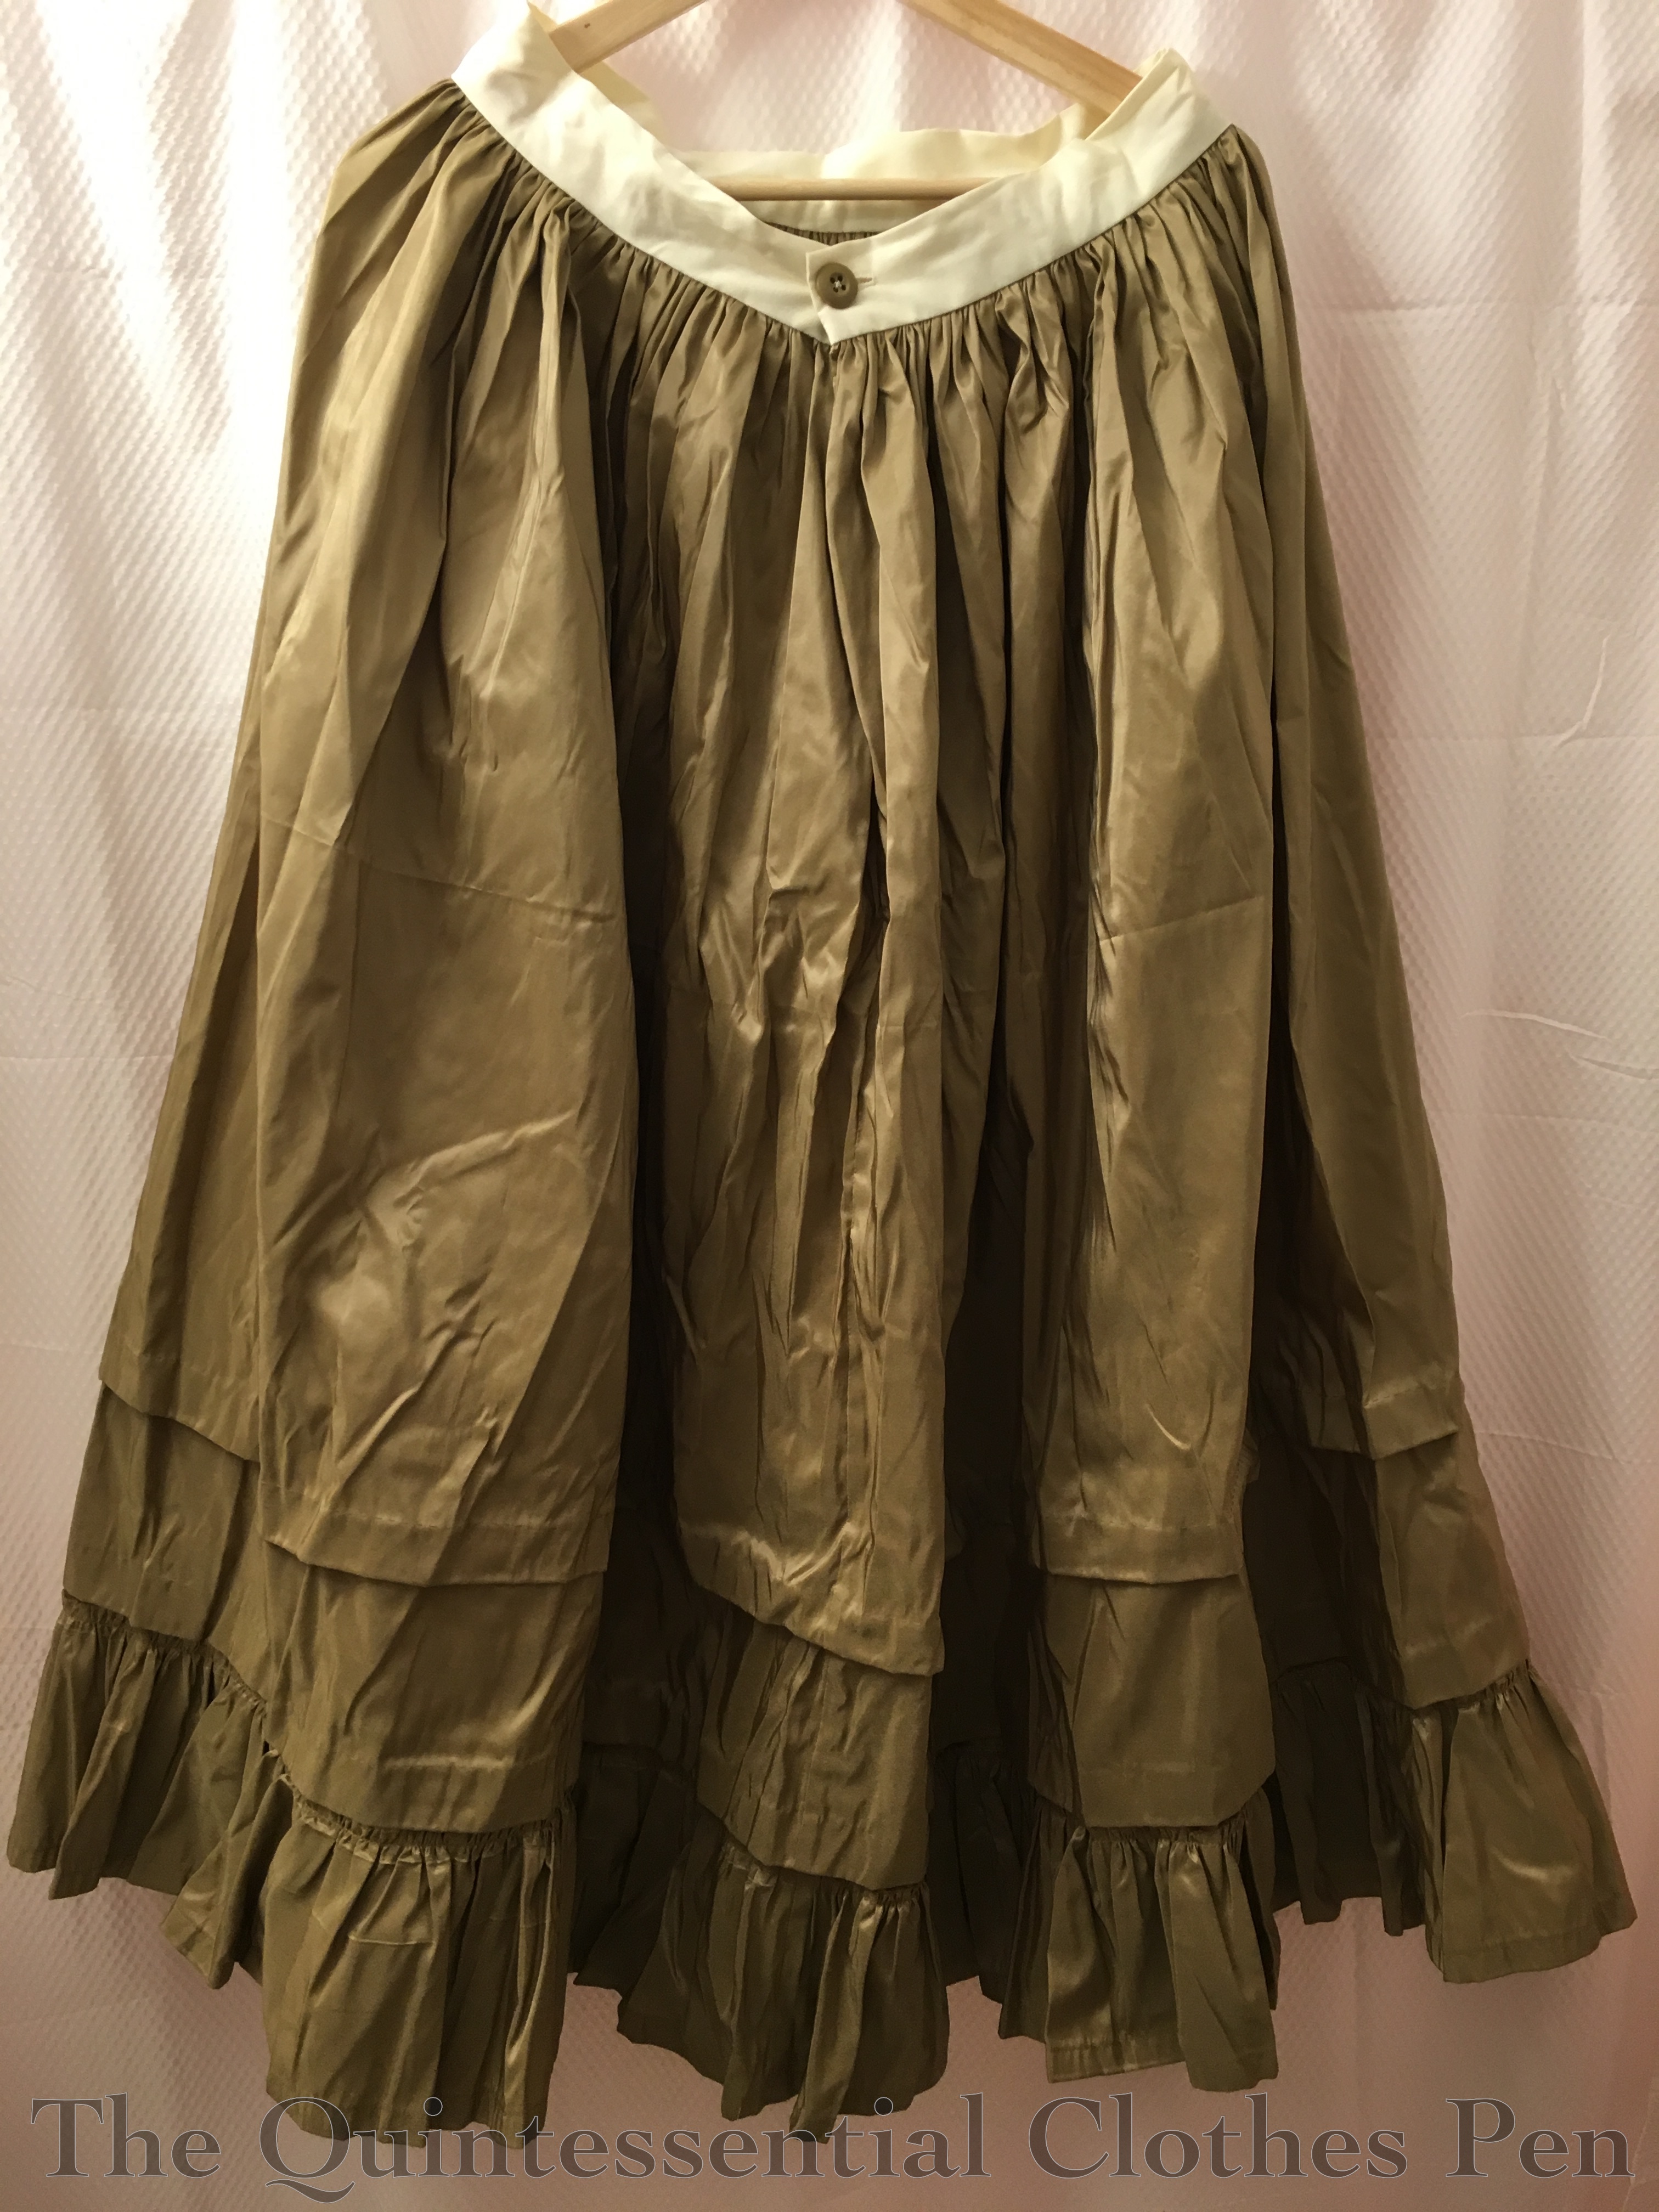
I decided to make one skirt with two bodices, so in addition to this 1834 dress I also have an 1838 bodice halfway completed. It is a variation on a theme, using mostly the same bodice pieces, but with a different front style and different sleeves. More on that in the future, but for the purposes of this post it is an explanation for the fact that the skirt of my 1830s dress hooks to the bodice in a way that is common in the mid-19th century, as you can see below. (The loops on the skirt waistband blend really well with the pattern on the fabric, but you can see them if you look really carefully.)

Skirt Construction

As I mentioned earlier, my skirt is made up of 3 panels of my 45″ wide cotton. They are carefully pattern matched to keep the scrolling consistent across the panels and to help hide the seam lines. They’re not perfect, but they are pretty darn close.

Two seams are on each side of center front and one is at center back. The two front seams have french seamed pockets set into them below the cartridge pleats. This is wonderfully helpful while wearing the dress! I made sure to make the pockets big enough to hold a phone, keys, etc.

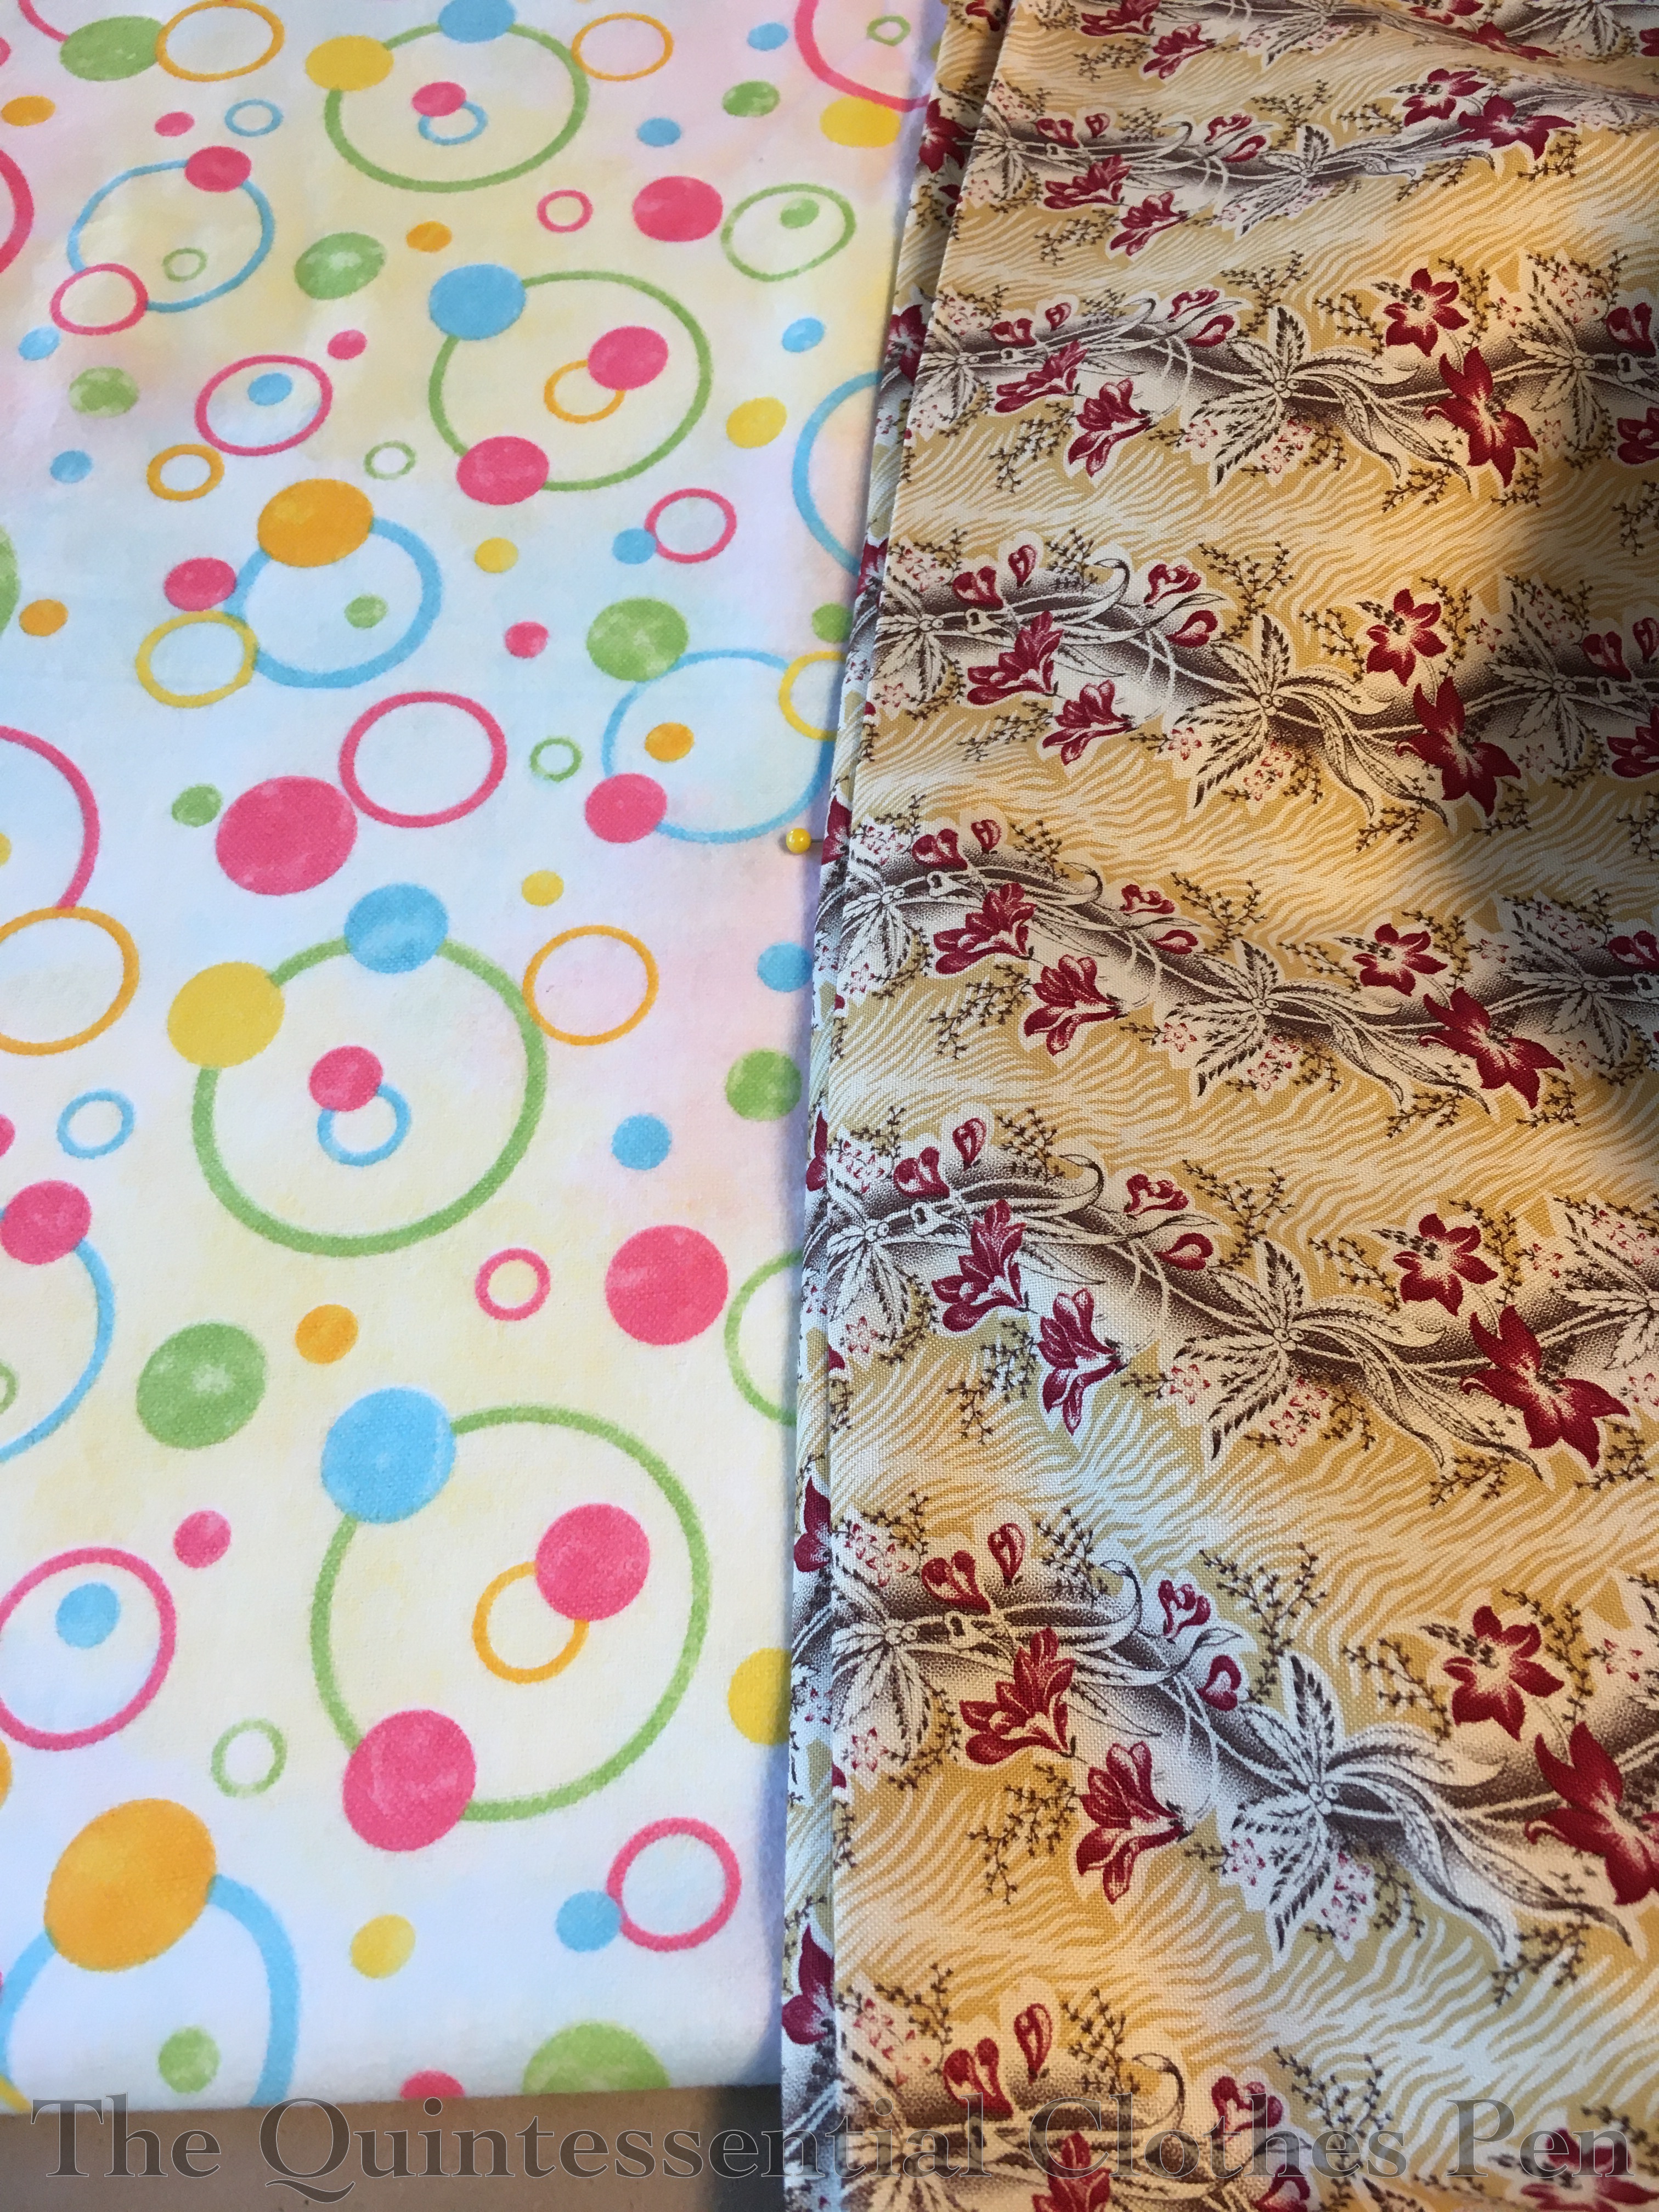
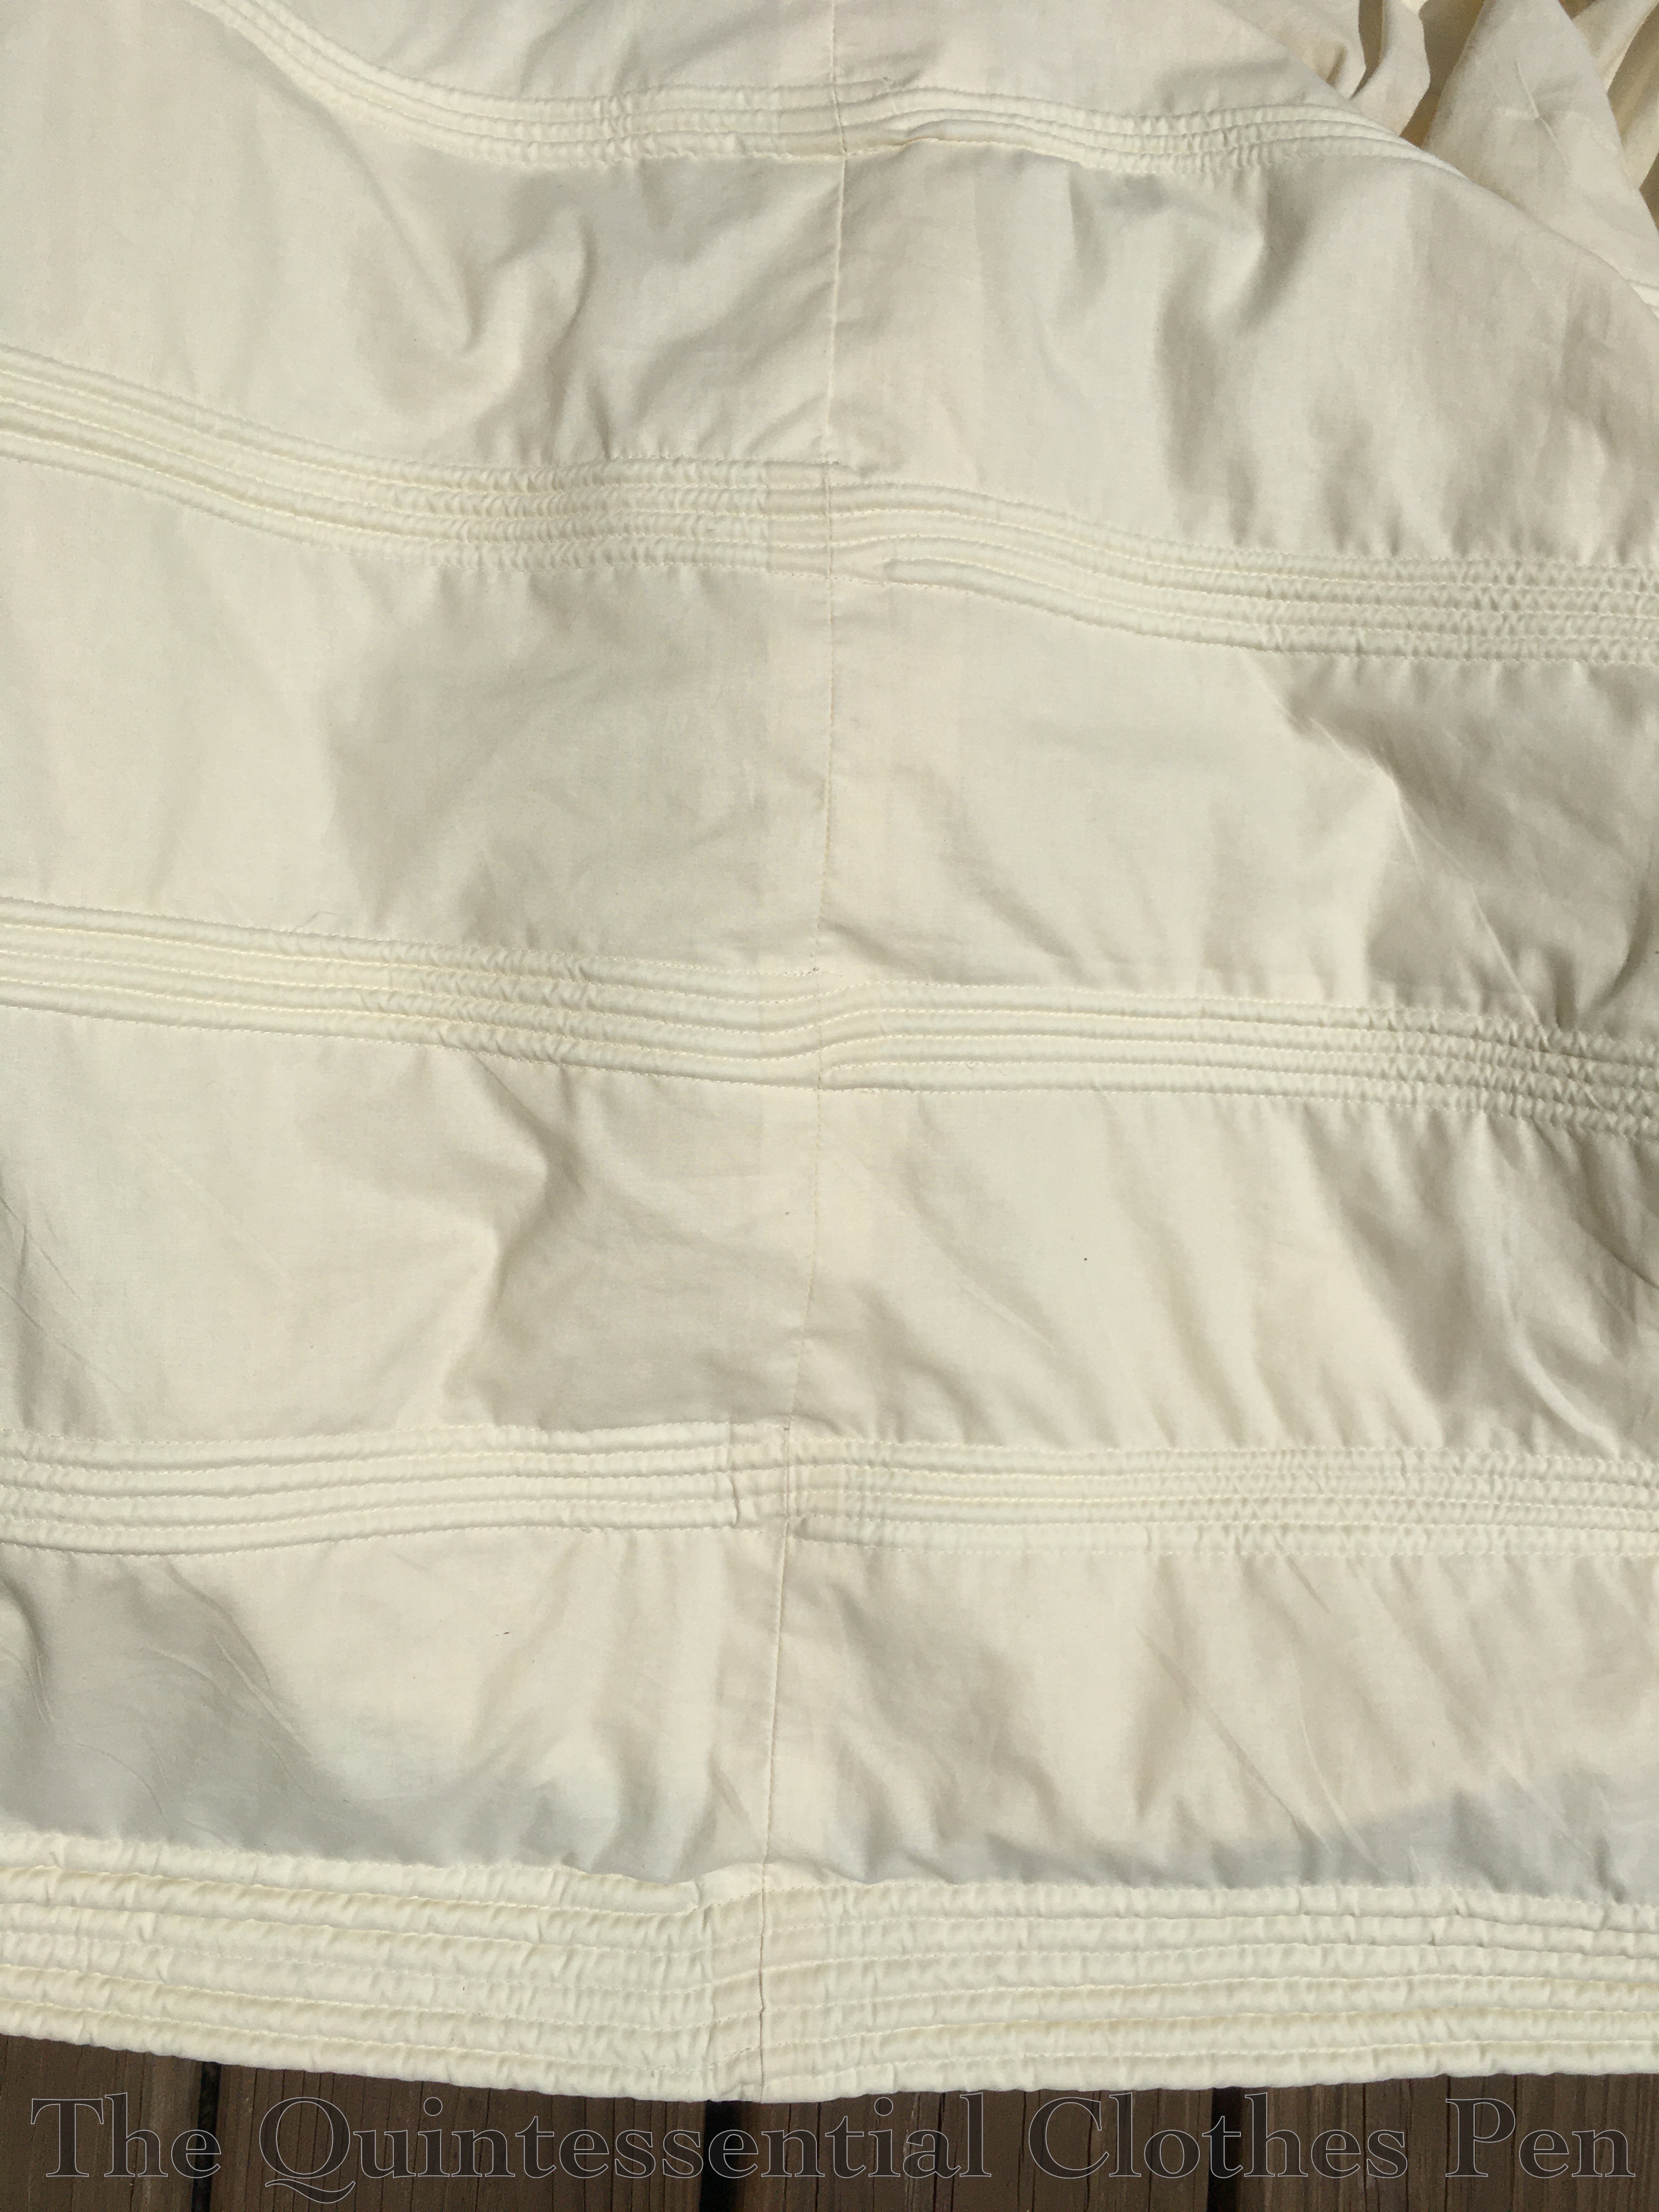
The fullness of the skirt is cartridge pleated to the waistband. I find that this quantity of cotton is weeny looking when cartridge pleated to a waistband without a little help to create loft, so I sandwiched a single layer of cotton flannel into the pleats to help them have a little bit of puff. I just used scrap flannel from my stash for this–the fun dot print pictured below. This is the top of my skirt pressed and ready for pleating!

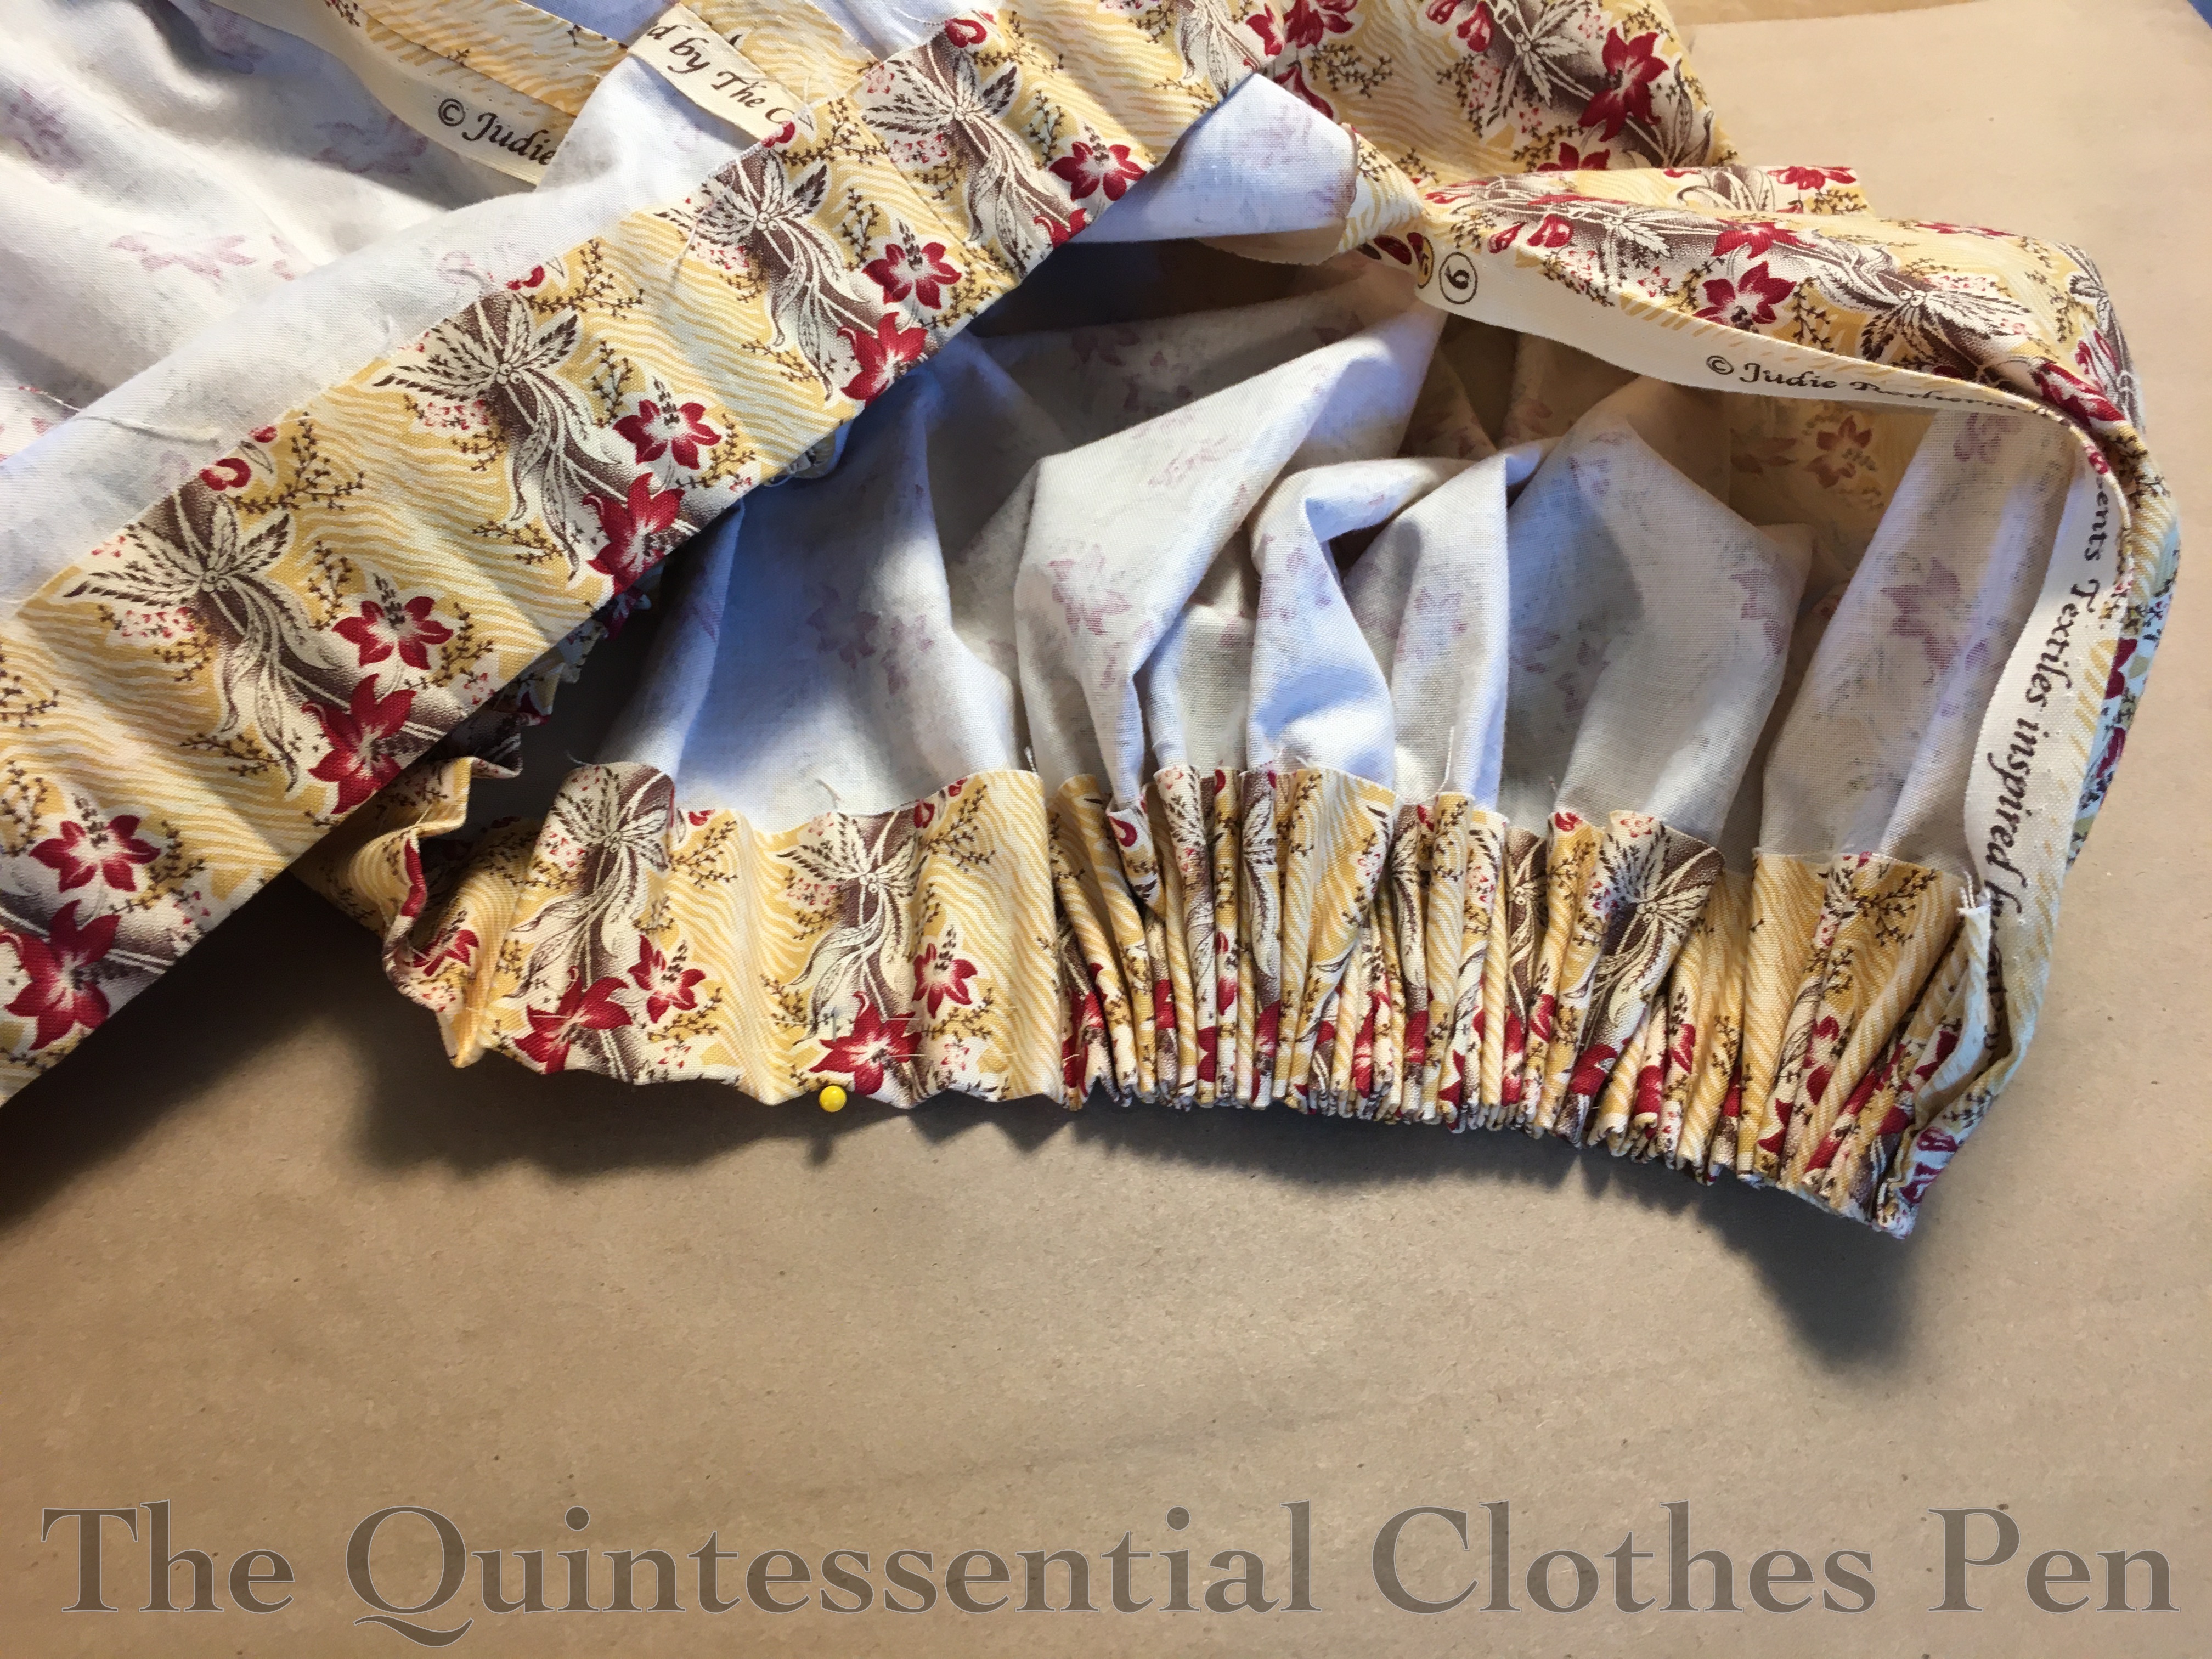
Here is the skirt in the process of being pleated. The top edge is left raw and folded over the flannel before I ran two rows of parallel stitches to form the pleats.

I absolutely eyeball my cartridge pleats! My stitches are vaguely even but I really don’t worry too much about that. I mark the quarter points of the skirt and waistband and then adjust the pleats to fit. No math for this process!

The waistband has a single layer of canvas inside (a scrap from a decorating project) to help stiffen it and provide stability for the cartridge pleats and closures. This is machine stitched to the cotton where it will not show.

The cotton is then wrapped around the canvas and whip stitched in place. I finished the waistband entirely before whip stitching the cartridge pleats in place.

Bodice Construction

The construction of this bodice is pretty straightforward as 19th century bodices go, though I spent a bit of time searching out photos of extant dress interiors from this decade so I could see how they were finished (or left with unfinished edges!). I found these dresses featured on All The Pretty Dresses very helpful, especially as they have interior views: late 1830s green/blue/red cotton print dress and early 1830s brown dress.

There are other inspirational dresses on my Pinterest board for this project, as well. Many of them are held by the Metropolitan Museum of Art. Those are excellent because you can really zoom in on the photos to look at details, but unfortunately they don’t often show interior views of the dresses.

The hardest part about this bodice was the pattern matching! It was mind boggling to keep the flowers growing upwards, match the wave, keep the dark pink flowers at corresponding places, and keep some parts on the bias and some on the straight.

For example, here is my first attempt at the front bodice, which is cut on the bias. It’s not awful… but it’s just not quite right, and that bothers my eyes.

I very carefully tried again…

And was able to get this, which I was much happier with!

And I was able to use the reject front piece to cut out a pocket piece (and later a bit of bias as well)… no waste here!

Here is the front piece after flatlining (the fronts, side backs, and backs of the bodice are all flat lined with muslin), stitching the darts, and putting cording down the center front seam.

Ah yes, the cording! There is 1/16″ cotton cording in most of the bodice seams (front, side back, shoulders, armholes, neckline, and to finish the cuffs). This detail is taken directly from extant 1830s dresses.

My cording is made up of bias scraps, some as small as about 4″ long, that are pieced together. The cording is machine stitched. I made it with even seam allowances for most of the seams, but thought ahead and offset the seam allowance for the neckline cording, to make it easier to turn it under and whip stitch later. The photo below shows the neckline cording (on the top) and regular seam cording (on the bottom).

Here are the side back pieces with the cording attached, before being sewn to the back pieces. As you can see, I carefully matched my pattern across these two pieces as well.

And here is one side back sewn to its corresponding back, with the cording in the seam. Even across these pieces my pattern matching is pretty good, especially at the bottom!

And the back! It also makes me very happy, but was a super mind boggle to figure out! I have a flap that overlaps past center back, covering a pleat on the other side that will anchor my loops. I found this detail on a number of 1830s dresses, including this 1835-1836 dress at The Met and this c. 1837 dress at The Met.

It doesn’t look like much until it’s lined up to be closed… and then it’s perfect!

The final step was to finish the bottom. I wanted to have a self fabric waistband on this bodice, as with the bodice at the V & A, so that I would have the option of wearing my dress with or without a belt, while still having the visual change of pattern in the fabric.

The outer waistband and inner muslin facing encase the bottom seam allowance of the bodice. They are machine stitched at the top, have graded seam allowances, and then the muslin is whip stitched along the bottom.

Sleeve Construction

With the bodice mostly assembled, I moved on to the sleeves. These are not flat lined.

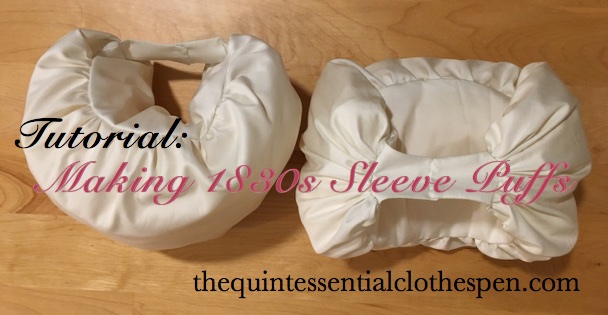
The sleeve is given shape by the use of sleeve puffs. I made my sleeve puffs in 2018 and posted a tutorial about how to make them.

I upgraded my sleeve puffs for this ensemble by giving them ties to attach to the armsceye of the dress so I can control the height that they sit at. This is essential for getting the right shape poof with this sleeve style. Looking into a sleeve, here is one sleeve puff tied in place.

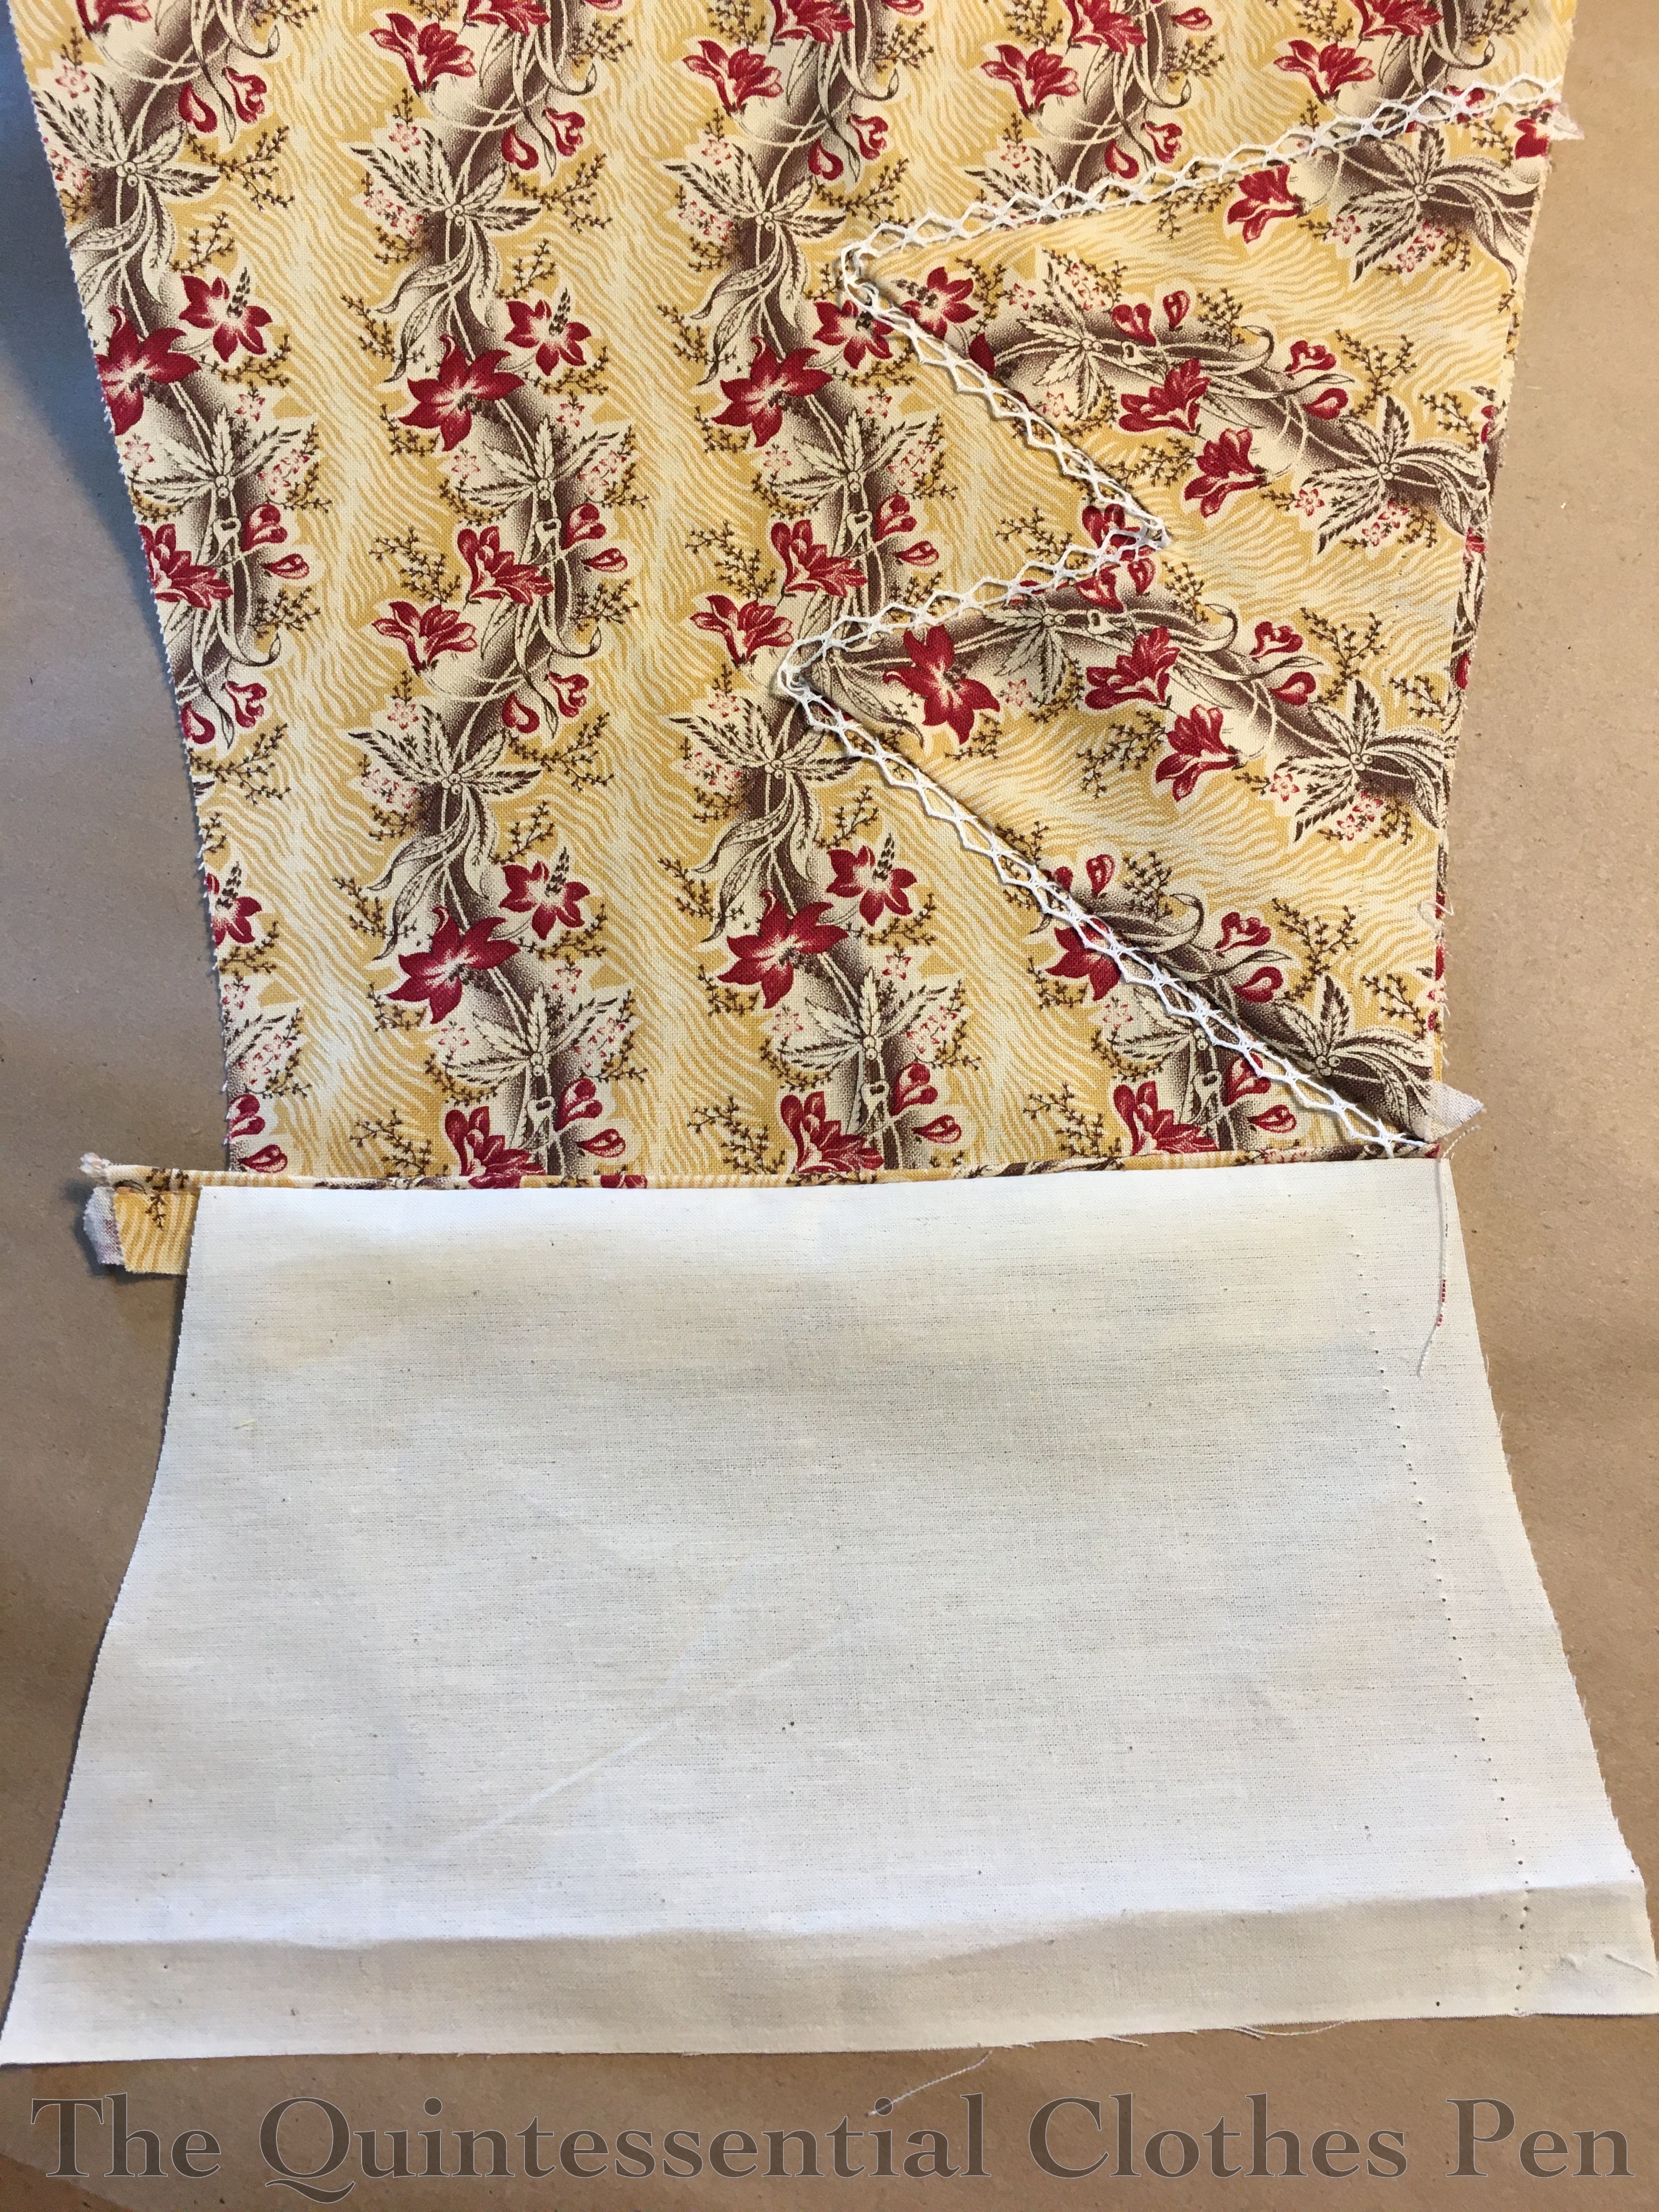
I edged my decorative mancheron and cuff zig zag with narrow lace before attaching them to my sleeve. The cuff zig zags are sewn on by hand, while the full tops of the sleeves are gathered and machine sewn to the mancherons (you can see a the seam allowance from this seam in the photo above).

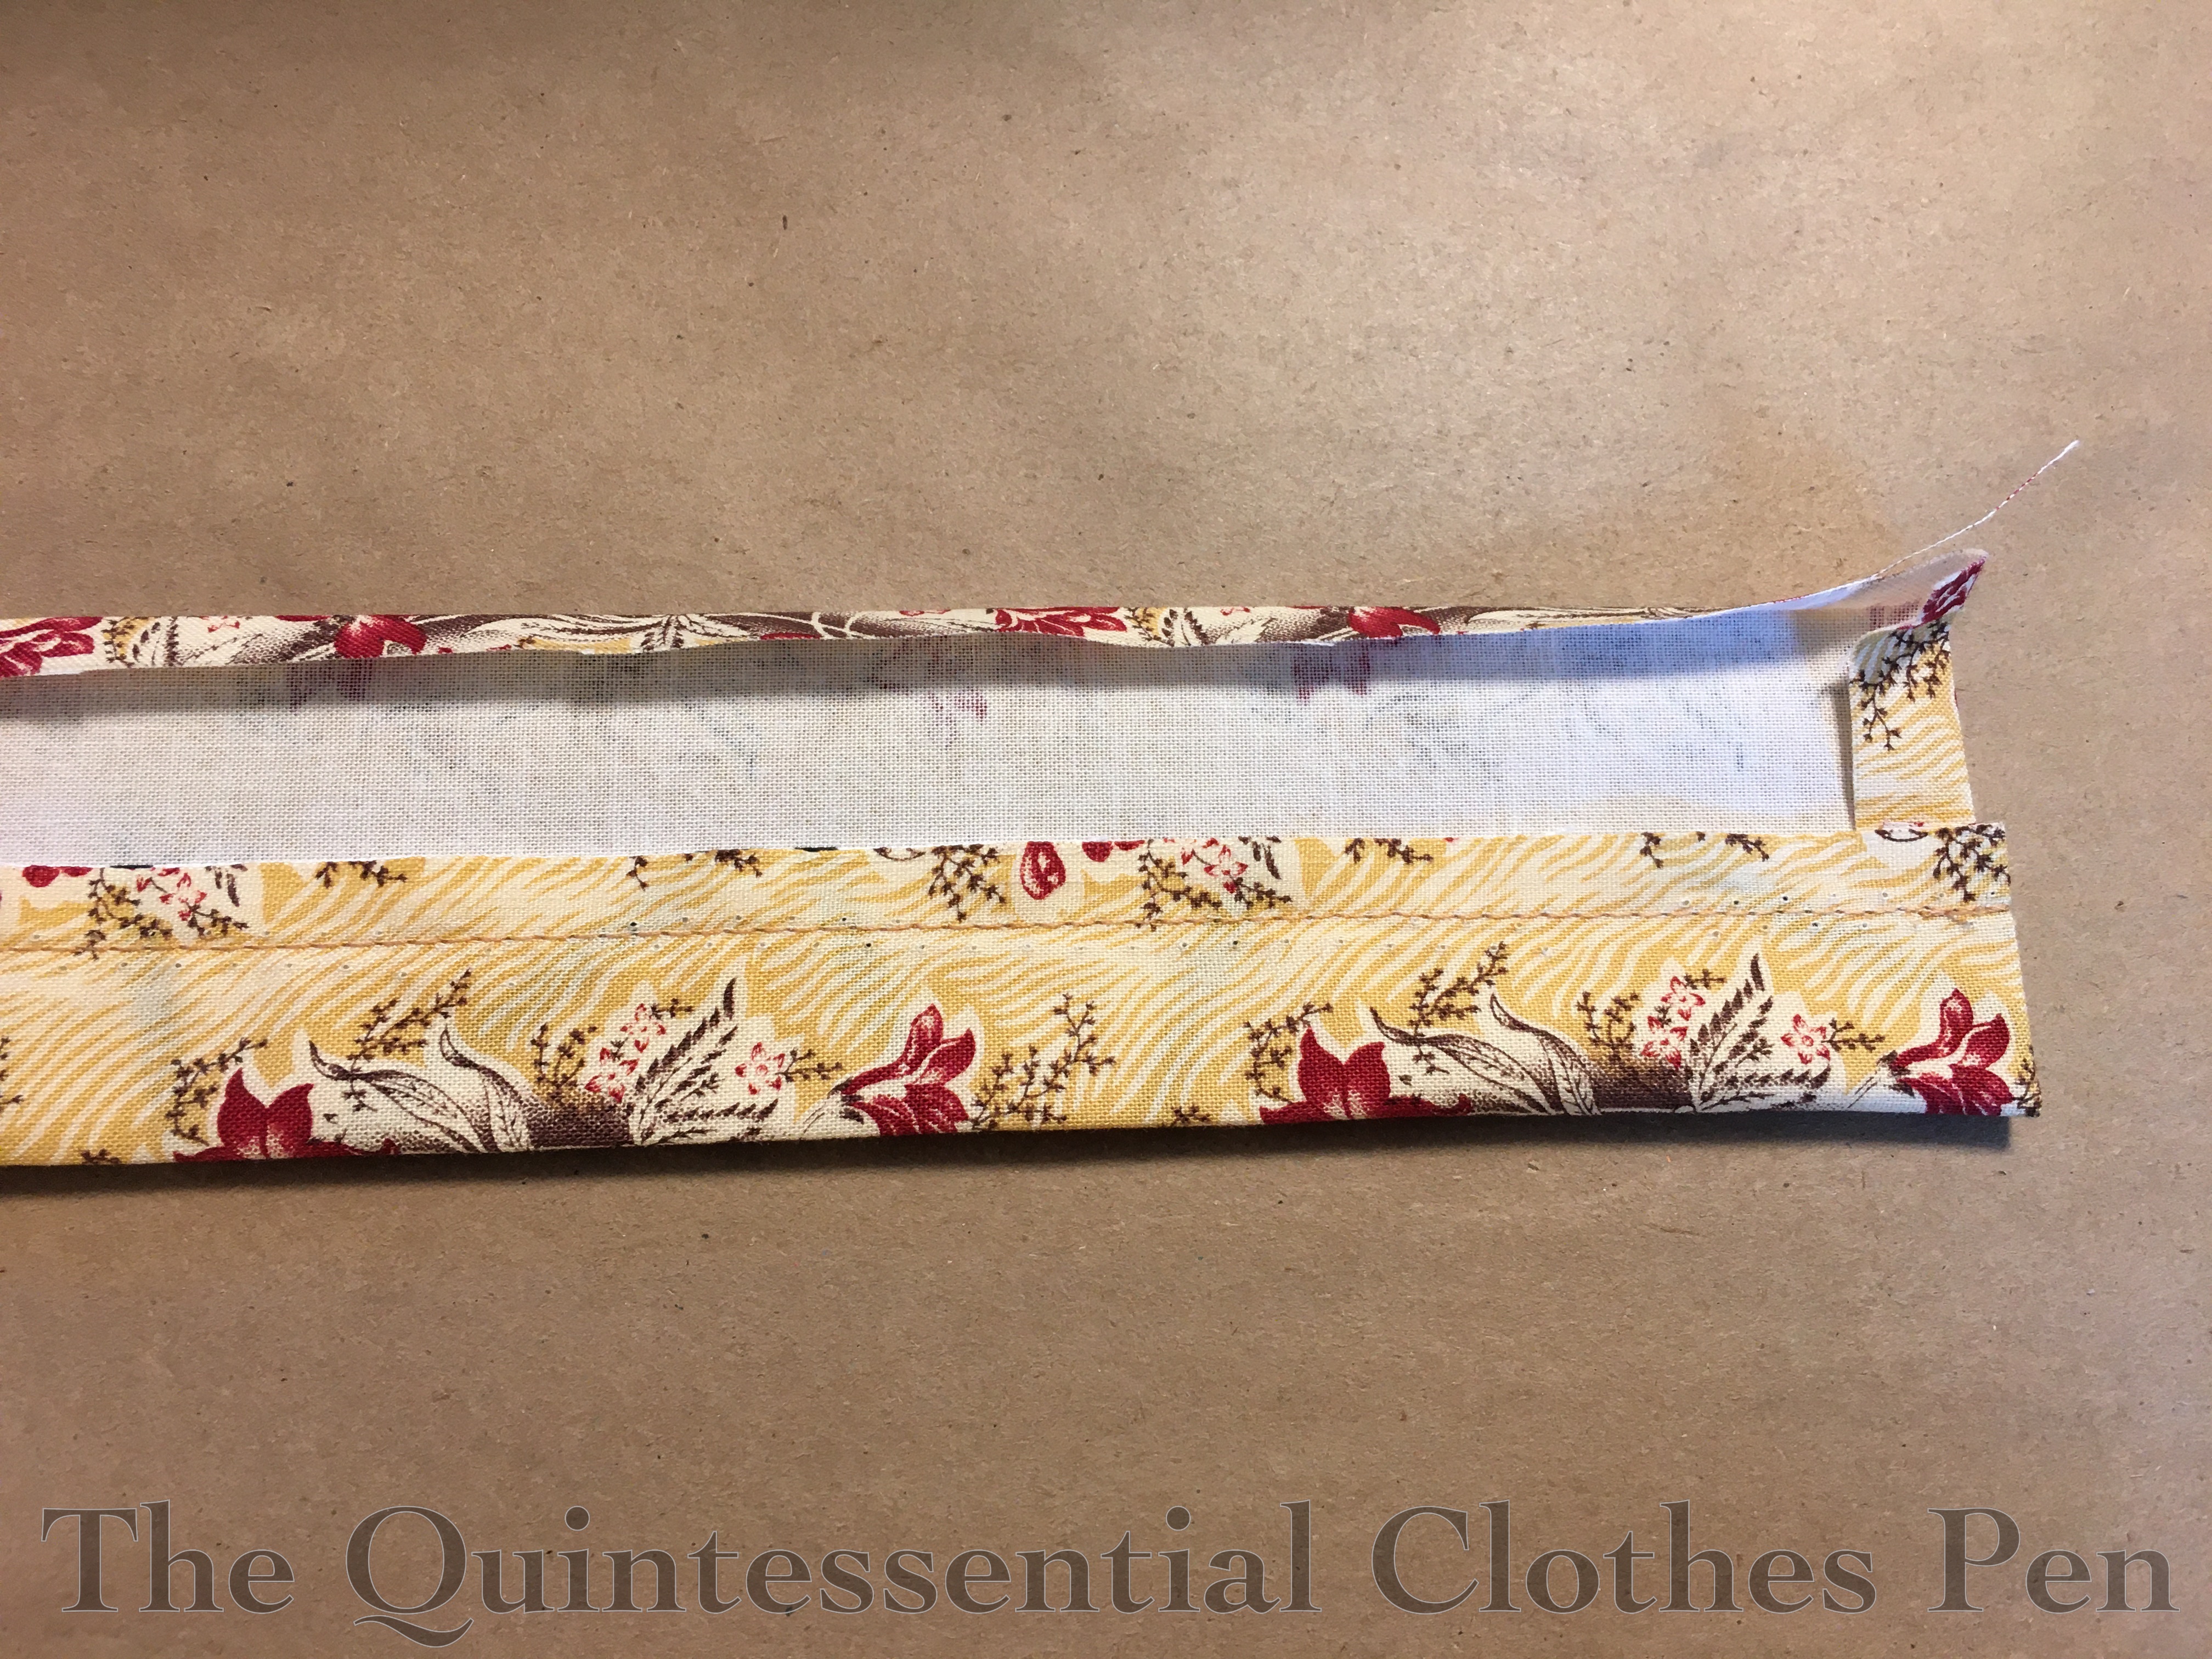
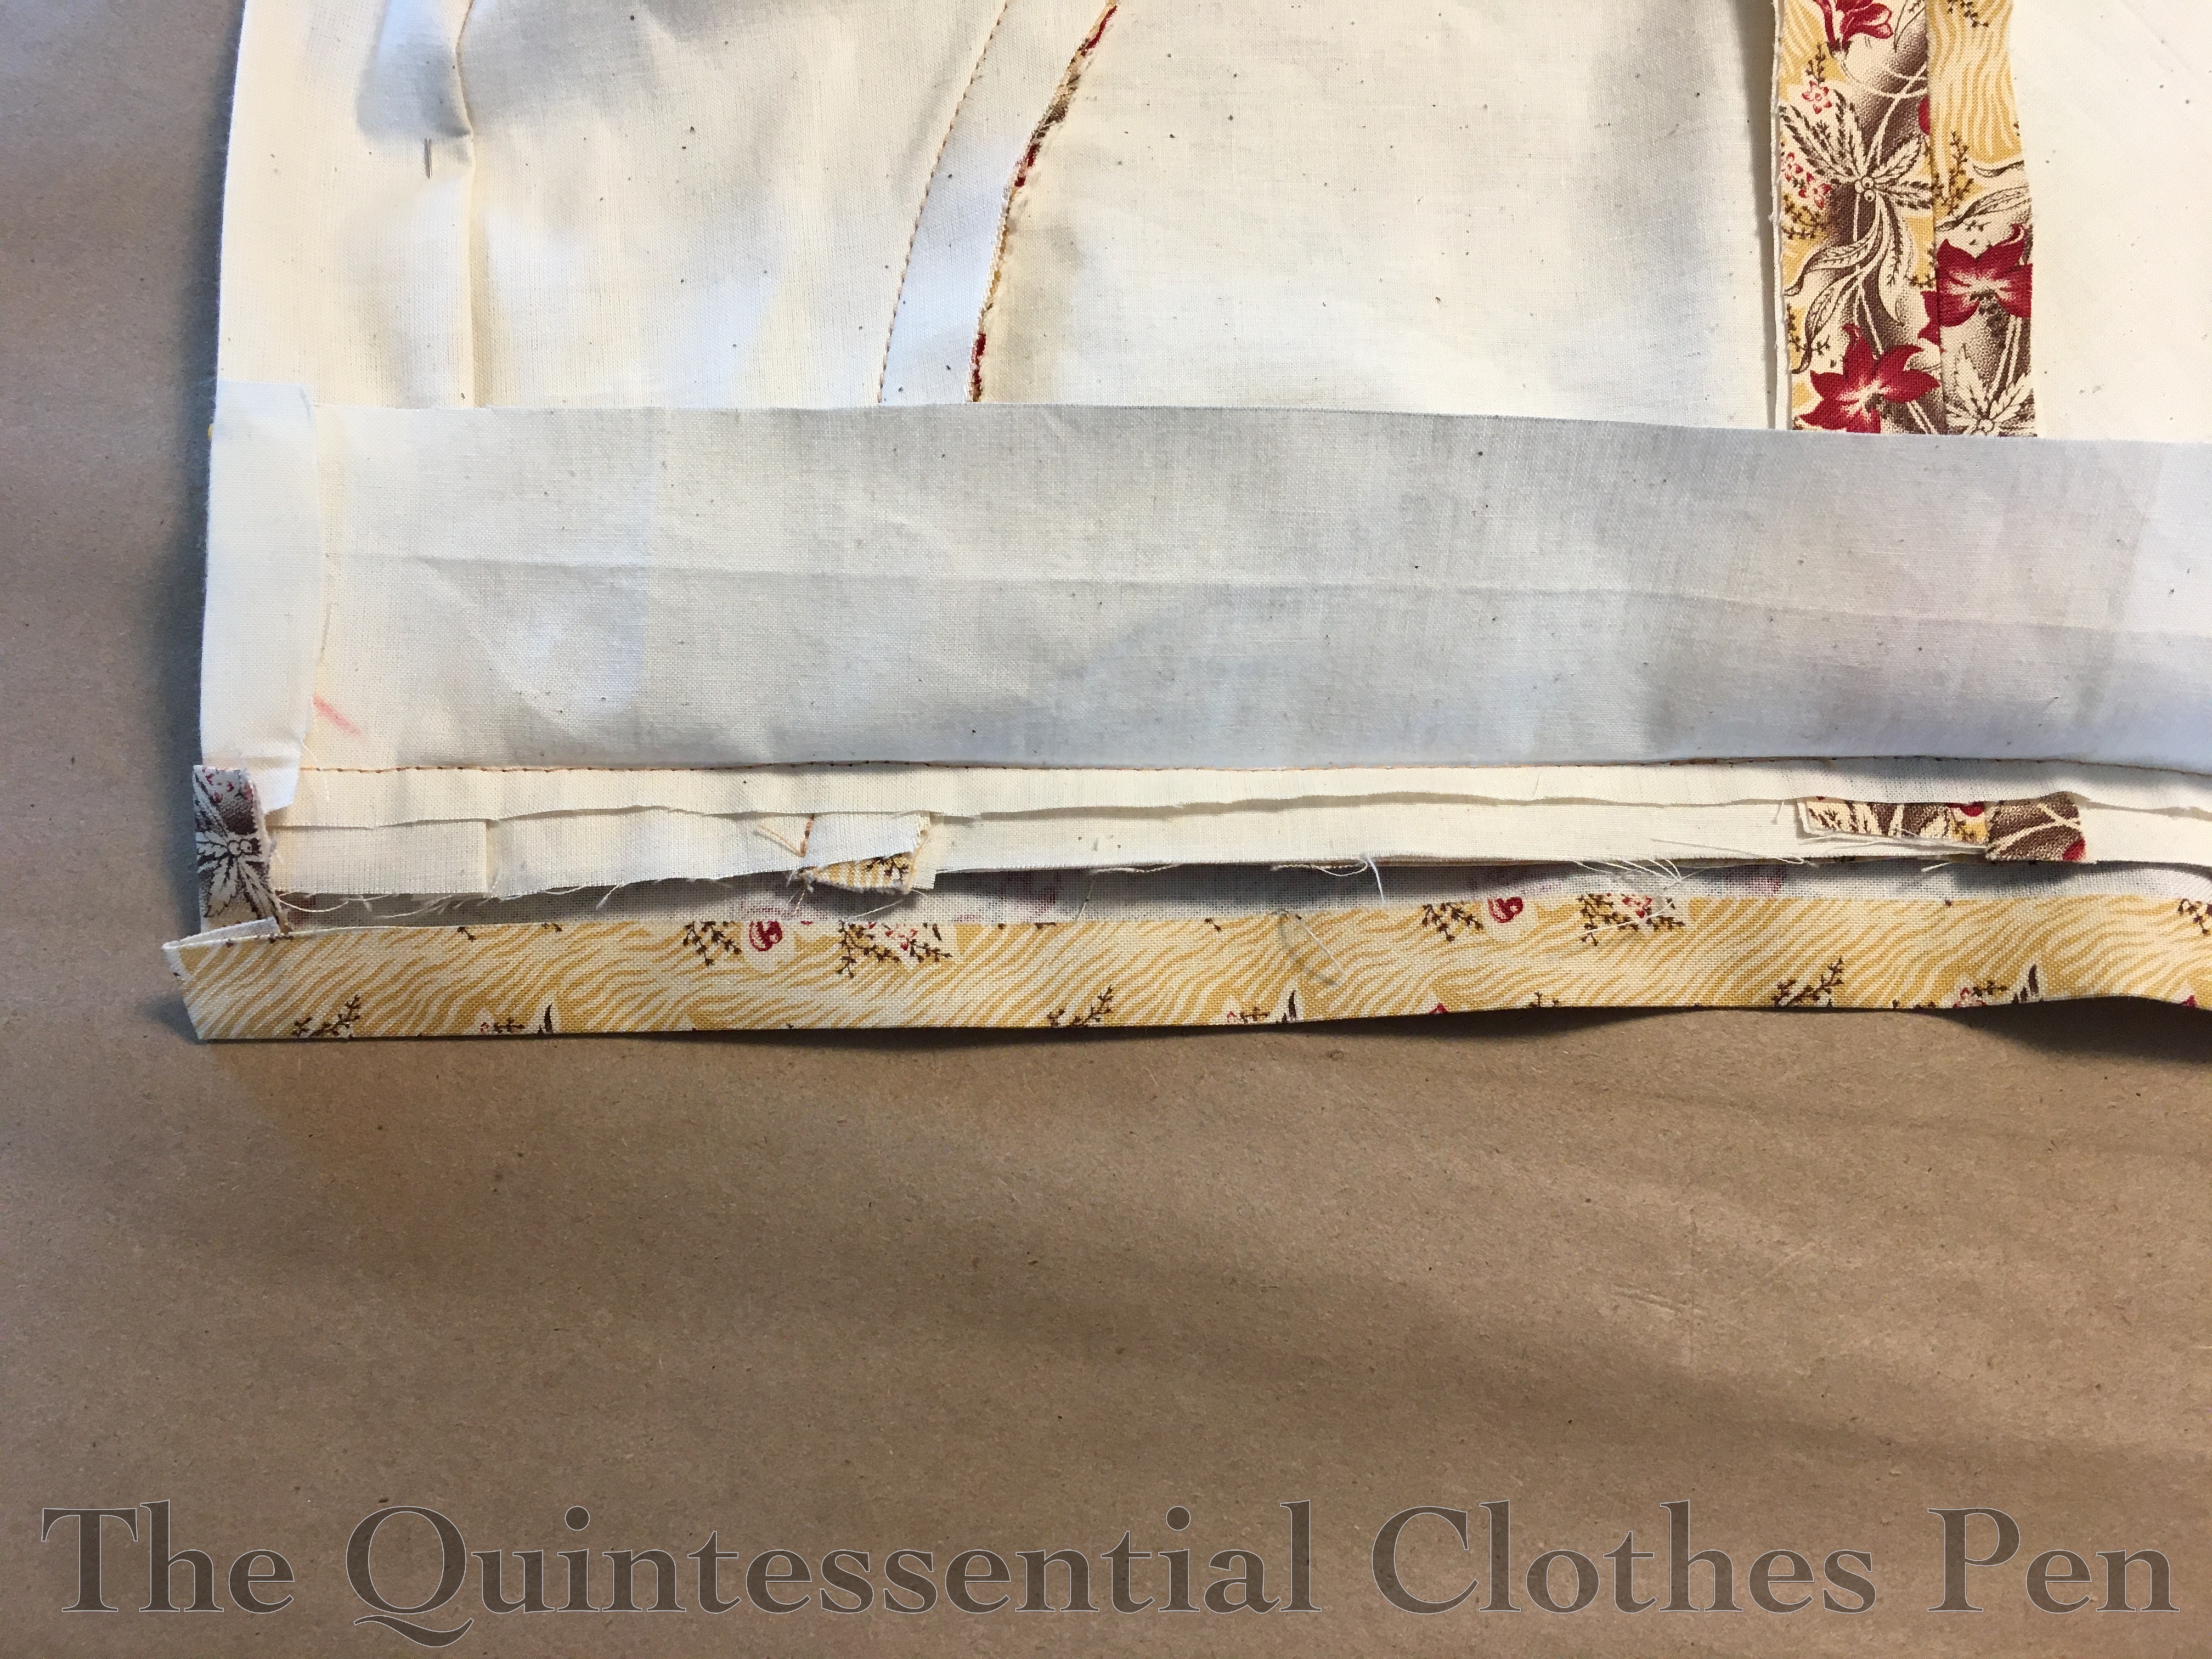
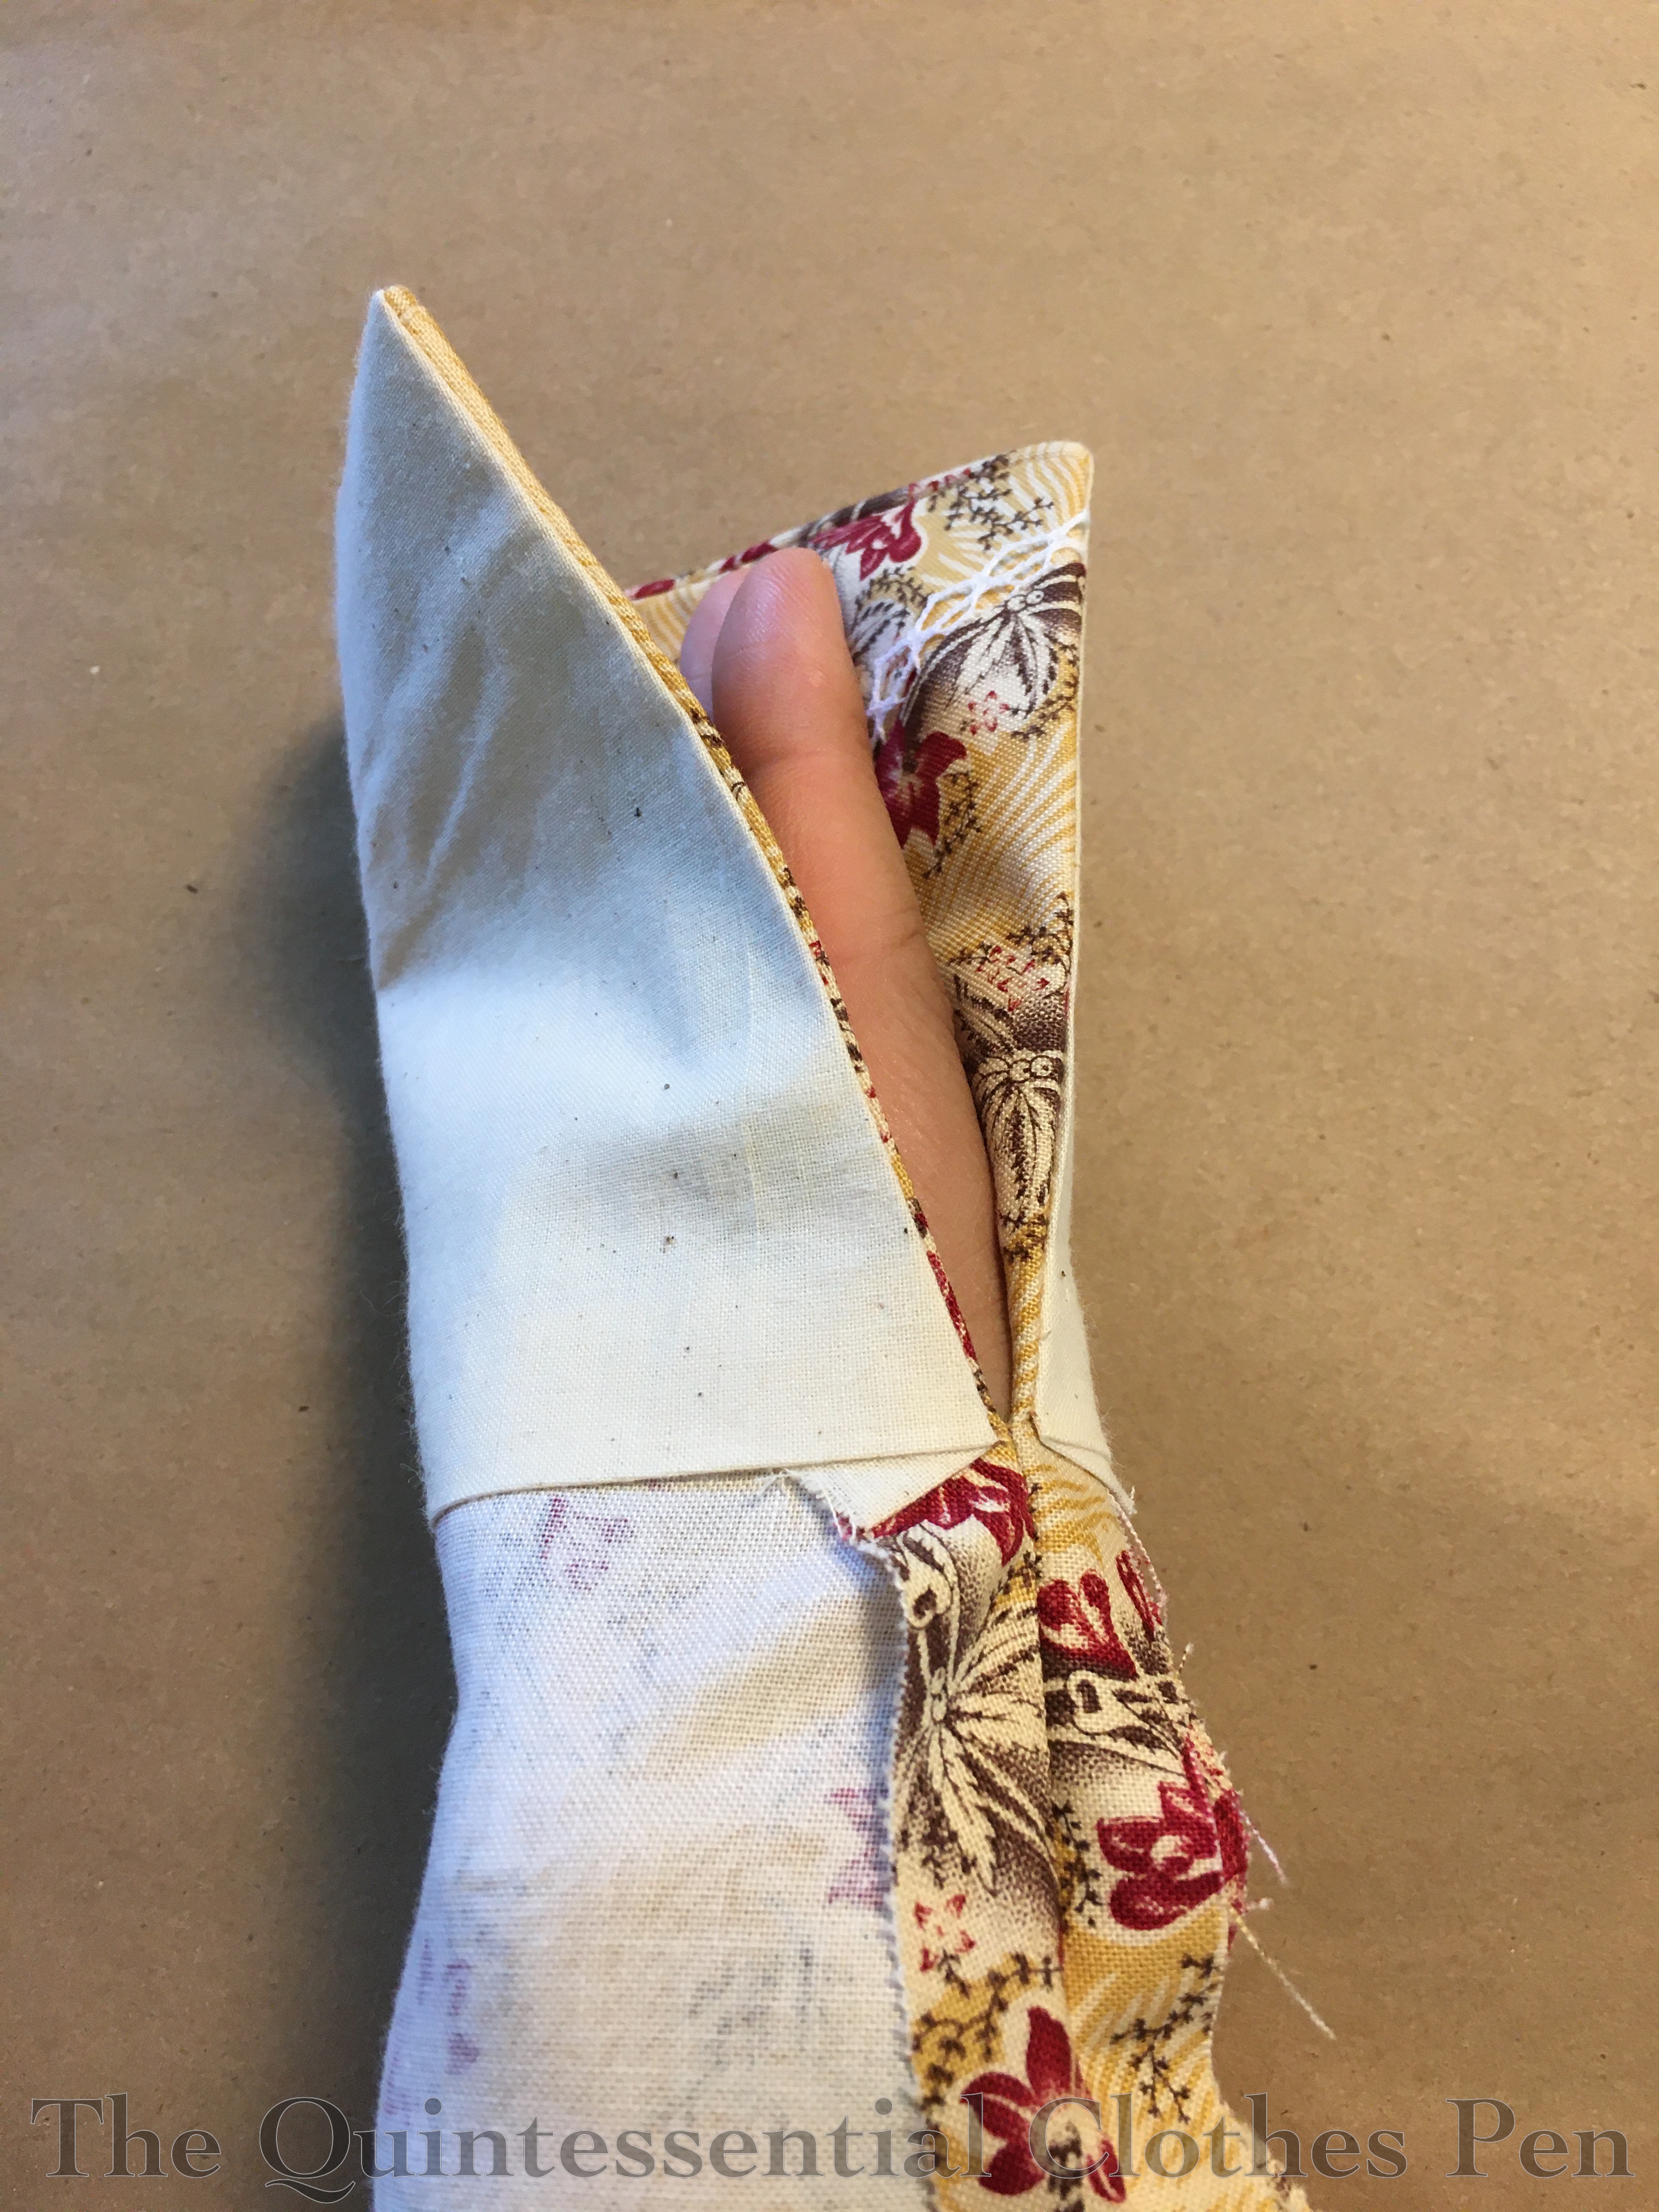
After the trim was added to the cuffs, I sewed cording to the bottom edge and then a muslin facing to finish everything off. This allows me to have nicely finished edges for the sleeve openings, which extend up about 8″ and allow for the tight fit of the forearms.

Here’s what that looks like flipped up and ready to be slip stitched along the top edge. You can see my hand sewing from attaching the cuff zig zag.

So… I got this far and realized that my sleeve was too narrow (even though I’d had no trouble in my mockup!) and my hand wouldn’t fit through the opening! Even if I made the opening higher, the sleeve edges wouldn’t butt, but would have a gap!

It’s good to have extra fabric… Having extra allowed me to make the decision to cut off the old forearm pieces and piece on new ones (with careful pattern matching, of course!). This meant redoing the cuff trim and finishing, but I couldn’t find a better solution. The seam hides under the crazy big sleeves, so it’s really not noticeable at all (even if I hadn’t pattern matched the seam!).

Finishing

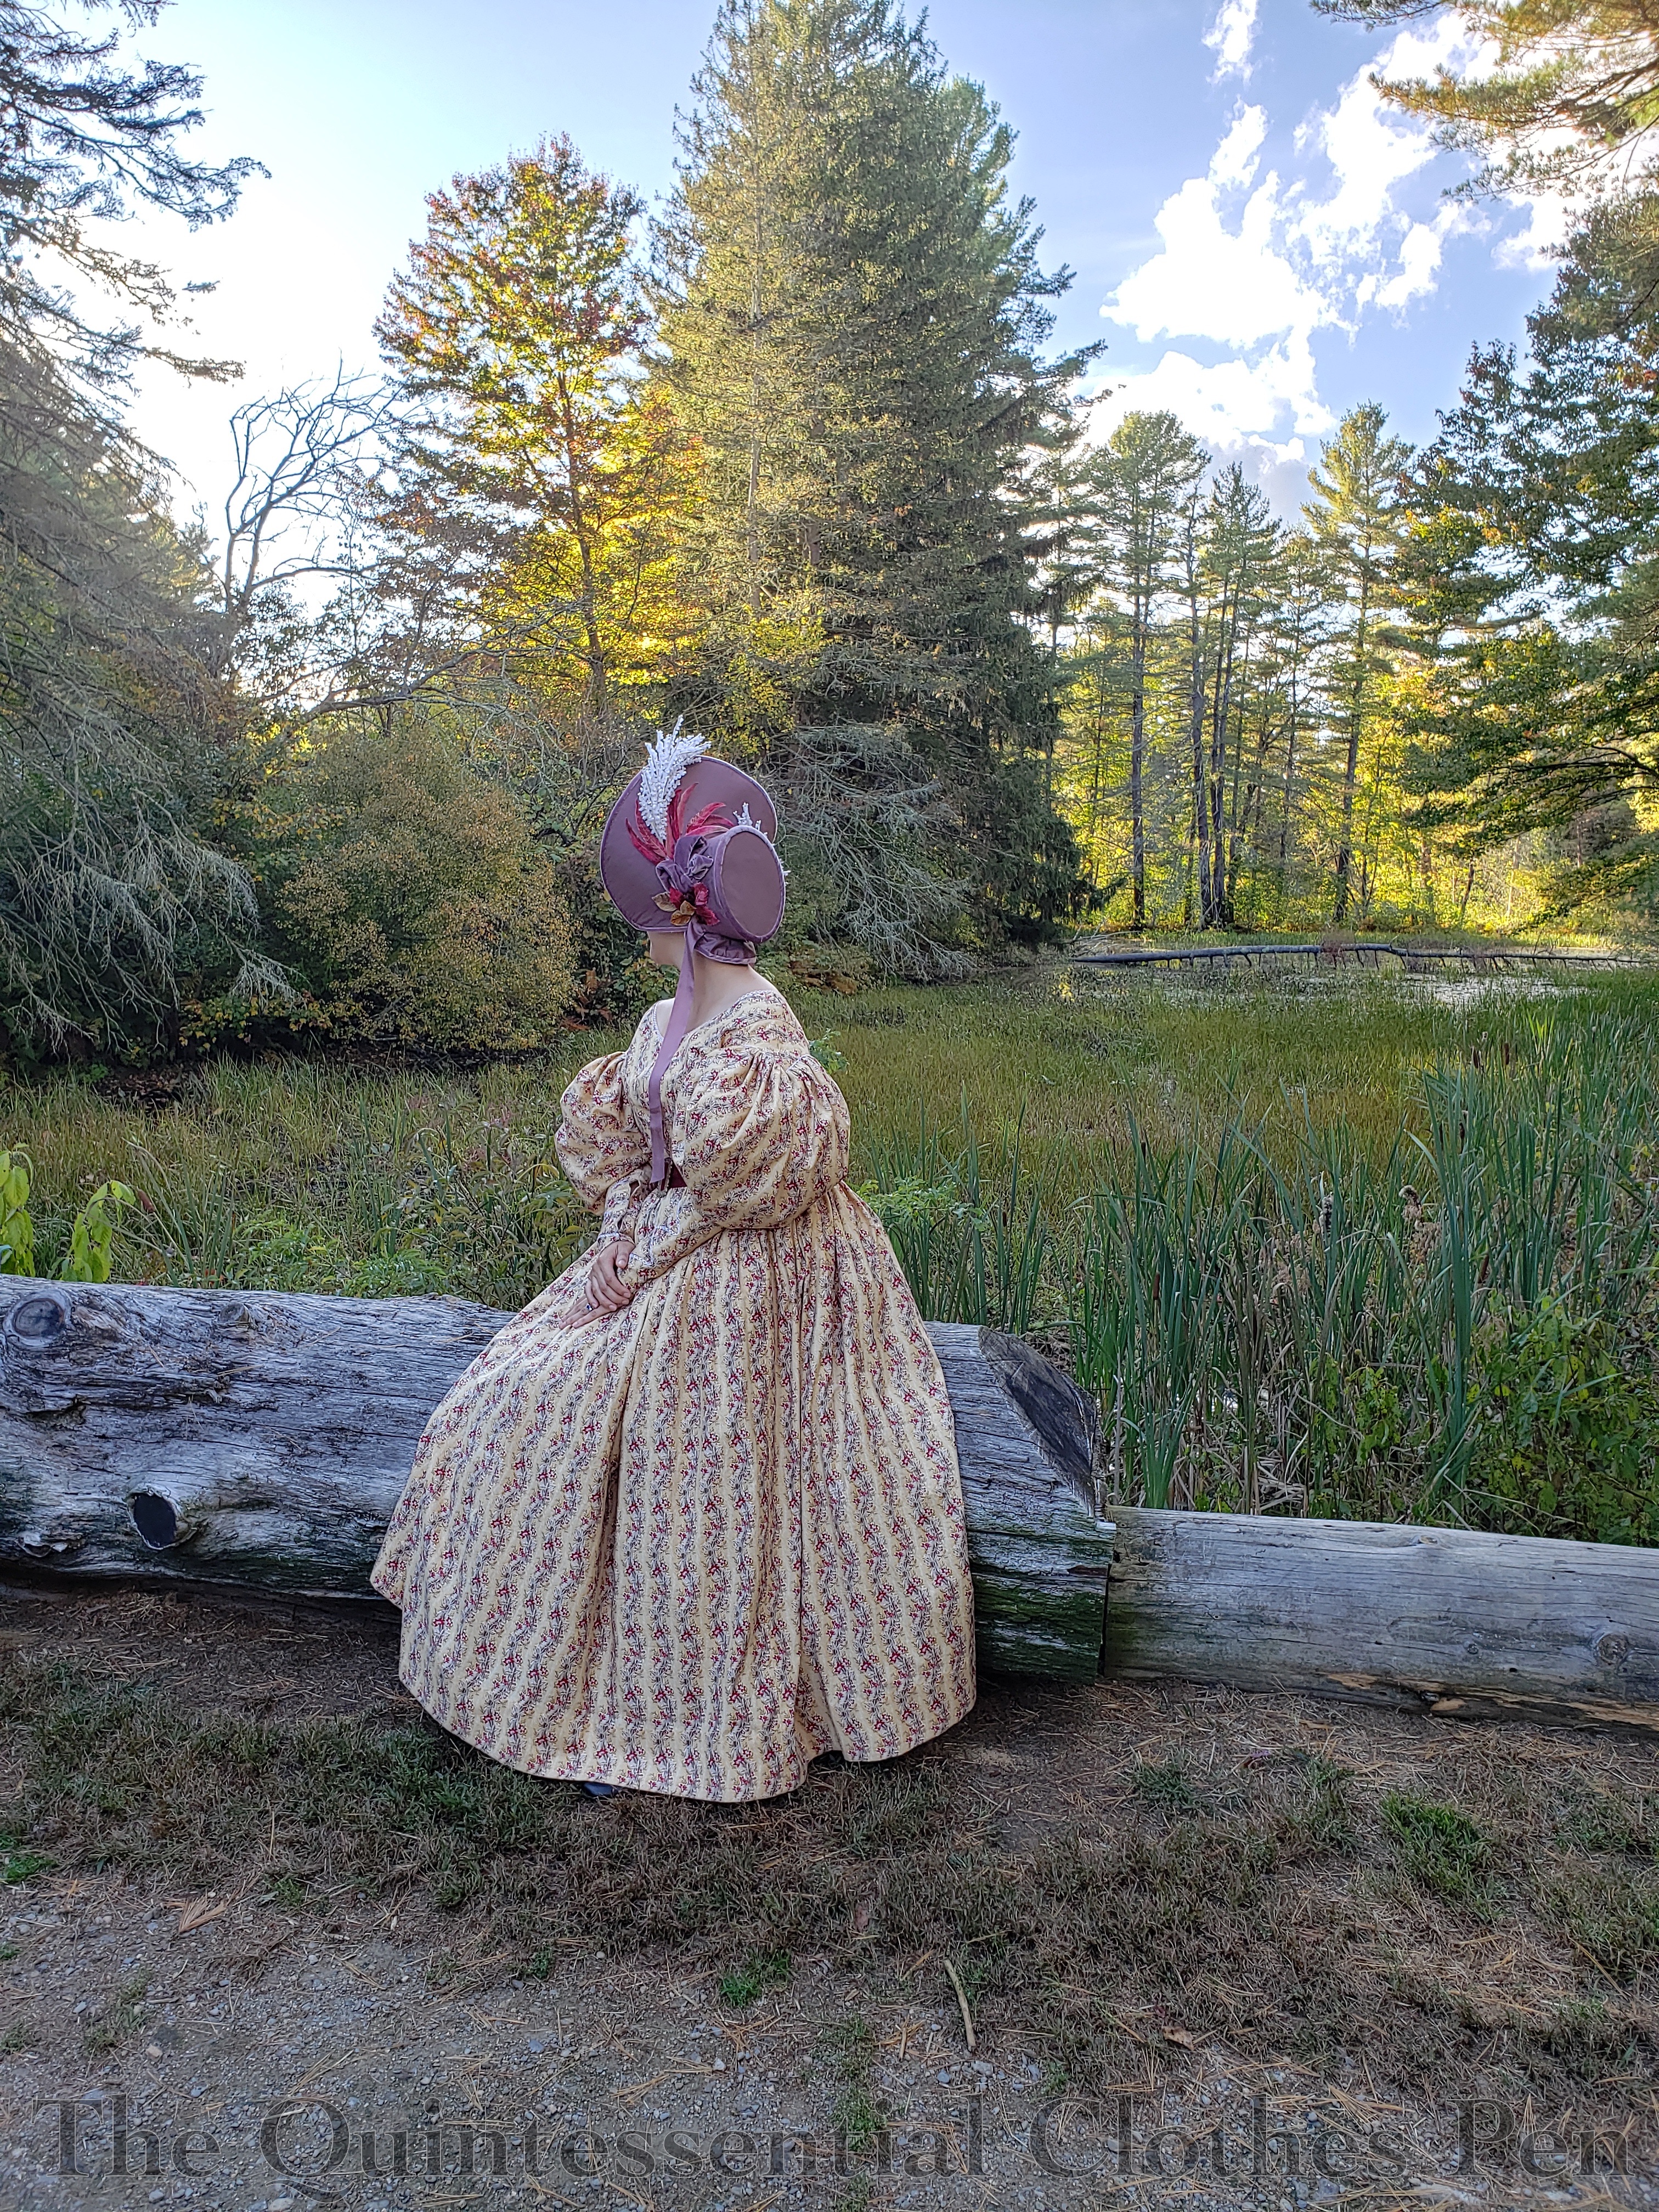
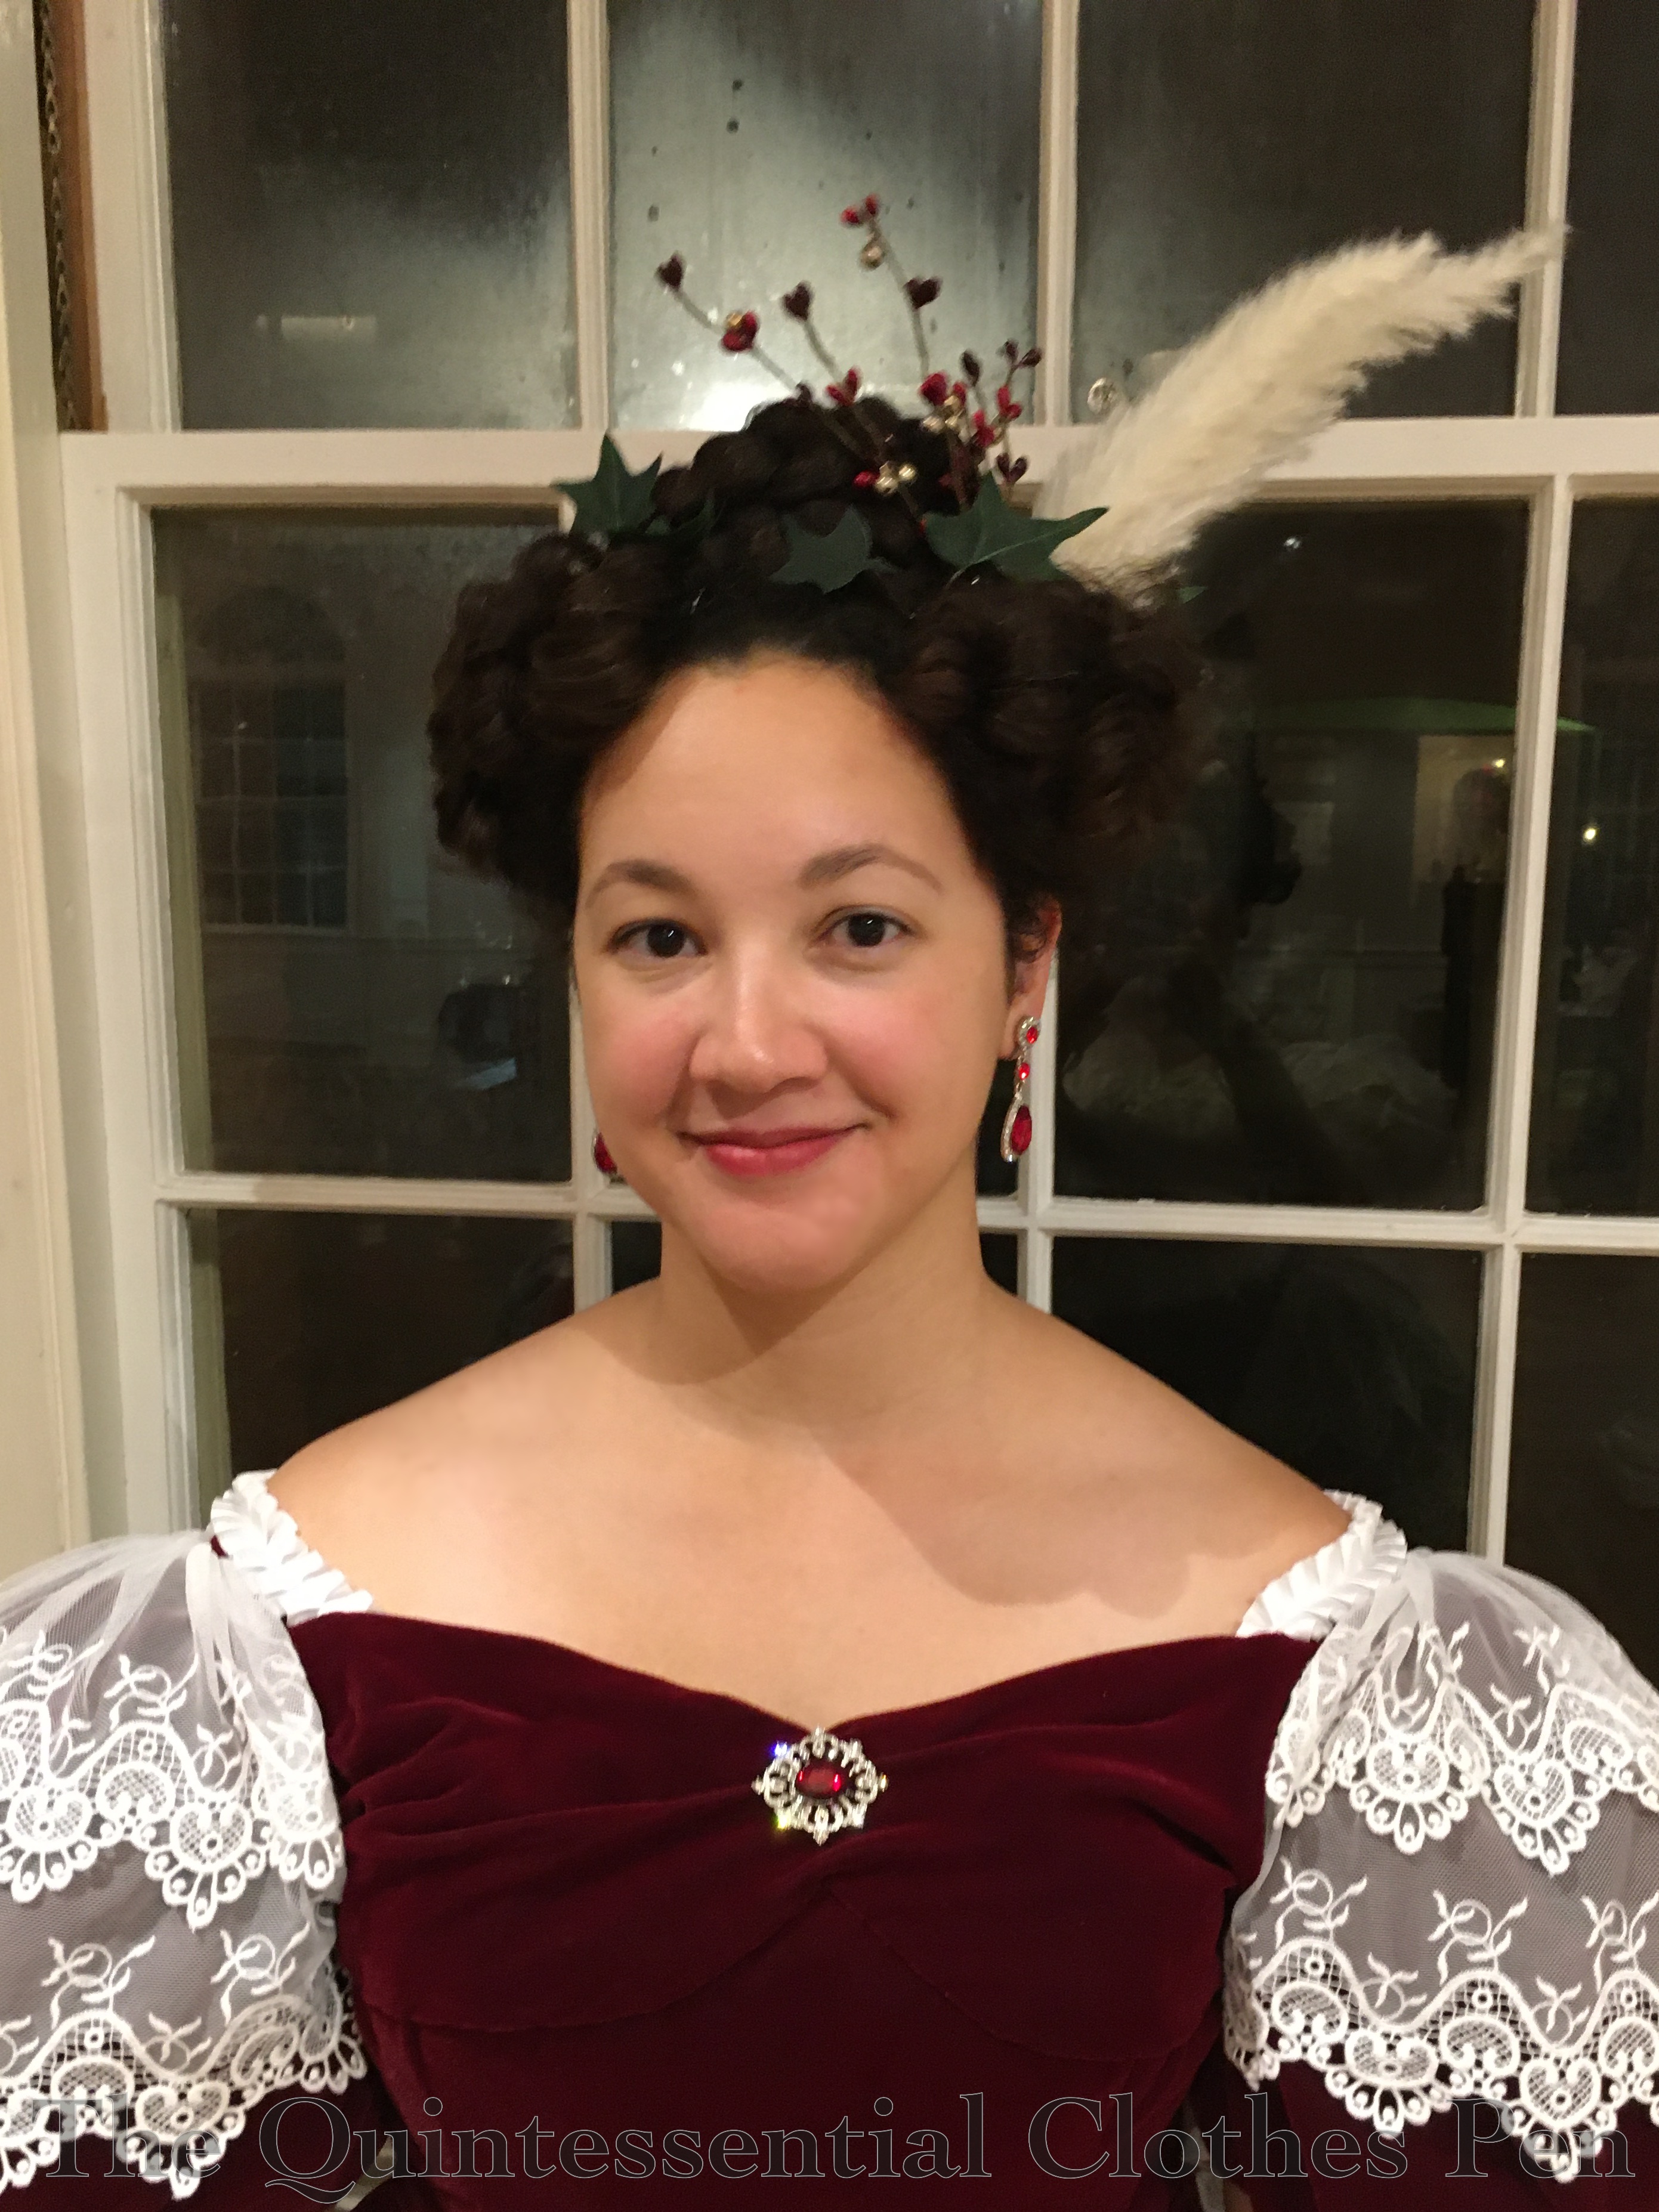
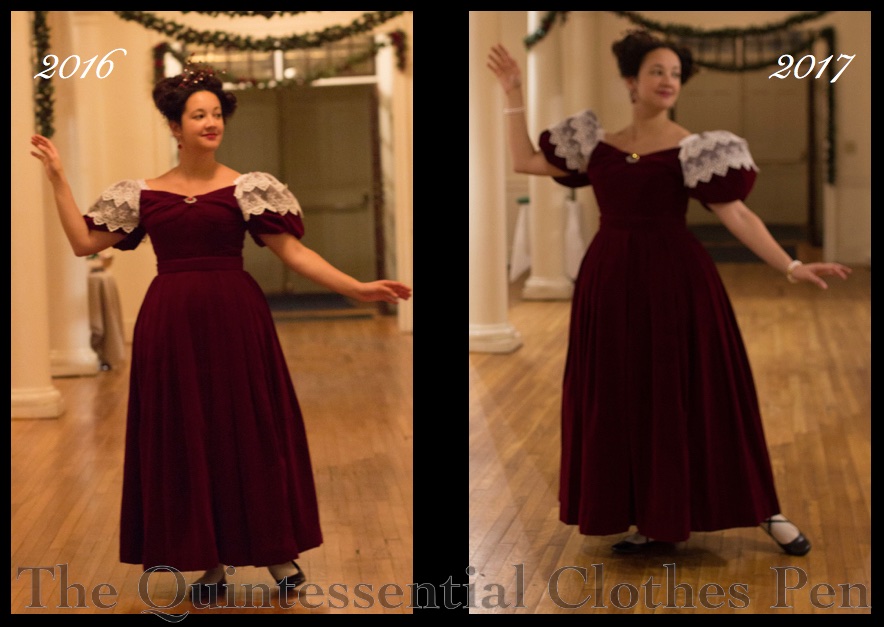
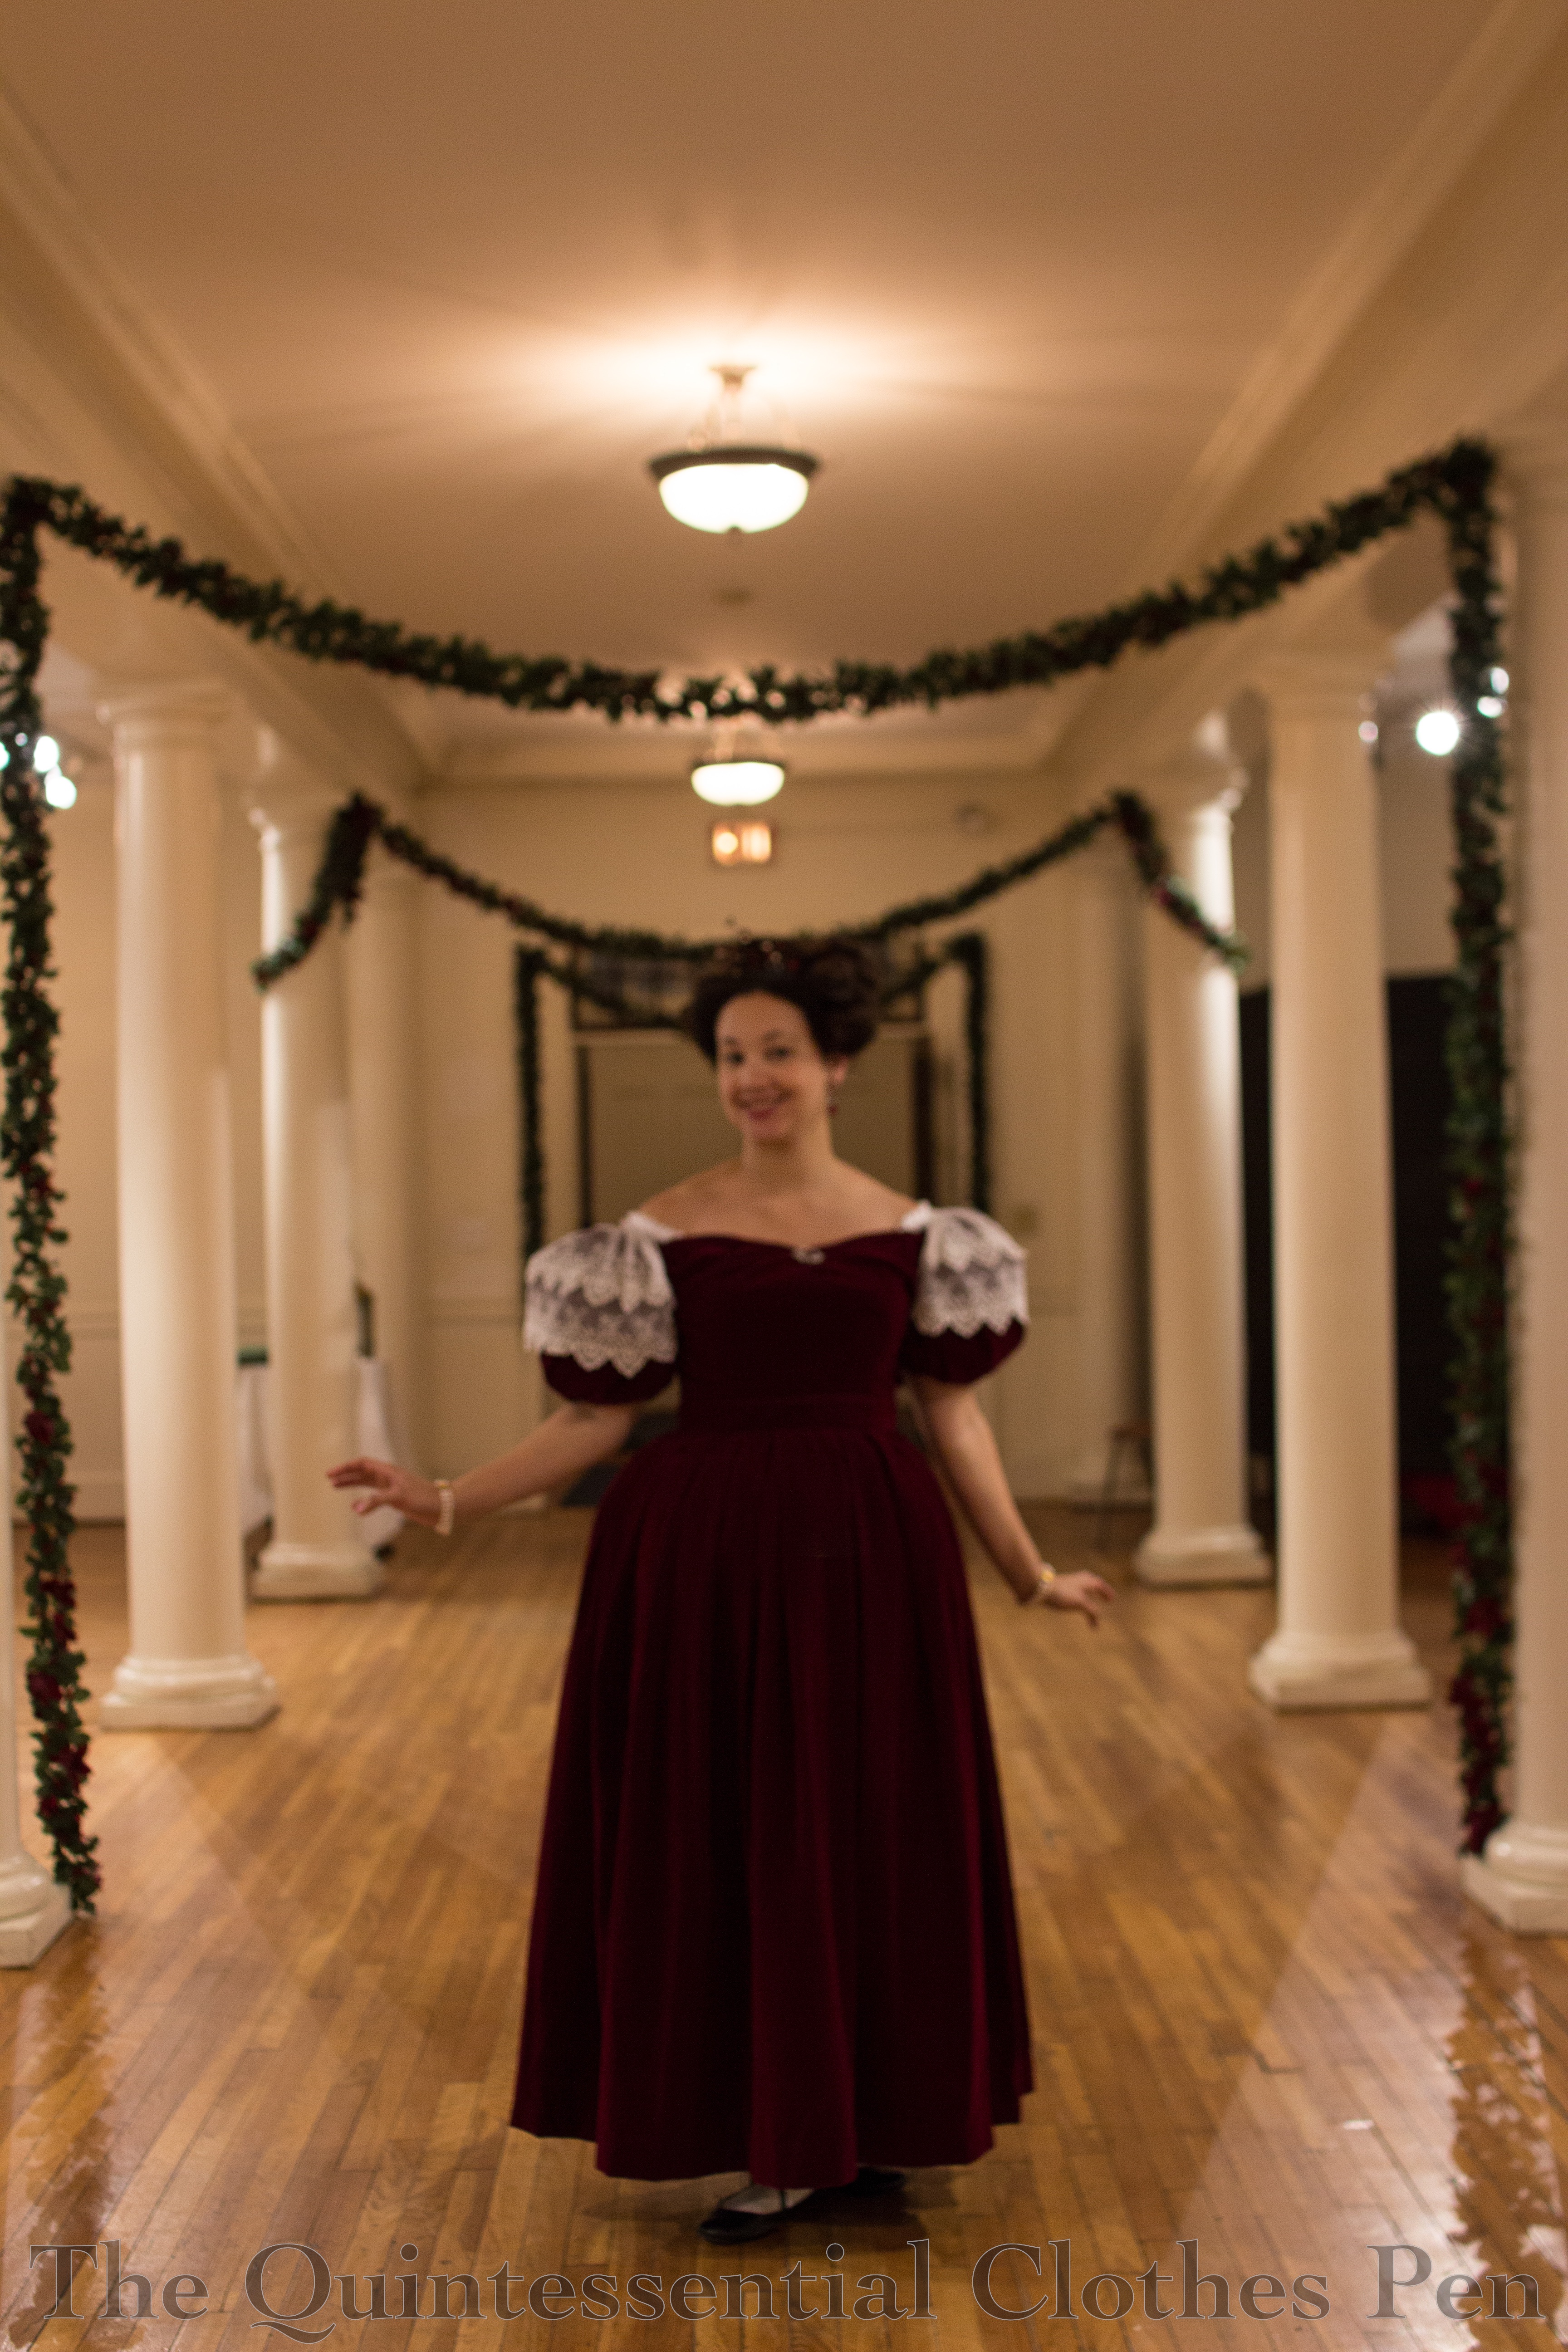
Finally, after these various successes and challenges… the dress was done! Here are some more photos of it in its finished state.

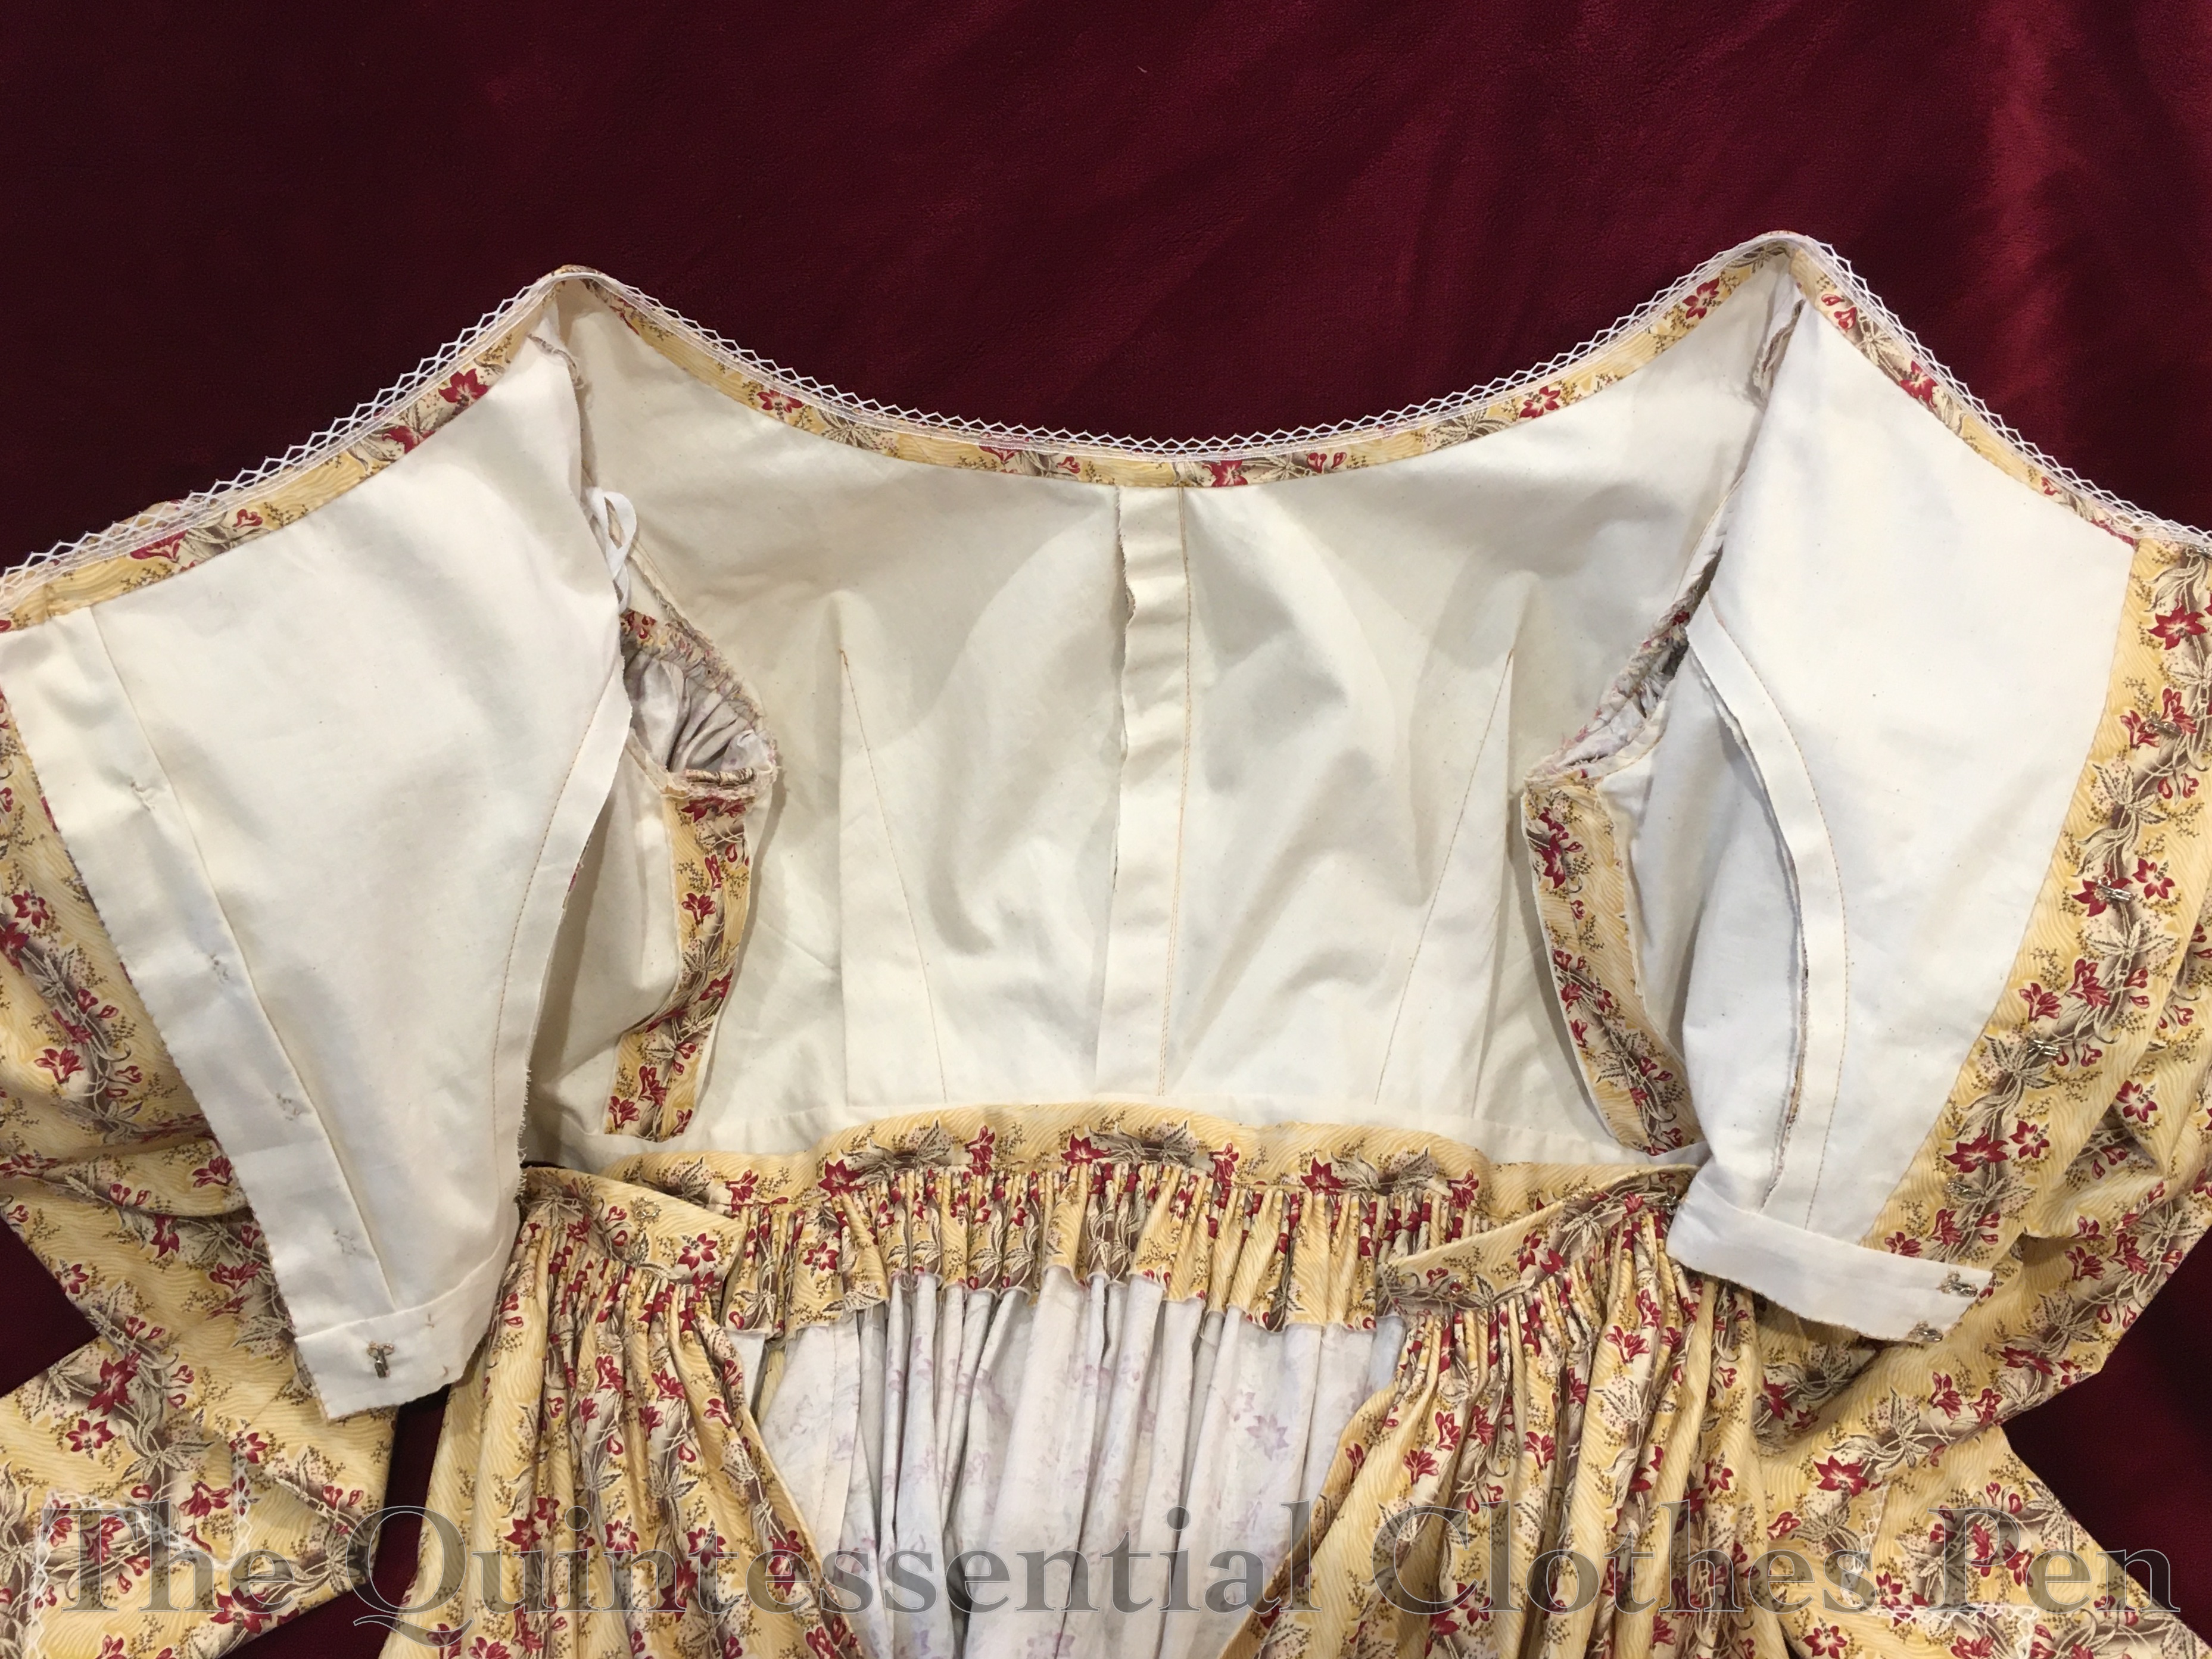
This is the inside of the bodice with the skirt attached. You can see machine stitching, seam allowances mostly left unfinished (they really don’t fray at all), neck binding, closures, etc.

This closeup shows a shoulder seam, as well as the neckline and armhole finishing. The bias on the neck is turned under and whip stitched. The lace is sewn on top of that. The armhole seam allowances were trimmed and then roughly whip stitched to hold the layers together. You can also see a little square of the twill tape tie for the sleeve puff (it is sewn to the armsceye seam allowance below the shoulder seam).

Here is the finished cuff opening. Hidden under the zig zag are the hooks that correspond to the loops on the muslin facing.

This is the center back opening with all of the closures in place. Those hooks really do camouflage well on the brown scroll, don’t they? Doing the closures this way leaves lots of seam allowance at center back for me to make alterations in the future if I need to.

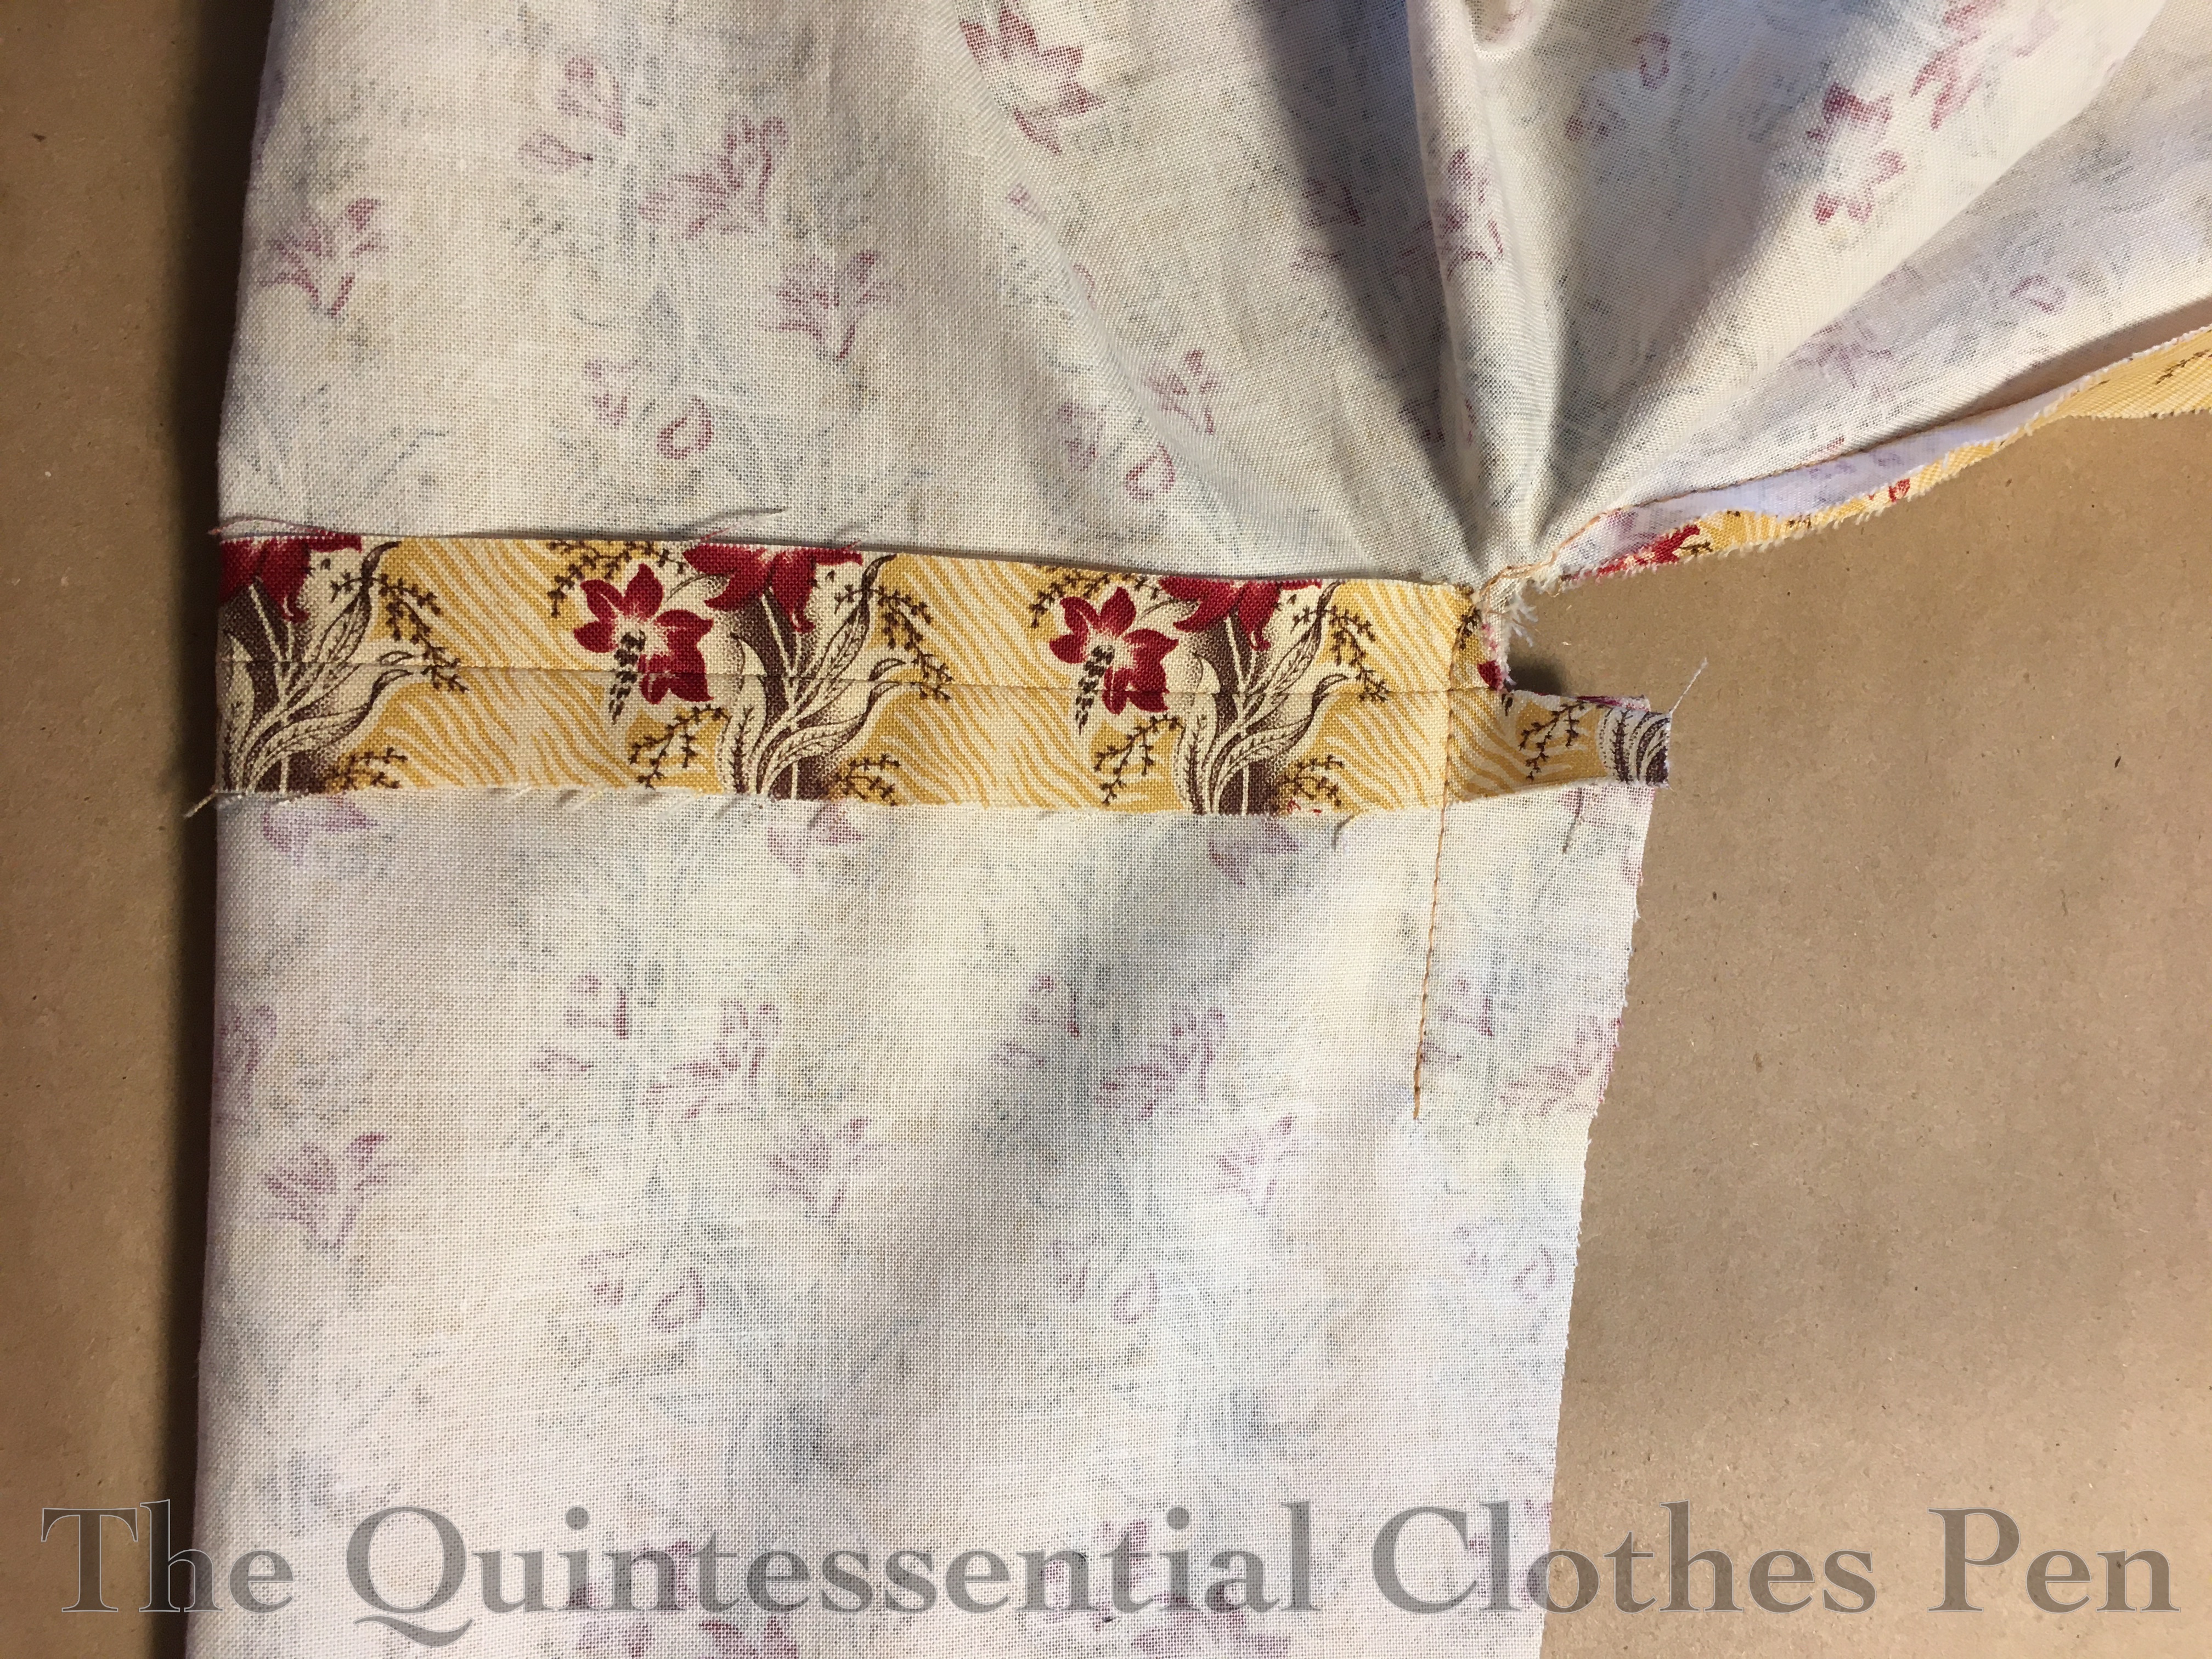
This photo shows the inside of the skirt and bodice. Specifically, you can see the raw edge of the top edge skirt seam allowance folded to the inside (the skirt is intentionally shorter in the front than in the back, which you can see in the varied top edge seam allowanced length), the french seam of the pocket, and the skirt opening, which is simply an opening in the back seam (no placket on this skirt, the fullness of the cartridge pleats easily hides the opening).

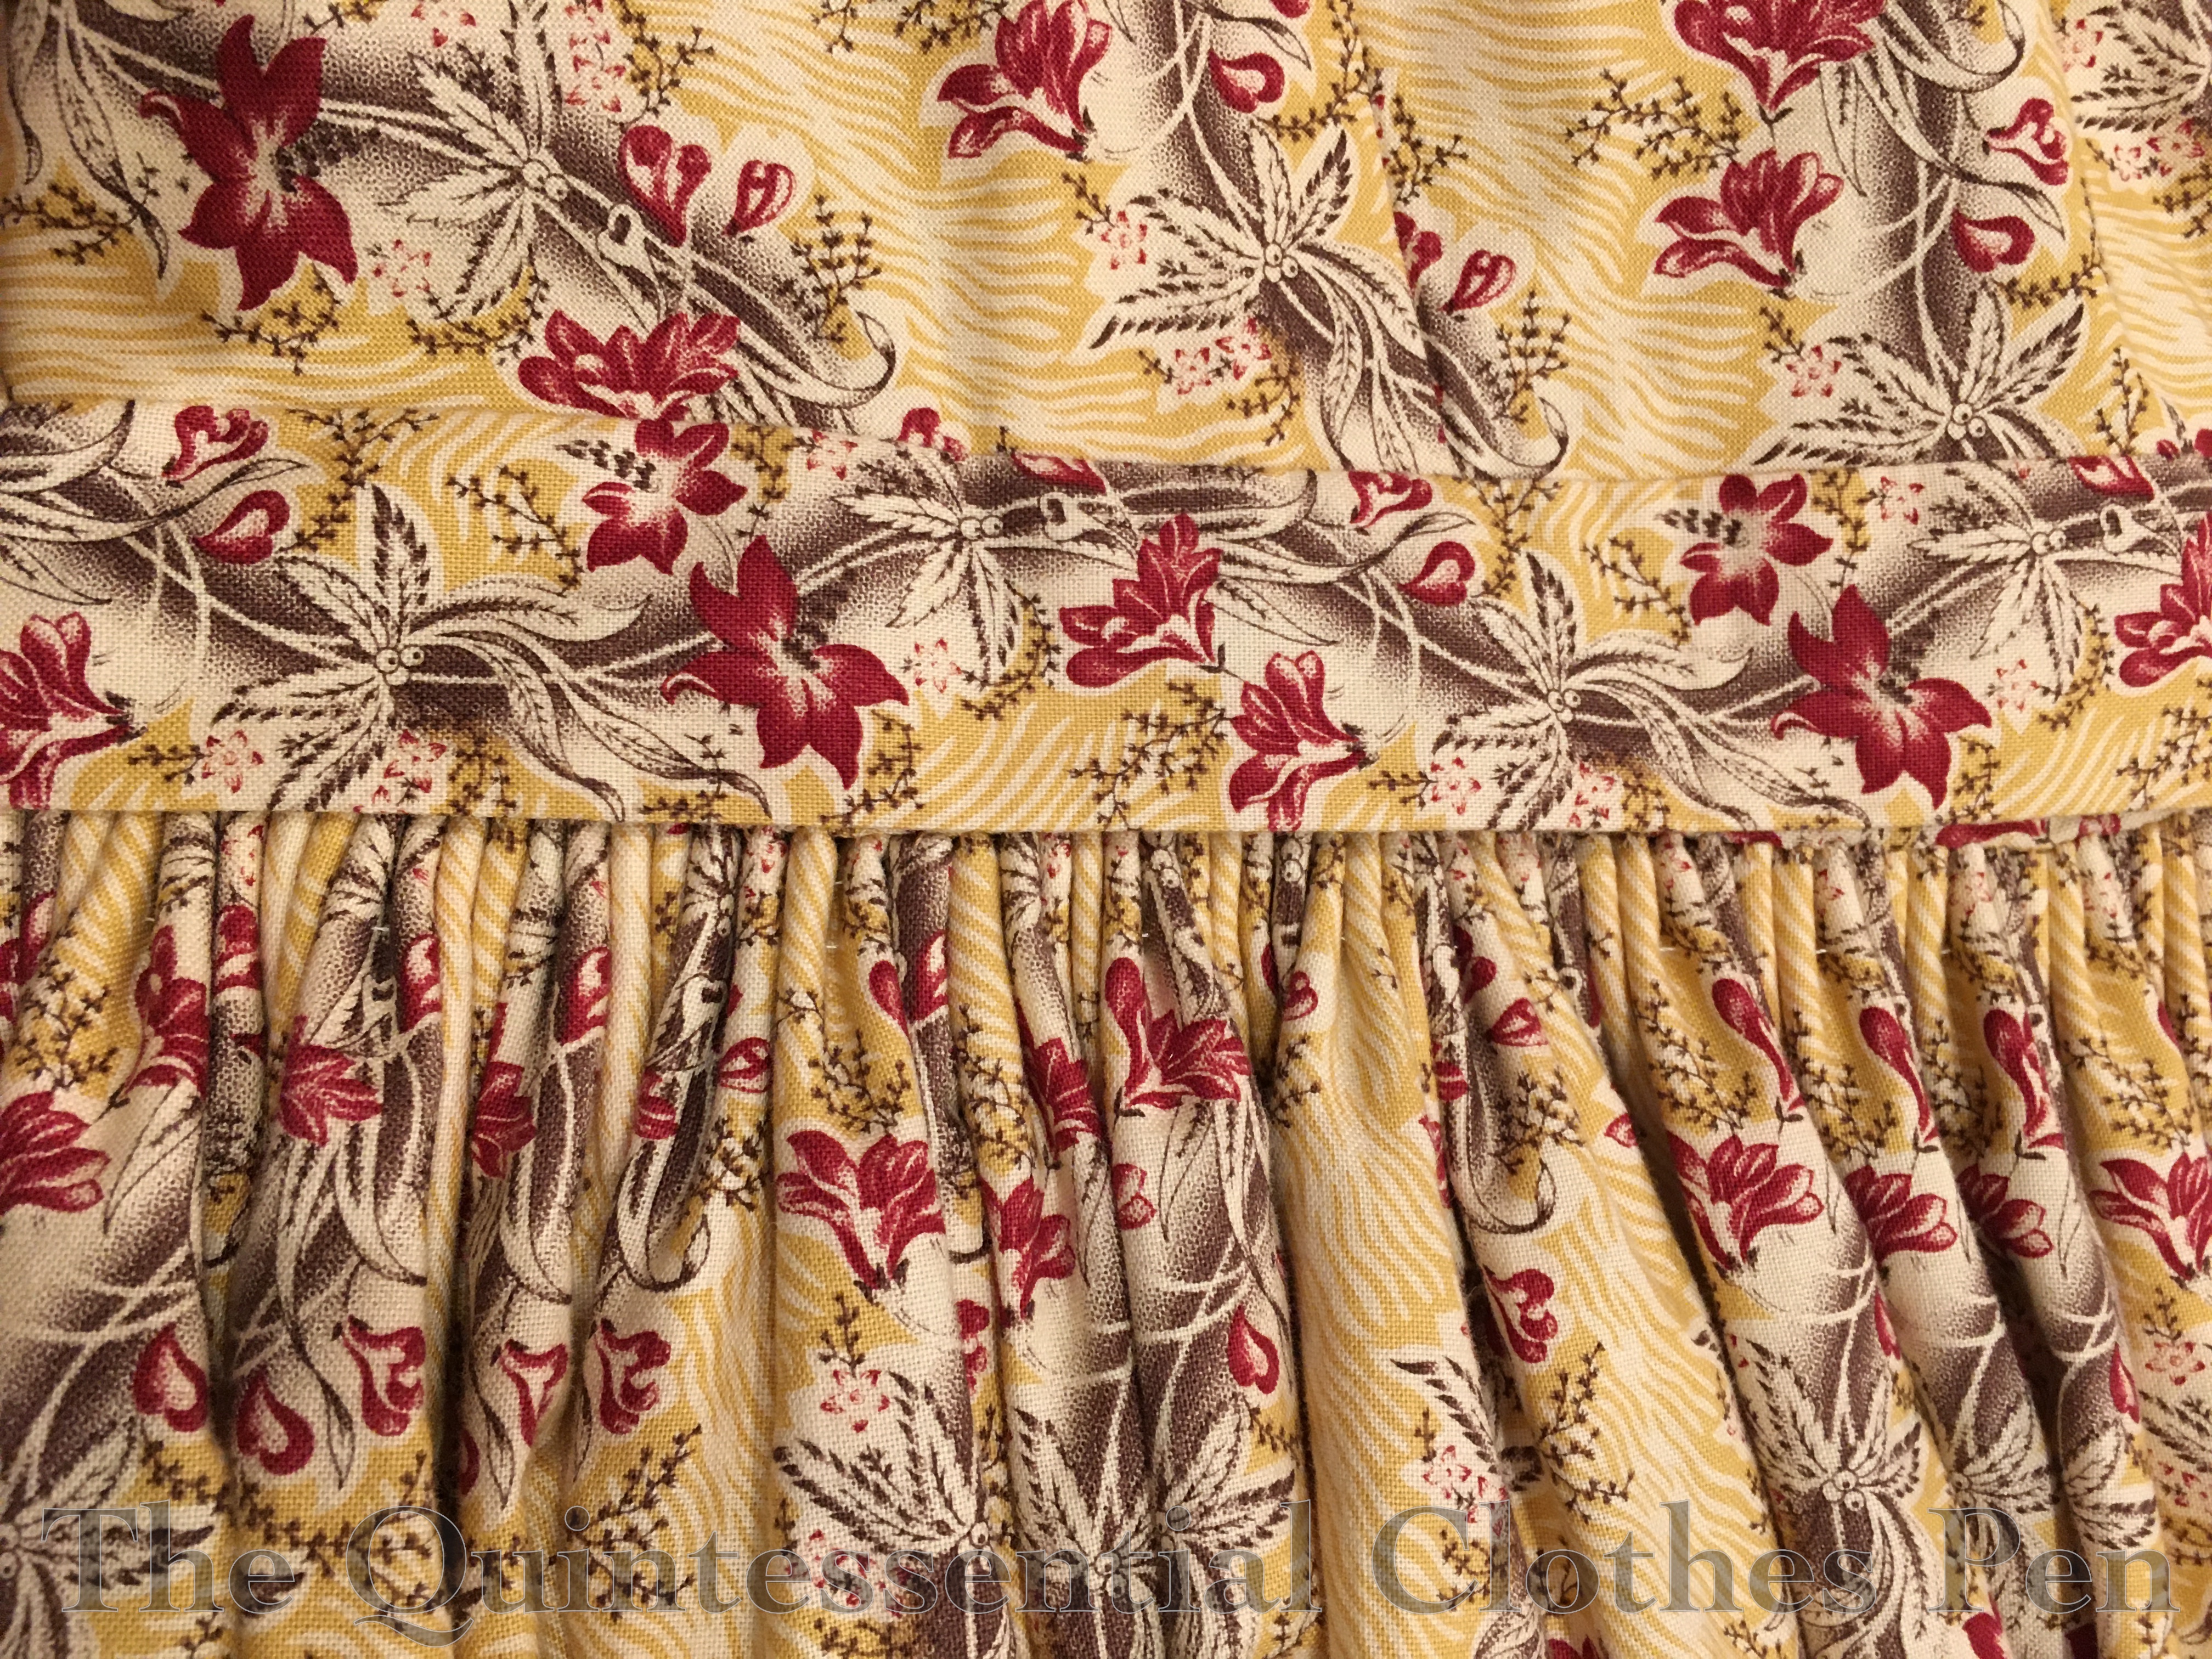
One last photo! This is the cartridge pleats and bodice waistband from the exterior. Cartridge pleats are always visually intriguing to me and I also love how the waistband of the bodice is perfectly cut to show off the scroll and flower pattern.

After so many construction photos, here is a reminder of what the completed dress looks like from the exterior. I’m looking forward to sharing more photos in future posts!

Thanks for sticking with me through this very long post!

Making A Corded Petticoat For 1830s & 1840s Ensembles

My sewing has taken a sharp turn into the 1830s in the last two months or so. It’s an exciting detour that has been on the horizon for a long time–ever since I purchased this yellow block print cotton back in 2013, in fact.

I wanted to up my silhouette game for the 1830s and achieve a fuller looking skirt than I’ve been able to do with my 1832 velvet gown in the past. To that end, I decided to make a corded petticoat.

I followed the directions from American Duchess in this video and only changed the cording pattern to suit my materials. If you’re interested in making a corded petticoat yourself I definitely recommend the American Duchess video. I found it easy to follow along with the steps and appreciated the mentions of pitfalls and tips along the way.

I was super excited to get started and maintained my enthusiasm for the first 4 sections of cording, but by the top 2 sections I was definitely feeling ready to be done! By that point the petticoat was unruly and difficult to turn as I sewed around each channel. Despite being less fun than when I started, I pushed on, and I was quite grateful when I finished the last section of cording!

Here’s a closeup photo of the cording sections. I used a continuous piece of cord for each section, as suggested in the American Duchess video.

My opening is just a portion of one seam left open just above the top section of cording. This is what it looks like from the outside. I made the waistband extra long to allow for future adjustment (just in case!), which is why the button is set over so far from the edge of the waistband.

On the inside, that opening looks like this. The second layer of fabric is just turned back from the edge and top stitched in place. The other seam allowance edges are selvedges, so they didn’t require finishing. Easy and tidy!

The ivory cotton waistband is whip stitched on the inside finish it all off nicely. Hidden underneath is a layer of cotton canvas that helps to stiffen the waistband a bit.

This petticoat is almost entirely machine sewn and took 8.5 hours to make. I used 4 ¼ yards of ivory cotton, 13 ¼ yards of 5/16″ cording from Wawak, 39 ¼ yards of 7/32″ cording also from Wawak, the canvas scrap for the waistband, and a lone ivory button from the stash. The materials cost about $33.

When I started this petticoat, I thought that it would only be worn with the 1832 velvet gown I mentioned earlier, but since then 1830s daywear using the yellow print cotton has made it onto my sewing table… and this will definitely get worn with the new dress. I also hope to be able to wear it with 1840s dresses that will someday make it onto my sewing table. It’s a great step towards improving my silhouette!

Fezziwig’s Ball 2019

I’m a bit slow to post about it, but last December I again attended The Commonwealth Vintage Dancers’ annual holiday event: Fezziwig’s Ball. (You can check out posts about past years here.)

This year, I decided to wear my 1832 Burgundy Velvet Gown again, but I changed up my hairstyle slightly by adding a new element, since I was wearing a dress I’ve worn before. In addition to some new decorations, I also added a faux hair braid to make a giant swirly bun on the back part of my head. I wrote a blog post in January focusing on the hairstyle and my new faux hair braid that you can read here.

1830s hair is absurd and very fun. I enjoy the challenge of trying to style my own hair into these crazy styles. This year I had the faux braid and a few mesh supports under the front curls, but all the rest of the hair is my own. Those front curls are different each year… this year they have a sort of marching-in-a-line look that is interesting and different than in the past, but still documentable. Check out these curls from 1826 and these from 1829.

It’s fun to wear 1830s, as it’s a decade I don’t get to wear the clothes for as often as some others. The giant sleeves take a bit of getting used to but are entertaining in the end.

Looking festive with the addition of my Refreshing Apron, cranberry punch, hot apple cider, some real and faux fruit lurking near the punch bowls, and another 1830s-clad friend wearing a Refreshing-Apron-sibling.

1830s is more in fun (and maybe less ridiculous looking?) in groups. Here is a contingent of even more 1830s ladies from this holiday ball! It’s as though we sprouted from the column!


1830s Sleeve Puff Tutorial

Why make sleeve puffs, you ask? In order to keep the large sleeves of 1830s dresses from deflating, of course! Here’s an example of my 1832 dress without puffs (on the left) and with puffs (on the right). They make such a difference!

I chose to use a sewing machine for much of the assembly of my puffs, but you could easily hand sew all of these steps instead.

To make these sleeve puffs you will need the following materials:

  • Fabric: ¾ yard of 44″ wide or ⅜ yard of 60″ wide (cotton, linen, and silk are the most historical options, but you can use whatever is comfortable on your skin, just make sure it’s not too loosely woven or too heavy in weight)
  • Stuffing: I used scraps of stiff net and organza, but you could also use batting, tulle, down, etc.
  • Thread

To begin, you’ll need to cut out your pieces:

  • Two rectangles: 25″ wide x 13″tall
  • Two shaped bases: 18.5″ wide x 7.5″ tall at the center and curved down to 2.5″ tall at the sides
  • Four end caps (two for each end of your shaped base): use the shaped base as a pattern and cut the end caps so they are 2.5″ wide

Next, you’ll assemble your puffs:

Step 1: Lay your end caps on each end of the shaped base. Sew around the three exterior sides, leaving the side towards the center unstitched.

Step 2: Trim your seam allowances, corners, and clip through seam allowance close to the end of your stitch line on the shaped base.

Step 3: Turn each end cap so the right sides face out–the clip through the seam allowance allows the end caps to sit nice and flat on the shaped base.


Step 4: Run gathering stitches along each individual side of the four sides of each rectangle (not one long gathering line that turns the corners).

Step 5: Pull up your gathering stitches on the long sides and pin to the curved edges of the shaped base. You want to pin the rectangle to the side of the shaped based that does not have the end caps on it.


Step 6: Sew the gathered rectangle to the shaped base and turn it right side out.

Step 7: Now pull up the gathering threads on one short side of each rectangle. Turn the raw edge under and pin the gathers in place. Hand sew these gathers through all the layers, making sure to take small stitches and catch the gathers in many places. Leave the other side open for now.

Step 8: Stuff those puffs!

Step 9: Now pull up the gathering threads on the remaining short side of each rectangle. Turn the raw edge under and pin the gathers in place. Hand sew these gathers through all the layers as well, making sure to take small stitches and catch the gathers in many places. (This is the same as step 7.)

Step 10: Overlap the end caps about ¼” and sew them together.

Ta da! Now you have some sleeve puffs of your very own!

Extra tips:

I strongly suggest taking a look at extant puffs. As a starting point, I suggest this pair at the MFA and this pair at the V and A.

If you’re worried about keeping your puffs in place, ties can be added to the puffs which would be secured to additional ties in the armholes of dresses. Take another look at the those two pairs of extant puffs and you’ll see ties.

I also suggest looking at the puffs other people have made. It never hurts to see more methods of construction. I referenced Fresh Frippery and Stepping Into History when creating my puffs. Have you come across other 1830s puff making resources? If so, please share!

SaveSave

SaveSave

SaveSave

SaveSave

SaveSave

SaveSave

SaveSave

SaveSave

SaveSave

SaveSave

Christmas Cheer (Fezziwig’s Ball 2017)

While it’s still holiday season I want to share a few pictures from The Commonwealth Vintage Dancers’ 2017 Fezziwig’s Ball. This year we had snow on the day of the event. It made for some slippery driving, which unfortunately caused a number of people to not be able to make it, but the bright side was that Salem was enchantingly draped in snow.

It was a bit colder than it has been in some previous years, so it was necessary to wrap up warmly for outdoor caroling. The easiest (and warmest) option that would fit over my gigantic 1830s sleeves was my 1860s wool cape (it is lined in flannel and has thick batting so it is quite soft and warm!). It was great to make use of its amazing warmth since I hadn’t worn it in years, though I have yet to get actual documenting photos of it. I always seem to be wearing it when it’s dark outside! We did get this nice picture though. The stars of light are made using a special Petzval lens (you can read more about this special lens in this past post). The cape plus a muff did a good job of keeping everything but my head warm. There’s no easy way I know of to cover a big hairstyle without mussing it while also keeping your head warm…

As I’ve mentioned in previous posts, I wore last year’s 1832 dress again, but with bigger and better underpinnings, so you’ll likely recognize one of these images from my comparison of 1830s pouf.

Super puffed sleeves, a little more skirt volume, and ribbons on my shoes are the notable changes from last year’s wearing.

I basically styled my hair the same way as last year. I really liked what I came up with and there seemed to be no need to reinvent the wheel!

After vigorous dancing to lovely holiday music it is always a treat to partake of the lavish refreshments, which provided a perfect outing for my refreshing apron. It does a wonderful job of keeping my dresses clean!

Happy holidays!

I hope you’ve had a joyous December so far, full of laughter and blessings!

SaveSave

SaveSaveSaveSave

SaveSave

SaveSave

A Comparison Of Pouf

Last year, I made and wore an 1832 dress to the annual Christmas ball, but was disappointed with the silhouette as I didn’t have the time to make all of the supporting garments to really get it right. This year, I made the supporting garments to fill out last year’s dress so I could get the silhouette just right. Are you as curious as I am to compare the silhouette from one year to the next? Wait no more! (I even managed almost the exact same pose!)

I’m especially pleased with my sleeves! I have to confess that my sleeves were brushing up against things as I wasn’t used to how large they were! It was great! And the skirt is ever so slightly more full as well, which helps to balance the rather enormous sleeves.

I’m also pleased with the subtle difference of having laces on my shoes. Last year, I tried using masking tape to attach the laces inside the shoes, but pressure from walking pulled them right off. This year, I sewed the ribbons to lining of the shoe. That part worked great, but the ribbons would not stay tied and it was rather a challenge to bend over in a corset and tie the bows behind my ankles on a regular basis. It was great for looks but not for practicality!

SaveSave

New 1830s Underpinnings: Sleeve Puffs & Skirt Puffer (HSM #11)

I made an 1832 dress last year for the annual Christmas ball. I was very happy with the dress itself, but a bit saddened by the silhouette due to the fact that I didn’t have time to make all the accessories to help give the dress just the right silhouette. This year I’m wearing the same dress again for the Christmas ball but I’ve taken the time to create two different underpinnings that will really help the shape.

There are two areas where I was disappointed with last year’s silhouette. The first was my sleeves. The dress I made has large beret sleeves but without anything inside to keep their shape they became deflated as the night wore on. The solution: a pair of 1830s sleeve puffs! The one below, from the V and A, is just one example (and what I used as direct inspiration for creating mine).

Conveniently, these fit this month’s HSM challenge perfectly!

HSF Inspiration: “One of the best things about the HSF is seeing what everyone else creates, and using it to spark your own creativity. Be inspired by something that has been made for the HSF over the years to make your own fabulous item.”

Sleeve puffs have been made by multiple people over the years of the Historical Sew Fortnightly/Monthly, though most recently a pair was submitted for Challenge #10: Out of Your Comfort Zone in 2017.

Here are my sleeve puffs!

So, just the facts:

Fabric: Soft cotton twill, polyester organza and stiff net for stuffing.

Pattern: My own, based on measurements and looking at extant puffs.

Year: 1830s.

Notions: Thread.

How historically accurate is it?: Let’s say 95%. It’s entirely recognizable in its own time. The exterior is plausible fabric, the stuffing is not.

Hours to complete: Perhaps 2?

First worn: Not yet! Will be worn in December.

Total cost: Free! All the fabrics are from the stash.

I took in progress pictures of the puffs as I made them, so eventually I’ll post a detailed tutorial for how exactly I made these. But for now, let’s talk about the second area that I was disappointed with my 1832 silhouette last year: the skirt fullness. I had hoped to create a nice round shape, but my silk petticoat alone wasn’t enough. I whipped up a puffer of stiff net gathered onto a waistband, but it didn’t add enough oomph either.

Of course, a corded or starched (or both) petticoat would be the ideal way to fix this problem. I didn’t devote the time to making either of these for this particular dress (and don’t already have them as part of my wardrobe.) Another idea one of my friends had was to use a fluffy many tiered organza petticoat from eBay to get a nice 1830s silhouette. I, however, was inspired by Lauren’s ‘ugly puffer’ (she made it for the 18th century, but the idea can be used to fill out skirts from many different eras) to try and get a better silhouette this year.

I actually used the same net puffer I used last year, but added a gathered layer of pre-quilted cotton from the stash. I hemmed the edges to help add stiffness and used up the small scrap that I had (only about ¼-⅓ of a yard), which amounted to about a 2:1 ratio of gathering.

That, plus giving my silk petticoat a shake out to get the ruffle at the bottom more full and less squashed from storage, seems to help, at least when I tried it on at home. We’ll see how these two underpinnings help at the ball. I’ll have to do comparison pictures between this year and last year!

How do you get an 1830s silhouette? Do you have any creative ways to get the right look?

SaveSave

SaveSave

SaveSave

HSM #1: Brown Silk Petticoat

While making my 1832 velvet gown at the end of last year, I decided that a generic 1830s/40s petticoat might add to the silhouette, besides being elegant and fun to own. Silk petticoats remind me of Mammy, in Gone With The Wind, who is very excited (and a bit scandalized) about a red silk petticoat gifted to her by Rhett.

I had purchased this silk taffeta a number of years ago on clearance, but it was languishing in the stash due to its unflattering shade of brown. I had 3 yards, which was just right for a petticoat. And since the garment is never seen nor worn near the face, the color was perfectly suited to the project.

img_2372

I made a tube of the yardage, then cut off the excess length and used that to make the ruffle. I had thought of making the ruffle twice as high, but realized that I needed to have more than a 1:1 ratio to gather… duh! I was sick while making this and clearly my head wasn’t working terribly well. Anyway, I cut my tall ruffle in half to make a 2:1 ratio and that was that.

The waistband is made of small bits of leftover cotton from some other project. There is evidence of quilted petticoats from the 1830s and 1840s having waistbands made of other fabrics, which was my inspiration (examples can be found here, here, and here). It was a perfect idea, as I was trying to make the best use of my fabric and I did not want to cut a waistband piece out of it.

Petticoats of this type also sometimes close with buttons (like this one), so I chose to close this petticoat in that way as well. It used up a single, random, khaki colored button from the stash and matches the fabric perfectly!

img_2373

I added tucks to the petticoat after trying it on with the 1832 dress and realizing it needed to be shorter. Those are hand sewn, but the rest of the construction was done on a machine except for the buttonhole and sewing down the inside of the waistband.

This garment fits the first HSM challenge of the year, Firsts and Lasts (create either the first item in a new ensemble, or one last piece to put the final fillip on an outfit), as it was the start of the 1830s ensemble.

Just the facts:

Fabric: 3 yards brown silk taffeta.

Pattern: None. Just rectangles and math, sort of.

Year: 1830s/40s.

Notions: Thread, a button, and a cotton scrap.

How historically accurate is it?: I’m going to go with 95% on this one. The materials are good and so is the method. The only thing off is the machine sewing and the plastic button.

Hours to complete: Not many, for me. Maybe 10? It didn’t help that I was sick  and not thinking straight.

First worn: December 10 for a ball.

Total cost: $18.

Vernet Project: A Witzchoura Tangent

I started this post soon after joining the Vernet Project, so I think it must have been in my drafts for close to two years at this point. I didn’t want to leave it in the drafts folder forever, though, so I thought I’d include it as I’m wrapping up my Vernet posts.

Throughout my research, I’ve looked through many hundreds of pins on my Pinterest boards from the 1810s, 1820s, and 1830s and have found only a handful of plates that show outerwear specifically labeled as witzchouras (these can be seen in this past post showing examples). There are a much larger number of other, similar, types of outerwear.

(If you’ve missed out, this post explores the origins and qualities of a witzchoura, while this past post explores witzchouras in even more depth, with multiple excepts from the first part of the 19th century mentioning them.)

Examples of garments similar to witzchouras

Common garments in this category are labeled using words such as pelisse and pardessus. Then there are also carriage dresses (example), promenade dresses (example), and redingotes (example) trimmed in fur, but it seems clear in the fashion plate descriptions that these garments were not considered witzchouras.

ac27bb830f63f1673e45316d0e18f87d
Fashion plate showing a Pardessus from 1811.

Here is another similar garment, a Russian mantle, described in The Ladies Pocket Magazine in 1838 under the chapter English Fashions and Novelties: Remarks On The Prevailing London Fashions.

content

Descriptions of garments similar to witzchouras

In 1849, La Belle Assembleé addresses this for us (while also mentioning yet another type of outer wear, a burnous. The Dreamstress defines and explores this garment specifically as it relates to historical fashion, which is excellent and full of images!). The author of this reflection of fashion specifically mentions the weight of a witzchoura and how that compares to the weight of a pardessus, as well as the types of outings that these garments would have been worn for. Interesting that they would be worn for carriage dress, when, alternatively, one could also wear a ‘carriage dress’.

content

This next excerpt, from La Belle Assembleé in 1825, tells us one distinctive quality of a pelisse which is that the arms were not encased in the garment and could be freely moved about.

content-1

a94e6fc37e3582c81ab22797c3c06b78
Example of a Pelisse from 1815, showing the armholes that would allow movement.
004c2dc3370c00425fcfd044369a9d53
A slightly later example of a Pelisse in a similar style. This is from 1821.

Examples of out of the ordinary witzchouras

Then there are garments labeled as witzchouras, but which are odd in a variety of ways. For example, take a look at the interesting witzchoura mentioned in The Lady’s Monthly Museum in 1817, seen below.

content

I’m not really sure what qualities allow a witzchorua to keep one’s dress from being rumpled, but what strikes me as odd is that the witzchoura mention is lined with silk and that is has a chapeau bras attached! Also in 1817, La Belle Assembleé mentions this exact garment twice! The first is a description of the garment. The second is about the inventor, Mrs. Bell, who, if you care to read more, has a long list of other interesting things that she supplies.

content

content-1

In this next case, the witzchoura is described as being lined with sarsnet (a fine plain or sometimes twill weave usually silk fabric) and only trimmed with fur rather than being lined entirely with fur. Haven’t we seen conclusively that a witzchoura should be lined and trimmed in fur? This witzchoura is also interesting because of its colors. It is quite likely a garment made for the general mourning of the death of Queen Charlotte, who passed away in November 1818.

“For out-door costume nothing can be reckoned more completely elegant than the Witchoura pelisse of black velvet lined with white sarsnet, and trimmed with real ermine.”

La Belle Assembleé  in January 1818

Finally, there is this fashion plate at the LACMA which is labeled as being a witzchoura but with nothing witzchoura-like about it! A mistake perhaps? This looks like a summer garment, not a heavy winter garment.

What a rabbit hole of obscure information the witzchoura is. I’m rather glad to say that I’ve now exhausted my currnet list of historical references to the witzchoura!

June Fabric Stash Additions

Twice recently I’ve wound up at the local low-priced fabric store not needing fabric, but finding fabric that I knew wouldn’t be there if I went looking for it again in the future. Those trips resulted in three new dress lengths of fabrics for the stash.

The first two were from the first trip, when a friend and I stopped by the fabric store so she could get some supplies… I didn’t need anything…

IMG_1489
Fabrics 1 and 2: rayon velvet and good imitation silk

But I bought the gorgeous burgundy rayon velvet specifically to make an 1830s evening gown I’ve been thinking of for the last year or so. It’s nice and lightweight and won’t weigh down the silhouette!

And the icy pink shot imitation silk I also purchased. I’ve used this fabric in other colors in the past multiple times, in my 1813 Regency dress and my 1811 Regency dress. It’s a little poofy, but looks like silk. I also have it in gold, which has been sitting in my stash for a few years. I have no current plans for this fabric, but I finished off the bolt so I have enough to make a dress from just about any decade in the 19th century I eventually decide on.

IMG_1529
Fabrics 3 and 4: very slightly slubbed silk and figured purple lightweight silk

The lovely pumpkin silk is a color I’ve been dreaming of having a dress made out of, but it’s one of those colors you don’t often find. I carried it around the store for probably an hour before purchasing it. I’ve thought specifically of an 1820s dress, but really this color could be used for many decades in the 19th century. I also finished off the bolt on this one with hopefully enough yardage for any project I eventually decide on.

In addition, I found a lovely figured silk online at Blackbird Fabrics that I also knew was a fabric I wouldn’t find if I went looking for something similar in the future. That’s how fabric shopping often is, at least near me. You have to buy great things when you see them because if you go looking for specific and similar things you’ll likely not find them. Is it like that near where you live?

The purple color is so very 2nd-half-of-the-19th-century-chemically-dyed and it’s figured. It’s hard to find good silks these days for a reasonable price that aren’t just solid. I’m eventually planning a new 1890s gown, though who knows when. Maybe when another 1890s ball pops up on my calendar?

For now I need to get back to using up stash fabrics for my summer projects instead of adding to the stash!