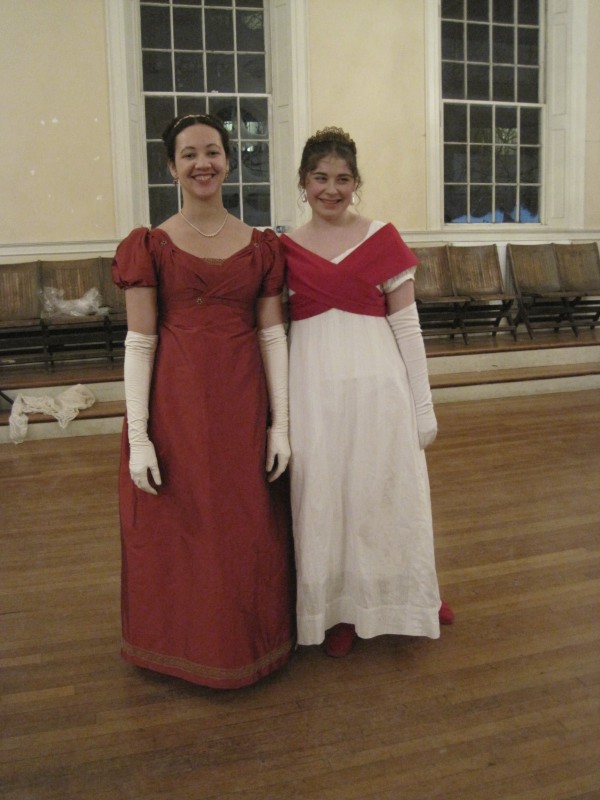
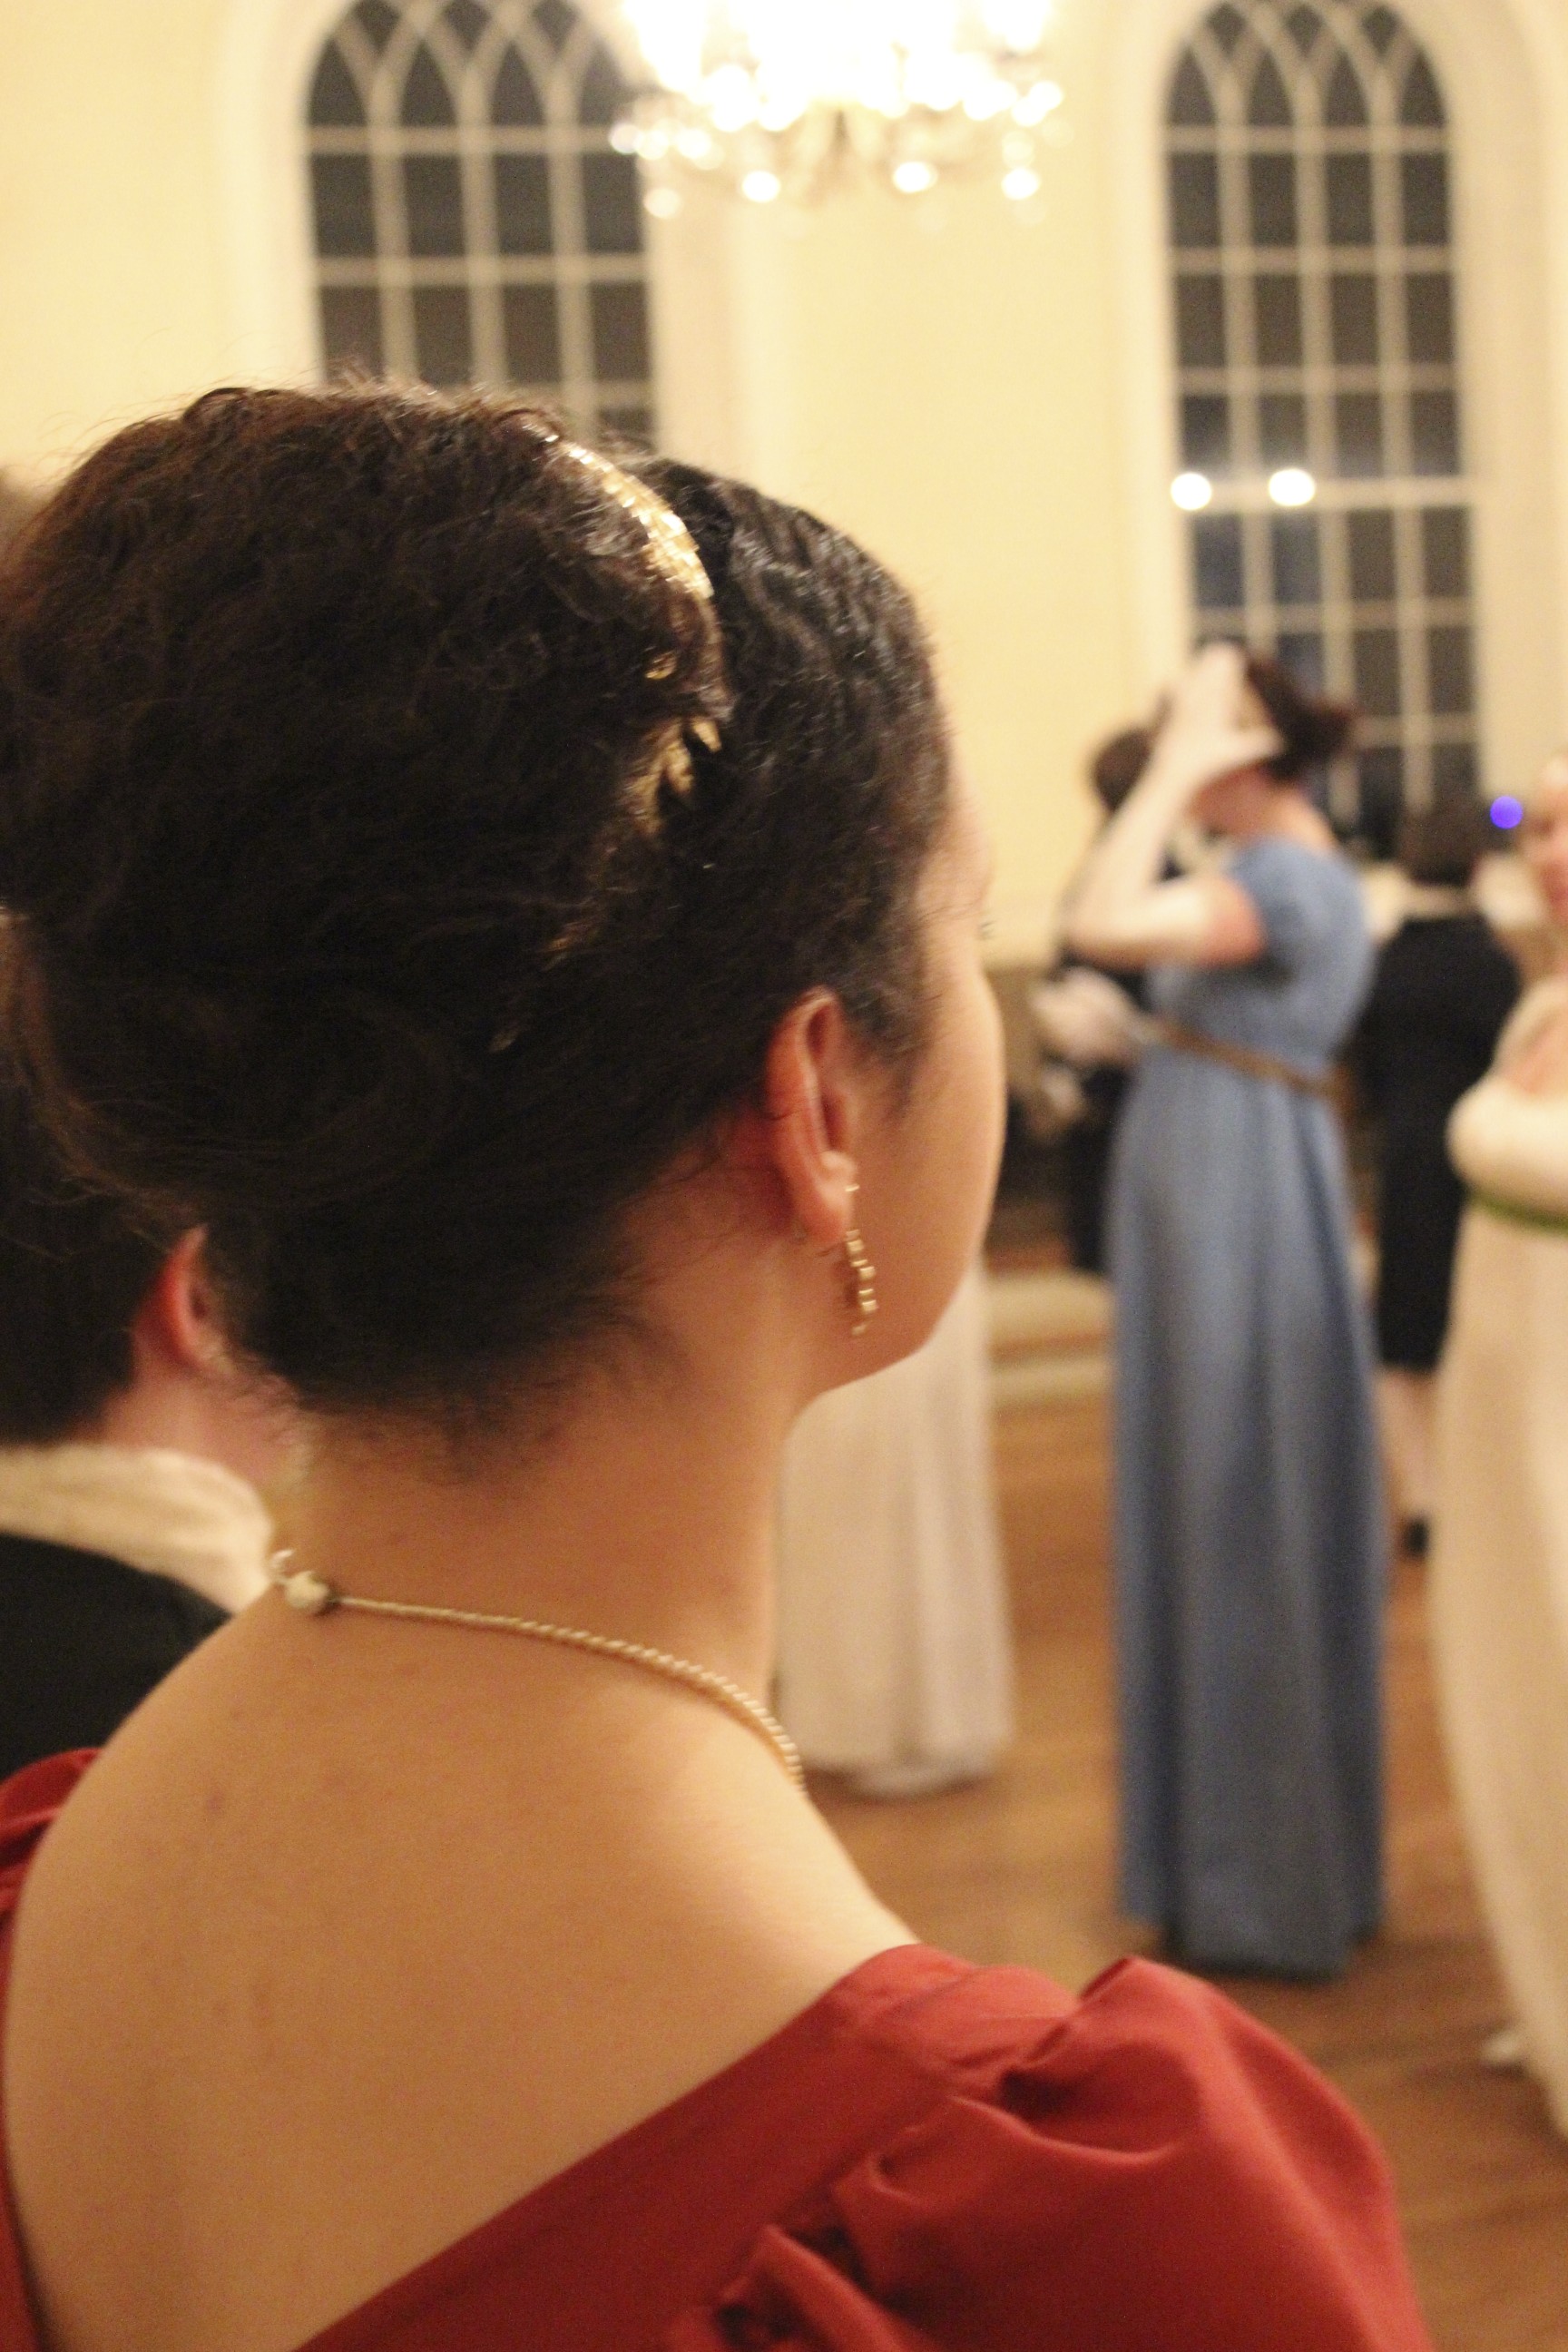
Last post, I shared pictures of my new 1813 evening dress and other related pretty clothes. This time we’re on to photos during the ball!
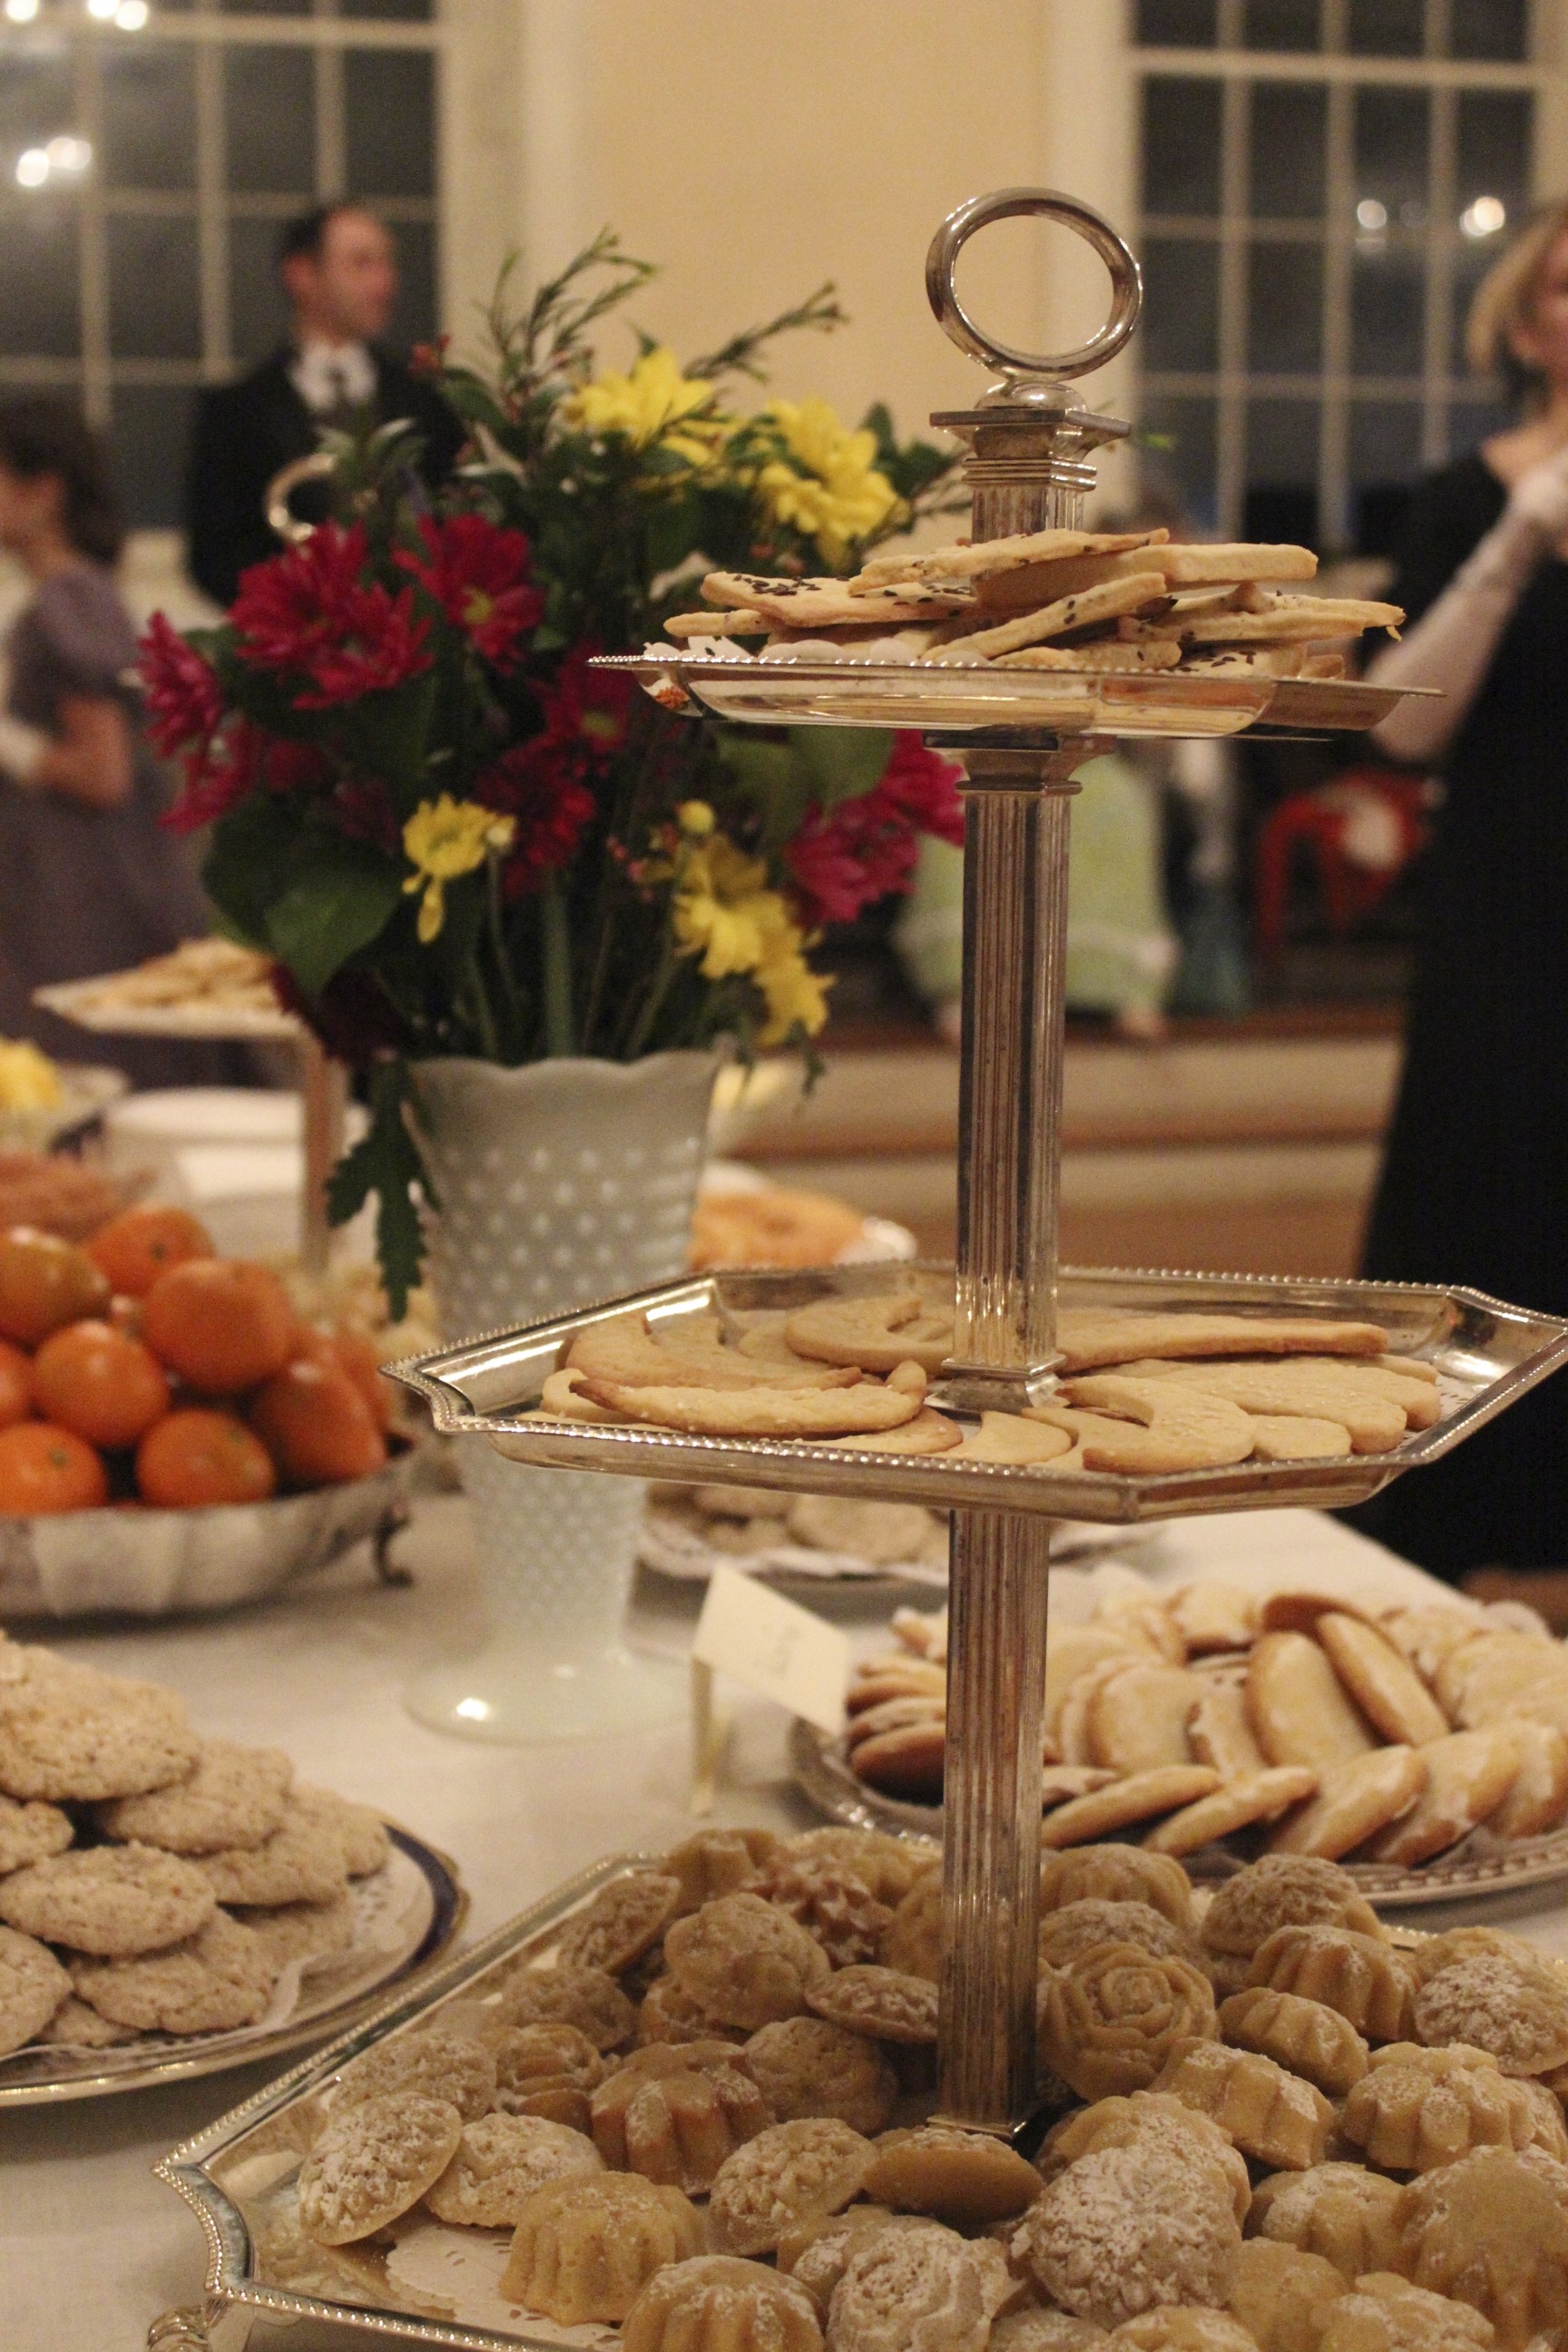
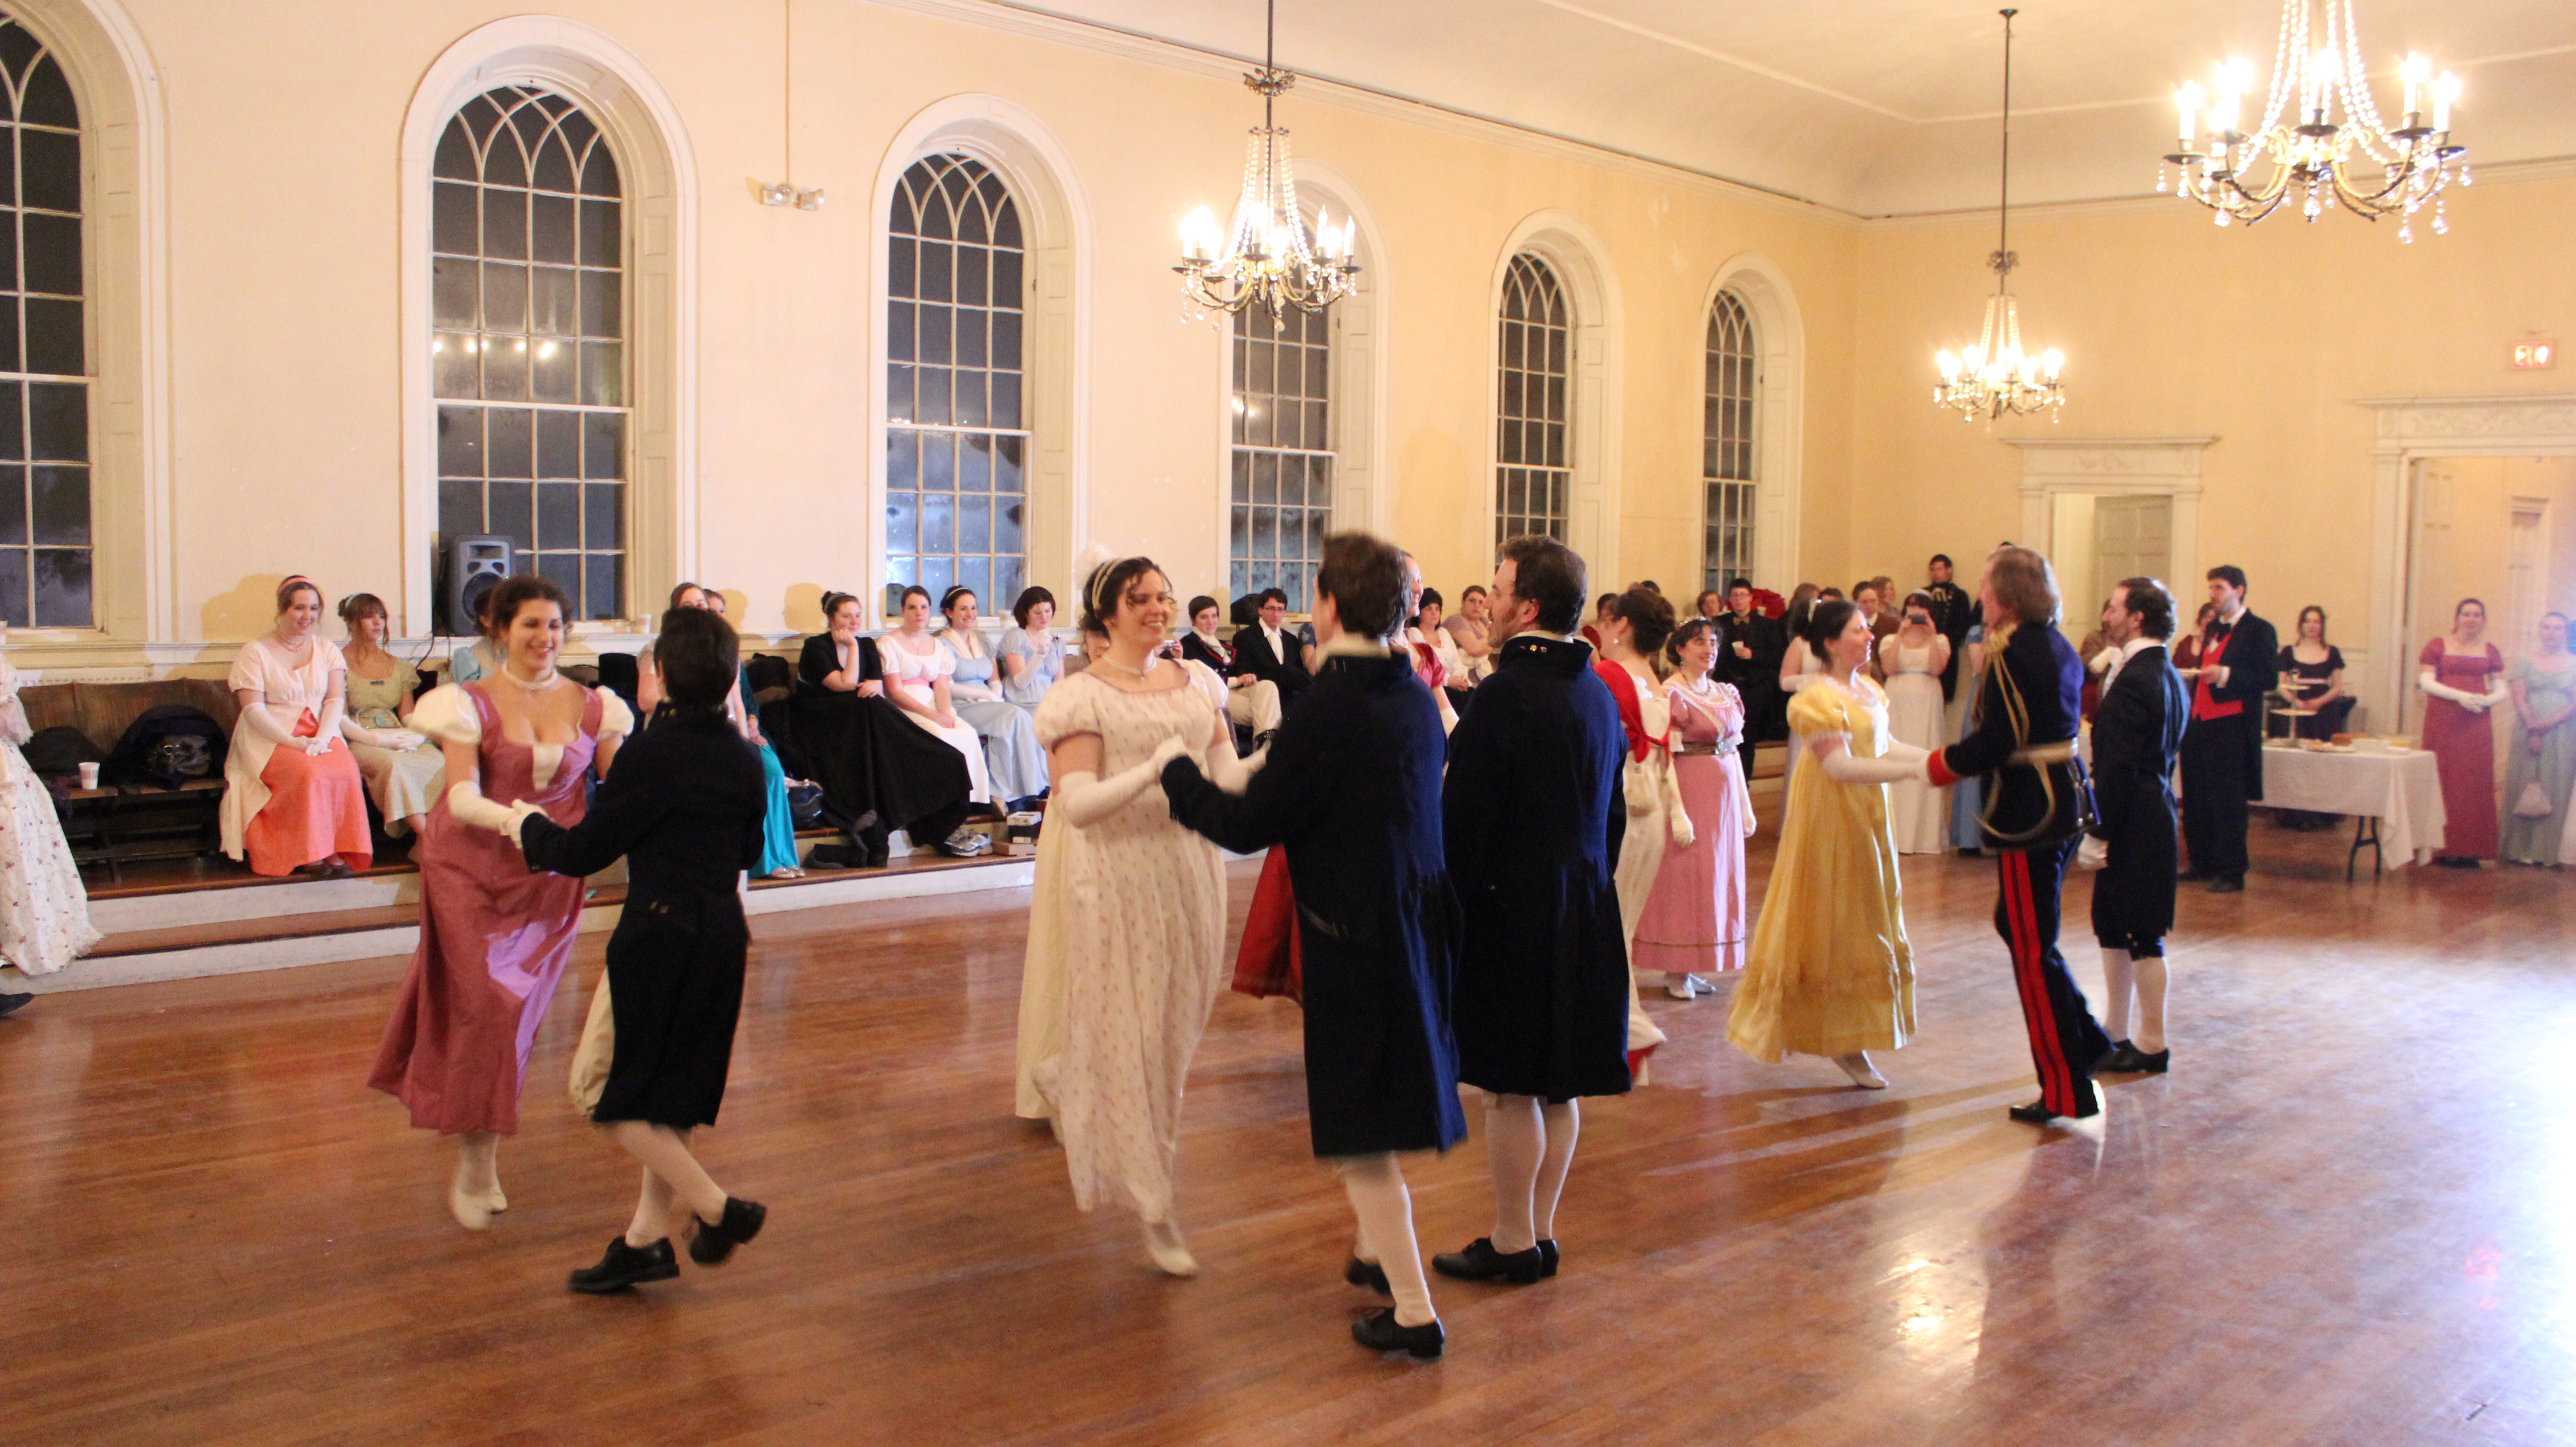
Dancing a waltz, Regency style.I believe this is a gallop.A hall full of eager dancers makes for a joyful ball.Just coming in from outdoors, it was nice to greet new people and see old friends.You chat.And then you smile for the camera.Part way through the evening the doors were flung open and a table full of yummy refreshments was brought it.The members of CVD about to perform a country dance called The Cottage Bonnet.Mid-dance, light feet flying!And we end.After the ball, it’s nice to take a break and rest your weary feet.Often, we have more ladies than gentlemen.Jazz hands! (This is one of my favorite!)Finally, we convinced some more members of CVD to come join us for a bigger group picture.Now for the sad end to the evening. As I was walking through a partially open door my dress caught and ripped! It’s on the back in the gathers, but it’s a good 4″ rip. Now I have to fix it before April, when I’ll be wearing this dress again. I’ve got multiple methods in mind, but it’s still not a fun or exciting thing to have to complete. I’d rather be making other new clothes…
Anyway, all things considered it was a lovely evening with lovely people. It was particularly nice to see old friends, but also nice to see usual ball friends. And I thought we all looked pretty smashing, which really does add to the atmosphere. I just wish I hadn’t ripped my dress…
Another thing that the Nemo blizzard affected was the Commonwealth Vintage Dancers‘ Pride and Prejudice Ball. Luckily, the ball was able to be rescheduled for this past weekend, which means that I did wind up having an opportunity to wear my new 1813 red gown (my HSF #1 project) after all! And that means pictures! Lots of pictures, in fact. I think I’ll split this into two posts… To start: the clothes!
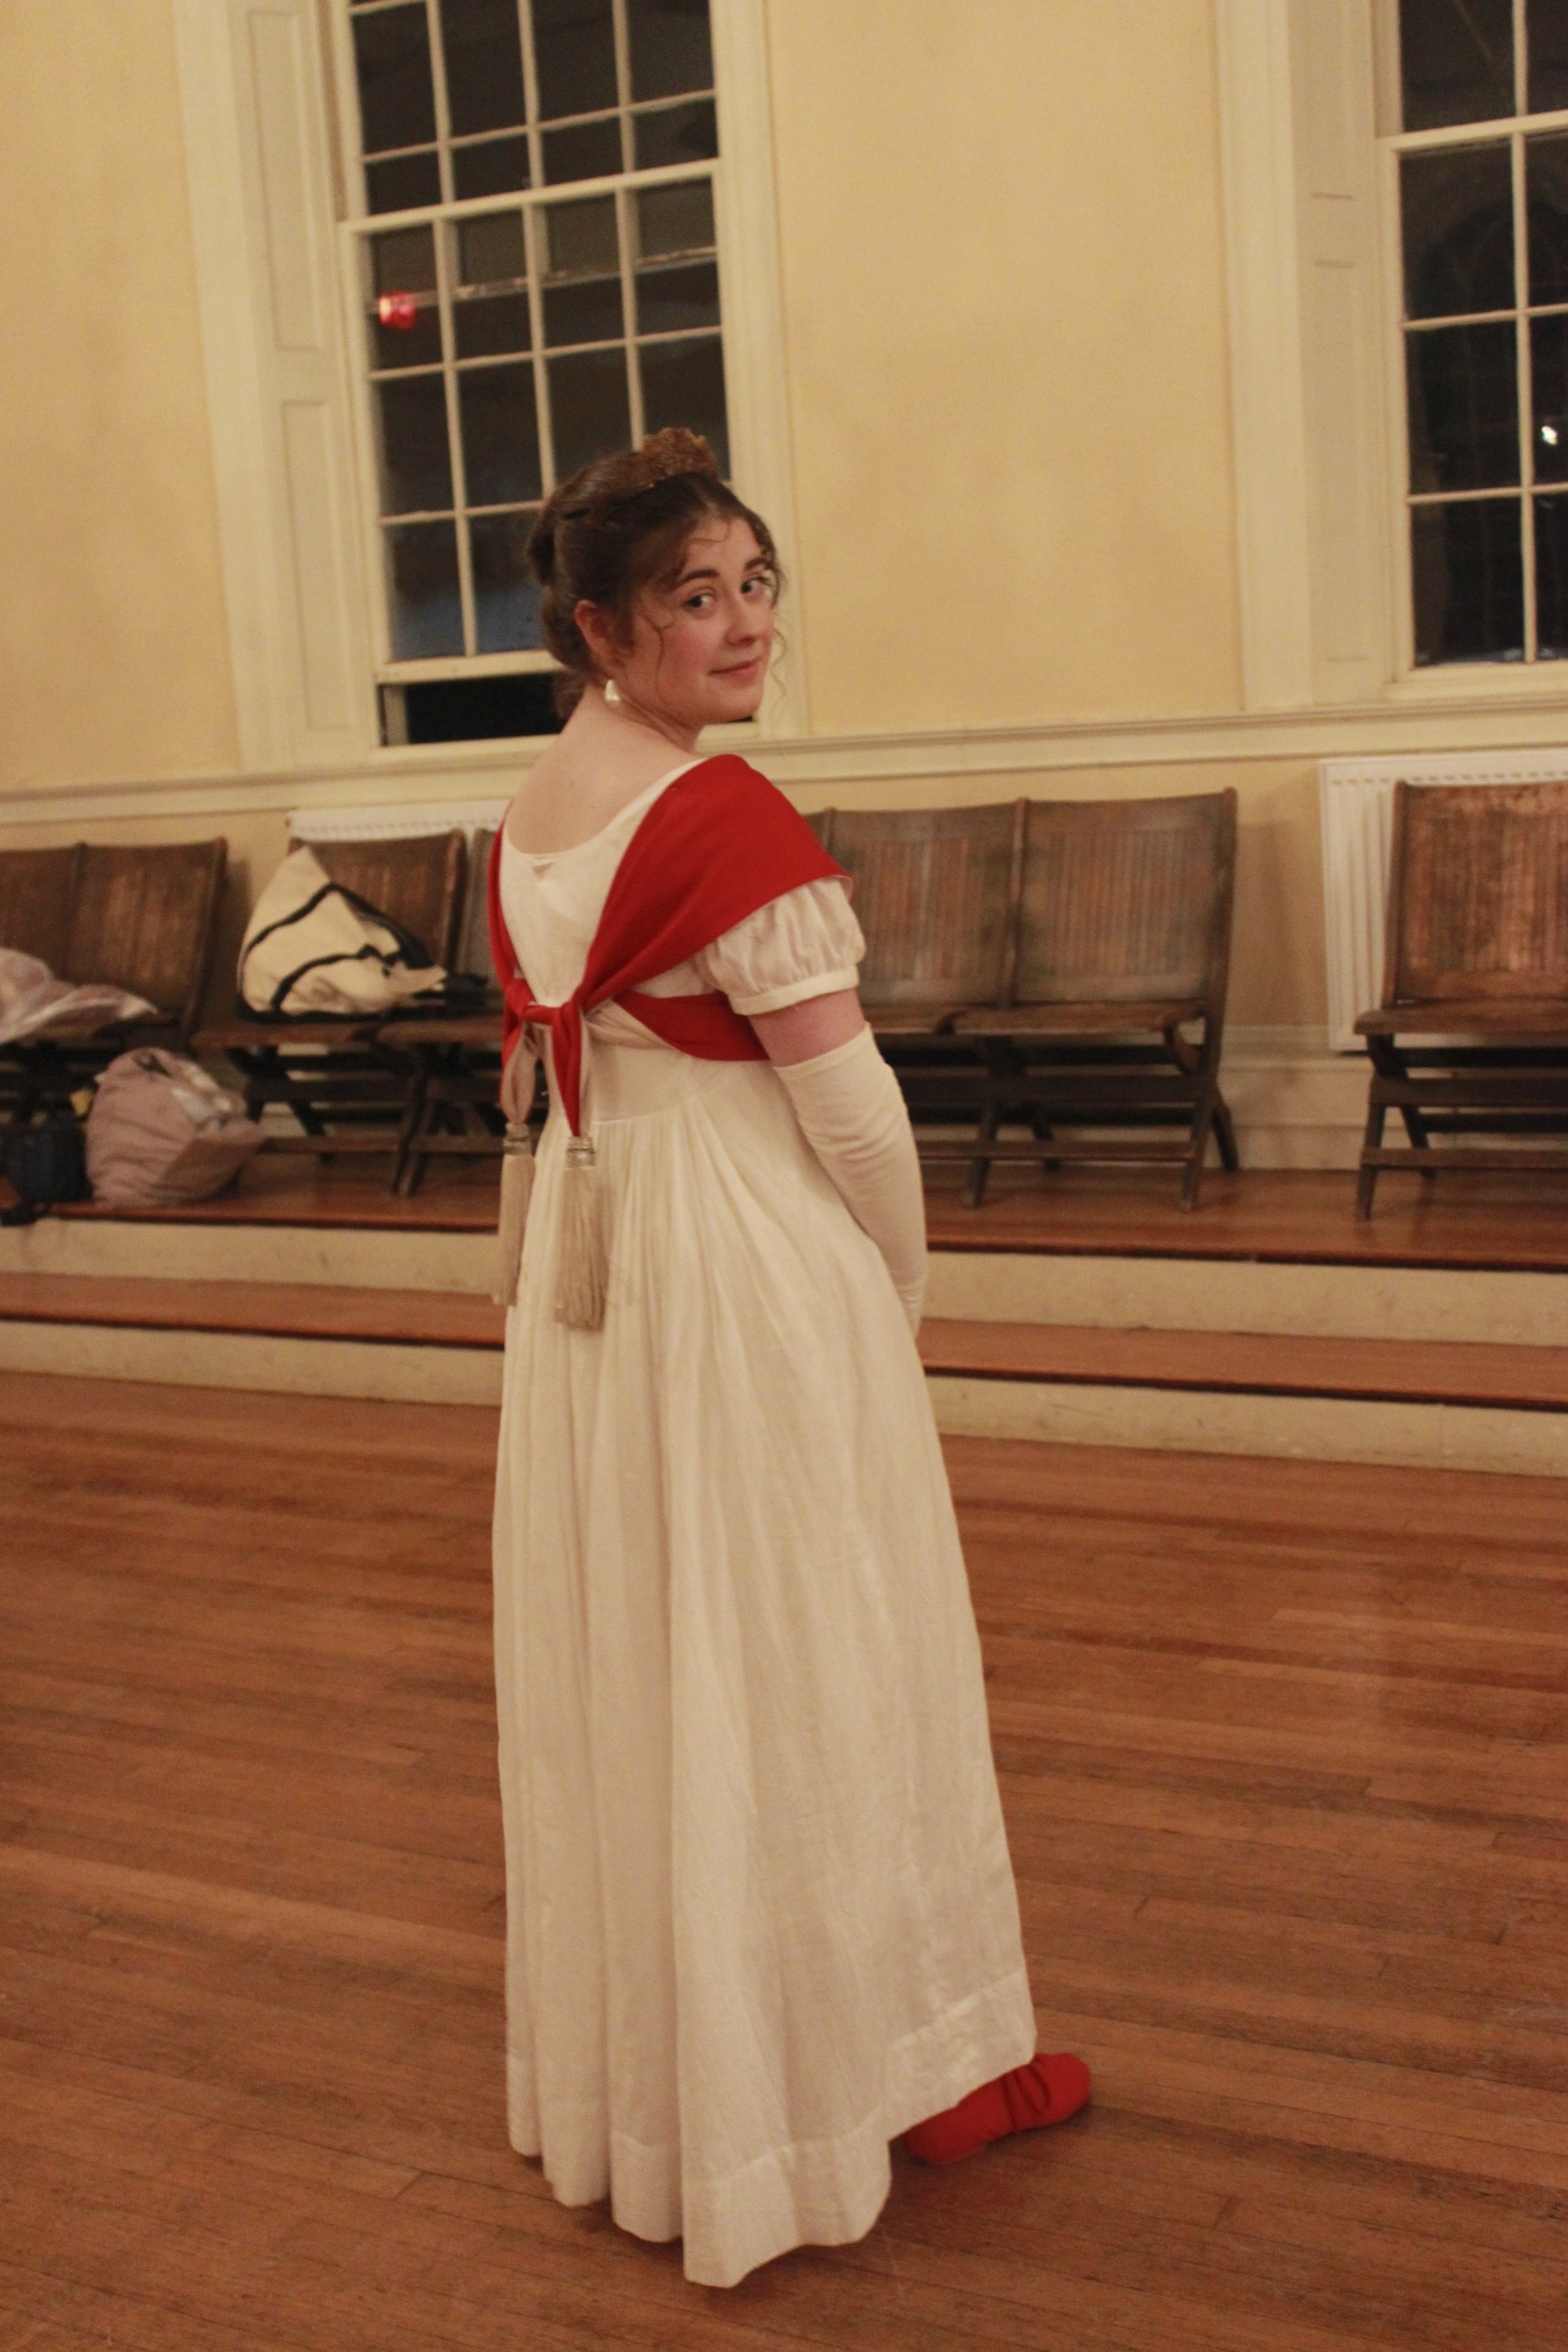
New dress!These pictures capture the color much better than my original pictures from January.Accessories: opera length kid gloves, white stockings and shoes, a gold laurel tiara, earrings to match the trim on my dress, and pearls.I wore the petticoat I built to go under my 1812 square neck gown, which is apparently a little longer than this new dress, because the hem of my petticoat was sticking out! Luckily, I had a needle and a friend had white thread, so I quickly basted up the hem of my petticoat so it wouldn’t show.Our colors match! So cute!The back of the creative Grecian sash wrapping. It was a great way to jazz up a white dress.More cuteness in the family.Great hair!Those face curls are hard to achieve without bangs. These look lovely!I tried the face curls, but it looked foolish. In the end I really liked how my hair turned out though! Super regal!More lovely face curls.
I thought everyone outdid their Regency selves and looked fantastic! I have to say, though, that not all these pictures are mine. Some are from a friend who caught all sorts of gorgeous moments! Thanks for sharing! More to come soon, with actual dancing and during the ball pictures.
I mentioned a few weeks ago, in my post about my new silk pockets, that I had spent the Nemo blizzard weekend working on the replacement of my failed berry ballroom dancing dress. I haven’t picked it up since that weekend, but I don’t need it for another few weeks, and I got far enough along to take pictures to show that I actually made progress!
The new “grape” dress!
This dress has been in the works since September, to replace the failed dress that was started about a year ago. My original vision for this dress was rather different than how it turned out. The skirt didn’t change much, but the bodice did. I won’t bore you with the details, but suffice it to say that the changes are for the better and I like how this turned out!
Bodice close up.
Originally, I bought gold rhinestones to put on this dress, but since buying them I have decided to use them for a future ballroom dress, incorporating some new knowledge I gained that I couldn’t put into use on this dress. That left me stuck without rhinestones for this dress and not wanting to spend more money. What to do? Years ago I had spent a pretty significant amount of money and time rhinestoning a lace overlay for a dress that was eventually ditched as my knowledge improved, but I kept the lace with all those rhinestones. It was time to finally put that lace to use!
Back bodice.
The skirt of the dress is charmeuse, as are the bodice drapes. The rest of the bodice is the recycled rhinestoned lace, and under that is polyester stretch. It’s shaped to my body with darts in addition to being stretchy. The skirt is triple layer, with the two under layers being organza. All three skirt layers have nylon horsehair around them to add some weight and movement as well as poof.
The great thing is that I didn’t have to glue rhinestones on this dress! The down side was that I had to hand sew the already rhinestoned lace to the spandex by hand, with a fair amount of piecing to make it fit the shape of the new bodice. Not hard, but time consuming. In the end, you can’t tell the lace is pieced at all! And, you can’t see my invisible zipper up the back, yay!
I’ve got a few more things to sew on the back of the bodice, and I need to sew some bra cups in. Then the only other thing remaining is to make floats: the chiffon pieces that hang off of my arms. I’ve got the fabric (also left over from the berry ballroom dress), so I just need to make them. That’s totally do-able by the end of March, even with my 1864 ball gown happening that month as well.
Ballroom dresses have their own style, so if you want to see my inspirations and lots of other lovely dresses to get a feel for what the style is, you can visit my pinterest page: New Standard Dress… Eek!
Well, I hope this isn’t too much of a stretch (or maybe interpretation is a better word), but I’ve finished preparing all of my skirt trim and I’m going to call it my project for the HSF #4 Challenge: Embellish. I say it’s a stretch because my completion of this project is the preparation of the trim, rather than the attachment to the garment. To be fair, just the prep has been a lot of sewing, so I think it counts. Here it is, below: gold trim on the rather wrinkly skirt of green and gold shot silk taffeta. Because the gold is shot with silver, and the green is shot with gold, they are both photographing more washed out looking than they appear to me when not looking through a camera. Hopefully one day I’ll be able to get a picture where they look a little less silvery.
All the skirt trim, gathered and ready to be attached!
The top pile of trim (that rather resembles a ruffly brain, don’t you think?) is for the zig zag. The two piles on either side are the 18 rosettes. The section on the bottom center is the ruffle that goes at the bottom. You can see the inspirational fashion plate here, in this previous post, to see what these different trim sections look like in their actual context.
My favorites are the rosettes. Aren’t they cute?Here’s all of them laid out like an accordion, or a slinky. They look so adorable!
Anyway… here are the facts:
Fabric: almost 1.5 yds of gold shot with silver silk shantung.
Pattern: none, just a lot of math.
Year: 1864.
Notions: none, just thread.
How historically accurate?: Well, shantung is not accurate, but silk is (and this shantung is pretty smooth and not slubby, so I don’t think anyone will know it’s shantung unless I tell them). The trim layout is from a fashion plate, so super accurate. The stitching is accurate. Overall, I give it a 90%.
Hours to complete: Um… a lot. It’s all hand sewn. I started in January, so… 50 hours to get to this point? I really have no idea. I think in terms of months or weeks usually, not hours or even days.
First worn: Not yet, but will be worn in March.
Total cost: $9, because the silk was a remnant.
And while I’m keeping count, let me also note the yards of stitching currently sewn into the trim. When it was all hemmed I was at 45 yards. Now I have the addition of gathering stitches (31 1/2 yds) and ruffle binding (9 yds). That ups the total yards stitched for trim to 86 1/2 yds, and that’s before attaching it! Nice.
The latest shoe from American Duchess: the Gibson.
Lauren has all sorts of cute shoes planned for 2013, so I’m pretty sure this is only the beginning of what will be more shoe posts this year. Aren’t these cute though? I’m trying to decide between black and brown… If you are at all interested, pre-order-time is the time to make your decision, because if Lauren doesn’t receive enough orders, the style (or certain colors) might be cancelled. And that would be sad! You now have no excuse. At the very least you should go check them out…
Product links in this post contain an affiliate code, which provides a small benefit to my shoe fund. This does not affect my impressions and reviews of this product.
It’s time. I’ve been wearing Annabelle, my flounced not-so-new-anymore white 1860 ball gown, to all Civil War events for about a year straight, with no relief on the horizon. Not that I dislike Annabelle, I just want options, and a change. I have Belle, a dark blue 1860 ball gown, as well, but I haven’t worn her since 2011, and since most of the women in our dance troupe have blue dresses it’s not likely that I’ll get to wear her soon, and anyway, she’s too heavy for summer, and summer is coming up. So it’s time. Time for a new 1860s gown! Yay!
This gown was included back in autumn of 2012, when I made my 9 month sewing plan. It’s my goal to have it finished by mid-March, for the annual Commonwealth Vintage Dancers Returning Heroes Ball. My inspiration is this fashion plate from 1864 (pictured below).
From The Bartos Collection. 1864.
Specifically, I’m going to be making the dress on the left. Or one inspired by/sort of like it. As I’ve been working on it I’ve made changes to my plan, as you’ll soon see. My dress will be green silk shot with gold and with gold silk trim. I bought the silk remnants for the project months ago, so I have had to make my plan work with the yardage I have. The green isn’t an issue, but the gold had to be carefully considered to make sure I have enough for all the trimmings. After lots of math, I realized I didn’t have enough to do all the trim, so I thought about what was visually most important and decided to eliminate the vertical lines of trim, as well as the waist trim. Here is the same fashion plate, with my changes:
Of course, me being me, I’ve decided to hand sew the entire gown! Yes, sometimes I like my big projects. But I’ve got time (I think). I’ve sewn the skirt and the polished cotton lining and hemmed them, though the skirt isn’t attached to a waistband yet. I’ve sewn the bodice seams, so now it needs boning, and cording, and trim, and closures in the back. And, most importantly, I’ve cut and hemmed the MANY yards of gold trim for the skirt.
Skirt trim: on top is the zig zag, in the middle is the rosettes, and on the bottom is the ruffle. Not gathered yet, but all hemmed!
Did I mention I’m hand sewing all of this? All of these trim bits on the skirt will be gathered to a ratio of just over 1 1/2 to 1 (that was all that my yardage would accommodate). The zig zag is hemmed on both sides and will be sewn onto the skirt with a band of green silk running down the middle. The rosettes will be gathered in the middle and the raw edges hidden, which is why that bit is hemmed on only one side. The ruffle at the bottom will be bound at the top, which is why only one edge is hemmed.
Hem-age: 13 1/2 yds of zig zag, hemmed on both sides equals 27 yds of hem; 10 1/2 yds of rosette hem (there will be 18 finished rosettes on the skirt, if all goes according to plan); and 7 1/2 yds of ruffle hem. Total hem-age: 45 yds, and that’s just the skirt trim!
I love hand sewing, which makes me excited about that total, rather than bored. And I really enjoy the sense of satisfaction I have when I’ve completed the different pieces of this project, so I can only imagine how great it will be when the entire gown is complete!
I’ve been sewing up a storm this weekend! (And yes, pun intended, since I was stuck inside all weekend because of the blizzard ‘Nemo’… and as a side note, do you think they saw the irony in naming this storm Nemo? All I think of is a cute cartoon fish, which seems at odds with the 2 1/2 feet of snow that is still being cleaned up outside as I create this post.)
Anyway… events were cancelled, including the Regency Ball I created my 1813 dress (HSF #1) for, which is rather sad. Not being able to go anywhere means I’ve had lots of time to work on other things, though. Mostly, I’ve spent the time working on my replacement of the berry ballroom dancing dress. I was hoping to move along on my new 1864 ball gown as well, but that didn’t happen because I was so inspired to keep working on the ballroom dress (and I made lots of progress, so that’s good!). I did take some time out of my furious sewing to finish up my new silk pockets, just in time for the deadline of the Historical Sew Fortnightly’s Challenge #3: Under It All.
Year: The year in Costume Close-Up is 1740-1770, but I think these can be used for years spanning almost the entirety of the 18th century.
Notions: About 2 yds of 1/4″ persimmon colored silk ribbon and about 1 yd of 1/4″ white cotton twill tape for ties.
How historically accurate?: I give them a 95% rating. Accurate fabrics, accurate piecing, accurate pattern, no machine sewing… Thread choice is not accurate, and I’m not convinced that the stitches I used to attach my edging ribbon are accurate either. (And I probably should have tea dyed my waist tie so it wouldn’t be so bright white… but I am the only person who is likely to see it, and frankly, I just wanted to attach it and be done.)
Hours to complete: Entirely hand sewn, so about 13 hours.
First worn: They haven’t been worn yet, and probably won’t be worn for awhile… but at least now they’re done, and ready to go for next time I need them!
Total cost: $7? If I count the cost of all the bits and pieces. Since they use scraps from other projects it’s hard to tell.
Back view. You can see the linen backing. The silk on the front has a second layer of linen under it.Close-up of the tiny stitches holding the ribbon down along the edges.
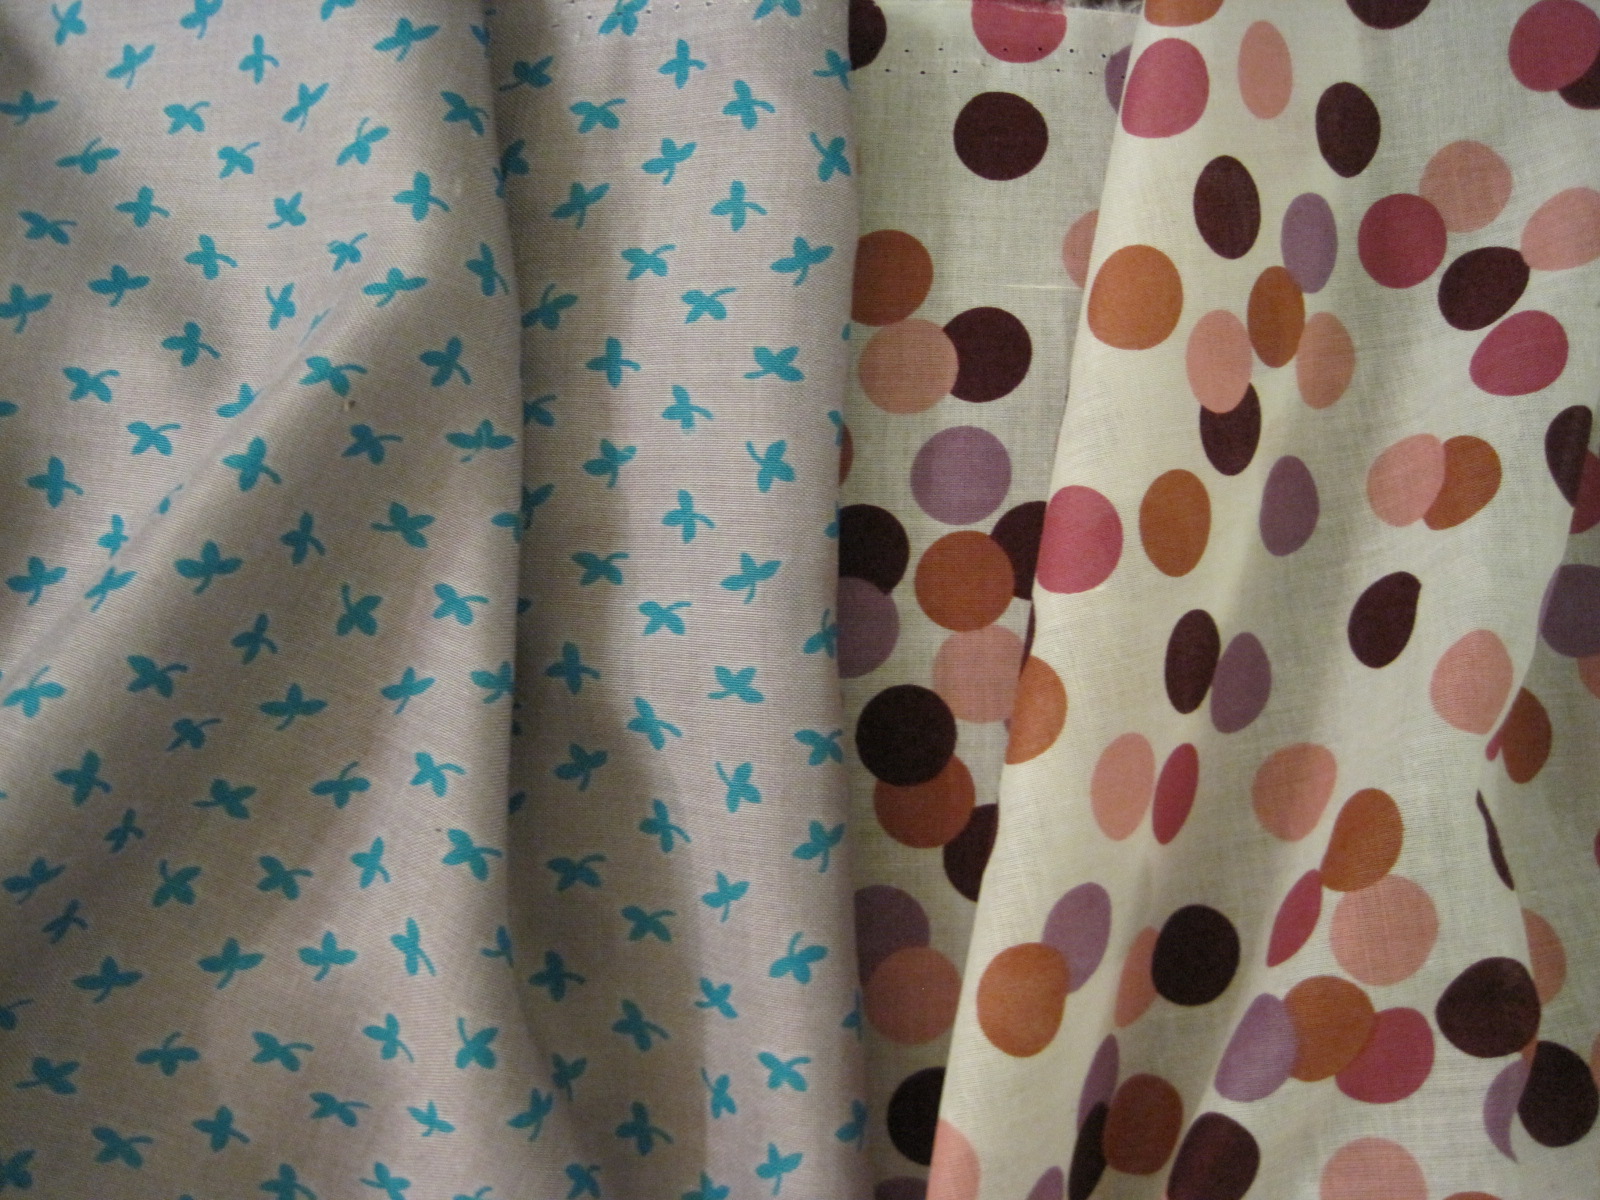
If you look at my clothes, modern and historic, you might notice that I usually wear solid colors. Yes, I do mix solid colors in outfits. But there it is: I hardly ever wear patterned fabric. I want to branch out a bit, at least in my historic wardrobe, so when I saw these patterned fabrics on sale I couldn’t resist.
So here they are: my most recent stash additions. On the left, a rayon challis with a slightly lilac tinted grey background and little teal clovers all over. On the right, a super lightweight cotton lawn with dots in shades of purple and pinkish/redish/orange. What for? I’m thinking 1930s or 40s for the challis and a 50s summer dress for the lawn. I’m pushing the envelope, thinking outside my normal eras! Of course, these projects are pretty low on the list of things to get done… so don’t expect to see them again soon. But maybe this summer the 50s dress could be a fun project. We’ll see. In the meantime, I’ll know I have patterned fabric in my stash, and that’s enough for me!
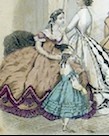
Isn’t this a cute fashion plate??? My favorite thing about it is her bright red shoes! My second favorite thing is that her bright red shoes match her red bodice! So cute!
First, this makes me want to wear colored shoes to a Regency ball. Often you see black or white in fashion plates, and our dance troupe tends to wear white to perform and also to balls out of habit, so without even thinking about it I usually pull out the neutral colored shoes… BUT! Extant shoes come in all sorts of colors, although maybe not quite as bright as these red ones. You can see some of them on my pinterest page here: Shoes: 1790-1829.
Second, that red bodice reminds me of this one that Natalie Garbett made for the HSF. Is it possible that this red one, like Natalie’s, is a separate piece from the dress? That would allow for more wardrobe options, certainly. I’m going to go on the assumption that it is, and congratulate this young lady in the fashion plate for being so coordinated and versatile in her wardrobe.
Separate bodice by Natalie Garbett. Lots of research information about this style on her blog: here.
So… I’ve got a new dress to wear to an upcoming Regency ball that doesn’t really need a separate bodice to jazz it up. Do we think I can wear I can wear fun colored shoes without a separate bodice? I think probably yes, given that there are lots of extant colored shoes and I know of other images that show colored shoes. And now I have an excuse to wear colored shoes with a white dress! Fun! Maybe I need to make a separate bodice, too?
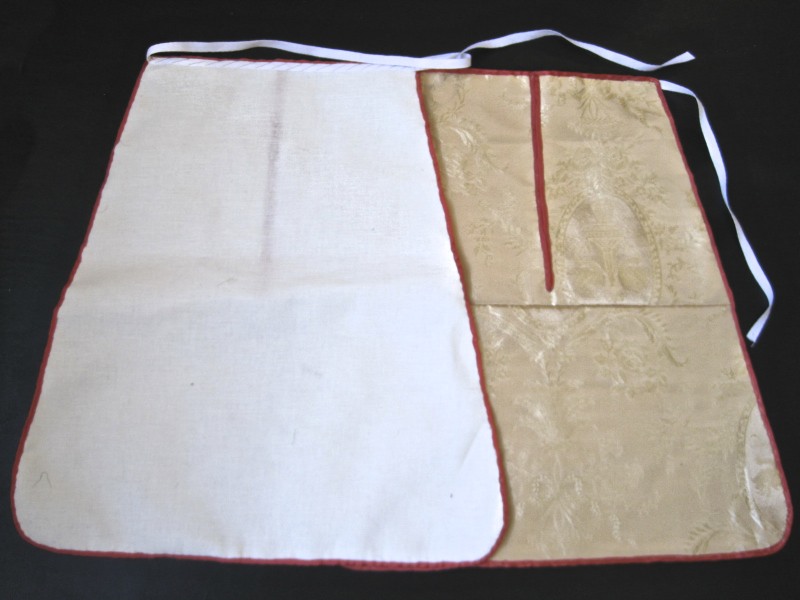
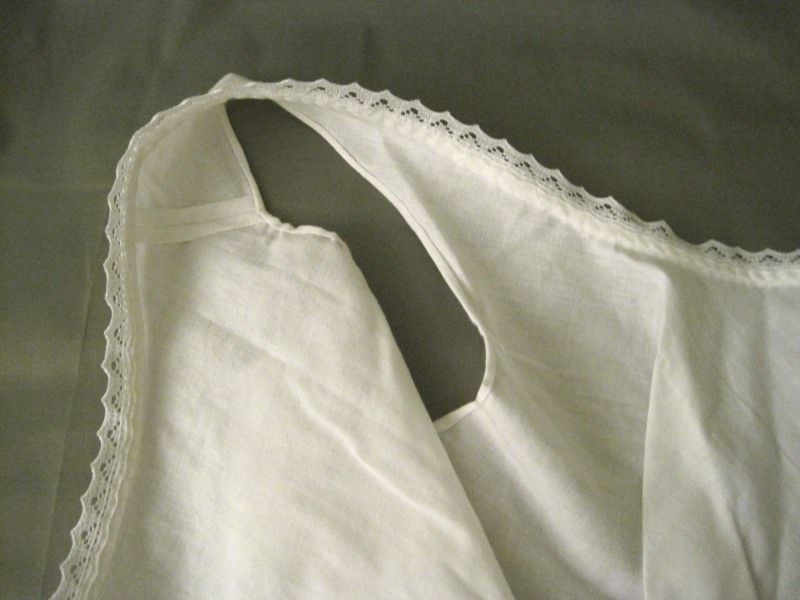
Is there enough alphabet soup for you in the title of this post? In case you’re not familiar with those acronyms, it means that this is a post about the Historical Sew Fortnightly Challenge #2: Un-Finished Object. In this case, the UFO is my 1820s petticoat from the very end of 2012.
You’ll remember that I wore it to Fezziwig’s Ball in December, but that I hadn’t finished the neckline? I’m pleased to say that it is now entirely complete!
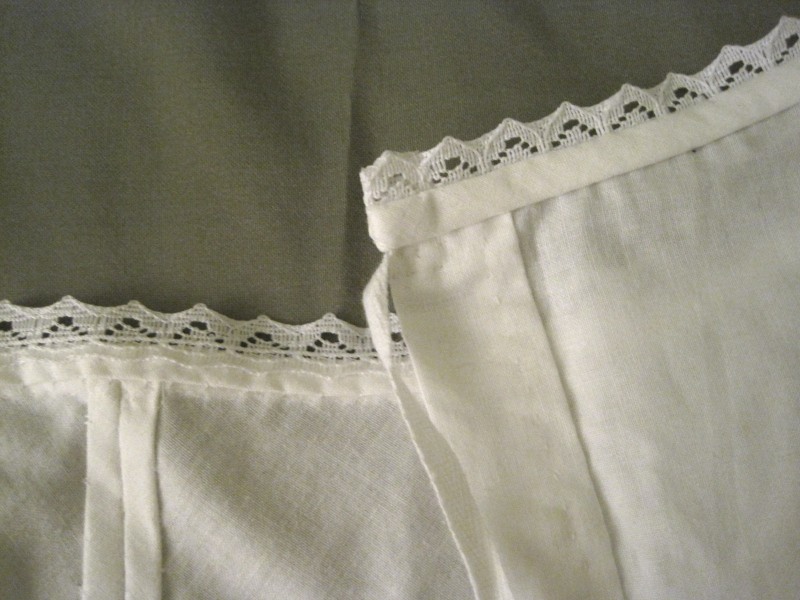
Inside view. This petticoat has three ties at center back to keep it closed.You know I like my insides to be pretty. This is a closeup of the arm hole and the neckline, which is bound with bias before having the lace sewn on.The double hem on the left is center front. Diagonally across the photo is the right side of the back.This cording was done last month, so it’s not really part of the UFO-ness, but it is still an accomplishment. 16 rows of hand sewn cording all around the hem.A close-up of the lace at the hem and my tiny stitches.
Pattern: Adapted from my 1822 green ball gown pattern. It’s pretty much exactly the same except that it doesn’t have sleeves. The ball gown pattern is based off of a pattern in Janet Arnold and styled as in the fashion plate you can see in this previous post.
Year: 1820s. The inspiration image is dated 1828-1835. You can see the inspiration image and my reasoning for it being more 1820s than 1830s here, in this past post.
Notions: About 1 1/2 yds of broderie anglaise trim, cut in half the long way to create double length; about 1 yd of white edging lace; and about 1 yd of 1/4″ cotton twill tape.
How historically accurate?: Very, having used modern materials. The pattern is from Janet Arnold, so you know it is good on accuracy. The entire petticoat is hand sewn and made of accurate fabric. The lace is machine made and the content is almost certainly not entirely accurate, but it is in the style of the early 19th century and the lace in the inspiration image. I’m not 100% sure that all of my seam finishes are perfectly accurate for this garment, but they are accurate for the period as a whole.
Hours to complete: I’m always bad at estimating this. Let’s say 120 hours.