Vernet Project: Toque de Velours

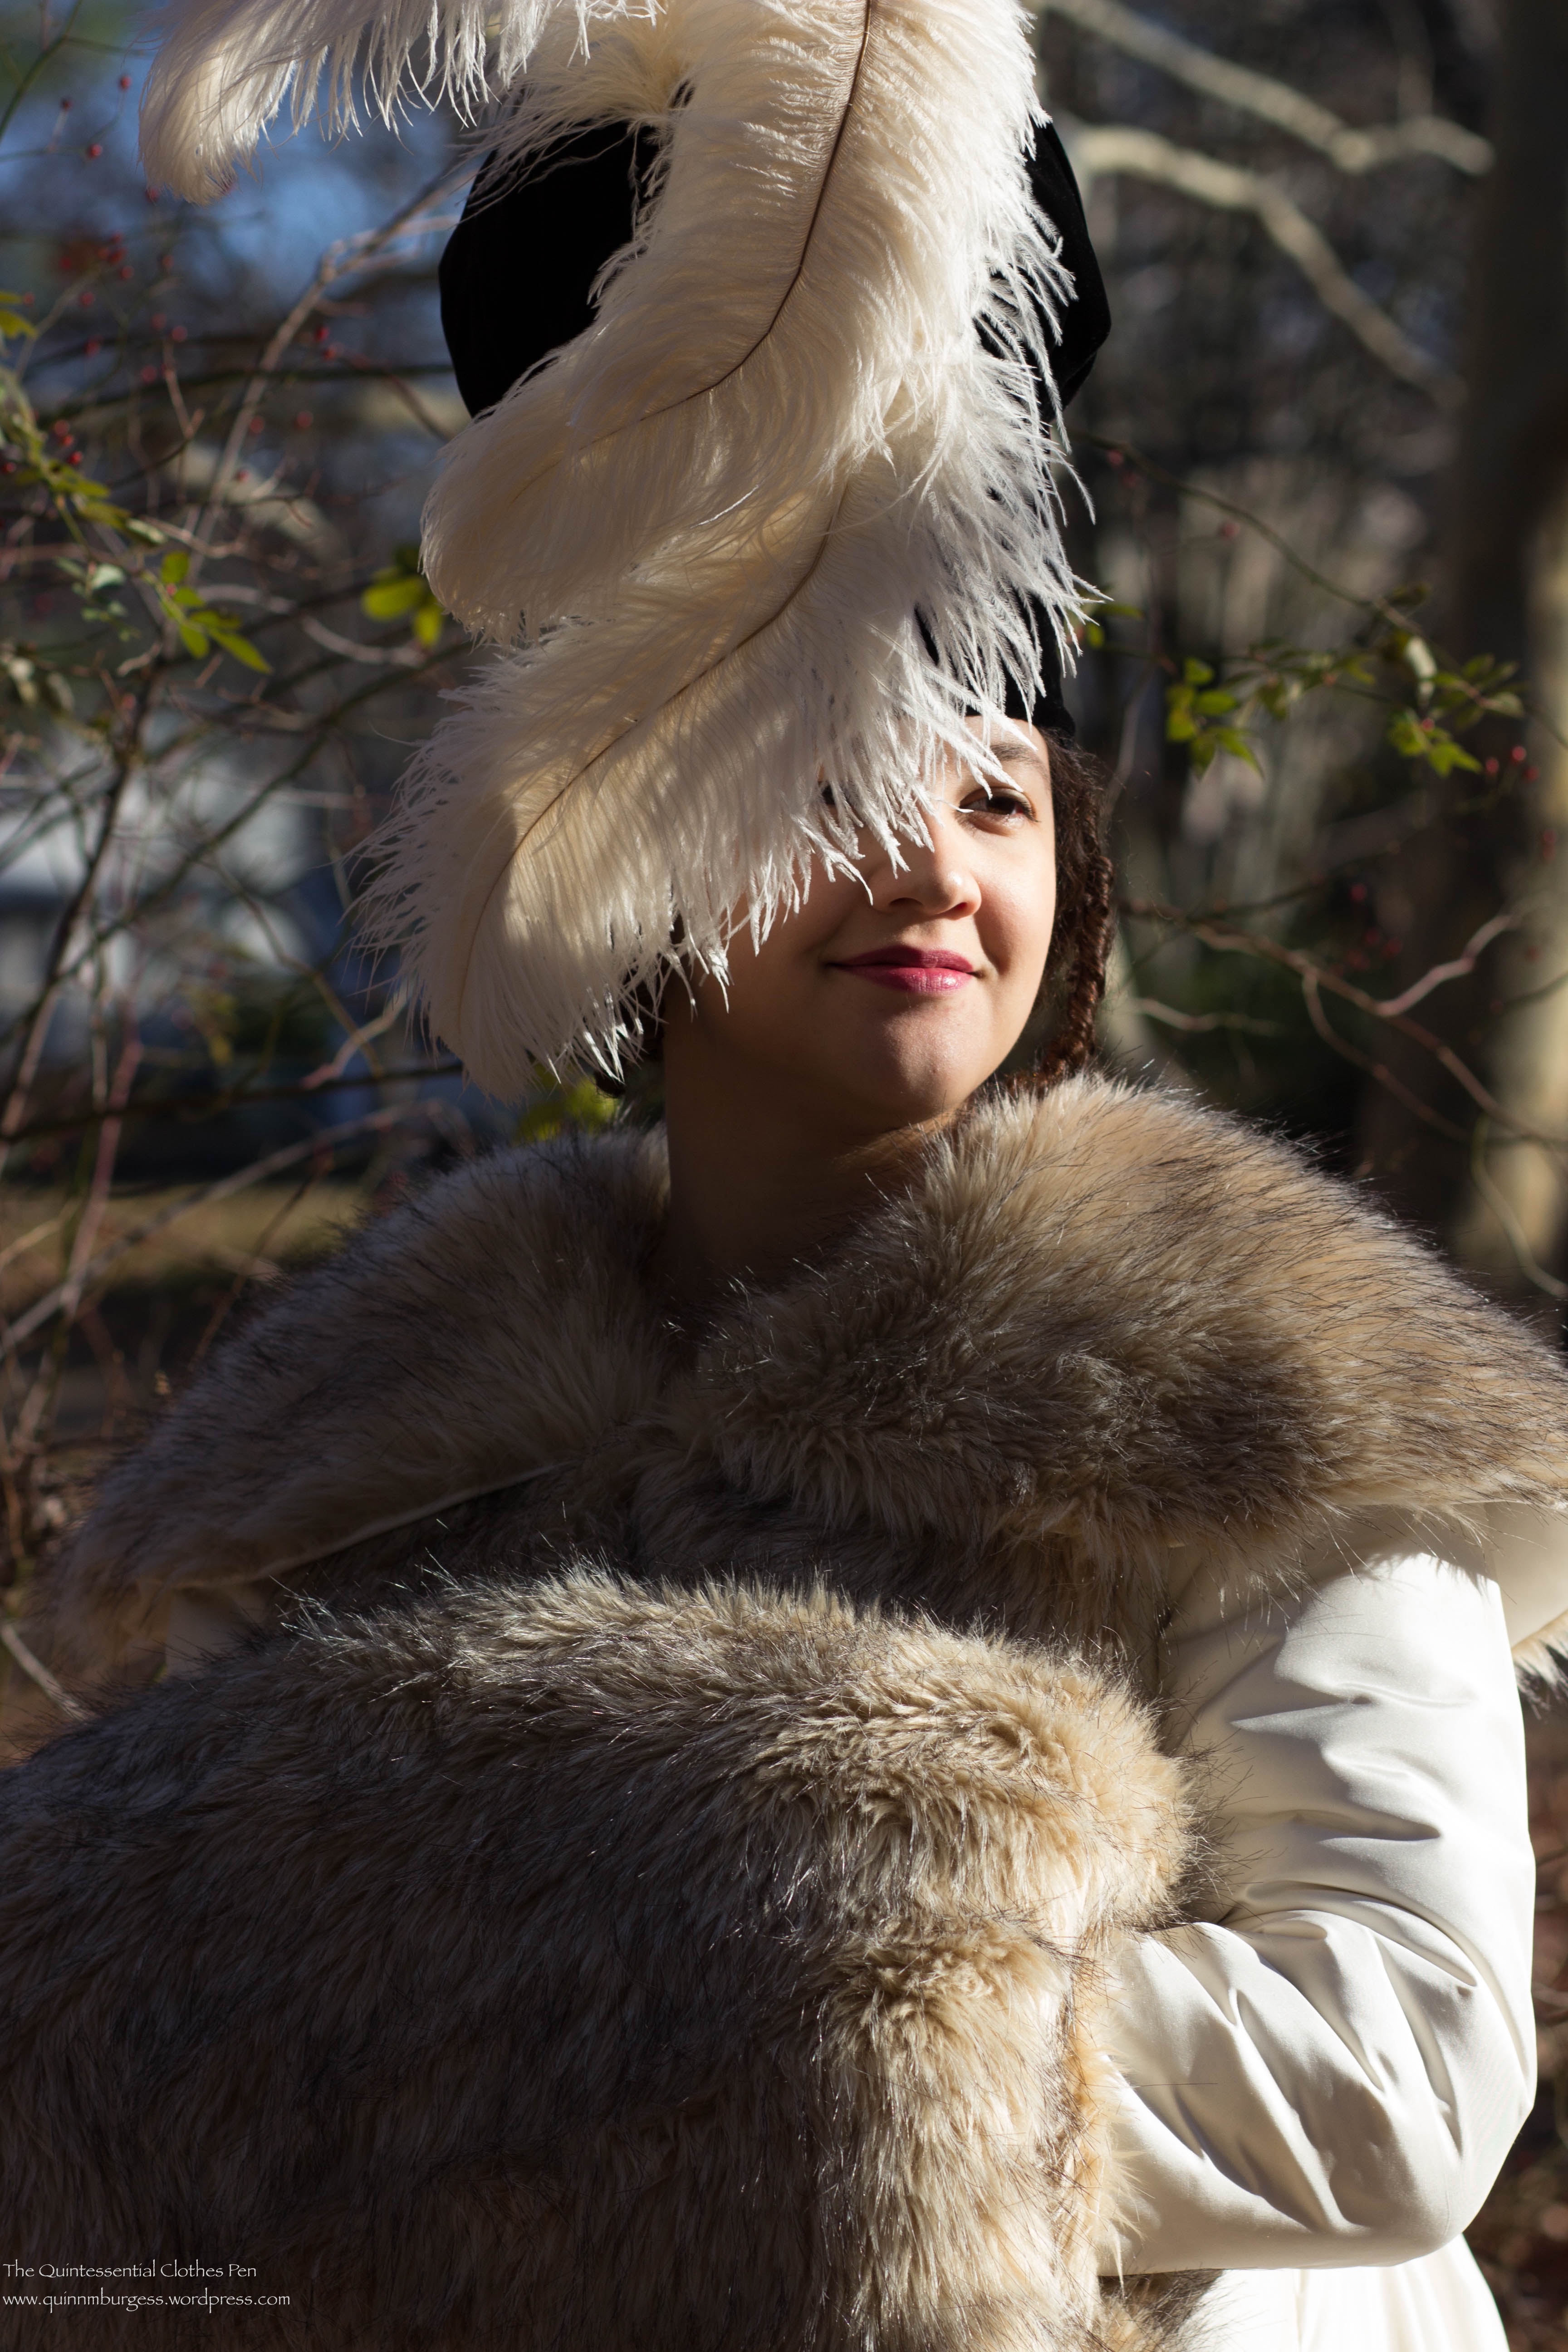
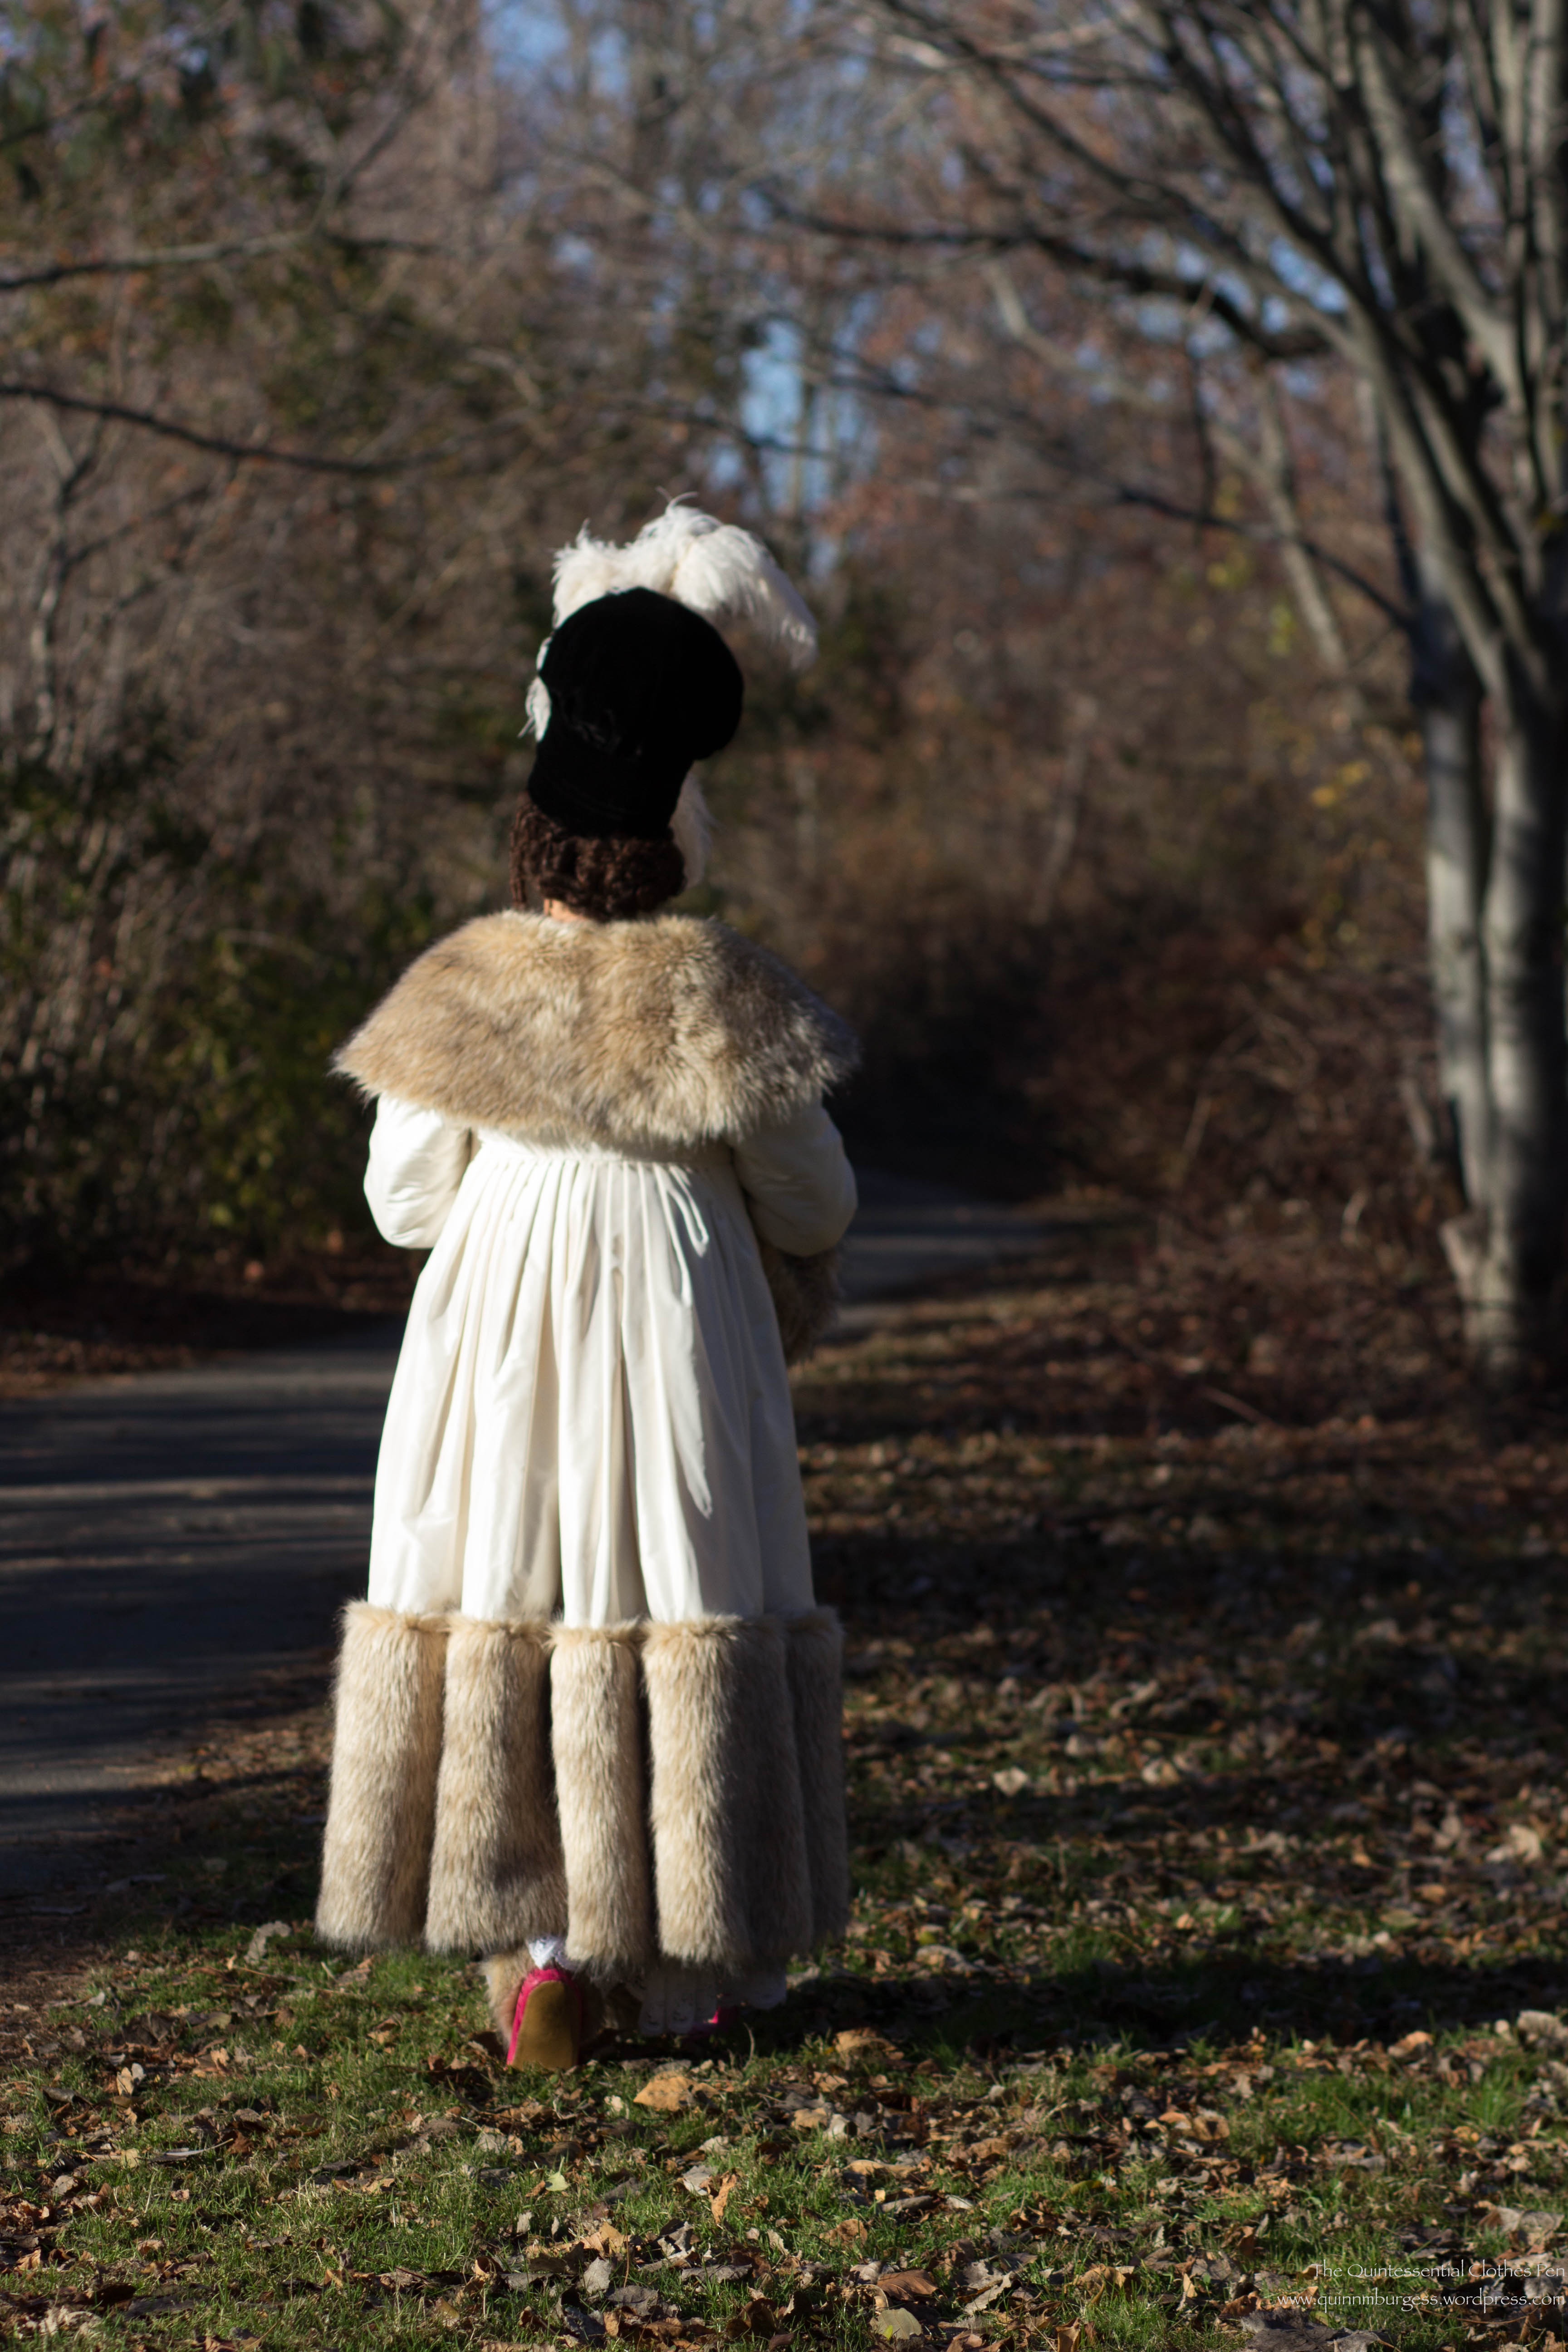
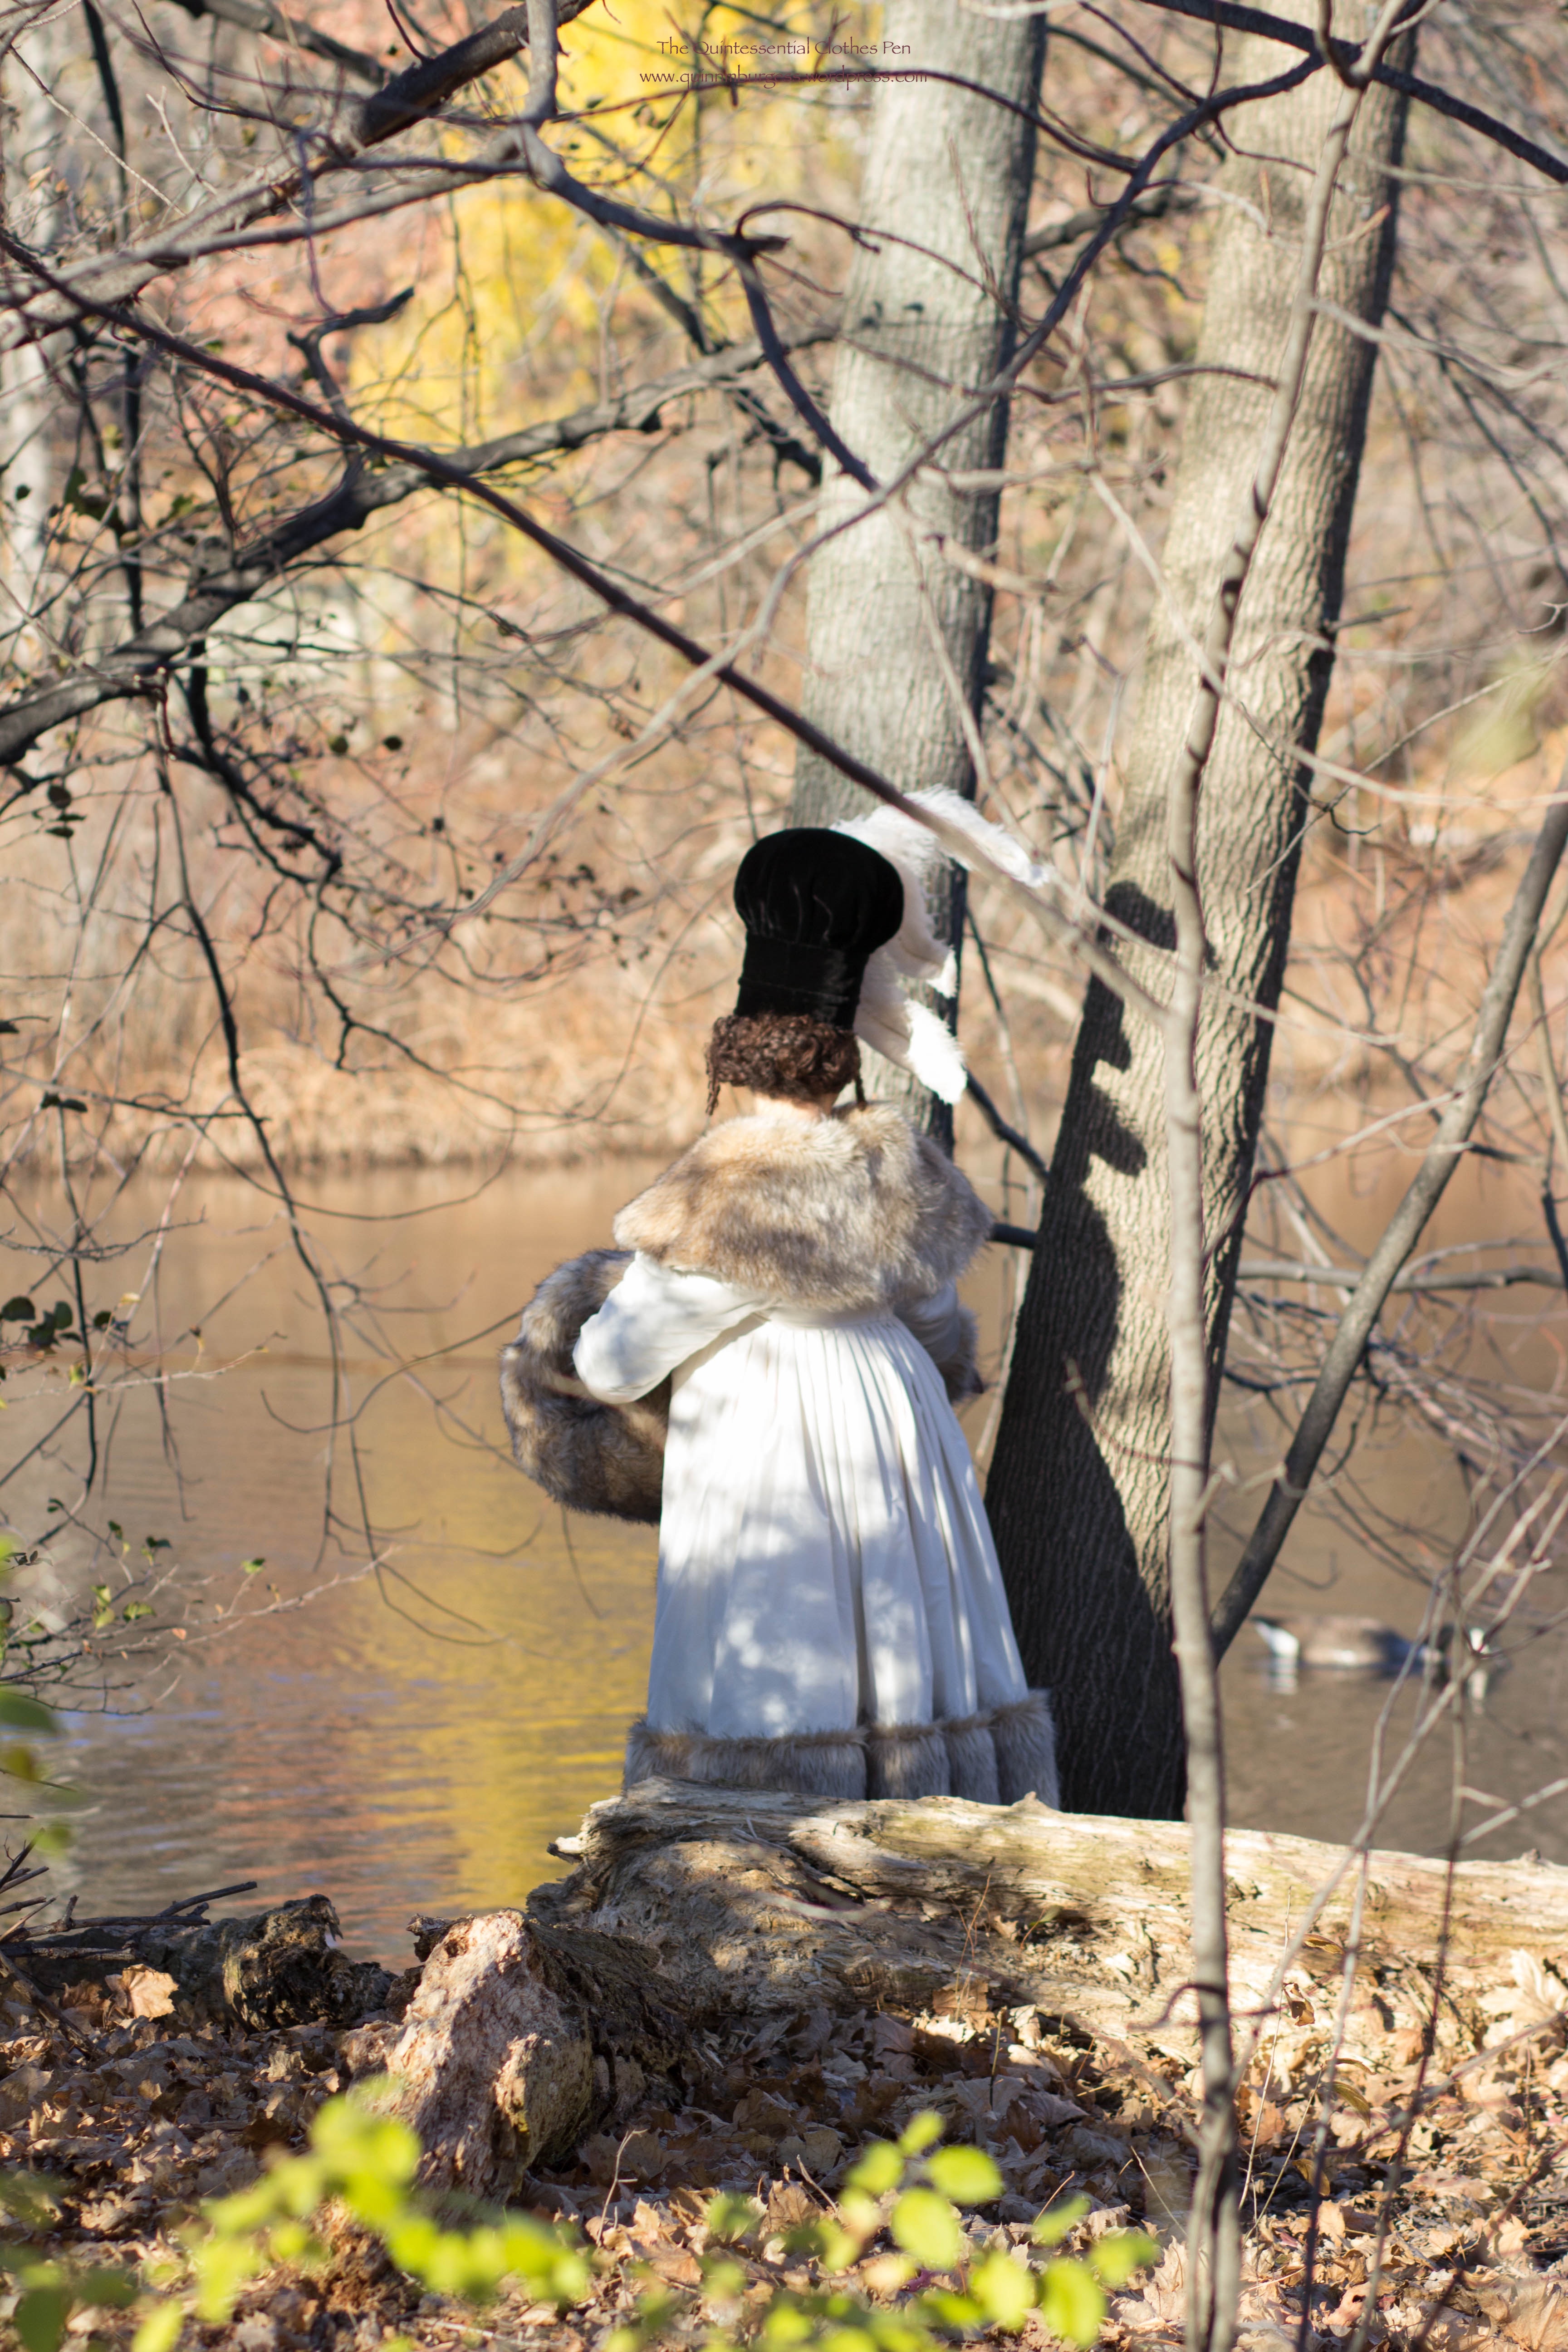
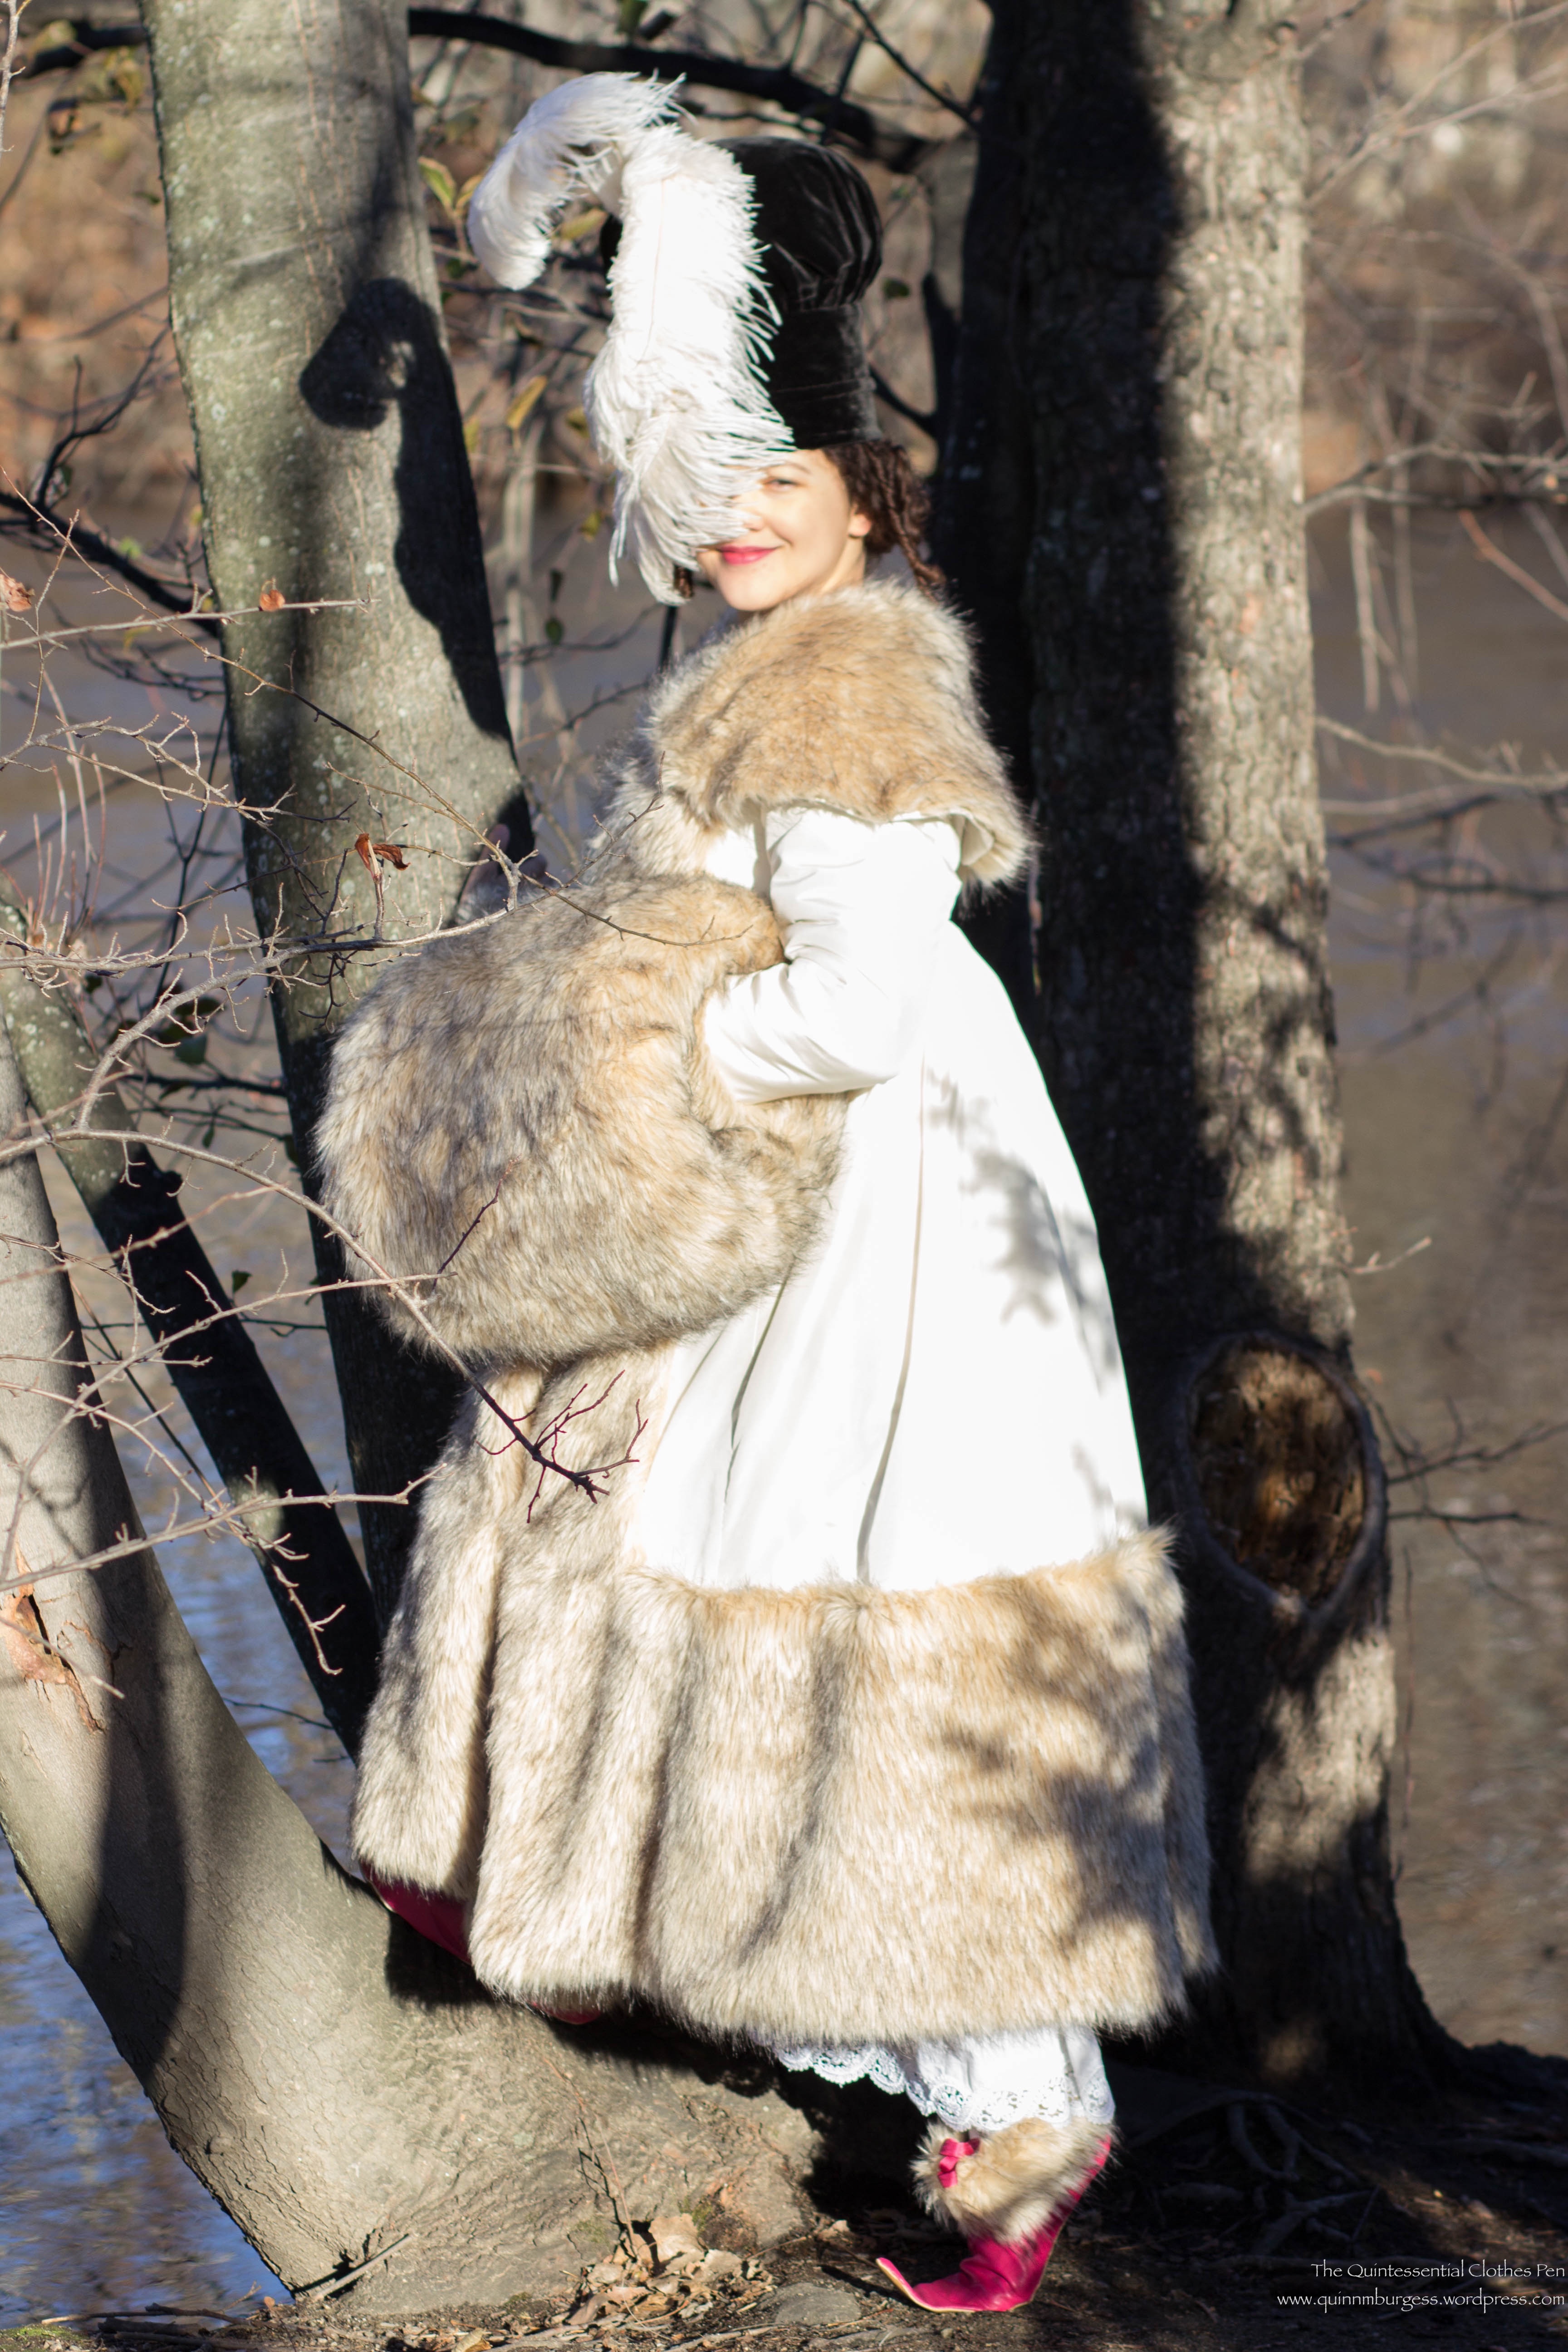
Today, I’m going to share more information about the unusual hat in my Vernet fashion plate.

IMG_1903

The caption reads “Toque de Velours.” I already had a rough translation in my head, basically “Hat of Velvet,” but thought I should double check the definitions before deciding on materials.

Toque:

1:  a woman’s small hat without a brim made in any of various soft close-fitting shapes

2:  tuque (a warm knitted usually pointed stocking cap)

3: a tall brimless hat worn by a chef —called also toque blanche

Velours:

1:  any of various fabrics with a pile or napped surface resembling velvet used in heavy weights for upholstery and curtains and in lighter weights for clothing; also  :  the article of clothing itself

2:  a fur felt (as of rabbit or nutria) finished with a long velvety nap and used especially for hats

Well, the hat does rather resemble a chef hat, doesn’t it? My rough translation was confirmed! Luckily, I had black silk velvet in my stash, which perfectly suited the project.

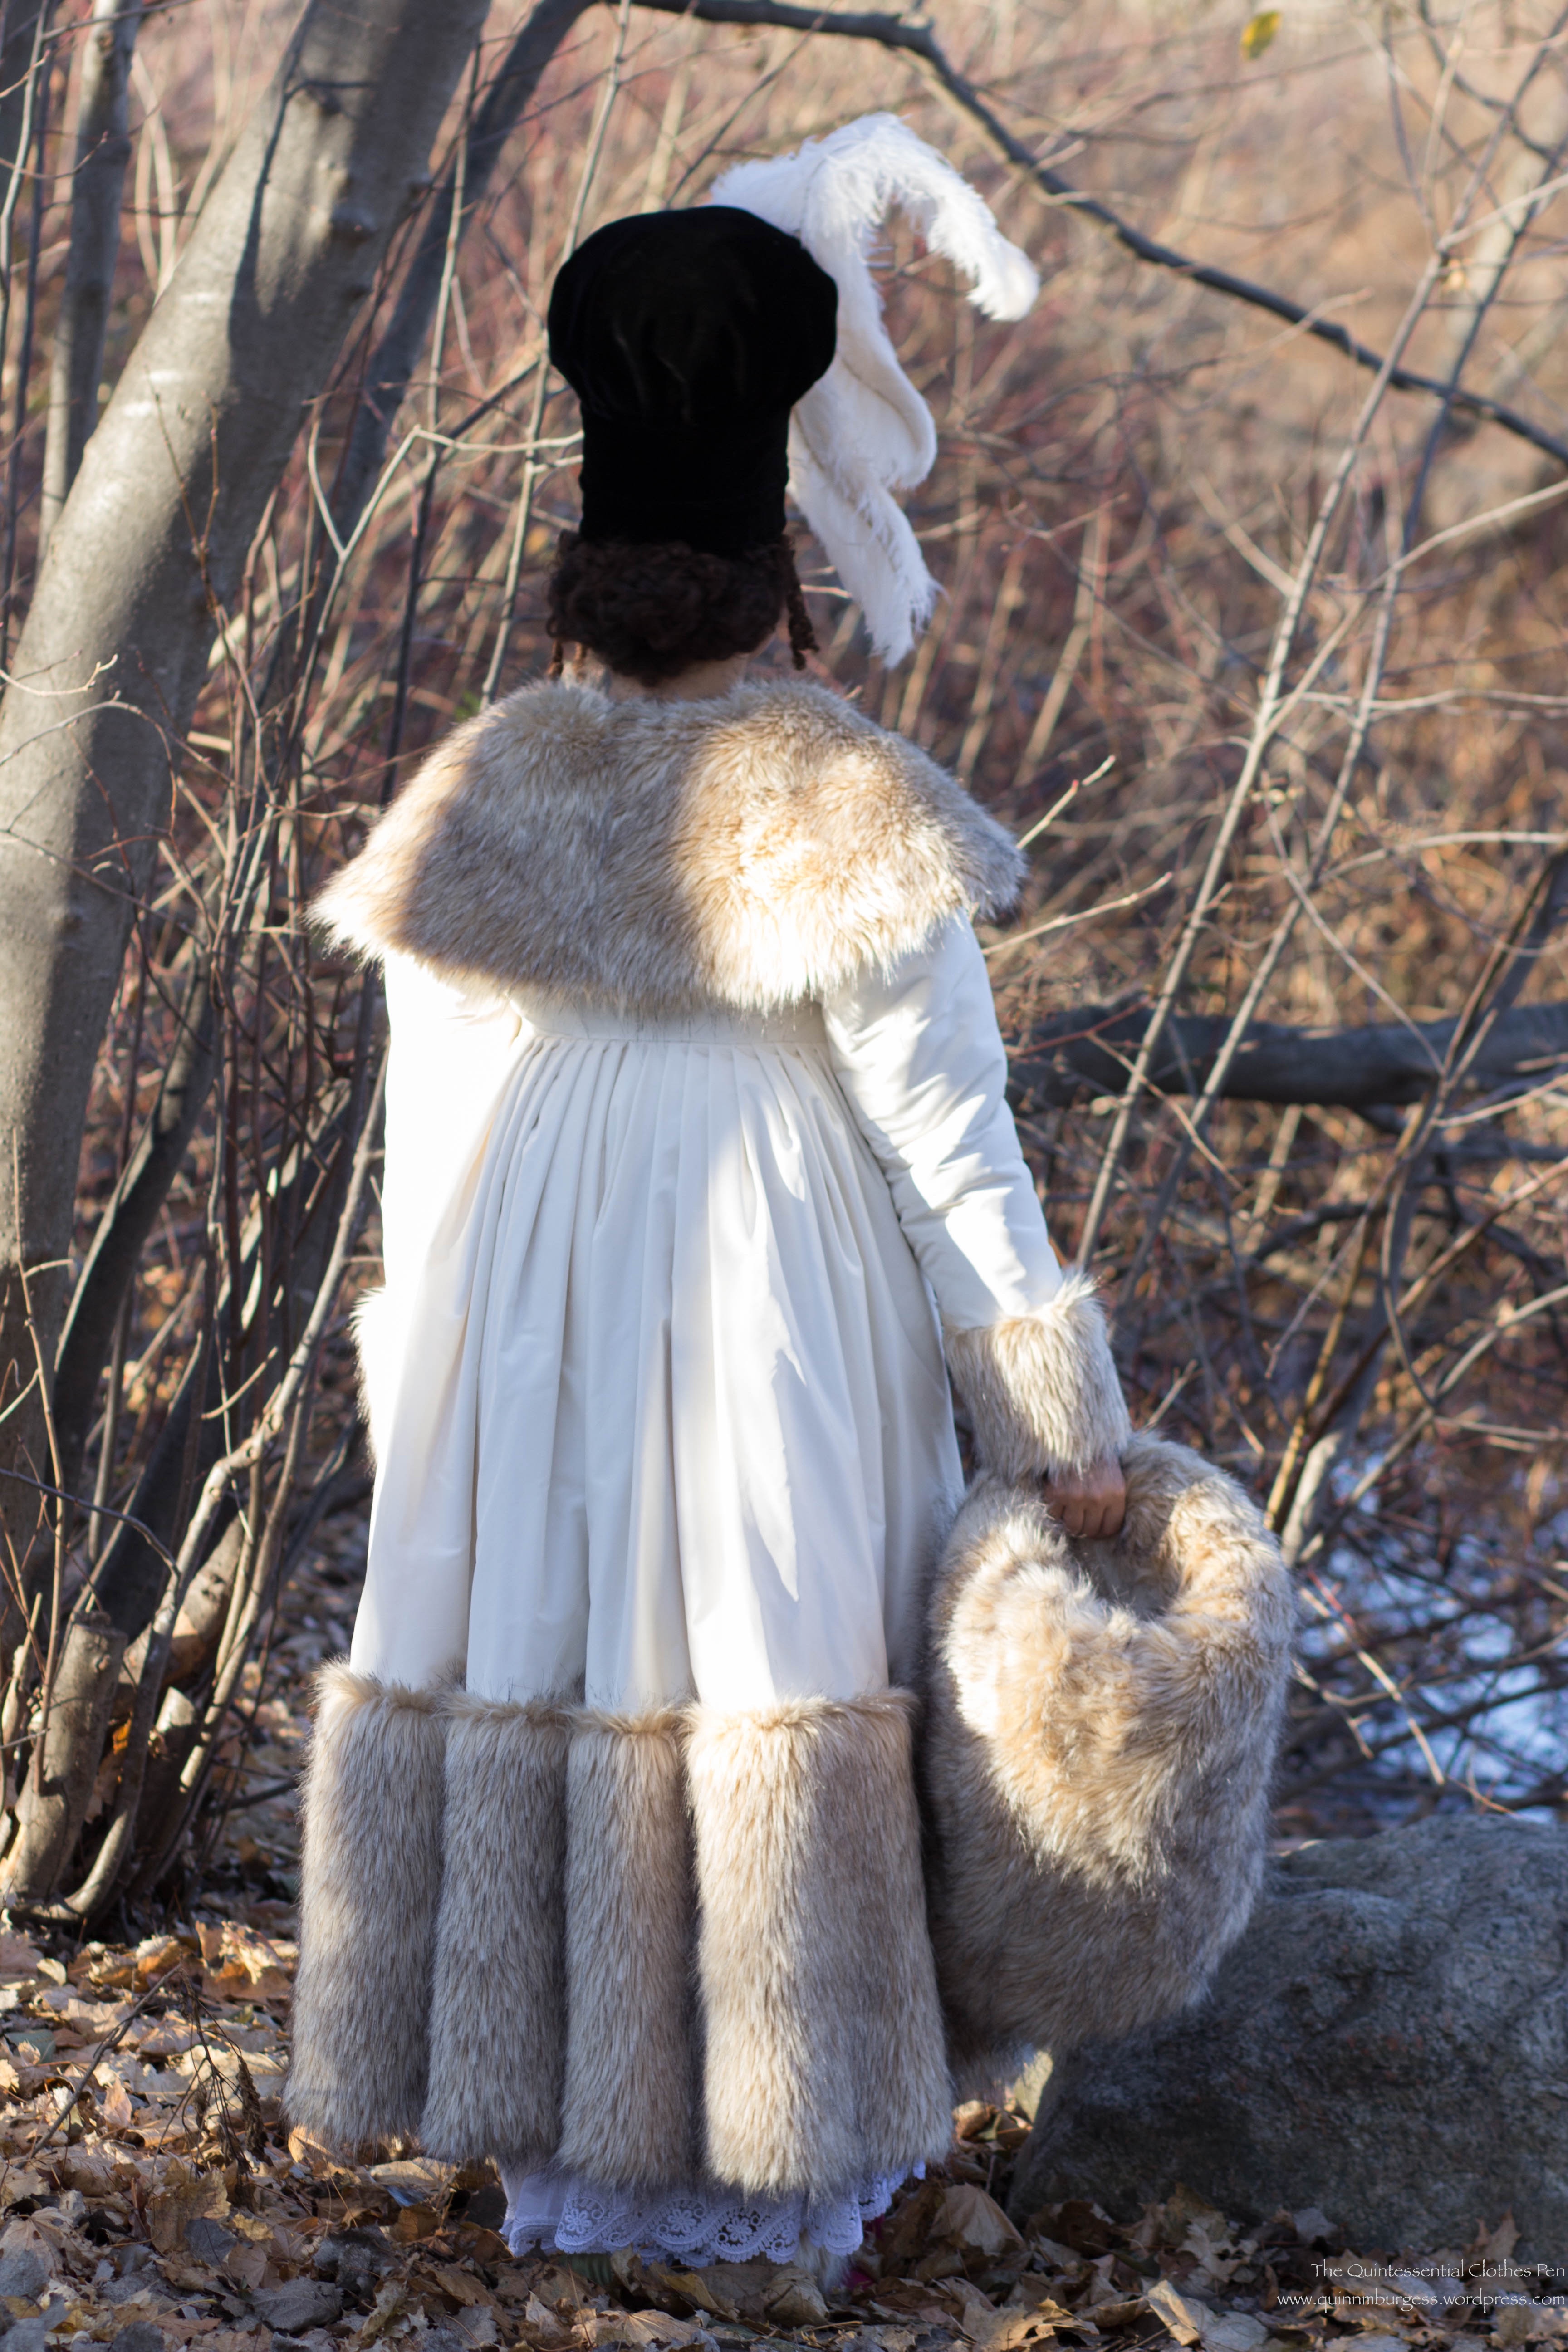
The hat base is buckram in the simple shape of an oval to fit my head with a flat tip on top. I don’t have pictures, but imagine the shape of a straight sided Lincoln-like top hat without the brim and you’ll have the right idea. The buckram is mulled with cotton flannel and wired around the head opening, tip, and partway up the side. The buckram support is about 8″ tall.

In addition, there is padding to support the poof on top. I chose to use polyester batting–it’s not at all accurate, but I had it on hand and it isn’t seen. There are concentric ovals on top that diminish in size with each layer as well as a few layers around the top of the buckram on the side to provide support for the tucks/pleats.
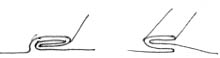
rolledpleats
The “stacked” pleat is on the right.

The poof is a large circle that is flat lined with a piece of muslin to help provide the support for the pleats. The pleats are about 1″ wide knife pleats that are then folded back on themselves to create a double pleat (this website calls this type of pleat a stacked pleat and is the source for the image). To determine the type of pleat, I played around with my fabric until I found a method that created an effect like the fashion plate, which is like fans or slices (you can see it in this post). Then I eyeballed how many to do, pinning and re-pinning until the pleats were evenly spaced and the poof fit into the side of my hat (no math here, I avoid it as much as possible most of the time).

The definition on the sides (at the head opening and about 1.5″ up from the head opening) was created by inserting “cording” under the velvet. My “cording” is actually modern acrylic yarn in sunshine yellow (like the batting, I made this choice because I had the materials on hand, it worked, and it will not be seen–but it is not accurate). I believe there are two or three lengths of yarn in each single section of “cording” to get the right thickness to show under the velvet.

IMG_1887
We took this photo specifically to capture the detail of the hat construction (usually the black all washes together, eliminating evidence of all the detail).

The rest is just sewing! The hat is entirely hand sewn, with the layers of velvet either tacked to the mulling or stitched through to the interior of the buckram base. Once I had finished the exterior sewing, I whipped up a lining of black silk  to tidy up the inside.

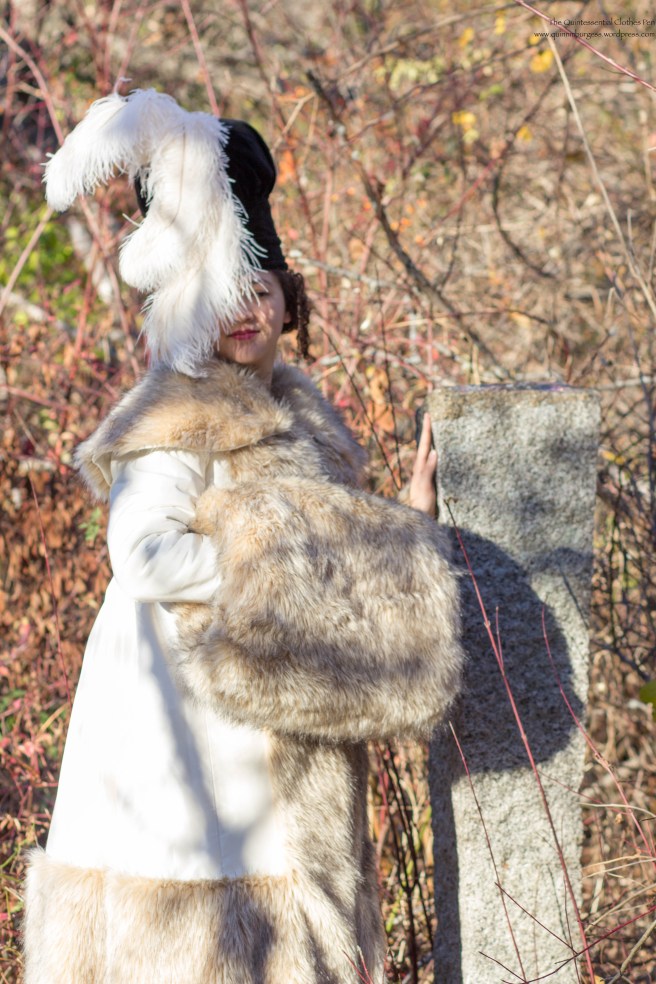
The last step was to trim the hat with the immense ostrich feathers depicted in the fashion plate. I ordered my feathers from Lamplight Feather, which I highly recommend (quick shipping, good quality, and great selection). The hat has 6 total feathers, each 17″-21″in length. Each plume is two feathers sewn together along the central stem before being shaped and sewn to the hat. The trickiest part was shaping the feathers to achieve the shape in the plate. Each plume is shaped so that it does an 180 degree turn (the plumes are attached to the hat standing up, but then are turned downward) in addition to the side sweep shape. As you can see, the wind occasionally blew lots of feather fluff into my face during the photo shoot, but it was totally worth it, to wear such lovely feathers.
IMG_1957
Feathers!

I constructed the hat such that it would sit almost horizontal across my head. It’s pretty light in terms of weight and is not uncomfortable to wear, being sized perfectly to fit my head. It also comes down far enough to be quite stable: even with the breeze and moving my head around there was no fear of it falling off.

As fun and silly as it is, I don’t really see a use for it in regular Regency wear. I will likely remove the feathers to use for another project someday (also partly because it would be hard to store the hat nicely with the feathers still attached). I’ve toyed with the idea of removing the poof (and maybe making a tam or turban or something out of it, or just sticking it back in my stash with the rest of the velvet) and using the buckram base with the velvet sides to make a shako style Regency hat. I have no immediate plans to put these ideas into action, except for removing the feathers, which I really should do soon, so I can put the hat away!
Vernet Project: Photo Shoot!

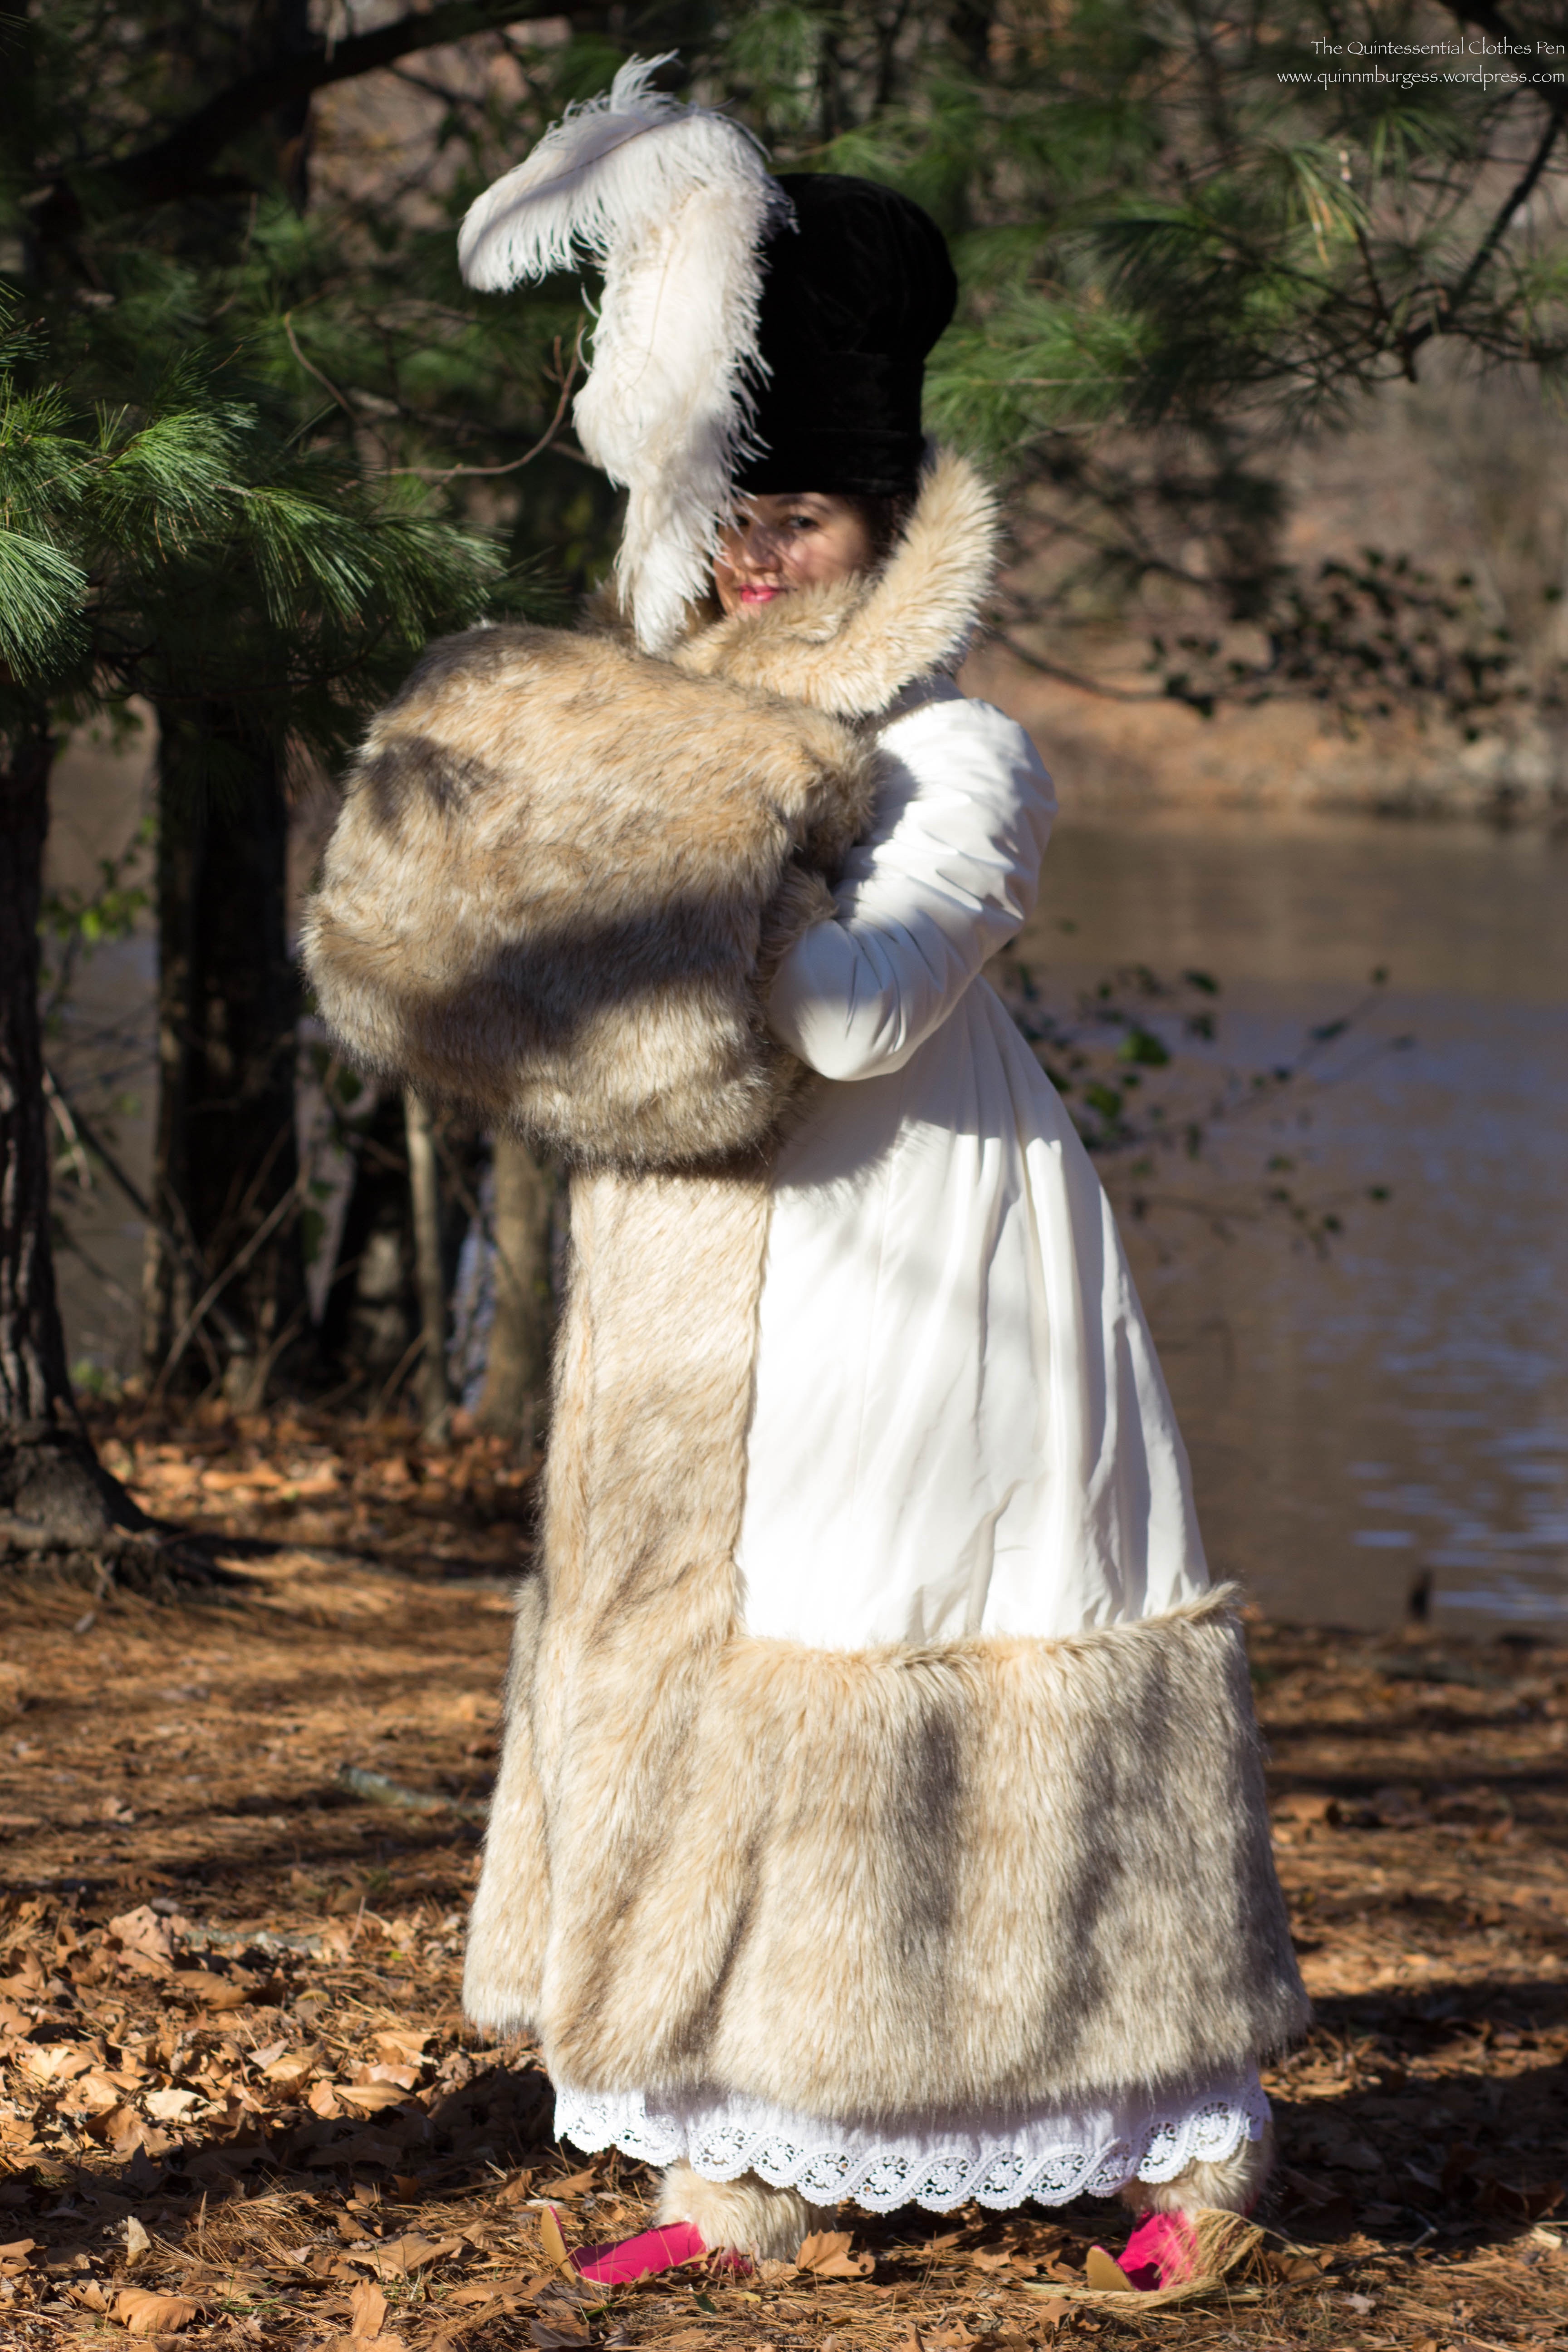
I thought I’d start the new year off with photos from my Vernet Ensemble photo shoot. (I’ll be doing separate posts with details about the construction of the ensemble as the year progresses.) I’m so incredibly pleased with my ensemble and with the quality of the pictures. I often have lovely pictures after events and when documenting sewing projects, but these are extra special in terms of the sharpness of the images, the clear colors, and the fun use of a historical lens.

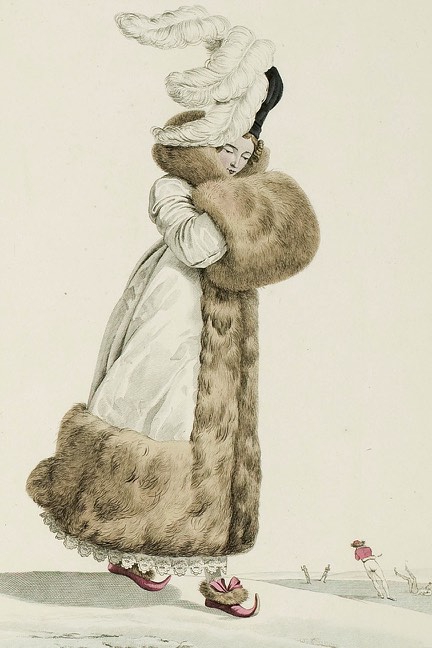
Hopefully, you were following along with the release of finished ensembles in December, but in case you missed mine or haven’t figured out yet which fashion plate I was recreating, here it is.

Plate No. 20 “Toque de Velours. Witz-choura de Satin.”

164-0000-021 - Version 2

Below is the “official release” picture. I did my best to mimic the pose of the fashion plate, but it was really hard to wrap my brain around the left and right of things in my own pose relative to the fashion plate. Left was right and right was left, and in the end we did the best we could and called it done. I think we actually did it right, it’s just that I’m facing the camera at a different angle. It still boggles my brain to try and figure it out!

IMG_1915 blog

Unfortunately, there was no snow in November when we took these pictures and so I didn’t get ice skaters falling over behind me (also, I would have had to find ice skaters)… but I did get unfrozen water, and you’ll just have to imagine the ice and the skaters!

IMG_1903

IMG_1902

IMG_1936

IMG_1978

IMG_1963

IMG_1972

IMG_1985

IMG_2004

IMG_2020

These last few pictures with the blurred background were taken using a reproduction 19th century Petzval lens. You can read more about the lens and how it causes this effect here, at my photographer’s blog. 

IMG_1928

IMG_1922

IMG_1917

I am so incredibly blessed that to have a friend that joyfully enjoys practicing her photography skills with her nice digital camera (with fancy and historical lenses, to boot!) by taking pictures of my endeavors, amongst other things. She happily came over one afternoon in November just to accompany me for the photo shoot and take these absolutely gorgeous pictures. Thank you!!!

HSF/M #12: Green Regency Shawl

IMG_2034

I was inspired this fall to make an extra long Regency shawl. Others around the blog world have done this before–it’s certainly not a new idea I came up with so I can’t take credit for the creativity of sewing two pashminas together to make one longer one.

IMG_2032

I started by looking at my Pinterest boards to see what colors popped up often in fashion plates and extant shawls so I could pick a reasonably Regency color for my own creation (this board has a number of fashion plates and extant shawls). Common colors I saw were cream, dark red, grassy green, and dark blue. Occasional other colors included vibrant autumnal orange and rich yellow.

The second step was to consider the colors in my current Regency wardrobe so I could pick a color shawl that would harmonize with my outfits. Lastly, I looked at what was available on eBay for available color options and with sufficiently wide borders around all the edges to have the look of a Regency shawl. I found a few that matched my research but the color that best fit all of my criteria was grassy green. This shawl from the Met is a very similar in color to mine and was an inspiration in terms of border proportions.

The shawl fulfills the HSF/M Challenge #12: Re-Do, with a re-do of Challenge #7: Accessorize. Just the facts:

Fabric: Two pashminas.

Pattern: None.

Year: c. 1805

Notions: Thread.

How historically accurate is it?: It definitely passes Leimomi’s test of being recognizable in its own time in general and in terms of the color and border trim proportions, but most shawls would have been silk or wool, which mine is not. Also, since it is two shawls sewn together, it has an inaccurate seam down the back. So we’ll sway 75%.

Hours to complete: Less than 1.

First worn: December 5, 2015.

Total cost: About $10-$15.

IMG_2062

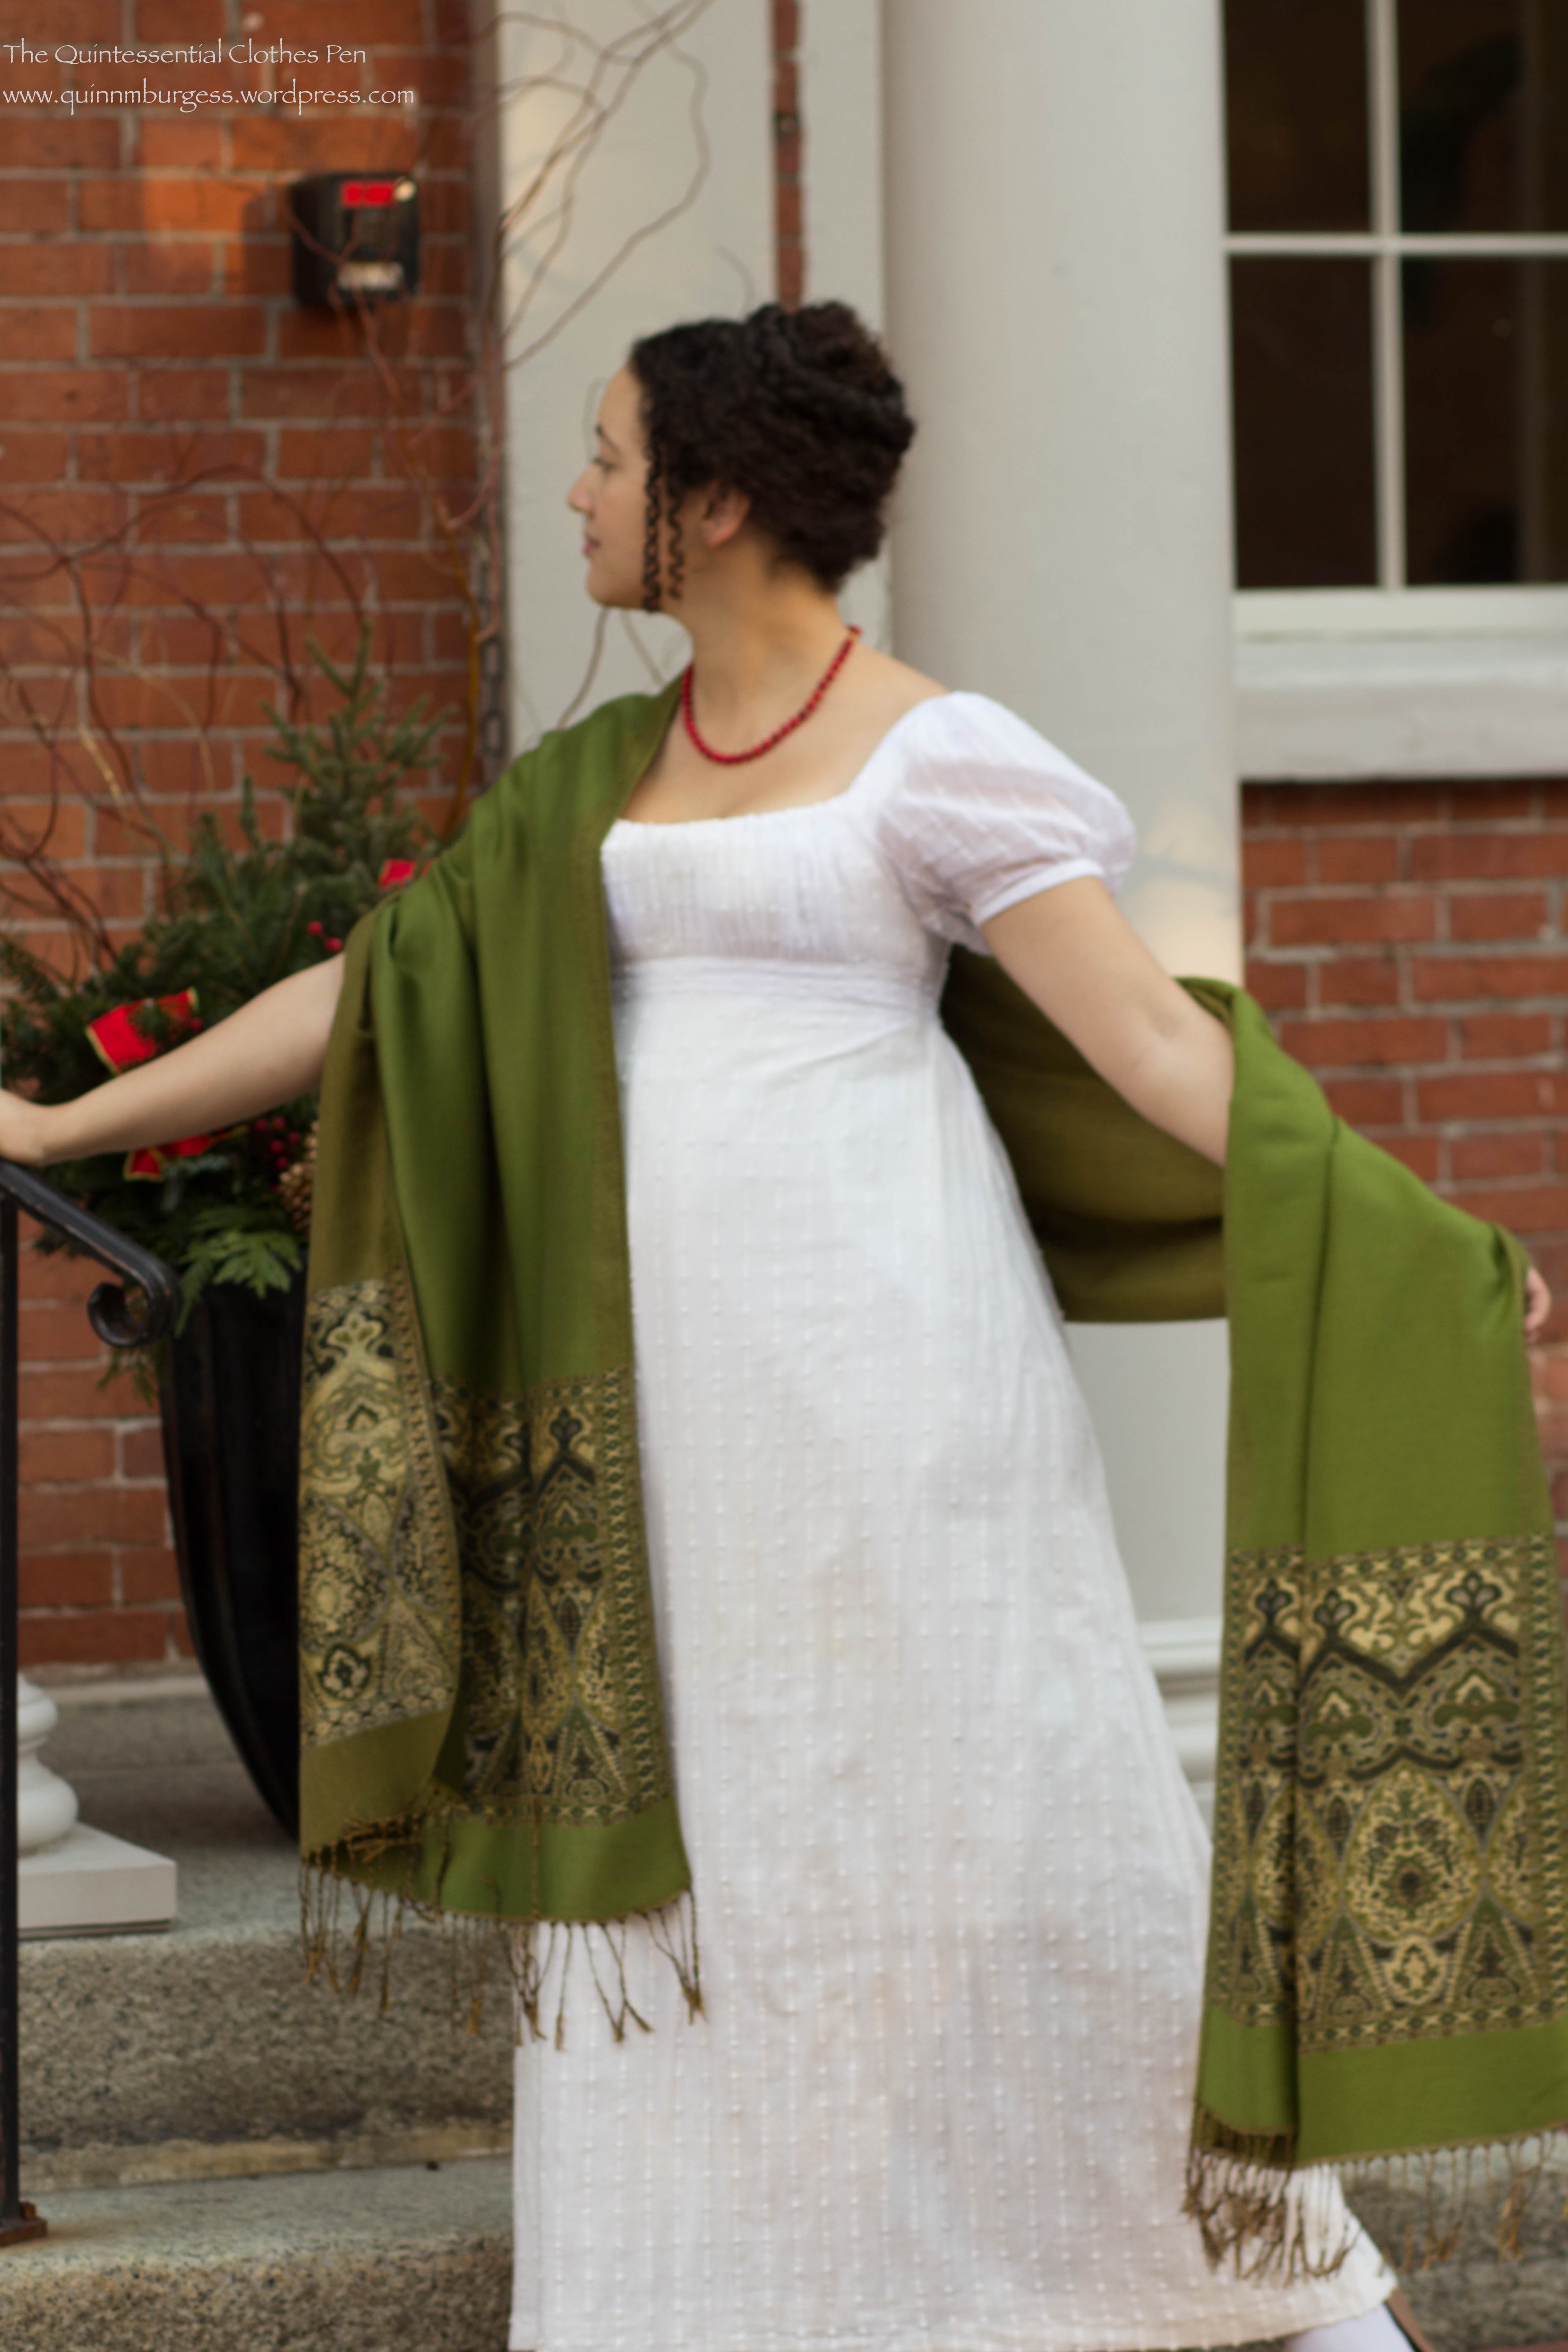
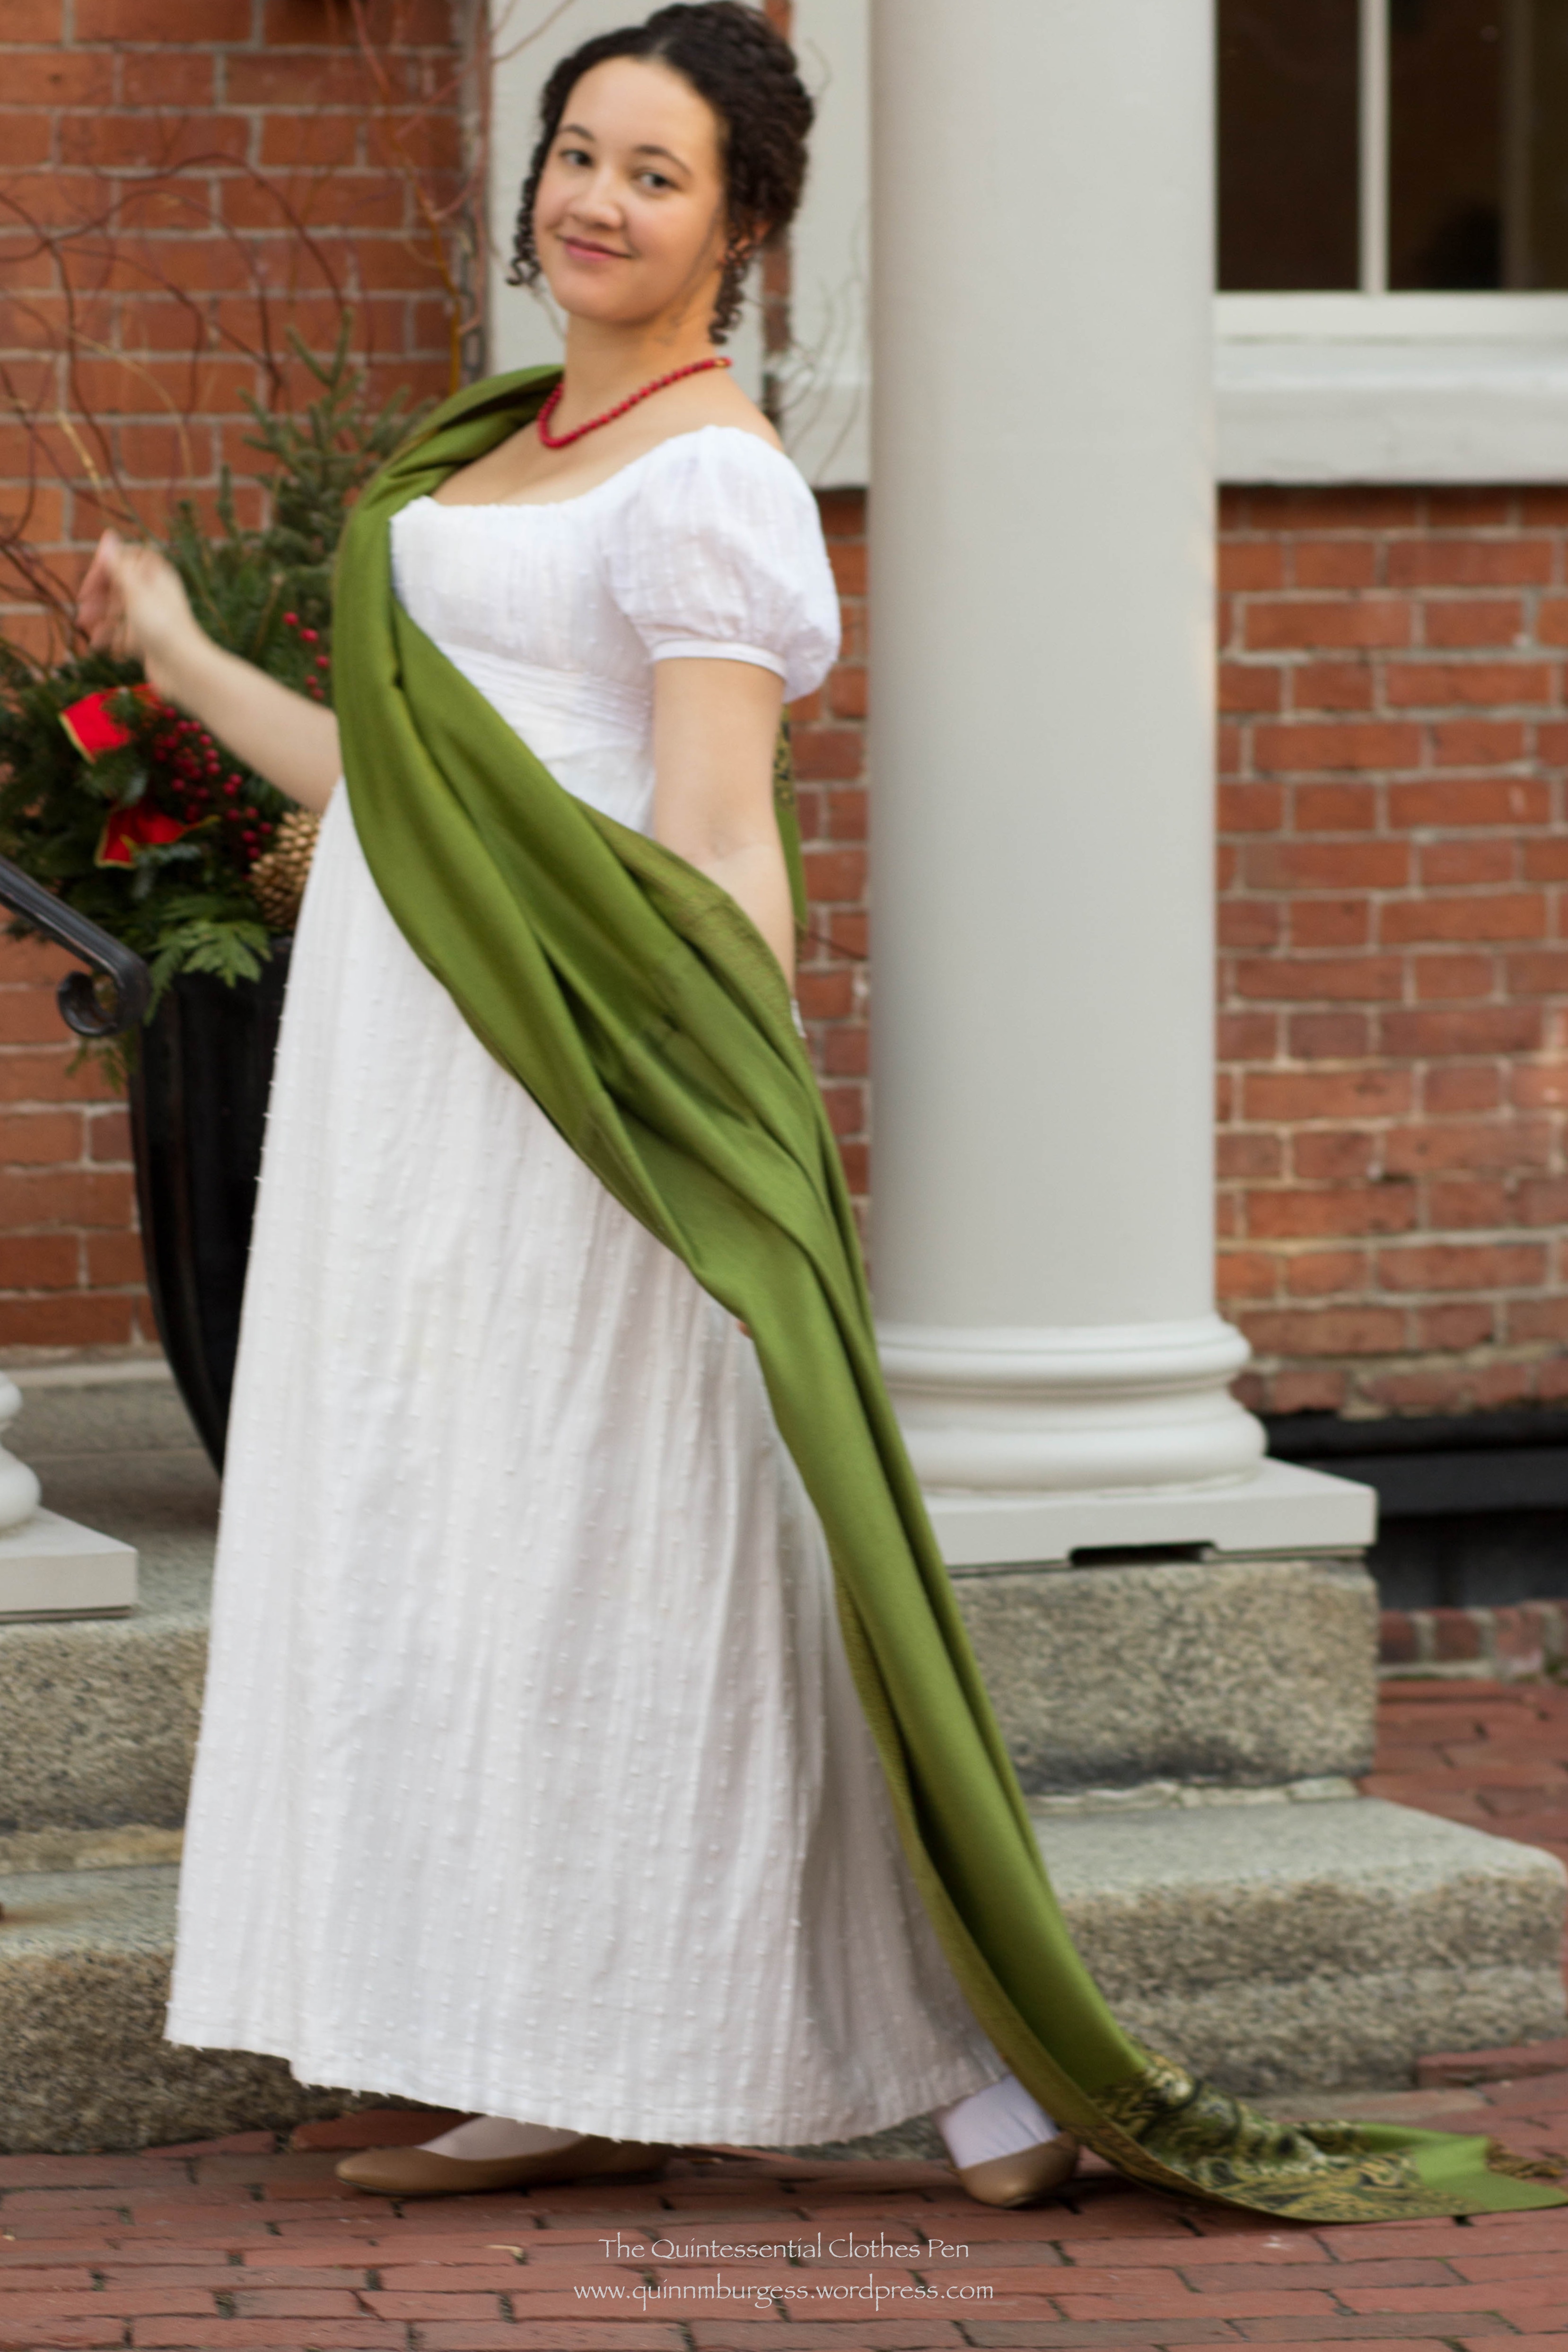
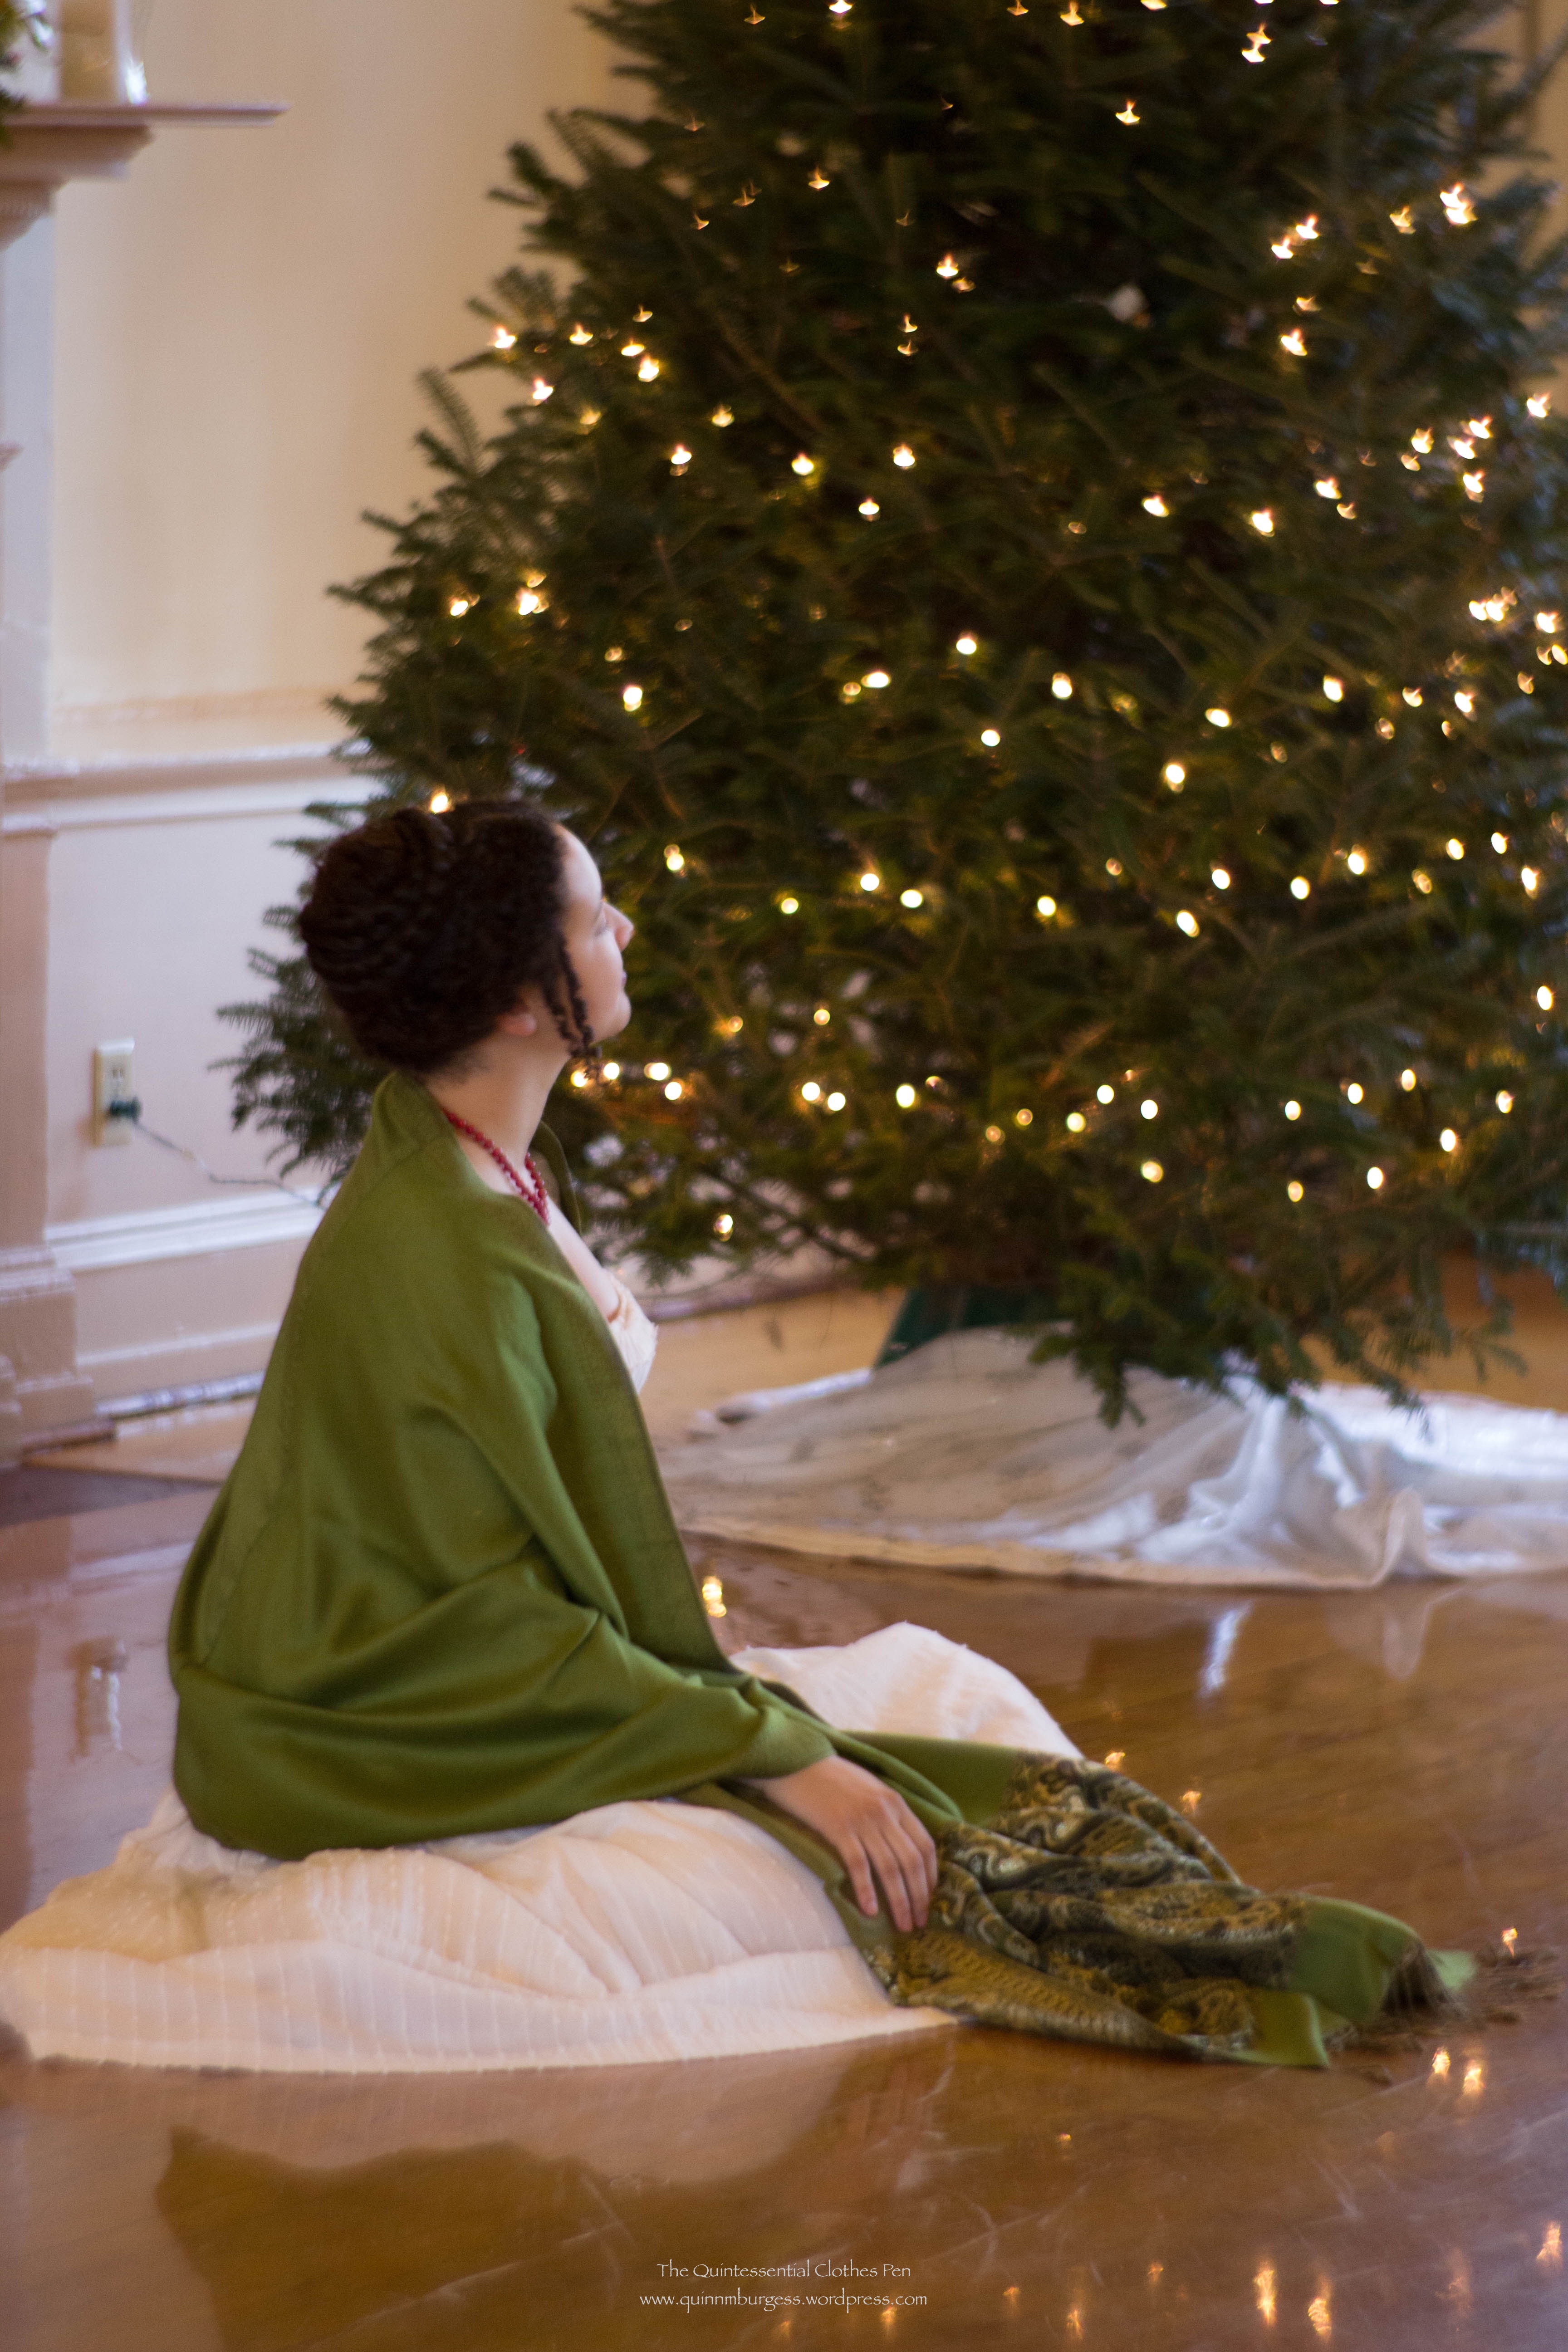
I was dancing in a Regency period hall in December and it was the perfect opportunity to get some of the classic Regency shawl pose pictures. (The hall was decorated for the holidays, which matched my accessories perfectly!) It’s always amusing to me how the shawls are often depicted halfway off the wearer or draped artfully but with no apparent desire to keep warm.

IMG_2069

I wore my 1812 square neck dress but removed the pink sash that I’ve had on it for the last two years or so. It was nice to go back to a plain white dress for a change. It’s not plain at all with the new shawl!

I took the time to create a fun hairstyle with small diameter face framing curls and an extra braid of fake hair. I was very pleased with the overall shape and silhouette. (I’ll be sharing more about how I made the curls at some point in 2016 when I post more information about my Vernet ensemble and the photo shoot of the completed outfit.)

IMG_2078

IMG_2080

I had a blast dancing all day in such a beautiful space. When I cooled off between dances the shawl was great to keep me warm. And I love how festive it looks with the red necklace! I hope your holidays are full of fun, joy, and blessings!

IMG_2089

Visiting WWII For A Day

I was all ready last weekend to create lots of picture heavy posts for the blog, and then my computer seriously died and required hard drive replacement. Luckily, Mr. Q takes care of me and established external backups a long time ago, so I didn’t loose anything (whew!!!). The store was able to fix my computer fairly quickly, but I’d lost the weekend to go through pictures and create posts.

So today is a quicker post with pictures from a WWII event a few weeks ago. WWII is a period I hardly ever visit and don’t have clothes for in my closet, so I was grateful to be able to borrow things from friends and Mr. Q’s closet (he had a polo shirt that looked way better than anything in my closet for this outfit!). The only thing I had was shoes and stockings–thanks guys–I would have been sad indeed without help!

IMG_0040

We were a mix of female War Correspondents and Women’s Army Corps. Good thing War Correspondents didn’t have uniforms, because my outfit was a bit thrown together…

IMG_0043

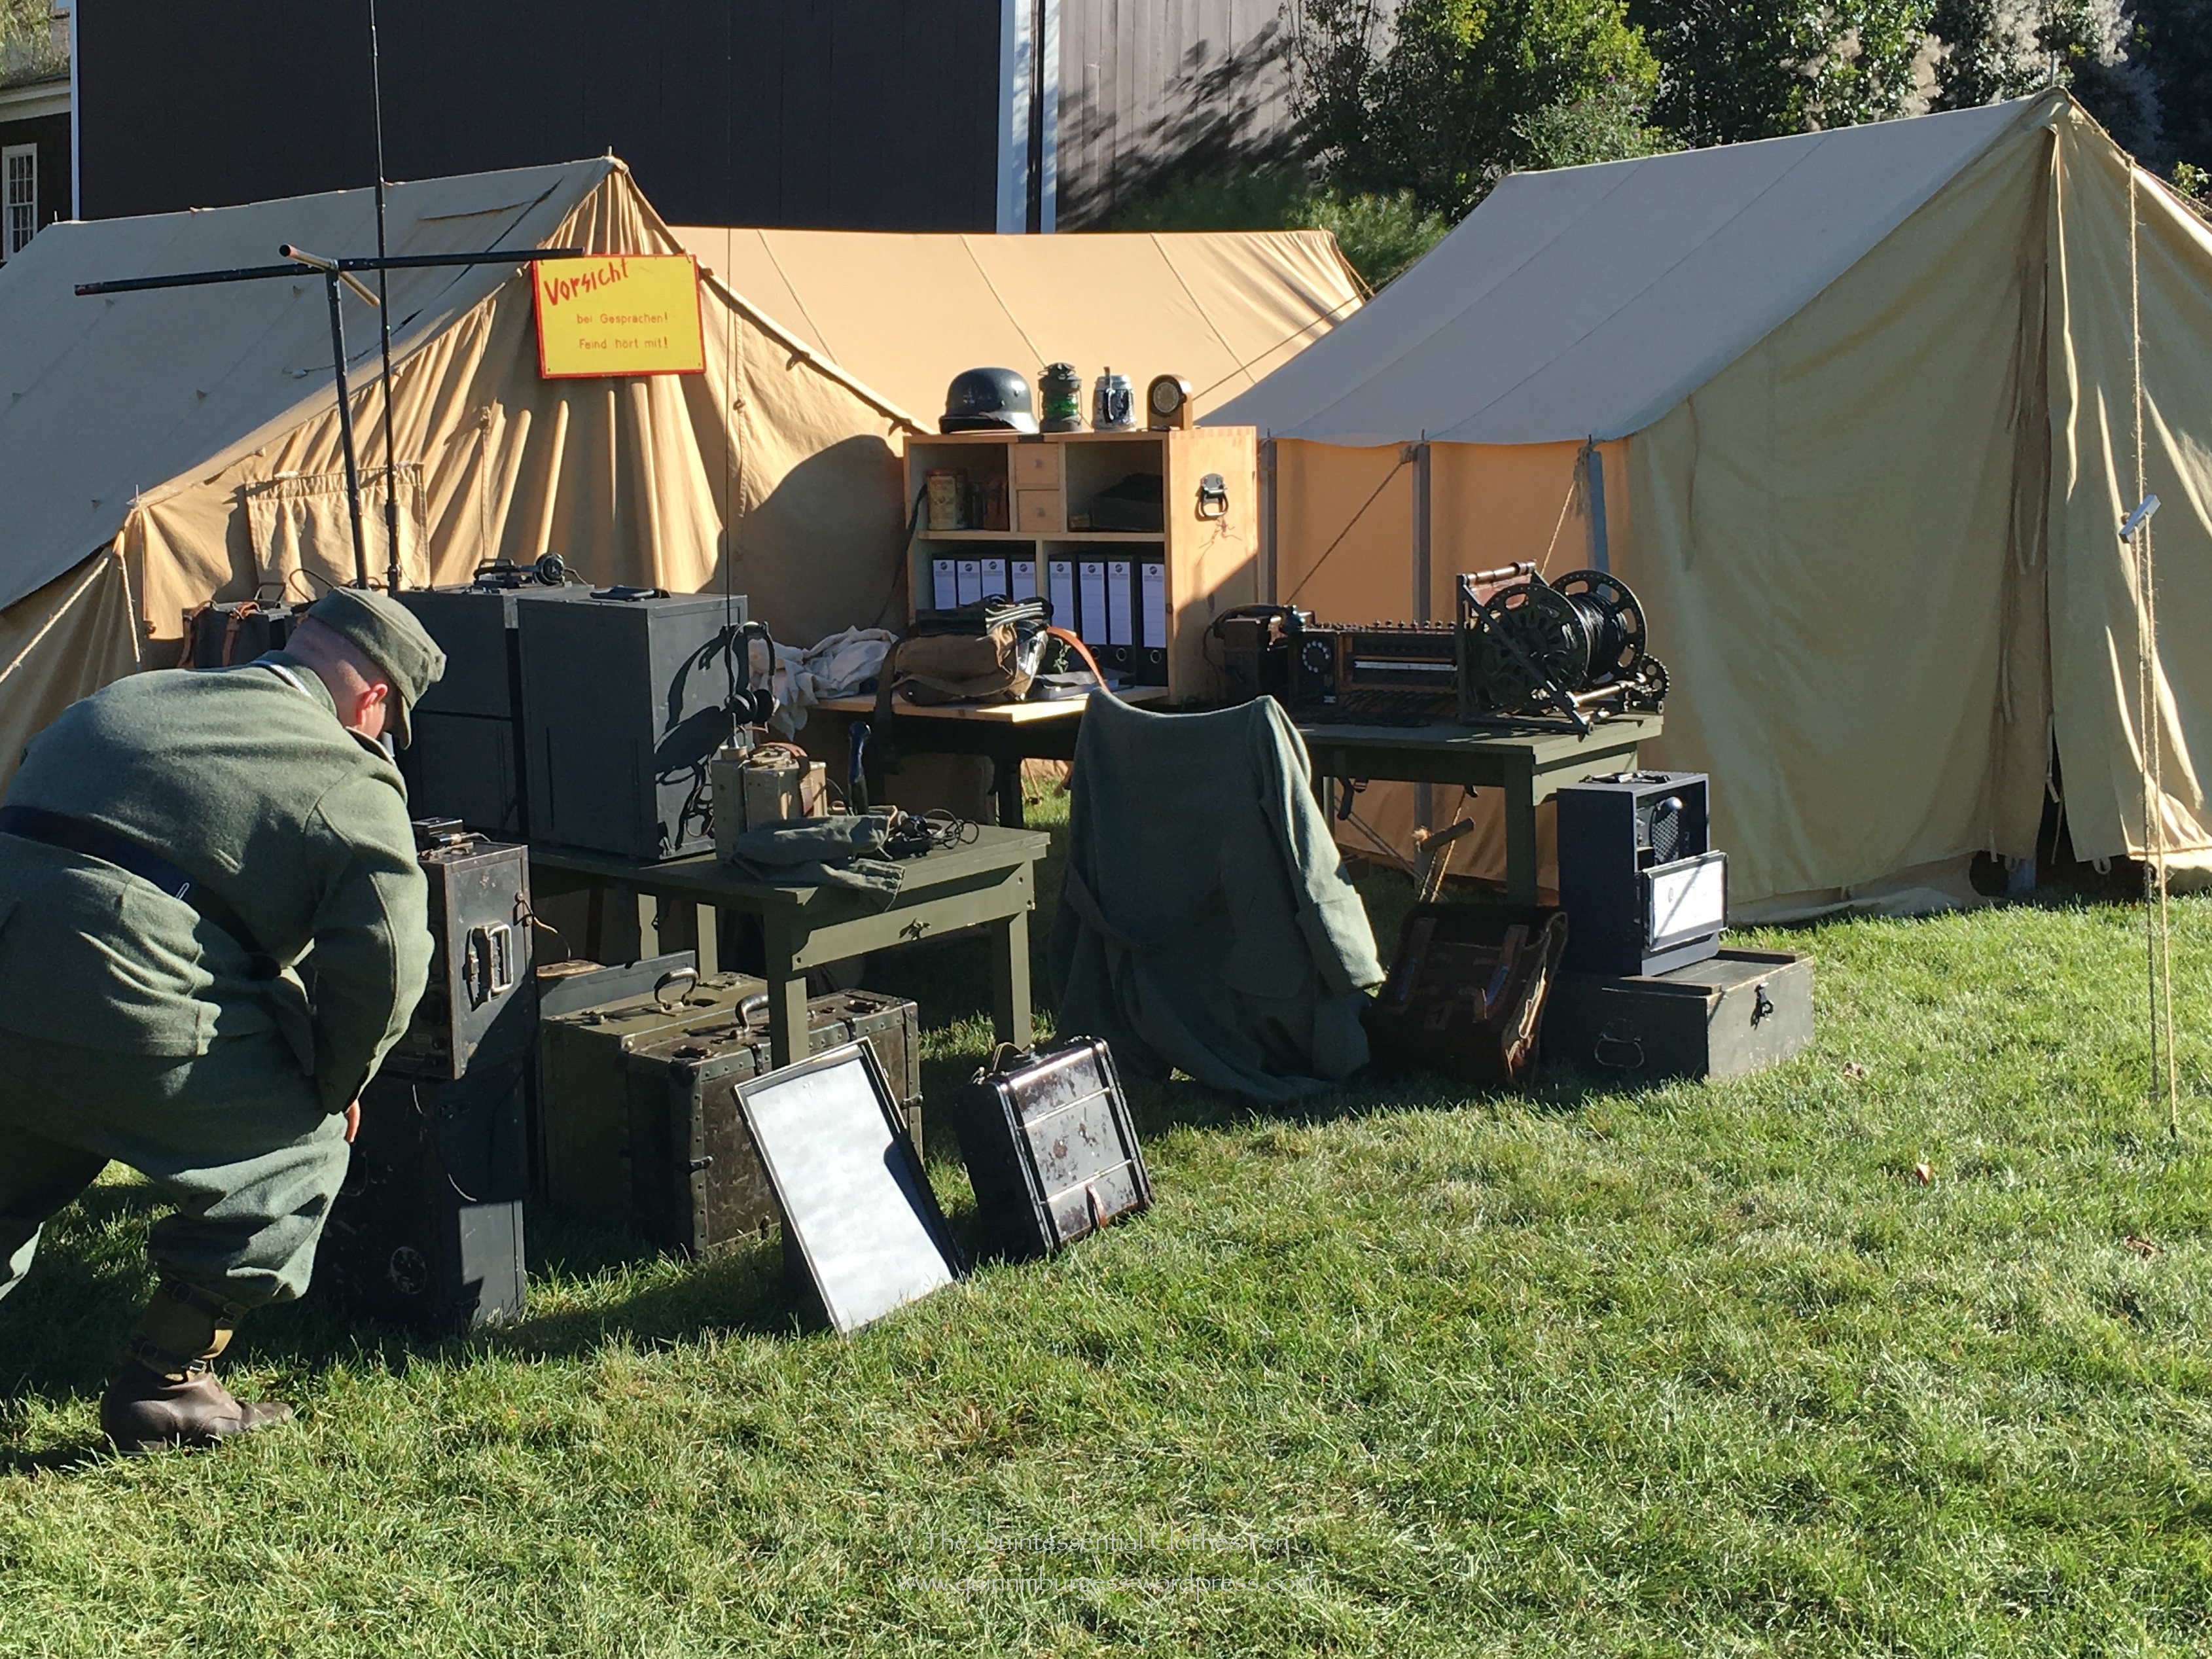
The day was gorgeous, though a little cold early in the morning. We just went for the day and enjoyed wandering around the Allied and Axis camps and watching the staged battle. This particular reenactment is known for the large variety of WWII vehicles that are on display and in use, which was neat to see.

IMG_0013

Here is the German telegraph set up. The Axis camp actually had a lot of things to look at and one especially interesting interactive set up with food from the period.

IMG_0024

The Germans also had some really snazzy cars and other vehicles. They did a few drives around the battlefield before the battle actually started.

IMG_0067

Prior to the battle some tanks had been hidden just inside the trees across the grass field. It was my favorite part when they came trundling out mid-battle (especially the well hidden ones that we didn’t spot before things started!). My second favorite part was when, after the battle, they backed the tanks back into the trees to reset for a second battle later in the day.

IMG_0082

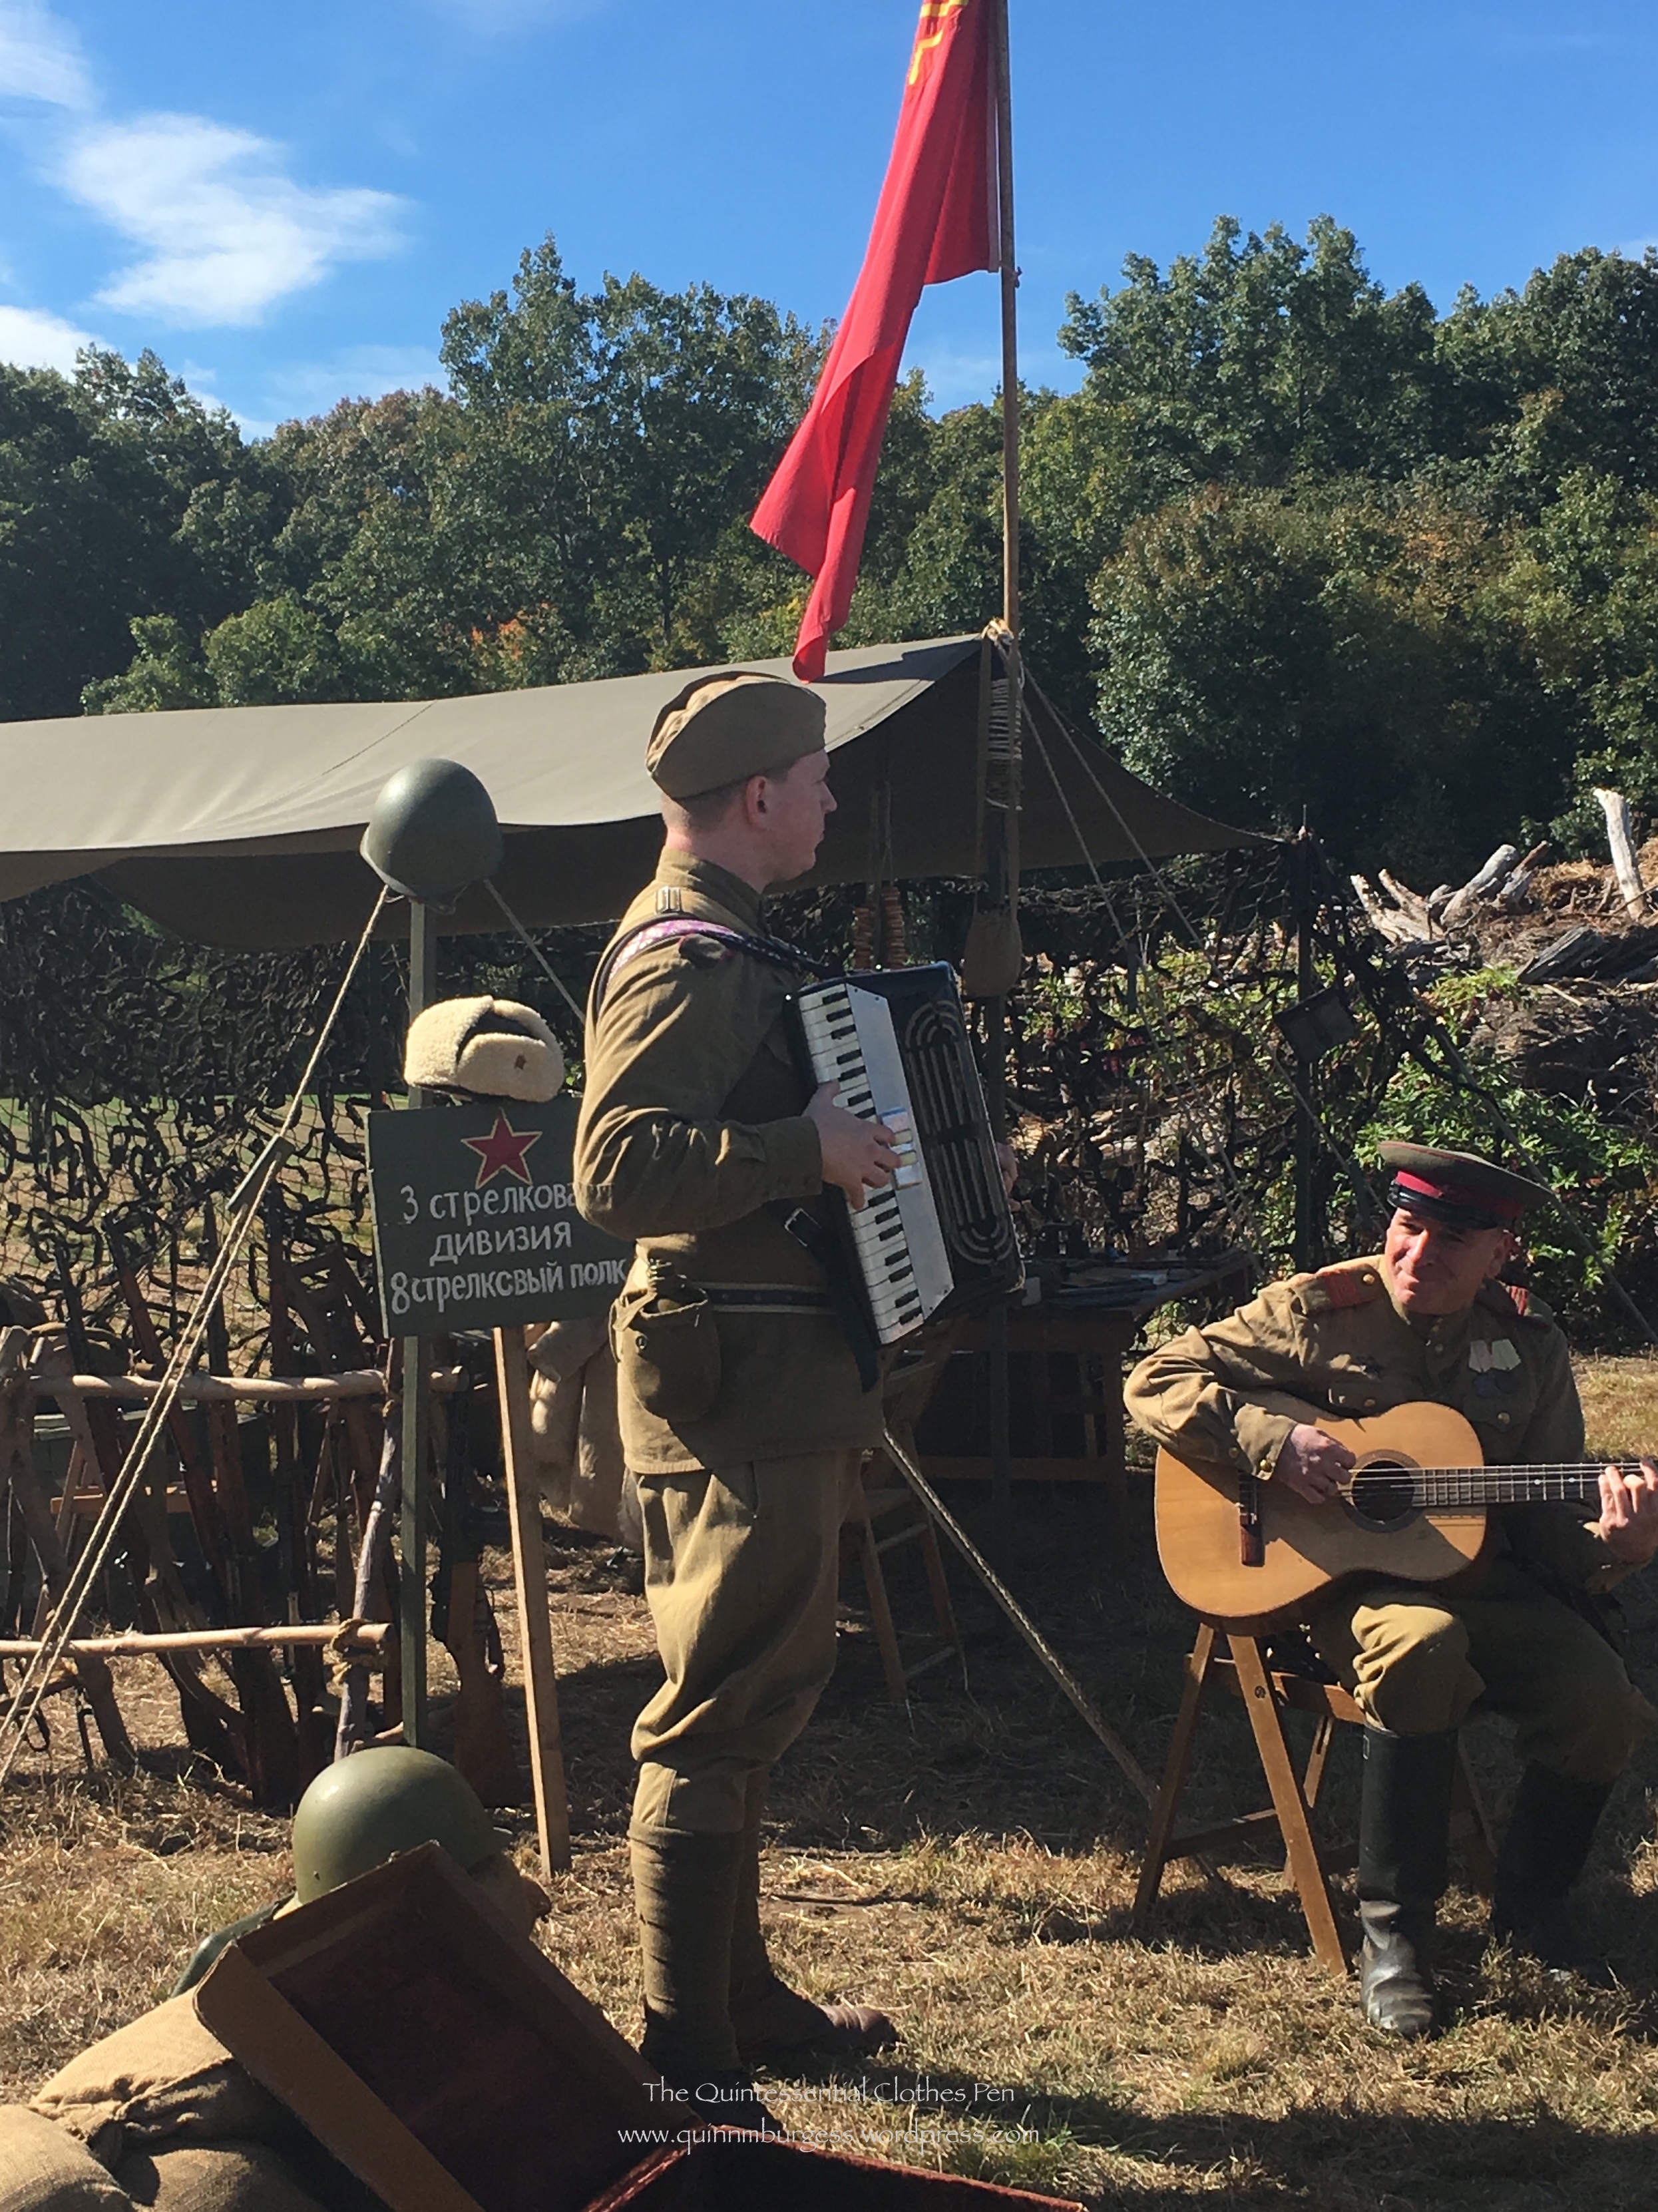
And finally, a Russian unit in the Allied camp. We met another female reenactor who was with the Russian unit (women aren’t that common at these WWII events, you know, so it’s especially neat to meet others, especially those you don’t previous know). The tea and fur coats were pretty tempting while the day was still cold and later in the day there was music! Fun!

IMG_0121


HSF/M #10: 1910 Dowager Countess Evening Gown

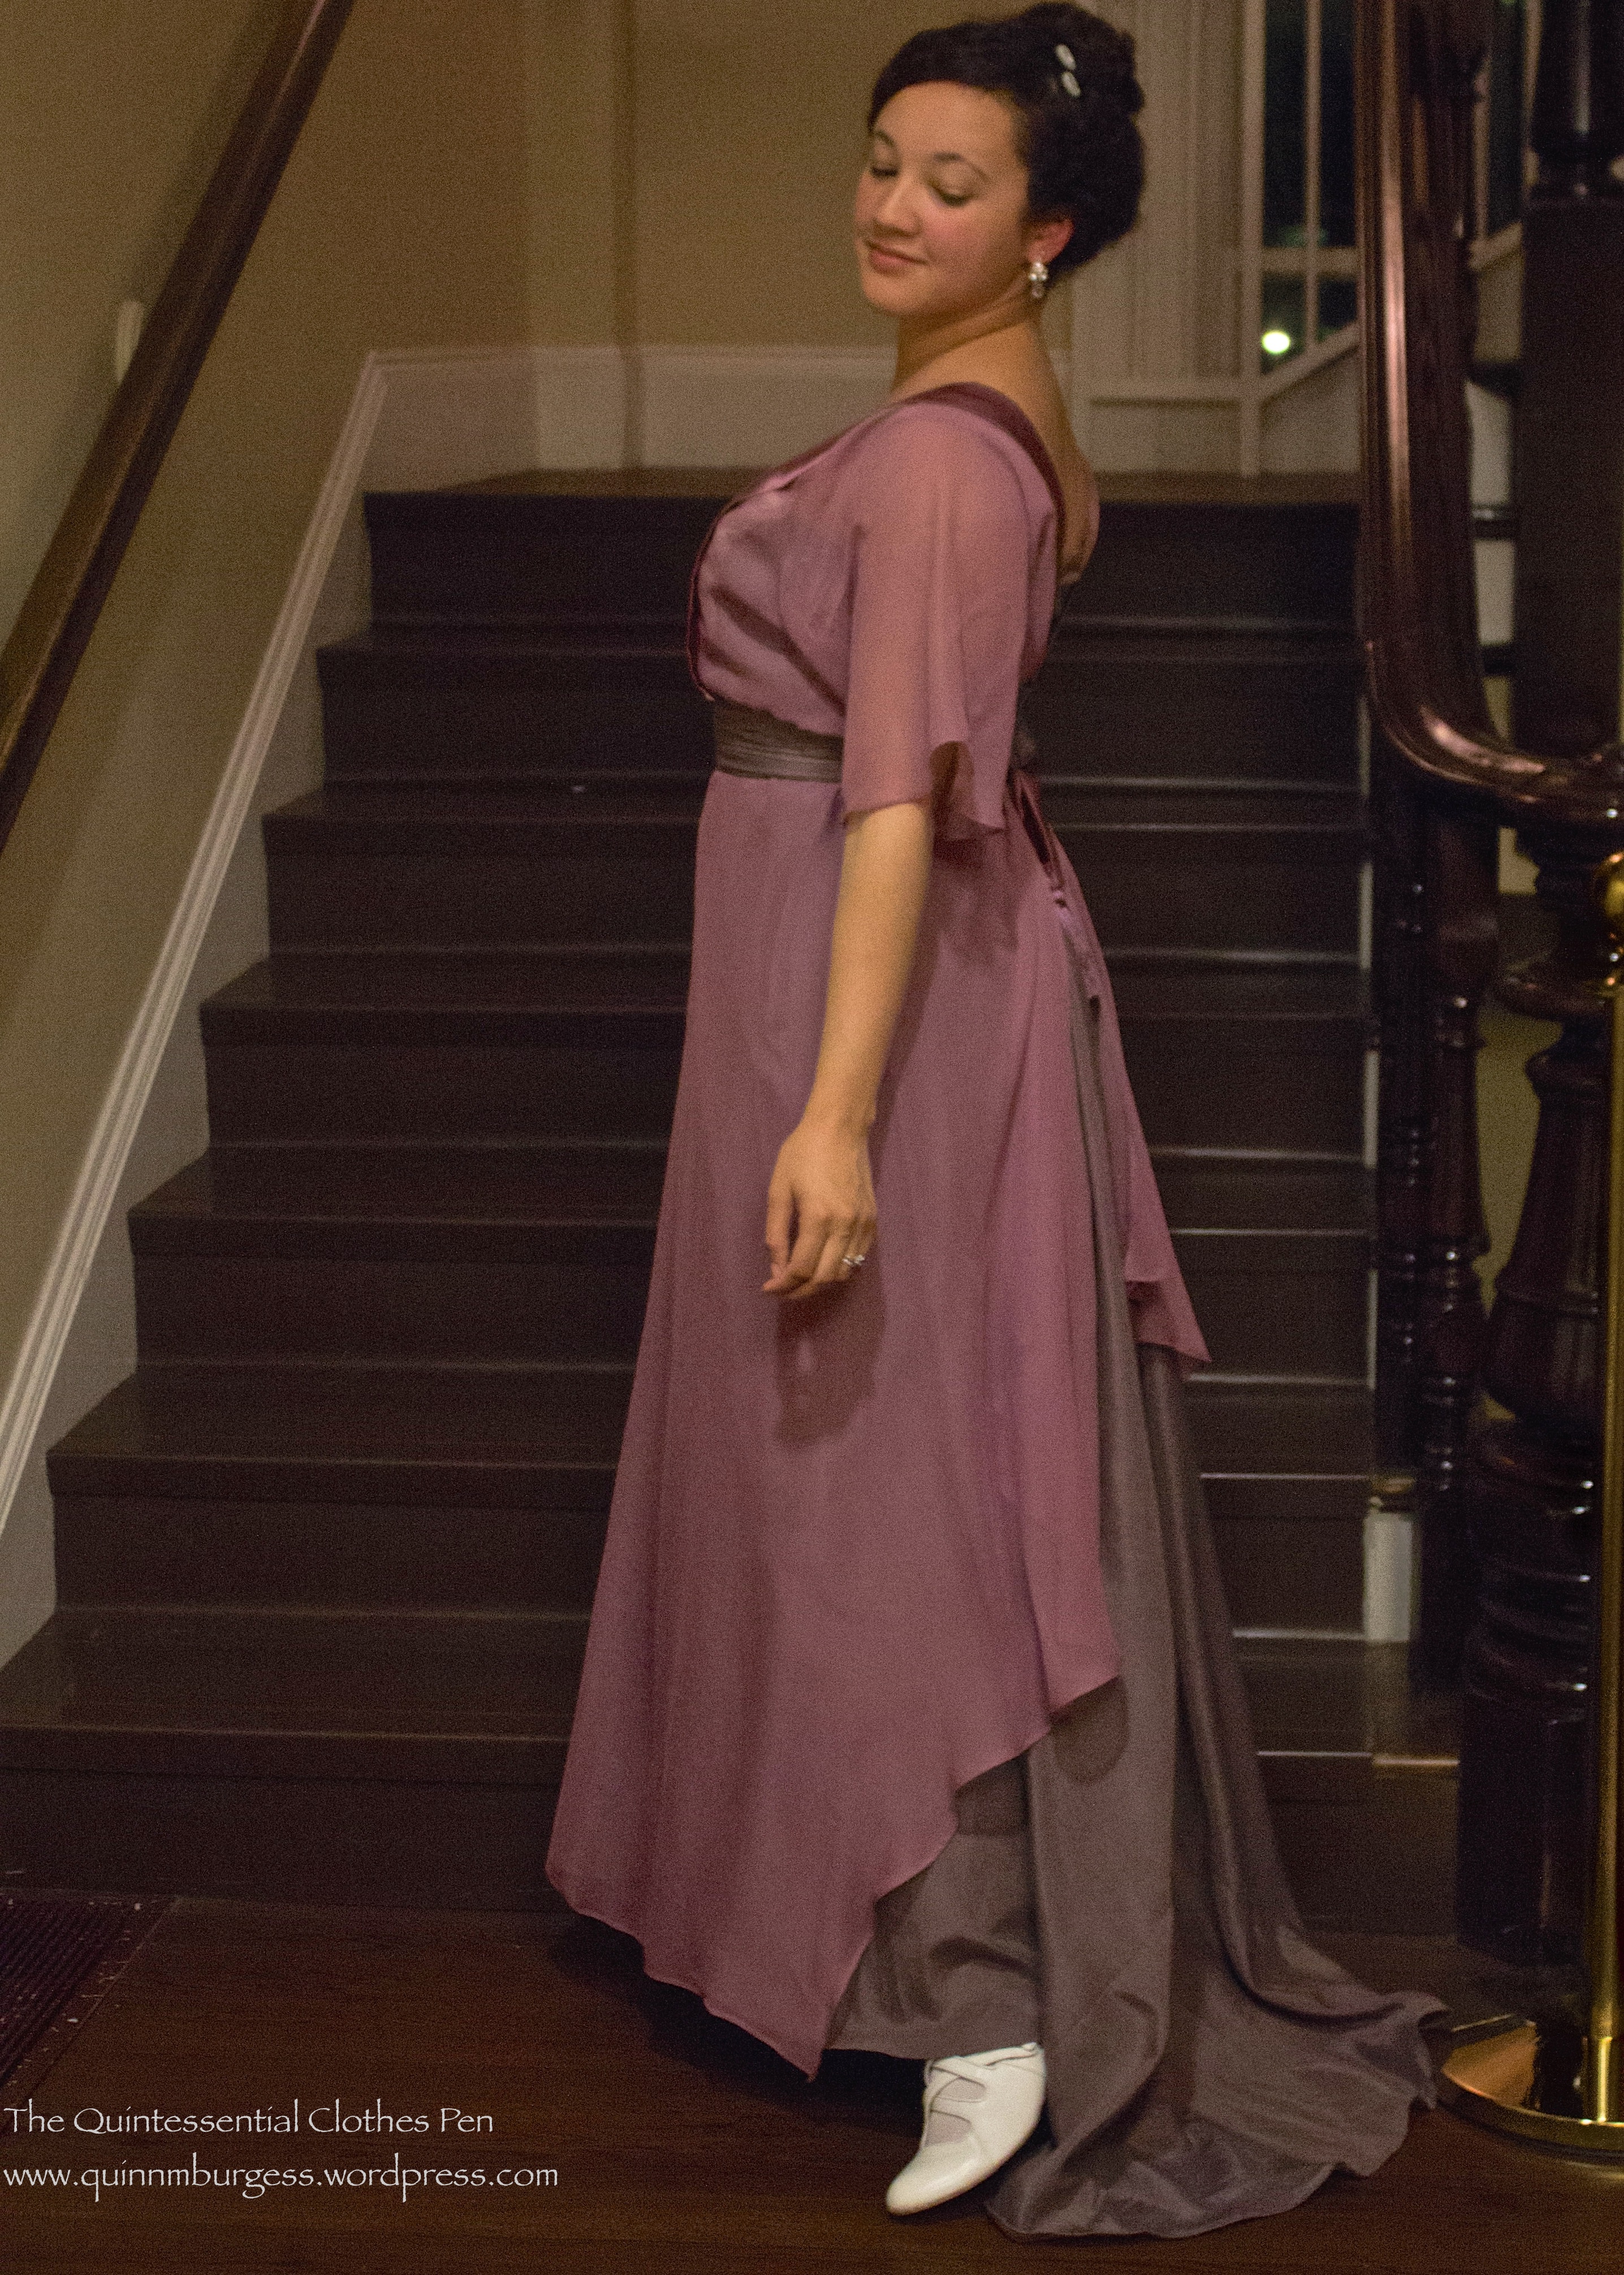
IMG_1597

This gown was already in my sewing plan before I decided it fit into the HSF/M Challenge #10: Sewing Secrets. It turns out that it fits into the Sewing Secrets challenge for multiple reasons:

#1: Because like many dresses from the first few decades of the 20th century, the method of closure is cleverly hidden, rather complicated, and definitely secretive–you really can’t tell how the dress goes on just looking at it once it’s all hooked up. (Right? Can you figure it out before I show you later in the post?)

#2: The beaded panel on the front might look familiar if you’ve been reading my blog for a few years. It is actually the sleeve (turned upside down) from a 1980s evening gown that I remade into a sleeveless 1925 evening gown.

#3: I made this dress with a train because I had enough fabric, it’s elegant, and I don’t get to have many dresses with trains because I’m usually dancing in them. However, I do plan to dance in this dress, so I included a secret hidden button under the decorative knot at the back and a loop on the center back skirt seam so that the skirt can hook up (bustling, essentially) to be a uniform length all around so I can dance unhindered!

IMG_1598

I paired this new dress with my American Duchess Astoria shoes, because they are super comfy and made sense color-wise with my other accessories: plain white stockings, a super long strand of faux pearls, lovely clear/white dangle earrings I’ve had for at least ten years, and two matching metallic silver wrapped hair pins I think my mother gave me also a number of years ago. Underneath is my 1913 chemise and corset.

IMG_1616

I’ve had all the fabrics in the stash for at least three to seven years. The underskirt was leftover from a former project never fully pictured here on the blog–an 1890s 2 part dress taken directly from an extant bodice with an extrapolated skirt (the skirt was worn by a friend in Newport in 2012–there are pictures toward the bottom of this past post, and I forgot that the ensemble I’m wearing in that post also uses this same fabric as trim). I had purchased way more fabric than I needed and had more than enough for the new project, so I guess I’ll be using it on another something someday. The matching chiffon and charmeuse I’d purchased with the intention of making a 1910s evening dress back in 2012, but ran out of time that year.

When I was first seriously thinking of making this dress, I thought I had enough fabric to do something like this dress, but I hit a snag when I realized I only had about ½ yd of the charmeuse and that the beaded sleeve I was hoping to incorporate into the dress was entirely unsuited for the shape of the beaded bit on the inspiration dress. I decided to make a dress like my original inspiration someday, but to go back to the beginning for the current dress and rethink what the dress might look like. I would up with something I am quite happy with that is drawn from a variety of inspirational dresses on my 1909-1914 evening gown Pinterest board with this as the most obvious inspiration.

Just the facts:

Fabric: One beaded silk sleeve from a 1980s evening dress that I deconstructed two years ago to make a 1925 evening dress, about ¼ yd of plain weave cotton for the base, less than ¼ yd of silk charmeuse, about 2 yds of silk chiffon, and 3-4 yds of lightweight silk faille for the underskirt.

Pattern: Created by me, loosely starting with the pattern for the bodice of my 1912 burgundy and gold evening gown and referencing skirt shapes in Janet Arnold for inspiration.

Year: 1910.

Notions: Thread, hooks and bars, and two pre-made tassels.

How historically accurate is it?: It definitely passes Leimomi’s test of being recognizable in its own time. It uses accurate materials and accurate techniques. 95%.

Hours to complete: More than I kept count of.

First worn: In September 2015.

Total cost: Technically this is a stash project because all of the things I used have been in my stash for years, except the tassels, which I bought within the last year knowing this project was high on the to do list. If I had to guess at the cost of the materials it was probably $50-$60 dollars.

The dress was sewn with a mixture of machine and hand sewing. Most of the assembly of the bodice and skirt pieces while they were separate was done by machine, as was the hemming of all the chiffon and faille (though the hem edge of the chiffon is actually the selvedge). The hand sewing came in when I went to mount all of the pieces together. I started with the under bodice and kept adding layers and figuring things out as I went. The closures are also hand sewn.

Incidentally, I’m not really sure what color to call this dress. I’ve been calling the colors orchid and mauve, but I’m not really sure those are the best color names. The chiffon and charmeuse are a shade of pinky/purple that’s hard to put a finger on and the contrast faille is more grey than anything when it’s by itself, though it really takes on a pinky/purple cast when paired with these other fabrics. Does any really perfect color name come to your mind? If it does I’d be happy to know what it is!

As I mentioned, the closure for this dress is quite complicated and as I knew I was going to include it in the sewing secrets challenge we took pictures specifically of the closures to document how it works. If I tried to explain only with words I’m sure there would be confusion, so I think the pictures will clarify things. We’ll start hooked up and unhook as we go.

IMG_1762
The back knot snaps into place over the belt, which hooks together at the back. The button for the bustling skirt loop is hidden under the belt in this picture.
IMG_1763
The belt unhooks all the way to center front.
IMG_1764
The chiffon overskirt unhooks from center back to the side.
IMG_1765
Then the front bodice chiffon layer unhooks at the top edge of the beading and at the waist so it peels back toward the side. After that the under bodice unhooks and the dress slides right off. Is that what you thought might be the closure system?

Overall, I’m super pleased with this dress. It’s very comfortable, has lots of fabric in the skirt so is easy to dance in, and is a nice transitional style between the full skirts and pigeon breasts of the years around 1908 and the much slimmer, longer lines of the years around 1912. Plus, it has a train!

Here’s a comparison of the dress with the train down and then with it looped up. Luckily, these pictures were taken before dancing. Turns out that while I was dancing a very fast waltz, either my or my partner’s foot caught the hem of the dress and caused the loop to break, so I’ll have to repair it more sturdily for the next wearing. Ah well, that’s why they make safety pins!

IMG_1638

IMG_1648

I was quite pleased with how my hair turned out, so I had to make sure to get a reasonable close-up. Some of the curls are natural and some are made nice and smooth with a curling iron. The key is to put the hair up in a lot of different sections–and I mean a lot!

IMG_1727

I call this dress the “Dowager Countess” gown because the shape of it reminds me of what Maggie Smith’s character in Downton Abbey often wears to dinner parties. Look at the bodices on these dresses: this dress, this dress, and this dress are all examples of a similar style–one that the Dowager Countess wears often! And why wouldn’t I want to be reminded of Maggie Smith when I think of this dress? Her snarky comments are highlights of Downton Abbey! (Incidentally, one of my friends wore the just-emerging-in-the-1910s style of pants in the ballroom to this ball–gasp!–and we took some posed snarky pictures. Head over to her blog, Plaid Petticoats, to take a look at her scandalous outfit. When you get to the bottom you’ll find the snarky pictures. You might even find that you think I’m there twice, because I was wearing this new 1910 dress and I loaned my 1912 evening gown from 2012 to a friend who happens to be being snarky with me.)

IMG_1646

SaveSave

1930s Beach Ensemble

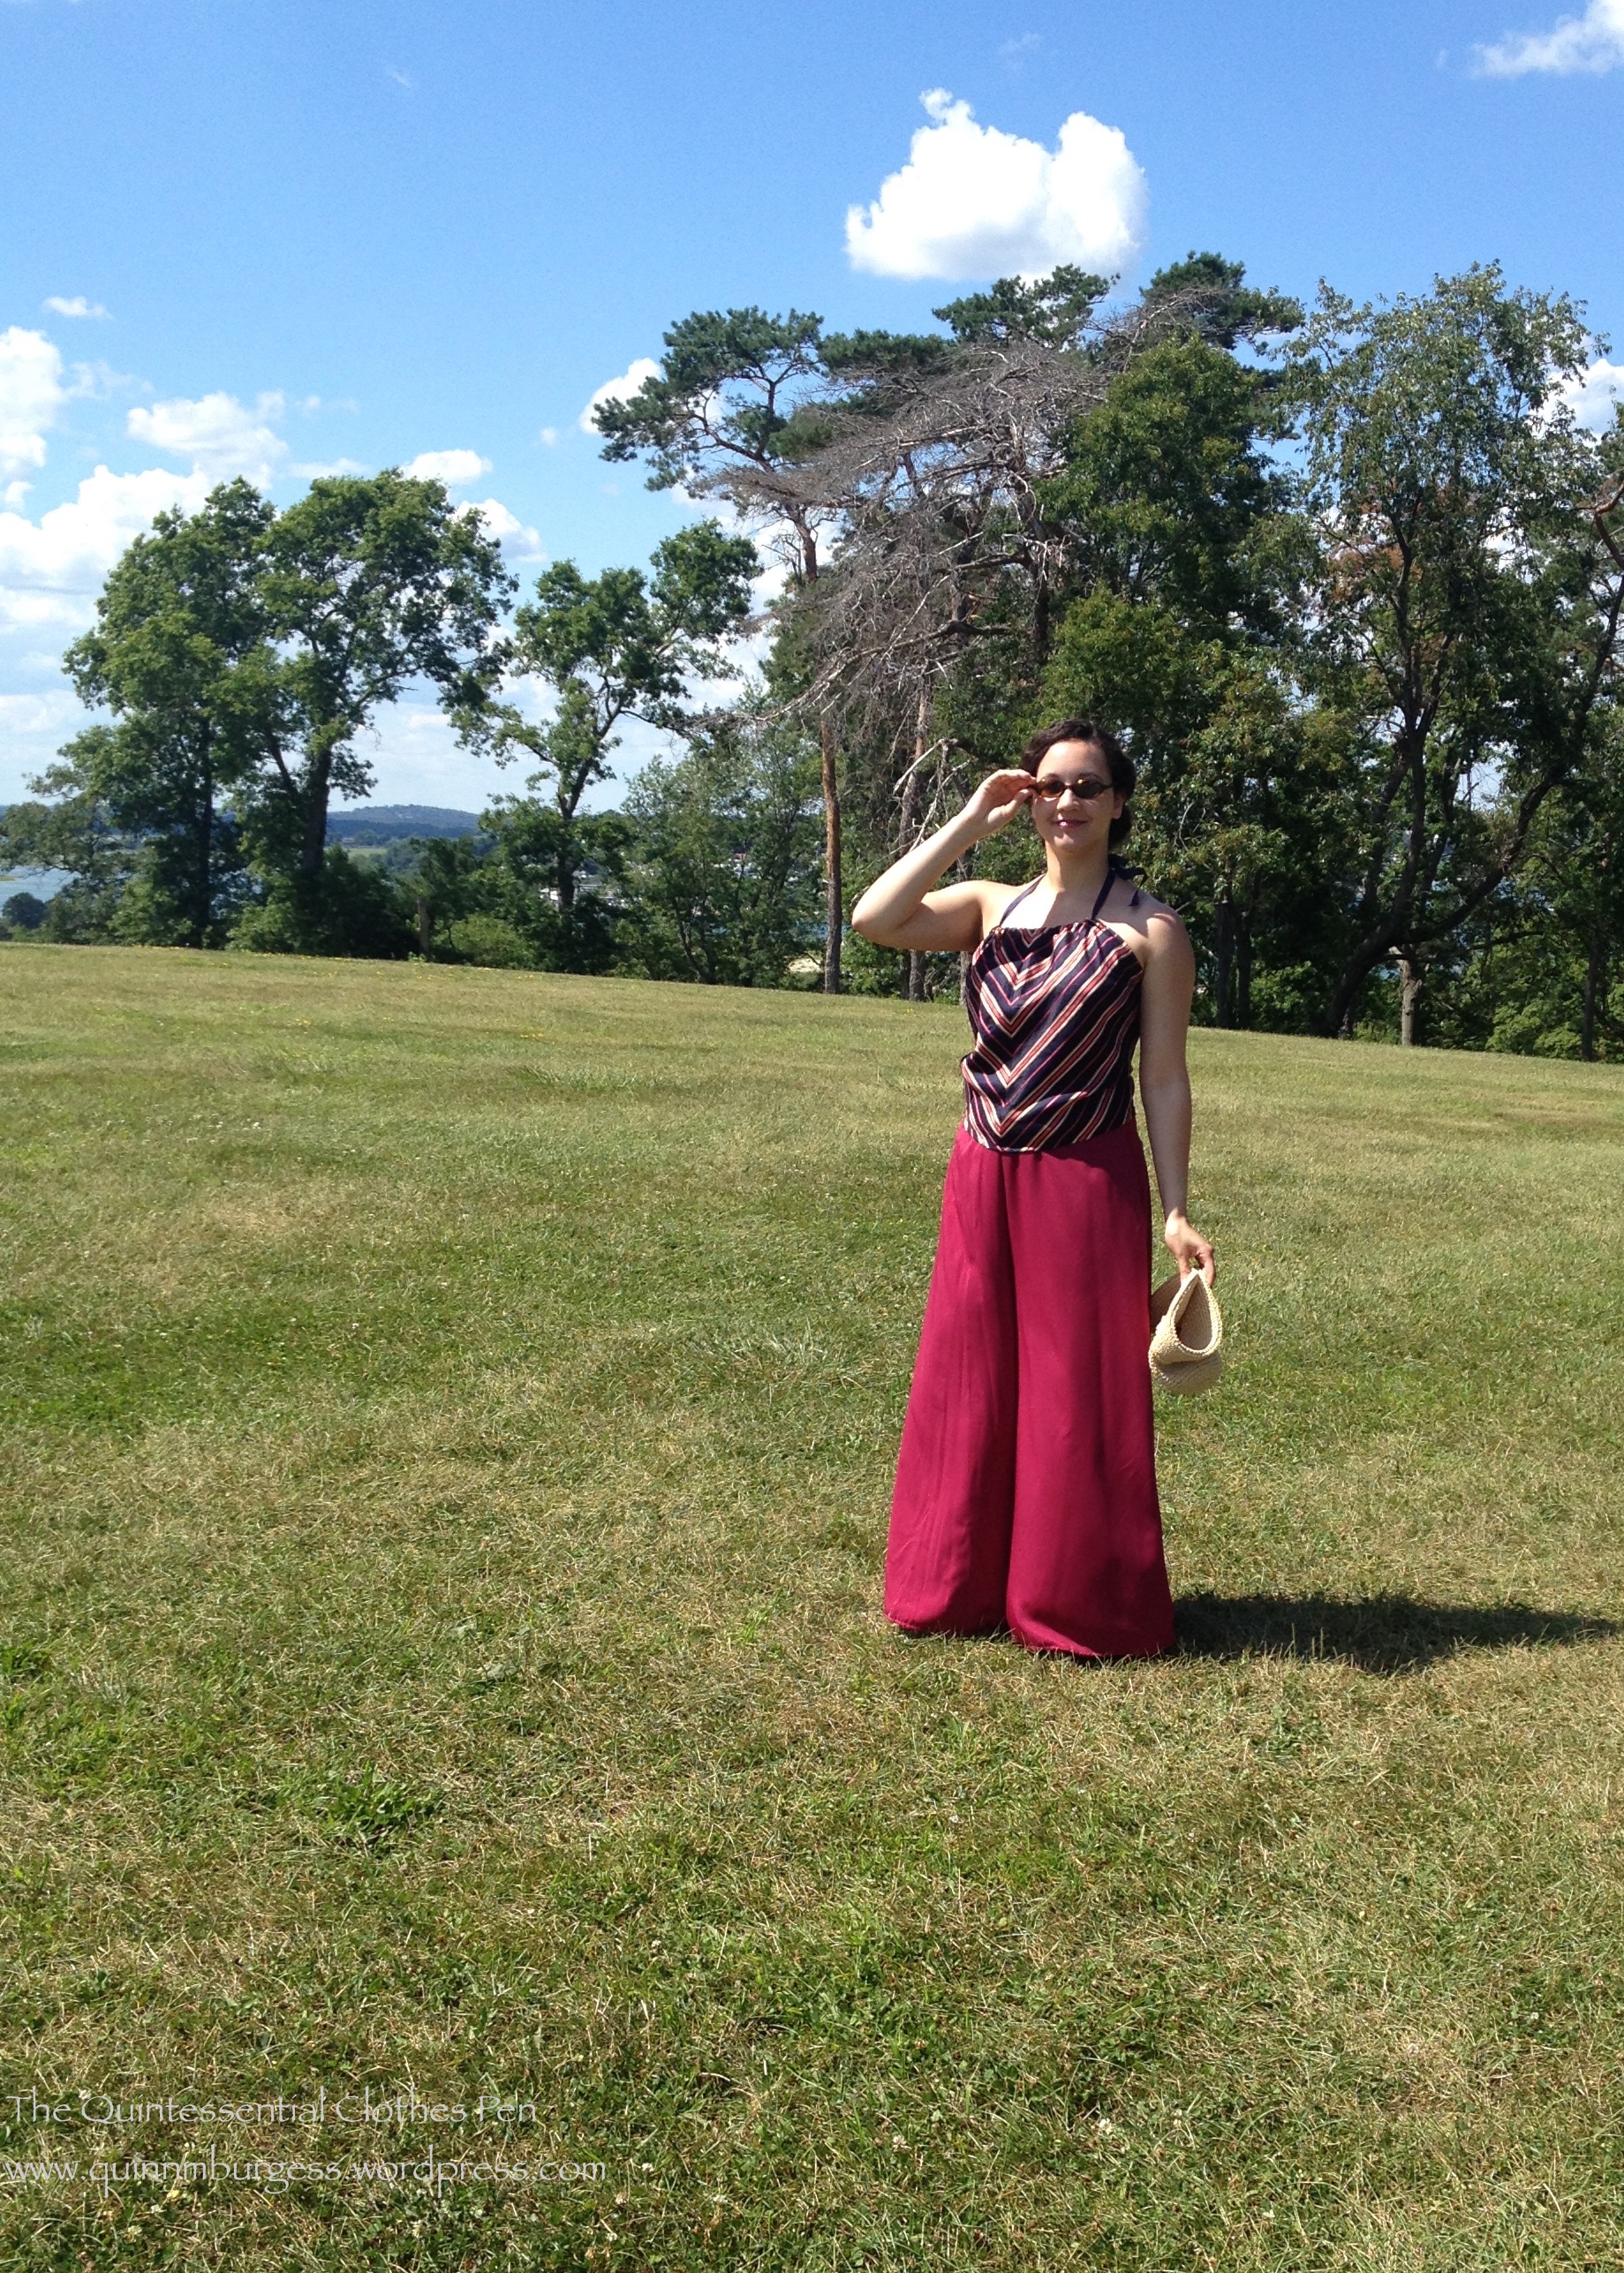
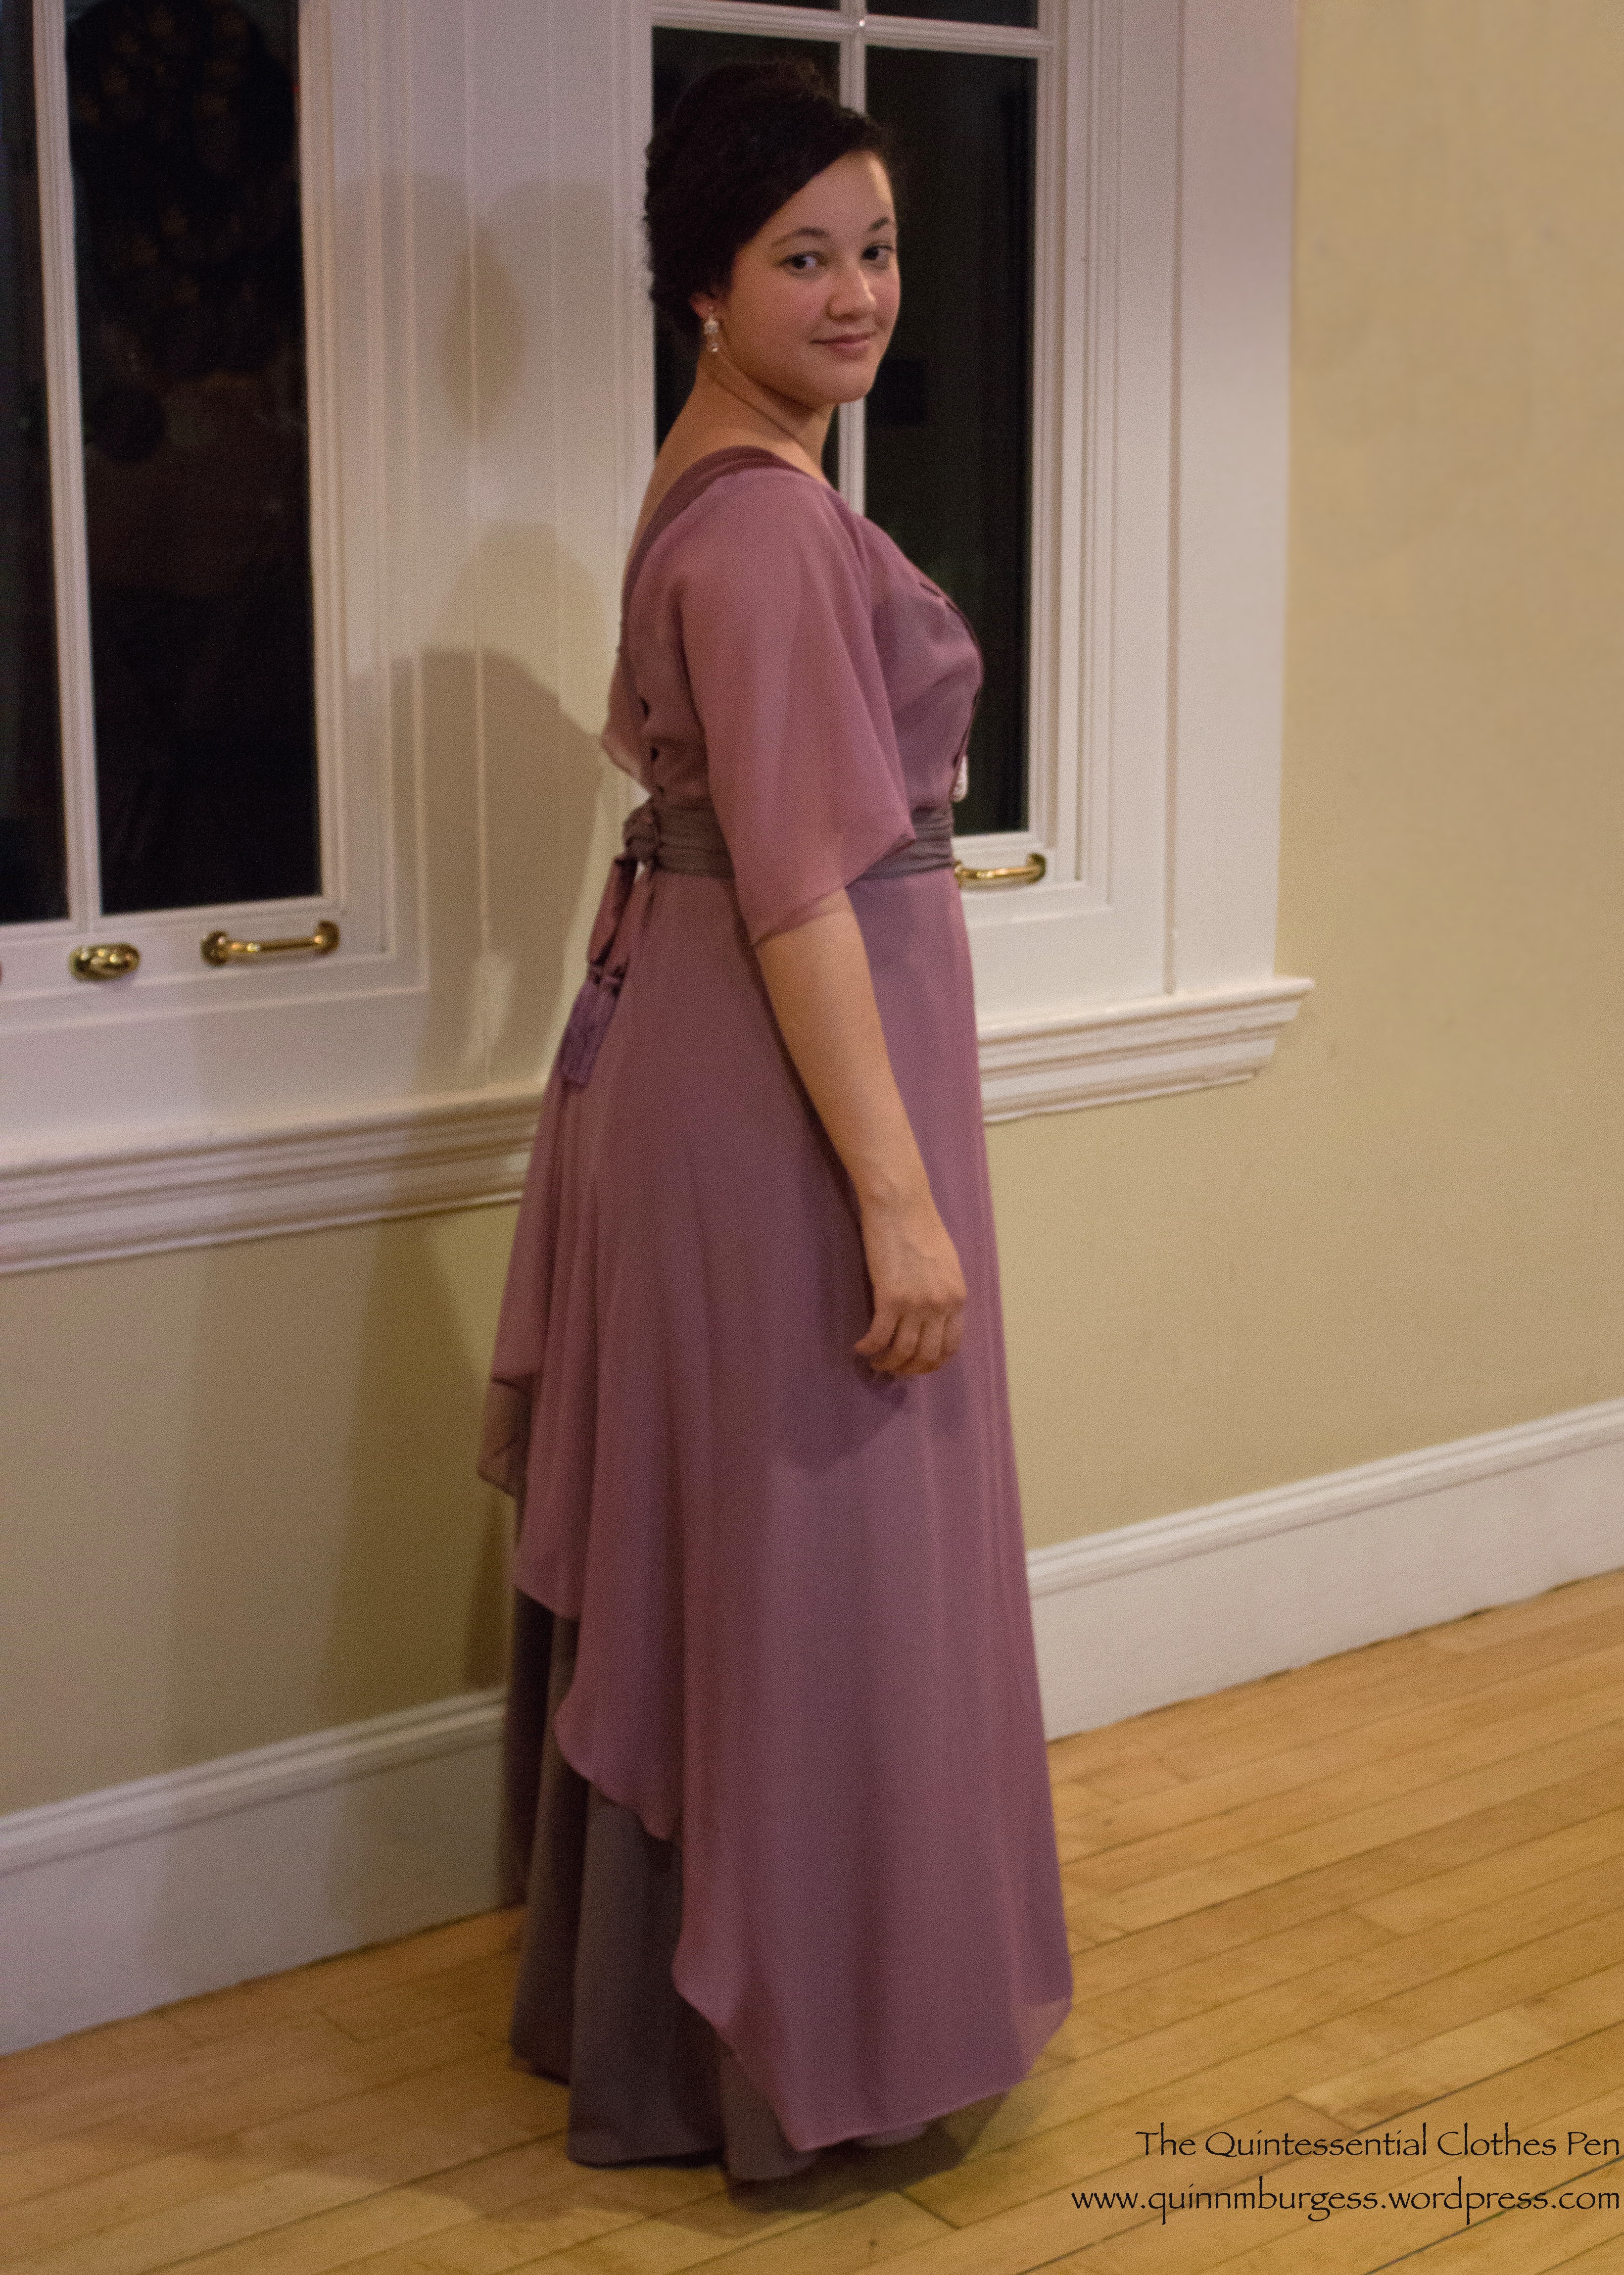
In August, I attended the 1920s Crane Estate Lawn Party again for it’s 3rd year. The last two years I’ve worn dresses (my 1926 sailor dress and my 1922 blouse, hat, and parasol ensemble), but this year I had hoped to go to the beach prior to the lawn party and I really wanted a more beachy ensemble than a dress. It was also on my to-do list to make a 1930s beach ensemble, so I bent the time period of the lawn party a bit and decided to make and wear a new 1930s beach ensemble despite not actually making it to the beach.

It was a super hot day, unfortunately, so I spent a lot of time huddled under an umbrella in the direct sun before we got smart and moved to the shade. Before we hunkered down to avoid the sun I did get some good pictures, though! My hair turned out very well–I’m quite pleased with it, though I can’t remember what I did to get it to look like that!
IMG_2658

unnamed

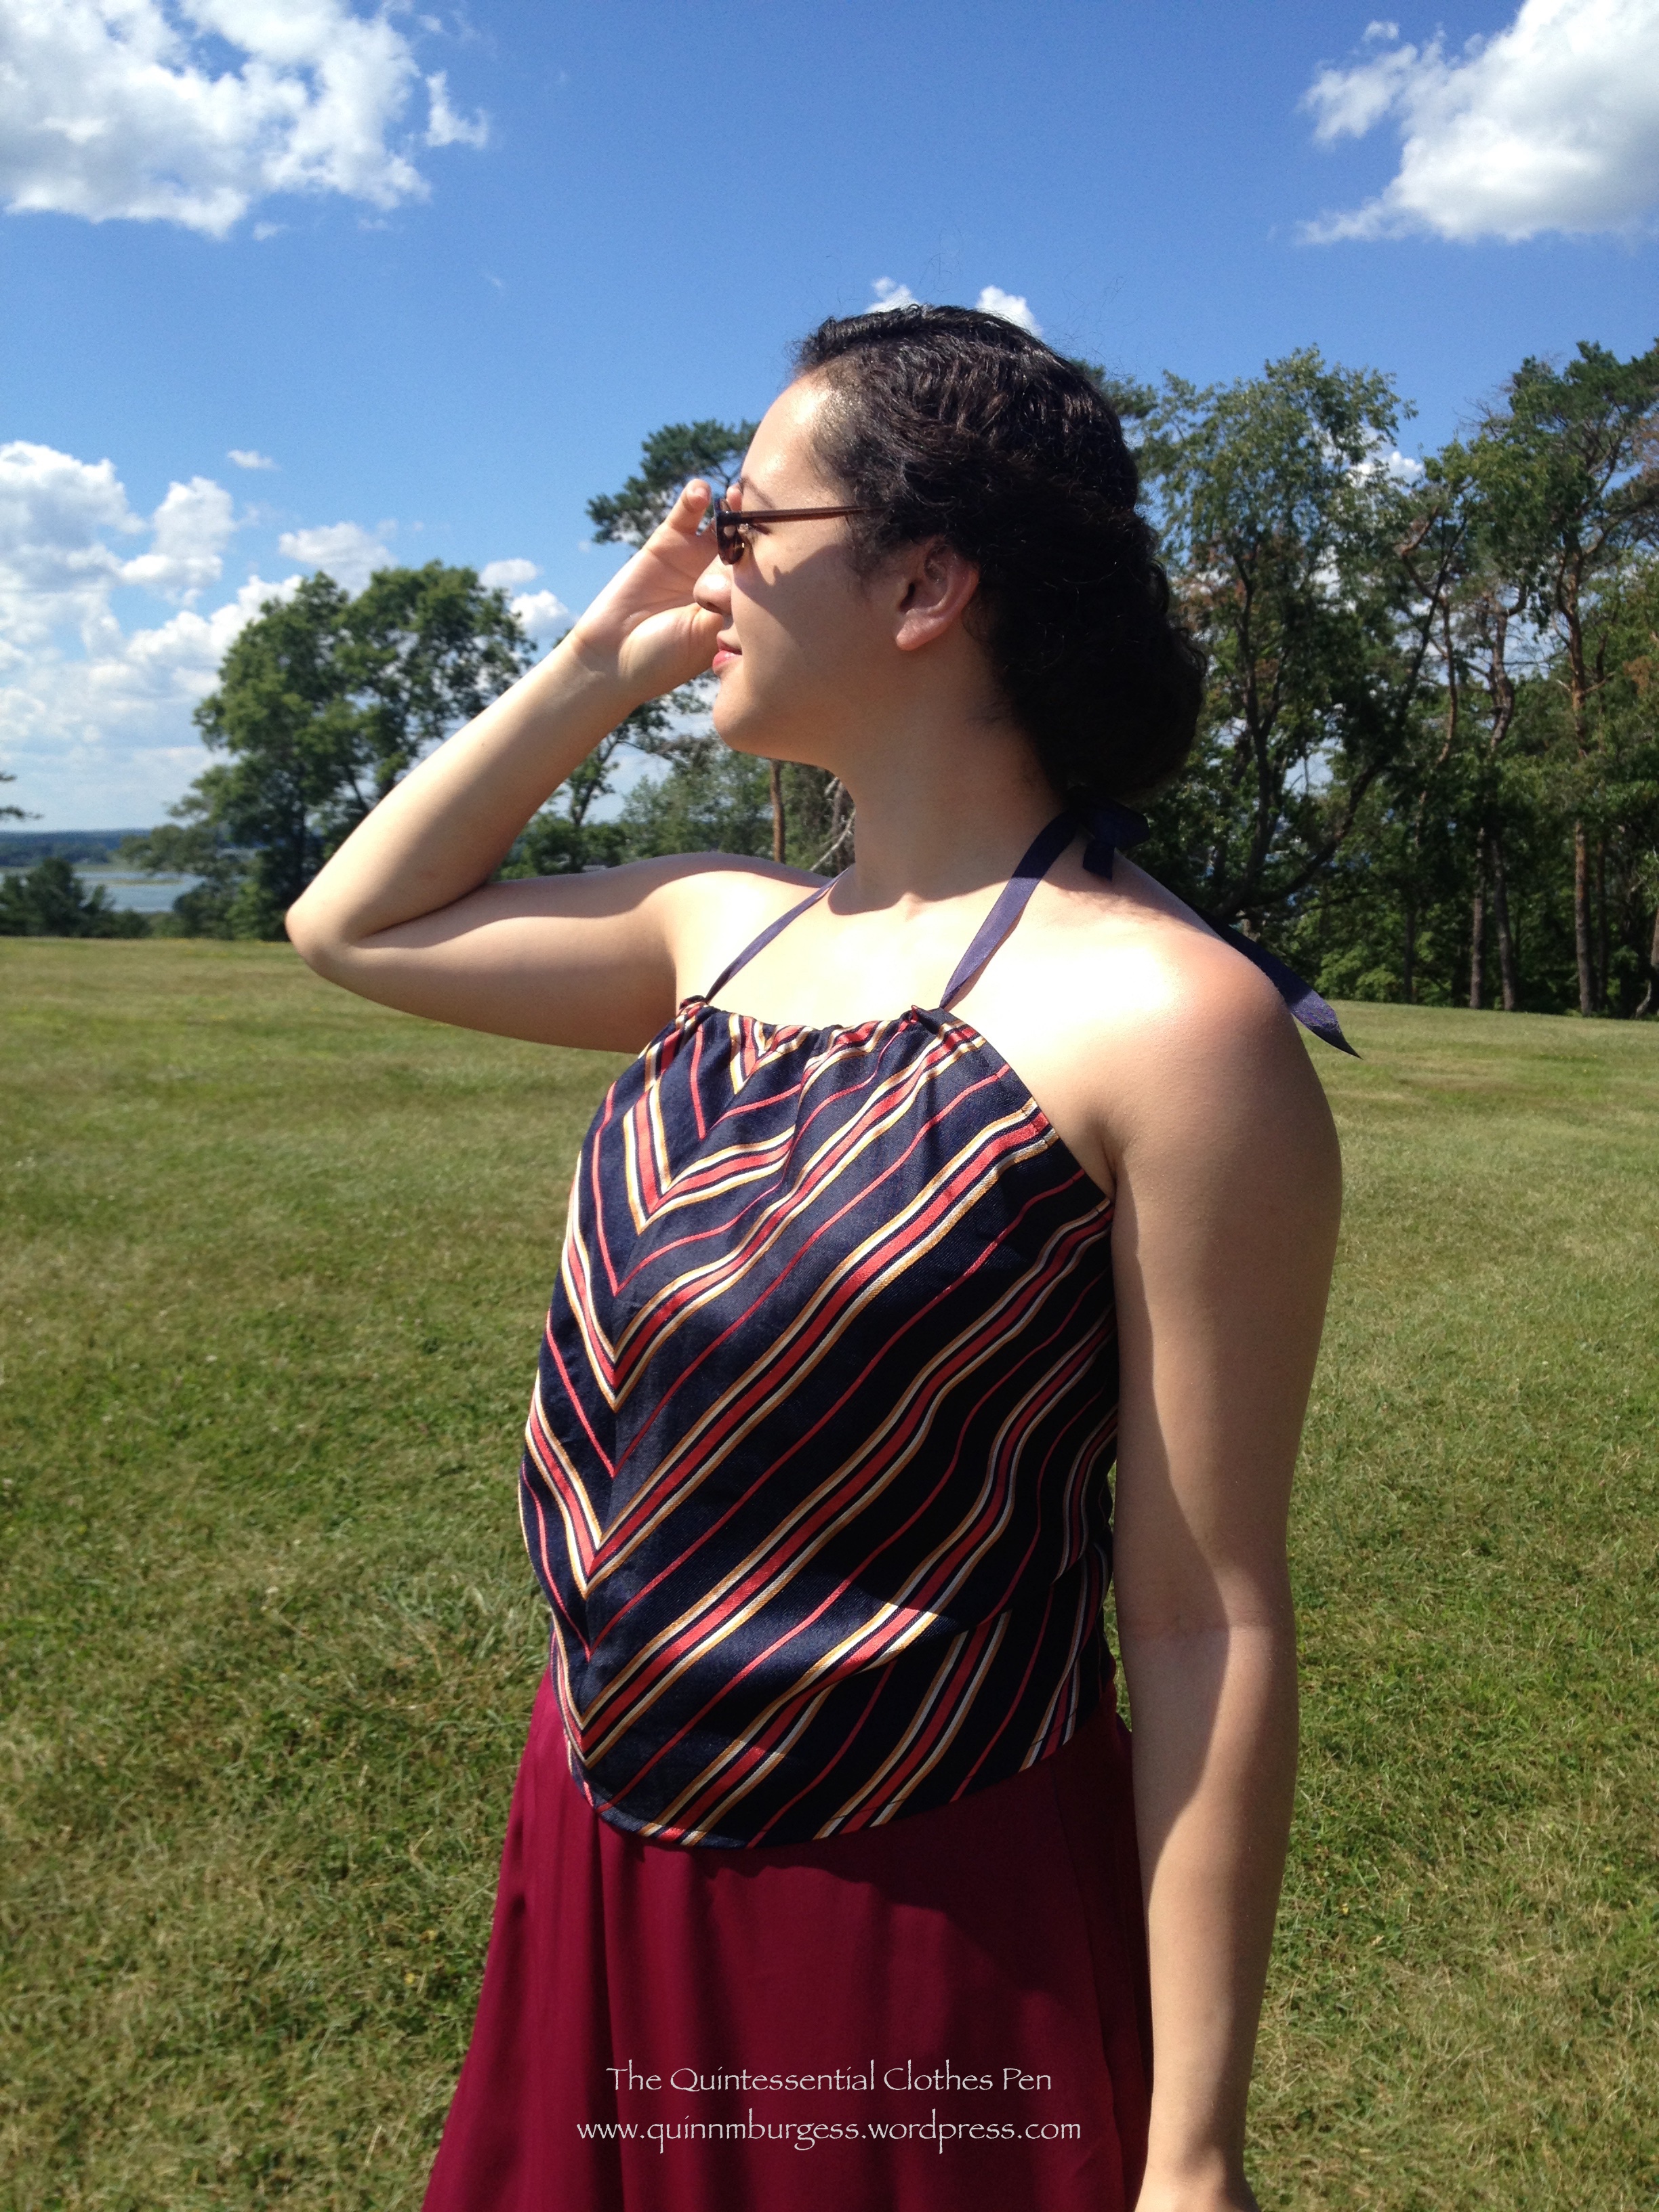
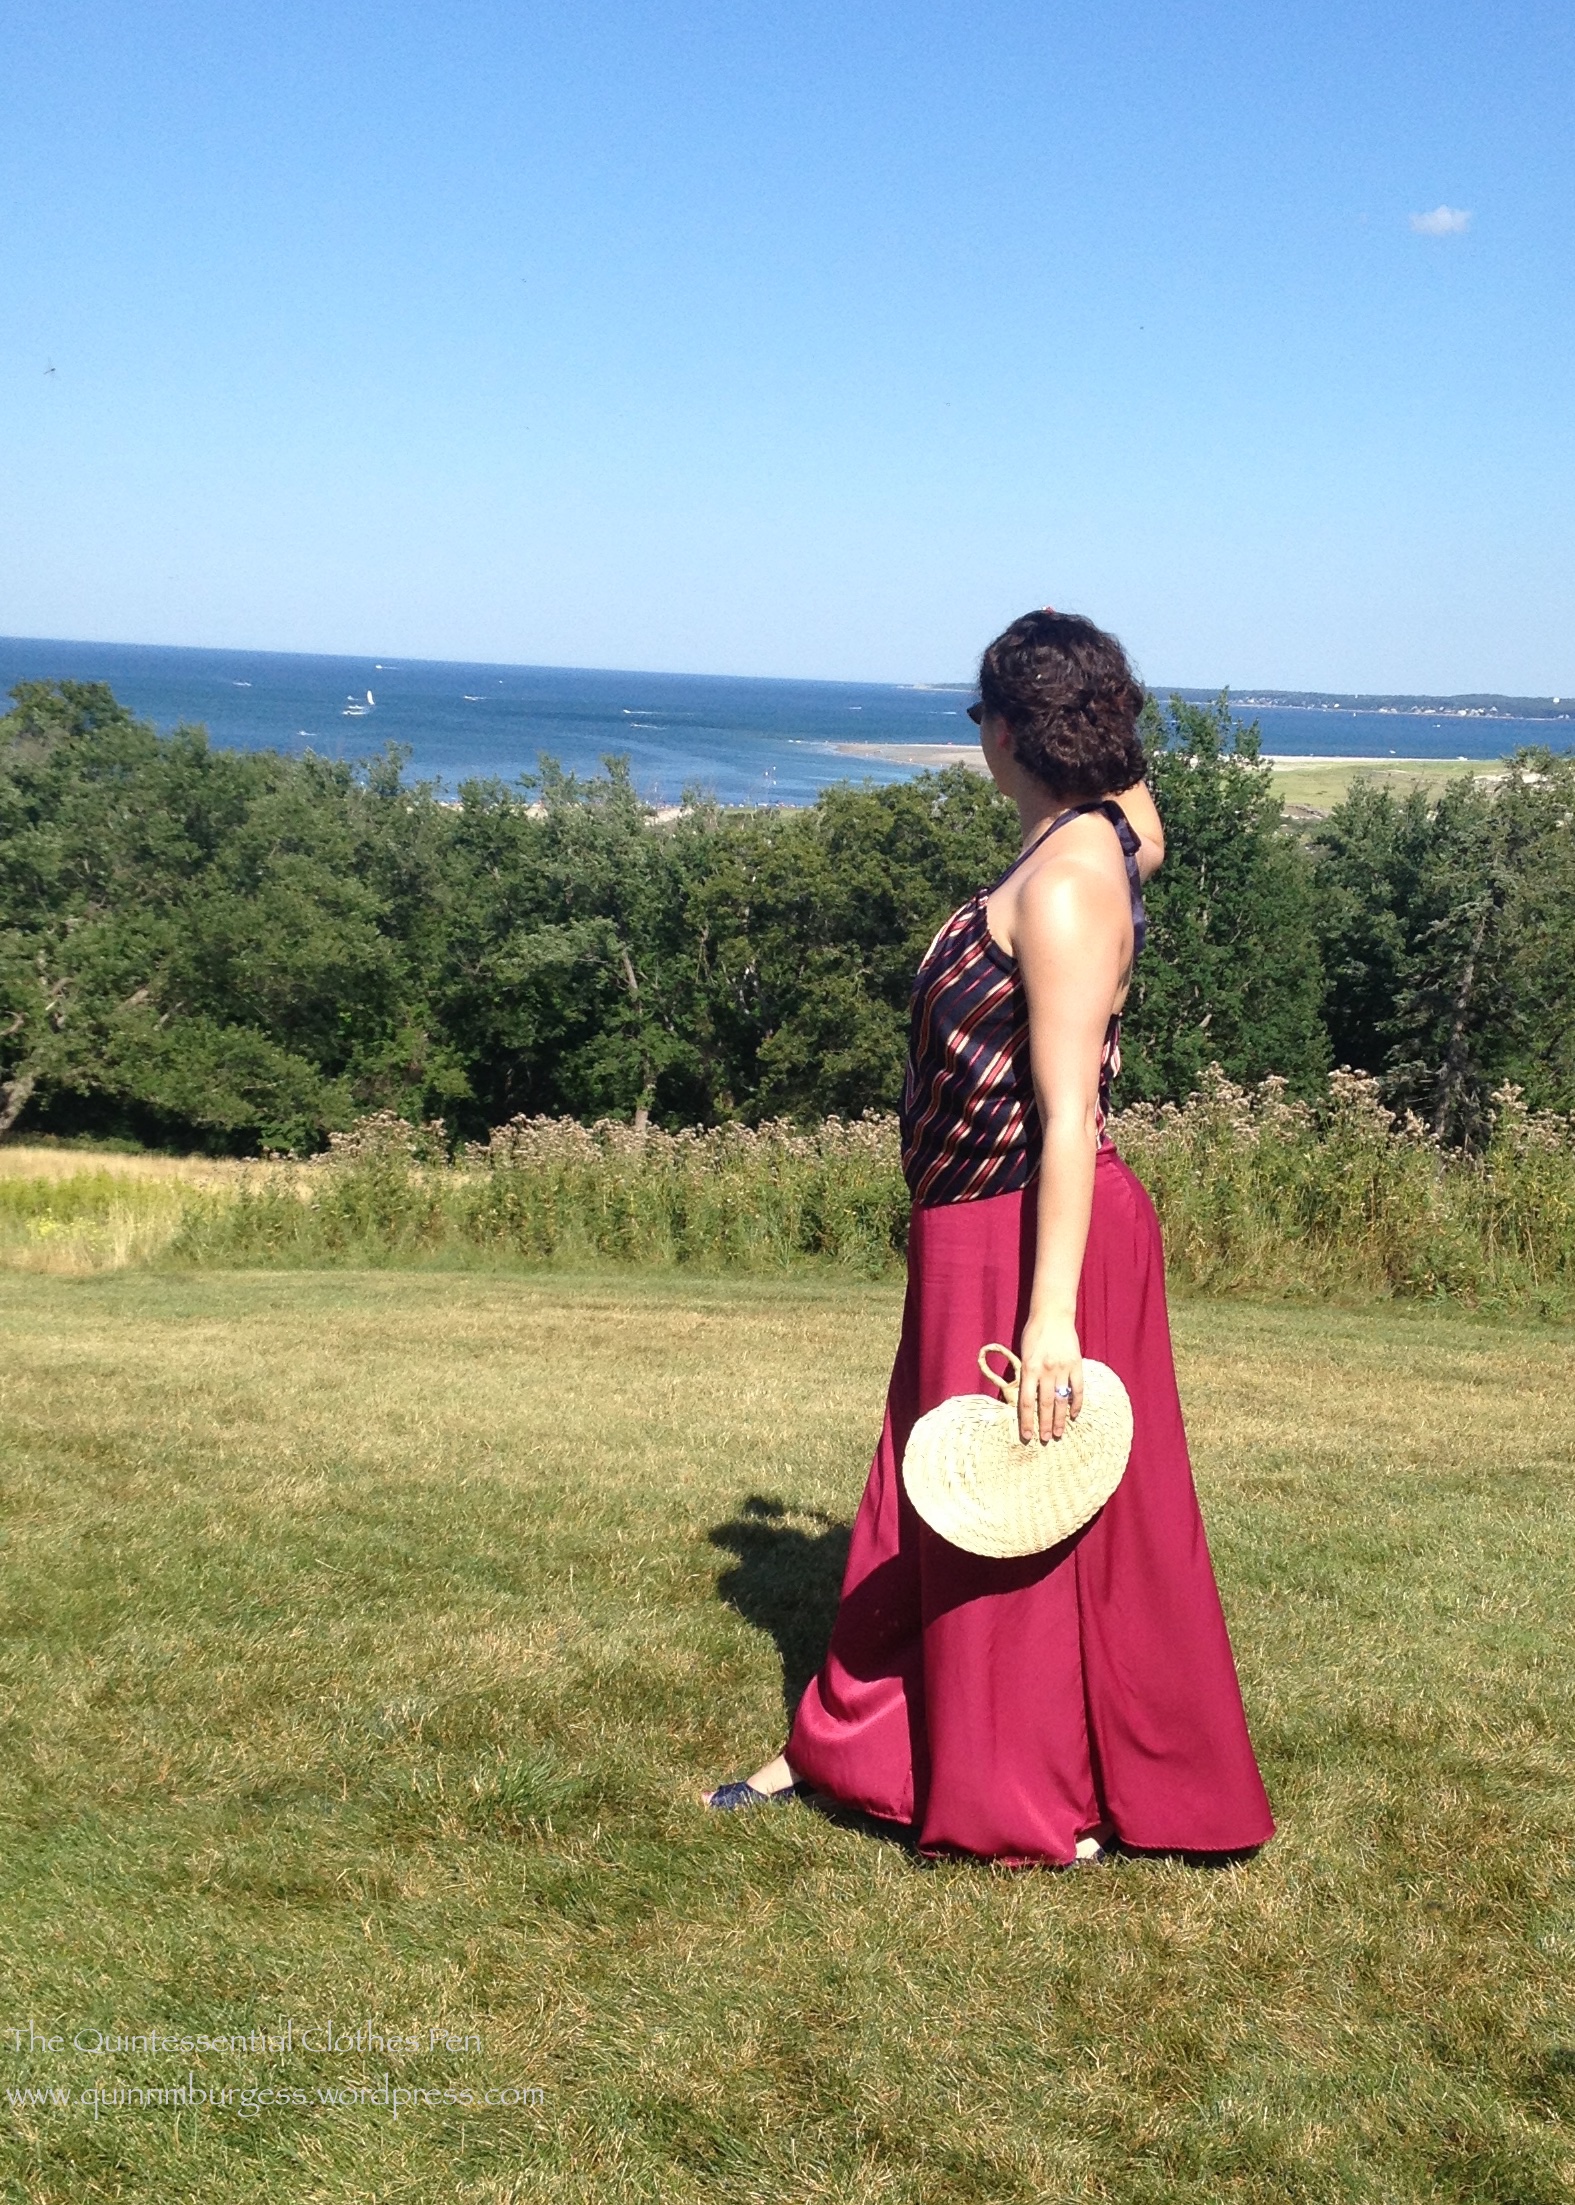
The halter was made using Leimomi’s tutorial “How to make a 1930s style handkerchief halter top“. I used an old striped silk twill fabric remnant rather than a handkerchief, so I had to finish my edges, but I also had to piece the fabric to get the right beginning square rather than rectangle shape. I also made my square a bit bigger than a scarf’s dimensions so that my lower back would be totally covered by the halter. And I used hug snug for my tie, because it was all I had on hand that matched. The halter was pinned around my body to a comfortable point on each side.

IMG_2647
Front.
IMG_2649
Back.
Colorized-early-30s-postcard-of-fashionable-beach-pyjama-wearing-holiday-ers-on-the-Cote-DAzure-2
My inspiration: one of the images that Leimomi includes in her tutorial post (just like the lady in the middle, I decided to make my center front seam decorative and do a chevron–it makes me very happy!). Beach pyjamas on the Cote D’Azure, colourized postcard, 1930s
IMG_2443
Cutting and piecing to get the chevron.

The pants I drafted myself. They’re actually based on the same pattern I made my dotty tap pants from, adjusted to have a waistband, full length legs, and much more fullness in the width of the legs! The pants close with an invisible side zip. They are constructed from soft washed crepe-like polyester fabric that is super comfy to wear while lounging around on picnic blankets. And bonus, both of these fabrics have been in my stash for years: the stripe for about 7 or 8 years and the pants fabric for about 4 years. Free, and yay for using up stash fabrics!

IMG_2645

IMG_2642

IMG_2651

There are more very fun examples of wide leg beach pajamas on my 1930s Sportswear Pinterest page. I’m looking forward to finding other opportunities to wear these again and hopefully getting pictures of them on a beach at some point!

Belated HSF 2013 #13: 1885 Frills and Furbelows

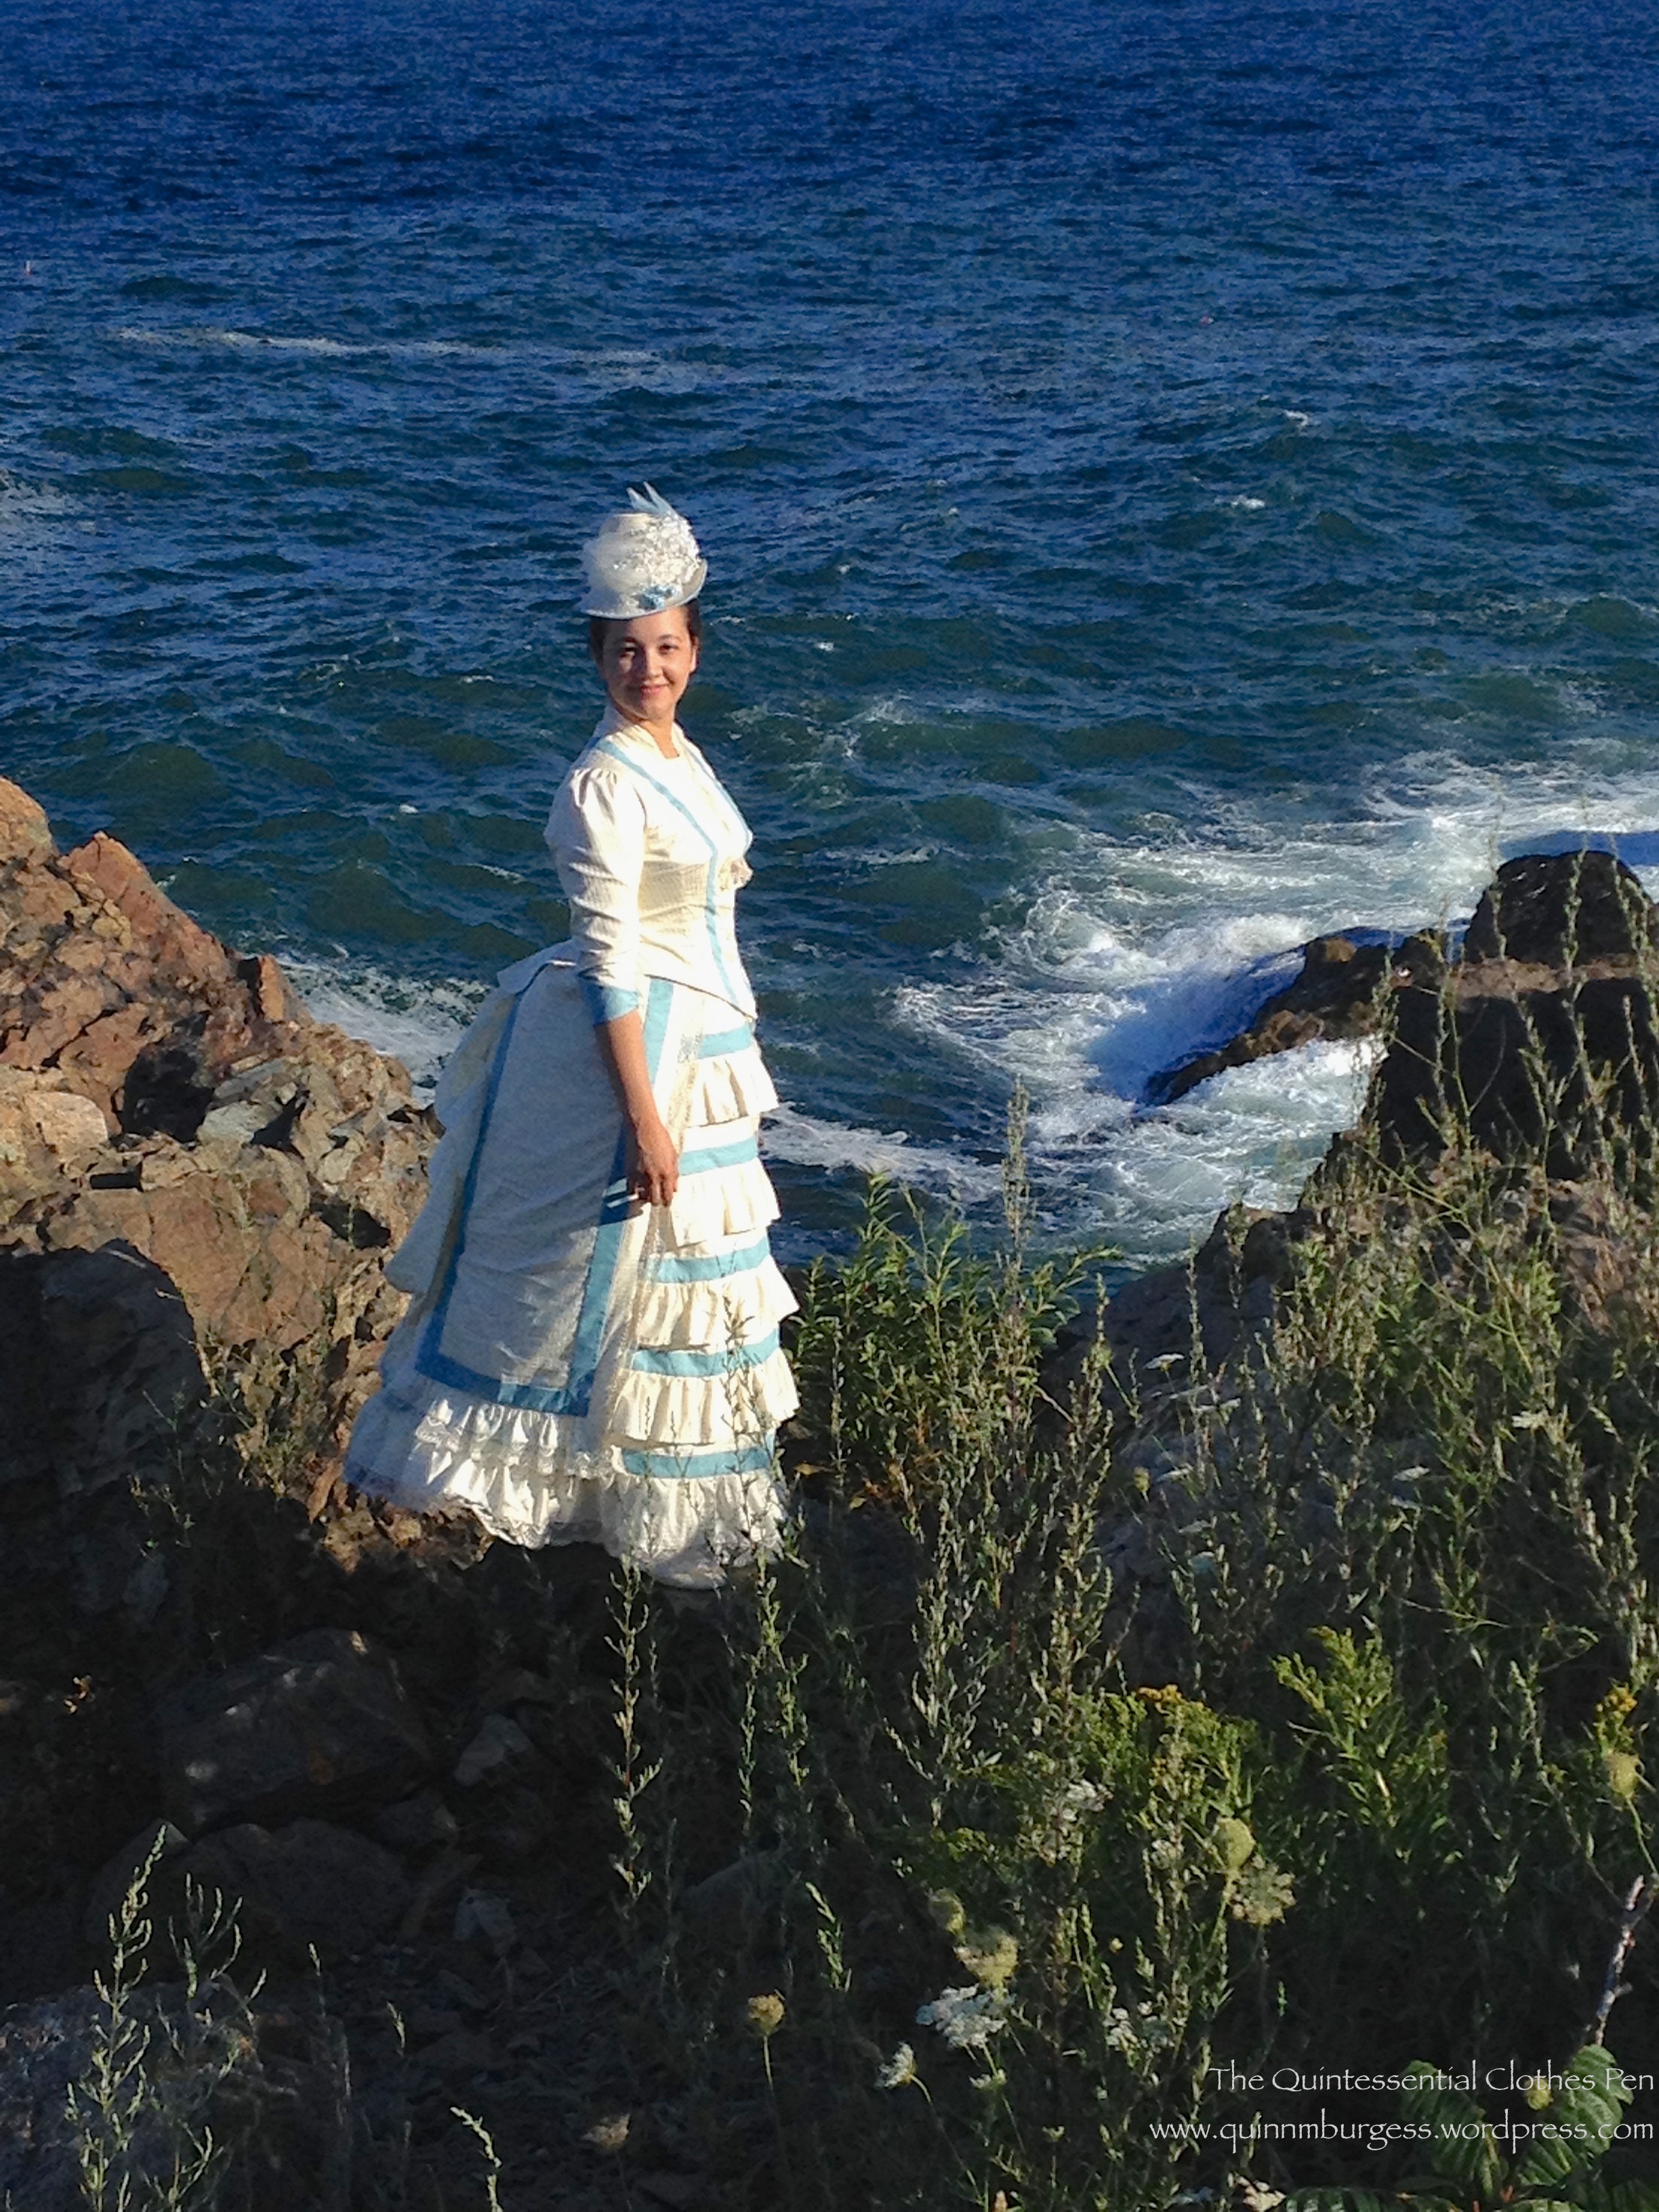
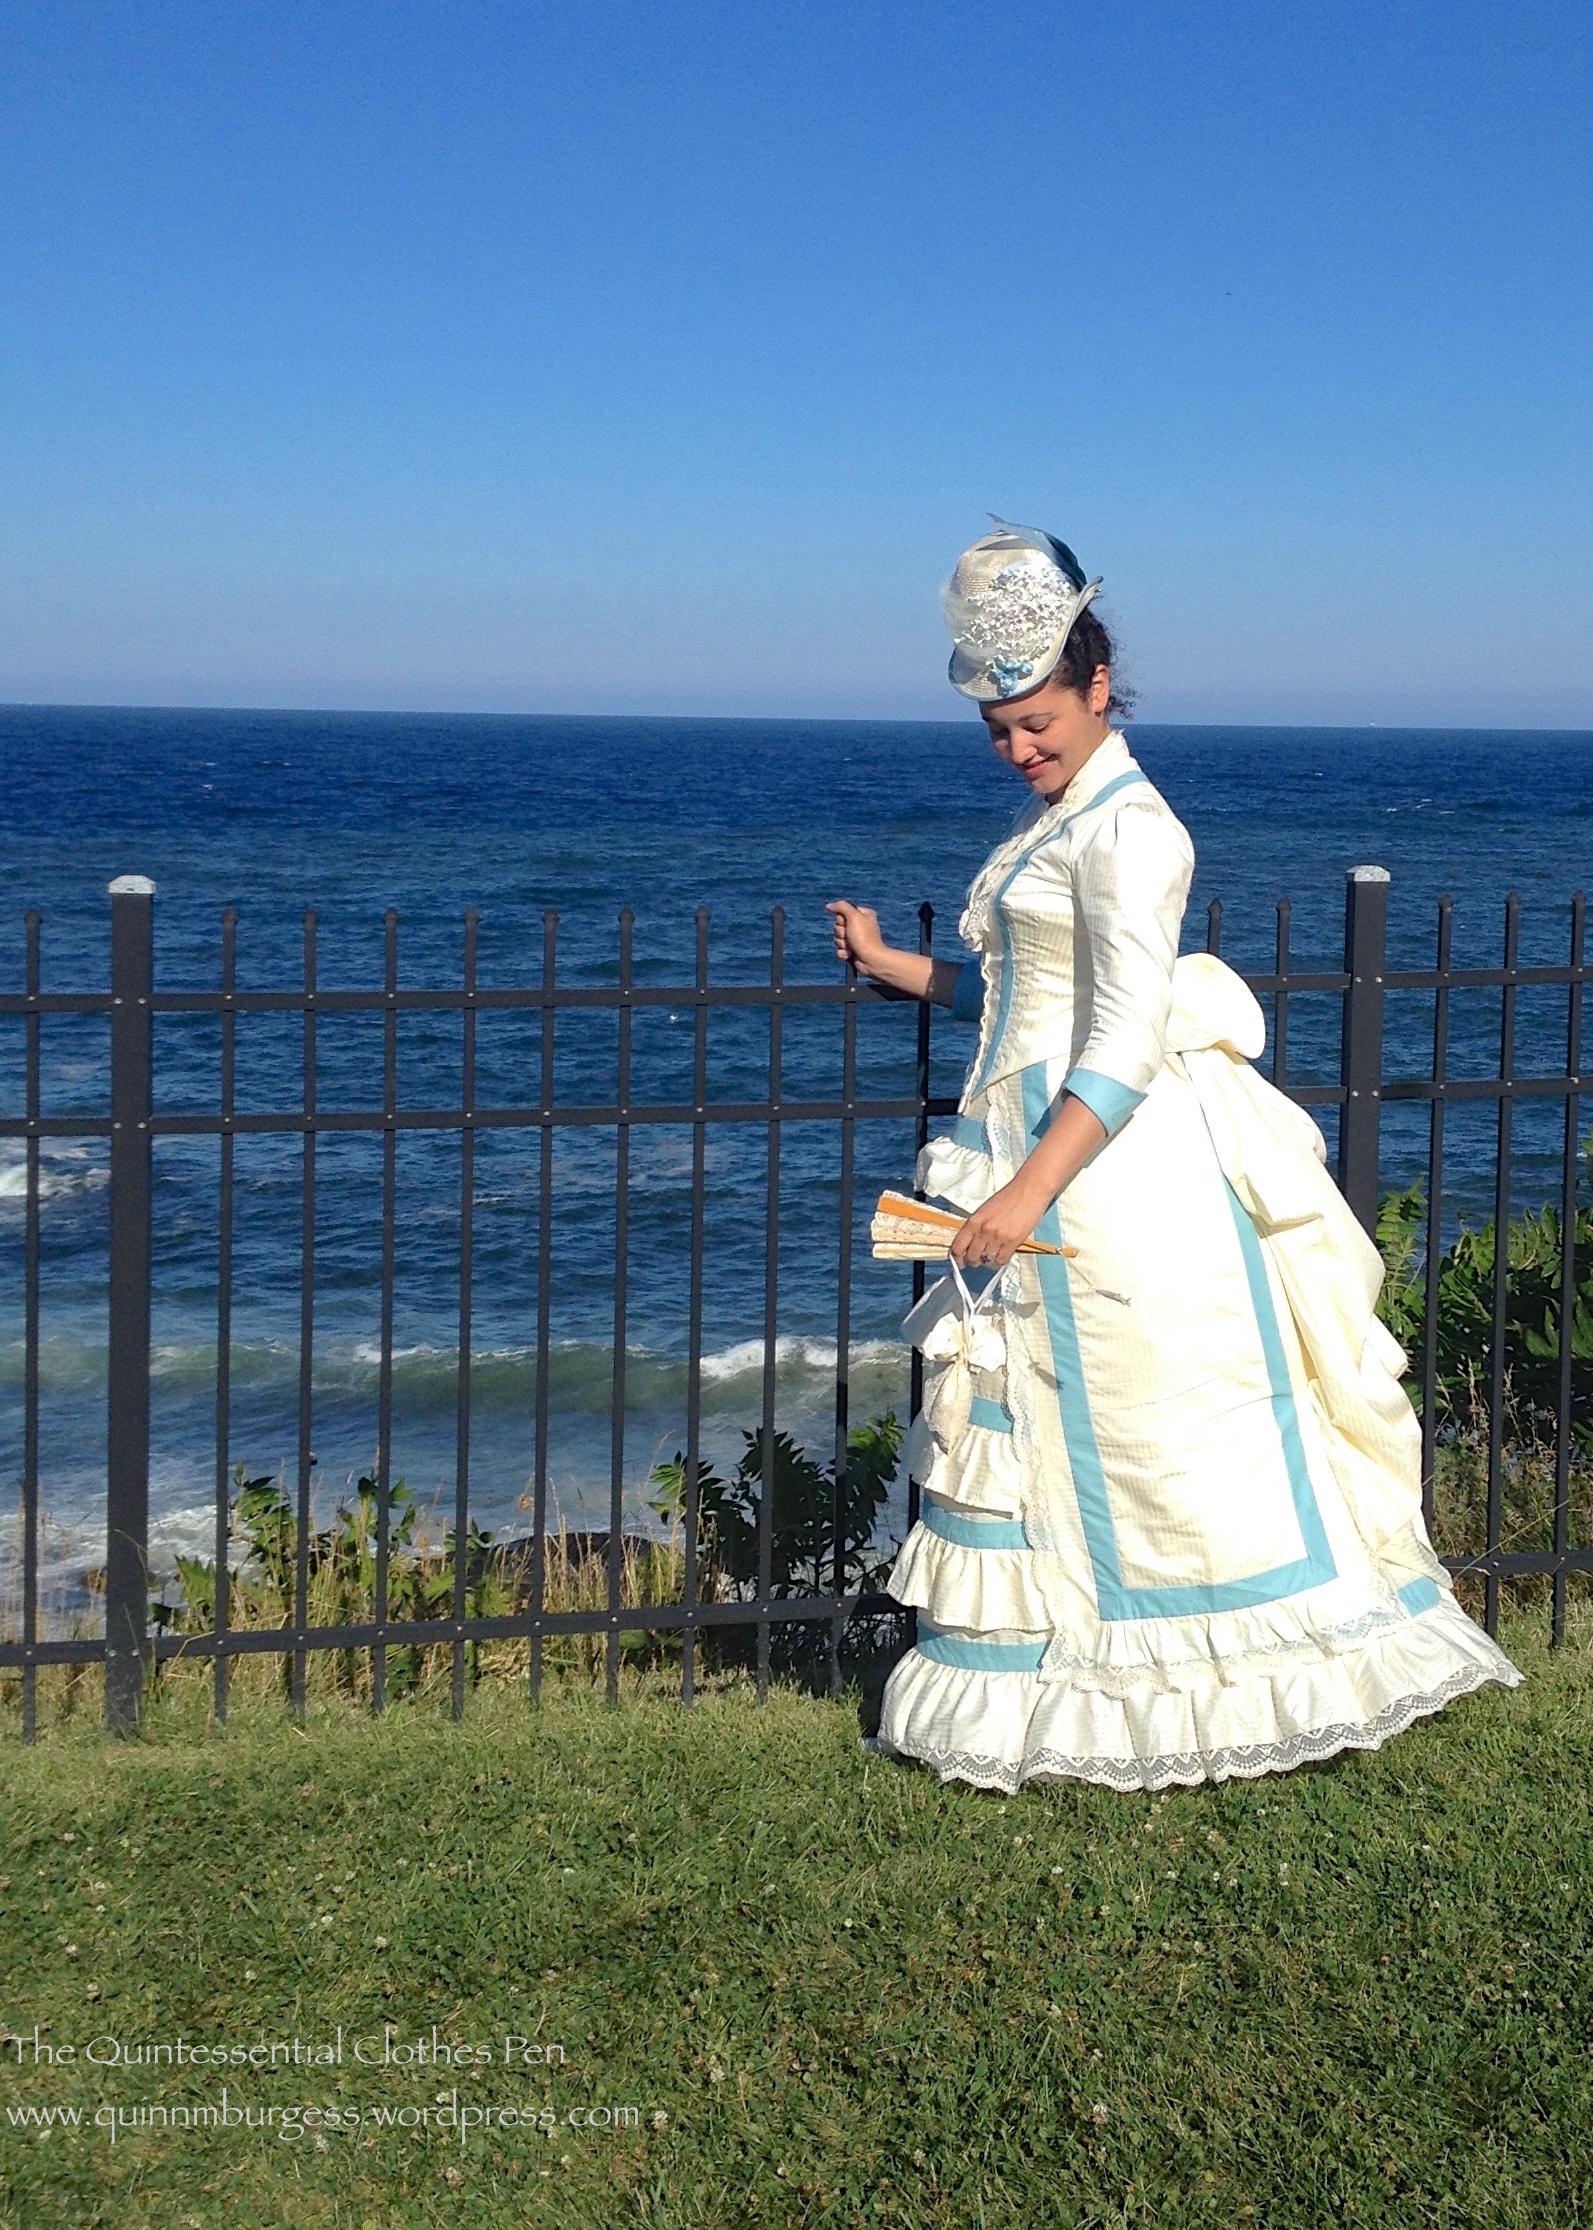
For my 300th post on the blog, I thought I’d share a dress that makes me smile. This dress makes me smile because of the frilliness of it which reminds me of Anne of Green Gables, because of the fact that it was very enjoyable and comfortable to wear, because I love that it is a UFO from 2013 that is finally complete, and because of the stunning backdrop I had for the pictures of it, which also remind me of Anne of Green Gables.

IMG_2725

I wore this dress to the Nahant Vintage Dance Weekend Formal Tea and Seaside Promenade in August. It was also the first outing for the my new 1880s steam molded corset and my recently made 1885 straw hat. I am pleased to report that they were all comfortable garments and accessories to wear. Being heavily boned, the corset was very supportive and thankfully didn’t feel heavy, and because it is shaped exactly to my body it was super comfortable–smoothing my figure without squishing it uncomfortably. The dress was perfectly reasonable to wear, with the exception of sitting, which required a slight sideways perch that was a bit precarious. And the hat stayed in place perfectly with two hat pins, as you can see from the pictures where my head is tilted in various directions.

IMG_2699

IMG_2689

IMG_2698

This dress has an association in my head with the puffed sleeves that Anne wants in Anne of Green Gables. While being from the wrong decade, it seems exactly like the sort of dress covered in frills and furbelows that Marilla wouldn’t waste fabric on. And just like Anne, I would often rather have the ridiculous, fashionable styles in historical clothing than the plain and sensible ones!

MARILLA: I’m not going to pamper your vanity. These are good and sensible dresses. This one is for Sunday, and the others you can wear to school.

ANNE: I am greatful, but I’d be even more grateful if you’d made this one with puffed sleeves.

MARILLA: I cannot waste material on ridiculous looking frills and furbelows. Plain and sensible is best.

ANNE: I’ve always dreamed of going to a picnic in puffed sleeves. I’d rather look ridiculous with everyone else than plain and sensible all by myself.

IMG_2706

This dress was started in 2013. I had grand hopes of finishing it that summer for the Historical Sew Fortnightly challenge #13: Lace and Lacing

Lacing is one of the simplest and oldest forms of fastening a garment, eminently practical, and occasionally decorative.  Lace has been one of the most valuable and desirable textiles for centuries, legislated, coveted, at times worth more than its weight in gold, passed down from one garment to the next over centuries. Elaborate and delicate it is eminently decorative, and rarely practical.  Celebrate the practicality of lacing, and the decorative frivolity of lace, with a garment that laces or has lace trim, or both.

And while I did make significant progress on the skirt that summer (getting all of the trimming figured out, cut, and assembled, as well as getting the skirt base and side panels constructed), I didn’t get anywhere near far enough along to have a wearable outfit. So it sat in my “in-progress” sewing box with hopes to be worked on, but didn’t really make it to the top of my sewing list again until this summer. I had enlarged and sized a pattern from Janet Arnold in between 2013 and 2015, even cutting and assembling a mockup, but that had been waiting for a fitting because I wanted to wear my new specifically 1880s corset with the dress and the new corset didn’t get completed until June. Once I had the corset done, I set to work on the dress again, fitting the mockup bodice, finishing the skirt, and making the bodice, as well as a slight delay while I made the hat to match. It’s handy to make a hat part-way through the process of making the dress, because you don’t wind up running out of time at the end and not having matching accessories!

IMG_2772

The first inspiration for my dress was this white summer dress at the LACMA. The skirt was pretty much directly taken from the original, except for the back, which has a cascade of fabric instead of tucks as on the original–I figured there was already enough fluff for me on the front of the dress. I originally planned to edge all the front ruffles in lace as well, but ran out of lace. Running out of lace also made me rethink how I was going to trim the bodice. I went back to my inspiration boards and found these dresses with inspiring bodice treatments: a seaside ensemble and an afternoon dress with very different fabrics and intent, but I thought this could be adapted for my summery seaside dress. I had only a few yards of lace left when I got to working on the bodice and I decided to save some for edging the top of the 1880s corset because the shape of the lace is perfect, but that didn’t leave me much for the bodice. It turns out I had just enough to execute the final trimming plan I decided on.

IMG_2754

Since this was originally intended to be part of the HSF, here are just the facts:

Fabric: 7ish, I think, yards of cream satin stripe cotton, 1/3ish of a yard of blue polished cotton, and 1.5 yards or so of cream polished cotton for flat lining the bodice.

Pattern: Created by me, but the shapes are based on a dress in Janet Arnold.

Year: 1885.

Notions: 9 yards of ivory lace, hooks and eyes, scraps of white cotton for finishing off the bodice edges, and vintage ivory buttons.

How historically accurate is it?: As accurate as I can be using the research I’ve done and the materials that are available in 2015. It definitely passes Leimomi’s test of being recognizable in its own time.

Hours to complete: Tons over two years.

First worn: In August 2015.

Total cost: I bought the all the cottons for super cheap, probably $3/yard, the lace was probably about $8, the buttons were a few dollars, and the rest was from the stash, so around $30-$35.

There were so many good pictures it was very hard to limit myself for this post! So here’s some more, with a bit of commentary to go along with them.

We had a beautiful day for the Tea and Promenade. It had been very hot prior to this, but the day of the event was a little cooler and the stiff ocean breezes made for a temperature that felt perfect for me in my layers and ¾ sleeves. The formal tea part of the day was at Egg Rock on Nahant (the same location as the Formal Soiree I attended last August). There was a lovely concert inside the house as well as guests lounging around outside, including me, playing croquet. At that point the stiff breeze had me worried that my hat wouldn’t stay on without pulling at my hair, so I chose not to wear it for awhile. (Thank goodness I gave it a try later, though, because it is perfect with the dress and I wouldn’t have wanted to miss wearing the two together!)

IMG_2668

11866207_10153557263049588_8661903483348243128_n

After the concert and some refreshments, the guests assembled for the promenade. As you would expect, we stopped traffic, attracted stares, and received questions from the more brave souls who would talk to us rather than just making up stories in their heads about our unusual clothing. The promenade took us to East Point, former site of the 19th century Nahant Hotel. The hotel is no longer standing, but there were stunning views of the Atlantic and the rocky coast to clamber on!

IMG_2716

IMG_2721

IMG_2735

IMG_2737 (1)

IMG_2742

IMG_2750

IMG_2776

Not me, but such a gorgeous view and cute picture that I had to share it, too!

IMG_2766

Some of us decided to head back a little early so we could stop at a small beach we had passed on our way to East Point and go wading! After the walk, the cold Atlantic water felt quite good on our feet. Here I am with stockings and shoes off, ready to head into the water.

IMG_2785

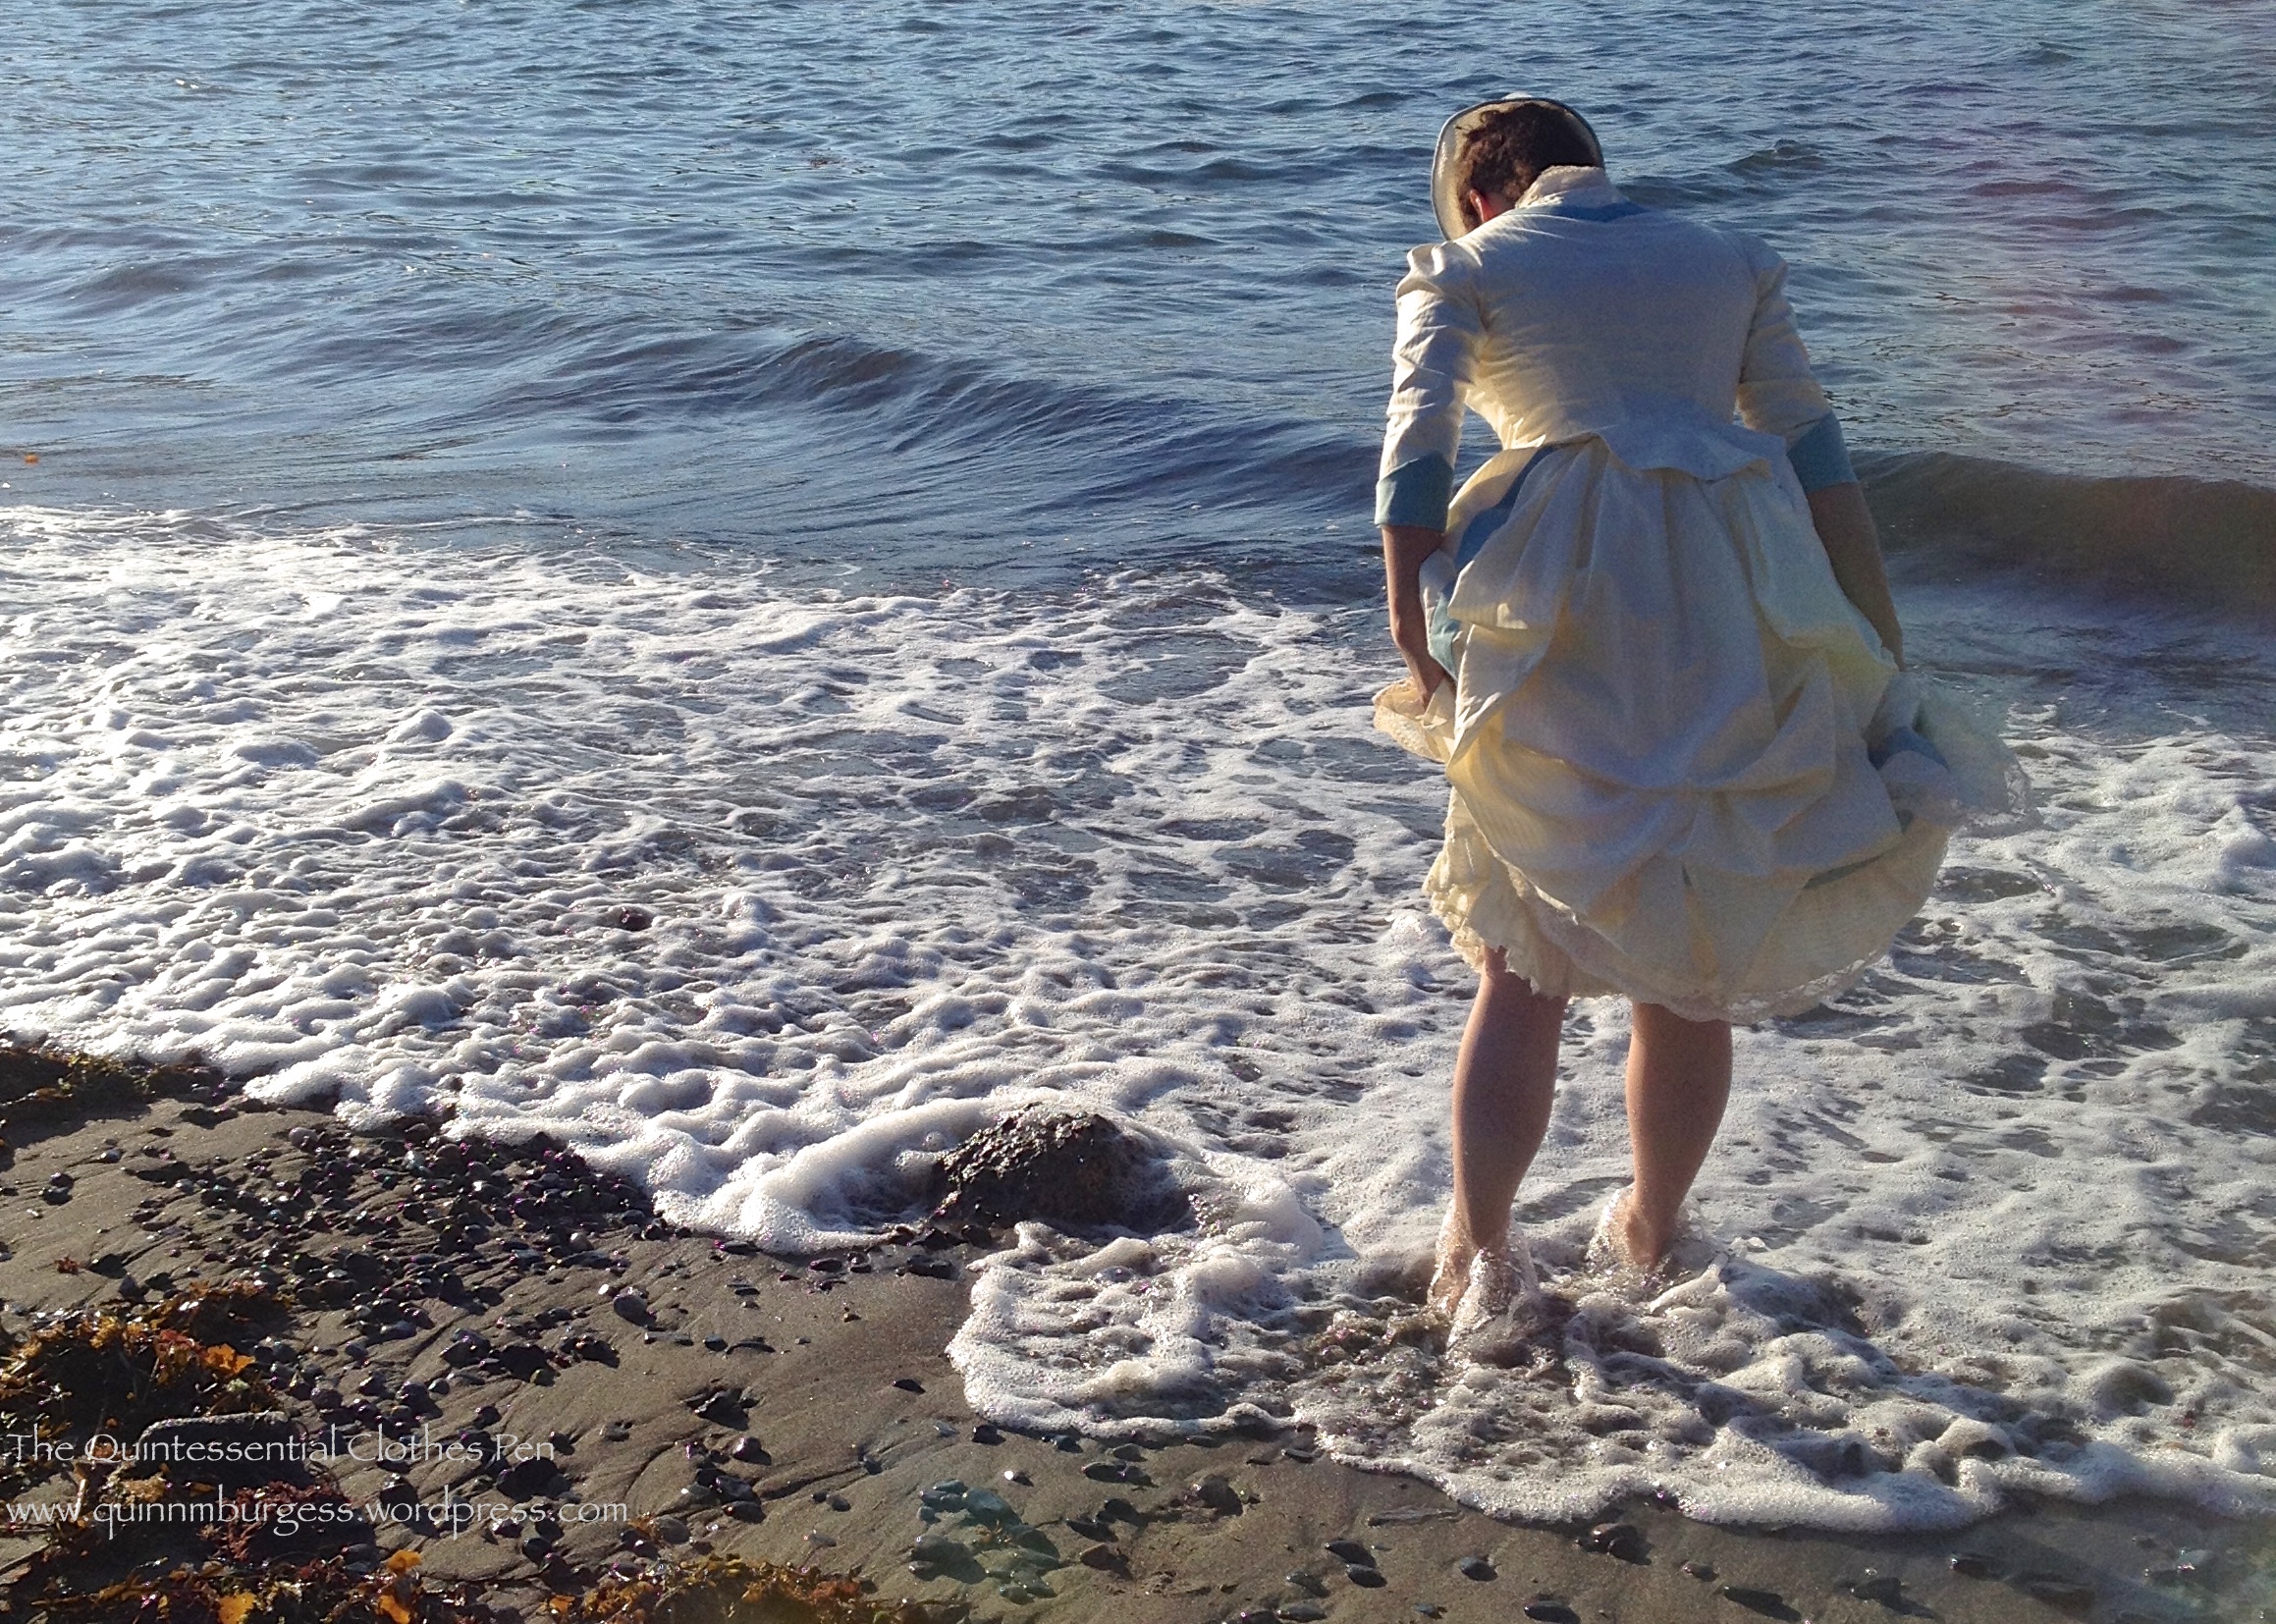
And here I am, wading in my bustle dress!

IMG_2816

There’s this picture of two ladies in bustle dresses from 1885 who look like they are collecting shells. That’s what I had in mind when I took this next picture, although looking at the 1885 picture again I see that the ladies in the picture are still wearing their stockings and shoes… I guess I’m pretty scandalous for 1885 in my bare legs and feet!

IMG_2827

Here we are, the whole wading group. It was a pretty fun adventure. I don’t think I’ve been wading in historical clothing since Newport in 2012.

IMG_2789

IMG_2810

Restyled 1928 Green Silk Dress

Perhaps you remember this late 1920s green dress, which I made and first posted about in 2012? When it was first completed, I was in the midst of creating lots of new things for Newport Vintage Dance Week and was grateful that it had made it to a wearable state. I hadn’t quite solved the issue of keeping one side bunched up, so for the first wearing I used the bronze sequined flower pin you see in the picture below.

The slippery silk of the dress caused the pin to move around and shift while I was wearing the dress. I also didn’t love that it did nothing to break up the smooth lines of the back side of the dress.

IMG_2793
In 2012.

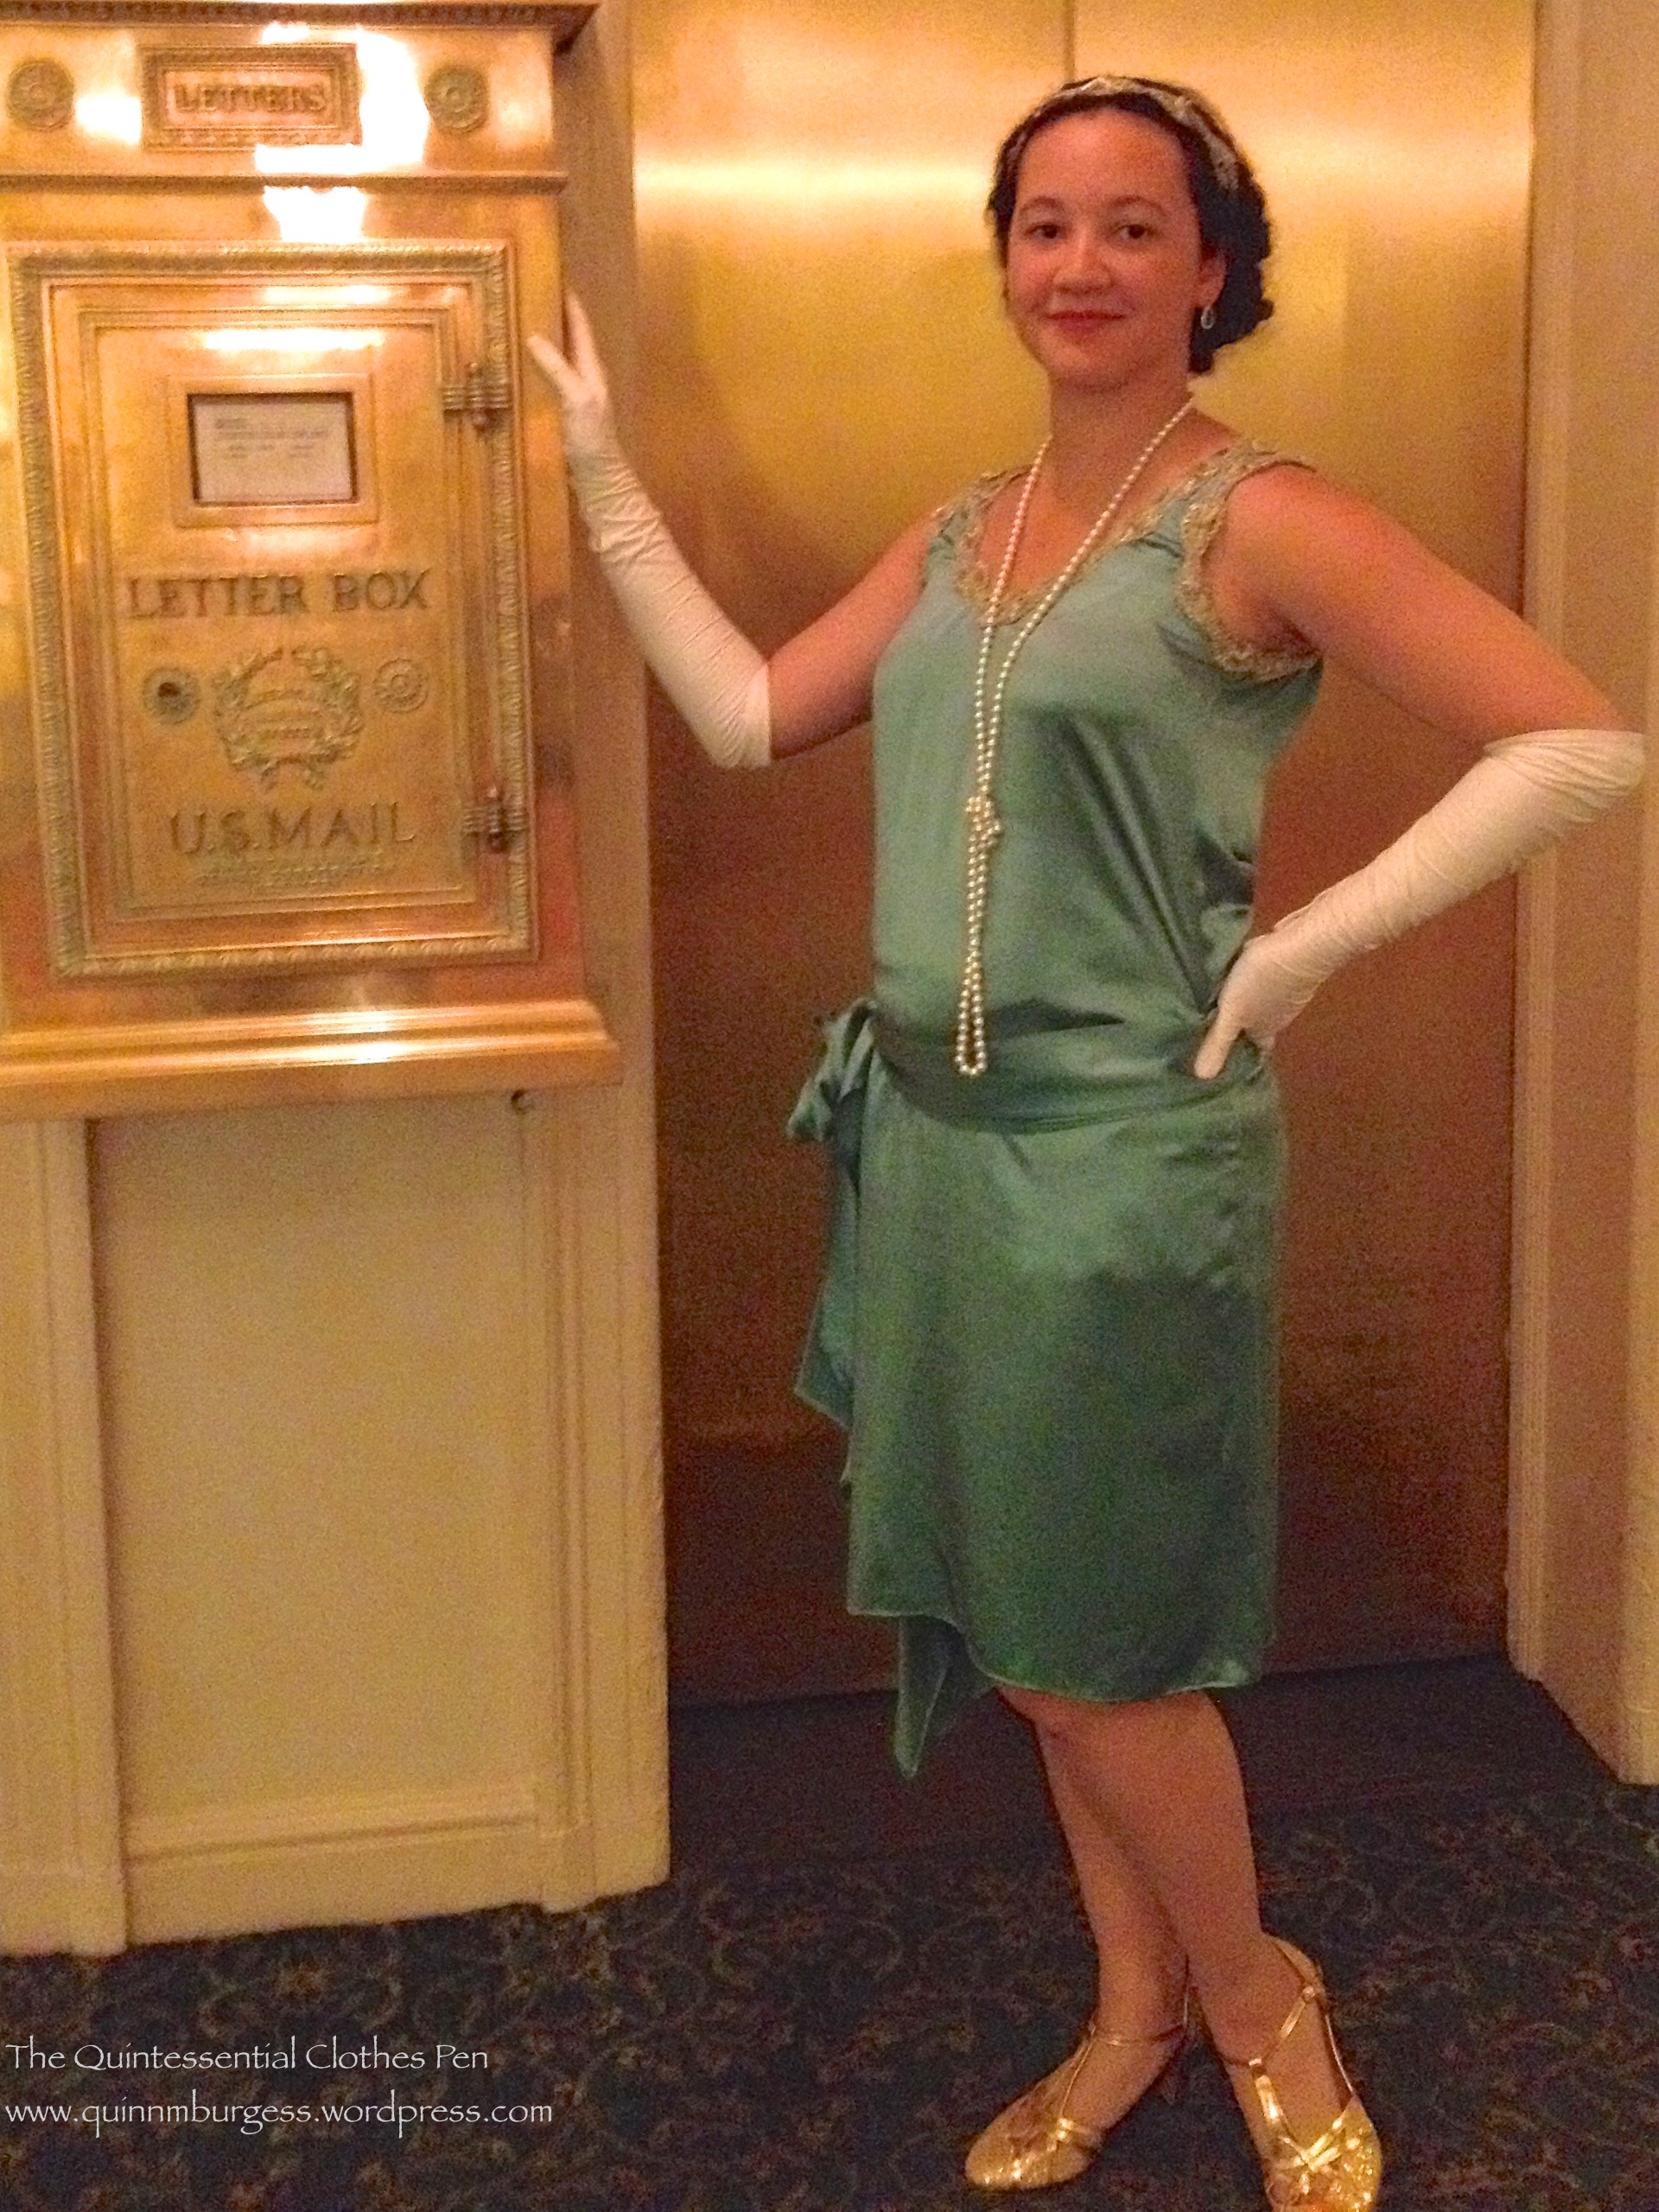
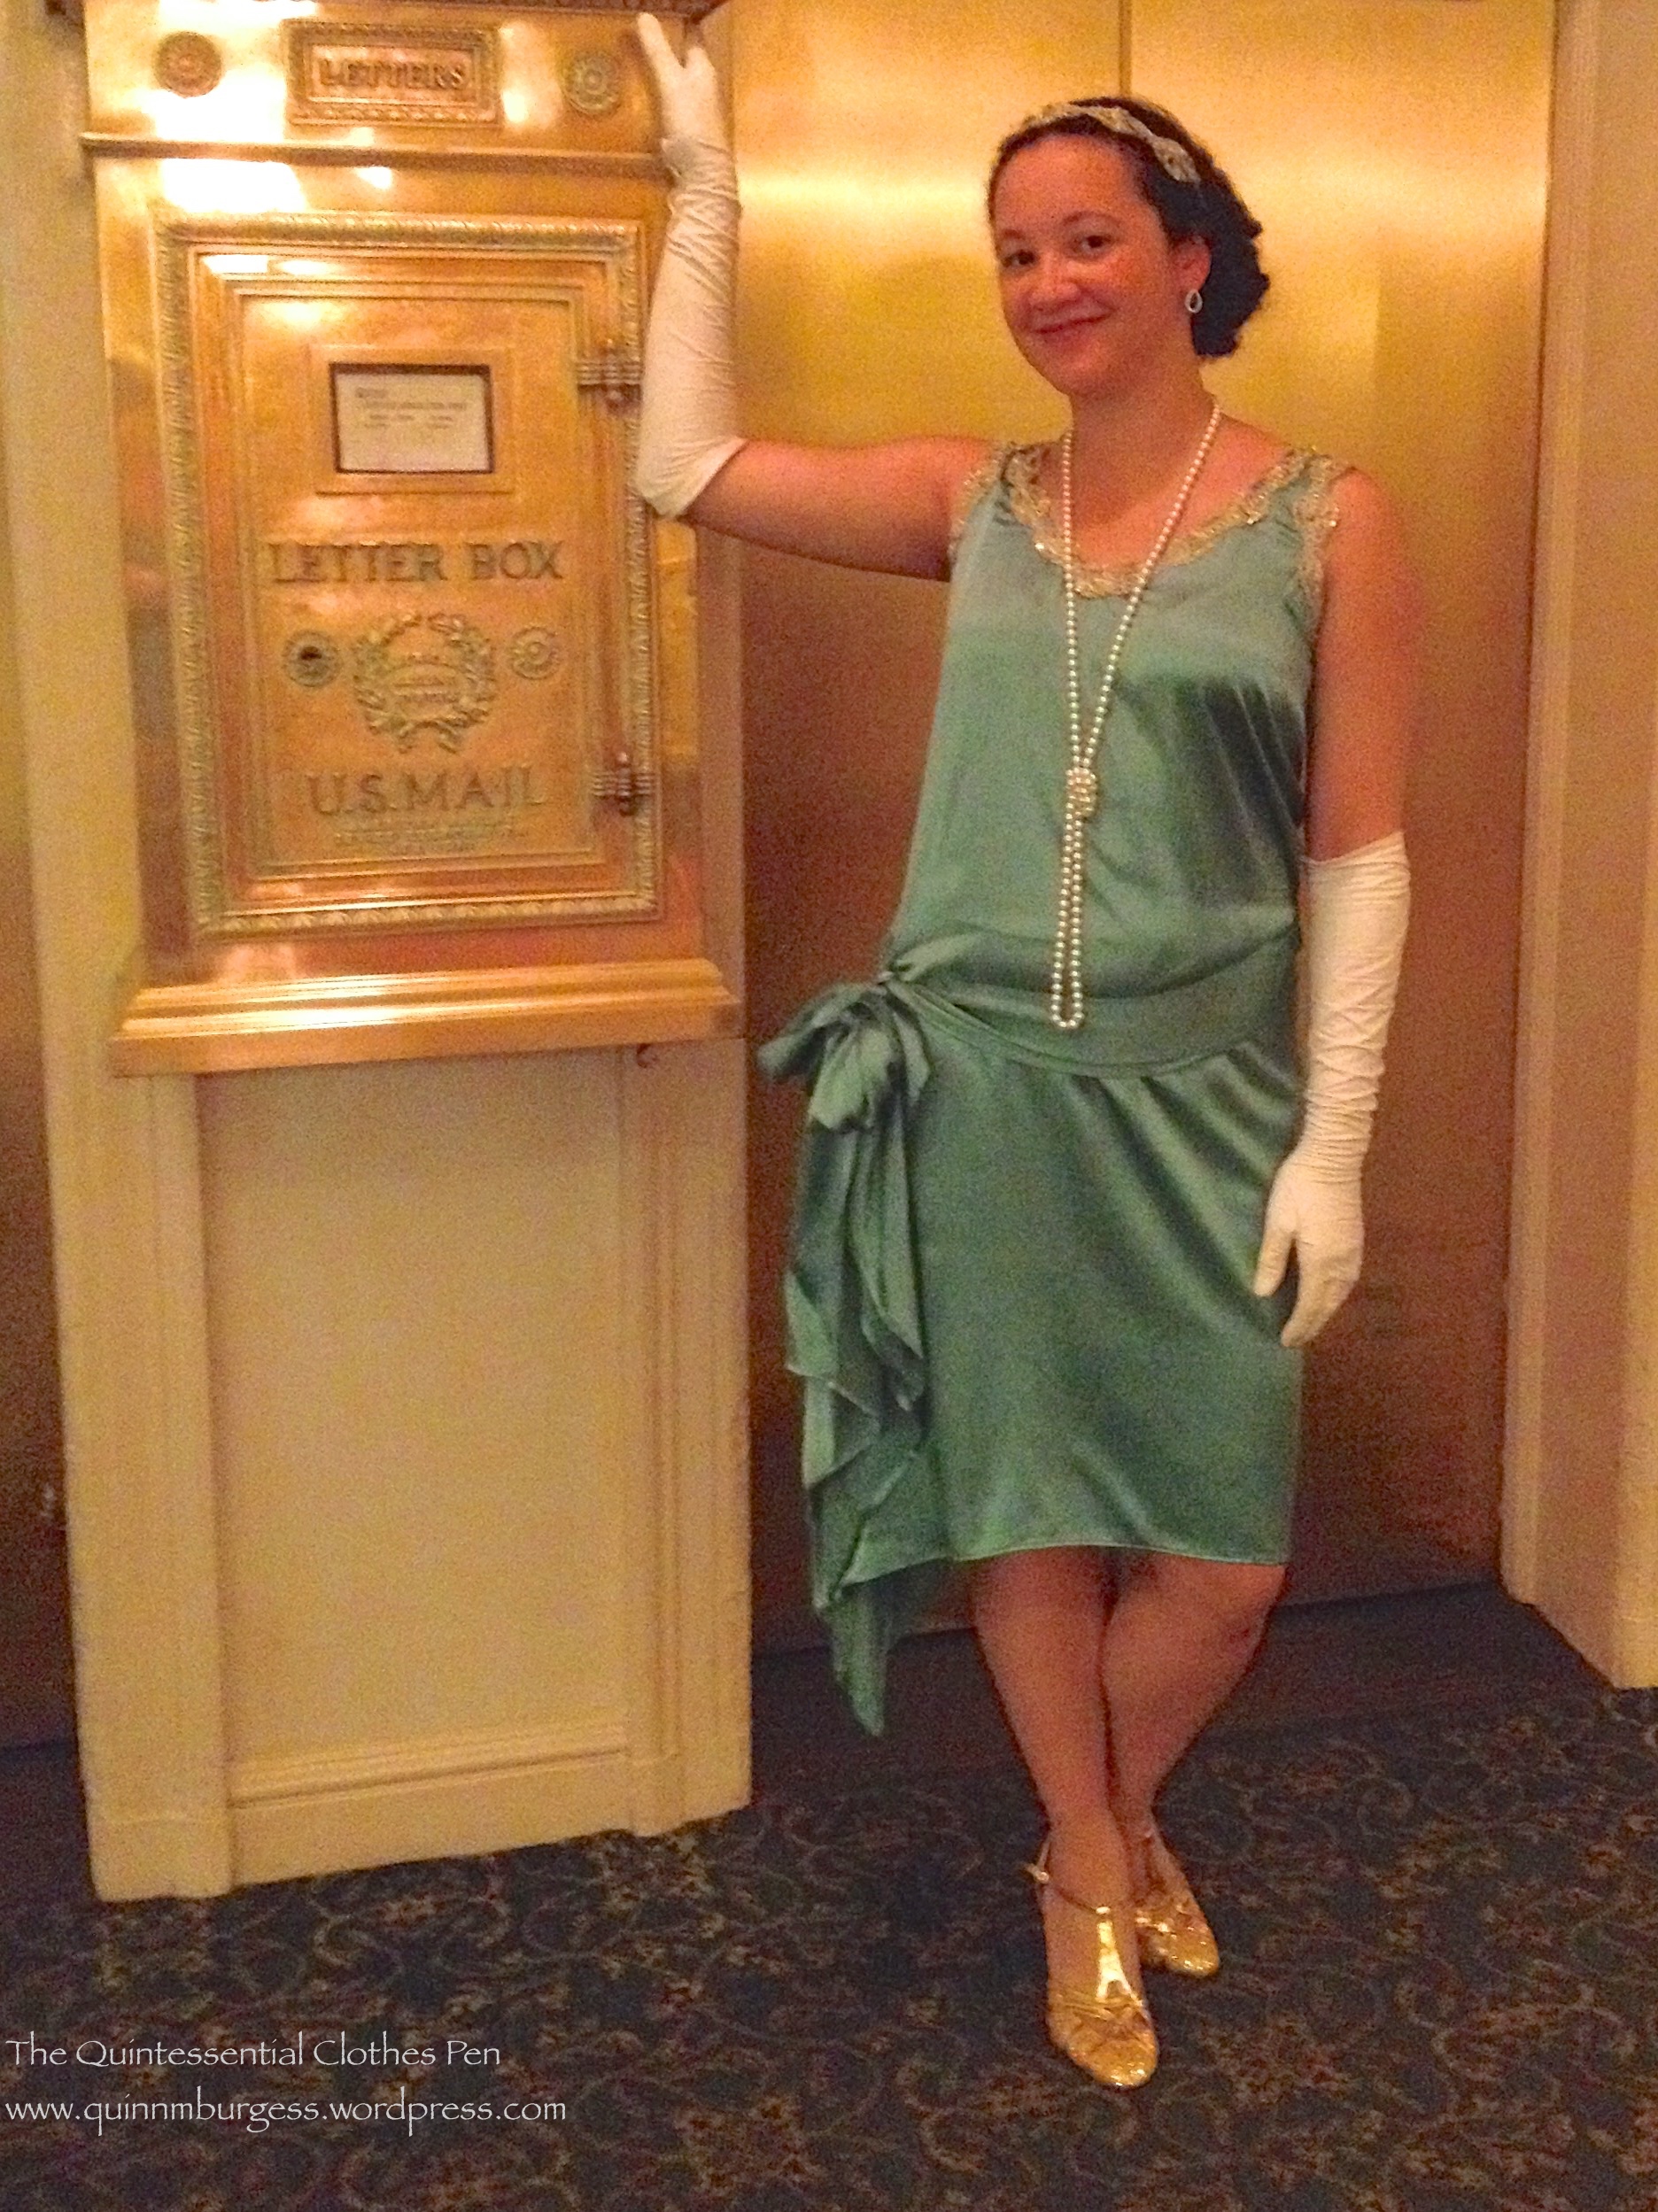
Last year, I had a reason to wear the dress again and I came up with a new design idea, based on this image from 1929. I loved the simple lines of the green dress on the right (and it happened to be the right color!) and the sash with a huge bow. It took me another year to get proper pictures of the new look and document it here, but I’m really pleased with the pictures, so I guess it was worth the wait!

I used my remaining fabric to create a separate sash for my dress. It’s separate so I didn’t have to deal with adding closures to the dress–it still slips on over my head; however, because the silk is slippery and the bow side of the sash wanted to slide down, I did safety pin both the bow side and the opposite side of the sash to the dress to keep it in place.

IMG_2429
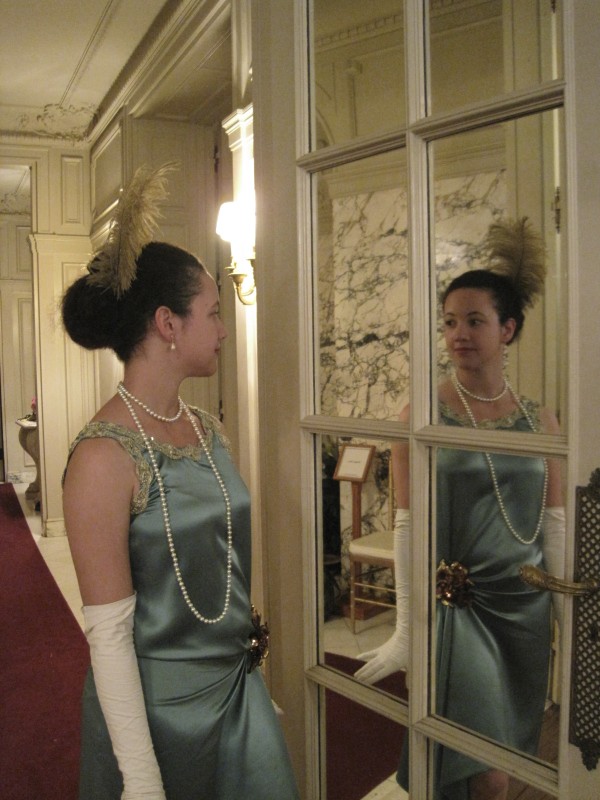
The same basic dress in 2015, styled differently. The same gloves and pearls (worn differently), with my newly shared gold t straps, green earrings, and a matching trim headband.
IMG_2438
And a different hair style. This is a better view of the bow.

I think the 20s silhouette grows in my estimation the more I wear it. It’s sort of odd at first, but can be quite elegant sometimes! I’m very pleased with how the sash and bow break up the dress and add extra oomph to the hem.

905794_10153002186899327_6142922609015185505_o
The event I wore the dress to was a 20s fundraiser at a local hotel. Here’s a bonus picture of the dress in action.


1924 Golden Robe De Style

I’ve wanted a robe de style to join my historic closet for at least a year, but haven’t had just the right fabric or the time or impetus to make it happen until this past spring. And as a general goal, I’ve been trying to expand my color choices beyond blues, greens, and reds, because those colors seem to dominate my historic wardrobe. Then this spring, I found gorgeous yellow silk at the local discount fabric store. I convinced myself that I didn’t need it, but couldn’t stop thinking about it, so I drove back to the fabric store a few days later to purchase the fabric.

IMG_2390

I was inspired by the styles from the earlier years of the 20s for this particular robe de style, when the skirts were long and full. You can see a mix of robe de styles from the 20s on my inspiration Pinterest board. I didn’t follow any particular image or extant garment, but used them in general to create a unique dress. I really enjoyed wearing this dress and would like to make another someday that I think I’ll make a little shorter, more like later 20s styles.

I chose to accent the waistline of this dress with a ribbon rosette in a contrasting silk ribbon. It has an inner circle of matching yellow silk and a bit of gold sequined lace in the center. It looks a little like I won a prize at a state fair, but I like that it breaks up all the yellow of the dress.

IMG_2388

The pattern is loosely based off the information provided by Maria in this blog post about her black robe de style. I scaled up her pattern, made a mockup, and then adjusted it to suit my body shape. The skirt required some math to get the right curve across the top to achieve the high-low hem–the bottom edges are the straight selvedge edges–but aside from that the panels are just gathered to fit the waist, with more gathers concentrated over the sides than in the front and back. The extra bonus about using selvedge edges for the hems is that they have a nice fringed edge that meant I didn’t even need to hem them! Instant hems and a nice lightweight looking skirt. Double win!

I used the opportunity of wearing this new dress to break out a new pair of shoes. Glamorous gold t-straps! (All the credit goes to Katherine for these shoes–she bought them in silver and posted about it which is what directed my attention to the style in the first place.) I bought them about 10 months ago for my birthday but hadn’t had an opportunity to wear them until now.

IMG_2362

IMG_2361

IMG_2354

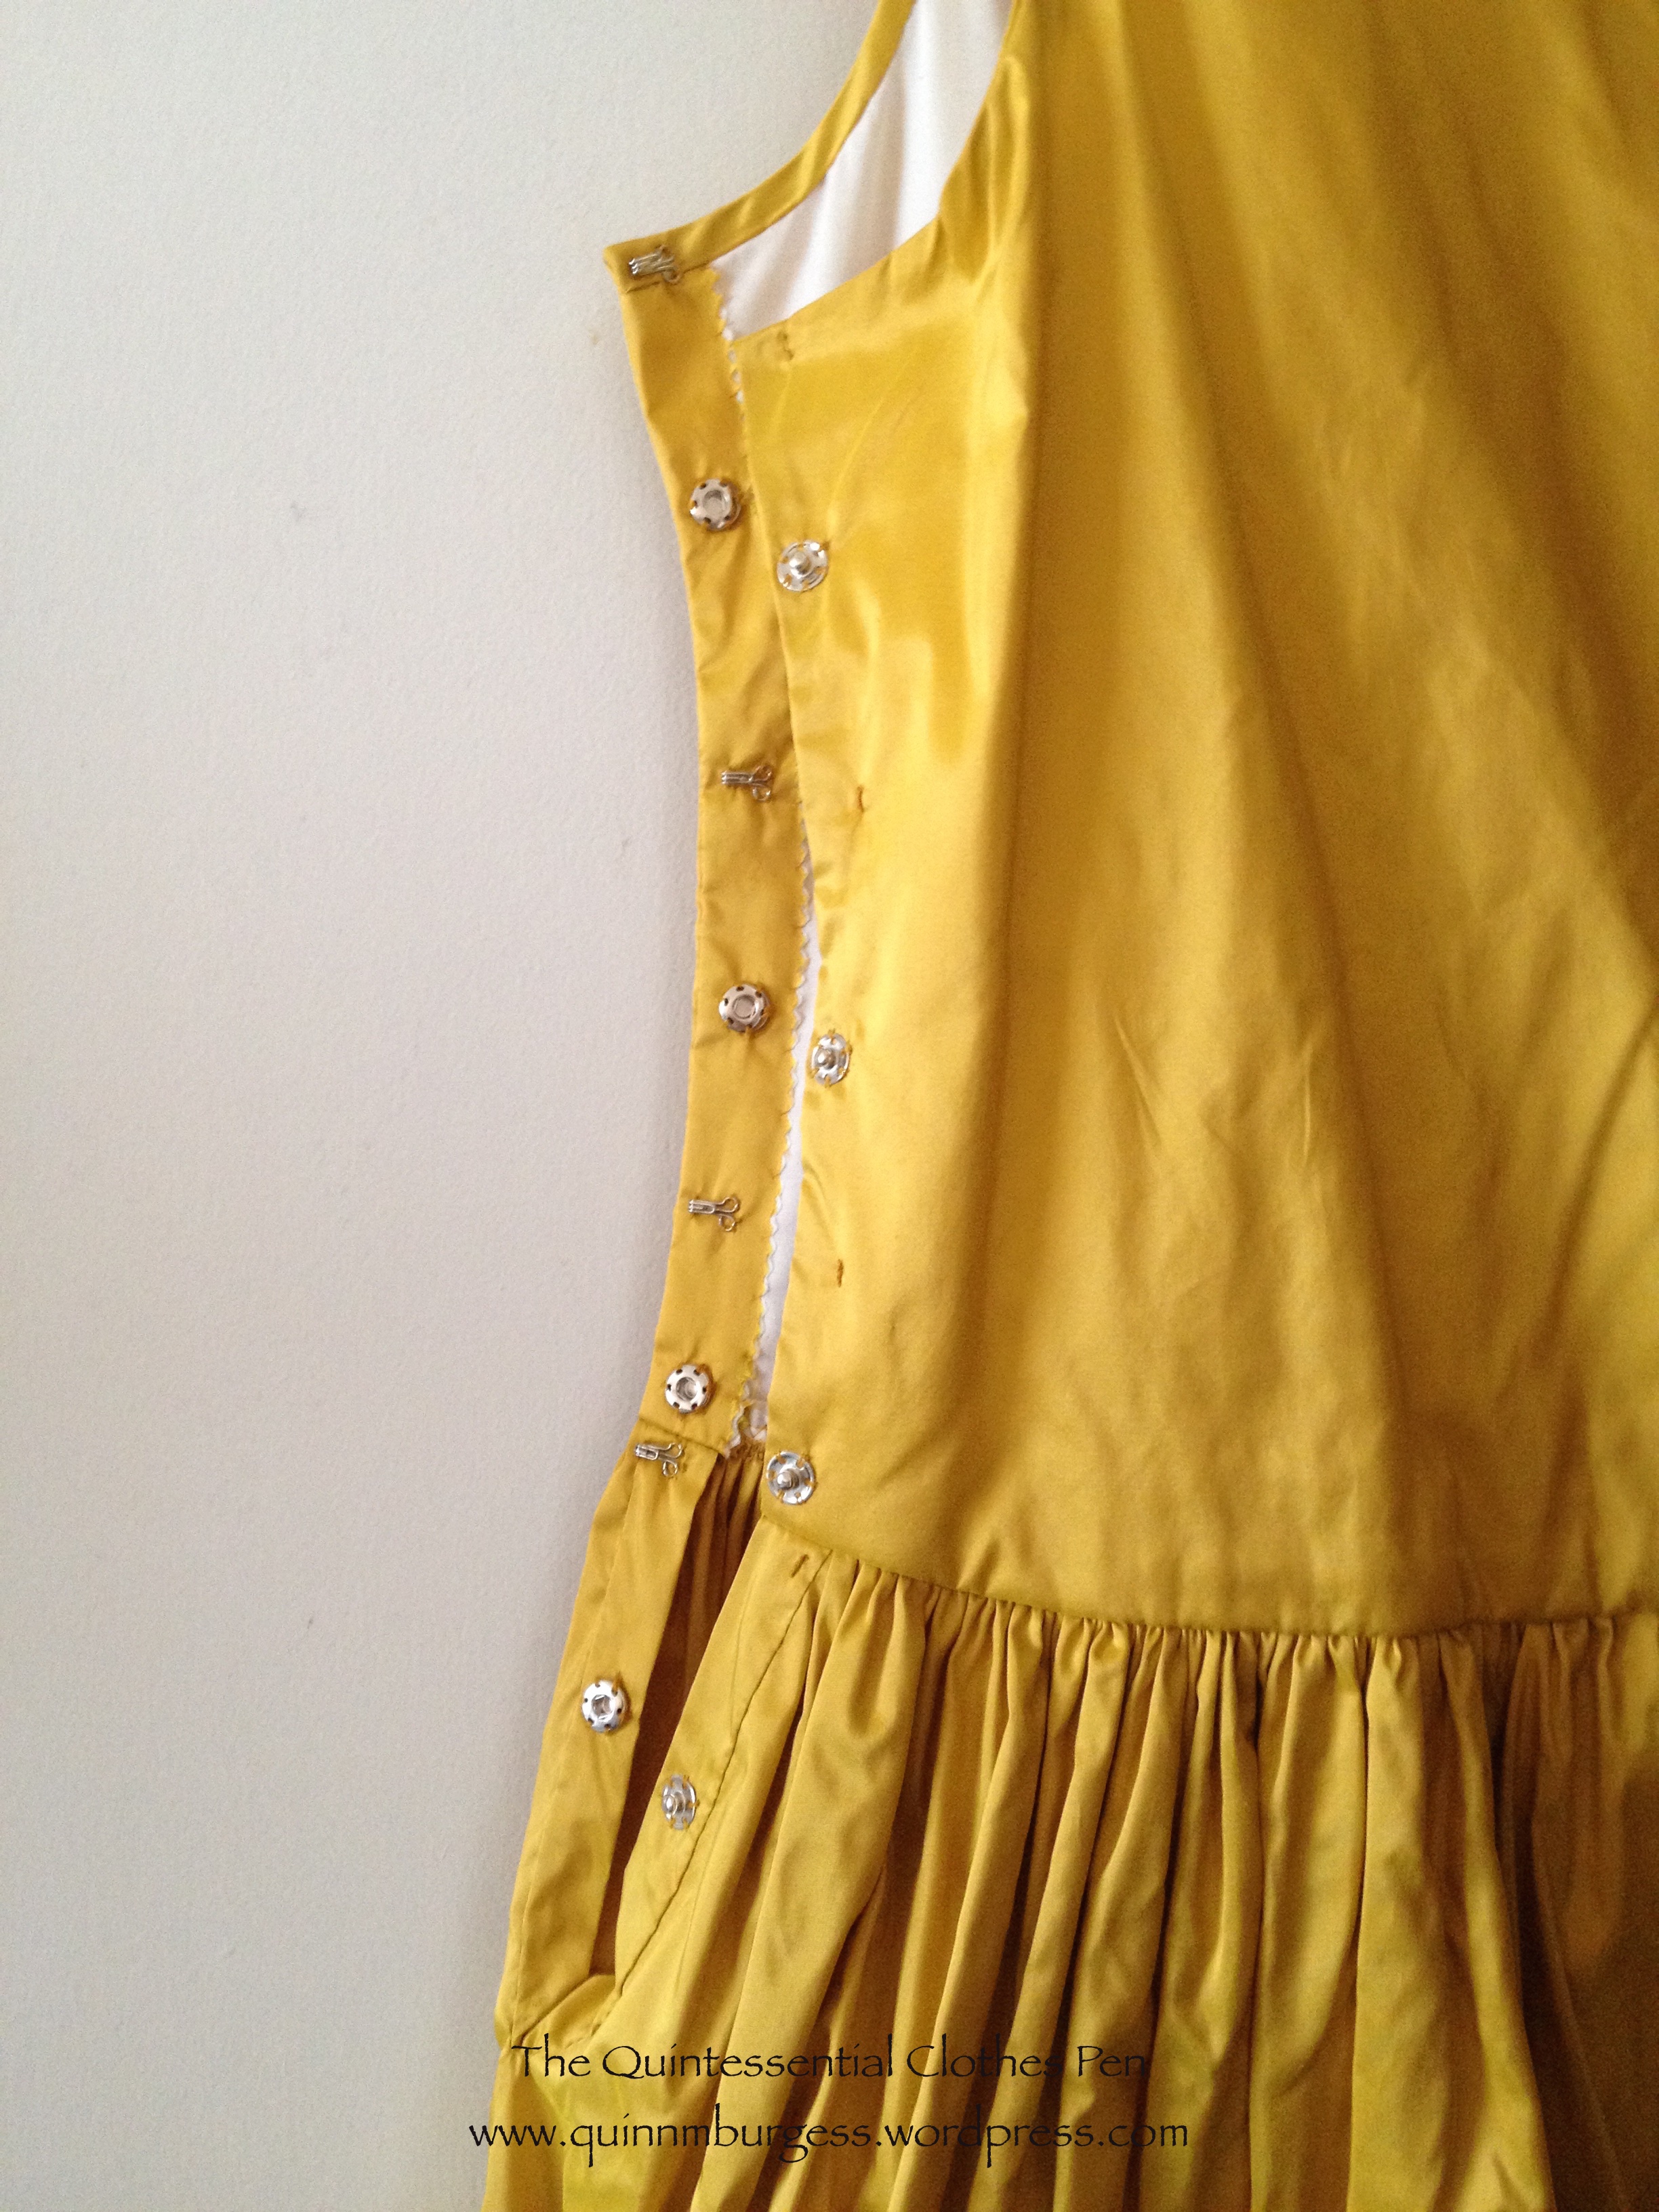
In addition to the pattern, I was also inspired by Maria’s simple finishing methods. I therefore flat lined my bodice, finished the neck and armholes with bias, and made a side closure. I opted to alternate snaps and hook/eyes for the closure, since Maria (and Katherine, who also made an inspirational robe de style you can see here) mentioned that their predominantly snap closures had a tendency not to stay closed. I had no problems with my closures on the dress’s first outing!

IMG_2403

I chose to keep the understructure for this dress separate rather than building it in–that way I can easily use it for a second robe de style in the future! The understructure is mini-18th century pocket hoops attached to a grosgrain ribbon that fastens around my hips. I found that they shifted a little bit while I was wearing the dress, but not enough for me to really notice or care.

Unfortunately, the silk does want to wrinkle every chance it gets. But when the dress is in motion it’s really not very noticeable! I wore the new dress to an afternoon ragtime tea dance, which is what the pictures in action are from. There are 2 more tea dances this summer (one of them is this coming Sunday) and a suffrage rally and formal ball in September, so if you’re in the area and have the time I would love to see you at one of these future events (details here).

IMG_2378

IMG_2374

A Turban Fillet, 1811

A while ago now, during the Journal Journey Into La Belle Assemblee series, Natalie over at A Frolic Through Time brought two similar ball/evening hair styles to my (and her other readers’) attention. These styles for October 1811 were pointed out by Natalie as being perfect for someone to attempt for a Regency event and I thought “Oh! These are neat! And they would go so well with my pearl trimmed 1811 Elusive Blue gown. Perfect!” So I saved the link to the post and have been meaning to go back to it for the last few months.

After returning to that inspiration earlier this year and comparing the two styles in Natalie’s post, I decided on a turban fillet (see end of post for a definition). February’s HSF/M Challenge #2: Blue was the perfect kick I needed to get to work. While I technically submitted finishing the trim on my elusive blue dress for the challenge, I also finished my turban fillet slightly after the deadline. I enjoyed having a small project: it was a nice change from the usually long and complicated projects I often take on and am constantly in the midst of.

Here, then, is the fashion plate to which I am referring.

october-1811-evening-dress-bassemblee-hern
No. 1. EVENING DRESS. A sea-green crape dress, vandykcd round the petticoat, and ornamented with large beads; a full drapery over the shoulders, and confined in to the back with a pearl band, ornamented round the neck and down the back with beads. A full turban fillet tapered, worn on the head. Pearl necklace, white kid gloves and shoes.

And here is the finished result of my labors.

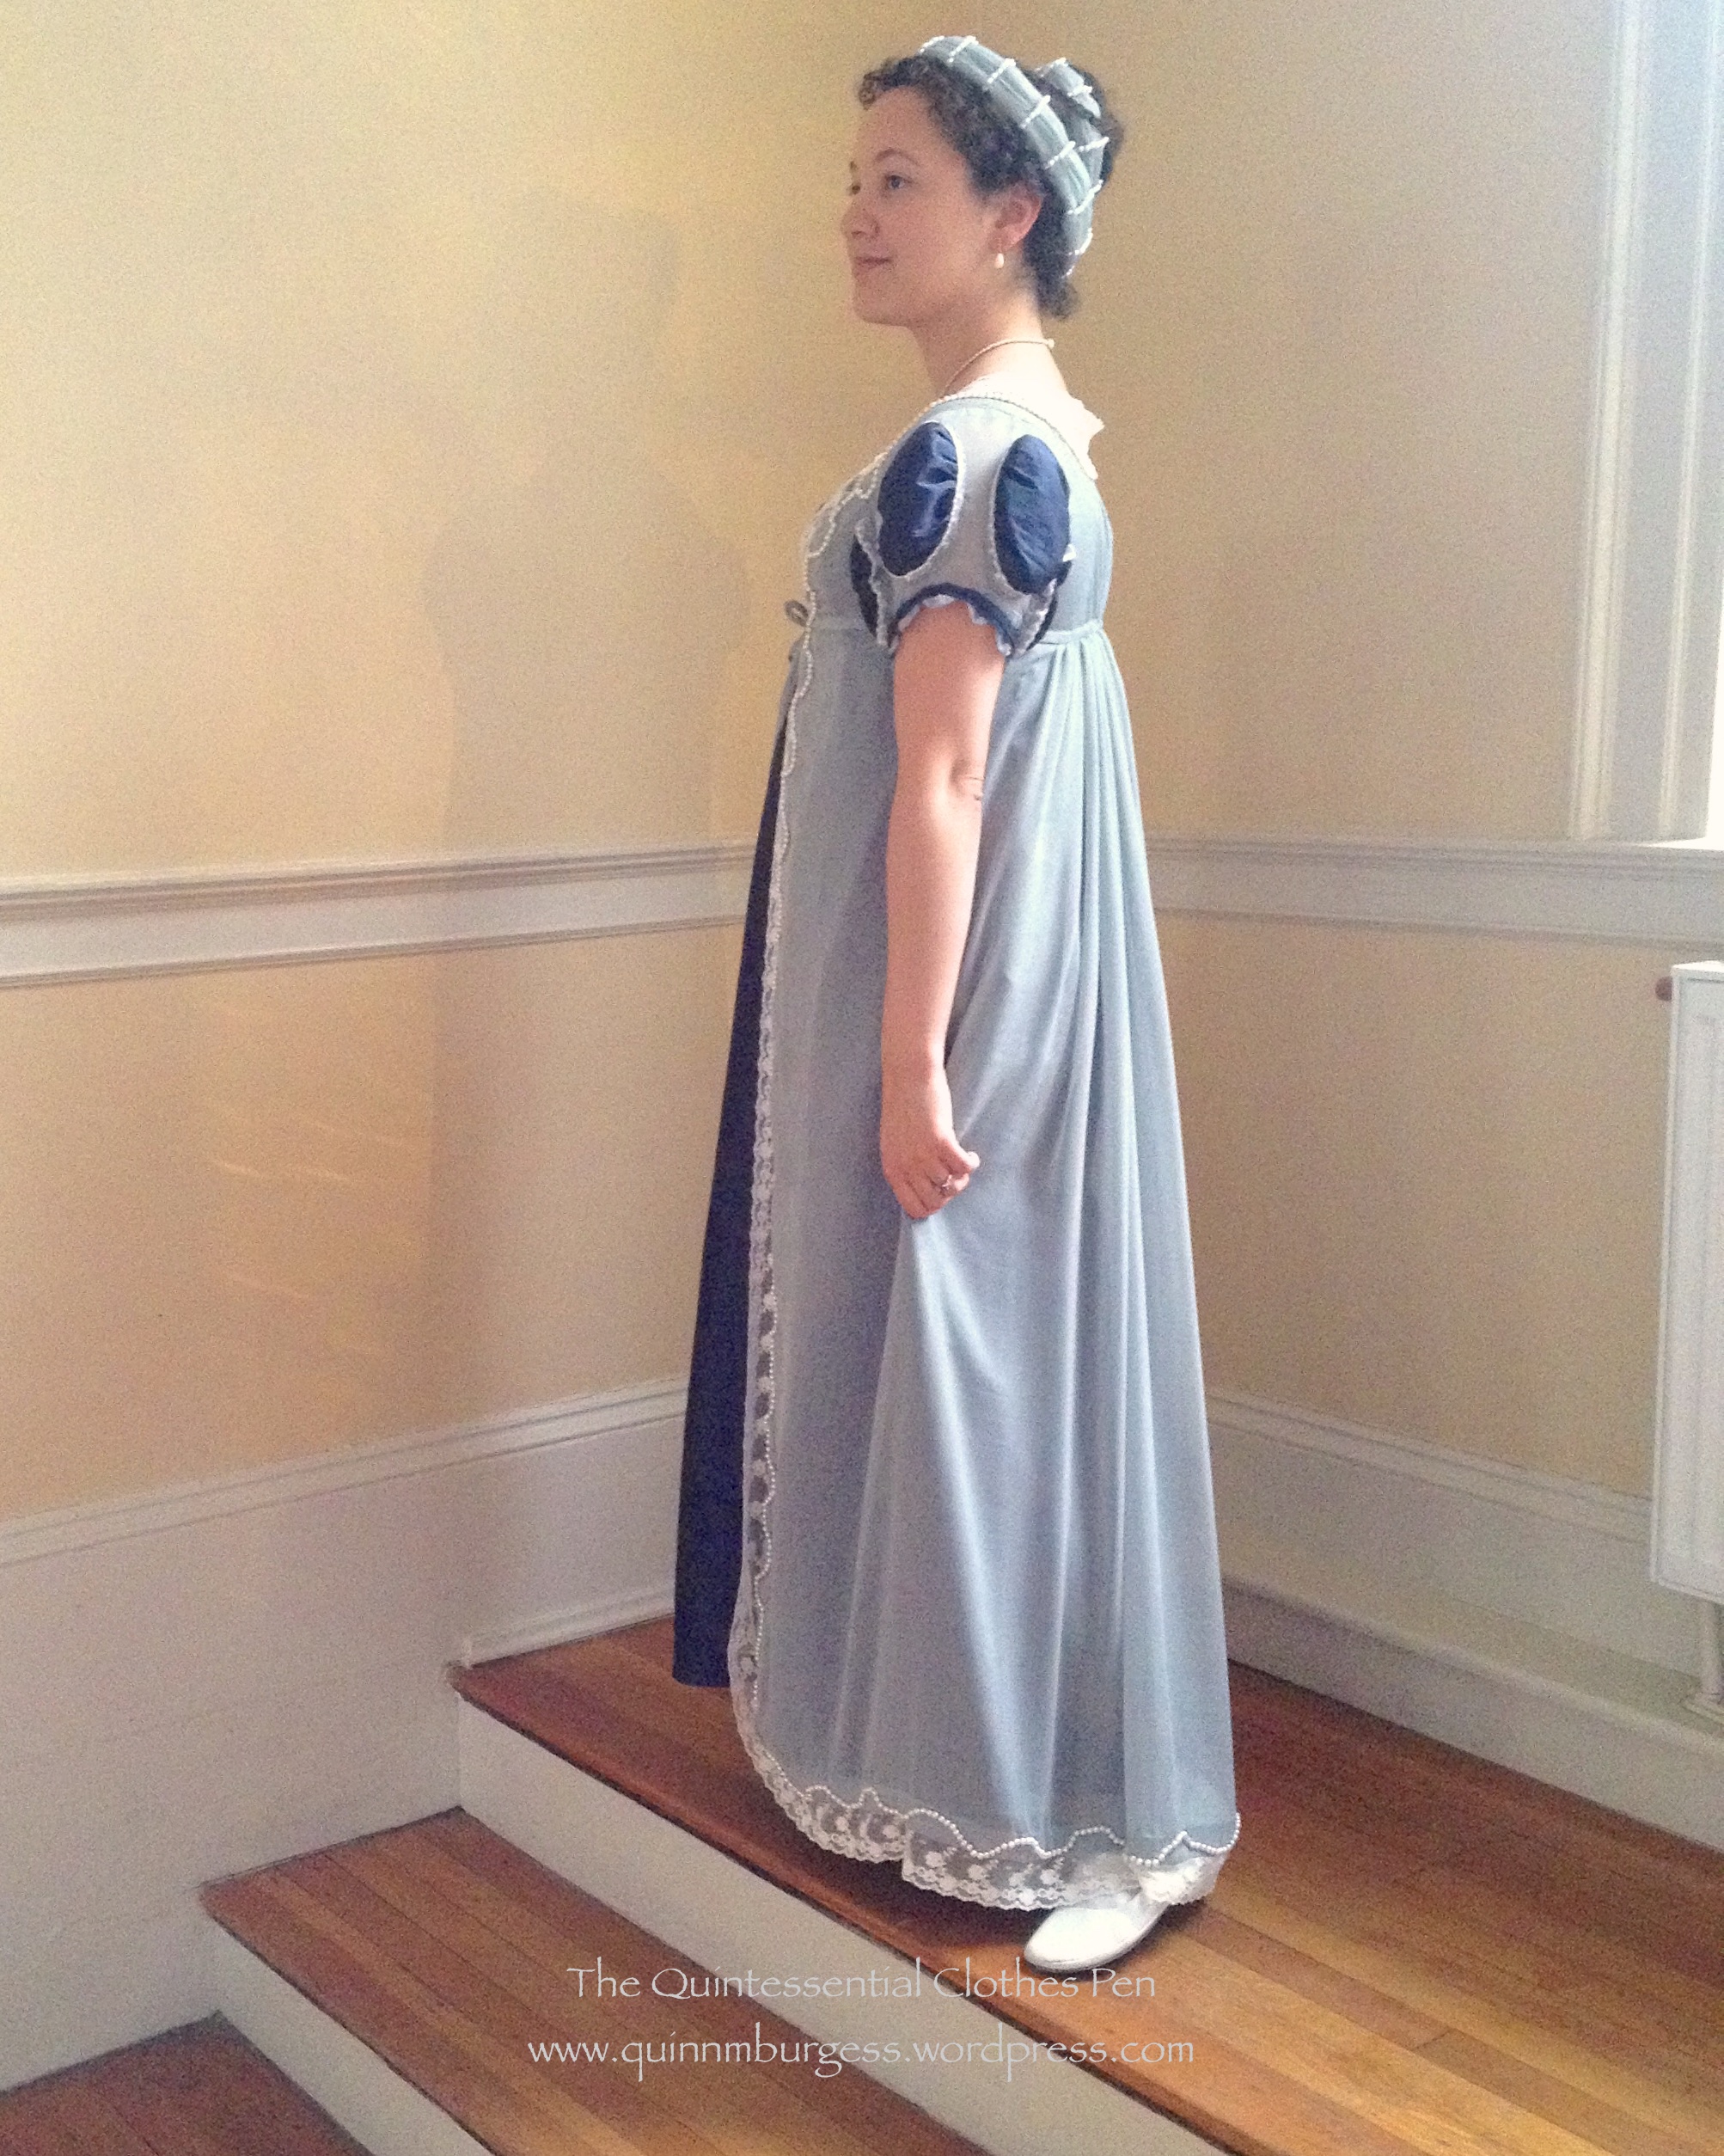
IMG_2195
Side.
IMG_2198
Back.
IMG_2176
And the full ensemble.

I attempted to follow the detail of the hairstyle from La Belle Assemblee, down to the curls around my face (lots of extra work since all my hair is long!) and the little braid on the side. It was a puzzle to figure out and enjoyable to wear.

The question is, how did I get the turban fillet to stay in place on my head? Well, I thought of making a gathered tube wound with pearls, as Natalie proposes below, but decided to make my turban fillet have a flat back instead for multiple reasons. #1: there has to be a seam somewhere, so why not hide it intentionally? #2: I only had so many pearls, and winding them all around a sample tube used them up far too quickly so that I would never have reached the end and still been able to have pearls. #3: the angle of the pearls when winding them around was very challenging and I couldn’t figure out how to arrange them pleasingly. #4: “why waste pearls against my head?” I thought, when they’re going to be slightly uncomfortable and slippery there anyway?

So here is what I came up with: a length of fabric about 40″ long, wrapped around a strip of hi-loft poly-fill batting (not period, I know, but easy and free!), turned under and sewn down on the back, gathered across the top, with rows of pearls sewn on at intervals, and finished with loops on the back every few rows of pearls in order to secure the whole thing to my head. The entire thing is hand sewn. I have no idea how you would use a machine to assemble this the way I did!

IMG_2199
The top is the front of the turban fillet and the bottom is the back.

And yes, I was able to wear this to a Regency ball in April!

* Natalie notes the following about the description “turban fillet”. Please check out her post to see both fashion plates she refers to.

Turban fillet. For a change, just what you might imagine: a “fillet” is normally a narrow ribbon or wire wound round or encircling the head, while a turban is a, well, a turban. In this month’s evening dress hairstyle, we have a length of fabric well gathered to make a narrow, round, gathered tube, wound round the head. The turban is wound with pearls for extra measure. Handsome and I hope that someone will take up this style for a ball before long! The ball dress plate uses a similar design; it encircles the head more like the fillets we remember from Medieval fairy tales, but ironically, the effect is more turban-like to my eyes than the evening dress example, yet isn’t called a turban. Fashion, fashion.