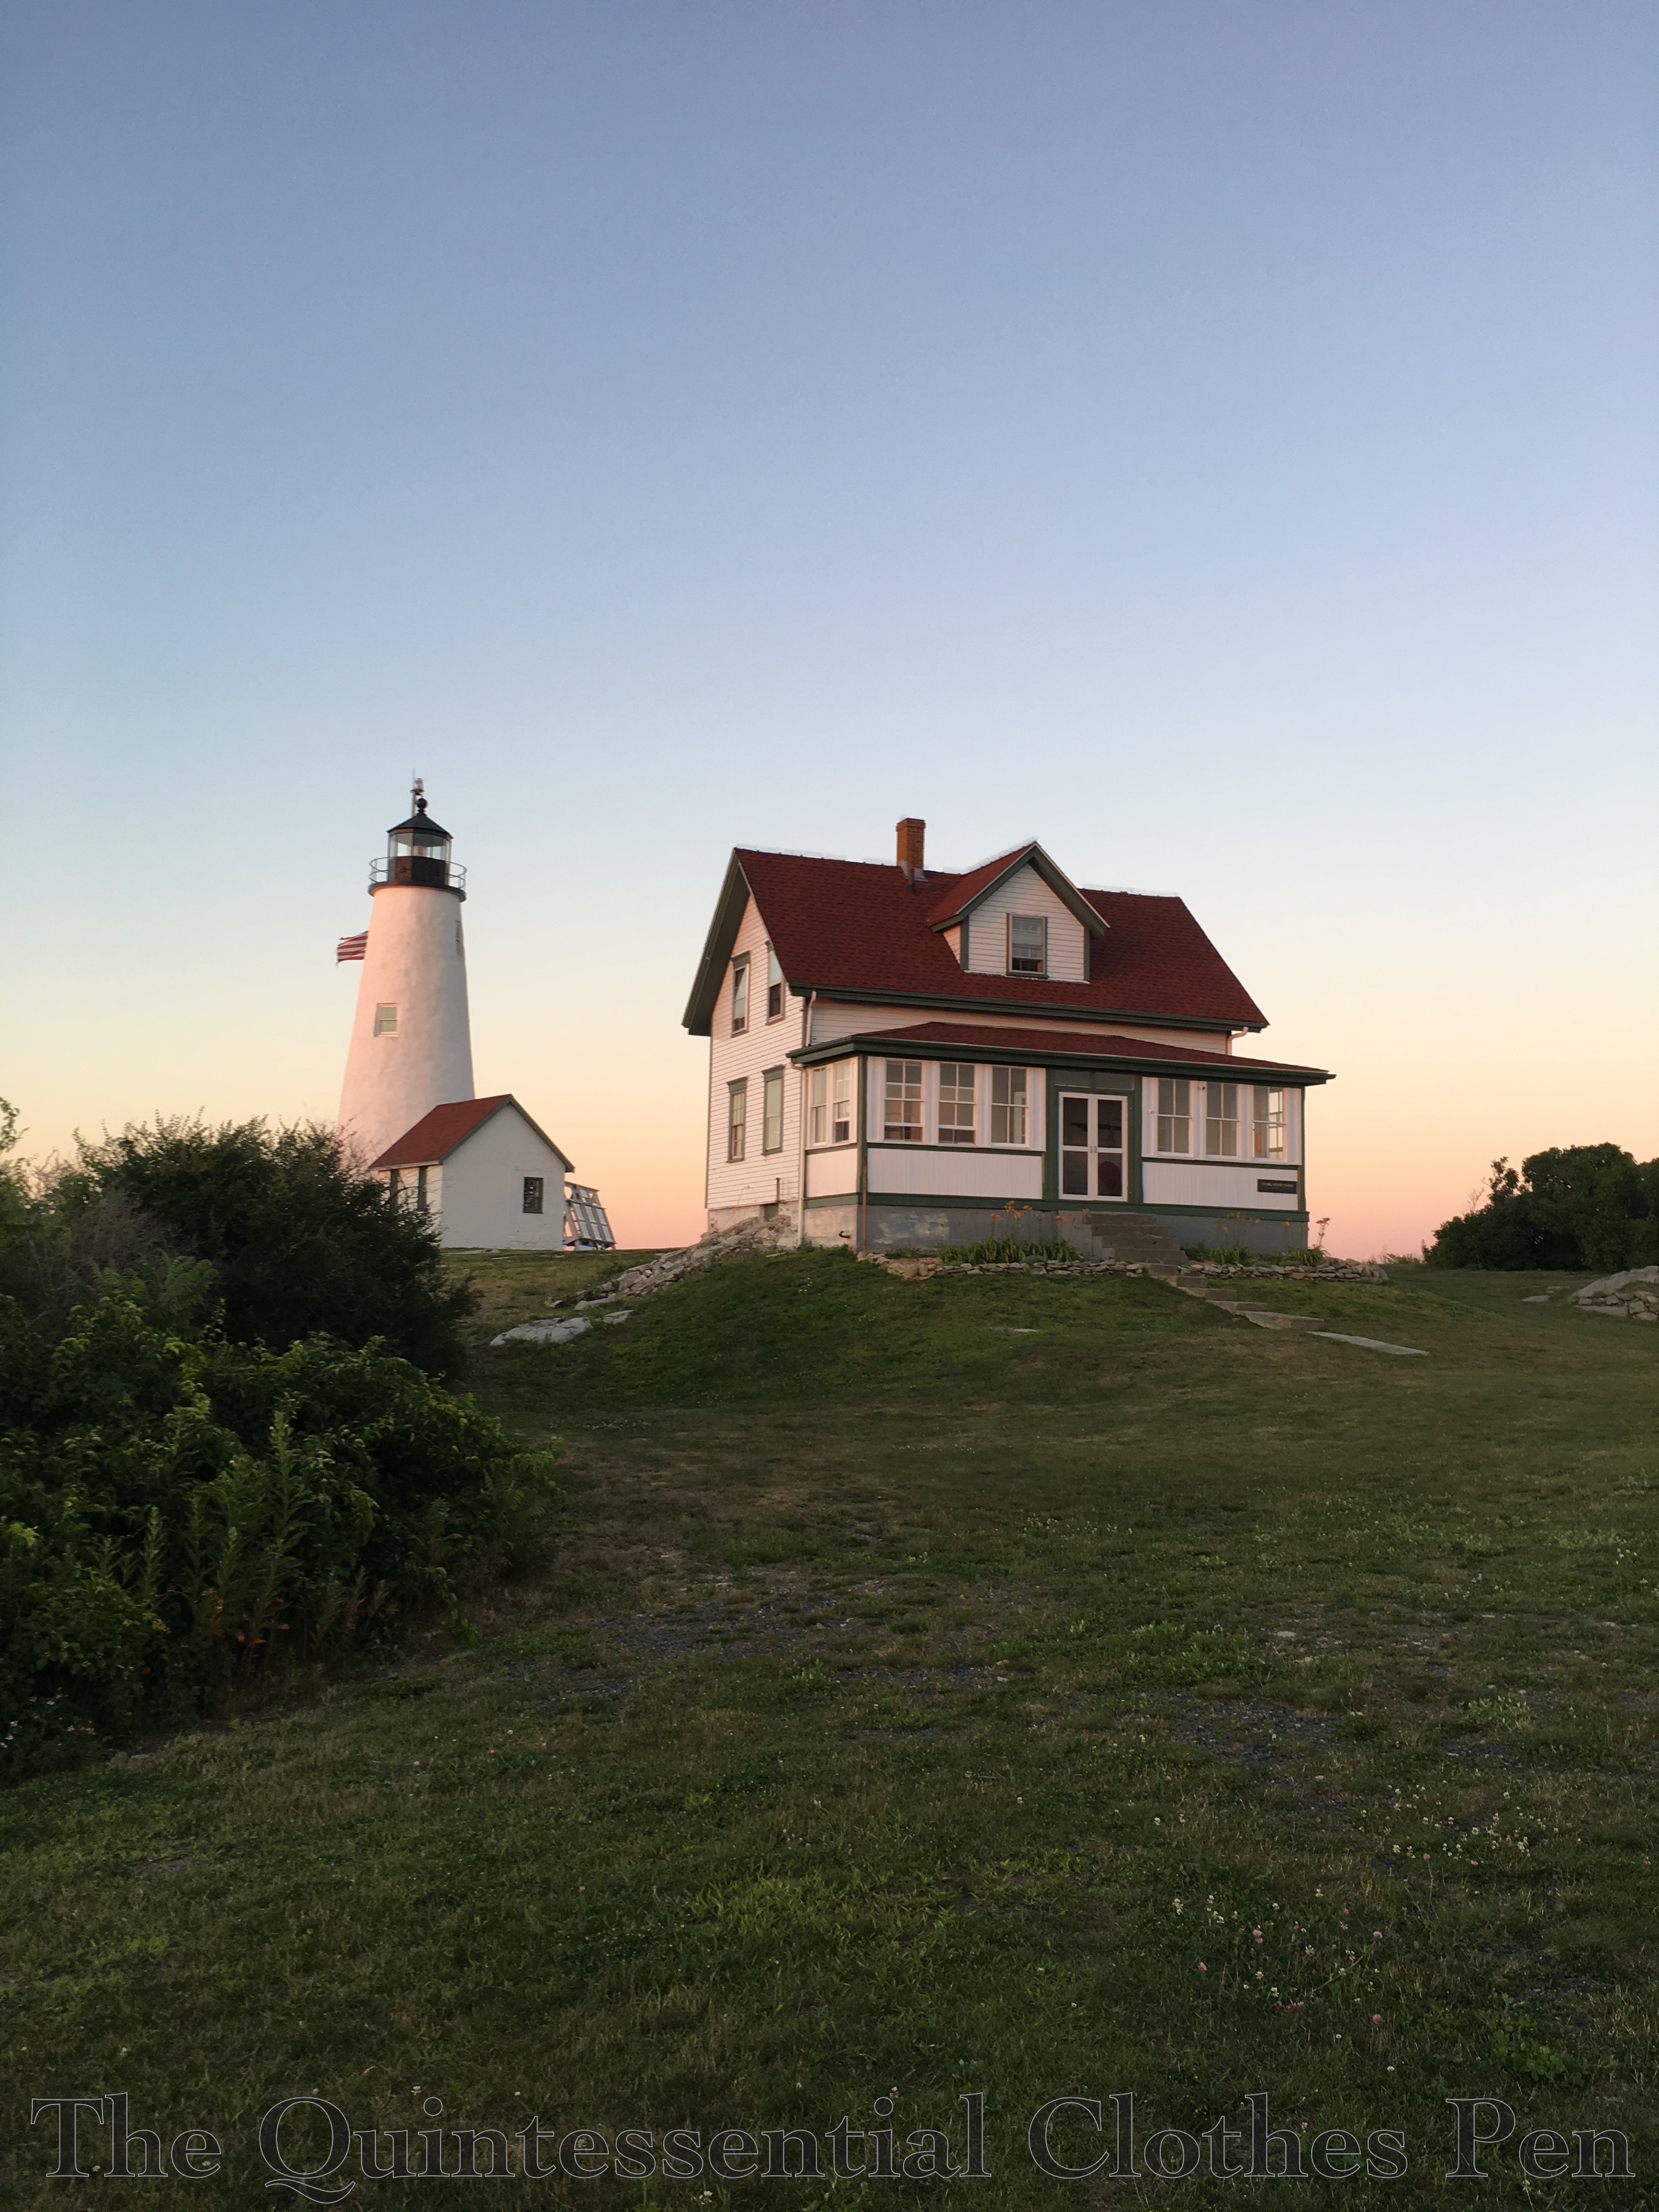
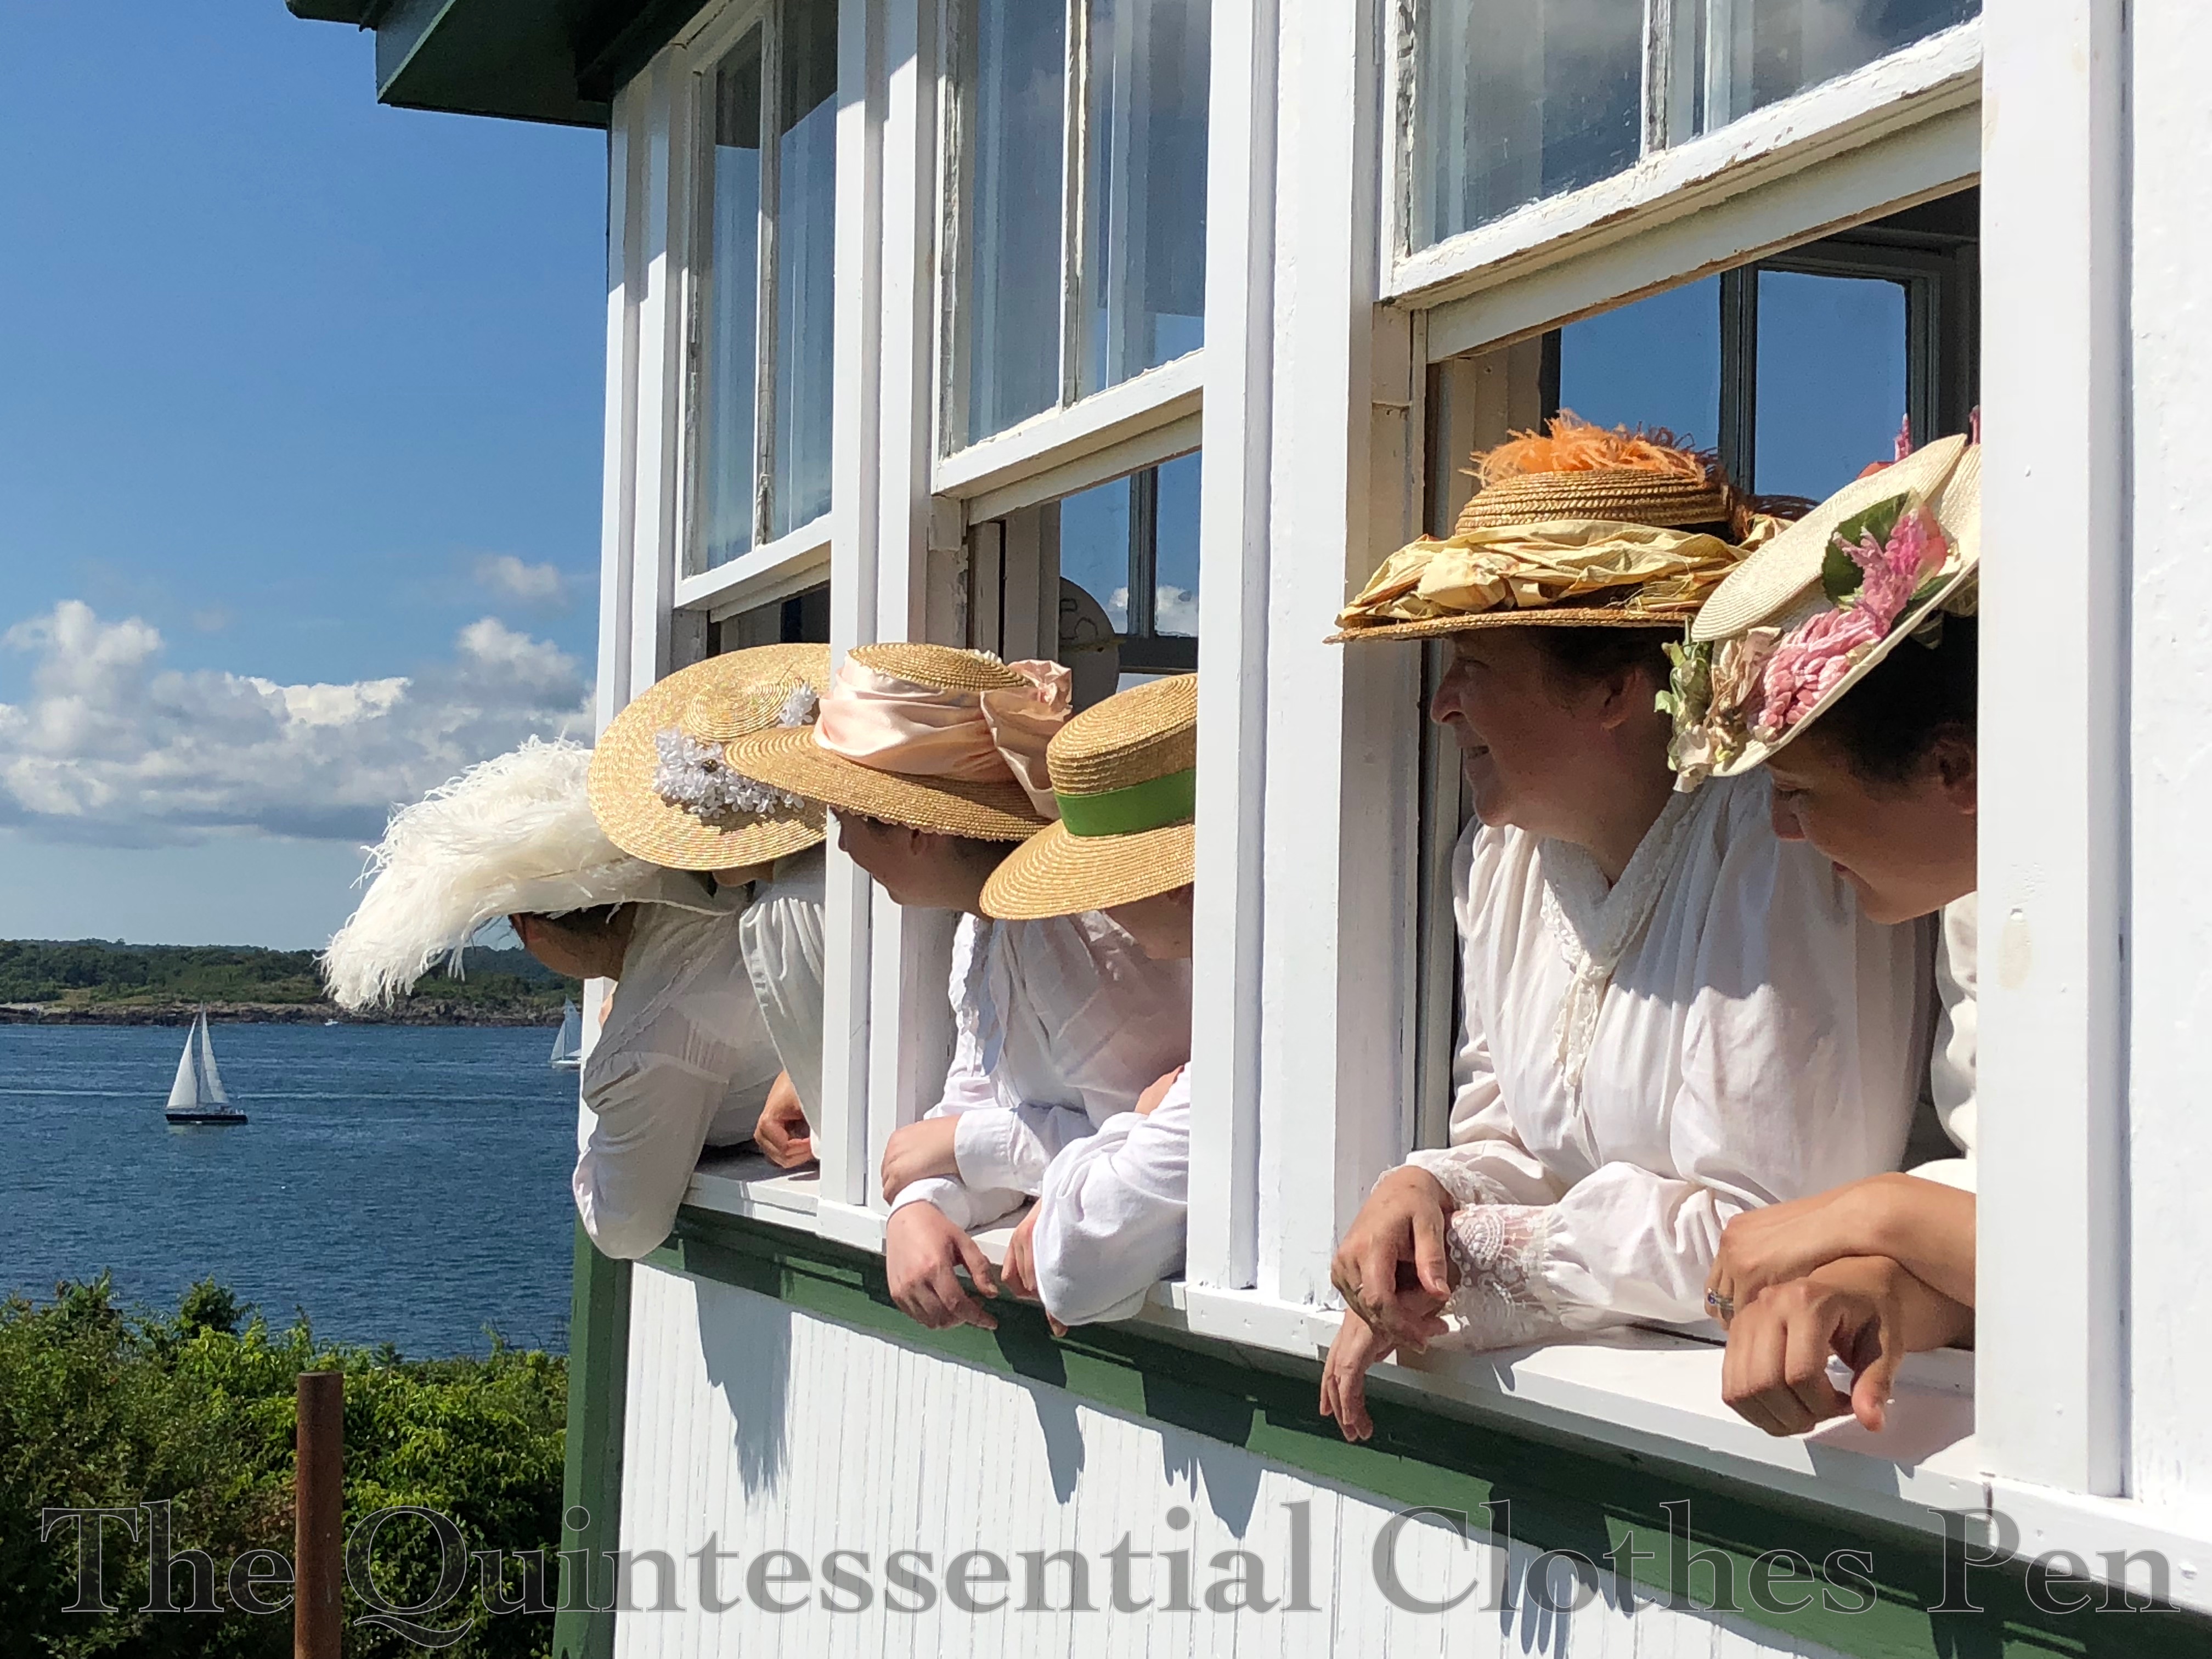
Over the summer, my dance group was invited to create a turn-of-the-century atmosphere for a weekend on Bakers Island, off the coast of Salem, MA. Today, the part of the island we were on is managed by Essex Heritage and is home to a lighthouse, but for our visit the idea was that visitors to the island could get a sense of what the island would have been like over 100 years ago when there was a large hotel located there.
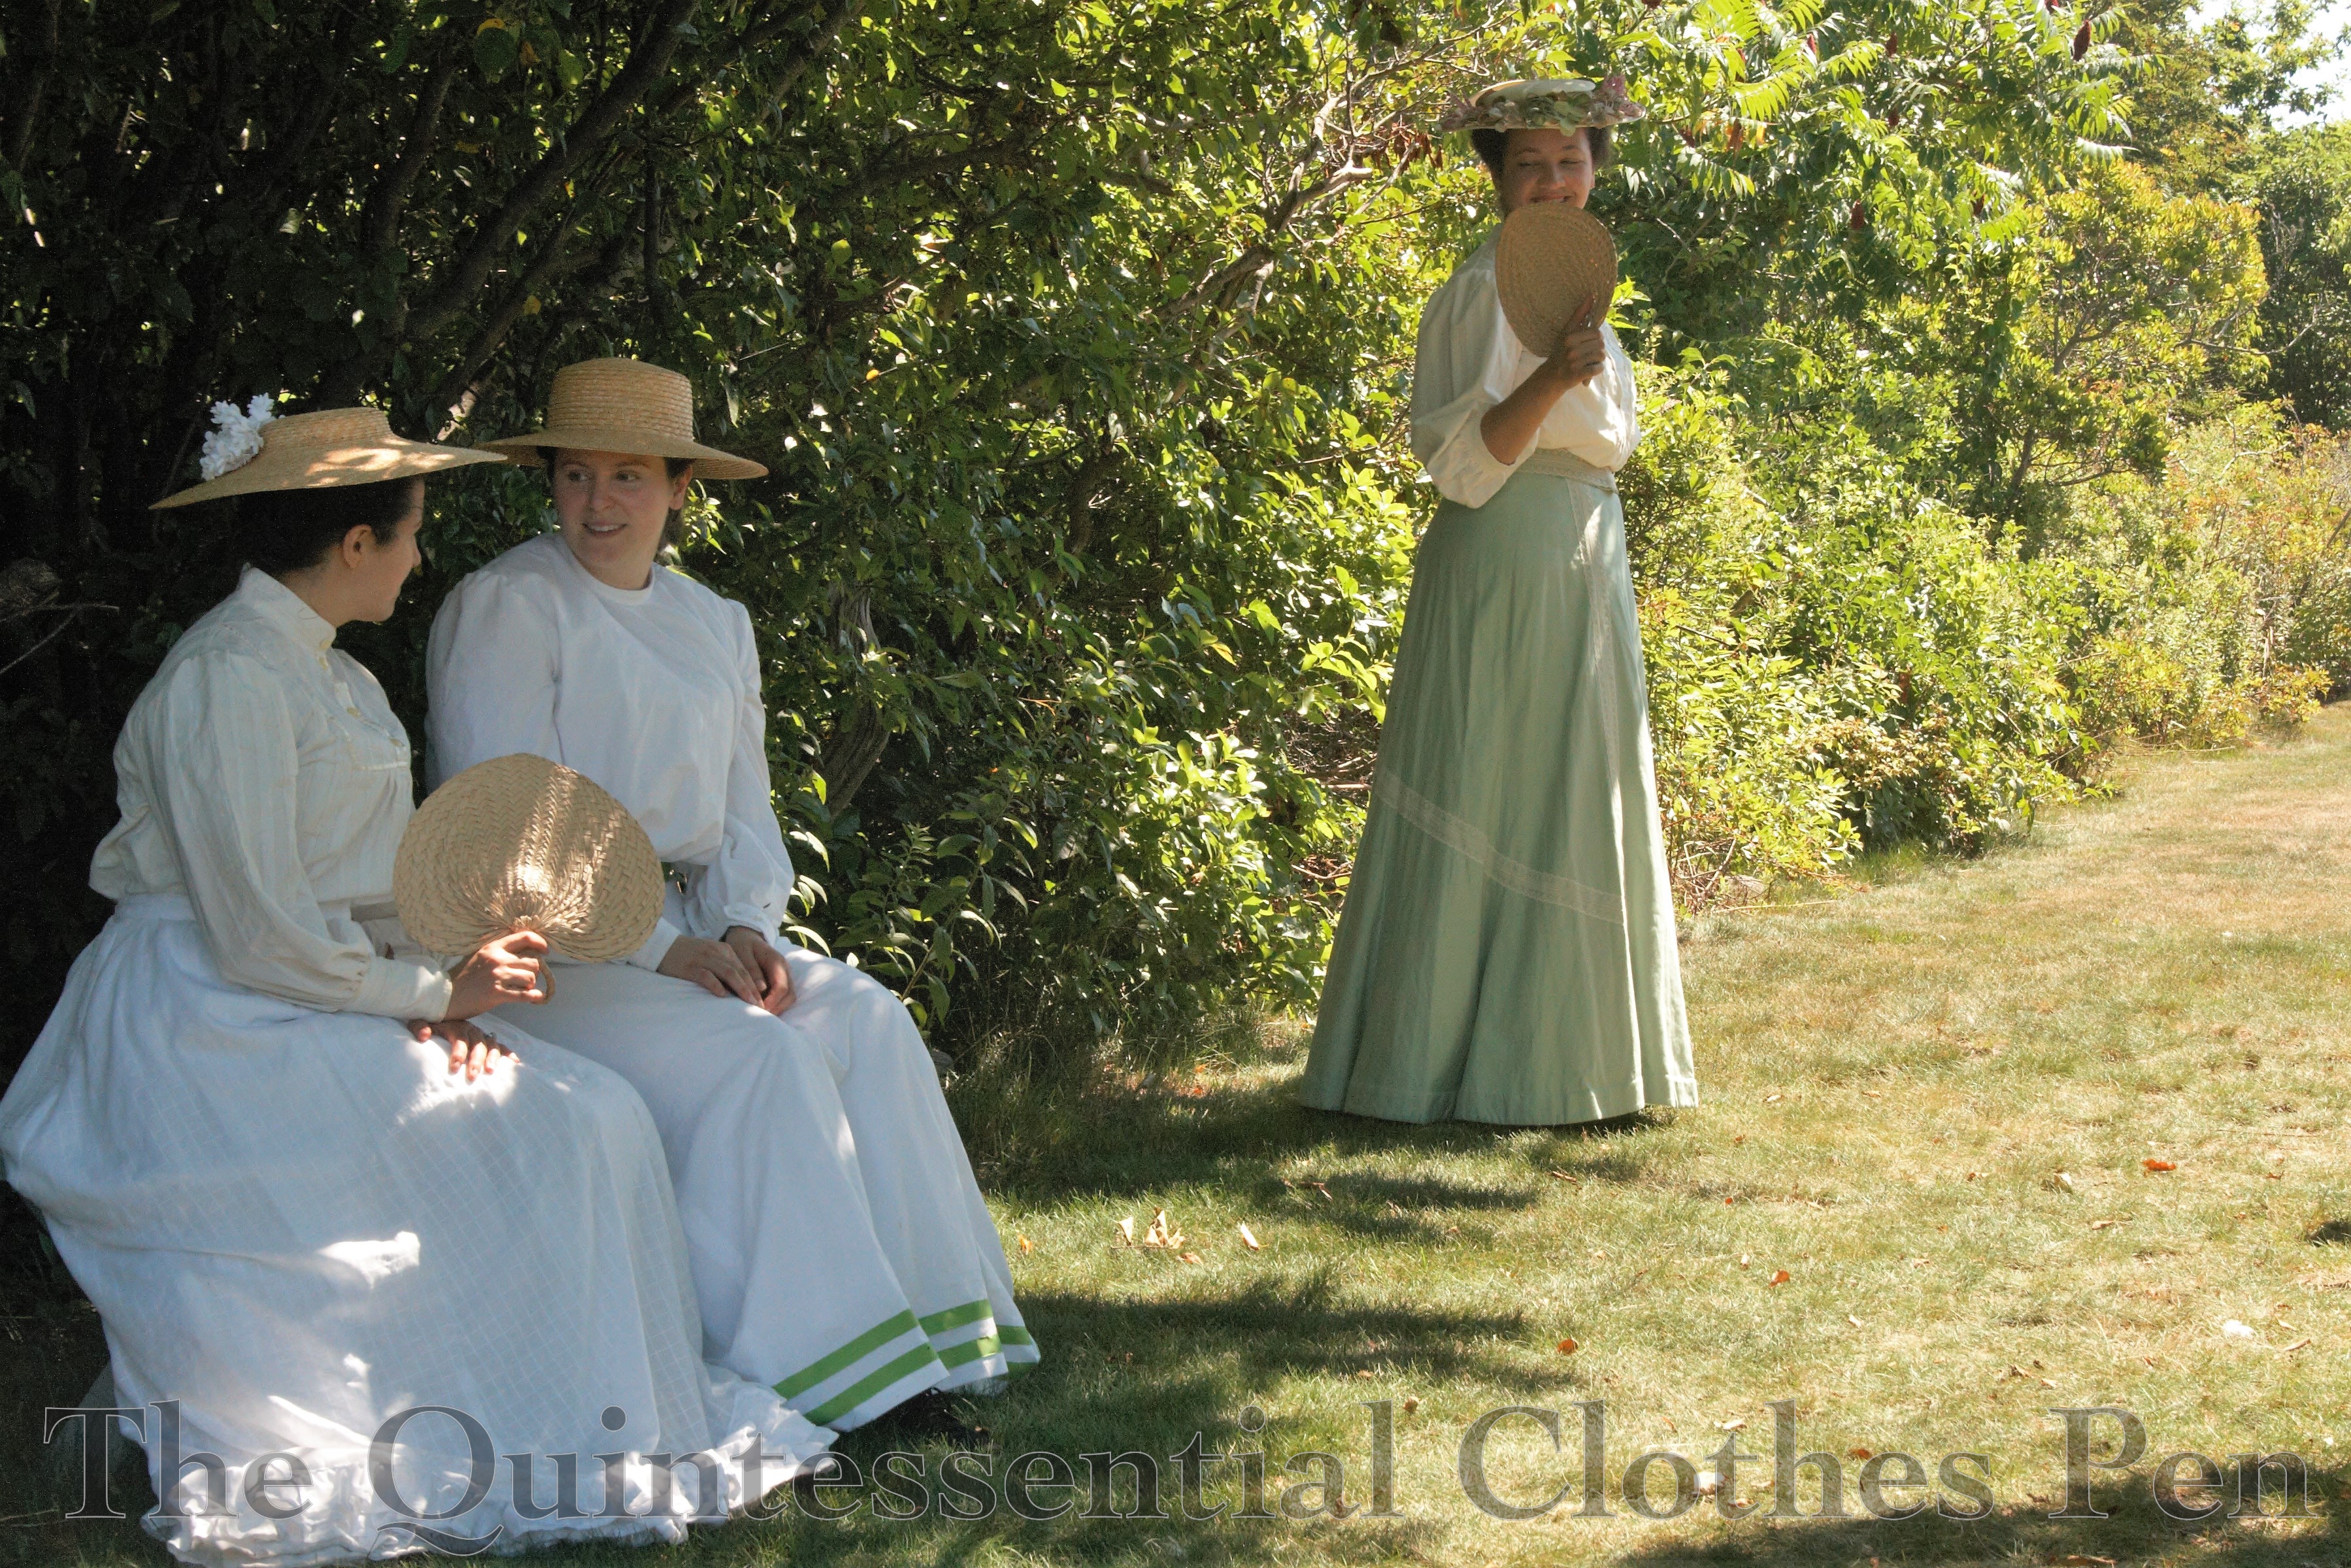
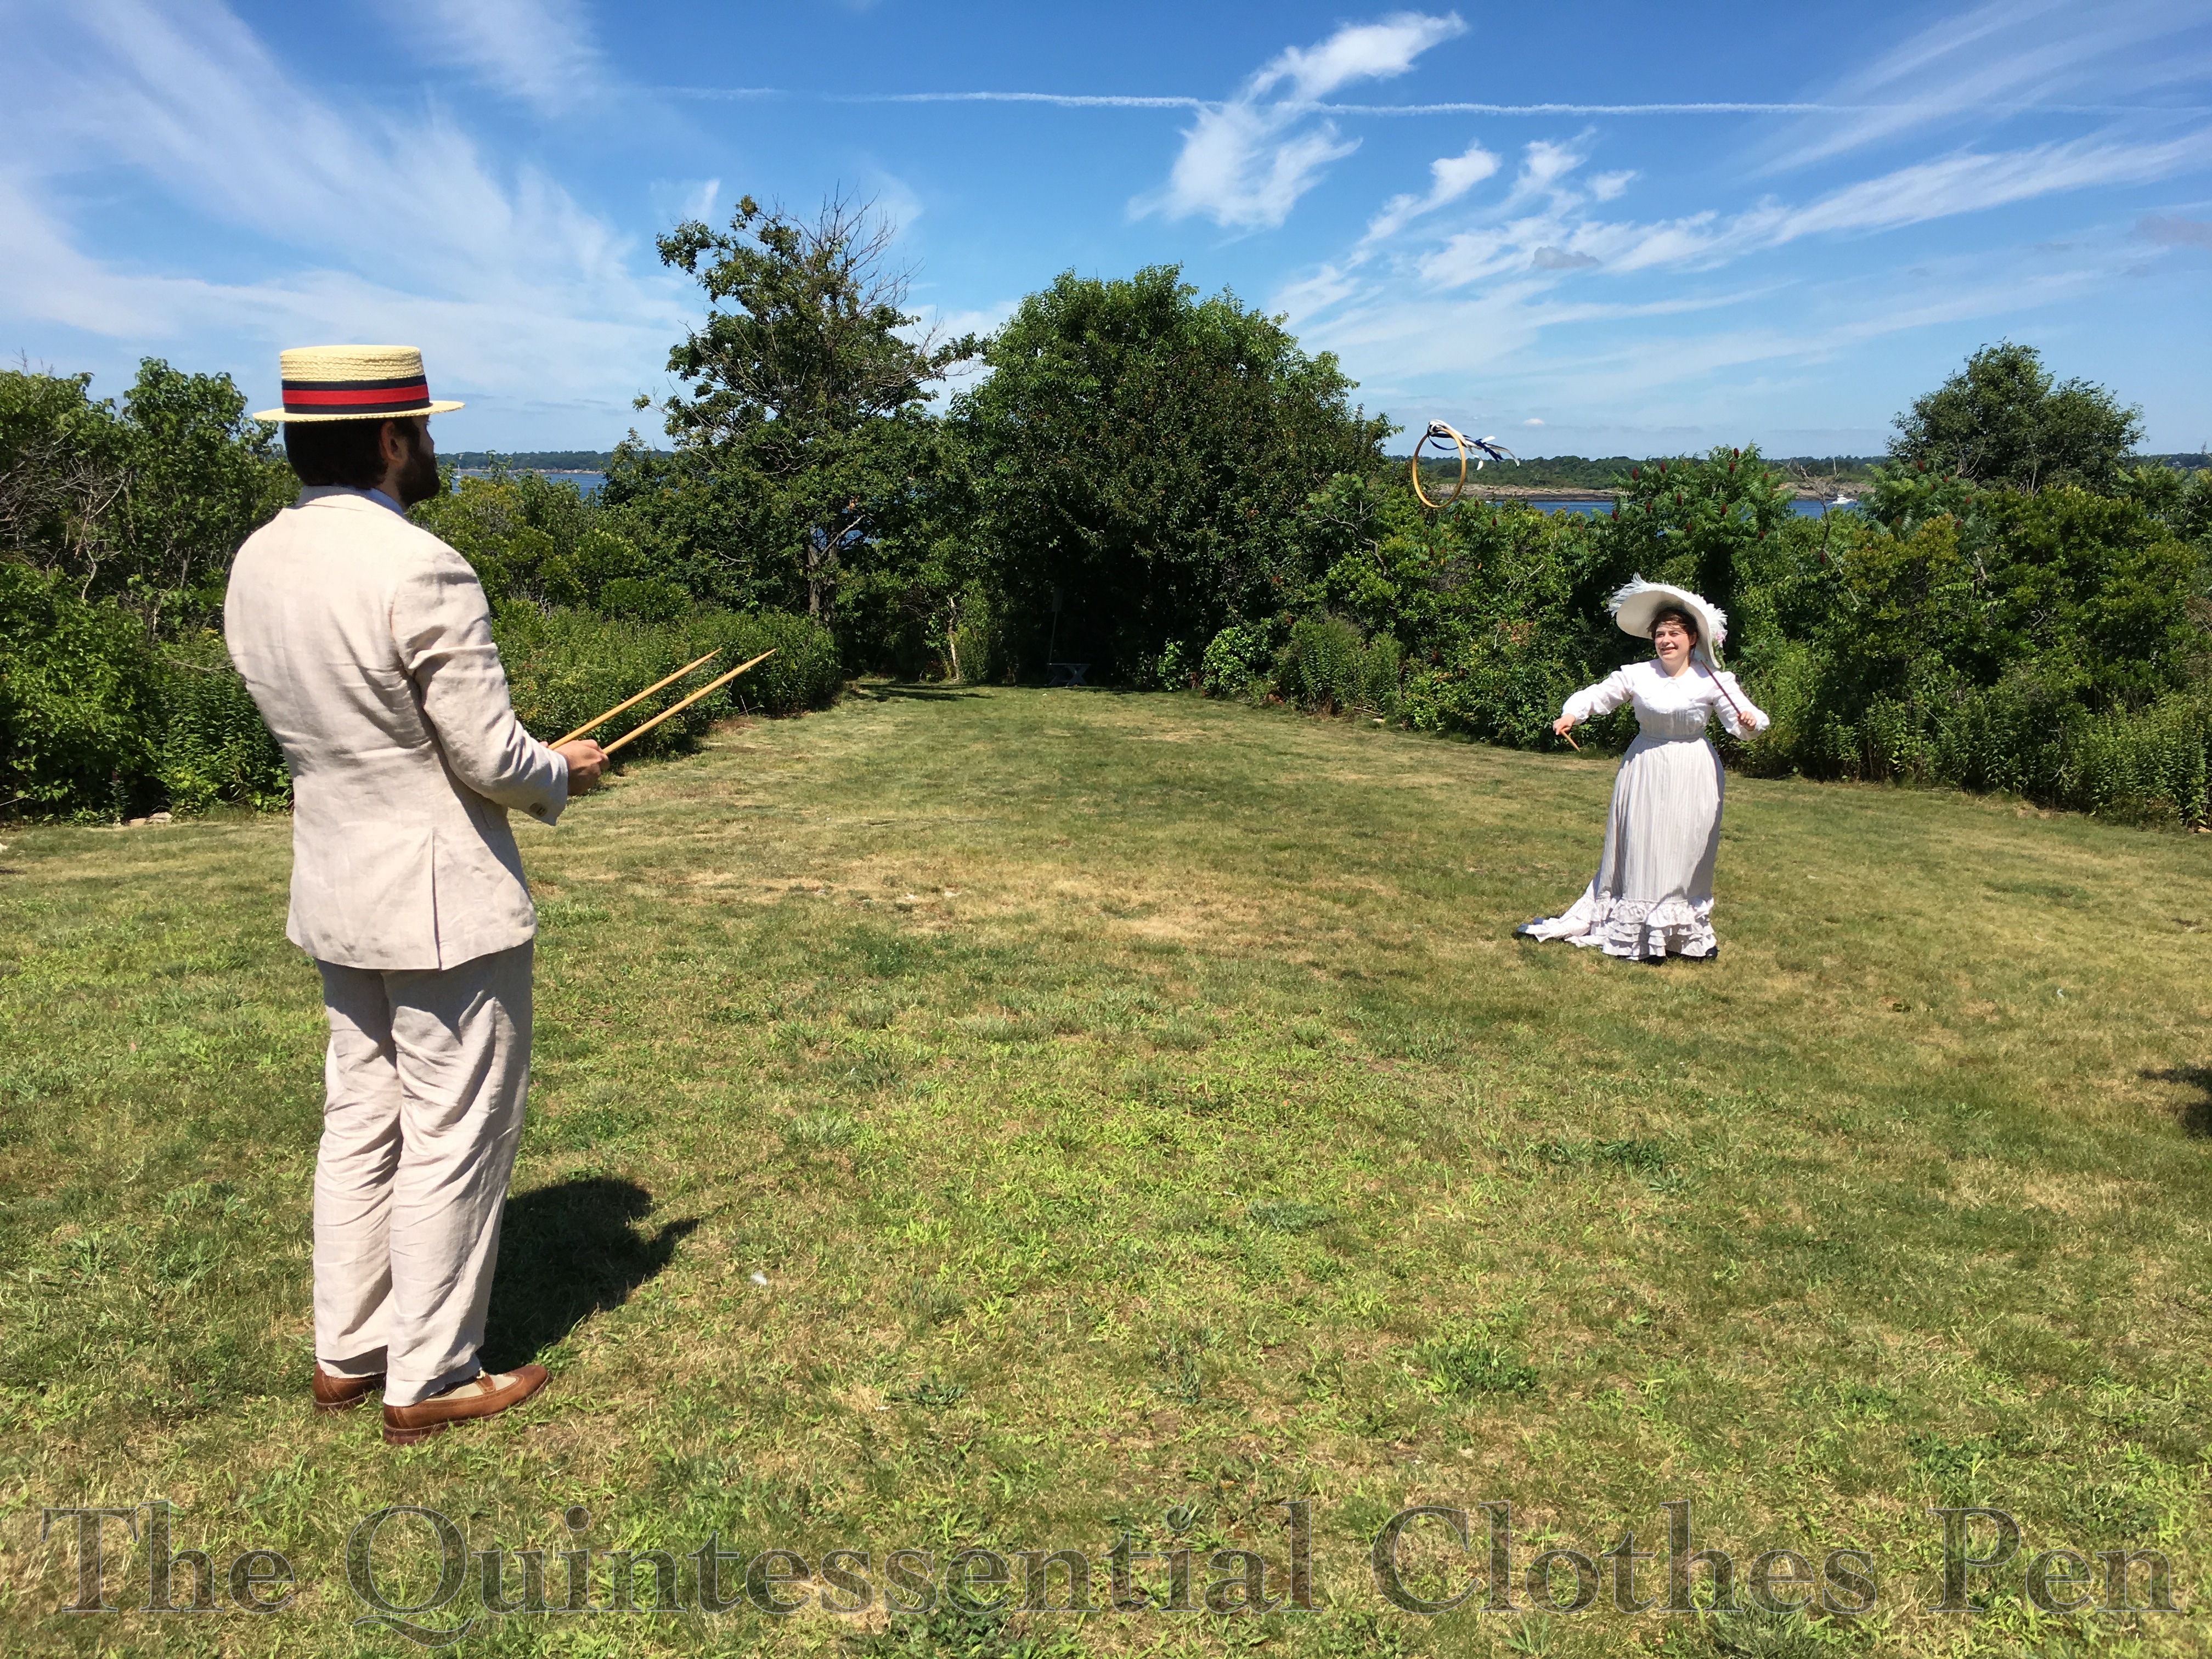
We didn’t actually dance, but we played historical games and activities and explained our context to the visitors. They came upon us along various paths during their walking tour.
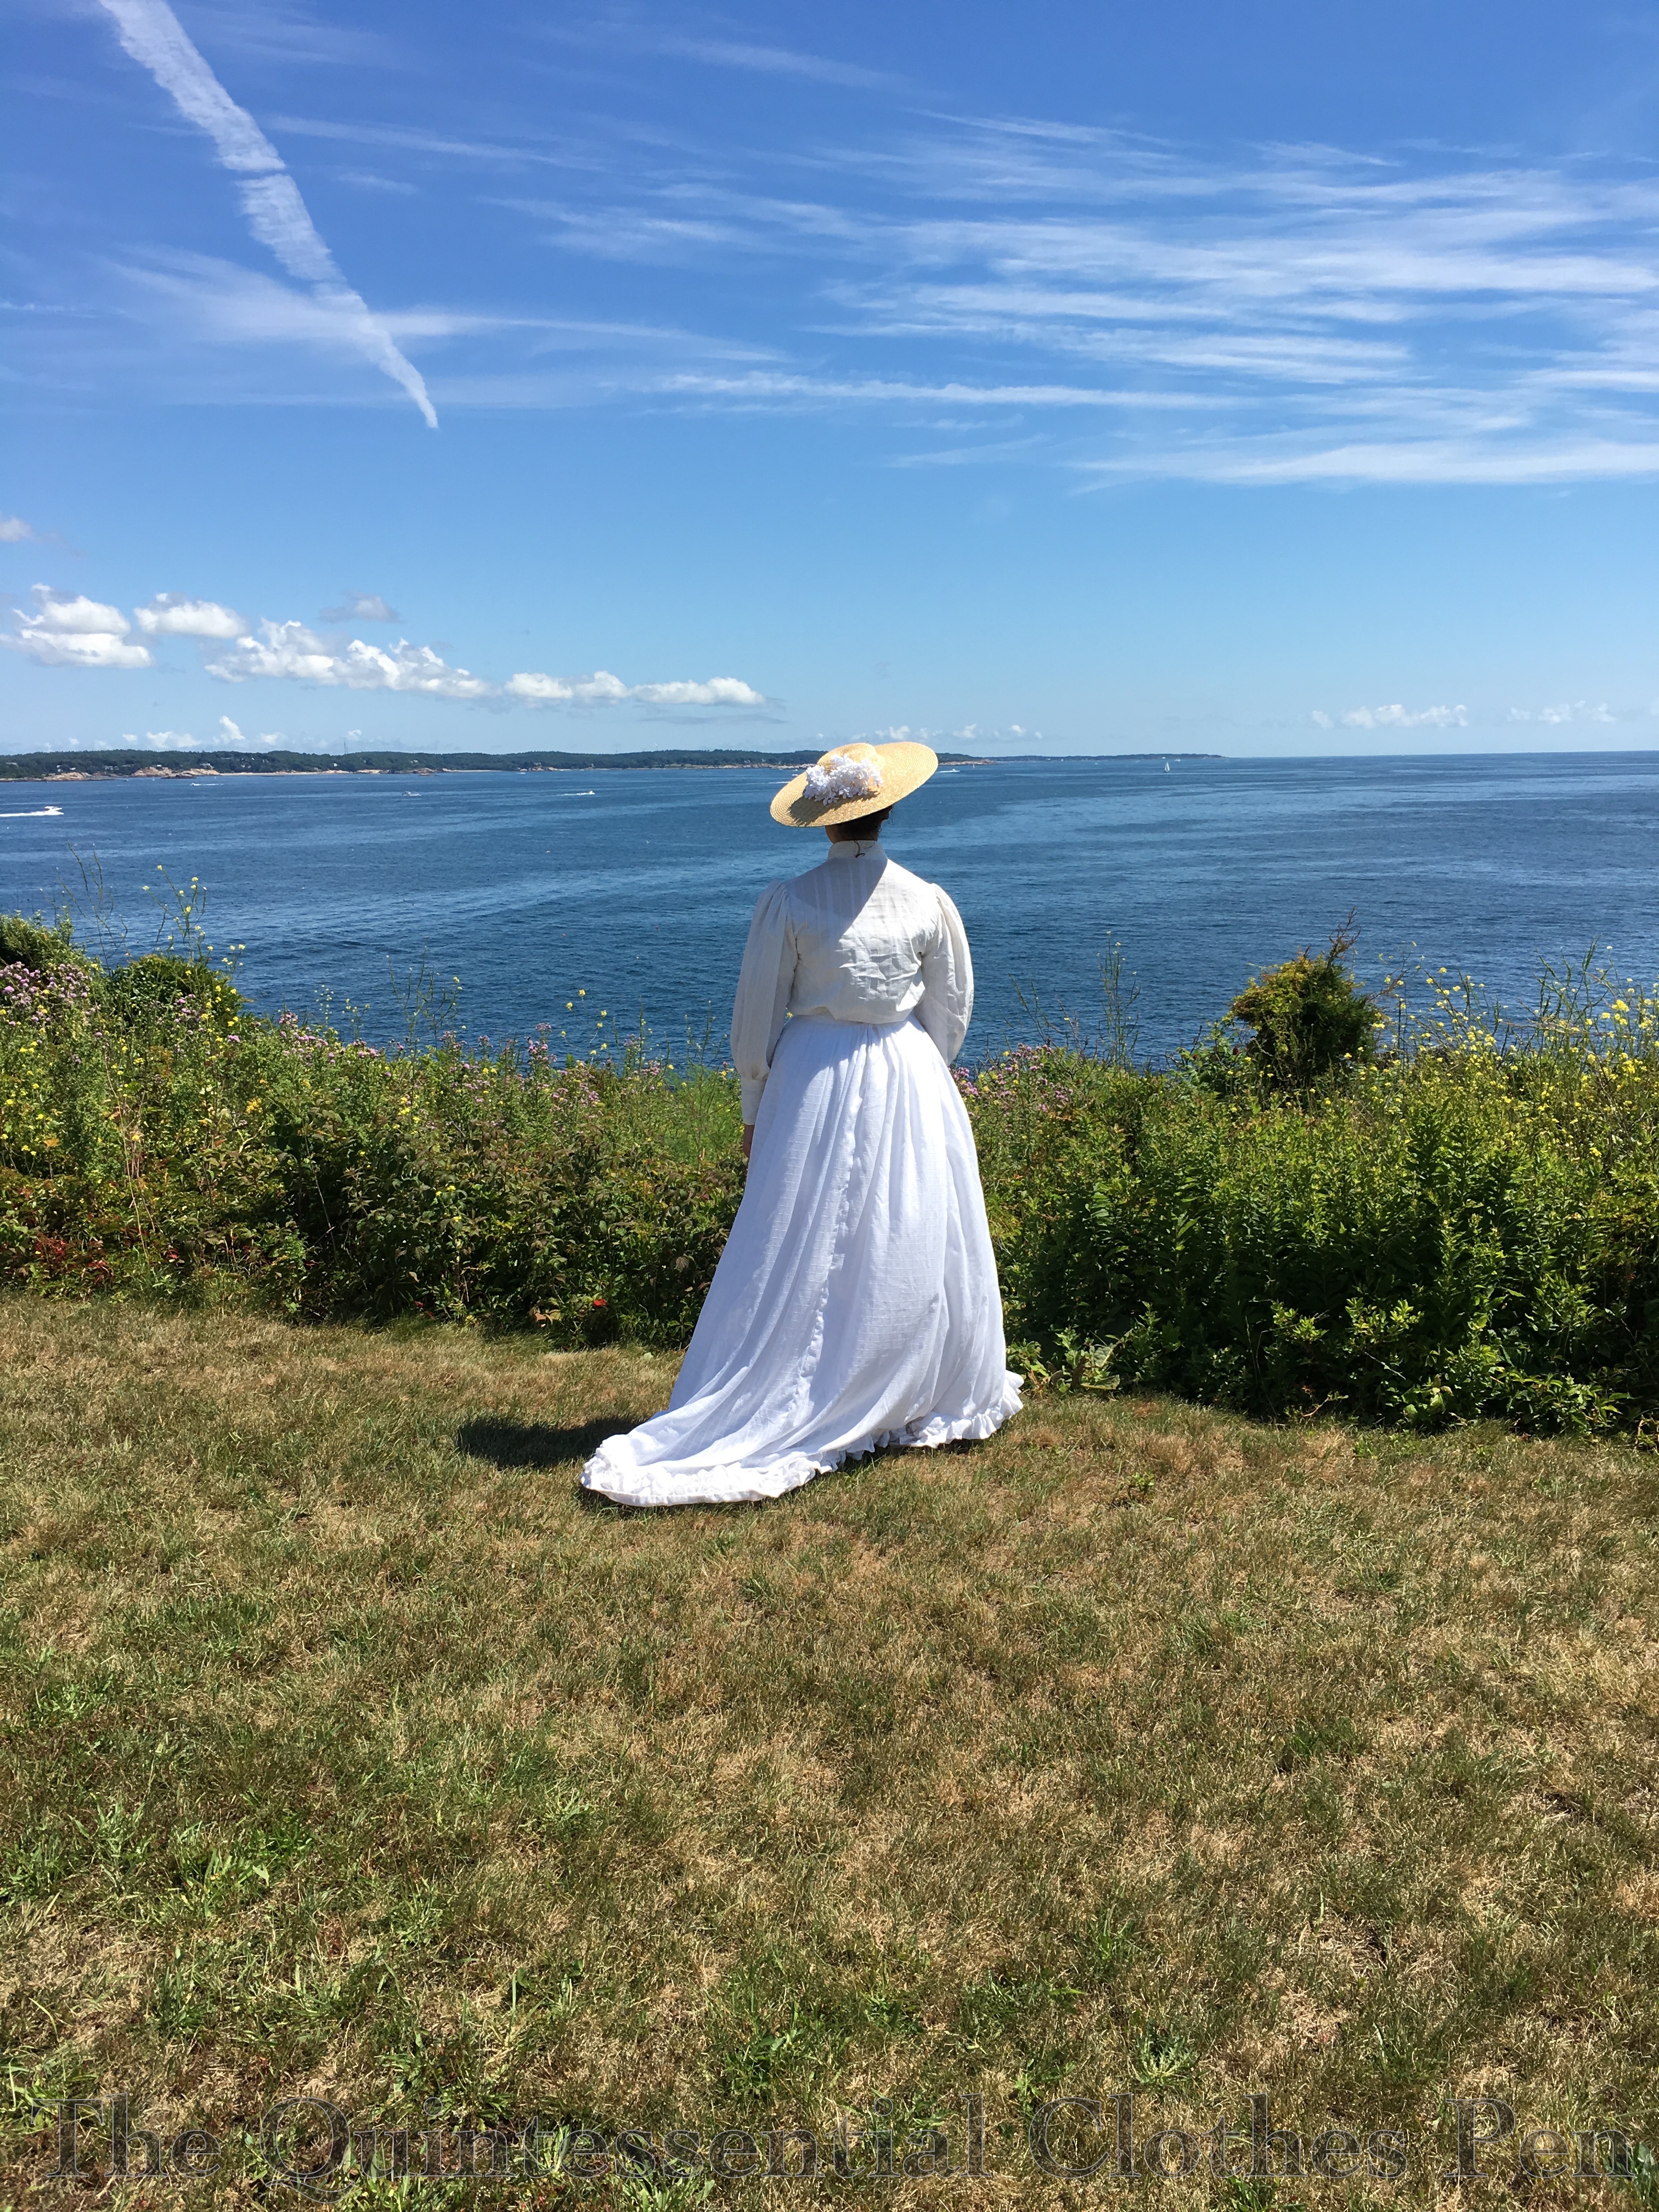
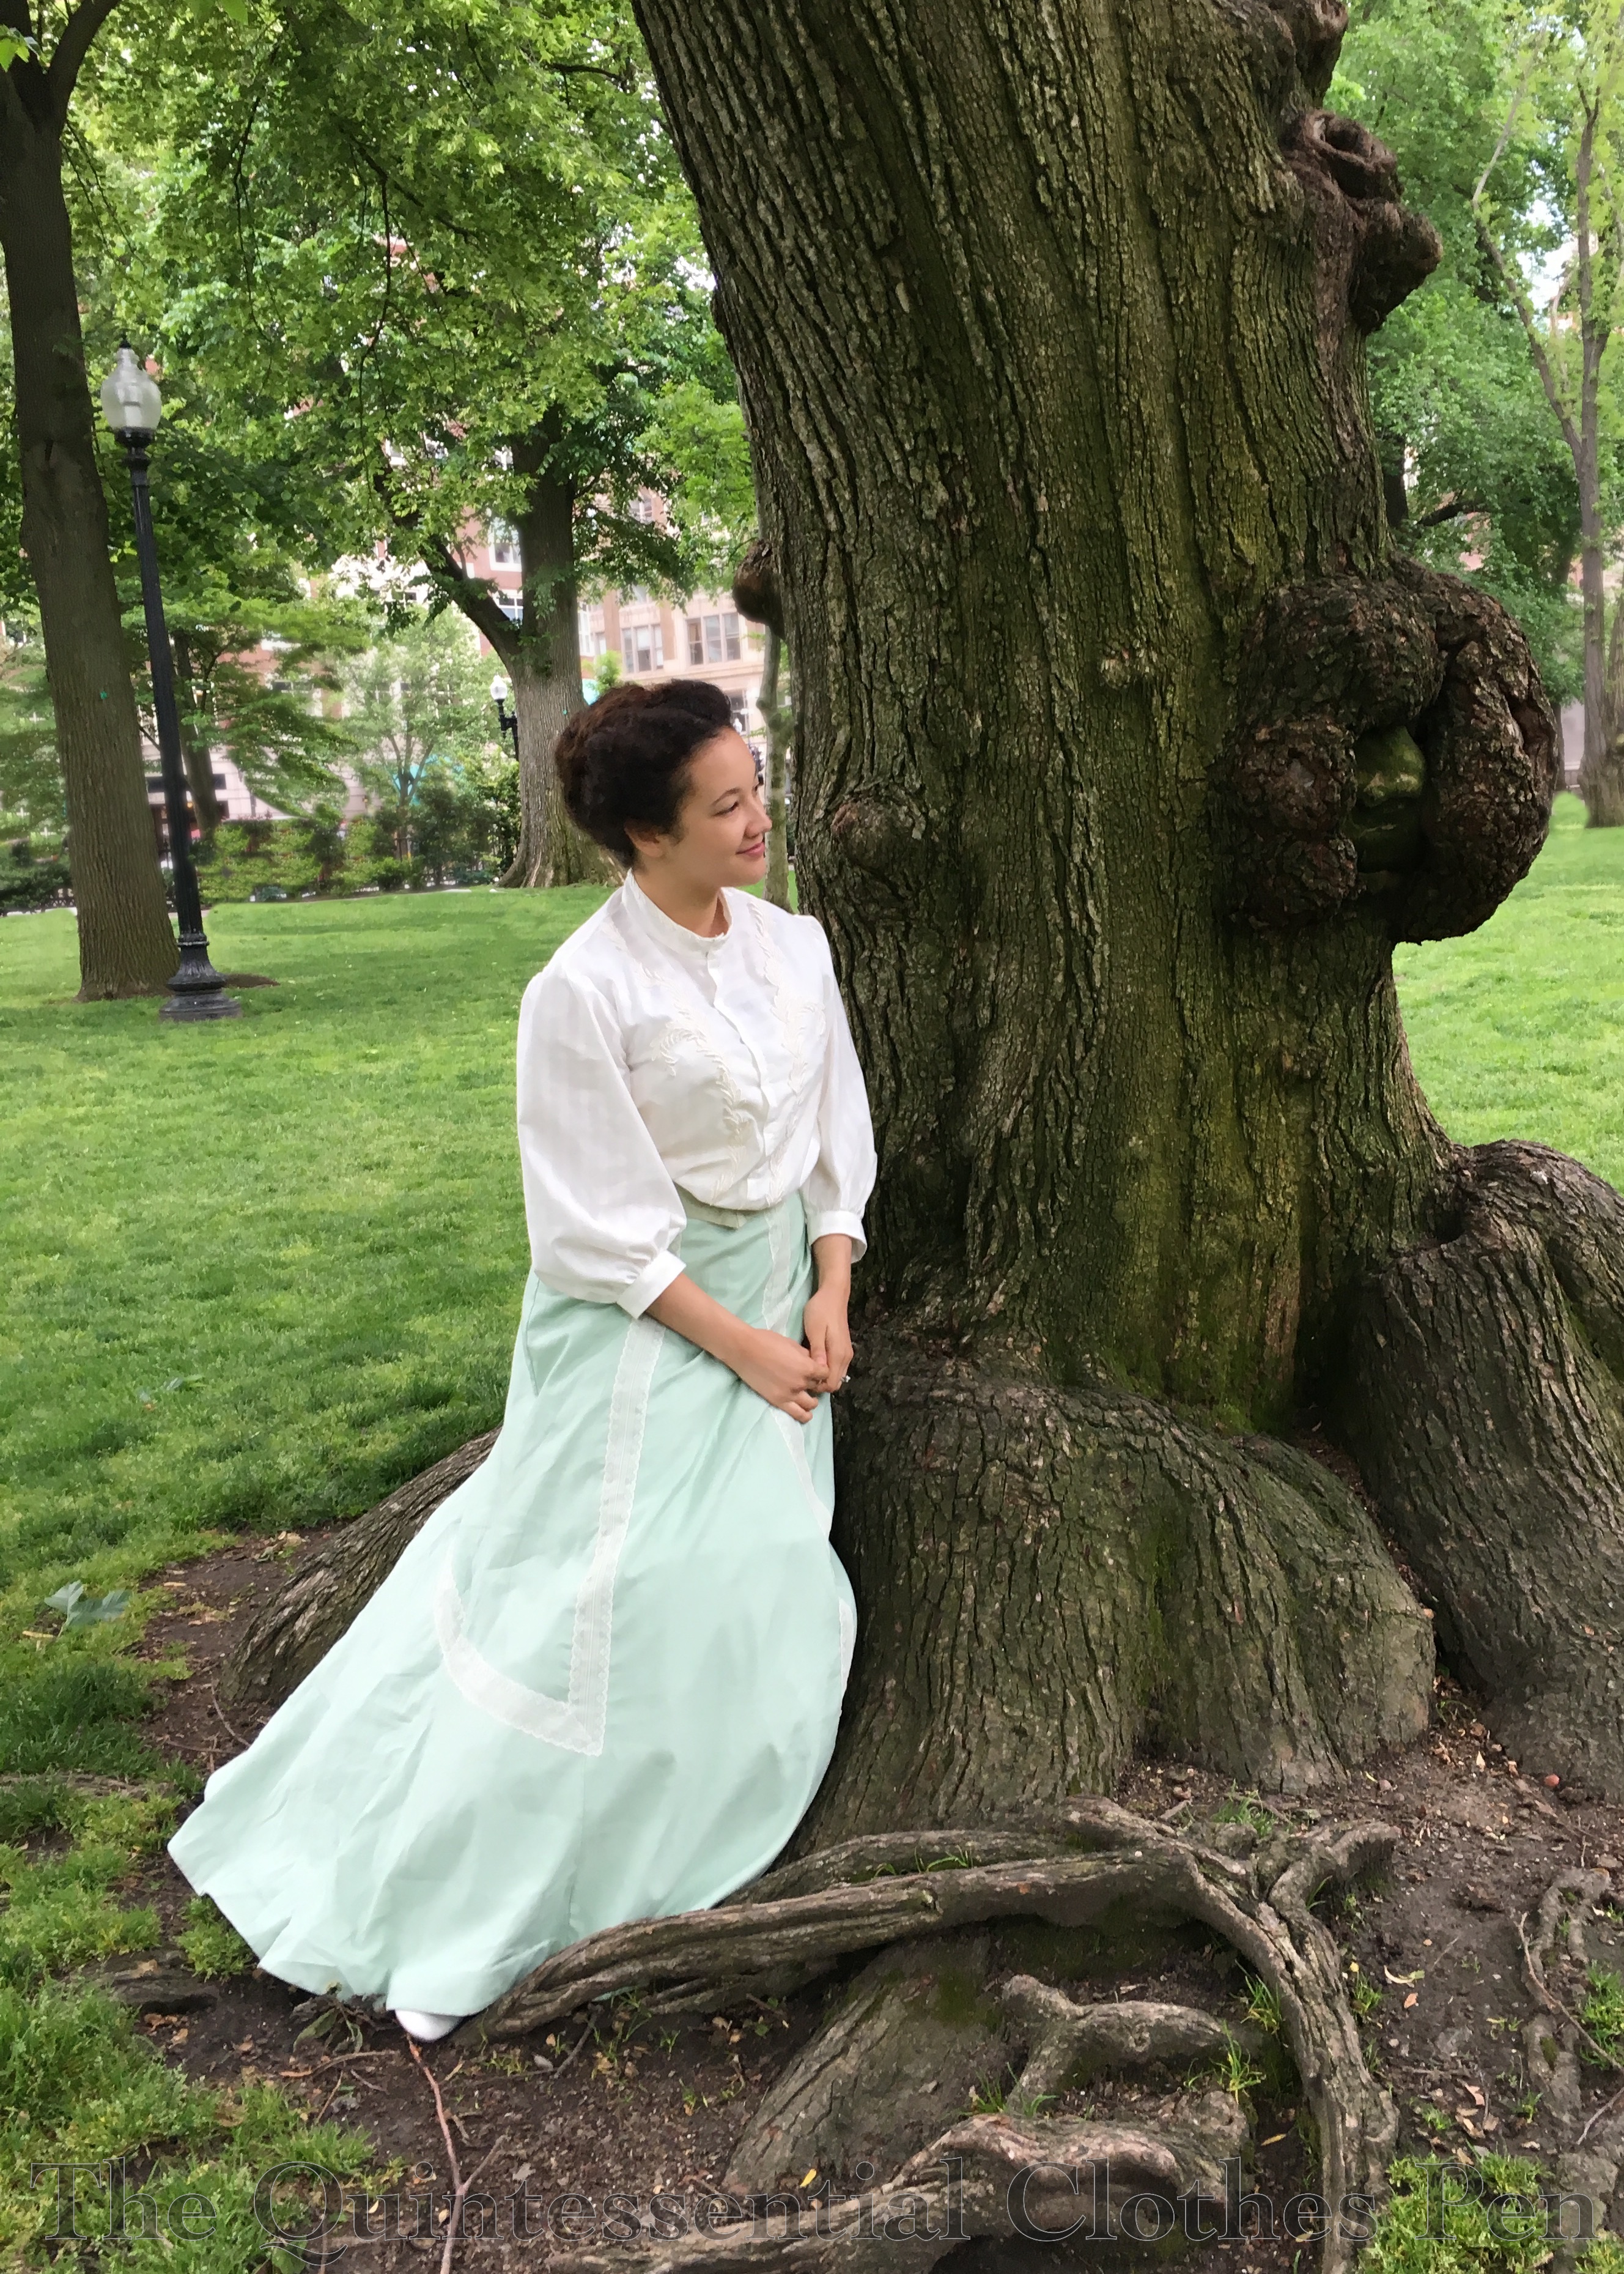
I wore my 1904 Anne of Green Gables ensemble. This time, though, I had a new belt and I got my hat to behave. It’s supposed to flip up in back, but was misbehaving last time I wore it and was flipped down in back. Boo!
The new belt is green silk covered with the same lace that I used on the skirt. The green isn’t a perfect match to the skirt, but I like that it coordinates without being too match-y. Taking a photo of it also allowed us to capture the subtle lace detail and woven stripe in the fabric of the blouse better than we did last time, which was a bonus outcome.
In between tours, we took some group photos around the lighthouse and the light keeper’s house. The light keeper’s house, in particular, provided us with some really adorable photos. These were provided to us by the light keepers, who keep their own charming blog (currently about their stay on Bakers Island this summer) which you can view here.
Behind the scenes, we needed to arrive before the visitors to set up. Given when boats were available that meant we had to arrive the day before the visitors. There aren’t any indoor accommodations we were able to take advantage of, so it was camping in tents for us. I’m not really a camping kind of person, but thankfully other people had tents to share. Between the modern equipment and food that we needed as well as the historical clothes, games, and amusements, we had quite the pile of luggage for two days and seven people! Here we are waiting for the boat back to the mainland.
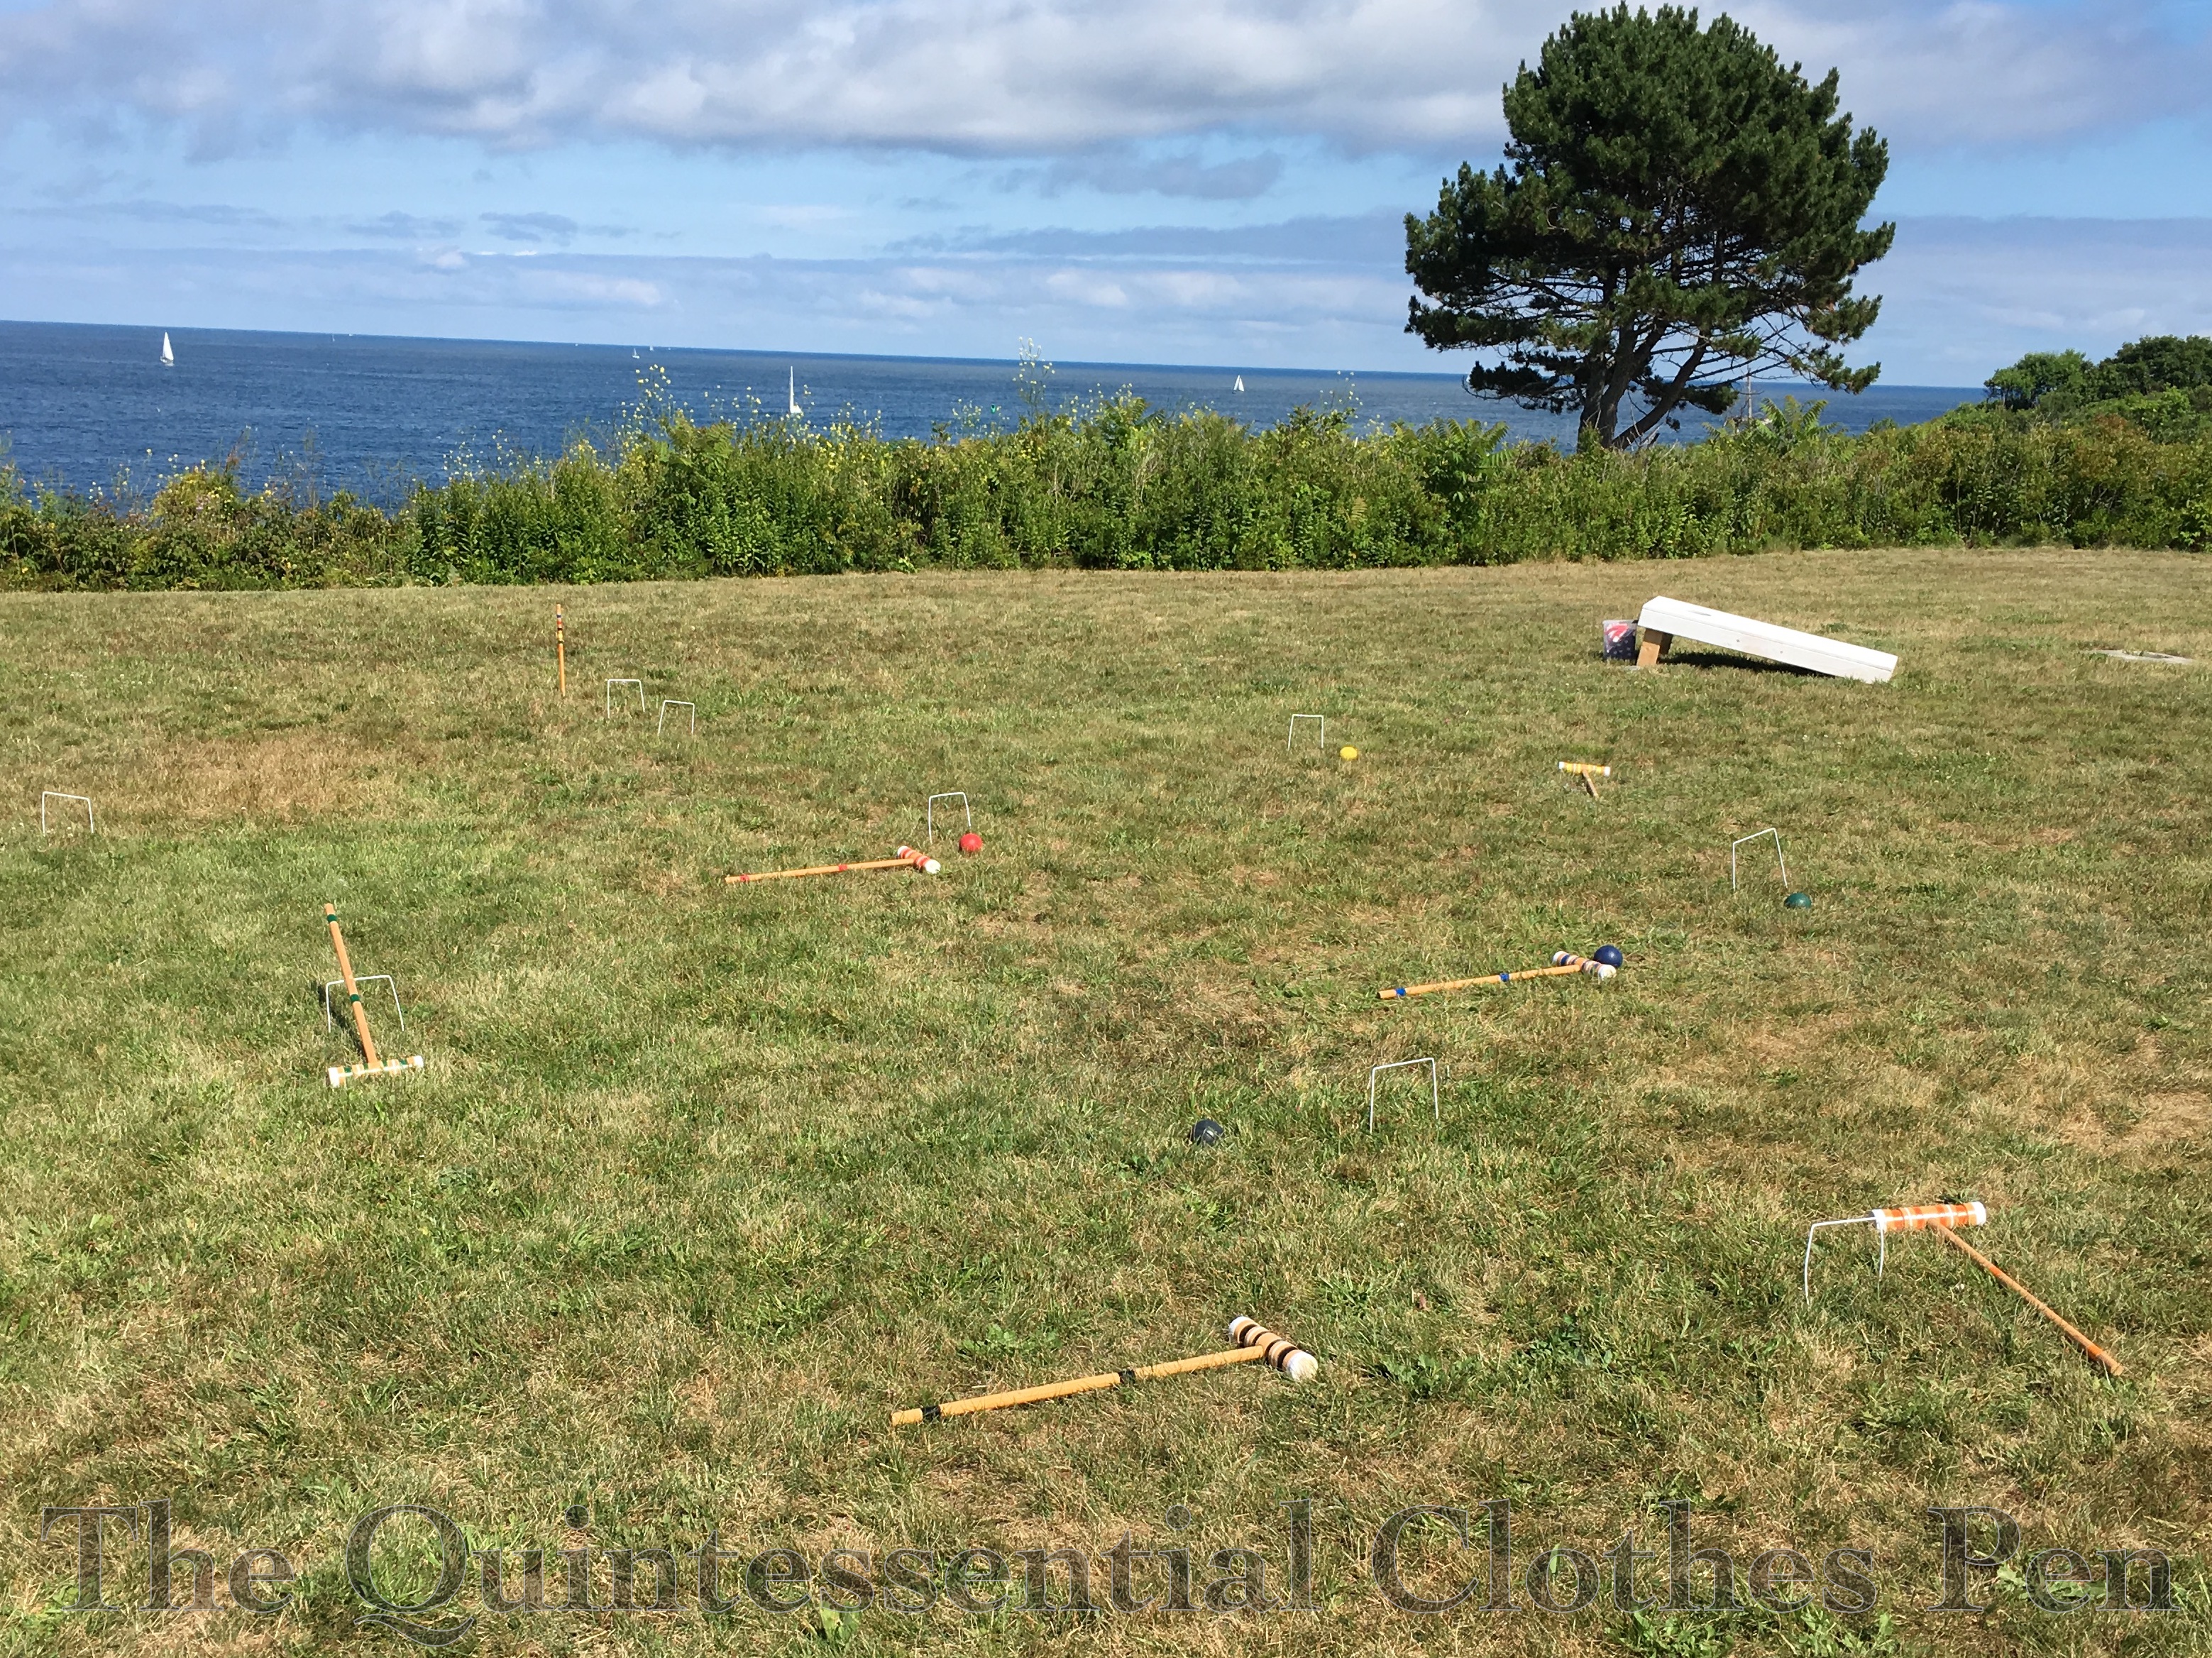
A new adventure complete! The croquet set is still in place but the players are gone! Maybe someday there will be others (or maybe us, who knows?) to once again bring history to life on this island.
In 2012, I made and wore a c.1900 green skirt and straw hat at Newport Vintage Dance Week. I had plans to make a blouse as well with it but ran out of time and wore a 1913 blouse I already had instead. I wasn’t terribly pleased with the whole look, so I didn’t ever focus on it in a blog post, though I did include it in my overview of the dance week.
At Newport Vintage Dance Week in 2012.
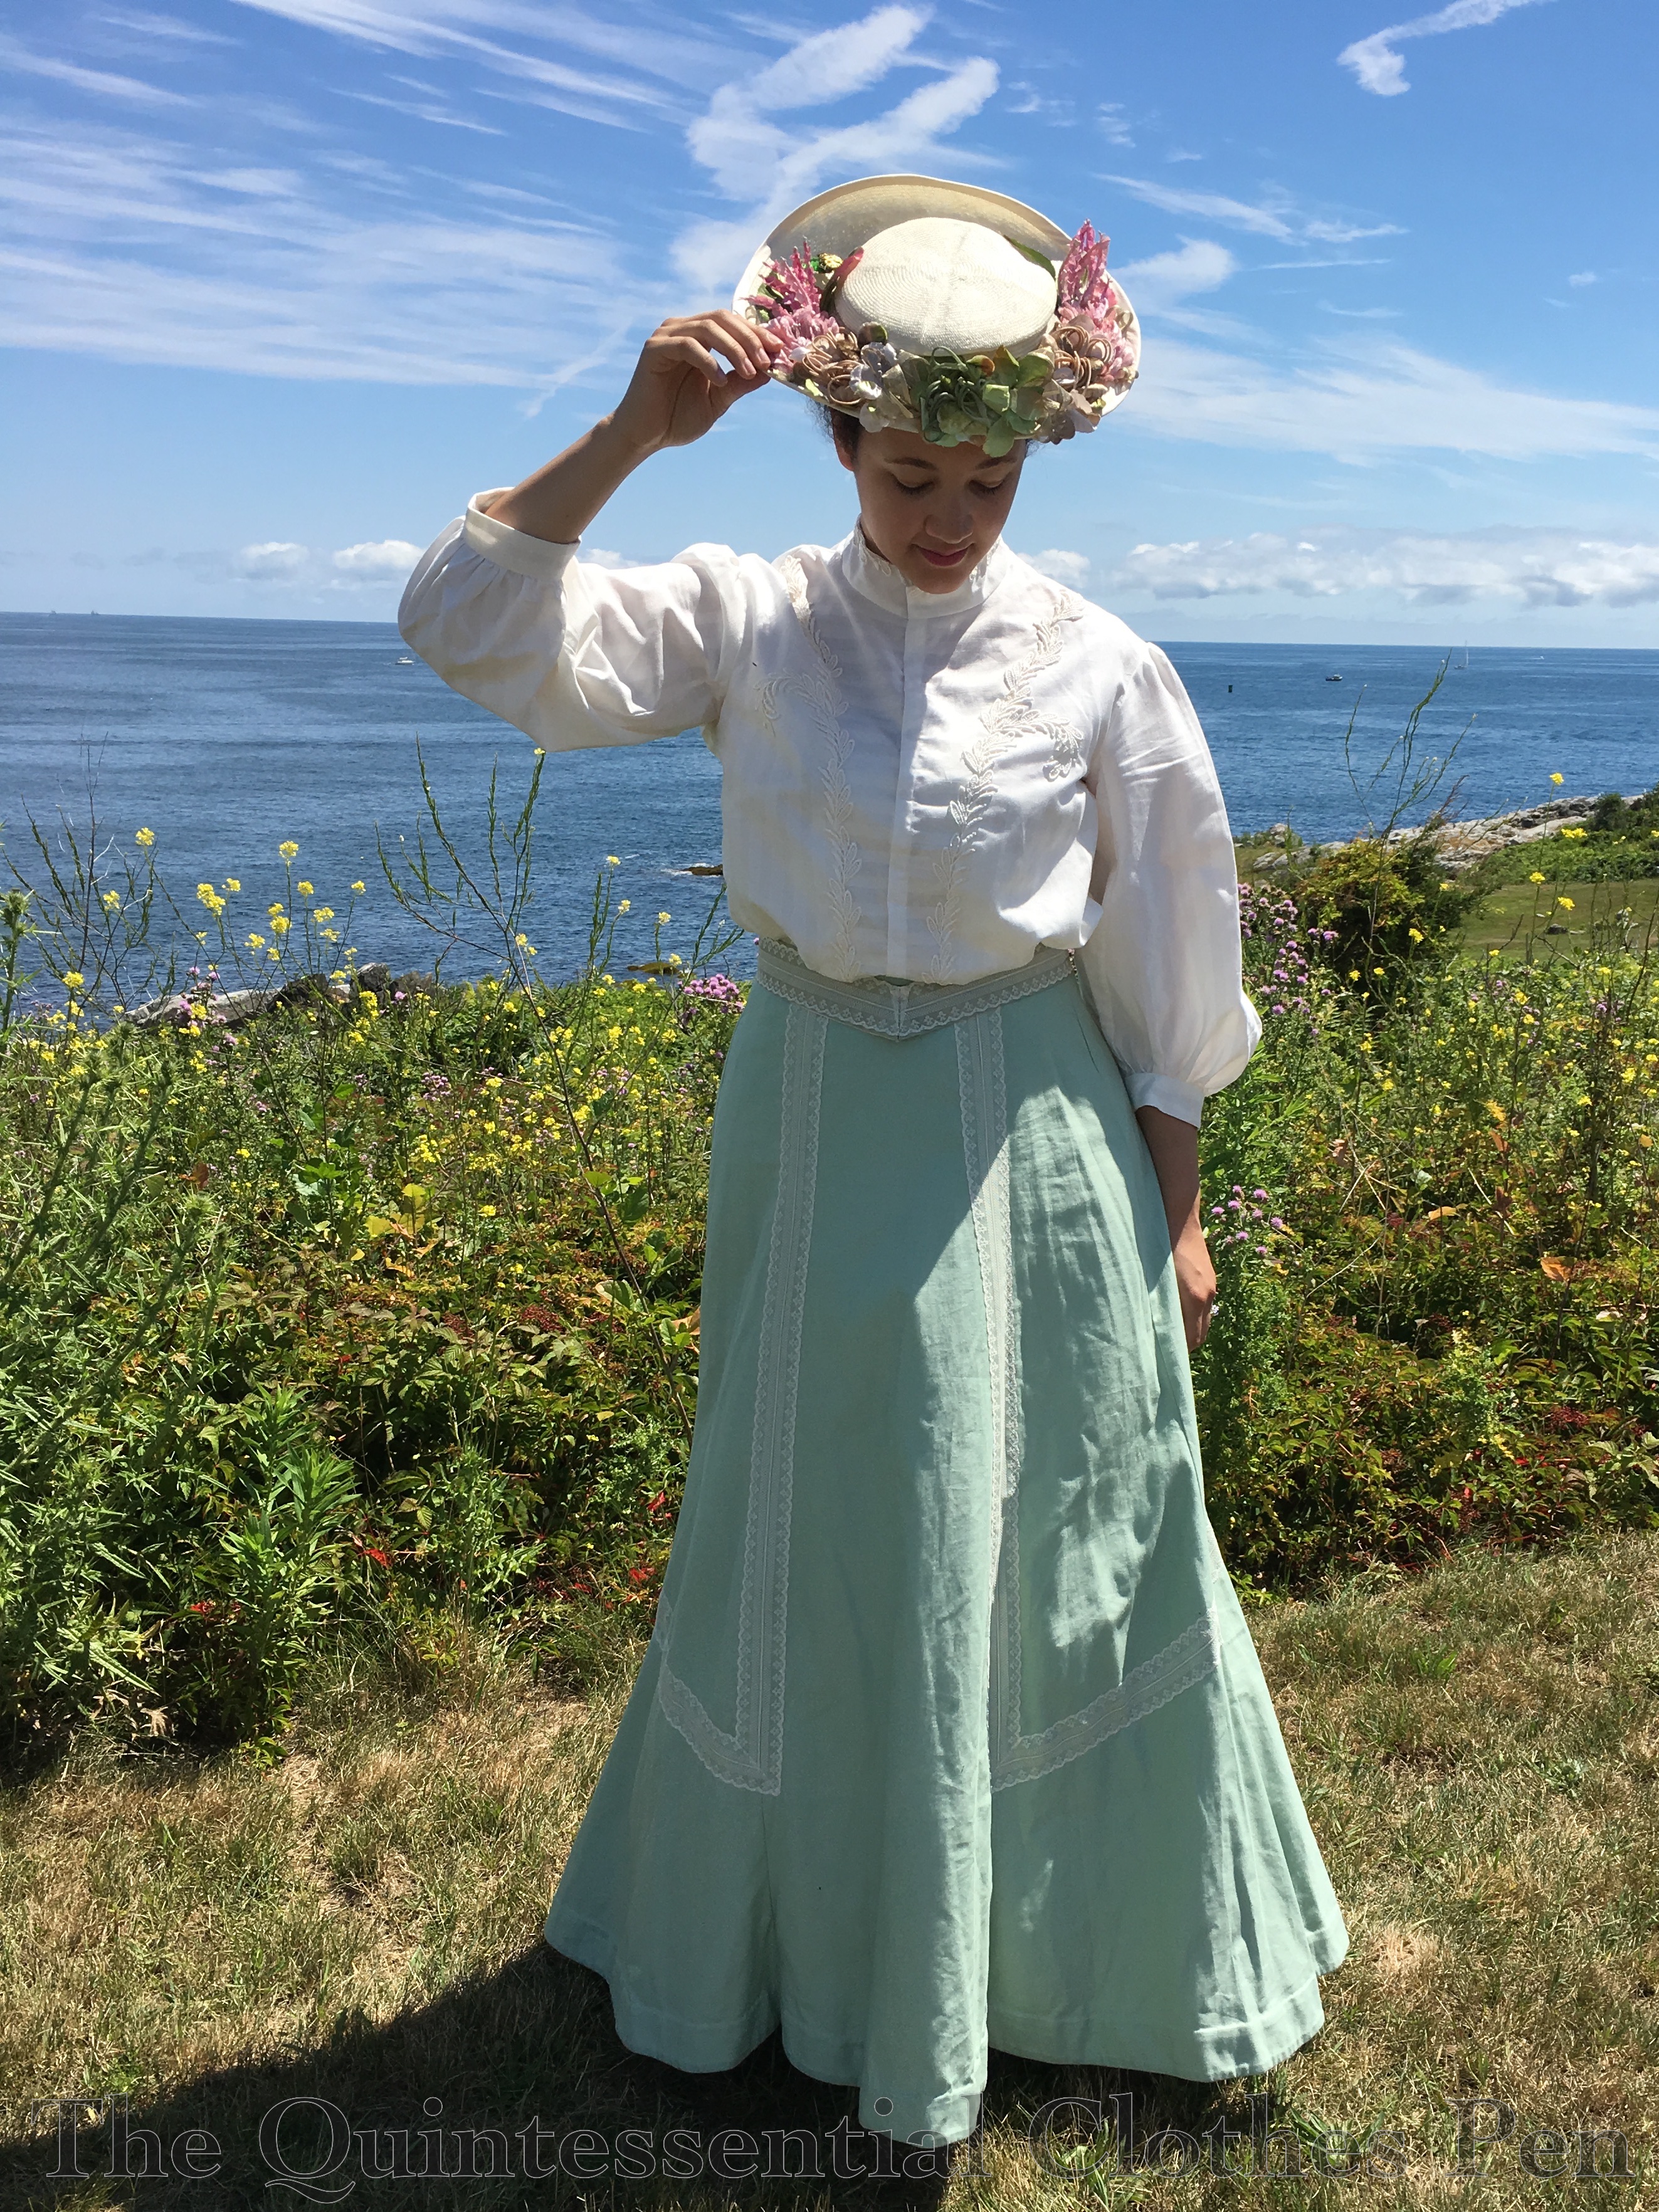
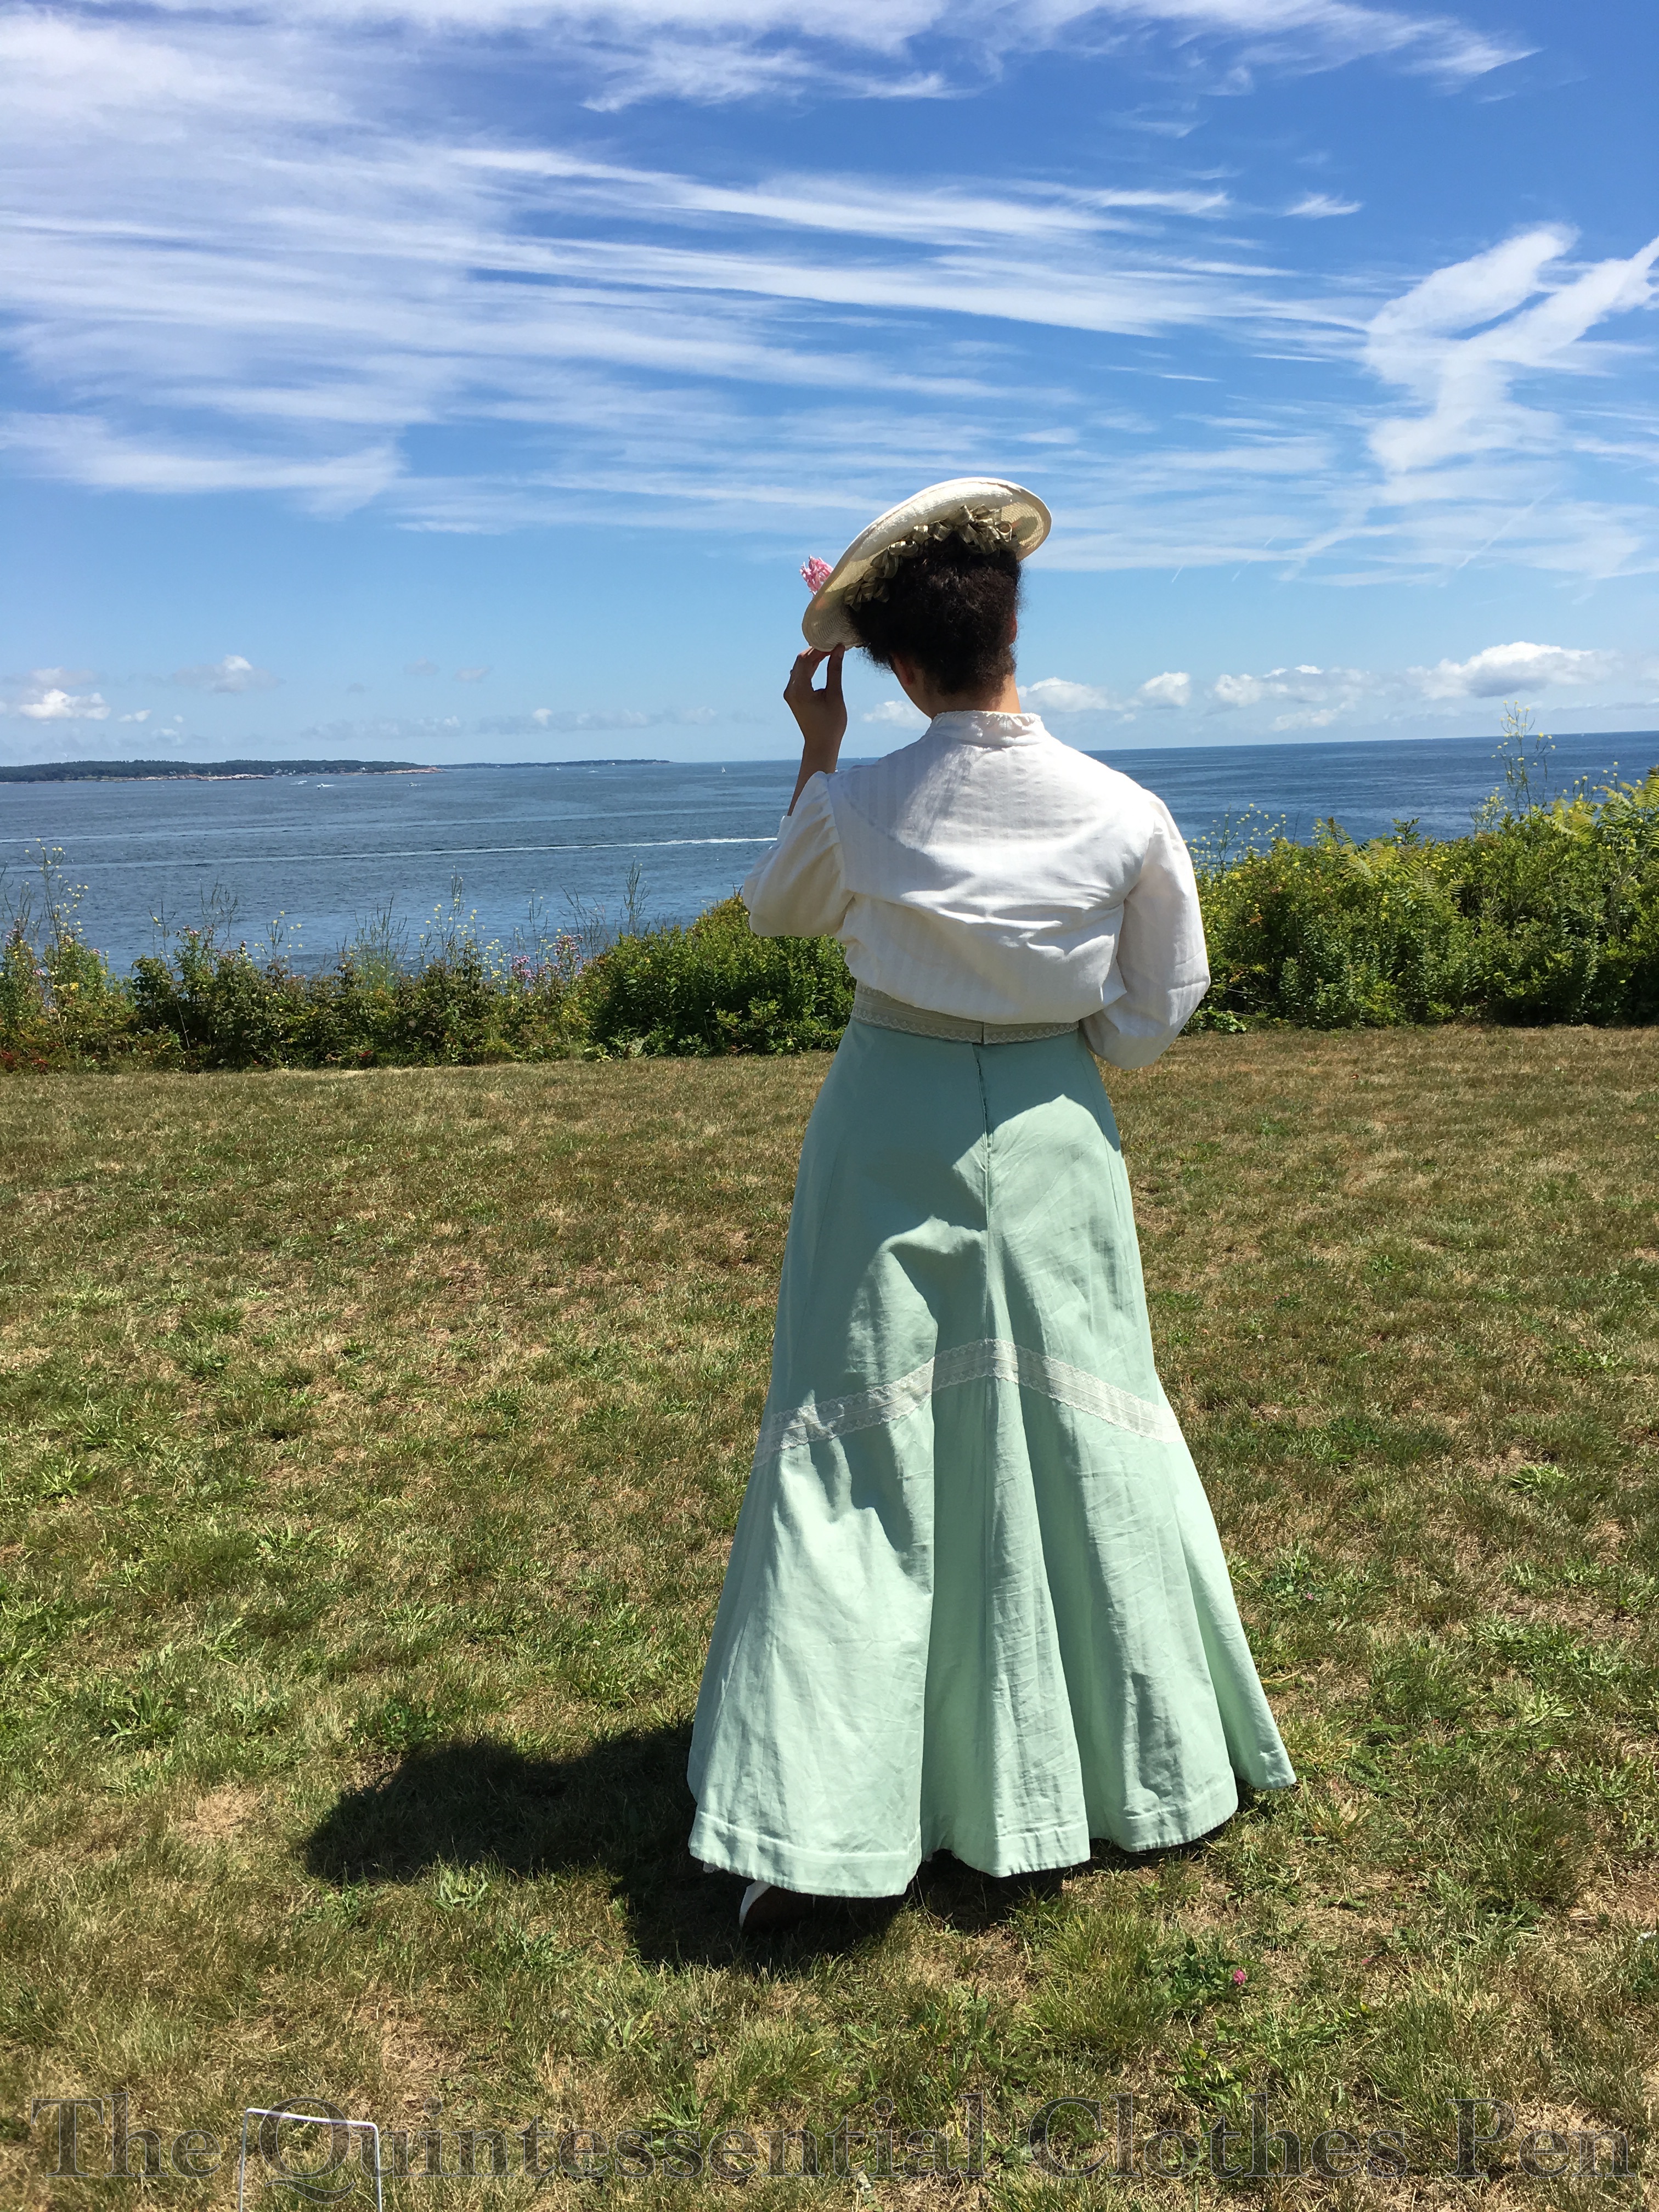
Since then I’ve worn the skirt a few times, but haven’t been able to for the last few years because (and this shouldn’t be surprising given the subject of my last post) the waist was too small!
Thankfully, I had two things going for me that made changing the waist size quite simple. First, I had extra fabric. Second, when I’d originally made the skirt the waist circumference was a few inches too big for the waistband, so I took a tuck on each side of center back. Now all I had to do was let out the tucks and extend the waistband with my extra fabric!
Updated ensemble in 2017.
It took me years to finally get around to doing it, but I’m glad I did, because I really like this skirt and it’s fun to remember the lovely wading adventure we had back in 2012 while I was wearing it! What gave me the final push to do the change was the opportunity for an early summer picnic, for which I had clothes but really wanted to have something new. Who hasn’t experienced that desire?
More About The New/Updated Ensemble
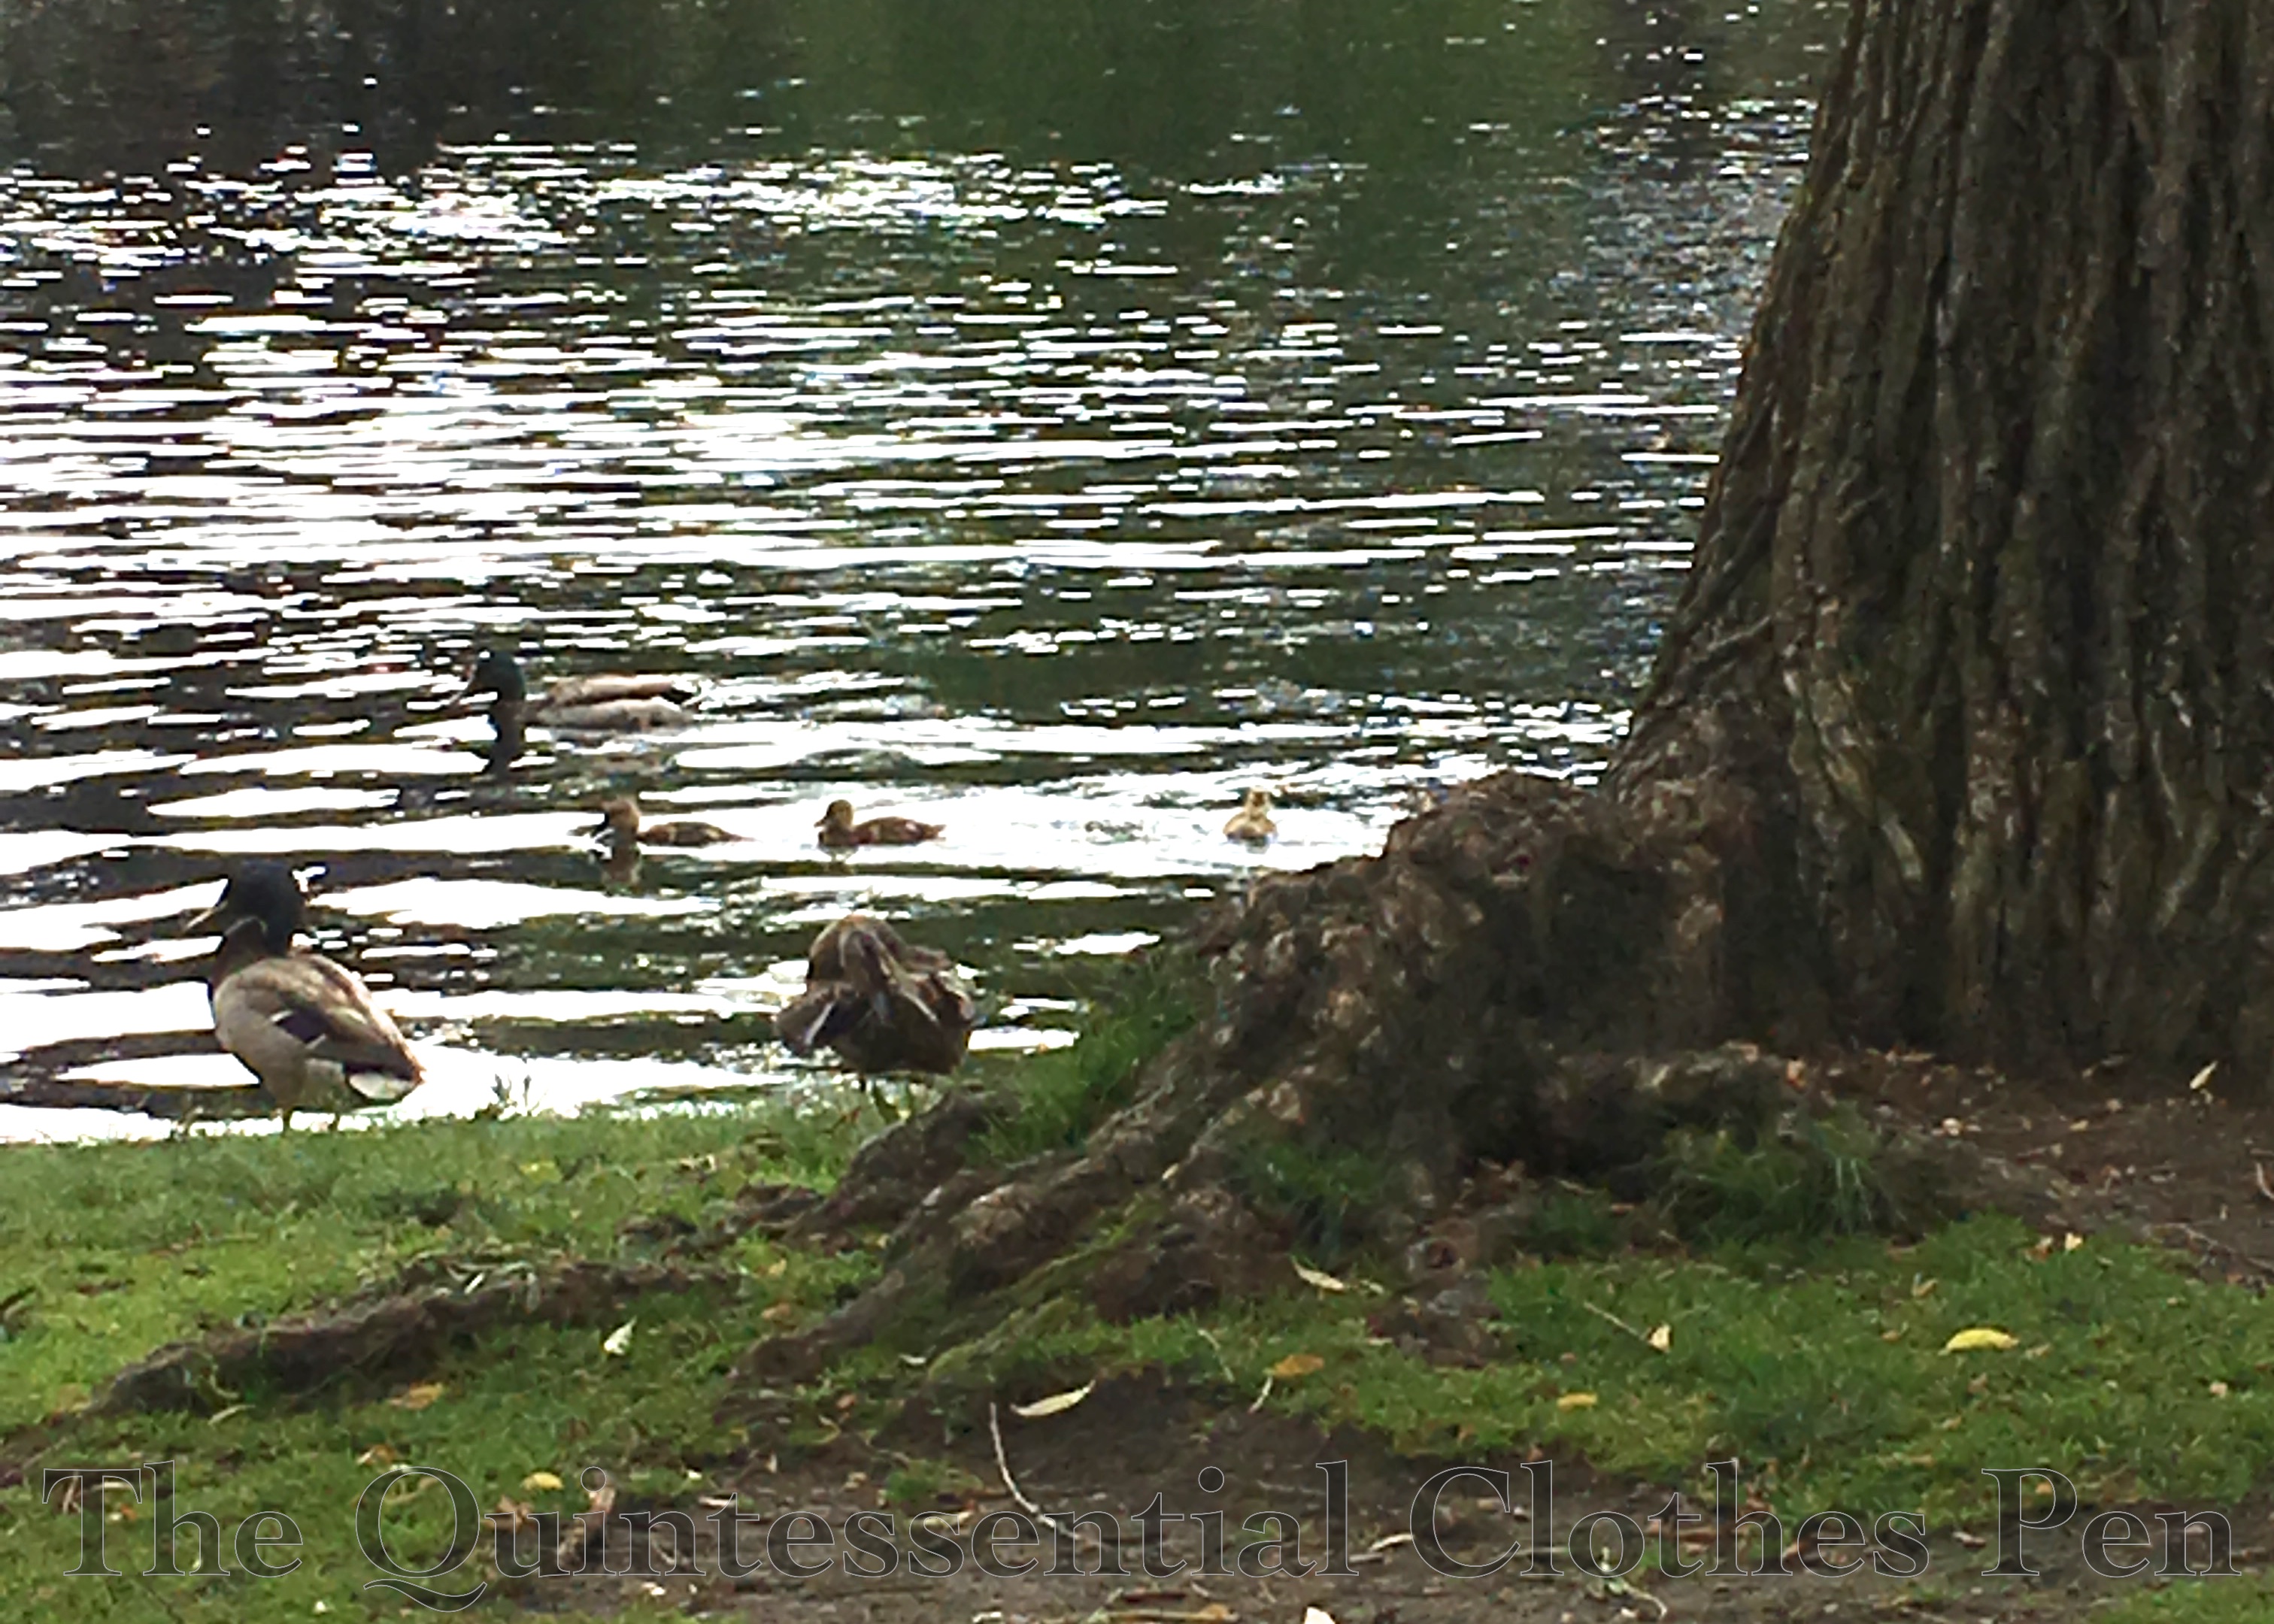
Ducks (and baby ducks) at the picnic!
The picnic provided some lovely backgrounds to take documentation pictures of all the new and updated pieces that form my Anne-inspired ensemble! I ironed out all the wrinkles in the skirt ahead of time… and then sat on picnic blanket before taking pictures, so the back pictures have a rather wrinkly bum.
The Blouse Inspiration
In addition to wanting to update the skirt, I’ve also had that blouse to go with it on my to-do list for years. Instead of going back to the blouse plan from 2012, I started over with new inspiration. (Never fear, the unfinished blouse from 2012 is still in a box waiting for me to go back to it… someday.)
The new inspiration came directly from the scene in Anne of Green Gables when she’s walking down the lane with Gilbert and his horse (just before she gets mad and whacks him with her basket!). I’ve always love her silhouette and decided a blouse with a similar shape would suit the green skirt nicely.
Anne and Gilbert! (And the horse.)
I researched blouses from this period and decided on the year 1904 for my blouse. I was particularly inspired by this ivory c. 1905 blouse, this black c. 1905 blouse, and this blouse that The Met dates to 1899-1902. The idea to play with the direction of the stripes and to have curling lace trim (mimicking embroidery) was taken directly from this page from The Ladies’ Home Journal for April 1904 that Lauren of Wearing History kindly shared on her blog. Other views of some of these blouses as well as other inspiration are gathered on my Pinterest board for this project, here.
The Blouse Construction
My blouse is made of an ivory cotton that is woven with narrow stripes. In the center front panel the stripes are horizontal, while on the rest of the blouse they are vertical. The blouse is trimmed with lace appliqués in the same pattern as the Ladies’ Home Journal blouse from 1904. Unfortunately, all of the subtle ivory on ivory details are hard to photograph.
The blouse is mostly machine sewn and uses French seams except at the armholes, which are left raw. It is finished by hand and closes up the front with concealed hooks and thread bars. There is a twill tape channel for a drawstring at the waist to help control the fullness and the pigeon front.
The silhouette was looking a little deflated for a 1904 pigeon breast look, so I tacked ruffles down the front seams to help fill out the blouse. It’s subtle-but-useful method and was easy since I already had the circular ruffles in my stash.
The Hat Inspiration
The most direct inspiration for my hat was this image from 1903. While I decided against feathers, the general trim placement as well as the poofs under the back of the brim are present in my hat.
There are more inspirational hats here, on my Pinterest board for this project.
The Hat Construction
The hat in the 2012 version of this ensemble was an admirable idea in theory, but not execution. (I was displeased enough that it was remade into my 1885 Flower Pot Hat in 2015.) However, I had another of the same straw base that I decided to remake for the new Anne ensemble.
In 2012, I had used the second straw base to make a Regency bonnet, another project I wasn’t entirely happy with (this is not the right type of straw to get a good bonnet shape). All that needed to be done was removing the trimmings from the hat and taking out the stitching holding the wire around the edge… and I had a straw hat blank ready to be remade into a new hat!
For a hat block, I used a shallow glass bowl covered in tin foil and plastic wrap. I wet the straw base in the bathtub, then used a paintbrush to cover the straw with a layer of my sizing (a bit of elmer’s glue dissolved in water–no formula, I just winged it). I set the hat out in the hot sun to let it dry, holding the edges down with spice jars to keep it from blowing away. (Can you tell I just wandered into my kitchen to see what I had that would work to help me with this hat?)
Reshaped straw hat base next to my improvised hat block.
I tidied up the edges of the hat with scissors, bound the edge of the straw with narrow strips of tulle to keep the straw from fraying, and then reshaped my wire and resewed it around the edge of the hat. I covered these edge treatments with a binding of ivory silk satin, trimmed the hat, and I was done!
The tulle was sewn with a straight stitch. The wire was then stitched with a zig zag.
Sundries
In order to achieve my desired pigeon breast silhouette of 1904, I needed some omph in the back in addition to the ruffles inside the blouse in the front. I tried wearing a small bum pad (about 10″ wide), but then my hips looked sunken by comparison. I determined I needed a new bum pad that would fill in both my hips and backside to help create the illusion I was aiming for.
I also made a new belt to go with this ensemble. I wanted something a little more V shaped in front and a little less dramatic in terms of color. I actually reused the lining from the previous iteration of my new hat to make a new belt. The two shades of green don’t quite match, but they also don’t offend, so I’m pleased.
Instead of a traditional Gibson Girl hair style, I tried a style more like this, with a center part and poofs on each side. It was a bit squashed by my hat, but I was quite pleased with it overall. Unfortunately, I didn’t get any perfect shots of just my hair style. I’ll have to try it again someday and get hair pictures.
This gown was already in my sewing plan before I decided it fit into the HSF/M Challenge #10: Sewing Secrets. It turns out that it fits into the Sewing Secrets challenge for multiple reasons:
#1: Because like many dresses from the first few decades of the 20th century, the method of closure is cleverly hidden, rather complicated, and definitely secretive–you really can’t tell how the dress goes on just looking at it once it’s all hooked up. (Right? Can you figure it out before I show you later in the post?)
#2: The beaded panel on the front might look familiar if you’ve been reading my blog for a few years. It is actually the sleeve (turned upside down) from a 1980s evening gown that I remade into a sleeveless 1925 evening gown.
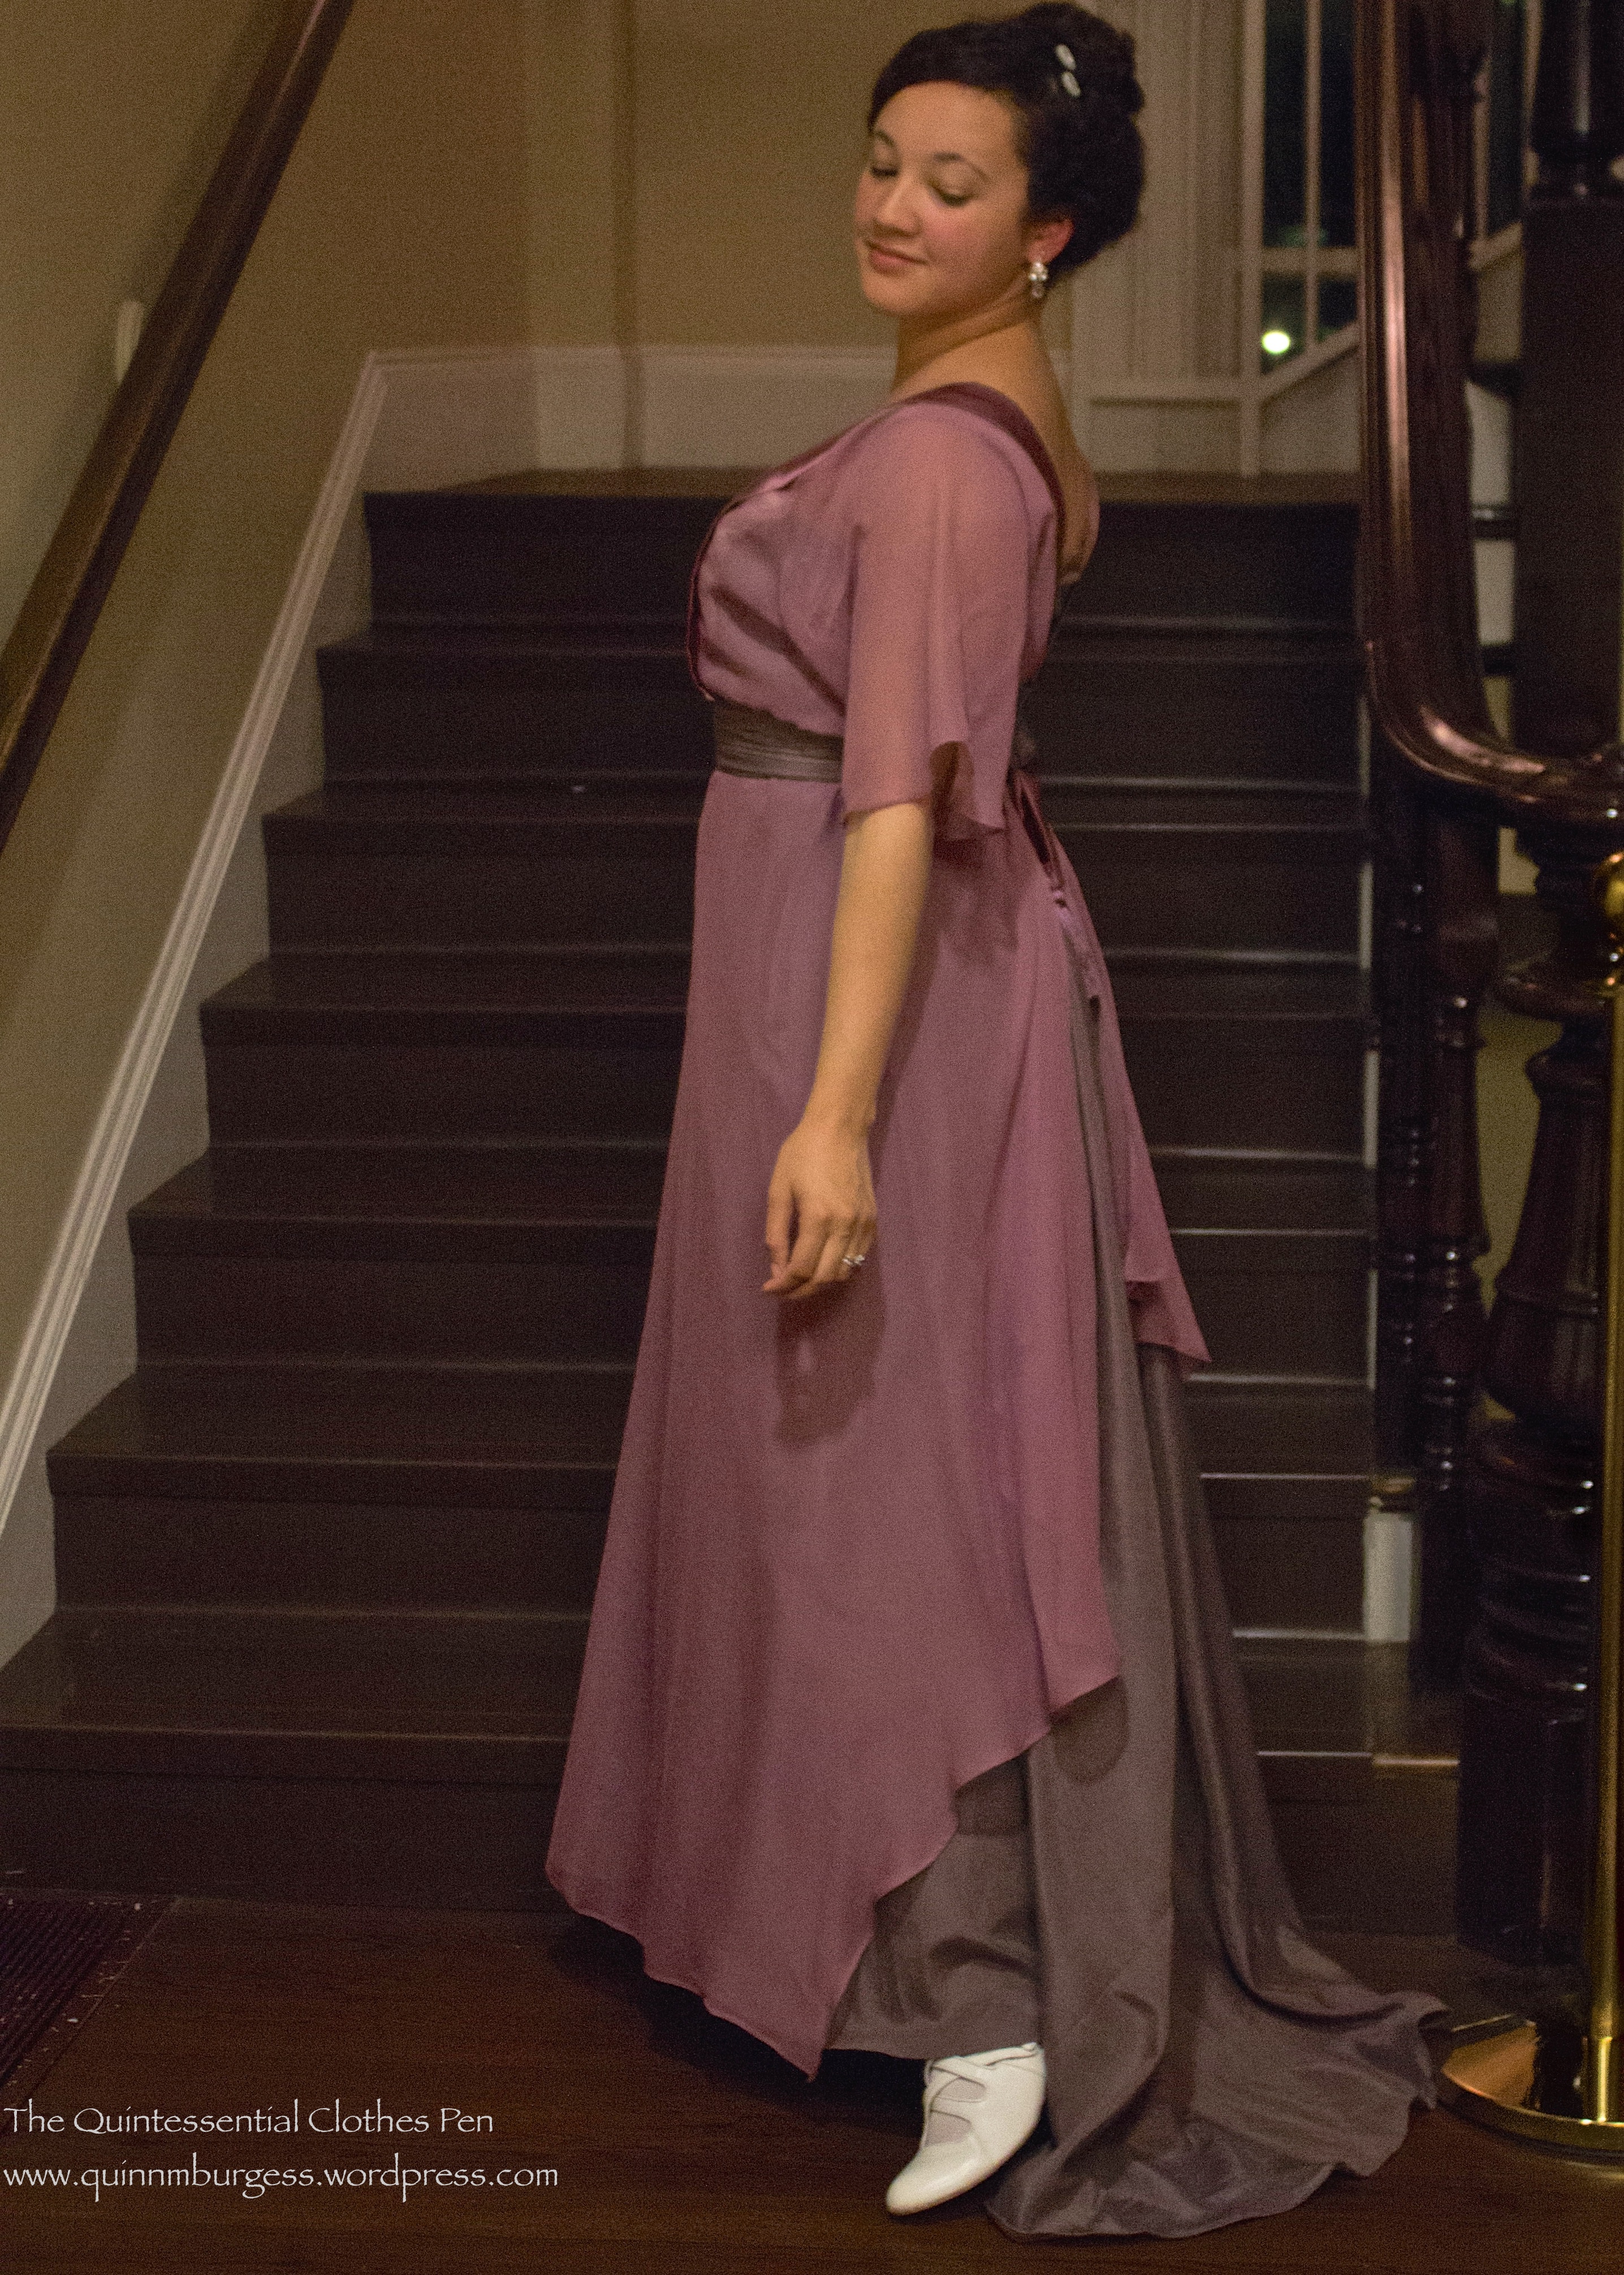
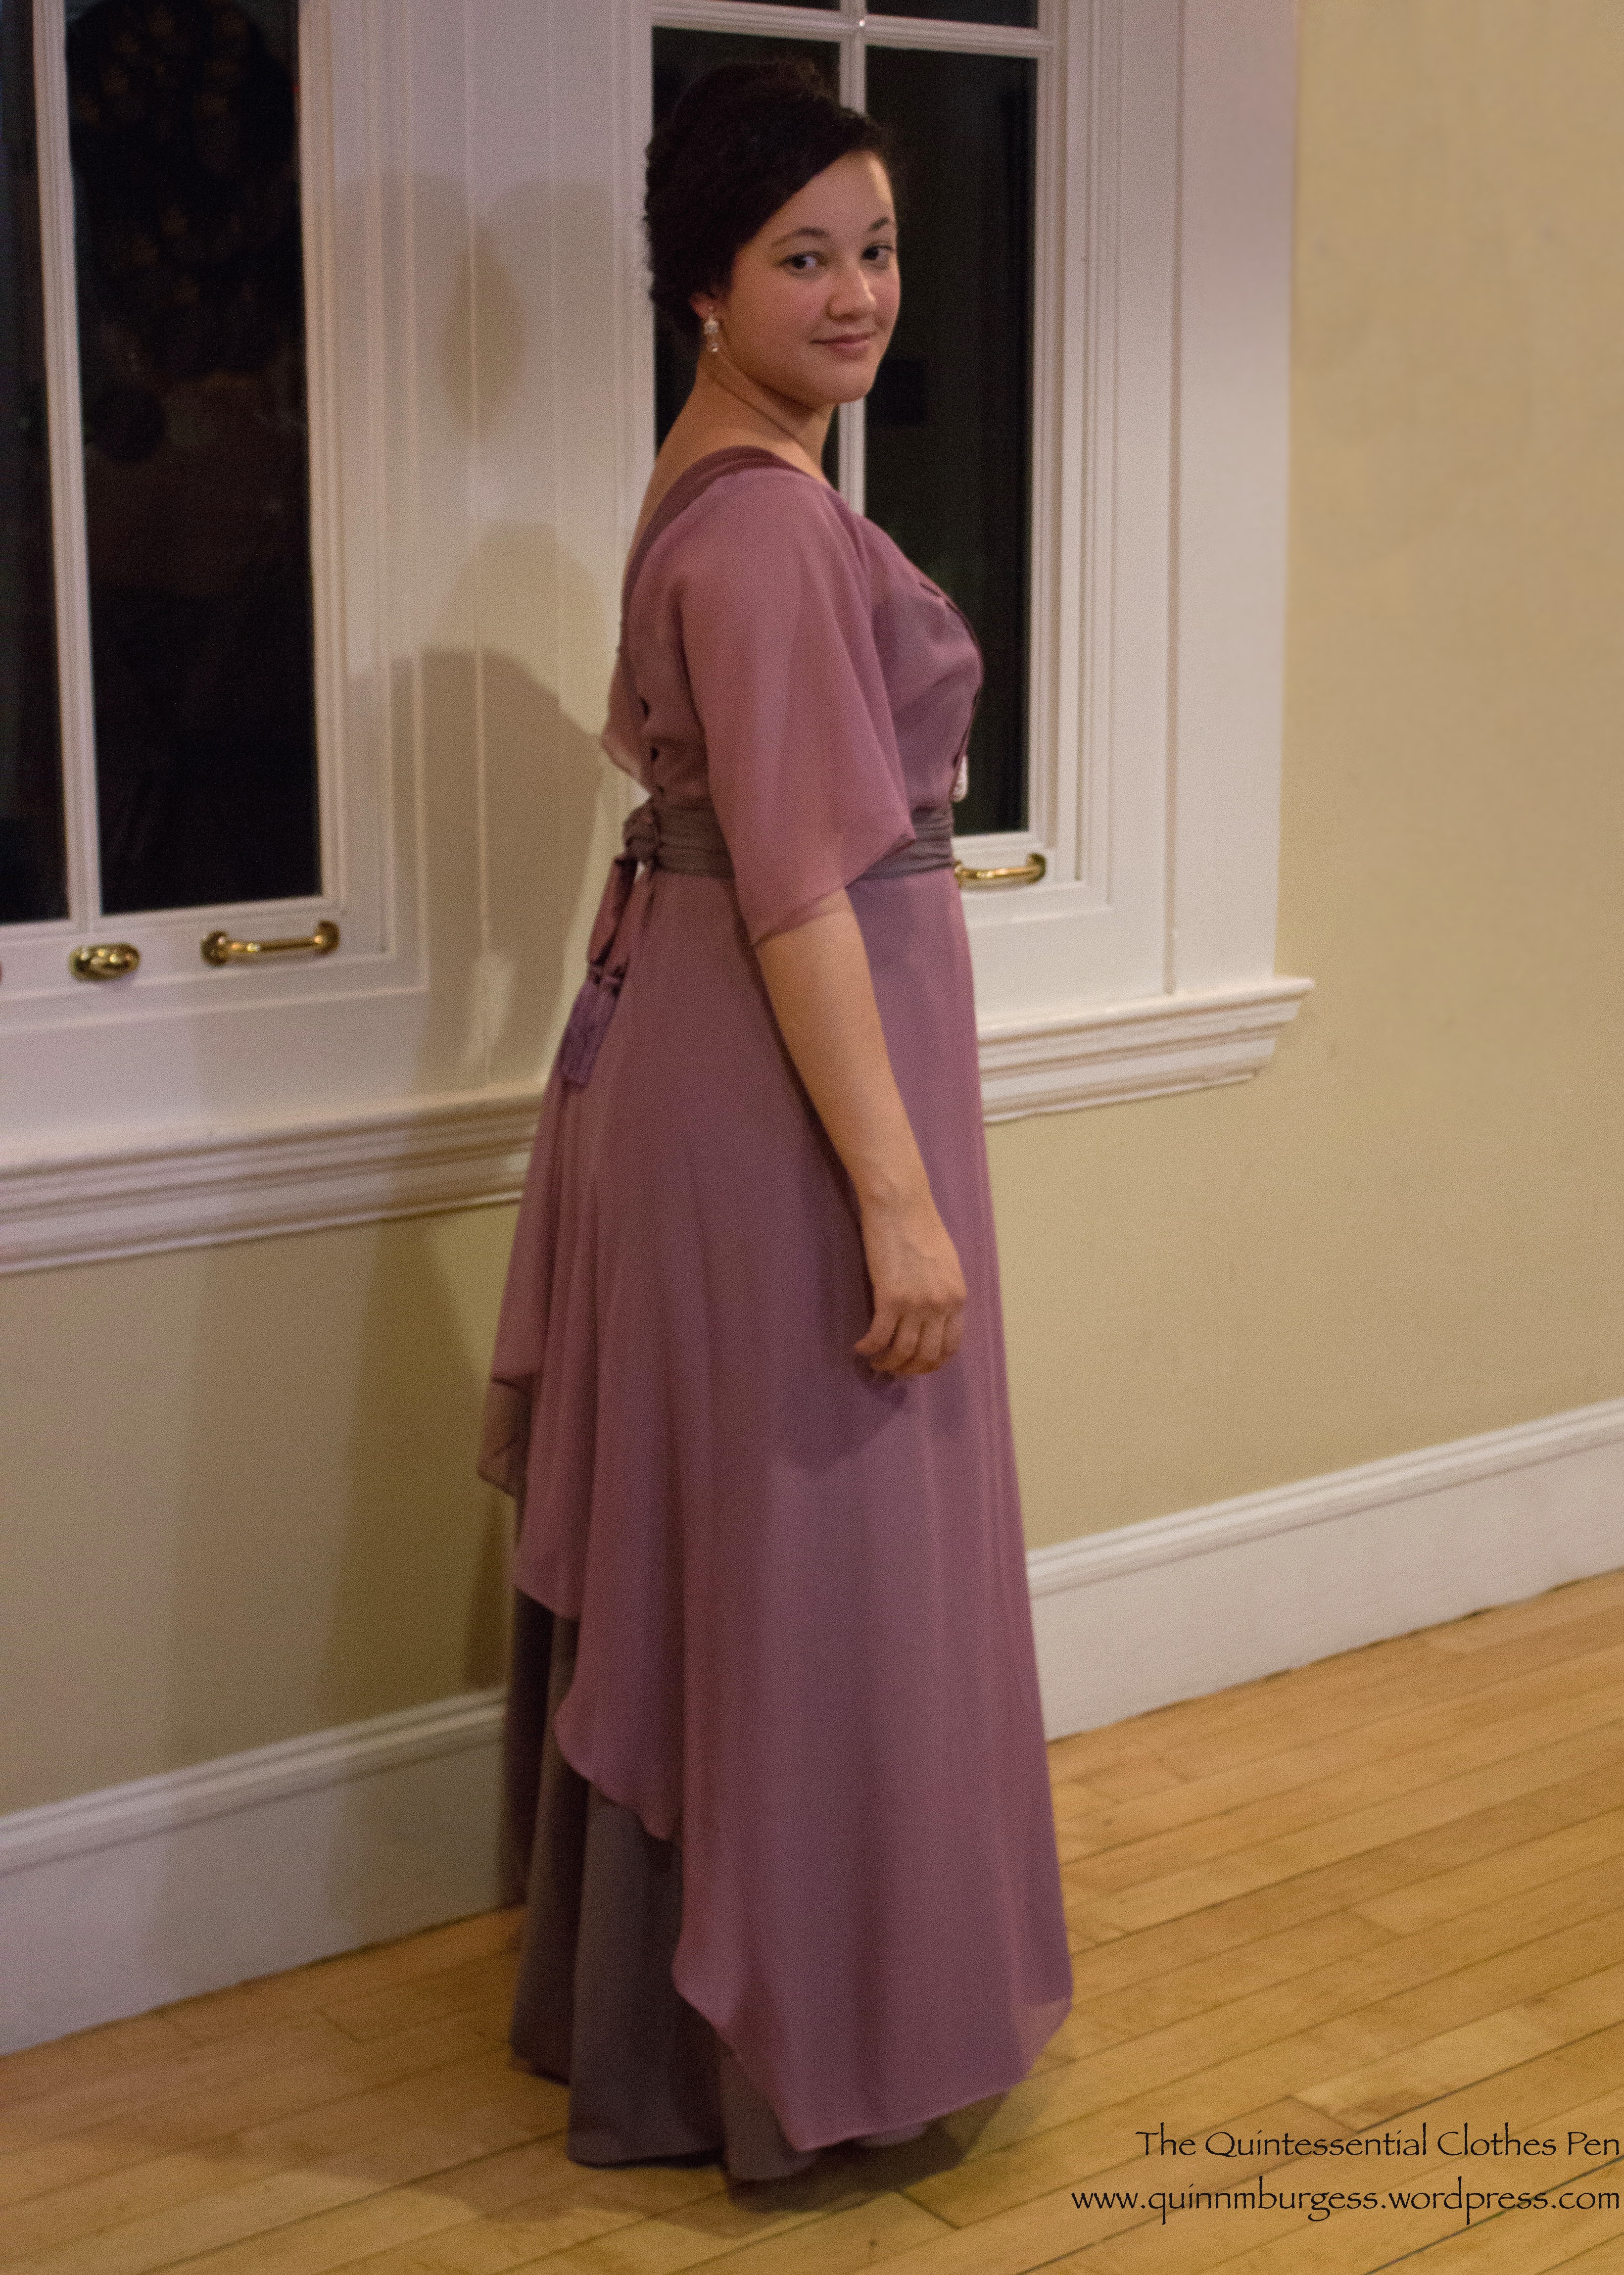
#3: I made this dress with a train because I had enough fabric, it’s elegant, and I don’t get to have many dresses with trains because I’m usually dancing in them. However, I do plan to dance in this dress, so I included a secret hidden button under the decorative knot at the back and a loop on the center back skirt seam so that the skirt can hook up (bustling, essentially) to be a uniform length all around so I can dance unhindered!
I paired this new dress with my American Duchess Astoria shoes, because they are super comfy and made sense color-wise with my other accessories: plain white stockings, a super long strand of faux pearls, lovely clear/white dangle earrings I’ve had for at least ten years, and two matching metallic silver wrapped hair pins I think my mother gave me also a number of years ago. Underneath is my 1913 chemise and corset.
I’ve had all the fabrics in the stash for at least three to seven years. The underskirt was leftover from a former project never fully pictured here on the blog–an 1890s 2 part dress taken directly from an extant bodice with an extrapolated skirt (the skirt was worn by a friend in Newport in 2012–there are pictures toward the bottom of this past post, and I forgot that the ensemble I’m wearing in that post also uses this same fabric as trim). I had purchased way more fabric than I needed and had more than enough for the new project, so I guess I’ll be using it on another something someday. The matching chiffon and charmeuse I’d purchased with the intention of making a 1910s evening dress back in 2012, but ran out of time that year.
When I was first seriously thinking of making this dress, I thought I had enough fabric to do something like this dress, but I hit a snag when I realized I only had about ½ yd of the charmeuse and that the beaded sleeve I was hoping to incorporate into the dress was entirely unsuited for the shape of the beaded bit on the inspiration dress. I decided to make a dress like my original inspiration someday, but to go back to the beginning for the current dress and rethink what the dress might look like. I would up with something I am quite happy with that is drawn from a variety of inspirational dresses on my 1909-1914 evening gown Pinterest board with this as the most obvious inspiration.
Just the facts:
Fabric: One beaded silk sleeve from a 1980s evening dress that I deconstructed two years ago to make a 1925 evening dress, about ¼ yd of plain weave cotton for the base, less than ¼ yd of silk charmeuse, about 2 yds of silk chiffon, and 3-4 yds of lightweight silk faille for the underskirt.
Pattern: Created by me, loosely starting with the pattern for the bodice of my 1912 burgundy and gold evening gown and referencing skirt shapes in Janet Arnold for inspiration.
Year: 1910.
Notions: Thread, hooks and bars, and two pre-made tassels.
How historically accurate is it?: It definitely passes Leimomi’s test of being recognizable in its own time. It uses accurate materials and accurate techniques. 95%.
Hours to complete: More than I kept count of.
First worn: In September 2015.
Total cost: Technically this is a stash project because all of the things I used have been in my stash for years, except the tassels, which I bought within the last year knowing this project was high on the to do list. If I had to guess at the cost of the materials it was probably $50-$60 dollars.
The dress was sewn with a mixture of machine and hand sewing. Most of the assembly of the bodice and skirt pieces while they were separate was done by machine, as was the hemming of all the chiffon and faille (though the hem edge of the chiffon is actually the selvedge). The hand sewing came in when I went to mount all of the pieces together. I started with the under bodice and kept adding layers and figuring things out as I went. The closures are also hand sewn.
Incidentally, I’m not really sure what color to call this dress. I’ve been calling the colors orchid and mauve, but I’m not really sure those are the best color names. The chiffon and charmeuse are a shade of pinky/purple that’s hard to put a finger on and the contrast faille is more grey than anything when it’s by itself, though it really takes on a pinky/purple cast when paired with these other fabrics. Does any really perfect color name come to your mind? If it does I’d be happy to know what it is!
As I mentioned, the closure for this dress is quite complicated and as I knew I was going to include it in the sewing secrets challenge we took pictures specifically of the closures to document how it works. If I tried to explain only with words I’m sure there would be confusion, so I think the pictures will clarify things. We’ll start hooked up and unhook as we go.
The back knot snaps into place over the belt, which hooks together at the back. The button for the bustling skirt loop is hidden under the belt in this picture.The belt unhooks all the way to center front.The chiffon overskirt unhooks from center back to the side.Then the front bodice chiffon layer unhooks at the top edge of the beading and at the waist so it peels back toward the side. After that the under bodice unhooks and the dress slides right off. Is that what you thought might be the closure system?
Overall, I’m super pleased with this dress. It’s very comfortable, has lots of fabric in the skirt so is easy to dance in, and is a nice transitional style between the full skirts and pigeon breasts of the years around 1908 and the much slimmer, longer lines of the years around 1912. Plus, it has a train!
Here’s a comparison of the dress with the train down and then with it looped up. Luckily, these pictures were taken before dancing. Turns out that while I was dancing a very fast waltz, either my or my partner’s foot caught the hem of the dress and caused the loop to break, so I’ll have to repair it more sturdily for the next wearing. Ah well, that’s why they make safety pins!
I was quite pleased with how my hair turned out, so I had to make sure to get a reasonable close-up. Some of the curls are natural and some are made nice and smooth with a curling iron. The key is to put the hair up in a lot of different sections–and I mean a lot!
I call this dress the “Dowager Countess” gown because the shape of it reminds me of what Maggie Smith’s character in Downton Abbey often wears to dinner parties. Look at the bodices on these dresses: this dress, this dress, and this dress are all examples of a similar style–one that the Dowager Countess wears often! And why wouldn’t I want to be reminded of Maggie Smith when I think of this dress? Her snarky comments are highlights of Downton Abbey! (Incidentally, one of my friends wore the just-emerging-in-the-1910s style of pants in the ballroom to this ball–gasp!–and we took some posed snarky pictures. Head over to her blog, Plaid Petticoats, to take a look at her scandalous outfit. When you get to the bottom you’ll find the snarky pictures. You might even find that you think I’m there twice, because I was wearing this new 1910 dress and I loaned my 1912 evening gown from 2012 to a friend who happens to be being snarky with me.)
At the very end of my first post about the Ragtime evening event at Glen Manor, I had just shared with you our series of pictures of the “young set” spelling out our most recent acronym: TNG. You’ll have to read the captions in the pictures of the that post to see what it stands for, because this post is moving on to pictures of the Ragtime ball. Before I start on pictures, I just have to share that this ball had the most fantastic food catered for our dinner. I don’t know what company catered it, unfortunately, but it was spectacular and delicious! We all ate generous first and second helpings and were super full… but it was SO good!
The light was fading as we returned from our adventures down by the water and on the dock… This is the back side of Glen Manor with the lights on in the downstairs rooms and the twilight sky behind.The orchestra for the night. I believe this is the New River Orchestra.The doors were thrown wide open to the patio and gardens, which allowed for picturesque viewing of the dancers.This was one of the venues in which the dancers progressed through a series of small-ish rooms.It was fun to look in and watch people dance. Because they were traveling through different rooms there were always new people to watch.There were lots of really beautiful gowns to admire.Dancers in the main ballroom.The interior of one of the beautiful rooms.The fabulous red carpeted staircase. Not quite as grand as Rosecliff or Ochre Court, but still beautiful.Most members of TNG lounging on the stairs.One of our faithful cameramen caught lounging without a camera in hand!None of the young set danced very much, but there were a few times we stood up and danced. This is one of them.And another, blurry, picture of members of the young set actually dancing.Photographic proof the Scott the Portsmouth Policeman danced (and with one of our own young set–as well as many other dancers).On the left is Scott the Policeman. Elsewhere are other wonderfully dressed dancers.We may not look like we’re dancing, but we had just finished a tango. One of the few times the young set danced.We did get up to dance the Charleston!And we basically had the room to ourselves, which meant we could be super silly!A silly Charleston figure called something like “shine your shoes.”Charleston in a line. A TNG favorite.The traditional TNG “raise the roof” Charleston! (It’s like patting your head and rubbing your stomach… to Charleston while raising the roof! You should try it!)Follow the leader. Now everyone is doing the “raise the roof” Charleston!Double trouble! We caught one of our TNG faithful photographers and Bill Cunningham in the same picture!I believe at least some of us are doing the “flying Charleston” in this picture.Yay! We Charleston-ed!We’re all laughing and smiling! Doesn’t it look like a wonderful time? Don’t you just want to jump in the photo and join us?Two fabulous TNG-ers.The fearless leader of TNG and the Commonwealth Vintage Dancers. What a fabulous fan! Doesn’t it just scream for sillyness?Well, here you go! Sillyness! (Can you tell that it’s her tail? Like a peacock?)Okay, I’m not actually asleep… but the stairs were a pretty comfy place to relax… Clearly, it is nearing bed time.“Follow the moon path!” I said, knowing you can’t actually follow the moon path over the water. It’s a good metaphor for life though, to follow your dreams.Last view of Glen Manor that night, with the lights on and the rising moon. So lovely!
Final tally: 72 pictures between 2 posts out of a total of 1,266 pictures total for this event. Not bad, I say.
The next formal event at Newport was a Ragtime Dinner Reception and Formal Ball held at Glen Manor House in Portsmouth, Rhode Island. Glen Manor was designed by renowned architect John Russell Pope to resemble the Petit Trianon at Versailles. Construction began in 1921 and the house was completed in 1923.
It is truly lovely inside and out, as you will soon see in the photos! I have 1,266 pictures from that evening… and even though I’ve slimmed down the number I’m going to share with you I’m going to have to break the evening up into two posts. The first part will be before the ball and the second part during and after the ball.
The exterior of Glen Manor.One of the ladies’ changing rooms just off of the entrance hallway.Once I passed through the rooms, this was the view that greeted me.The magnificent garden was also behind the main house.Before dinner we took some group photos. While standing in the group I took the opportunity to snap a shot of Bill Cunningham taking photos of us! We were a little afraid for his safety on the ladder, so you can see people keeping careful watch.This is Scott, from the Portsmouth Police. He has worked this particular event in years past and really loved it; indeed, he jiggled his work schedule around to join us again this year. He was so excited by the historic clothing that he had purchased a historic uniform to wear just for the event!After the group photo the four of us and our faithful photographers set out to be silly and take beautiful pictures.One of our faithful photographers caught Bill Cunningham (another of our faithful photographers) taking photos of us! It was really magical to have Bill Cunningham hurrying to catch our pictures! At one point he said he would “stop bothering us for five minutes” and then five minutes later he was back again, saying “I couldn’t resist, it’s been five minutes!”The picture Bill Cunningham was trying to capture included frantic waving of the arms…Running around is a returning theme for us. This time we were just enjoying the beauty and being silly.Striking theatrical poses under the trees…I think we resemble the Muses…There were so many lovely flowers in the garden! We found some to match each of our dresses!Flowers to match the burgundy in my dress.Looking the other way. I think I like the first one better, but this is lovely as well.Purple, white, and green!Those hibiscus flowers were huge! And they matched so well!There was also this lovely hydrangea bush that looked so droopy we just had to imitate it.Peek a boo!Elegantly perched.One more panorama of the garden, because it is just so lovely!After being in the gardens awhile we began to be drawn toward the water…But decided to turn and take another picture before heading down the hill.Heading down the hill toward the water.At water’s edge. Literally, the water was lapping at the rocks just a few feet away.Silly time!Looking to our left, we noticed that enticing dock…So naturally we had to go and investigate!Diving in! With a red moon rising beyond the water.The sun was obviously setting as the moon was rising. We stood on the end of the dock, thinking of the Great Gatsby, pointing across the water at the moon, and talking of West Egg and the green light.Looking off into the distance and enjoying the twilight.The sash on the left was another of my last minute creations. There was a breeze and we just had to soak in the atmosphere. So magical!Don’t you just want to jump into the picture and join us?By this point in the week the “young set” had taken on the name TNG “The Next Generation” (of the Commonwealth Vintage Dancers). We’re trying to spell TNG, but the N is hard to see and the G is a little like a blob…So we tried again with all caps. Can you see it?Now do you see it?The new name sparked many bouts of Star Trek references… I hope that you see the connection!
I leave you for now, in a magical twilight world with TNG.
This fabulous vintage Edwardian dress was recently brought to my attention by one of you fabulous readers. It is for sale on eBay for $2,250! I certainly won’t be purchasing this original, but I absolutely think it is something to add to my body of inspirational images of clothing for future projects… The seller has included many pictures of the dress as well as background information on the dressmaker and a detailed description of the garment. I have included some of that information in addition to pictures for you to view here in this post.
The lace is exquisite! The rhinestones add even more sparkle! I love that there are pictures which show the closures and construction details. I classify this gown as “drool-worthy.” What do you think? Do you like it? Or not? Why?
“This was created by Mrs. Catherine Donovan who was originally from Ireland (b.1826) and studied fashion in Paris. She owned the couture shop “MRS. C. DONOVAN & CO” which was located at 29 East 55th St.in New York. Her dresses in 1910 were billed at $100 and up which was extravagant as a gown from her would cost over $4,000 today!
Many of her garments are found in Museums throughout the world. There are 4 dresses at the Metropolitan Museum of Art alone. But the detailing and workmanship of these garments are worth every penny in my opinion.
FABRIC:
This is made of peach satin (formerly peach silk) and covered in exquisite ivory lace with re-embroidered patterns done with silk thread. The lace gives hints of Orientalism (which was made popular by Paul Poiret ) with its Royal Pavillion shapes on the back panels. The rosette and belt details are done in peach silk.
This enchanting garment features a fitted satin strapless bodice covered with a blouson bodice of lace. The bodice features a low square neckline and the dolman sleeves are short. Both the neckline and arms are decorated with cream glass and gold painted cut steel beads. There is an inner netted bodice which helps with the weight of the dress.
The empire waist is decorated with a ruched sash which is adorned with rhinestones, each individually sewn on a gold lame’ backing in the shape of a buckle.
The straight satin skirt is covered in two tiers of lace at the front. Each tier is decorated with cream glass beads and gold steel cut beads in a chevron shape. The tier is separated with a silk band featuring a large silk rosette. The top tier is adorned with crystal cut glass beads around the hemline.
The back has a surplice detail on the bodice with the silk band closing at the back decorated with more rhinestones.
The lace skirt is made of 3 tiers with one extra panel which attaches to the finger as a drape or can be left hanging as a short train. The top tier and second tier are both decorated with crystal cut glass beads.
This closes with several snaps, hook & eyes and tiny crochet buttons at the back.”
Thank you, Kimberly, for bringing this dress to my attention!
As I recently mentioned, my American Duchess Astorias have gained a coat of paint and are now ivory. The buttons have also been moved and now it is time to officially show you how fun they are with feet in them! (By the way, I did include a picture where you could see them on my new portfolio page, which was unveiled before this post… it was a spoiler, though I don’t think it was very noticeable!)
Here’s the spoiler picture.They’re a little buried in the grass, but here they are!A close up!
Super fun! Now I have outdoor shoes to wear with Edwardian clothes!
Product links in this post contain an affiliate code, which provides a small benefit to my shoe fund. This does not affect my impressions and reviews of this product.
The back of my 1912 tea gown. I like the belt that crosses and swoops up (hard to see, except that the line of beading is interrupted by the belt) and the side back seams that end in pleats (it looks really cool while I’m walking!).It’s a little hard to see in the first image, but the side back seams make a few intentional right corners before opening in inverted box pleats that help form the train. Here is a close-up of those seams: unfortunately, they pucker a little in the silk charmeuse because I didn’t think to stabilize them before starting to sew and snip corners… Let that be a lesson to you!Another view of the back seam and pleats.Here’s a side view, so you can see the front and the back.And a recap picture of the mushroom hat.
I was able to wear my freshly painted and moved-button Astorias with this dress and others at Dress U recently, but you’ll have to wait to see pictures of the finished shoes–they’ll be coming in another post soon!
Yes! My leather painting was successful! My American Duchess Astorias are now a lovely shade of ivory–hard to notice the difference now that they are painted, but compare the two shoes in the picture below. Can you see the difference? I certainly can. I still need to move the buttons so that the straps do not gap, but half of my plan is complete! Only a few days left for me to do that before I wear them…
This link contains an affiliate code, which provides a small benefit to my shoe fund. This does not affect my impressions and reviews of this product.
Left: Unpainted, the original color Right: Painted ivory to match the fabric at the bottom of the pictureGetting ready to paint.
How did I go about painting them? Well, as I mentioned in my last post, I bought Angelus Leather Paint in three colors: yellow, white, and champagne. Technically, ivory is a very small amount of yellow diluted with mounds of white, but when I went to order the paint I had a great gut reaction thought that the champagne might make a better ivory than the yellow. It turns out that the yellow was just too strong! I made a little swatch card (so I could find the right shade of ivory, see what the shades looked like when dry, and so I could repeat the color if I needed to mix more paint). I tried the yellow first, and just one drop of yellow in a fair amount of white made a light yellow color, not at all similar to ivory!
Trying to make ivory paint from mixing yellow and white.
So back to paint mixing: I next tried the champagne. I kept adding more drops of the champagne color to the white to see what depth of shade I would want.
Ivory fabric, top left: that’s the color I was aiming for White toe of the Astoria, bottom left: unpainted My swatch card, right side: with an arrow at the shade I like
Then on to the painting! The Angelus paint worked wonderfully. I did two coats: a light first coat and then a second coat to blend away all the brush strokes and even out the color. I thought about mixing my paint with a little water, but actually liked the consistency straight out of the bottle. I had no trouble getting smooth looking paint after the two coats I applied.
If you look carefully, you can see that the back of the shoe and the heel have not been painted yet. The front was only just receiving the first coat of paint, so it was not super smooth or opaque yet.
As I said, the change is not drastic, but it is noticeable. The shoes no longer glare white at me. Yay! Here’s a final picture of my whole swatch card with the newly painted ivory Astoria!
Freshly painted Astoria, with my swatch card. Champagne ivories on the left and yellow not-quite-there ivories on the right.
Five months after my super intense excitement of the pre-order of my American Duchess Astorias, they have finally arrived! Luckily, I still have events coming up for which they will be great, though they did miss out on being worn at the Titanic Weekend back in April. Despite their innate cuteness, however, they are going to need some adjusting before I wear them. Here they are, unadjusted.
This link contains an affiliate code, which provides a small benefit to my shoe fund. This does not affect my impressions and reviews of this product.
Reasons I love them:
The straps are just so cute! There were a wide variety of shoes with this kind of detail in the Edwardian period and this modern shoe does a fantastic job of capturing that perfectly Edwardian spirit!
They are super comfortable! It hardly feels like there is a heel on them and the shape of the toe box is just right for comfot.
Things I’m disappointed with and want to change (and my plans for doing so):
Due to my very narrow flat feet at least half of the straps are about 1/2″ too big, causing unattractive gaping over my foot (the crossed straps look really outstanding when held taut against my foot, but when they gap the shoes just looks messy). The plan: to remove the buttons from their original location and restitch them at the point where the straps want to be when tight. Overall, it’s a pretty simple solution that just takes time to execute.
I ordered the ivory color of the shoe, and to my eyes it looks very white. Since I plan to wear the shoes with many clothes where ivory is a featured color, it is important to me that my shoes are ivory and not white. In the photo below you can see how different the shoe looks from the ivory silk background. The plan: to paint my Astorias with Angelus Leather Paint from Dharma Trading Company to be a suitable color.
Well, that’s the plan. Time to start–I’ve got two weeks before I wear them!


")
")


