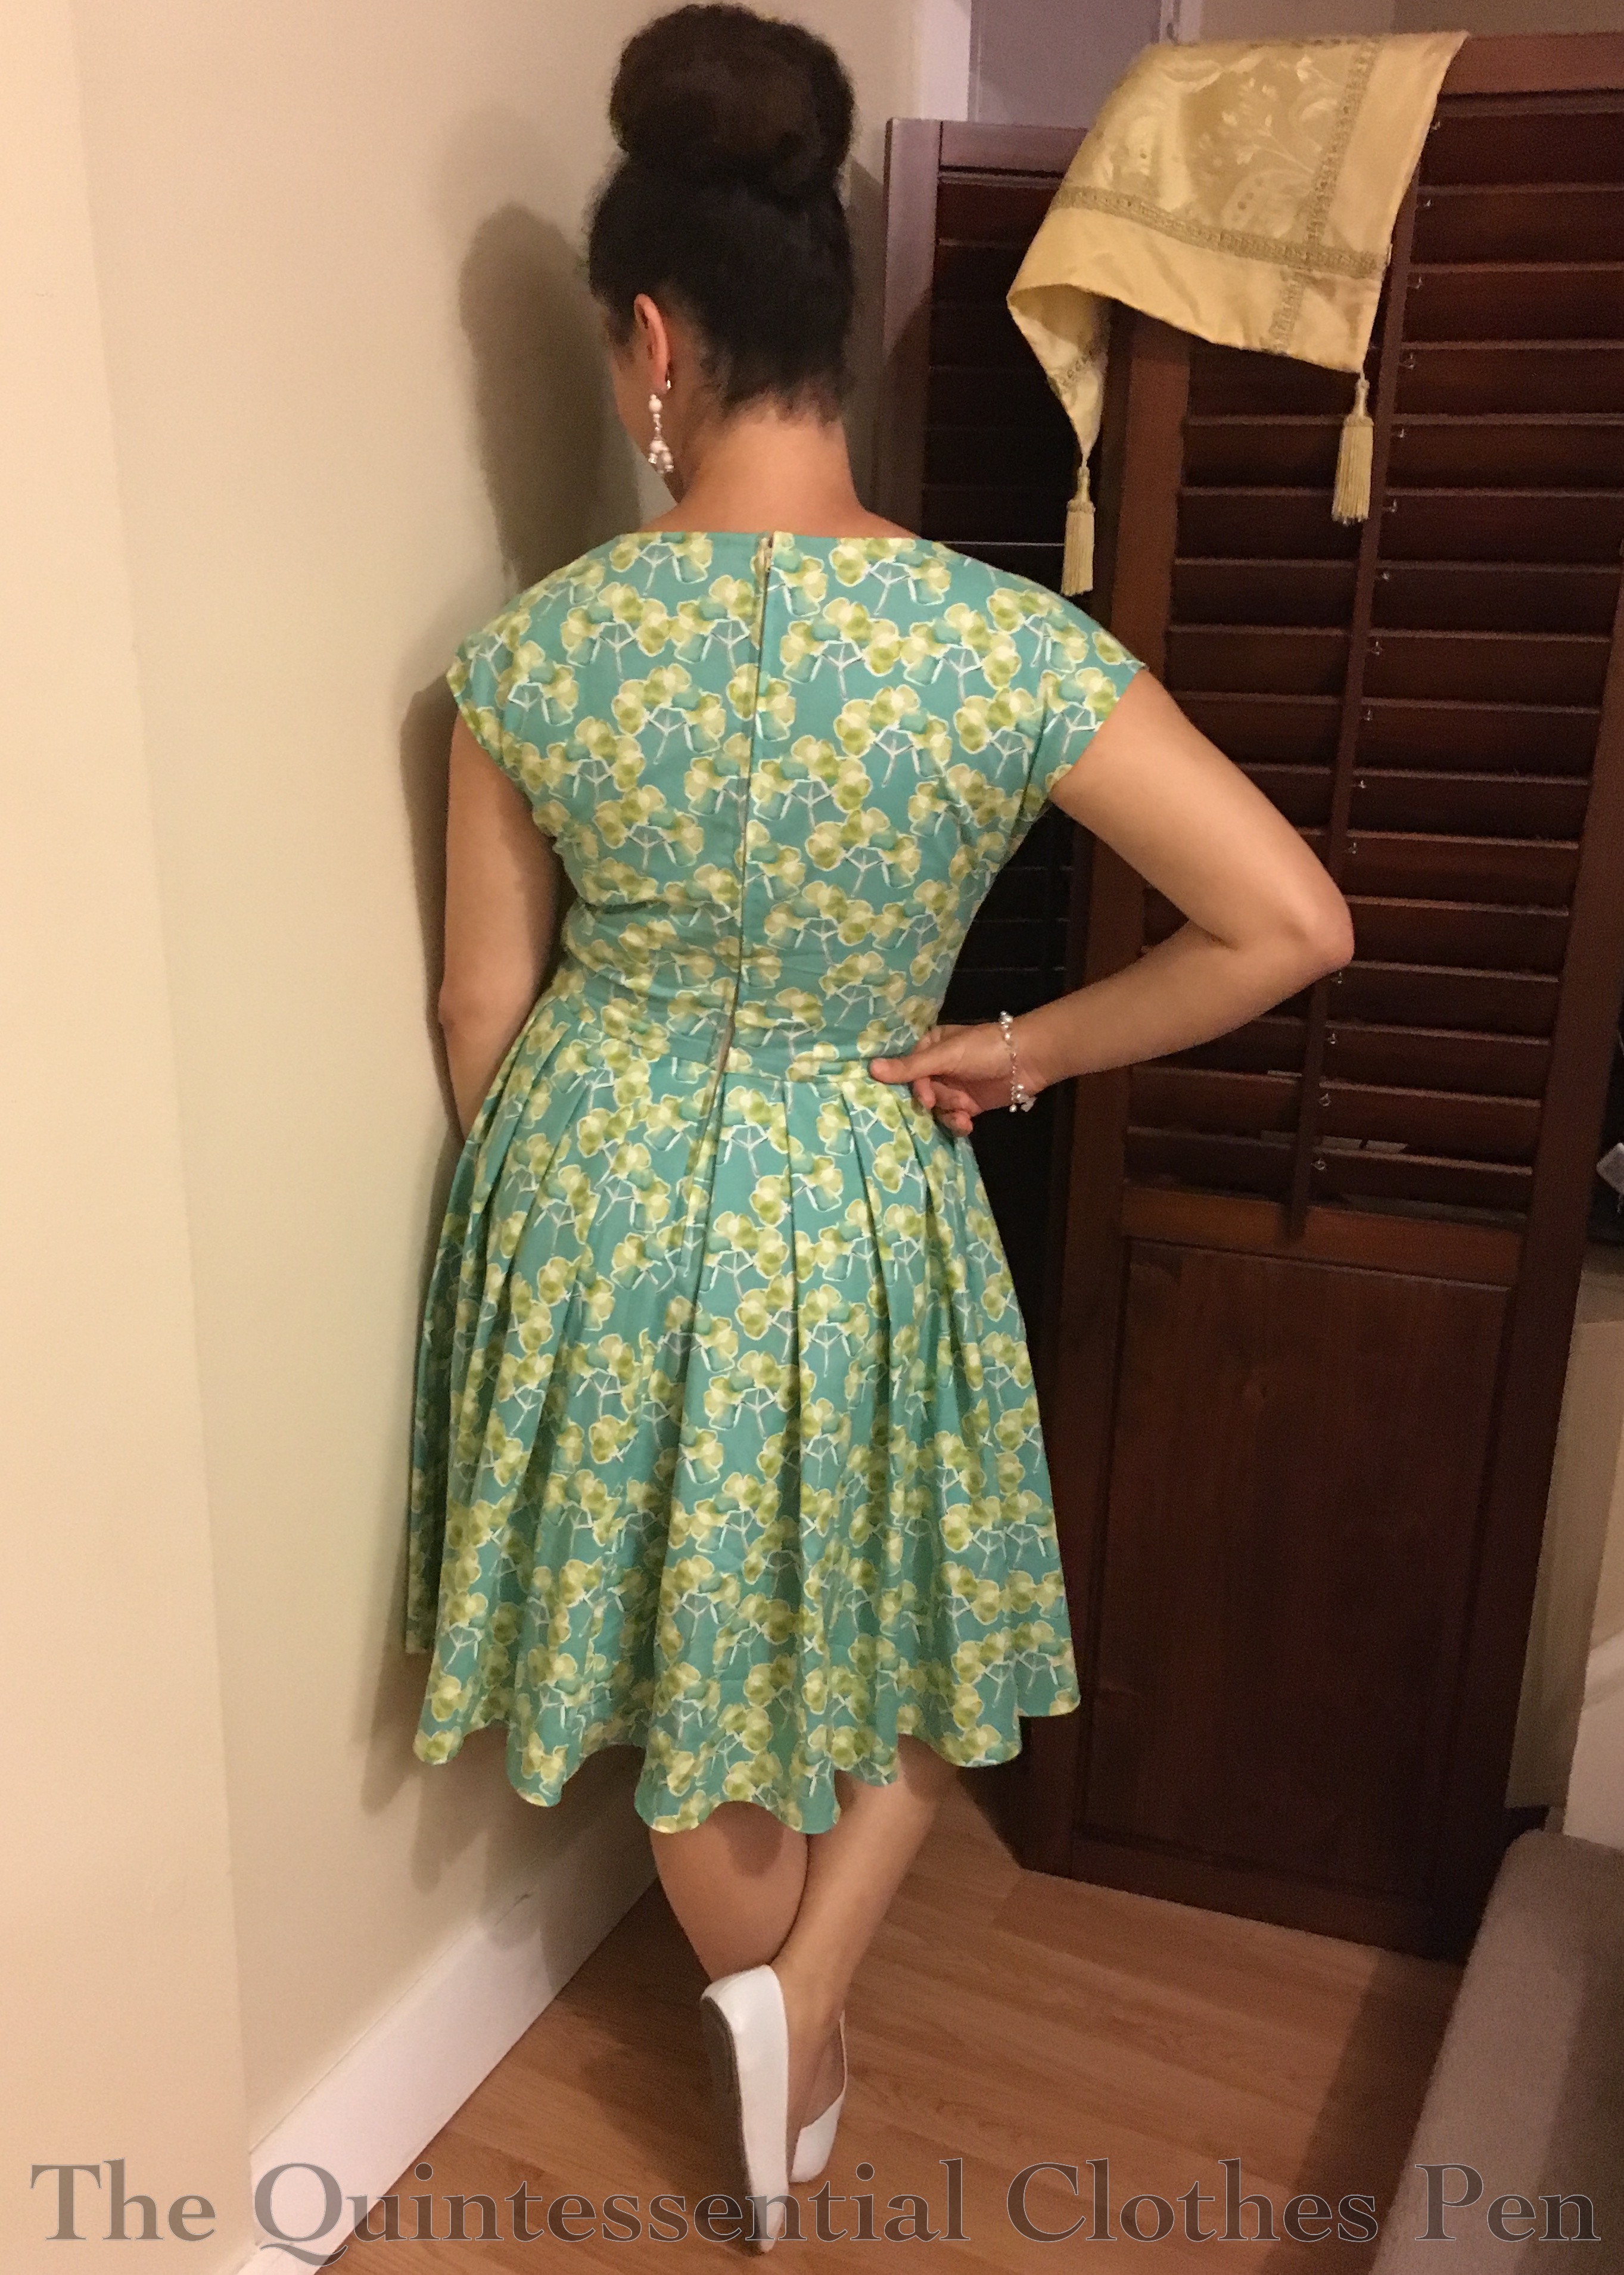
As I was getting dressed in my Happy Clover Dress one day last summer, I was pulling up the zipper… and it broke! I don’t remember exactly how it broke, now that I stop and think about it months later… I think that the pull came off of the teeth, or the pulling part came off of the part that grips the teeth… I don’t remember precisely, but needless to say, it was broken.
Below: the Happy Clover dress with its original zipper.
The original zipper was repurposed from a 1980s dress I took apart to make a 1920s beaded dress back in 2013 (a post about making that 1920s dress, including photos of the 1980s dress before I took it apart, can be seen here).
With the broken zipper, the dress wasn’t wearable! So on the day that is broke, I changed my outfit and put the Happy Clover Dress in the to-be-mended pile. Not long after that I bought a new YKK zipper in matching shade of teal. And then… the dress and zipper sat there for about 9 months…
Fast forward to May of this year and I was really tired of looking at my large mending-and-alterations-to-do pile (is that sounding familiar yet?)! I want to get back to sewing some of my larger projects and am craving both the physical space and mental release of completing the mends and alterations in order to do that.
So… that led me to finally put the new zipper into the dress!
Yes, the zipper is in! Just as before, it is centered and topstitched. This is due mostly to the fact that the zipper nestles under pleats in the back skirt, which means that it has to be sewn in two sections–the bodice section and the skirt section–to keep the pleats form being sewn down with the zipper.
You can see that in the photo above and you can also barely make out my extra backstitching where those two sections of stitching meet in the photo below.
Here’s a closer photo of the fun teal color of the new zipper!
And that’s it! Just in time for warm weather, the Happy Clover Dress is back in action! Yay!
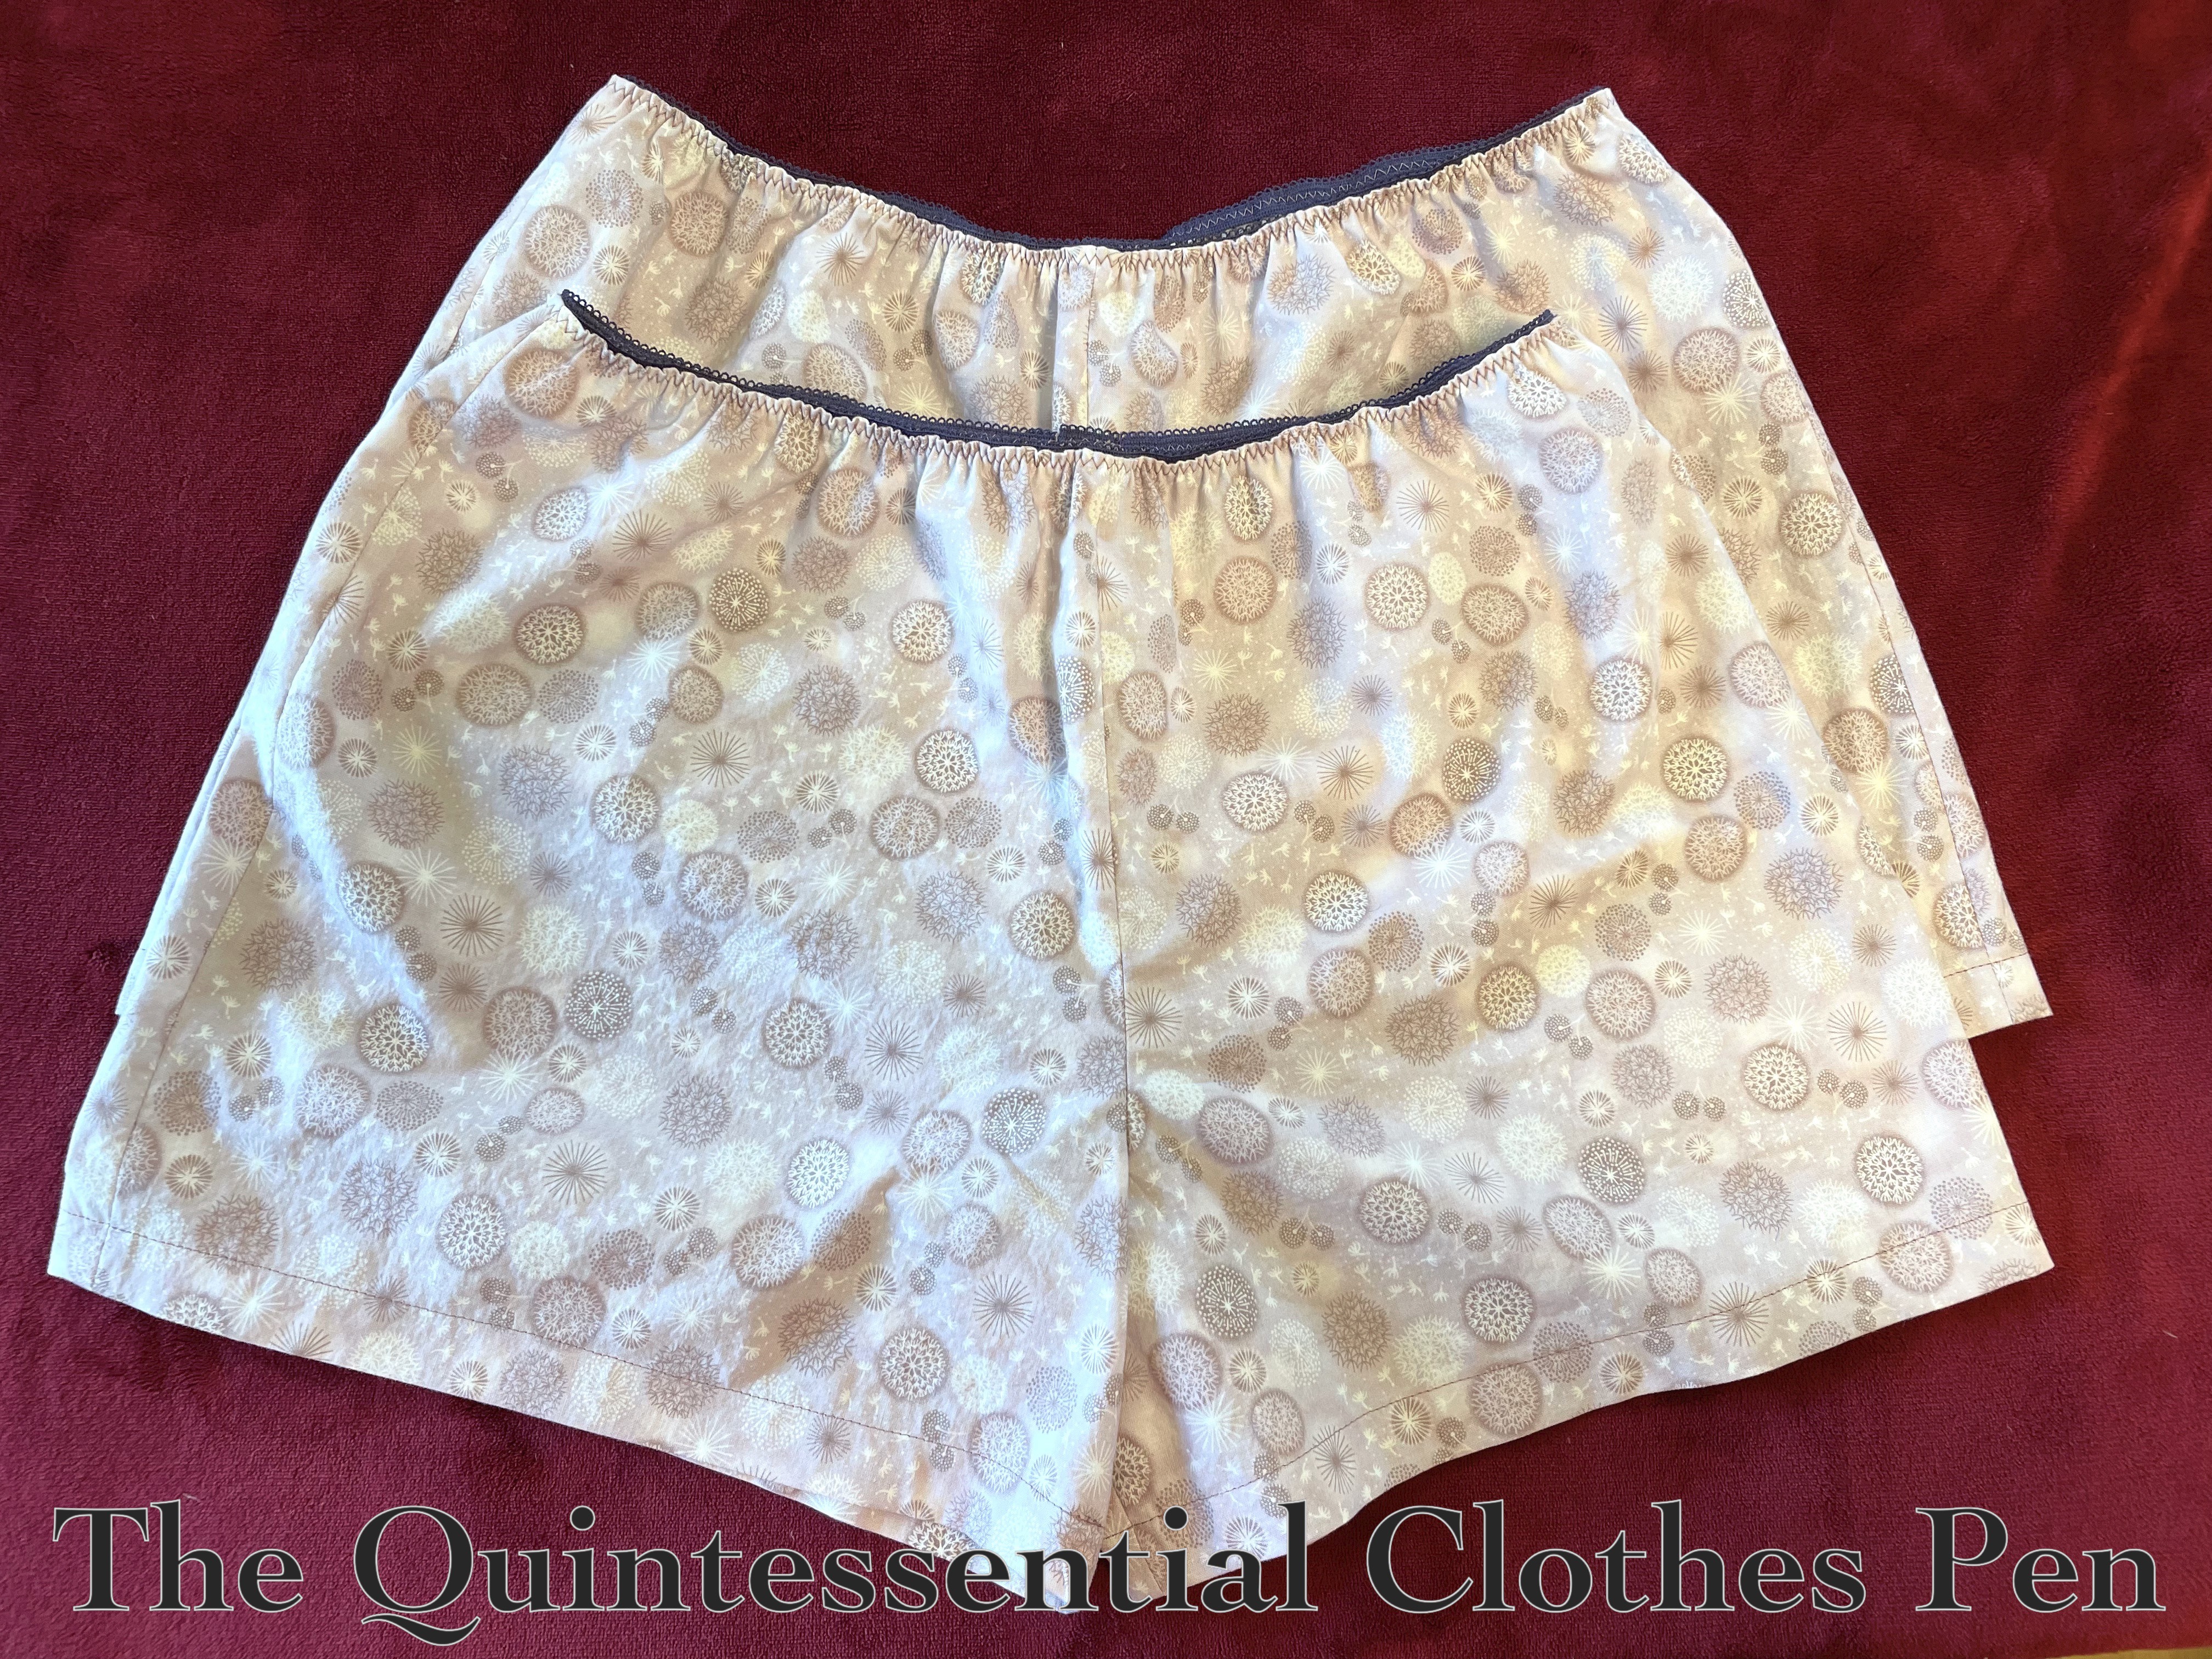
The last batch of cotton print shorts I made to wear during hot summer weather was completed in 2020 (I wrote about them in this past post). I get lots of use out of these garments and some old ones are starting to wear out, so it seemed it was time to create some more!
All of the shorts I’ve made along these lines have had circular or dot motifs and when I went fabric searching for this batch I kept that theme in mind. It’s also important for the shorts to be light-ish in color, so that I can wear them under dresses of any color! Those two goals are both met with the light purple allium (or dandelion, if you like) print fabric I used.
For comparison, here are purple allium flowers! I love the round shape the little blossoms create. It brings me joy. (Striking and unique allium exist in a variety of sizes and colors, including some that grow to be about 3 feet high with 6 inch diameter flower clusters!)
As with the previous batch of shorts, the fabric for these was purchased and washed months ago, in September. Then, the fabric sat on my pile of small-things-to-do near my sewing machine. I recently found the oomph needed to tackle the pile-of-small-things and completed the new shorts, along with a host of other small mends and alterations!
These are entirely machine sewn with the the seam allowances finished with an overlock machine. The waist is zig zagged to a bit of loop edged elastic. And really, that’s all there is to them! Two pairs!
I’m super pleased to have them off my to-do pile and ready to wear for the summer. I’m also super pleased to have completed a task that was on my official maybe-to-do list for this year!
I finally open my rereleased new copy of Patterns of Fashion 2 (Pof2) last summer and had great fun looking through all of the previously included garments (from the original edition) as well as the newly included ones. I remember seeing one dress (picture below), in particular, and thinking that it would be fun to recreate it, but that the beading seemed like it would be quite a challenge!
1940 Evening Dress designed by Elsa Schiaparelli. The Victoria and Albert Museum. T.48-1965
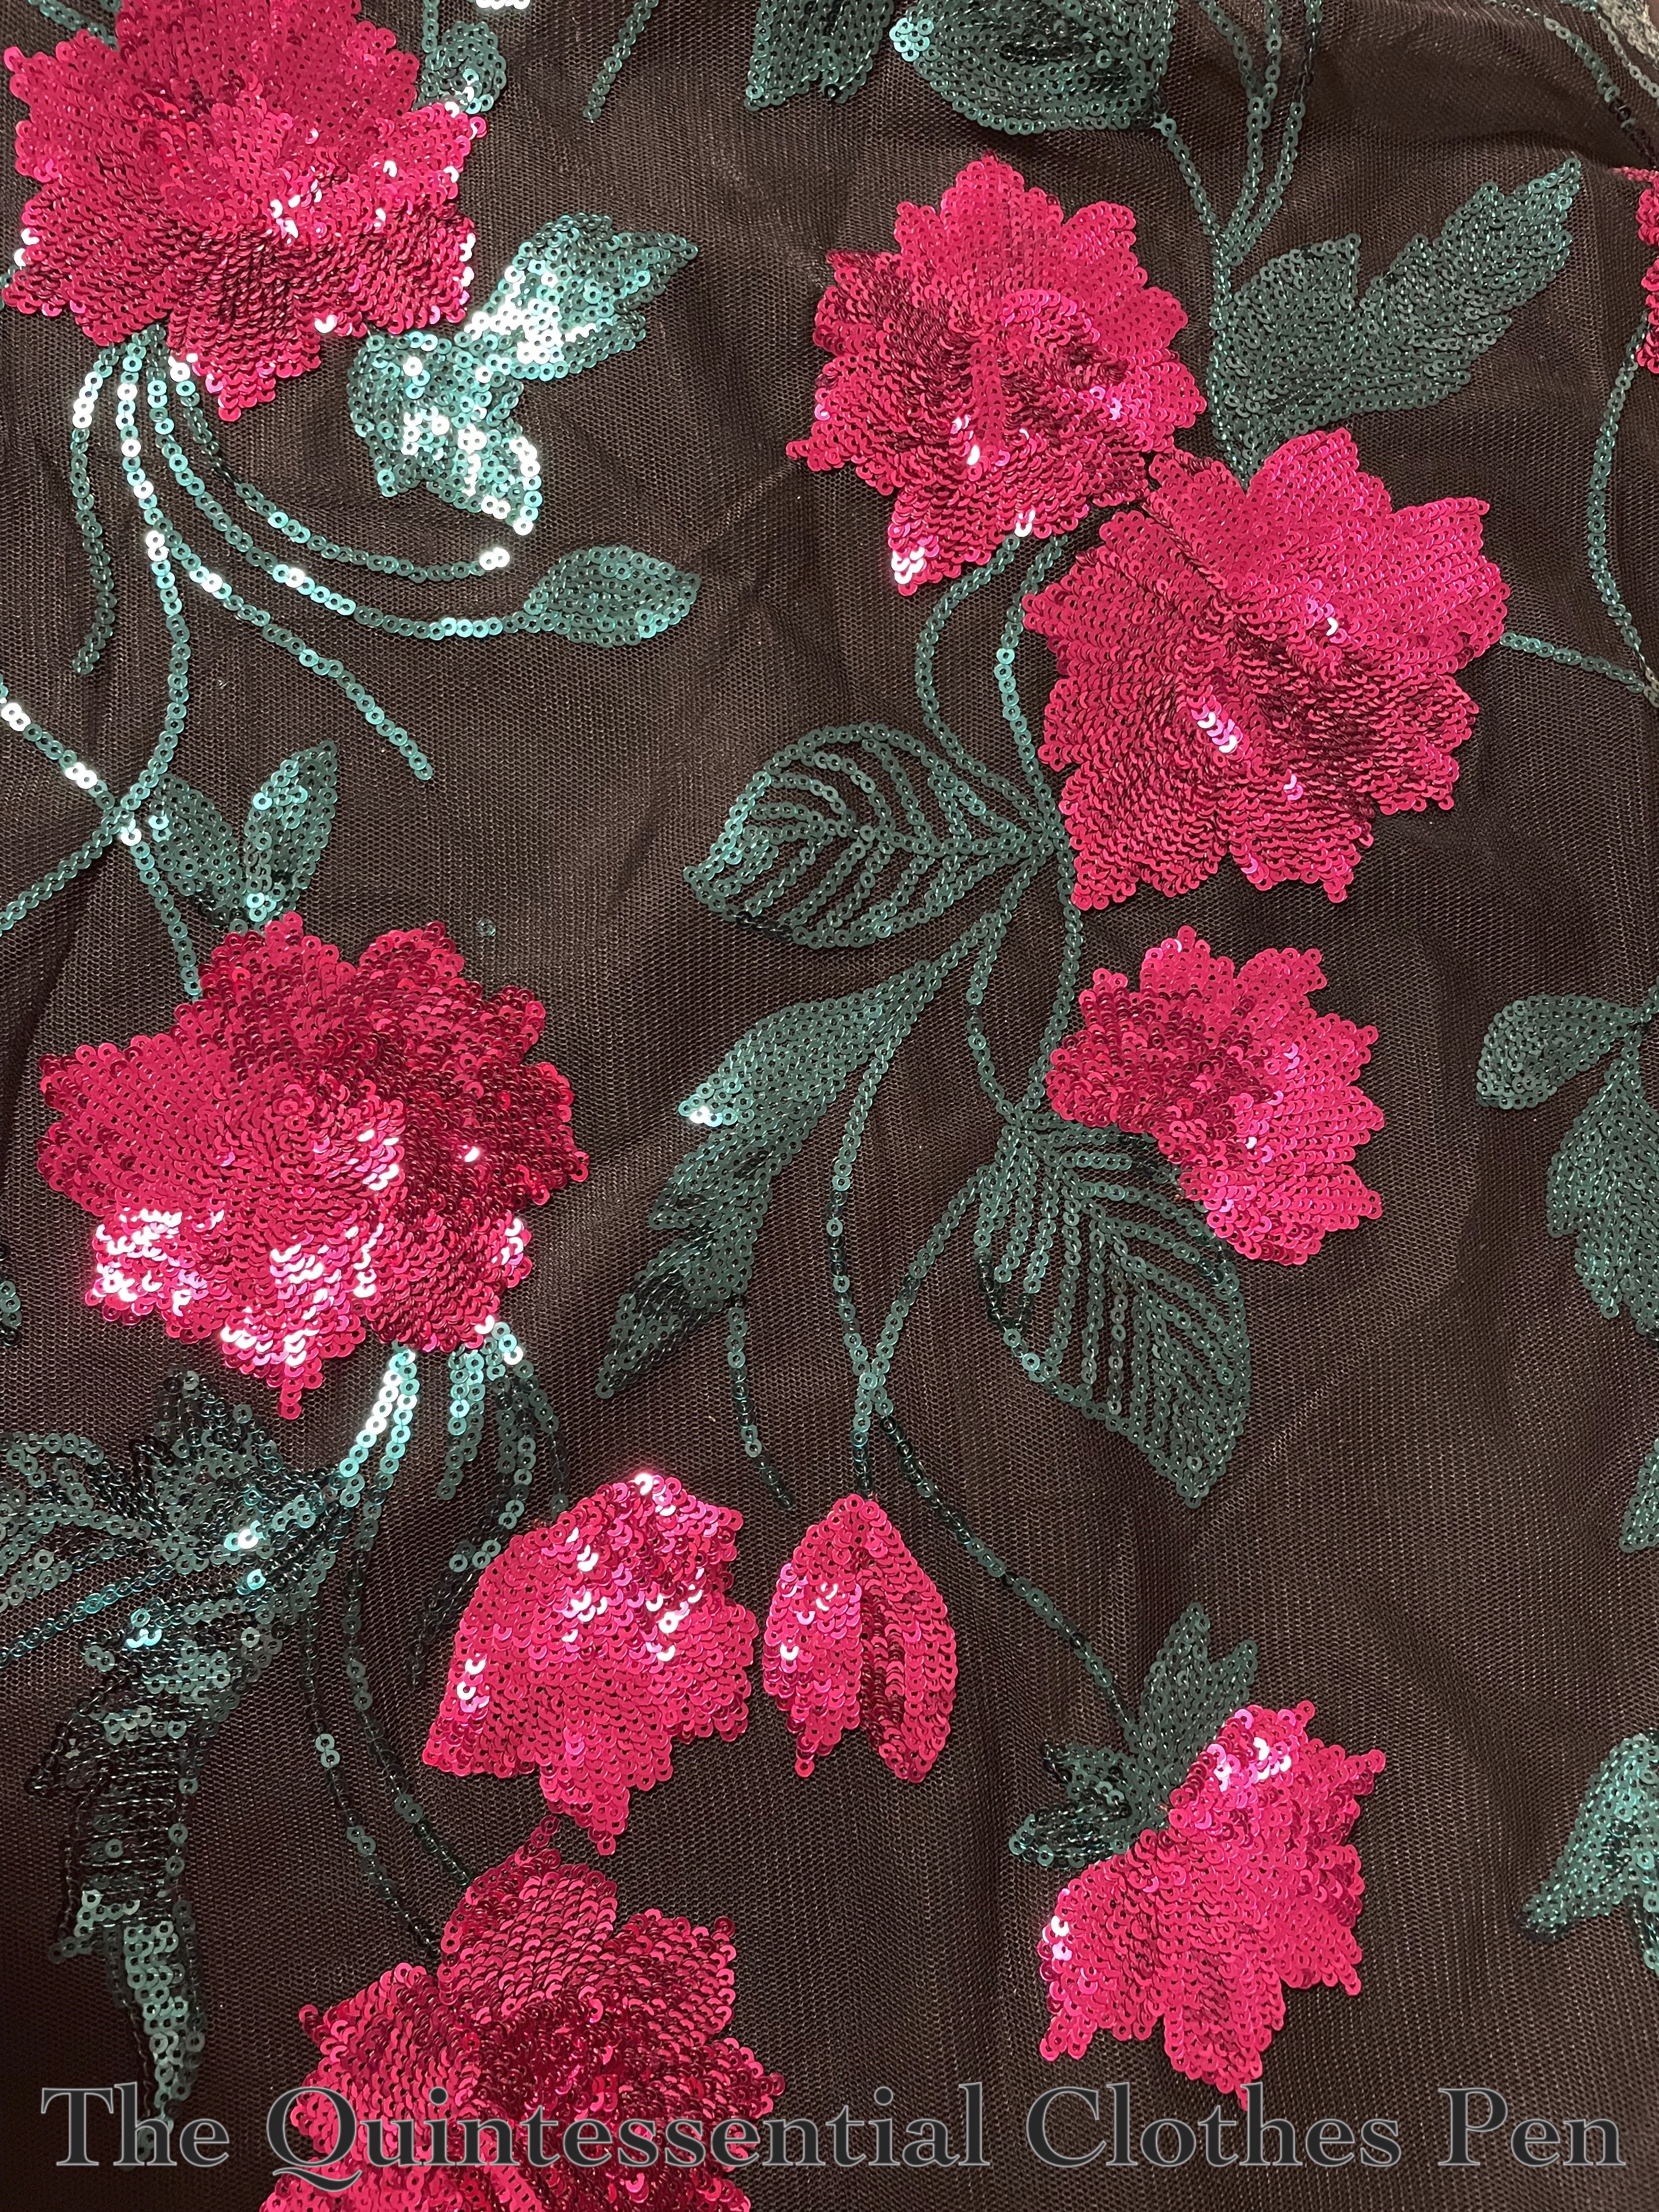
A few months later, I was at Joann Fabrics and saw a fabulous magenta and green sequined net poking out of a shelf. I pulled it out and immediately thought that the colors were very me. But did I have a use for it? Not really… Except… What if I used that fabric to recreate the beaded idea on that dress from PofF2??? Schiaparelli’s designs often made use of magenta pink as a Surrealist inspired color, so it didn’t seem too far fetched for me to include that color in my version of the dress.
So, I bought some. ¼ of a yard, to be exact. Not too much, but enough to be able to pick and choose different parts of the flowers to create a pattern similar to my inspiration. Below is a photo of the inspiration fabric: magenta and green sequins on black net.
Not too long after that, I decided that instead of wearing my updated 1933 Dramatic Evening Dress to a December event, I would instead make a new one–the 1940 Schiaparelli dress!
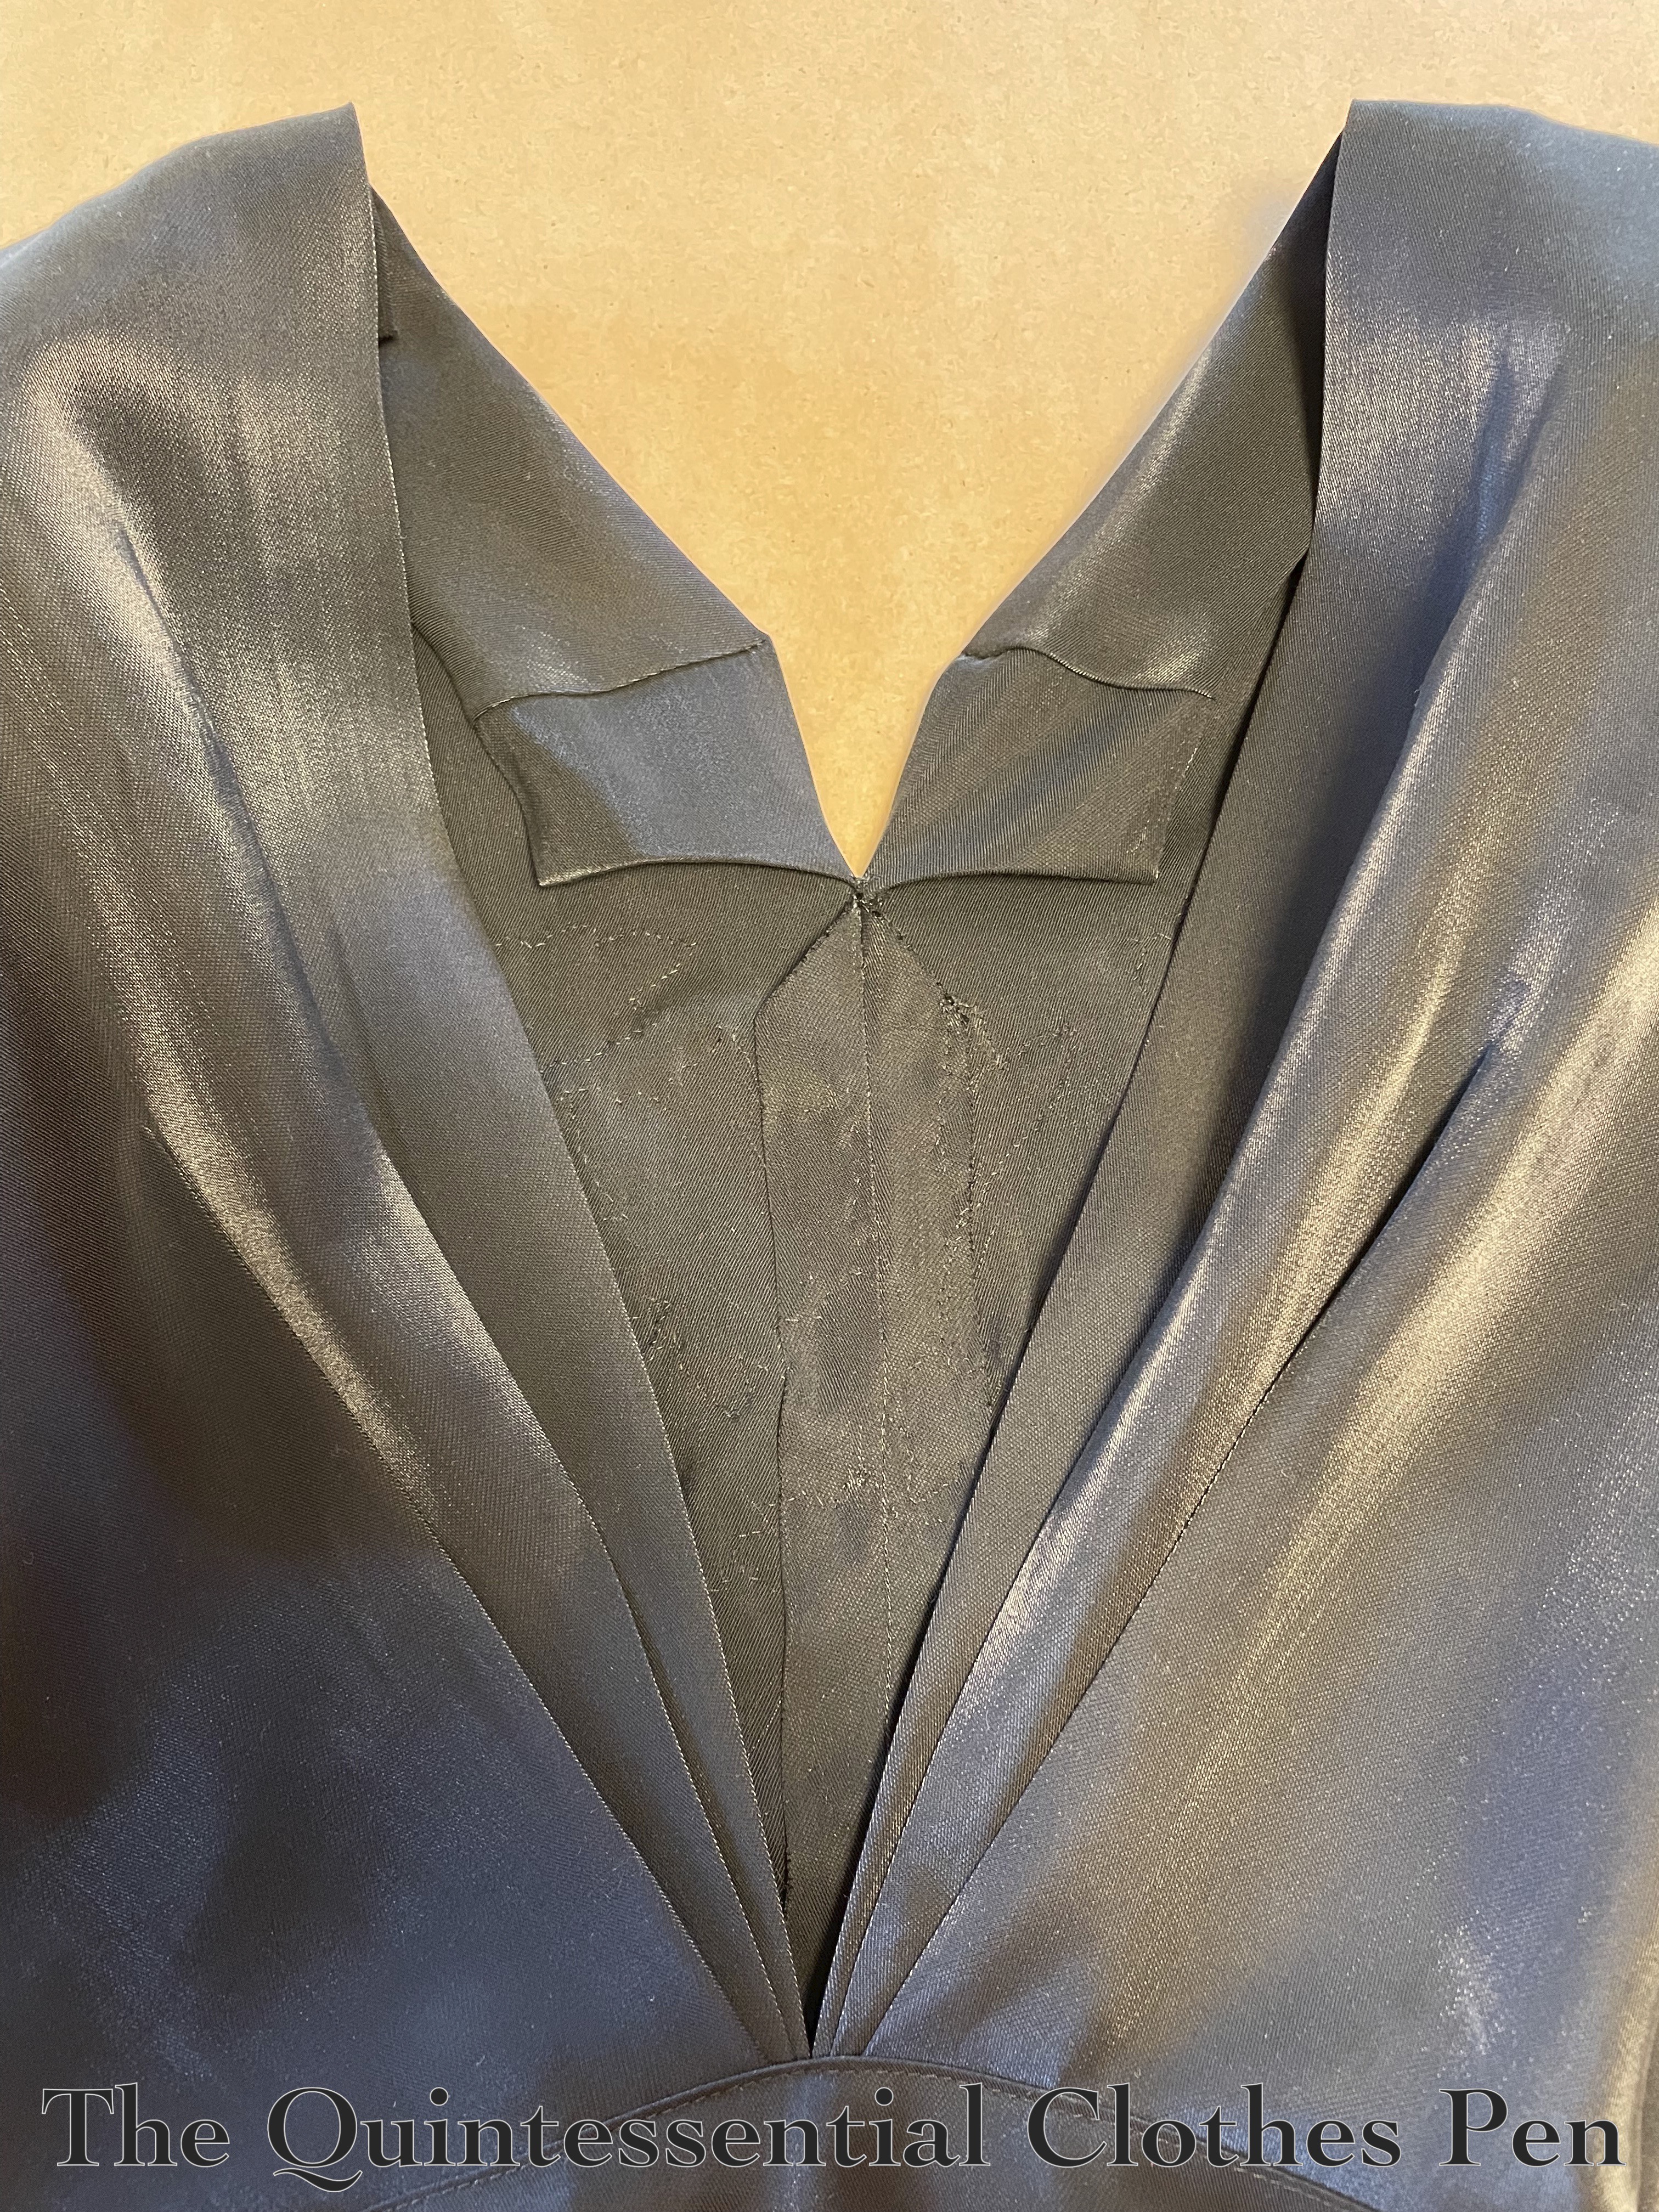
The first step after my decision was to find black fabric. The original is silk crepe, but I wanted to keep the cost down a bit more than what silk would allow for. I ordered a few swatches of rayon crepe and also went to stores to look at other options. I’d almost decided on one when I came across another random fabric at Joann that stood out to me. I debated for awhile, but decided the Black Shimmer Twill was more interesting than plain black crepe (the shimmer twill is visible in the above photo underneath the sequined net).
The next step was to size up the pattern in PofF2 and adjust it to be not tiny. I am definitely not the measurements of the original! I did those things and made a mockup:
The dress skirt worked, but I wasn’t happy with what the sleeves were doing.
The neckline needed some work to fit comfortably.
I changed the grainline of the back piece. On the original, the back bodices are cut on the bias, but I decided that they would lay better if I cut them on the straight of grain.
Then, another mockup. I made a few more changes and finally it was time for the real fabric!
Cutting out the pieces was pretty easy. There actually aren’t too many of them, especially because the facings are cleverly cut on with the front and back bodice pieces. The pieces are: back skirt, back bodice, front bodice/skirts, and sleeves.
Below is a photo of the finished garment showing the clever front facings and the shimmery quality of the black base fabric I chose. (The photo also shows the fun back element of this dress: three v-shaped pleats that meet at the center.)
I sewed up all of the seams I could (so that was the center front seam, the sleeves, and the back waist seams) while still keeping the front flat, so that I could replicate, or at least imitate, the floral V-shaped beading on the original.
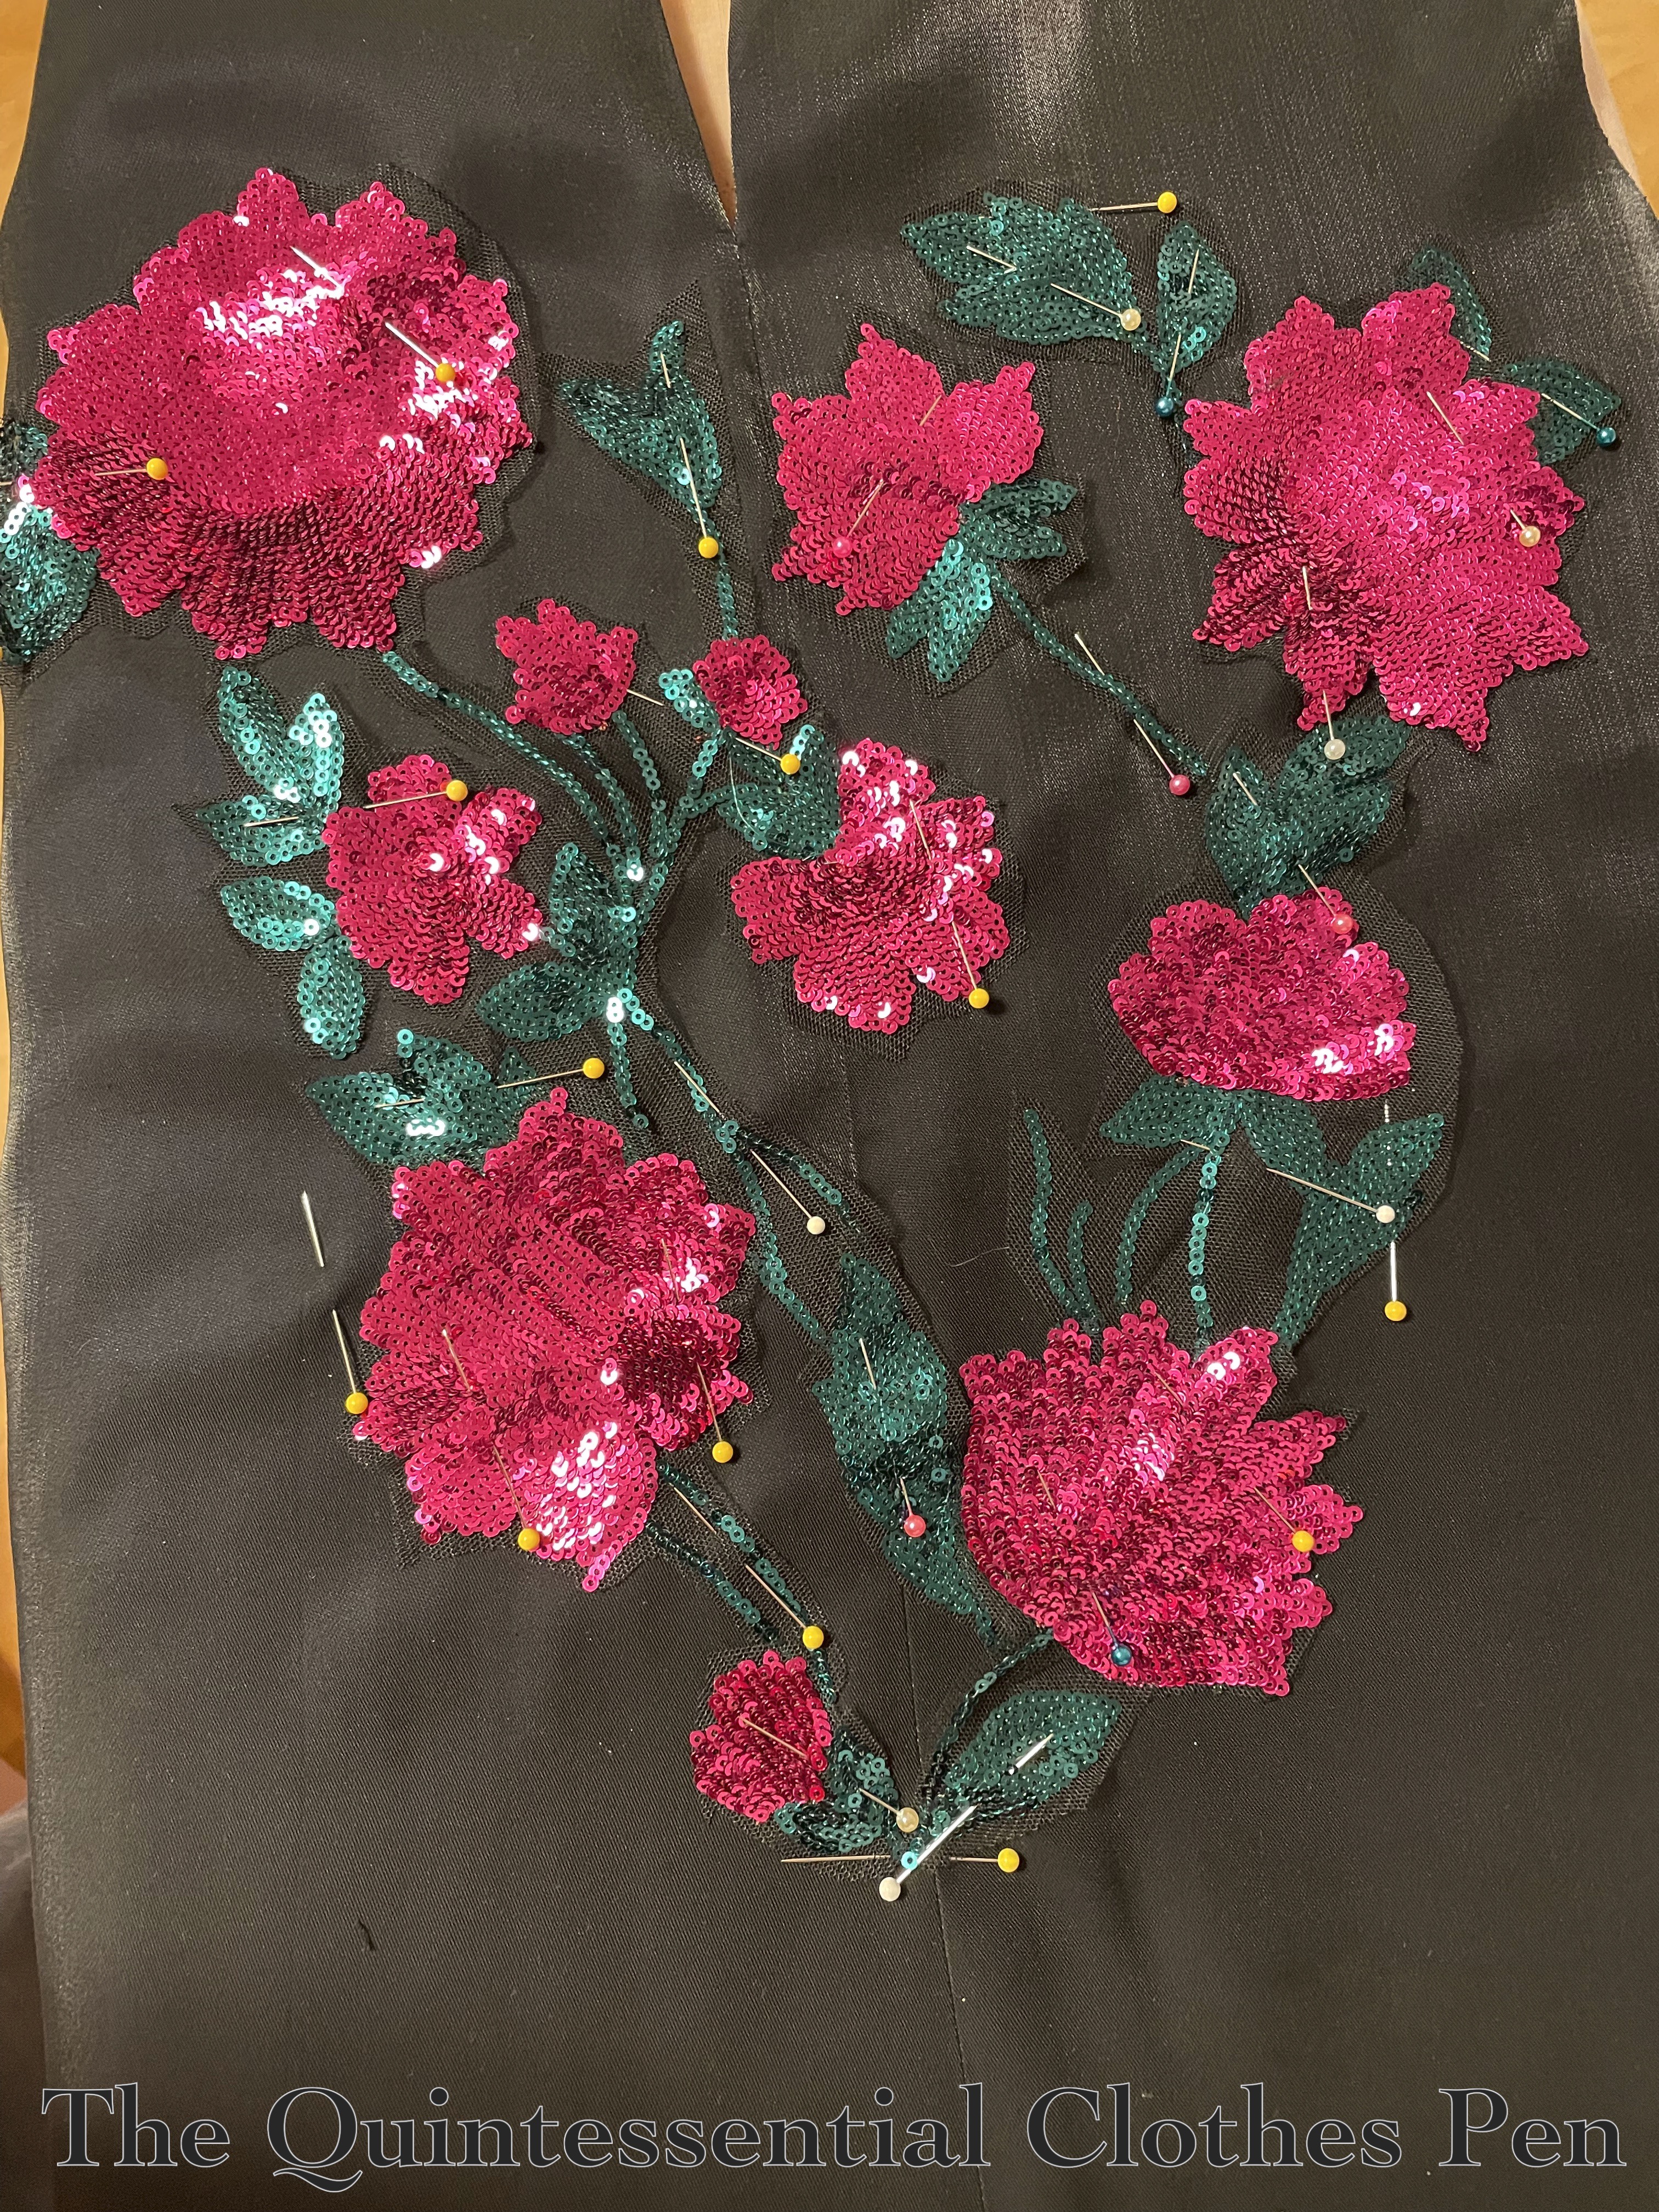
The next big step was using the sequined fabric to create a design similar in shape to the beading on the original. I cut out individual flowers and vines, arranging them on my assembled front pieces and pinning them in place until I was happy with the layout. Below, a photo of my cut out flowers, leaves, and vines while I was deciding on the layout.
Every piece had some net left around the edge so that I could flip them under and appliqué stitch them on. Below is an in-progress photo showing the top right flowers sewn on and some pieces pinned out of the way while I sewed bits that overlapped.
I get great joy out of taking tiny stitches, so I found it fun to catch every sequin as I went around all of the edges of all of the flowers! Here is a view of what all of those stitches look like on the inside of the dress! I didn’t think ahead to put anything to help stabilize the fabric on the inside… I wonder if it would have been less comfortable to wear if I had. Thankfully, the shimmer twill holds its own pretty well and doesn’t show puckers on the outside!
Eventually, all of my sequined bits were sewn in place. And then it was time to finish assembling the dress! The machine sewn seam allowances are all left raw on the inside.
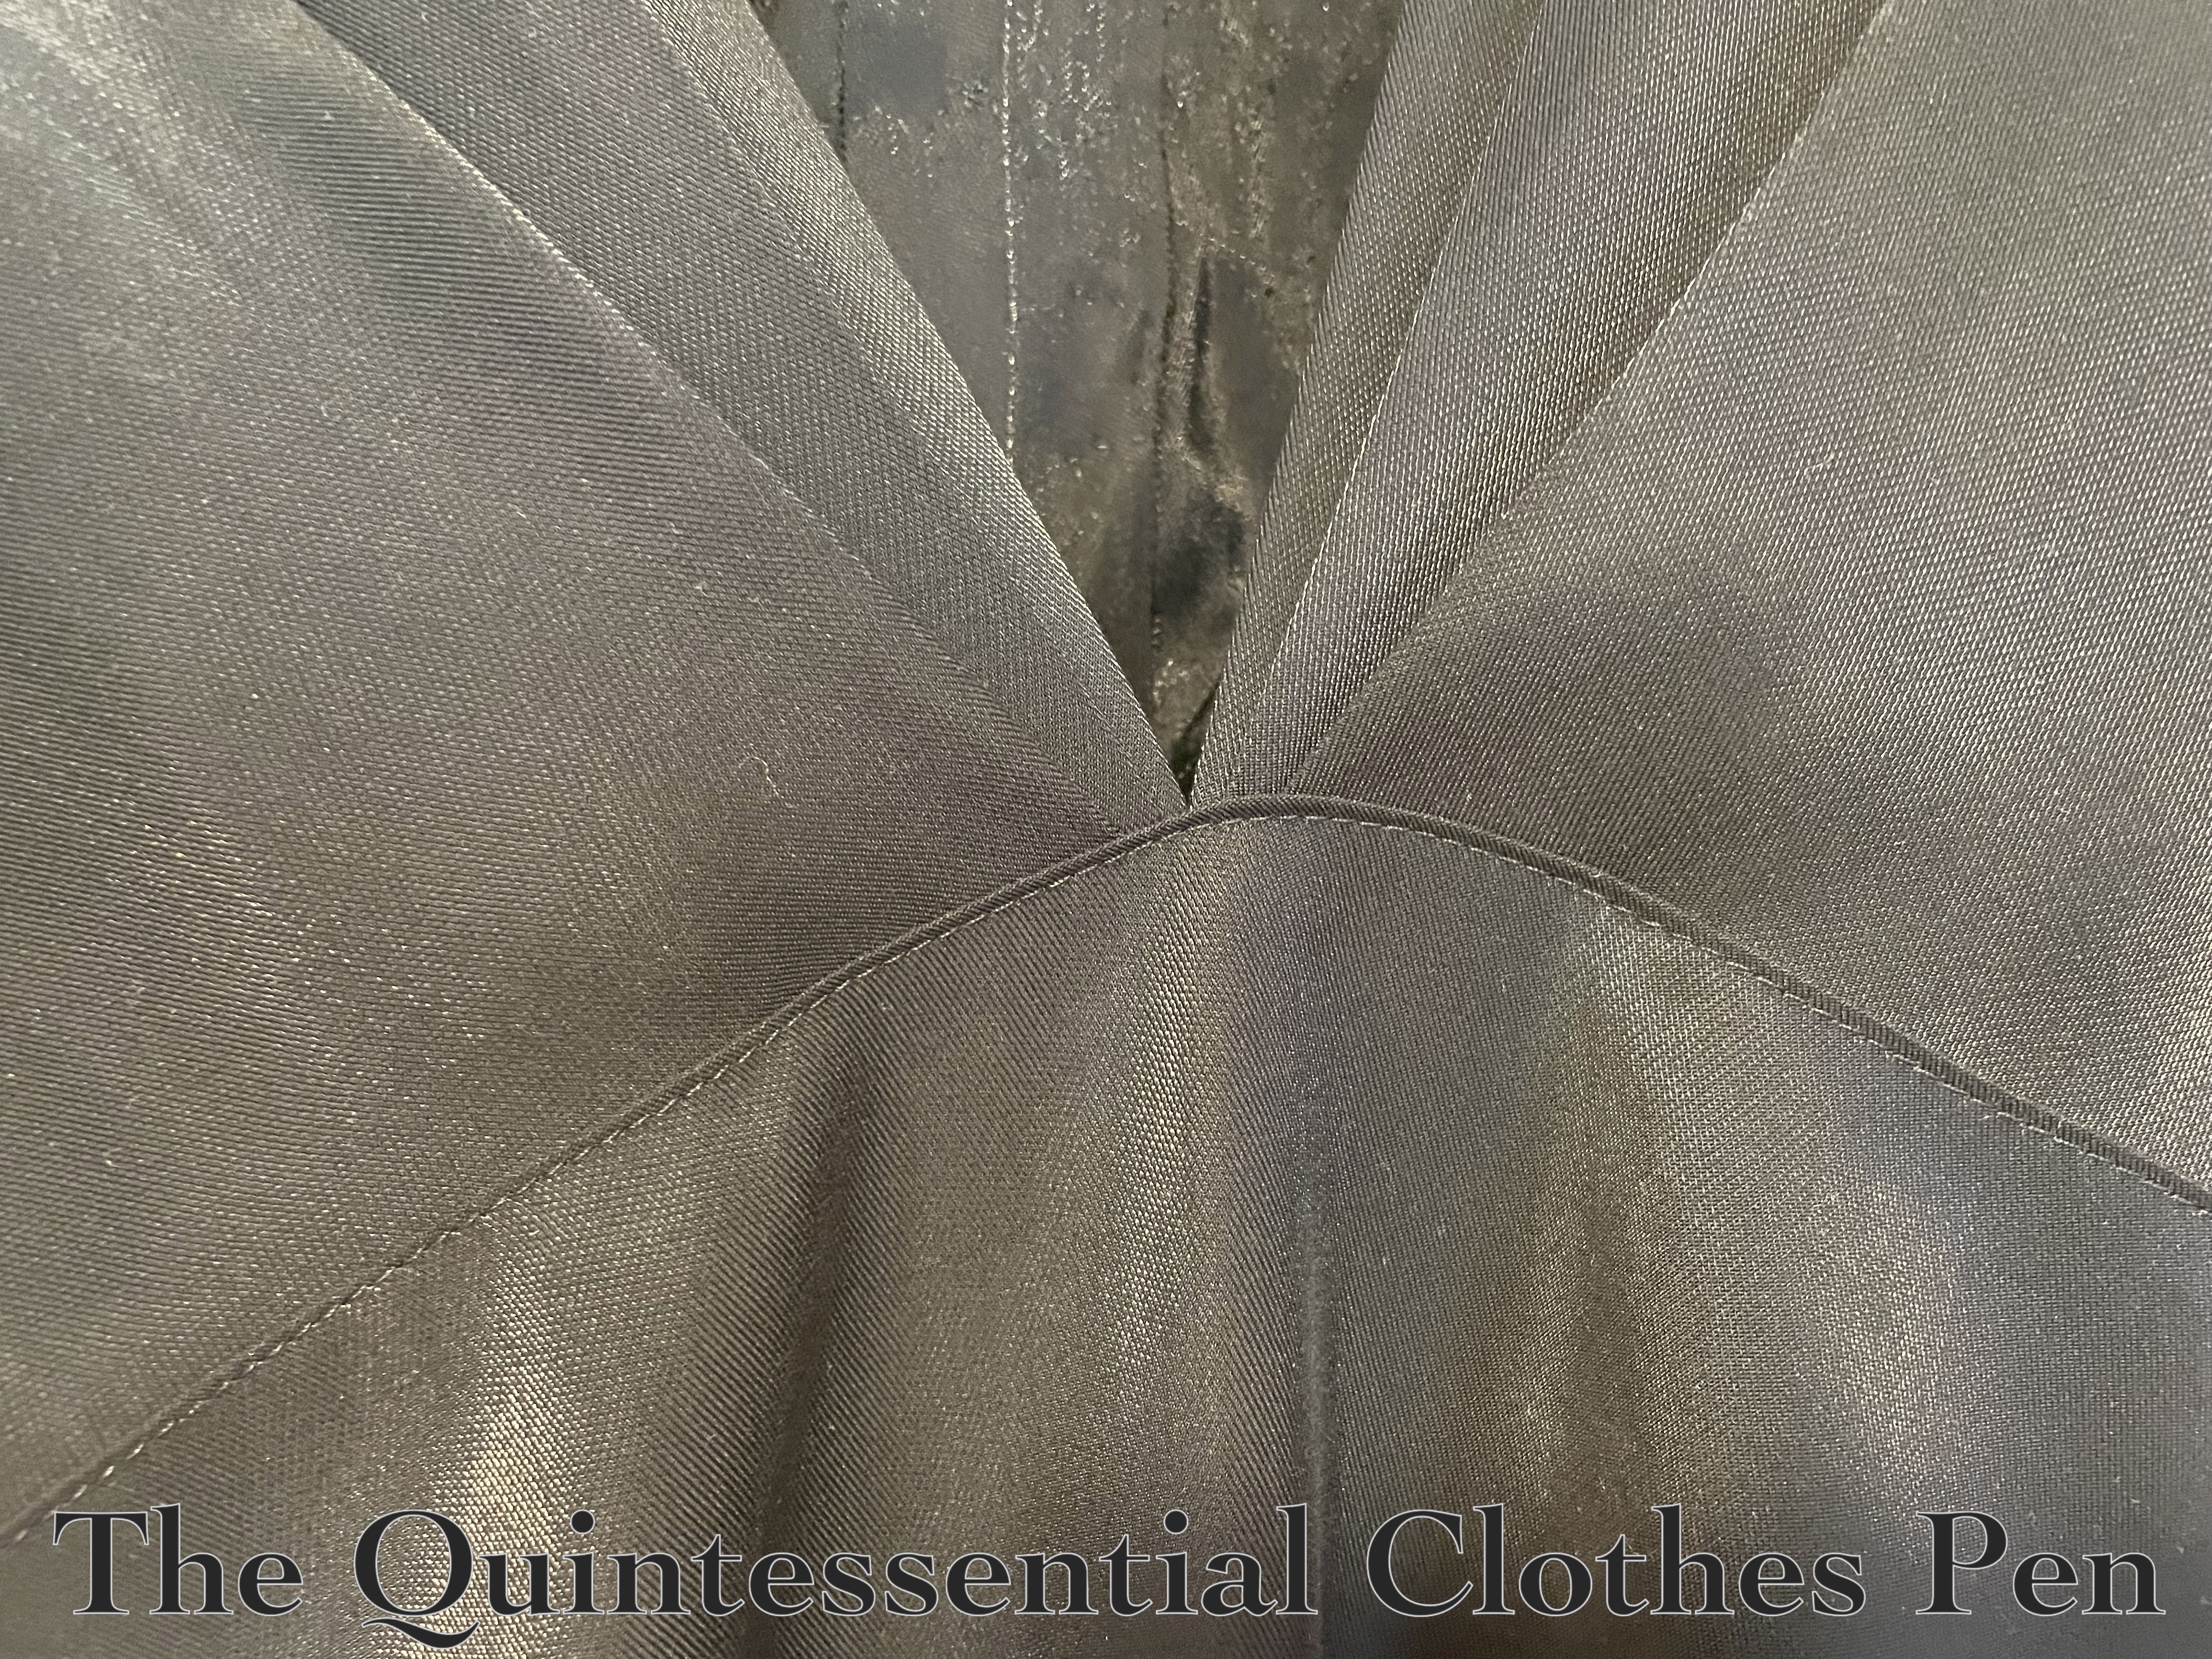
And the top back pieces and back skirt have a fun period way of attaching to each other, which is with a top stitched seam (shown in the photo below). This is pretty common on bias cut dresses I have seen. I understand that this helps to stabilize the seam and is easier to match and line up than it would be to put right sides together in the usual method.
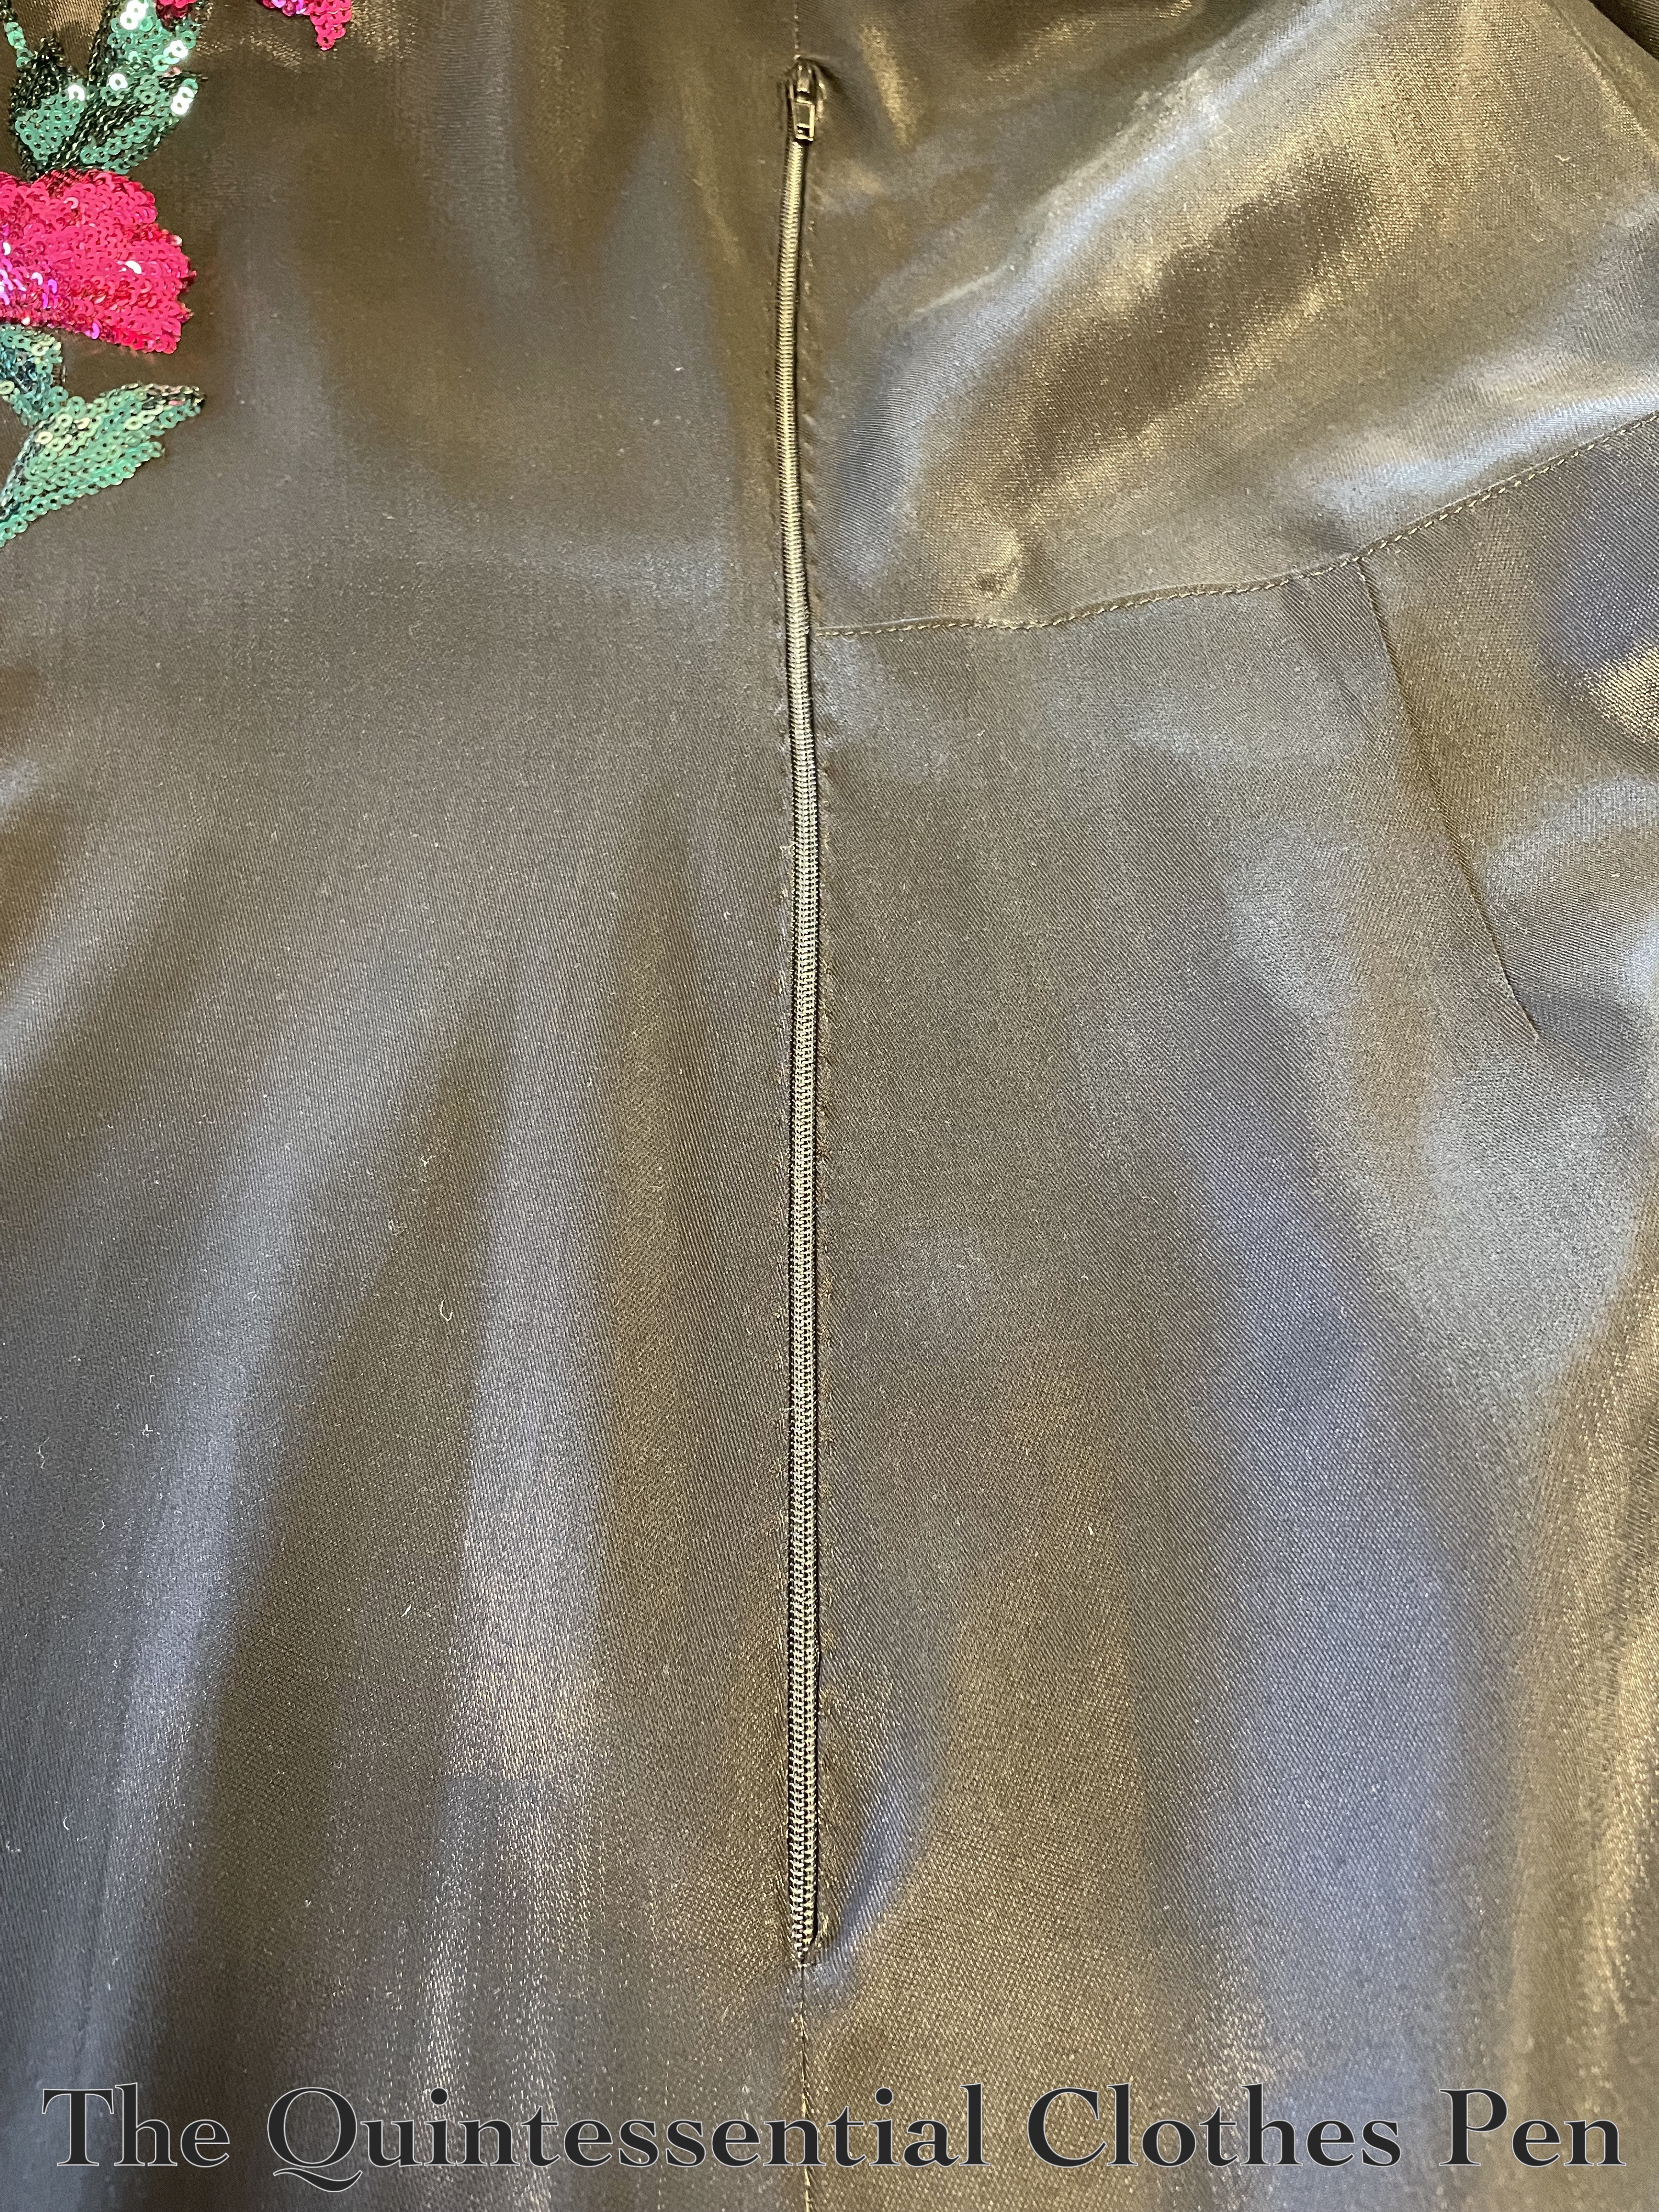
For closures, there is an exposed zipper (gifted to me) on the proper left side of the dress. This method and style was taken directly from the original dress information in PofF2. Below is a photo of the zipper, which is hand stitched into place.
The sleeves and skirt hem are stitched by hand, also following information in PofF2. Here’s a closeup of the sleeve. It is shaped with gathers at the top and two darts at the bottom. The hem is slip stitched into place by hand.
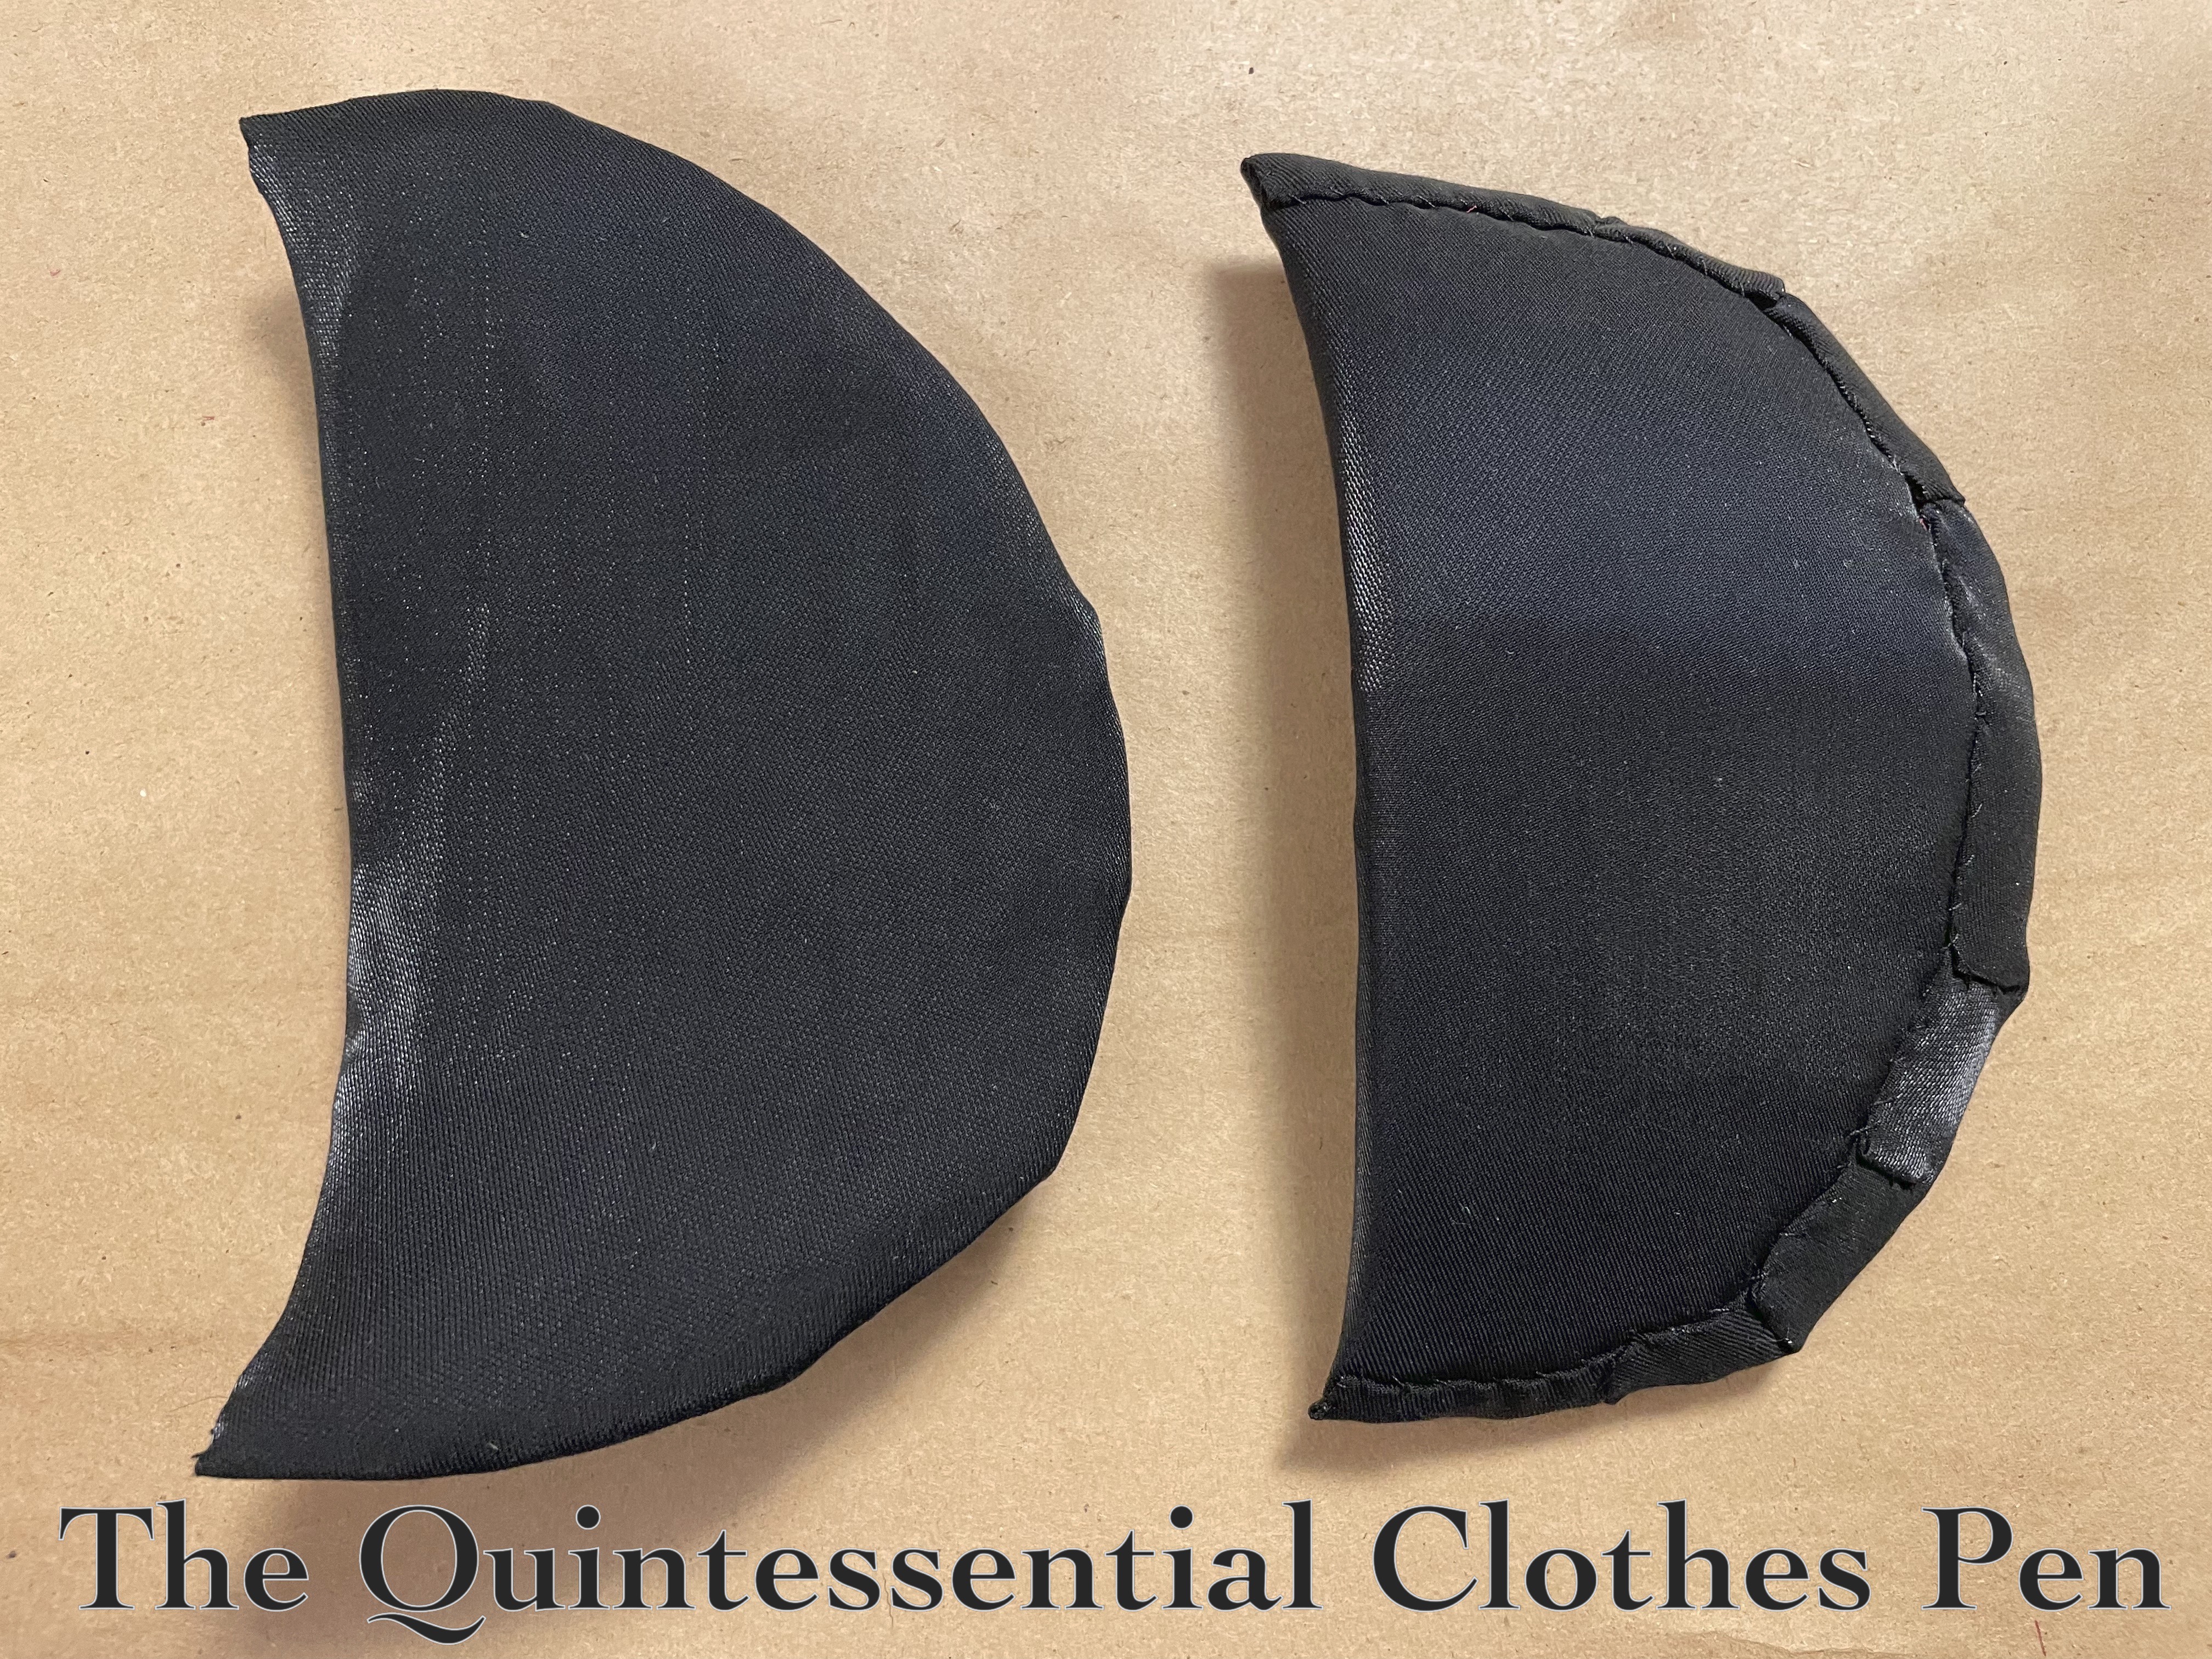
The only other thing that this dress needed was shoulder pads. I don’t think the original has them, as the shoulders look very sloped to me, but they were needed to make the dress sit properly on my body (and they add a very 1940s square shouldered look!).
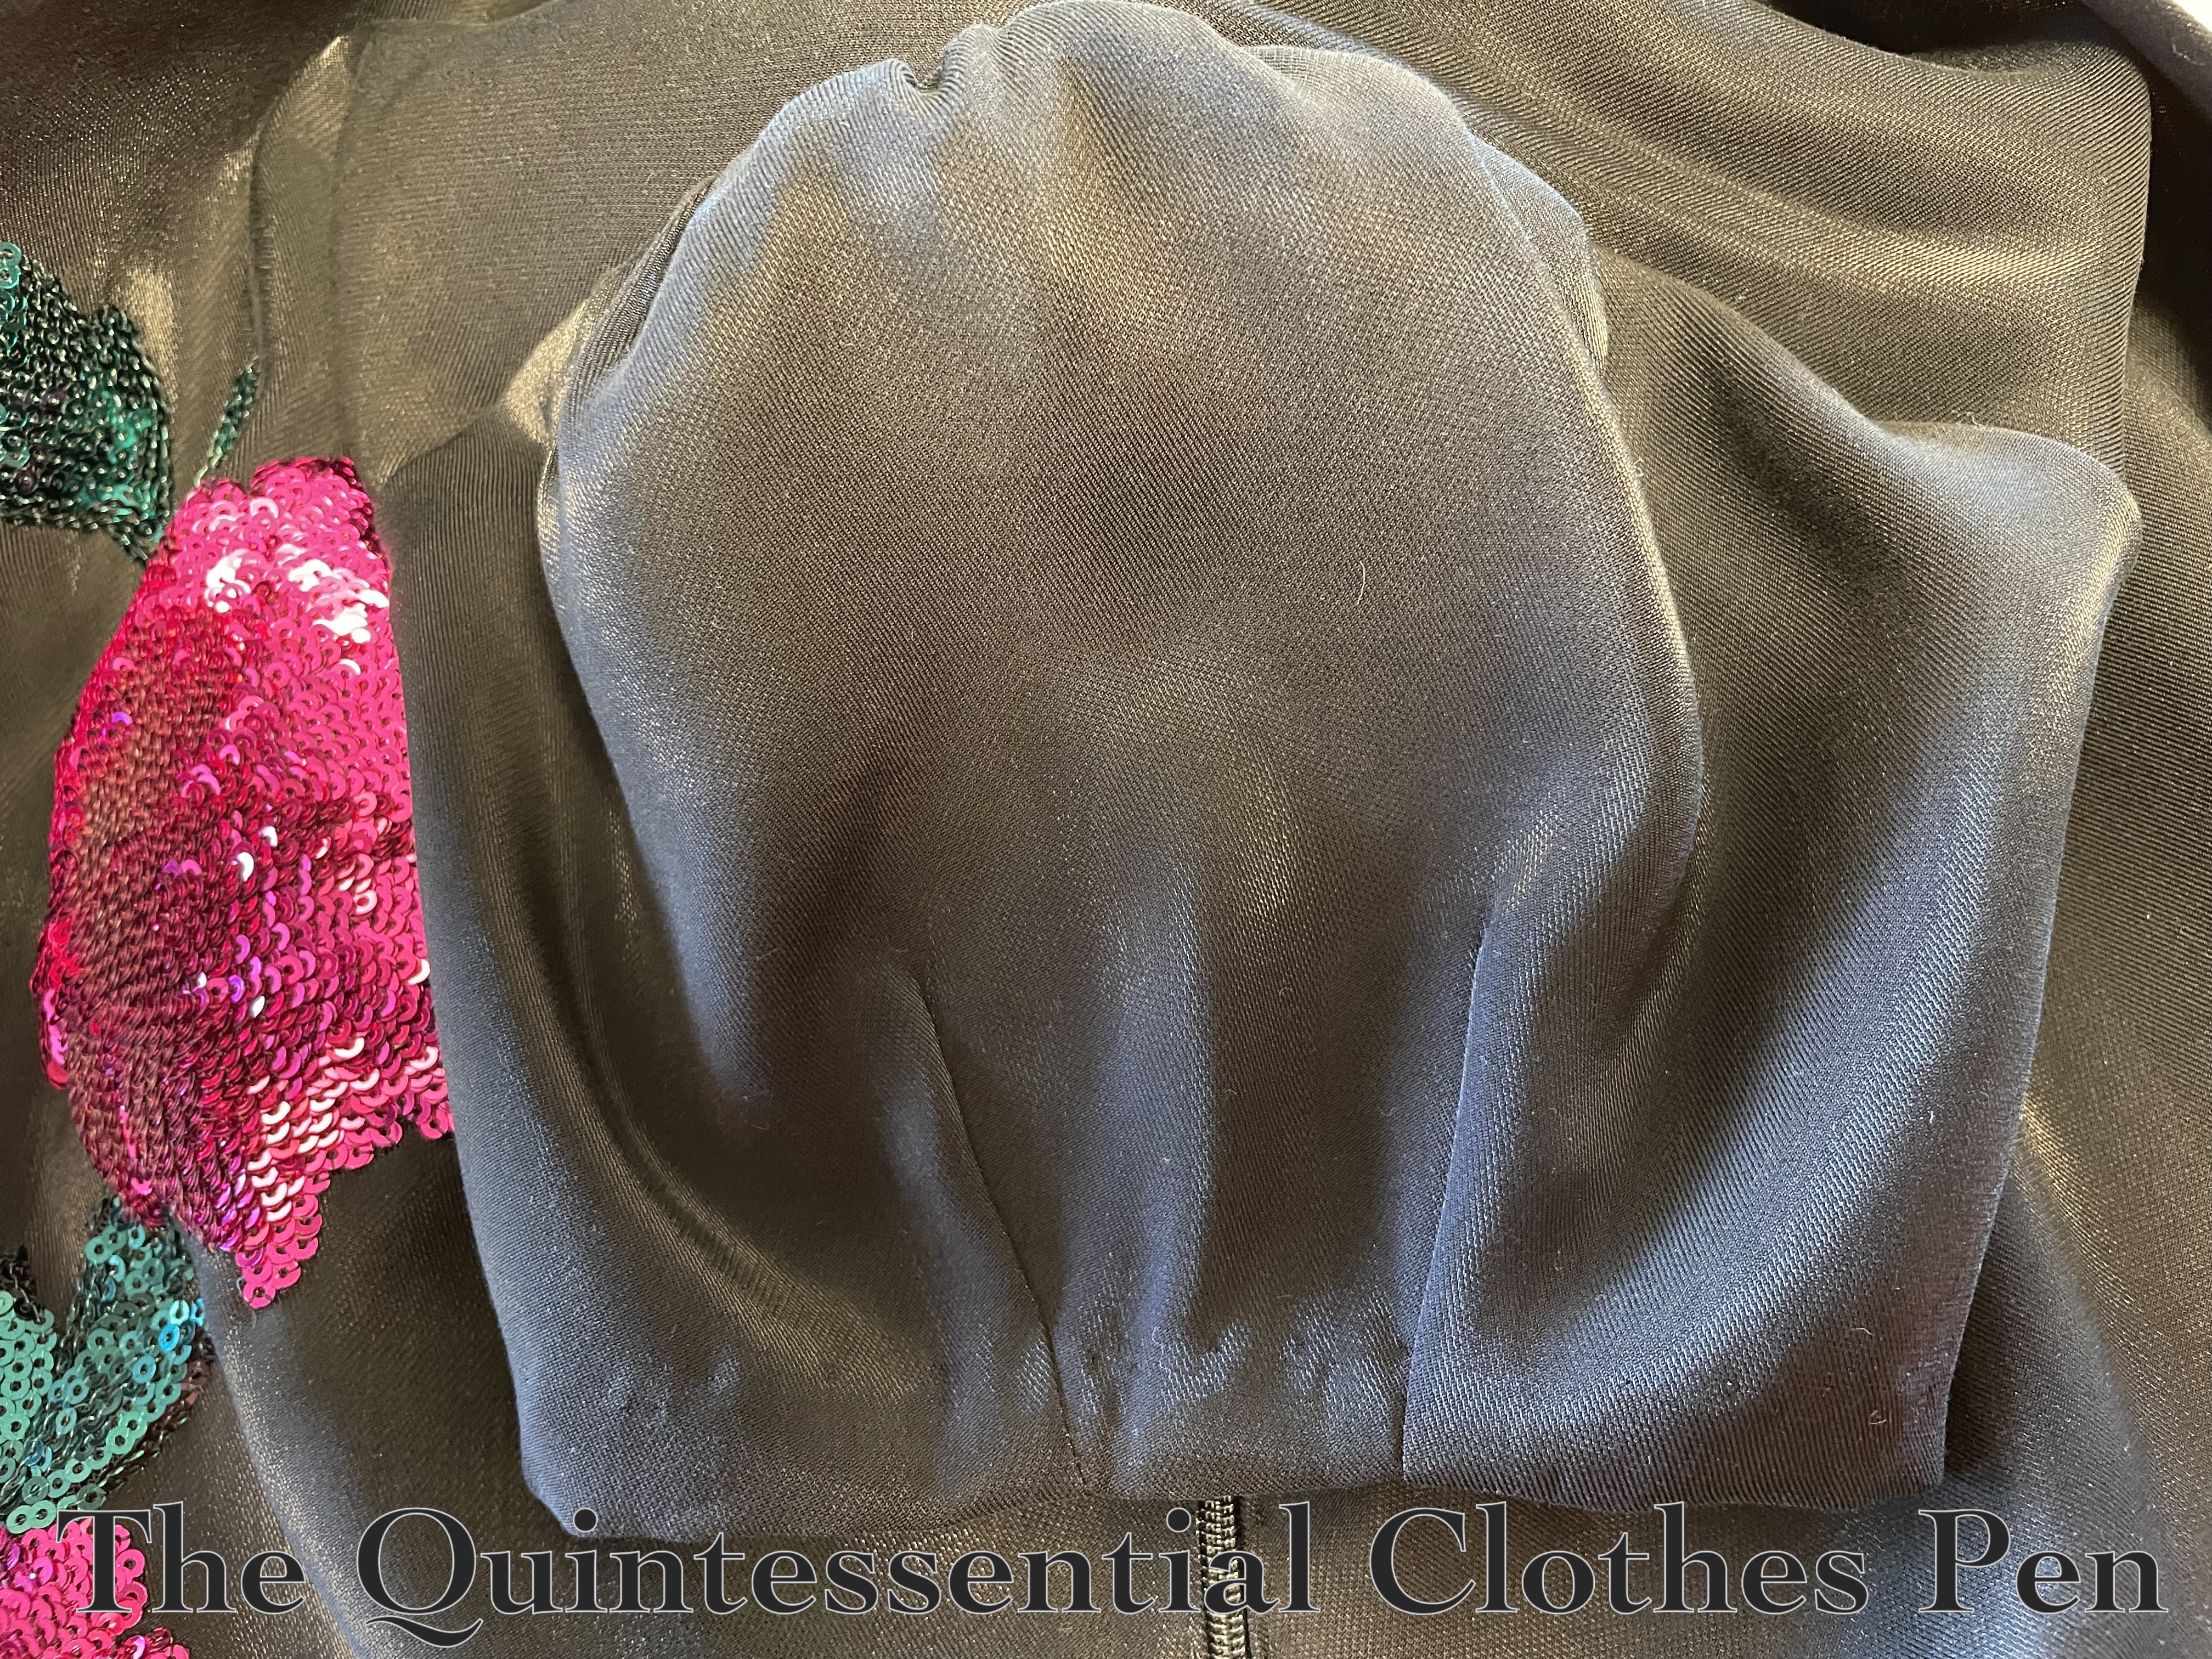
Conveniently, I had a pair of shoulder pads in my stash that worked well. They were, however, light colored and I thought it would be nice if they matched my dress better, so I covered them with scraps of the dress fabric before tacking them in.
Below is a photo of my covered shoulder pads followed by a photo of the shoulder pads sewn in place on the gown, with bra strap keeps added as well.
And that’s it for now! This post is long enough, so pictures of the full ensemble will be in another post!
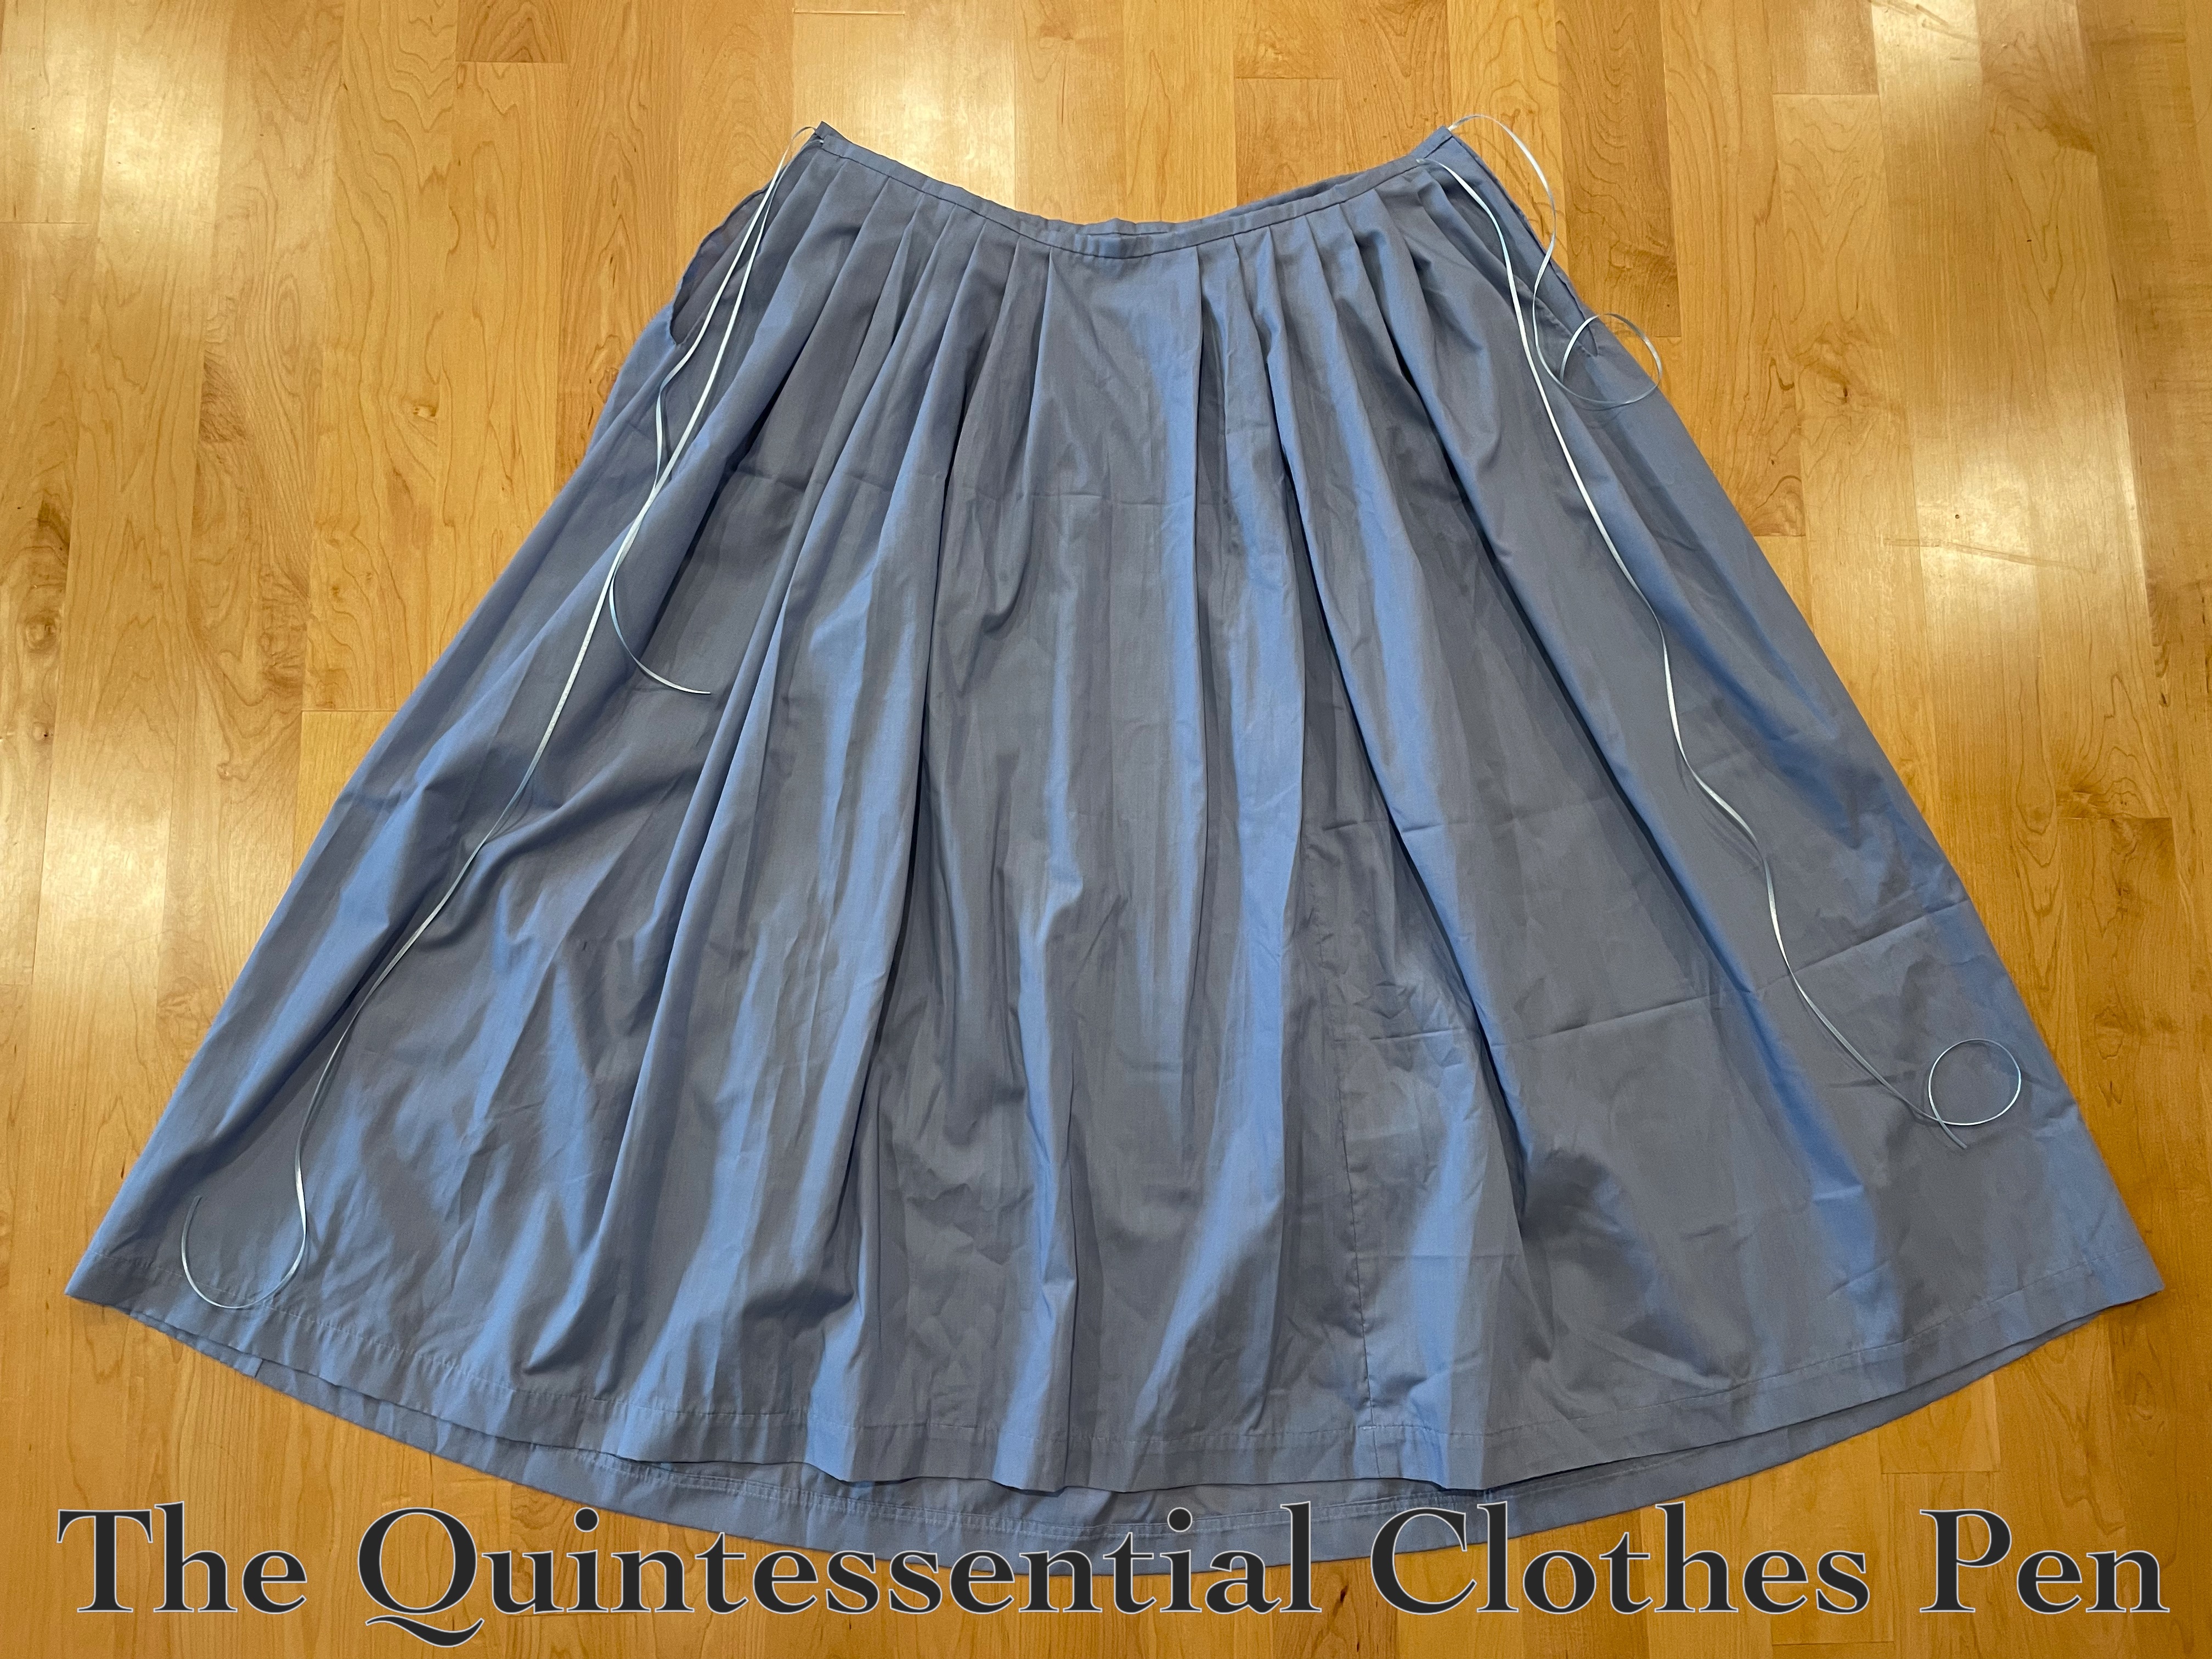
In addition to the c. 1770 Pink Panniers that I recently posted about, the blue foundation petticoat pictured below (front view) is also intended to be easily loaned to friends.
I’m super pleased with this for a few reasons:
1 – I was able to easily replicate the construction steps that I used for my Apricot Petticoat in 2013, ten years ago!
2 – I was able to re-make the petticoat from an old project: the 1812 Blue Under Dress I also made in 2013. I was never very happy with this color under my 1812 Striped White Gown (it was blah) and within even a few years of being made it no longer fit the width of my back, anyway.
3 – This remake qualifies for the HSM Challenge # 8, All Tied Up:
Make something that closes with ties, or something that uses knots/bows as a decorative feature.
Just the facts:
Fabric/Materials: Approximately 3-4 yards blue cotton/polyester blend fabric (salvaged from an old dress).
Pattern: None, but I referenced both of these tutorials on constructing 18th century petticoats. Katherine’s tutorial is for a petticoat with an uneven length (to go over panniers, or a bum roll, for example). Rebecca’s tutorial is for a petticoat with an even length (the same length all the way around, to be worn without extra supports). Both tutorials have construction information, Rebecca’s includes a bit more detail in terms of which stitches and methods to use.
Year: Loosely 1700-1790.
Notions: 3ish yards of 1/8″ blue polyester ribbon and thread.
How historically accurate is it?: 70%. Accuracy gets knocked down because: 1- all unseen seams are machine sewn, 2- I used polyester ribbon for ties, 3- I haven’t seen research that shows cotton being used at this time for a single plain petticoat of this sort.
Hours to complete: 5? I didn’t really keep track.
First worn: Has not been worn yet.
Total cost: Free! Materials were either in the stash/gifted to me or re-used from other projects.
Here are more photos of the petticoat, starting with a back view.
And, close-up evidence of weird things, such as the twice-stitched machine hem, which could be useful if I ever want to lengthen this petticoat. These hems are leftovers from the salvaged dress–no hemming required for this petticoat. Perfect!
I followed the instructions as indicated in Just The Facts earlier in this post. This leads to tidily finished waistbands, as you can see here (along with a randomly located vertical seam).
(Another weird thing about this petticoat is where the seams landed on this, now that it is a petticoat and not the skirt of a dress, and that each seam is finished in a different method!)
And here’s a the same view, but with the front folded down to show how the petticoat is made shorter at center from than it is anywhere else.
Below, a final closeup of the extra length at the front folded down and left raw. The top fold is encased in the waistband, which is machine sewn and whip stitched down on the inside.
I was super pleased to just barely fit this petticoat length out of the skirt length of the old dress. The hem circumference was just about perfect, too! And, I was able to cut the waistband strips from the front bodice pieces of the original dress!
All in all, a quick and satisfying project! I’m much more pleased with this as a petticoat than I ever was with it as a dress.
I have a longer-term goal to make a another sacque (similar the one I made for Versailles in 2016–documented in these many past posts). I specifically want this new one to be loan-able to a few friends, so I’m adjusting the size a bit from the one I made for myself.
I know that foundations make the garment on top look good, so it’s important to me to also be able to provide the foundation pieces that might be needed to go with the sacque. Stays are covered, as I now have the c. 1785 Green Linen Stays that can be loaned and/or some friends have their own, but panniers and an additional foundation petticoat felt like items that I don’t already have and therefore should make in addition to the sacque itself.
This post is going to document the panniers I made for this new ensemble. I’m pleased that they qualify for the Historical Sew Monthly Challenge #12, Paired to Perfection:
Make something that comes in a pair (mittens, stockings, garters, braces etc.) Or make something in which the trim or construction prominently features sets of two.
Just the facts:
Fabric/Materials: 1 yd (or probably a little less) pink cotton twill.
Pattern: The Dreamstress’s pattern from the Pannier Along in (oh my, has it been this long…???) 2013! All the steps, information, etc. is available on Leimomi’s blog, here.
Year: c. 1770.
Notions: Thread, 3 24″ x 3/8″ zip ties, and approximately 2 yds grosgrain ribbon.
How historically accurate is it?: 70%. Machine sewing and materials are generally not historically accurate, but the overall pattern and shapes are.
Hours to complete: I didn’t really keep track. Let’s say 5.
First worn: Has not been worn yet.
Total cost: All of the materials are from the stash (leftovers from other projects), so let’s say free!
A view of the top of the stays, with them collapsed down on themselves.
I made these following all of the steps in The Dreamstress’s tutorial, as mentioned above. I decided to mostly machine sew them, in the spirit of speed and because I knew the fabric I chose was not accurate to start with.
I made my boning channels out of the same fabric as the exteriors (pink cotton twill leftover from making early 19th century stays over ten years ago).
There are only two hand sewn bits. One is the slit on top (to be able to use these as pockets and store things in them), pictured below. Each slit is reinforced at the bottom to keep the fabric from ripping during use.
The other hand sewn bit is the band at the top, which is whipped down after being machine sewn on.
And that’s it! Pink panniers! It has a bit of a ring to it, I think!
I finished a project! It’s small, but I’m very pleased with it.
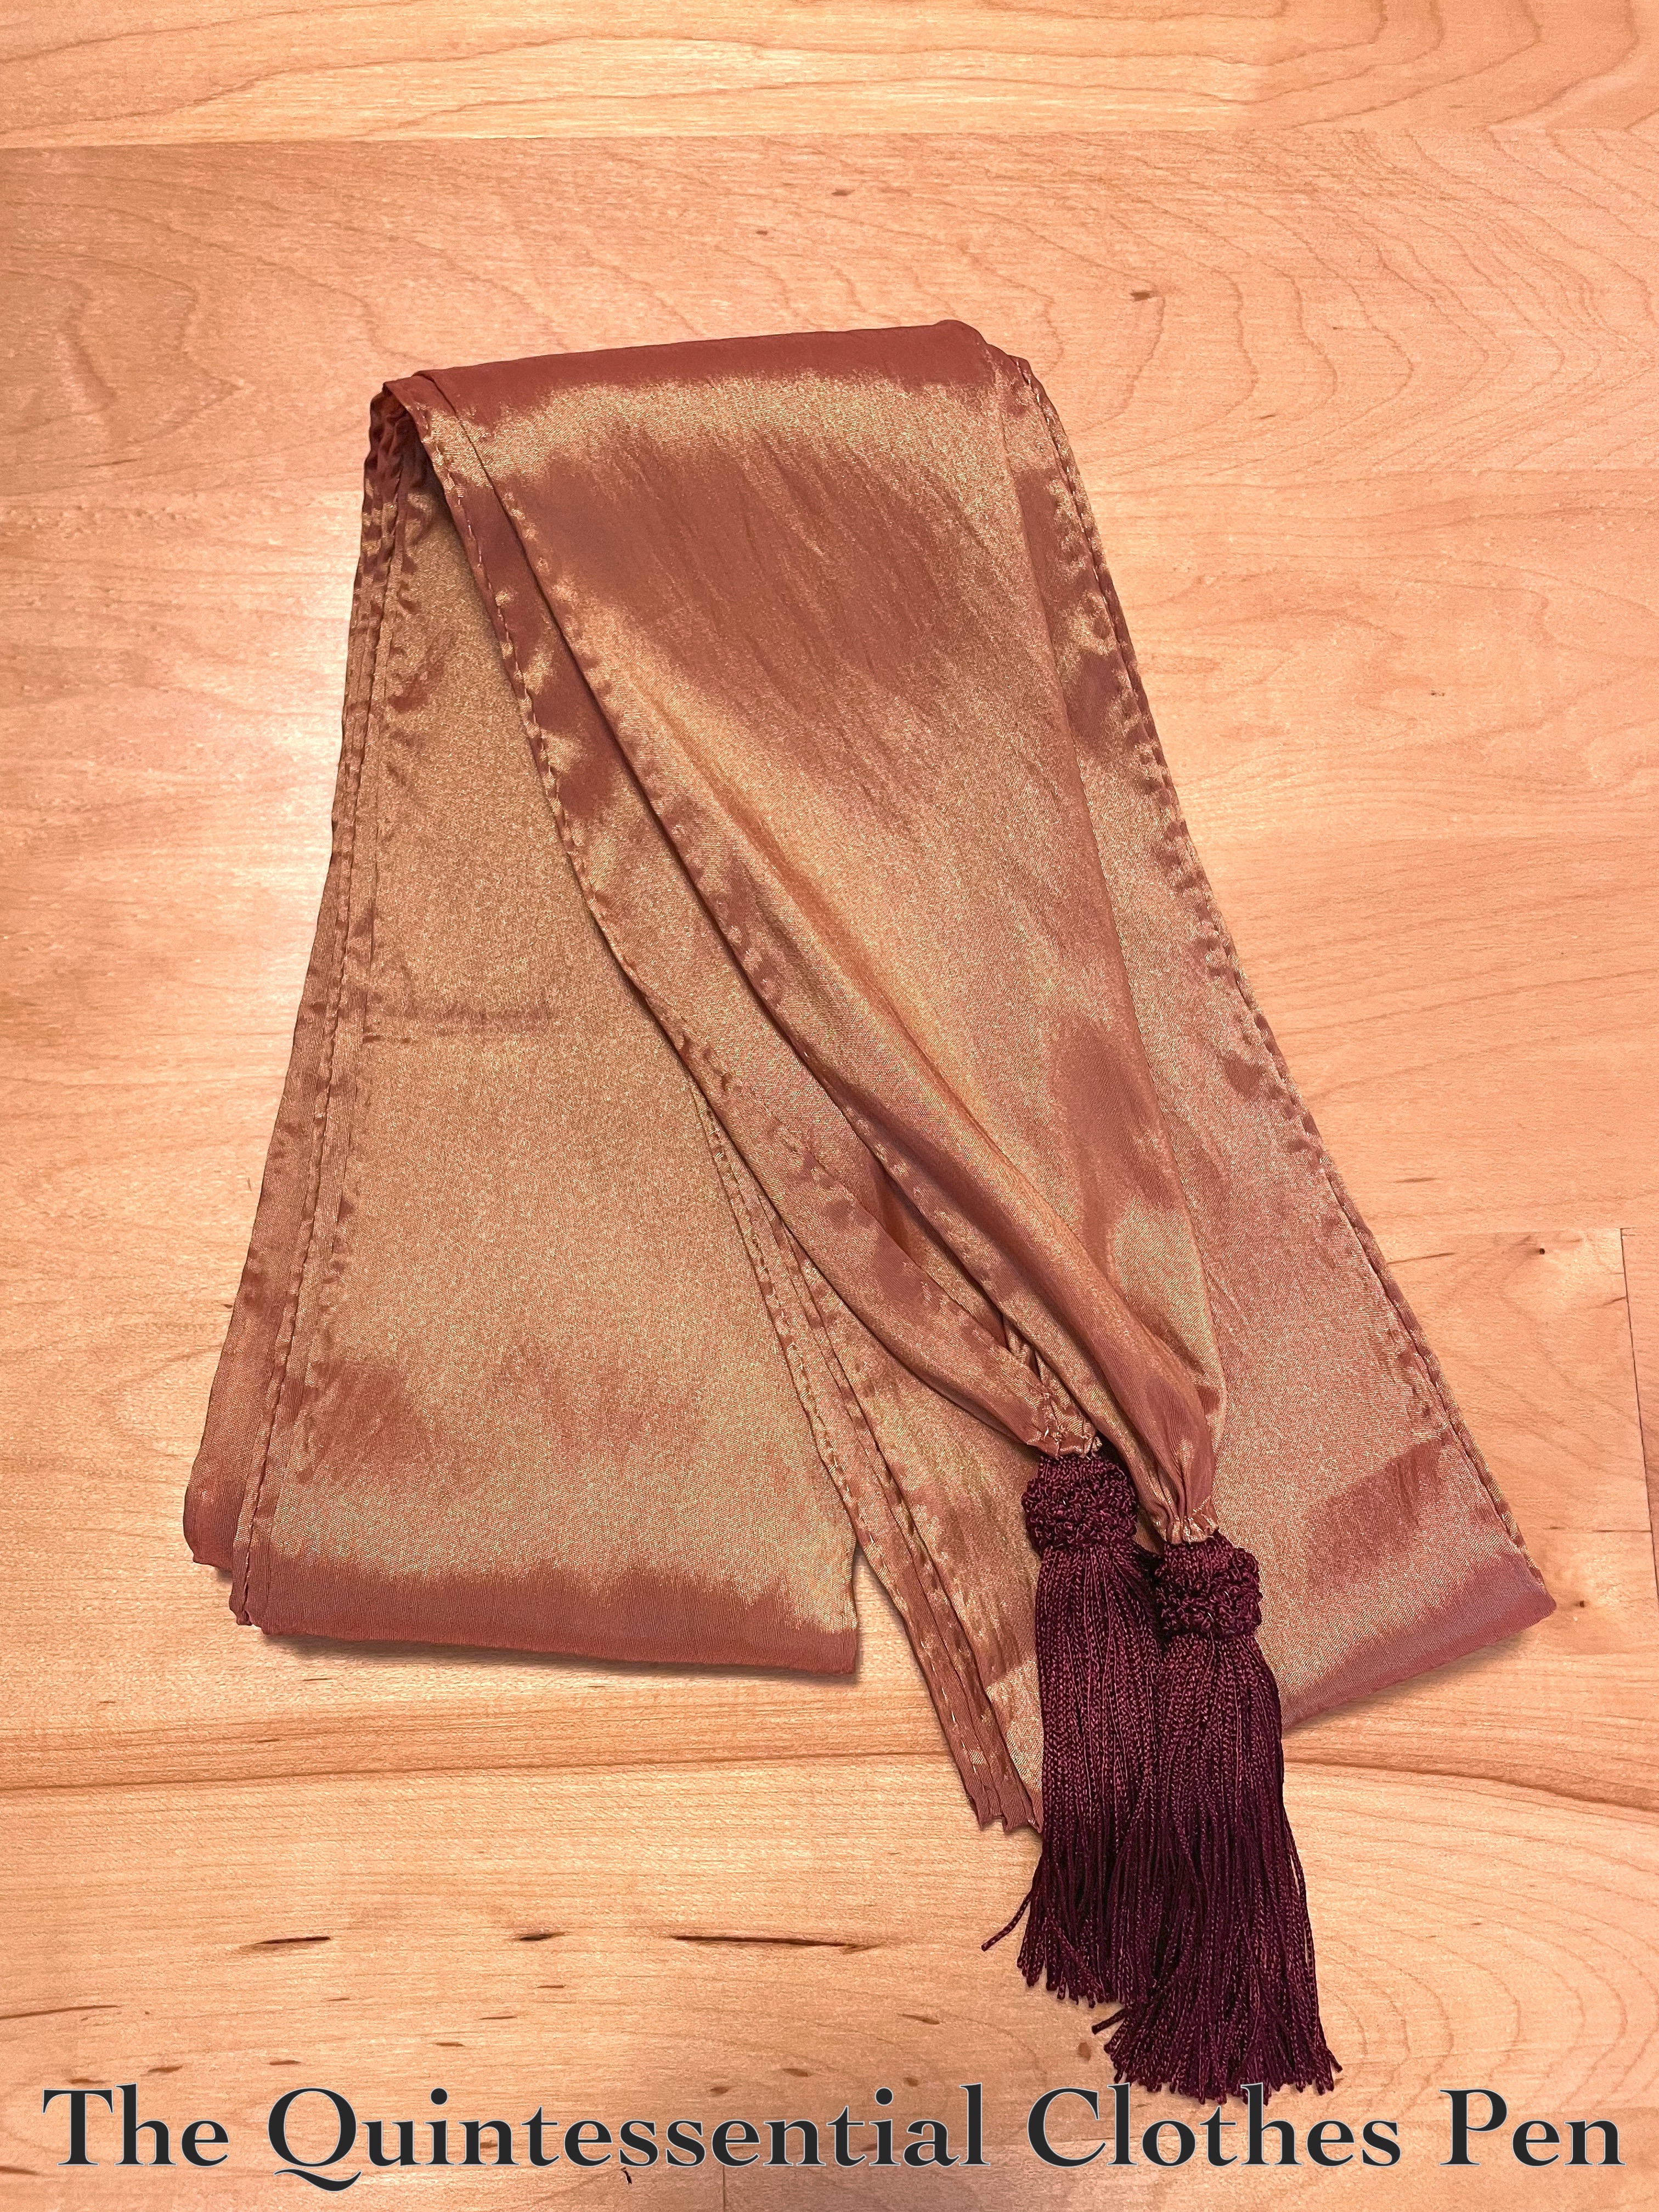
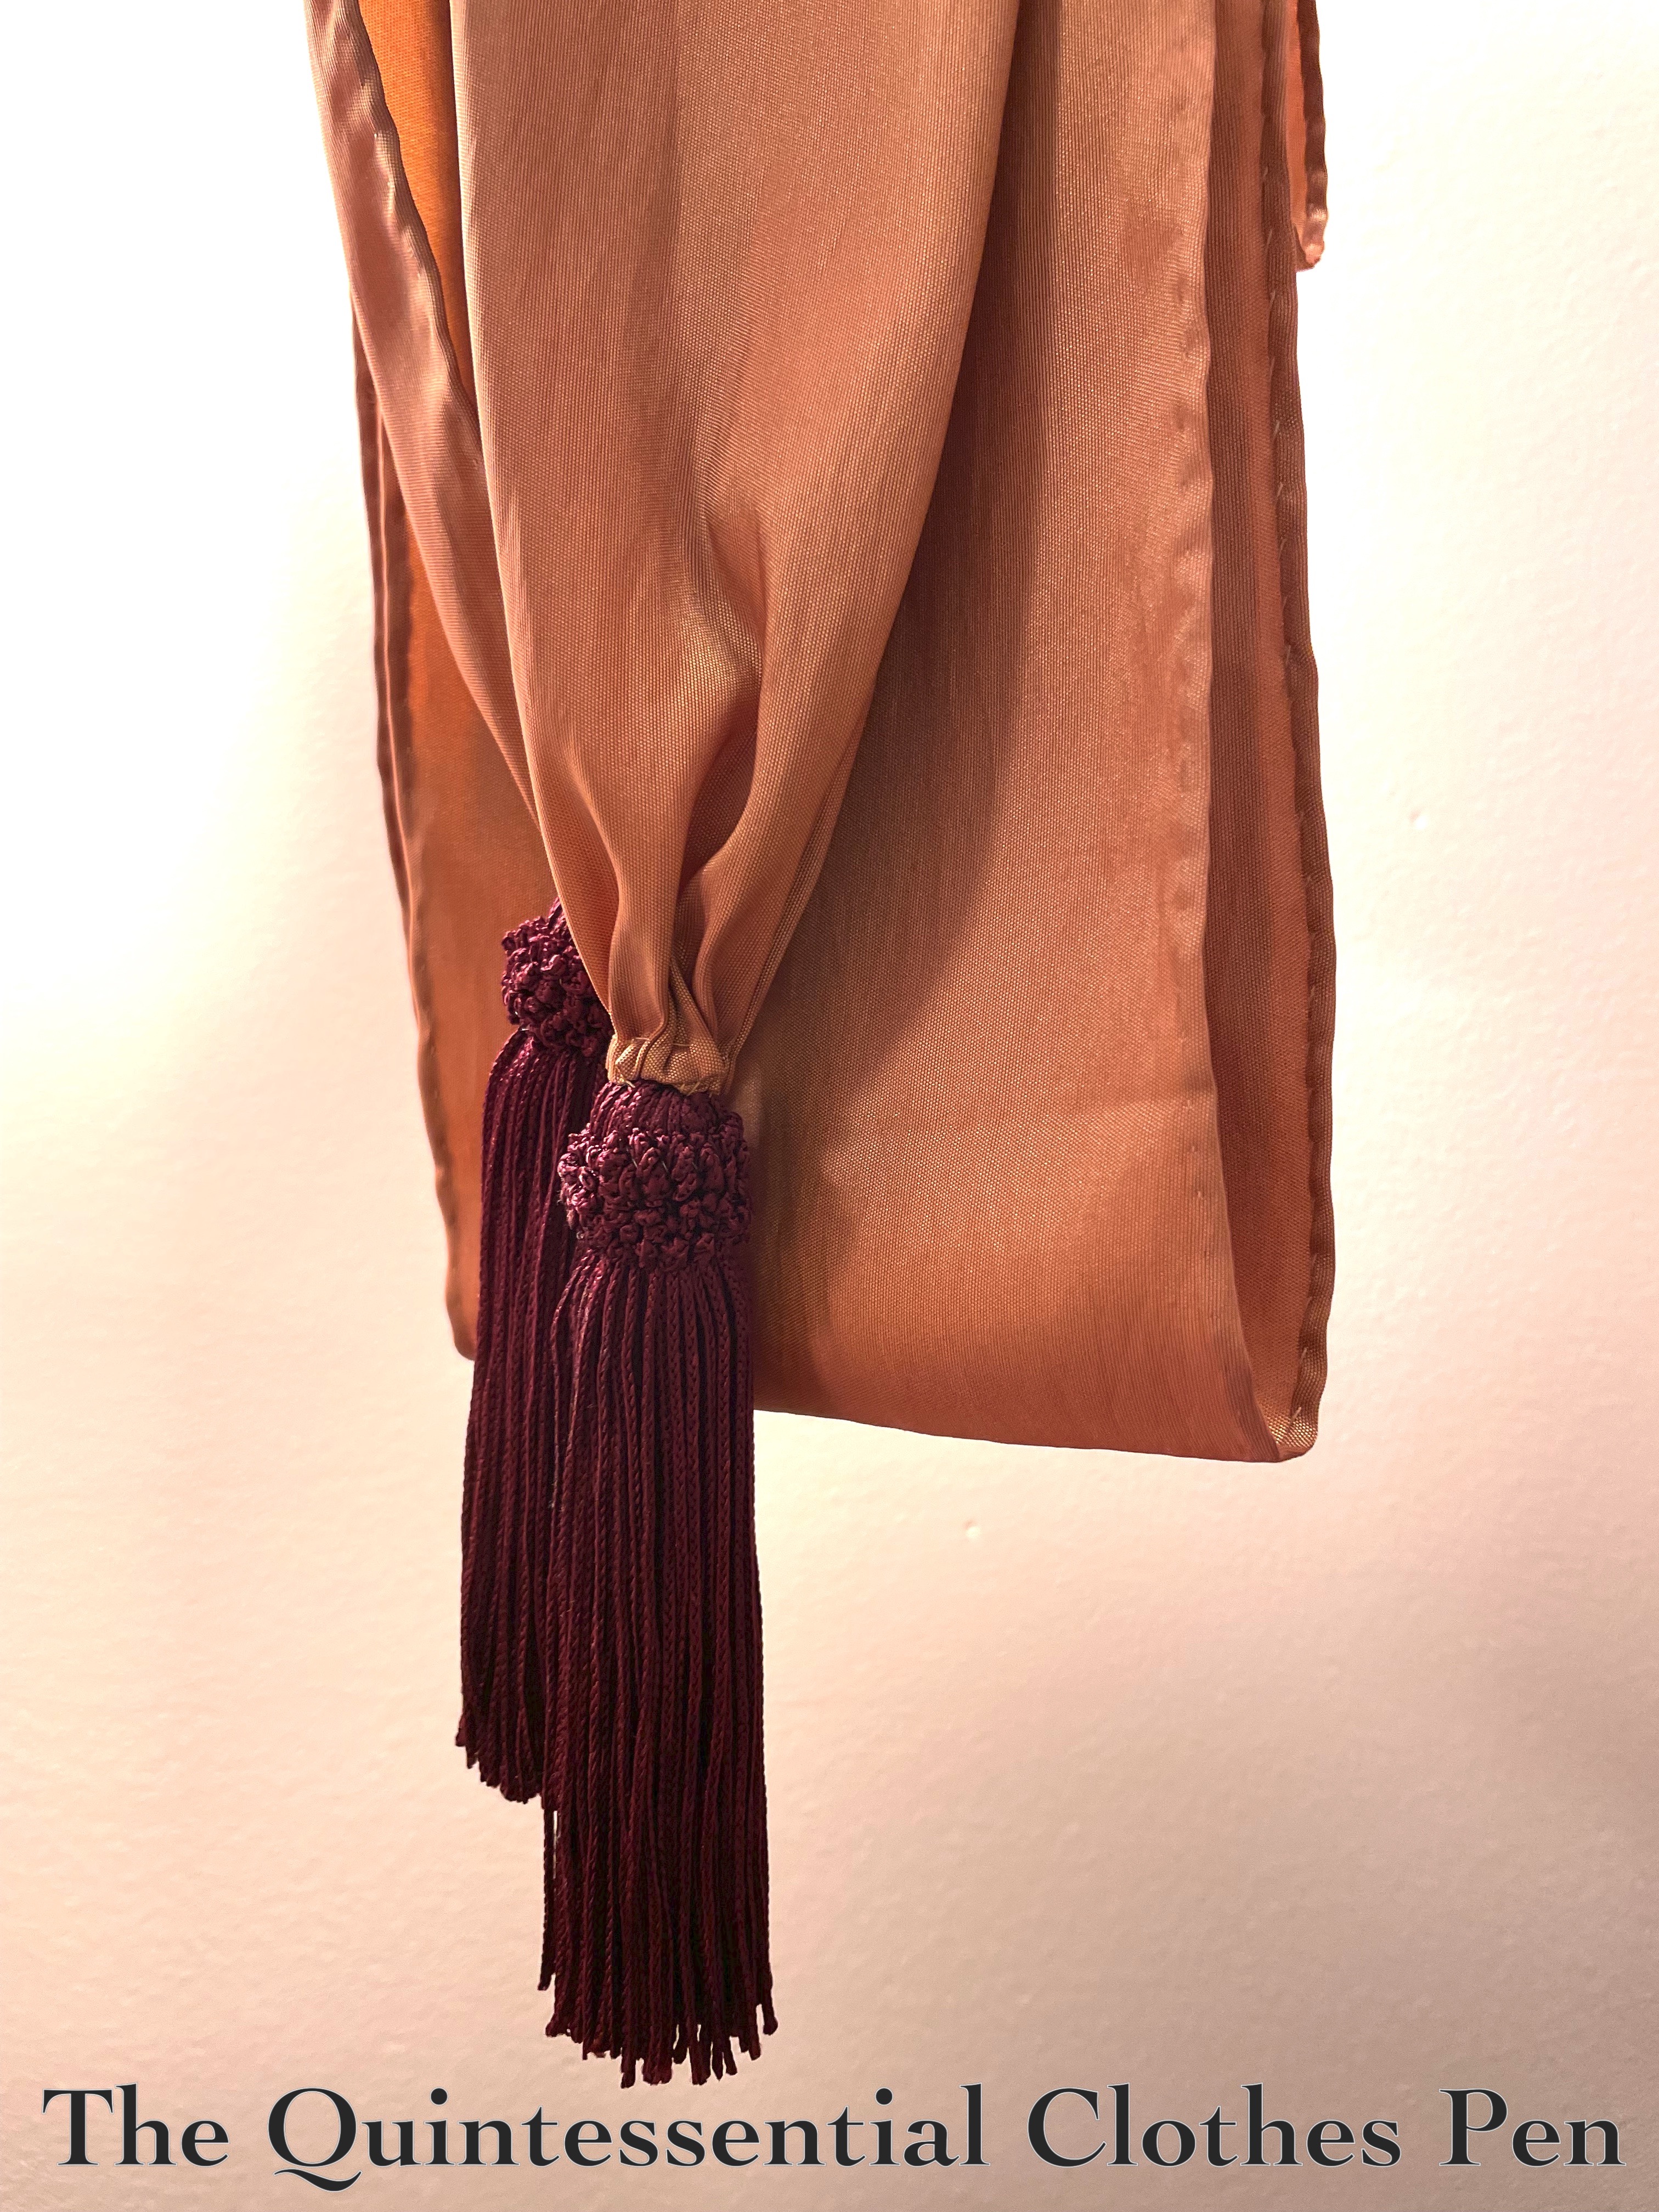
The project is a sash to be worn with an in-progress 1790s dress. The goal is to be slowly progressing towards an entire 1790s outfit, with all of the appropriate accessories.
I’ve enjoyed making lists of what those accessories might be and getting them cut out and lined up for mindless hand sewing. That way, even when life is busy and I don’t have time to think about a project, I can still make progress and have something to sew, which brings me great joy and a sense of calm.
This project takes its inspiration and instruction from The American Duchess Guide To 18th Century Dressmaking, by Lauren Stowell and Abby Cox.
I’m excited that the sash qualifies for the Historical Sew Monthly Challenge #3, Focus on the Fabric:
Make something in which the fabric colour/ texture/print/material etc. is the central feature of the design.
This fits the challenge in that the sash really isn’t at all about the construction details… The only cuts to the fabric were to make strips, and the only sewing is joining them and finishing the edges. So it really is all about the fabric!
Just the facts:
Fabric/Materials: ½ yard or so orange/gold shot polyester taffeta leftover from a very old project and 2 burgundy tassels.
Pattern: 1790s Sash in the book The American Duchess Guide To 18th Century Dressmaking, by Lauren Stowell and Abby Cox.
Year: c. 1790.
Notions: Thread.
How historically accurate is it?: 90%. Polyester is obviously not historically accurate, but the dimensions and hand sewing method are.
Hours to complete: 5.
First worn: Has not been worn yet.
Total cost: $2 for the tassels and let’s say $.50 for the thread. We’ll count the fabric as free. So, $2.50.
I didn’t make a new dress… but I did update an old one! In fact, this is the second round of major updates to this dress! The first round, pictured below, is explained in this past post from 2017.
While the dress with the first round of updates was certainly better than it had been in its initial form, I still wasn’t super pleased with the fit. Despite that, it has come in handy for a number of events and just keeps getting worn. So, for an event late last year I decided to do even more updates to the dress to try to feel happier about how it looks on me.
Here is a rundown of the most recent alterations:
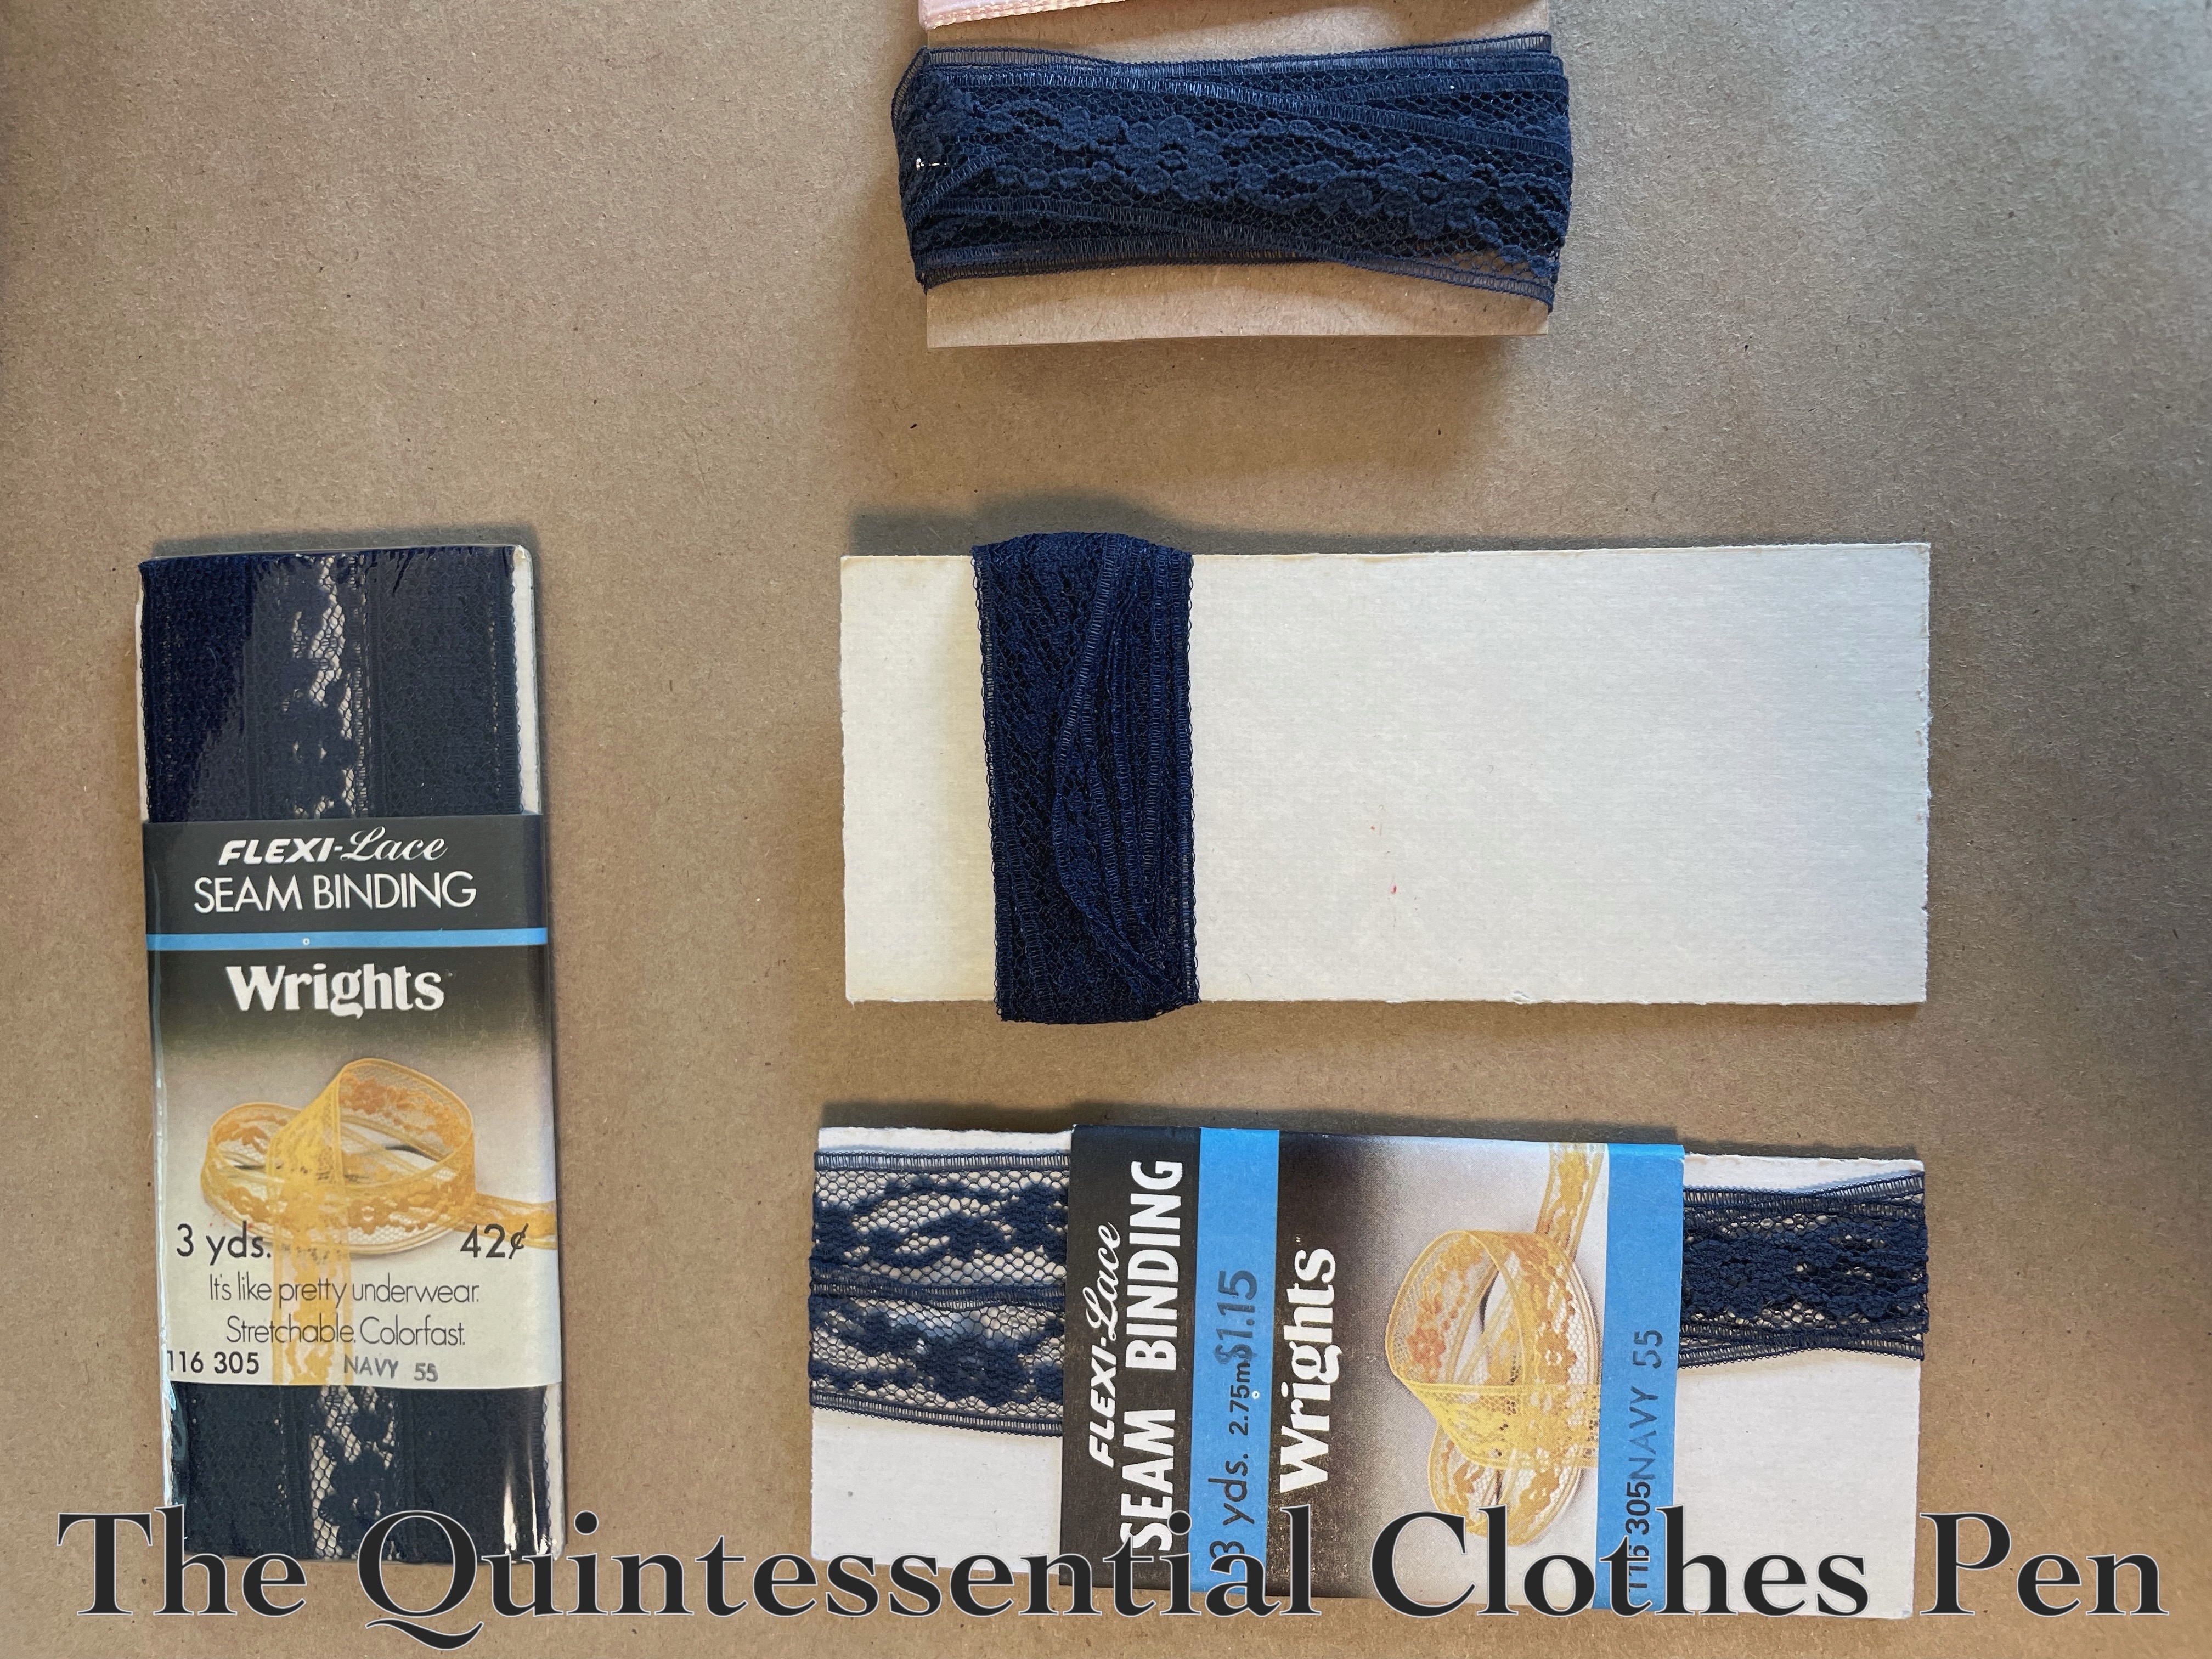
Maxed out the hem, using 3 different bits of vintage lace hem tape in various shades of ‘navy’ blue that were gifted to me over the years. It’s so nice to be able to use these gifted vintage finds. I appreciate seeing the prices on the packaging changing over the years!
Stiffened the hem of the back velvet drape with horsehair hidden under a facing of leftover velvet scraps (during and after photos, below).
Added small horizontal tucks at the sides to try to get the hem to be a little more of an A-line shape.
Took in the sides under the arms even more than I had previously and tacked down all of the flapping bits.
Added a 1″ belt, made from scraps of the fabric, with a rhinestone buckle at the center to help create more of a 1930s and less of a modern look.
Opened center front between the two bust pieces to create a deeper V neckline.
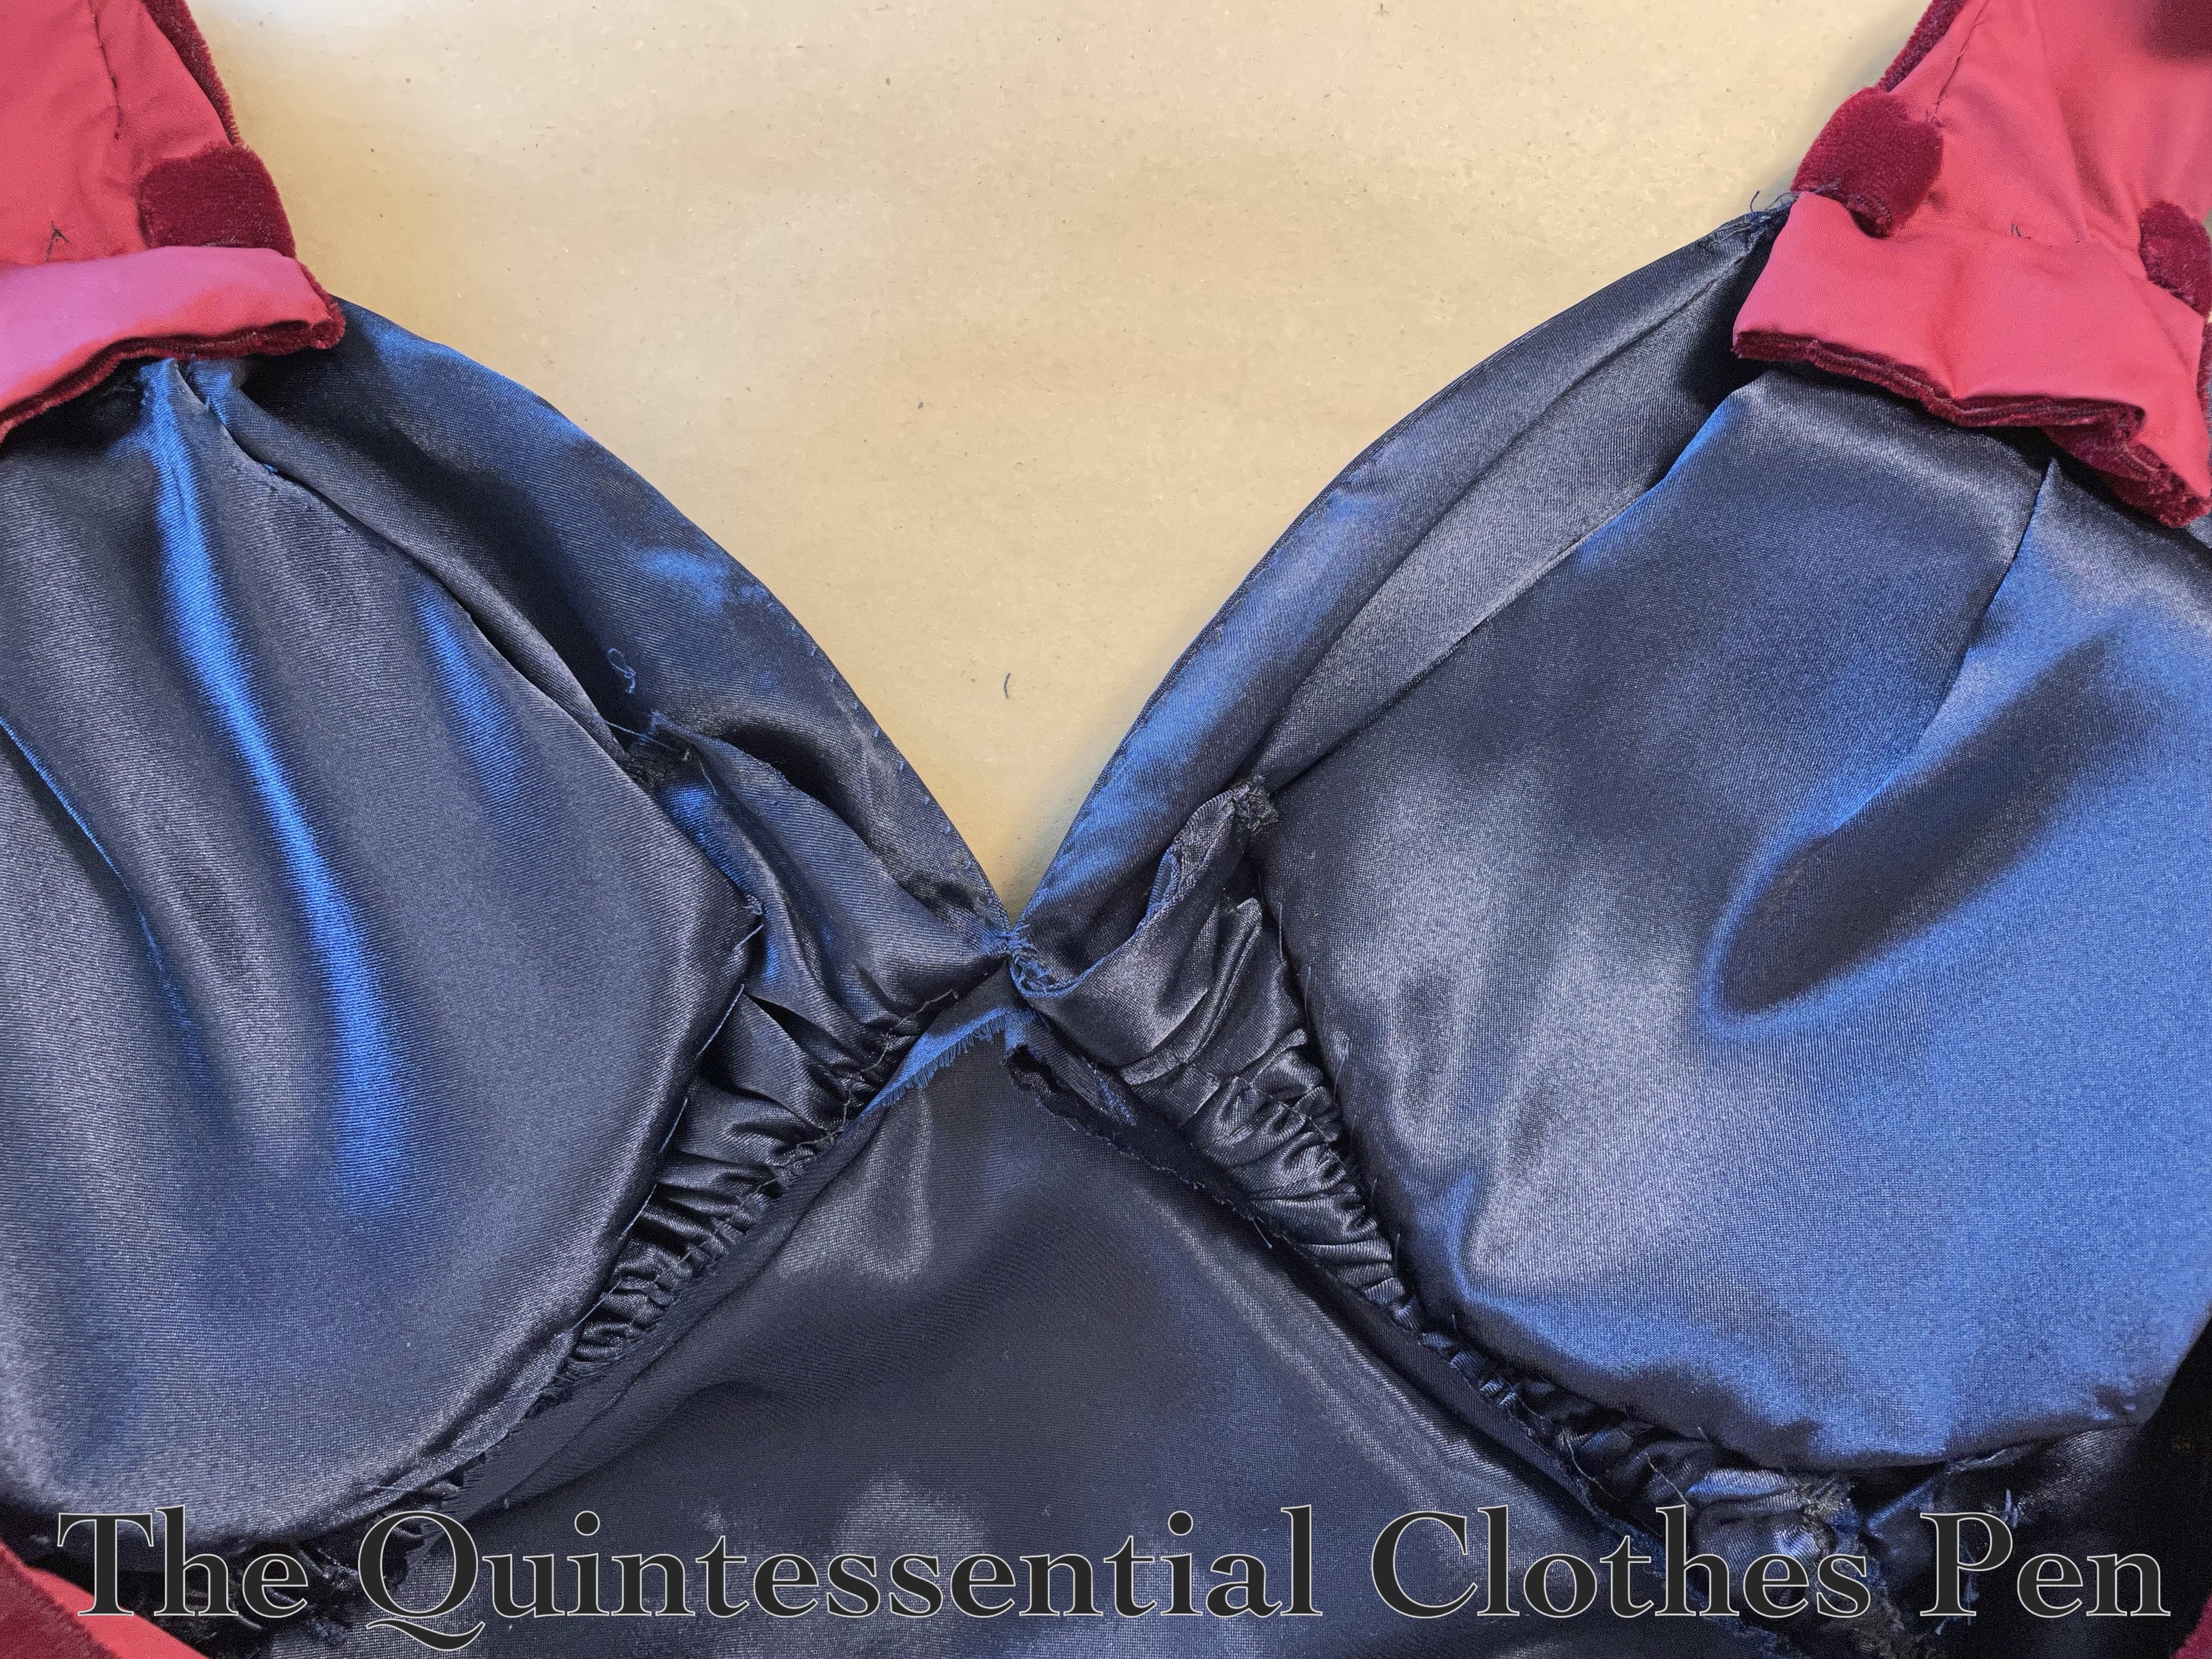
Added bra cups, covered with scrap fabric and tacked inside.
Added tacks as well as hooks and bars to the back velvet drape to help it hang nicely.
I hope to wear this again later this year and get photos of this second iteration of updates!
I recently finished up a series of blog posts that document the trials, tribulations, and triumphs of a new pair of 18th century stays. Here is the link to the most recent post (and I’ll include a link to all of the posts in the series at the end of this post).
I’m really, really excited that this pair of stays is complete! They are entirely hand sewn, which took quite a bit of time. And, they were a struggle to fit that ended in success. For both of those reasons, I’m excited that these qualify for the HSM Challenge #11: Style Starts At Home:
Make something which would generally be seen only within the household (ex: informal at-home wear, nightwear, undergarments)
How do these fit the challenge? Well, stays are an undergarment that would generally only be seen at home!
Just the facts:
Fabric/Materials: ⅔ yard natural linen for exterior (scraps from another project), 1 ⅓ yards thick/heavy white linen for interlining (scraps from another project), and ½ yard cream linen/cotton blend for lining
Pattern: 1785-1788 Half-Boned Stays from Mandy Barrington’s book Stays and Corsets: Historical Patterns Translated for the Modern Body
Year: c. 1785-1788
Notions: 29 10″-14″ zip ties that I cut to be 3/16″ wide for boning, 2 ½ yards 3/16″ wide natural linen twill tape for seam covering, 4 yards 1/2″ wide natural linen plain weave tape for binding, 3 yards white cotton cord for lacing, 1 yard ¼” wide cotton twill tape for front lacing, 2 yards ¾” wide cream cotton twill tape for straps, regular weight thread, and heavy weight thread
How historically accurate is it?: 90%. The pattern and methods are based on historical examples. The materials are pretty close, though the zip ties and cotton/linen blend aren’t perfect replicas of 18th century materials.
Hours to complete: I only kept track of about 50 hours, but my guess is that I spent at least 70-80 on these stays.
First worn: In May 2023 for photos.
Total cost: Approximately $40.
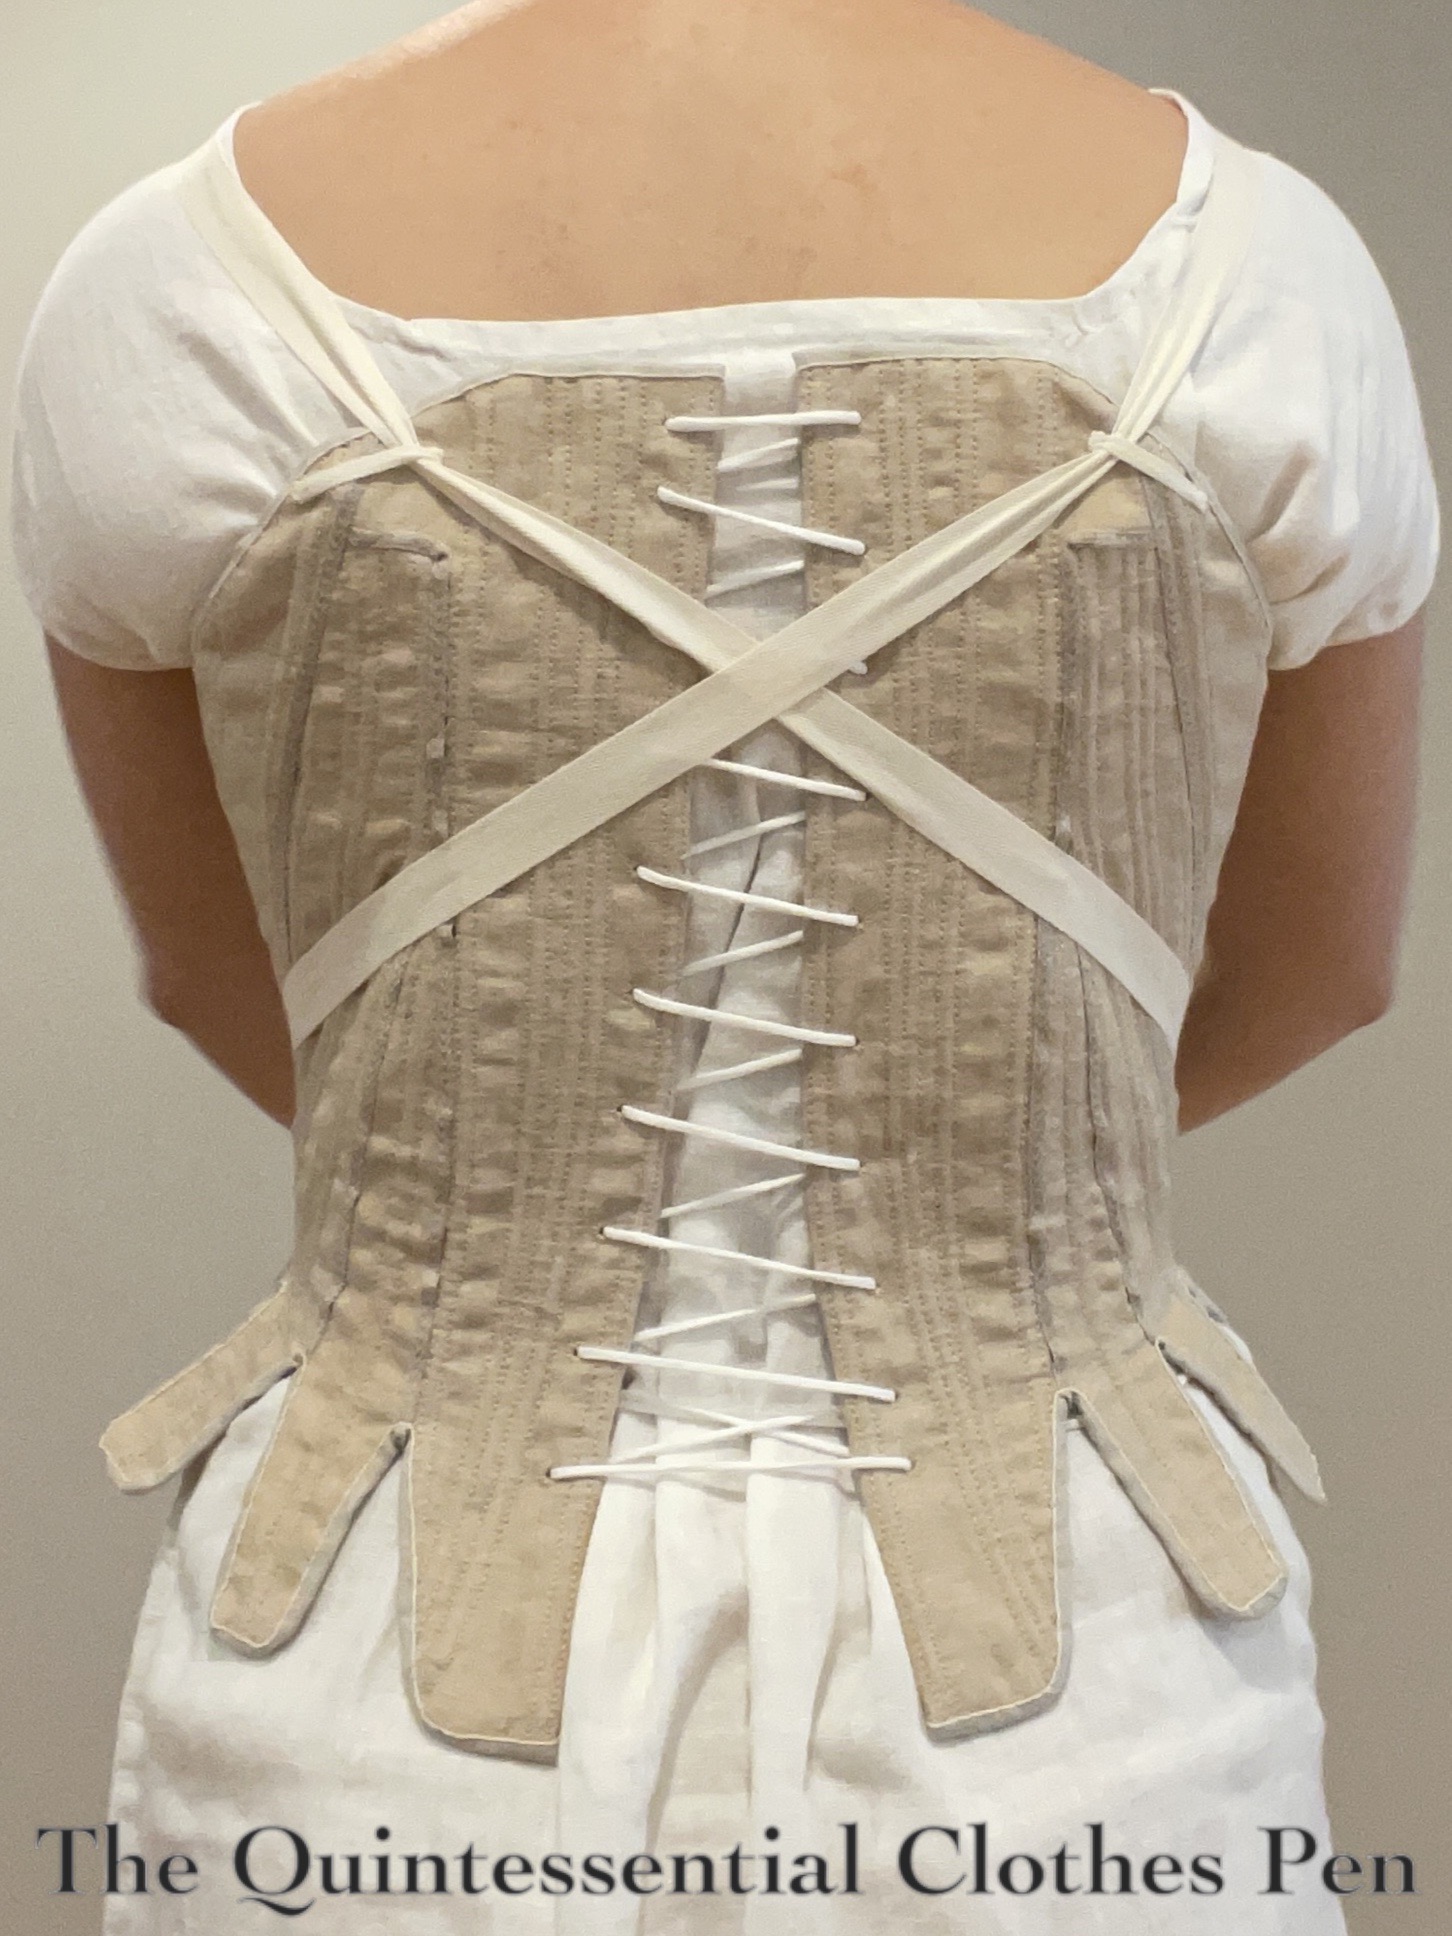
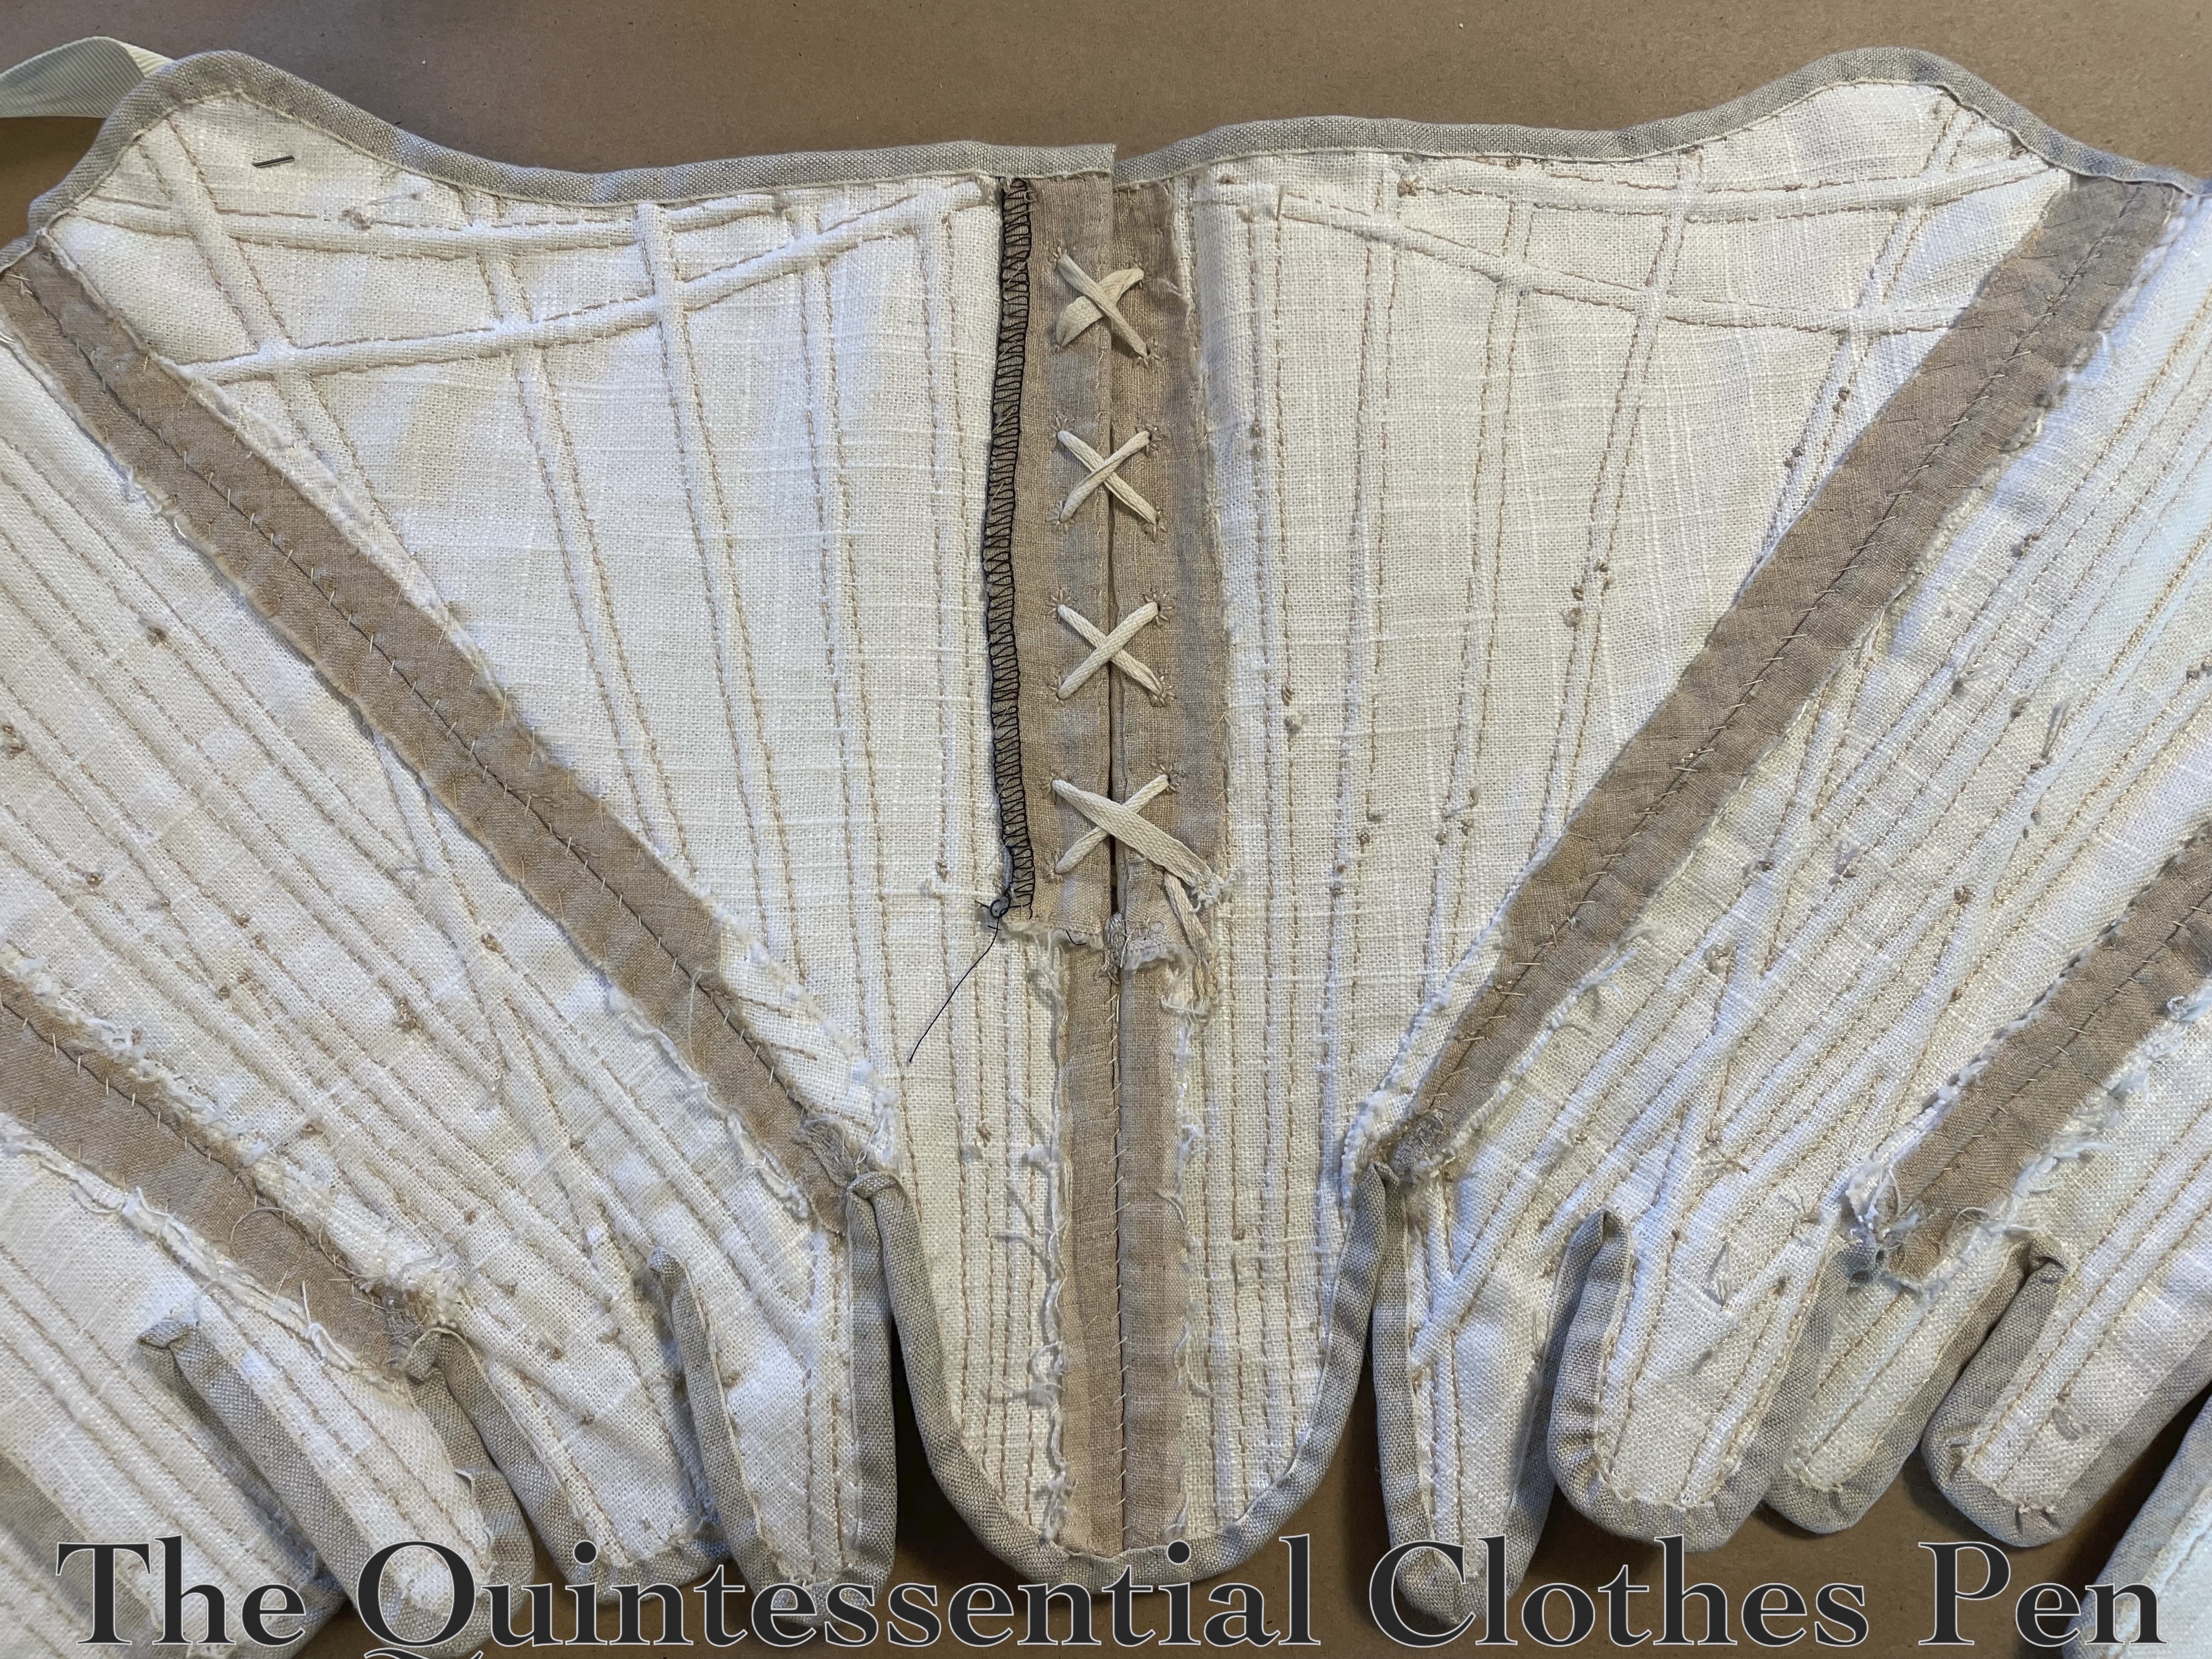
And, a few more photos: side and back view, as well as a view of the stays folded in half from the inside.
Did you notice the change in the name of these stays??? I’ve decided to call them the Stays of Success instead of the Stays of Fail!
This is partly to give them a more uplifting name that brings joy instead of disappointment, but also because I finally took photos of them… and then proceeded to wear them around the house for a number of hours because they were actually quite comfortable! Success!
Conclusions and Musings
I want to start by exploring why I originally named this pair of stays the ‘Stays of Fail’. That is because, until very recently, I felt that this attempt at stays was a failure in terms of comfort. The comfort is what I based the original name of them on.
By the time the construction was almost done, I felt slightly better and that they were a (very struggle-y) learning opportunity. After adapting them, I was thinking that ‘Stays of Fail’ maybe should turn into ‘Stays of Learning’ (although isn’t that every project?!?) or maybe just c. 1785 Hand Sewn Natural Linen Stays (but that’s not very exciting!).
Stays of Success is more entertaining!
Reflections On The Process
Would I use the book Stays and Corsets: Historical Patterns Translated for the Modern Body by Mandy Barrington again?
My experience, as I moved forward with the construction process, was that I regularly lamented the focus of the book on modern theatrical methods, as I was aiming to produce historical stays. When I wanted to go back and get detailed information about the materials, construction methods, measurements of bindings, etc. I found that information just wasn’t included. It was especially frustrating when information was just missing–such as the locations of the front eyelets–even on a pattern taken from the original.
At one point, I thought I could get around the problem of lack of historical detail in the book by looking for the online record of the Chertsey stays that the pattern was based on. Clever, I thought! However, I can only find two images of them and it seems that aside from that they aren’t available to view online in full. (The back lacing can be seen here and a front view can be seen by Google image searching ‘Chertsey museum stays’, but clicking through to the museum website doesn’t lead to the image.)
This lack of information is why I heavily relied on Patterns of Fashion 5 (PoF5)–because all of the detailed information I wanted (and more!) is there. (I did have to extrapolate and make decisions based on the information in PoF5 since it is all for similar stays but not for the exact pair that I’ve patterned.)
So, while using this book was a valuable experiment, I don’t think I would be inclined to use it to create another historical support garment for myself. However, I can see the benefit of drafting a pattern with similar proportions for someone who is vastly different than the original pattern size, for theatrical purposes in particular. For that purpose, I wouldn’t be interested in replicating the historical details and so the omissions I mentioned would not be a detriment to the garment I would be intending to produce.
In the end, I’ve learned a lot about what this book can, and can’t, do and that is helpful even if I’ve been a bit frustrated along the way due to my goals being different than what the book is aimed at.
Further Experiments
Unfortunately, one of the fitting problems I encountered might be due to an alteration I made in the mockup to take in the waist (I’m taking ownership of my actions!). This inside photo of the mockup shows the center front and side area alterations I made.
After finishing the stays, I was curious to see how the mockup would fit if I compared it to the finished stays. It turns out that I basically had to add in the width I’d taken out in the mockup when I added my back gusset. Sigh!
In theory, my alterations should have made the mockup slightly smaller than the finished stays with the added gusset, but the odd thing is that the mockup dimensions (with the alterations) are pretty similar to the finished stays (with the back gusset added in). So perhaps the real fabric stay pieces shrunk or wound up being smaller than I thought? Who knows?!? I’m done puzzling on this one!
In The Meantime…
While wrestling with these stays, I decided that I didn’t want my lack of stays to hold me back from making dresses any further and so I decided to start a whole new pair of stays instead off dealing with this pair (at least for a short time).
I held off sharing about them for quite awhile because I wanted to finish the saga of these stays… but eventually I gave up, and at the end of 2022 had great fun sharing the success and construction of my c. 1785 Green Linen Stays.
Resources
This is not comprehensive by any standards, but I thought it might be helpful to collect some links that I’ve found useful for anyone who wants to know more, see other people’s stays, or people who are making stays themselves. (These sites were especially useful for seeing the process when I didn’t have PoF5 on my cutting table!)
Atelier Nostalgia: showing the construction process of a set of Late 18th Century Stays, again with straps that are the same type as what I decided to do
The Fashionable Past: 1780s Stays Tutorial (not quite the same shape as mine, but the process is basically the same and this has lots of great photos of each step)
Rockin’ The Rococo: 18th century stays (the shape is earlier than mine, but the process is basically the same and this has lots of great photos of each step)
The Mantua Maker At Midnight: Making Stays 1730-1780s (this is earlier than mine, but the process is basically the same and this has lots of great photos of each step)
After the progress made in the last post, there weren’t that many steps left to complete. Yay! Below are details about those steps.
Binding
I used ½” natural linen tape. It is whip stitched onto the right side and then wrapped around to the inside and more roughly whipped. The inside stitches will be covered with the lining, so making them invisible and pretty is less important. Below is a photo of the inside of the stays after the binding was sewn on.
Lining
At this point, the stays were almost done. The lining serves to cover up all of the interior construction. To make it, I laid my stays out wrong side face up (as in the above photo) with my lining fabric on top. I pinned in a few strategic places and then roughly penciled where I wanted the cutting lines to be. Then, I cut the lining pieces out.
Once cut, I pinned the center lining piece in place, then pinned the piece next to it, turning under my raw edges at the places I wanted the seam to be and around the edges. Those edges were all pinned in place and then each edge was whip stitched. Additionally, each tab has a separate, small piece of lining whose edges are also whip stitched in place.
Straps
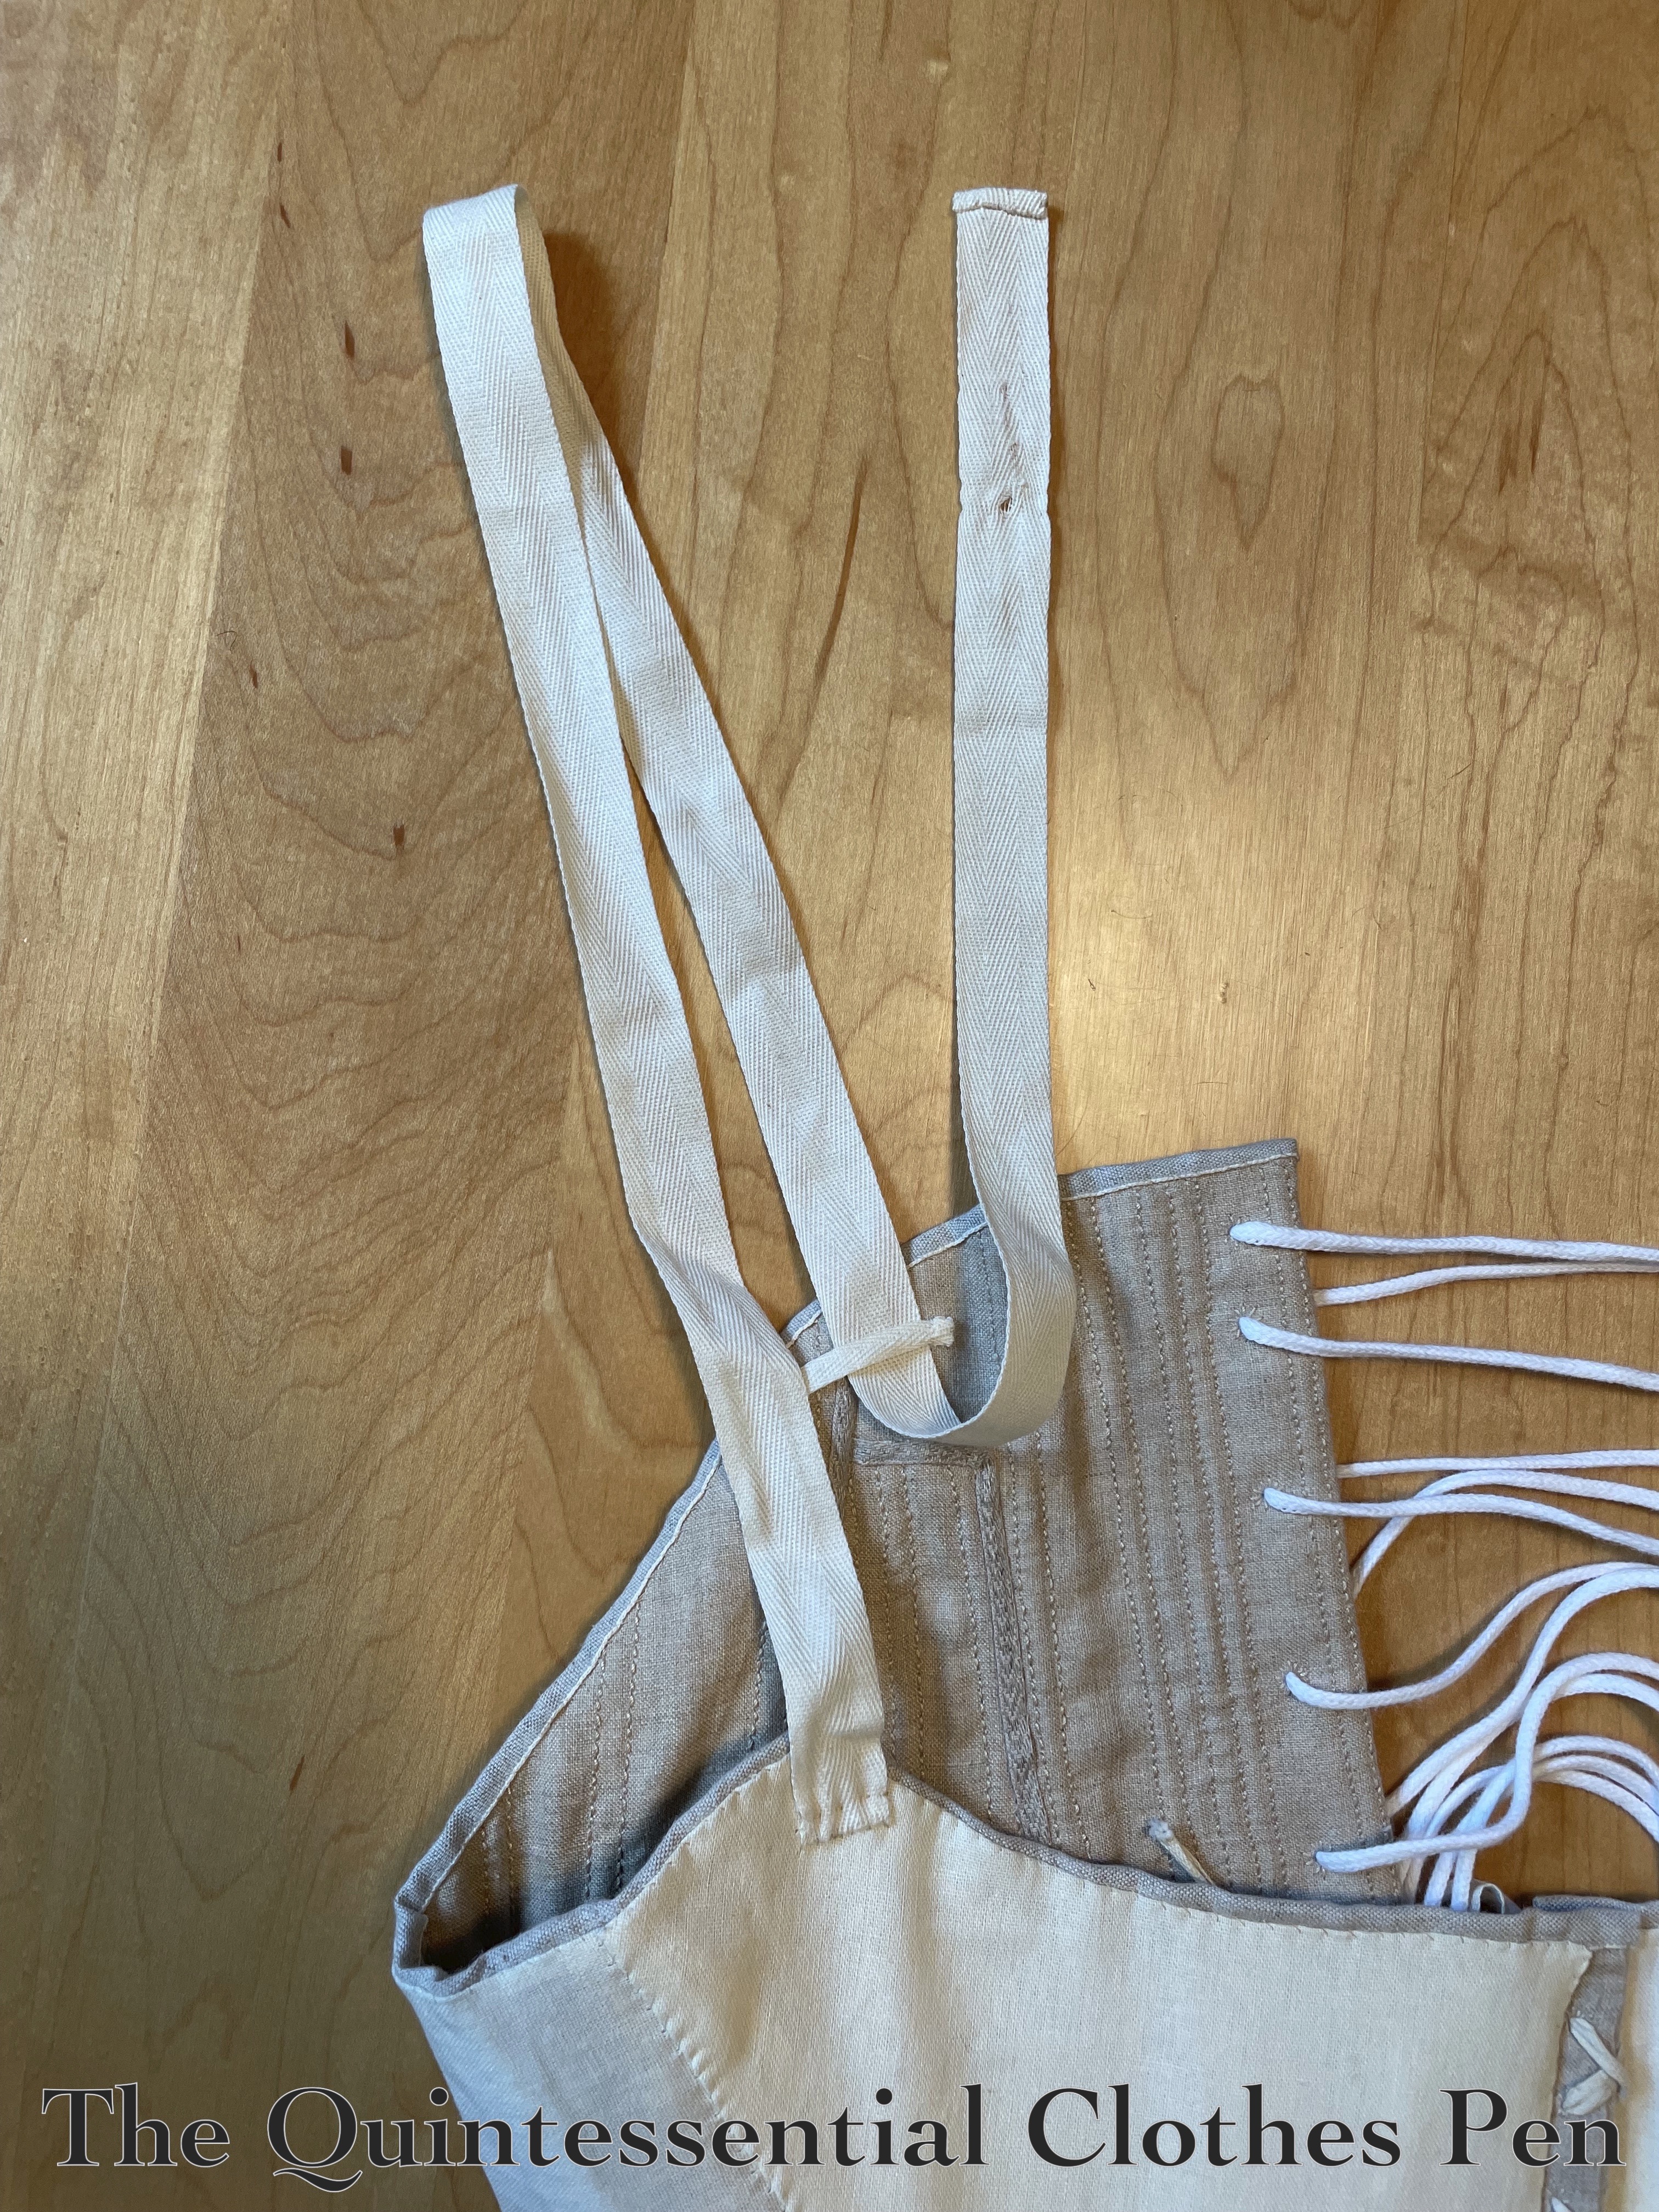
The truly final step was to add straps! I used ¾” ivory cotton twill tape. Each strap was sewn to the front points of the stays and the short raw end hemmed. A scrap of ¼” twill tape was also sewn on each of the side backs for the wider tape to run through.
Then, I tried on the stays and determined where I needed to place the hooks that the straps would attach to. Below is a photo of one of the straps held in place by the sideways hook. The straps are long enough to wrap over the shoulder, cross in back, and wrap around towards the front to catch on the hooks.
After that, all I had to do was attach the hooks… and… after many years… the stays were finally, finally… finally…. DONE! They were finished in April 2023.