The short explanation of the crazy is that Kendra, of Demode Couture, has started an 18th Century Court Ensemble Sew-Along. The longer explanation of the crazy is written by Kendra herself, here on her blog.
I’m talking about it on my blog because I’ve submitted to the indirect costuming peer pressure and joined in! (You should too…) I’ve got my fears about my participation (I spent about two days debating my decision to join in!): I’m unlikely to have a relevant event to wear a court gown to (unless I make one!), I’m not super confident in my ability to get 18th century “right” yet, and I don’t want to spend mounds of money on this project (which you could so easily do!).But… I want to participate! So, I’ve found some cures for my fears and committed, in a thoughtful and careful way, to the crazy.
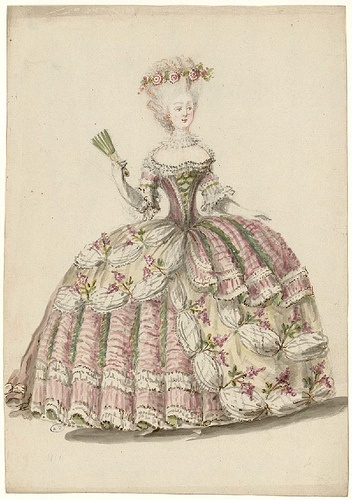
This is the gown I’ve decided on. It was a hard choice! But it’s a good choice for me, because I’ve already got pink silk in the stash that I bought back in January with the intent of making “an 18th century something” perhaps, so that takes care of the bulk of the materials (and the cost). So I’ve just got to procure the trim materials and accessories. I’ve already found the things I want, but I’m going to wait a bit to purchase them and get started on the sewing, so stay tuned for more posts about that in a few months!
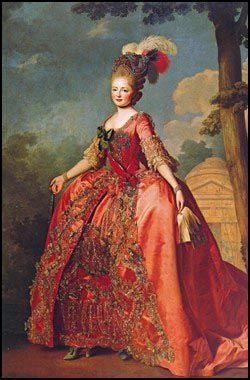
Grand Duchess Maria Feodorovna by Roslin, wearing the Star and Badge of the Order in 1770. (I’ve also seen this dated as 1777.)Slightly different version of same painting. Included in an article about Women’s Imperial Court Costume In Imperial Russia.
I also considered these other gowns, but decided against them in the end.
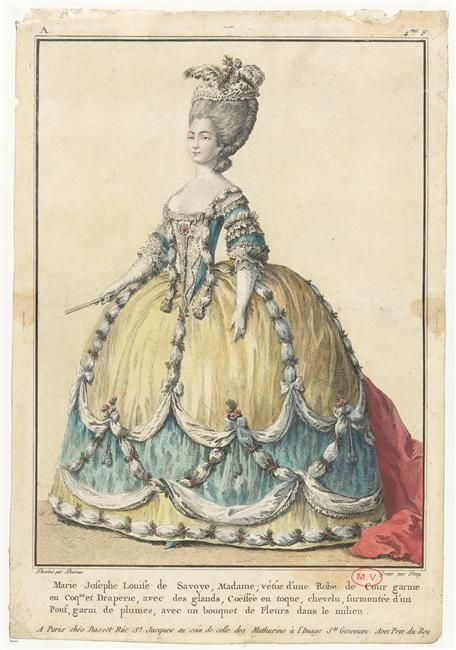
Robe de cour from Les Arts Decoratifs
I love this robe de cour! It looks more like fancy dress than a court gown to me. I can imagine it as “Snowflake” or “Winter” or “Snow Queen.” I seriously considered this one… but I don’t have any of the appropriate materials in my stash right now, and the cost of the materials I wanted to use was more than I wanted to spend on this project. So I’ve added this to my list of “things I eventually want to sew.” I can even envision it as fancy dress in the 19th century with a different skirt shape… a bustle gown, perhaps? I just love that the triangles look like icicles, and the diagonal trim looks like snowflakes… It’s pretty ridiculous!
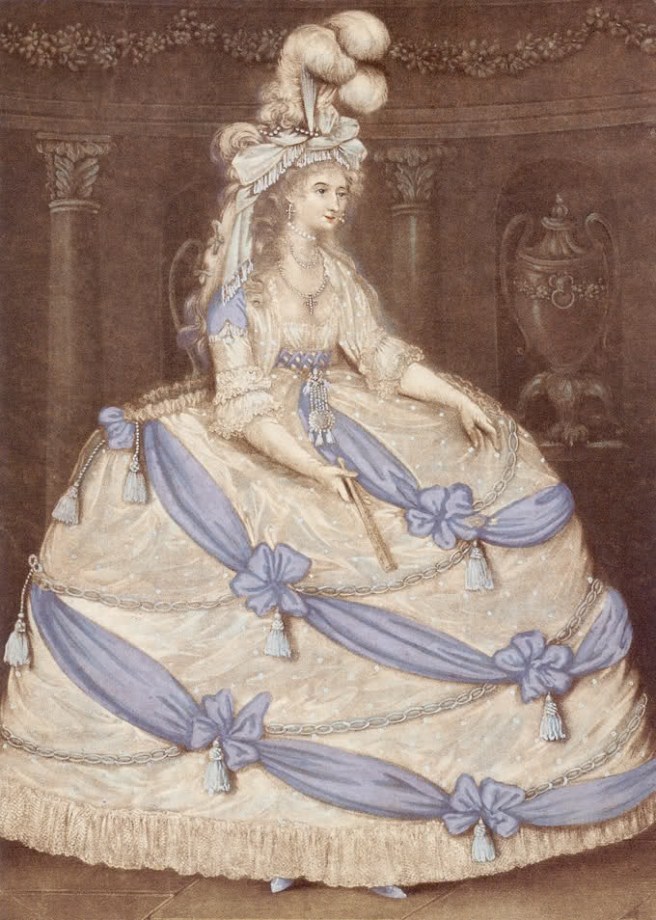
1795 – Caroline, Princess of Wales
Then there’s this absurd looking court gown from the very end of the 18th century. I love the periwinkle color, the tassels, and what looks like chain (wouldn’t that be fun to figure out!) edging the poofs. It’s pretty silly. But again, I don’t have any appropriate fabrics in my stash…
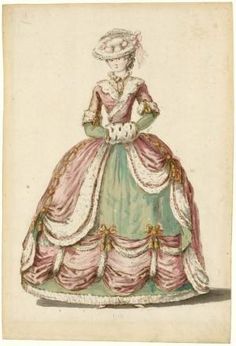
Robe de cour from Les Arts Decoratifs
I like this last one, too, although not as much as the first two. I feel like this would be a great use of an iridescent shot silk, at least for the green part. I like the fur trim, and the gold, but I’m just not overwhelmed by awesome-ness.
The choice was made more difficult by the fact that other people have already “claimed” certain court gowns they want to make, and the idea is that no two dresses are the same. (So I might have had more options, but they’d already been claimed!) You can see what other people have picked and keep track of all the court ensembles being made on Kendra’s blog: Demode Couture. There are at least 30 people participating so far and lots of pretties have been chosen! These are my favorite gowns from among the ones that are already claimed.
18th century court gown. It’s so cute!18th century robe de cour. How to achieve those fantastic waves? But I do love this one!18th century robe de cour. This one has great waves as well! Lovely.
Kendra already did a post on 18th Century Court Gown Basics that’s a great introduction to this oddly specifc class of garments, and I’m sure more information will be coming over the next year from all of the participants.
I recently participated in an outdoor mid-century dance performance for which the weather was an un-obliging 90-something degrees + humidity. Yup, not kidding. It was HOT! And we were dancing on asphalt. Luckily, we were out on an island in the Boston harbor and had a breeze. But it was HOT!
Anyway, more on that performance soon, because it involved a new cotton print day dress made from one of my recently acquired historic cotton prints! In addition to the dress, I also restyled a straw hat to go with the outfit and keep some of the sun off of my head. The hat has been used with various other clothes (1780s and Regency come to mind), but I had only ever added a simple ribbon to it rather than really styling it. This was the perfect opportunity to really make something of the hat!
I wanted to keep it simple and in the 1850s/60s, so I started by adding inspirational images to my pinterest board for this project. I visited the board many times before making a decision that I loved the shape of Eugenie’s straw hat in this painting. The hat has that nice downward curve in the front that sort of frames the face and accentuates the fashionable heart shape. The gauzy/tulle trim was a little whimsical for my purposes, so I opted for a more subdued and practical trim style on my hat.
Franz Xaver Winterhalter (1805–1873) Eugénie of Montijo, Empress of France Date 1857
I started by wetting my hat in the bathtub then tying it with string so it would dry with the curve that I wanted to achieve in the brim. I also wanted the back to curve under a bit, so I let the hat curve on both sides.
Tying the hat to create curves.
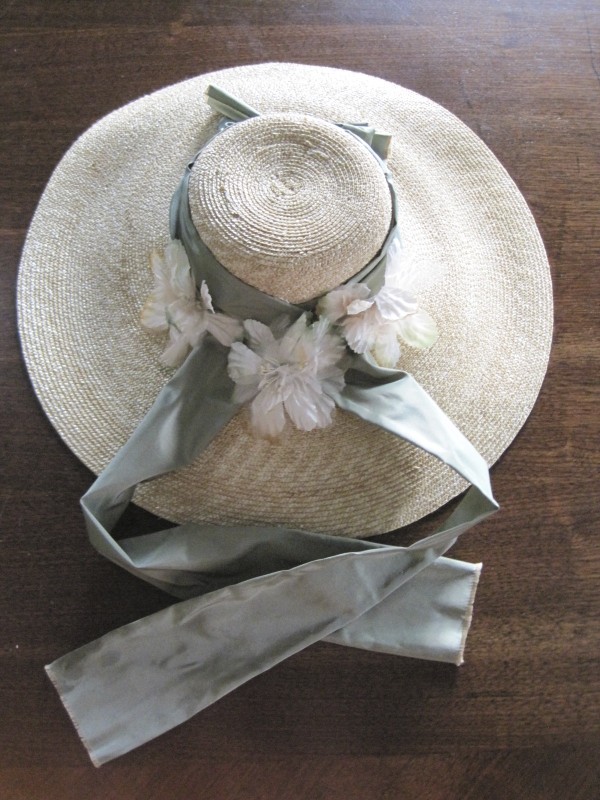
Once the hat had dried all that was left was to trim it! I chose to use green silk left over from Evie, my 1864 ball gown, and some silk millinery flowers. The silk is narrow hemmed on both sides and the ends are fringed, showing gold threads (the fabric is green/gold shot taffeta). The long ends hang down the back while the hat is worn, a style like the one below which you can see in the images on my pinterest board. I also added a bow on the front like you see in the images. Turns out that the bow is not quite centered… whoops!
LAPL, Magasin des Demoiselles, August 1858
And here is the result of my labors, and my fulfillment of the HSF Challenge #16: Separates. “Make a non-matching garment which can be paired with other items in your historical wardrobe to extend your outfit choices.”
You can’t see the curve since the hat is sitting flat on the table… but you can see the trim!
Just the facts:
Fabric: A 4″ width of green silk 60″ wide plus a few scraps.
Pattern: None.
Year: 1850s generally, 1857 specifically.
Notions: Straw hat, silk flowers, thread.
How historically accurate?: I give it 98% (and that’s pretty high for me!). Straw, silk, more silk… The sewing machine was even invented by 1858, so the machine sewn hat isn’t totally out of the realm of possibility. The -2% is for the polyester thread.
Hours to complete: 2, not including time for the straw to dry.
First worn: July 20 for a vintage dance performance on George’s Island in the Boston harbor.
Total cost: I bought the hat a few years ago for probably about $25, the silk was leftover from another project, and the flowers cost some small number of cents since I got them as part of a large box for only $5! Let’s just say $26 total.
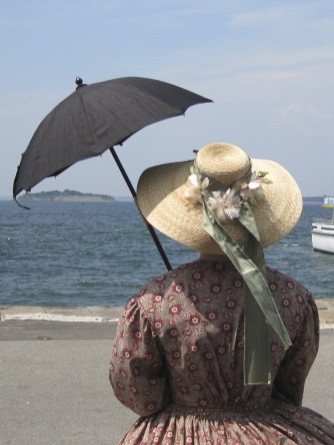
Back view of the hat on my head. See how the front dips? This is also a sneak peak of my new gown, Georgina, to whom you will be formally introduced soon.Front view. See the dip?
At first I thought I had made the curve too pronounced, but when I look at the pictures again, I think I was pretty darn spot on! Woo! Completed new separates accessory for my historic wardrobe: check. Oh, and did I mention I’m in early on this project? The deadline is August 12!
Well, it’s June now, and that means summer to me. I’ve been slow to post about my kite making adventures because I was busy posting about other things, but it seems fitting for this post to be the first one of June–summery, somehow.
After the official end of the Regency Dance Weekend I’ve been posting about recently, my friends and I stayed in the Salem area to relax a bit and have some further Regency adventures. We had been brainstorming about what sort of activity we might engage in that was outside of our usual occupations and had settled on the idea of flying kites!
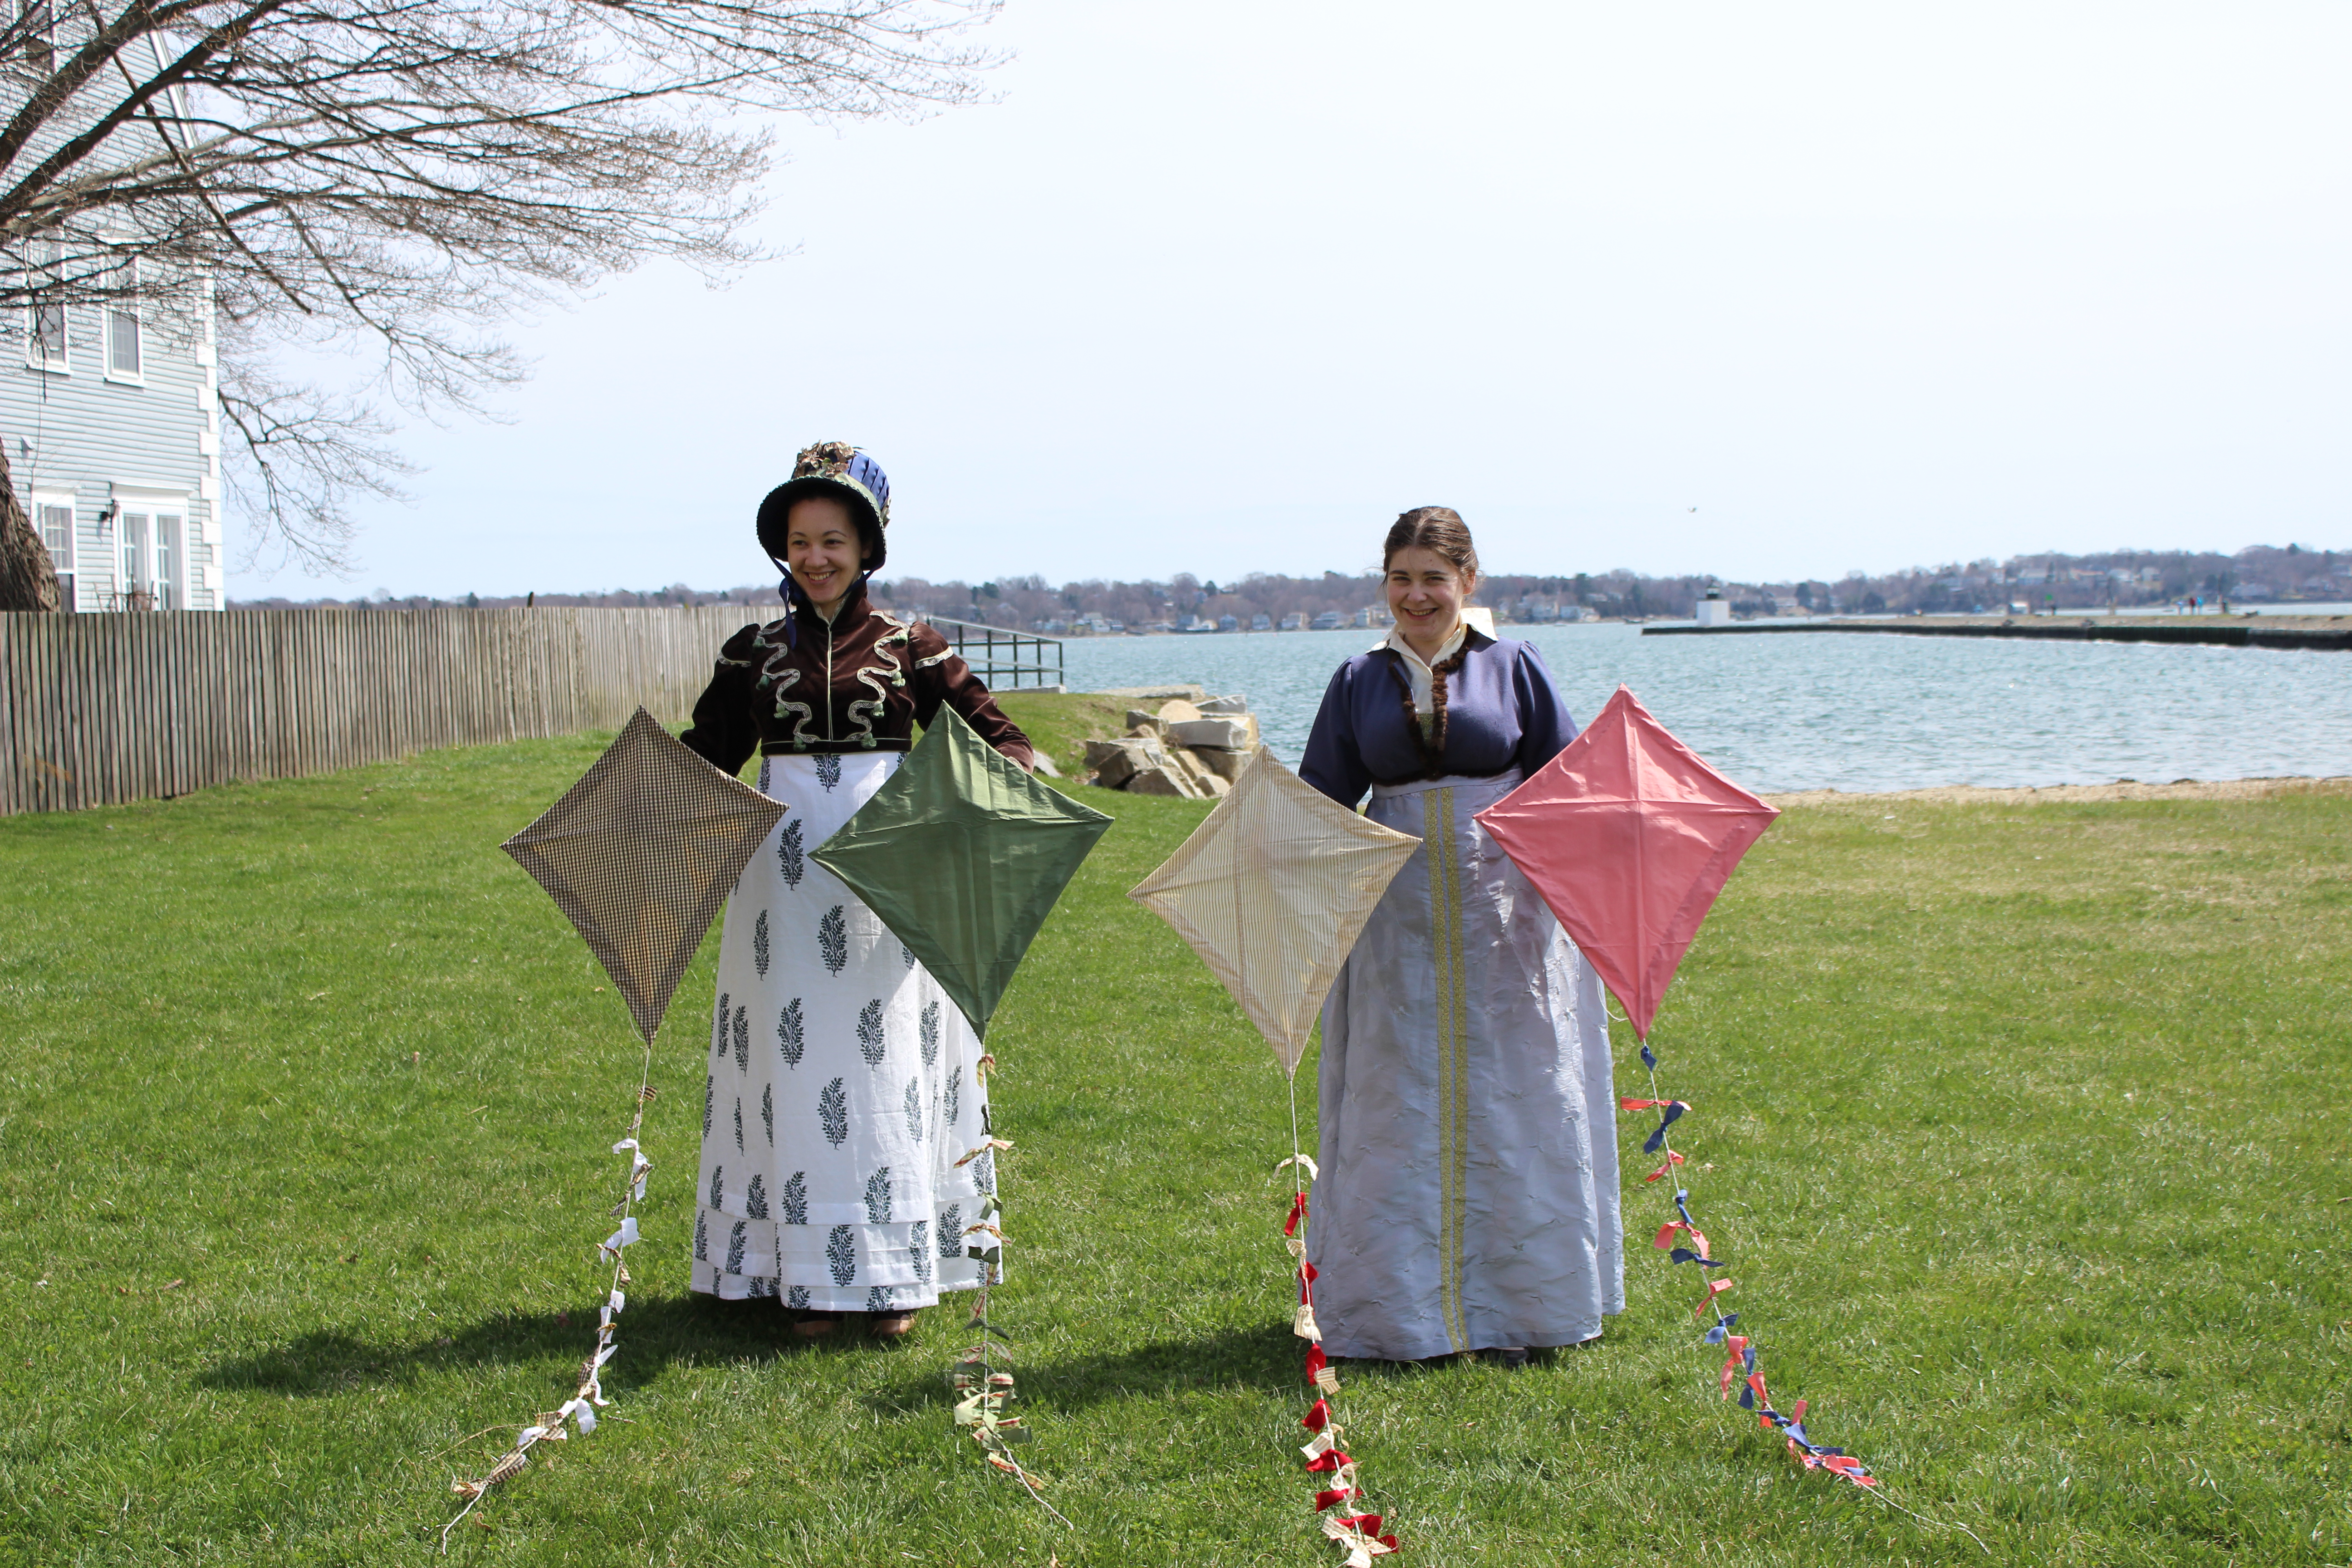
I did some research into Regency kites and spent some of my evening time during the weekend sewing these four silk kites with some help from friends.
Plaid, green, striped, and pink.
I didn’t find much to go on with the kite making. The best source I found was Jen’s post about Georgian Toys on her blog Festive Attyre. The post includes a link to this kite making how-to as well as a link to this 18th century extant kite. Unfortunately, I couldn’t find more information on the extant kite than that which is on that one page. Jen’s post is great and includes fun information about other Georgian toys as well as kites. The how-to link is a good one as well, though I did sub out modern methods for more period ones. For example: there is no tape to be found, instead there are stitches.
Making the kites was fun. I went to Home Depot to buy the dowels for the kite frames. They were cheap and luckily you can saw the lengths to be what you need while you’re in the store (good for me since I don’t own a saw!). I also bought twine there. It’s a poly-cotton blend (boo), but it’s smooth on the hands, so that’s worth it! The kite tails are bits of the main fabric and a contrasting fabric just tied around the twine. Instead of notching the ends of the dowels after they were cut (I tried, and it failed, because the dowels just wanted to splinter) I just wrapped the twine around the ends enough times that it wouldn’t move. The method definitely worked and sometimes that’s all you need.
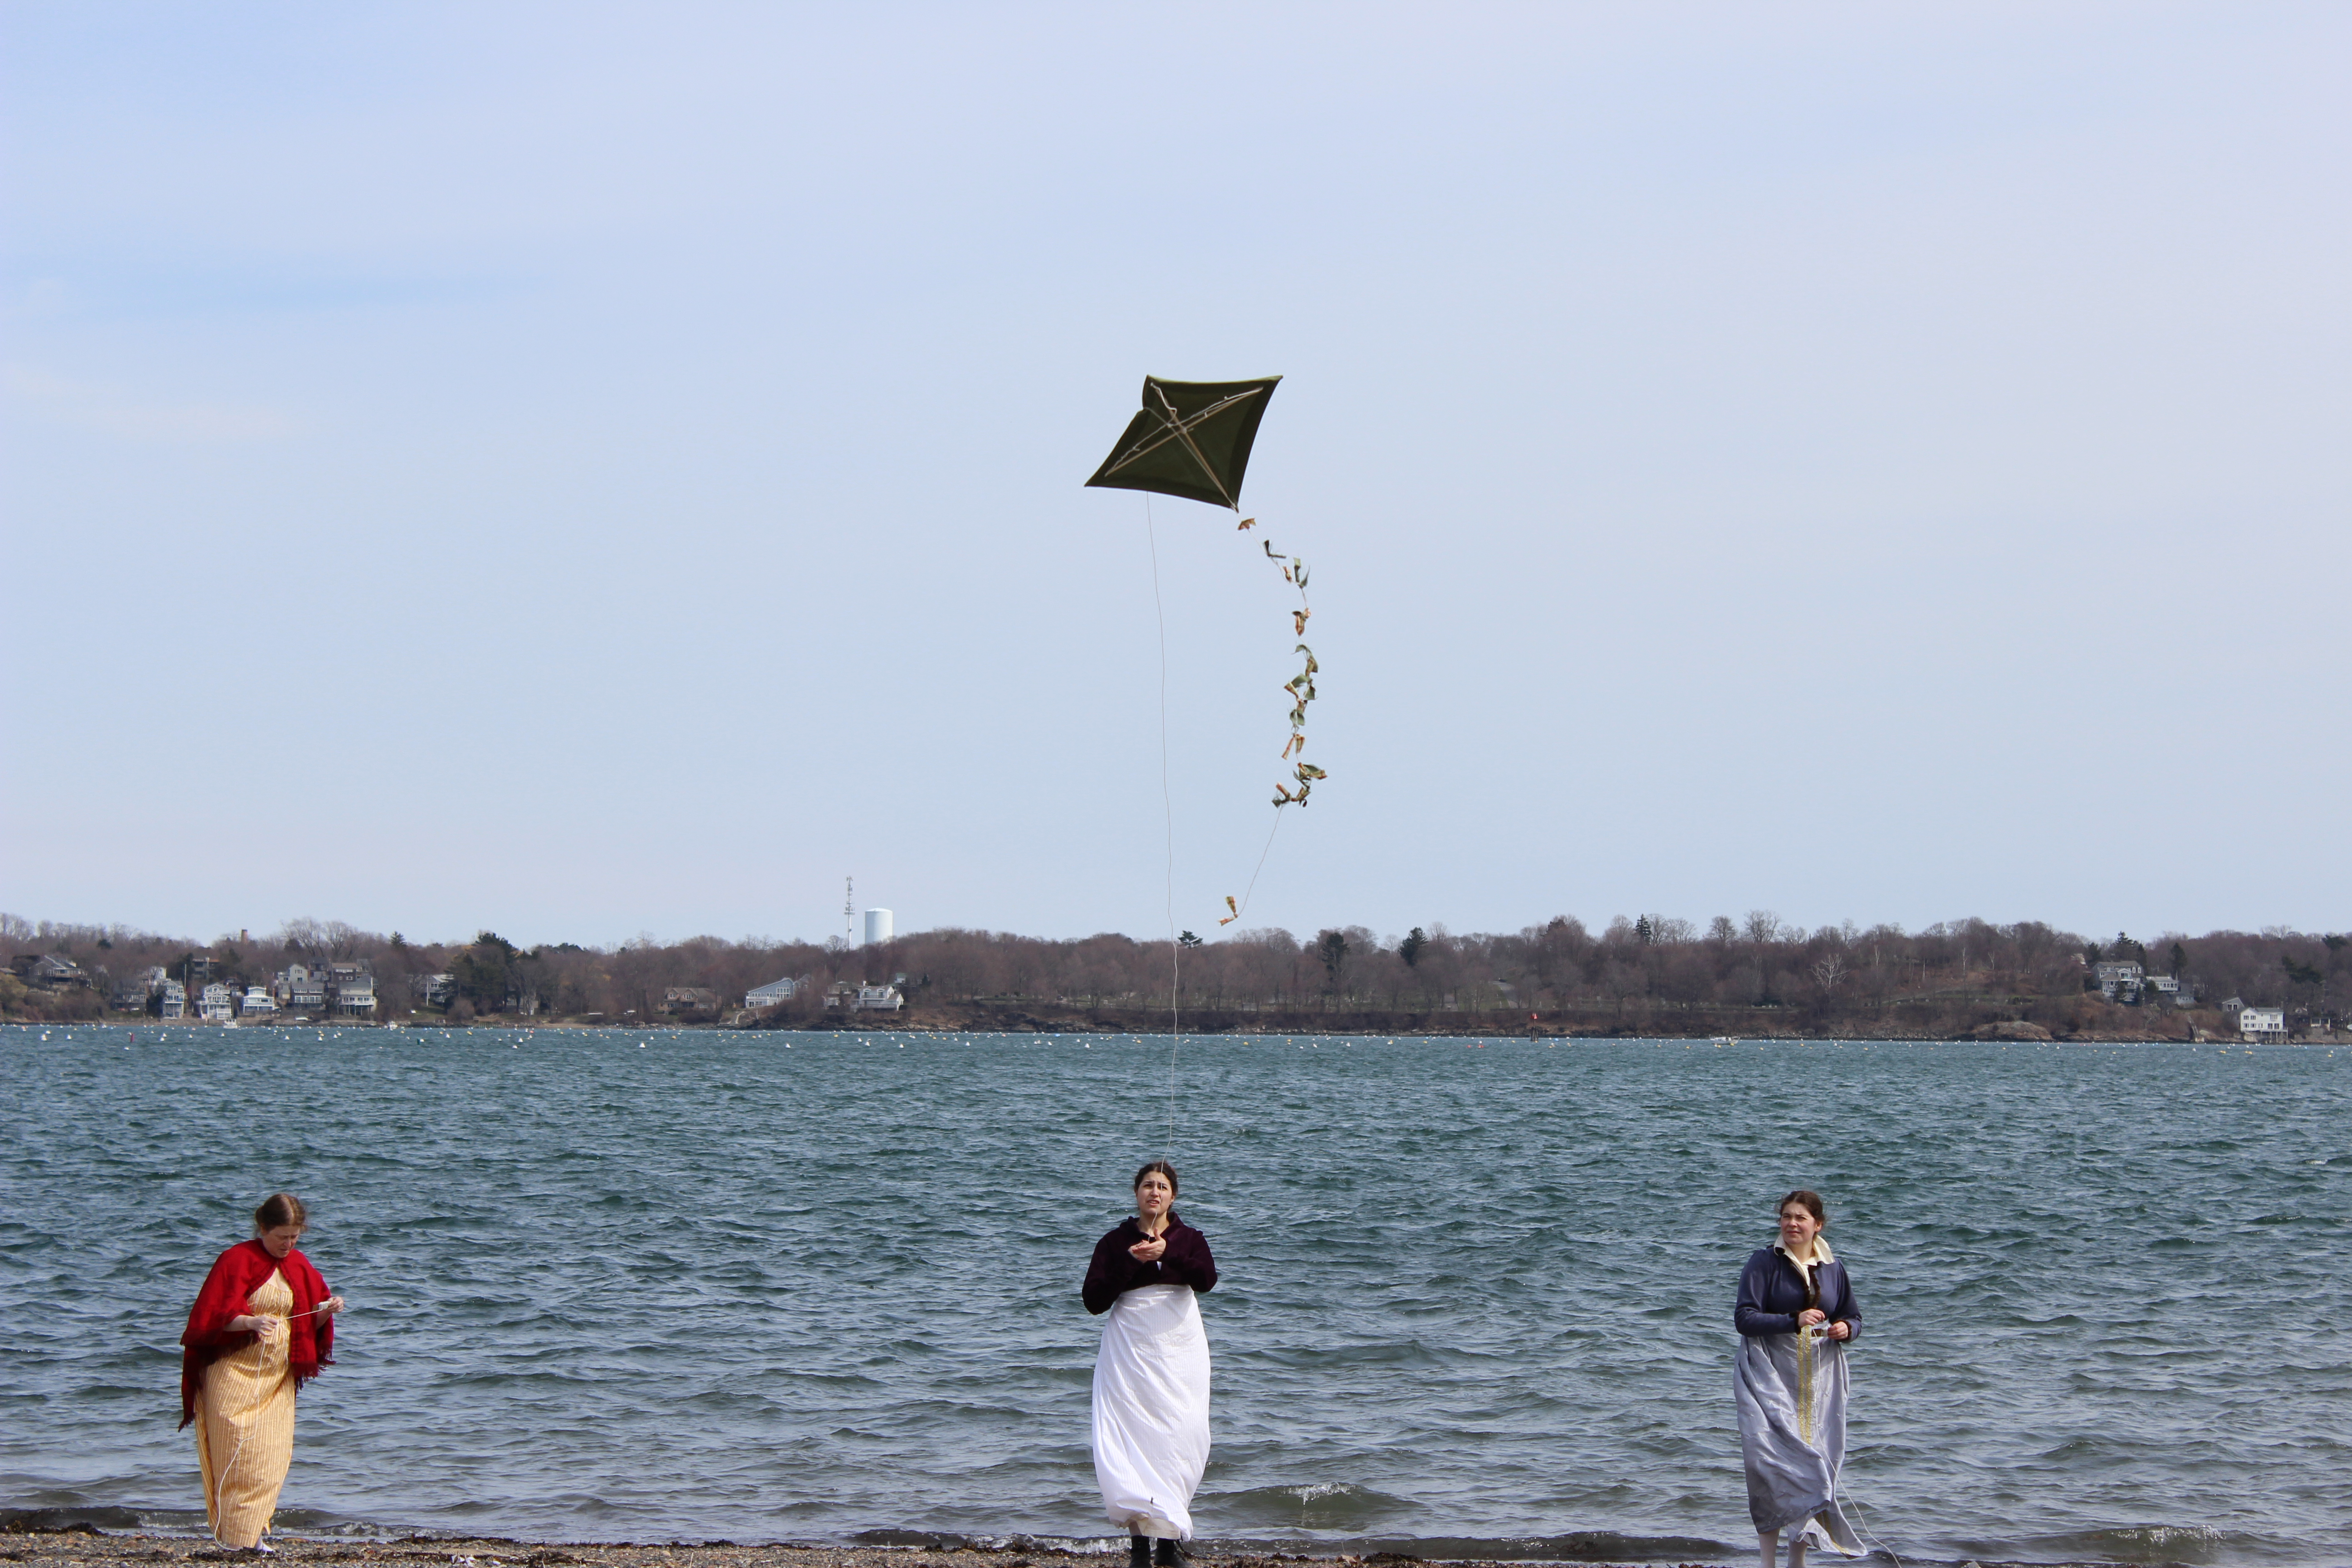
Despite the fact that it was super windy by the water, we had trouble getting the kites to stay in the air. I’ve surmised that my kite engineering skills are not super outstanding, because the kites did lots of circles near our head height and then dove into the ground… over and over and over again… It was a bit frustrating. These pictures capture the few times we got the kites up in the air. Trust me when I say they didn’t stay up very long!
Perhaps a running start?Perplexed but still trying.Clearly this kite did not want to go up.Triumph! (If only for the moment!)This kite had the best luck at staying in the air.Another successful moment.
There were some adjustments and kite injuries along the way. One of the dowels in the pink kite broke, so I have to figure out how I’m going to fix that. The other kites had things like alternate bridles made and pennies sewn into the edges to try to add weight. Some of those things seemed to work. I guess I just need to do some research about what makes kites stay up. I’m not sure the tails worked very well, either. They tangled easily and were hard to sort out again. If you know anything about kite making and have tips, I’d love to hear them!
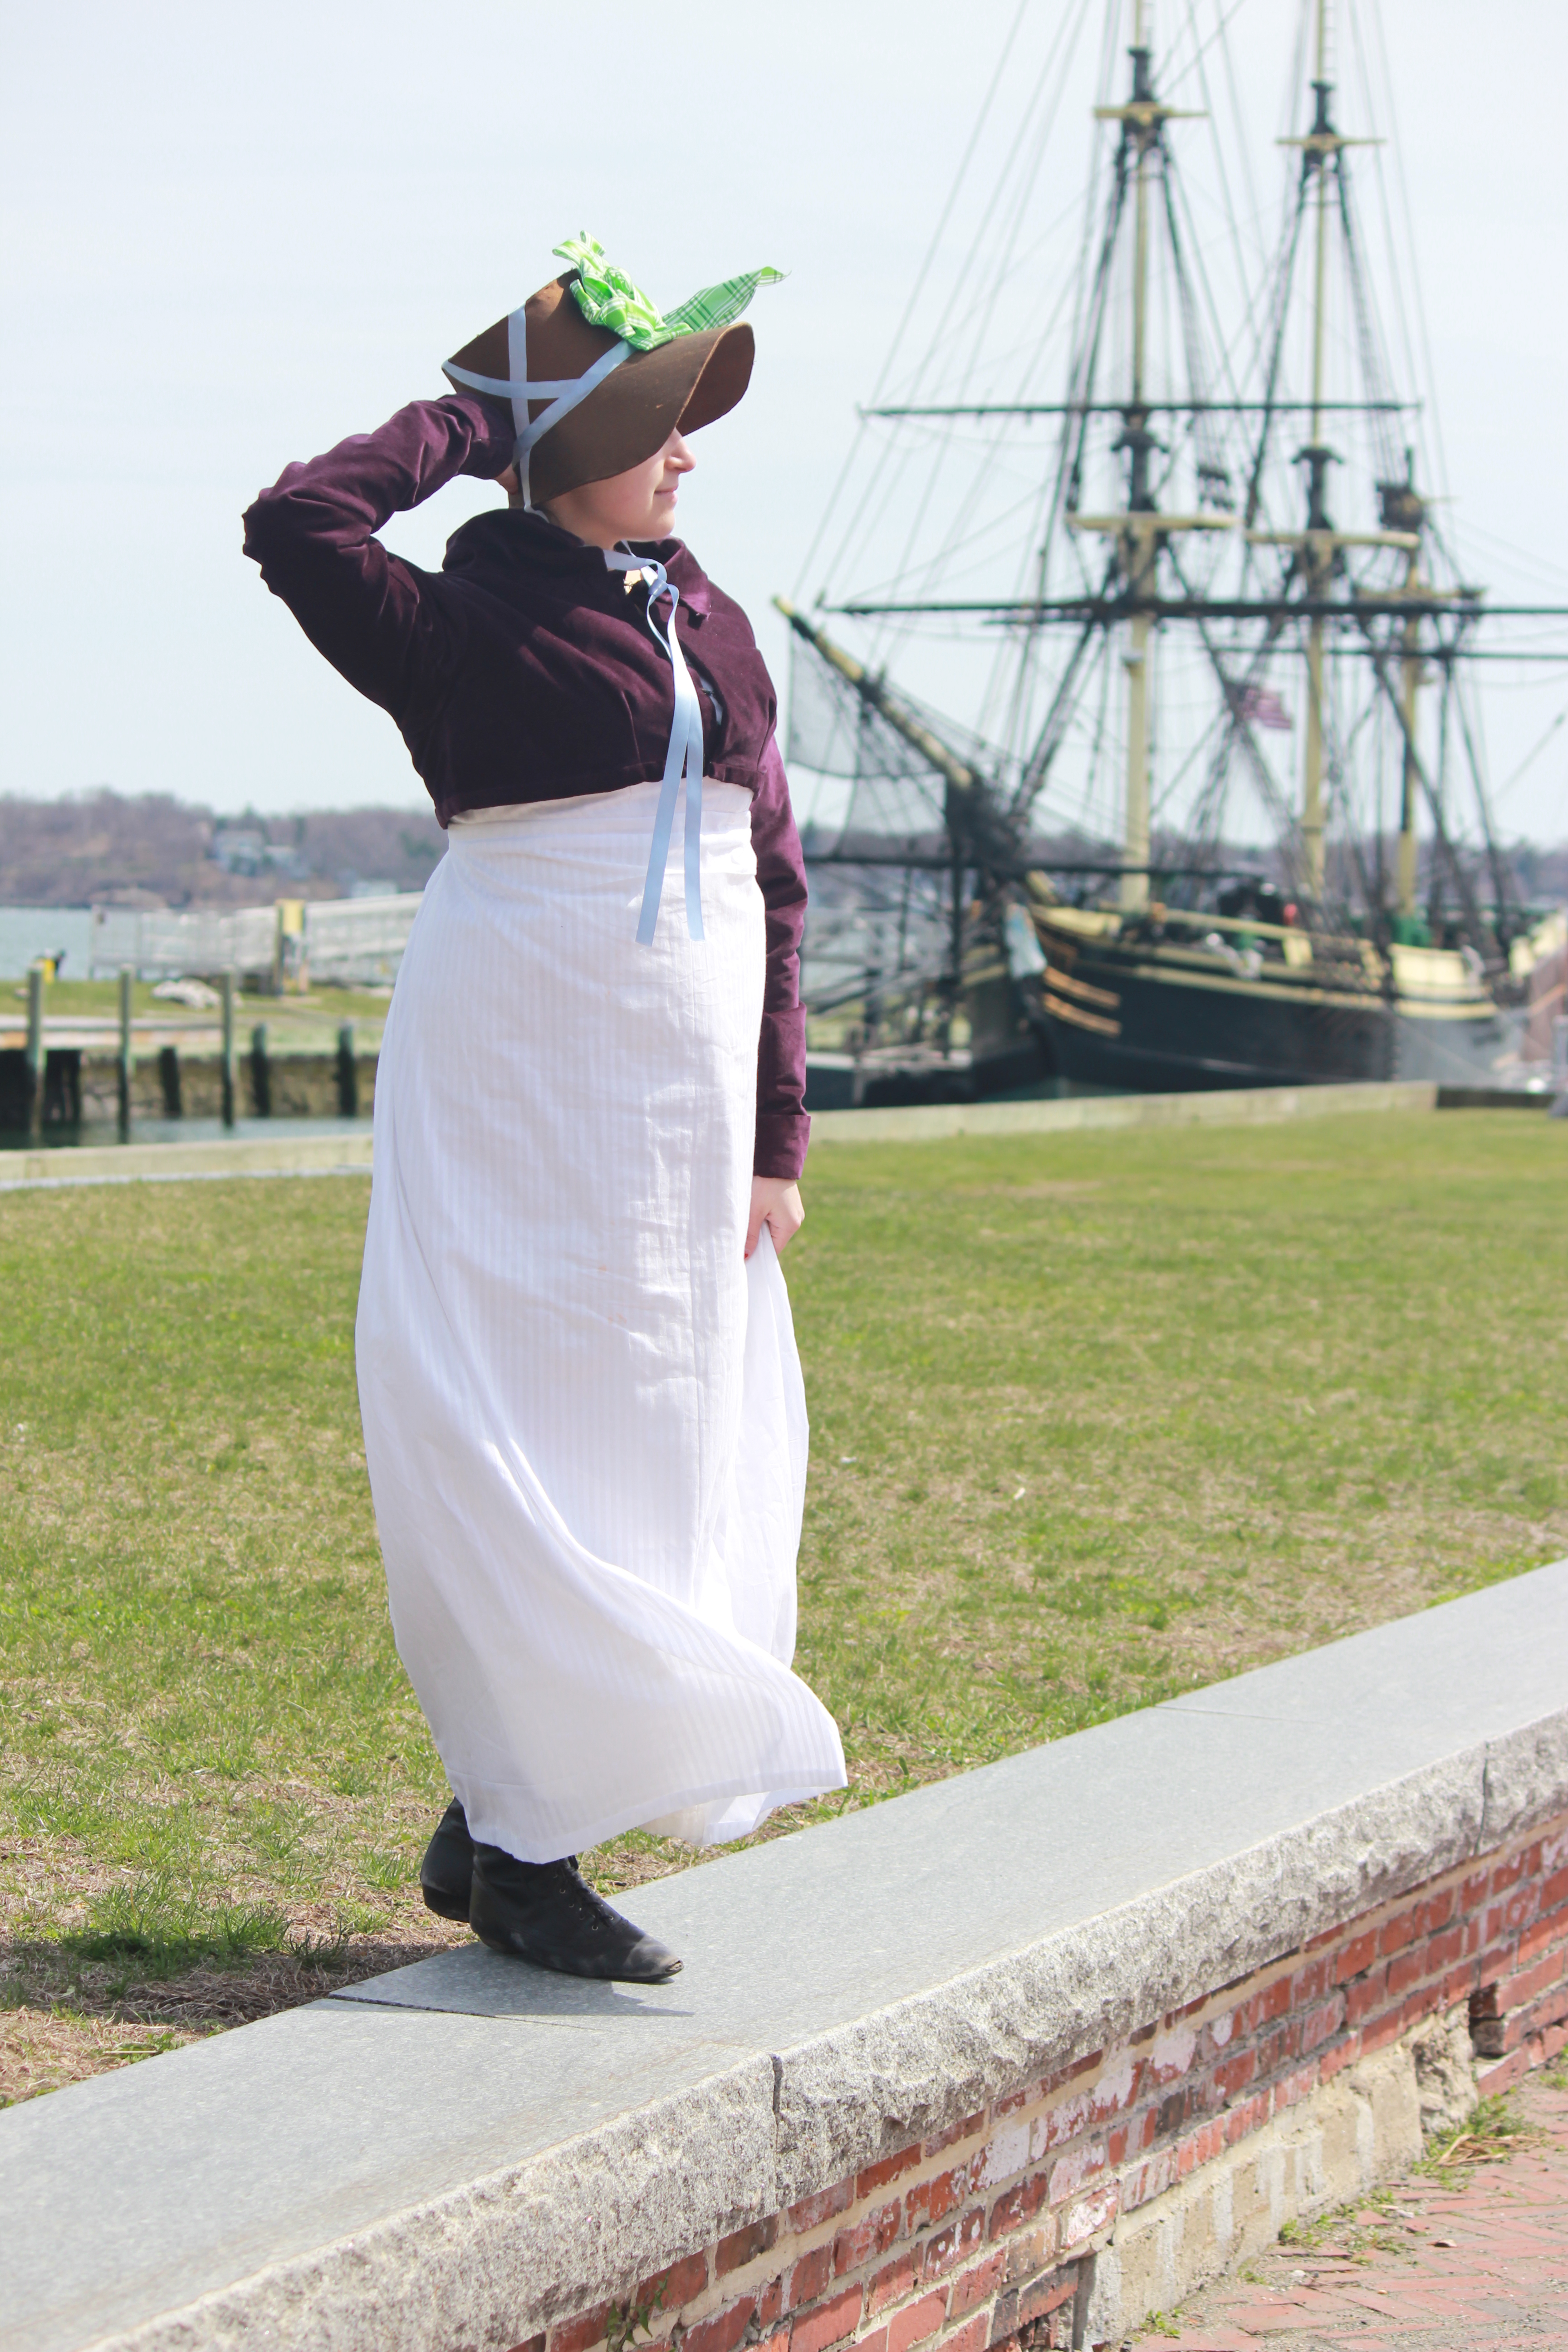
This is definitely something I plan to work on and try again. Perhaps at a summer picnic? We’ll see. It was a fun endeavor, despite the diving kites (and I had the opportunity to wear my new Tree Gown again!). Plus, there were pretty places nearby to take pictures!
Perfect photo opportunity.It was pretty windy, so hat holding was totally necessary!
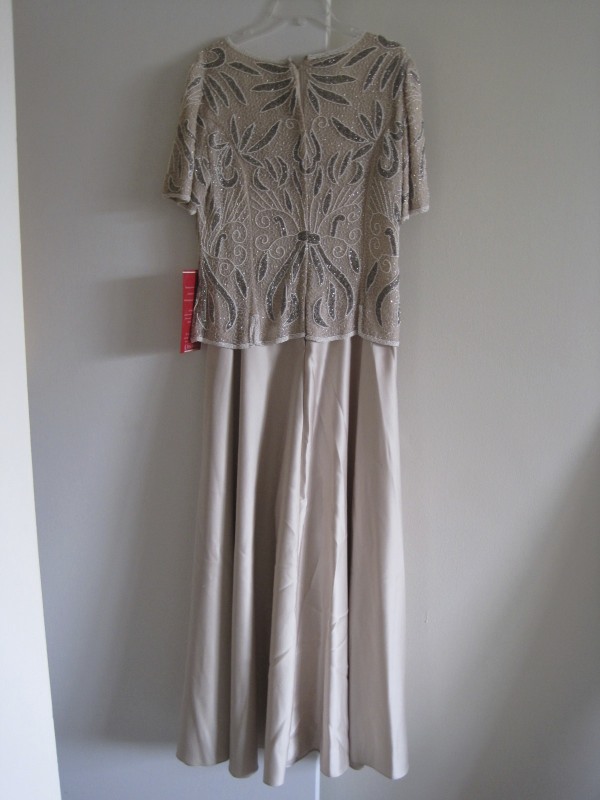
During the swap and sell at last summer’s Newport Vintage Dance Week, I came across a rather awful 80s or perhaps 90s evening gown while browsing. I had been considering trying to hand bead my own gown for the Gatsby Ball during the dance week, but had determined that I was not devoted enough to the 1920s and had settled for a less time intensive green silk gown. This 80s/90s dress, though, got my brain going. What if I used the beaded section to make a beaded 1920s evening gown? No hand sewn beading required! I dithered about the decision for maybe 20 or 30 minutes and asked for lots of opinions from my friends (none of whom were very decisively helpful, I must say), but then I hurried back to buy the dress before someone else did! It was only $10 or $15, not bad, for not having to bead it myself!
Size 14 beaded evening gown with princess seams and a giant zipper.Full length glory.
The whole thing was rather bleh colored with the pale lining. I decided that when I remade the dress it would need more color than the original, but I wanted to keep new fabrics in line with the beading colors so they wouldn’t look out of place. I picked grey for the skirt to bring out the beading and I picked pink for the slip to add some color under the grey but not distract from the beading.
First thing was to cut off the skirt. I kept it because I hate throwing things away, but it’s heavy and polyester… My thought is that one day I might need some sort of petticoat base or lining for a dress that is so great on the outside that this skirt won’t detract from it if it’s not seen. In the meantime, it’s taking up space in my stash. Oh well. After the skirt was cut off I removed the sleeves. They really were contributing to the dowdy look of the beaded section and they did not add to the sleeveless 20s evening dress look I was going for. I kept those too… I have no idea what I’m going to do with them! Beaded evening bag one day, perhaps?
No sleeves! It’s getting better already.
I debated for awhile about taking out the zipper (because it would add work, you know). In the end I decided I really didn’t want to see the lap of the zipper in the back, especially since it was pulling the beading around and making it not match up symmetrically. I also removed the nude lining in the bodice to expose just the silk gauze with the beads. I’m so glad the beading was done on silk! It really adds to the look. Of course all those interior seams were french seamed and I didn’t want to actually take apart all those seams in the silk gauze. So I carefully cut the lining away along the seams then was able to pull out the lining seam allowance because it would just fray where the stitches are. That part wasn’t super fun…
Cutting away the lining to expose the beaded silk gauze, then pulling out the lining seam allowance.
But I was left with a sleeveless top of beaded silk gauze! There was more hand sewing required to get it looking nice (there was no way to get a machine in there with all those beads!): I whip stitched the arm and neck openings; sewed up the back seam where the zipper was; whip stitched all of the seam allowances down on the inside; whip stitched the seams on the outside to close up un-beaded gaps on the seams so the princess seam lines weren’t so visible… Not all of this sewing was necessary to make the top wearable, but it was necessary to make it durable. I want to be able to wear this dress for a long time and not have problems with the beading or the silk gauze, so durability was important.
Completed beaded top.
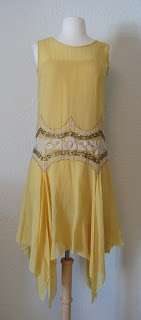
After getting the top finished up nicely I had to figure out a pattern/plan to make the grey skirt. I scoured my 1920s pinterest page to look for ideas. I liked the idea of an uneven hem and a skirt with extra fullness at certain points. This lovely yellow dress was my main inspiration.
1920s. Pictured on All The Pretty Dresses blog.
My points aren’t quite as long as this, though I wanted them to be… I didn’t have quite enough fabric for that. I had the added challenge of making sense of those little cut ups in the bottom edge of the beading in conjunction with the skirt. I didn’t want to sew those cut ups closed because the edge beading continued up them and it looked weird, so I had to figure out a way to work them into the skirt.
I think the yellow dress had rectangle pieces that are just left free at the dippy points. My skirt, however, has four a-line panels at front, back, and sides with diamond shaped pieces in between that go up into those cut ups. The skirt pieces are french seamed by machine. The hem was serged and then turned and topstitched by machine. The finished skirt was then attached to the beaded top by hand. First I sewed it along the beaded edges, then I turned the raw edge under on the inside and whip stitched that in place to keep the skirt from fraying.
After I replaced the zipper in the back with a seam I was able to get the beading to match up really nicely! The skirt hem with the serged edge turned inside and topstitched.Attaching the skirt to the bodice. Running stitches on the edge of the beading and then the raw edge turned under and whip stitched. (These are those cut ups in the bodice I was talking about!)
For the slip, I measured my waist and bust to determine the trapezoidal shape I would need to use. I just guessed at a length (which turned out to be about 6″ too long!). I added a few inches of ease to the waist and bust measurements to make sure I could easily put on and take off the slip without any closures. The side seams of the slip are french seamed by machine. I made tubes for the straps and machine sewed those on. The neck and hem were finished by hand because I had time and didn’t feel like pulling out my machine.
A pretty boring slip.
While wearing the slip I noticed it was showing at the underarms and front neck. The underarms were expected and I’m totally ok with that. But I didn’t want to see the slip at the front (I think part of it is because the beaded section is heavy and pulls down in front when I move), so I bunched it down with a safety pin. Will I ever sew it for real? Probably not. Sometimes safety pins are your friends.
Now i know which way is front on the slip! Not that it matters, since it’s the same front and back aside from the safety pin…
Ready for some more facts?
Fabric: ~1yd pink polyester medium weight crepe, ~1.5 yds grey polyester chiffon, and the beaded silk gauze section of an old evening dress.
Pattern: none.
Year: 1925.
Notions: thread.
How historically accurate?: I give it 85%. Polyester was definitely not in use in the 1920s and the princess seams on the bodice aren’t really accurate for these dresses either as far as I know.
Hours to complete: 20-25. Lots of hand sewing or it would have been faster.
First worn: To the opening of the Great Gatsby, old sport! I was part of a dance performance before the movie. More on that soon!
Total cost: $18-$23 depending on what I paid for the original dress, which I can’t remember!
This is the description for this HSF challenge:
The written word has commemorated and immortalised fashions for centuries, from the ‘gleaming’ clothes that Trojans wore before the war, to Desdemona’s handkerchief, ‘spotted with strawberries’, to Meg in Belle Moffat’s borrowed ballgown, and Anne’s longed for puffed sleeves.In this challenge make something inspired by literature: whether you recreate a garment or accessory mentioned in a book, poem or play, or dress your favourite historical literary character as you imagine them.
Oh wait, did I mention that my literary inspiration for this is The Great Gatsby?
Woo! 1920s beaded dress!
It was super fun to wear this to the opening of the Great Gatsby and dance in it. I was able to wear my ivory American Duchess Astorias (not for dancing, but for walking around) which made me happy, as well as a necklace recently given to me by my mom! And in the end, it’s great that the original dress was a size 14, because it gives the top that roomy/boxy/no waist 20s style on me!
This link contains an affiliate code, which provides a small benefit to my shoe fund. This does not affect my impressions and reviews of this product.
I’ve got these two related final notes:
The safety pin was patented by Walter Hunt on April 10, 1849. “Hunt’s pin was made from one piece of wire, which was coiled into a spring at one end and a separate clasp and point at the other end, allowing the point of the wire to be forced by the spring into the clasp. It was the first pin to have a clasp and spring action and Hunt claimed that it was designed to keep fingers safe from injury – hence the name.” From about.com’s entry on Walter Hunt as an inventor.
Serging/overlocking/merrowing was invented by the Merrow Machine Company in 1881. From wikipedia’s entry on ‘overlock’. It has been used to finish seams since at least the 1920s, according to the Vintage Fashion Guild (they’ve got a whole page of neat vintage clothes dating information that has good dates for when different sorts of construction styles and methods came into use!).
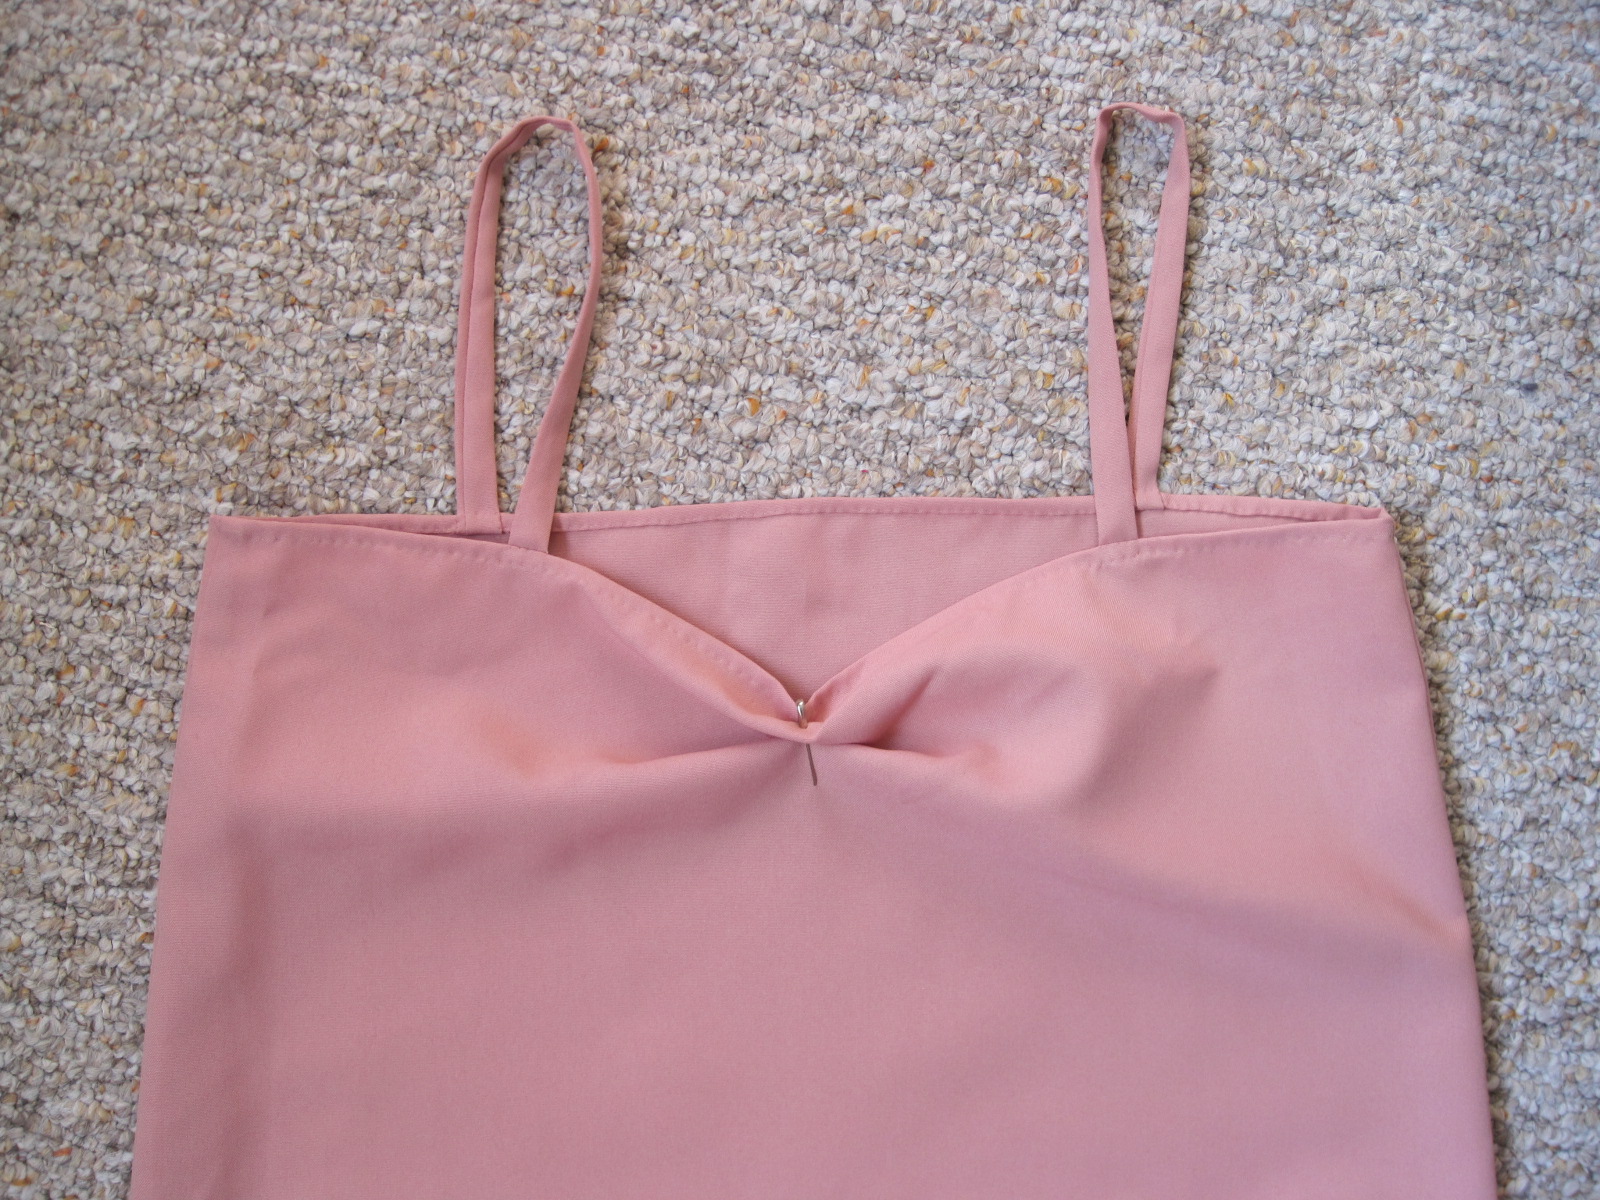
In all those pictures of Evie and the Returning Heroes Ball that I’ve posted recently, I don’t think there were any good shots of the front of my dress. So for now, a quick post showing the front of the gown with the double rosette to match the skirt and the graduated ruffle showing itself from under the bertha.
I’ve been slow to post my final group of pictures from this event. Sorry! You’ll remember that I first posted Three Series of Photos of my new green 1864 ball gown, Evie, and her undergarments? Then I posted A Second Series of Photos of friends? It’s finally time for the final installment of posts from the Commonwealth Vintage Dancers’ Returning Heroes Ball back in March.
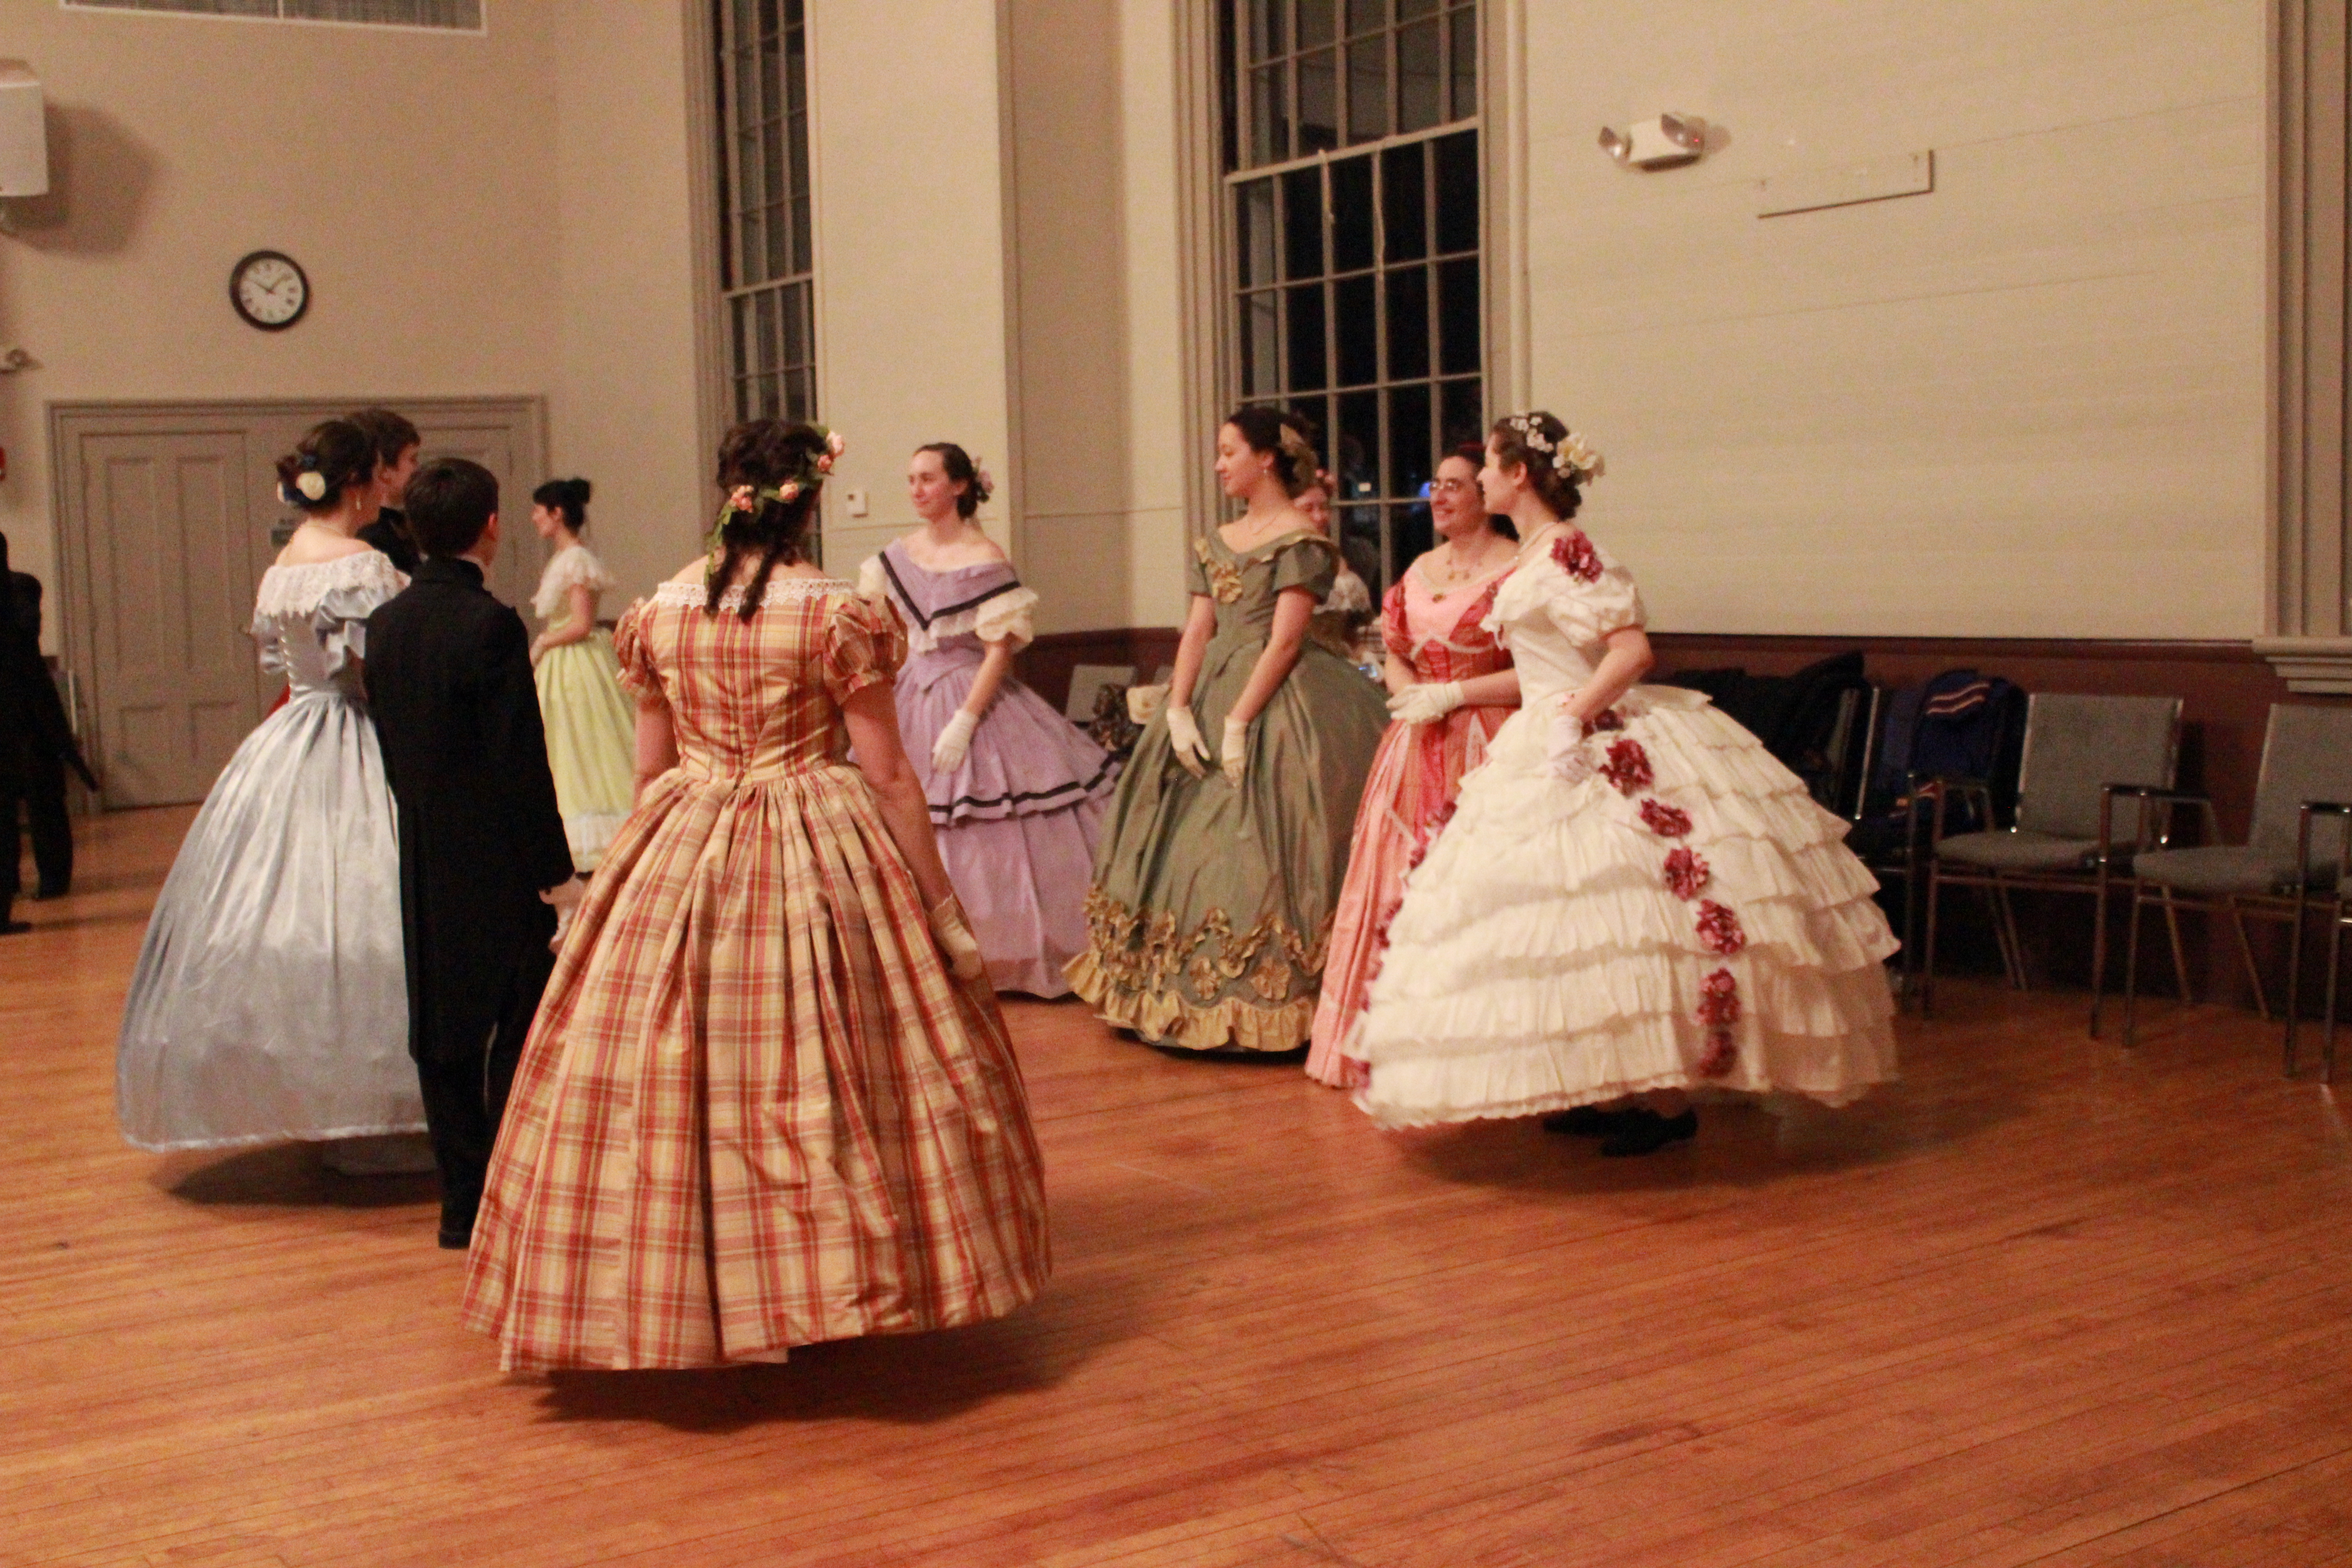
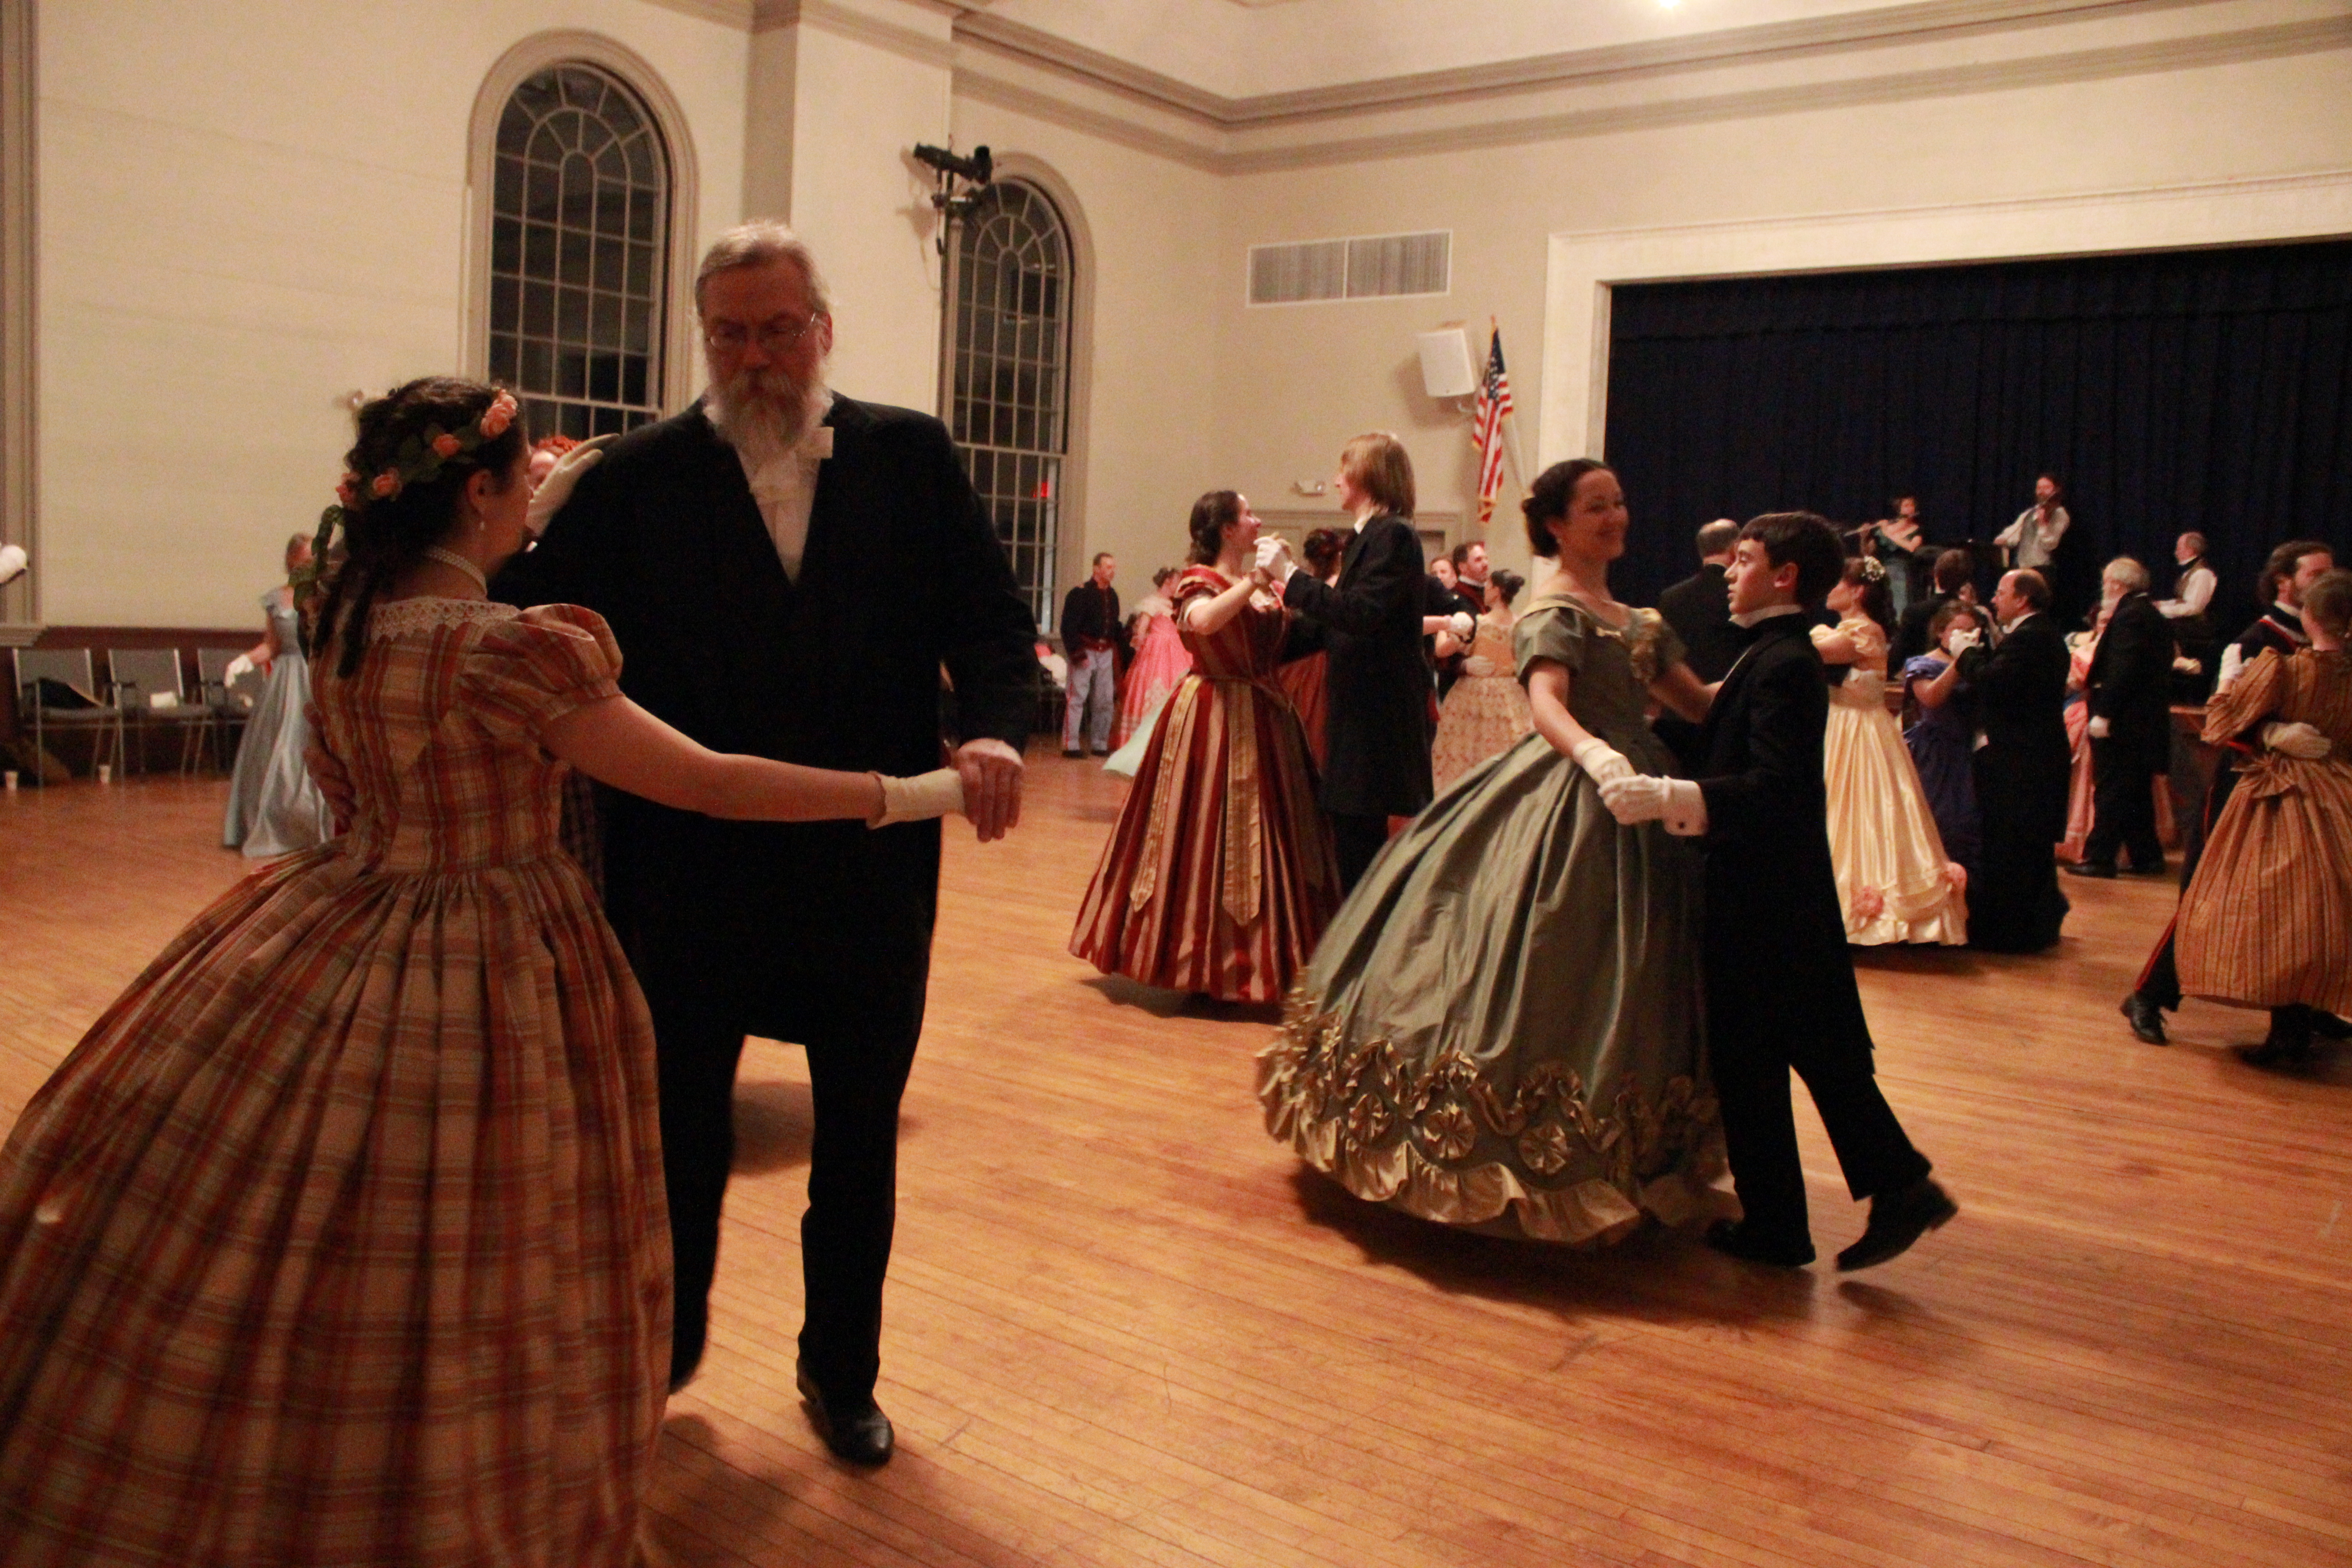
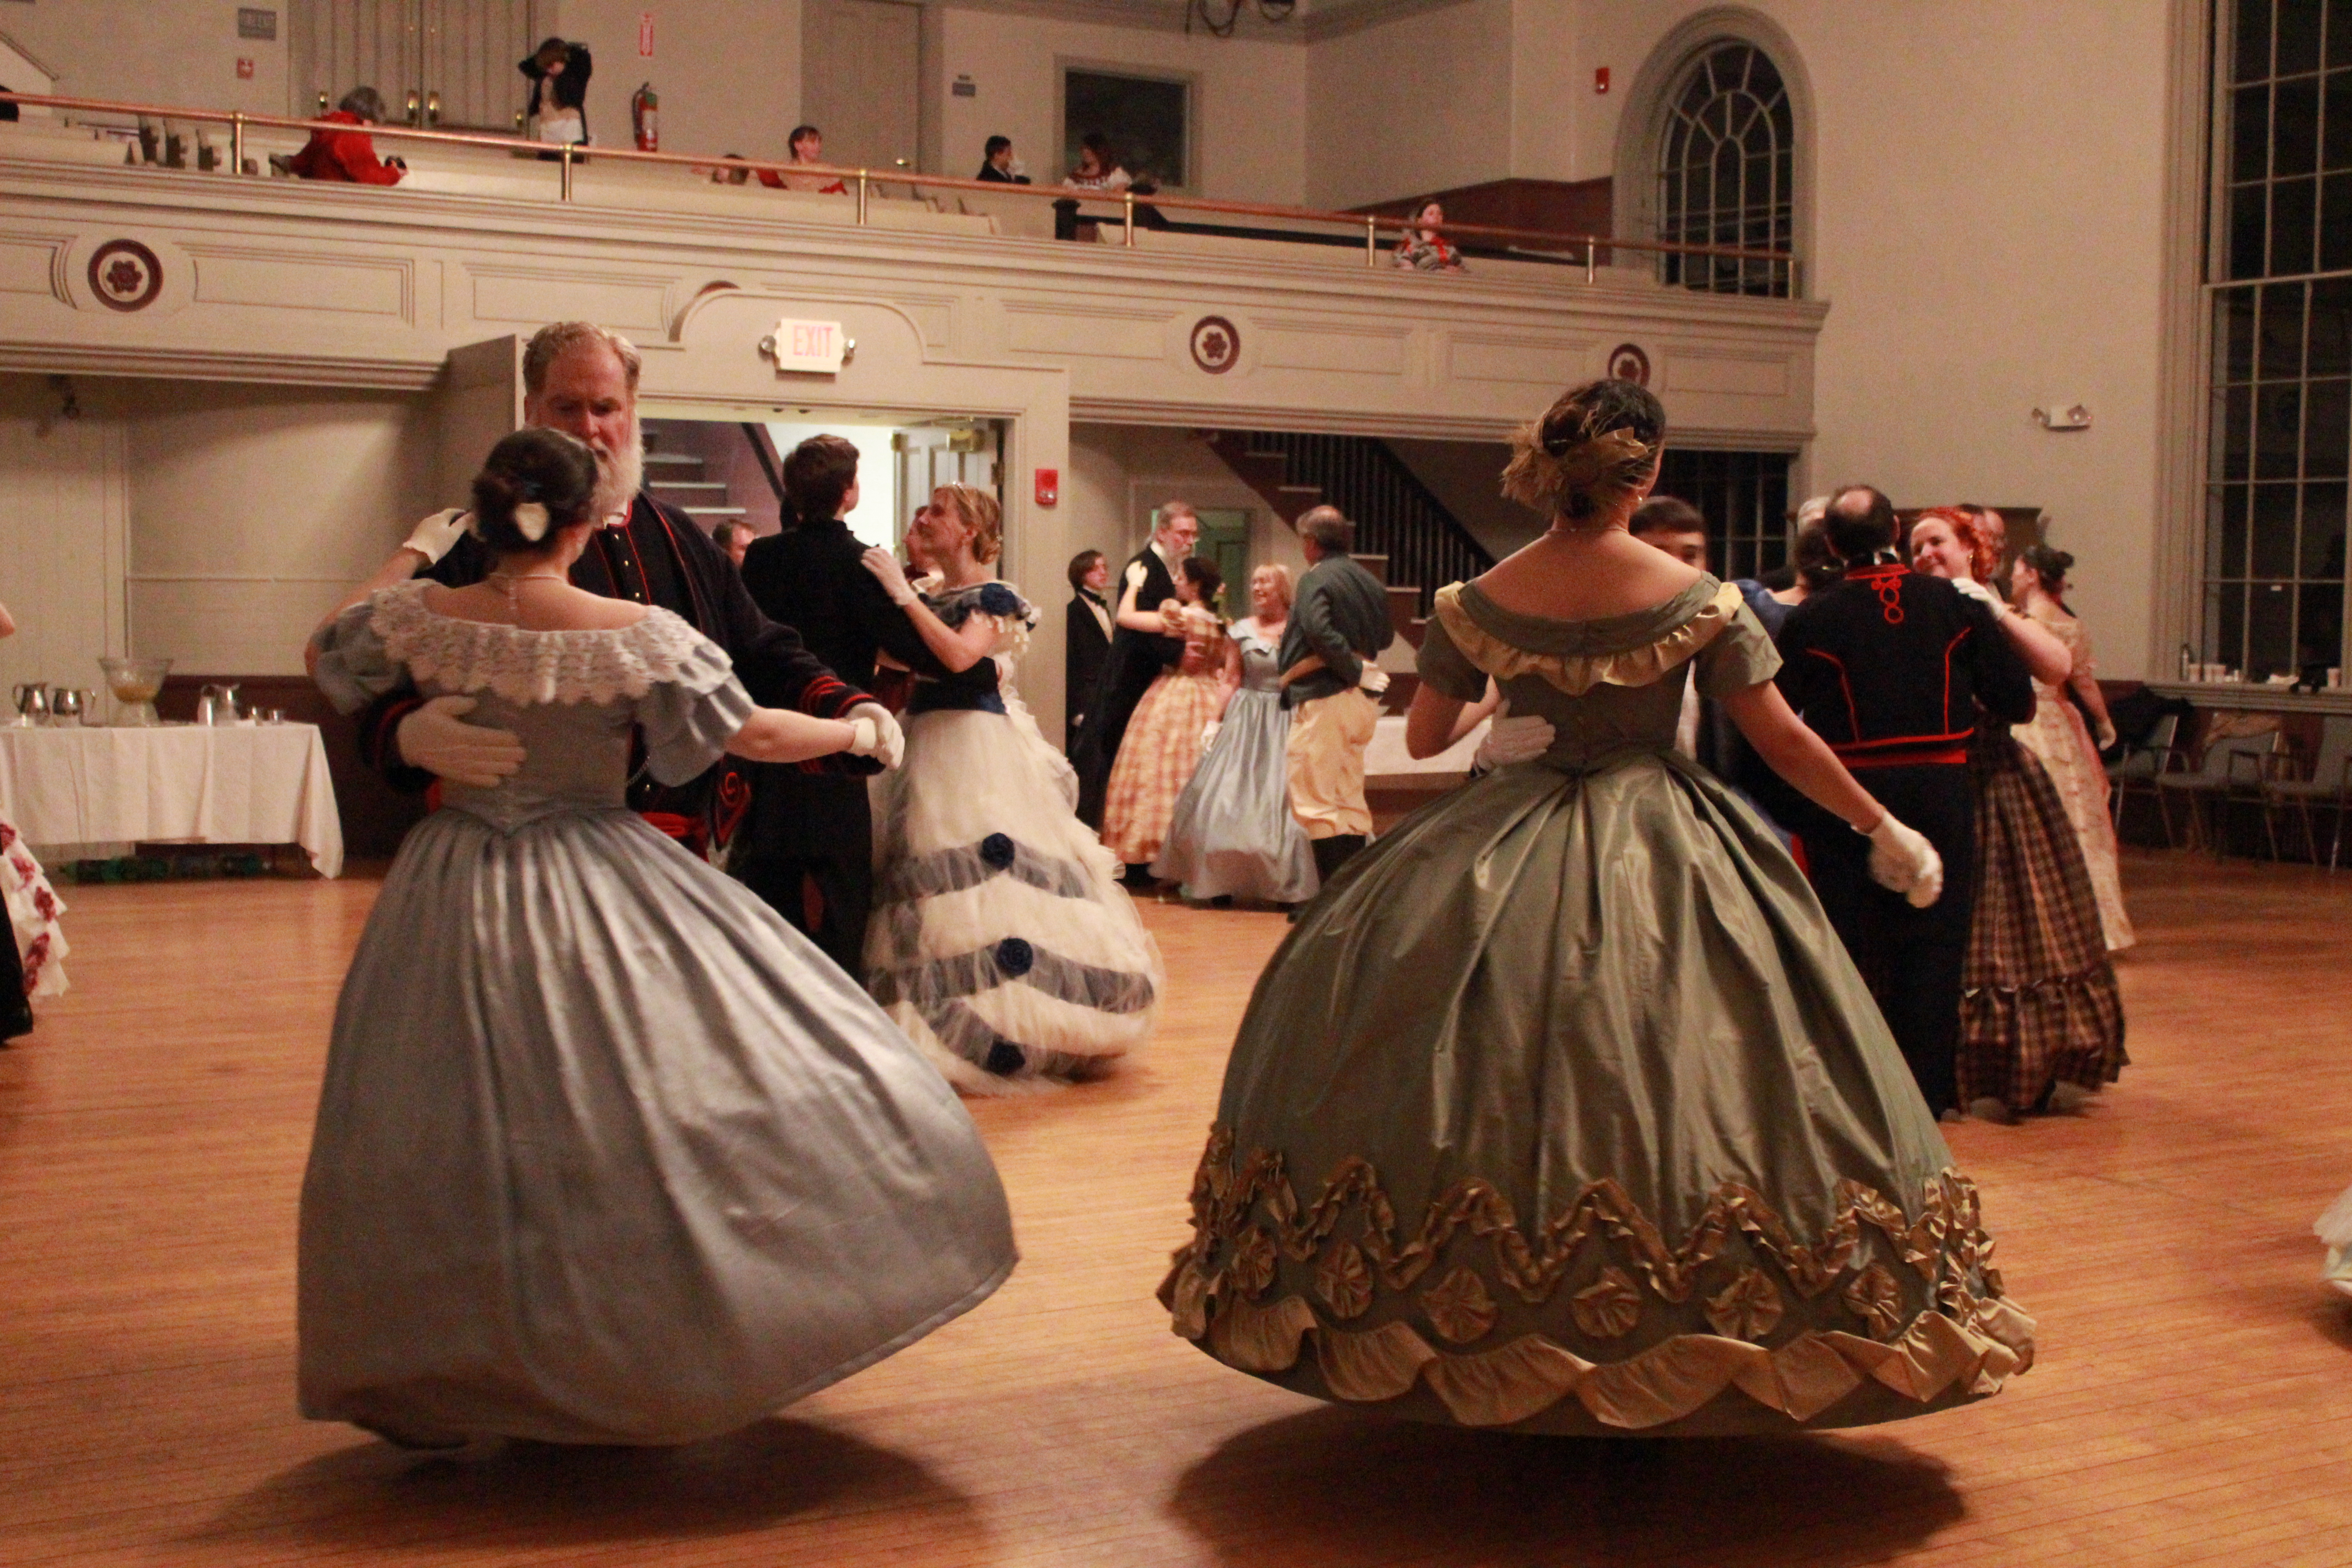
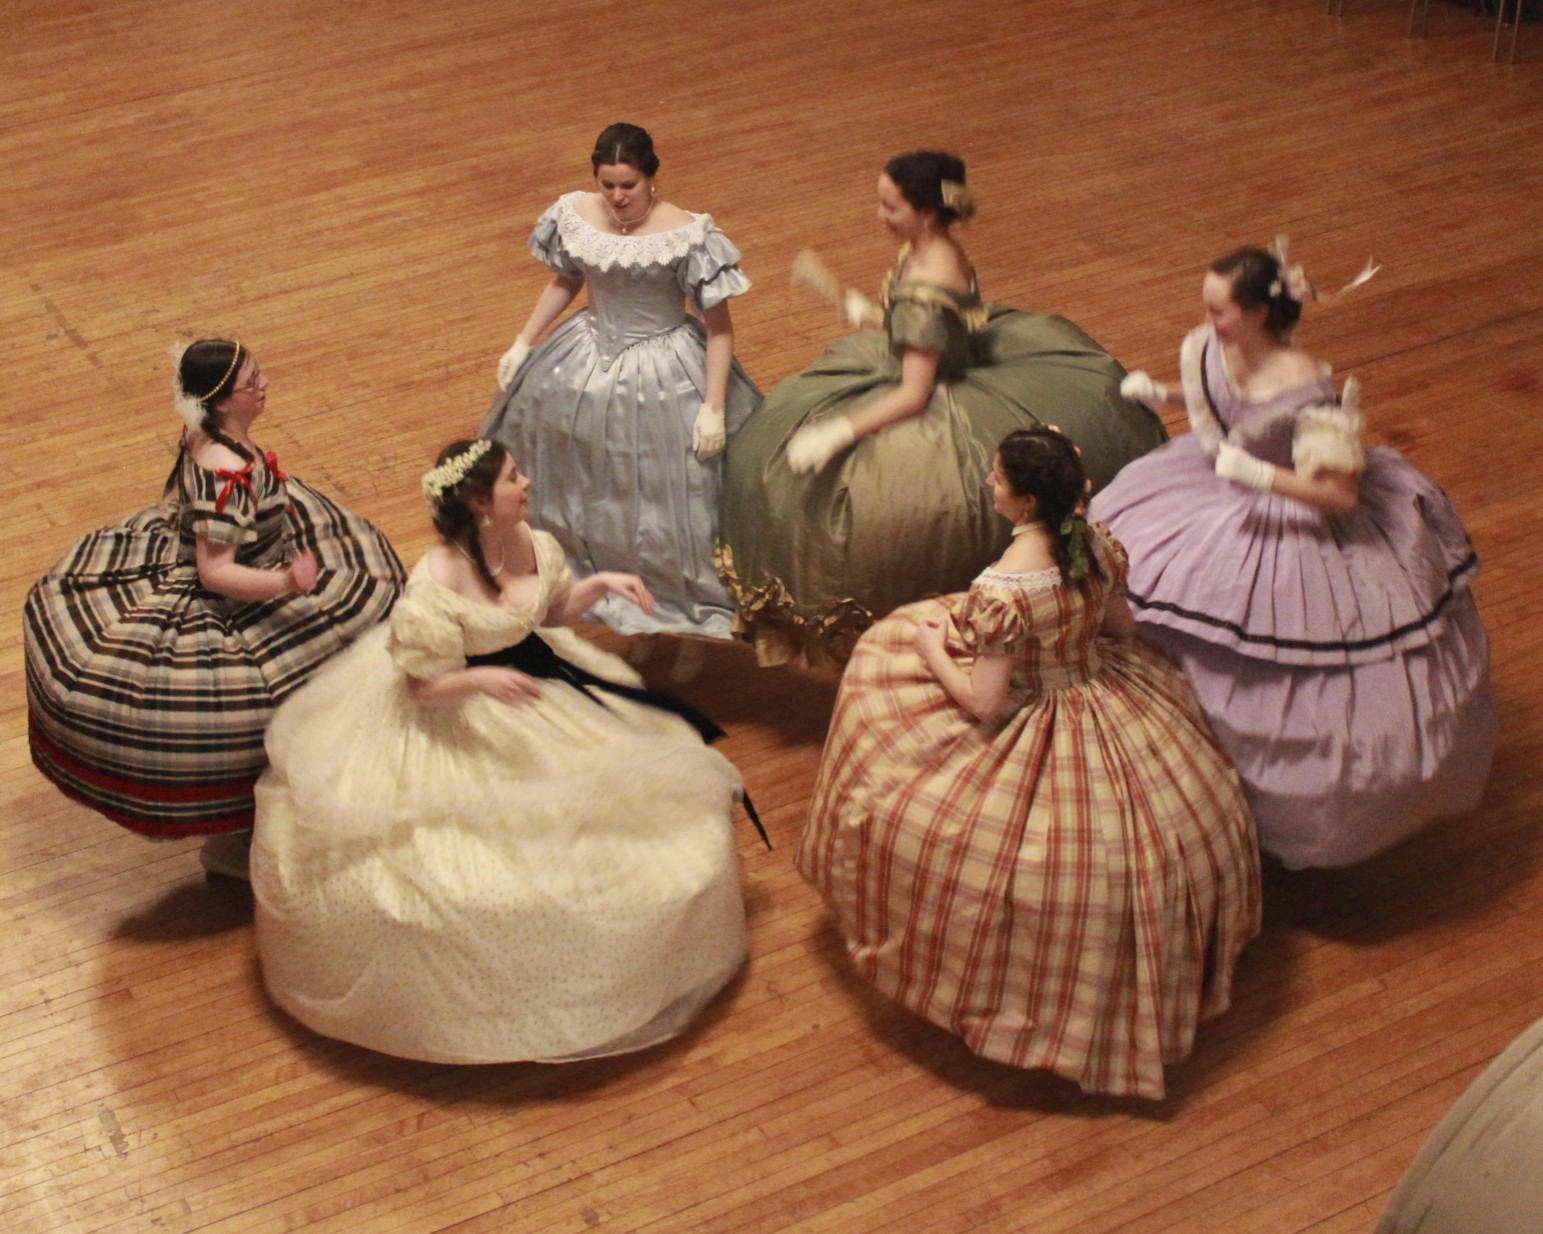
A ballroom full of hoop skirted ladies and suited gentlemen.A lovely set of dancers. Don’t we all look nice in our light colored dresses?Dancing a waltz.A “German Cotillion” dance game during intermission, in which the two young men vied for the young lady holding the candle, each trying to blow it out first. Whoever blew it out was rewarded with a waltz.More dancing after intermission.Caught on camera!Do The Jellyfish! There are more Jellyfish pictures from Ochre Court last year.The chandelier is perhaps not the loveliest style, but I like the artsy style of the photo. The coffered ceiling is great!
You know how sometimes the best laid plans are waylaid by life? I had every intention of finishing this bonnet before the HSF deadline of yesterday, but along the way got side tracked by life and made conscious choices to do other things with my time instead of bonnet-ing. Oh well, it happens to the best of us!
1815 bonnet (the more interesting side).
I made this bonnet to coordinate with my new Regency Tree Gown (which is why I’m calling it the Tree Bonnet). Lucky for me, it also fulfills the HSF Challenge #7: Accessorize and will coordinate with other items already in my closet (such as my 1819 brown spencer). I’ll be wearing the new gown, the spencer, and the bonnet this weekend for the Regency Dance Intensive, along with a lot of other Regency things, so be prepared for lots of pictures next week!
The facts:
Fabric: Silk twill, changeable silk taffeta for trim, and china silk for lining.
Pattern: Created by me.
Year: 1815.
Notions: Four approximately 8″ pieces of sage green polyester ribbon, a spray of wired millinery flowers, about 1 1/2 yds of navy silk ribbon for ties, about 3/4 yd of navy grosgrain ribbon for inner band, buckram for the base, millinery wire, cotton flannel for mulling, tacky glue, and thread.
How historically accurate?: 95% I’d say. There are a few polyester things, but the overall shape, impression, and majority of materials are accurate.
Hours to complete: 28? Hand finishing and trimming takes a long time, especially on hats, because the angles are weird, so it’s a slow process.
First worn: Not yet, but will be worn this weekend!
Total cost: $6ish for the silk twill bit, the green silk and china silk are remnants from other projects, the polyester bits are old and from the stash, the millinery flowers were from the stash, the buckram was maybe $4, the wire was probably $2… so about $12? I didn’t buy anything special for this bonnet, it’s all from the stash! Yay! Go me!
Close-up of the pleated silk trim and rosette-like decoration. You can also see the pleats on the side band of the bonnet.The millinery flowers on the front of the bonnet.The more plain side.Inside of the brim, looking into the lining and hat band.
This week marks the end of the MpRSW (though I still have one more post to go about that), with the final goal aimed at yesterday, #5: Anything Left! I’d already completed some packing for this goal, and procurement of kite making supplies (yes, there will be a future mention of kites!), but this bonnet also qualifies!
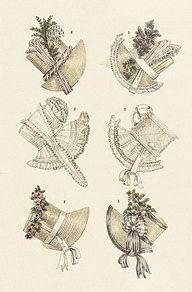
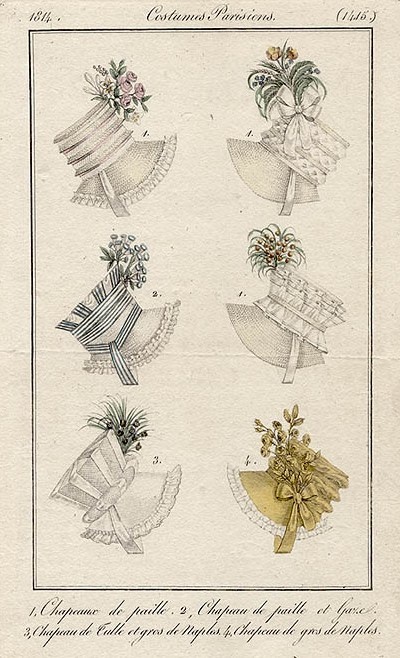
Now let me share some of my inspiration for this bonnet. There are more bonnet images on my 1810s Pinterest page as well.
From 1815. La Belle Assemblee, Parisian Promenade Hats, July 1816.Costume Parisien from 1814.Costume Parisien from 1815.
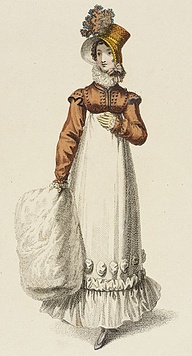
In trying to determine length of ties for the bonnet, I looked to some fashion plates that included people in them. Here are some of the best examples I found.
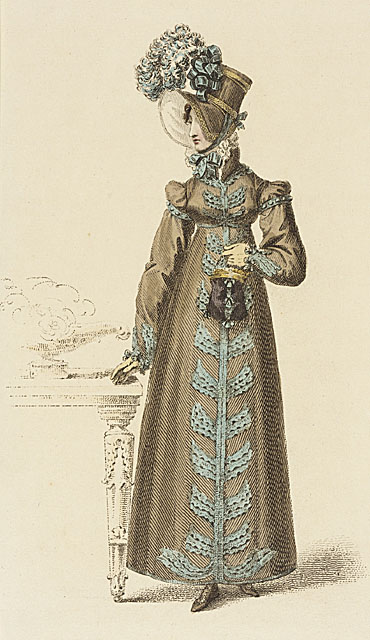
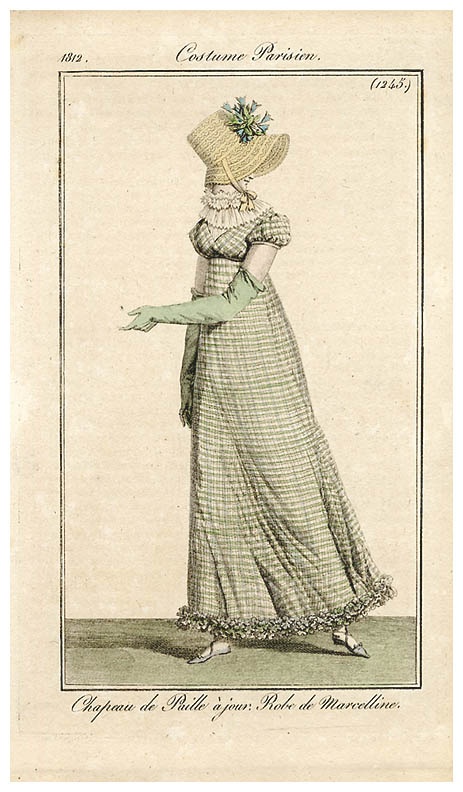
1813 afternoon promenade dress.Ackermann’s Repository, Walking Dress, April 1817.Ackermann’s Repository, Walking Dress, November 1817.Walking dress 1815EKDuncan – My Fanciful Muse: Regency Era Fashions – Ackermann’s Repository 1819Ackermann’s Repository, Walking Dress, February 1818.Robe de Marcelline, 1812 Costume Parisien
Well, there we are. I just finished sewing that pleated brim trim tonight, and I am glad to be done! It’s slow and slightly painful on the fingers. But pretty, so totally worth it!
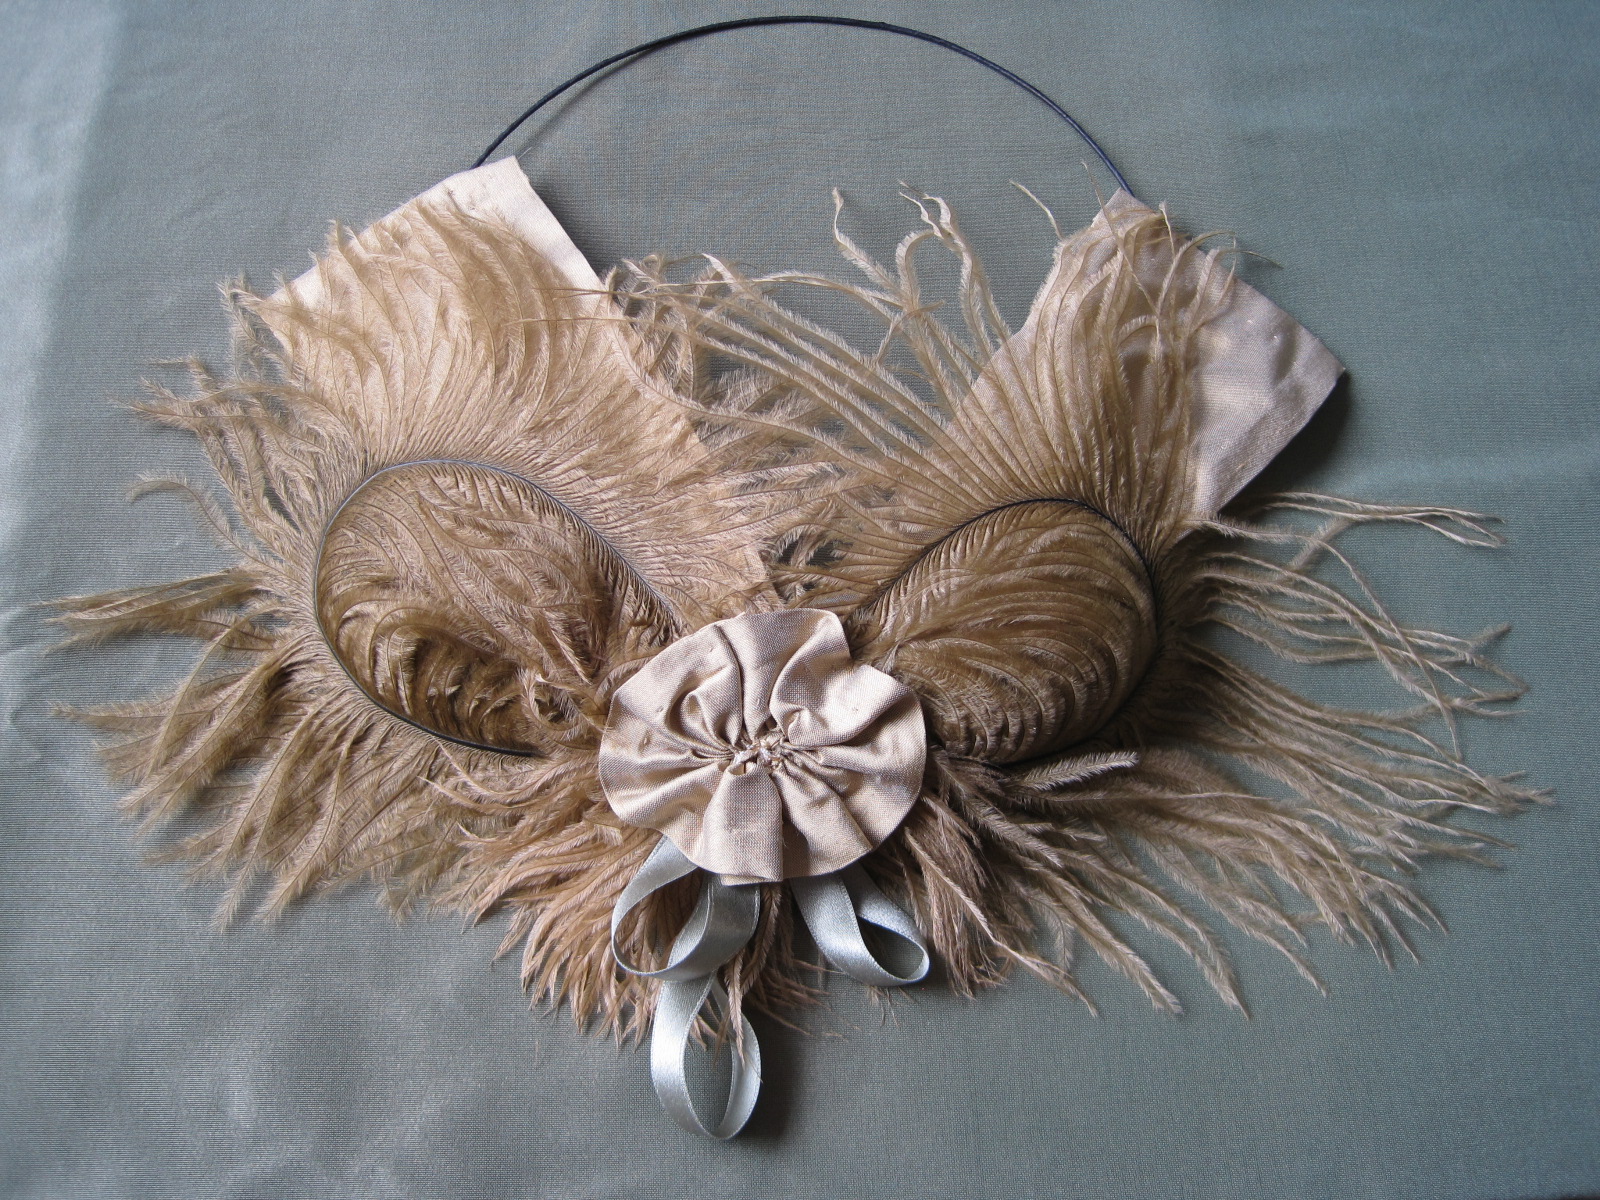
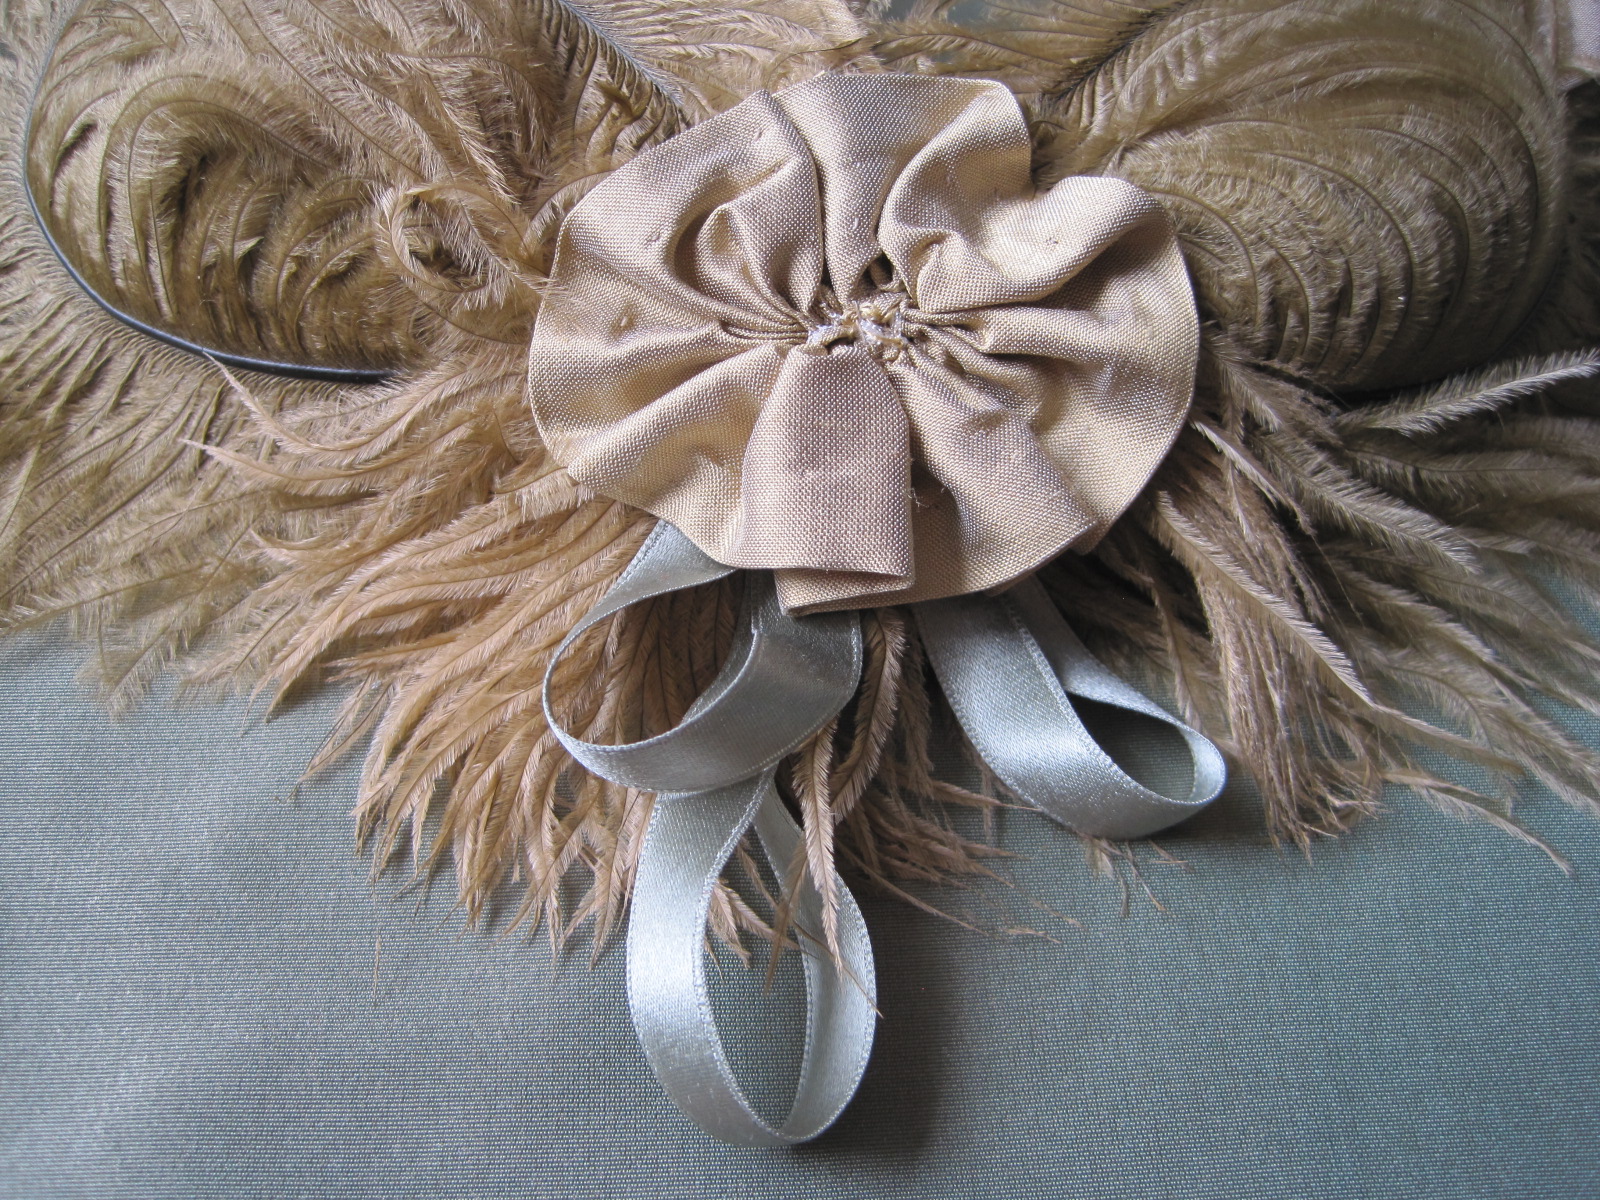
Remember Evie, my 1864 green ball gown? I felt compelled to make a matching hair wreath to wear with her, and here it is! A ring of paper covered millinery wire colored black (to blend with my hair) with a sharpie, decorated with a bit of gold silk, some green silk ribbon, and the mysteriously changeable gold/green ostrich feathers. Here those feather look gold, but I assure you that they sometimes appear as green as the silk background (which is the silk the dress is constructed of).
I think I would like to trim the ostrich feather on the right so it is the same shape as the one on the left, but aside from that one change, this is good as is! It’s super easy to bobby pin the wire to my hair and it’s easy to hide the bobby pins under all that silk and ostrich feather business going on at the bottom.
It’s been a little while since I posted about my new 1864 ball gown. Over a month, I think, because in February I posted about the plan/inspiration and then about the progress I made on the trim. I was steadily working on it during the month of March and had it ready to go for the Returning Heroes Ball a week ago. That’s not to say there wasn’t a little bit of last minute sewing the afternoon of the ball. My last minute sewing was gloves and hair piece, though, not dress, so that’s an accomplishment! And I wasn’t alone in my afternoon sewing… friends were sewing with me! There are lots of upcoming pictures but for now I’m going to post about the insides of the skirt and bodice. It’s a sneak peak, since you have to wait for the others pictures to see the full ensemble!
Completed skirt trim! I was SO ready to be done with it by the time I was sewing down the green zig zag (the last step of the skirt trim).
My other 1860s dresses have names: Belle is my dark blue gown and Annabelle is my white gown. I haven’t really been thinking of this dress by name until recently. Upon consideration, I’ve decided that she’s named Evelyn, or perhaps Evie for short. Why that name? I just like it, it’s old fashioned, and it has Y, and I have a fondness for the less commonly used letters of the alphabet. So here she is: Evie.
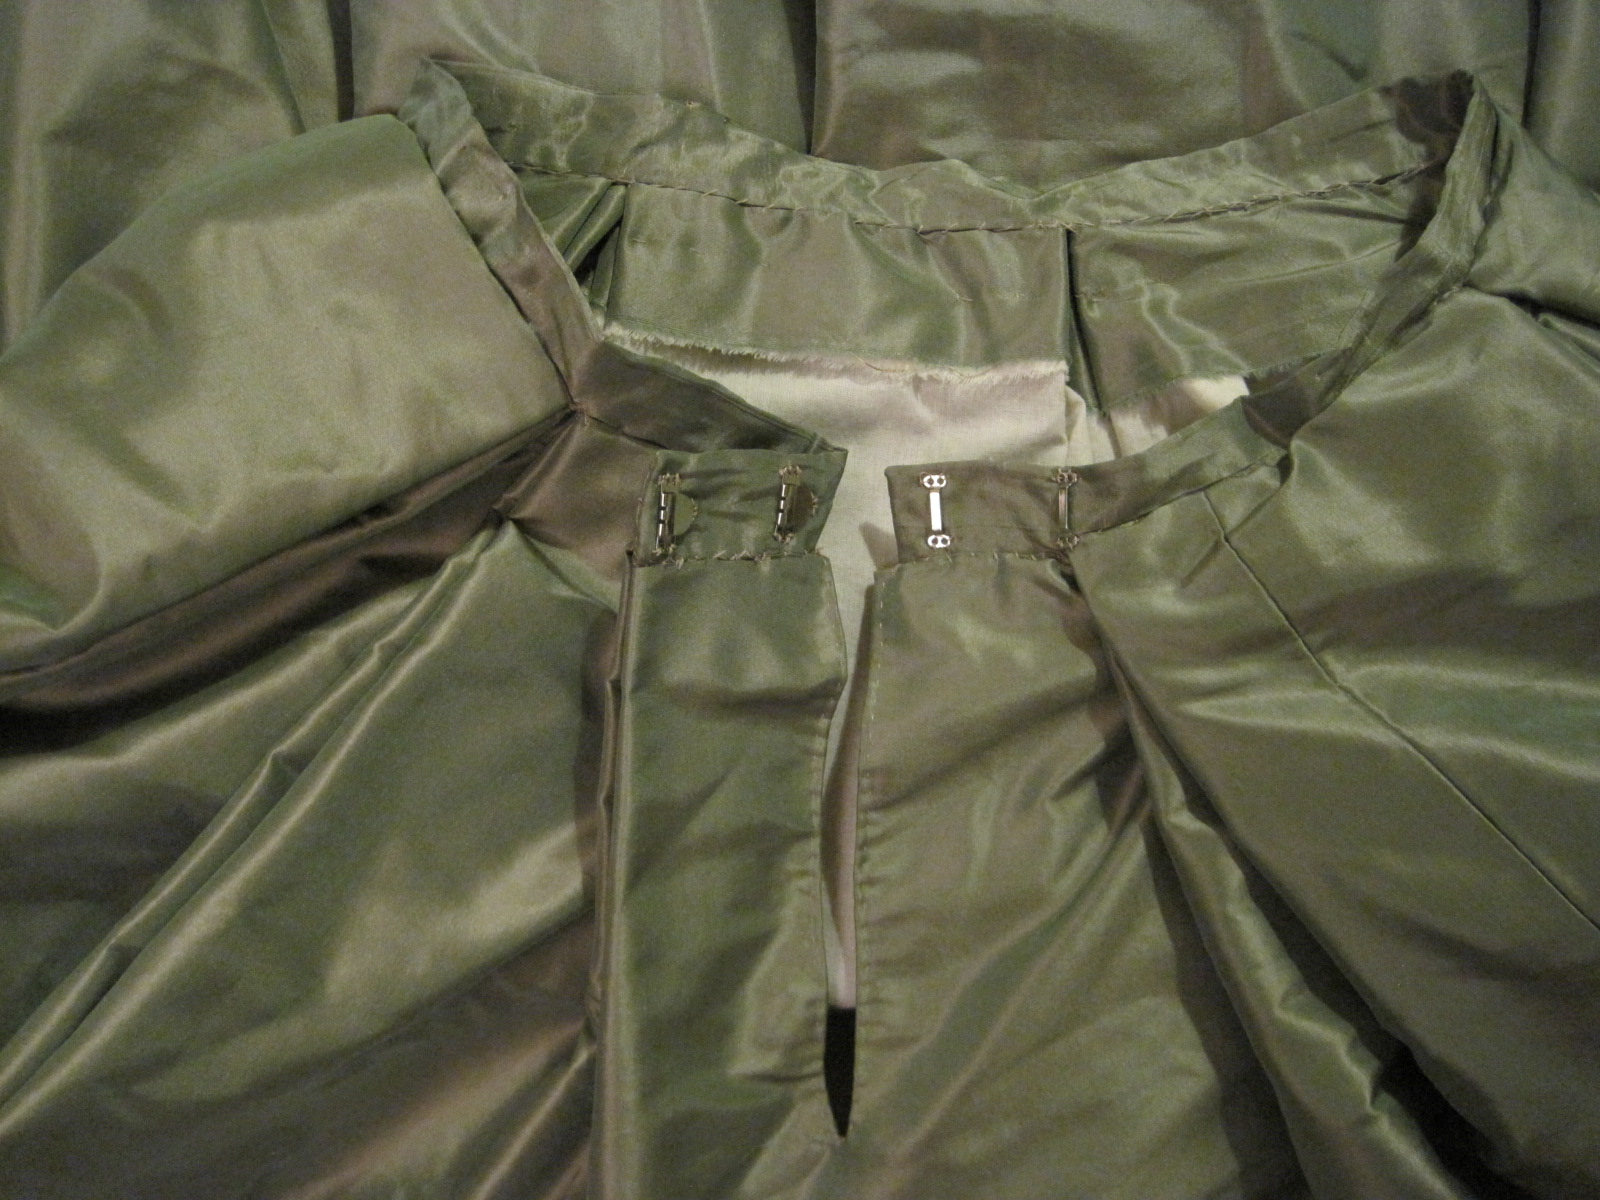
Skirt waistband of self fabric, to which the box pleated skirt is sewn. There is a cleverly hidden opening on the fold of one of the pleats.Magic! The pleats are deep enough that you can’t see the opening when the skirt is hooked closed, even with my hoops underneath.
The raw top edges of the skirt are just turned to the inside and left alone. The silk skirt is flat lined with muslin, which helps give it some body, preventing creasing, and some stability at the hem for all that trim. There are six double box pleats evenly spaced around the skirt, as you can see. I haven’t tried this evenly distributed method on an 1860s skirt before (my previous dresses have knife pleated fronts and cartridge pleated backs, which makes them much heavier in the back than the front… I suppose I could divide the skirt in half and do that method, but given how those skirts are weighted, I’m sure there’s more fabric in back than in front). All that to say that I love how evenly weighted this skirt is! It means I don’t need a giant bum pad to keep my hoops level with the floor. (Come to think of it, I suppose I could remount the skirts of my other dresses onto new waistbands and redistribute the fabric… hm… I’ll have to think about that!)
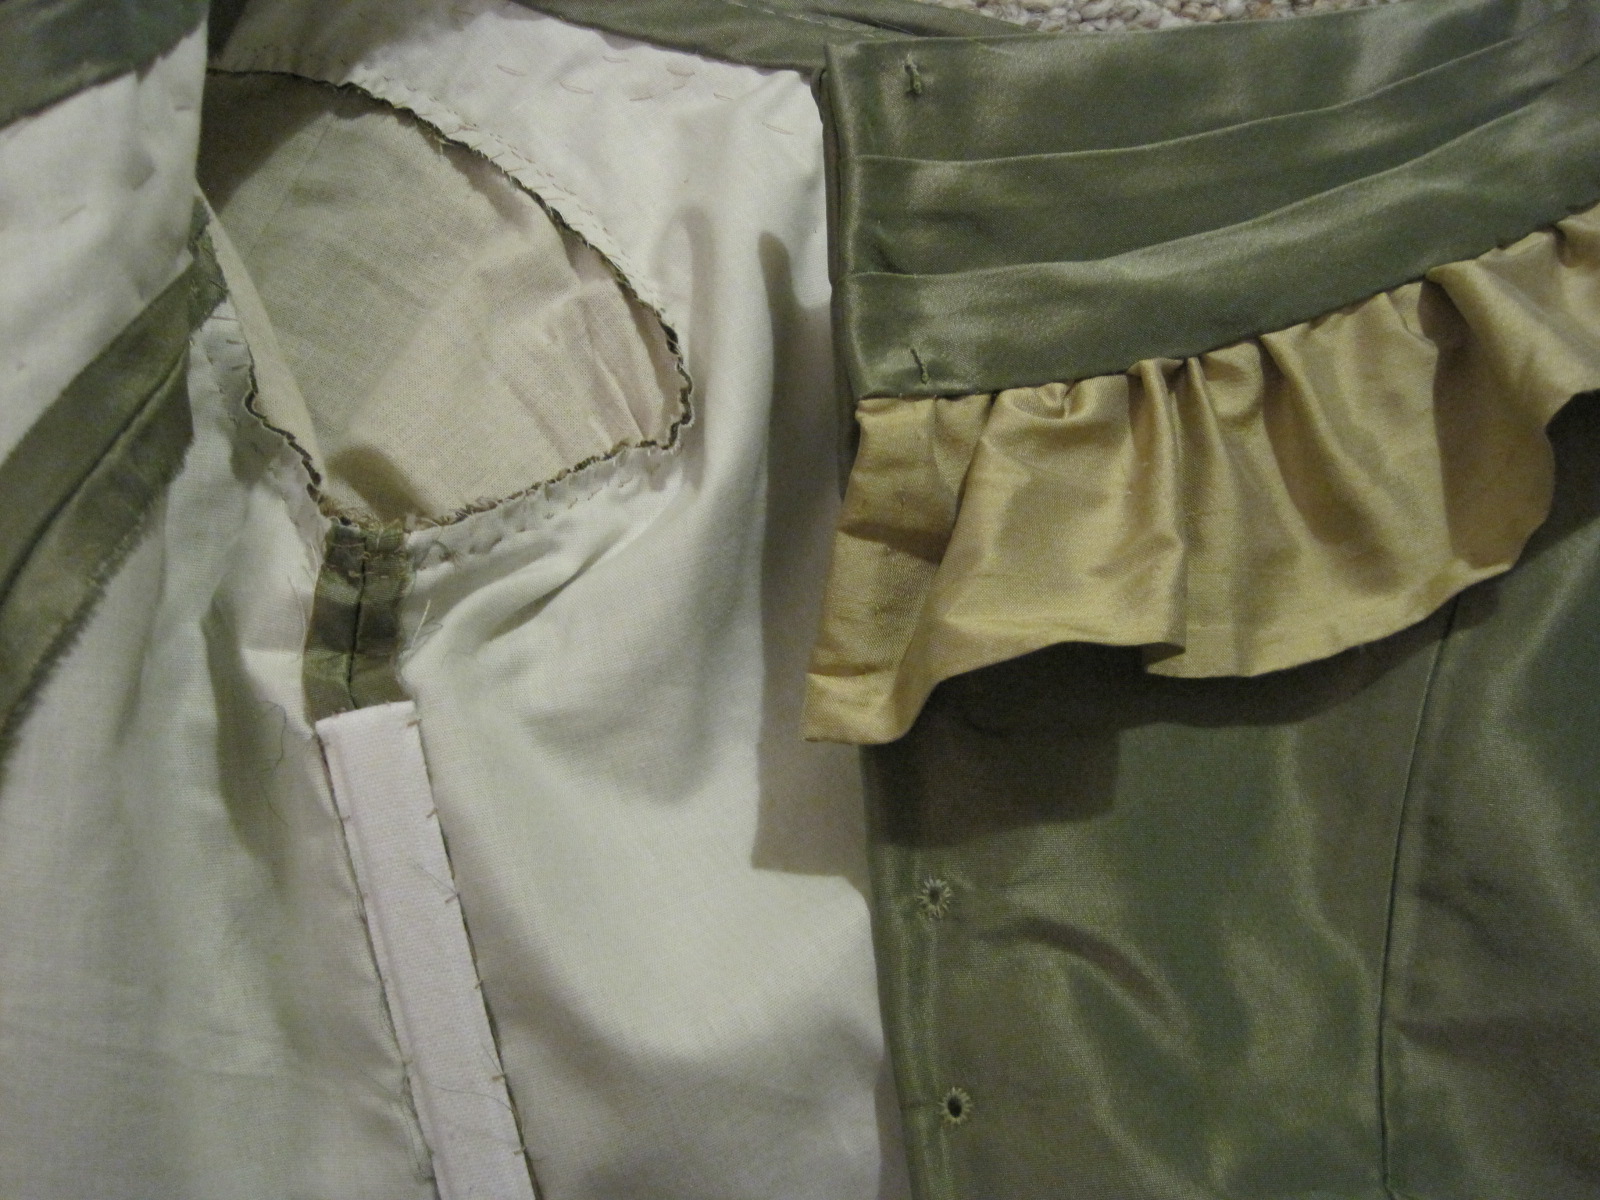
Inside of the bodice at center front. The bodice is flat lined in ivory polished cotton. The edges are finished with cording (even the top edge, which you can’t see on the outside because it is hidden by the bertha, grrr, but oh well!).Inside of the left front and outside of the right back.
The sleeve is lined in muslin. I originally intended that it wouldn’t be seen, but then changed the sleeve design so now the muslin is visible on the inside of the bodice. It doesn’t matter, though, but I do like it when everything matches. The seam allowances of the bodice are just left unfinished (I might whip stitch over the edges some day, but that’s unlikely, since I’ll probably be sewing something else!). The armhole seam allowances are whip stitched together to keep them from fraying and to keep all those layers together. The armholes also have cording in them. The bodice closes at center back with lacing. The eyelets, like everything else, are hand sewn. The bertha also closes at center back (unusual, since a lot of them close on the shoulder, but I didn’t want my bertha pleating to be able to move or show the top of the ruffle). You can see the stitching holding the bertha in place in the first bodice picture, because those stitches go right through to the inside of the bodice.
I stopped keeping track of how many yards of hand sewing went into this dress… but now I’m curious again. So when I finished stitching the gathering stitches I was at 86 1/2 yds just for the trim. I’d estimate about another 22 yds of stitching to attach the trim and about 12 yds of stitching to construct the skirt before attaching it to the waistband. Waistband attachment was probably about 7 yds (it’s quite sturdy and all those pleats are well sewn!). That puts the skirt at a total of about 127 1/2 yds of hand sewing. Then there’s the bodice, which is maybe 12 yds of hand sewing total? That’s a harder one to estimate. That brings Evie to a total of approximately 140 yds of stitching.
I’m proud to say that every single stitch is hand sewn. Next time, though, I’m planning on machine stitching the inside seams. It’s super satisfying to have an entirely hand sewn dress, but it took about two months, and that could have been much sped up with the use of a sewing machine, which means I could have made more things! Who knows, I might change my mind, but right now even I am tired of hand sewing that dress.
Well, I hope this isn’t too much of a stretch (or maybe interpretation is a better word), but I’ve finished preparing all of my skirt trim and I’m going to call it my project for the HSF #4 Challenge: Embellish. I say it’s a stretch because my completion of this project is the preparation of the trim, rather than the attachment to the garment. To be fair, just the prep has been a lot of sewing, so I think it counts. Here it is, below: gold trim on the rather wrinkly skirt of green and gold shot silk taffeta. Because the gold is shot with silver, and the green is shot with gold, they are both photographing more washed out looking than they appear to me when not looking through a camera. Hopefully one day I’ll be able to get a picture where they look a little less silvery.
All the skirt trim, gathered and ready to be attached!
The top pile of trim (that rather resembles a ruffly brain, don’t you think?) is for the zig zag. The two piles on either side are the 18 rosettes. The section on the bottom center is the ruffle that goes at the bottom. You can see the inspirational fashion plate here, in this previous post, to see what these different trim sections look like in their actual context.
My favorites are the rosettes. Aren’t they cute?Here’s all of them laid out like an accordion, or a slinky. They look so adorable!
Anyway… here are the facts:
Fabric: almost 1.5 yds of gold shot with silver silk shantung.
Pattern: none, just a lot of math.
Year: 1864.
Notions: none, just thread.
How historically accurate?: Well, shantung is not accurate, but silk is (and this shantung is pretty smooth and not slubby, so I don’t think anyone will know it’s shantung unless I tell them). The trim layout is from a fashion plate, so super accurate. The stitching is accurate. Overall, I give it a 90%.
Hours to complete: Um… a lot. It’s all hand sewn. I started in January, so… 50 hours to get to this point? I really have no idea. I think in terms of months or weeks usually, not hours or even days.
First worn: Not yet, but will be worn in March.
Total cost: $9, because the silk was a remnant.
And while I’m keeping count, let me also note the yards of stitching currently sewn into the trim. When it was all hemmed I was at 45 yards. Now I have the addition of gathering stitches (31 1/2 yds) and ruffle binding (9 yds). That ups the total yards stitched for trim to 86 1/2 yds, and that’s before attaching it! Nice.