Well, I went to the fabric store today looking for fabrics to cover some gifted pillow forms to grace our newly redecorated rooms (they’re still not quite done after two weeks of work, but hopefully soon they’ll be done and I’ll have pictures!). I found some truly horrendous fabrics like the one below… (don’t worry! I didn’t buy it. I can only imagine this being in a farmhouse kitchen and even then I wonder about all the mixed motifs…)
Roosters, and damask motifs, and sunflowers, and gingham, and words…
I did find a few pillow possibilities that I liked, but they all had oatmeal/neutral backgrounds that would not look good in our space, so I didn’t purchase any of those. (I’ve got more places to check out, so I’m not concerned on that front, yet.)
And I did look through the silks, as I always do. Danger!!!! I found lovely plaid smooth silk taffeta (no slubs, hooray!) and it just wanted to come home with me to be made into an 1850s/60s evening gown. I finished off the bolt, which was just under 7 yards. Hopefully enough to make a skirt, possibly both day and evening bodices, and also maybe self trim. Someday (maybe next year?).
A very kind and enabling friend who happened to be with me helped convince me that the silk was a good idea. So in the grand tradition of all my 1850s/60s gowns which have names, when I get around to building the new plaid one I affectionally plan to name the new gown “Johanna” after her. It’s actually a bit more subdued in person. More of a “bruise palette” collection of colors than my usual jewel tones, but “bruise palette” is Johanna’s go to for color choices, so that is perfect. And it’s patterned, which is in keeping with my need to add more patterns to my wardrobe. I think I’ll play up the purple in this rather than the green, since I already have a green 1860s ball gown.
Fabric! (Because obviously I don’t have enough of it in my stash or enough to accomplish in my life right now…)
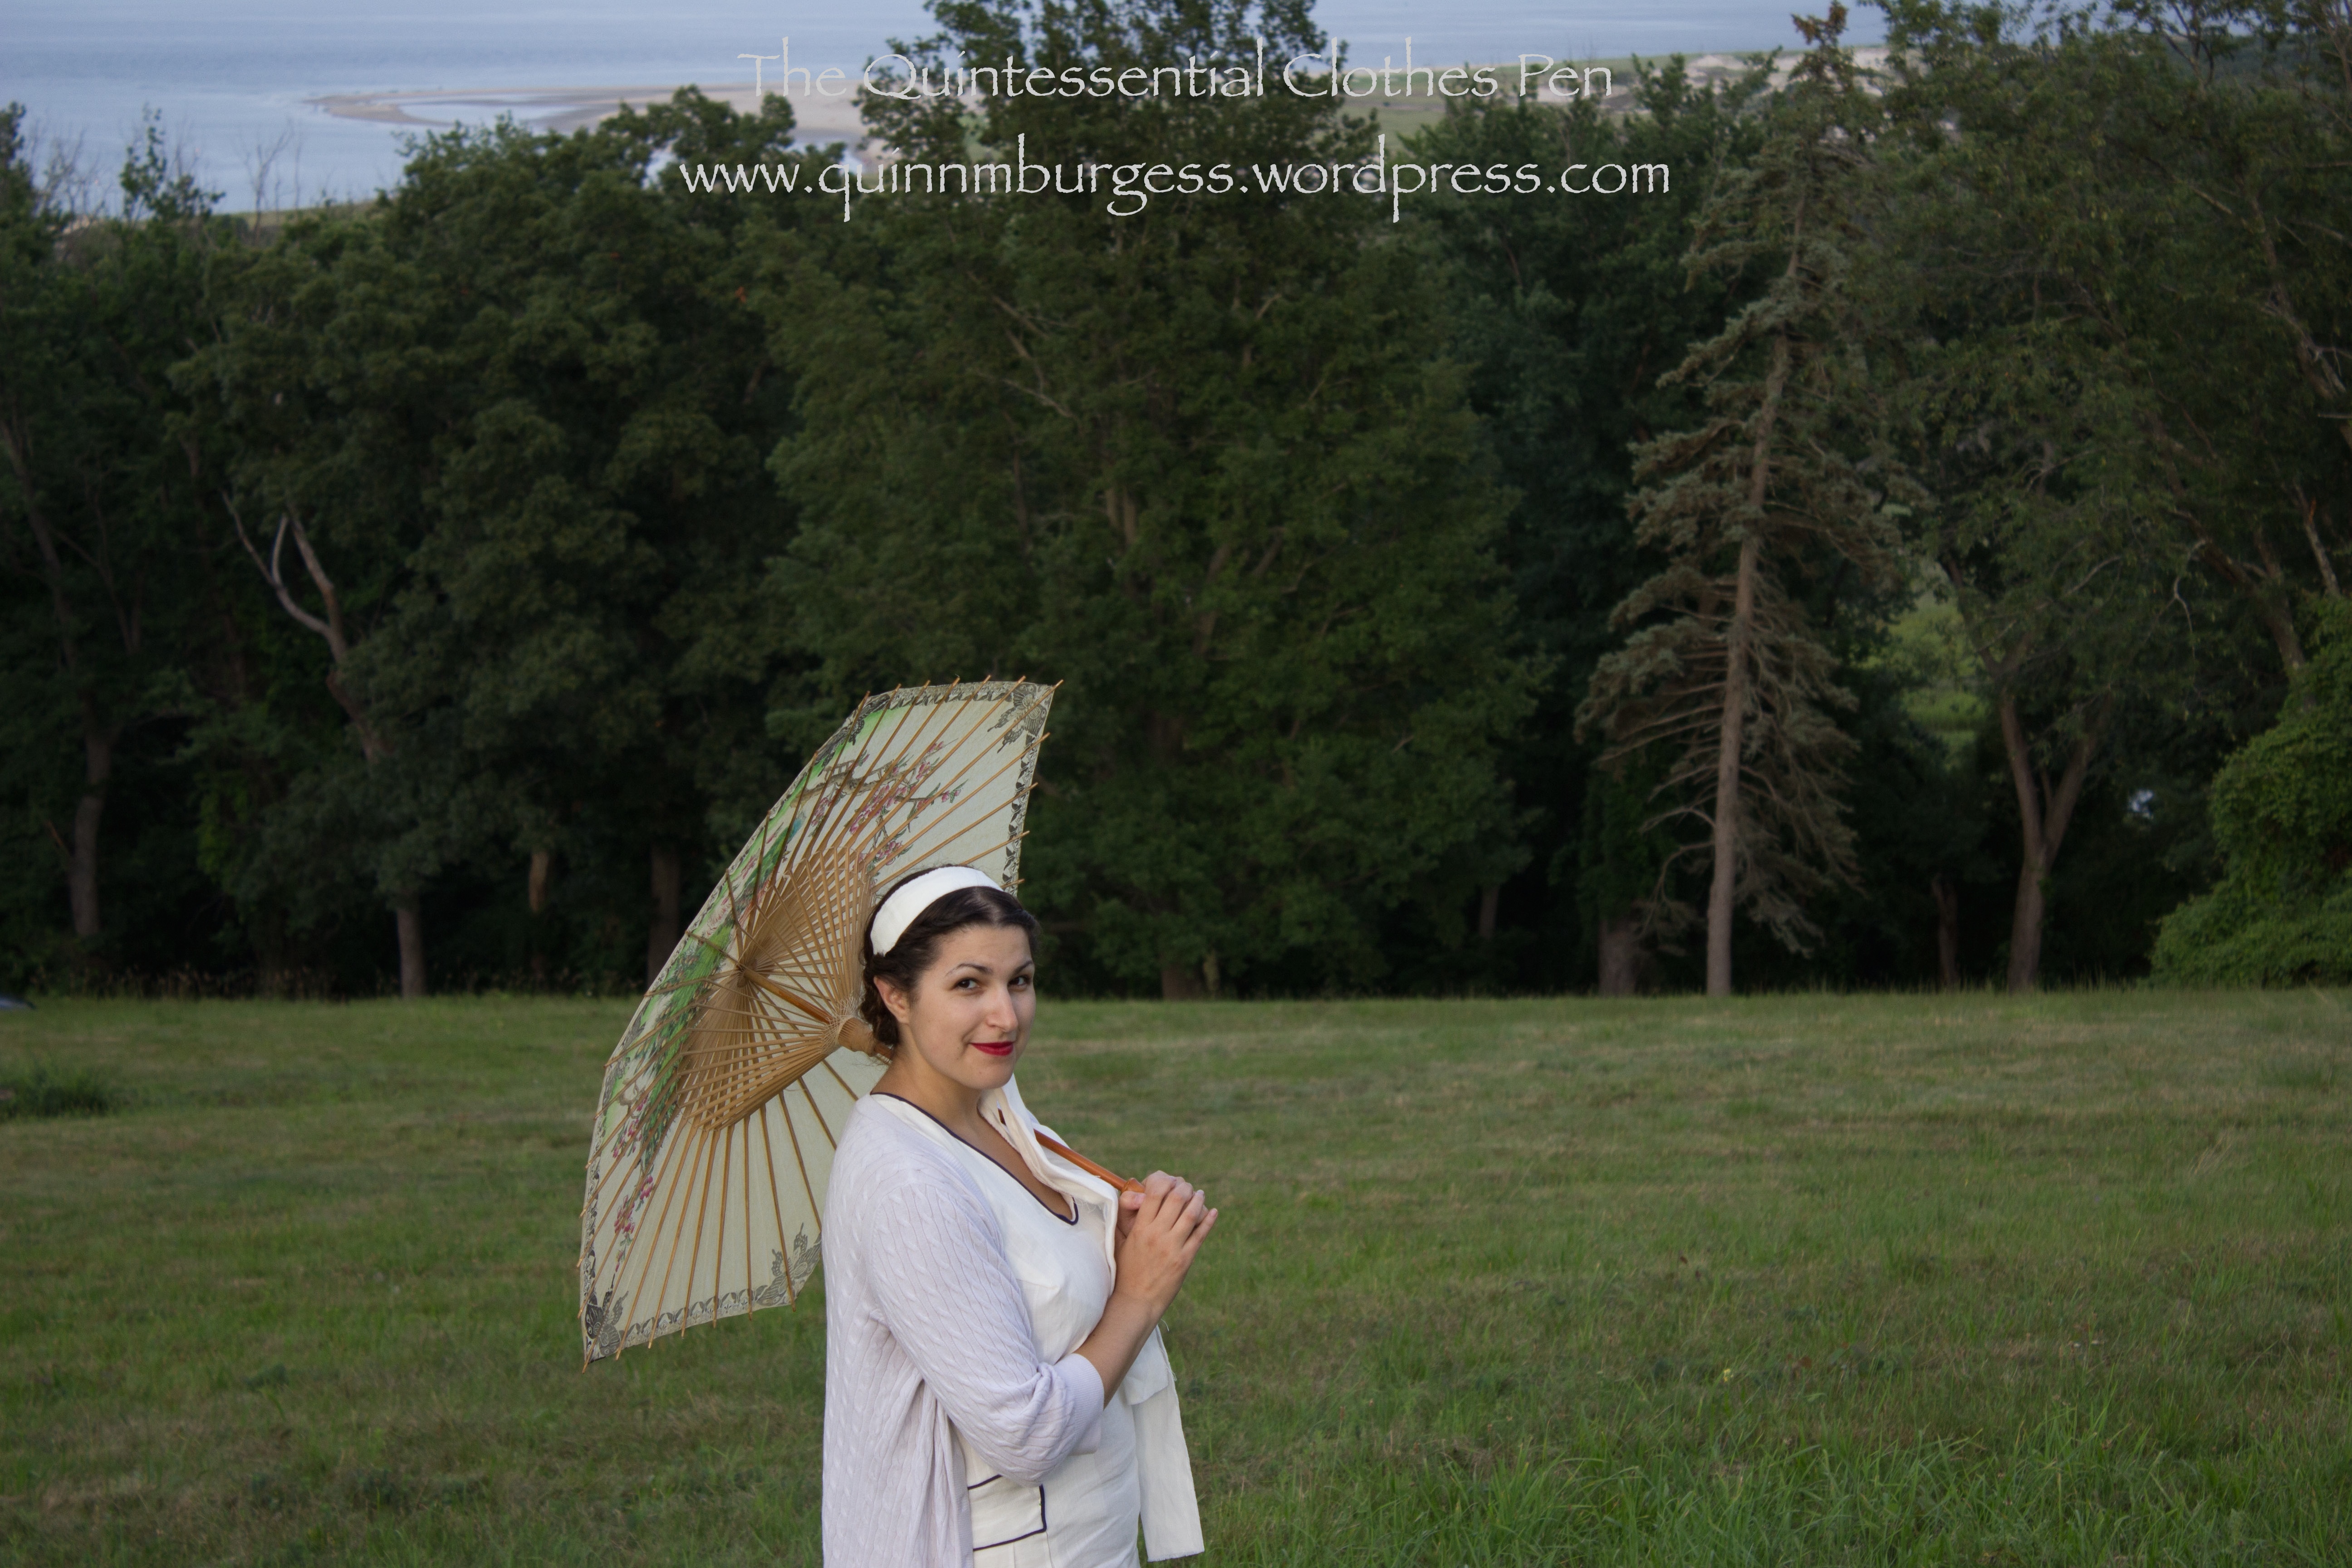
This year, I paired my new parasol and hat with a pleated skirt from ebay (it was one of those things you gamble on when you order, and while I don’t like it for modern wear I think it worked perfectly for an early 20s look!), a new silk blouse c. 1922, my 1917 Knitted Sweater of Angorina (because I’m sure people didn’t wear their clothing only during one year!), and my American Duchess Astorias. It’s wonderful to have accessories and pieces like sweaters in the closet that can fill out an outfit without having to always create an entirely new ensemble.
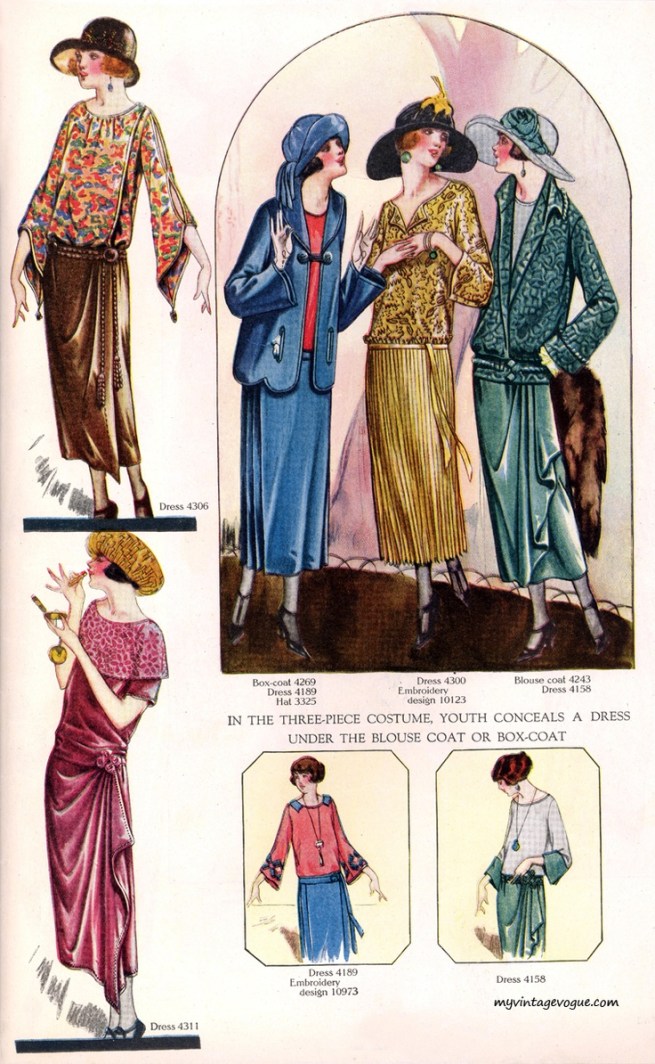
My goal was an early 1920s look, when the skirts were still long and the clothes weren’t quite such bags. In terms of overall clothing style, I was aiming for the yellow lady in the image below. In terms of accessories, I was aiming for some of the looks which you can see in this past post about making my parasol.
The Delineator Magazine 1923
The blouse I made from white silk crepe the afternoon before the event. It’s all one piece, with the gathered sections on the sides. I used short sleeves, as in view A, but omitted the bow, as in view C. This was partially due to fabric restrictions, as I used fabric left over from another project and I only had an odd shaped piece to work with. I’m not entirely pleased with it, because, being 20s, it is rather a bag, but it was very comfortable, which I did like. I think I would like it better if it was an off white rather than a bright white, because it would have complimented my outfit better. But my hand knitted sweater is ivory and I was really pleased to wear it over the blouse, because I liked the color and the length better. It has such nice proportions with the skirt!
My inspiration for the blouse. Butterick pattern #3779 from 1922 at COPA. I used the pattern layout as a general guide for creating my blouse.My 1922 blouse. (…that is a bag!)
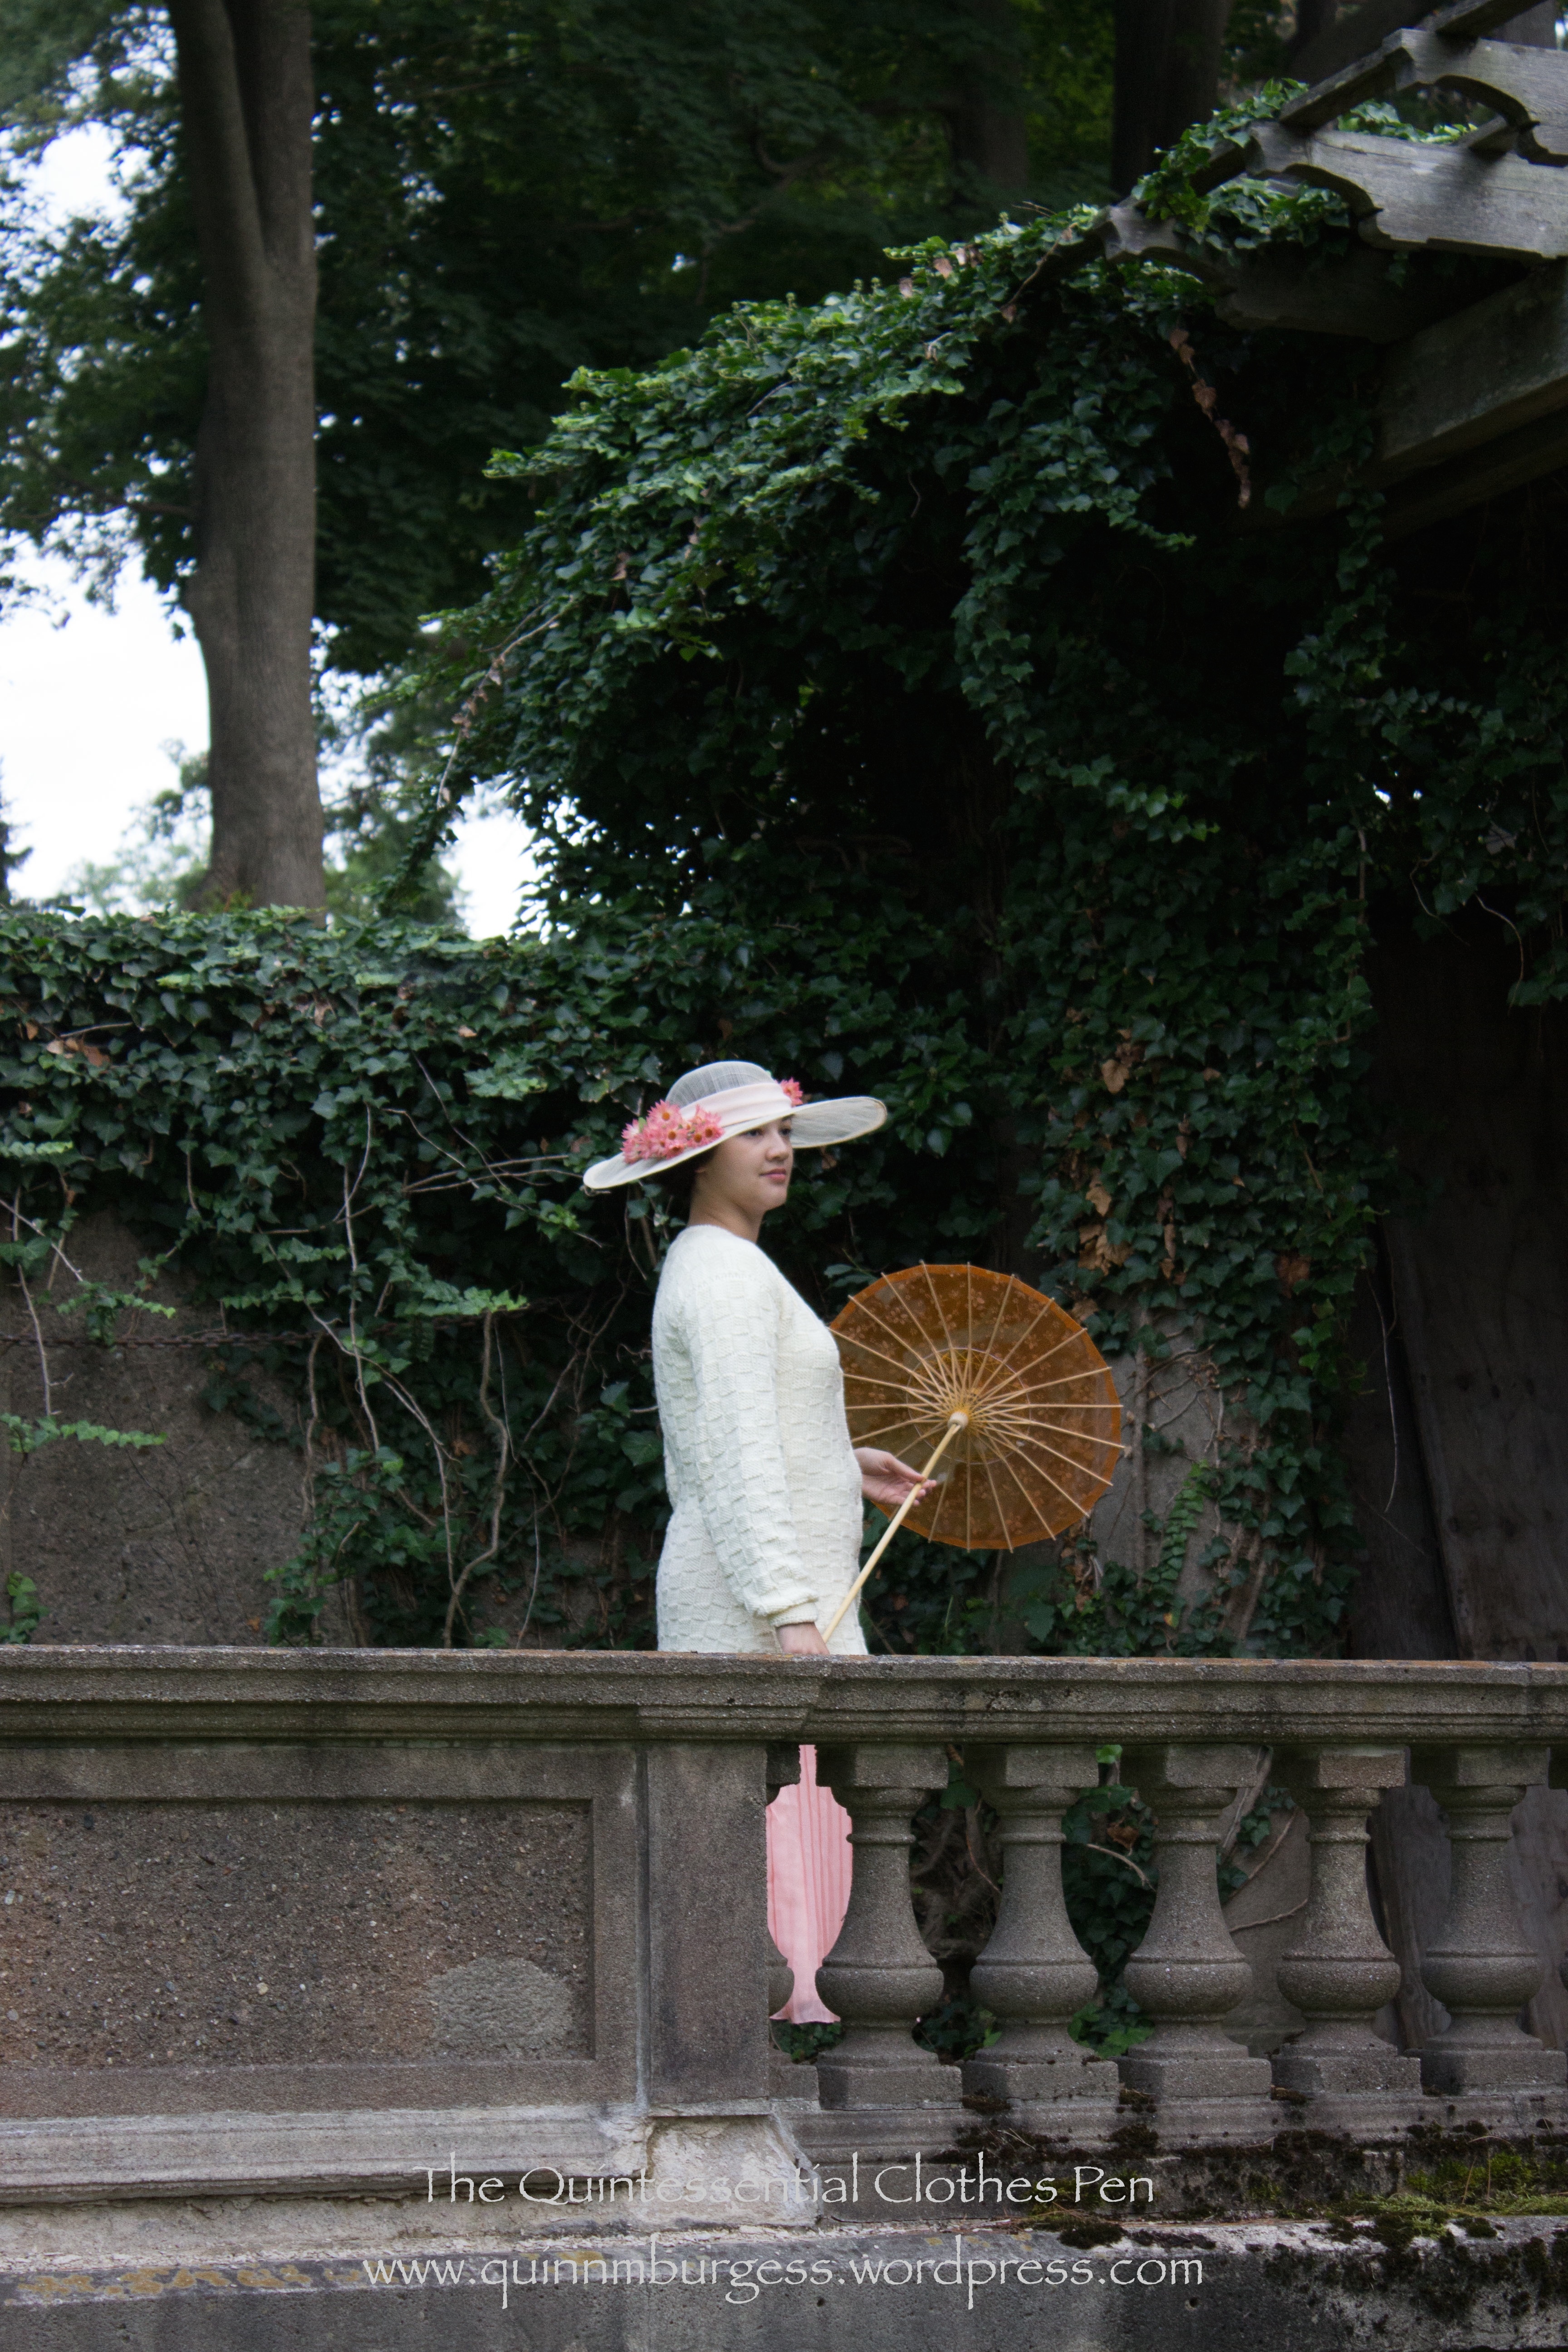
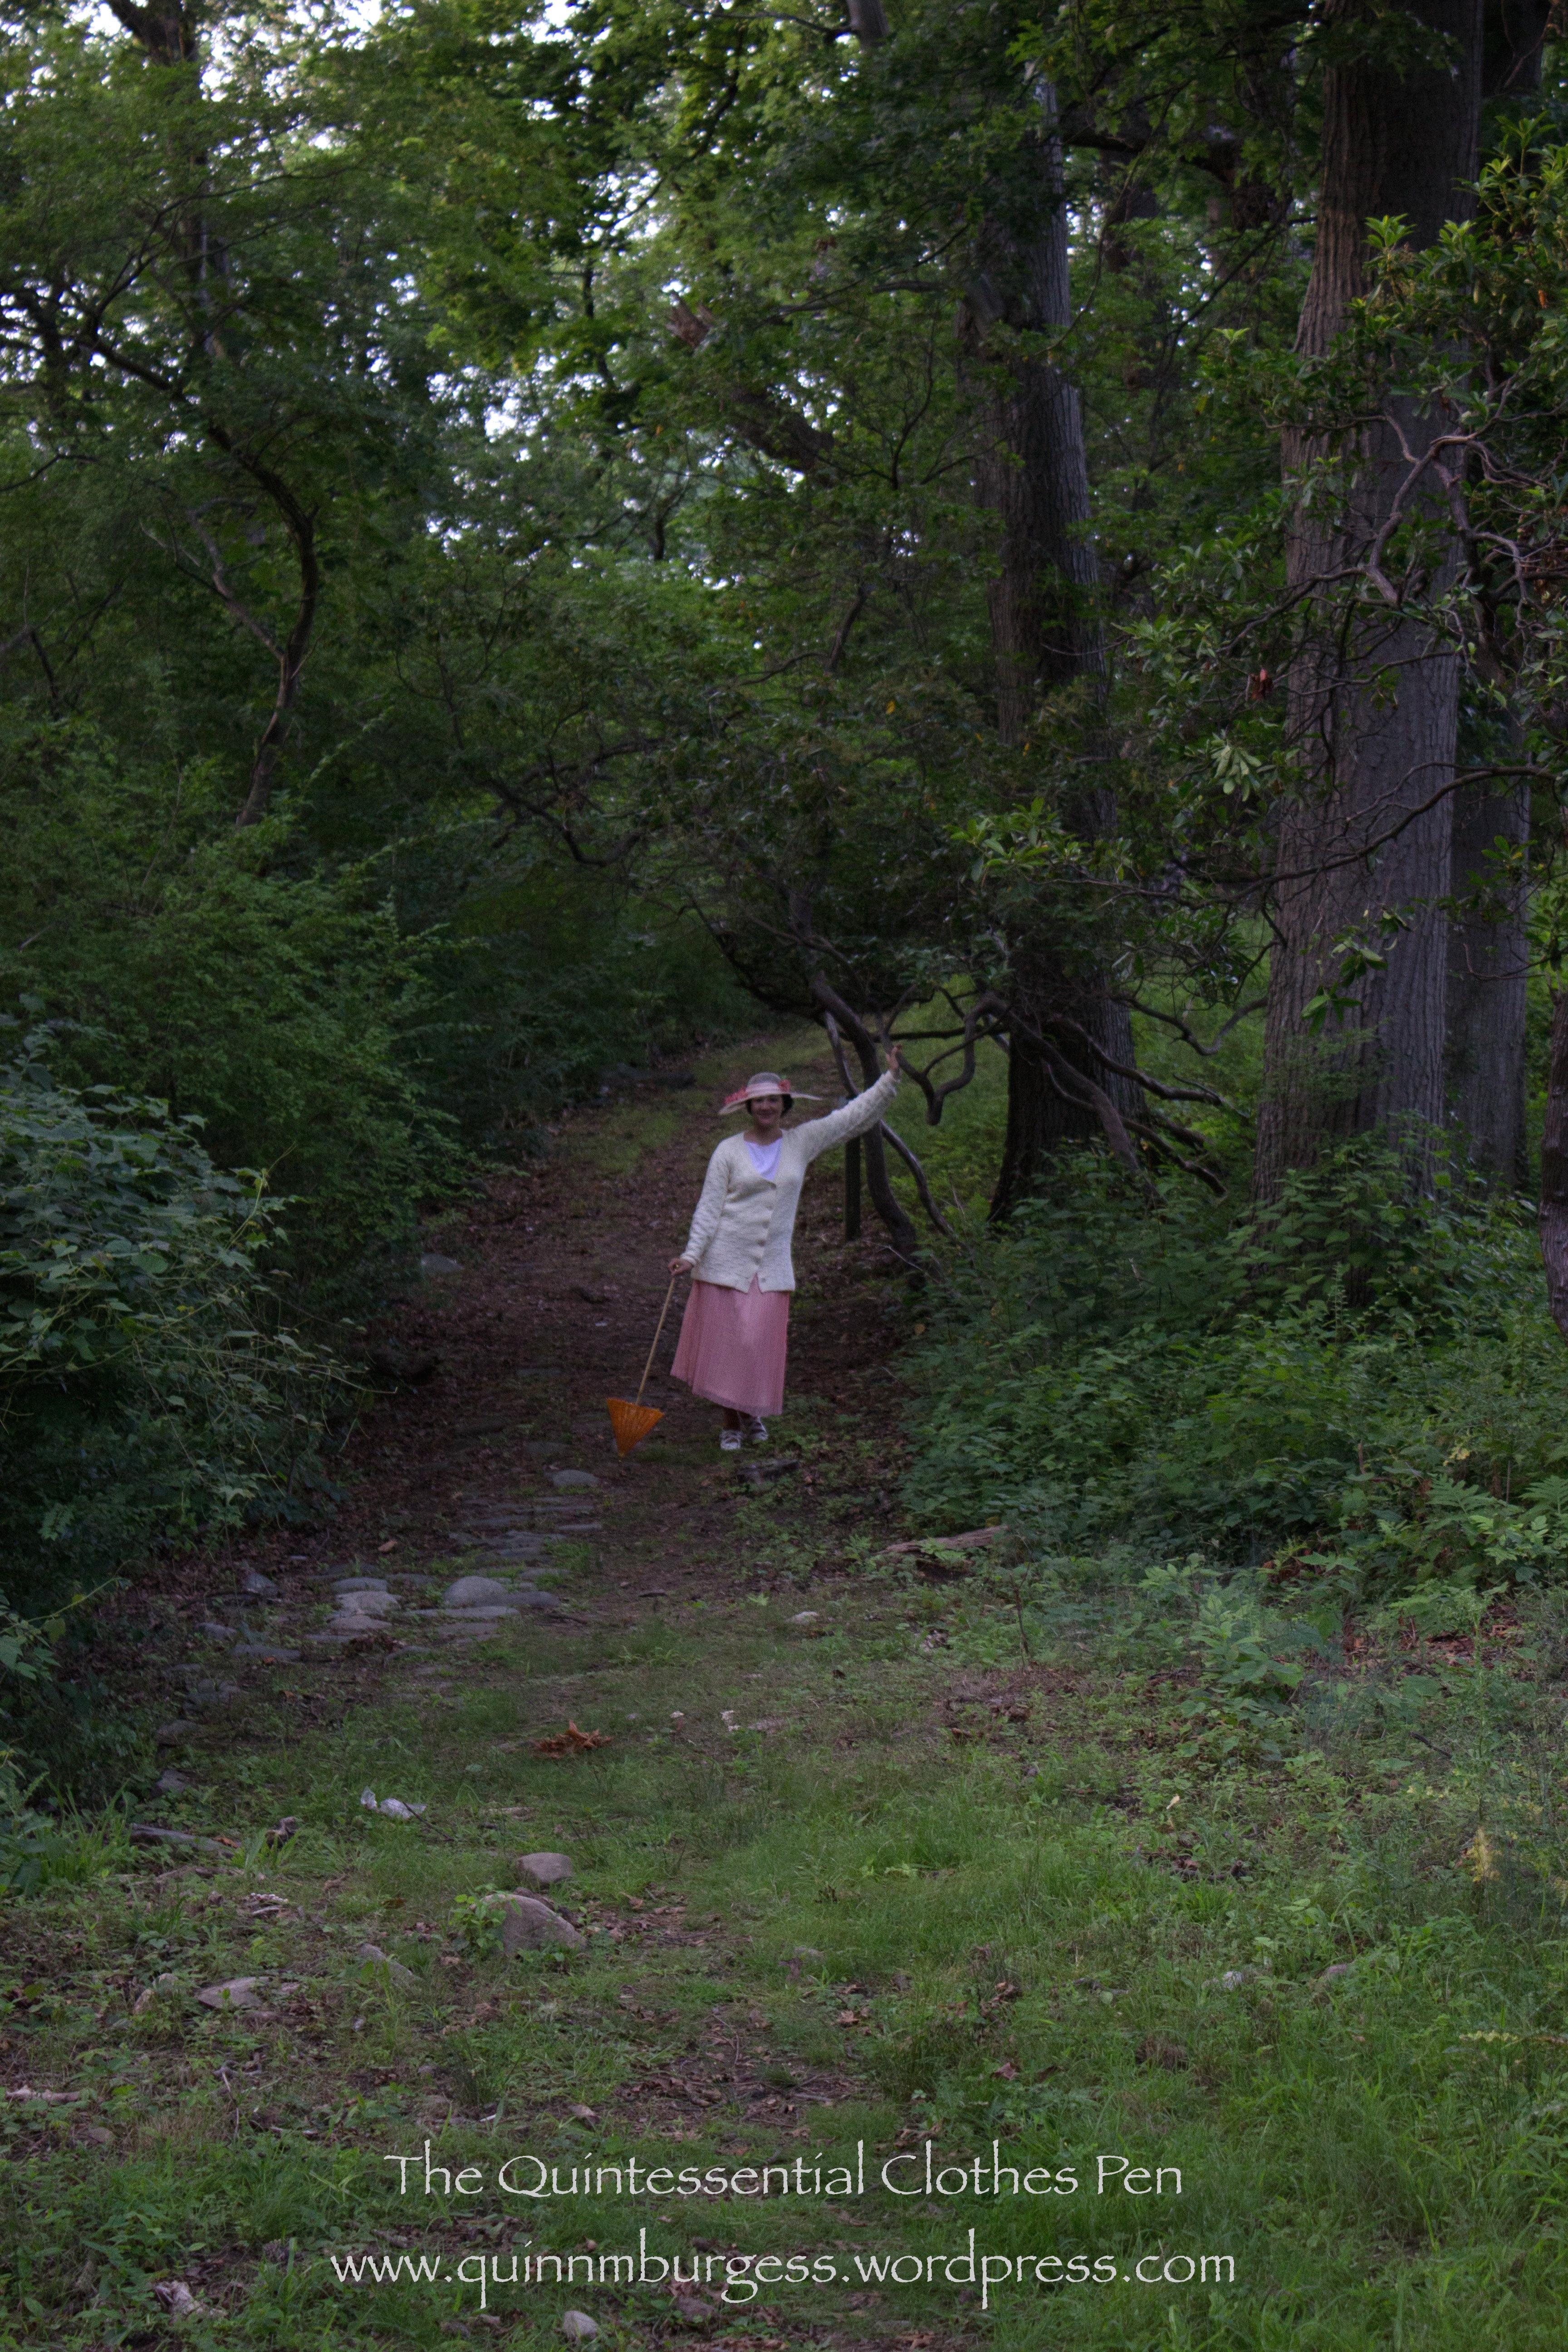
In no particular order, here are a variety of pictures taken around the estate of the entire ensemble. There were quite a few that I liked, for the movement of the fabrics, or the pose, or the background. The wide hat brim was great for hiding my face. Useful, since I am really good at making weird faces and not always the best at making good picture faces.
Looking out over the ocean.In the sunken garden.At the gate to the secret garden.At the beginning of the wooded path.Exploring the wooded path.Appreciating the gnarly trees.Ascending the path.
Of course, sometimes I was the person behind the camera as well (it’s only fair that if I want lots of pictures of my outfits that I also reciprocate!). Here are a few other pictures just for fun. I took all of these except the last one.
Capturing the ocean and the lovely parasol.The house is surrounded by a lovely terrace with stone walls.Through the gate to the secret garden was distant view of marshes.
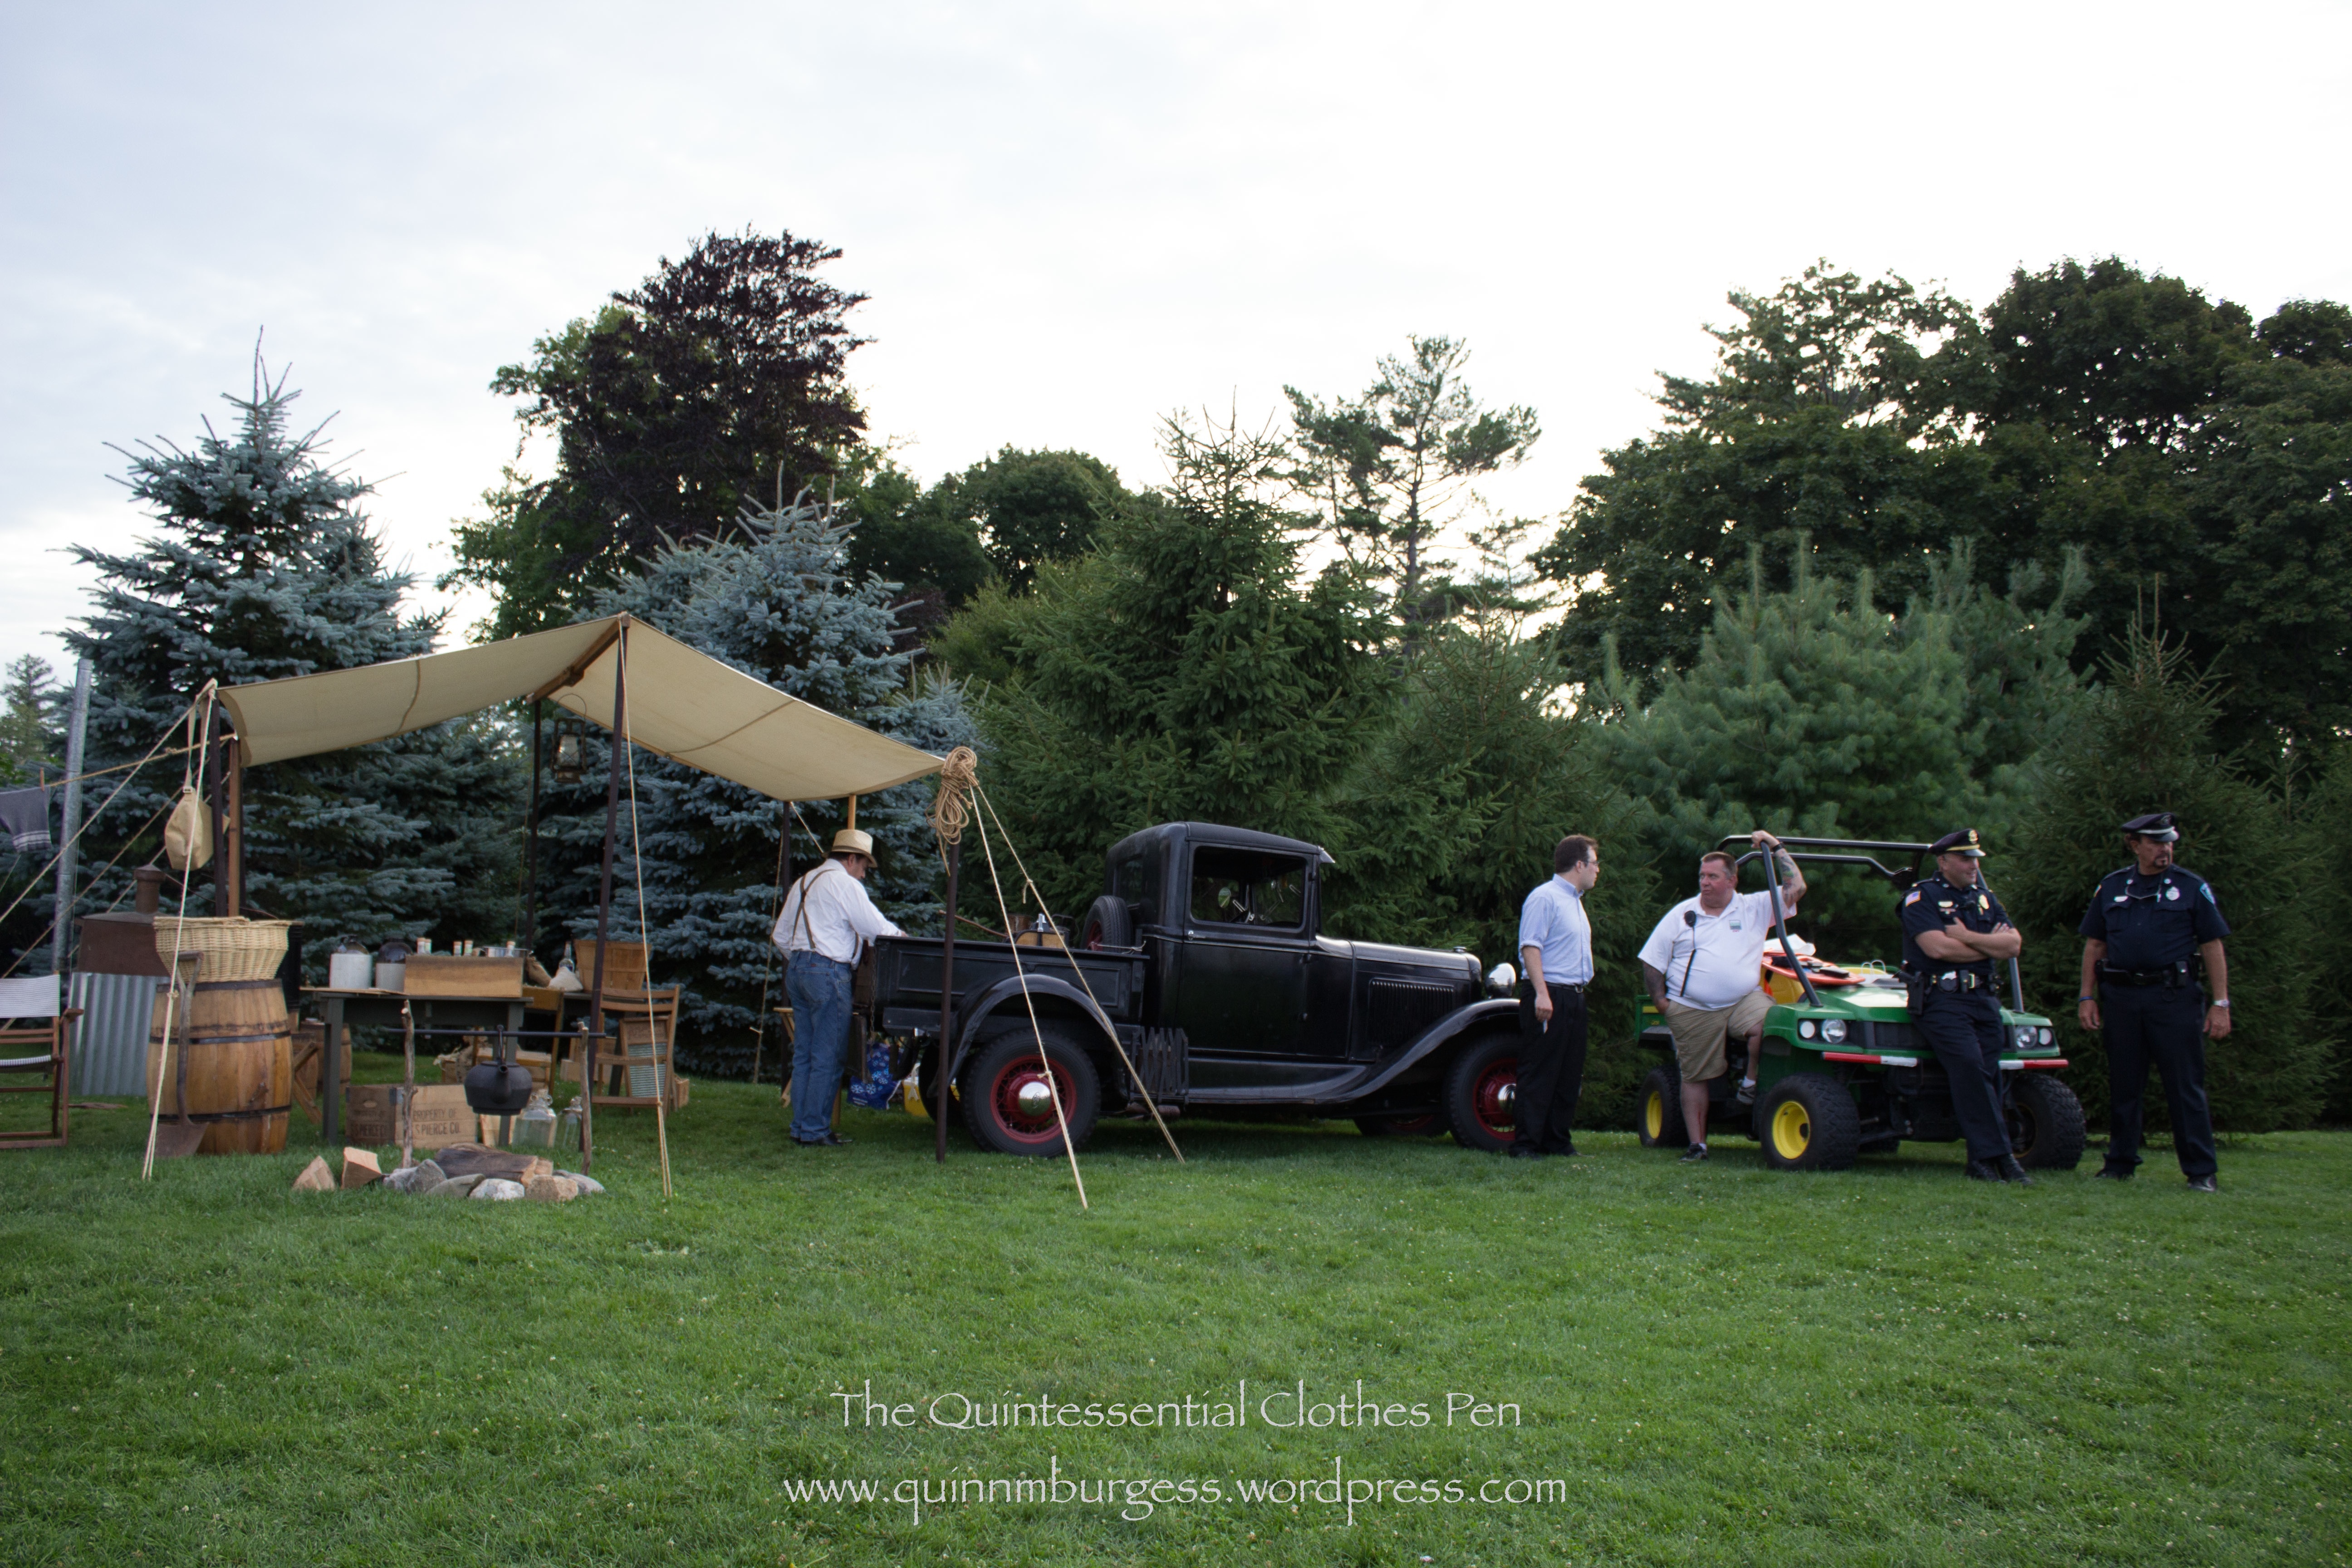
And, lastly, a bit of humor to end the parade of pictures.
One section of the lawn had a great bootlegger setup and I was particularly amused to see the (modern) police hanging out right next to it.
And there we are! All of my recent 1920s accessories have been worn/used and documented in my complex photography files. That’s it for 1920s for awhile.
I thought I’d share a couple of extant round reticules that bear some similarity to the one I recently made and posted about here. These both have a gathered or pleated outer circle surrounding a decorated inner circle. The bottom one uses the same cord as the ties are made of to circle the inner circle. Both reticules have an opening that is gathered to close, though the bottom one’s gathering direction is more unusual and unexpected. I like both, and think they are fun! Do you have a favorite between these?
A cotton reticule that the Met dates to the 1st quarter of the 19th century.A silk reticule that the MFA dates to the early 19th century.
I’ve recently finished another Regency reticule (I say another, because not too long ago I posted about a new red and gold reticule). This one is circular!
I love the round shape.
I was inspired by an image and directions found in The American Girl’s Book: Or, Occupation For Play Hours, which can be viewed here, on google books (the directions for the circular reticule are found on page 262). I was particularly encouraged by having already gathered silk strips left over after adjusting my brown fur muff at the end of last year. In addition to the leftover gathered silk strips, I used some pink silk scraps backed with coutil for the center of the circles, a bit of peach cotton for the lining, pink poly ribbon for the handles (it was the best color, even though it wasn’t silk), and, for the beading, 2 buckles I picked up for $1 each.
I didn’t really follow the directions, instead I just made up my own order of events. I started by cutting out the center circle and basting the coutil to the silk. Then I placed the buckles on these circles and pinned the gathered silk around the edges After that I sewed the edges. The next step was to sew the two finished sides together, then sew a lining of two more circles of the cotton. The last thing was to sew on the ribbons and whip stitch the top edges of the silk to the lining.
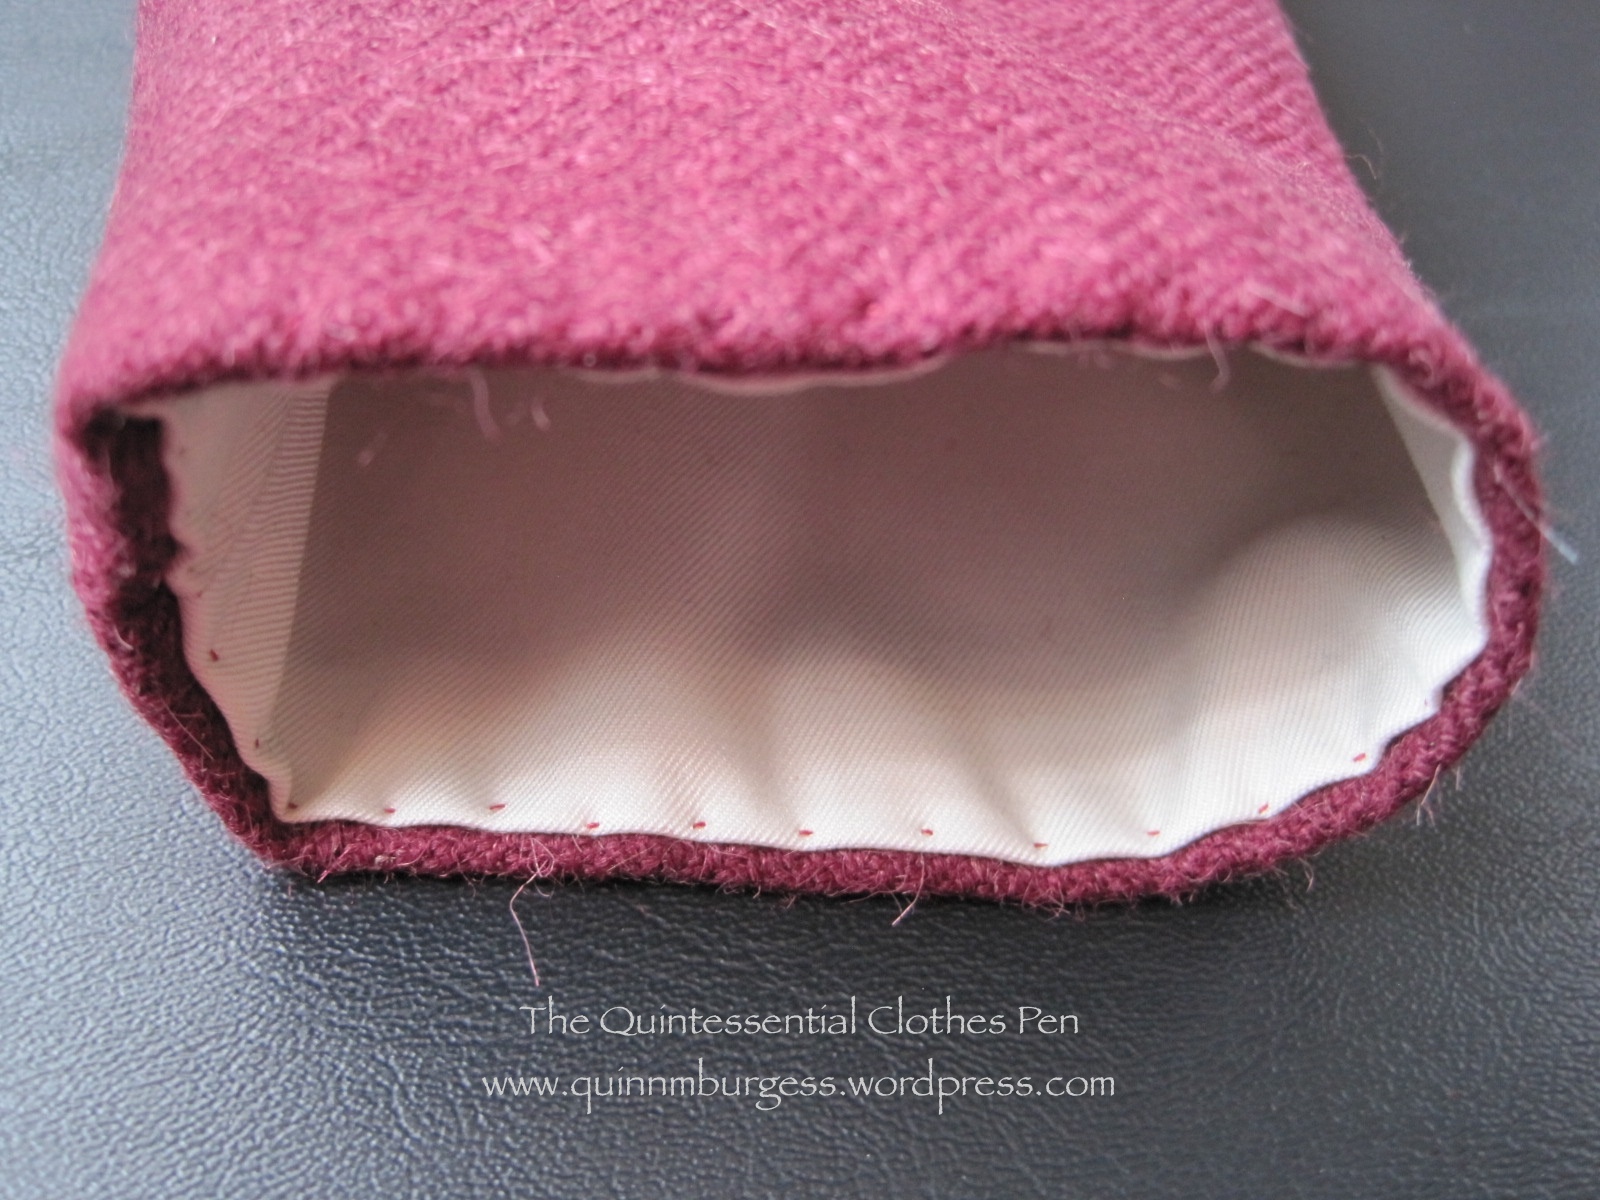
Looking down into the lining.
I decided not to have my ribbons gather the opening, because I so like the look of the circle and really didn’t want to ruin the effect. Plus, the reticule just perfectly fits my phone right now, and if the top was gathered it might not fit! Yay for a relatively quick project that’s entirely hand sewn. It’s exciting to have more reticule options!
This is a follow-up post to my last post: ca. 1860 Corset For Me! (HSF #4). That post has a short background on my reasons for building the corset, but it doesn’t mention other details, so that’s what this post is for!
My new ca. 1860 corset.
So let’s start with more background, since this post is all about intense amounts of details! We’ll start with the pattern I made for this corset: you’ll notice it has bust and hip gores as well as that curved piece on each side of the front. The bust gores aren’t so unusual for a modern 1860s corset recreation, but I don’t see too many corsets made (and certainly not many corset patterns) with hip gores and I’m not sure I’ve ever seen anyone reproduce an 1860s corset with that curved piece in front. I found these details intriguing and wanted to make this style for two reasons: 1, because it’s a style I haven’t seen recreated, but which I have multiple examples of in my research, and 2, because it seemed like it would fit into a new thought I absorbed a few months ago.
1865-1867 corset, The Met
First, a discussion about the style. It seems like a lot of modern ca. 1860s corsets are cut with vertical seams that run from top to bottom of the corset to create shaping, sometimes with the addition of bust gores. (The corset on the right is an example of one from the 1860s that uses this style of seaming to create shape.) These corsets are cut with shaping in the seams to create space for the bust and hips, but an alternative to this is to use bust and hip gores to achieve shape for the body. The interesting thing is that hip gores do not seem to be very commonly used in historic corsets made by modern people, despite their use in historic clothing. I attribute this to the fact that shaped seams are easier to execute than inserting gores of any type, but especially gores that are not in a seam (like the gores in my corset). Also, I would think that pattern companies have an easier time grading patterns using the shaped seams, because the gores (particularly hip gores) really need a lot more individual adjustment and fiddling on a body than shaped seams do.
Second, about this new thought that I absorbed. While reading Merja’s most recent blog posts about corset construction, I was rather surprised by a simple statement that makes so much sense but which I haven’t necessarily followed in corset making in the past (here are Merja’s gusseted 1870s corset, which has the sentence which mentions this magical new thought, as well as her 1880s purple corset and 1860s white corset with seaming like the Met corset, above, which exhibit the thought without it being explicitly stated). Essentially, she says that she always makes adequate space in the corset for bust and hips, so that the corset is only constraining her waist. Duh! A related thought is that when you tighten your corset you displace some bits to your bust and hips, so your corset really does need adequate room there to accommodate the normal and the extra. That makes so much sense and sounds so much more comfortable than having a corset that digs into your hips or pushes your bust around uncomfortably. I made the goal to take this approach for the new corset and all future corsets! and this new corset was my first attempt at really following this sound piece of information.
So given that the style I set out to make is one that I haven’t ever seen a pattern for, where did I get mine? Well, it’s loosely based off of one in Corsets and Crinolines by Norah Waugh (the pattern is ca. 1873, pg. 80). I say loosely, because I started there, but then began combining pieces and changing the shape of them to suit my measurements and the seam placement that I wanted (most importantly the hip gore and that curved front piece). Interestingly, Waugh notes on a different corset pattern (ca. 1860, pg. 78) that the 1860s style of corset without bust or hip gores (more like what I seem to see in modern made ca. 1860 corsets like the one from the Met at the top of this post) was a style preferred in France. The English preferred the style of corset I am making with gores. (Merja’s white 1860s corset I mentioned in the pervious paragraph uses this French corset pattern in Waugh, if you’d like to see what it looks like made up.)
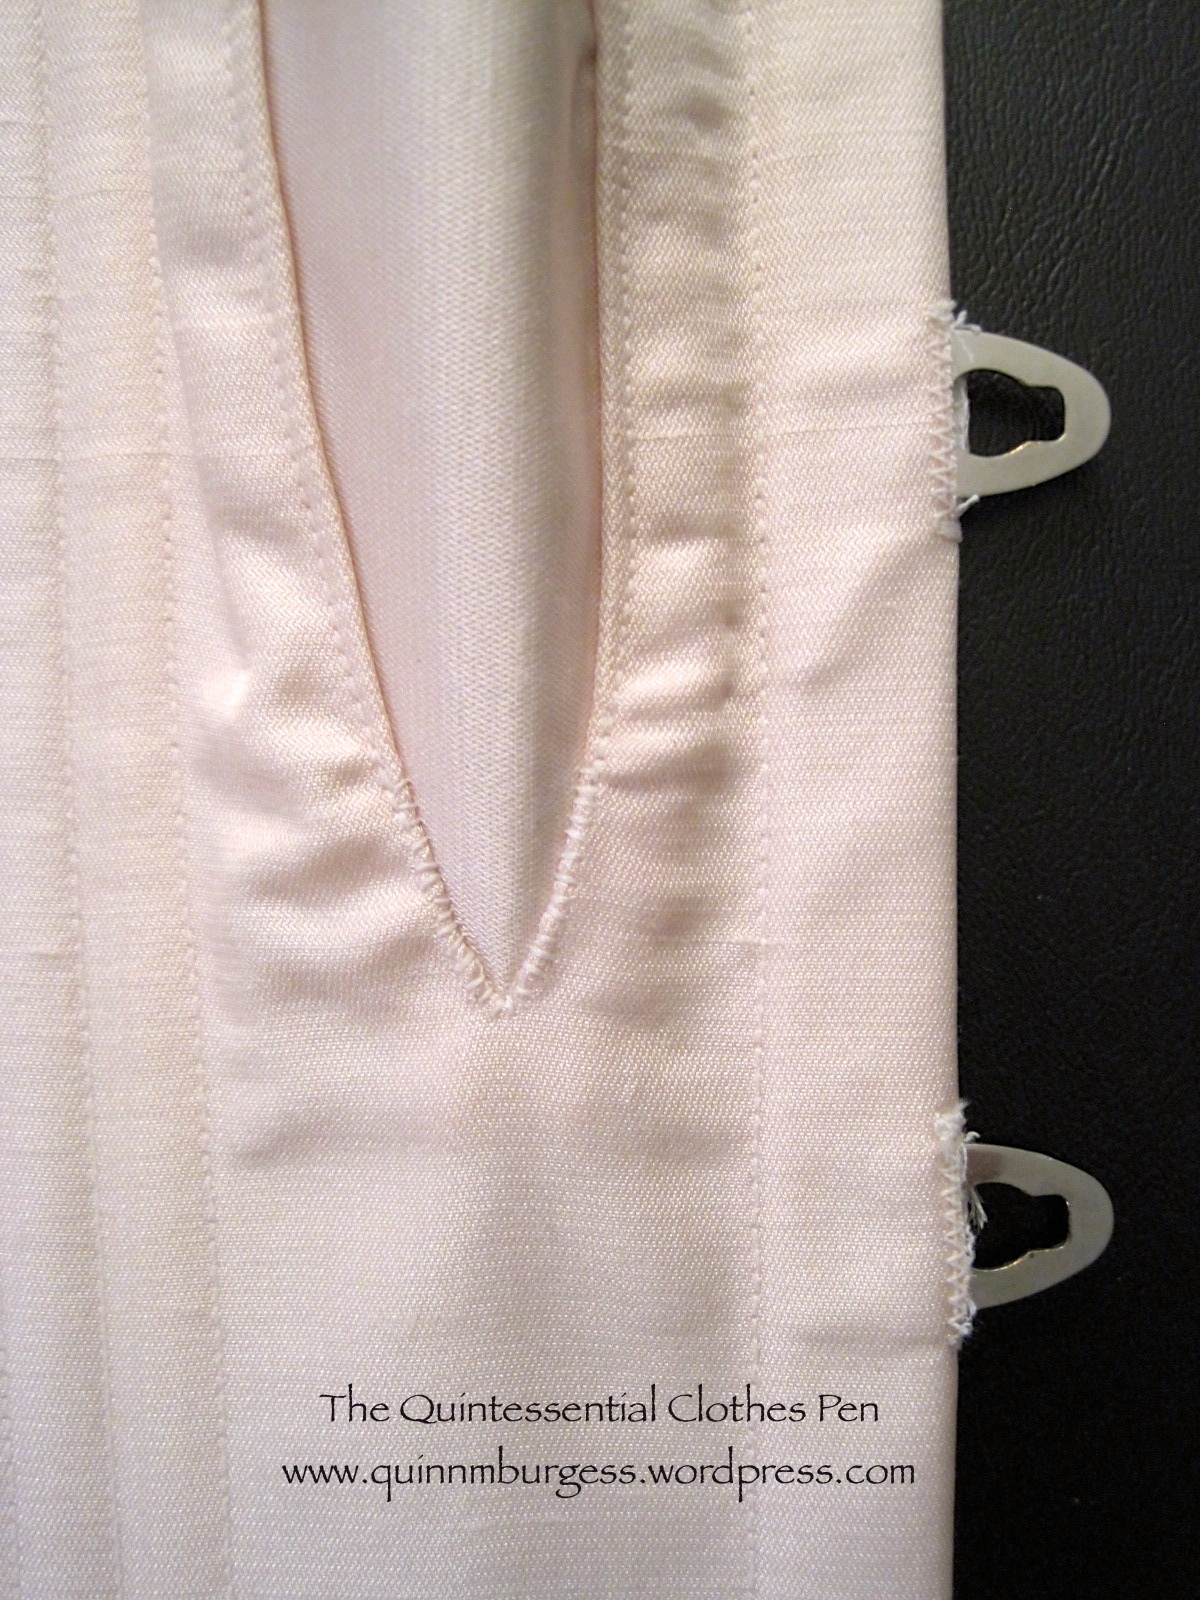
I wound up making two mockups to get the pattern the way I wanted it even after adjusting the pattern from the beginning (and still made a few alterations before cutting out my real fabric). The original pattern in the book had a waist that was much too small and a bust that was a little large relative to my measurements. Despite my changes, the first mockup was too short waisted, needed bigger and longer bust gores, smaller hip gores (I had overestimated how much ease I needed there), and a little bigger waist. The second mockup was still a little short (I added another ½” to the top), the hip gores were still just slightly too big, and the lacing gap between the back pieces was wider than I wanted it to be by about 3″. Ugh! I actually determined that last fact after cutting out and sewing up my actual fabric. Turns out my shoulder blade area is bigger than I thought. I had an inner struggle about if I wanted to take out the small stitch size flat felled seam to insert a piece or if I wanted to just let it go. Adding a piece won in the end, because I figured that I was spending so much time on the corset that I really wanted to be pleased with it and not have nagging doubts for the next number of years until making a replacement. (The piece I added is between the front and back pieces. You can see it easily in the first picture in this post. It’s a v shaped piece that extends from top to bottom.) Adding the piece actually wasn’t so bad, despite all my inner complaining and I’m very pleased I did it, because I am happy with the result.
1864 corset, The Victoria and Albert Museum.
That’s all the aspects of choosing the pattern and executing it. Now I can move on to my inspiration for creating it. This blue corset at the V and A is the most thoroughly photographed piece of inspiration (click through, there are lots of different angles of the corset, and close up pictures!). As you can see, the blue corset has bust gores, that curved front piece, (and if you look at the pictures of the back…) hip gores, as well as useful close up construction photos showing the flossing, how the busk is sewn in, how the binding is sewn on, etc. You can also see great detail for things like how to sew the points of the bust darts and the tops of the hip gores: they are overcast near the tips of the bust gores and tops of the hip gores before being machine sewn with topstitching to the binding. I used this method in my corset, sewing the overcasting by hand. I found that it was very useful on the bust gores (since mine are set into a slit in the fabric, not a seam) because the amount of seam allowance near the points is negligible (like, less than ⅛”) and that would have been extremely frustrating to try and machine sew! Also, the overcasting kept the edges from fraying as I was working with them. It also adds an extra measure of stability and sturdiness to those areas.
1839-1841 corset, The Met.
Other very useful images to me were this orange 1860s corset front and side views (with generally similar lines as the blue V and A one) and this 1862 Godey’s image of a corset (with very similar lines as the blue V and A one). (As a side note: Does anyone know what collection houses the orange corset? I’ve only been able to find images, but no real source.) These corsets provide a nice end date range for my corset pattern, because in the 1870s the corset begins to change shape. But to determine a good start date for my corset I had to look elsewhere. The Met has a corset dated 1839-1841 with similar hip gores and the front curved piece (great zoomable pictures including an interior view, click through the image!), but it does not have separate bust gores (they are cut in one with the front pieces as is usual for 1840s corsets) and it does not have a front opening busk (those weren’t in general use until 1849). The 1839-41 corset is more curvy than the 1860s ones, as you would expect from an 1840s corset, but it still looks like a forerunner to me! Waugh has an 1844 corset pattern (pg. 77) that has similar lines to the 1839-41 Met one, with bust gores but without hip gores or the curved front piece. These 1840s corsets are useful for determining the start point of my date range, which seems to safely be the 1850s. Thus, my corset is dated ca. 1860, which is just a shorter way of saying 1850-1870. That makes sense looking at the silhouette of the dresses from these decades, as well, since neither the 1850s or 1860s require the curvy shape of 1840s or 1870s corsets.
EDIT: The orange corset mentioned above is in the collection of the Manchester Art Gallery via this link.
I used all of these different images to look for construction details to use in my corset. Specific things I was looking for include: stitch size, width of the binding, method of sewing the binding, placement of bones, design of flossing, seam placement, method of setting bust and hip gores, location of topstitching, placement of eyelets down the back, finishing of the interior of the corset, and length of the busk. Some of these things can be determined by looking at the extant corsets I’ve shared in this post, but others required other helpful research. Specifically, the gusset construction method I used came from this image that Merja shared in her 1870s corset post. It’s from 1872, but is still relevant for my corset, because if you look at the blue and orange corset pictures you will see it used on the overcasting at the bust and hip gores. This image, from 1868, shows similar methods as well (and has a selection of mostly French and a few English style corsets if you’d like to see more examples of those).
And now, here are the close up construction details of my corset that I promised.
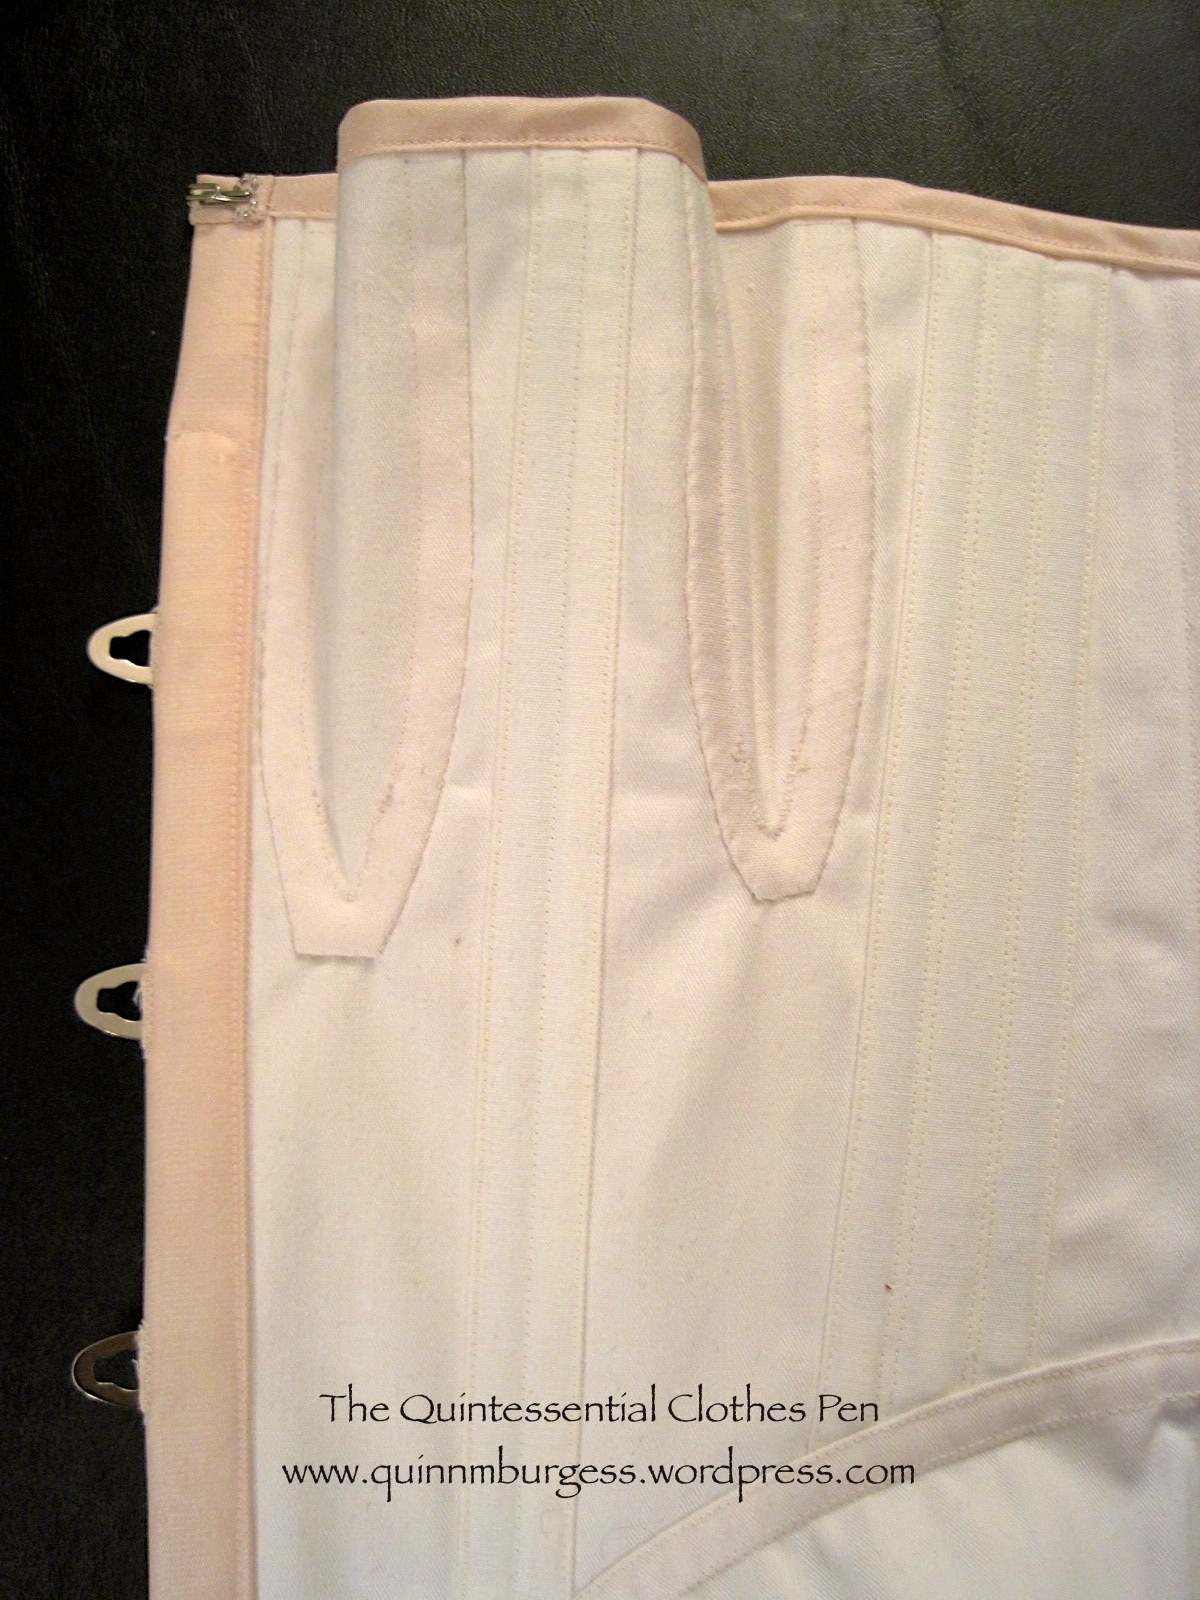
An interior view of my corset. It’s important to me that the inside of garments is as nicely finished as the outside, as you can see. It’s a little hard to see, but the grommets near the waist are set closer together than the ones a the top and bottom.Details: Hand sewn overcast stitches at the bast of the bust gore and machine top stitching above that. Machine sewn button holes for the busk hooks (I’ve found this method to be much sturdier than leaving a gap in a seam on the edge).Details: The busk is top stitched around the top curve to keep it from moving. There is flossing at the top of the boning channels (every boning channel is flossed at the top and bottom). Machine sewn top stitched binding.Details: The top hook of my busk is a few inches below the top of the corset, so I added a hook and thread loop at the top to keep it closed. I used coutil cut on the straight of grain for my boning channels: the edges are pressed under and then they are topstitched into place and into the proper number of channels (keeps the inside tidy and doesn’t require extra notions!). The seam allowance of my bust gores is turned under and flat felled by hand with a whip stitch that only catches the coutil. The curved front piece is flat felled by machine.Years of use have caused my busk to have a bend in it at my waist line. See how it curves up from the table in the middle? Impressive, really, that my body can permanently change the shape of metal.
I’m hoping to get pictures of the corset on me this weekend at its first ever wearing. Hopefully I’ll be able to share those in the near future!
Unfortunately, I’m a few days late completing my project for the HSF Challenge #4: Under It All. I tried really hard on this one and was definitely motivated to keep working consistently by the fact that I wanted to get it done for the HSF challenge. I was held up by a severe cold that took me out for about a week and other dealing with life things. So while I’m late, I’m super glad and excited to be done with this project (especially because the last two days have included a lot of flossing, and my fingers/hand muscles are so done with that for awhile)!
The last ca. 1860 corset I built for myself was made in 2006 or 2007 (you can see it in this post). It’s been worn more times than I can count and has stood up to the test of time and tension well, especially considering it was the first corset I ever made! But the time has come for a new corset for this period–one that is made to fit me using all the skills in pattern making and construction that I’ve gained over the last 7 or 8 years.
I realized while working on this corset that aside from building my first corset to fit me in 2006 or 2007, the only other stays or corsets I wear with my historic clothes that were made to fit me are my 18th century stays, my short Regency stays, and my c. 1825 long stays. I wear other corsets from 1895 (hm, I don’t think there are pictures of this on the blog), 1903, and 1913 but none of them were constructed to fit me (though I did construct them beautifully!). I’ve made them work and they sort of fit me, but all of them have problems because they were made to fit other people: a busk that’s too long, being a little small, especially in the hips, or being too big and needing a tuck. So it occurred to me that I should probably invest in making a few more corsets made to my measurements for the Victorian and Edwardian periods. Sounds obvious, but it was a revelation to me when I sat down and thought about it!
So that’s what this project is: a ca. 1860 corset made to fit me!
Hard to see the details in this picture, I know. There will be detail shots and lots of commentary in an upcoming post!
I have lots of other thoughts and inspiration to share with regard to this project, but I expect it to be lengthy, so I’ll be writing it up in a separate post. Plus, I want to post about my completion of the challenge as soon as possible. So for now, the very much condensed details.
Fabric: 1/2 yd ish of white herringbone cotton coutil and ½ yds ish of slightly slubby pale pink silk satin.
Notions: Metal boning, metal grommets, a recycled metal busk from my old ca. 1860 corset, regular weight ivory thread, and heavy weight ivory thread for flossing.
How historically accurate?: Pretty darn accurate, I’d say. I wanted to create a corset using the seam lines found in extant garments, but which don’t seem to be much recreated. I used construction methods that are accurate as far as I know. Let’s say 90% because you can’t ever quite make it to 100% if it’s modern, can you?
Hours to complete: A lot. I didn’t keep track, but I’ve been working on this for at least 2 or 3 weeks, and some of those days have been a full day’s work on the corset, not just evenings.
First worn: Has not been worn yet, but will be worn to a ball in March.
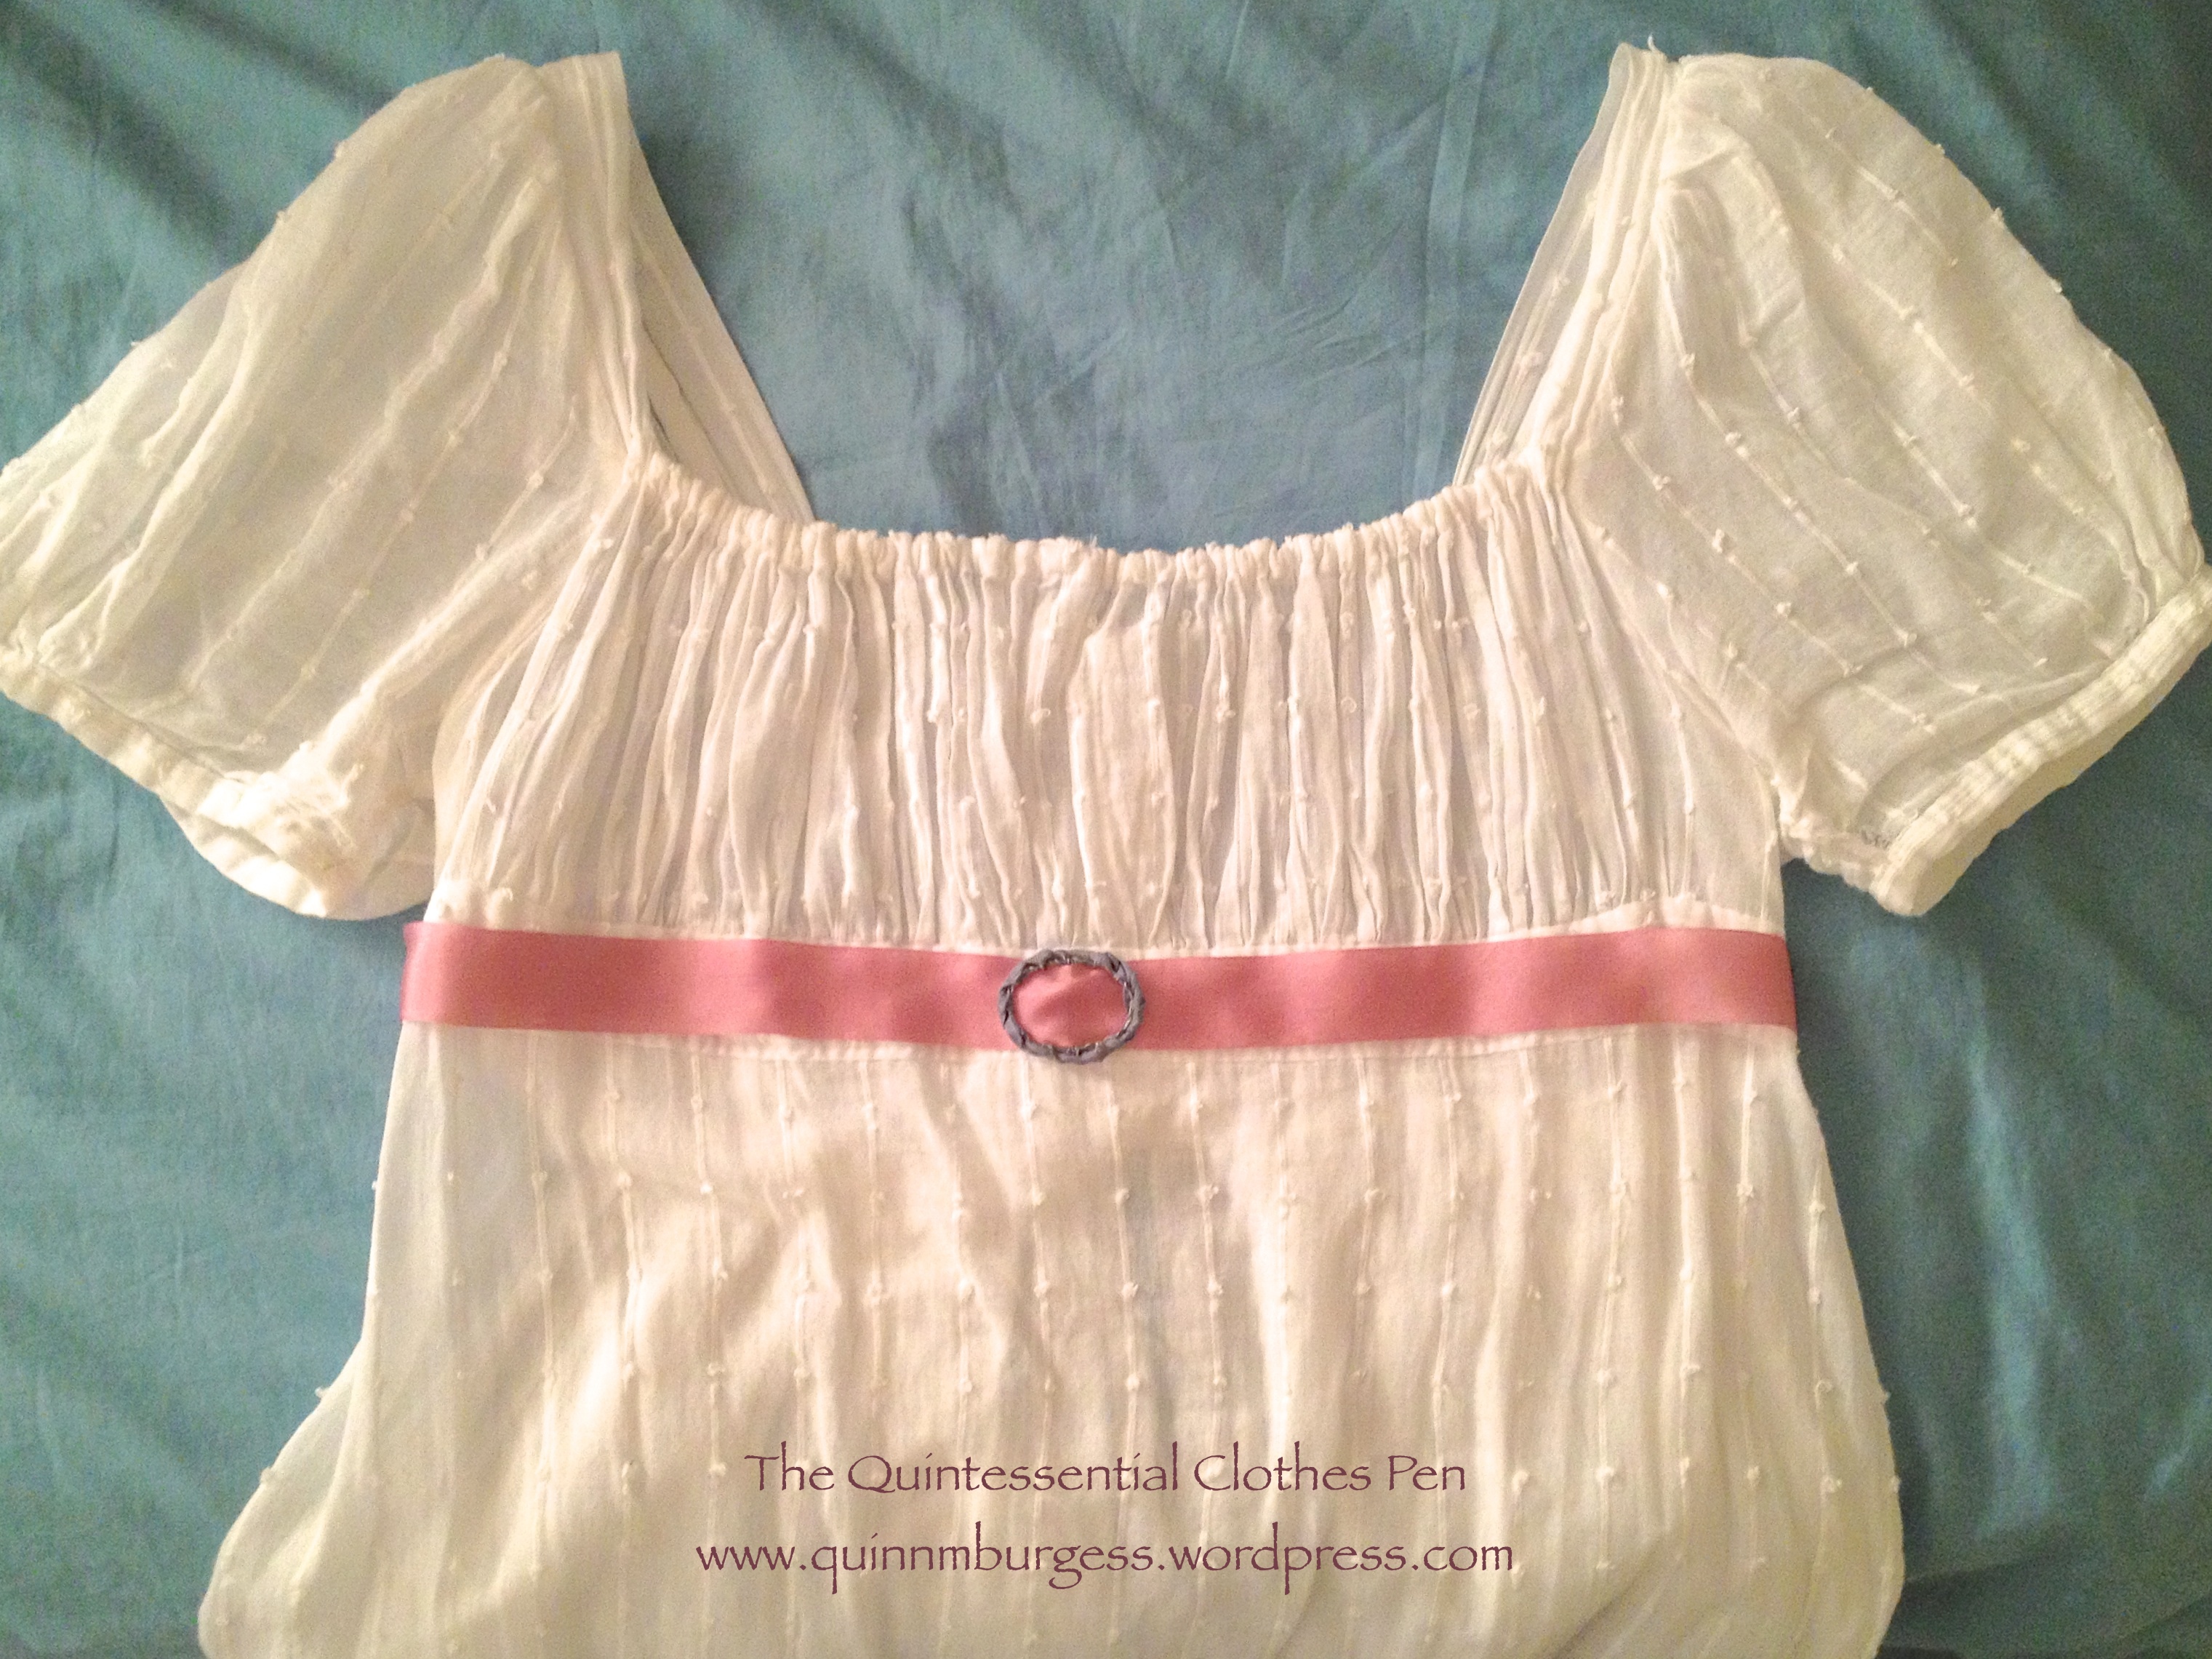
My project for the HSF Challenge #3: Pink is a silk belt style sash for my square neck 1812 gown. It’s a small project because I’m working on multiple other bigger projects (two different Regency dresses and a new 1850-1870 corset–more on those in the upcoming months) and I didn’t want to distract myself. Part of my decision to make a belt style sash came from the discussion with friends that led to my previous post on adding variety to Regency sash styles (this post explains what I mean by a belt style sash, in addition to explaining other Regency sash styles).
And now, as usual, on to the facts:
Fabric: None.
Pattern: None.
Year: c. 1810
Notions: About 1 yard pink silk ribbon, some unknown yards of 28 gauge wire, maybe 2 yards grayish blue hug snug, a hook and bar, and thread.
How historically accurate?: Silk is an accurate material, but nothing else is for this time frame. So… maybe 80% for looks and 40% for materials.
Hours to complete: More than it should have because I made the buckle from scratch. Let’s say 4.
First worn: To a vintage dance performance in January.
Total cost: Free (all stash materials)!
I didn’t have a non-sparkly buckle in the right size, so I decided to make one from wire. At first I thought that it might be cute with the scallops around it, but it didn’t look solid enough from a distance. So I experimented with weaving ribbons through and around the scallops. I tried gold silk ribbon first but it ended up looking like straw. In the end I decided on the hug snug because I liked the color.A closeup of the finished buckle. It wound up looking rather braided.The finished effect.
For the performance, I sewed the belt to the dress even though I also sewed a hook and bar to the belt. The idea is that I can wear it with another dress in the future if I want to!
I’m taking a quick break from the 1950s adventure posts to insert my HSF #21 post into the mix. More 1950s coming soon!
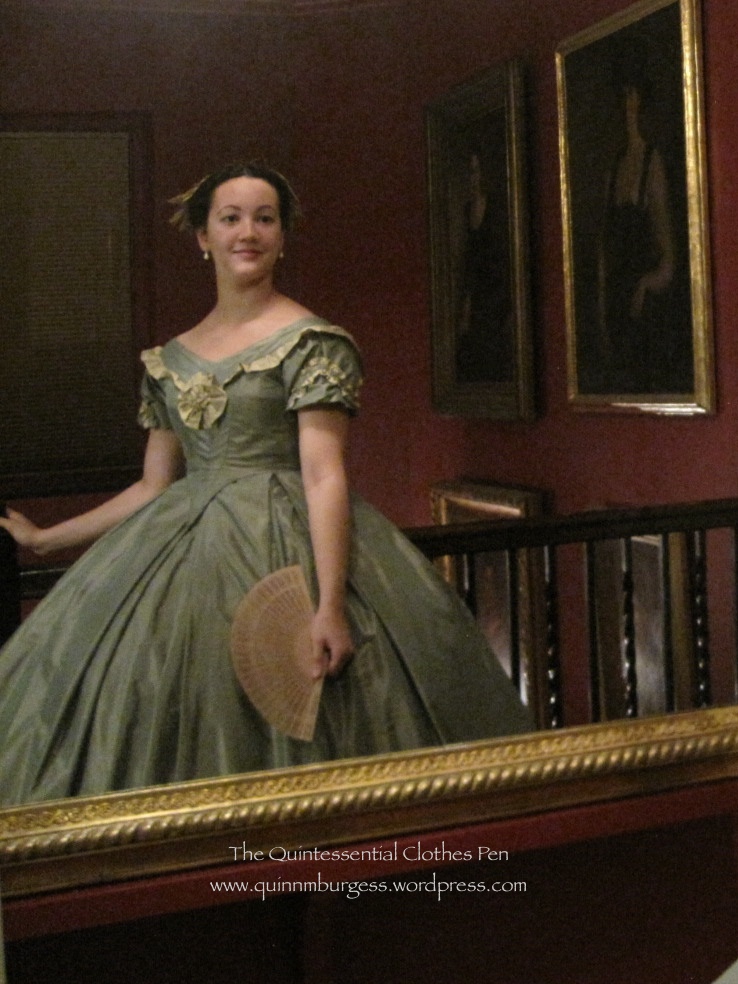
It’s been on my sewing list for a few months to add a bit more trim to the sleeves of Evie, my most recent Civil War era dress, but I’ve been working on knitting my sweater and completing other projects, like my 1822 Walking Dress, so I hadn’t really been inspired to complete the trim. However, the Commonwealth Vintage Dancers were asked to run a ball as part of recent Civil War reenactments in Worcester, MA, and that gave me the perfect incentive to finish up trimming Evie! She also happens to be green, so this is my entry for the HSF Challenge #21: Green.
Oh yes, I forgot I had some other minor changes to make to Evie since I last wore her in March as well. Boring things, like changing out the boning at center back, and enlarging the armsceye a bit under the arm, and adding hooks and bars to connect the bodice to the skirt. I got all those things done, too, though they don’t get their own photographs. I really like the added trim. It gives the bodice a little bit more interest and helps balance out the immense skirt.
Here is Evie, with her new sleeve trim.Another view. The sleeve trim is a smaller scale version of the trim on the skirt.A cropped version of the picture above. I can’t decide which way I like it better, so I’m including both.And here is what the bodice of Evie looked like before I added the sleeve trim.
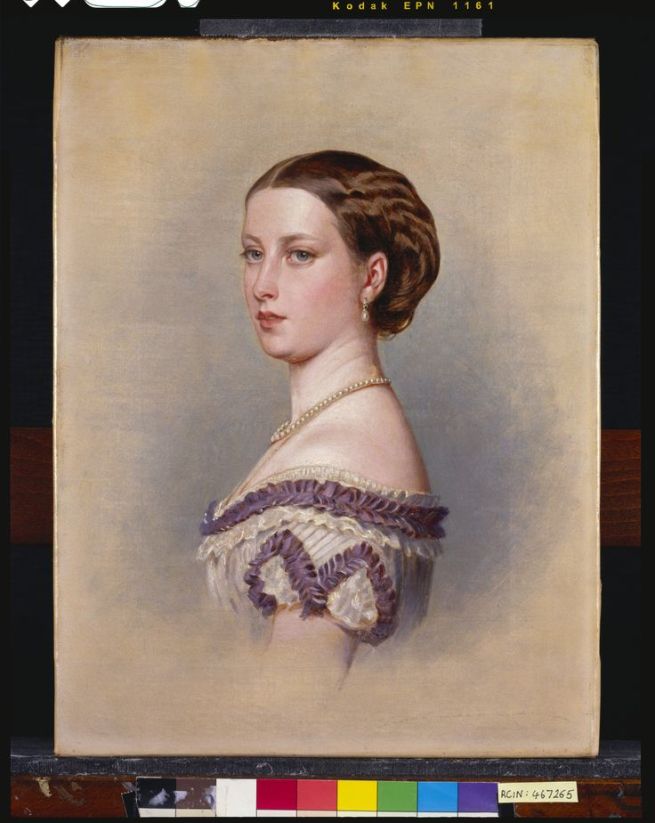
Most of the trim on this dress is based on two images I discussed in this previous post: a fashion plate from 1864 and a costume made by Tirelli Costumi. The sleeve trim is based off of yet a third inspiration source: the painting, below, of Princess Helena in the Royal Collection. It’s perfect that it’s from 1864, just like my inspiration fashion plate. It’s even better that it echoes the bertha trim I already had and the zig zag on my skirt.
This is a copy by William Corden (1819-1900) of the portrait of Princess Helena by Albert Graefle (RCIN 403988). The original was painted for Princess Helena as a birthday present for Queen Victoria on 24 May 1864. Princess Helena (1846-1923), nicknamed Lenchen, was the fifth child and third daughter of Queen Victoria and Prince Albert. She was lively, outspoken and something of a tomboy. In 1866, two years after this portrait was painted, she married Prince Christian of Schleswig Holstein and in 1916 they celebrated their Golden Wedding anniversary; she was the only child of Queen Victoria to do so. Queen Victoria recorded in her Journal that ‘Lenchen’s picture by Graefle, is extremely good & pretty’.
Now, the facts:
Fabric: small bits of leftover gold silk shantung and green silk taffeta from the construction of the dress.
Pattern: none.
Year: 1864.
Notions: only thread.
How historically accurate?: Well, shantung is not accurate, but silk is (and this doesn’t look very shantung-y). I give this trim a 98% on accuracy.
Hours to complete: 4? All hand sewn.
First worn: With the new trim, on October 11, to a Civil War ball.
Total cost: $0, because it’s leftovers!
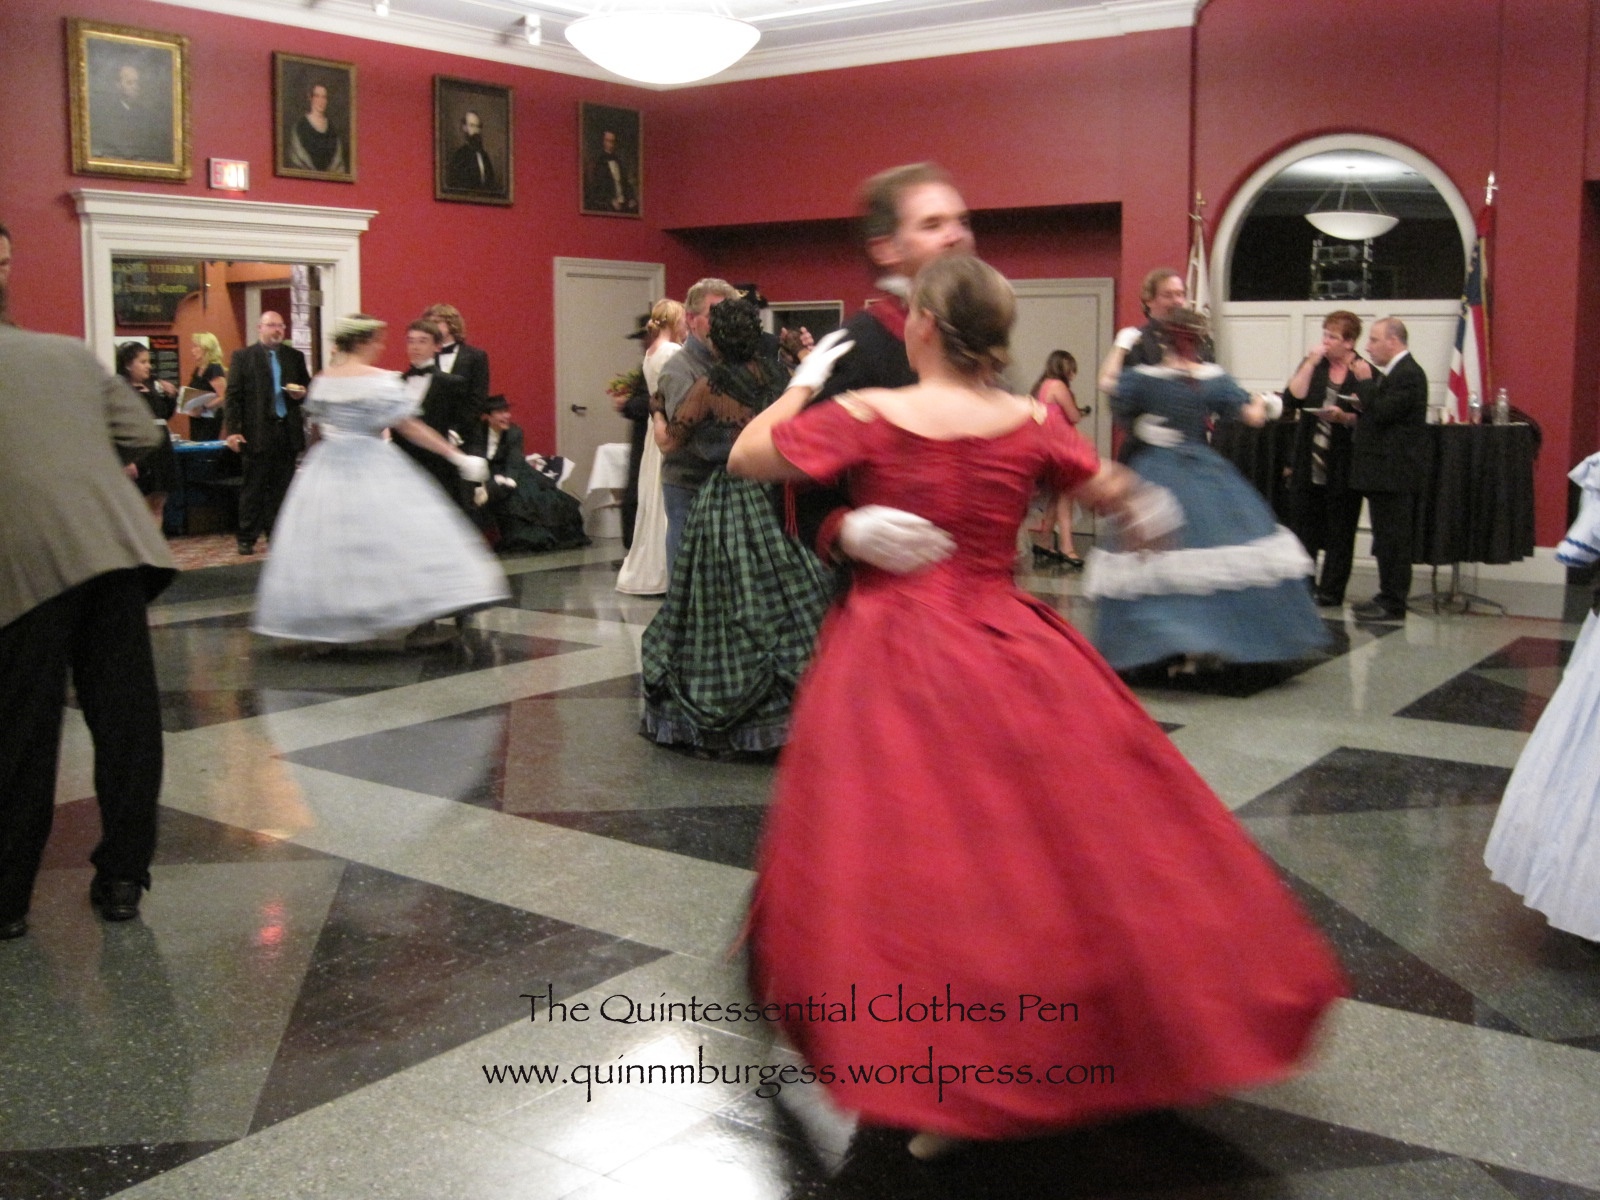
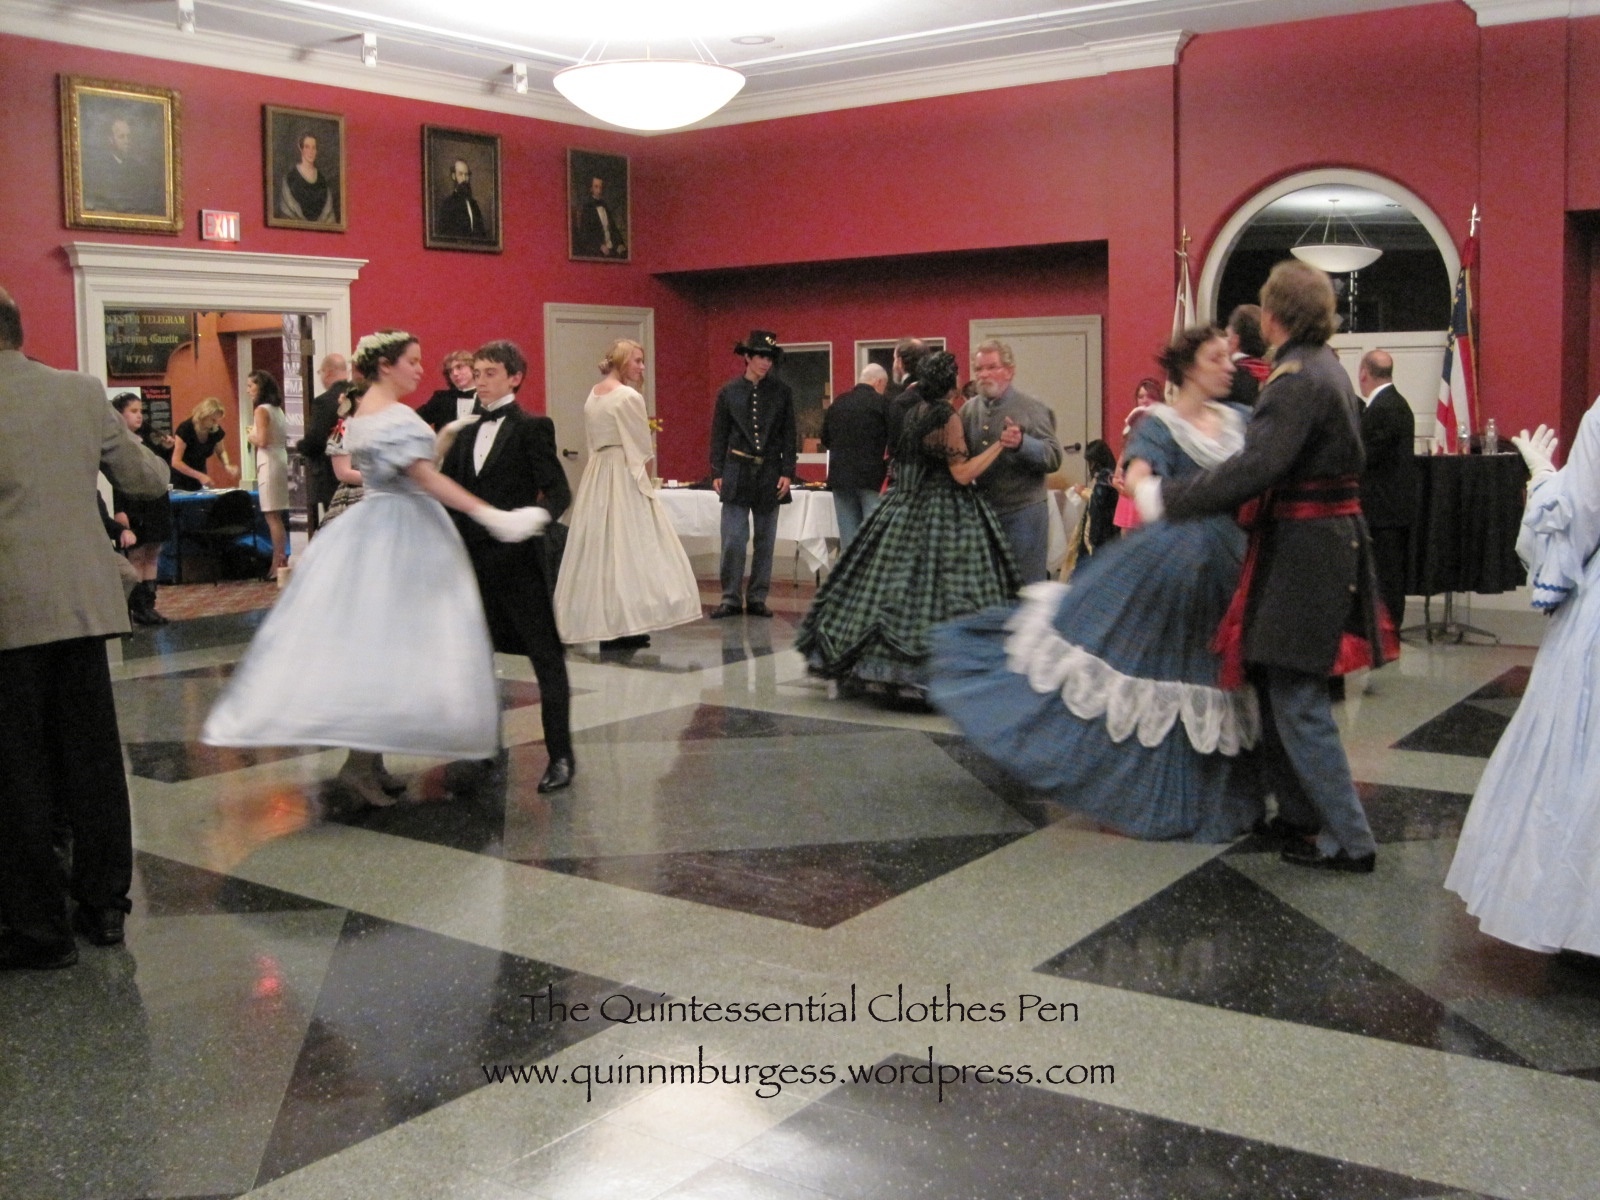
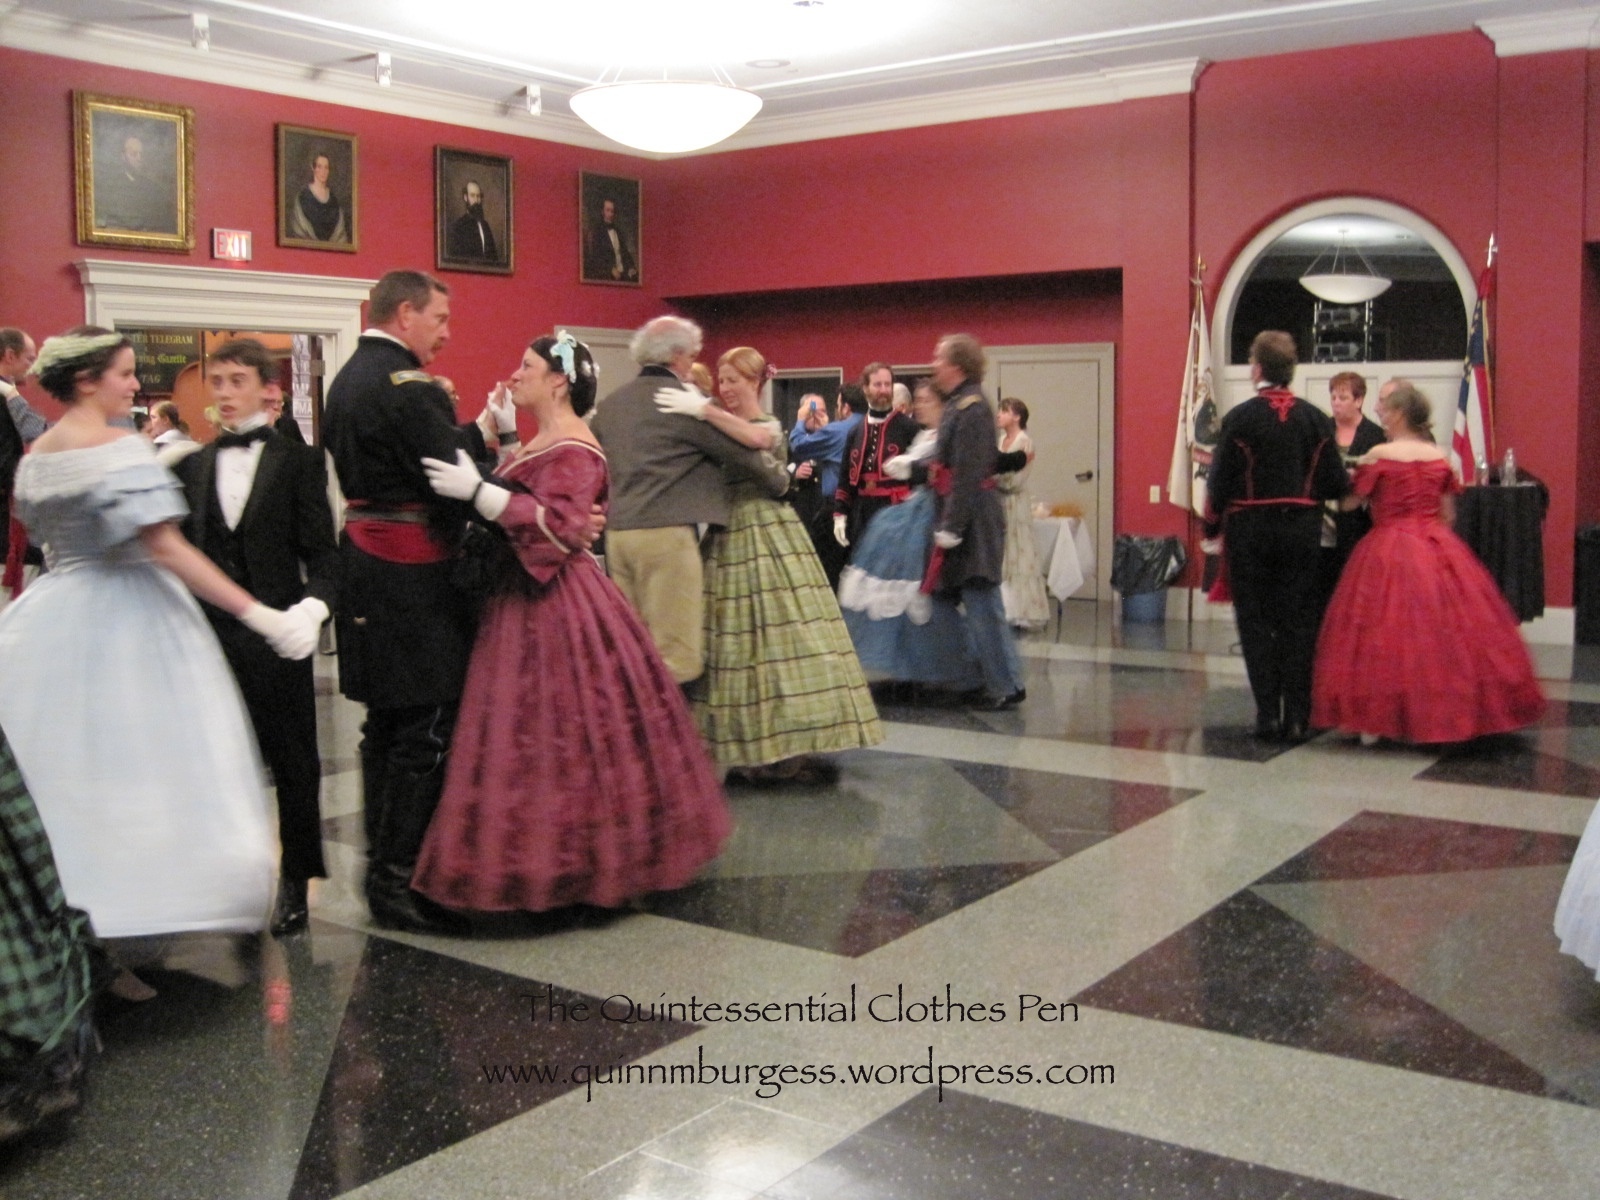
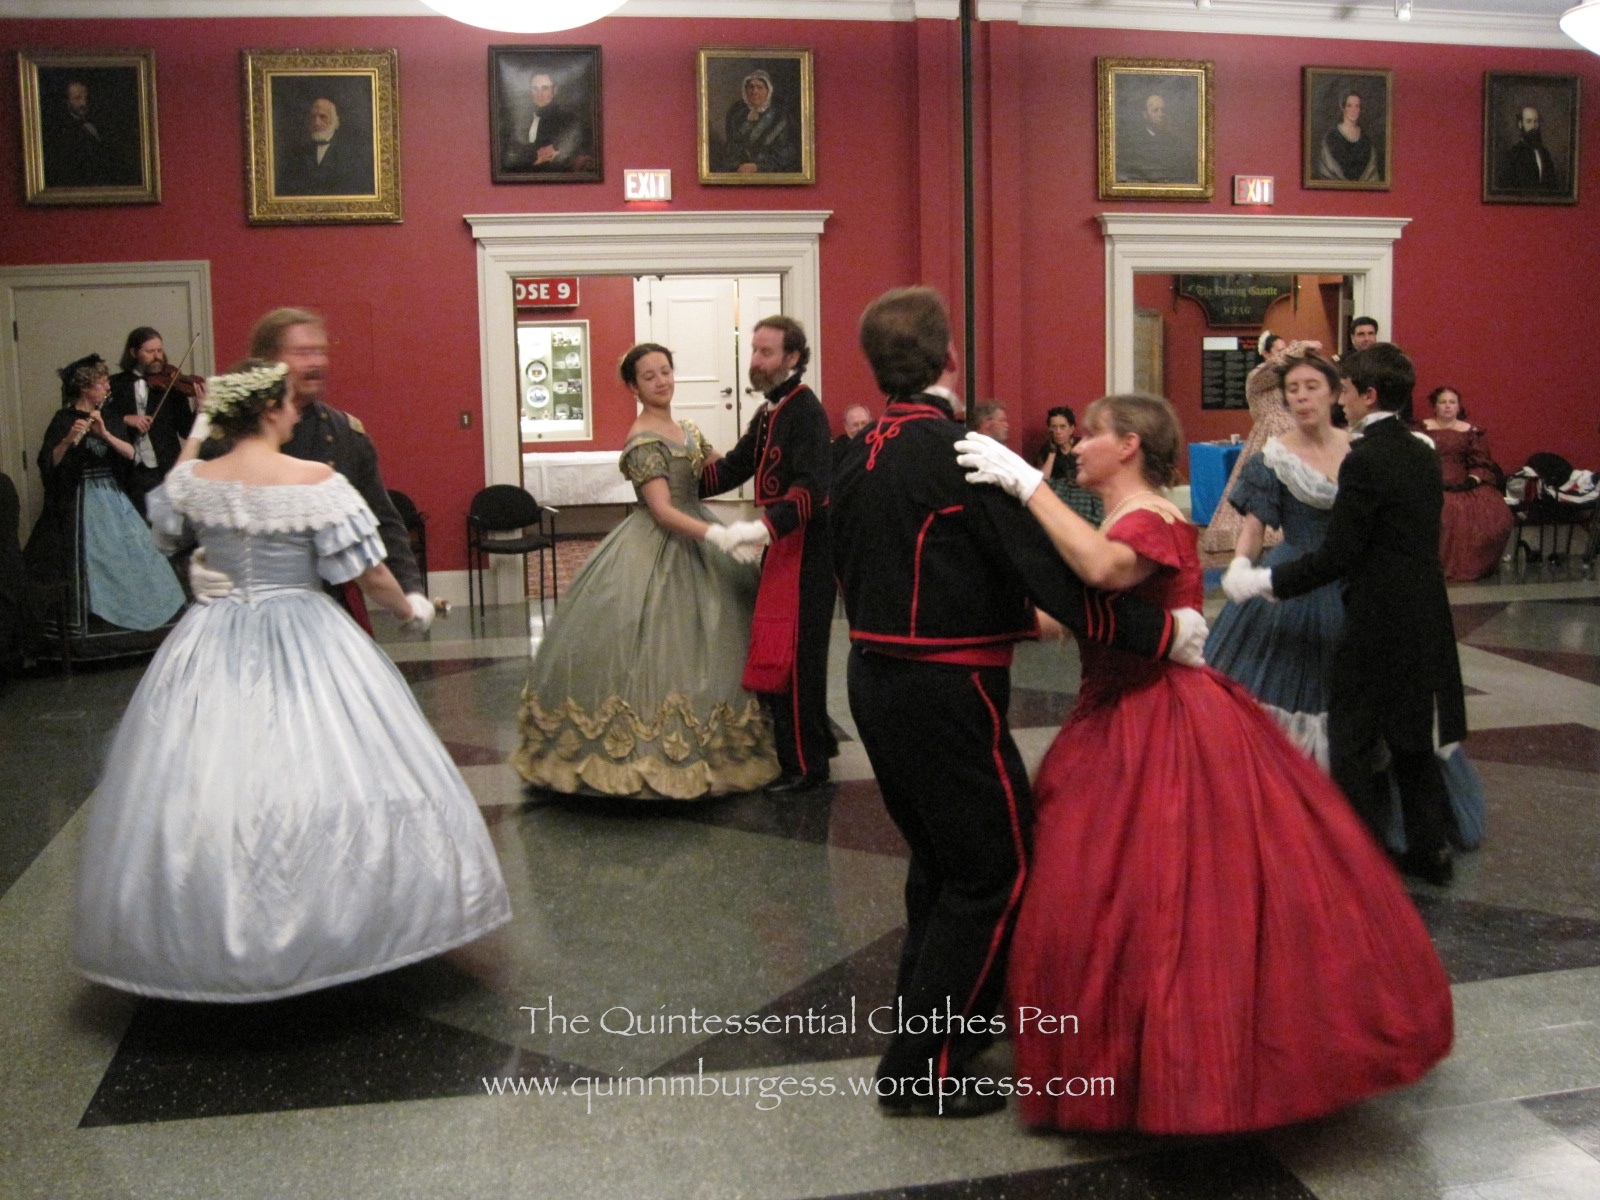
Now for the bonus part of this post where I include pictures from the Civil War ball.
The entrance to the building had these fabulous doors.Each section looked like this.Dancing a waltz.Swinging skirts are fun!People looked very nice.And it was nice to see unfamiliar faces and meet new people.There was a constant swishing sound of skirts brushing against one another.The Commonwealth Vintage Dancers interspersed short performances throughout the evening.This is the Triplet Galop Quadrille.The ball room had large, dark, seriously-faced portraits around the perimeter. I’m not sure they approved of all the dancing!There were also Civil War era flags that the reenactors had brought to help decorate the room. And here’s a full length shot of Evie with her new sleeve trim.
I had a lovely time. This ball was nicely different than our usual evening balls with all the new faces. My senses were most struck by the abundance of rather more sturdy and thick wools worn by the military gentlemen than I am used to feeling at most balls, when there are more gentlemen in smoother wool tailcoats. The occasional feel of the thicker wool on my left arm was a tangible, and rather transporting, connection to the past. It seems quite likely that at a ball held during the Civil War a lady would have felt more thick wool on uniformed gentlemen than she might have felt at a ball pre or post war when there would have been more civilian tailcoats at a ball.
Have I inspired you to want to learn 1860s dancing and attend a ball? I’ll end with this small encouragement for your attendance at the Commonwealth Vintage Dancers’ next Civil War events. The Commonwealth Vintage Dancers have a Civil War Dance Weekend coming up in November, 2013. It’s super reasonably priced and includes lots of dance classes, two balls, and a German. There’s no experience necessary. If you’re at all interested and in the New England area you should check it out, because we’re doing lots of awesome Civil War dancing in 2014 as well (they are listed at the bottom of the Civil War Dance Weekend link, above), and why not get started learning or brushing up sooner rather than later? I’d love to see you there!
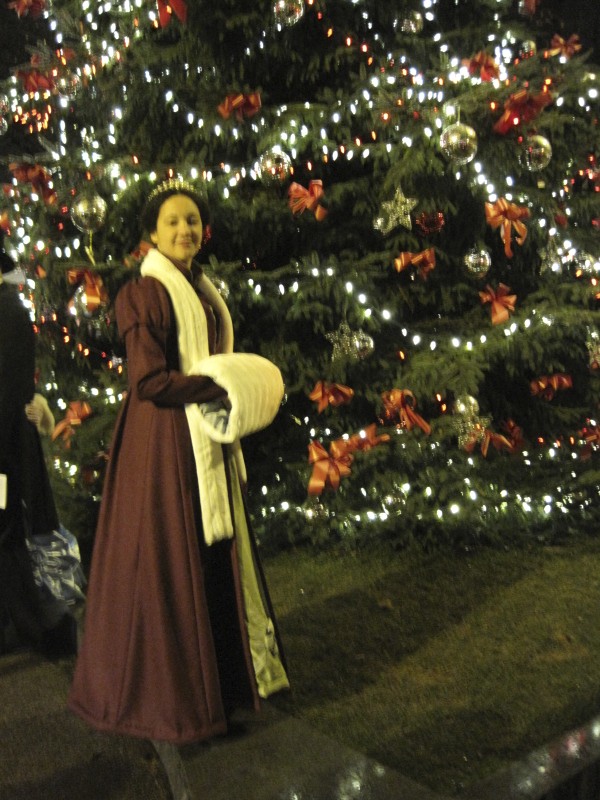
…It’s only been a year! Or pretty close to a year. I posted an overview of my early 1820s project last November. The project included a petticoat, 1824 ball gown, 1822 walking dress, muff, tippet, bonnet, and chemisette. Some of these things are still in the UFO pile or on the to do list, but I’m super pleased that this post is about the completion of the 1822 walking dress!
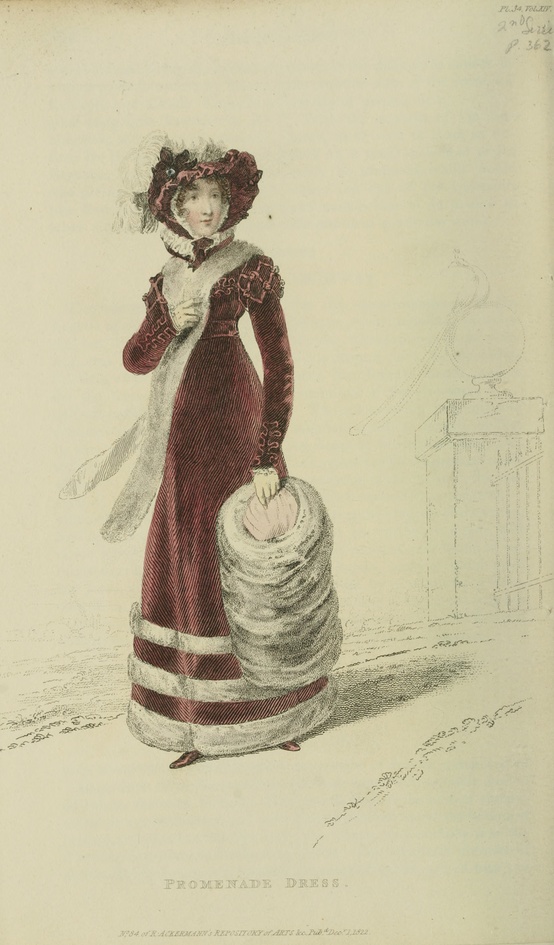
The image below is my inspiration for the now complete walking dress. I wore it last December to go caroling outside before Fezziwig’s Ball, but at that point my time had run out and though the construction was complete there was no trim. Below the image of my inspiration is an image of the walking dress as it looked last December with no trim. And below that is an image of the now completed walking dress with trim! It certainly fits me better than the hanger, but you’ll have to wait a few months to see it on me.
Promenade Dress. Ackerman’s Repository. December 1822.December 2012. Unfinished early 1820s ensemble.Yay! All the trim is on!
Before I share some close ups of the trim and construction, let me share the facts:
Fabric: 4-5 yds of dark pink wool, 4-5 yds of ivory super soft and thick cotton twill, 1/2 yd-ish of lavender polyester velvet, 1/2 yd-ish of lavender silk shantung, and a bit of canvas for the collar.
Pattern: Adapted from my 1822 green ball gown pattern, I think. It’s pretty much exactly the same except that it has a higher back, collar, and sleeves. The ball gown pattern is based off of a pattern in Janet Arnold.
Year: 1822.
Notions: Pink and lavender thread, polyester batting in the hem, and hooks for the waist.
How historically accurate?: Very, having used modern materials and a few very nice looking modern fabrics . The pattern is from Janet Arnold, so you know it is good on accuracy and the trim scale and pattern is taken from a fashion plate from 1822. As a historic costume I give it 98%.
Hours to complete: Oh goodness… I’m sure the main construction took at least 40 hours and the trim took probably 50ish hours to cut, press, and hand sew. I didn’t keep track at all on this project.
Top of the sleeve. First I had to sew the bias into a tube so the raw edges would be finished and the bias could “float” without having to be sewn down all along the edges. Then I tacked the bias tubes in a zig zag then crossed and tied other zig zags to get the finished pattern.The front. The pattern looks very much like an oak leaf to me. The bias is stitched in a tube with the raw edges showing on the back, then the edges are stitched down all around to create the pattern.The sleeve. The bias is stitched on the same way as it is on the front. The motifs are sewn on the front of the arm rather than the outside.
I actually had forgotten that I’d taken these construction shots. In fact, I had totally forgotten the method I had used to construct my sleeves until I saw the picture again! These pictures where the wool looks more pink than maroon show the color best. It’s really much more vibrant, and much less brownish, than some of the pictures make it look.
The canvas pad stitched into the collar before sewing the pieces together.The top of the sleeve before the gathered sleeve top was sewn on. I didn’t want to waste wool where it wouldn’t be seen, so it stops part way up the lining, then the gathered cap is sewn on and hides the raw edge of the wool.The lining is stab stitched to the wool at the cuff.
And just in case you want to read more about my entire project from the early 1820s, here’s a link to that category of entries on my blog. As I continue to finish up other bits and pieces I’ll keep adding them to that category, and it’s neat because the category filters only those posts so there’s a nice continuity.
A few weeks ago, I was super excited and motivated that I had time to work on my Curtain Along jacket. I made the changes I had deemed necessary from my last fitting and was feeling good about getting it done and how much I liked it… but then I tried it on again to determine center front and decide about trim… and there were new problems, and I was so discouraged!
The problems sum up in the following way:
Problem #1- The sleeves that go with the jacket in Janet Arnold just do not work for me without serious alteration. The crown isn’t large enough for me to be able to move or be comfortable, and the sleeve is at least 4 inches too short. With the sleeves set in the jacket was pulled all over the place and was so unbearably uncomfortable! And the annoying thing is that in the mockup the sleeve worked!
After ripping the sleeves out, and being thankful that, at least, they were what was causing the bodice to do all sorts of wonky things, I bounced back and came up with a solution. I’ll use the sleeve pattern from my 1780s Robe A La Anglaise and recut the sleeves. I’ve got extra Mineral Felicite fabric, so that’s no problem. On the other hand, I have only tiny matching linen scraps left. Of course, it would be totally period correct to use a different linen to line the sleeves than what I used to line the bodice. But piecing is also period correct, and I decided to use all my tiny matching linen scraps to piece together pieces big enough to cut out the new sleeve pattern.
Extreme piecing. I’m amused by it at this point. This sleeve is only partially completed (there is more piecing to be done!) but you can see the original pattern shape.
I haven’t finished piecing, or cut out the new Mineral Felicite sleeve, or sewn the new sleeves in… but I think that my solution will work, so we’ll call that problem solved. Whew!
Problem #2- After my initial fittings, I had to add an extension to my center front pieces to get the jacket to close comfortably and without wrinkles. It barely closed in my mockup and I thought it would be enough, but in the real fabric it just wasn’t. So I pieced on extensions. Piecing is totally period correct, but this piecing is so… obvious and symmetrical.
Center front piecing. The yellow headed pins are my center front line. I haven’t done anything about center front since I put those pins in!
This problem is still unresolved. Plus, I can’t decide how I want the jacket to close, anyway. Pins? Hooks and loops? If you have any thoughts about the piecing problem or the closure indecision, please do share!
Problem #3- Trim! I was going to trim the jacket with box pleated blue silk ribbon around the neck, front, hem, and cuffs. I thought I had enough ribbon (6yds), but in the end I think I have not quite enough to trim all of those edges. AND, the blue didn’t seem to pick up the blue in the print as much as I originally thought it did, and I’m worried that even if I do less pleated trim (say, not the sleeves, or something) the trim will look super costume-y and not 18th century. I also have a gold silk ribbon (5 yds). Not enough to trim the whole jacket, but what if I scrap the idea of trimming the edges and instead do some sort of center front bow trim/something of some sort to hide the piecing using the gold? I think the gold looks nice… but what sort of trim would I do that wouldn’t look made-up and costume-y???
Blue silk ribbon. There’s blue in the flowers, but perhaps not enough blue to make the blue ribbon make sense???Gold silk ribbon. Too match-y?Blue and gold together, for comparison.
I have no idea what I’m going to do about the ribbon issue. Bows at center front seem to be used on stomacher front jackets, and stomacher front jackets seem to be exclusively pet en l’air styles. This jacket is not a pet en l’air, though it could be altered to have a stomacher front (thus eliminating the piecing issue). Sigh. I just think myself around in circles. So again, I appeal to you! If you have any thoughts, please share!