Making Waves In 1925

On my to-do list for this summer was a 1920s bathing suit. At first I thought I might knit one, but I wanted a smaller project than that, and also, a friend who hand knit a swimsuit last year reported a fair bit of sagging happening when she wore hers in the water. So I decided to try a different approach and make my suit from wool jersey fabric, a historically accurate option in terms of weave and fiber for a 1920s suit, as far as I can tell from my research.

IMG_2965-2 (1)

After spending lots of time looking at inspirational images on Pinterest and compiling this board of the most inspirational images, I decided on the year 1925, when suits were getting shorter and often sported built in shorts. My main inspiration was this extant suit from 1925 at Abiti Antichi. It’s where my decorative inspiration came from and also justified the visible seam where the shorts attach to the dress. I also referenced this 1920s extant suit at All The Pretty Dresses, which shows interior finishing (serging!) and has narrower straps.

IMG_2929-2 (1)

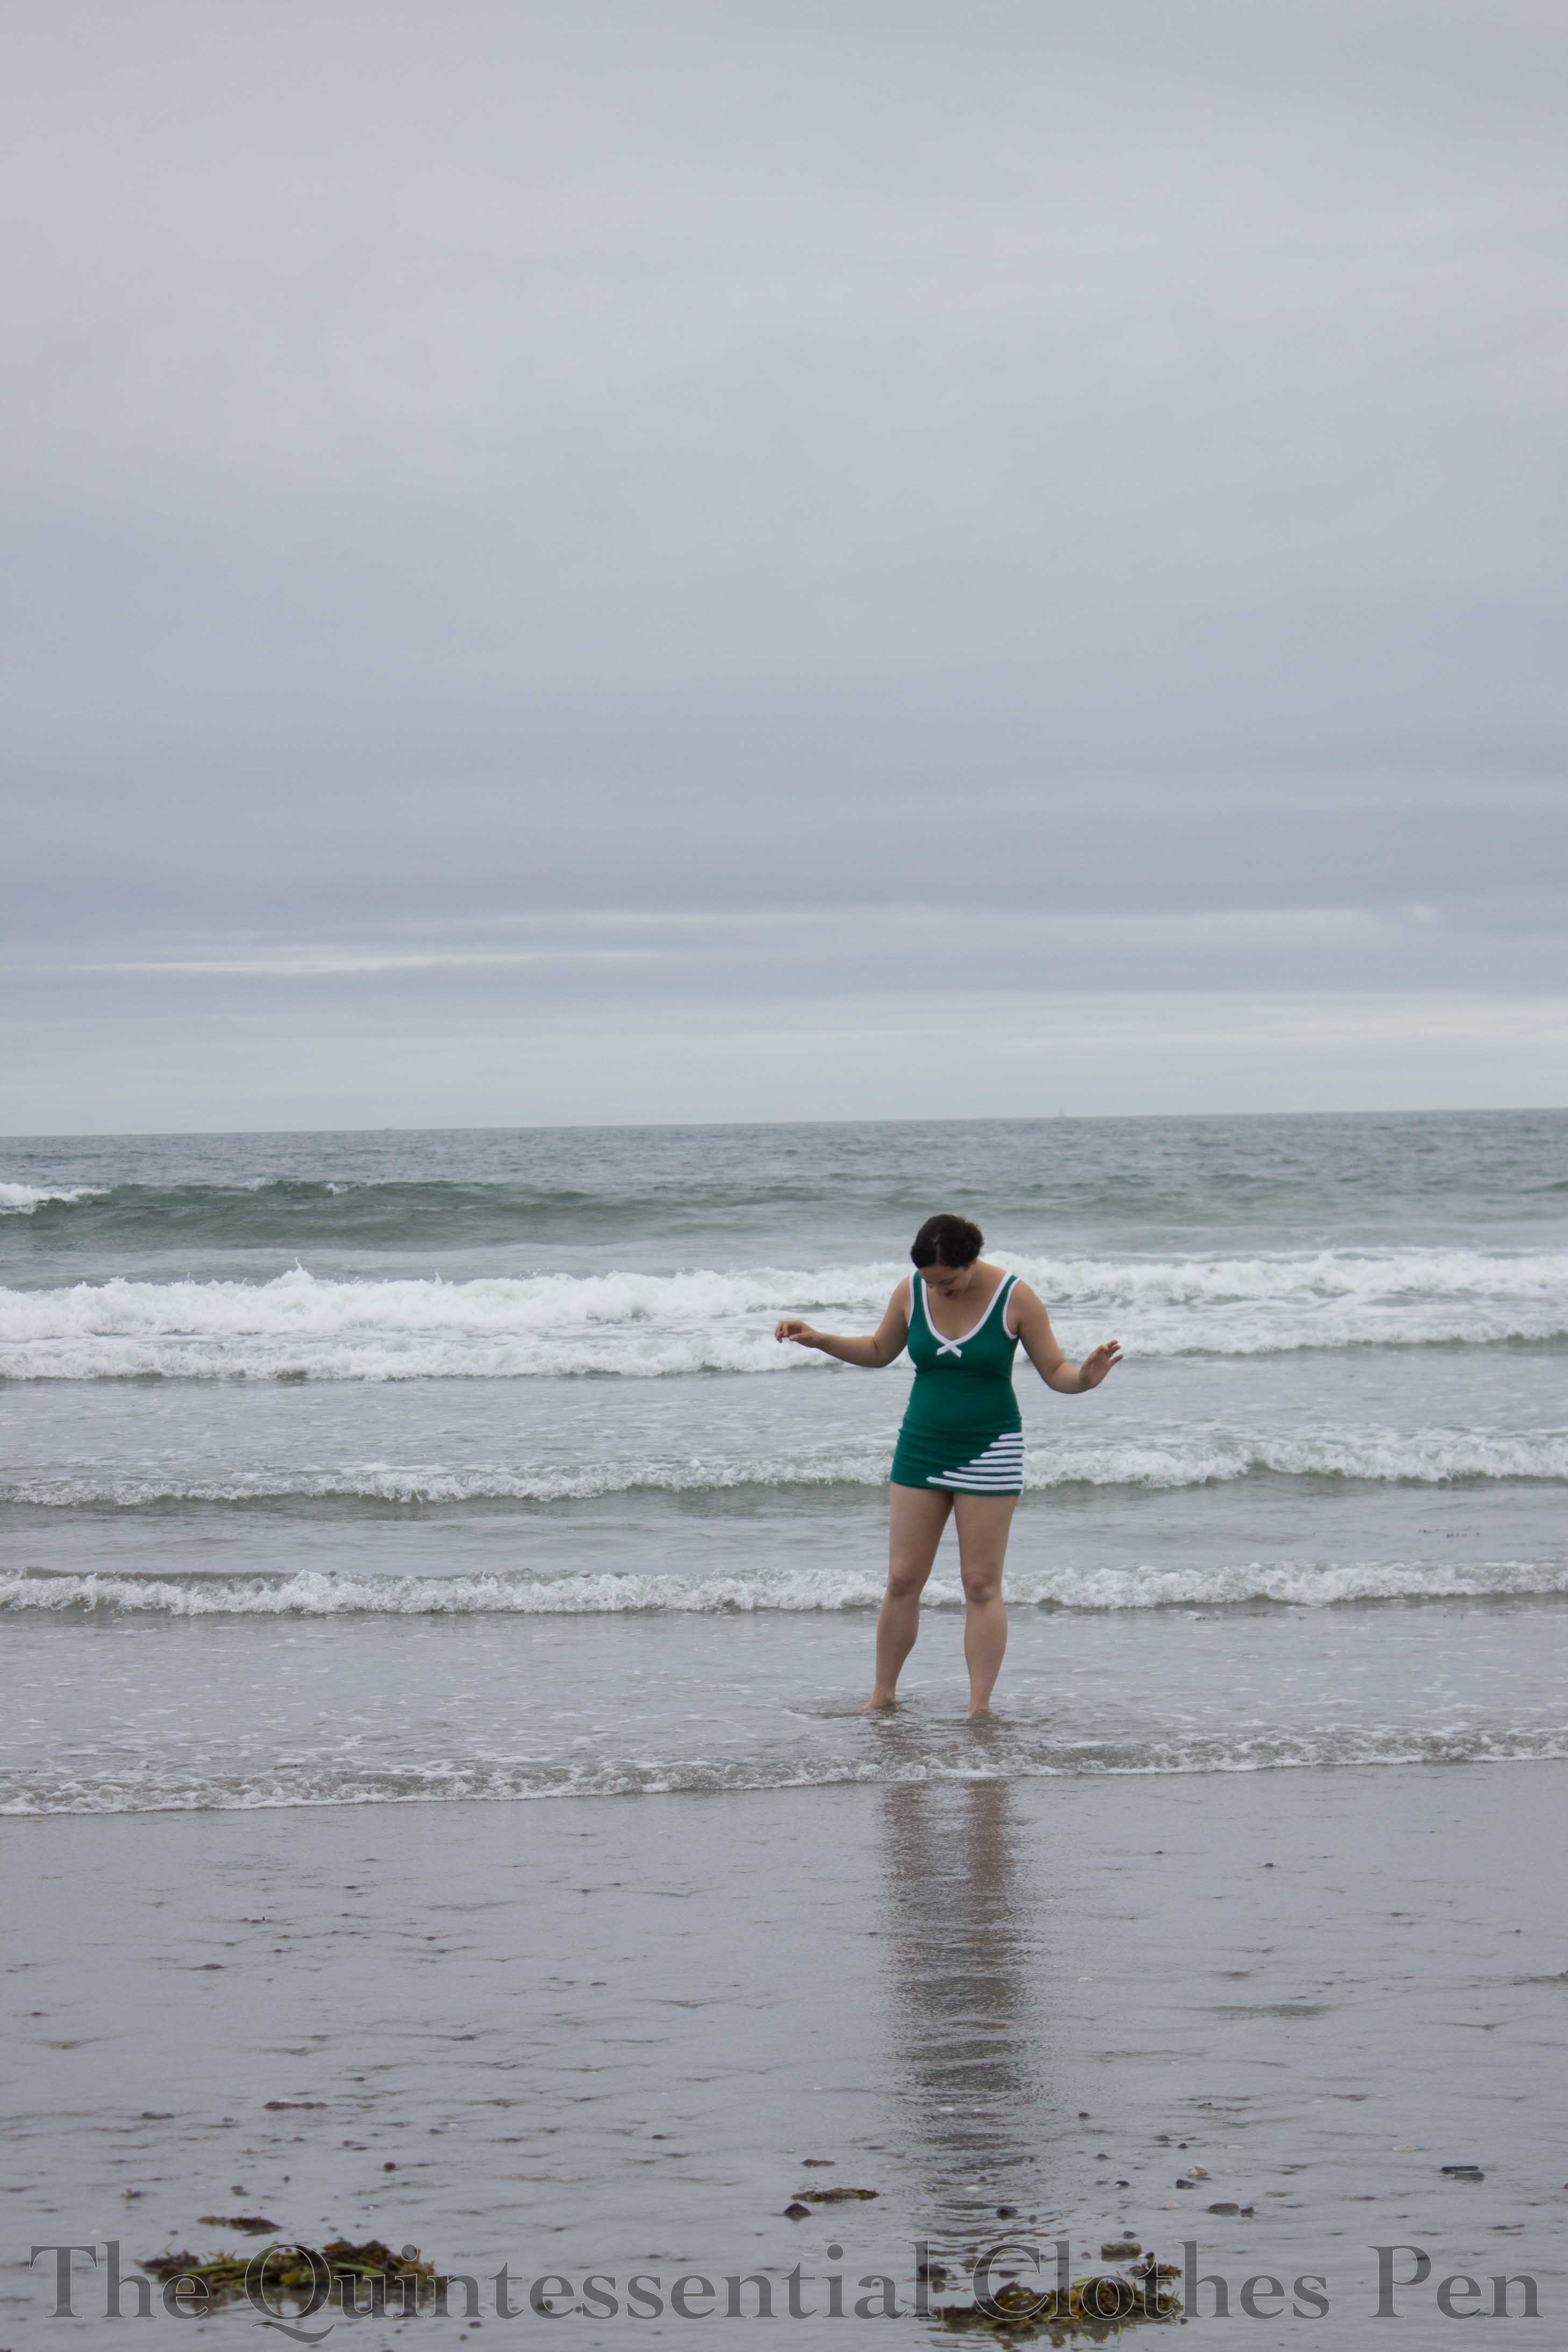
I knew there was no chance of finding wool jersey at a local fabric store, so I searched around the internet for sources. I believe I found only three–a company in New Zealand, New Zealand Merino and Fabrics, that makes gorgeous colors and sells through their own website and through Etsy; Denver Fabrics, which had wool double knit fabric; and Nature’s Fabrics, which I had never ordered from before, but which had lovely colors. I decided on bottle green from Nature’s Fabrics and vowed to get the whole project out of just one yard.

IMG_2957 (1)

For a pattern, I used a tank top from Old Navy as a starting point since I liked the straps, adding length (and width since my wool jersey was less stretchy than the tank). I cut the dress pieces first, then used the extra bits to cut the shorts.

IMG_1527 (1)

I wanted to use the pattern from my dotty tap pants for the shorts, but I didn’t have it handy, so I pulled out a finished pair of the shorts and used that instead. Unfortunately, I was a few inches shy of being able to cut all four shorts pieces out of my leftover fabric. My solution was to cut the two fronts out and then piece the back pieces with a seam about 4″ below the waist, hoping that it wouldn’t be noticeable in the finished suit. There’s a slight line, but it’s not something I’m worried about, especially since I basically used up all the fabric I had–no adding to the stash on this project!

IMG_2931 (1)

The white trim came from the stash. It’s a lightweight knit terrycloth I bought at JoAnn’s when I first started sewing. I made a robe, but didn’t love it. I did, however, keep it and am happy to have repurposed the fabric.

This would have been a really speedy project if it wasn’t for the trim. I used a serger with four threads to sew/finish the seams all at once, making the construction super speedy (I think I cut and assembled the whole thing in an evening). However, the white lines took a long time to carefully machine sew on and then I still had to bind the arm and neck holes, turning the project into a multi-evening size. The time spent was worth it though, because I love the finished product!

IMG_2937 (1)

I love the images of the bathing suit contests here from the 1920s, in particular this one from 1926. All the bathing beauties are wearing their nice pumps with their bathing suits!

1926-bathing-suit-contest-mem-pd

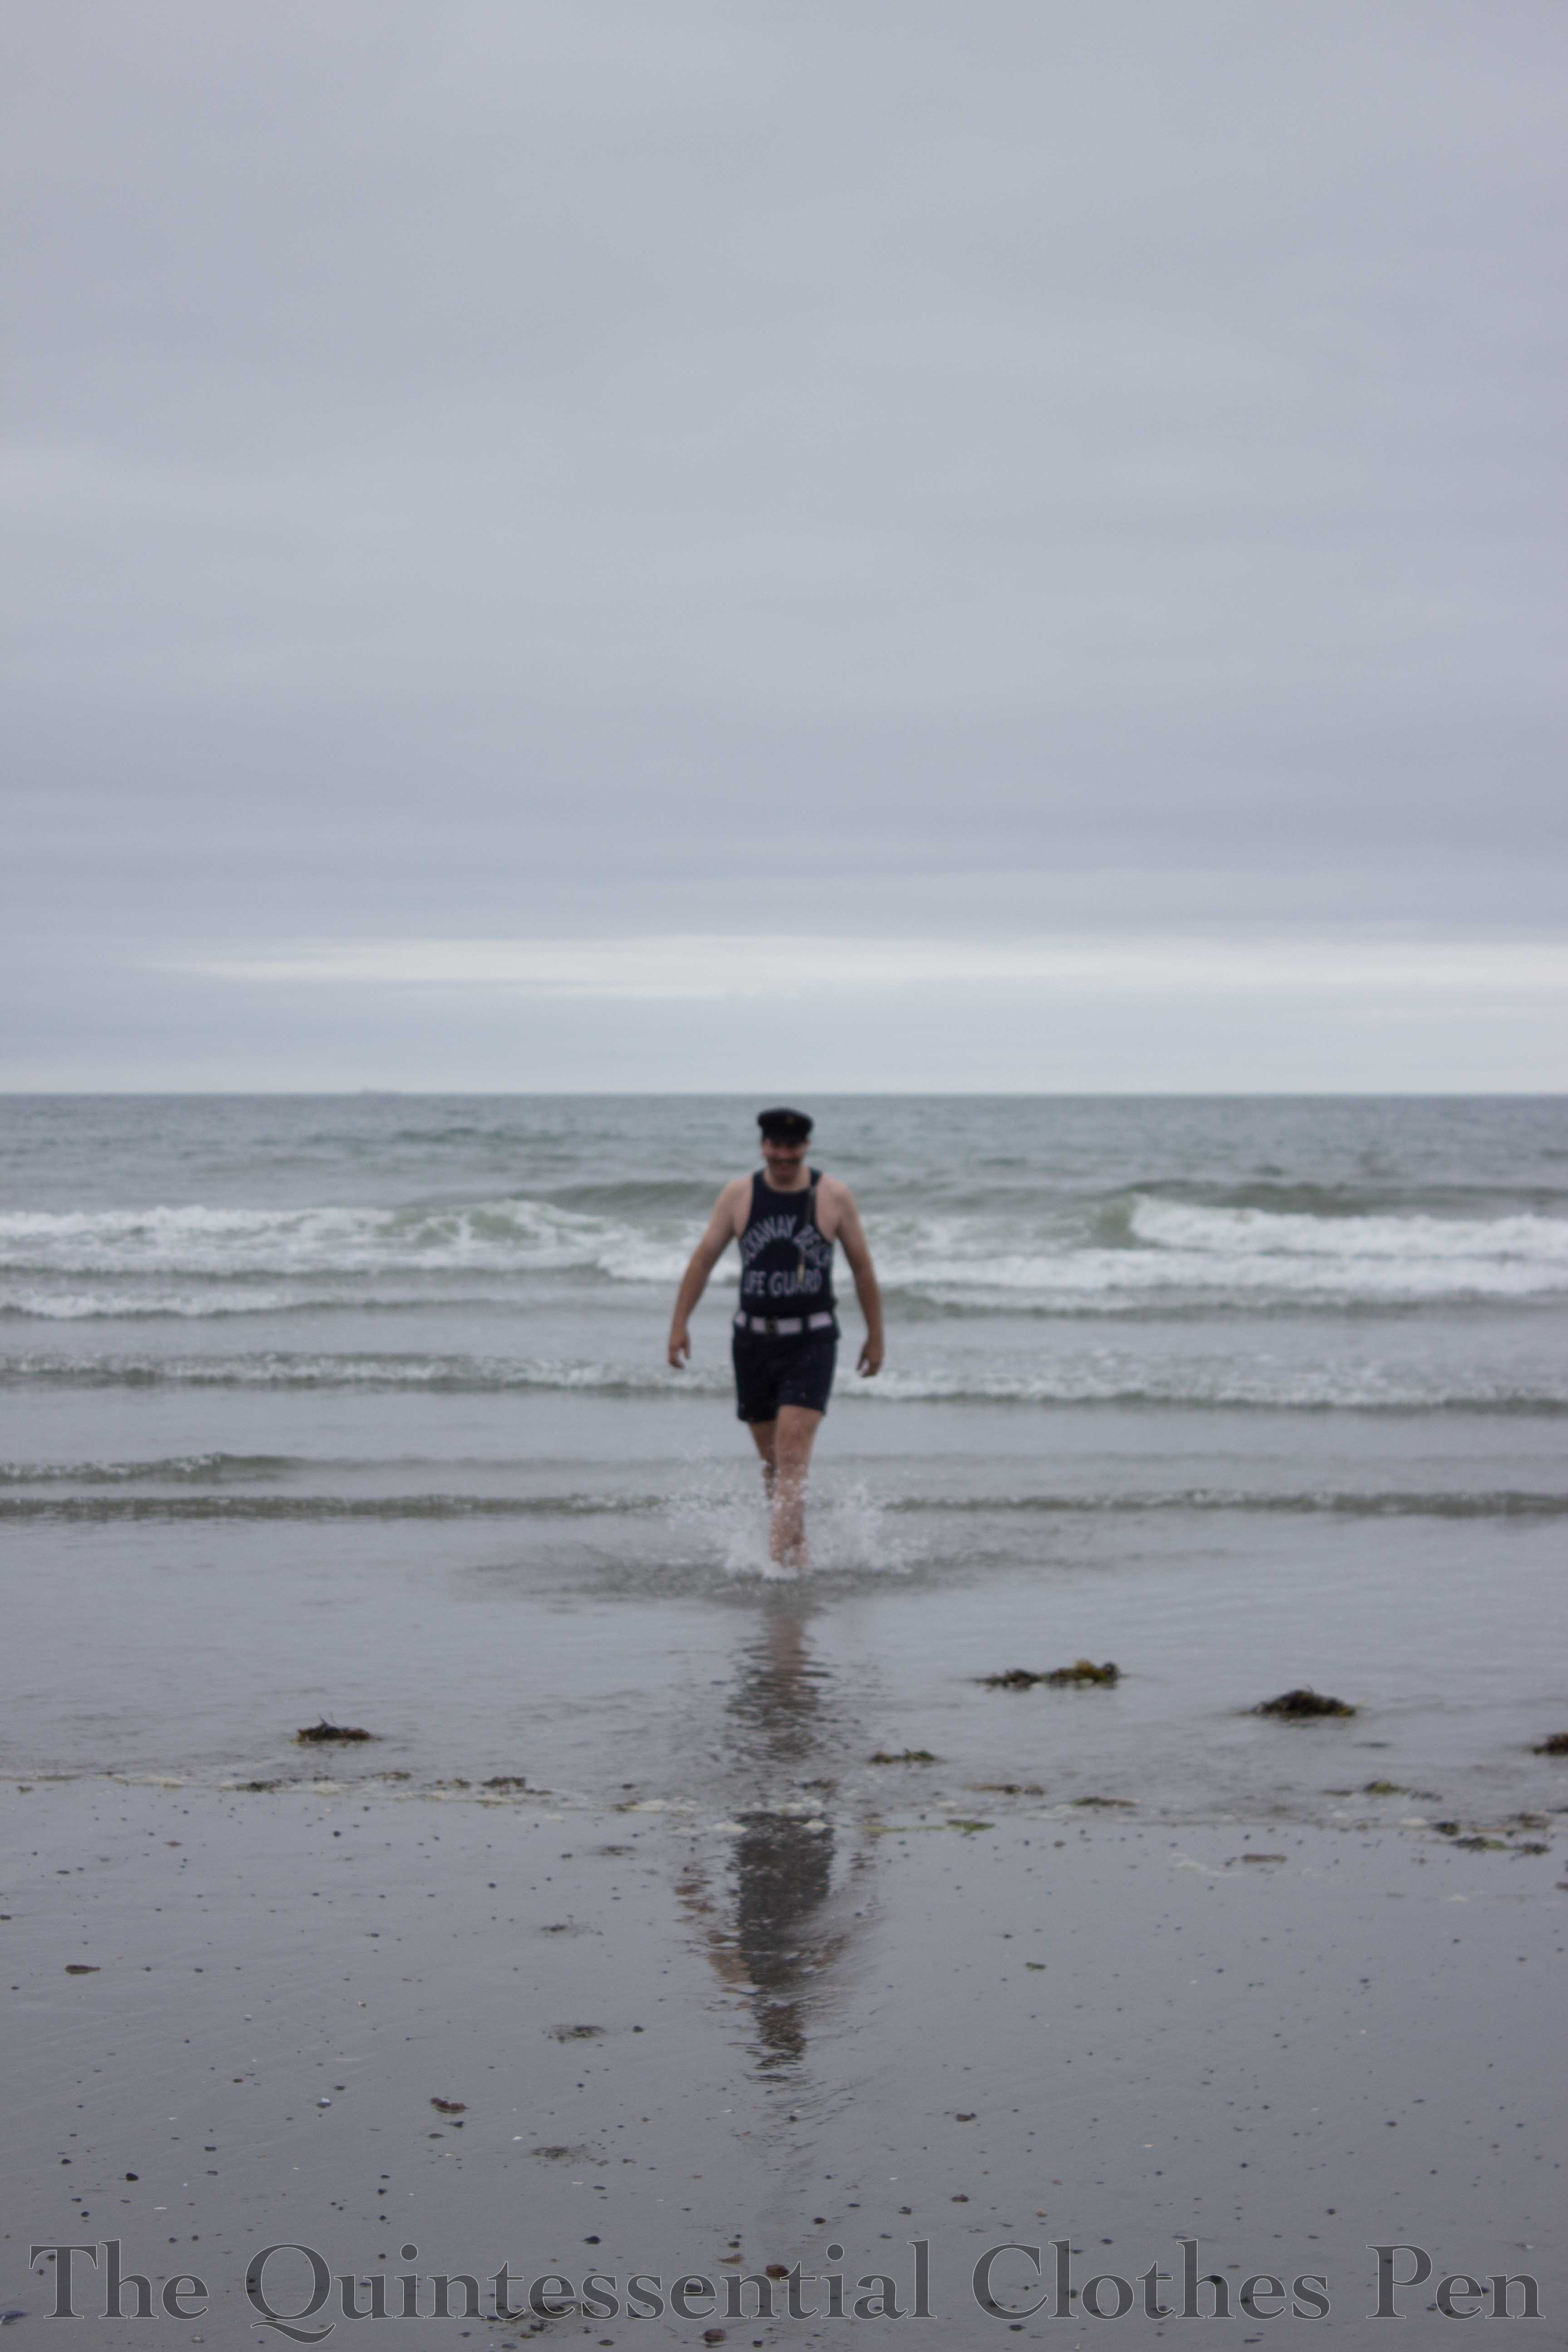
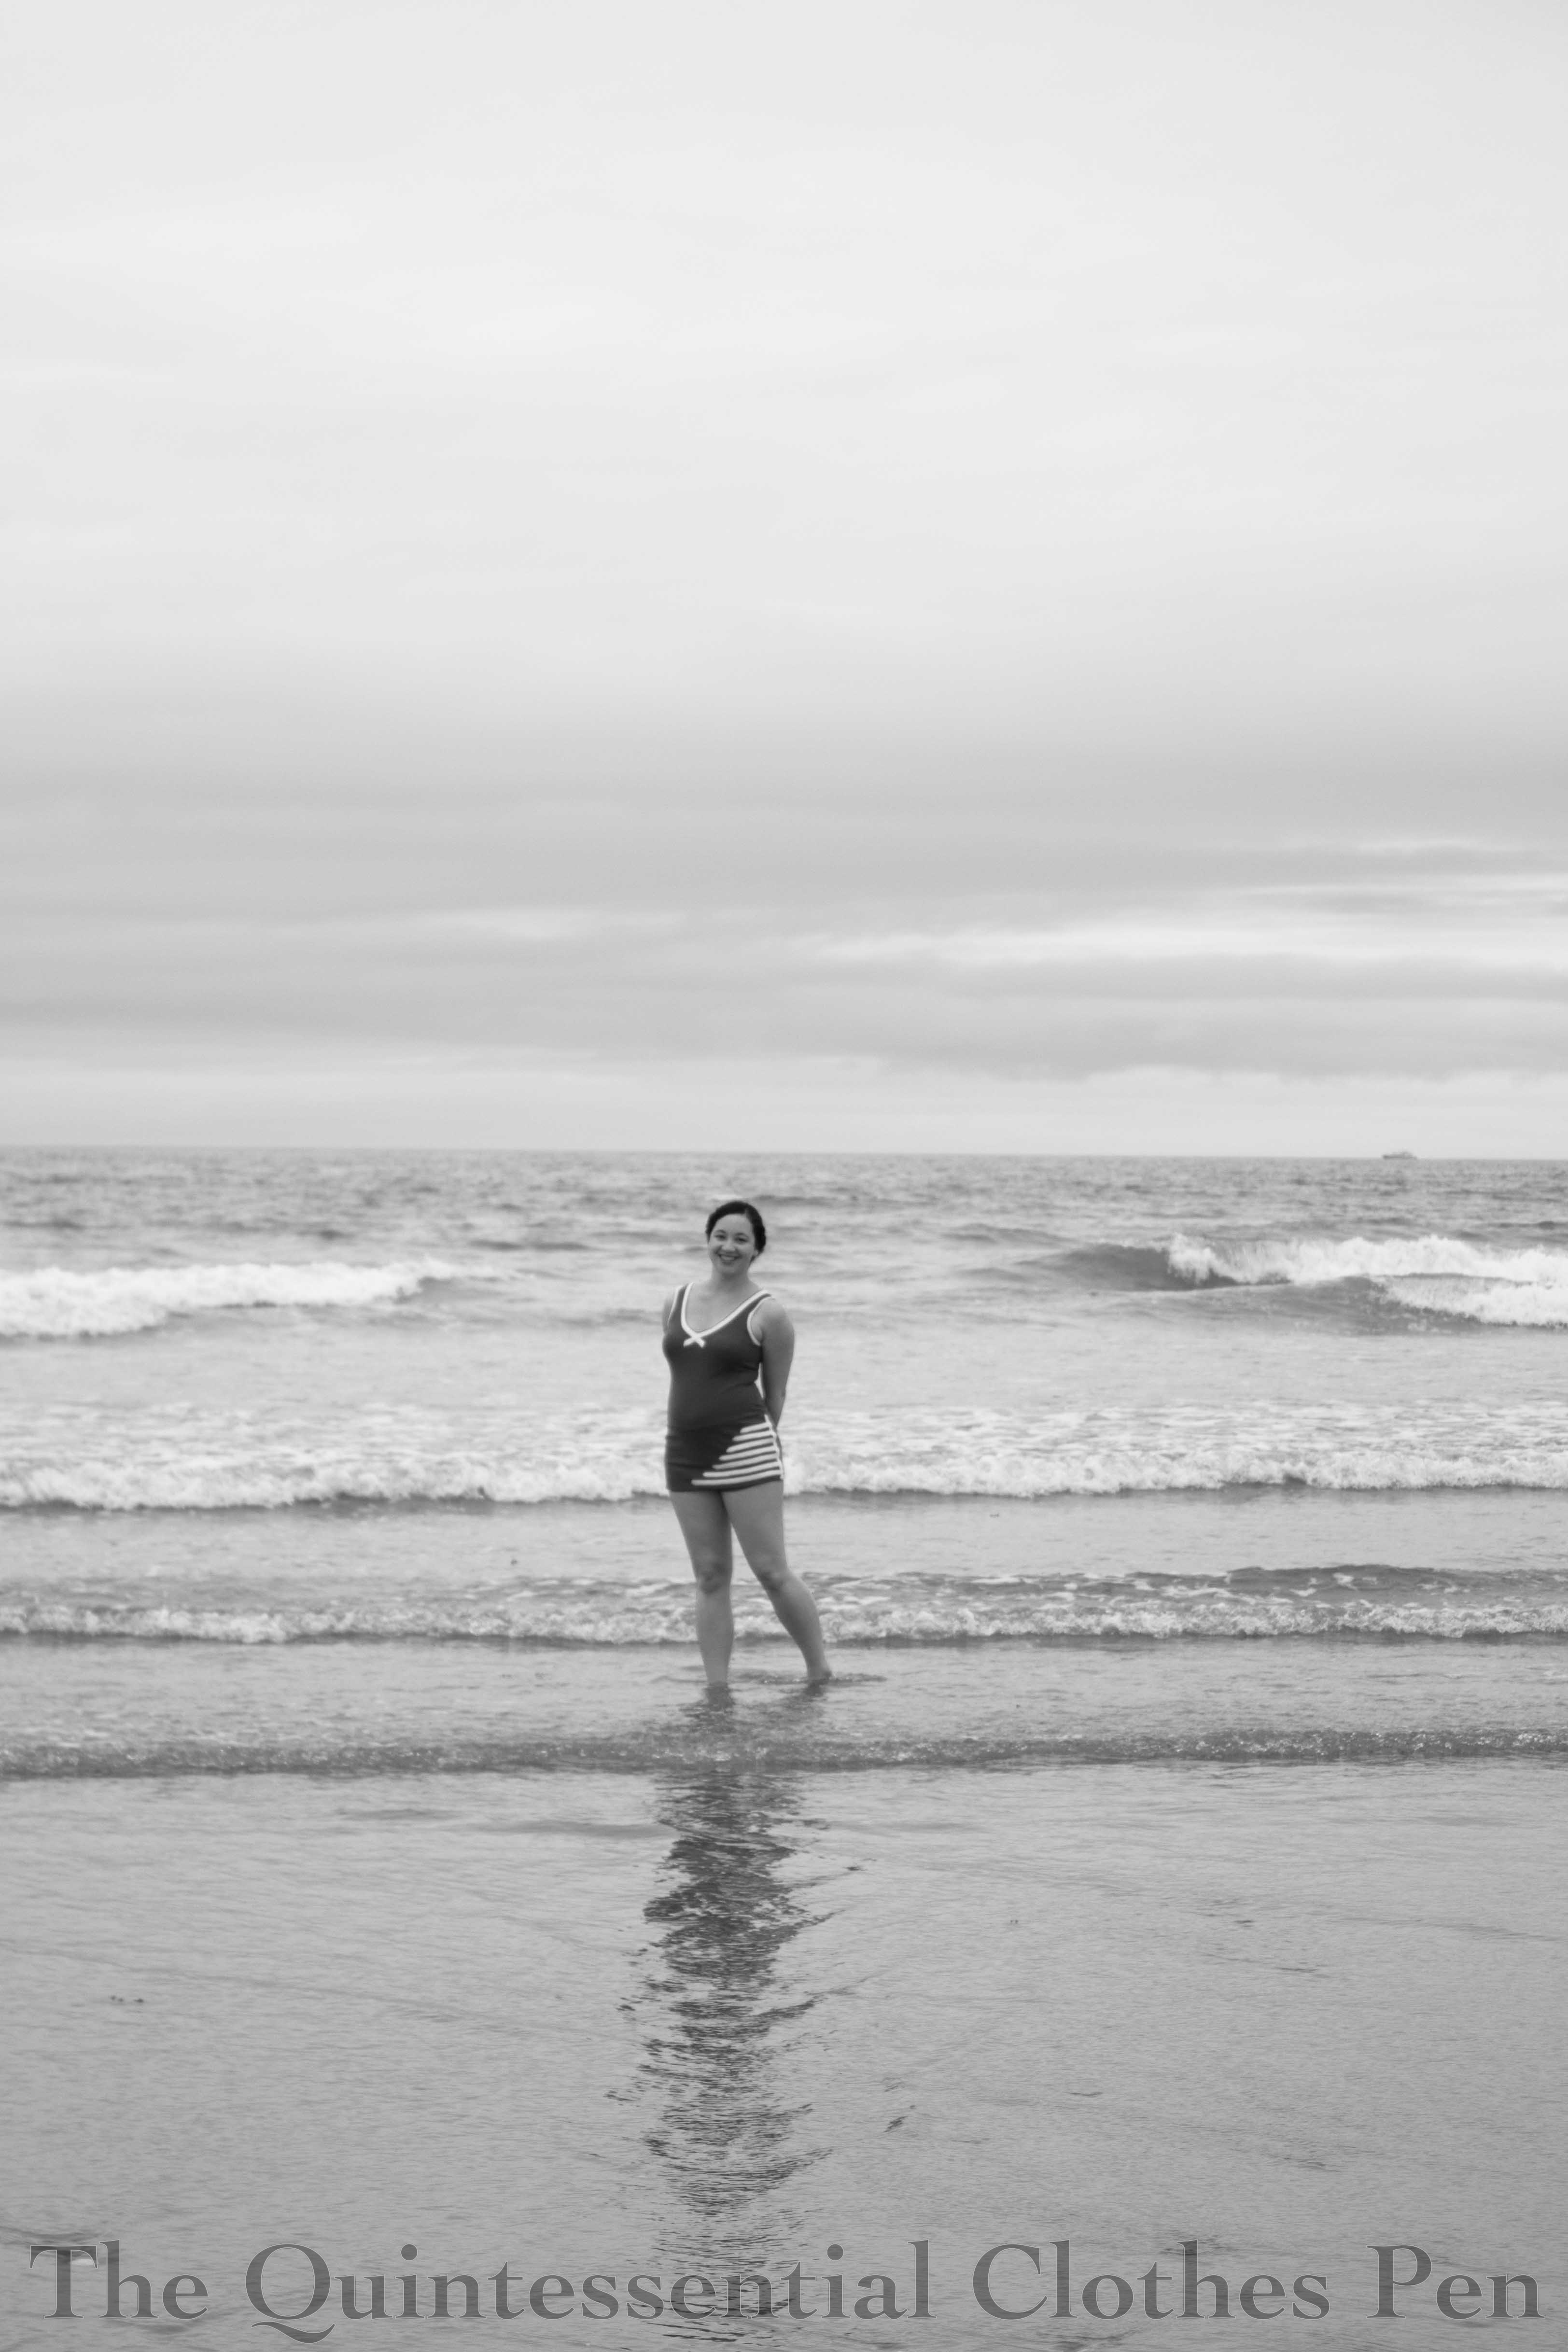
I didn’t have time to get a sash together, but the bathing beauty look is what I was aiming for in this picture, wearing my American Duchess Seaburys with my swimsuit.

IMG_2831 (1)

My main goal was to have the suit for an event at the end of August, but it was done in time for a vintage beach outing in July! It was an unusually cold day and therefore the beach was pretty empty, but it meant we had the beach basically to ourselves and got some great pictures!  In August, I’m planning for the whole suit to get wet, so we’ll see how that goes! In the meantime, here are a few more fun pictures from the July beach day.

IMG_2872 (1)

IMG_2991-2 (1)

1919 Ivory Eyelet Dress (HSF #7)

I have a three evening gowns from the 1920s, but only two daytime ensembles. For summer events from the Ragtime dance period and the 1920s in general, I wanted a new addition in the daywear lineup, so I kept my eyes open while out shopping for other projects. I came across the fabric for this dress a few months ago before I had time to sew, but with a general plan in mind.

IMG_1622

Fast forward to about a month ago and I started actually planning the dress. I had thought to make a dress from about 1916 with a distinct a-line shape (a silhouette like this), but reconsidered that plan when considering the very linear effect of the tucks in the fabric. The linear fabric was much more suited to the period from 1919 to 1922 and so down that road I went.

IMG_1628

Just the facts:

Fabric: 4.5 yards pre-tucked ivory cotton.

Pattern: Adapted from Past Patterns #9127, Ladies’ Dress 1918-1920.

Year: 1919, explained in detail further along in the post.

Notions: Thread, snaps, and a hook and bar.

How historically accurate is it?: 95%. Accurate pattern from the period, reasonable fabric, and accurate finishing methods. Woo!

Hours to complete: 30? I took my time to enjoy the process, hand sewed more than was absolutely necessary in order to watch Netflix and not dig out the sewing machine, and fiddled with the bodice for awhile to get a style I was satisfied with.

First worn: July 17 for a Ragtime tea dance.

Total cost: $30 for the fabric.

(Edit: I forgot to mention what HSF challenge this was for when I originally published the post. It’s for challenge #7: Monochrome.)

IMG_1626

Why did I decide on 1919 for the year of my dress? The pattern dates to 1918-1920, putting my dress squarely in the middle, but I also looked at the details that changed with each year from 1918-1922 to confirm the plan.

3a57a53918caa3169851de5ee4e07f00
1918. Skirts have just ceased being the A-line shape of the prior three years, but they still have fullness and waists remain high.
c7f197805c10c37b29edb75dc9474571
1919. Still some full skirts, but the silhouette is narrowing.
42a3c1119c5fe26a015e785a9c6ce956
1920. Slimmer skirts with high waists.
6f15eba27b2b6312a8cc5d2e5851dc39
1921. Slimmer skirts with a dropping waistline.
8fa6917ee7b0b47dc885ad5c3fada90c
1922. The waistline has dropped to hip level and drape effects are fashionable.

1919 is the year when the features I most wanted all come together: full skirt, high waist, playing with the linear nature of my fabric going both vertically and horizontally, and skirt tucks. These features can be seen in the following most inspirational images.

fb02413f850f398dc842e2f9628c33ec
c. 1915
def974fc2efd8f1405bc5f1789b45392
c. 1915
0c121e6a1372e33bef4ca33340f96061
c. 1920
090083175fa5efb1cb137c925c241252
1919

Plus, these two fashion plates, from 1920 and 1921.

And construction? I kept it simple, with a few unfinished edges in the skirt (gasp!), pinking on the seams and exposed edges in the bodice, and as few closures as possible. No fuss. The bodice closes off center in front but the skirt closes in back because I was originally planning to make a separate blouse and skirt. When I decided I didn’t feel like dealing with a peplum, and that even with a peplum a blouse was likely to come untucked (as happens with my 1917 blouse when I wear it), I just hand sewed the now-bodice to the inside of the waistband  and sewed snaps around the other side to keep it together, as you can see. This way, it’s easy to separate the two pieces in the future.

IMG_1637

All in all, a pretty quick project as my projects go. Comfortable, flattering, easy to alter (a component of sewing projects I am trying to incorporate more often as I move forward with projects), satisfying to wear, plus it goes well with my Astoria shoes. Win!

SaveSave

Project Journal: Versailles Sacque: Construction Details

It’s time for some in depth detail about the construction of the robe a la francaise I wore to Versailles in May. My original plan was to use pink silk in my fabric stash to create a robe de cour inspired by Maria Federovna, but I realized when I went to cut out the pieces that I did not have enough fabric.

The change in plan resulted in new fabric and a new plan. I stuck with the decade of the 1770s, but decided to make a robe a la francaise, or sacque, instead of a robe de cour as it seemed like a garment I might be more likely to wear again in the future. Accordingly, I found and ordered new fabric: 11 yards of a very lightweight changeable silk ‘lutestring’ from Burnley and Trowbridge. Luckily, the new fabric still worked with the metallic silver net I’d purchased for trim. It’s the same metallic silver net that is on my 1885 Night Sky Fancy Dress, just cut into strips.

The pattern is from JP Ryan: it’s the Pet en Lair pattern, lengthened to create a gown as they suggest. Underneath I’m wearing a shift, stays, pocketsMr. Panniers, a generic 18th century petticoat, and the petticoat that matches the gown. I also have American Duchess clocked stockings and embellished American Duchess Kensingtons. All my jewelry is from eBay. You can read more about how I created my hairstyle and the hair ornament in this past post.

IMG_0258

Regarding the pattern, I found some of the directions to be confusing. For example, making the petticoat seemed way overcomplicated.   You can read more details about how I made my petticoat here. Also, I found the directions for pleating the front robings/facing and the back pleats quite confusing. There, I was saved by this post written by AJ who also used the JP Ryan pattern, got confused, and posted about the confusing bits. Very helpful! Aside from the confusing directions, the gown pieces went together perfectly with no trouble. I did have to alter the front strap area to make the front sit flat against my body. Two friends who used this same pattern did not have to make that adjustment, so I chalk it up to differing body shapes but do not think it negatively affects the pattern.

IMG_0687 (1)The lining of the gown is made from a one yard piece of cotton/linen blend from my stash. Also from my stash and used inside the gown were a scrap of medium blue linen and a scrap of medium blue cotton twill used to interface the stomacher. These were all the bits left of those three stash fabrics–yay! I was also amused that all of the random non-silk fabrics in this gown and petticoat wound up being blue. I used my lining as my mockup, meaning that I had to take a dart in the front strap area, but was able to adjust the pattern to eliminate the dart before cutting out the silk.

The back of the lining is adjustable using a tie threaded through eyelets. The edges are boned with reed. The pattern suggests ties, but you also see lacing in extant garments and this seemed easier to adjust and that it would use less length for the tie(s). There are examples of both ties and lacing on my Pinterest board for this project. The tie is a 1/4″ cotton twill tape. It’s not accurate, but did the job.

IMG_1476 (1)

Underneath the decorative stomacher, the gown closes with lacing panels attached to the lining. Again, mine laces closed using twill tape.

IMG_1477 (1)

This is the inside of the front lacing panels. You can see the medium blue linen backing. I think I had run out of the cotton/linen blend at that point. As is usual with 18th century garments, the armhole is left unfinished.

IMG_1478 (1)

Here’s a close up of the back pleats. These are stitched all the way through to the lining. The directions for the pleats were slightly confusing, but made sense once I started fiddling with my fabric. It was important that I had transferred all the markings from the pattern to make the pleating easier to understand. The pattern uses another four pleats pleats, underneath these, that you can’t see to add volume to the back.

IMG_0922 (1)

IMG_0286 (1)

Due to the unexpected nature of the purchase of the silk fabric for this gown, I decided to do that fabric justice by hand sewing the entire garment. So in addition to the exterior stitching like that anchoring the pleats on the back, all of the interior seams are also hand sewn. I rather enjoy hand sewing and it makes a lot more sense given the way 18th century garments were constructed.

Here is the gown mostly sewn in its essential elements, but lacking trim. The sleeve flounces were individually gathered and sewn to the arm openings. They are pinked with scalloped shears on the top and bottom edges.

The following image is the gown that I followed in terms of trim placement. It took many more hours than I thought it would to pin the trim on. Those big waves are more complicated than they look, plus I had the challenge of creating the smaller scallops as I went along as well. All of the trim had to be sewn along both sides and tacked at each scrunch after it had been pinned.

IMG_0919 (1)

8423a2253758be21b68f0141235eadb1
Robe a la Francaise. 1765. LACMA.

You can see that I pressed my robings down all the way to the hem, though once the trim was applied on top it was really not very noticeable. I like the finished result, but I think it’s worth pointing out that this pattern is designed to have a wide stomacher. I was envisioning it coming out a little narrower at the waist. But I think adjusting the back opening enough to make a noticeable difference would only create awkward wrinkles under the arms.

The finished stomacher was covered in scalloped trim and finished off with a sparkly brooch. I went to France with an untrimmed stomacher and no clear idea about how I wanted to trim it except that I wanted it to be an all over metallic feast for the eyes. Luckily, early in the trip I was able to go see the 300 Centuries of Fashion exhibit at Les Arts Decoratifs. In addition to being amazing (I got to stand within 6 feet of Dior’s Bar Suit and see many garments I’ve only ever seen on Pinterest!), I also took a picture of a stomacher that was inspirational in terms of the overall wavy patterns and filler shapes. That picture is below.

IMG_0419 (1)

IMG_1153 (1)

Trimming the stomacher took place in the evenings in the few days before the special event. Here is the stomacher in progress. I took it specifically to show the amazing green color that the fabric can appear from some angles. I was hoping to get a picture of the finished gown looking this color, but had to be content with seeing shades of green in some of the pictures as we didn’t capture any where the whole gown was this color.

IMG_1339 (1)

Another part of the dress that was finished in France were my engageants. The pattern includes flounces of two lengths to be made of silk and then one longer flounce for an under flounce or engageant. I sacrificed some lace I’ve been intending for another project, threw some darts in at the longest section to get the scalloped edge to be the right shape, and filled in the length with a bit of mystery ivory sheer. The resulting flounce was gathered and sewn to a cotton tape that was basted into the arm opening.

IMG_1481 (1)

It sure sounds like a lot of work, recounting these bits of the process. It was! And it paid off. I’m very pleased with the gown. And very pleased that this picture captures some of the stunning green in the fabric!

IMG_0287 (1)

Suggestions For Dressmakers, 1896

“When it comes to making, the actual sewing and finishing, the American dressmaker has nothing to learn from anyone. First class American dressmakers turn out the best work, so far as the mechanics of dressmaking go, of any dressmakers in the world. In point of fact, they make dresses too well. They might with advantage to themselves, and with no disadvantage to their patrons, unlearn something about sewing, and let some of the fussy details, over which they now bother their heads to very little purpose, go by default.

But the A-1 American dressmaker puts too much fine sewing into her dresses. They look well; they look about as well on the wrong side as upon the right side; perhaps if they were not such marvels of patience in the inside finishing, they might be more artistic to look like on the outside. Look at even the highest priced foreign made dresses; by comparison, they seem almost slovenly in workmanship, compared with American dress, but after all to what end put such an infinite amount of pains into finishing off a dress that, nowadays, is worn but a few times…house dresses and evening dresses might be slighted in finishing just as the Parisian dressmakers slight them without suffering an iota in looks or wearing possibilities, and with a notable saving in time and trouble.

The Parisian dressmaker is clever. She knows every trick in putting her work where it will make the most show. So long as she gets the effect she wants, and it stays as long…as it is required, which is not long, for instance, in a tulle party frock, she doesn’t try to make the sewing in every part of the sort that would win a prize at a school exhibition. The Parisian Milliner long, long ago, found that she could get effects by pinning on her hat and bonnet trimmings that absolutely defied sewing, and the Parisian dressmaker will catch a flounce of lace here and a ribbon there with fascinating grace, and never bother her head about what it looks like on the wrong side. Why should she?”

7138bd5bed5bd5a8921d1fd61bbdfd27I came across this passage in Suggestions For Dressmakers (1896) a number of months ago around the time I was completing my 1899 elusive blue evening gown. It is from the chapter called “Making” on pages 27-28.

The passage immediately brought to mind my process for making historical garments, which is usually along the lines of the “American dressmaker” in that I put many hours of fine sewing into my dresses to make the insides just as much as work of art as the exterior.

The obvious and most current example that came to mind was the dress I was completing at the time, but there are many others as well. Here are a few made during the last few years and spanning the 19th century in terms of their origins.

IMG_0544
In the style of the “American Dressmaker”, the beautifully finished interior of my 1899 elusive blue bodice made in 2016.
IMG_0951 (1 of 1)
Another beautifully finished bodice in the “American Dressmaker” style from 2014. This is Georgina’s 1858 evening bodice.
IMG_4277
Tidy insides in my 1813 evening gown made in 2013, also in the “American Dressmaker” style.

I also had this passage in mind while working over the first part of this year on my recent 1885 Night Sky fancy dress. I decided with that ensemble to follow the suggestion to adapt to the “Parisian Dressmaker” style and not worry about the insides as I usually do. While still quite tidy, I did not spend time finishing unseen seams inside the skirt or finishing the edges of the vertical seams on the bodice, as you can see below. It was a bit of a struggle with my natural instincts, but worked out very well in terms of the working on this right up until the deadline and not having time for all the pretty finishing anyway.

IMG_1483
I couldn’t entirely shake the urge to be tidy and nicely finish things, but I did leave some edges raw and basted on the trim in case I want to easily remove it in the future.

There’s also the mention of pinning trim on hats. That is a suggestion that I often make use of! I can think of multiple examples of hats that have had trim pinned on for years even while the hats are in storage. For example, remember the hat that I wear with my 1895 Skating Ensemble? That’s the same hat from my 1883 Tailored Ensemble with fur trim and extra feathers that have been pinned on since early 2015. I’ve felt no need to sew those on!

Do you sew like American dressmaker or a Parisian dressmaker? Is it a conscious choice for you to pick one style or the other, or is it just your natural sewing method? What about hats? Do you ever pin your trimmings on?

1885 Night Sky Fancy Dress

It has been a goal to make a specifically fancy dress outfit for years, but particularly since I made a makeshift 1860s flower basket fancy dress outfit in 2015. This May I had the perfect opportunity in the form of a fancy dress ball!

I decided to make an 1880s bustle dress because I already had all the undergarments, including my still-new-feeling 1880s steam molded corset, and because it’s a period of dress that I rarely wear, especially for dancing. I wanted to experiment with dancing in a bustle to see how it worked and what it felt like.

Design-wise, I was inspired by Mrs. Alice Gwynn Vanderbilt’s Electric Light fancy dress outfit made by Worth in 1883, but wanted to adapt the idea to fabrics I already had on hand. Since the fabric I came up with was navy blue, I decided on Night Sky as my inspiration.

2753c5268e0e74e0fc49e0c0d77e3053
Mrs. Alice Gwynn Vanderbilt’s Electric Light fancy dress outfit, 1883

I started my outfit in January and worked on it over the next four months or so, but despite all that preparation time I was still working on it right up until the day before the event. Luckily, I did the vast majority of the work of cutting, sewing, and fitting before March and April when I became super busy. Tasks left at that point included finishing the bodice edges, trimming, and closures.

IMG_0999 (1)

In addition to the Mrs. Vanderbilt’s inspiration I also looked at other 1880s skirts for draping ideas and other 1880s fancy dress outfits for trimming ideas. You can see the most inspiring images and extant garments on my Pinterest board for this project here.

For ease of documentation, I’ll do the facts as with the HSF:

Fabric: 2-3 yards of navy blue cotton twill for underskirt, 6ish yards of navy blue polyester charmeuse, 1ish yard of pink cotton twill for flat lining, and 1-2yds of silver net.

Pattern: My 1885 Frills and Furbelows Bustle Dress pattern, adapted for evening and for the style of skirt desired.

Year: 1885.

Notions: A 3yd tinsel garland, 6 star brooches, 3yds of navy polyester ribbon for lacing, hook and bar closures for the skirt, and thread.

How historically accurate is it?: 90%. Recognizable in it’s own time, certainly. Reasonable construction, certainly. Materials, not so much. It was much more important to use what was on hand than to purchase new fabrics, especially since this is an outfit that I don’t see getting a lot of use.

Hours to complete: Tons. I didn’t keep track. Bustles are fussy and require lots of time with a dress form to achieve an elegant drape.

First worn: May 21.

Total cost: Most of the fabrics were in the stash with the exception of the silver net and most of the notions were purchased cheaply on eBay. Let’s say $20.

IMG_1011 (1)

For the photos I wore the dress with my black Seaburys and the new rhinestone shoe clips that I purchased in March. It was quite sparkly and elegant, but for dancing I changed into navy blue velvet flats. They were just as cute but did not get the special treatment of being shown off in photos.

I had the grand idea to use my curly hair ends flipped up on top of my head like the curled fringe popular in the 1880s. It’s also long enough that I was able to make the bun shape on the back also using only my natural hair. I pinned in star brooches to match those on my dress as decoration.

IMG_1034 (1)

All in all I’m quite happy with the final result! Dancing in the bustle was just as easy as any other Victorian style. The differences were that all the extra fabric was behind me making some movements more challenging due to space such as during a quadrille, and that the bustle and layers of fabric on the back gathered a fair bit of momentum when turning, creating quite a swish!

Construction wise the only change I would like to make after one wearing is to bone the center back edges so that the back lies flat when laced onto my body and to sew in a matching fabric piece behind the lacing holes to hide any white from undergarments that wants to peak out. I’ll also need to wear a different chemise or tuck the top down so there’s not white cotton poking out at the armholes. However, these are minor changes and I’m not sure when I’ll have the opportunity to wear this again so it might be awhile before they happen.

IMG_1023 (1)

For this ball we set up a double sided picture backdrop, one side of which you’ve already seen. The other side included a large stuffed jaguar/panther I dubbed Jaggy for the night. You often see backdrops in regular Victorian photos as well as fancy dress photos. Unfortunately, with my heels on I was too tall for them! Oops! Being too tall inspired me to take some fun sitting photos.

IMG_1094 (1)
Hanging out with Jaggy.
IMG_1097 (1)
Tired after a night of dancing.

For decoration out of the ordinary, we had the lucky and unexpected use of the fabulous blue and turquoise lanterns in many of the pictures as well as multicolored paper lanterns with lights inside. We put the lanterns around the room in glass vases as bouquets. First, a picture from the set up part of the evening. Second, a picture with some lanterns creeping into the photo.

IMG_0973 (1)

IMG_1080 (1)

Fancy dress outfit, check!

Project Journal: Versailles Sacque: A Pretty Petticoat

The petticoat for my Versailles Sacque has been done for a few weeks now, but was waiting in the blog post queue to have its progress made public. It’s sort of boring to look at the whole petticoat, because it’s just a petticoat with longer sides than normal, so I’ve focused the pictures on the more interesting waistband section of the petticoat. (As you can see, this picture was taken before I ironed the front of the petticoat…)

IMG_0866

In making the petticoat I referenced Katherine’s 18th Century Petticoat Tutorial and The Standard 18th Century Petticoat Tutorial at A Fashionable Frolick. The nice thing about Katherine’s tutorial is that it’s adjusted for a petticoat to go over pocket hoops, while the great thing about the tutorial at A Fashionable Frolick is that it has tons of detailed construction information like which stitches to use. Both tutorials are clear and very helpful.

When it came to pleating, I thought I might struggle as Mr. Panniers is larger than normal pocket hoops, but I found that once I put the petticoat on the dress form with Mr. Panniers underneath I could neatly arrange the pleats around the waist and not go into the extra complicated pleated needed for a very square and wide pannier shape (such as in Katherine’s court gown and Kendra’s court gown). Whew! I placed all my pleats off to the side (further than I would for a normal 18th century petticoat) to keep the front of the petticoat flat where the trim will be visible between the fronts of the sacque.

The front panel of my petticoat is the fashionable silk that my sacque is/will be made of. (Enjoy the sneak peak!) The back panels are the same blue mystery fabric that Mr. Panniers is made of. The ties are polyester ribbon to match the silk, because hey, I was already fudging the accuracy of materials with the mystery fabric but on the other hand the color compliments the silk very nicely!

Here’s what the inside looks like. The extra fabric at the top of the petticoat is turned to the inside, slit up the middle to accommodate the curved top edge, and left raw.

IMG_0867

And here is the back. The petticoat is hand sewn. The center back seam is felled mostly because I am slightly obsessive with having nice insides and the other two seams are selvedges. For some reason the raw edges across the top don’t bother me. Go figure.

IMG_0868

I’ve also been playing with hair styling. I’m not satisfied yet, so I don’t consider it done, but at least I’ve made a start! The sacque is coming along nicely, too!

  • Panniers
  • Petticoat
  • Robe a la francaise (with a subset of trimming)
  • Hair
  • Shoes

Springtime In 1895

Part of my super busy April included a few historical adventures and for one of them I made a new skirt! I was lucky to be able to squeeze it in between working on things for Versailles and for my other event in May–a fancy dress ball!

The morning was rainy and cold and so I threw on a sweater to keep warm. I rather fancied that I looked like an 1890s adventurer, sort of 1890s-lady-does-Indiana-Jones-in-the-rain-without-the-hat. (I really want to make an adventuring/archeologist outfit and find a great place for pictures…! Someday…)

IMG_0796 (1)

IMG_0803 (1)

By the afternoon the rain and ceased and the sun came out, which was a perfect opportunity to take some pictures of my ensemble without the sweater. I find I don’t have many outfit pictures taken in the springtime and this seemed like a perfect opportunity to counteract that problem.

IMG_0819 (1)

The new 1895 skirt is being worn with an 1895 blouse I made in 2012 as well as a silk taffeta belt and my super silk petticoat for volume. The last few times I wore this blouse I was wearing a skirt from about five years later. Not out of the question in terms of plausibility, but not as perfect in silhouette as I was hoping for. This time though, I was excited to have springtime pictures with an outfit in which all the clothing was from the right period!

IMG_0820 (1)

The skirt is an umbrella shape, meaning that it is all one piece with only a center back seam, just like my 1895 skating skirt. It is hand sewn simply because it was easier to sew it by hand than get out the machine to do it. It’s made from a rayon blend herringbone weave fabric which has a lovely drape, but wrinkles very easily. I like that it is neutral without being white and that it has a subtle pattern.

There was also a covered well that seemed cute for taking pictures until I stopped to think about how to pose. Most of my pictures are extra silly looking, but these two are reasonable and my favorite.

IMG_0832 (1)

IMG_0836 (1)

Thank goodness spring is finally here! The flowers and green on the trees is lovely and such a change from the dull brown and grey of winter.

Wicked, Monstrous, Silly, And A Good Time

10012673_1109871912380610_4283278151979500963_o
Some friends and I, taken by the official photographer of the night.

In the words of journalist Heywood Broun, “The Jazz Age was wicked and monstrous and silly. Unfortunately, I had a good time.” I don’t know about wicked or monstrous, but I certainly had a silly and good time recently at the Greater Boston Vintage Society’s White Lightning Ball.

IMG_2309
Silly faces!

I wore my 1924 robe de style from last summer, updated with new dramatic trimmings that suit the dress much better than the last iteration. It’s such a fun, unusual, and distinctive style to wear. I fielded quite a few questions about the style and happily encouraged people who knew things about it such as that it looked like Lanvin. For my hair, I didn’t have time to attempt waves, so I aimed for a romantic style that was less time consuming, inspired by these: no waves worn with a robe de style, a romantic bun (on the right), and long hair pinned up. Also, this set of drawings shows a large hair comb worn with a robe de style which reminded me that I haven’t worn mine in a long time.

IMG_2331 (1)

My accessories include: my vintage celluloid hair comb; silver drop earrings with peachy faux stones, which don’t often match things, so it was nice to wear them since they don’t get worn often; and a recent purchase from American Duchess, black Seaburys! (Never fear, there’s a whole post coming about the Seaburys, but for now we’re focusing on the event and the clothes.)

IMG_2362 (1)

This event is held at the Larz Anderson Auto Museum in what was the Anderson family’s carriage house in the early 20th century. It is a large building with multiple levels used for stabling horses as well as storing carriages and cars. The upper floor of the carriage house housed an exhibit of motorcycles during the event, if you’re wondering about the background. Downstairs was the collection of Anderson family cars from the 1900s and 1910s. They were very fun to look at and so tempting to sit in… I know it wouldn’t be good for the cars… And there were security cameras… so I had to content myself with looking at them and dreaming of reproductions that we could ride in.

IMG_2352 (1)

My other silly accessory was a candy cigarette. It does rather add to the 20s look, but of course I don’t smoke, so there was rather a lot of me flipping it around in my hand trying to figure out how to hold it and not look ridiculous. I didn’t ever try eating it, so I can’t report how it tasted, but I was pleased that it lasted almost until the end of the night when I dropped it for the second time and it broke in half. Until then it was going strong and gave me something to do with my hands in pictures, which is always a good thing.

IMG_2372-2 (1)

Mostly I stood around and talked to friends, hatched dreamy plans for how to sit in the cars, and took pictures, but we did go out on the dance floor a few times for some Charleston. Too bad nobody got pictures of that!

IMG_2375 (1)

This was the third year of the event, I believe, but only the first year I had been free to attend. It was fun, and nice to attend an event that I wasn’t helping to run.

SaveSave

1890s Skating Ensemble Photo Shoot

When I first wore my 1895 skating ensemble last January, I ran out of time and braid after trimming the back and sleeves. Sometime last year I ordered more of the braid from Debs Lace and Trims* and in November or December I ordered black wood toggles from eBay (super cheap, 50 for $2–I’ll have toggles for life!).

IMG_7425
Showing off the finished trim on the back and sleeves from the first wearing.

I’ve only found this one picture of the front of the inspiration skating jacket. It’s not as close-up as I would like, but it was enough to base a plan on for my own jacket. Using that and other images on my sewing project Pinterest board, I planned out the yardage for each new row of trim. After lots of pinning, stringing toggles, and careful sewing I had used up every single inch of the new batch of braid for a total of 10 yards of braid trim on the jacket. But the result is excellent! I’m just as chuffed with the additional trim as I was with the ensemble when I first made it.

IMG_7421

It didn’t snow much here this year (such a change from last year!), but we did have a day of sticky snow right after I finished the trim that was lovely to look at. I convinced Mr. Q to take pictures of me around our neighborhood the next morning while the temperature warmed up and everything began to melt. Luckily we made it out early enough in the day that there was still snow!

IMG_7452

Passersby were staring, a lady on a balcony started a conversation with me about my outfit, and Mr. Q was, well, out of his comfort zone. I guess I’m just used to the situation. He was not–and I was amused.

IMG_7417

However, despite my penchant for making really odd faces and talking when someone is trying to get a good shot of me, Mr. Q did manage to get a number of very nice pictures of the totally finished ensemble.

IMG_7439

As you can see, I’ve edited out the odd faces and so far only included some of the more elegant and put together ones I managed to pull off.

IMG_7423

Here are some silly ones. I’m not sure what’s happening this one–it looks like I’m blowing a kiss or making a wish. I might have been talking. It’s cute though!

IMG_7429

This was a successful pose! Sometimes I just look totally silly when I pose, but I guess curious-what’s-around-this-tree face is not so bad.

IMG_7418

And finally, one in which I wonder again what I’m doing… I think I was going to reach up for the tree branch, but then Mr. Q pointed out that it looked weird… It’s a fun silhouette shot, anyway.

IMG_7431

*If you haven’t been before, check out Debs Lace and Trims. You can’t beat her prices and most laces and trims I’ve ordered from her have been excellent, with the exception of a few stiff laces when I was hoping for soft lace. But even then, the prices are so low that I put the lace in my stash and use it for other projects without being worried I wasted my money on a product I wasn’t happy with.

Project Journal: Versailles Sacque: Meet Mr. Panniers

There are five big checkboxes on my related-to-the-trip sewing to-do list before my trip involving Versailles in May:

  1. Panniers
  2. Petticoat
  3. Robe a la francaise (with a subset of trimming)
  4. Hair
  5. Shoes

This week, I checked the first item off the list!

IMG_0681
“Take that, Mr. Panniers! You are totally and completely done!”

I think part of the reason I feel so triumphant is that I really had to wrangle these to make them bend to my will. I started back in 2013 or 2014 when I decided to join the 18th Century Court Gown Sew Along. At that point, I made the decision to use the Simplicity pattern (#3635) and $1/yard lightweight and tightly woven mystery fabric from my stash.

At first, everything seemed to behave: I cut out the pieces and started sewing. Then I realized I didn’t have time for the project and so I let the panniers languish until earlier this year when I pulled them out again to finish them so I could use them as a base for my Versailles Sacque. Perhaps it was the languishing that caused Mr. Panniers to take on a personality and want to thwart me when I got back to him this year…

It started with perfectly amiable sewing. The waist casing and drawstring were without event. And then, boning! There was twisting, and warping, and curving inwards, and all sorts of bad. The lower three bone channels eventually cooperated, but those angled top bones? Nope! No cooperation from them! (Yes, check my picture, there are no angled top bones. No, I’m not trying to trick you.)

The bones curved in on my bum and front side so badly that it made the panniers look like a jelly bean! Not what I was aiming for. My solution was to unpick the channels across the front and back (not the sides) and make one continuous horizontal bone channel like those below it. (That’s why you can’t see angled bone channels in the picture.) But the fabric is a very tight weave and does not easily forgive pin or needle holes, so you can still see the angle I originally stitched as directed by the pattern if you look closely.

IMG_0682

Mr. Panniers was much more cooperative with the new horizontal channel across the top. Whew! And ok, I have to take some responsibility for the problems because I’m confident that some of the struggle was due to my choice of boning–1/2″ wide zip ties about 18″ long that I masking taped together to get the lengths I needed. I have to pack this guy, and having bones that don’t weigh a lot (like metal) and won’t break (like cane or reed) was high on the list. The bones are simply overlapped in the channels, each of which has an opening, so the plan is to remove them (and label them) for packing, then reinsert them once I’m unpacking the whole ensemble in France. Anyway, the zip ties were coiled in the packaging and didn’t want to change their shape, which is why the angled bones were curving in towards my body and why the whole thing is so bent on warping if not carefully and delicately handled.

IMG_0684

Here’s a look at Mr. Panniers interior. The white ribbons are suggested in the pattern to help keep the shape. They’ve all been adjusted to my body shape (tedious, but worth it–sewing these on and fixing that angled bone channel problem were the things that kept this from being finished a month ago!).

As you can see, in terms of materials and construction, Mr. Panniers aims for the right shape as the goal. To that end, I appreciate that with my overlapping bones I can easily adjust the size at any point by overlapping the bones more. I find that this pattern is a bit too trapezoidal for my taste, so I’ve overlapped the bottom bone a little extra to make the skirt hang more vertically from about the knee down.

Needless to say, the bones are staying in and Mr. Pannier will be resting flat and collapsed until I need to pack him, so that for any fittings, etc. no more wrangling will be necessary.

(Side question: Does anyone know when it would be appropriate to use singular ‘pannier’? Would that be appropriate for referring to one of a set of two pocket hoops, for example?)

Side note: this is officially the last post that will be tagged 1770 court gown, since that project has now morphed into the saga of the Versailles Sacque and accessories.