1875 Hair & Finished Hat (HSM #7)

Last post, I shared details about the style I decided on for the hat to accompany my 1875 reception dress, as well as how I made the hat.

Today, we get to see the finished hat being worn and take a look at the hairstyle I created to support the it!

This hat qualifies for the Historical Sew Monthly challenge #7: No-Buy! I was pleased that I had everything I needed for this hat on hand and it was a bonus that I was even able to use scraps in a lot of places!

Make something without buying anything.  Whether it’s finishing off a UFO, using up scraps of fabric from earlier challenges in the year, sewing entirely from stash, or finding the perfect project for those small balls of yarn, this is your opportunity to get creative without acquiring more stuff.

Just the facts:

Fabric/Materials:  Scraps of buckram, scraps of cotton flannel, scraps of pink, green, and ivory silk, 2 green-ish/brown ostrich feathers, 9 vintage silk millinery flowers, and a bit of cotton velvet.

Pattern: My own.

Year: c. 1875.

Notions: Millinery wire and thread.

How historically accurate is it?: Let’s say 85%. It’s pretty good on shape, materials, and methods, I believe, and it would be recognizable in its time.

Hours to complete: 10 ¾ hours.

First worn: In May, for photos with my 1875 ensemble!

Total cost: This was a stash project, so I count it as free; however, not counting fabric scraps I think I spent about $12 on the other materials at some point in the past.

Hairstyle Possibilities

When I was deciding on the style of hat I would be making, I also had to consider what my hairstyle might be, as the two support and complement each other. The post showing how I made this hat also shows a variety of hat styles popular at this time.

Along those same lines, let’s look at possible hairstyles from the years around 1875. Hairstyles changed throughout the 1870s, sometimes in subtle ways… and sometimes in not subtle ways! Here is not subtle for you.

Guy Little Theatrical Photograph, V & A, S.145:535-2007

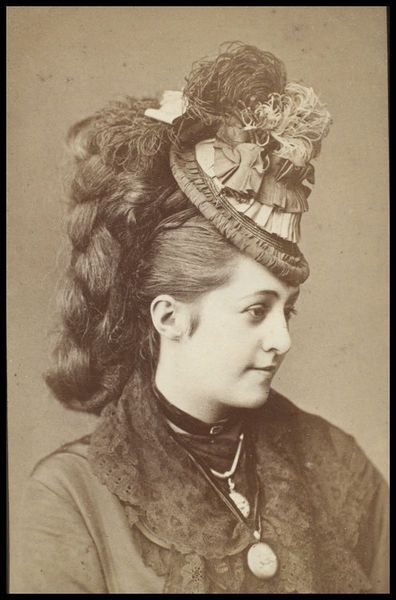
I love this look (though I can see why you might chose to have a differing opinion), with ginormous braids and twists that use much more hair than most people naturally have on their heads. However, this style (with all of the additional hair at the back of the head) does not coordinate with the type of hat I chose–one that would sit on the back of my head, creating a crown effect.

Looking at the years right around 1875 (the year of my reception dress), I found hairstyles with lots of curls and twists hanging down. 1875 is the part of the decade when the fashionable silhouette of dresses changes from the very round styles of 1870-1874 (like this, for example, from 1870) to the styles from 1875-1877 that have fabric starting to slide down the backs of skirts (like this, for example, from 1875).

As if in sympathy with the dresses, I notice that hairstyles start to slide down, too. It is these years when I see curls and twists hanging down the back, while the top parts of the hair are still sculptural, decorative, and large. Here is another example showing both the cascading fabric and the sympathetic hanging curls.

La Mode Artistique, 1875, via Yesterday’s Thimble

Interestingly, there are lots of advertisements for hair pieces to help achieve these styles–for ready-made curls, twists, braids… we know that women were not achieving this with only their own hair!

Ten illustrations of different types of wigs and hair pieces, May 1875, via Hats From History

Another hairstyle option is much more subdued and most popular starting in 1878. This is the Natural Form period, when skirts are quite narrow by comparison with earlier years (like this, for example, from 1880). In keeping with the streamlined silhouette, the hair is now generally swept up, but with much less ornamentation and volume than we see in the previous years. Here is an example. No hanging curls or twists and no masses of faux hair.

1880, Le Journal des Modes, via the LAPL

Hairstyle Decision

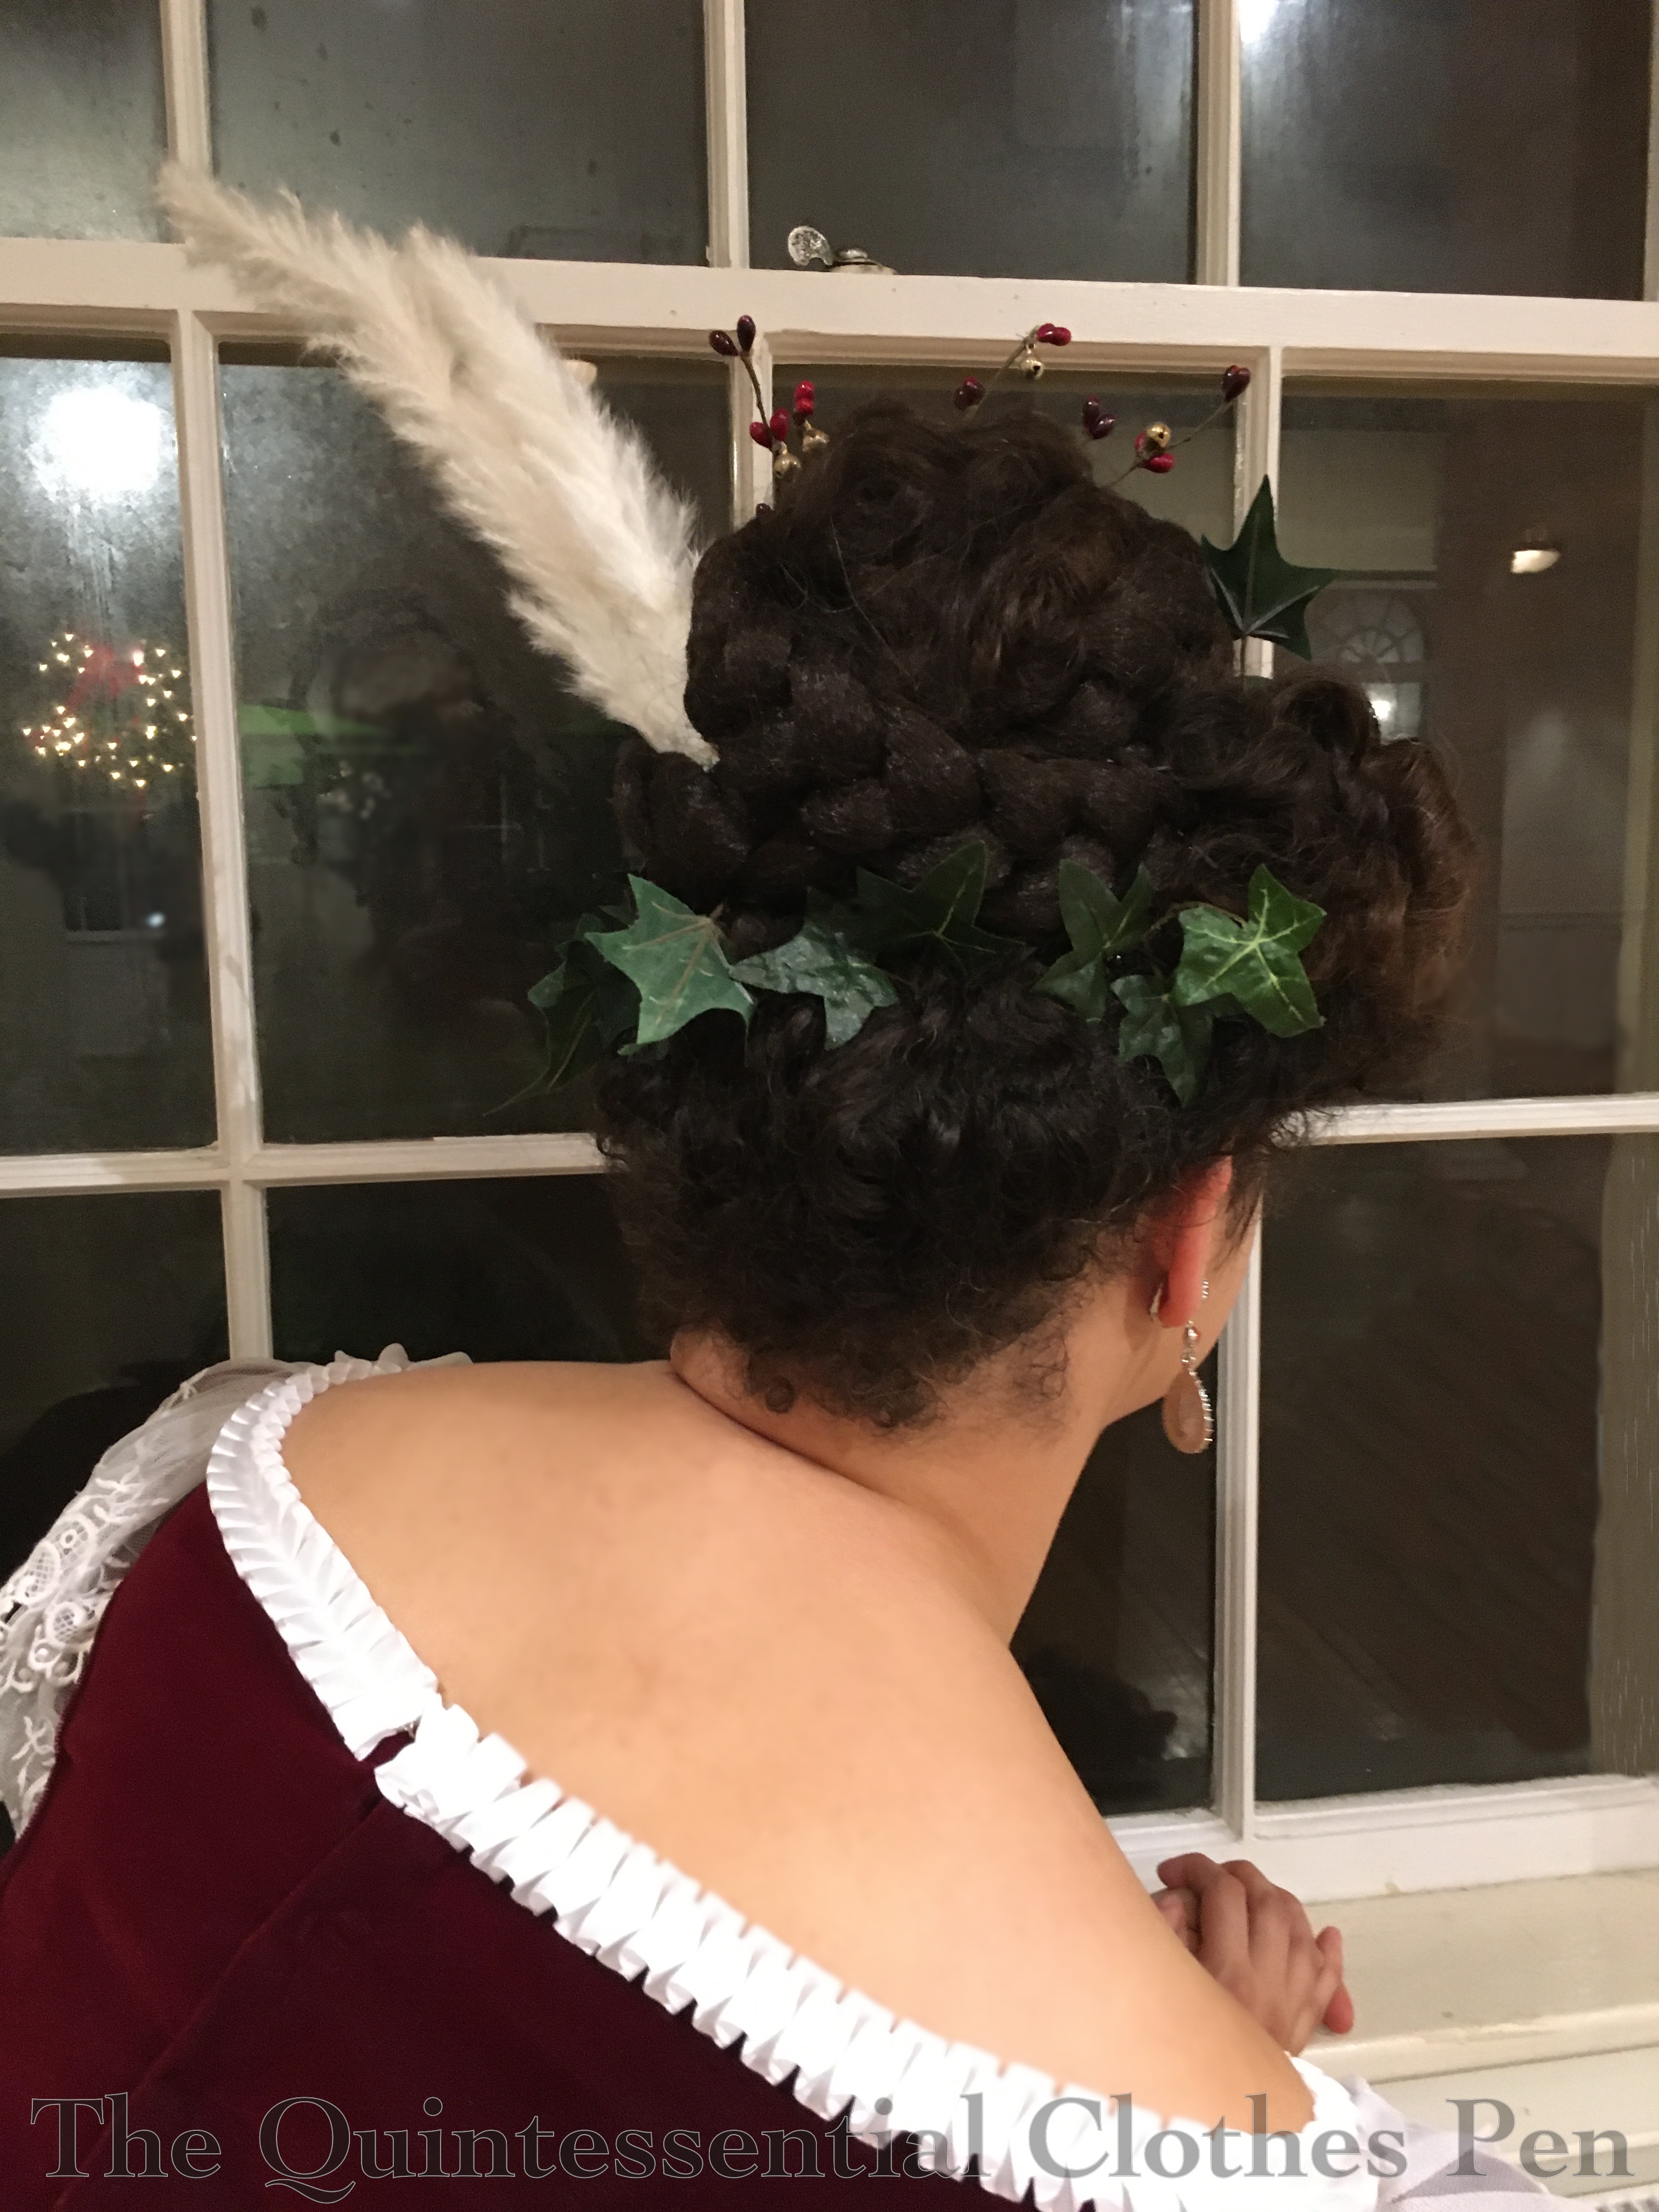
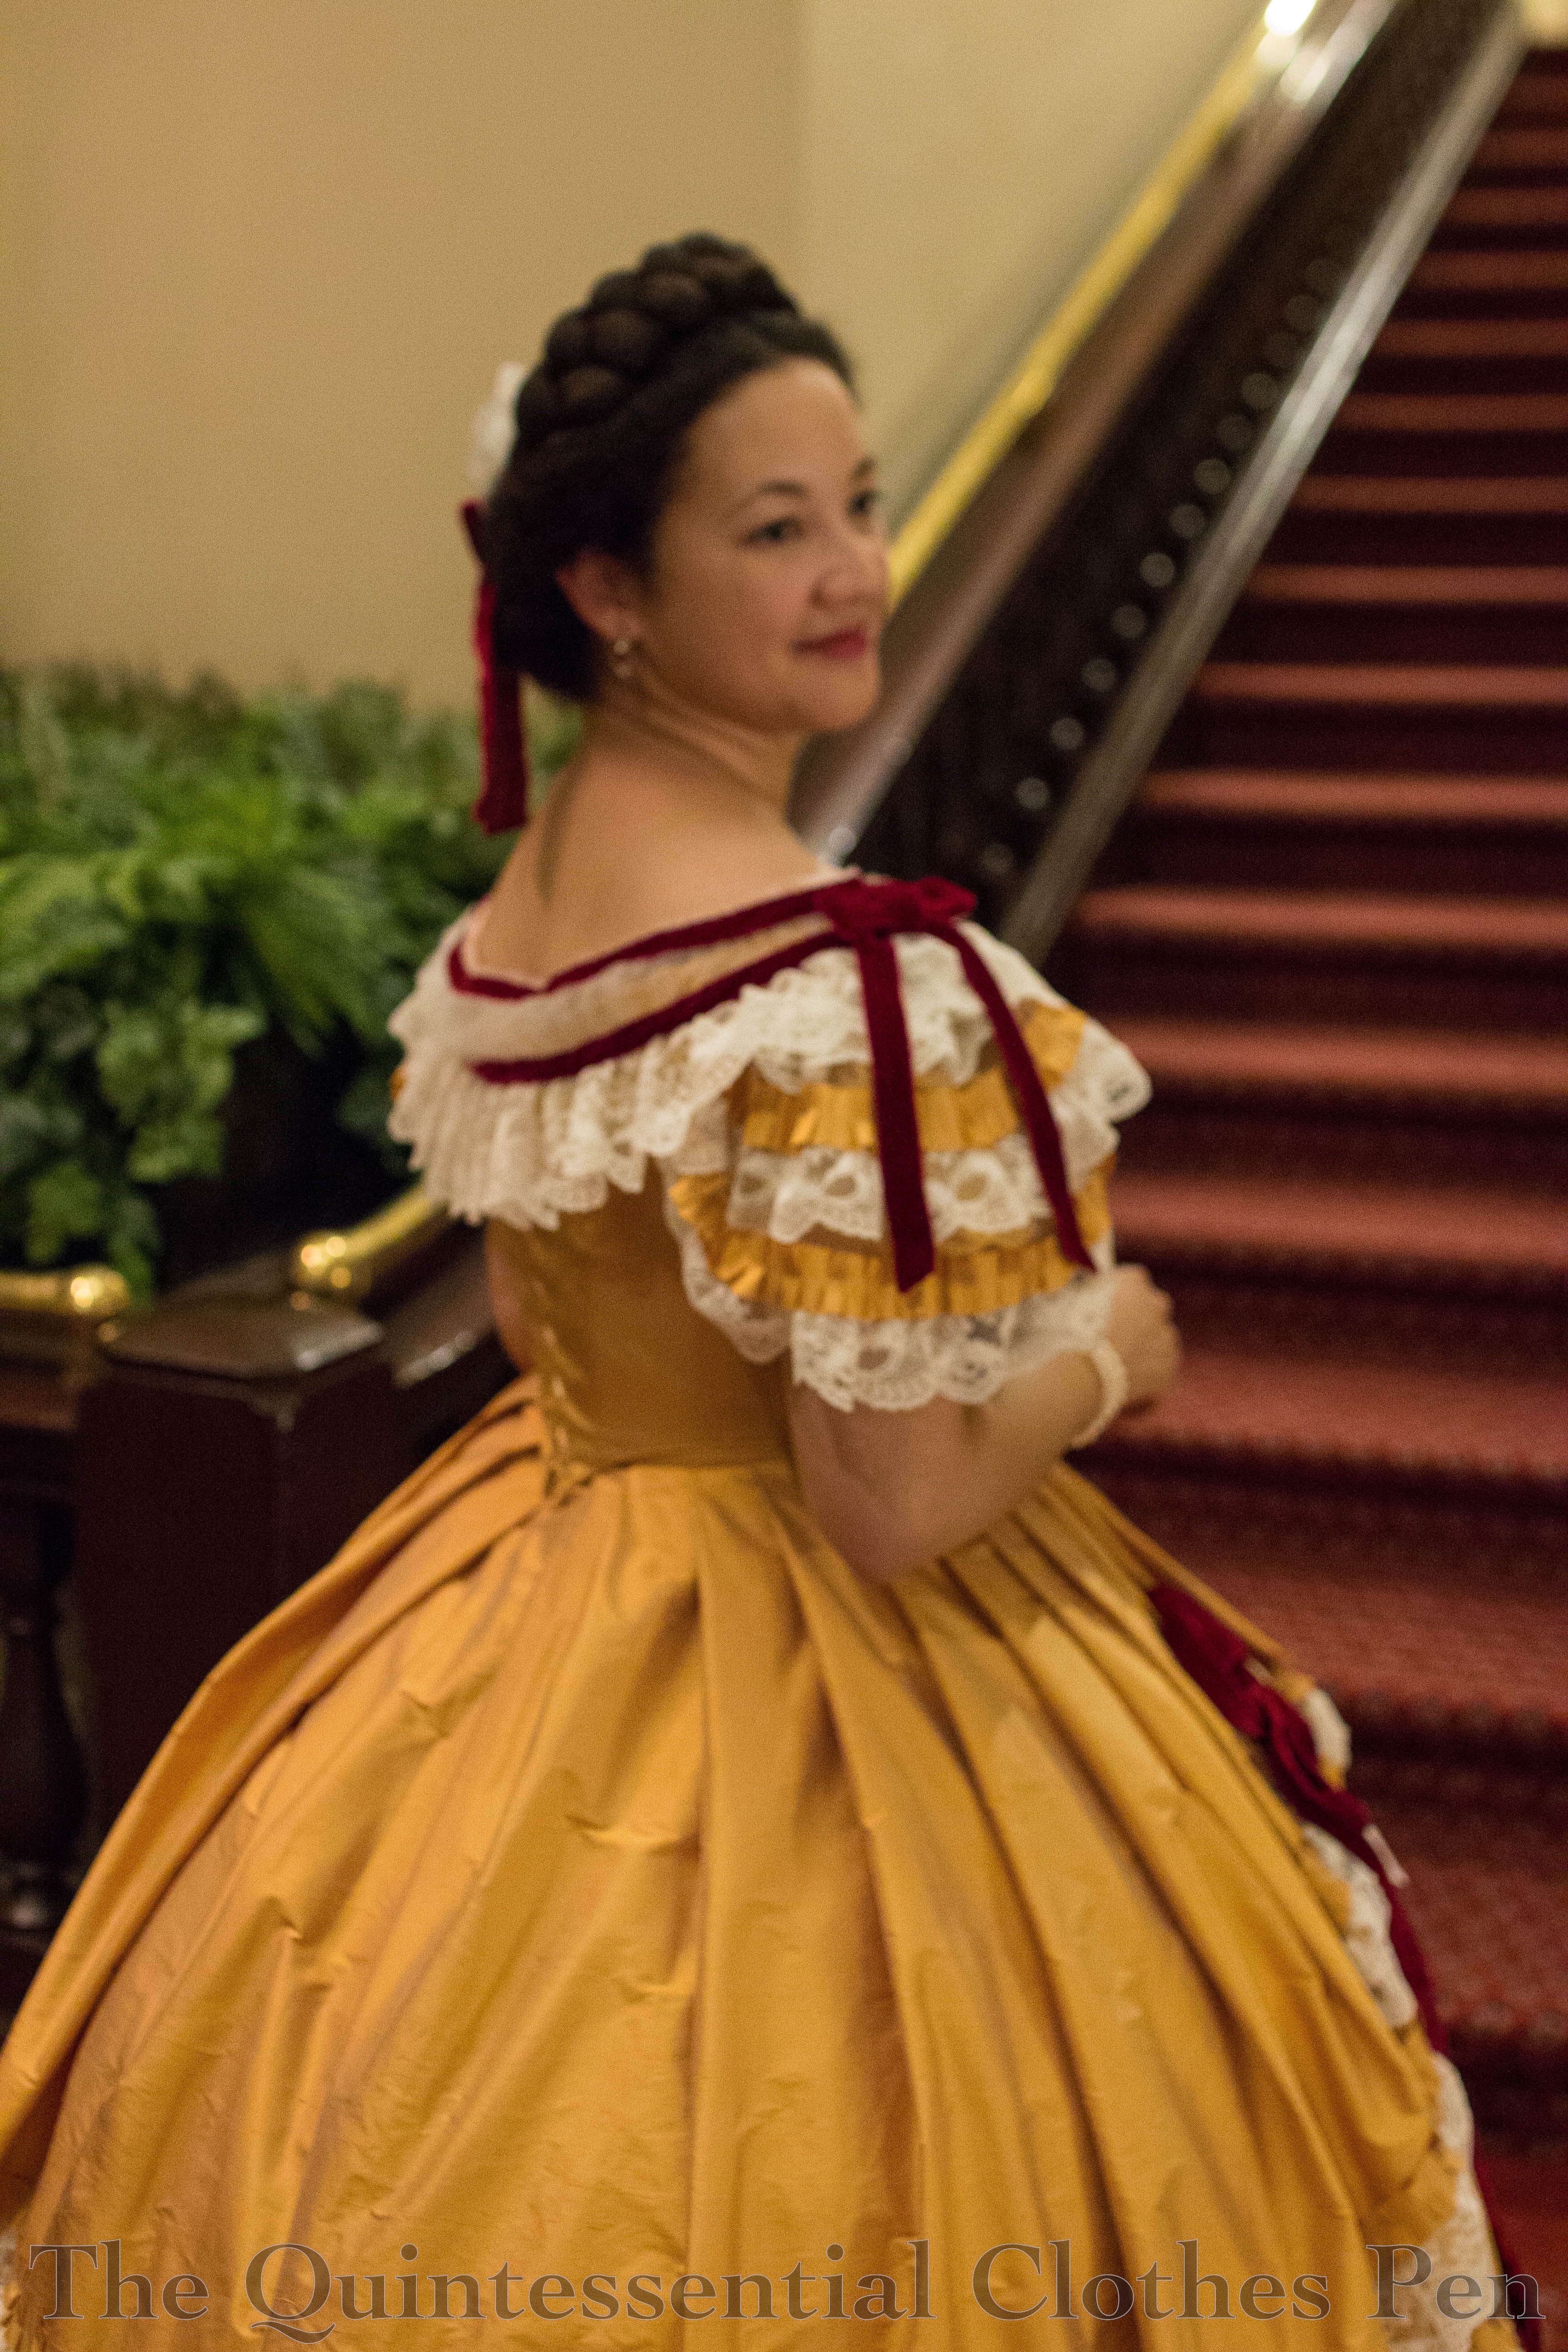
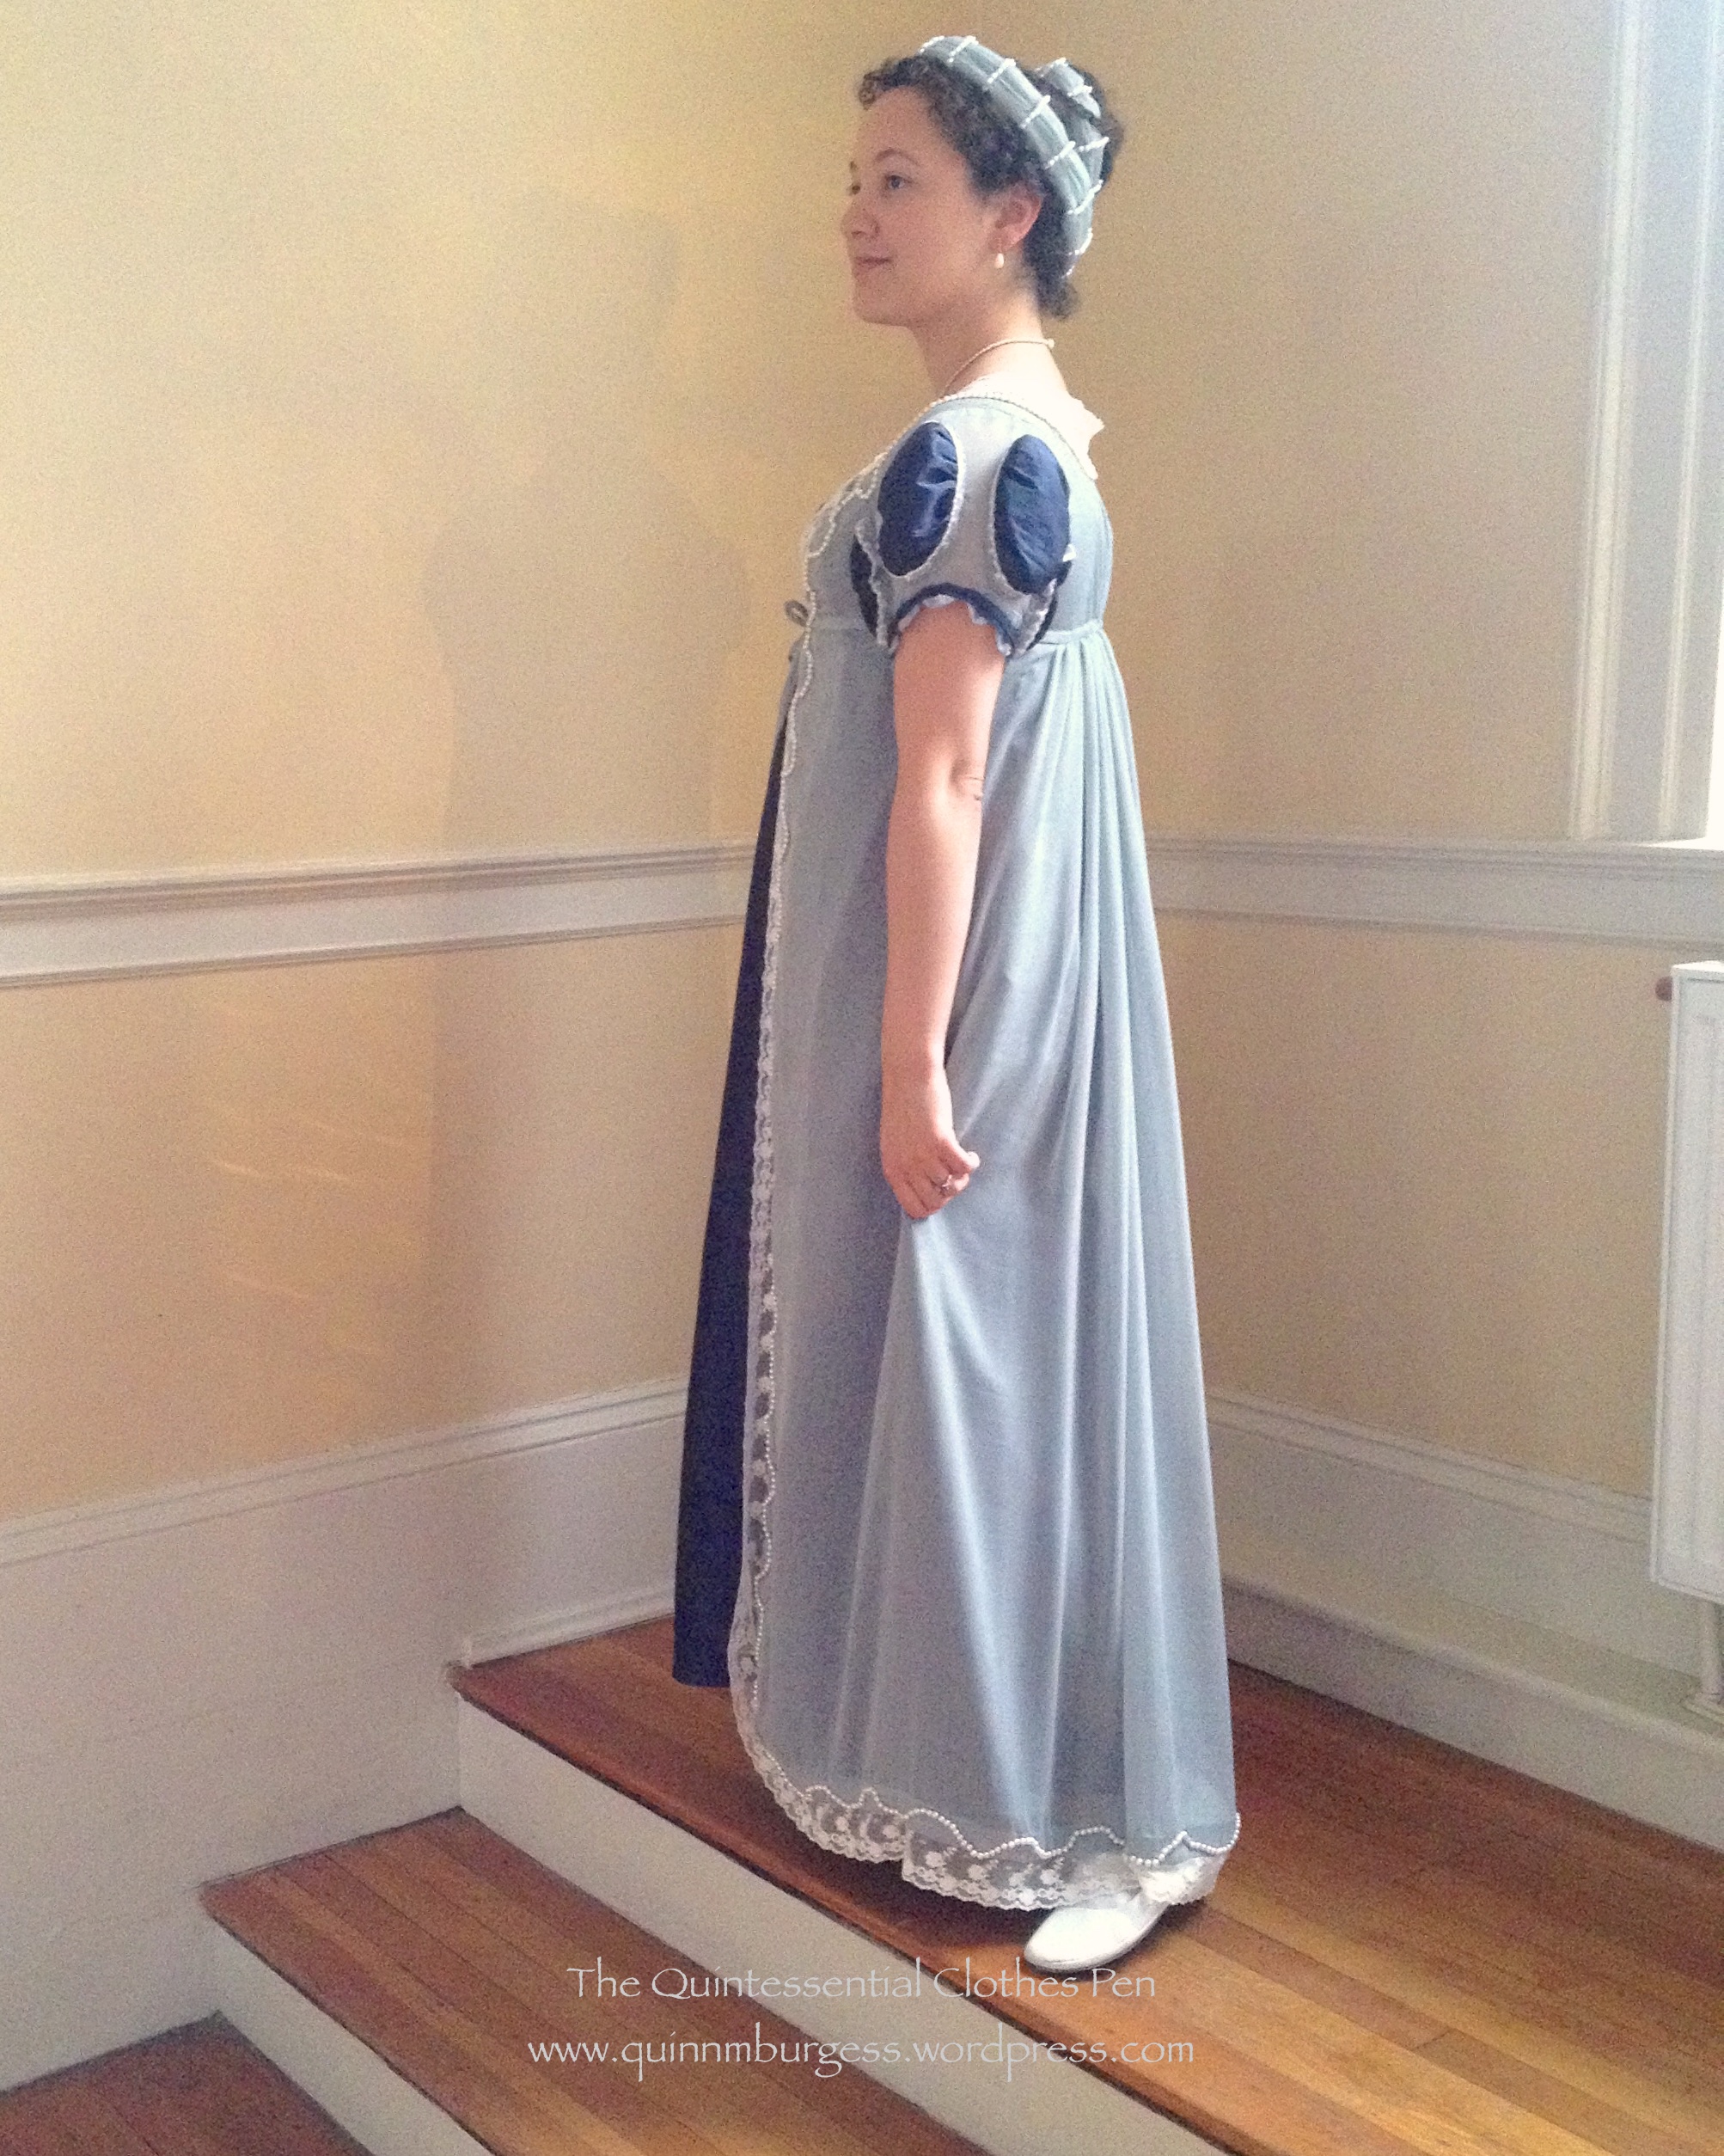
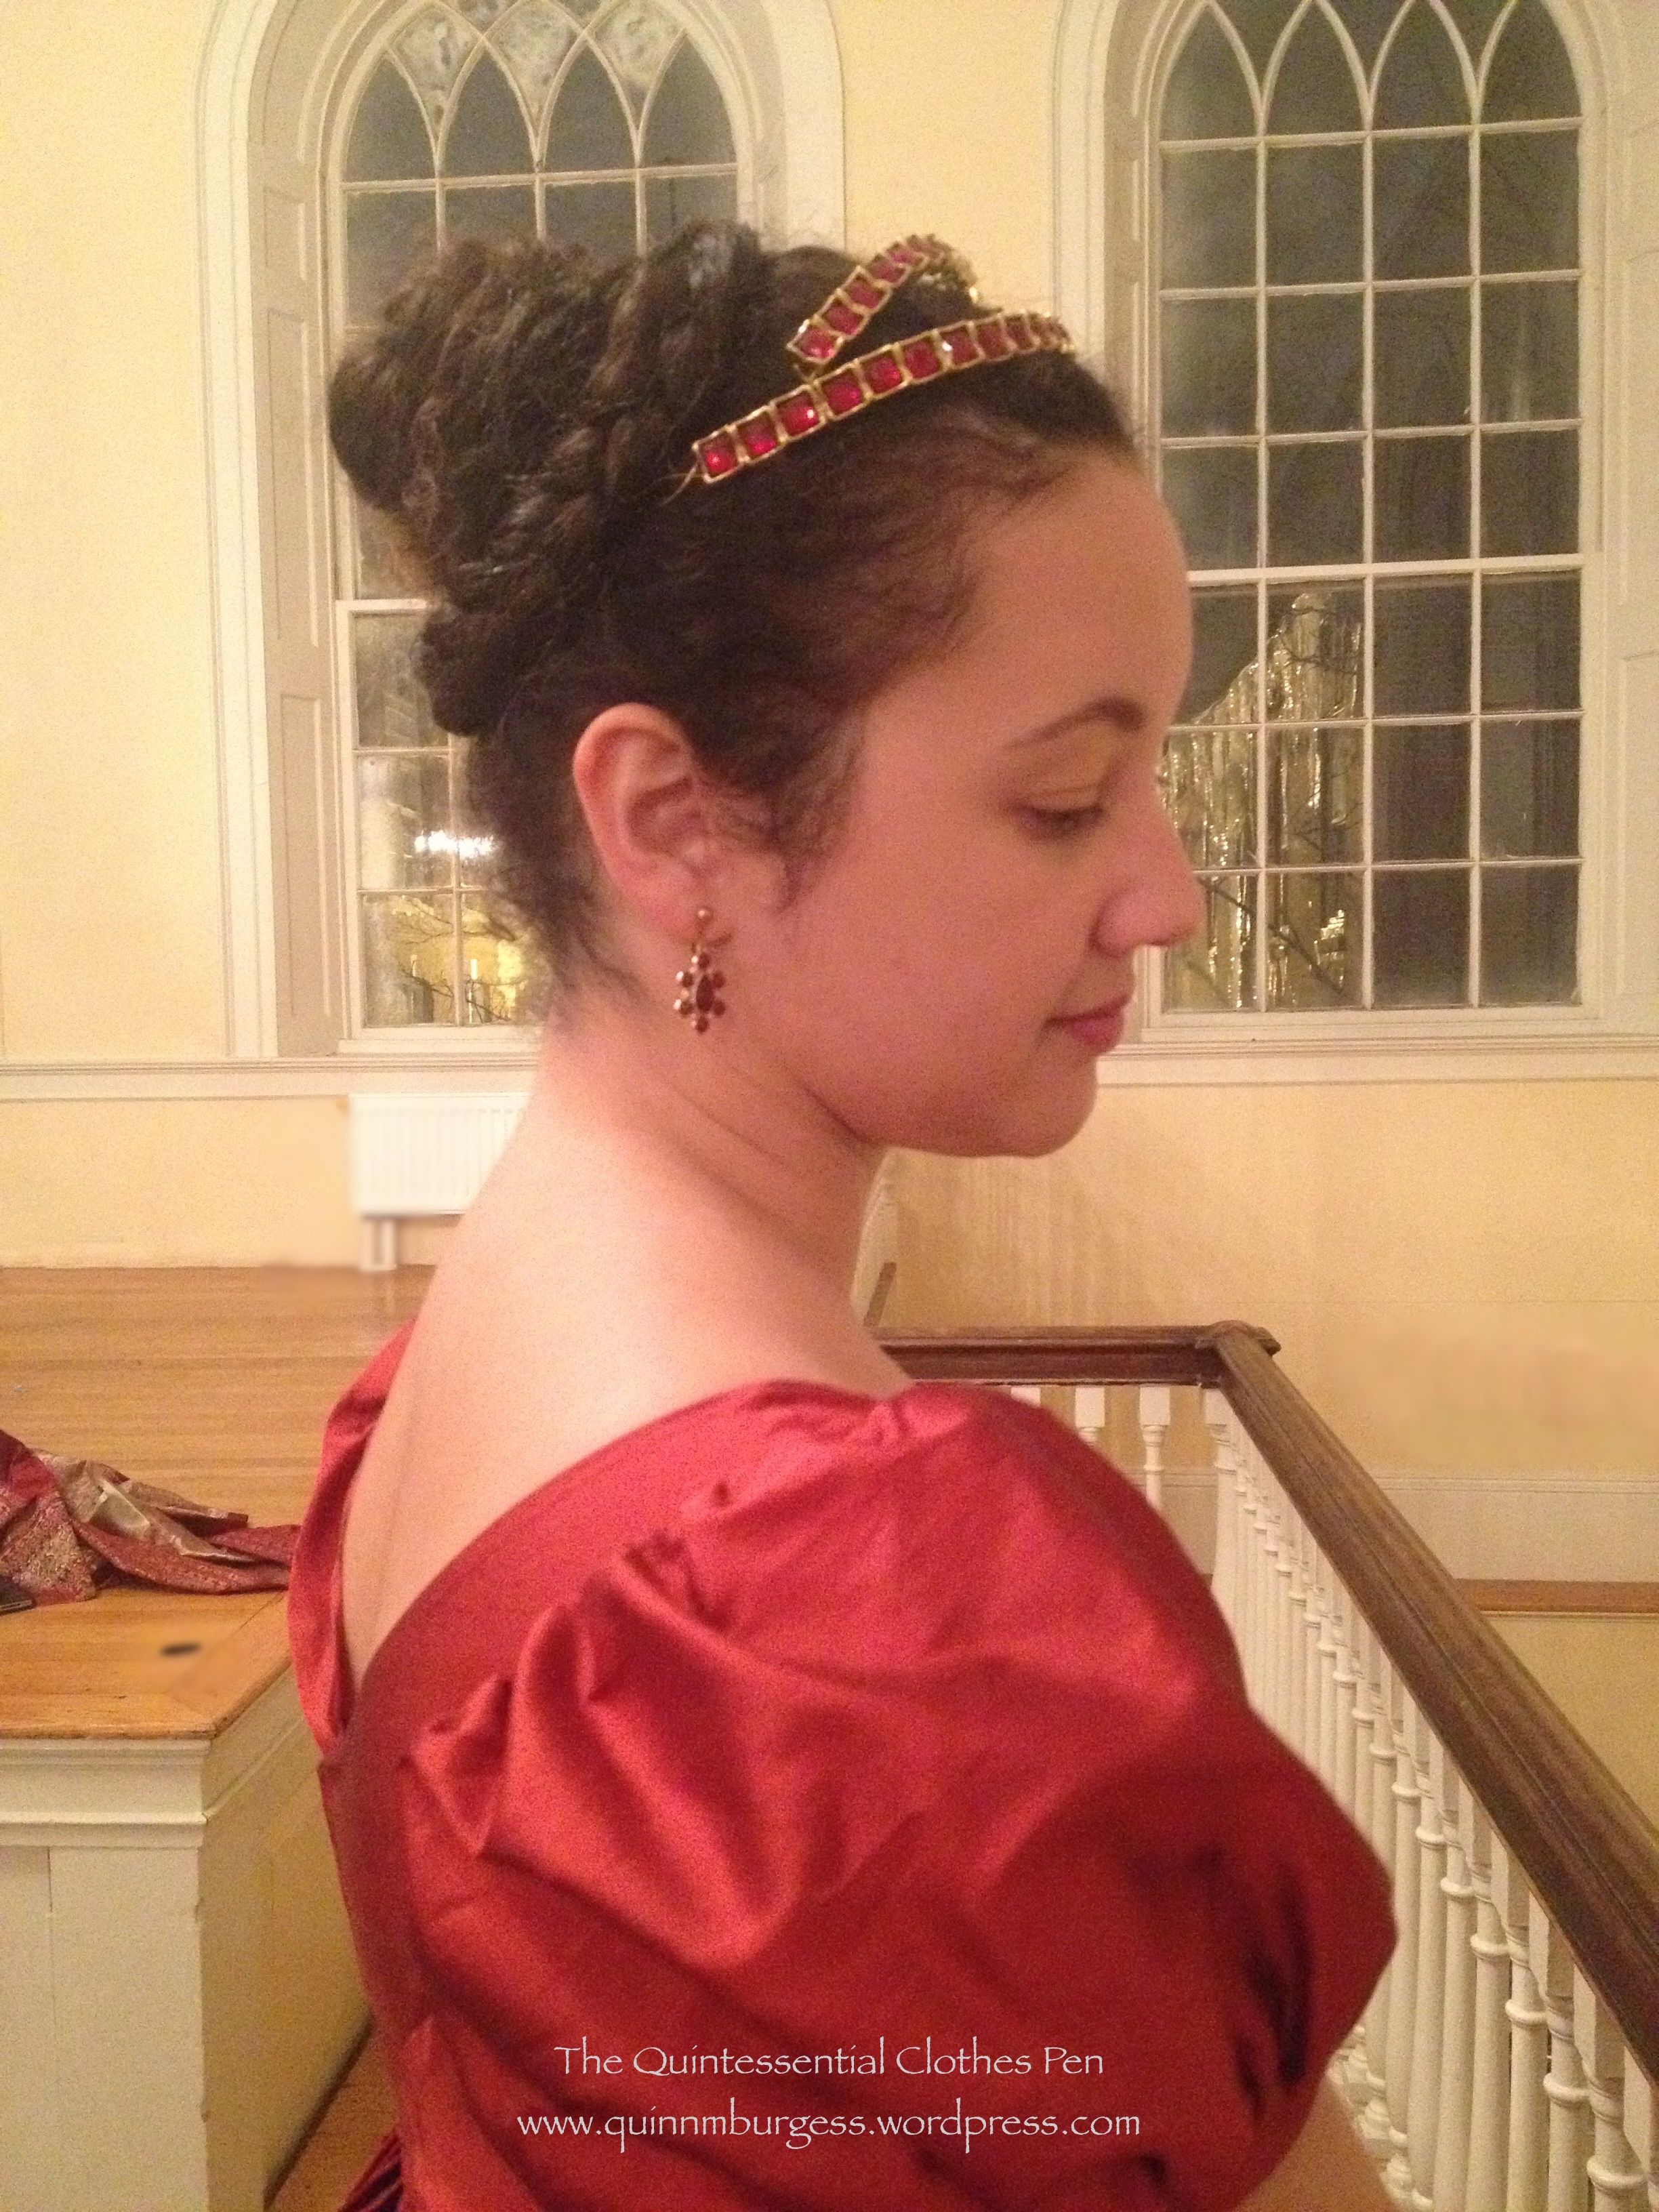
I settled on the mid-century hairstyle of decorative bits hanging down the back with sculptural hair on the top of my head, to complement the hat. This style provided a solid base that helped visually and physically balance and anchor the hat. Indeed, without all the extra volume on top of my head the hat just looks out of place.

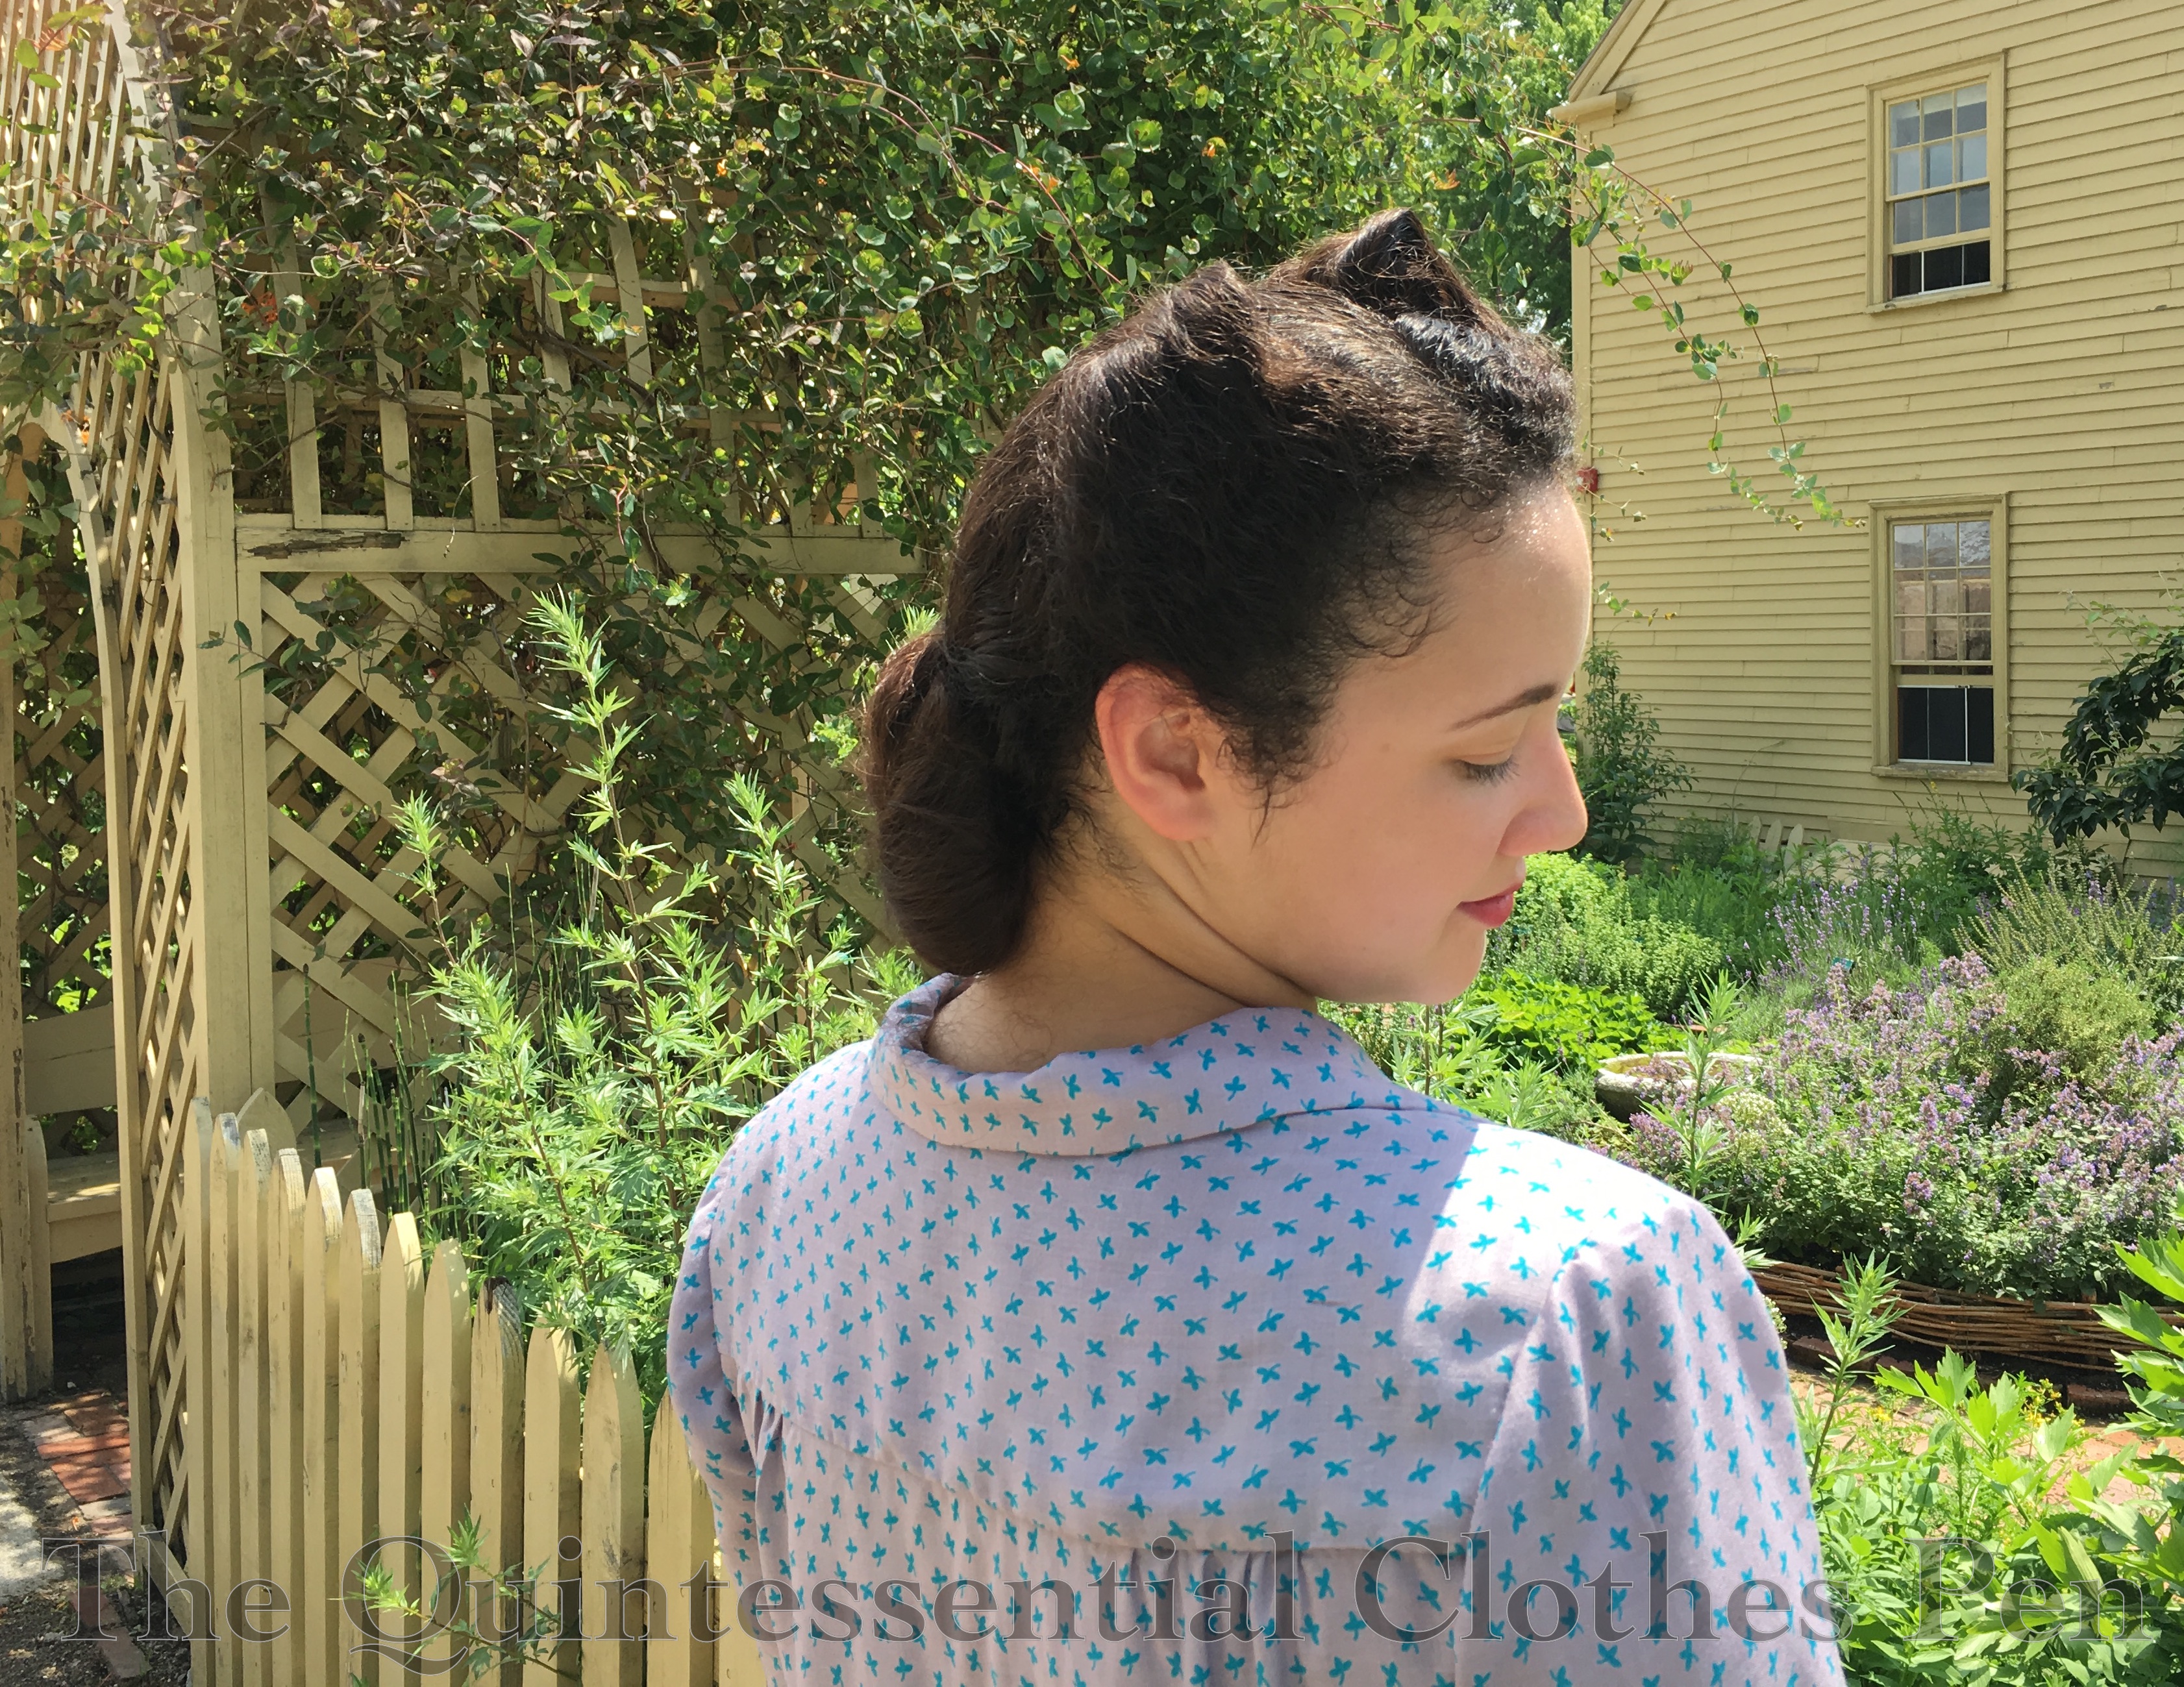
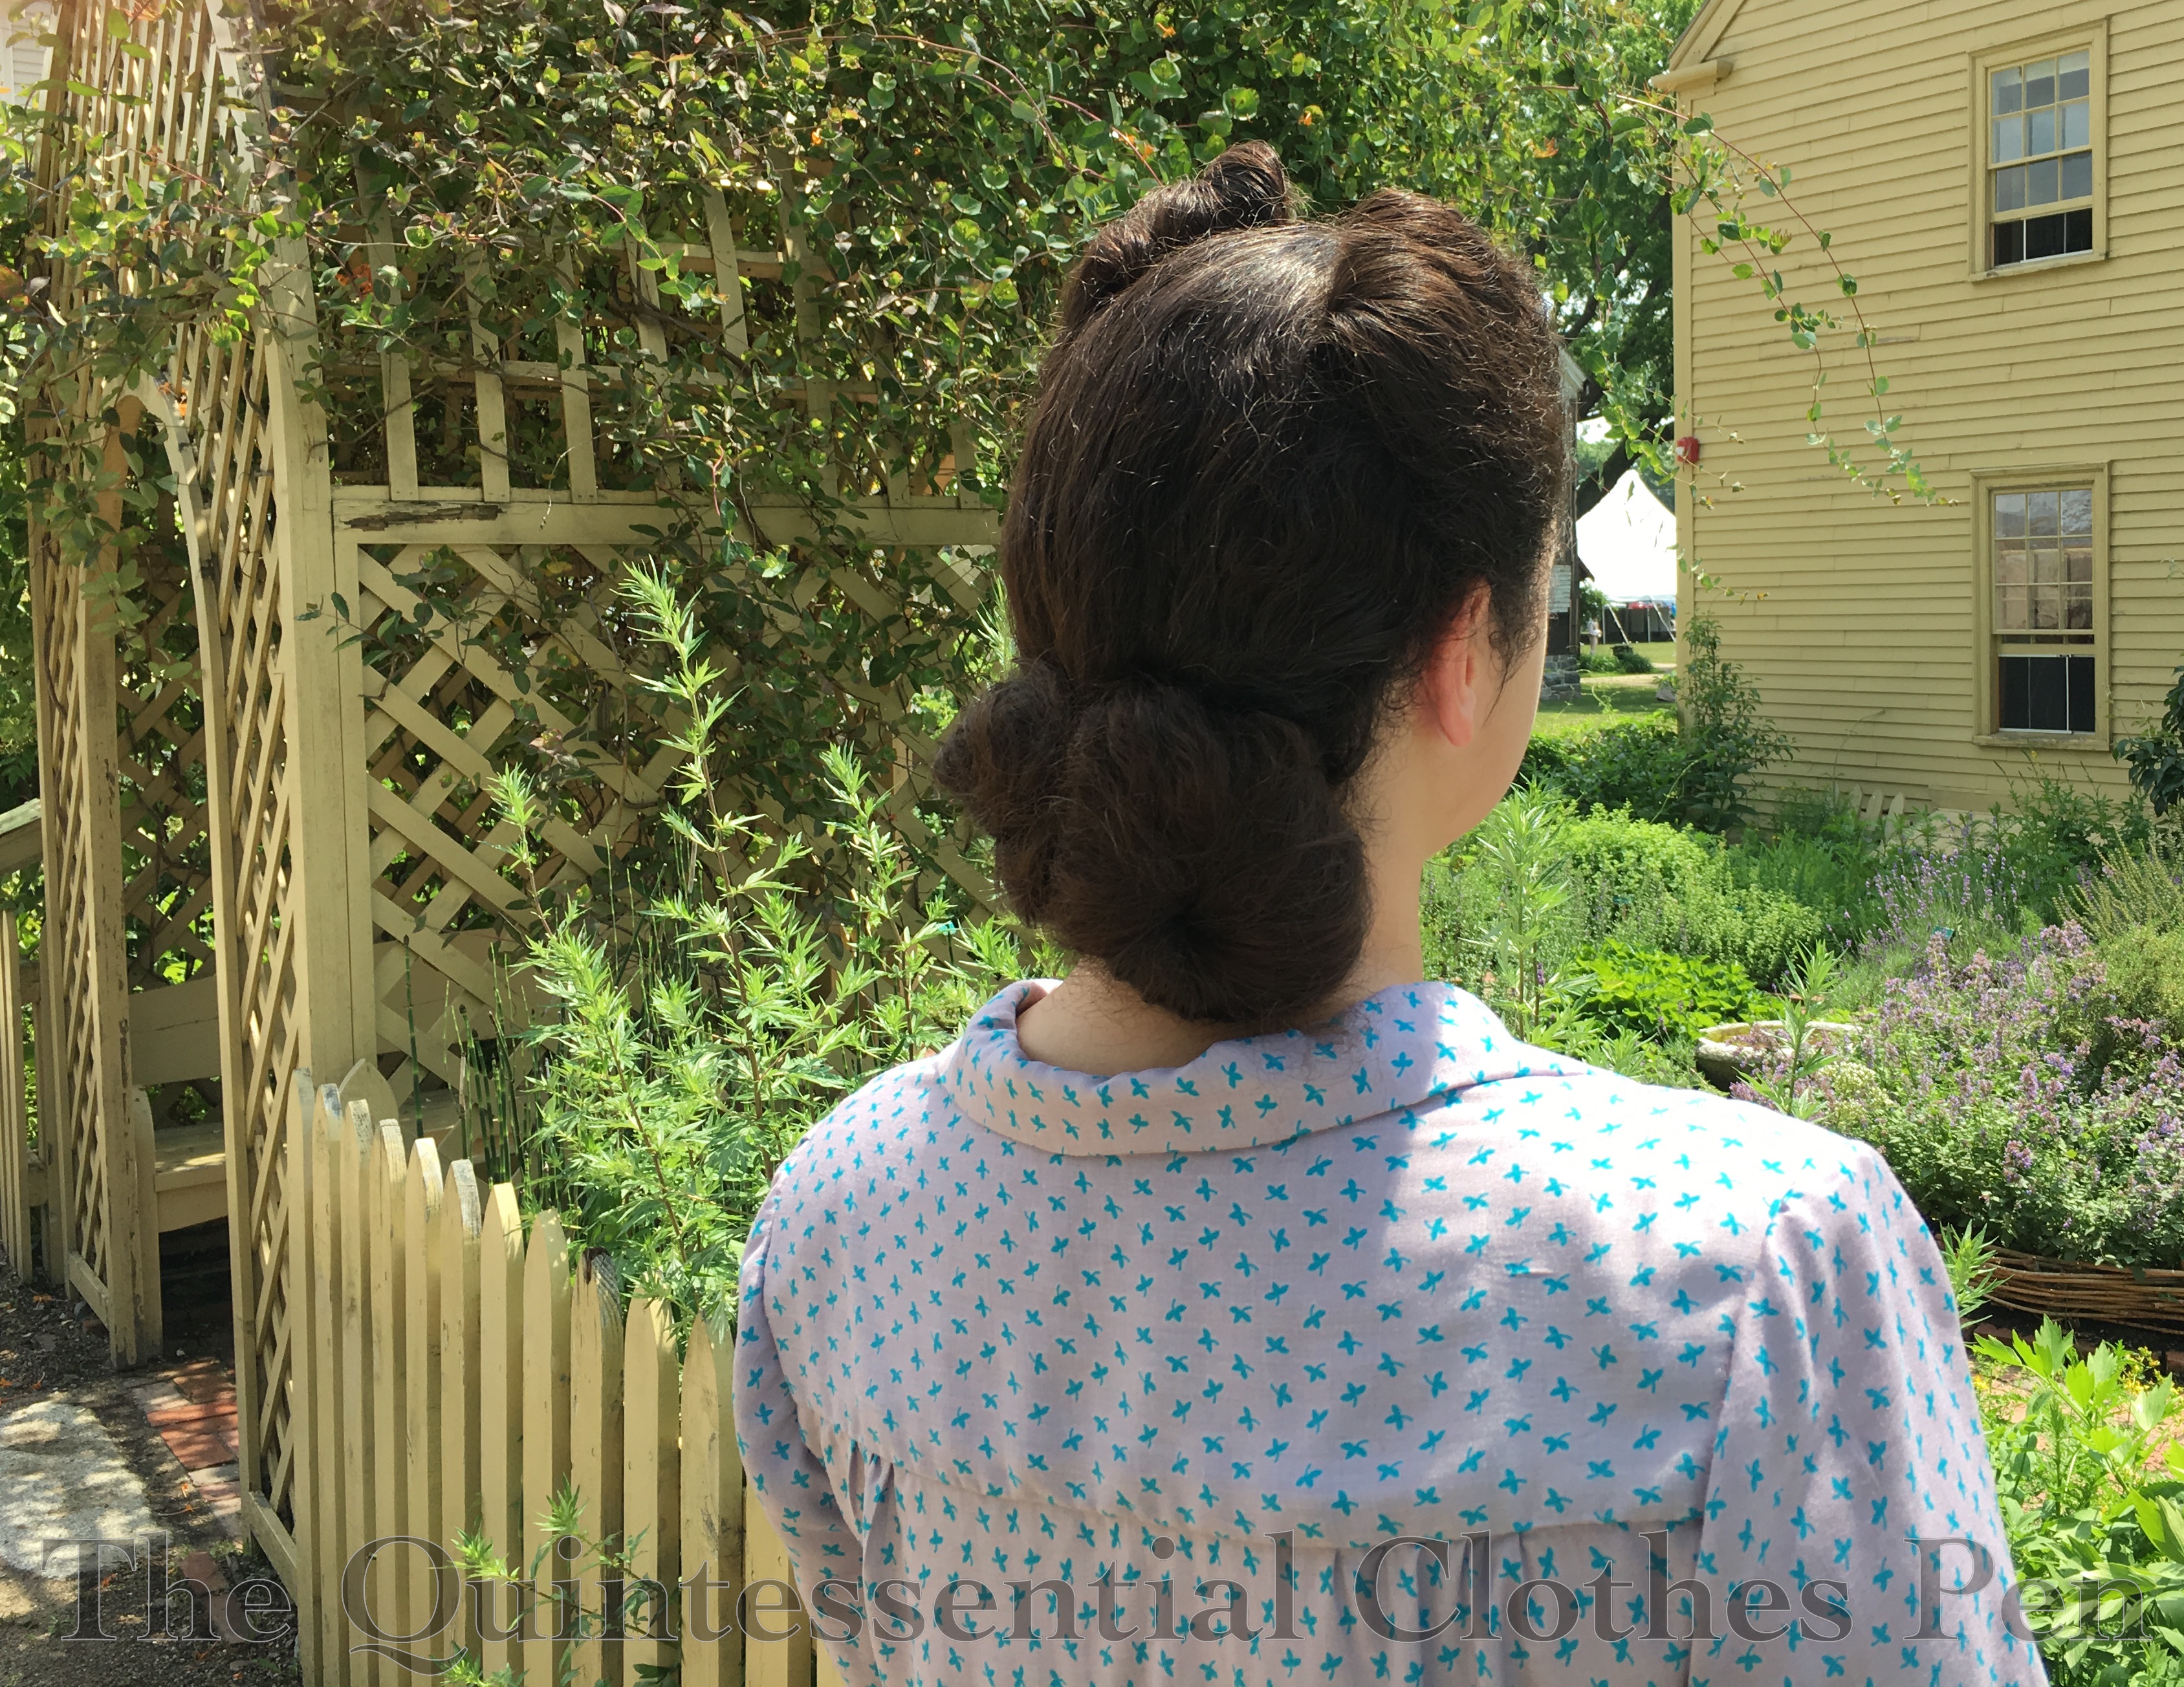
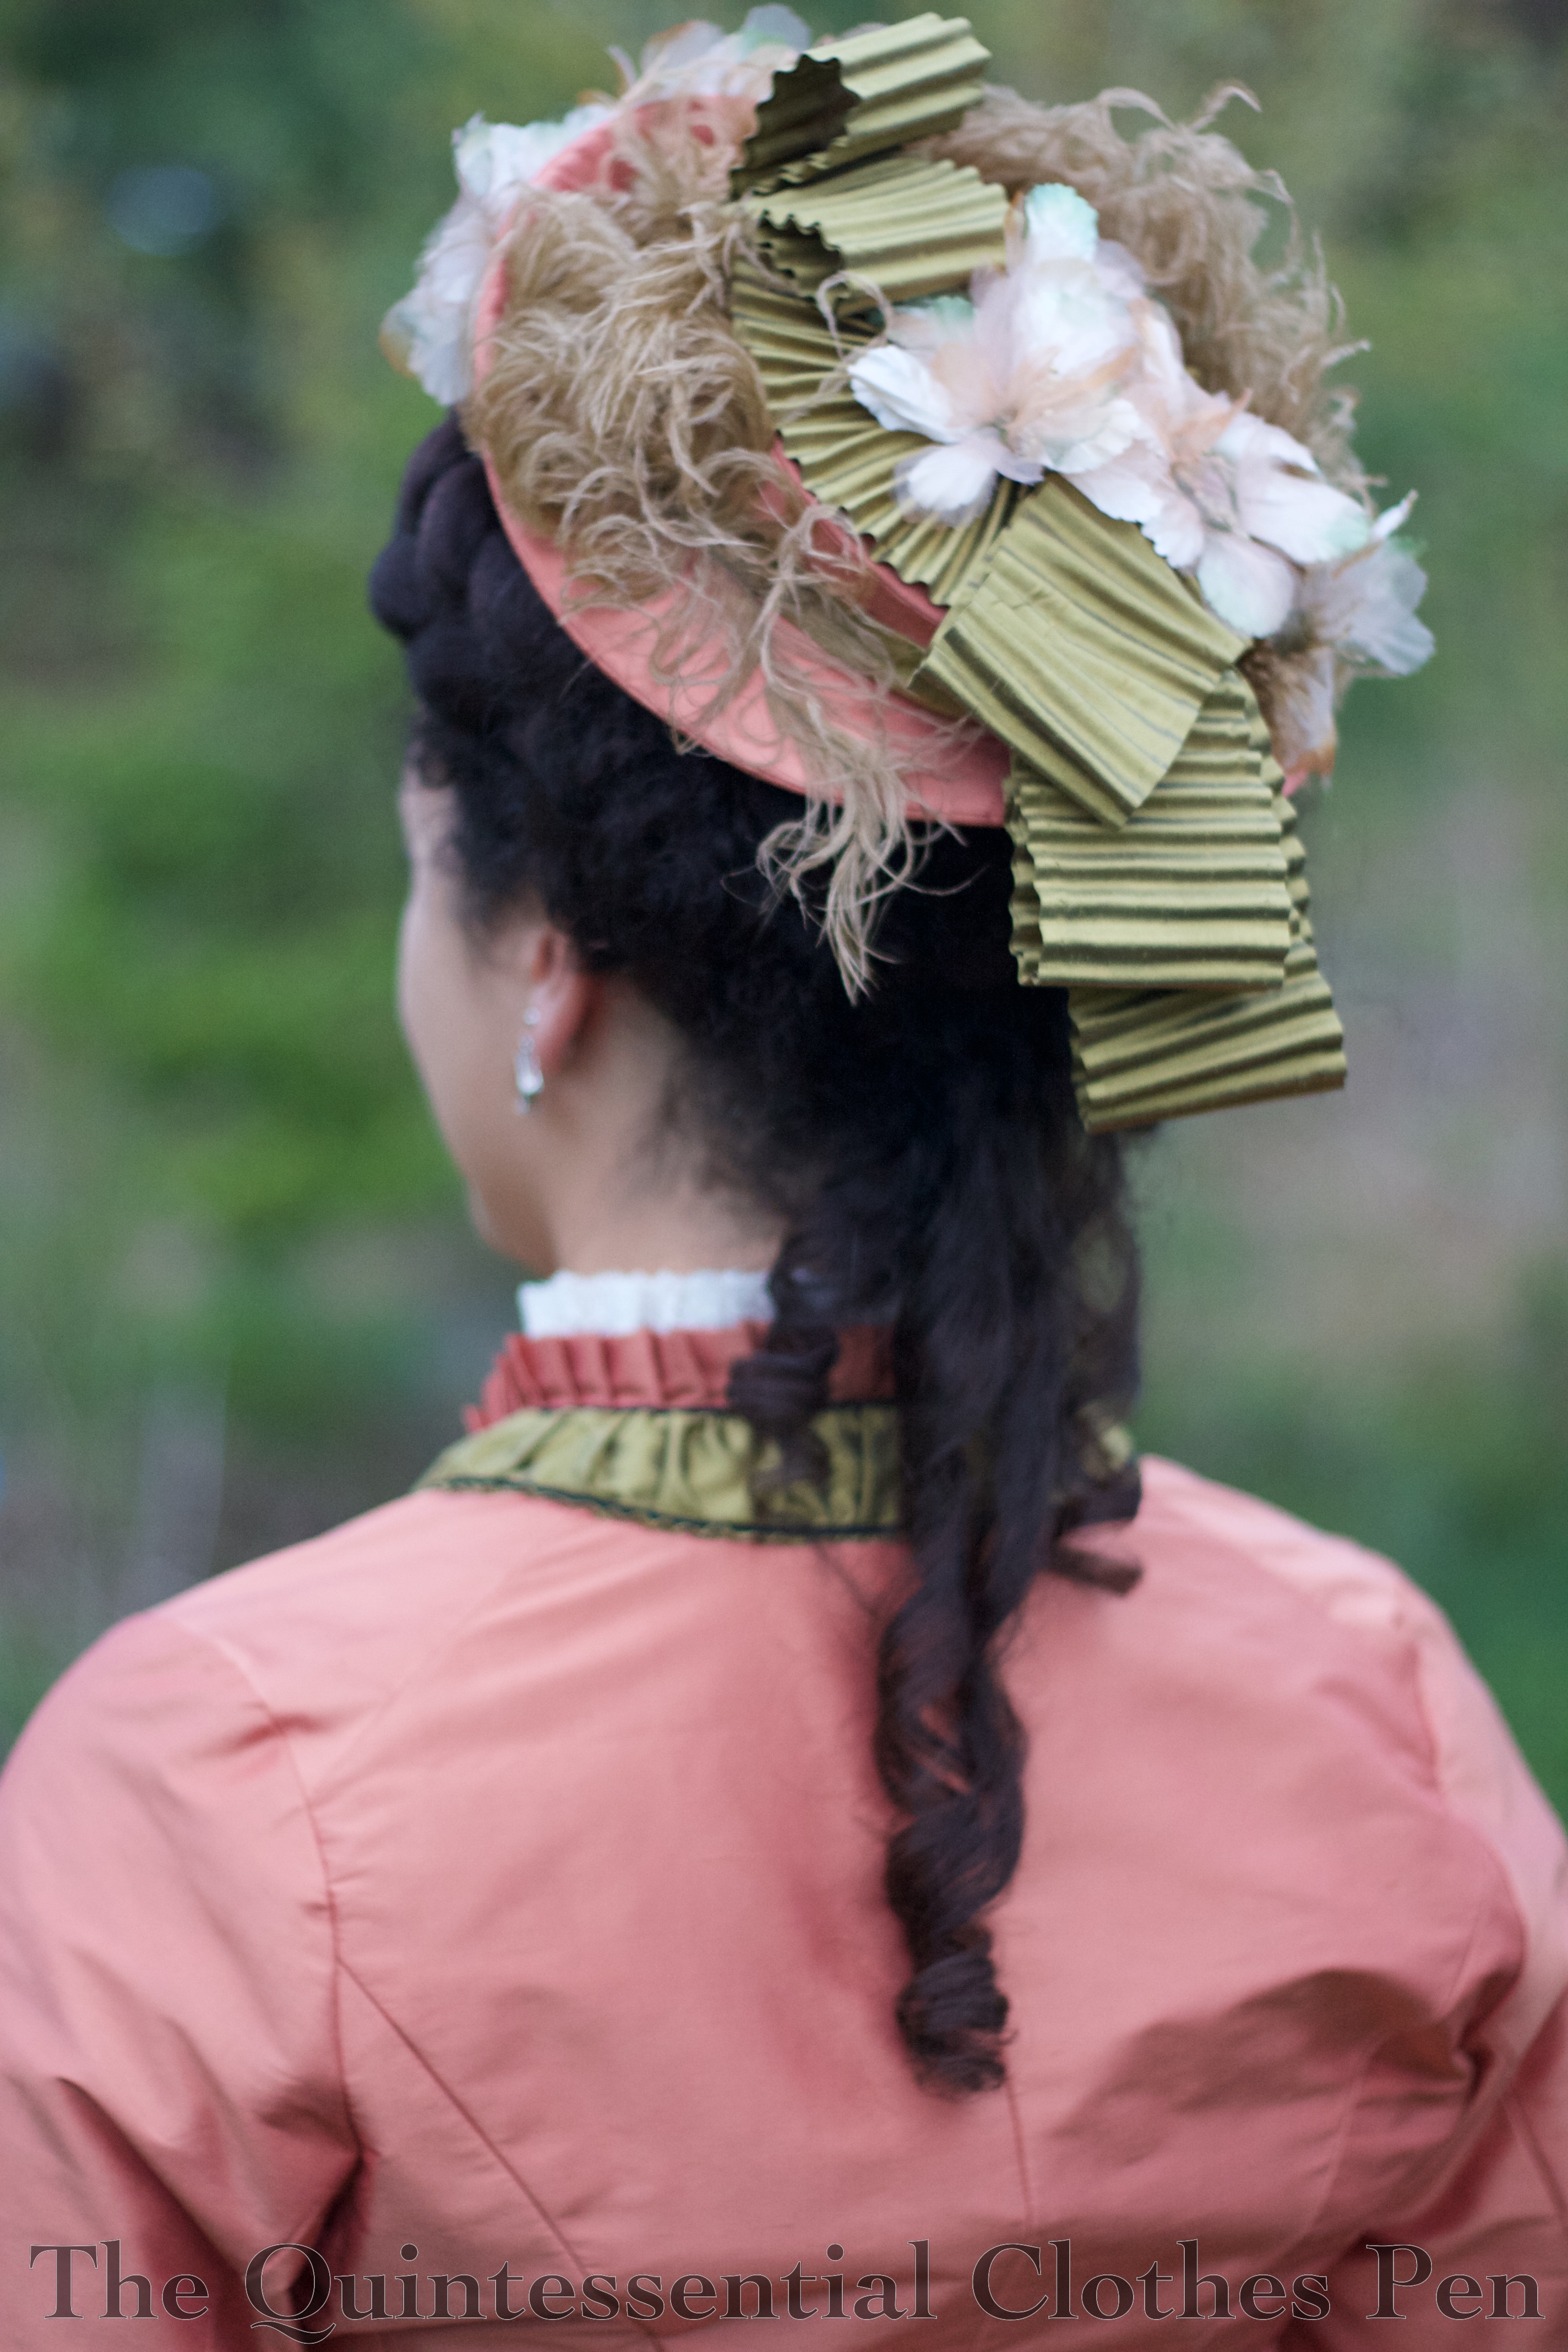
As you can see in the front view photo (above), I used a giant braid for the top/front of my style. There’s a whole blog post about how I created the braid here. Behind that, there is a bun form to help create volume on top of my head. This worked wonderfully for anchoring my hat pin, which you can just see poking out on the right side of the photo below–it’s tipped in a green glass leaf.

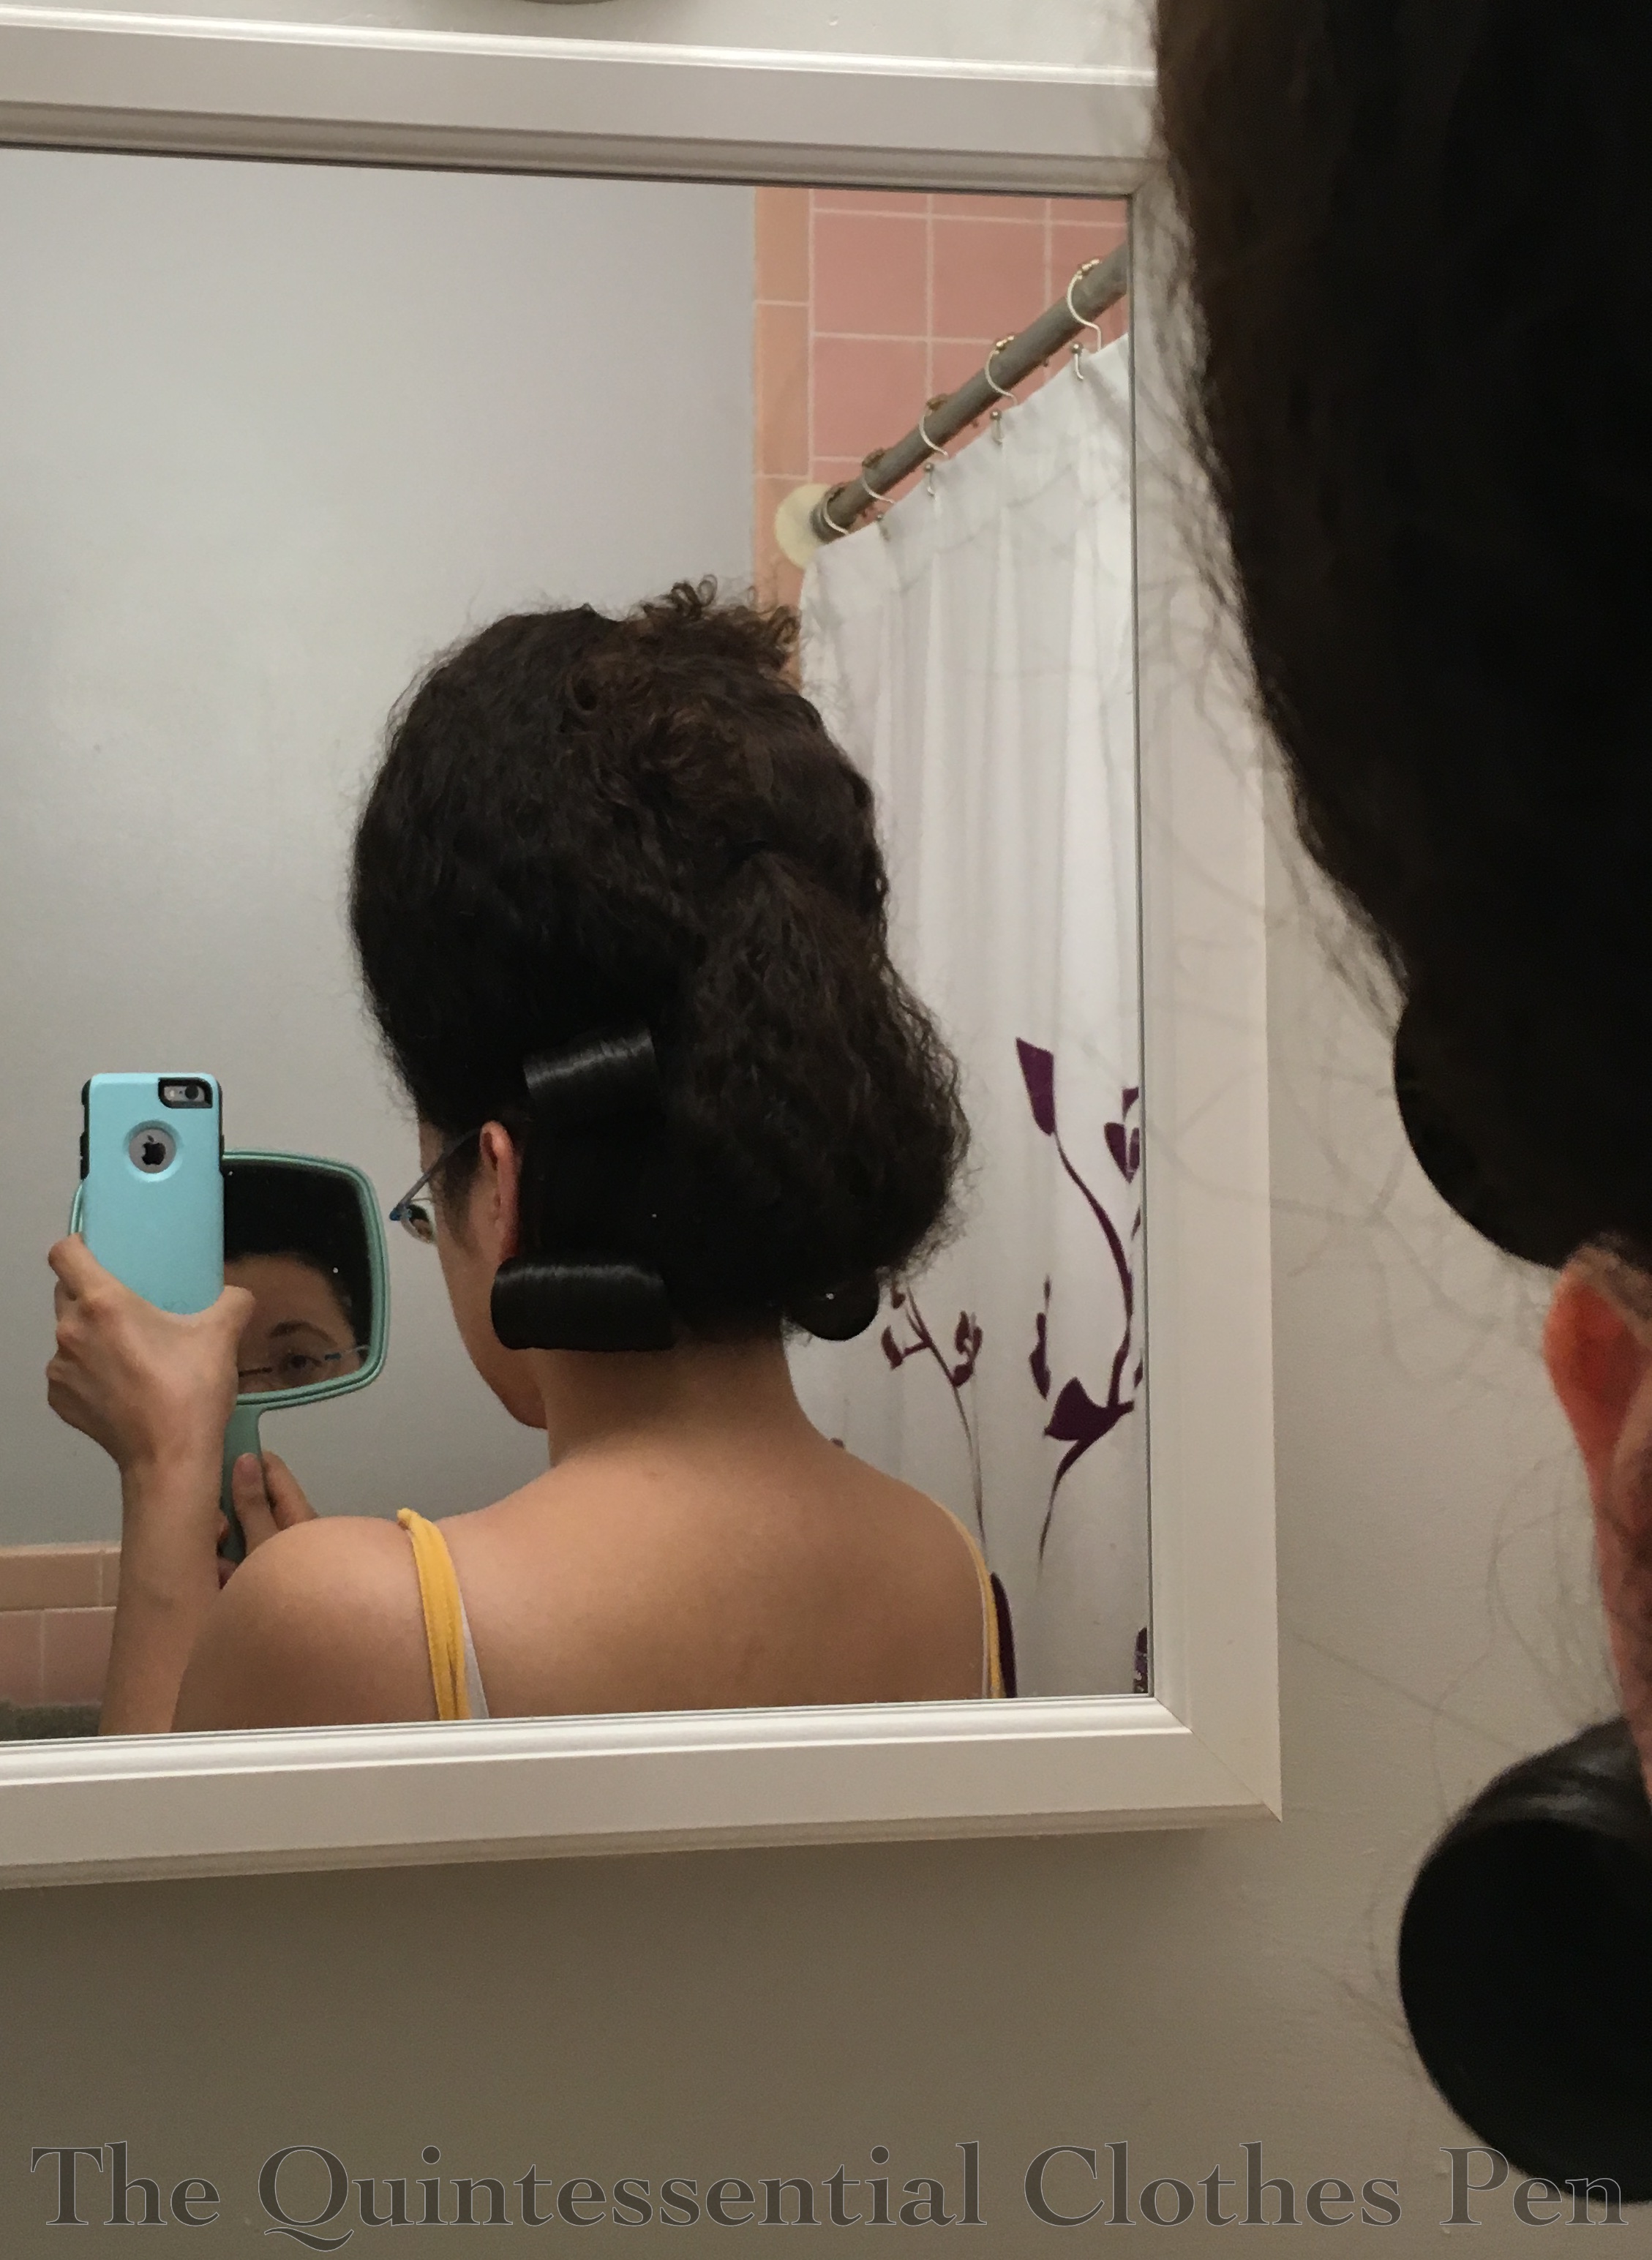
I attempted to create loops and swirls of hair around and below the bun, but I’m afraid that part of the style wasn’t as successful as I was hoping for. It’s difficult to do on the back of your own head and it’s hard to make the loops distinct, especially with my hair texture. I suspect it would be easier with smoother hair and definitely easier to do on someone else instead of yourself. I’ll have to try this style again some day. For this first attempt the back of my head was completely covered by my hat, so it doesn’t really matter what it looks like!

Below the loopy/swoopy bit I left curls hanging down at a few different lengths, as I saw in many fashion plates. This part turned out well!

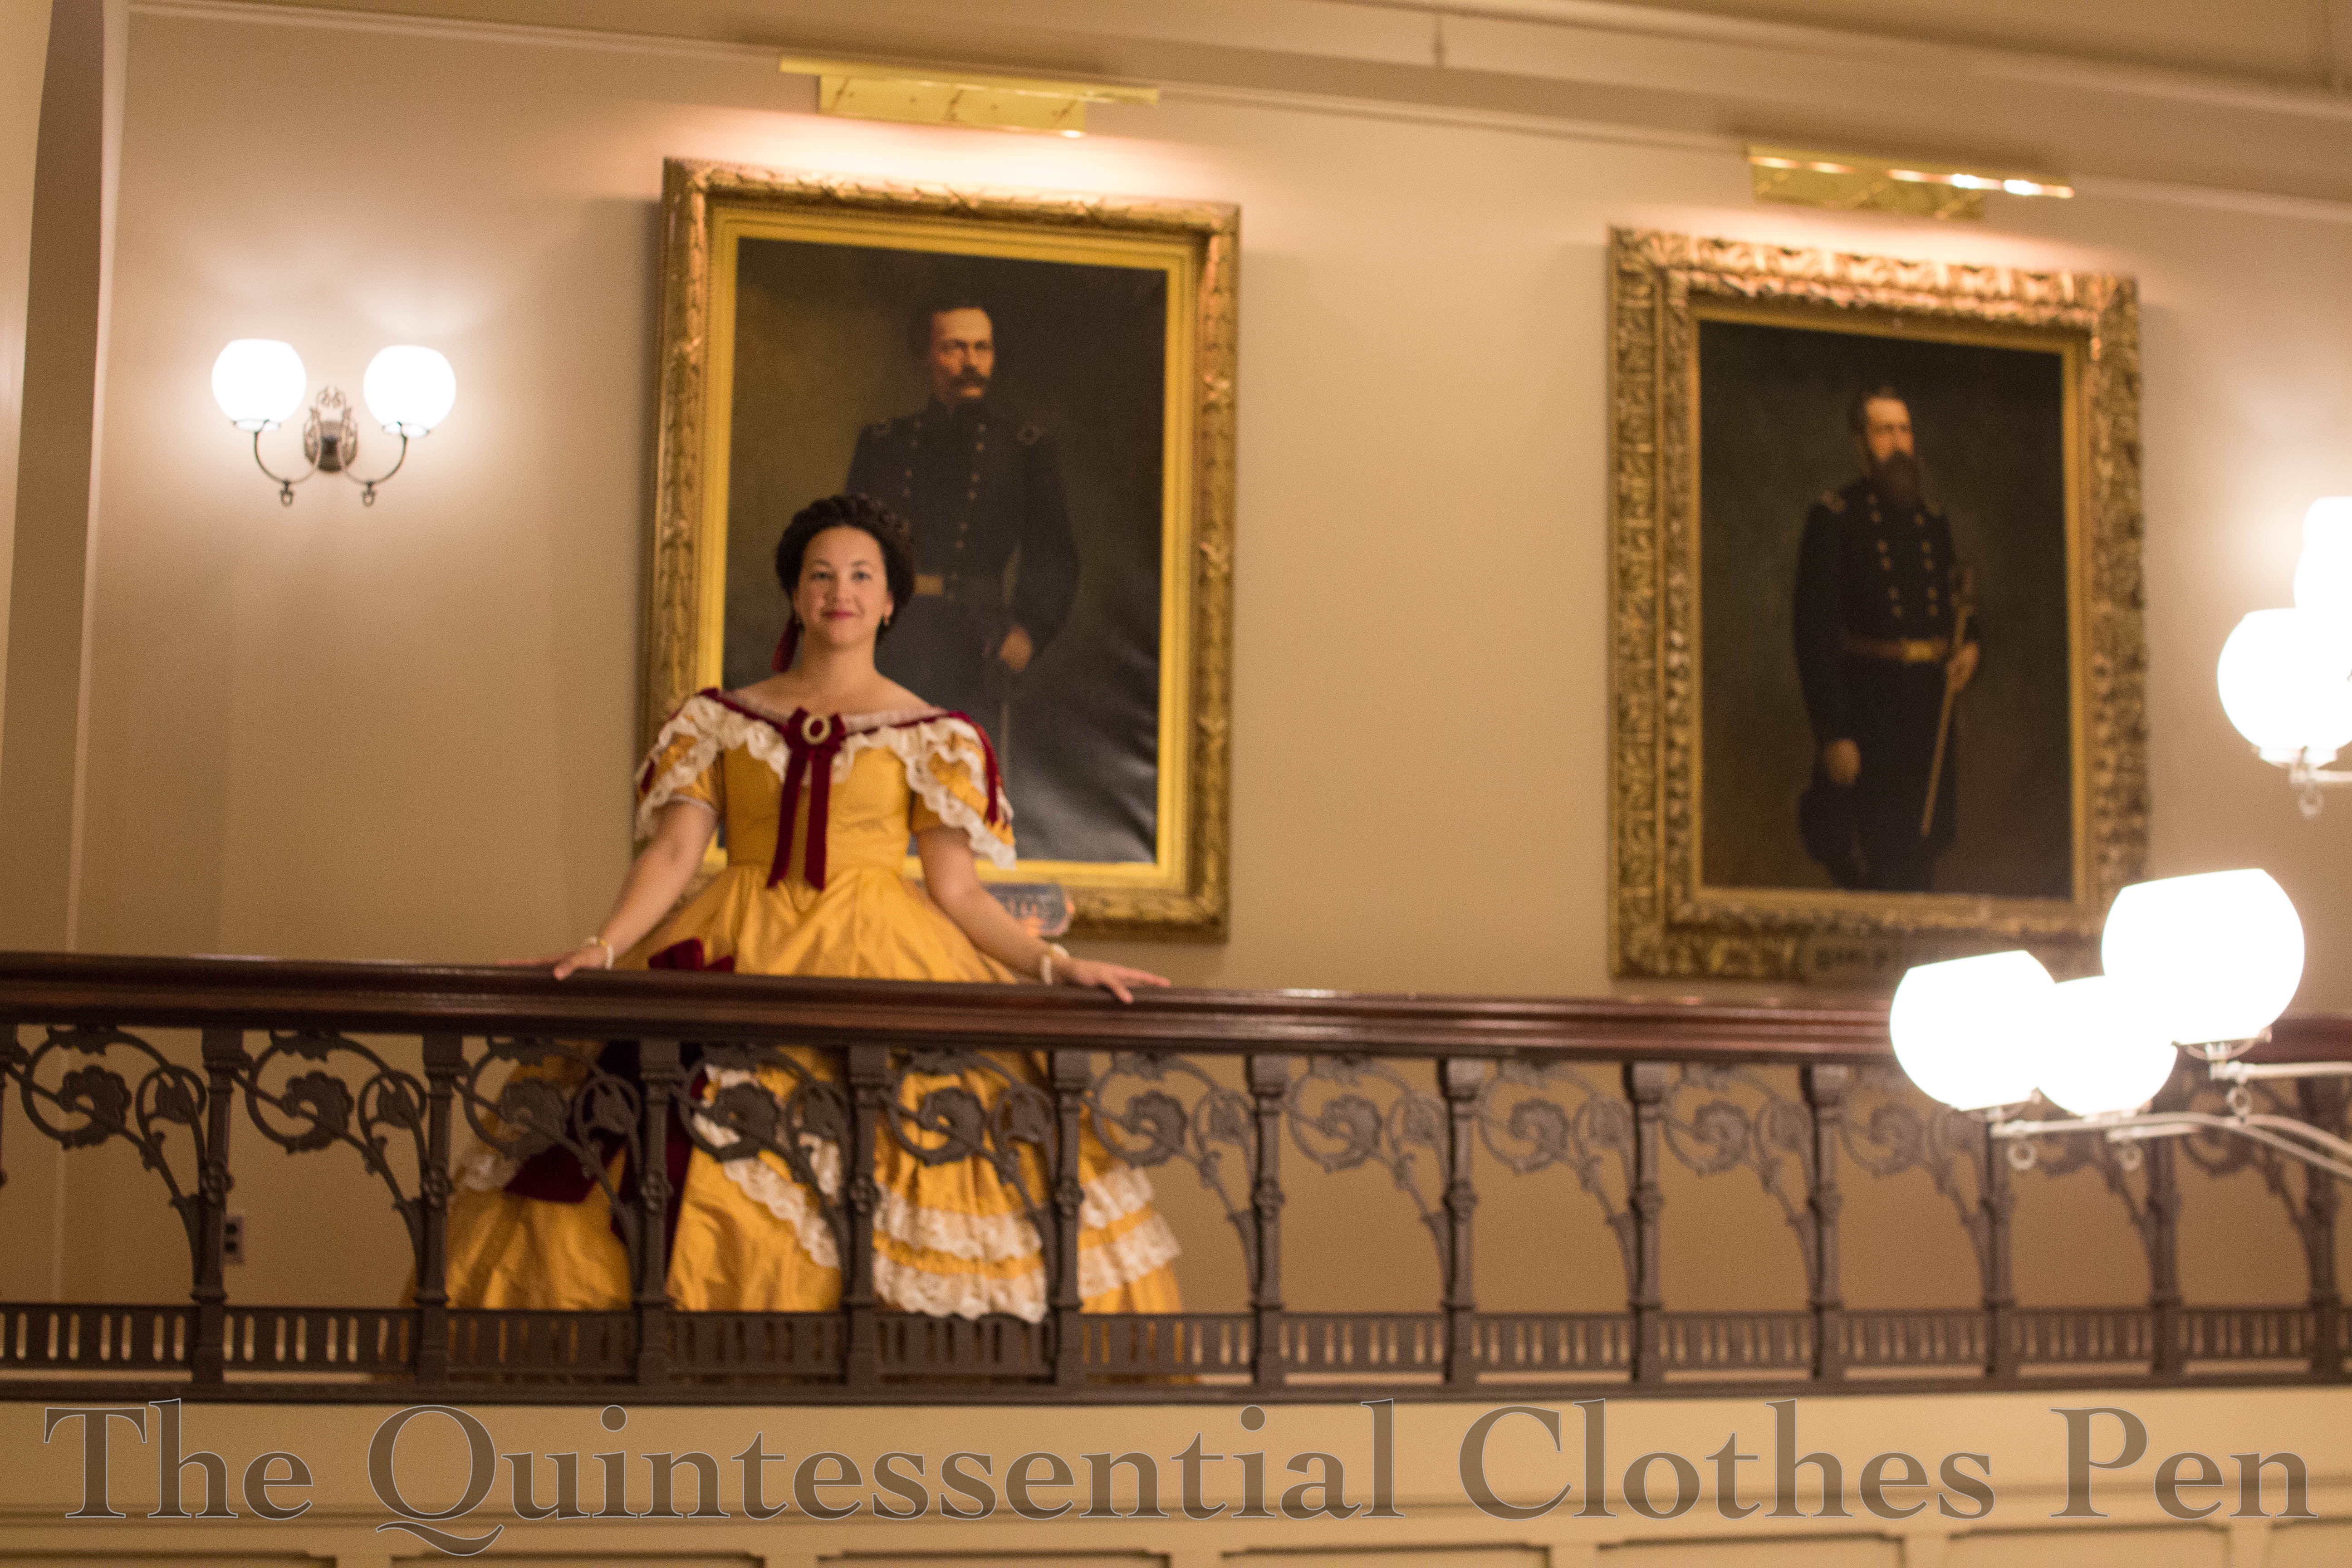
That’s it, really. Massive hair, some hanging curls, plop the trimmed hat on top, secure it with a hat pin, and suddenly my head is about double the size it normally is! Here is another photo showing the hat and a sneak peak at more of the dress. Lots of details are coming up about the dress in future posts!

A New Faux Hair Braid (HSM #12)

December’s HSM challenge was On a Shoestring. The description is as follows: 

It’s an expensive time of year, so make an item on a tight budget (say, under $15, or less than you’d spend on a reasonable priced takeaway meal for one person in your country – and no ‘stash’ doesn’t count as free: you still have to count what you would have originally paid for those items)

I haven’t been sewing much in the past month and so I was having trouble coming up with any ideas for this challenge. Then I remembered that I had, in fact, sewn a small item that fits this challenge–a new faux hair braid to add to my 1830s hairstyle for the annual Christmas ball!

Just the facts:

Fabric (we’ll call this ‘materials’, for this entry):  1 pack of Kanekalon faux hair in dark brown.

Pattern: None.

Year: 1830s, but it can be used for most of the 19th century.

Notions: 3 black hair nets, 2 black hair ties, and thread.

How historically accurate is it?: 95%. Adding faux hair to make complicated styles was a popular practice in the late 18th century and through most of the 19th century, but of course my braid is made of modern materials.

Hours to complete: 3.

First worn: December 14, 2019.

Total cost: Approximately $9.

The wonderful thing about covering the braid in hair nets is that it stays super smooth and not frizzy. Sometimes I like the frizz (to match my own) so I also have a braid that does not have the hair nets on it. And, I’ve decided that it’s fun to have a sleek braid, too. You can see (and read about) my method for covering the braid with the hair nets in this post.

This braid is 40″ long. It is simple and ready to be styled in any way I can think of!

Project Journal: 1863 Apricot Evening Gown Part IX: Braided Crown Hairstyle Details

I am very pleased with how my hairstyle turned out for the first wearing of Genevieve, the 1863 dress I’ve been blogging about for the last few months. I took the idea directly from my inspiration drawing, though I changed the hair decoration that accompanied the style.

I’ve used false hair to have braided crown styles before (here’s an example of the same braid used for a Regency hairstyle), but that old braid is only about 1 ½” wide, which is a bit subtle for the look I wanted for this dress. It’s also long enough to wrap around my head about 1.5 times, which is longer than what I wanted for the new hairstyle.

So I decided to buy some new false hair and make a new, fatter braid. I used this hair in dark brown. It’s intended for African style braid extensions, so it has a texture that’s great for matching my curly hair–I don’t think it would work well for someone with straight hair. I also bought these black hair nets.

I used one bundle of the false hair for this braid. The hair comes braided already, but I took it out and re-braided it a little tighter than how it was originally. Then I cut the elastic on one of the hair nets so that it would stretch out to be as long as my braid.

I laid the braid on top of the hair net and wrapped the hair net around to the back side of the braid. Then I used large whip stitches to secure the net to the braid. You can see one of those stitches mostly centered in the next photo. Covering the braid with a hair net helps keep all the frizzies from making the braid look messy. (My old braid isn’t covered in a hair net, so it looks very organic, like my real hair… nice and frizzy!)

The final step was to go back and stitch the hair net down in the dips between each section of the braid. In the photo above you can see the hair net traveling between braid bumps, but in the finished photo below those are mostly sewn down and much less visible.

For the actual hairstyle, I secured the braid to my head behind the sections near my face that get swept back over my ears. (I also pinned the braid to the top of my head to keep it in place while dancing. Those pins were put into the back side of the braid (to keep them hidden) and secured into the roots of my hair.) After securing the braid I was able to arrange the front sweep sections on either side of my face. I made sure to cover the ends of the braid with these sections.

Then I arranged the back of my hair. I wanted to keep it simple to showcase the braid and the velvet bow, so I arranged the back of my hair into a low puff. It continues the ring of the braid around my head while being more unobtrusive than the braid itself.

The final step was the bit of lace and the velvet bow. I opted for those instead of the lace framing the braid in the inspiration image. I wasn’t sure how I would accomplish that without essentially creating a cap… and that’s not the look I wanted. So I made up something else!

The bow is one I was able to make after my bow disaster. I think it adds a nice touch of color on my dark hair. I wasn’t sure what I was going to do with it and the lace until the ball, so I bobby pinned each piece in place for that first wearing. Then one of my after-the-ball tasks before I could put this away was to sew these two pieces together and add a comb so that it is now an official accessory that will be easier to put in my hair the next time I wear this dress.

Here’s a side view of what all of that amounts to. I intentionally placed the bow and lace off-center on my head in order to pick up on the asymmetrical bow on the skirt of the dress.

When I did a quick trial with the braid in modern clothes it felt very large and I was worried it would be too big, but once dressed in Genevieve I think the scale of this new braid is great–an excellent hair crown size and length, and the hair net keeps it looking super tidy and frizz free!


1940s Victory Rolls For Curly Hair

I really wanted to try victory rolls as a hairstyle to accompany my 1943 mauve dress. This was in part because they’re so iconic (though not universal, which perhaps means that we shouldn’t all represent them, but still, I couldn’t resist) but also because my hair texture proves to be such a challenge that I had to take it on and see if I could subdue it to my will.

I’ve been interested in trying this style for awhile, so I’ve read and watched various instructions on how to create victory rolls. My favorite for the most information and ease of watching is Miss Victory Violet’s tutorial, which is available here. She’s got lots of other great content about vintage styles in videos and as written blog posts, too. Her blog can be found here. I highly recommend browsing through it!

Here’s the thing. My hair is naturally curly and frizzy. Neither of these things are your friend when you’re trying to make a smooth hairstyle like this. The frizz is an obvious opposite to the smooth goal, but the natural curl is also not helpful. The natural waves actually obscure the beautiful swoop of the rolls! I found that in order to get a successful roll I had to first straighten my hair. Time consuming, yes, but also successful.

Here are some close-ups. It was so hot that my own sweat and the humidity was starting to cause my hair to revert to its natural state, especially near the roots.

Another challenge for me in creating this shape is that my hair is long. Down-to-the-middle-of-my-back-when-it’s-straight long. That’s great for making 18th and 19th century up-dos (1770s1830s, and 1890s, to name a few), but less great for making tidy victory rolls. It’s really easy for them to get messy as I roll 18″+ inches of hair in from the ends to my head. The only trick I found for that was practice. I definitely had many rolls fail because they weren’t tidy enough to show off the shape of the roll by the time they made it to my head.

The other obstacle presented by my long hair was what to do with the back of it. Most of these hairstyles were achieved with hair much shorter than mine, which was easier to tuck up into cute 1940s shapes in the back. It was much harder to find inspiration for what to do with long hair. Eventually, though, I came upon an image which shows two asymmetrical buns in the back.

The Double Chignon would work for me! I even had visual instructions and a lovely description encouraging me to try out the style. Here’s the result.

It’s down on my neck like I wanted it to be, but I wonder if the asymmetry just looks like I made a mistake rather than a choice… That’s not a comment on the style, just on my execution of it. Oh well! I was very pleased with the two front rolls and the overall heart-shaped silhouette stye gave my face.

Has anyone else tried victory rolls with long or naturally curly/frizzy hair? Have you been successful? I’m curious to know your experiences and find out your tricks or tips!

SaveSave

SaveSaveSaveSaveSaveSaveSaveSaveSaveSaveSaveSave

Regency Face Curls

Remember this post from last December about my green Regency shawl and the photoshoot for my Vernet project?

IMG_2080
From the wearing of my green Regency shawl.

For both of those Regency period hairstyles I took the time to create narrow curls to frame my face and I’ve been meaning to share how to achieve these perfect curls ever since, but am only just getting to it. However, I can’t take credit for the idea myself. I was inspired by Sanna and Noora during the Vernet project. I believe we had a conversation about it in the Vernet seamstress group but I can’t find the content at this point, so you’ll just have to take my word for it. (They both used straw curls for their hairstyles in this post of Sanna’s and this post by Noora, if you’d like to see how this technique can turn out on other hair types.)

IMG_1917
From my Vernet project photo shoot.

The secret to getting really lovely corkscrew curls? Drinking straws used as rollers. This works for shorter length hair to create the oft-seen small curls around the face, but it also works just as well for longer hair. Have you heard of using straws for curls before?

The look is achieved by rolling wet hair around a drinking straw (with or without product–I’ve tried it both ways and have achieved good results) and letting the hair dry. Sanna and Noora reported that after rolling hair around the straws they knotted the ends of the straws, pinned the rolls to keep them in place, and left them in overnight. My method was slightly different. I cut my straws in half, rolled my hair around the shorter straws, pinned them in place, used a hair dryer on them until they were dry, and then took them down.

You could also use this technique to create curls for other time periods. The ‘hedgehog’ styles of the later 18th century are one possibility. What types of hairstyles have you created  (or do you now want to try!?!) using this method?

Project Journal: Versailles Sacque: Hair In Detail

Part of the work of getting ready for my trip to Versailles was hair: figuring out how I wanted to style my hair, obtaining or creating all of the necessary pieces and accessories, and practicing ahead of time. After looking at lots of inspiring images with a variety of hair shapes, I settled on creating a high slightly egg shaped style c. 1770.

I did two trial hair sessions in the month or so before I left. The first was rather frustrating, as I was learning what I liked (or didn’t like), and the end result was less than satisfactory. The progress was slow because I was creating hair pieces as I went along. The second day was much quicker and ended in success! At the time of the success post there was no time to post about how I achieved my look, but now there is, so here we go.

The pictures I took were for myself so that I could remember each successful step on the day of the event while getting ready. It worked quite well! And it means I have step by step pictures to share here. Once I had the plan down, I think styling took about 45 minutes with all the steps including trim and powder.

IMG_0887
One of my first hair pad contraptions. This wasn’t tall enough or large enough around.
IMG_1341
My final hair pad contraption with the addition of my Gibson Girl hair pad for bulk.
IMG_0923
I started by anchoring the pad to my head in about eight different places using crossed bobby pins. Then the front section of hair was brought up over the front of the hair pad, and pinned in place.
IMG_0927
I may look crazed, but I used my fluffy ends to help fill out the sides of my hairstyle even more. This is the middle of the back of my hair pulled up, crossed to help hide the hair pad and pinned in place.
IMG_0928
The sides were smoothed up and over the crazed side curls and pinned so the ends helped cover the hair pad in back. The curly bit sticking out on top was later tucked in and hidden.
IMG_0935
From the back. At this point I had clipped in four of the five permanently glued buckles.
IMG_0945
The remaining back section was loosely looped up. The fifth buckle was placed over the pins holding the loop of hair in place.

Then, for the actual event, I used baby powder to powder my hair. It was easy to use, required no extra products to hold in place, and smelled fresh. (I forgot to powder my hair on the trial days, so your eyes aren’t deceiving you if my hair looks darker in those step by step photos. There is a picture of my hair half powdered in this post taken while I was getting ready on the day of the event.)

IMG_0328
The finished result! My ornament is the one I made for my 1899 evening gown with some extra white feathers.

My buckles were made using synthetic hair. I purchased a ‘full head’ clip in set, 20″ long, that came with sections of various widths already attached to wig clips (similar to this). I purchased color #4, which matches the darker brown parts of my hair nicely, aside from being super shiny. I used the narrower widths for the buckles, but I still have the wider ones leftover. (I’m thinking I might be able to use them to create some 1830s clip in hair pieces…)

I am very grateful that Kendra Van Cleave did an immense amount of research into 18th century hair and wigs and shared it. An excellent taste is available on her blog and she’s also compiled her knowledge into a very detailed, picture-filled book that was quite helpful along my path to creating 18th century hair. Amongst lots of other information, there are instructions for creating temporary and permanent curls and buckles (including the instructions I used to create my buckles), lots of background about types of wigs and hair pieces, a discussion about powder options, and step-by-step tutorials showing ways to create a variety of styles from throughout the 18th century. Very useful!

A Quick ‘Behind The Scenes’ Of My Versailles Evening

All those pictures of Versailles look amazing, but a lot of work went into looking effortlessly elegant. Some of the work I’ll be sharing in posts specifically about my hair and gown, but I also have a few pictures from the day along the same lines that didn’t quite fit into main post. They’re more ‘behind the scenes’. Enjoy!

IMG_1340
This is Mr. Panniers after escaping my suitcase and before having his bones inserted for the big event. Hard to recognize without his proper shape, I think!
IMG_1343
Getting ready. My half finished hair is half powdered, to show the difference in color. As you can see, I only did a light bit of powder.
IMG_1437
A final graceful pose in the Hall of Mirrors as the staff was very slowly herding us out.

Project Journal: Versailles Sacque: Hair Decided

I’m quite busy sewing up a storm to get my sacque finished in the last few days I have before heading out on my trip. Therefore this is just a quick post to document my progress.

In the last few weeks I had two hair trial days. The first was a bit frustrating, because I did my hair twice and wasn’t satisfied either time. I was experimenting: figuring out what worked and what didn’t, what was becoming and what wasn’t, fashioning and refashioning the support for the style, and making permanent and detachable buckles (see below for a description of a buckle, from Cunnington’s The Dictionary of Fashion History).

Screen Shot 2016-05-20 at 7.52.27 PM

The second day was much more successful. The buckles were already made, I knew what shape I wanted to achieve, and I had a clearer idea of how to get there. Eventually I plan to share more details about creating the style, but for now, here are pictures of the style on trial day #2 with another sneak peak at my sacque in the process of having its trim added.

IMG_0951 - Version 2

IMG_0954

I also played with powdering my hair on day #2. I was unsure about it before I tried it, but the powder helps the real greys (ahem) blend in and helps the false hair of the buckles with their sheen blend better, too. For the actual event I’ll have to do a better job making it even so I don’t look like I have a streak!

The sacque is so close to done that I’m crossing it off, too. It needs one more sleeve flounce layer and an under sleeve flounce layer added, but that’s it! And trim. Pinning the trim is taking a lot longer than I imagined it would because I am a perfectionist about the placement. I don’t expect that sewing it will be as slow, but I’m not there yet. Ahh! Off to sew!

  • Panniers
  • Petticoat
  • Robe a la francaise (with a subset of trimming)
  • Hair
  • Shoes

A Turban Fillet, 1811

A while ago now, during the Journal Journey Into La Belle Assemblee series, Natalie over at A Frolic Through Time brought two similar ball/evening hair styles to my (and her other readers’) attention. These styles for October 1811 were pointed out by Natalie as being perfect for someone to attempt for a Regency event and I thought “Oh! These are neat! And they would go so well with my pearl trimmed 1811 Elusive Blue gown. Perfect!” So I saved the link to the post and have been meaning to go back to it for the last few months.

After returning to that inspiration earlier this year and comparing the two styles in Natalie’s post, I decided on a turban fillet (see end of post for a definition). February’s HSF/M Challenge #2: Blue was the perfect kick I needed to get to work. While I technically submitted finishing the trim on my elusive blue dress for the challenge, I also finished my turban fillet slightly after the deadline. I enjoyed having a small project: it was a nice change from the usually long and complicated projects I often take on and am constantly in the midst of.

Here, then, is the fashion plate to which I am referring.

october-1811-evening-dress-bassemblee-hern
No. 1. EVENING DRESS. A sea-green crape dress, vandykcd round the petticoat, and ornamented with large beads; a full drapery over the shoulders, and confined in to the back with a pearl band, ornamented round the neck and down the back with beads. A full turban fillet tapered, worn on the head. Pearl necklace, white kid gloves and shoes.

And here is the finished result of my labors.

IMG_2195
Side.
IMG_2198
Back.
IMG_2176
And the full ensemble.

I attempted to follow the detail of the hairstyle from La Belle Assemblee, down to the curls around my face (lots of extra work since all my hair is long!) and the little braid on the side. It was a puzzle to figure out and enjoyable to wear.

The question is, how did I get the turban fillet to stay in place on my head? Well, I thought of making a gathered tube wound with pearls, as Natalie proposes below, but decided to make my turban fillet have a flat back instead for multiple reasons. #1: there has to be a seam somewhere, so why not hide it intentionally? #2: I only had so many pearls, and winding them all around a sample tube used them up far too quickly so that I would never have reached the end and still been able to have pearls. #3: the angle of the pearls when winding them around was very challenging and I couldn’t figure out how to arrange them pleasingly. #4: “why waste pearls against my head?” I thought, when they’re going to be slightly uncomfortable and slippery there anyway?

So here is what I came up with: a length of fabric about 40″ long, wrapped around a strip of hi-loft poly-fill batting (not period, I know, but easy and free!), turned under and sewn down on the back, gathered across the top, with rows of pearls sewn on at intervals, and finished with loops on the back every few rows of pearls in order to secure the whole thing to my head. The entire thing is hand sewn. I have no idea how you would use a machine to assemble this the way I did!

IMG_2199
The top is the front of the turban fillet and the bottom is the back.

And yes, I was able to wear this to a Regency ball in April!

* Natalie notes the following about the description “turban fillet”. Please check out her post to see both fashion plates she refers to.

Turban fillet. For a change, just what you might imagine: a “fillet” is normally a narrow ribbon or wire wound round or encircling the head, while a turban is a, well, a turban. In this month’s evening dress hairstyle, we have a length of fabric well gathered to make a narrow, round, gathered tube, wound round the head. The turban is wound with pearls for extra measure. Handsome and I hope that someone will take up this style for a ball before long! The ball dress plate uses a similar design; it encircles the head more like the fillets we remember from Medieval fairy tales, but ironically, the effect is more turban-like to my eyes than the evening dress example, yet isn’t called a turban. Fashion, fashion.

Subdued “Coeffure a la Chinoise” In Red And Gold

I attended a small Regency ball last weekend. It was charming and not nearly as packed full of people as I have grown accustomed to at these events in recent years. The smaller crowd made for a much more subdued (but still pleasant) evening than I was expecting.

The only downside was that the hall was exceptionally cold and not being full of people did not warm up very quickly! Few of us had planned for the situation and we were mostly scrambling to find any scarves or sweaters to wrap ourselves in. Many of us were resorting to items that we’d worn to keep ourselves warm outside, sacrificing fashion for warmth (it’s been below freezing here in Boston for at least the last three or four weeks consistently). I, for example, wrapped up in my pink cashmere scarf despite wearing a red dress. I thought it looked odd, though I was told that the colors looked good together. But there were a few lucky solutions that were both fashionable and warm: a large paisley shawl and a plaid scarf/wrap that looked very Scottish were the two most fashionable looks in my opinion. After some dancing and about midway through the evening, many had warmed up enough that scarves were being discarded, though I do believe I kept my scarf wrapped over my shoulders and chest throughout the entire evening.

IMG_1973
Elegant, fashionable lounging during the refreshment break.
IMG_1972
Delicious refreshments alluringly laid out.

I wore my red 1813 evening gown and my homemade red and gold tiara. (I had hoped to finish and wear my 1811 elusive blue evening gown, but I would have had to do a lot of last minute sewing to finish it in time and after my recent skating costume last minute sewing adventure I was not inclined to do so again so soon. It is very satisfying to have a closet of options for an event, especially when plans to complete something new go awry.) I also brought along my red and gold reticule, because it matches the outfit so perfectly (although the only thing I kept in it was my phone… which is the reason for the slightly blurry, grainy photos).

IMG_1976
All the red and gold Regency pieces in my wardrobe put together in one outfit!
IMG_1980
It was so cold getting dressed that I was not inclined to do a complicated hair style. Heeheehee, fake hair to the rescue! I just put my hair in a pony tail, braided it, and wrapped it around itself. Simple! The big braid is what makes it look complicated, but it is pre-braided fake hair. I think it completes the style perfectly and has a bit of a “chinoise” look to it, too.

What do I mean by “chinoise”? The word itself is from the French adjective meaning Chinese. In terms of fashion, there are scarce references to “chinoise” styles in Regency fashion plates (compared to the abundance of Regency fashion plates showing other styles). Here are a few examples. This Merveilleuse from 1814 has a “Coeffure Chinoise,” this lady from 1812 has a “Coeffure a la Chinoise,” and this fashion plate shows “La Toilette Chinoise.” (I do sort of wonder how some of these attributes, and the hairstyles in particular, said “Chinese” to people during the Regency, but of course the world was perceived very differently then and people had access to vastly different quantities and types of information than I do today.)

I’ve often noticed that “chinoise” hairstyles make use of braids that wrap around the head. In addition, there seems to often be a vertical emphasis to the hair and to a bun, if one is present in the style. It is these attributes that say “a la chinoise” when I look at my own coiffure from last weekend. Sometime, I’ll have to try to make a more exaggerated “chinoise” style with a very tall and flyaway bun such as the Merveilleuse from 1814 has. I’m pretty sure my hair will have no trouble with that since it is naturally curly and wanting to fly away!