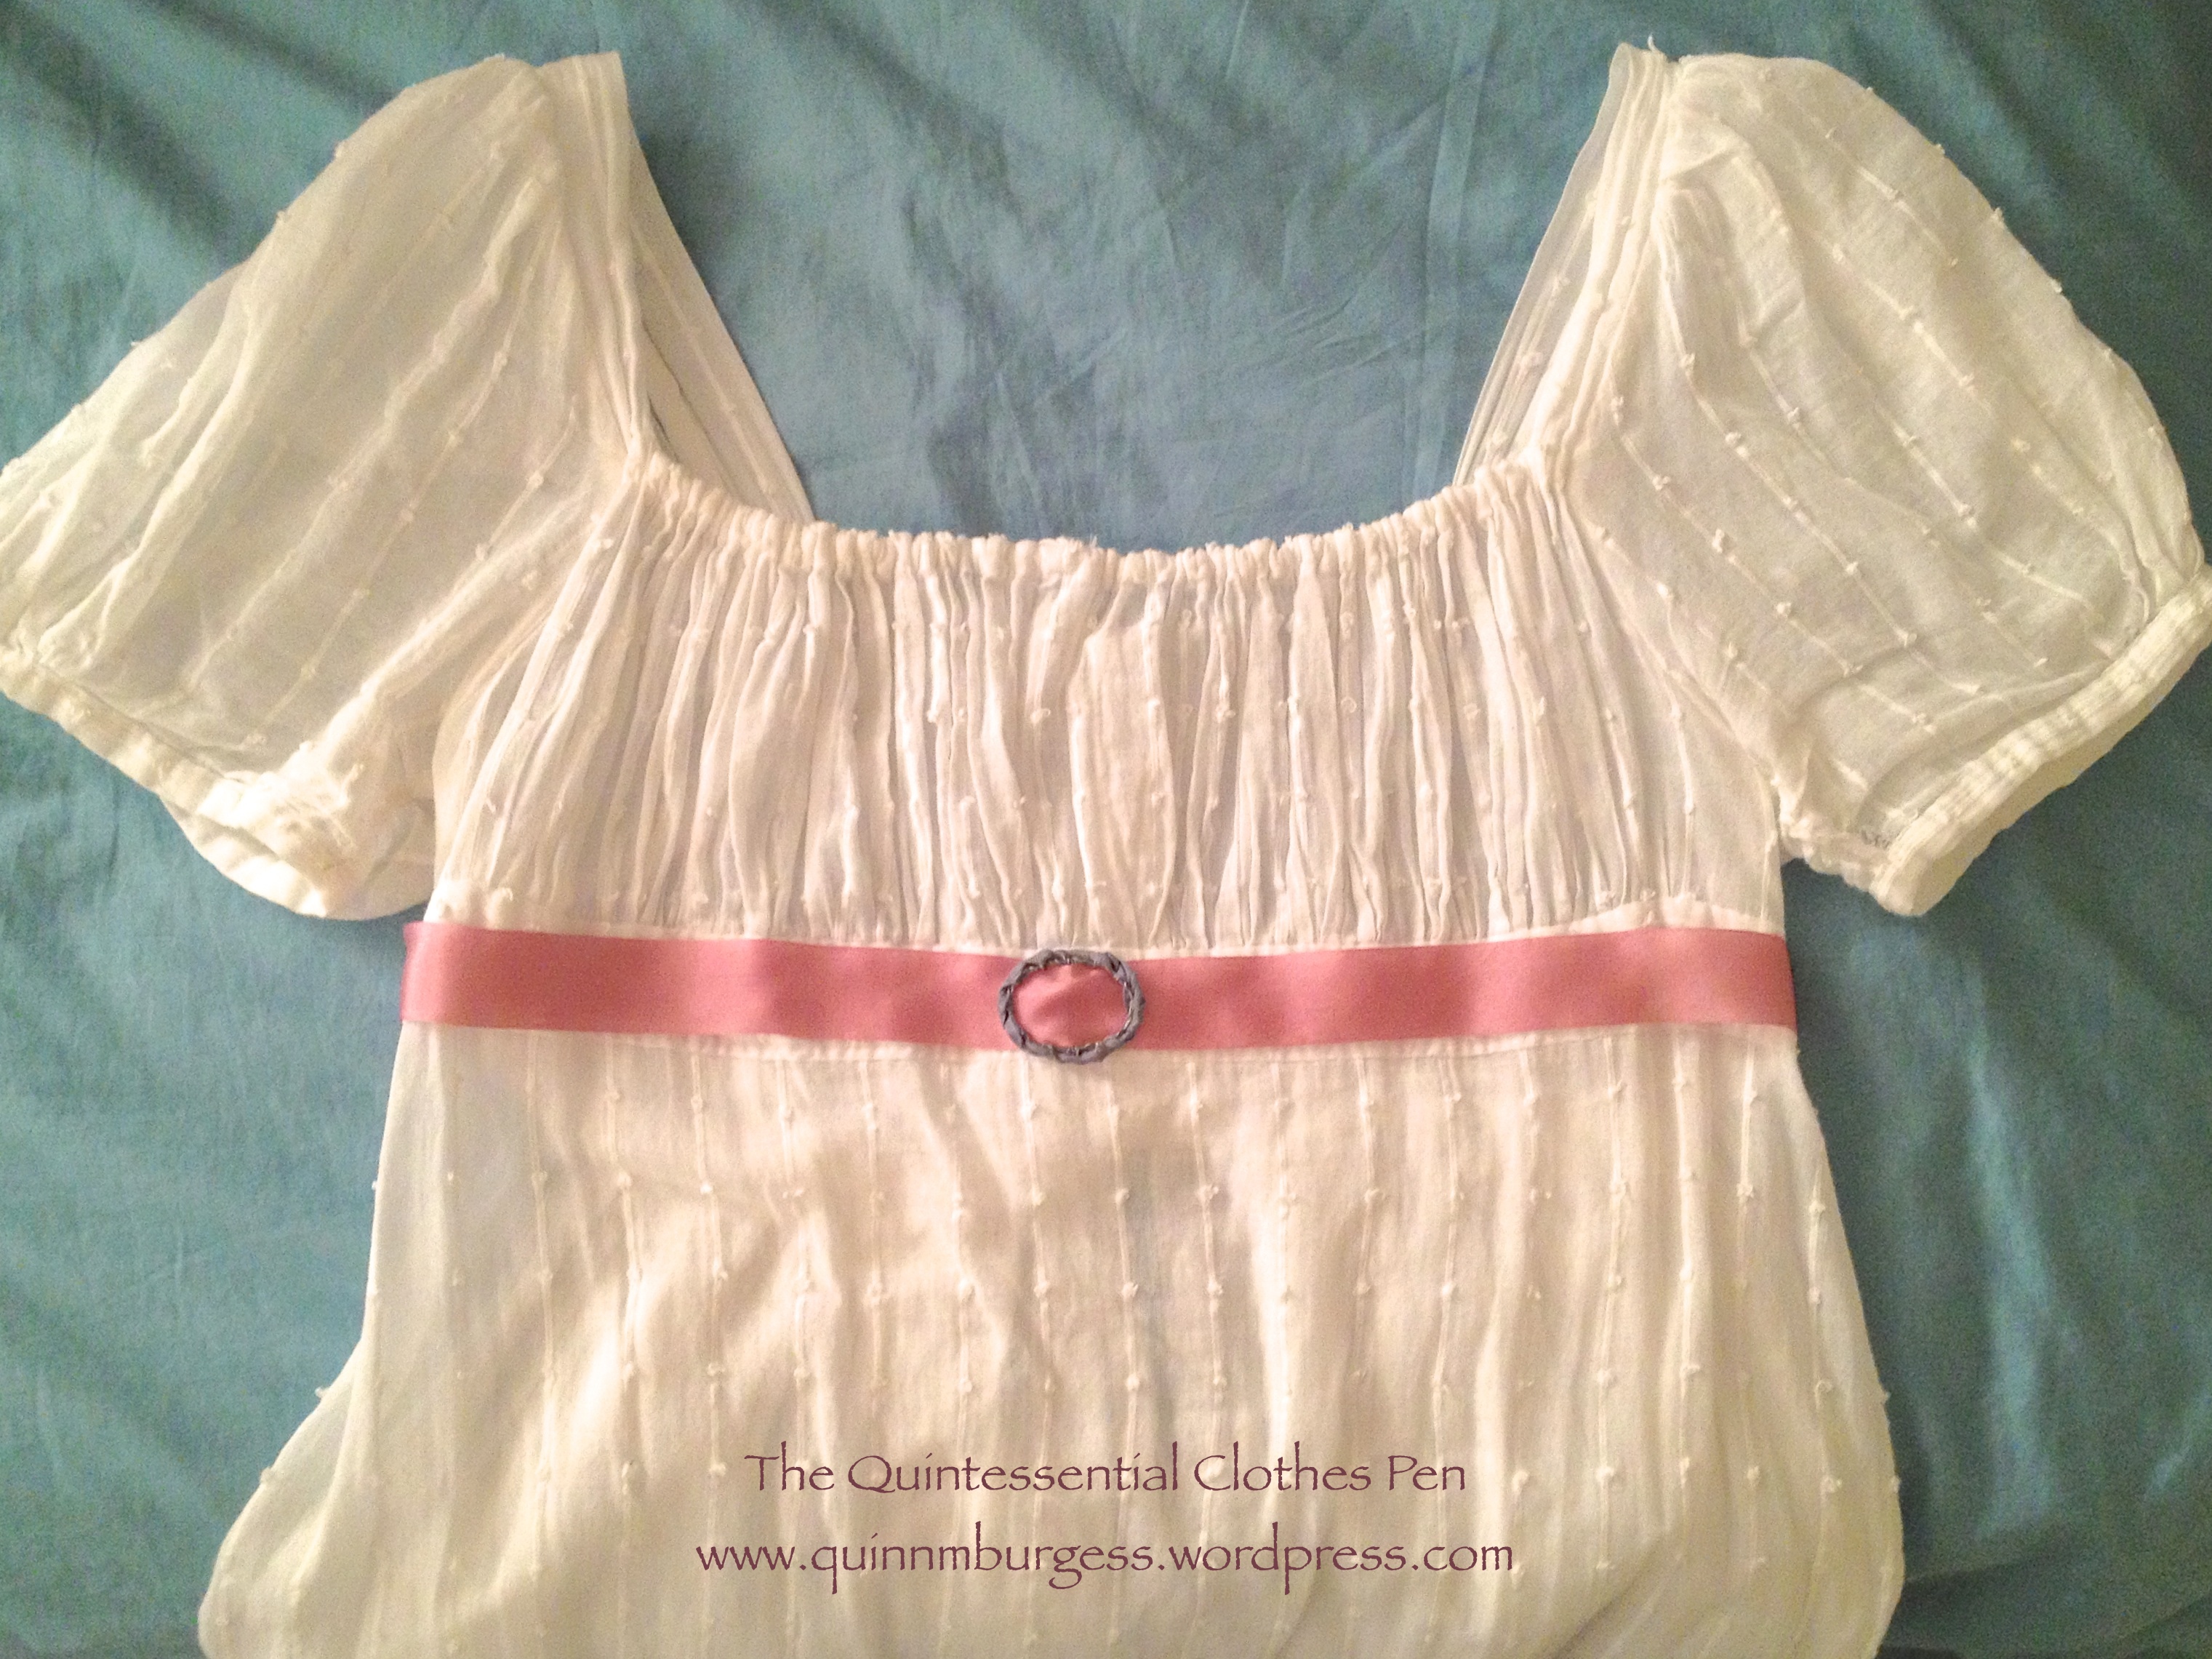
My project for the HSF Challenge #3: Pink is a silk belt style sash for my square neck 1812 gown. It’s a small project because I’m working on multiple other bigger projects (two different Regency dresses and a new 1850-1870 corset–more on those in the upcoming months) and I didn’t want to distract myself. Part of my decision to make a belt style sash came from the discussion with friends that led to my previous post on adding variety to Regency sash styles (this post explains what I mean by a belt style sash, in addition to explaining other Regency sash styles).
And now, as usual, on to the facts:
Fabric: None.
Pattern: None.
Year: c. 1810
Notions: About 1 yard pink silk ribbon, some unknown yards of 28 gauge wire, maybe 2 yards grayish blue hug snug, a hook and bar, and thread.
How historically accurate?: Silk is an accurate material, but nothing else is for this time frame. So… maybe 80% for looks and 40% for materials.
Hours to complete: More than it should have because I made the buckle from scratch. Let’s say 4.
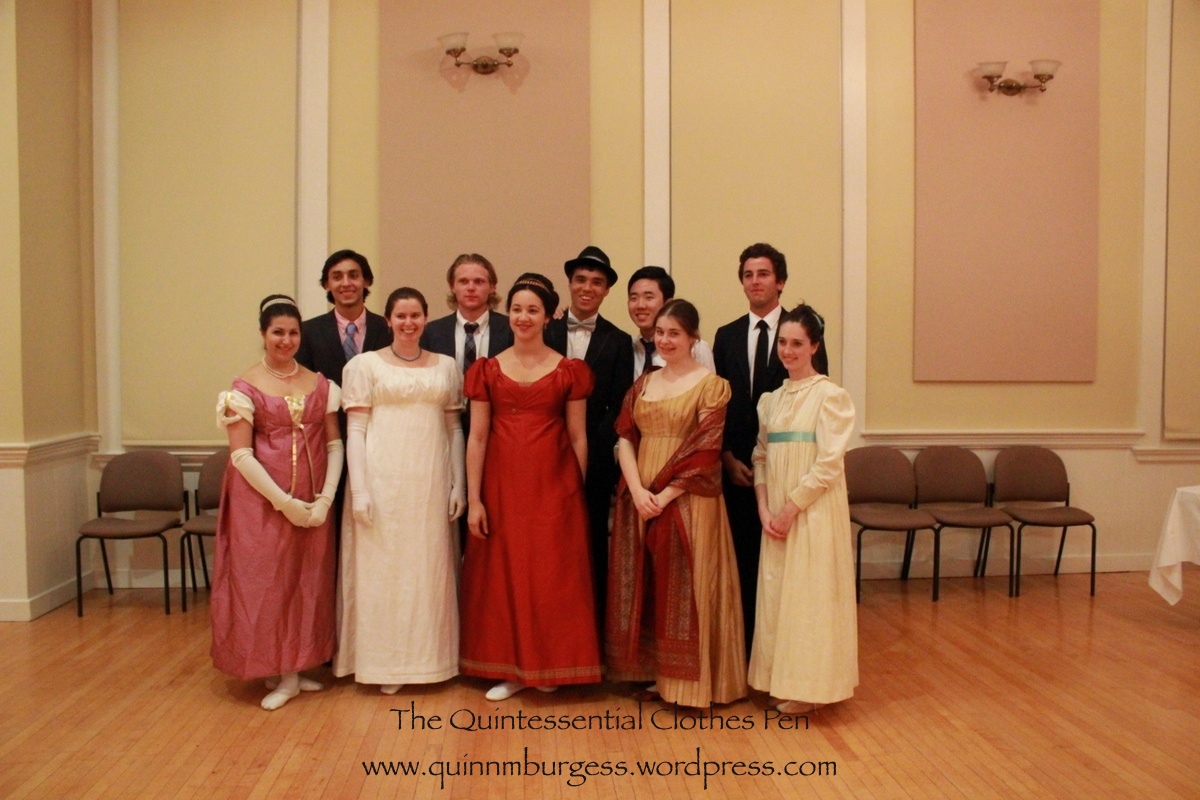
First worn: To a vintage dance performance in January.
Total cost: Free (all stash materials)!
I didn’t have a non-sparkly buckle in the right size, so I decided to make one from wire. At first I thought that it might be cute with the scallops around it, but it didn’t look solid enough from a distance. So I experimented with weaving ribbons through and around the scallops. I tried gold silk ribbon first but it ended up looking like straw. In the end I decided on the hug snug because I liked the color.A closeup of the finished buckle. It wound up looking rather braided.The finished effect.
For the performance, I sewed the belt to the dress even though I also sewed a hook and bar to the belt. The idea is that I can wear it with another dress in the future if I want to!
Have you seen the Downton Abbey jewelry line at Macy’s? Some of the things are very modern (and ugly, I think), but some of them are quite charming and possibly even useful for historic costume purposes. There are necklaces, earrings, and brooches. Looks to me like the earrings and brooches are the best of the bunch for the most part. However, don’t be fooled by the pictures and do take a look at the measurements of things because the pictures make them look larger than they actually are!
I am very excited to share that I am finally done sewing the trim on my 1822 Walking Dress and 1824 Ball Gown. I actually finished sewing the trim on both garments about two months ago. Yay me, for being ready for a ball a full month ahead of time!
I wore both garments this year at Fezziwig’s Ball, hosted by the Commonwealth Vintage Dancers, just as I did last year. Last year, however, I didn’t have enough time to trim them like I wanted to and I didn’t really have time to look into proper hair styles either. So this year, in addition to adding trim, I also decided to try out a different hair style that would be much more early 1820s.
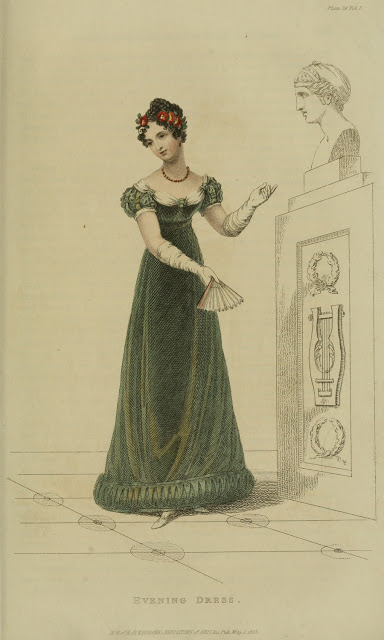
I looked at lots of fashion plates and noted what elements made the styles look 1820s. This is the look, from 1823 (also pictured a little farther down). The style required a new hair wreath, so that was the only last minute sewing for this year’s event. I did the same style as the fashion plated: crossed braids on top of my head and little curls around my hair line. When you have long hair and no bangs like me it’s quite a challenge to get curls around the hair line. I managed to make the little curls happen, but I still want to improve my methods. The hair wreath was essential for hiding my long hair and only showing the curly ends. It is made of wired millinery flowers sewn to a length of millinery wire. The front bits are small flower sprays and the back is velvet leaves.
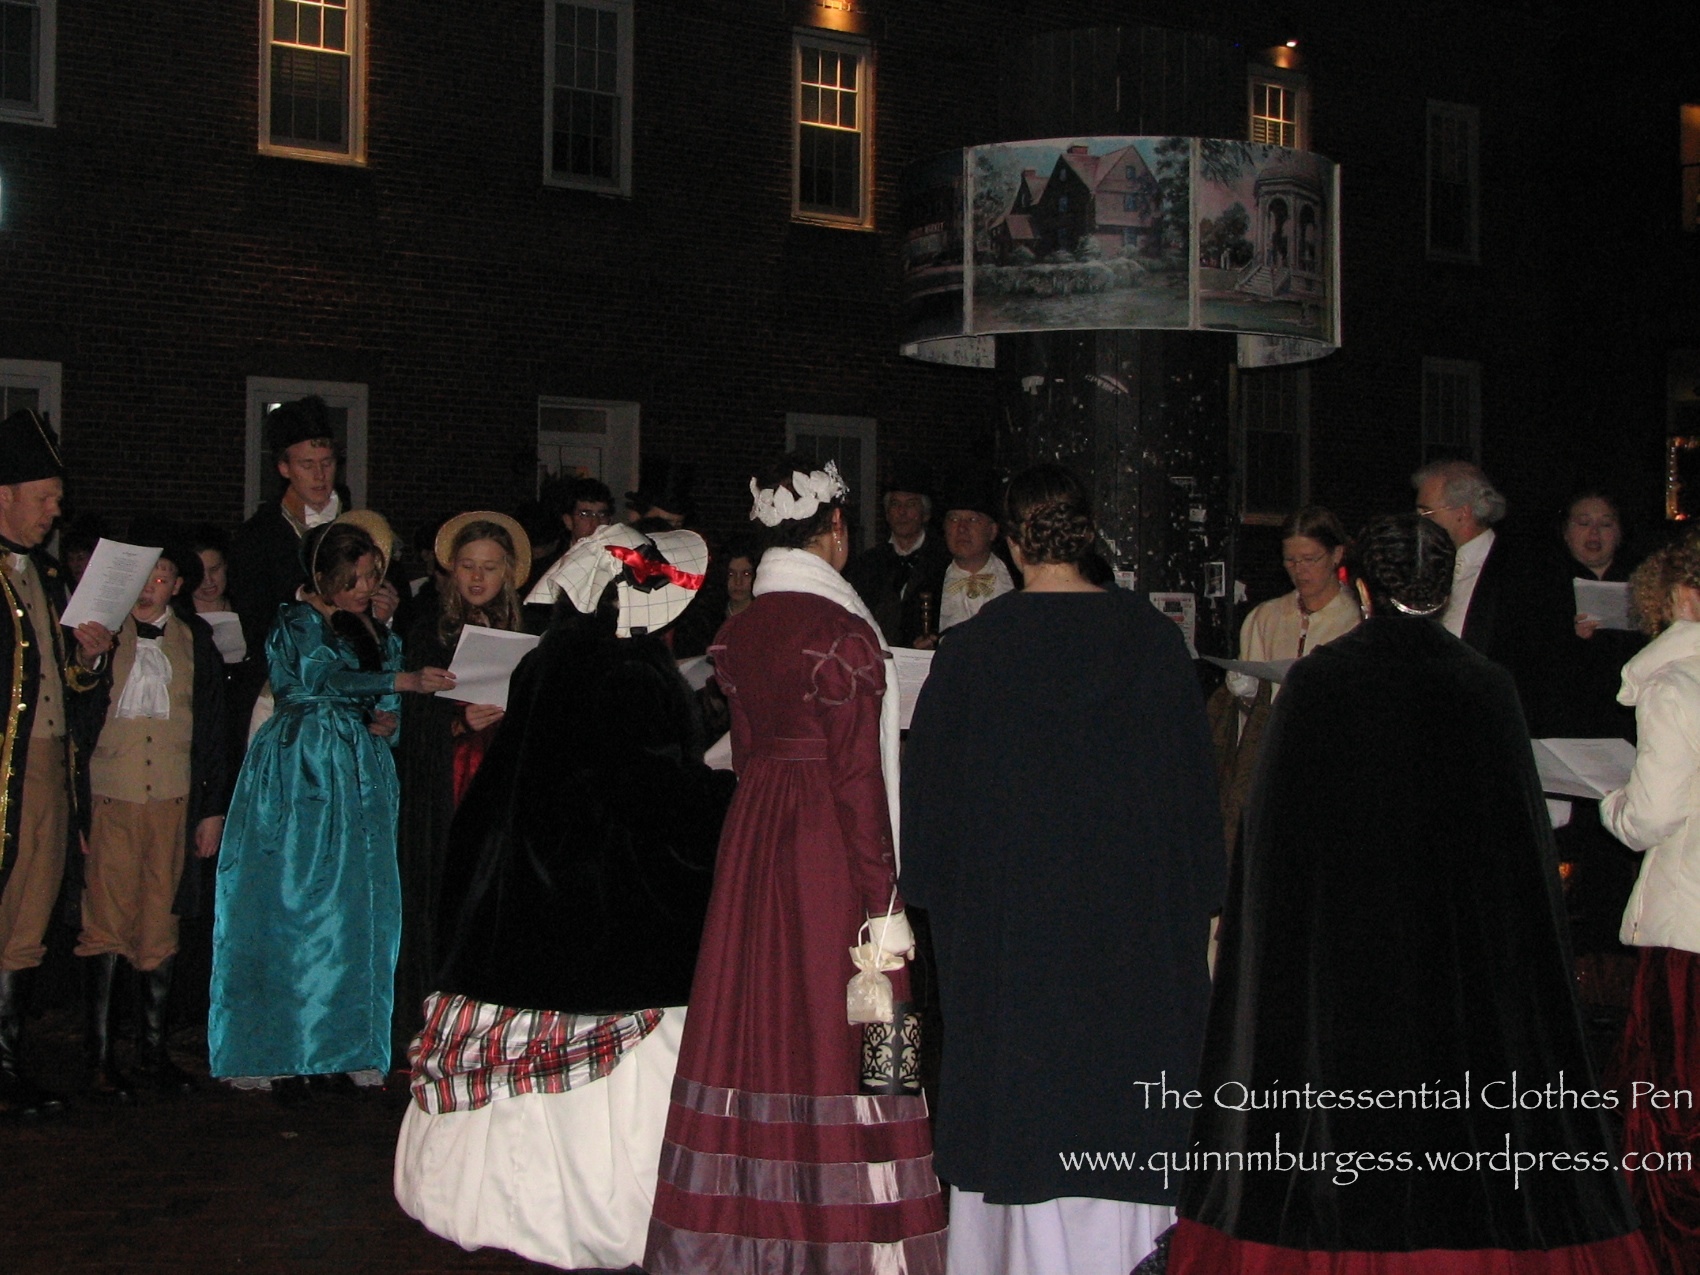
Caroling before the ball.This is a great view of the back of my walking dress and the back of my new hair wreath.Here we are: 1822 walking dress with trim, worn with a chemise, corset, corded petticoat, muff, tippet, gloves, and my new hair wreath. (If you want to see/read more details about these garments you can view the entire Project Journal for this ensemble.)1823 – Ackermann’s Repository Series 3 Vol 1 – May Issue (My inspiration for my hair wreath, hair style, and for the picture below.)Changed for the ball: 1824 ball gown with finished trim on the sleeves and front. Same undergarments with different accessories (long leather gloves with red stockings and burgundy shoes to be in the holiday spirit!).Lining up for a grand march during the ball. I loved the garlands hanging in the background.
I was amused throughout the night that people kept commenting on how much they liked the sleeve appliques on my green dress. I didn’t realize they were so exciting, but I do think they balance out the skirt nicely. By the end of the night my curls were looking a bit crazed… but it was fun, and I do enjoy wearing these garments and the style of the 1820s, in general. Oh, and I was able to wear my refreshing apron, too, though we were too busy refilling refreshments to take pictures. So yay for completion! It’s nice to get these things off the sewing list to make room for other fancily trimmed things!
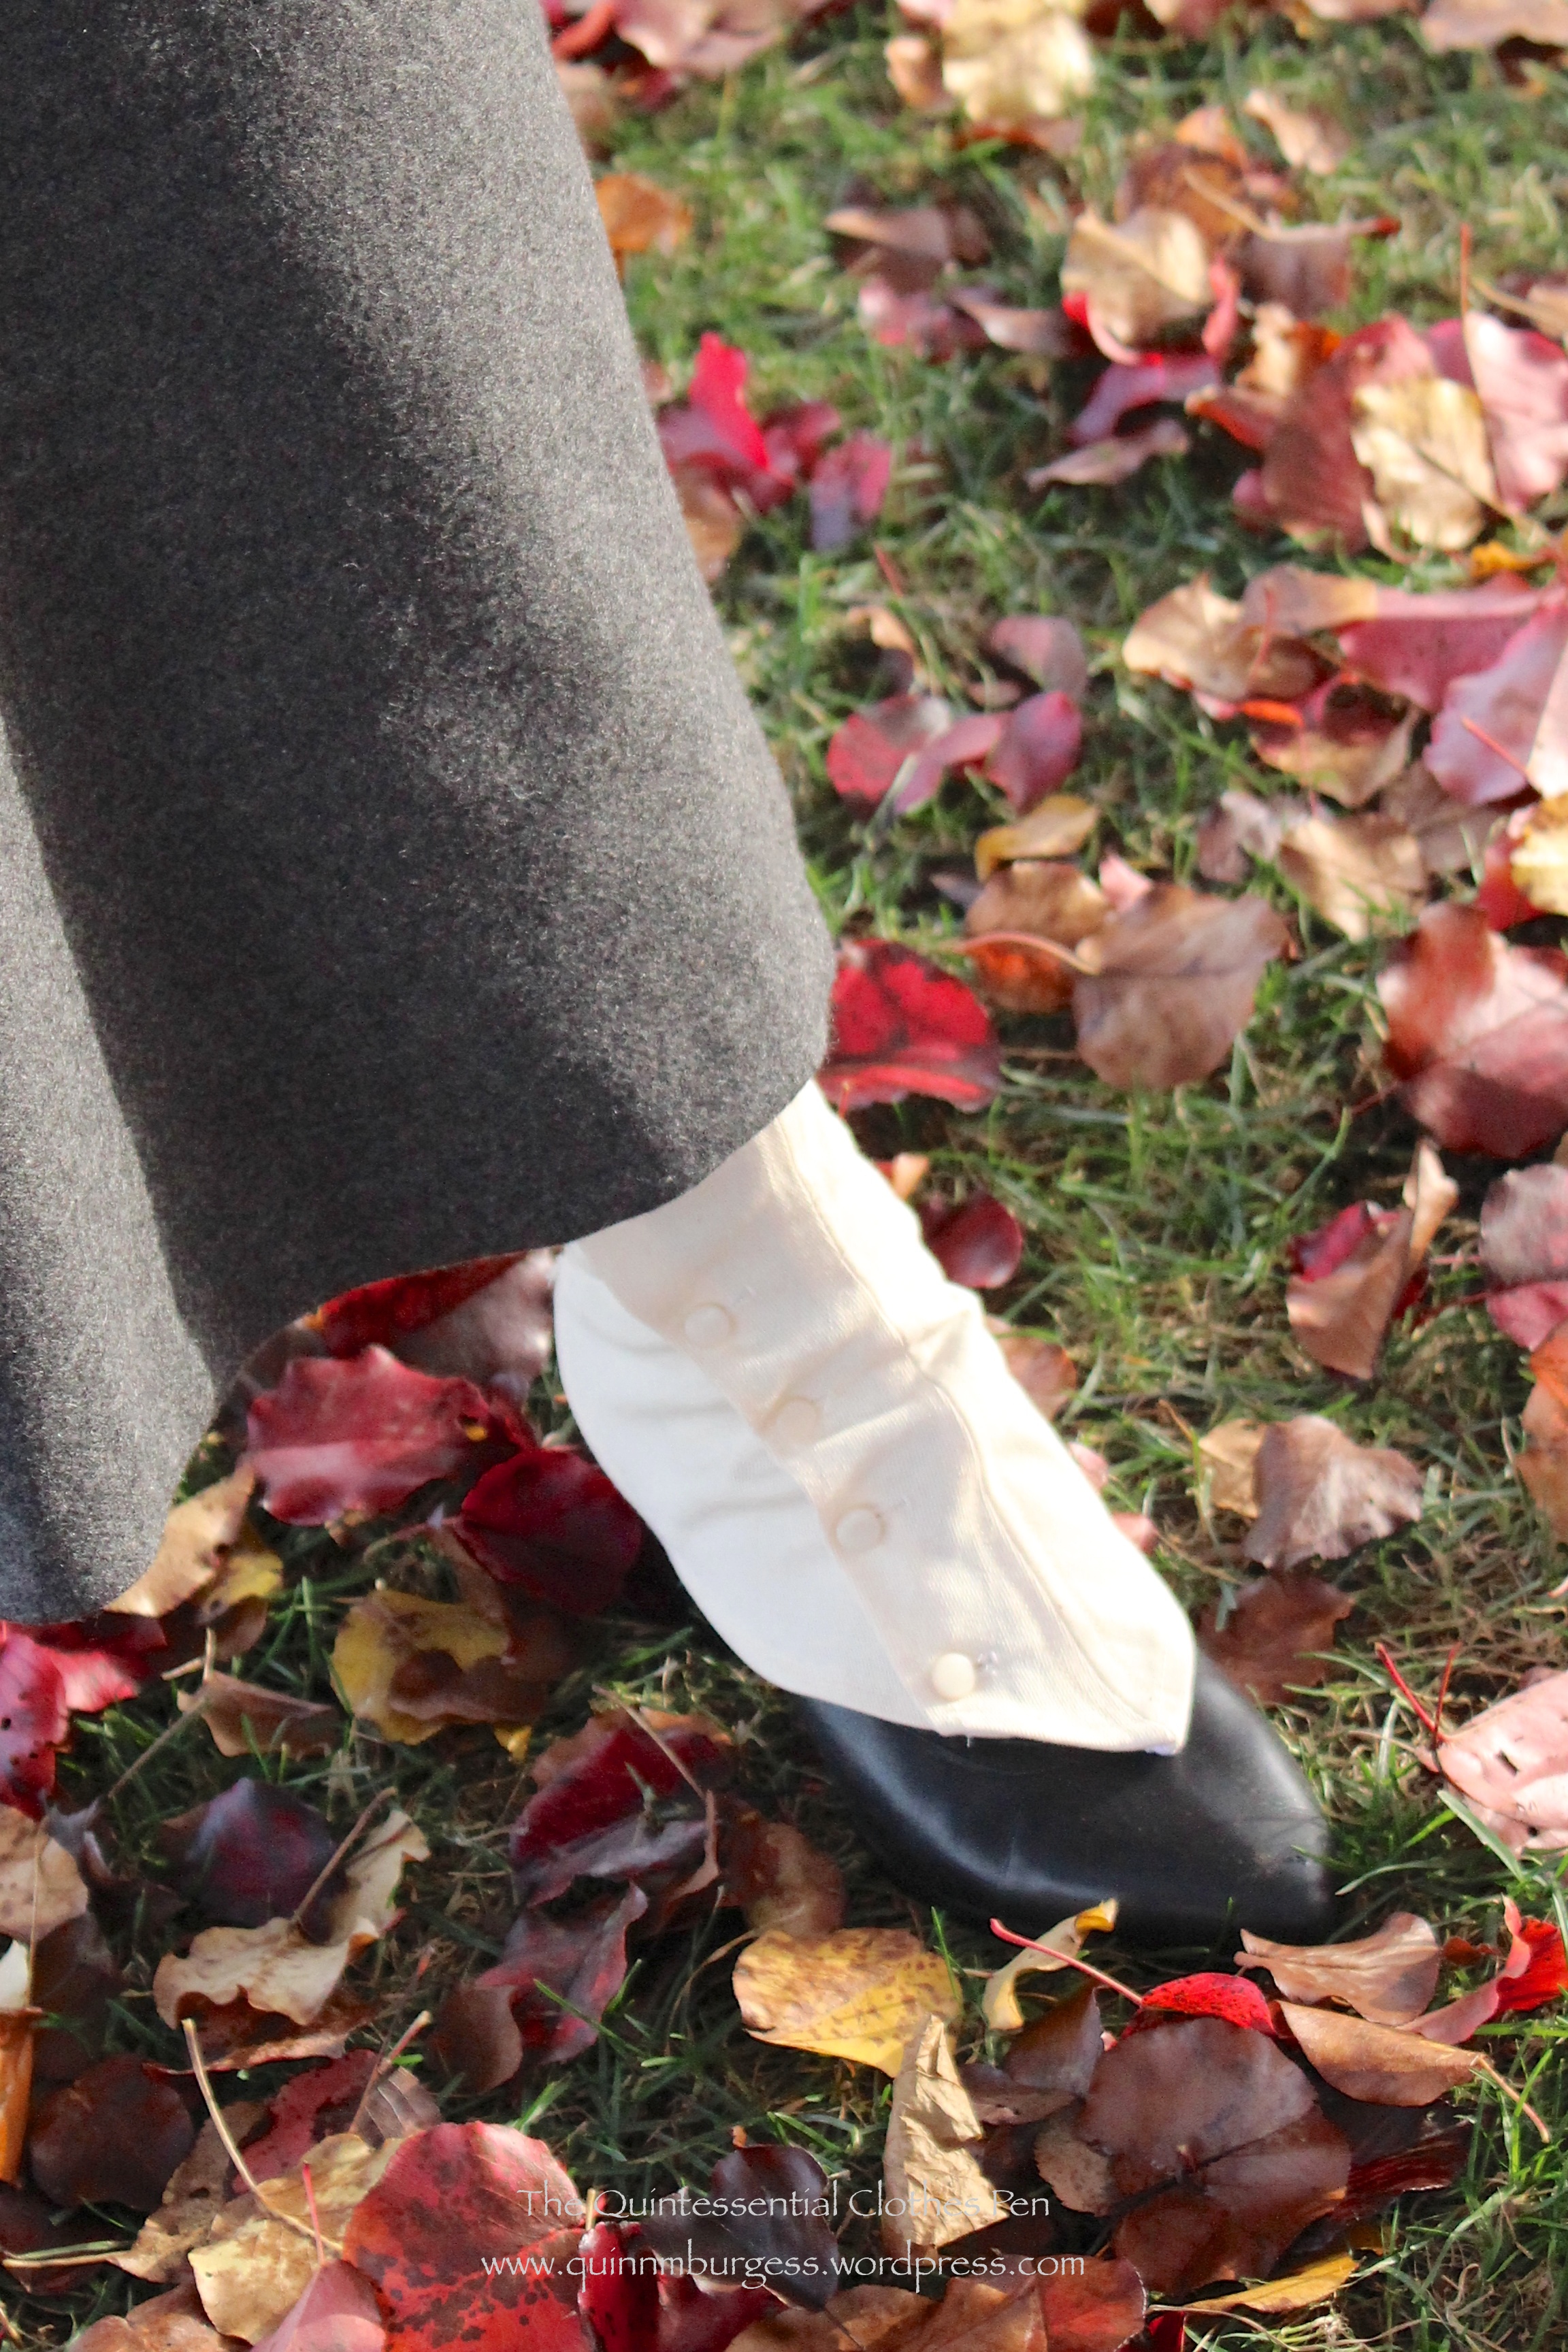
It’s time for the details about my entry for HSF challenge #25: One Metre. I prefer saying I’m wearing “spat-boots” though the actual items I’m really wearing are shoes and “gaiters.” Spat-boots has more of a ring to it, I think.
Close up of my spat-boot look.
The gaiters very effectively turn my sort-of-1910s-but-more-1920s American Duchess Gibsons into very 19-teens spat-boots! If you look at the first black and white image of suffragists in this previous post you can clearly see some similar spat-boot styles. And if you look at the images on my Sewing Project: 1917 Blouse and Accessories Pinterest board you can see multiple examples of the spat-boot style. Some boots, like these from 1917 at the Met, were made in two different colors of leather. That’s the look I was trying to imitate, except that I was doing it with a separate garment rather than as a part of my shoe. The Met actually has quite a number of early 20th century gaiters, made out of leather and cotton. If you’d like to see these examples, I’ve pinned many of them to my Early 20th Century Accessories Pinterest board.
The facts, you ask?
Fabric: Scraps of heavy unbleached cotton.
Pattern: Created by me.
Year: 1917.
Notions: Thread, black elastic, cotton twill tape in various widths, and plastic buttons.
How historically accurate?: 90%. The look is right but the materials are a mix and match of right and modern.
Hours to complete: 6-8? Took a few fittings to get them ready to sew. Then finishing and sewing on buttons took awhile.
Total cost: None. The fabric was left over from a grad school mock up and the notions were all from my stash. (See that odd marking in the middle of the center piece? That’s blue sharpie that soaked onto this part of the fabric from notes I wrote on the mock up… There was a lot of blue sharpie, and I couldn’t cut around it and still have enough fabric. Doesn’t show on the outside though!)
Here’s an inside view of one of the gaiters. You can see that I’ve used three different kinds of twill tape to bind the seams and the edges. All of the sewing was done by machine except sewing on the buttons.
There are a few things that I would change consider changing if I made these again in some other reality. #1: Having my buttons spaced closer together, as the extant gaiters and boots do. But in this case I only had a limited number of buttons to work with! #2: Potentially putting a strap with a buckle to go under the foot rather than elastic, since the buckle method is what extant gaiters have. But the elastic worked so well and you really couldn’t see it… so I probably wouldn’t actually change this, especially since I don’t have the right sort of buckles in my stash. #3: Making the back part that comes down over my heel longer. I was aiming for a nice swoop up from the part held down by the elastic, but the back of the gaiters kept popping up over the edge of my shoes, which was a little uncomfortable. I spent a lot of time during the day I wore these pulling the back of the gaiters down.
Like a flamengo, I’m standing on one leg and pulling down the back of my gaiter, which had popped up over the back of my shoe.Overall, I’m super pleased. These were quite successful. You should try some yourself!
Product links in this post contain an affiliate code, which provides a small benefit to my shoe fund. This does not affect my impressions and reviews of this product.
The theme of this HSF challenge is Re-Do, in which you re-do a previous challenge for a second time or you re-do a challenge you didn’t complete the first time around.
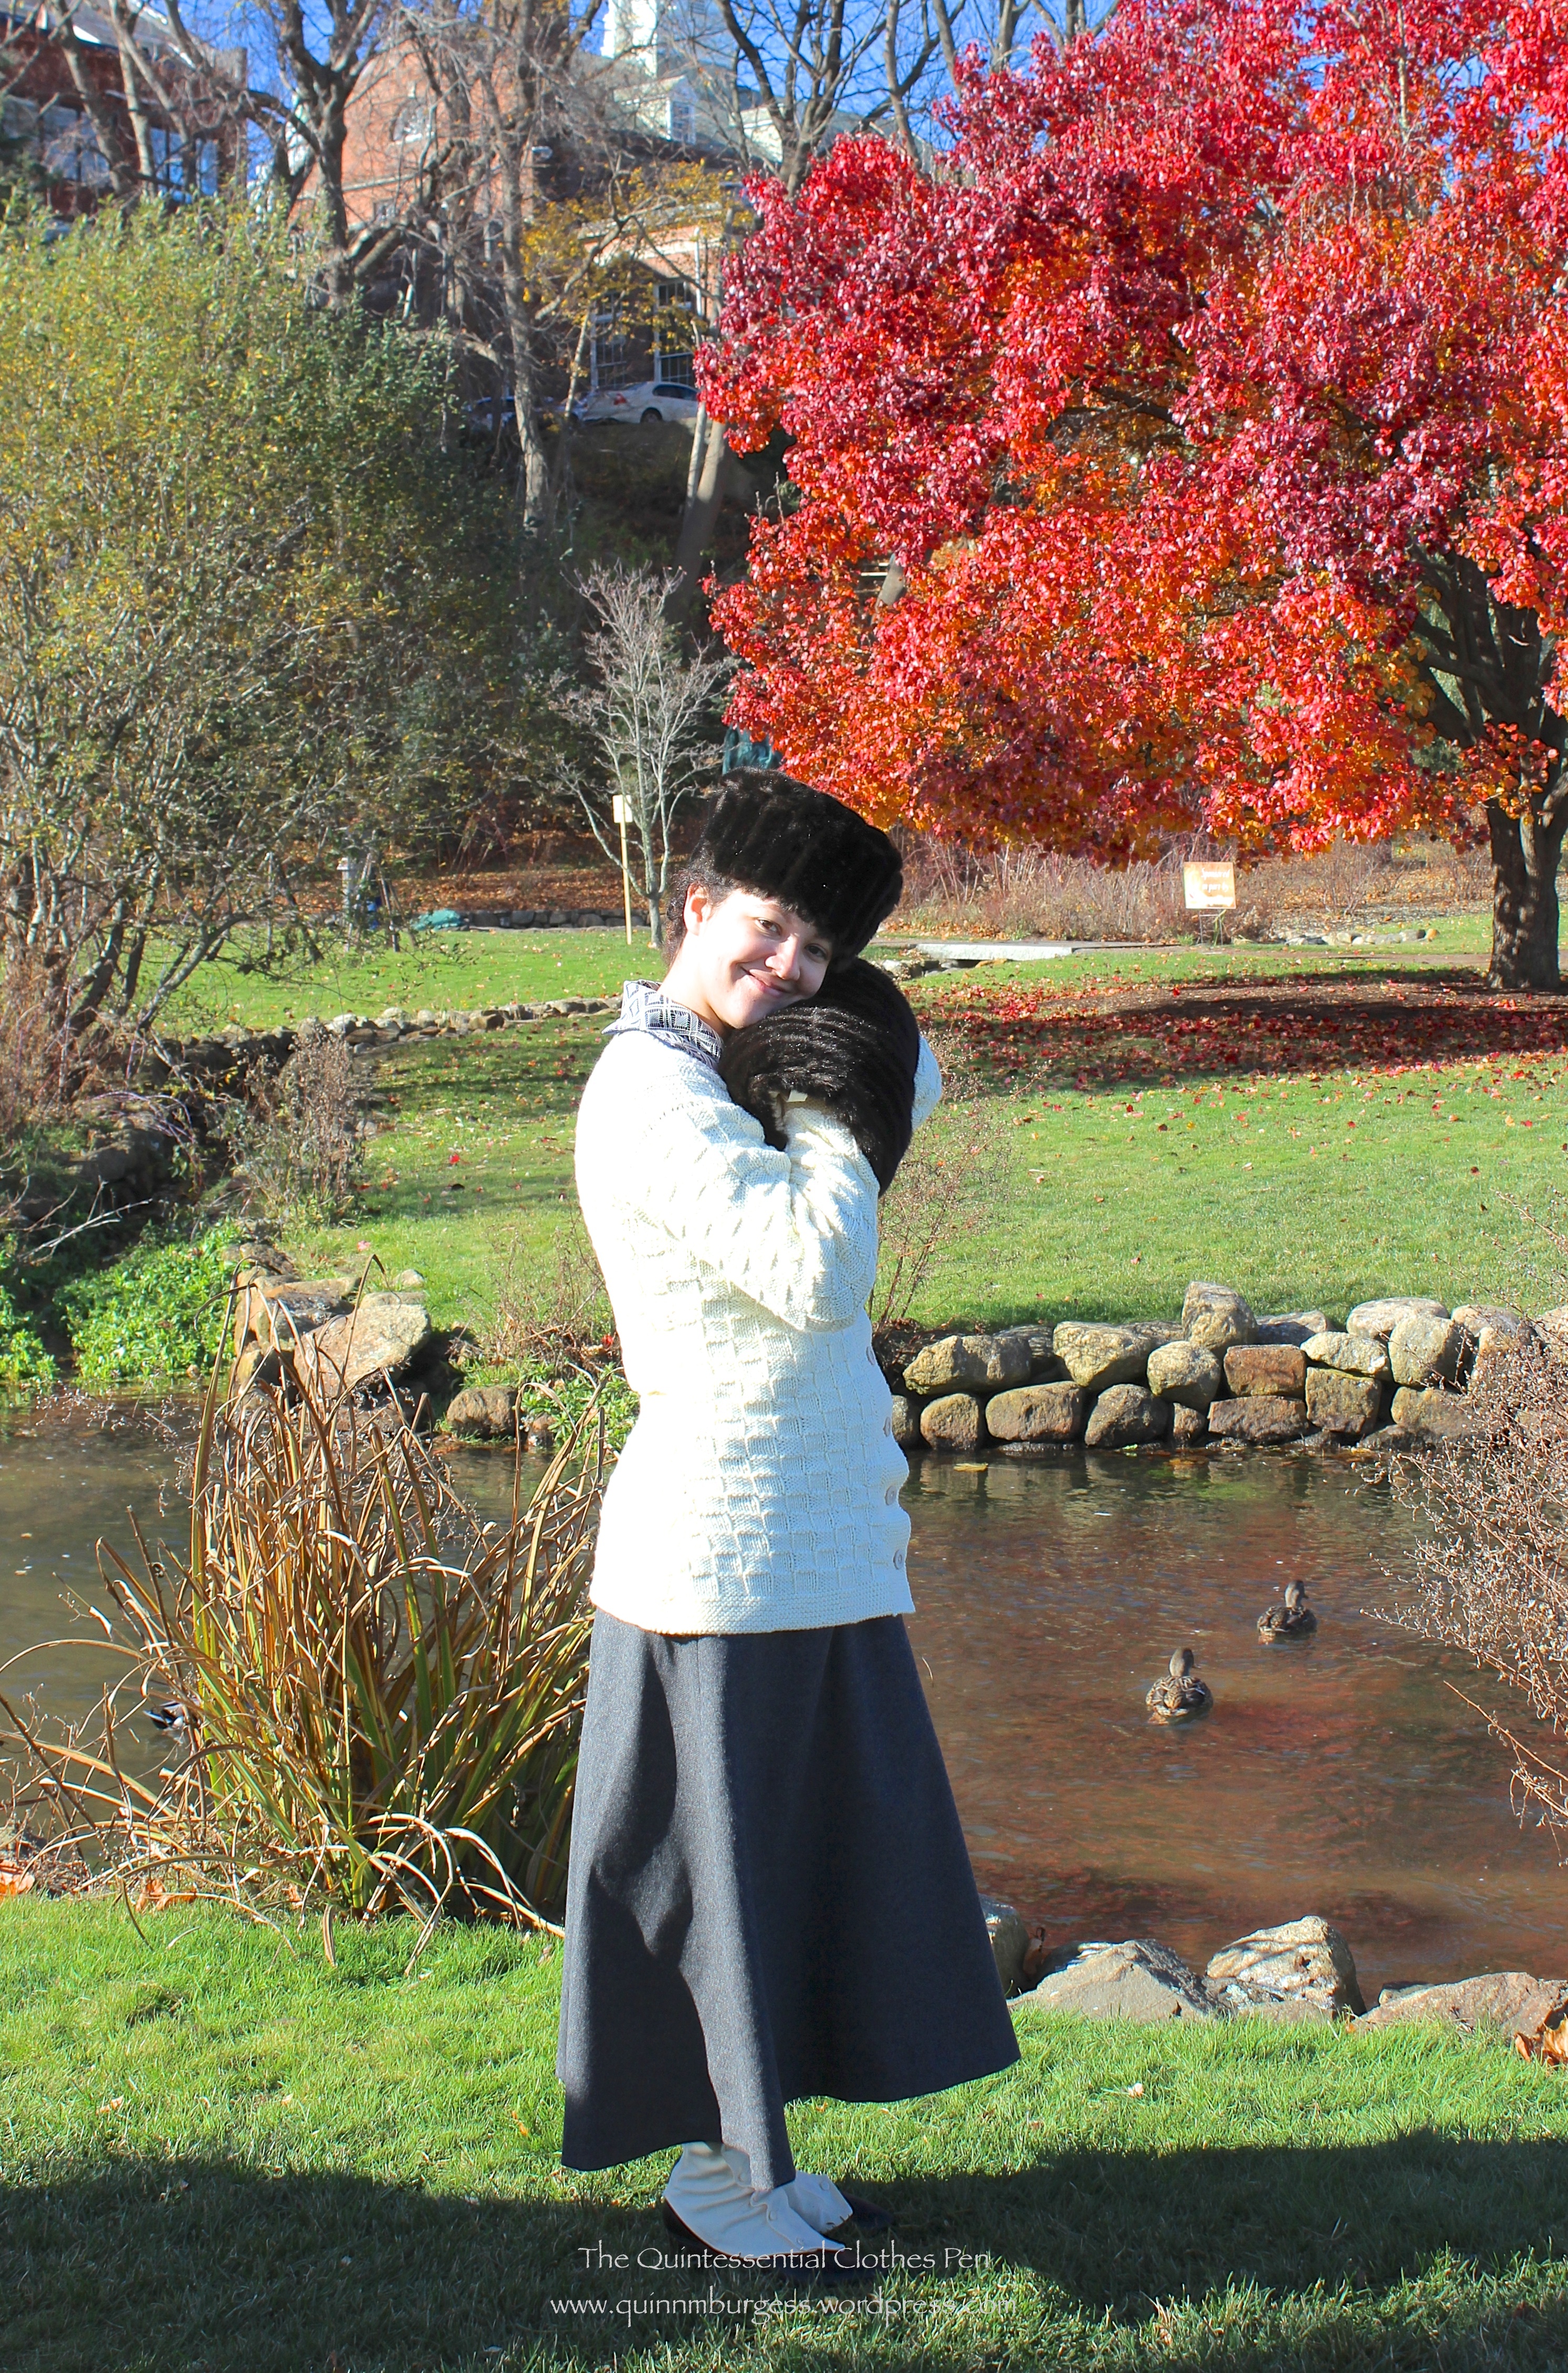
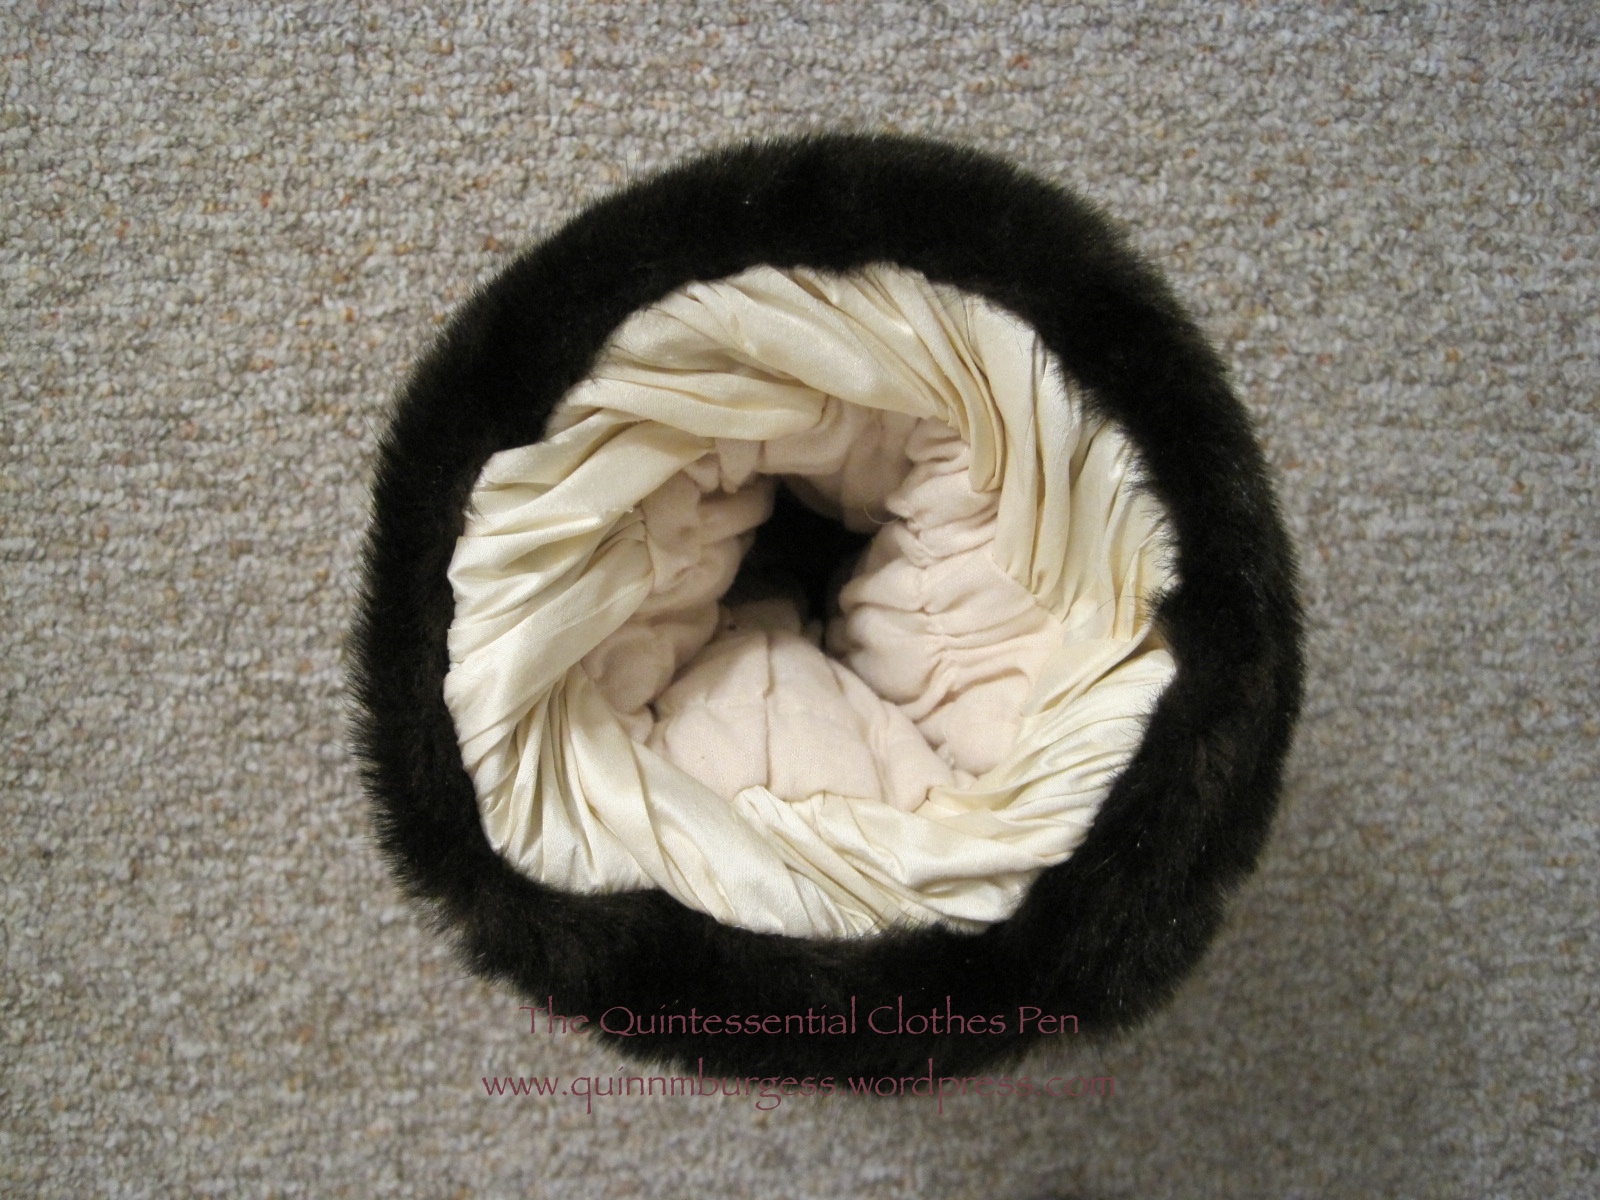
The muff and hat are super soft. In addition to keeping my hands in the muff, I also spent a fair amount of time hugging and patting it.
I’m using my recently completed 1917 fur hat and recently revised matching muff as my entry for this challenge. I think the hat and muff best qualify for a re-do of Challenge #20: Outerwear, which I did complete with my 1822 Walking Dress (so this would be a re-do of a challenge I already completed). So, the facts:
Fabric: About 1/4 yd of faux fur and about 1/4 yd cotton flannel.
Pattern: Created by me.
Year: 1917.
Notions: Thread, polyester batting.
How historically accurate?: 90%. Tall round hats of this sort were popular in 1917, though they were likely made of real fur rather than faux fur. The revised muff has a great shape for lots of periods, including this one, and is pretty accurate, aside from the fact that it is also faux fur. Oh, and neither hats nor muffs were insulated with poly batting… but it is so warm! And no one will know except me, and those of you reading this!
Hours to complete: Unknown. I was pretty tired while working on the hat, so I know it took longer than it should have. The muff was quick (like 2 hours) but that’s just the revision. I don’t remember how long it took to make it originally.
Total cost: None, since I bought the fur and the flannel specifically for the muff over two years ago I count it as a stash project.
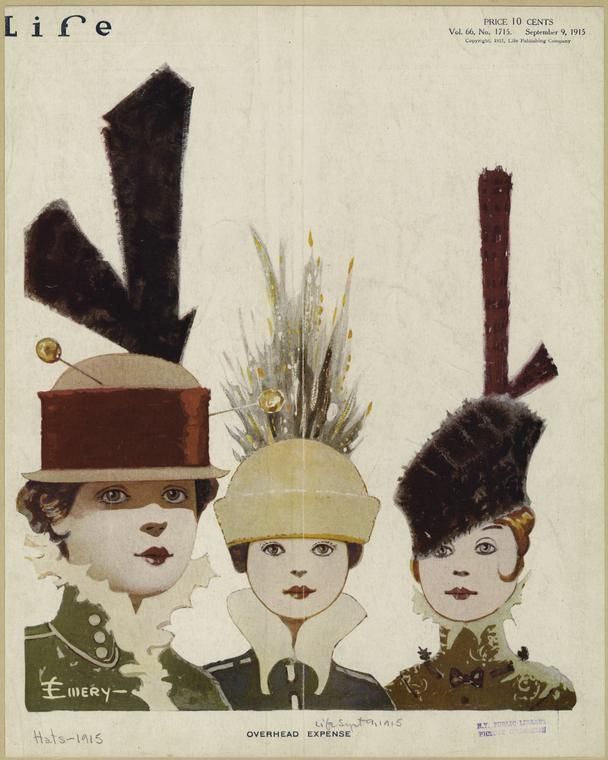
Here’s my inspiration for the hat. I was aiming for the exaggerated shape on the right. I don’t think I quite achieved that, unfortunately. I did actually spend a lot of time patterning the hat so it would look right sitting at an angle rather than straight. I think I was so cold when I was wearing it that I pulled it down to cover more of my head and thus pulled it off of its angle. Sad! But also, the thick fur rather obscures the shape anyway. I chose not to do the sticky-up bit, partly because I ran out of time, and partly because I just didn’t know what to make it out of, since the hat was already fur. Oh well. I really like that middle hat, too…
1915. In the collection of the NYPL.
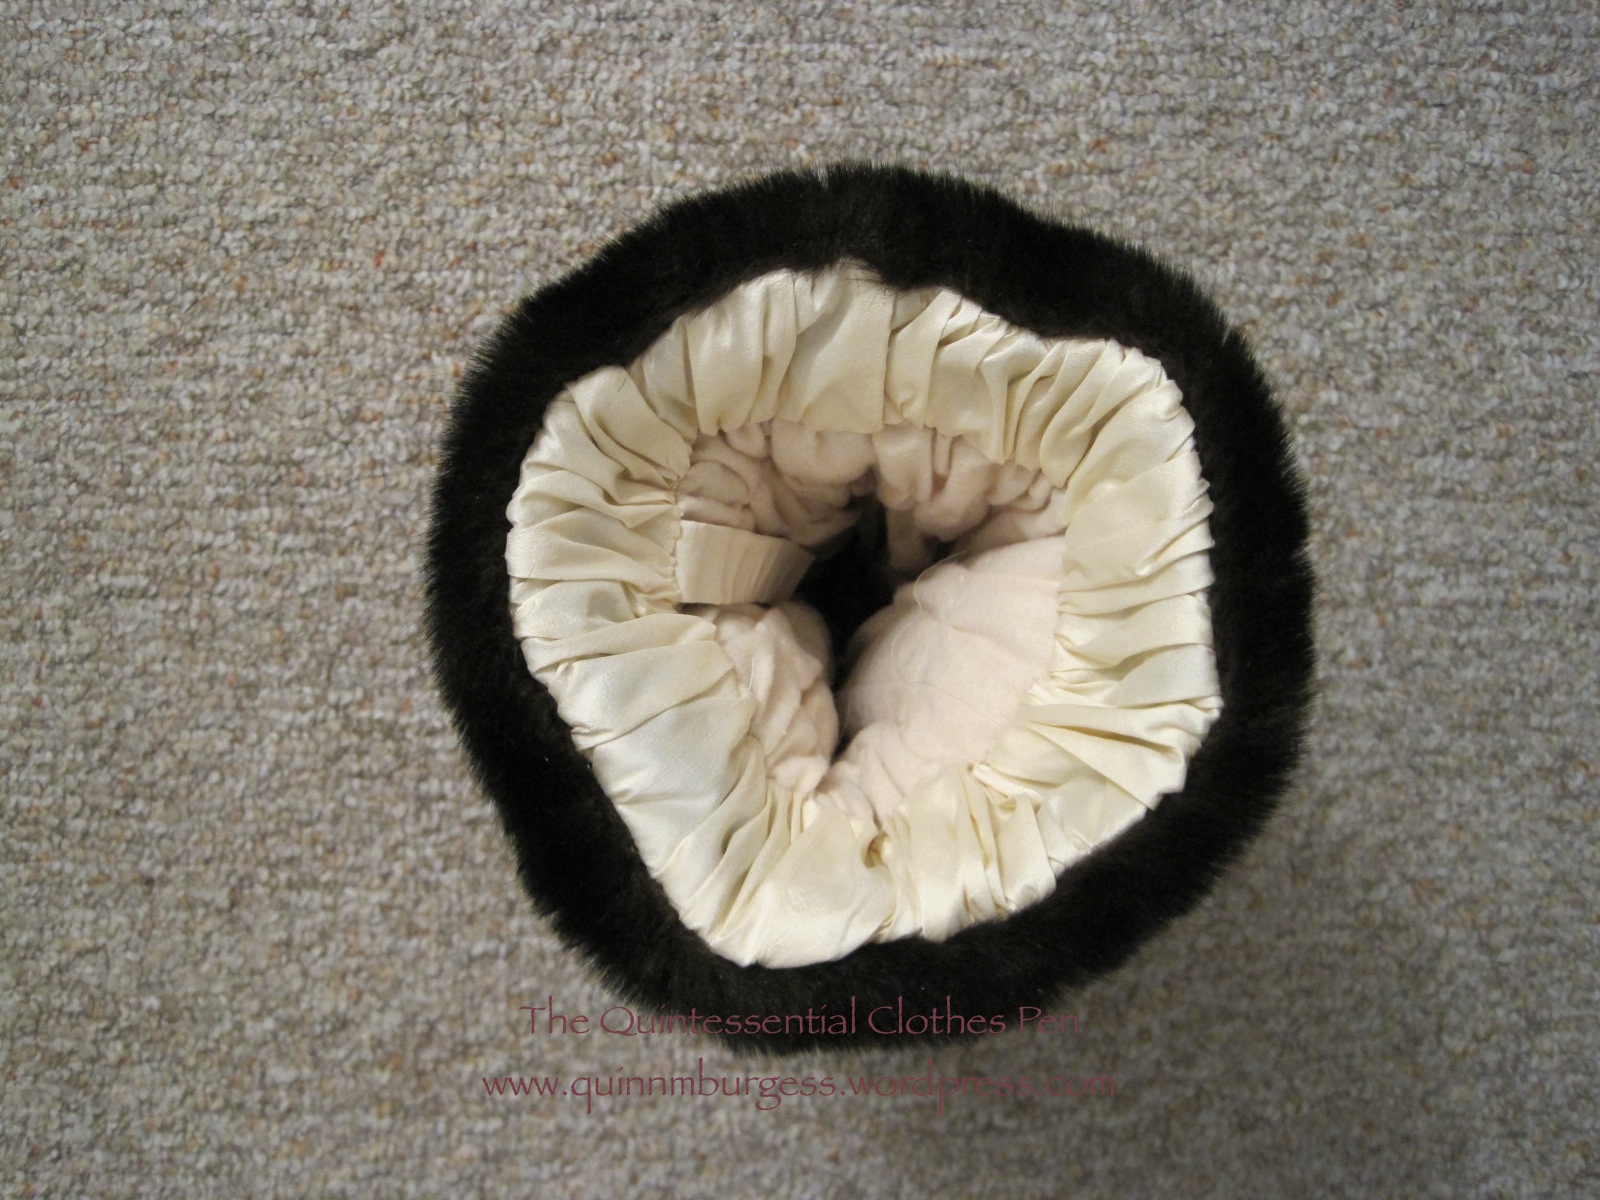
I originally made the muff for an 1860s event a few years ago. I had a plan to use gathered silk for the two ends, but it turns out it looked cooler in my head than when I executed the plan. Also, the muff was a little longer than I liked, so I decided that for this event I would shorten the muff by taking off the silk ends and folding the fur over to cover the ends. Here’s my Pinterest board of inspiration for this project. You’ll see that there are various shapes and sizes of muffs c. 1917. Mine is somewhere in the middle in terms of size and shape.
This is sort of what I was envisioning with the silk on the ends, but it is a little underwhelming. You can see the cotton flannel lining in the middle. It holds body heat, so it doesn’t feel cold when you put your hands in!This is the other side. It’s pretty twisty and sad.
But as I said, I took the silk off, folded the fur down over the ends, and sewed it directly to the flannel. (I have plans to use the silk for a Regency reticule at some point in the future… yay recycling!) You can see the results in these next few pictures. I’m quite happy with the results! The muff is about 3″ shorter and I like the look of the fur on the sides.
See the fur on the sides? That used to be the silk part.This was our silly shot and it shows off the new muff end well.Another silly shot, just for fun. I think maybe I was trying to keep my face warm?
Refreshing in a tiara and apron.While preparing the refreshments someone realized we didn’t have a knife to cut the pound cake. That didn’t stop us for long, though, because it’s entirely normal for the men in our group to have swords in the car. All that was required was a quick walk out to the car to get one, and just like that we were back in business!One of the pretty cards labeling the refreshments.
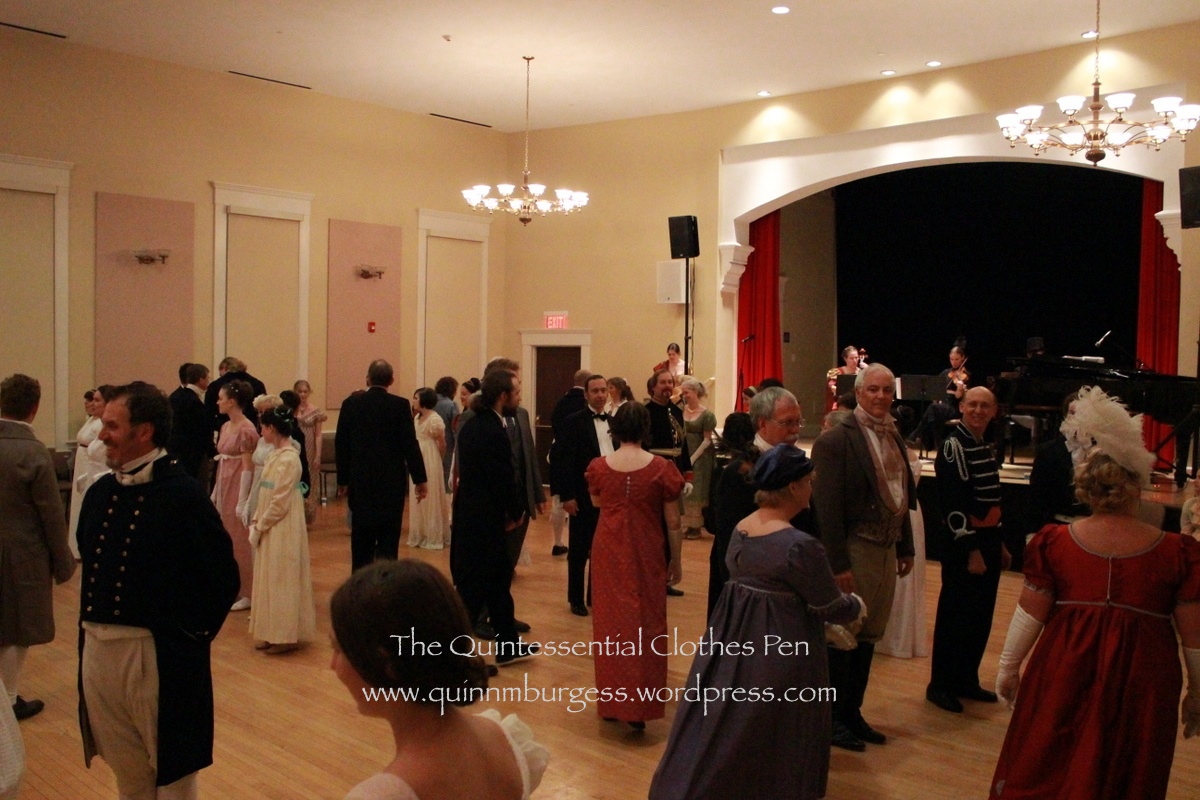
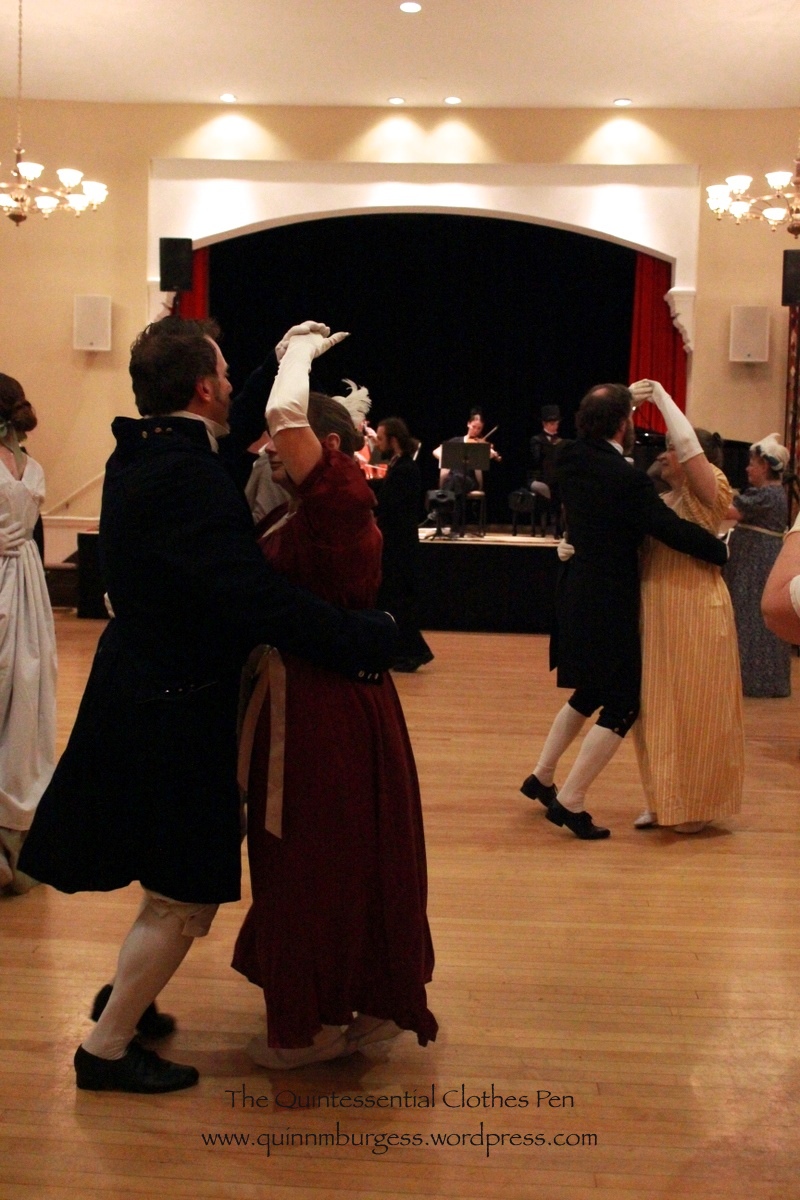
The ball was a huge success. I think there were about 70 attendees, which quite filled up the room we were in. There was live music played on a piano, cello, and violin. People seemed to really enjoy themselves.
A view of the crowded room.Dancing a country dance.I was so busy dealing with refreshments I didn’t get to dance much, which was a little sad, but this was one of the dances I was able to dance.Couples dancing a Regency waltz.More waltzing.People were very well dressed and it’s always fun to look at the clothing people who are new to one’s acquaintance.One of our friends made a new dress for herself as well as a friend who was visiting and attending the ball. So kind!And there were a surprising number of new faces. This group of young men requested a picture with us, and we obliged.I’ll leave you with this further, slightly artsy, proof of my new tiara being worn.
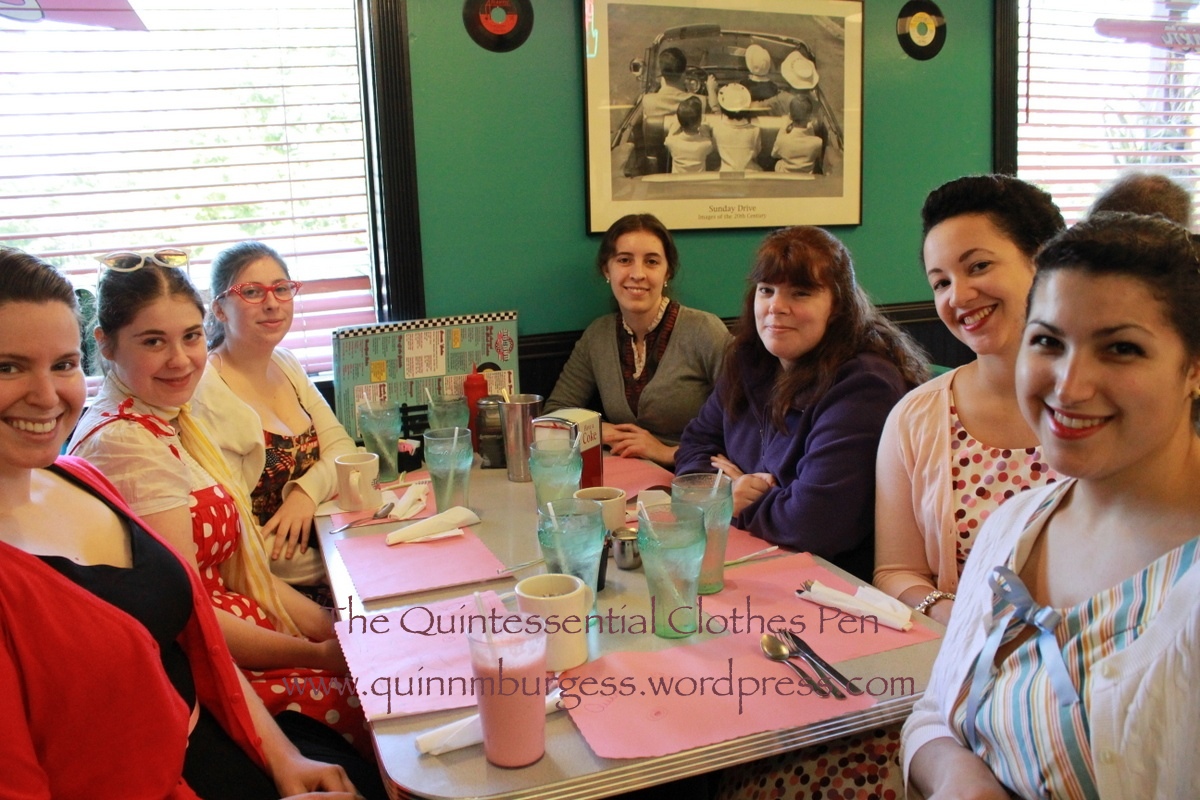
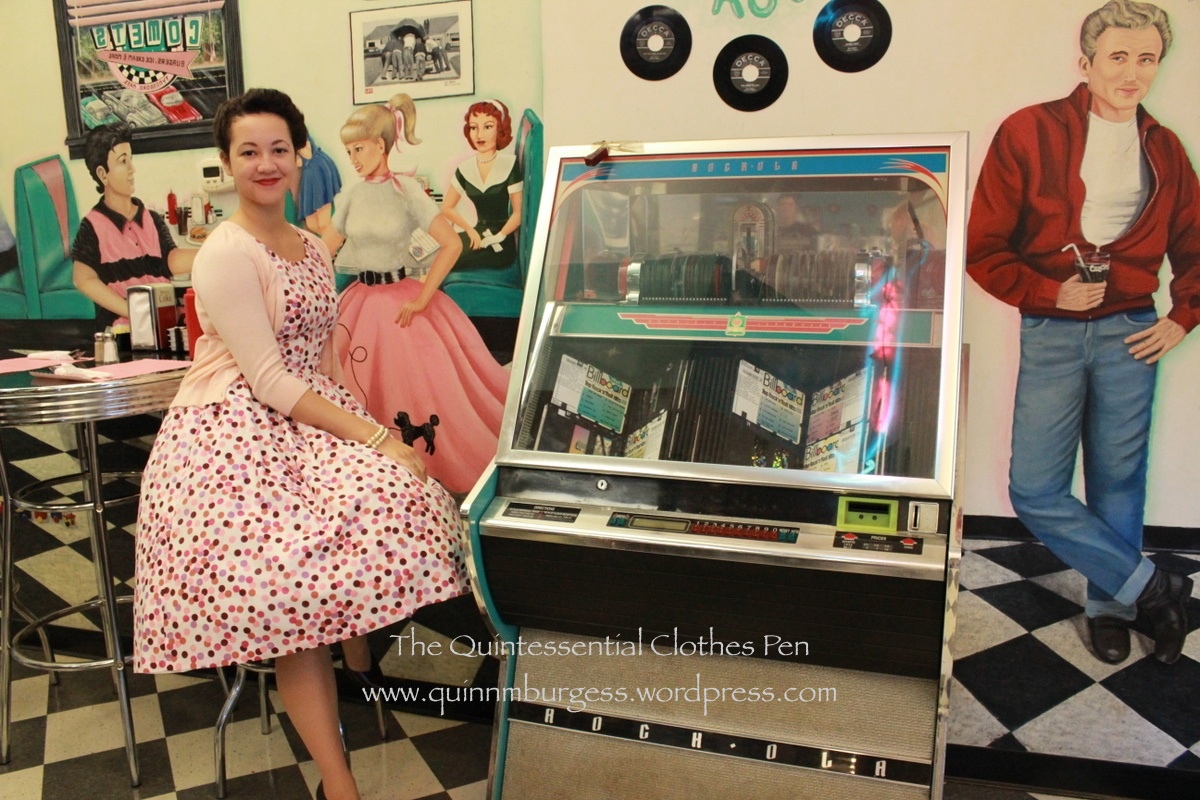
Remember when I posted the details about my 1953 dot dress, I mentioned that I was waiting to participate in a grand adventure to get photos of the dress on me? It worked out recently that schedules were free on the same day, so we were able to have a 1950s adventure! We started out going for brunch at a 1950s themed diner, then stopped by the side of the road to take fall color pictures on our way to go to a thrift store (where I purchased a flip top picnic basket for $4!), followed by roller skating, and then we finished off the evening with a Regency ball. It was a long, awesome day. I was absolutely exhausted by the end of it.
But I’ve got lots of fun pictures to share! Yay! I’m going to break up the 1950s pictures into three parts: photos at the diner, fall color photos, and photos of roller skating. There will be a separate post about the Regency ball (which includes pictures of my Refreshing Apron in action and my new tiara!).
Our 1950s group at the diner. We had another patron take the group shot and she sort of cut off people’s heads, but we’re grateful for the photo nonetheless.I rather loved the aqua and pink color scheme, which included the aqua/green coke water glasses.
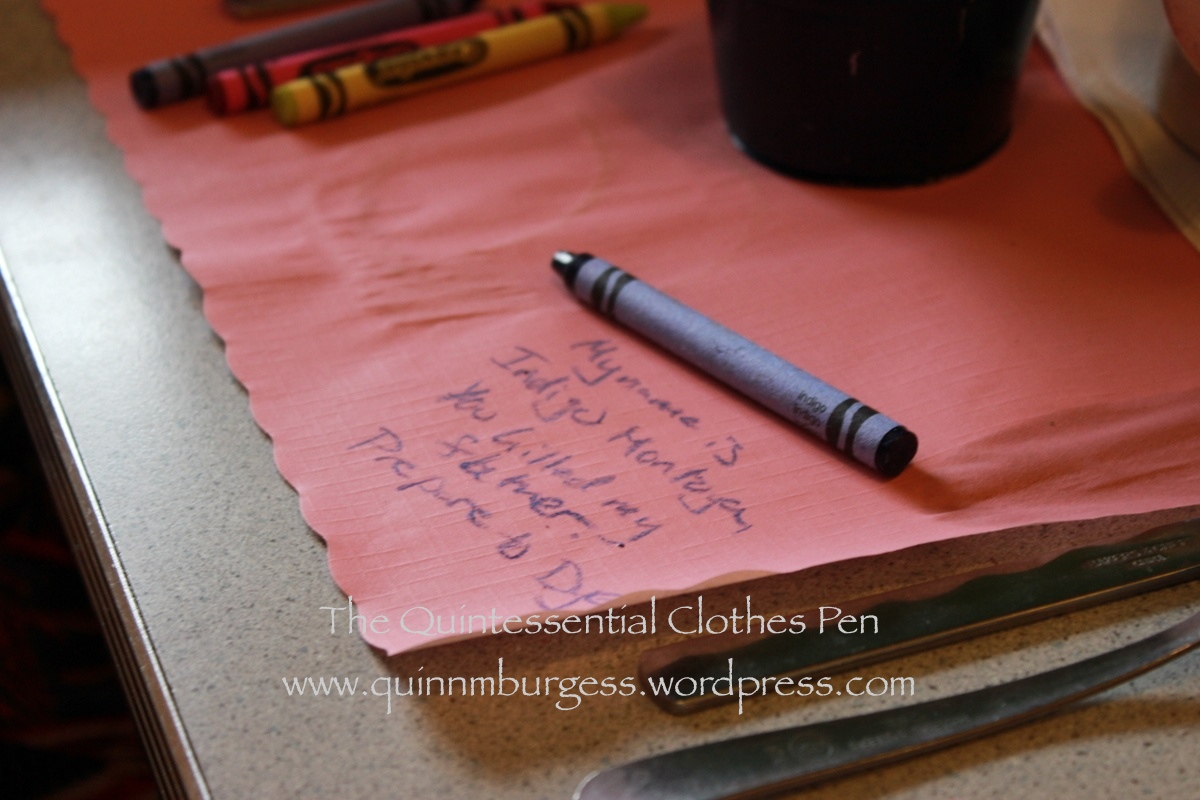
I noticed crayons on another table the waitresses were clearing off and asked if we could have them… because you never really stop being a child! Though I have to say I was more easily inspired when I was a child. It was hard to come up with something to draw!
Crayons!“My name is Indigo Montoya. You killed my father. Prepare to dye.” The crayon color was Indigo, and the reference is from The Princess Bride.Doodling away. We were competing to see who could draw a better record.Here’s mine. It’s hard to draw a record with crayons! Do the music notes help?And here I am, drawing away. I really like this picture! (I’m not making a crazy face!)
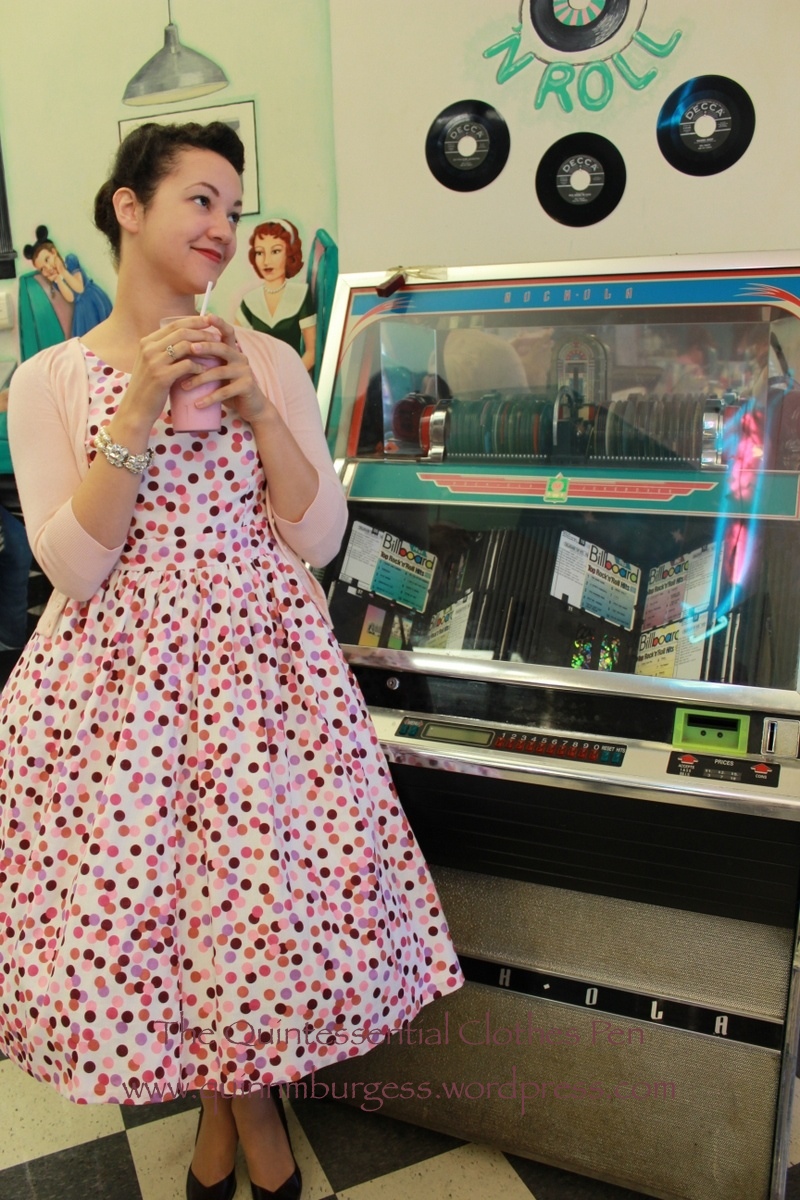
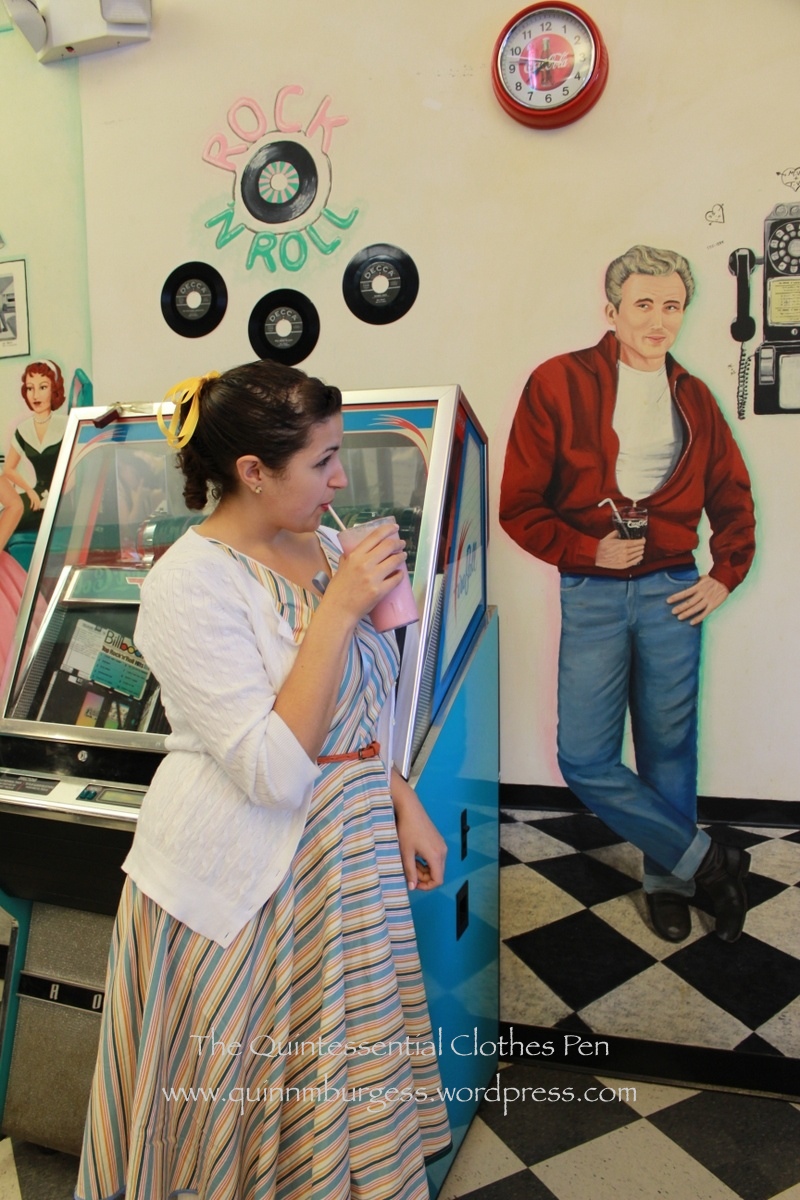
Now is as good a time as any to talk about my hair and accessories (especially since I’m about to subject you to a series of me-shots). I tried to do rolls with my hair. I think they were quite successful, though they did take a very long time. I had to dry my hair, straighten my hair, then curl my hair while adding hairspray and trying to contain the waves and the frizz… I aimed for an asymmetrical style but in some pictures it looks like I just have an odd halo of hair on one side of my head and not the other. I ran out of time and inspiration for the back, so my hair is just in a bun. It’s the first time I’ve attempted this sort of hair style, so I certainly don’t have lots of practice. Ah well, I like that I look very put together and made up–that just seems like a 50s way to be.
Unfortunately, the juke box isn’t functional. But it’s a great photo opportunity!
Oh right, and accessories! Well, I’ve got a modern sweater from Old Navy. I’ve got Nine West brown heels (a little tall for the 50s, but other than that they have a great shape). And I’ve got a faux pearl and jewel bracelet (another of the costume jewelry presents from my mom). Thanks mom!
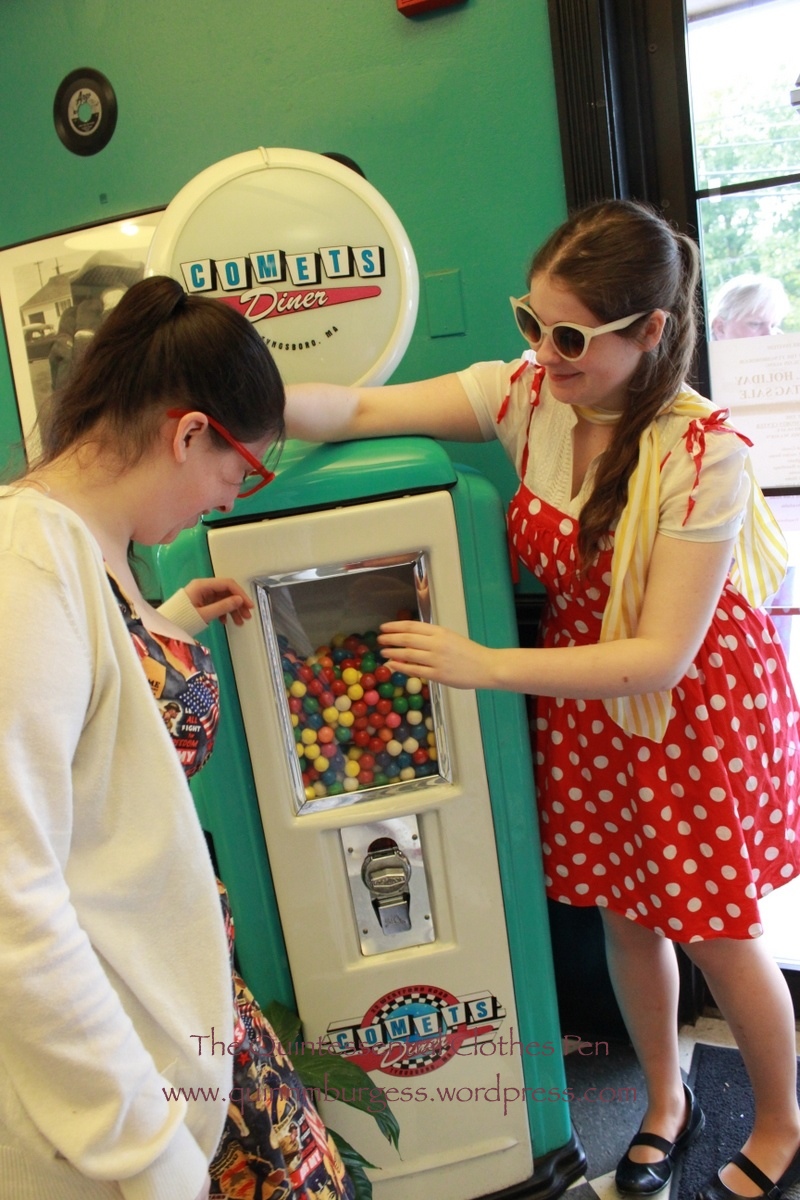
Posing with someone else’s shake. But it’s pink, so it had to be done. I’m pretty bad at posing. There are lots of pictures where I’m just making awkward faces…One of my favorite pictures! I love the painted people in the background, and that I’m not making a crazy face.See? Half halo head. Anyway, I like this picture, too.The actual owner of the pink shake also posed by the juke box. That guy on the wall is pretty funny.Gumball machine!
Finally, step outside and there’s a cute scarecrow waiting for you (at least during the month of October…)!
Shaking hands with Mr. Scarecrow.Ditzy faces. Oh hey, my hair looks less dorky in these scarecrow pictures. It really depends on the angle!
See? So many smiles. Next stop will be the side of the road where we stopped to take fall color pictures…
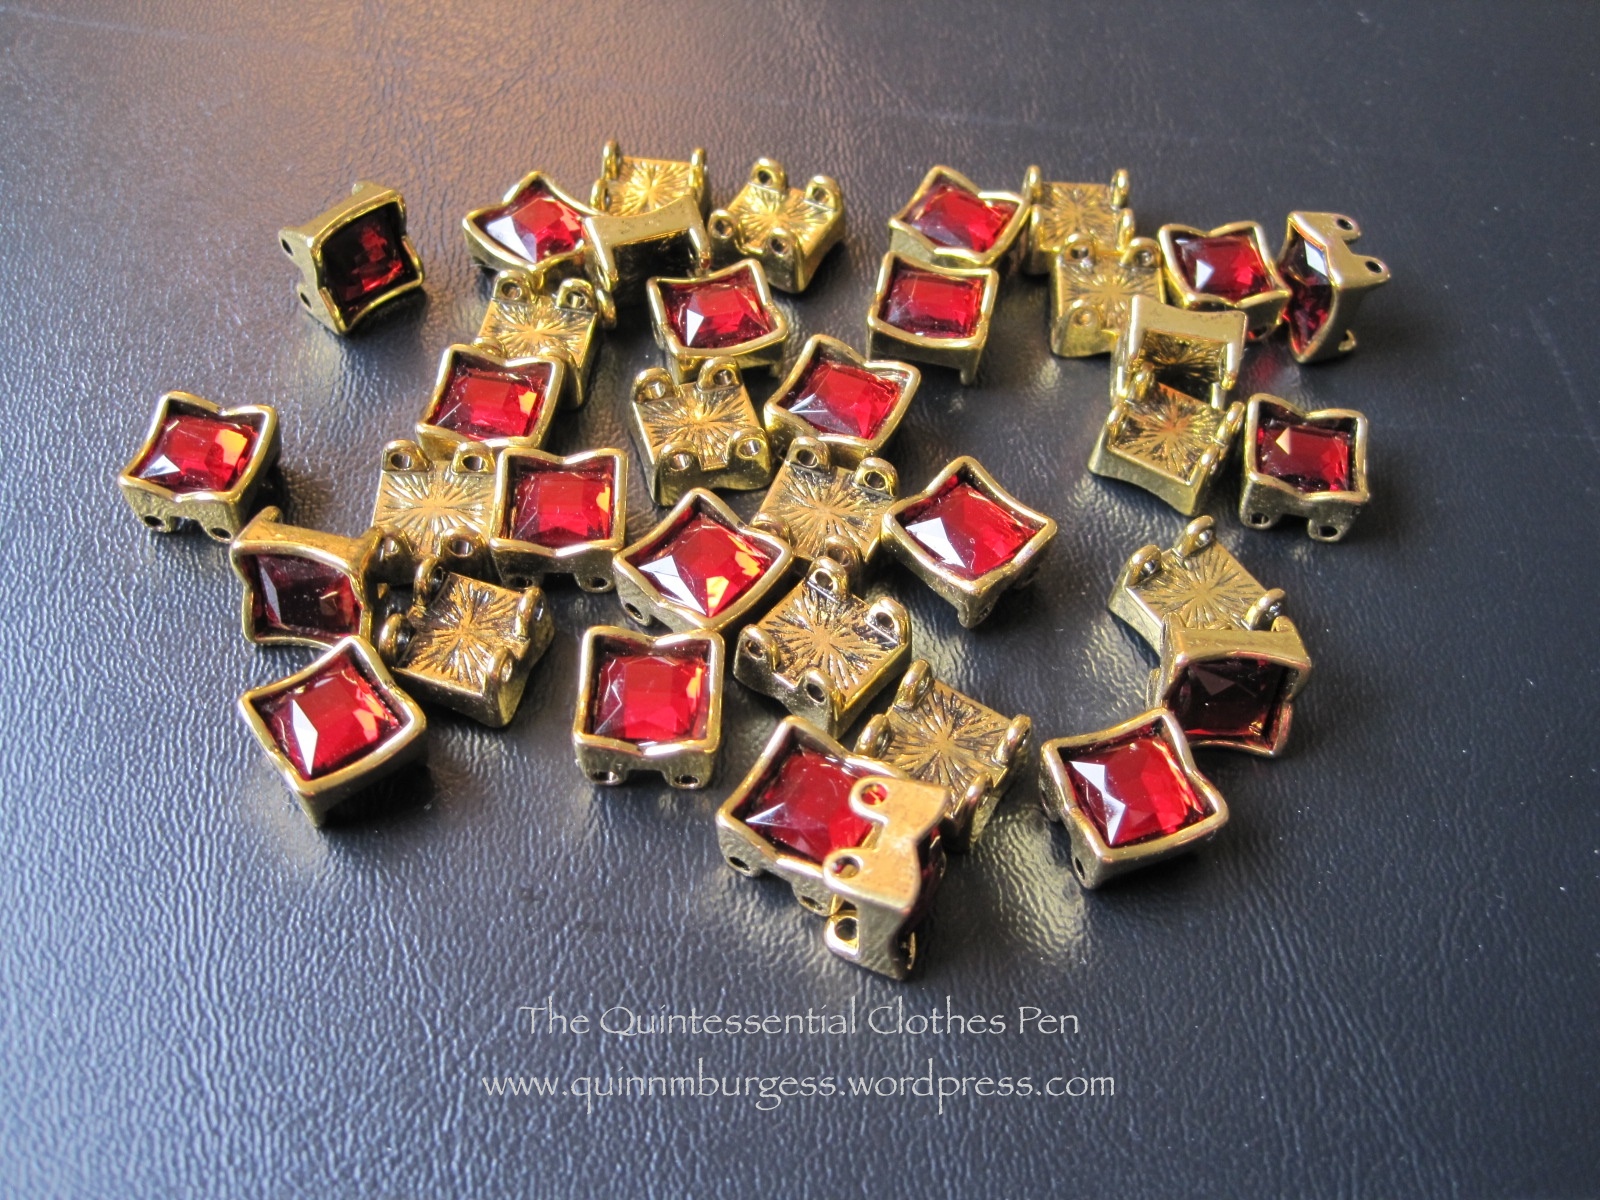
Fabric: None! But I started with two modern bracelets that were a gift from my mom.
Pattern: None.
Year: Loosely 1790-1820, but who knows, perhaps this will find a use in another period as well!
Notions: Gold wire and hot glue.
How historically accurate?: I give it 50%. This is absolutely on the more on the historically inspired side of things rather than the accurate historic costume side of things. The jewels are almost certainly plastic and the design is based on general Regency styles rather than any specific inspiration. Oh, they also did not have hot glue back then…
Hours to complete: 2.
First worn: Has not been worn yet, but will get worn to a Regency ball in Chelmsford, MA on October 5th!
Total cost: Free (the wire and the hot glue was in the stash)!
Here are some more shots of the construction of this tiara:
In the beginning: stretchy bracelets. Thanks mom!The loose jewels after I cut off the elastic.Another possible design. I decided against having some of the jewels turned on their corners. It would have been hard to engineer and, after all, simplicity was a popular style in the Regency!The back of the tiara, where you can see the wires holding it together. There is also a loop at the center of the bottom row of jewels so I can pin the tiara to my hair at that point to keep it from bouncing.There are wire loops at the ends of the tiara so I can pin it to my hair. The hot glue covers the ends of the wires so they don’t also catch my hair.
That’s all for now. When I wear this I’ll be sure to take more pictures!
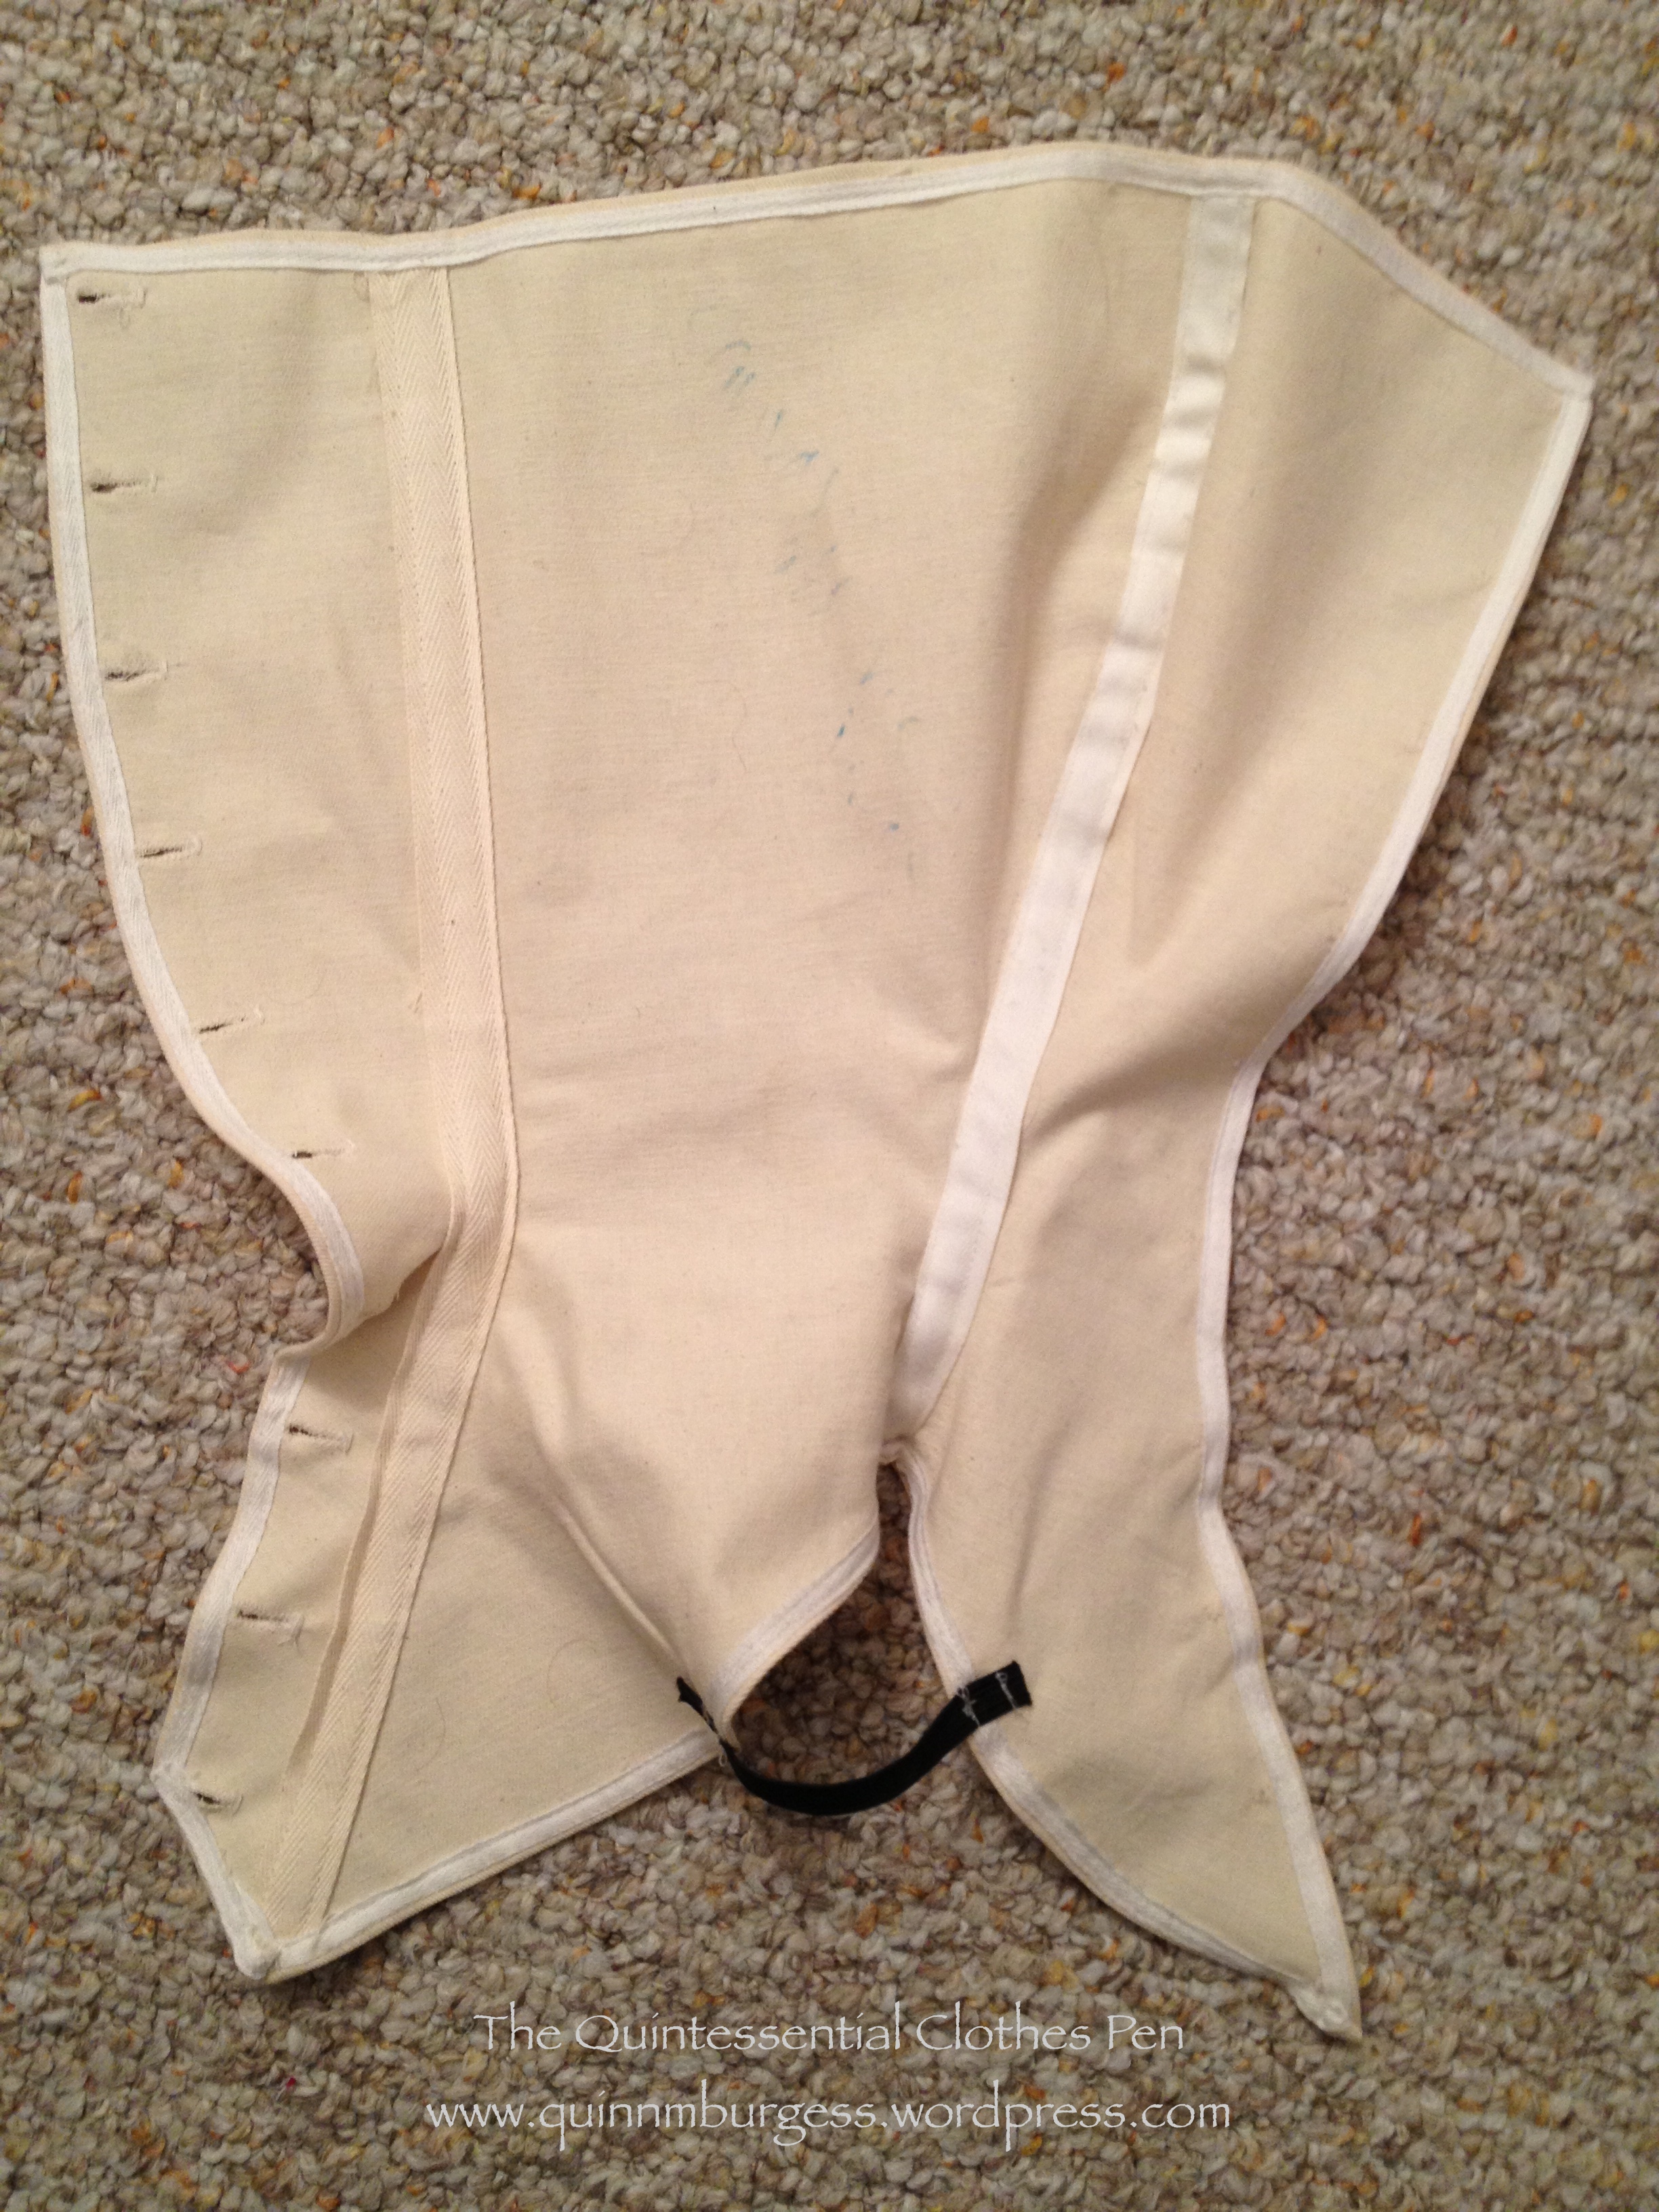
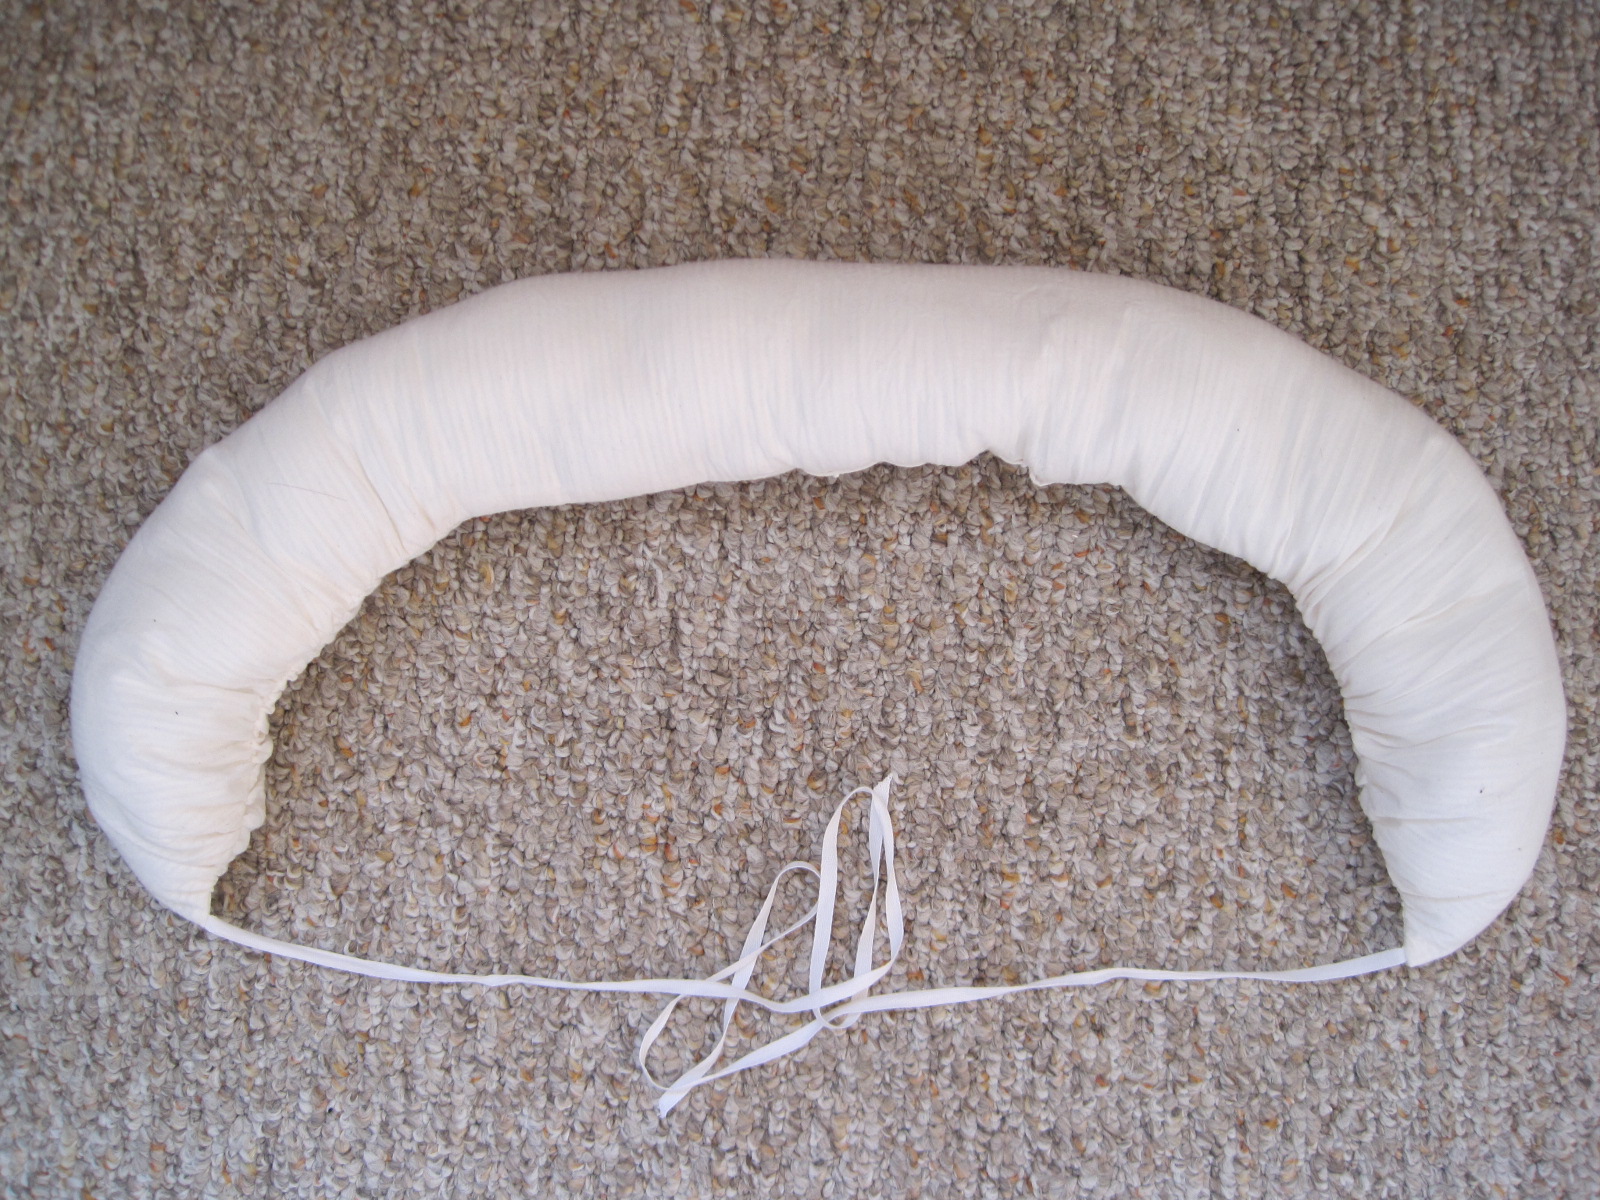
When I posted about my new apricot 18th century petticoat, I also mentioned that there was a sneak peak at my new bum roll in the pictures. Remember? The bum roll fulfills the HSF #15 Challenge: White. It’s a rather simple accessory, so there’s not a whole lot to say about it.
Ooo… A white bum roll!
The facts:
Fabric: About 10″ white striped cotton
Pattern: None, the bum roll is just a rectangle that’s gathered at the sides and tapered a little toward the front points.
Year: Loosely 1700-1780.
Notions: Thread, poly fill, 1/4″ white cotton tape for ties.
How historically accurate?: I give it 80%. Bum pads/rolls in the 18th century were probably not made of cotton or stuffed with poly fill. But the shape achieves the desired silhouette and is in the vein of research I have seen on 18th century bum rolls.
Hours to complete: 1
First worn: Well, Squishy wore it for pictures!
Total cost: The fabric was $1 a yard, so about 30 cents.
The gathers are what creates the crescent shape. It pulls in to be a tighter curve when tied around the body as well.
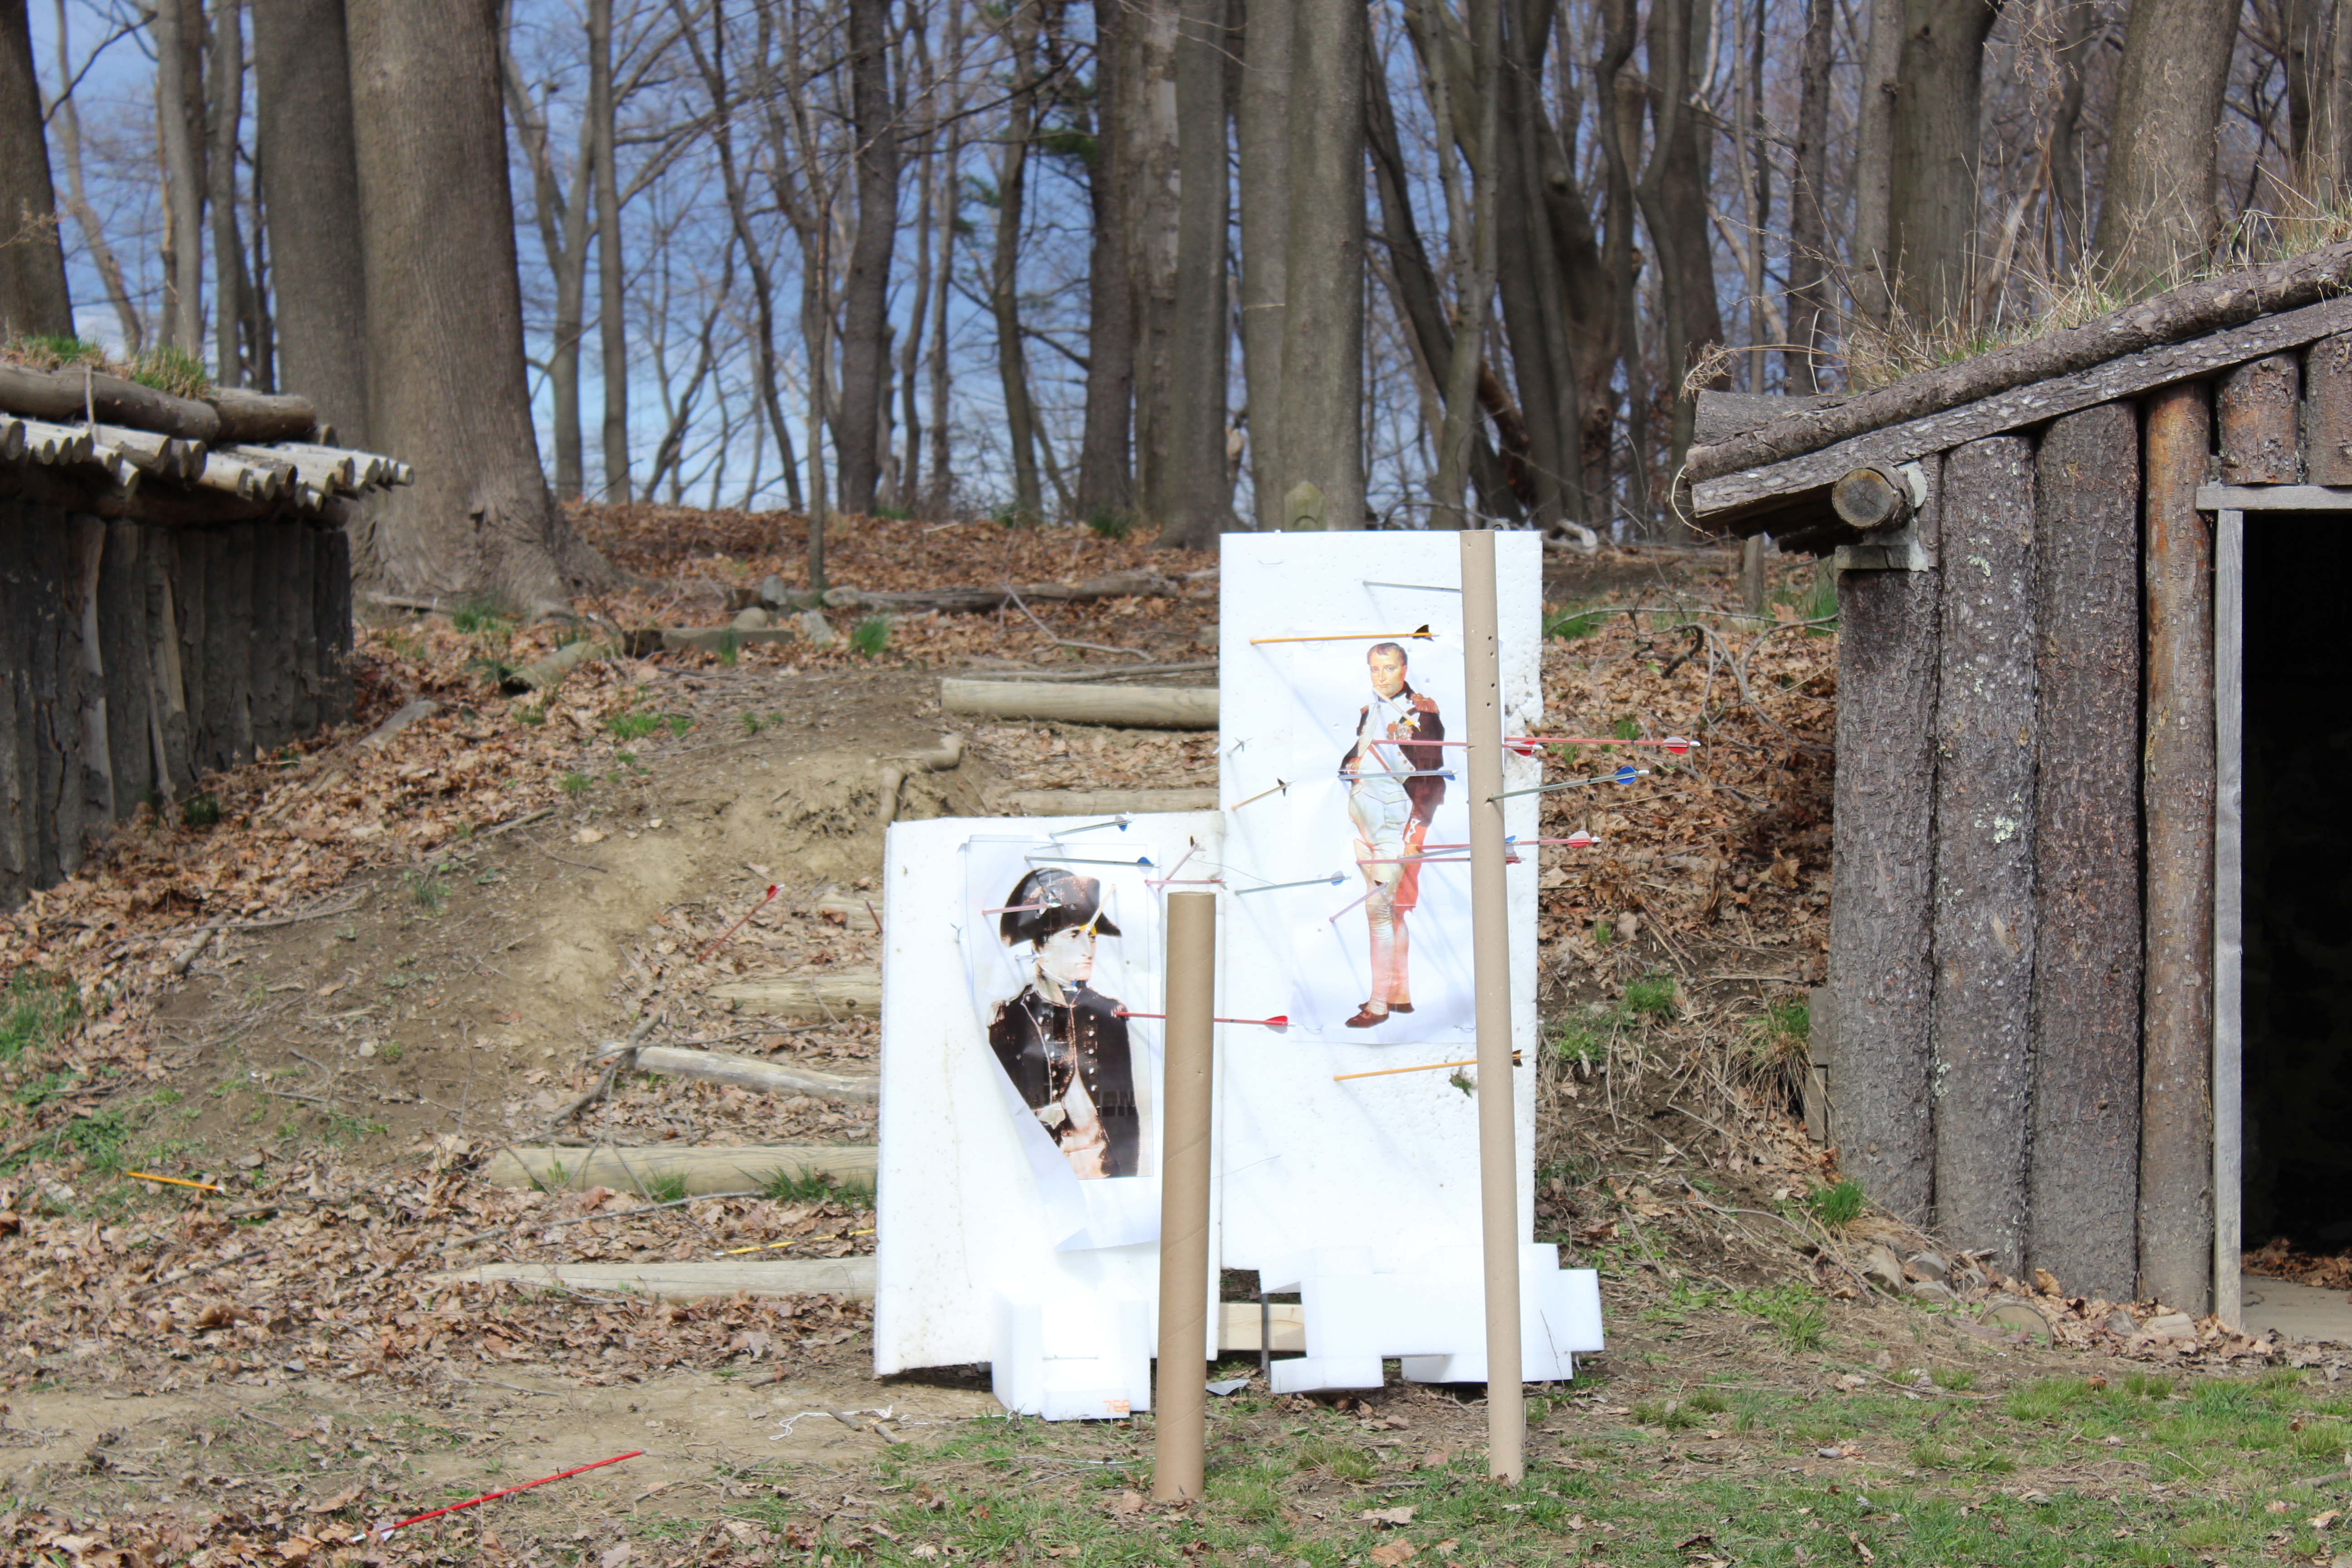
Not very long ago, I shared the first section of Regency Dance Weekend photos: Settling In–about dance classes, an 1807 house, and an informal dance. Now it’s time for Part II: relating to archery (yay!) and outdoor lounging. These outdoor events took place on Sunday afternoon at Pioneer Village in Salem, MA. The village had been opened specifically for our use, so we had our run of the place!
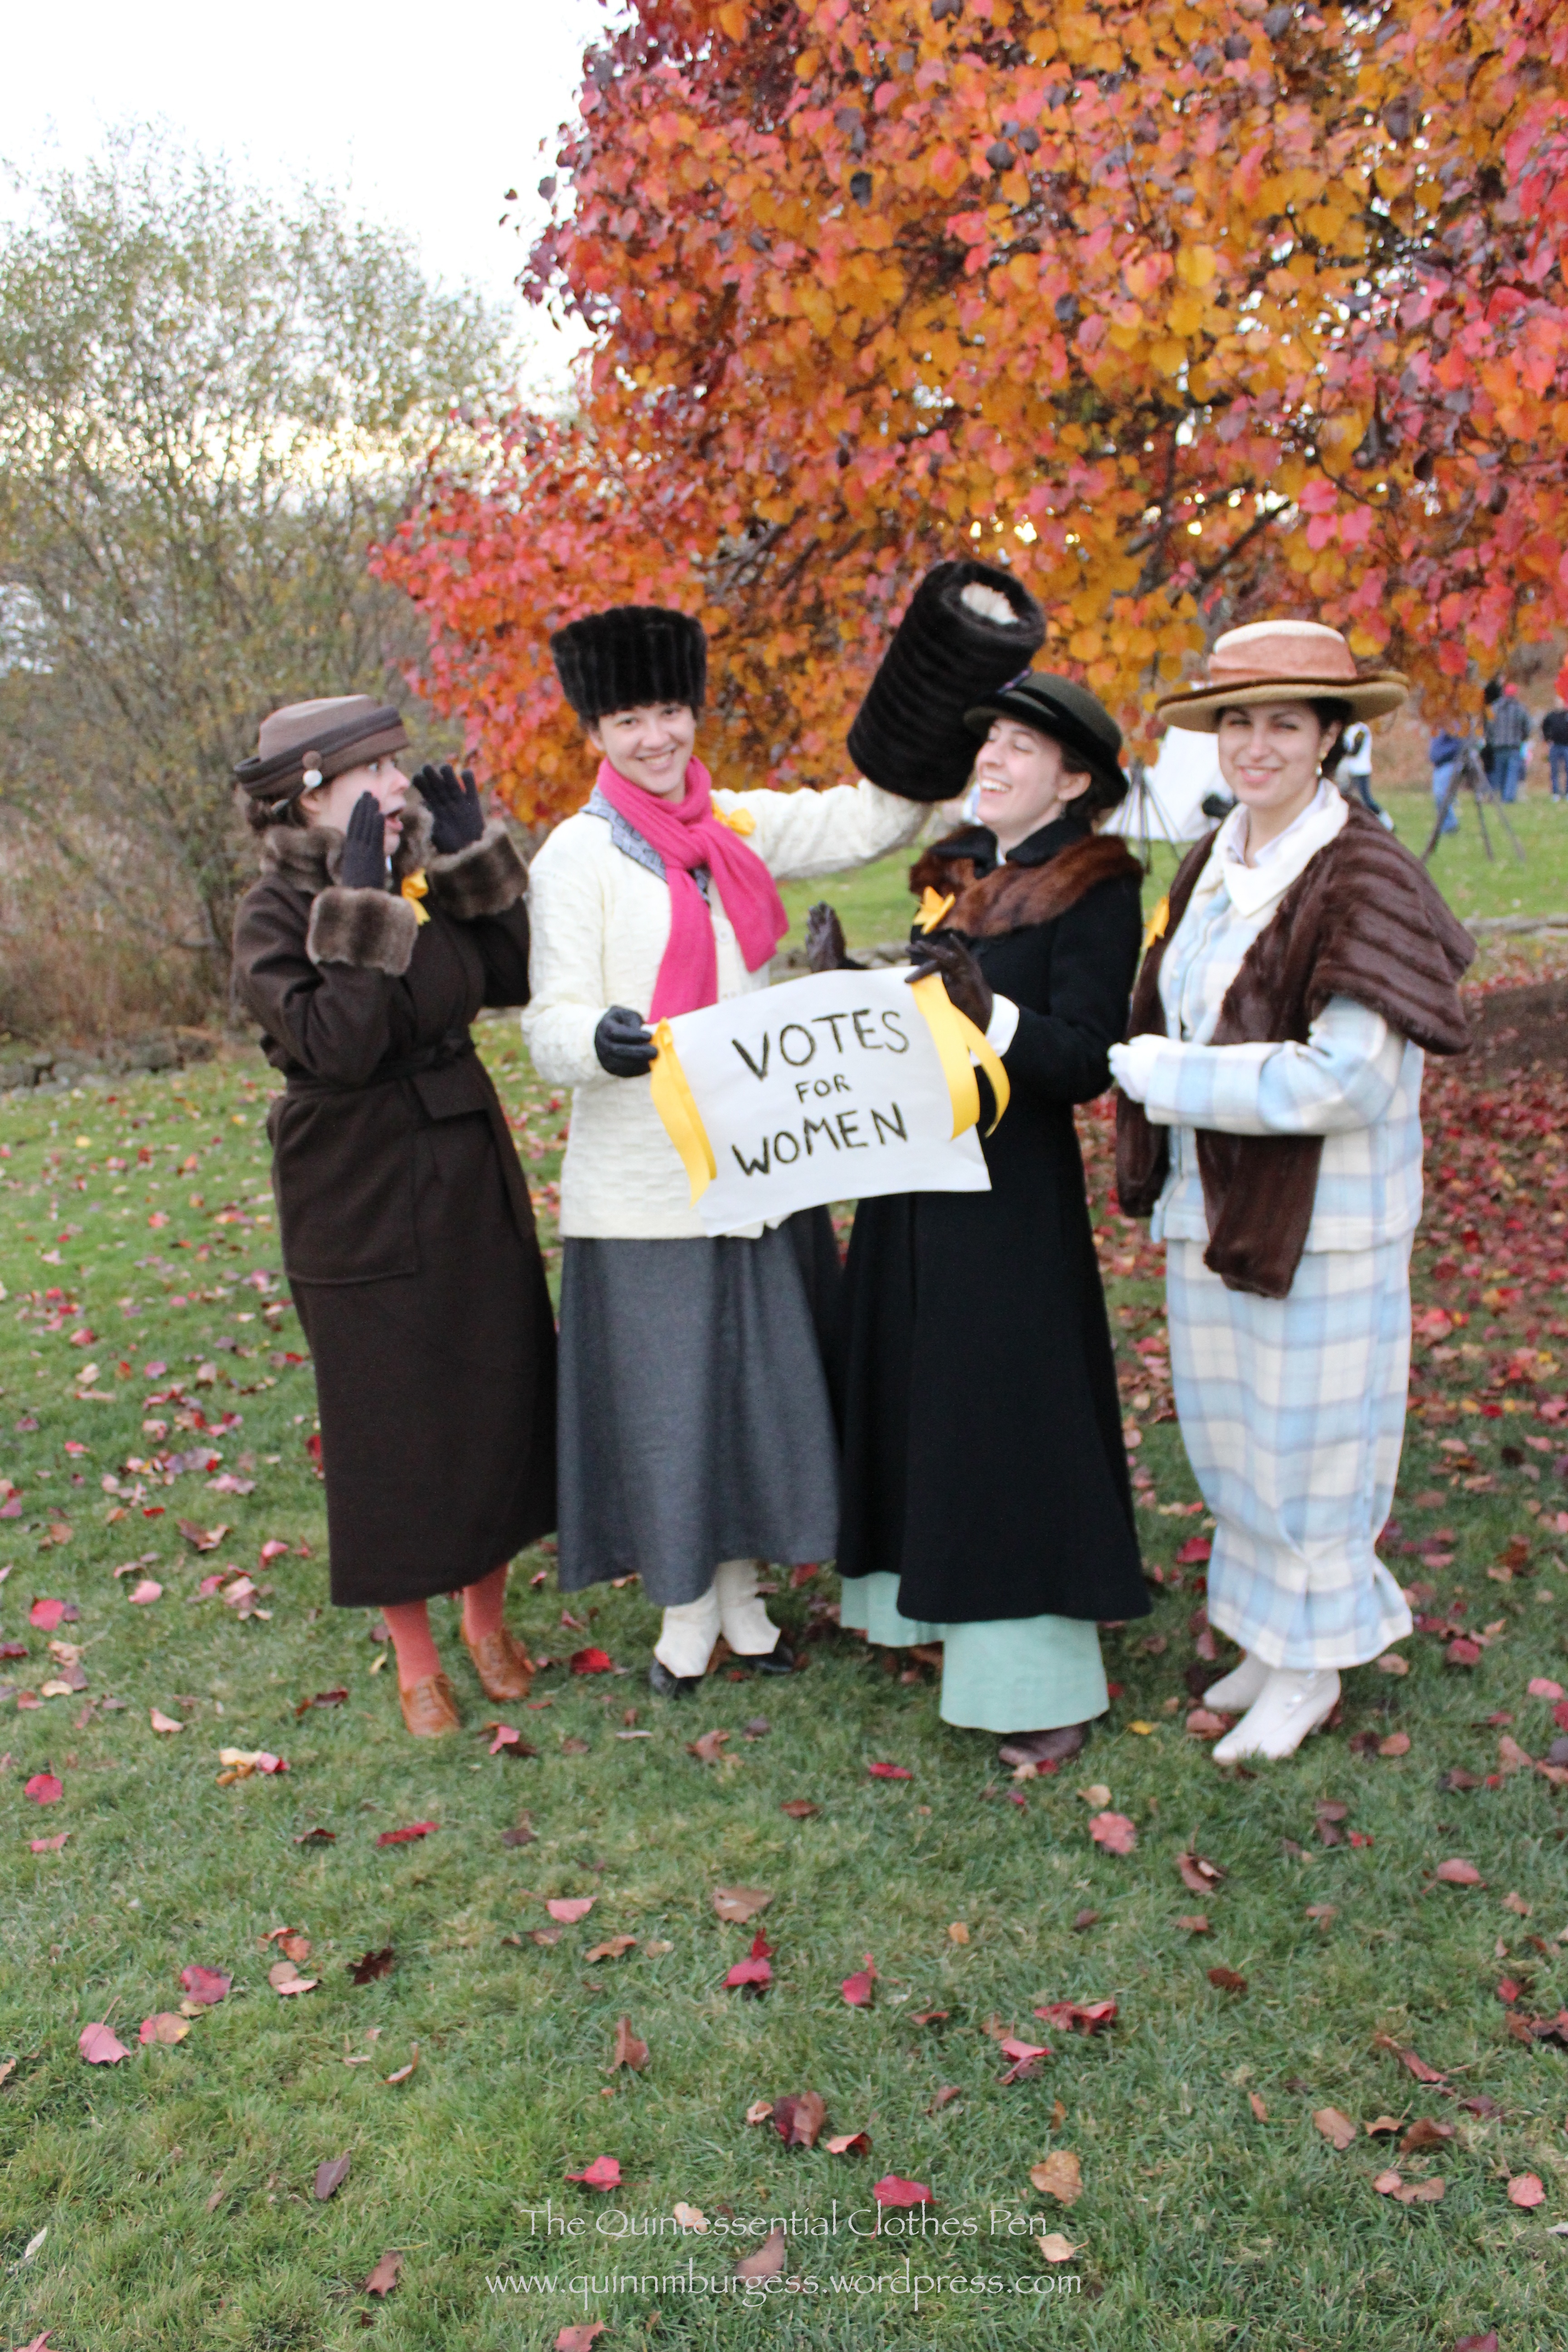
Archery was the major activity and took up most of the time allotted before preparing for the Grand Ball and Reception that evening. Given that it was a Regency period event, there were plans made (and executed) to use images of Napoleon as targets, which was super silly and fun. I think there were perhaps 30-40 people who took part in this daytime event.
Our instructor teaching us basics and safety.I think most people were pretty successful at hitting the target at least sometimes.There he is! Napoleon is lurking on the left.Archery in a bonnet is an extra challenge, but we made it work.Recognize that dress and bonnet? And perhaps the spencer? This is your first glimpse of my new clothes!We got him, and the tubes he was hiding behind!There were replacement Napoleons for when the first few had been well hit.
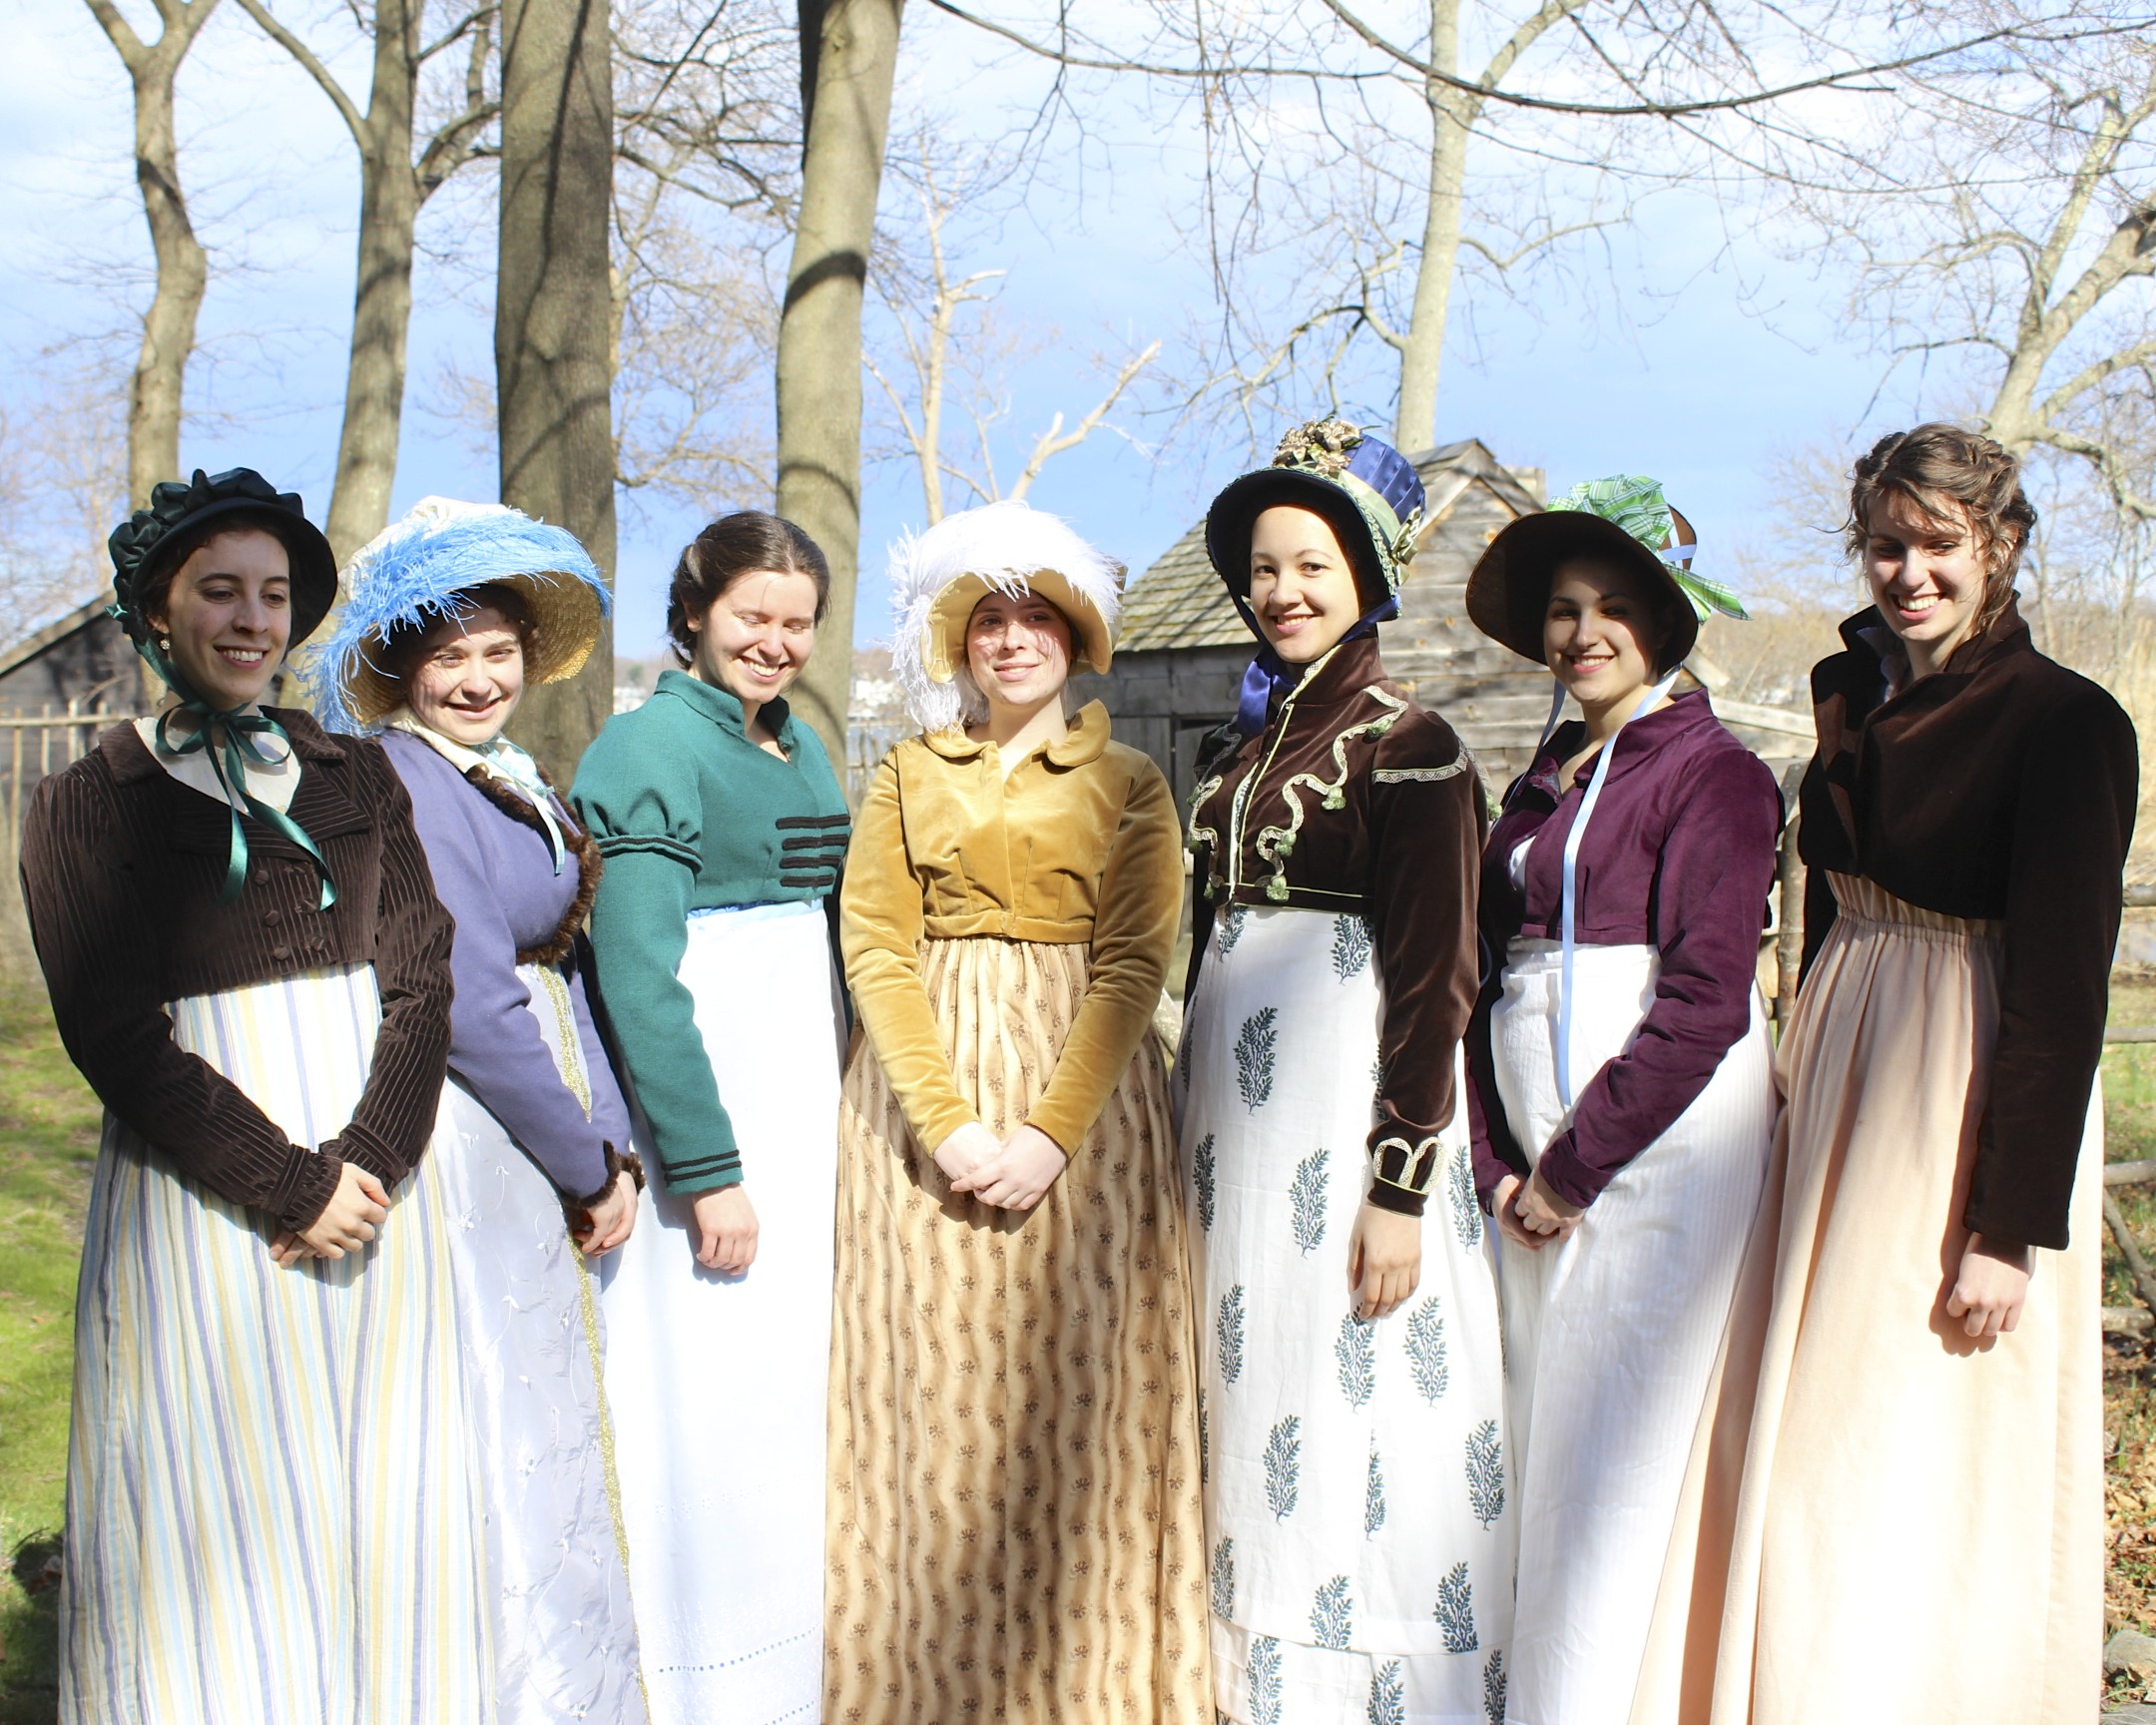
It was pretty cold out, actually, especially when we weren’t distracted by archery! Nevertheless, we prevailed for hours and were still willing to stay outside and lounge for more pictures even after archery was complete.
New clothes amongst the trees.Striking a pose on the footbridge.Climbing a fence. Perhaps while out on a stroll? I feel like this is something the more athletic Jane Austen characters do.New long sleeved day dress and a new bonnet. You know how it is when someone is wearing something new. It always requires pictures!I was very pleased with how my new dress and bonnet look and feel, and I’m so pleased that they coordinate so well with the spencer. Yay!Spencer time. It’s so neat that we’ve built up our wardrobes and are well equipped with dresses and spencers! Bonnets are on most sewing lists, too, which is so much fun!
Next up is a post specifically dedicated to my new tree gown!