Introducing the “Mar-pril Regency Sew Weekly”

JPEG Regency Sew Weekly

What is that, you ask? It’s a group sew along!

Why? Well, you see, in April my friends and I will be participating in a Regency Intensive Dance Weekend hosted by the Commonwealth Vintage Dancers. There will be lots of dance classes in modern clothes, but also balls and day events in Regency clothing! Of course that means new clothes to be sewn during the months of March and April and some of us keep our motivation going better than others. This sew along is intended to encourage and sustain the motivation of all of us (and anyone else who is interested in participating!).

regencyweekend-2013s
April 13-14, 2013 in Salem, MA. Hosted by the Commonwealth Vintage Dancers

What do you have to do? Sew! Really, though, that’s it. You can make your goals as small or large as you need to. All you have to do is complete the goals as they come up, and then share your progress. That will keep you accountable, and hopefully encourage you to stay motivated.

Goal #1 (due March 18): Under Wear Ideas to complete this goal: make from scratch, finish, or trim something worn under another garment, a petticoat, underdress, shirt, or waistcoat could fall into that category, or maybe this is a great opportunity to trim a finished garment already in your closet.

Goal #2 (due March 25): Evening Wear Ideas to complete this goal: an all new garment (gown, breeches, waistcoat, or tailcoat, for example), finishing a garment in progress, trimming an already finished garment, sewing something to keep you warm while on your way to an evening event, or maybe completing accessories to wear or take with you to an evening event.

Goal #3 (due April 1): Day Wear Ideas to complete this goal: making, finishing, or trimming a dress, a spencer, a pelisse, a tailcoat, or a waistcoat, or perhaps completing accessories to wear or take with you to a day event.

Goal #4 (due April 8): Accessories Ideas to complete this goal: reticules, chemisettes, parasols, bonnets, gloves, hats, shoes, boots, stockings… this is a soft and easy goal so if you didn’t make one of the first three goals, this gives you a great catch-up opportunity!

Goal #5 (due April 12): Anything Left! You know there are always things you hoped to finish earlier but you’re still trying to finish them up at the last minute? Make this a goal to complete whatever it is you didn’t complete before now. Maybe that’s another accessory, or a hem, or some trim, or maybe it’s just gathering your thoughts and your clothes to pack for the weekend.

How do you participate? Take the MpRSW (Mar-pril Regency Sew Weekly) image at the top of this post and add it to your blog, if you have one. Then, as you complete the goals, post about it on your blog. Don’t forget to leave a comment here with a link back to your blog post!

Do you have to participate in all of the challenges to participate? Nope! Pick and choose as you wish. The overall goal is just to inspire creativity and completion of Regency related sewing projects!

Do you have to be attending the Regency Intensive Dance Weekend to participate? Of course not! Again, the goal is just to inspire creativity and completion of sewing projects!

If you’re also participating in the Historical Sew Fortnightly, as I am, then perhaps there will be times where the two sew-alongs overlap for you. I know that my HSF #6: Stripes (due March 25) item will also fit into a MpRSW goal, since it’s a Regency item. Other upcoming HSF challenges include #7: Accessorize (due April 8), which should be easy to use for overlap, since the MpRSW #4 goal: Accessories, is due the same day, and #8: By The Sea (due April 22).

Finally, let me just say that it would be pretty awesome if you’re out there in the blogging world and want to join in! This sew along is smilingly aimed at all of you who might enjoy a helpful hand of motivation to be fully sewn and fully clothed (ahead of time) for the Regency Intensive Dance Weekend, but I hope that doesn’t discourage you from participating, even if you won’t be at that event. Hopefully some of my sewing motivation will be passed on!

Lovely Clothes, Lovely Ball: Part II (Pride and Prejudice Ball 2013)

Last post, I shared pictures of my new 1813 evening dress and other related pretty clothes. This time we’re on to photos during the ball!

IMG_4218
Dancing a waltz, Regency style.
IMG_9376
I believe this is a gallop.
IMG_9209
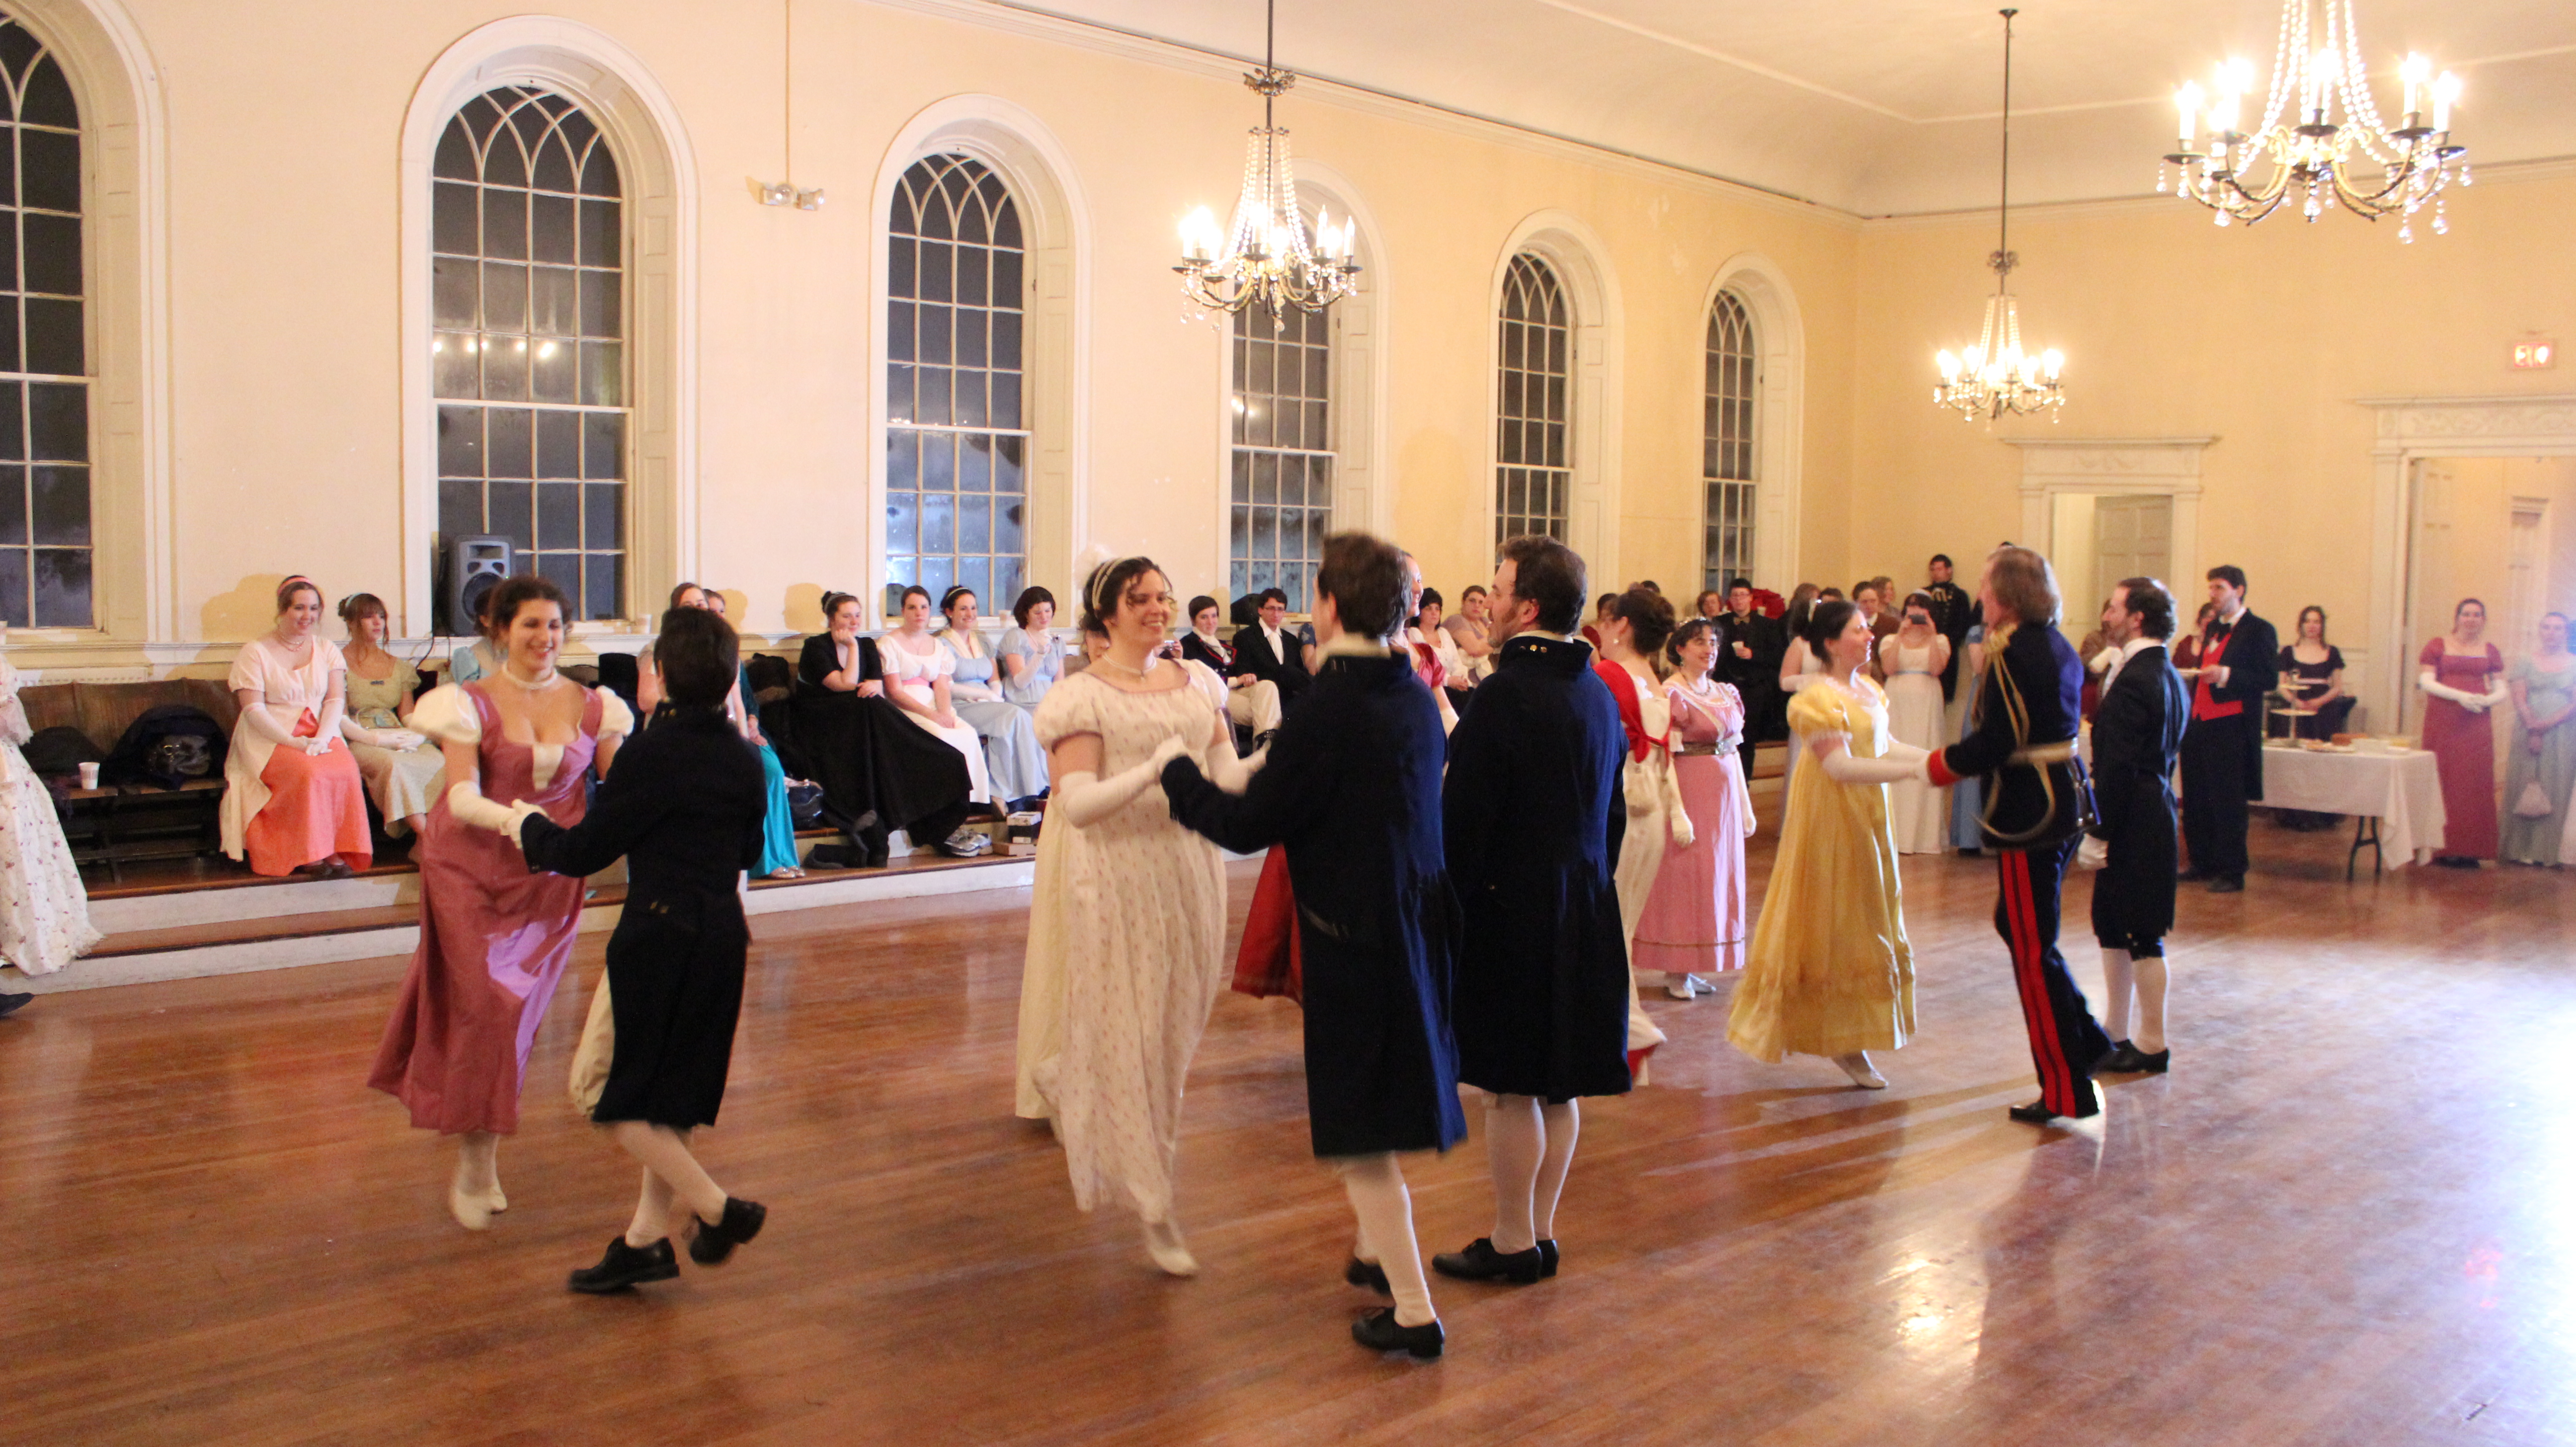
A hall full of eager dancers makes for a joyful ball.
IMG_9201
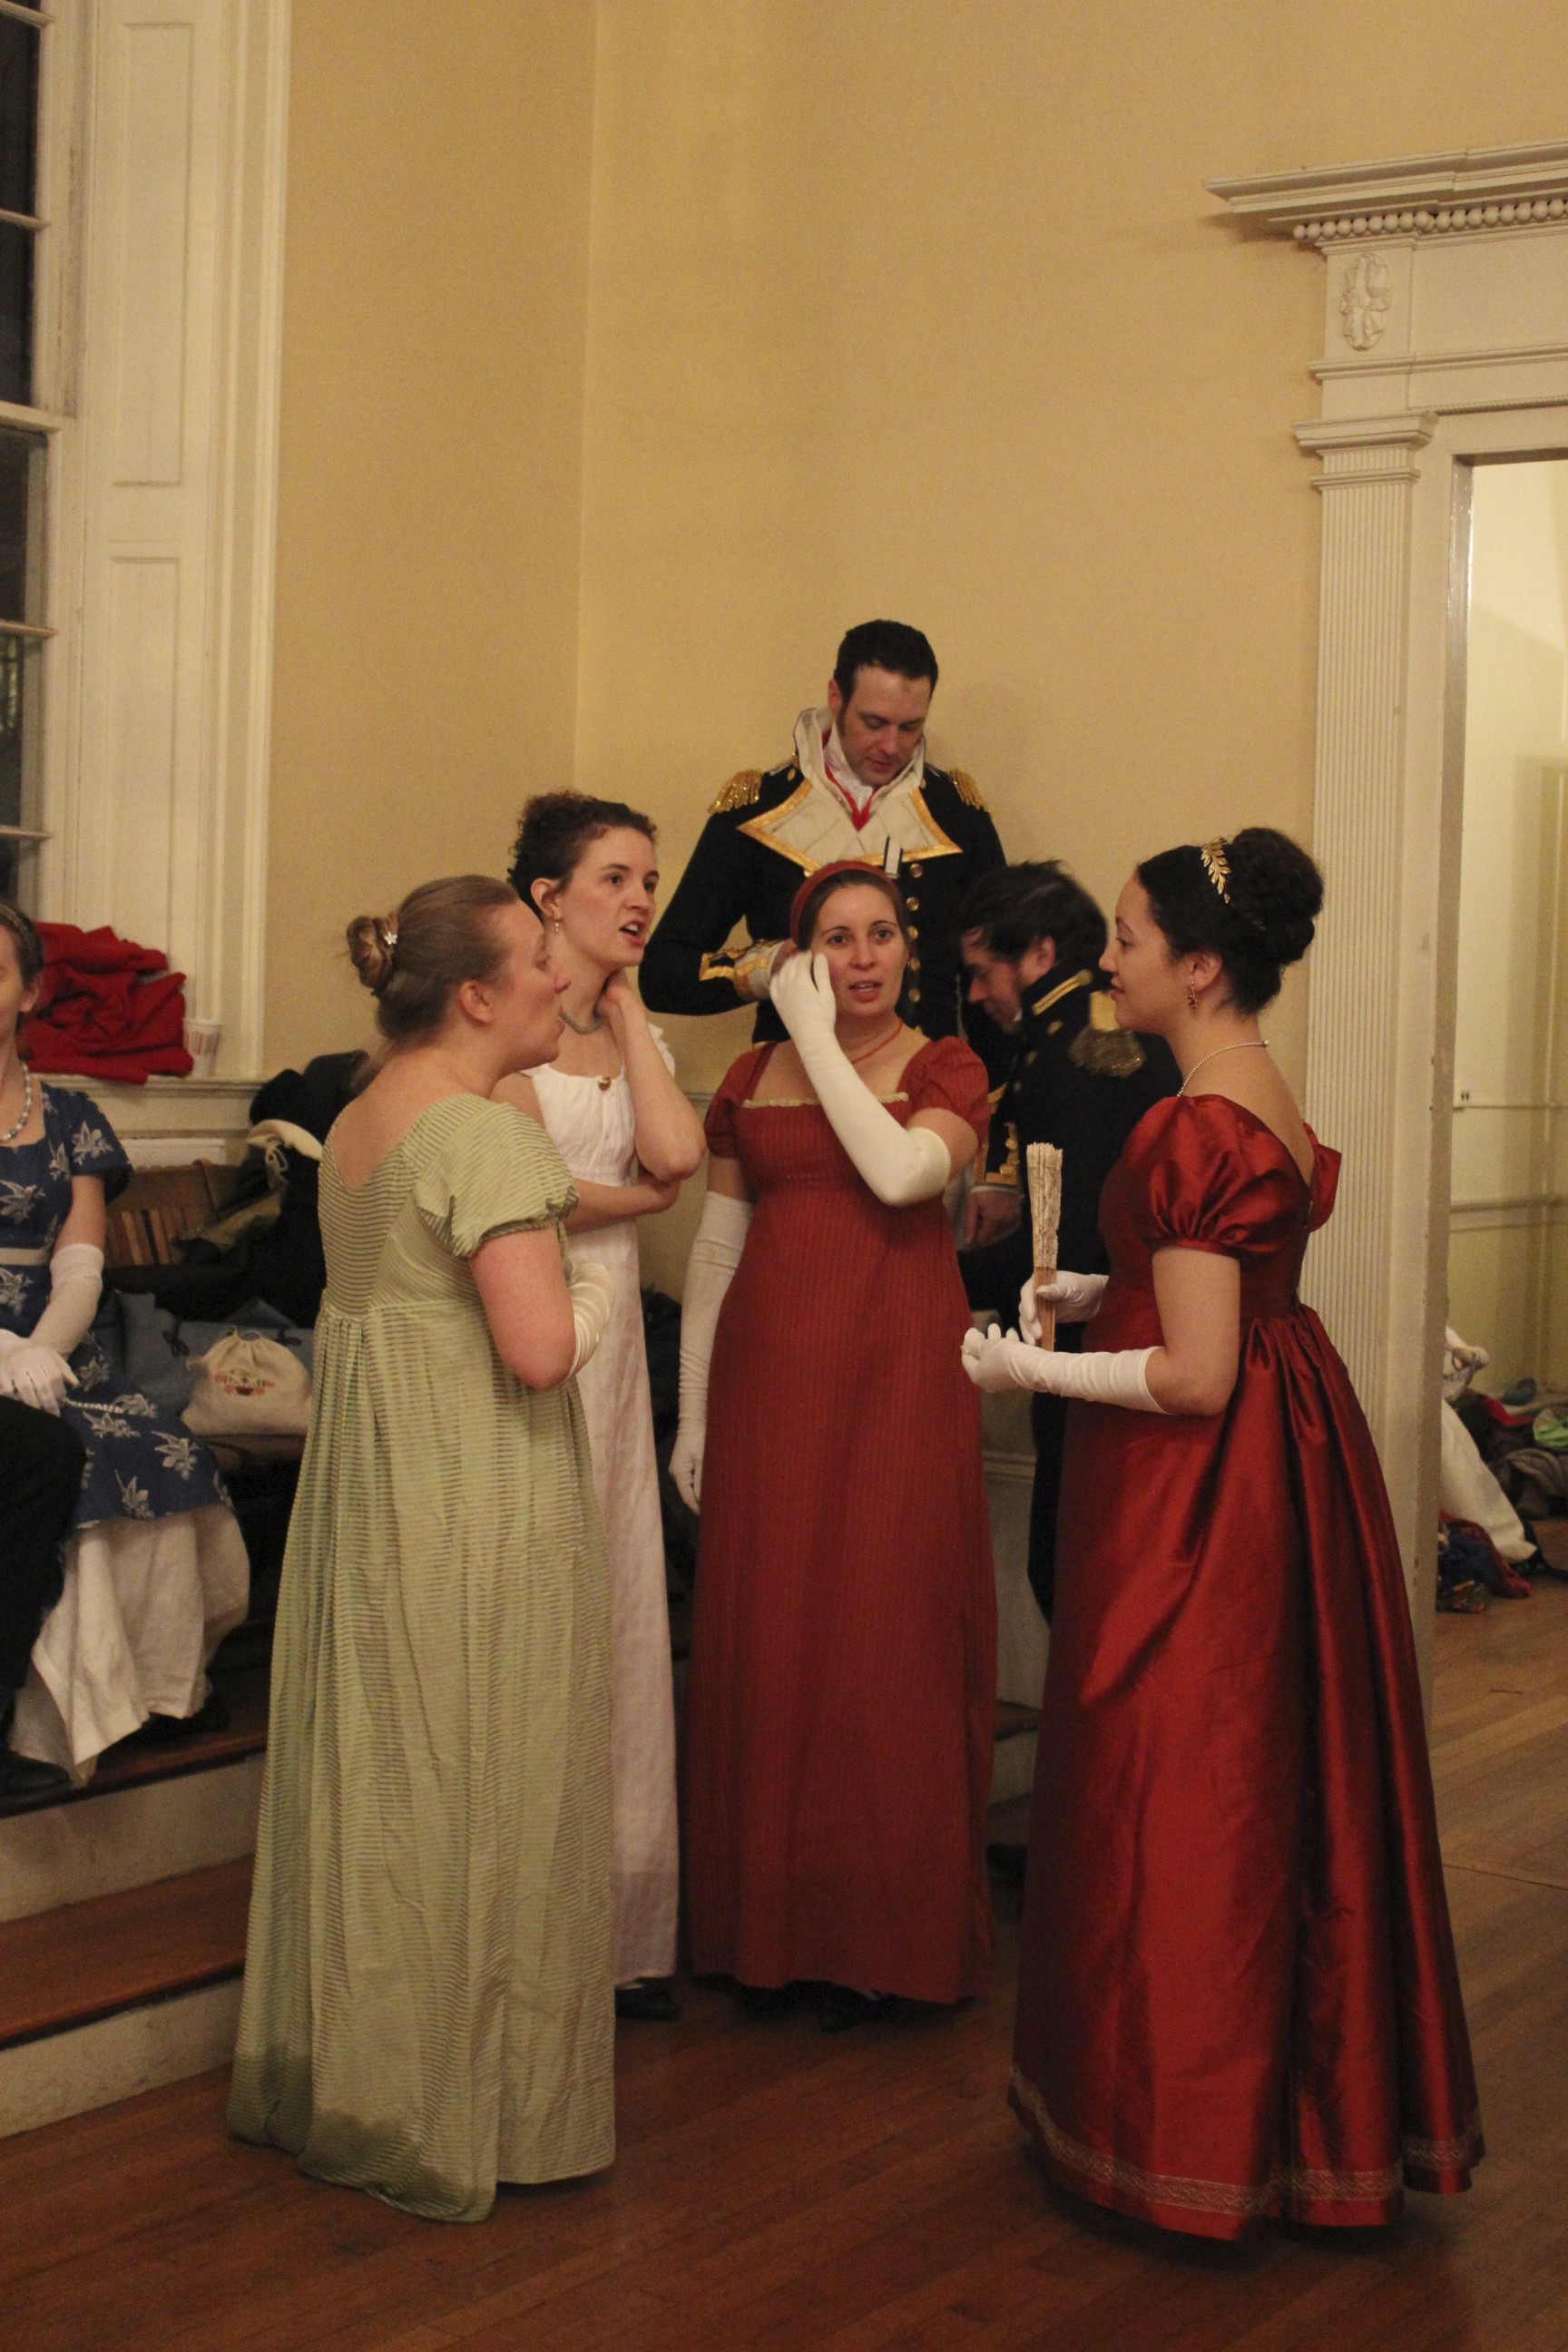
Just coming in from outdoors, it was nice to greet new people and see old friends.
IMG_9284
You chat.
IMG_9286
And then you smile for the camera.
IMG_9306
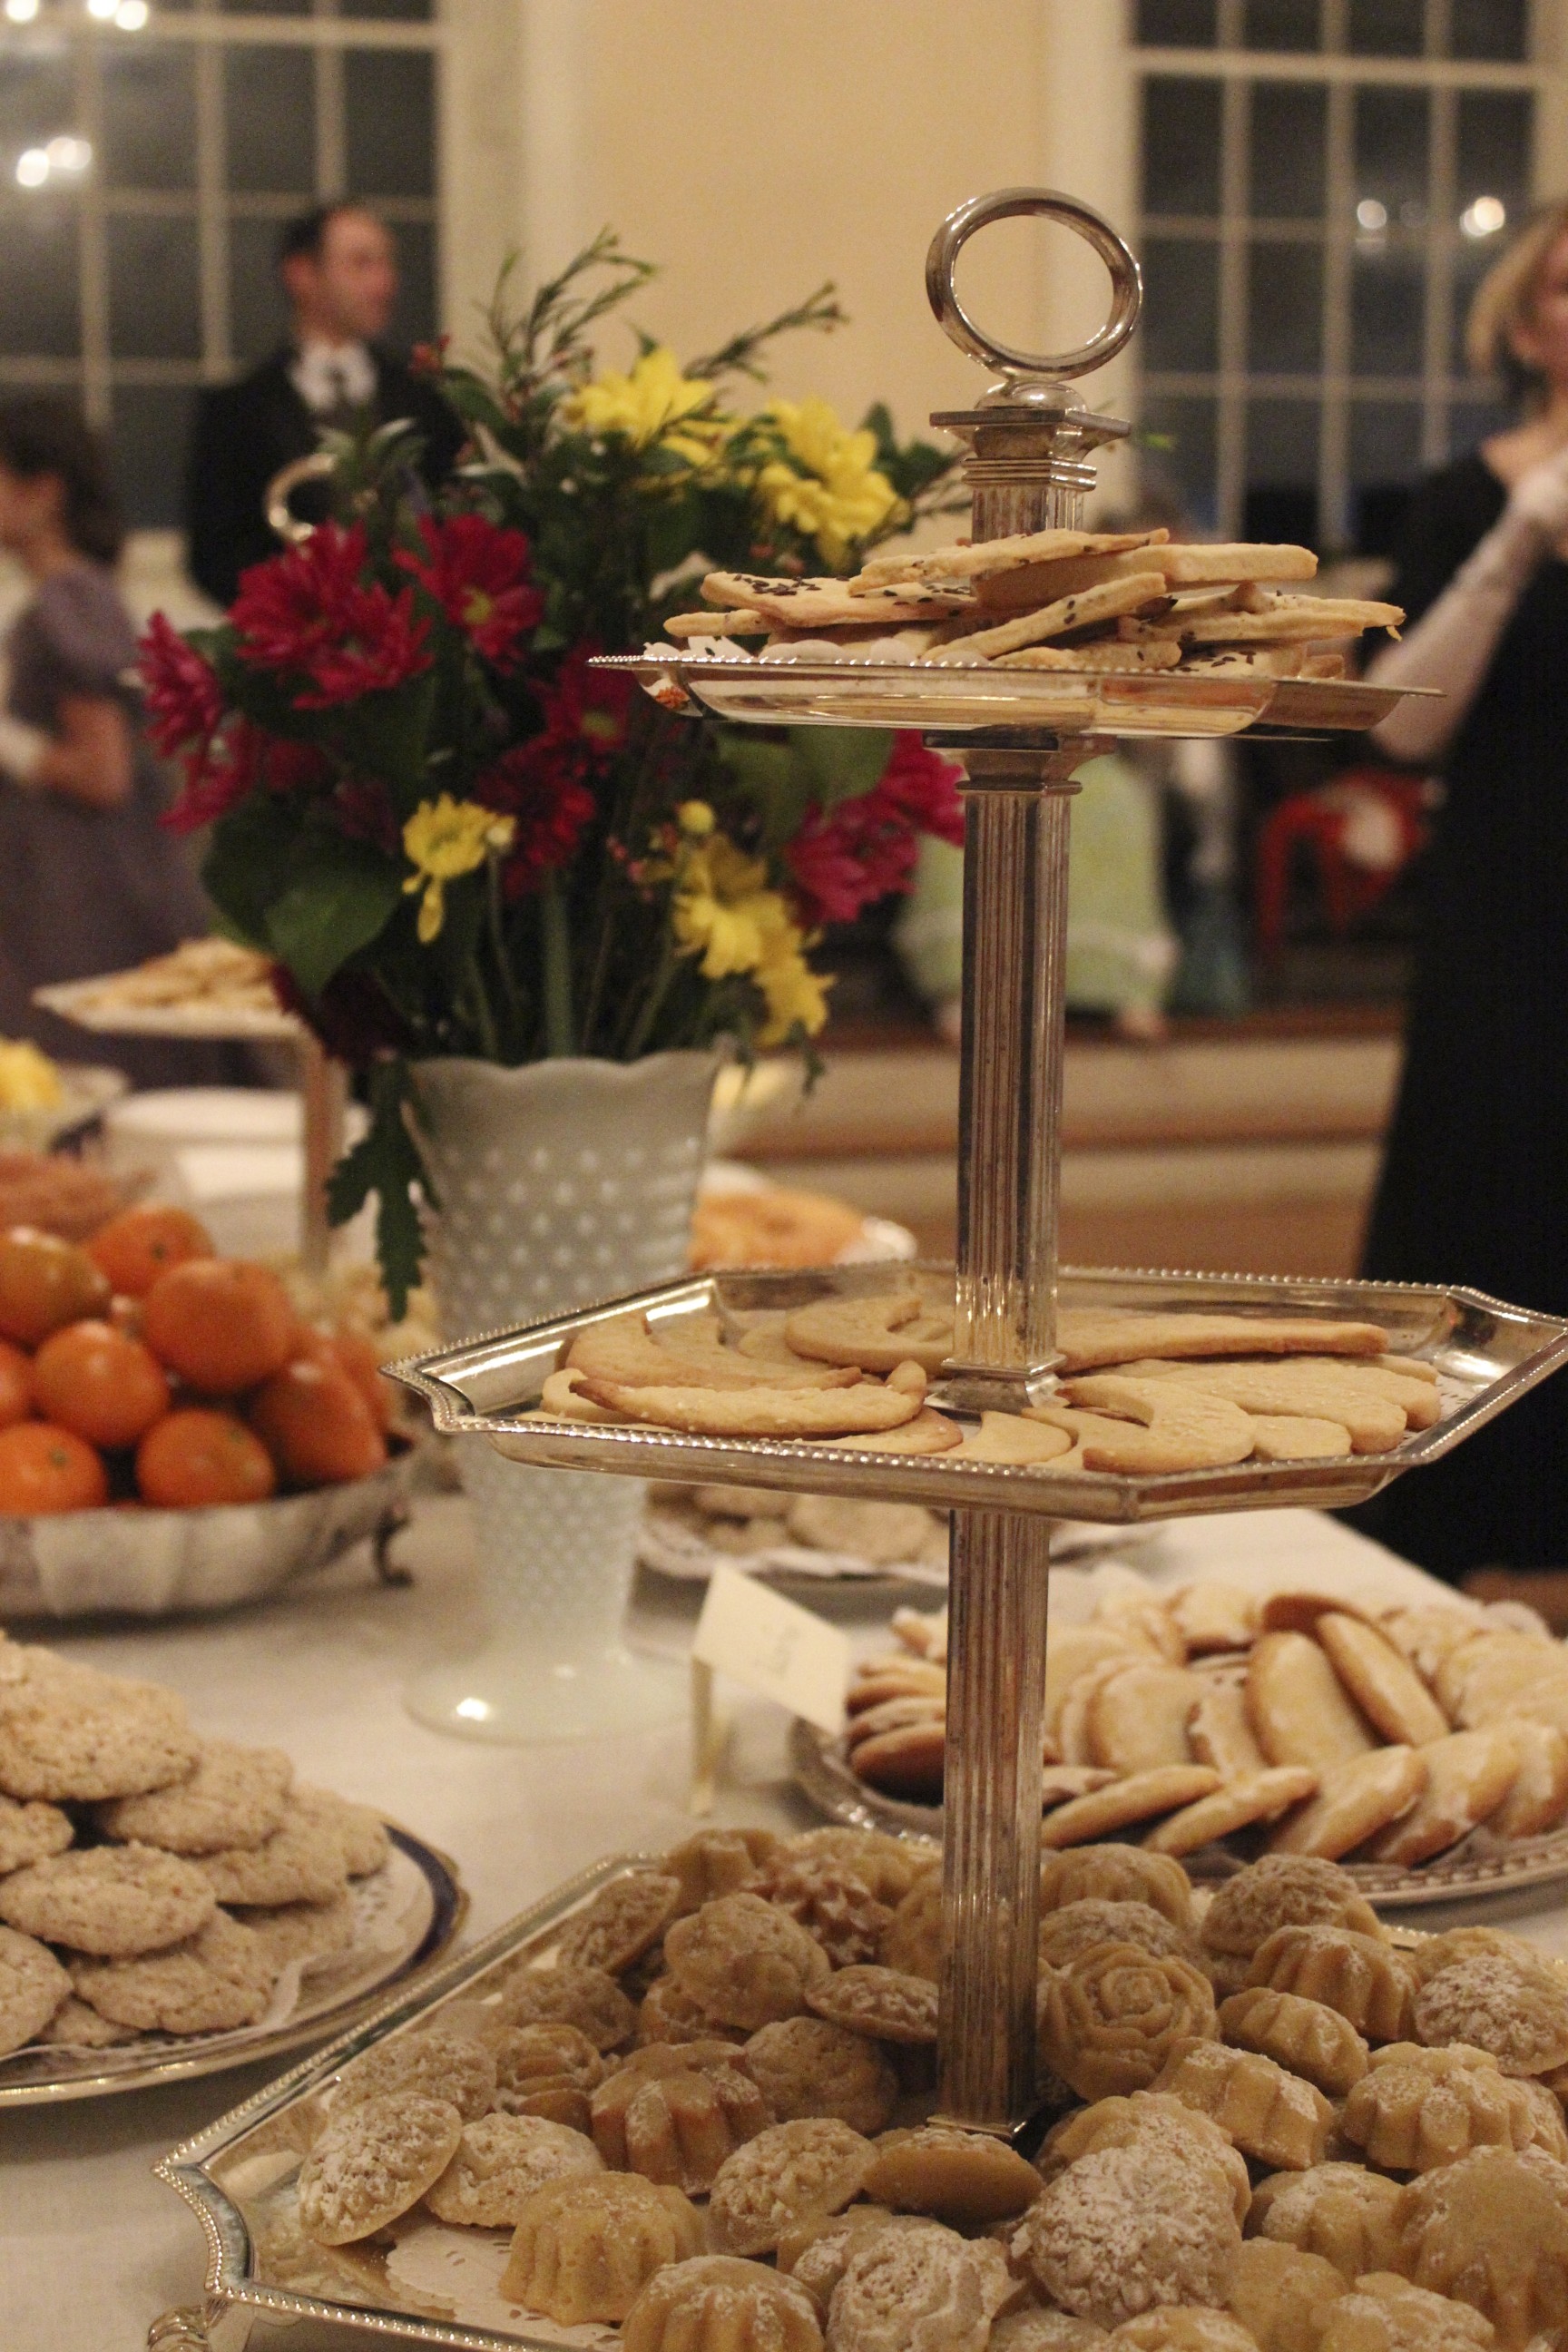
Part way through the evening the doors were flung open and a table full of yummy refreshments was brought it.
IMG_9322
The members of CVD about to perform a country dance called The Cottage Bonnet.
IMG_9331
Mid-dance, light feet flying!
IMG_9332
And we end.
IMG_4234
After the ball, it’s nice to take a break and rest your weary feet.
IMG_4248
Often, we have more ladies than gentlemen.
IMG_4244
Jazz hands! (This is one of my favorite!)
IMG_4256
Finally, we convinced some more members of CVD to come join us for a bigger group picture.
IMG_4281
Now for the sad end to the evening. As I was walking through a partially open door my dress caught and ripped! It’s on the back in the gathers, but it’s a good 4″ rip. Now I have to fix it before April, when I’ll be wearing this dress again. I’ve got multiple methods in mind, but it’s still not a fun or exciting thing to have to complete. I’d rather be making other new clothes…

Anyway, all things considered it was a lovely evening with lovely people. It was particularly nice to see old friends, but also nice to see usual ball friends. And I thought we all looked pretty smashing, which really does add to the atmosphere. I just wish I hadn’t ripped my dress…

Lovely Clothes, Lovely Ball: Part I (Pride and Prejudice Ball 2013)

Another thing that the Nemo blizzard affected was the Commonwealth Vintage Dancers‘ Pride and Prejudice Ball. Luckily, the ball was able to be rescheduled for this past weekend, which means that I did wind up having an opportunity to wear my new 1813 red gown (my HSF #1 project) after all! And that means pictures! Lots of pictures, in fact. I think I’ll split this into two posts… To start: the clothes!

IMG_4267
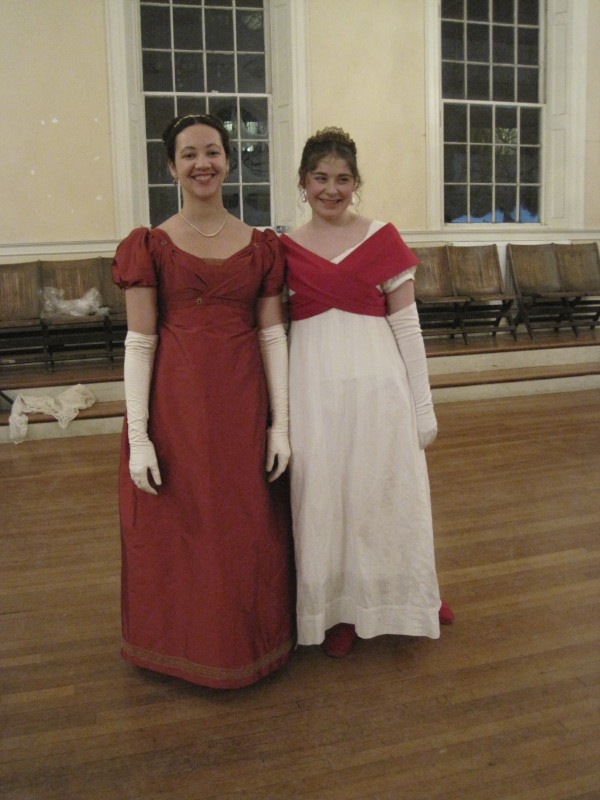
New dress!
IMG_4271
These pictures capture the color much better than my original pictures from January.
IMG_4273
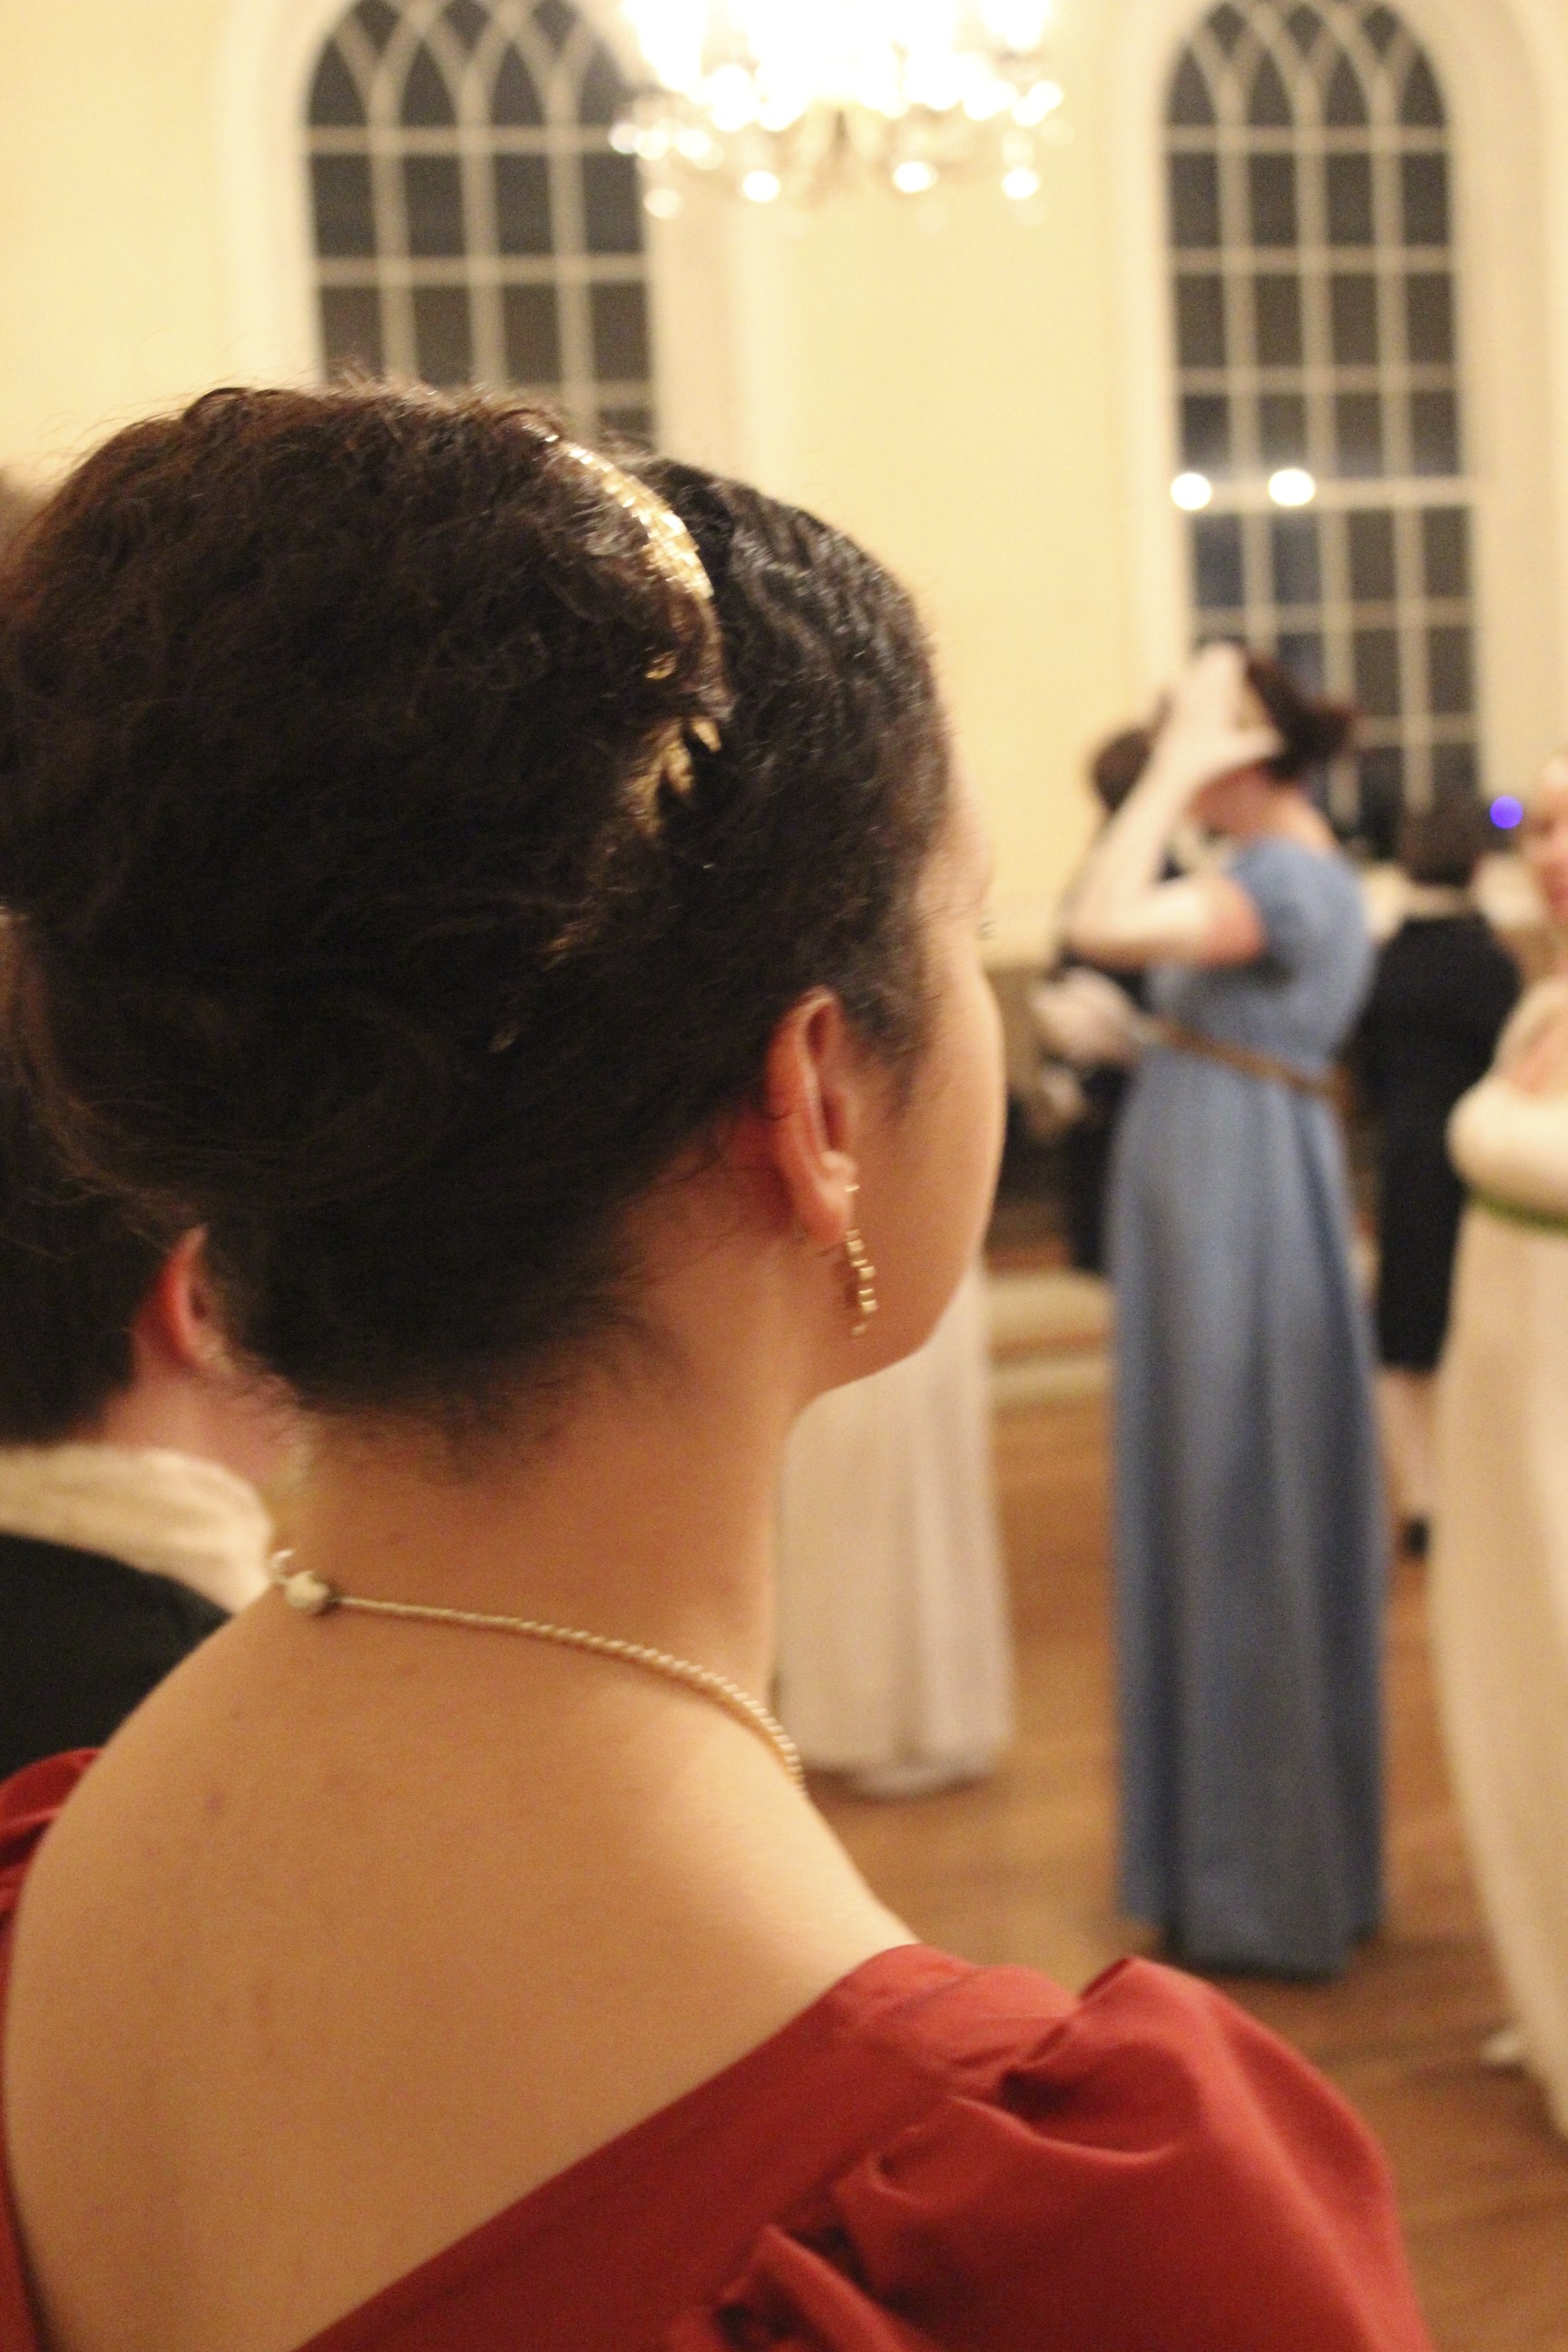
Accessories: opera length kid gloves, white stockings and shoes, a gold laurel tiara, earrings to match the trim on my dress, and pearls.
IMG_9195
I wore the petticoat I built to go under my 1812 square neck gown, which is apparently a little longer than this new dress, because the hem of my petticoat was sticking out! Luckily, I had a needle and a friend had white thread, so I quickly basted up the hem of my petticoat so it wouldn’t show.
IMG_4275
Our colors match! So cute!
IMG_9488
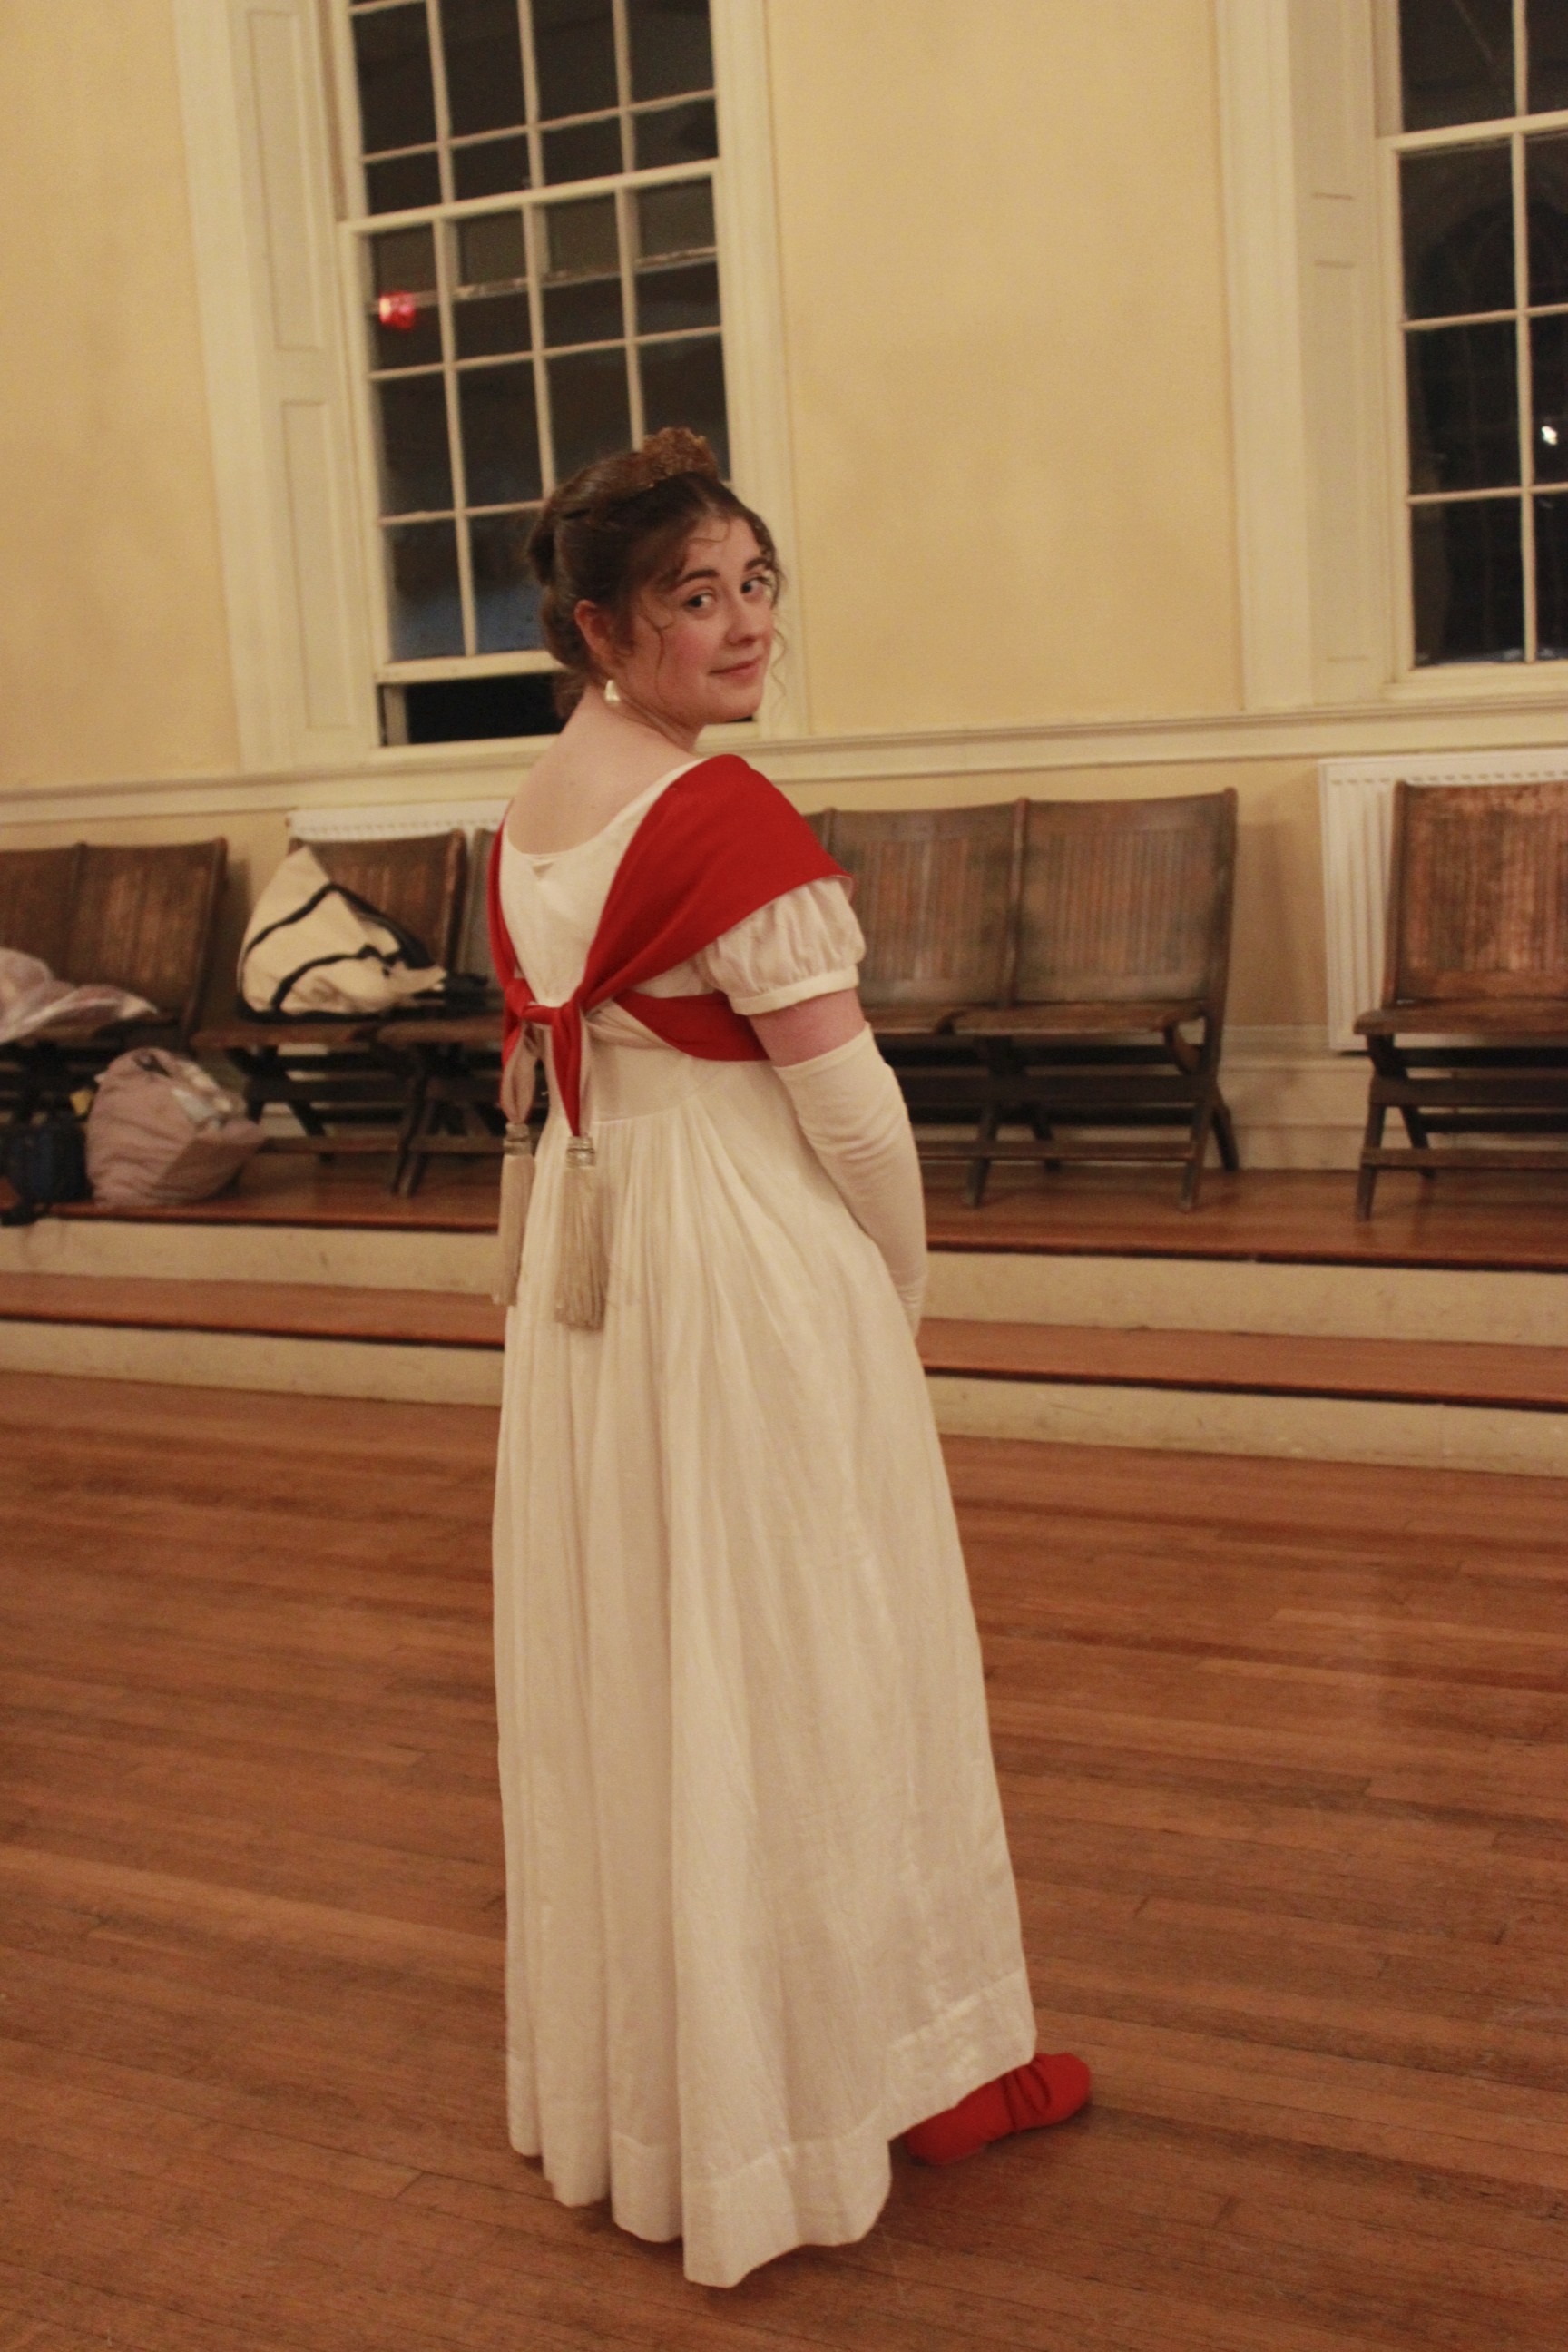
The back of the creative Grecian sash wrapping. It was a great way to jazz up a white dress.
IMG_4259
More cuteness in the family.
IMG_9396
Great hair!
IMG_9512
Those face curls are hard to achieve without bangs. These look lovely!
IMG_9204
I tried the face curls, but it looked foolish. In the end I really liked how my hair turned out though! Super regal!
IMG_9383
More lovely face curls.

I thought everyone outdid their Regency selves and looked fantastic! I have to say, though, that not all these pictures are mine. Some are from a friend who caught all sorts of gorgeous moments! Thanks for sharing! More to come soon, with actual dancing and during the ball pictures.

Project Journal: 1864 Ball Gown Part II: Trim Progress (HSF #4)

Well, I hope this isn’t too much of a stretch (or maybe interpretation is a better word), but I’ve finished preparing all of my skirt trim and I’m going to call it my project for the HSF #4  Challenge: Embellish. I say it’s a stretch because my completion of this project is the preparation of the trim, rather than the attachment to the garment. To be fair, just the prep has been a lot of sewing, so I think it counts. Here it is, below: gold trim on the rather wrinkly skirt of green and gold shot silk taffeta. Because the gold is shot with silver, and the green is shot with gold, they are both photographing more washed out looking than they appear to me when not looking through a camera. Hopefully one day I’ll be able to get a picture where they look a little less silvery.

IMG_4284
All the skirt trim, gathered and ready to be attached!

The top pile of trim (that rather resembles a ruffly brain, don’t you think?) is for the zig zag. The two piles on either side are the 18 rosettes. The section on the bottom center is the ruffle that goes at the bottom. You can see the inspirational fashion plate here, in this previous post, to see what these different trim sections look like in their actual context.

IMG_4285
My favorites are the rosettes. Aren’t they cute?
IMG_4286
Here’s all of them laid out like an accordion, or a slinky. They look so adorable!

Anyway… here are the facts:

Fabric: almost 1.5 yds of gold shot with silver silk shantung.

Pattern: none, just a lot of math.

Year: 1864.

Notions: none, just thread.

How historically accurate?: Well, shantung is not accurate, but silk is (and this shantung is pretty smooth and not slubby, so I don’t think anyone will know it’s shantung unless I tell them). The trim layout is from a fashion plate, so super accurate. The stitching is accurate. Overall, I give it a 90%.

Hours to complete: Um… a lot. It’s all hand sewn. I started in January, so… 50 hours to get to this point? I really have no idea. I think in terms of months or weeks usually, not hours or even days.

First worn: Not yet, but will be worn in March.

Total cost: $9, because the silk was a remnant.

And while I’m keeping count, let me also note the yards of stitching currently sewn into the trim. When it was all hemmed I was at 45 yards. Now I have the addition of gathering stitches (31 1/2 yds) and ruffle binding (9 yds). That ups the total yards stitched for trim to 86 1/2 yds, and that’s before attaching it! Nice.

The Gibson Shoe!

The latest shoe from American Duchess: the Gibson.

S3701-01

Lauren has all sorts of cute shoes planned for 2013, so I’m pretty sure this is only the beginning of what will be more shoe posts this year. Aren’t these cute though? I’m trying to decide between black and brown… If you are at all interested, pre-order-time is the time to make your decision, because if Lauren doesn’t receive enough orders, the style (or certain colors) might be cancelled. And that would be  sad! You now have no excuse. At the very least you should go check them out…

Product links in this post contain an affiliate code, which provides a small benefit to my shoe fund. This does not affect my impressions and reviews of this product.

SaveSave

Project Journal: 1864 Ball Gown Part I: The Plan And The Trim

It’s time. I’ve been wearing Annabelle, my flounced not-so-new-anymore white 1860 ball gown, to all Civil War events for about a year straight, with no relief on the horizon. Not that I dislike Annabelle, I just want options, and a change. I have Belle, a dark blue 1860 ball gown, as well, but I haven’t worn her since 2011, and since most of the women in our dance troupe have blue dresses it’s not likely that I’ll get to wear her soon, and anyway, she’s too heavy for summer, and summer is coming up. So it’s time. Time for a new 1860s gown! Yay!

This gown was included back in autumn of 2012, when I made my 9 month sewing plan. It’s my goal to have it finished by mid-March, for the annual Commonwealth Vintage Dancers Returning Heroes Ball. My inspiration is this fashion plate from 1864 (pictured below).

315_1864_FashionPlateAA
From The Bartos Collection. 1864.

Specifically, I’m going to be making the dress on the left. Or one inspired by/sort of like it. As I’ve been working on it I’ve made changes to my plan, as you’ll soon see. My dress will be green silk shot with gold and with gold silk trim. I bought the silk remnants for the project months ago, so I have had to make my plan work with the yardage I have. The green isn’t an issue, but the gold had to be carefully considered to make sure I have enough for all the trimmings. After lots of math, I realized I didn’t have enough to do all the trim, so I thought about what was visually most important and decided to eliminate the vertical lines of trim, as well as the waist trim. Here is the same fashion plate, with my changes:

480_1864_FashionPlateAA - Version 3

Of course, me being me, I’ve decided to hand sew the entire gown! Yes, sometimes I like my big projects. But I’ve got time (I think). I’ve sewn the skirt and the polished cotton lining and hemmed them, though the skirt isn’t attached to a waistband yet. I’ve sewn the bodice seams, so now it needs boning, and cording, and trim, and closures in the back. And, most importantly, I’ve cut and hemmed the MANY yards of gold trim for the skirt.

IMG_4198
Skirt trim: on top is the zig zag, in the middle is the rosettes, and on the bottom is the ruffle. Not gathered yet, but all hemmed!

Did I mention I’m hand sewing all of this? All of these trim bits on the skirt will be gathered to a ratio of just over 1 1/2 to 1 (that was all that my yardage would accommodate). The zig zag is hemmed on both sides and will be sewn onto the skirt with a band of green silk running down the middle. The rosettes will be gathered in the middle and the raw edges hidden, which is why that bit is hemmed on only one side. The ruffle at the bottom will be bound at the top, which is why only one edge is hemmed.

Hem-age: 13 1/2 yds of zig zag, hemmed on both sides equals 27 yds of hem; 10 1/2 yds of rosette hem (there will be 18 finished rosettes on the skirt, if all goes according to plan); and 7 1/2 yds of ruffle hem. Total hem-age: 45 yds, and that’s just the skirt trim!

I love hand sewing, which makes me excited about that total, rather than bored. And I really enjoy the sense of satisfaction I have when I’ve completed the different pieces of this project, so I can only imagine how great it will be when the entire gown is complete!

An Excuse For Colored Shoes In The Regency

Volare Digital Capture
Evening Dress. 1812. UK.

Isn’t this a cute fashion plate??? My favorite thing about it is her bright red shoes! My second favorite thing is that her bright red shoes match her red bodice! So cute!

First, this makes me want to wear colored shoes to a Regency ball. Often you see black or white in fashion plates, and our dance troupe tends to wear white to perform and also to balls out of habit, so without even thinking about it I usually pull out the neutral colored shoes… BUT! Extant shoes come in all sorts of colors, although maybe not quite as bright as these red ones. You can see some of them on my pinterest page here: Shoes: 1790-1829.

Second, that red bodice reminds me of this one that Natalie Garbett made for the HSF. Is it possible that this red one, like Natalie’s, is a separate piece from the dress? That would allow for more wardrobe options, certainly. I’m going to go on the assumption that it is, and congratulate this young lady in the fashion plate for being so coordinated and versatile in her wardrobe.

19562579603292643_PZwl3ZNE_c
Separate bodice by Natalie Garbett. Lots of research information about this style on her blog: here.

So… I’ve got a new dress to wear to an upcoming Regency ball that doesn’t really need a separate bodice to jazz it up. Do we think I can wear I can wear fun colored shoes without a separate bodice? I think probably yes, given that there are lots of extant colored shoes and I know of other images that show colored shoes. And now I have an excuse to wear colored shoes with a white dress! Fun! Maybe I need to make a separate bodice, too?

HSF #2: UFO

Is there enough alphabet soup for you in the title of this post? In case you’re not familiar with those acronyms, it means that this is a post about the Historical Sew Fortnightly Challenge #2: Un-Finished Object. In this case, the UFO is my 1820s petticoat from the very end of 2012.

You’ll remember that I wore it to Fezziwig’s Ball in December, but that I hadn’t finished the neckline? I’m pleased to say that it is now entirely complete!

IMG_4187
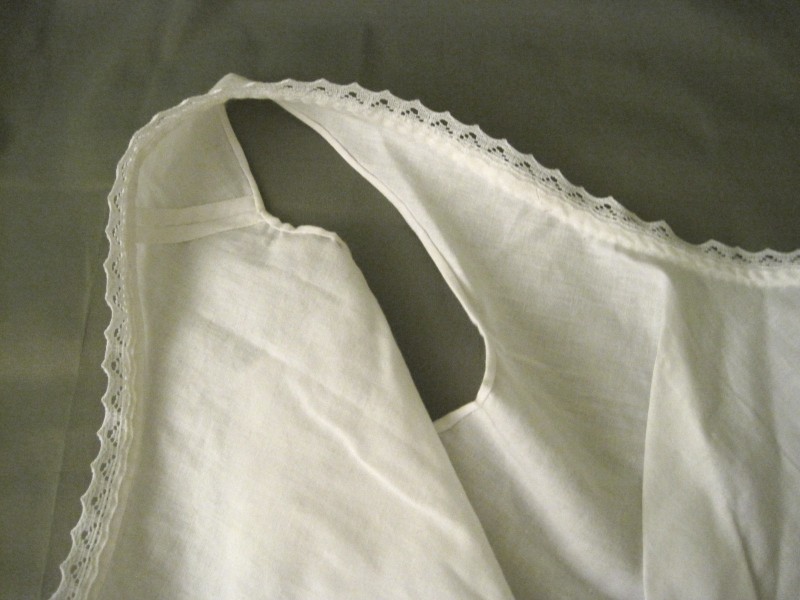
Inside view. This petticoat has three ties at center back to keep it closed.
IMG_4188
You know I like my insides to be pretty. This is a closeup of the arm hole and the neckline, which is bound with bias before having the lace sewn on.
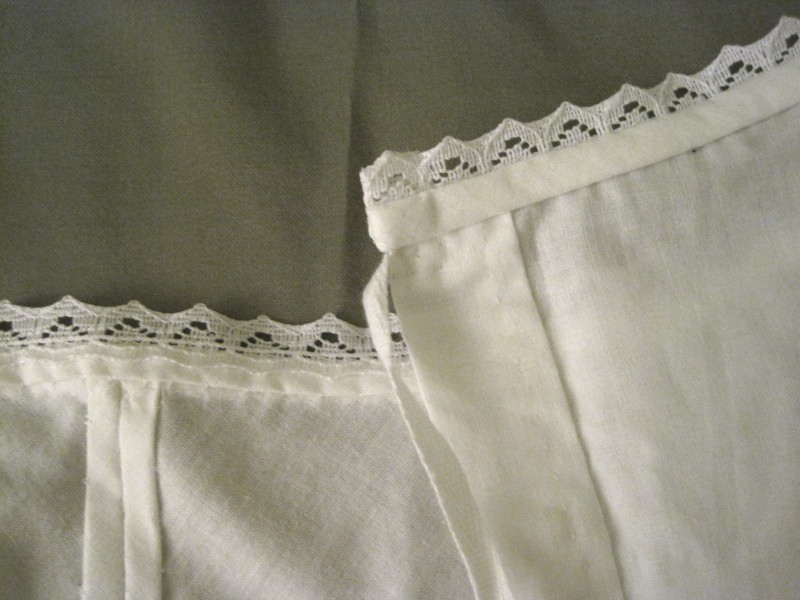
IMG_4189
The double hem on the left is center front. Diagonally across the photo is the right side of the back.
IMG_4190
This cording was done last month, so it’s not really part of the UFO-ness, but it is still an accomplishment. 16 rows of hand sewn cording all around the hem.
IMG_4191
A close-up of the lace at the hem and my tiny stitches.

You can see some more detail shots in this past post.

And the facts?

Fabric: 3 1/2ish yds of white cotton

Pattern: Adapted from my 1822 green ball gown pattern. It’s pretty much exactly the same except that it doesn’t have sleeves. The ball gown pattern is based off of a pattern in Janet Arnold and styled as in the fashion plate you can see in this previous post.

Year: 1820s. The inspiration image is dated 1828-1835. You can see the inspiration image and my reasoning for it being more 1820s than 1830s here, in this past post.

Notions: About 1 1/2 yds of broderie anglaise trim, cut in half the long way to create double length; about 1 yd of white edging lace; and about 1 yd of 1/4″ cotton twill tape.

How historically accurate?: Very, having used modern materials. The pattern is from Janet Arnold, so you know it is good on accuracy. The entire petticoat is hand sewn and made of accurate fabric. The lace is machine made and the content is almost certainly not entirely accurate, but it is in the style of the early 19th century and the lace in the inspiration image. I’m not 100% sure that all of my seam finishes are perfectly accurate for this garment, but they are accurate for the period as a whole.

Hours to complete: I’m always bad at estimating this. Let’s say 120 hours.

First worn: To Fezziwig’s Ball in December 2012.

Total cost: Approzimately $13.

HSF #1: 1813 Evening Gown

IMG_4162
1813 Evening Gown

Historical Sew Fortnightly (HSF) Challenge #1 complete! It was actually completed a few days ago, which I am super pleased about. Even better is that it is for a Regency ball in February, and it is entirely complete a full month ahead of time! All the trim, all the closures, everything! All I have to do on the day of the ball is put it on. Wow! Usually when I wear a new dress to a ball I’m furiously sewing right up until the end and often all the trim doesn’t make it on (that’s what happened with my 1820s green dress back in December, remember?).

The facts:

Fabric: 4 yds red and black shot polyester

Pattern: The bodice front was draped, the back was adapted from my 1812 square neck Ikea gown, and the skirt is the same as the 1812 square neck Ikea gown, with the pattern originally from Janet Arnold’s Patterns of Fashion

Year: 1813

Notions: 3 yds metallic gold bobbin lace, hooks, and little brooch bits

How historically accurate?: The silhouette, cut, and style are accurate, as is the interior finishing (all flat felled and bound edges… it’s quite pretty!). The fabric is obviously not accurate and neither is the lace fiber content, though the style of it is. The closure is accurate. The little brooch bits are accurate in style, though not in materials.

Hours to complete: I’m so bad at estimating this. Let’s say 48 hours.

First worn: Hasn’t been worn yet! Its first wear will be in February 2013.

Total cost: Approximately $26

Now for other details!

Well, first, here’s a closeup of the bodice, so you can actually see the details and the little brooch bits. I’m super pleased with them, because I think they really finish off the bodice and add a little extra touch. I got them from New York and Company, actually. They were part of triple drop earrings, which I took apart. I kept the bottom drop and put them on clip backs (so now I have matching earrings for the dress!) which you can see in the picture below. And the best part is that one of the sections had a missing gem, so the cost of the earrings was refunded by NY&Co and so the total cost of the earrings is $0! Awesome! (It worked out perfectly, because I only used 5 sections of the triple drop earrings, so the damaged one wasn’t a problem.) Of course, the materials used in the earrings are not at all historically accurate, but I’m ok with that, for the cost (yay!) and the fact that they do have the right look.

IMG_4170
Little brooch bits!
IMG_4169
Single drop! Clips! Perfect!

And here’s the back. As you can see, it doesn’t quite fit Squishy in the back, but it shouldn’t have trouble fitting me. I love the drape of the fabric! Now that all the raw edges are enclosed and the polyester can’t fray everywhere, I am totally happy with the fabric choice (bargain!). The photos don’t really do justice to the fabulous gold lace at the hem.

IMG_4164
Aren’t those gathers and folds lovely?!?

The dress is entirely hand finished and mostly hand sewn. Originally, I was going to make it all by machine, but then I had sewing parties and things that required hand sewing, and I just didn’t feel like lugging out the machine, so I wound up hand sewing a lot of it, which was quite satisfying. There’s one side back seam sewn my machine, I think the long skirt seams are sewn by machine (though I can’t remember, because I started this dress back in October or November), and the waistband was sewn by machine. Actually, it was so much easier to keep the width consistent using the machine than when sewing it by hand.

The only other information to share is my inspiration for the dress.

19562579602239981_TEw2UjIU_c
For her neckline and sleeves: Comtesse de Tournon by Ingres, 1812.
131378514099875826_v9iatcAj_c
Another neckline inspiration: L’Art de vivre au temps de Josephine.
1810-gold-mccord
For the overall silhouette and the trim style: 1810.
12-501052
One more neckline inspiration and another similar dress built by Natalie Garbett. Here is her post about her 1812 gown with a v neck.

Clearly, I need a Kashmir shawl to complete the ensemble… I have a pashmina that sort of looks the part, so I’ll have to try that out at the ball. Stay tuned for more pictures of this dress in about a month!

Project Journal: 1822-1824 Ensemble Part VI: Muff and Tippet

One thing I actually did finish for the recent ball was the muff and tippet. For visual reference, the picture below shows the garments I’m discussing.

IMG_4145
1822 walking dress with muff and tippet (and a bit of the 1824 ball gown peeking out).

What is tippet, exactly? Merriam-Webster defines it, thus:

1: a long hanging end of cloth attached to a sleeve, cap, or hood
2: a shoulder cape of fur or cloth often with hanging ends


So, how did I make my tippet? First, I cut a piece of high loft polyester batting the length and width that I wanted. (I know they didn’t have poly batting  in the 19th century… but it’s super warm and sometimes just worth it!) Then I cut a piece of my faux fur that was double the width of the batting plus an extra 3/4″ or so on each side as well as about 1″ longer on each end. I centered the batting on the wrong side of the fur, wrapped the fur around to the back, turned one edge under, and pinned. The ends of the fur I just turned up and under the other pinned bits. Then I whip stitched that folded edge down using pretty large stitches. The stitches disappeared in the fur… and voila, tippet! Too bad I didn’t take pictures of the construction!
The muff was slightly more tricky, not because of construction details, but because I agonized over what color lining to use! (To construct the muff, I made two tubes, one out of fur and one out of silk lining. I stitched one end of each tube to the other, turned the whole thing right sides out, inserted a tube of poly batting (warm!), pulled the lining through the middle, and pinned the open side of the fur to the silk, with the fur edge turned under. Then I simply whip stitched it like I did the tippet.

But before I could make the muff, I had to pick the lining color! Did I want it to match my walking dress trim (and be lavender?) Did I want to pick a color from a fashion plate? What colors were used in fashion plates? So many questions! I determined that of the muff linings I could see in fashion plates from that general period, there were three recurring colors: pink, blue, and white. Here’s what I came up with, image-wise:

PINK

19562579602803386_gVTjJrmC_c
January 1823 Walking Dress. La Belle Assemblee.
19562579602401776_TvaRkZoN_c
December 1822 Promenade Dress. Ackerman’s Repository.
19562579602401842_51zasE7P_c
January 1826 Promenade Dress. Ackerman’s Repository.

BLUE

19562579602401785_nUUKnK8g_c
March 1823 Walking Dress. Ackerman’s Repository.
186688347022992512_HVaD6lEY_c
December 1825 Carriage Dress. Lady’s Magazine.

WHITE

186688347022992610_ERzVeK6C_c
1825 Promenade Dress.
83035186849486953_XGi68fzU_c
1829 Walking Dress. Ackerman’s Repository.

UNKNOWN/OTHER

145663369167455361_eRX7bB2f_c
c. 1810 Redingote (and muff!). KCI. (Also a tippet, though they call it a “palantine”: which M-W defines as a fur cape or stole covering the neck and shoulders.)
19562579602930398_Bi3xvCKC_c
November 1814. La Belle Assemblee.
Volare Digital Capture
November 1817 Walking Dress. Ackerman’s Repository.
186688347023026494_QoWFeN5r_c
1823 Carriage Dress

So pink came in with 3, blue and white tied with 2 each, and then there were an assortment of unknown/other. But I didn’t like the idea of pink with my dark pinkish wool (you can see what that would look like in the December 1822 fashion plate: that’s the inspiration for my walking dress), so I settled for the light blue, which I think is delicate and softly Regency. Also, I had just a small amount of that color silk, and it’s a color that doesn’t really complement my skin, so I wasn’t likely to use it for a bonnet or something similar… but with a muff most of my skin is hidden! You can see the predominance of white fur for the muffs in these fashion plates (one of the reasons I chose white fur for the muff and tippet). There are brown, too, but a lot of white! 7 out of the 11 I included are white. Well, there you go. That’s my rationale for the muff and tippet.
All of these images are on my Pinterest pages with lots of other beautiful garments. Specifically, these are on the 1810s Inspiration, 1820-1824 Inspiration, and 1825-1829 Inspiration pages.