Early in August, I was able to attend two events that were part of Vintage Victorian’s Nahant Vintage Dance Weekend. The first was a lovely late 19th/early 20th century soiree at Egg Rock, a lovely historic house with beautiful furnishings built in 1864 right on the cliffs overlooking the ocean (the second was the Grand Ball, but I’ll save that for another post). The event was quite elegant and included catered food and drinks. I’d like to take you with me to wander around the house, if you’re inclined. (I apologize for the slightly blurry pictures, the phone camera didn’t like the lighting much.)
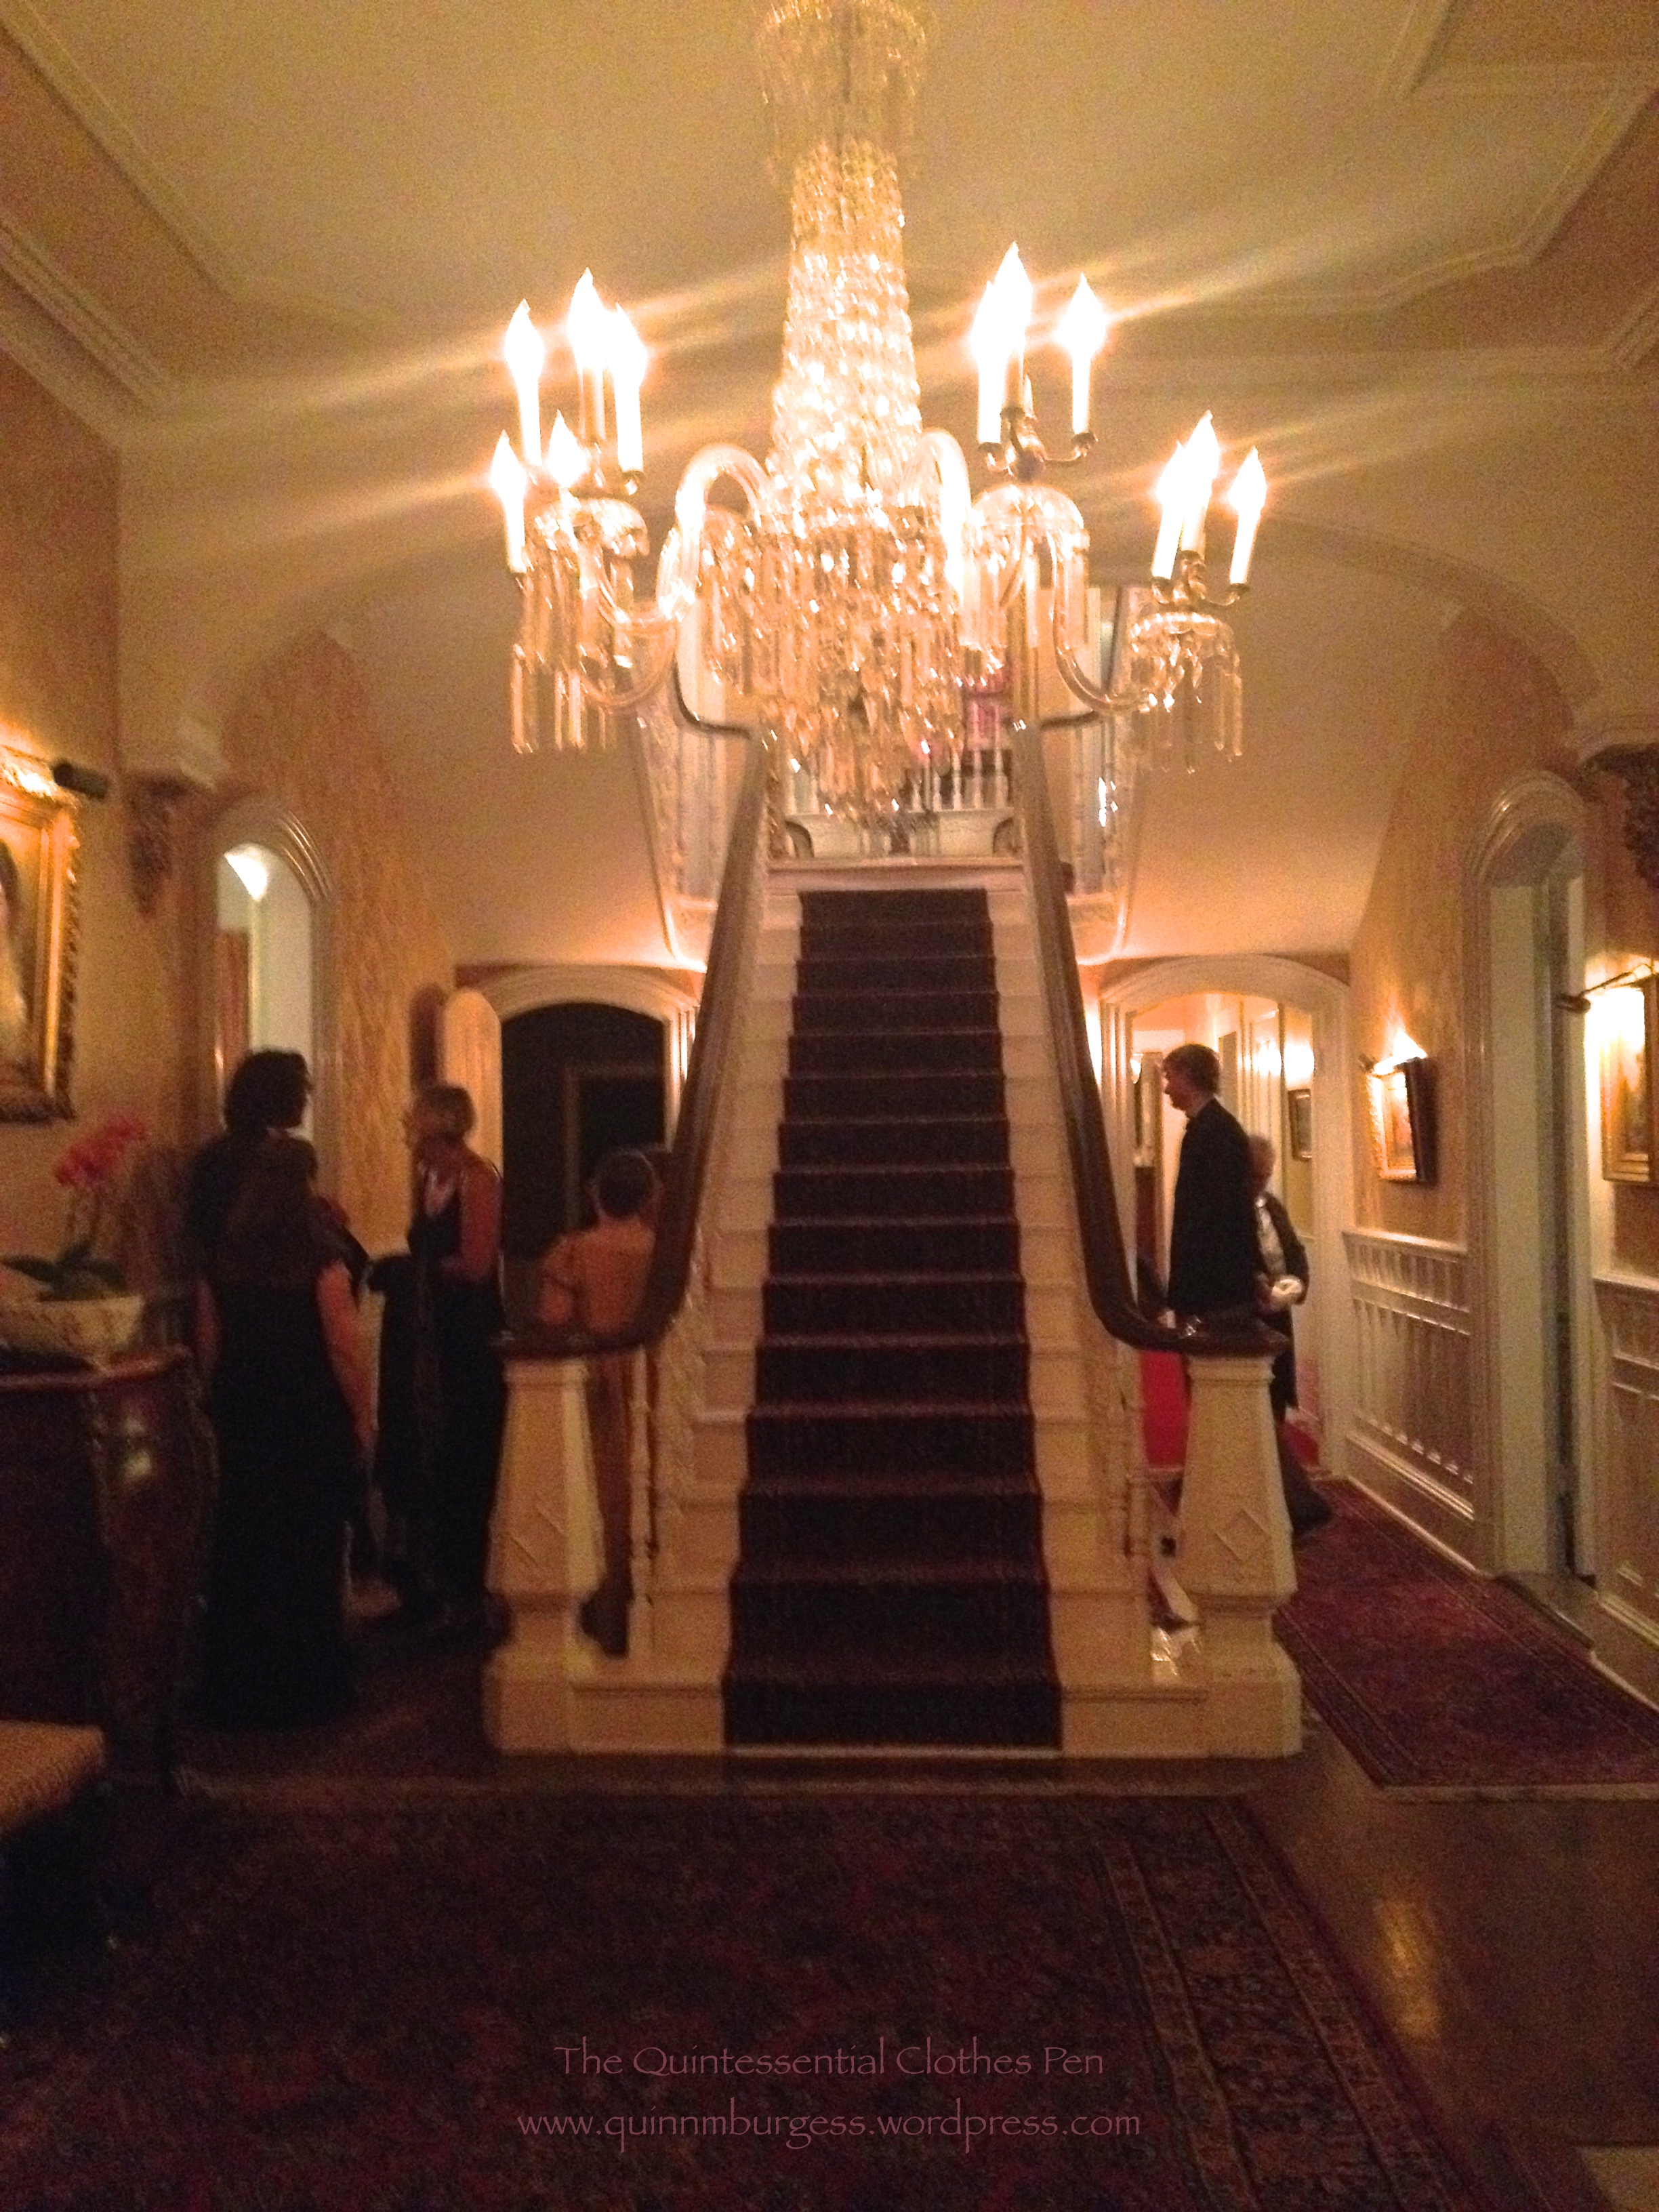
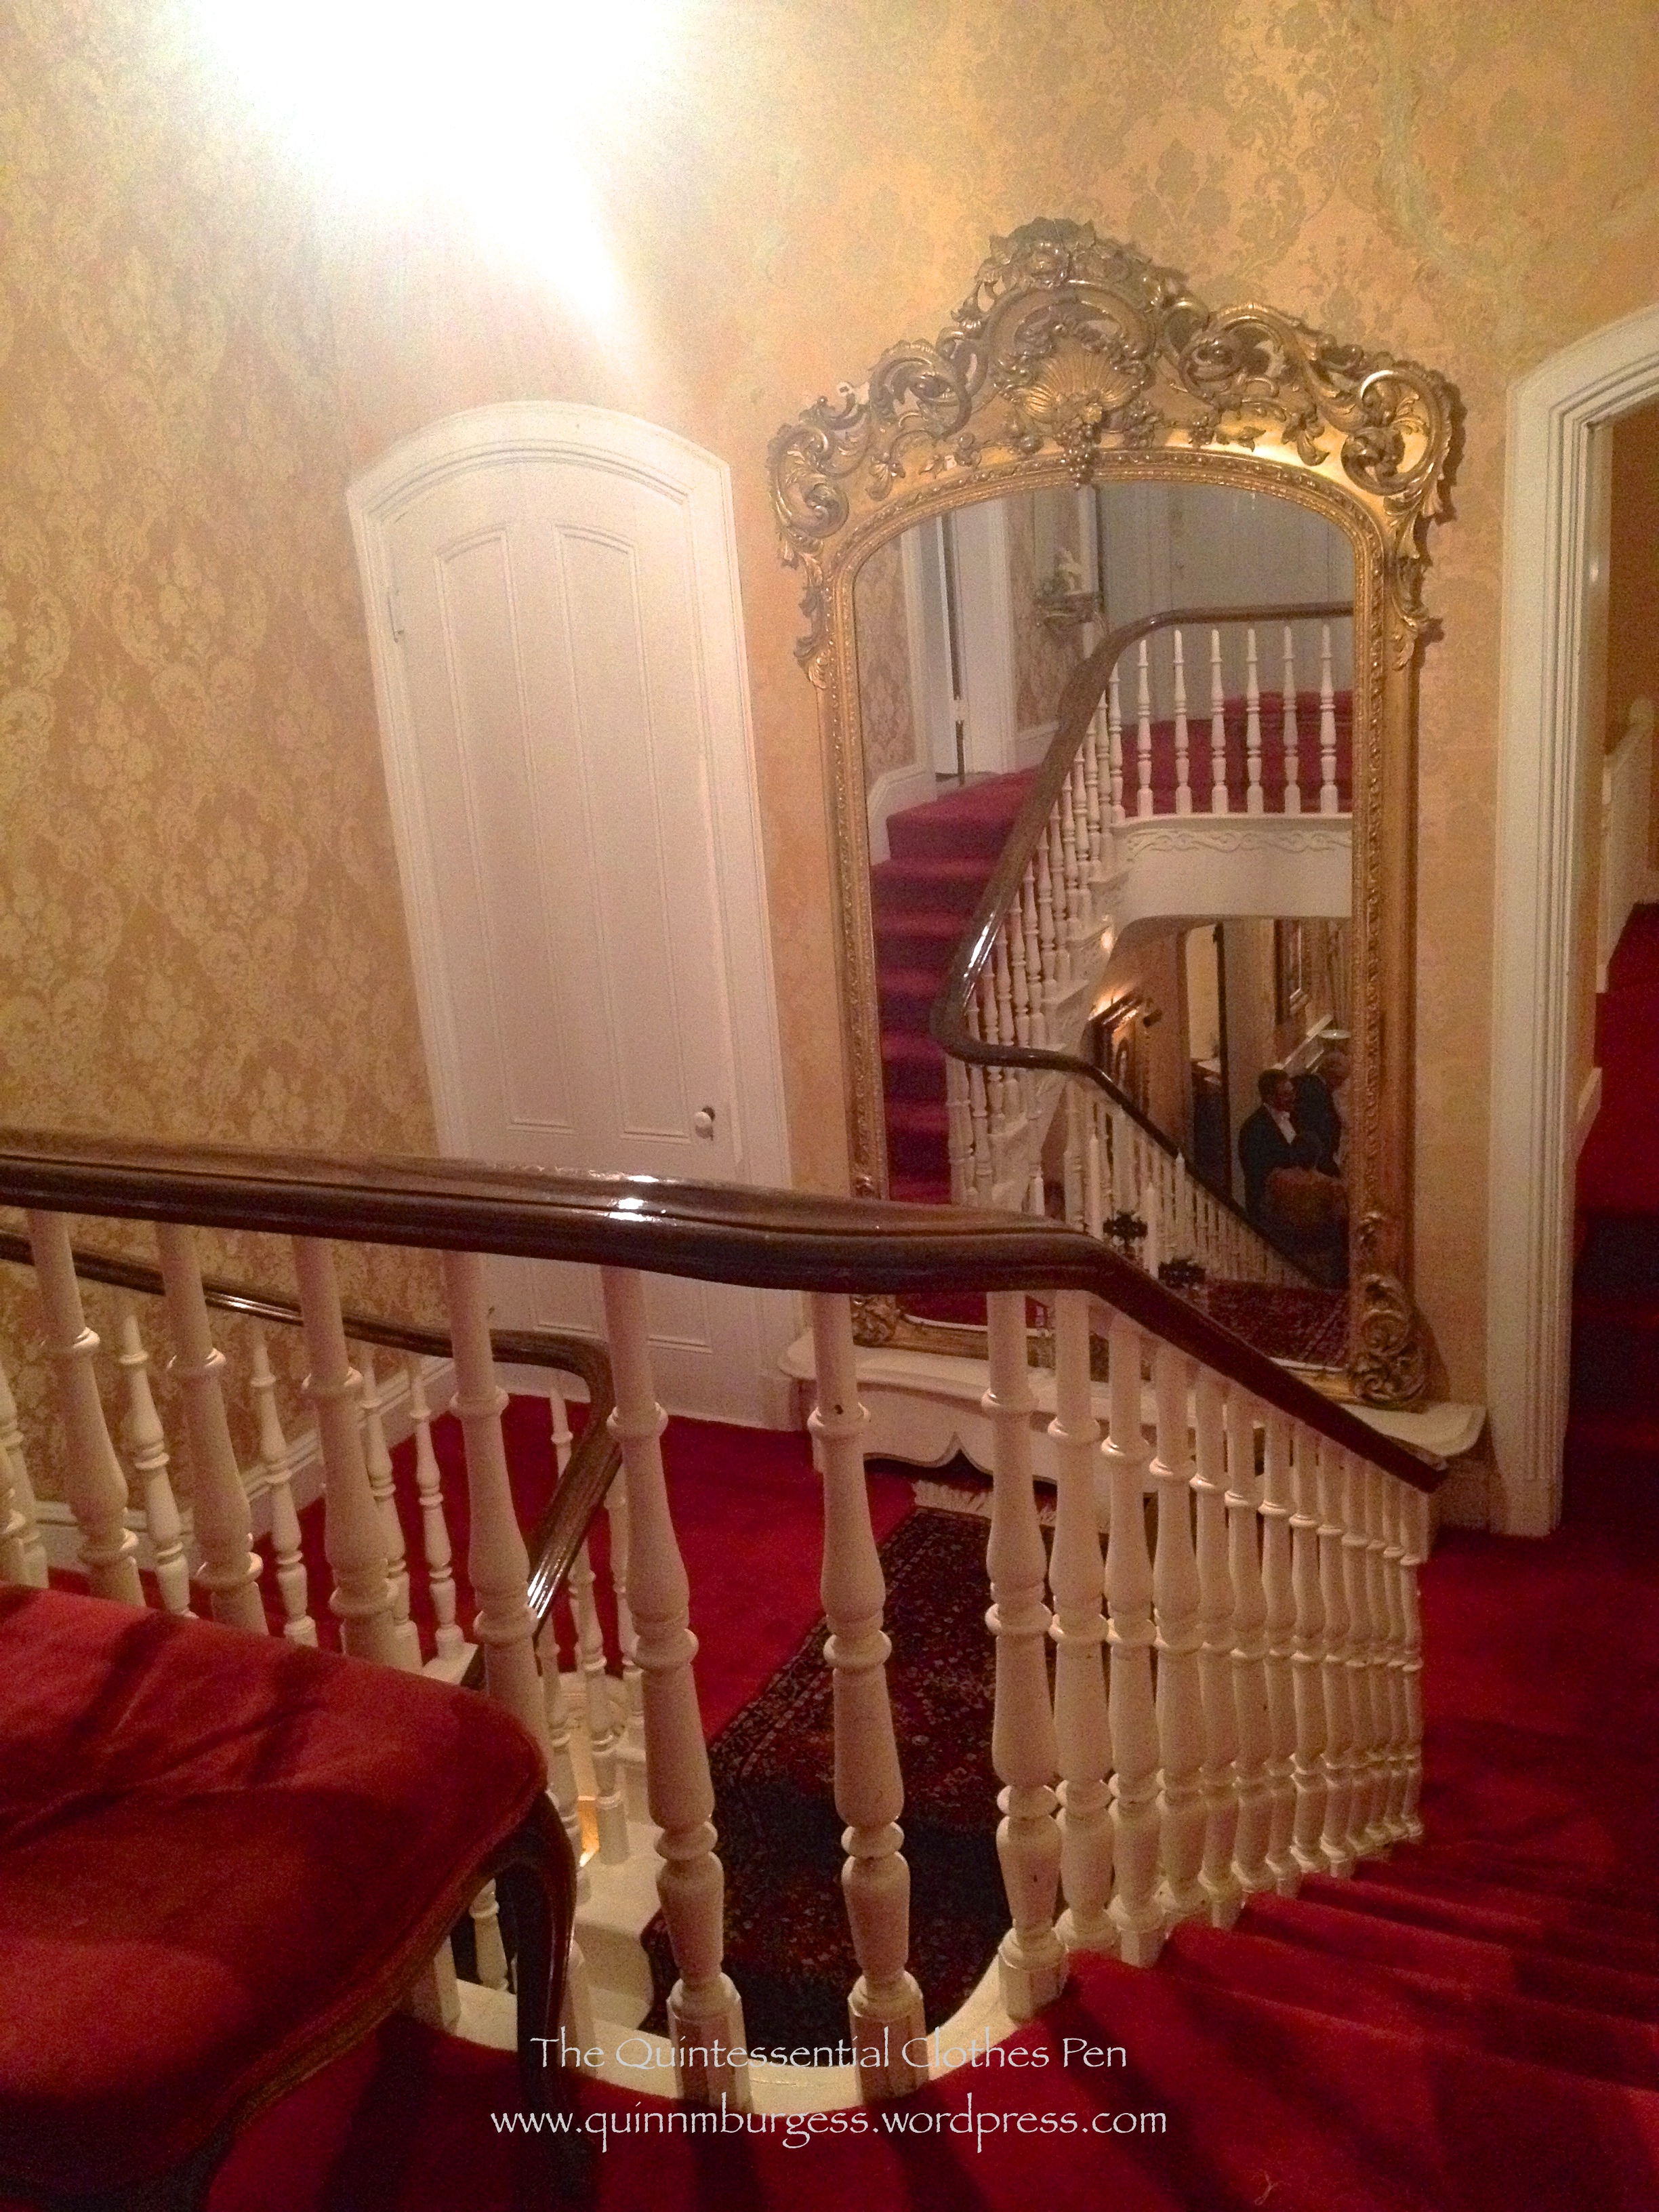
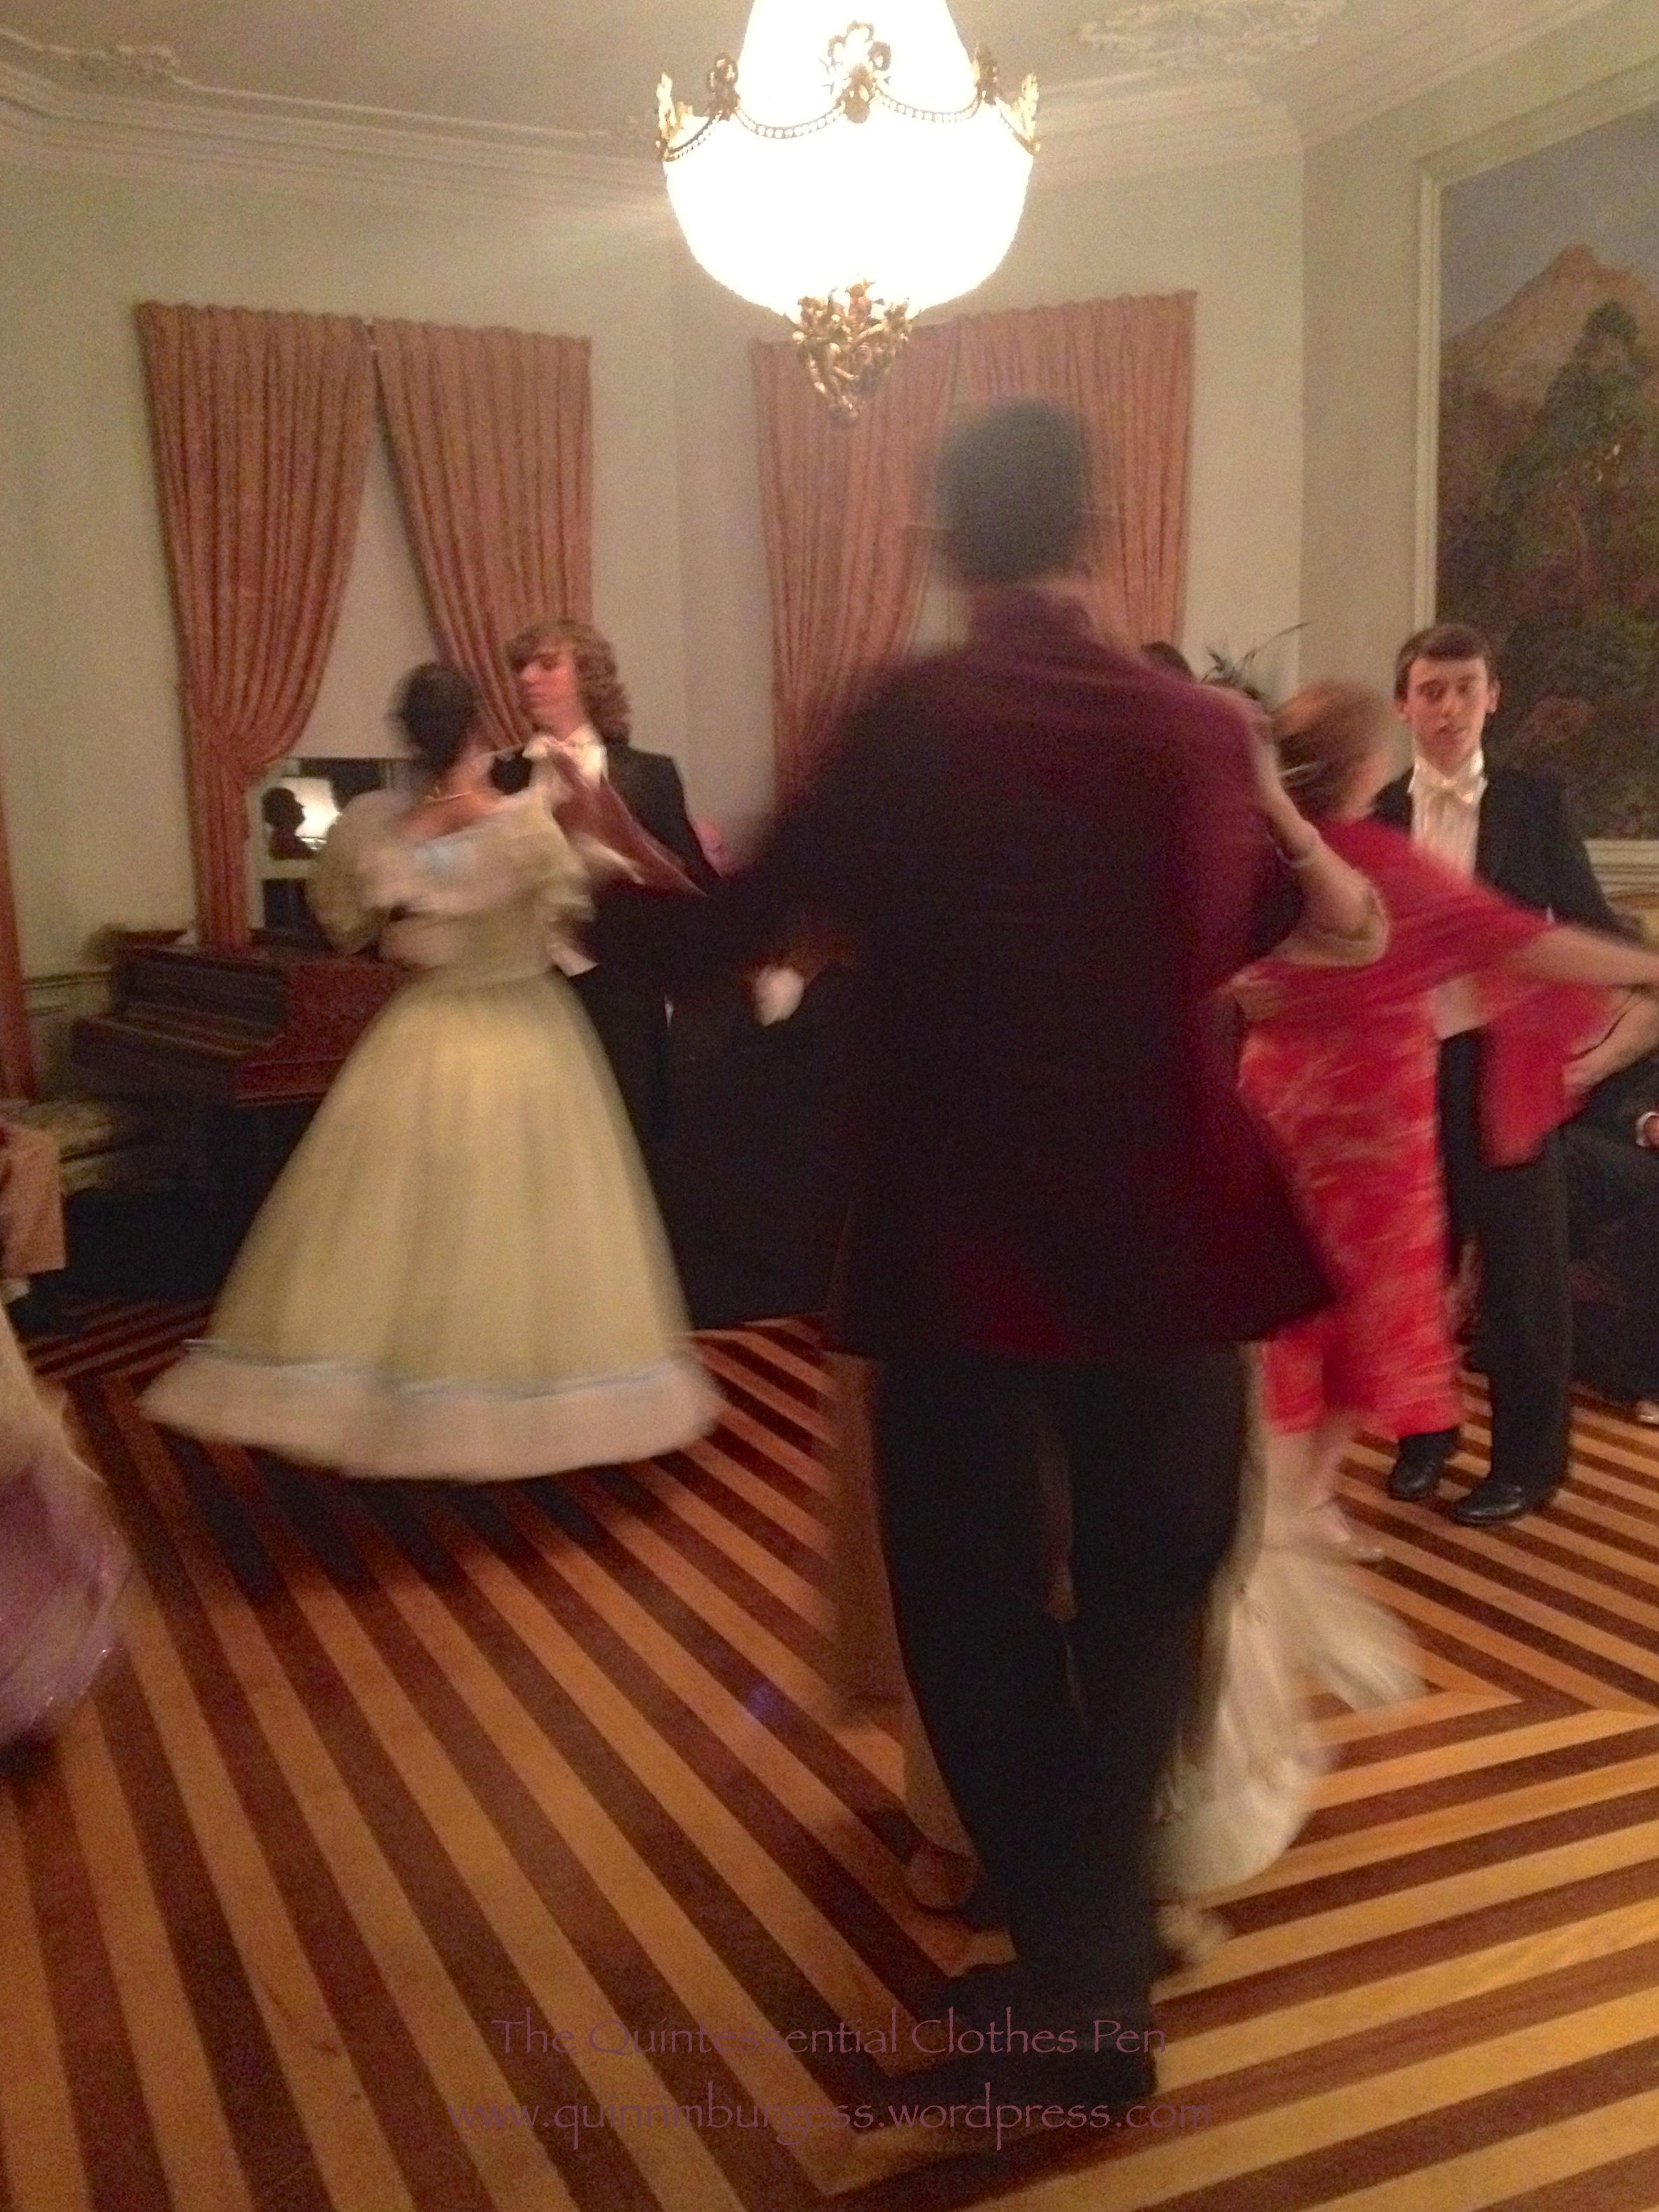
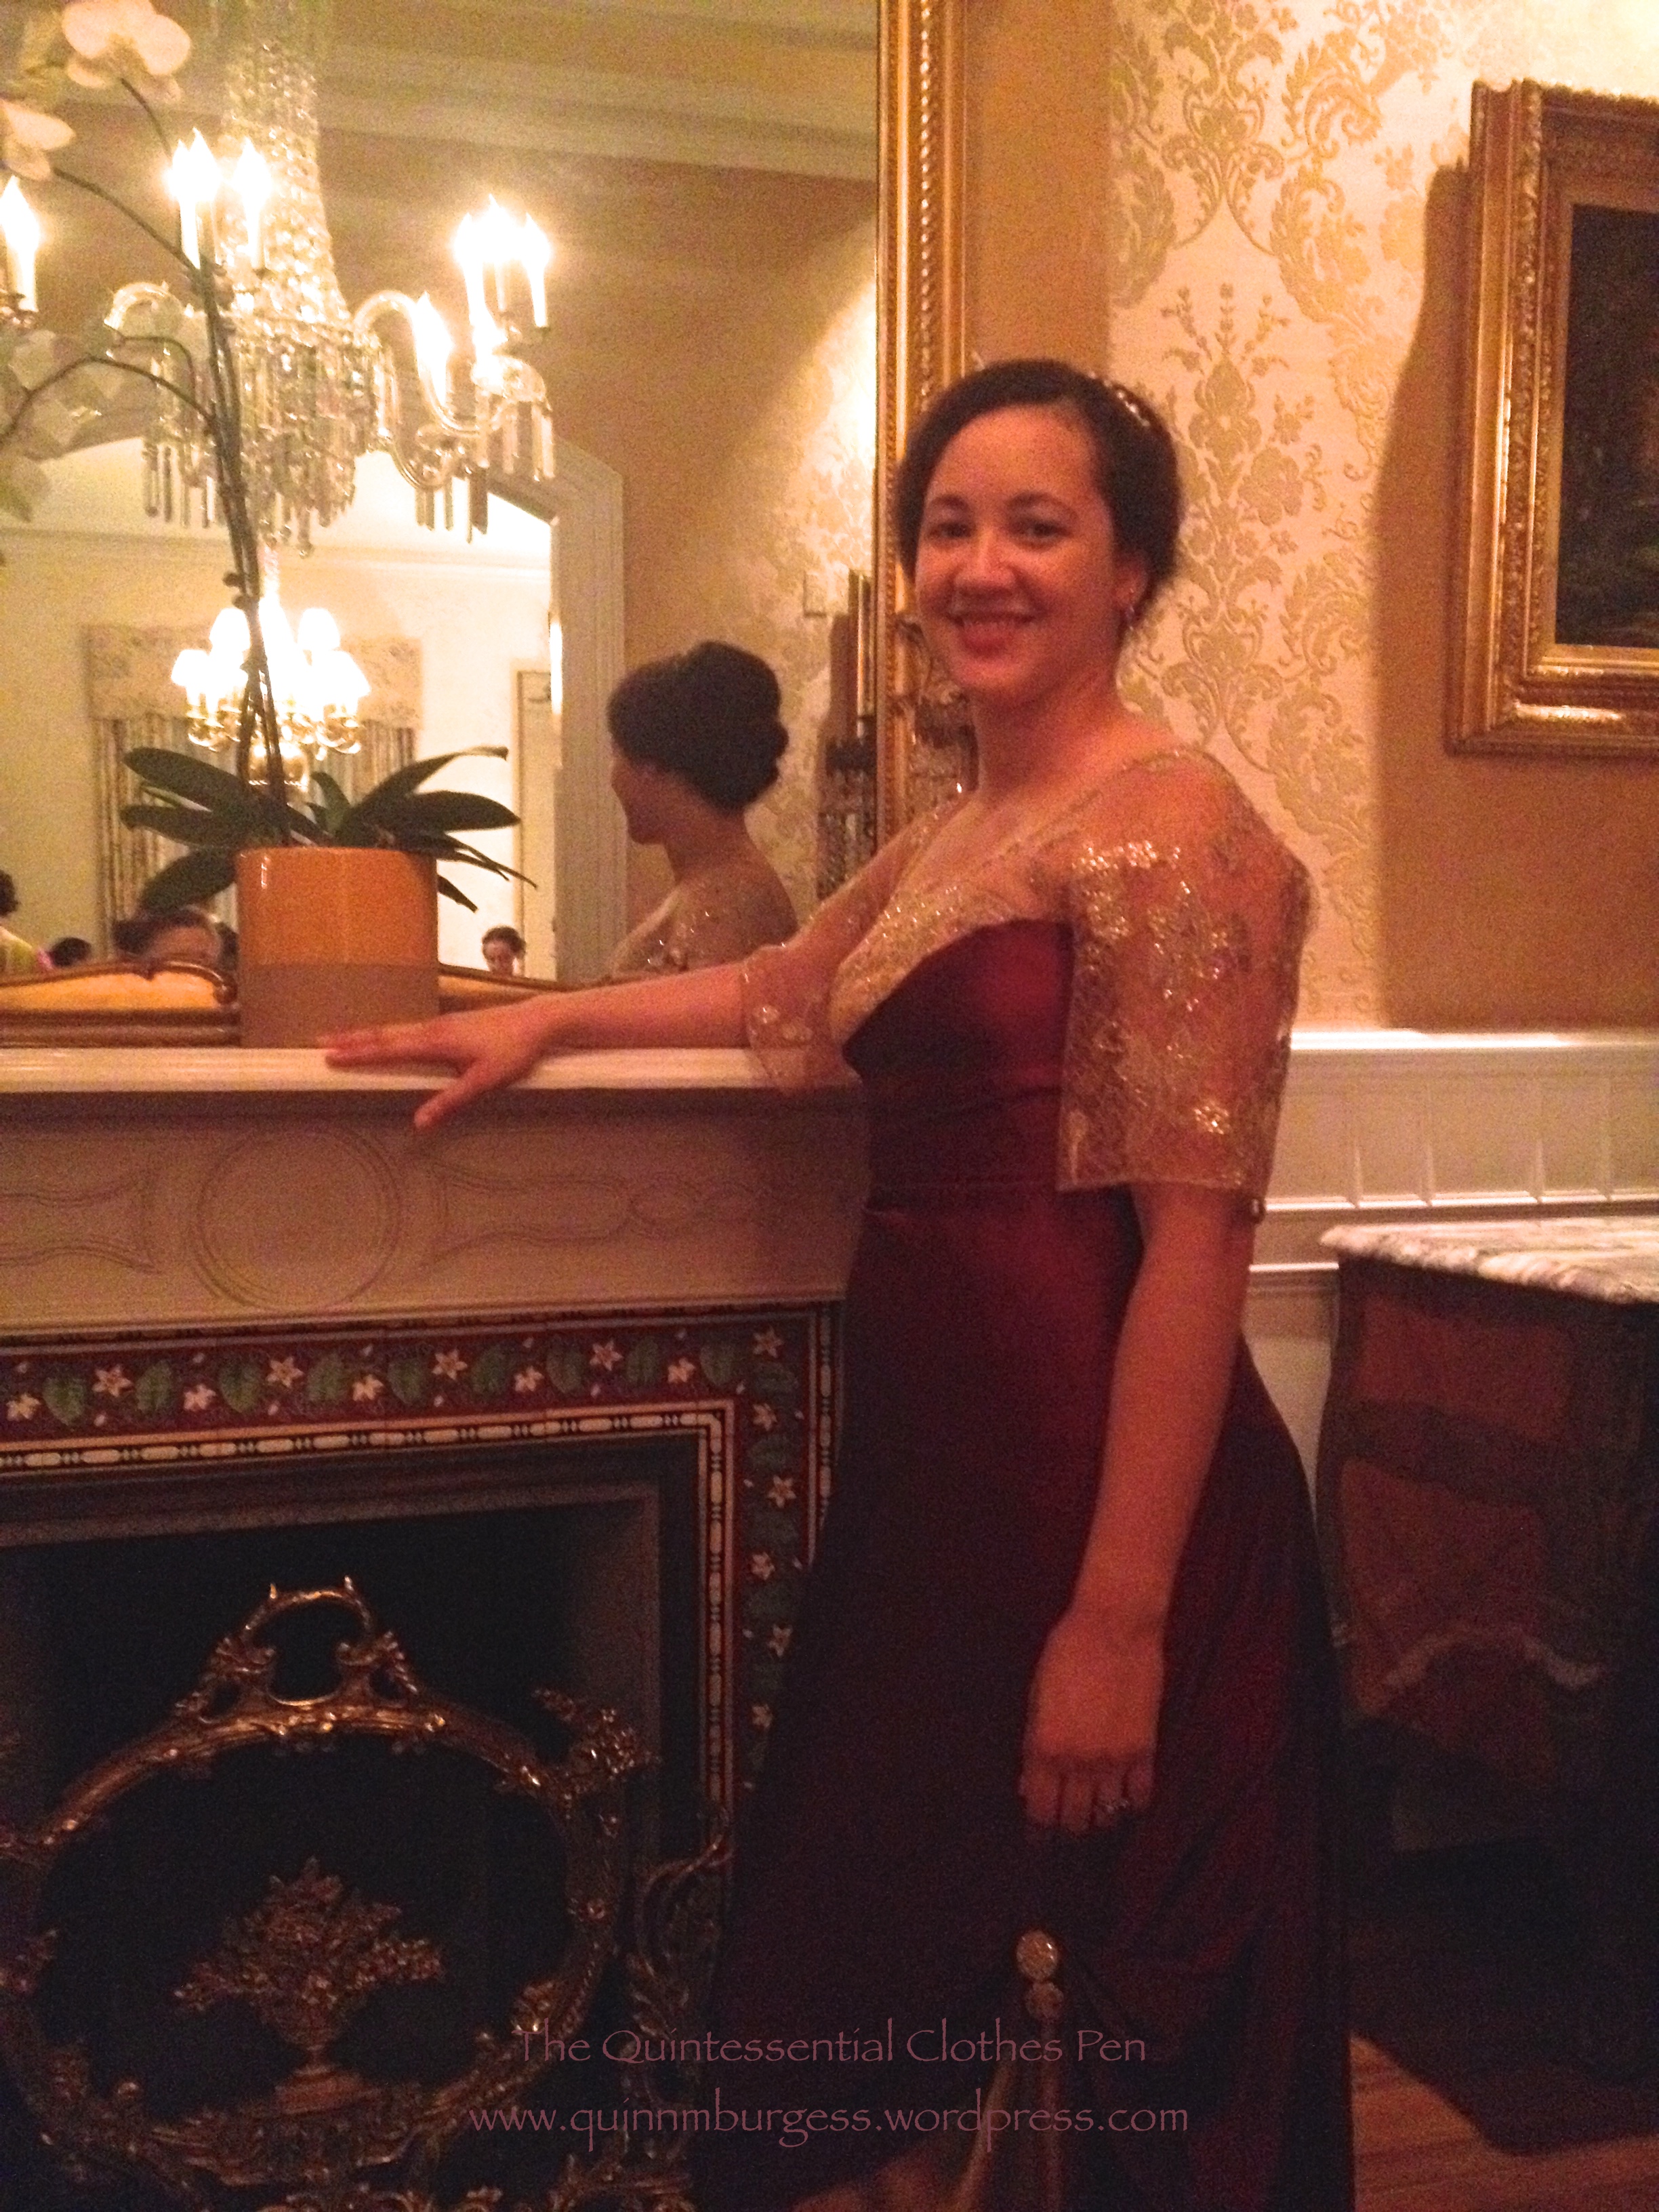
A lovely staircase in the front hall greets us, as is is typical of a mid-19 century home.Beautiful architectural details grace all aspects of the house: see the lovely gold damask wallpaper and the decorative woodwork along the stair moulding?At the top of the stairs there is another split set of stairs leading up to a cute balcony and bedrooms overlooking the ocean.Standing at the top of the balcony we can look into the fabulous tall mirror down the stairs into the hallway below.Back downstairs in the entrance hall we can appreciate another lovely mirror, beautiful fireplace, and elegant grandfather clock.Off to the opposite side of the hall from the fireplace is a small ballroom with a distinctive wood floor. Dancers whirled in small circles here all evening to the tune of live music.The ballroom’s walls were adorned with large pastoral paintings which sadly were peeling and in need of conservation. There was also this elegant sofa on one side. I love that the colors in these dresses complement each other so well and that the attitudes of each person are so distinctive and pretty.And here I am, wearing my burgundy and gold 1912 evening gown, which harmonized beautifully with the colors in the entry hall. See that wallpaper? I love it!
I was rather undecided about attending this event until the last moment, so I did a reprise of my hair style from July using the beaded gold necklace as a headband, but did it hastily and without a curling iron, so the texture was my normal wavy frizz rather than defined waves and curls. I’m glad I attended, though, because I had a lovely time and really enjoyed the house. I hope you also enjoyed this short visit to Egg Rock!
We performed on George’s Island again this year and were quite thankful that the weather was slightly cloudy and at least 15 degrees cooler than last year! It was a great opportunity for all of us to wear our cotton print day dresses again and it was neat to see the entire dance troupe all wearing cotton dresses with a pattern (no solids to be seen!).
I wore Georgina just as I did last year, the only difference being that I took a little bit of time to make a collar for this year. I had wanted to last year but ran out of time. It seemed more important to have the dress than to have a collar without the dress… But it was entirely feasible this year to add just the small item of the collar and I do think it really completes my outfit quite nicely.
New collar!
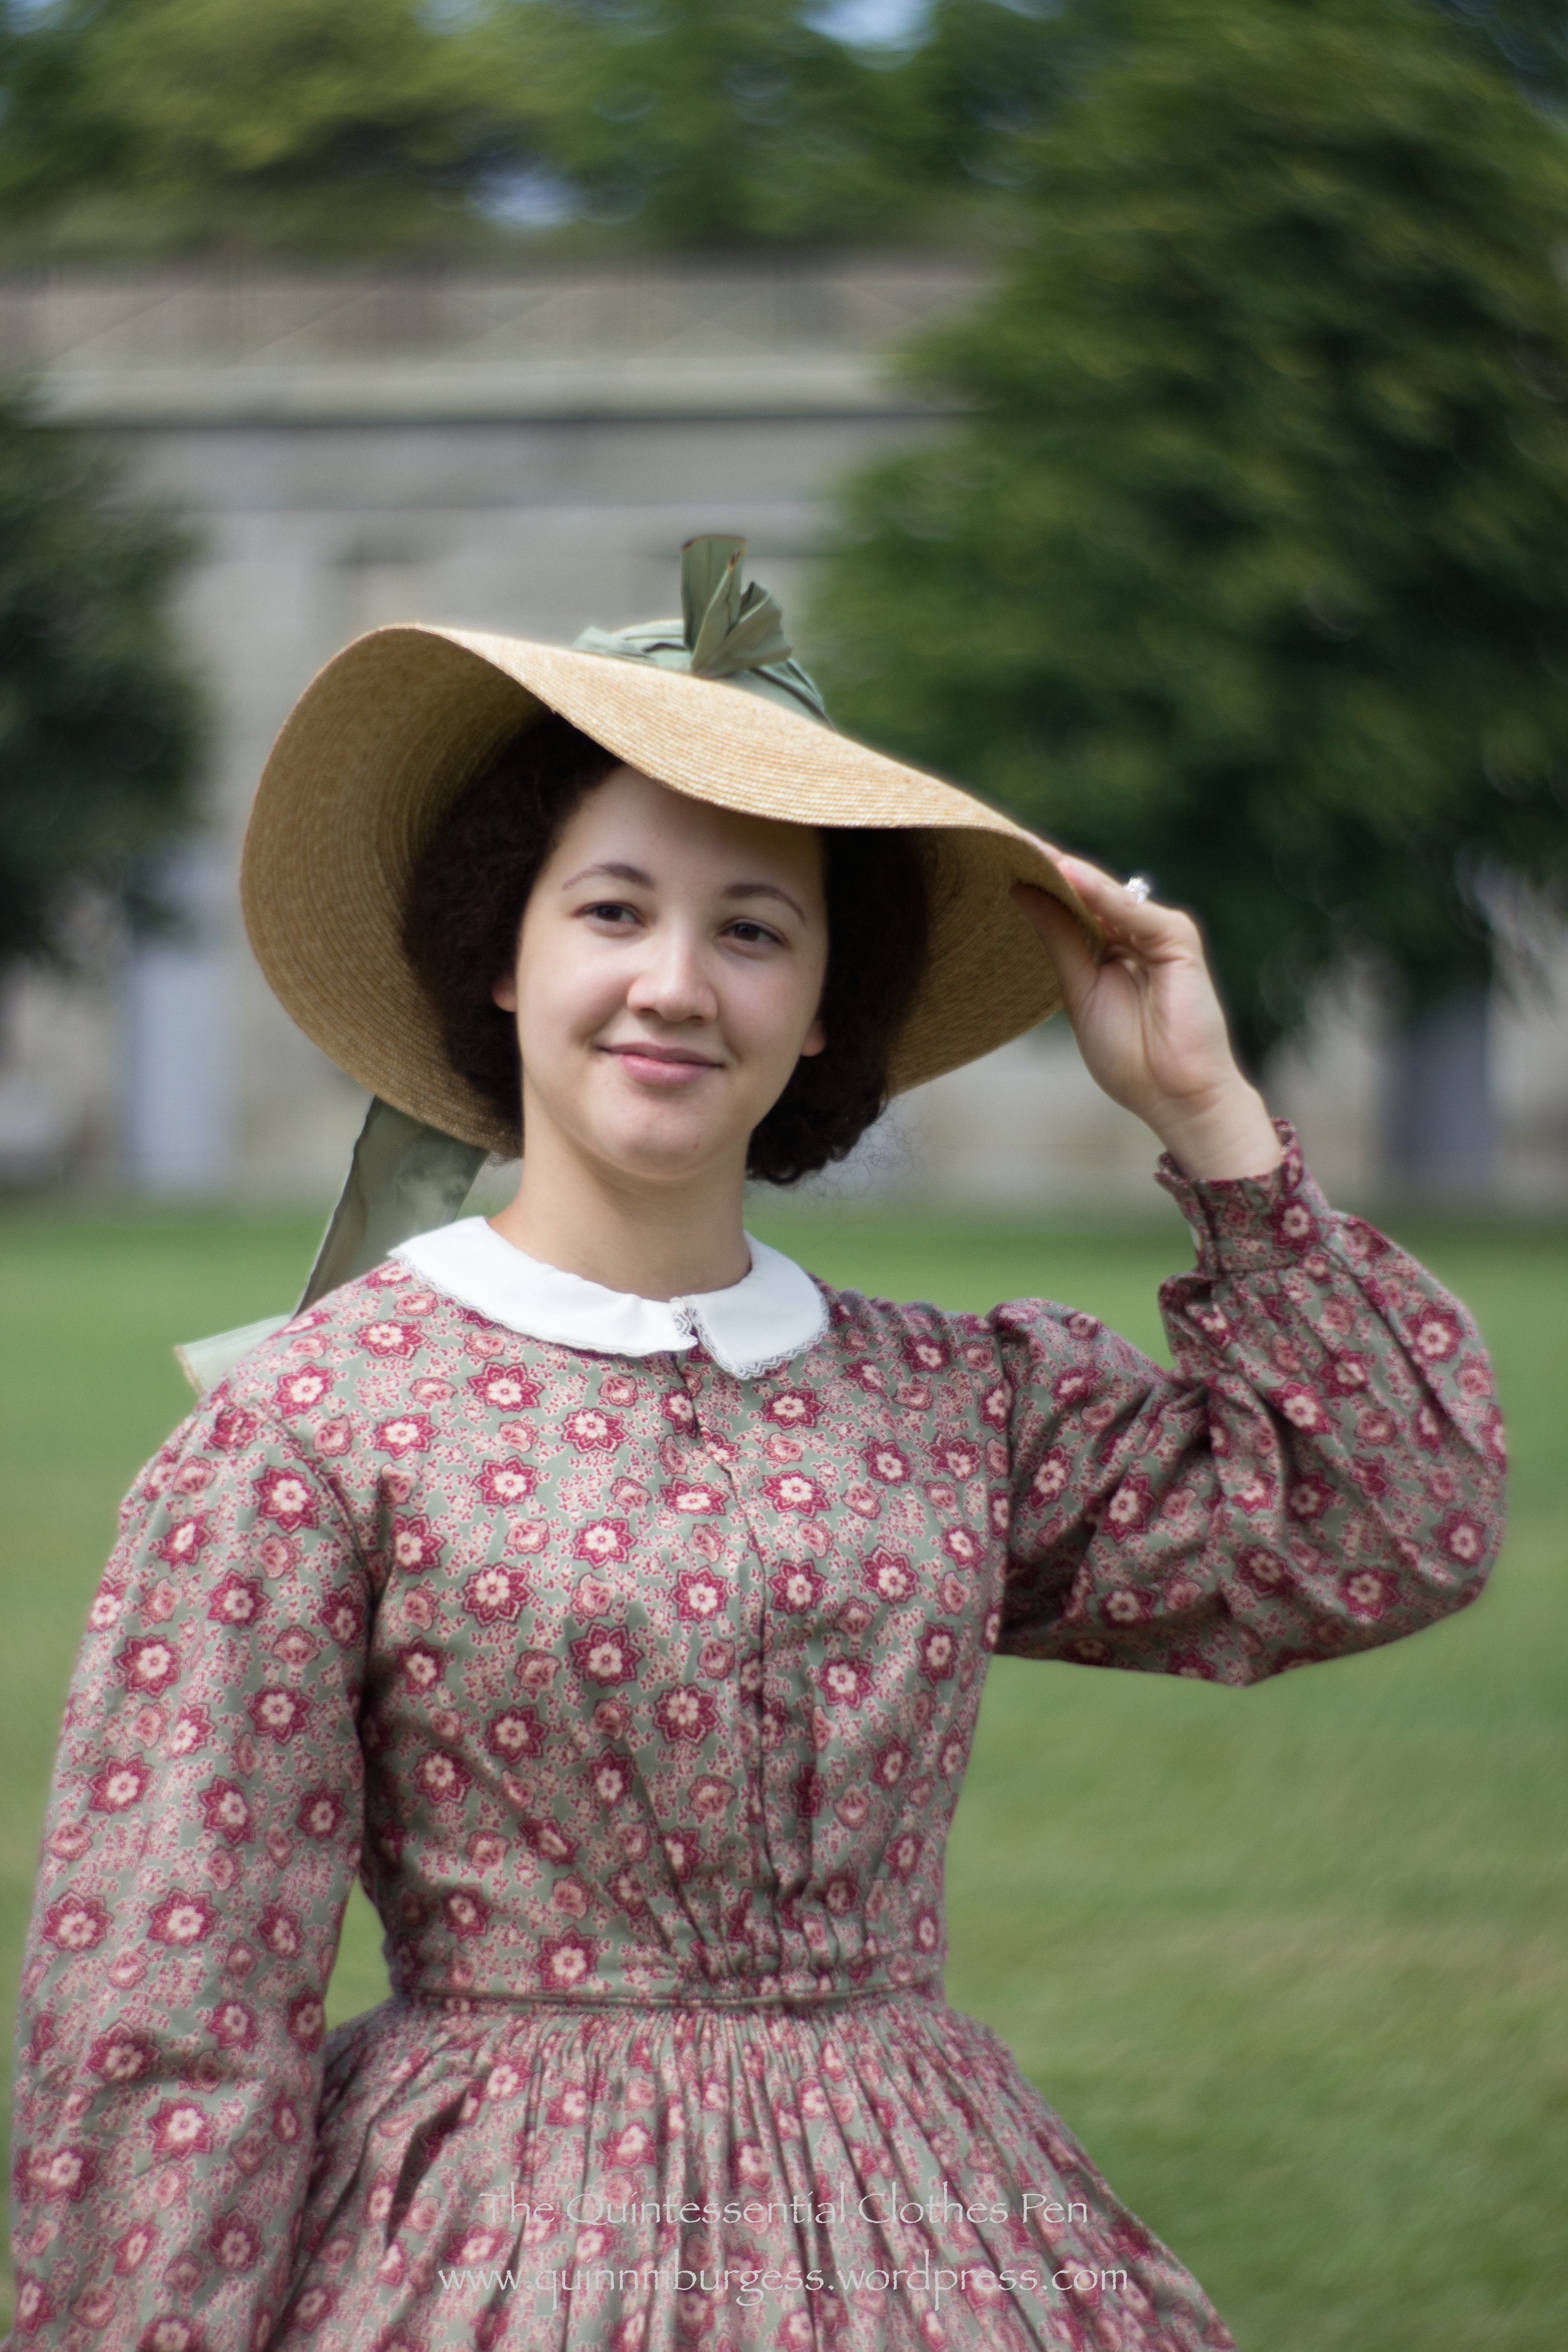
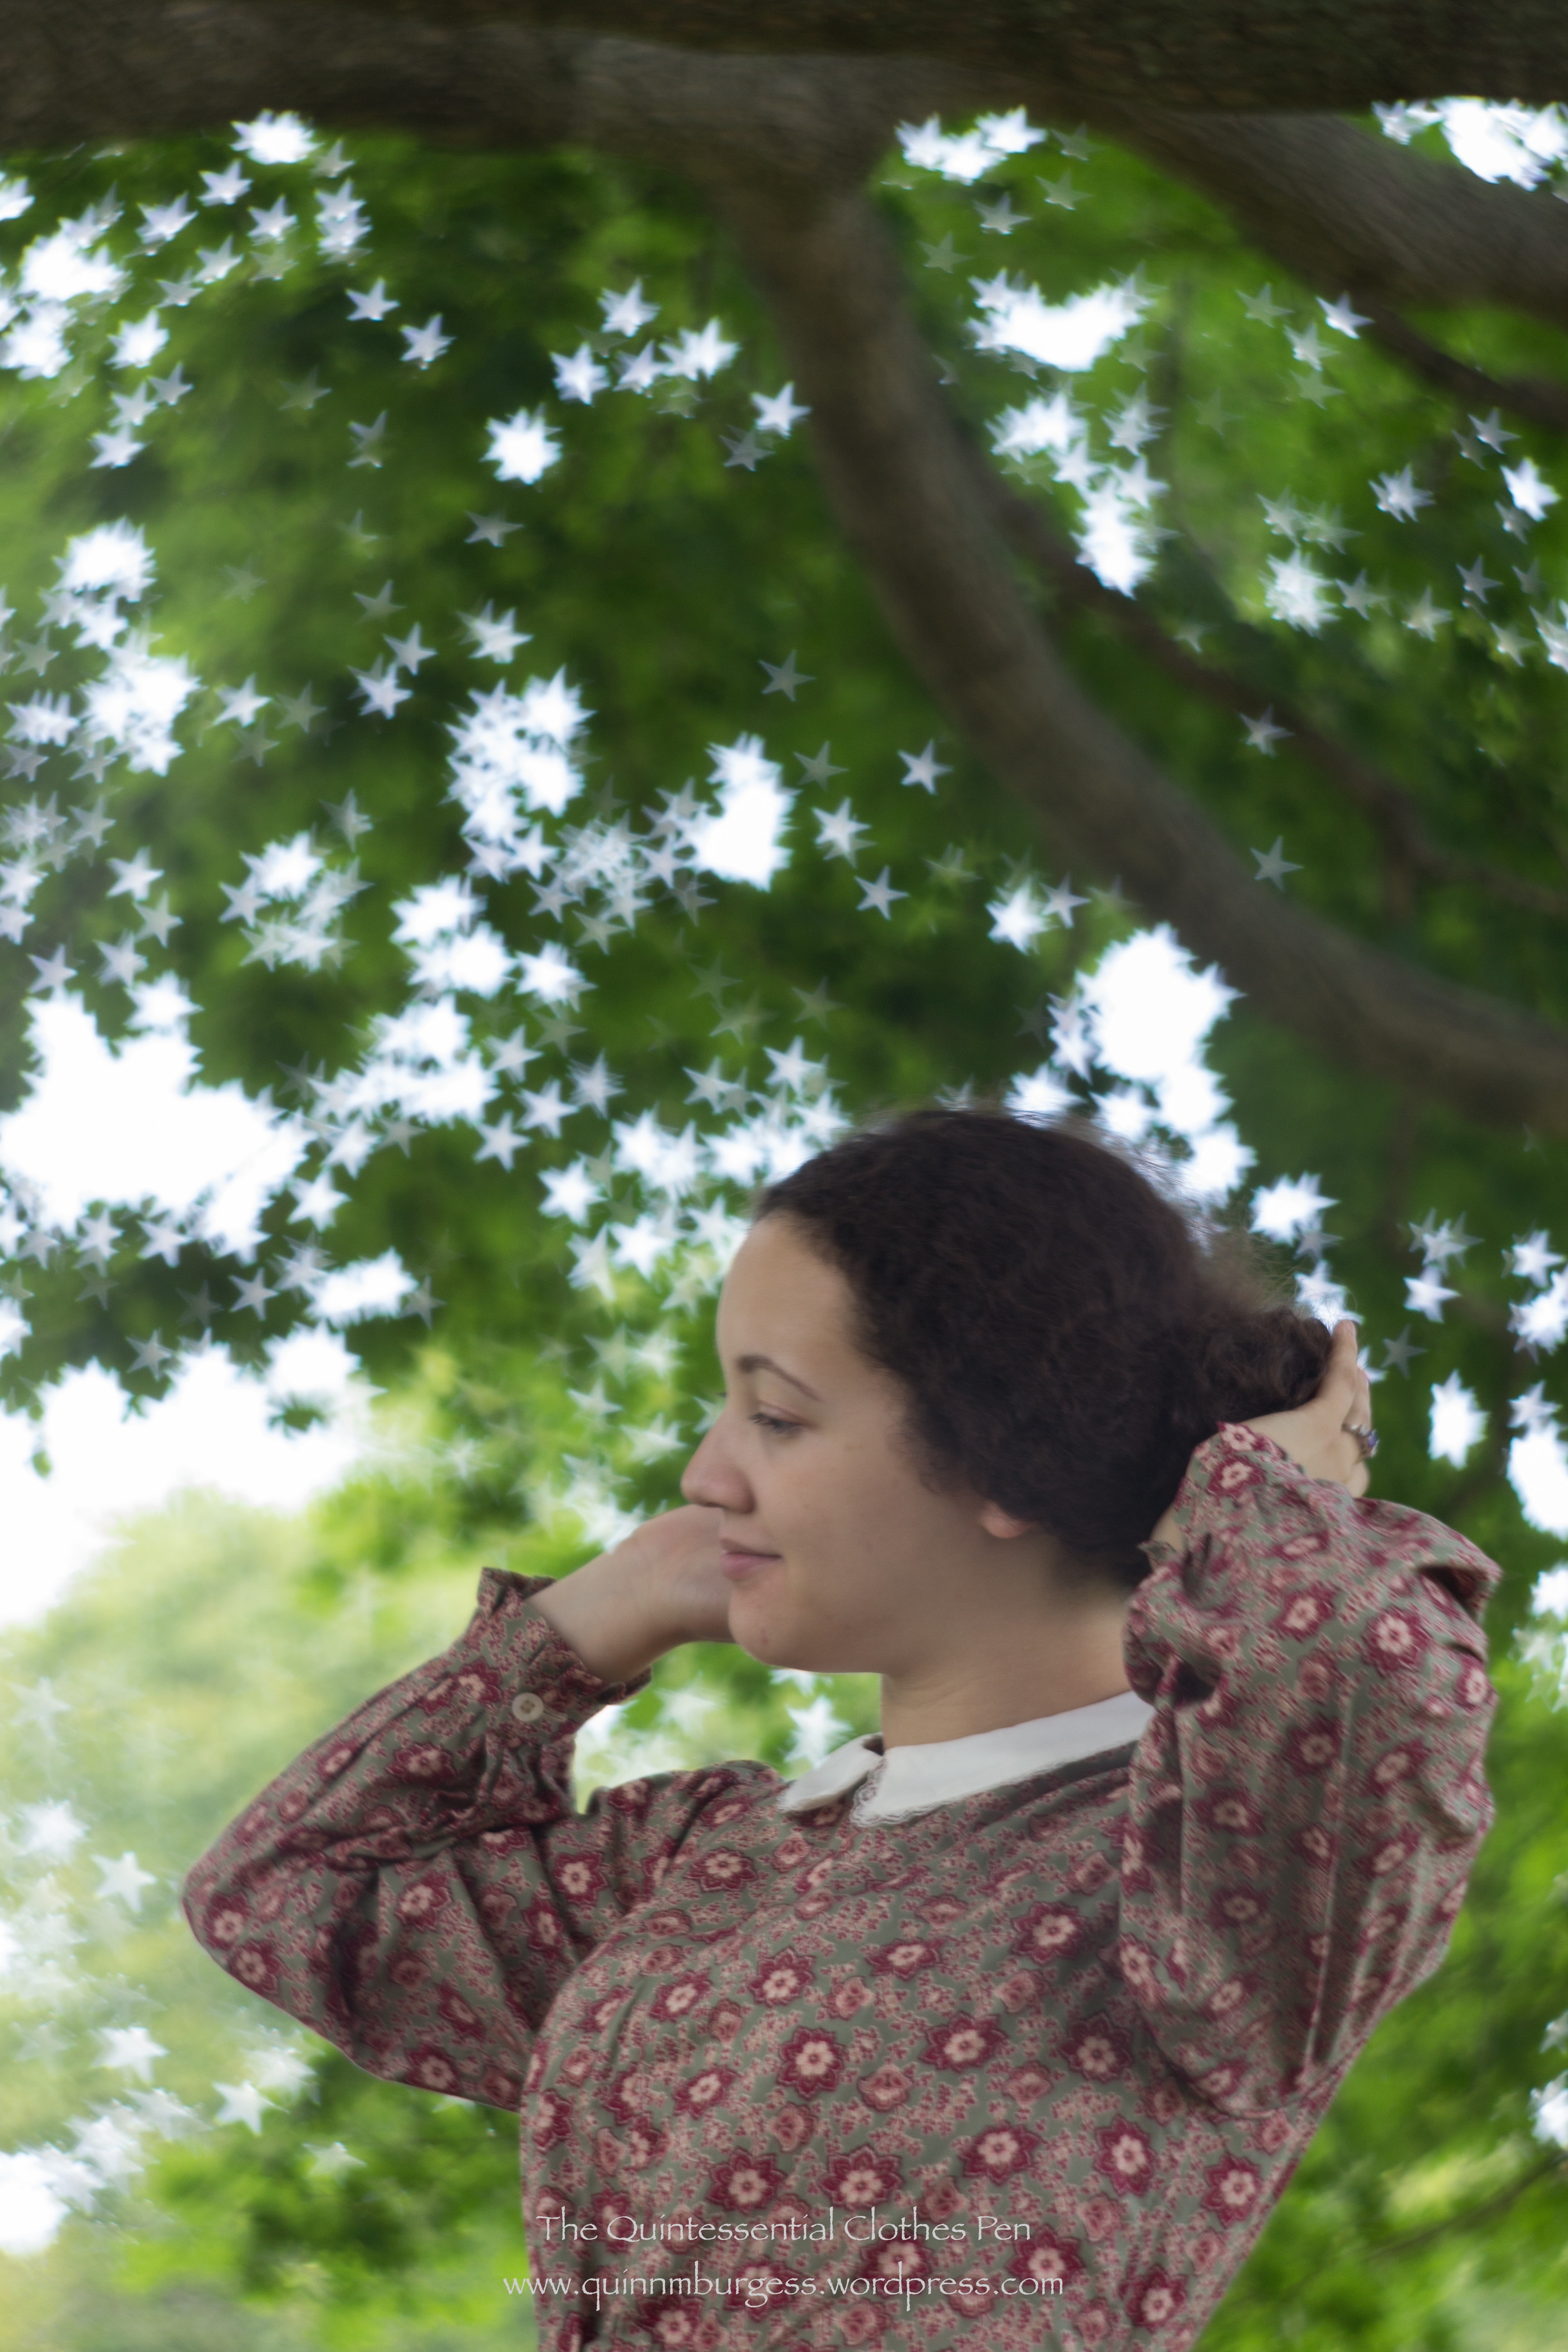
This year, our friend with the camera had purchased a new, special, Petzval lens (you can learn more about it and 19th century photography here at her blog). It’s a modern digital version of a historic lens. I love the pictures it produces! I’ve been told that the background is sort of swirled when the picture is captured, but to me it just looks nicely diffused and out of focus. It’s a lovely contrast to the foreground, which stays nicely in focus. All of these pictures were taken in color, but some of them are much more stunning in black and white.
This one captures the breeze and a bit of sun squint…This one a burst of joy and laughter…This one the tired desire for food during a picnic break…And this one just a simple stroll across the lawn.
This last one made use of a special part of the new lens. There is a piece which can be changed out and which creates the interesting background variations. All of the previous pictures were taken using the piece which blurs the background, but this last one was taken using the piece which causes the light in the background to be star shaped. Isn’t that neat?
Fixing my wind swept and straw hat frizzed hair… with stars in the leaves!
The collar is constructed from 2 layers of ivory cotton from my small bits stash (at least, it’s likely cotton… I don’t remember where it came from and there was the perfect amount, so I just went with it without knowing the details). It is edged with ivory lace. I made the pattern directly on Georgina’s day bodice so that it would fit the neck perfectly. It’s mostly machine sewn with hand finishing. It is lightly basted on to the piping at the neck edge of the bodice so that I can easily remove it if I want to in the future. I’m quite satisfied. I like the scale, the lace, and I think it adds a nice 1850s touch, completing the ensemble.
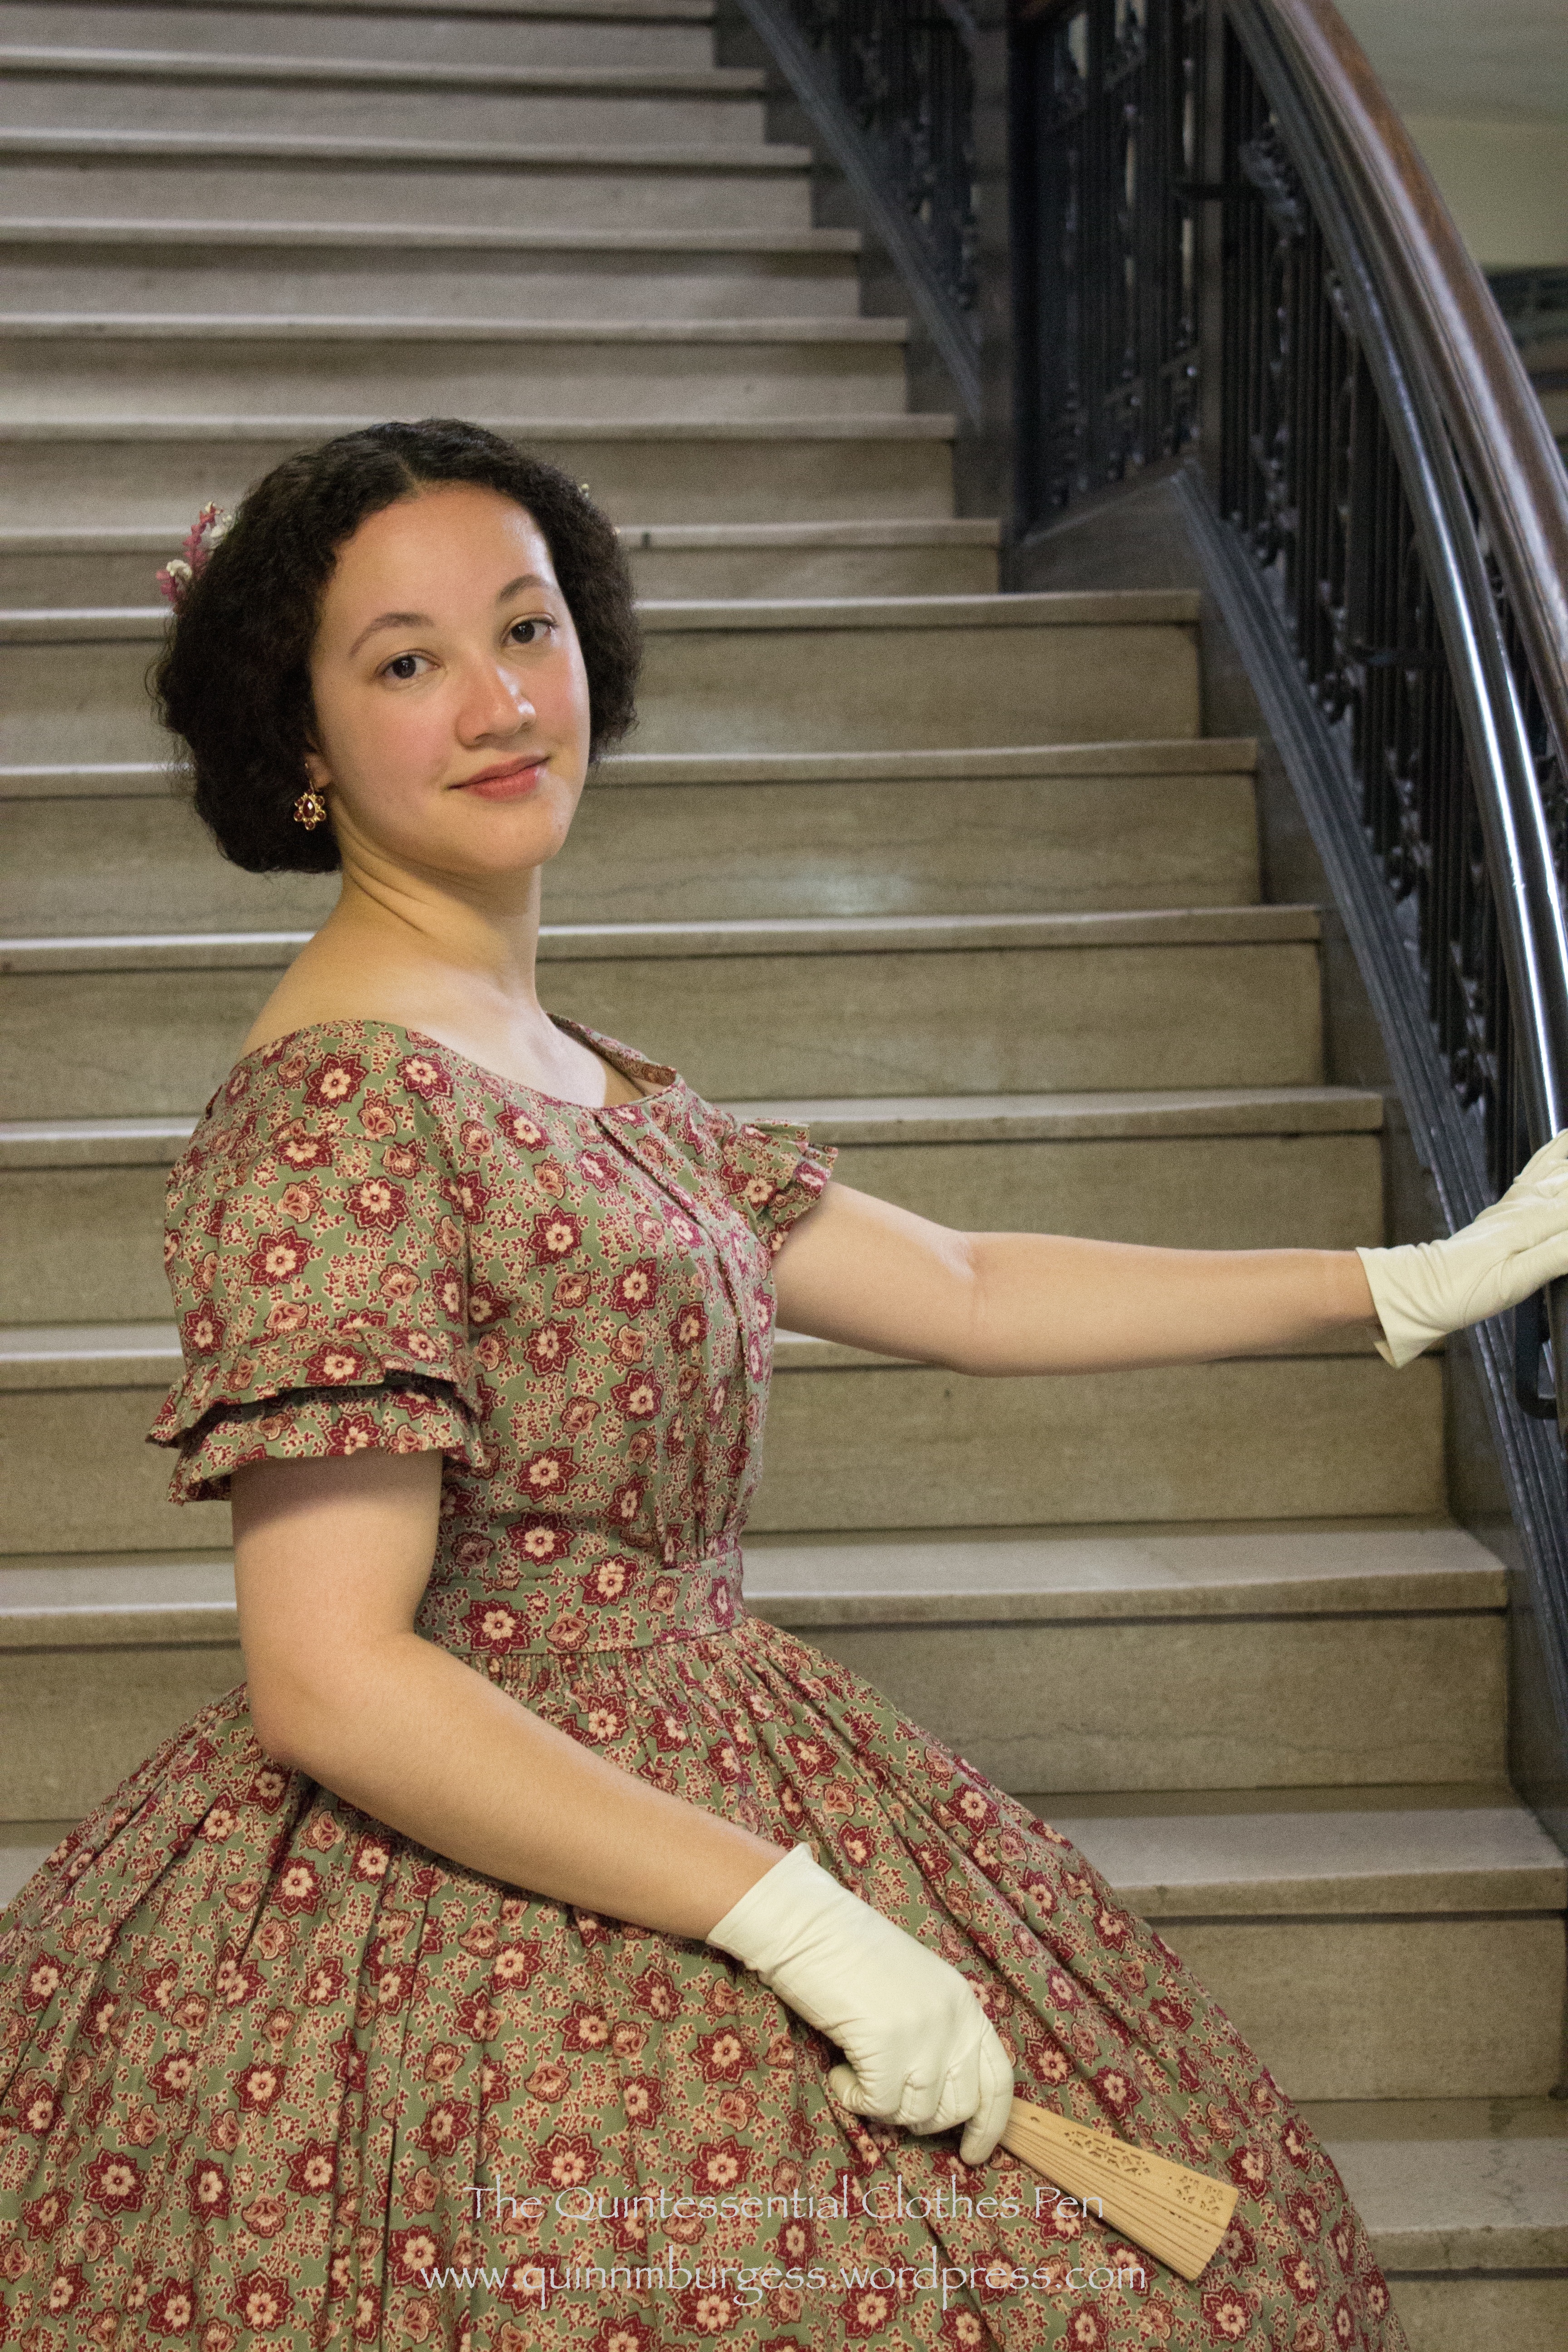
Here are a few group pictures from the recent ball at which Georgina’s new evening bodice made her first appearance. As I mentioned before, it was a lovely ball with enthusiastic and elegant dancers. I had a fantastic time.
Four of us wearing cotton dresses. You might remember that the print dresses (Georgina, the green dress, and the purple dress) were all made from mid-19th century historic cotton prints and worn with day bodices last summer at our George’s Island performance.
And remember this picture, from Newport Vintage Dance Week back in 2012? Different time period, obviously, but The Next Generation of vintage dancers is still going strong, so we thought we’d take a TNG picture at this ball, too!
At Newport Vintage Dance Week in August 2012.A more recent group of TNG.
It’s very rewarding to be continuing the legacy of historic dancing in beautiful clothes with lovely companions and in stunning places. Next weekend, Georgina’s day bodice will be making another appearance on George’s Island for another vintage dance performance. I’m sure we’ll have pictures!
A few months ago, I had a master plan to use the leftover yardage from Georgina, my 1858 cotton print day dress, to make an evening bodice in addition to her current day bodice for versatility and washability. Luckily, I was able to complete the bodice and a new hair crescent before my life exploded in June and I was smothered under an immense amount of work. I am pleased to have work, don’t get me wrong, but I was so exhausted by the end of the month all I could do was sleep and be disoriented! I’ve just come back from a vacation and feel like I can peer out from under my rock and join the world again! So, to celebrate constructing historic clothing for myself rather than other people, here is a post about a really neat addition to my historic wardrobe! And it fits into the current HSF challenge #13: Under $10, a bonus since the HSF challenges haven’t lined up very well with a lot of my projects this year.
c. 1855 new evening bodice, with previously constructed skirt. Worn with all the usual underpinnings (chemise, my new corset, drawers, stockings, hoops, and petticoat) and accessorized with gloves, fan, earrings, and a new hair crescent. Oh, and I’m wearing burgundy velvet shoes! No picture of that, though.
Pattern: I began with Past Patterns #701 but altered it extensively to fit me, to have pleats and gathers on the exterior, and to have an evening neckline. The sleeve pattern was drafted by me.
Year: c. 1855
Notions: Thread, plastic wire ties for boning, hooks and eyes, and cotton cording.
How historically accurate?: Based off of historic examples, constructed with accurate details… I think the only compromise is the plastic boning, which I used because I didn’t have the right length in metal, and because plastic is easily washable (and I want this to be a garment that can be washed easily–that’s part of the goal in having a cotton evening bodice!).
Hours to complete: I have no idea… 32 hours maybe? I really didn’t keep track at all on this project.
First worn: To a mid-19th century ball in June (one of the few moments of respite in my crazy month).
Total cost: About $3 for approximately 1 yard of historic cotton print and a lot of stash materials, which count as free, since I have no idea what I paid for them at this point! Let’s call the total about $8.
Inside of the bodice.
As you know, I like things to be tidy. All of the seam allowances are either hidden between the layers of fabric or nicely finished. There are plastic bones in the darts and the side seams. The bodice is machine sewn and hand finished. (One amusing mistake is that I cut the lining with a center front opening for fitting purposes (and left lots of seam allowance, as you can see) but then forgot to leave seam allowance in the back… So the lining doesn’t extend all the way to the folded edge of the print, but it’s all covered up so no one will ever know and it fits just fine… it’s just one of those amusing things!)
From the back with the right side flipped open.
The bodice closes with hooks and bars. I wanted to use metal bars but make sure they wouldn’t been seen, so I let about ¼” of the print extend past the points of the hooks to create an overlap. I also left extra print extended past the bars, in addition to all the seam allowance, in case I want or need to adjust the size of the bodice in the future. The bars are especially hard to spot on the print, but if you look carefully on the left you can see them. The neck and armsceyes both have very narrow cording.
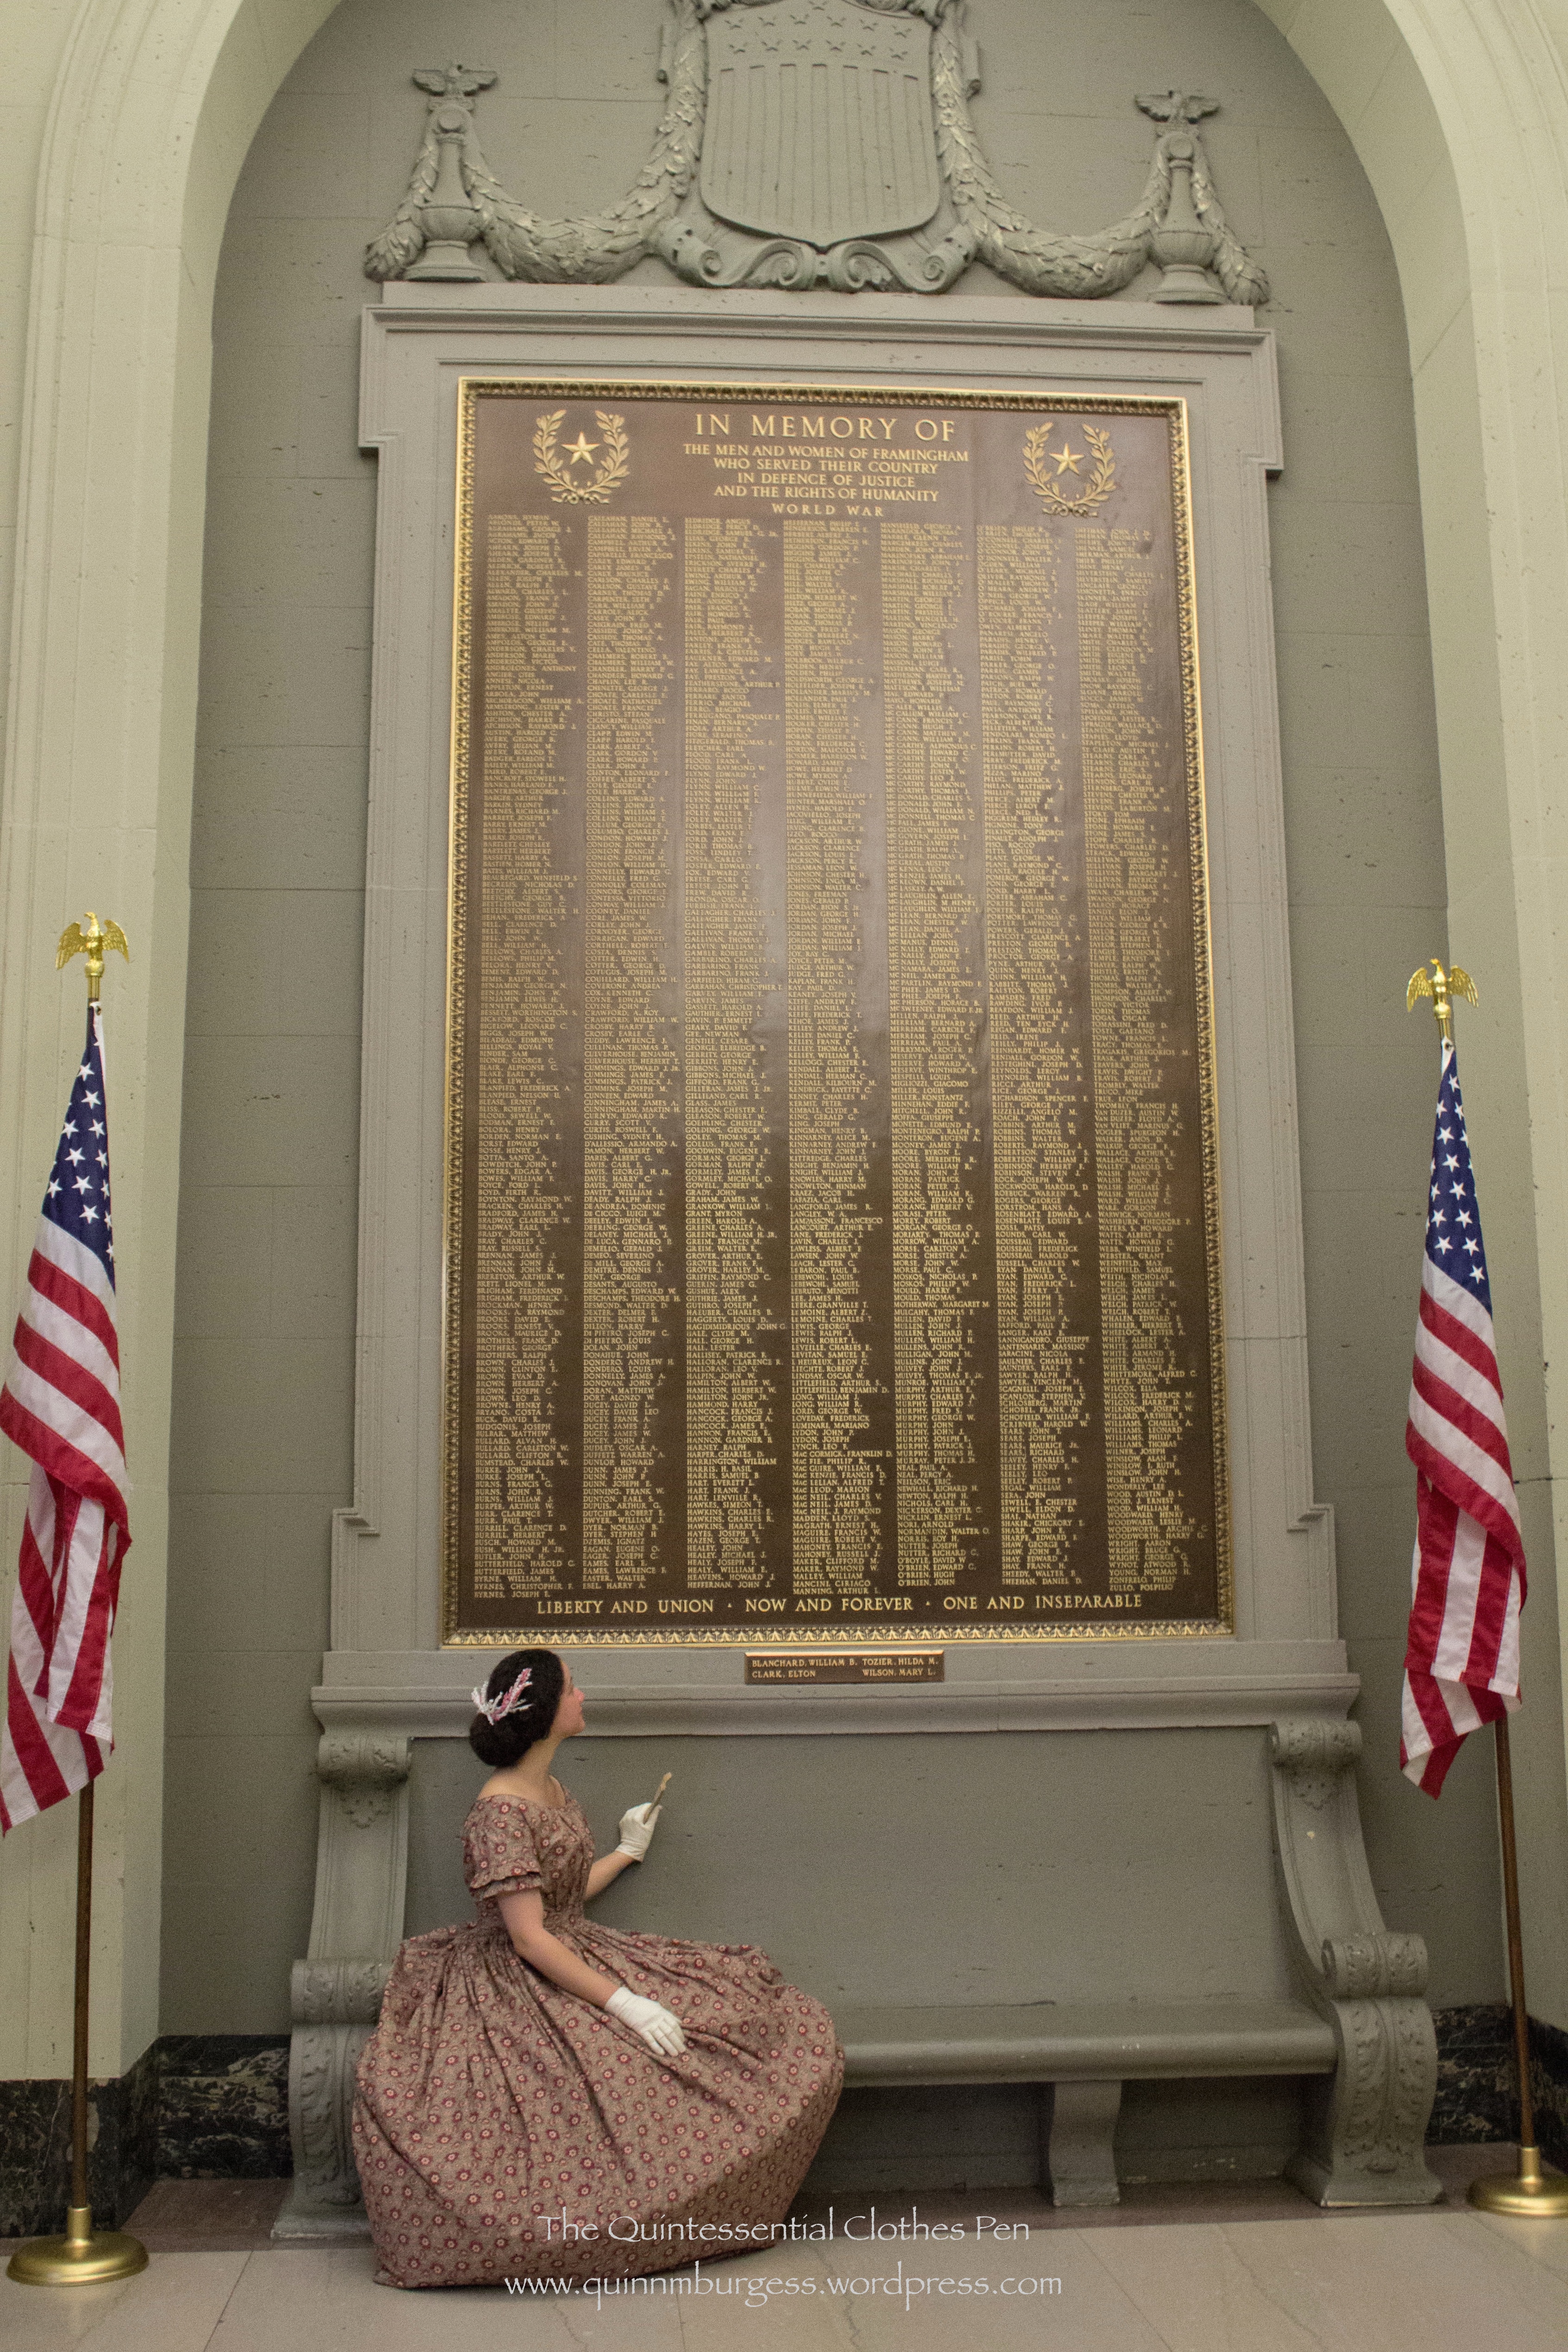
Appreciating those who have served our country. The ball was held in a local town hall which had lists for all the 20th century wars. I don’t think they have 19the century war plaques, but we thought it was a nice photo opportunity.
The defining design details were obviously the low neck and short sleeves, but there were other common details as well, such as double puffs or pleats to trim the sleeves, tubular sleeves without very much fullness at the top or bottom, 1.5″-2″ waistbands sitting on the outside of the skirt waistband, and gathered or pleated fullness on the fronts and backs (no darts on any of these cotton bodices). Some of the bodices have a yoke around the top so that only the bottom portion of the bodice is gathered, but this look says “young girl” not “grown woman” to me, so I opted for a bodice without a yoke.
In terms of construction, to have enough fabric in the print for the pleats and gathers on the print fabric, I first constructed and fit the lining. Then I separated one side of the lining to use as a pattern and added width to have space for the pleats I had planned. Once I had cut the print, I reassembled the lining and mounted the pleated print on top. From there on I treated the two layers as one.
Bodice closeup and a nice view of my successful 1850s round hair style!
As I’ve looked at 1850s images and fashion plates in comparison to early 1860s, especially, what I’ve noticed is that the 1850s really attempted to make a woman’s head look round or wide, whereas by the early 1860s the styles begin to grown upward and become vertically elongated. Here are some great examples of the round 1850s hair look: from 1851-53, c. 1855, from 1857, another 1857, yet another 1857, one more from 1857, and one from 1859. Here’s a super wide 1850s style and here is an example of the different shape of the early 1860s. The very round shape is what I was attempting to complement my 1850s bodice.
How? Well, I put gel right at the roots of my hair while it was still wet and then encouraged it to stand up from my head rather than being pulled back. I let it dry like that and it stayed all day. Later in the day, I styled it for my 1940s Anne Adams dress photos by brushing it out (and brushing my hair when it’s dry makes it big!!!). There was lots of added hair spray for that style, so when I went to restyle it there was plenty of fullness and air in my hair. I puffed the fronts and pinned them up and behind my ears then did a big roll with the rest.
The finishing touch was a new hair crescent that I made specifically to complement the colors in the cotton print. The crescent is made up of fully wired millinery flowers in ivory, some of which I dyed to be pinkish. Each extension is a singular stem and I just twisted them together until I liked the result. Lastly, I sewed a hair comb in the center to help attach it to my head and stabilize the wires. Each side also has a bobby pin to secure it to my head so the extended bits don’t flap around while I’m dancing.
Back view, and new hair crescent.
I’m super pleased with the end result: the bodice, the hair style, and the hair crescent! Oh, and the pictures (thanks!). And I had a marvelous time at the ball–it was one of the class of events which makes me feel radiant and at which I really enjoy myself (compared to those when I’m grumpy and grouchy at the world). And all the smiling and dancing gave me a lovely natural rosy glow in the pictures. The aloof face is my attempt at a 19th century portrait face (it took a long time to capture a picture then, which is my rationale for why everyone has a generally serious face!). You had to pick something you could keep still for a long time, and a big smile is hard to maintain without movement or looking staged.
I thought I’d share a couple of extant round reticules that bear some similarity to the one I recently made and posted about here. These both have a gathered or pleated outer circle surrounding a decorated inner circle. The bottom one uses the same cord as the ties are made of to circle the inner circle. Both reticules have an opening that is gathered to close, though the bottom one’s gathering direction is more unusual and unexpected. I like both, and think they are fun! Do you have a favorite between these?
A cotton reticule that the Met dates to the 1st quarter of the 19th century.A silk reticule that the MFA dates to the early 19th century.
I’ve recently finished another Regency reticule (I say another, because not too long ago I posted about a new red and gold reticule). This one is circular!
I love the round shape.
I was inspired by an image and directions found in The American Girl’s Book: Or, Occupation For Play Hours, which can be viewed here, on google books (the directions for the circular reticule are found on page 262). I was particularly encouraged by having already gathered silk strips left over after adjusting my brown fur muff at the end of last year. In addition to the leftover gathered silk strips, I used some pink silk scraps backed with coutil for the center of the circles, a bit of peach cotton for the lining, pink poly ribbon for the handles (it was the best color, even though it wasn’t silk), and, for the beading, 2 buckles I picked up for $1 each.
I didn’t really follow the directions, instead I just made up my own order of events. I started by cutting out the center circle and basting the coutil to the silk. Then I placed the buckles on these circles and pinned the gathered silk around the edges After that I sewed the edges. The next step was to sew the two finished sides together, then sew a lining of two more circles of the cotton. The last thing was to sew on the ribbons and whip stitch the top edges of the silk to the lining.
Looking down into the lining.
I decided not to have my ribbons gather the opening, because I so like the look of the circle and really didn’t want to ruin the effect. Plus, the reticule just perfectly fits my phone right now, and if the top was gathered it might not fit! Yay for a relatively quick project that’s entirely hand sewn. It’s exciting to have more reticule options!
As promised last post, here are a few pictures from the two balls at April’s Regency Intensive Dance Weekend. Hopefully, you remember my descriptions of this weekend as being full of amazing learning opportunities and lovely memories with amiable people. Indeed, both balls left me with a feeling, expressed by Elizabeth Bennet in Pride and Prejudice, of being at a very pleasant house party or private ball, though indeed these events are open to the public.
Dancers displaying their waltz at Saturday’s informal ball.
“It is your turn to say something now, Mr. Darcy. — I talked about the dance, and you ought to make some kind of remark on the size of the room, or the number of couples.”
He smiled, and assured her that whatever she wished him to say should be said.
“Very well. — That reply will do for the present. — Perhaps by and by I may observe that private balls are much pleasanter than public ones. — But now we may be silent.”
From Pride and Prejudice by Jane Austen, in Chapter Eighteen.
Looking into Sunday evening’s formal reception, which included a balcony for the musicians (see them in the mirror?).The formal ball included lavish and delicious refreshments.Taking a break from dancing to munch on some super yummy syllabub.
Indeed, we were dancing so often at the formal ball that we really didn’t get many pictures of the dancing in action, so you’ll just have to believe me when I express the elegance of the dancing and the ballroom scene.
You can read more about Sunday afternoon’s imaginary visit to Mansfield Park in this post and more about the new ball gown that I made for the Sunday evening ball in this post. You can read more about the entire weekend here, at Plaid Petticoats blog post about the weekend.
I know I promised pictures of the two balls at the Regency Intensive Dance Weekend in my last post, and I still promise that those are coming, but we’re going to take a quick detour before we get to ball pictures, to look at…
“A Dress Suited For Eve” (Elusive blue ball gown, 1811)
When dressed for the evening the girls nowadays
Scarce an atom of dress on them leave;
Nor blame them; for what is an evening dress
But a dress that is suited for Eve?
-1818
Quoted from page 42 of C. Willett Cunnington’s Fashion and Women’s Attitudes in the Nineteenth Century.
I came across this quote as I was either planning or starting this dress and I so enjoyed the curmudgeonly generation-gap thoughts expressed in it that it has stuck in my head as a sort of motto. I should explain that this quote occurs as Cunnington is discussing the new Classical style of gowns between the years 1800-1820. These dresses are usually not quite as scandalous to our modern sensibilities as they would have been to people at the time, especially those of older generations. Interestingly, this quote is from 1818 although in my opinion the often sheer muslin dresses from 1800-1810 are generally more revealing than those from 1810-1815, and especially more revealing than those from 1815-1820. Regardless, the idea of these dresses being so revealing that one is dressed as Eve would have been (i.e., wearing nothing!) is amusing to me.
This new gown is actually two separate gowns: a dark blue sleeveless underdress and a lightweight sleeved overdress in a color I call “elusive blue.” Both dresses are a mixture of hand and machine sewing, though all the finishing was done by hand on both pieces.
The underdress is simple and without a waist seam: it is gathered to a yoke in the back and gathered by a drawstring in front. The waist is created by tying the overdress. The overdress, however, is more complicated. The skirt is a simple rectangle with rounded front corners (two widths of fabric wide: there’s a seam at center back), but the bodice has front pieces, shoulder straps, and an interestingly gathered back piece, as well as sleeves. In addition to having more pieces, the overdress is edged all around with lace and faux pearls, as well as having puffs edged with lace and trim sewn on to the sleeves.
Back view (you can see the gathers on the back bodice piece).
I did indeed sew all the pearls on by hand, individually, and good thing, too! You see, if each pearl is sewn on individually then if the thread breaks you might loose a few pearls, but you won’t have your entire pearl job go spilling all over the dance floor (that could be catastrophic for the dancing and your hard work!). I did wear this to the Grand Ball on the Sunday evening of the Regency Dance Weekend, and by the end of the night I had lost a very small section of pearls along the back hem of my dress. Thanks to all my fastidious pearl sewing, that was all I lost and there were no comical/catastrophic scenes with pearls spilling on to the dance floor! If you look closely at the wavy lines you can see that they get a little wobbly at times, but I did do my best to be symmetrical despite the wobbles. I also did my best to estimate the wavelength of the pearls and replicate it as best I could while eyeballing as I went along. (In fact, I think my wavy lines of pearls are actually more regular than those on my inspiration dress.)
My dress is a direct interpretation of the ball gown at the Met from 1811 (pictured below). The most obvious difference is the colors I chose to use (partly because I found the fabulous elusive blue overdress fabric in the perfect light weight fabric for $1/yard!). I’m sure there are other small differences, too, but I did my best to follow the construction methods I gleaned from the zoom feature when making my dress. (The zoom feature on most of the Met’s pictures is so amazing! I love it.)
Ball gown, 1811, the Met.
As is usual with the first wearing of a new garment, there are things I am unsatisfied with and want to change. There are also things that didn’t quite get completed and need to be addressed.
First, the sleeves. My sleeves didn’t quite turn out like the ones in the inspiration photo, but they also didn’t get completed before I wore the dress (if you look closely, you’ll see that my sleeves are just raw edges on the bottom!). I ran out of time, but I also wasn’t sure that I would like how my sleeve puffs look and I didn’t want to spend time completing the sleeves if I was going to wind up disliking them in the end. Each puff is edged in the narrow bit I cut off of the wide edging lace and then also edged in a bit of trim that perfectly matches the elusive blue fabric (and that I purchased for about $2!). I don’t think my puffs look quite as elegant as the original, but they were a lot of work and I don’t have any more of that elusive blue trim to change things up. Also, if you look closely at the sleeves of the dress on the Met you’ll see that they are not displayed in the same way. I prefer the sleeve that is more puffed up (on the right), but I examined the pictures really closely and I think that it is just caught up on the mannequin and is intended to look like the other sleeve (on the left). So I have to decide, and that will help me determine how to finish the bottom of my sleeves.
Other things that bothered me were the length of my underdress (seems to have a similar length ratio to the inspiration, but I think I want my underdress to be about 2″ longer), the fact that I realized after sewing on all the lace that I had put in on with the wrong side facing out (oops! but I am absolutely not changing that!), and the fact that the blue underdress is a super bag without the overdress holding it in (I think part of the problem is my skirt shaping–I tried something new and it did not work–but the skirt kept wanting to poof out from between the fronts of the overdress, which I didn’t like). I’d like to address the underdress problems, but I’m not going to bother with that lace problem!
The lighting in this photo captures the colors of the dress much better than in the other photos.
I tried a new thing with my hair for this event which I think was quite successful. The poof is normal, but in front of it and my pearl hair “tiara” (it’s really a necklace!) are two narrow braids, one coming from each side of my head. I managed to hide the ends under the braids and my natural highlights allowed the braids to stand out from my front hair, in the right light (as with the picture, above). The only odd thing was covering up the points where the braids started. I liked it and I think I’ll try it again sometime. I also was able to wear some new earrings: green gems with little fake diamonds set around the edge of the teardrop shape. Despite not matching exactly, I think they suited the dress.
Ok, now the next post in this series really will be about the balls themselves!
This April, I was again blessed to be able to take a weekend and step out of my modern, incredibly busy life to join other like-minded individuals for a Regency Intensive Dance Weekend hosted by the Commonwealth Vintage Dancers. Here is the link to all of last year’s posts, which describe a weekend just as wonderful as this year’s turned out to be.
Saturday consisted of lots of dance class, followed in the evening by an informal ball. Sunday’s schedule had a little bit of dance class in the morning followed by a low-key afternoon of Regency non-dance activities and finished up with a reception and grand ball in the evening.
We took fewer pictures this year than last year, but we still captured the amazing essence of this wonderful event: Saturday’s ball really felt like an immersion into an intimate house party rather than a public ball, Sunday’s afternoon events were wonderfully relaxed and felt like an afternoon one might have while visiting Mansfield Park, and Sunday’s grand ball was amazing to behold and be a part of in terms of exquisite refreshments, companionable company, and excellent dancing.
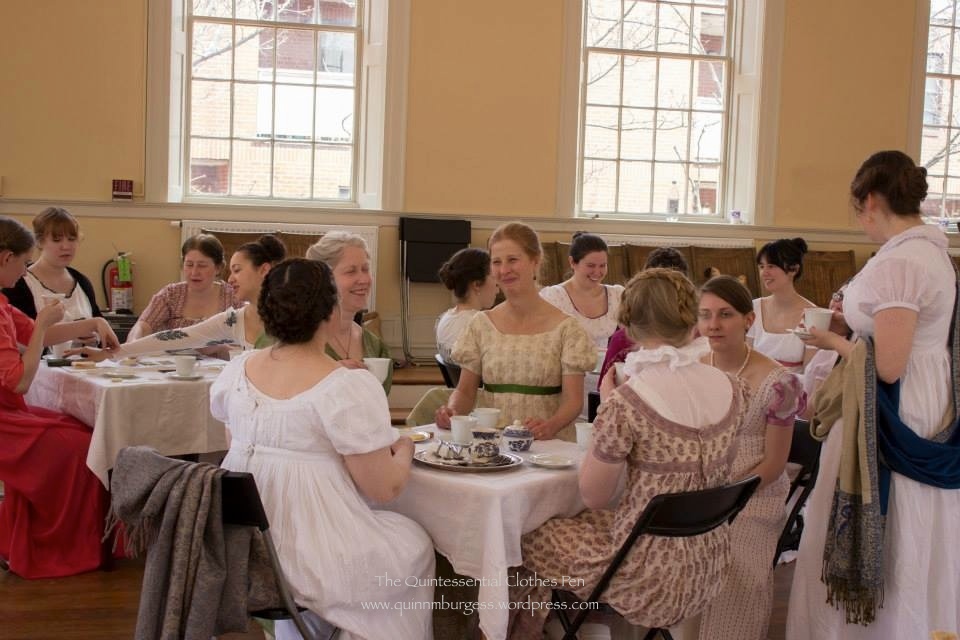
Having so few pictures of the Saturday evening informal ball, I’ve decided to just include them in a second post which will have pictures from both balls. So then this post will be about Sunday afternoon’s event. Activities included sword demonstrations, playing various period card games, participating in or watching a “theatrical,” listening to a short and impromptu piano interlude, and delighting in the delicious refreshments and tea. Of course, there was also lively conversation, as you would expect! (We had hoped to have some outdoor actives, too, such as playing graces in the park and taking a walk, but unfortunately it was raining all morning and things were wet, so we decided to stay inside. In the end, it turned out to be just fine and we still had a lovely time!)
Cards and counting chips laid out and ready to participate in a game.
The “theatrical” was staged for us by a group of interested and theatrically inclined ladies. They only had perhaps a portion of an hour to prepare a few scenes from The Rivals for us (a play first performed in 1775 and written by Richard Brinsley Sheridan). It was highly enjoyable and, we, the audience laughed a lot! Indeed, The Rivals is one of the plays that is dismissed by the party in Mansfield Park when they are thinking of putting on a play (hence why I’ve specifically mentioned that the afternoon felt like visiting Mansfield Park!). In the book, they decide on another play in the end (Lovers’ Vows, from 1798), but it was neat to see scenes from one of the plays mentioned in the book!
“All the best plays were run over in vain. Neither Hamlet, nor Macbeth, nor Othello, nor Douglas, nor The Gamester, presented anything that could satisfy even the tragedians; and The Rivals, The School for Scandal, Wheel of Fortune, Heir at Law, and a long et cetera, were successively dismissed with yet warmer objections.” From Mansfield Park by Jane Austen, in Chapter Fourteen.
Small props had been thought of ahead of time and provided extra amusement: the hat, cravat, and beard were a few of these amusing things!Really, the scenes were amusing and acted with conviction.Delicious refreshments (we had a variety of scones, cookies, and cucumber sandwiches). Tea is being poured out in the background.A portion of the party enjoying card games, conversation, and refreshments.
Our venue was built around 1816-1817 and provides a wonderful environment for Regency activities especially: beautiful windows, high ceilings, a lovely dance floor that lends itself to Regency style dancing, etc. I also like the creamy butter yellow walls with lovely white trim.
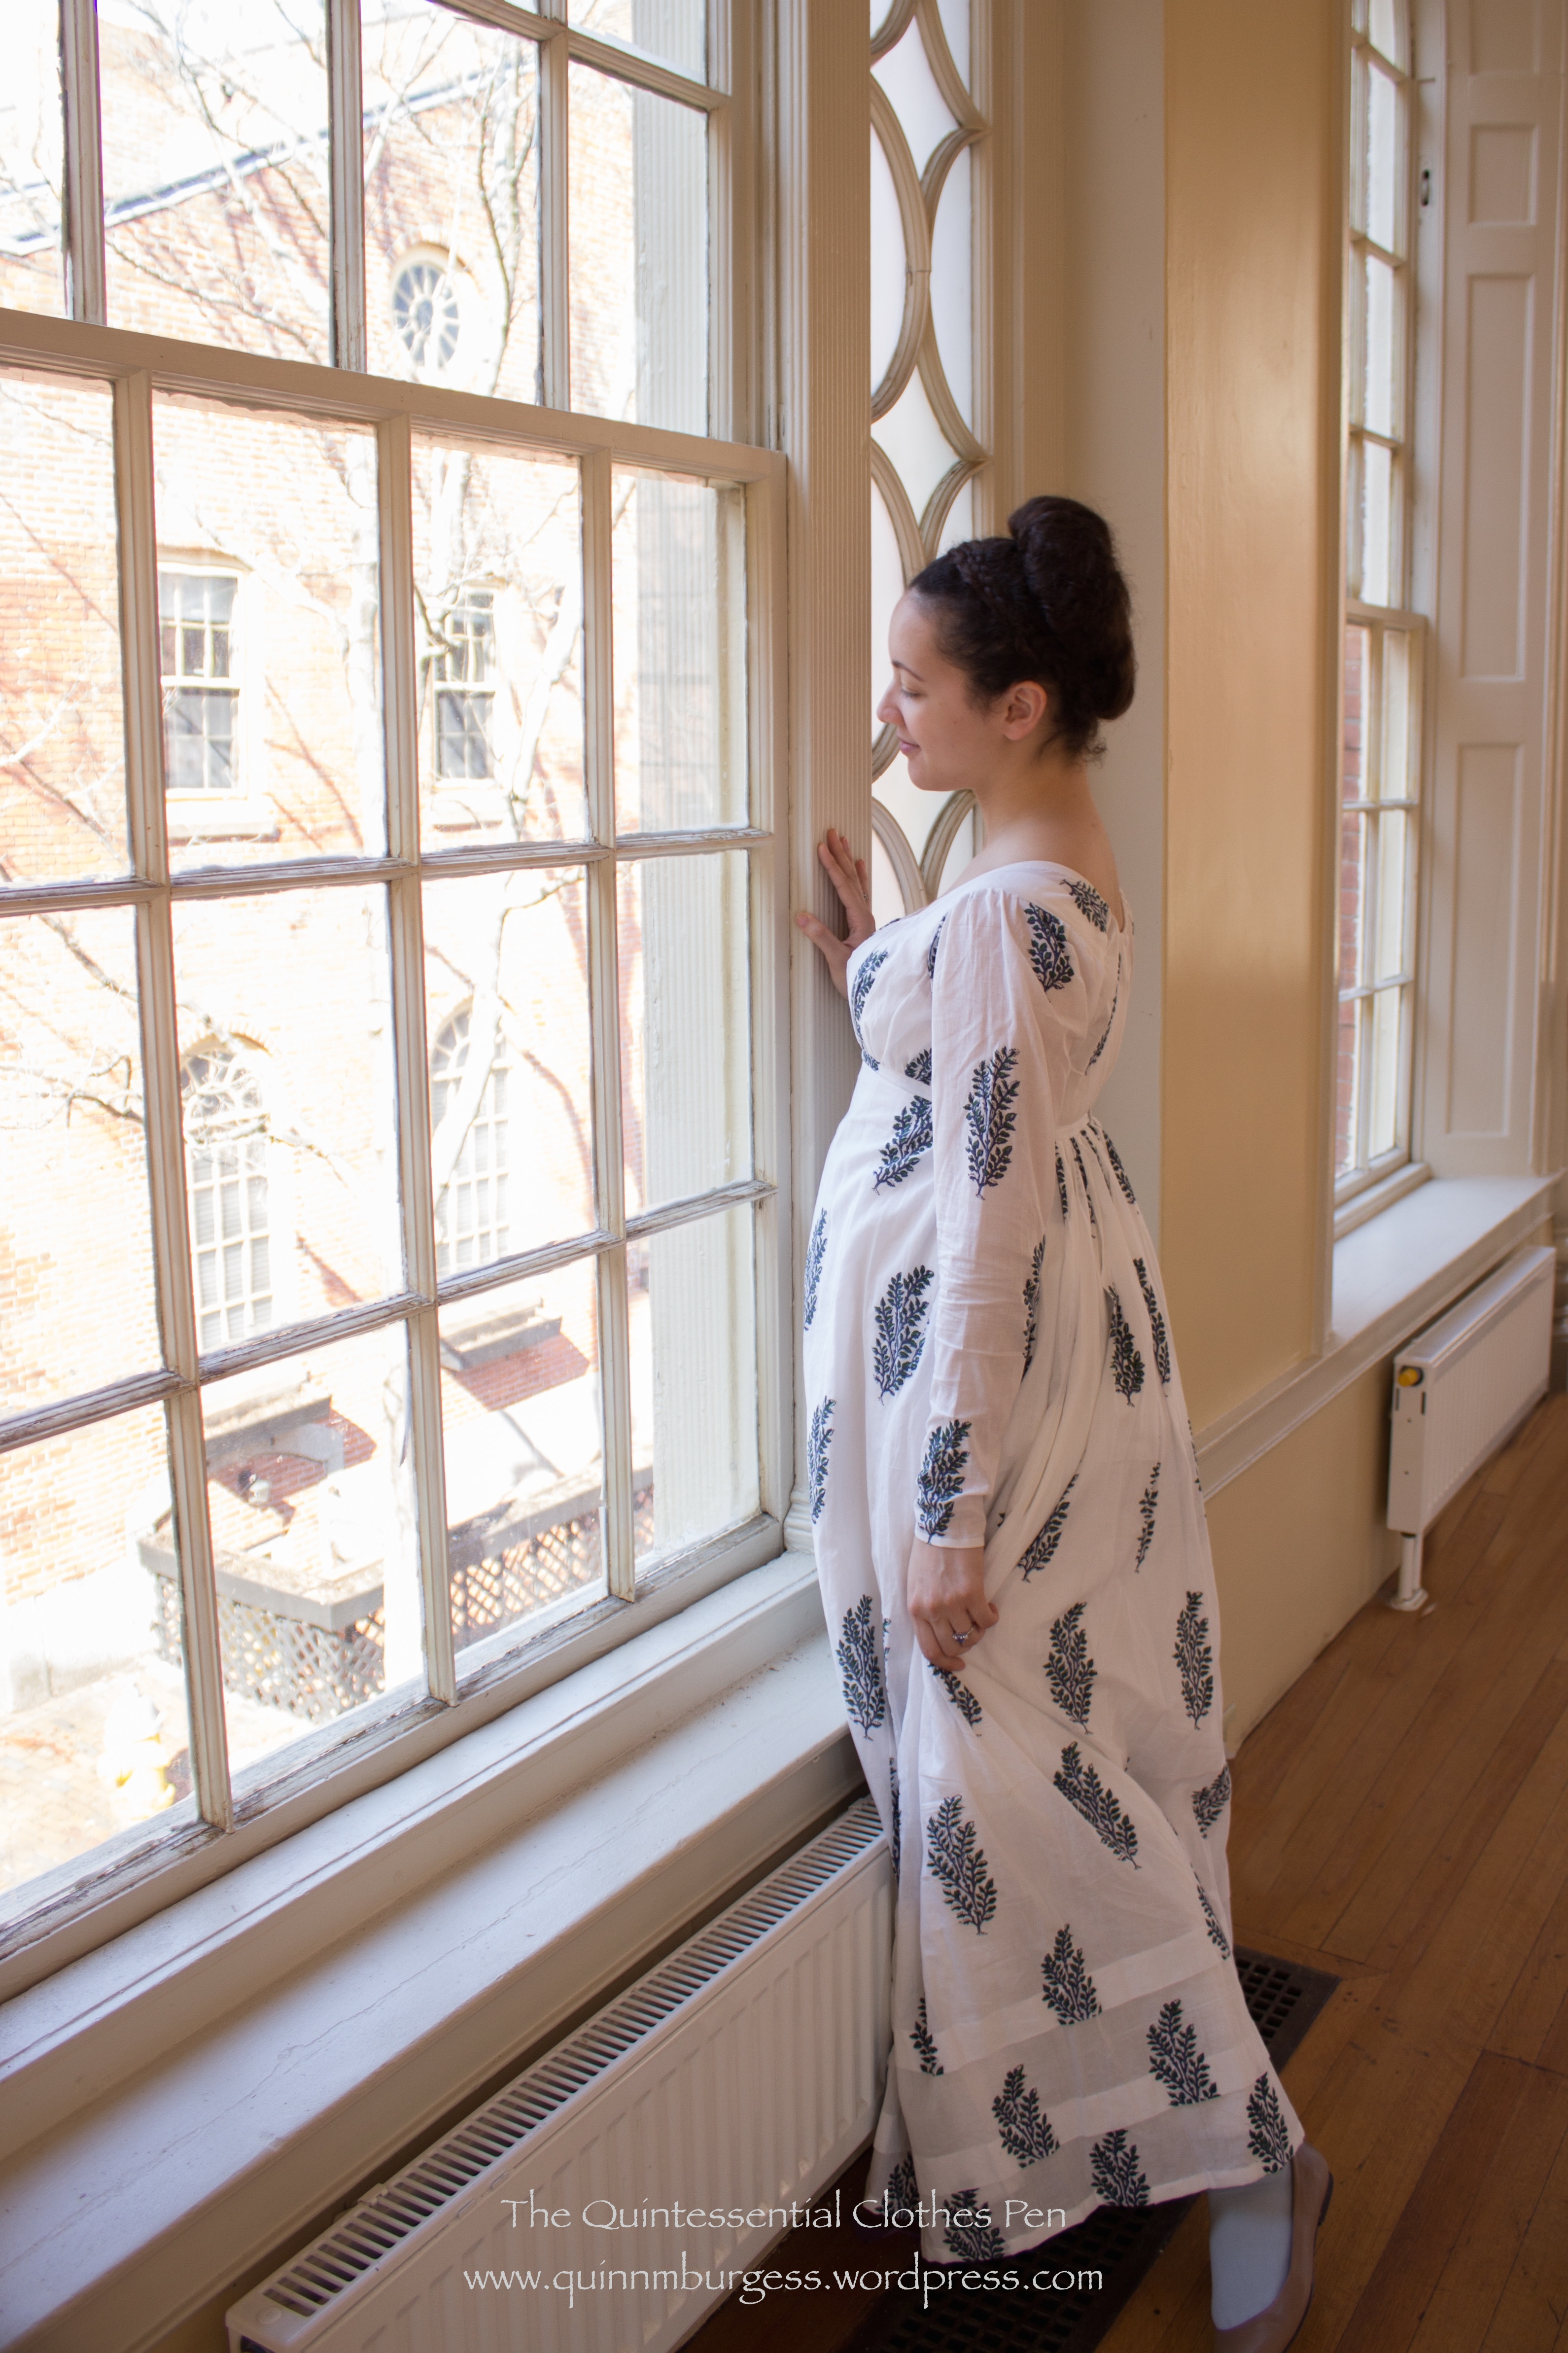
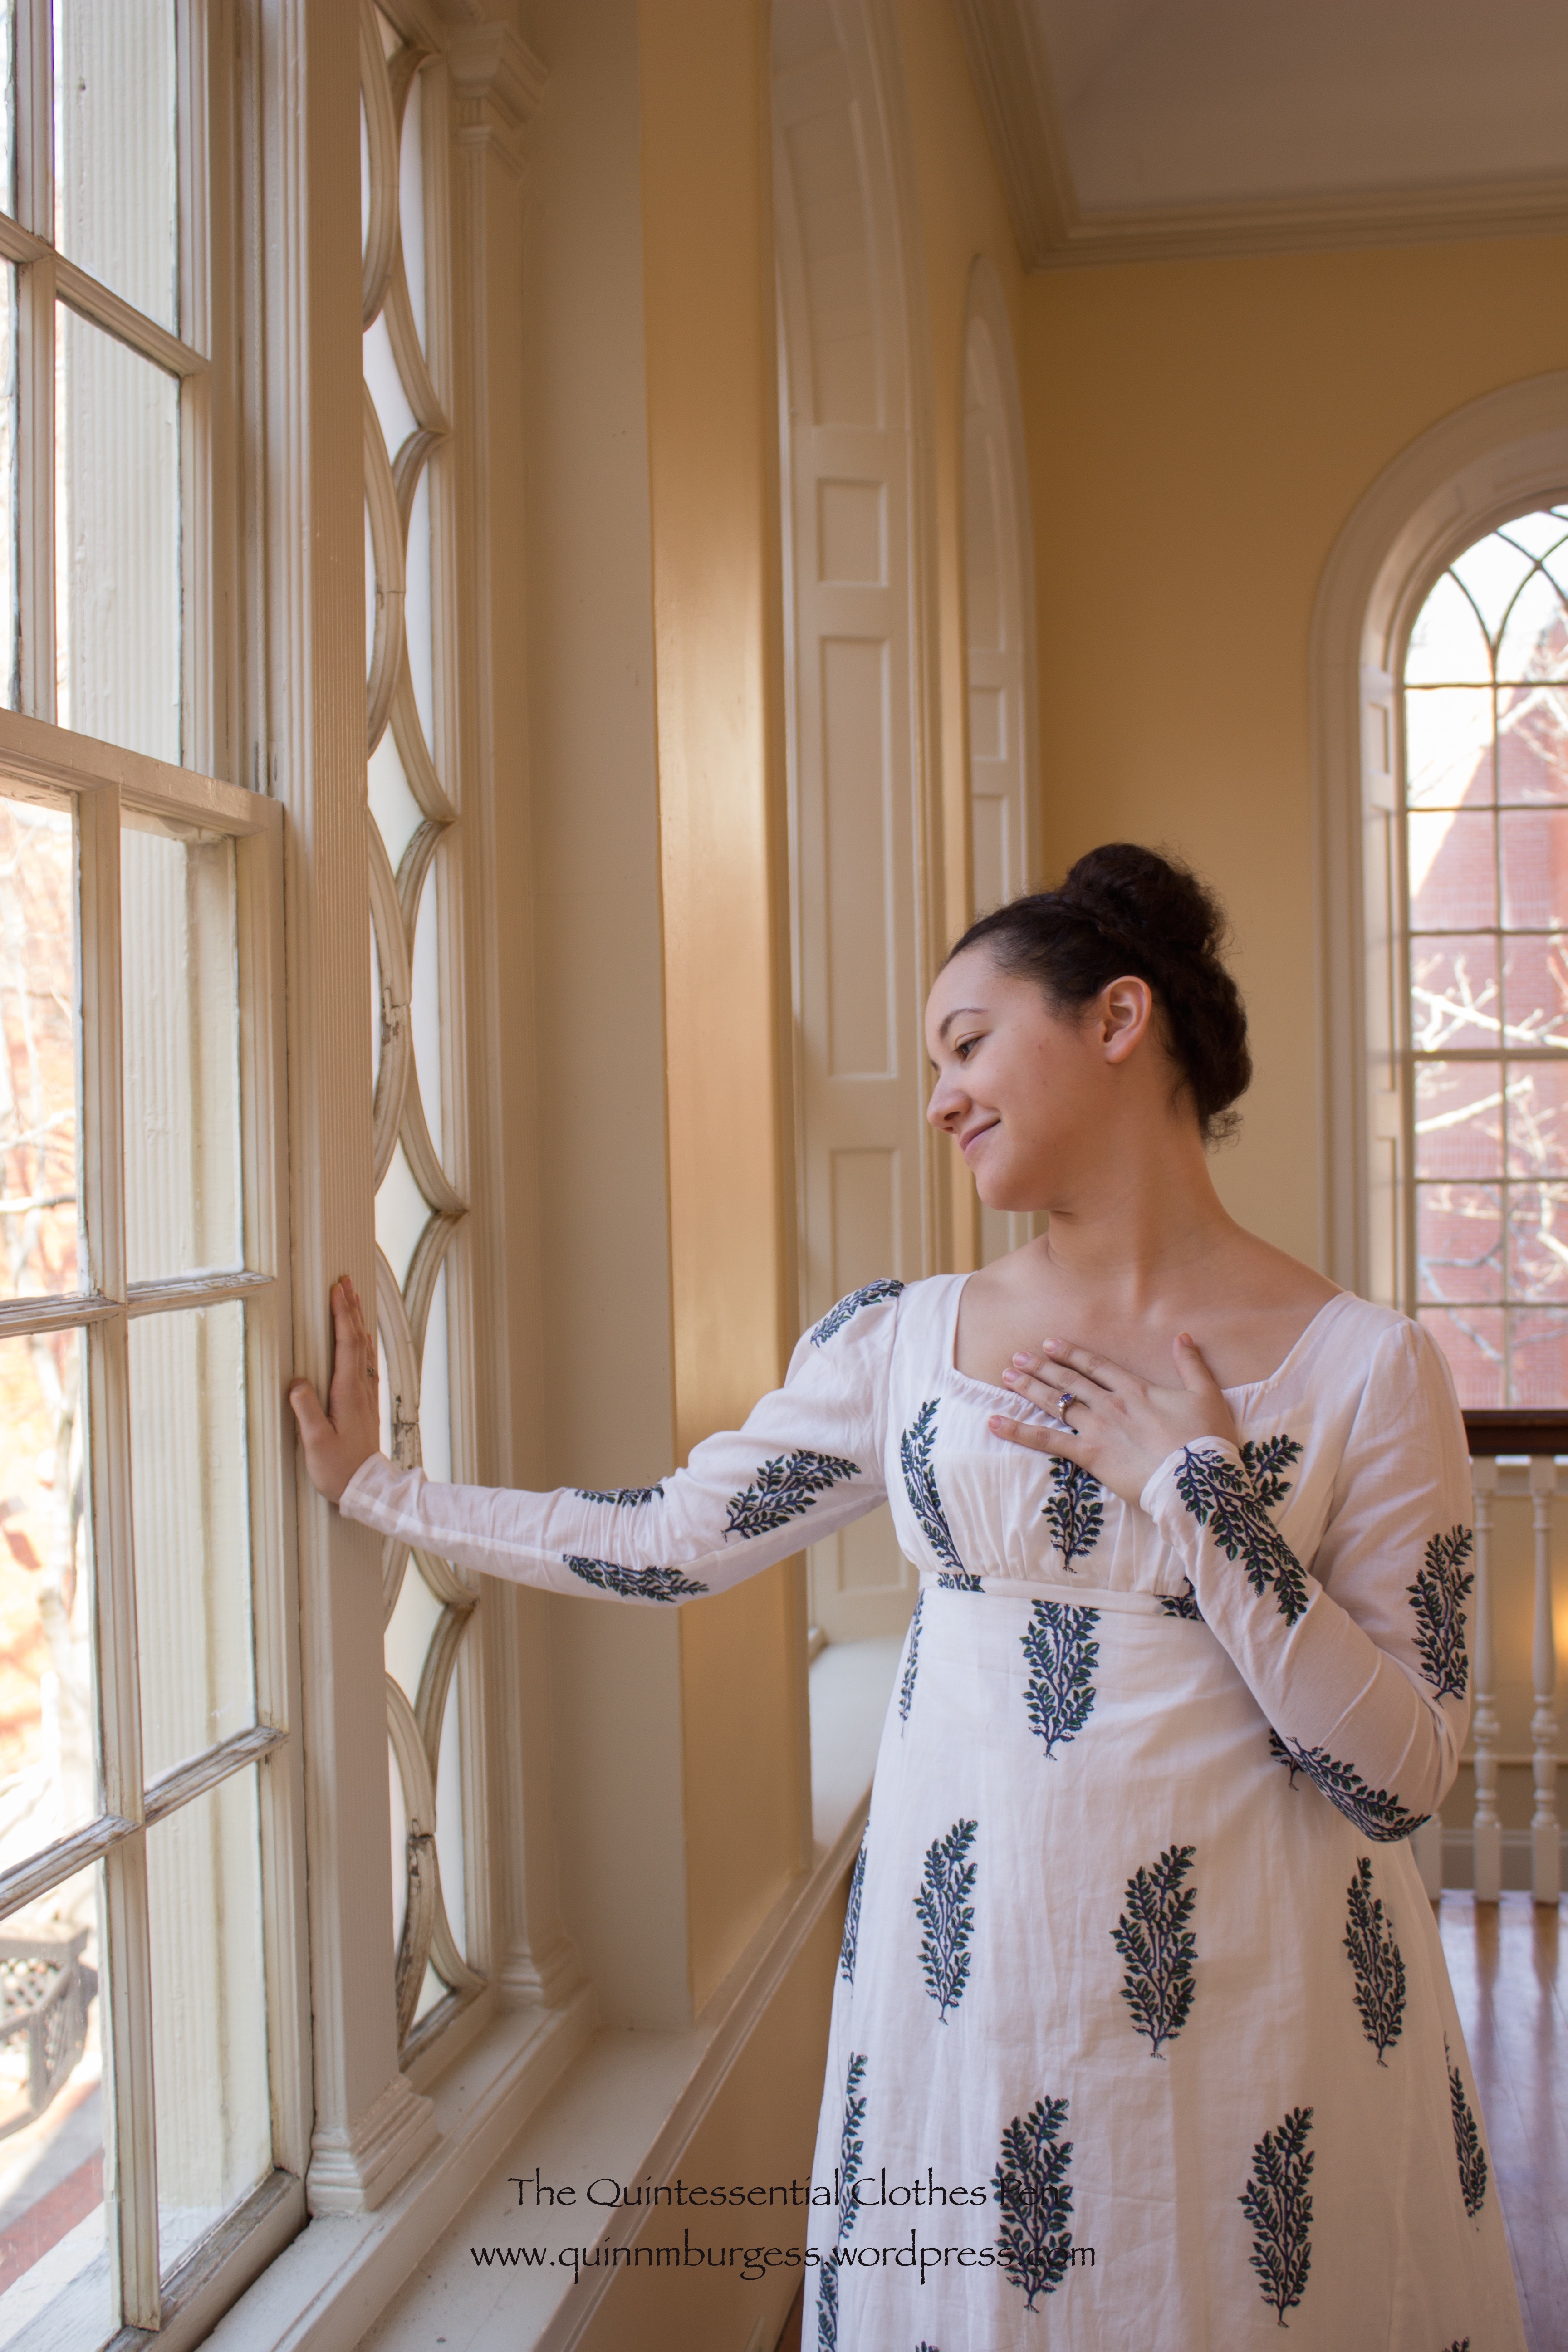
I wore my tree gown. I’m attempting to look pensively out the window hoping that Mr. Darcy will come by…I’ve seen him! Be still my heart!
Yes, I know I’m mixing my books here. Perhaps I should have thought of myself as Fanny Price waiting to see a glimpse of Edmund Bertram out the window. Ah, but I don’t identify with Fanny so much as Elizabeth Bennet, so you’ll have to cope with my mixing of books!
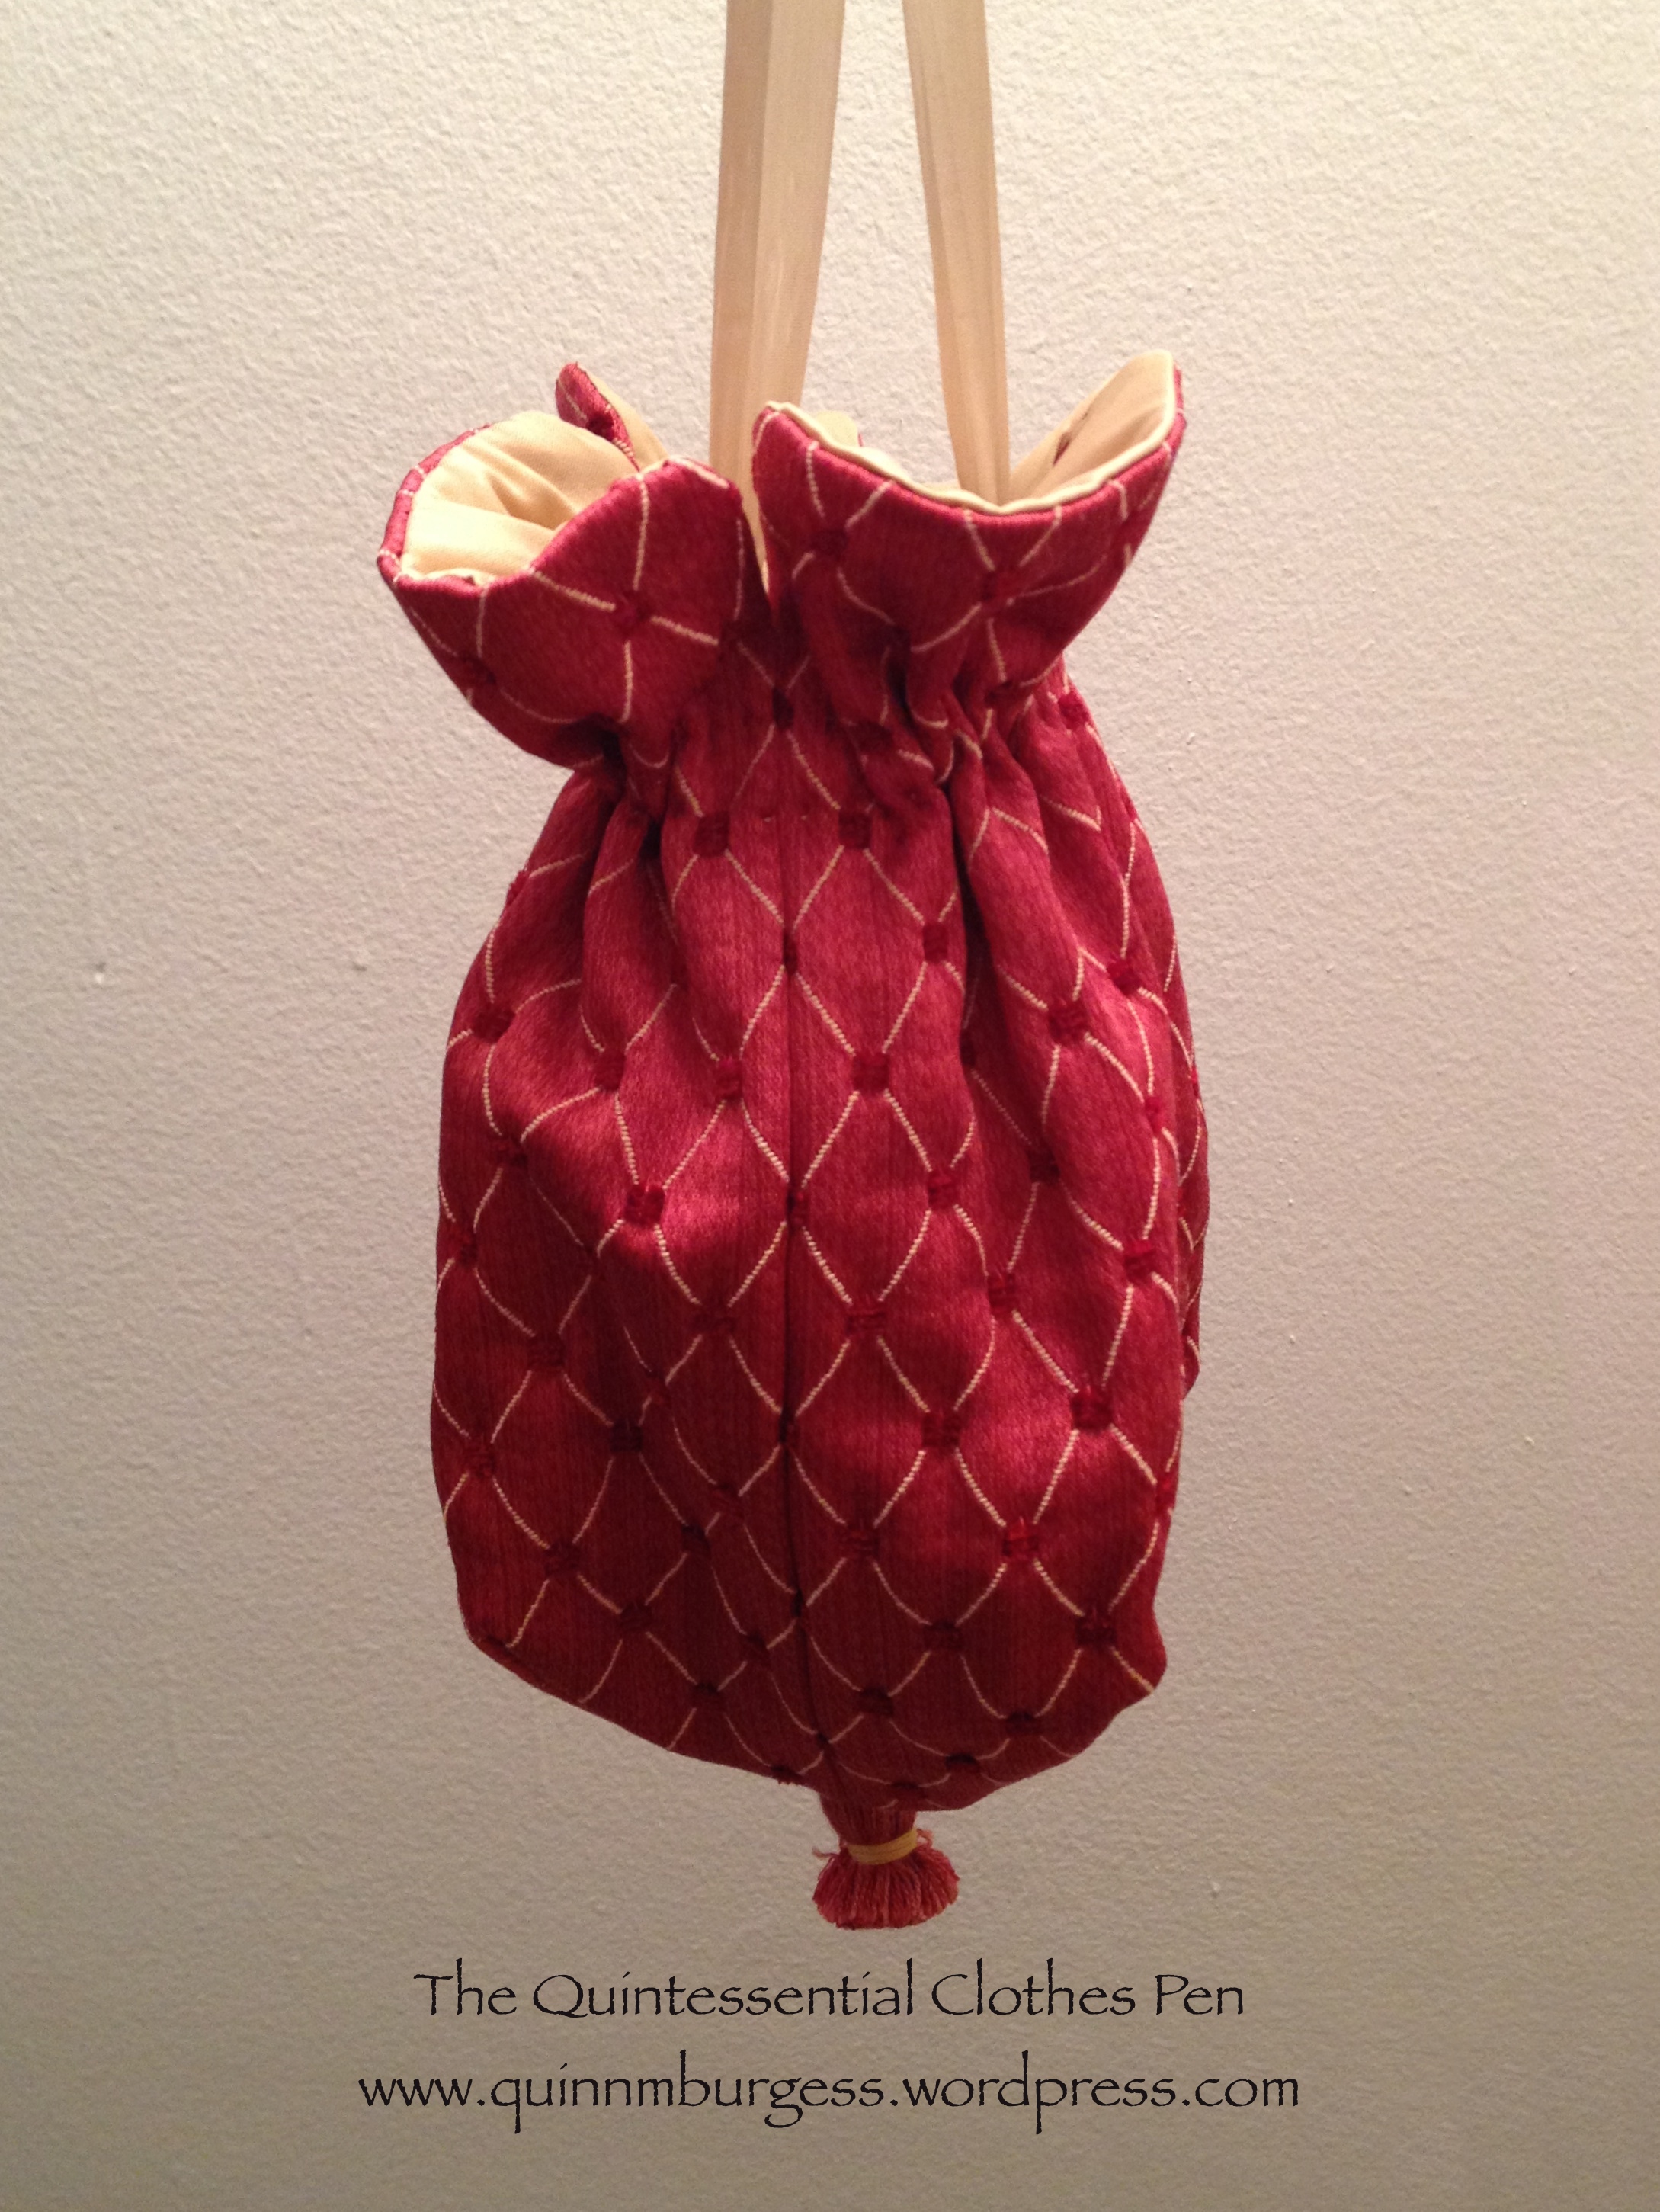
It’s been a little while since I completed a challenge for the HSF 2014. I’ve either been too busy to sew (sad!) or I’ve been sewing things that haven’t remotely lined up with the HSF challenges as they came along (also sad!). This time, though, I found a little bit of time to finish up a partially completed Regency reticule, which perfectly fits challenge #8: UFOs and PHDs (click through the link if you don’t know what those acronyms mean in sewing-land!).
Red/Gold Regency Reticule
I was inspired by this Regency reticule pattern which is available on Etsy. I just made up my own pattern based on the image. I didn’t quite get the proportions right so mine is more elongated and a little less round, as well as not bunching up very tightly at the top due to the fabric I chose, but I’m happy with it nonetheless. Perhaps some day, I’ll try making it in a lighter weight fabric and see if I can get a more round shape and a tighter gather at the top (on the other hand, this one does hold its shape nicely… and a lighter weight fabric may not do that for me).
The facts:
Fabric: Polyester upholstery fabric for the exterior and gold polyester taffeta for the lining.
Pattern: Made up by me.
Year: c. 1810
Notions: 1 tassel, gold and burgundy thread, and about 1 yd of gold silk ribbon.
How historically accurate?: Accurate in style but not in materials or use of a sewing machine… Let’s say 50%.
Hours to complete: Not many, though I didn’t really keep track since I worked on it in small bits of time.